HOLIDAY DONATION DRIVE - SUPPORT MSW - DO YOUR PART TO KEEP THIS GREAT FORUM GOING! (Only 72 donations so far out of 49,000 members - Can we at least get 100? C'mon guys!)
×


davec
-
Posts
383 -
Joined
-
Last visited
Content Type
Profiles
Forums
Gallery
Events
Everything posted by davec
-

HMS RESOLUTION 1667 by KarenM - 1:48
davec replied to KarenM's topic in - Build logs for subjects built 1501 - 1750
really impressive!! -
Impressive work on the covering boards. I'm looking forward to seeing the progress pictures. Dave
-
James - I think your work looks great, and the photoetch you have used, especially the instruments, really add to the model. I also agree with CDW that a lot of the photoetch in the sets isn't very helpful. Some of the prepainted instruments are way better than paint and decal and some of the folded metal looks way better than thick molded plastic. Some definitely doesn't. Picking and choosing which to use definitely makes sense. I'm looking forward to seeing the rest of the model come together.
- 60 replies
-
- 10
-

-

-
Nice! congratulations on finishing!
-
AMC DH9 by davec - FINISHED - Wingnut Wings - 1/32
davec replied to davec's topic in Non-ship/categorised builds
James - I'd promised myself I would never accumulate a stash. I had 13 or 14 wnw kits on the shelf, which was more than I ever planned. My father was a big time accumulator. When he passed he had several hundred models in his attic (and a house packed full of other things). I brought home about 50 of the models, so now I have a full utility shelf worth to build. Makes me feel guilty having them sit there when a new model comes out that I want to build more. It was funny you mentioned the Kotare Spitfire, because I got a great deal on one at the local IPMS show in February and will probably build it next. Most of his other models got sold to a wholesaler. Lots of lessons about what our families have to deal with when we leave our treasures behind. I'm travelling for a few days. Before I left I got did some more work on the DH-9. I have finished painting, other than some touch up where I pulled off the masking. I will start decaling as soon as I get home. Dave -
Great to see you back at work on the model. Coming along beautifully! Dave
- 201 replies
-
- 6
-
-
- Oyster Sharpie
- first scratch build
- (and 1 more)
-
AMC DH9 by davec - FINISHED - Wingnut Wings - 1/32
davec replied to davec's topic in Non-ship/categorised builds
Hi James - It was very disappointing to see WNW go under, and then the big spike in prices. I was lucky to buy a number of their kits at list price (including when there was free shipping from NZ). I really enjoyed my first one, a Fokker EIII which went together relatively quickly, so I bought the other ones I liked, then bought some more when they had their water damaged kit sale and their final warehouse clearance sale. Then I inherited my dad's very substantial stash. I have enough models to keep me busy a long, long time. The kits were a little expensive at their original price, but spread over the 2-3 months it takes me to build one, it stays an affordable hobby. My skills don't really do them justice, but I bought them to build, not collect. -
I'm impressed by your research and the drawing on the building board. I'm really looking forward to seeing your progress.
-
I think I'm finally in business with the frames being properly oriented. I have some night shifts and travel coming up. It will be a week or so before I can start fairing.

-
AMC DH9 by davec - FINISHED - Wingnut Wings - 1/32
davec replied to davec's topic in Non-ship/categorised builds
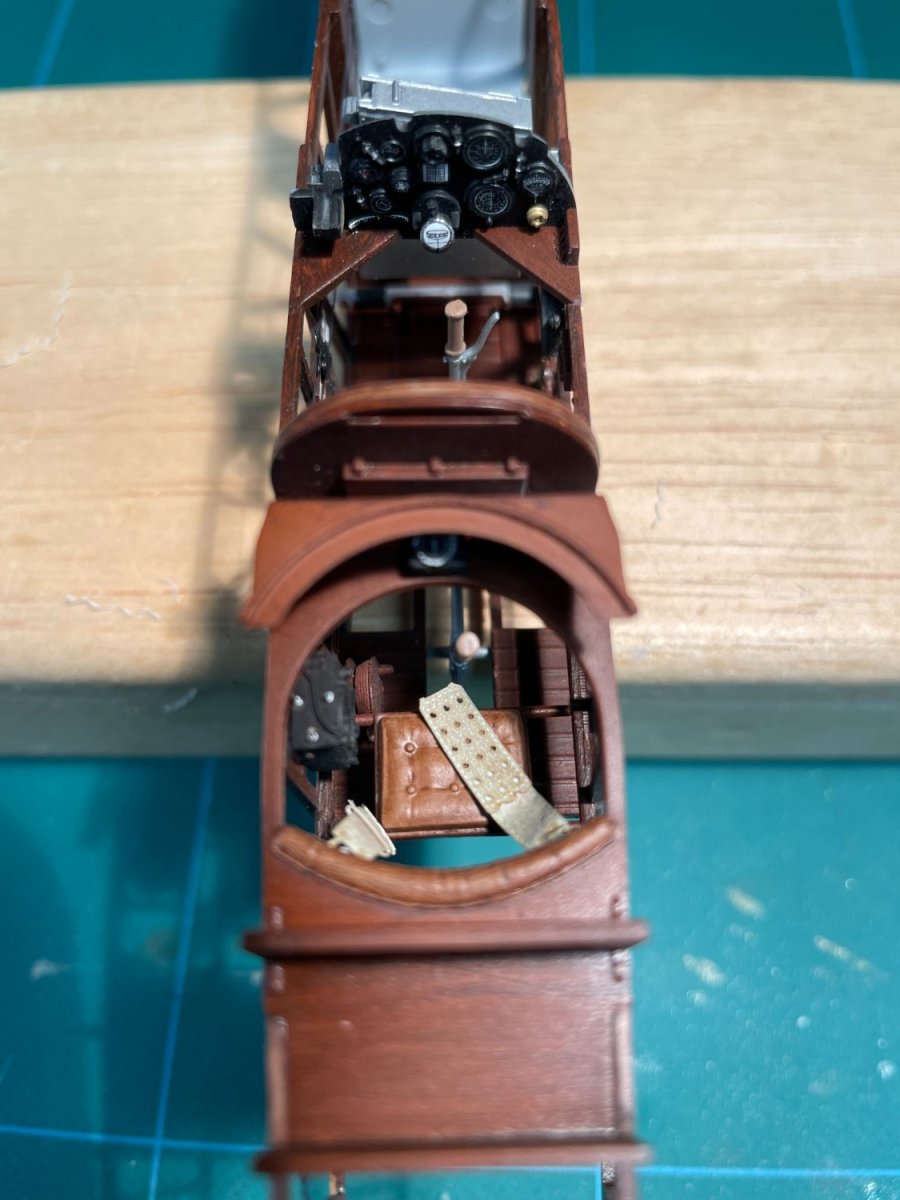
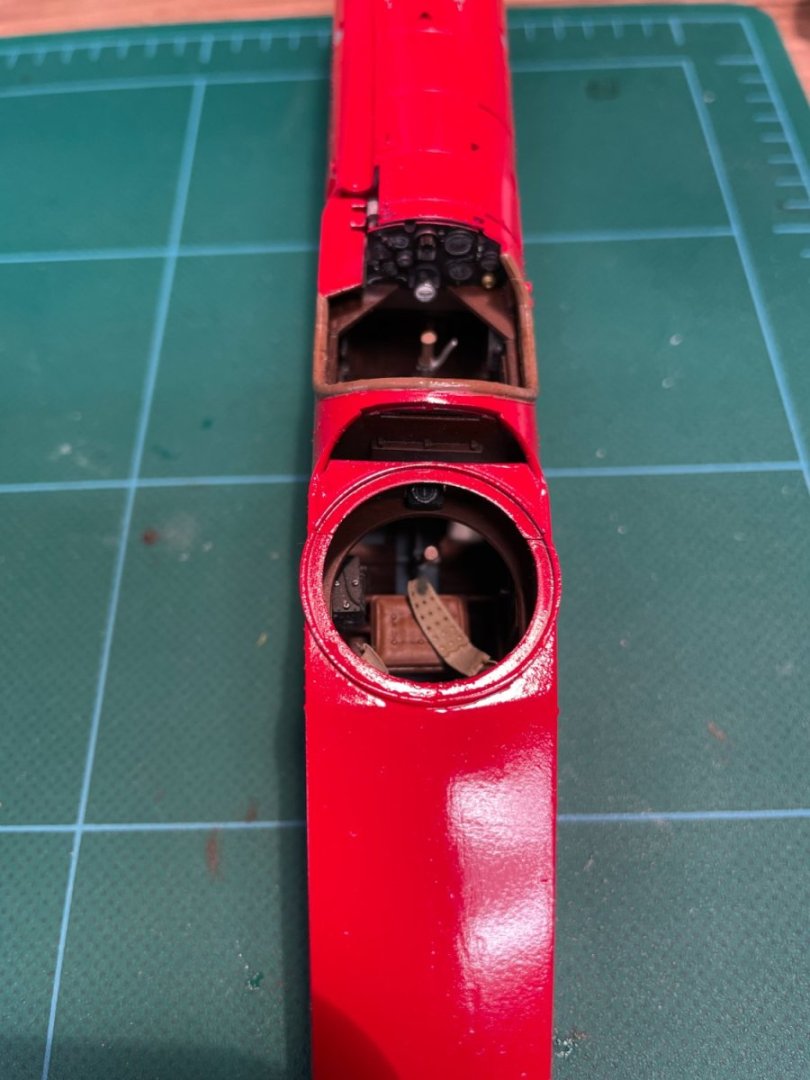
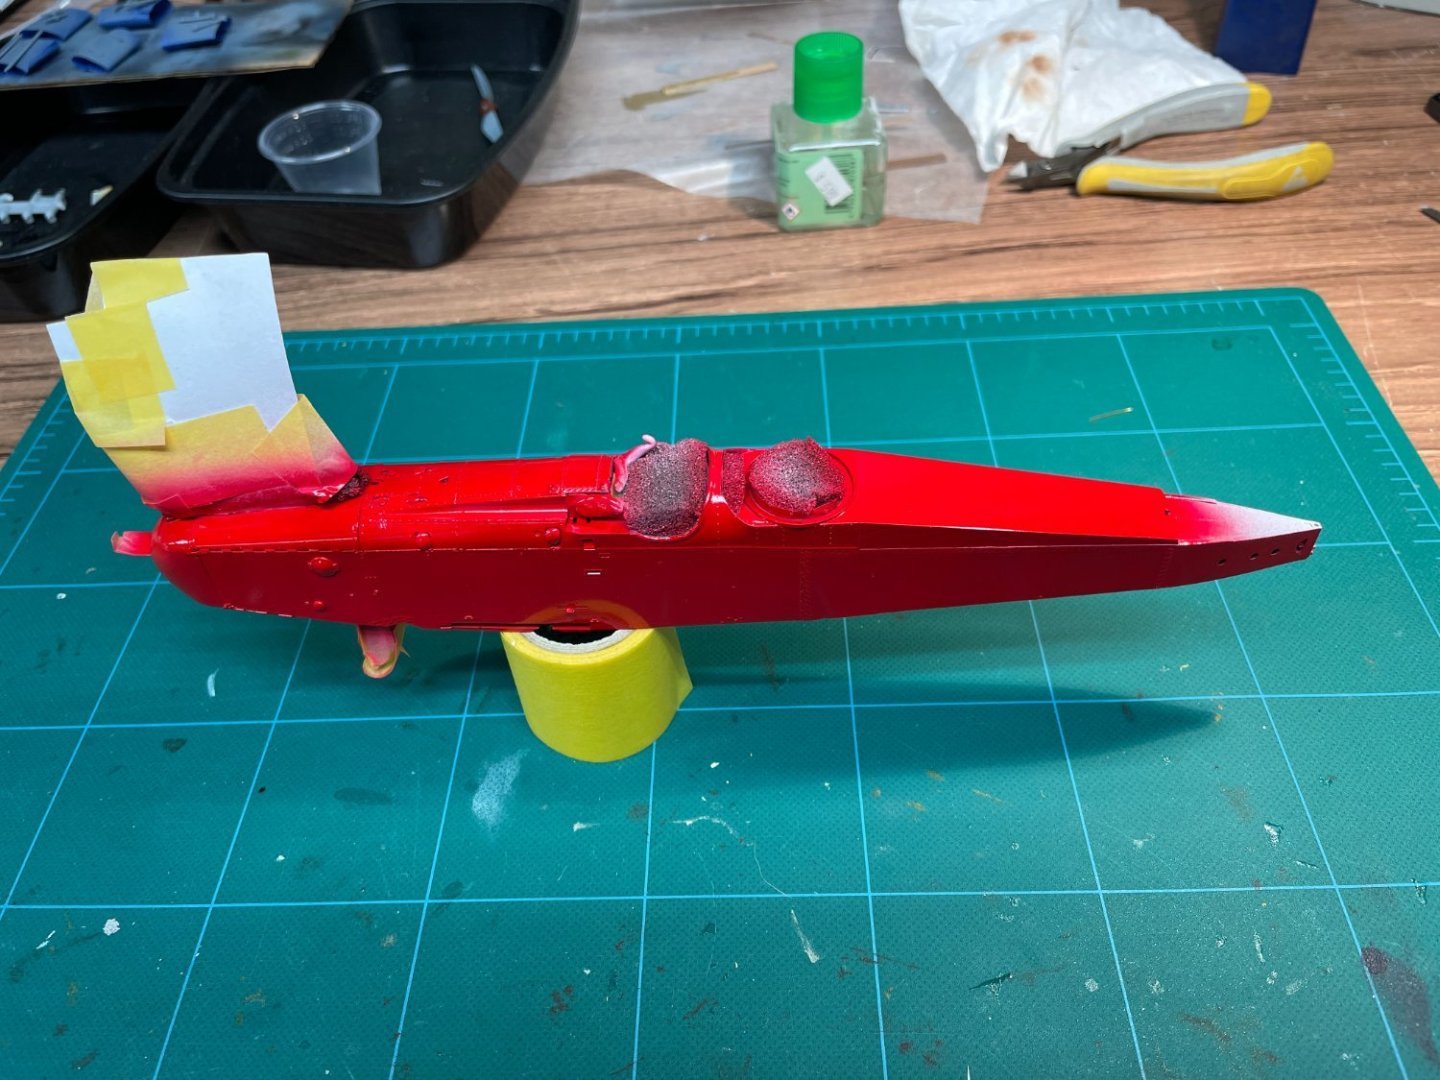
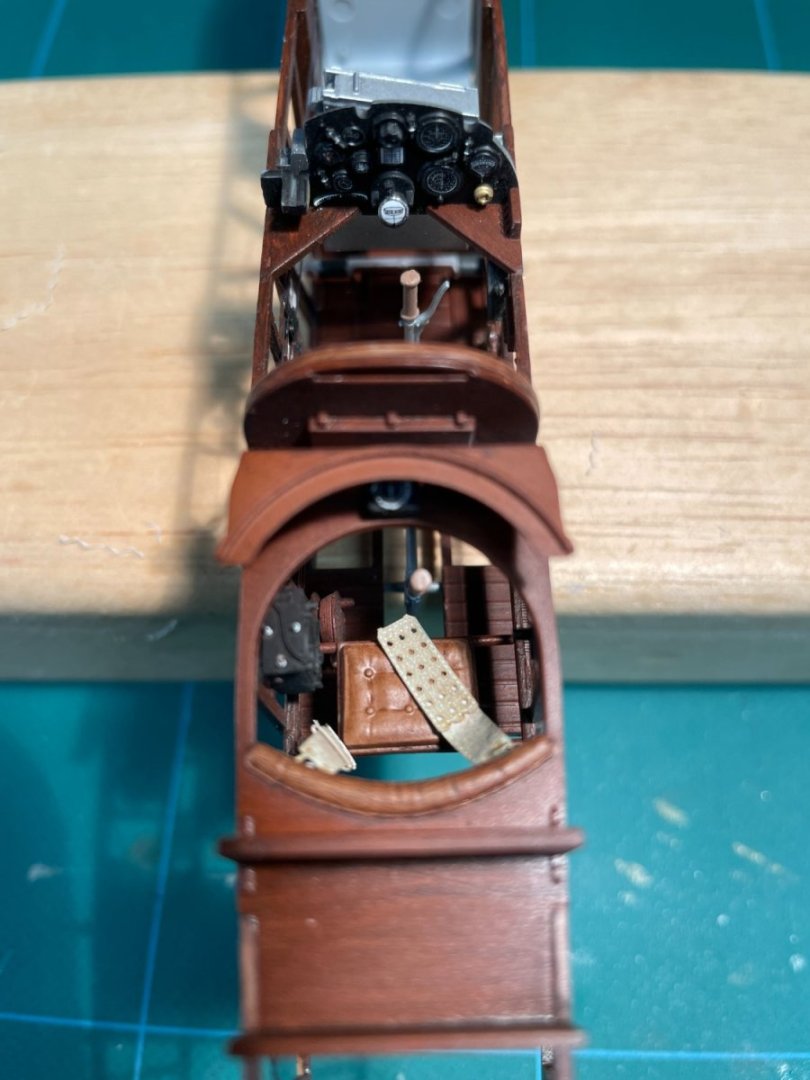
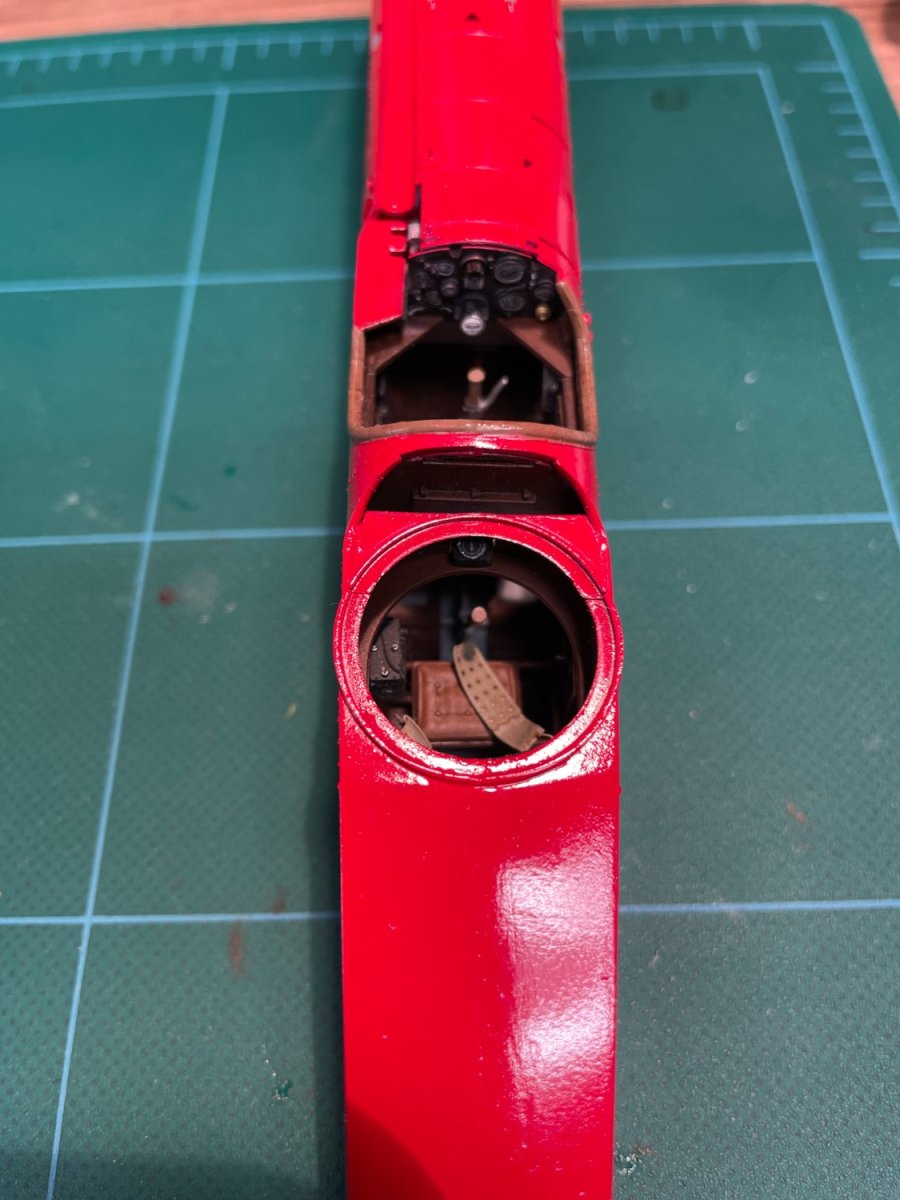
Ken - many thanks! That will save me a step and decrease the chance that I have another painting mishap. Sprayed a lot of red paint today. The wings are drying. I went back to the fuselage, pulled off the rest of the masking, put a wash on the leather around the cockpit, and did more touching up. I also finished painting the tail. The stabilizer doesn't lie flat, so some of that area may end up visible. I'm very pleased with the instrument panel touch up. I didn't take a before picture, but the overspray was pretty significant. This is a vast improvement and I think this is the best I'm going to do - it isn't that easy to reach with a brush. I'll touch up the red on the edge (didn't see that until the picture). The red tinge on the middle upper instrument is probably reflection. It wasn't there when I went back to the model.
- 43 replies
-
- 11
-
-
AMC DH9 by davec - FINISHED - Wingnut Wings - 1/32
davec replied to davec's topic in Non-ship/categorised builds
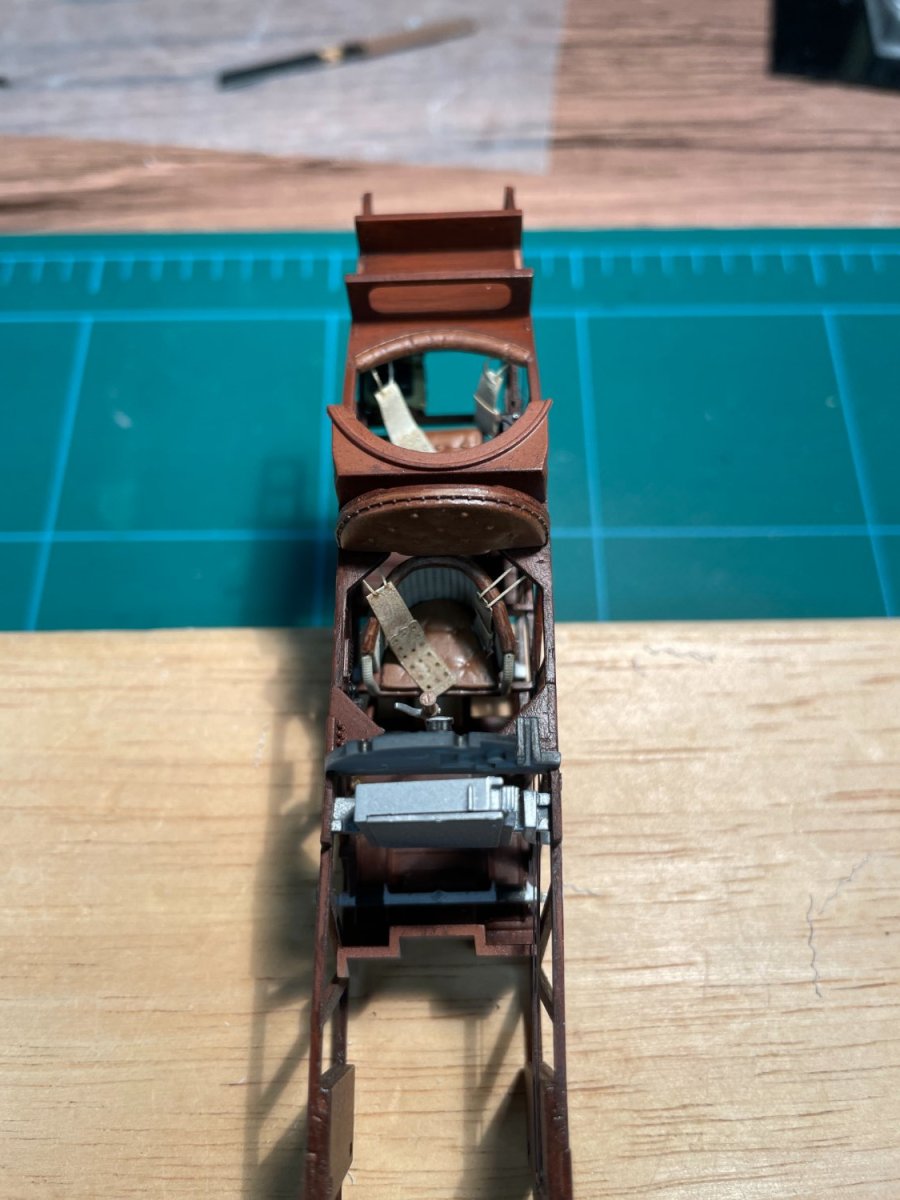
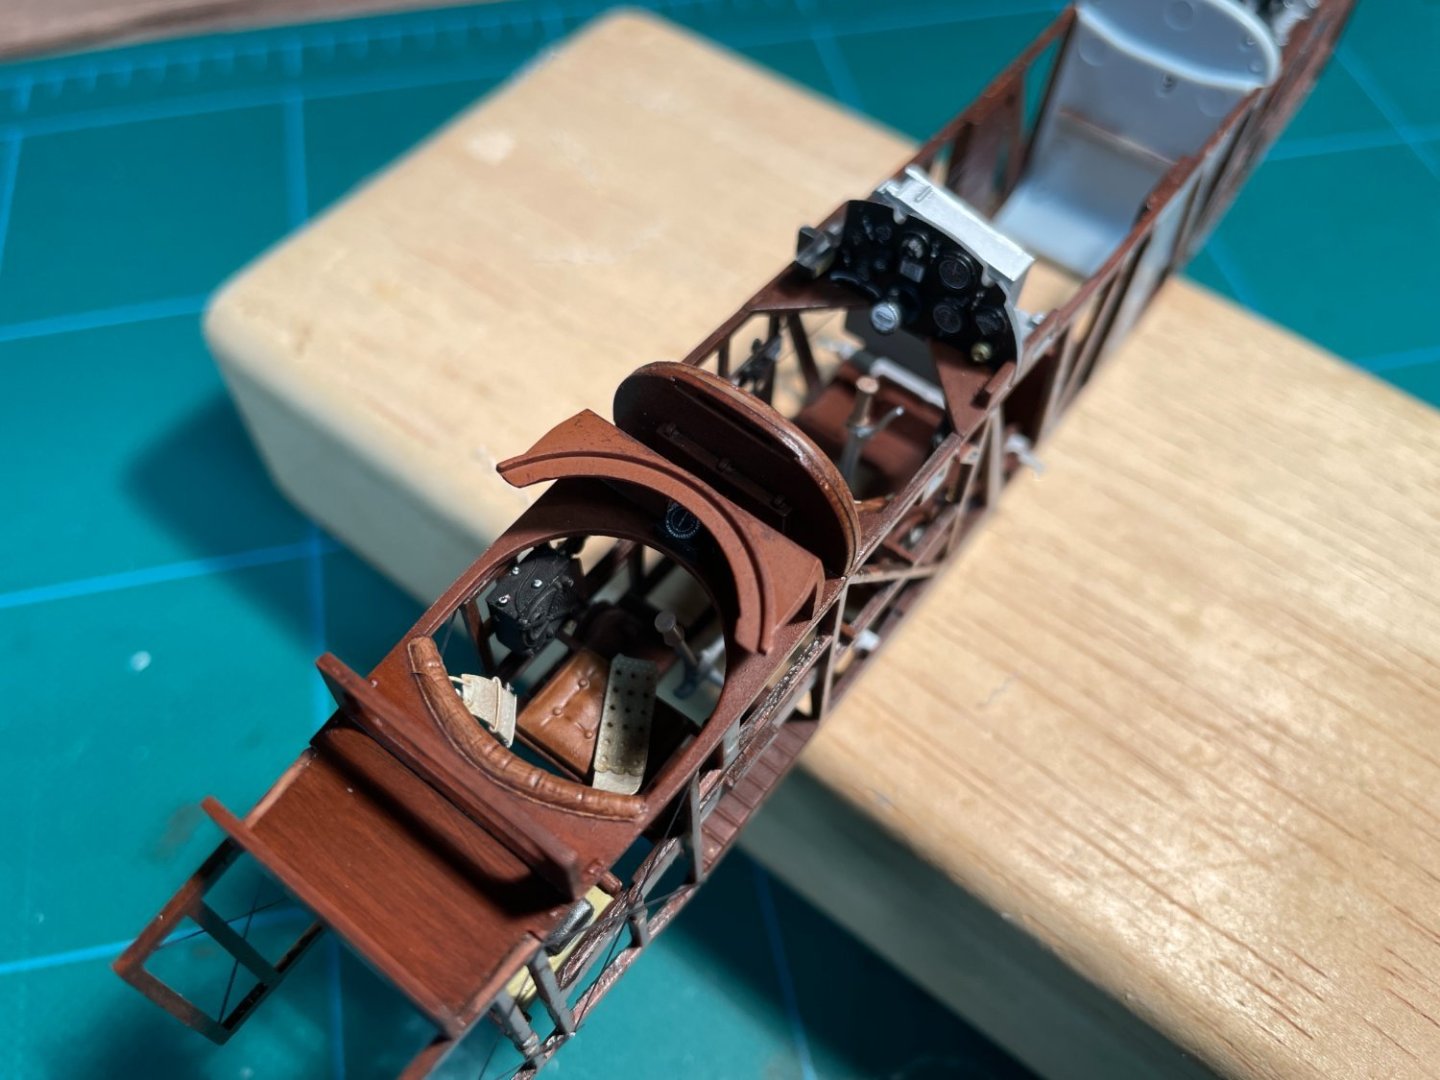
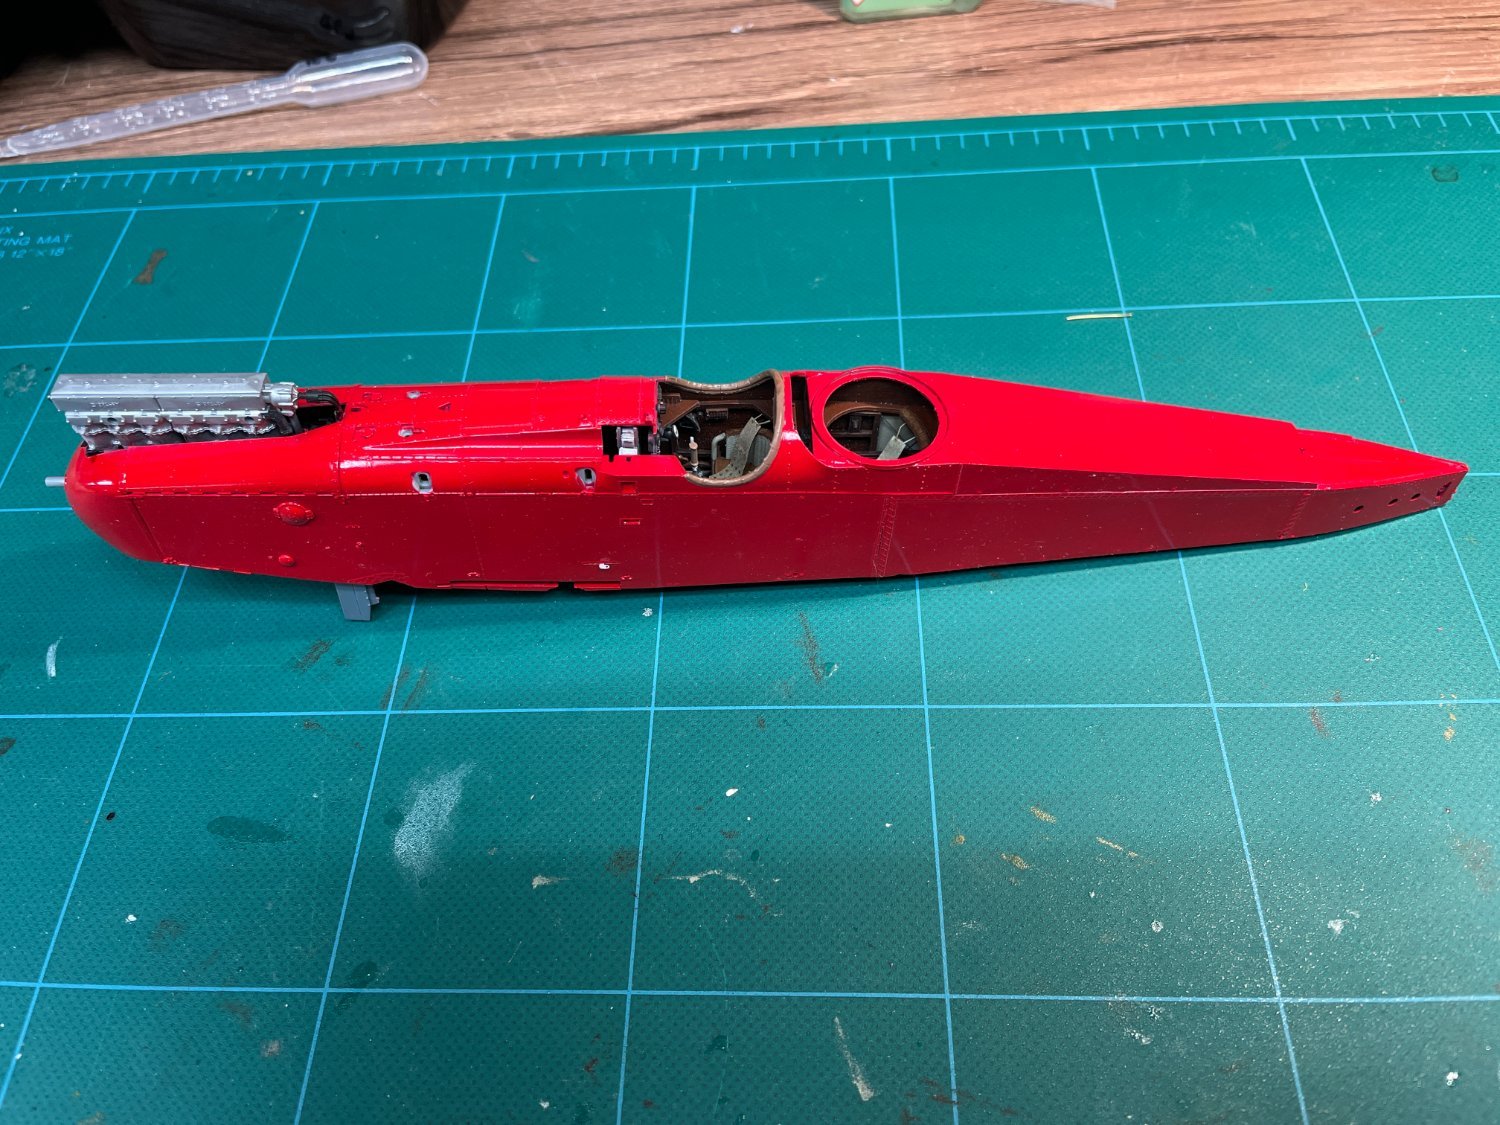
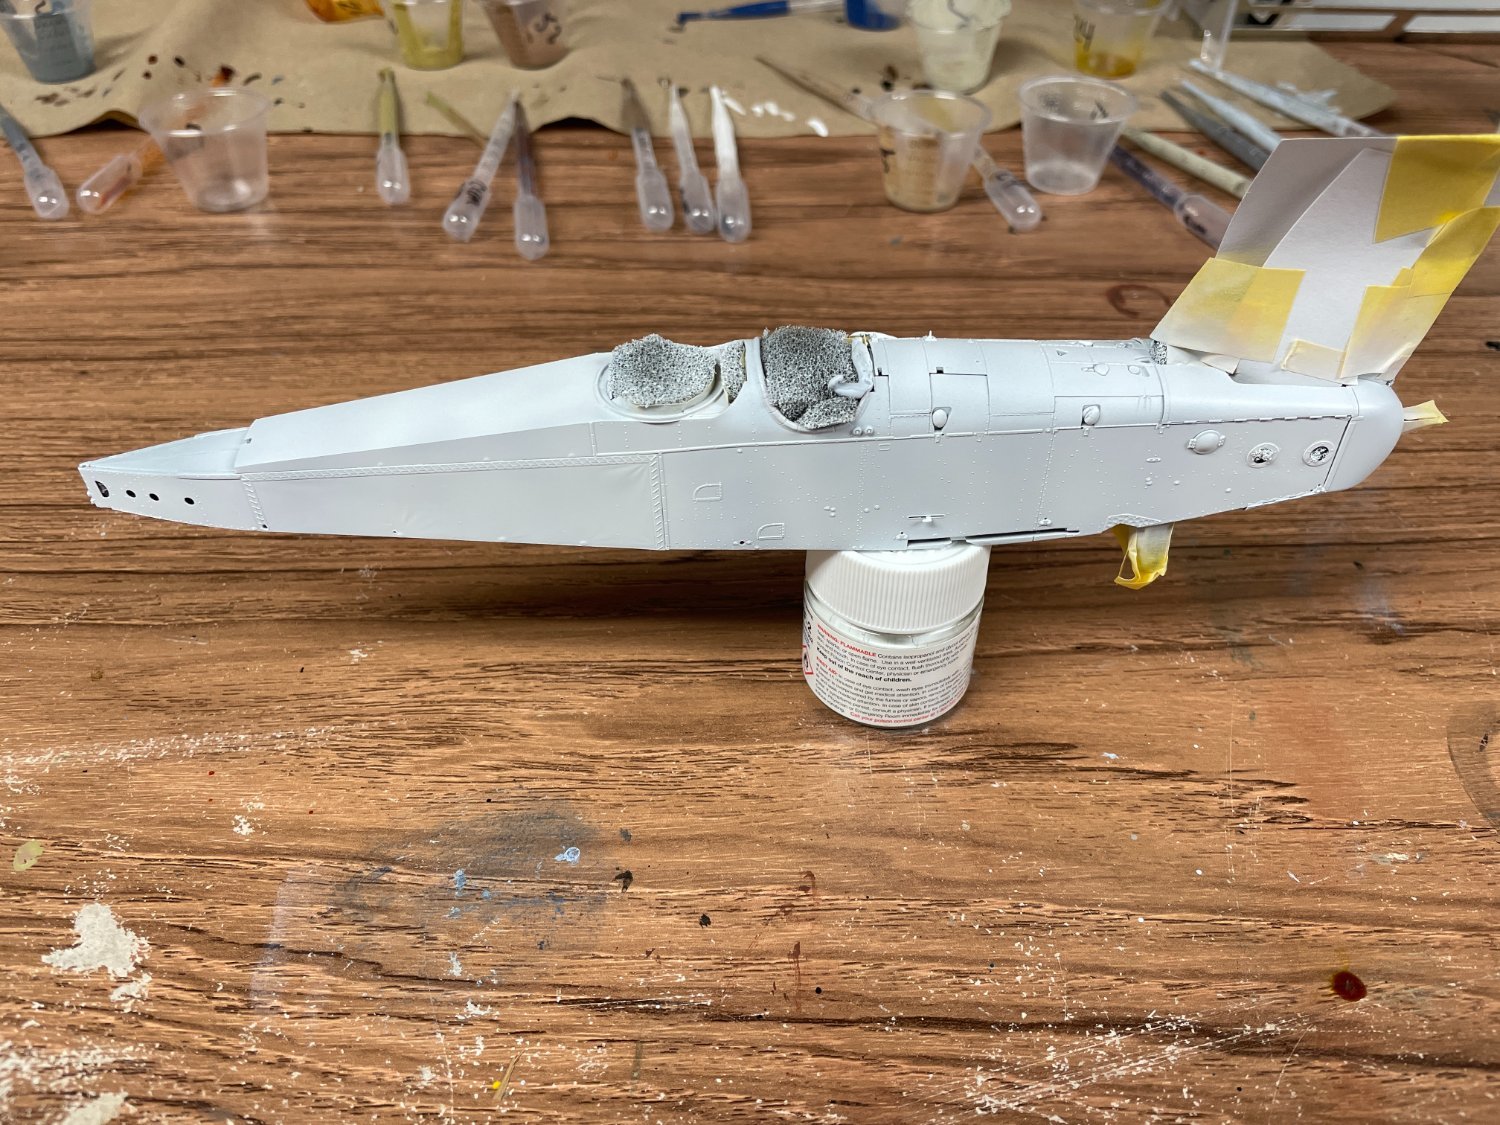
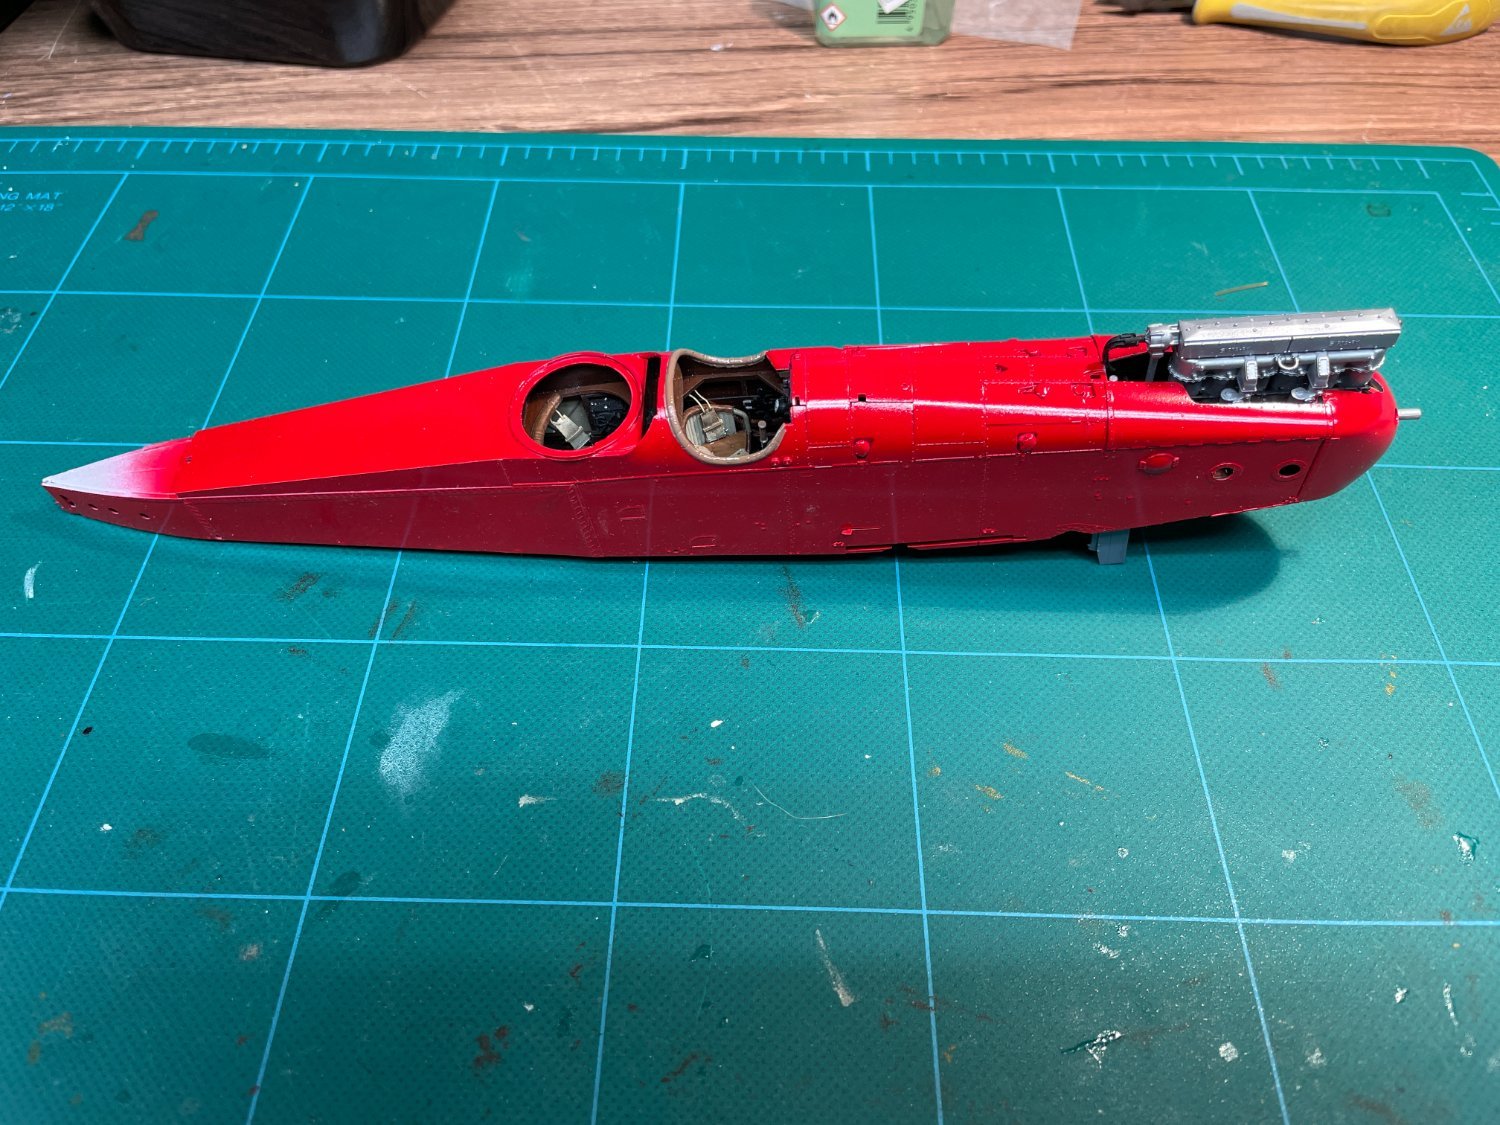
I’ve been working on the model for a few minutes every few days. I got the fuselage closed. Tolerances are always so tight that despite being really careful to clean up the glue joints, I end up with a little step at the joint that requires some sanding and filling. I had a few mistakes when priming and sanding, especially not masking far enough away from where I was working and getting some overspray on the instrument panel, which was very frustrating. I always find masking world war 1 models with the exposed engines and open cockpits really challenging - please let me know if you have any suggestions. I’m painting the model red, so used white primer. I just sprayed the red paint, which went down pretty well. The lobster scheme has decals over nearly the entire fuselage, so I sprayed gloss paint, which should let me put the decals on directly (do I need a clear gloss coat over a gloss finish?). It looks pretty toylike now, but with the decals on and a clear flat coat, should look as intended. I’ve cleaned up the overspray and touched up, and am feeling better about the progress. I’ve always had difficulty getting a good finish brushing Tamiya paint and had my first revelation of the project – I highly recommend Tamiya retarder. Mixing a drop of retarder with a few drops of paint in a palette completely changes how it brushes – all of a sudden it flows really well. I’ve got a lot of the rest of the parts cut out and sanded and most painted. I masked and primed the wings this morning.
- 43 replies
-
- 15
-
-
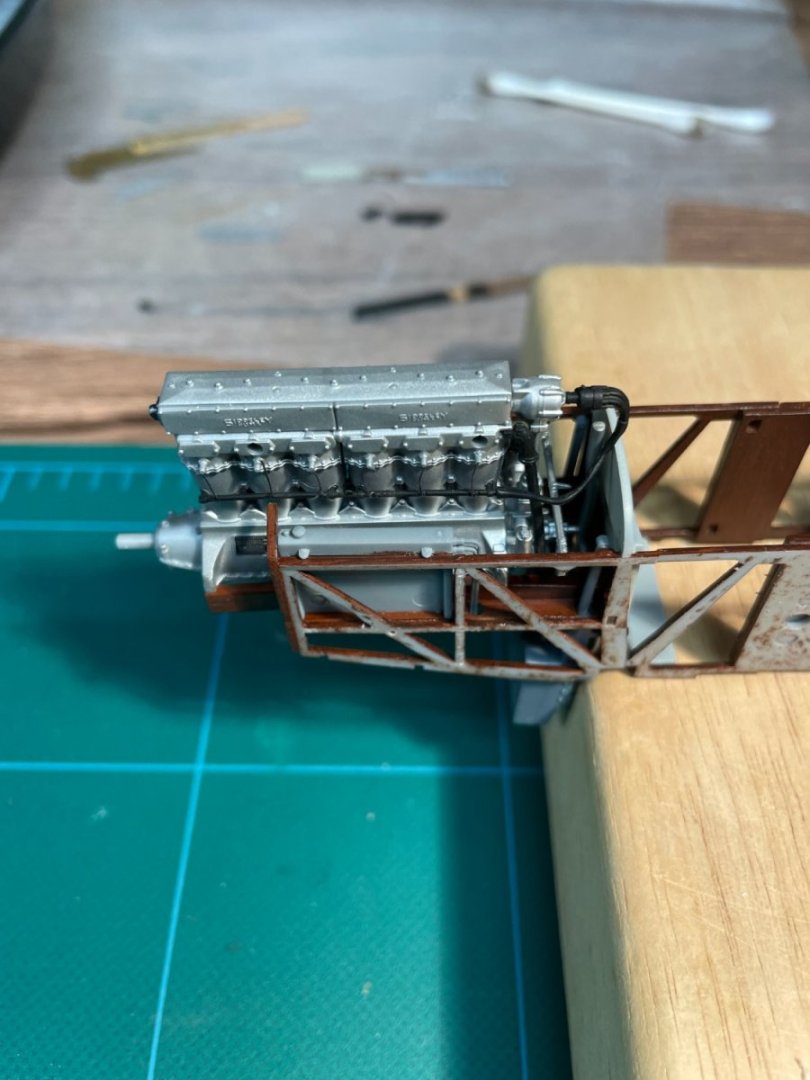
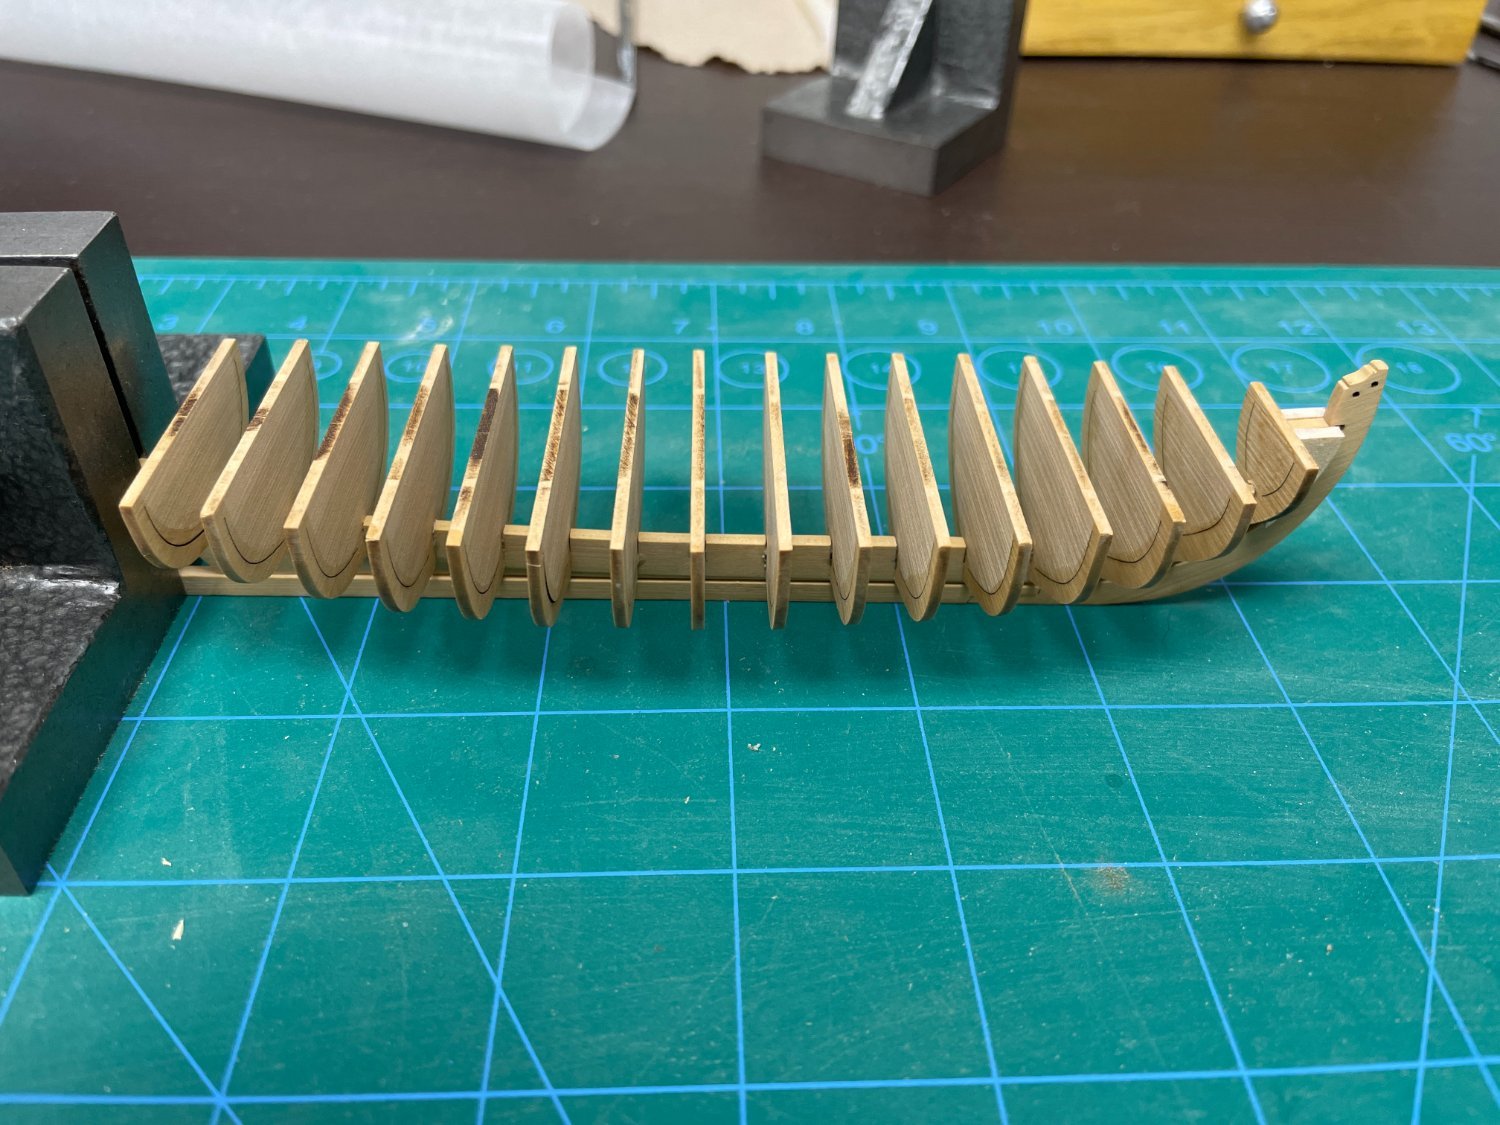
Getting the frames set in all 3 dimensions turned a little more challenging than I thought. I’ve done some travelling and only had short workshop sessions each day, so was only attaching 1-2 frames every few days. I had a setback where every time I added a piece, I got a dark mark at the joint. I thought it was the char particles getting caught in the glue so I debonded, sanded, and reglued a few times. I finally realized that the moisture in the glue was oxidizing the machinist angle plates I was using to keep things square when drying. I stopped using the plates, which got rid of the staining, but made keeping everything oriented more challenging. I think I finally have the frames where I want them. I’ll be shaping a sacrificial strip to glue across the upper end of the frames, crossing over to the filler pieces. I’m worried that I debonded and reglued so much that my glue joints won’t be strong and the extra support will be important. I have the last piece drying and will post a picture later today.
-
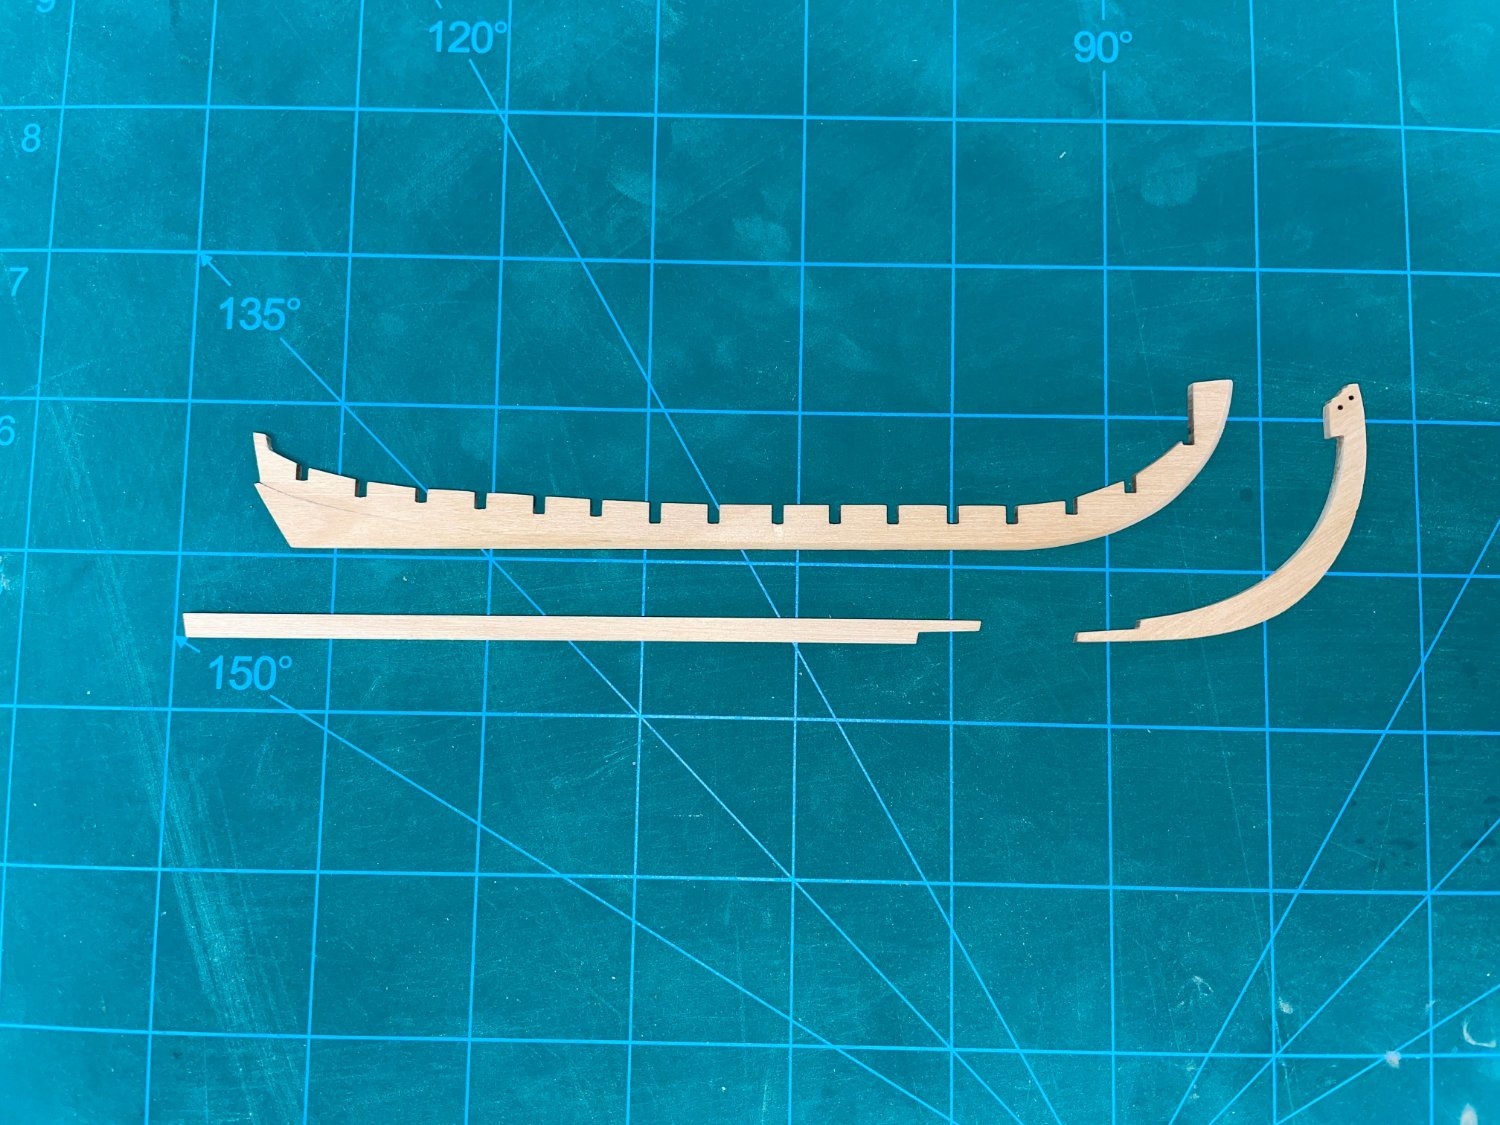
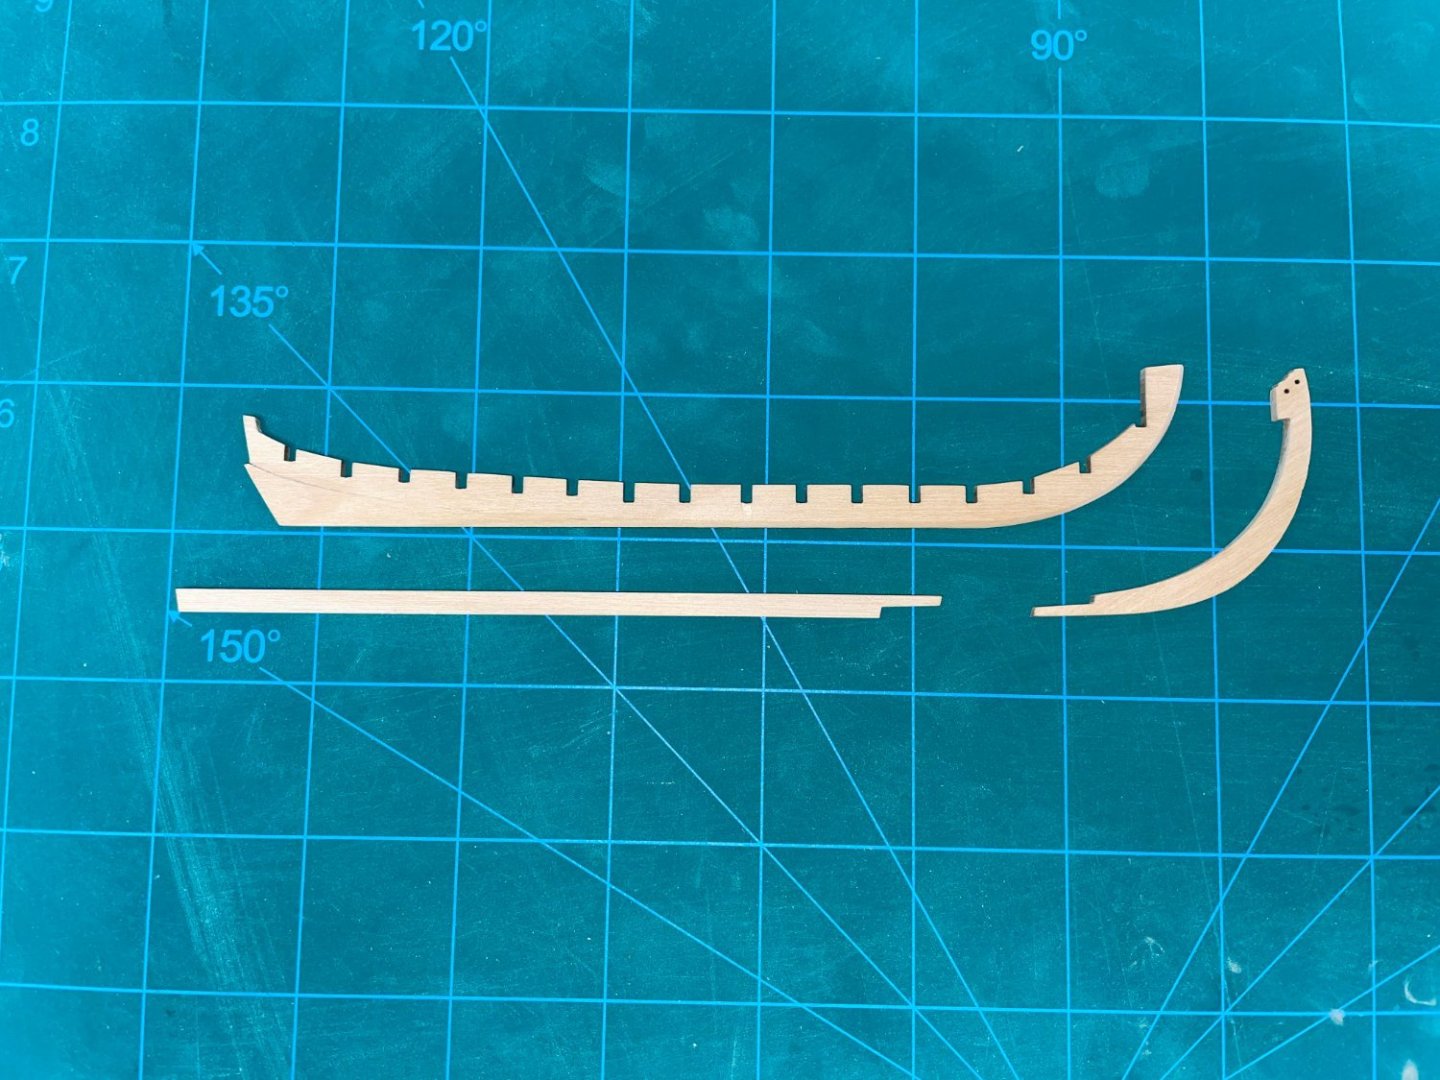
Robert - many thanks! I have a special talent for turning simple things into challenges. Helge - thanks for following. I looked at your build, which looks really interesting. I hadn't realized that Dorys were rigged for sail. I plan on building according to the model shipways plans (or at least to scans of the kit parts) so will not be rigging the model. I've made a little progress, adding the stem and stern. I've started cutting the frames and crosspieces for the building jig.
.thumb.JPG.18761bddc28302dd823d1d8a85fedcf1.JPG)
- 32 replies
-
- 7
-
-
- Grand Banks Dory
- Model Shipways
- (and 2 more)
-
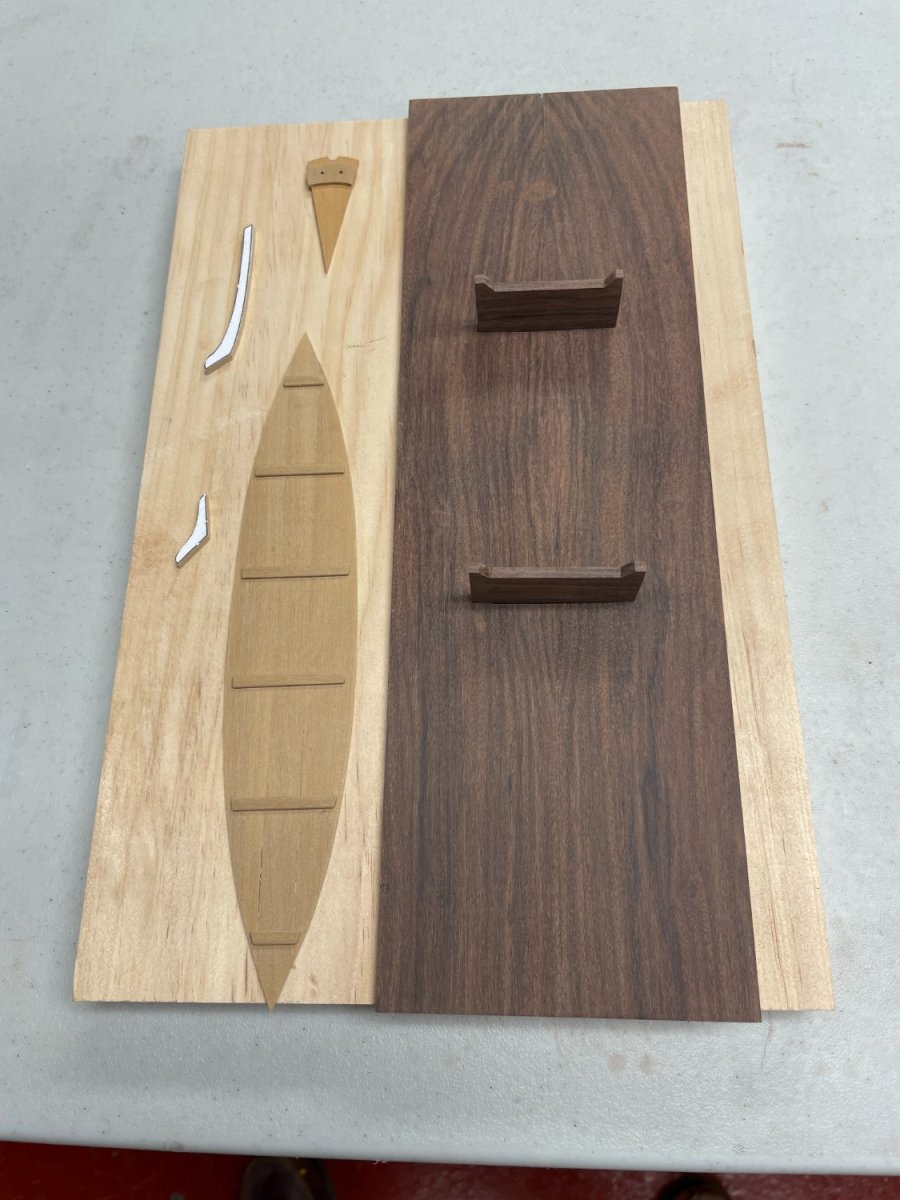
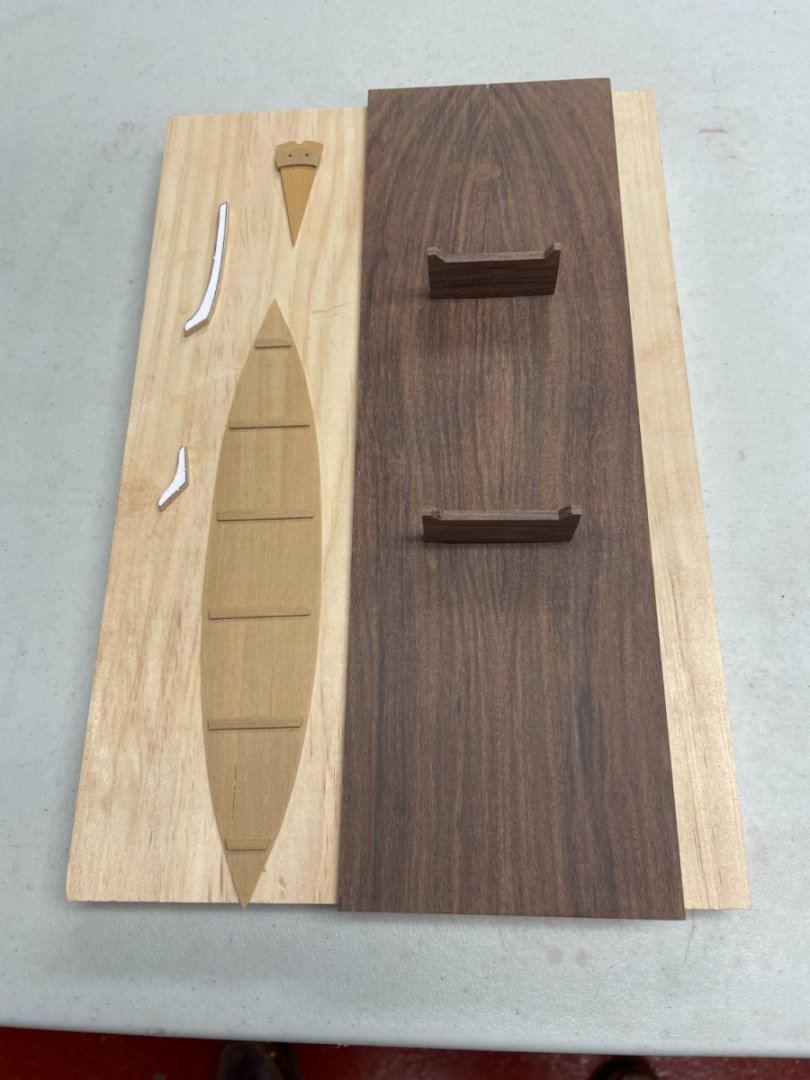
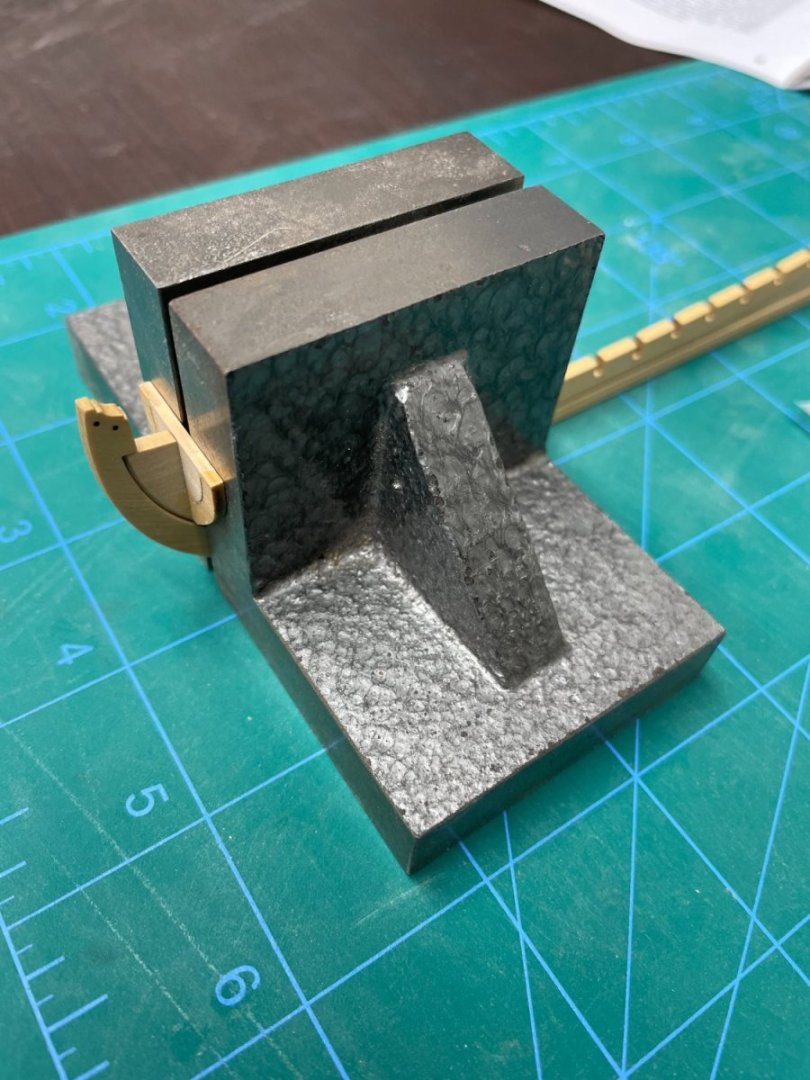
I started another project, the Model Shipways Grand Banks Dory. There are many build logs with kit pictures, so I won’t include here. I’m planning on replacing all the basswood anyways. I usually have two projects (wooden ship and plastic airplane) going, but for a bunch of reasons, thought I should try doing two ship models at the same time. Rationale: · I got a really good deal on it at a club auction · I’ve wanted to try one of David Antscherl’s kits · I think I have my jointer and bandsaw finally tuned right, and wanted to try milling some wood · I’ve found working with laser cut pieces on the longboat a little frustrating. I’m sure I will get better at it with some more practice, but wanted to get a sense of the comparison between cutting the parts out myself vs cleaning char off laser cut pieces. · I want to build with boxwood and some contrasting wood, and wanted to see how well patterns made from scanned laser cut sheets would work. This was particularly important on this model as the plans in the instruction book don’t include all the parts. · Main reason: I’m planning on starting a fully framed Echo, but want another project going so I don’t try working on Echo when tired or distracted. This seemed a good opportunity to pilot building two ship models at the same time. If it isn’t going to work for two fairly simple kits (longboat and Dory), I shouldn’t try it with Echo. So far, so good. I started with the stand as a test for the jointer and bandsaw. The wood is a piece of pao ferro that I had on my shelf. Very happy with both tools. The bandsaw got knocked out of alignment during the house move a few years ago, and is finally dialed back in. The jointer was never fully adjusted and is finally working the way it should. Scanning the basswood laser cut sheets has also worked well. The burn marks are thin enough and in the right place to get good patterns. For the first few pieces (hull bottom, stem, transom, stern knee) cutting the parts out has been very straightforward and taken less time than cleaning char. For some parts like the longboat frames this would not be true. I’ve also been making some progress on the other two projects and will update the logs soon.
- 32 replies
-
- 11
-
-
- Grand Banks Dory
- Model Shipways
- (and 2 more)
-
I'm pretty sure their decals are from cartograph
-
Mark - it was great to see you at the workshop, and so sorry that the travel set you back so much. Glad to see you back at work on Bellona and looking forward to seeing more progress. You do amazing work. Dave
-
AMC DH9 by davec - FINISHED - Wingnut Wings - 1/32
davec replied to davec's topic in Non-ship/categorised builds
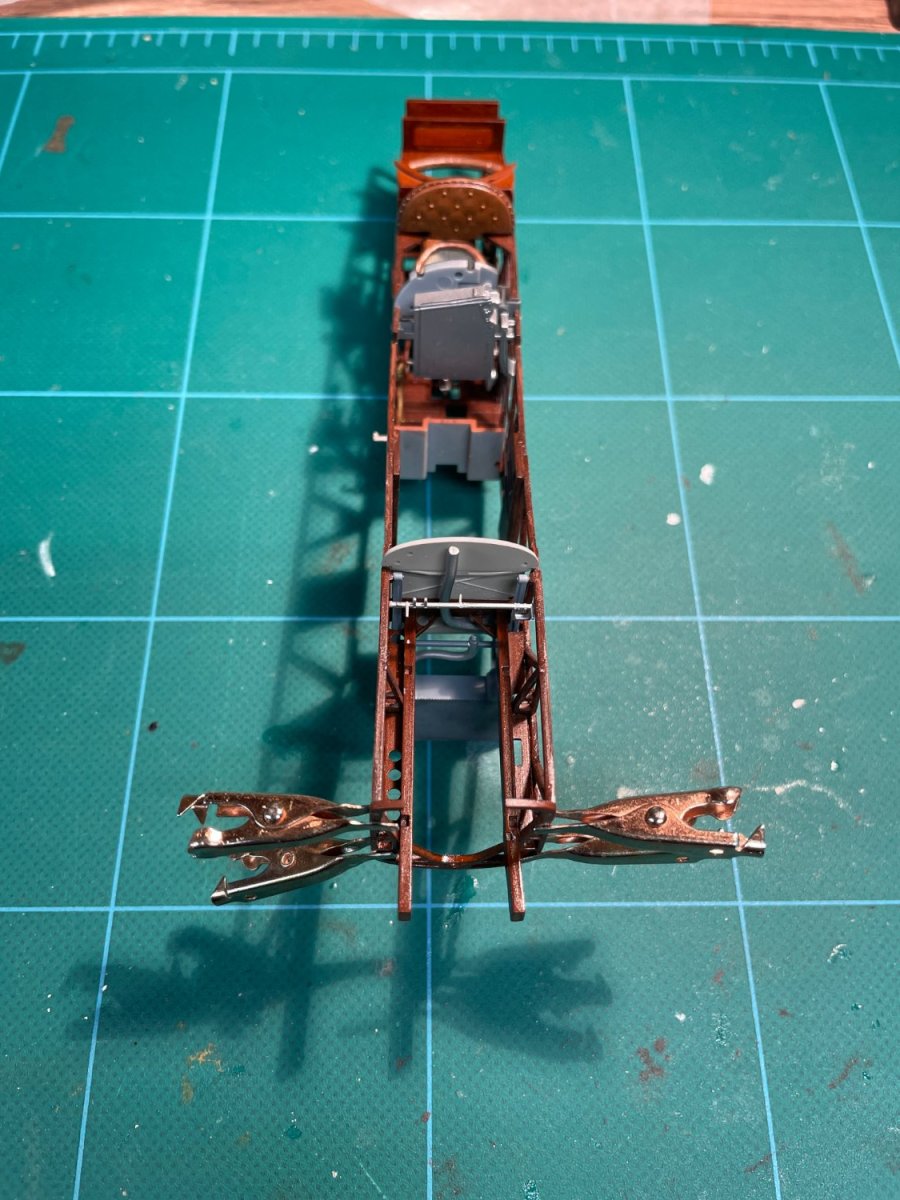
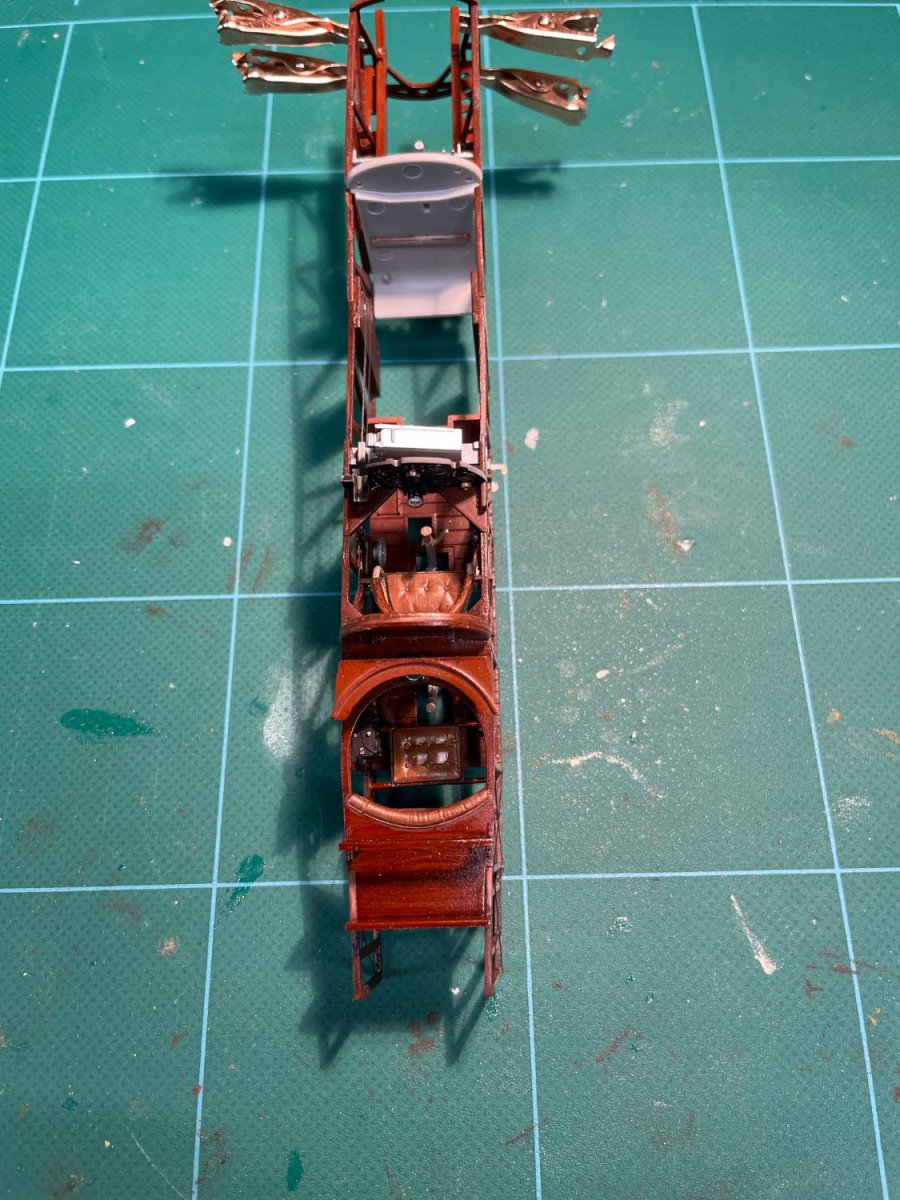
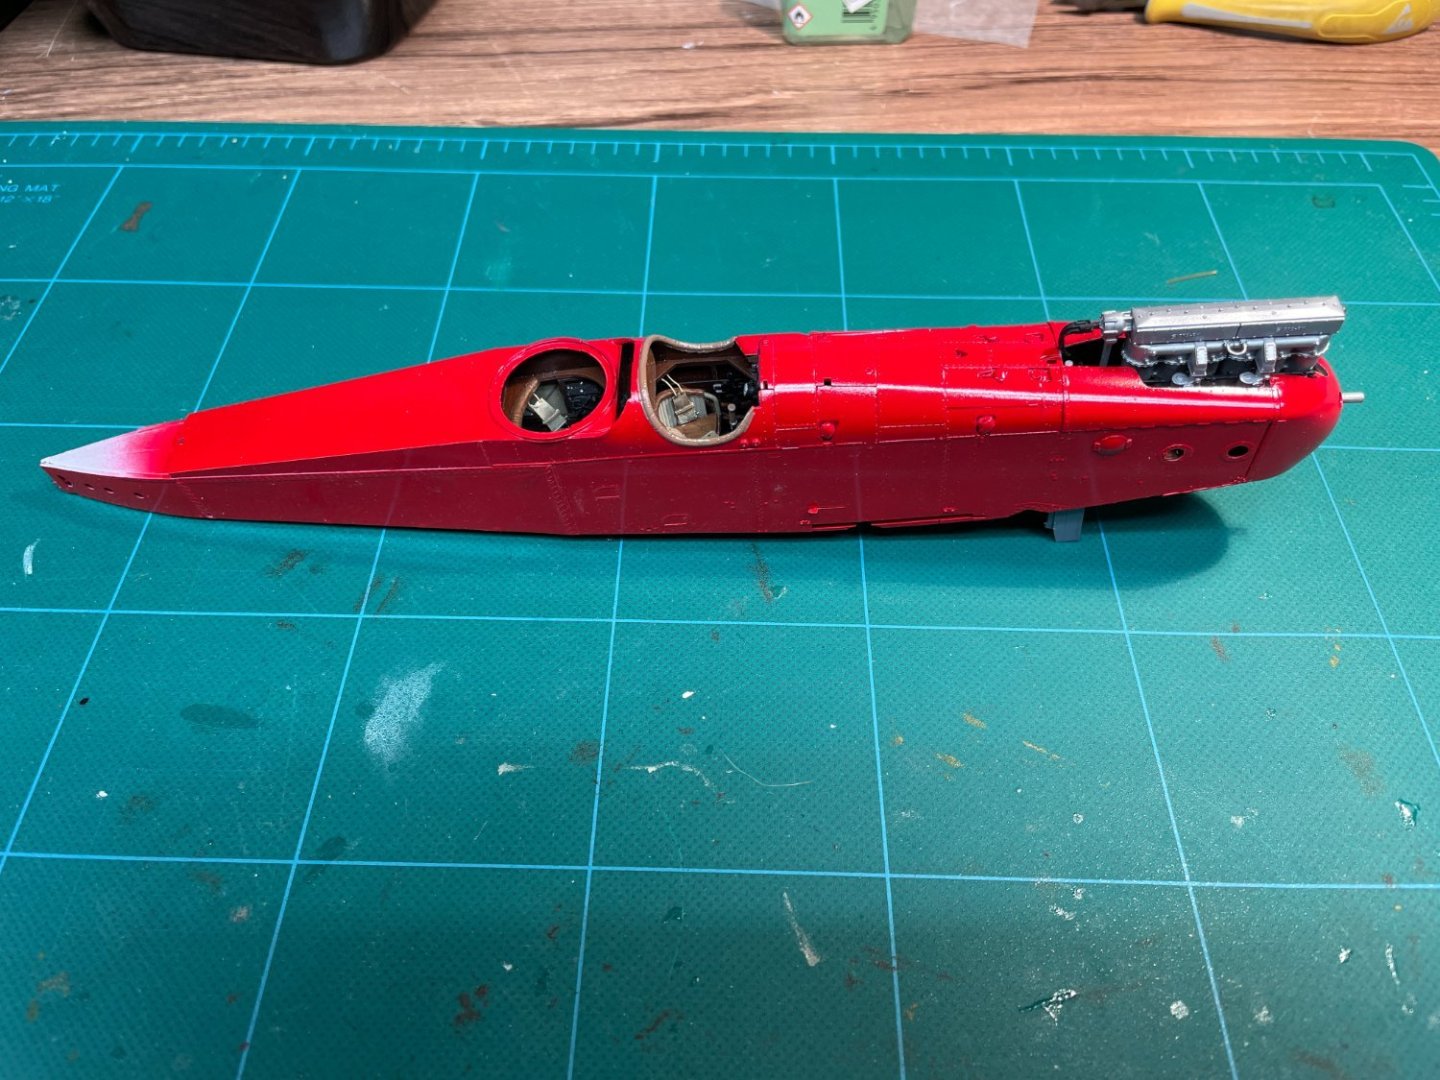
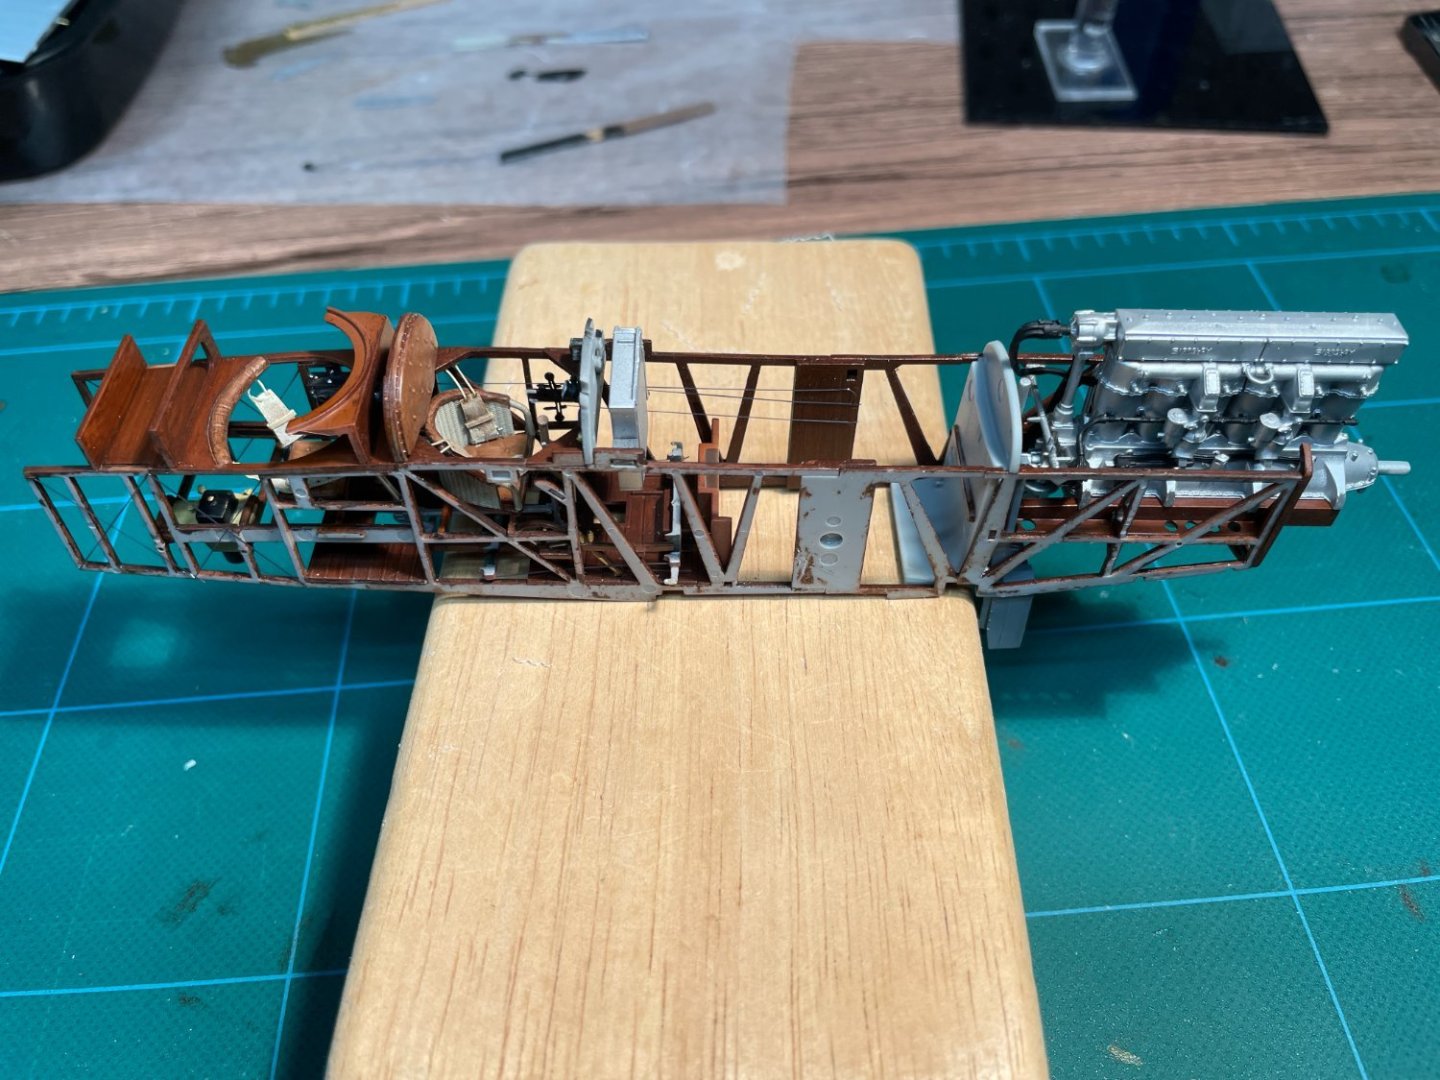
Engine finished and the rest of the cockpit and engine compartment complete. Dry fit of the fuselage halves looks good. I spent a few hours cutting most of the rest of the parts off the sprues and cleaning them up, drilling holes for wire reinforcements for aileron and stabilizer attachments, and drilling holes for the rigging attachments. I didn't take pictures - just looks like a pile of parts.
- 43 replies
-
- 19
-
-

-
I usually use minwax wipe on poly on boxwood and planned to do the same here. I thought applying it before assembly would work better than trying to brush or rub it on smoothly between the frames. I wanted to avoid the surfaces that would get glued. I usually use it full strength and apply as per the directions. This time I thinned with mineral spirits and brushed it on and am happy - I was able to brush around the slots for the frames and the pseudo-rabbet, so it shouldn't interfere with the strength of the glue joints. Only surprise was when I brushed over the laser precut separation, I got some laser char mixed in. Next time I'll need to try to vacuum or brush away any loose char from the slots before finishing. I've glued in the first frame.
-
I'm really impressed by the weathering - I usually build mine so they look like they just came out of the factory. I ordered the fiber pen and an looking forward to trying it - should arrive early this week. Dave
-
Hi Tim - With two, it doesn't feel too much like juggling. I haven't done build logs of both, but I've been doing a plastic plane at the same time I work on my ship for the last few years. A lot of evenings I only work on one project. I have the space to leave both out at the same time. It's nice to have a second project for when I'm stuck on one or have to wait while glue or paint dries. It's a lot easier to see progress on the plastic model. I also don't stress quite as much about overall quality on the plastic models, so usually work on them when I come home tired and am worried I won't do work I'm happy with.
-
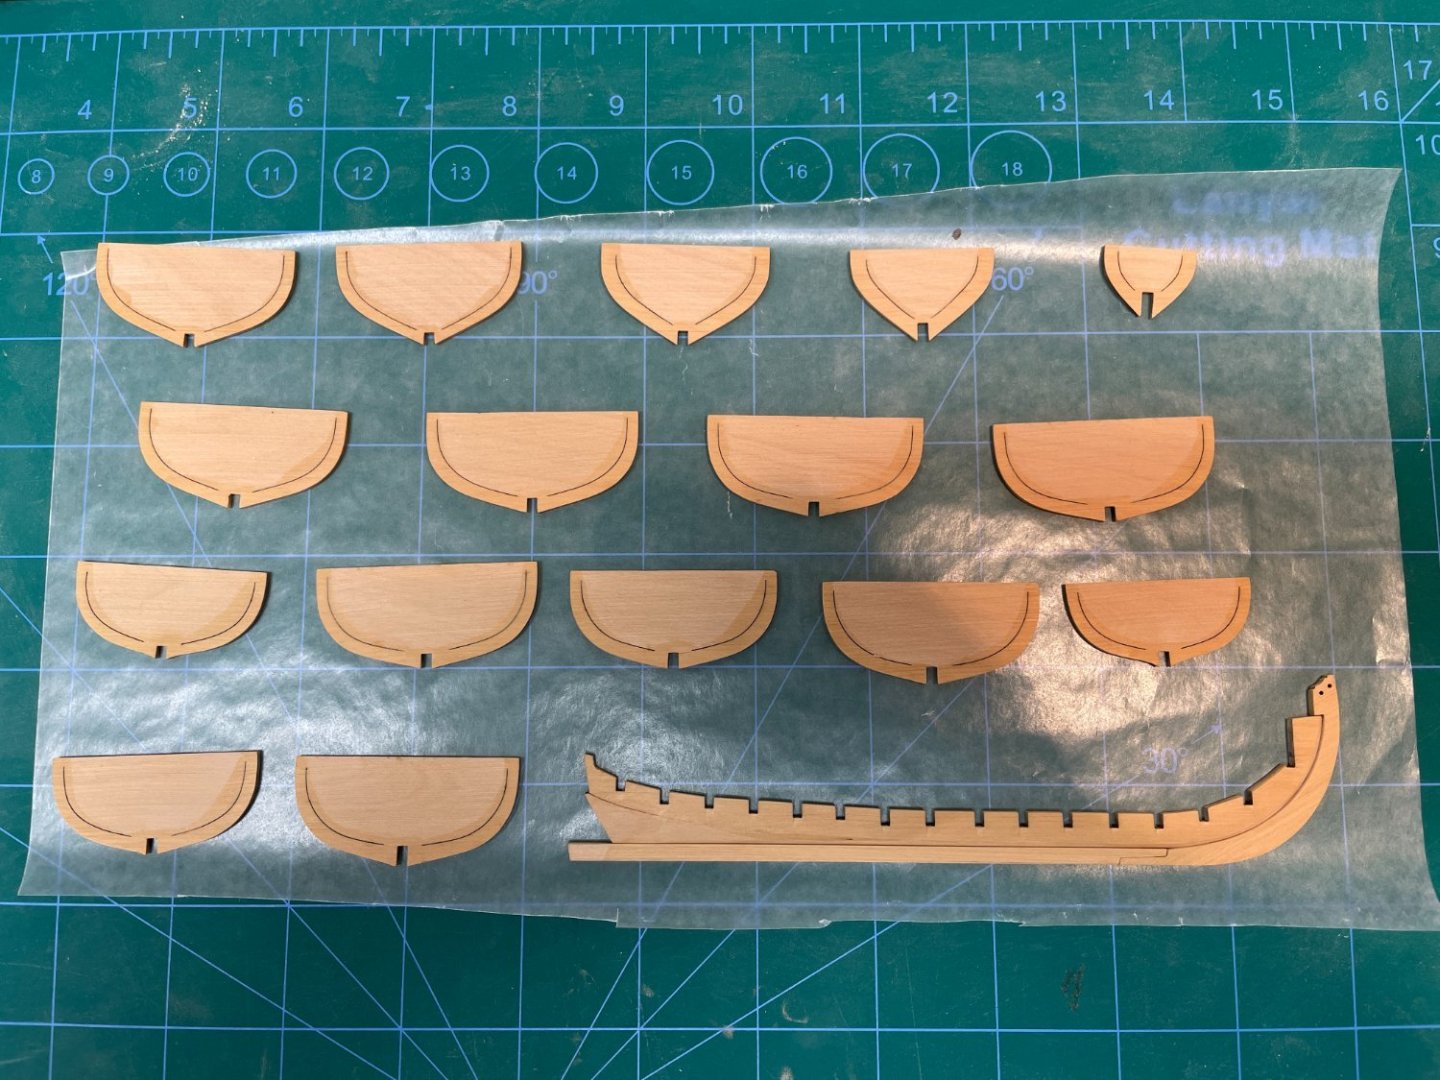
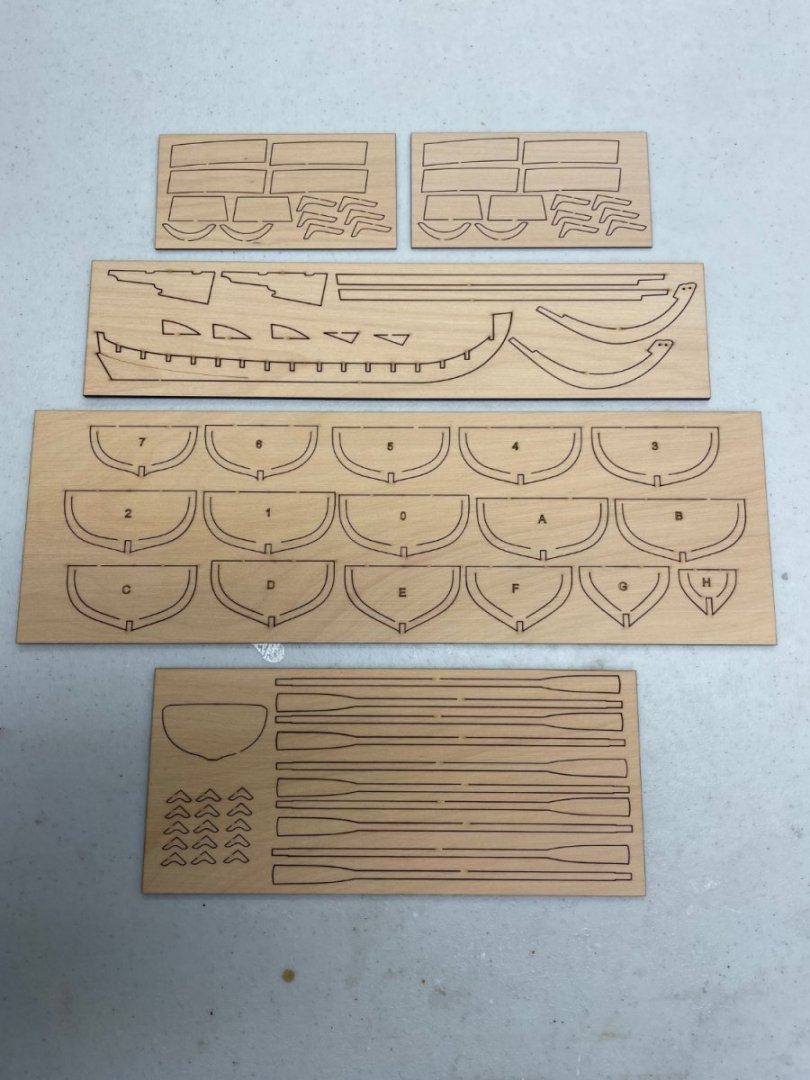
In addition to my DH-9, I’ve also started the Model Shipways longboat. There are lots of other build logs with pictures of the kit parts, so I won’t repeat pictures here. I'm very appreciative of all the other great logs to use for reference. This build will be very heavily kit-bashed. I’m planning on replacing all of the basswood with boxwood. I’m very grateful to Chuck, who laser cut the frames for me. I was going to try to cut them on a scroll saw, but was worried that it wouldn't work as well as the laser for the partially cut inside each frame, which is important to hold everything together while fairing and planking. Chuck not only sent me laser cut frames, but also the other laser cut pieces. The kit includes 3/32 thick basswood frames, which are a little out of scale, but necessary as the basswood isn’t as forgiving as boxwood for fairing and clamping the planks. Chuck cut the frames on 1/16” boxwood, which is more to scale. I thought I would have to scratch the false keel with 1/16 instead of 3/32 slots, but even that had been adjusted for – tremendously impressive. I usually scratch build, so this was my first experience with laser cutting and removing char. The thread on char removal (char-removal-arrrghh) was really helpful. Scraping with an 11 blade followed by 320 grit sandpaper has worked pretty well for me. I’ve been using an abrasive cleaning stick so I don’t have to discard the sanding stick once it gets dirty with char, which has also worked pretty well. It is also taking some time to get used to adjusting the laser kerf to a right angle. Removing char and kerf without changing the part's size and shape has been a challenge. I thought I had screwed up taking too much off the stem when I saw it didn't line up with the keel. I saw Chuck’s comment in the other thread that he makes the parts oversize to allow for cleanup and checked the plans. The stem is the right size and I just need to sand down the keel to match. I’m having mixed feelings about laser cutting. It is great for complicated parts like the frames and the keelson with all the slots. I just made the filler pieces for the bow. It was much faster to cut them on the scroll saw than it would have been to clean the char. I’ll probably be selective about which laser cut pieces I use and which ones I replace moving forward. Keel and keelson are done and glued. I think I have the tapering right for the rabbet, and after a little filing, the frames all fit in the slots in the keelson. I'll start assembling the frames soon.

-
AMC DH9 by davec - FINISHED - Wingnut Wings - 1/32
davec replied to davec's topic in Non-ship/categorised builds
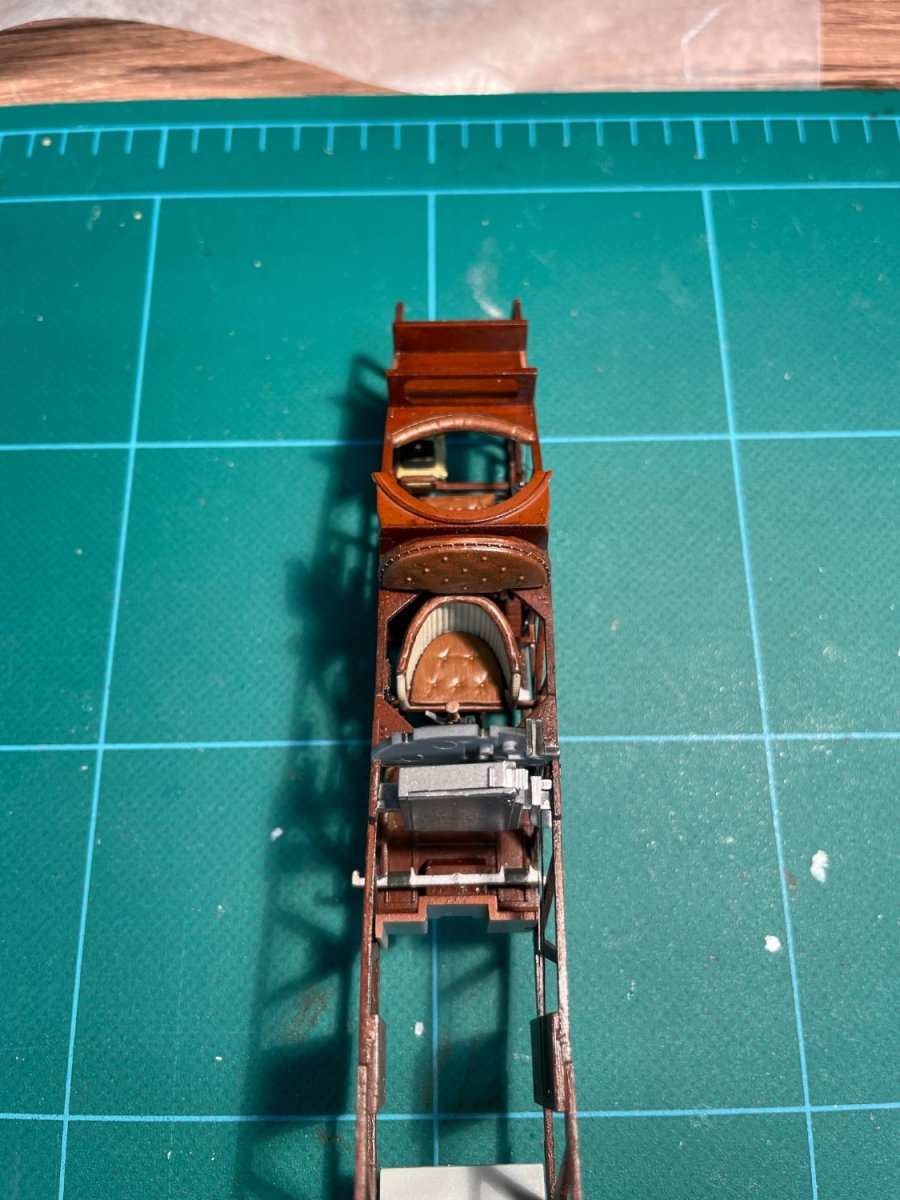
Thanks everyone for the likes and comments. Rob - great advice - I have been test fitting the fuselage halves as I add parts to the cockpit and am optimistic that it will come together OK. The Greek color scheme is neat - another nice variation from the usual olive drab and tan DH9 colors. Progress continues. I'm working on the seatbelts and engine- more pictures soon. I'm not much into weathering. Plane should look like it is ready for its first flight when done.


- 43 replies
-
- 15
-
-
You mentioned using a fiber pencil for mating surfaces. I haven't heard of this before. What are you using?? thanks!!
-
I have this one on the shelf for someday - it's so big it won't fit into my display case and I'm not sure where I would put it if I finished. I'm looking forward to seeing your build.

.JPG.8be5b98e27233297e7dd650d685bd3eb.JPG)