HOLIDAY DONATION DRIVE - SUPPORT MSW - DO YOUR PART TO KEEP THIS GREAT FORUM GOING! (Only 13 donations so far - C'mon guys!)
×


davec
-
Posts
382 -
Joined
-
Last visited
Content Type
Profiles
Forums
Gallery
Events
Everything posted by davec
-
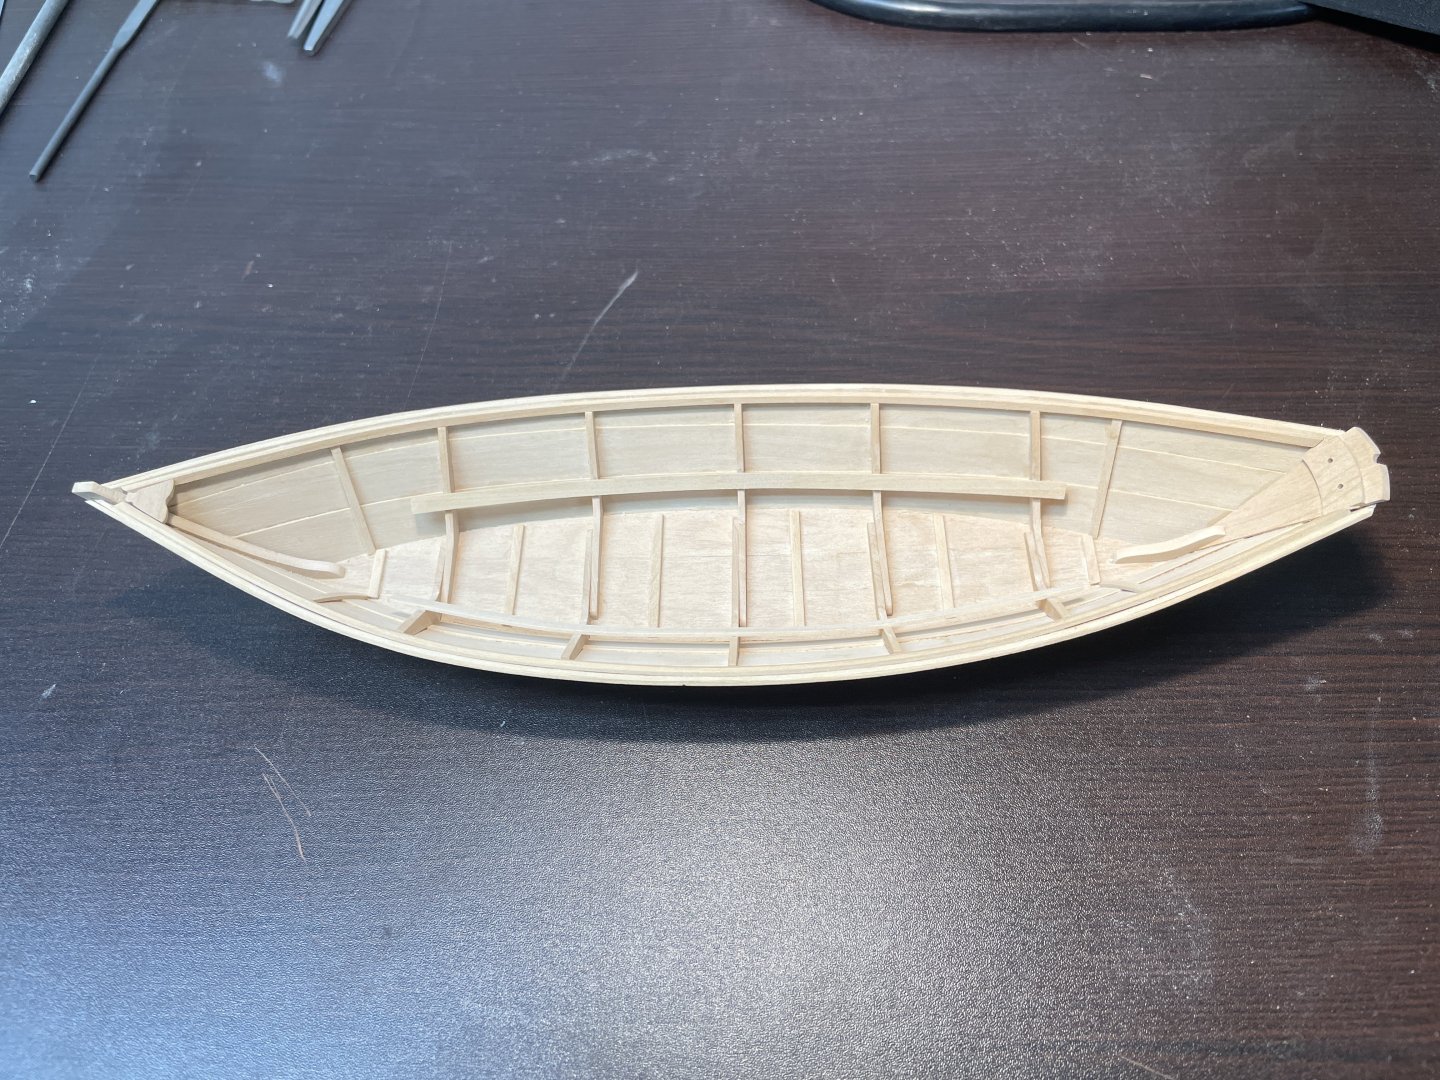
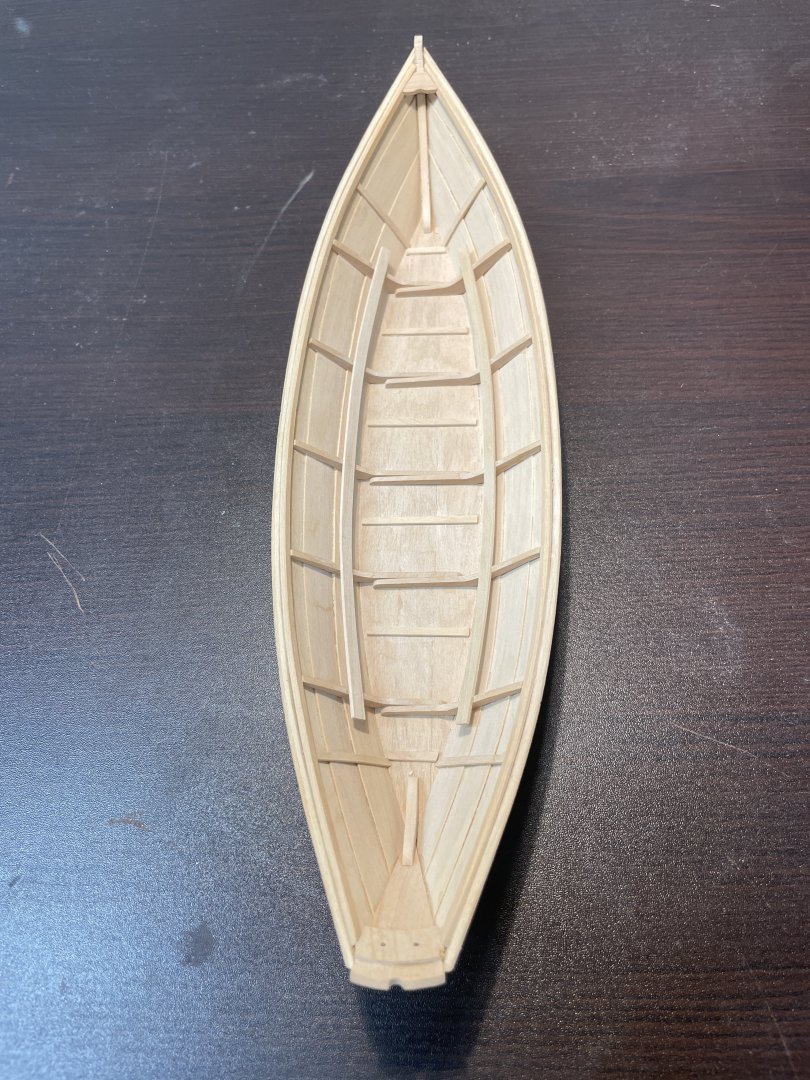
 It's coming together. I redid the fore thwart and raised the end one of the seat risers which was a little low. Beckets have been installed. I'm going to call it quits for the day and plan to finish after work tomorrow. I just have to glue down the thwarts and oars and add the thole pins.
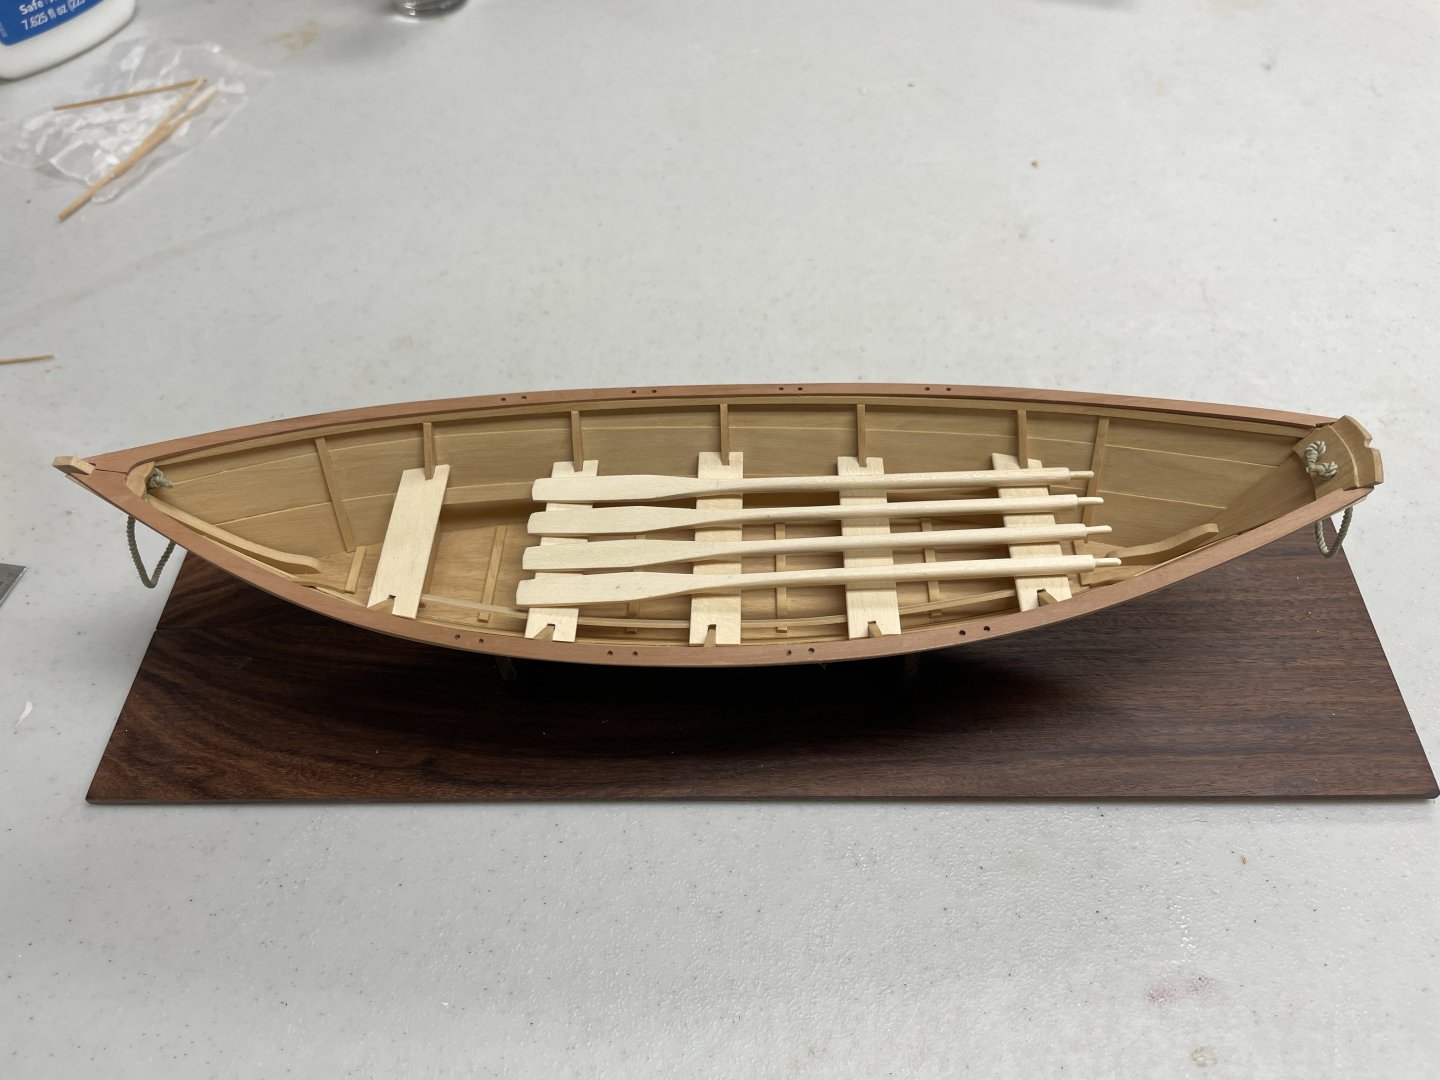
- 32 replies
-
- 7
-

-
- Grand Banks Dory
- Model Shipways
- (and 2 more)
-
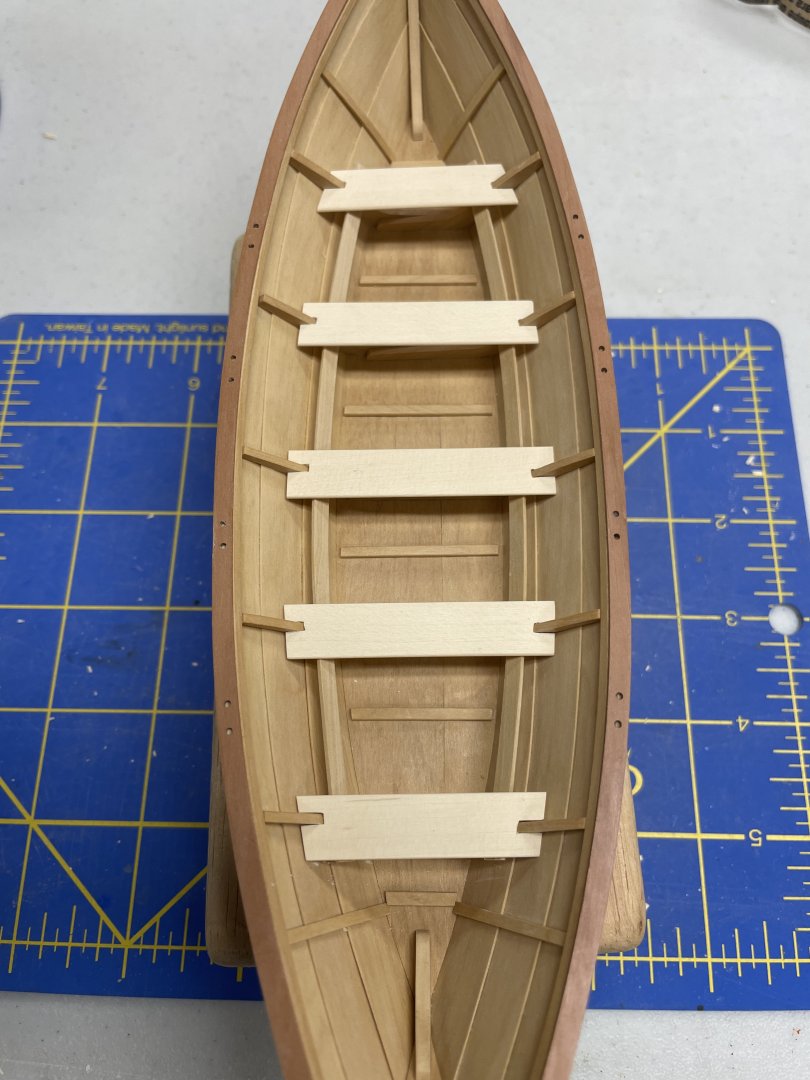
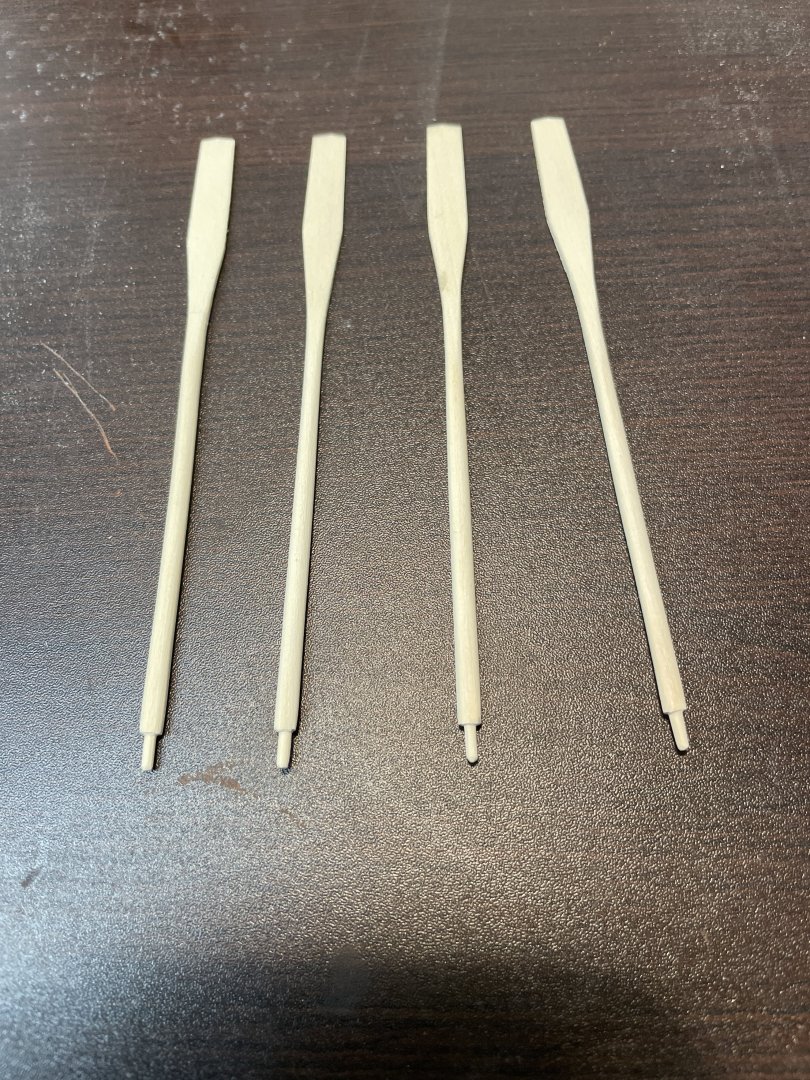
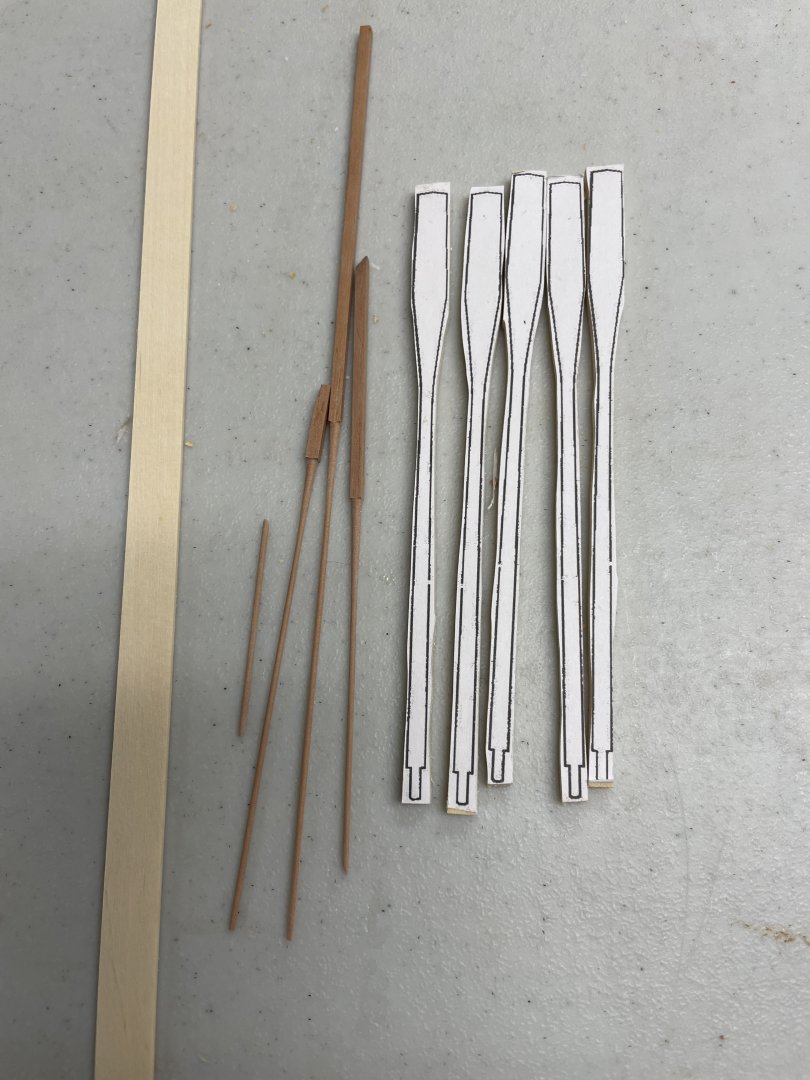
I have the oars mostly shaped. Some need some more sanding. I also cut out the thwarts. This was another area where laser cutting would have been easier. Cutting slots with chisels and files has turned out to be really tough. I'm not entirely happy with them. They aren't glued in place yet. I took them out to finish with minwax polycrylic (dries clear without changing the color of the holly). What looks like misalignment of the fore and aft thwart I think is distortion from the camera. I will recheck once the finish is dry and adjust/replace if necessary.
- 32 replies
-
- 7
-
-
- Grand Banks Dory
- Model Shipways
- (and 2 more)
-
Druxey - many thanks! Fortunately, I did not make any commitments to finish by the end of the year. I thought about it, but it didn't happen. I did do some more work. I finished the hull with minwax wipe-on poly, which I think brings out the colors of the pear and boxwood really well. I also made some 3/64 pear dowel, ripped holly for the thwarts, and rough cut the oars, also out of holly. I started shaping them, but won't post pictures until they start to look ok.


- 32 replies
-
- 5
-
-
- Grand Banks Dory
- Model Shipways
- (and 2 more)
-
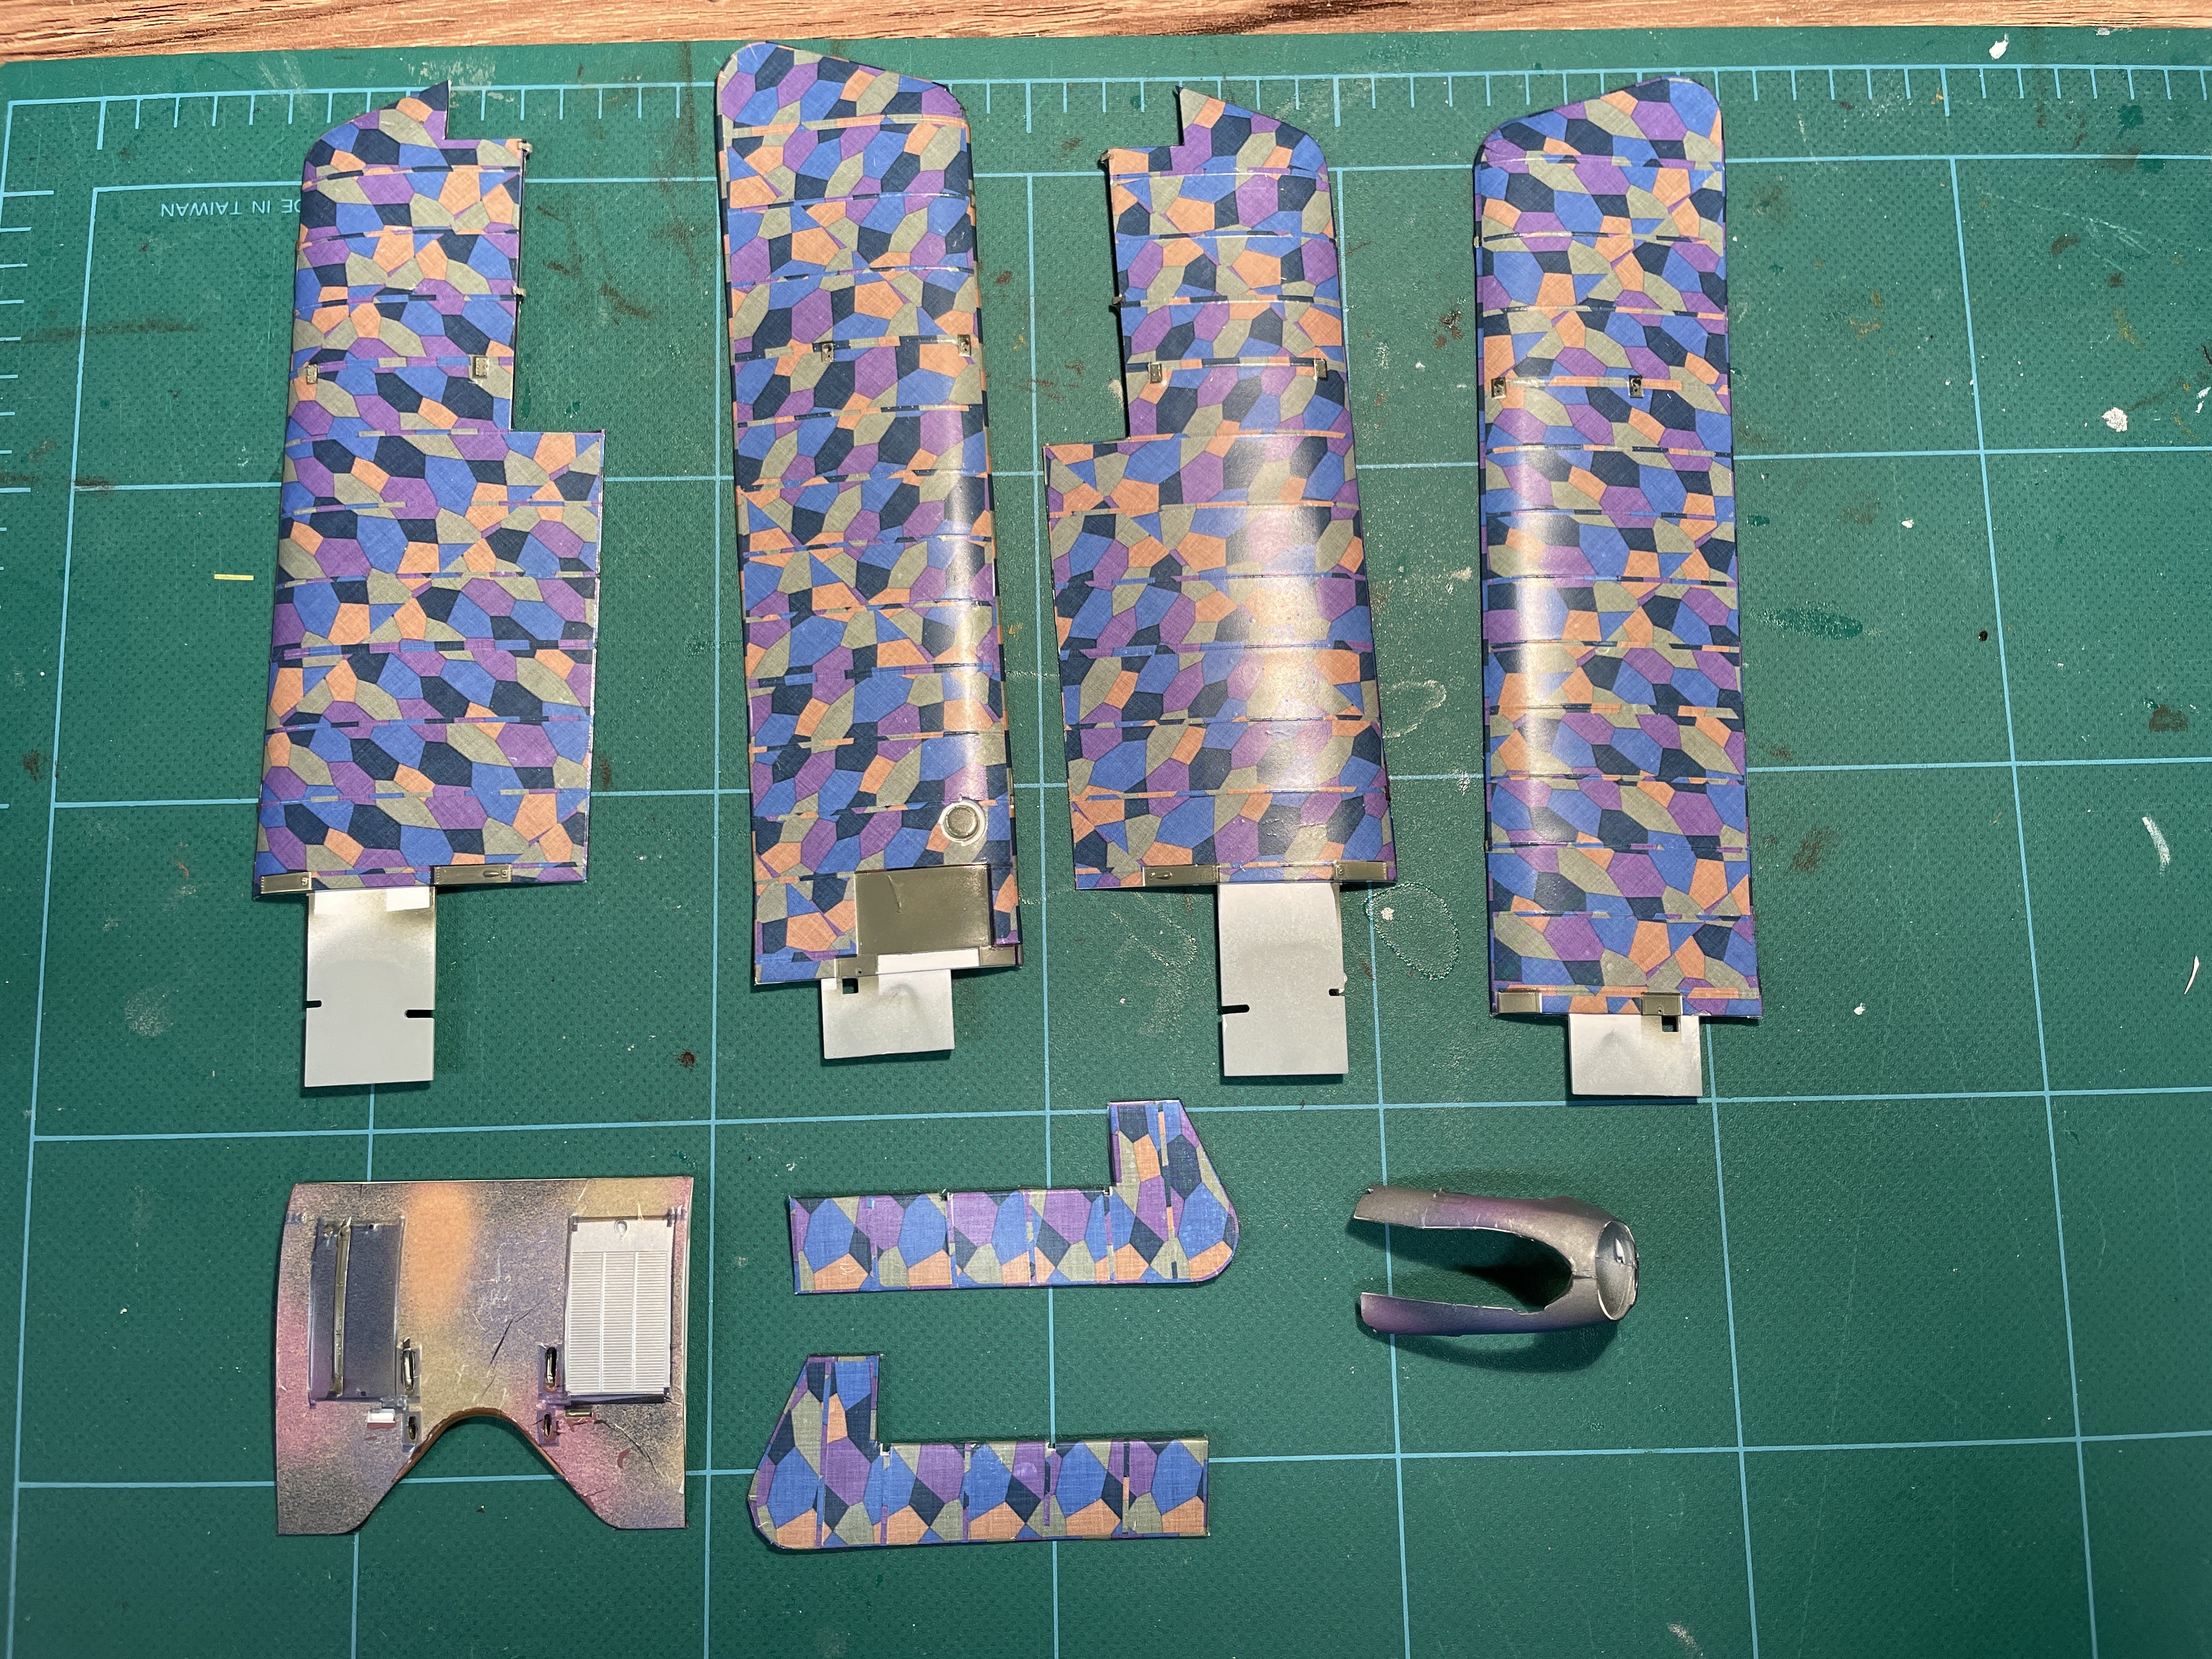
I got the avaittic wing lozenges mostly to try something new. I used the wingnuts ones on a prior model and wanted to see the difference. I found the aviattic ones easier to apply without creases or bubbles, but because they were clear, they needed a lot better surface prep prior to application. It ended up being about the same in terms of difficulty and final appearance. The avaiattic would be the better choice if you plan to preshade.
-
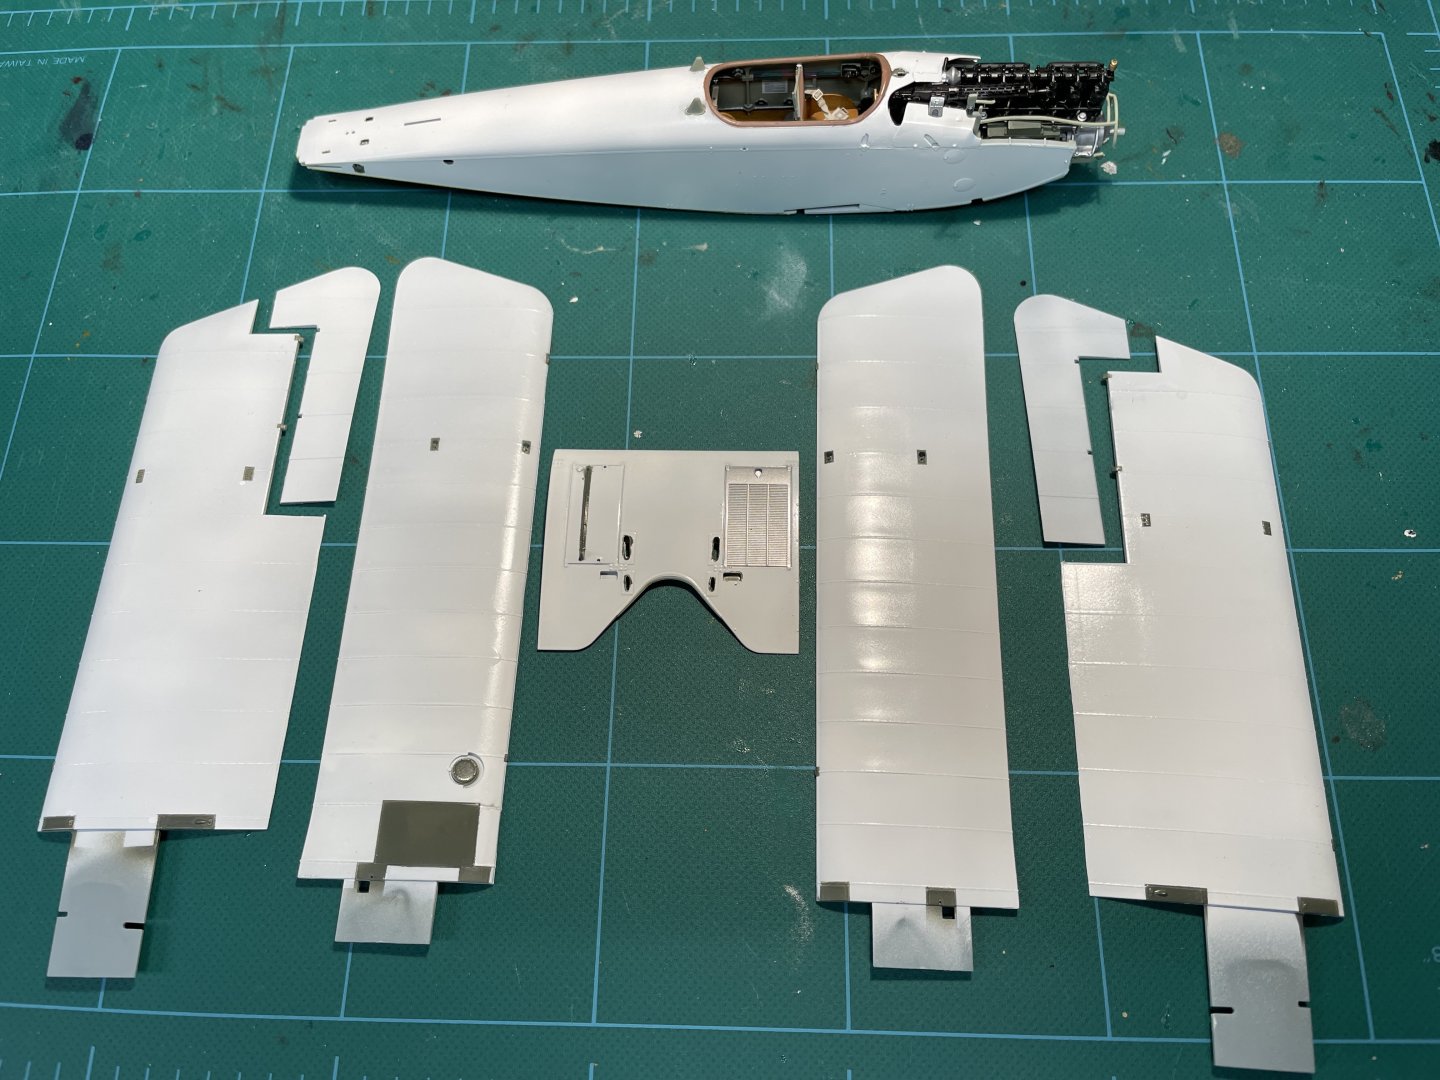
I’ve applied the Aviattic decals to the wings and fuselage. There was a pretty steep learning curve. They are amazing decals. This was one of the areas where I was in new territory – these are really big decals (cover almost entire surface of wings and fuselage and go around some significant compound curves). Painting isn’t really an option for me. I like WW1 airplanes, but I’m not passionate enough about them to do the masking required for painting the lozenge camouflage or even worse, painting the lozenges then spattering paint on top of them for the fuselage camouflage. The decals are very thin and begin separating as soon as they get wet. After I got the hang of it, I moistened, then let them sit for 30 seconds, at which point most were easy to manipulate for about 30 seconds. It was easy to align them given the many openings for struts and other molded details. Sizing was accurate. They need to be cut out close to the edge of the design as the design is printed on a single sheet of clear decal film. They were a little finicky. Most were easy to apply and conformed really well to the curves. I thought the fuselage would be the hardest, but those decals went on really well. I did the center of the top wing last as it was so visible, but thought it would be easy given it was flat and not very large. For unclear reasons, it bonded instantly and couldn’t be moved. The picture is after a lot of touching up. I’m going to try to smooth out the wrinkles a little more, but will need to live with it. Once the decals are applied, I used a q-tip from the center of the detail outwards to smooth out bubbles. Most of the edges around the wings stuck just fine. The instructions suggest using some white glue as necessary and this worked in the areas that didn’t stick. I still have some touching up to do and bubbles and wrinkles to work out with solvaset. Because the decals are clear, if they fold over or overlap you get a dark area. I learned a valuable lesson trying to unfold an area on the fuselage. After about 30 seconds the decals can’t be manipulated. I ended up cutting away the folded over area and replacing it with scrap. The decalling will be far from perfect with some significant flaws, but overall effect will be good enough to make finishing it worthwhile. I have another Halberstadt as part of the duelist package, so at some point will get a second chance.


- 40 replies
-
- 15
-
-
Ben - tremendous workmanship. Your model looks incredible.
- 399 replies
-
- 2
-
-
- winchelsea
- Syren Ship Model Company
- (and 1 more)
-
Beautiful metal work and coils. Amazing work!
- 201 replies
-
- 3
-

-
-
- Oyster Sharpie
- first scratch build
- (and 1 more)
-
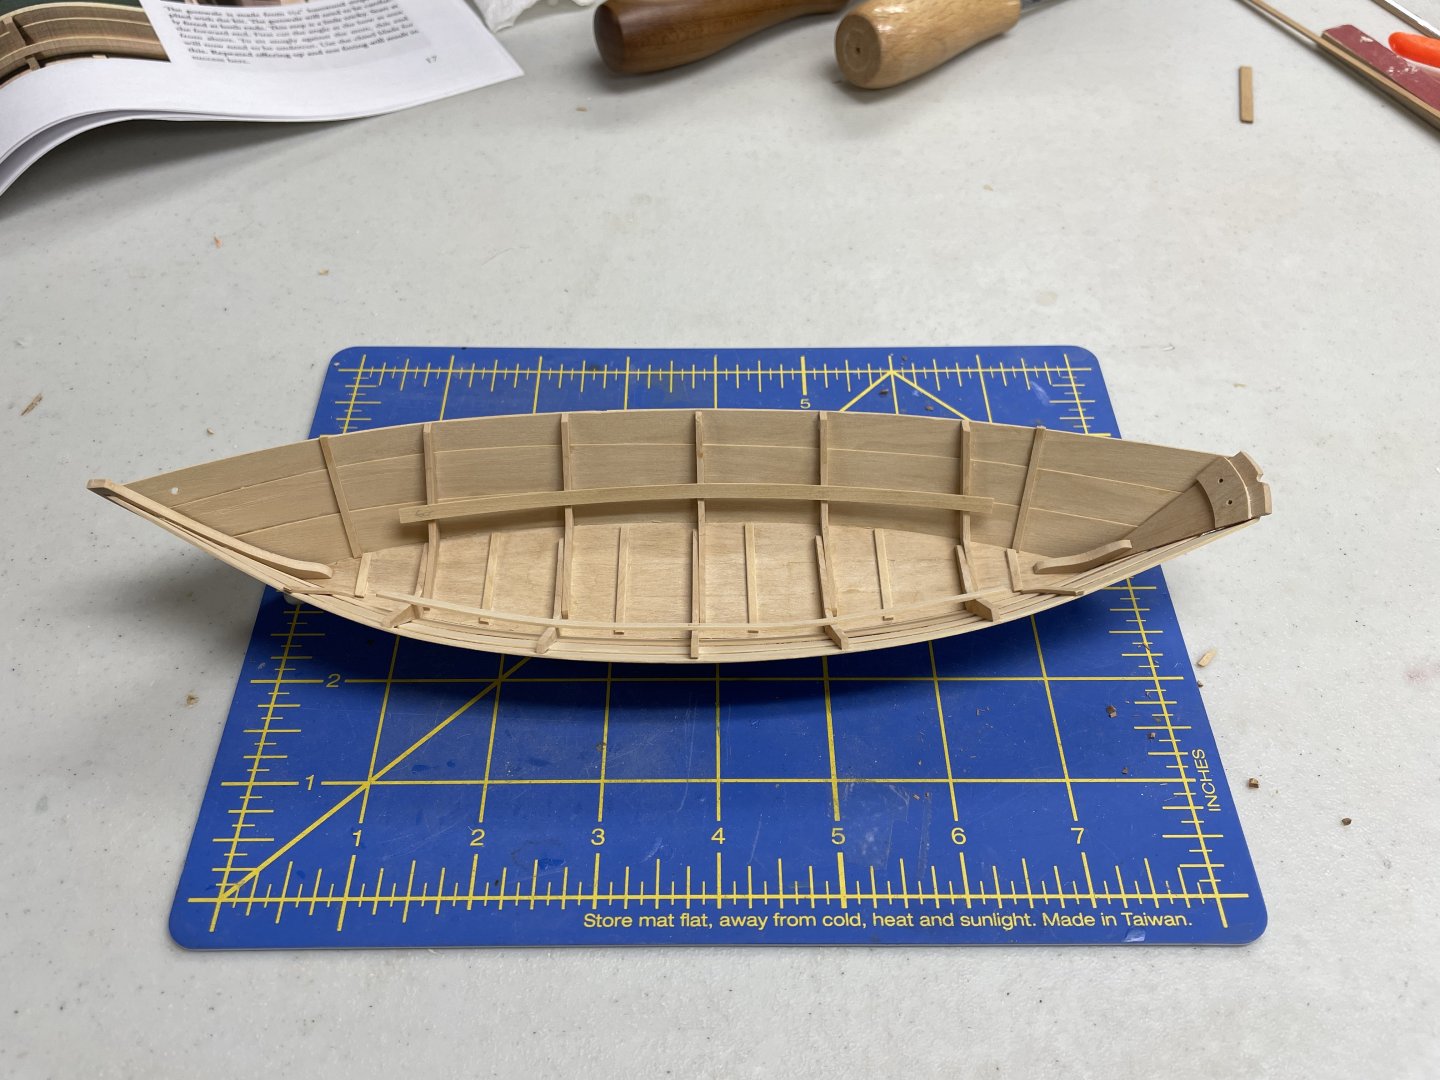
Cap rails attached. The instructions say "any gap can be fixed with a little filler and paint." The model is a little more challenging when that isn't an option. The instructions and a lot of the completed models use a three color scheme with white oars and thwarts. I will make these out of holly. If I get to the workshop later today I will work on the last few parts and apply some clear finish.


- 32 replies
-
- 8
-
-
- Grand Banks Dory
- Model Shipways
- (and 2 more)
-
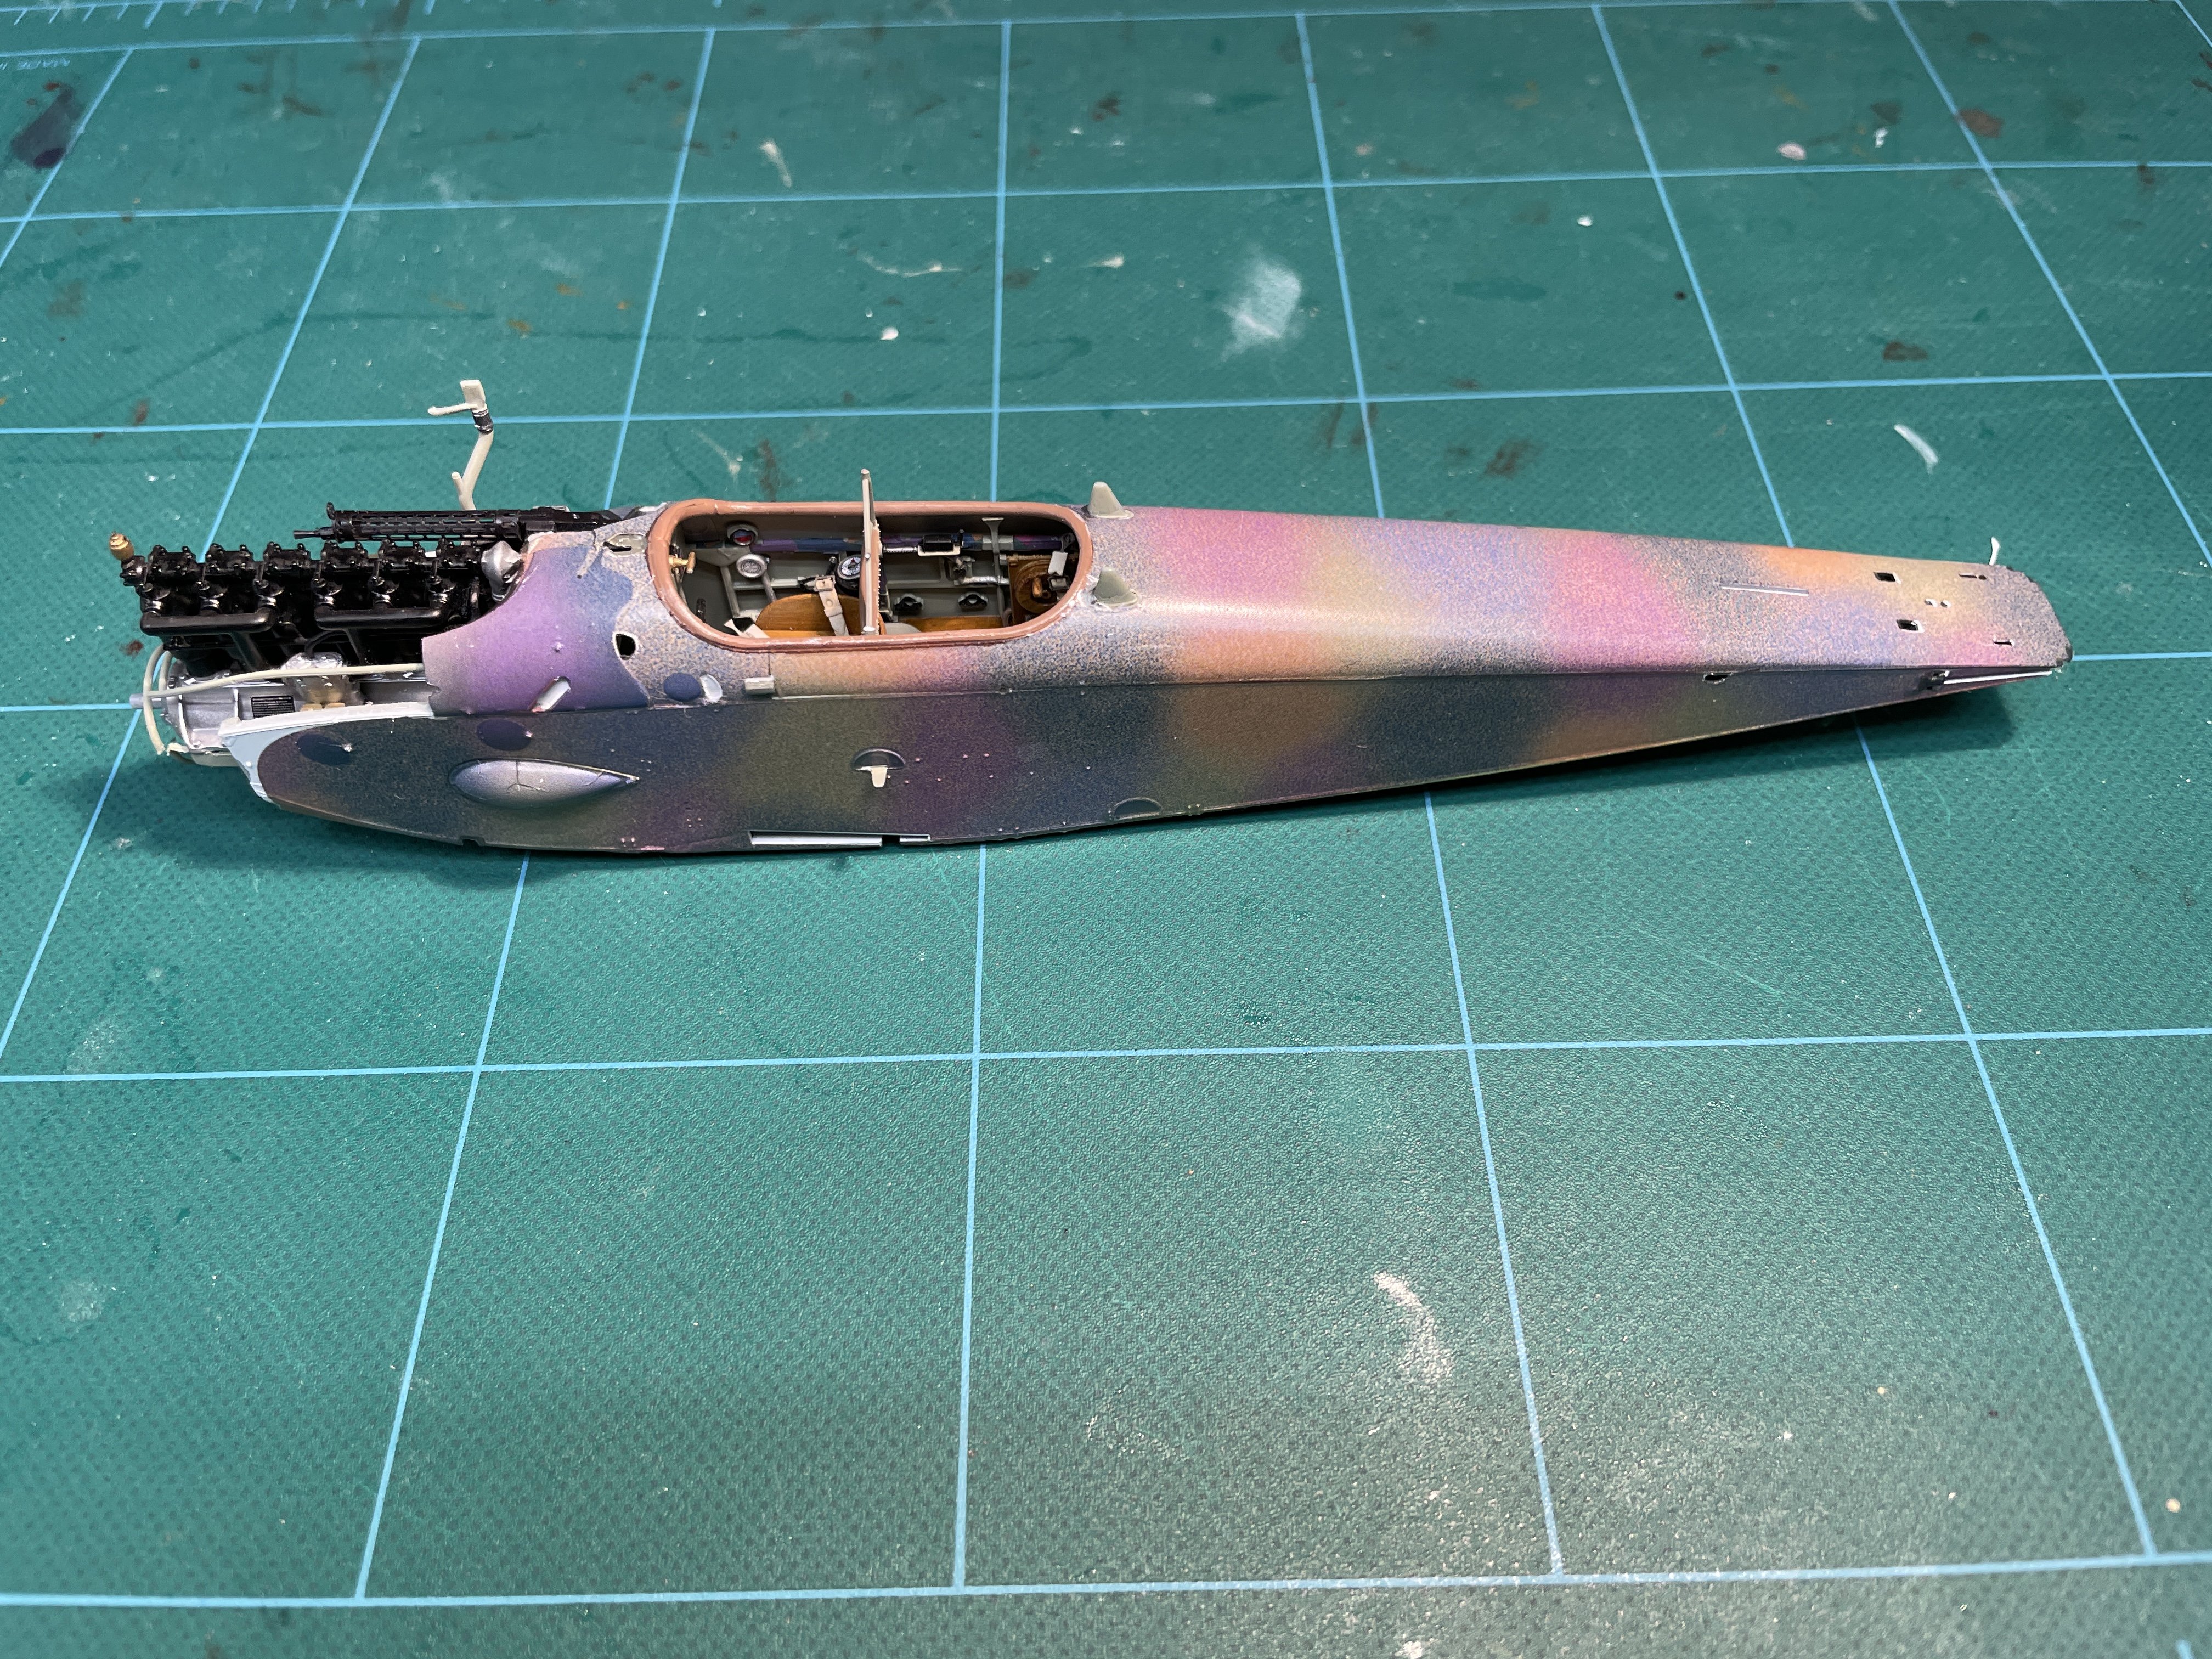
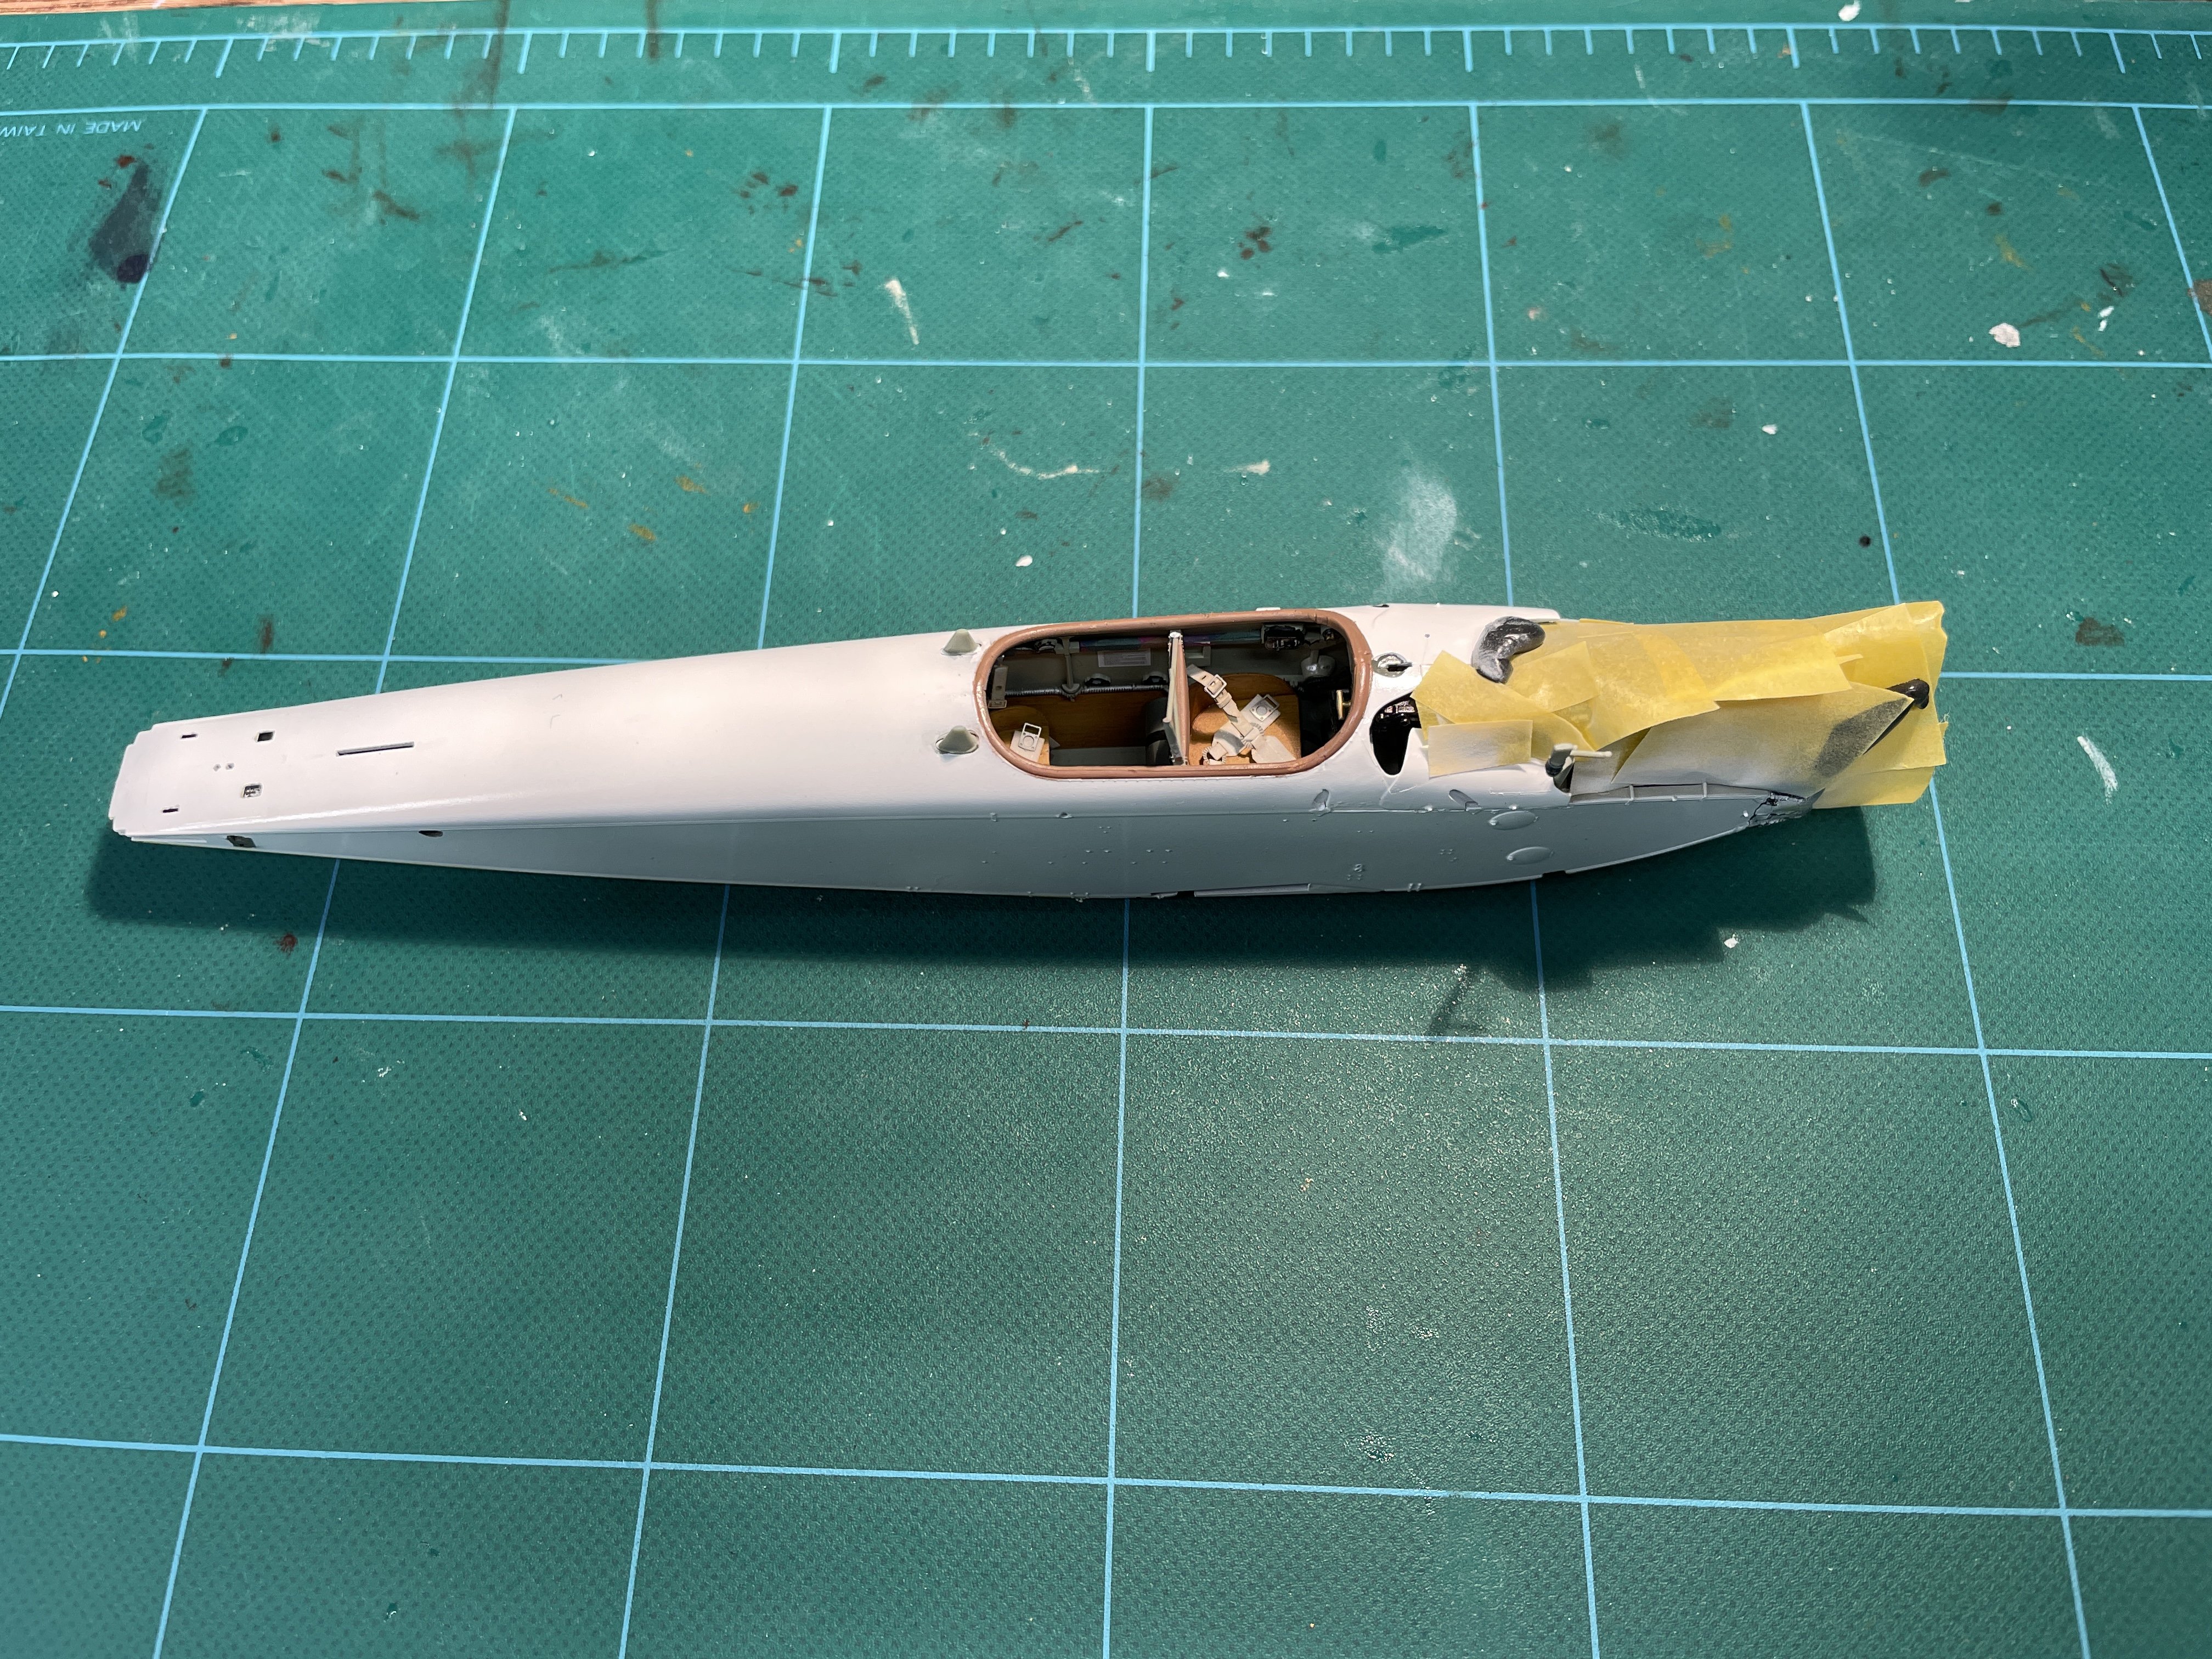
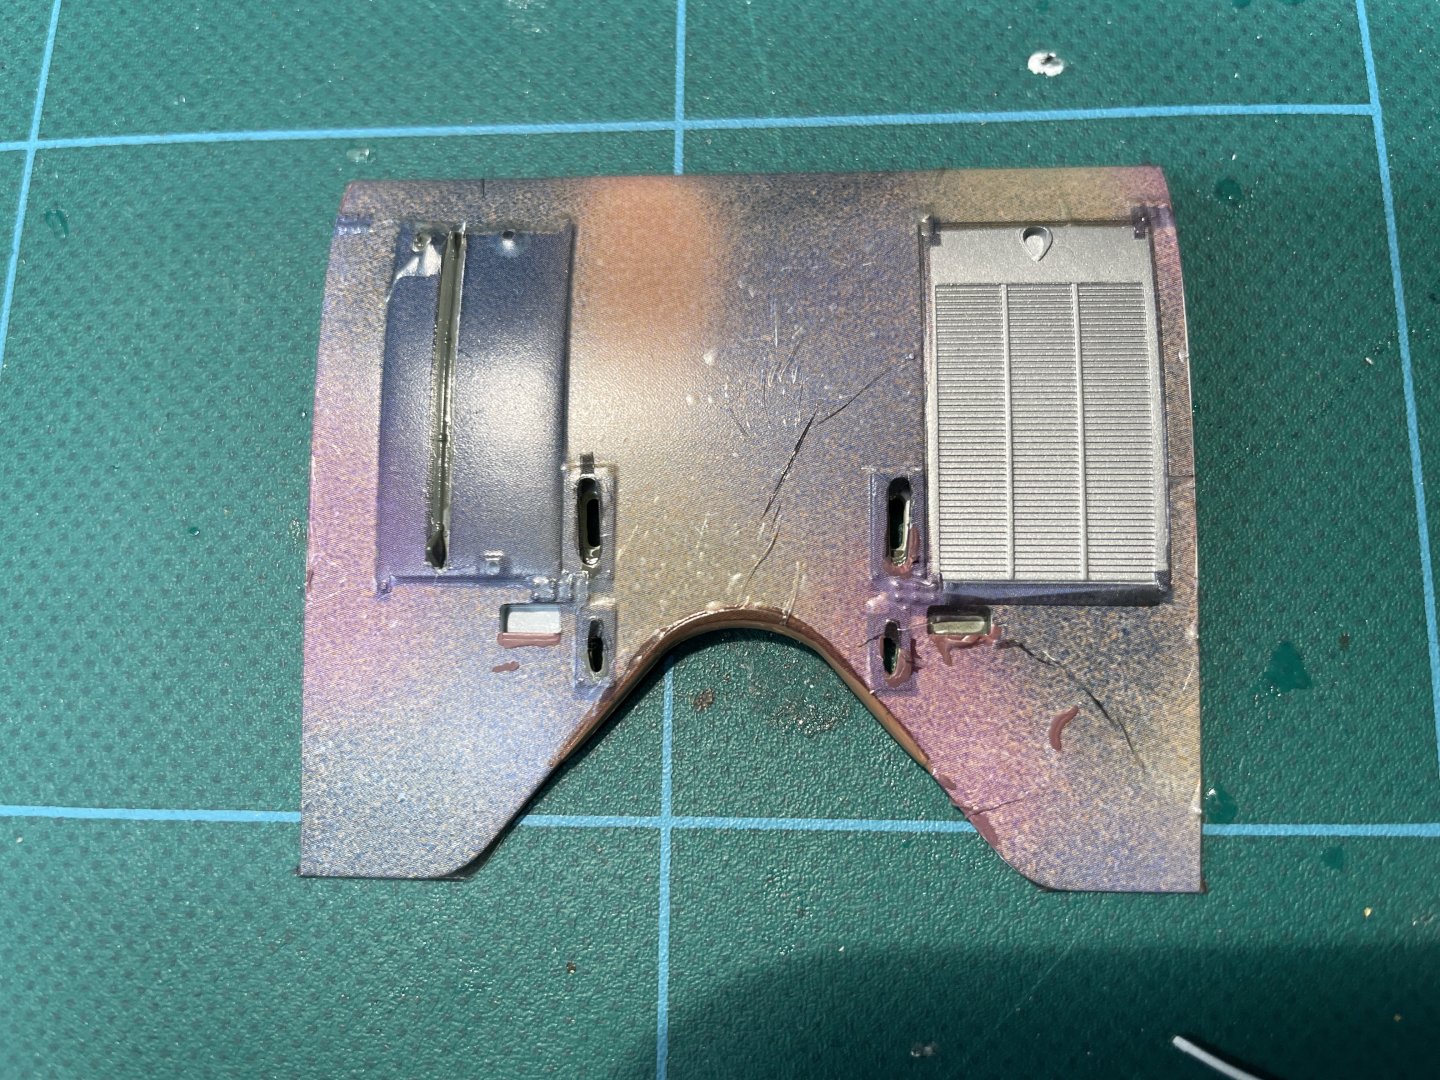
Thanks for the likes and comments. I’ve had some travel and work things, so haven’t had blocks of time to work on the model and was slowed down trying to figure out order of assembly and how to mask the fuselage. While I was figuring this out, I cut out pieces, painted them and made subassemblies in 15-30 minute blocks of time that randomly came up. It has added up to some progress. The aviattic decals are clear, so they need to go over gloss white paint. I did not do any preshading as I usually build the planes as I see them in museums, and the canvas seems to be painted heavily enough that I usually can’t see the framing through the canvas with the available light. I was also nervous about the decaling and did not want to sink the extra hours into something that was turning into a learning experience. The fuselage halves are glued together and seams filled. I built following the instructions and masked the cockpit, engine, and other fuselage openings. I had my first fit problems at the nose where the fuselage is slightly wider than the assembled cowl. I added some .02” shim between the two cowl halves to get things to fit. I’ve started to decal and will add some pictures when I get a little further along. Everything in the pictures is Tamiya white primer with Tamiya gloss coat over it. I’ve painted everything that won’t be covered by the decals. The instructions did not have color directions for a lot of things, so I went heavily with the grey that was recommended for other similar parts.

- 40 replies
-
- 12
-
-

-
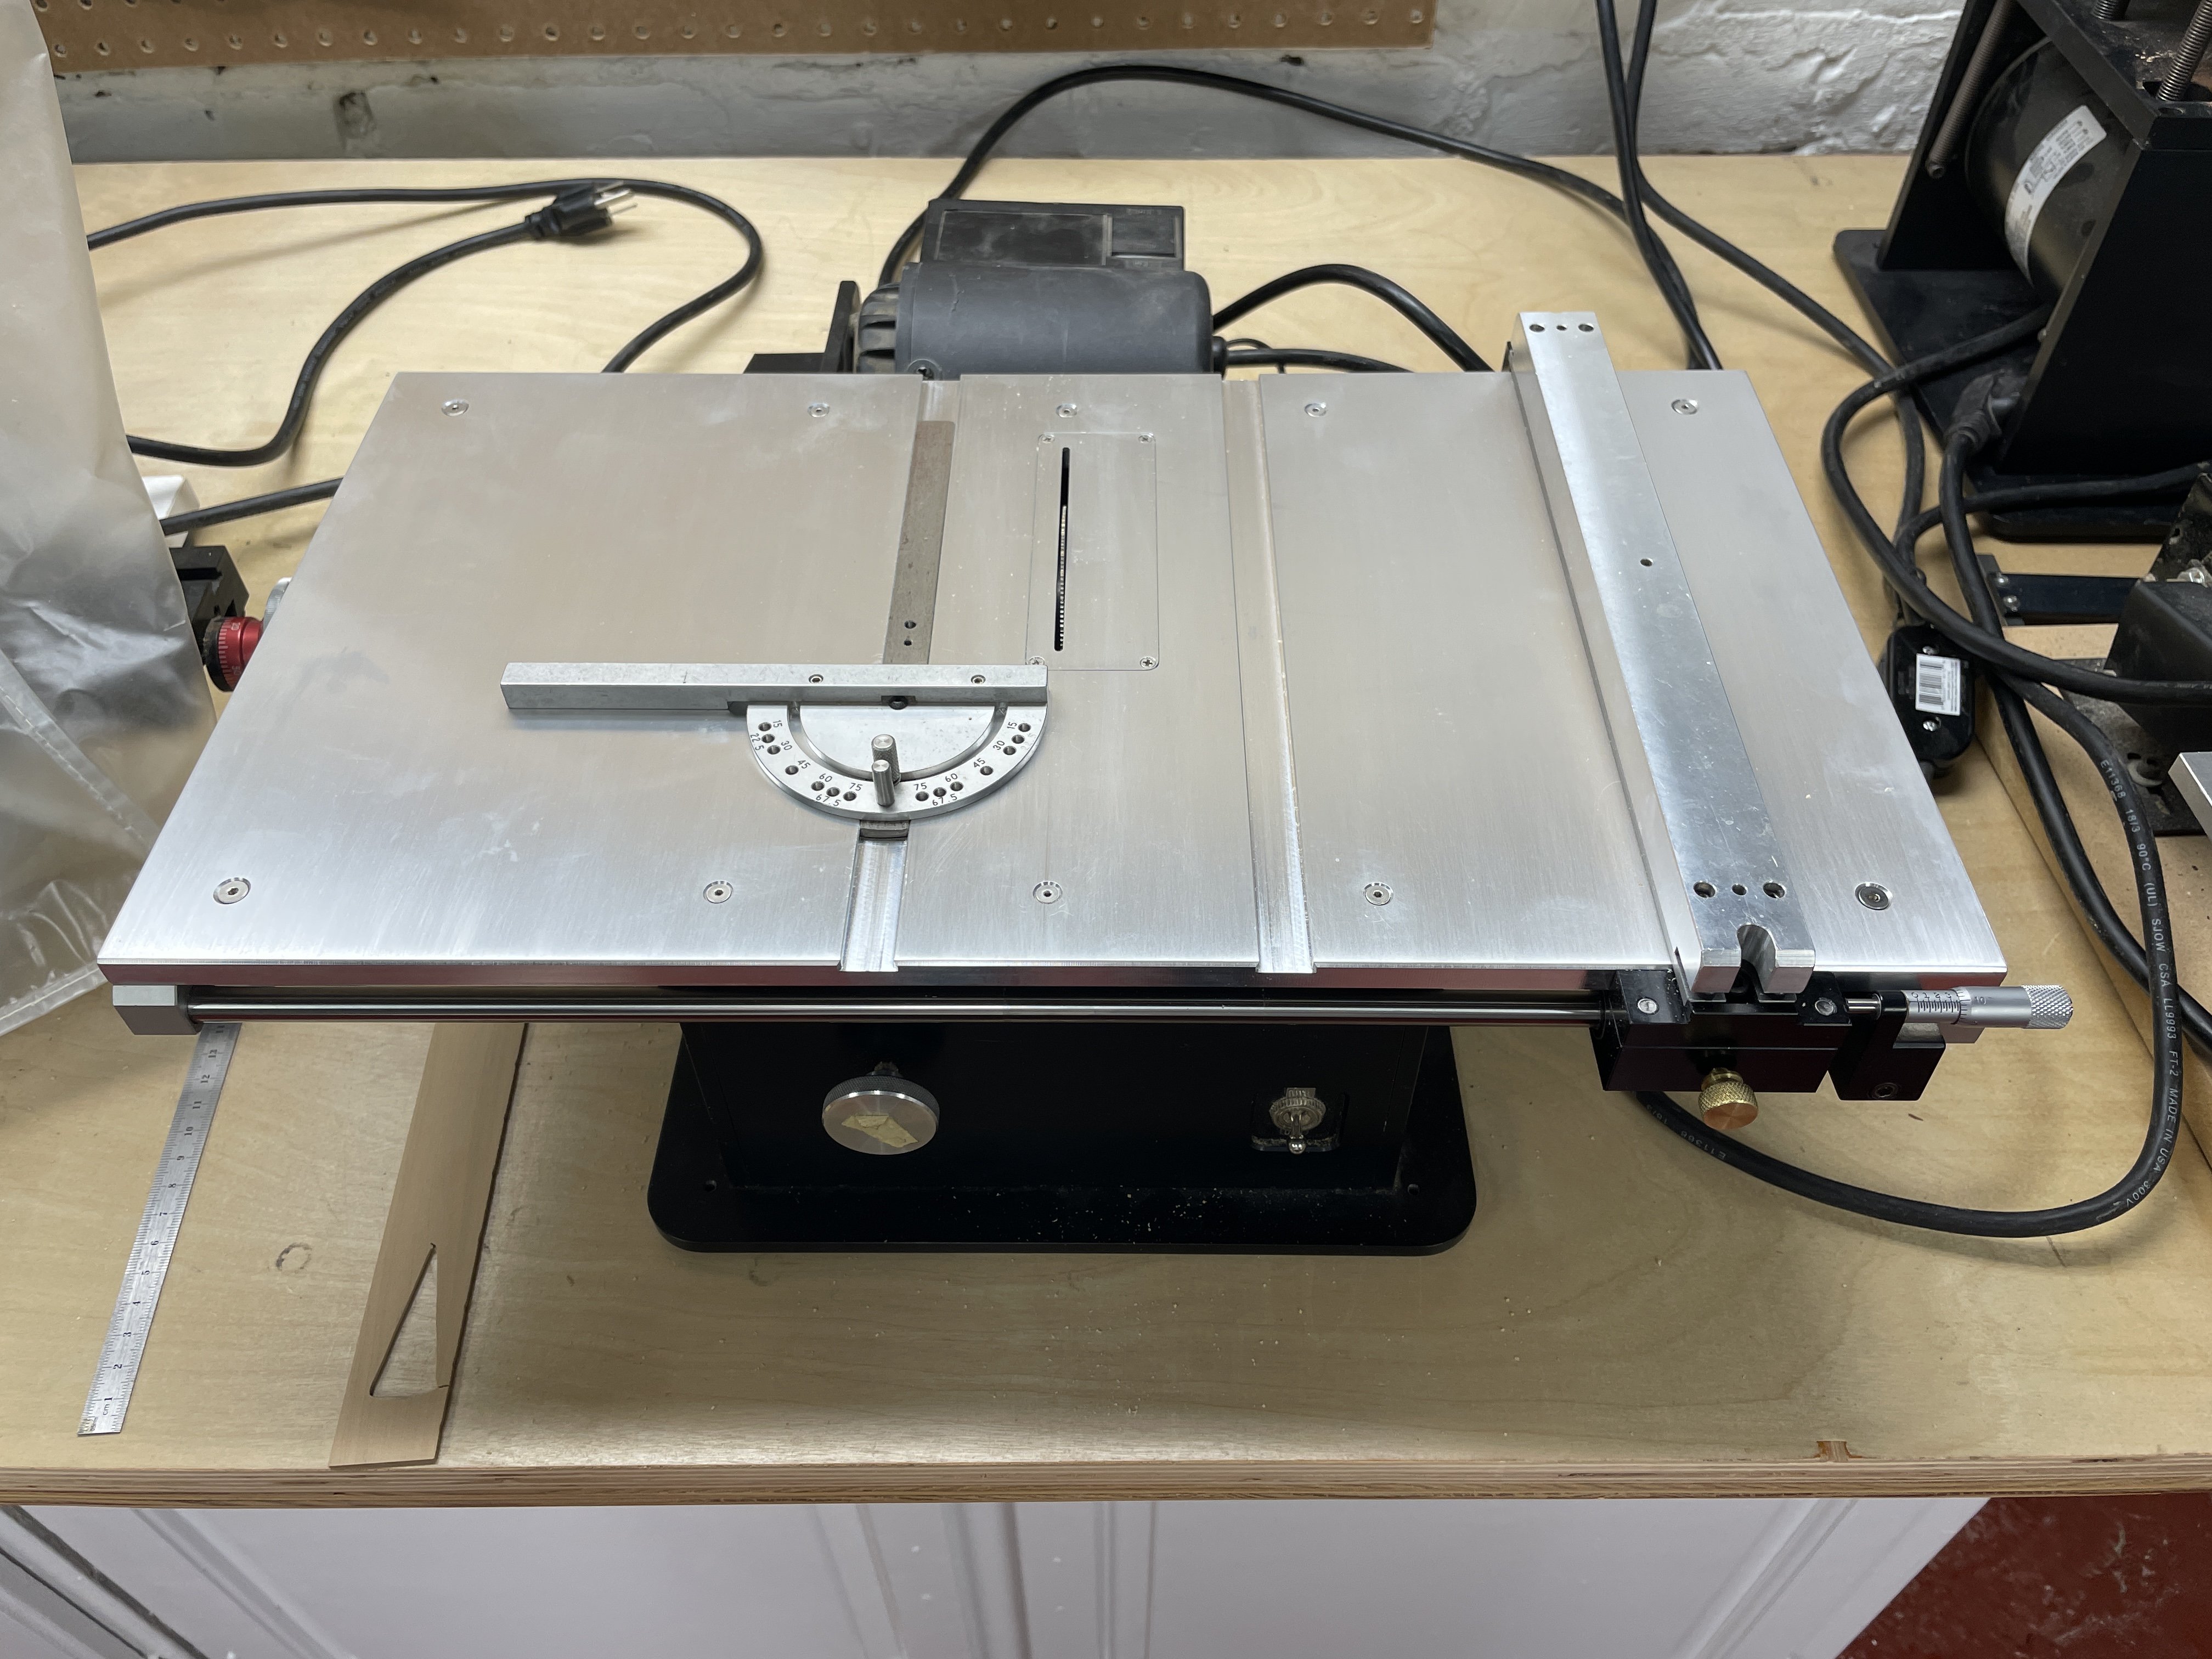
Byrnes 18" extended table saw table
davec replied to davec's topic in Modeling tools and Workshop Equipment
I may have an older model. The screws go through holes, not slots in the mounting cover. To remove it, I needed to take the screws all the way out. I thought about trying to modify it to allow it to do what you describe. -
I am so sorry I missed your post until now. Completed model is approximately 16" long, 17" tall, and 4 1/2" wide (all dimensions approximate - I measured it while it was in the case. Thank you so much for your kind comments.
-
I’ve been looking at the 18” extended table for the Byrnes saw since it became available. Prior to Jim’s passing, his shop would do the install. I reached out to Donna. The extended table was still available but I would have to install it myself. I was terrified about potentially messing up a saw that would be difficult to repair or replace, but decided to move ahead anyways. It came with instructions, but they were a little sparse. 7 steps totaling 9 sentences, no illustrations. Turns out the instructions are actually adequate and despite my limited mechanical skills, I was able to complete the install. I did not take pictures (sorry) but had some additional detail that might help anyone who takes on the same project: 1) Remove belt guard and belt This step was pretty self explanatory. To remove the blade guard you need a Phillips head screwdriver with narrow diameter. The access holes are small. 2) Lower blade mechanism all the way down Again, self explanatory 3) Turn saw over and remove the blade And again, self explanatory. I was feeling pretty good at this point. 4) The coupler (U-Joint) that has the threaded rod going into it needs to be heated because it is loctited in place. This is where I started to get nervous. Loctite comes in 3 different forms. For the more permanent variety, I read about using a butane torch. I did not want to use anything this hot. Turns out a regular heat gun is adequate – the same one that I use for bending wood. I ran it over the coupler for about 30 seconds. 5) Break the set screw loose… press the blade mechanism down toward the bottom of table and the threaded rod should come out of the coupler (u-joint). Once it has broke loose, turn the saw back over. I didn’t like the “break” word. Turns out this works as written. With gentle pressure, the threaded rod pops out of the coupler. 6) Remove the 6 screws that are holding the table to cabinet and remove table This is straightforward as well. 7) Put your new 18” table on cabinet, and do all the above in reverse order. Insert screws, flip saw over and put loctite on new threaded rod going into coupler. I laughed when I read “do all the above in the reverse order.” This is like in surgery training where we were jokingly told that after you remove whatever needs to come out, you just “stitch everything you cut back together in the reverse order” – it isn’t usually that straightforward, and wasn’t here. - I had big problems getting the new threaded rod into the coupler. I’m still not sure why this was a problem. It looked exactly the same as the old threaded rod- same diameter and threads. After almost giving up, I took the old coupling rod off the 12”top and swapped it for the new rod. For whatever reason, this one fit easily. - Replacing the belt guard was a nightmare -if anyone has replaced the belt and has a trick for this, please post it. This will be hard to understand without pictures. The guard creates a closed space, and 3 of the 4 attachment screws are not reachable from the open end. I supported the saw on its side so the belt side was up and level, balanced the 3 screws in their holes in the belt guard, and attempted to line up the holes and get the screws started through the small access holes. Invariably two screws would fall out while I got the first one started. I finally got two of them started. The fourth screw is easy as it can be reached from the end that opens for the belt. Fortunately, the cover is secure with just 3 screws. Unless there is some special tool, I’m not sure how to get all 4 screws in place. There must be a trick because it came with all 4 in place. I’m happy with the new saw. I think the extra 6” of top makes a big difference. - On the left of the blade is more table to support long pieces while being cut. This makes it easier to manage long or bulky pieces. Also, it is easier to keep fingers further from the blade. - The right side of the blade is where the big improvement (for me) happens. I can now cut 6” pieces without removing the fence of micrometer adjustment. I work mostly in 1/48, so this is a scale 24’ length of lumber. Removing the fence isn’t that big a deal (two screws), but somehow I always dropped at least one of them and had to search for it, so this is a big deal for me. - Downsides- The saw takes up more room on the workbench and is a little heavier and more cumbersome to move around. It will likely make blade change a little more difficult. I’ve done some cutting on it since the install. I’m very happy with it. I may have knocked the old saw a little out of alignment in around 15 years of use. This one rips like the saw is new.

-
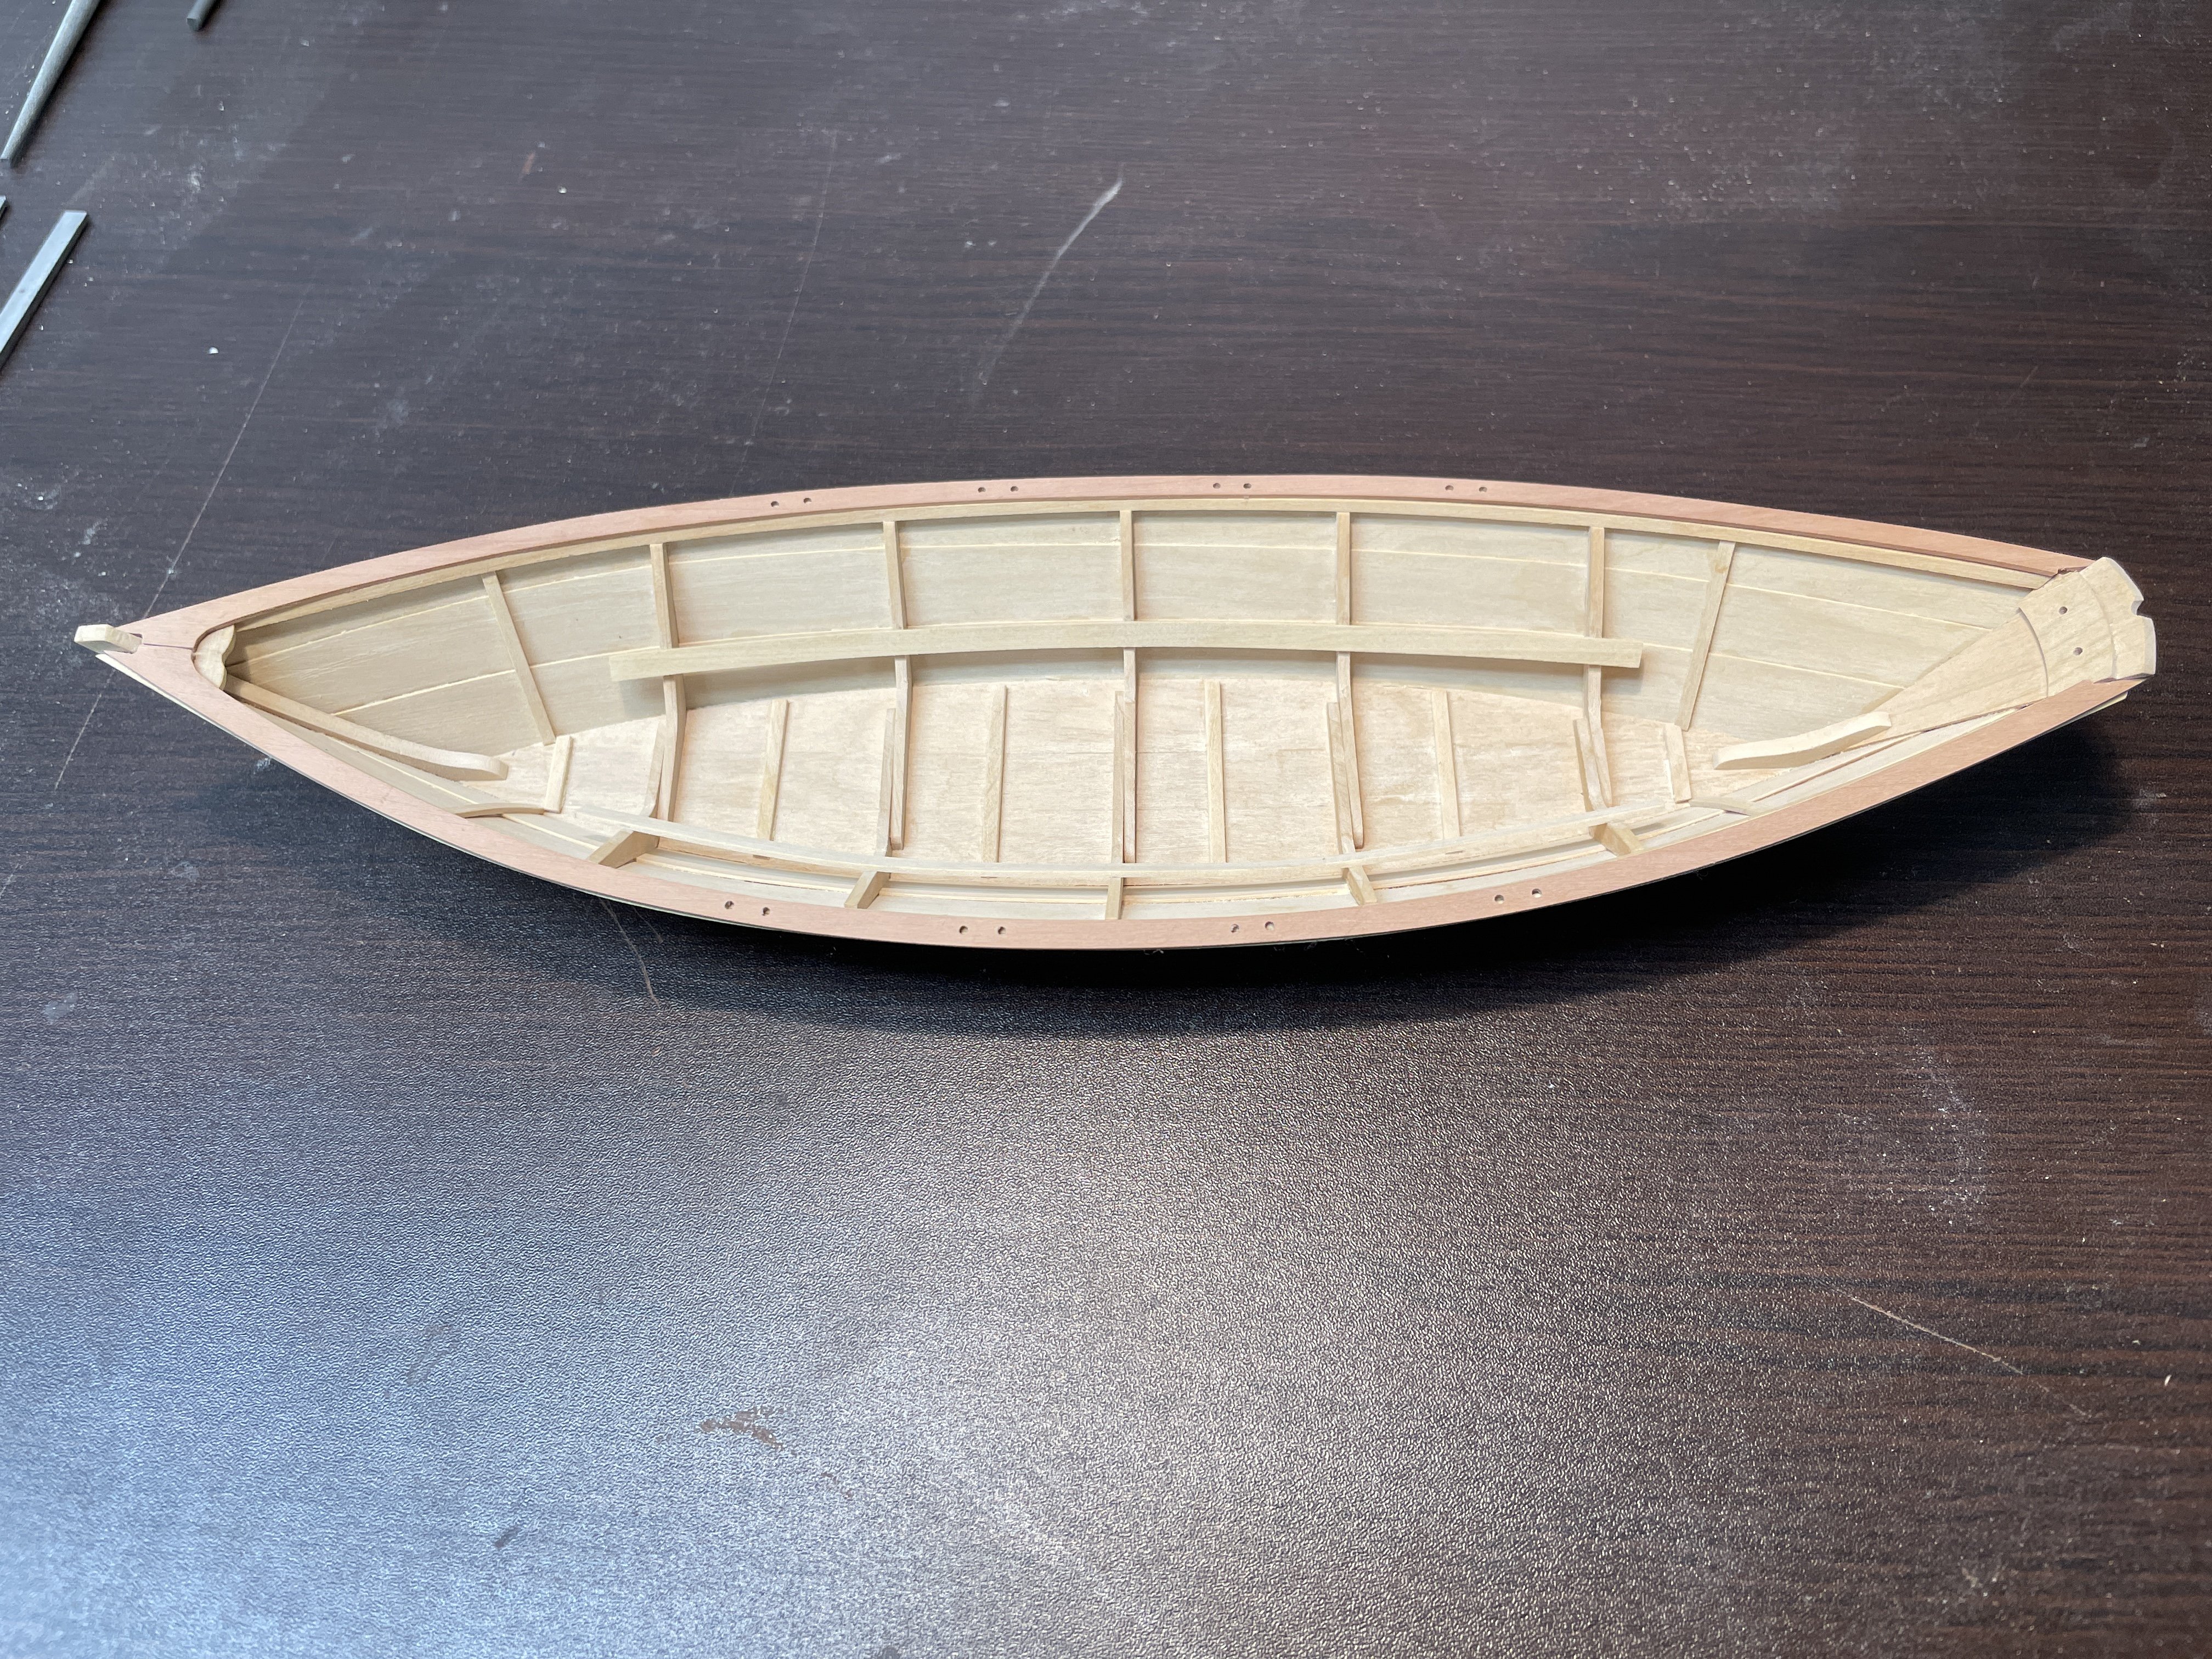
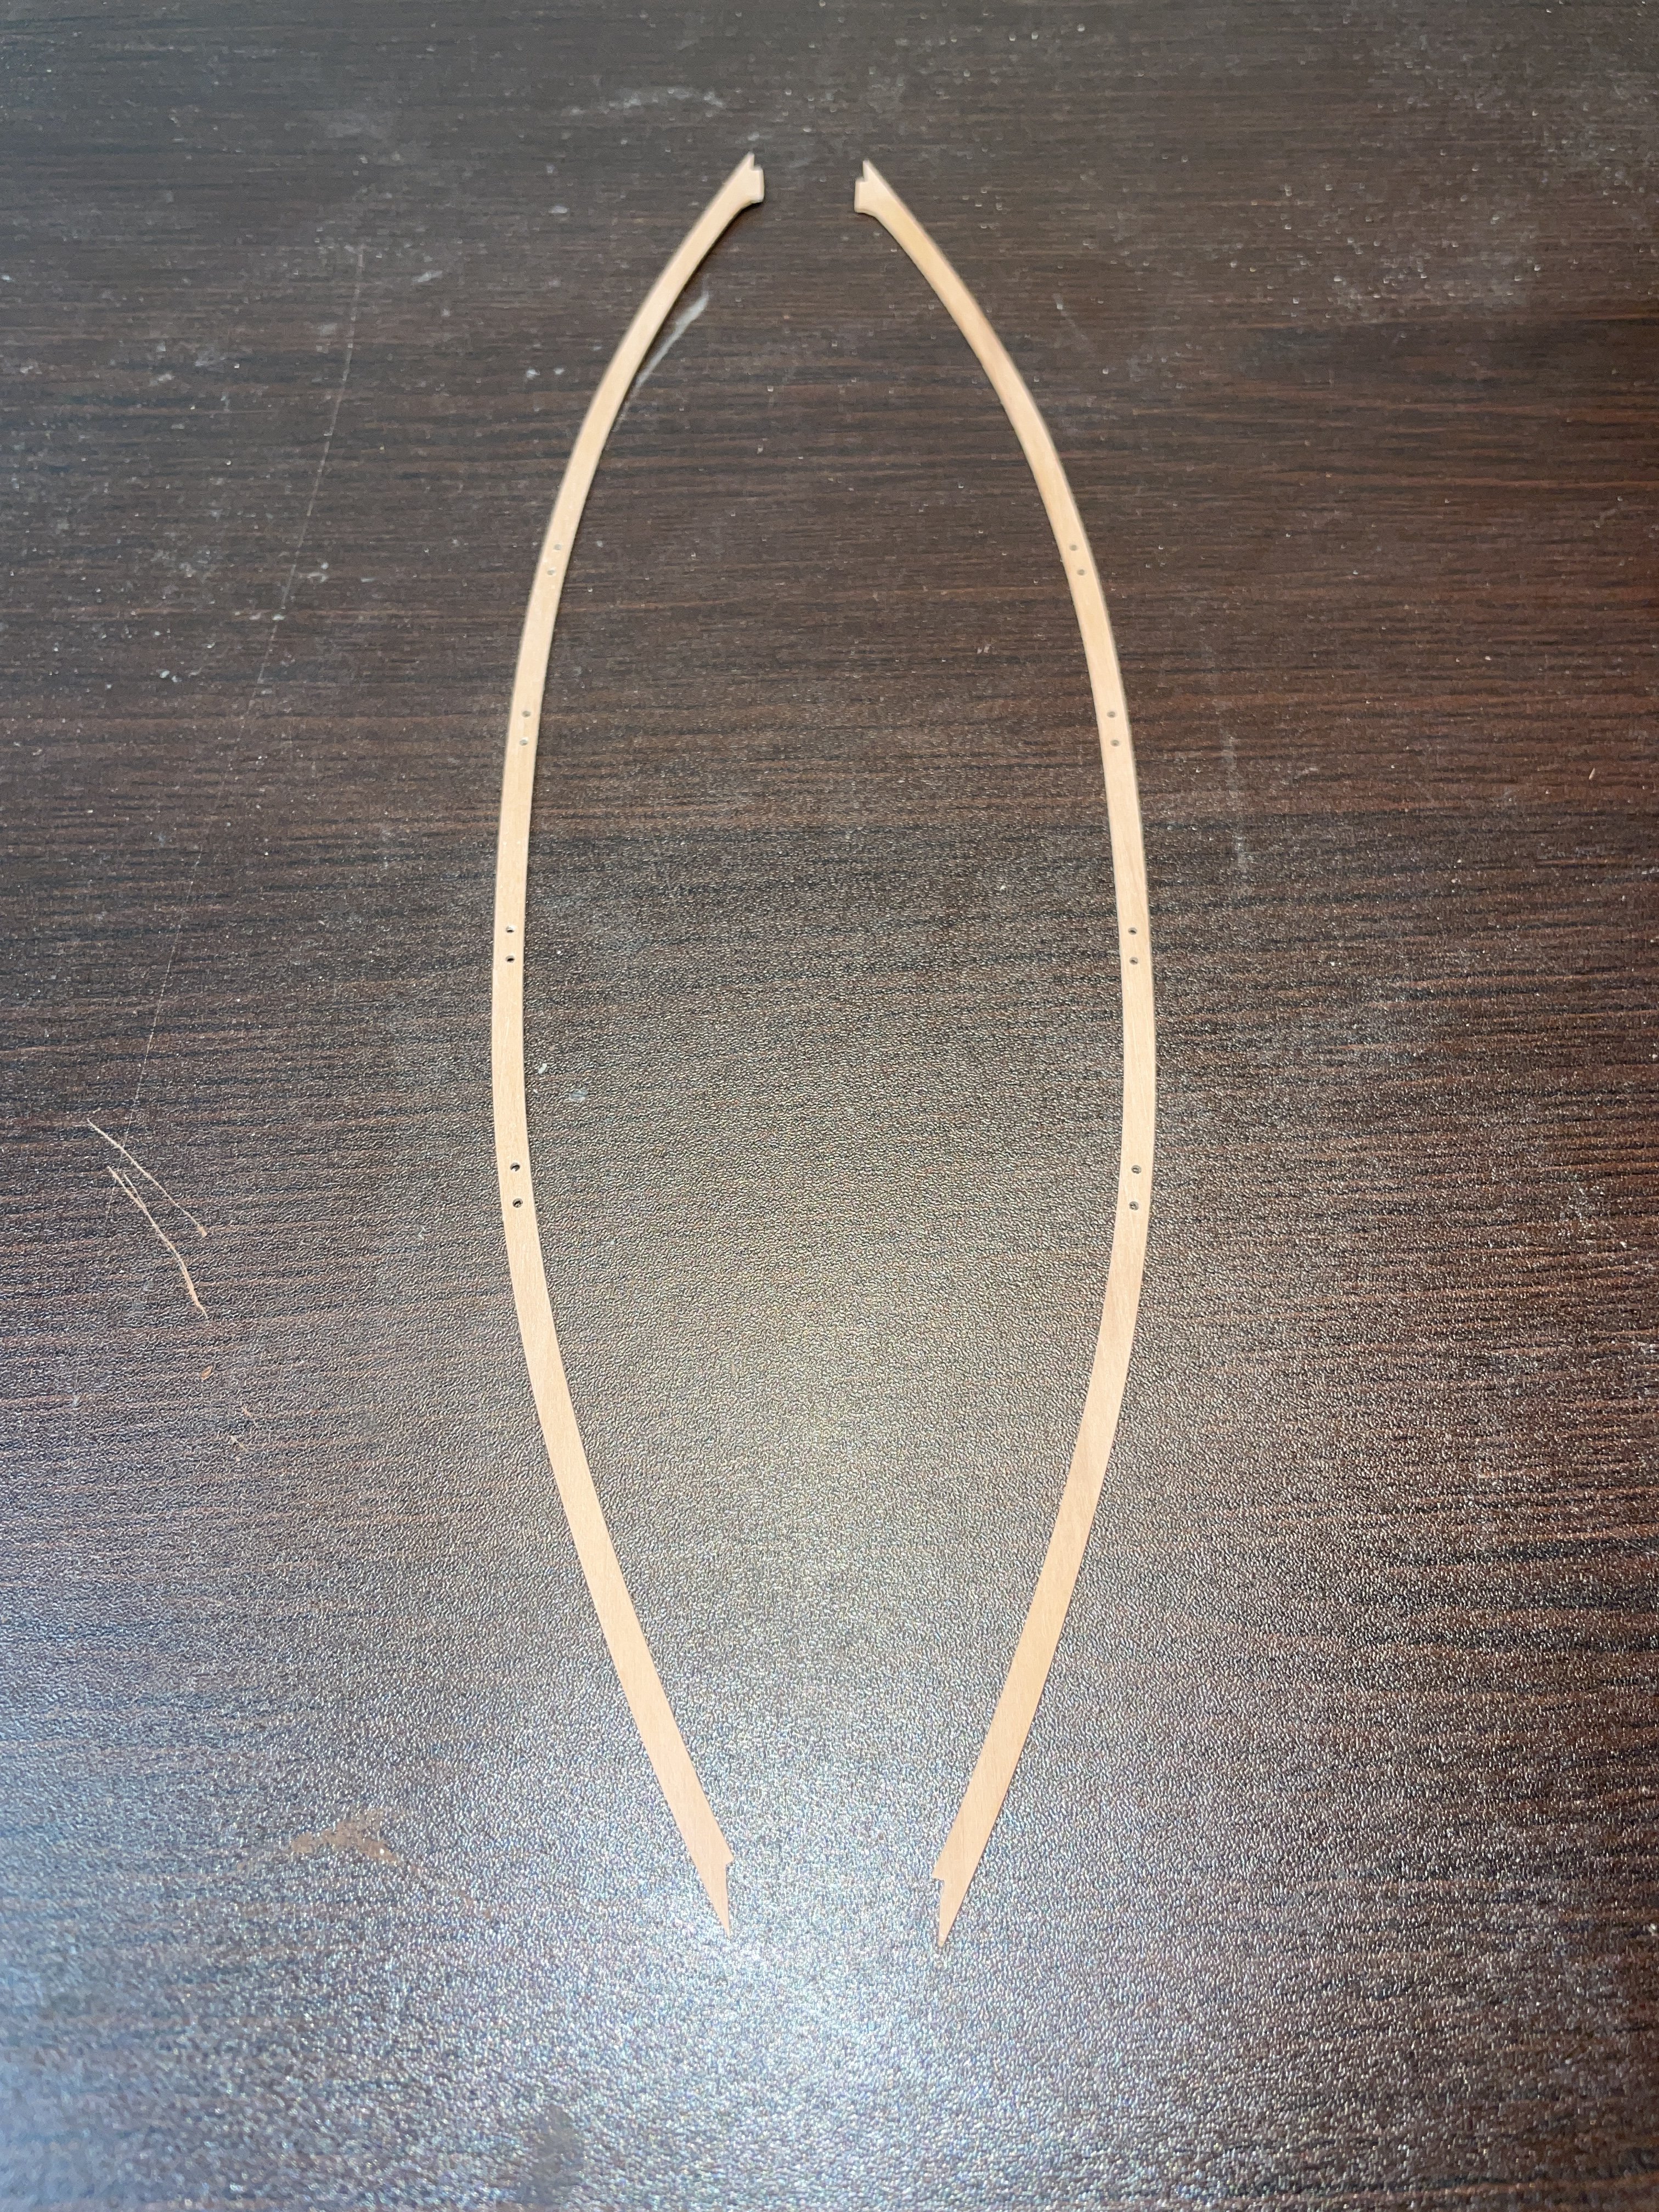
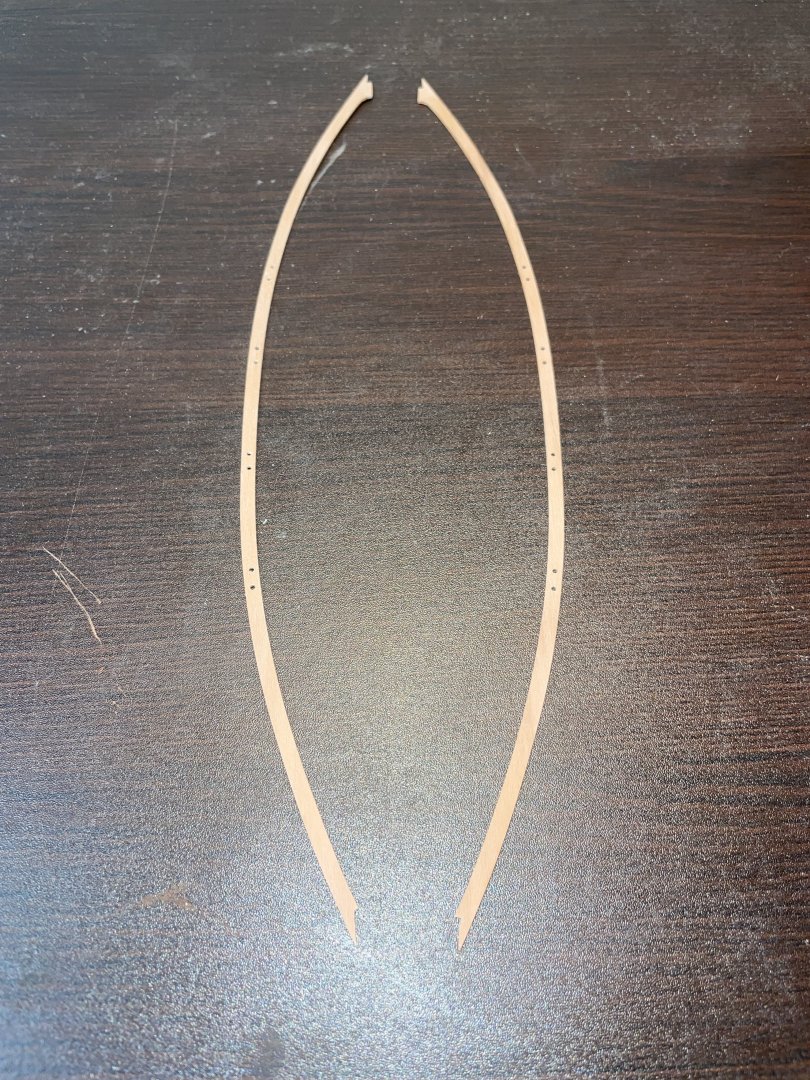
I have some time off over the holidays and have restarted work. I've added the bands, gunwales, and breast hook and cut the cap rails. Cap rails are Swiss pear to give some contrast. I had a few false starts with the gunwales. I didn't shorten the frames enough and ended up sanding the gunwales too thin when fairing the upper edge. I debonded and repeated. I think I will make the frame irons out of brass. I am going to glue the gunwales in place, apply some minwax wipe on poly finish, then add the frame irons.
- 32 replies
-
- 6
-
-
- Grand Banks Dory
- Model Shipways
- (and 2 more)
-
Paul - You do incredible work. The masting, spars, and rigging look tremendous.
- 201 replies
-
- 4
-
-
-
- Oyster Sharpie
- first scratch build
- (and 1 more)
-
I don't paint my models and have been really happy with minwax wipe-on poly. It is easy to apply and clean up. I haven't used it on traditional pear, but have on swiss pear, boxwood, cherry, and ebony, and have been happy with how it turned out. I don't use it on holly as it gives a yellow tinge to the white color- I've been using minwax polycrylic over holly.
-
It looks like it is the first of two parts. The full title includes "Part 1: the material remains and archeological context." According to the book's foreword, a second volume on the contextual analysis is planned.
-
On the inner side, the lower edge of the plank should only be rolling beveled at the bow and stern. It should be full thickness for the bulk of its length. This allows the planks to lie flush at the bow and stern. The overlap for most of the length should be full thickness. This gives the clinker appearance and was probably important for holding fasteners when building full sized boats.
- 28 replies
-
- 3
-
-
- Lowell Grand Banks Dory
- Model Shipways
- (and 1 more)
-
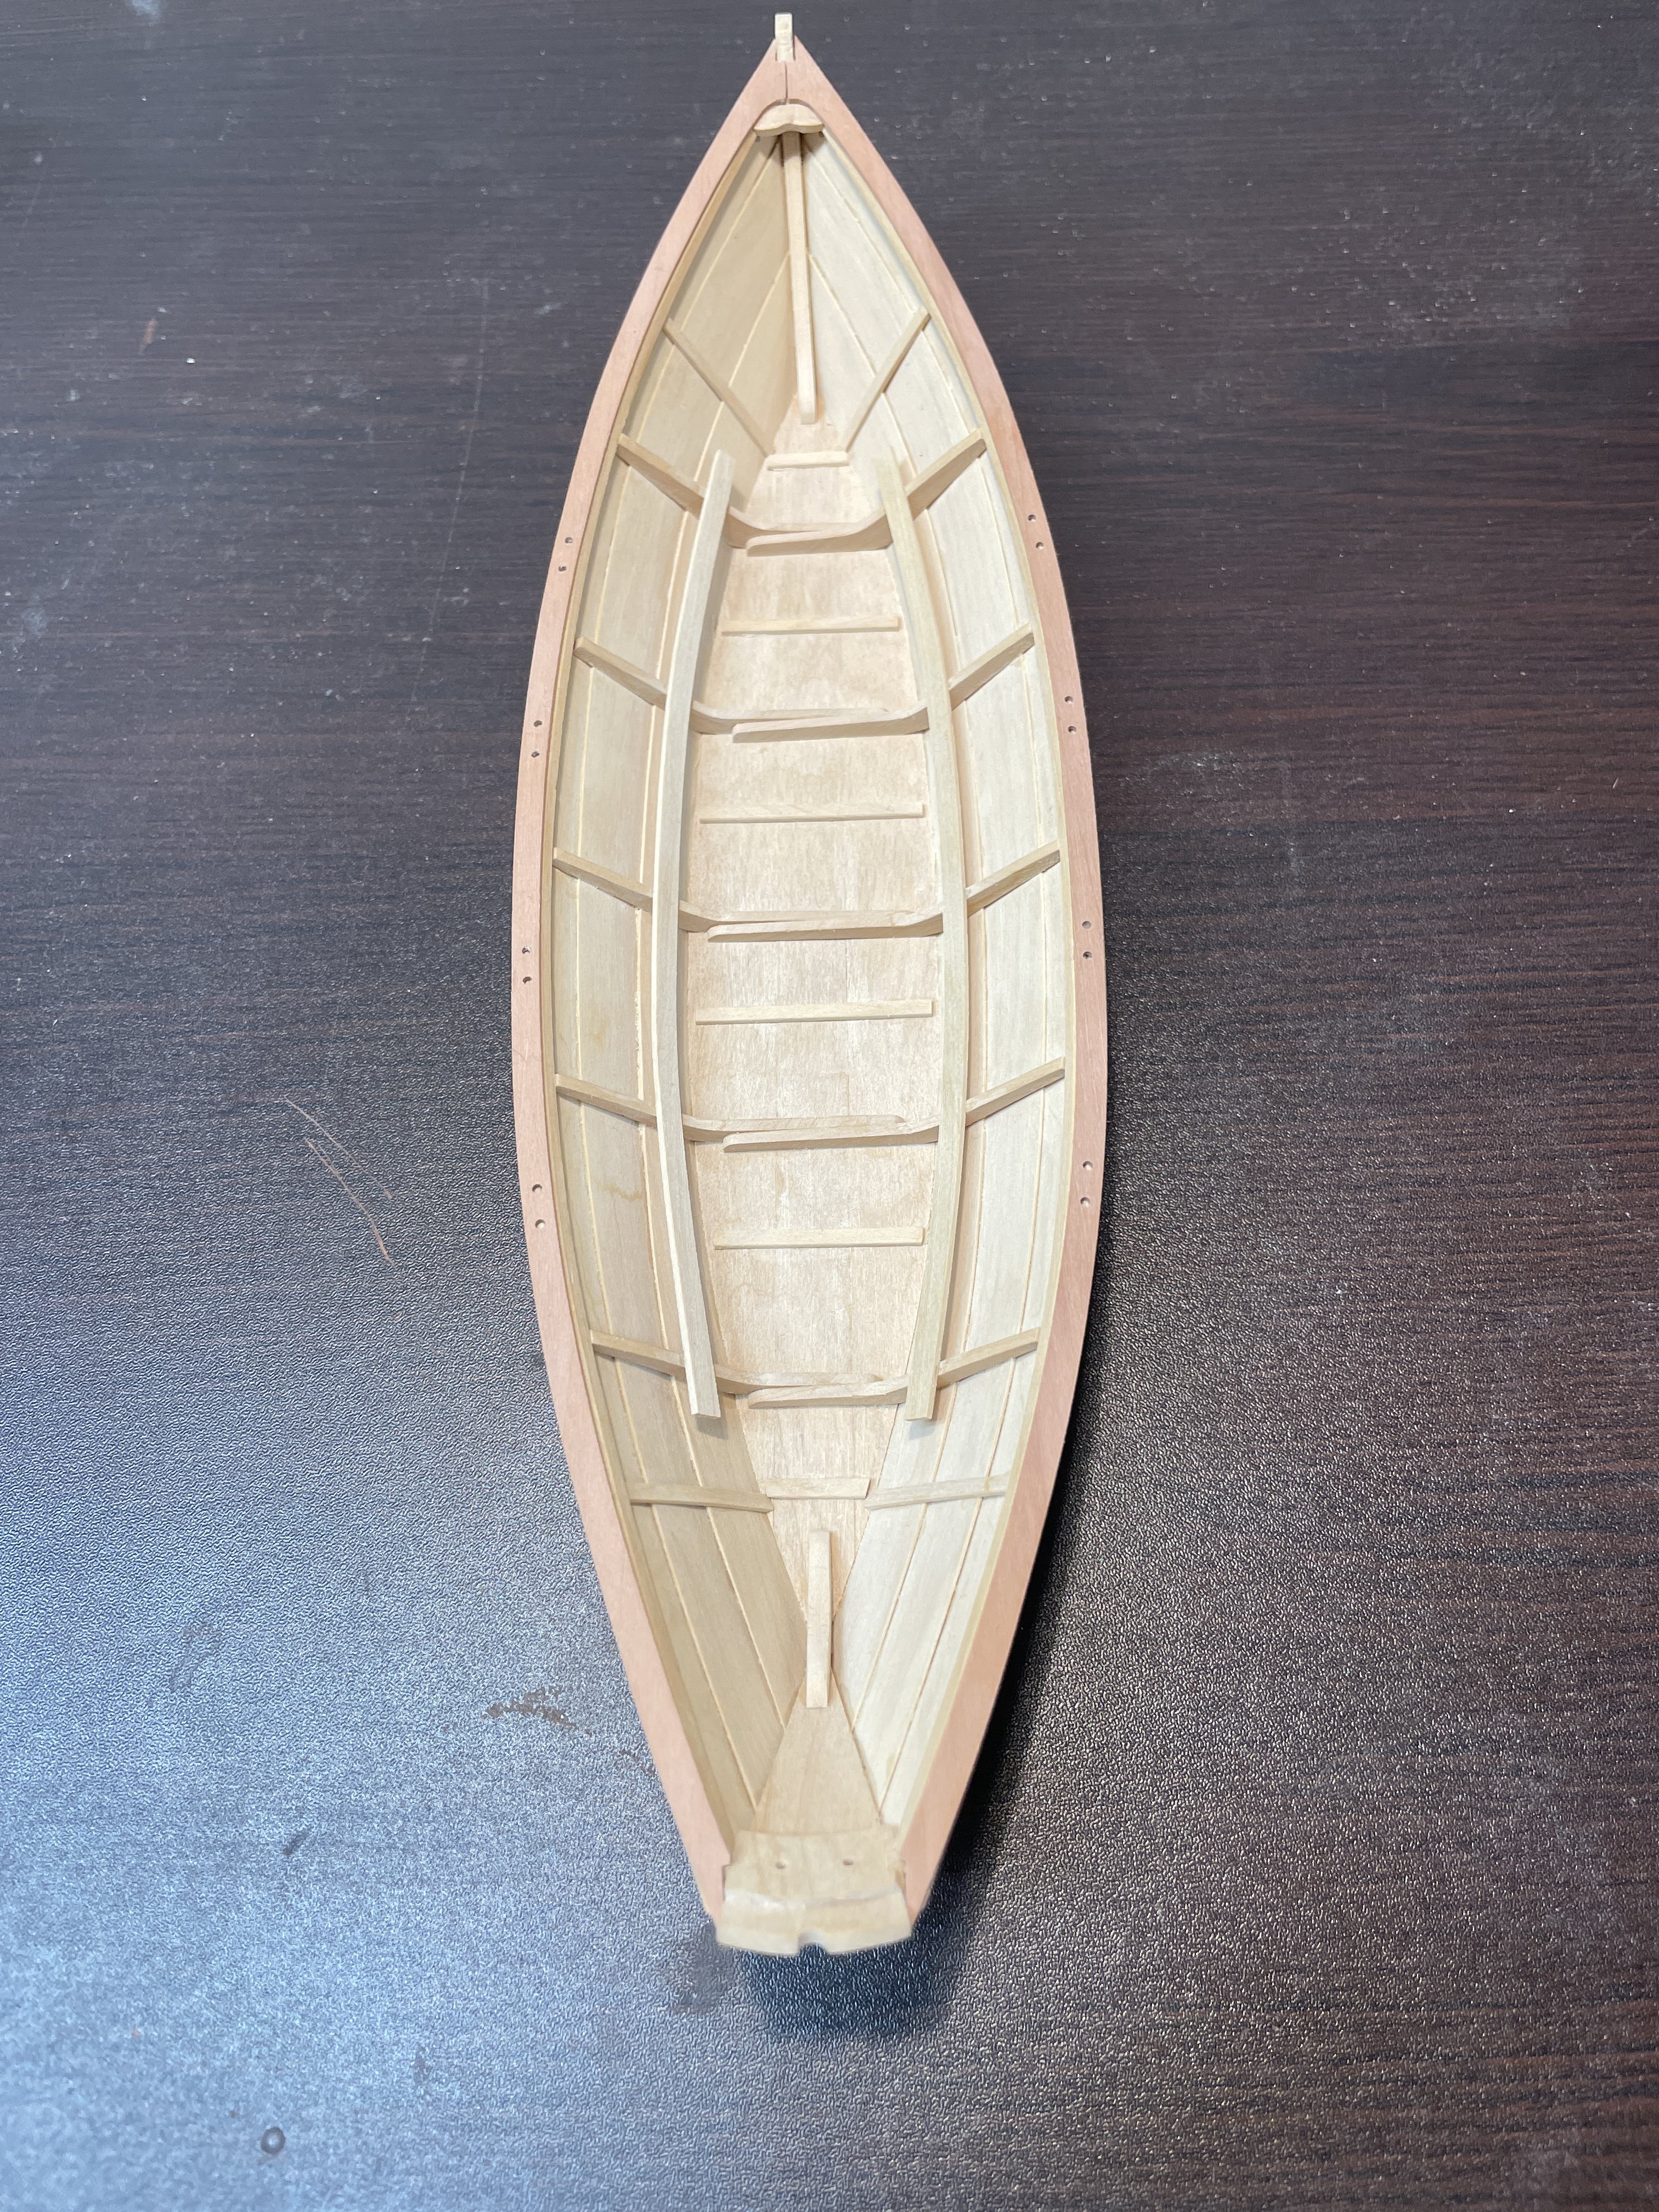
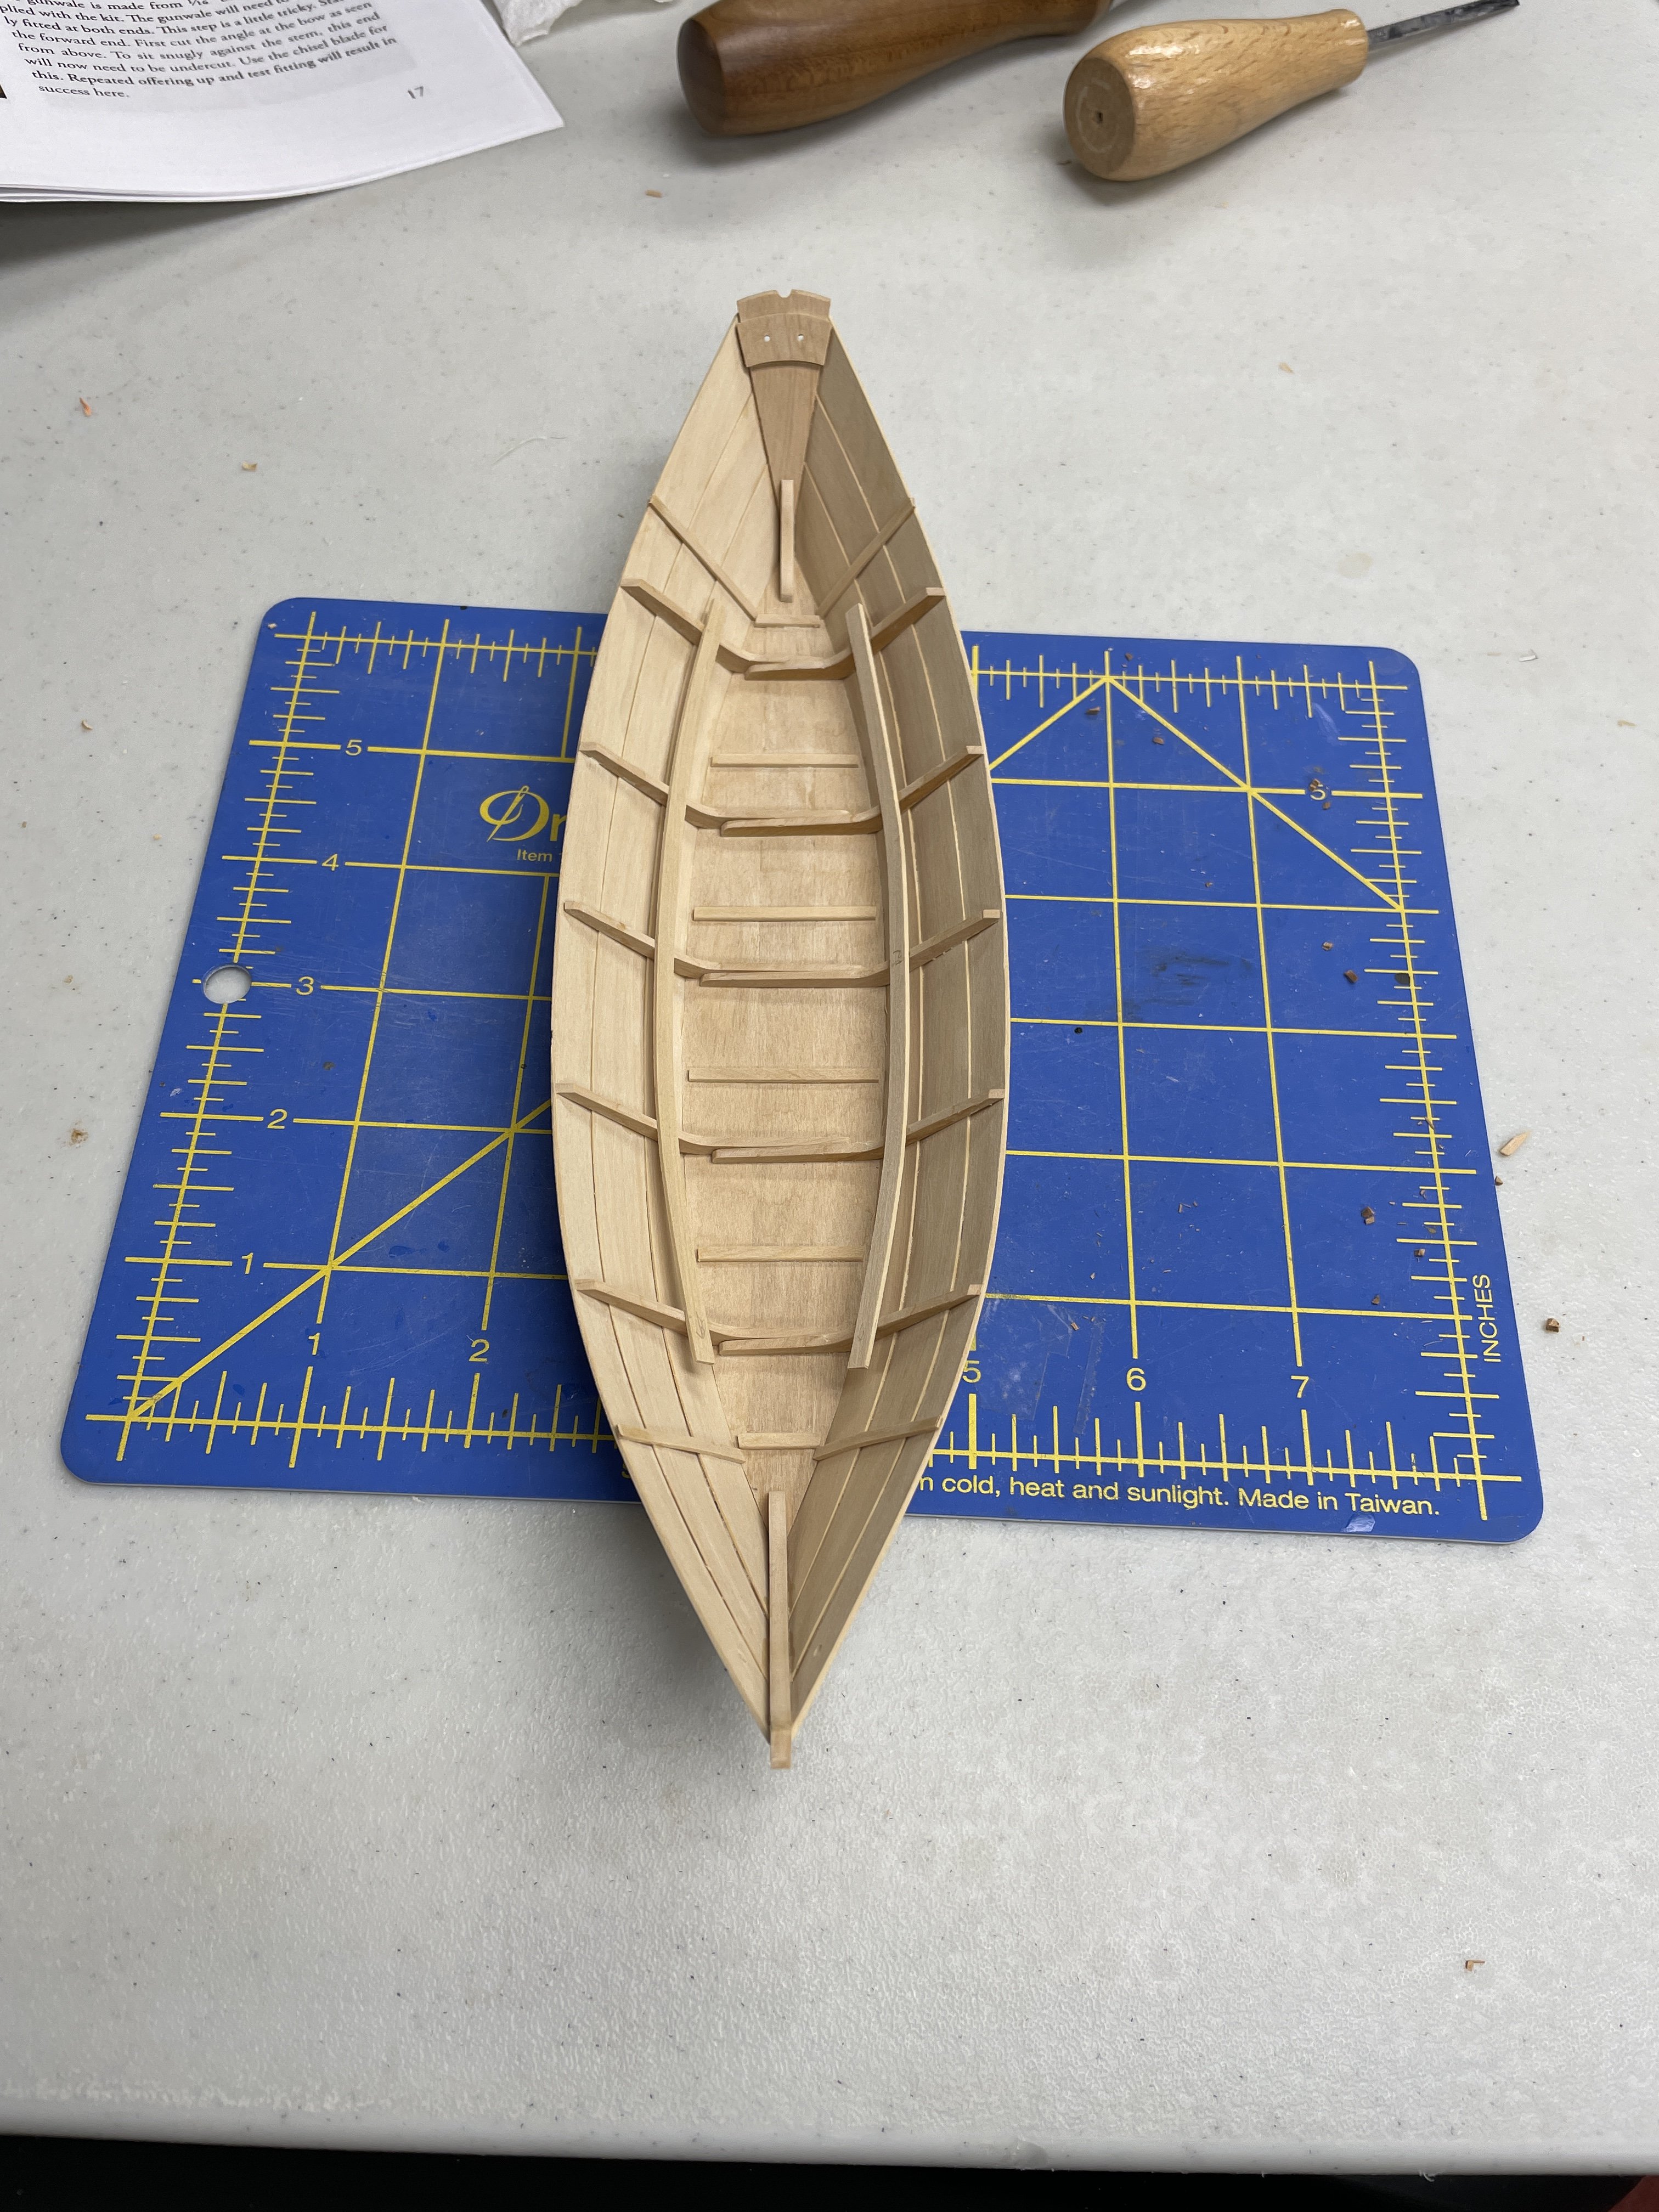
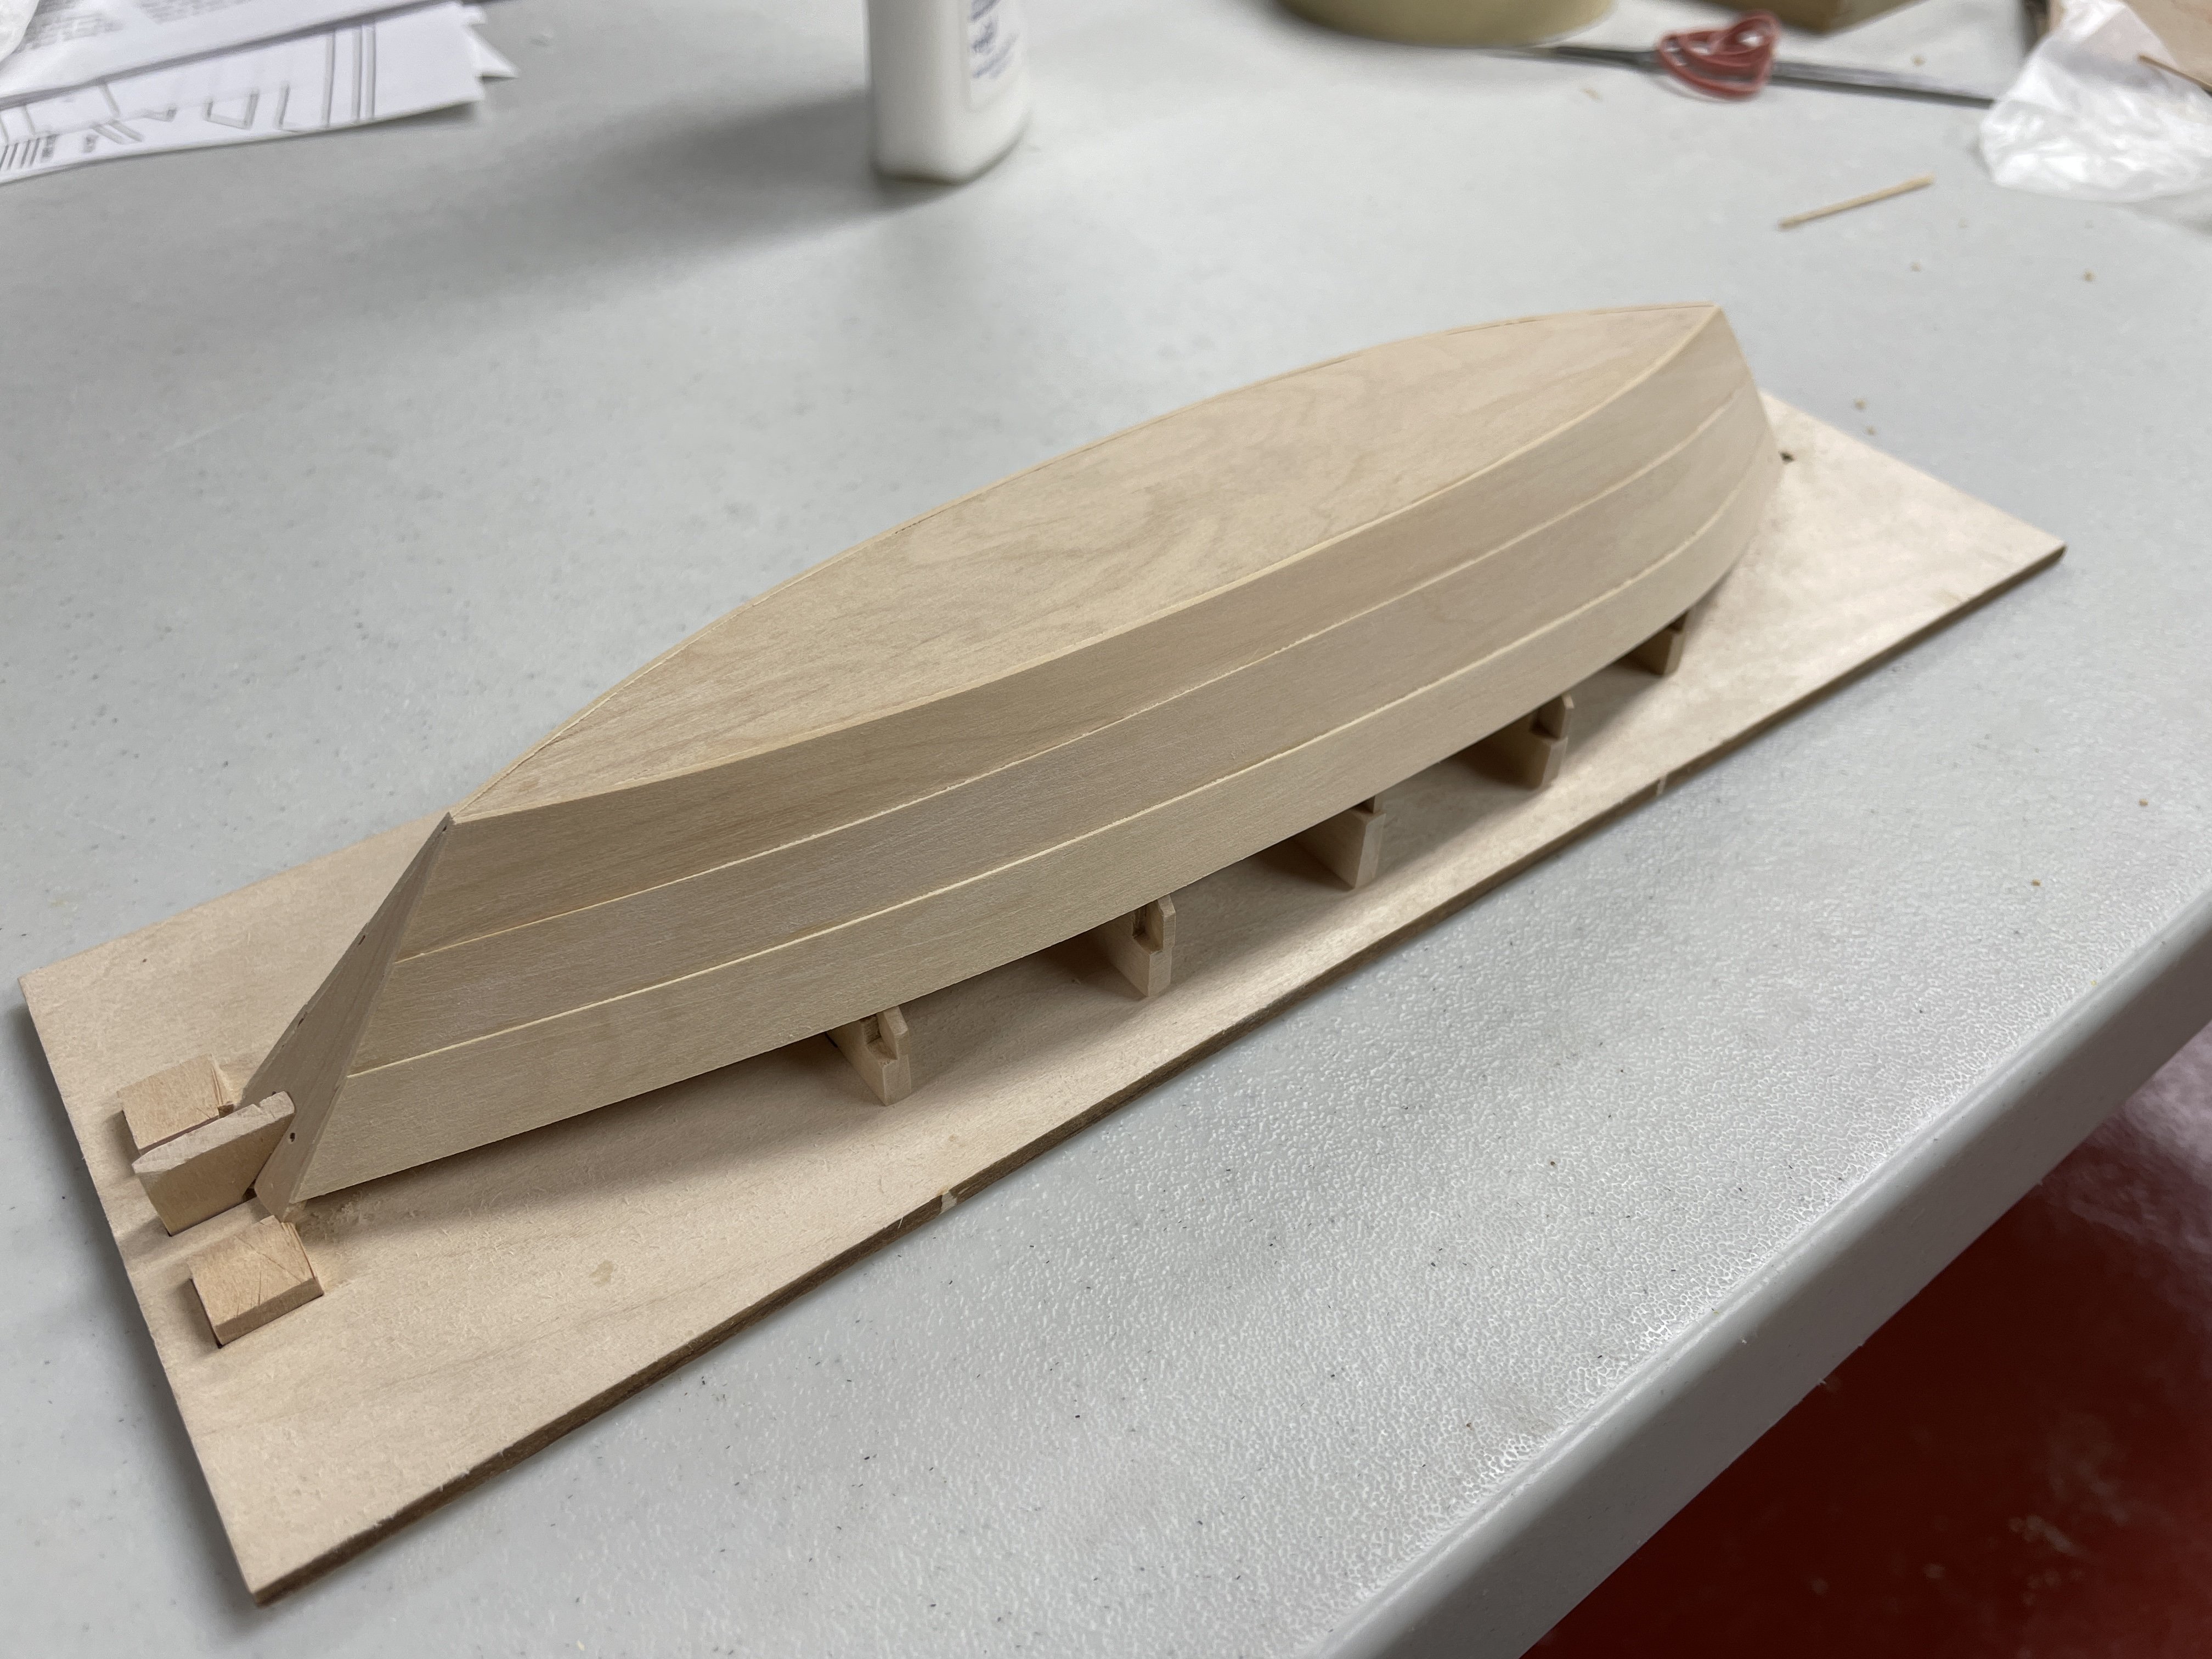
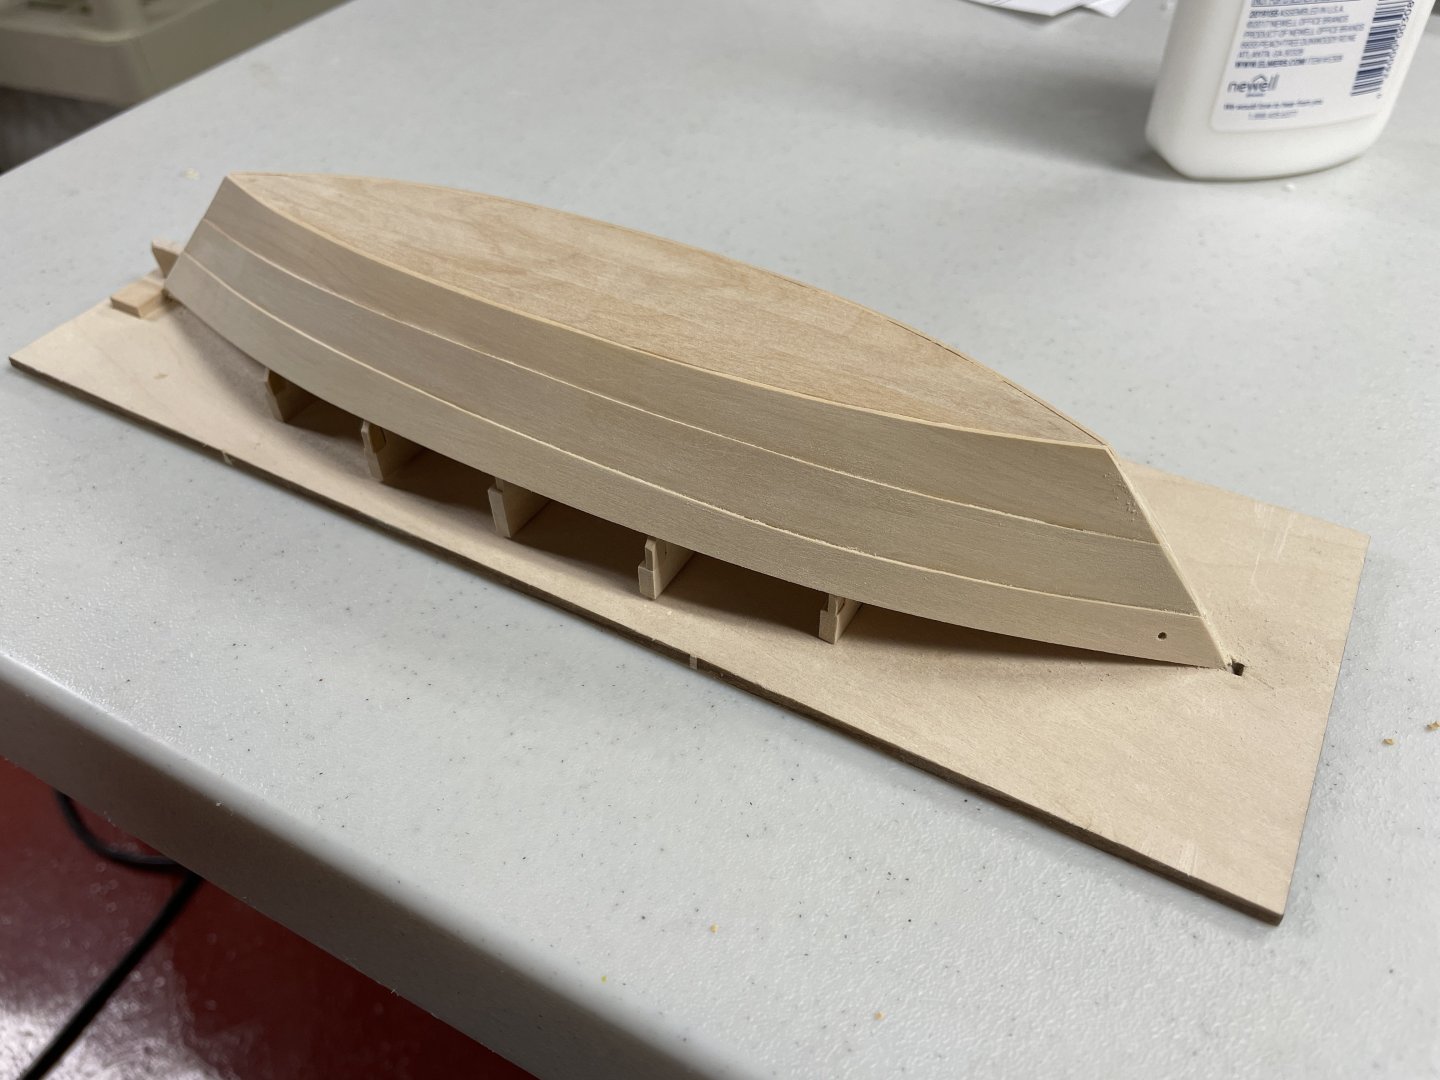
A little more work done. I've removed the hull from the building jig, and added the false stem, side cleats, and seat risers. I've also cut out the bands, milled some 1/16" square stock for the gunwales, and sharpened my chisels in preparation for trimming the frames for the gunwales.

- 32 replies
-
- 7
-
-
- Grand Banks Dory
- Model Shipways
- (and 2 more)
-
wow - I've tried that and have not been able to get anything close to the precise shape you were able to do.
-
Wipe On Poly Techniques
davec replied to Freebird's topic in Painting, finishing and weathering products and techniques
I use cotton cloth for easy to reach areas and a brush to get into tight areas. Both work fine. -
Beautiful work! How did you grind your lathe cutting tool for the deadeyes? thanks!! Dave
-
Looks great!!
-
She came out beautifully - congratulations on finishing!
- 840 replies
-
- 4
-
-
- winchelsea
- Syren Ship Model Company
- (and 1 more)
-
Back in business - shear planks replaced. I've been afraid to look at how much glue I will need to clean up on the inside, but the outside cleaned up well enough that I think I can use a clear finish. I'm trying to decide between swiss pear, cherry, and natural pear for the contrasting wood. I really like swiss pear, but am thinking of going with one of the other woods just so it looks different from my other models.

- 32 replies
-
- 10
-
-
- Grand Banks Dory
- Model Shipways
- (and 2 more)