HOLIDAY DONATION DRIVE - SUPPORT MSW - DO YOUR PART TO KEEP THIS GREAT FORUM GOING! (Only 13 donations so far - C'mon guys!)
×


davec
-
Posts
382 -
Joined
-
Last visited
Content Type
Profiles
Forums
Gallery
Events
Everything posted by davec
-
 Tim- Feel free to take me up on the offer - it is the least I can do given the number of people who helped me. VTHokiEE - not sure about the two capital E's at the end, but it looks like you have spent some time in my part of the country Dave
 -
I had a great time building this cross section, and learned a huge amount. There are lots of people on MSW who are probably better sources of advice than me, but if you need input from someone who also tends to "over analyze everything," I'm happy to help any time. I'm really looking forward to seeing your progress. Great work on your practice pieces. Dave
-
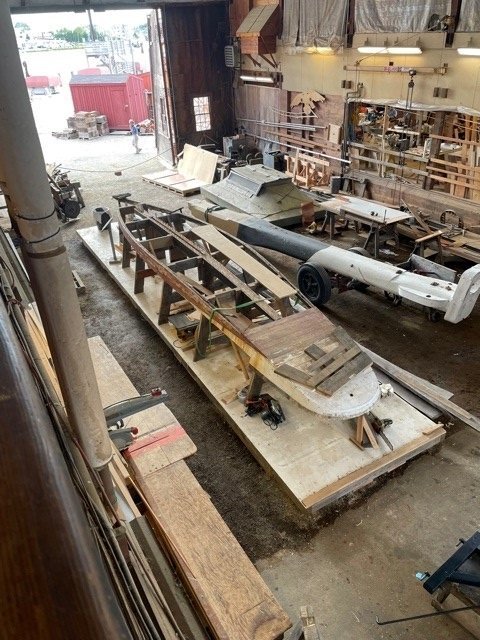
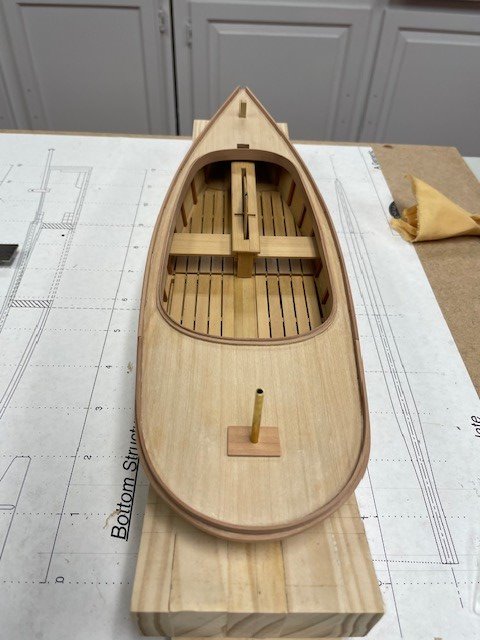
The Sharpie has only gotten intermittent work since January. I got hung up on the researching the rigging, then got distracted by life and some other projects. I got reengaged after passing through Mystic over Labor day weekend. They are restoring a very similar late 19th century Sharpie. The restoration is going very slow because of COVID and a number of other parallel projects, and they are just getting going. I was amazed at how much the framing and the molds on the model parallels the work they are doing on the restoration. My May and June 2020 build log pictures look a lot like this stage of the restoration. I got to speak to the restorer for a while, which made me feel much better about my model. He reminded me that these boats were so simple that they were frequently built in people’s yards, without much in the way of plans other than the mold measurements, and usually using easy to gather materials. I’ve been trying to research it like I have done on my other models, all British warships with abundant documentation of rigorous establishments. For rigging fittings I need to think local hardware store and what people could make in their workshops. I will post some pictures of the model tomorrow, but since January I’ve been picking away it: finish on the hull, built a stand, added the rudder, and made the mast, bowsprit, gaff, and boom.
- 75 replies
-
- 11
-

-
I was at Mystic Seaport a week ago. I wasn't specifically taking king plank pictures, but did get the section in Maury's plan in one of my photos. As restored, there is one wide central plank with a narrower adjacent one on either side, exactly as in the plan.

-
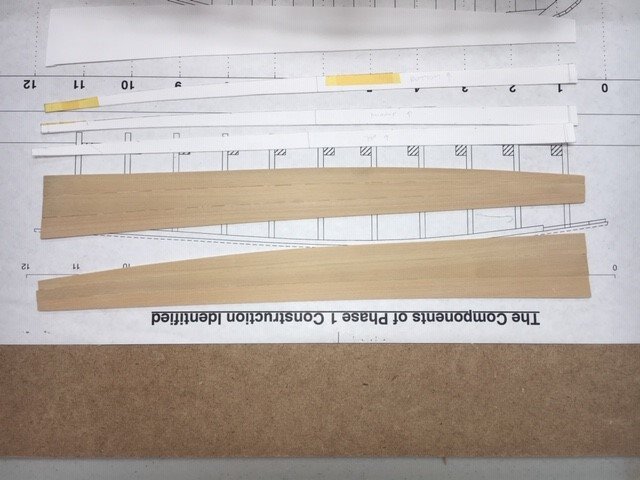
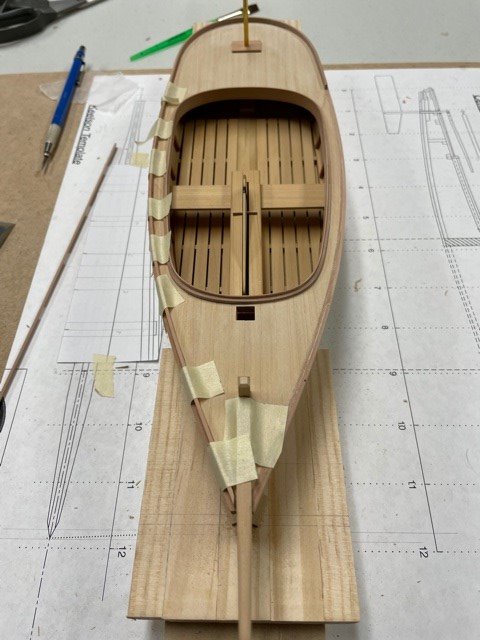
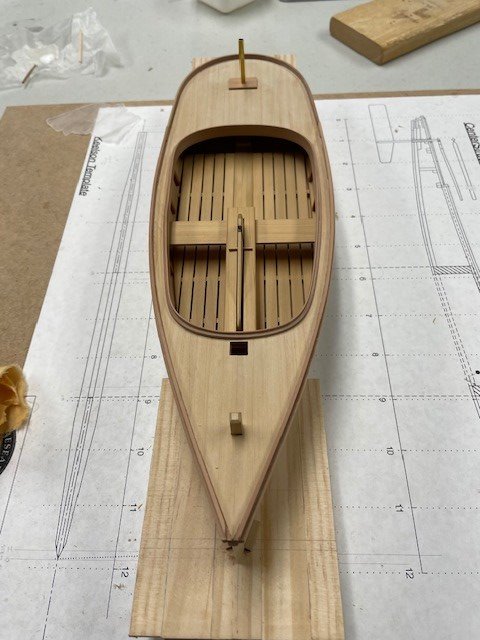
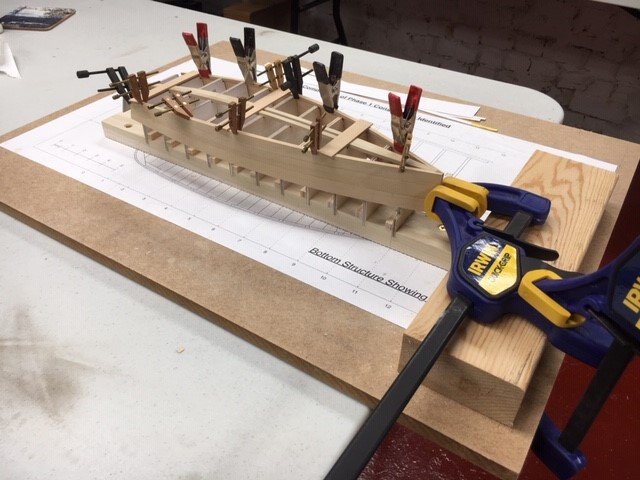
I spent the last two weeks having adventures in bending wood. I’ll briefly summarize here. When I downloaded pictures, I realized I had only taken a few. The model has 5 different trim strips that go around tight curves at the stern and cockpit combing. I’ve bent wood for hull planking before, but never around curves this tight. Up until now I’ve used soaking and a bending iron, which worked adequately, but I was afraid might not work well for the tight bends. I’d heard good things about using a heat gun, so gave it a try. Other than at the stern, the bending was only in one dimension, so spiling wasn’t necessary. I did the cockpit combing first, trying to air bend with the heat gun held in a vice. Didn’t work. I cut a form to the shape of the cockpit opening from ¼” plywood, and once I’d figured out clamping and the right heat setting, it worked great. The 1/32x1/4” cockpit combing bent right around the form. I could actually feel the wood give as the heat did its job. It took a little experimenting to find the highest heat that didn’t discolor the wood. The false wale at the stern had the added challenge of being thicker 1/16x9/32”, and wrapping around a beveled surface, so it needed to be spiled. The pattern wasn’t hard, and I was able to reuse it for the 1/8x1/16” rub rail that went over it. I made a beveled bending jig that matched the shape and angle of the stern. Biggest challenge was clamping the piece while gluing in place. Would have been much easier to install the two stern trim strips prior to planking the deck, when clamping would have been very easy. I think I used every clamp I have ever accumulated when gluing the trim strips in place. The 1/16” square pear trim strip around the cockpit combing turned out to be the biggest challenge. Dry heat worked OK for the fore piece. I had saved the aft piece for last thinking it would be the easiest, but the two bends were the most acute, and the pear kept breaking. That was when I finally tried soaking the wood prior to using the heat gun. I really wish I had tried this at the beginning- it was like magic. Not only did the wood bend without breaking, but once dry it had much less memory and did not try to spring back to its original position. I put the first coat of wipe on poly on the deck, which highlighted glue spots I had missed sanding away. Getting the curved pieces all clamped into place was challenging, and frequently I got glue spots. It is easy to sand it away, but because it dries clear, some of it wasn’t visible until I tried to put finish over it. This is somewhat of a milestone with an essentially completed hull and bowsprit. Mast, boom, gaff, rudder, stand, and rigging to go. I need to sort out a stand next. There weren’t real options for hiding mounting bolts in the flat hull. I don’t anticipate needing to transport the ship once finished, so I will probably build some sort of cradle and not fasten the boat in place.

- 75 replies
-
- 15
-
-

-
Dust extractor - compact and quiet?
davec replied to Rik Thistle's topic in Modeling tools and Workshop Equipment
Hi Michael - I almost bought one of those. How does it work with really fine dust? Most of my hard to control dust is from thickness sanding, where the dust is really fine and ends up clogging the filter on the shop vac I use with the sander. I was worried that if I got the Festool vacuum I would end up having to add the $300 festool dust separator. I ended up getting a cyclone dust devil, which takes care of dust extraction, but is really inconvenient because I have to move the shop vac and cyclone from machine to machine. Are you having to clean the Festool filter frequently? If it worked for all my sanding, I might still get one. Even if it works for everything else but the thickness sander, might still make sense. Right now if I'm milling wood strips I end up setting the cyclone and shop vac up on the planer, then band saw, then thickness sander, then Byrnes saw. Would be way easier with a single extractor than the cyclone/vacuum combo. If need be, I guess I could leave the cyclone attached to the thickness sander and use the festool for everything else. My wife got a bunch of HEPA air filters for the house when I developed a chronic cough. I have one in the shop. It does help for the airborne stuff, but wouldn't be near adequate on its own. Way easier to have direct dust extraction to the sawdust generating machines than trying to get everything with a vacuum cleaner after. It has seemed to cut the airborne dust when it is time to do finish work. I wear a mask while sanding/painting, but nice to know the dust is taken care of when a mask isn't otherwise necessary. Dave -
Swan-Class Sloop by Stuglo - FINISHED - 1:48
davec replied to stuglo's topic in - Build logs for subjects built 1751 - 1800
Sorry about your accident. I used to use my 10" table saw to slice billets, but got scared away prior to having an accident. I got a 10" bandsaw with a resaw blade. Still pretty frightening, but relatively speaking, feels way safer than the table saw. Between that big exposed table saw blade raised way up, potential kickback, and trying to rip two foot lengths of fairly narrow boxwood and pear which involved push sticks close to the blade, just felt dangerous. Much easier to rip short pieces with the bandsaw, and the kerf is narrower, so less waste. Only time I cut myself bad enough for stitches was on the Byrnes saw with the tilting table. Another tool to be wary of. Your build is going great! tremendous work Dave -
Michael - looking forward to seeing Cheerful develop, but I'm a little disappointed. Was hoping there might be another Echo cross section in the works. I've added the deck beams and ripped and sanded the scale 4" (1/16"x1/4" actual) deck planks. I got a 6" wahuda jointer, and this was the first trial. Took a few nights to get it dialed in, but it made cutting the planks a lot easier. In the past I haven't had an easy way to get a completely flat side on the billet prior to thickness sanding. With the jointer I was able to have two completely flat, perpendicular sides to my billet, and it took under a minute. I only had to thickness sand one side to get the billet to 1/4". Made ripping the planks much easier, and had straighter planks with less blade marks to sand.
.JPG.6147001e224ea204e5b83a89e19a3947.JPG)
-
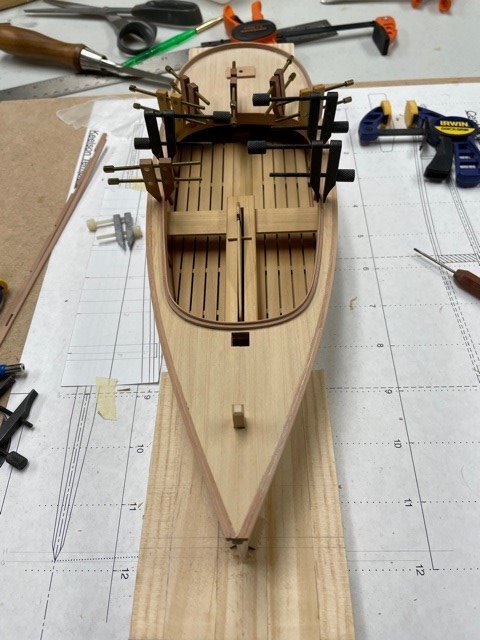
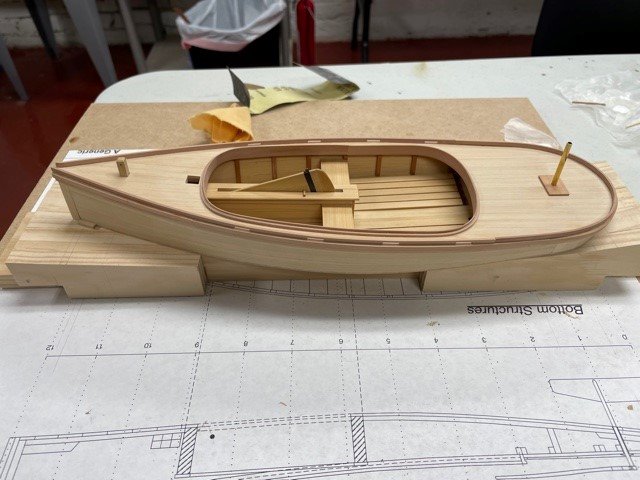
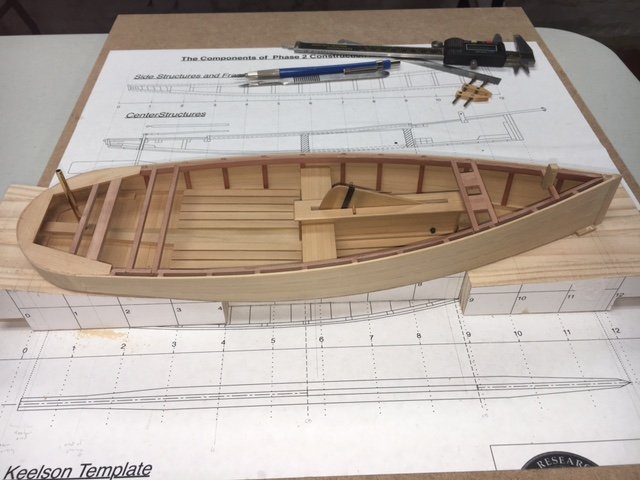
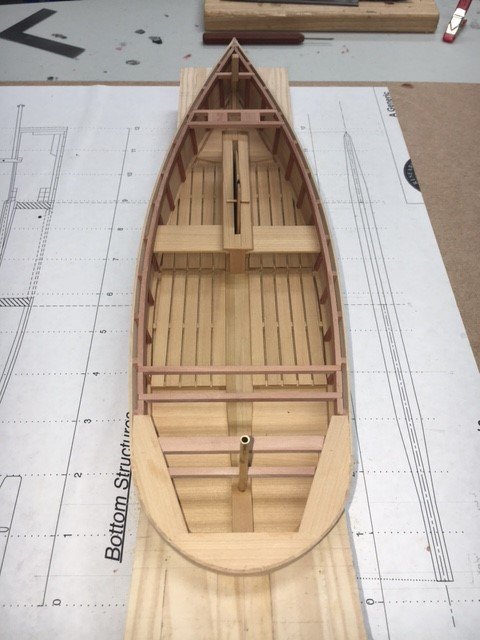
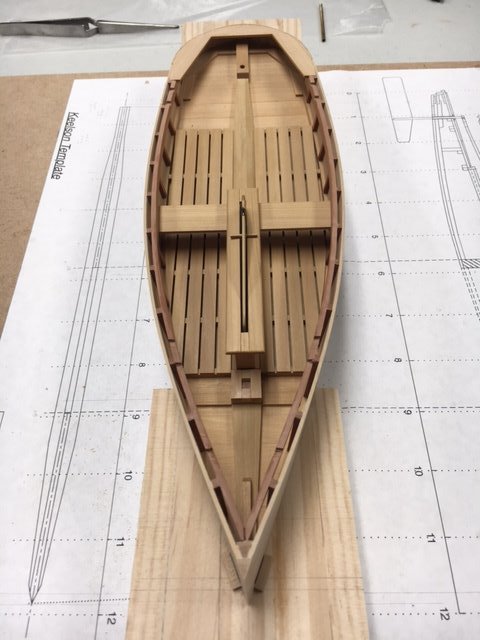
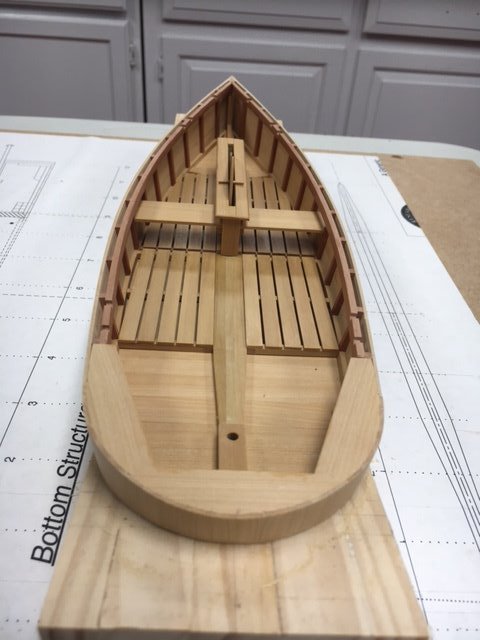
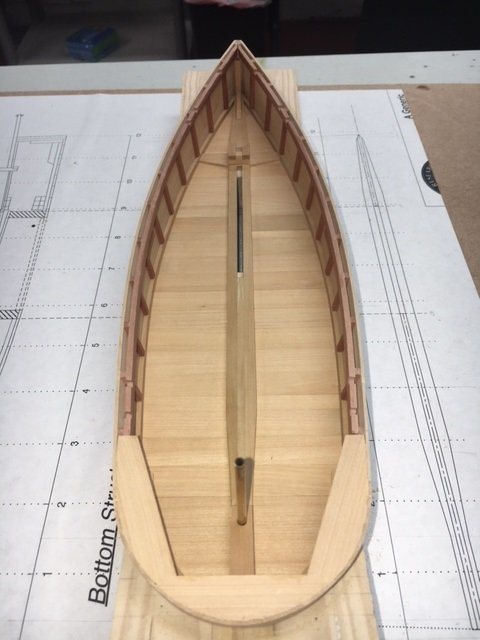
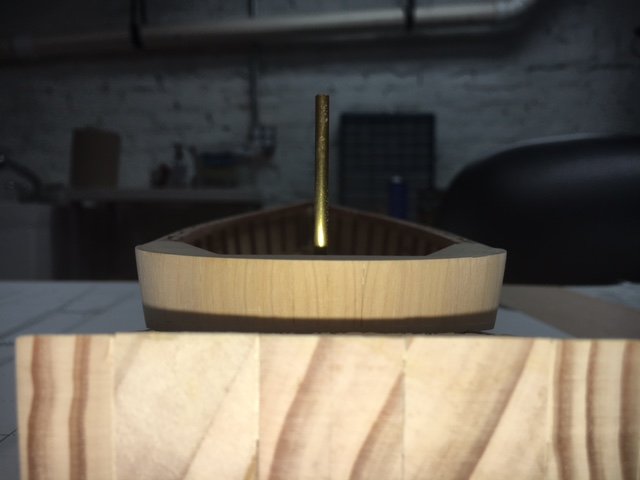
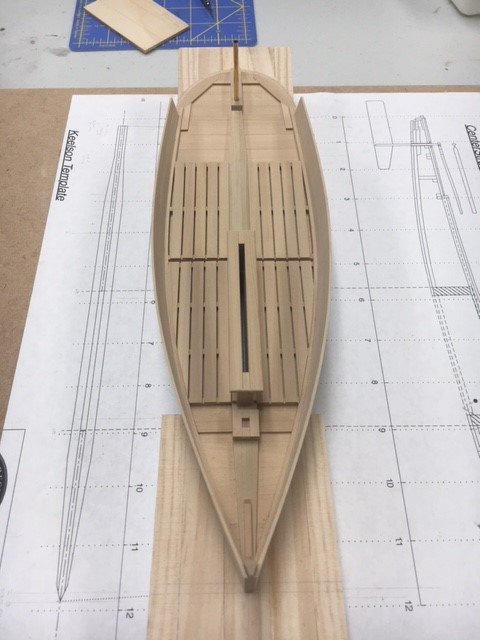
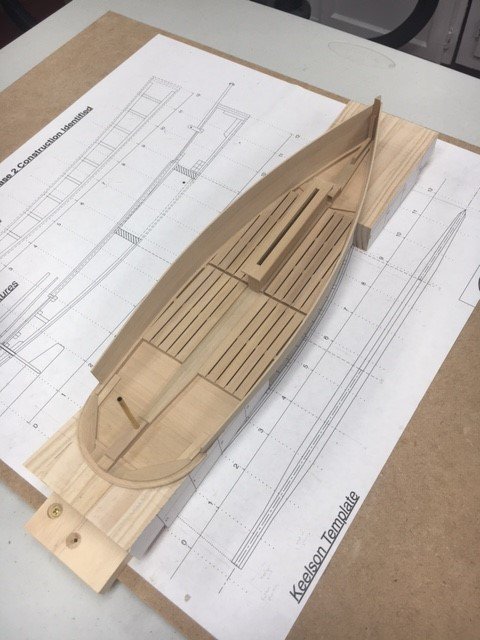
Moab and Michael - thanks!! Michael - did you decide what you are starting now that the Queen Anne Barge is complete? I installed all the pieces I have been making over the last month or so. The centerboard and housing, stem, thwarts, and removable flooring are now in place. I’m still not doing as well with metal blackening as I’d like, but I’ll be displaying the centerboard retracted, so none of the problem areas are visible. I’ve also made the deck beams, and hope to post pictures of the beams and bowsprit bitts installed shortly.

- 75 replies
-
- 11
-
-
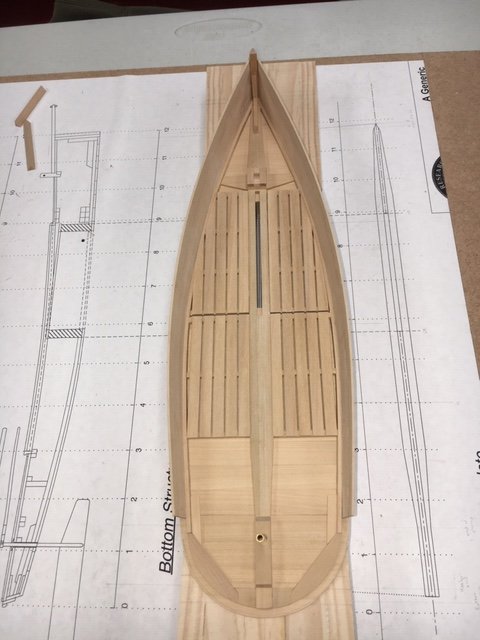
I put a coat of wipe-on poly on the inner surfaces that won’t be glue joints. I also sanded out the curved stern. I left way too much excess on the bottom planking overhang. It took a while to sand flush. I didn’t include pictures, but I’ve also put finish on the removable flooring, thwarts, and centerboard housing. Project for the weekend is the metal work for the centerboard. Once that is done, I can install all the innards and start working on the deck. The two wooden strips along the centerboard housing are the shoes. They are on the plans and mentioned as one of the components of the centerboard housing, but I missed them until now. Clamping would have been a little easier if I had installed them before the side planking.
-
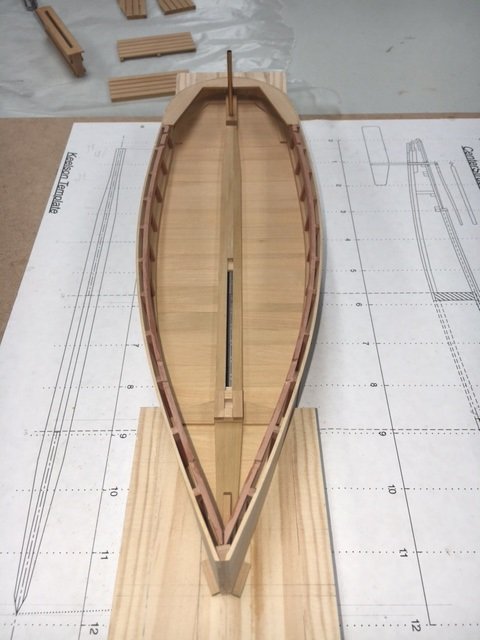
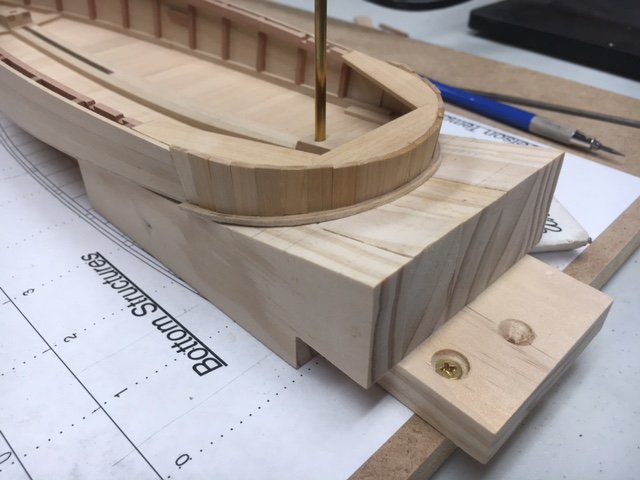
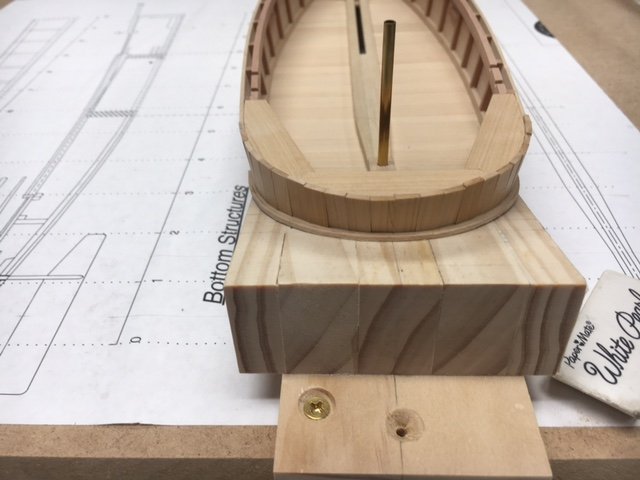
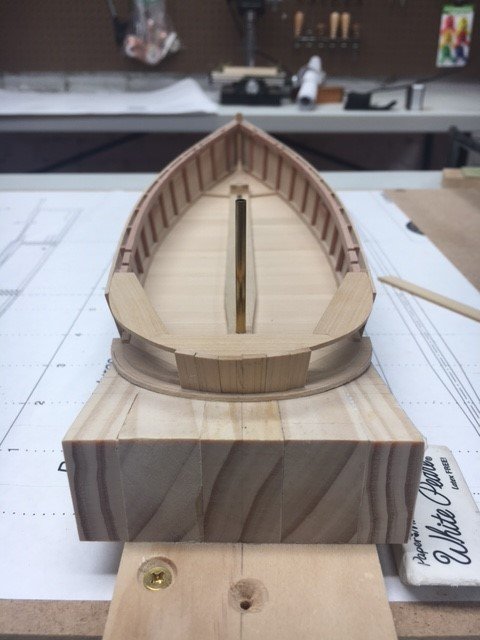
I just noticed how long it had been since I had updated the log. The basement work got finished in a few weeks- my wife would be an excellent contractor and got the floor people in the day the asbestos people finished. I got side tracked by finishing a Wingnut Wings Ninak that had been on the bench for months, then built the new Tamiya 1/48 Spitfire Mark I to try to fix some of my airbrush skill deficiencies. I kept picking away at the Sharpie a few minutes at a time a few times a week, which eventually turned into some progress. I finished the centerboard and centerboard housing and thwarts. I installed the deck clamps and framing. I decided to use swiss pear to have a little contrast to the boxwood. Most of the framing and clamps will be invisible when the deck is installed. I also completed the curved stern. For anyone trying to build from the instructions, there are a couple areas to be careful of. Dimensions of the wood in the text is different than the plans. If you are building using stock wood, use the dimensions in the text. If you are milling your own, use the dimensions in the plans, which are more to scale. The instructions say to fit the upper frame after the stern planks have been glued in place. They have two planking options, one of which uses a bent strip to guide the outer surface, the other which installed the planks without a form. Building this way worked for the authors, but looked harder than it needed to be. I installed the upper framing and planked over it. It made planking really easy, and made sure that the stern followed the same shape as the plans.
-
HI Greg - are the Echo plans also available in digital format? thanks! Dave
-
Gilmer wood sells ebony as small pieces of lumber and instrument sizes (https://www.gilmerwood.com/search/results?utf8=✓&q=ebony). I've never seen anyone sell as milled strip wood. It is very expensive, but model ships don't require very much. Dyed holly and boxwood look tremendous, but not exactly the same as ebony. I've used it on wales, deadeyes, spars, deck furniture, and trim. The dust is a pain, but can be managed with a mask and good vacuum. It is harder to work with than other woods, but mostly just needs power tools and really sharp hand tools. The biggest challenge is bending - usually requires laminating thin strips, multiple repetitions of heat, and lots of broken pieces and swearing. In small amounts, I think the appearance is worth the extra work. I can't imagine what it would be like to try planking a whole model.
-
You seem to have some extra pieces or a different model than I have. Mine is definitely a Preac.

-
Hi Jim - The house is a 1914 row house. We bought it 2 years ago and did a down to the studs remodel including replacing all the knob and tube wiring. The basement floor was one of the things we put off when we decided we'd gone far enough down the slippery slope, and it was time to stop. The asbestos got missed (or maybe ignored) by multiple inspectors and contractors. Both are things we genuinely regret not taking care of when the house was empty and crawling with contractors.
-
John - thanks! My build is on hold for about a month. We found some asbestos in the basement that needed removal. Needed to clear everything out of the whole basement (first floor of the house is a nightmare with everything moved upstairs). In the interest of never having to do this again, we are having the 60 year old peeling floor tile removed from the rest of the basement and the floor painted. Asbestos is done, and the tiles are up and concrete getting patched. Hoping the paint goes down this week so we can move all the stuff downstairs and set the workshop back up soon. Will be a month from starting to take things down to being moved back in. Has made me appreciate how important getting into the workshop a few minutes each day is for my mental health, especially during COVID. On the bright side, I've never been more academically productive, and have quite a few of my work projects finishing and getting submitted for publication.
-
Looks like we were posting at the same time Congratulations on your son completing his Eagle project - that is a huge accomplishment! My son was an Eagle Scout, too. Dave
- 221 replies
-
- 1
-
-
- queen anne barge
- Syren Ship Model Company
- (and 1 more)
-
I can't speak to Triton, but Echo was a great project. The framing seemed to cover all the different frame types that I will need to make for the full ship model I hope to build someday. My build took eons because I did two house moves and have a job a lot like yours, not because there was anything overly difficult about the model. David and Greg were incredibly helpful, and there seems to be a lot more reference material (TFFSM in particular) for Echo than Triton. Echo is just different enough from Swan class that it felt like there was adequate reference material, but not quite straight out of the book building. The monograph is really helpful. Unless you really like building cross sections, not sure there would be a lot of incremental learning in building both Triton and Echo. Dave
- 221 replies
-
- 2
-
-
- queen anne barge
- Syren Ship Model Company
- (and 1 more)
-
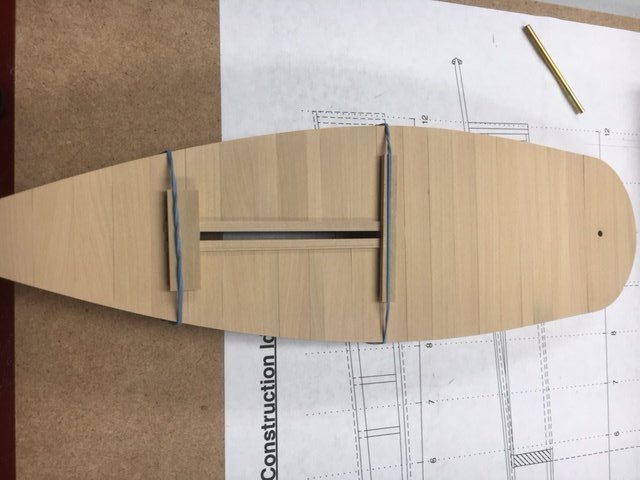
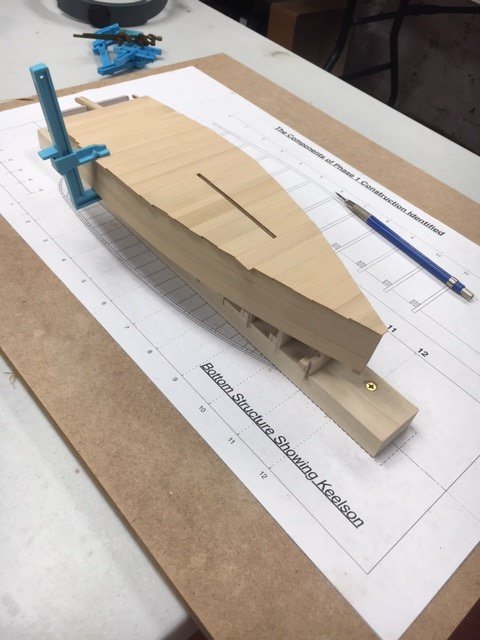
Small update. I've built the rudder log and lower stern framing, mast step, and removable floor boards. Nothing has finish on it yet. Not sure where they grey tinge in the wood in the pictures is coming from.
- 75 replies
-
- 10
-
-
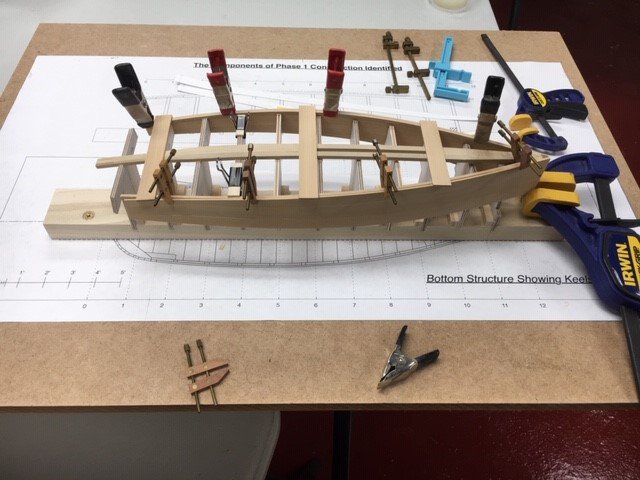
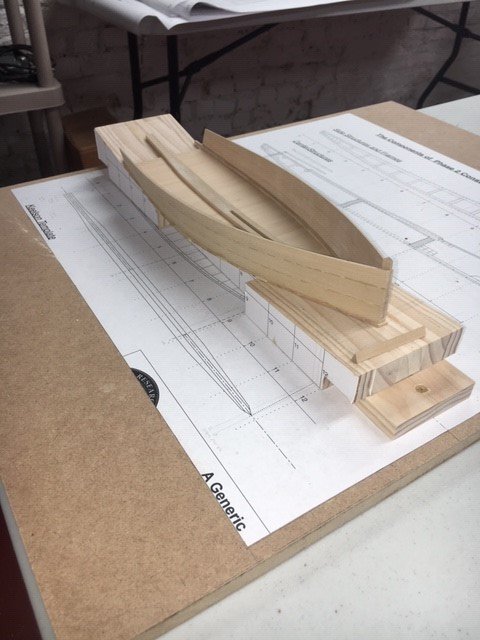
Jim - many thanks. I'm looking forward to building the stern. I have a plan for how to do it, that will be a little more straightforward than the monograph. I plan on building the frame first, then doing the vertical planking as opposed to the monograph, which planks first (unsupported), then fits the framing. I mostly need to figure out the shape of the upper framing along the shear. Need to figure out whether I can draw the projection from the top view of the plans using turbo cad, or whether I should free hand it with Bristol board templates until I have something that fits. Turbo cad would be the right way, but I'm not very good with it. I'm definitely ready to call planking over the molds a success. I added the bottom planks. I didn't have any problem taking the hull off the mold (no issues with it getting accidentally glued in place). It held its shape off the mold. Not in the pictures yet, but I have sanded the edges of the bottom planks flush, and sanded off the glue on the plank seams that I didn't see until I looked at the pictures. It is pretty sturdy. It took a lot of sanding to get the edges flush, and only one bottom plank got a little loose. In the monograph they plank the bottom before adding the side planks, and use a scroll saw to trim the planks. I didn't think this through prior to gluing the bottom planks. With the angled side planking in place, I couldn't use a scroll saw. It ended up being a lot of sanding. If I was doing this again, would have cut the planks with less overhang.
-
Jim - really beautiful work!! - Dave
-
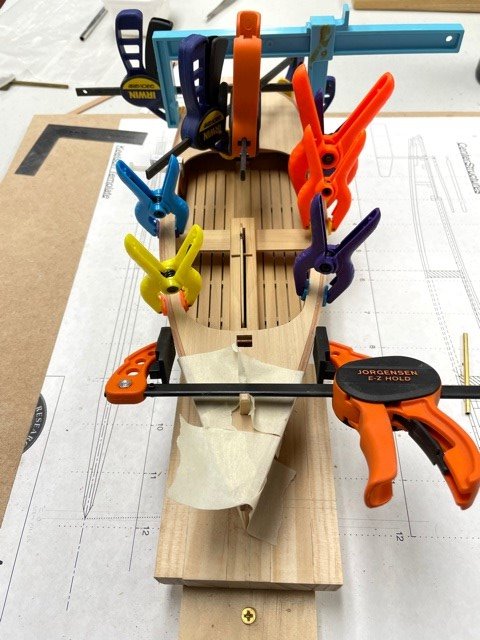
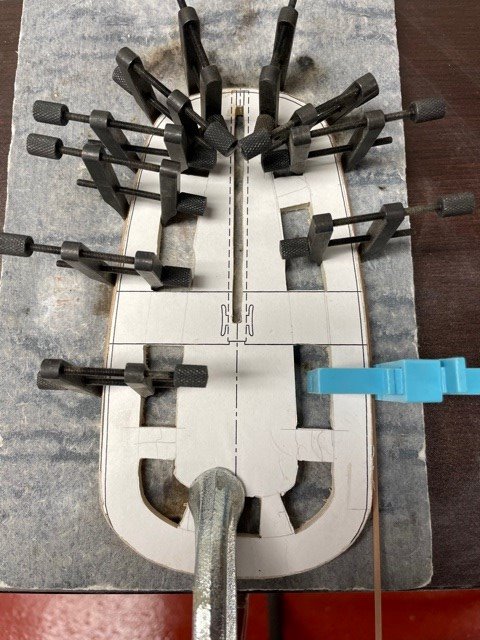
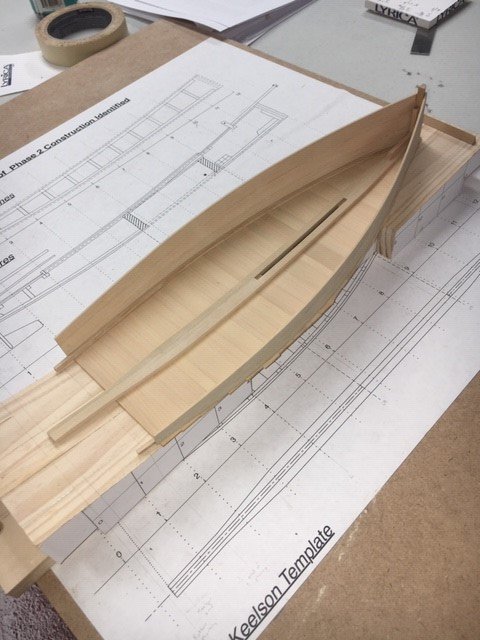
Planks soaked yesterday, and clamped in place overnight. The glue joints tolerated the soaking without separating, and the planks bent mostly into shape so that only a little pressure was necessary with the clamps for gluing. After soaking, the fit against the molds was also good - the side planking lies flat against them, and I don't have the sense they will bend inward when I take the hull off the molds. I glued everything up this morning. Fingers crossed for when I take the clamps off tonight.
- 75 replies
-
- 11
-
-
Michael - not sure how I missed your update. Your paint and carving look great!! Dave
- 221 replies
-
- 1
-
-
- queen anne barge
- Syren Ship Model Company
- (and 1 more)
-
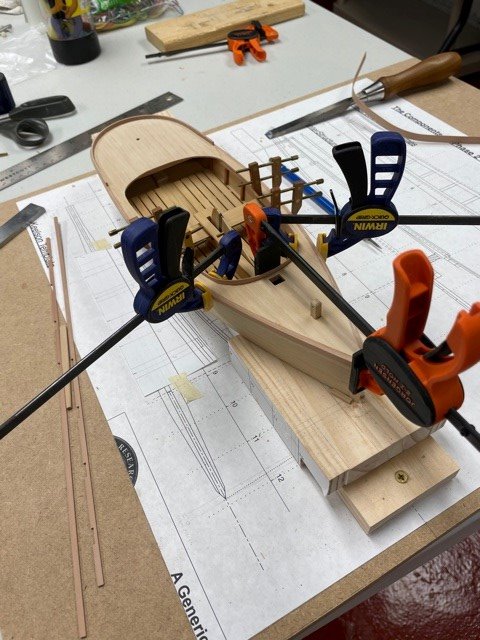
Finished the side planks. As they are flat, decided I would glue them together off the model. I thought I could clamp them better and minimize the gap between planks. That part worked OK. The joints look a little irregular in the pictures. I took them right after sanding. After I used some mineral spirits to wipe away the sawdust in the joint, they looked better. I put my right angle blocks on top to keep them flat while they dried. I had used a damp cloth to wipe away the extra glue. When I put the metal blocks on top, I got some discoloration of the wood, probably from some oxidation even though they were only there a few hours. Should have put some wax paper or saran wrap between. I was able to sand it away, except for where it discolored the glue. I was going to redo, then tried reversing the sides, so the side with the spots was now inside, where they will be hidden. I trimmed the fore end and clamped them side planks in place as a test. It is beginning to look pretty boat-like. I need to trim the aft end of the planks. I decided to end them vertically. I’ll trim them this afternoon, then soak the planks and clamp back in place to dry before gluing. The only thing I’m nervous about is whether the glue joints will separate with a few hours of soaking. I used titebond 3, which is waterproof (although it says “do not submerge”). If they separate, will need to redo.