PMG
-
Posts
199 -
Joined
-
Last visited
Content Type
Profiles
Forums
Gallery
Events
Everything posted by PMG
-

HMS AGAMEMNON by PMG - Caldercraft
PMG replied to PMG's topic in - Kit build logs for subjects built from 1751 - 1800
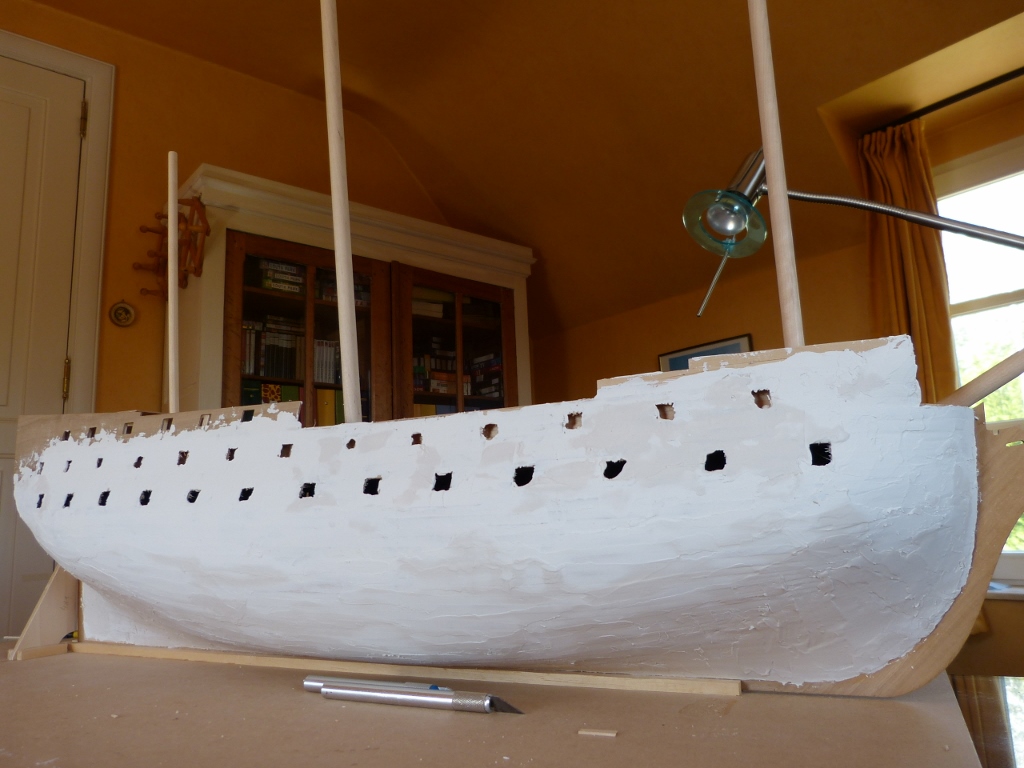
I am still trying to position correctly my gunports. It's a little nightmare. Now, I am mastering the level, but I discovered that the longitudinal positionning I made using the supplied template was not right at all. So, I took the right location straight from the plans with reference to an easily identifiable line (the end of the quarter bulwalk). And, so, I could make a fair positionning. See the picture. However, I discovered then that the dummy guns of the lower gundeck fixed in the center of the pieces nr 23 were not always fallinf in the center of the gunport. At the time I had pierced the holes for the dummy guns, it appeared to be a good idea. But... So, Martin, if you allow me to give a little advice, be very careful when you fix the pieces 61 and 62. Remember they will be used as a reference for starting your first planking, but later also to recheck the position of the gunports. Have a good W-E. Pierre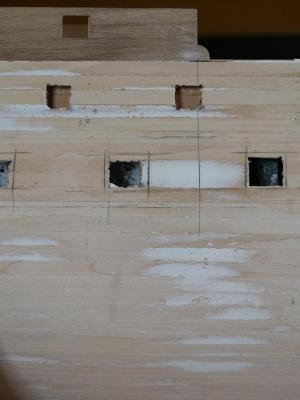
-
HMS SERAPIS by PMG - Aeropiccola
PMG replied to PMG's topic in - Kit build logs for subjects built from 1751 - 1800
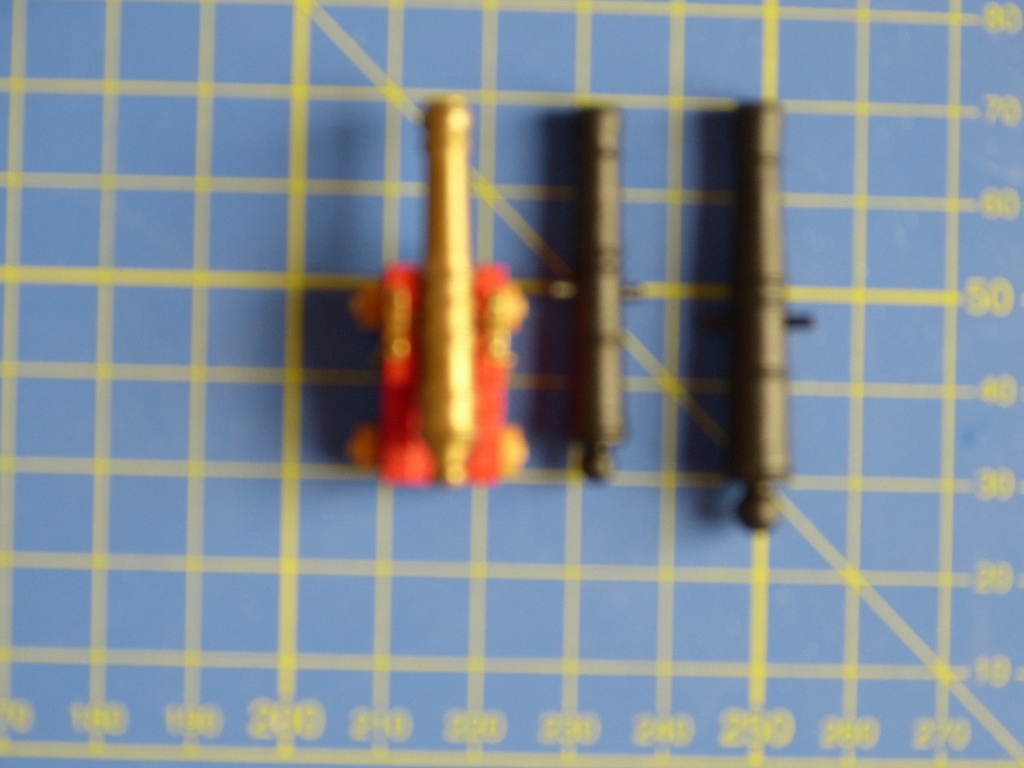
Hi Chris, Hi Steve, Very interesting discussion indeed. Thank you, gentlemen. Steve is absolutely right about the original armement. It is highly improbable, in fact impossible, that these ten 9pdrs have been carried by the quarter deck. But, at the time I realised that, it was to late, and my bulwalk was built. So I managed to buy two smaller guns (I hope they are 6pdrs) to be positionned on the forecastle as chase guns. Later, I wondered if the additional gunports were not there for carronades. You now that carronades were never accounted in the number of guns of a ship. So I made 4 larger openings in the quarter deck (like on the frigate Diana for example) to accept carronades. They are still 6 gunpots to much. May be, if I find them, I shall place 6pdrs. About the scale: I like to believe that's 1/64 because it is then consistant with my HMS Agamemnon, and, by a lot of arguments, I try to convince myself (and you too) that's the right scale... My kit, probably coming straight from Italy, was never speeking about a second planking, and of course, it was not supplied. They were also no instructions except the drawing sheets (in italian). Probably, they changed later for supplying in the US. Pierre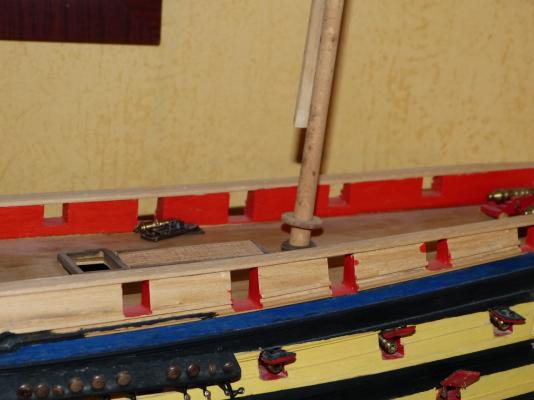
-
HMS AGAMEMNON by PMG - Caldercraft
PMG replied to PMG's topic in - Kit build logs for subjects built from 1751 - 1800
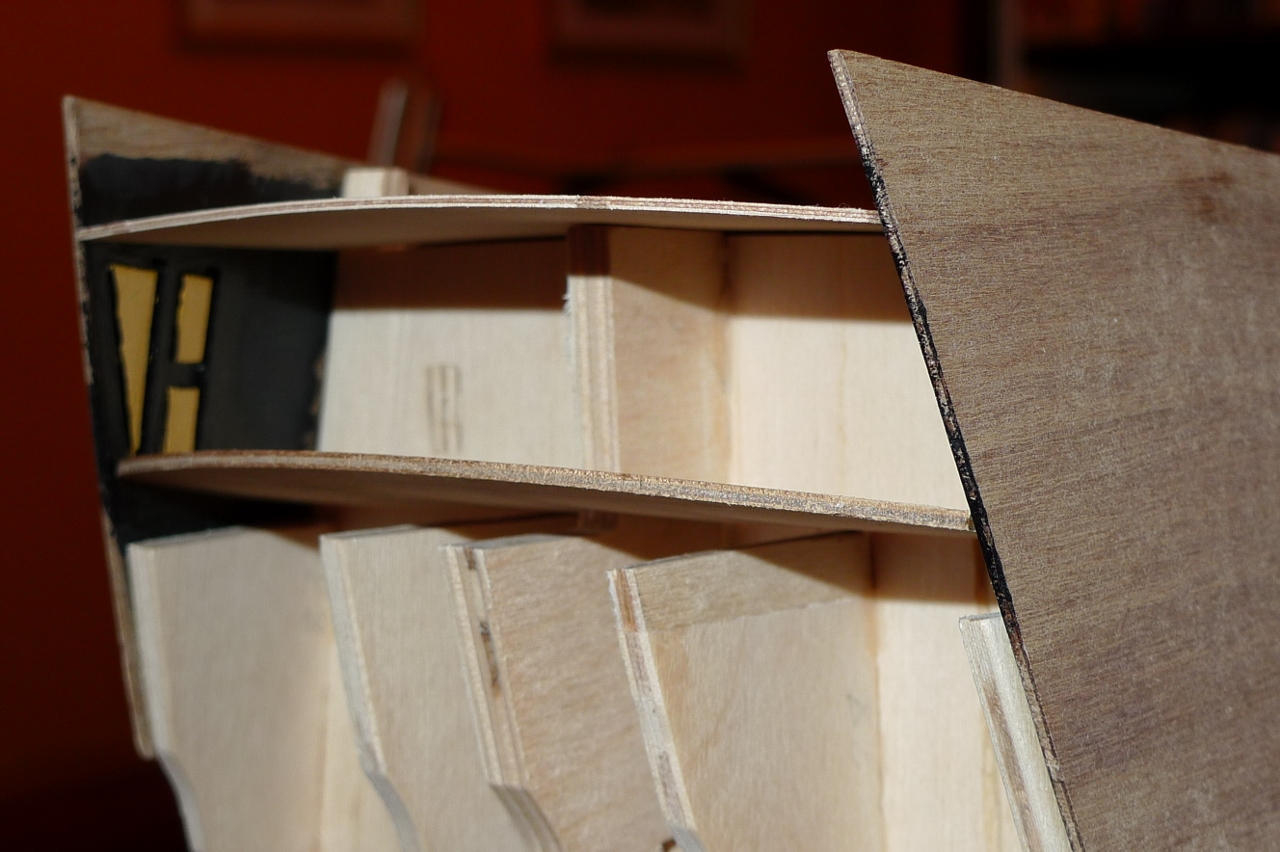
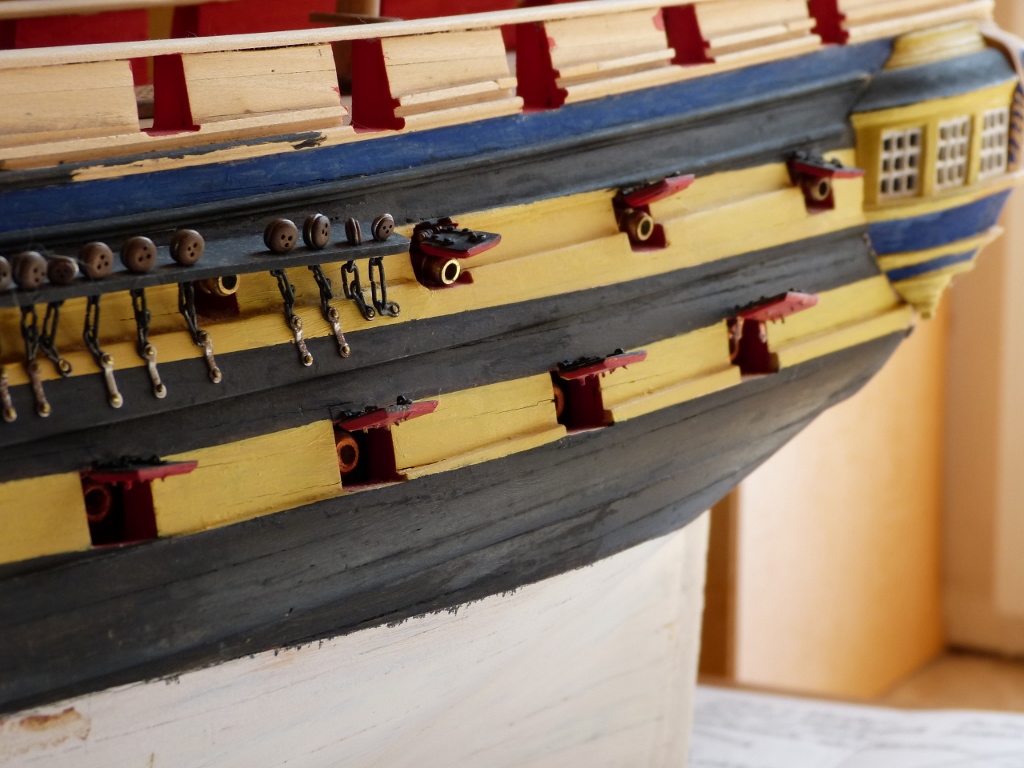
Hello Martin, Here is another picture of what I did. The main question was: is the bottom of the engraving black or yellow? I finally decided to make only the panel yellow and all the engraving in black. I looked to others realisations and I got the impression that otherwise the yellow should be too impressive. The magnification of the photography is showing the imprecision of my painting work... It is relatively difficult to respect the straight lines at the limit of the engraving. Hopefully, I think that it will not be very visible on the finished model. You see also that I continued the panel in black. However, it is well possible that later I paint the interior of the room in white. By the way, two or three layers of paint are necessary. I hope I answered your question. Pierre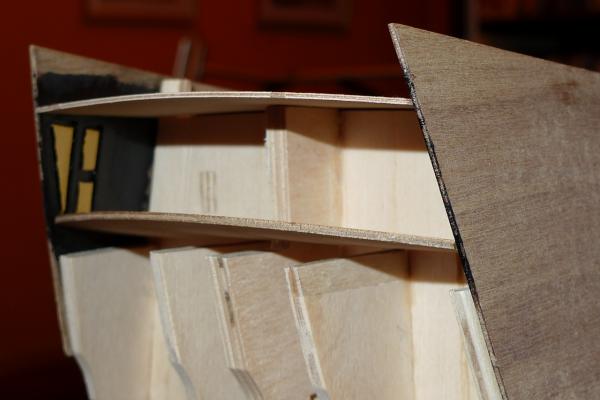
-
HMS AGAMEMNON by PMG - Caldercraft
PMG replied to PMG's topic in - Kit build logs for subjects built from 1751 - 1800
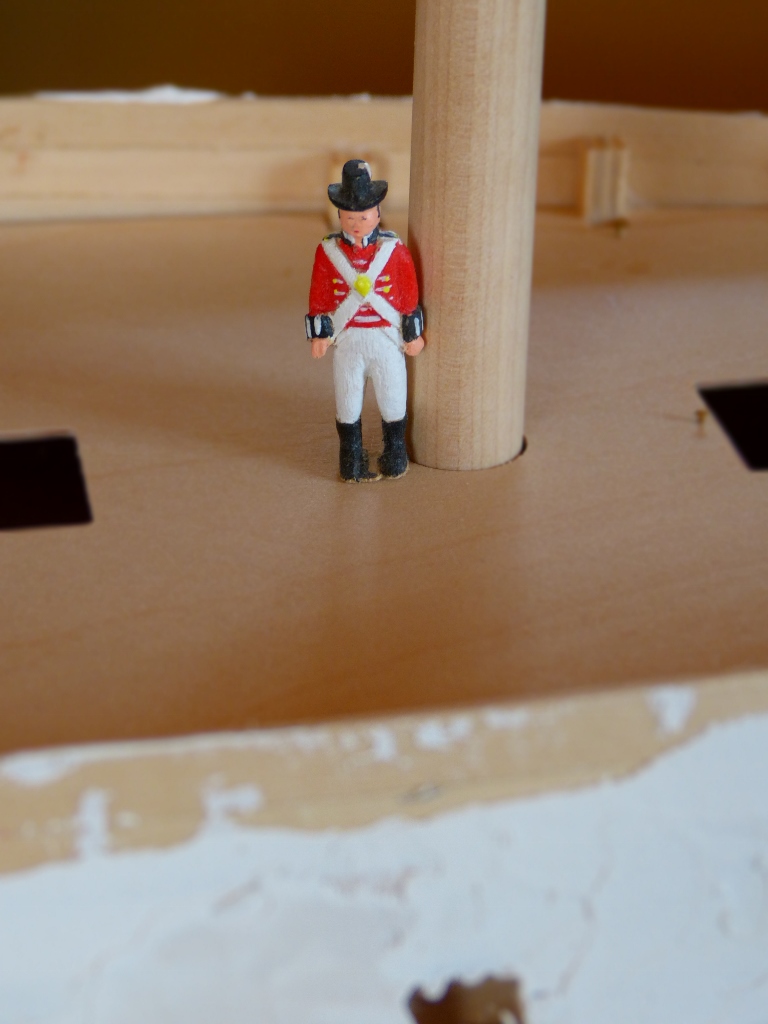
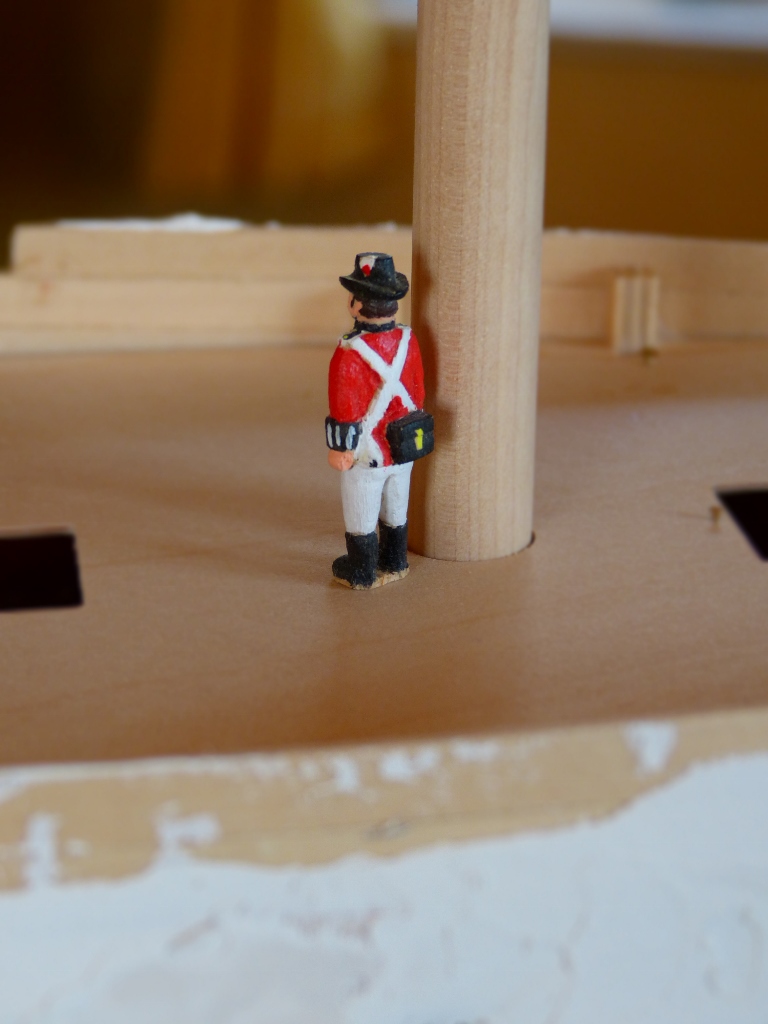
Here is another of my crewmembers. This is a marine. The musket is still missing. He looks a little bit more martial than the previous one... Pierre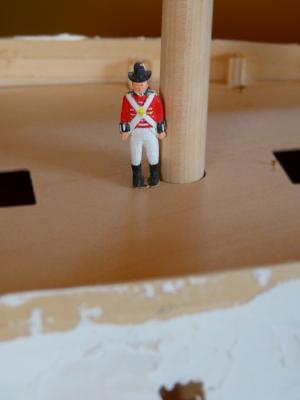
-
Mobbsie, I am full of admiration about your way of working. I think you started 2 or 3 years after me and I don't hope to reach the point where you are before the middle of next year...... Pierre
-
Hello Martin, Have a look on the last post I made on my log. You can see the engravings I carefully painted before gluing definitely (not temporarly) the parts 61 and 62. Actually these engravings are the inner side of the quarter gallery, and they are seen once the model is finished. I hope it helped you. Pierre
-
HMS SERAPIS by PMG - Aeropiccola
PMG replied to PMG's topic in - Kit build logs for subjects built from 1751 - 1800
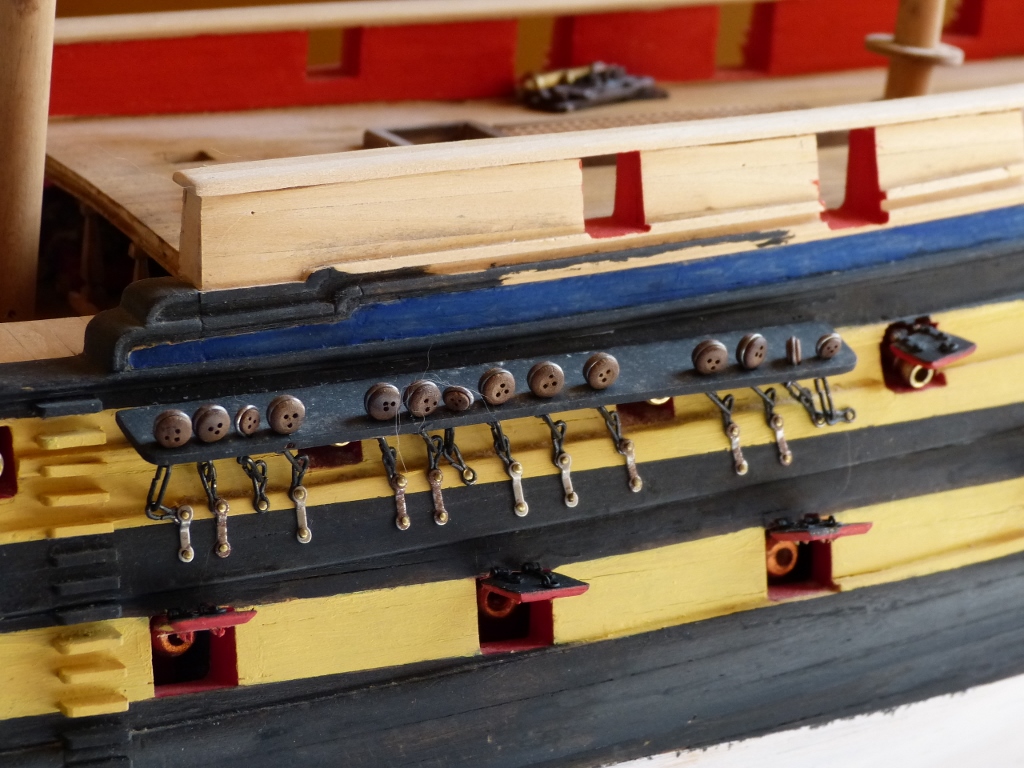
I show you another problem I had with my Serapis: fixing the channels. I did it using PVA. But, when I fixed the chains, they were pulling (not too much, but enough) on the channels. I think I shall retry using CA. I should like to leave the chains in position, because they are well placed. I don't like at all to use CA because you don't have enough time to careful place the piece, but in this case, I am well obliged. Pierre
-
HMS AGAMEMNON by PMG - Caldercraft
PMG replied to PMG's topic in - Kit build logs for subjects built from 1751 - 1800
Next step: I finished the stern counter and made the rudder hole. Pierre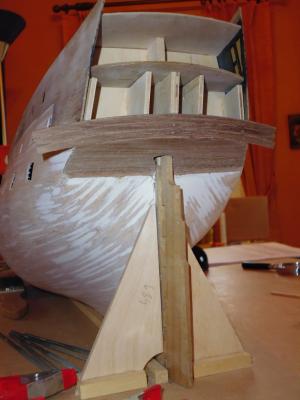
-
Waouw! Thank you. Very impressive and surely very strong. It's a pity, I finished my first planking. Next time, I shall try your system. Pierre
-
Hello Martin, Just a liitle question. What kind of needles are you using to fix your planks? Are you making treenails? Thank you. Pierre
-
Hello Martin (wich one?), I wondered also seeing Martin (wich one?) starting the first planking before planking the upper gundeck and temporarly fixing the false decks. I am not sure it's a bad idea because cutting the gunports may be easier afterwards (?). I follow, as much as I can, the indications of Keith Julier in The new period ship handbook. It is relatively well done. I bought the book through Amazon and it was relatively easy. Greetings Pierre
-
Nice beginning and good luck! Pierre
-
I Jason, I am discovering your log and I am really impressed by the quality of your construction. I shall follow it with great pleasure. Cheers, Pierre
-
HMS SERAPIS by PMG - Aeropiccola
PMG replied to PMG's topic in - Kit build logs for subjects built from 1751 - 1800
I show you here another feature of my HMS SERAPIS. On the Aeroppicola drawings you can see that the lower deck gunports are closed and it is not foreseen to opens them. I managed to build a dummy deck, I opened the gunports and I made wooden gummy guns. My intent was to present my ship with either opened either closed lower gunports. The next picture shows a detail of the hull. The gunports (hurted with the time...) need to be correctly repositionned. Pierre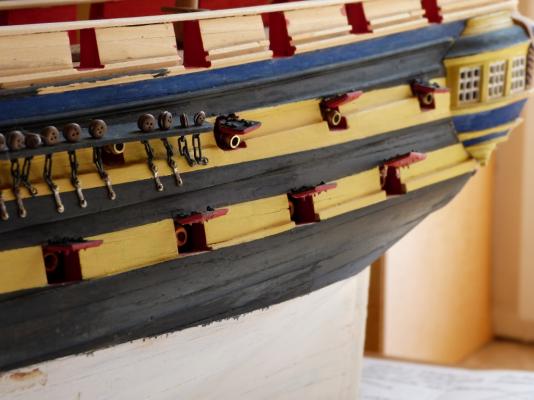
-
HMS AGAMEMNON by PMG - Caldercraft
PMG replied to PMG's topic in - Kit build logs for subjects built from 1751 - 1800
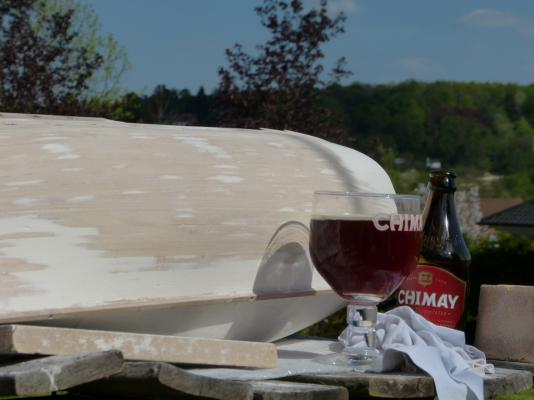
Hello Jason, Thank you for your comment. Actually, I am not sure I am mastering the question of the gunports at this moment. I first drafted carefully the position of the decks when I was making the first planking. It is, of course, a good idea to be able to check the height of the gunports. The problem is that after adding filler and sanding the hull the lines disappear. Mobbsie advised me then to cut the gunports before filling and sanding, what I did. But I rapidly discovered that the template supplied with the kit and the drawings were not always consistant. You can see above in my previous post all the discussion on the final size of these gunports. (There is no difficulty for the quarter deck gunports, they are precut as happens on more recents kits) Now, the hull is (almost) completely sanded (a too nice finish is not necessary) and I shall reposition all the gunports. Luckily, the holes already made are smaller than the final port. I have also to prepare some callipers to size properly the ports. HMS Agamemnon is a very nice ship. Not too big, not too small. Nice lines. I am very happy with. The kit is of excellent quality. Cheers, Pierre P.S.: Chimay is located at around 50 miles from my home. You know that Belgium is the country of the (true) trappist beers. Next time, I show another... Very important: always drink them in theit genuine glass. The taste is different!!! -
HMS AGAMEMNON by PMG - Caldercraft
PMG replied to PMG's topic in - Kit build logs for subjects built from 1751 - 1800
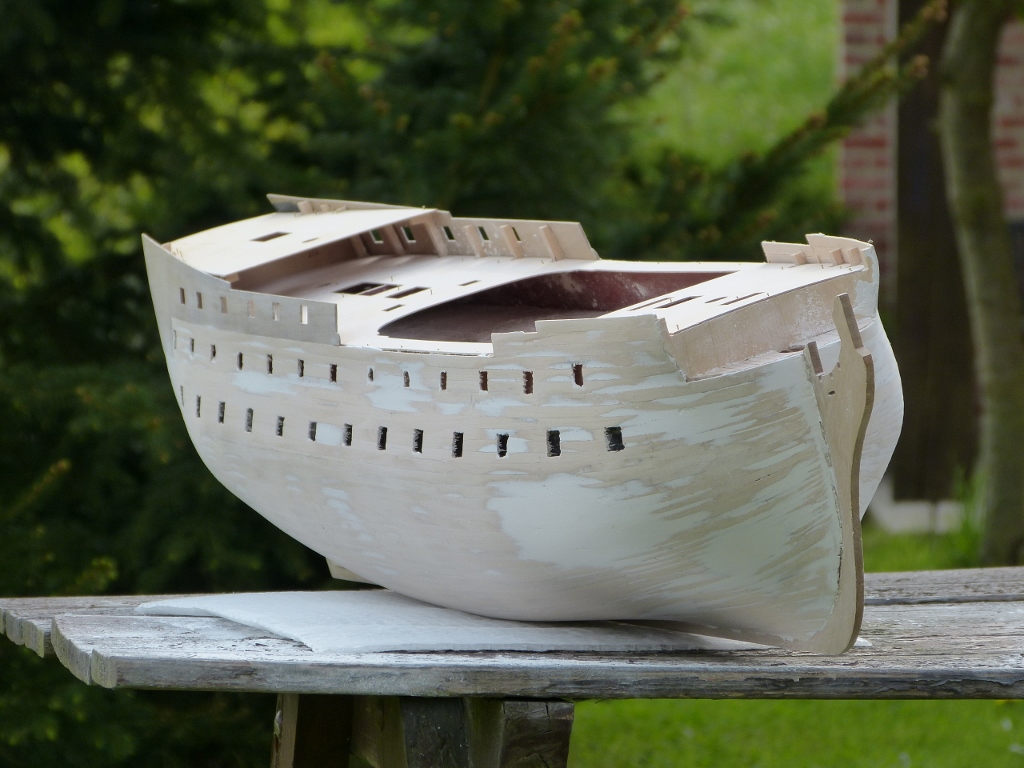
Today, the weather was dry and windy. Ideal for sanding in the garden. I made the second half of the work. My Aggie is now almost completely sanded. Still some finishing details to do near the keel and the stern. Next step will be to redraw the gunports. Pierre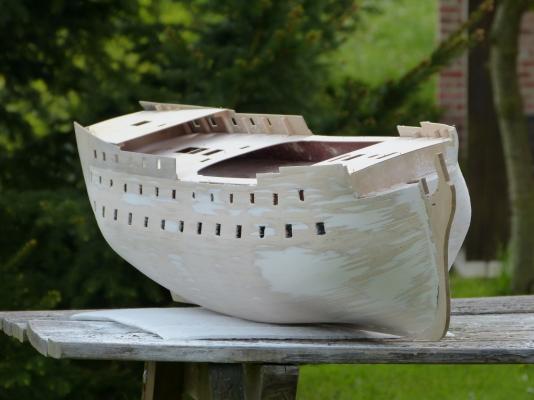
-
So happy to see you back! Your HMS Agamemnon has always been for me a reference of quality work. Pierre
-
HMS AGAMEMNON by PMG - Caldercraft
PMG replied to PMG's topic in - Kit build logs for subjects built from 1751 - 1800
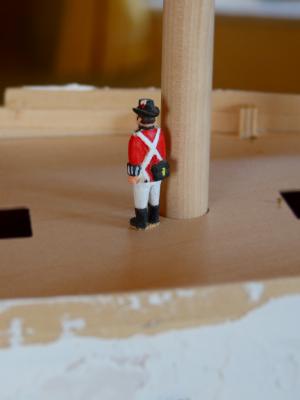
Enough for today. Nice weather and a good trappist beer. The hull of my Agamemnon is more or less half sanded. The other half will be for to morrow(?) and finishing too. I wonder if it is necessary to finish it completely leaving almost no filler more. Anyway, there will be a second planking and also a copper shielding. I am glad to see that my last crewmember was not disregarded. I still have a couple of others to show in the coming days. Pierre
-
Sjors, You are right, except for sanding.... It's much better in the garden with a good trappist beer! I hope the weather will remain fine for a couple of days.. Pierre
- 1,873 replies
-
- 1
-

-
- occre
- san ildefonso
- (and 1 more)
-
I am very interested to follow your build. Bellona is a very very nice ship. Pierre
-
HMS AGAMEMNON by PMG - Caldercraft
PMG replied to PMG's topic in - Kit build logs for subjects built from 1751 - 1800
OK, the weather is not too bad, I hope the filler is dry (I took the opportunity to put a little bit more filler at bulkhead Nr 4 where there is a very very little dip), my sanding blocks are ready... and I think I shall start the sanding at the "siesta time" this afternoon. I send you a picture of the next of my sailors. I hope the picture will not be censored, but this guy sits in a very natural position at the beakhead of the ship. Of course, he doesn't look very martial, but... it has to be done, and with more than 500 people on board, it must be more frequent than shown by the general naval pictography. Have a good (end of) WE Pierre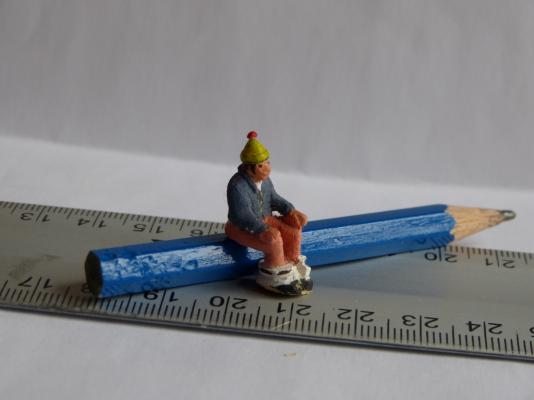
-
Sjors, your San Idelfonso is great! I will be happy to follow the next steps after your good WE in UK. Pierre
-
HMS SERAPIS by PMG - Aeropiccola
PMG replied to PMG's topic in - Kit build logs for subjects built from 1751 - 1800
Hi Mark, Thank you for your post. The HMS SERAPIS kit is indeed an interesting project and worth to spend some time in historical research. I think that the NMM drawings are fully correct, but they surely lack on information, surely about masting and rigging. I am convinced that the kit designers have taken from "The anatomy of Nelson's ships" by C. Nepean LONGBRIDGE the missing information. And that's the origin of the anachronisms you find in the kit. I will come back later on the subject. But it is amazing to see how much the drawings of the kit are more or less (adapted of course) as those from Longbridge's book. The problem, is that Longbridge describes a 1805 version of the Victory, and the Serapis was lunched and lost in 1779... I am, by the way, convinced that HMS Serapis couldn't have the plain quarter deck bulwarks, even as it appears on a contemporary painting. But everybody knows that these paintings were often made 15 or 20 years after the event... The Roebuck was the closest ship to the Serapis I found. Of course, the stern is different. The Serapis being a little bit younger, the designers had abandonned the second row of (fictive) windows. But otherwise, the armament, the general dimension and probably the arrangement are more than likely the same. The measurements, I am talking about in a previous post, are not too accurate because they have been taken from Hahn's book and that's not very easy. However, I am still convinced that the scale of the kit is 1/64. I found another demonstration in the sizes of the guns. On the attached picture, you can see a (mounted) 9pdrs from the Serapis kit compared to a (black) 9pdrs barrel from the Agamemnon kit. And they have exactly the same size. (sorry for the poor quality of the picture) Pierre
-
HMS SERAPIS by PMG - Aeropiccola
PMG replied to PMG's topic in - Kit build logs for subjects built from 1751 - 1800
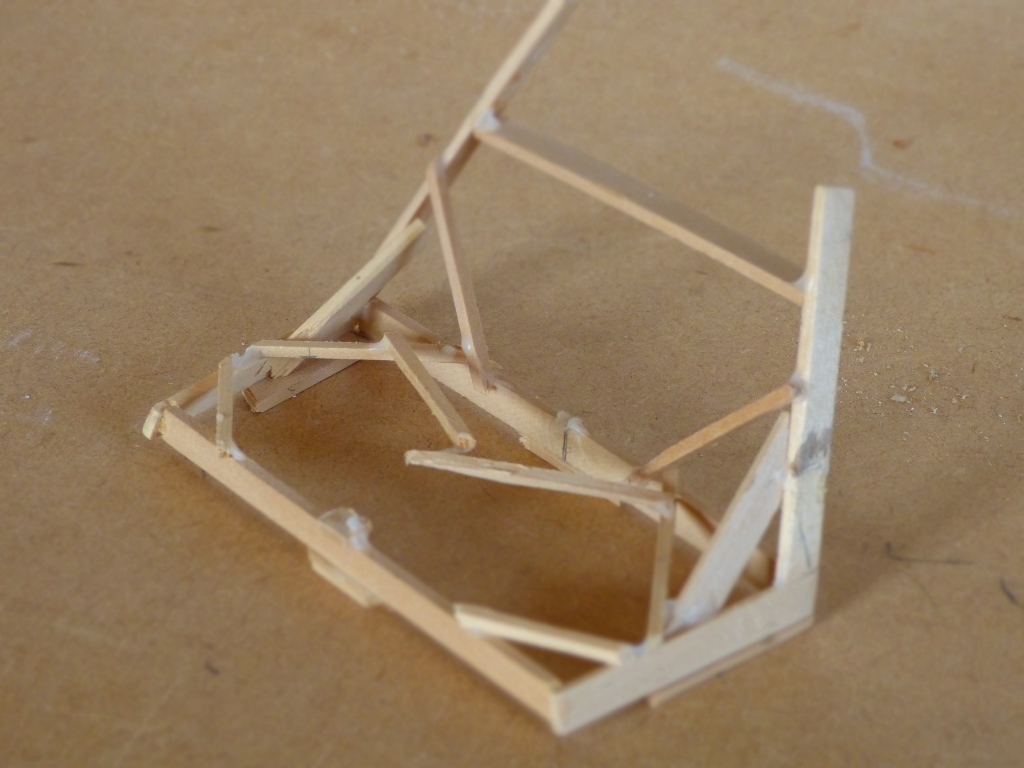
I come back on my post where I said that HMS SERAPIS was designed for a single planking. I made some research on internet and I found that some kits were still available. And on some of them it is specified that the planks are provided for a second planking. That should be nice. These are probably more recent editions of the kit than mine where it is absolutely not foreseen. On the same way, I see that sometimes the scale 1/60 is also mentionned. It is not written on the boxes, neither on the drawings, I suppose. There, I am more formal, I am pretty sure that the scale is 1/64, as demonstrated before. I am adding a picture of the small frame I made using scrap wood to position more accurately the preformed wood pieces at the poop. Pierre
-
HMS AGAMEMNON by PMG - Caldercraft
PMG replied to PMG's topic in - Kit build logs for subjects built from 1751 - 1800
This is the present status of my Aggie. Plenty of filler to be removed.... I let it dry for a couple of days and the .... sanding. I think I shall wait for a better weather to be able to make the sanding outside. My wife shouldn't appreciate to have that in home! In the mean time, I can prepare my sanding blocks. Pierre