HOLIDAY DONATION DRIVE - SUPPORT MSW - DO YOUR PART TO KEEP THIS GREAT FORUM GOING! (Only 51 donations so far out of 49,000 members - C'mon guys!)
×


chevygrunt
-
Posts
28 -
Joined
-
Last visited
Content Type
Profiles
Forums
Gallery
Events
Everything posted by chevygrunt
-
Hi, Having a small amount of lapping experience. I would be careful with using a grinding/lapping compound between the valves and the brass. As I understand it, certain types of lapping use a soft and hard material. The soft material is the lapping tool and the harder material the work piece. When the compound is applied it beds into the softer material and forms a fine abrasive surface which then works to remove material from the work piece. In your application, I would hate to see the brass become embedded with grit which could be difficult to remove after seating the valves. Most modern day car heads have hardened seats, so it isn't such an issue. I am not an expert in this and would happily be corrected. An excellent job by the way. As a machinist, I can fully appreciate what you have achieved! Well done!! Cheers, Scott.
-
That wasn't the tack hammer you used for the brads in the top left corner of the photo, was it?
-
Hi All, Steve & Bob, thanks for the comments. I AM SORRY to do this! The log isn't finished, and I do intend to finish it (along with the boat). I am just stopping for a while. As big as MSW is, unfortunately, it just isn't big enough for two of these logs. My choice is to continue with the build and record all the progress as I go. Then add it to MSW later. Thank you to everyone who has hit a like, made a comment, lurked in the background, or even unknowingly helped by sharing things in their own logs! Also a big thank you to MSW in general, you are a top notch site!! Cheers for now, Scott. P.s Hellen is looking to get a coat of colour soon! Will post on that when it happens
-
Hi All, Thanks for the all the likes and kind comments! They are appreciated! Due to several reasons, I am going to stop adding posts to my log. I am sad about doing this, and maybe will come back to continue my log down the track. I really don't want to go into details, and am really sorry to all who were looking forward to following the build. Model building to me is something I enjoy and love to share with people who can appreciate the skills and effort involved. It is not something I want to big note myself on, nor do I feel like it should be a competition. Unfortunately, I haven't found running a log on this boat to be very enjoyable. I may even go back to working on "Hellen" for a while. Sadly, signing off, Scott. P.s I will still be reading the other fine logs happening, so don't everyone stop!
-
Hi, I would certainly recommend using a mask when working with MDF. It's not really the wood particles that is the nasty one here. It's the glue! Having worked as a maintenance worker in a former MDF manufacturing plant. I know that the glue they use contained formaldehyde and some say it is released when working with the material. I can remember that the area of the plant where the panels were pressed was particularly nasty and I was glad I was based on the other side of the plant. The only other downfall I find with MDF is that it will swell terribly with moisture, including paints, without proper sealing Cheers, Scott
-
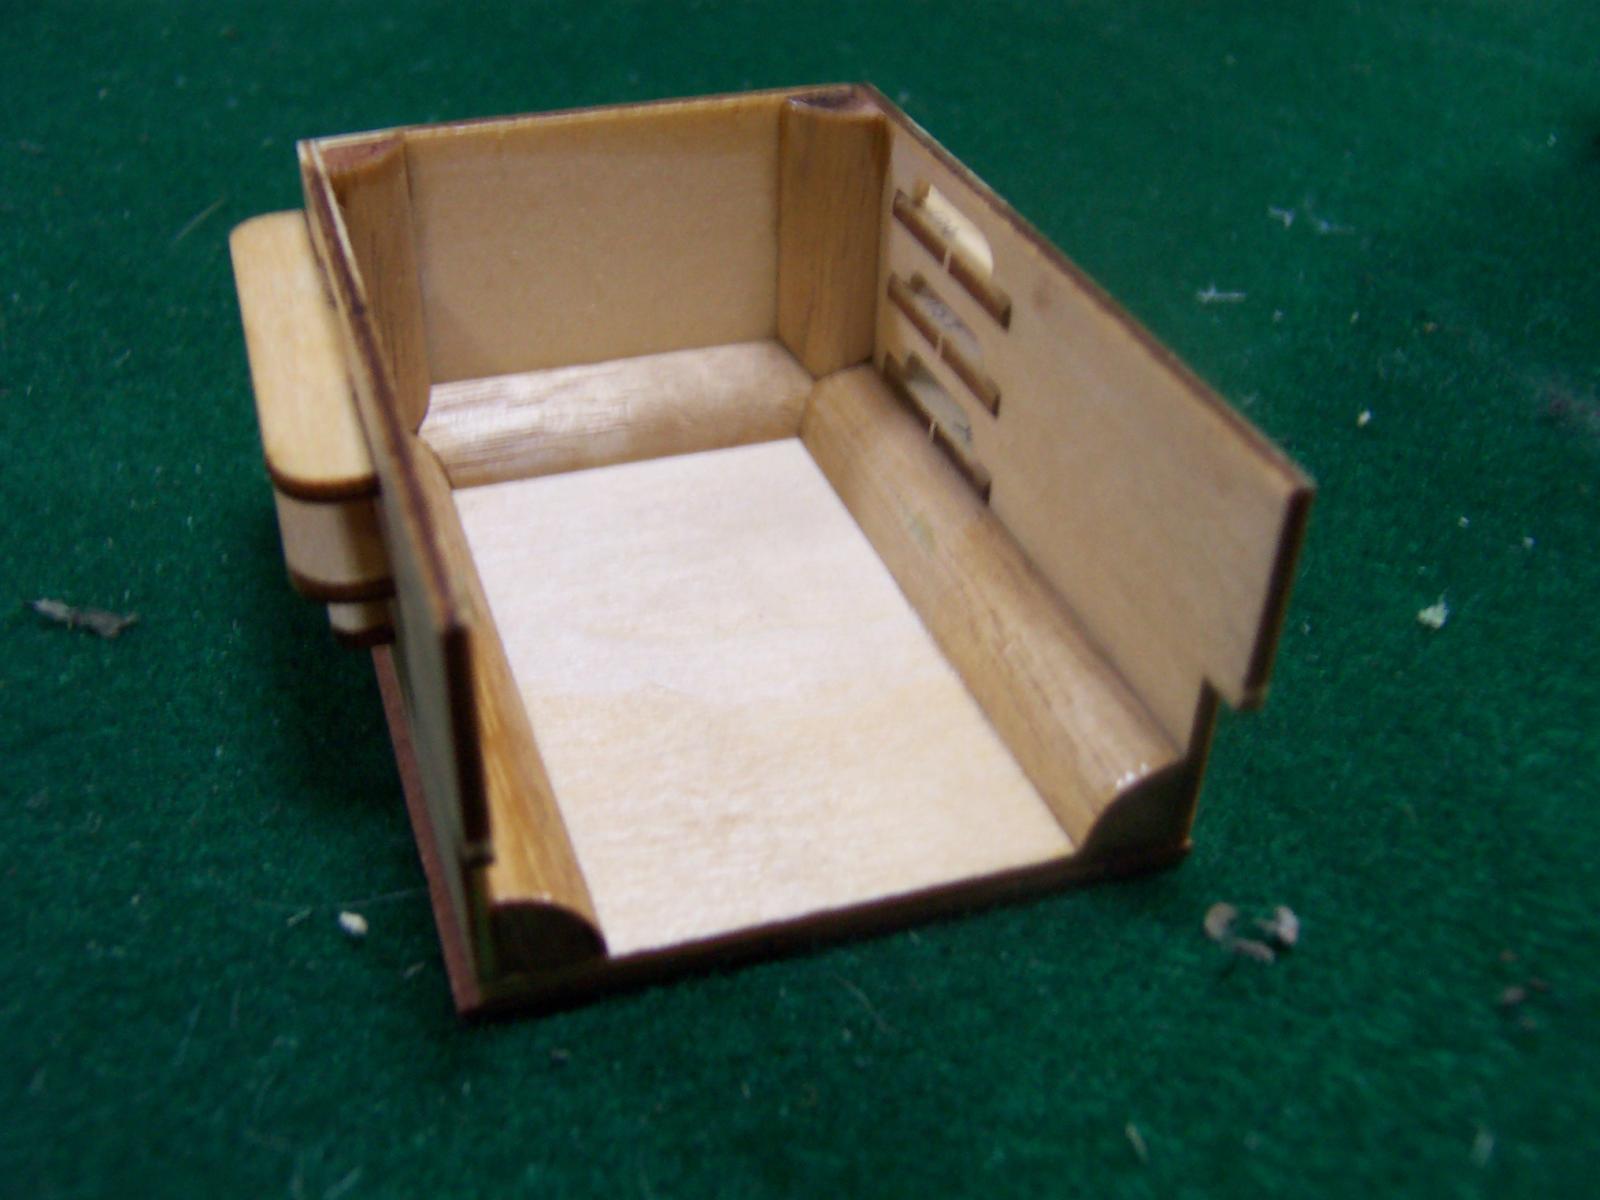
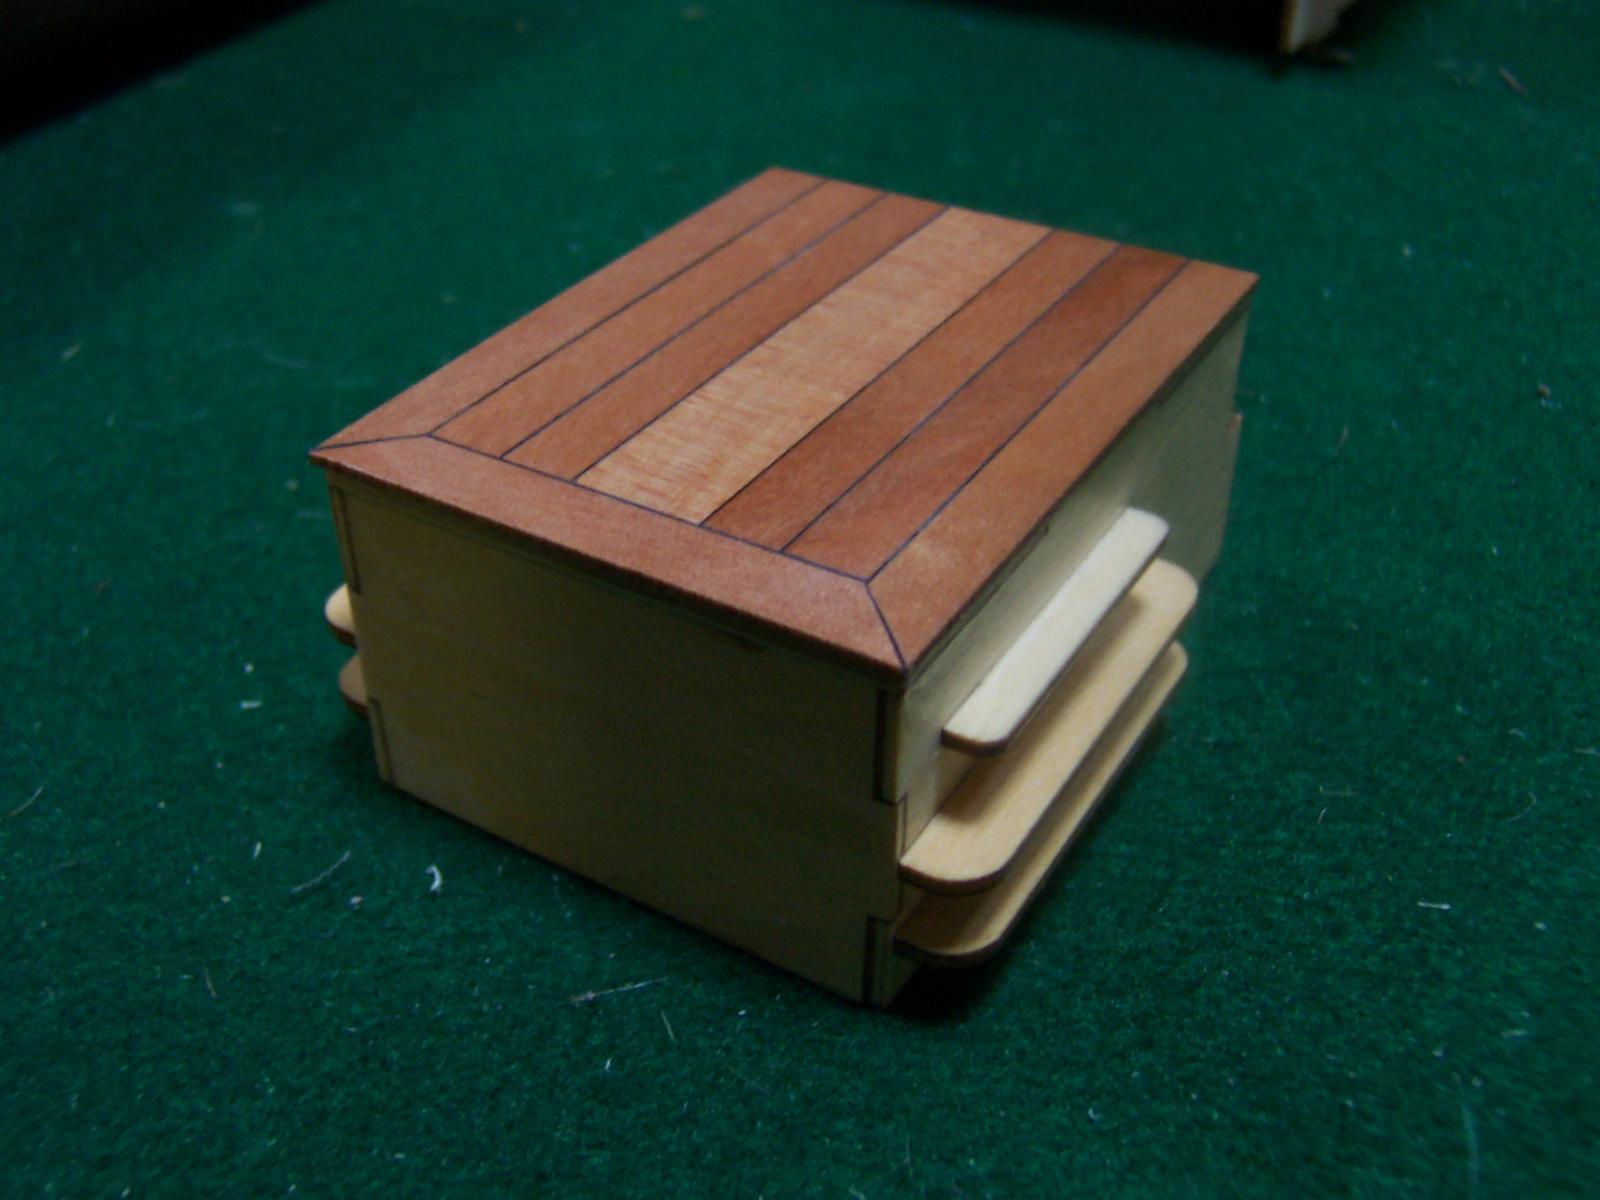
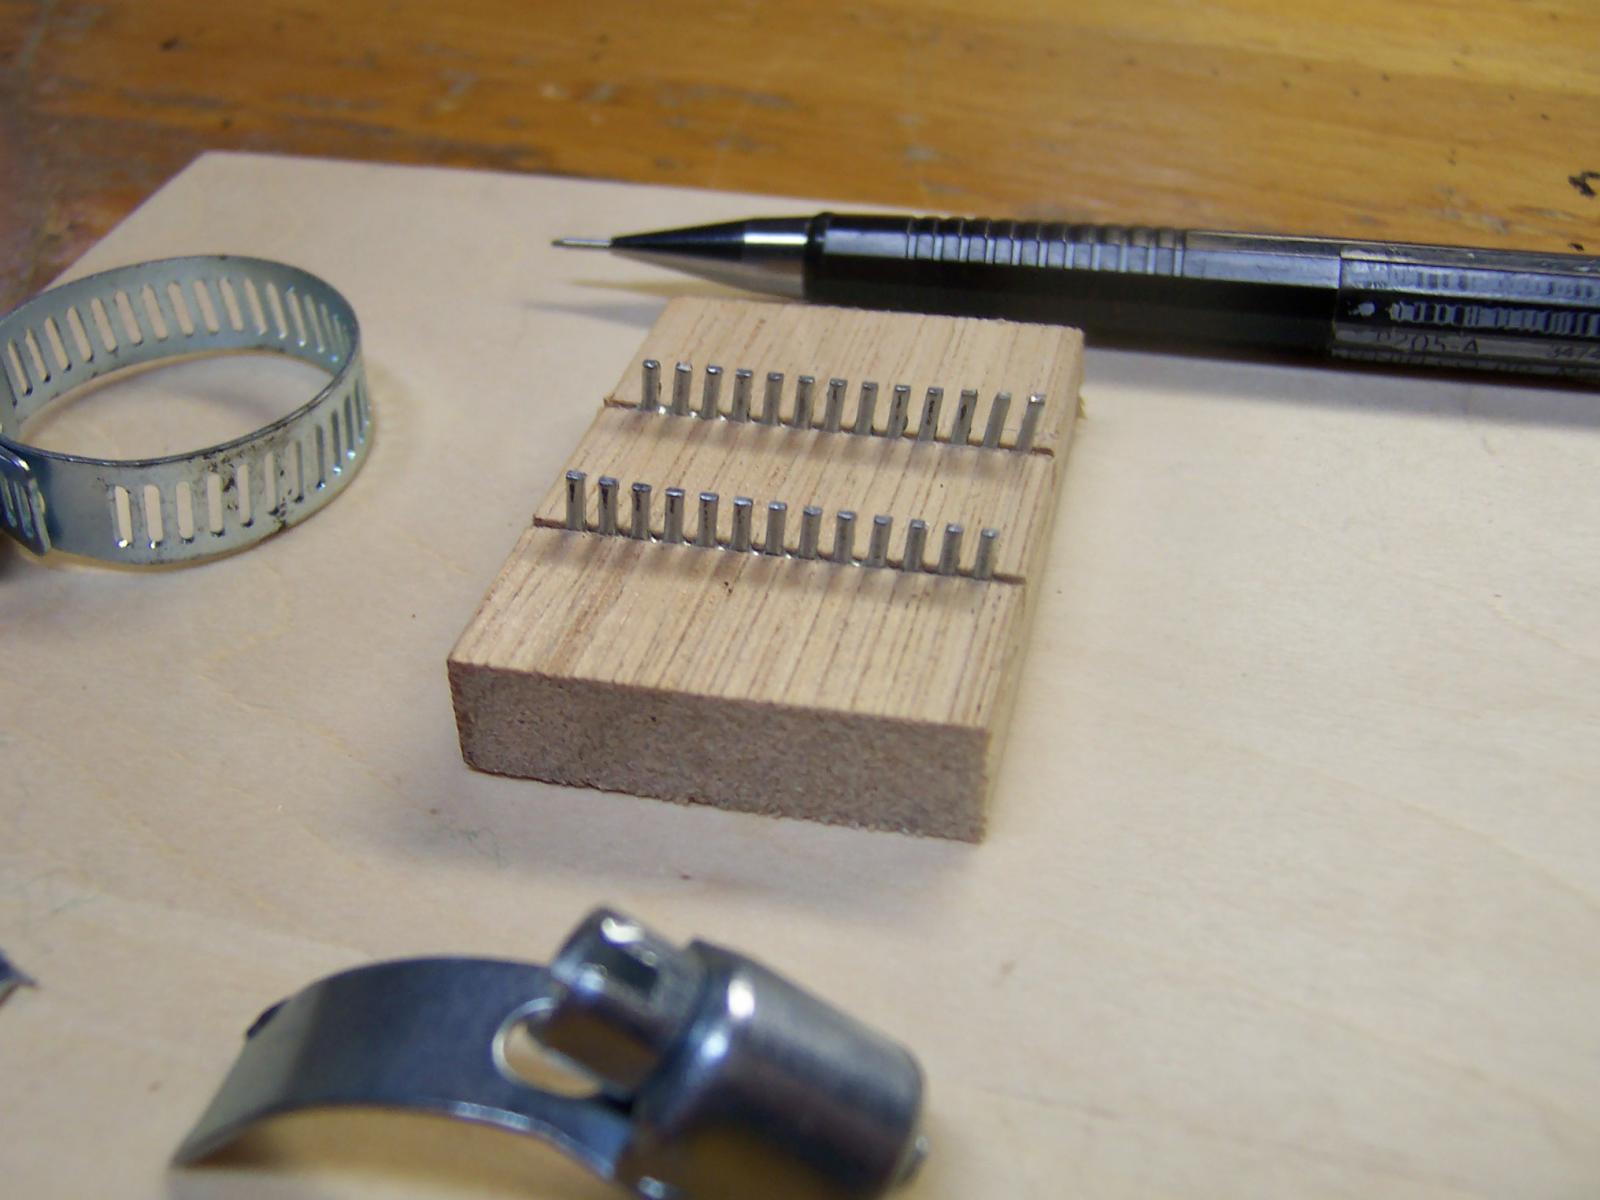
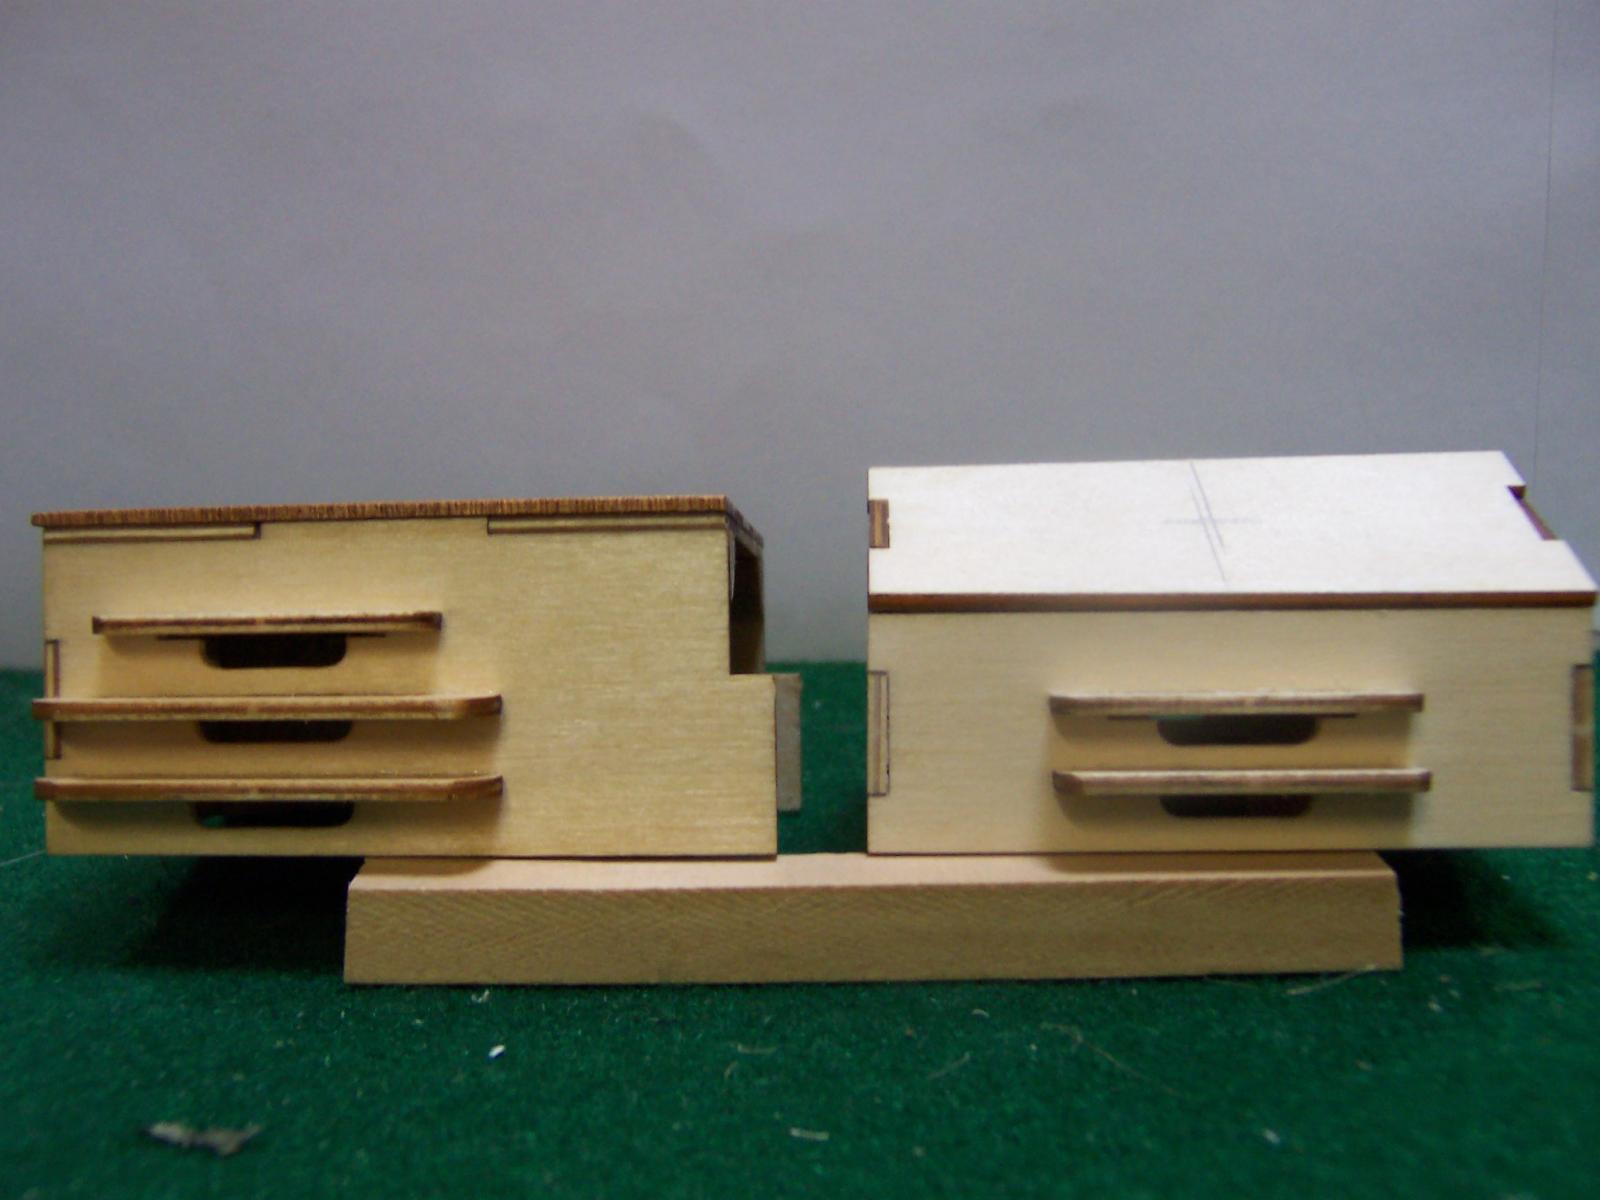
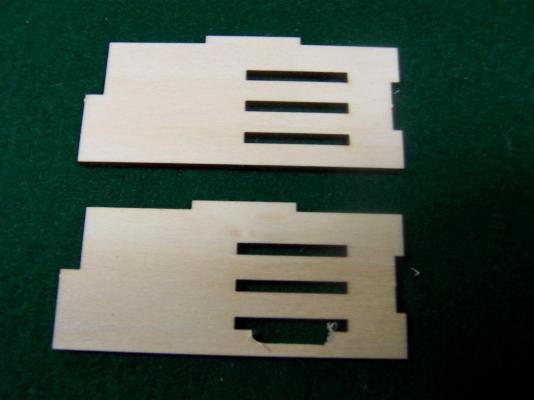
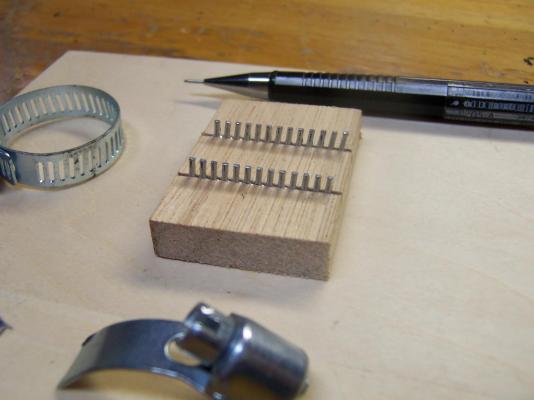
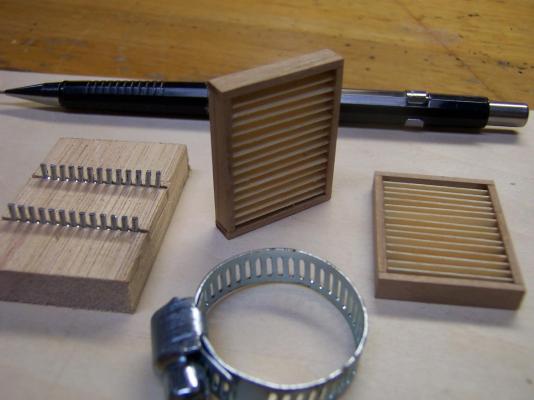
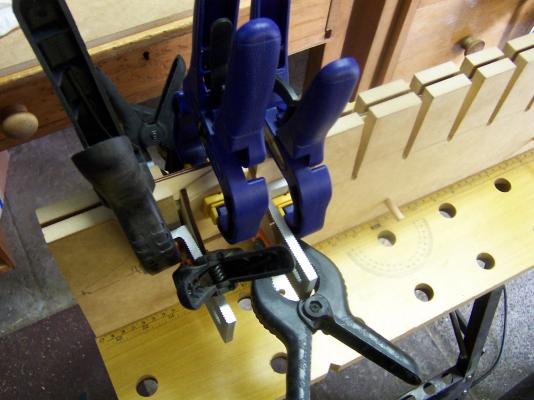
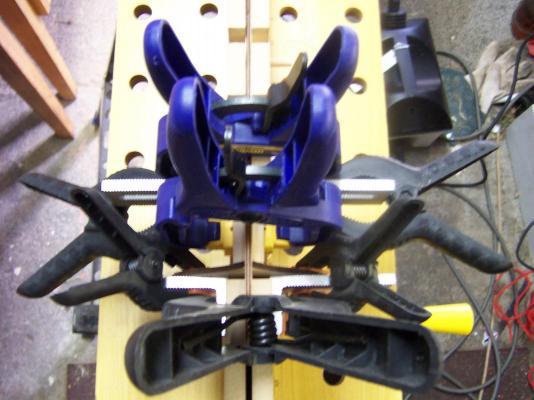
G'day All, A quick update on some progress. I have spent some time working on getting some ventilation into the hull. First I cut some slots under the steps on the rear deck structures. This was done before gluing the parts together, using a Dremel Router Table and a 1/8" cutter. Then the structure extending from the cabin assembly was made and planked with Myrtle. As this assembly will be one of the most removed pieces for access to the internals, I braced the inside with some Tas oak quading. Then I started to scratch some vents that will be mounted into the sides of the sub cabin assembly. I made frames from some leftovers from my Hellen build. Then I used part of a cheap hose-clamp to make a jig to hold slats in place ready for gluing. The hose-clamp was ground down carefully on one side with a small stone in a rotary tool. This gave me a piece of steel with a heap of little fingers ready to hold the slats. Trimmed this into two equal parts and then mounted them into slots cut with a hacksaw into a scrap block of wood to make the jig. Then the frame was placed over the top and the slats cut to size and dropped into the fingers. Once they were dry-fitted and I was happy everything was aligned squarely, I used a toothpick to apply thin C.A to the joints to hold the slats in place. The vent then lifted easily off the jig when the glue had dried and some more C.A was added to the back side just to make sure the were firmly attached. These vents are probably not common on this type of vessel, but they will be hidden behind the bulwarks and are going to be my main intake for fresh air to the burner. The next job is to make the cabin doors swing, so I can pop em open for even more air. I have started on a prototype and will take some pic's soon. Cheers, Scott


- 33 replies
-
- 7
-

-
- sanson
- artesania latina
- (and 1 more)
-
@ John, Thanks for the lovely comment! @ Bob, Yes, I sometimes think I might have bitten off more than I can chew! I will continue till it's done or fail miserably. My fallback is, I can always go electric RC in this one and pick another boat more suitable. My choice for this kit was the size. At 24", it wont take much to transport and display. In my eye's "Hellen" is just too big to be practical (she is close to a meter long). I am determined to finish an RC steam boat, and I'm not going to give up easy! @ Steve, The finish on the Myrtle was a quick sanding with 240g paper followed by a thinned down coat of Bondall Clear Gloss Marine Varnish. The deck has only had one coat to help prevent any damage as I fit the wheelhouse and other fittings. The varnish has only the slightest of tints and is only noiticeable on light timbers with multiple coats. The colour you see is the lovely natural colour the Myrtle is gifted with. I am lucky to have a nice collection of different pieces ranging in colour from a rich apricot orange to lovely deep reds to nearly maroon. Thanks everyone else for the likes. Cheers, Scott.
- 33 replies
-
- 1
-
-
- sanson
- artesania latina
- (and 1 more)
-
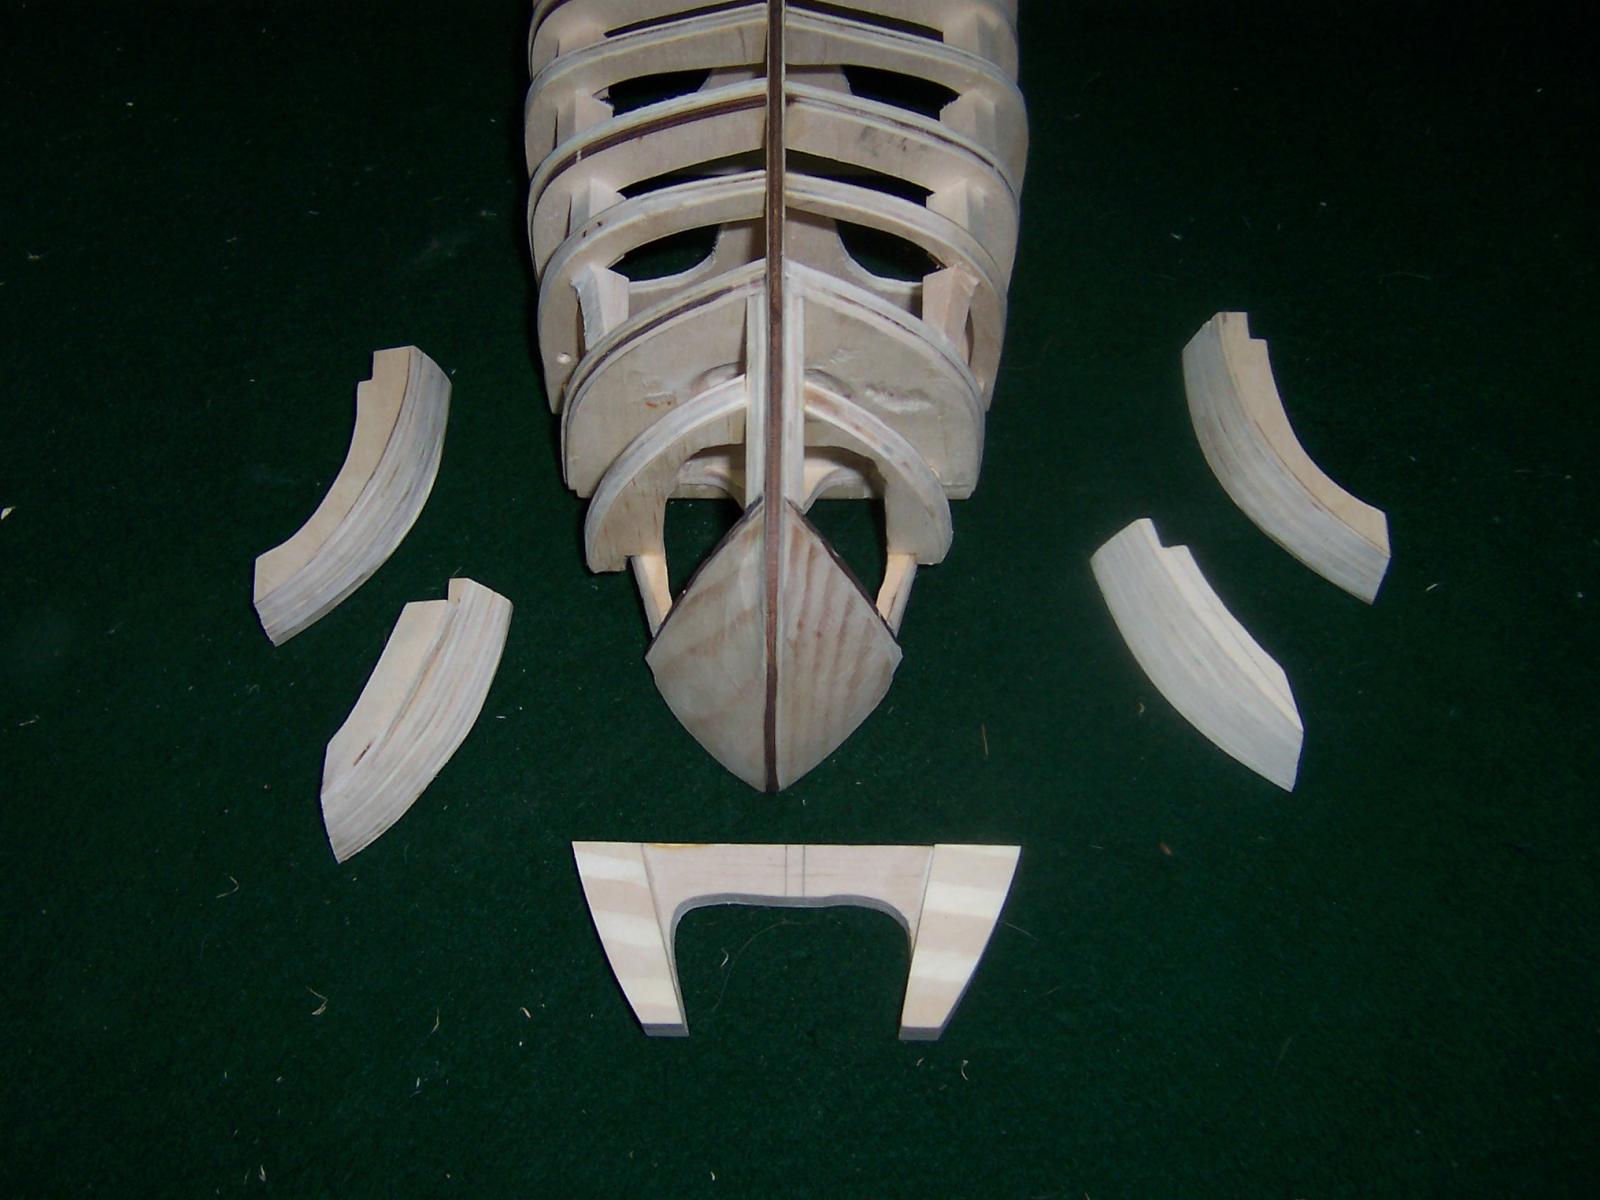
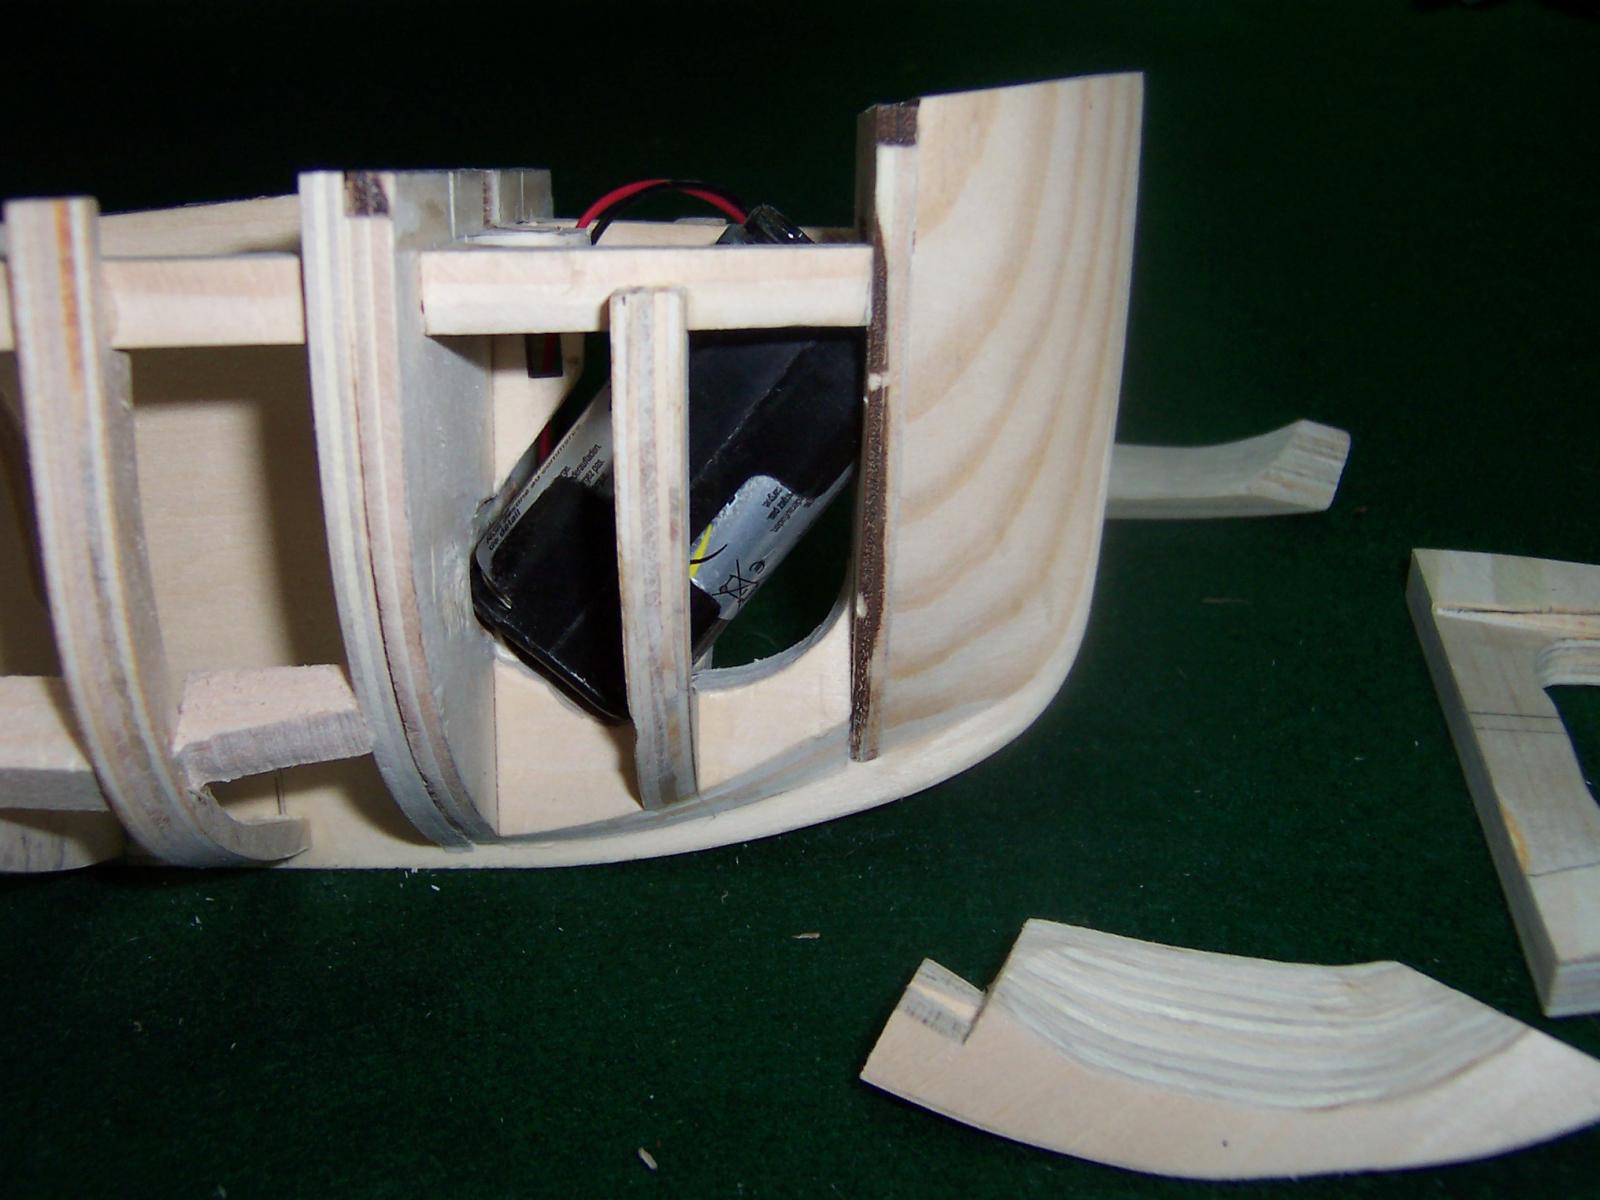
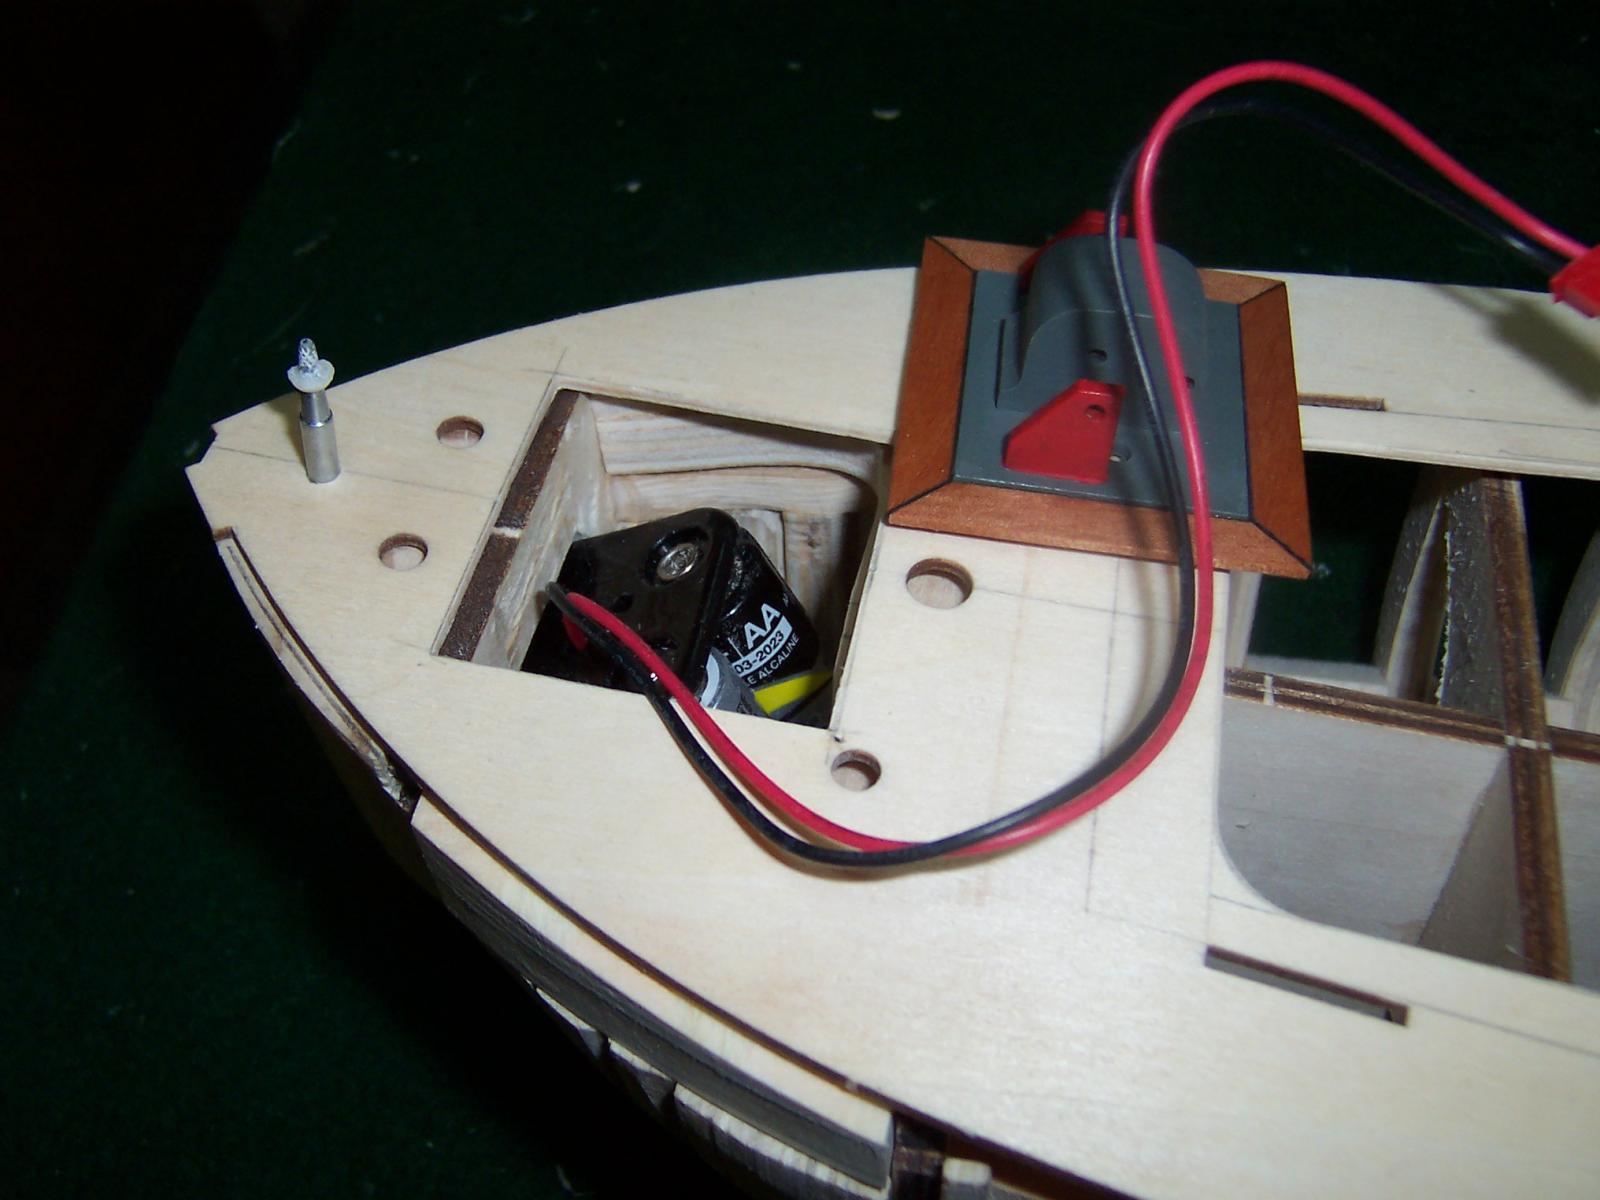
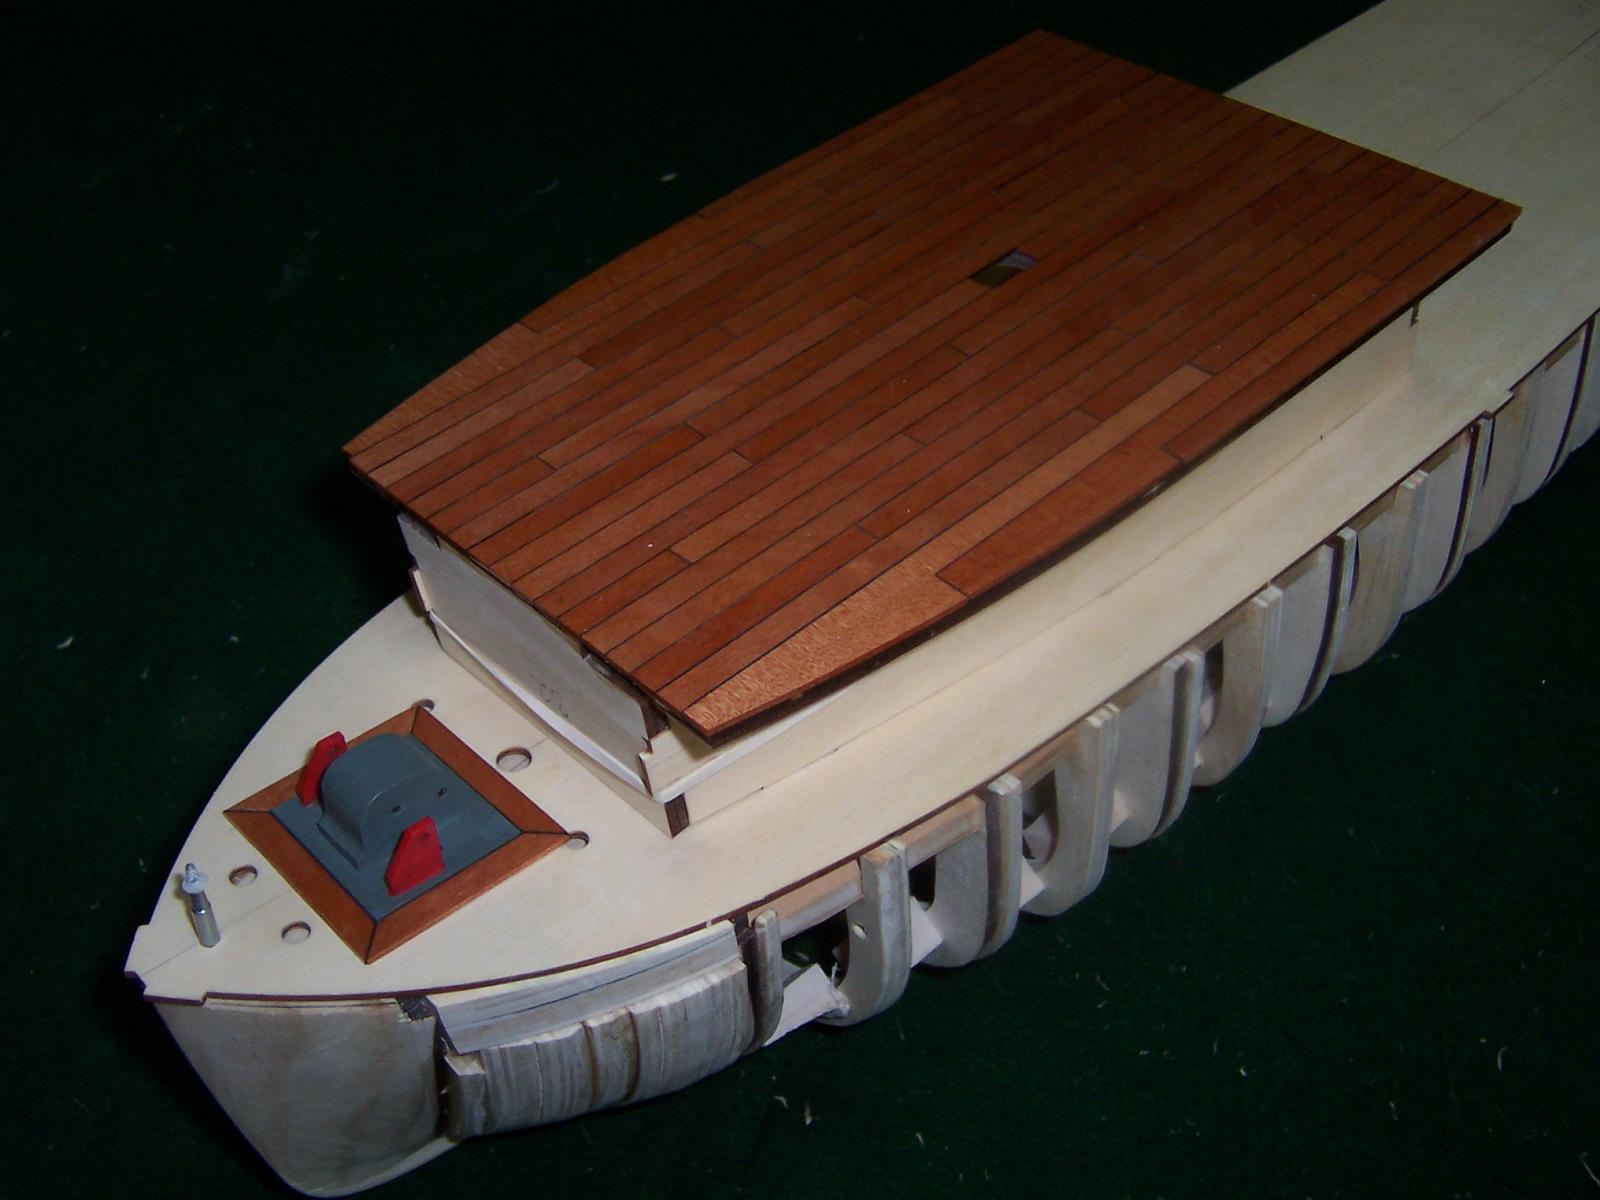
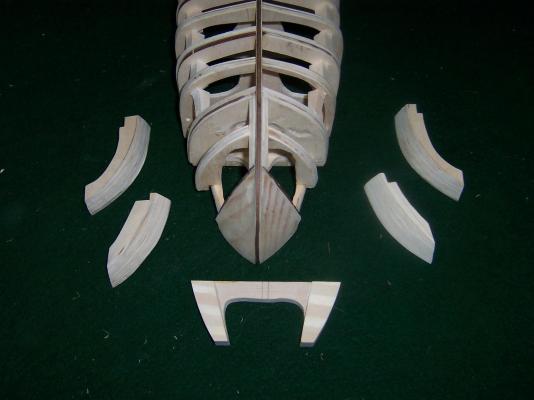
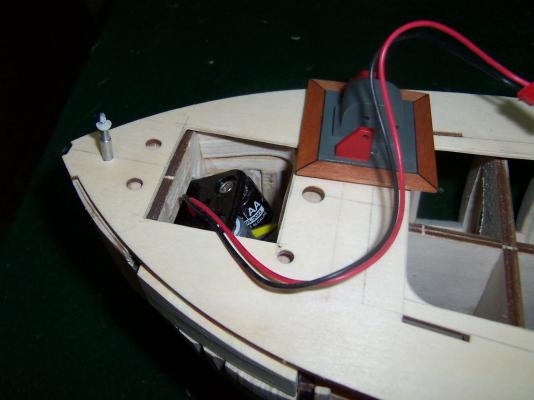
Hi All, Thanks everyone for the likes and kind comments! I feel quite humble to have such craftsmen follow my work! An update on the weeks progress. I mainly concentrated on the bow area, and spent a lot of time cutting and laminating Basswood ply to fill the gaps back to the 3rd bulkhead. I decided to go with the Basswood instead of Balsa, as I will probably want to use some pins or nails to hold things in place while planking. I also wanted to fit the battery pack into this space in the bow. So after cutting the ply, I glued the pieces together to make some removable blocks. Then I shaped the inside to give the batteries space. To access this space, I assembled the anchor winch and fitted it to an offcut of the sub-deck ply. I bordered the winch with Myrtle planks, then shaped a hole to suit in the deck. This ended up being a bit tight between the hawser holes and the breather funnels and I will need to move the funnels a whisker. I gave the new bits a coat of marine varnish and painted the winch with Tamiya acrylics. While I had the varnish handy, I also gave the planking on the lower cabin a quick coat with pleasing results. Then I moved to sizing up for the boiler. Two disks were cut to the O.D of the boiler tube, then slotted to slip over the bulkhead former. This gives me an idea of how low I can possibly mount the boiler to keep the centre of gravity down. From this I can see that I will have to go with the internal burner tube option. Now I need to work out a way to get the exhaust to the stack which will be located approximately half way above the boiler. Next I move to the stern and my plan is to laminate more Basswood ply to fill the voids before fairing. Thanks for visiting and happy modelling to all. Cheers, Scott.


- 33 replies
-
- 5
-
-
- sanson
- artesania latina
- (and 1 more)
-
Hi, What a lovely Tug you have built! The standards have just been raised and I hope I can achieve something half as good as yours(I'm building a little Steam Tug named "Sanson"). Your boiler is quite interesting and a V6 says it all. Please remember all the joy she has given, and really consider rebuilding the boiler in the future. Cheer, Scott.
-
That's a nice looking Tug! How big is the completed model? Will follow your build with interest! Cheers, Scott.
-
Thanks John! Yes, I will be adding filler blocks at the bow and stern. The bow already has some out of pine and I think I will fill the next void between bulkheads too. Later in the build I may use this space by boring a hole down from the deck. It may be needed to mount the batteries or fuel tank. As for the stern, which is still unassembled. I still need to decide the best way to do this. My plan is to mount all the rudder linkage and servo hidden under the deck. I think this is best to be done by replacing most of the stern pieces with larger bits to provide the fill at the same time. Where I am still stumped, is how I am going to run my cuts to achieve some reasonable reference points to fair the stern to. Once I have my head around it, I will post the process. Cheers, Scott
- 33 replies
-
- 1
-
-
- sanson
- artesania latina
- (and 1 more)
-
G'day Steve, You are still producing some fine work there! Currently I have two kits on the go. I started with "Hellen", a fishing boat from A.L and it has moved over for "Sanson", a tug also from A.L. They both have logs going, but poor "Hellen" has nearly stopped for the moment. Keep the good stuff coming. Cheers, Scott.
- 569 replies
-
- 1
-
-
- shenandoah
- corel
- (and 1 more)
-
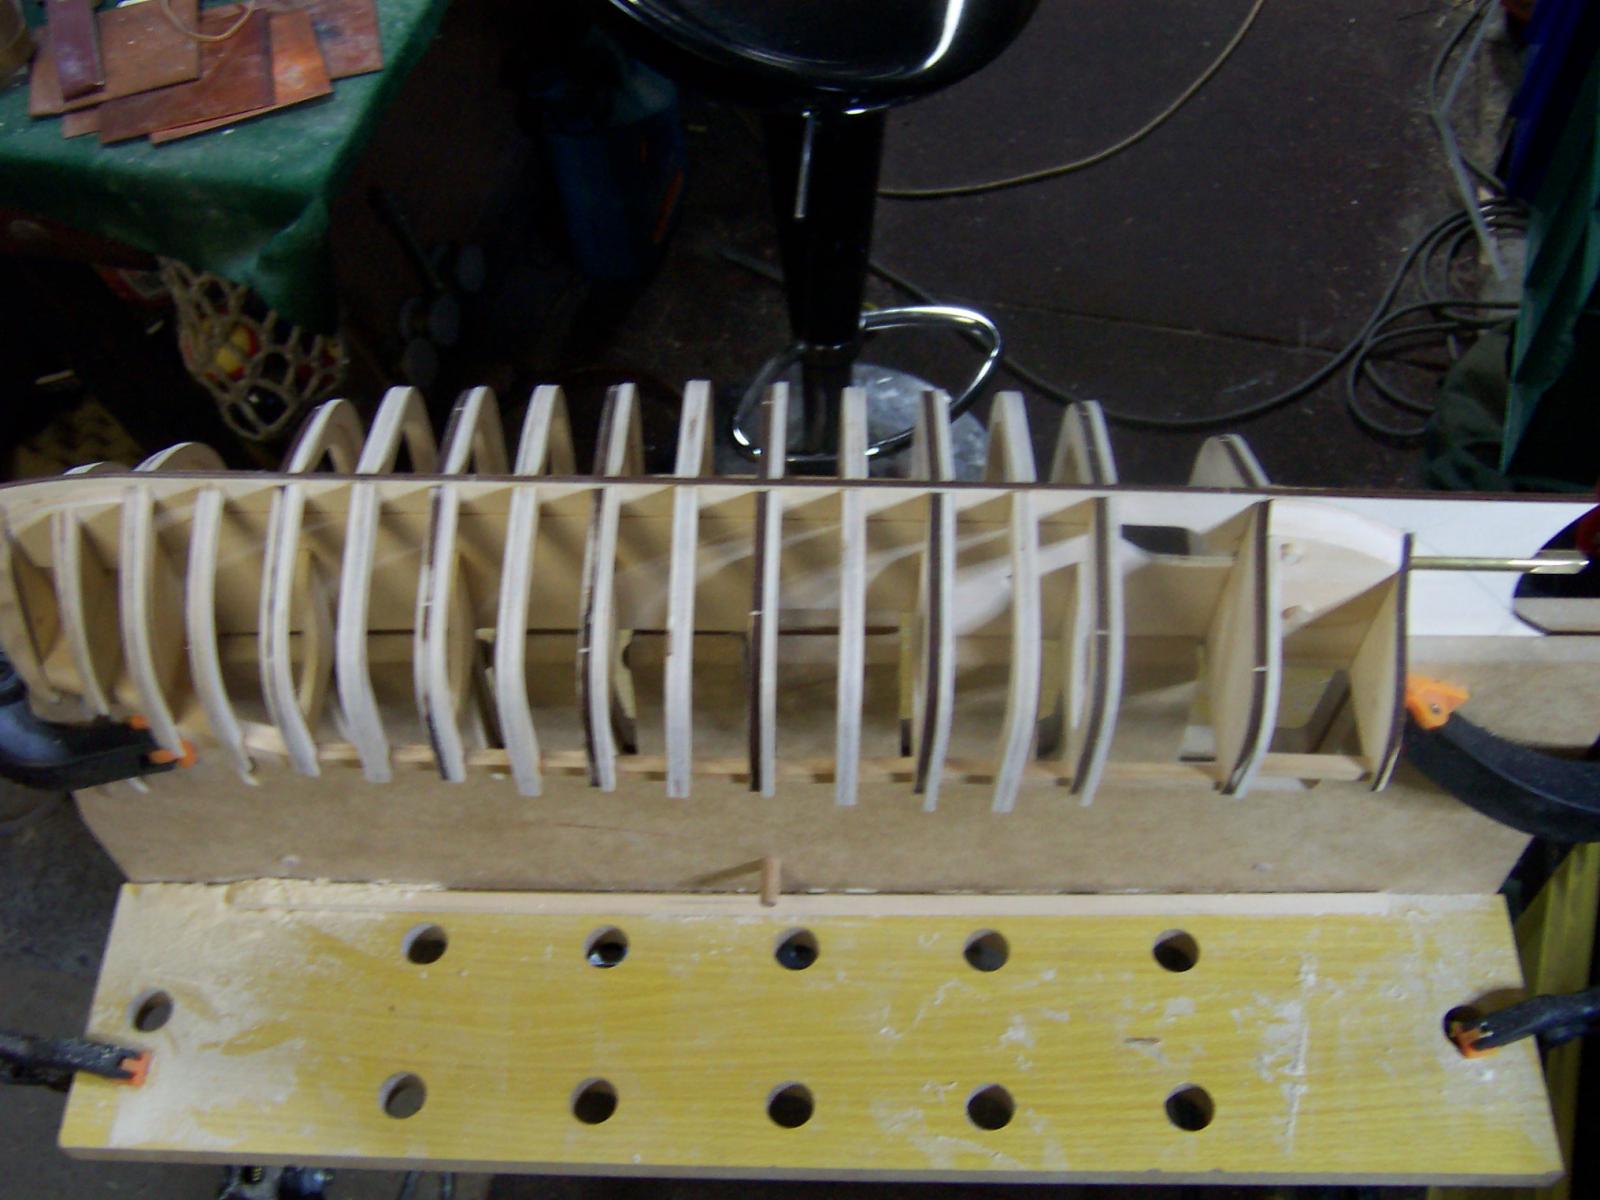
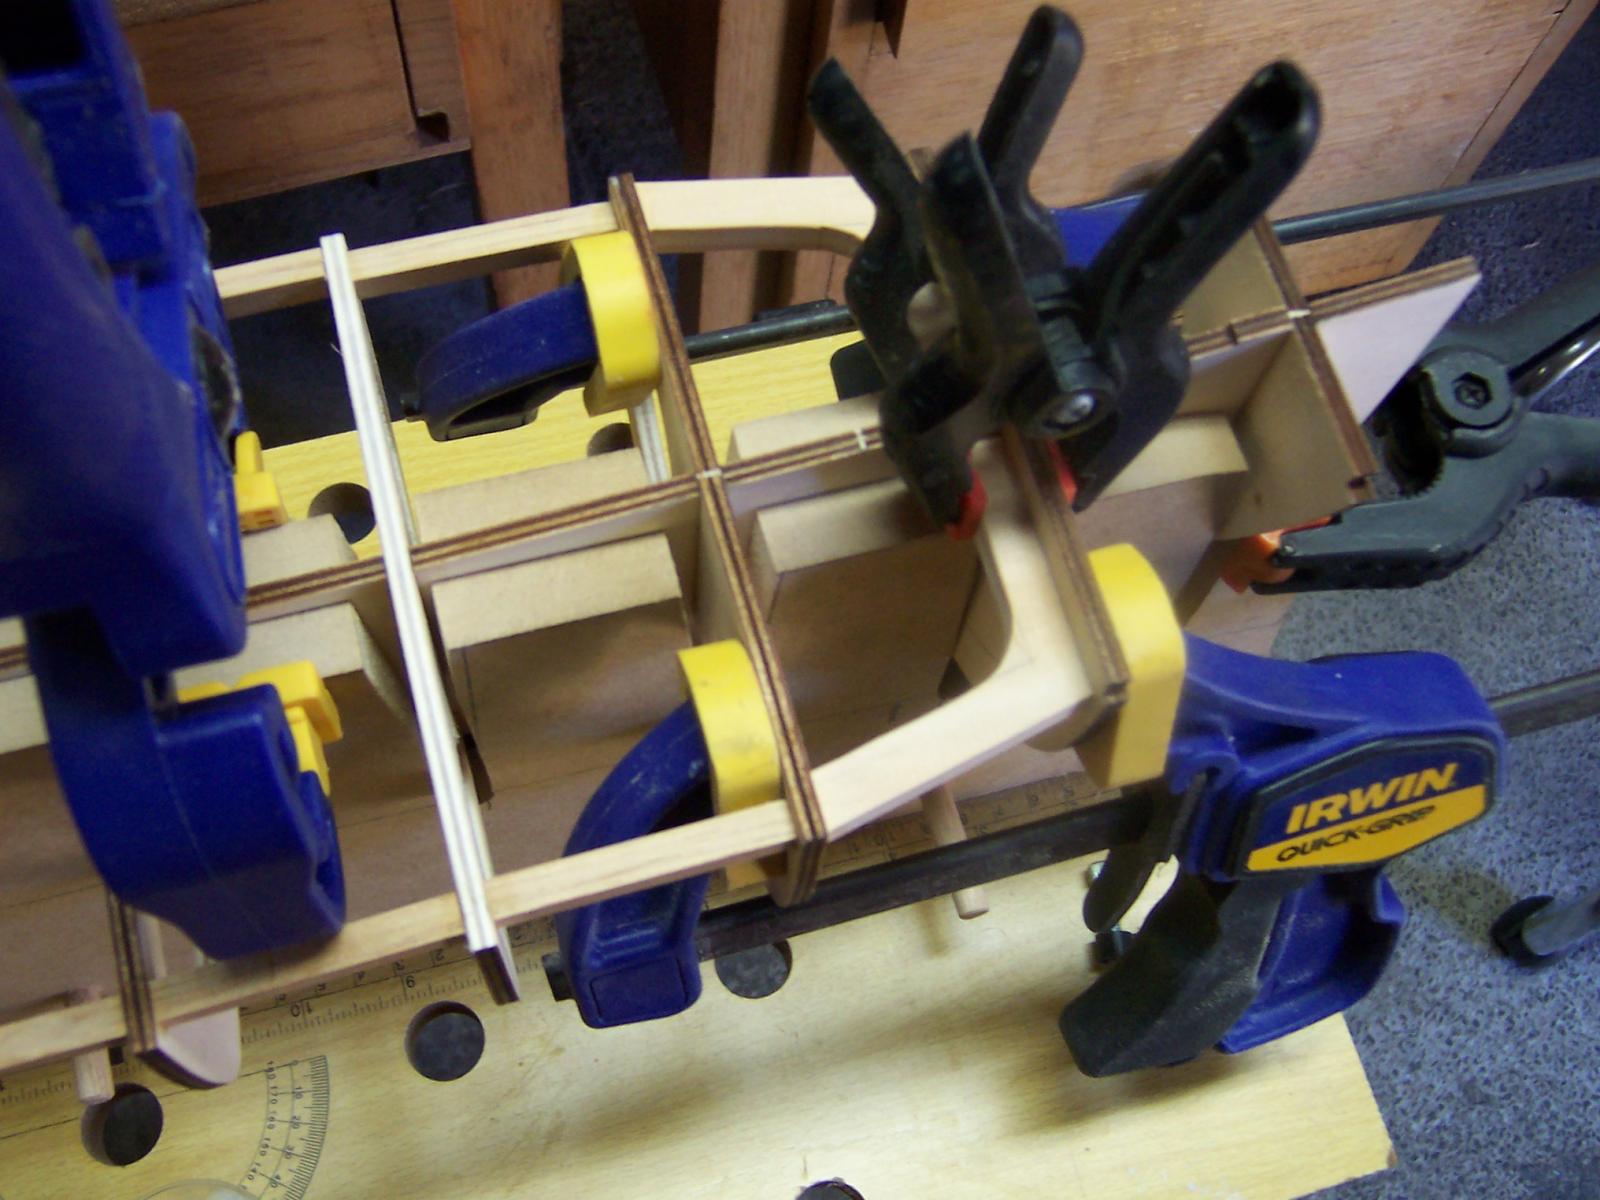
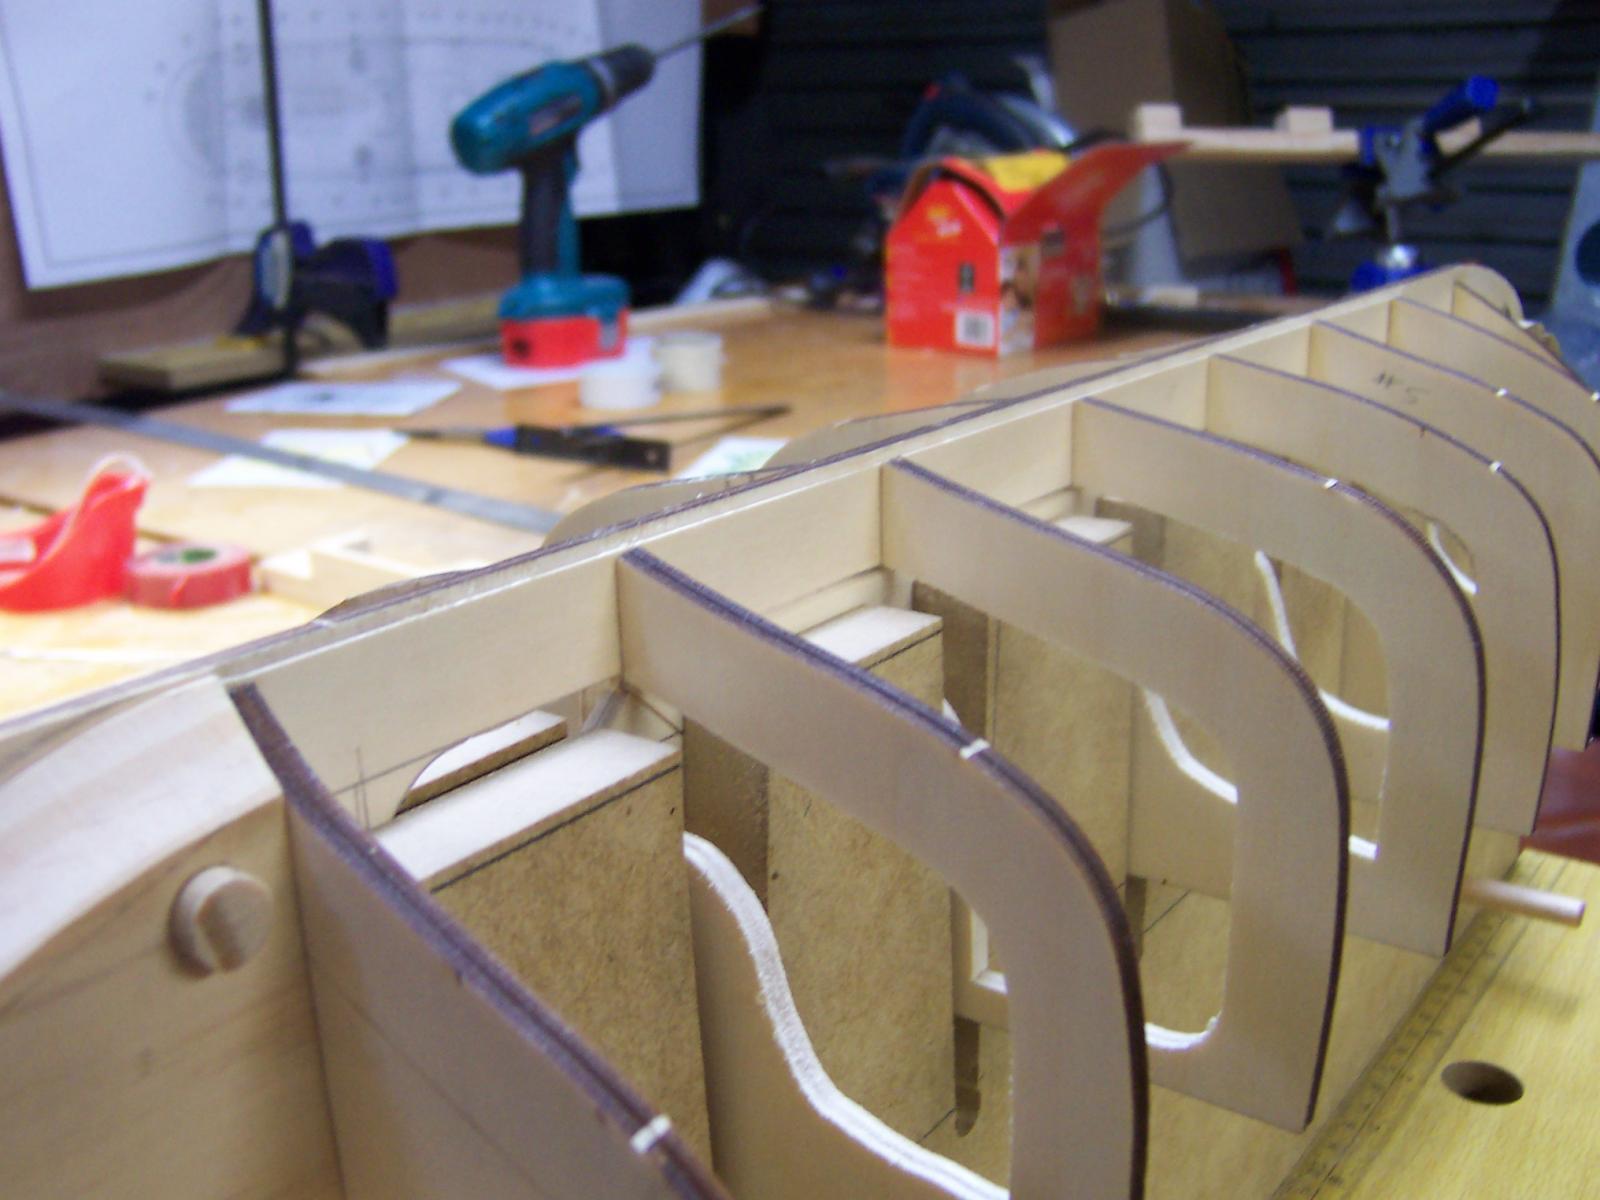
G'day All, Just a quick update of the weeks progress. After starting to fair the bulkheads, I quickly became unhappy of the large spacing between the bulkhead centers (approx. 2"). I also wasn't too keen on the 4mm wide thickness of them. My dodgey aim would place more nails beside the bulkheads than in them. So I cut some scrap ply and doubled the thickness to 8mm. Then I found some 8mm ply to cut some additional bulkheads. These were glued evenly between the existing. The results so far. Before then after (& yes, I still have a couple to go). Cheers, Scott.


- 33 replies
-
- 5
-
-
- sanson
- artesania latina
- (and 1 more)
-
Thanks for your tip Yanos. I have been very careful to keep all my cuts running the same way. It is good advice though and applies to more types of wood than just Huon. Cheers, Scott.
-
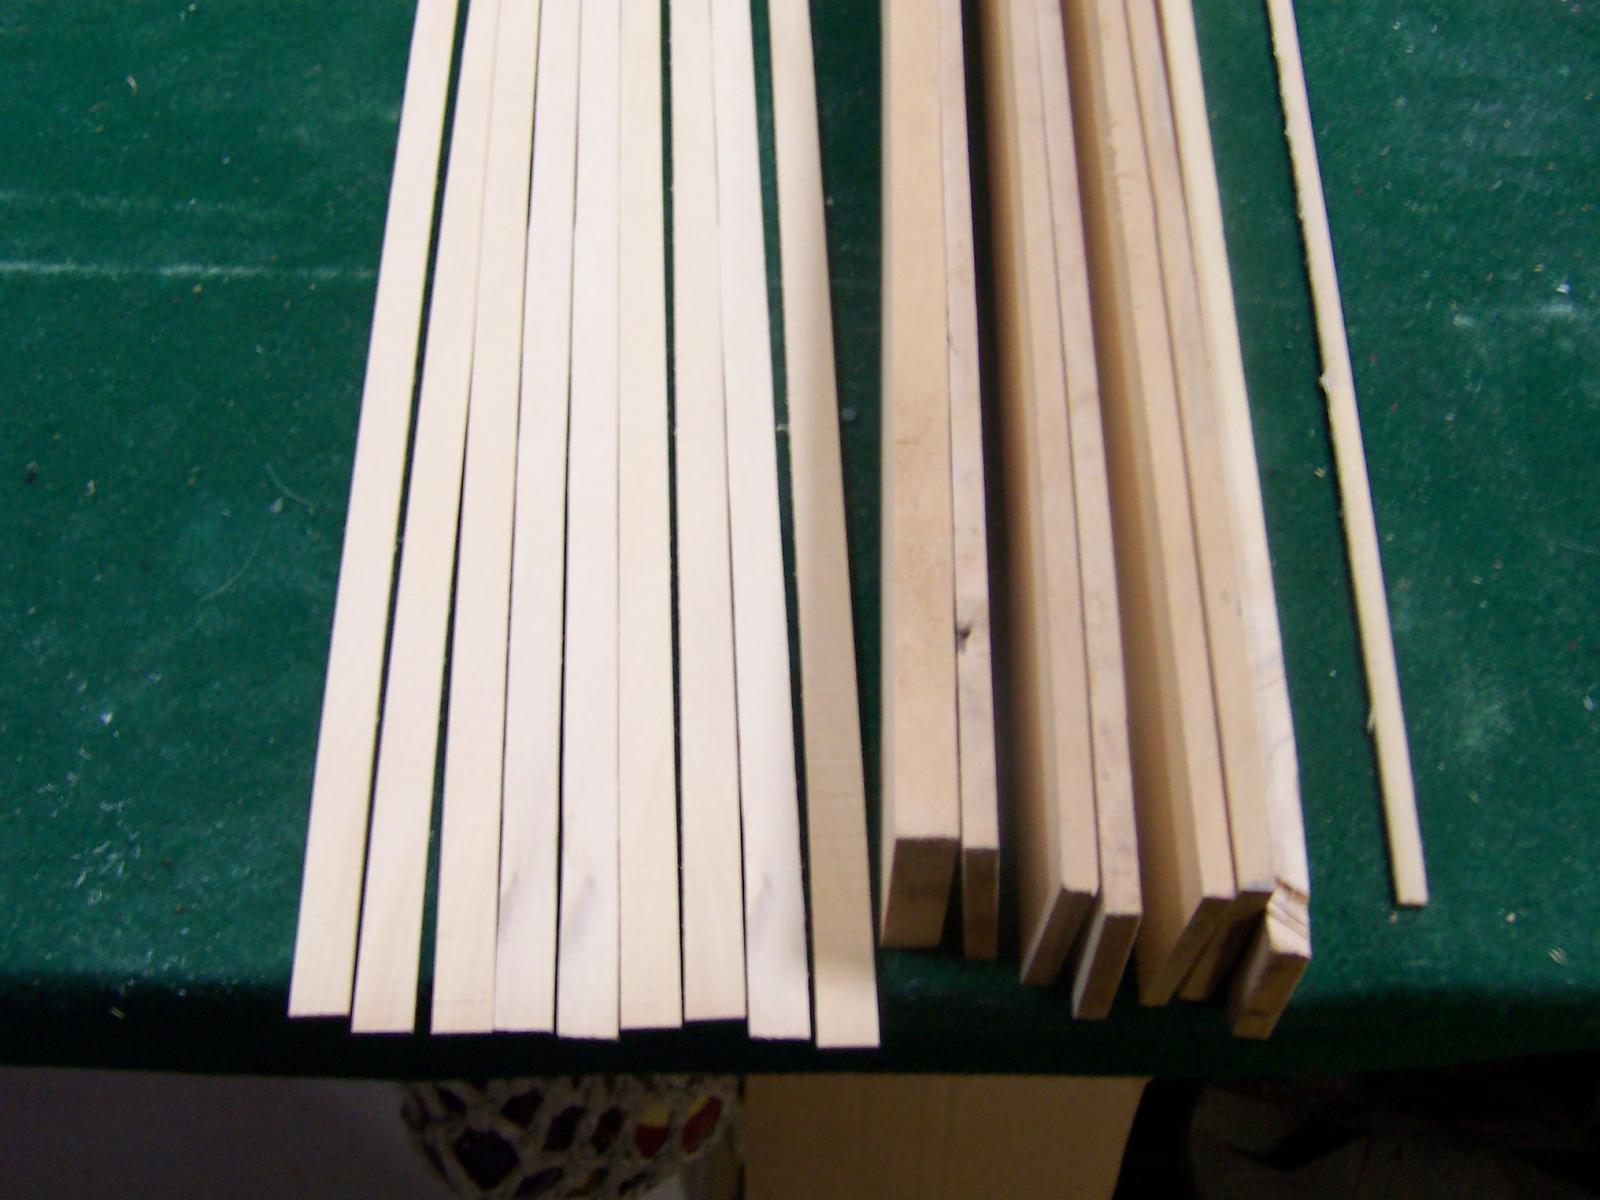
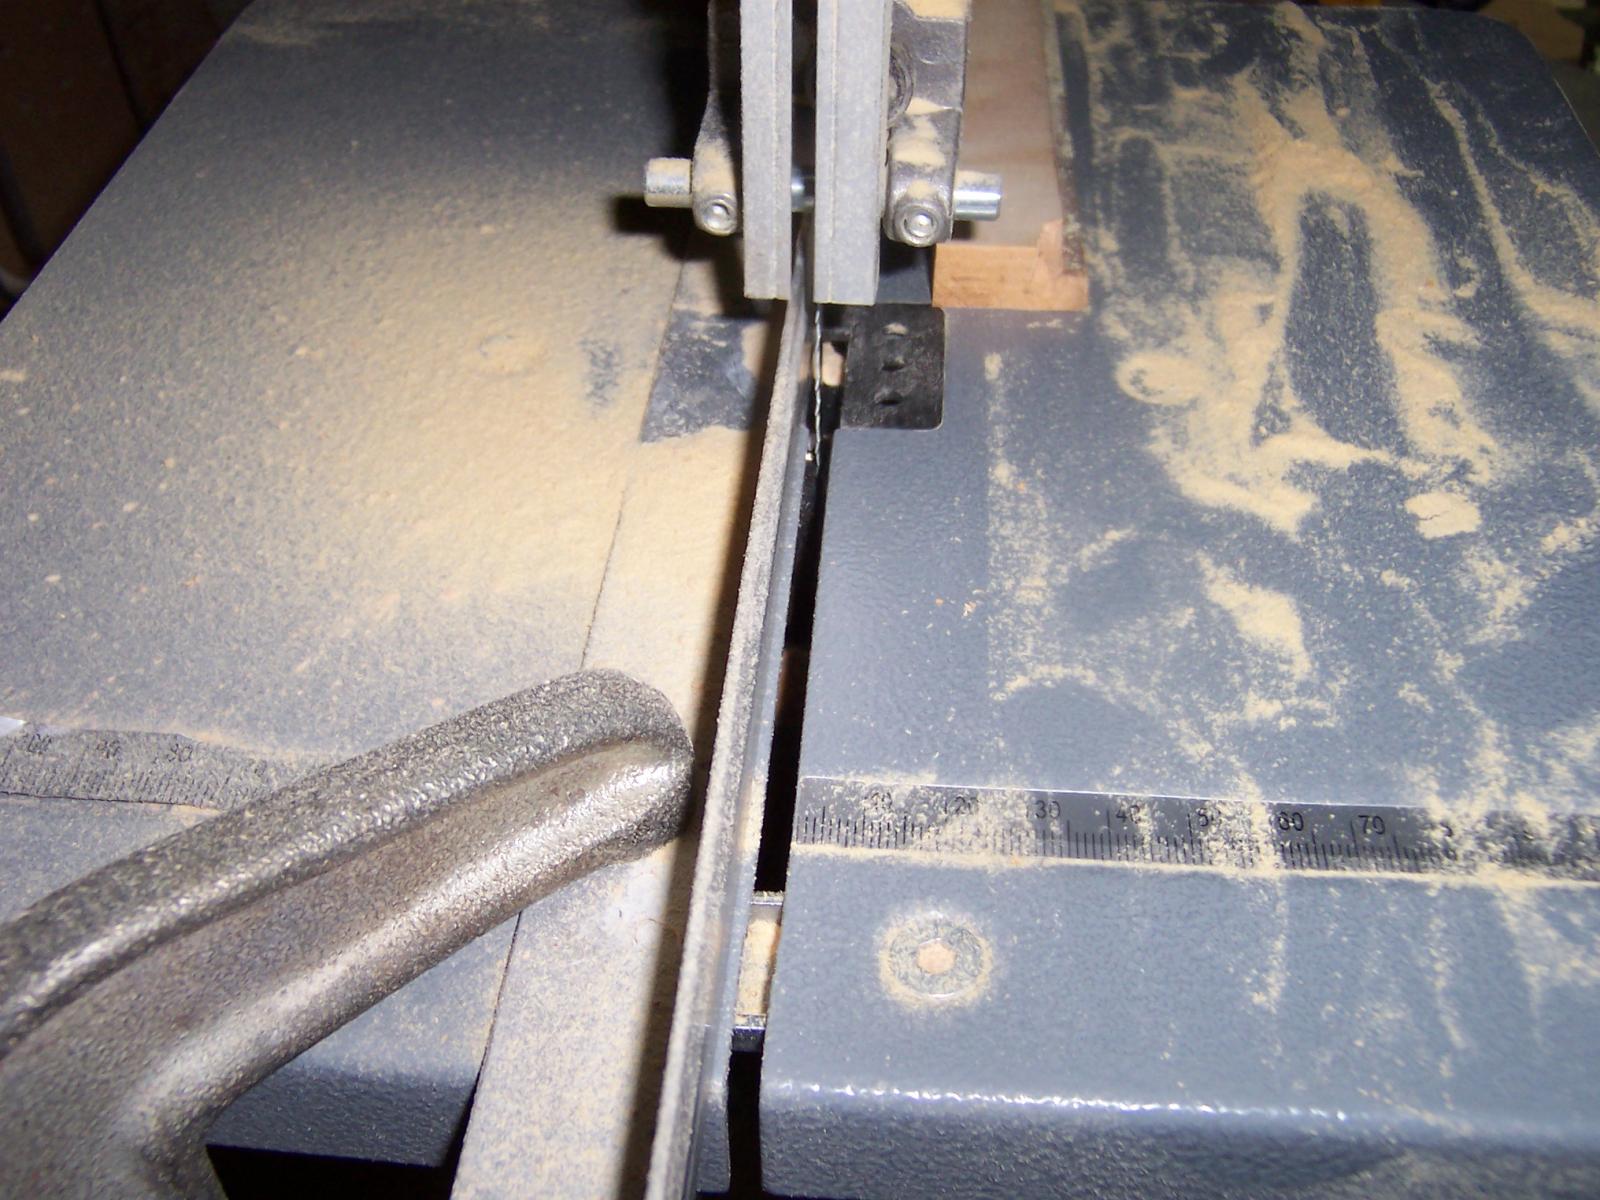
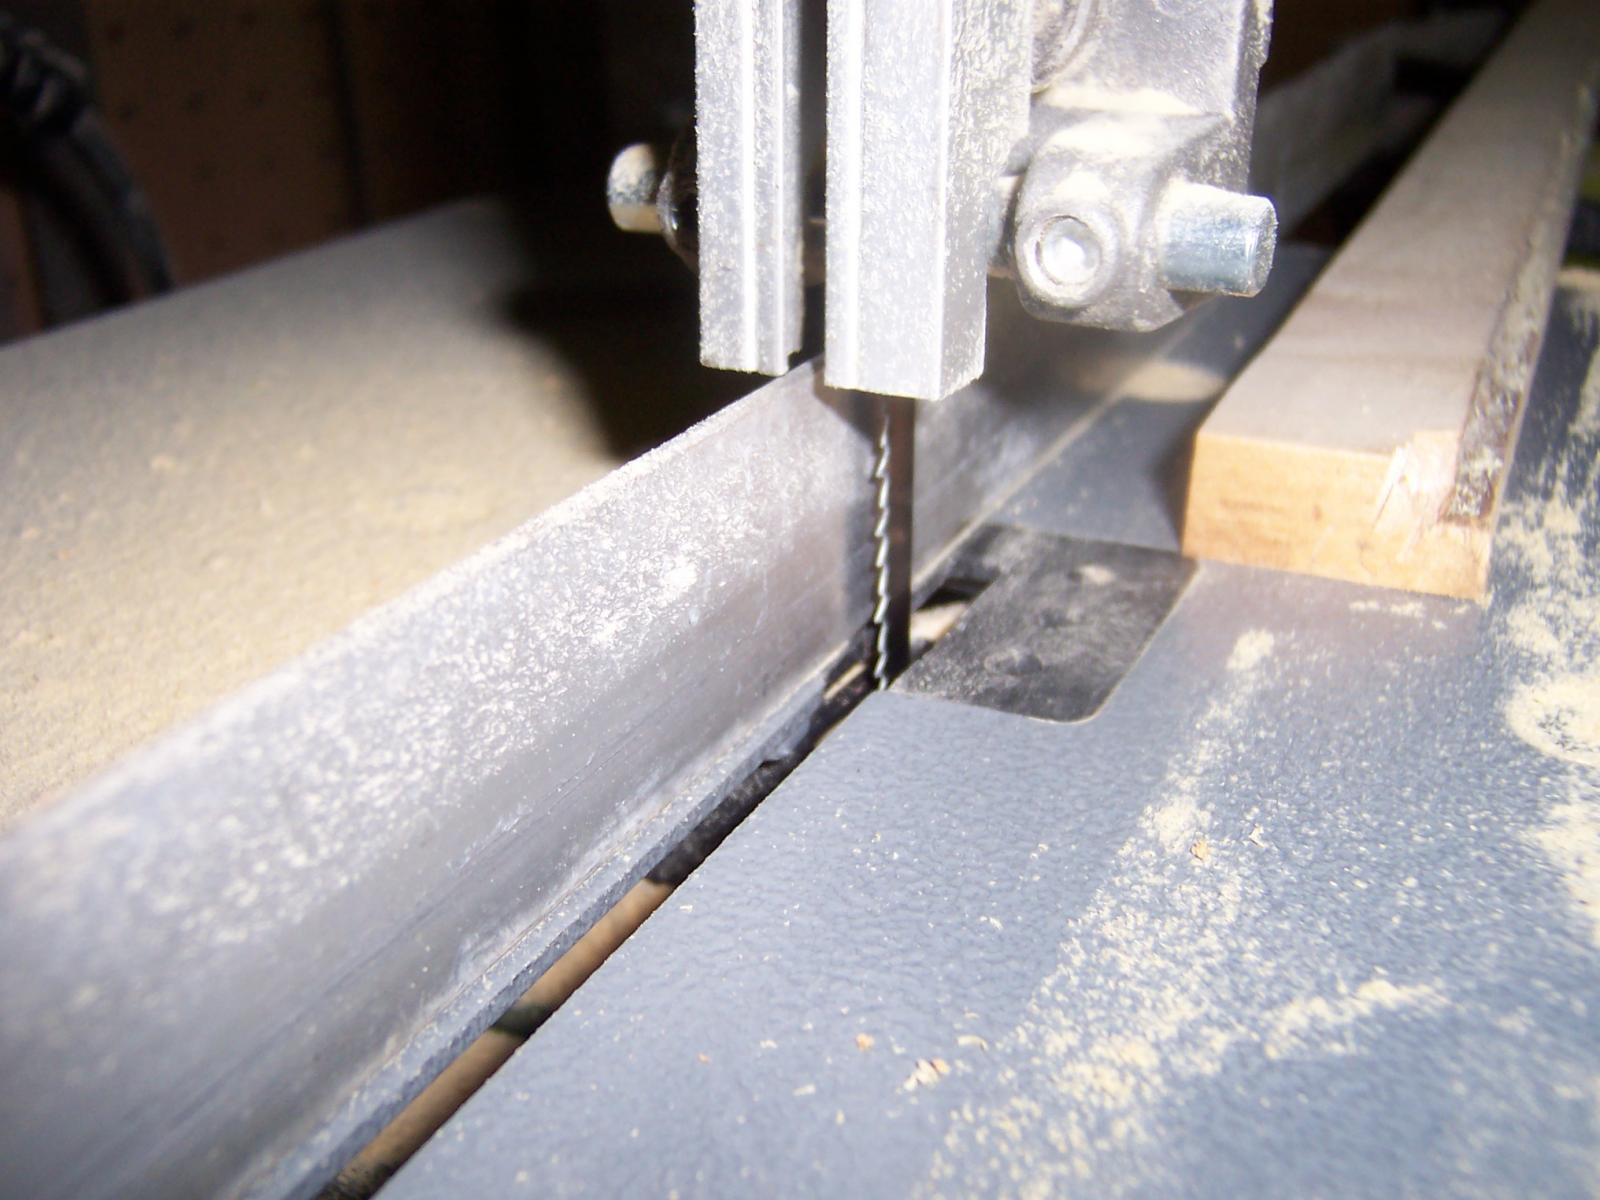
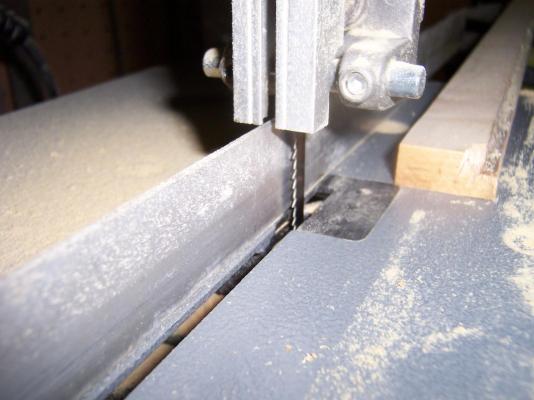
Hi All, I have just made a post in my build log that covers how I stripped some planks for my Tug. I will copy it in here as it may be useful. O.K, I experimented with stripping down the Huon pine. I started with a block about 2" sq and slightly longer than the hull. After some careful setup with my bandsaw (all the guides adjusted and a good clean) and a new 14tpi blade fitted. I stripped two strips 12mm wide, then the remainder 6mm wide. Then I fitted a low fence to my saw so I could lower my top guide to minimal distance above the work piece. After testing the thickness it was cutting on some scrap, I preceded to cut the 12mm down to 1.8mm thick strips. I was impressed with the way the Huon cut. For those unfamiliar with this wood, it is a very slow growing timber found only in certain parts of Tasmania. It is reputed to be the best wood for wooden boat making worldwide and Tasmania has a quite a history for making wooden boats from this timber. In those days they pillaged the forests for it and now days it cannot be logged and only a limited number of people are allowed to recover non-growing timber for specialty woodworkers and craftsmen. It is also reputed to not rot and has a natural ability to take bends very nicely. I am just lucky to have inherited a nice stash from an uncle who had a keen eye for recycling wood. I chose to strip to 1.8mm wide in the hope that I may be able to pull off a single layer hull. If not, I have the Walnut veneer to use as a second layer or I have tried stripping down to 1mm successfully and could possibly do two layers in the Huon. Here is a pic of the Huon strips so far. And of the saw setup. This is a very basic overview of how I did it, but the main thing is, I managed to achieve very satisfactory results without the need for thicknessing or planing. Also my saw is only a very cheap unit, so don't think you need an expensive machine to get good results. It is more in the careful setup and blade choice (new blade if possible). Here is a pic of some Myrtle planks that were stripped the same and only needed a light sand after planking. Hope this gives people more confidence to try their own. Cheers, Scott.


-
O.K, I experimented with stripping down the Huon pine. I started with a block about 2" sq and slightly longer than the hull. After some careful setup with my bandsaw and a new 14tpi blade fitted. I stripped two strips 12mm wide, then the remainder 6mm wide. Then I fitted a low fence to my saw so I could lower my top guide to minimal distance above the work piece. After testing the thickness it was cutting on some scrap, I preceded to cut the 12mm down to 1.8mm thick strips. I was impressed with the way the Huon cut. For those unfamiliar with this wood, it is a very slow growing timber found only in certain parts of Tasmania. It is reputed to be the best wood for wooden boat making worldwide and Tasmania has a quite a history for making wooden boats from this timber. In those days they pillaged the forests for it and now days it cannot be logged and only a limited number of people are allowed to recover non-growing timber for specialty woodworkers and craftsmen. It is also reputed to not rot and has a natural ability to take bends very nicely. I am just lucky to have inherited a nice stash from an uncle who had a keen eye for recycling wood. I chose to strip to 1.8mm wide in the hope that I may be able to pull off a single layer hull. If not, I have the Walnut veneer to use as a second layer or I have tried stripping down to 1mm successfully and could possibly do two layers in the Huon. Here is a pic of the Huon strips so far. And of the saw setup. Cheers, Scott.


- 33 replies
-
- 2
-
-
- sanson
- artesania latina
- (and 1 more)
-
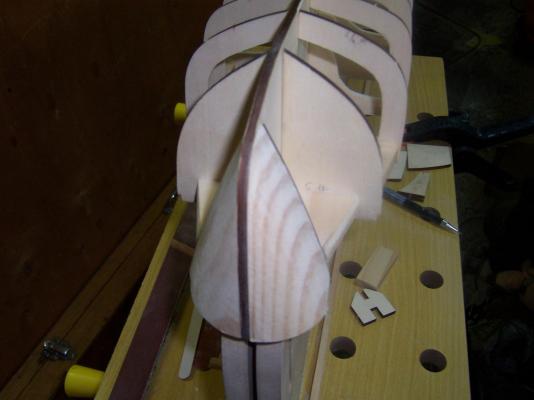
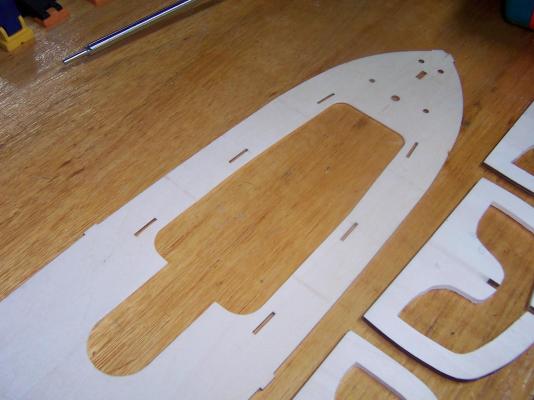
G'day All, I am still in the process of adding the last of the filler blocks and fairing my hull. It is being a slow process as I am really taking my time to get it the best I can. I was having trouble picturing the shape of the bow as I sanded the filler blocks. As the build is being done out of sequence to the plans (to fit the go-bits). I hadn't fitted the deck to the frame at this stage. I didn't think about this till I then realized that this would give a guide to sand to if built in the sequence the manufacturers say. So I flipped the frame, sat the deck on, and marked the curve of the bow to the tops of the filler blocks. I then found it easy to sand down to the lines checking with a strake as I go. I realize this build is pretty basic and not much differs from most of the builds made from kits so far. But I need to learn how to build a planked hull before I can really start on the steam bits and trust me, I'm keen to get build'n em. The boiler will be started soon. As for now, I have a few questions. The wood supplied with the kit for planking is one layer of planking in 1.5x5mm Basswood with a veneer of 0.6x5mm Walnut. I want to plank the hull using a proper Garboard and spiled planks. This means the wood is near useless to me as down here in Tassie I would struggle to get Basswood to match. My idea is to replace the wood with Huon pine from my stash. Only I would have to strip it down on a bandsaw. What thickness do people recommend I strip the timber to? I don't know if I am going to double plank or not. I just am not that confident I could pull off a single layer hull on my first build. If I do double plank do people recommend using the Huon pine for both layers or just the top (visible) layer. It is an expensive wood and getting harder to get, so I dont really want to waste too much. What other woods are suitable for the base layer or match the Basswood supplied (bearing in mind I am in Tasmania, Australia)? Thanks in advance for any help with this. Cheers, Scott.
-
Hi, I have just spent the night reading your build log. Some very nice work you have done! It's high quality work like this that makes beginners like me feel slightly intimidated to post their own work. I can only hope, in time, I may gain the skills and patience needed to do such fine work. Keep it up and I look forward to following your build. I have learnt lots from it already. Cheers, Scott. P.s I have now lost another nights work on my build! Too busy reading about yours!!
-
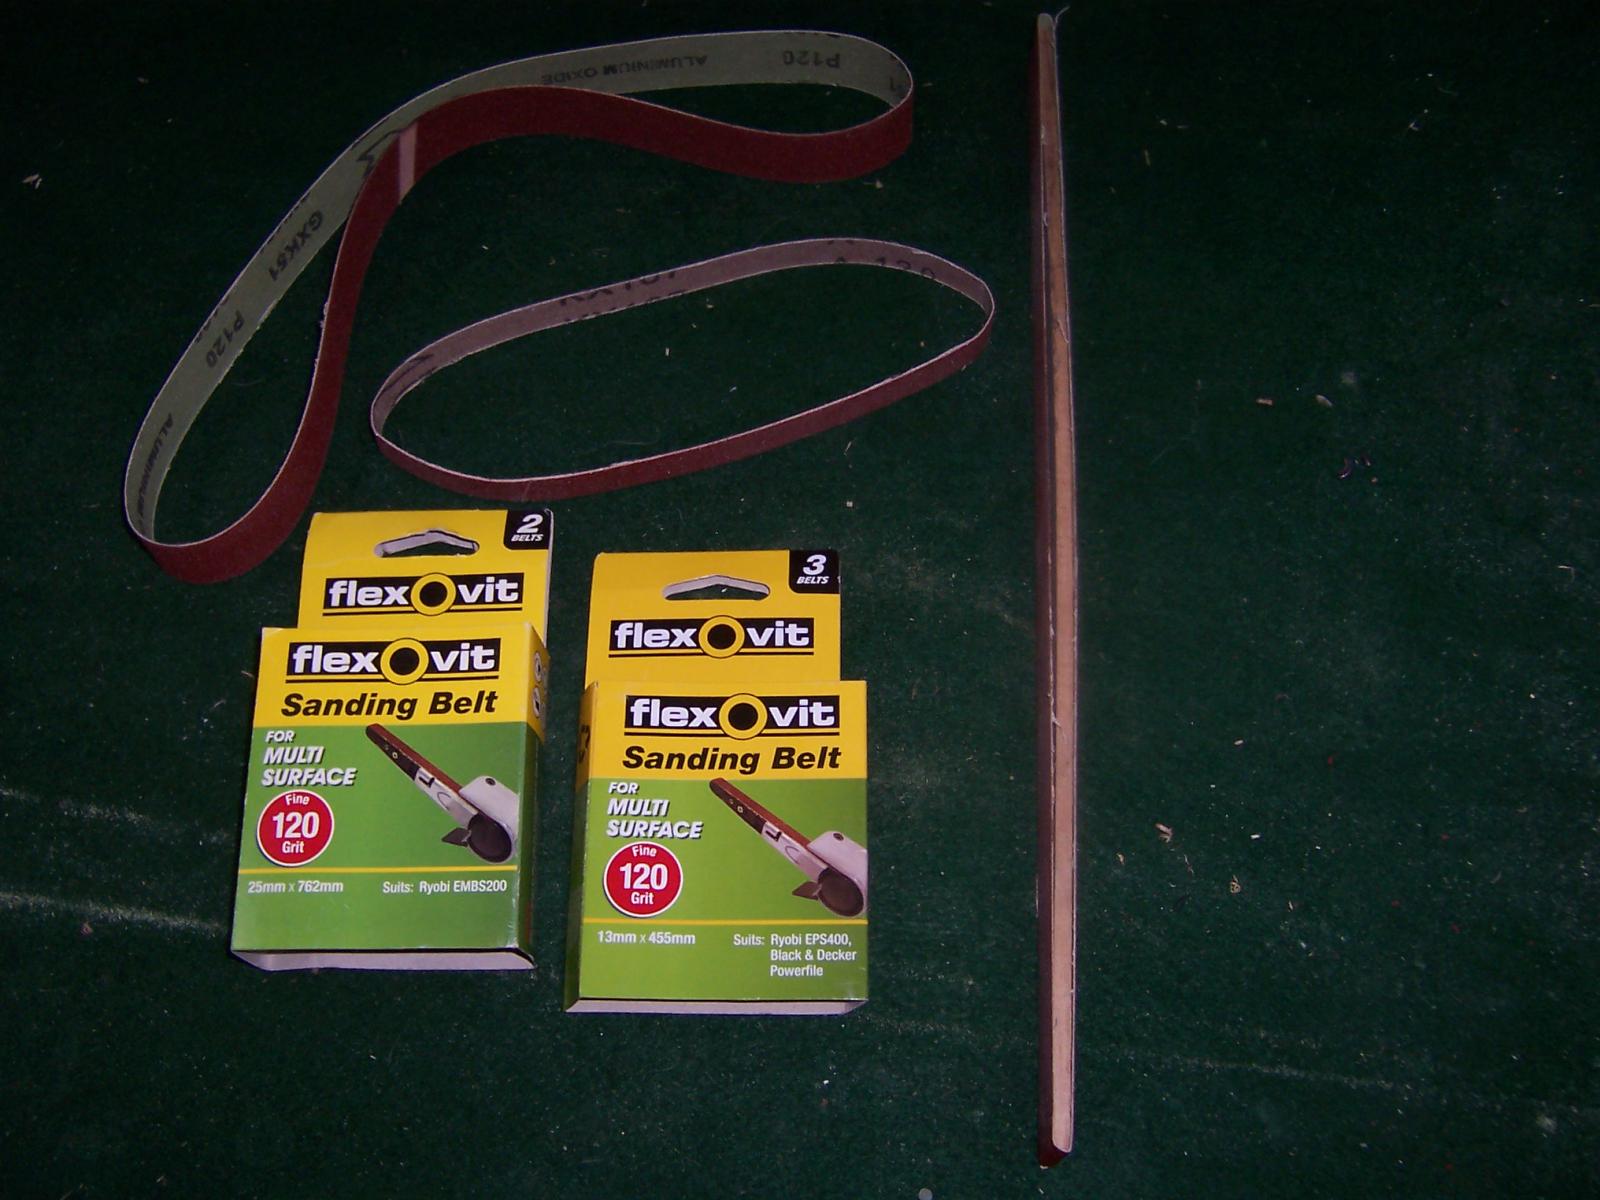
Hi All, I would just like to share an idea I had whilst fairing my skeleton. As I am new to this, I started to think of ideas for a curved sanding stick. I soon came to think of the endless sanding belts available in various sizes. So after purchasing some I rattled the scrap bin and found a thin strip of oak (25x5mm). I then cut it to a length longer than the belt flattened by about 5mm+. Then rounded the square edges, and cleaned up till smooth. Then I flexed the strip into a bow and slipped the belt on. The result was a nice gentle curve to the stick, and the inside working surface can flex till it reaches the strip. The example shown has only a slight curve and this could be increased with a slightly longer stick. I have found the belts to last a good bit of sanding without much loss of grit (far superior to normal glass paper) and can be changed easily without the need of glue. I just wish I had one of these years ago, I'm that happy with it!! Cheers, Scott.

- 33 replies
-
- 3
-
-
- sanson
- artesania latina
- (and 1 more)
-
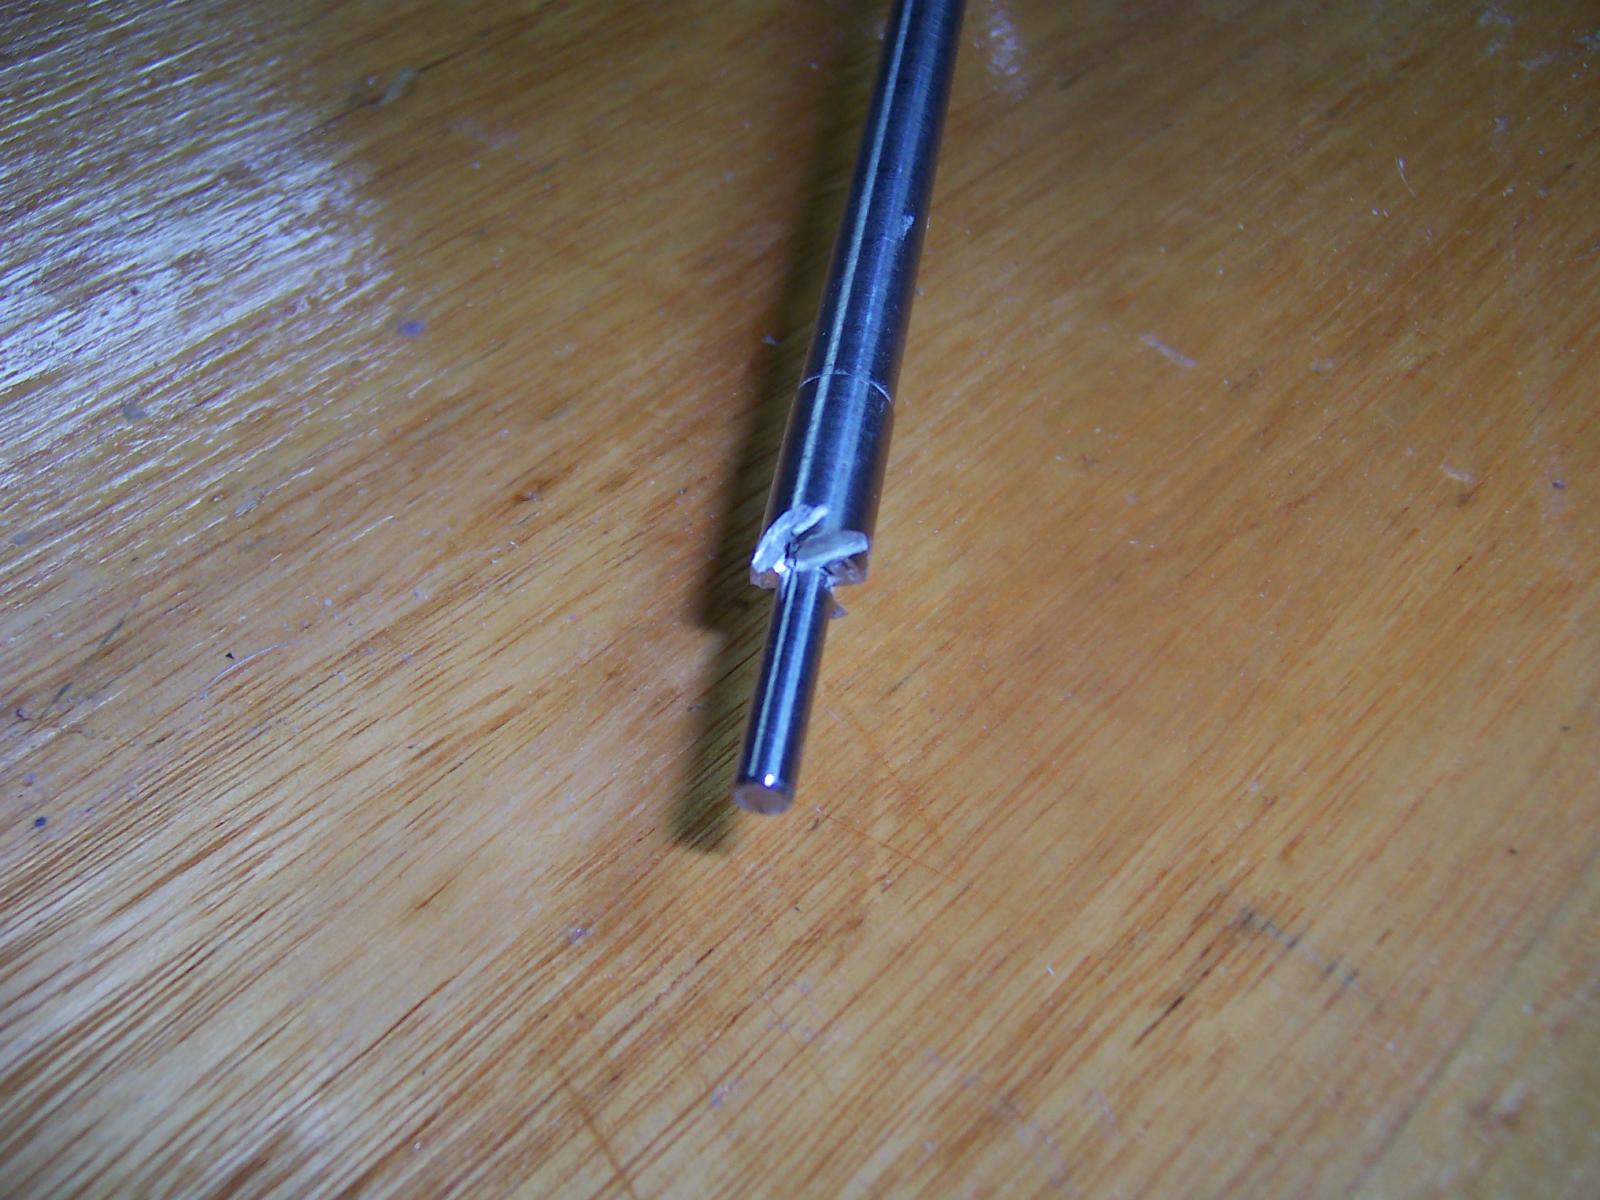
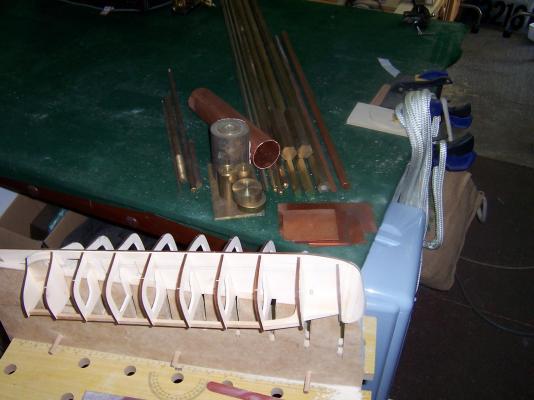
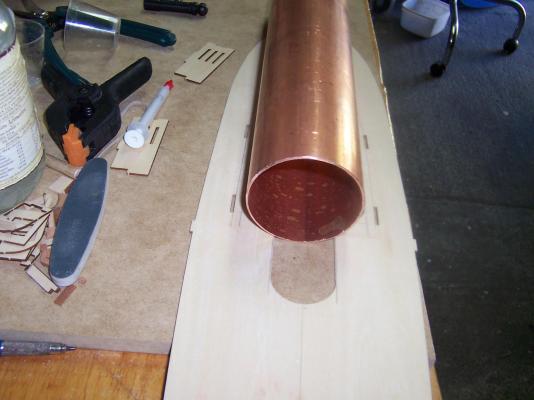
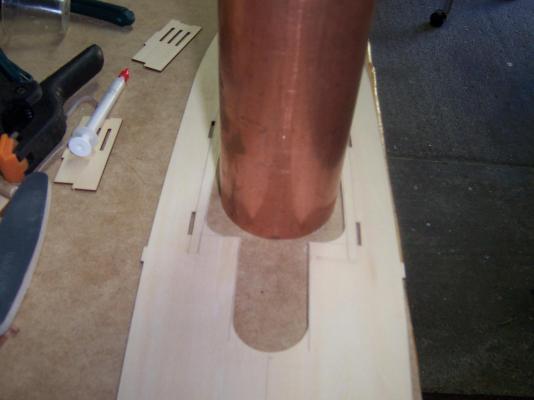
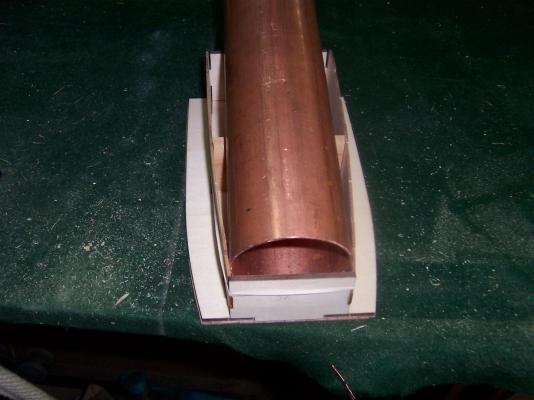
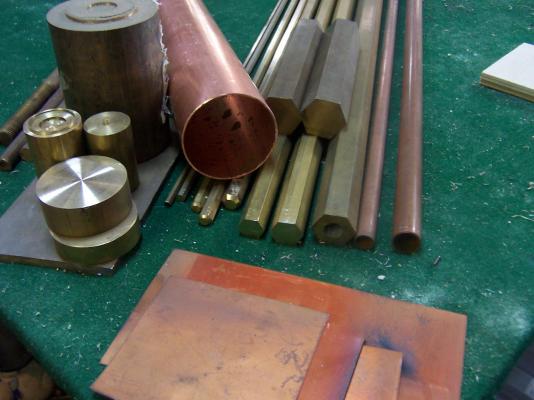
Hi All, I have now finished the bow end braces and filler blocks. Started fairing the bow last night and quickly started to get a new respect for surfboard shapers. I soon realized I had left plenty of meat on my fillers and being solid pine they are taking a bit of sanding. I also got a delivery in the post today, my new bit of copper tube for the boiler. So I had a quick look around my shed at what materials I have to start the steam plant. And here is the boiler tube against the deck. And sitting in the upside down cabin assembly. O.k enough of a break for me, back to fairing! Cheers, Scott.

- 33 replies
-
- 2
-
-
- sanson
- artesania latina
- (and 1 more)
-
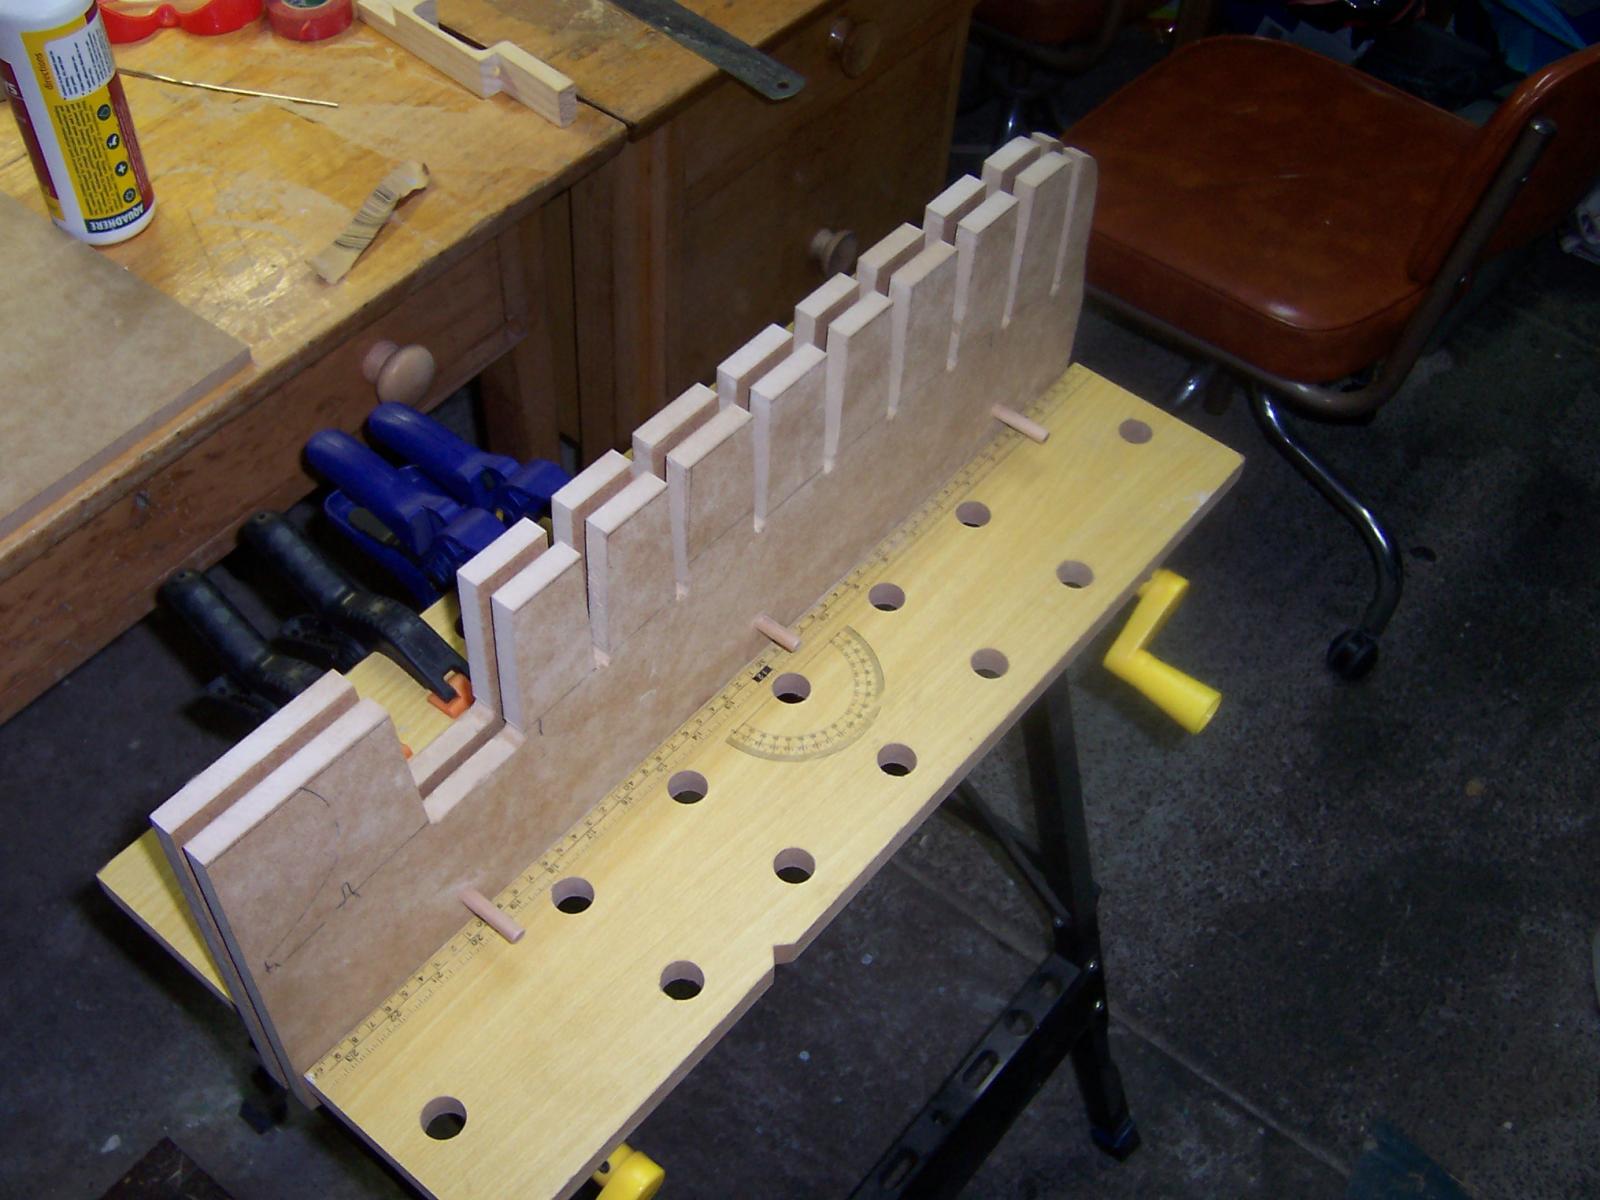
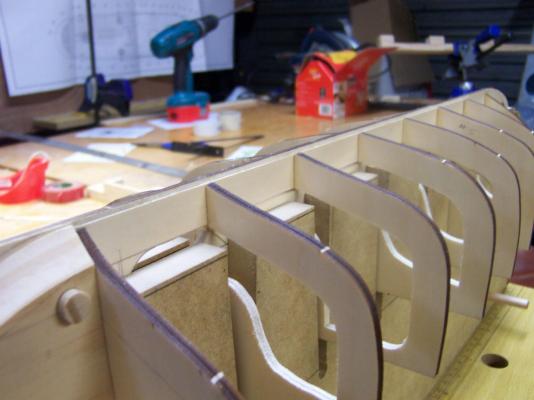
Thanks Capt'n, The jig was really easy to make, so I will explain what I did and why. First I sat the Former on the mdf about 150mm in from the edge and traced the outline. Then I stripped off the marked piece. Then I cut a second strip from the other side of the board (this was so I had two straight edges). Clamped them together with the straight edges aligned and drilled and pinned them with 5/16" dowels. Then I drilled a 5/16" hole at the bottom of every marking for the bulkheads. Then I cutout the bulkhead slots with a scroll saw. With the saw blade set carefully square, it gave me some nice edges I could reference to keep things square whilst gluing. Then all that is needed to finish is a piece of scrap to pack out the jig when in use (same thickness as bulkhead former) and a cheap saw horse completes the jig nicely. My reasons for making the jig like this started from the fact that all other methods I had for clamping the former were shoddy. They left the top of it unsupported and allowed the warp to come back. This was no good to me as I have run a cut appprox 1/2" in from the keel edge, most of the length of the former. This jig is capable of holding it right up to the keel edge and beyond. After gluing all my braces in I plan to dock the ends down so the jig can still be used right up till I've finished planking. I even plan on using two more dowels through the section of former that gets removed to assist in holding it during fairing and planking. The jig also holds the former up both ways and is being useful for dry fitting the deck. I have now completed gluing my braces between bulkheads and am just about to start on filler blocks for the Bow and Stern. Cheers, Scott.
-
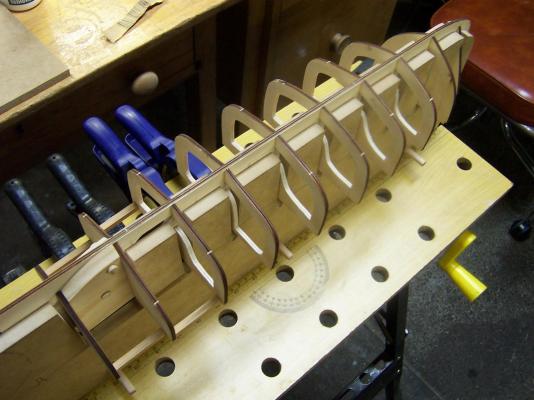
Hi All, Quick update on building the frame. Got to the stage today where I thought I had completed all my cuts needed and was ready to start gluing. My bulkhead former was warped when unboxed and nothing I have done has completely removed it yet. This has been the case with both my A.L kits and I would say the warp has been formed by the shrinkwrap pulling the boards uneven when they pack'em. To combat this (& the fact my former is as floppy as a rag doll with all the extra cuts in it) I built a jig/clamp out of 1/2" MDF. Its an overkill i'm sure, but it was cheap and easy to make. So I started with the blocks that rejoin the bulkhead former where I cut the channel for the propshaft. I also glued the two bulkheads that ran beside these blocks. Left it for an hour, and removed it from my jig, only to realise I hadn't cut my recesses for the servo's!! Bugger!! My first major mistake in only the first bit of gluing. I can only hope this is not a sign of things to come. Here is the first bulkheads getting glued. All but two bulkheads glued, and starting to add braces. And here is how they line up with my rabbet (which isn't finished). My glue should be dry on those last parts now, so I'm off to do some more. Cheers, Scott.

- 33 replies
-
- 7
-
-
- sanson
- artesania latina
- (and 1 more)
-
Hi, I am glad to see another "Sanson" build. I am working on the same kit and hope you don't mind me pinching ideas. You will probably fly through your build, as I have taken on the task of trying to fit a RC steam plant. I love the look of your deck and it makes me think using non supplied wood for my model may not have been needed. Keep up the good work and updates, your tug is already showing the signs of a nicely built ship. Cheers, Scott. P.s you may like to check out my pic of the brace I added to the inside of the cabin assembly, it really made the curve of the walls sit nicely instead of pulling in at the bottom where it sits on the deck. Also I found that the holes either side of the stack for part #99 (large hoses?) were too big and the parts will fall straight through. This can be easily fixed before fixing the assembly to the deck with a backing block from underneath. I only noticed this after planking and luckily before opening the holes out in the planking.
-
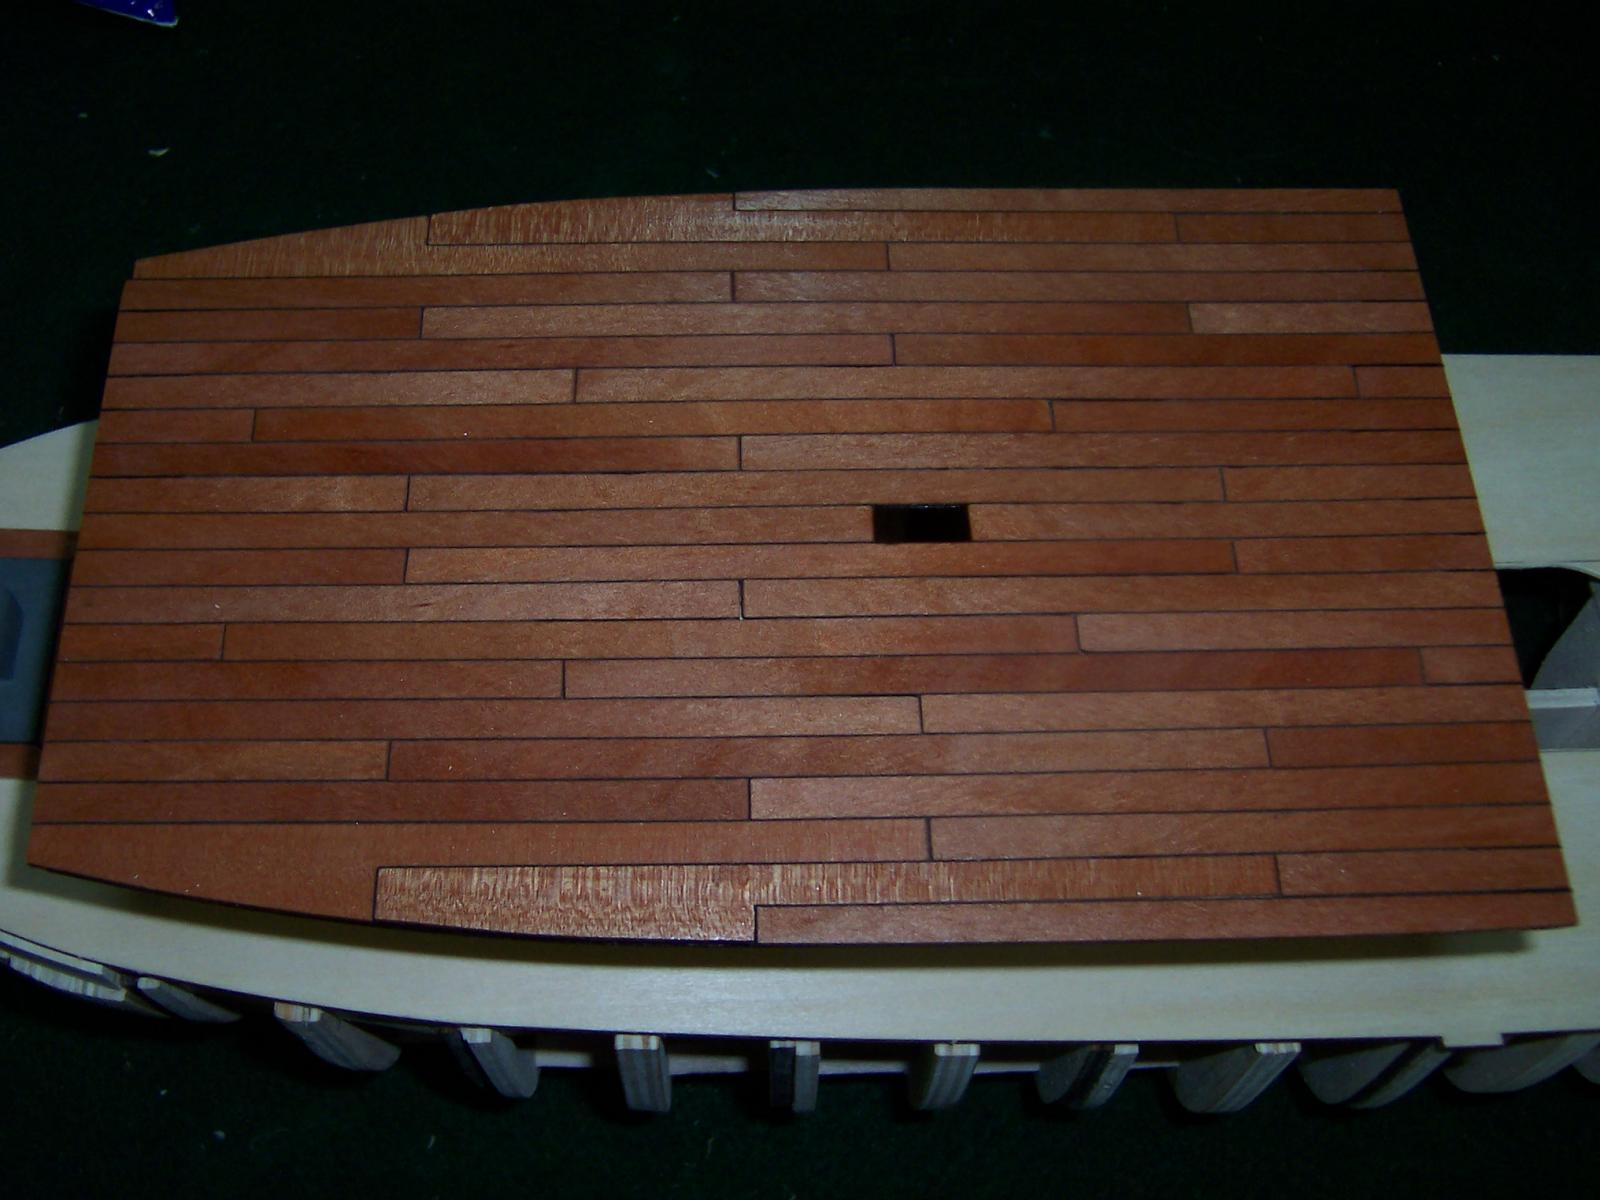
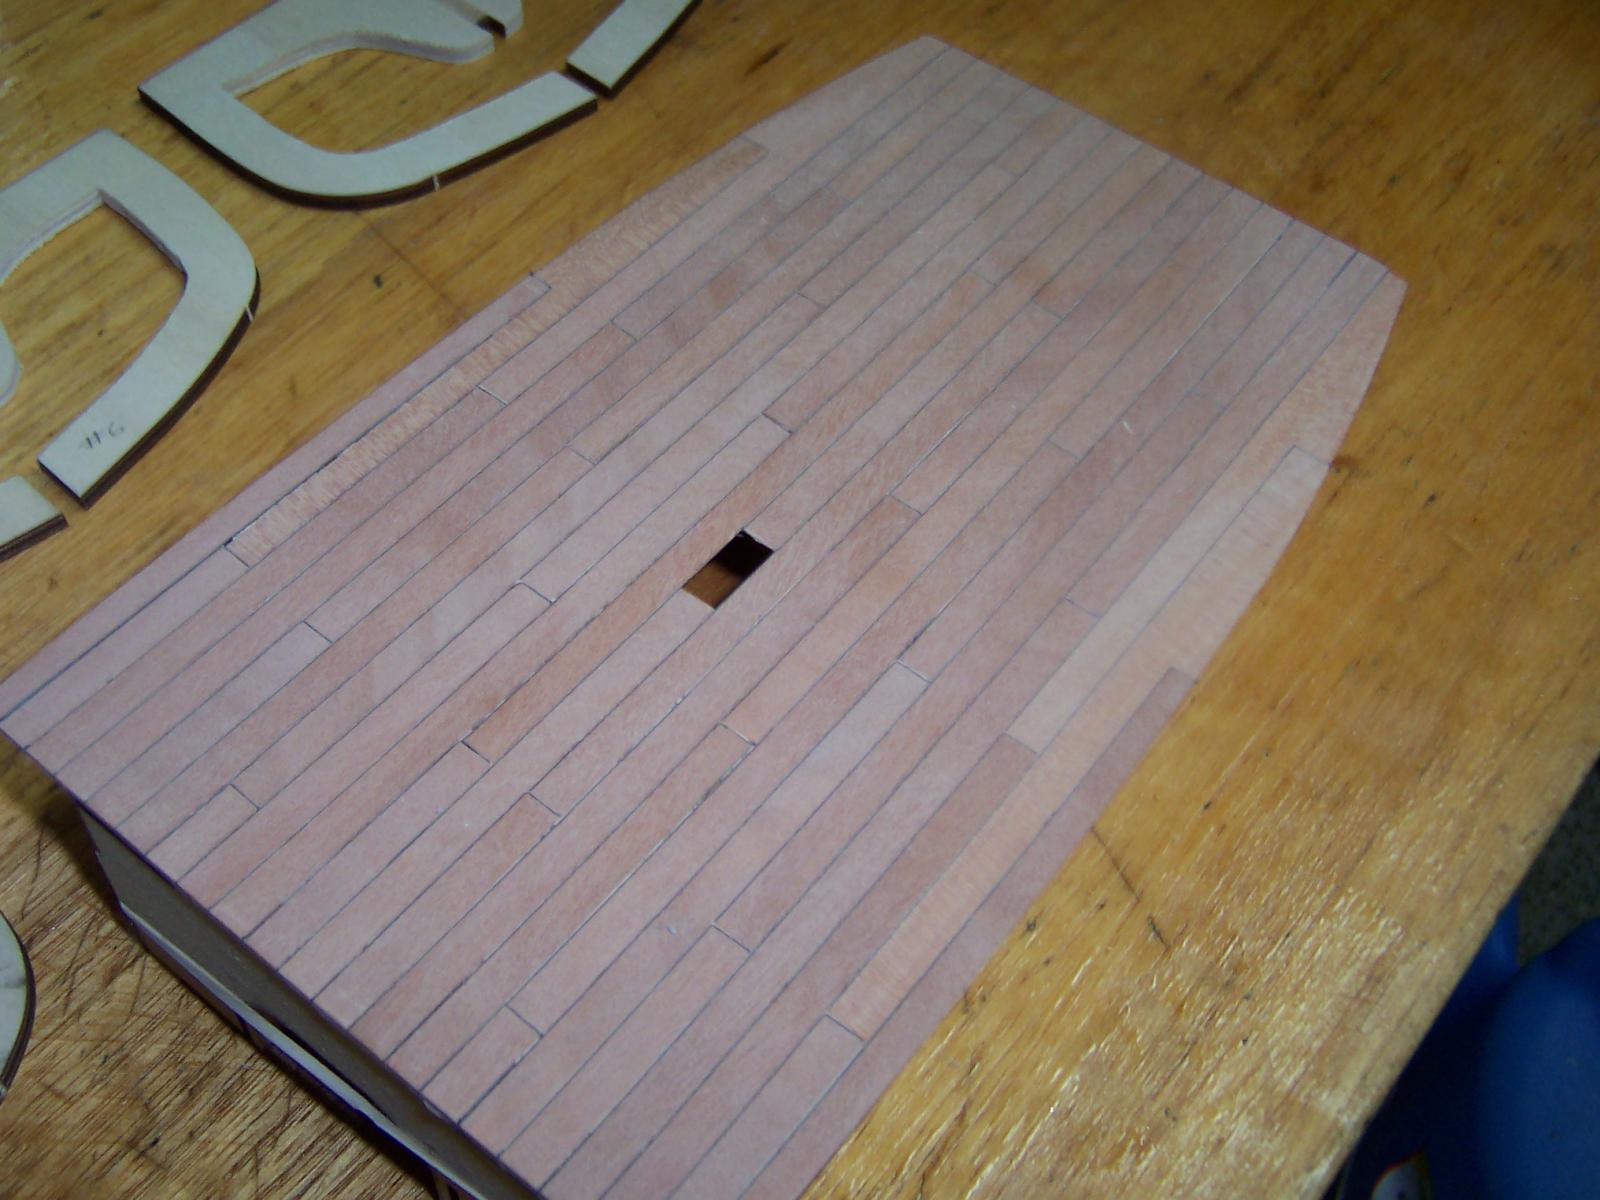
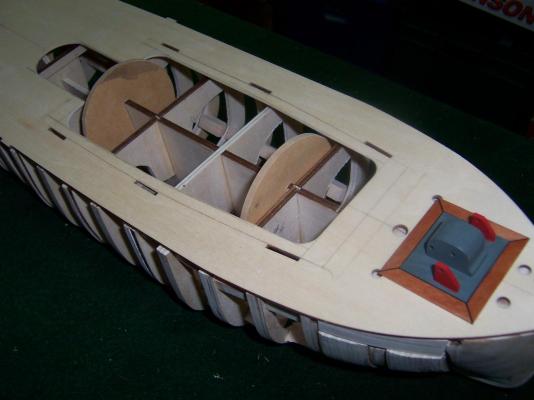
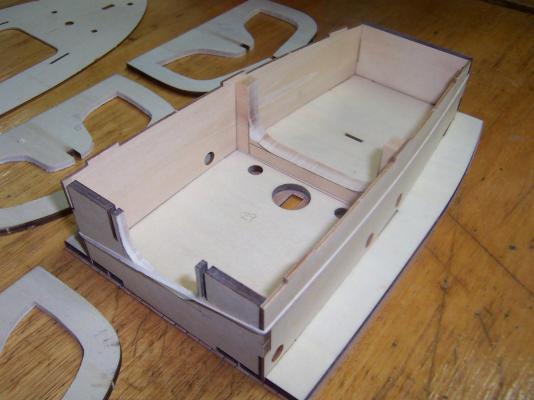
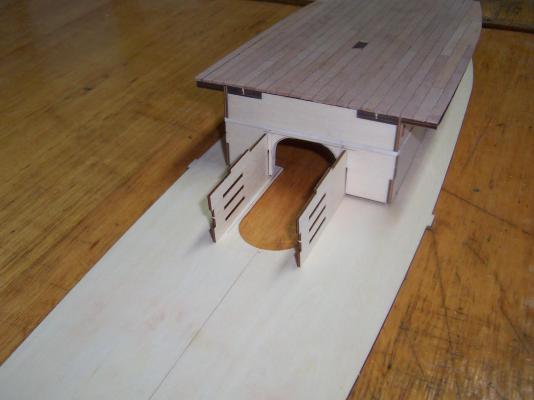
Thanks for the likes everyone, and yes I hope I can keep you interested Don. This far it only looks like I have butchered a good static model. Next I had to start working out the available room on offer through the deck into cabins etc. This is to start planning the layout of the steam plant. I want to retain all the kits features and detail, including using the boats stack for the exhaust. The plant will have an engine, boiler, condenser, butane tank and burner. I decided against finding room for a water tank and pump as I will refill by manual hand pump. I can't see myself running the thing for extended periods so it probably wont matter. The steam engine will consist of a twin cylinder, dual action, oscillating type, with the cylinders running back to back vertically. The boiler will be a horizontal job, using 68mm OD copper tube. I will decide if I go center flue or not later. So first I dry fitted the skeleton and placed the sub deck onto it. I then built the base of the cabin assembly. This was only done with a light amount of white glue so I can disassemble and tweak later. I then planked the top with Myrtle. This was out of my hand-me-down stuff and stripped on a benchtop bandsaw. I simulated the chalking using linen paper glued to one edge. This was the result after a quick sand. I also shaped a brace to go inside where the curve starts and this really helped keep the thing in shape nicely. Then the unit was placed on the deck and the precut parts running back from this were slipped in place. When this assembly was done I could start to pencil some reference marks ready for cutting holes in the deck. The cutting was then done leaving plenty of meat around the edges for further removal later. I also opened out the rear of the cabin assembly into the area covered. This gave me a nice indication of what I have to play with once the hull gets planked. Now to searching for materials for building the steam plant and sourcing radio gear and servos. Unfortunately, I see the biggest thing slowing this build is getting everything needed so I can fit things whilst it's easy. I know where two of the servos are getting mounted, and it will be simple to fit them now rather than later. The Admiral has put her foot down tho and limited how big and quick I can spend on this project (& any wise Man knows, you don't argue with the "Minister for war and finances").

- 33 replies
-
- 6
-
-
- sanson
- artesania latina
- (and 1 more)
-
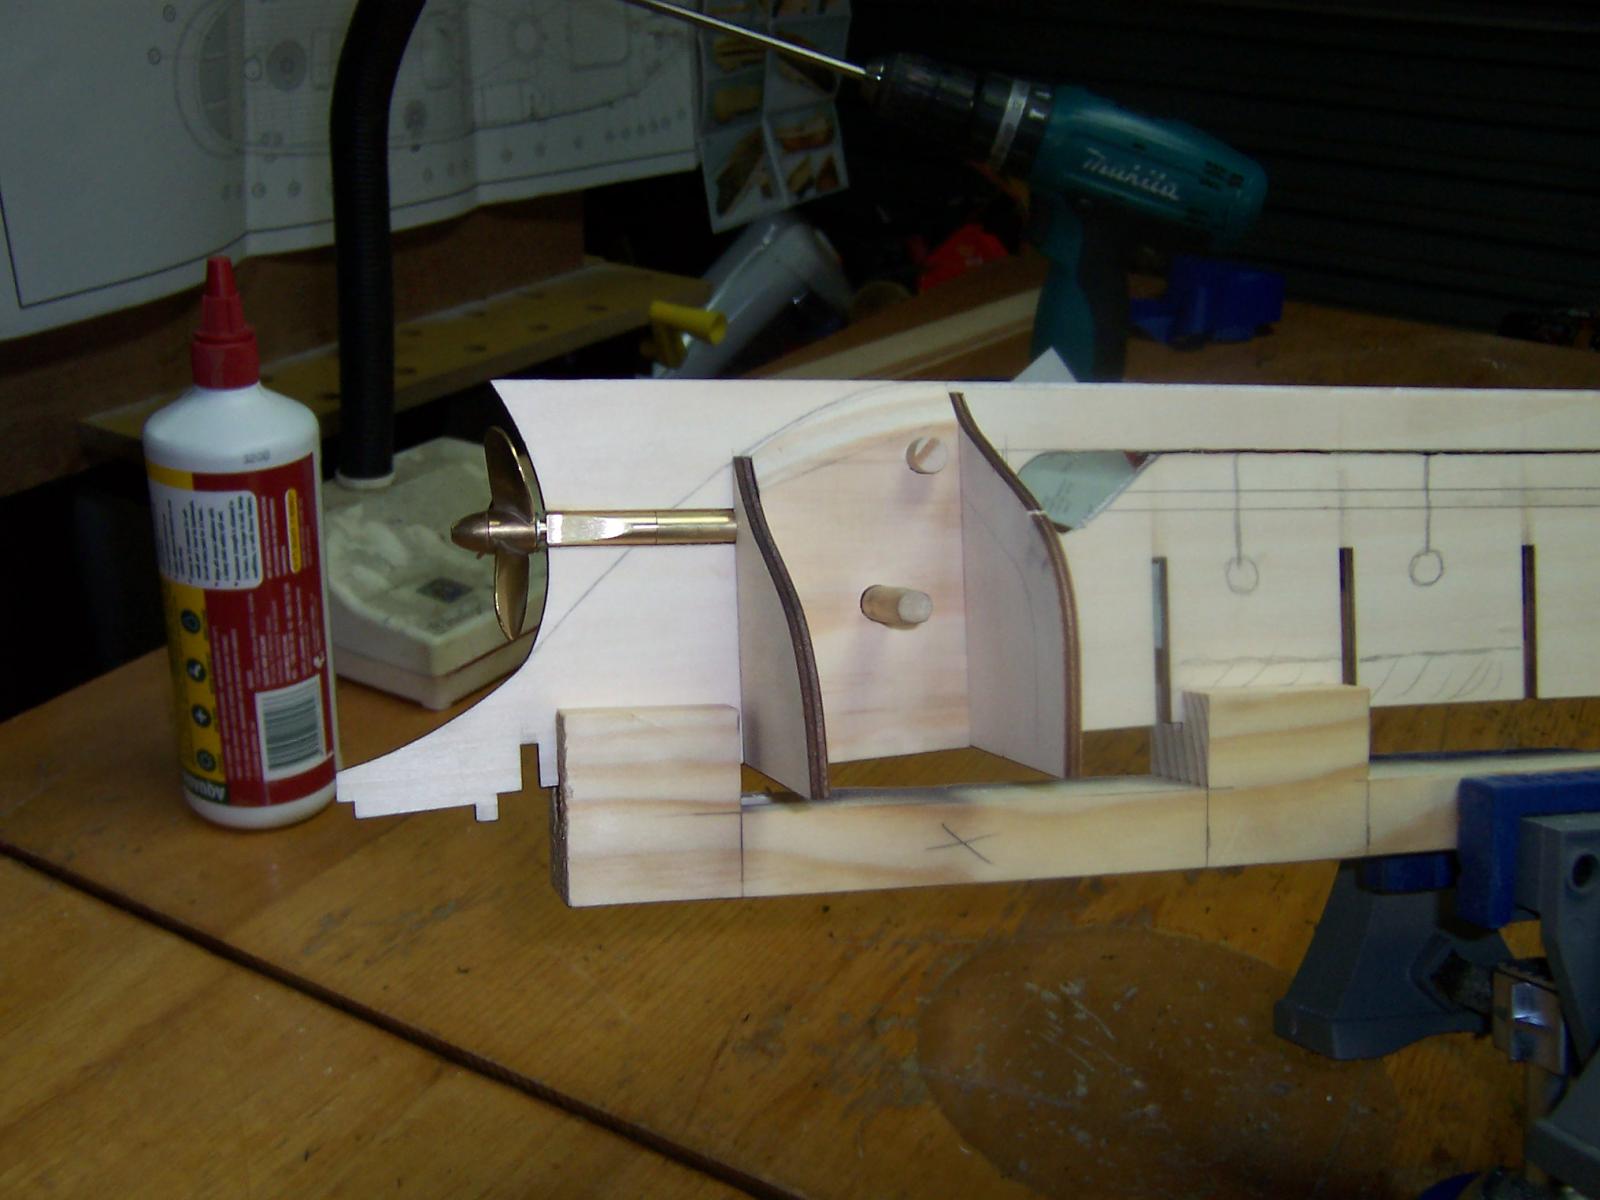
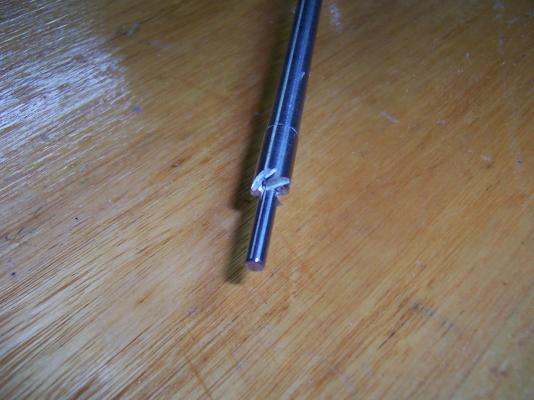
Hi, Time to explain the work done to fit the prop-tube. First I made some filler blocks to cover the cutout needed to run the tube. Then they were drilled whilst clamped to the keel so some 5/16 dowel could be used to locate the keel after cutting the tube slot. The keel was then cut to fit the tube. The cut then dropped lower and was run parallel to the bottom edge of the keel up to nearly the second bulkhead from the bow. The blocks were fitted back to the keel (dry). This then gave me a slot that was wide enough in the keel to fit the tube, but the blocks needed a slight radius cut in them to accommodate the tube. So I pulled out a homemade reamer made for my other build. It is machined from stainless steel and has a diameter of 5/16 to suit prop-tubes. The first 1" or so is reduced to the thickness of the keel and acts as a guide. Teeth were cut into the stepped face with a cutting saw in a Dremel. It requires a lot of chip clearing in use, but gives a much smoother safer finish than can be obtained with a drill or file. The bulkheads were fitted dry as I reamed the hole and this gave a nice neat hole for the tube. Another problem with the tube is the diameter when it comes to the bearding line. The keel is 4mm ply and the tube 8mm. To solve this I machined an extended rear bearing out of solid bronze. This allowed me to increase the bearing area so the sides of the bearing can be faired with the keel. A small 5mm dia was machined on the end to aid with keeping things even when fairing (also to act as an end to the bearing where the prop will have contact). Time will only tell if my ideas work. I am using a prop-shaft with a dia of 4mm, so I really cannot afford to fair the stern too much. I am also limited with how much room there is to fit the prop in between the stern and rudder post, so i have decided to not run a nut behind the prop. I hope this doesn't give me any issues down the track.

- 33 replies
-
- 6
-
-
- sanson
- artesania latina
- (and 1 more)