DONATION DRIVE - SUPPORT MSW - DO YOUR PART TO KEEP THIS GREAT FORUM GOING!
×


KeithAug
-
Posts
3,980 -
Joined
-
Last visited
Content Type
Profiles
Forums
Gallery
Events
Everything posted by KeithAug
-
 Yves - Only through the skylights - which will be very limited. I am assuming that in future everyone will have a nanobot mounted miniature camera. Steve - Good news, I will pass on your assurance to the guests. Pat - I have always wanted to visit Australia but paneling is that enticing. Thank you John, Phil, Druxey, Craig, Eberhard and Keith. I thought I had better own up that today is our 50th wedding anniversary. Ann who is always looking for opportunities to keep me on my toes has just informed me that she has booked a 12 o'clock slot for me to visit our local recycling centre. She says she has something that she wants me to drop off (without being specific about what it is).🥴.
 -
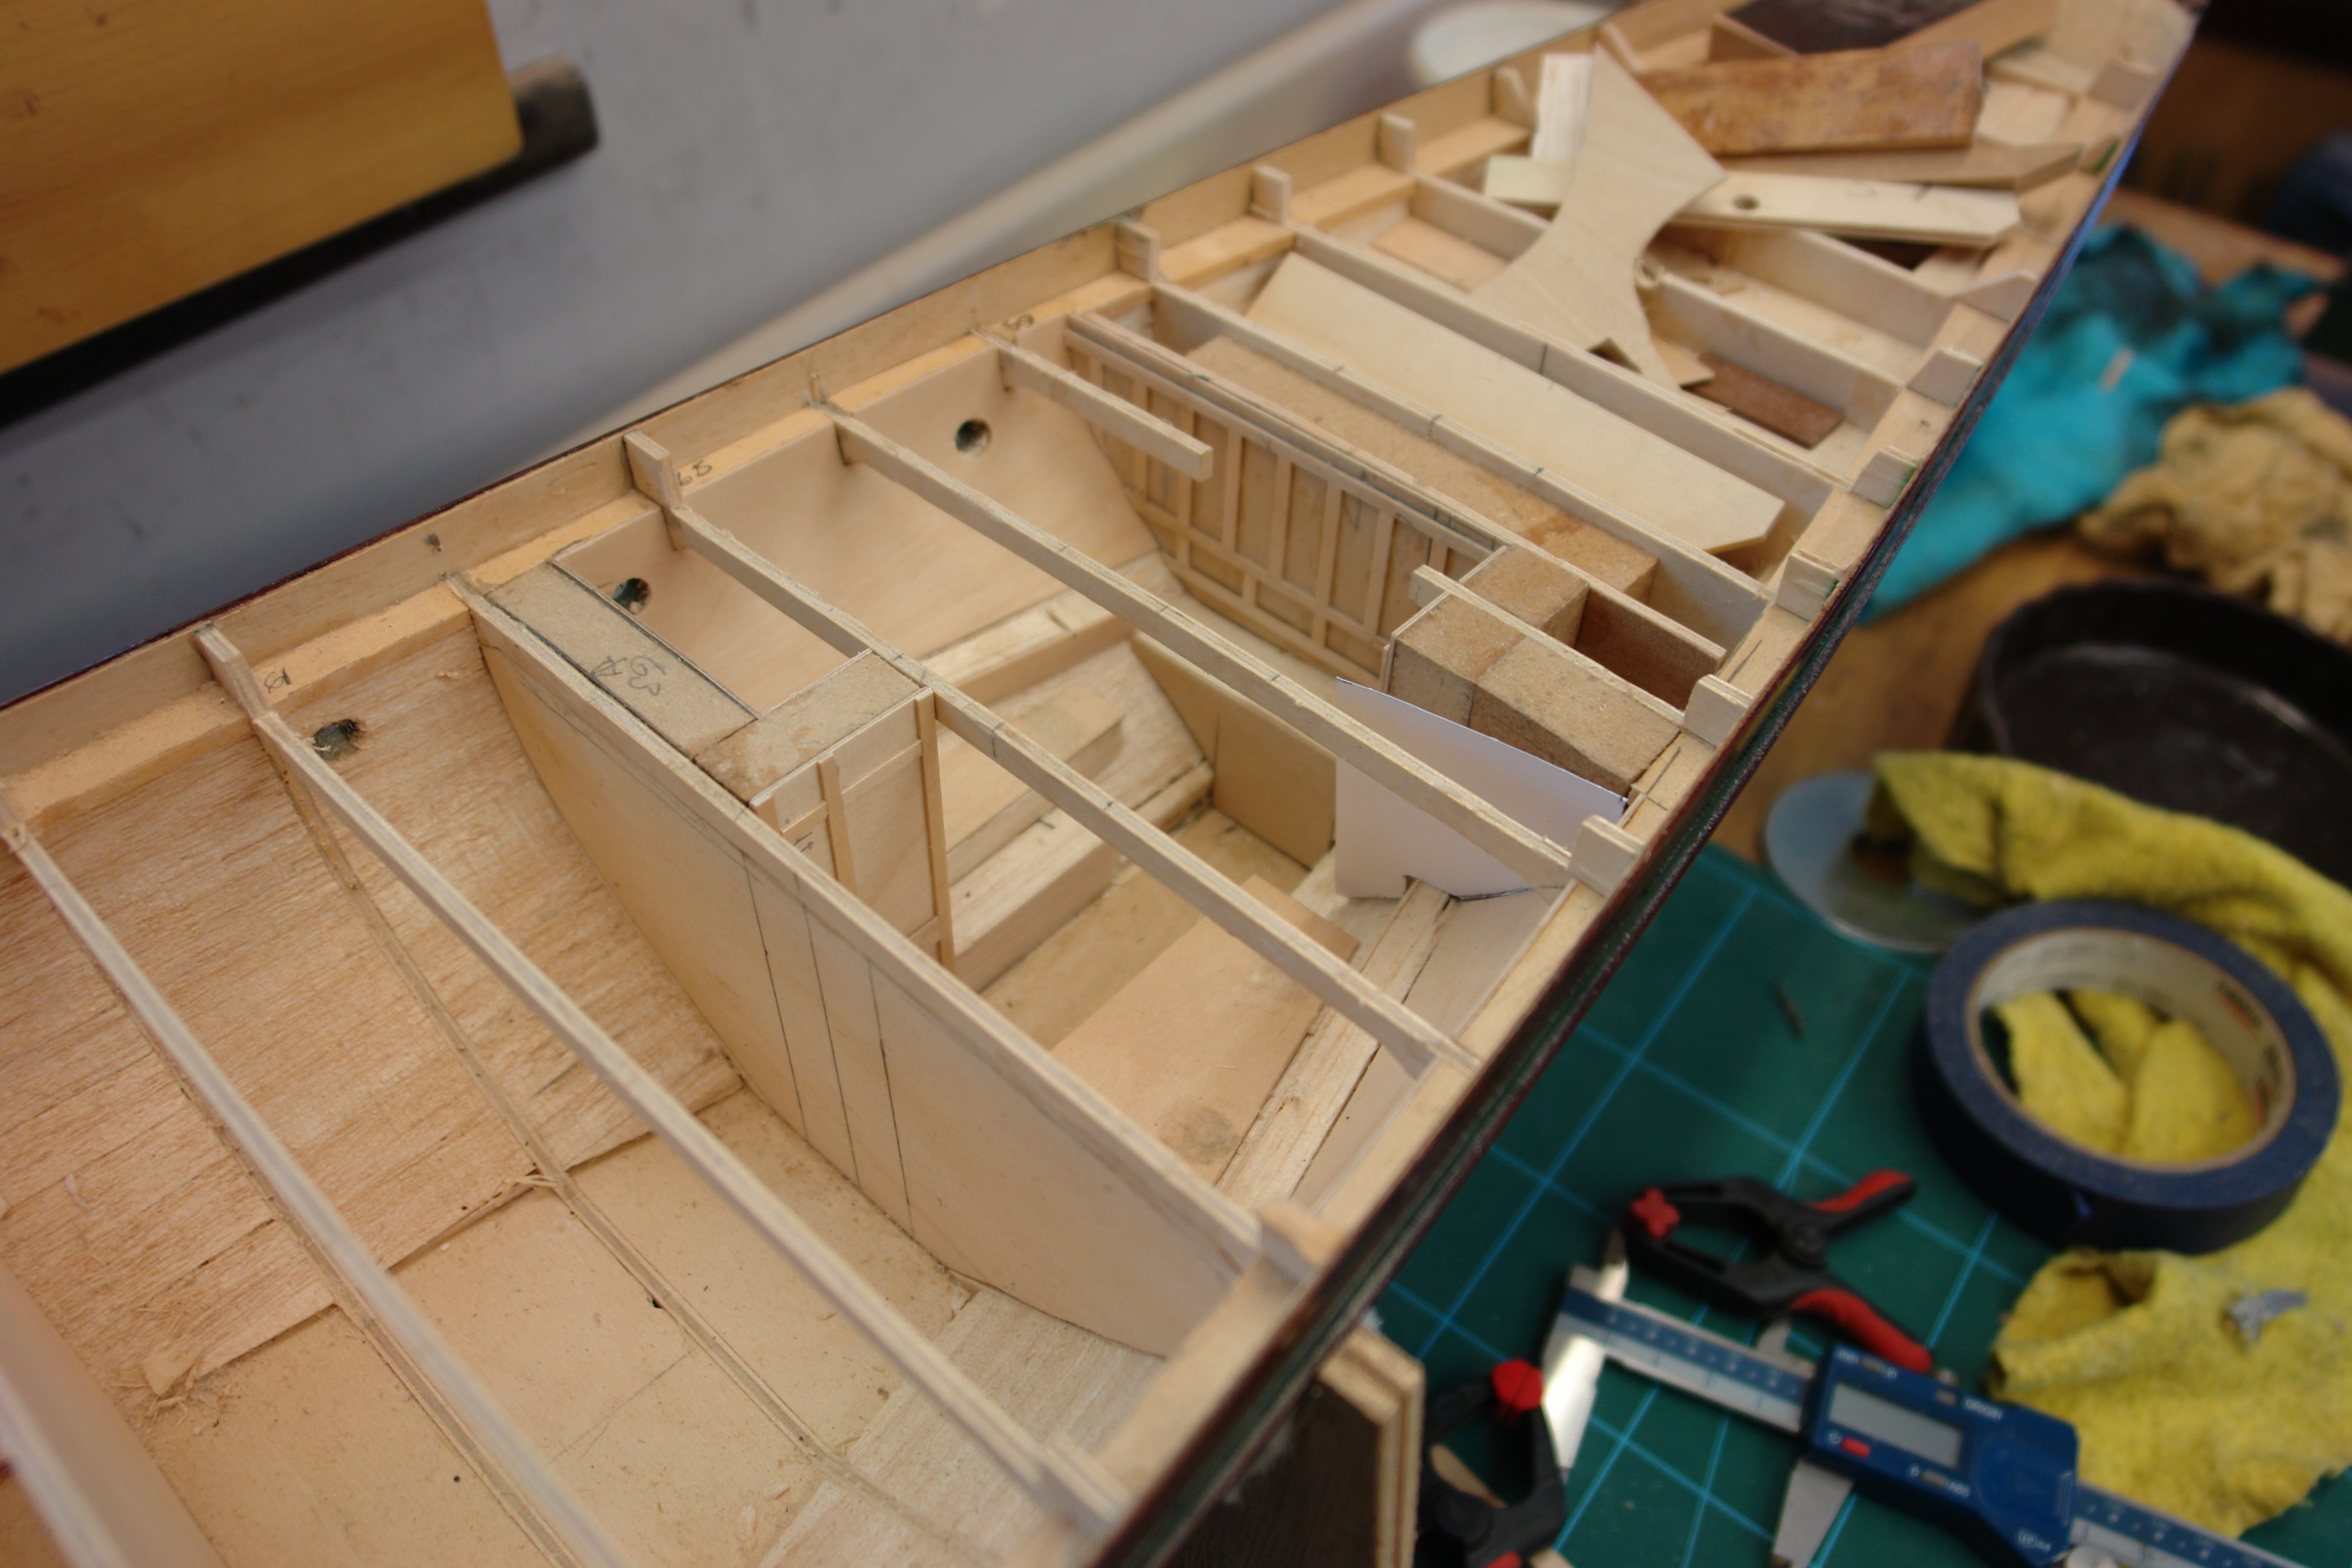
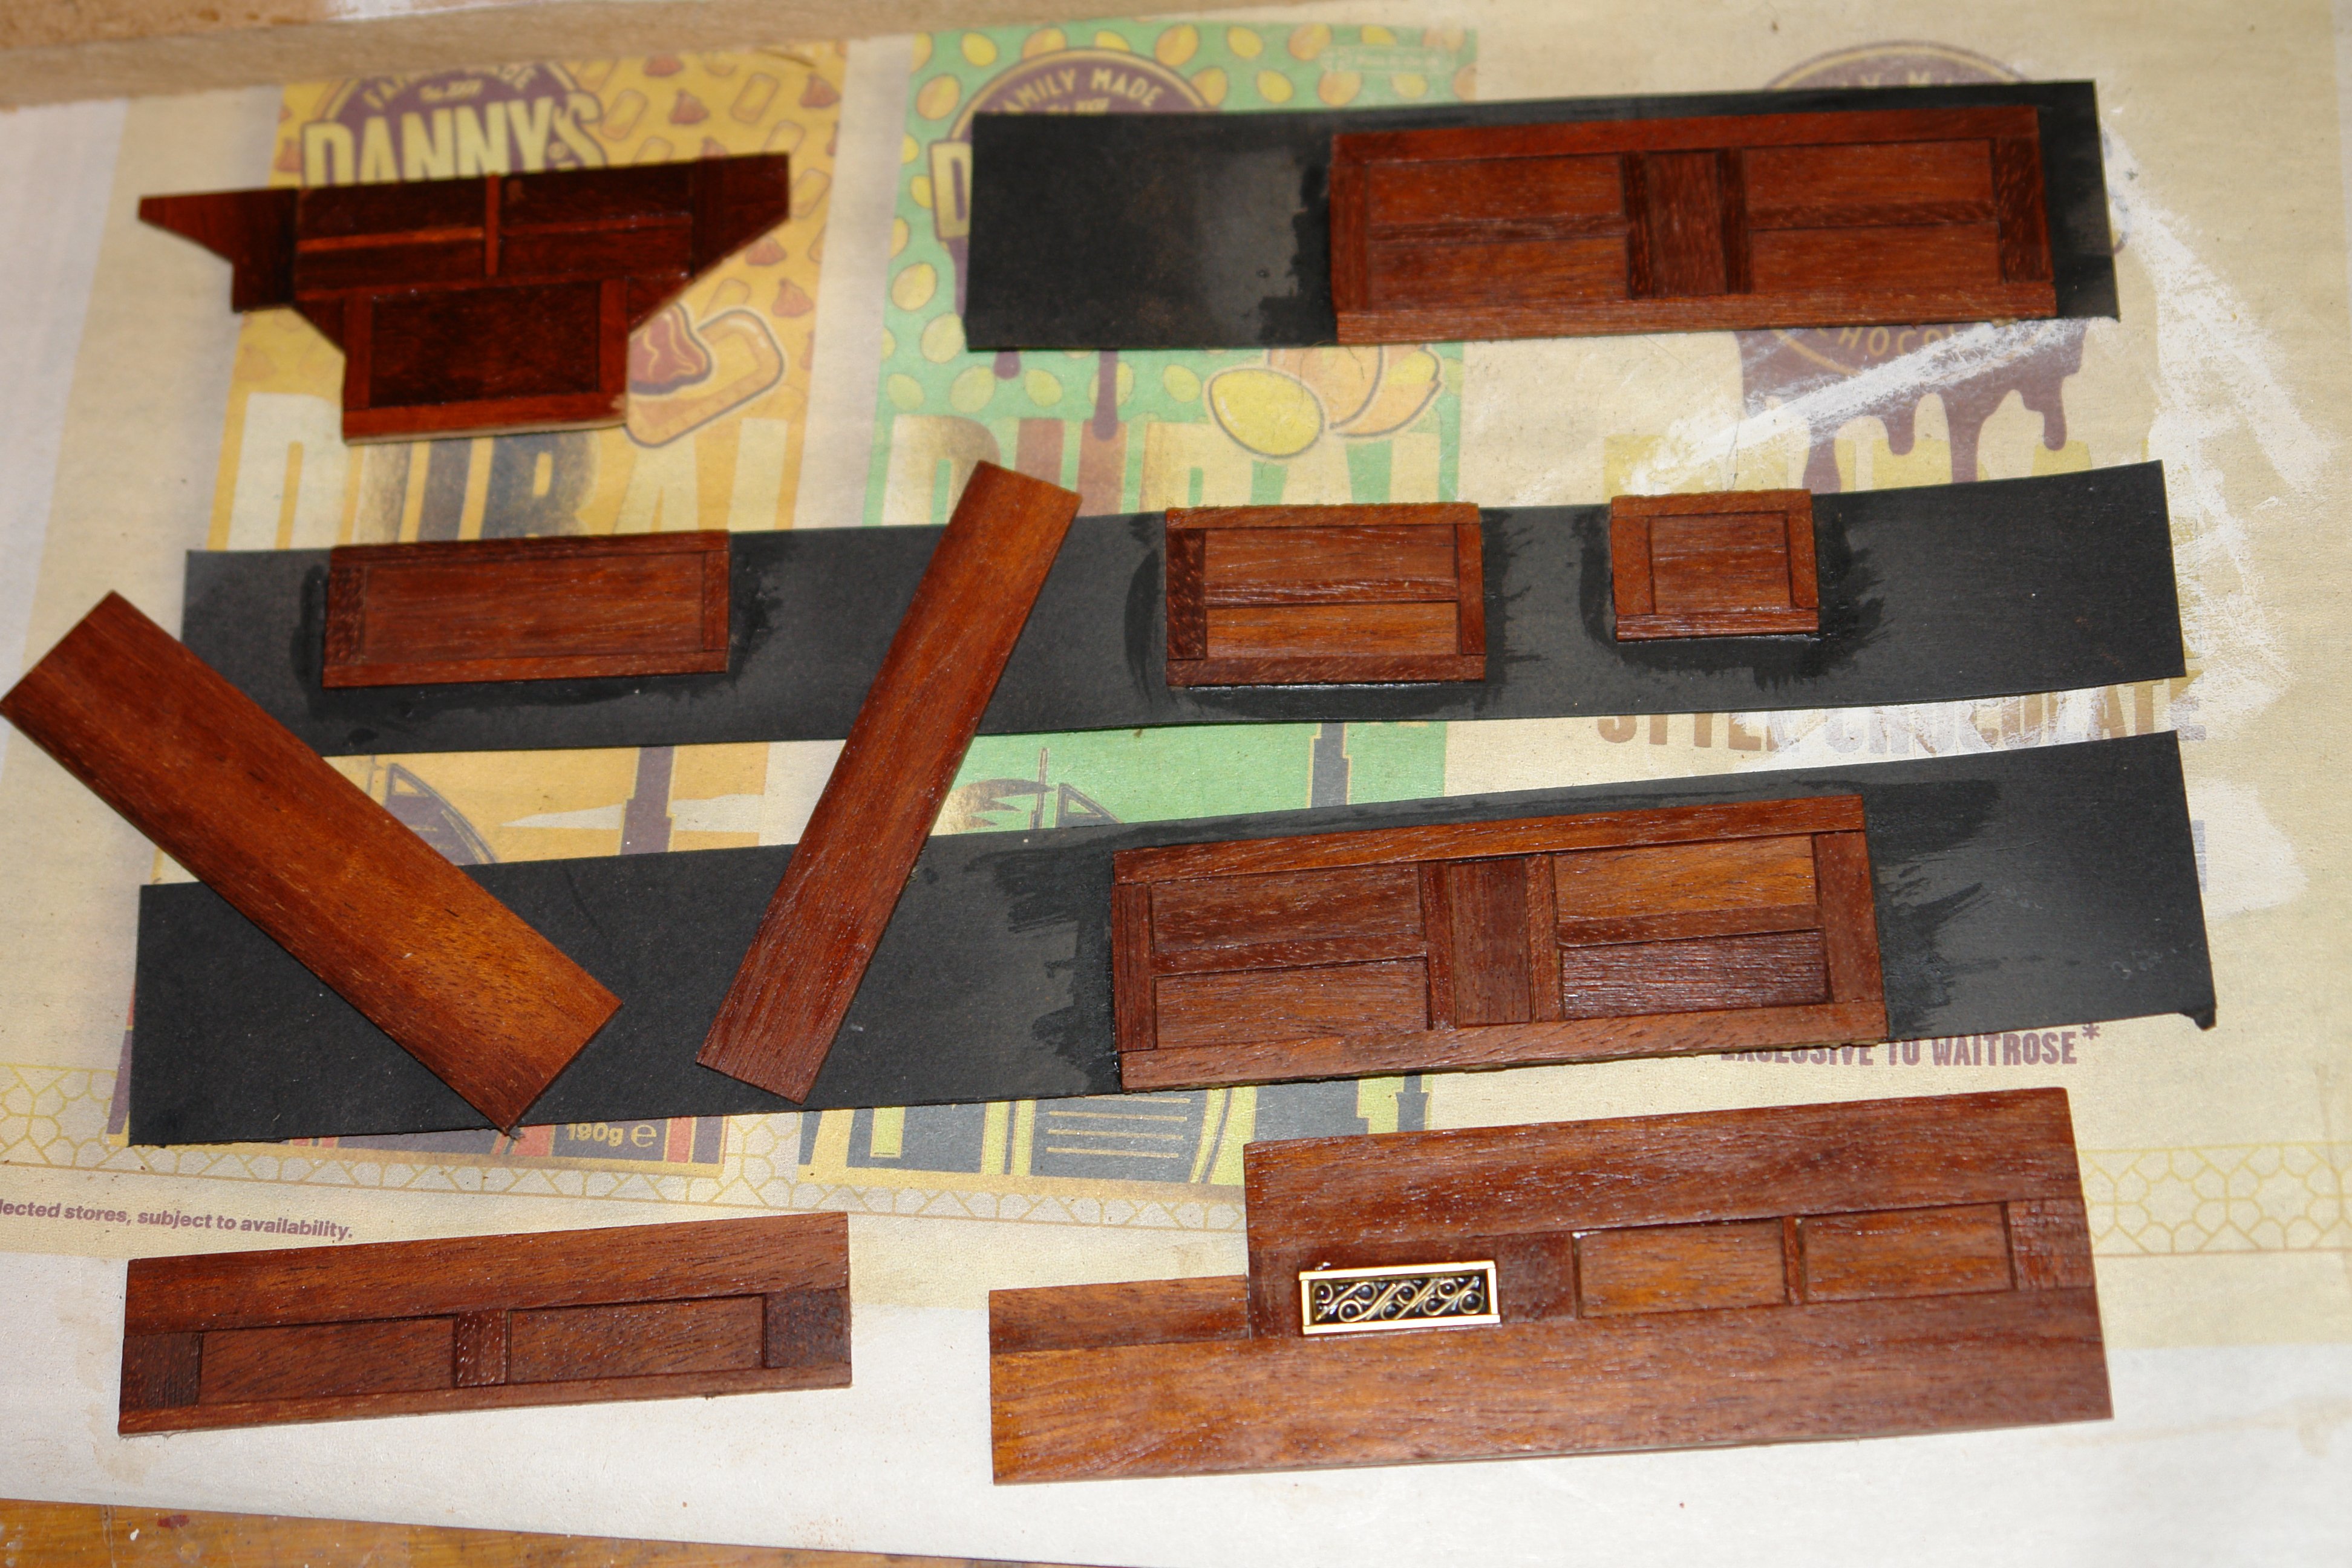
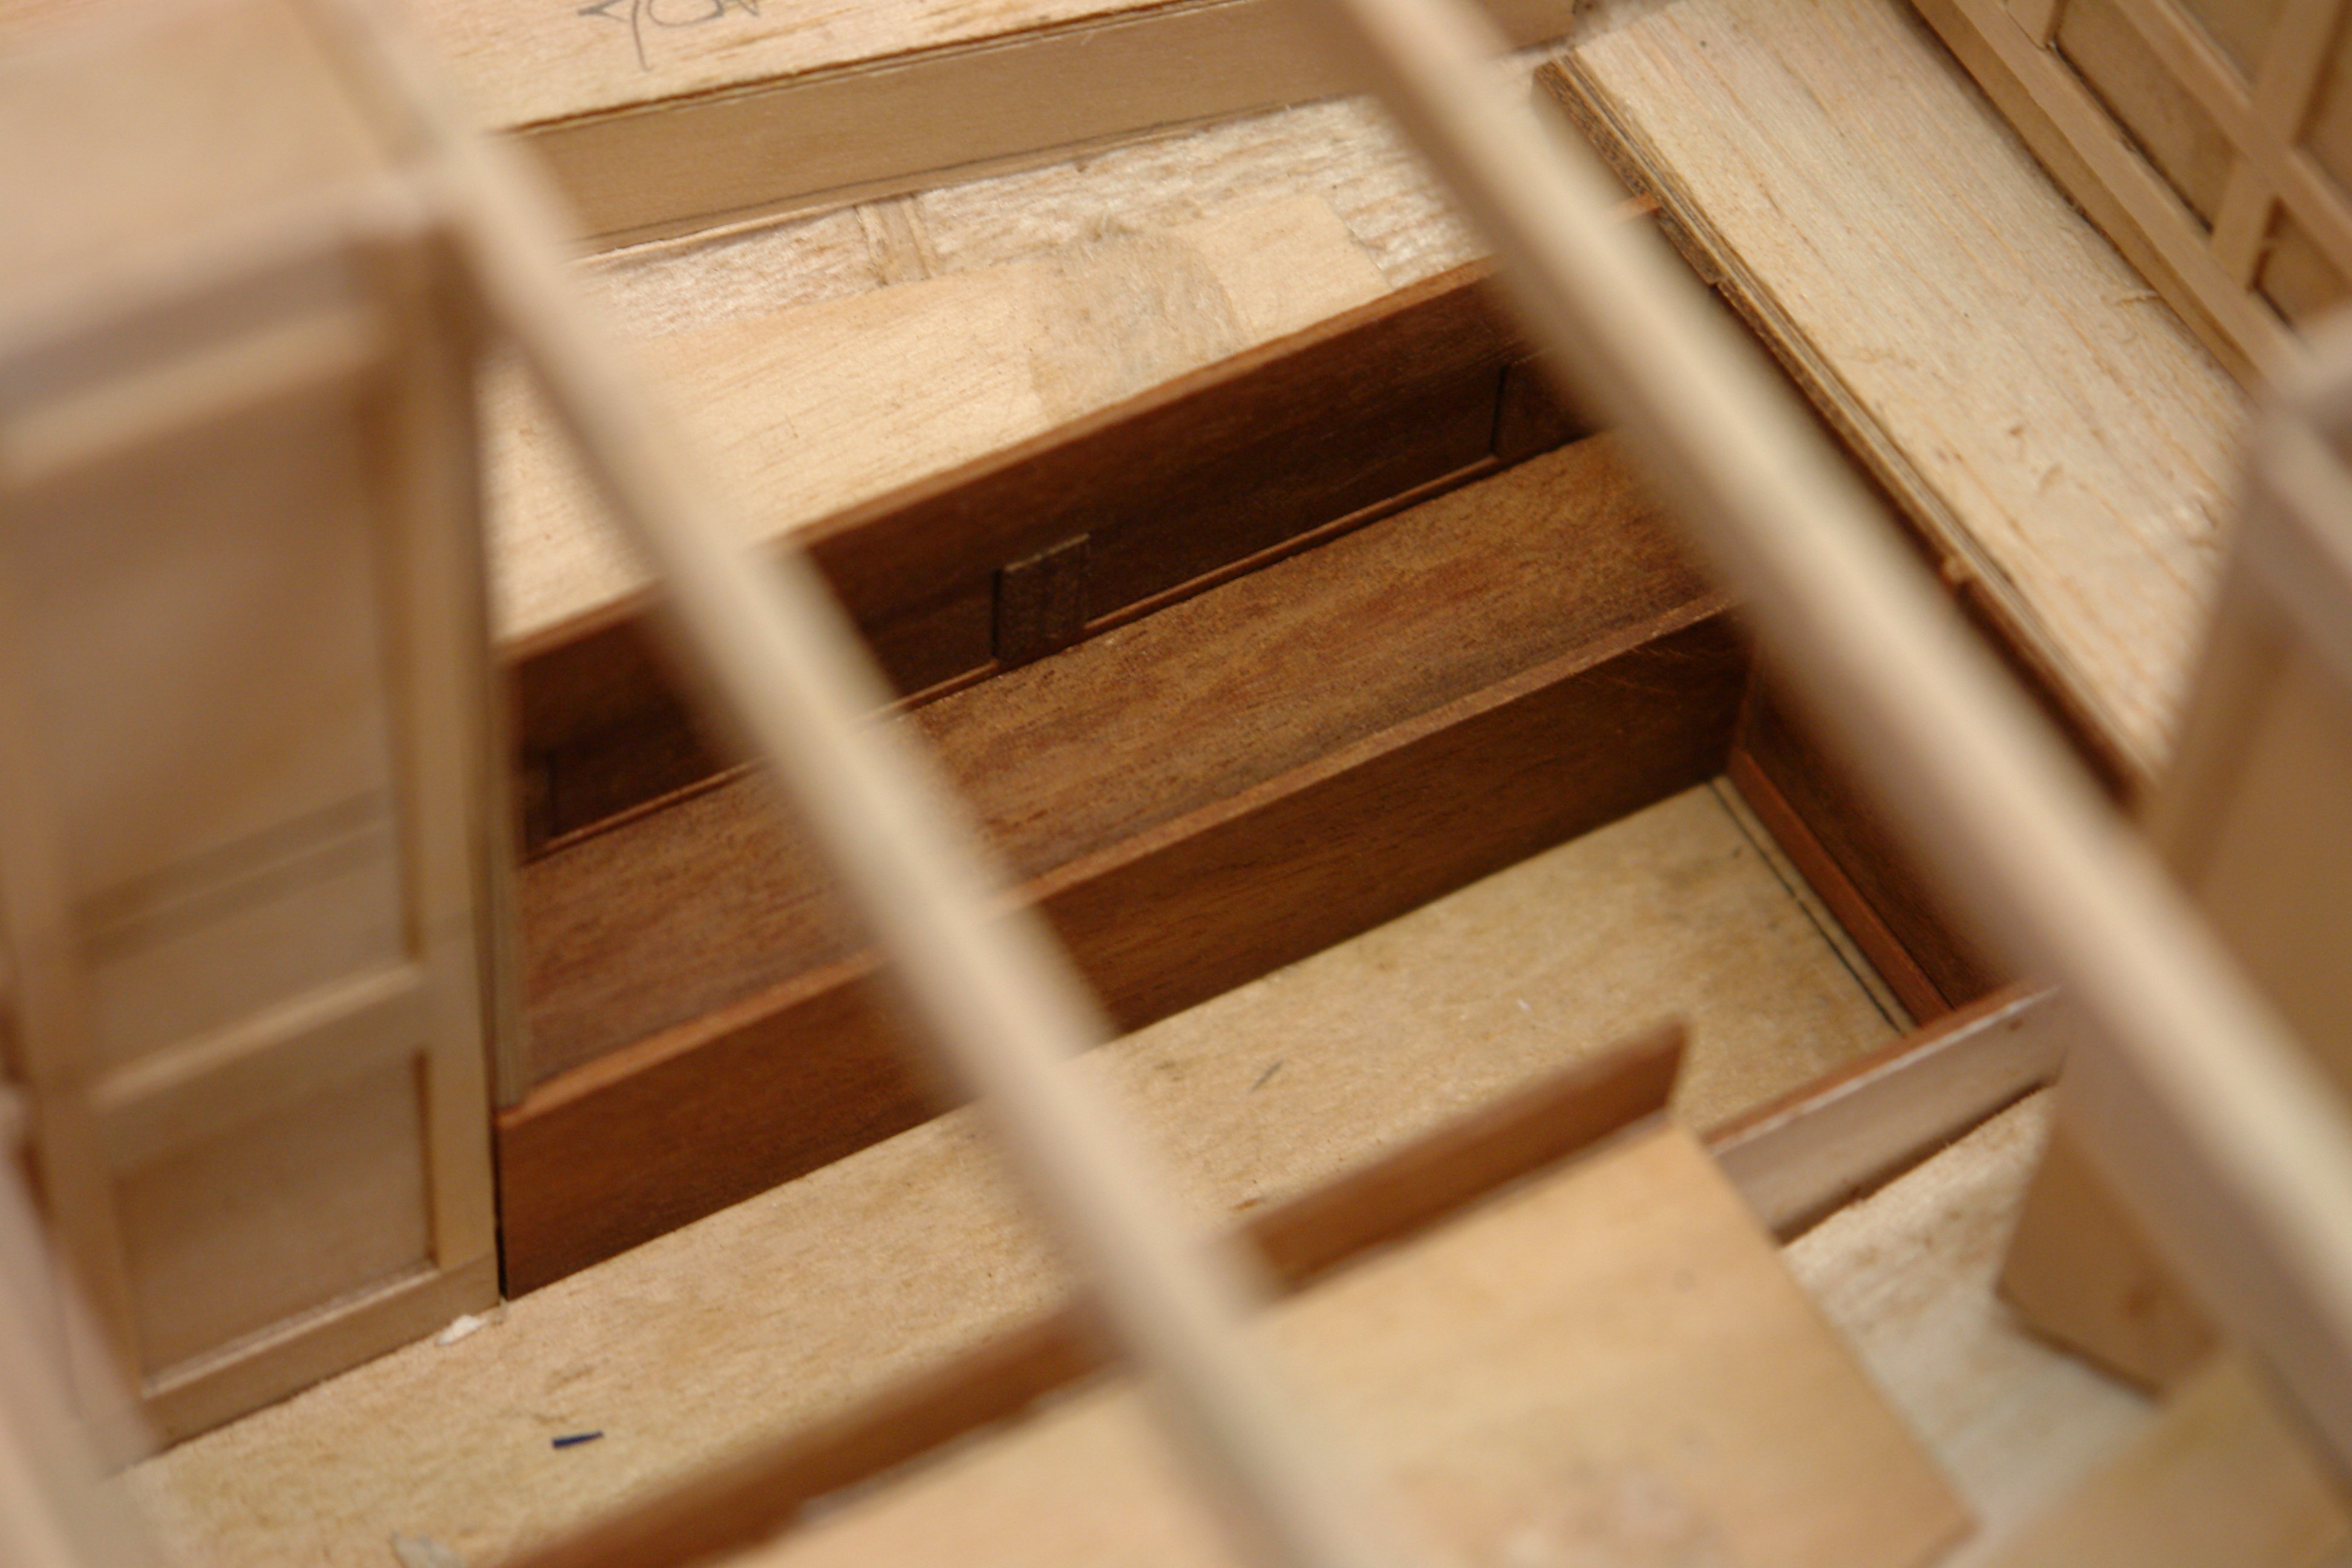
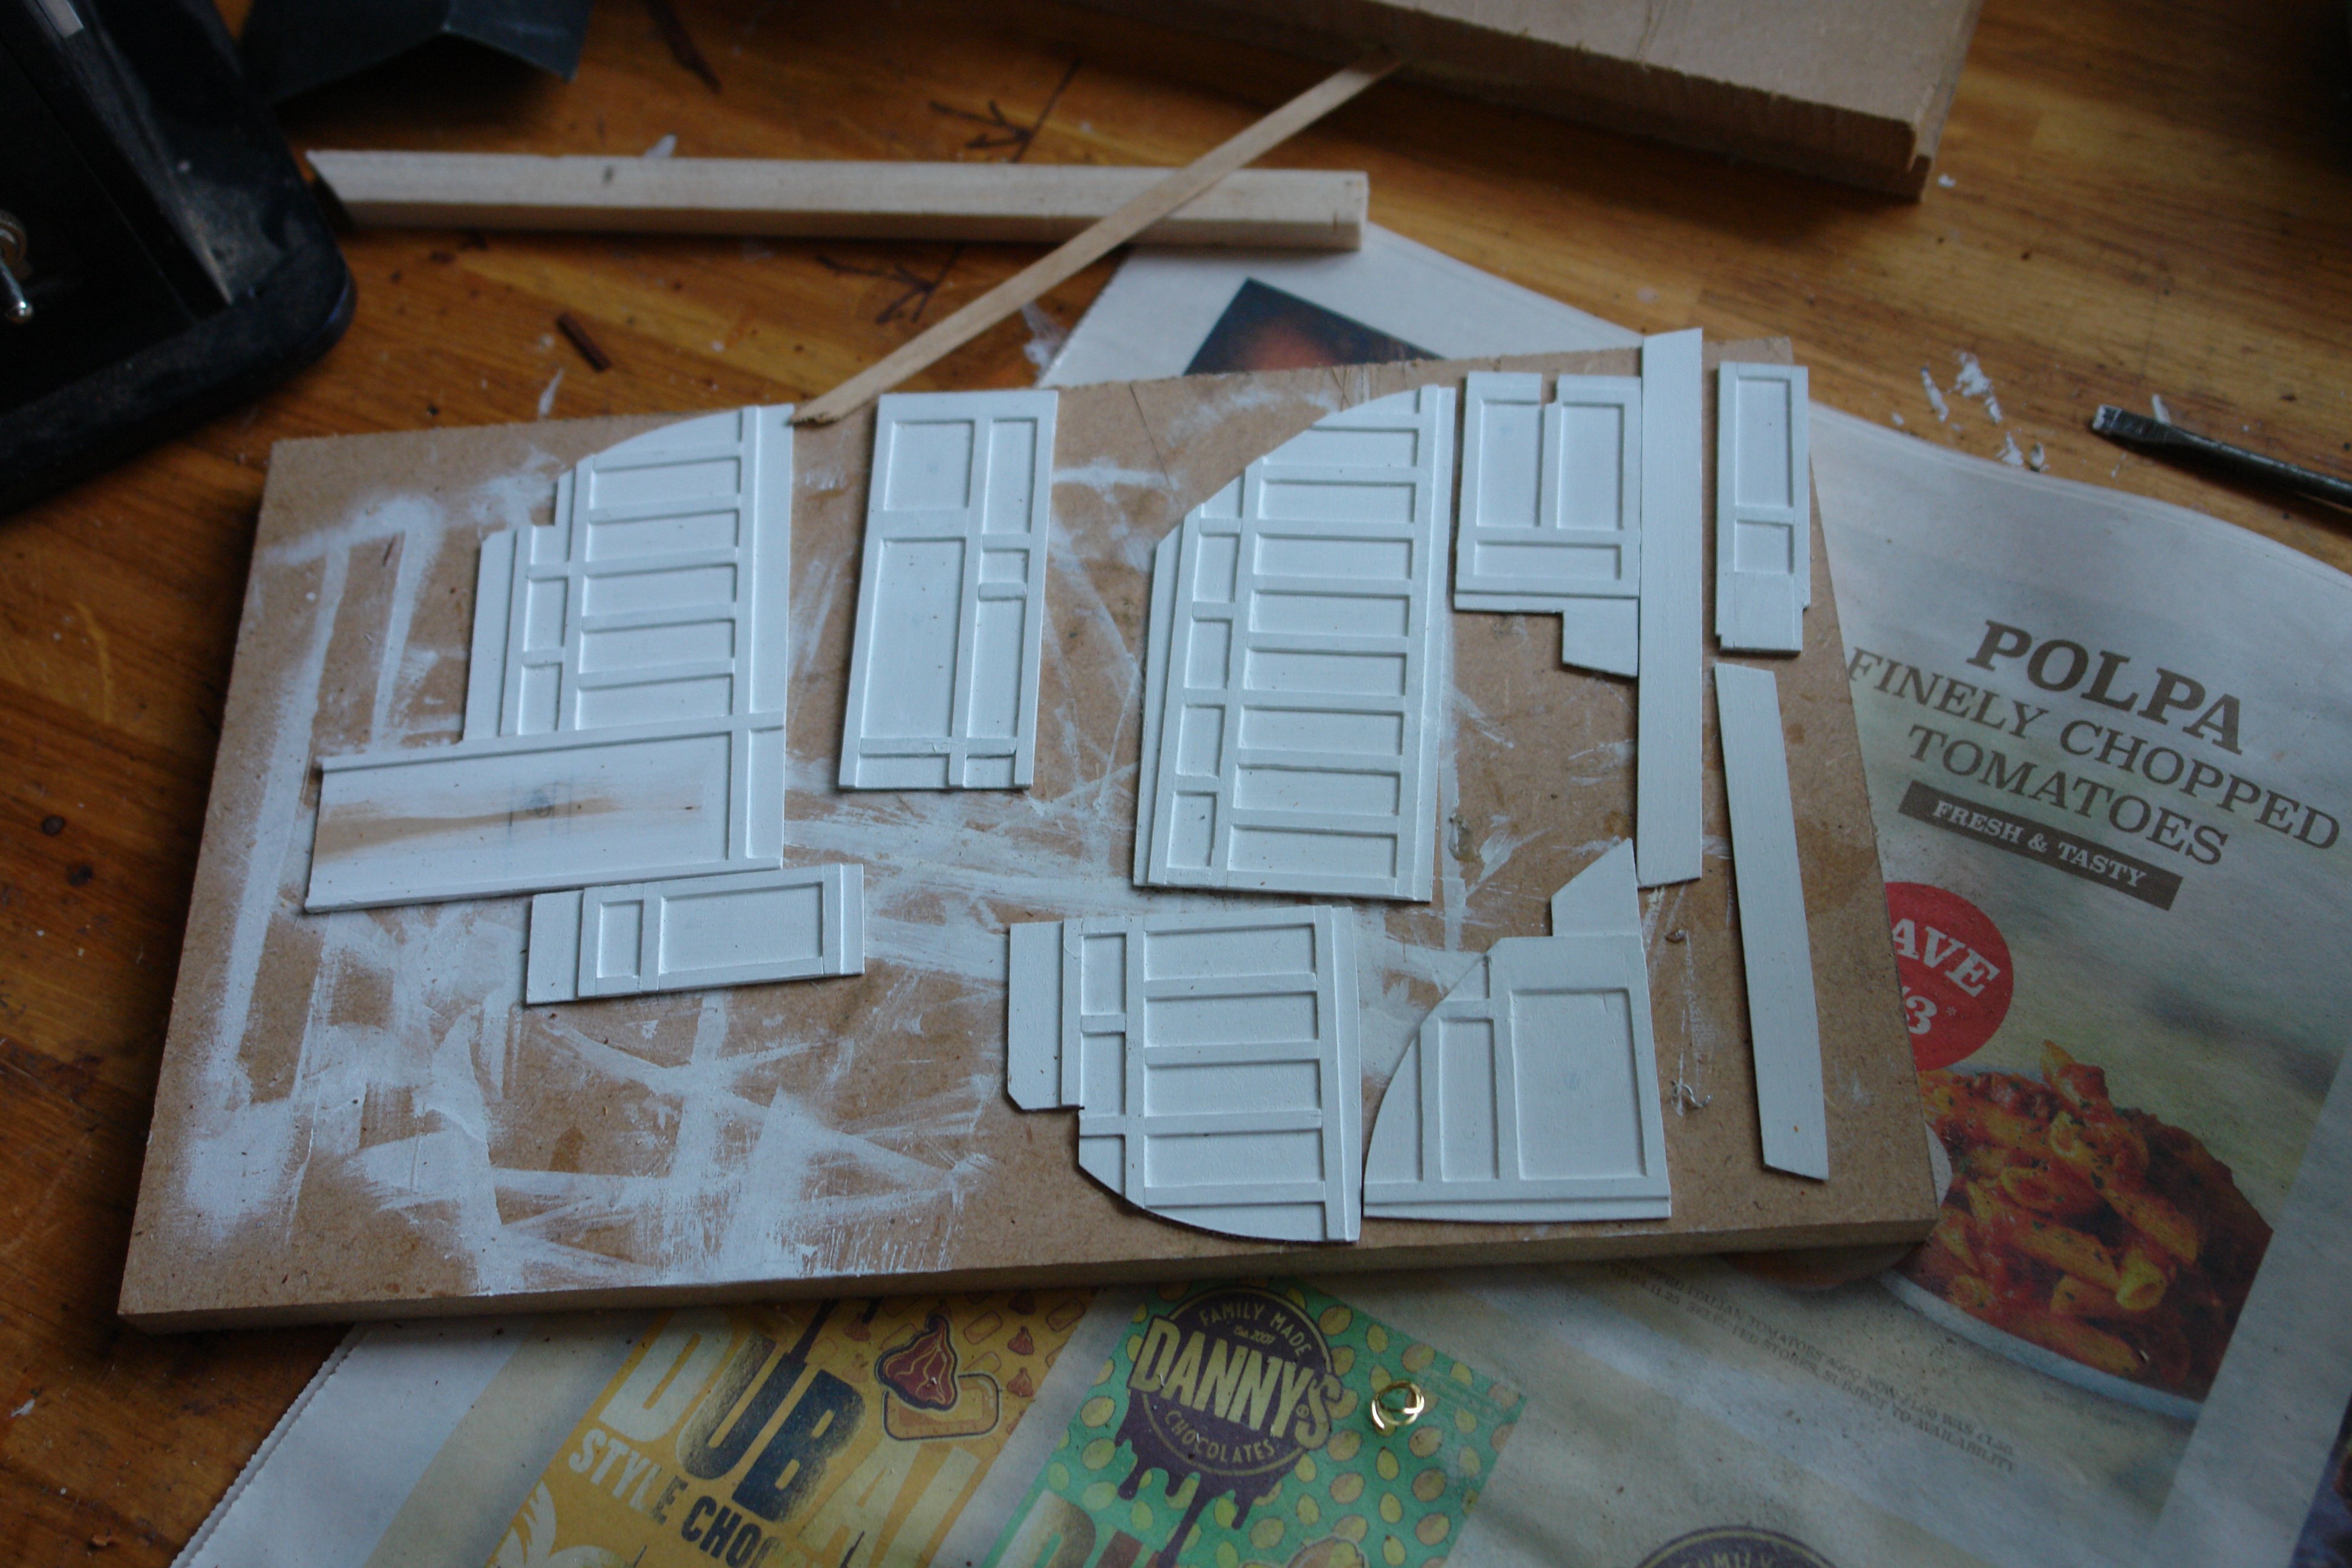
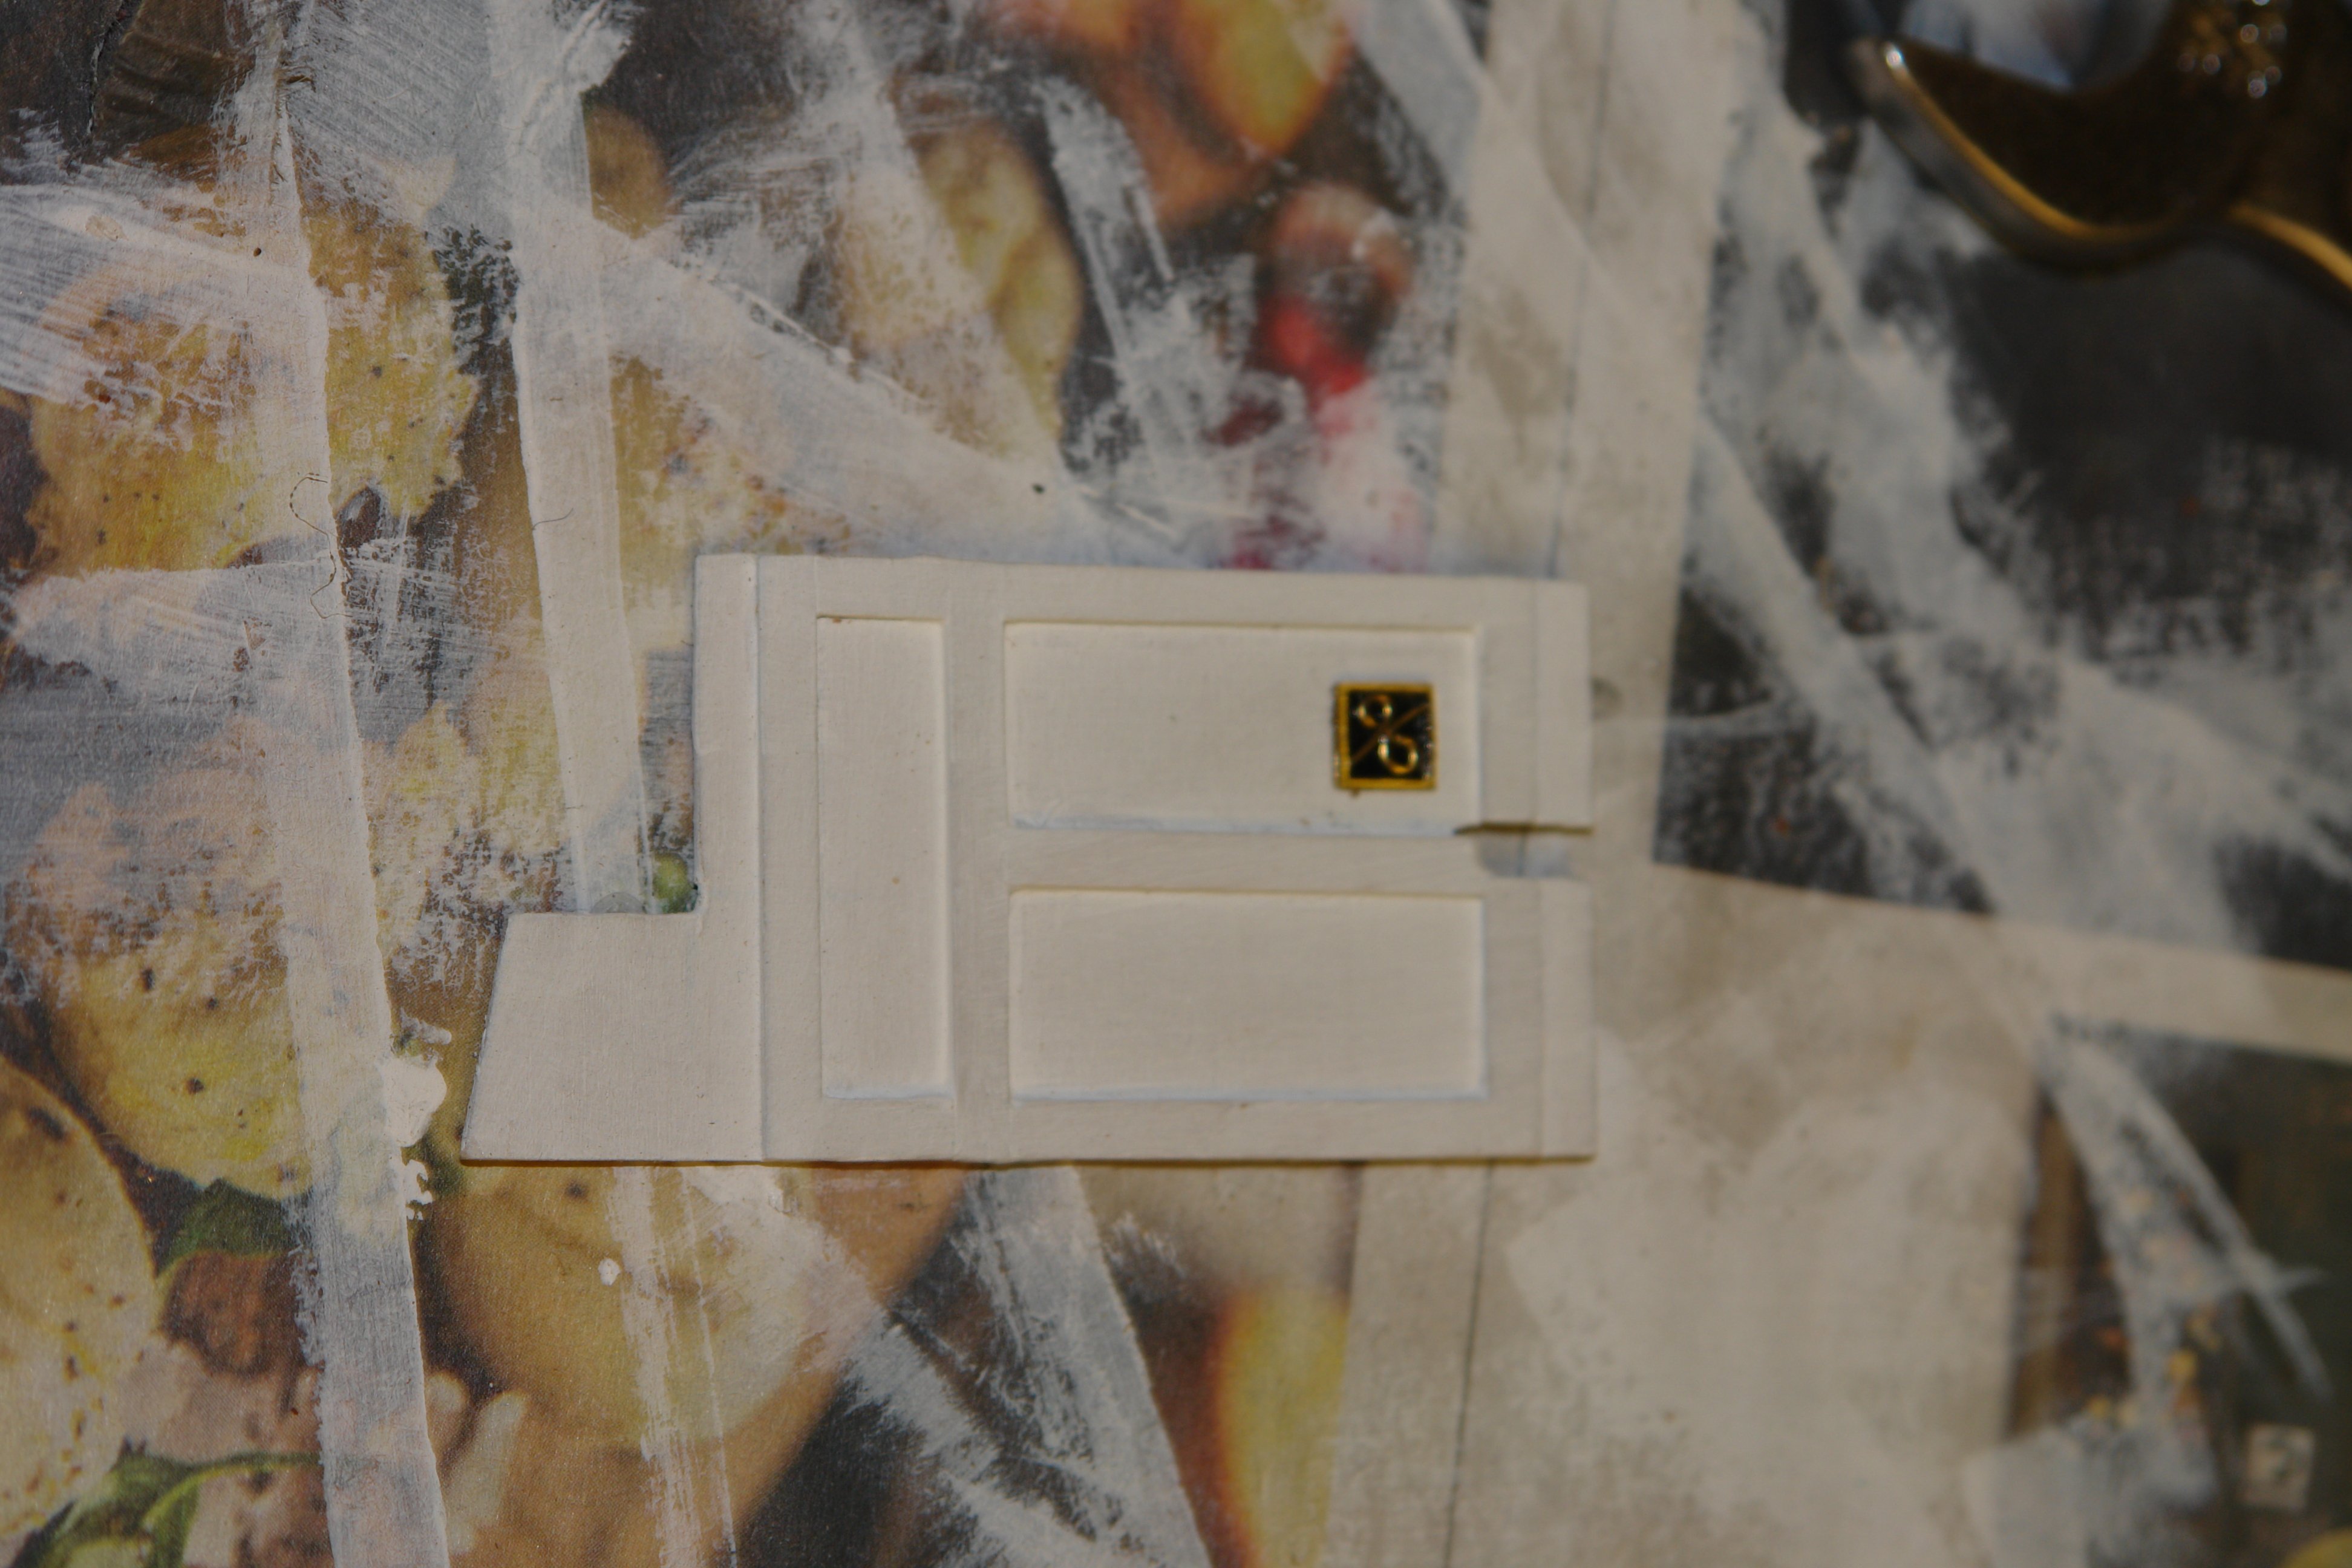
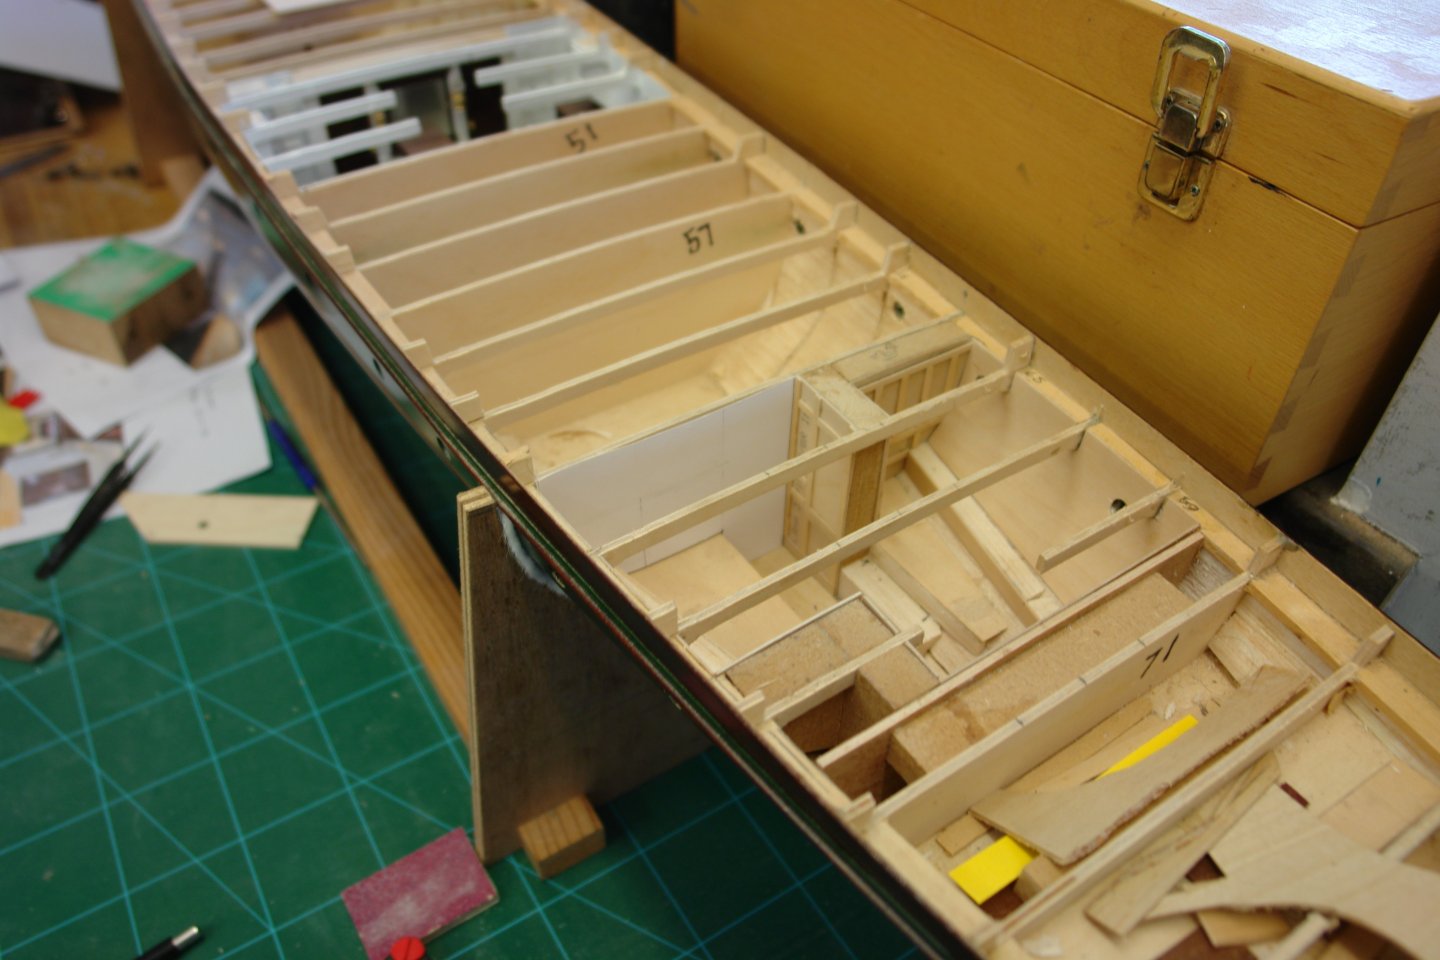
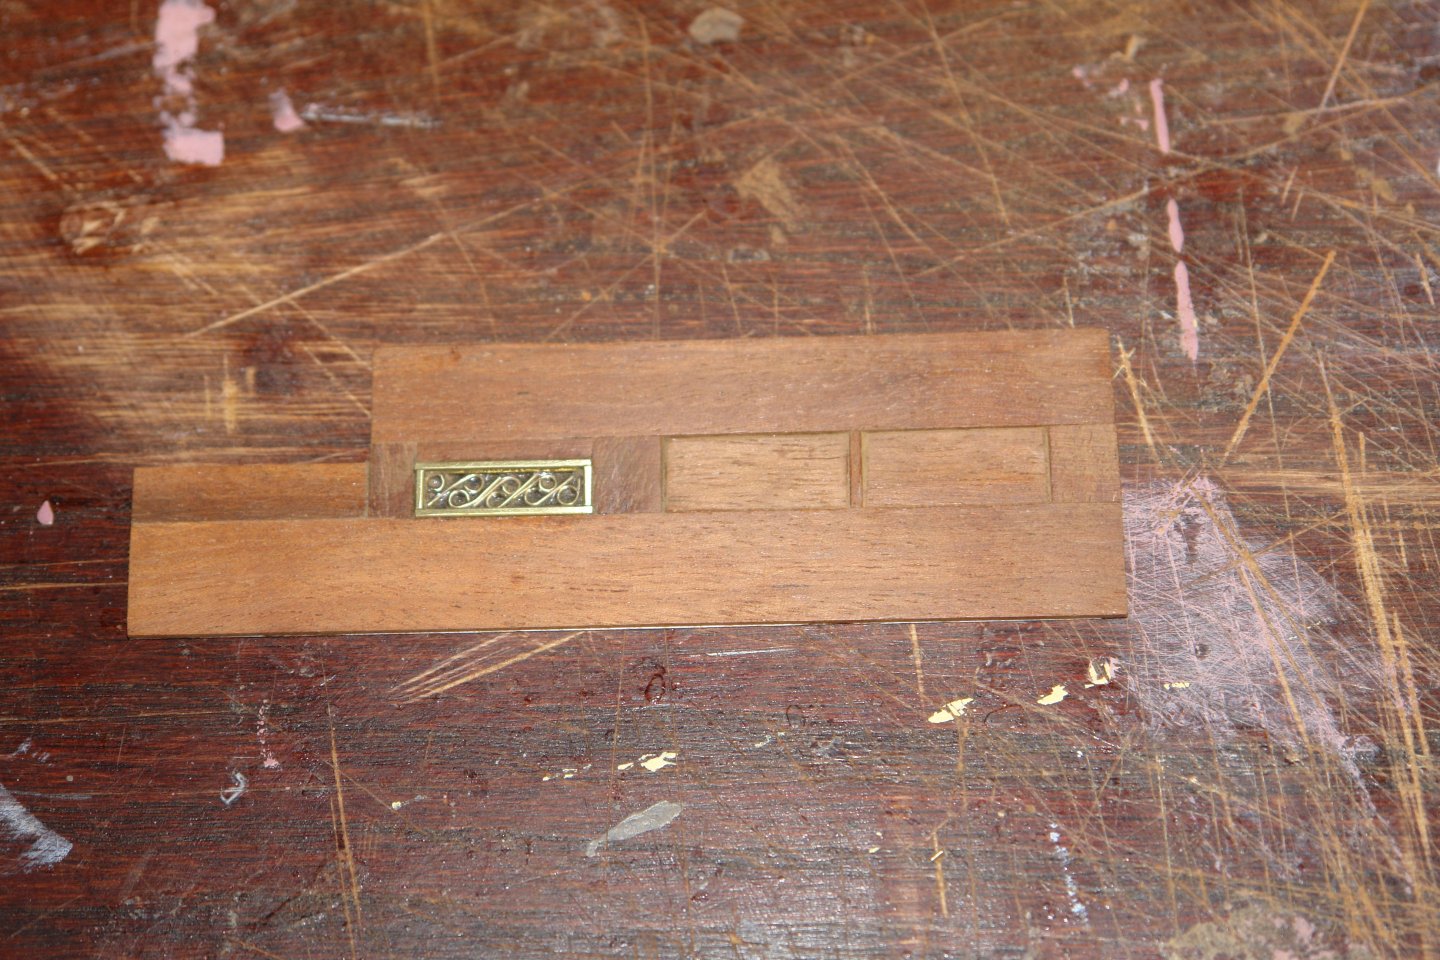
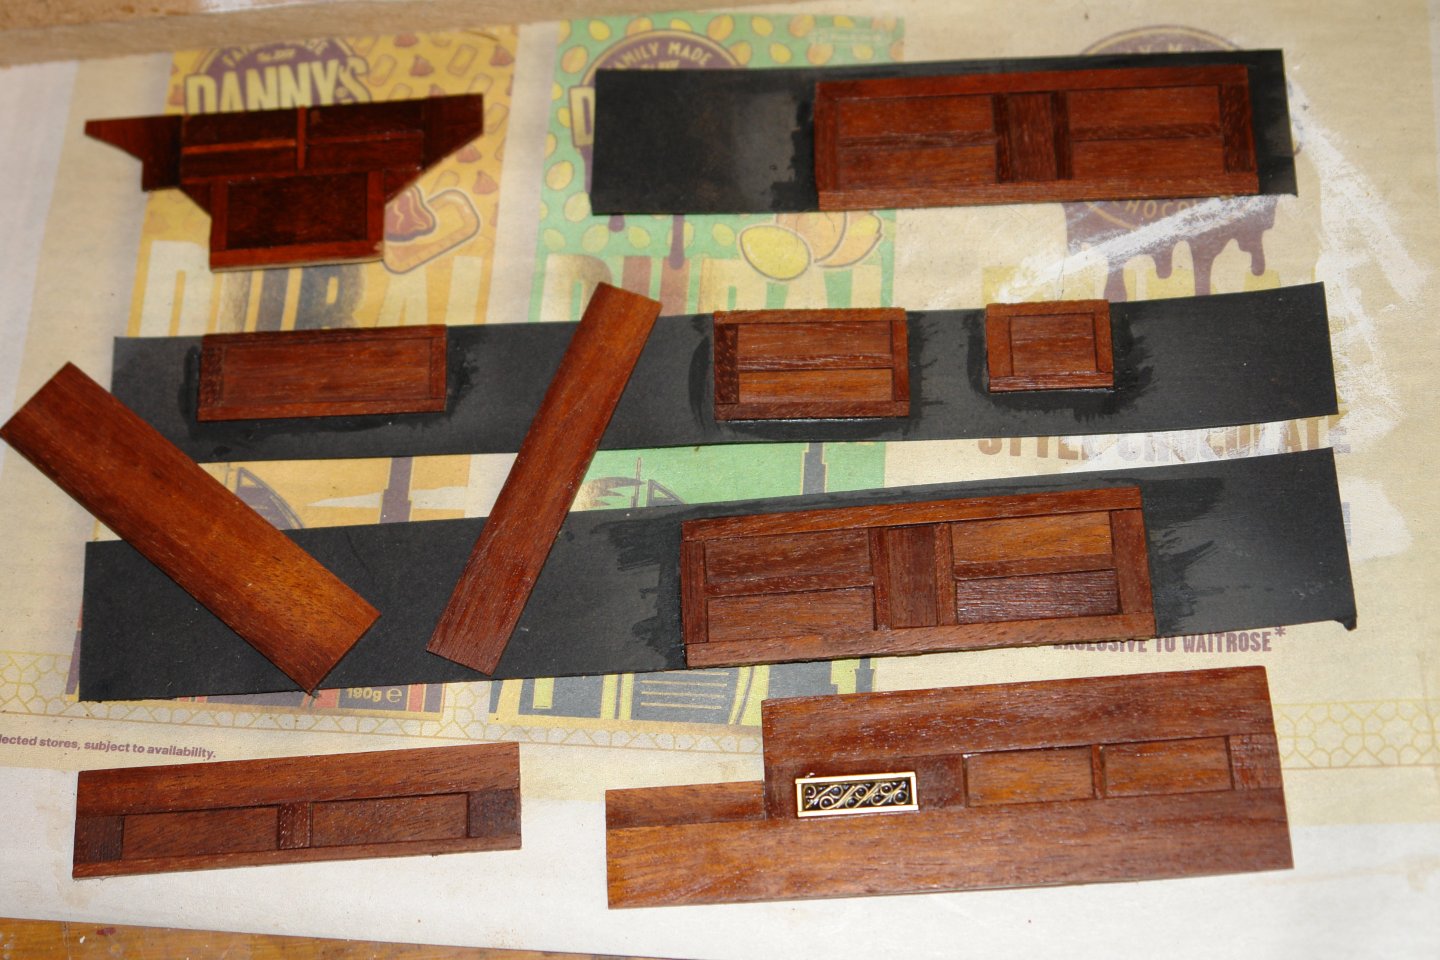
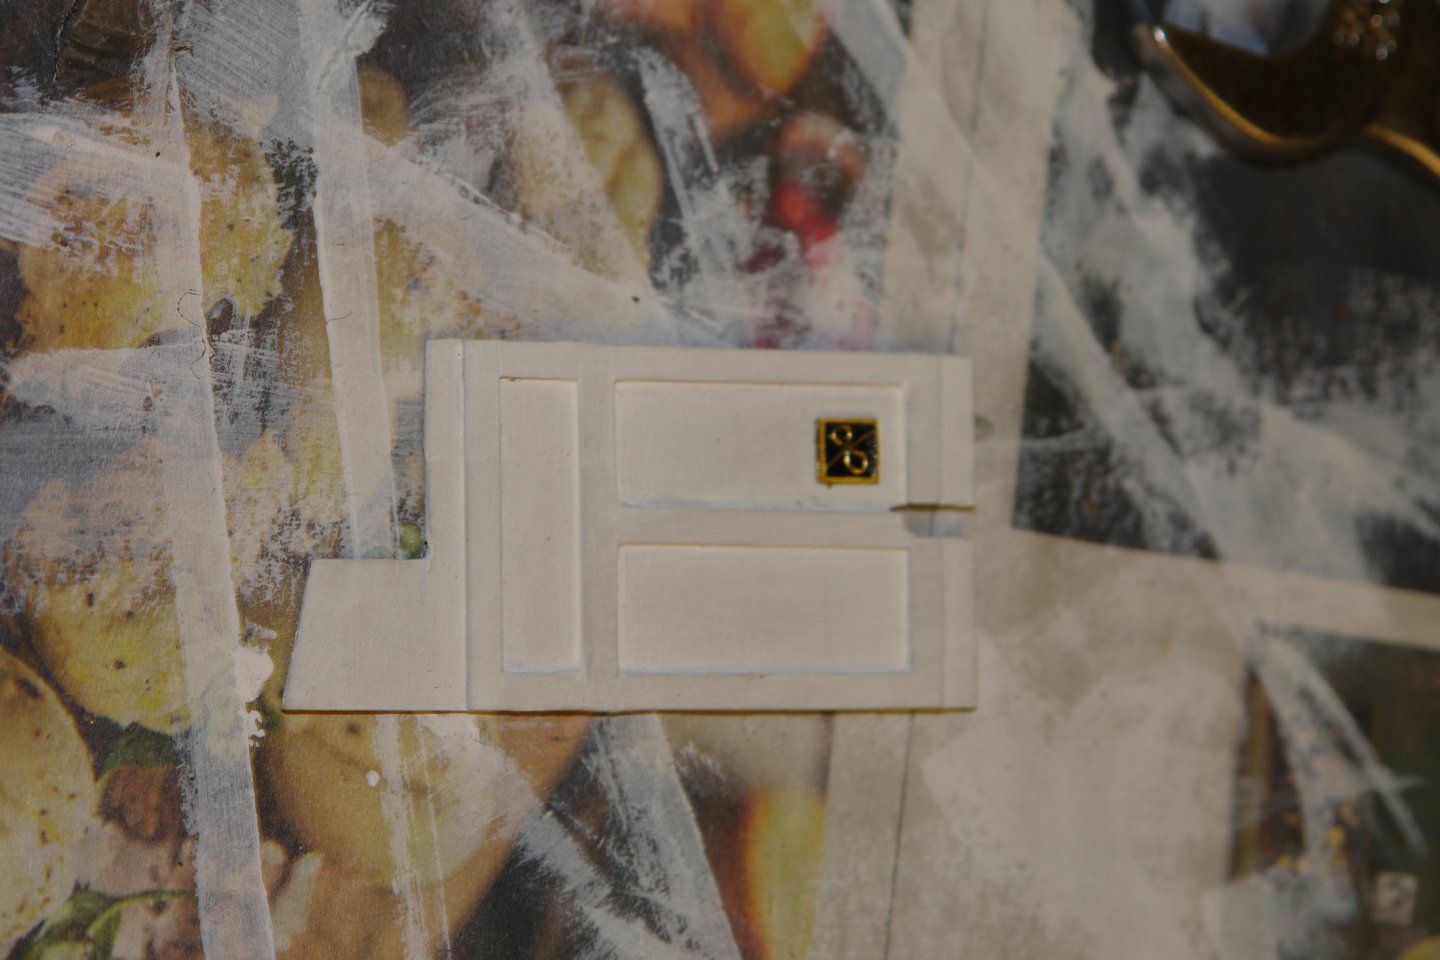
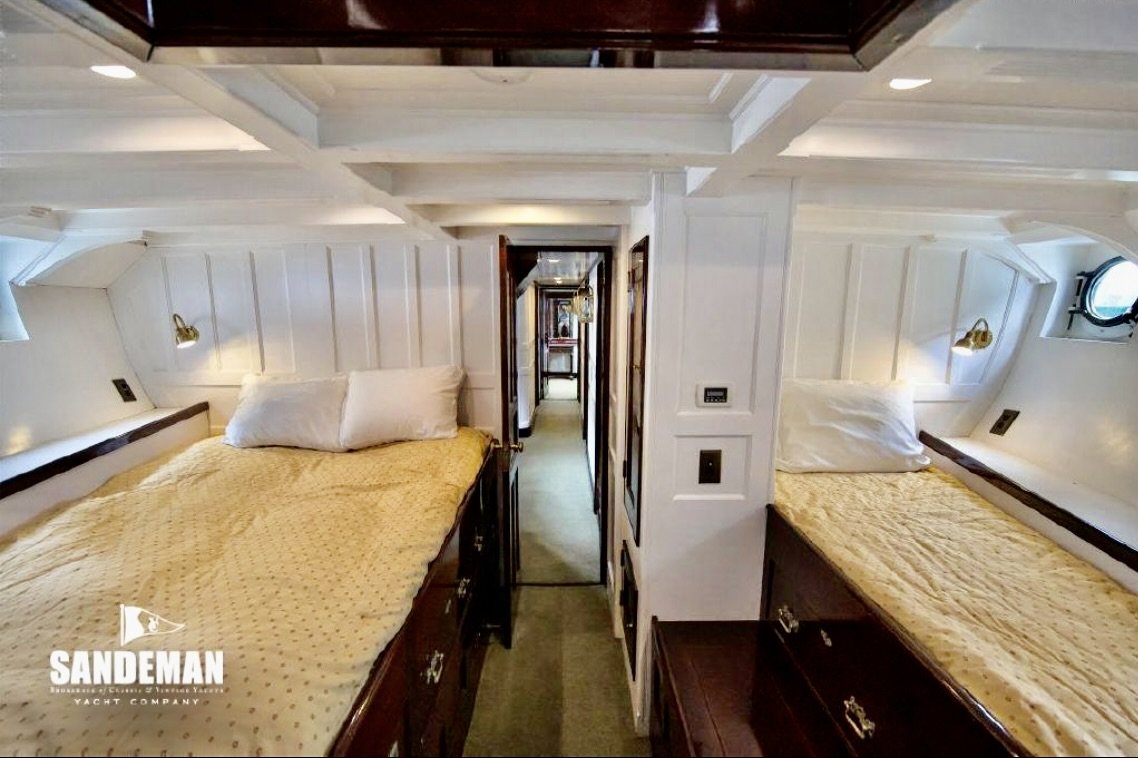
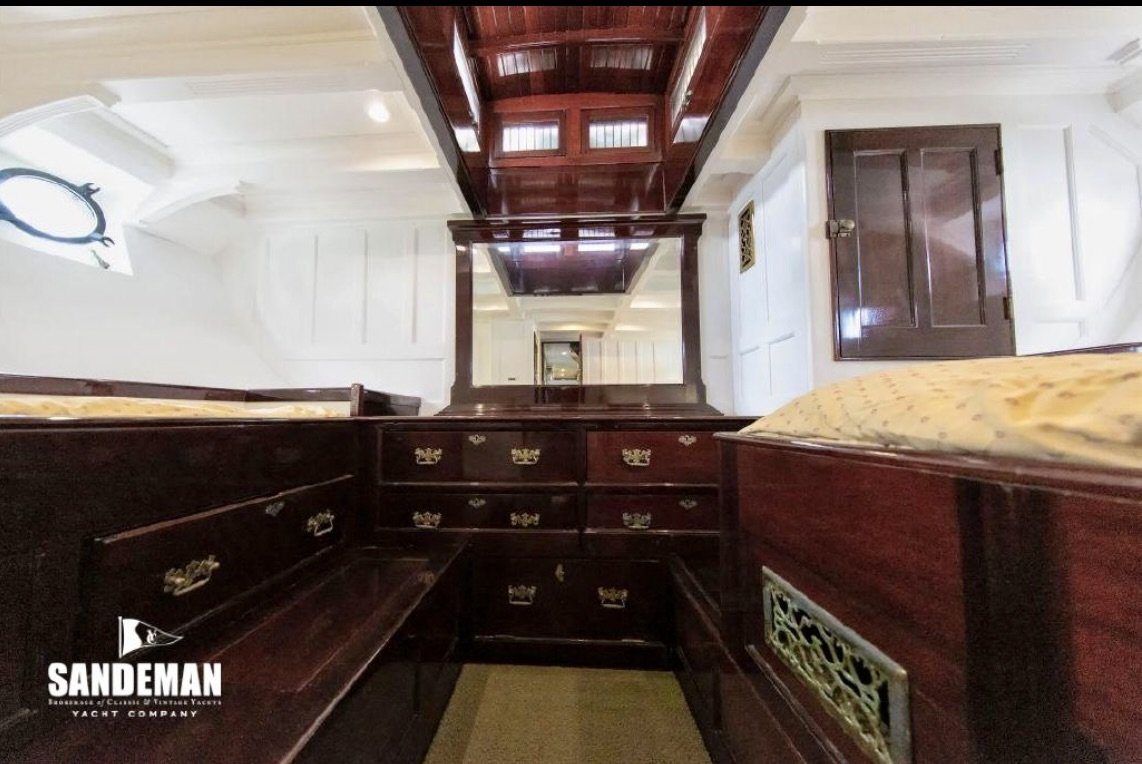
As I continue to unravel the contours of aft guest cabin i realise there are a few hidden areas that don't feature on any of the photos. The obscured areas lie between the foot end of the berths and rear wall on either beam. I am going to have to guess what is going on here. I am finding that card templates are the most successful way of progressing. Once the templates seem sensible I replace them with 1/32 ply. I continue to utilise my Starbucks sticks to hold surfaces while the glue sets. I am also using card templates to identify the shapes of the various walls. Below I have made the aft wall and some of the walls around the lockers. I have also clad the hull walls ready for painting. And then continuing with more templates and more wall cladding. Once the wall cladding panels were complete I moved on to the mahogany panelling. Here is the panel to the side of the double berth with its brass ventilation grille and two draws. Followed by many other mahogany parts. Including the aft end draw fronts, various doors, shelfs / steps and more draws. Getting the fitting of the mahogany parts correct seemed to take an age. All of the wall panels needed painting white. Plus another small ventilation grille. I now need to get on and glue it all together - but this may be after Christmas. A Merry Christmas to you all ---- Ho! Ho! Ho!.


-
Brian - Yes it seems to have worked very well. I keep shying away because I don't want to get bogged down with the frustrations of programming. Am I worrying needlessly - or should I just add it to the Santa list? Caroline turned out real good - well done.
-
Realtor - for those that need translation
-
Moron - child will probably grow up to be an estate agent! John - Exquisite - does she get a plate with your name on it - a legacy? Steve ........Hmmm! I am dreading the day that Benji has the same thought.
-
Must remember the tinning process, it works really well.
-
The more you practice the luckier you get.
-
The advantage is that by stringing a line between the bow and centre of the transom you get one fat and one slender version.
- 33 replies
-
- 2
-

-
- gaff sloop
- restoration
- (and 1 more)
-
Beautiful paint job Mark.
-
Or saw it down the middle and create 2 new models for the price of one (just kidding).
- 33 replies
-
- 1
-

-
- gaff sloop
- restoration
- (and 1 more)
-
Phil - I fear his big sister and mother are into train disasters. How fast can it go round corners with the mini figures on the roof being a favourite game. Benji is by far the least of my worries. Thank you Keith and the same to you and yours.
-
Michael - You are back - i was only wondering what had happened to you a couple of days ago. Very pleased to see you are still functional.🙂
-
John - Interesting no Plimsoll mark - on the original.
-
Steve - now you mention it - this photo does show it quite noticeably I suppose it could have been a camera effect but the measurements are quite conclusive. I am thinking that the curve and twist may have been present from birth as it is hard to see how such a solid build would have distorted so much without more obvious structural failure. Pity though, I was looking forward to the journey. I think you are right, it would be difficult to make a silk purse out of this sow's ear.

- 33 replies
-
- 4
-
-
- gaff sloop
- restoration
- (and 1 more)
-
There is an old one in the loft above the garage. However I have been steadily buying LEGO electric train track off eBay. He is coming over for a few days between Christmas and New Year and it will all be set out ready for his arrival. 🙂
-
Hakan - looks great - nothing to worry about really. 4th anniversary coming up soon, good to see you are still thriving.
-
It's just a bit rustic - more in keeping with Billy than the original in my view. In fact the original looks more suited to a William than a Billy.
-
Keith - Bean said only last week - Quote - "it is my best present because when I opened it it was full of presents" ------- we had wrapped the accessories. Yes she plays with it and Benji does as well - he is in charge of disorganisation. His passion however is choo choos. He is now 2yrs 3months and quite a character. John - fortunately being a reciprocating steam engine I guess it is very quiet. The prop shaft wizzing round 12" below the floor however might be a different story.
-
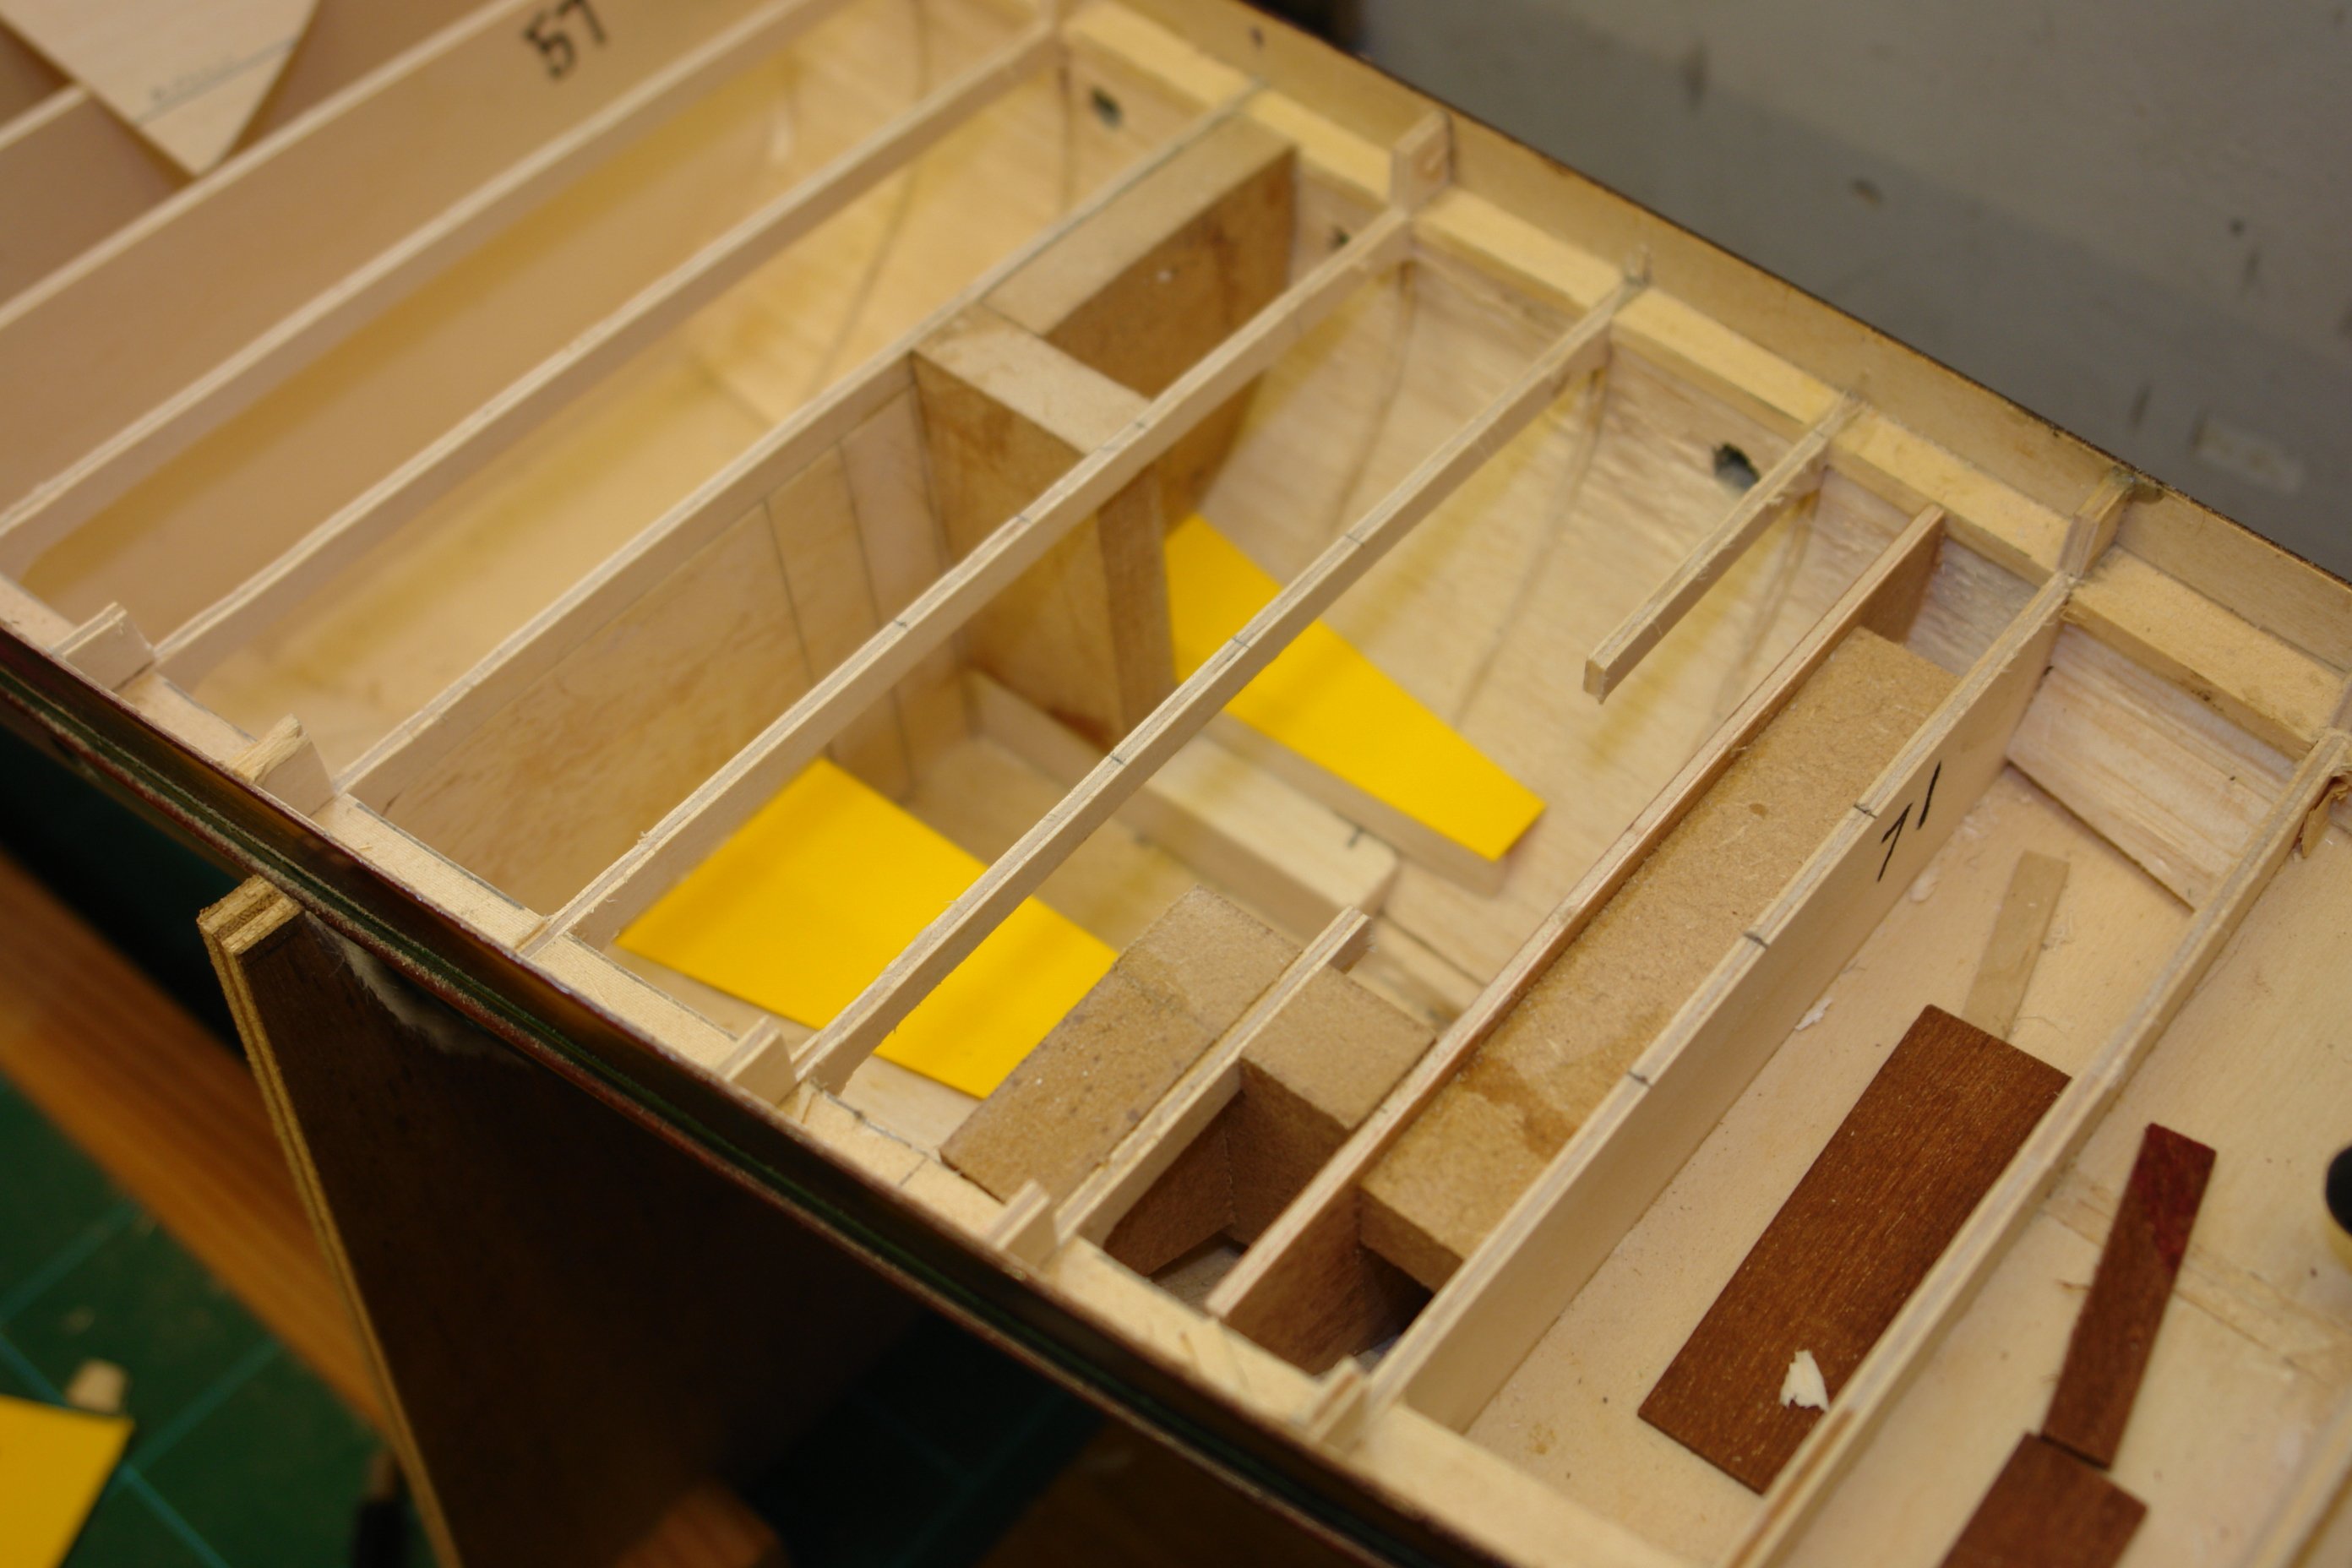
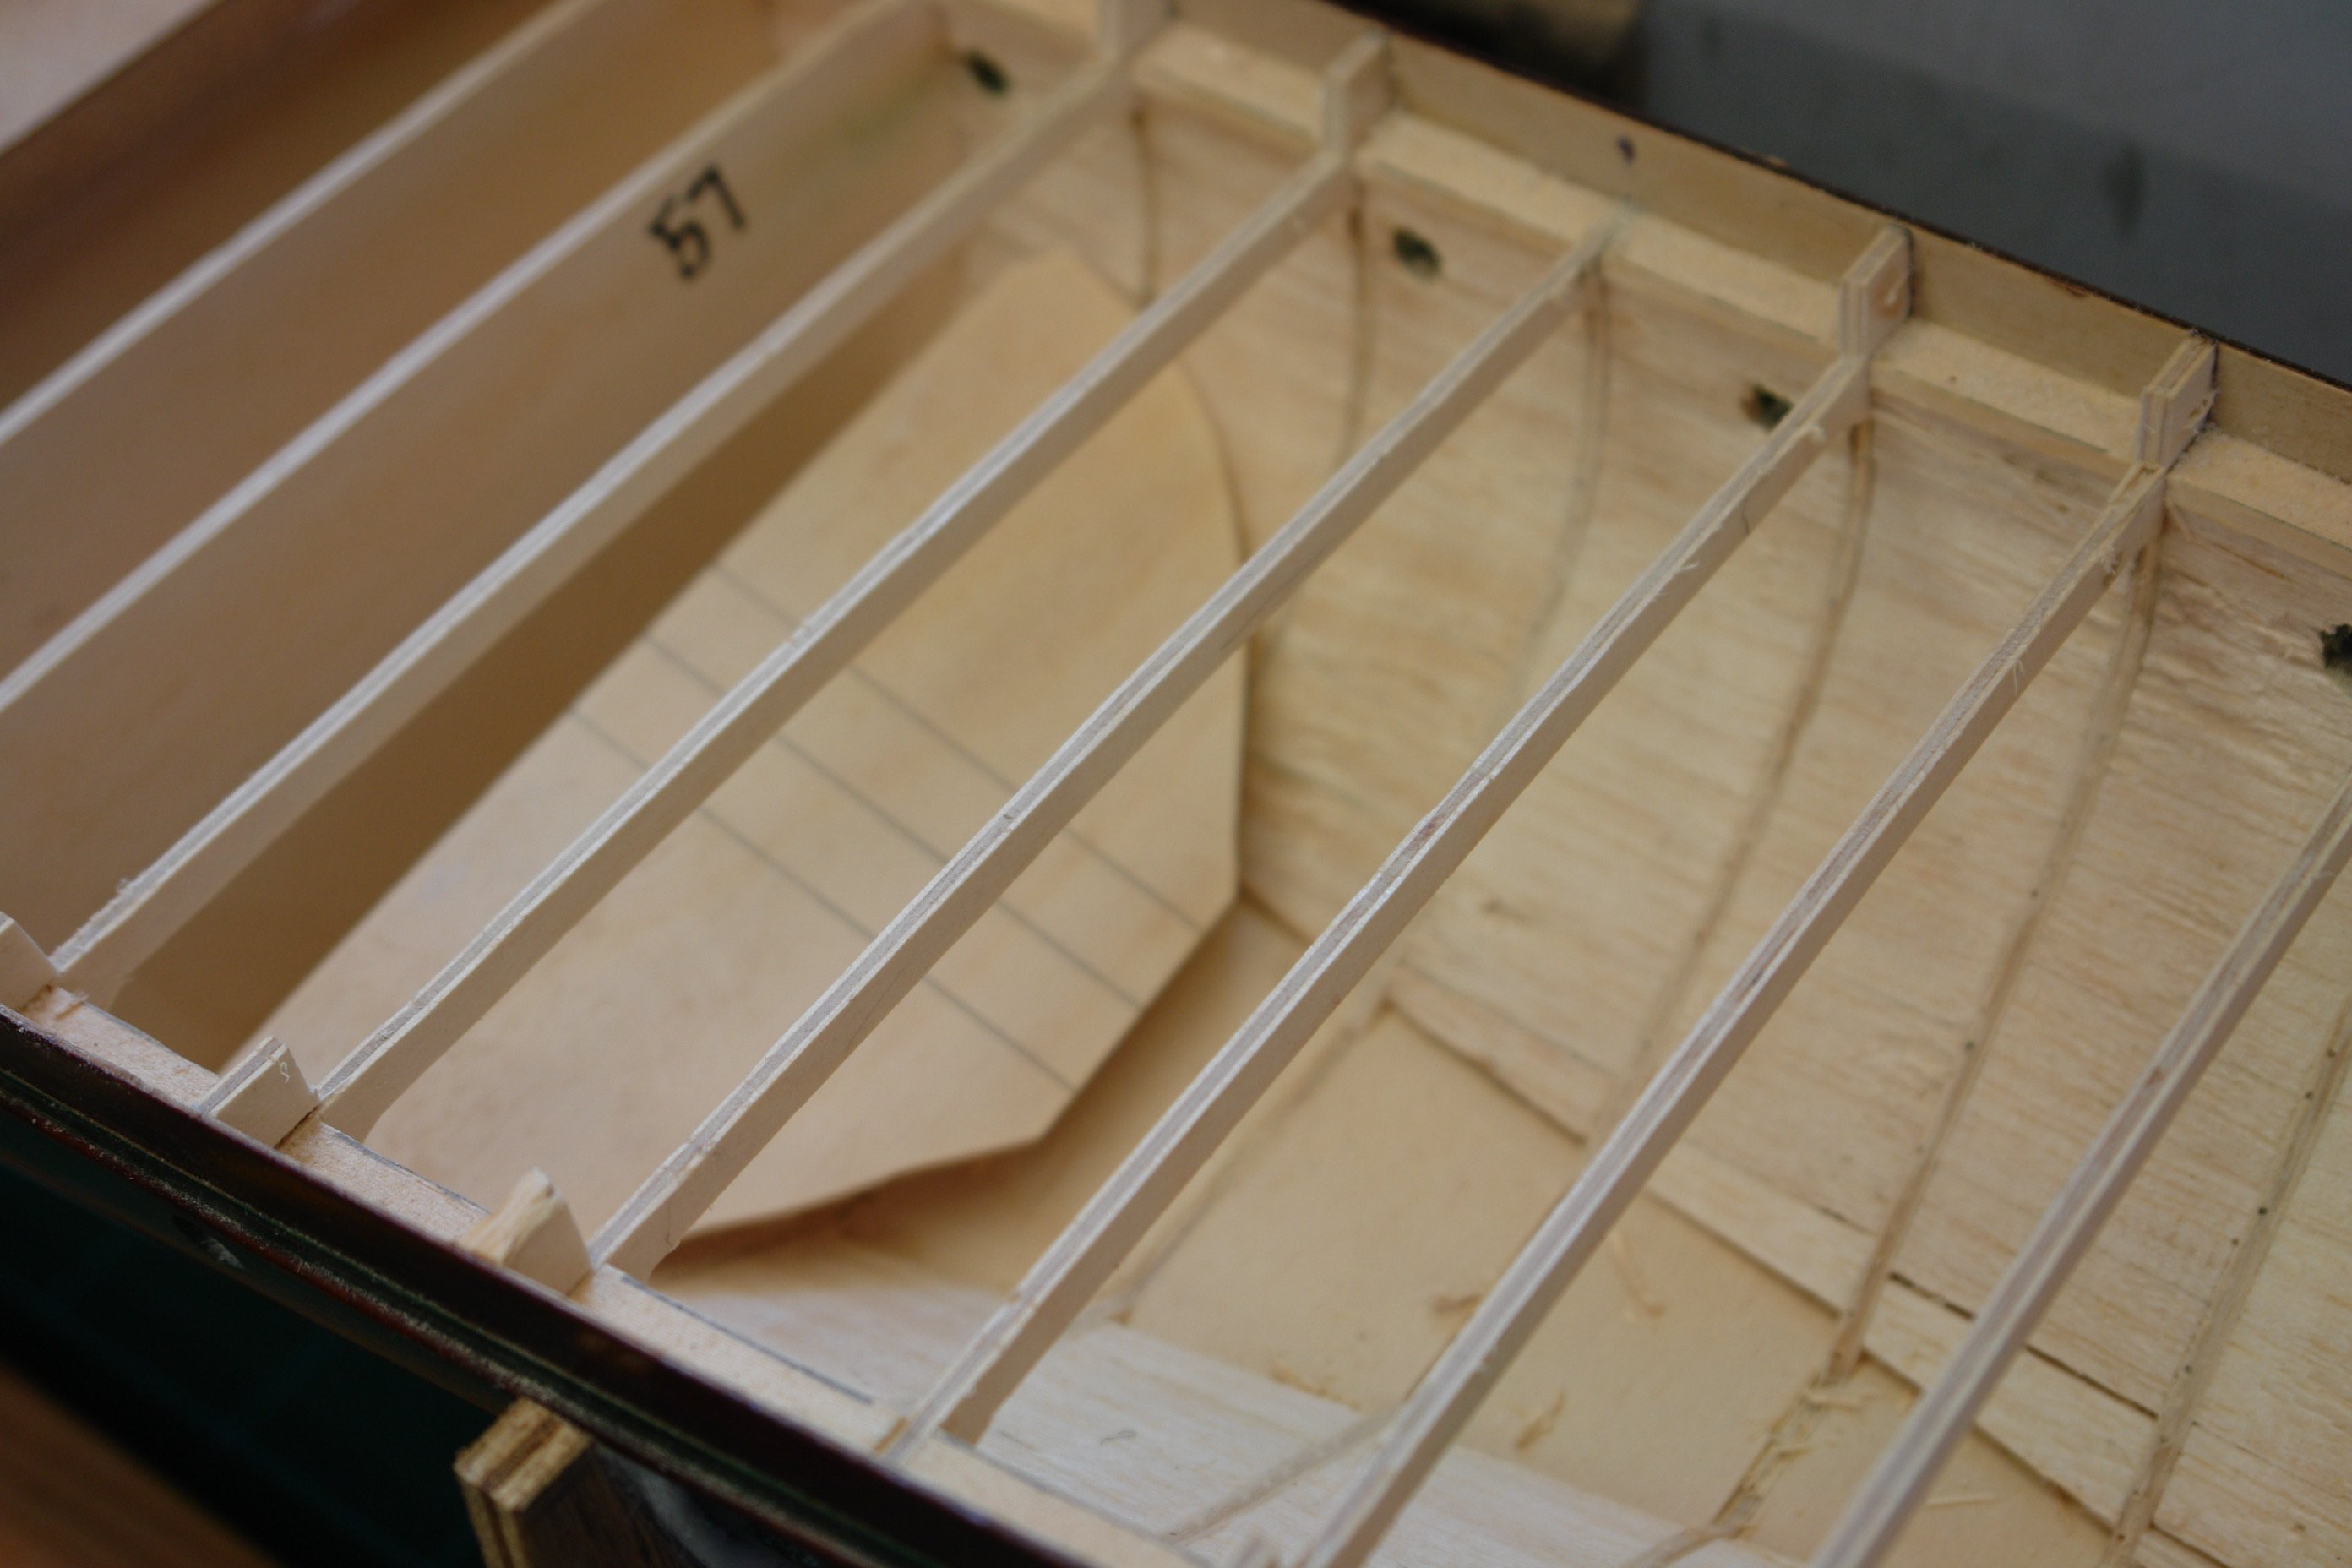
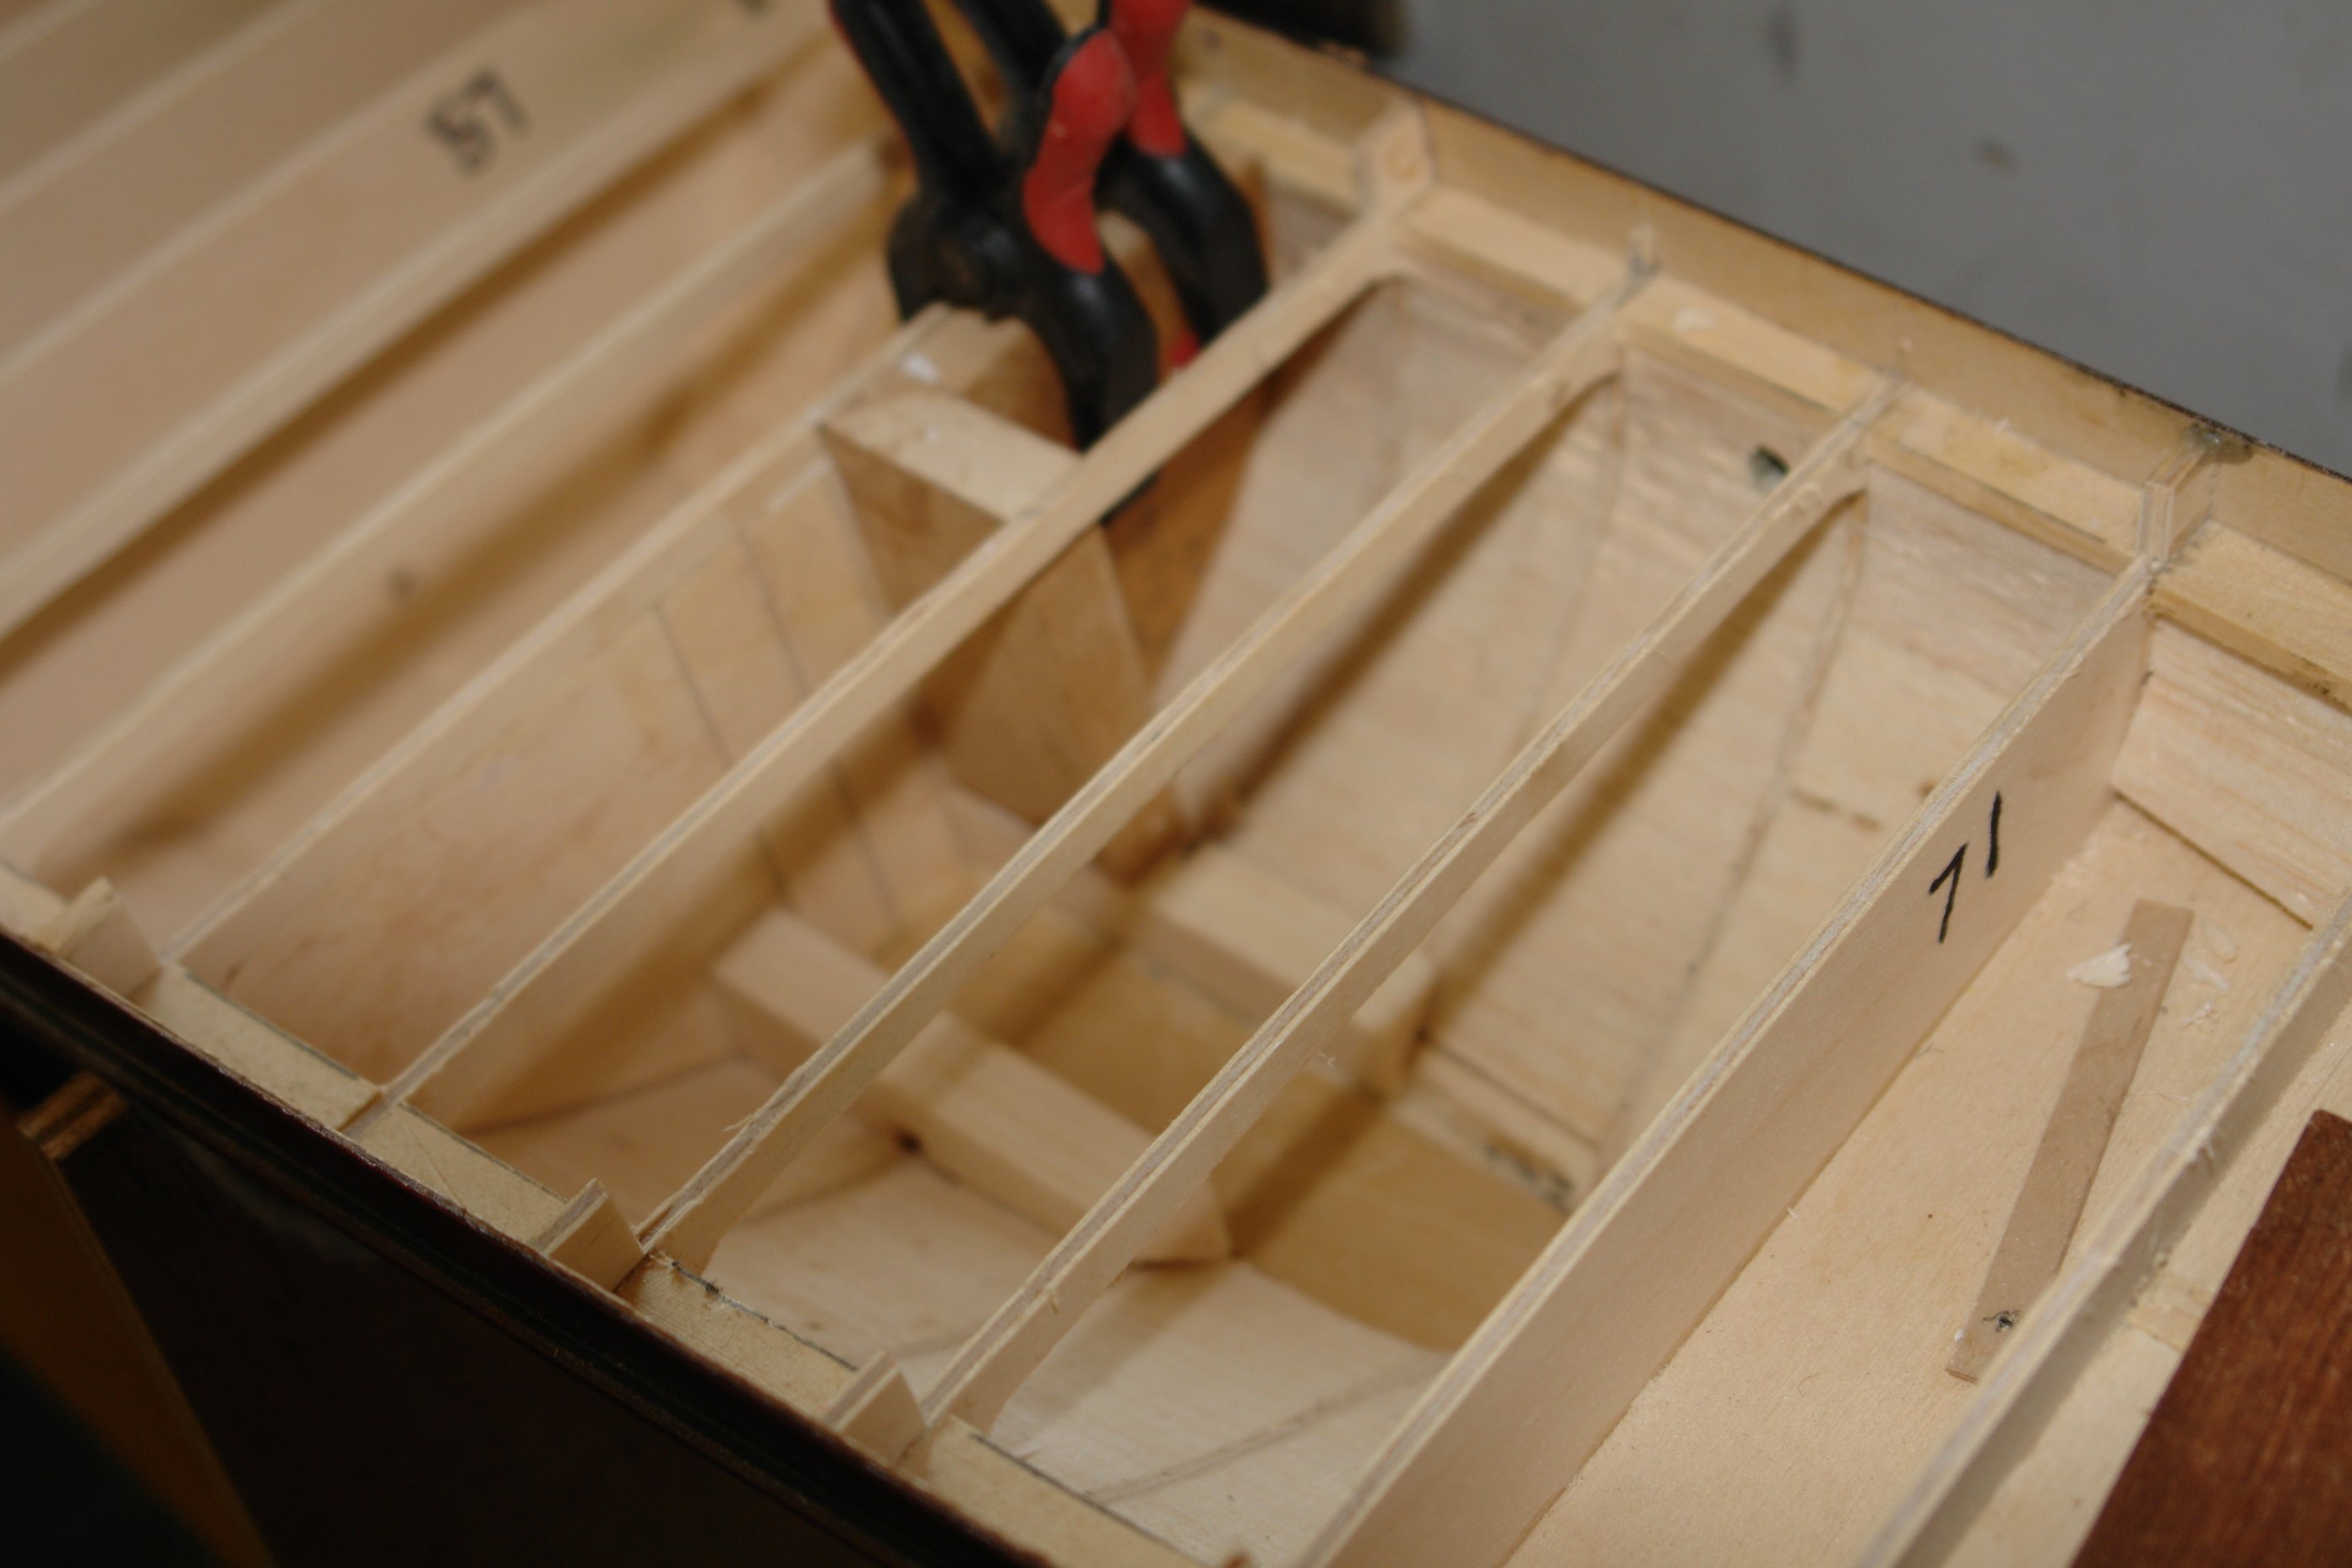
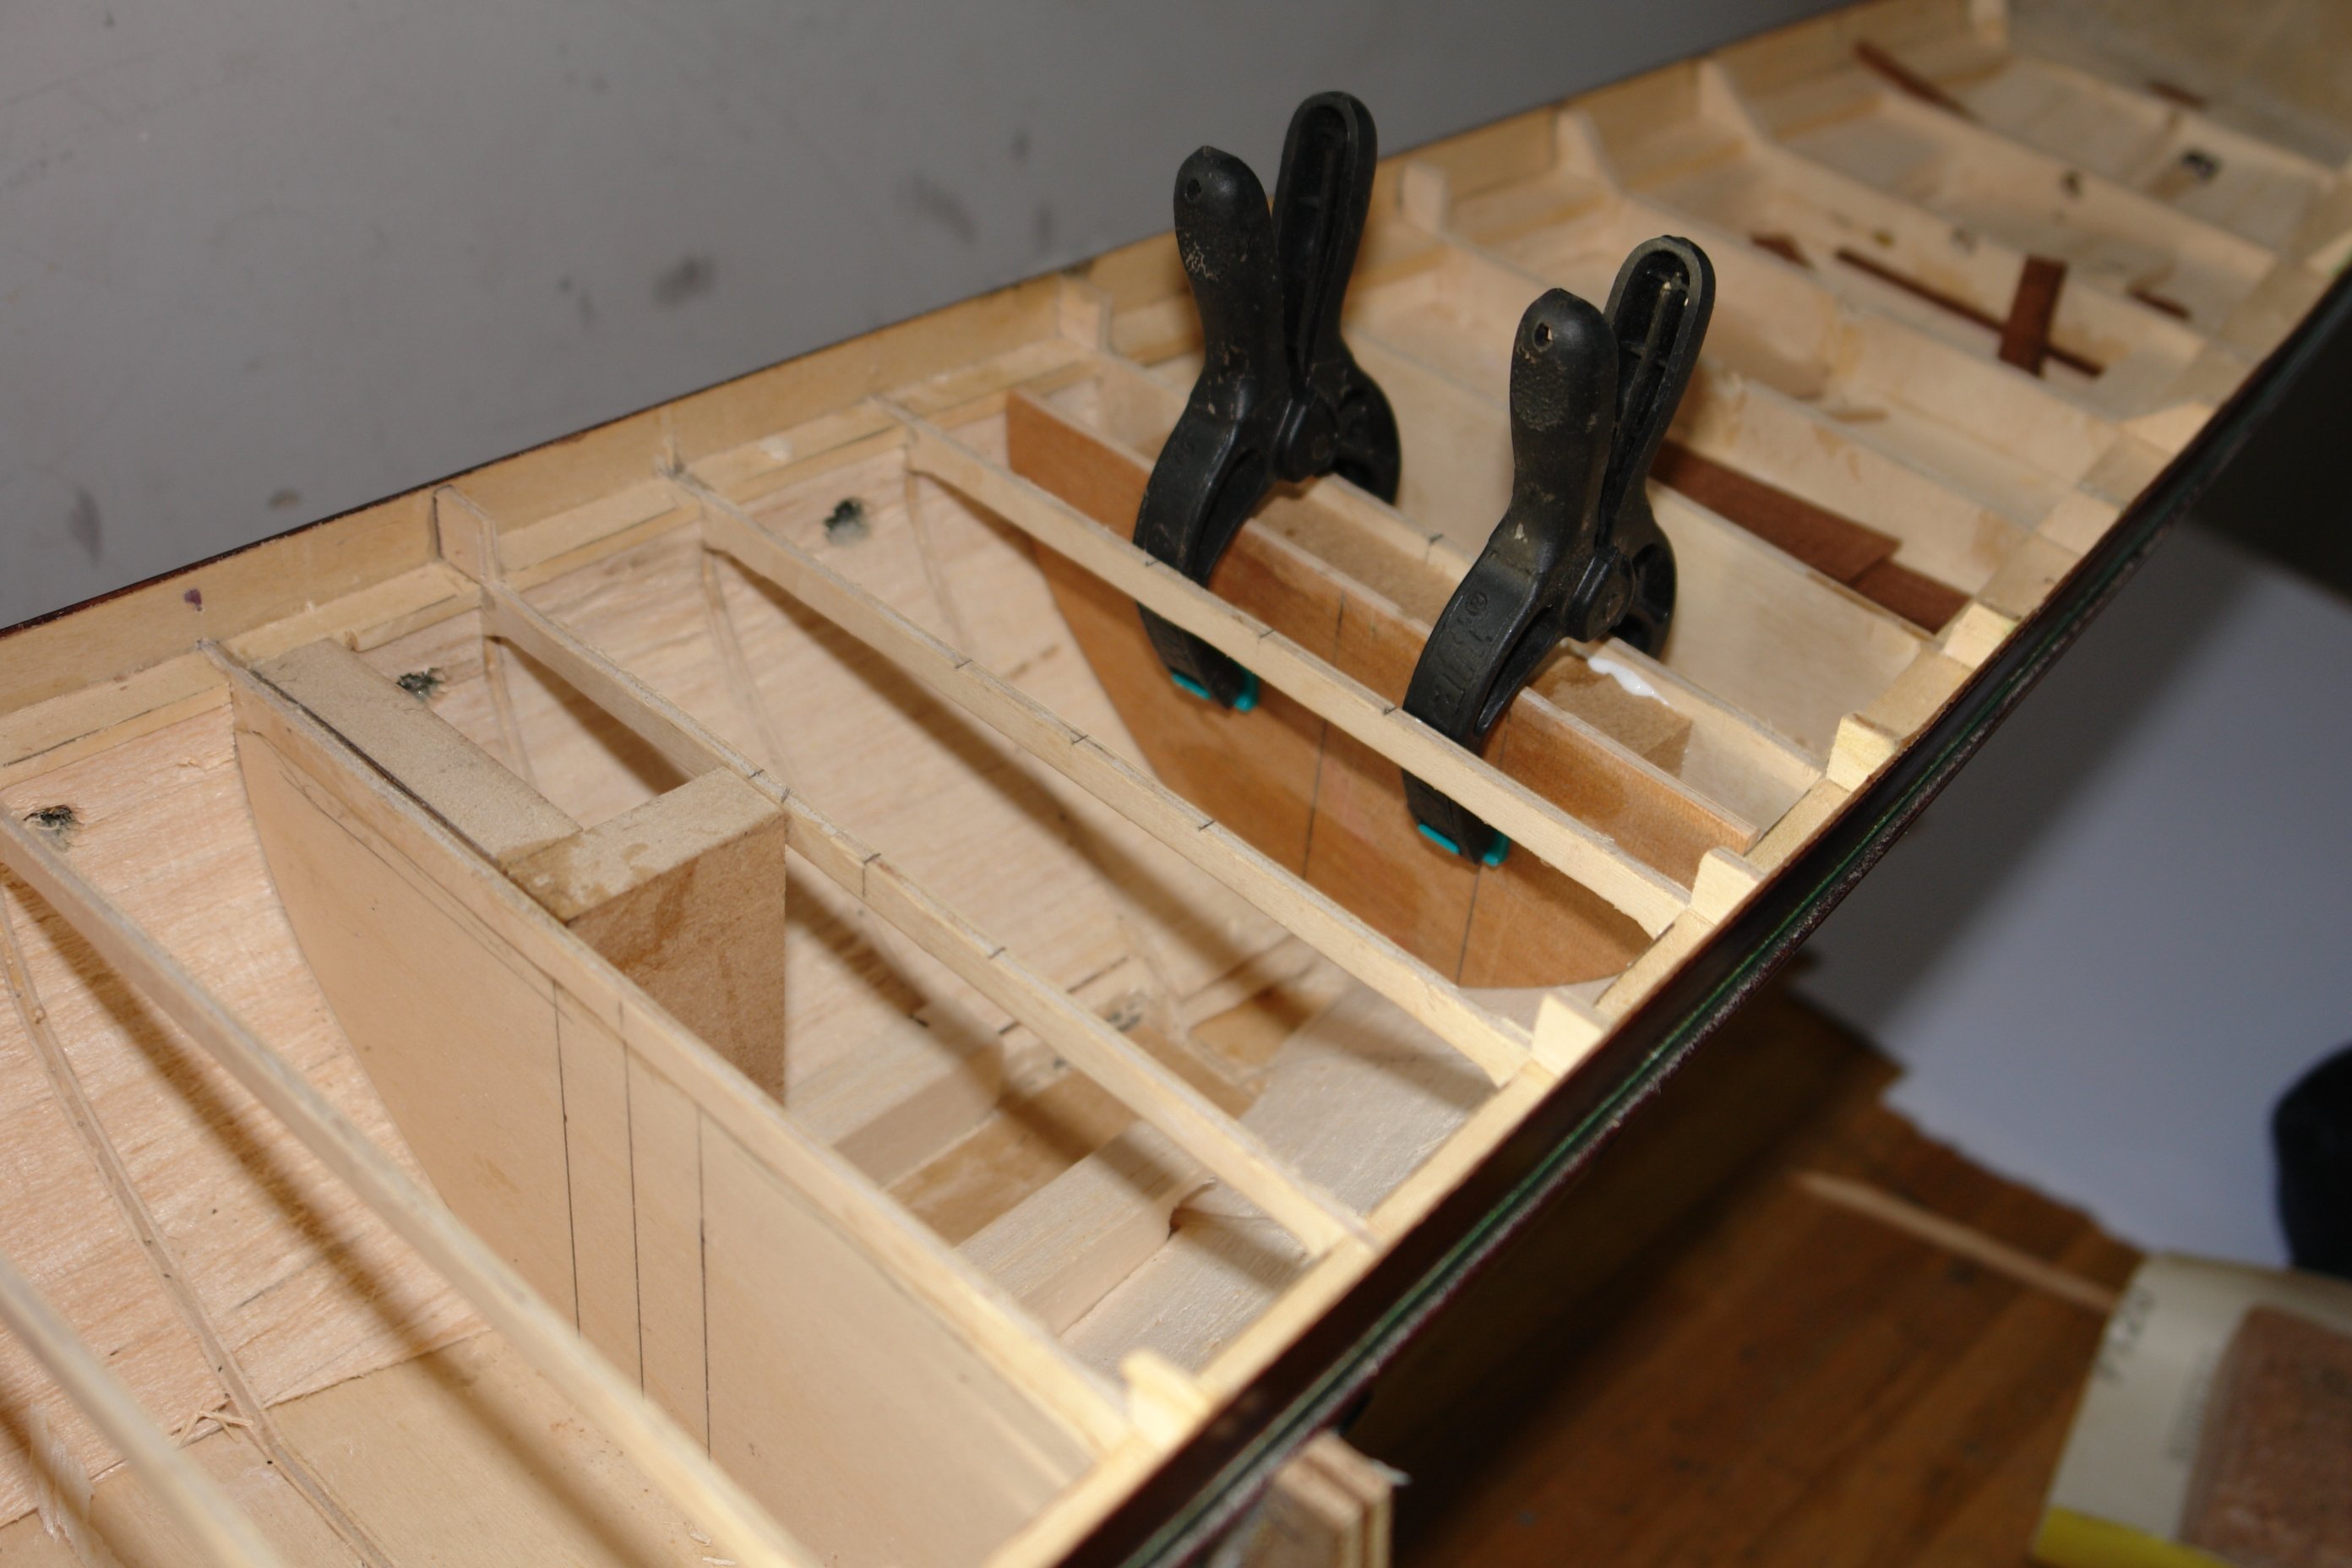
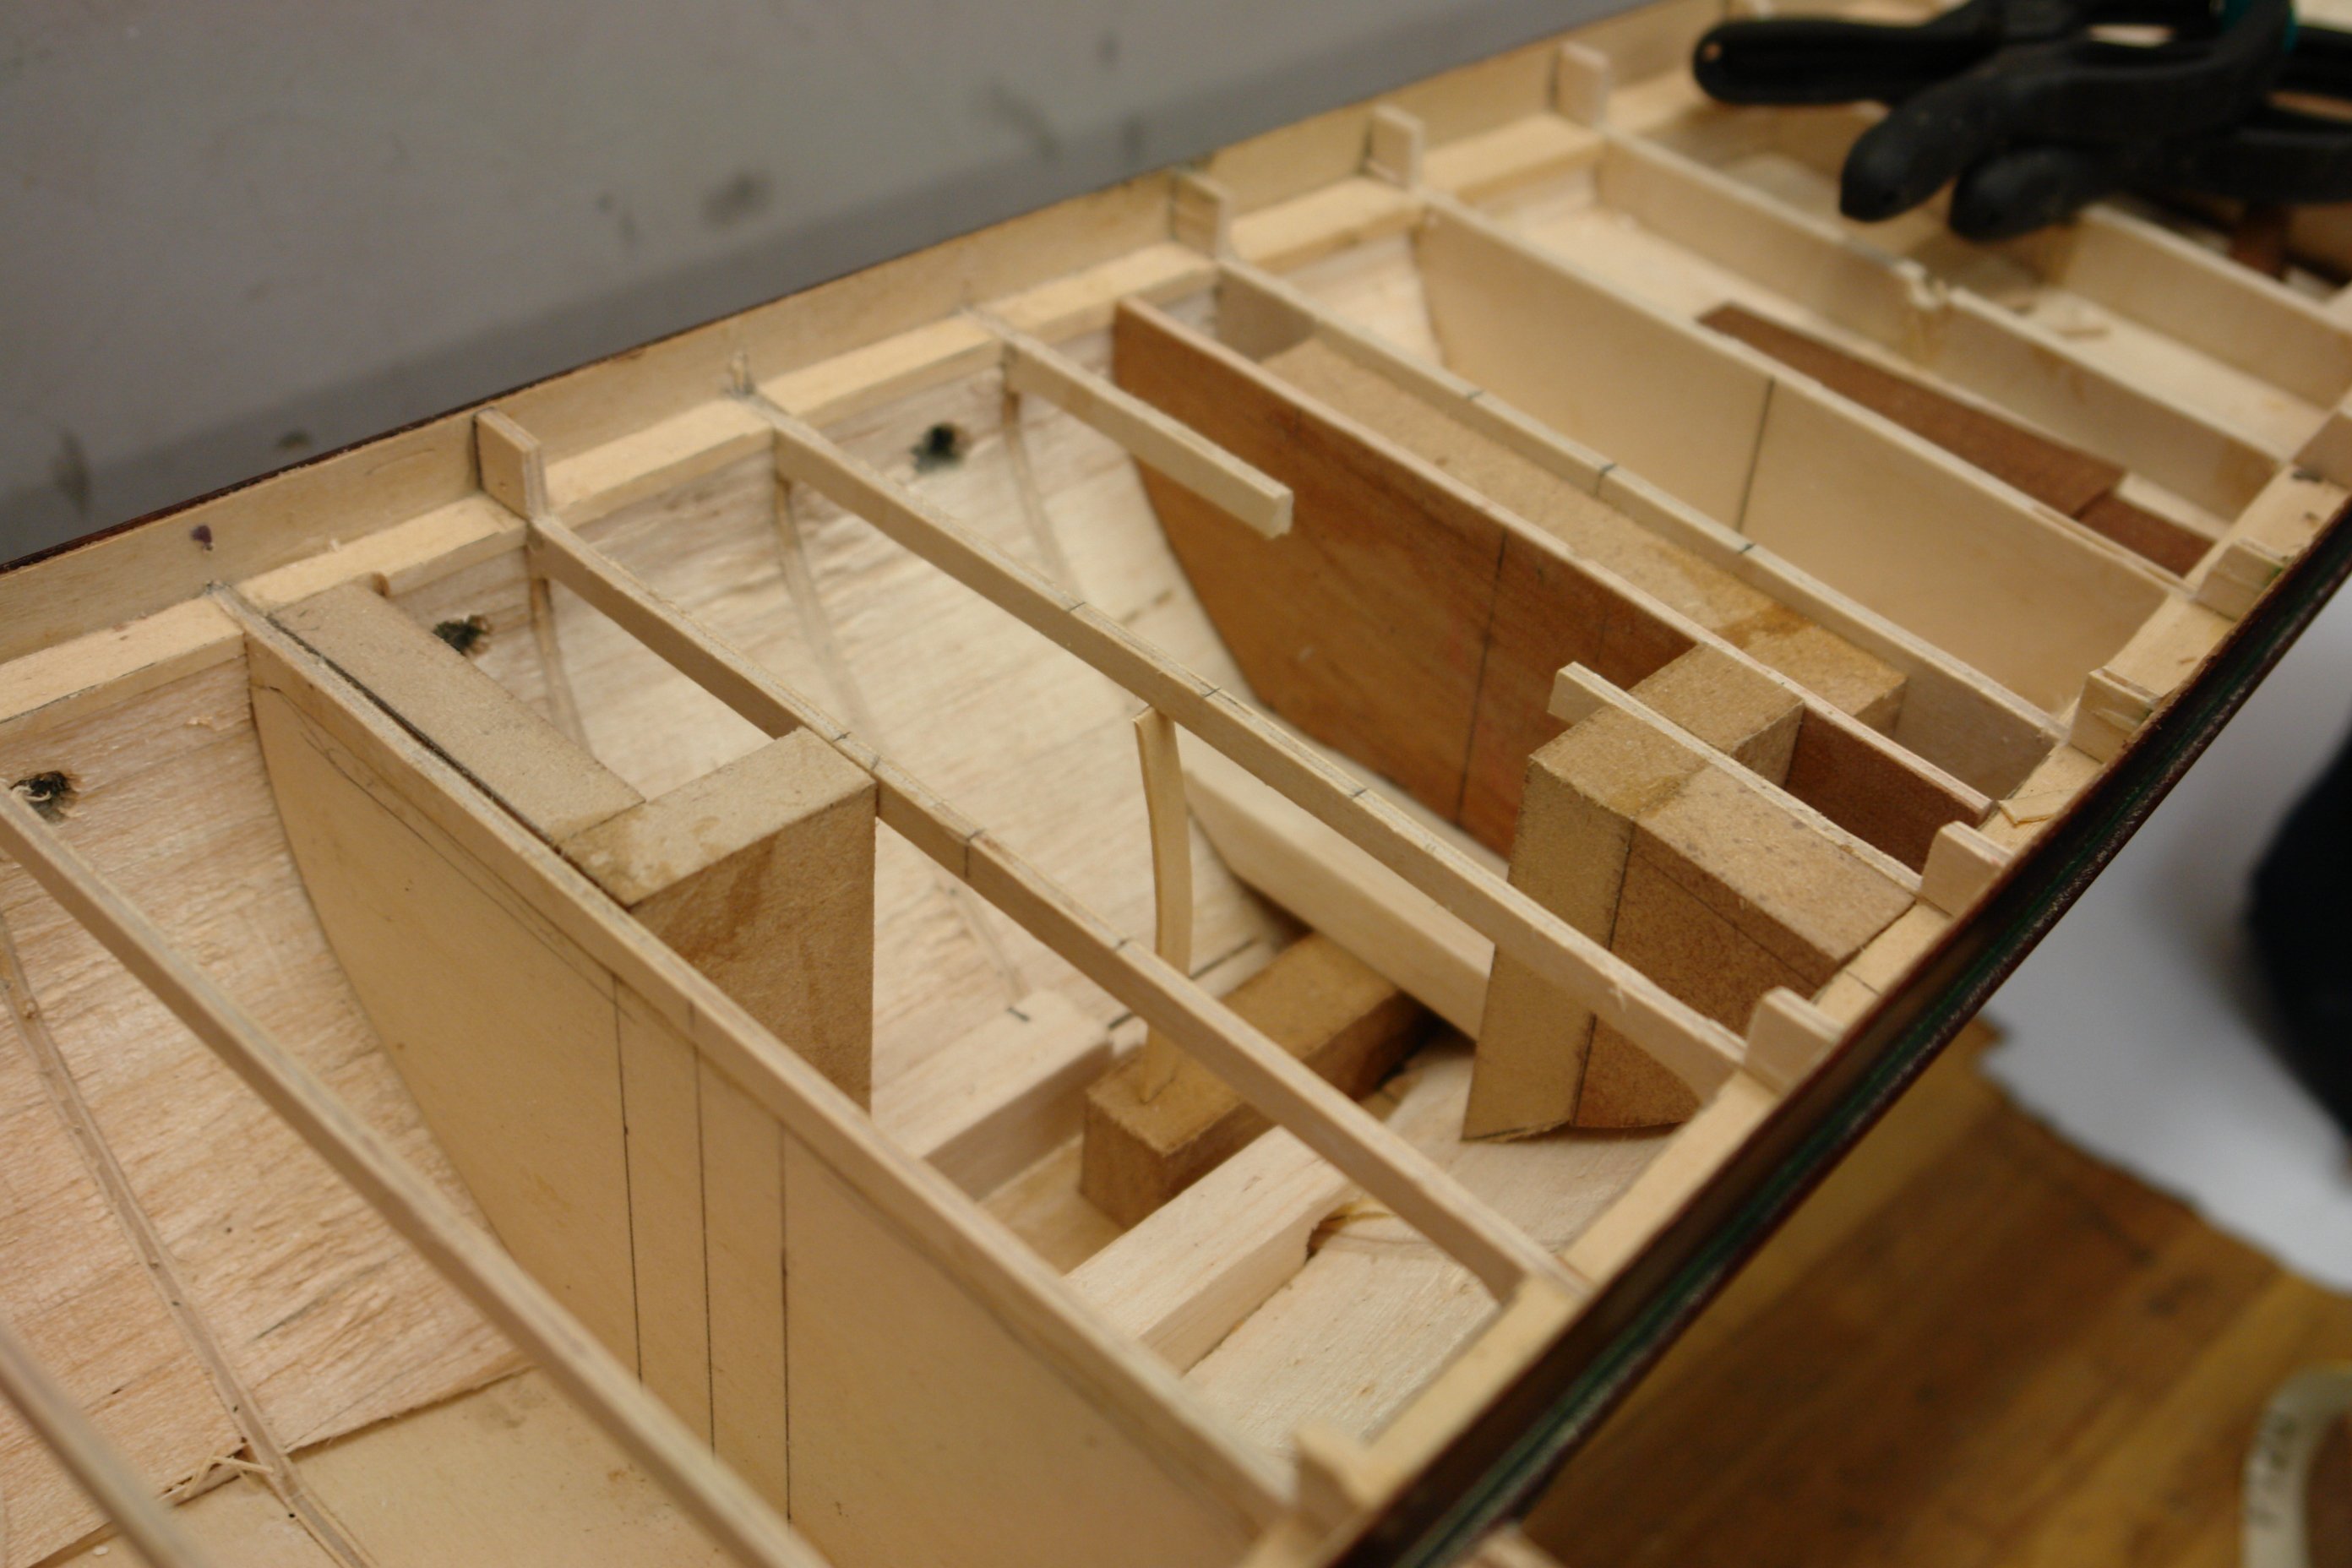
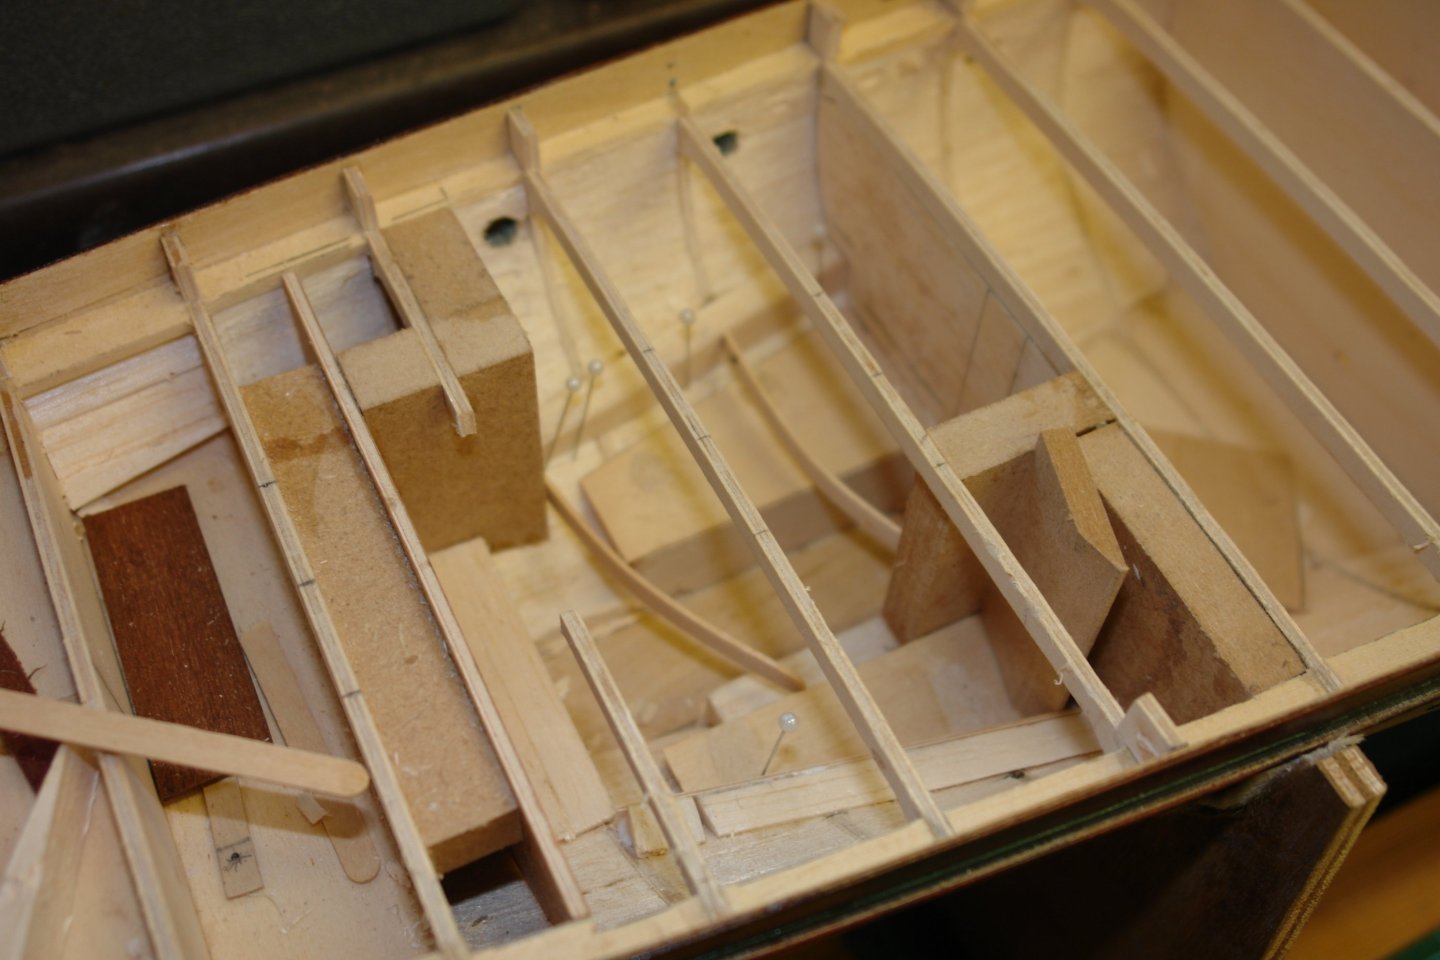
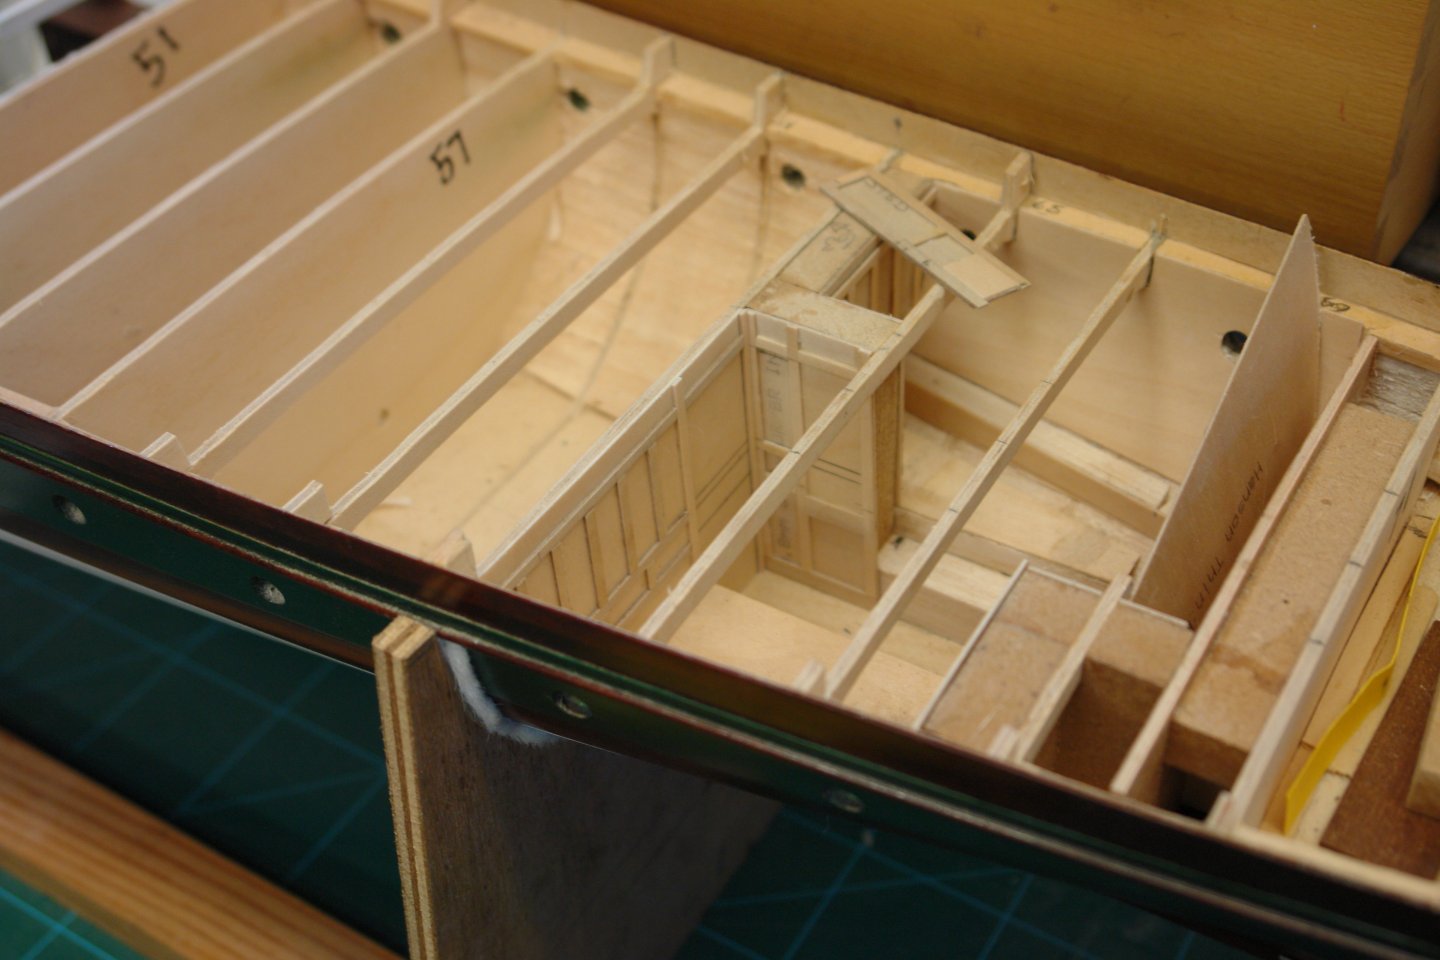
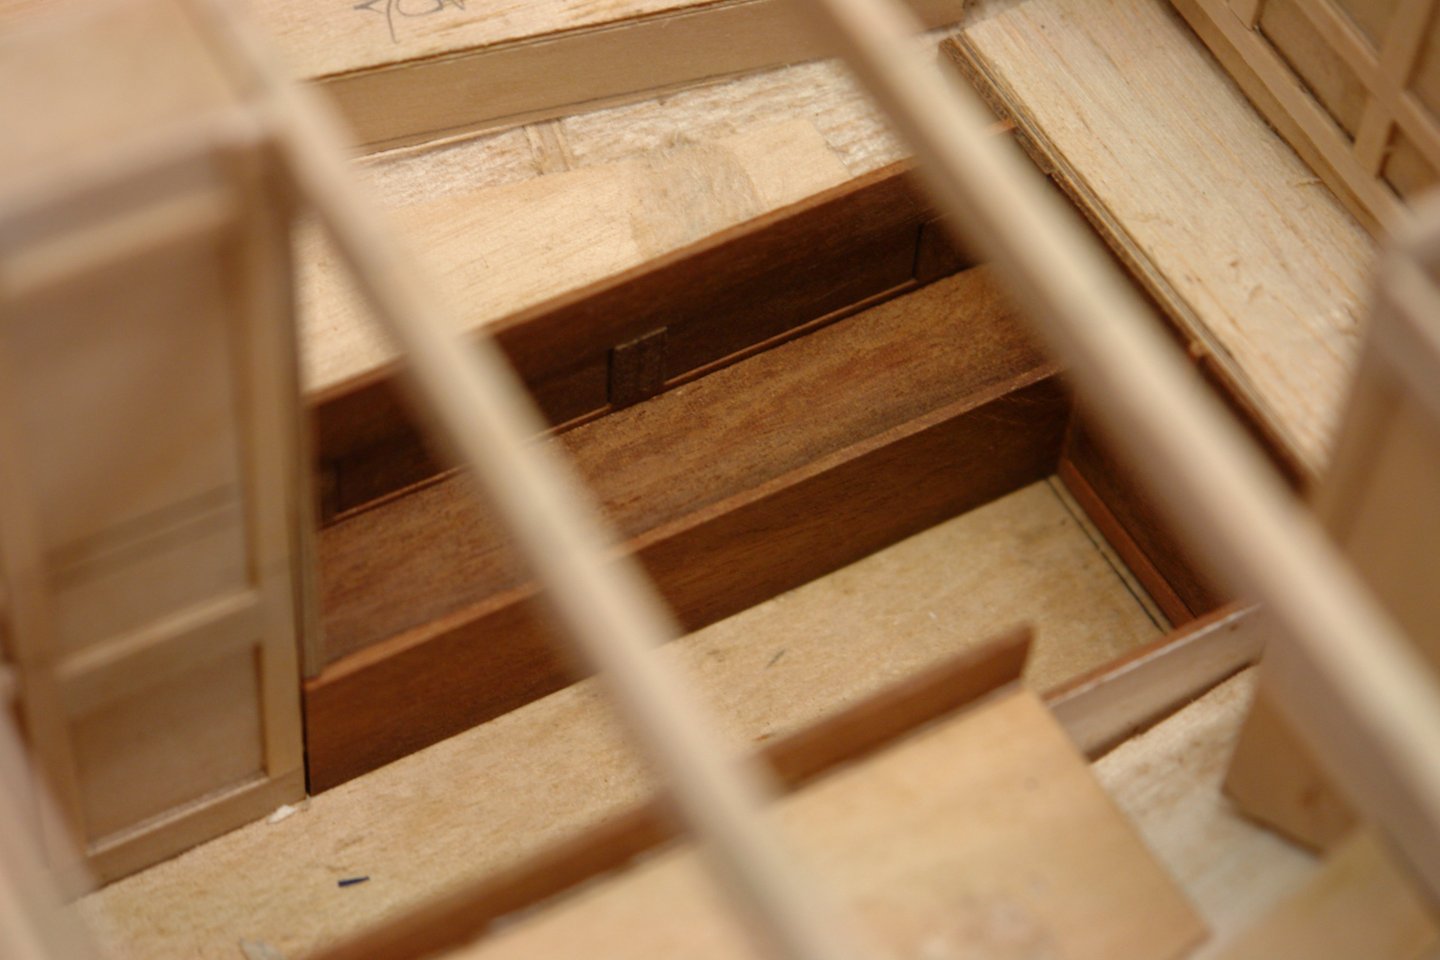
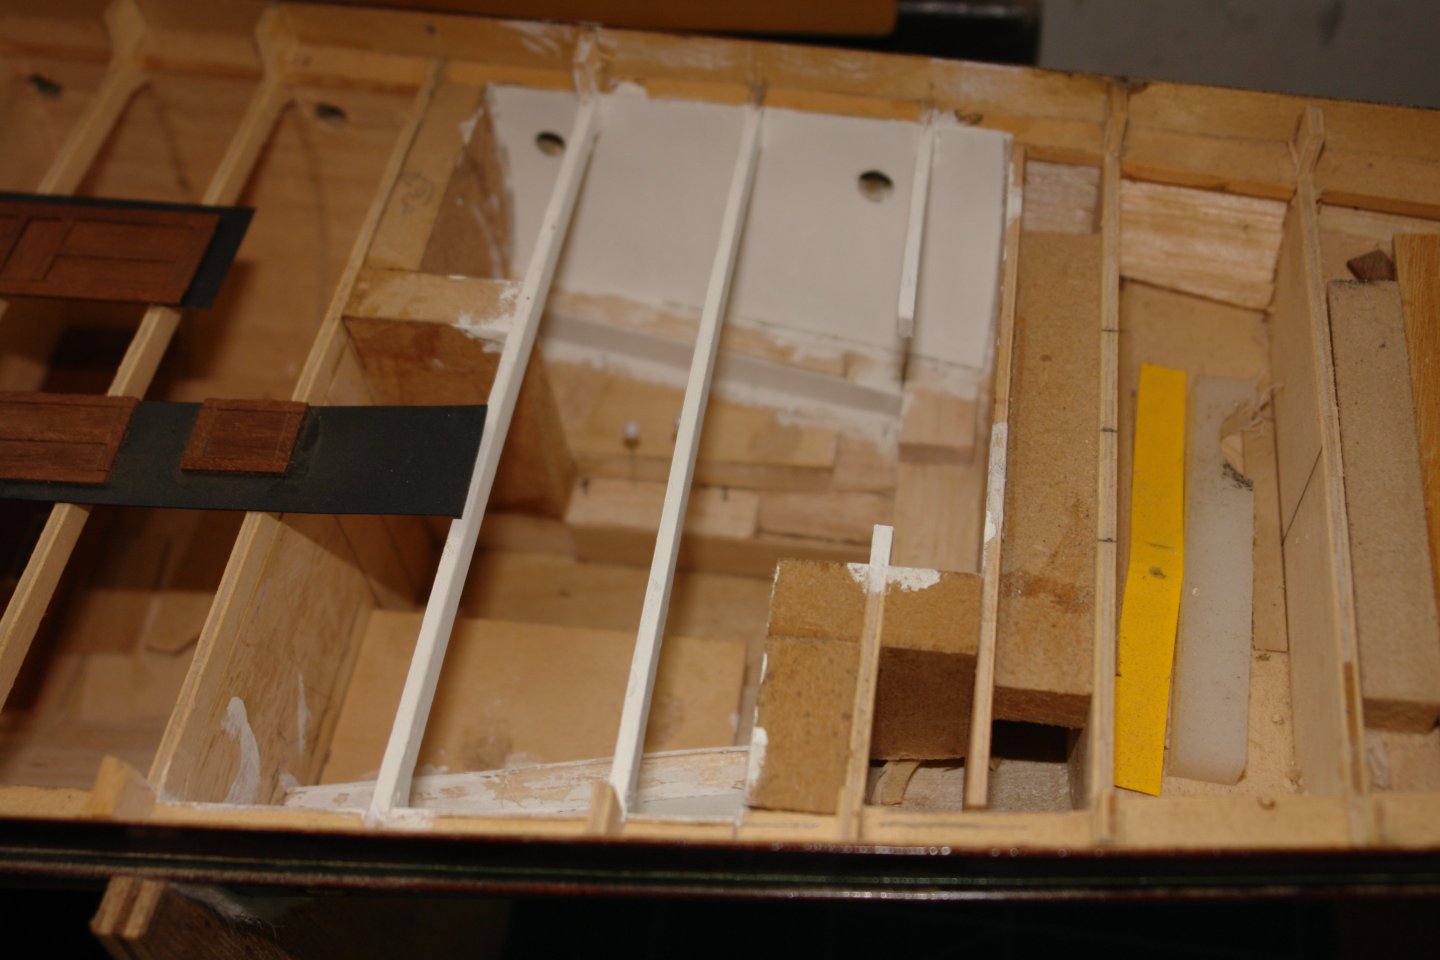
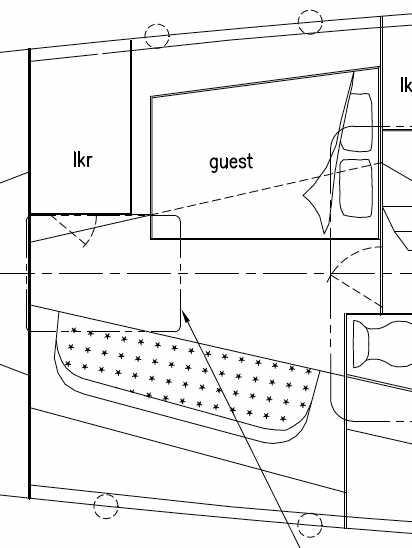
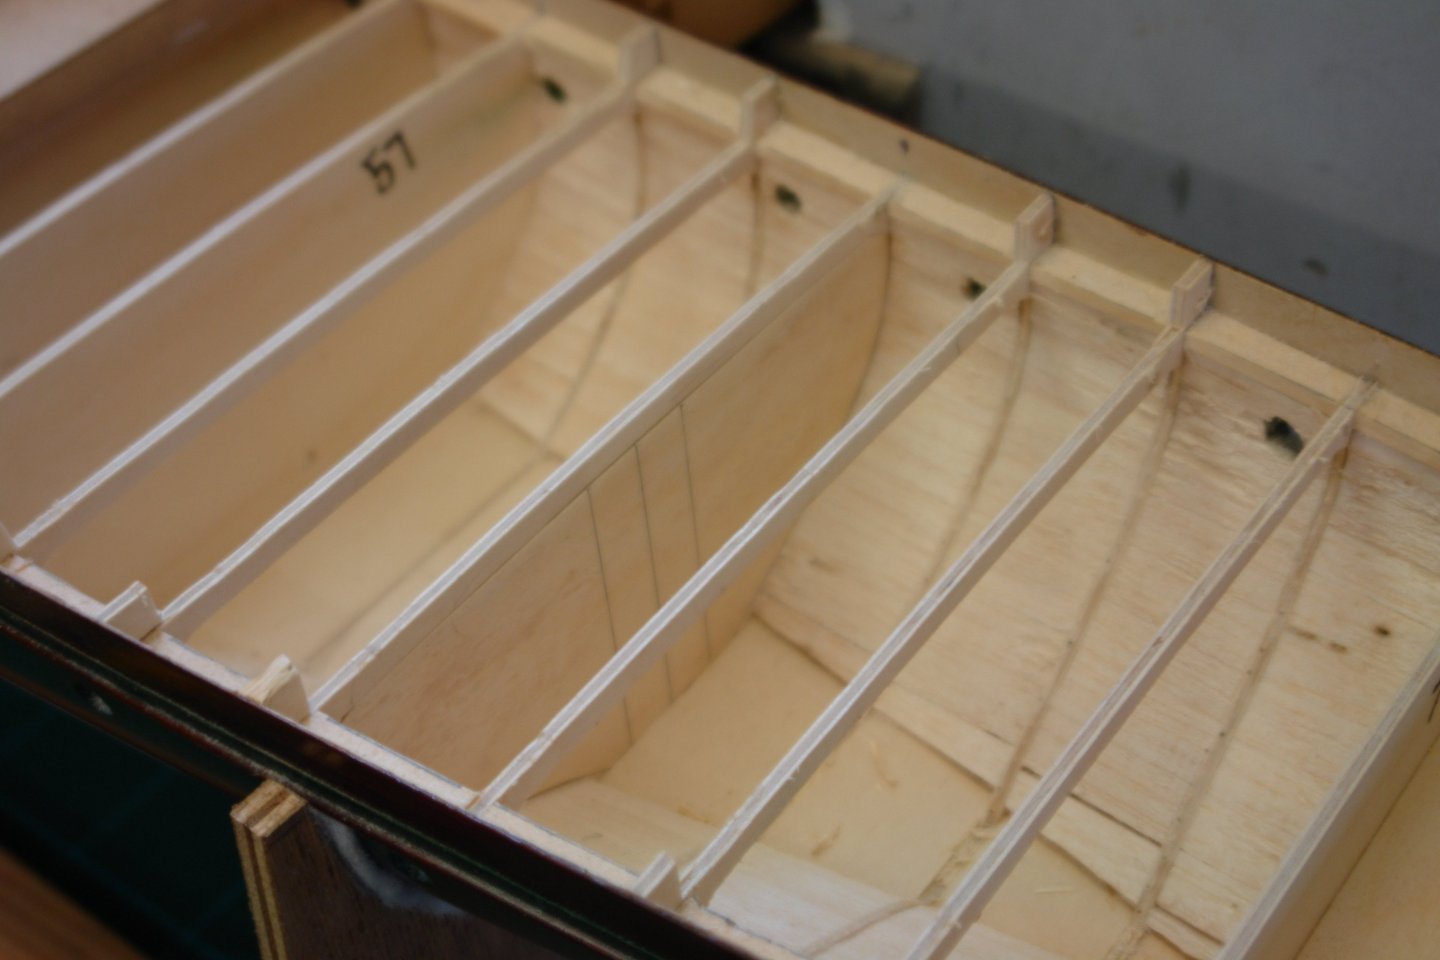
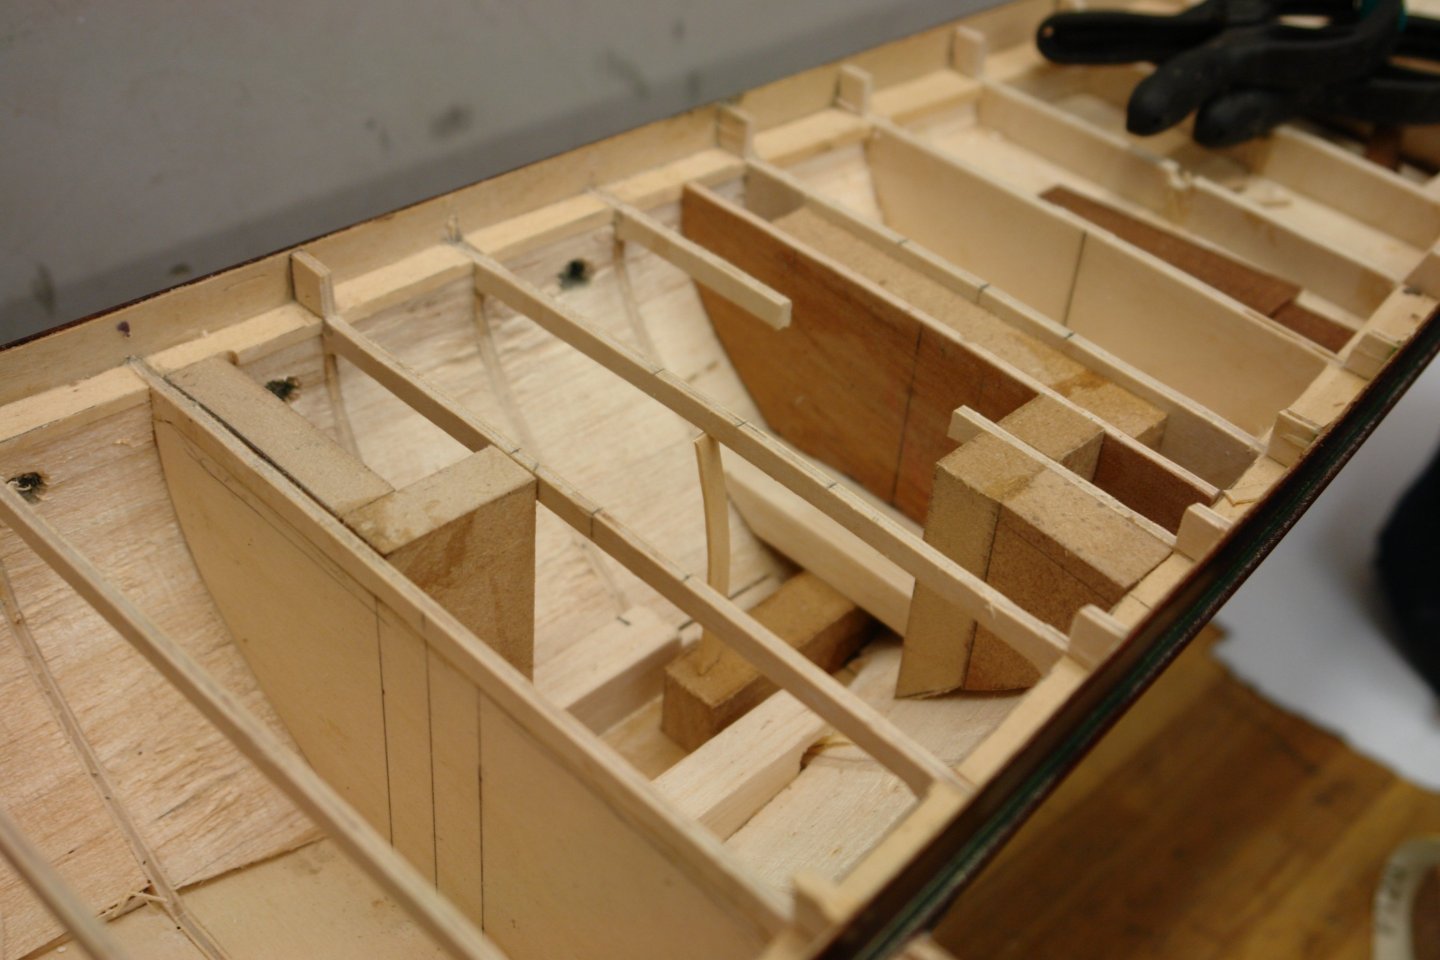
Moving onwards I have started the aft most guest cabin. Constrained to fit into the narrowing hull, over the prop shaft and near the screw this cabin was presumably reserved for the mother-in-law. The plans for this room are markedly different to the available photo's. On the plan this cabin has a "sort of" double berth - constrained to narrow markedly at the foot end. On the starboard wall is a large seat. A large locker is shown on the port side aft with a door opening towards the centreline. Only the double birth remained as per the plan. In the next photo - looking forward the double berth is on the port side but on the starboard side is a single berth. A narrow locker partially segregates the two berths. The next photo is looking aft. The port locker door is no longer on the longitudinal wall. Both photographs show quite a lot of draws and one quite ornate ventilation grille together with one much smaller one at high level - supply and extract no doubt. My late decision about the modelling of internal detail prompted some corrective works to the hull. The forward wall of the cabin sits at frame 63 but I had cut the middle out of this frame. The replacement middle can be seen lying in the hull ready for installation. Now installed:- The wall behind the starboard single bunk seems to be at frame 64 and MDF blocs were installed to create this wall and the centre line locker. Some of you with long memories will recall that I omitted all the even numbered frames because I dint feel I needed them to get an accurate hull form. The aft wall of this cabin sits at frame 70 so once again lack of planning prompted some rework. A new frame was cut and glued in place. The complex hull curvature is causing me a lot of head scratching as I struggle to work out how to model the various features as well as how it all fits together. I am starting to install various horizontal shelfs to pick up the positions of draws, bed bases etc. I have also blocked out the aft port side locker. Not a very exciting update I'm afraid but progress is progress no matter how small.


-
Yes Mark. I remember being very keen on changing sails up to the age of about 50 and thereafter being much less fussy about being over or under sailed. With advancing years "spilling wind" became the preferred strategy. Fortunately roller reefing provided some relief. I do remember my sailing pal commenting frequently that "I see keith is over sailed again". I guess with more traditional boats sail changes are somewhat more time consuming.
-
Hmmm, it might go faster and point better without the rail submerged. 🙂
-
Keith, Coming together very nicely. Good luck with 4.0 and the Maggie pen.
-
Yes that is a common problem. I invariably find that I have a few section that need to be "filled out" using edging strips. All part of the fun of scratch building.