HOLIDAY DONATION DRIVE - SUPPORT MSW - DO YOUR PART TO KEEP THIS GREAT FORUM GOING! (Only 24 donations so far out of 49,000 members - C'mon guys!)
×


vossy
-
Posts
600 -
Joined
-
Last visited
Content Type
Profiles
Forums
Gallery
Events
Everything posted by vossy
-
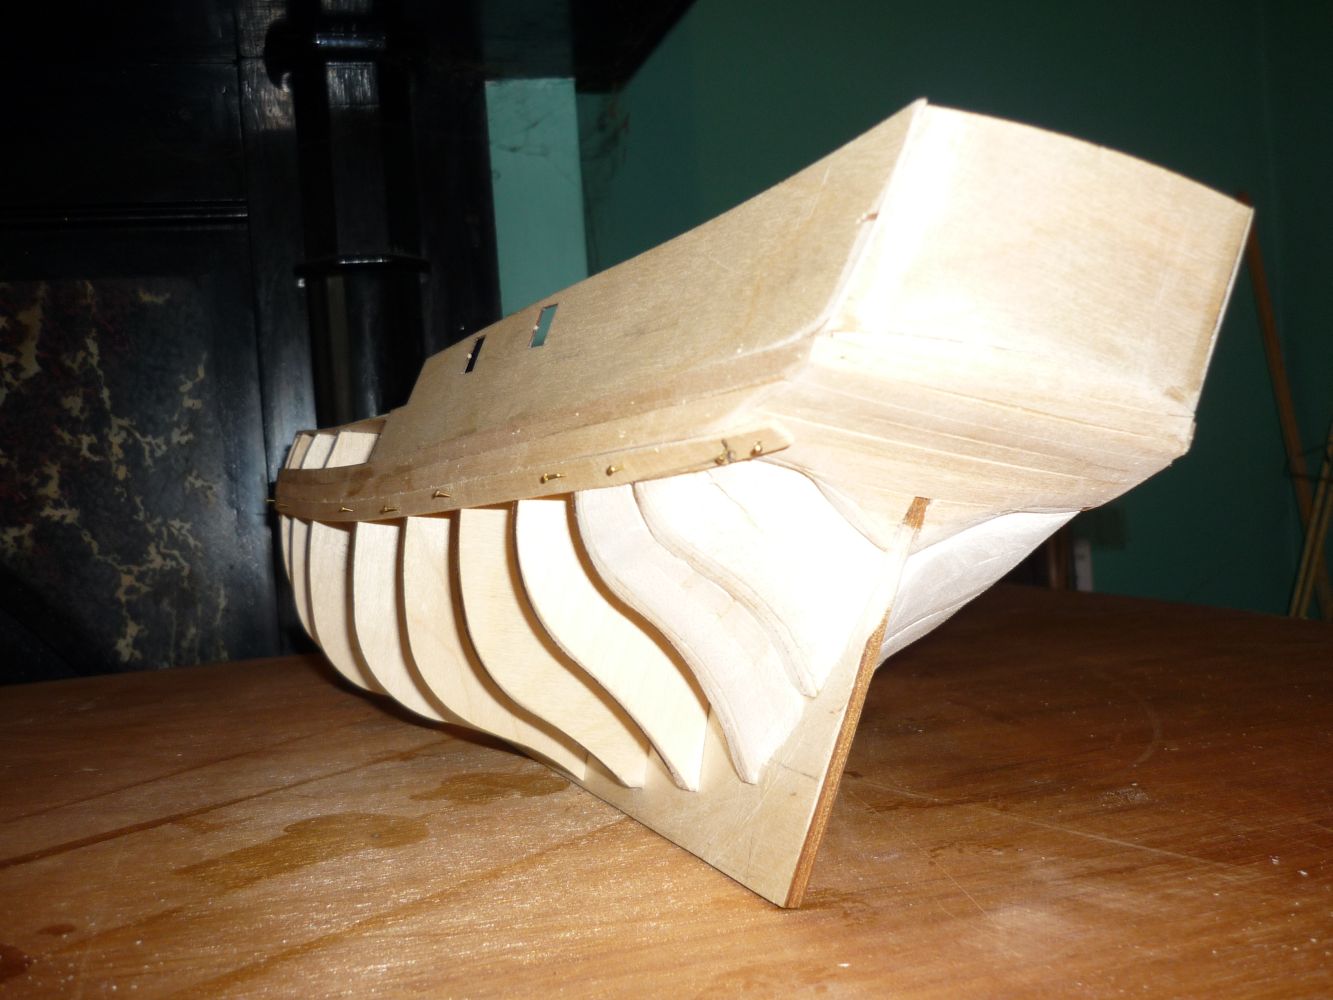
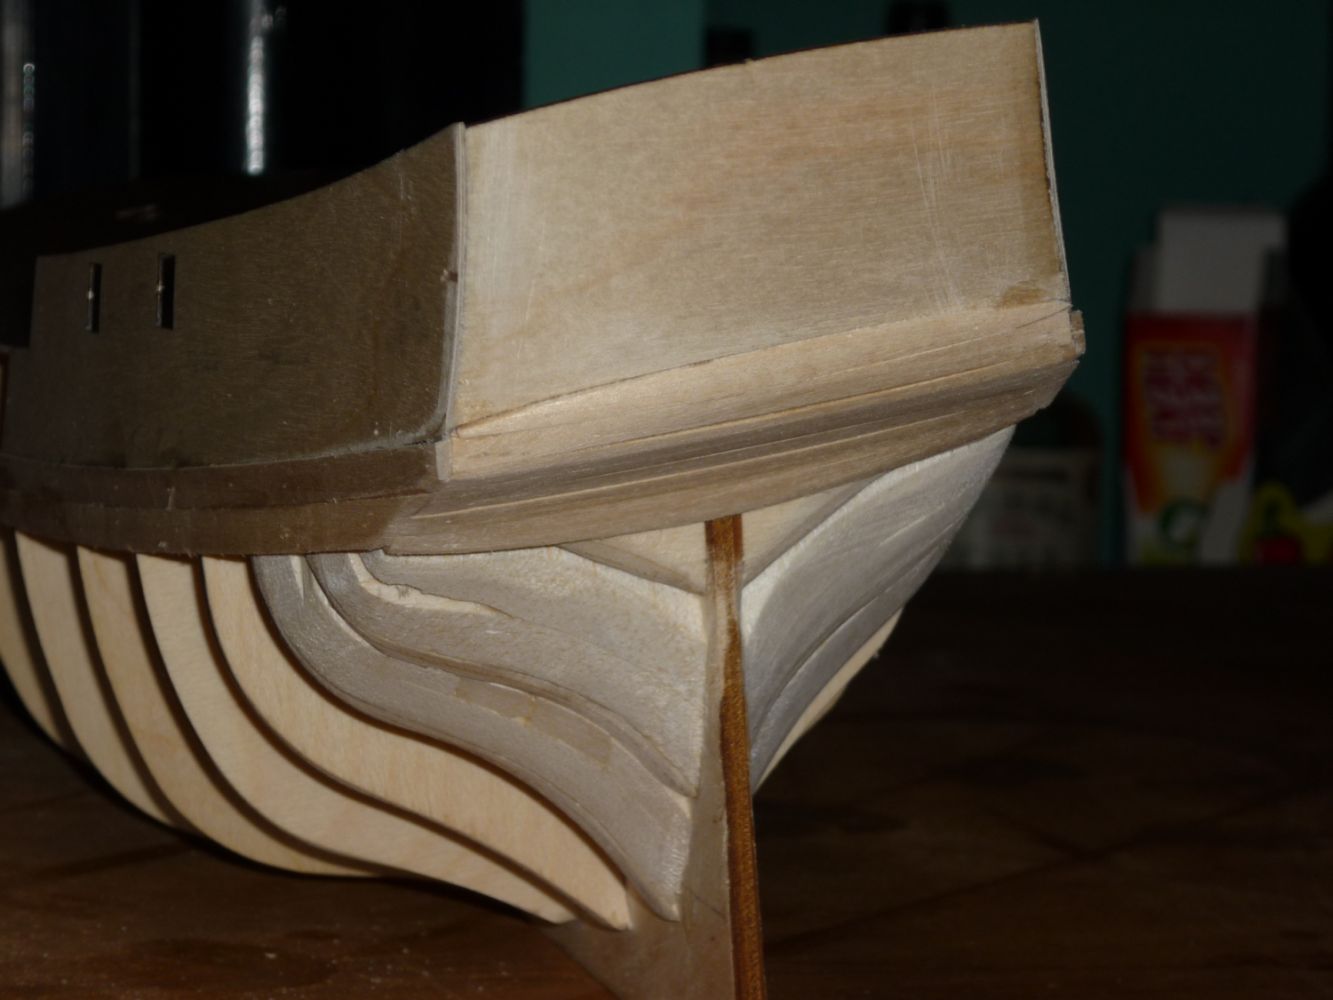
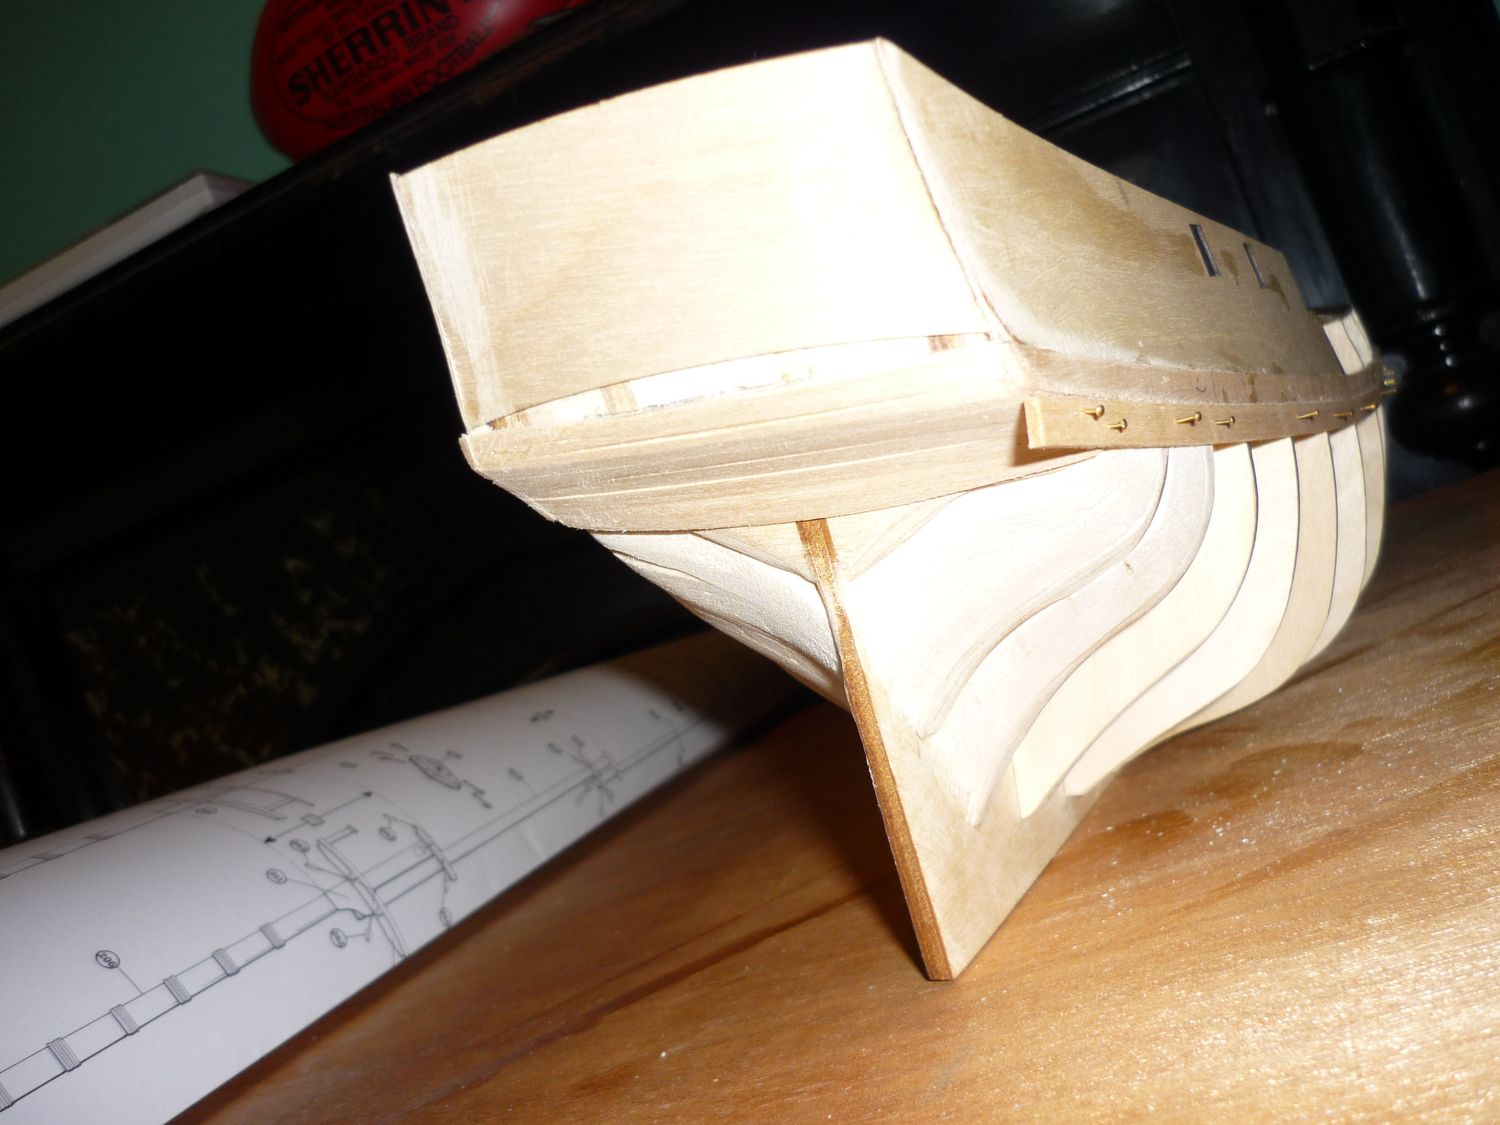
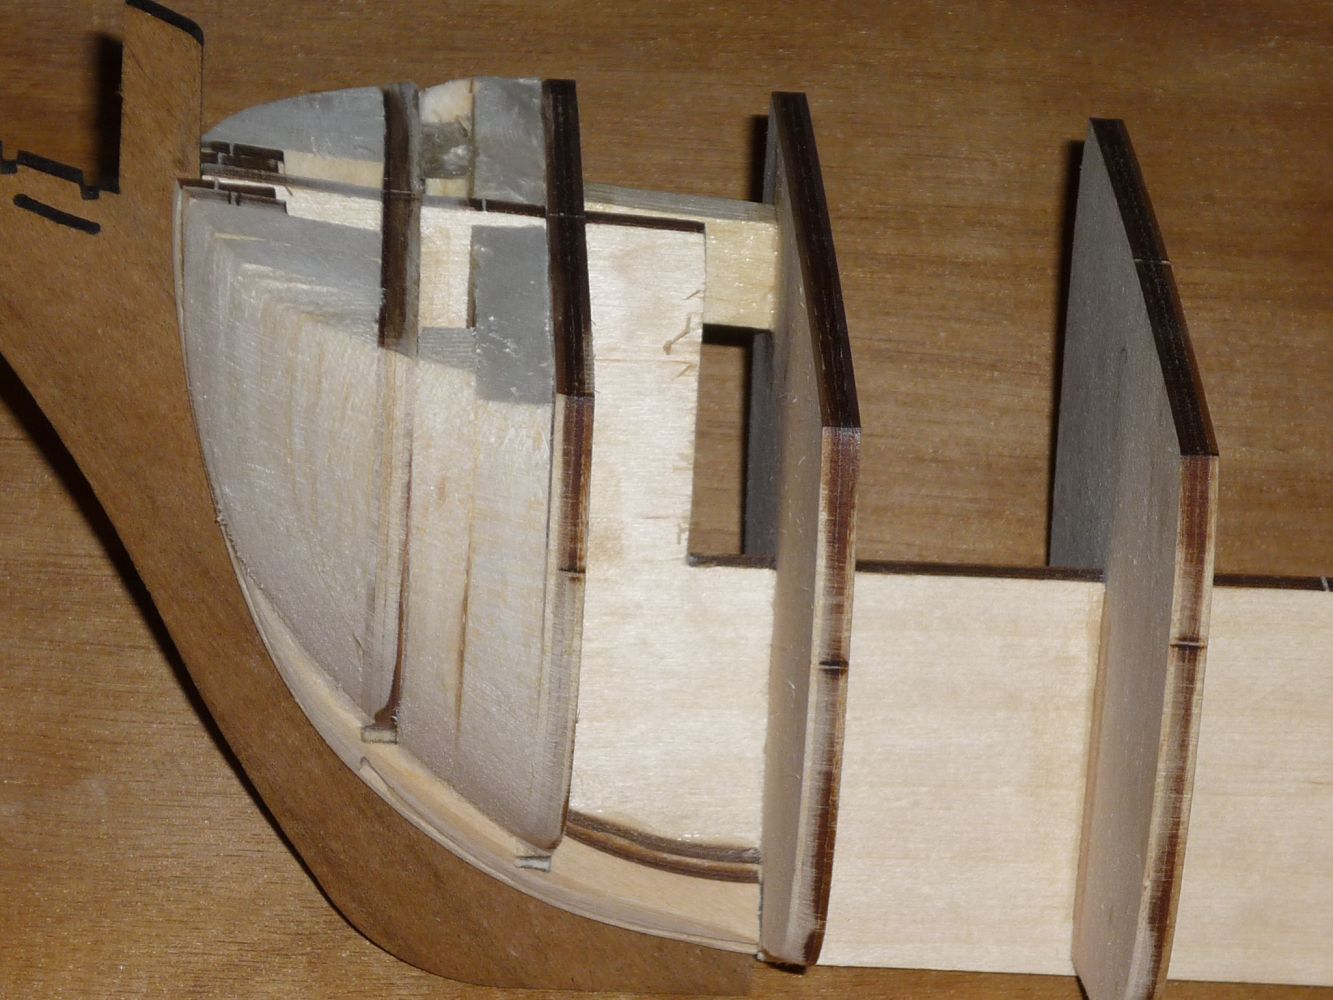
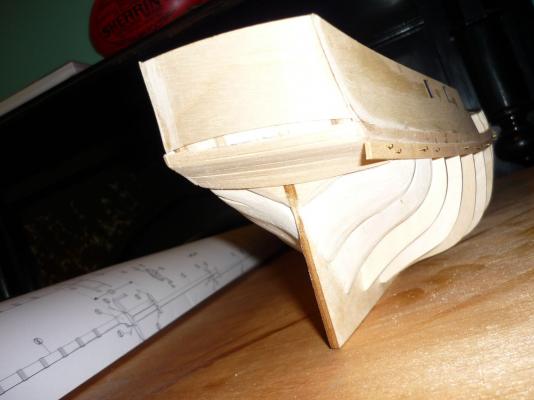
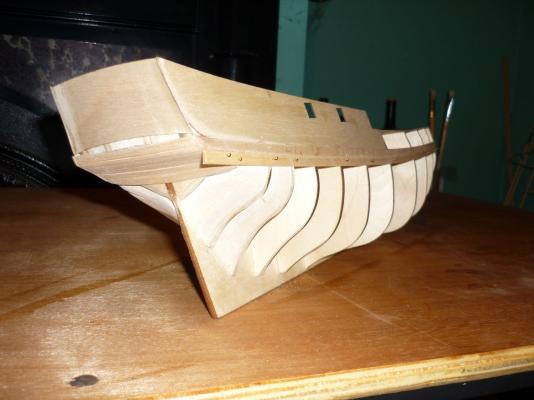
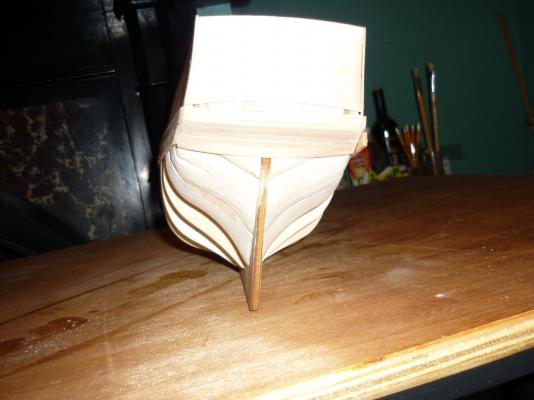
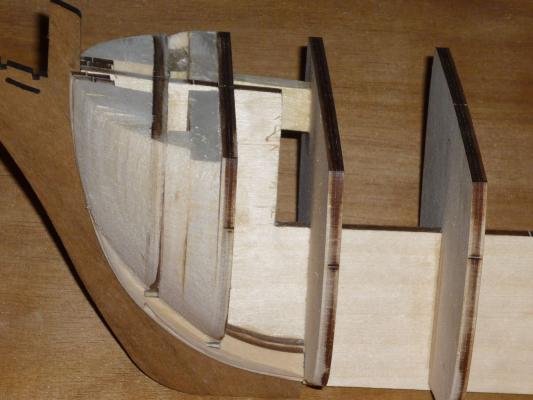
 g'day all. so as I have said I'm a bit confused as to my next move so a pic and some comments would be most appreciated the said plank hasn't been glued only bent and nailed. question - does this look like I'm on the right track after I shape this plank on the stern ( I realize I have to do that). this is my first time at this type of stern. santa maria and golden hind were both flat and I found them pretty (well relatively) easy. this I just don't know anyway onto the pic cheers chris
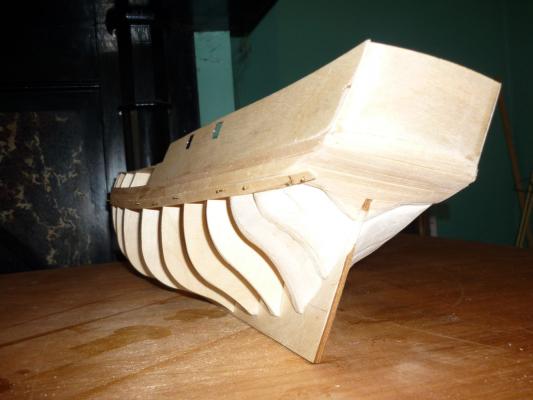
-
g'day Graham, as druxey said there are many great tutees on this site and Mark makes valid points as well. search this site for build logs on your particular model - these can be invaluable. whilst i love this site don't limit yourself to it. google your model name, scale and "build log" and you never know what may come up. there is a fantastic site very similar to this in russia - www.shipmodeling.ru - will get you there. it is moderated by roman roganov who is also a member here. like this site there are many members, mostly from russia though although i'm one and as you can see i'm an aussie. use google chrome to translate the page into english if your russian is a little scratchy roman is a very helpful guy and i contact him regulary and he always has great insights and advice. see his bounty log here. other sites are modelbrouwers.nl in the netherlands and modellismo.net which is an italian forum. you will find many cross post logs across these sites but i find the logs are more expansive in both pics and text in the native tongue. again view these in chrome for a pretty good english translation. good luck, great to have you aboard cheers chris
-
g'day jack, what a fabulous job you have done on her! truly magnificent build. i have this kit on the shelf but unfortunately mine is a bit old and has lots of plastic (which billings was famous for back in the day). the scroll work is all plastic as are the shields etc. anyway i will get to it sooner or later but viewing your masterpiece it maybe sooner cheers chris
-
well this is where I'm at. stuck! no-one seems to either know or want to offer advice bar roman who lives in Russia and takes an eternity to communicate with because of the distance and time zone issues (not his fault btw). will give it till the end of the weekend then just like Indiana jones take the great leap of faithand hope for the best.


-
g'day Duke, good to see another Bounty, albeit a different kit to mine. you are lucky that there is a great build log on this site for your particular model. me, i have no such reference i'm afraid. anyway onto your keel problem - i reckon you could probably fix that by using filler blocks or rods between problem bulkheads until the alignment is right. i don't know how many models you have built but i have done a few and i can assure you that the keel and bulkhead definitely need to be 100% correct alignment and perpendicular before you attempt to do the first planking. in fact i reckon this somewhat boring and seemingly easy part of the build is imo perhaps the most critical part of the build for if you get this wrong pretty much everything afterward will also be wrong and out of alignment. anyway happy building over there in canada cheers chris
-
g'day brian, thanks for that. so i'm figuring its going ok at this stage?
-
Christmas tool and equipment list
vossy replied to schnu's topic in Modeling tools and Workshop Equipment
all i want is some guidance on the first planking of my Bounty -
ok need a bit of advice here hope someone can help it appears there are zero build logs on the beginning of this model in case I muck up the uploading of files again!!!! I will ask the question and just hope the pics come through. Do I need to add any more horizontal first planks to Bounty's stern area? Or should I now just keep going with the first planking layer on the sides and sweep them up to meet the stern area as it currently is? cheers chris Hopefully that worked

-
g'day brian, we didn't have it during gulf war 1. but then again we were stationed behind nearly all the US Fleet so probably didn't need it that much
-
HMAS Torrens camo was grey. i know - i personally put a lot of it on
-
g'day all have progressed but work in the wineries takes up much of my time will post updated pics tomorrow hopefully. just began first planking on stern
-
g'day all, this is probably a dumb question but what exactly does a serving machine do? do i need one? and if so any recommendations on units out there? cheers chris
-
can't find it on a google search but my computer skills are as refined as a ballet dancer in football boots but at any rate i've never heard of them. cheers chris
-
g'day mate, apart from the brisbane lions afl website this is the only place to be seen on the net. anything and everything Bounty will surely be appreciated by many here. welcome
-
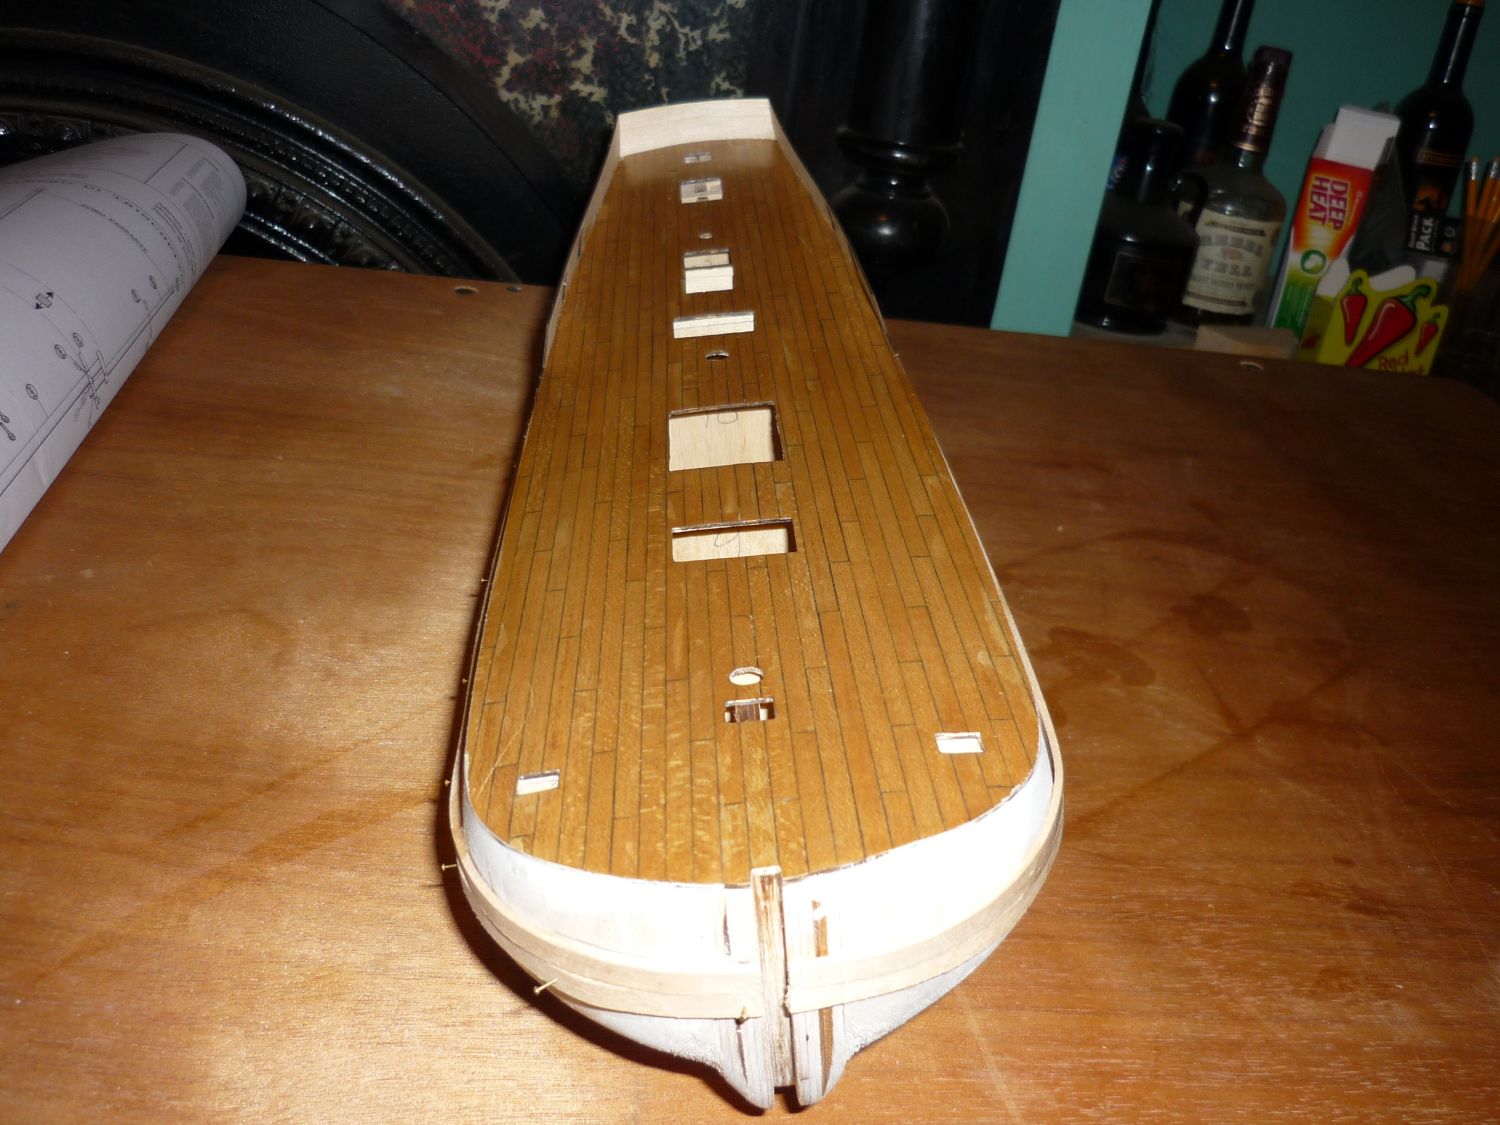
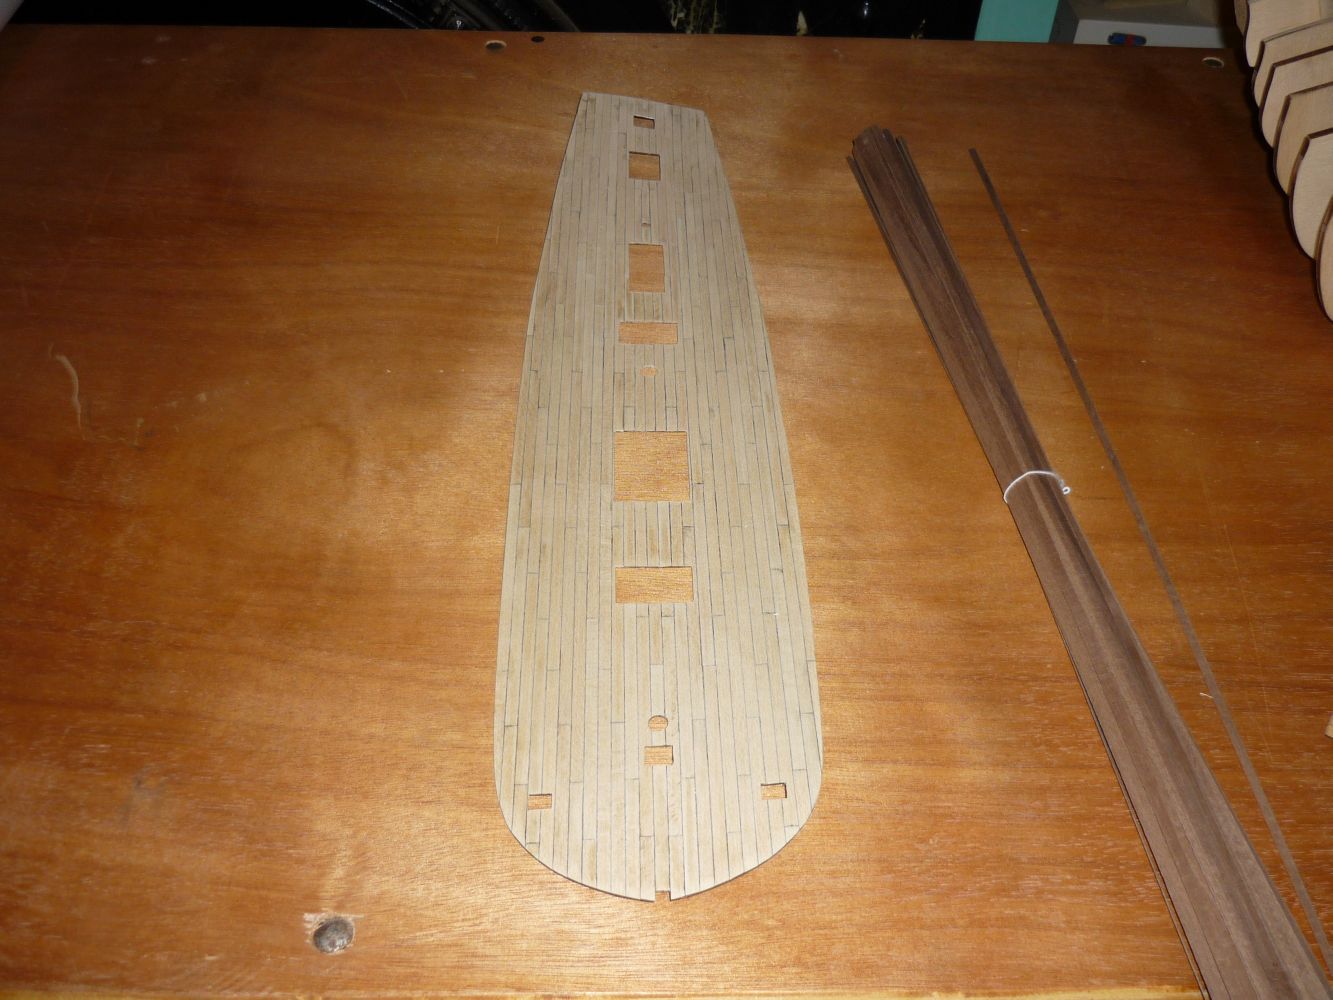
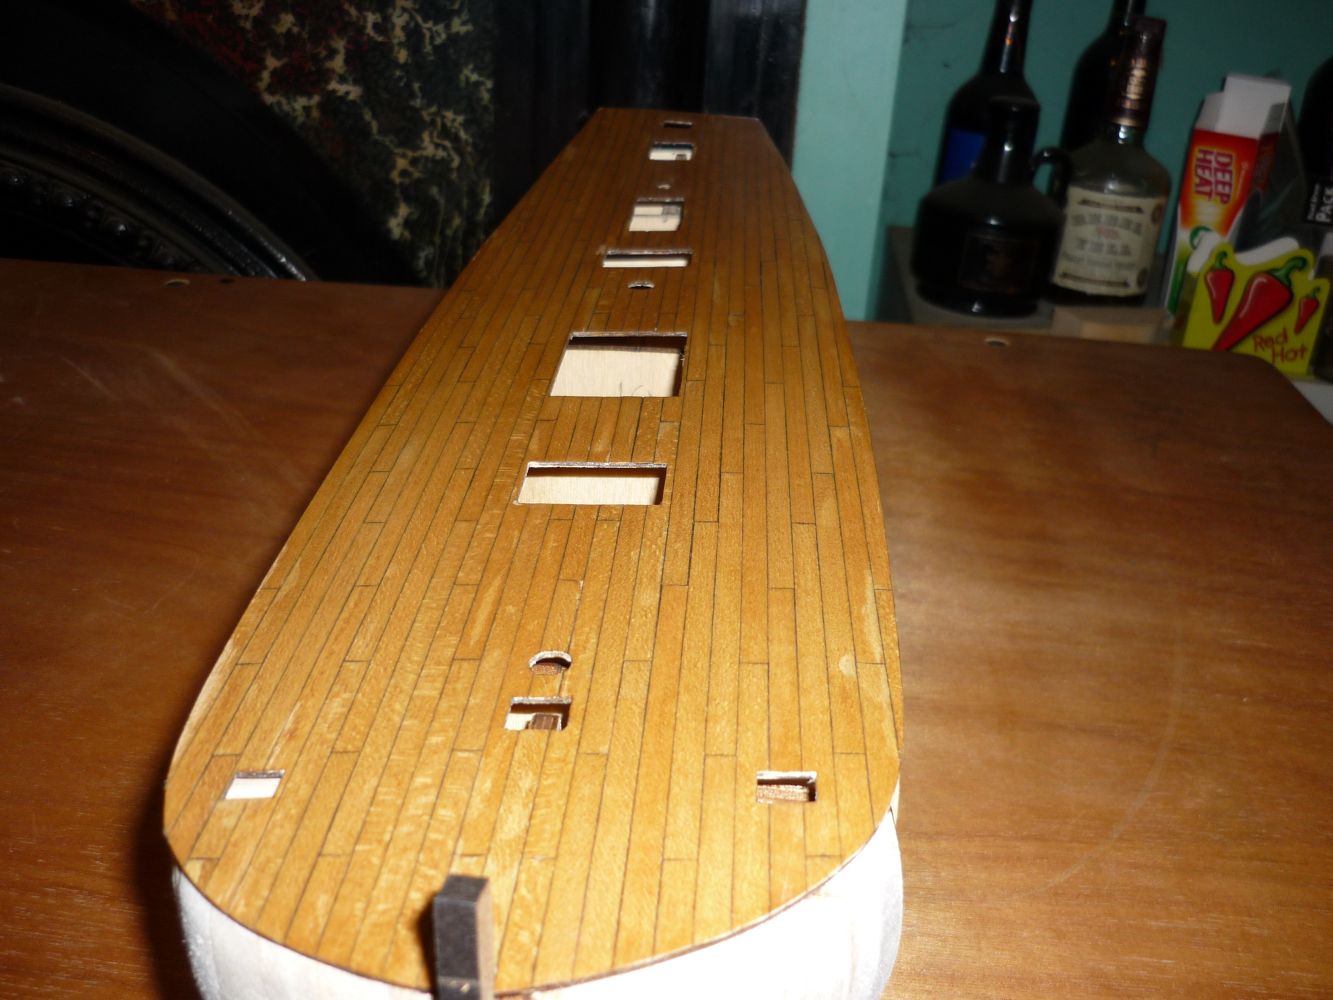
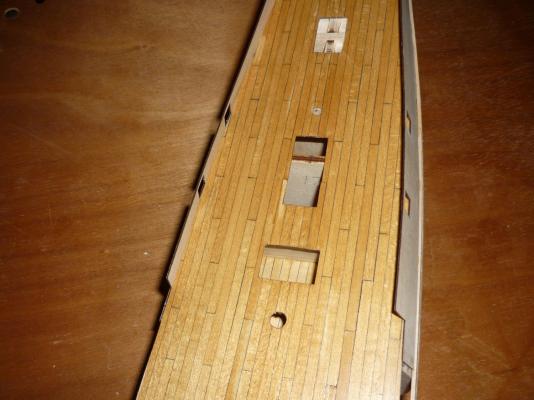
maybe this will work they wanted me to plank the deck in walnut in the kit too dark so I bought new limewood strips and stained them light maple


-
I'm sorry but I'm finding it harder to create the log than to actually build the model!!!
-
ok so that sorta worked will try to post more pics... standby incoming... ummm how do I post more pics in my log??? :( I'm no bill gates either!
-
:piratebo5:ok so I thought I would begin a log on the Bounty as their are very few around. I have viewed david's and roman's build of this great vessel a zillion times and hope to do them justice with this effort. due to my interstate work commitments updates maybe somewhat spasmodic but I will do my best. please be forewarned I'm no Damien Parer with a camera though! am going to bypass the usual pics of box contents etc and get into the nitty gritty. here goes..... I always use filler blocks its a little known fact that God created Balsa wood to specifically stop model ship builders from abandoning the project at this stage and on the stern ok heaps more to come just need to see if this worked before posting more. cheers vossy


-
g'day mate, my advise, buy the kit and bash the living daylights out of it! doubt you will find many (other than very top end i.e.. price) that don't need a little tweaking here and there. our hobby isn't an exact science but thats what makes it fun.
-
g'day mate, i score each of my deck planks with a 2b grey lead pencil on either side and end before laying them. i find even after a good, albeit light sanding with 240 grit the caulking effect is just right for me (i am captain after all). i tend to use lime wood 0.5mm strips for my planking (wether supplied with the kit or not - amati bounty supplied walnut strips which i considered too dark so i bought replacements from my favourite shop - hello float-a-boat - for 8 bucks). this timber is quite pale so i reckon i might stain with a light oakish type of colour. i do recommend however to do test patches on scrap timber before committing the final colour to your build. cheers chris
-
hi mark, totally 100% with your last statement; "just make sure you have fun" metal lifeboats still suck though!! cheers chris
-
i reckon half the fun and the challenge is to research, learn and bash as you go. i have bought five kits - billings oseberg (in hibernation), amati santa maria (completed), mamoli golden hind (about to step the masts), amati bounty (just begun), corel victory (first planking nearly complete). all these vessels were actual boats in their day and i'm pretty happy with what i will be building (apart from the insistence of these manufacturers to include metal lifeboats on vessels built in the 15th century etc). at the end of the day who cares if 'your' model was a real ship or not? i bet most of your family and friends who admire and stare enviously at your finished ship wouldn't know endeavour from bounty, cutty sark from thermopylae etc. i say more effort on the manufactures part should go into the supply of more authentic materials to build such things as boats, gun carriages, incidental deck furniture etc and let the builder recreate it as best he/she can. i say we start up a movement to abolish fake metal lifeboats. my hero columbus would turn in his grave! cheers chris
-
glowing after oil
vossy replied to michael101's topic in Painting, finishing and weathering products and techniques
umm, glowing? sorry michael not sure anymore? cheers chris -
glowing after oil
vossy replied to michael101's topic in Painting, finishing and weathering products and techniques
g'day brian, nothing wrong with the product, just wouldn't recommend it for a final coat on a model cheers chris -
glowing after oil
vossy replied to michael101's topic in Painting, finishing and weathering products and techniques
g'day brian, linseed oil would be one of the worst oils to use as it penetrates extremely well. its why back in the day all the cricketers used to oil there bats with it. it soaks in toughens the wood and gives a more flexible timber. downside; nothing much sticks to it. hence the reason cricket bat manufacturers made polymer bats so their logo's would adhere to the wood for longer. bottom line: linseed oil is a highly efficient/effective penetrating wood conditioning oil. once applied its pretty much there to stay. cheers chris