


Moxis
-
Posts
314 -
Joined
-
Last visited
Reputation Activity
-

 Moxis got a reaction from archjofo in Clara May by Moxis - FINISHED - 1/48 scale - ketch - after David McGregor plans
Now that the rigging phase is about to start, I had to prepare myself by starting to make the blocks. According to drawing the smallest blocks are about 4x3x2 mm, so there is no need to make very small "microblocks".
Again I chose birch to be my material for these, and made first about 2 mm thick piece of it. From this a strip containing 10 pcs billets was milled with a cnc router. Because my machine doesn`t have fourth axle, the slots for wheels had to be milled using manual machine with 0,6 mm cutter. 0,5 mm thick wheels were cut from diam. 1,6 mm styrene rod and inserted into the slots. Finally the blocks were separated from strip and sanded manually & stained with oak colour.
I could very easily have made working blocks by drilling axle holes to the blocks and wheels, but I thought these stationary ones to be enough for my build.
Outer form milled in CNC machine:
Slots for wheels milled using manual milling machine:
Blocks separated from the strip and wheels inserted:
Final stained blocks. Wheels to be coloured brown and glued:
And now the only thing that remains is to make hundreds of these, including some double and triple ones too, but that is another story....
matti
-
 Moxis got a reaction from druxey in Clara May by Moxis - FINISHED - 1/48 scale - ketch - after David McGregor plans
Now that the rigging phase is about to start, I had to prepare myself by starting to make the blocks. According to drawing the smallest blocks are about 4x3x2 mm, so there is no need to make very small "microblocks".
Again I chose birch to be my material for these, and made first about 2 mm thick piece of it. From this a strip containing 10 pcs billets was milled with a cnc router. Because my machine doesn`t have fourth axle, the slots for wheels had to be milled using manual machine with 0,6 mm cutter. 0,5 mm thick wheels were cut from diam. 1,6 mm styrene rod and inserted into the slots. Finally the blocks were separated from strip and sanded manually & stained with oak colour.
I could very easily have made working blocks by drilling axle holes to the blocks and wheels, but I thought these stationary ones to be enough for my build.
Outer form milled in CNC machine:
Slots for wheels milled using manual milling machine:
Blocks separated from the strip and wheels inserted:
Final stained blocks. Wheels to be coloured brown and glued:
And now the only thing that remains is to make hundreds of these, including some double and triple ones too, but that is another story....
matti
-
 Moxis got a reaction from mtaylor in Clara May by Moxis - FINISHED - 1/48 scale - ketch - after David McGregor plans
Thanks for your kind words Patrick, aviaamator and bdgiantman2, and all "likes".
I am glad that my humble build interests you.
bdgiantman2: I too like the lines and simplicity of this ship. I am glad that I chose this one as my first attempt to build a wooden ship model. Bigger and more complex ships with their numerous guns and rigging parts would have been too much for my skills. But I will learn. Who knows what next....
matti
-
 Moxis got a reaction from dgbot in Clara May by Moxis - FINISHED - 1/48 scale - ketch - after David McGregor plans
Now that the rigging phase is about to start, I had to prepare myself by starting to make the blocks. According to drawing the smallest blocks are about 4x3x2 mm, so there is no need to make very small "microblocks".
Again I chose birch to be my material for these, and made first about 2 mm thick piece of it. From this a strip containing 10 pcs billets was milled with a cnc router. Because my machine doesn`t have fourth axle, the slots for wheels had to be milled using manual machine with 0,6 mm cutter. 0,5 mm thick wheels were cut from diam. 1,6 mm styrene rod and inserted into the slots. Finally the blocks were separated from strip and sanded manually & stained with oak colour.
I could very easily have made working blocks by drilling axle holes to the blocks and wheels, but I thought these stationary ones to be enough for my build.
Outer form milled in CNC machine:
Slots for wheels milled using manual milling machine:
Blocks separated from the strip and wheels inserted:
Final stained blocks. Wheels to be coloured brown and glued:
And now the only thing that remains is to make hundreds of these, including some double and triple ones too, but that is another story....
matti
-
 Moxis got a reaction from Omega1234 in Clara May by Moxis - FINISHED - 1/48 scale - ketch - after David McGregor plans
Thanks for your kind words Patrick, aviaamator and bdgiantman2, and all "likes".
I am glad that my humble build interests you.
bdgiantman2: I too like the lines and simplicity of this ship. I am glad that I chose this one as my first attempt to build a wooden ship model. Bigger and more complex ships with their numerous guns and rigging parts would have been too much for my skills. But I will learn. Who knows what next....
matti
-
 Moxis reacted to bdgiantman2 in Clara May by Moxis - FINISHED - 1/48 scale - ketch - after David McGregor plans
Found this build very late, but very impressive work. Your ship has clean lines, I personally admire ketches a lot. Should add this model to my future build list. Keep up the great construction.
-
Moxis reacted to aviaamator in Clara May by Moxis - FINISHED - 1/48 scale - ketch - after David McGregor plans
Matti! Great job!
-
 Moxis got a reaction from JerryGreening in Clara May by Moxis - FINISHED - 1/48 scale - ketch - after David McGregor plans
Now that the rigging phase is about to start, I had to prepare myself by starting to make the blocks. According to drawing the smallest blocks are about 4x3x2 mm, so there is no need to make very small "microblocks".
Again I chose birch to be my material for these, and made first about 2 mm thick piece of it. From this a strip containing 10 pcs billets was milled with a cnc router. Because my machine doesn`t have fourth axle, the slots for wheels had to be milled using manual machine with 0,6 mm cutter. 0,5 mm thick wheels were cut from diam. 1,6 mm styrene rod and inserted into the slots. Finally the blocks were separated from strip and sanded manually & stained with oak colour.
I could very easily have made working blocks by drilling axle holes to the blocks and wheels, but I thought these stationary ones to be enough for my build.
Outer form milled in CNC machine:
Slots for wheels milled using manual milling machine:
Blocks separated from the strip and wheels inserted:
Final stained blocks. Wheels to be coloured brown and glued:
And now the only thing that remains is to make hundreds of these, including some double and triple ones too, but that is another story....
matti
-
 Moxis got a reaction from tasmanian in Clara May by Moxis - FINISHED - 1/48 scale - ketch - after David McGregor plans
Now that the rigging phase is about to start, I had to prepare myself by starting to make the blocks. According to drawing the smallest blocks are about 4x3x2 mm, so there is no need to make very small "microblocks".
Again I chose birch to be my material for these, and made first about 2 mm thick piece of it. From this a strip containing 10 pcs billets was milled with a cnc router. Because my machine doesn`t have fourth axle, the slots for wheels had to be milled using manual machine with 0,6 mm cutter. 0,5 mm thick wheels were cut from diam. 1,6 mm styrene rod and inserted into the slots. Finally the blocks were separated from strip and sanded manually & stained with oak colour.
I could very easily have made working blocks by drilling axle holes to the blocks and wheels, but I thought these stationary ones to be enough for my build.
Outer form milled in CNC machine:
Slots for wheels milled using manual milling machine:
Blocks separated from the strip and wheels inserted:
Final stained blocks. Wheels to be coloured brown and glued:
And now the only thing that remains is to make hundreds of these, including some double and triple ones too, but that is another story....
matti
-
Moxis reacted to Omega1234 in Clara May by Moxis - FINISHED - 1/48 scale - ketch - after David McGregor plans
Hi Matti
Wow, those blocks look good!
Cheers
Patrick
-
 Moxis got a reaction from Rudolf in Clara May by Moxis - FINISHED - 1/48 scale - ketch - after David McGregor plans
Now that the rigging phase is about to start, I had to prepare myself by starting to make the blocks. According to drawing the smallest blocks are about 4x3x2 mm, so there is no need to make very small "microblocks".
Again I chose birch to be my material for these, and made first about 2 mm thick piece of it. From this a strip containing 10 pcs billets was milled with a cnc router. Because my machine doesn`t have fourth axle, the slots for wheels had to be milled using manual machine with 0,6 mm cutter. 0,5 mm thick wheels were cut from diam. 1,6 mm styrene rod and inserted into the slots. Finally the blocks were separated from strip and sanded manually & stained with oak colour.
I could very easily have made working blocks by drilling axle holes to the blocks and wheels, but I thought these stationary ones to be enough for my build.
Outer form milled in CNC machine:
Slots for wheels milled using manual milling machine:
Blocks separated from the strip and wheels inserted:
Final stained blocks. Wheels to be coloured brown and glued:
And now the only thing that remains is to make hundreds of these, including some double and triple ones too, but that is another story....
matti
-
 Moxis got a reaction from dj.bobo in Clara May by Moxis - FINISHED - 1/48 scale - ketch - after David McGregor plans
Now that the rigging phase is about to start, I had to prepare myself by starting to make the blocks. According to drawing the smallest blocks are about 4x3x2 mm, so there is no need to make very small "microblocks".
Again I chose birch to be my material for these, and made first about 2 mm thick piece of it. From this a strip containing 10 pcs billets was milled with a cnc router. Because my machine doesn`t have fourth axle, the slots for wheels had to be milled using manual machine with 0,6 mm cutter. 0,5 mm thick wheels were cut from diam. 1,6 mm styrene rod and inserted into the slots. Finally the blocks were separated from strip and sanded manually & stained with oak colour.
I could very easily have made working blocks by drilling axle holes to the blocks and wheels, but I thought these stationary ones to be enough for my build.
Outer form milled in CNC machine:
Slots for wheels milled using manual milling machine:
Blocks separated from the strip and wheels inserted:
Final stained blocks. Wheels to be coloured brown and glued:
And now the only thing that remains is to make hundreds of these, including some double and triple ones too, but that is another story....
matti
-
 Moxis got a reaction from pete48 in Clara May by Moxis - FINISHED - 1/48 scale - ketch - after David McGregor plans
Now that the rigging phase is about to start, I had to prepare myself by starting to make the blocks. According to drawing the smallest blocks are about 4x3x2 mm, so there is no need to make very small "microblocks".
Again I chose birch to be my material for these, and made first about 2 mm thick piece of it. From this a strip containing 10 pcs billets was milled with a cnc router. Because my machine doesn`t have fourth axle, the slots for wheels had to be milled using manual machine with 0,6 mm cutter. 0,5 mm thick wheels were cut from diam. 1,6 mm styrene rod and inserted into the slots. Finally the blocks were separated from strip and sanded manually & stained with oak colour.
I could very easily have made working blocks by drilling axle holes to the blocks and wheels, but I thought these stationary ones to be enough for my build.
Outer form milled in CNC machine:
Slots for wheels milled using manual milling machine:
Blocks separated from the strip and wheels inserted:
Final stained blocks. Wheels to be coloured brown and glued:
And now the only thing that remains is to make hundreds of these, including some double and triple ones too, but that is another story....
matti
-
Moxis got a reaction from mtaylor in Clara May by Moxis - FINISHED - 1/48 scale - ketch - after David McGregor plans
Now that the rigging phase is about to start, I had to prepare myself by starting to make the blocks. According to drawing the smallest blocks are about 4x3x2 mm, so there is no need to make very small "microblocks".
Again I chose birch to be my material for these, and made first about 2 mm thick piece of it. From this a strip containing 10 pcs billets was milled with a cnc router. Because my machine doesn`t have fourth axle, the slots for wheels had to be milled using manual machine with 0,6 mm cutter. 0,5 mm thick wheels were cut from diam. 1,6 mm styrene rod and inserted into the slots. Finally the blocks were separated from strip and sanded manually & stained with oak colour.
I could very easily have made working blocks by drilling axle holes to the blocks and wheels, but I thought these stationary ones to be enough for my build.
Outer form milled in CNC machine:
Slots for wheels milled using manual milling machine:
Blocks separated from the strip and wheels inserted:
Final stained blocks. Wheels to be coloured brown and glued:
And now the only thing that remains is to make hundreds of these, including some double and triple ones too, but that is another story....
matti
-
 Moxis got a reaction from wyz in Clara May by Moxis - FINISHED - 1/48 scale - ketch - after David McGregor plans
I started to make the bowsprit with my build, but encountered immediately some problems. According to plan there are one chain and one rope coming from the bowsprit towards the hull, but it is not shown clearly, where in hull these should be connected. I wonder if any of you could help me with this?
So where are connected the chain and a rope below it marked with red arrow:
matti
-
Moxis got a reaction from druxey in Clara May by Moxis - FINISHED - 1/48 scale - ketch - after David McGregor plans
Now that the holiday season begins to be on the right side, it is time to continue shipbuilding again. The last structure on deck is the windlass. It was made of different bits and pieces of birch, the "metal" parts are styrene. Gears are milled of birch too, using the dividing attachment at the milling machine. Brass M1 bolts and M1.4 nuts were also used to represent the fasteners that keep everything together.
For the ship`s bell I turned a small piece of round birch dowel which represented the inside form of the bell. This was primed, greased (to separate the cured shell from the form) and covered with the stuff made of epoxy and microballs. When cured the shell was removed from the form, and we had a beautiful thin walled bell which was painted with brass colour.
Windlass and ship`s bell.
Structures located on deck.
-
Moxis got a reaction from druxey in Clara May by Moxis - FINISHED - 1/48 scale - ketch - after David McGregor plans
Thanks for your kind words Omega1234, Mark and Tom!
And again some more deck structures.
Pumps, hatch and some sort of cabinets. All made of 1 mm birch plywood and 0,6 mm veneer:
Cargo hatches:
Pentry house and winch:
And everything arranged on the deck but not yet glued:
-
Moxis got a reaction from druxey in Clara May by Moxis - FINISHED - 1/48 scale - ketch - after David McGregor plans
First of all, very merry and peaceful Christmas to everybody! Santa Claus has started his trip to all parts of the world from Korvatunturi in Finland where his workshop is situated. Don`t worry if it takes a little more time than normally, because we have no snow here in southern Finland: http://youtu.be/9LDtPR8xHNg
And again it is time for a short update. I started to make the deck structure. First the rudderhouse, helm, binnacle and skylight.
Material for rudderhouse is 1 mm birch plywood. Framing is cut from 0,6 mm veneer. Roof was made by scattering thin sand on the roof which was soaked with diluted glue. Then painted with Vallejo colours and weathered with Mig pigments.
Spokes for the helm were turned from dia. 1 mm birch dowel. Other parts are 1mm birch veneer and 0,3 mm brass sheet.
The binnacle stand was milled octagonal from birch dowel. Brass looking parts are resin and styrene. And finally the skylight is made of 1 mm veneer. The black metal bars are 0,25 mm insect needles.
Turning the helm spokes in the lathe:
Rudder house, helm, binnacle and skylight:
And the structure on deck. Not yet glued:
-
Moxis got a reaction from Omega1234 in Clara May by Moxis - FINISHED - 1/48 scale - ketch - after David McGregor plans
I started to make the bowsprit with my build, but encountered immediately some problems. According to plan there are one chain and one rope coming from the bowsprit towards the hull, but it is not shown clearly, where in hull these should be connected. I wonder if any of you could help me with this?
So where are connected the chain and a rope below it marked with red arrow:
matti
-
Moxis got a reaction from Omega1234 in Clara May by Moxis - FINISHED - 1/48 scale - ketch - after David McGregor plans
Hello Frank, I am glad that you like my humble build. Hopefully I have soon something new to show.
Matti
-
Moxis got a reaction from mtaylor in Clara May by Moxis - FINISHED - 1/48 scale - ketch - after David McGregor plans
Hello Frank, I am glad that you like my humble build. Hopefully I have soon something new to show.
Matti
-
 Moxis got a reaction from stanwill in Clara May by Moxis - FINISHED - 1/48 scale - ketch - after David McGregor plans
Thanks Patric and Tom!
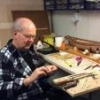
Now that I have gathered experience of ship model building about a month, I have to say that this is really nice hobby.
So was car and tank building too, but I think this is better.
And Tom, when I was nearing my retirement years, I purchased so many tools and machines I could, because I knew that after retirement there is no more money to spend on them.
I have been making models almost my entire life, so I knew that this is going to continue also on retirement. After all you must have hobbies when you have nothing more than free time. Without them life is going to be very boring.
-
Moxis reacted to Mahuna in Clara May by Moxis - FINISHED - 1/48 scale - ketch - after David McGregor plans
Hi Matti - I just found your log and I'm very impressed with your work. I plan to follow along from here on.
-
 Moxis got a reaction from Dimitris71 in SS Kaiser Wilhelm der Grosse 1897 by Mirabell61 - FINISHED - scale 1:144 - POF - first German four stacker of the Norddeutscher Lloyd line
Wonderful Nils. I am going to place my order for these immediately. From time to time it comes needs to build something that looks like made of metal with all the rivets and boltheads, so this is an answer to my prayers. Thanks a lot!
Matti
-
Moxis got a reaction from Dimitris71 in SS Kaiser Wilhelm der Grosse 1897 by Mirabell61 - FINISHED - scale 1:144 - POF - first German four stacker of the Norddeutscher Lloyd line
Hello Nils,
After having joined this wonderful community for a short while ago I have followed your extraordinary build very carefully. All superlatives have been said already many times and I fully agree with them.
However one question has not been answered before, which I have in mind, namely: Which brand of self adhering aluminum tape are you using for plating, and where are you purchasing that?
I remember already 50 years ago when building models of WW2 fighters we used to use aluminum foil with riveting made with small gears dismantled from old alarm clocks, but the foil didn't have this self adhering film. The foil was glued into aeroplane wings and hull with contact glue, but that was a messy and not always succesful method.
So your way to do this seems to be a superior procedure, and could be the way if I ever should need to copy a riveted surfaces at my builds.
At the same time I wish a very best New Year to you, your family and all the colleagues at the forum!
Matti