


Cabbie
-
Posts
597 -
Joined
-
Last visited
Content Type
Profiles
Forums
Gallery
Events
Posts posted by Cabbie
-
-
Welcome Peter? sounds very interesting. Please start a build log and show us what you are doing.
Hooroo Chris
-
Morning or evening for you Phil and thanks for replying.
Definitely a windows user and it exports DXF or DWG, so that should be ok.
Sounds very good about the ease of use help forums, though i might
go for the 3d version just in case.
thanks Chris
-
-
-
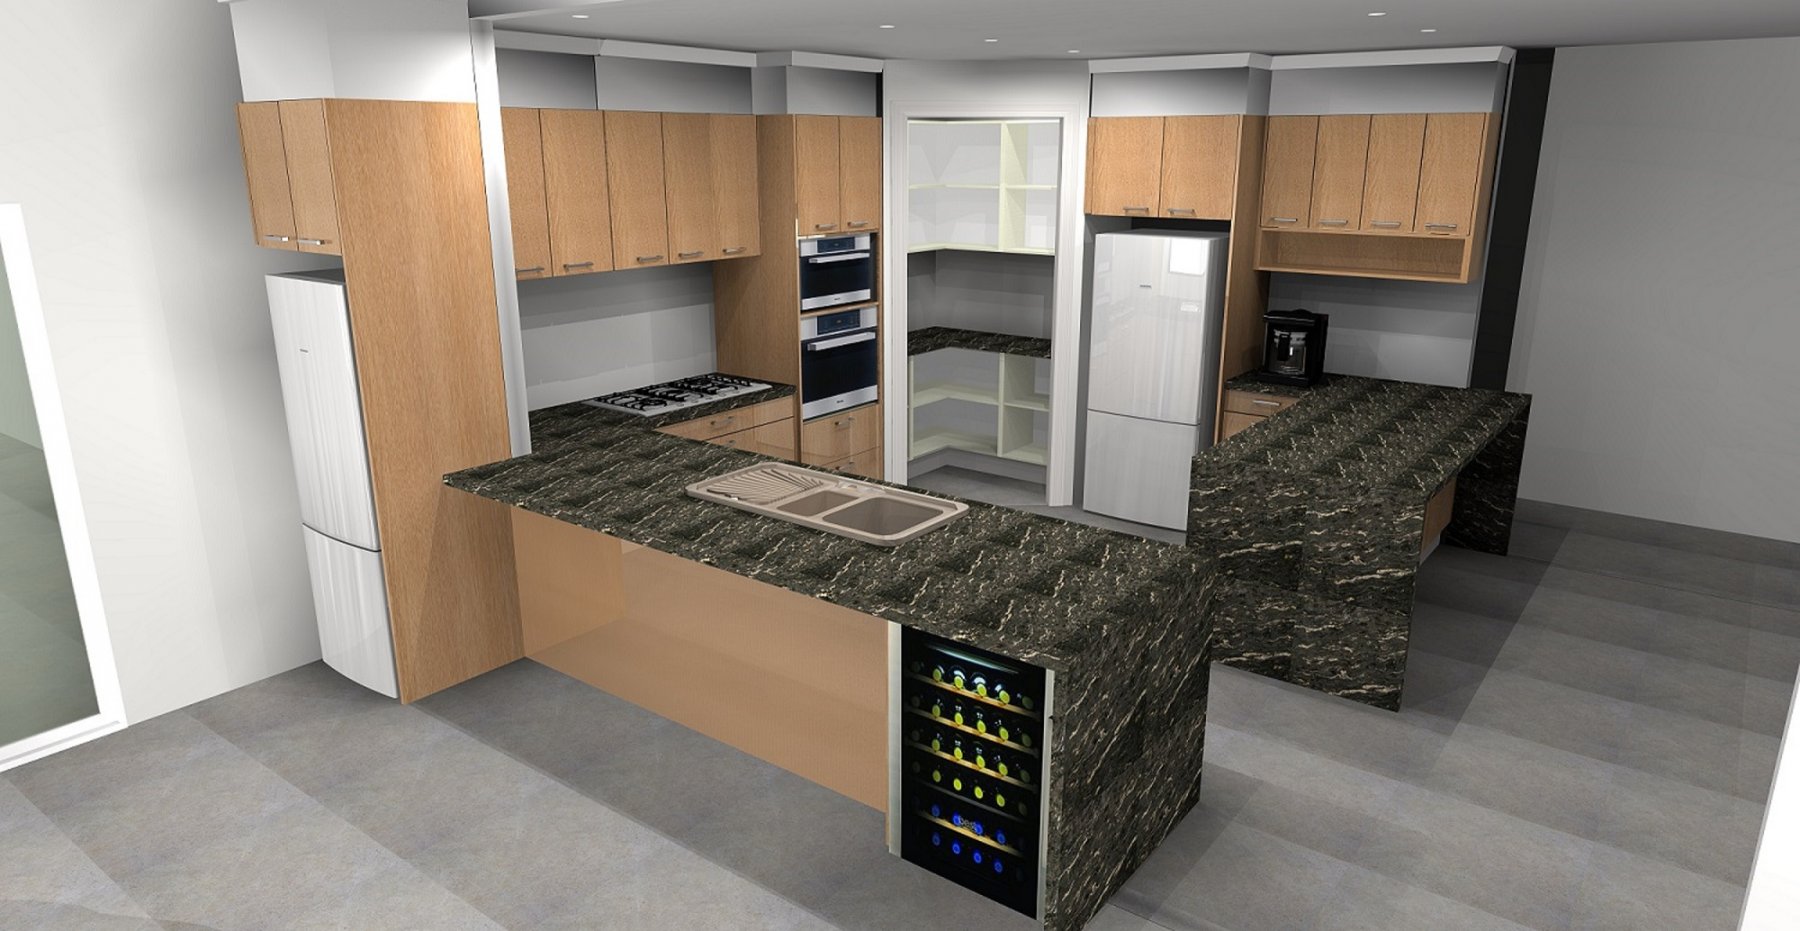
Hello Forum
Apologies if topic not suitable here please shift
I am a cabinetmaker by trade but terrible at cad.
Can anyone suggest a simple to use (lol for me)
cad program that i can import? plans from my kitchen design program
and do basic adjustments, measurements etc.
Currently my kitchen program outputs to bto cad , but
i am finding that too complicated to use, don't have the time
to learn it. All i want to achieve is a plan like pic attached but that i can add measurements too.
My design programs produces some very nice 3d rendered images but the they go to bto cad
and i get lost.
Thanks Chris
-
Hmmmmm to which part, Rick
-
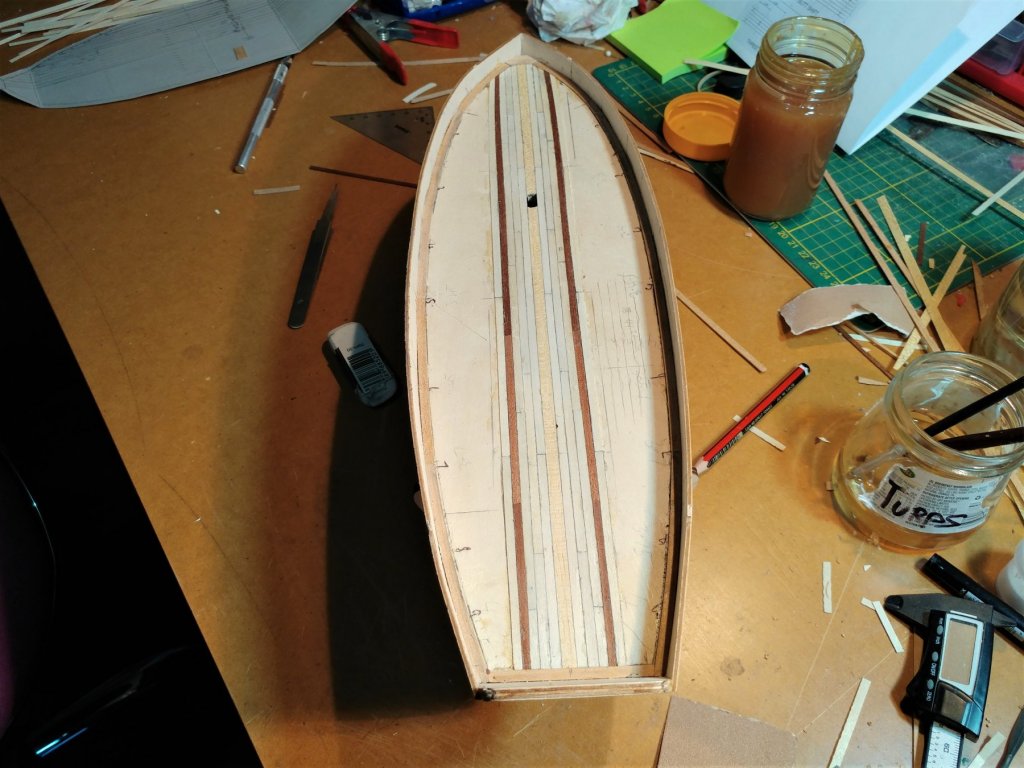
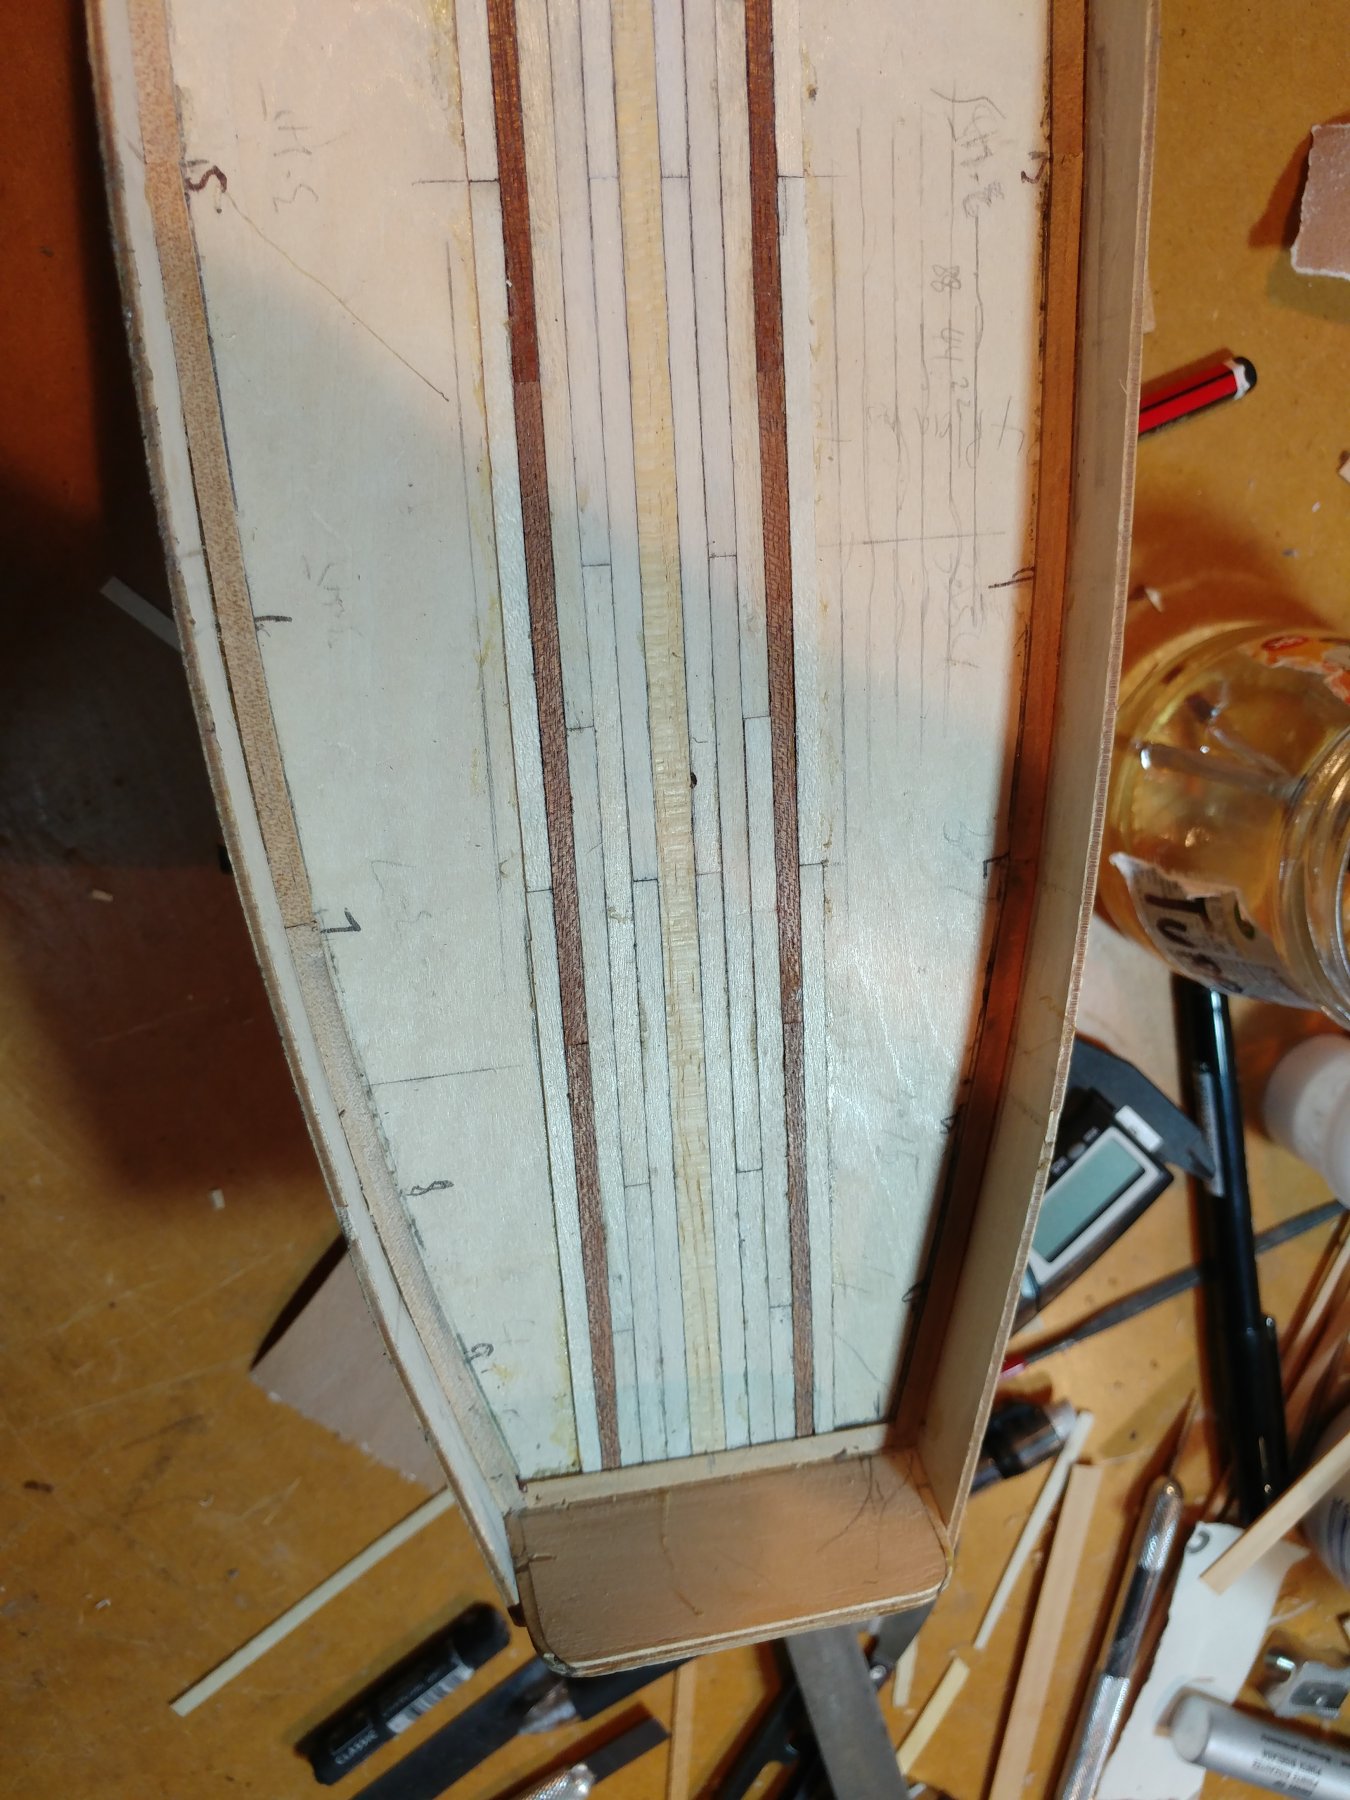
Minor update and look what happens when I turn my back for 5 minutes.
The boys thought it would look good with "racing stripes". Who would have
heard of such a preposterous idea. However i really don't mid the look, a bit
unconventional, but what the heck. Lets hope that is all they have in mind!!
Cheers Chris


-
You are not getting away that quick Harry I need to sort out the shift as well.
I did have a lot of references saved but then a computer crash wiped them out.
Now the old gray matter has to try and work out what i got from where.
-
Hi Rick
You need to explain these terms "King" and "sectional sketch that he did".
Do you have any drawings or photos of what you did.
I am currently drawing my layout on cardboard I will post here when done
Thanks Chris
-
-
-
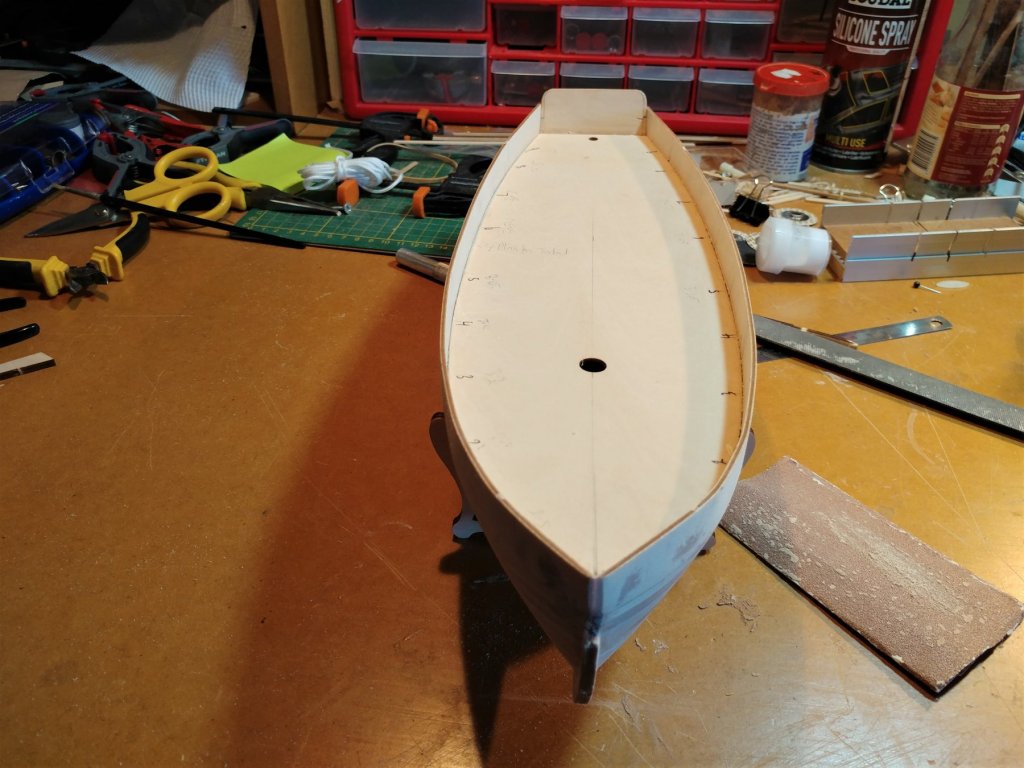
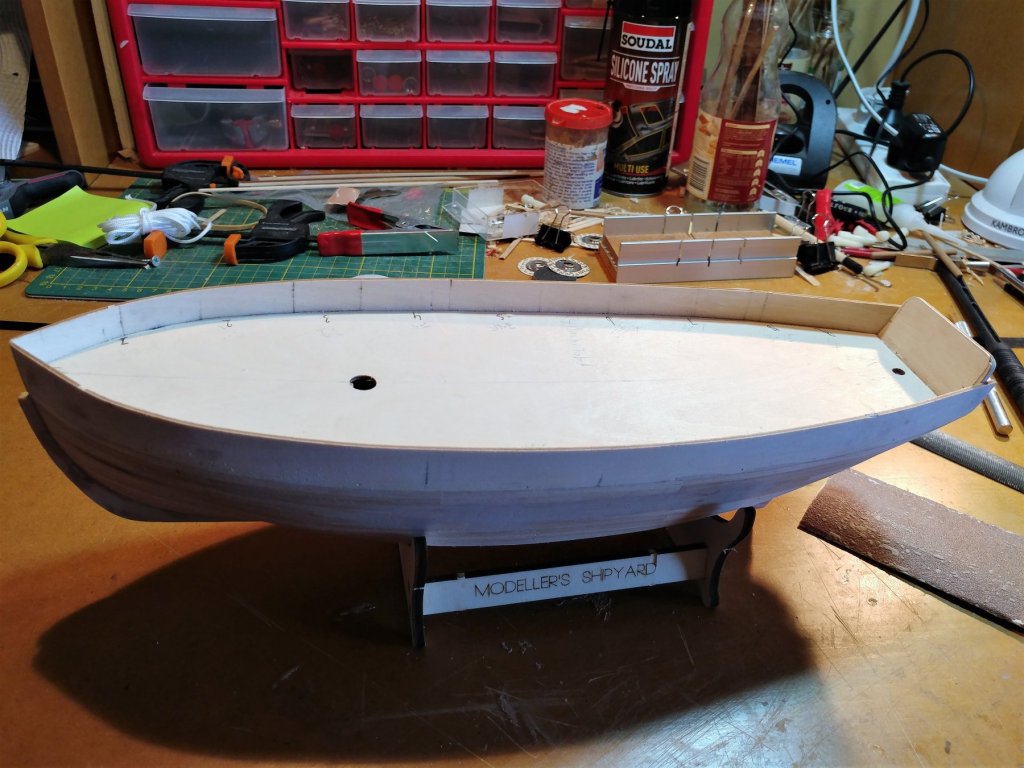
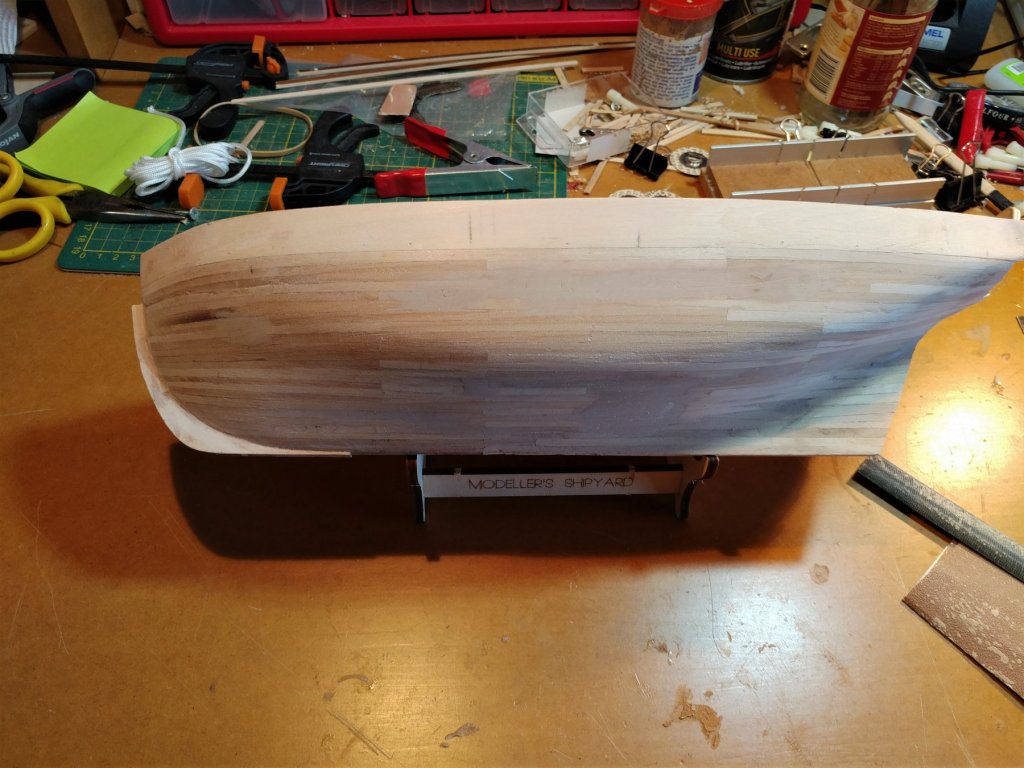
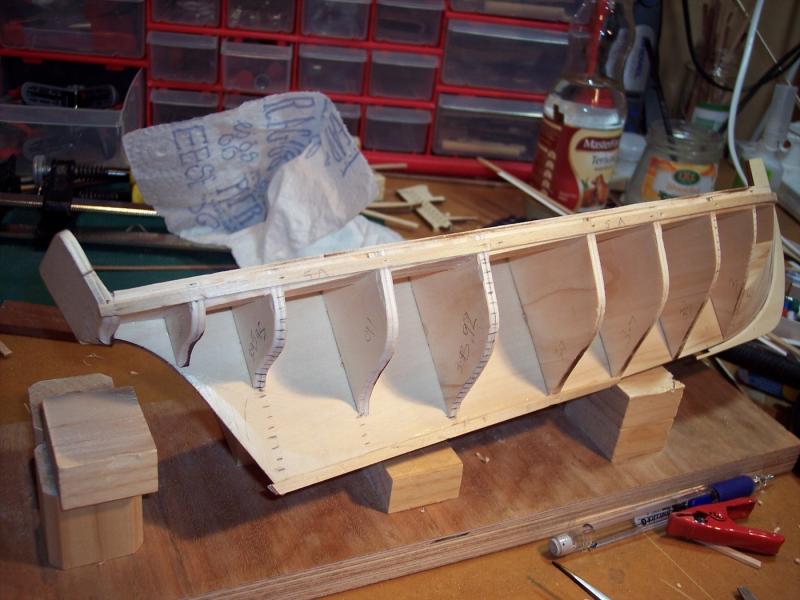
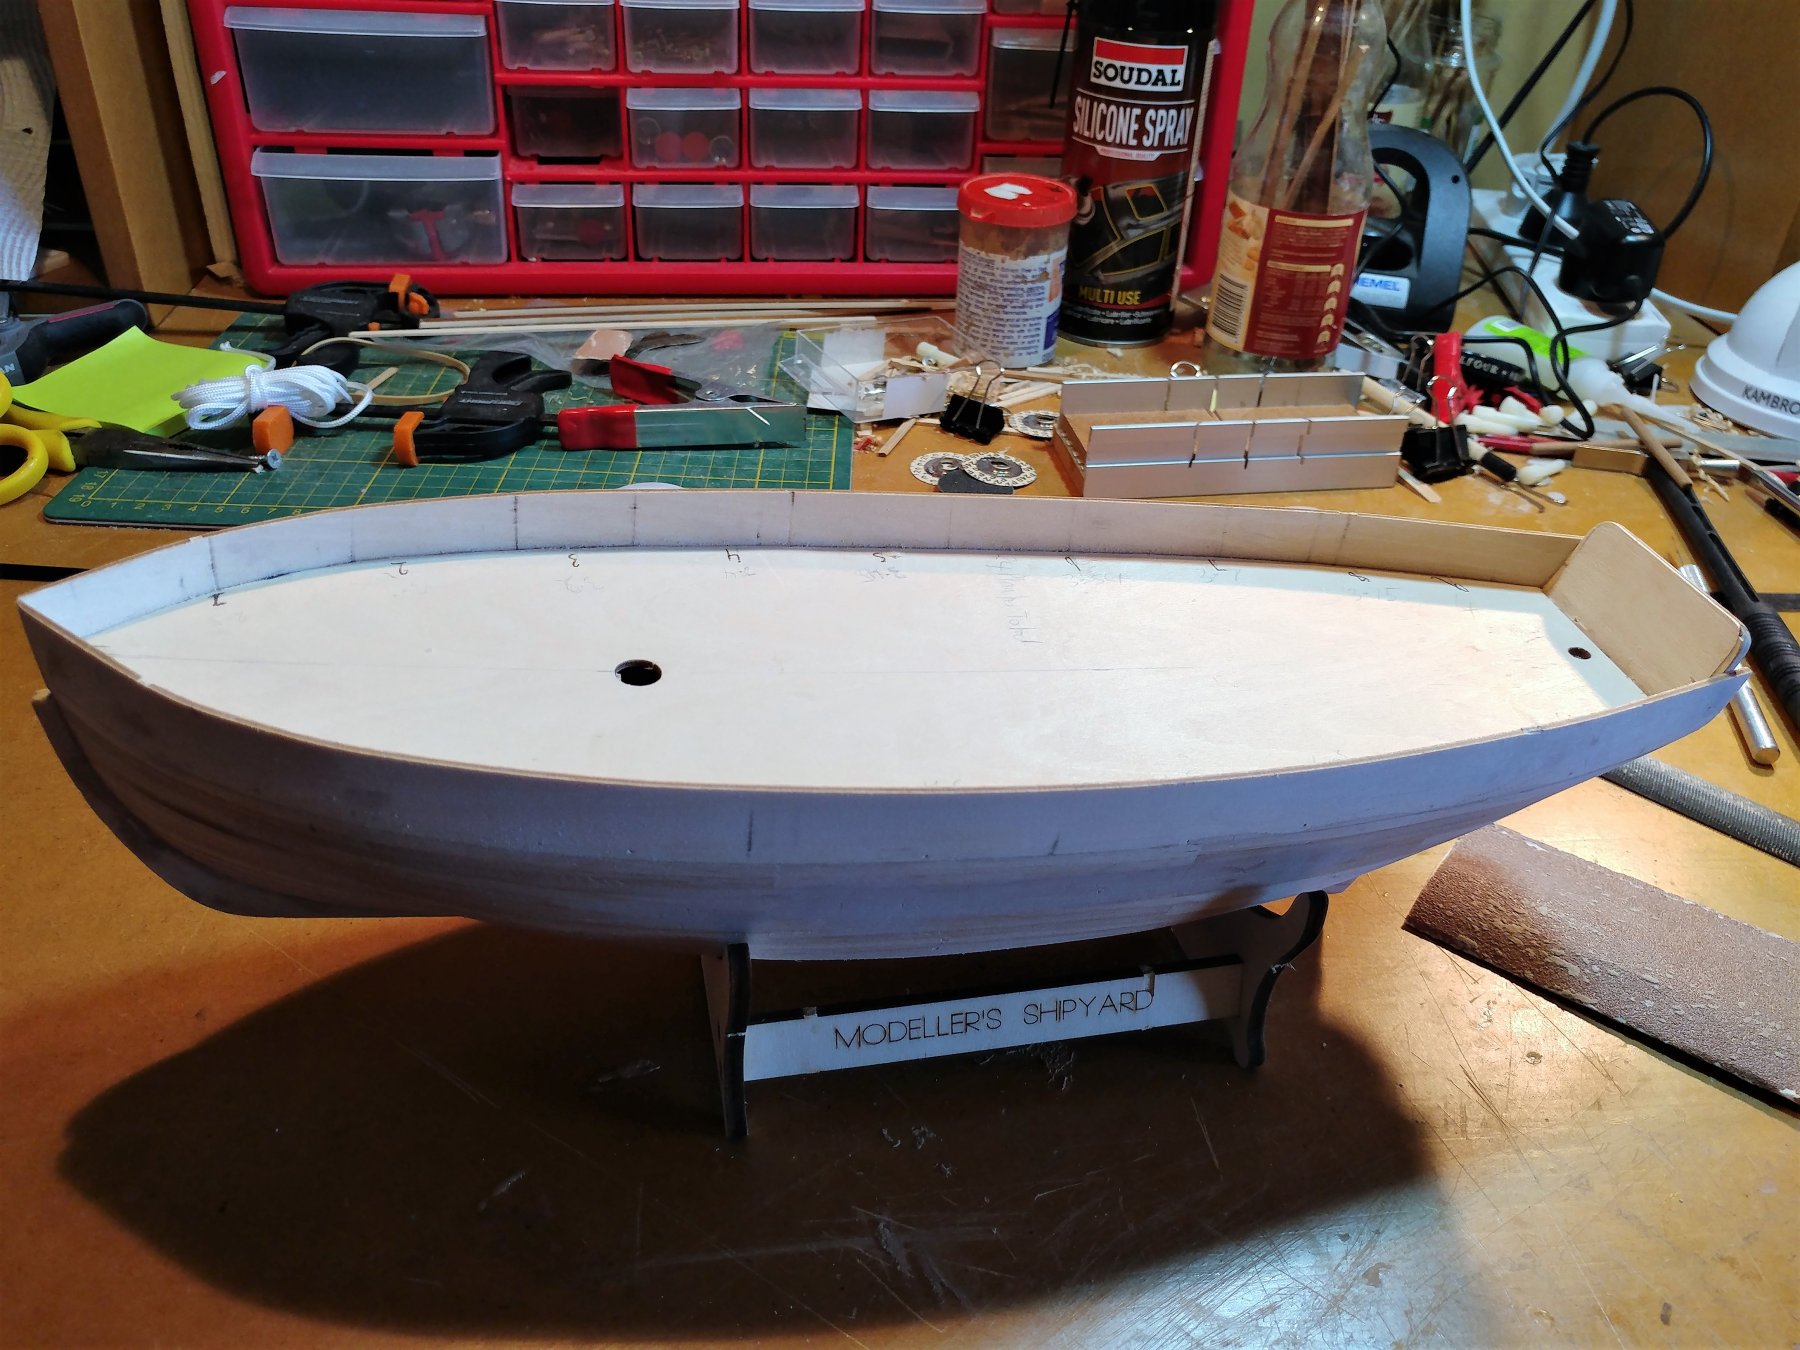
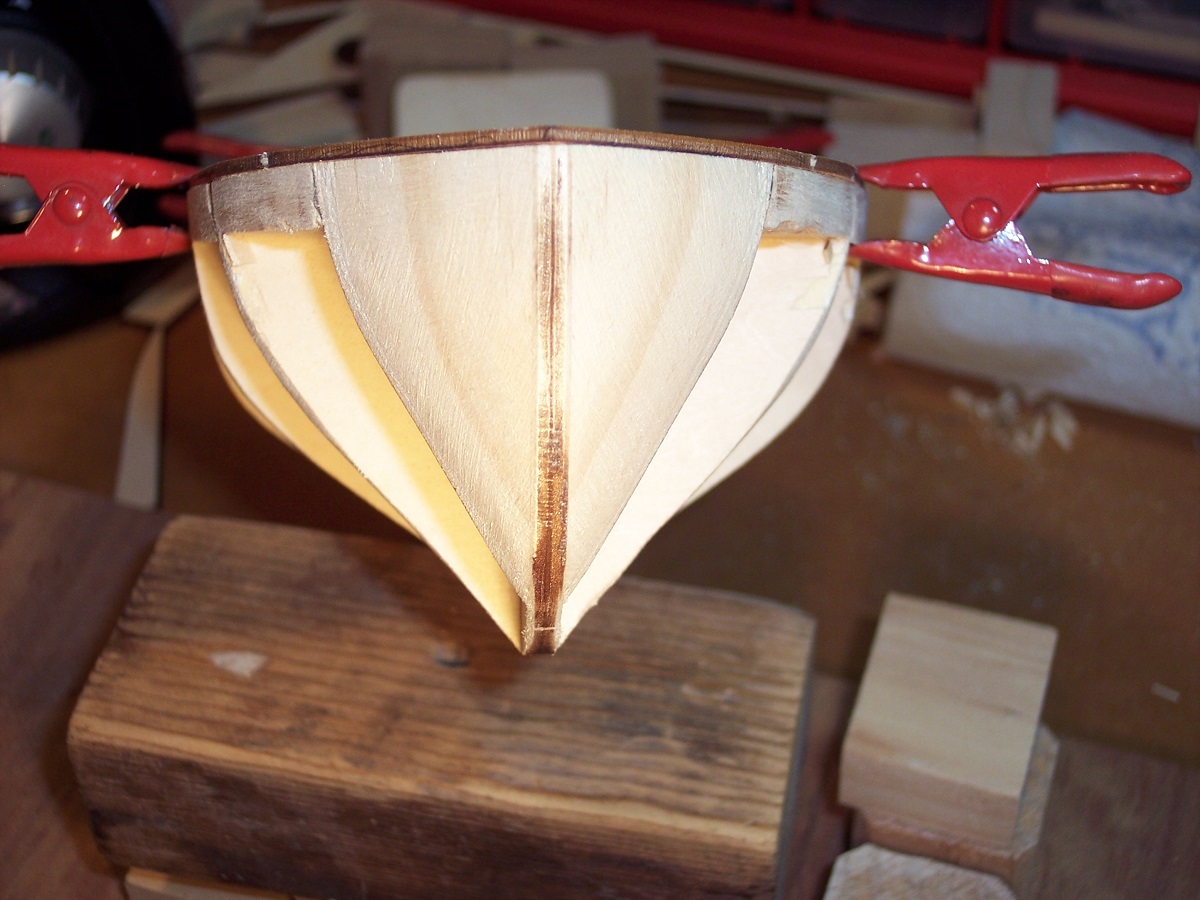
Wonders will never cease, I am back to model building and staying this time, though progress
will be slow. A few pics are attached to show that the first planking is finished with a little bit of filler and the
bulwarks have been glued on. Time to plank the deck next I think, should read instructions I suppose.
I am planning on using hooked, tapered and bent planking if I can
with the material provided in kit.
Hooroo chris
- KARAVOKIRIS, Fernando E, Rick01 and 5 others
-
 8
8
-
Good Morning Capt'n Al
Difficult job planking these sorts of ships and I was lucky that I had a full size replica to copy.
https://www.flickr.com/photos/endeavourvoyages/albums/72157634081735926/with/9022926874/
Be careful with what I say I am not, by any means an expert on old sailing ships. more like an eggspurt.
I think your 1st paragraph is close to the mark, but planks should not be reduced to less than half the original size.
The planking rules did still apply, the joins still needed to run in the right line.
I tended to to whatever I needed to do to make the plank fit, without doing anything too drastic.
Have a look at how my endeavour planking finished.I haven't had any comments about whether it is strictly within rules.
I didn't use steelers at the stern. I started out with wider planks at the keel which when tapered gave a natural curve upwards.
Planks were dropped under the wales as per the replica.
I Hope some of this helps
Cheers Chris
-
Ok Thanks Rick I will have a look for some.
It means a trip to Bendigo, which I usually avoid, but
I do have to go up in the near future -
-
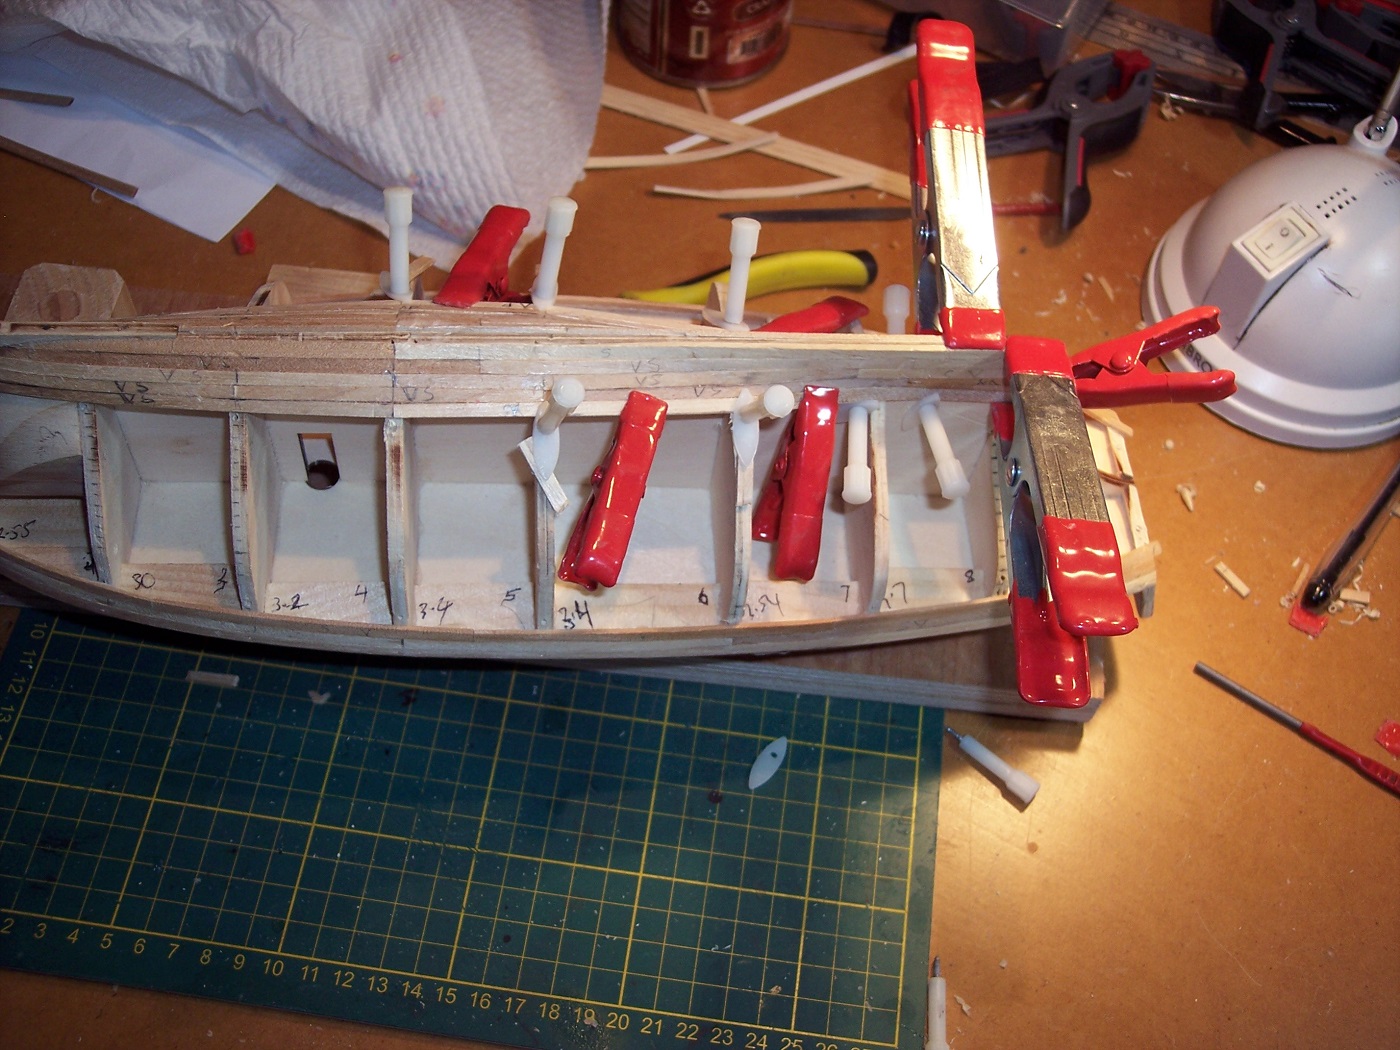
Hi Rick, unfortunately not in the Whitsundays. Had a bit of time off over Christmas
but haven't got much done. Other things keep intruding, went back to work last
Monday. Too many customers at the moment and its not going to get any better.
I have managed to get a few planks on, and have been experimenting with different methods of
holding them in place I have given up on the chart pins and now will just use the
planking screws.


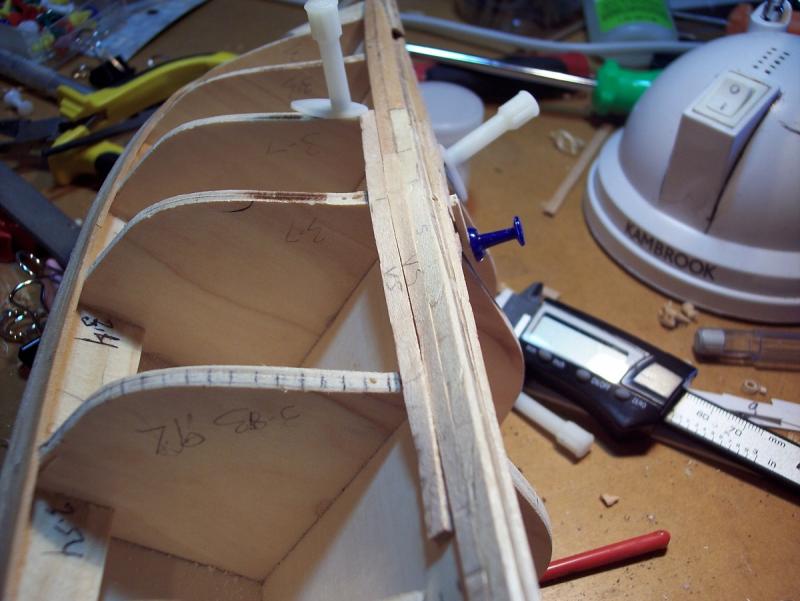
The plank with the 90 degree twist is a pain in the butt to make fit.
It did glue in better than what the photo shows.
I have started steaming only those planks in a container in the
microwave and it softens them enough to allow them to twist.
And then use the planking screws to hold them in place until they dry.
Then I take them off and do a final fit and glue in place.
Yeah I know doing it the hard way, each plank is tapered, fitted and glued in place.
I think that now is the best time to practice planking and work out methods.
Thanks for the tip about the cannons, but the are
still a while off yet. LOL
Cheers Chris
-
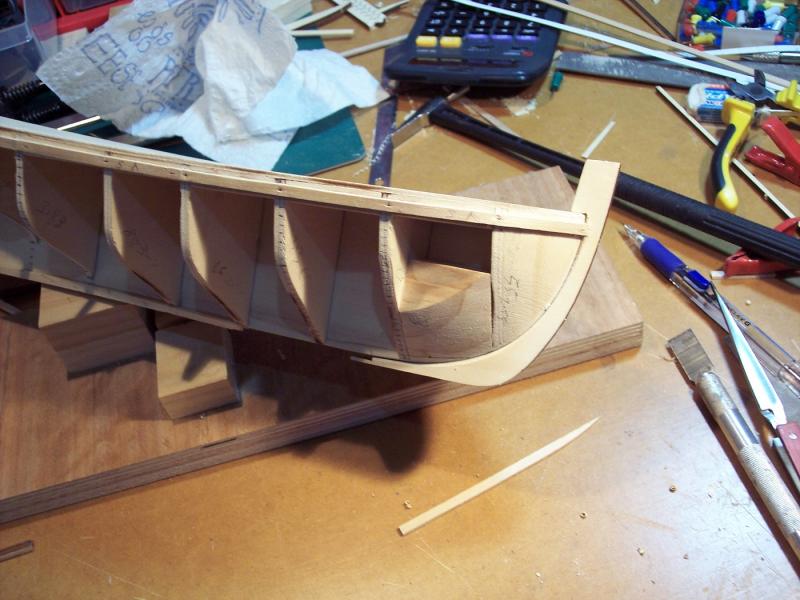
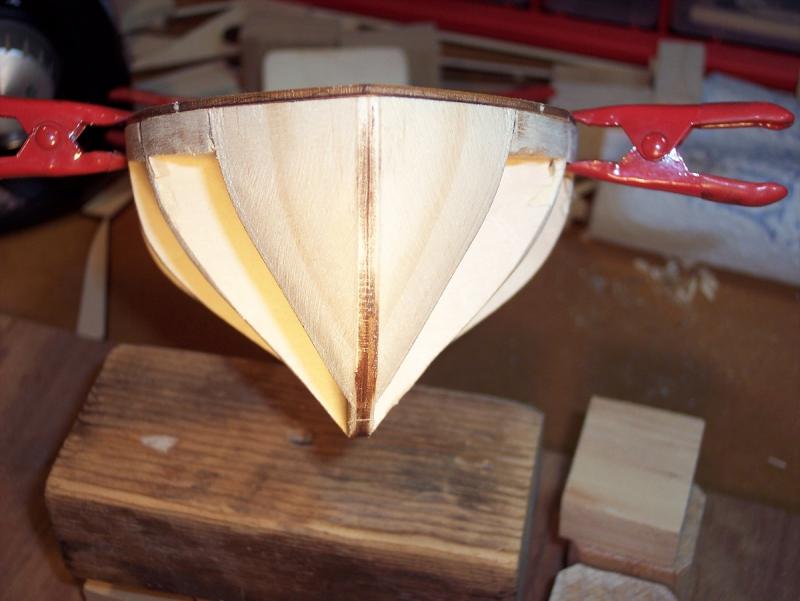
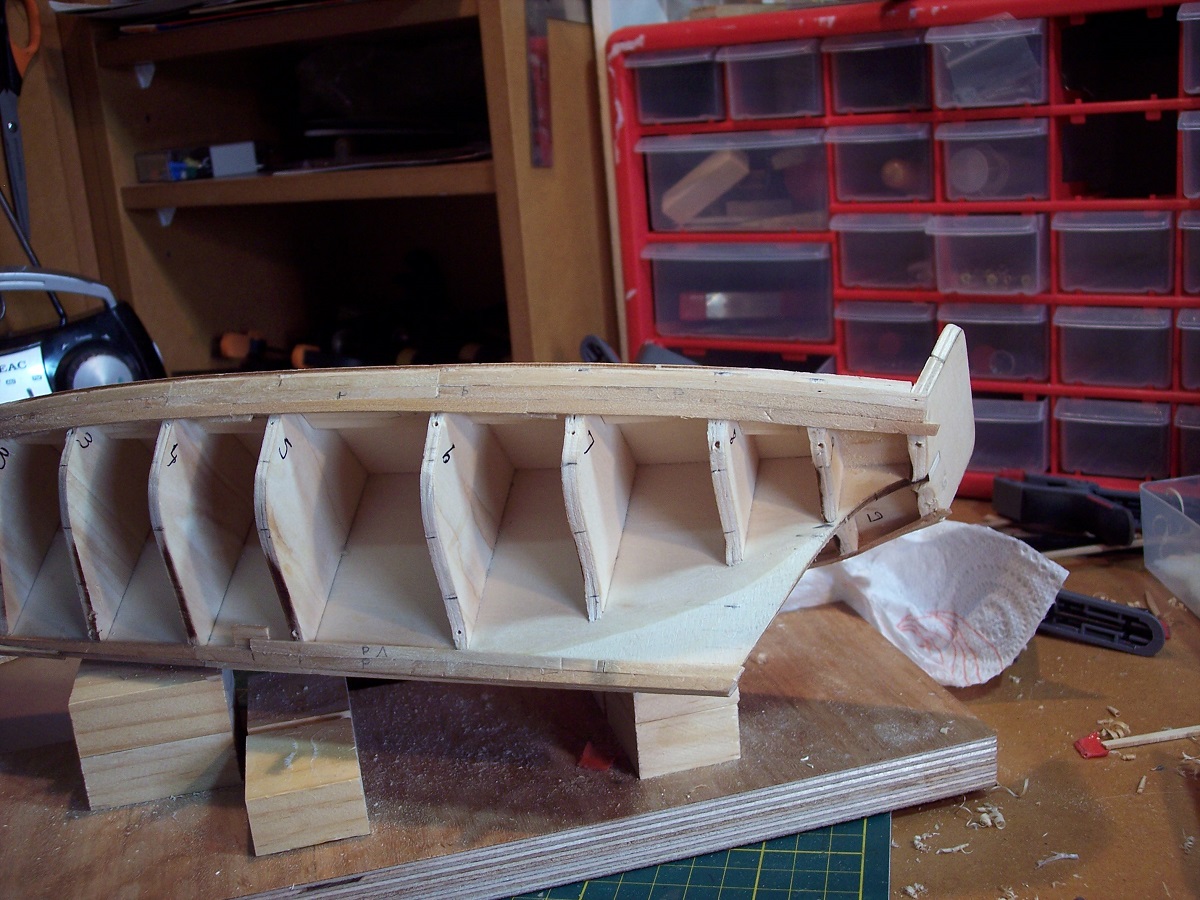
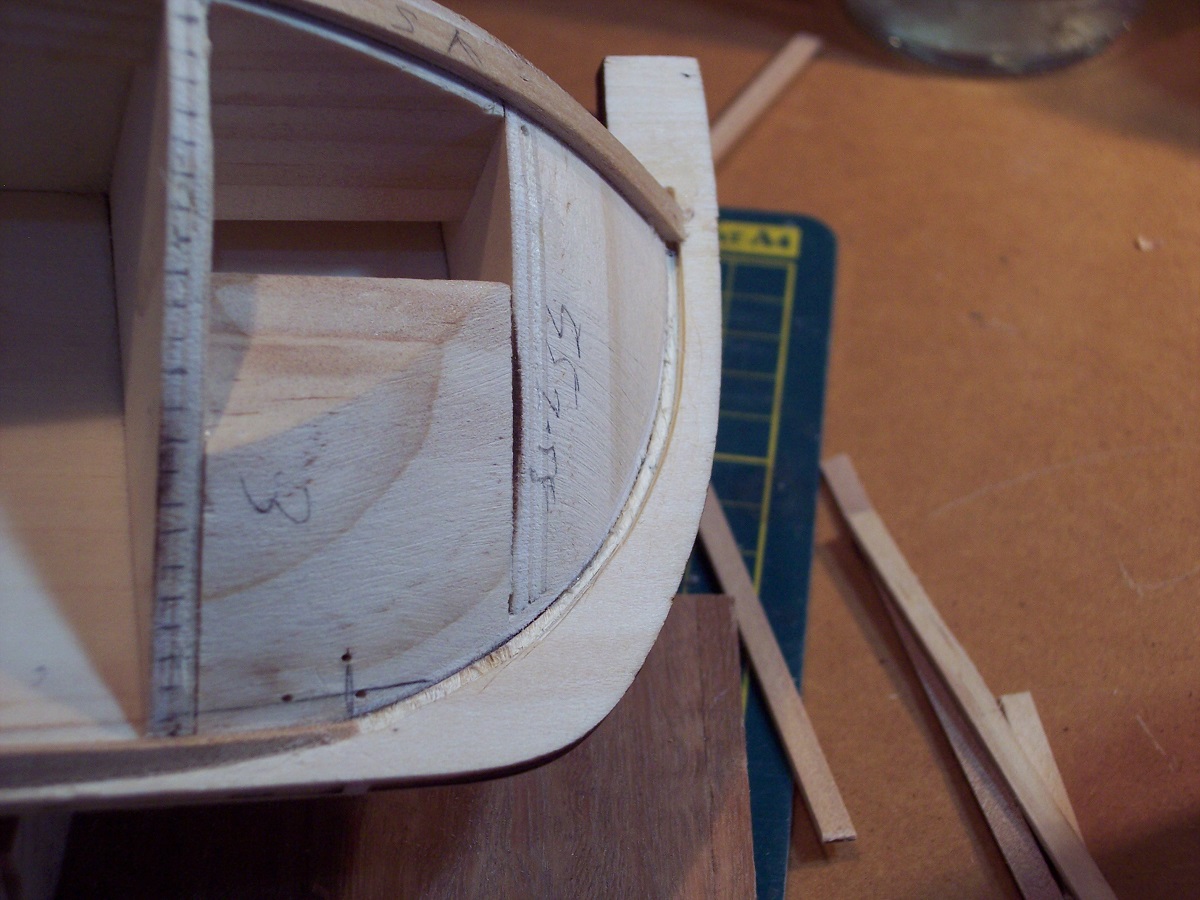
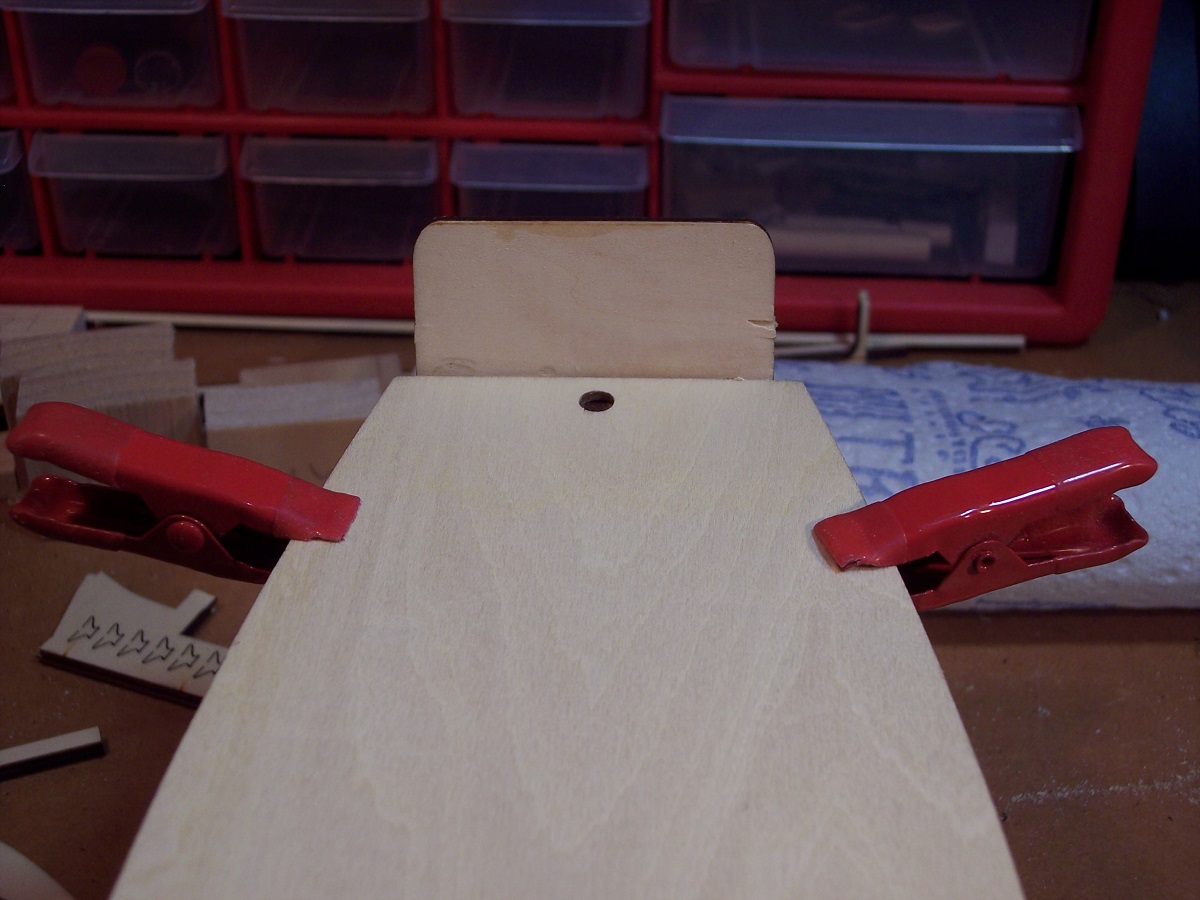
Finally garbords are on, and rebate has been cut into the stem.
Now its time to plank.
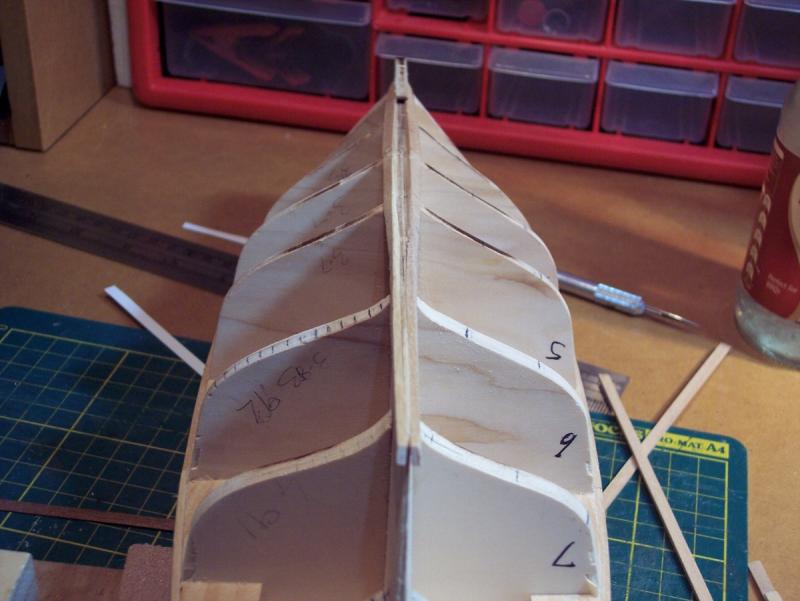

It is a bit unconventional leaving the false keel off,
but that will make it easier to get the thickness right.
It will be fixed on before 2nd planking
I will probably make it a bit higher, as it is now
there is not much showing under the planking.
hooroo Chris
-
Hi Rick haven't got started today yet, the Admiral is at work and will be home soon.
Then we will get stuck into it.
i left the false keel of at this stage so that i can sand to the right thickness before the 2nd planking.
I am very conscious of the planks fitting up to it, and will glue on before 2nd planking.
-
Thanks Rick, yes air con is on and the modelling room is a great place to sit under it.
Might add the blocks, will see if I can do without.
It is a bit hot and dust today, but 36C is ok if you don't have to go out in it.
Hi Dupree thanks for looking in, BUT, be careful
following me, you don't know where you might end up.
Cheers Chris
-
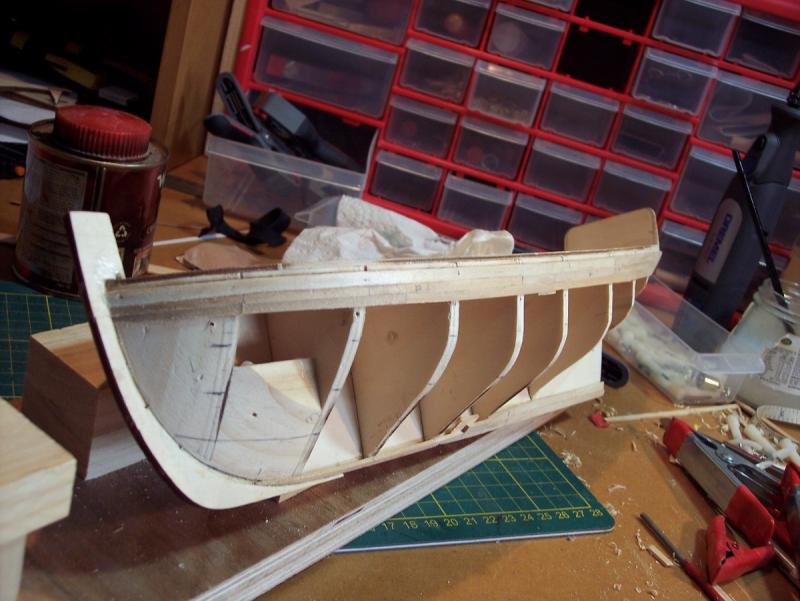
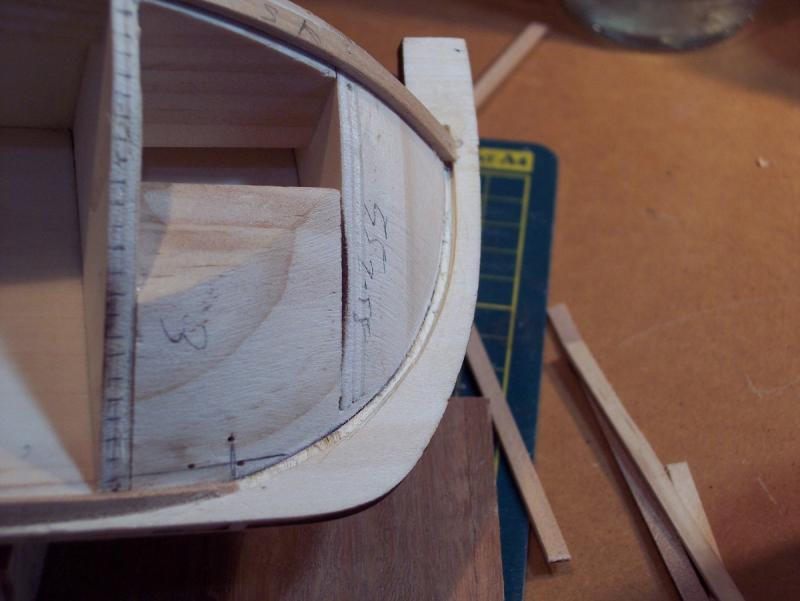
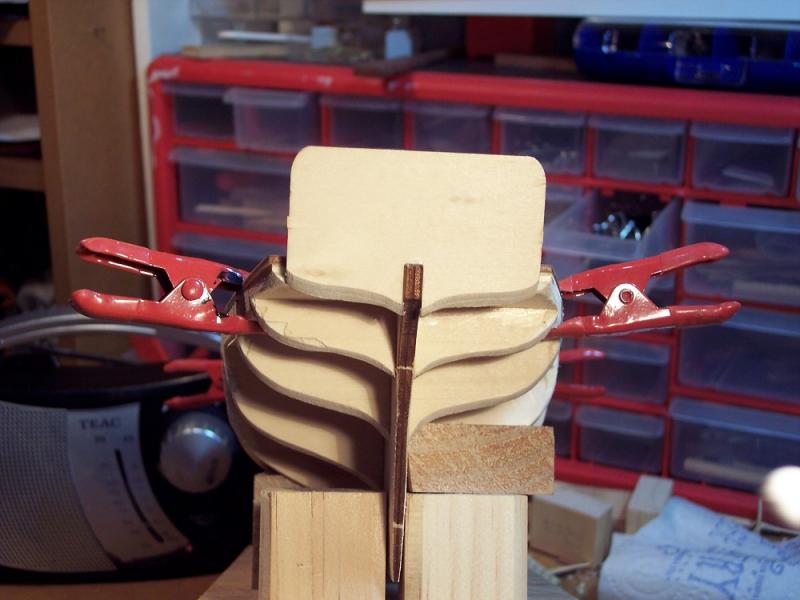
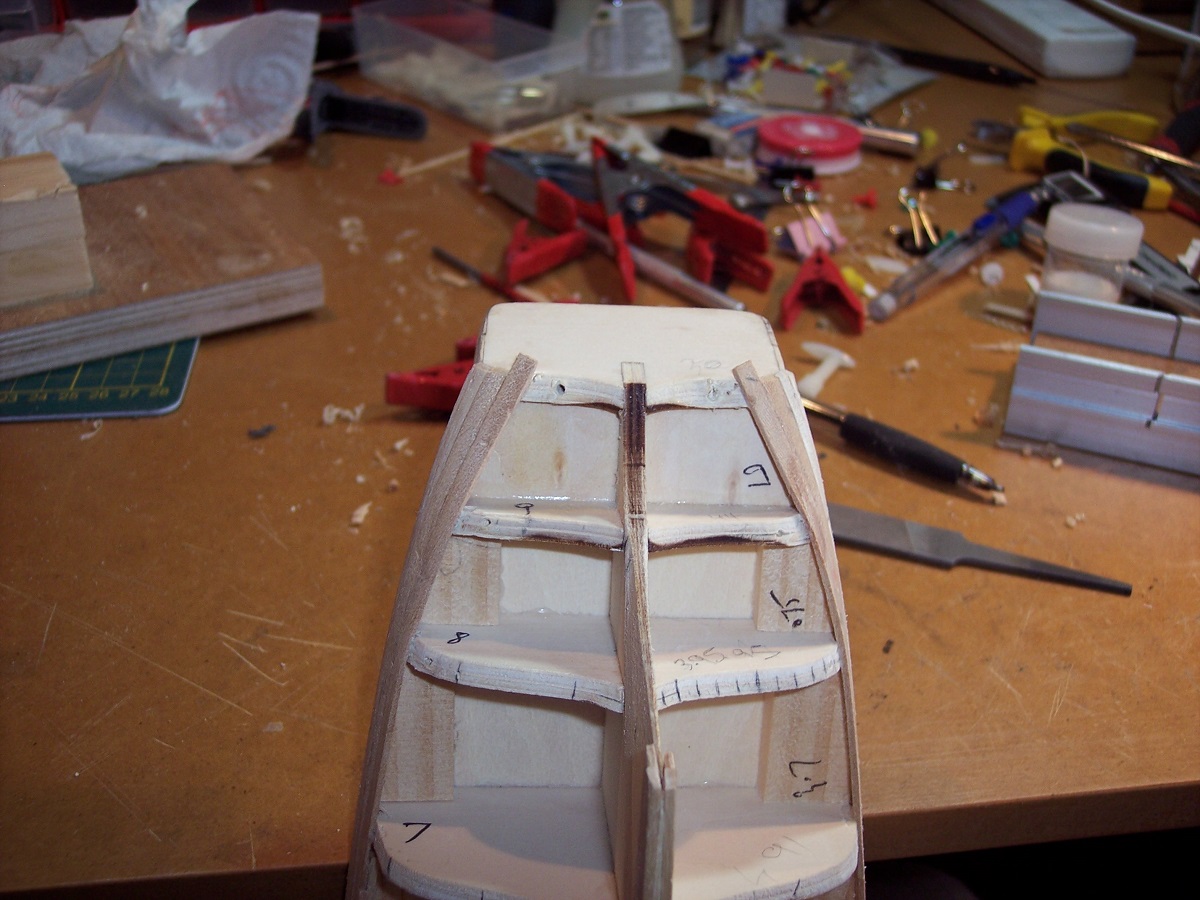
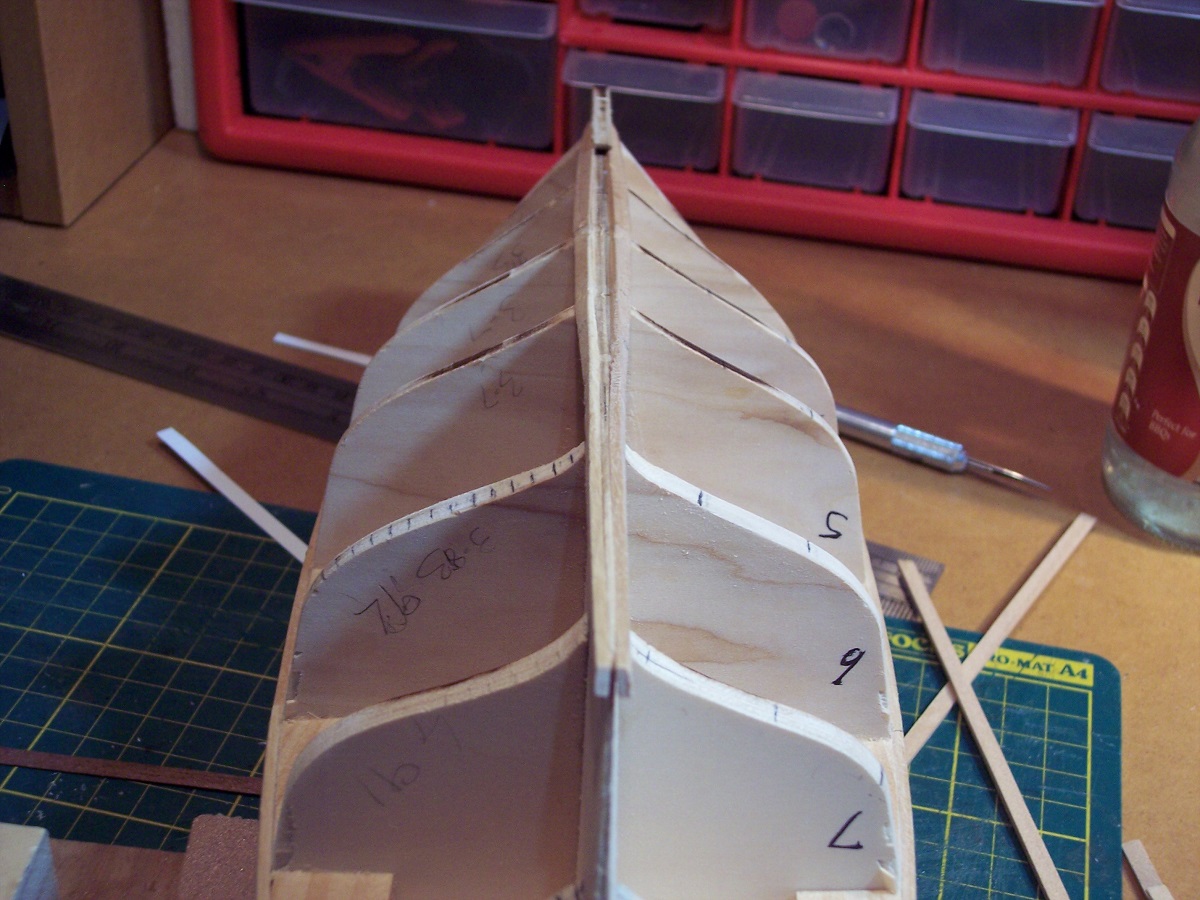
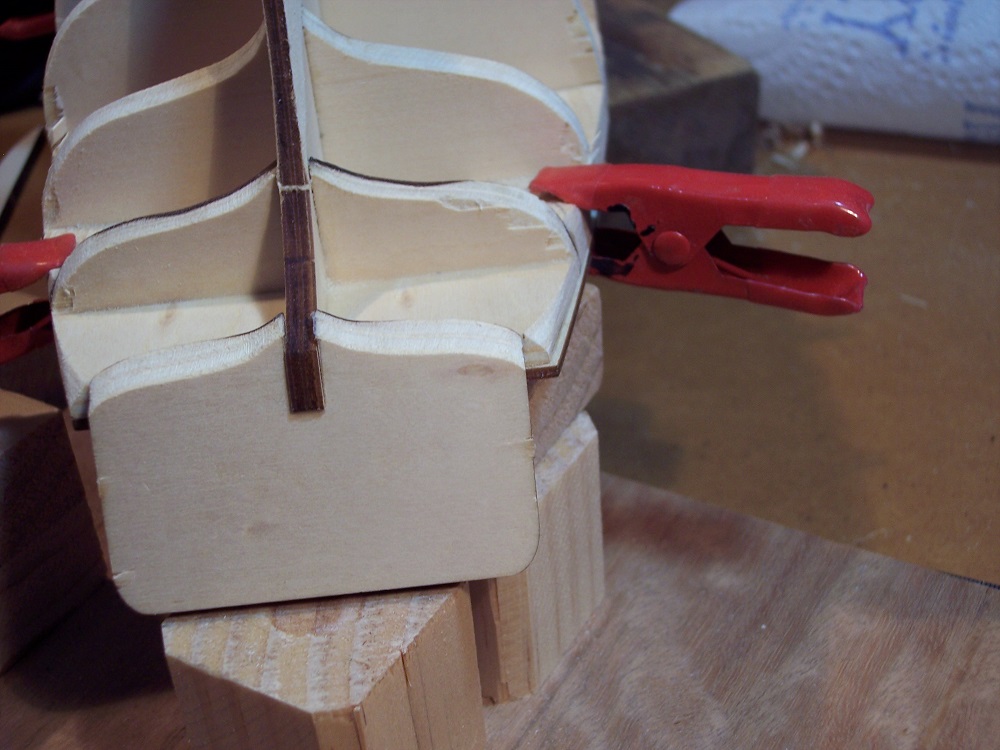
Good afternoon mi Lords and Ladies
And merry Christmas, or a happy whatever you like to celebrate.
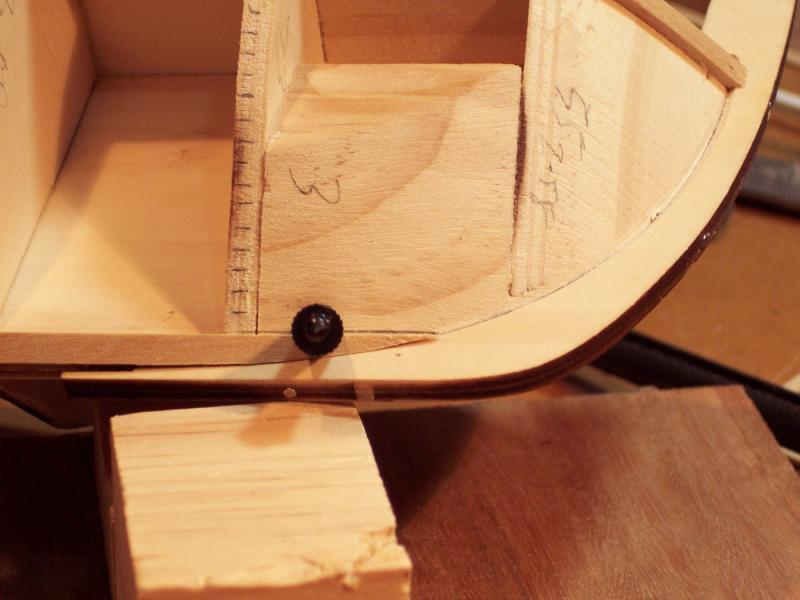
A little bit has been happening on the Mermaid,
2 blocks added in the bow to give the planks something to finish on.
The top planks under the gunwales are on,
and part of the Garbords are on.
First some pics


And now a question, or is that 3? or more
How should the garbord plank finish up to the stem post?
I believe that they shouldn't finish in a point?
Is it correct in what I am doing?
Should it be done as a hooked plank, with the next cut from a
wider plank to allow that.
yes i am a fussy bloke, this is only the first planking, but
I figure that this is the best time to get the technique right.
Cheers Chris
-
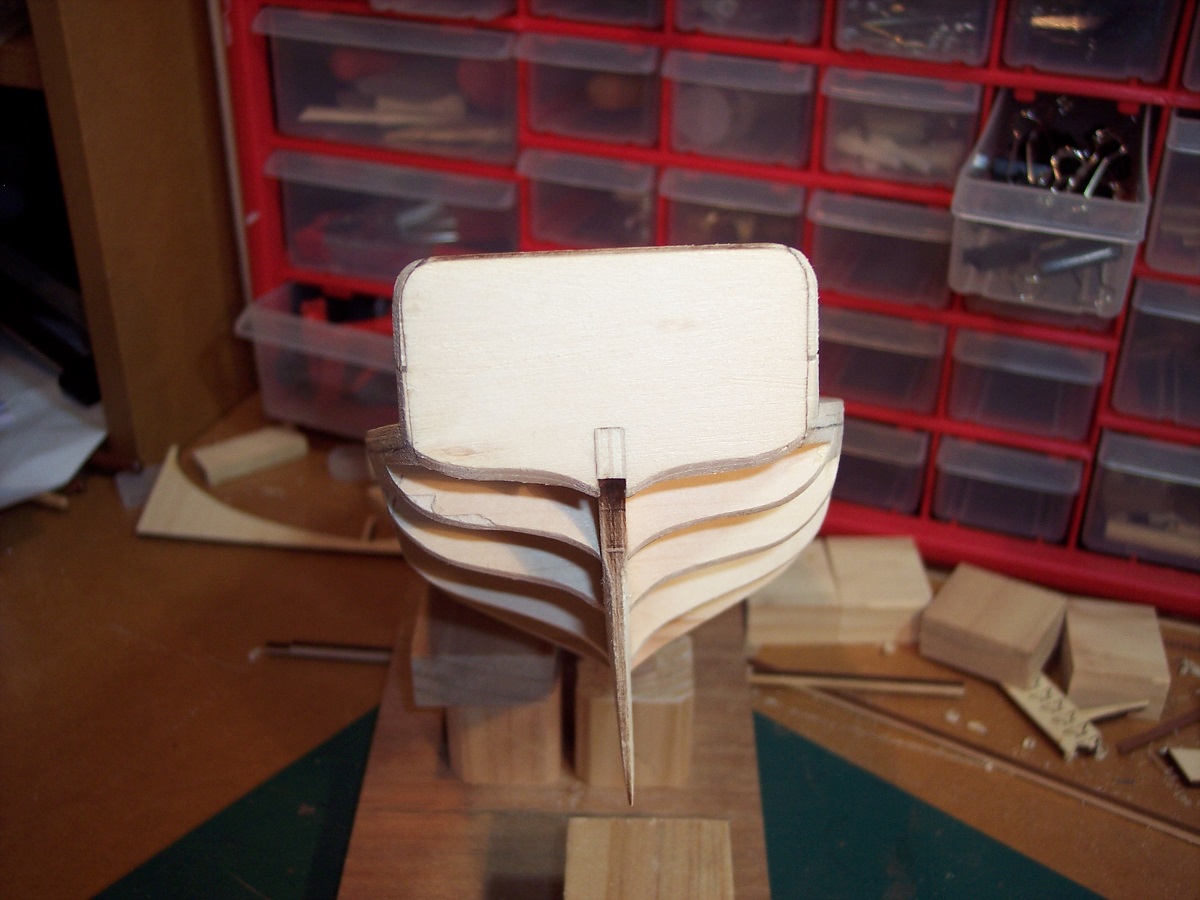
Thanks Rick, Steve and Hof
For the pictures and advice.
I have decided to glue half the amount on as Hof suggested, I found the off cut of ply sheet that
the transom was in, and have glued it in place. One reason for doing so is that I will be
able to have a large round on the bottom of the transom to plank around.
I will probably take off the 2 downward points, of the transom at the keel. They are right behind the rudder hole and at this stage
I don't see any need of them, but will leave that until I need to do.
Just another little question, What would have been the width of a hull plank on a full size boat
like this,150mm, 200mm?
Thanks again, Gents
-
Good afternoon Hof
Can't see any reason, there isn't any plans as such, just photos and colored drawings.
They don't show it too clear. The bulwarks are meant to run to the transom and glue to it.
I am inclined to make the transom wider, and have less fairing to do.
Thanks Chris
-
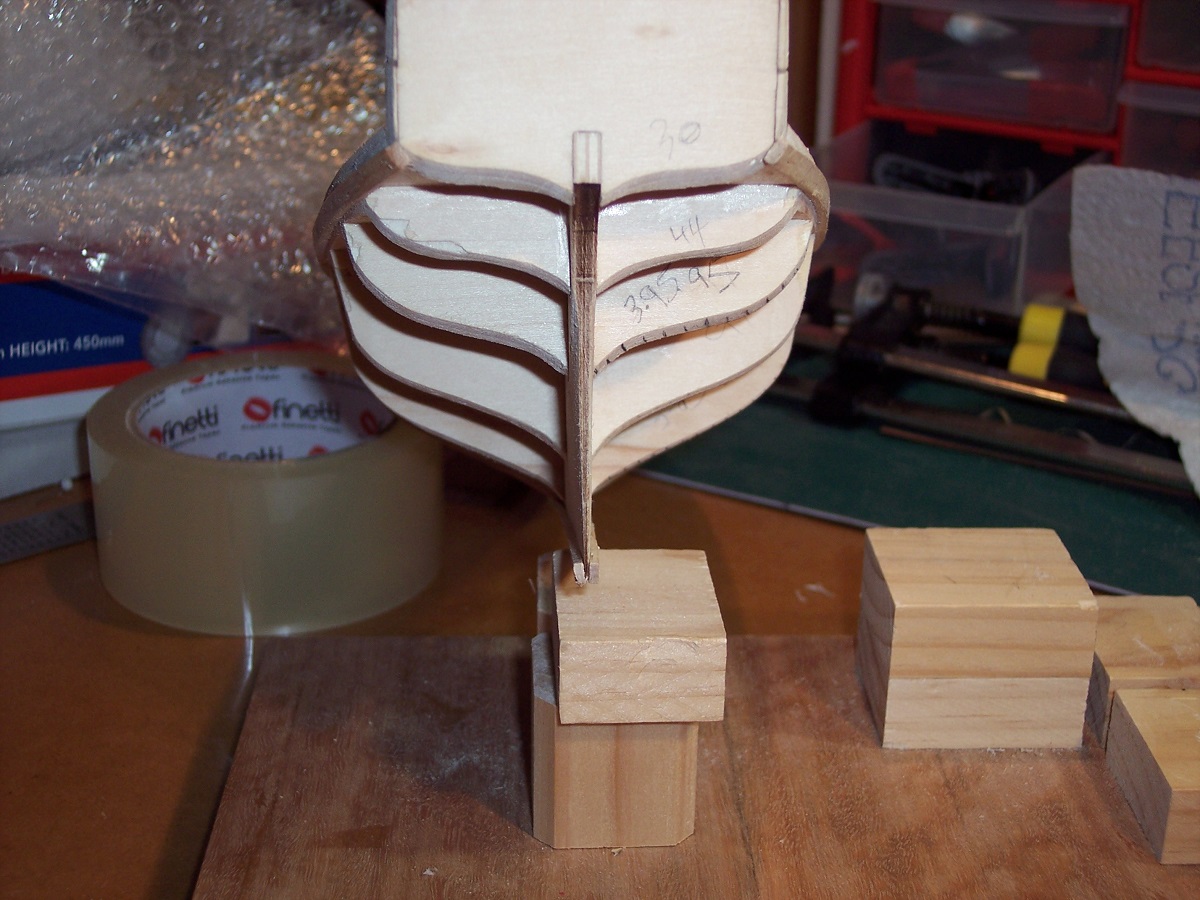
Thanks Hof
But if you are watching, you have to help.
A couple of questions for the brains trust, I have been fairing which was easy enough to do,
except for the bit, up to each side of the transom.
It seems to be a lot to take off, or should I glue some strips on to make the transom wider.
And how should the bottom of the transom be finished? with the curl as now, or straight across,
or as the plans have it, with a rounded bottom.
A few pics to show


-
For someone who works at turtle pace, you seem to get a lot done.
And it is all quality work. It will take me a month of Sundays to work out what you are doing with
the cad program, and then actually do the building.
You must have retired in recent times.
Cheers Chris


new here.
in New member Introductions
Posted
In one of the sections in link, depending on whether you are scratch or kit.
But please read the topic on naming your log makes ti easier for others to find later on.
https://modelshipworld.com/forum/9-members-build-logs/