

Cabbie
-
Posts
597 -
Joined
-
Last visited
Content Type
Profiles
Forums
Gallery
Events
Posts posted by Cabbie
-
-
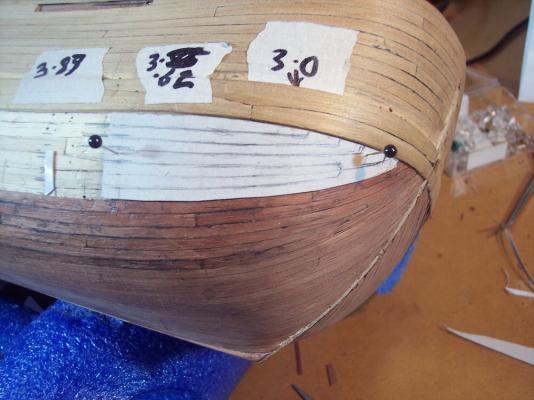
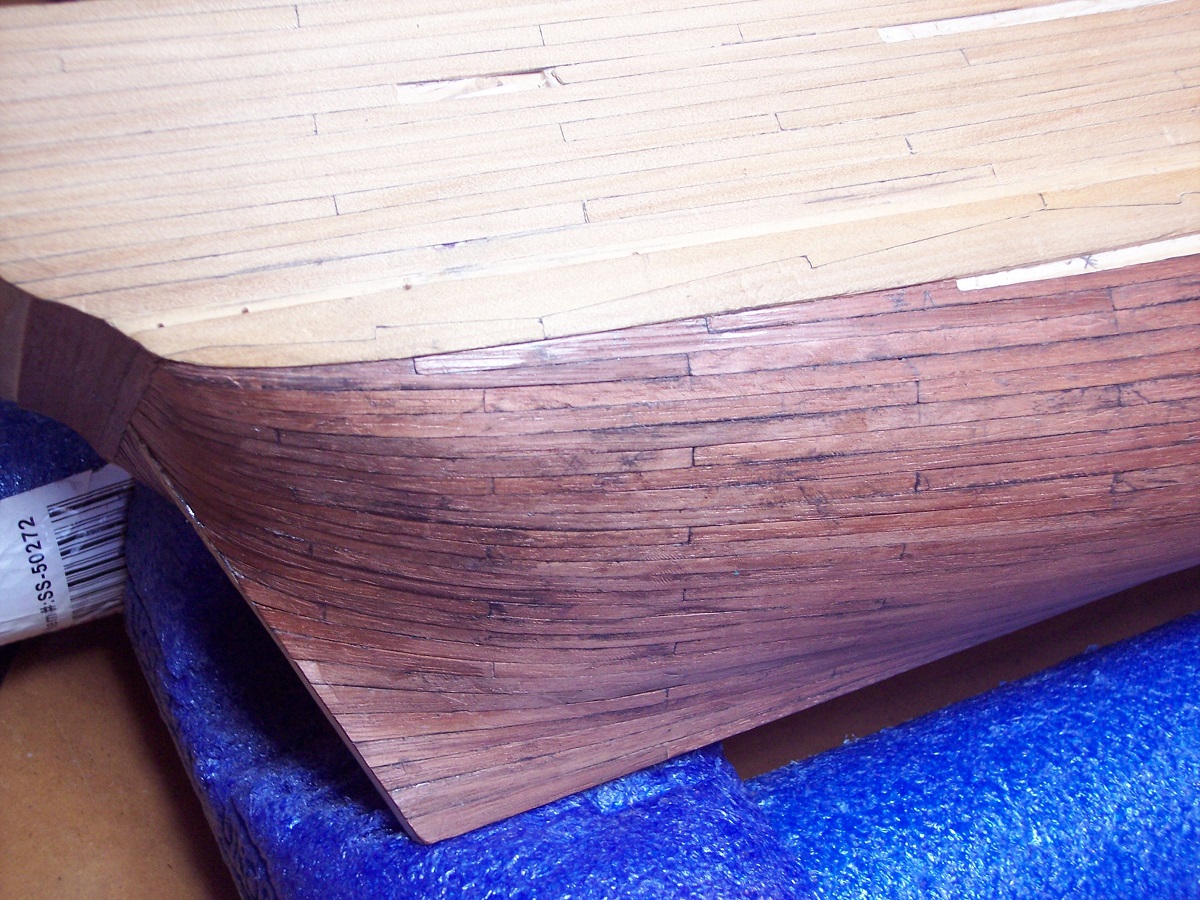
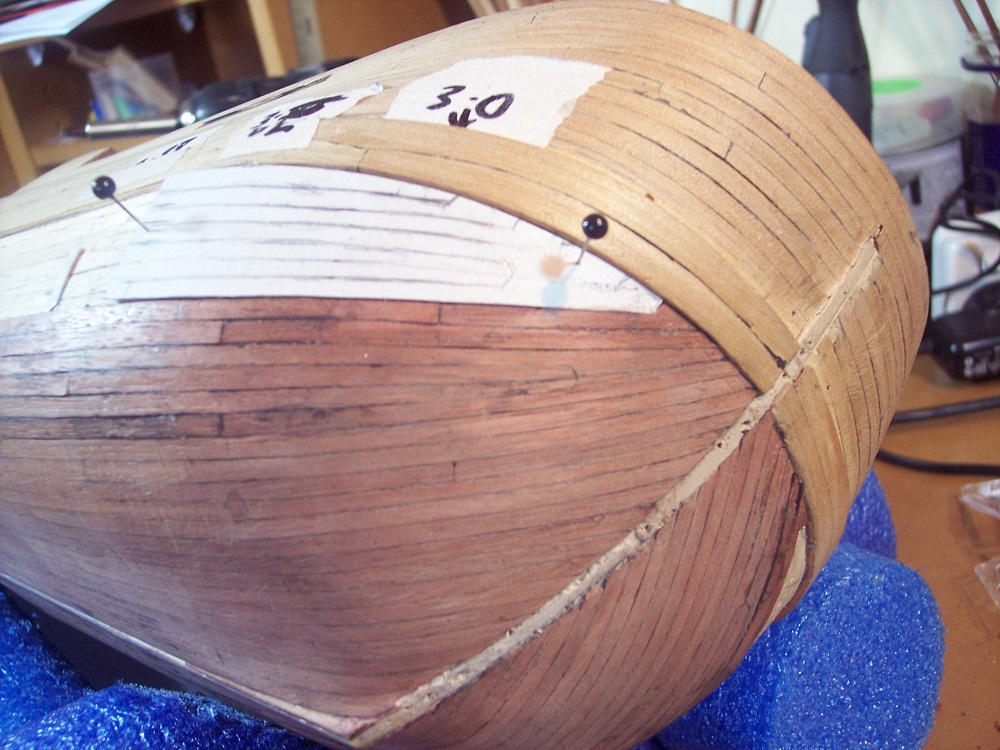
Thanks for the likes and looks folks.
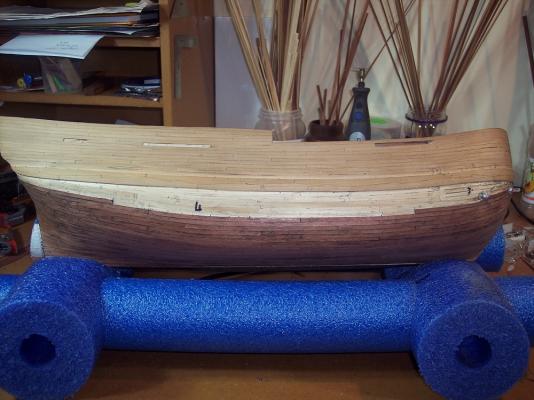
But there is going to be a little delay while
I remove one of the planks in the top photo and replace it.
it is going to keep bugging me if i don't, It won't take too long
I have already had a bit of practice doing this.
These close up photos just show too much some times.
And yes, Slog can't wait to have a good sand and put some poly on.
Cheers Chris
-
Good Morning Don she is looking like a fun build
and you are doing a top job as usual.
Perhaps you should save on glue by setting up a webcam,
it would be far better than whats on tv these days.
Or at least record what you are doing and we can download and watch.
Cheers Chris
-
One more update today,
And yeehaaaah one side completed.

A few more to do on the other side, and then a big sand Monday night,
and if I can get permission i will put some poly on.
Cheers Chris
- DaveRow, Captain Slog, hof00 and 6 others
-
 9
9
-
Good afternoon all
Getting closer now, only 10 planks to go to finish
under the wales. And it will be pleasing to move on
even though I have enjoyed it so far
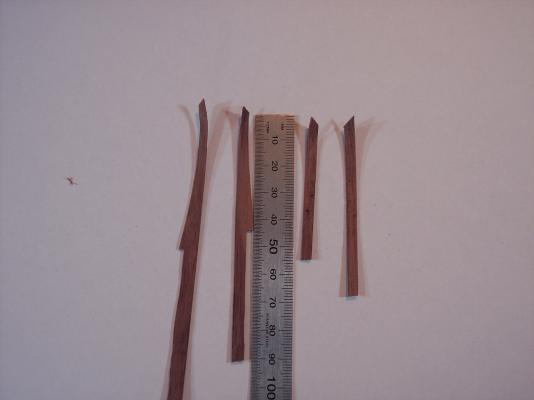
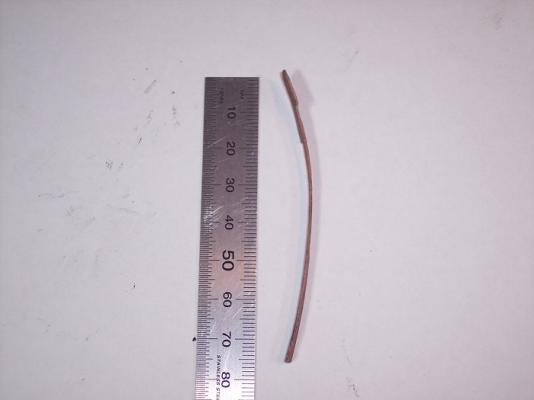
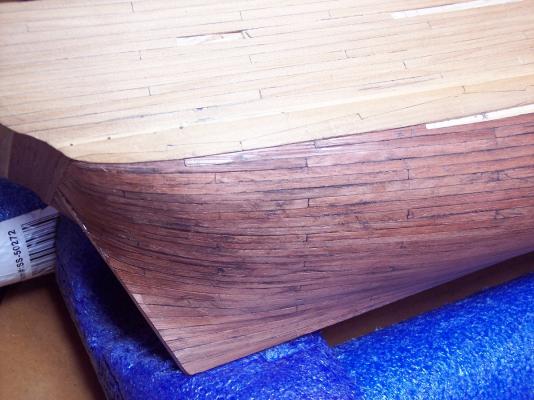
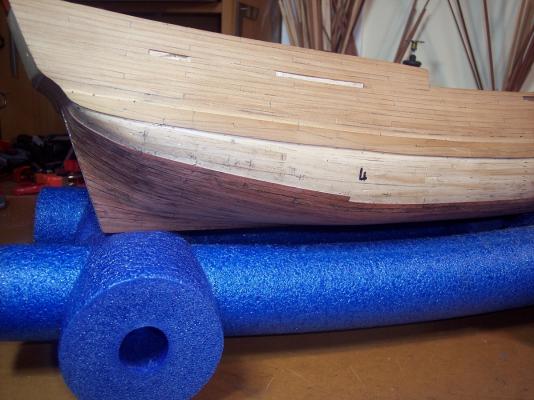
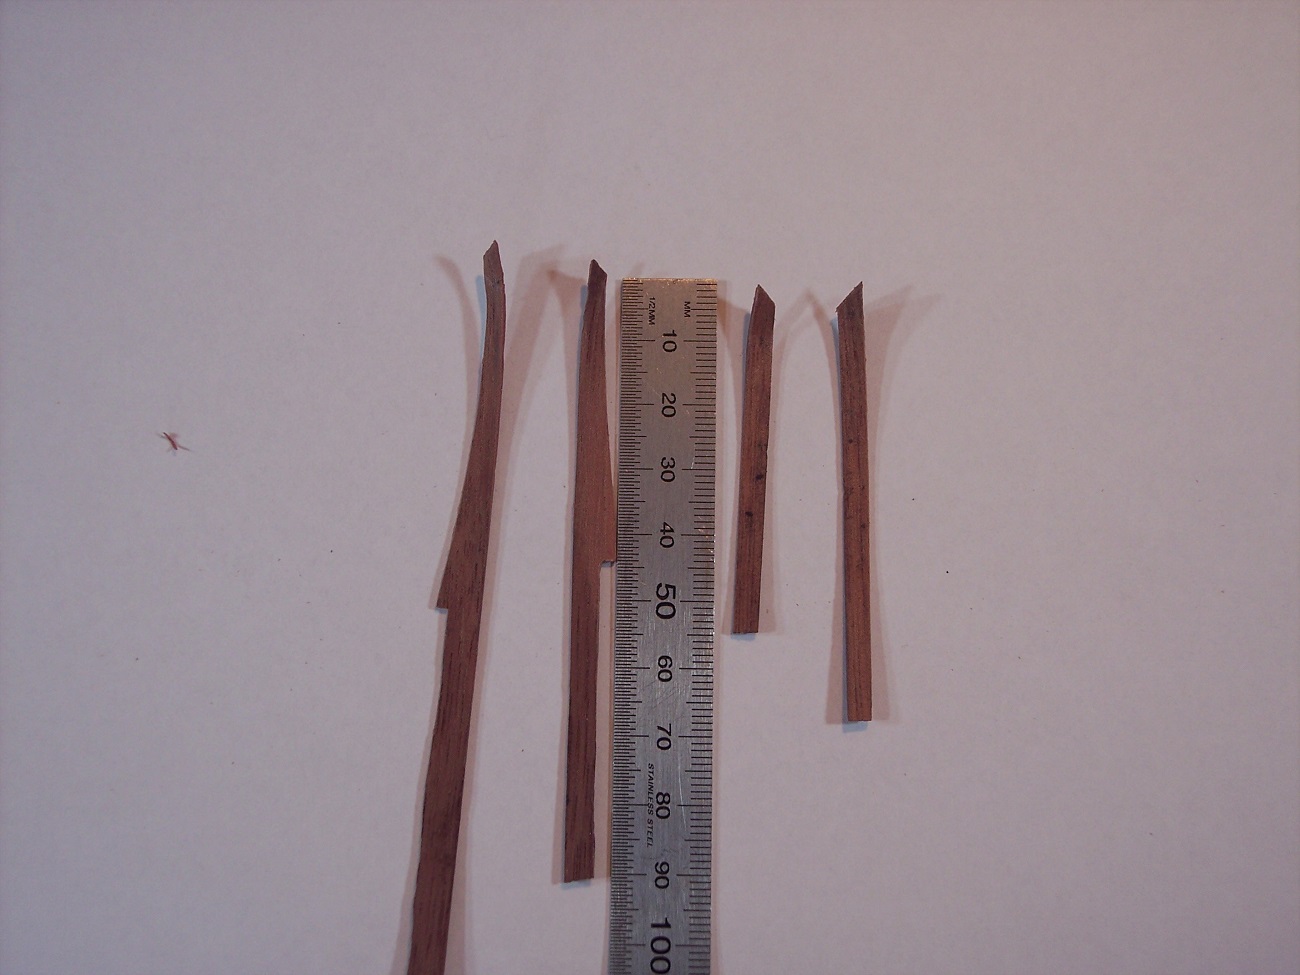
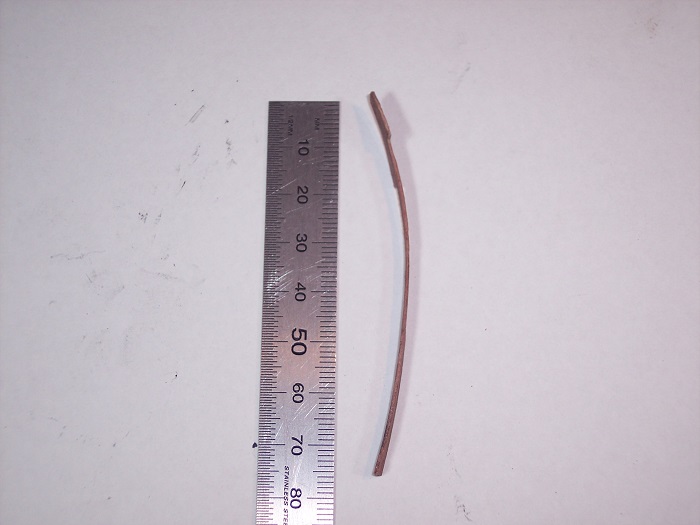
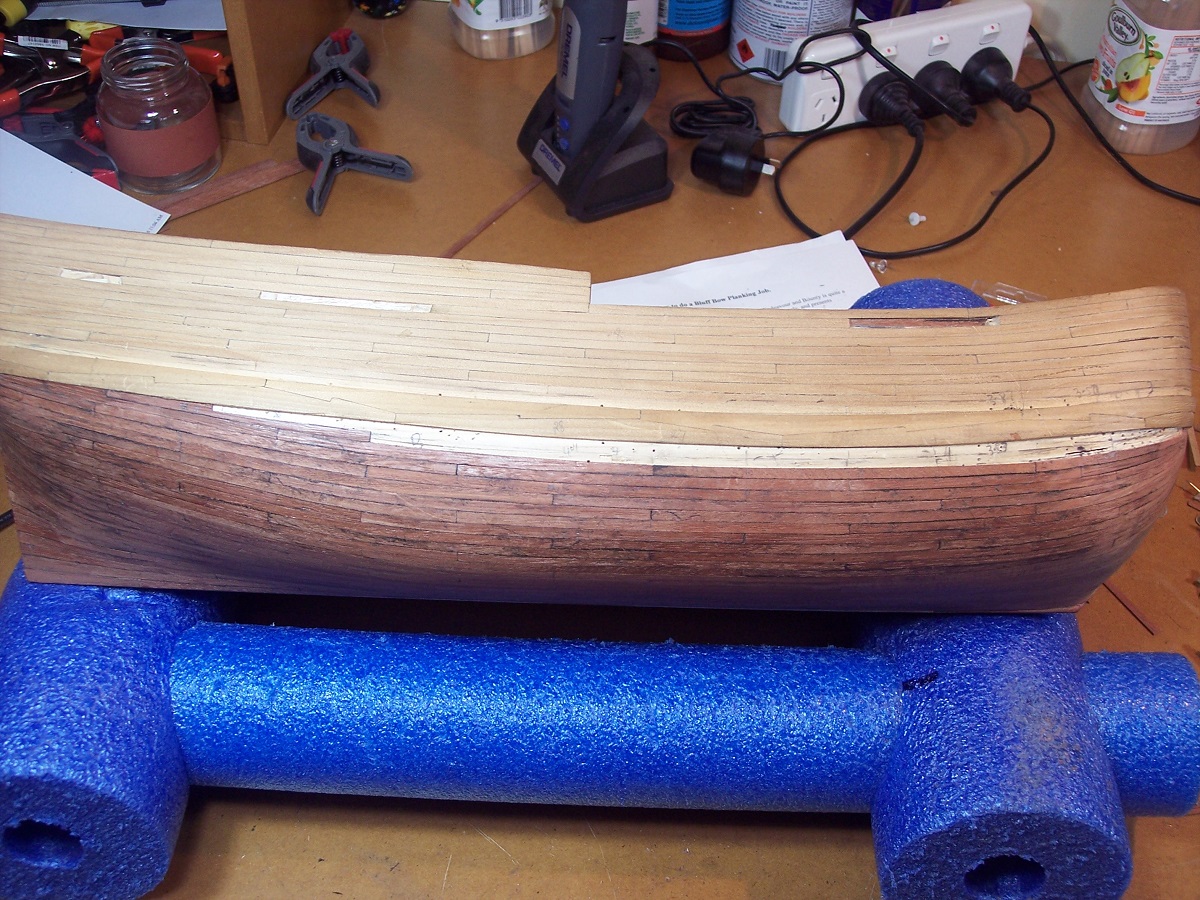
First a couple of pics of bent planks before fixing
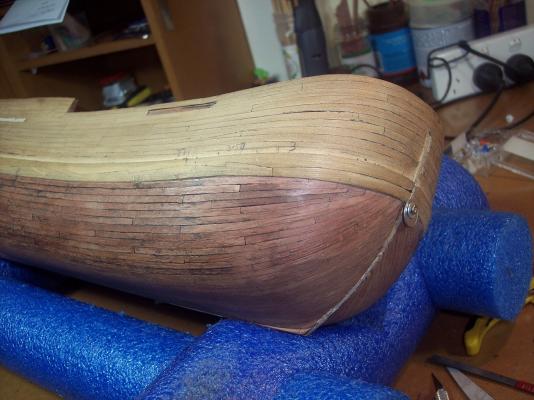
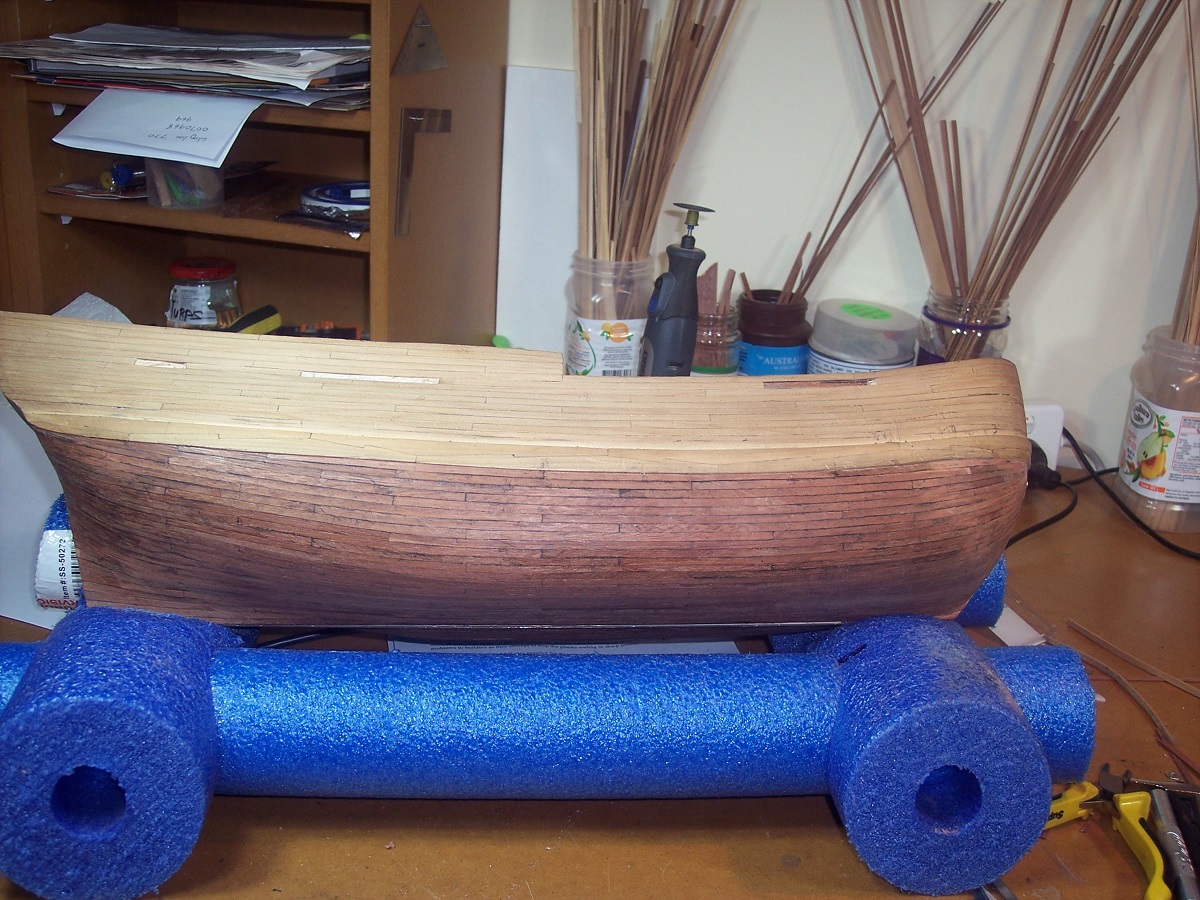
And some photos of her as of Saturday arvo.

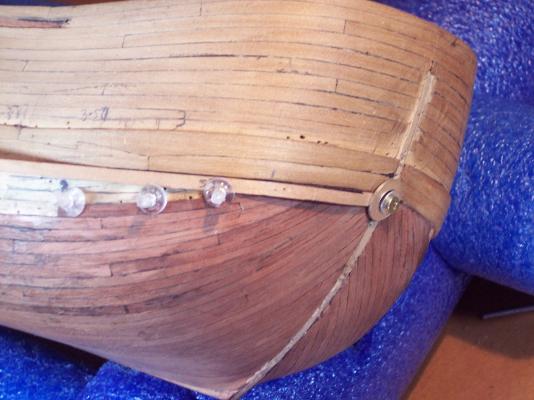
This is one of the clamping method I
used to hold the plank whilst drying.
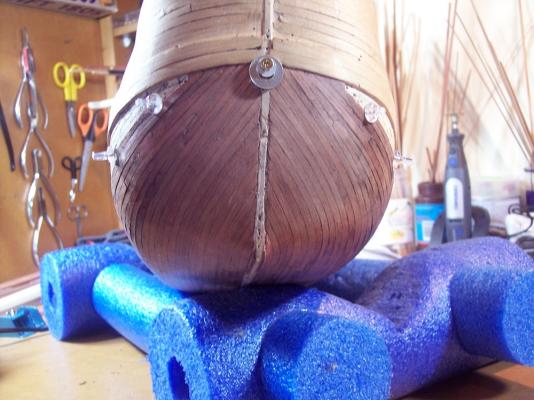
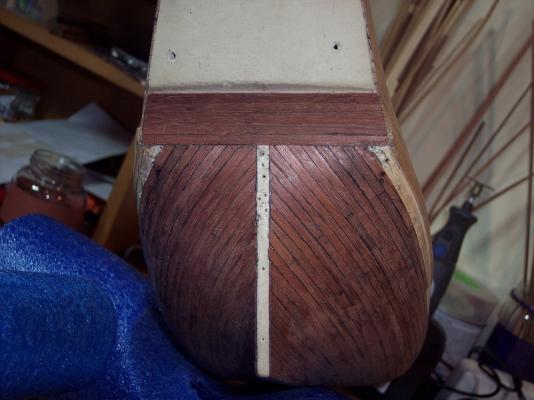
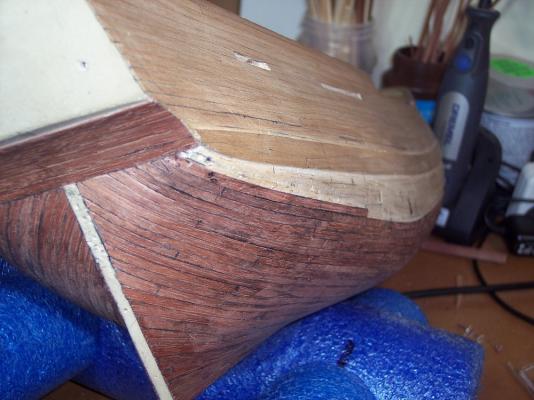
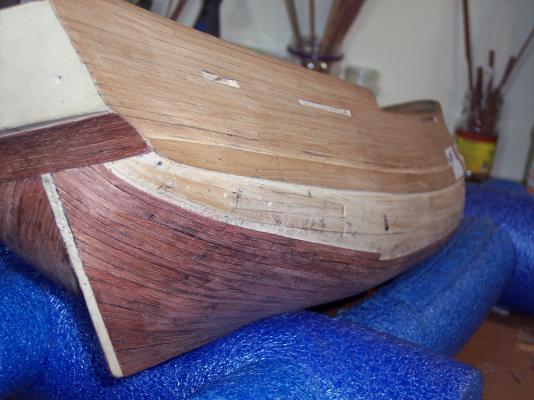
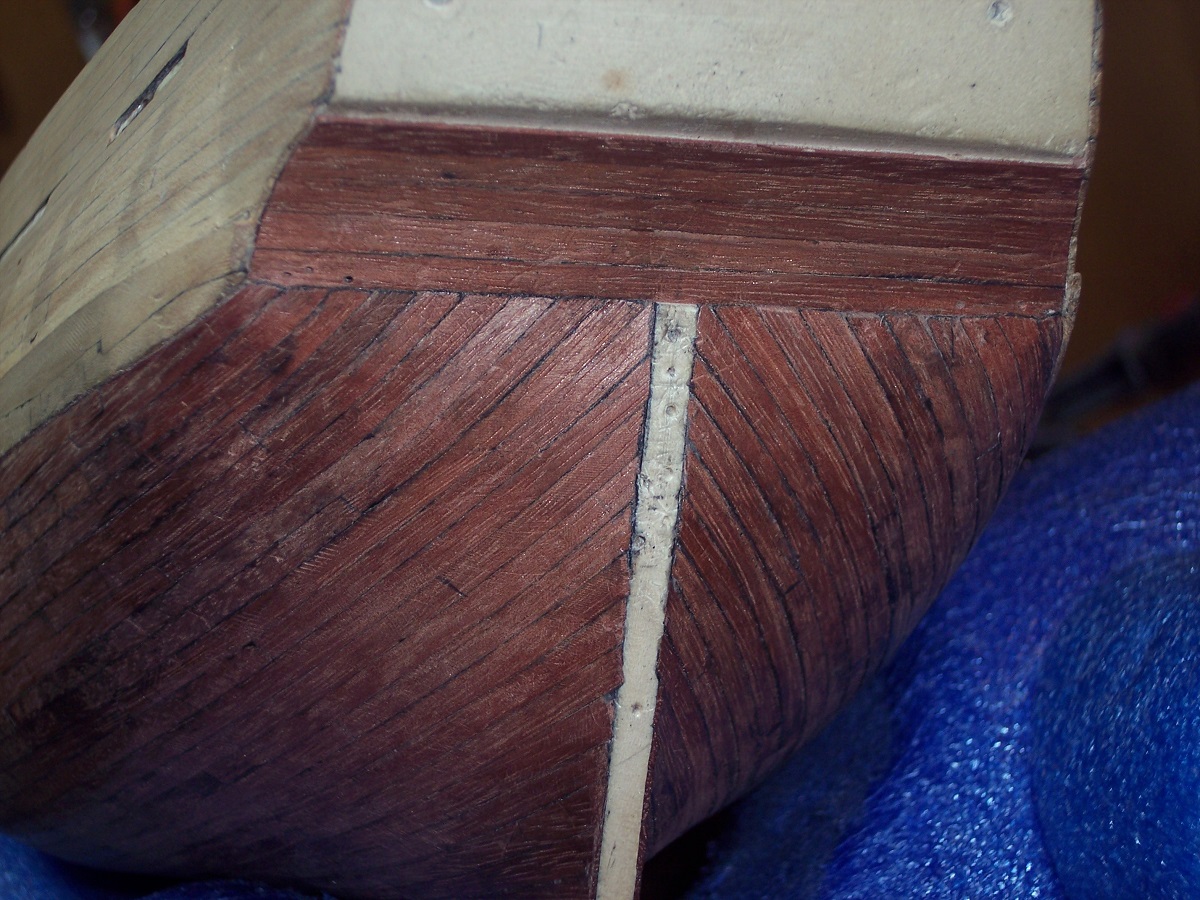
And one of the stern, it looks a bit ugly like this
The sanding will make a big improvement.

Hooroo Chris
-
-
-
-
Good morning Mike
Yes you will need wider planks, I don't know enough yet myself to help you with what you need to do.
But this topic was going earlier
http://modelshipworld.com/index.php/topic/12582-to-spile-or-not-to-spile/
I think in the past they looked for the trees with right bend in them.
Cheers Chris
-
Good Morning Ian and thanks
I have seen the scratch idea and didn't get around to trying it.
One thing I did for spiling was to get the shape first by trial and fit,
and the once the plank is made, fit a piece of card on the ship next to the existing fixed plank,
and then place spiled plank on top of the card and mark the top edge on the card,
which is then the bottom edge of the next plank. Make sense??
Any way, done with spiling wasn't too bad only 4 spiled planks each side.
Hooroo Chris
- dgbot, mtaylor and Seventynet
-
3
-
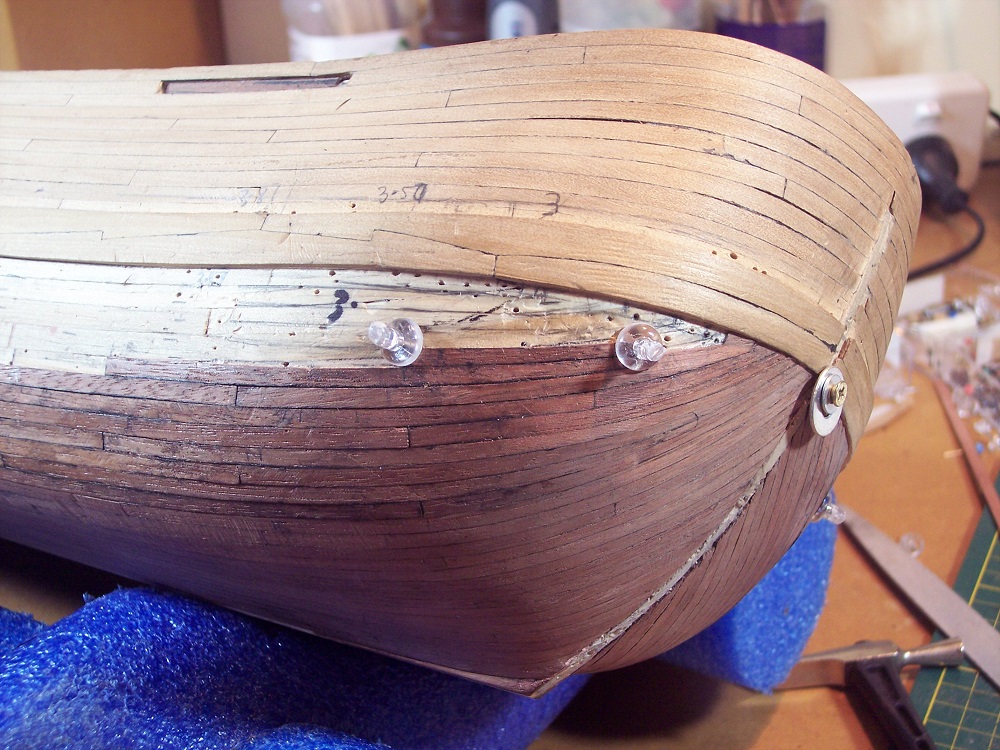
Good Morning to all.
Still planking, but getting closer.
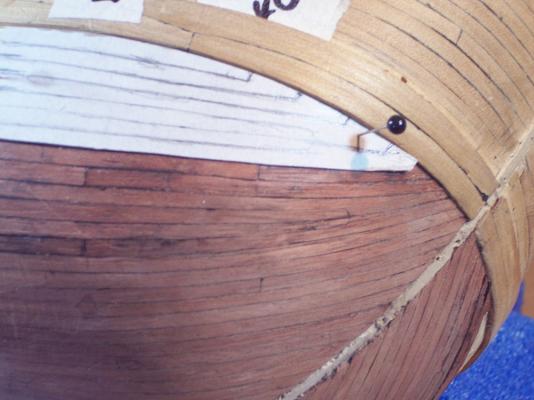
the plank under to one that is being held by the pins had to
be spiled, but after making the card template it wasn't too hard.
I am hoping to finish under the wales by the end of next weekend. err maybe!

Now off to do a bit of planking, before
some house chores.
Cheers Chris
PS Hi Mark can't wait to sand and put some poly on it.

- Captain Slog, mtaylor and dashi
-
3
-
Very creative work, Ian
This ship is going to look amazing when finished, with the
different timbers and the patterns on the deck and the
quality work you are doing.
Hooroo Chris
- Robert29, Seventynet and mtaylor
-
3
-
Good Morning Hof
Just checking to see how things are going.
The lower planking is certainly time consuming and fiddly to do.
How is it going?
Have you given much thought to the
various, portholes, openings, hinges? What are they properly called?
I am waiting to see what you do with yours . I haven't got a clue.
Except I don't like the metal ones supplied with the kit.
Cheers Chris
-
Yes, definitely top class work work, Ron
Very neat and tidy.
Cheers Chris
PS Do we get to see a pic of Ron bouncing on the trampoline.
Maybe when you are finished as a celebration.
- mtaylor, Captain Slog and kiwiron
-
3
-
Thanks for the tips Pat and David, though I'm not sure about using the CA glue.
Will it stay there and show through the poly later on?
I tried to work out the next plank and couldn't, so I decide to shape some card
to fit in the remaining space and mark the planks on it.
That made it a lot easier to mark out, and I realized rhat
I can cut each plank off as i go and use to make them.
So now its off to file some finger nails, and skin off me.
Cheers Chris
- Captain Slog, Seventynet, dashi and 2 others
-
5
-
-
-
Good Afternoon all
35c outside here this afternoon, so that's it for the outside work.
So I thought might as well do a little update, any excuse to think ship modelling, will do.
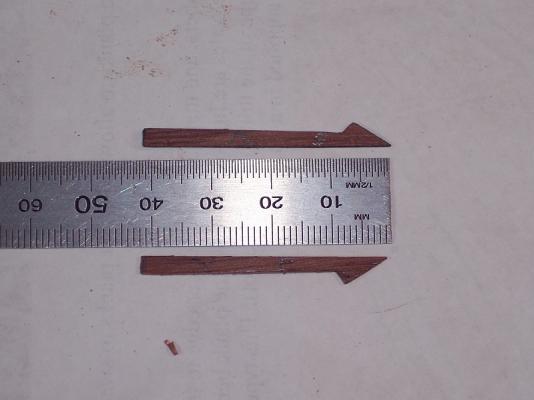
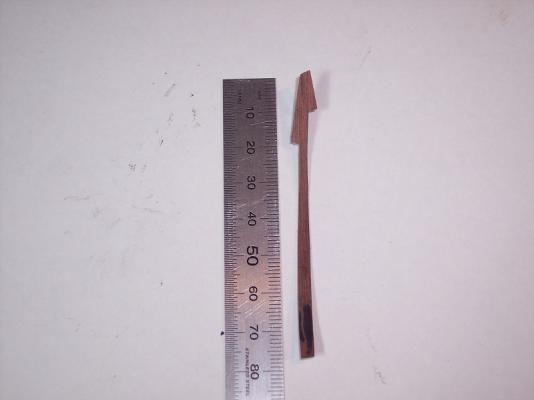
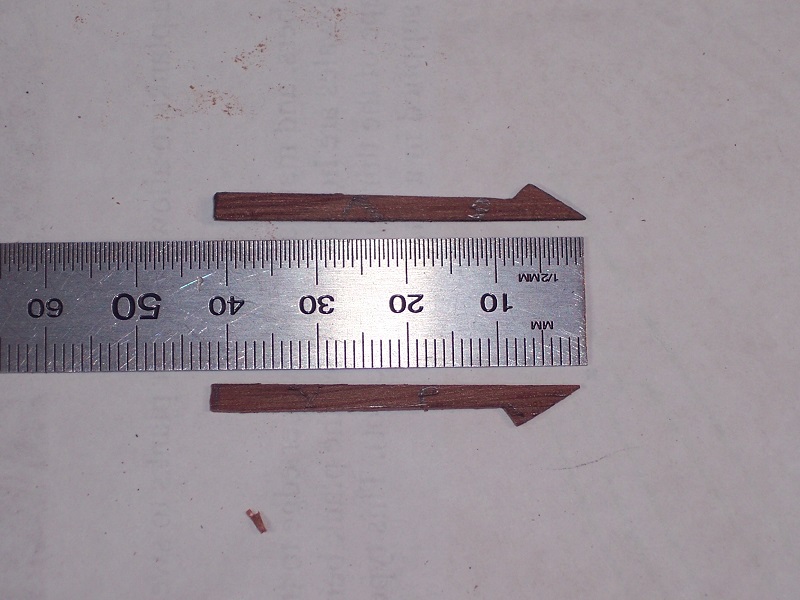
The bottom photo is of the first 2 hooked planks for the bow. it
took 4 goes to make the first one. The Jarrah is brittle and breaks little bits off.
I will be only posting a limited number photos until I finish planking below the wales.
Its too hard to take a good photo to show the details without doing a proper sanding
and putting a finish on the planks. Specially of the bow.
Any way planking is proceeding at usual pace, so won't take too long.
For those that haven't seen this pic I am trying to plank the bow
as per scan 38 on this page
On a different note I just noticed that I have followers, very flattering, thanks to all.
BUT, Being a follower here doesn't mean that you sit back for an easy ride.
You will need to put in at some stage, I will need it later.
Some have already offered advice and I always say "the more the better"
So chip in especially, if you see me about to do something wrong.
Hooroo Chris
- Seventynet, mtaylor, Captain Slog and 1 other
-
4
-
Good Morning Gonzz0
On my swift I made them run parallel with the top of the sides, from memory i think they had to be
side bent to some degree, But i don't think they needed much persuading.
Here is a link to some photos I put in my new member intro.
I still plank by the rule of "If i can bend it and make it sit flat, i do it"
Probably not correct ship building technique, but a man has to do, what he has to do.
I sill haven't learnt what exactly is the correct method for something like this,
perhaps someone else will chip in.
Keep modelling Chris
-
-
Good Morning Hof
AOTS has them down in actual mm's with its 1 to 96 scale going from the bow 25.5, 23, 30, 33 mms at the stern.
The middle measurements taken at the step in the gunwales. On their plan they have a little curve up
at the stern to be 30mm.
On our scale mine ended up being close to parallel, 40mm at the front half and 54 at the rear.
Hope all this makes sense.
cheers Chris
-
Good Morning everyone
Thanks to all for the looks, likes and comments.
I nearly have the first pair of drop planks done, will post some pics soon.
Tricky little devils to keep in the right line.
Hi Don, yes I cant wait to finish below the wales and get some poly on it.
A lot of planning and in my case, some copying of the replica, but i still
had to make it fit on my ship, and it needs constant checking to see that
I am keeping spaces right and planks in line.
It is a very busy site, MSW these days. Logs disappear down the list quick,
and its a lot of time spent looking to keep up.
Hooroo Chris
-
-
Good Morning Dave and thank you
The one thing that I do want to achieve with this build, considering my
very limited sailing ship knowledge, is the look of a real
ship.
As you know the details are very demanding to get right, but
if it looks real, that will do me.
Cheers Chris
-
Good Evening Gonzz0 and welcome aboard.
From the look of your work so far you seem to know
your way around a model ship kit.
It all looks neat and methodical.
Sorry I can't help with question, beyond my knowledge at this stage.
I think from memory there are some build logs on this ship.
Do a search in the build logs for ship kits.
Others might have had the same question.
Hooroo Chris


HMB Endeavour 1768 by Cabbie - Artesania Latina - 1:60 - Kit Fiddle
in - Kit build logs for subjects built from 1751 - 1800
Posted · Edited by Cabbie
Good Afternoon Don
No Biggie, just more practice, can't argue with that.
I ended up taking 2 off, once I started i remembered that the next plank
had a damaged edge, so both were done.
Actually it is going to fix another tiny thing as well, so all good
Ho Hum work today, so will fix tonight. Chris