


dafi
-
Posts
2,297 -
Joined
-
Last visited
Content Type
Profiles
Forums
Gallery
Events
Posts posted by dafi
-
-
Hello Jay, looks like my earlier post didn´t make it to the front end ...
These drills I use are from Proxxon/Dremmel accessories department. There are the same kind from the DIY department stores, but they are inferior quality.
Daniel
-
...hihihihi......good night goody ...
 ...and the one I was most curious for:
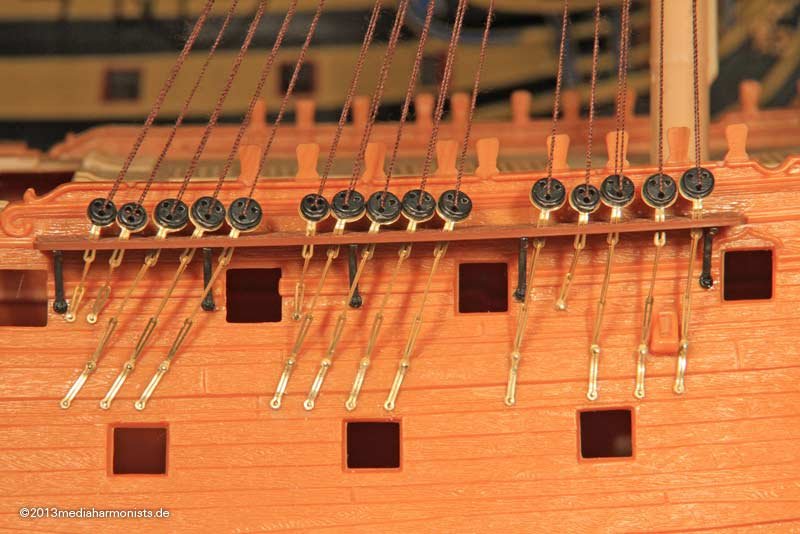 Grüßle, Daniel
 -
Great fun to review this!
Daniel
-
Could it be said that the staysails are just going to the sprit itself but not to the topmast as this was a rather fragile construction?
If a jib was used, can it be, that the topsail spar was taken down and replaced by a spar protruding to the front becoming later on the Jibboom?
Daniel
-
Hello Patrick,
thank you.
I will soon show them as the final stage is done. it is 4 A5 plates jam packed plus 2 plates with sidings :-)
Daniel
-
Usually the hammock cranes are the easiest topic, the construction is quite clear out of square or round iron rods, from a certain height on with a rod holding them together on the top.
The netting is already more confusing: diagonal as mostly shown or horizontal and vertical as seen in Brays drawings and some museum ships today?
http://collections.rmg.co.uk/collections/objects/200823.html
Also were they black or white - both versions seen on the vic over the years, the actual one is diagonal in white.
The cranes were covered with tarred (?) canvas. Does this mean light brown or a deeper color?
And now the most complicated. Usually (if shown) the hammocks are a small roll of tissue, bent in the middle to a "u"-shape and stored vertical.
I am rather sure, that there were about 7 lachings holding it tight together and they looked like giant (dirty) white maggots :-)
But were they stowed vertically? Especially on the poop decks the cranes had a very reduced height, so it would be more logical to lay them horizontally. How was it done with the higher cranes? Also horizontal or mixed directions?
Could not find contemporary hints for that one yet.
As usual, plenty of questions, hope they are interesting to you too, Daniel
-
Nice to have you back Evan :-)
All the best, Daniel
-
And here comes yesterdays workout program:
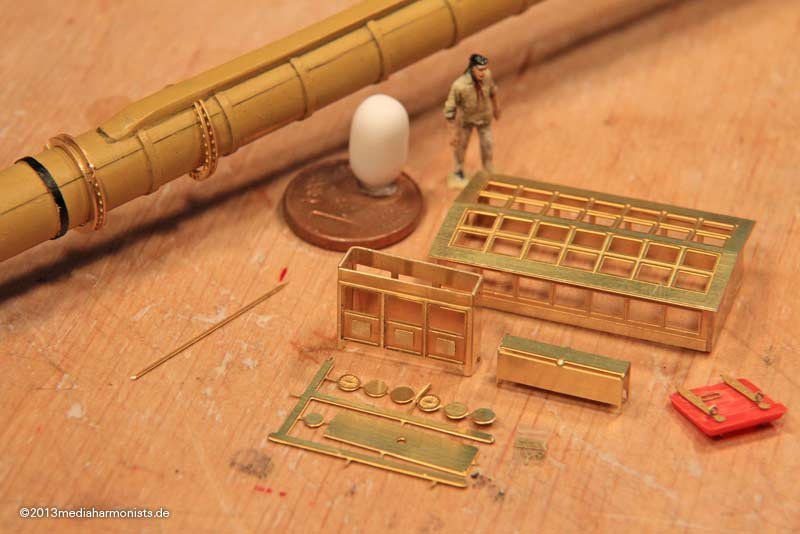 First the easiest part the poop skylight - Still the glazing and some reinforcements on the inside have to be added.
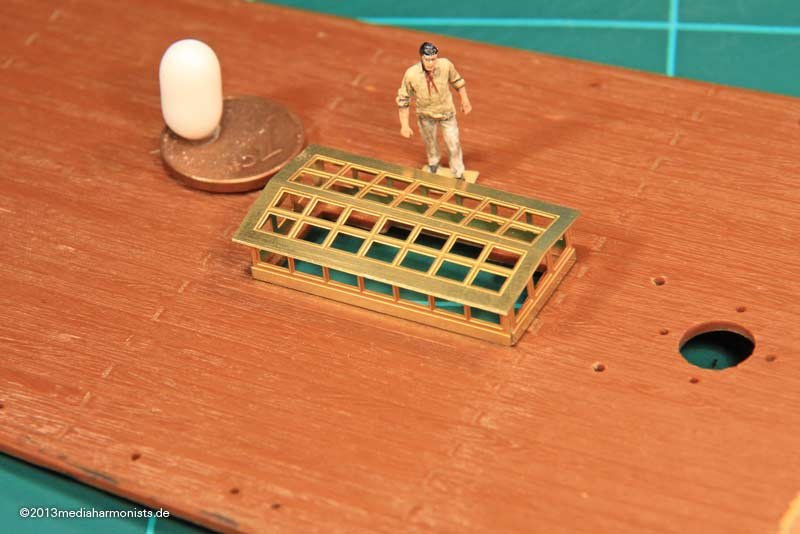 Then the different gunport lid hinges ...
 ... in place and beringed, both sides.
 The fake steering wheel columne:
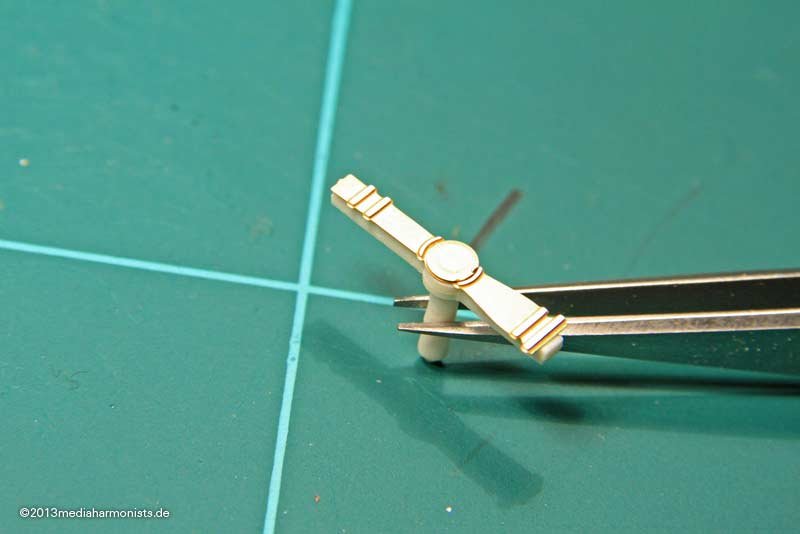 The rail of the poop got more exiting again. Closed the slots and cut off the nipples from the buckets ...
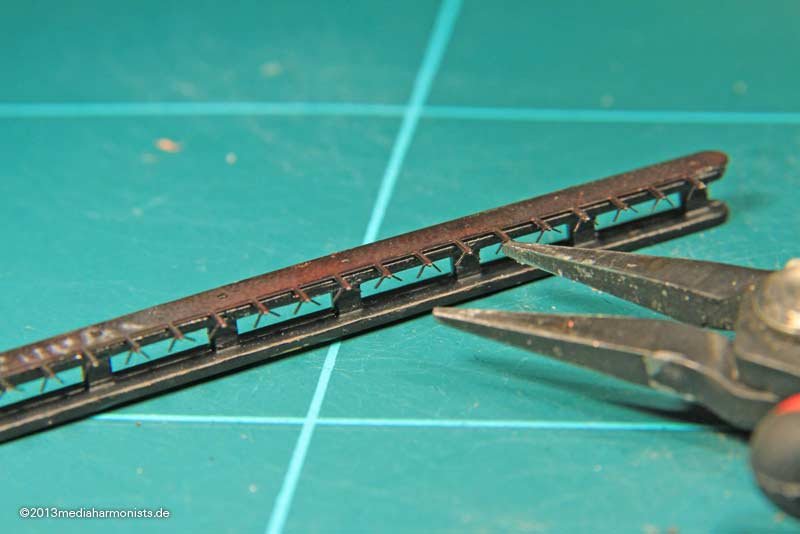 ... flexed the new hangers of the buckets ...... drilled the holes for the hammock cranes into the styrene ...
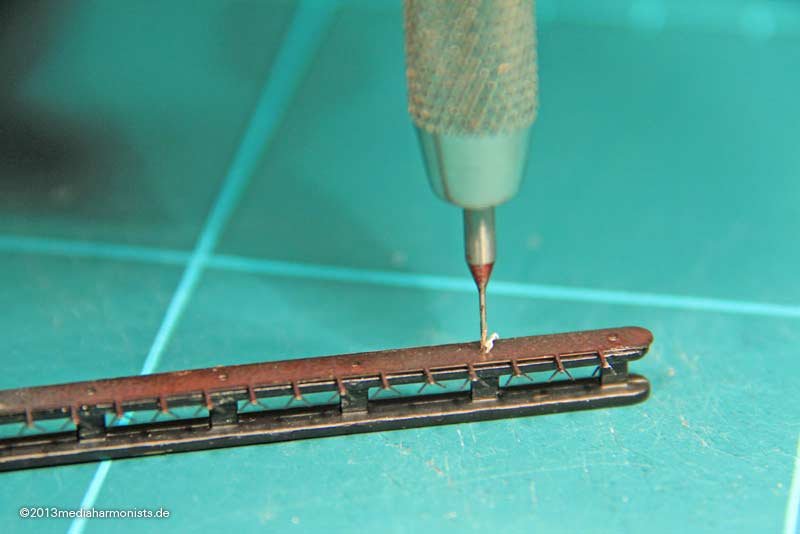 ... and fixed the cranes and a bucket - fits :-)
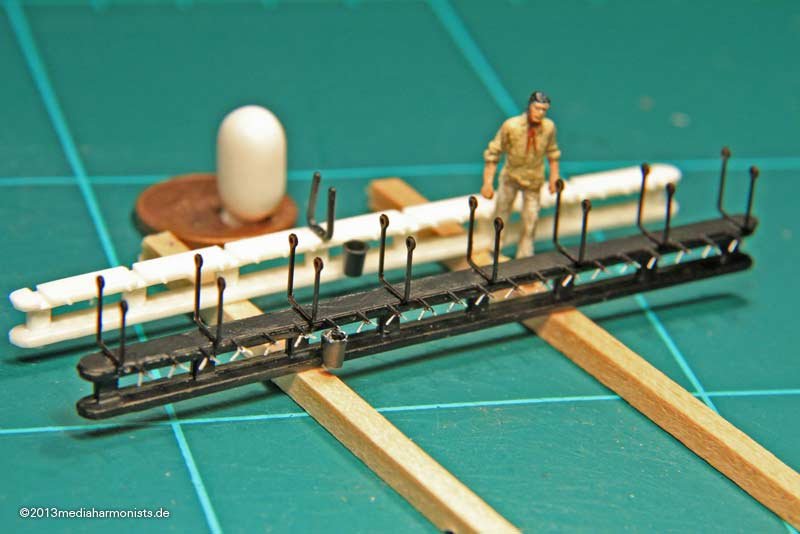 Even more fun was the binnacle ...
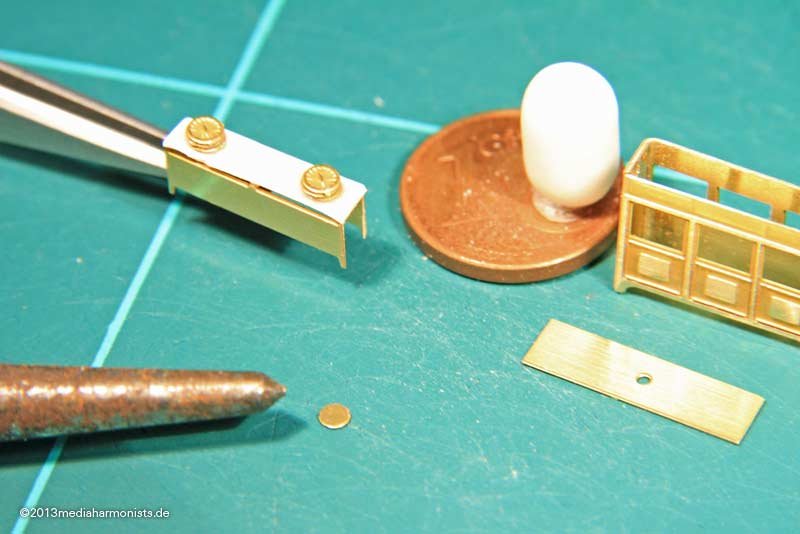 ... the outside was tight part to be bent, bent the inside part, paper "flooded with thin CA" (Reed) as base for the compass layer cake, ...
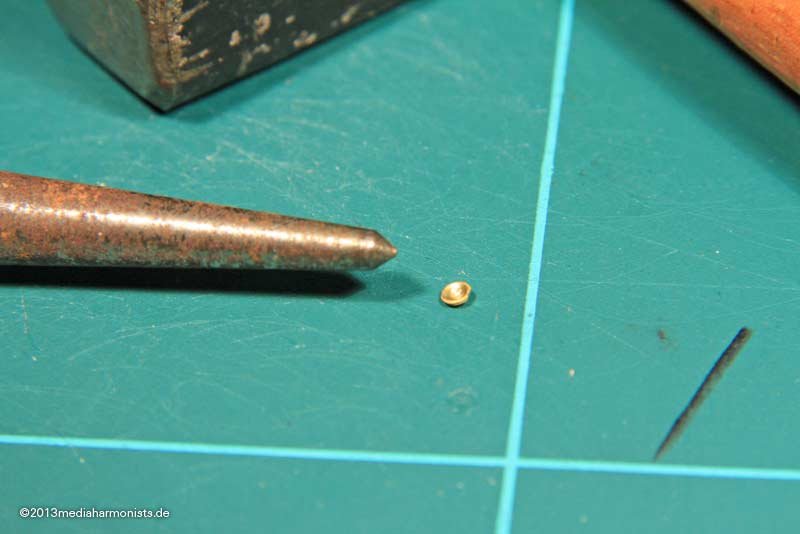 ... small top for the funnel formed with the center punch ...
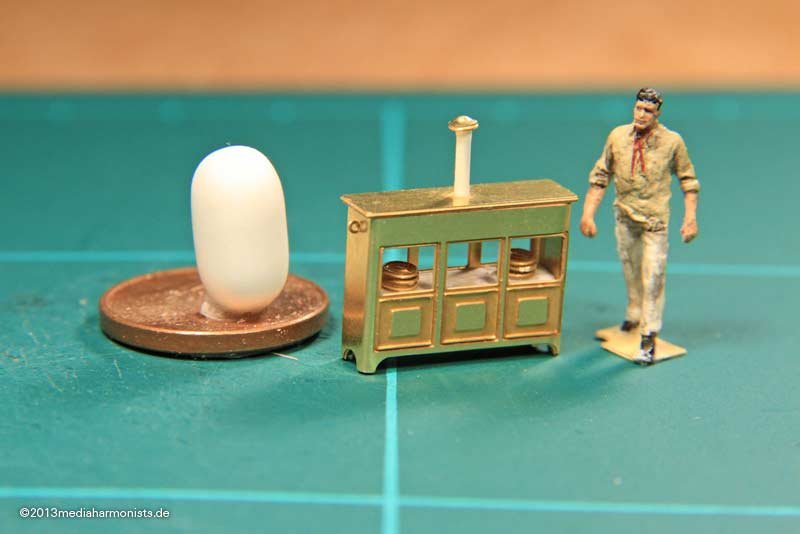 ... and with the styrine rod and the micro rings on the side it is at least an improvement towards the one of the box :-)Still missing the glazing and the lantern in the middle, this one out of a toothpick as done before.And then the heading for mishaps, missteps, and misfortune: the boarding pikes.The brass parts were ok, but first I took the wrong measures - first tear-off - then forgot that I elongated the rubbing pouch downwards - second tear-off - and then still misplaced the rings and lost the nice detail of the spearhead underneath the ring - no tear off as I did not manage - so have to live with this small mishap ...One can imagine, how the brass parts and the masts looked like ...In the meantime I managed to clean it up a tad, and the rest will disappear underneath the collar that protects the hole in the deck and the underneath the main and preventer stay.
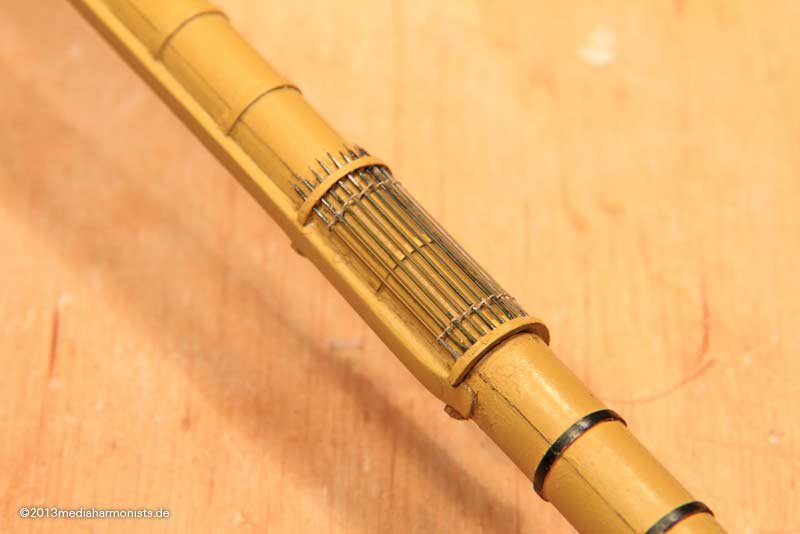 Now still have to try the chains and some other unimportant stuff :-)Lieber Gruß, Daniel
-
Thank you Sirs :-)
Last cognizance was that I forgot the ciphers on the already glued in guns ......so I tried something new ...... I thought ...... and remembered, that CA does not stick on silicon. So stuck a ball of silicon on a stick and took a form of one gun with cipher.After taking off the form, I plaved a cipher inside and ...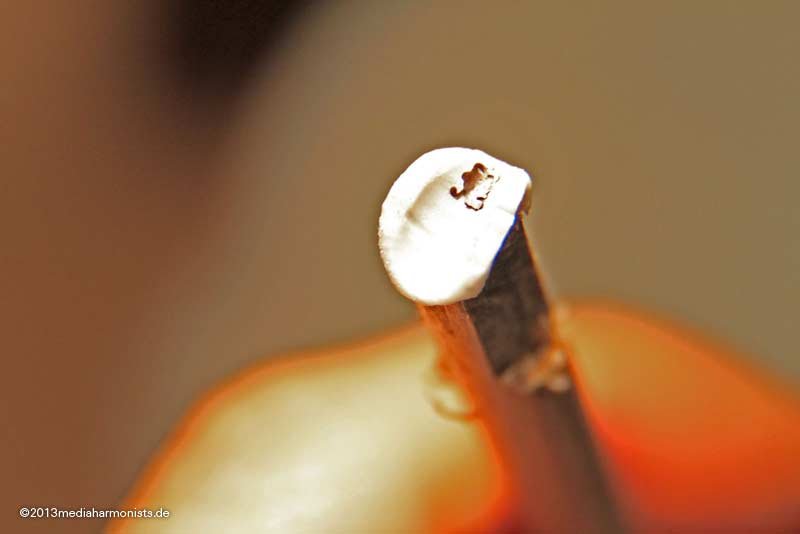 ... with some CA on the cipher I ran full risk ...
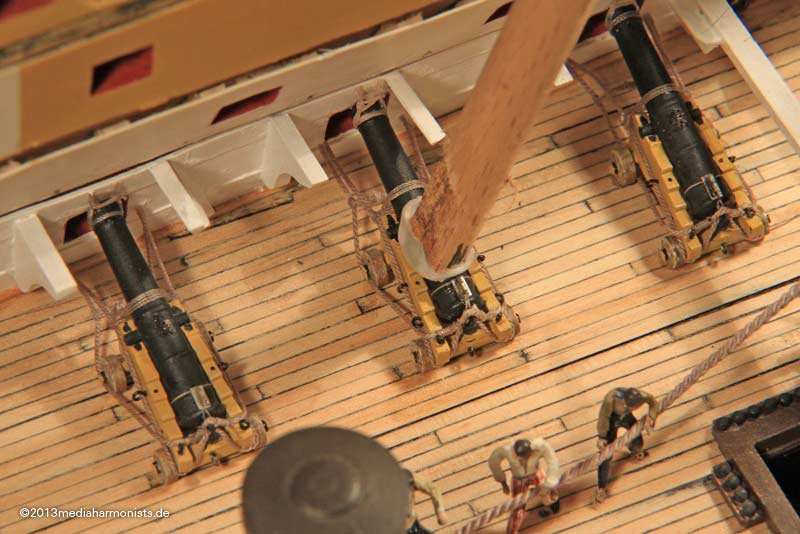 ... and placed it onto the gun, and after two seconds I was able to retrieve the stick and the cipher was on place :-)Have to remember this trick :-)And just some more Cipherorama ...
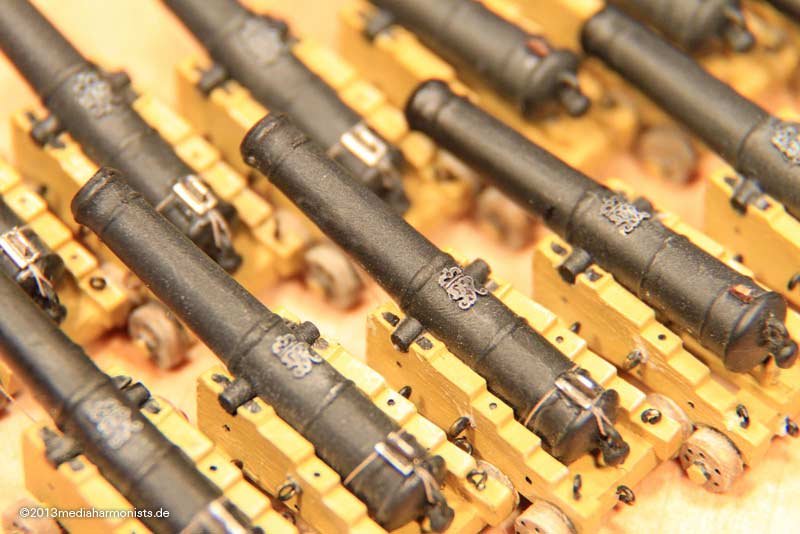 Enjoy, Daniel
 -
Nice to see the twins again.
Tasty rendering of the cages :-)
Daniel
-
-
-
Do not worry Jan, this build here will have priority :-)
Some parts I need myself like the ciphers and the hammock cranes - not shown yet - and some parts go to a friend at Wettringer, who is desperately waiting for the parts. So these parts also can help others as they are not just for myself and will be available as soon as I checked them being correct :-)
And the there are still some nice ideas of mine towards the other hulls ...
;-)
DAniel
-
Hy Walt,
here is something about the chain pumps incl. the dales of HMS Victory:
Regards, Daniel
-
Sounds a great way too!
Thanks, Daniel
-
:-)
Thanks, Daniel
-
This can be done in any local shop that does the car branding with foils or window letterings. It is rather cheap, as they can place it on the cut outs of other jobs.
There are two qualities:
For cars: Foil is very thin and goes easily around corners but sticks like hell
For inside: More sturdy, but more easy to take off
I always advise tests first on original wood and original paint. if the glue is too strong, try to dust it carfully with flower :-)
The shop also will tell you about the accepted formats, usually Illustrator.
Good luck, Daniel
-
Thank you Patrick :-)
And of course the parts I neede for the lower deck :-)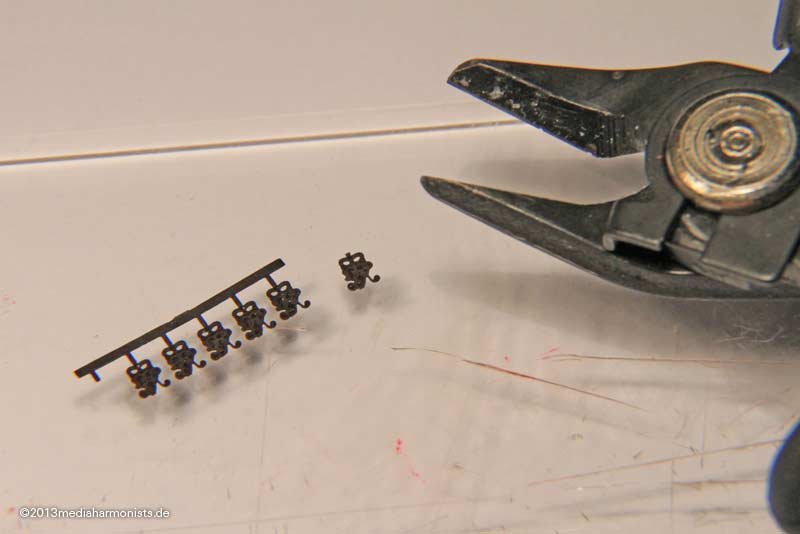 Looks a bit like ticks ...
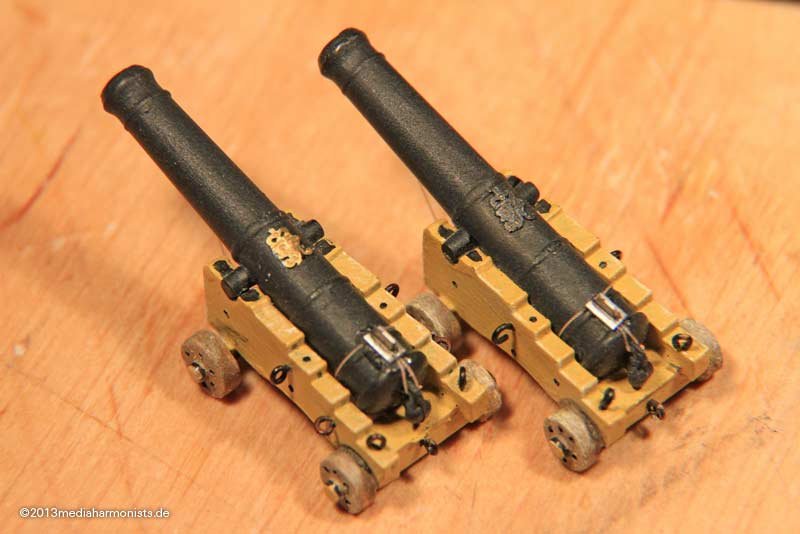 ... also one size for the 12 pounders :-)
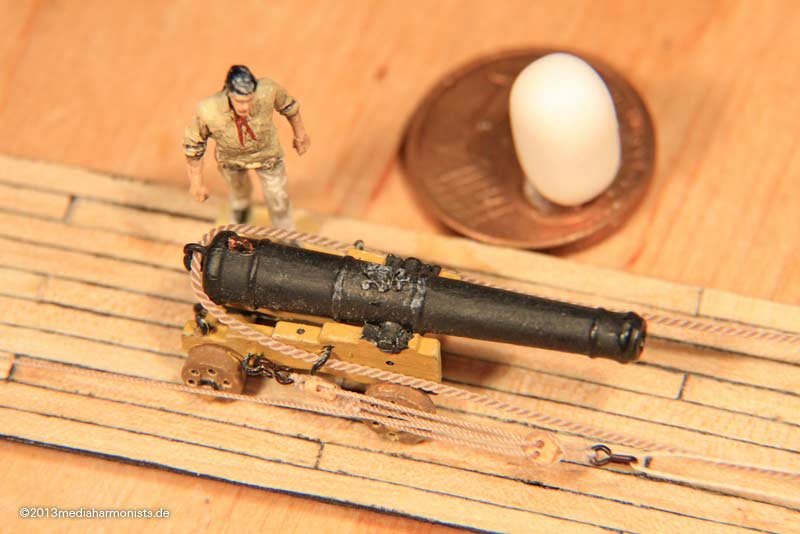 I blacken them before assembly, makes painting easier ...
 ... place over a gap ...
 ... and press them into a curve with something round.
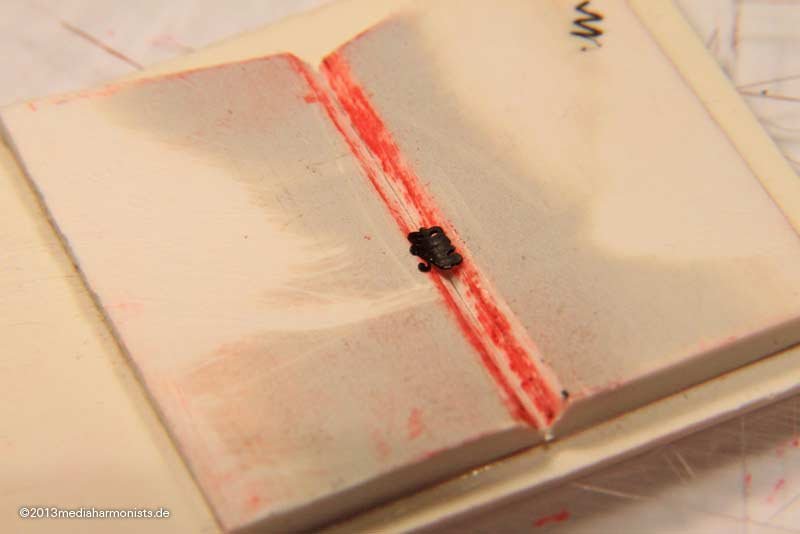 A small touch with the file to create space for the glue underneath ...
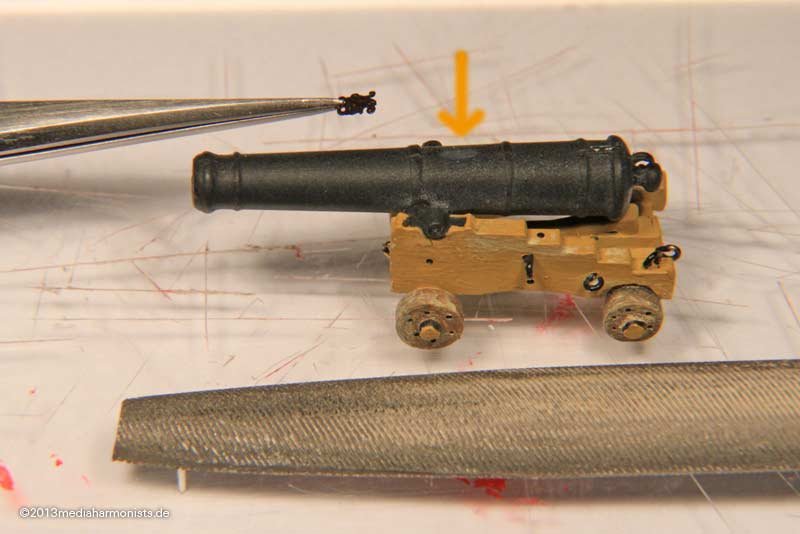 ... a drop of CA ...
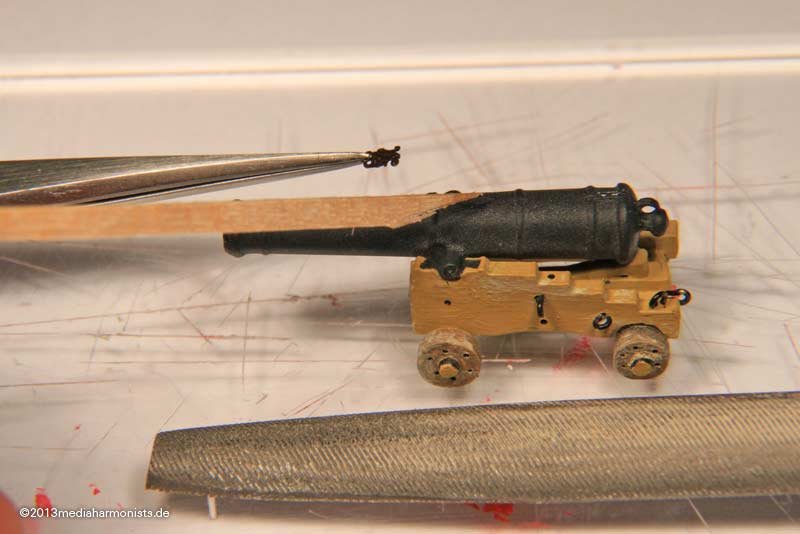 ... placed ...
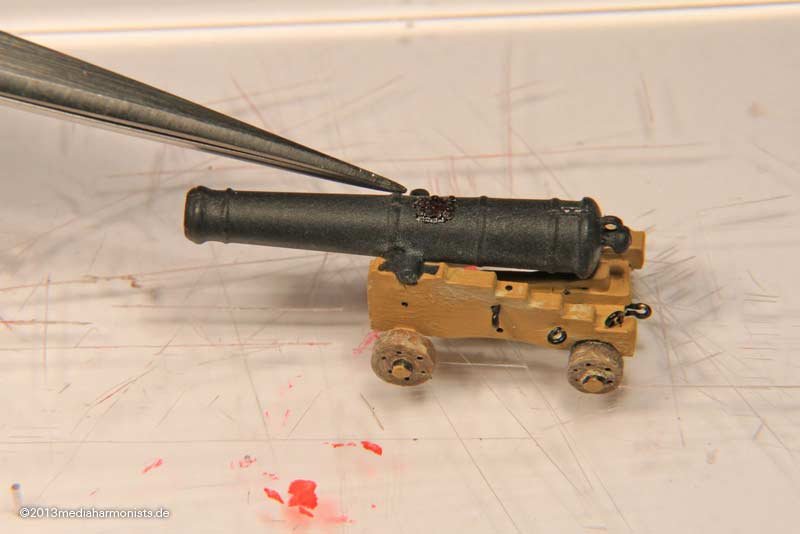 ...colored ...
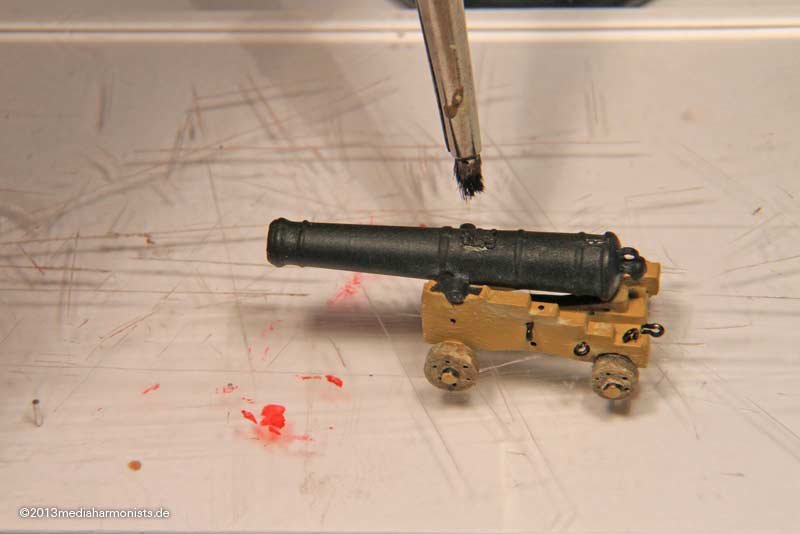 ... and brushed:-)
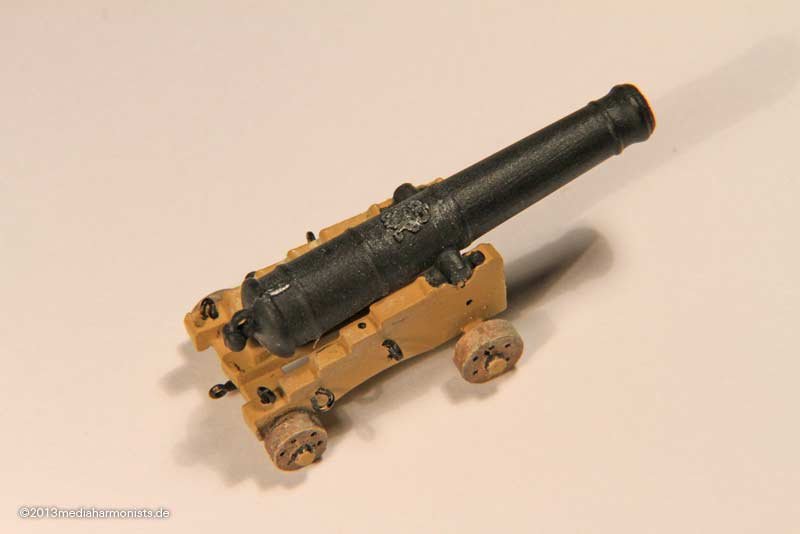 The other 2757 part will be shown peu à peu containing everything a Heller heart desires ...XXXDAnPS: And me stupid did glue the first guns already in, forgetting about those ciphers ...... now I can look how i fix that ...
 -
Today is a special day. Today three years ago I started my building report at Wettringers - this is where the madness really took off :-)And to celebrate my little Vic got some small presents to get soon many more sisters :-)That is why, a small and logic step for myself, but a leap for the heller-builders ...
 So courageously cut the window bars with a sharp wire cutter ...
 ... clean with a scalpel ...
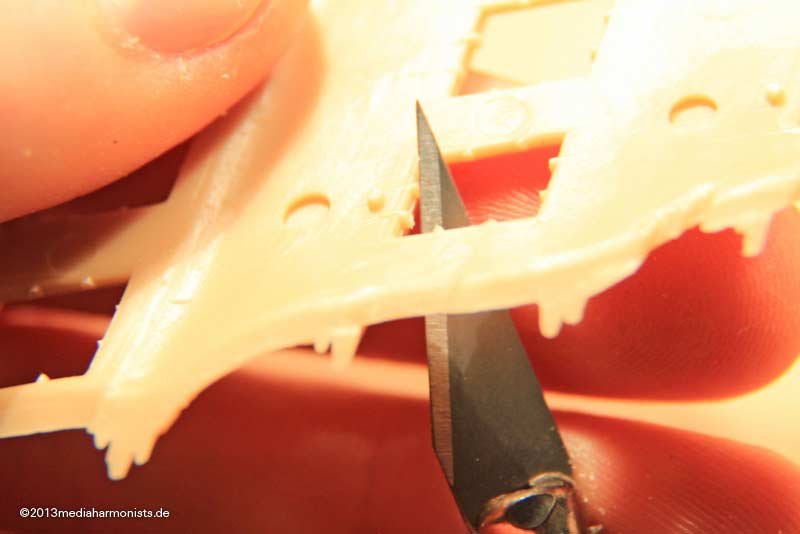 ... do the touch ups with the file ...
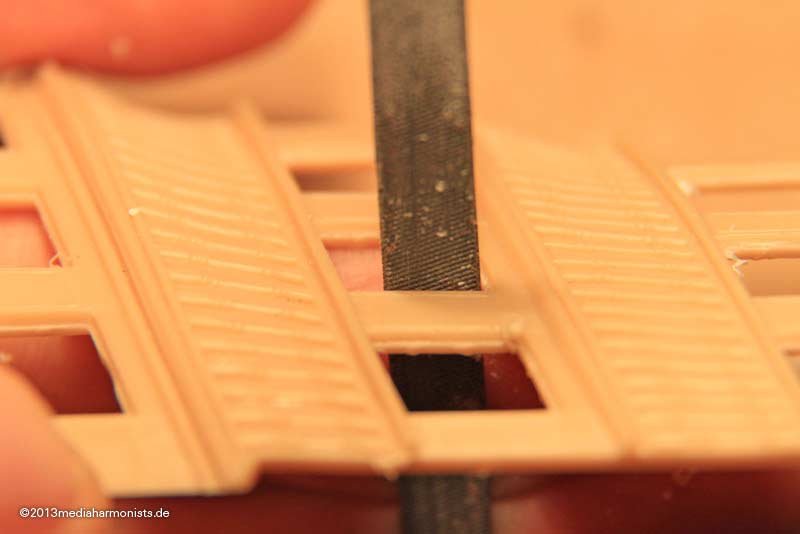 ... and fit in the etch parts.
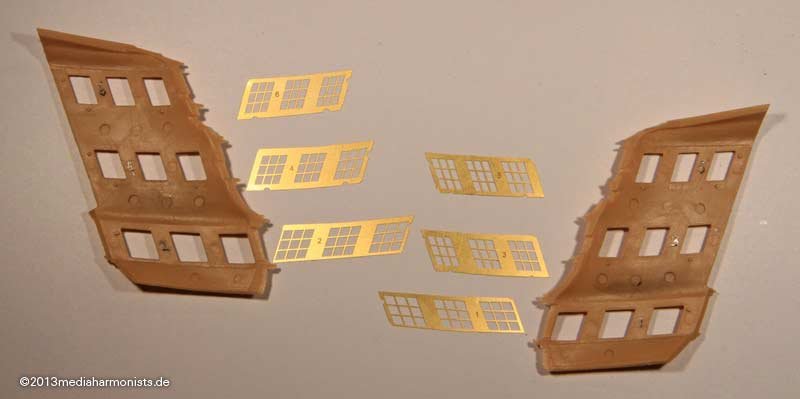 Then scratch off the name cartouche ...
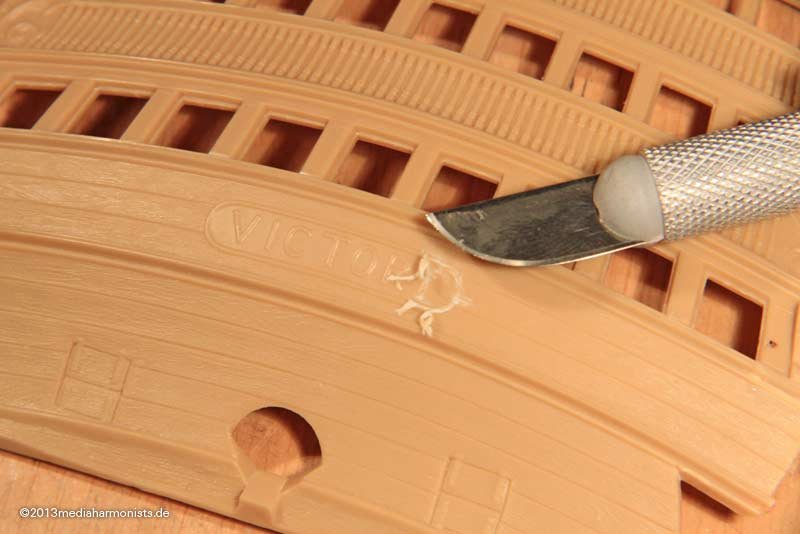 ... take the template, mark the position ...
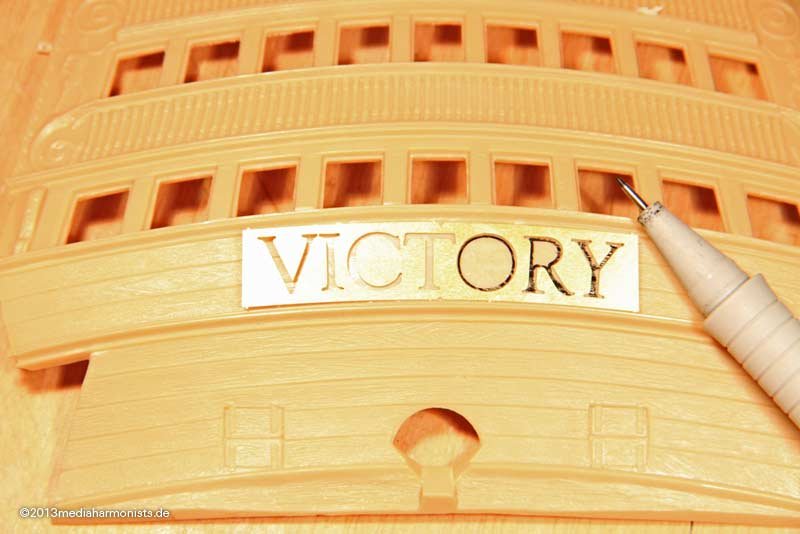 ... and glue in the Letters :-)Last put the 8 bolts. For not loosing the bolts - outside diamater 1 mm or larger at choice - I secured them with Sellotape.
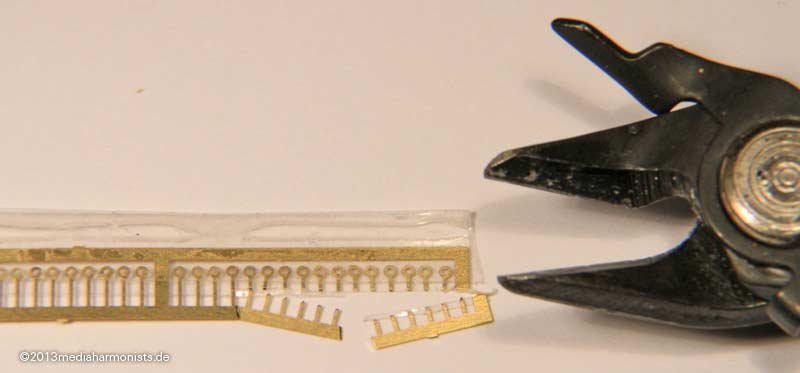 Next step is easy and wont make you sweat after all this: Scratch down the old rigols and ...
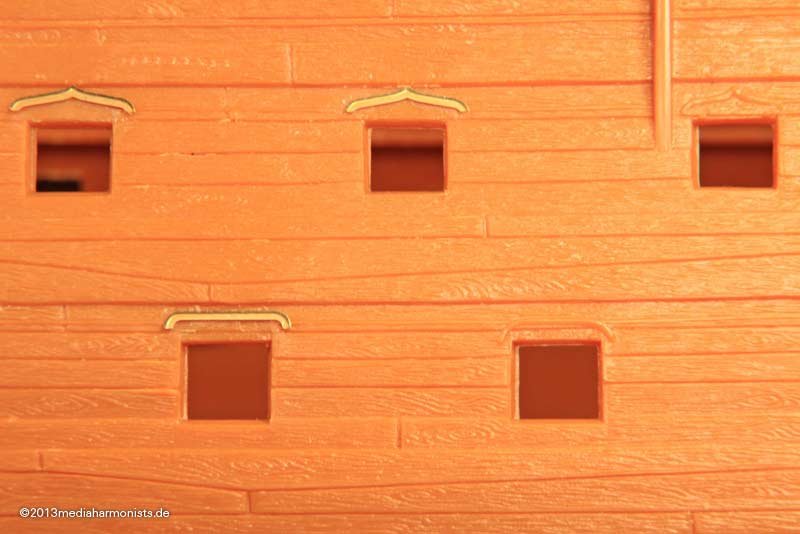 ... replace them by the new ones.
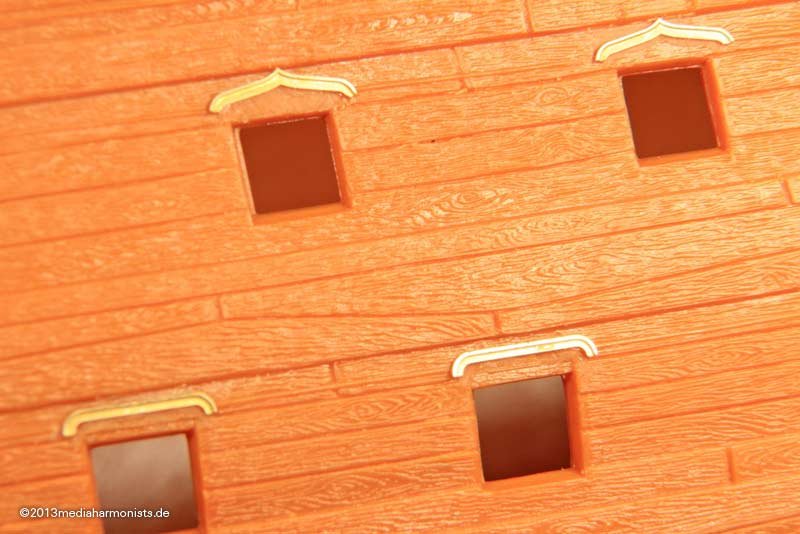 ...hihihihi...Häppy anniversary,XXXDAn
 -
Colored the shaft and the arms for the chamfers ...
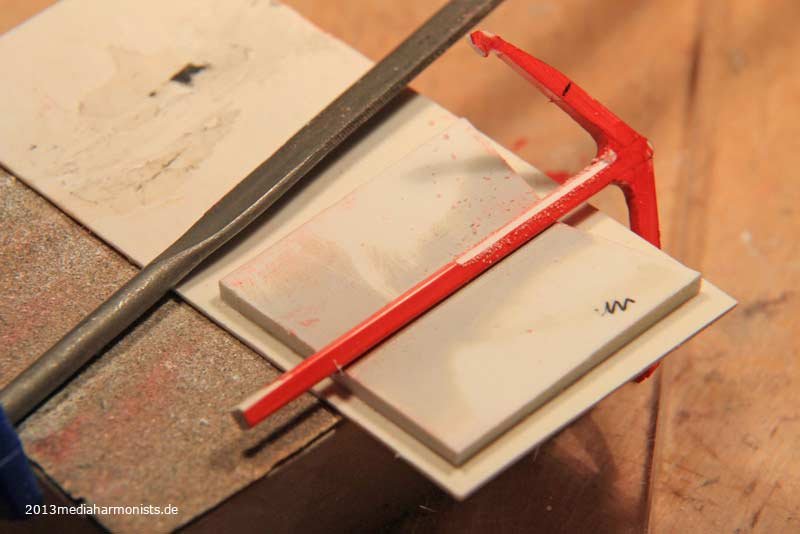 ... drilled the hole for the ring and most was done.
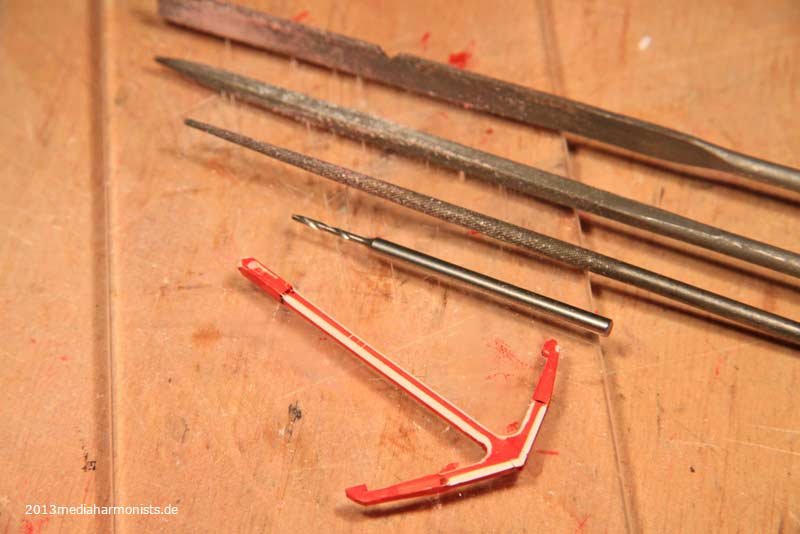 Used my small template to cut the palms ...
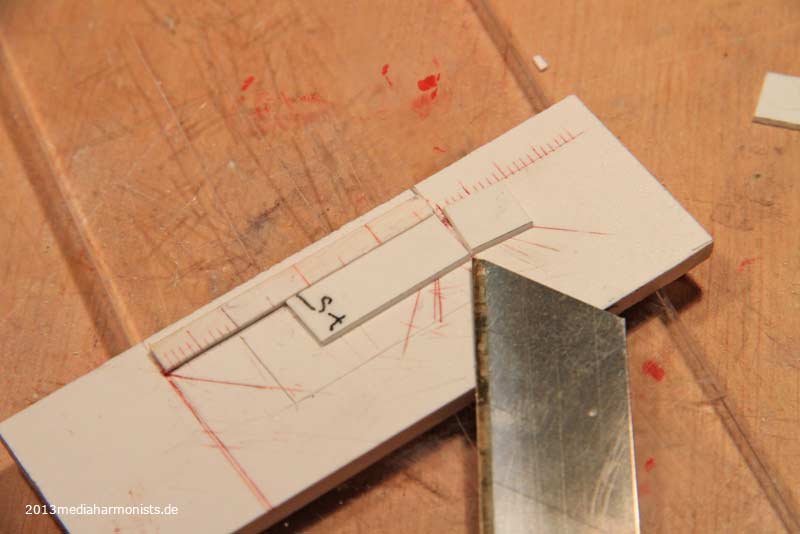 ...glued in place, cut ...
 ... cleaned up and done :-)
 And here the family shot with all the needed tools that were needed for conception.All the best, Daniel
- druxey, JayCub, aviaamator and 2 others
-
 5
5
-
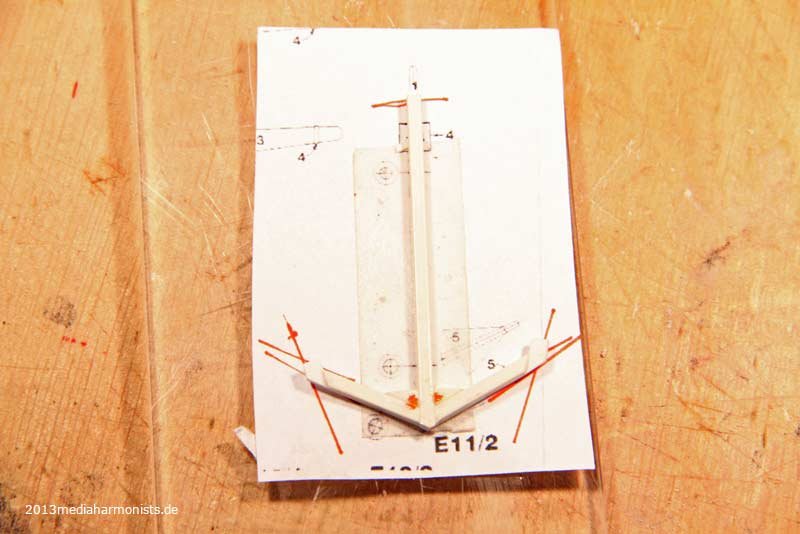
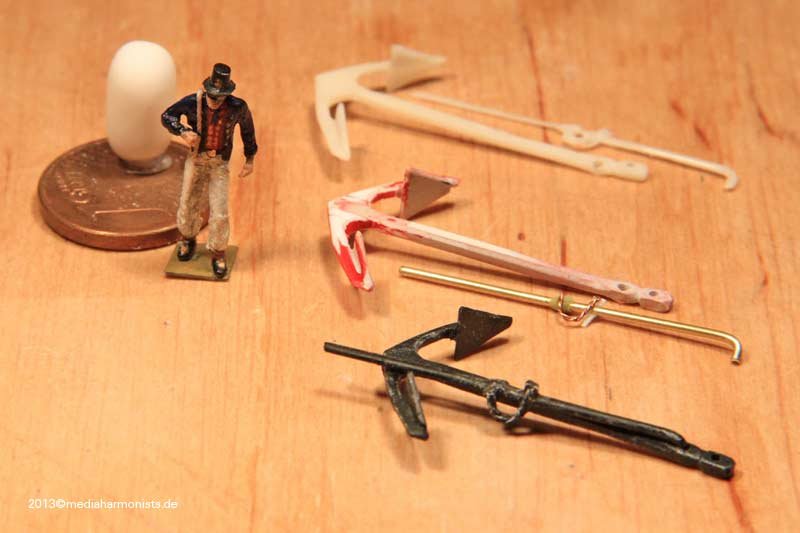
I took the chance to make a documentation of doing my anchors, similar in other materials....First printing the plan in the right size, taking double sided Scotch tape to fix some Evergreen in the right position, and flood the joints with CA ...
 ... took it out and glued the reverse too. As the arms grow thinner, I glued a thinner material on the tip as guide:
 Then files carefully the whole area in between the shaft and the tip ...
 ... until the small step to the thinner tip disappeared. Then turned the anchor to do the other side, and as it was not lying flat any more I supported the hanging arm by some sheet.
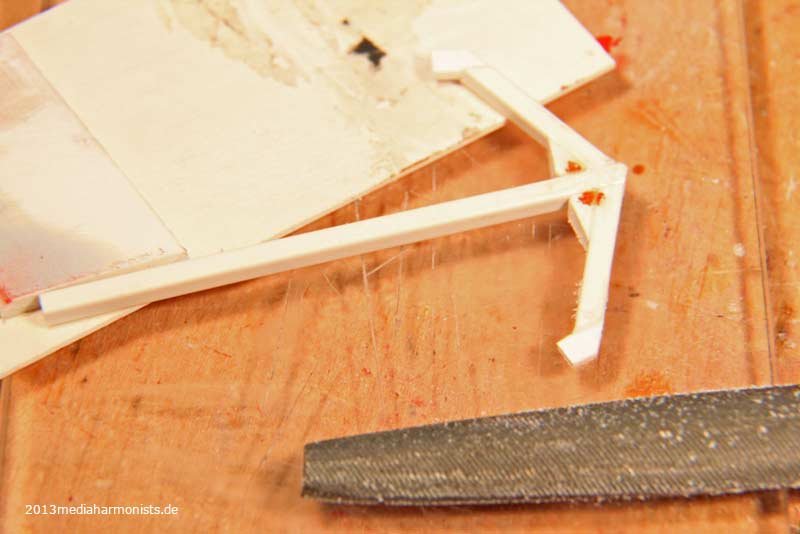 Here from a different perspective:before ...
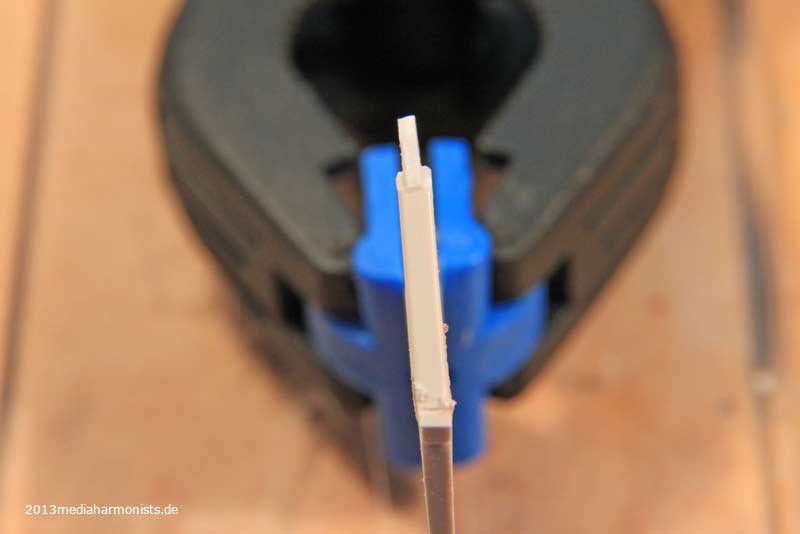 ... and after.
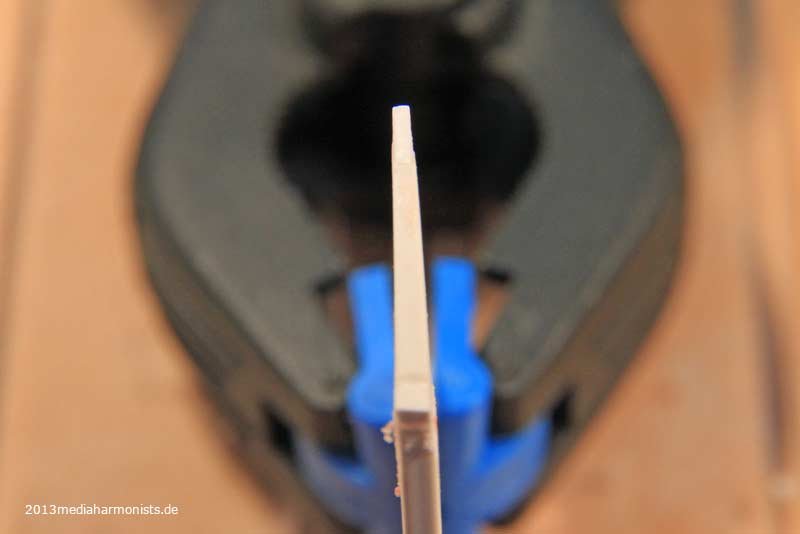 Then for the bent of the arms I colored the surface with Edding ...
 ... and one can nicely see what is done and what still has to be done.
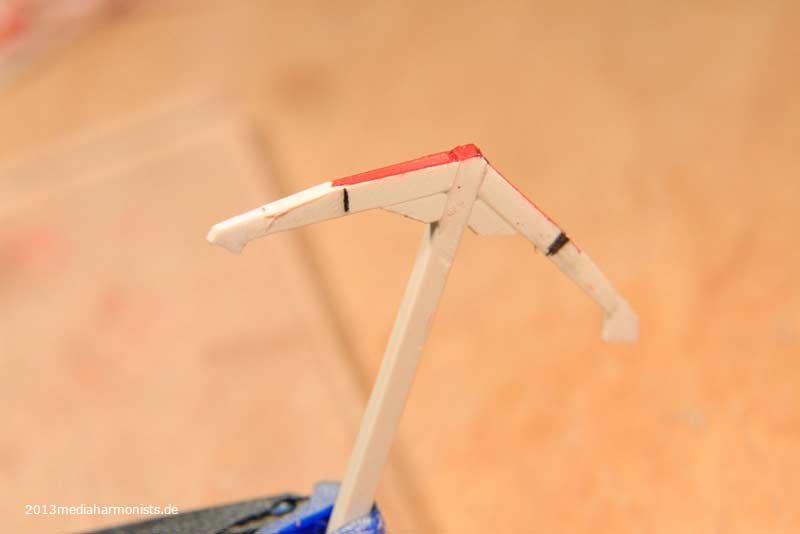 It helps to work on a thin Plexi, as one can use the sides as guide for the file.
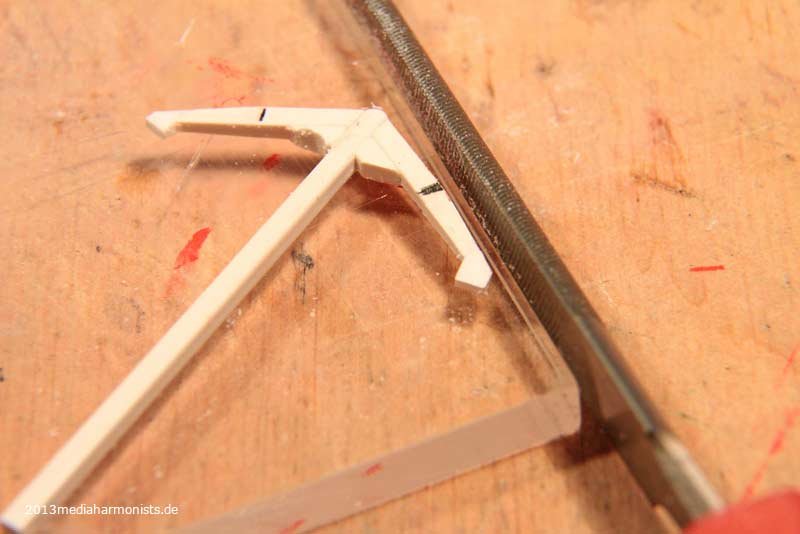 Then comes the throat, the area in beween the shaft and the arms. At those days it was rather small, later versions of anchors accumulated much more material on this spot.
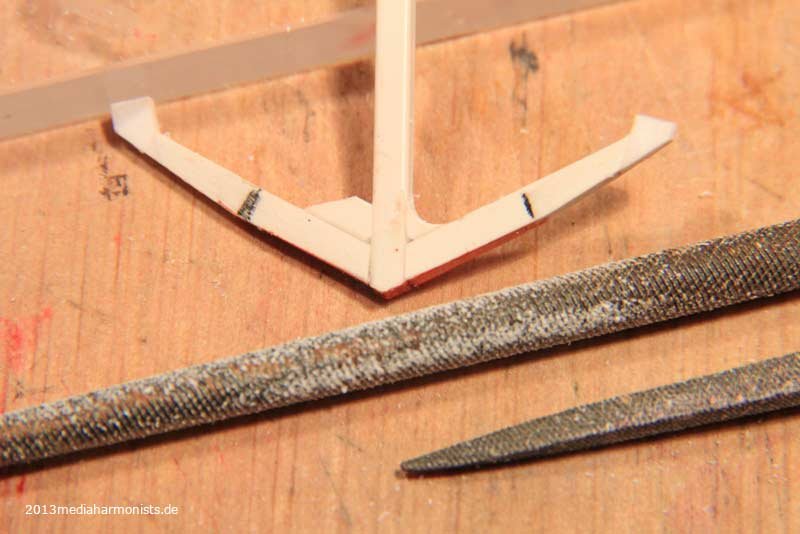 The filing itself is easy...
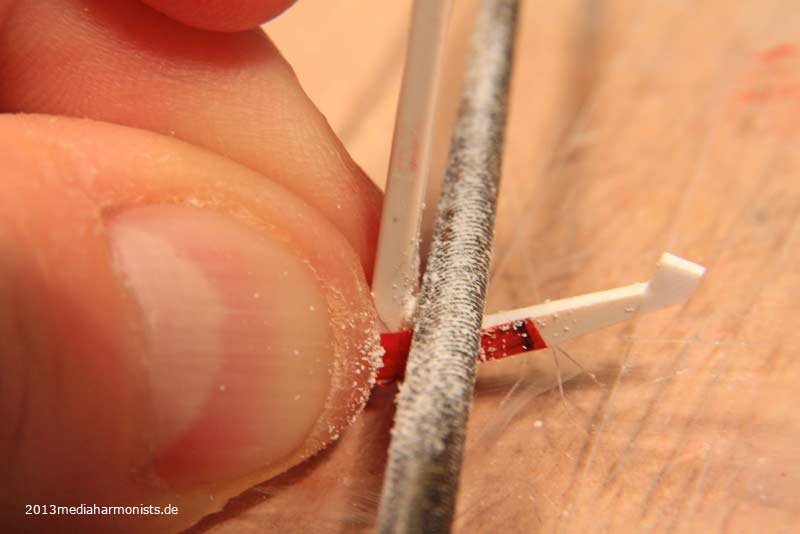 ... just getting both sides equal is needs a careful approach.
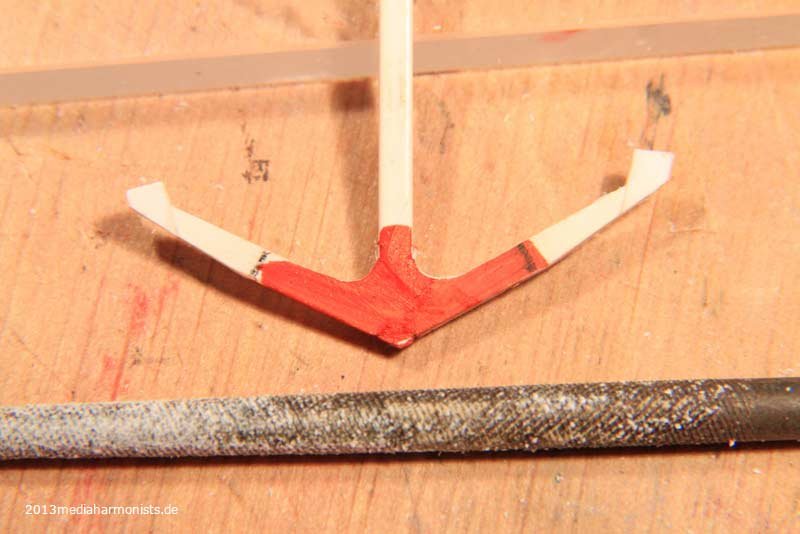
-
And here we are at the end of the small summary, we are up to date with some wonderful new things happening soon :-)
So just a small season greetings out off the kitchen, just a little bit of ship ... ... but it is just a question of ones point of view :-)
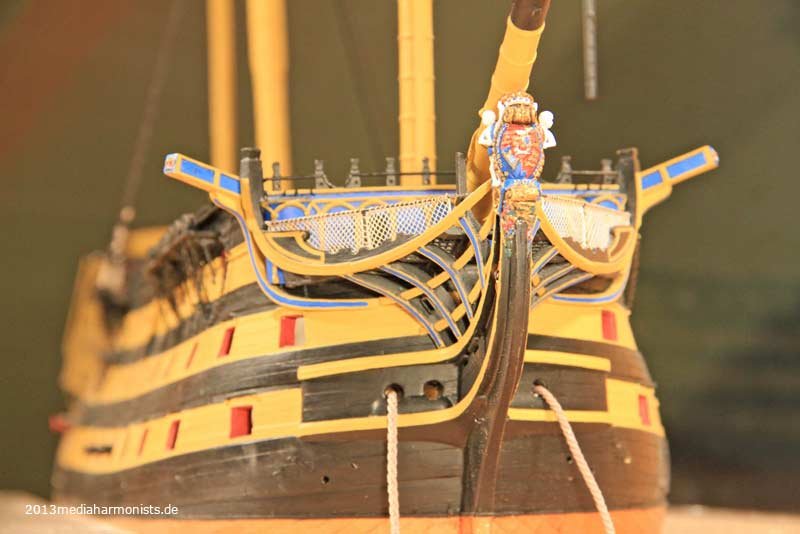 Greetings, Daniel
 -
tätä - tätä - tätä... as does german carnival ...And here comes some petitesse: the kedge on the mizzen channels ...
 ... with the foldable iron stock and locks ...
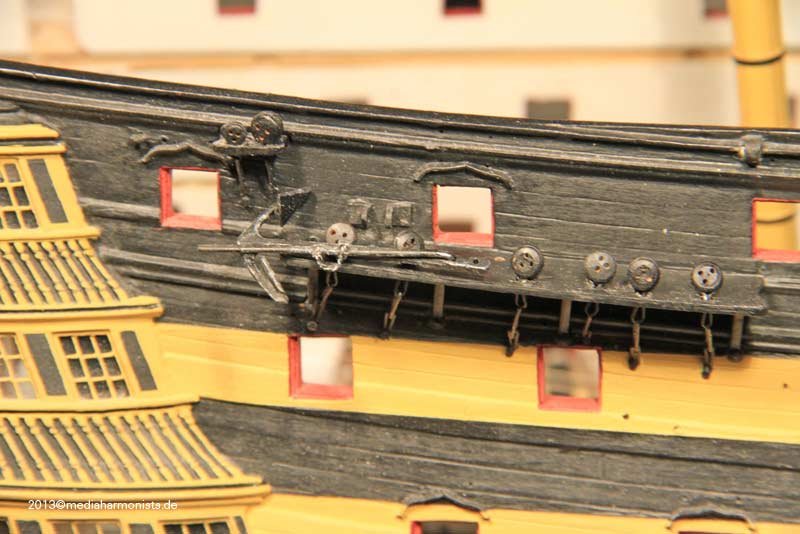 ... and having a test placement - and shooed it to the back end for that the palms keep clear davids and boats.Also found finally the guts to drill the holes for the dales of the chain pumps ...
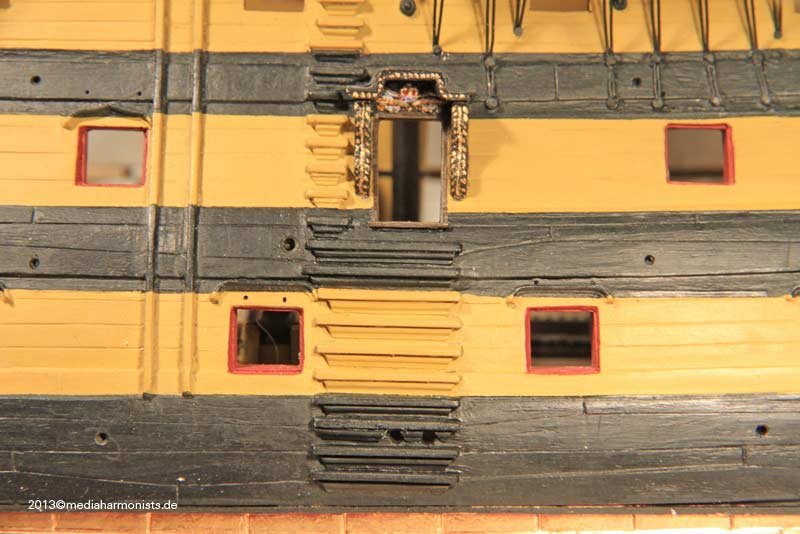 ... with their strange places on top of the gunport and in the middle of the stairs.tätä - tätä - tätäAnd some more unsignificant things on a ship of this kind: first ten guns are permanetly fixed - I can hear Rob yelling of joy as he even gave up asking for it ;-)First breechroped them, decided to opt for the controversial Goodwin setting, with S-laid rope and preventer brreching rope - just to keep the discussion going :-)
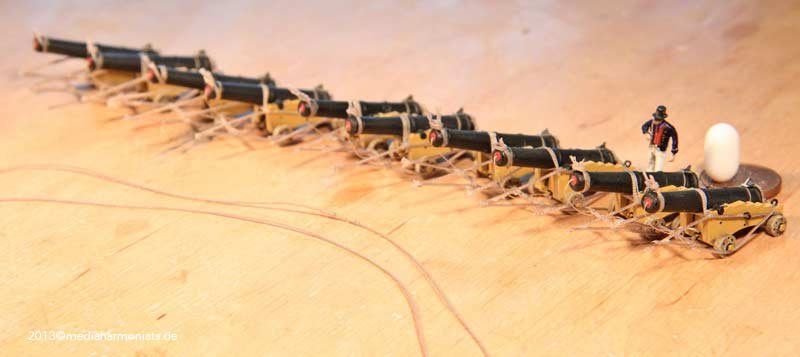 Prepared outboard on the already shown template ...
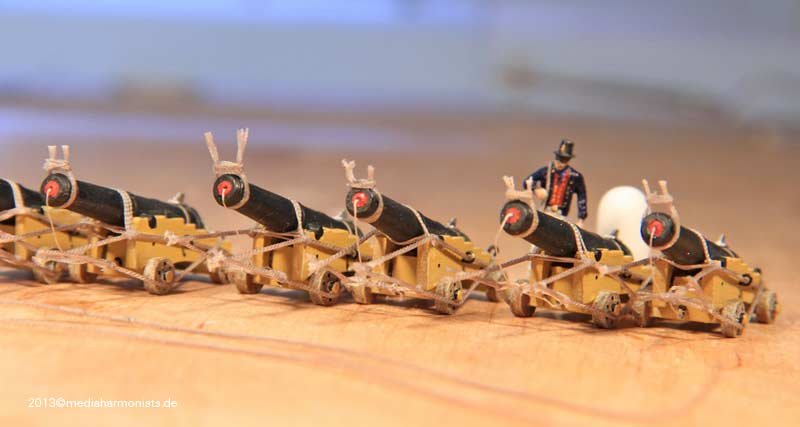 ... and with a small cheat on the eye splice of the preventer breeching line ;-)
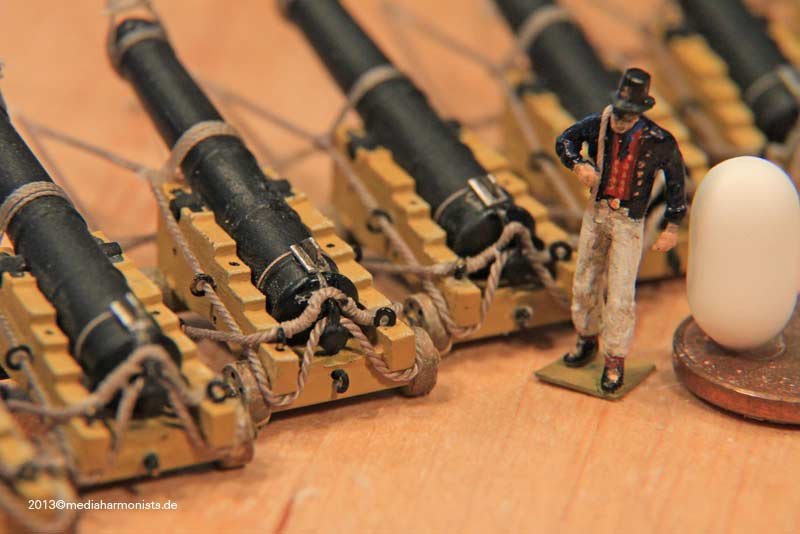 Mise en place ...
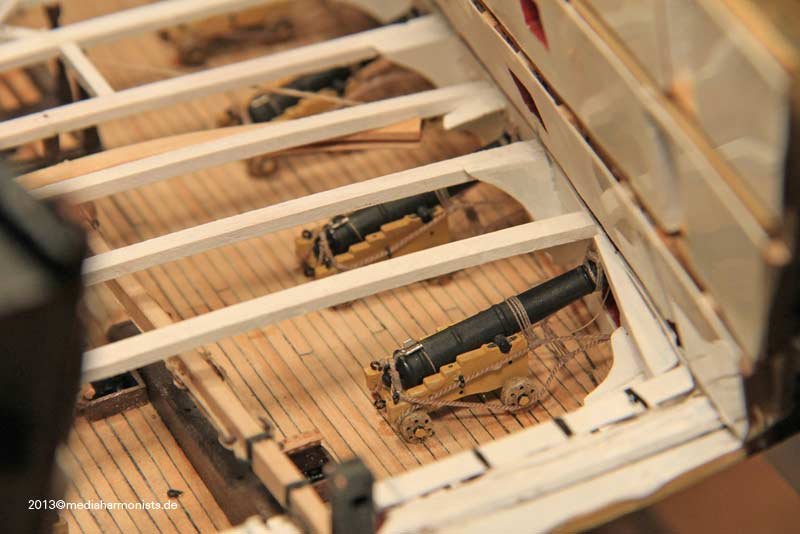 ... and ...
 ... enjoy!
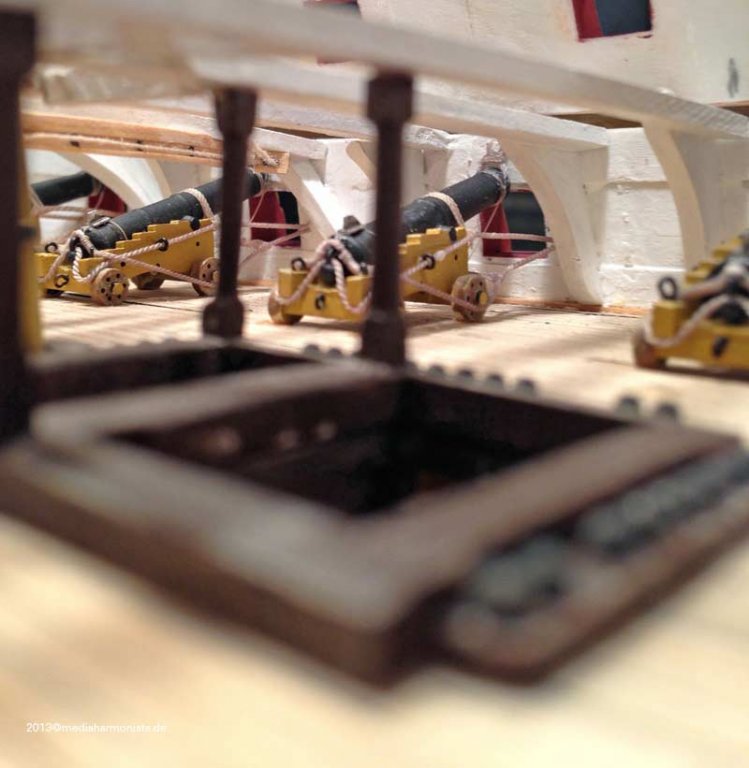 Happy carnival greetings ...tätä - tätä - tätäDaniel
 -
Of course, it had to come ...... of course, I admit, I made it easier by using just one single strand to serve the anchor´s ring and not the multitude as in the original ...... of course, this was already tricky enough to me ...... of course, I had no idea how to do other wise ...... and of course someone was moaning ...... and of course, the challenge was accepted!Once I used my thinking equipment ...... and of course I used first 4 strands to serve ...
 ... but the difference was not to visible, so I tried 8 of them ...
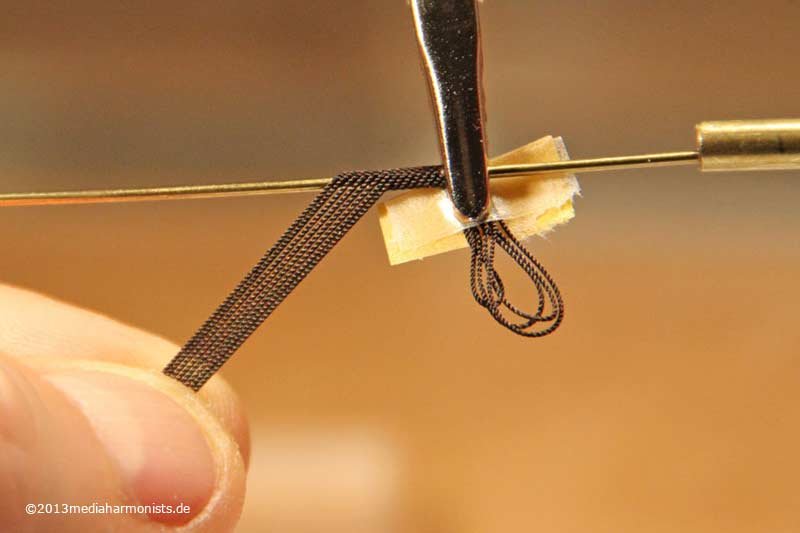 ... and of course looks much more authentic :-)
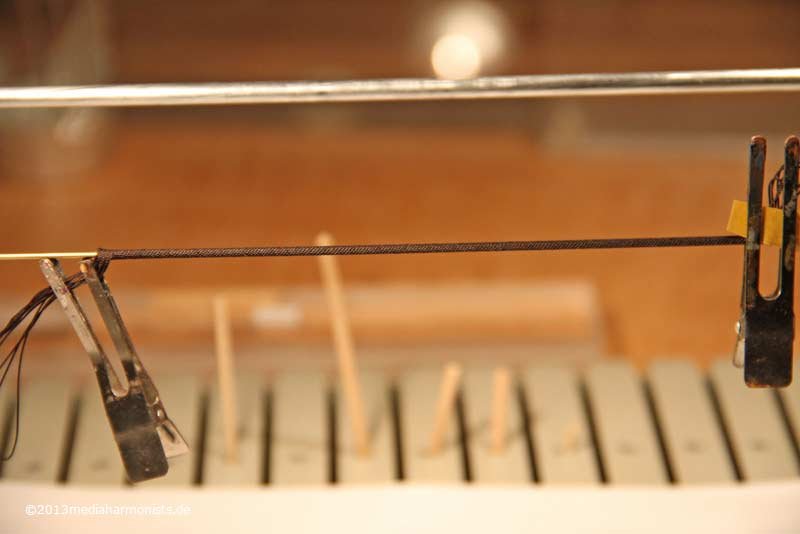 Then bent the served wire around a core ...
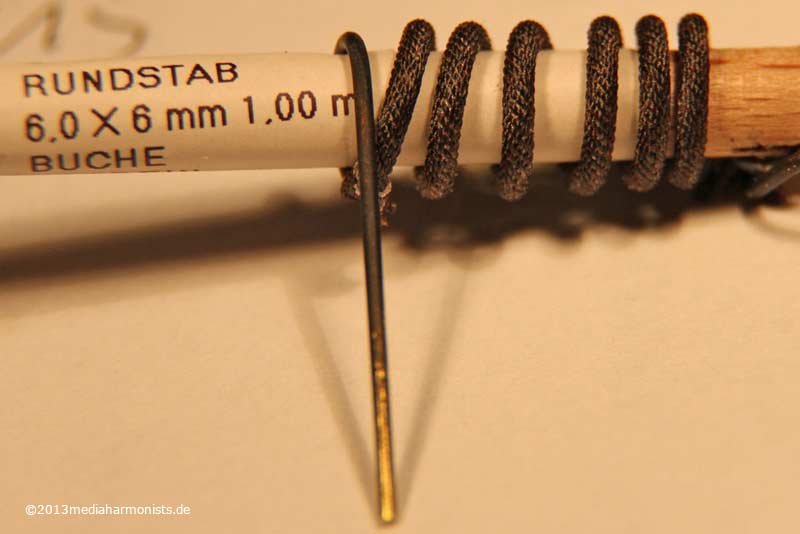 ... and here we are, on the left side the new one :-)
 ...hihihihihihi...Challenge won!!!Of course the seizings are badly done as I did take the wrong rope and it was already late, but the next ones, just wait!!!Mission accomplished :-)And now to the other rings ...... underneath the eyes as these things cost sleep ...... of course ...XXXDAn
- Blue Ensign and gieb8688
-
2
A serving machine that serves you well
in Modeling tools and Workshop Equipment
Posted
Thank you Sirs,
@p2s: Not shown here, but easily done when needed.
:-)
Daniel