


Izzy Madd
-
Posts
382 -
Joined
-
Last visited
Content Type
Profiles
Forums
Gallery
Events
Posts posted by Izzy Madd
-
-
Hi,
Someone gave me a list of research materials but for the life of me I can't find it anywhere. Sorry to ask but whom ever it was could you please re submit it to me.
Thanks
Izzy
-
I've found over the years that citric acid. Very cheap and organic and almost harmless, it stings if you have a cut. But the blacking process takes about three days and so is very finely controlled. And leaves a natural dark color on steel balls like these. As well as removing all grease and no stains. Just put them somewhere warm to dry swiftly. And they look just right
Izzy
... and now something completely different :-)
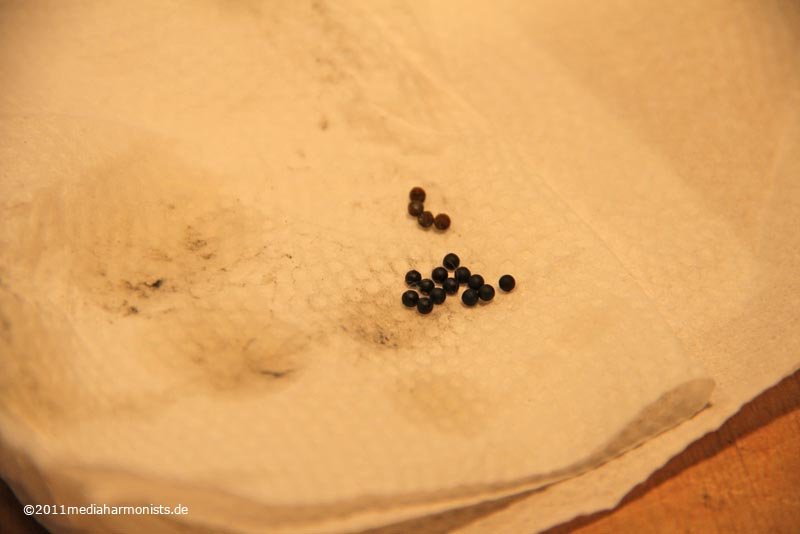
The cannon balls I already presented quite a while ago, they came from here ...
http://www.kugel-winnie.de/epages/62136757.sf/de_DE/?ObjectPath=/Shops/62136757/Products/010101003
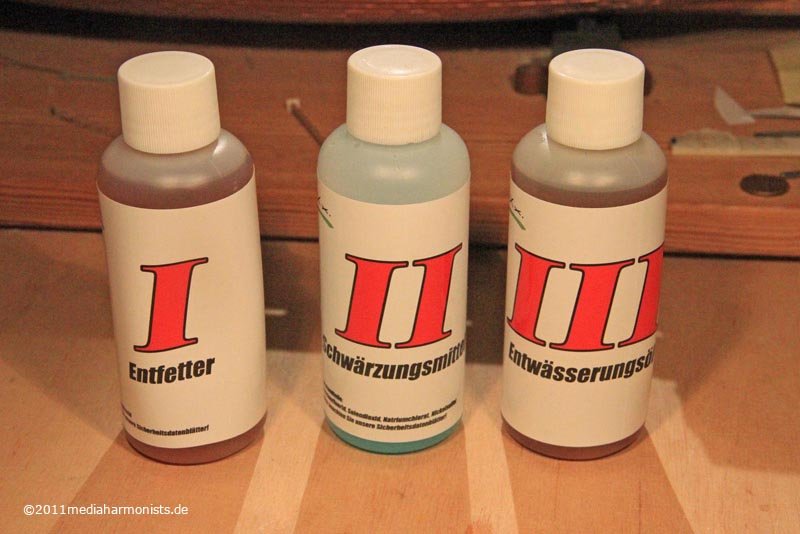
... and the blackening stuff from here:
First one to take the grease off, second the blackening and the oil for dehydration ...
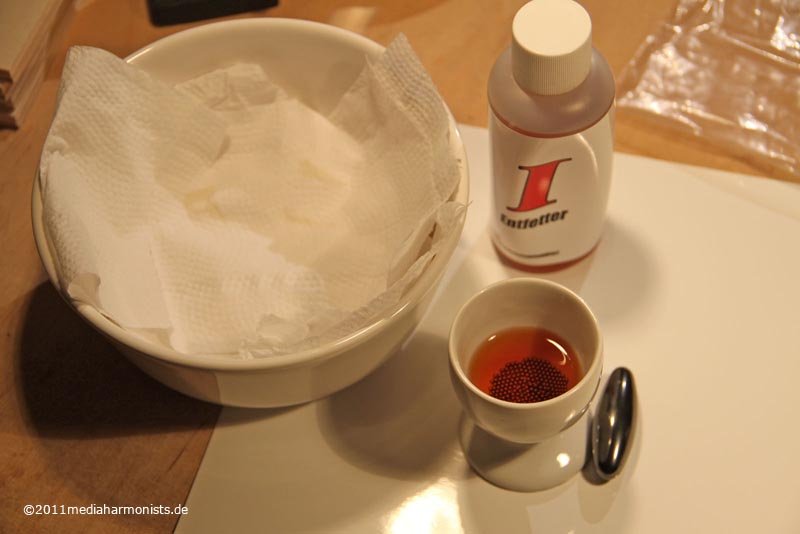
... first the degreasing ...
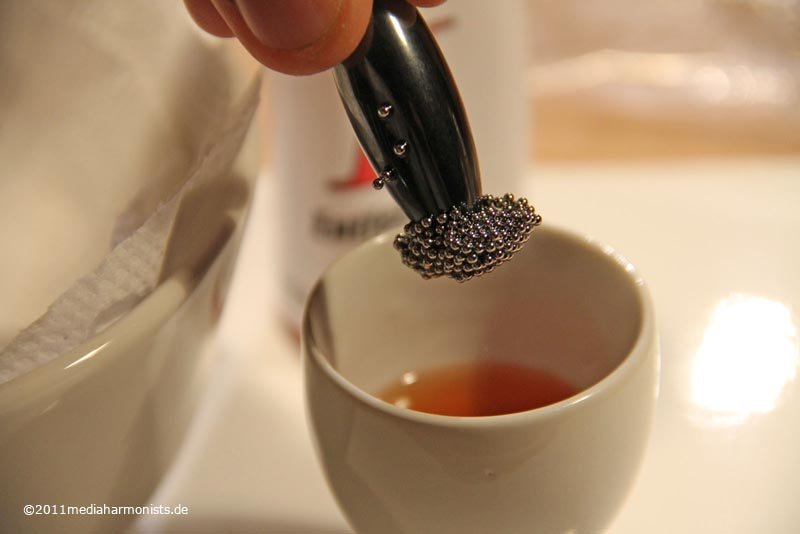
... used a magnet to take them out ...
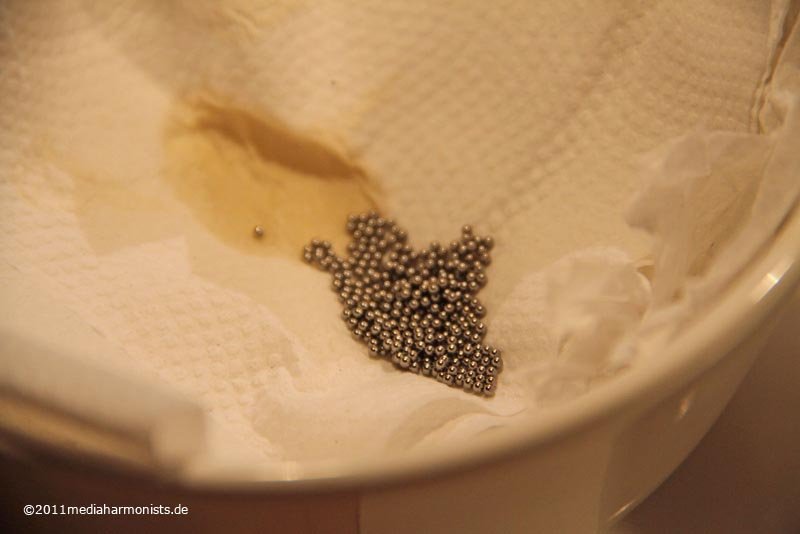
... well dried ...
... and like Roger Rabbit back to the soup, the blue one for blackening ...

... luckily used old china as the stains remained :-)
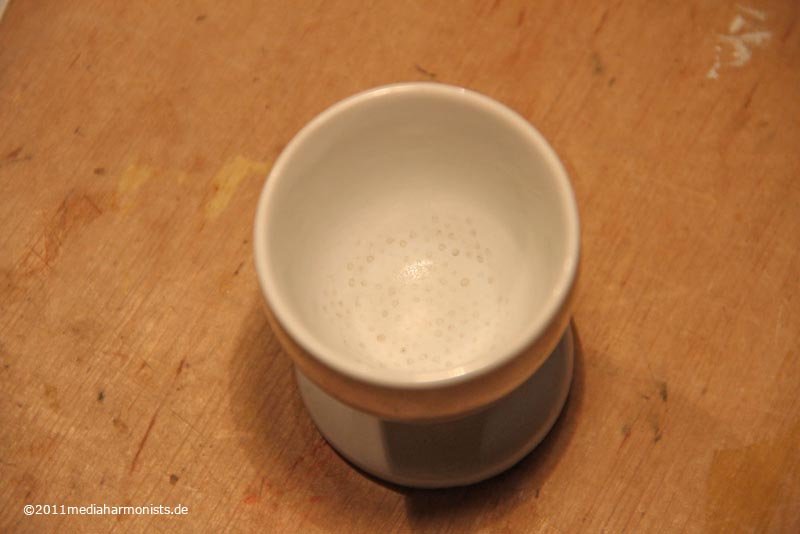
First I wanted to avoid the dehydration oil because of the glueing, but some of the balls turned brown :-(
So same procedure as every year James, back to degreasing - the rust come of the balls but not off the china ...

... freshely blackned and oiled.
Putted UHU Universal into a old syringe and gave nice injections ...
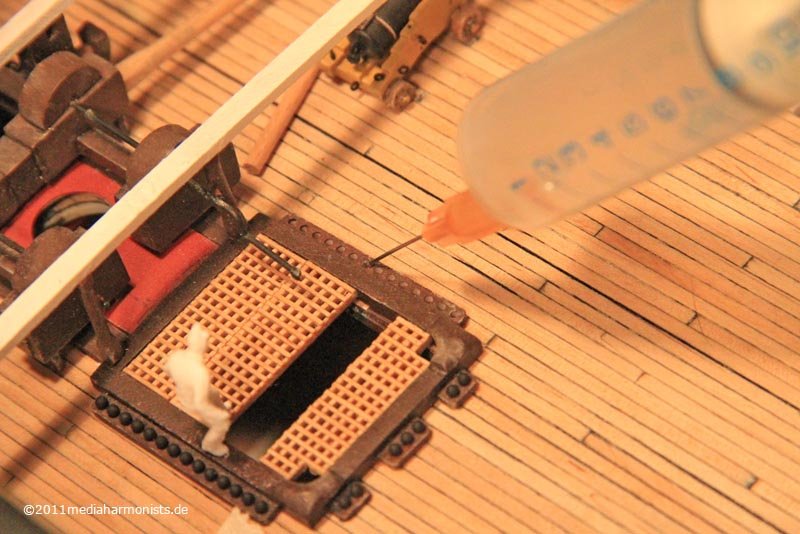
... uand placed the bullets :-)

Used lots of glue but still some came off, the oxide is a ideal separation agent ...
So then, good luck, Daniel
-
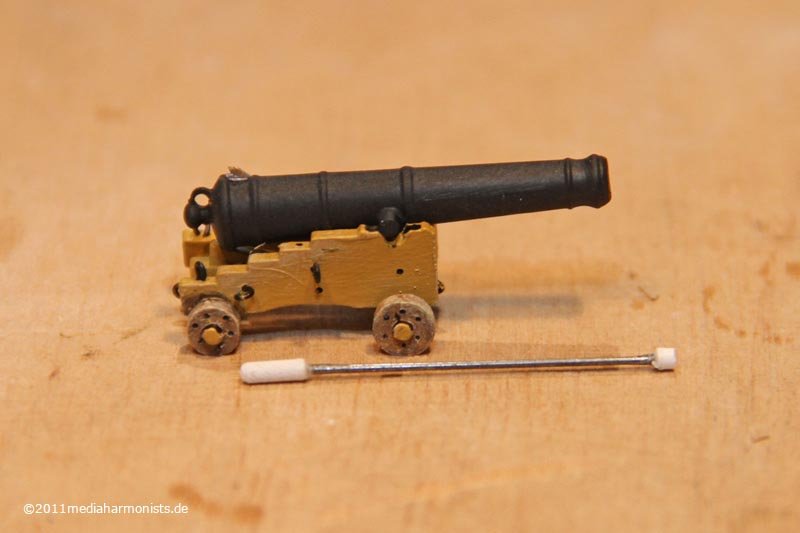
Observation but you've got no bucket in this scene which was vital in times of full on battle as the sponge and rag often came out smoking or even burning.
After I had a lot of work to be done lately, no bigger things could be moved, but I found a smaller task to keep myself happy.
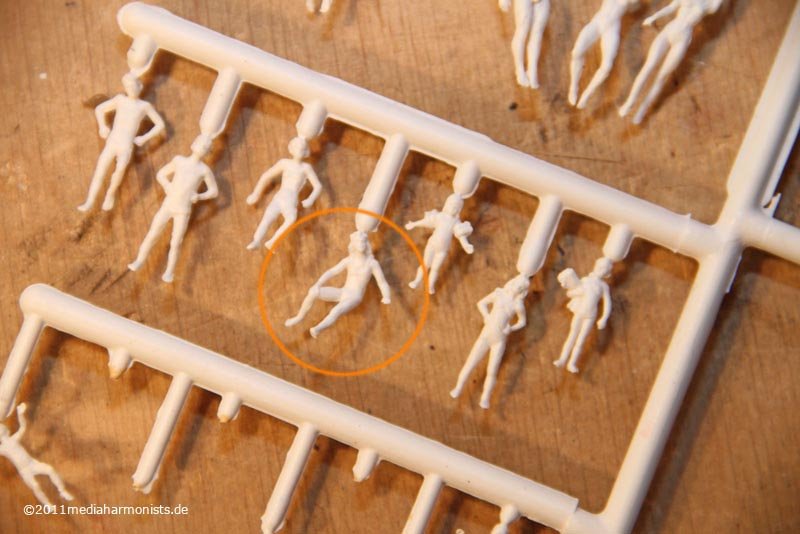
I realized that a lot of crews for the models were treated with much care concerning the painting and the historical correctness of the uniforms: But still they kept the positions they were delivered in - mostly these are people that were meant strolling along, nothing to do with the hustle and bustle and the action on a gundeck or working the sails.
So something to investigated: Take three times the same train passenger with luggage and leave once à la nature (right side) and strip the other ones off their bags, dissect them and reconfigure them ...
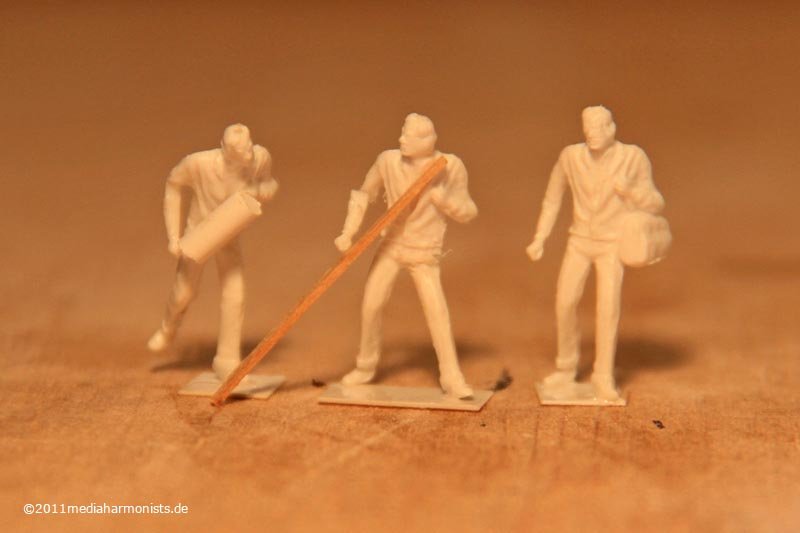
... and look daddy - some real boys :-)
Open the footfall, twist in the upper body, moving the center of gravity to the edge of the standing area, turning the head into an opposite direction, moving the arm ...
Here they are helped by a ex-diver, once organizing his equipment, same operations ...
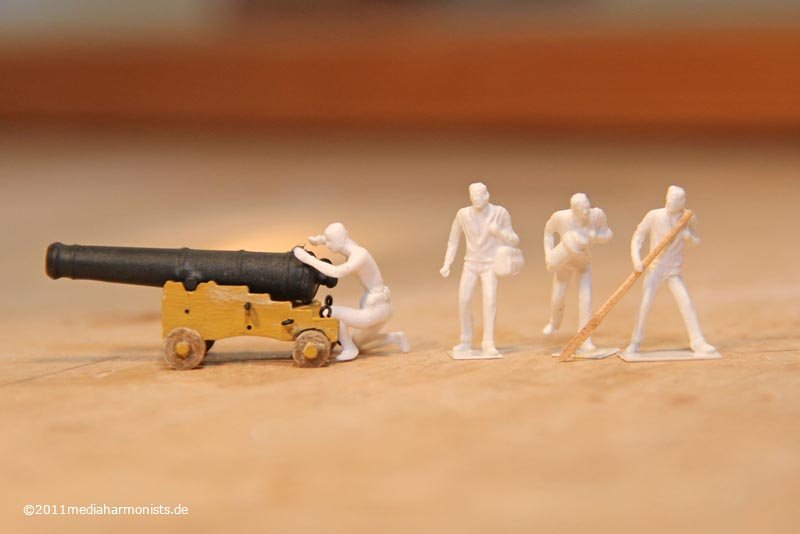
... and now busy with organizing the flintlok. And a nice blondy, once meant to relax on the swimming-pool towel ...
... and stirred, not shaken, is a useful member of the guncrew :-)
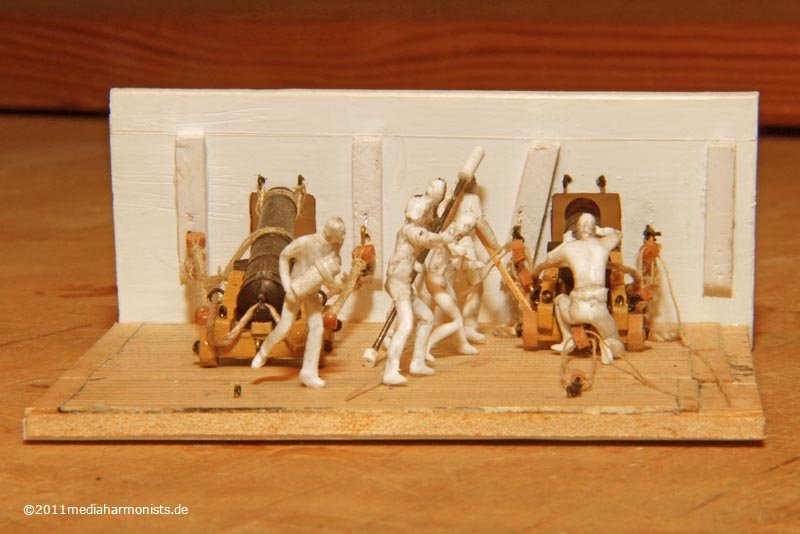
And a small excursus into some moping up ...
... and the enlightment, that the sponge can not be held too upright because of the restricted hight of the gundeck - so had to change the first version of arms of the holding crew member.
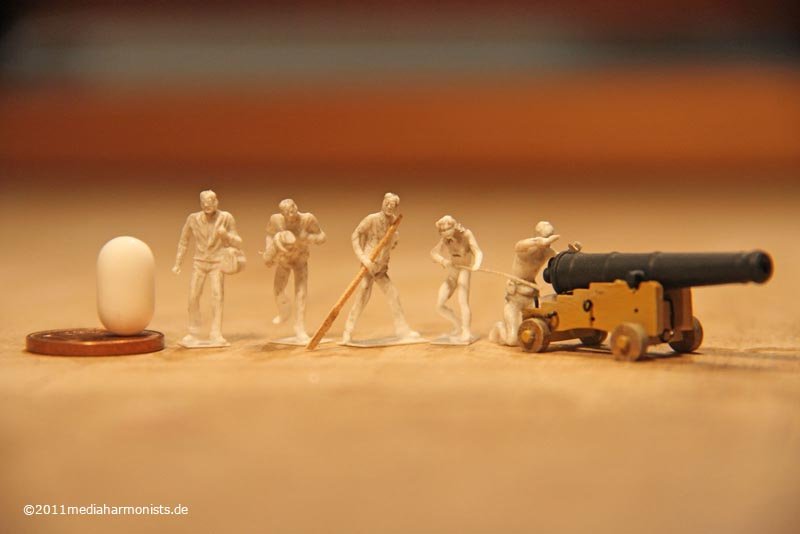
And here it is the hustle and bustle and the action of half a gun crew ...
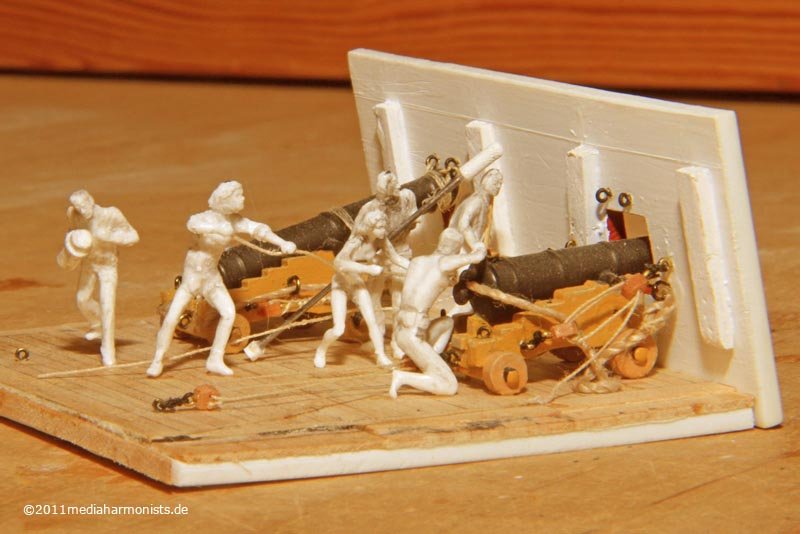
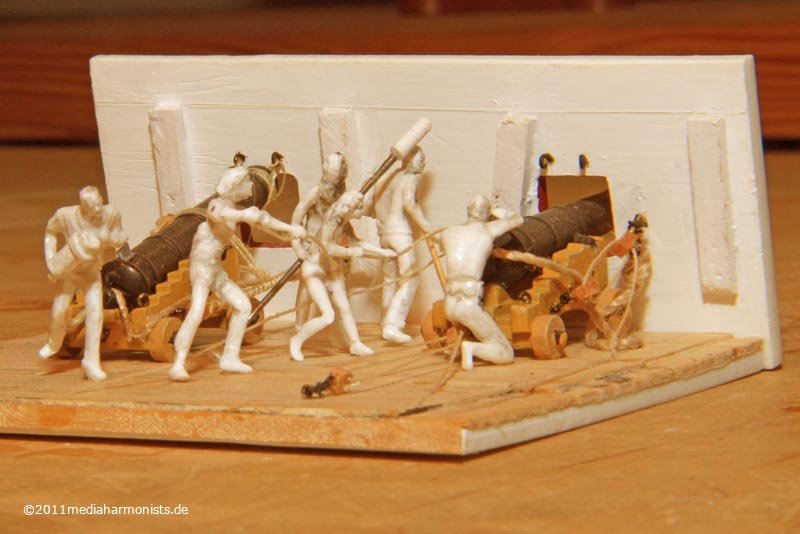
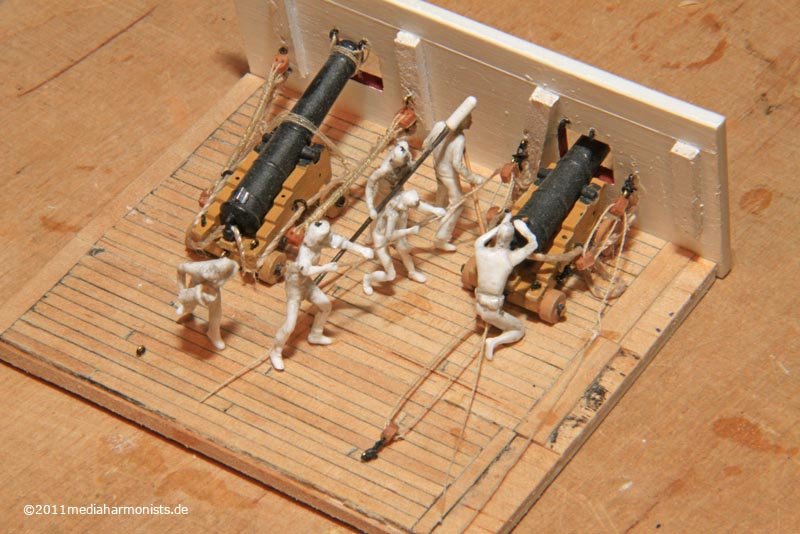
... and now imagine the melee with the other half also present and the those of the neighboring guns! What a throng ...
all the best, Daniel
-
Hello Thom,
I used brown package tape - just try different ones :-)
Liebe Grüße zurück!
Amicalement, Daniel
Having had a similar issue except full size. I used two 1” eye bolts looped into each other. Not simple or easy. Then into a large tube or dowel ends. This worked great as a universal joint worked both ways and even in three directions. Also if a tube is used even on the end the a collet can be inserted to hold the bit with the tube threaded to take a domed nut with a hole in the dome to tighten it. IMO
-
Looking at these images. Would the same effect have been achieved buy cutting grooves in the wood with grooves going the opposite direction on the same side. The glue strips into a solid piece, more stable. Then when the glue is dry run the whole thing over the saw to create the grooves on the underside? I'm just curious as to if you attempted this before I might?
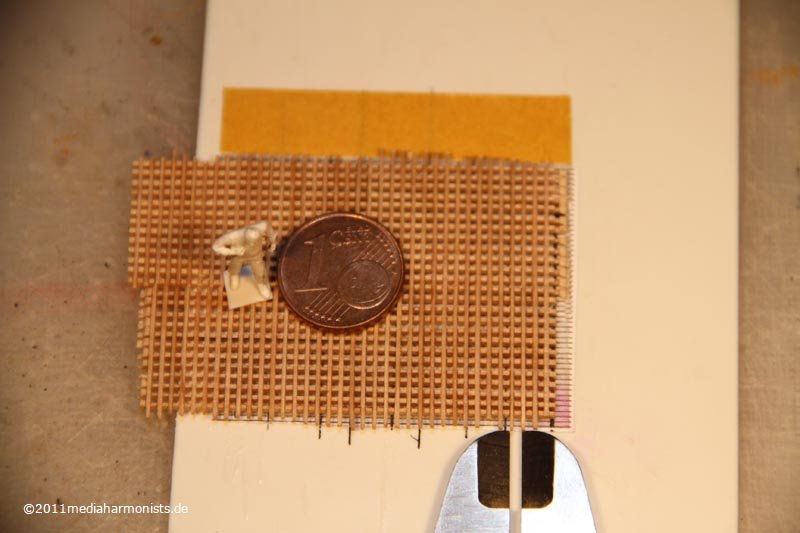
... and believed the 1mm gratings from the shop still were too big ...
... and so the tests began ...
... and her is the whole story ...
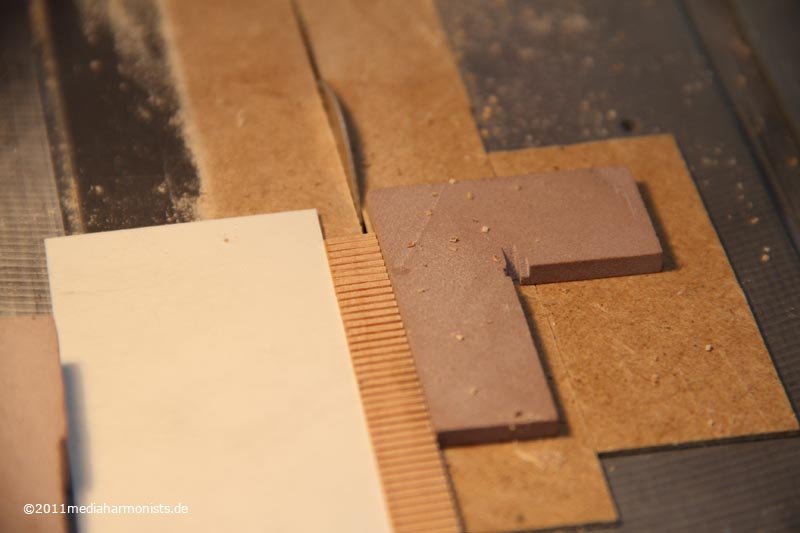
Literature always indicates to use the circular saw with a small guide beside the blade. So far understandable and comprehensive and does not sound scary. A first test free hand prooved that my wood was suitable :-)
Fastily changed the machine ...
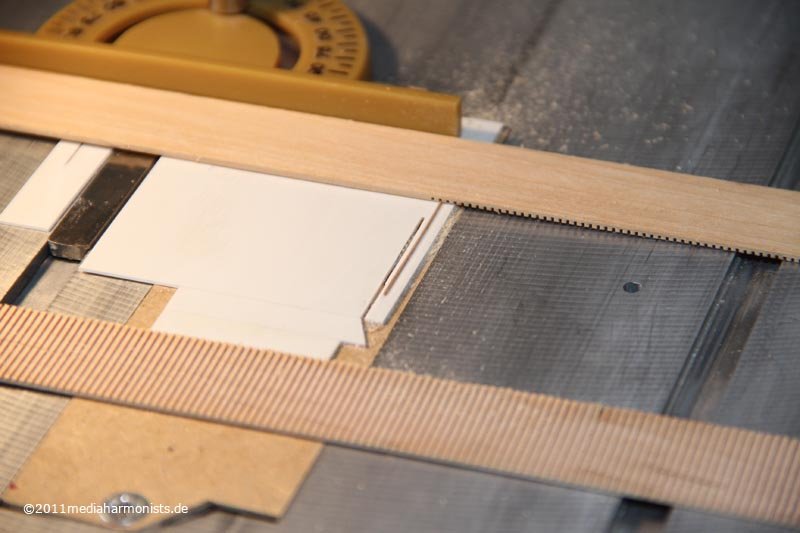
.... or not that fastily, because untill everything was adjusted to the 0.5 mm blade, the right hight of blade and suitable thickness of the guide, and smooth cutting worked, it took some time. But then putted stripes of 1.5 mm thickness to cut ...
... and it looked a little bit tattered, see the stripe in the front. So gave it some clear varnisch and the stripe startetd to bend in all directions :-( Used some plastic foil as a separation on the topside and clamped it against another piece of wood to let dry. And luckiely it came out straight and after the second time through the saw it looked clean, see the stripe behind :-)
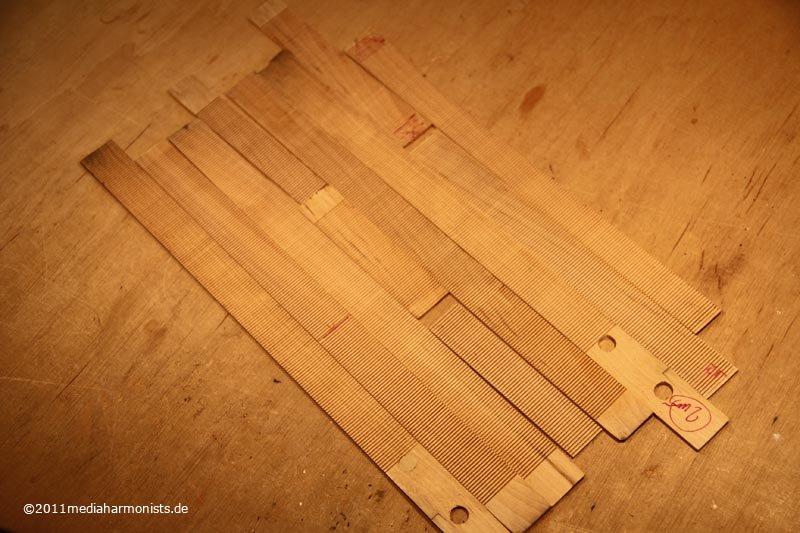
... and this is the bounty: material for the next years to come :-)
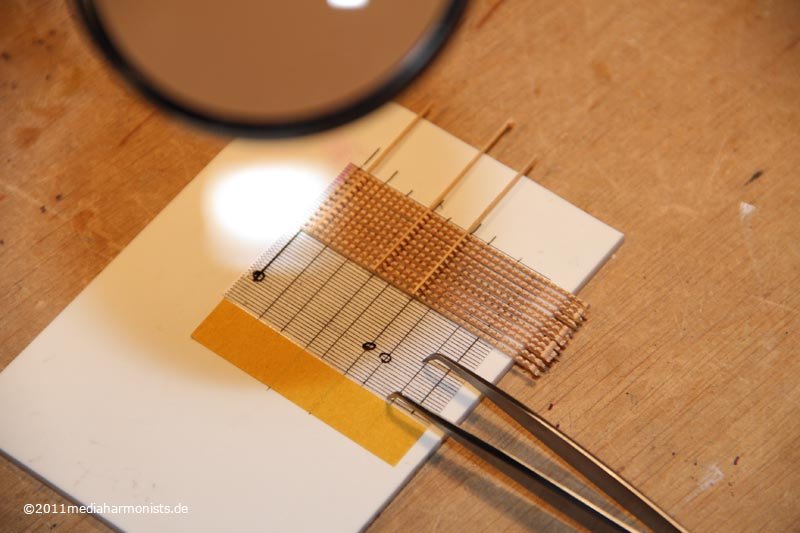
So came the next task: Cutting it into 0.5 mm bars without breaking its tiny teeth and without the bars disappearing in the machine. The latter was easily resolved with some tape. The first came out of the problem, that with the standard guide, the line was rubbing against the blade. So made a new shorter guide that releases the bars immediately ...
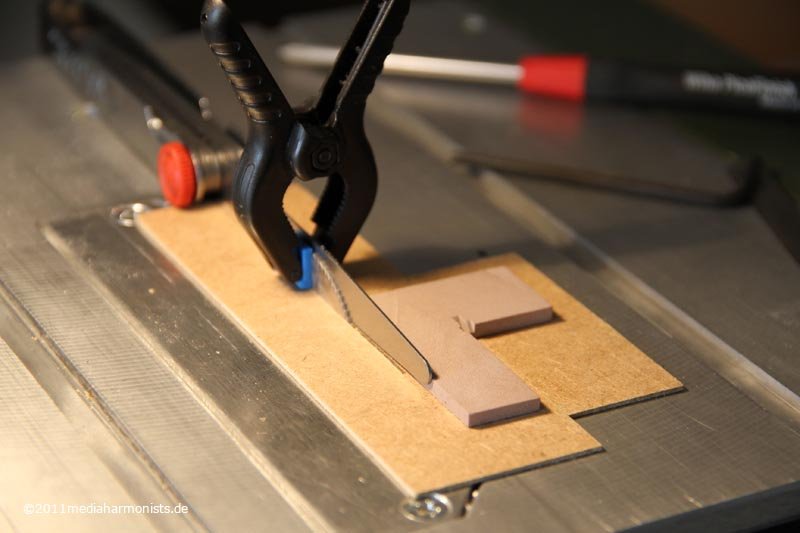
... adjusted the distance with a 0.5 feeler gauge ...
... and glued same sheet on the side of the wood to get the fingers further off the blade. So managed to cut nice bars :-)
Next thing is mentioned neither in any book: The cutting is just one thing - the gluing is the bigger problem ...
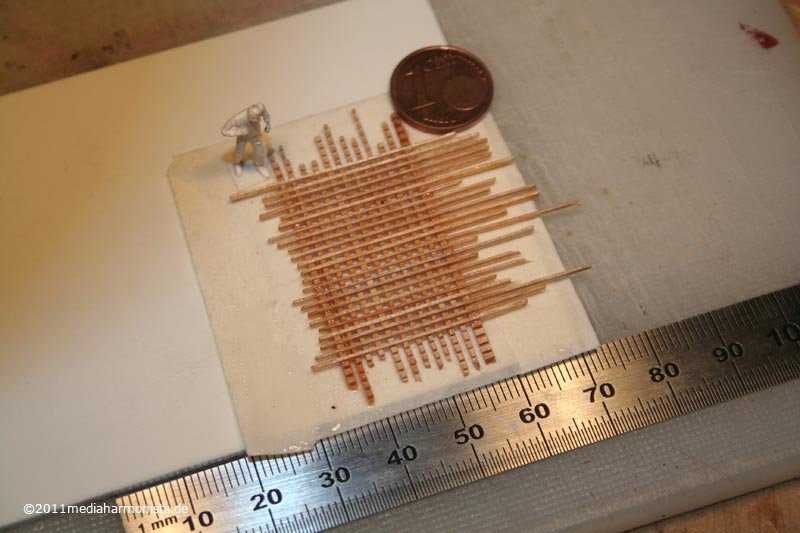
... used some soft adhesive tape and tried to put it together with 0,5 x 0,5 mm toothless bars - looks nicely uneven ...
... so printed a 0.7 grid onto paper and used transparent double sided tape and a loupe to fix them together. Nice meditational work :-)
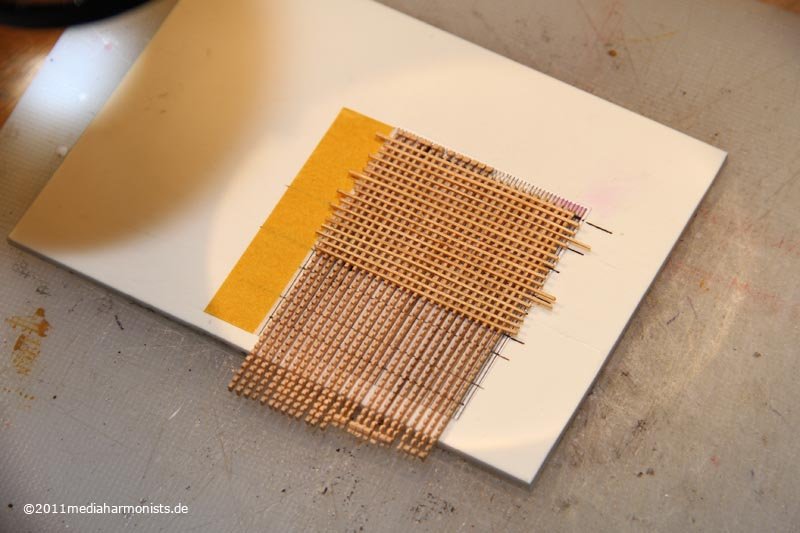
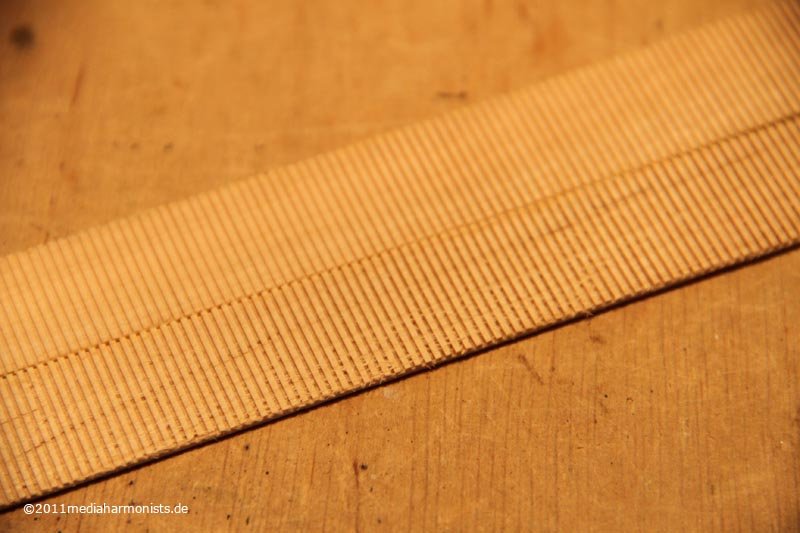
So it is filling up:
The caliper is set to 1.4 mm.
And my little worker was so kind to lift one up to show the underneath :-)
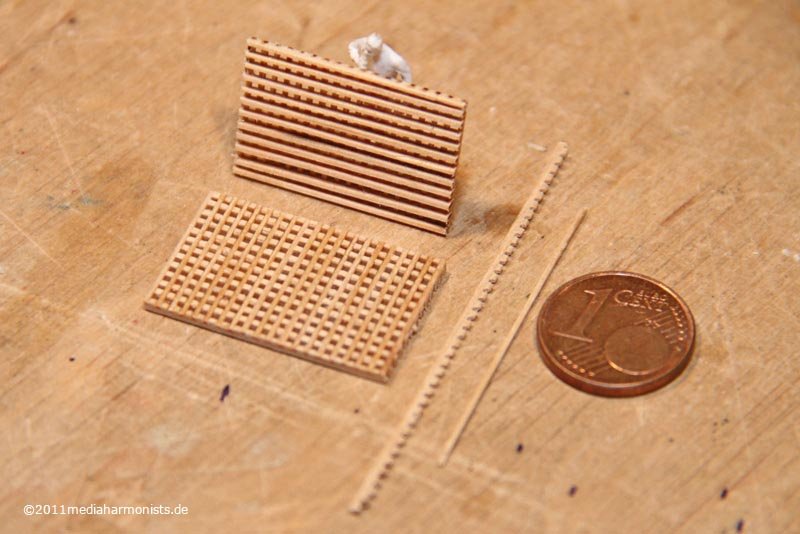
... and the result is a cute 0.7 mm grating and soon I will be able to show where it will end up :-)
All the best, Daniel
- VonHoldinghausen, homer, Rudolf and 3 others
-
 6
6
-
It looks like and would probably work if you were to make a small diarama of the carnage of battle (-:
What do you want with the axe, James???
Disclaimer:jg
The following pictures are nothing ror the weak at heart! We will not take over responsibilities from any side effects you possibly may suffer ...
Shiver with fear!!!
This is the lower gundeck with the riding bits, that are with me now for several years already.
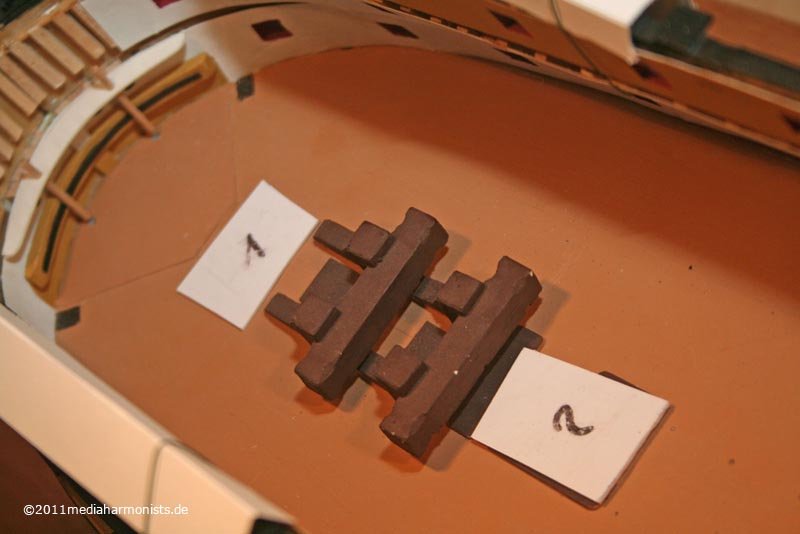
Build as a small detail to create an interesting view through the gunports and shaped roughly out of balsa. As the standard of the model grew, I would like to put a first layer of wooden decks to ecxcercise my technics. For that I do not want to have to plank around obstacles and also to replace the bits by better ones, heavy measures had to be taken ...
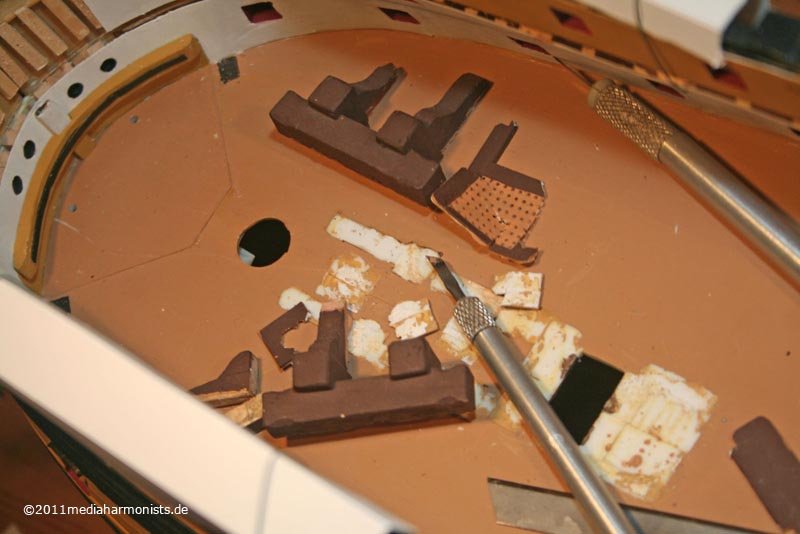
... therefore got out the heavy tools and realised that the things were well glued onto the deck. So after no blood but loads of sweat and tears the deck was cleaned ...
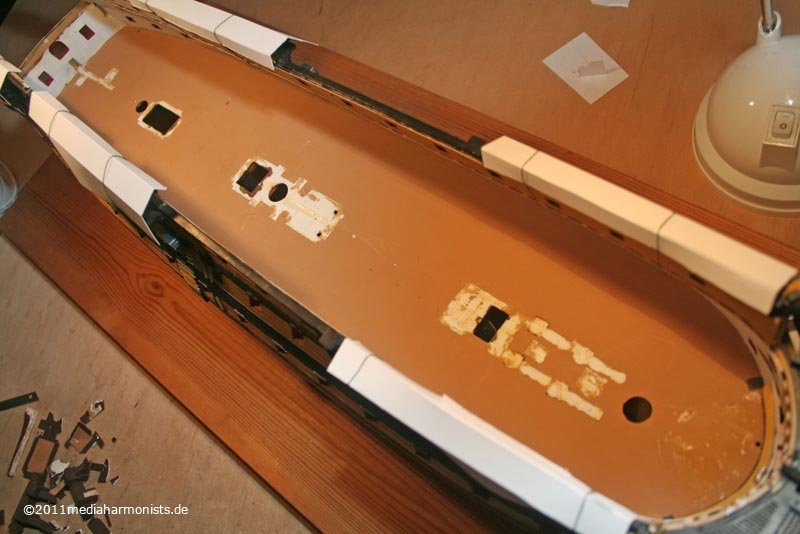
... and the rubbish big. Real after battle feeling ;-)
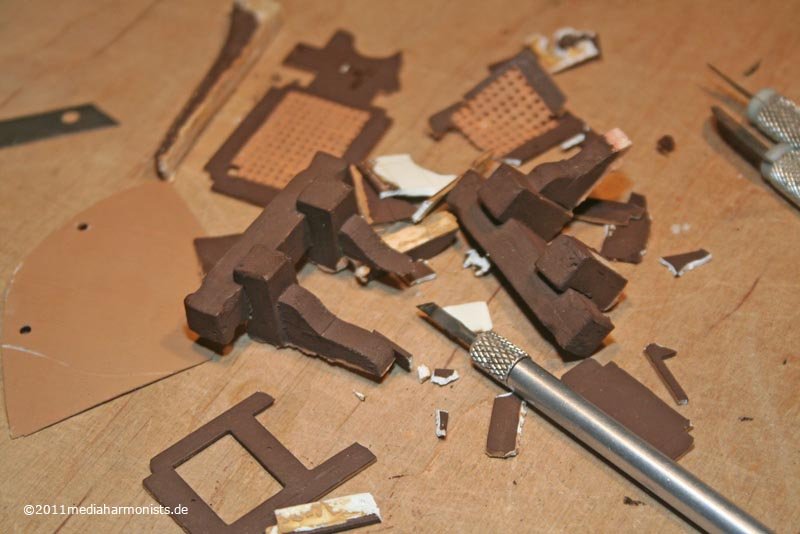
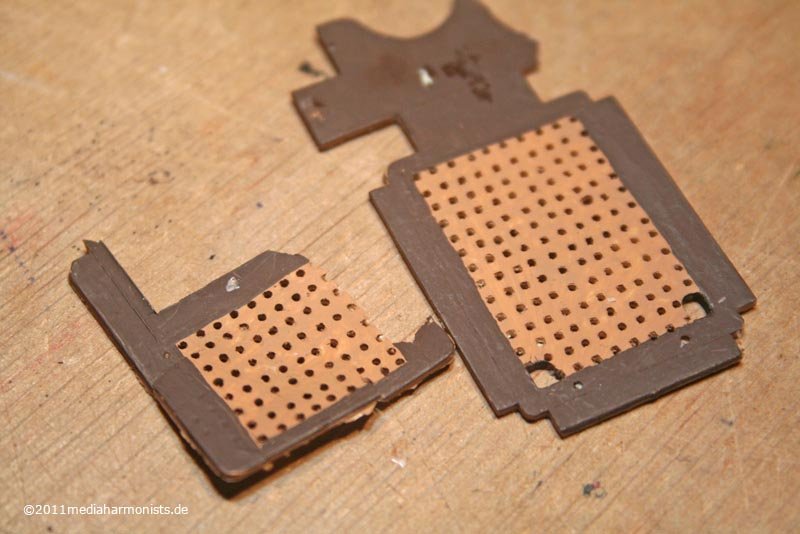
Here the gratings that were taken out: In those days I simulated them by taking a perforated sheet with 1 mm holes as drill template and forced the tip a small recangular file inside ...
At least, it did the job in those days :-)
... ok, I hope, that was not too tough for you???
;-)
All the best to the brave out there, Daniel
-
Just an observation from another angle. That's exa how thread is started when sewing leather so that it can't pull through and "makes a small splice". I fear I may get to involved with the ropes myself as knots are another of my passions and I hate doing them wrong. Even on this scale...
And now to something completely different:
Halleluja, praise the heavens!
Why? Because also small things can make me happy :-)
Looking back: A year ago I was already working on the improved gunport lids but had a grandious failure on the gunport tackles:
Looks like a ball of hair straight out of the shower plughole :-(

These days I broused through Gil Middletons wonderful Jotika-Victory and dicovered the splicing that he presents there:
We proudly present: The Powersplice
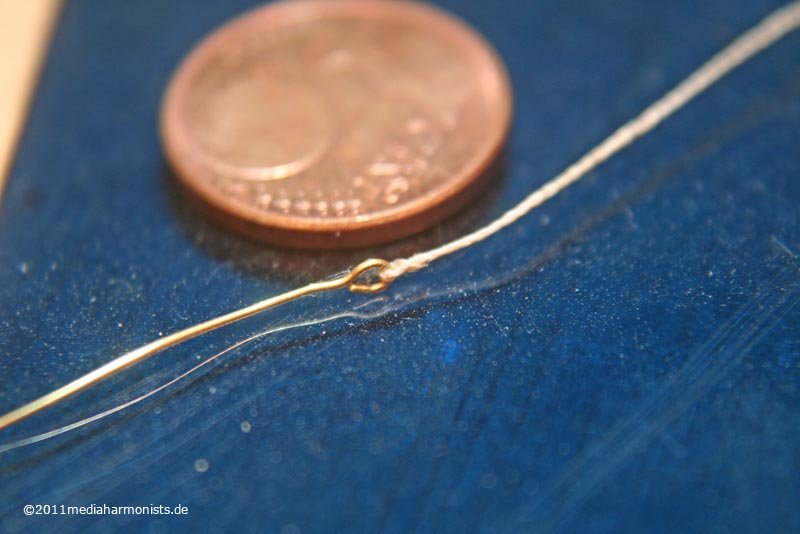
It is simple but effective:
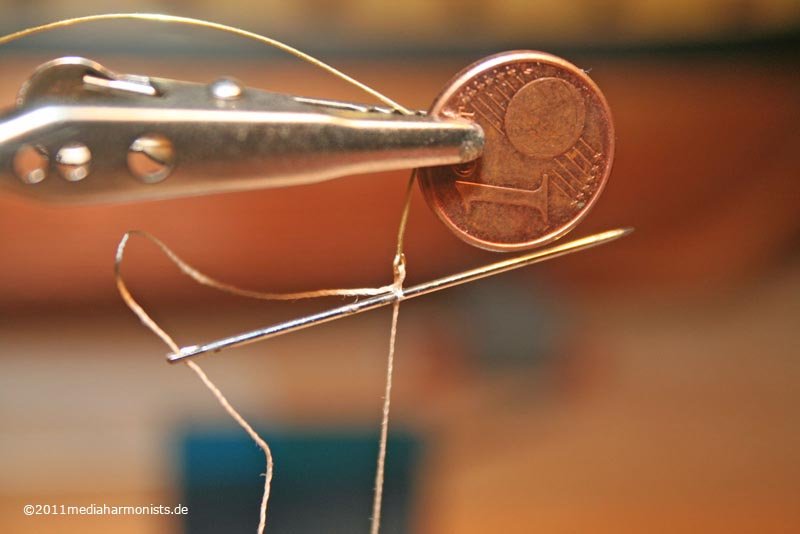
Thread - here 0,3 mm - through the ring, neadle through the thread, it is more easy than it looks ...
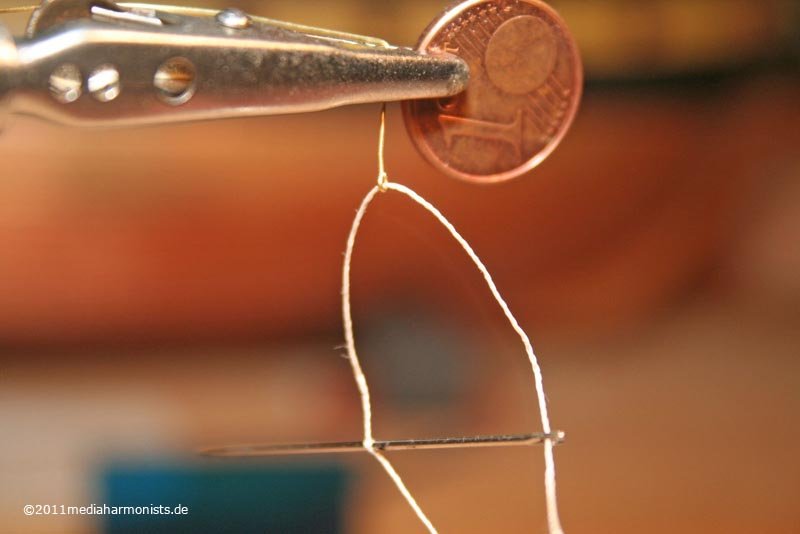
... make tight, secure with a drop of glue ...
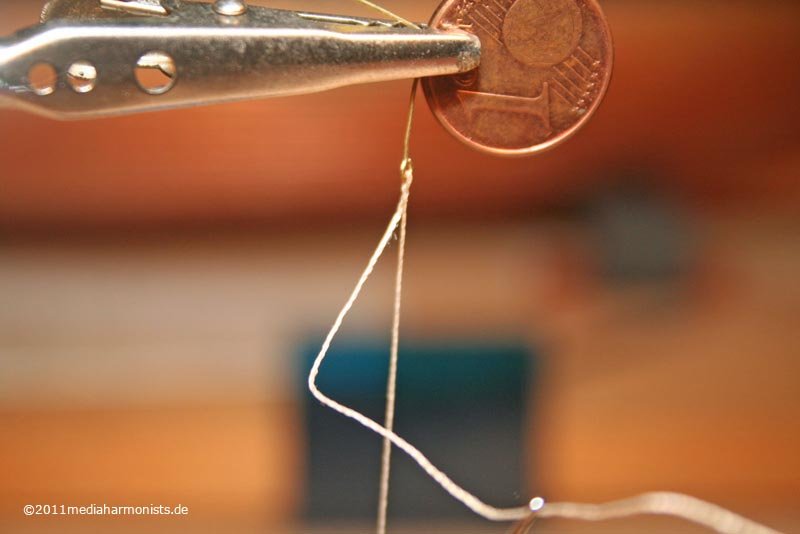
... and once more through it with feeling ...
... pull thight and ...
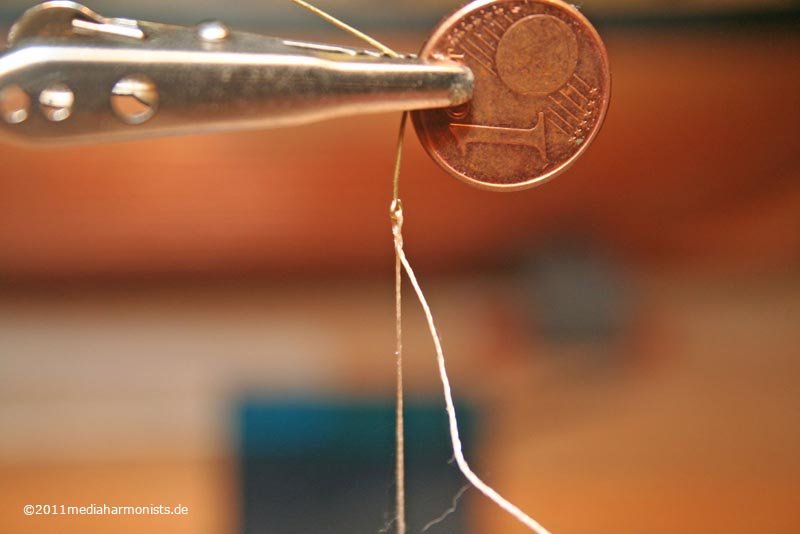
here we are!
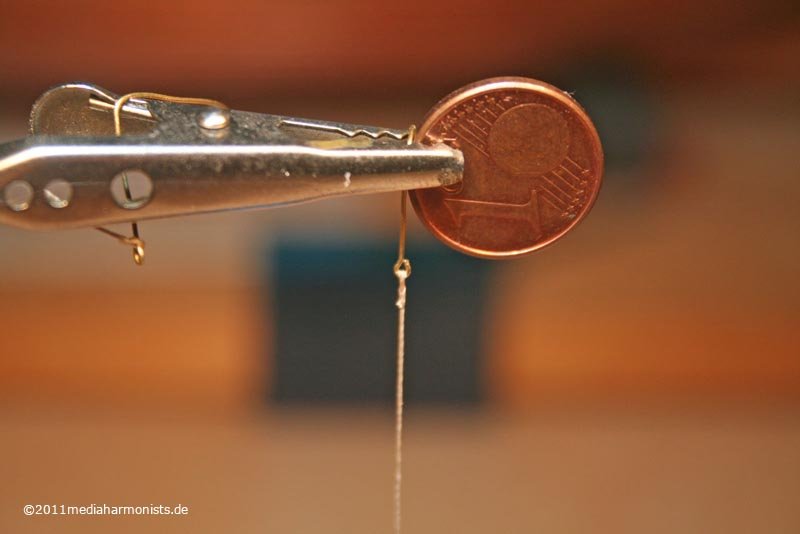
Great, isn´t it???
All the best from a happy Daniel with thanks to Gil!
-
[you mean to say I'll be the only one full rigging EVERY gun?
Sorry but not only was I also an art student but an art student in the last even years who did grouch design so detail is absolute:-)
quote name=dafi" post="3107" timestamp="1361120716]And what is that for???
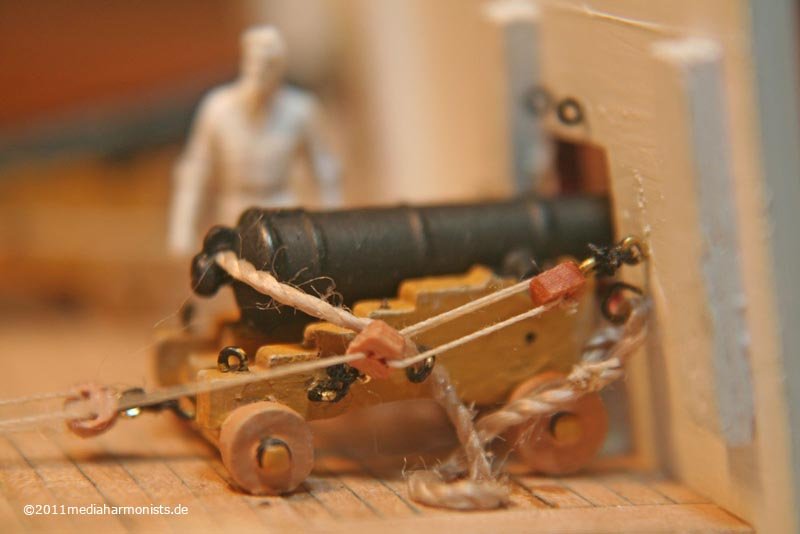
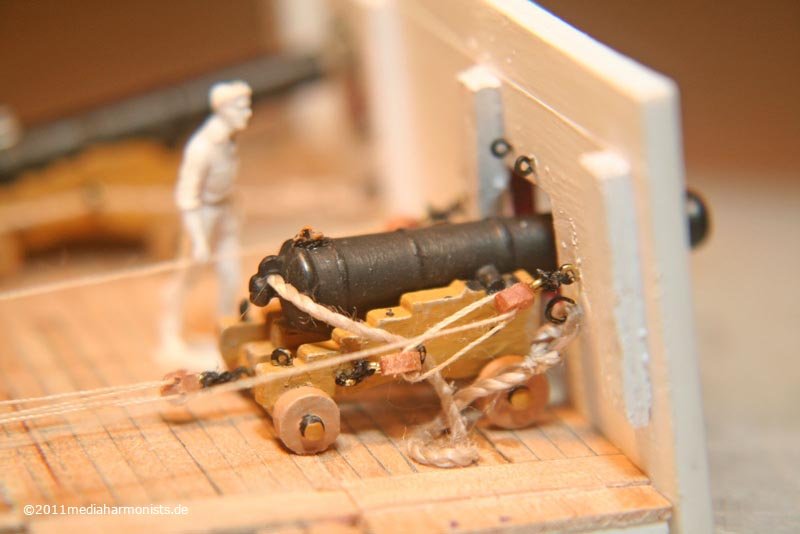
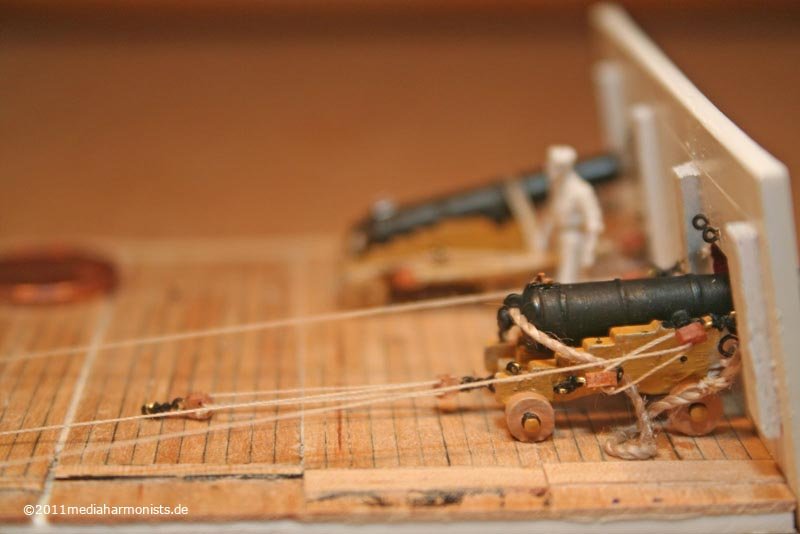
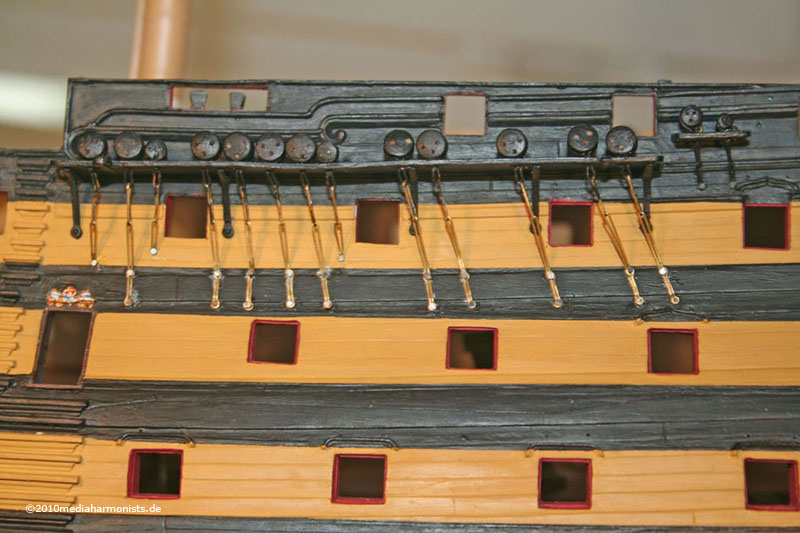
Until now she is a nice ship but as I mentioned already in a earlier post, it is meant to be a martial piece of war technology ...
... and I simply realized that I will not be able to push much further away the wonderful and lovely task of building the hundred cannons ;-)
First came bolts and some color shading: highlights and shadow - as usual. Then the apron for the secured one ...
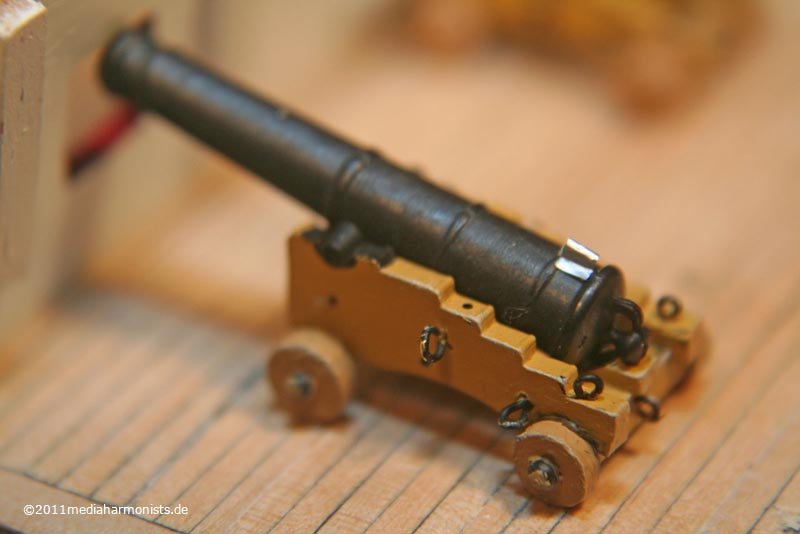
... the flint look for the one in use and the breeching ropes.
Even though it looks short, it is long enough that the muzzel can be retrieved inside for about a meter. The rope will be replaced still by a better one :-)
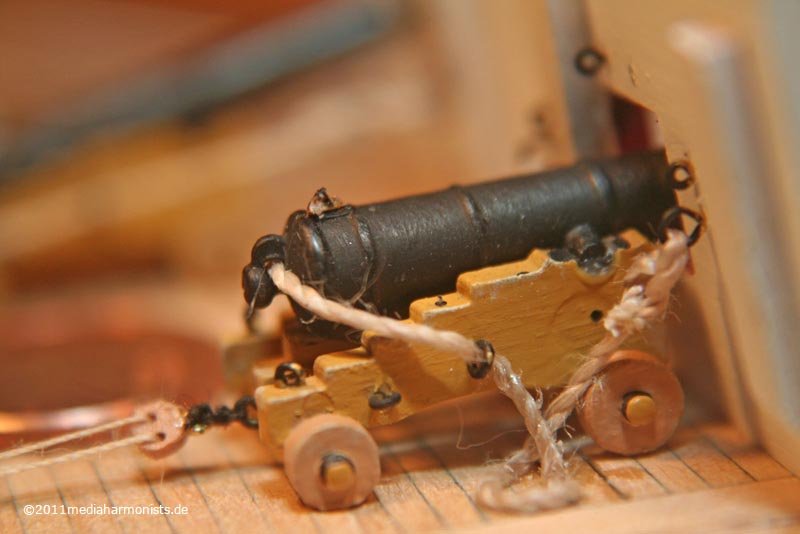
For the rigging there are so many different versions found in the literature and in Portsmouth, so I decided to try that one for the secured one:
Now come the freshely build blocks ...
... but looks strange ... *think* ... *read* ... ok ...
... block and lanyard were the wrong way ...
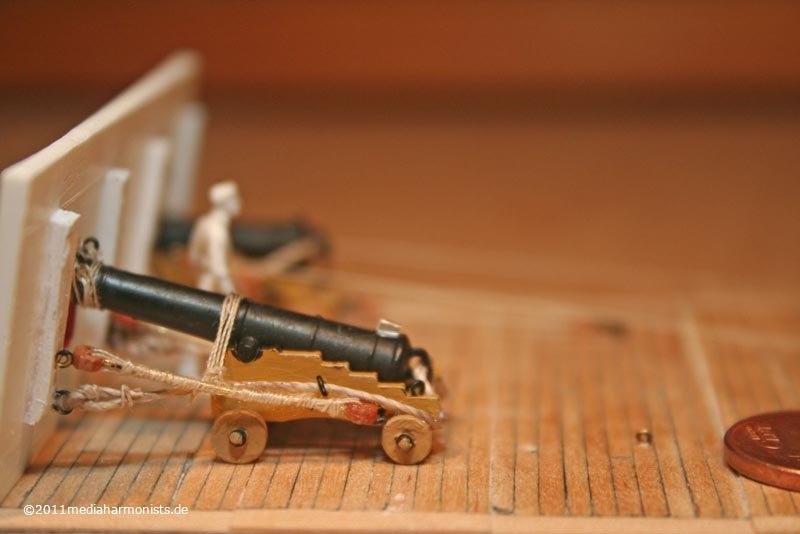
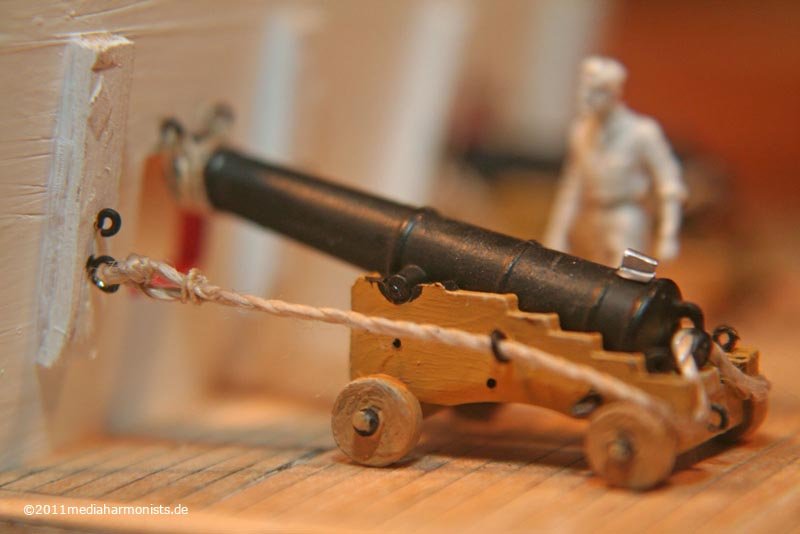
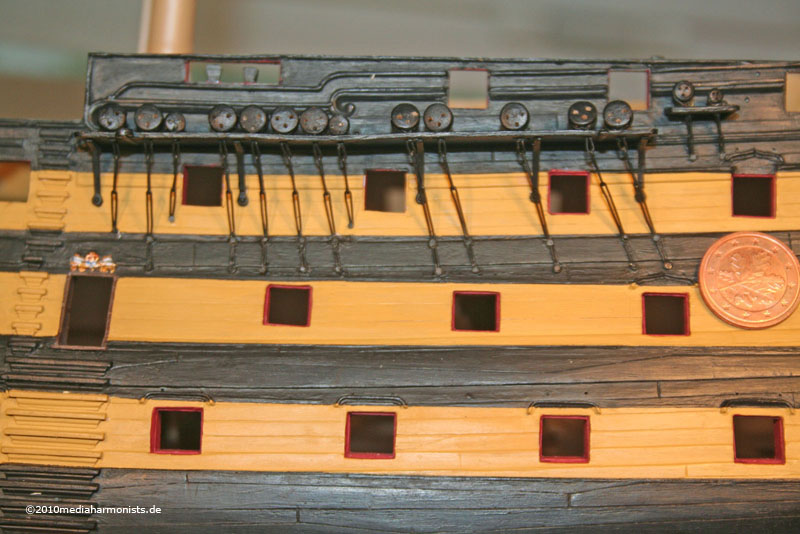
... and here on the secured one.
And as it pleases here some more views :-)
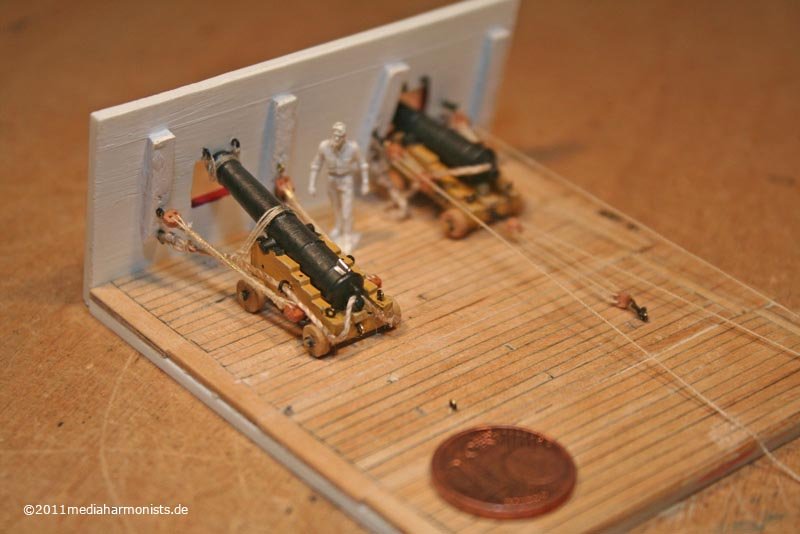
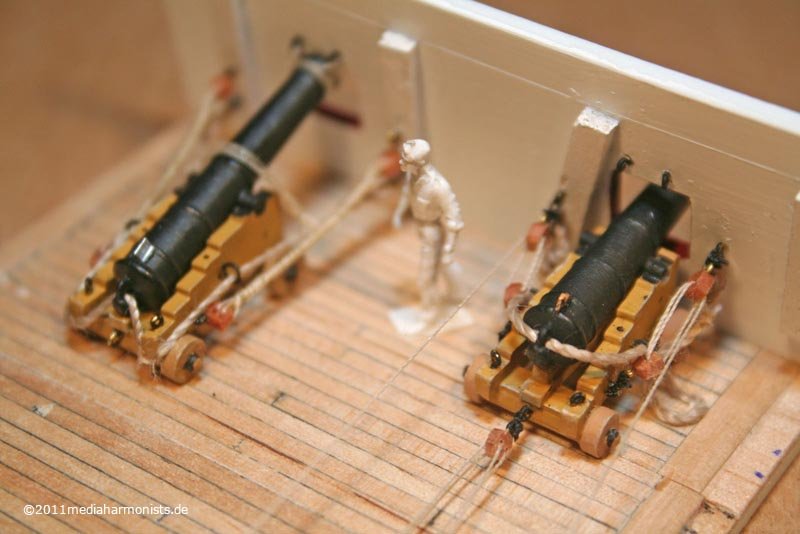
Now welcome Hell-O-Kitty ;-)
Remark 1: The side lanyards are not meant to stay that tightly pulled to the back, they are meant to be loose on the floor. But it was less disturbing for the work :-)
Remark 2: No, even I will not do all the guns this way on the lower decks! But to work out simplifications, I have to know the real thing :-)
All the best, Daniel
-
Hello Ian,
I think I will have to see this one again :-)
Meanwhile a small picture of my ever growing family ...
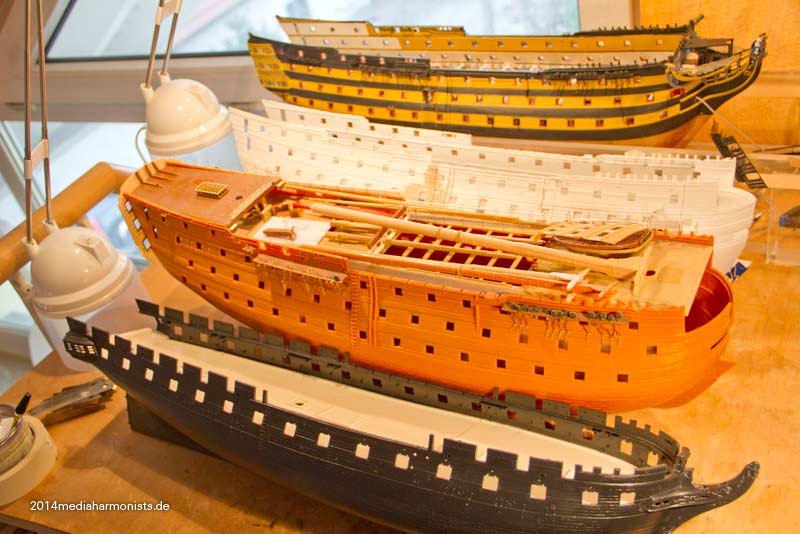
Some already knew about the freshest member in the front. As I had lately some requests regarding my Victory fittings for USS Constitution, I finally managed to do a first sample.
These are the oob ones, not too bad for plastic ...
... and these are the original parts from my Vic :-)
Cheers, Daniel
Sorry to be picky but aren't the groves for the ropes on the wooden deadeye going the wrong way as the rope would have gone up not down. Just asking for my model as I'd rather do it right and if this is just a show and tell image rather than a final look then I know not to copy or to copy. No offence meant.
Izzy
-
Also, if I'm understanding what your issue with the holes is they would have originally been grooved as well as holes. This can be recreated by usin a "brick saw" which is simply a twisted piece of wire. The twists in the wire are sufficient to create grooves but do so slowly and leave a very smooth finish. In the same way rope would. Obviously true brick saws used steel wire but fuse wire works great on this scale and can be used to enlarge holes that sould be irregular or even cut out hard to reach parts as the frame that's hold the "blade" is purpose made from strong rod for each use.
-
Hi,
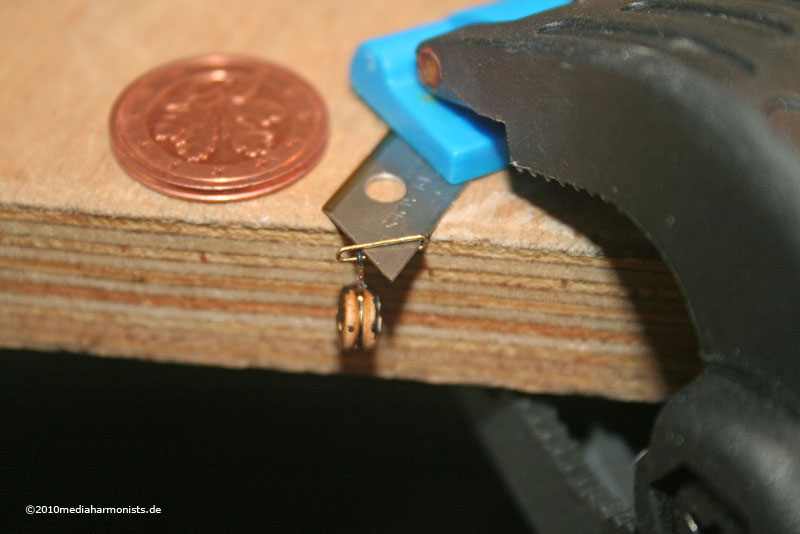
Have you ever tried pre applied solder pieces when doing this sort of thing? On this scale it's fiddly. And probably best to leave the solder on the work surface. But if you hammer the solder flat and pre cut just enough for each joint. Then it's possible to create a production line and solder them one after the other. With the solder under the metal, the metal pre flexed or fluxed solder. I used both. Then just hold each piece in place with a wooden coffee stirrer shaped just right the touch with the solder iron. Only needs a second or two as its so small but there is no unsightly lump of solder as only just enough is used and you can go along them doing perhaps twenty a minute. Without over soldering one of them.
Izzy
And now something completelydifferent: the larch ...
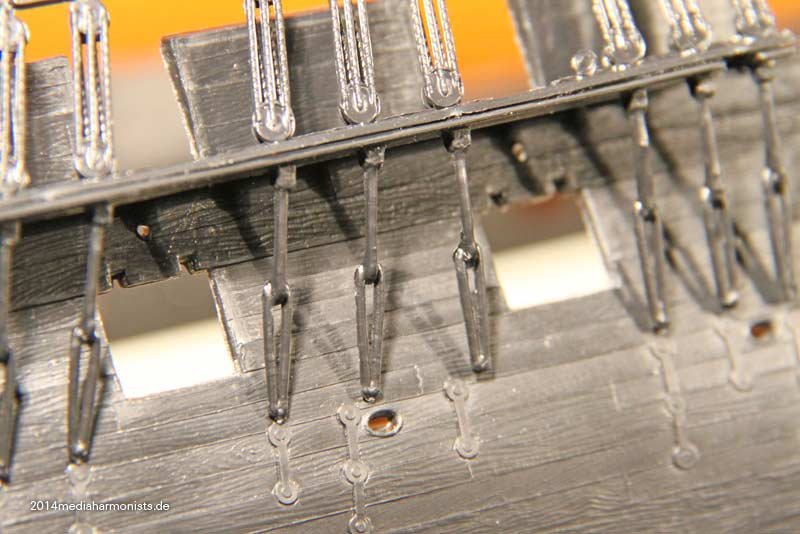
It took me ages to develop the way of doing the chain plates as I did not find any documentation on the internet by the time that I was trying to find out how to do it. Tried lot of work arounds as I did not know how to mass produce in a satisfactory way and tried to avoid soldering which I never really did before. On the other hand I did not want any photo eched parts because they always look "flat" to me.
But in the end I realised, the only way that worked for me was to produce it the same way the originals work - just a lil´bit smaller :-)
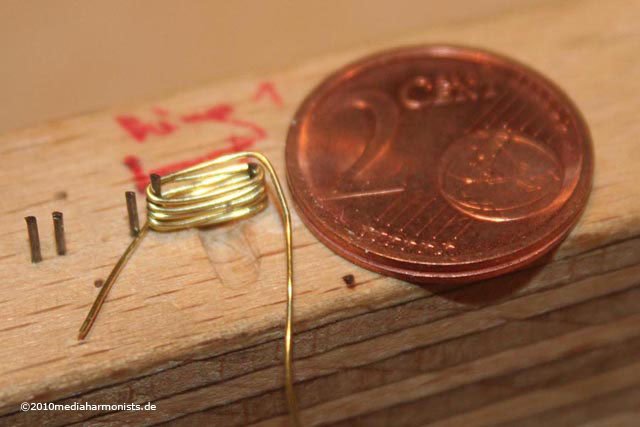
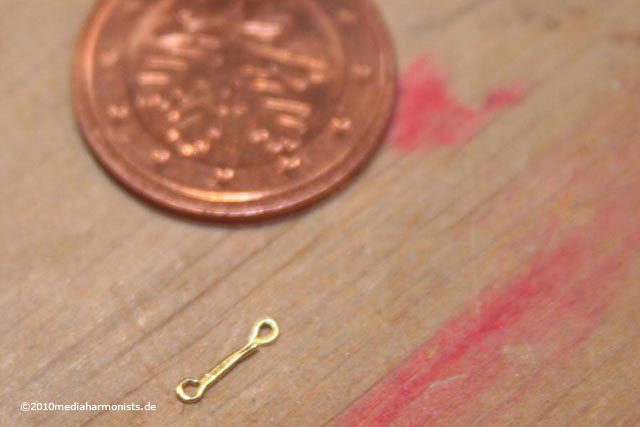
First some 0,5 mm brass wire around the deadeyes ...
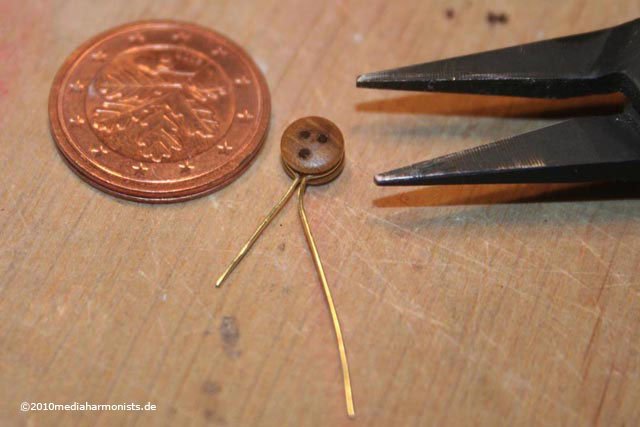
... putting it in a template with tree steel pins ...
... cut into lenght and the top part is ready for soldering.
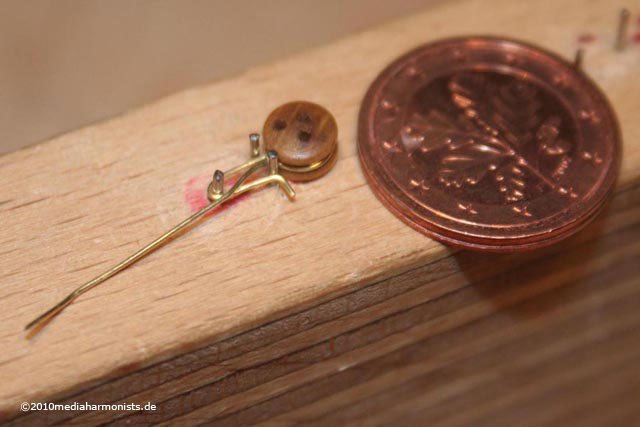
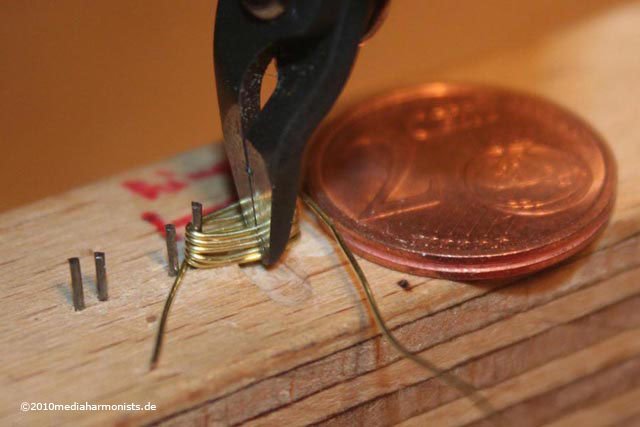
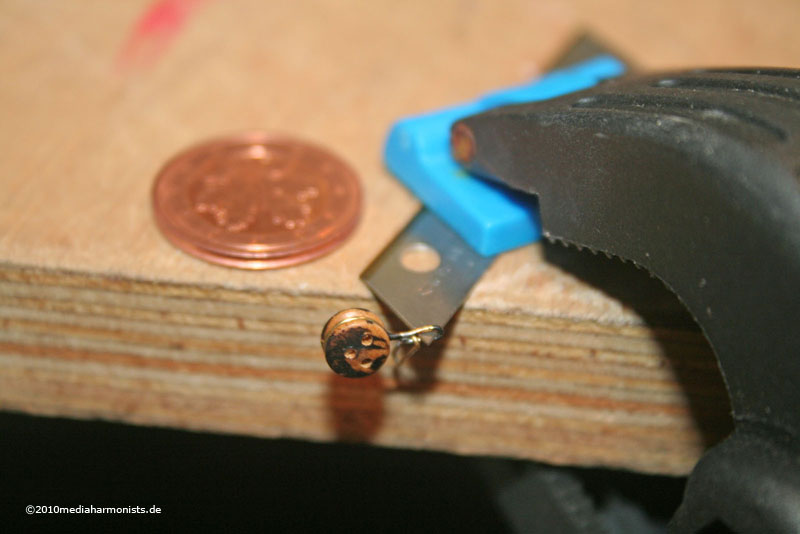
The ring underneath is done out of a couple of rounds around two steel pins ...
... cut in one go - the gap underneath helps to access the lower rounds ...
... first a little bit soggy ...
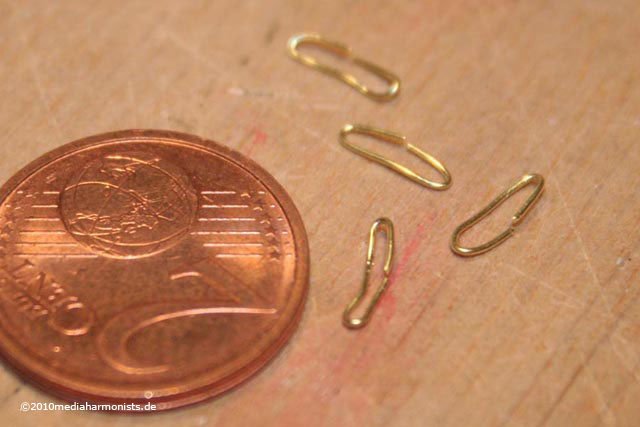
... and straightend up - The real straightening up will be done just after soldering.
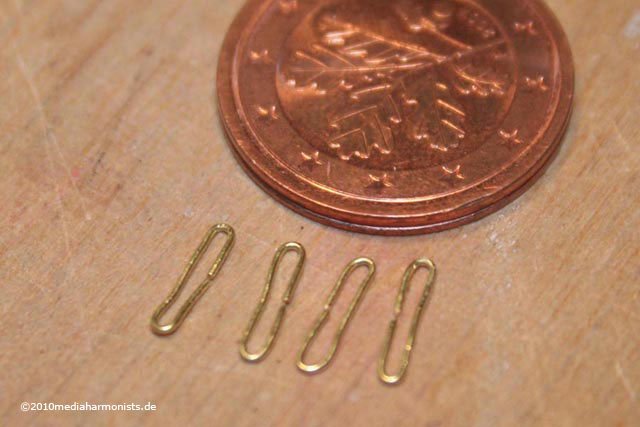
Here comes the lower part for the fore- and main-channels ...
... bent around two steel pins and squeezed in the middle.
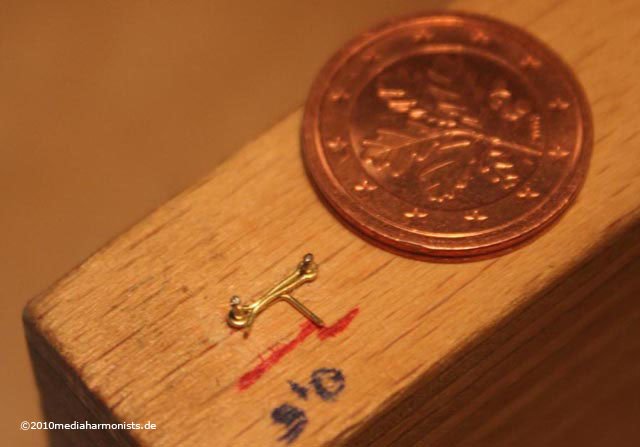
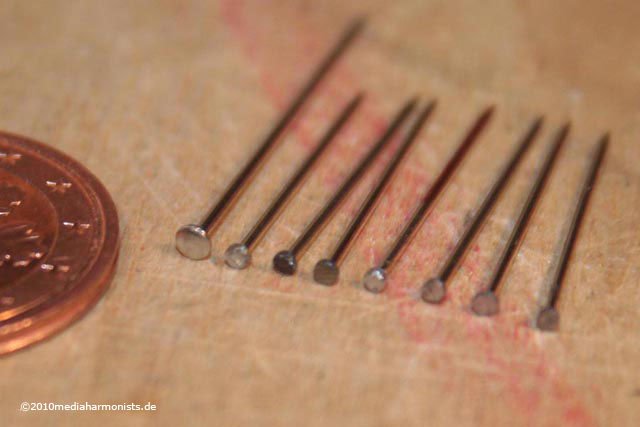
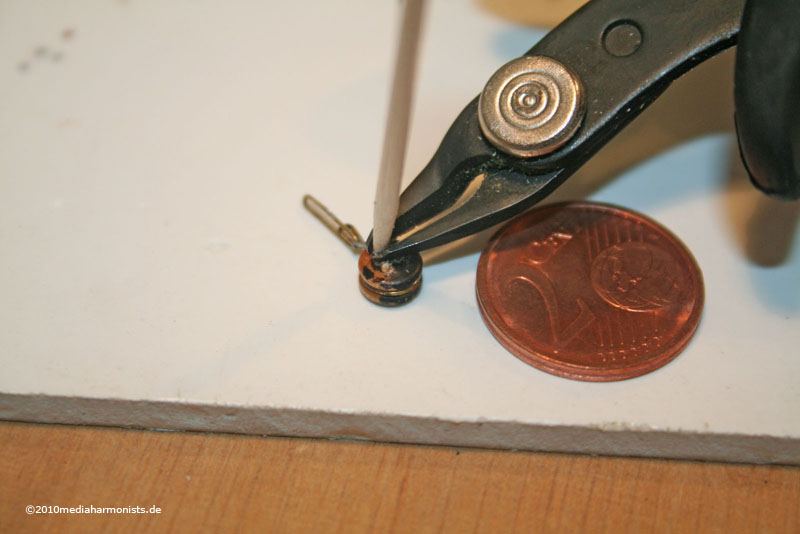
For the bolts I use sewing pins. I grind the diameter on a file by putting the pins into my Dremel and afterwards still reduced the hight. The needed lengh will be around 4 mm. On the left the original needle.
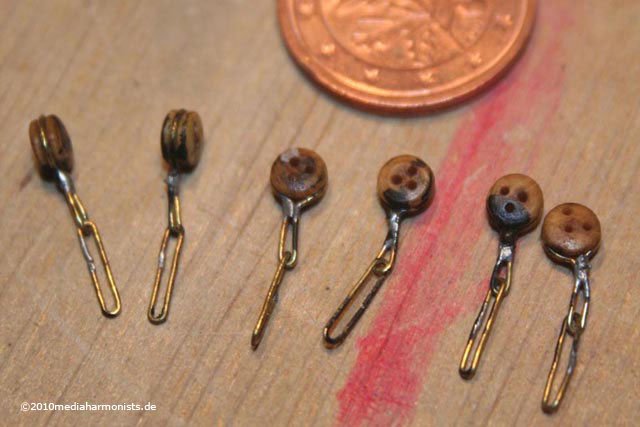
And now the soldering - what a hell to learn :-)
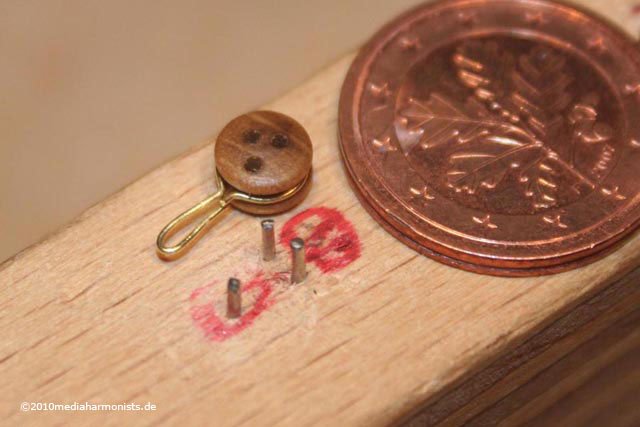
First the lower ring, then sliding it into the loop of the deadeye, putting it into the third hand for soldering ...

... and ready. Looks sooooo easy ;-) The black is not burnt but just some paint :-)
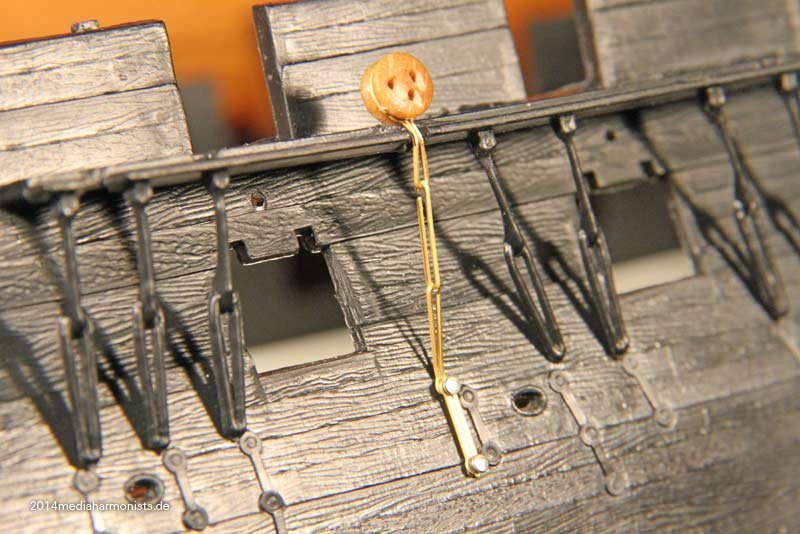
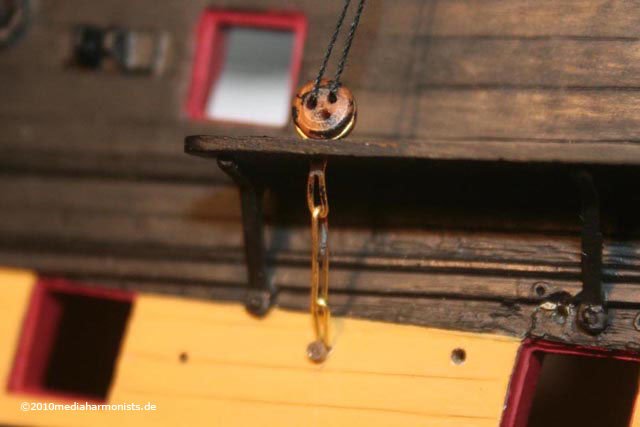
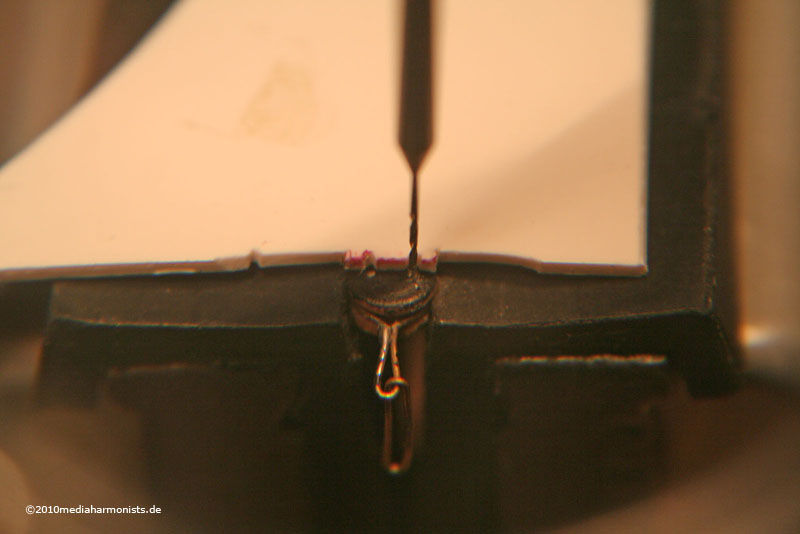
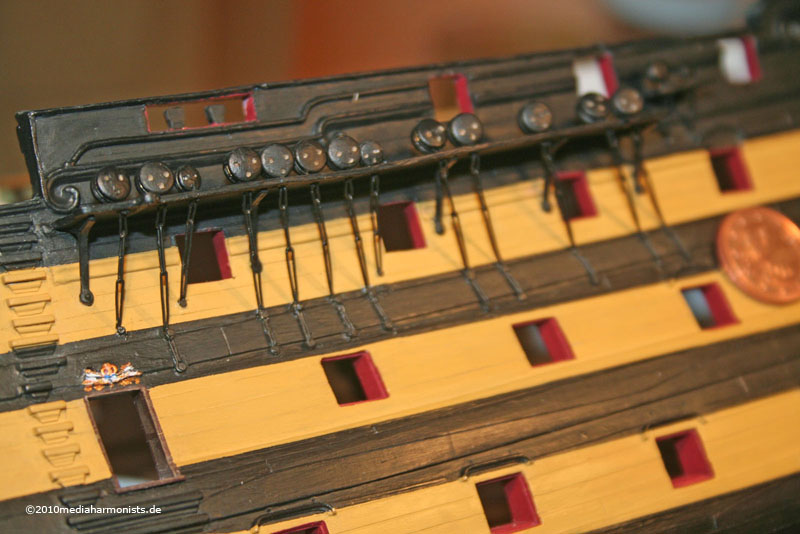
Here the ensemble is already in place, the part that is ment to go into the hole of the hull is lenghend in its place and bent ...
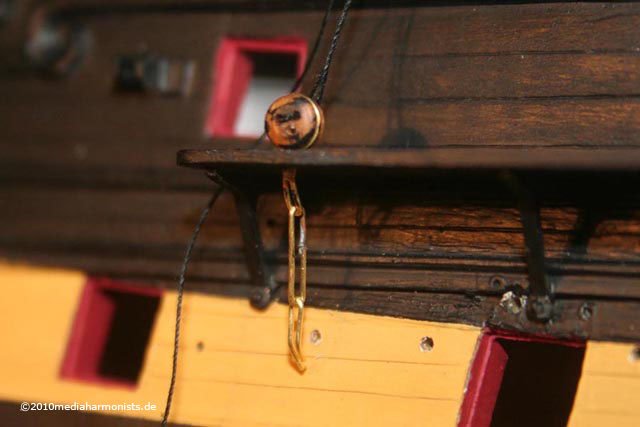
... putten into the hole and the needle forced in with it. Take a thread and check direction and angle. Secure it with a drop of superglue.
A package of tree with different lengths.
http://mediaharmonists.de/bilder/640_victory-ruesten2_9459.JPG
That is when I realized that the used Krick-deadeyes were drilled too unevenly for my taste ... As I did not want to discard my painfully soldered parts and get better deadeyes, I startet closing the holes with toothpicks and filed them even.
http://mediaharmonists.de/bilder/800_victory-rusten_9639.jpg
Just then I realized that because of the size and curved surface the planned drilling templates did not work :-(
At least I know by now why they those bastards are drilled the way that they are ...
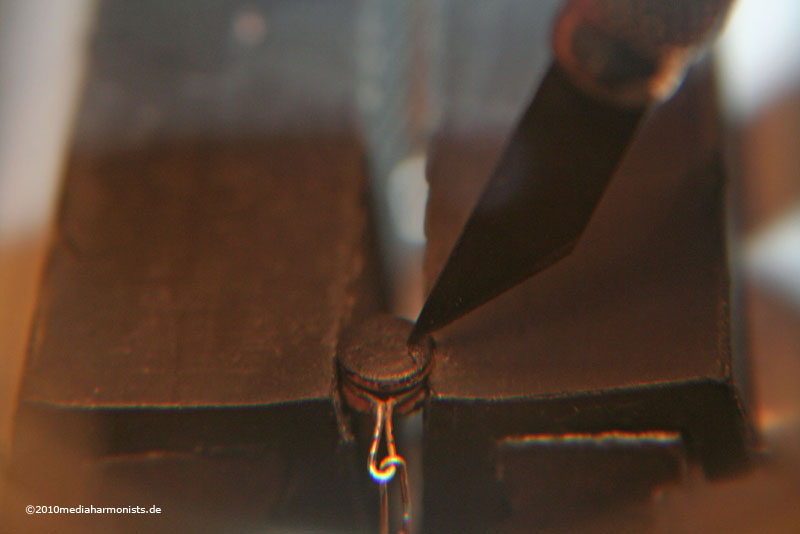
OK, good old solid handwork, putting each part into the vise and mark the central line for the two middle holes ...
http://mediaharmonists.de/bilder/800_victory-rusten_0127.jpg
... and with patience, a template and a good eye drill the preliminary holes with 0,5 mm, set the third hole with a fresh eye ...
http://mediaharmonists.de/bilder/800_victory-rusten_0128.jpg
... and finish the drilling with 0,8 mm.
http://mediaharmonists.de/bilder/800_victory-rusten_0126.jpg
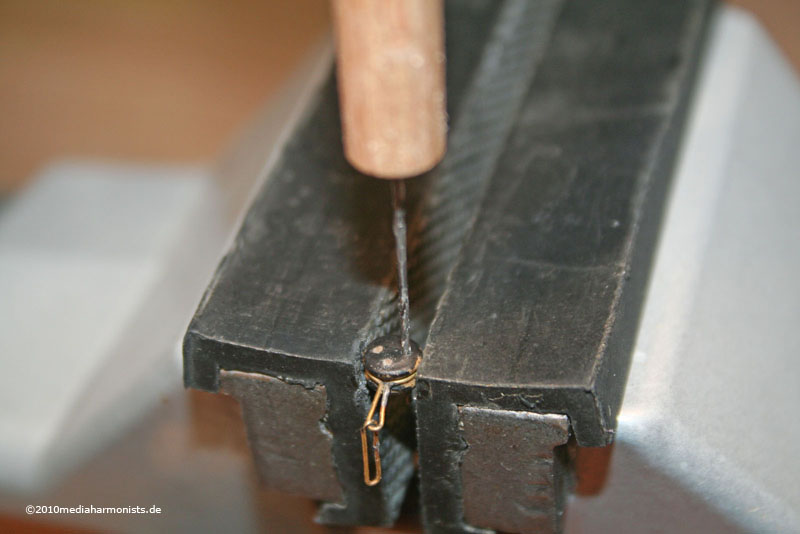
I usually drill small holes by hand with the drill fixed on a round material as it gives far more control as any machine! .
Now came the tricky part of straightening everything up, worked best upon a cutterblade, even the smallest loops :-)
http://mediaharmonists.de/bilder/800_victory-rusten_9640.jpg
http://mediaharmonists.de/bilder/800_victory-rusten_9641.jpg
And finally I had a complete set of deadeyes and preventer plates for the main-mast channel on my adhesive tape. :-)
http://mediaharmonists.de/bilder/800_victory-rusten_0227.jpg
Hourray
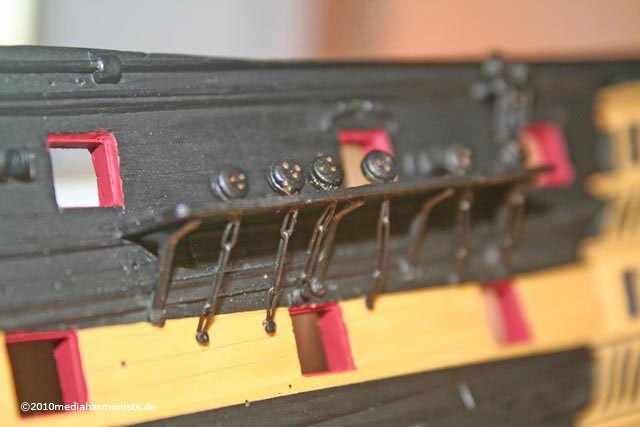
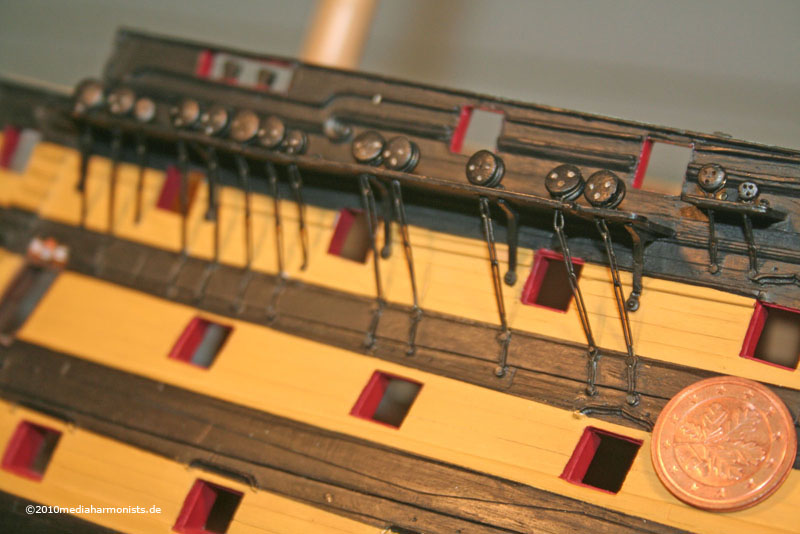
... and finally came the montage :-)
First à la nature ...
http://mediaharmonists.de/bilder/800_victory-rusten_0249.jpg
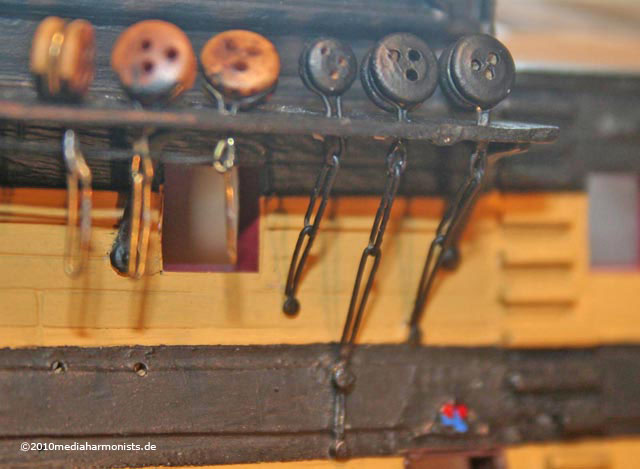
... then with a little bit of colour ...
http://mediaharmonists.de/bilder/800_victory-rusten_0257.jpg
http://mediaharmonists.de/bilder/800_victory-rusten_0258.jpg
http://mediaharmonists.de/bilder/800_victory-rusten_0259.jpg
... and it looks like it was all simple! ;-)
I also added the missing fitht support bracket to the channel and also the missing small deadeye n# 8 which unfortunately is too tight and bends the channel. It will be replaced upon a later occasion. I see by now, that the channels would have had needed the thickness to be increased by 0,5 mm or more. ****, but thats too late by now, even for me ;-)
Liebe Grüße, Daniel
- dafi and popeye the sailor
-
2
-
-
Hi,
I'm very new to this site but tackled tall ships some thirty years ago. Nothing like this as there was only really airfix at the time. Your ageing a great job probably far better than i will as I'm just waiting for the kit to arrive.
I'm using and areing over the etched parts. Not that there is anything wrong with them they are fab. It's just the cost. Could you share some advice/views about them. As they are something I'll be having to buy, if I do, as I go along. And was hopeful you could advise me in which order to get them?
And any other tips please.
Thanks
-
I would get a copy of Anatomy of Nelsons Ships by Longridge. Its really a close study and description of the building of an HMS VIctory model. Its notable for its great pen and ink illustrations. All the drawings of Victory you could wish for and all of them done really well.
I'm working on a Heller Victory as are some other guys here. feel free to ask questions.
Hi.
Thanks for that as it happens I've just got the book and leafed through it and as you say the drawings are brilliant. Especially the spaghetti sorry riging. So as you can all see I'm not just relying on you I am trying to get the information myself but please. Do comment.
-
One question I have is the etched parts. As they are actually more expensive than the model. Is the full set worth it or just a certain selection.
And if they are the bees knees. I'll be buying them piecemeal. Which should I get in what order.
Thanks again
And I'm hopefully aiming to build something that looks like it's just about to slip into the water all shiny and new.
I realise they never went into the water fully rigged but you know what I mean.
Not much in the way of distressing.
Just something to leave my name on with pride.
-
Hi.
I'm just waiting for the arrival of my first model in 35 years. And I know this is a big leap from way back then. So I'm also doing an airfix H.M.S. Catty Sark in between. Hopefully to retain what's left of my insanity.
The reason I'm starting this thread is, I suppose obvious in a way. Help advice and tips. But the real reason is decades ago I was young and able to conquer the world. As we all were. Now I'm in a slow slide of disability. And I suppose you could call this my Swan Song. Go out with a bang eh. At least I'll have a boat waiting at the end :-).
But in the meantime I'm wanting to make this one to remember. And as I have issues with mobility, vision, and dexterity oh and memory. Any advice, as to what others have done or trick to make thing simpler. Will be gratefully welcomed. As well as a few other choice comments I'm sure I'll raise. Feel free to point out any pratfalls I make as I hope to share the build on here as well. If not here then in the appropriate part of the forum. (Moderators. Please feel free to move this where ever you feel it belongs. I apologise in advance for the many errors, and faux pars I'll make)
So as Nelson said "England Expects" and with your kind help this jolly jack English man wil rise to the occasion.
So please shout up and tell me whatever you feel needs saying that will make this journey simpler. Even if it's already been said. I don't mind being treated like a idiot it gives me something to reach for. But if I can avoid mistakes it's better than correcting them.
Thanks in advance
Izack(Izzy) Madd
H.M.S. Victory, Heller, 1/100, Onward and Upwards.
in Plastic model kits
Posted
Update for my comment about blacking steel cannonball
There's an auction on eBay, 221688613139, for 1kilo of 2mm lead shot. You have to make your own arrangements for collecting but at 2mm they are very close and already the right colour. Also the bearings in general are where I picked up the trick of ciric acid. As I bought some old stock that was very old 30+ years maybe. But some had gone rusty. I threw them all into the acid simply for speed. Within two minutes they started bubbling. So much so that the jar I'd put them in poped the lid off within the hour. But I just kept swilling them around when I thought about it until they were jet black. But no chance of it chipping or scratching. As I researched later to discover what had happened was the surface of the metal had bee turned into a protective layer of FeO₃ which it seems they call pickling in the metal trade. And has just about replaced Muric acid. As it does a better job and can be dropped down the drain. As its found in most soft drinks.