HOLIDAY DONATION DRIVE - SUPPORT MSW - DO YOUR PART TO KEEP THIS GREAT FORUM GOING! (Only 20 donations so far - C'mon guys!)
×


Gaetan Bordeleau
-
Posts
1,307 -
Joined
-
Last visited
Content Type
Profiles
Forums
Gallery
Events
Everything posted by Gaetan Bordeleau
-
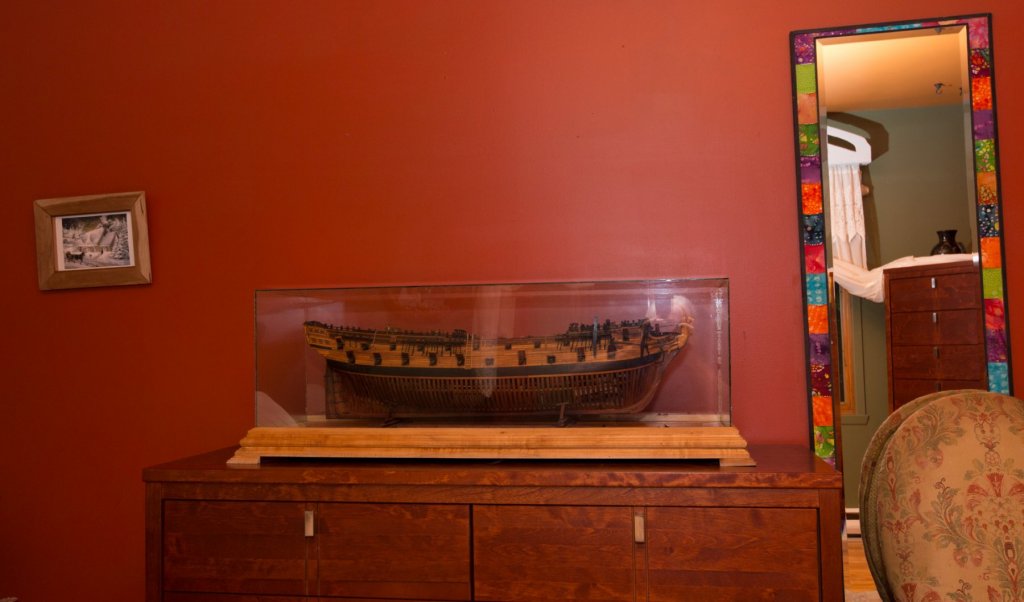
 Hi Dilbert, Similar one, also at 1/24: 130 pounds
-
Before the dental chair, it was a pain to change working height, it had to be manual mechanical ways. Ikea hand crank table would be in this same category. It is not really made to be constantly height modulate. I would see 2 different avenues. Dental chairs have the same screw motor that you could built a table with. The easiest way is to buy an electric height table. Depending of the motors in can raise between 150 and 300 pounds. Here in Quebec on Kijiji site, we can buy a dental chair used between 3 and 7 hundred dollars. The only thing I had to do was to put a table on top and put a set of wheels under. Here is how I tried to group these 5 words together this morning after reading a post on copyright: 74 guns plans, 3D, copyright, group project Many peoples have drawn frames for the 74 guns. Many peoples dreams to draw and then sell these plans. I know nothing about copyright, but if I understand well, when somebody does not want a third person to make money on his back, he uses this symbol ©. Does he have to do a specific action of registering something somewhere, this is a complete mystery for me. Many other peoples on this forum did or would like to draw these famous missing frames from the 74 guns. Modelship building is a hobby for me. To make money with it is not a goal. What happens if I draw a set of plans, keel and frames for the 74 guns, and I have no money intention. I think that the 2 main reasons to draw these frames are : To build the 74 guns ship, or just to make his hand, you need a set of plans for the frames 2D or 3D, or To sell the plans after. Up to now, we know that 1 people selling the plans for the frames. Here is what I was thinking this morning while reading a post on copyright. If I do a work and I put it in public cloud with free access, or even better in this forum, then may be (as I said copyright is a mystery for me), may be copyright would not be needed as nobody wants to make money with it. I guess this is the same idea as putting a log on this forum. Personnally, here is how I see it : when I put a photo in this log, Public access becomes the owner of this photo and everybody can use it as he wants. To me trying to find a copyright way for my log is useless. If a write a log on this forum, this is not to sell anything but rather to share my hobby. If many peoples draw these frames for different reasons and these set of plans rest somewhere unused after. What if the peoples desiring or actually drawing 2D or 3D plans would unite in a group project creating a set of plans for the 74 or another project and give access to everybody? The goal of this group would be to create a set of plans free of use.
-
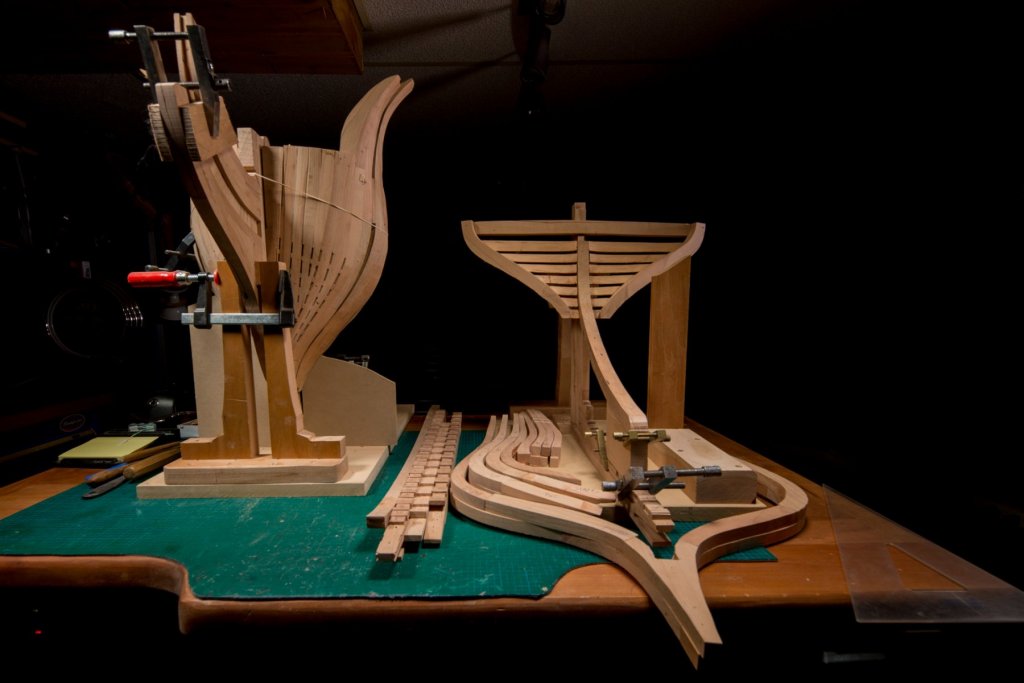
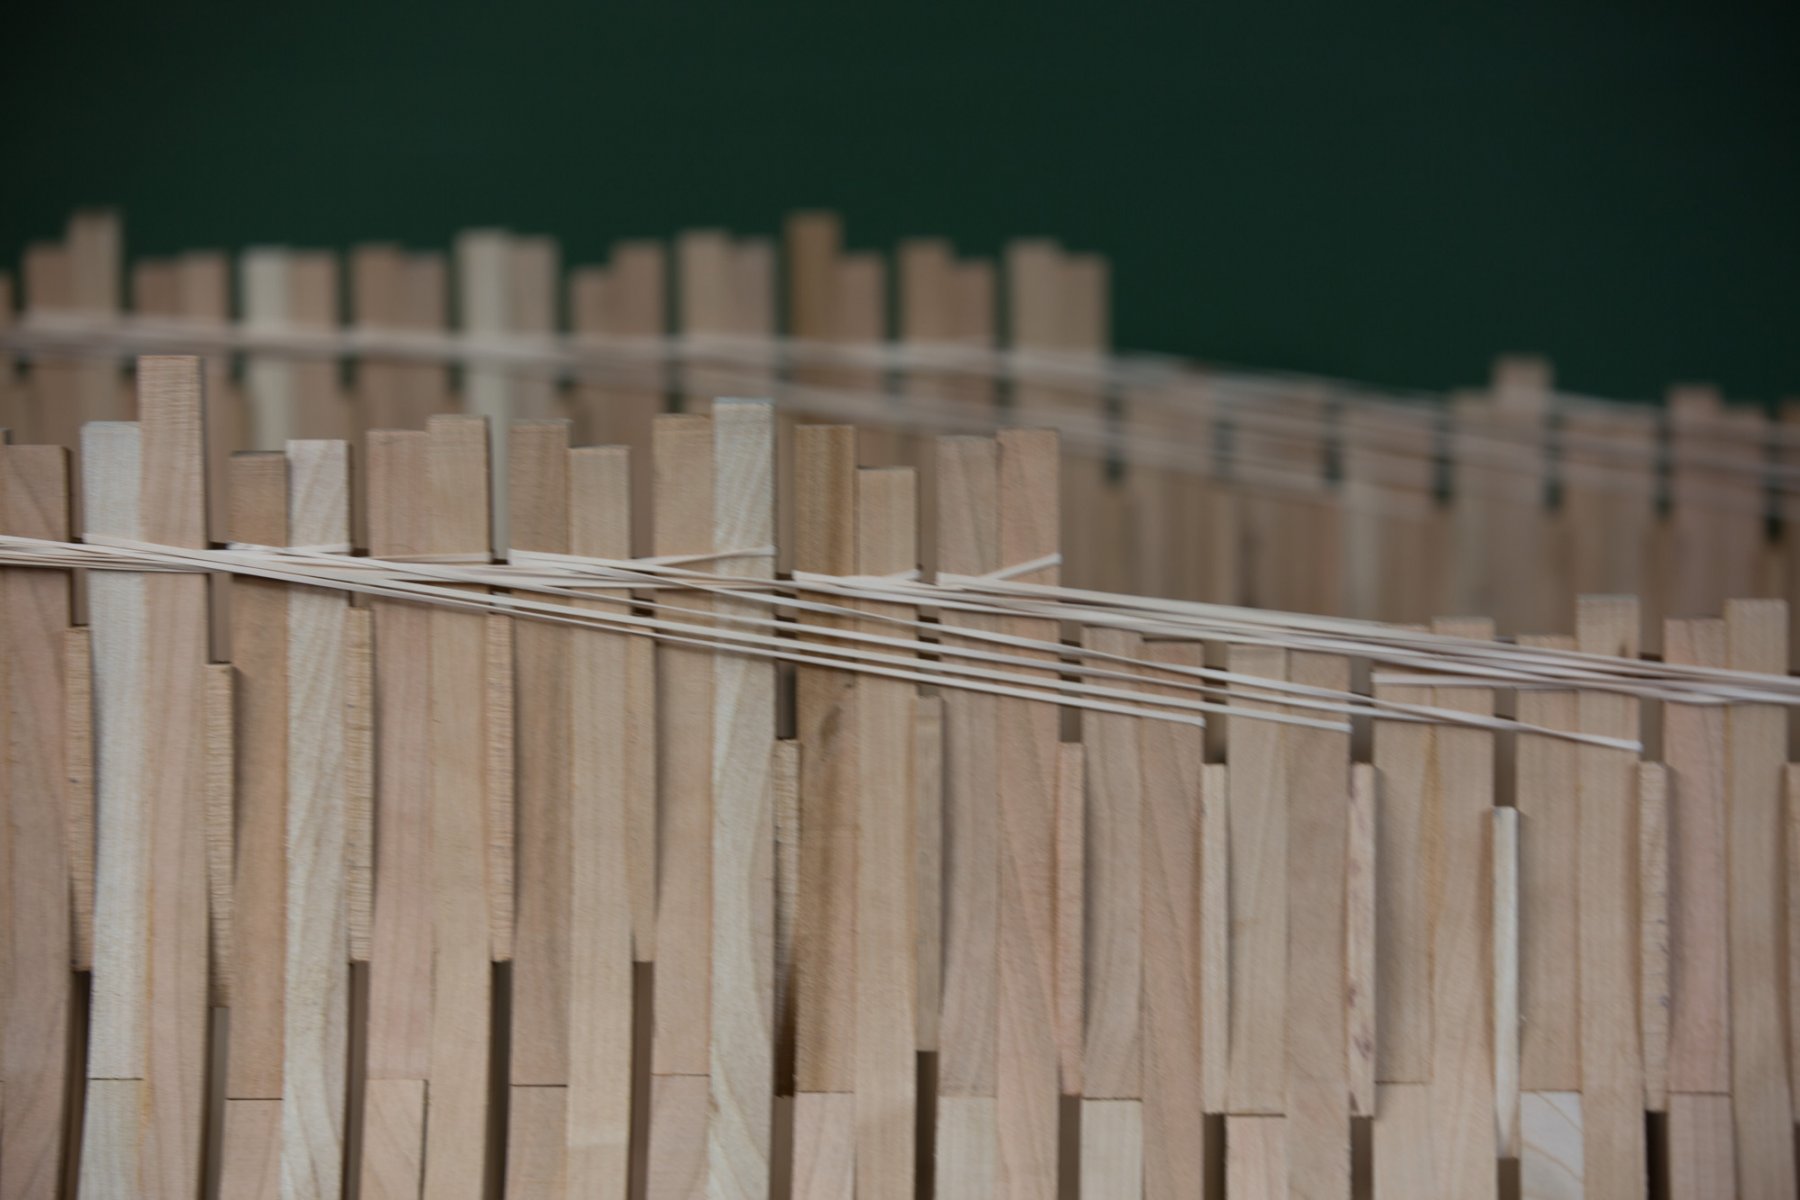
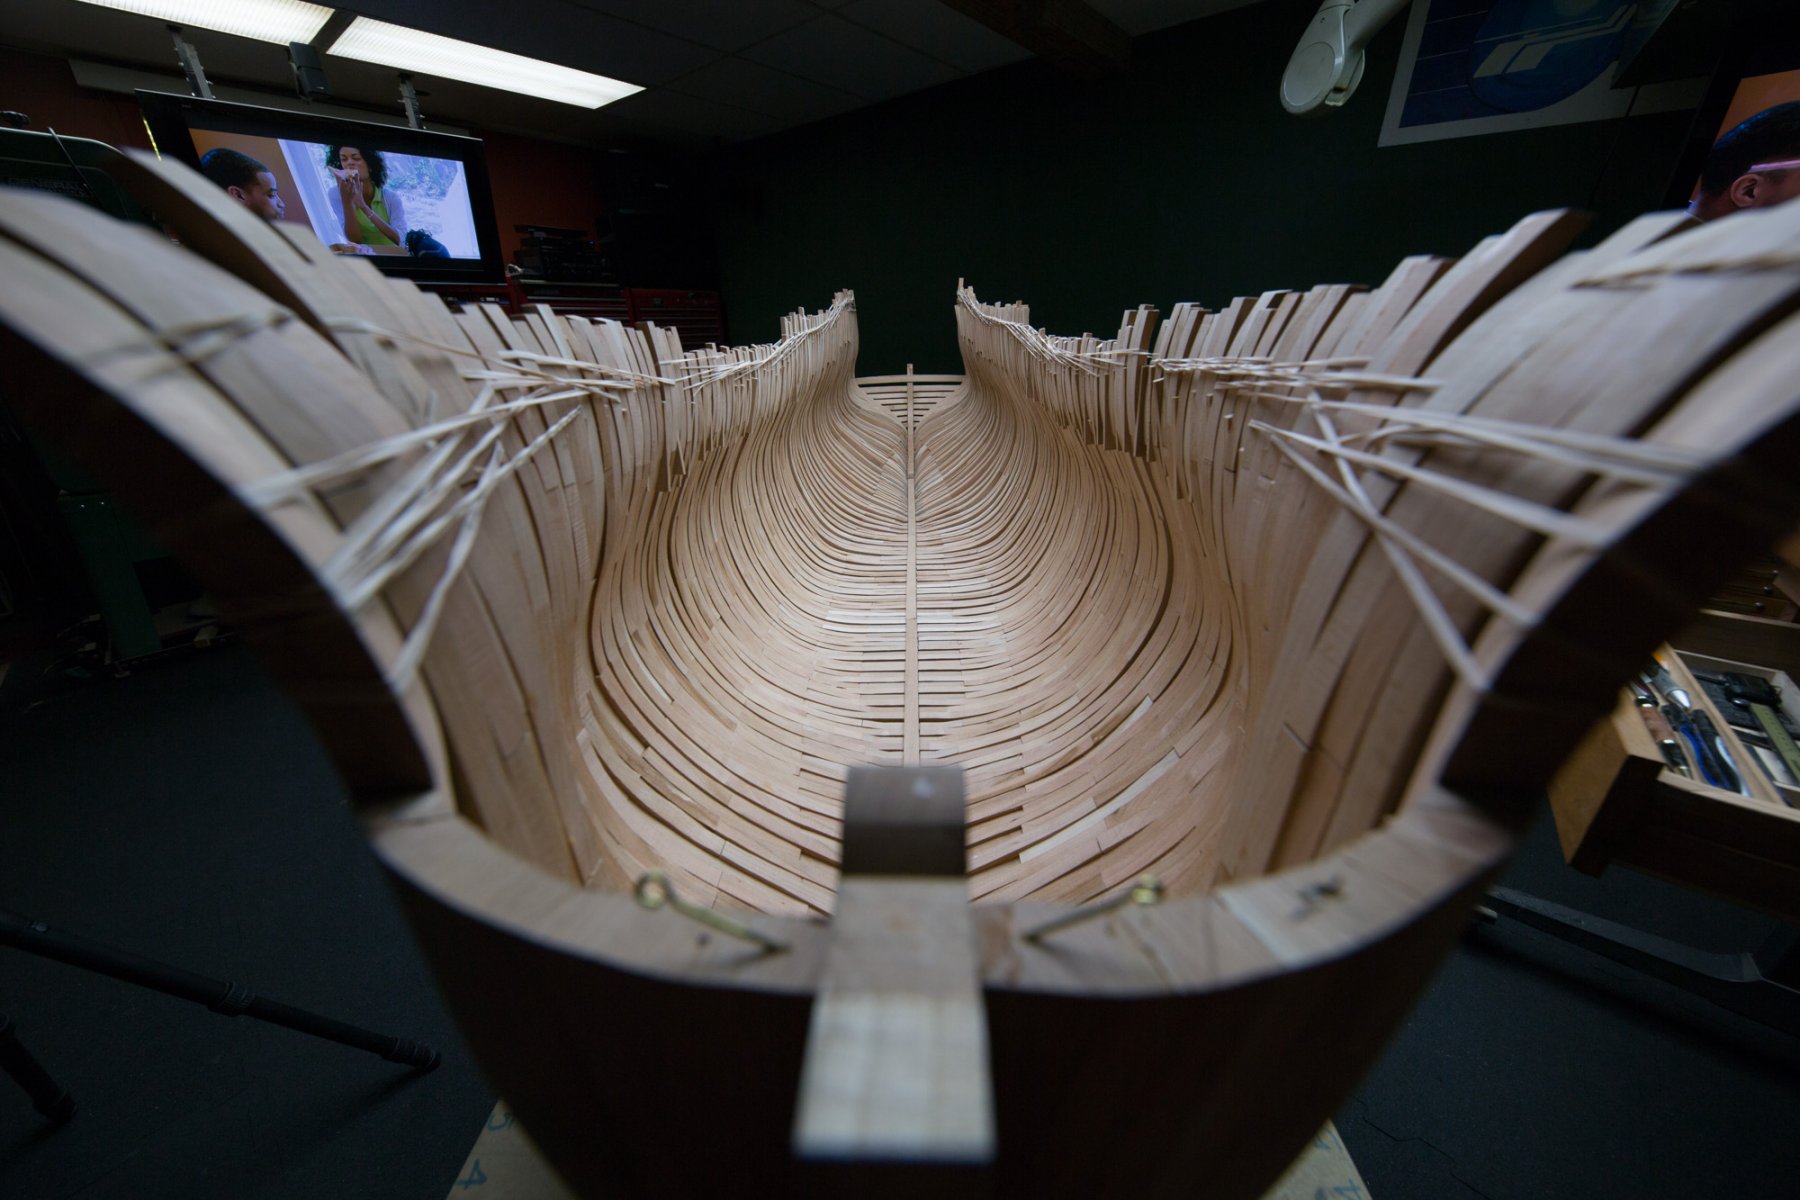
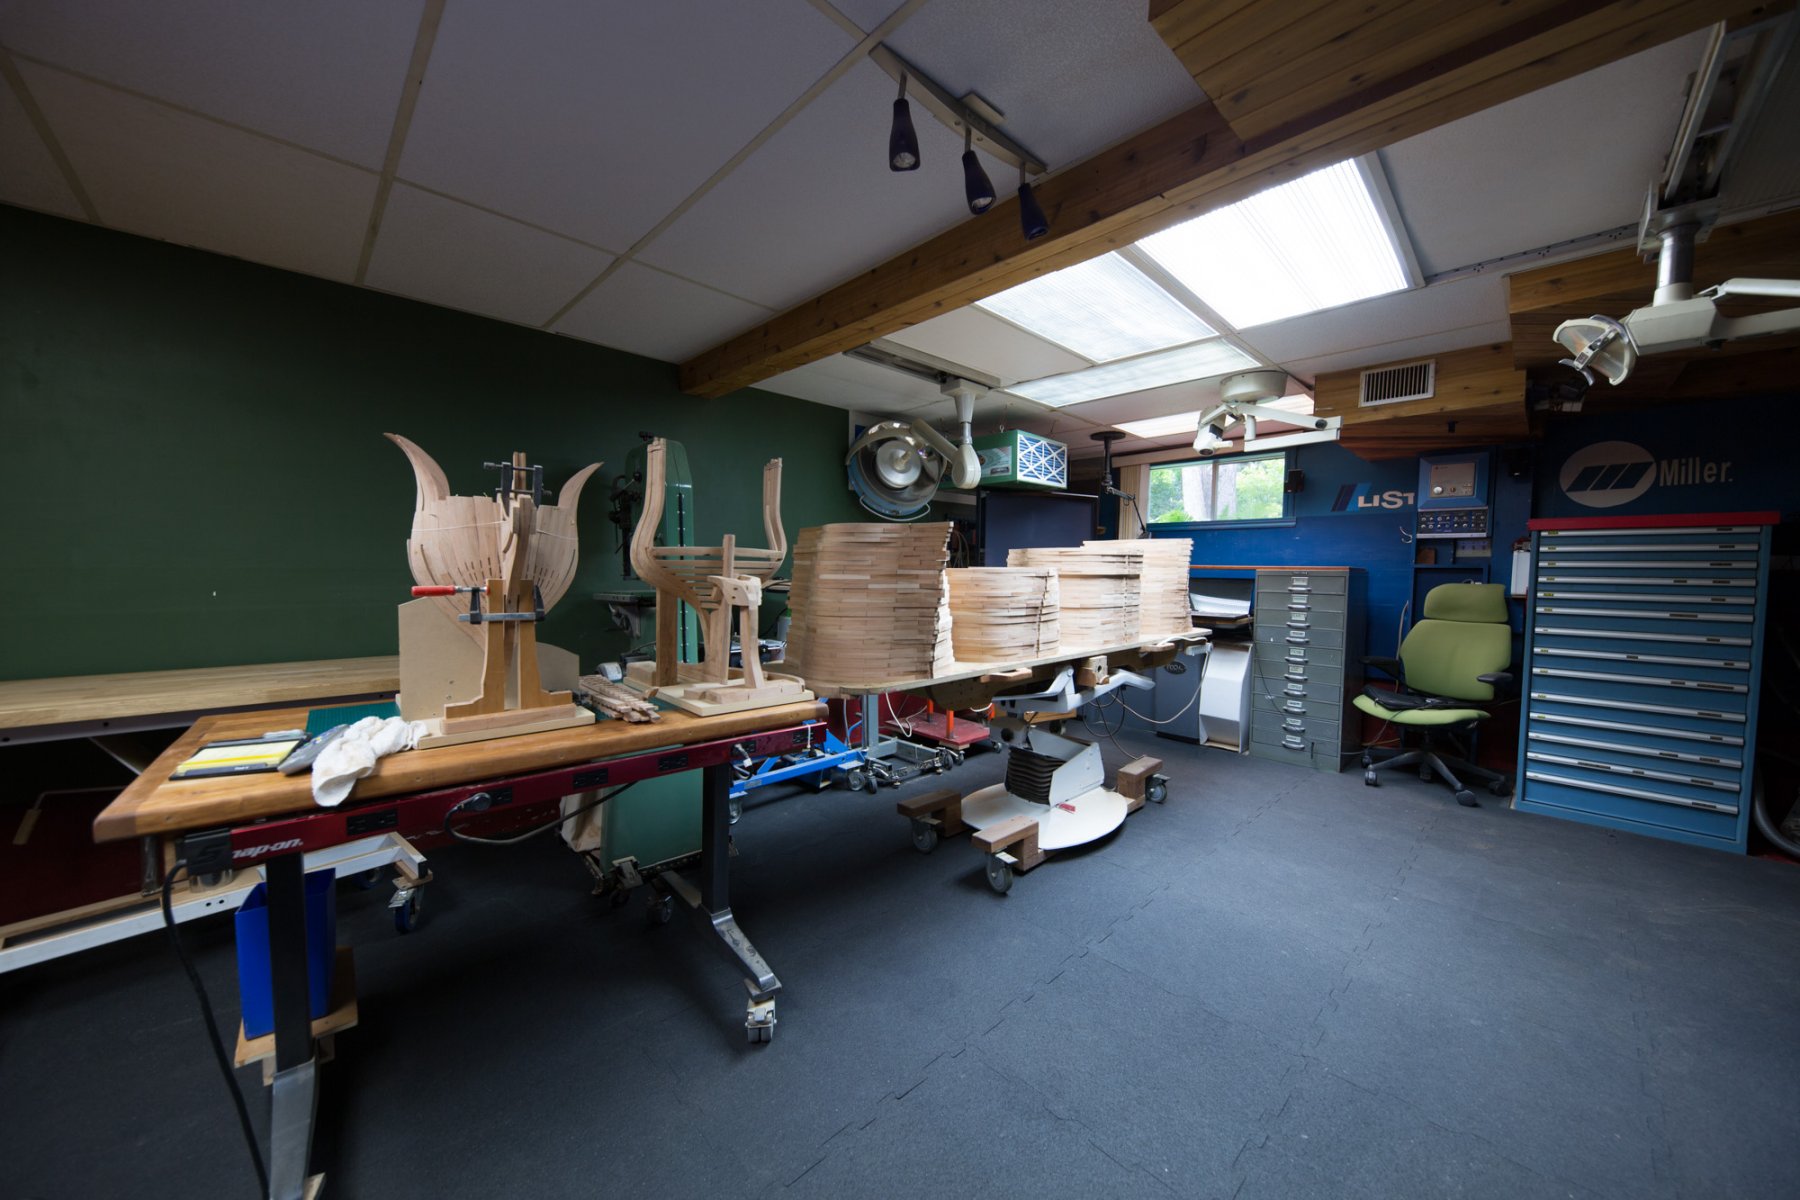
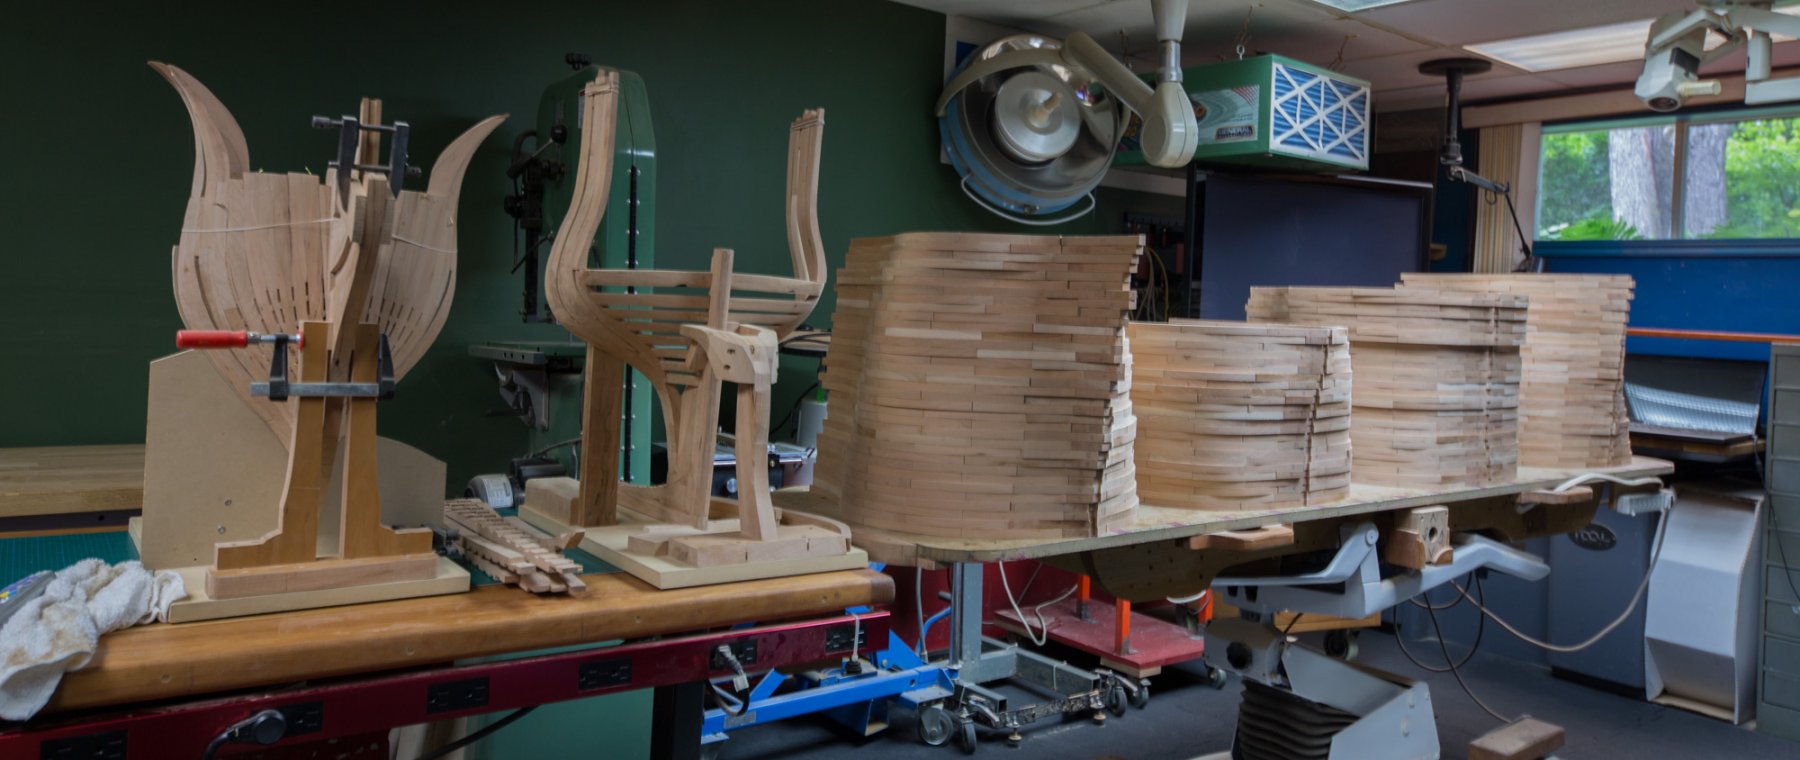
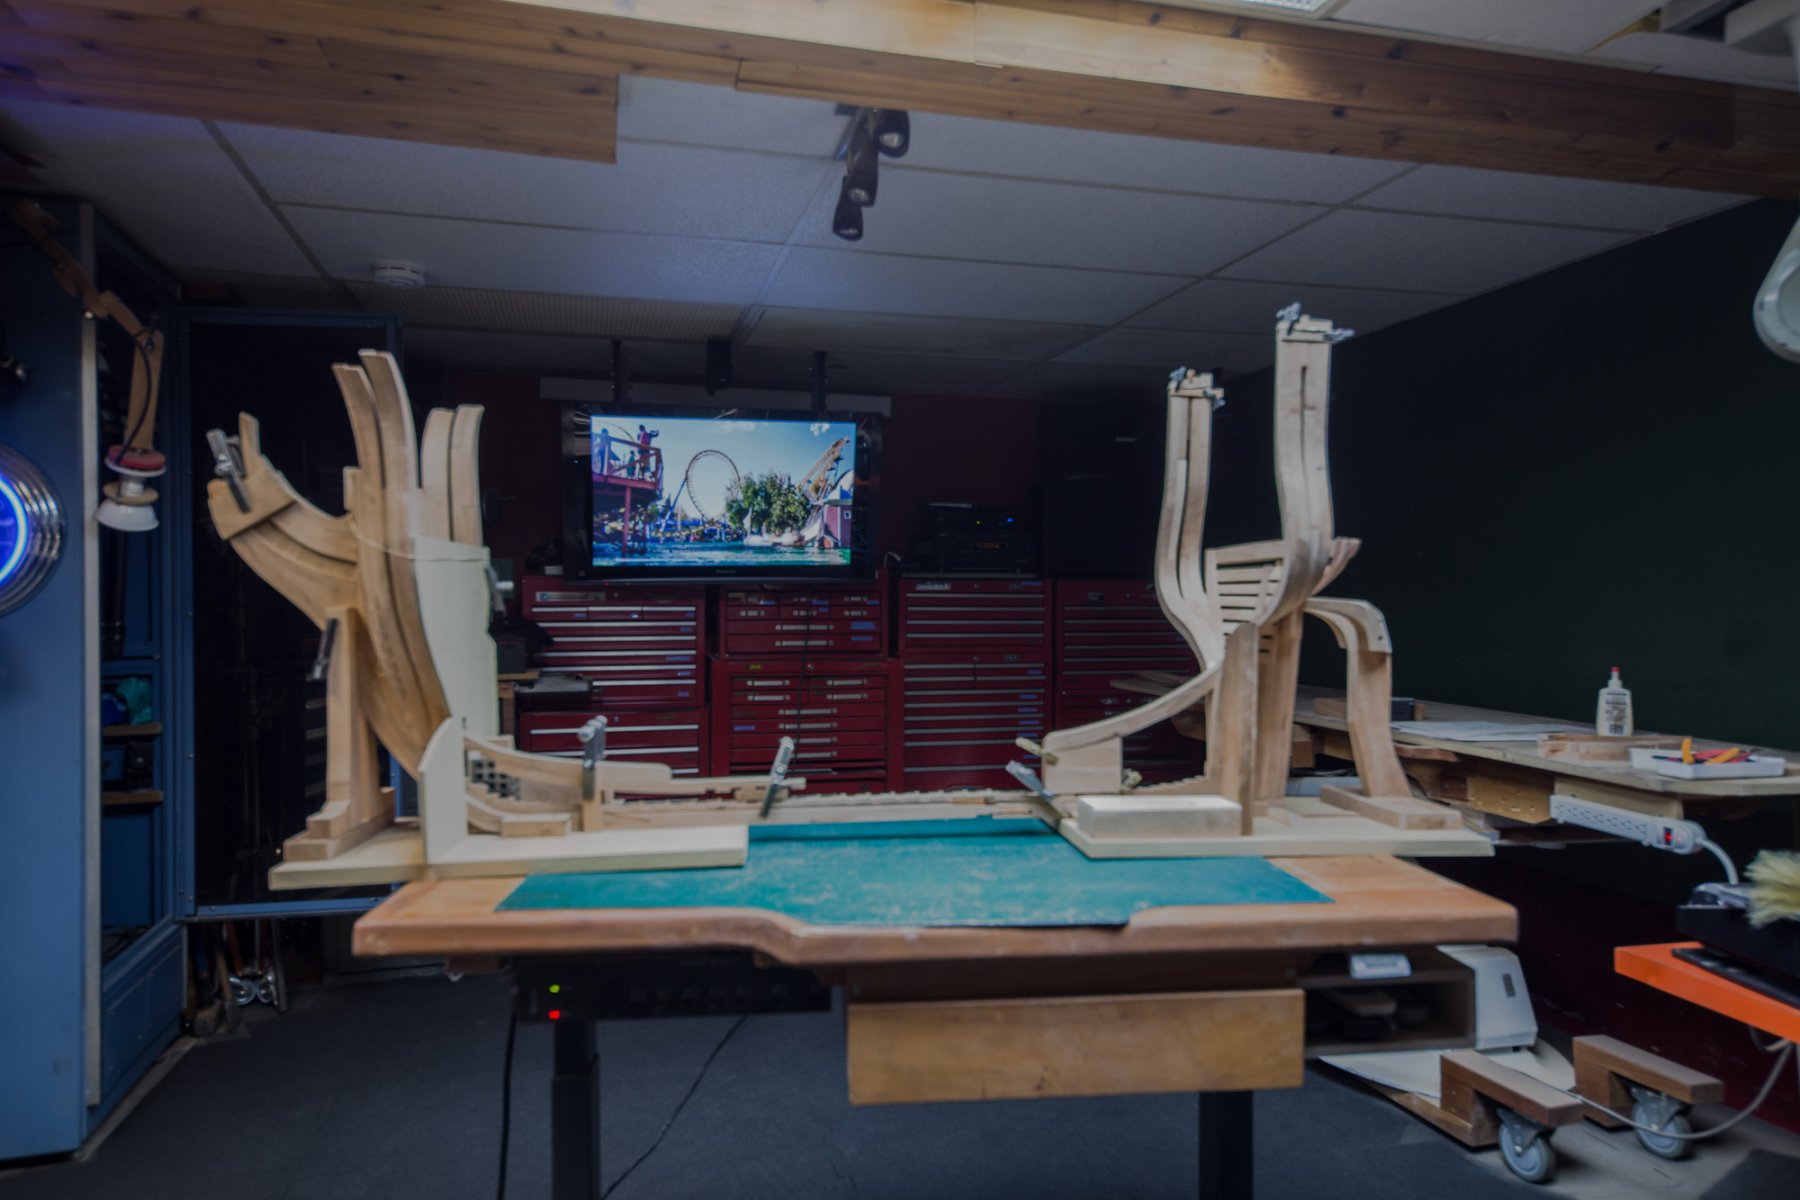
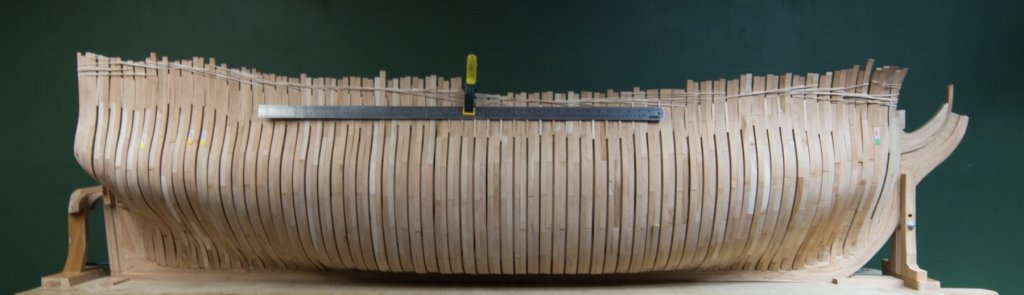
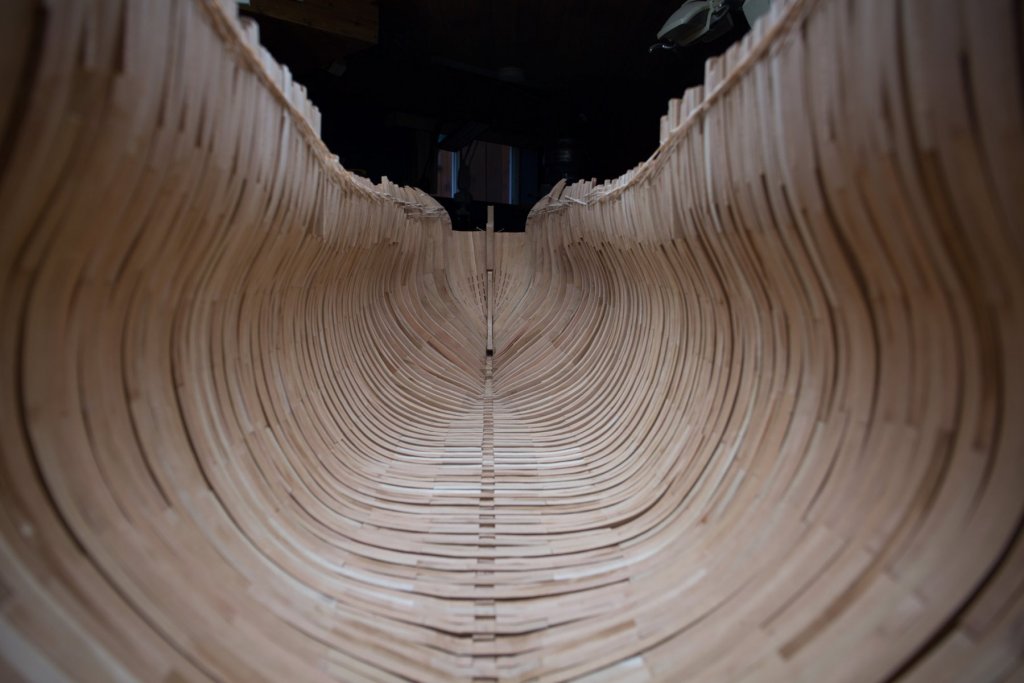
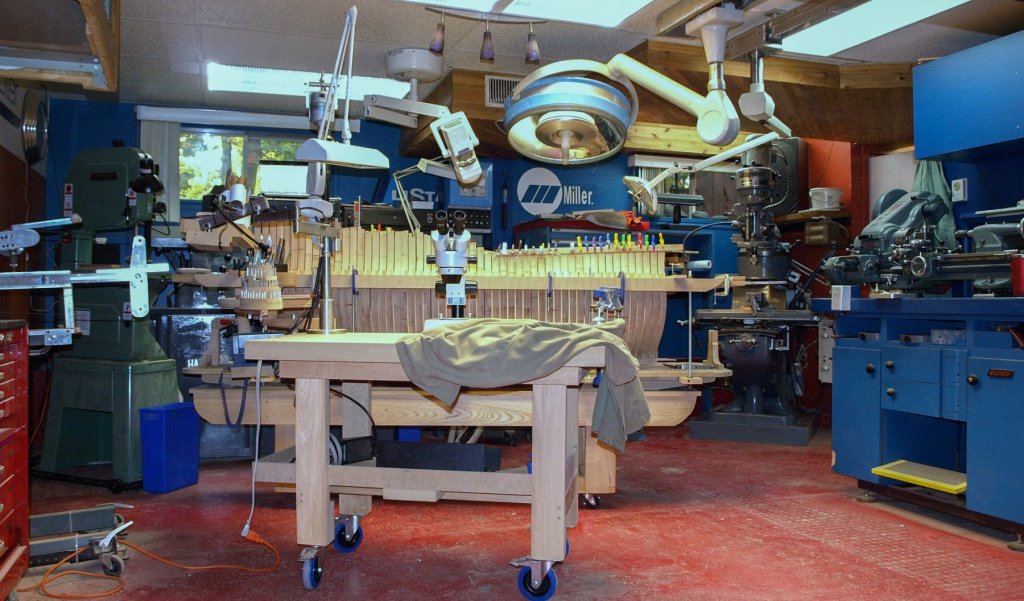
Time for a fresh update; This is the second time that there is a dry fit assembly of the frames and the keel. The first time, showed in earlier photos, was to make sure that each frame fits on the keel. This time, is to make sure that completed frames fit on the keel, in relation to each other to form a regular curve. Still, the height of few frame needs to be adjusted. A lot of sanding of the frames will be done before gluing. This time, to help to hold all the frames together; elastics are used massively. Each frame have at least 2, 1 on each side. On the first photo, there is a 1meter ruler. Just before the last photo, the previous build of the 74 guns show the first method used: Hahn style but not upside down. On the last photo we can see other tools to help to make the work easier. One of the first tool, a ship modeler should buy is a height adjusting table. It is of course possible to do the work always at the same height but it is much easier to do the wotk at the good height. One last item, on that same picture; all the ’’small ’’ tools are regrouped in the same tool chest. Before the were in many different smaller tool chest.


-
Google translator works pretty well. I understand your 3 questions. 1- Why do I make the same ship for the fourth time? a- the first reason : I wanted to explore the differences between scales. I chose a small scale, a standard scale and a big scale : 1 /196, 1/48, 1/24. The conclusion was : the bigger the scale, the easier it is to work. The main reason being that it is easier to hold a piece of wood with a hand instead of only 2 fingers. We have more control by using the hand. b- the second reason : for me, it is not a problem to make 4 versions of the same ship, even if it is the same ship, it will be 4 different presentations and in each version new technics are explored. c- The third reason, my prefered part in the building of a model ship is to work with wood. By using the 74 guns by Boudriot, he did all the reseach and the plans and what is left to do is my favorite part to build a model ship with wood. 2- The choice of tools : Knives vs power tools You like to carve with knives To get good results, you use a soft wood user friendly for your knives. Boxwood ‘’ kills’’ your knives and it is too difficult to carve. I like to use rotary burrs; easy to use and strenght is not needed. I take advantage of the power of the electric tool. The tool being easier to control, better results are easier to achieve. 3- The choice of wood. Carving a detailed figurehead in soft head cannot produce sharp details. The only way to get sharp details is to use dense wood. For a small scale as we use, the best there is, with a high density and fine grain, Boxwood.
-
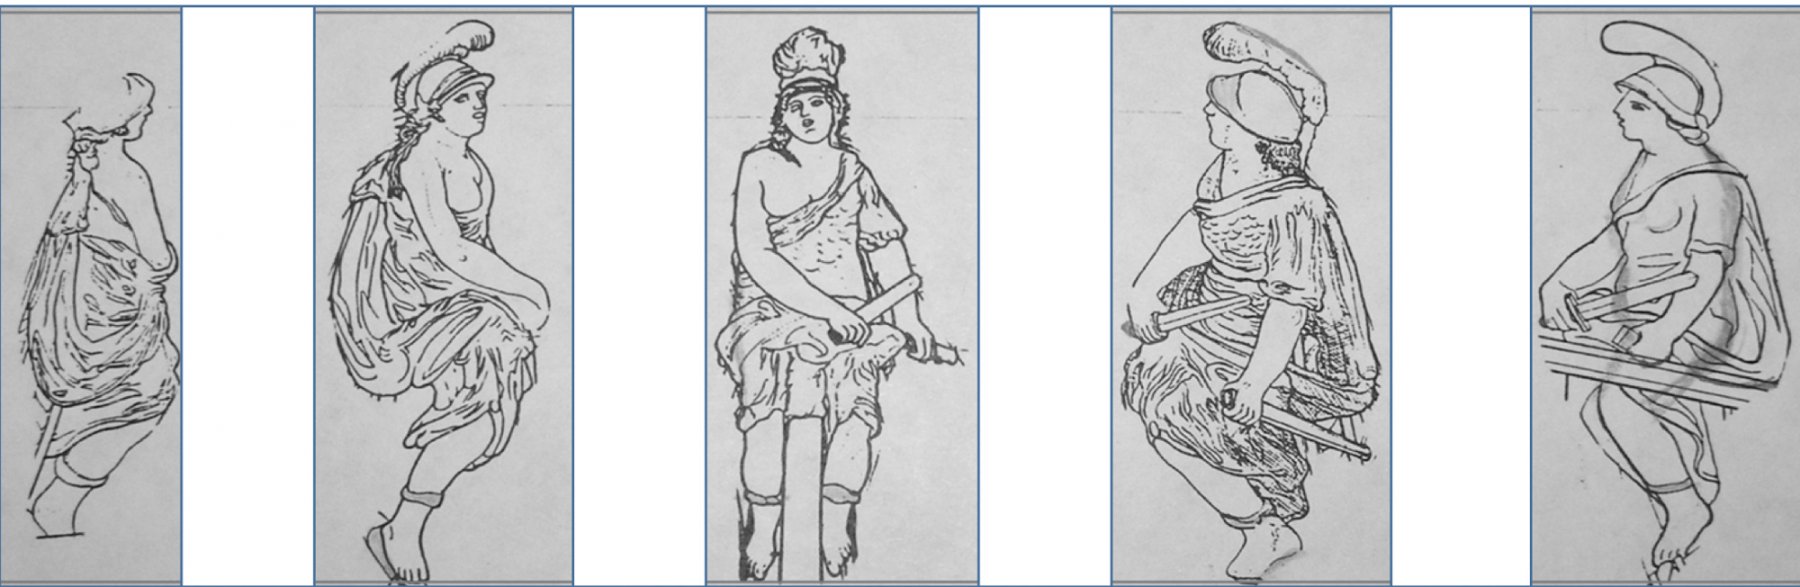
Hi Alexander, The choice of the scale will have a major impact on the quality of your carving. If 1/48 up to 1/100 is a common scale among modelers, it is simply because a model at that scale is easy to manipulate. Then there are the other 2 ends; very small or bigger. On a scale of how difficult to how easy is the carving : the smaller the scale, the harder it will be to carve. A figurehead at 1/200 requires the higher degree of concentration you can achieve. This means the morning is a good time to do it, not after a big day of work. Strangly even if that scale requires that you must be in control of your moves, it is not that scale which will produce the best results. At that scale, a very good pair of magnifying glass is essential and you need more lights; ideally 2 : 1 each side at 45 degrees to elimate shadows. The bigger the scale you will use the more precise will be each part of the human body. At 1/200, the 4 fingers of a hand will be together and at 1/24 it will be easier to carve each finger separately. At a bigger scale, it is easier to distinguish muscles separately. On last item, tools : we can separate the main tools in 2 categories : knives or rotating burs. Even if knives are preferred by many, it is easier to carve with burs. The reason is easy :it is easier to control a bur and it is much more difficult to control a knife that you push in the wood.

-
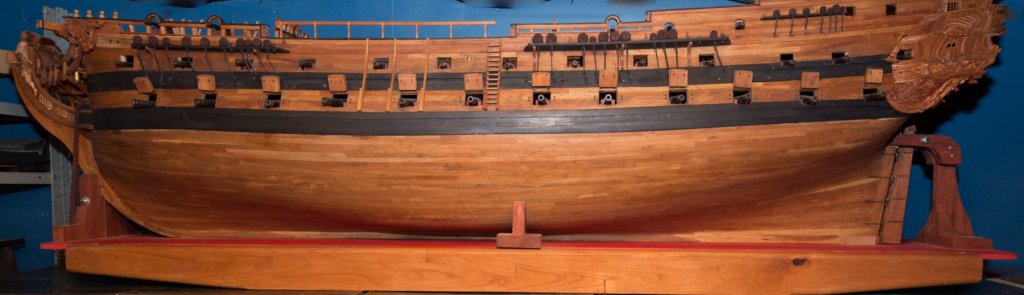
Very nice results and nice colors! For the final results, I hope you will show us a picture without the MDF plank under the model.
- 290 replies
-
- 1
-

-
- confederacy
- frigate
- (and 1 more)
-
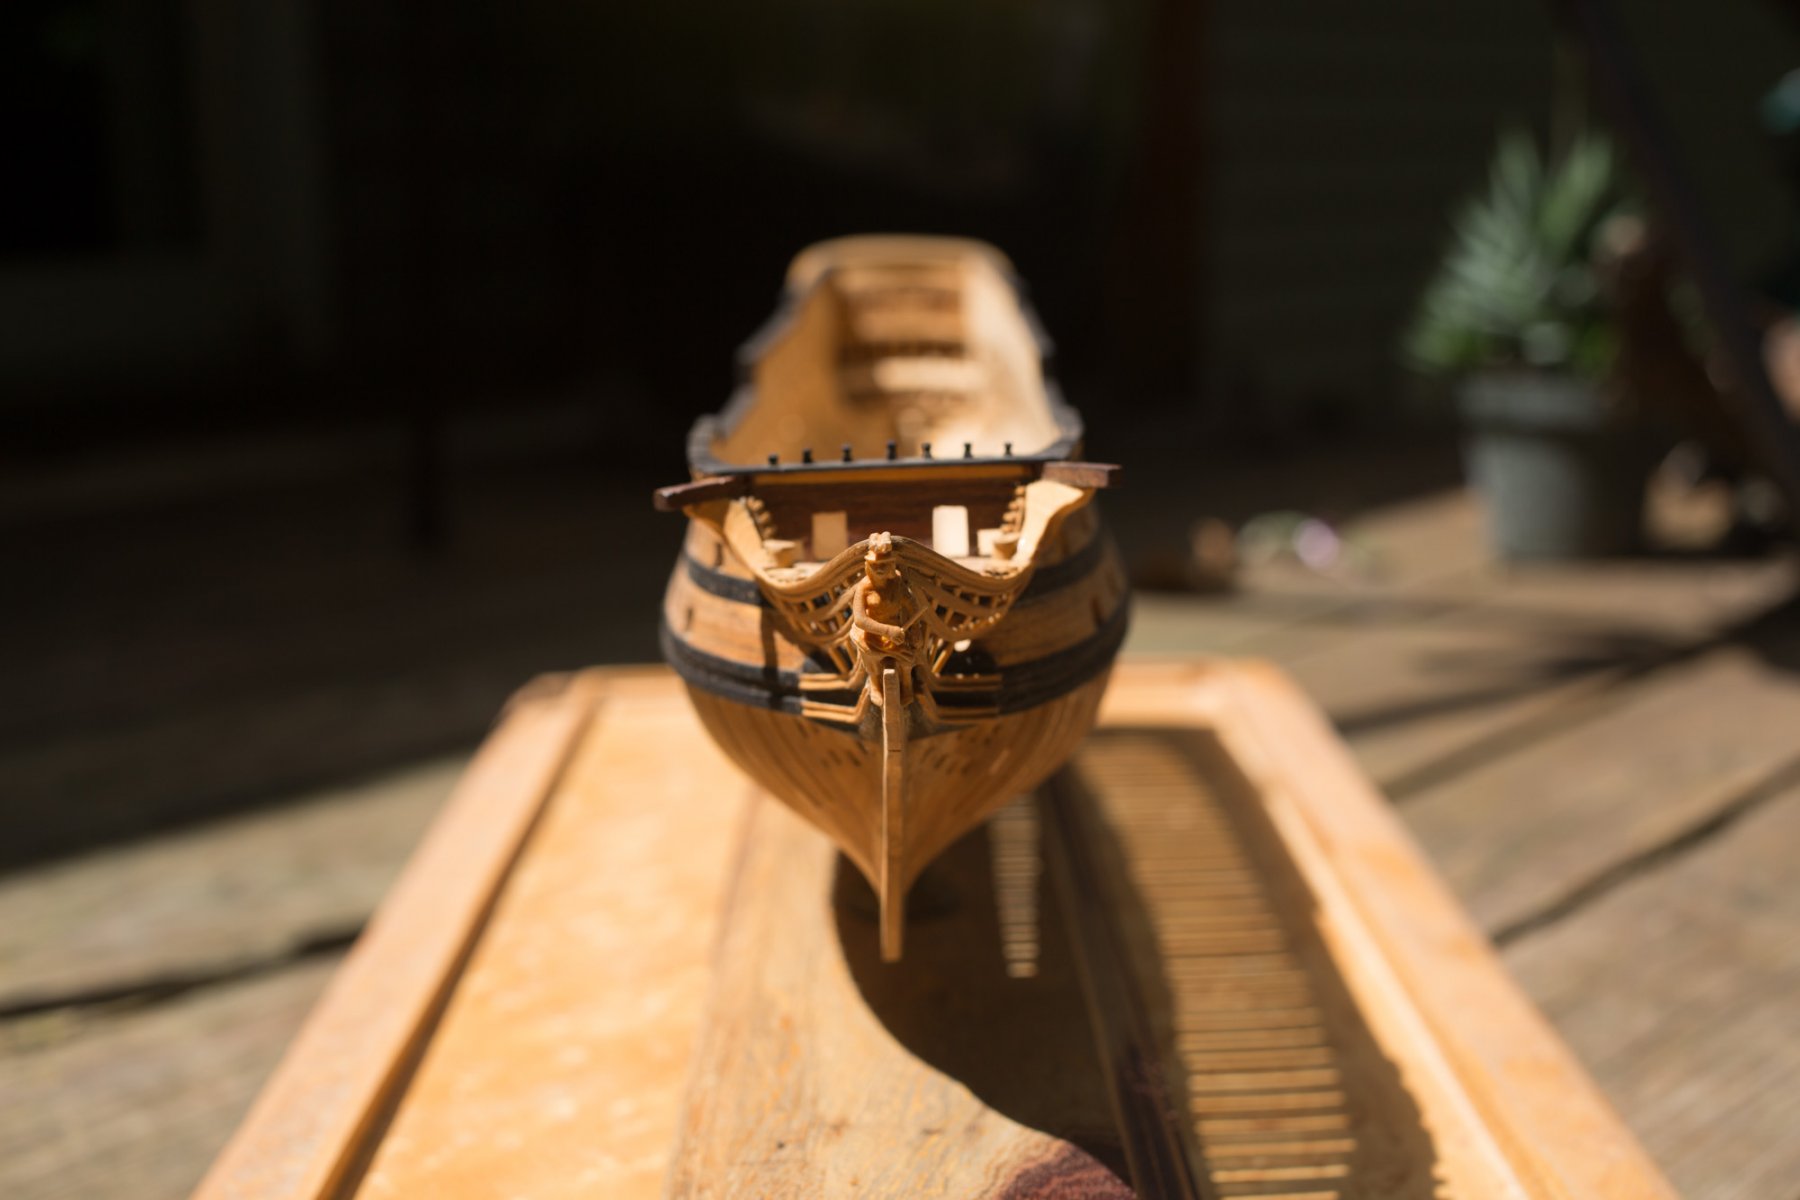
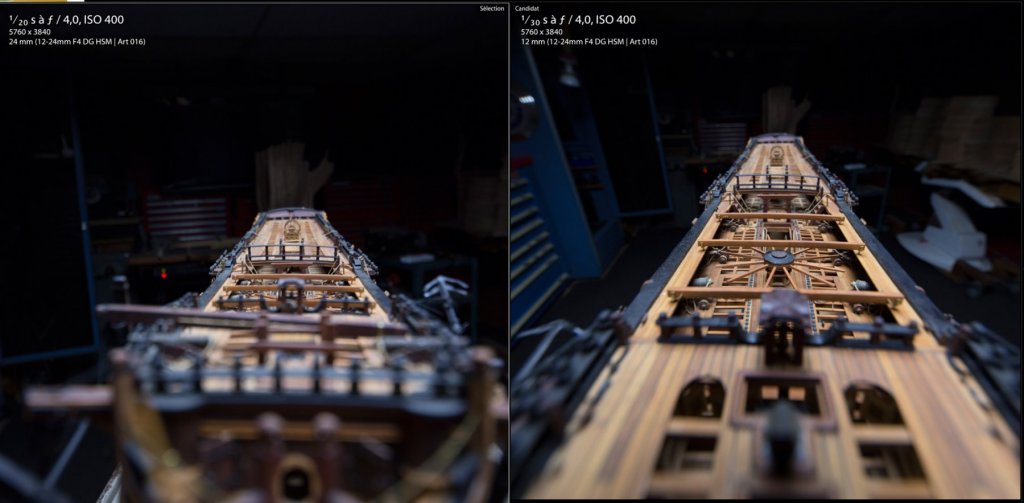
Hi Bill, Building the Constitution at 1/24 is surely a nice project. You know that it is easier to build at 1/24 scale simply because each part are easier to hold. I guess that is the reason why we 5 fingers in each hand instead of only 2. This is my third build here on MSW at that scale : 74 guns in MSW 1.0, Le Fleuron, finished at the beginning of this year and now this one. Hi Joe, thank you very much I tried the free E-viewer (Mac or Windows) and I guess this is probably the kind of program which would be perfect to manipulate a 3D plans by an amateur like me. Who knows, may be a guy will sell a 3D plans one day! I surely would like to buy a copy. Being in the scratbuild category, the ideal SET OF PLANS for me would be data I could put on a key and go to the printer for 2D plans and study the 3D plans on screen. I suppose it would be easy for someone drawing 3D to also incorporate a 2D version for printing. Enough dreaming, one last picture to show how to cheat the distance on a 1/76 build. This time another kind of lens; the wide angle. In this category, there is also the fisheye but this is more for an artisitic point of view, this lens take a line and turn it in a curve. I like to use a wide angle lens to give the illusion of a greater distance. Here is an example at 11 and 22 mm. So, camera is our friend, but it is not an human eye. Knowing the possibilities, sometimes it is interesting to try some photos with our model ship under construction.
-
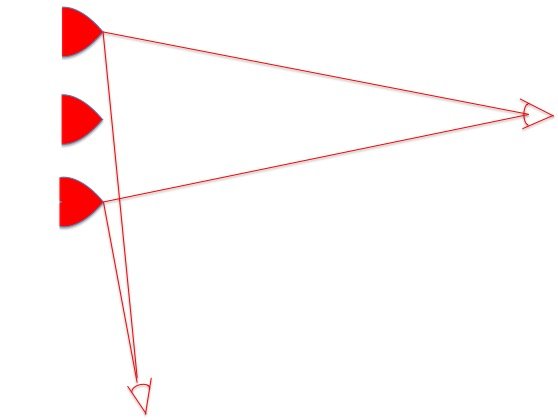
There is another way to get the effect of a lens distance compression with an standard lens. The distance between each part can change depending the angle of the camera. Example with photo 1 and 2: photo of 3 objects : photo taken in front or at angle Photo from front : the 3 objects have a distance between them. Photo from side : the 3 objects have no distance between them.


-
Hi Hjx, You are close to what I would like. Ideally, I would like to buy a set of plans in 2D, of by example 74 guns, plus with this, a small visual program where I can extract in 3D, the most difficult parts to realize. Here is an example how I would like to be able to use it. One important fact is that I can see a part, separately from the entire build. A good example would be to extract the keel from the build so that we can see all the details especially how the planking touch the keel and the grooves made for this. In the 74 guns books, there are often drawings made in 3D by hand. That was 50 years ago! Sometimes 2D drawings are not enough to understand well. This is exactly there that 3D could help. In a way 3D is better than the real thing because it is easier to see the details: the lines show all the intersections. In a realistic way, I know that a good model needs 5 years to build. Still today, I have no idea, how long it could be for an experienced man like you to draw a complete set of a 3D ship plan? 1 year, 3 years or more! Hjx you and other modelers, represent the next generation of model ship builder. I do not know how you are going to use 3D tools. It is realistic to think that better tool will come on the market. In 1750 when they needed a plank to be cut, everything had to be done by hand. Today, electric tool replace most of hand saws. Even if I want to build a model ship as close as the original, I do not think that I am oblige to follow the same path as in 1750. Today, in 2017, electric tools can saves a lot of time and greatly facilitate the work. To build a model ship at scale is not something easy. For many years, when I saw a tool which could help me to build things in a easier way, I saved money to buy it. All I can say, I do not know how 3D will be use in 10 or 15 years from now but I would like to use it a bit if I still live.
-
To meet a member from the next generation of Modelship builder like Mike: I know that the future of this hobby is in good hand, and yes it was a special day! A dream workshop, and to live in a super expensive town are 2 things very often impossible to match. A lot less expensive in Canada, and the temperature now is 19 degrees celsius outside. It is always a difficult choice to do when we are young. We want to be close to the job and when the job is in a big town, the house has a big price. On the other hand everything is more affordable in a smaller town but with this choice, travel time for the job increases.
-
Hjx, I like to read from peoples with experience in 3D. To create a team of ‘’expert’’ is an innovative way of thinking but close to 100% of MSW forum build model ship alone, and some fortunate discuss the subject in clubs. MSW forum can also be a very educative tool. Many problems of construction are resolved with the help of members from this forum. Does this forum could be a platform for a common project? Personally, my satisfaction is to build with wood, I have no interest in the commercial aspect. To produce a 3D kit is another area. I would like to buy ‘’the Perfect set of Model ShipPlans 2D-3D’’ and you help me to understand that these plans need many hours before it can be executed. There are many possible different model ship which can be chosen to draw plans and HMS Princess Royal could be one of them. Are there plans from a museum, I do not know?
-
Hi Hjx, You have a very nice and a big project. Here is a guess on the duration of this kind of project. To be able to build a highly detailed model could be a job of many years, something like +/- 10. Part 1 : +/- 5 years Research of available documentation : 1-2 years Plans redrawn with a higher level of details in 2D with the most difficult details in 3D : 2-3 years ------------------------------------------ Part 2 : 5 years Building the model What a satisfaction to be able to travel all this road! The first time is the most difficult, the second time is much easier because you saw the road once.
-
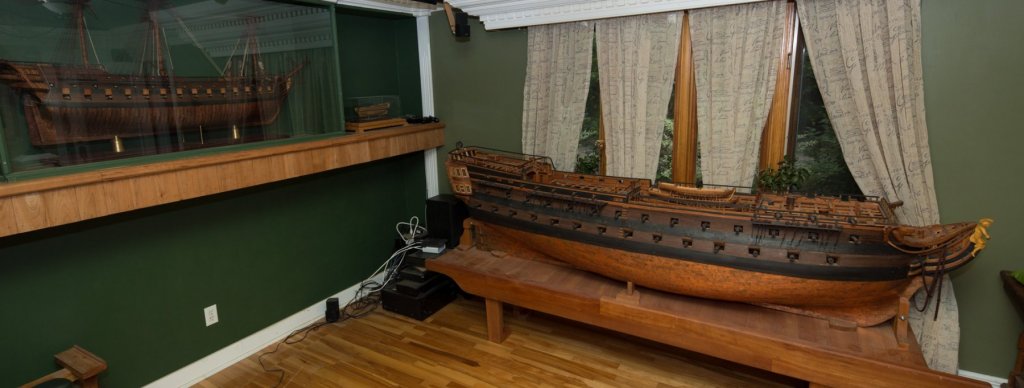
Last week end, a very good MSW member, from Stockholm, came to Canada for business. He wanted, in his spare times, to visit a Model ship Museum but I suspect he also wanted to see a workshop. Unfortunately, there is no such Museum near my home, so I prepared an improvised visit of what he could see near Montreal if such a place existed.
-
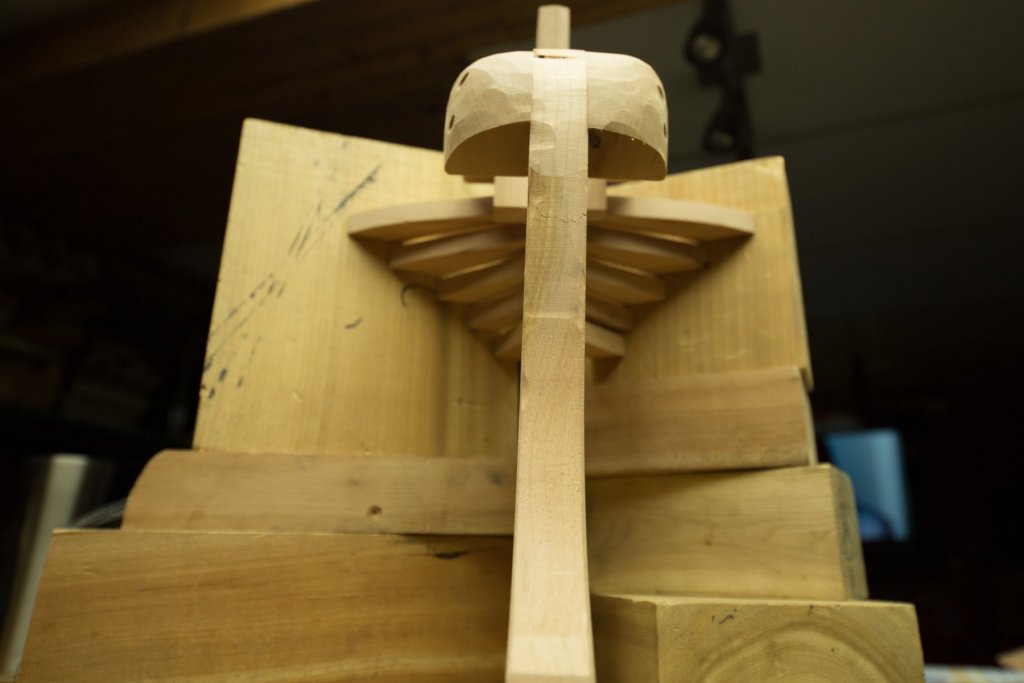
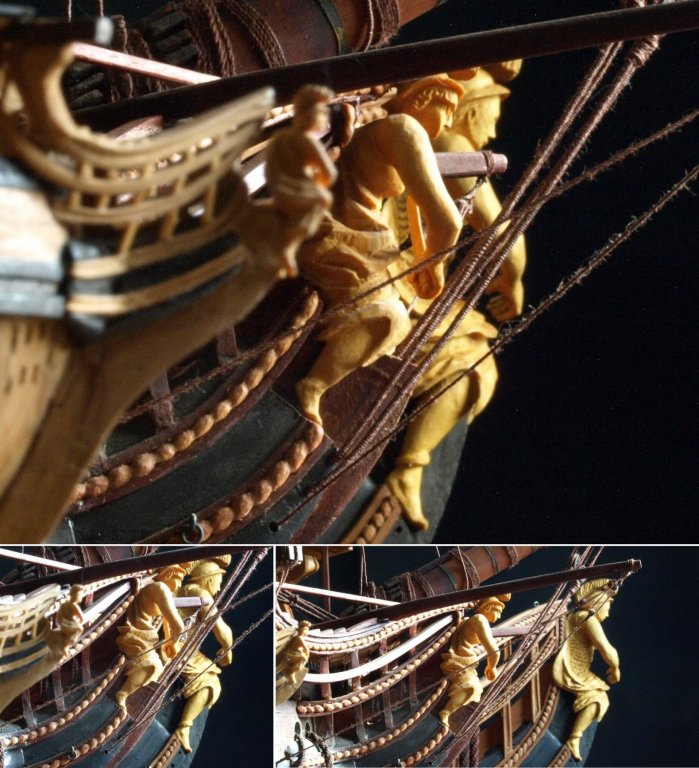
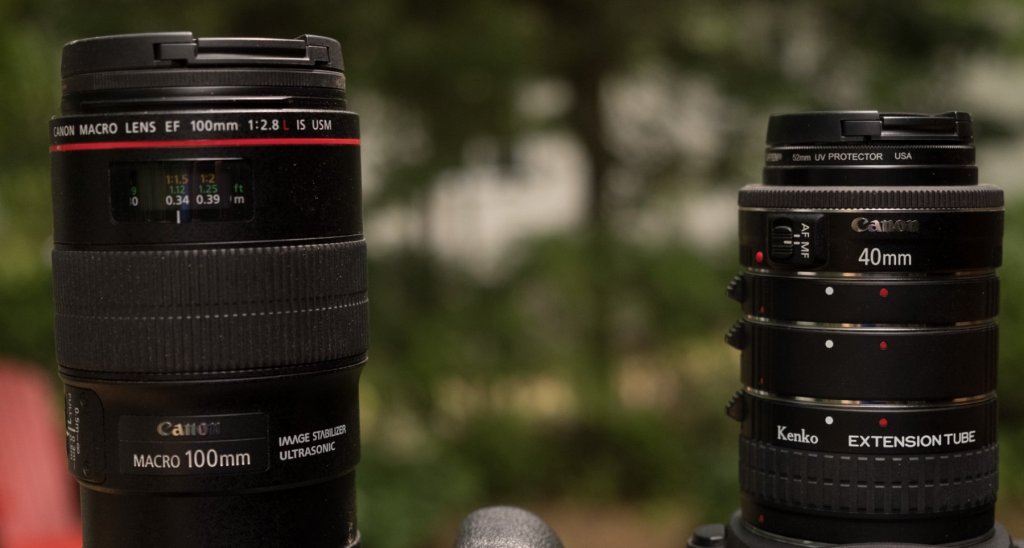
Here is another comparison: a macro 100mm vs a wide angle 40mm. A 40mm is not a macro lens, but if we can increase the distance between the camera and the lens, we will have a new macro lens. This is possible by adding Kenko Extension tube. Price of 40mm+ 3 tubes: 1/3 of 100mm. Here are the results of the figurehead of the 74 guns at 1/192 scale. The diameter of the figure head is about 1/4 of a small finger. Photo 1 Lens macro 100mm, lens 40mm+ 3 extender tube : 12+ 20+ 36mm Photo 2 Lens 40mm Photo 3 Lens 100mm Photo4 Lens 40 mm + 3 extension tubes


-
daHeld, It is exactly as cutting a plank: there are many kinds of saws that can do the job. Here is another example with 2 lens: photo 1 photo 2: macro lens 100mm at 1 foot: Macro photo 3: spotting scope at 7 feet: Macrodigiscopy (Macro + digital photo + spotting scope)

-
Show pictures of your work area
Gaetan Bordeleau replied to a topic in Modeling tools and Workshop Equipment
-
This morning, i was asking myself which type of lens would be the best one for a model ship. When I want to take photos only at a few feet and cover 8 feet large, I need a wide angle. There are 2 types of lens: variable or fixed angle. Theoretically a fixed angle takes better picture than a variable angle. I definitely prefer variable angle instead of a prime lens for the following reason. If I install the camera on a tripod and use a fixed angle, I will surely have to move closer or farther with the camera to get the part to photography. Always have to move the tripod, I do not like this. What is the best lens? This is the one you prefer. Is there only 1 lens to do the job you want? There is probably more than one. Exploring the possibilities of a lens is very interesting. Here is a photo taken with a 150-600. If I follow the rules of the book, I would not use it for a small model ship. But I like the result, so why not try new things.
-
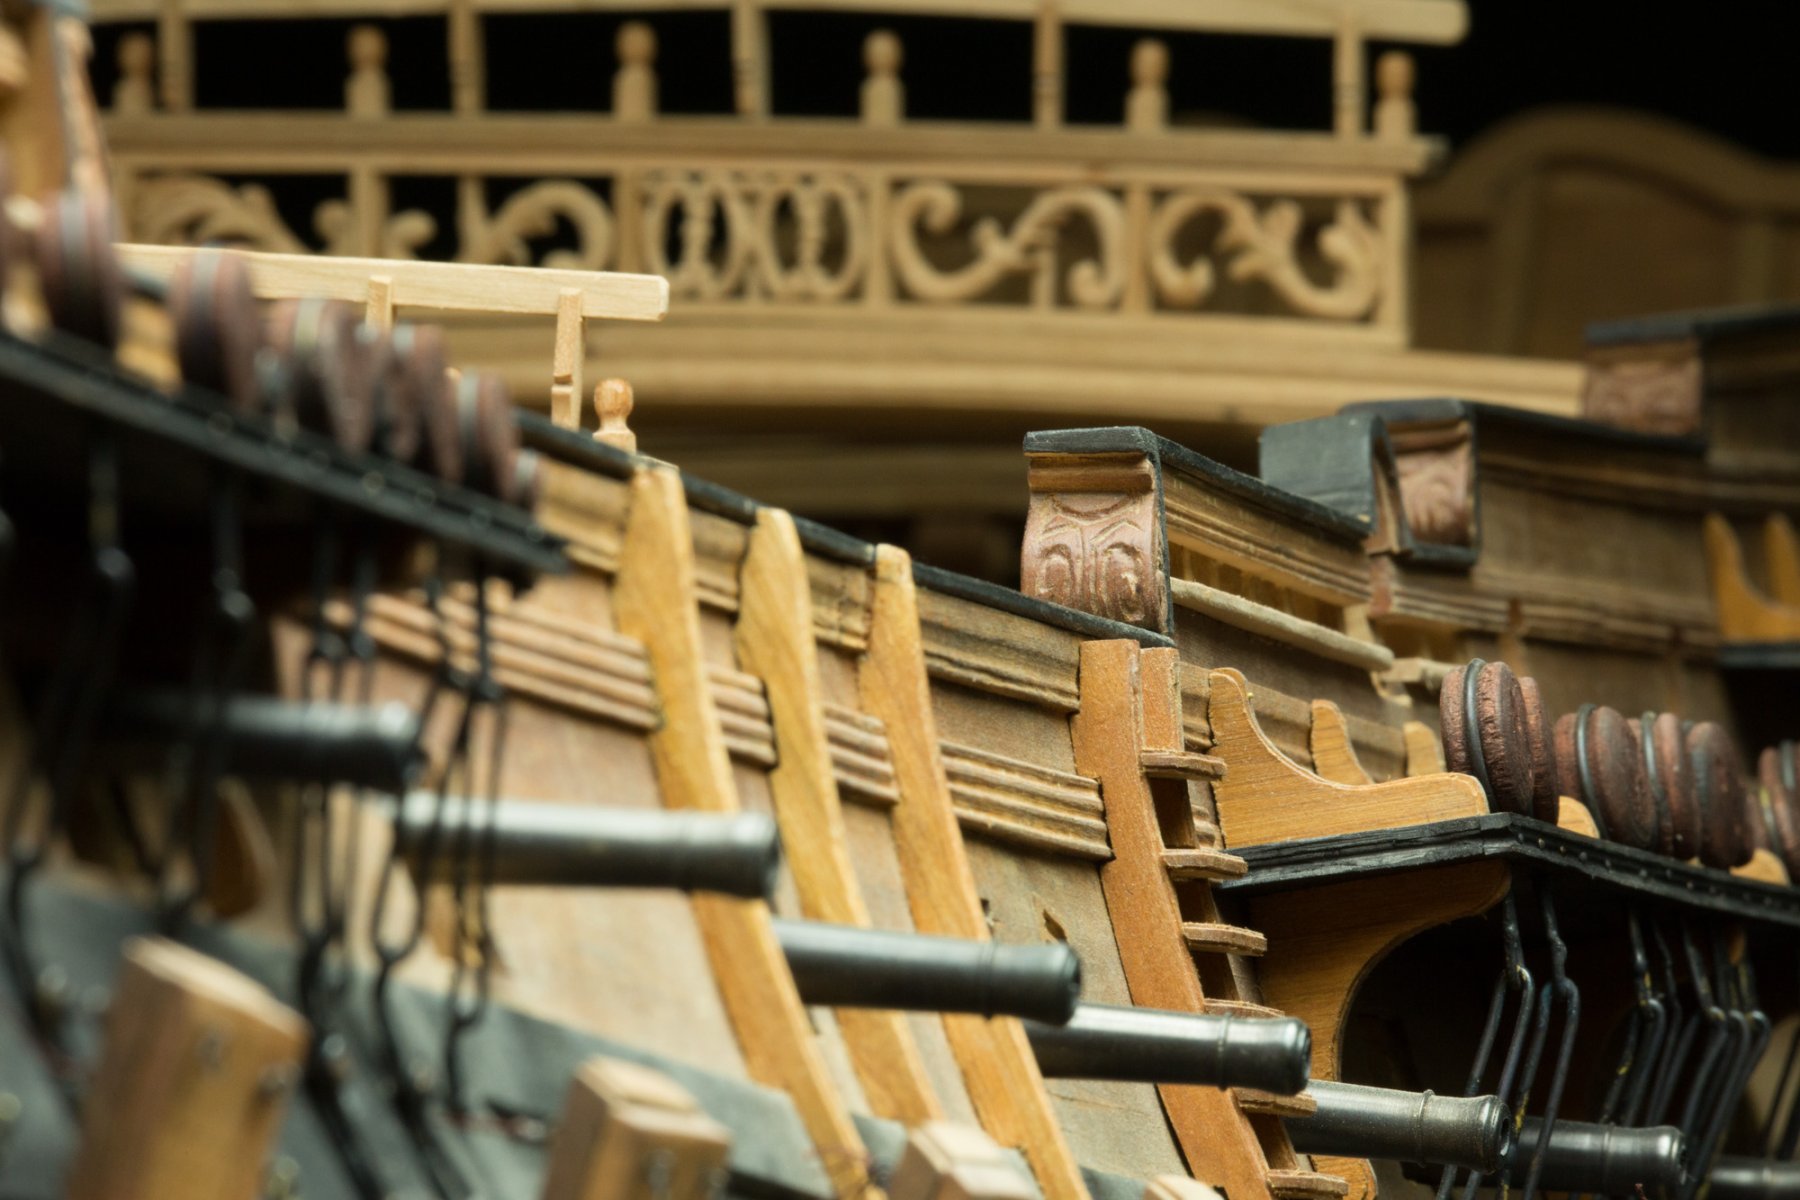
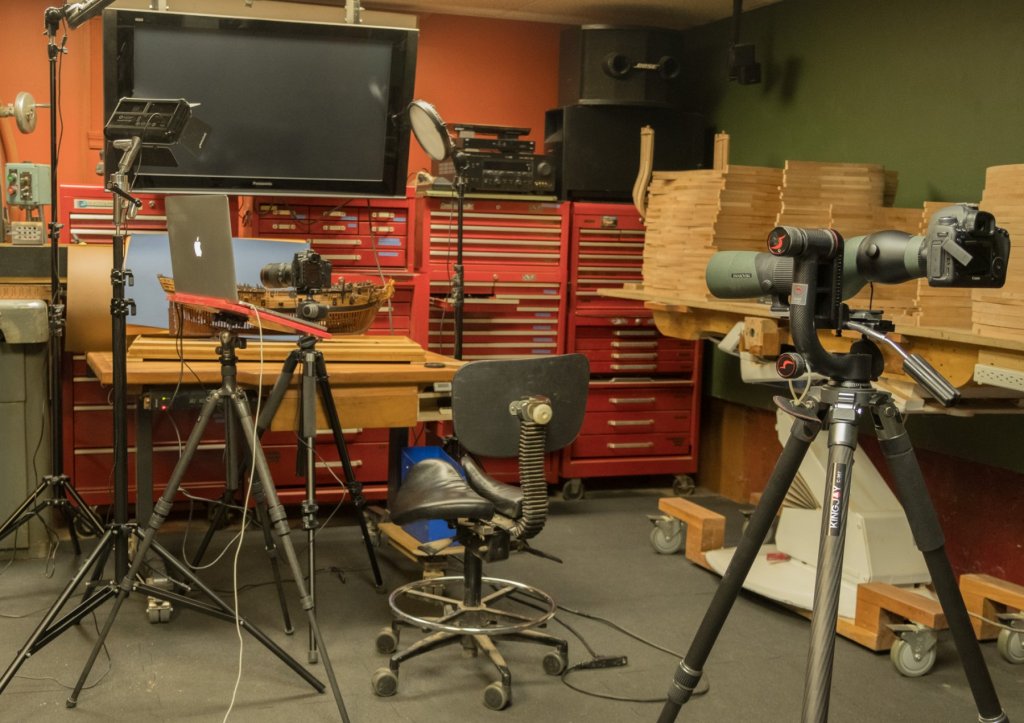
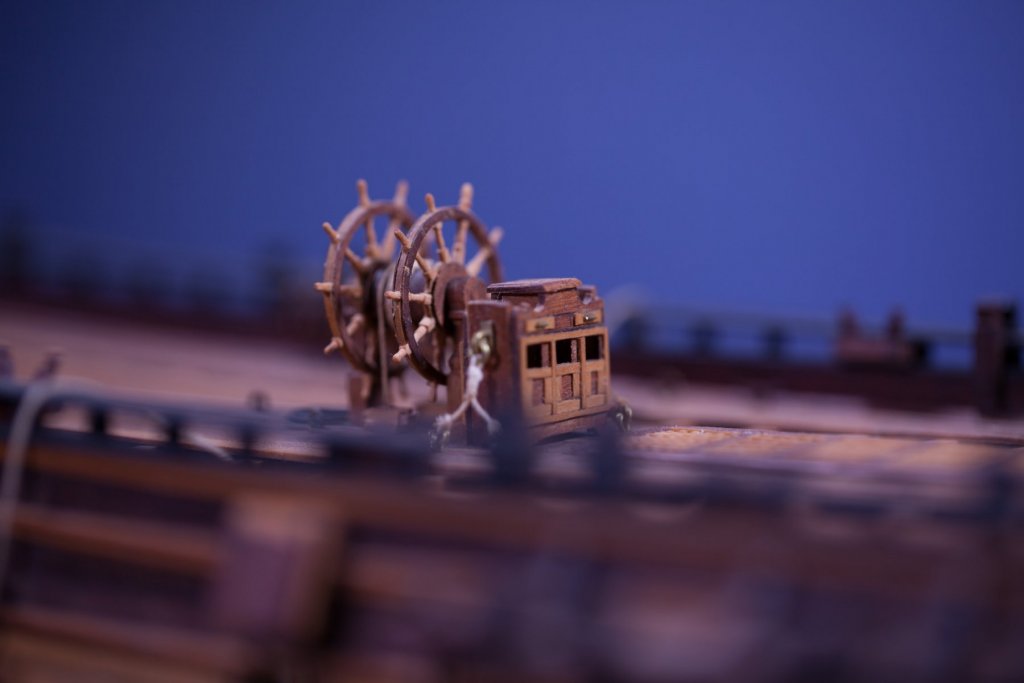
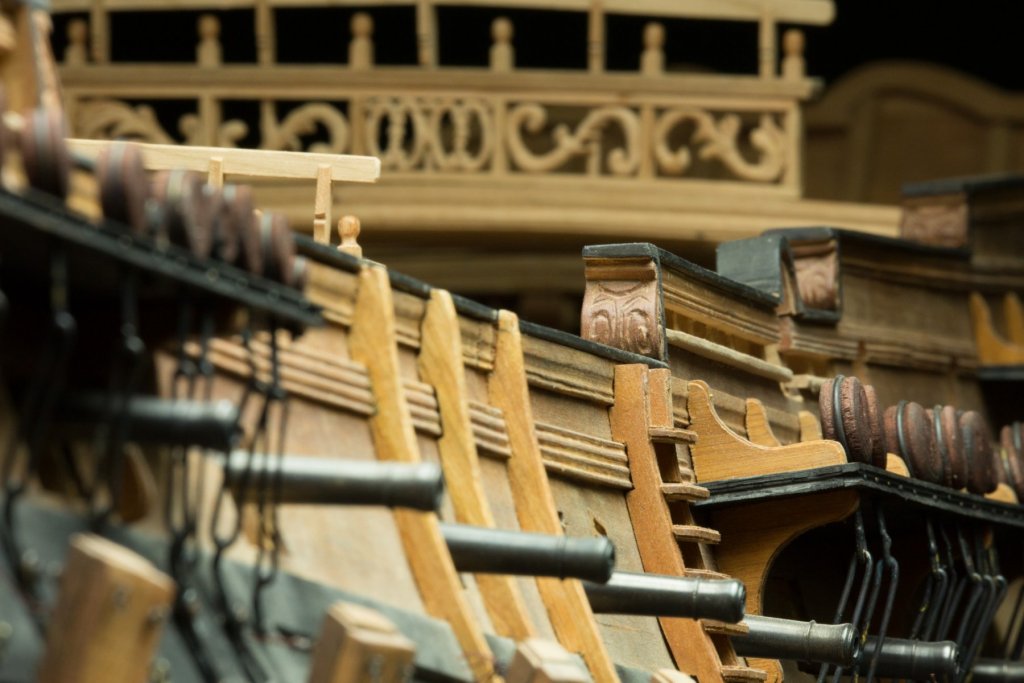
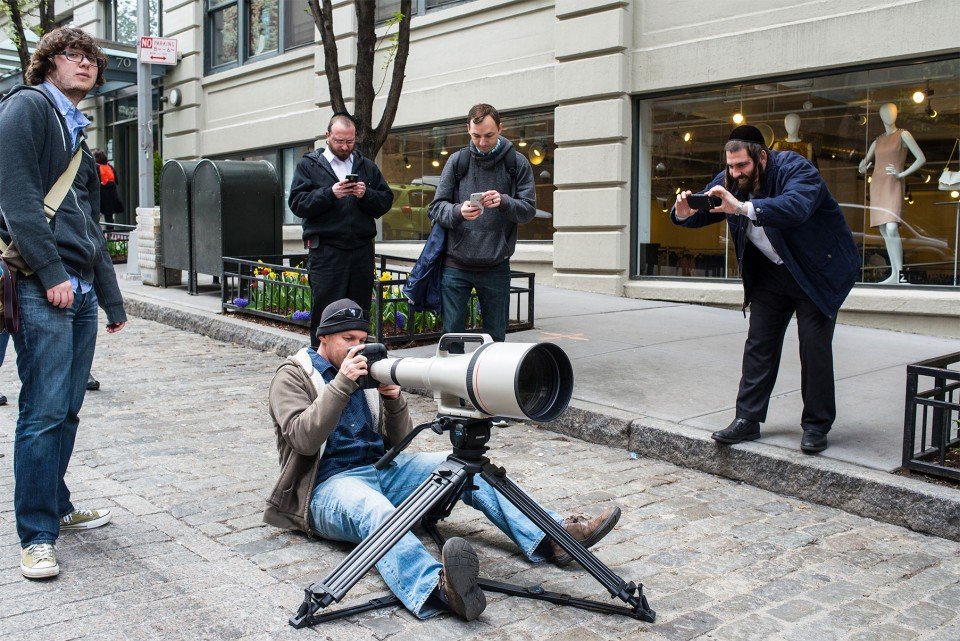
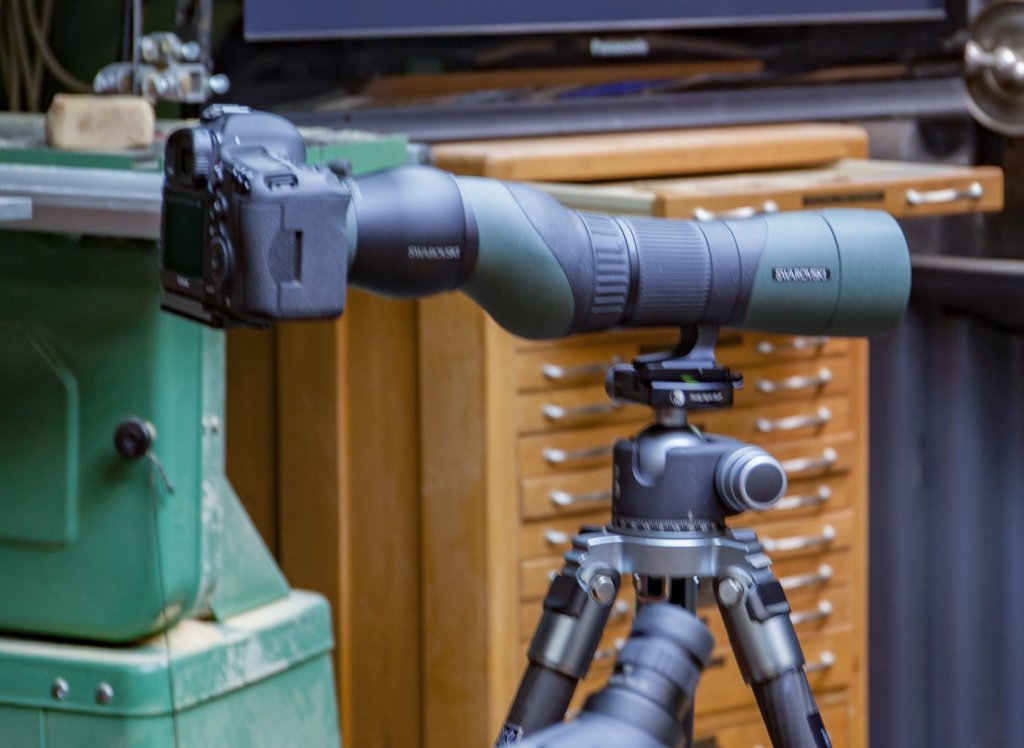
Here are the latest photography tests using a Telephoto lens. The first picture, I think is a good example to show how distance can be compress by a telephoto lens. If you look at the lanterns on the right side of the picture, knowing that the distance between each one is about 500 feet; you can observe the compression effect on the distance. For many reasons, I wanted to try to take better pictures with a camera and one of these is to show photos of modelship construction on this forum. In this quest I explored many lenses. The biggest telephoto I could afford is a 150-600mm. After this stage, prices are out of range. To show an example of how expensive it can go, the second picture is a used lens of a 1200mm for only : $180,000. There is another way to go with a higher magnification at a much better price. I chose one between 750 and 1800mm. Even if it is a not a camera lens it acts as one. The main difference is that less light enters by this lens. The name of this lense is a spotting scope. There are many uses, by examples to look animals and birds. There is a new adapter on the market of 43mm for a full frame camera. This allows you to take photos. It is similar as taking photos with a microsope. Taking photos with a spotting scope, it is called Digiscopy. At first sight, looking at objects from far is of no interest for a model ship maker but as a piece of 10 cents; there are 2 sides to it. The other side being it also can be use as a macro lens and the minimum focus distance is under 7 feet. The next photos are examples of macrodigiscopy and the last picture shows the setup.


-
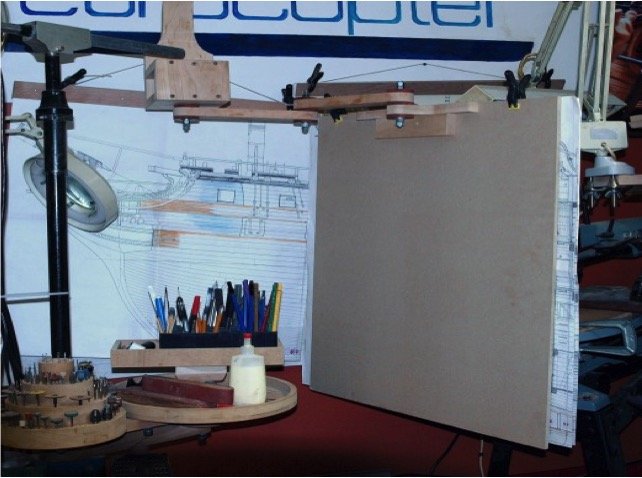
I used few times this gadget I made when I needed big plans to work on. Holds on the ceiling with adjustable arms for proper positioning
-
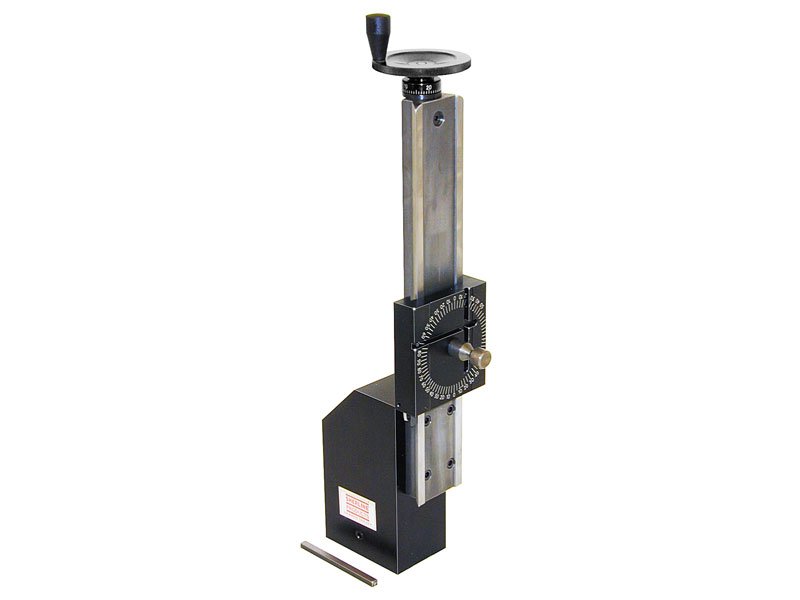
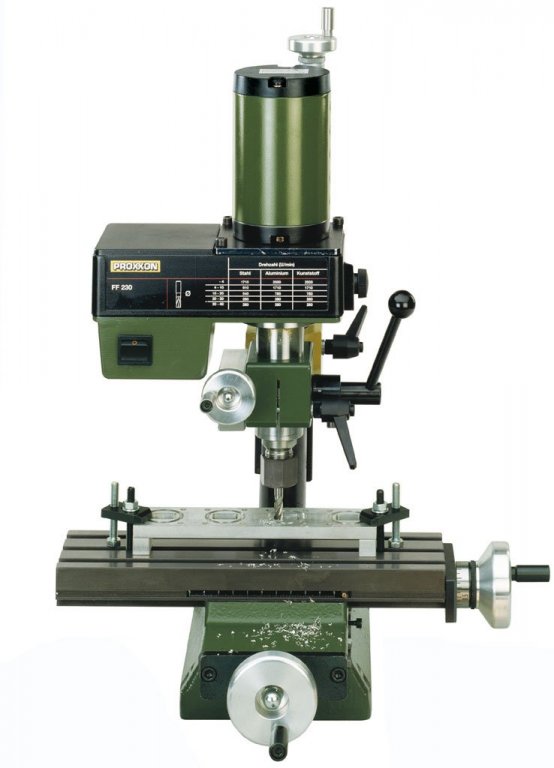
Usually a milling machine is also a bench drill press. A drill press is used more often than a mill. There are 2 ways to use a drill press: the slow way by turning a handle mechanism out for clarity and the fast way...
-
Hi Mauricio, Very satisfied about it. Ear protection could be better. Best feature, positive pressure inside the helmet, no mist, cool air and no dust.
-
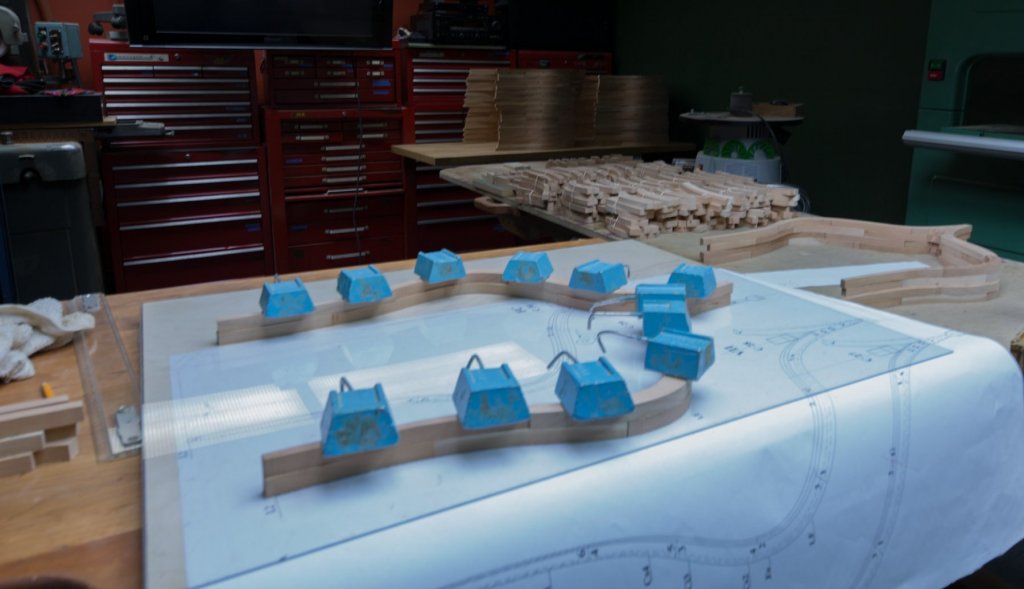
Frames assembly and gluing on a flat surface in 3 layers: a plexiglass sheet, wood glue does not stick well on it and it does preserve the next layer under the paper pattern. Under a Russian, multi layered. It is difficult to find a large very flat surface made of wood because stability and wood do not go together. A good flat surface need to be made from a harder material like high density plastic, glass or a mineral like table pool table slate or granite flat surface.


-
Painting Wales
Gaetan Bordeleau replied to JohnB40's topic in Painting, finishing and weathering products and techniques
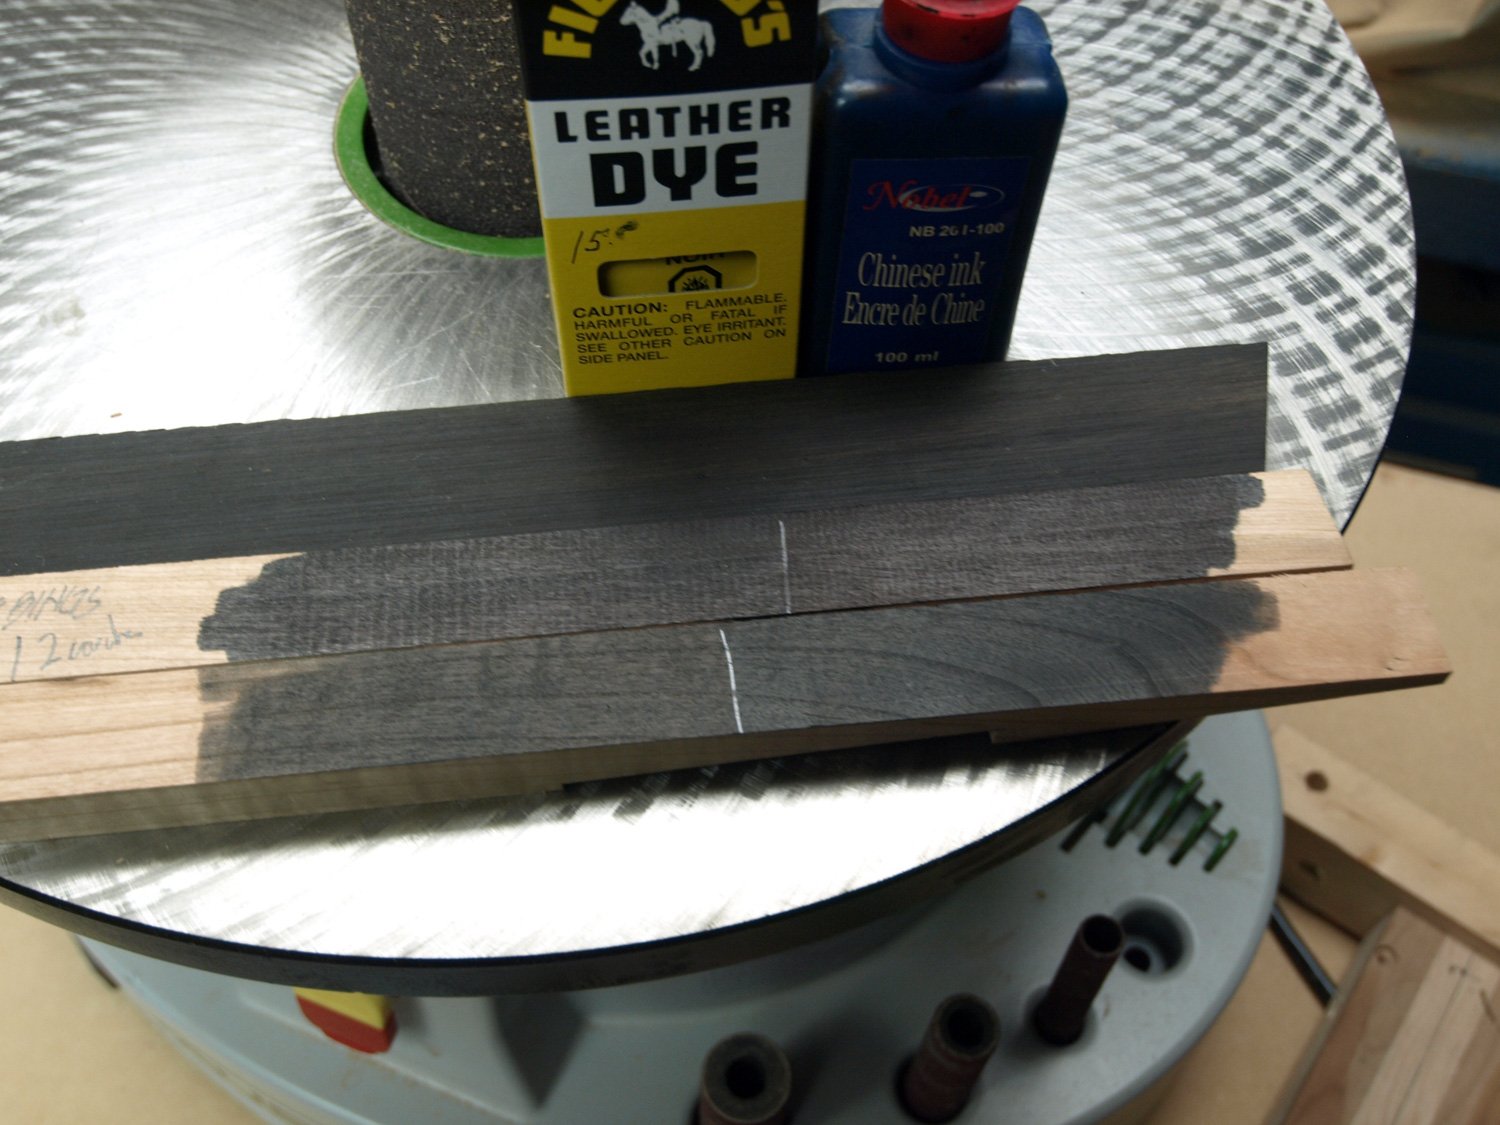
For the black wales, there are many solutions: Ebony, nothing matches the look and the feel of this wood but the extra fine dust penetrates everywhere. Leather dye India ink Saman water based wood stain black. Different results with the camera. On the picture, ebony and dye and ink
-
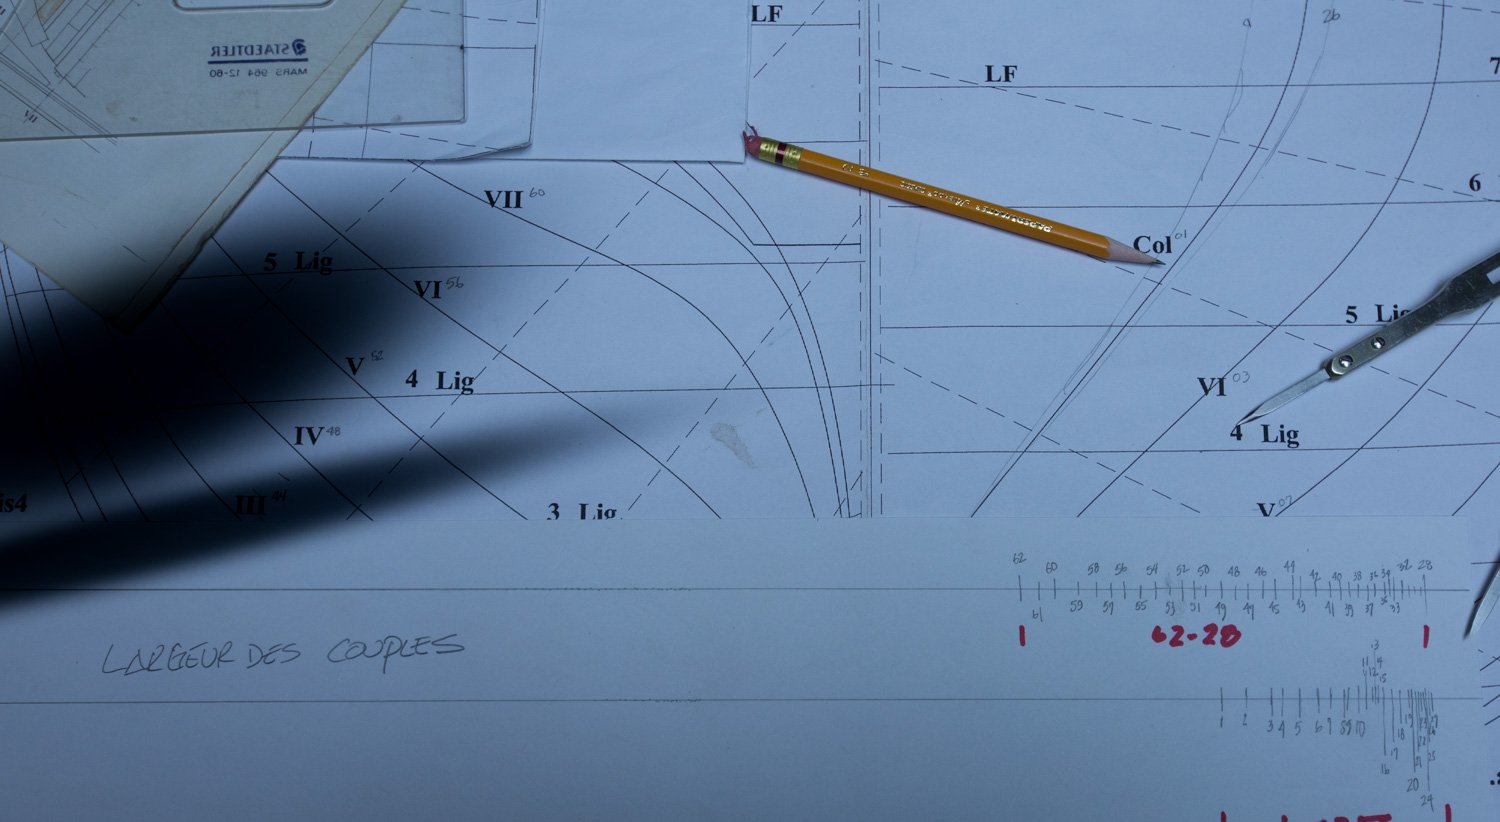
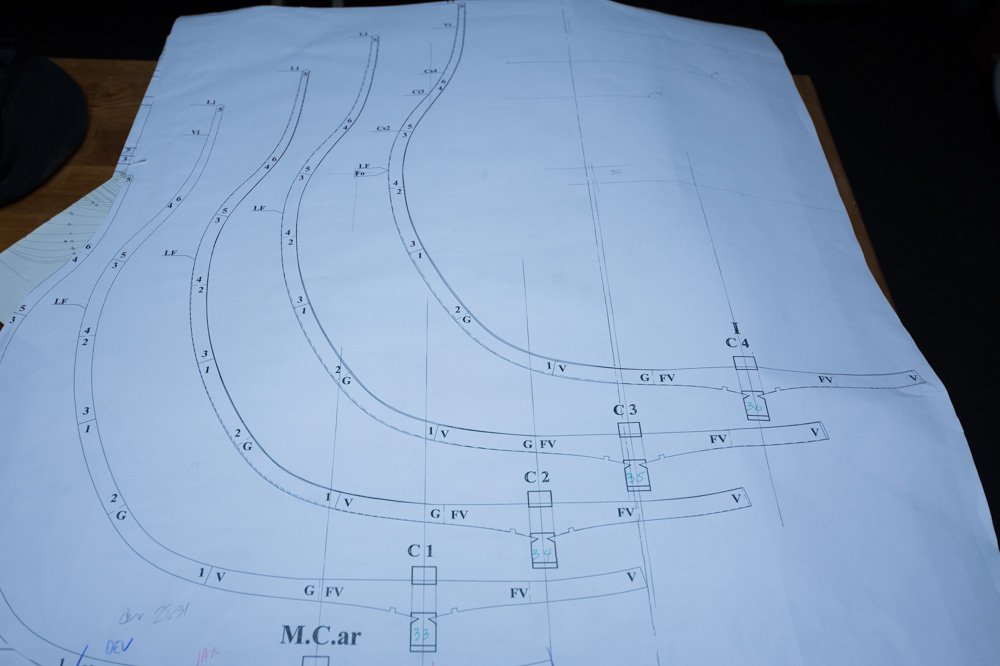
Parts were layed down on tables for each frame had 4 groups, 2 parts for each half. Regrouped in 62 bundles with elastic... 1 table less is now needed. I do not think that I save time buying frames already drawn. Drawings are not user friendly. Frames are drawn 1 side only. To help to build 2 half frames with the correct width, I draw on a paper ruler, the correct spacing for each frame at the top of each one. The spacing will surely be more regular this way, at least I think, in comparison if I deuct by the center line of each frame.

-
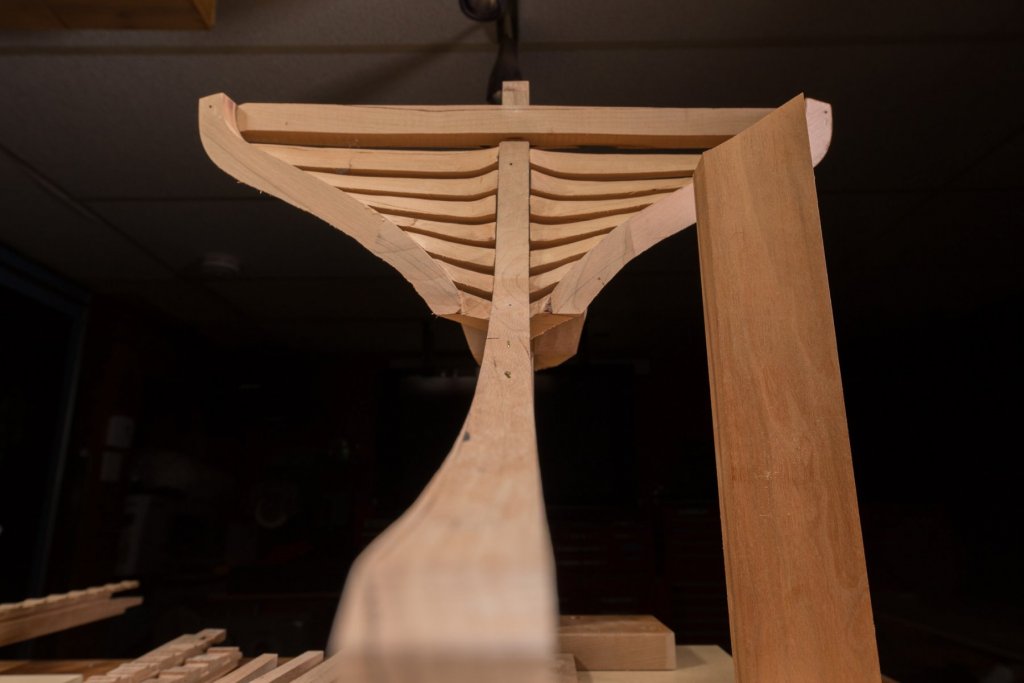
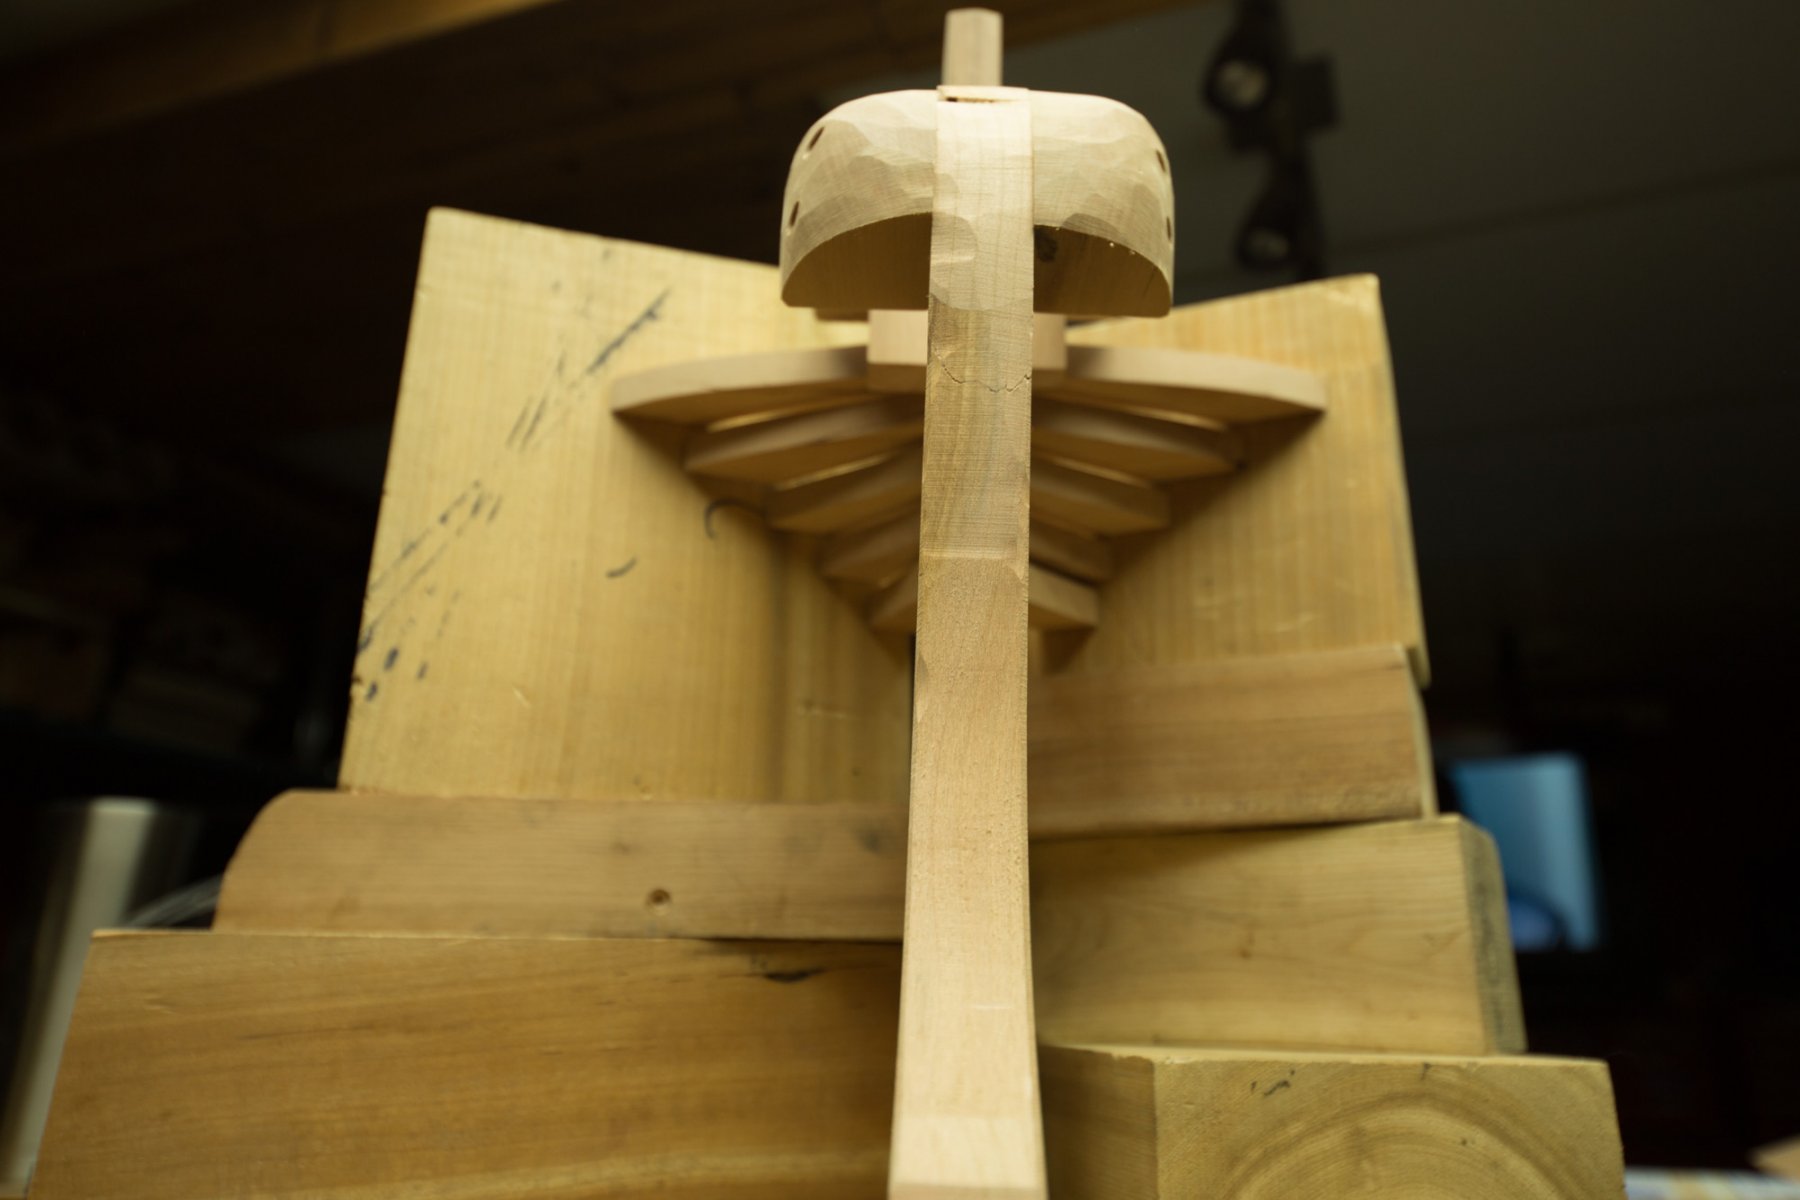
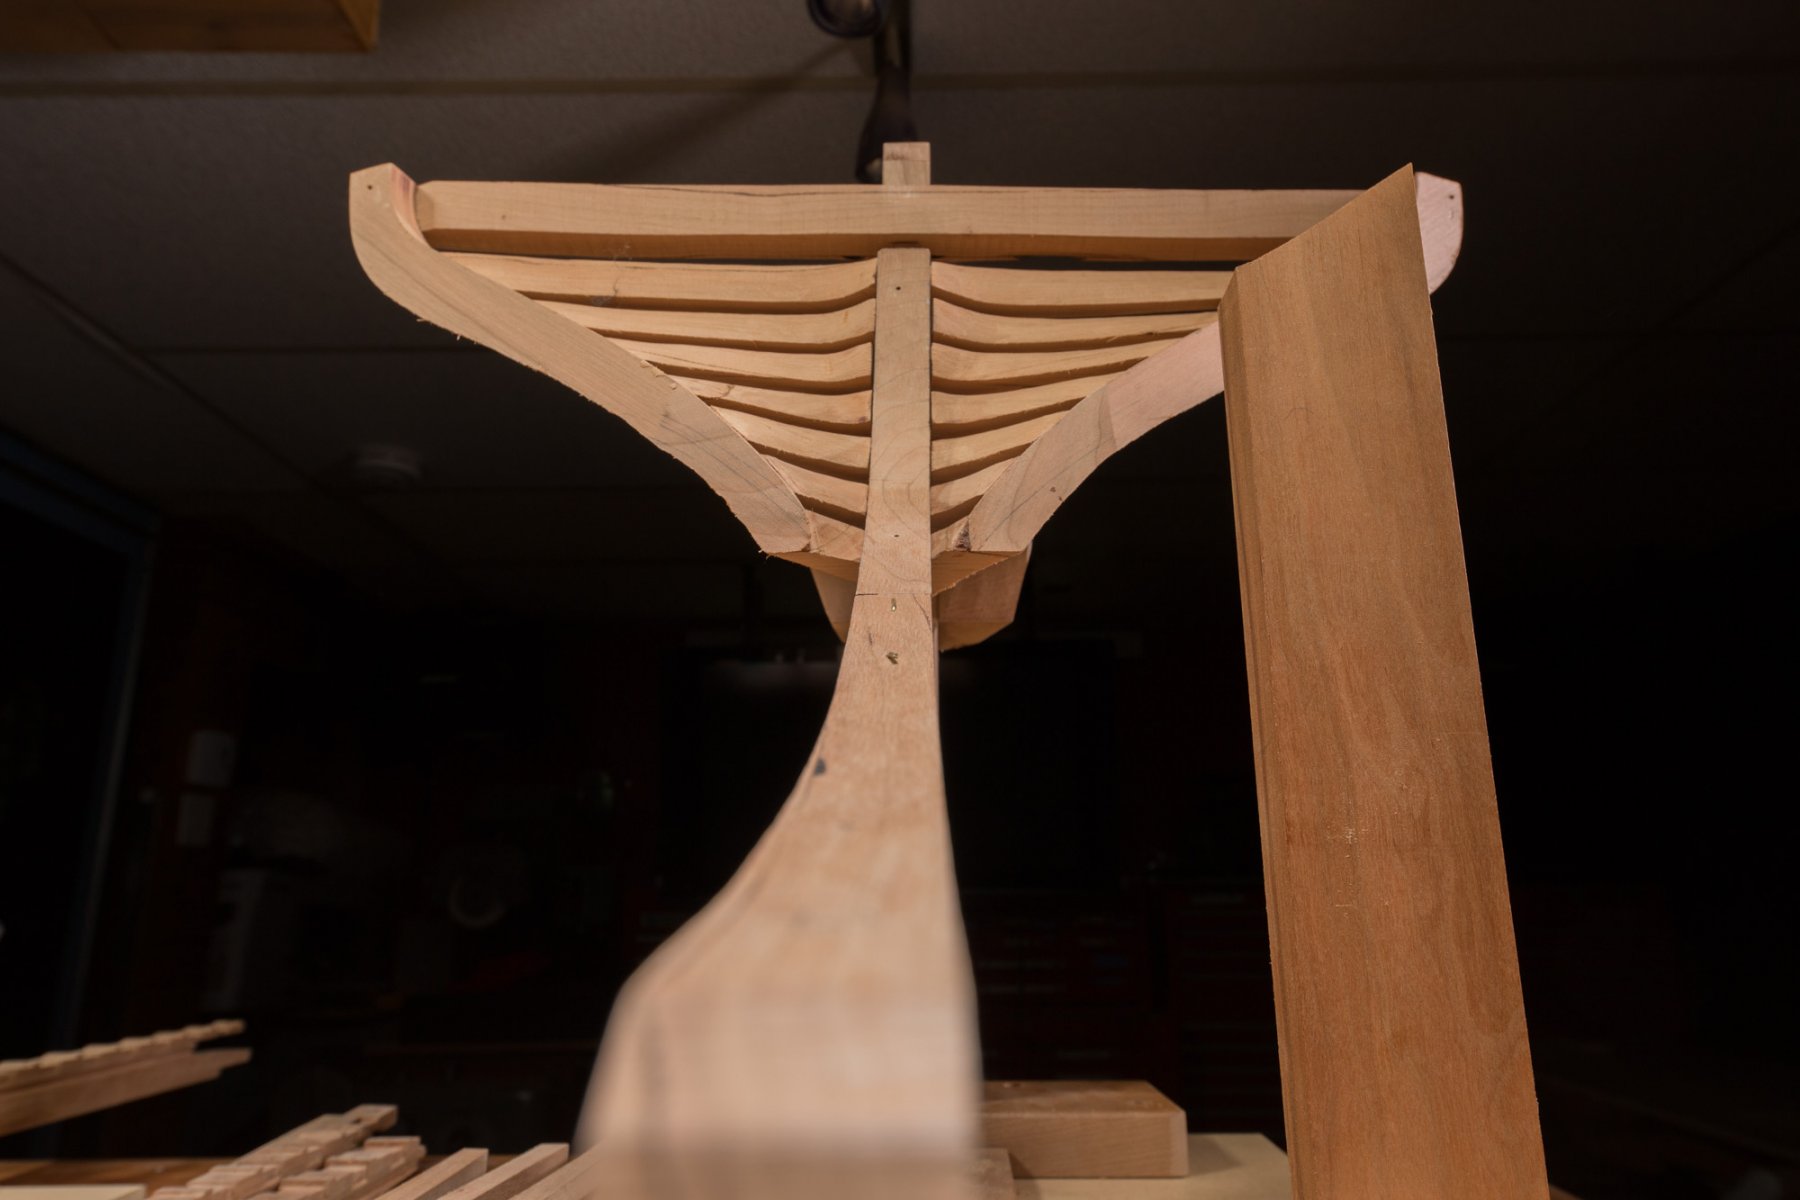
Before assembling the frames, fore and aft ends are began. Actually working at the aft. It is a long work which goes like this: try, sand, fit... It is a long ladder to climb, the more level, the more precise parts will be adjusted. The only question to ask is when is it adjusted enough. Continuation at the aft section will continue to receive some parts. Only after ''middle frames'' will be assembled