Gaetan Bordeleau
-
Posts
1,307 -
Joined
-
Last visited
Content Type
Profiles
Forums
Gallery
Events
Everything posted by Gaetan Bordeleau
-

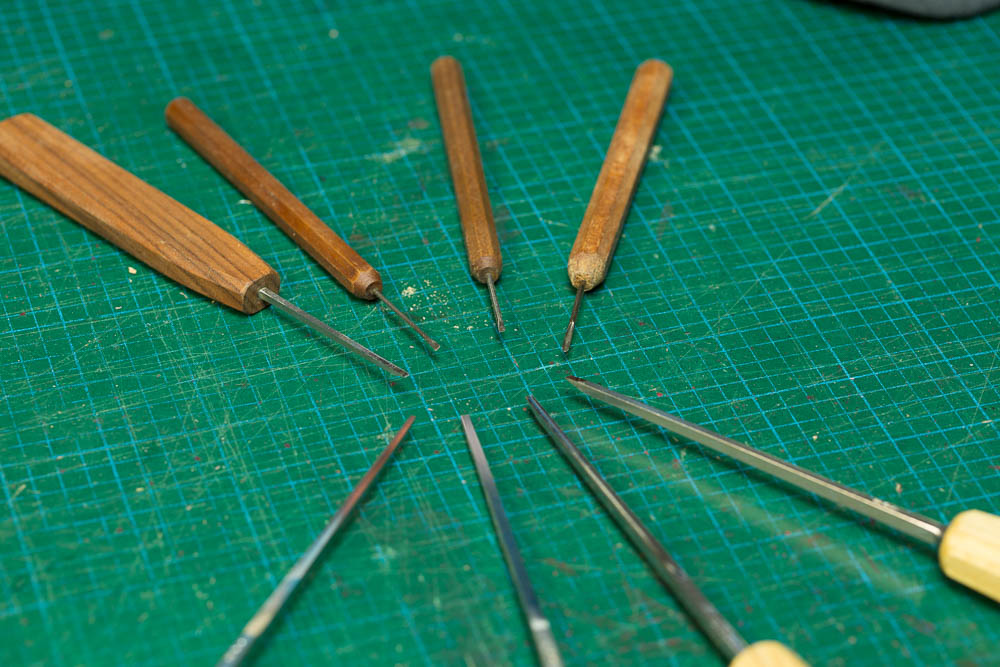
Miniature Hand Tools
Gaetan Bordeleau replied to Julie Mo's topic in Modeling tools and Workshop Equipment
I agree with Roger 3/8 in surely not miniature chisel even if you have a miniature handle. I do not think that this kind of chisel is a good choice, even if it would be done with high quality steel. The reason is very simple and it is exactly the same thing as choosing a scale for modeling. The bigger the scale, the easier will be the construction. The video shows a perfect example of the principle: the guy is holding the chisel with 2 fingers. He would have much more control if he could use all the 5 fingers of the hand on a bigger handle. So what you need is a small width of steel and a big handle. -
Today I saw a very convincing demonstration by a 35 years experience carver on how to sharpen a knife. # 80 water sanding paper and soft polishing cotton wheel with green compound. He sharpened using sand paper until he felt burr on the edge of the blade. Then he took off the burr with the polishing wheel. To check his work he tried the knife on a sheet of paper... and it was cutting. Experience is better than a lot of tools!
-
I needed a background for the pen kit I bought and I turned a briar tube, sanded with fine paper and applied pure bee wax while the tube was still on the lathe.
- 728 replies
-
- 28
-

-
- le fleuron
- 64 gun
- (and 1 more)
-
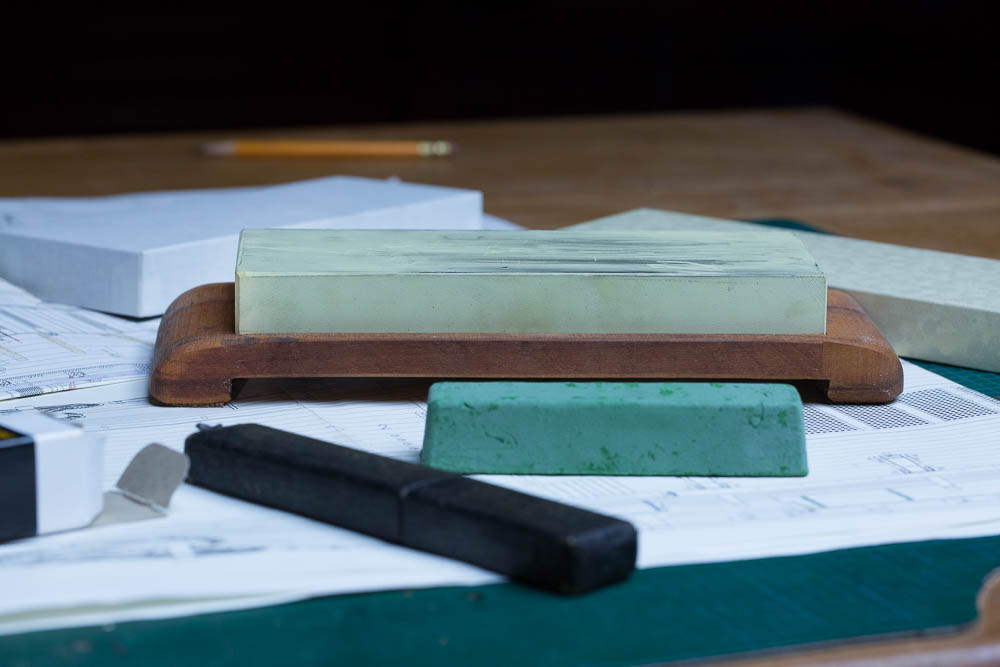
Let's try a recapitulation for resharpening: Oil stones: Rough grit in hundreds, slow and dirty, why use it? Diamond stone, between oil stone and water stone, much faster than oil and you can use water. Water stone are easy to use and perfect to bring back the cut again. A good sharpening is done in thousands that provide water stone. You can go farther in sharpening with a water stone compare to a oil stone. A good sharpening needs a high finish that an oil stone can not provide an oil stone. In a way, the finer the grit, the finer the edge. The finer the edge, the sharper the edge. Water stone must always be kept flat. here is an example of a dressing stone: http://www.leevalley.com/fr/Wood/page.aspx?p=55067&cat=1,43072,67175,68992&ap=1 Water stone does the job but you can add another step with leather with or without compound. I guess it is probably again a matter of number; the higher the number, the sharper the edge. In number: preparing the edge: 0-1000 bring back the edge: 1000 to 20000 finishing the edge: 50000 to 100000
-
Workshop Advice
Gaetan Bordeleau replied to ChrisLBren's topic in Modeling tools and Workshop Equipment
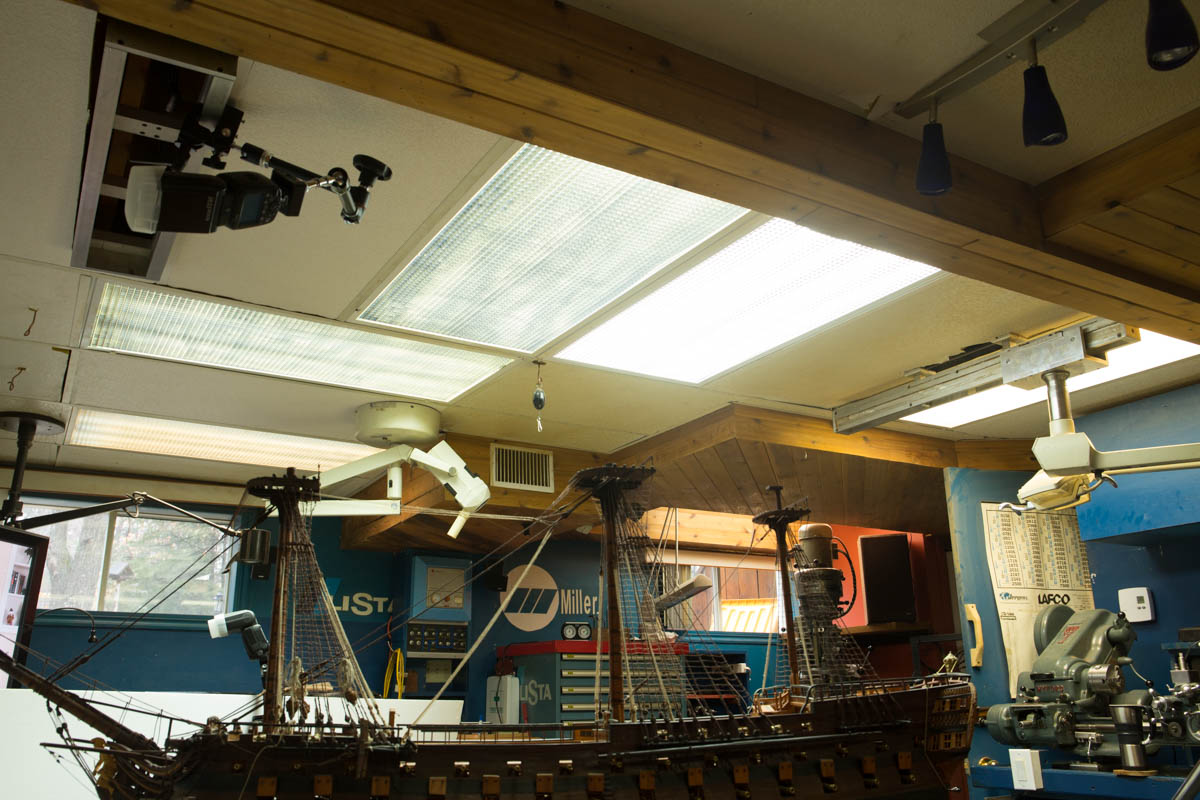
Over the years I tried many installation configuration for the tools. There are 2 aspects that I still take into consideration: Lighting: there is never enough. Flexibility to have the tools at hand: to do this every table have wheels to be move easily.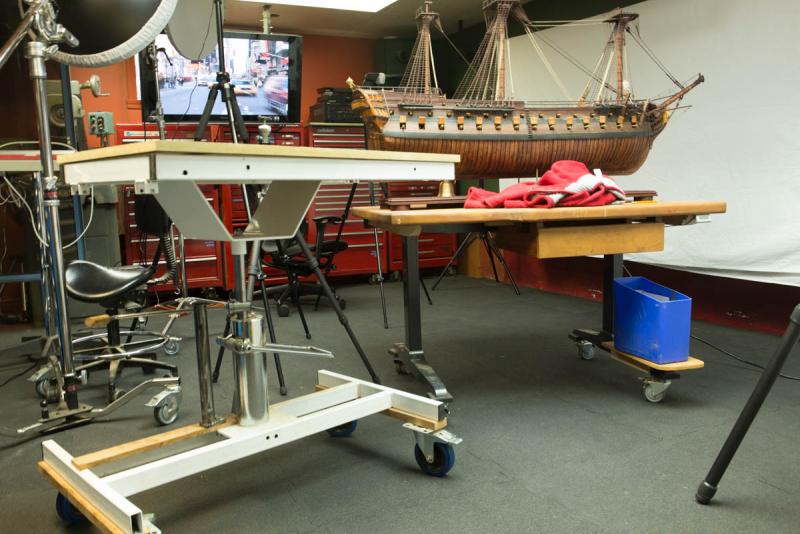

- 72 replies
-
- 15
-
-
Mike, Ebony is the nicest wood you can use and no other wood can have the look and feel of this wood but saw dust is like a micro sand which penetrates everywhere and this wood can be dangerous for the lungs in the long run. The problem with dye is to control the penetration. When you dye after wood installation and final sanding, you will want to use a tape to limit the area but many dies will want to go under the tape. I use a water based paint easy to control the coverage and also it is very stable in time. I do not want to apply any oil over it. I see no benefit. Chances are that if I do this, the surface will be more reflective and when you will take pictures you will see some light reflection. I think you are overthinking, in french we say why make it easy when you can make it complicated. It is exactly the same thing when you create a jig, you try to do it as simple as it can be.
- 968 replies
-
- 10
-
-
- hahn
- oliver cromwell
- (and 1 more)
-
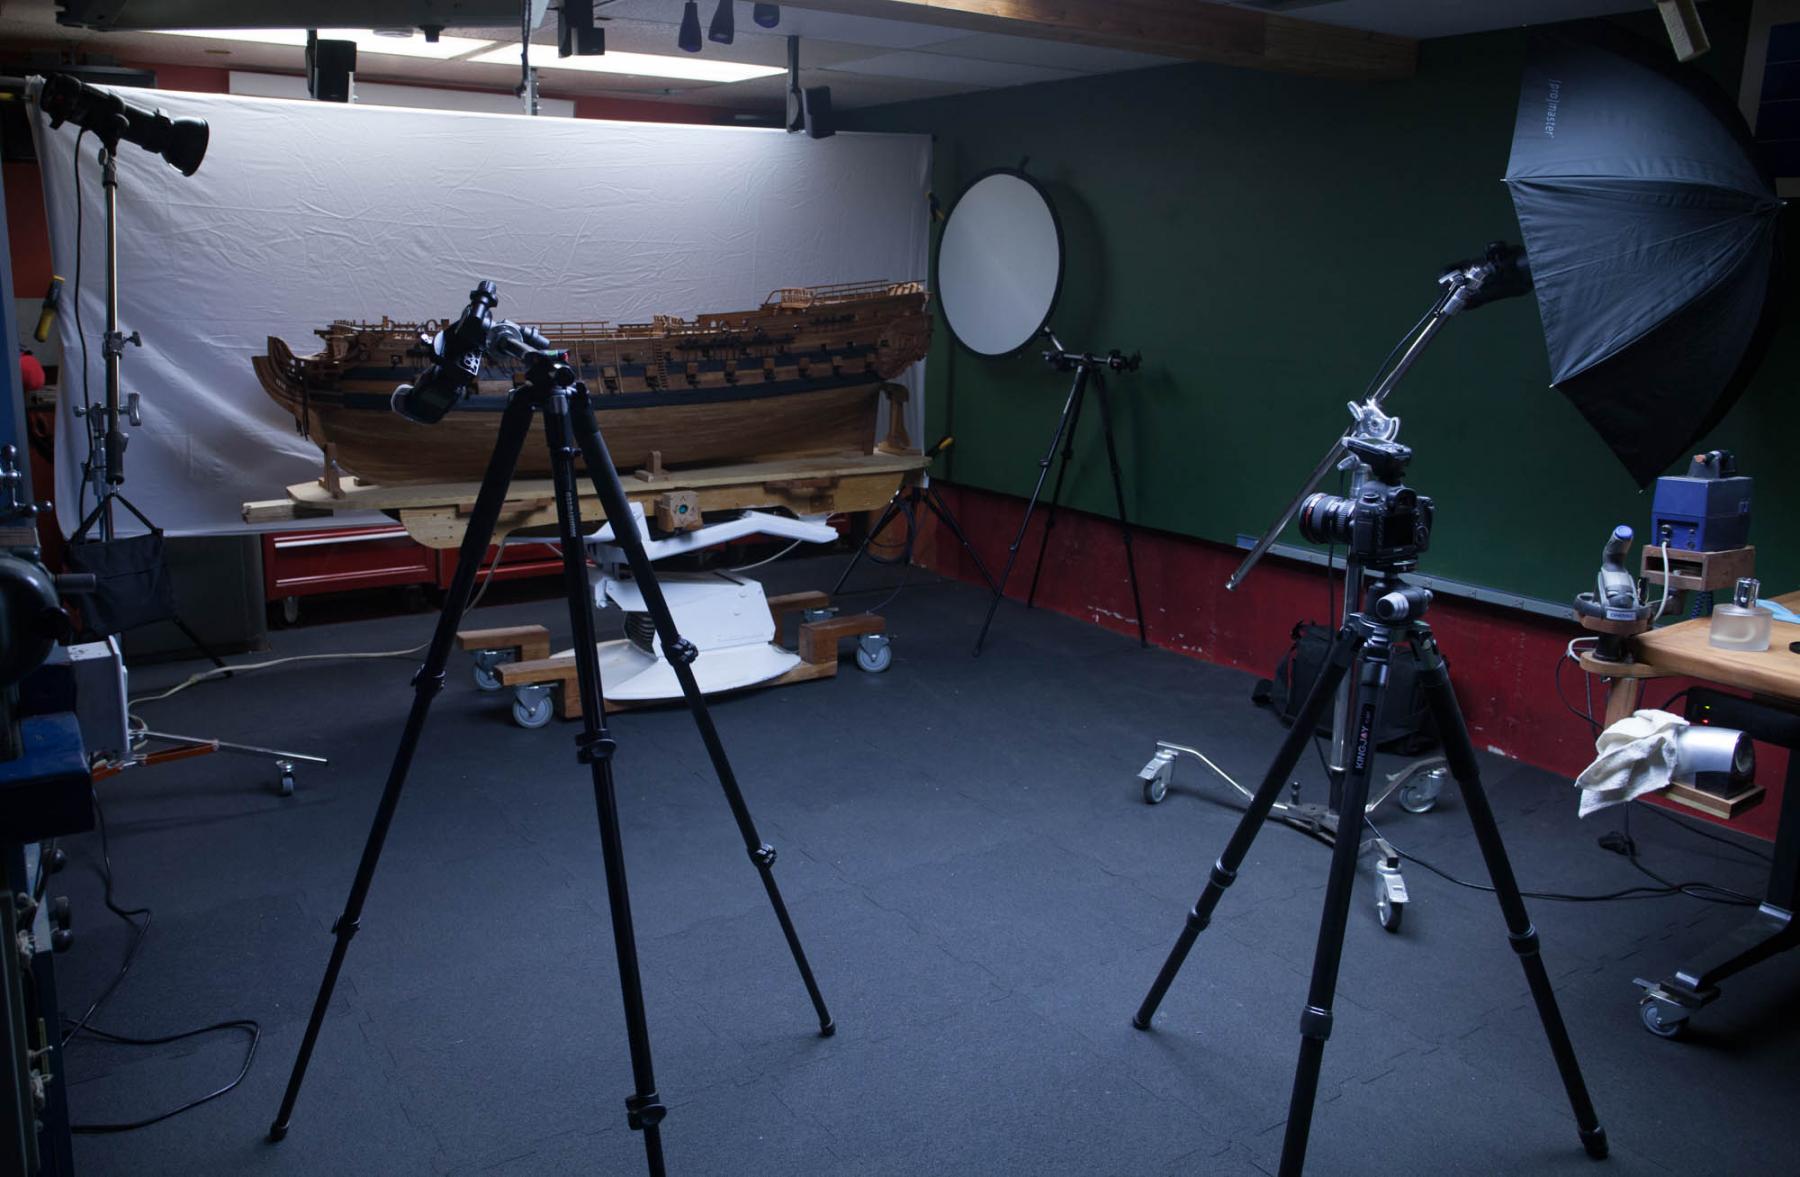
The serach for the lighting continues. In the last months I searched a way to synchronize 2 kinds of flash lighting. There are few information on internet, each company makes his own transmitter and very few want to mix with other companies. But it is possible synchronize the 2 different kinds of flash I use. 3 speedlites flashes installed on or separate from a camera and 2 strobes lighting on a light stand. Each system has his own transmitter and the solution is to find a way to fire all the flashes at the same time. Finally the solution is very easy and there is no need to buy any additionnal transmitter like Pocket wizard and this event if they said so in a video sponsorised by Pocket wizard. The Canon speedlites are all synchronized in 1 group to flash at the same time. The other kind of strobes from Profoto have a cell that detects the flash from Canon: so they all can fire at the same time. Last week, I went in a photography equipement show and I brought back a continuous LED lighting. I measured it to compare with the other lighting I have. It is even better than the best Lamp I have: 25,000 lux at 12 inches. The best Lamp I have is a Xenon light 19,800 lux at 12 inches and the worst I have are 3 halogens with 500 lux. So if you want a good lighting to see every thing, this is the way to go.


- 728 replies
-
- 21
-
-
- le fleuron
- 64 gun
- (and 1 more)
-
1 diamond 1 water stone 1000 1 water stone 8000 1leather strop I bought some at Lee Valley
-
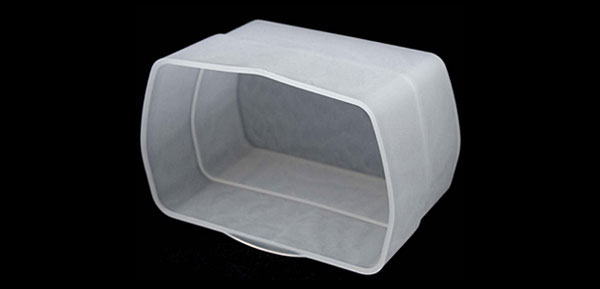
Allan, for someone who would like more than point and shoot, the next step would be; 1 camera + 1 flash + 1 diffuser at $5 and it would be more than enough to take very nice photo of a model ship at a scale of 1/48 and higher. Gaetan
- 728 replies
-
- 2
-
-
- le fleuron
- 64 gun
- (and 1 more)
-
Inspirings words,thank you. Ideally if I pass 1000hours to build a model ship, the last task I would need to do to complete the presentation would be to show some nice photos of the finished model. To build a model, you need to work with wood and metal but you also need to work with a camera. As evereybody knows, the subject of photography was never a success on this forum. I think the best way to begin this subject would have been with this first methodology : How to photograph a model ship and there would be also a space for equipment. The first thing I would buy would be a flash with a diffuser.
- 728 replies
-
- 3
-
-
- le fleuron
- 64 gun
- (and 1 more)
-
8 microns shavings
Gaetan Bordeleau replied to Gaetan Bordeleau's topic in Modeling tools and Workshop Equipment
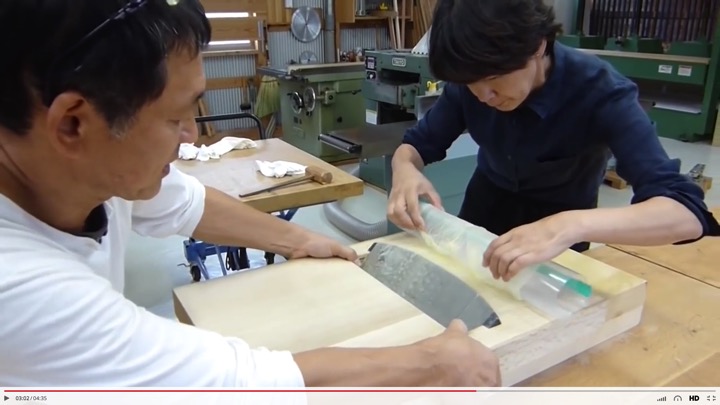
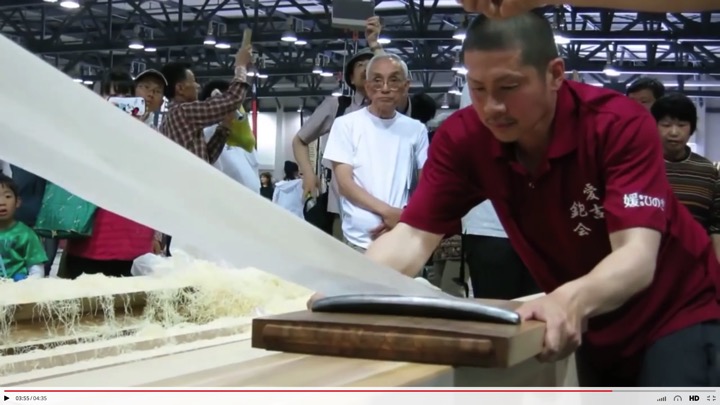
Japanese hand planes or kannas annual Kezuroukai exhibition in Japan, planers are allowed to bring bundles of whatever wood they think yields the best result the wood planing competition was held in the port city of Uwajima, on the island of Shikoku, https://brianholcombewoodworker.com/2016/08/18/kezurou-kai-approaching-zero/ http://mokuchiwoodworking.com/events/kez2016/ Alaskan Yellow Cedar ''It takes very high quality lumber to be able to produce a considerably thin shaving, not simply the species of lumber but also the orientation of the grain. Wood, in it’s strongest format would need to be oriented with the grain running vertical on all faces, this is otherwise known as VG (Vertical Grain), in order to provide a VG format the first step is for the lumber to be sawn in a manner which produces a rift cut. A rift cut is one in which the grain runs corner to corner at approximately 45 degrees. The rift cut can run off course, so the pith (center) of the tree must be aligned so that the board produces grain running parallel to the edges. The final step is to cut the lumber to follow the grain running along the faces of the board. The strongest lumber is that without grain runout. Grain runout is an occurrence in which the grain terminates on a vertical face. If you have ever caught a splinter in a board it was likely at a point in which the grain rose to the surface of the board. A common place to find such an effect is in an area surrounding a knot. Vertical grain, in it’s best form is one in which there is no runout. In addition to the sawing program this also requires the tree to have grown in a straight run for the at least the length of the board. This happens most often in dense forrest where the tree gives up on low branches very quickly as it grows higher to compete for sunlight. The species of lumber is next considered. Alaskan Yellow Cedar, commonly referred to as AYC is the species of choice. Alaska has very short growing seasons and so the lumber yields very tight growth rings. Tight growth rings are preferred on high quality lumber. I’ve heard stories of people acquiring lumber which required a magnifying glass to count the rings. Growth rings that tight are coming from trees which are centuries if not thousands of years old. Cutting down thousand year old trees is not something I carry much interest in doing, instead I’ve acquired wood more common to the trade and still very high quality AYC.'' -
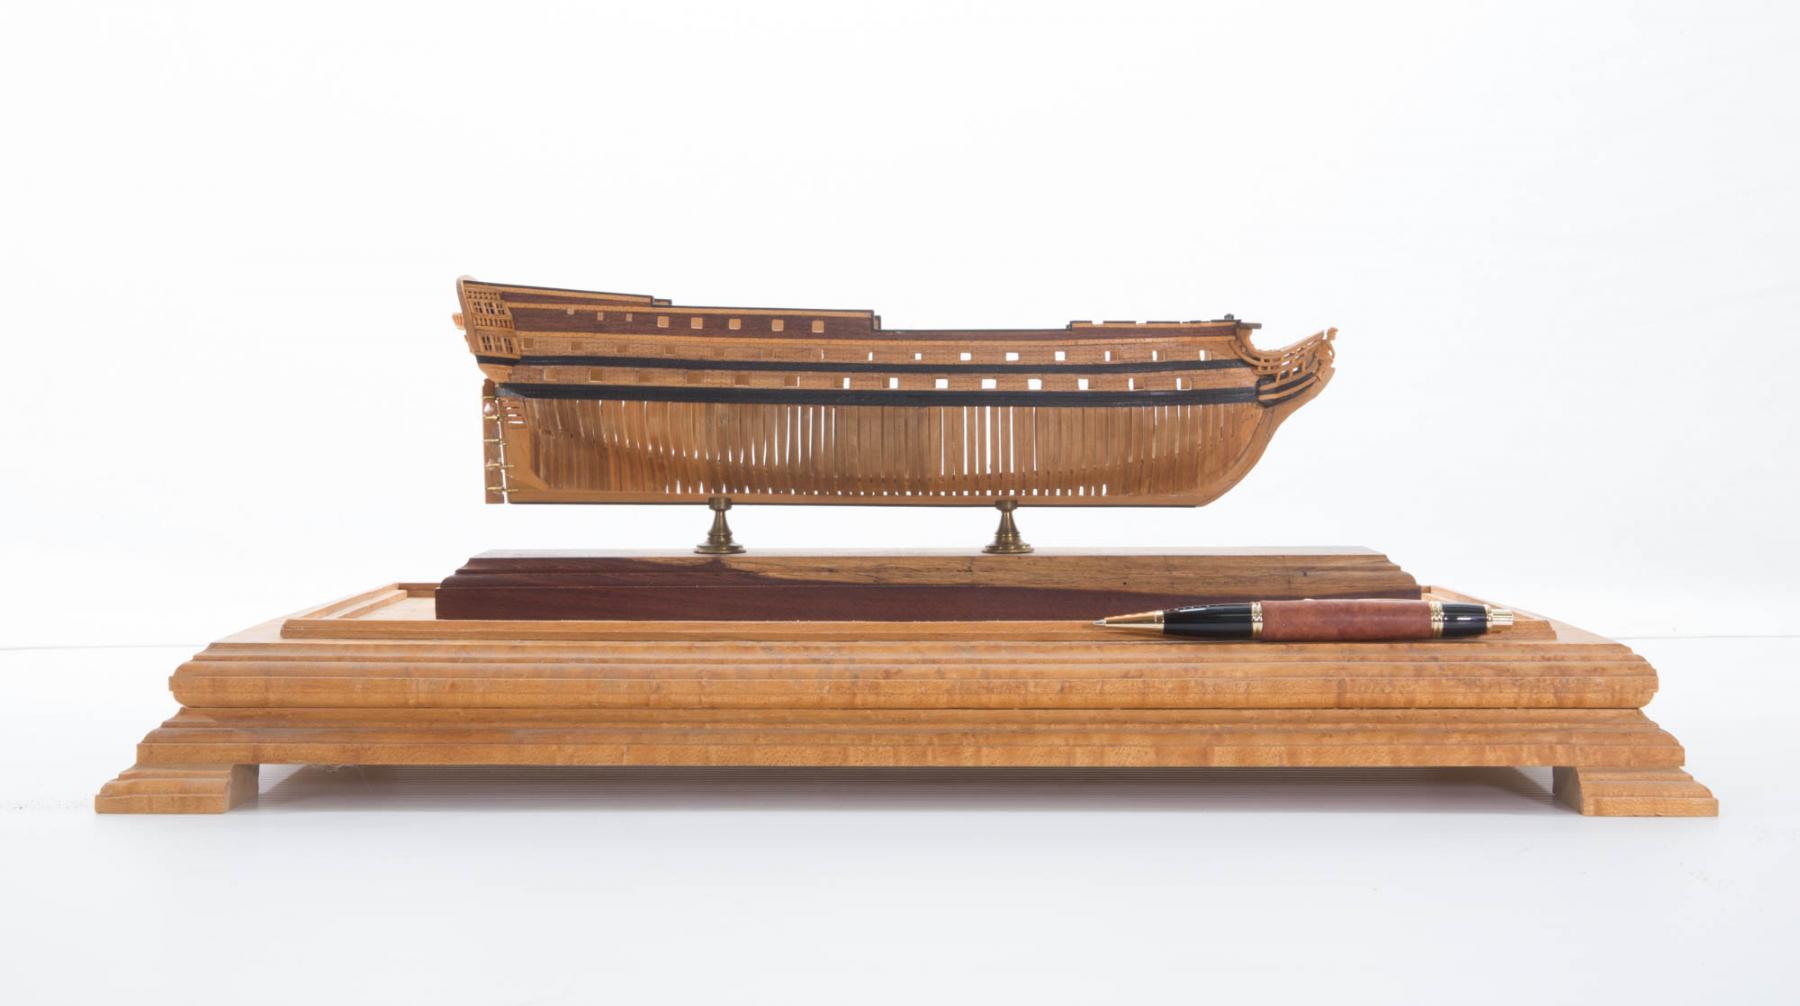
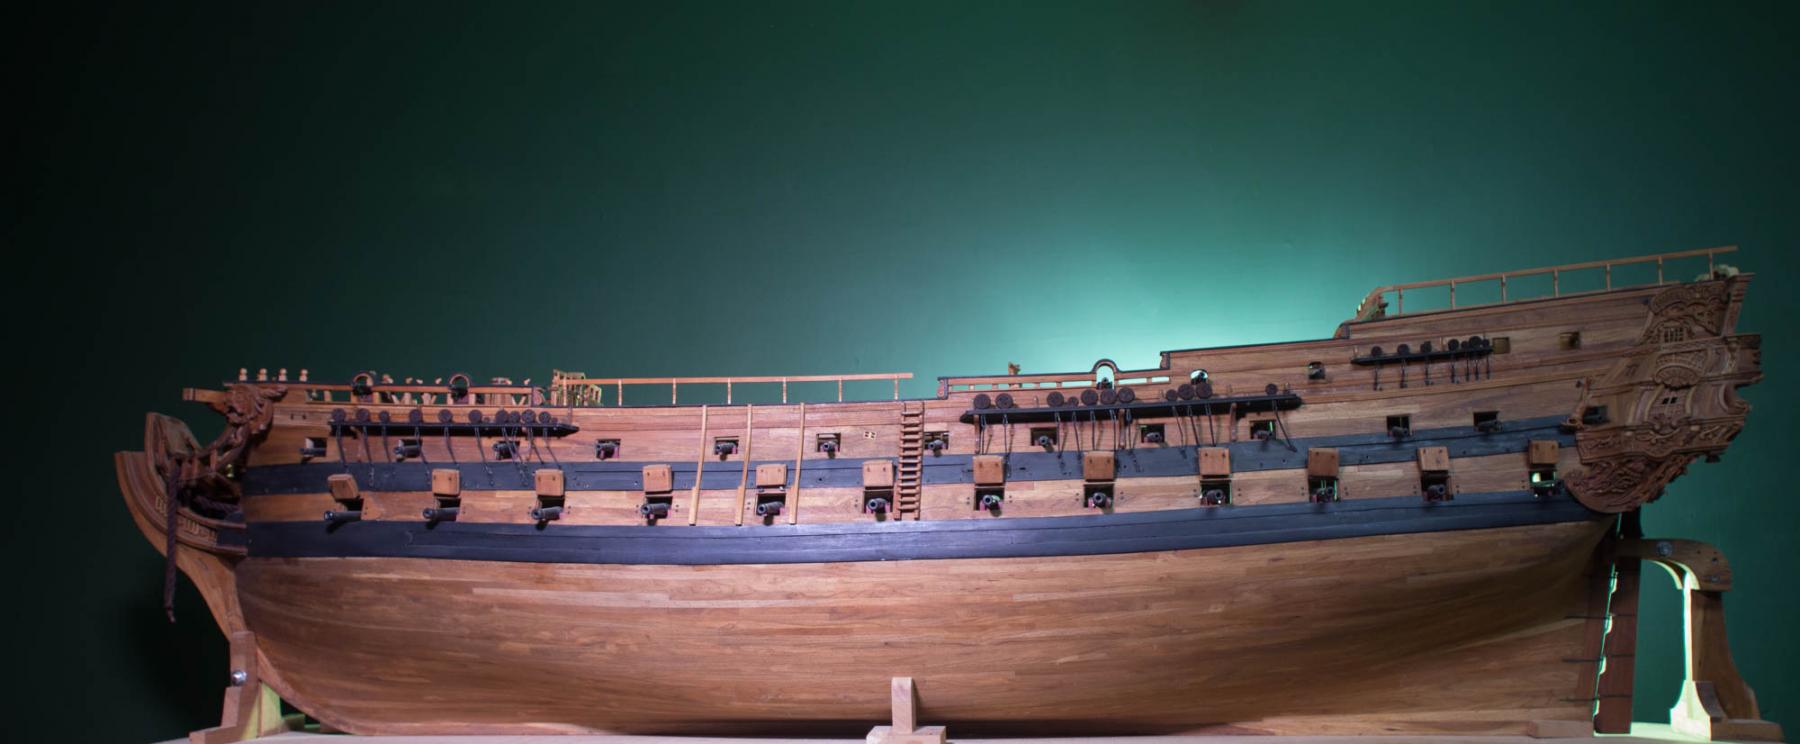
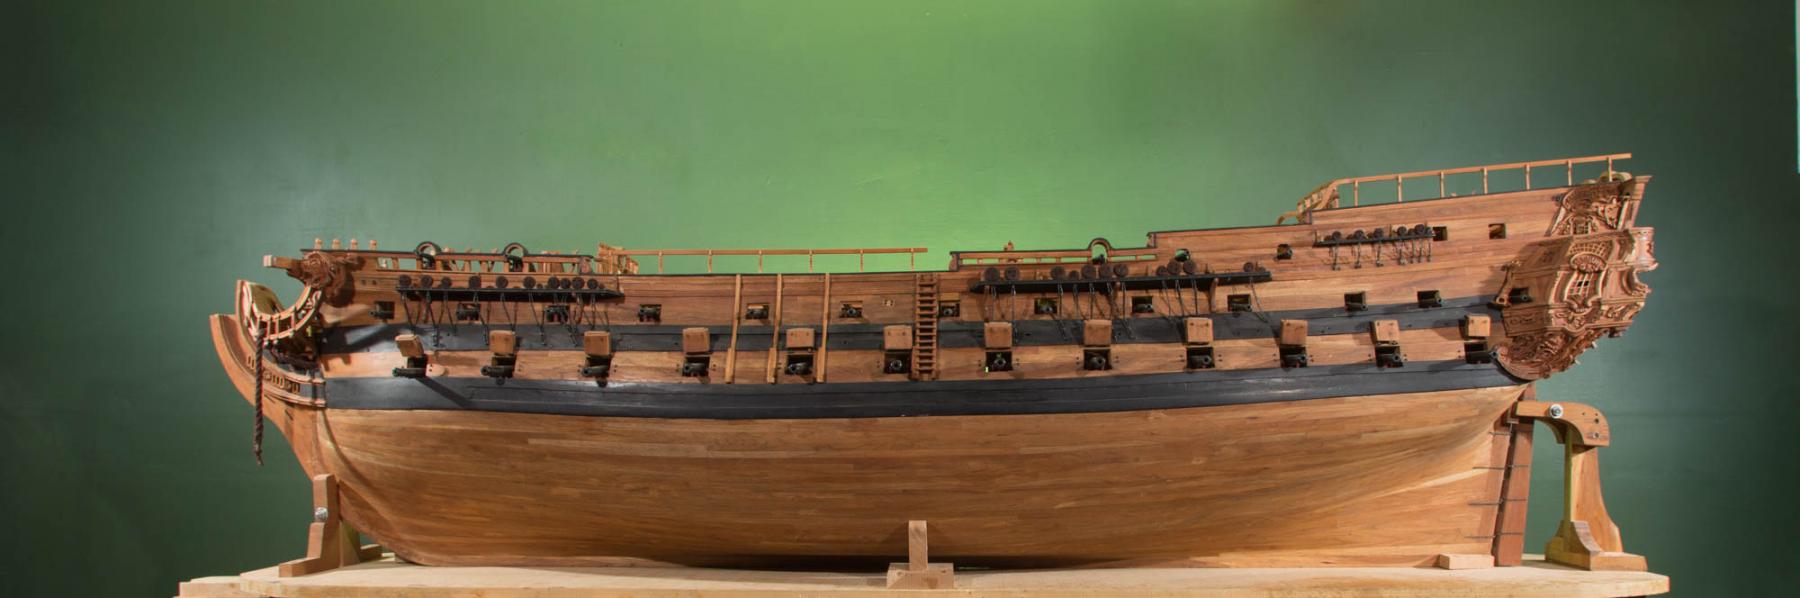
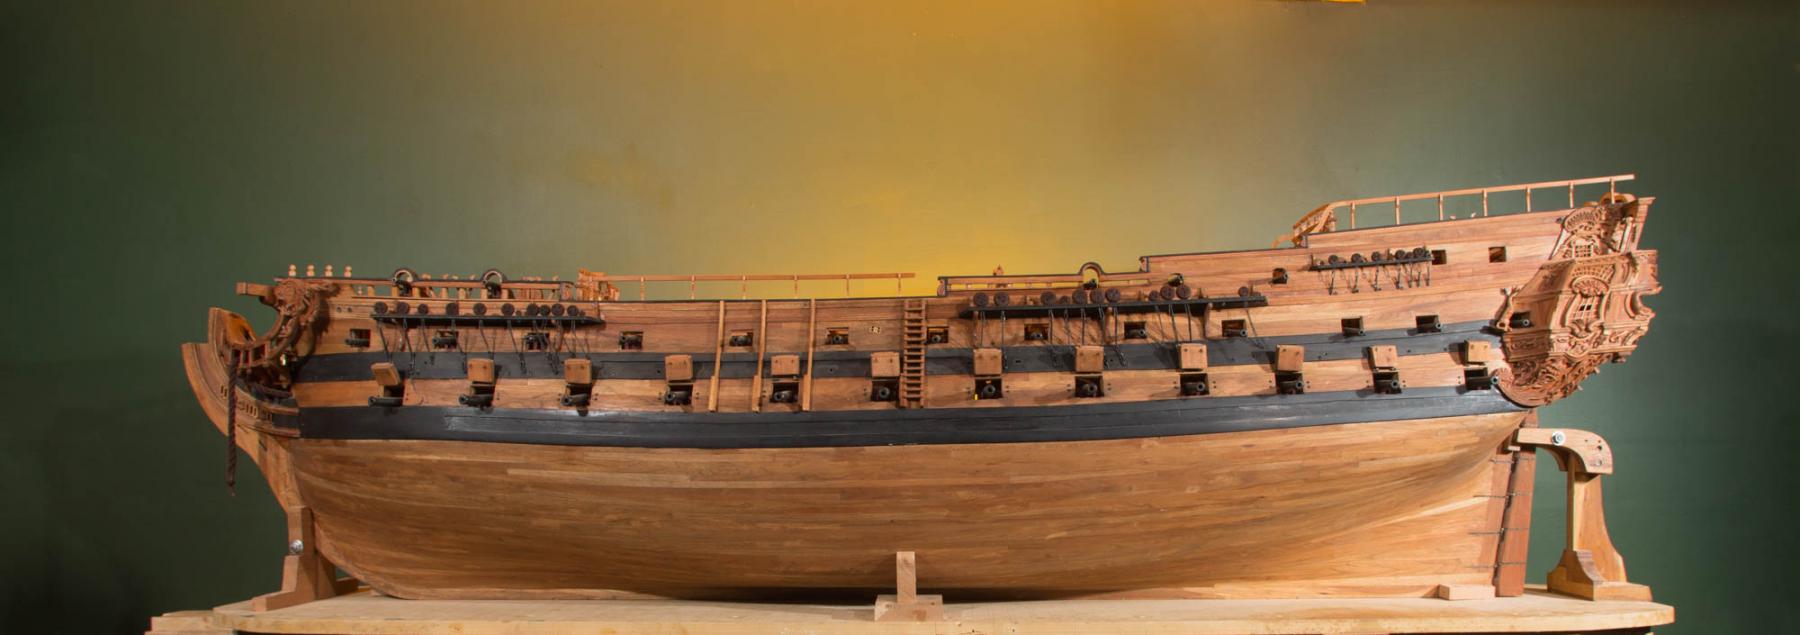
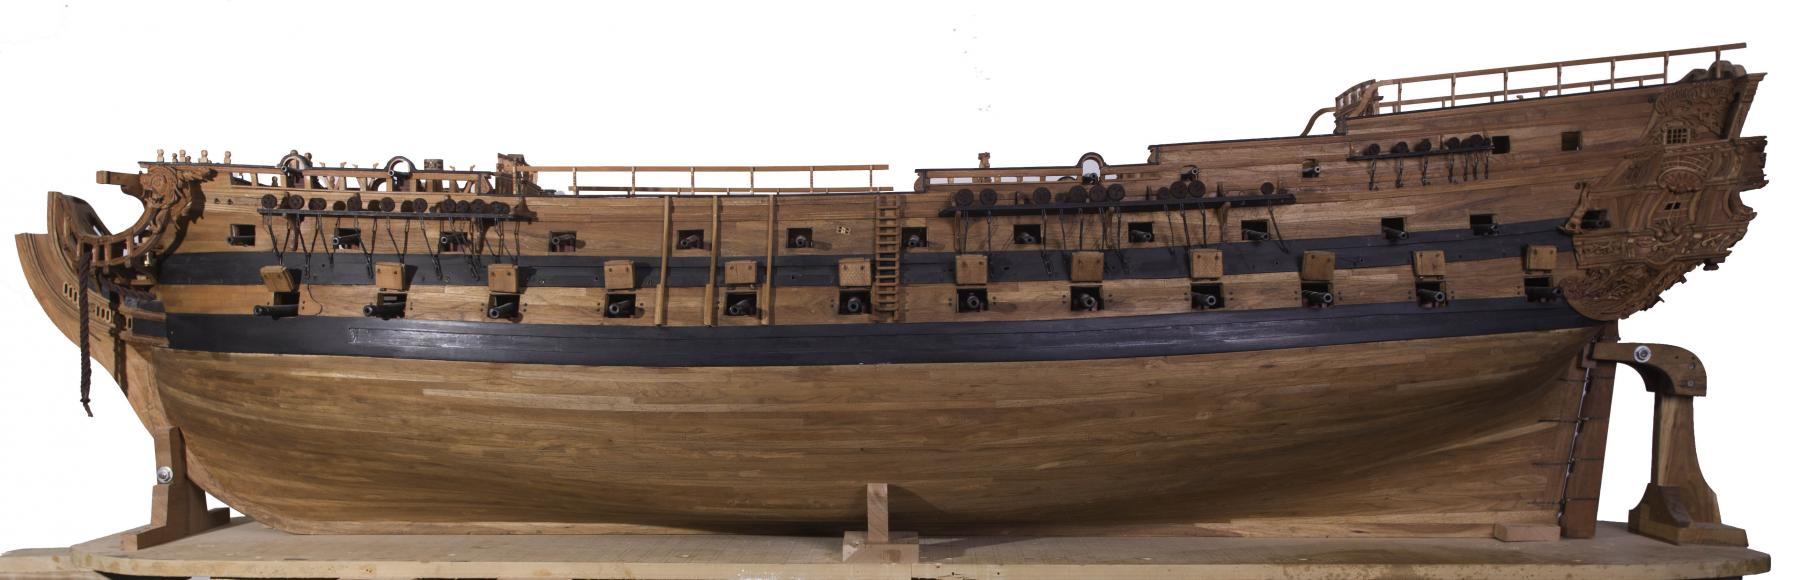
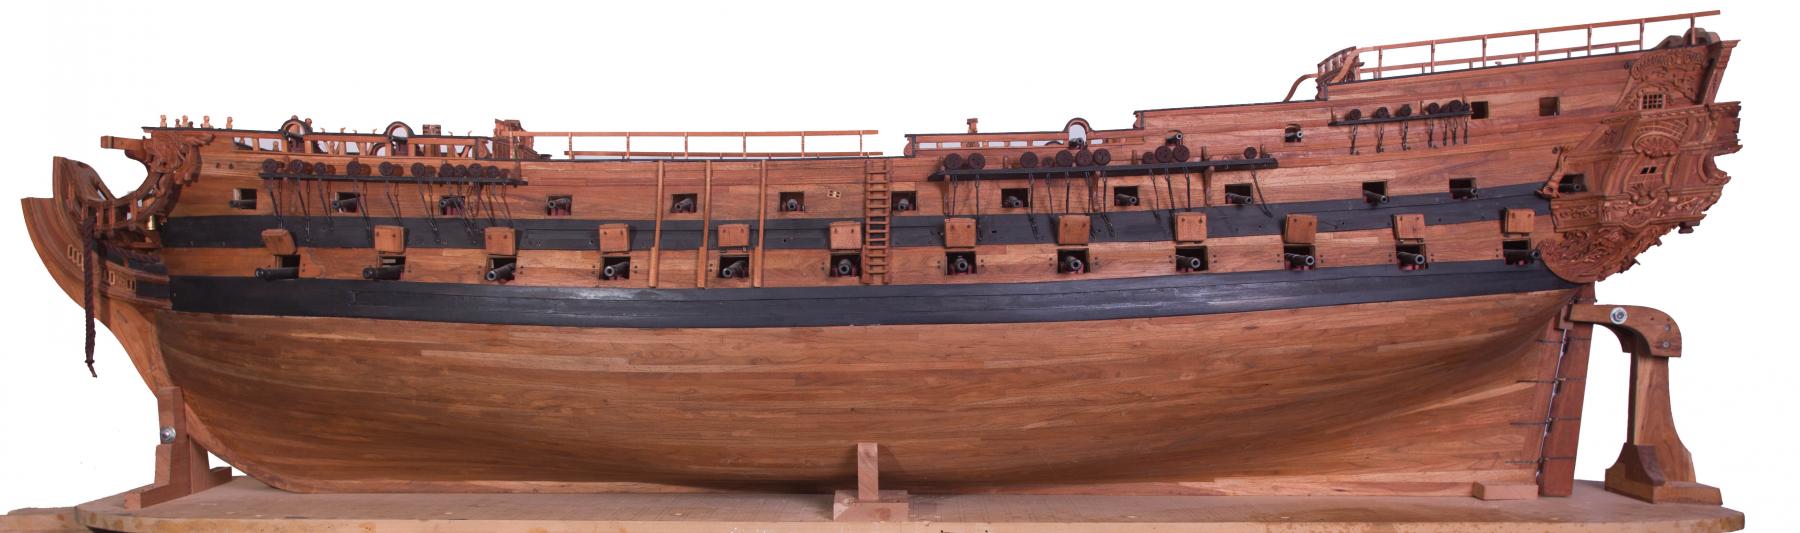
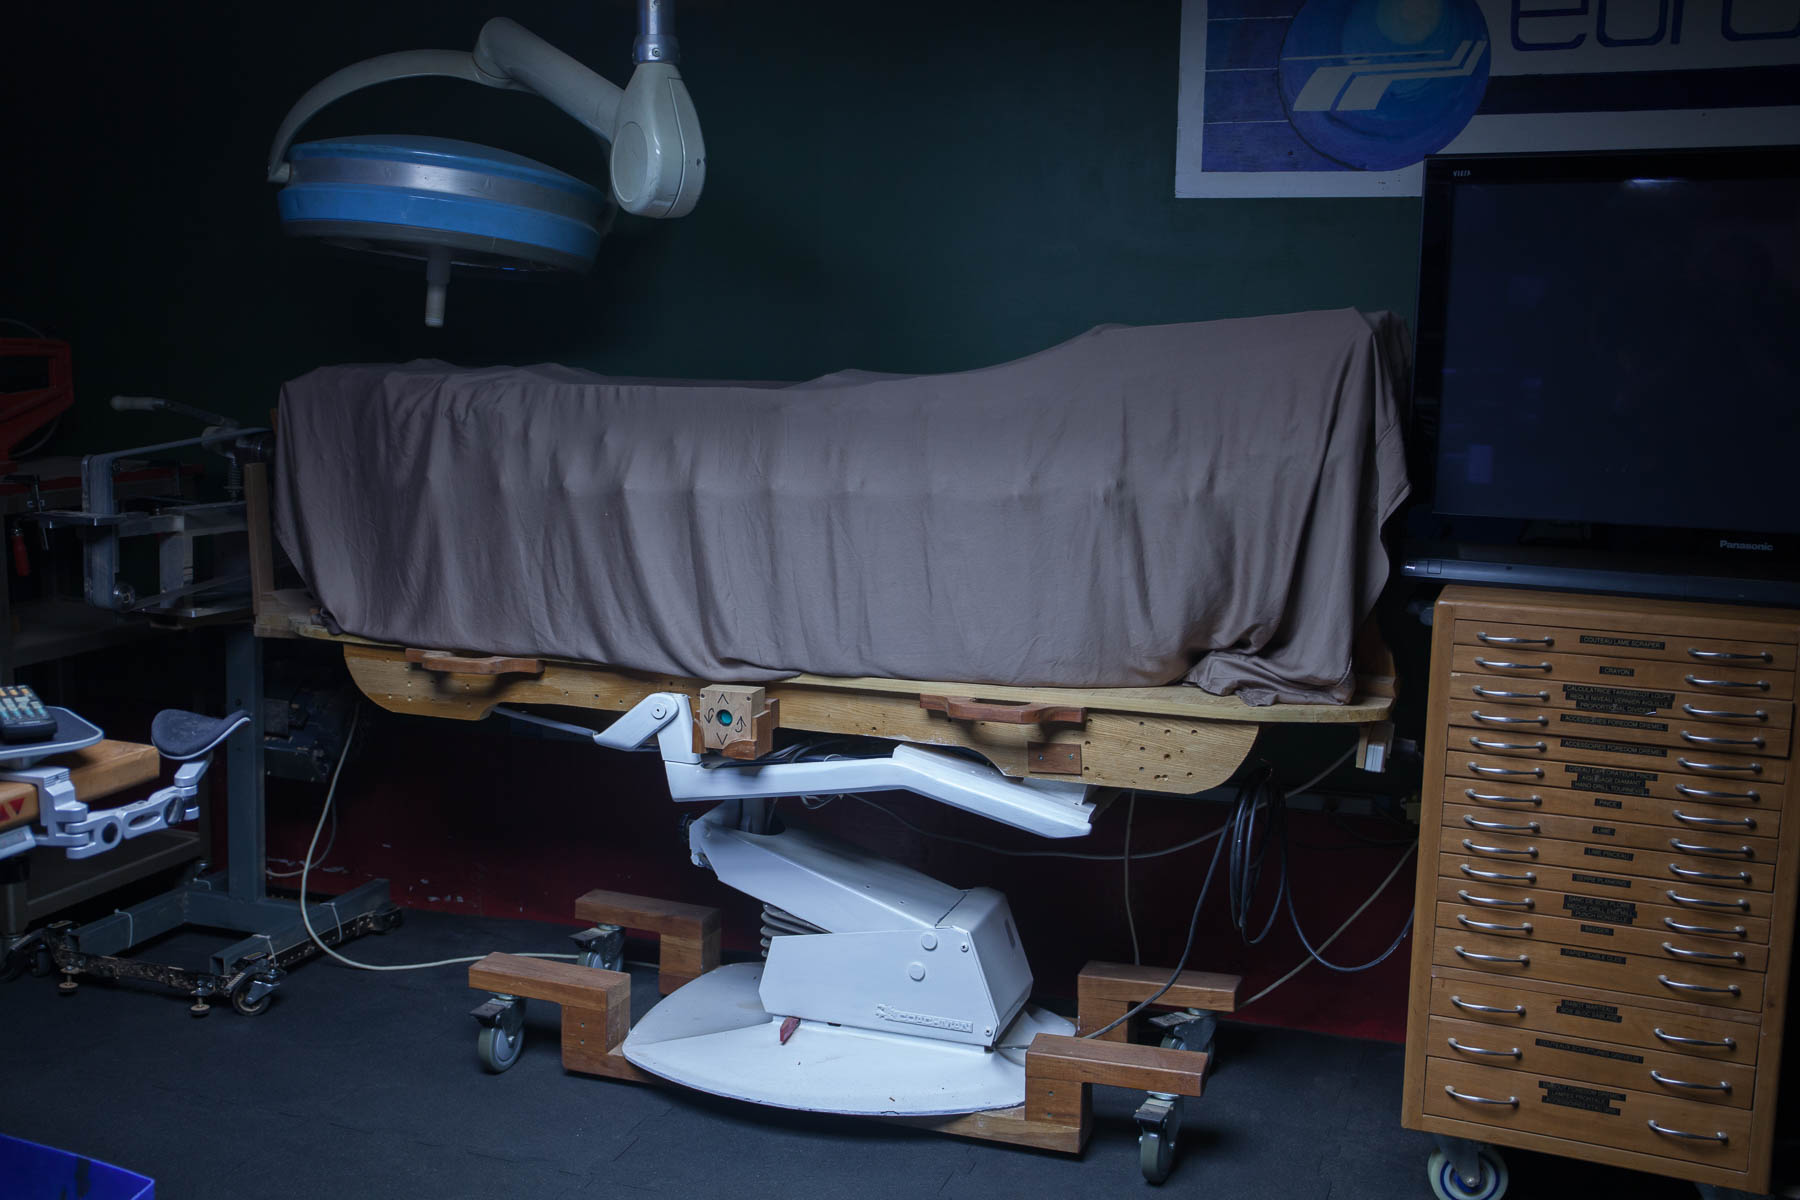
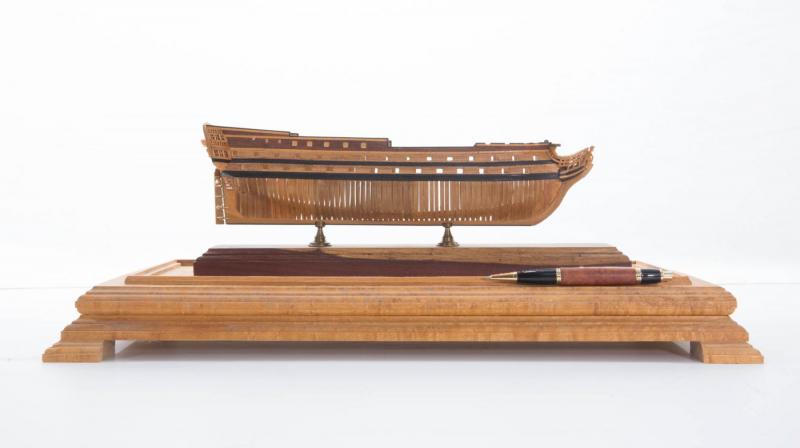
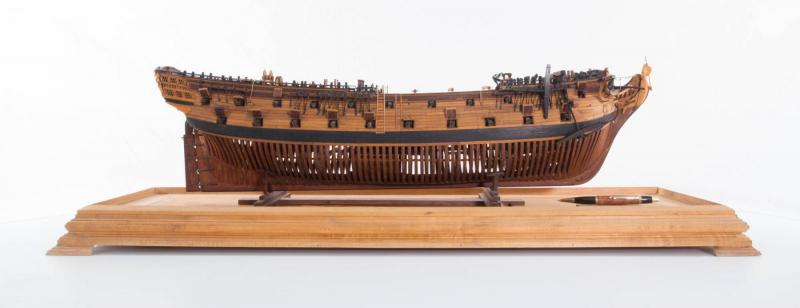
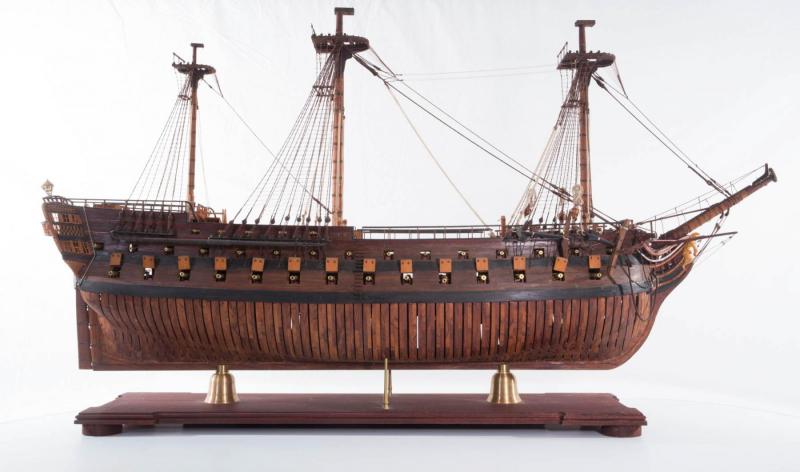
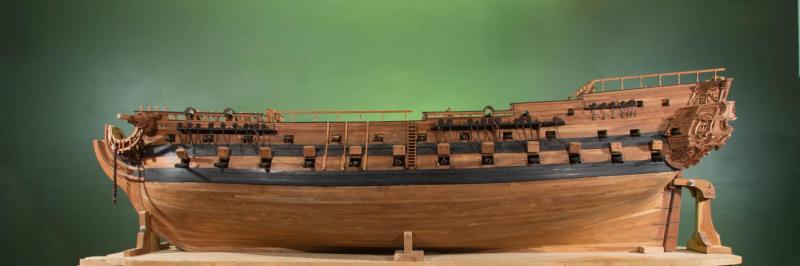
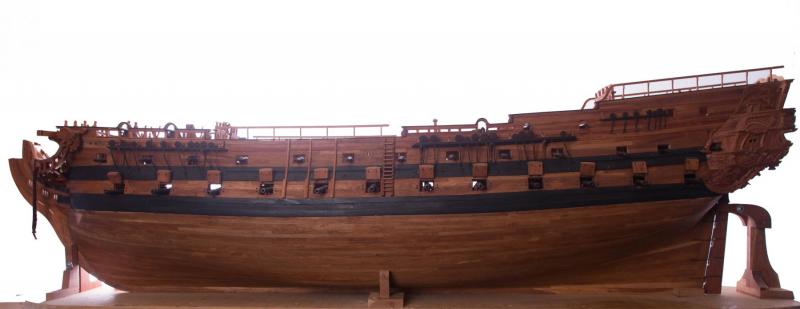
I am having pleasure to try to shoot a perfect picture with a white background. Whe I look at these 3 pictures on the screen, the real color of the model is somewhere between 1 and 2. Many fluctuating variables must be controlled in 1 shot. In a way, it is exactly like trying to calibrate a motor, each part must be adjusted in relation with his group and everything must turn and produce a good sound and in this case, a good picture. It is difficult to position the lights to get : a pure white background, the real color of the model, no reflections on the model. I can control each variable separately, but I have difficulties to get a well tuned engine. The large surface is also a problem about 4 by 8 feet. . A black background is 100 times easier to approach. You can do it with a black curtain or with the flash close to the model. Theoretically, reflection is easy to control if there is not more than 2 coats of tung oil, accumulation of coats create a thickness in the oil and this dried thickness can be very reflective. The worst finish I could use is a shiny reflective varnish. Black wales represent a problem. The water based black paint looks fine under the naked eye but when the camera looks at it, she has no mercy. When I look where are the shining spots, some corrections must be brought to correct the problems but it is very delicate and in few cases a very light sanding. In a summary, the model would need better finish, and the photograph needs some more practice. I probably did at least 500 pictures of the same model. I did not see the perfect shot yet. The main thing is that the last picture is better than the first one. This is a good sign which means; Continue to learn and you will succeed.
- 728 replies
-
- 7
-
-
- le fleuron
- 64 gun
- (and 1 more)
-
different colors, no, different lighting. In fact, practice for a white background. The idea is to have 2 lights: 1 for the model and for for the background with 1 F stop in more.


- 728 replies
-
- 16
-
-
- le fleuron
- 64 gun
- (and 1 more)
-
Japanese style With these shavings you can laminate woods and make a lot of parts.
- 5 replies
-
- 13
-
-
Here is what I found about the use of bitumen by old artists, the key is not to use more than what turpentine can dissolves. http://www.naturalpigments.com/art-supply-education/asphaltum-bitumen ''Although many aspersions have been cast upon the use of any asphaltum in oil painting, it is interesting to note these comments by Church. The disadvantages attending to the use of these coal-tar browns and of ordinary asphalt are two-fold. Not only are they treacherous on account of their easy fusibility, but they are liable to stain contiguous pigments by reason of their solubility in oil or varnish. When used successfully by the older artists they were always introduced sparingly, or were largely commingled with more solid paints." Basically, it is the same principle for aging wood; dissolves bitumen in turpentine and then add oil. There is a maximum of bitumen that can be dissolved in turpentine. Passed this point bitumen sinks in the bottom of the container.
-
Power Tools for a Fully Framed Build
Gaetan Bordeleau replied to ChrisLBren's topic in Modeling tools and Workshop Equipment
These small chisels are not bad. They could have benefit from a better quality steel for more rigidity. Also a bigger handle would be beneficial to give more control to the chisel. To have a main sharpening system is the beginning. Personally, I prefer a side coated diamond wheel; fast, efficient and giving a nice finish. But this is not enough, the blade needs some finishing to enhance and increase the sharpening, a fine water stone is good for the next step. For the final touch, a leather stop can give a little plus.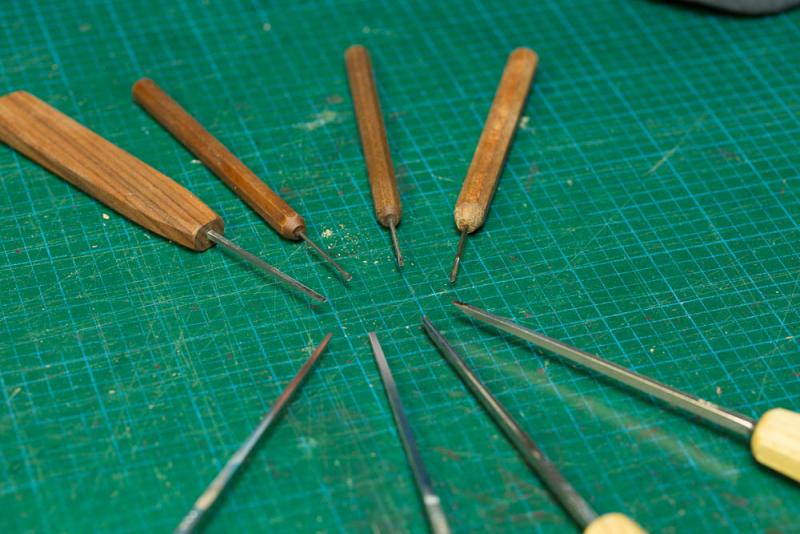

-
Power Tools for a Fully Framed Build
Gaetan Bordeleau replied to ChrisLBren's topic in Modeling tools and Workshop Equipment
Size for a lathe or a mill in model ship building is not a matter because you work on woods mainly and on few occasions on brass . Proxxon is the only one that I know who qualify for Speed for the mills because of the speed. Of course you can mill at 5000 rpm but in comparison it is like finishing at #80 in comparison with #600, wood particles will also be smaller and it will chip less. Unless you want to mill aluminum or harder materials, tool room machines are not required. The difference between a miniature lathe and a toolroom lathe is a pass of .001'' in comparison of .01'', 10 times faster A mill is not really necessary, you can easily go without it. To use it to make notches is not a real good thing, it needs a longer time to do it because it leaves round corners, it faster to do it by hand only. For the lathe it is a different story; it would be harder to go without a lathe for a model ship builder, the cheapest alternative being to use a drill. -
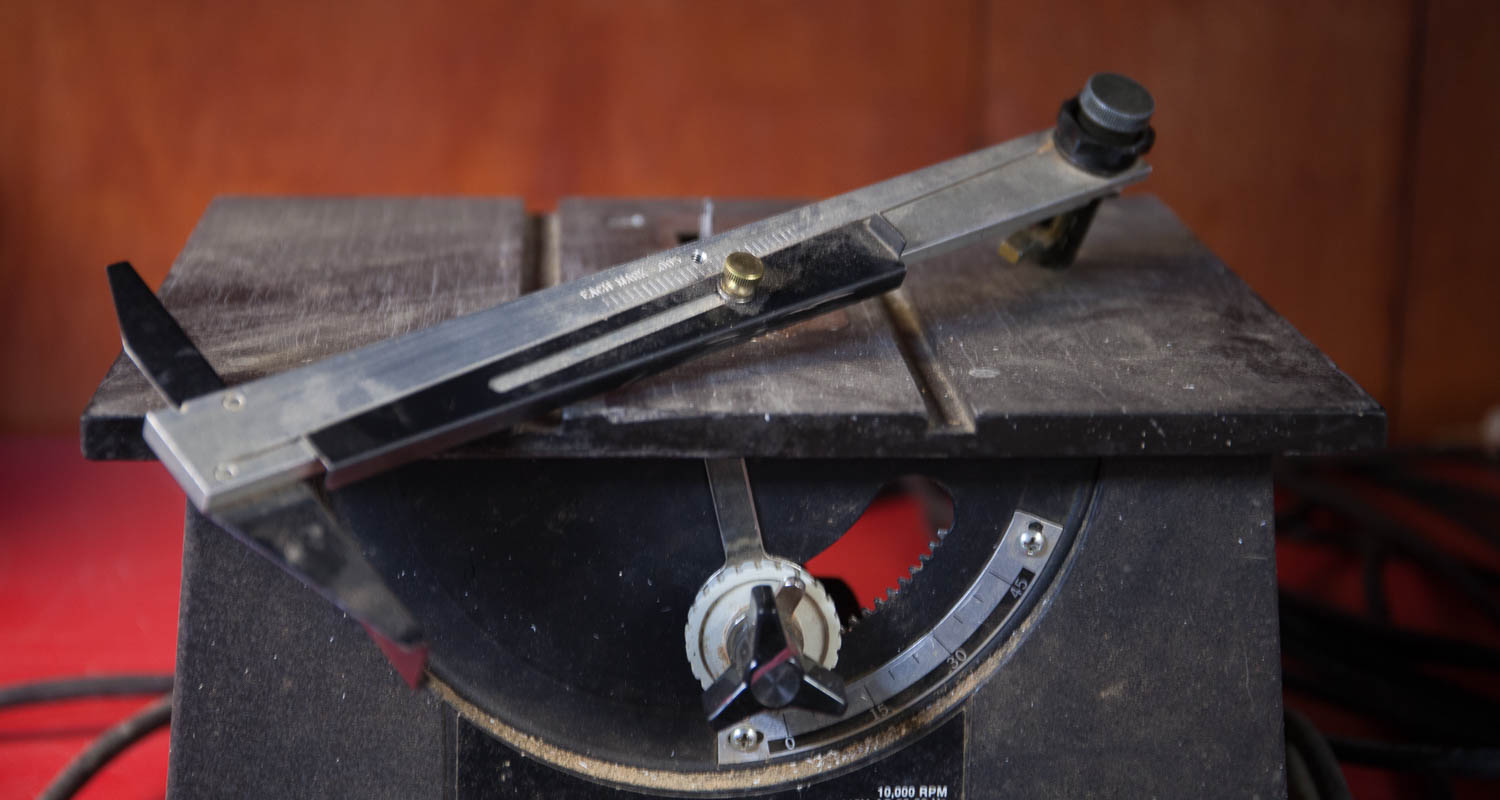
Dremel saw refit
Gaetan Bordeleau replied to DocBlake's topic in Modeling tools and Workshop Equipment
The best upgrade bought for this saw accurate fence to .001'' by a taper sliding on the fence. I do not remember the name, bought this at least 25 years ago and I have always used carbide teeth blades.
-
Byrnes Ropewalk
Gaetan Bordeleau replied to DocBlake's topic in Modeling tools and Workshop Equipment
There are some parameters to control when making ropes to get the best quality ropes. One of the difficulties in making ropes is the control of the tension applied during ropes turning, too much and the rope will be too hard. Controlling the number of turns at one end is one thing but you also need to control the number at the other end to balance the strength in the ropes so that the finished product keeps a stable length and does not stretch. Many types of ropes machines exist but some works better than other. The type you are looking is the best looking type of rope machine on the market. But I would ask myself 2 question: - Are there peoples on this forum who can control the process with this kind of machine and get perfect different type of ropes? - If the answer is no, then is there another type of rope making machine which can process the perfect rope? Can the answer to the second question be yes? Yes but you would have to build it. Here is an example;
-
Tools and Supplies for My "Shipyard"
Gaetan Bordeleau replied to daveward's topic in Modeling tools and Workshop Equipment
Tools needed is a subject which comes back periodically but always in a new thread and often with similar inputs in the: Modeling tools and Workshop Equipment section There is a subject that I have never seen in this category which is saving tool files in the computer: I expanded the tool section in 3 main directory: Metal Wood Model ship with few secondary files that suits my needs like by example workshop. Here are few examples of files for metal; lathe, milling, micro drilling, grinding etc. For the wood section, mainly some particular tool pictures. For the Model ship tools, tools dedicated to this hobby or some particular tools that i would like to have or fabricate like a balanced wood handle for a jeweler's hammer. -
Tools and Supplies for My "Shipyard"
Gaetan Bordeleau replied to daveward's topic in Modeling tools and Workshop Equipment
Allan, an advice would not be about #11 blades but to get a scalpel with acrylic handle. For100 blades around $25, at 25 cents a blade I do not not bother to resharpen but you can try if you want. The first you will remark when you try it is how much easier to do it with a scalpel in comparison with an exacto. -
Tools and Supplies for My "Shipyard"
Gaetan Bordeleau replied to daveward's topic in Modeling tools and Workshop Equipment
E.J. you are in the good direction, Lighting is a very large subject. By example color; incandescent is of a red color, halogen is yellow, fluorescent is blue and finally LED is white. You should consider this when taking pictures. The easiest way is to correct the color rendition with the White Balance or you can do it manually wit gel, different plastic color to get rid of color you do not want to see. The smaller you will go and this is specially true when you need a high level of concentration in carving a small figurehead. The stronger the light, the better you will see the details. At the opposite, insufficient lighting will not allow you to see all the details and the first effect will be to reduce greatly the quality of your work. Quality of lighting ican be measured in foot candle or lux. This is a good indication how much your lighting will facilitate your task. Many tables are available for this subject. High quality lamps are usable at greater distance 4 feet by example. In certain circumstances, you can use a medium quality light which would have by example a working distance of 2 feet and increase the foot candle by bringing the lamp much closer. The range of lighting is also very large, it can go from below 100 to 20,000 lux. -
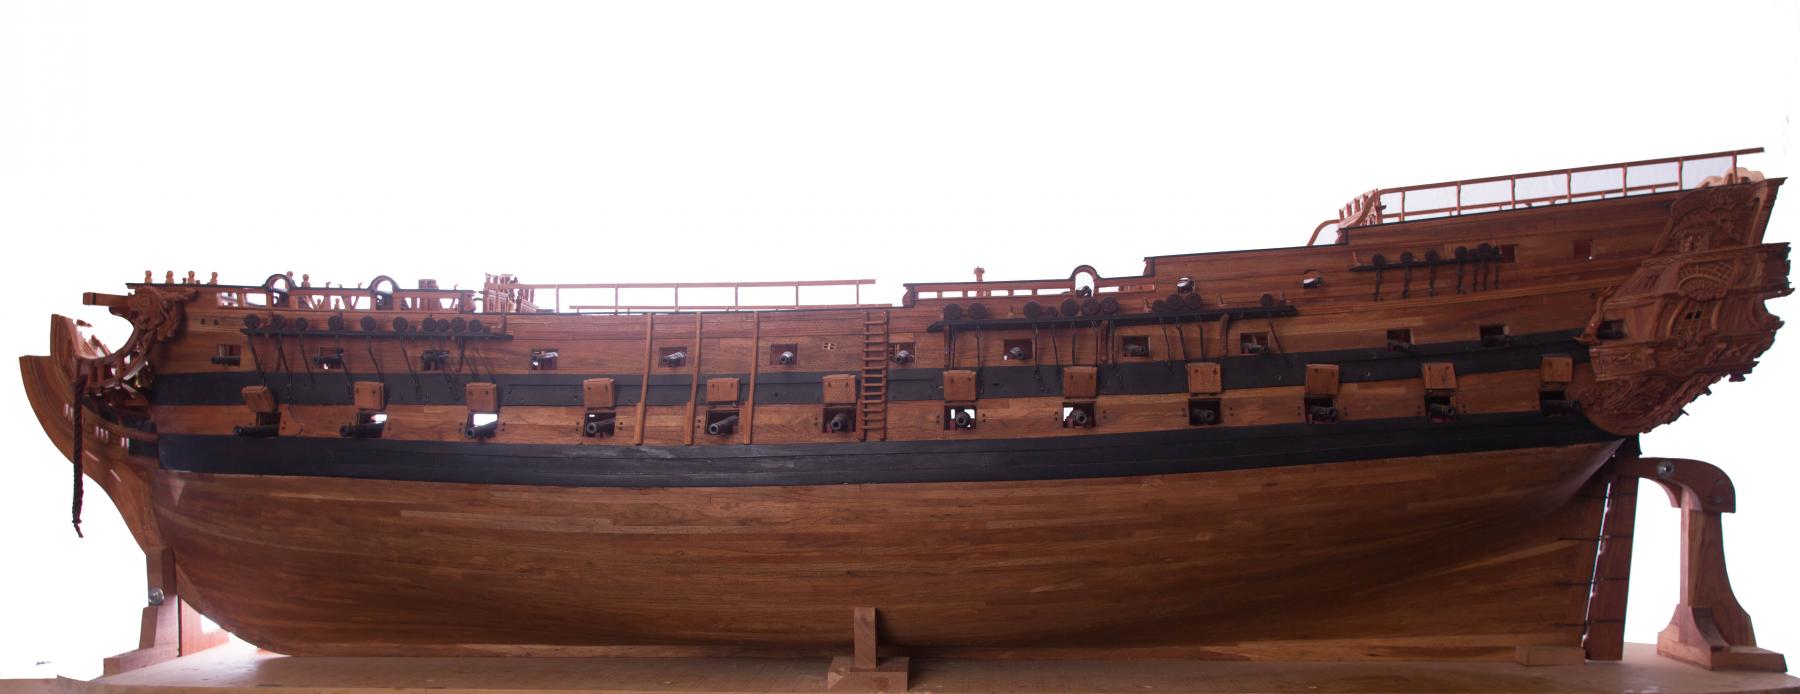
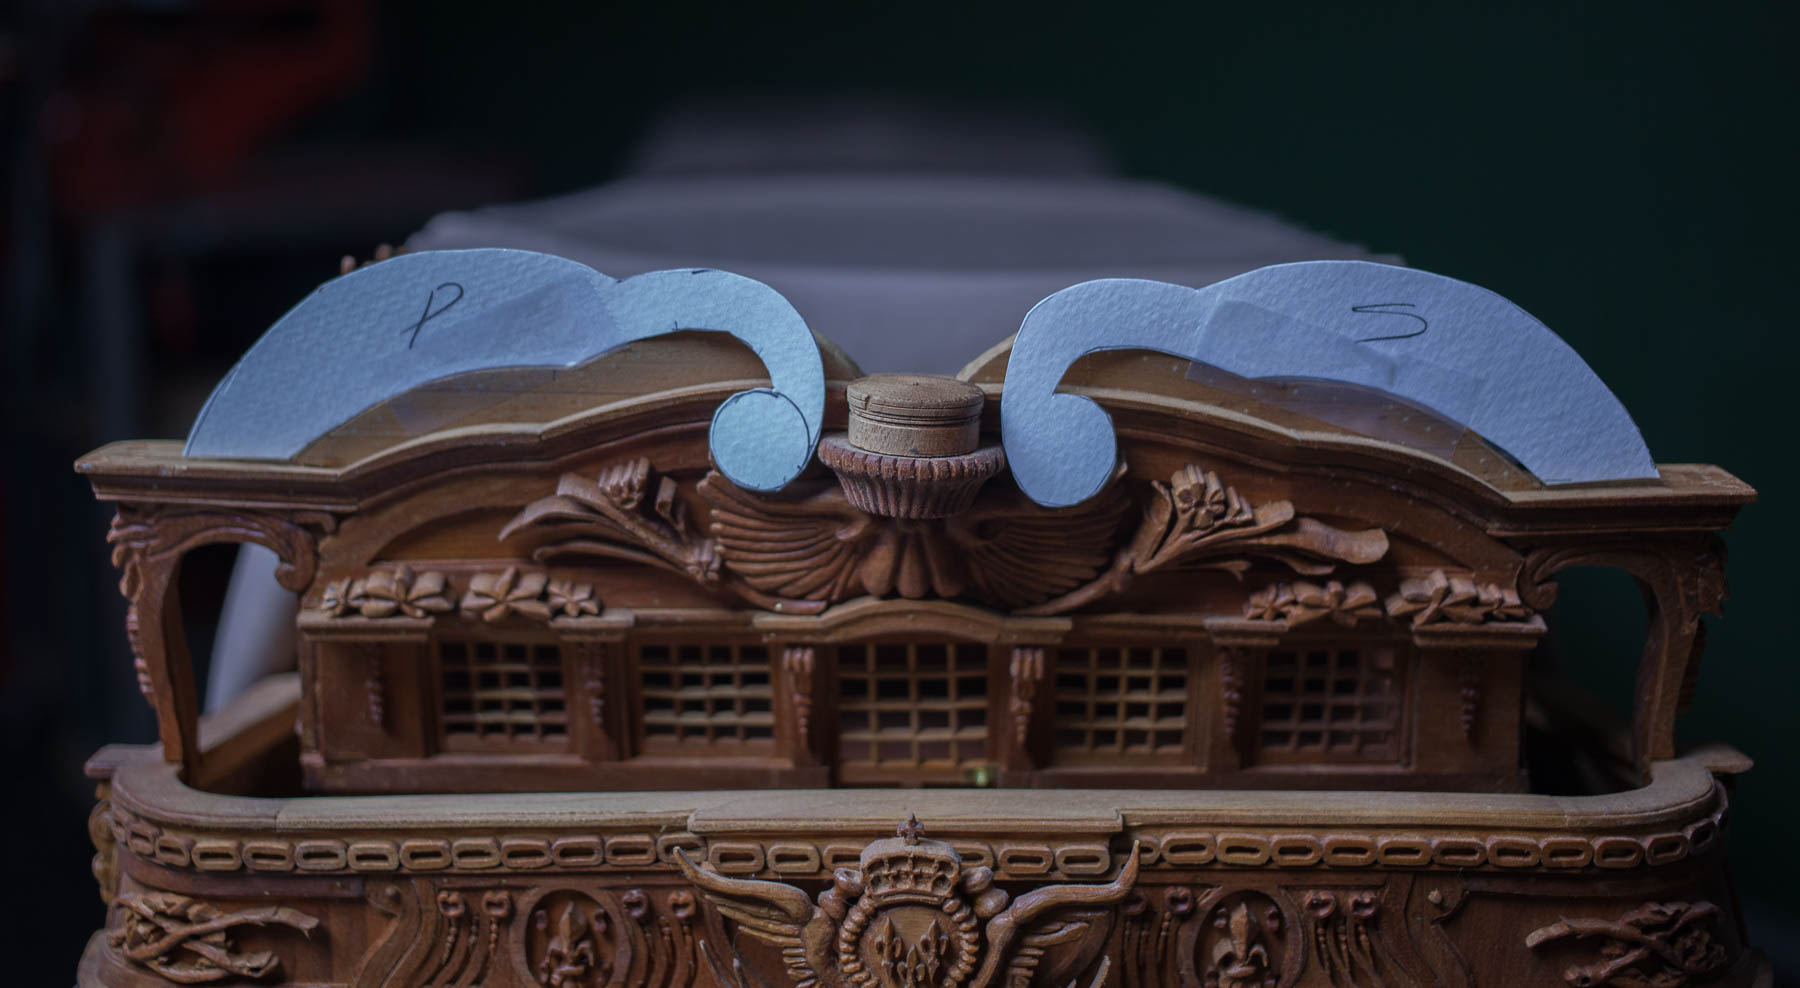
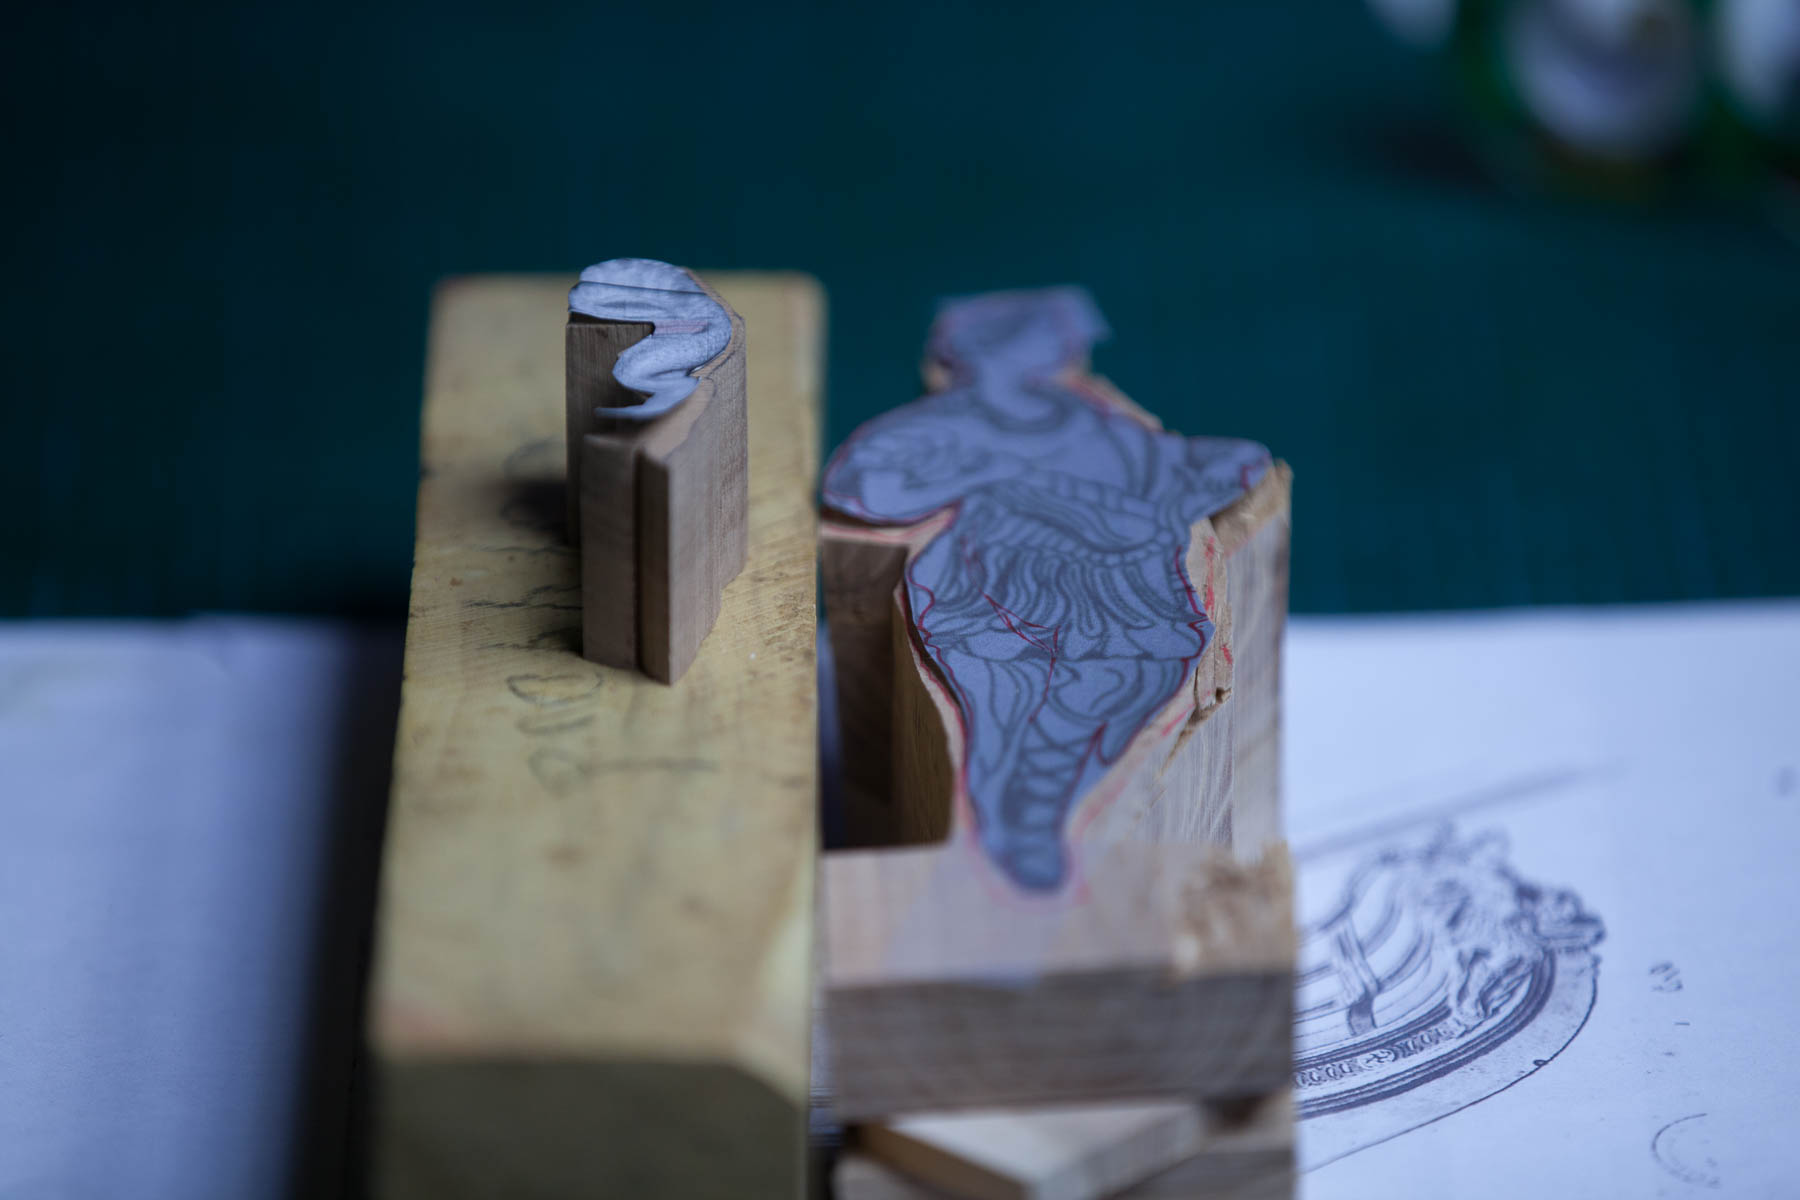
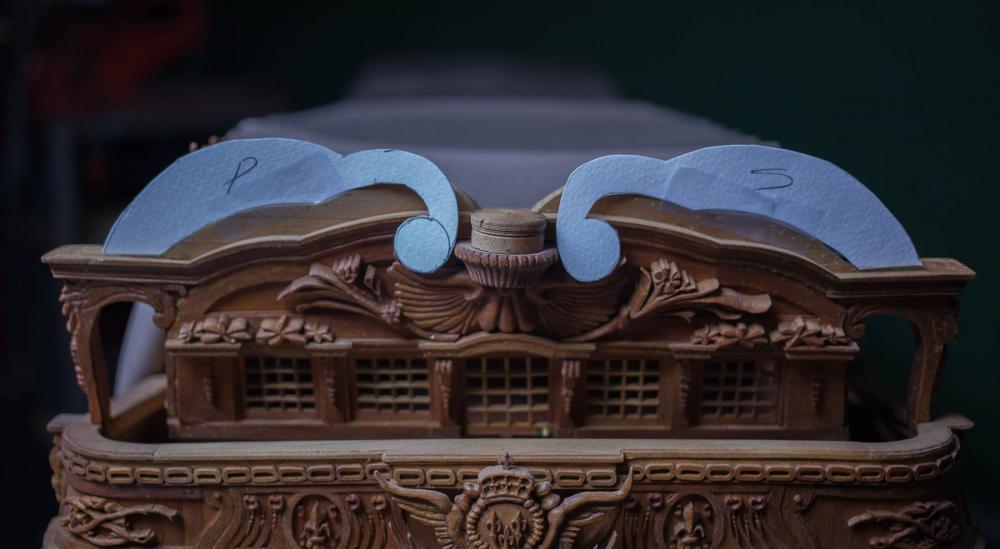
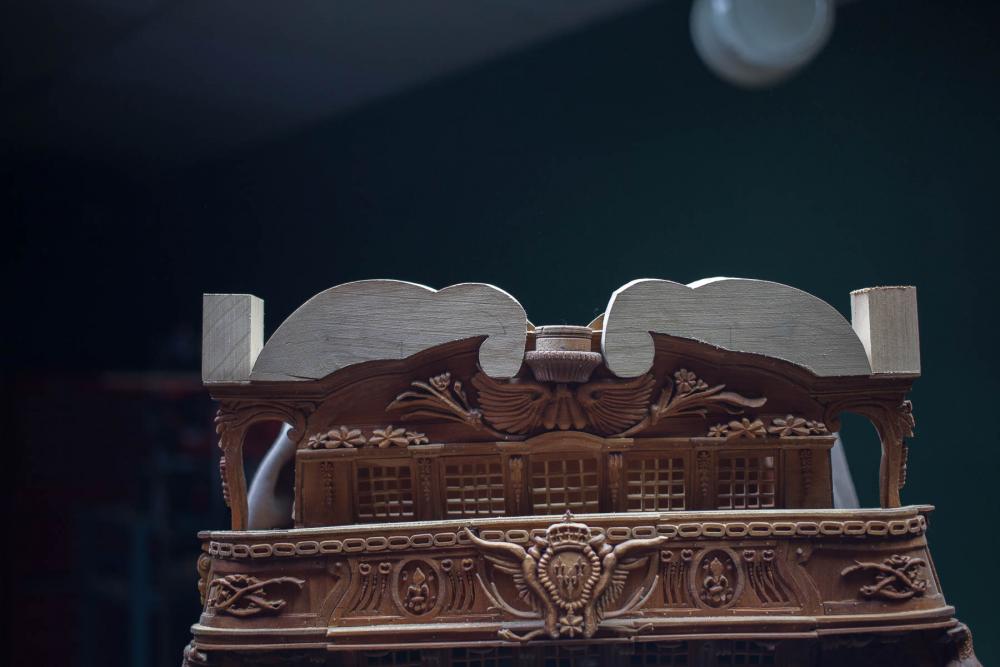
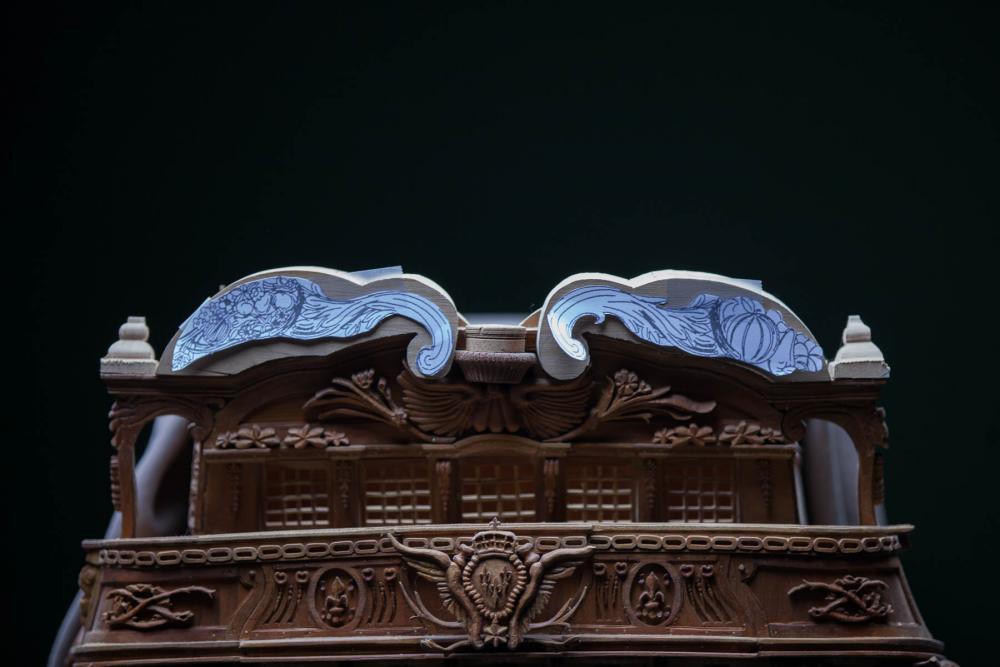
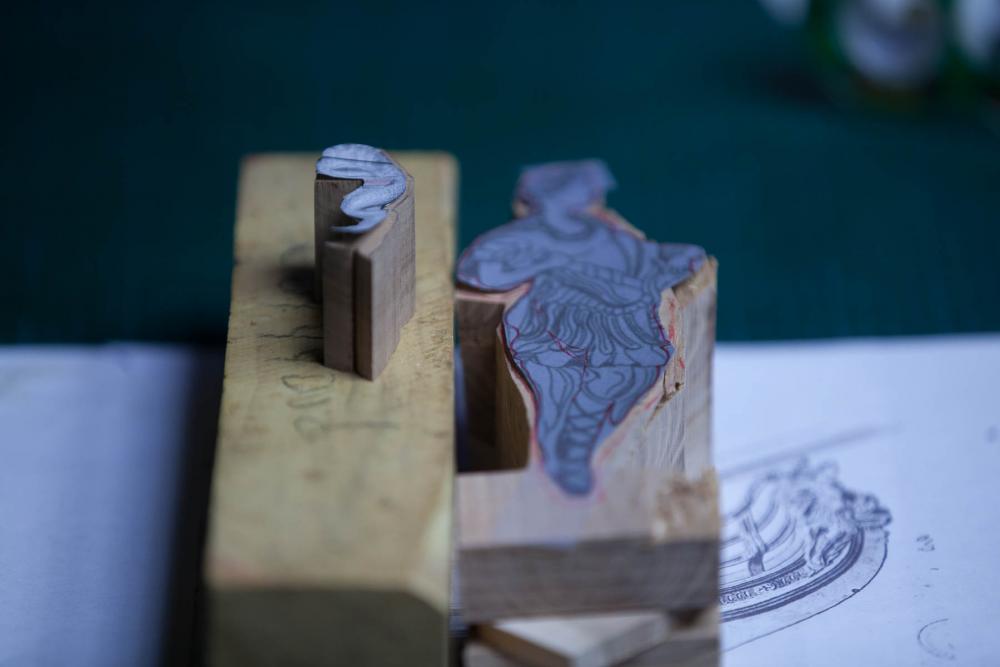
Preparation of the blanks of the cornucopia and the blank for the figurehead Even if I could use a boxwood blank as the rules stipulations, I will not use it. For this model, cherry wood is almost the only wood used.The main idea at the beginning was to create a homogeneous wood color for this model. I have a blank of apple wood. I will try carving this kind of wood to see what kind of results are possible. Next step, this autumn, carving the blanks.


- 728 replies
-
- 28
-
-
- le fleuron
- 64 gun
- (and 1 more)
-
Tools and Supplies for My "Shipyard"
Gaetan Bordeleau replied to daveward's topic in Modeling tools and Workshop Equipment
Light with magnifier built in vs Optivisor Exacto These are 2 popular subjects which come back again again and again on this forum The lens of the magnifier is not made to work for long period, it is made to have a quick look on a part. The focal length of these glasses is very narrow in comparison of the Optivisor. It is very easy to move the head and loose the good focal length. In comparison the Optivisor has a broader focal length. Easier to wear for long period without causing headache. Magnifying is a subject which is often treated alone but lighting should always be treated at the same time. Exacto is the most popular knife among beginners, It is hard to say why? The only reason I could find is that the kit resellers also sells Exacto kit. Exacto is a well know cutter and it is probably the preferred kind by modelers. I used exacto for many years and was happy with it. For certain tools we can learn to use better products and Exacto is one of these families. The next step is to use a stainless steel scalpel with blade # 11. For mysterious reasons Exacto are preferred to scalpels. There is a big difference between these 2. It is like doing a comparison between a butter knife and a steak knife. Believe it or not the difference is as great as this, but peoples prefer to use a butter knife. There is also another step in learning to use a better knife than the stainless steel handle of the scalpel. Working hours with a scalpel can cause some skin irritations caused by repetitive friction.So we look at the other handles on the market and we discover Swann Morton #5a acrylic handle and the problem is definitively solved.