xken
-
Posts
841 -
Joined
-
Last visited
Content Type
Profiles
Forums
Gallery
Events
Everything posted by xken
-
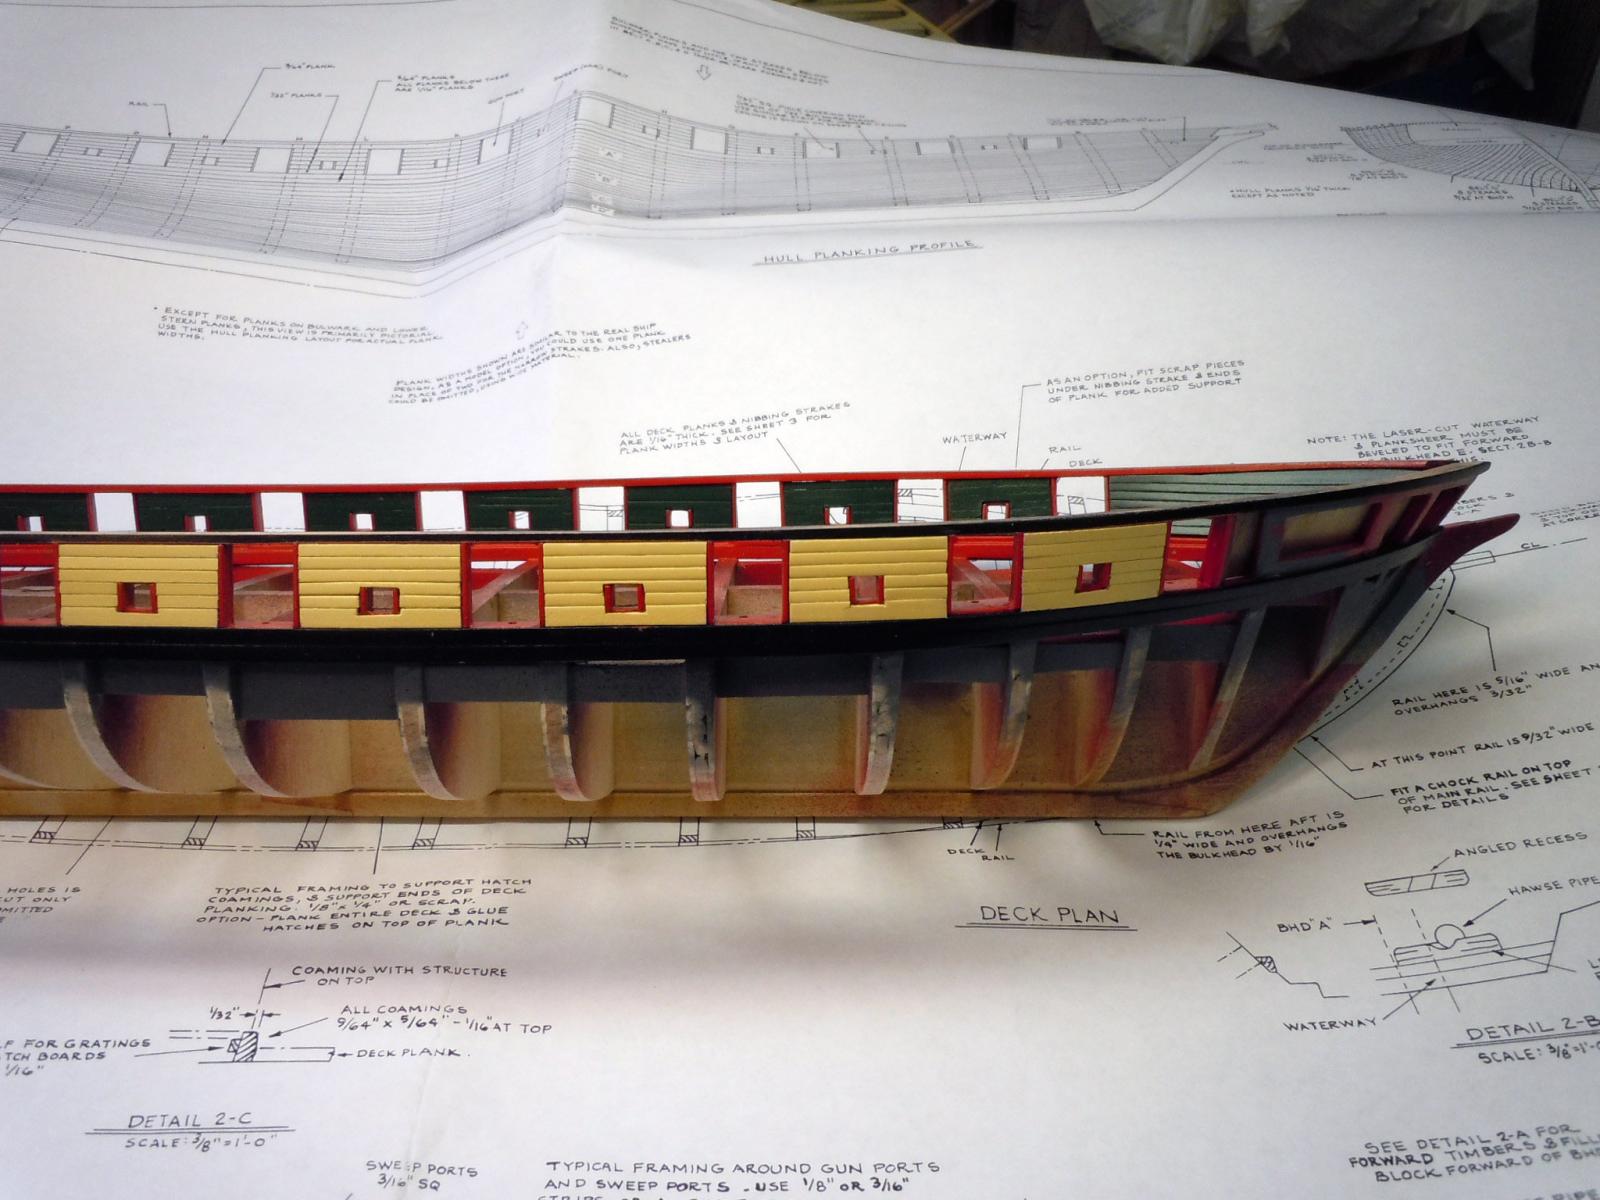
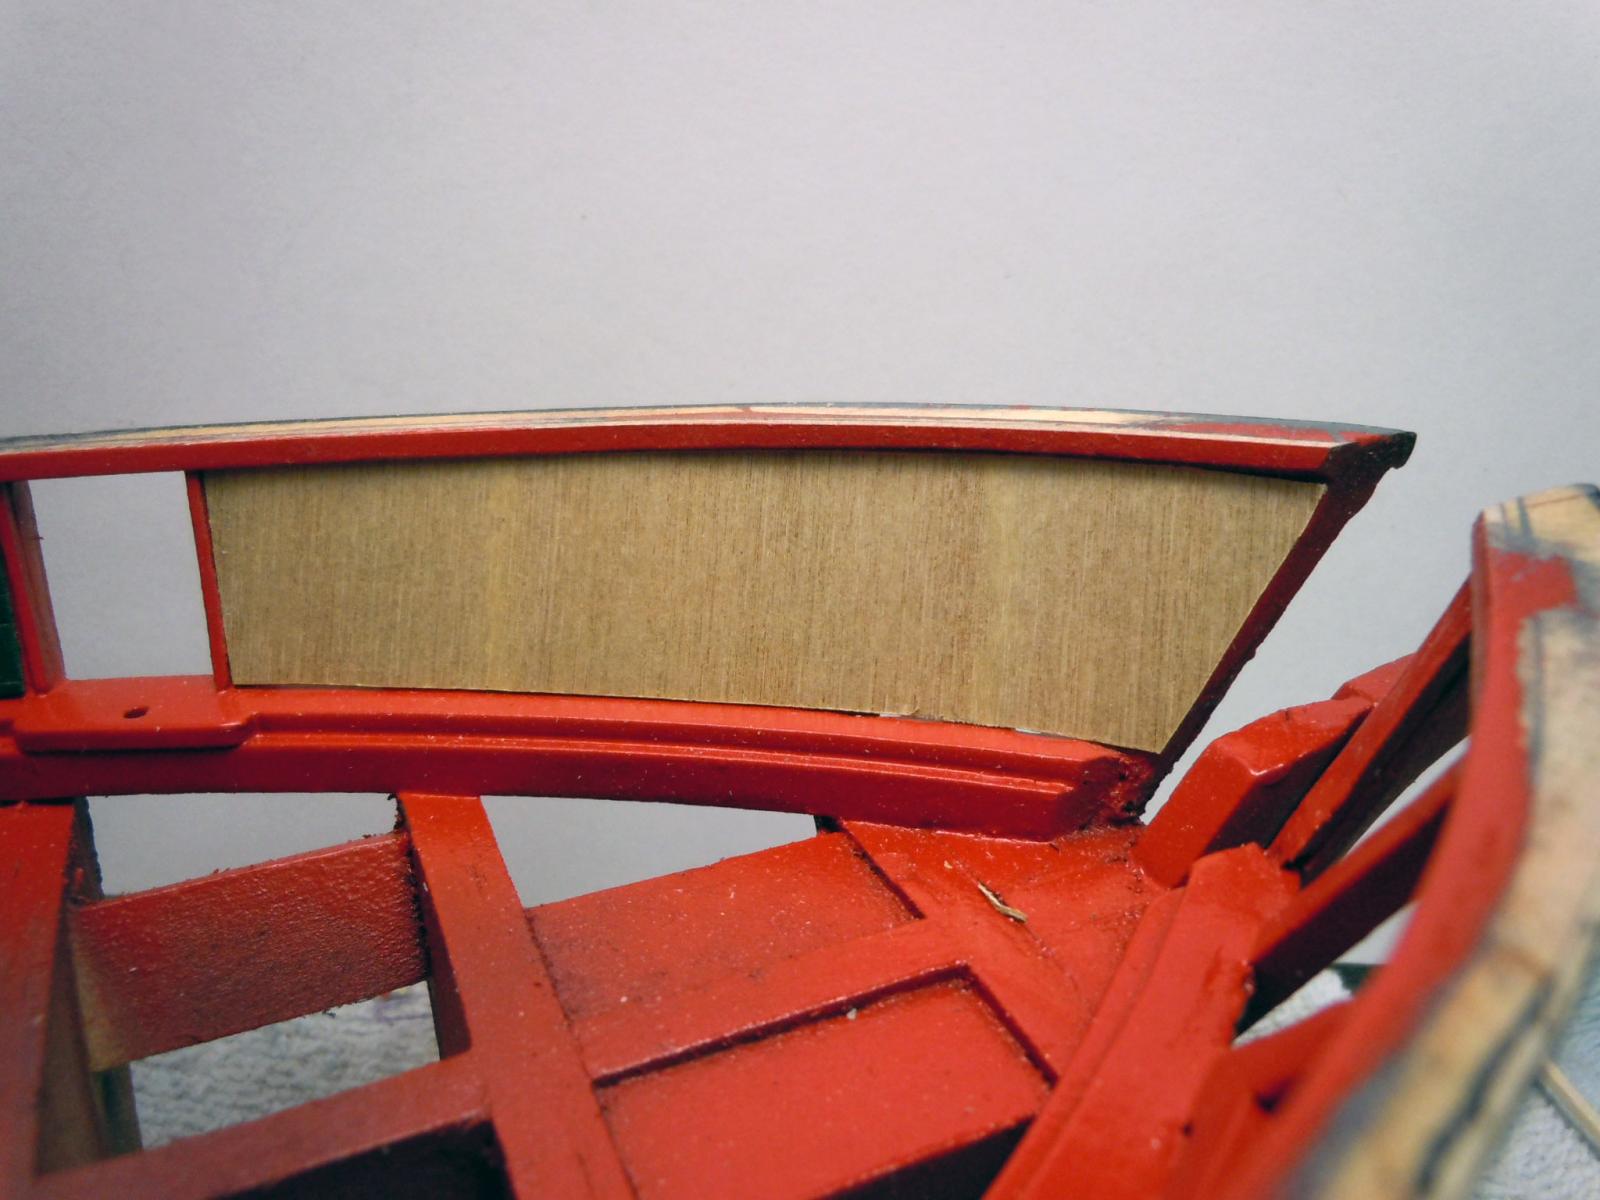
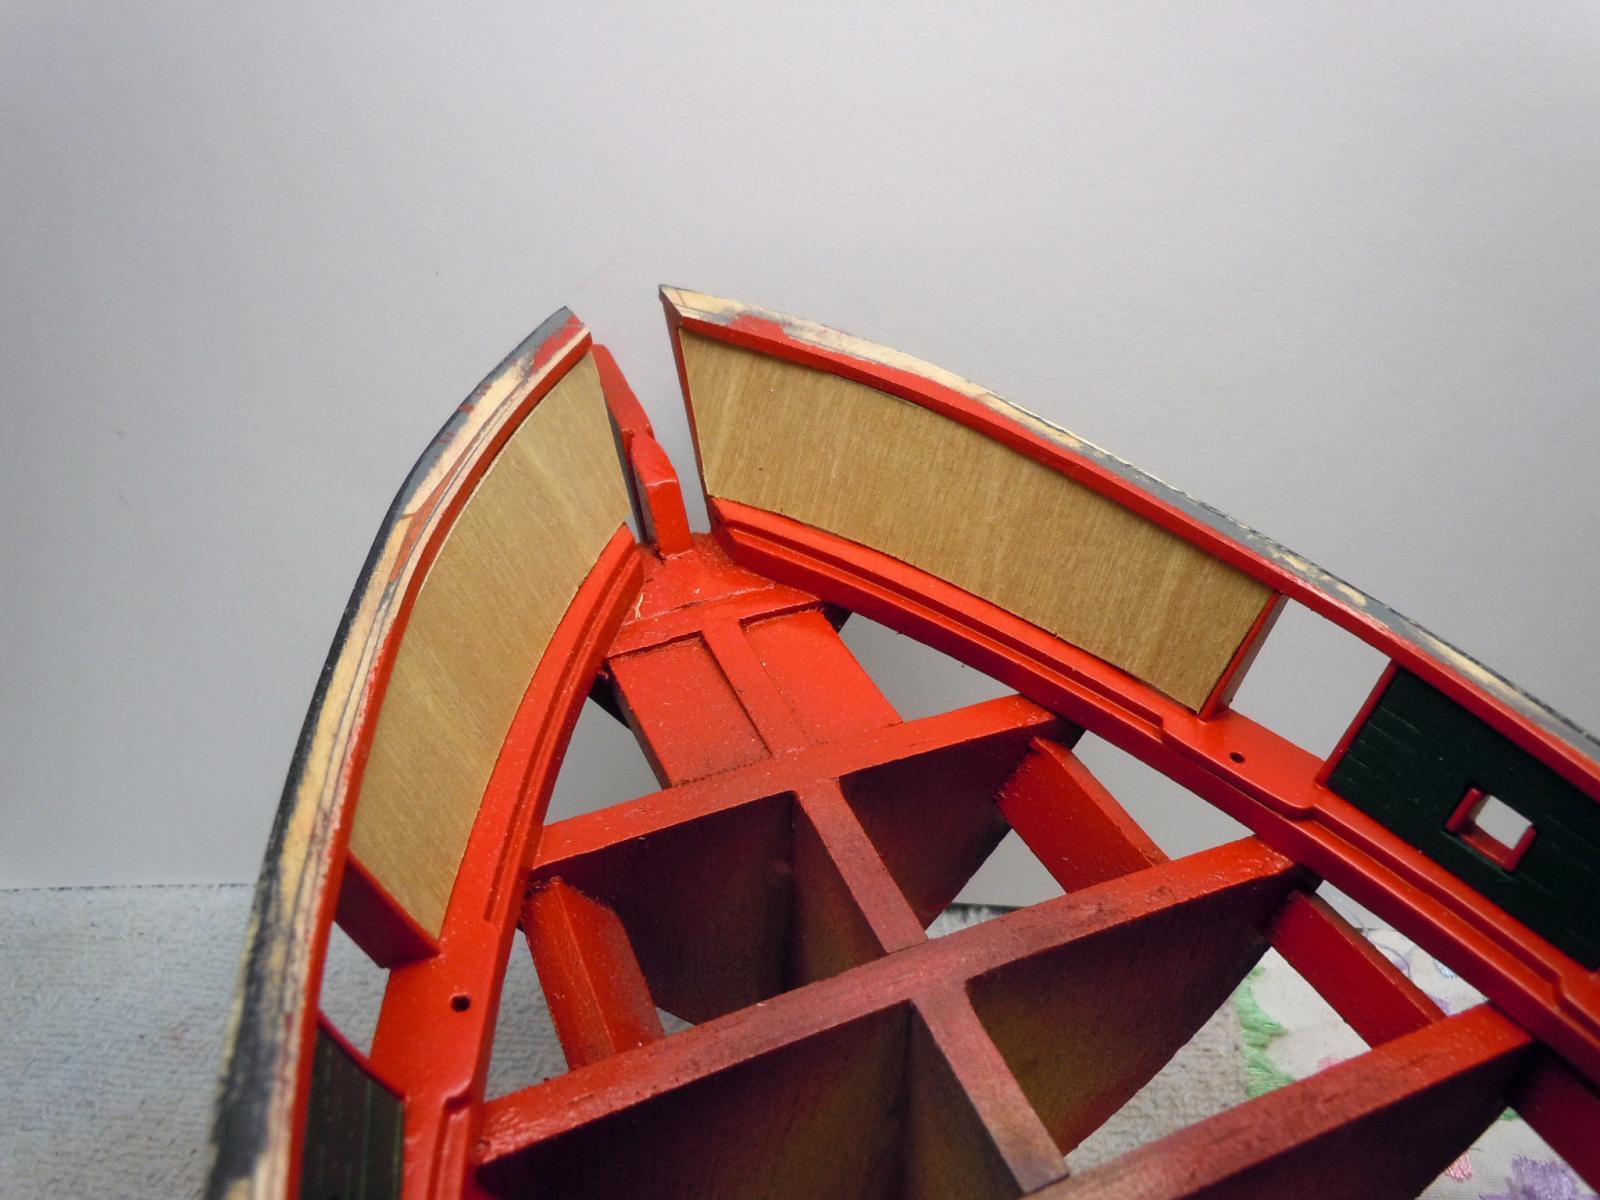
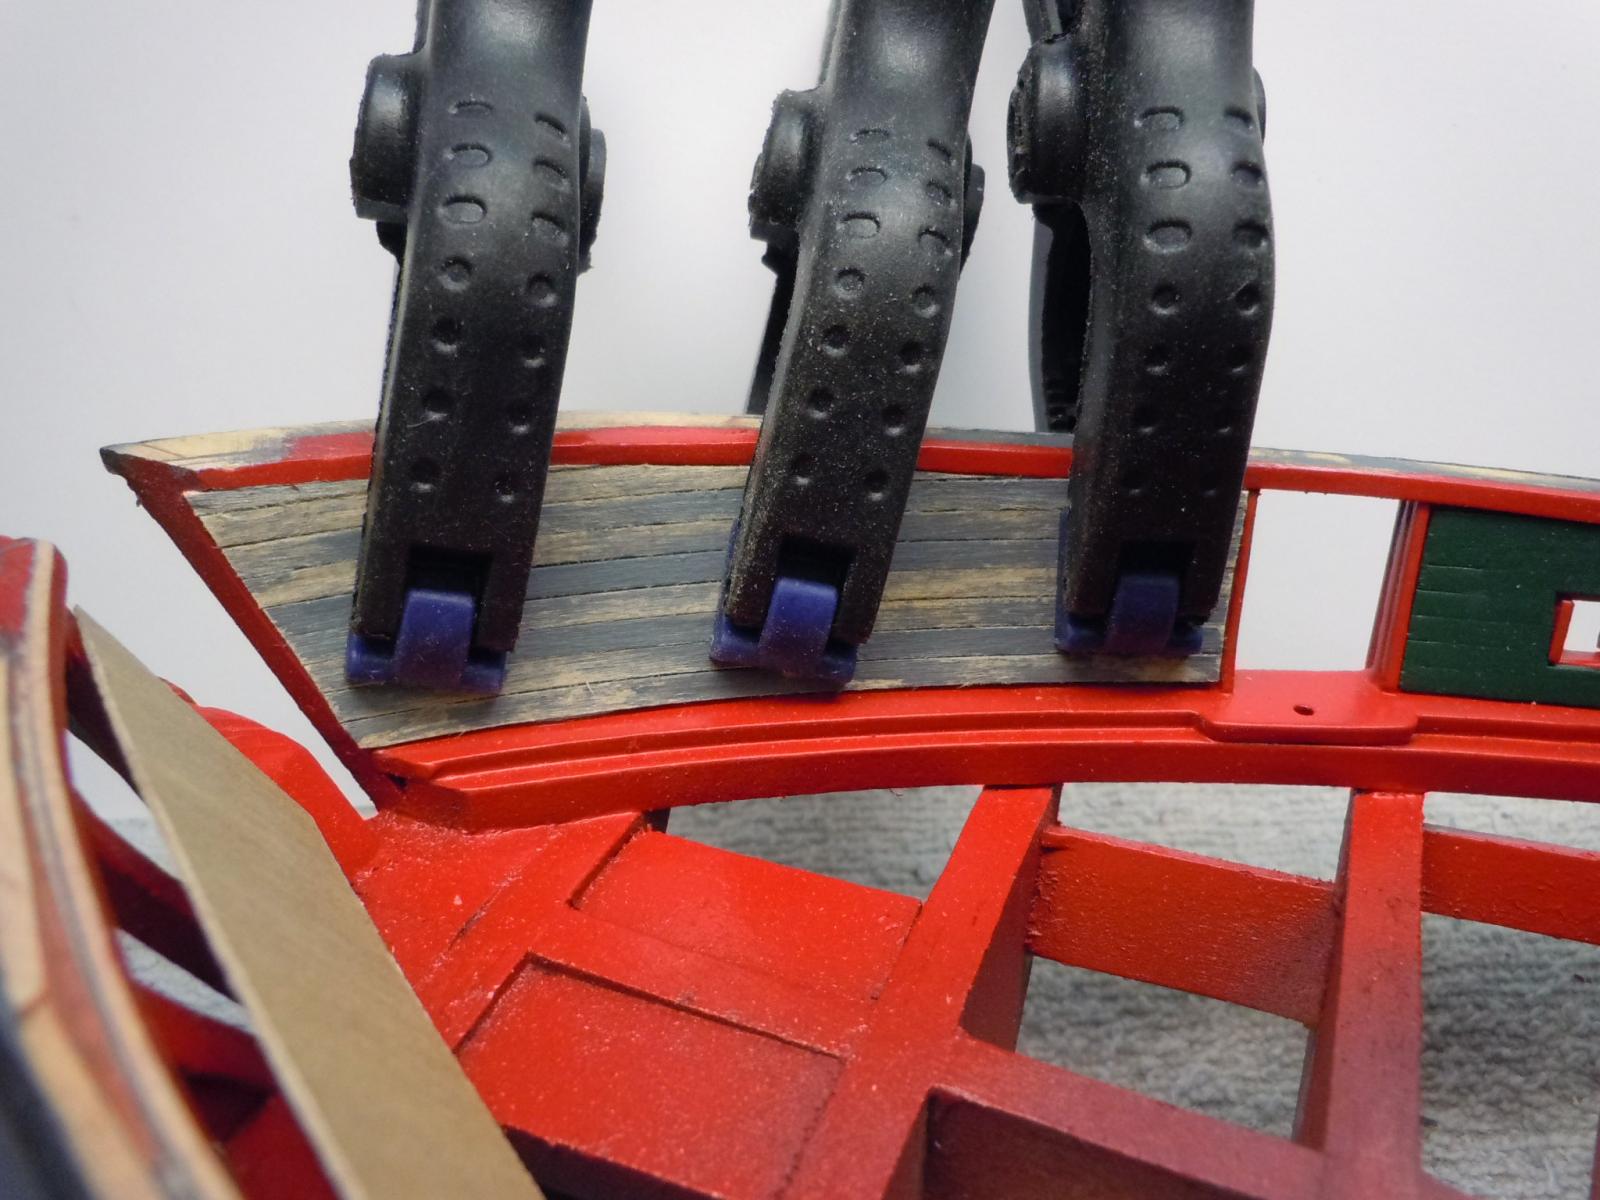
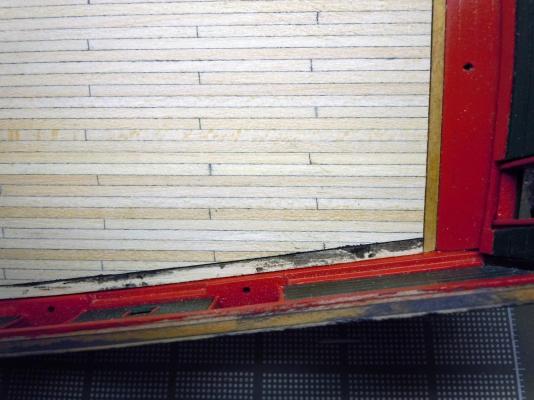
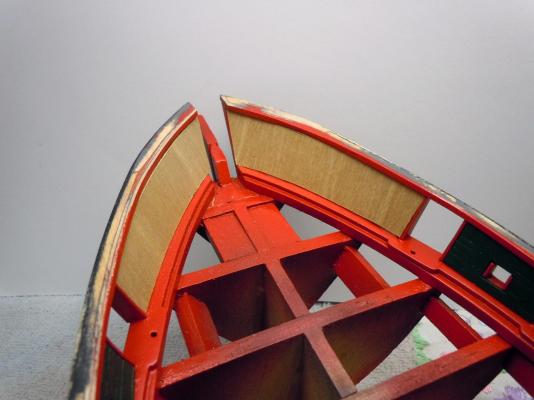
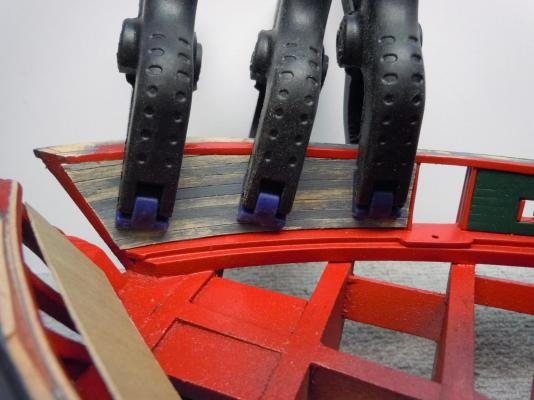
 Nigel, here is a quick picture of the deck flexibility at roughly 4 inches with a little more to go. George, here is a better picture showing the first side strake glued in place against the waterway. The deck surface was masked off to avoid additional glue on it. Here I have just cut in the second strake using the mast holes to locate the deck in place holding the first strake tight against the waterway. I then very carefully with one hand pressed the second strake in place against the waterway and both cut and pressed against the strake with the tip of the blade trimmed the excess the length of the strake and pressed it in place as I went. The glue will take up some space since it will be glued separately and not in place, which will require some fine tuning once the glue has set. Ken
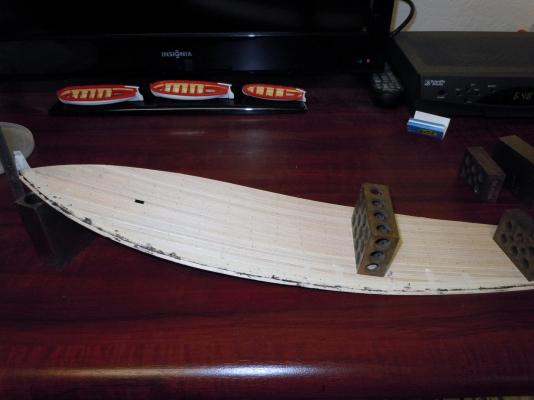
- 440 replies
-
- 5
-

-
- niagara
- model shipways
- (and 1 more)
-
Nigel, the deck was glued together flat and as a result there is quite a bit of glue that seeped to the underside as each strip was added; consequently as I sanded and dried the sheet it developed a slight side to side arc that worked perfect for the deck which has a slight side to side crown. Now that it is cut to shape it is quite flexible both fore and aft as well as side to side. I can bend front to rear about 4 inches quite easily; which is a factor of length, side to side bend is about 3/4". As for a compound bend in both directions at the same time I am sure it could be done with a resulting flat spot where the two arcs would intersect. If more severe than this I would add a reinforcing thin fabric to the underside for additional strength. Much like the fabric used on RC airplanes (not the heat shrink film). Ken
- 440 replies
-
- 2
-
-
- niagara
- model shipways
- (and 1 more)
-
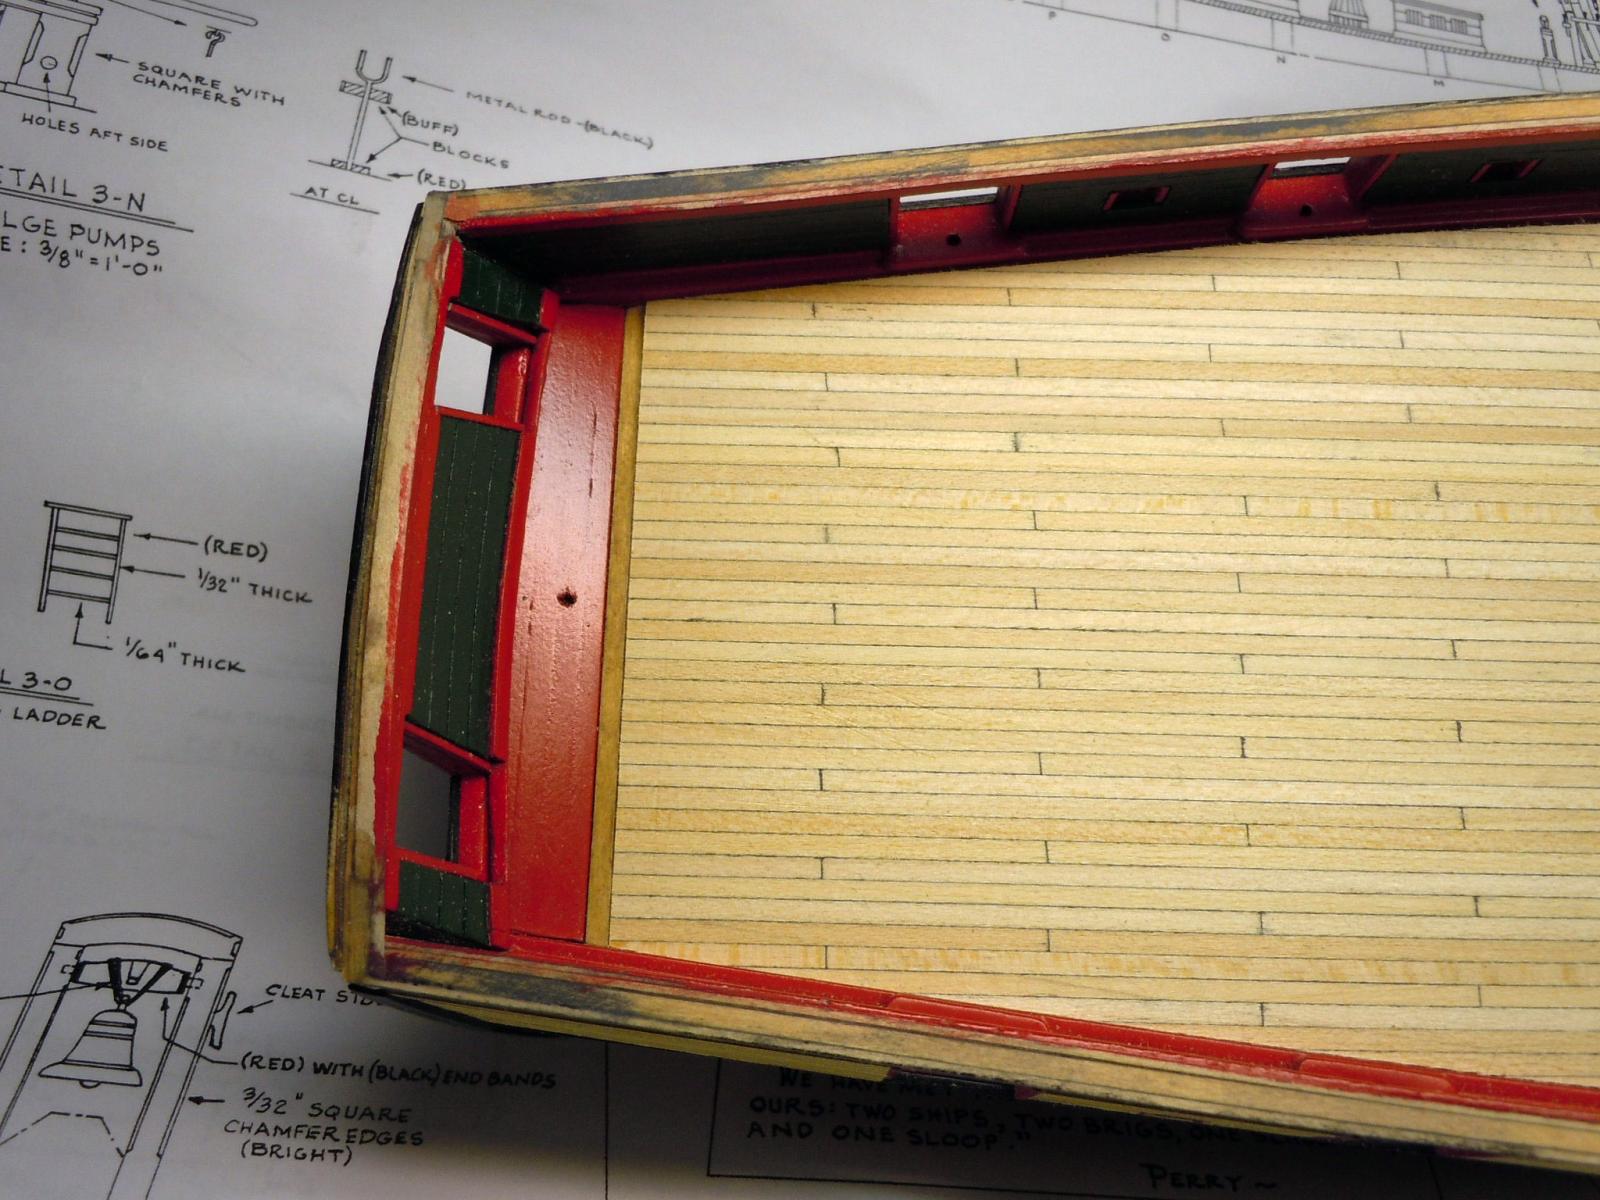
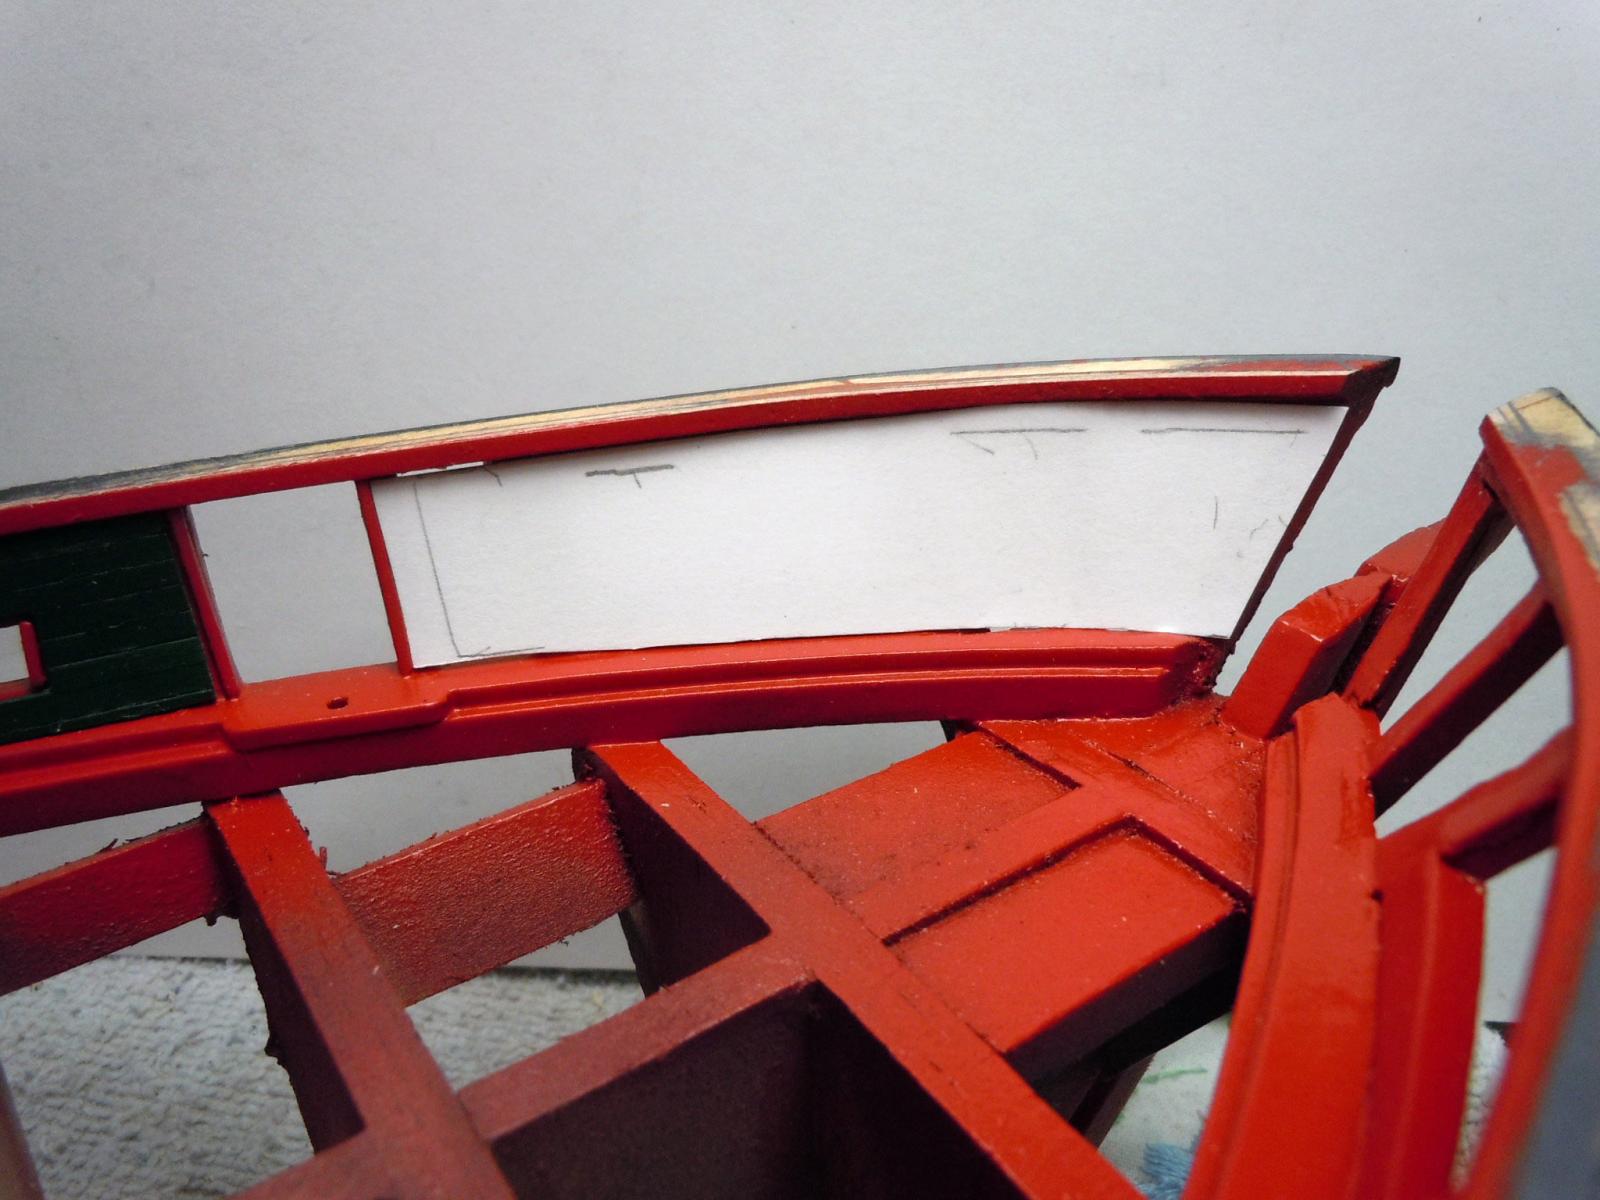
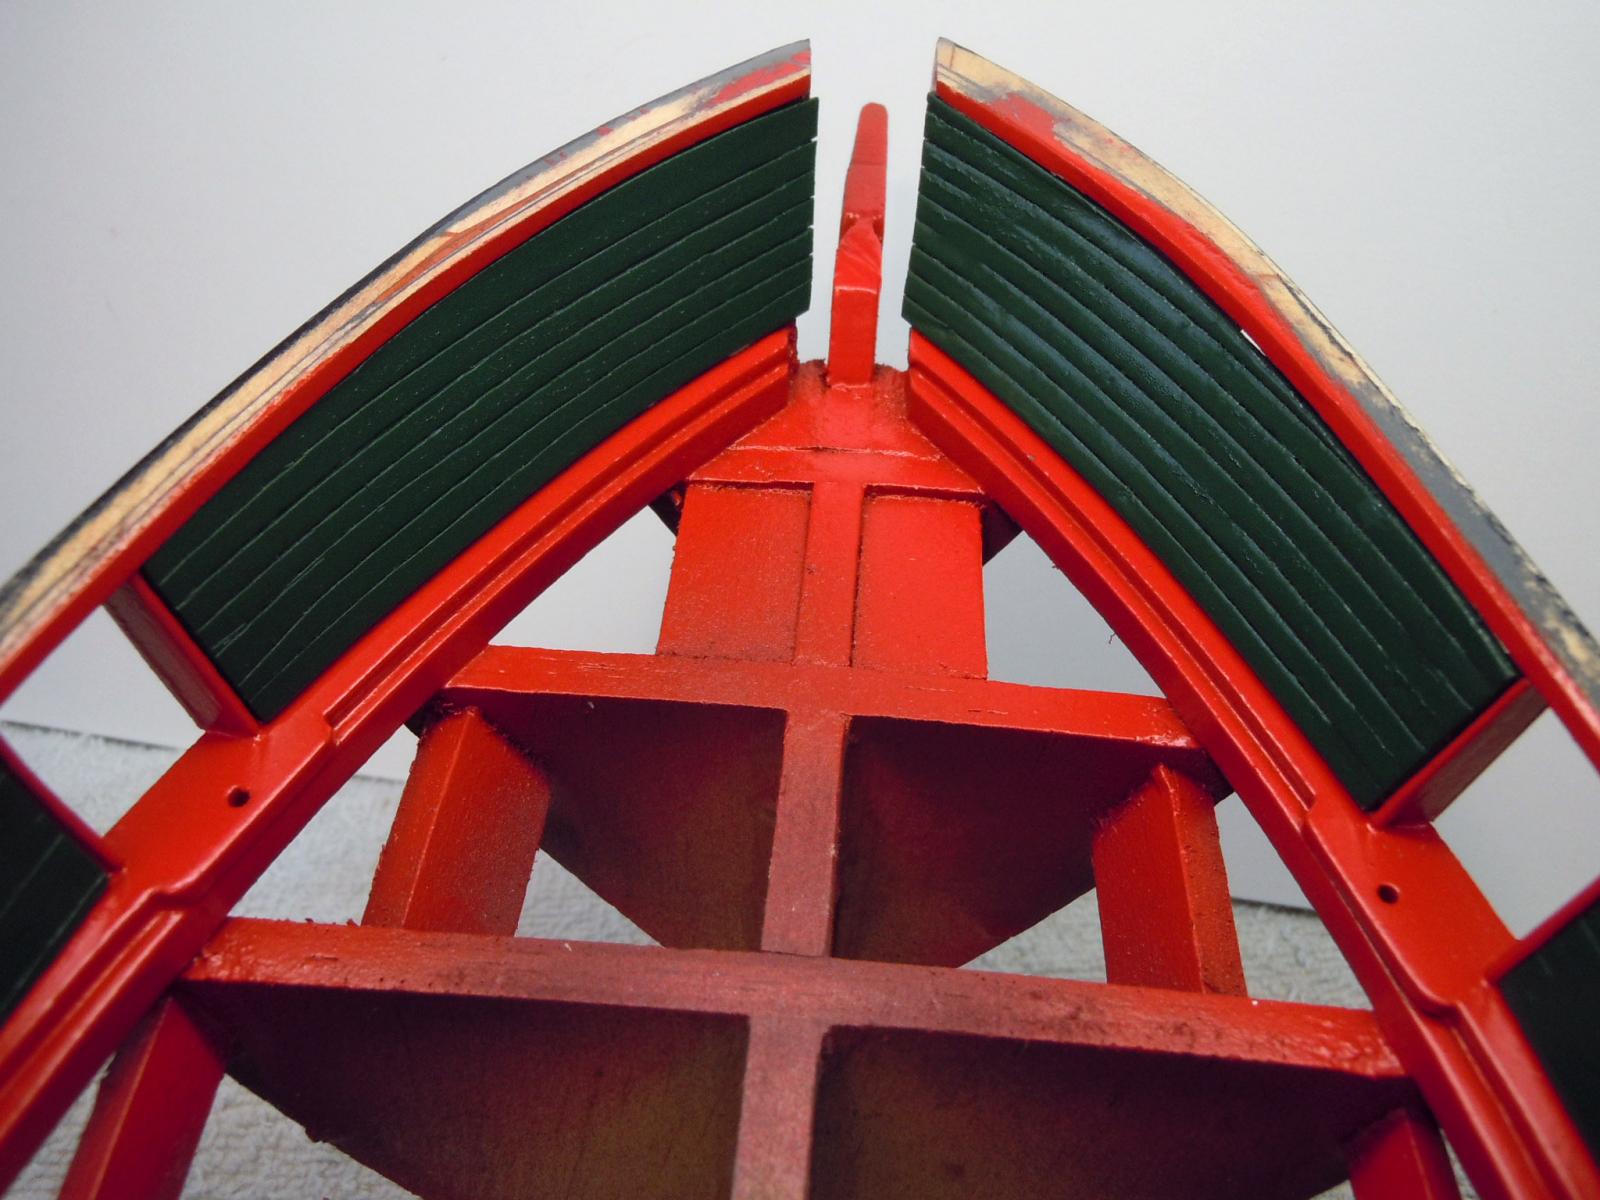
George, it is butted up to the waterway for now and I am in the process of cutting in the strakes that fit between the deck planking and the waterway. On the plans it is called the nibbing strake. The top waterway is in the shadow and the bottom (in the picture) the red is the waterway with the planksheer on top of it. Ken
- 440 replies
-
- 1
-
-
- niagara
- model shipways
- (and 1 more)
-
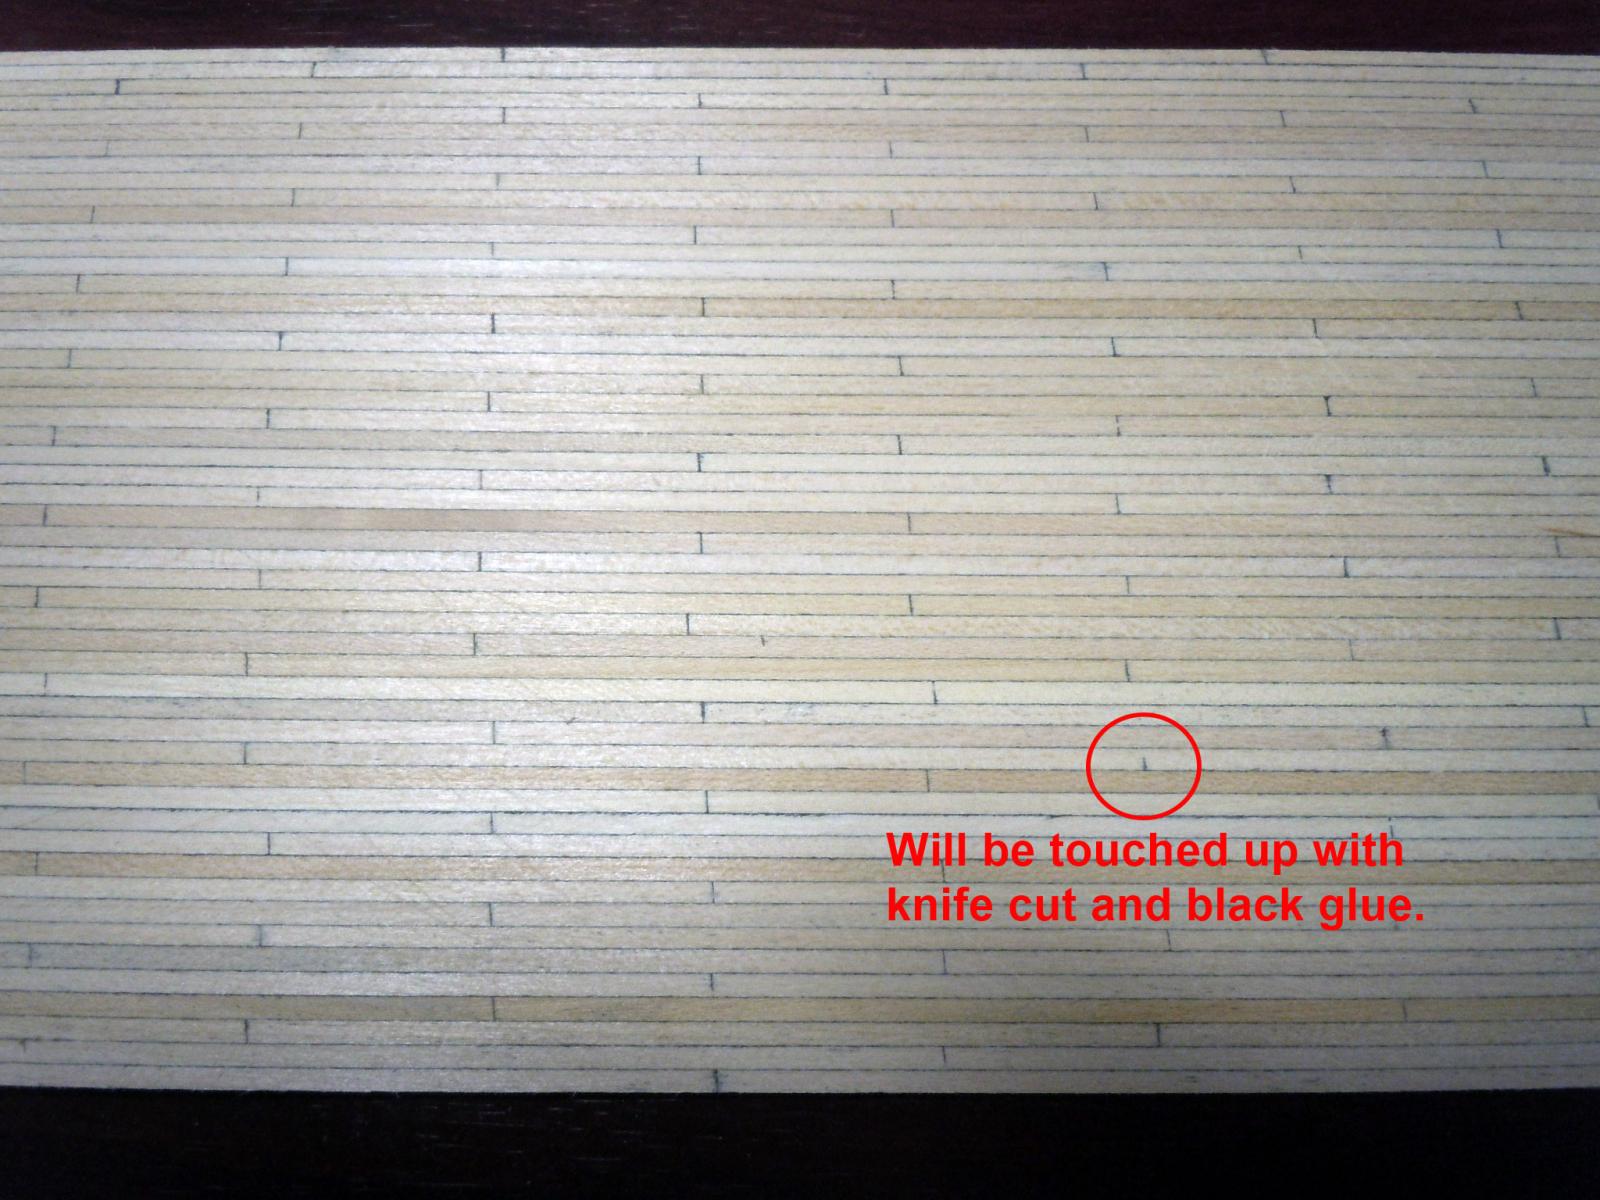
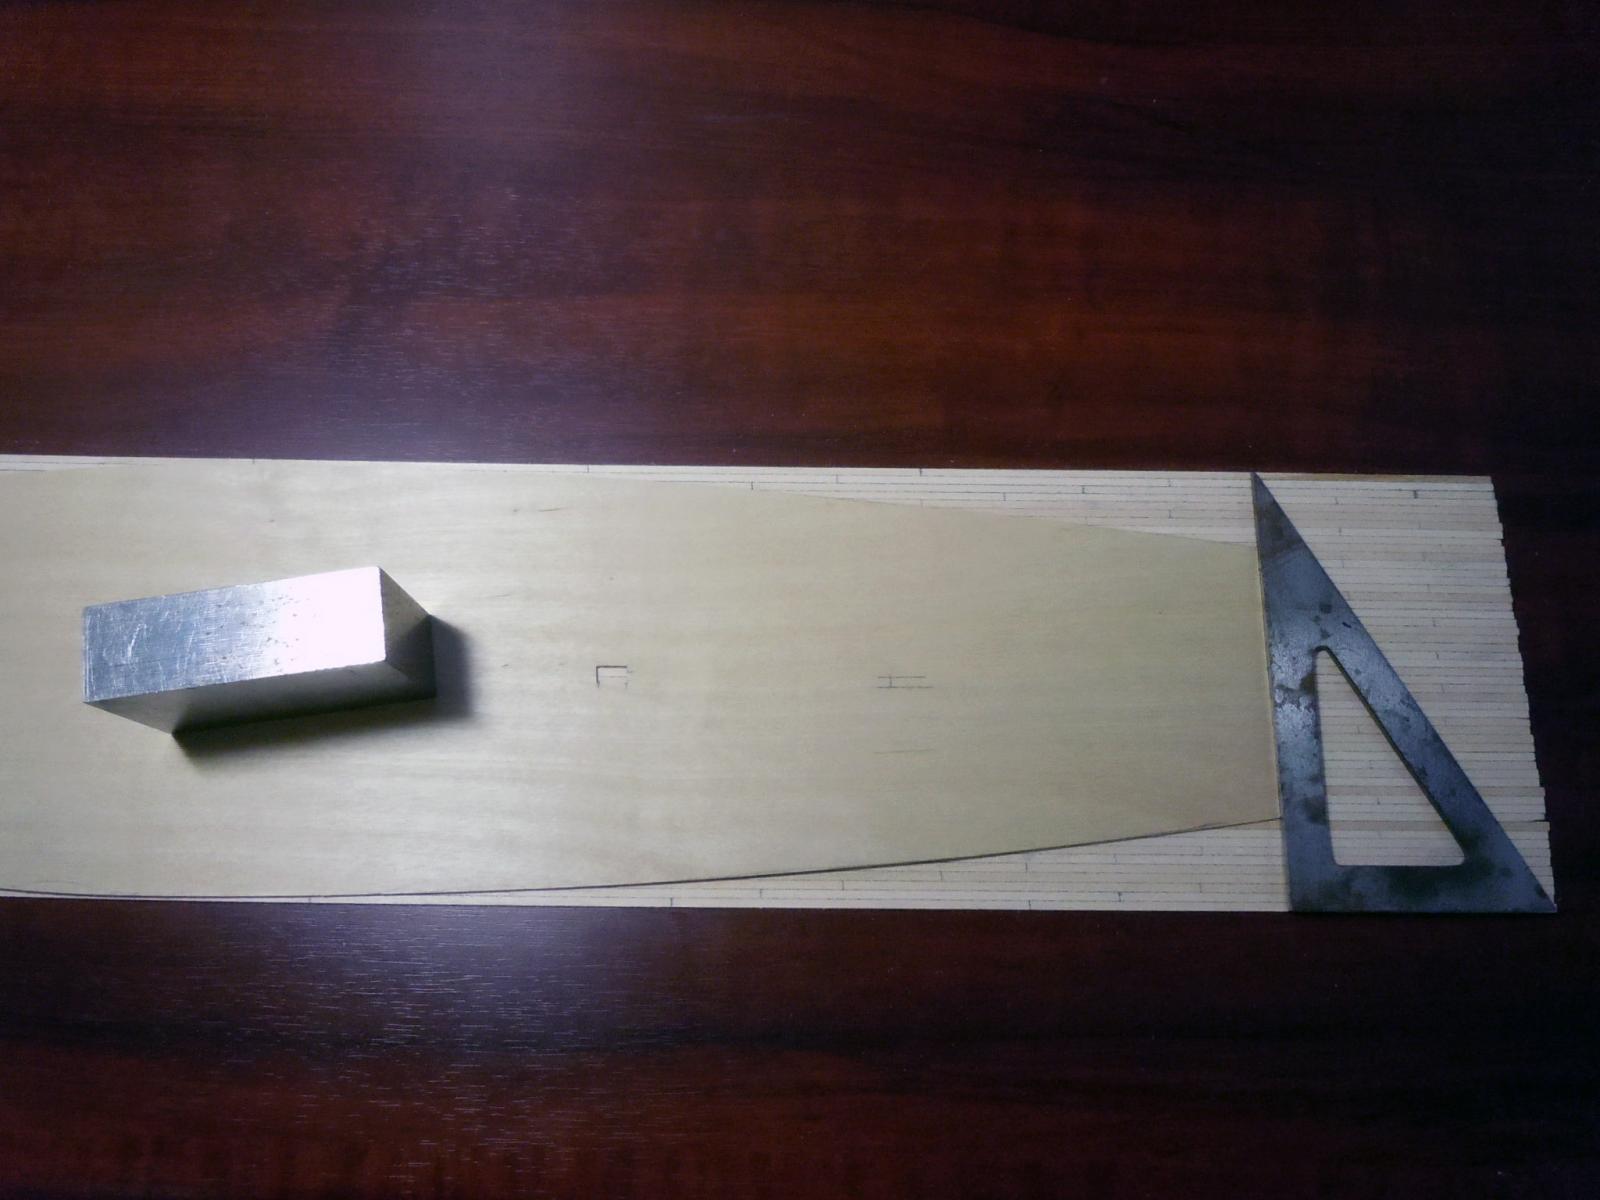
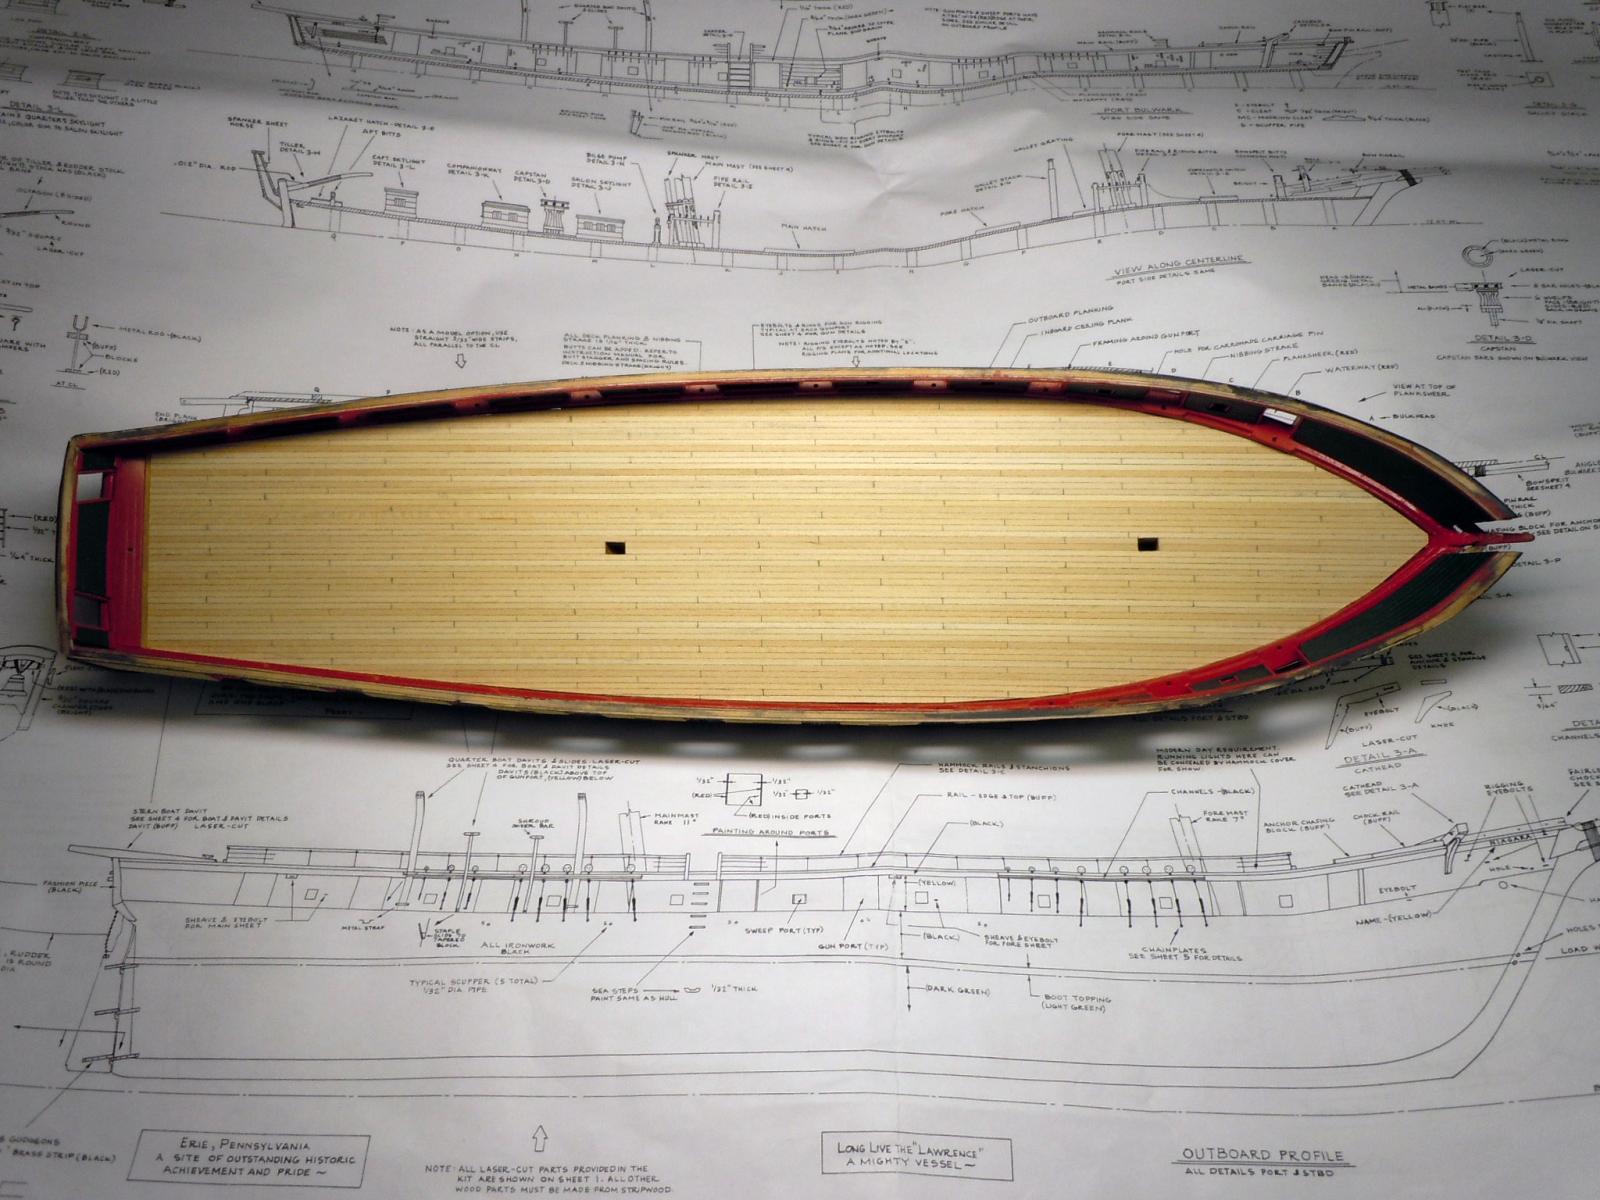
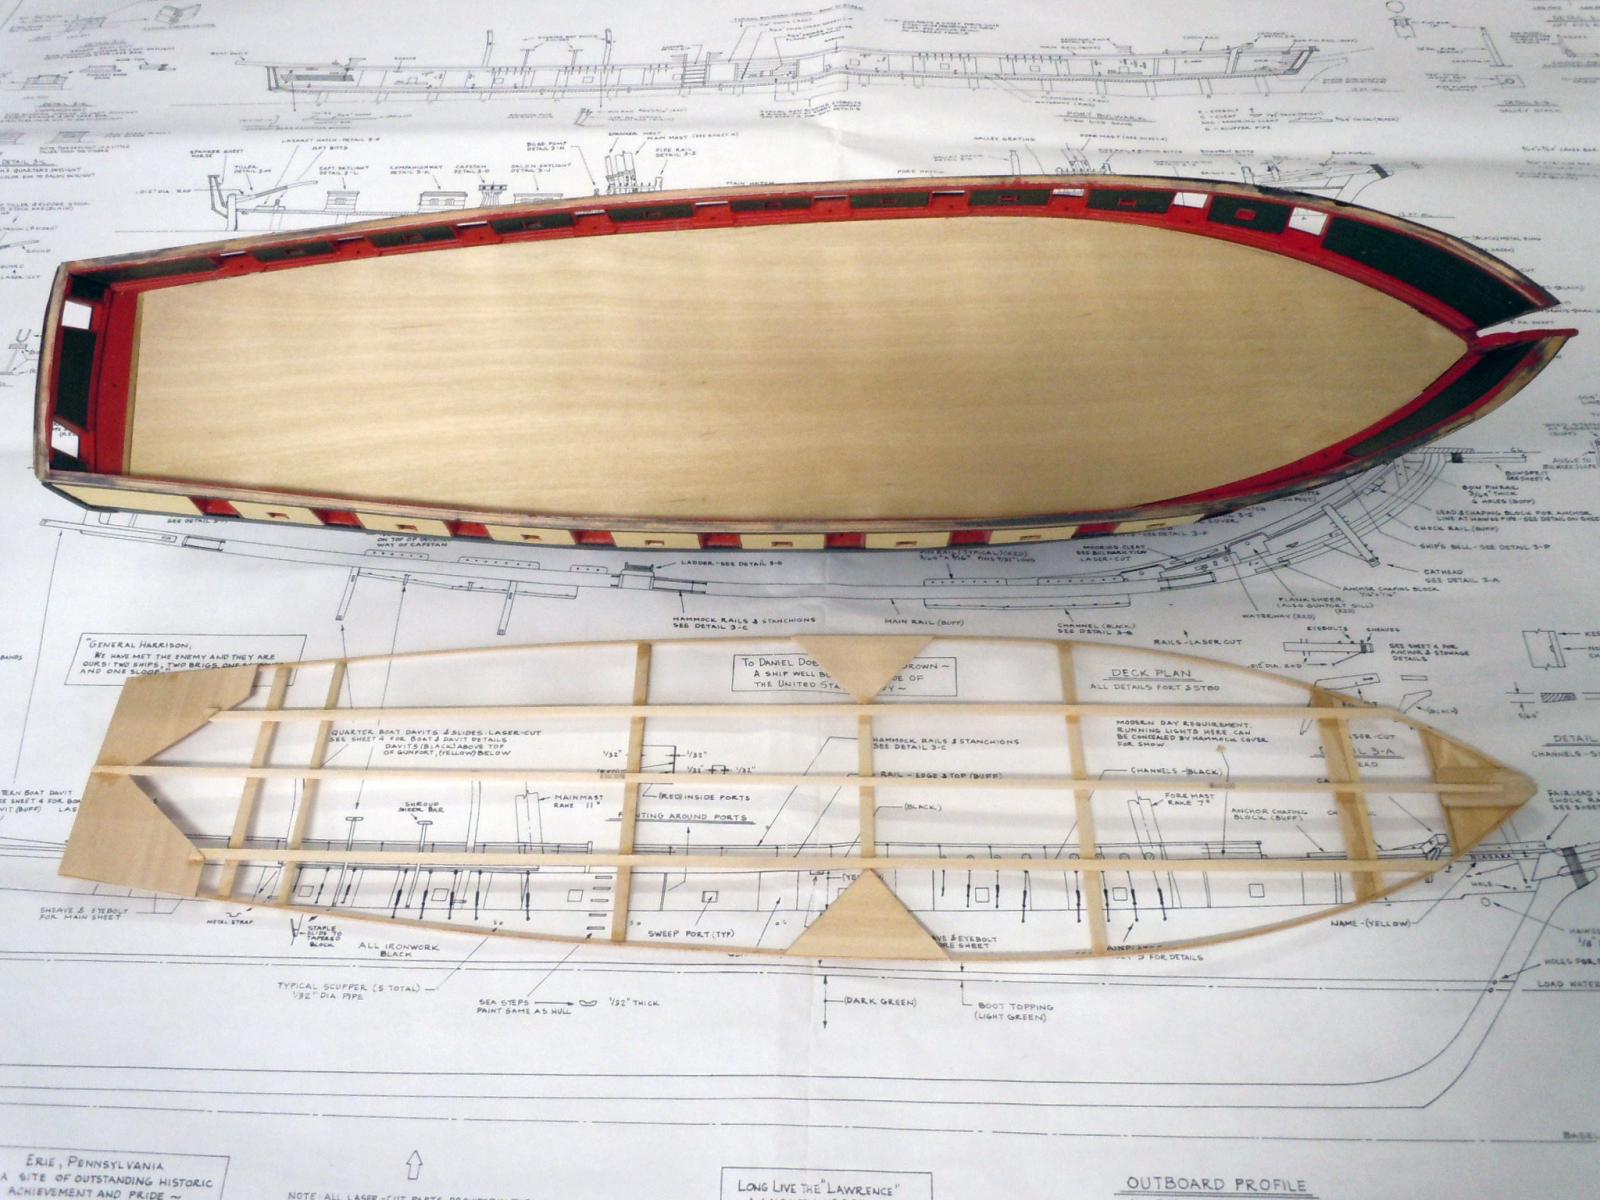
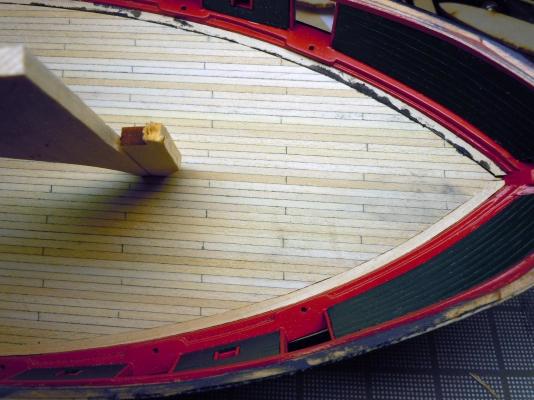
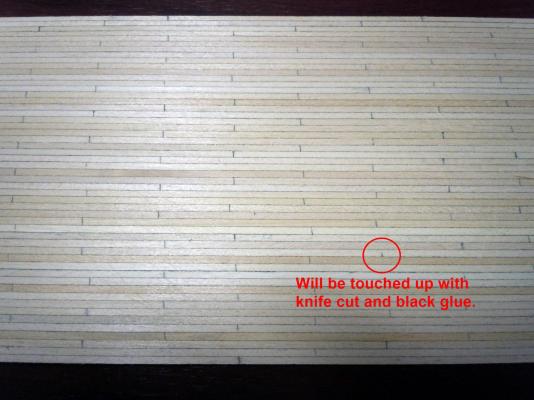
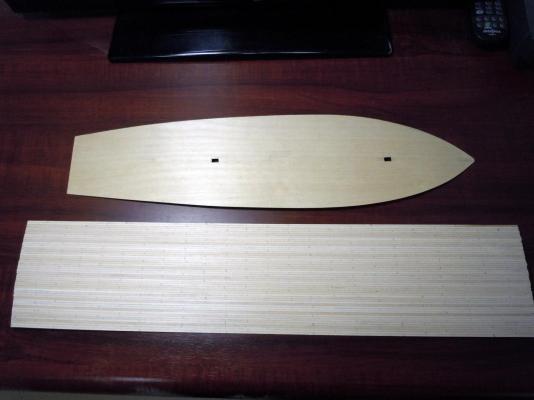
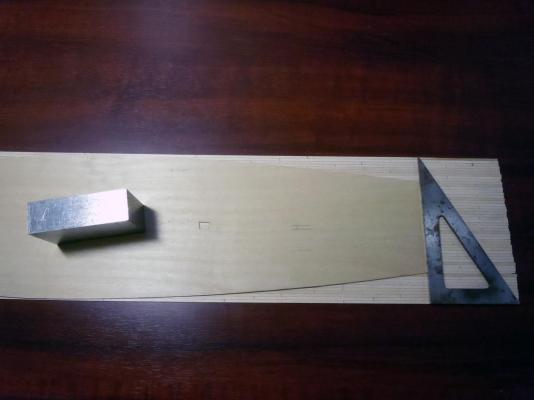
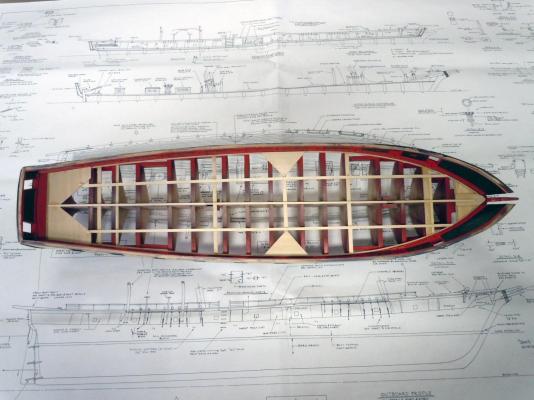
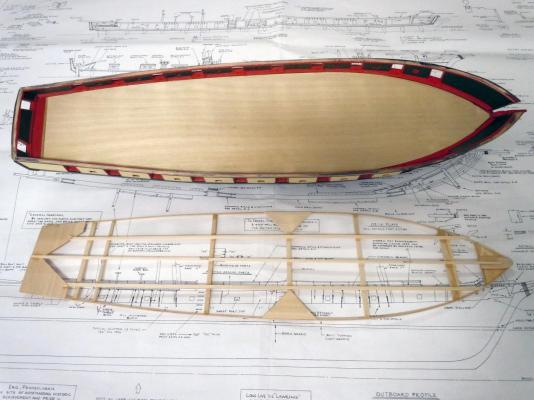
George, it worked very well for my first attempt and I have learned a few things for the next time I do this. Here is the rough sanded deck plank sheet. A few of the butt cuts I did not cut quite deep enough or I did not plunge the blade evenly as seen in the red circle. These were easily fixed with another carefully placed blade cut and a dab of black glue filler. Here is the full 24" long sheet ready to cut to shape using the pattern, both the perimeter and mast holes. Located the pattern on the sheet and made sure it was square to the sheet before tracing the perimeter and hole locations. I used a steel block to weigh it down to avoid shifting. This is one of those where you need a third arm. This shows the sheet cut and fit to the ship's deck area. Keep in mind that the next step will be to locate the two strakes down each side and cut the deck sheet to receive them. And then glue them in place as well. Here is a close up showing the nice fit I got using the pattern and then some careful trimming and sanding. Even a blind pig gets lucky now and then. I just hope I do not screw it up adding the strakes. Now to see what it looks like when it is eventually stained. Ken

- 440 replies
-
- 3
-
-
- niagara
- model shipways
- (and 1 more)
-
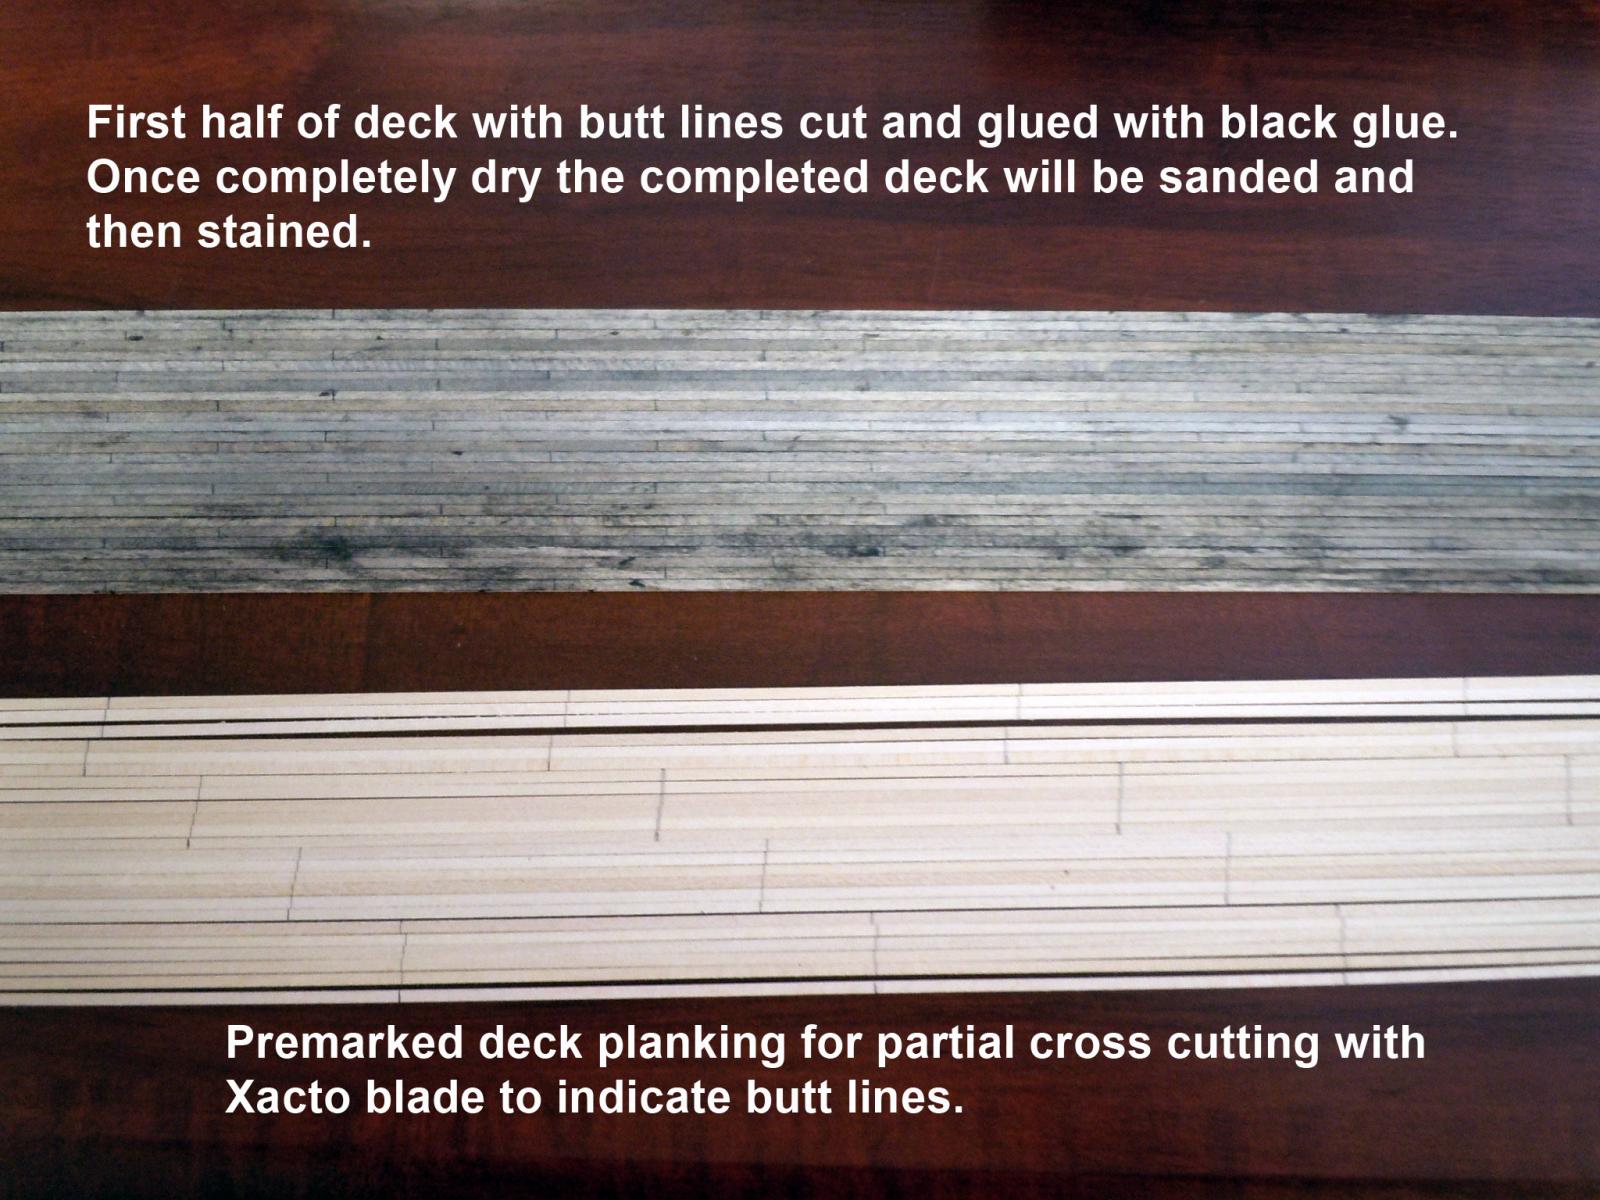
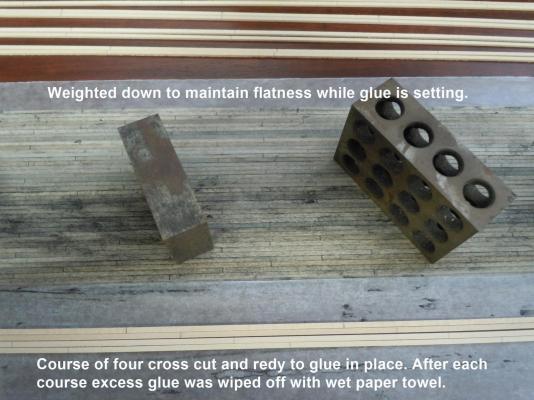
Proceeded with the gluing of the deck planks with black glue, which was slow going to assure each piece adhered correctly. I was able to complete one half before calling it a night last evening. The planks were premarked and cross cut with an Xacto blade just about half way through each location before gluing in place. I marked planks at 4 inches with a one inch stagger to the next that allowed for three boards between butt joints. I found it easier to work with four planks at a time to cross cut, glue in place, glue fill the cross cut and wipe off the excess with a wet paper towel followed immediately with a dry one to absorb any excess water. I then weighted down and moved to the next course. Here is a close up showing a course ready to glue. I am finished and the deck now just needs to dry completely before sanding. Hopefully this experiment should work. Ken

- 440 replies
-
- 4
-
-
- niagara
- model shipways
- (and 1 more)
-
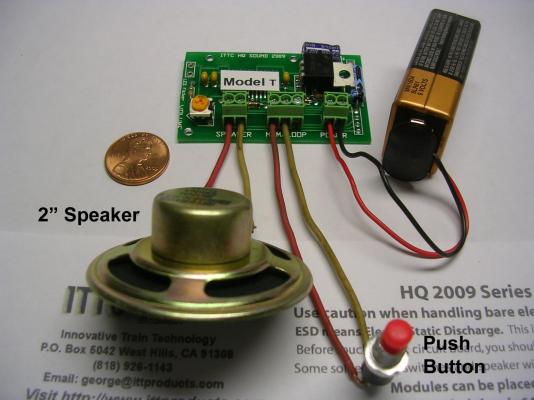
Captain Steve, if I could be so bold to offer up an idea building on your lighting of the ship. Add a sound module as well that could easily fit within the hull. I would imagine a beat to quarters with deck sounds and canon fire, wind and waves in the background. I added a sound module borrowed from the Railroad side of modelling when I built my 1/8 scale Model T with the engine starting up, running and then fading in the distance. Here is an image of the entire module with battery since it was held within the trunk of the T. The sound chip has a max run time of 60 seconds and then automatically shuts off. Several sound clips can be blended and then looped for the run time. All was accomplished over the internet including the editing and tweaking of the sound chip with the developer. If any interest I could send you a link to the supplier. The cost was around $50.00 US. I have also purchased the model and will be following your build with interest. I am new to ship building so I have not yet learned where all the sacred cows are. Have a great build! Ken
-
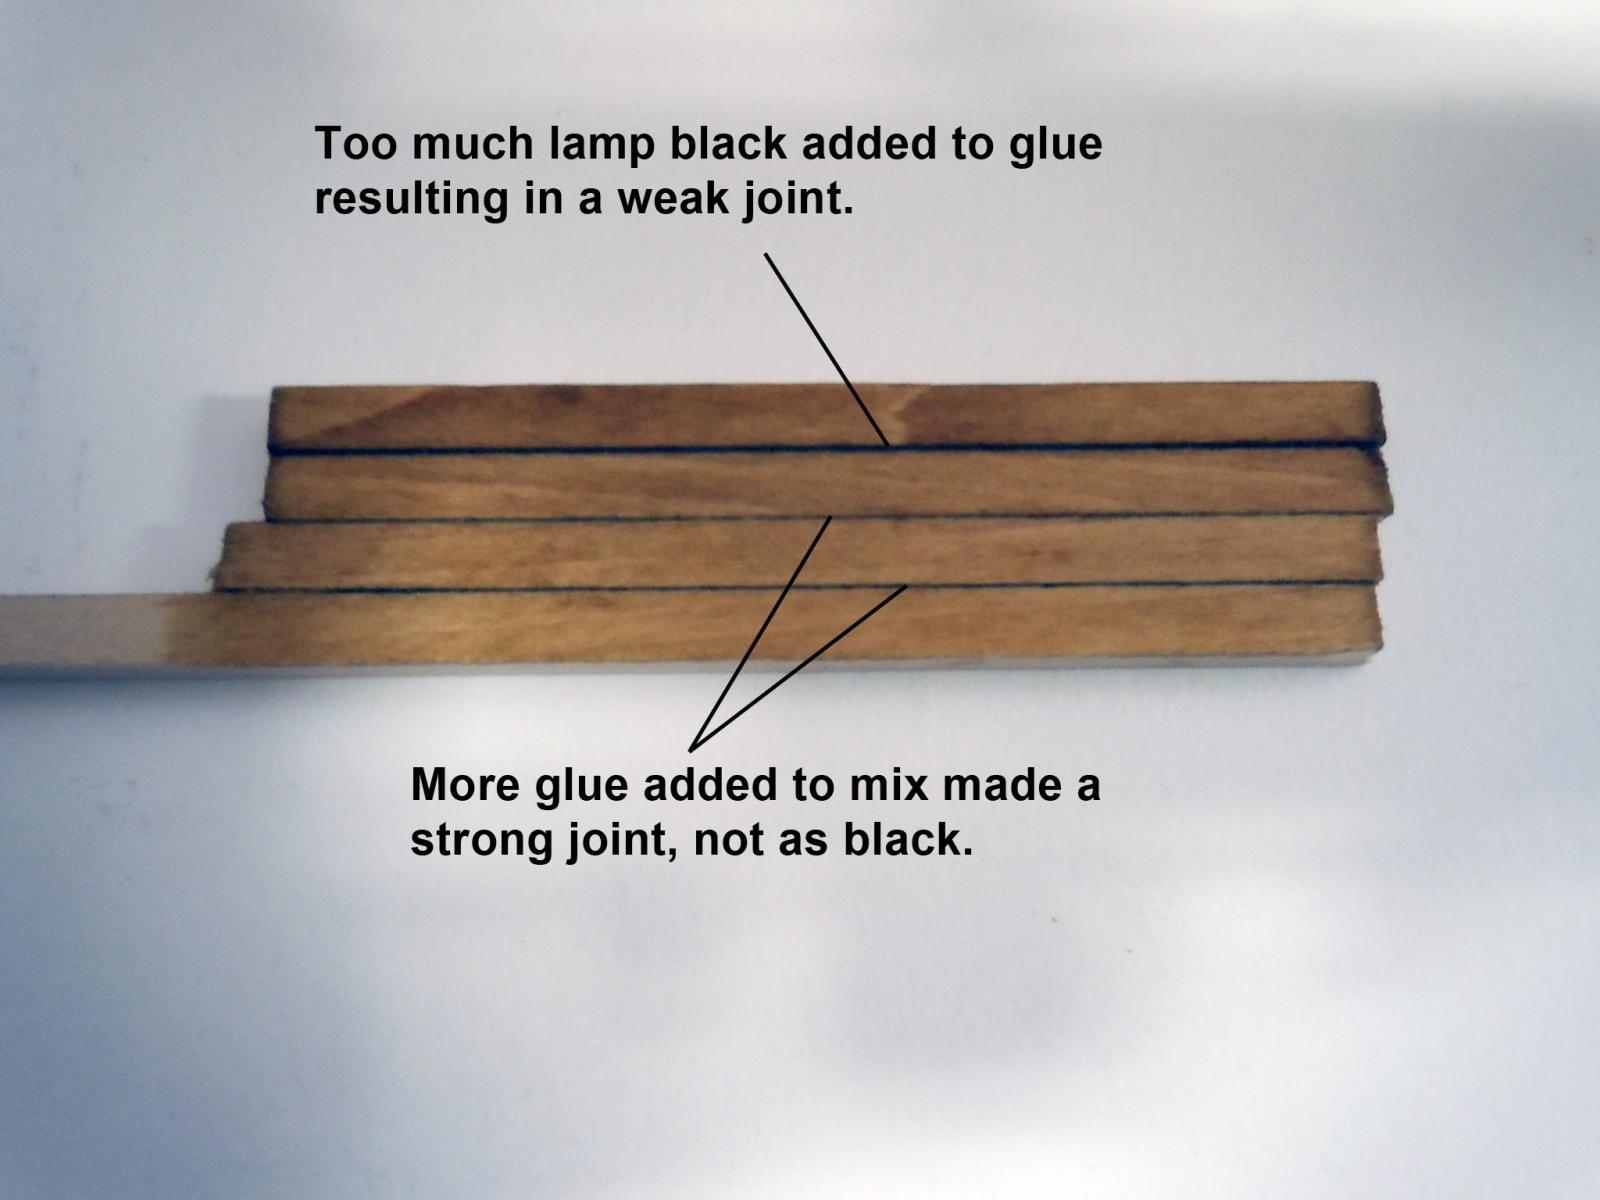
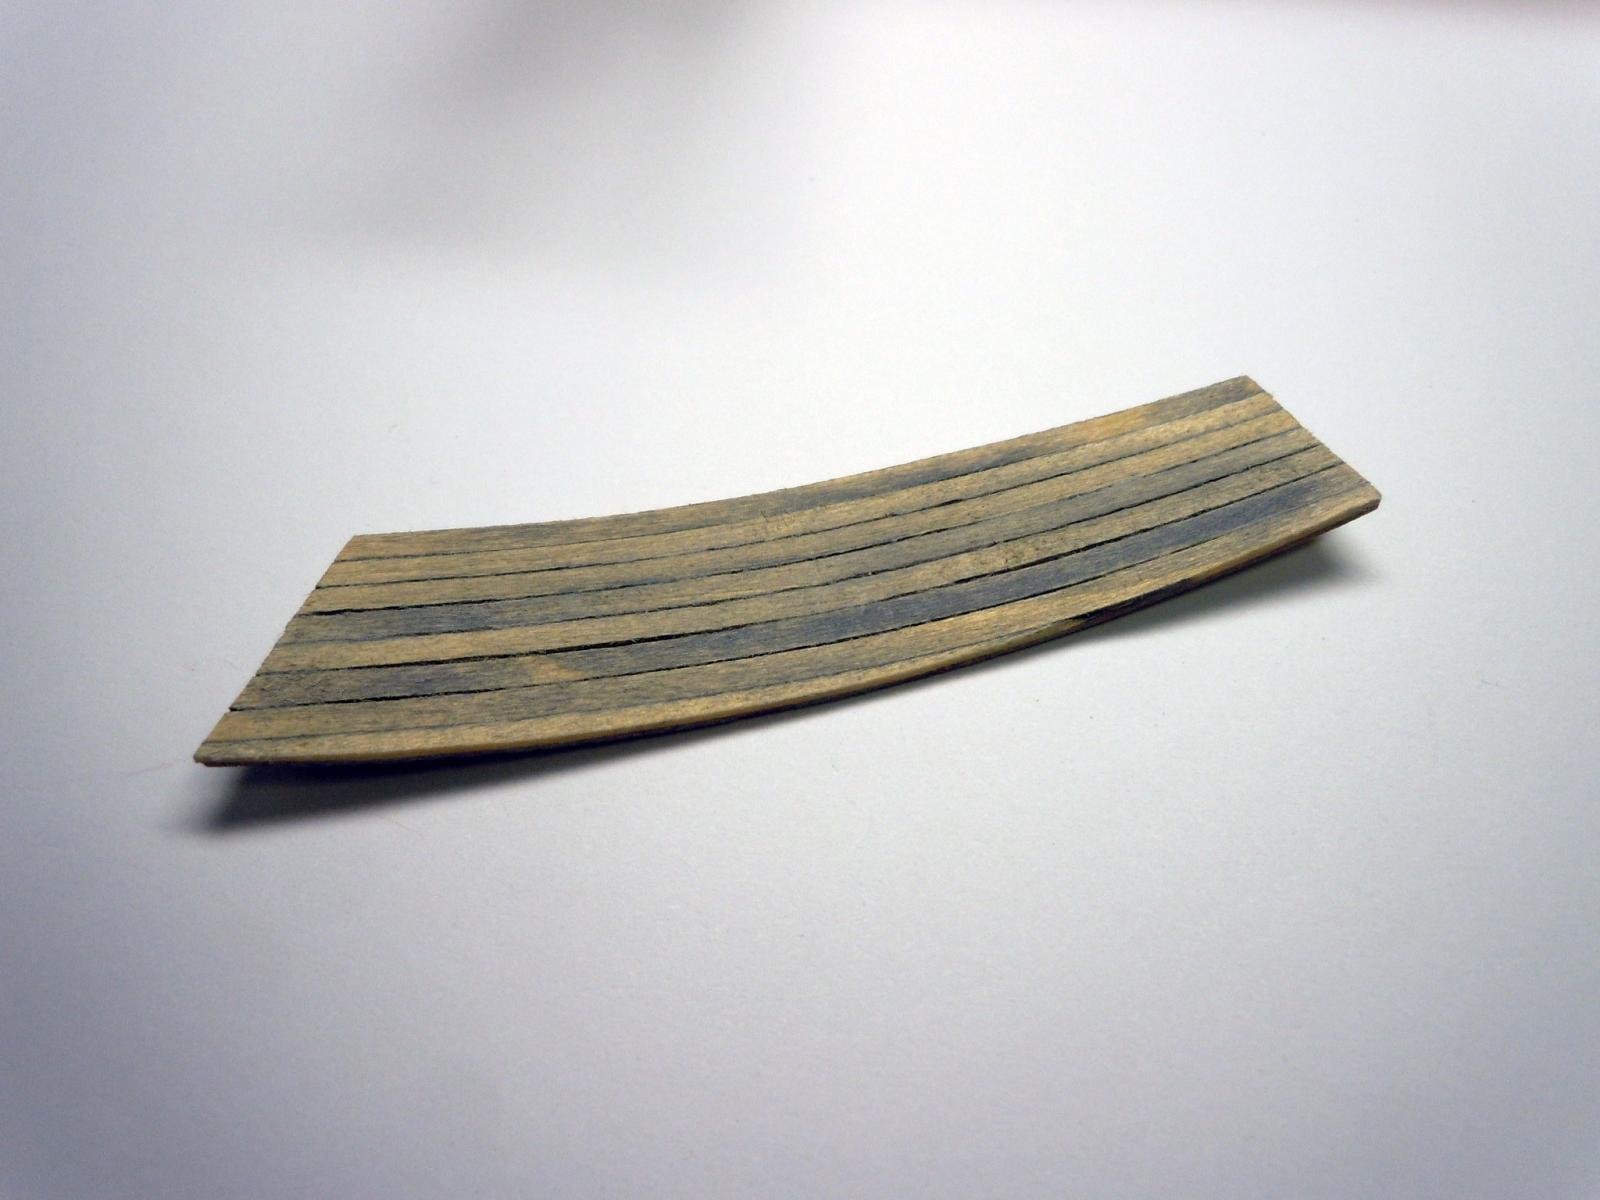
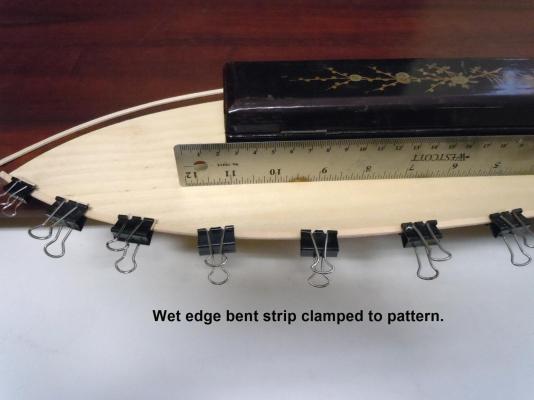
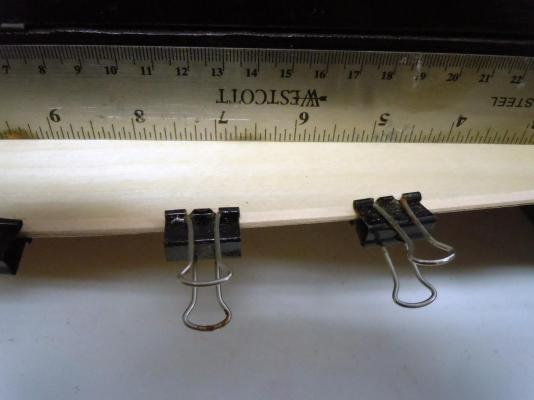
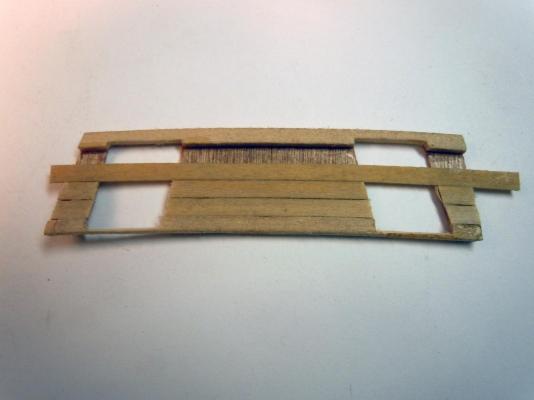
Made a test with the black glue experiment using white glue and Lamp Black; my first attempt I added too much Lamp Black which resulted in a weak glue joint. I added more white glue to the mix and then had a strong joint also a more of a darker gray than a true black. Lamp Black can be purchased at any paint store that mixes paint, I bought 1 ounce for less than a dollar. After the glue set I sanded then piece down to get a nice clean joint. I then stained with Colonial Oak which looks similar to the deck of the real brig pictures. The stain I have is oil based so must be stained after gluing. Staining first would result in poor adhesion of the glue unless a water based stain is used. I water soaked two long strips in the plastic bag that wood strips are shipped in over night and edge formed them and clamped one at a time to the 1/32" pattern. The clamped half overhung the edge of a desk while weighted to keep the pattern flat and I used a ruler to check the flatness of the pattern. When one was dried on the pattern it was removed and the second clamped and dried. The longer the parts are left dried (ideally overnight) the better the results with less spring back. Here is a closeup showing the flatness of the pattern which is critical. This shows the pattern with the formed strips with the deck planking awaiting the black glue. Now to sort out the butt pattern for the deck planks; right now I am considering a length of 4 inches for the individual planks and then bleeding off with random lengths at the stern and bow. Ken

- 440 replies
-
- 5
-
-
- niagara
- model shipways
- (and 1 more)
-
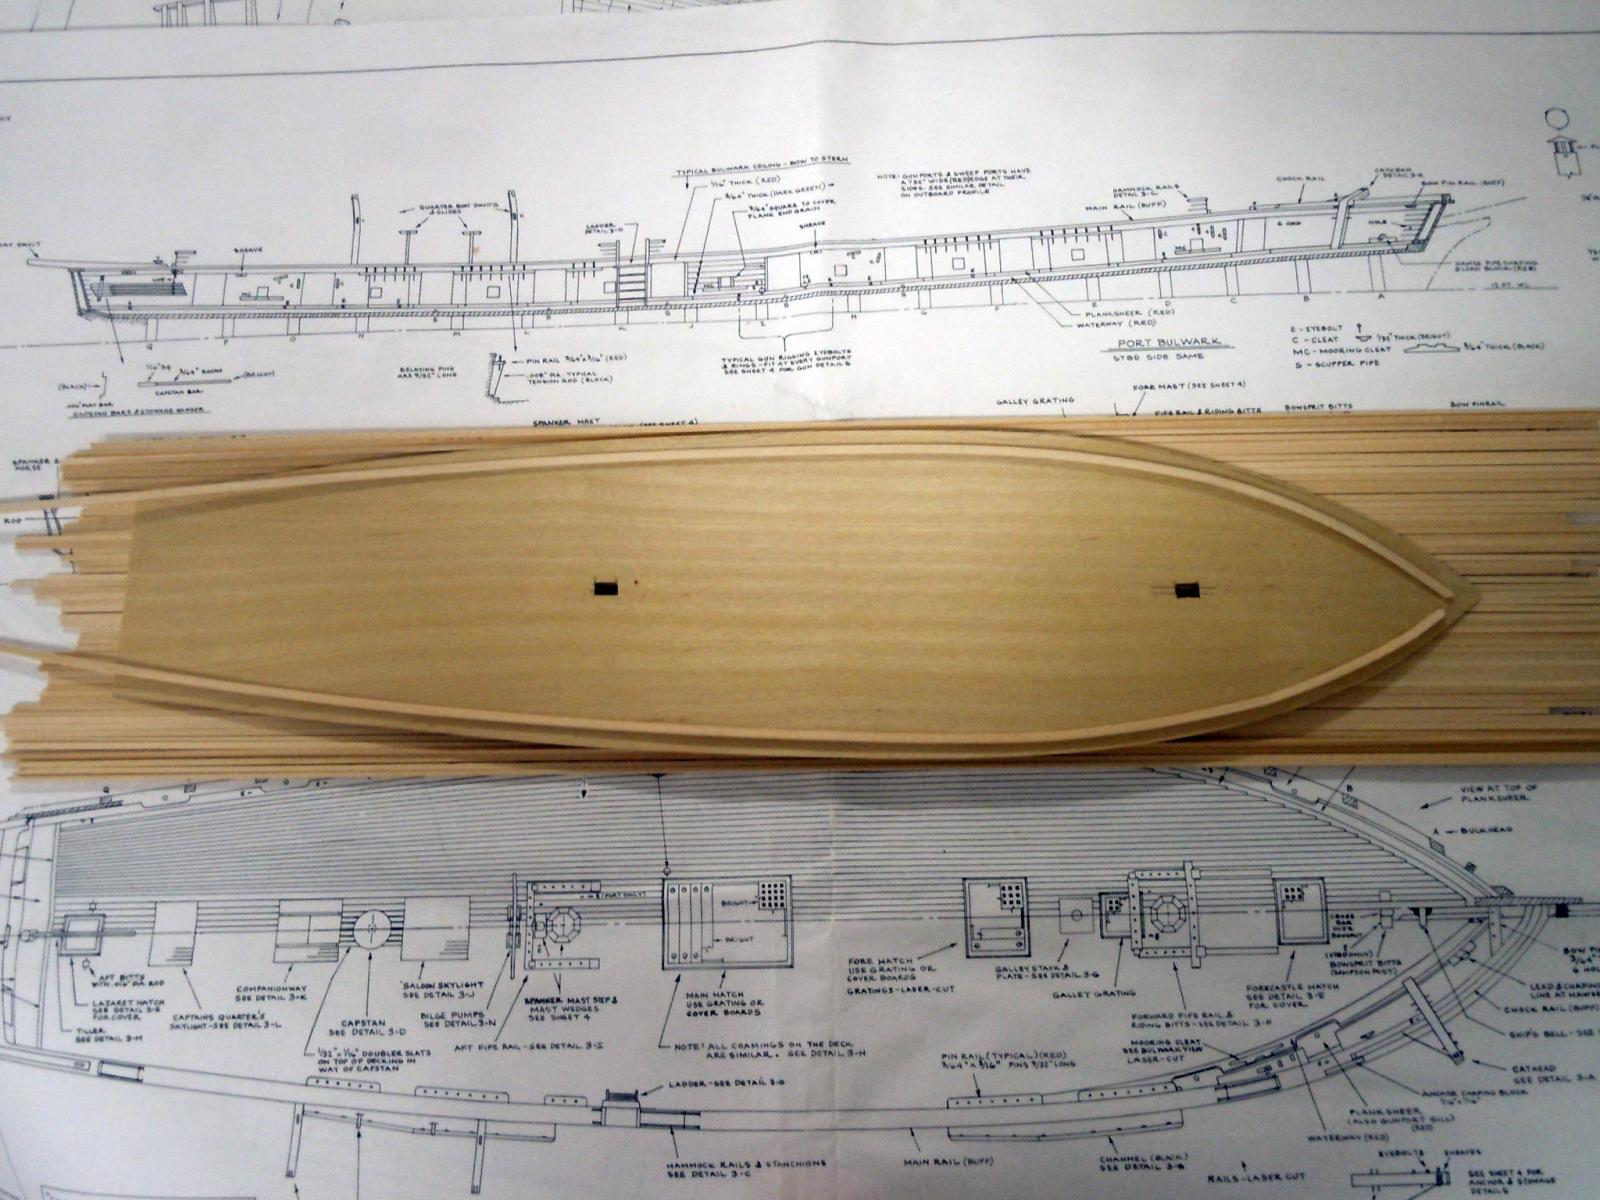
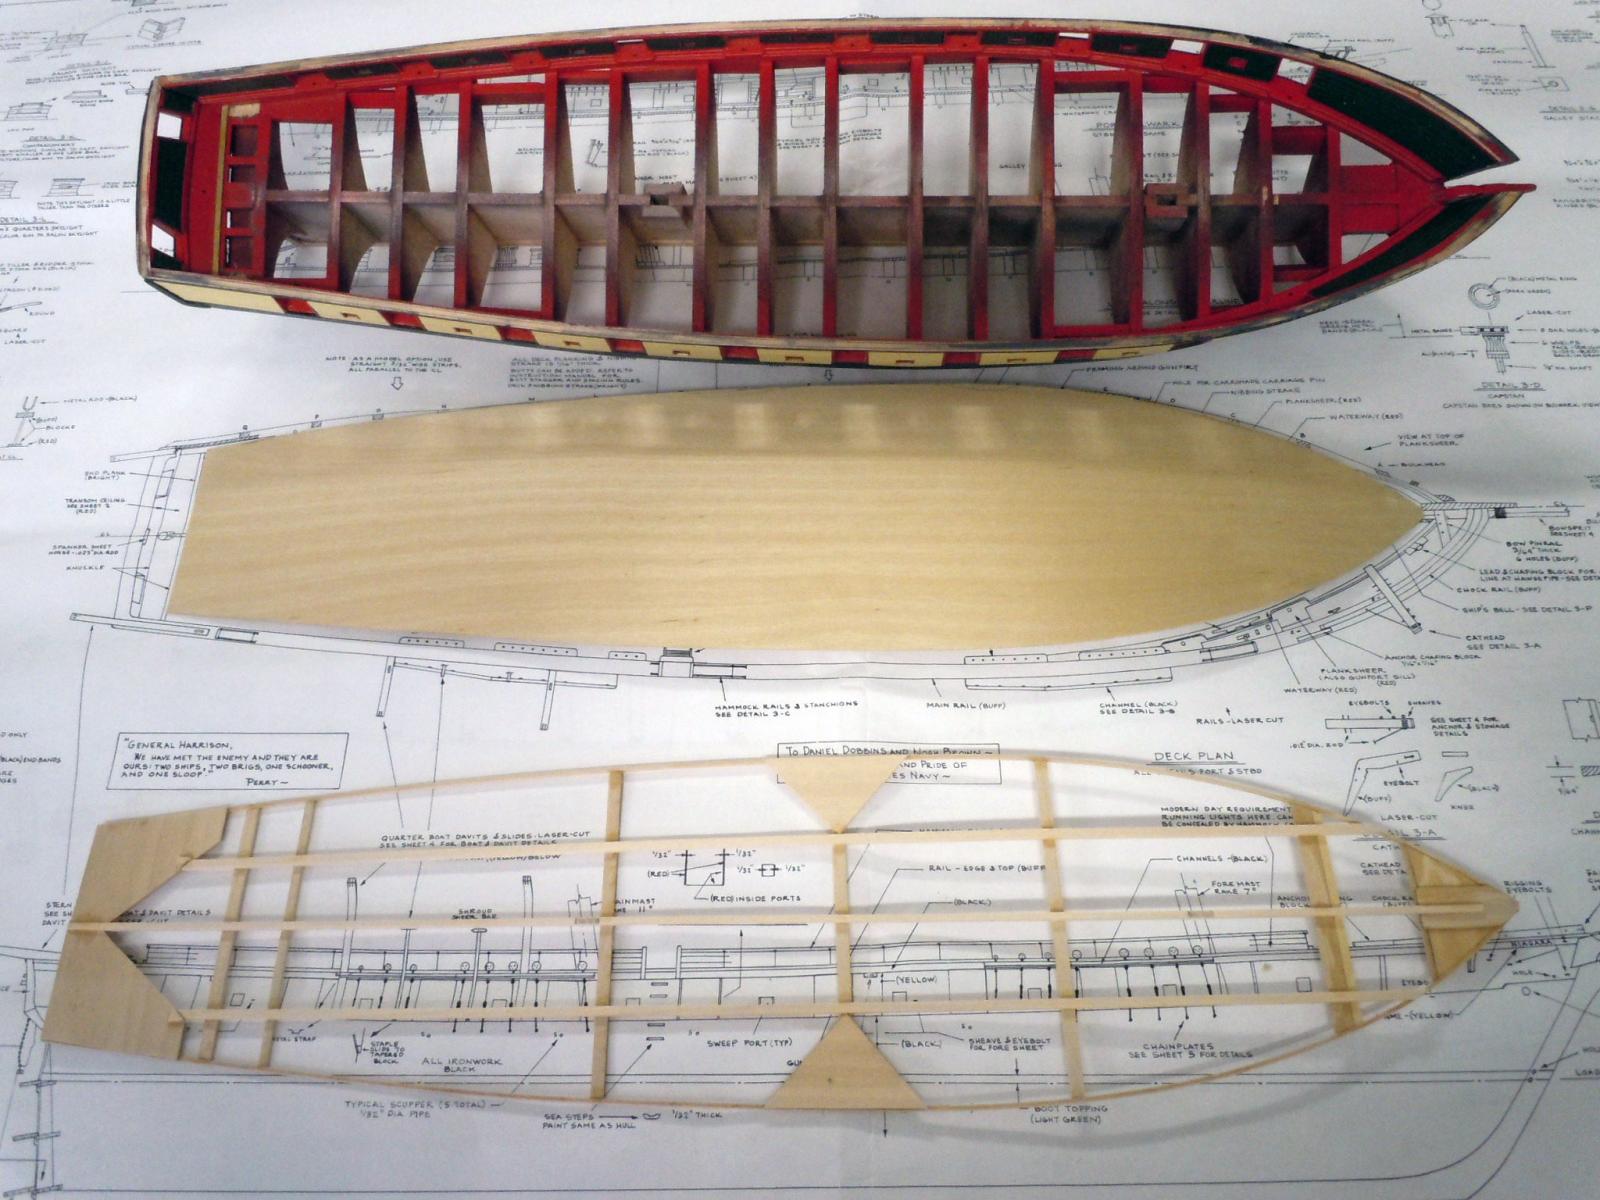
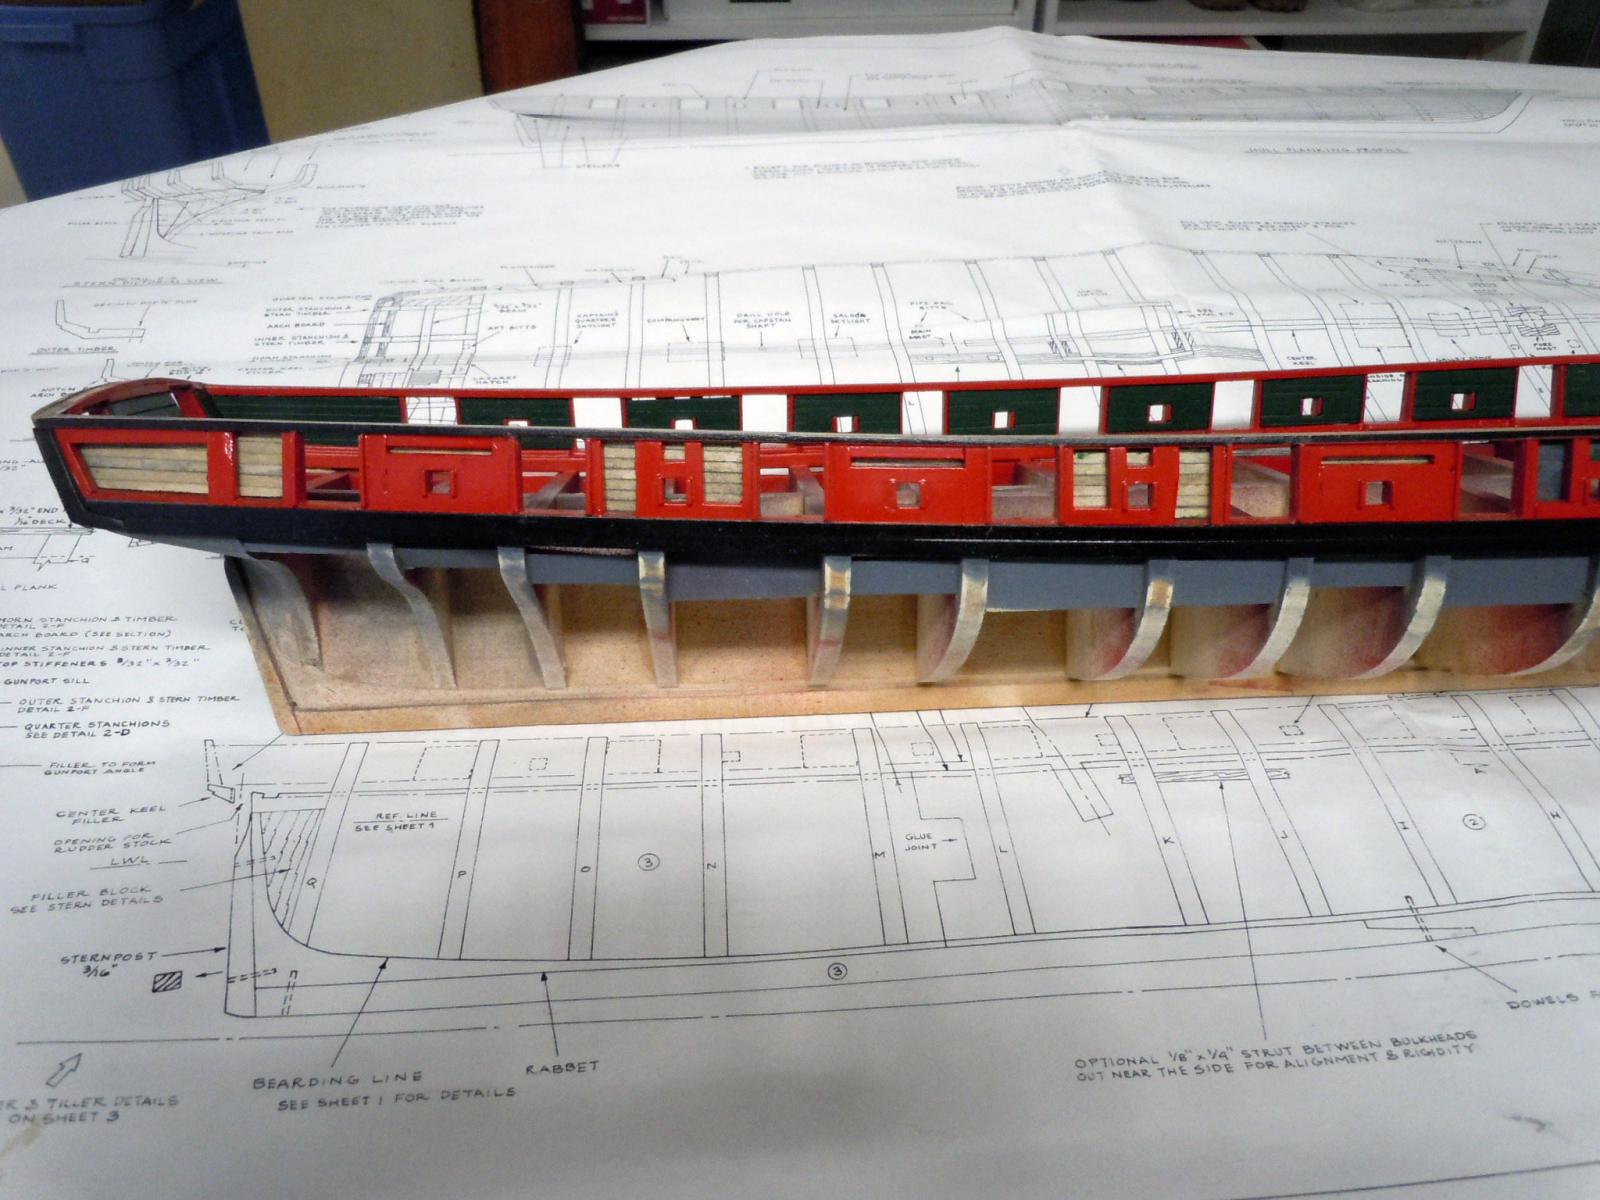
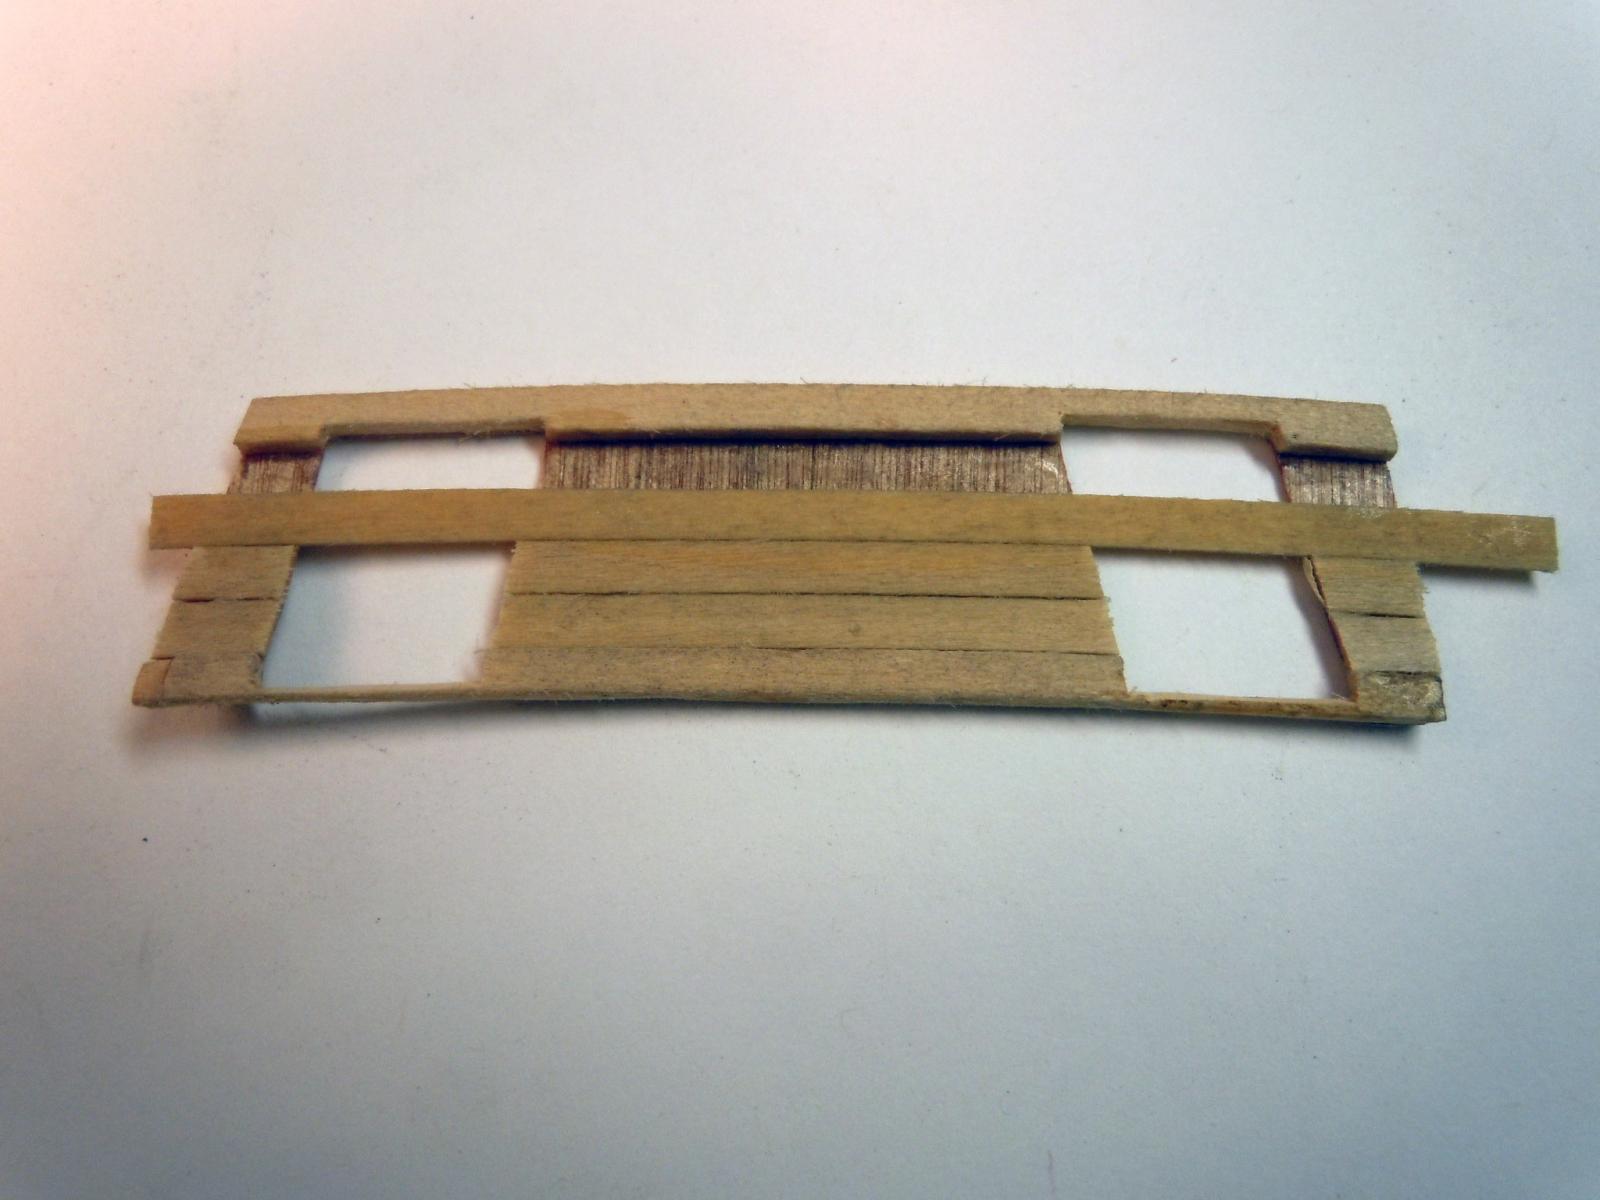
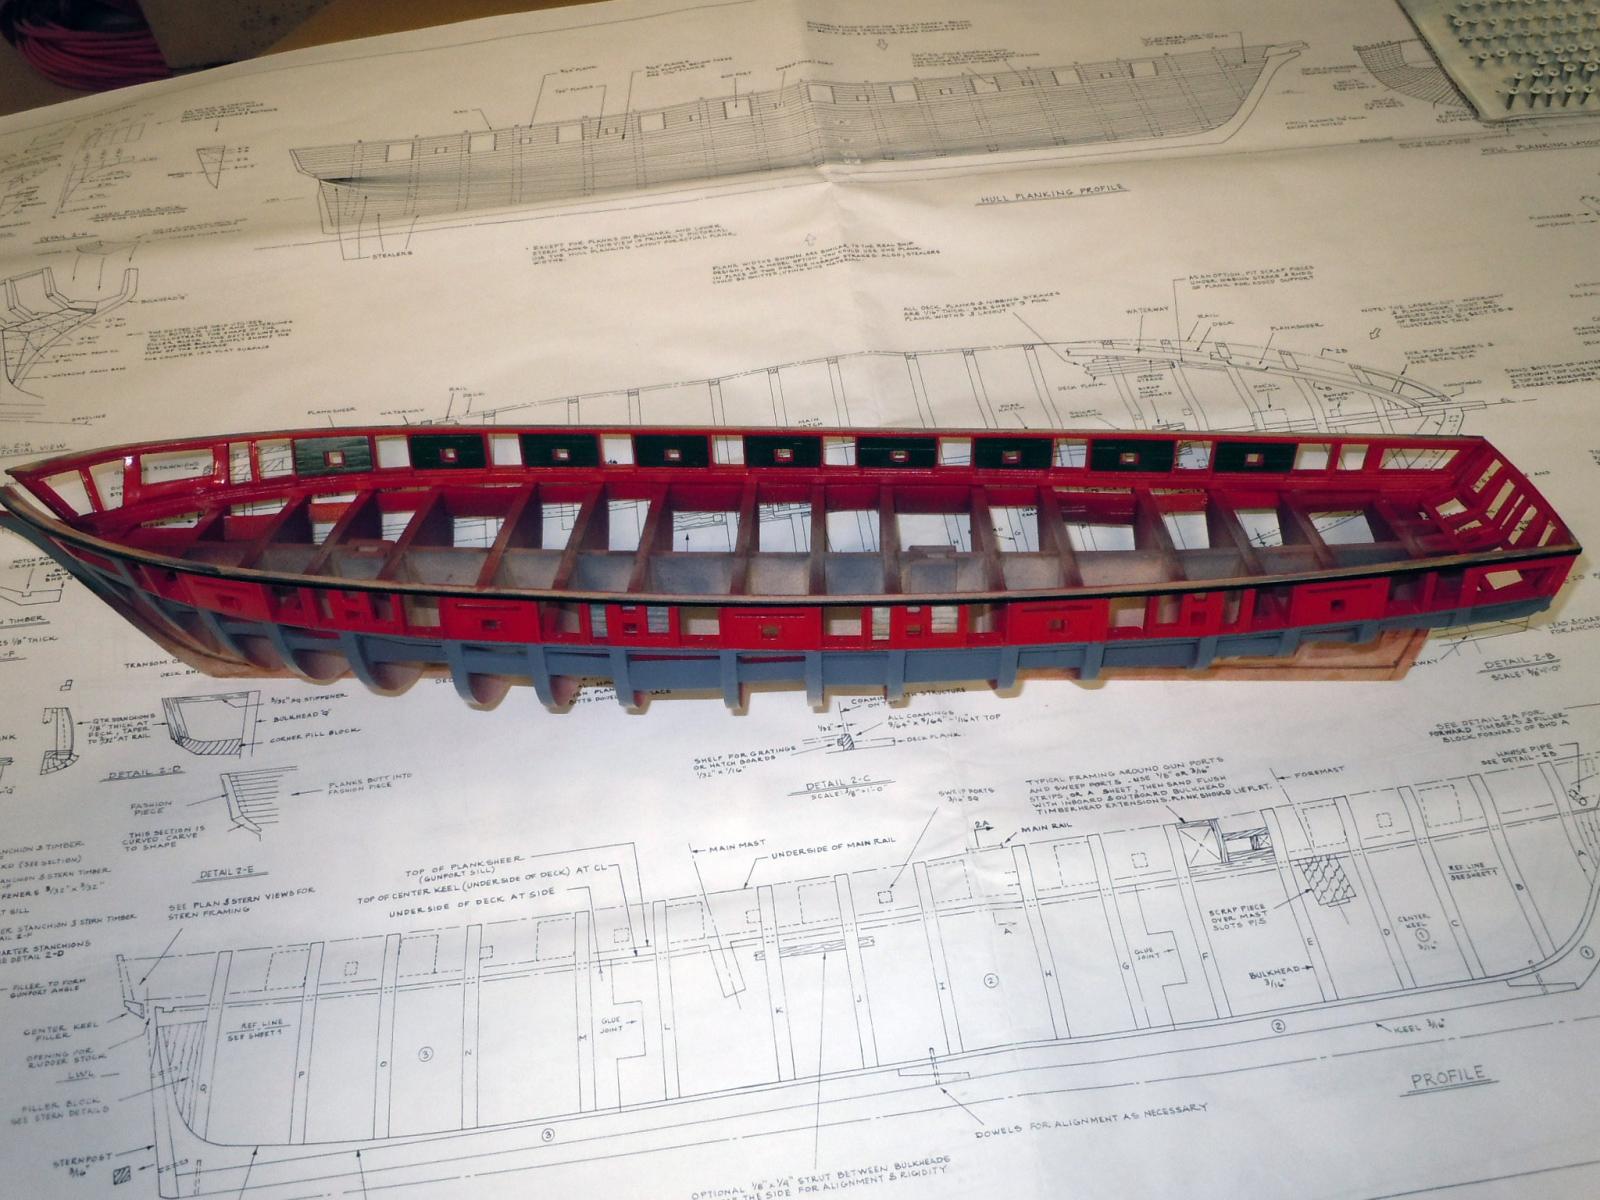
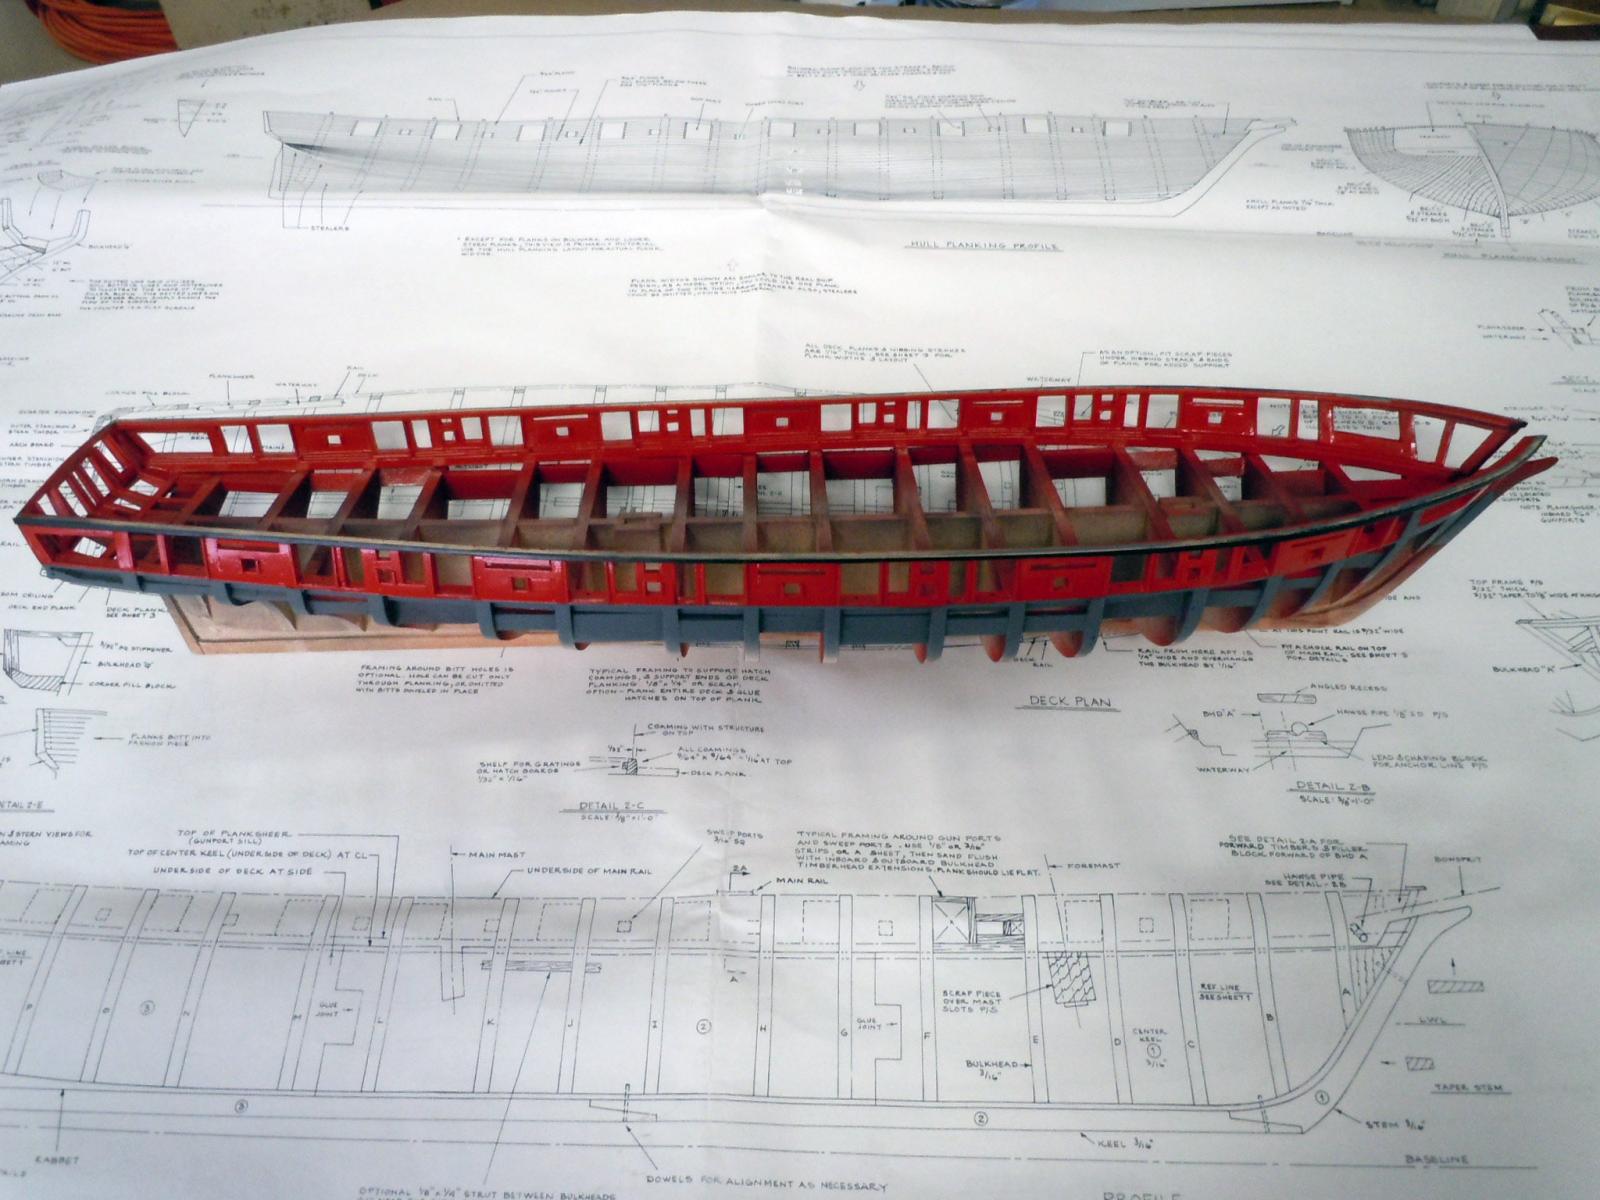
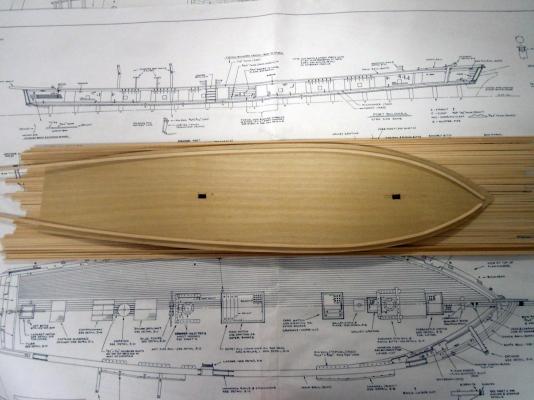
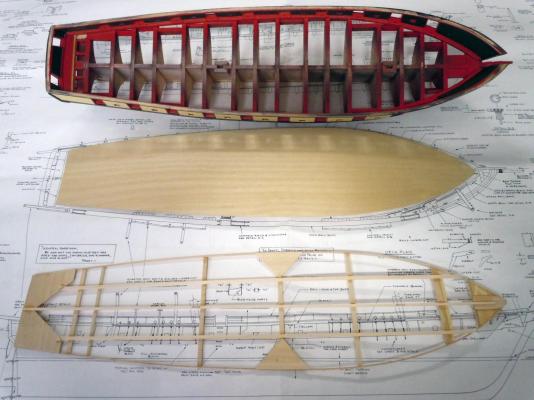
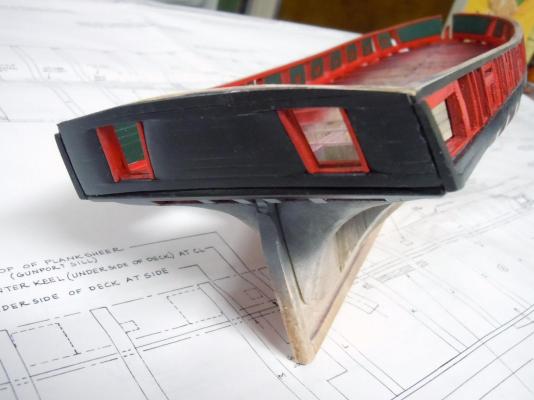
Finally finished up the gun stripes. The bows sections required carving away stock from the framework to allow for the thickness of the carrier plywood. I am also very satisfied with the color as compared to photographs available. While waiting for paint and glue to set I also finished up the lower transom down to the keel. I then fabricated a deck pattern using the model structure rather than the plans with various pieces of spare stock. 1/16" square was used on the sides for ease of bending and being cross braced to maintain shape. The real challenge here was to not glue the pattern to the structure. Once the pattern glue was set; reinforcement braces were added to assure correctness of pattern. I then cut a 1/32" sheet using the pattern. The 1/32" pattern required a little perimeter fussing to sand to a press fit. I still have to add the slots for the two masts. This is what I will use as a pattern to now build the deck which I think will be much easier to build outside the hull than inside. I will also have the benefit of being able to access the inside when adding the hull planking. This may not be a traditional approach, but I will find out soon enough. I am also thinking of using black glue on the decking to emphasis the grouting and stain the decking with colonial oak. I will do a test section first to see what it looks like. Ken
- 440 replies
-
- 6
-
-
- niagara
- model shipways
- (and 1 more)
-
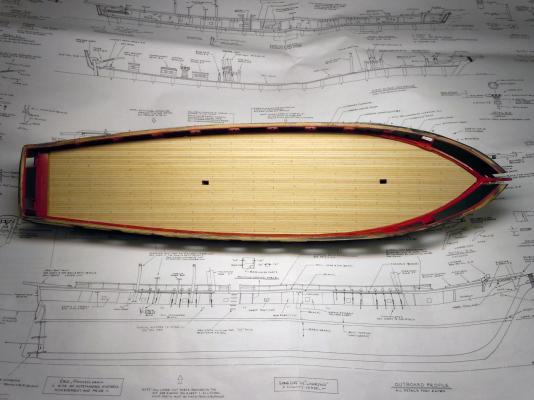
Scott, absolutely correct and also if I had the real brig on hand to compare to. Since I only have on site photos on the earlier page I will just make the judgement call. When I worked I had a computer color matching system at my disposal which was fantastic. We also had it matched to use automotive paints so you just took the formula in to the local paint shop and they could mix it up. Now I just have a pair of old eyes and judgement. Ken
- 440 replies
-
- 3
-
-
- niagara
- model shipways
- (and 1 more)
-
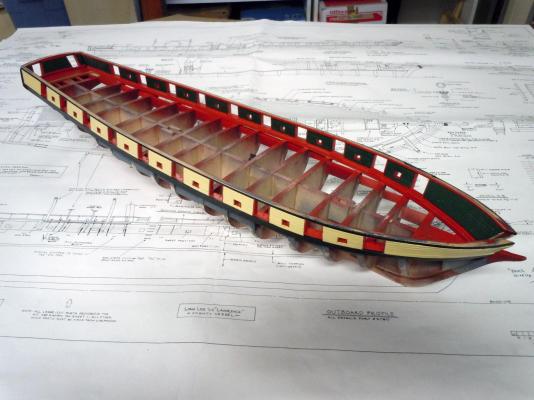
Thanks George! The color is close based on the pictures I have seen and of course the light conditions will change a color as well. As long as the impression is close it works for me. Here are additional in progress of the starboard side planking. I have settled on a process of doing them that is improving with each one. I will do the bow section the same way I did the inside with a 1/64" birch plywood carrier to handle the compound curving. I have the patterns done and just need to transfer to the plywood. Here is the aft section. The forward section. Here is an overall view completed to this point. Now to the bow sections. Ken

- 440 replies
-
- 4
-
-
- niagara
- model shipways
- (and 1 more)
-
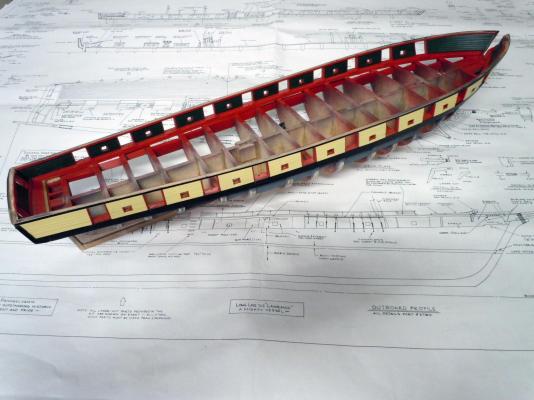
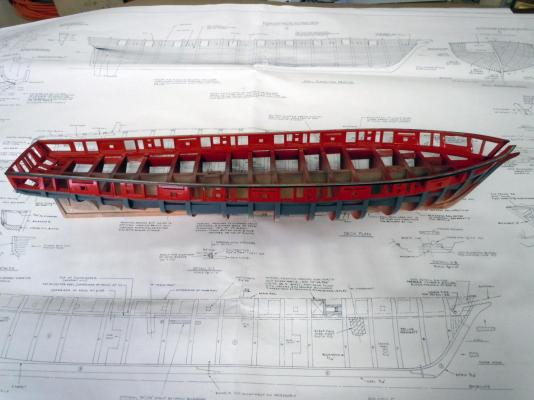
I have settled on a color for the gun stripe and am moving forward on the planking. Here is the color and the start of the planking on the starboard side starting at the stern and moving forward. These planks are just set in place and will need some fine tuning on the edges before the final gluing in place. Ken

- 440 replies
-
- 6
-
-
- niagara
- model shipways
- (and 1 more)
-
Tim, Please by all means borrow it; knowledge and experience not shared is a true waste. Roughed in the transom wall and here are a few in progress and painted; keep in mind more parts are to be added like the chafing blocks at the bottom of the gunports. Planks added. Painted and test fit. In place and showing the fashion frame. Then I added the two 3/64" thick planks that define the lower edge of the gun stripe from bow to stern. Next I will start on the gun stripe planking. Ken


- 440 replies
-
- 4
-
-
- niagara
- model shipways
- (and 1 more)
-
Scott, Brian, Thank you for your kind words. I am learning as I am going wood is not at all like working with brass so I am now broadening my skill sets. Working with these plans is kind of like being a detective; study the plans and look for the clues as to what to build next. Right now the rear transom wall with the gun ports is done. I am adding the two planks below the gun ports so sorting out the yellow will need to be resolved tomorrow or the day after, otherwise I may start planking the deck or hull. Brian, that yellow ochre is almost a pumpkin color versus the yellow on the real brig. Thanks for sharing! Ken
- 440 replies
-
- 1
-
-
- niagara
- model shipways
- (and 1 more)
-
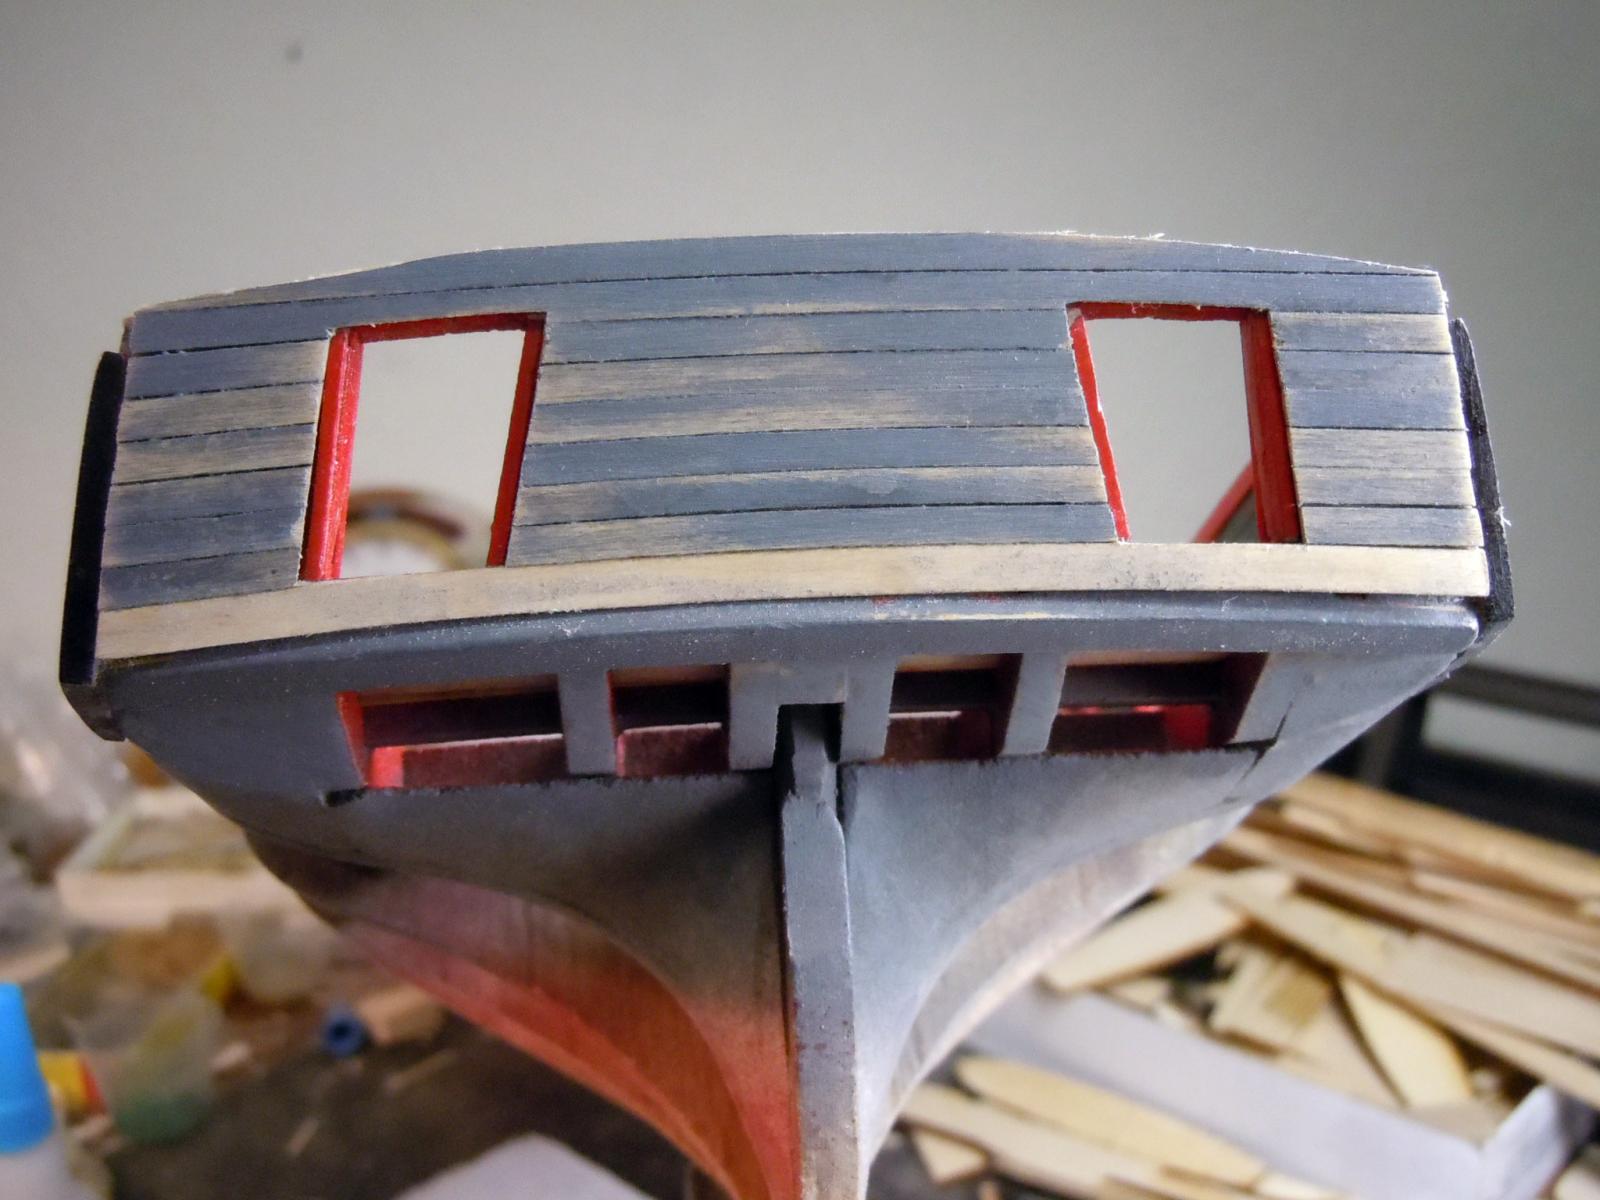
Here is a sequence showing the bow walls being built for those who may not be familiar with this technique. I start with a piece of card stock(from Staples) then transfer the pattern to 1/64" birch plywood. Note plywood has a bias to bending in one direction orient the part for ease of desired direction of bending. I then cleaned up and fine tune the fit of the plywood parts; the same pattern worked for both left and right sides, so the symmetry is very close. Then I cut the planks to length prior to fussing with the plywood fit and soaked the planking in water. I added the soaked planks while still very moist using CA; once the planks were in place and trimmed I then clamped them while still wet to the bow section. When dry (the next morning) they were bone dry and held their position with no spring back. The both were then painted and glued in place. Clamps were not needed only finger pressure until the CA set. Once the glue is completely set the bowsprit area will be trimmed to match. Next I will move to the outside and add the planking around the gun ports. Ken


- 440 replies
-
- 5
-
-
- niagara
- model shipways
- (and 1 more)
-
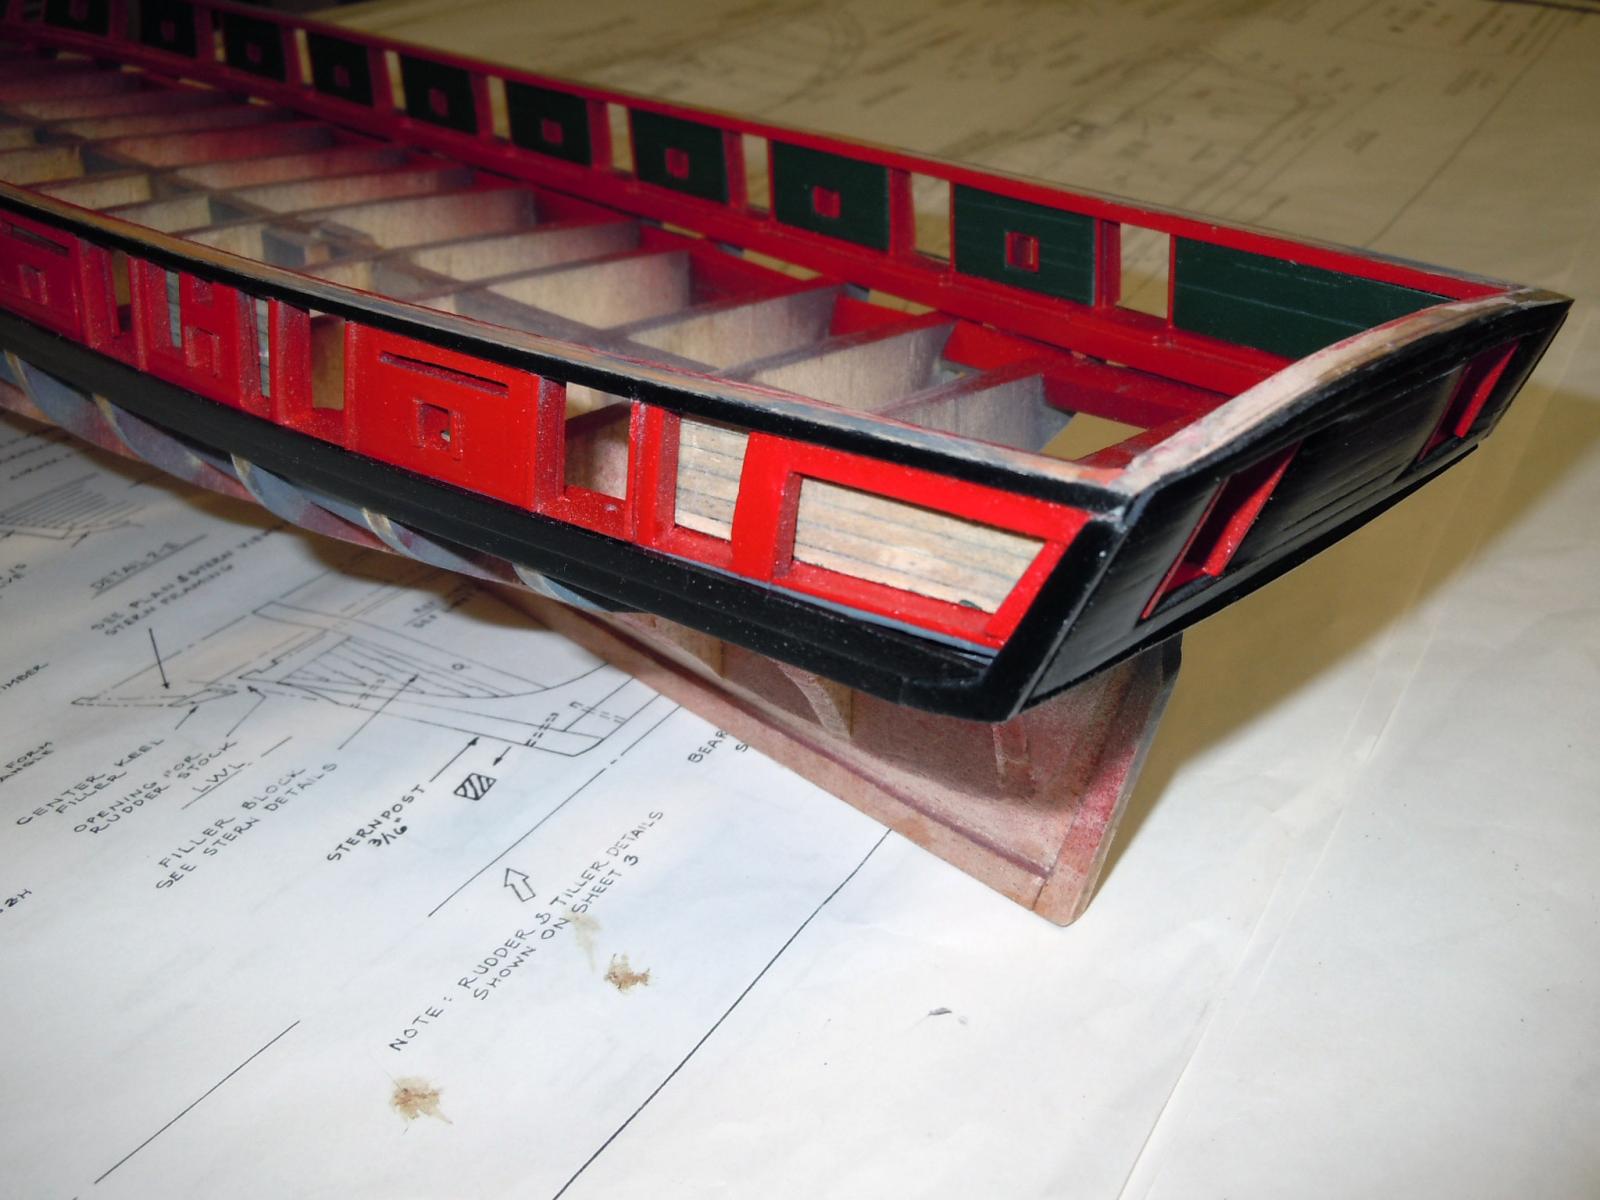
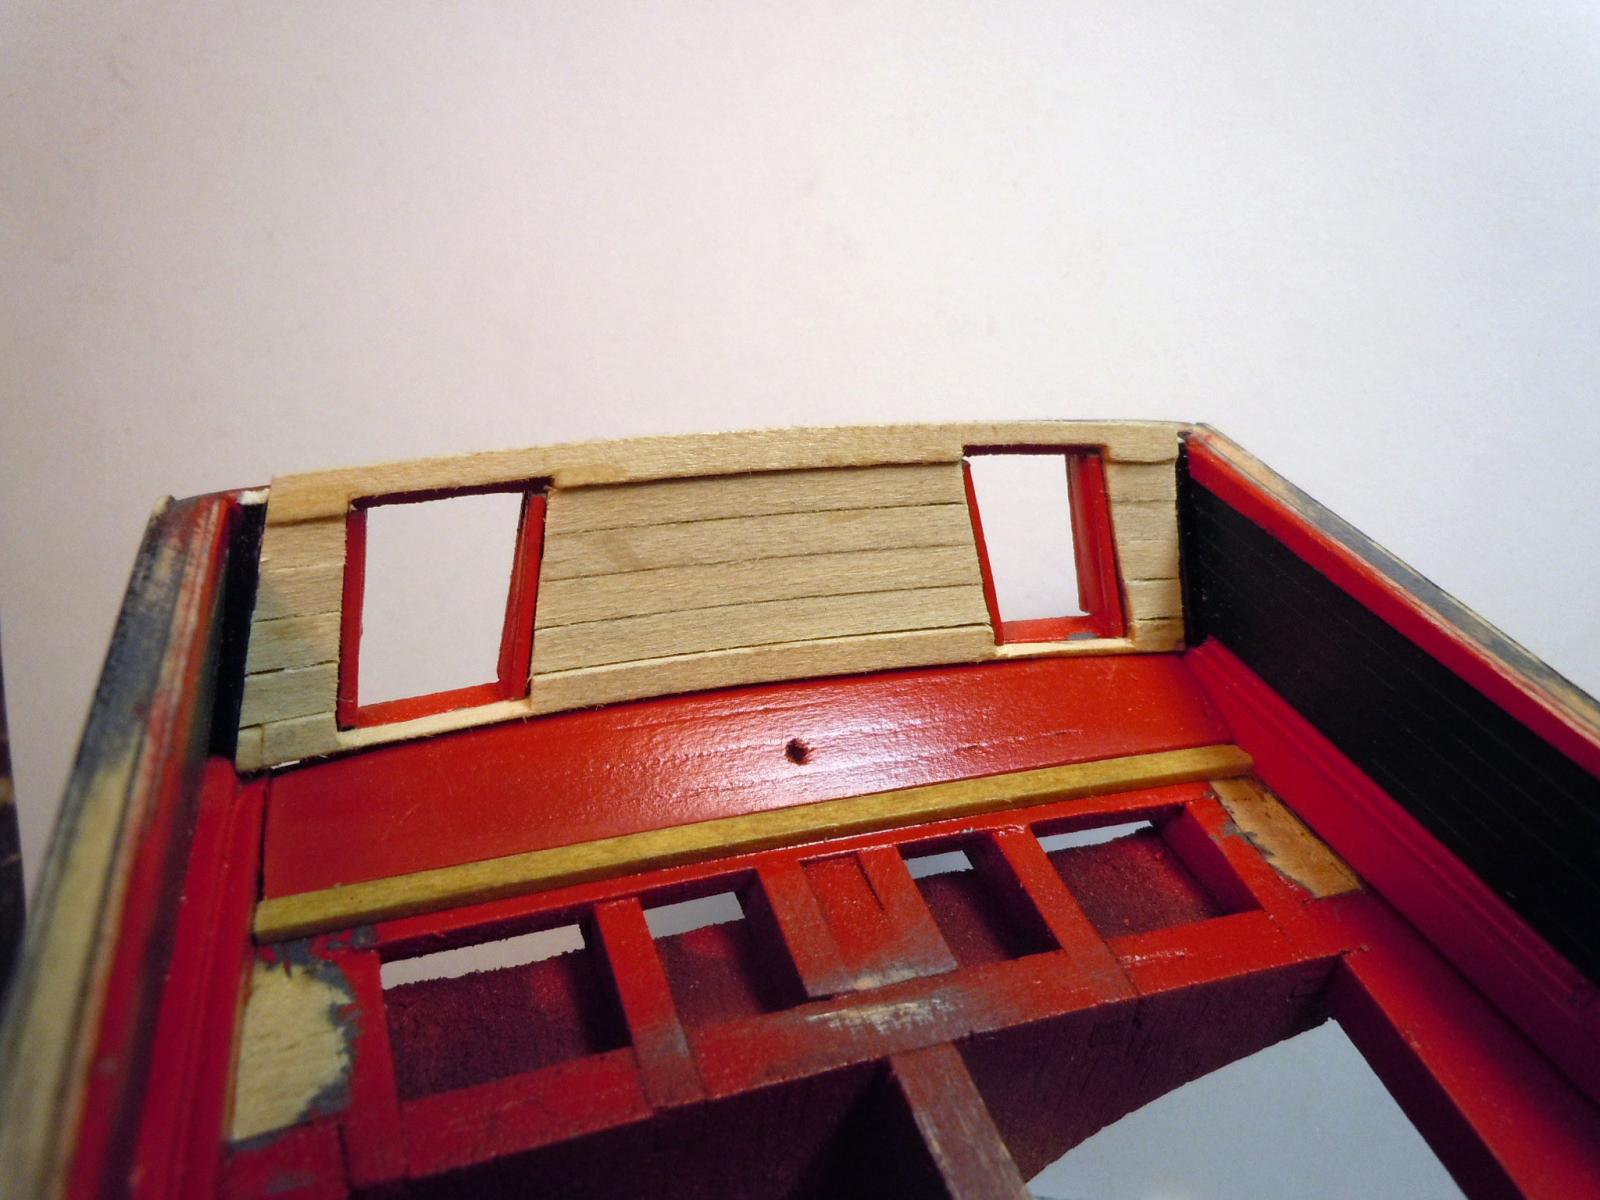
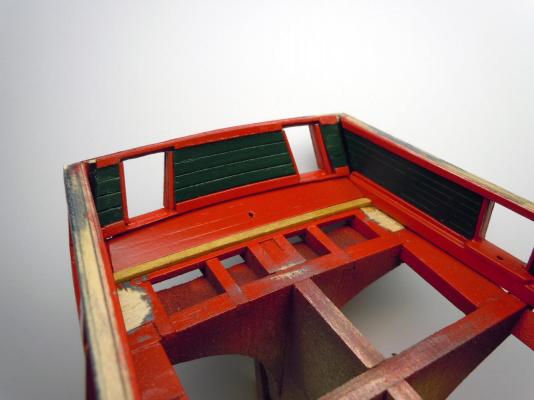
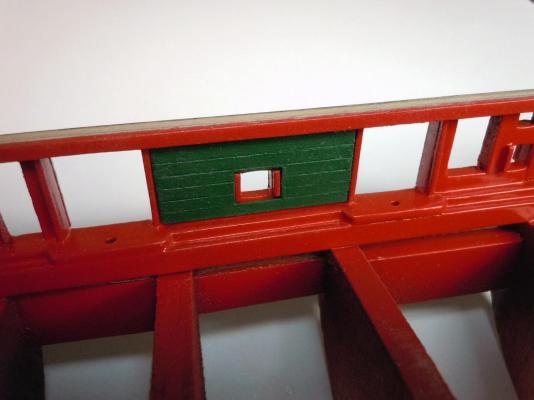
Today I worked on the transom; first I cut and stained the end of the decking. I then planked the section to the vertical wall and located the pilot hole for the tiller which will be enlarged when the tiller is installed. Next the area on the transom wall has two gun ports that would have some very small end pieces so I fell back on one of my airplane techniques and used a carrier piece of 1/64" plywood to glue the parts to and maintain position. The top and bottom frame parts are thicker than the planking which is 1/32" thick. Here you can see the frame parts with the top and bottom gunport notches. Here is a picture showing the planking being added to the carrier piece. Here is the fitting of the wall part prior to painting; I also added the black corner pieces that are the inside of the fashion corners which will also be added to the outside later. Here is the part in place painted as instructed with the red frame and green planking. The top frame will be trimmed down to fit the main rail later allowing the glue to set completely. Next I will move forward to the inner bow wall planking which is a compound cured section. I will probably use the carrier technique on them as well. Ken


- 440 replies
-
- 4
-
-
- niagara
- model shipways
- (and 1 more)
-
Dale, Thanks for the pictures I will see what I can find. Ken
-
The Niagara plans just say yellow. I will see if I can find a picture of the real ship and import it. Then I can check in Photoshop for a match. Ken
-
Tim, I am new to ship building and this is my first ship build, so I am not familiar with all the nautical terms yet. I looked over the plans and cannot find a reference to the gun-stripe. Perhaps if you could explain or post an image that would really help in my education. Ken
-
Sorry to hear about that happening; but you are not alone. Over the year's I have had a few as well. That's when I sit down with a bottle of my favorite beverage. Tomorrow is a new day!
- 468 replies
-
- 2
-
-
- niagara
- model shipways
- (and 1 more)
-
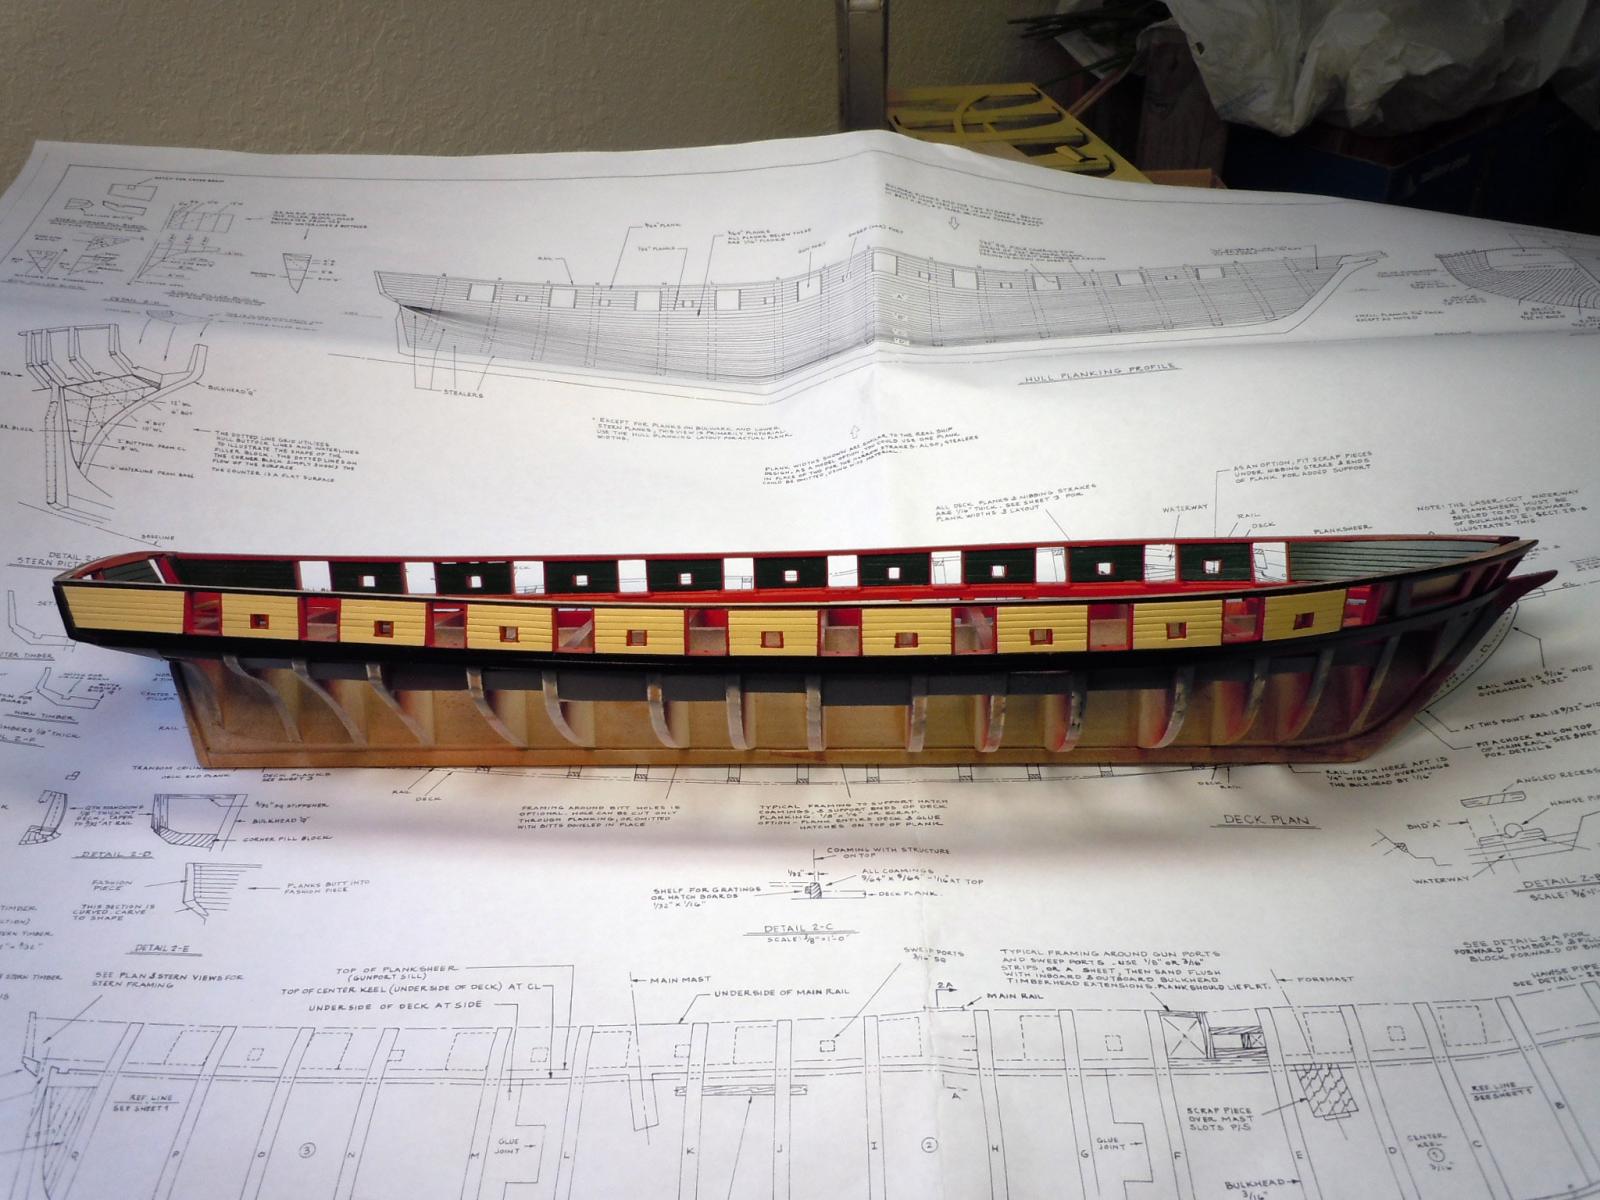
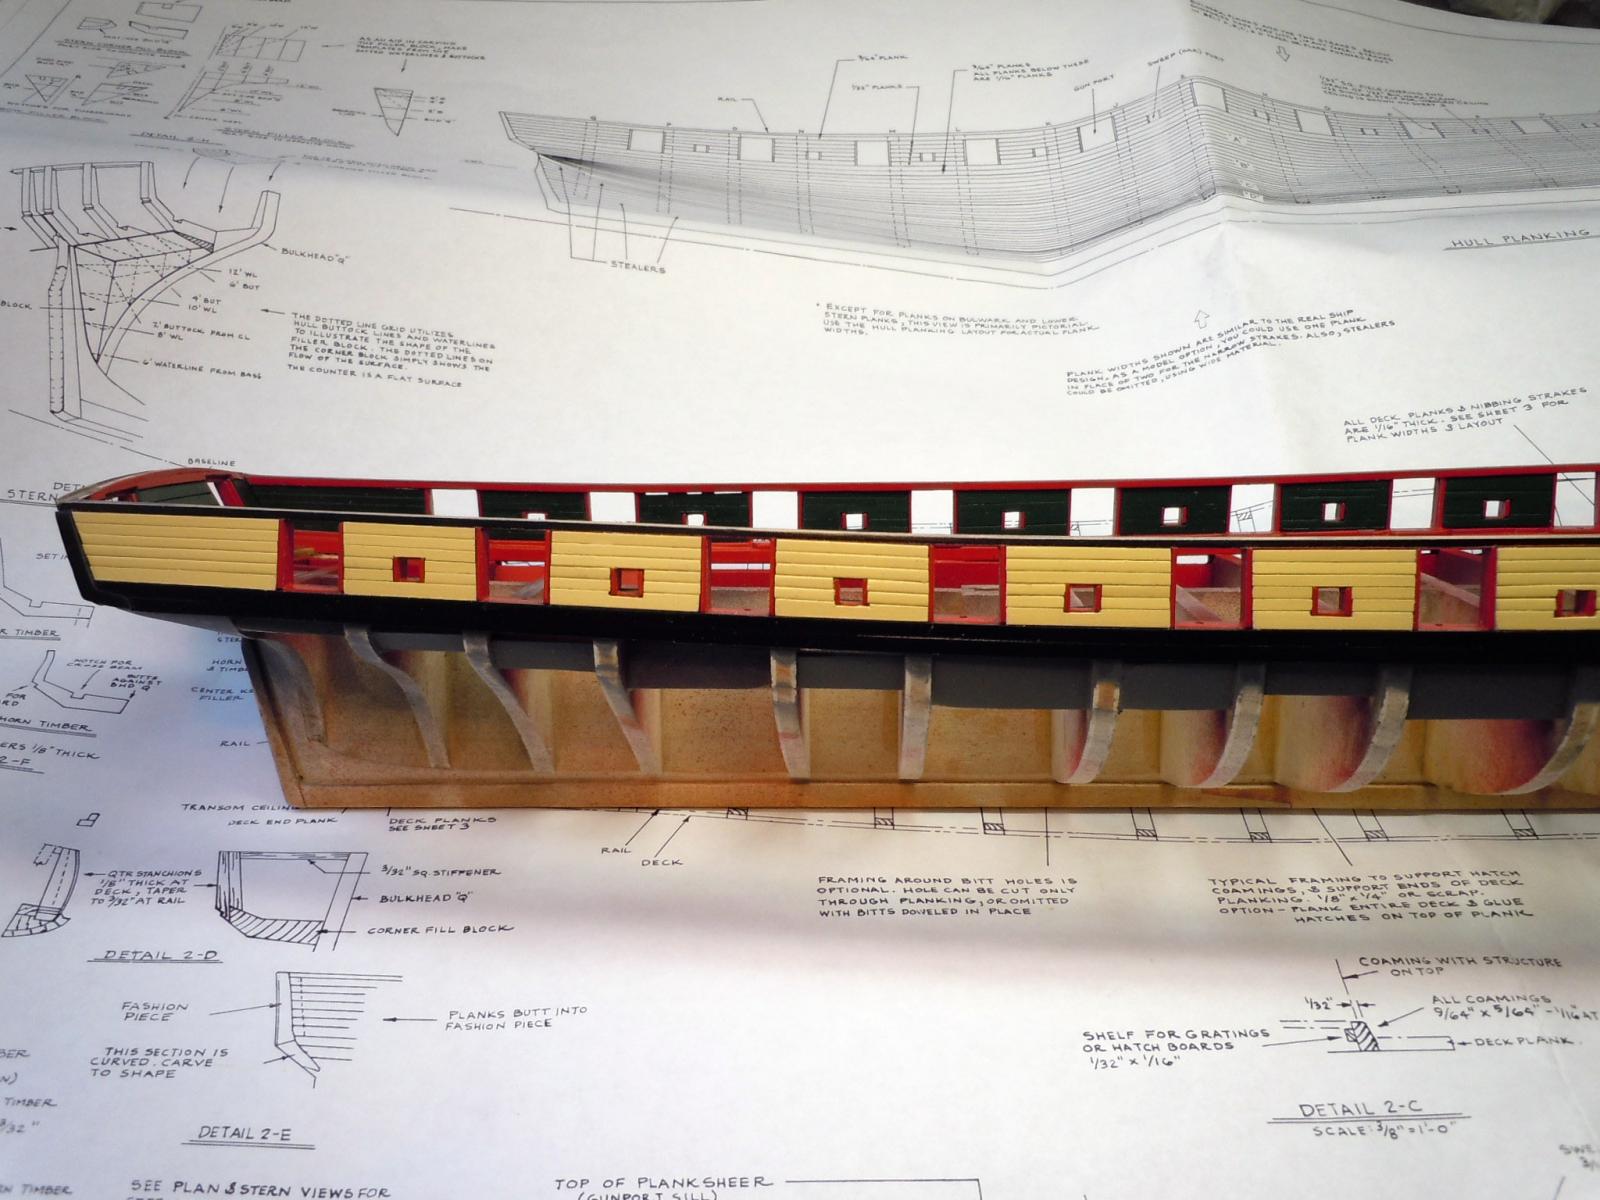
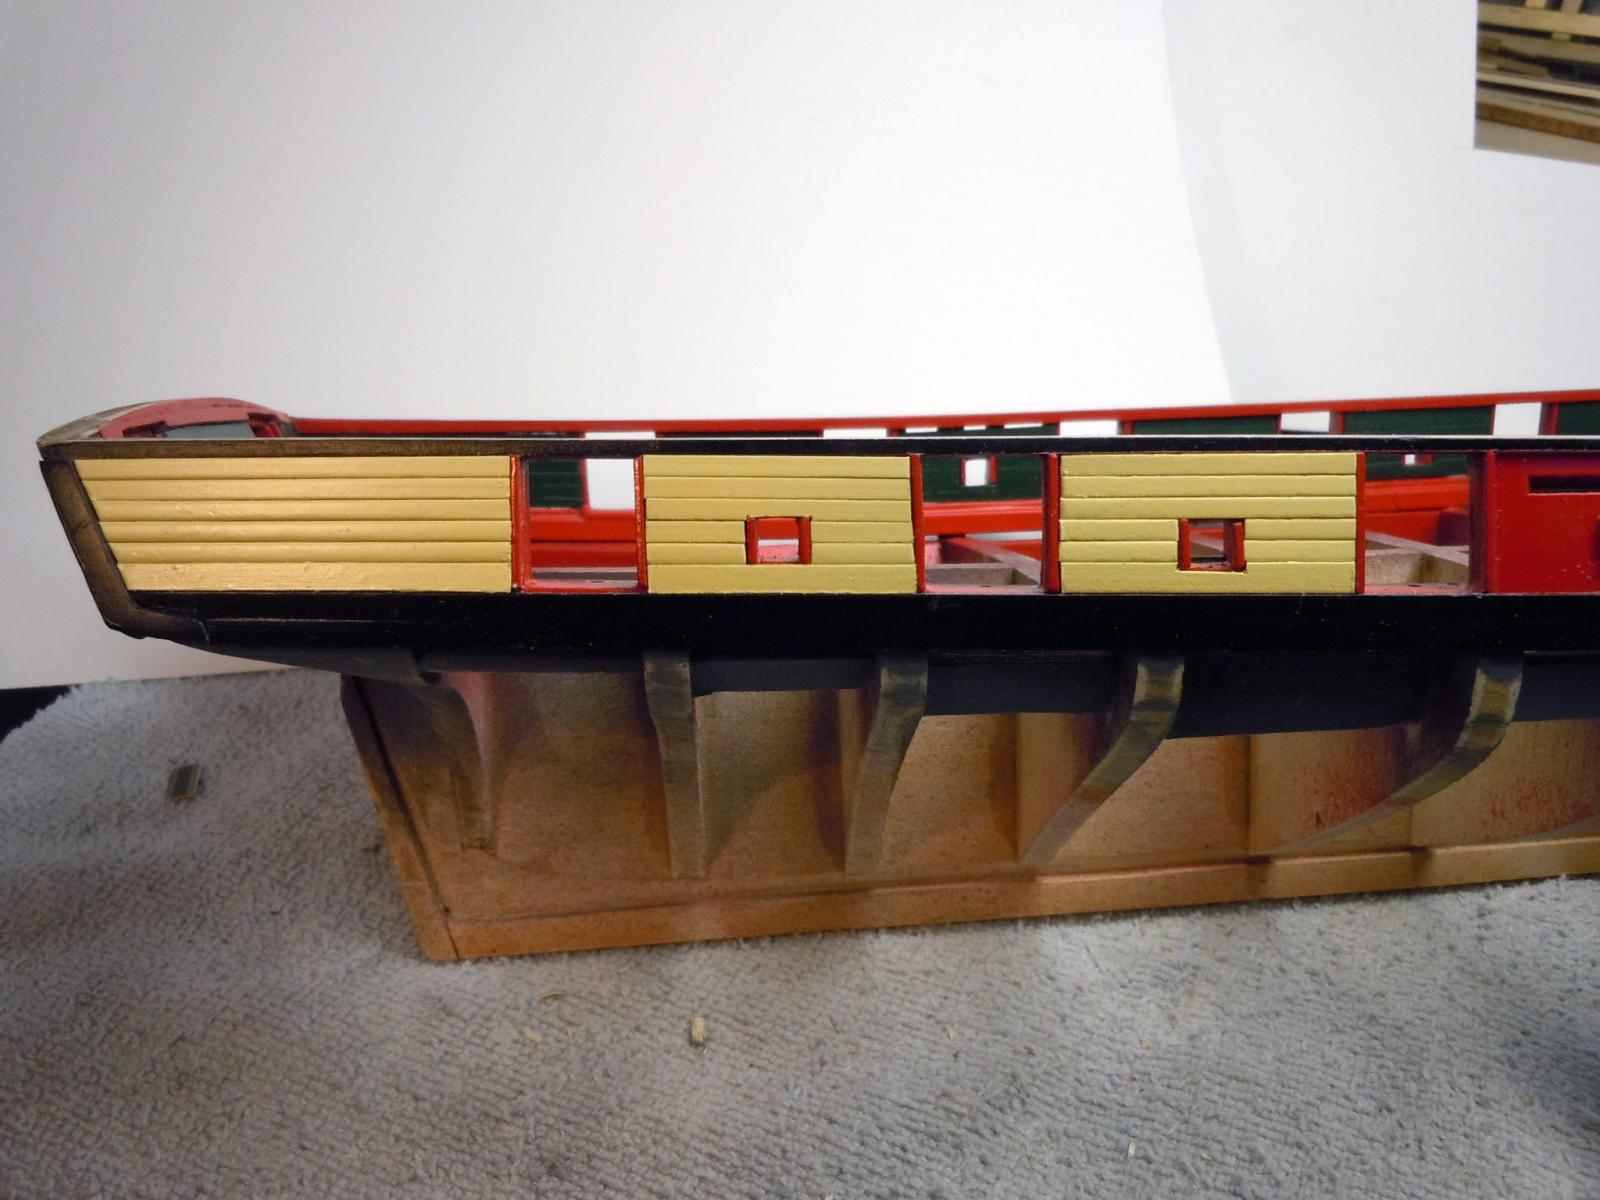
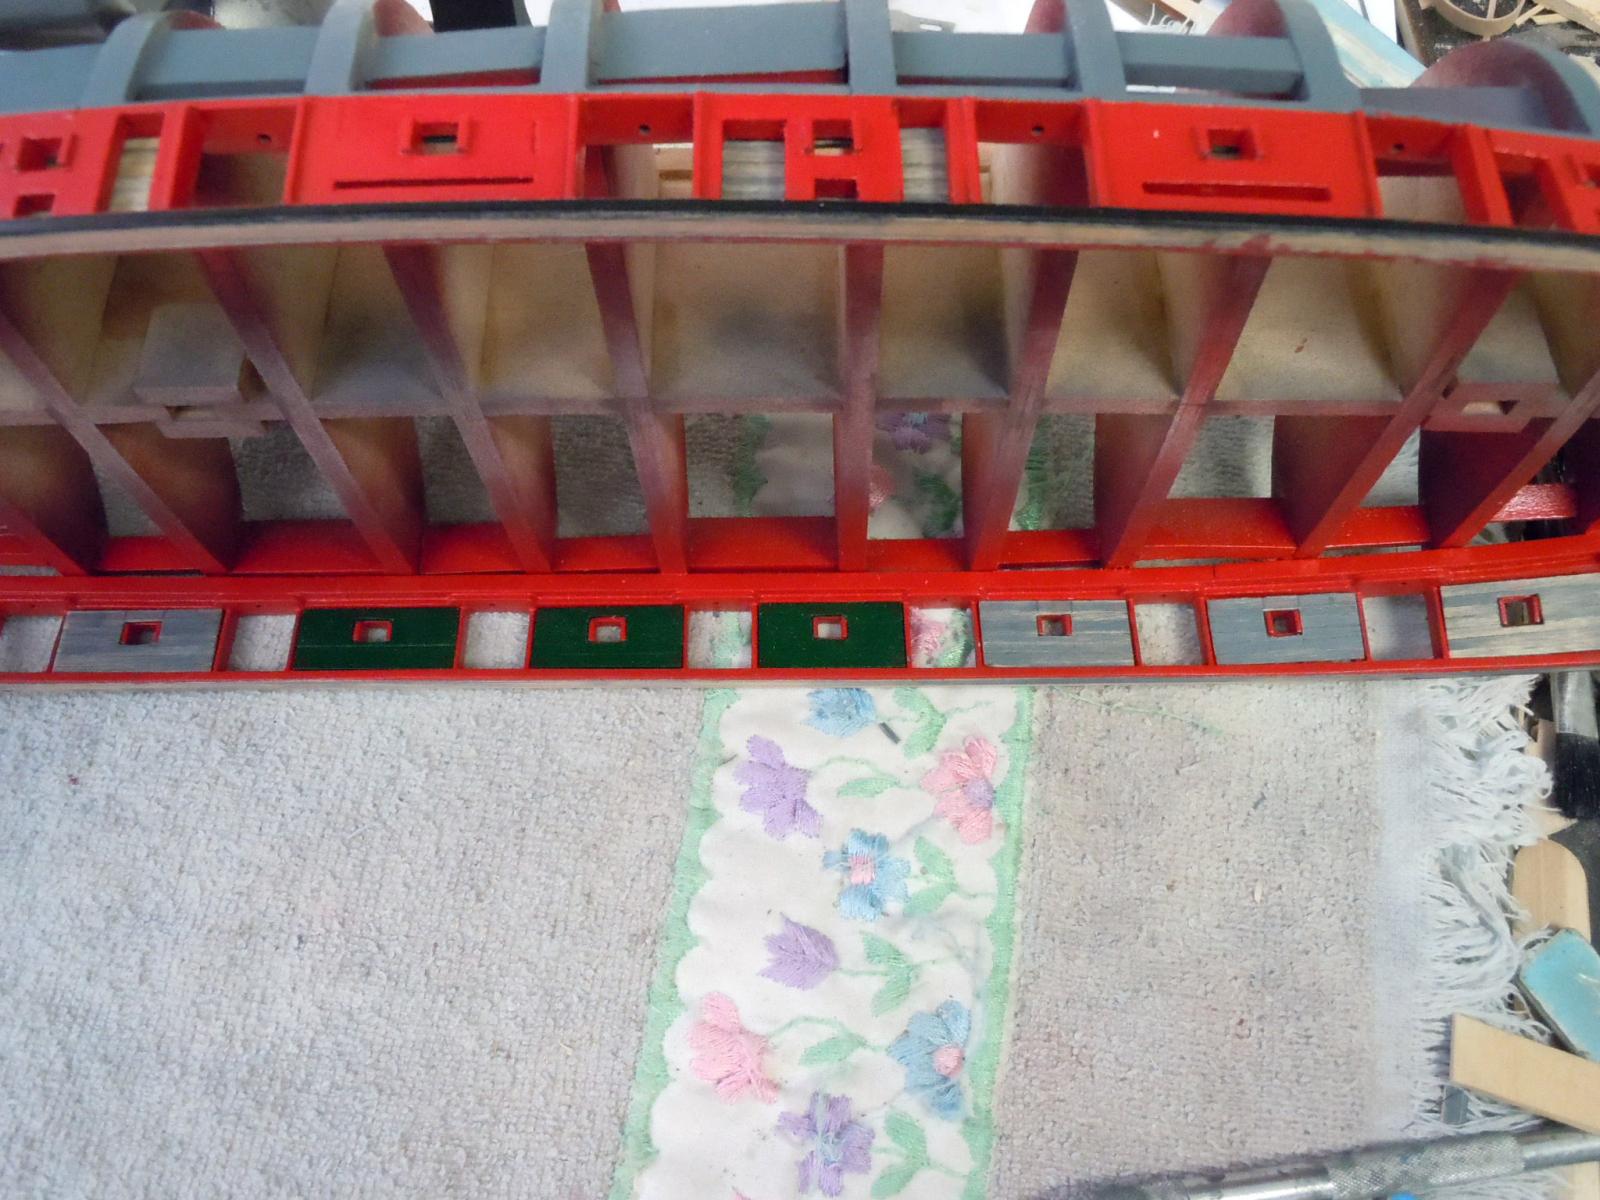
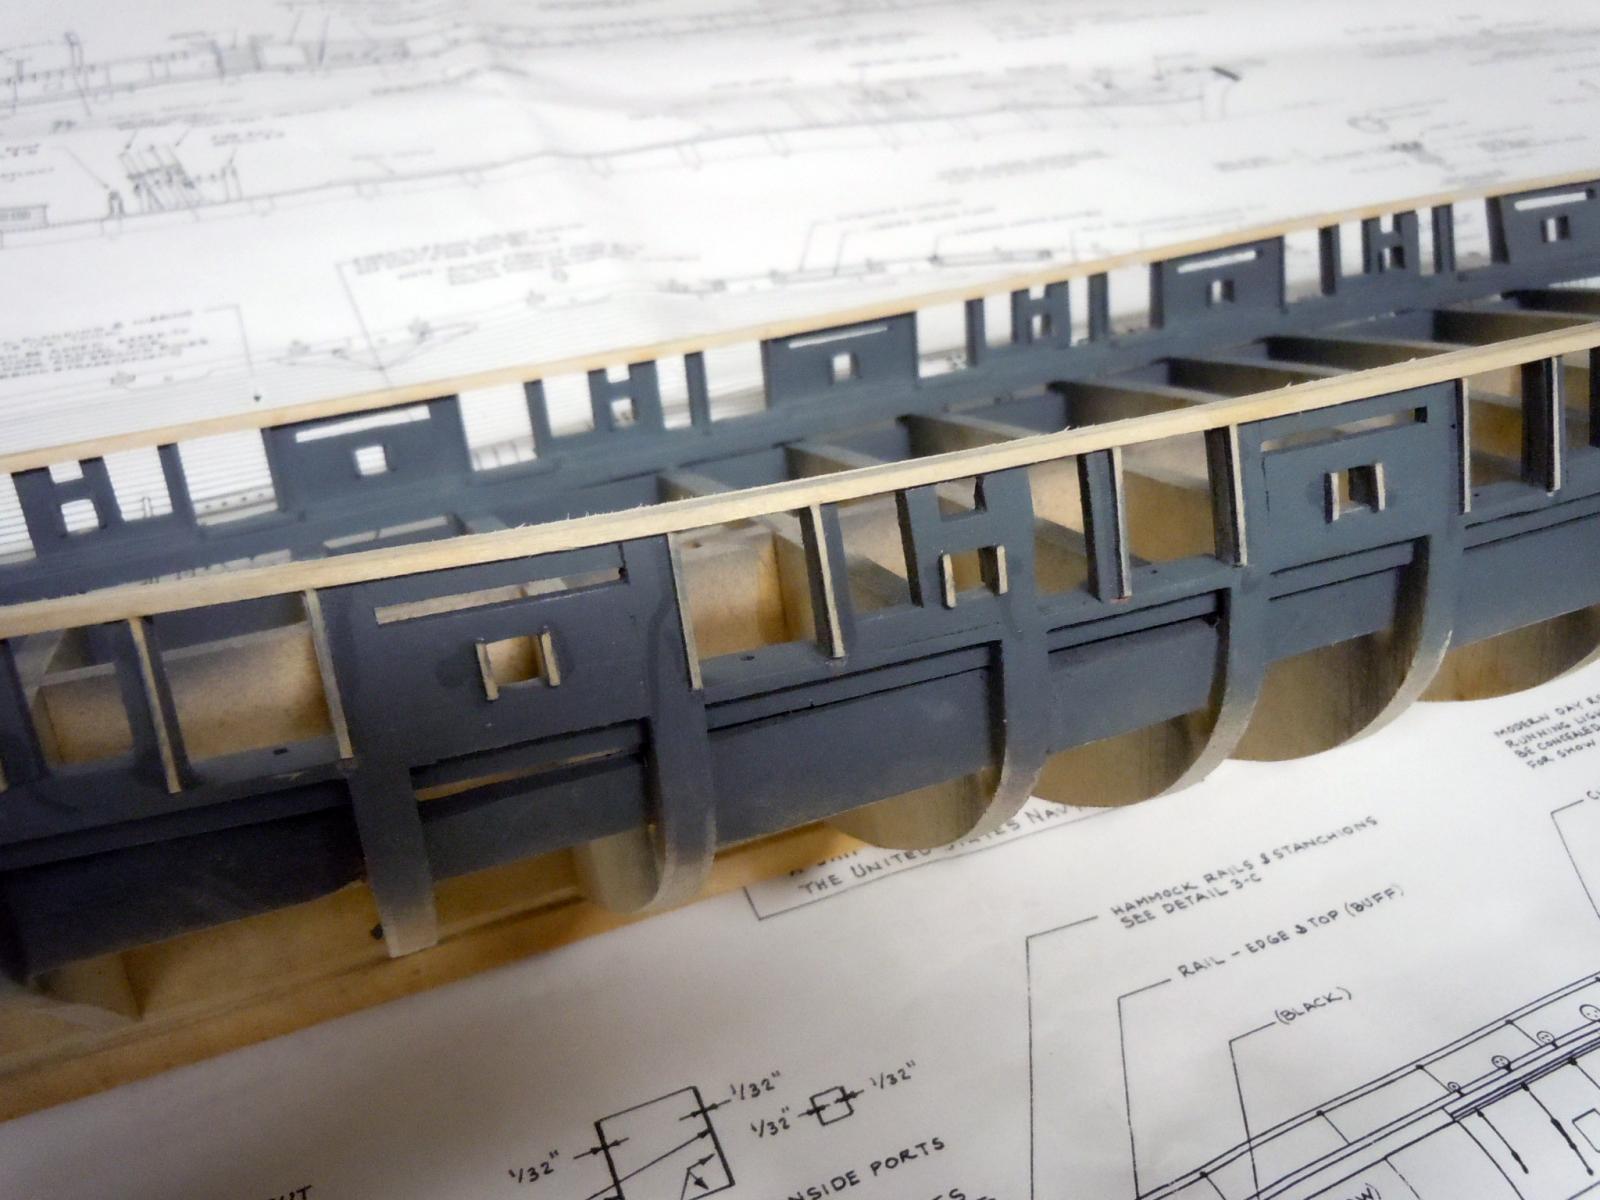
Tests are over and the CA wins. The wood glues were just not strong enough to withstand the cutting out of the square holes. I modified the CA technique by laying out the wood pieces and adding just drops of CA at each end of the panel; let set and removed from the polyethylene and then carefully added CA drops on the backside center just enough for a secure joints. Here are pictures of the results of one side gunports and sweeps completed and just pressed in place for now. The first photo shows 3 completed painted panels and primed ones being fitted and if you look close you can see the pencil tick marks for the hole locations. Here are the ones completed on the starboard side. I am still sorting out how to do the bow and stern sections. Ken


- 440 replies
-
- 5
-
-
- niagara
- model shipways
- (and 1 more)
-
Here is a quick test of the interior planking. I sanded, primed and re-sanded the 1/32" x 3/32" strips which are pretty rough especially the edges. Anyway I cut them to a little over the length needed and glued them together using CA on a polyethylene bondo spreader ( nothing sticks to polyethylene) and sanded the CA film off the front. Cut the sides to length to fit the area then transferred the sweep port location and cut out with a sharp Xacto blade and then painted with the Model Expo Dark Green. My next test with be with a wood glue to see it I get better results (less sanding). I think most of the interior panels can be done this way except the bow section which is compounded curves. Ken
- 440 replies
-
- 7
-
-
- niagara
- model shipways
- (and 1 more)
-
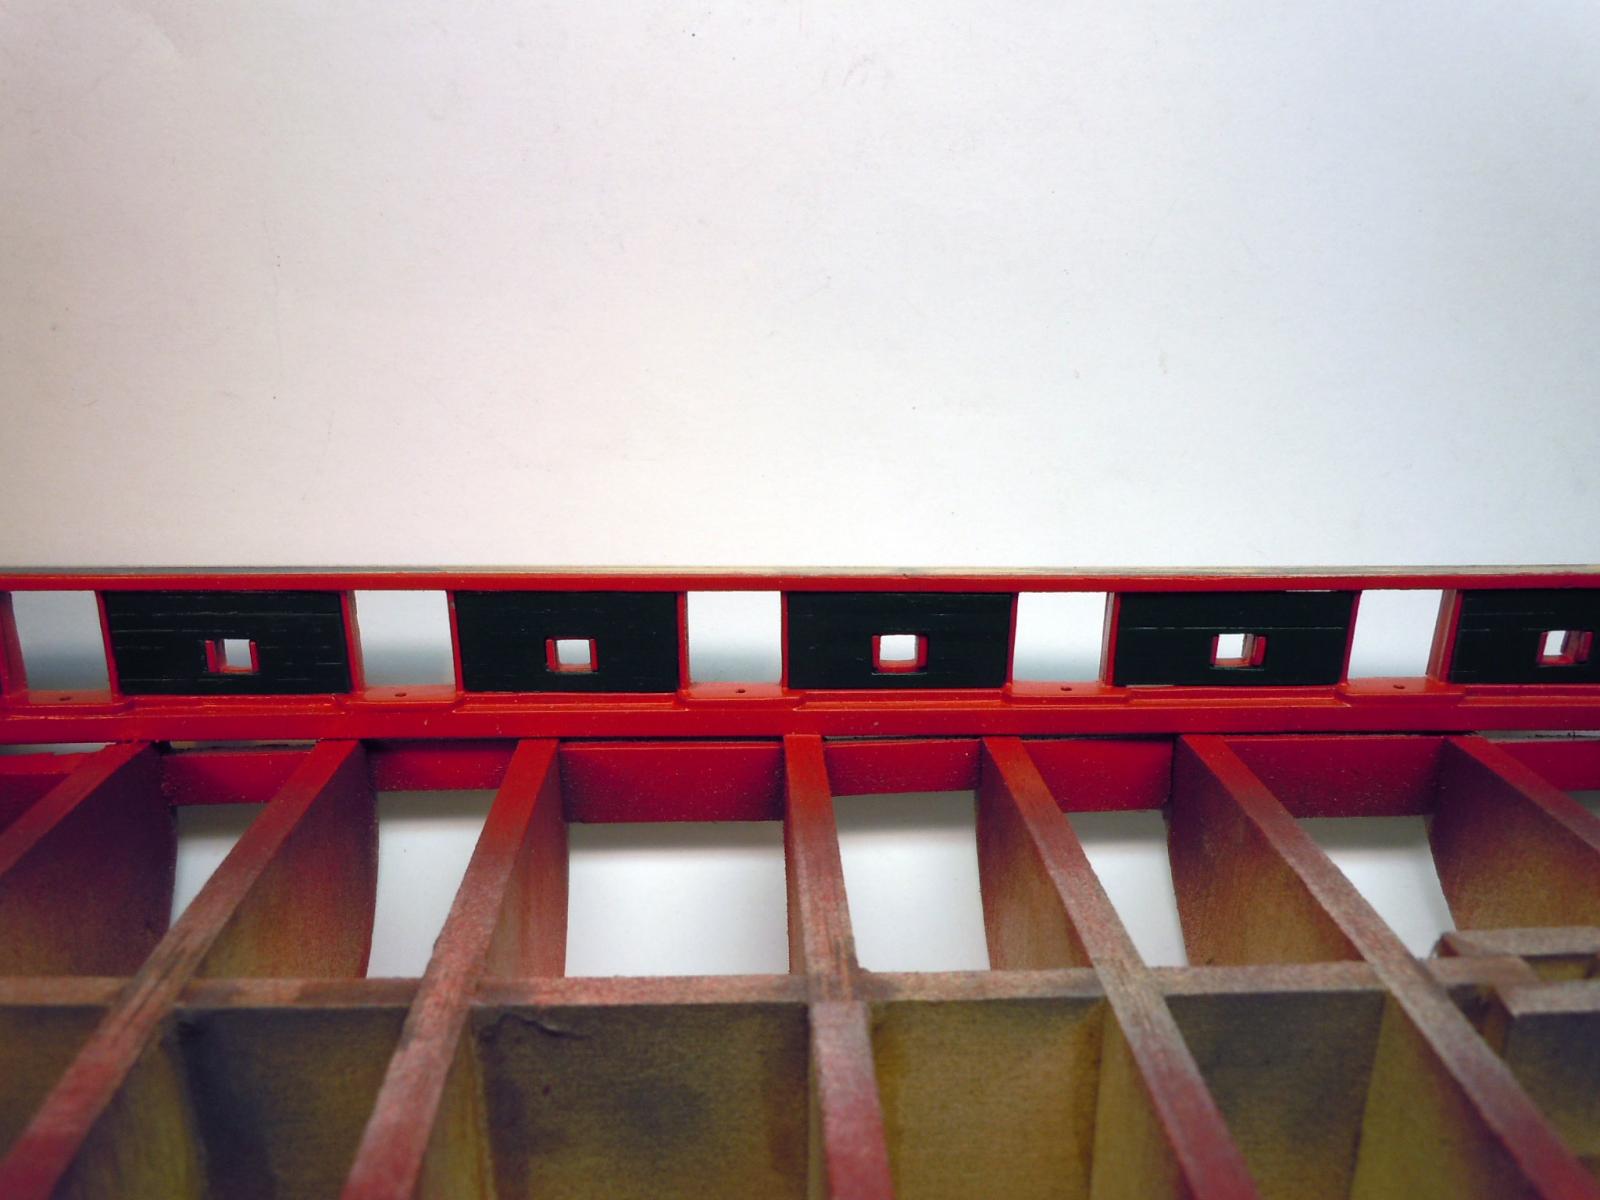
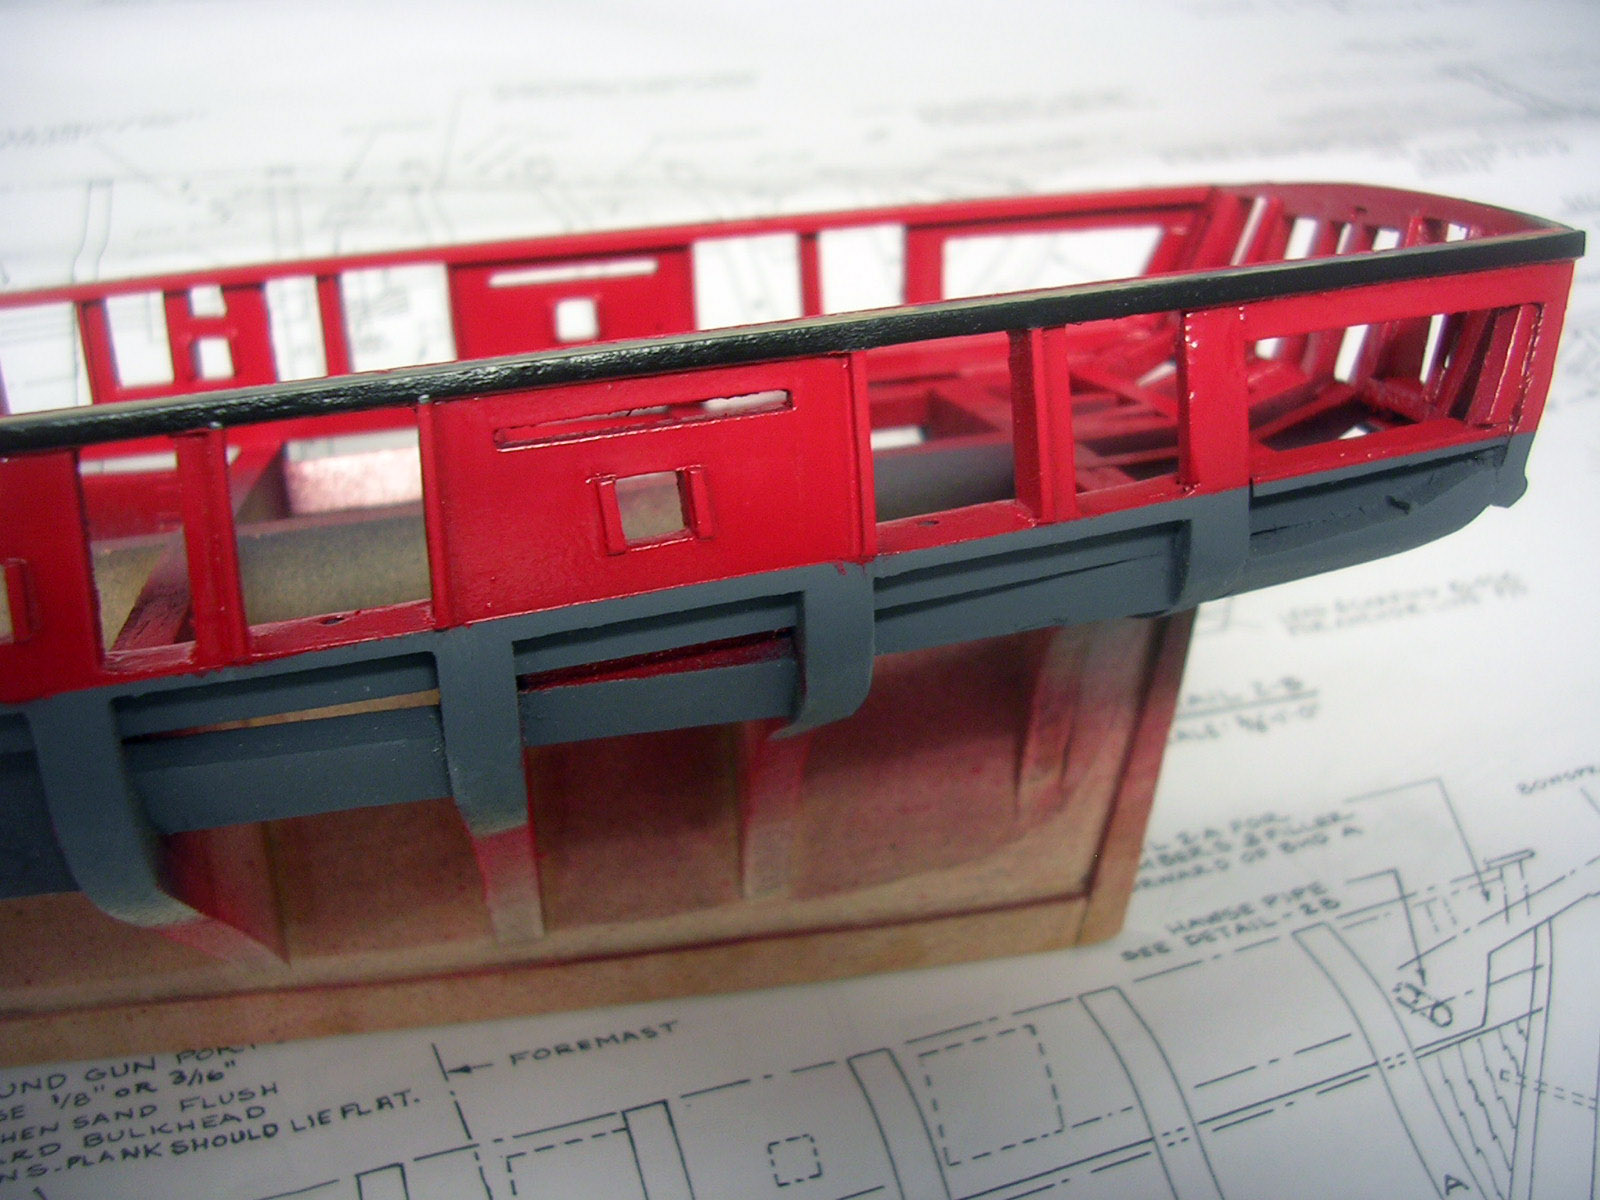
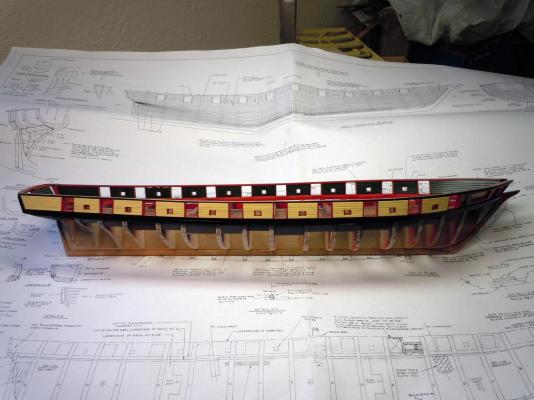
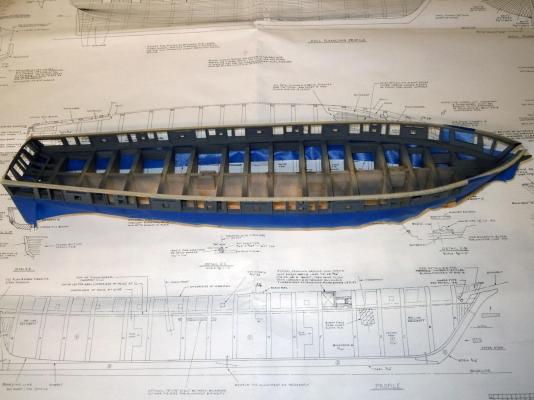
The hull was primed for paint and then masked off first to paint the black plank at the top that the main rail will rest on. Once the black was dry I then masked off the black using 1/4" masking tape as seen below then added blue tape below the gunports for additional protection from painting and over spray. This next picture shows the overall painted red most of which will be covered with planking so no need to mask off. Here is a close up showing a gunport butt strips with the transition to the black at the top. A painting trick I learned in the Marines when having to deal with two colors with masking tape was to first spray a light coat of clear; if the tape edge did not seal the bleed under would be clear. This would minimize the risk of color bled under the tape when spraying the next color on top. Now to do a little cleanup and add the interior planking which will help in stiffing the bulkhead structure. Ken

- 440 replies
-
- 6
-
-
- niagara
- model shipways
- (and 1 more)
-
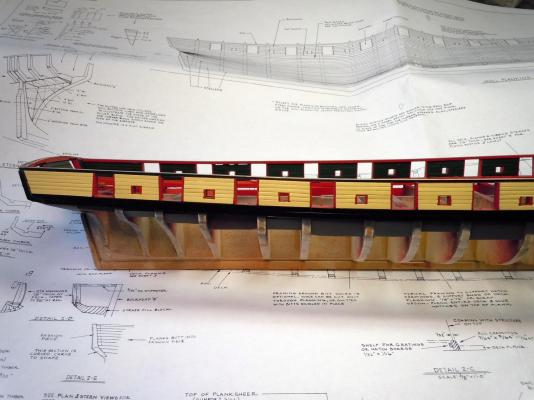
Here are the outside butt strips on the sides of the gun ports and sweep ports. These are sanded down to match the cap strip which will be painted black while the butt strips will be red. Also the second cap strip was added on the existing inside ones to complete the 1/16" thickness specified on the plans. Much easier to form at the bow with two 1/32" strips versus one 1/16" thick one. This shows the strips in place and sanded to match. A stand off and a closeup. I think I will mask and paint the black strip first and then mask it off and then spray the red. Ken


- 440 replies
-
- 4
-
-
- niagara
- model shipways
- (and 1 more)
-
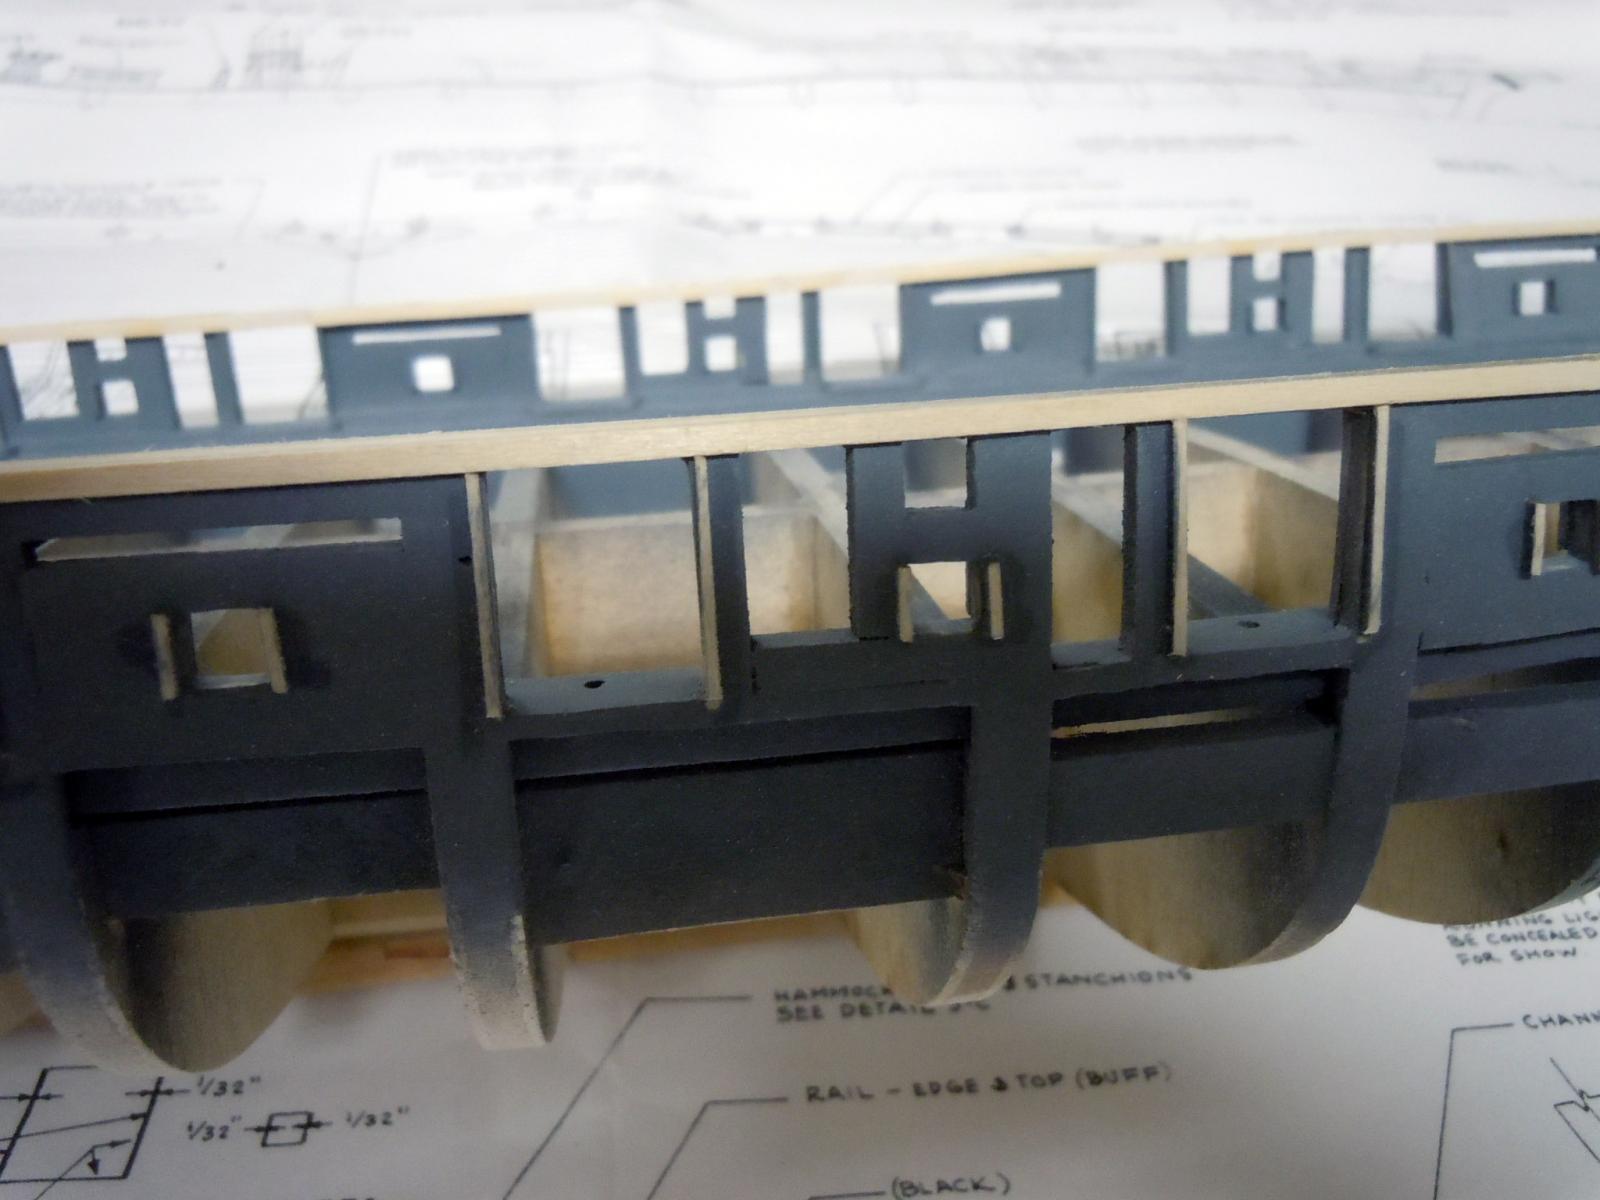
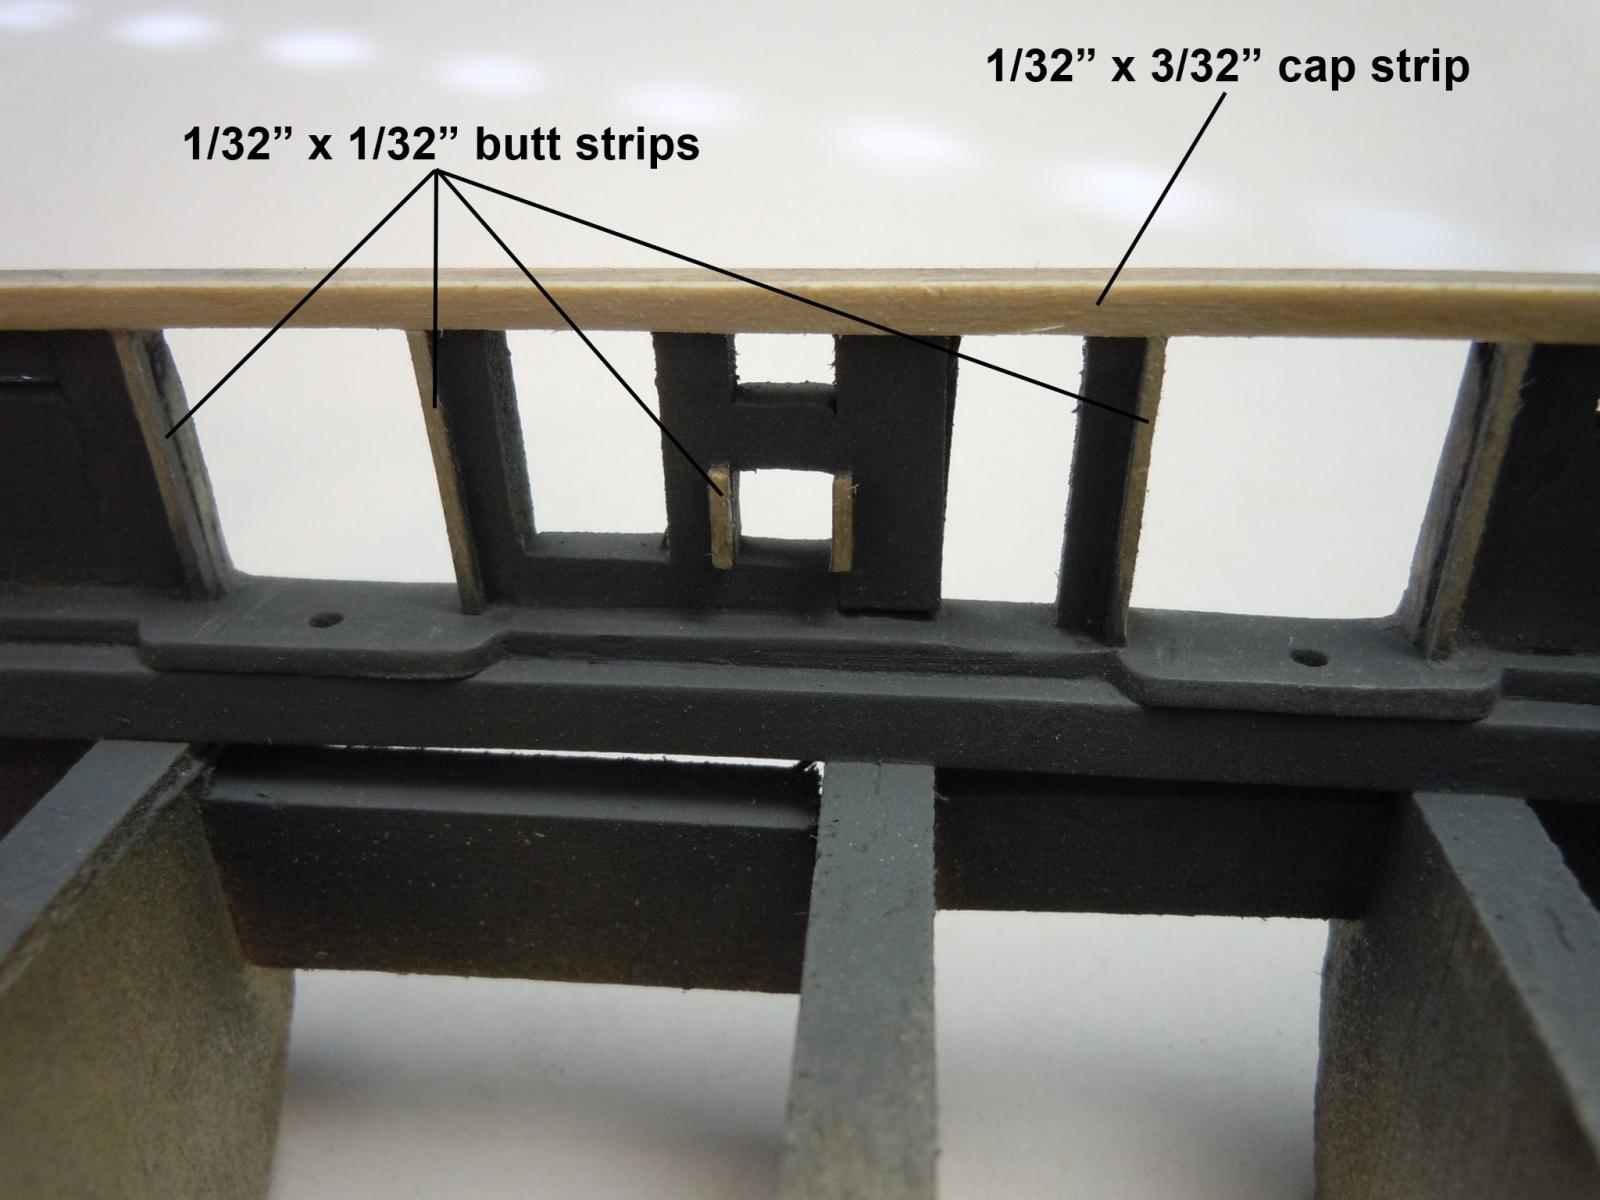
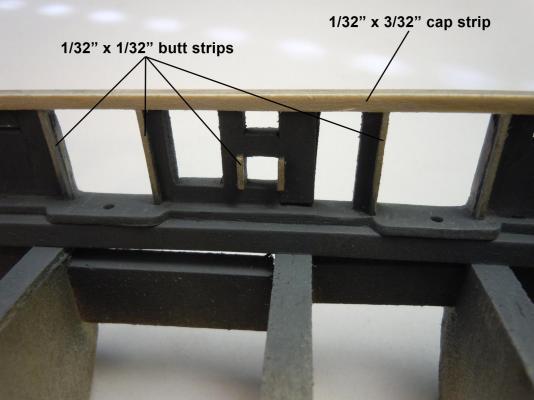
Here is a closeup of the fillers strips that will finish the plank ends. The cap strip will trim the tops and the main rail will rest on top. This shows the inner side. Placing these requires good eyesight, a steady hand and patience especially with the small ones on the sweep ports. I sanded and then primed the strips prior to adding them. Then once the glue was set I trimmed the tops and bottoms to match the port openings or tops in the case of the gun ports strips. I then added the cap strip and very carefully sanded all to match. Now I will move to the outside. Ken
- 440 replies
-
- 4
-
-
- niagara
- model shipways
- (and 1 more)
-
Scott, the plans and instructions indicate the main rail, however I used the 3/32" square to get to the height needed and the main rail will be added on top of it as shown in the picture I provided. Right now I am adding the 1/32" square strips both inside and outside of the gunports and sweep ports and on the inside I will run a 1/32" x 3/32" strip down both sides on top of the square strips to top them off and then I will be able to add the main rail. Ken
- 440 replies
-
- 1
-
-
- niagara
- model shipways
- (and 1 more)