xken
-
Posts
841 -
Joined
-
Last visited
Content Type
Profiles
Forums
Gallery
Events
Everything posted by xken
-
 I would recommend this kit for someone that is experienced in building ships and with a knowledge of rigging. I have found the assembly instructions and plans somewhat lacking in completeness in some critical details. I found the pictures of the replica ship being very helpful in filling the gaps and resolving how to complete some of the missing information. The kit itself is amply stocked with wood and the laser cut parts are good quality. I would recommend purchasing the rope and blocks from Chuck. The cast metal parts were of good quality but I was short a few of the cleats which ME replaced quickly. I would study both my build as well as others as supplement guidance to the assembly instructions and plans. I would also welcome others who have built this kit to comment as well about their experiences in building as well as some of the challenges they had. Please keep in mind that this was my first ship build, but I have many years of experience in scratch building other subjects. Despite some of the challenges I found this to be a very enjoyable build and have learned a great deal and my next build will be much smoother.
- 440 replies
-
- 5
-

-
- niagara
- model shipways
- (and 1 more)
-
Yes no matter what rigging is always a challenge. Scott I found by putting a drop of CA on the end of the rope kept the rope ends from unraveling and also hardened the end to function like a needle to feed into holes. Once the ropes were through I just trimmed the end down very close to the glued area. My issue was not so much the hole size as much as the side by side alignment which through off the block when lines were tightened. I am now trying to figure out the lift lines for the topsail, top gallant and royal yards which are not shown on the plans. What is confusing is some block with lines are shown in the yards lowered position but not shown in the raised position and where they attach on the masts. The picture on the box shows the yards in the lowered position with the lines clearly visible from the end of the yards to the mast. Oh well the joys of what I will call imperfect plans and my lack of knowledge since this is my first build.
- 440 replies
-
- 4
-
-
- niagara
- model shipways
- (and 1 more)
-
Brian, Great job on the rigging! Nice and clean and tight.
- 831 replies
-
- 5
-
-
- Armed Virginia Sloop
- Model Shipways
- (and 1 more)
-
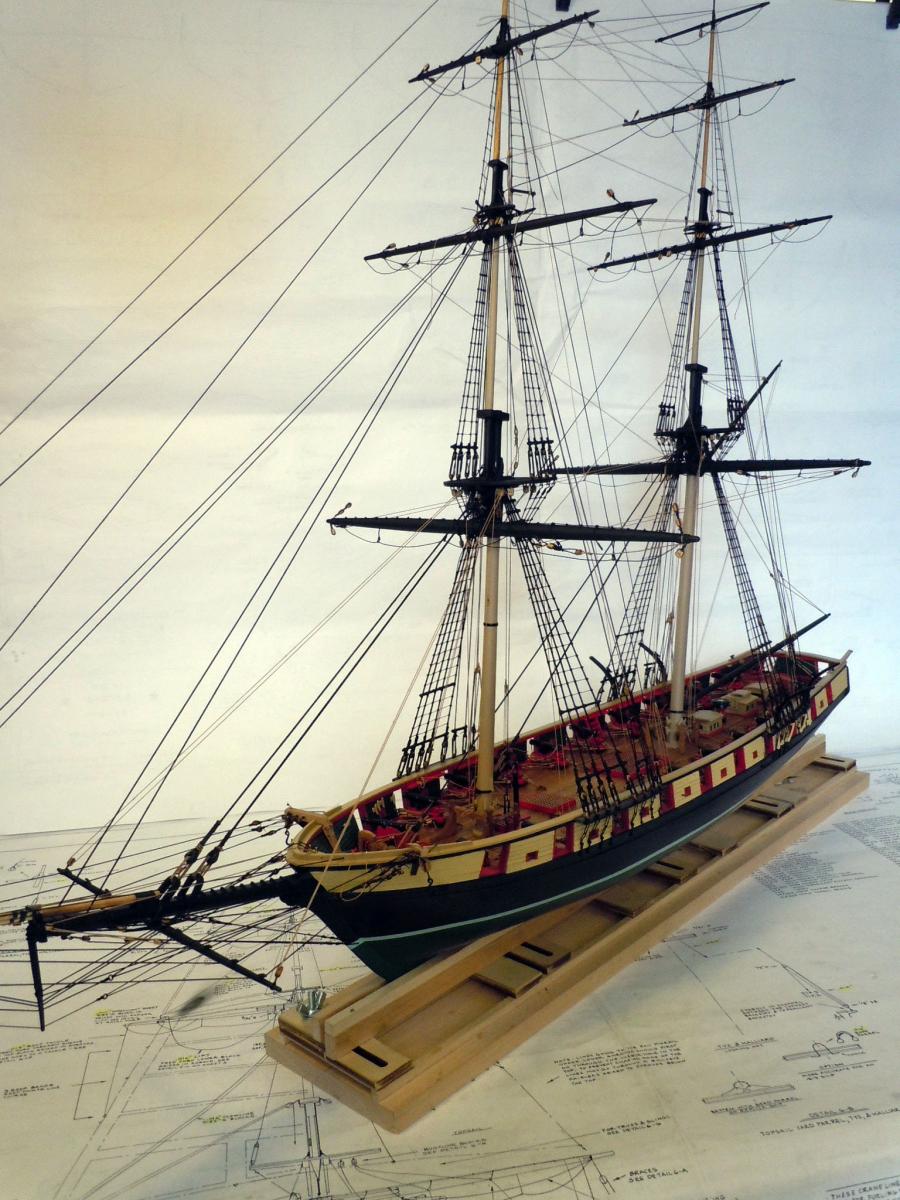
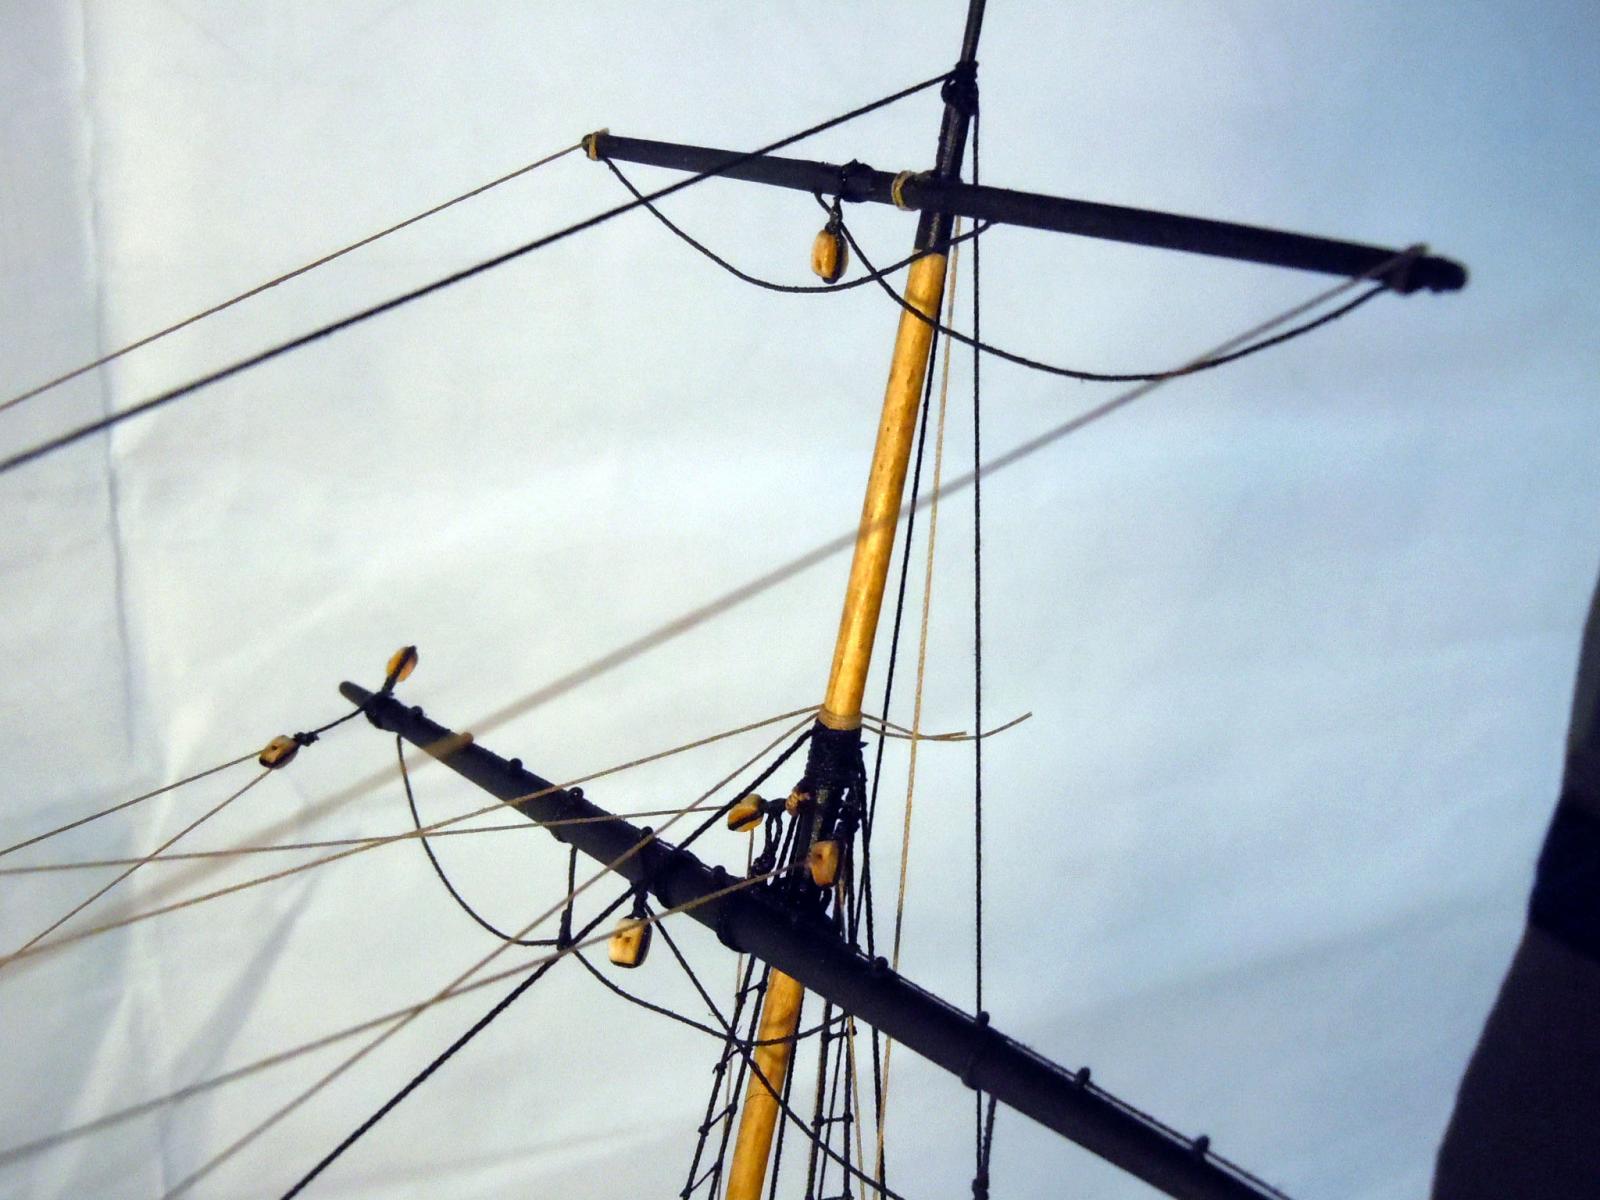
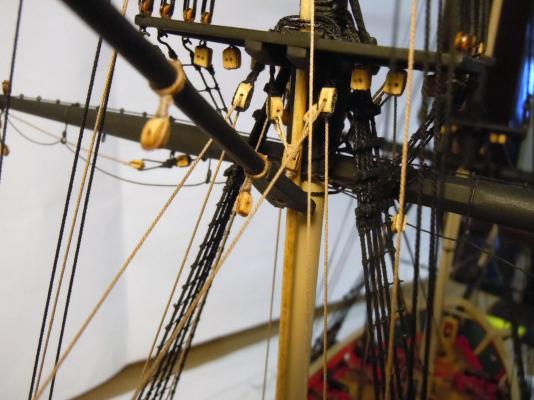
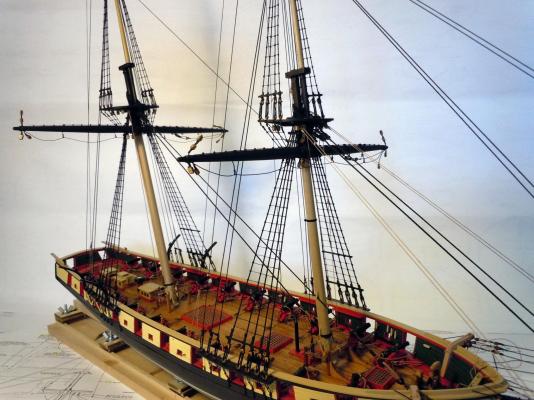
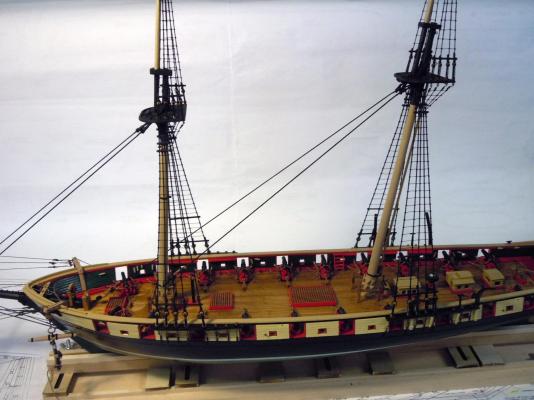
Finished hanging all the yards and then added the yard bracing lines. I started at the top royal yard and worked my way down. In the following images are overall views as well as closeups. I must say that I think I have tied clove hitches in all possible positions securing lines to their respective positions using tweezers. One disappointment was the inconsistency of the drilled holes in the blocks being drilled at angles which impacted the lines and caused extra time an effort to correct. In the next build I will buy Chuck's blocks. You may see untrimmed lines and that is to allow them to set overnight due to stretch before being glued in place. I realized as the lines were added that each line had a prime function in the structure and interrelated with each other. I still have more lines to add from the masts to the yards for support. Here is an over all view to date. Here are more pictures showing details of attachment points. Here is a front view and please forgive the camera distortion in the pictures. Now back to more yard work.

- 440 replies
-
- 10
-
-
- niagara
- model shipways
- (and 1 more)
-
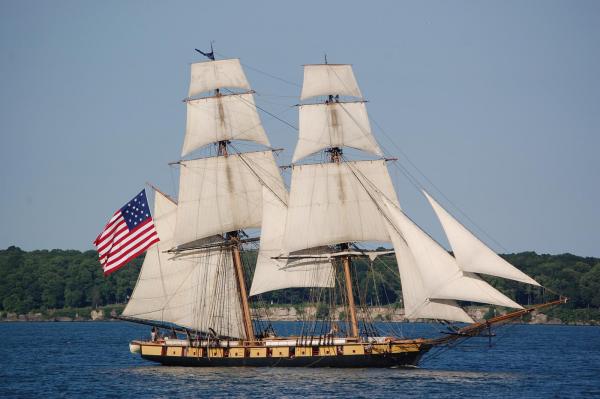
Brian, thanks for the image! I also found this one of the replica brig which shows very clearly the size it should be for the period. Roughly 1/3 from the waterline to the top of the spanker. Many historical paintings show ship flags being quite large compared to those today. Being a scratch builder of various subjects and this is the first "kit" I have built in years; it is much easier to build when the parts already exist. I guess from my stand point the challenge is sorting out what is correct when conflicts arise between the instructions and the plans and also no detail on either for some assemblies. If I were an experienced ship builder with the knowledge and experience of previous builds this would have been much easier to execute. This being my first ship build my intent was to learn, which I am doing. My next build the Constitution will be much easier than this one.
- 440 replies
-
- 4
-
-
- niagara
- model shipways
- (and 1 more)
-
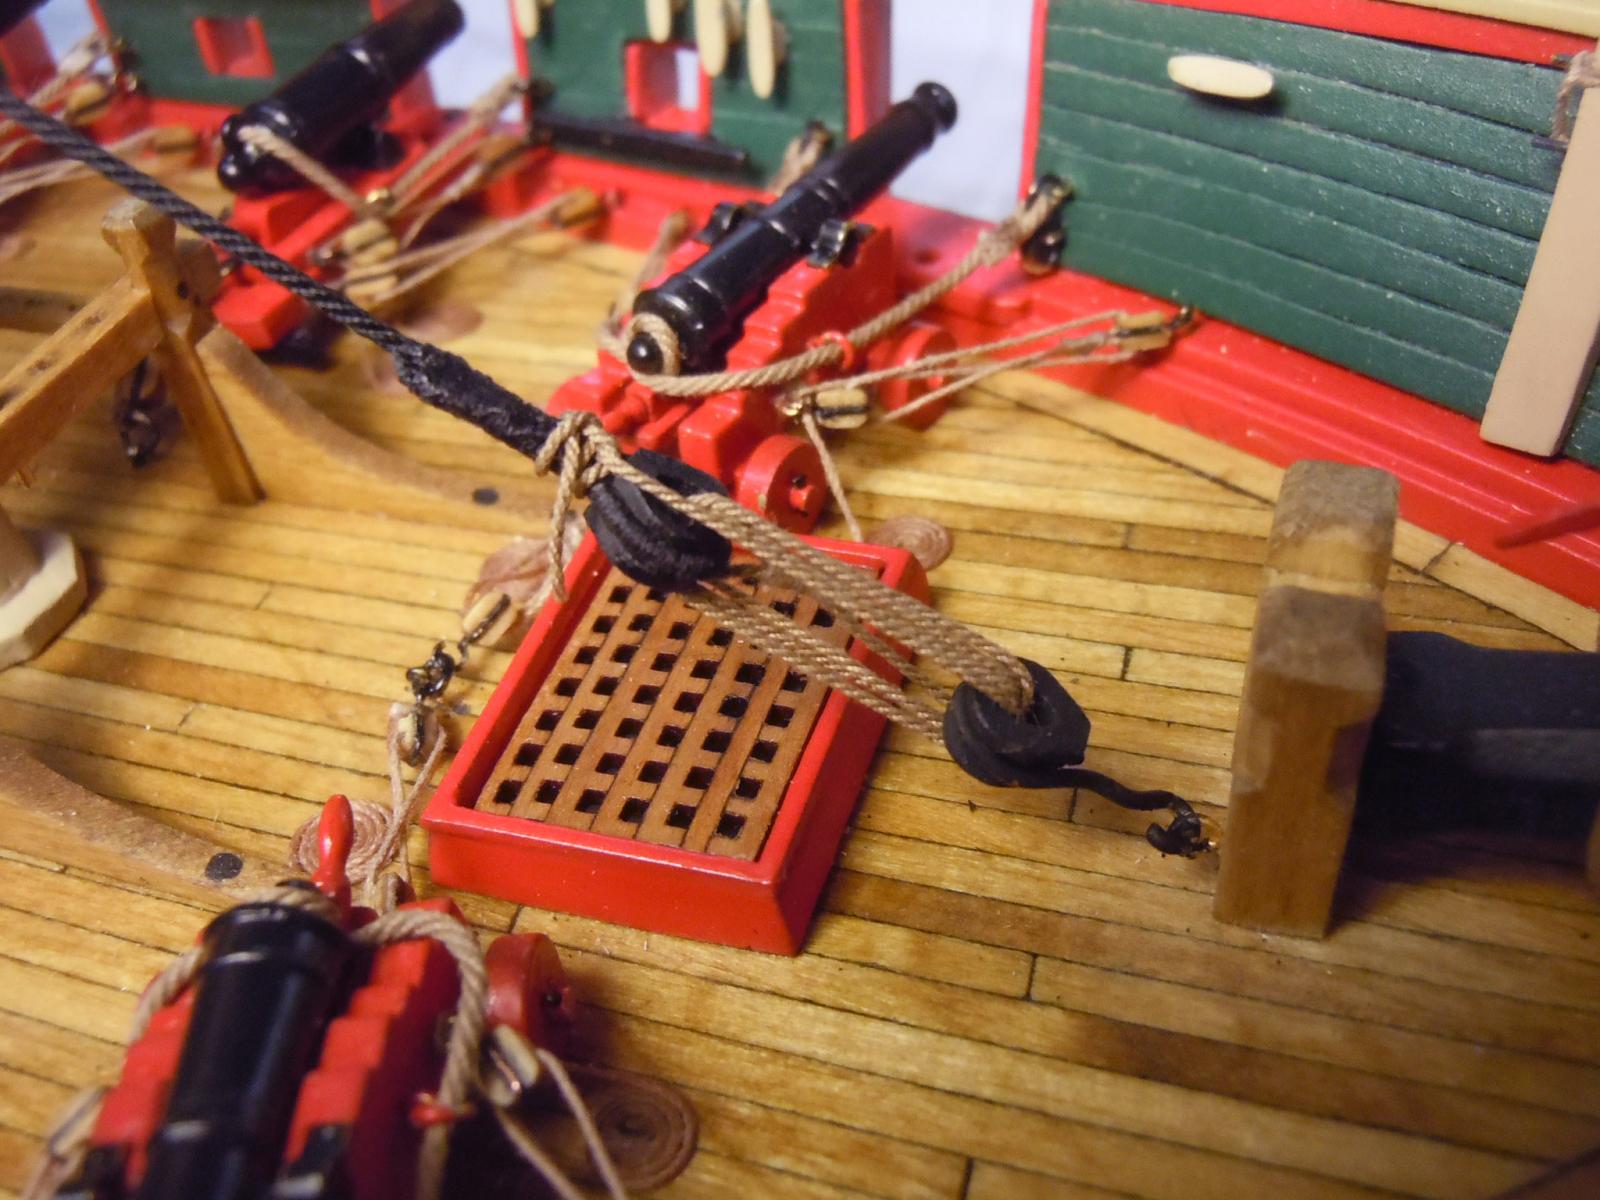
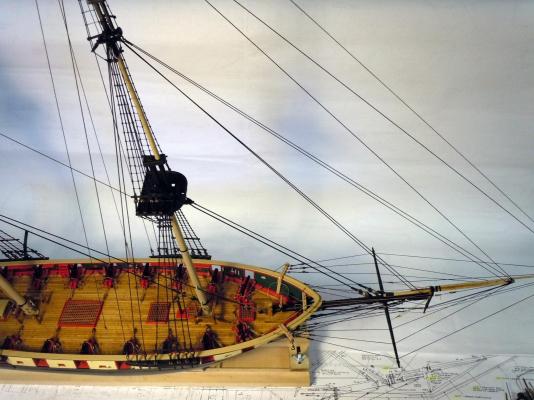
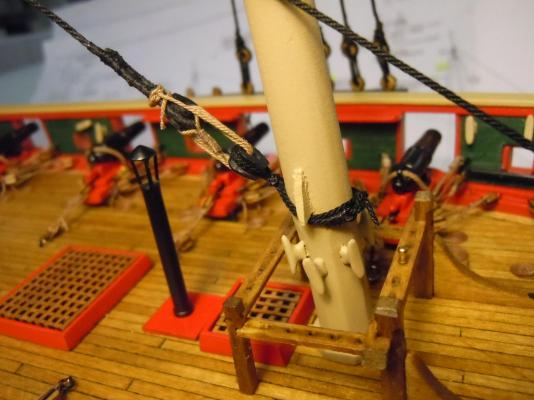
Thank you all for your kind words and encouragement on this build. I completed the main mast topsail and ran out of .012" black rope; so I ordered more from Chuck as well as a couple of other items. While waiting for the order to come I decided to move onto the boom and spanker and again with more detective work due to lack of some details on the plans. Here is a completed main topsail yard. Next I sorted out the boom and rigged it per instructions and images of the replica ship. Here is an overall view of both the boom and spanker in place. Here is a closer up view. What surprised me the most was how strong the boom became once rigged. Here is a detail of the boom rigging with the boom centered with the stern attachments. Here is a detail of the spanker attachment at the main mast just below the course yard. As rigged the lifting ropes work. Here you can also see the great quality of Chuck's rope in scale. A rear view of the rigging in place. Here you can also see the flag halliard. Can anyone share what the size of the flag should be? Now that the rope order arrived back to finishing the rigging on the balance of the yards
- 440 replies
-
- 9
-
-
- niagara
- model shipways
- (and 1 more)
-
Brian, looking great and I am sure you will enjoy making the ratlines just take your time and enjoy tying clove hitches.
- 831 replies
-
- 3
-
-
- Armed Virginia Sloop
- Model Shipways
- (and 1 more)
-
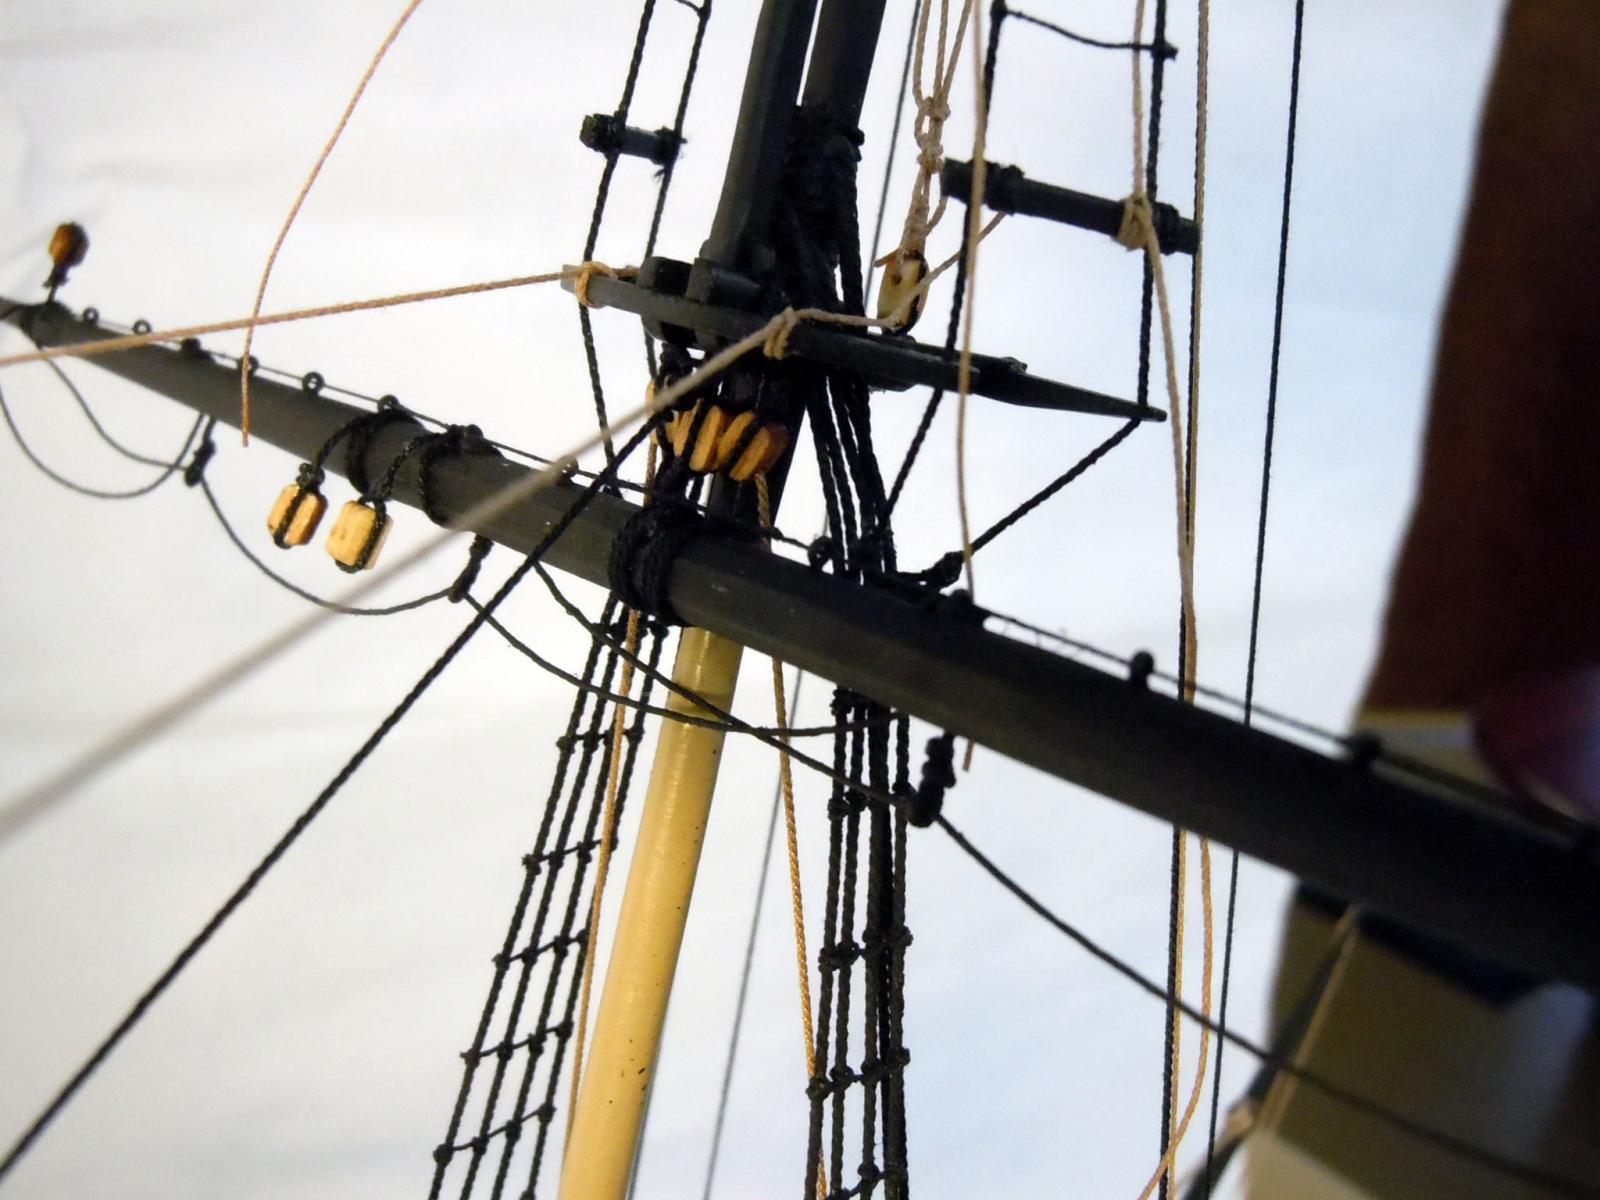
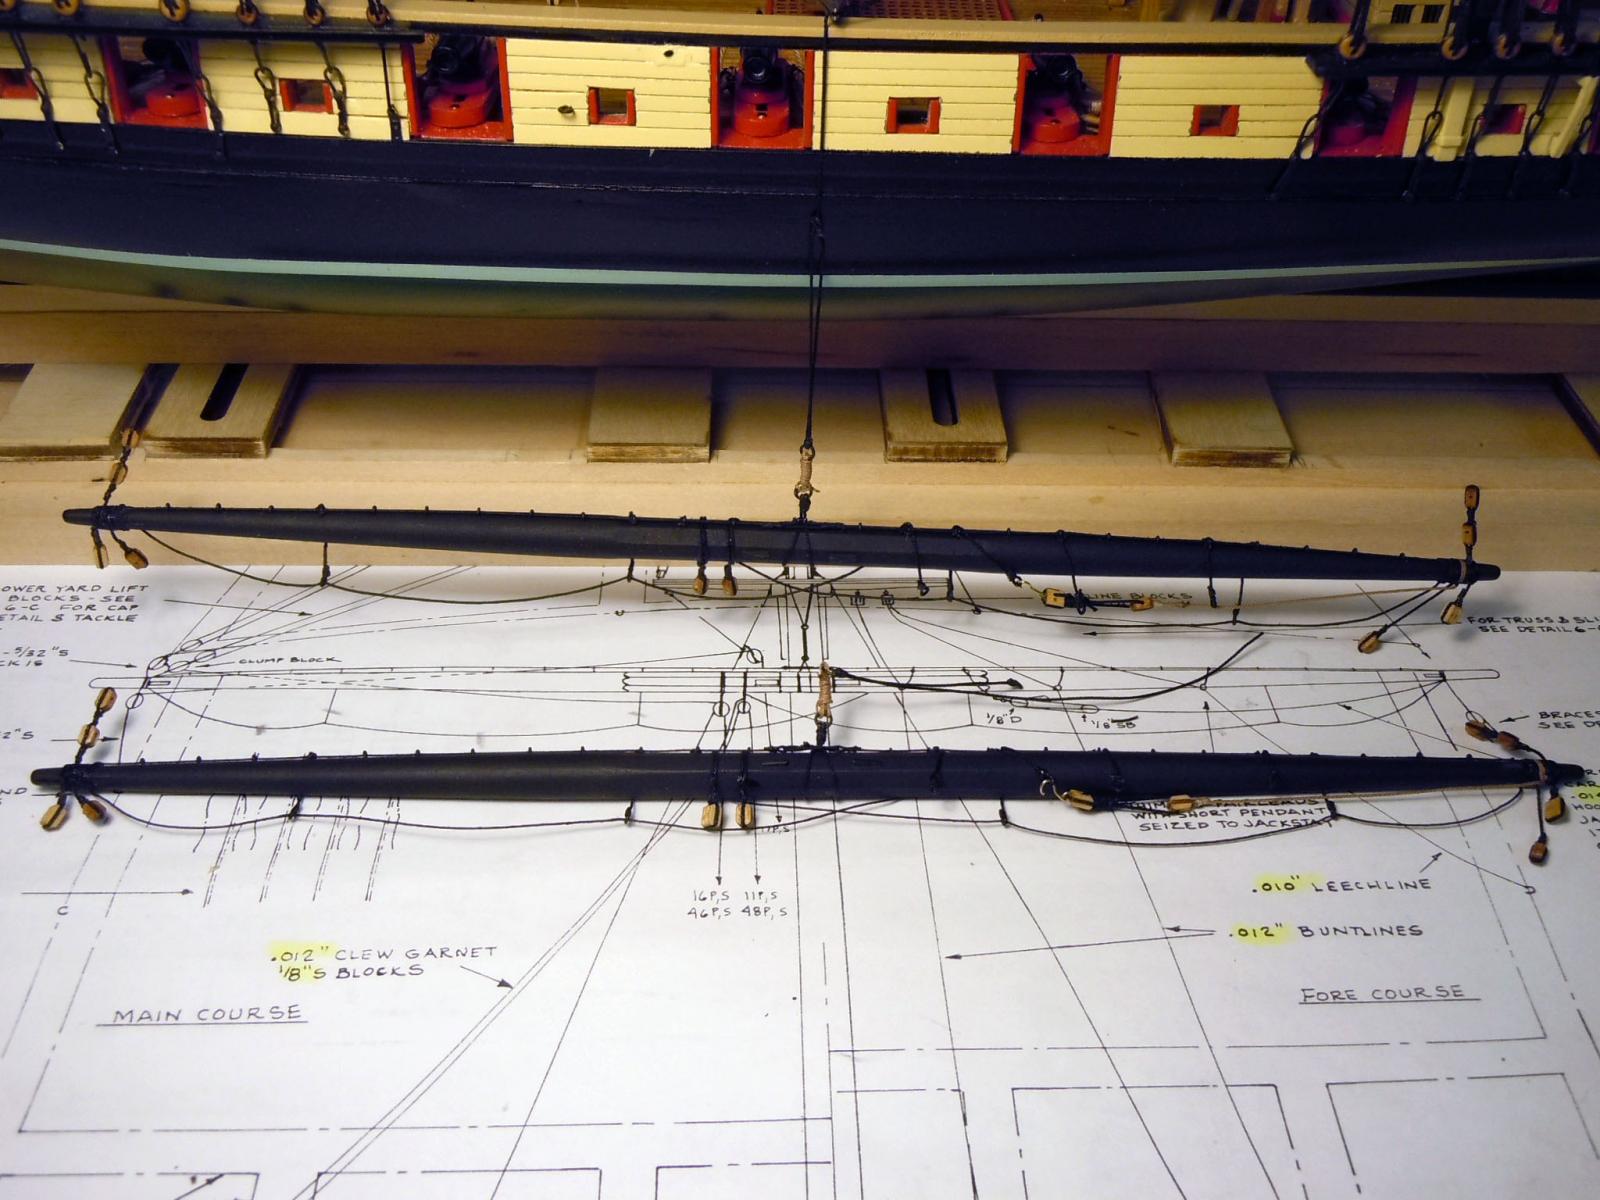
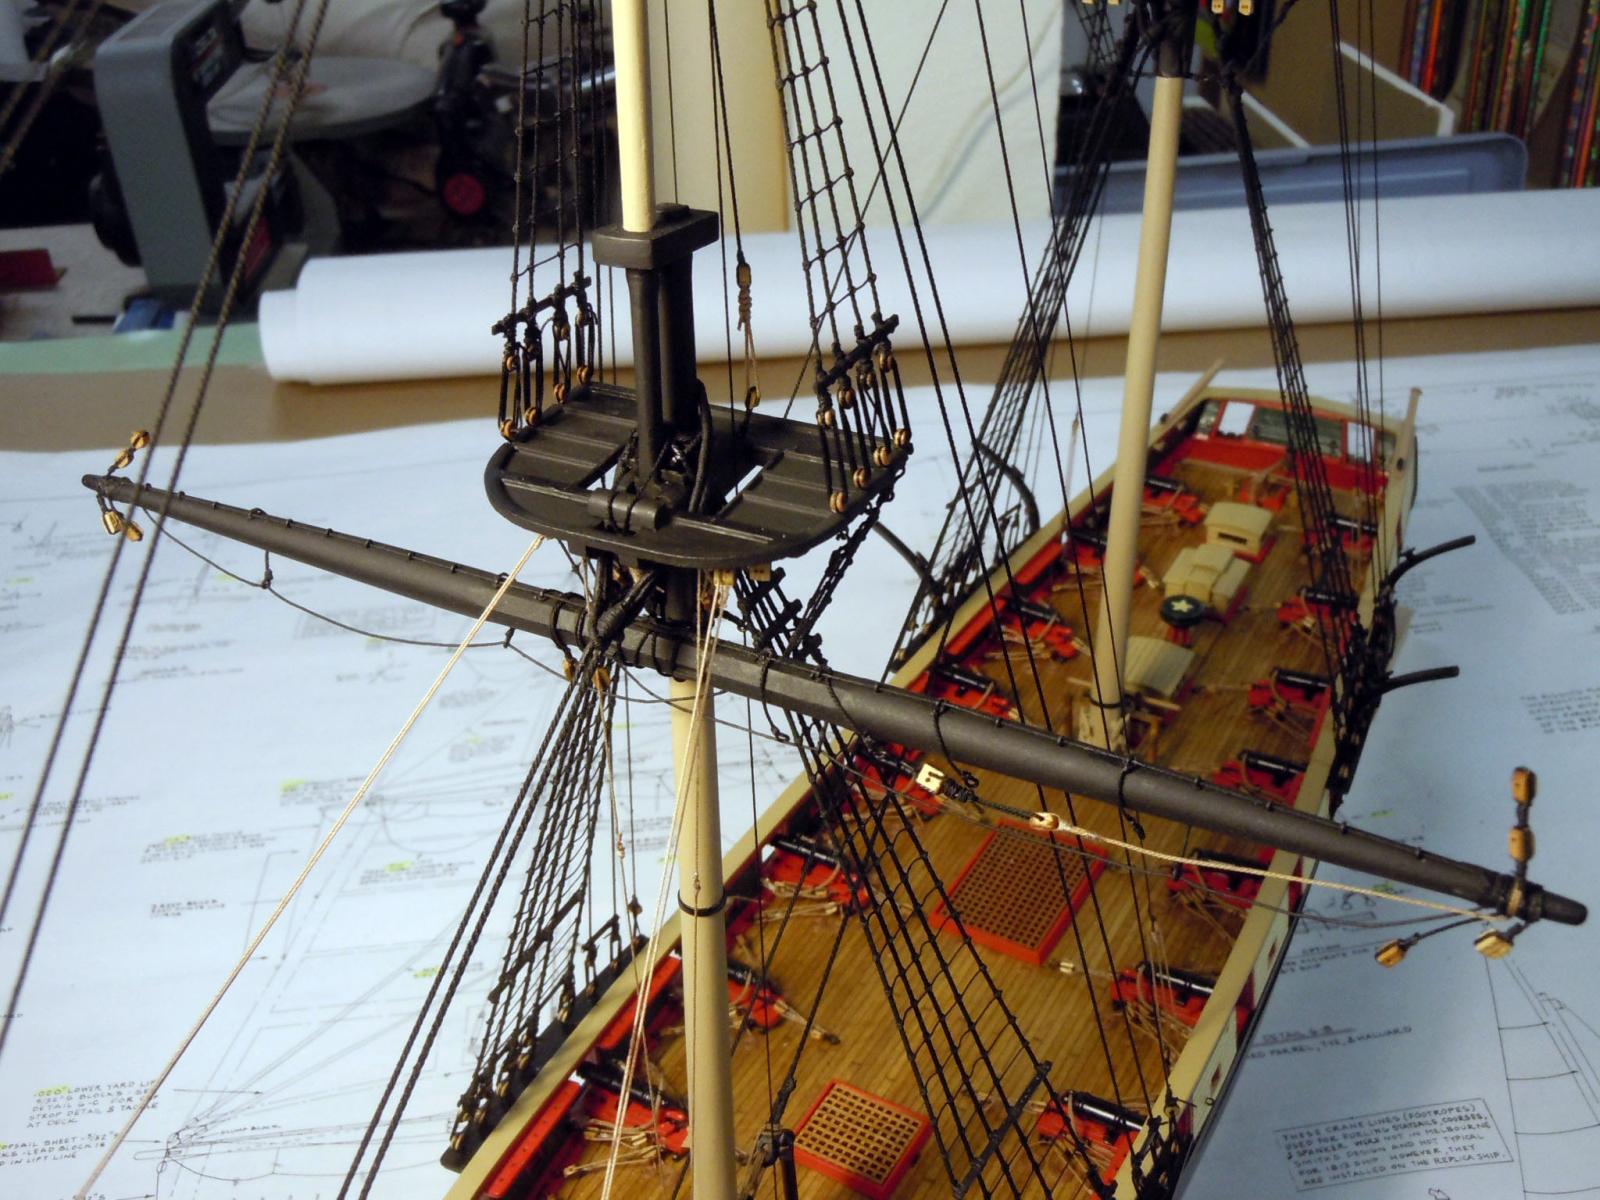
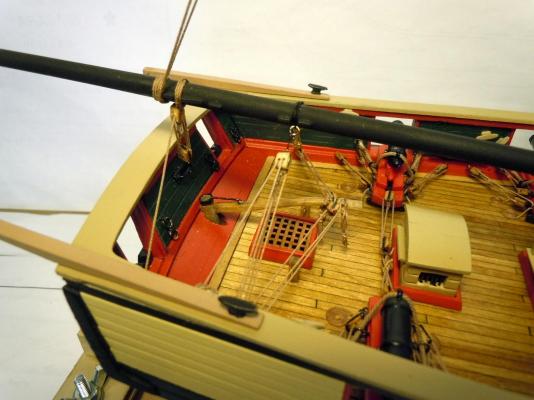
The last couple of days rigging and hanging the two course yards has brought a whole new meaning to "yard work". Again I had to do some detective work since the plans have drawing errors and conflicts in details. I went to the picture file on the replica ship and sorted things out between the two. Here are the two course yards rigged before hanging including the cargo lifting tackle with hooks. This may save some time for those who down the road will build this kit. Here is the foremast yard hung in place using the same technique as the real ship as described in the assembly instructions. It would have been helpful if a final assembled perspective drawing was included in the plans in addition to the separate details. Here is a closeup detail which I had to sort out from the replica images. This again demonstrates my lack of experience in ship building and that certain details are not explained for those building a ship for the first time. Here are the two yards hung in place. I now understand why certain elements are configured the way they are and result in a tight fit once in place. Now more lines can be added to the course yards before moving up to the next yards. This is like playing chess and having to think two or three steps ahead so as not to add an interference line. Now back to "yard work".


- 440 replies
-
- 12
-
-
- niagara
- model shipways
- (and 1 more)
-
I will be checking in from time to time since this will be my next build once I finish the Brig Niagara that I am building now. Keep up the great work you are doing!
-
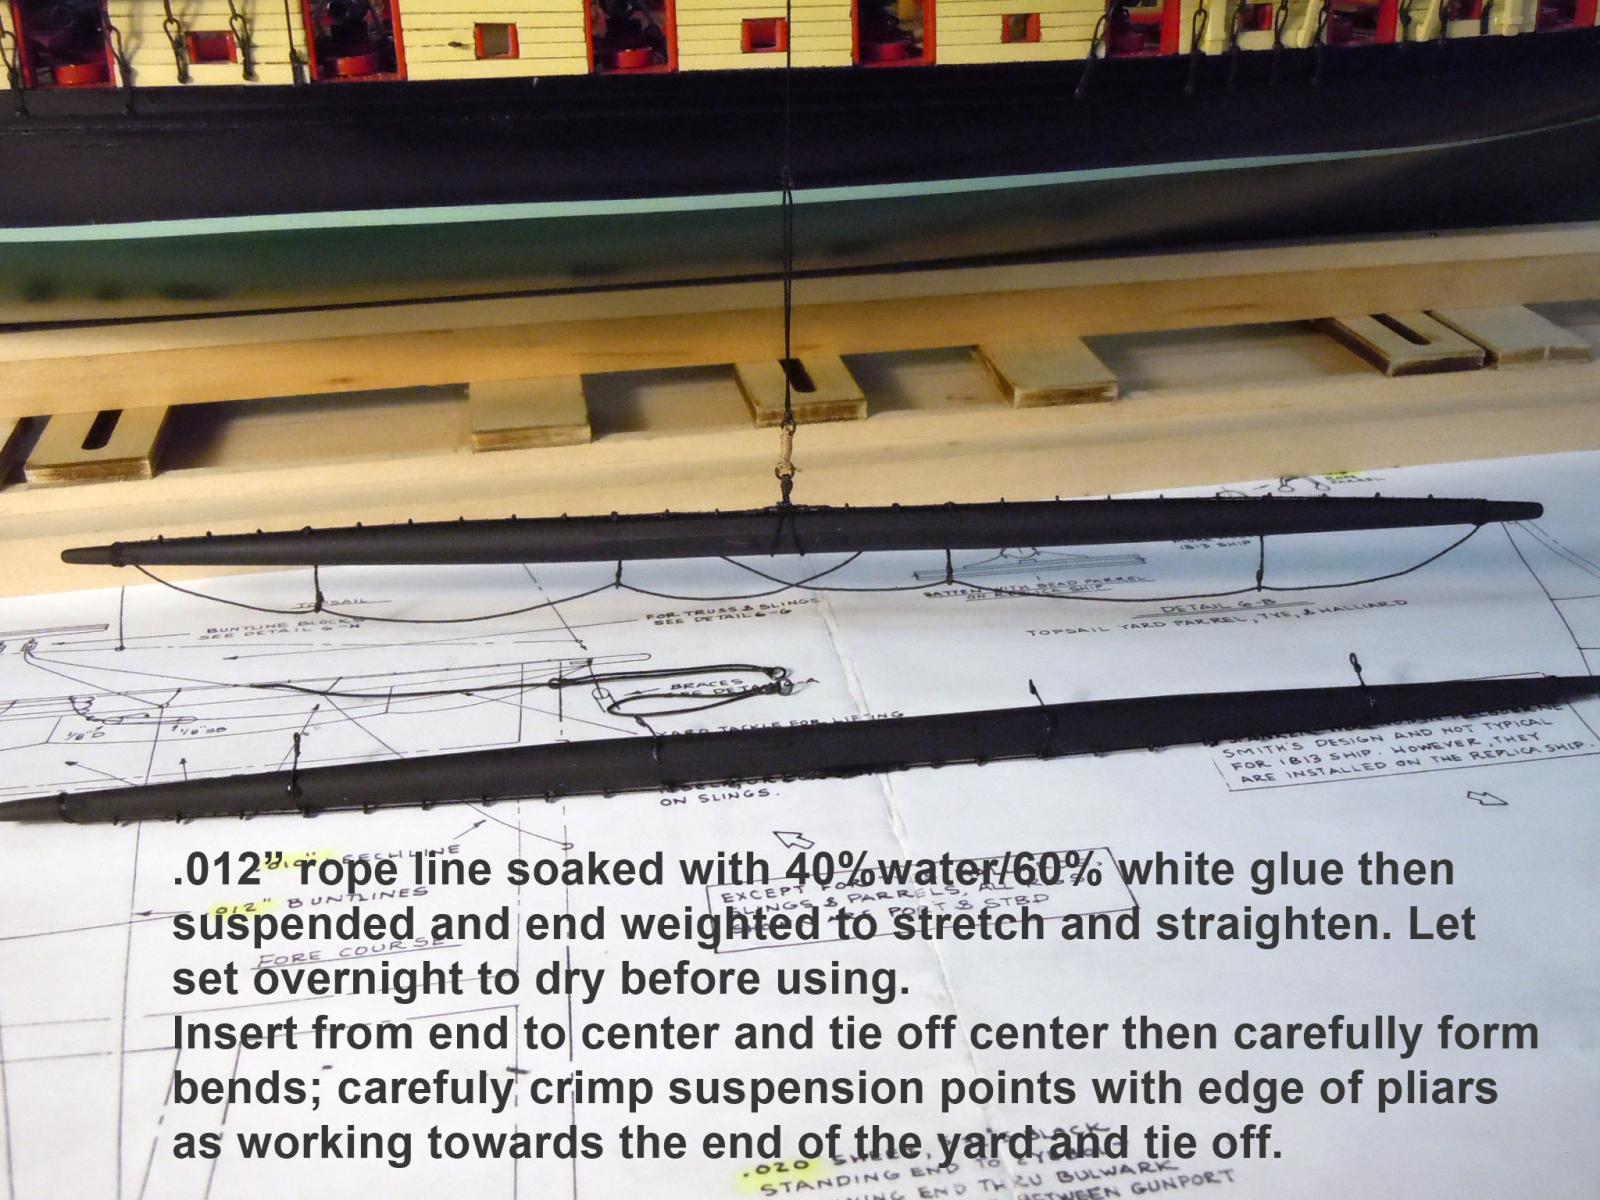
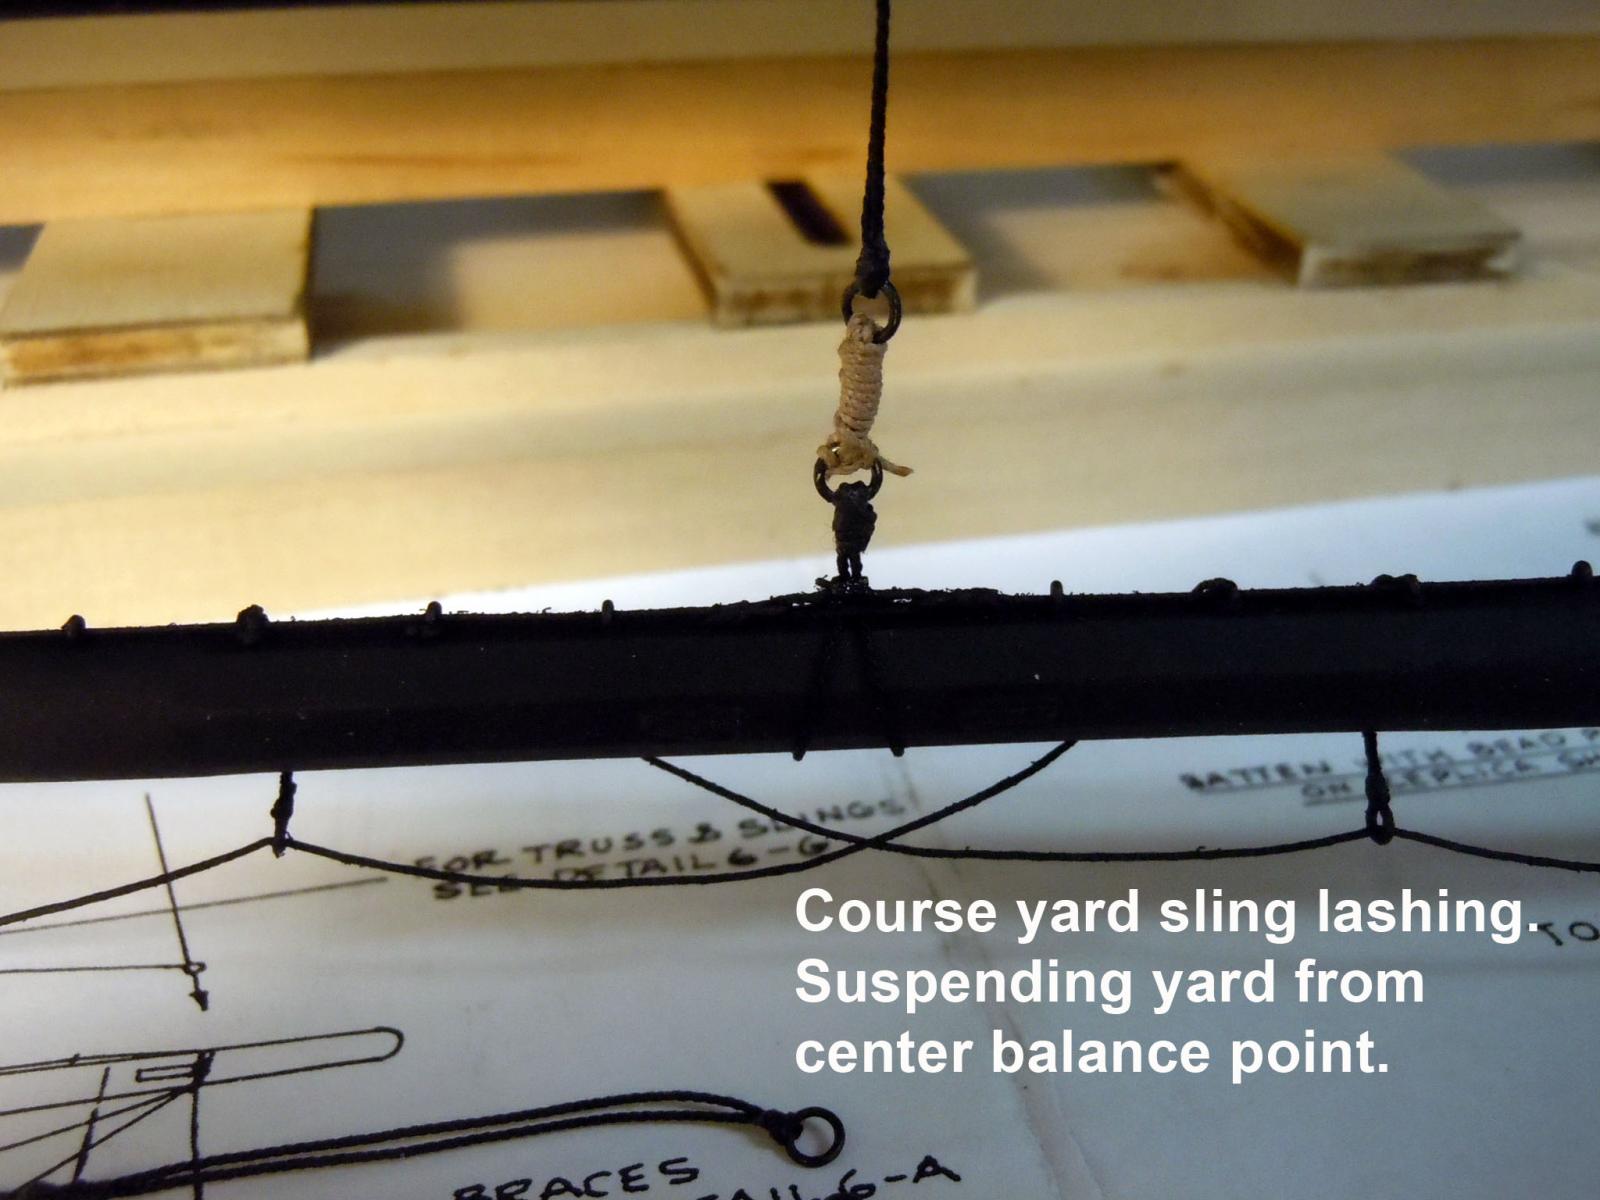
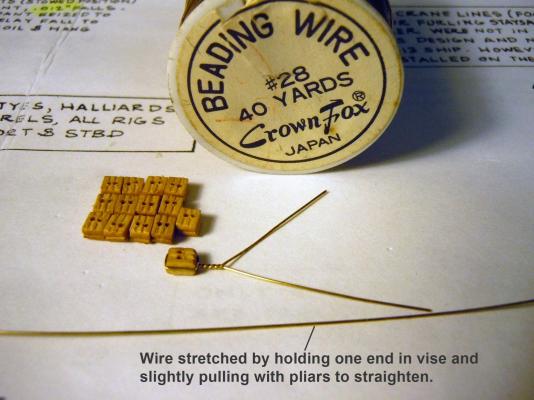
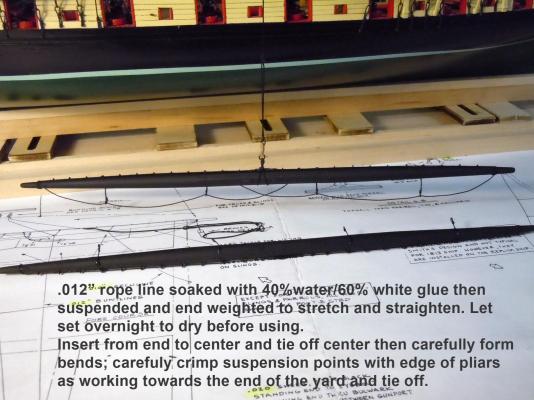
Thanks for your compliments! I found a brass wire used for beading that is stronger than the blackened copper wire. However, it must be slightly stretched before using. One end is held by a vise while the other end is slightly pulled to stretch and straighten. This stiffened brass wire is then formed around the block. First, I formed a "U" the width of the block using needle nose pliers, slipping the block into the "U" trapping a line if necessary and then gluing with CA before twisting close. As twist is formed when close to the block there will be a triangular opening formed; grip twist with pliers and carefully press the twist to close the triangular gap against the block. I moved on to the rigging of the yards and after a couple of futile attempts with the .012" unruly rope I reverted to and airplane technique I used for steel wiring. I cut lengths needed and suspended them with pins into the edge of workbench and weighted the free end with a small spring clamp and added 60% white glue/40% water and soaked the rope using a small paint brush and rubbing gently with fingers to evenly distribute the mixture; I then added more glue worked it in with fingers. Once soaked two more small spring clamps were added to the first for additional weight and slight stretching. Allowed to dry overnight. The ends were inserted into the loops from the end of the yard towards the middle and seized at the appropriate jack stay. Curves were then carefully formed and attachment points carefully crimped with the edge of pliers for a crisp joint. Curves the repeated to the end and the end seized with a clove hitch. Here the course yard sling has been added at the center point and checked for balance while hanging. The lashing is between the two thimbles; I selected brown as indicated on the replica ship. I will now address the rest of the yards working from the deck up and adding any blocks or other details prior to adding the yards to the masts.

- 440 replies
-
- 9
-
-
- niagara
- model shipways
- (and 1 more)
-
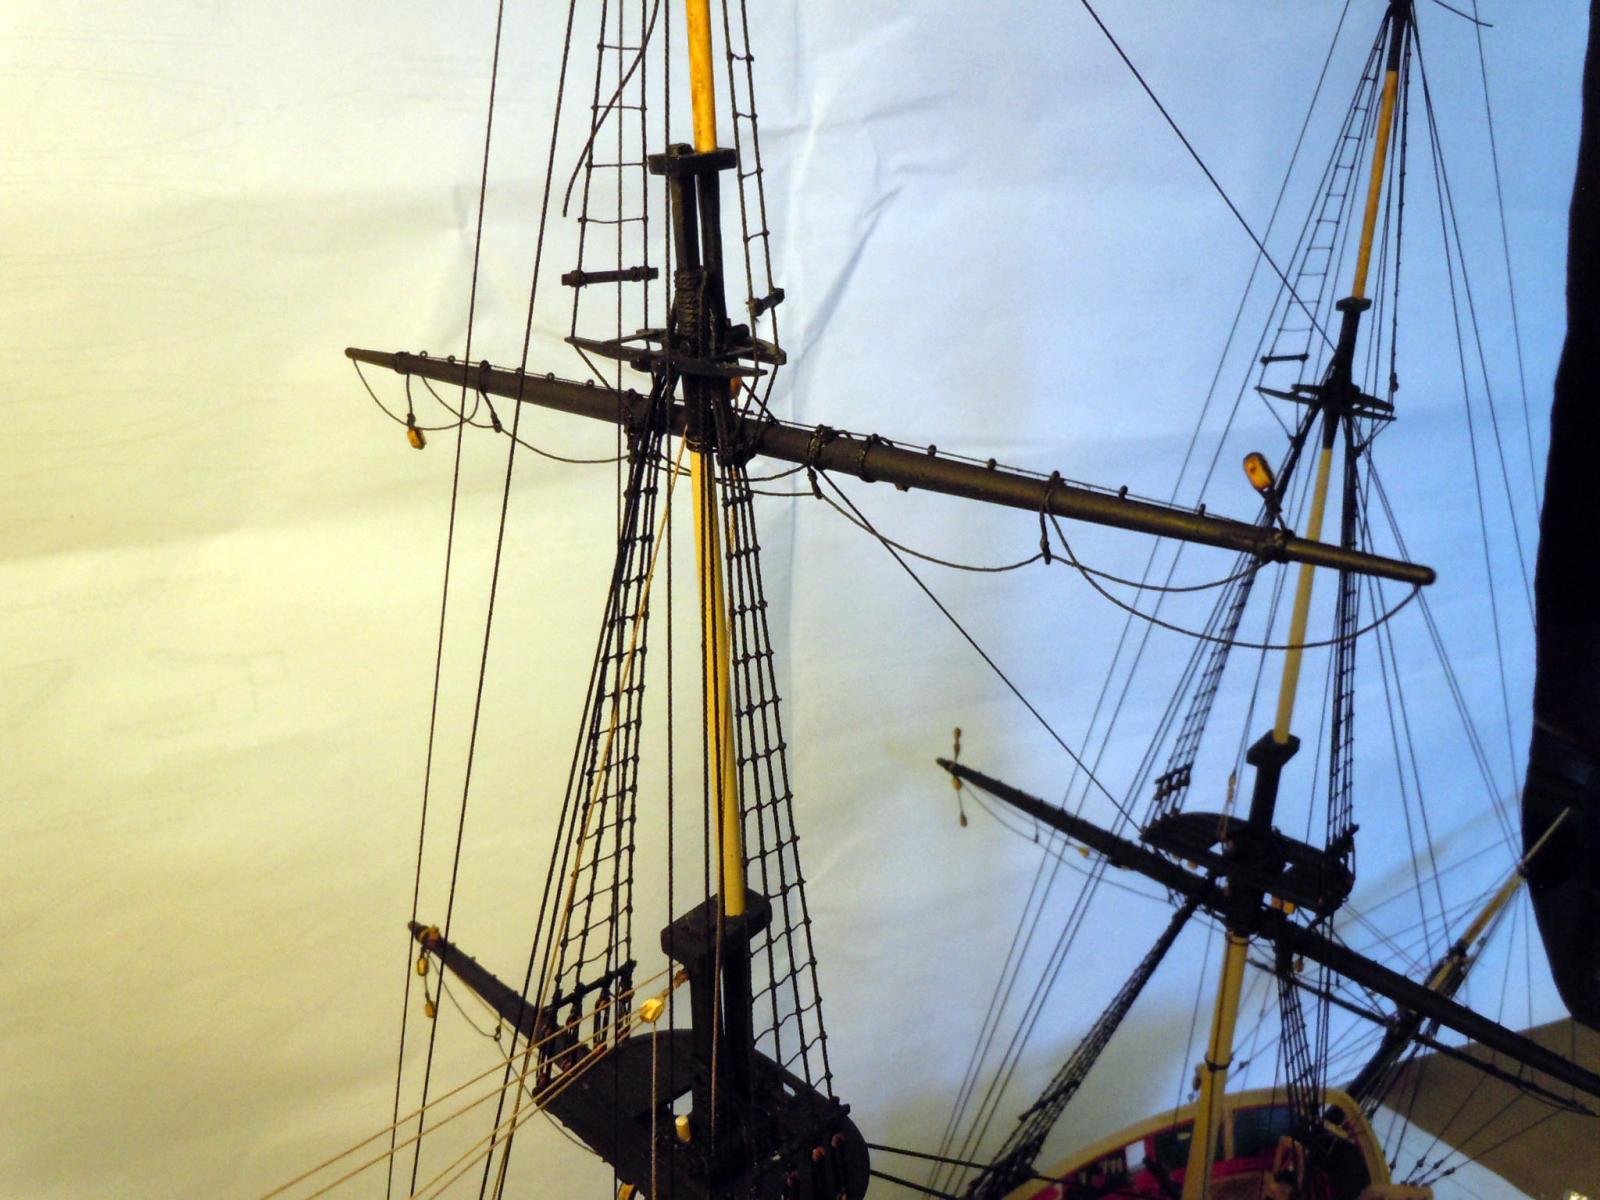
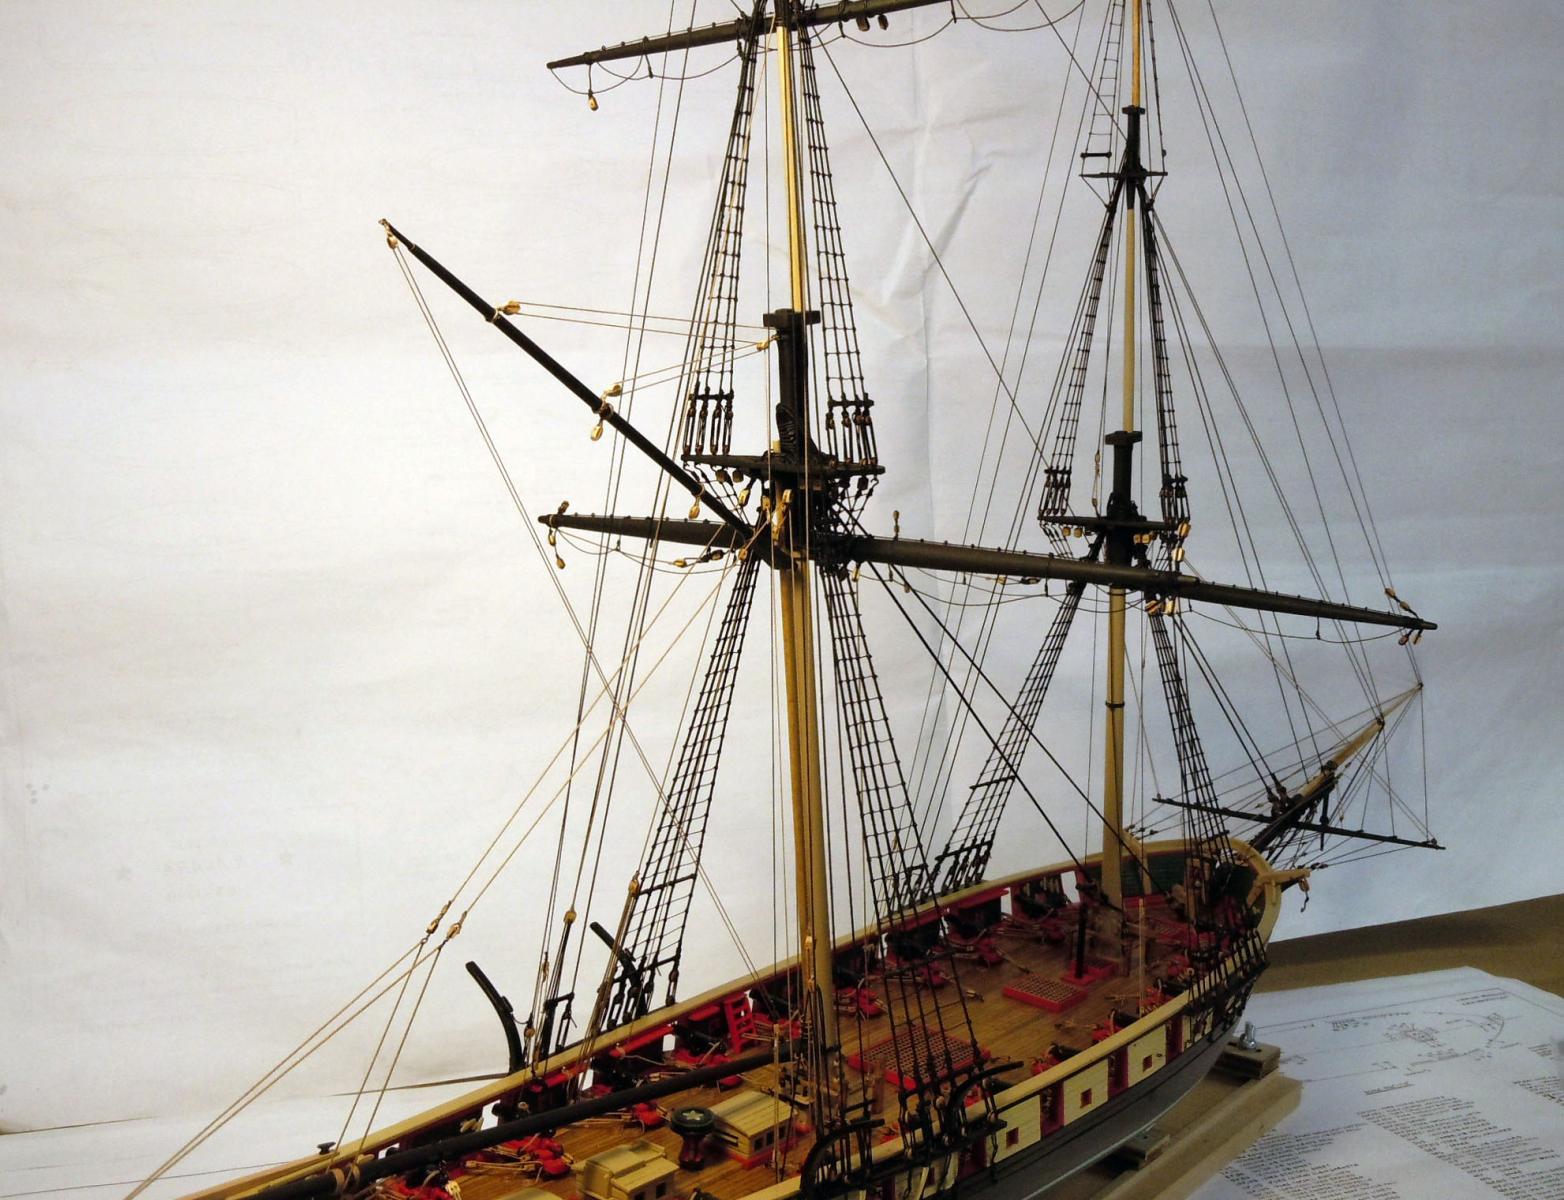
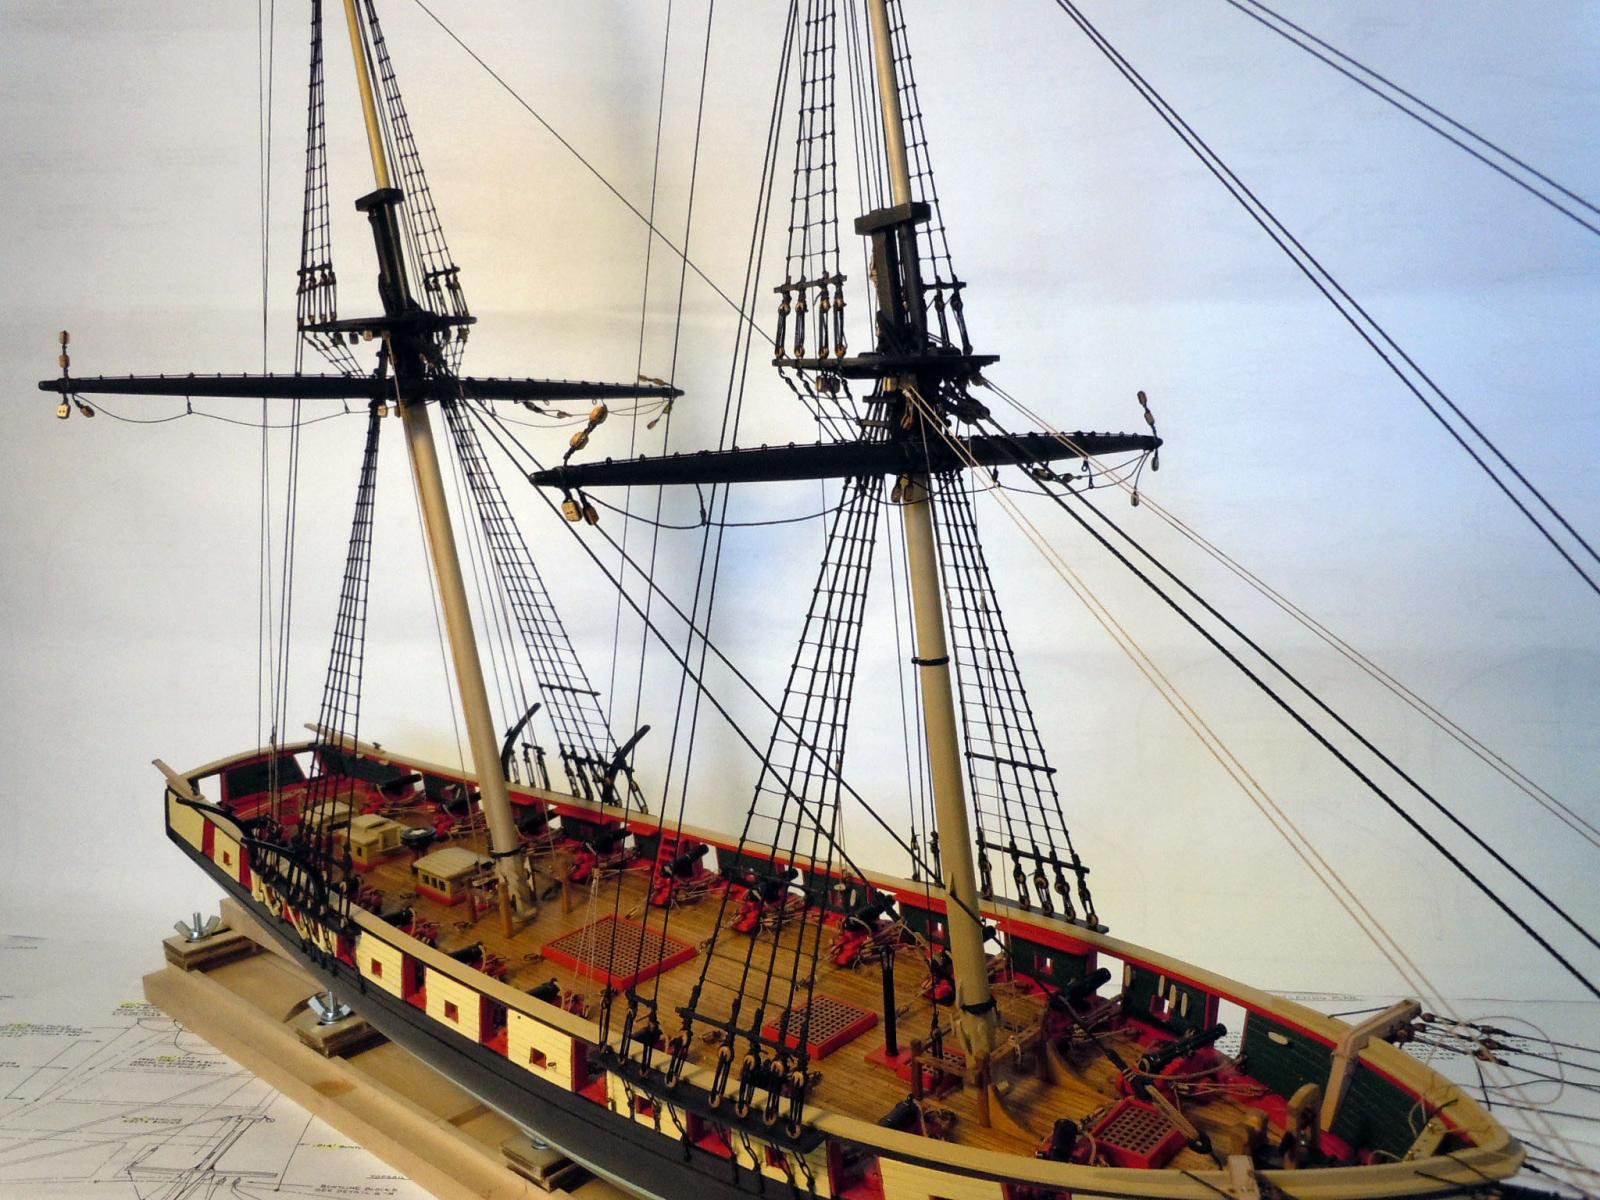
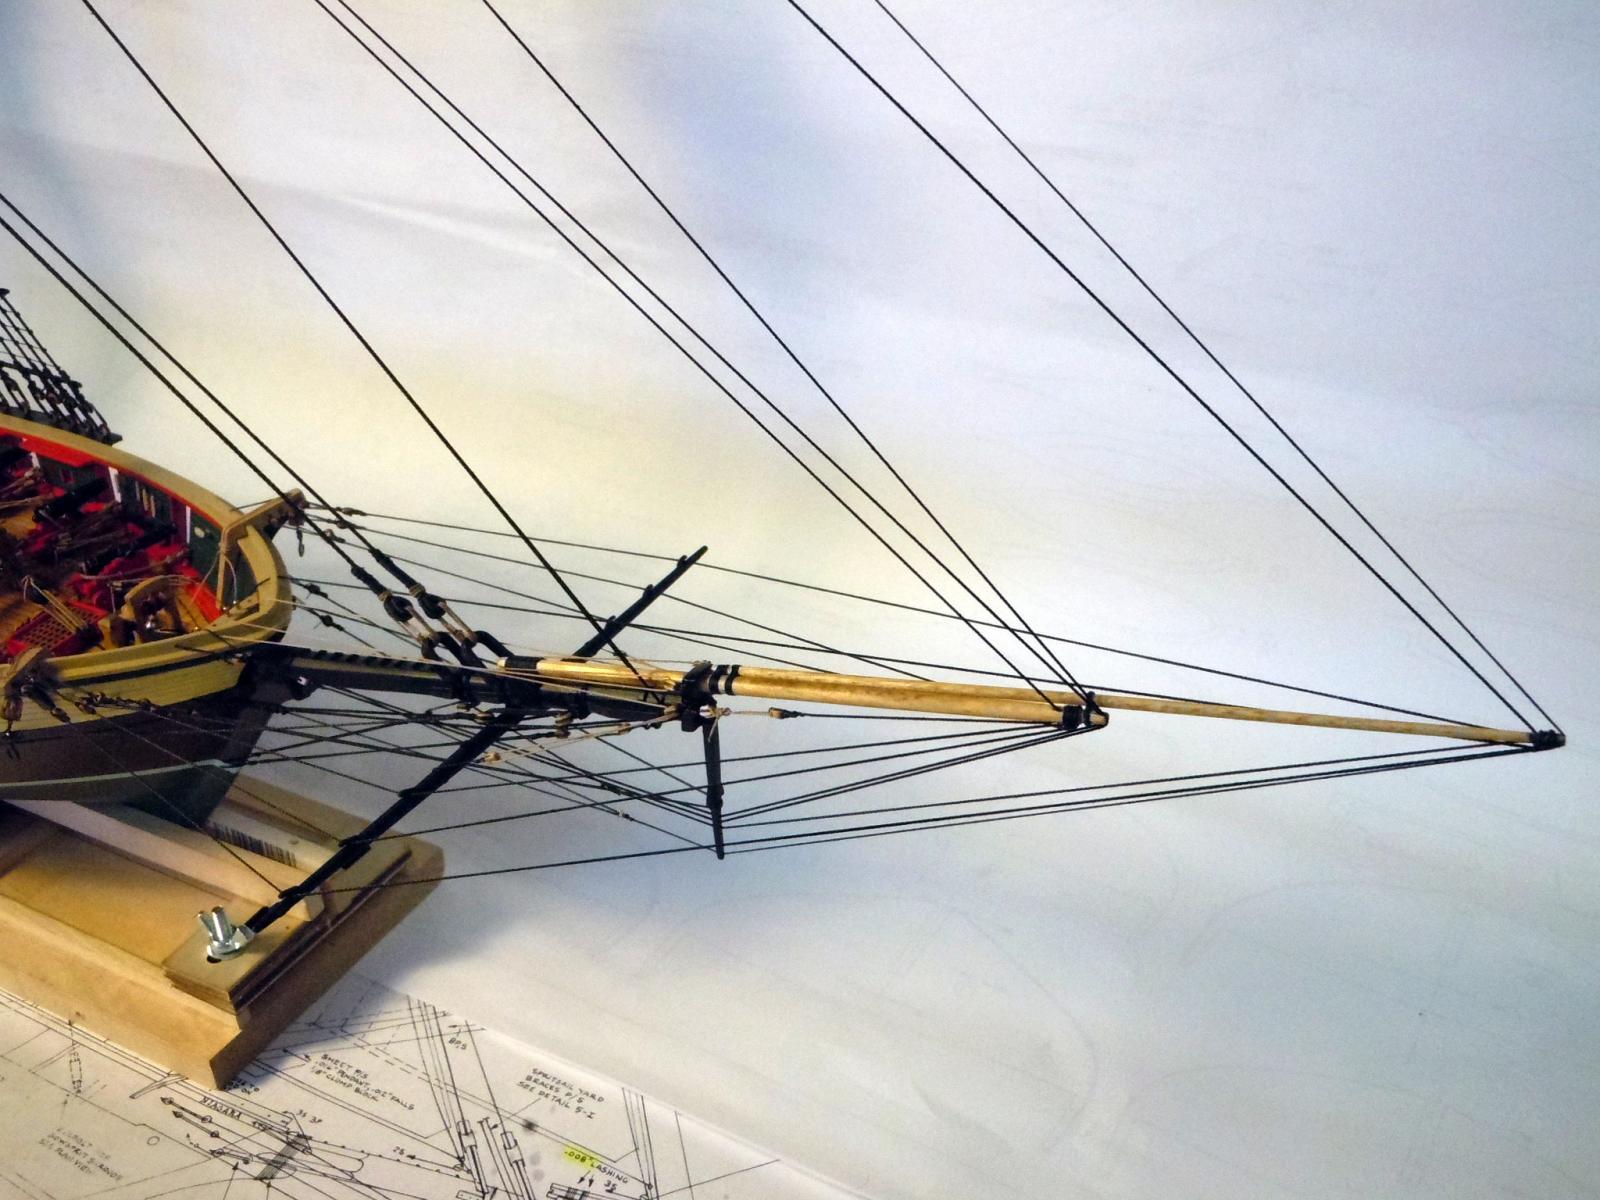
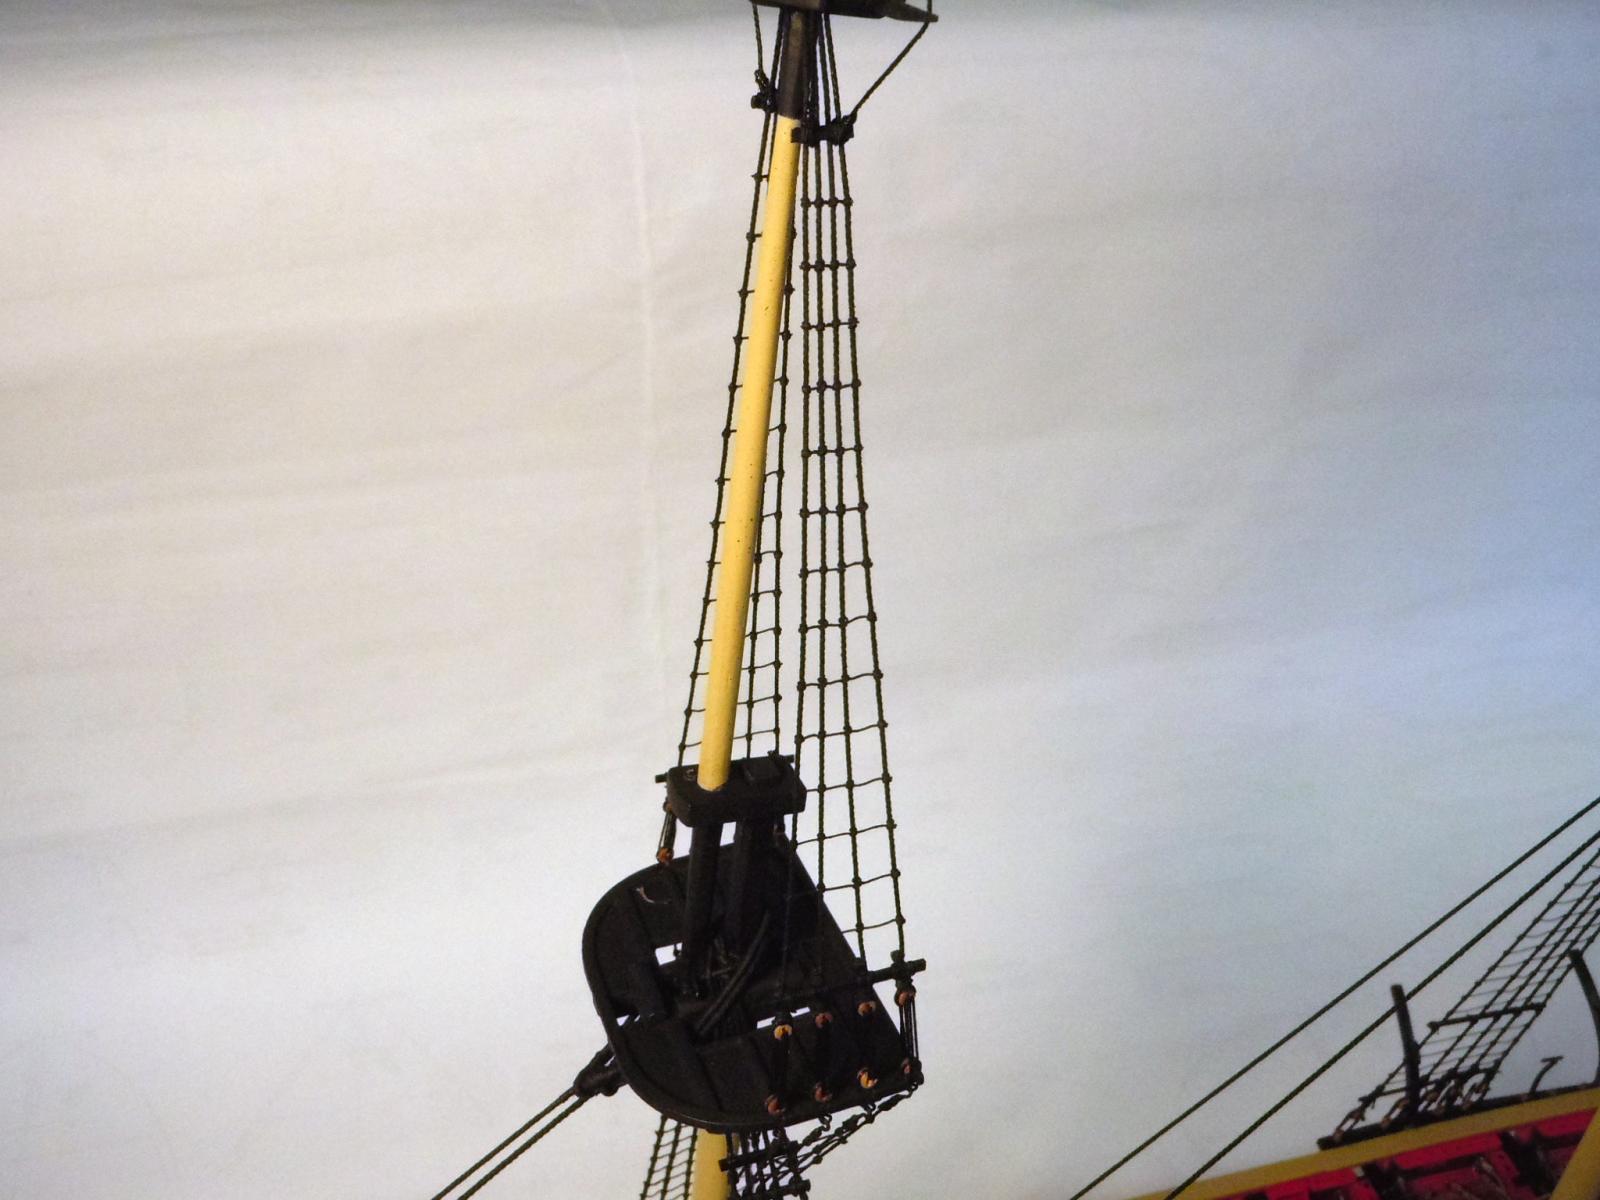
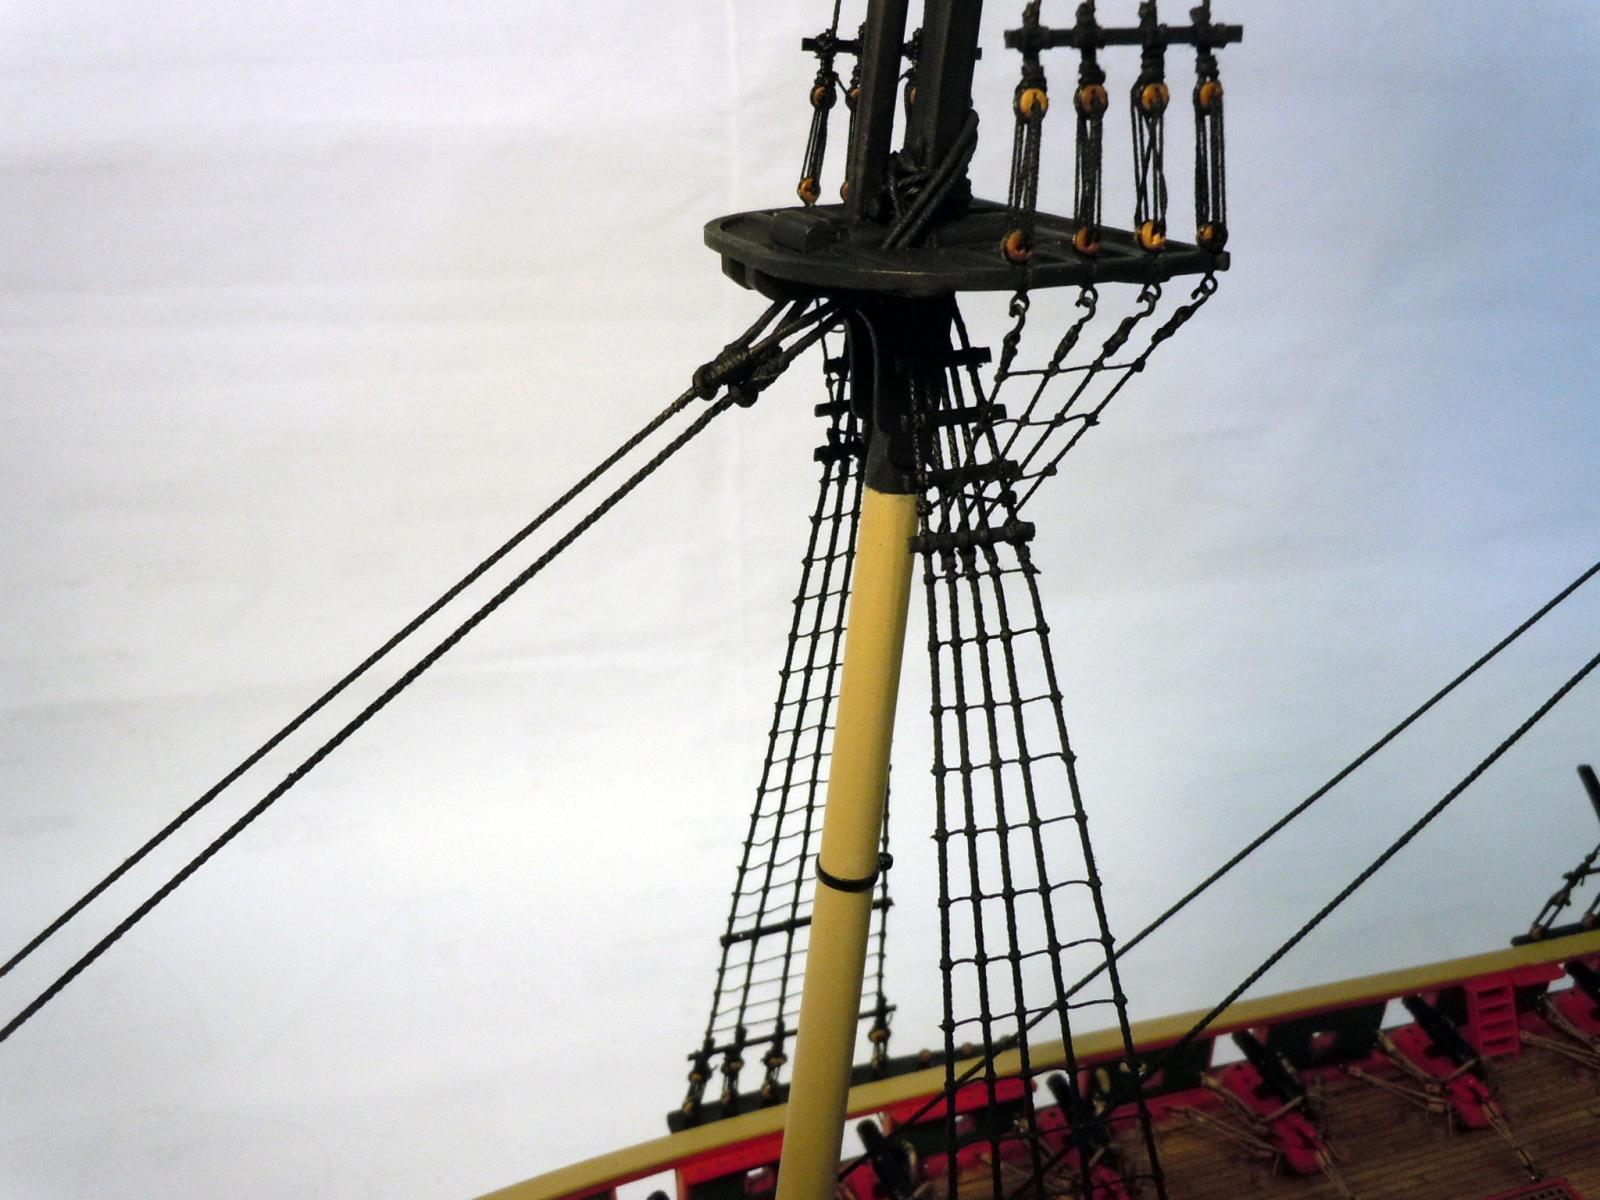
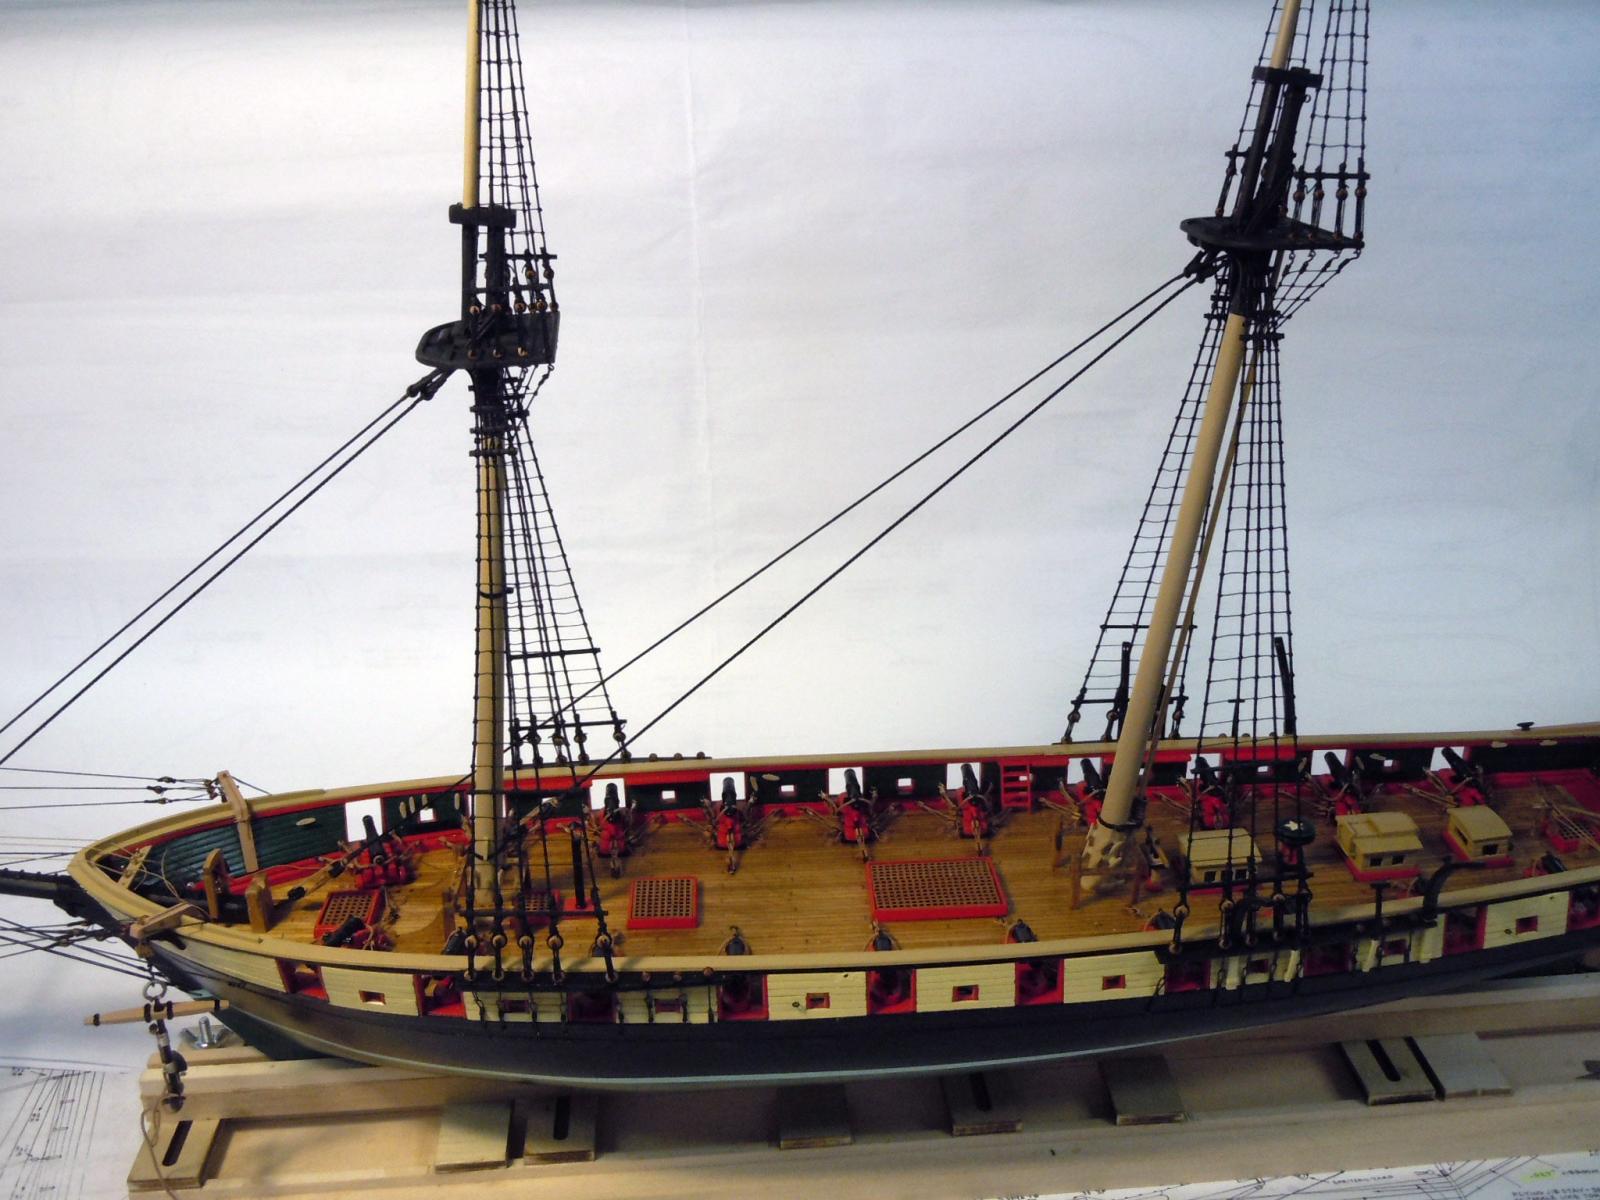
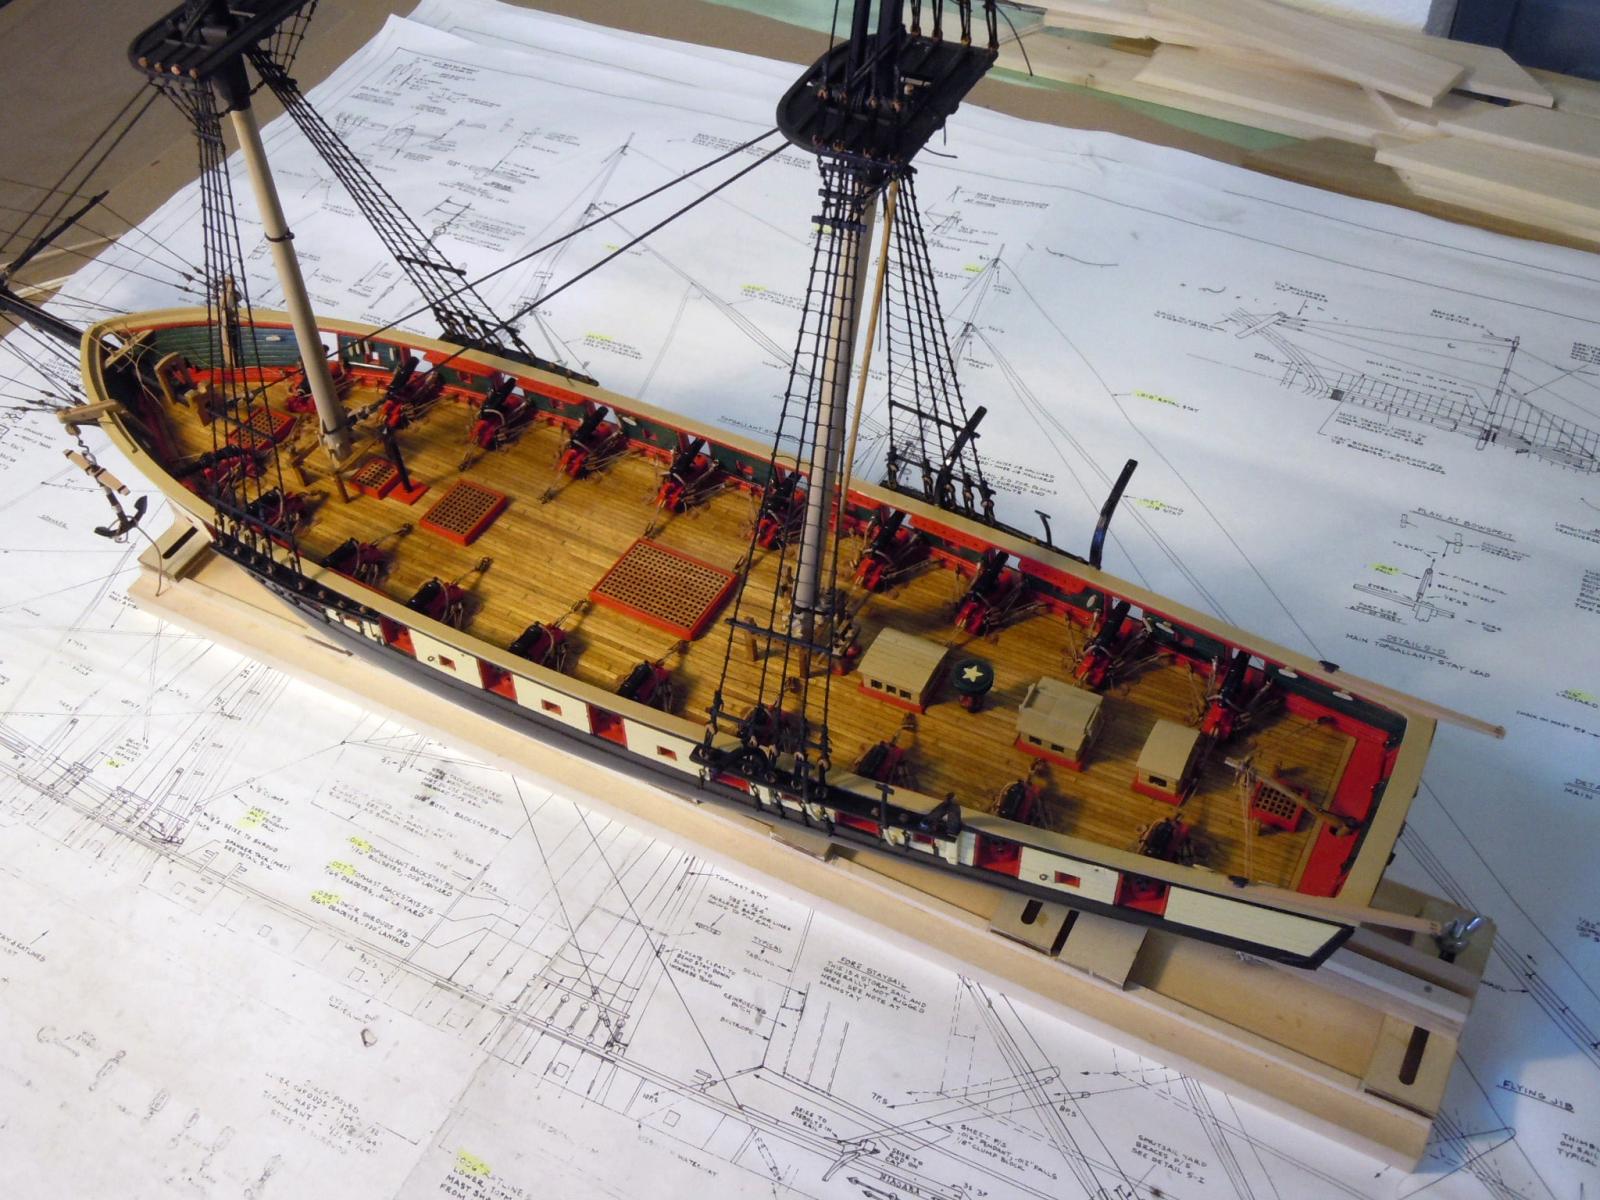
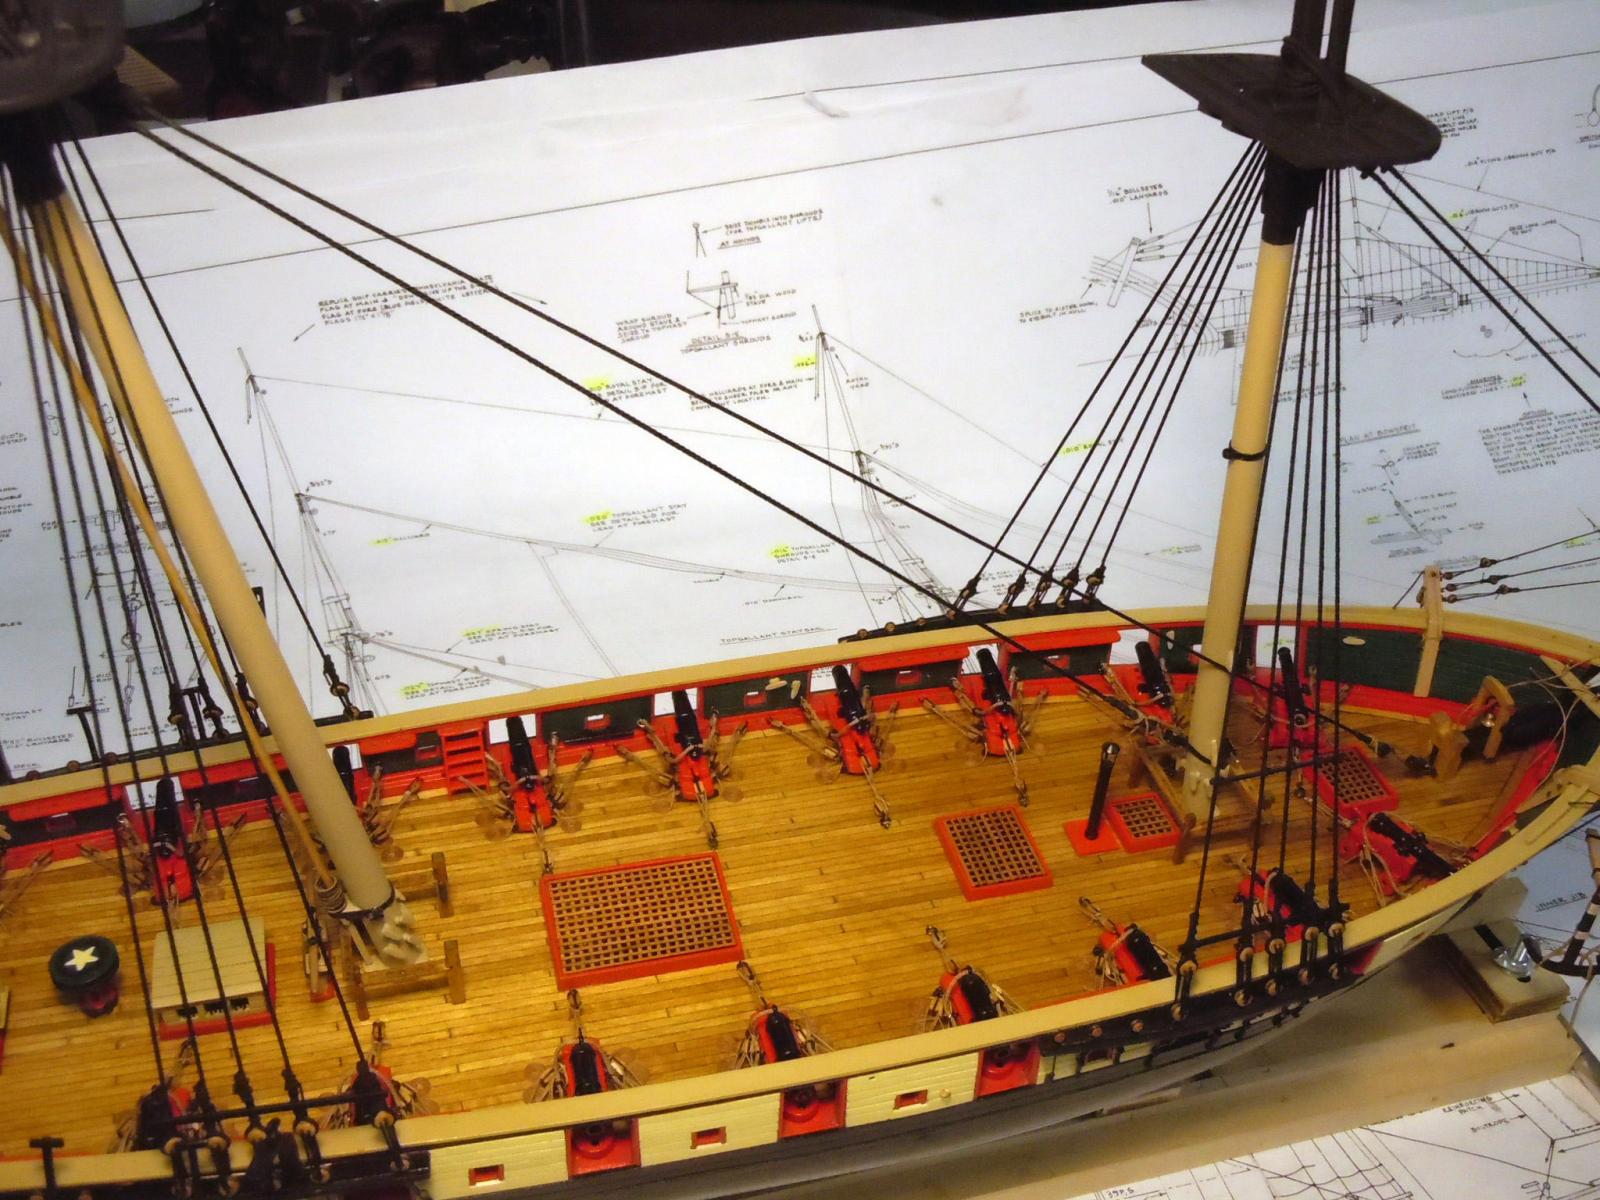
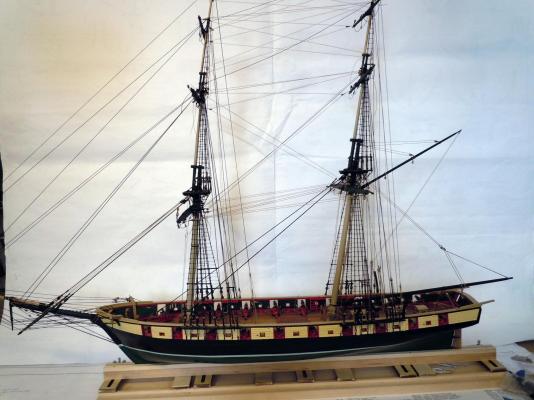
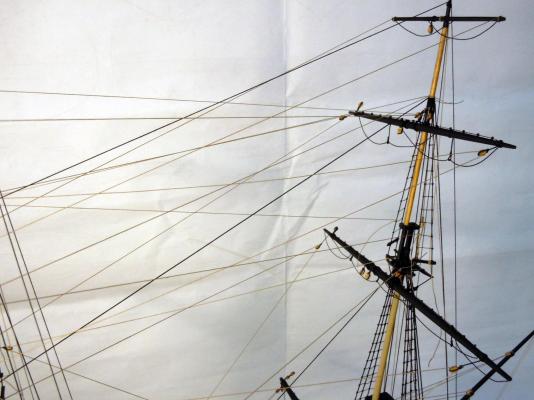
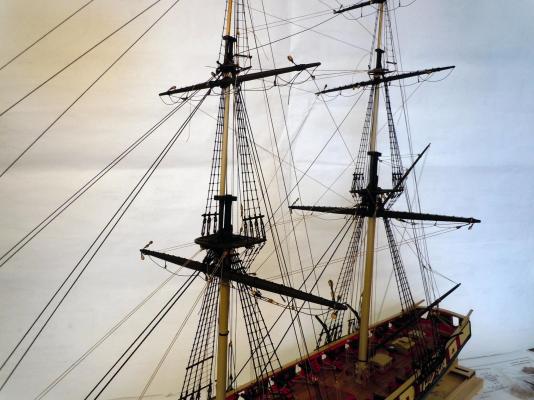
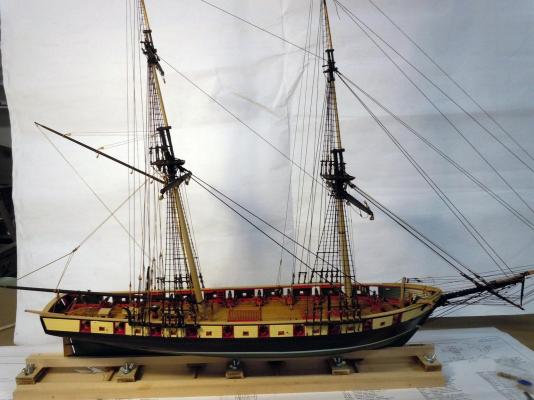
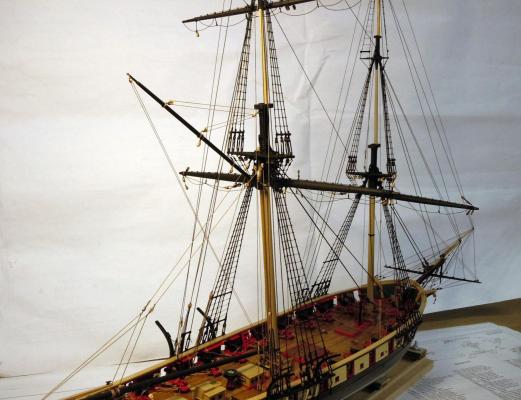
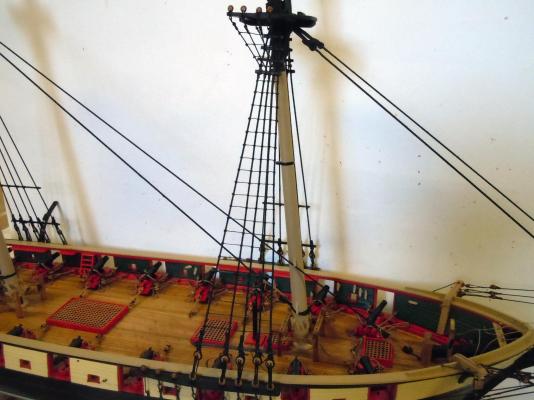
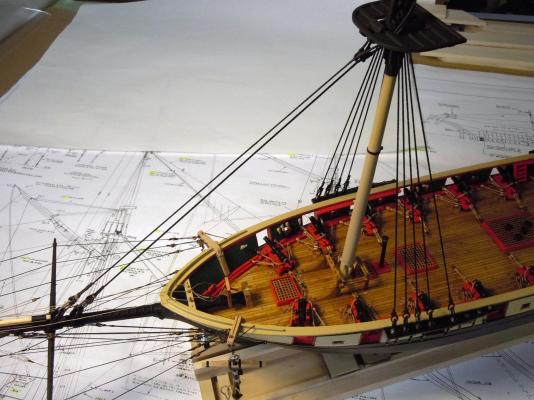
After a hiatus from building over the Labor Day weekend helping my wife at an art show I am back at adding all the mast stay lines for the standing rigging. I added the balance of the lines to the bowsprit and then basically worked fore to aft and bottom to top. I quickly learned that it requires a delicate touch when seizing the lines so as not to warp or deflect the thinner mast sections out of alignment. I left most of the top ends of the lines not glued to allow for rope stretching under tension and adjusted as needed and will not glue them until all the yards are in place. I found the assembly instructions not very helpful and I felt like a detective tracing the lines to their attachment points; especially when not identified. I am sure part of the problem is my lack of specific knowledge of rigging since this is my first ship build. Following are pictures of most of the lines in place. I also need to acquire a better background for photographing since she is getting bigger. Once the final stay lines are completed I will then start the yards working from bow to stern, bottom to top and then add the booms.


- 440 replies
-
- 10
-
-
- niagara
- model shipways
- (and 1 more)
-
Jack, Grant thank you for your kind words. I have finished the ratlines and am adding the mast stays and the rest of the stays as I can figure out from the plans.
- 440 replies
-
- 4
-
-
- niagara
- model shipways
- (and 1 more)
-
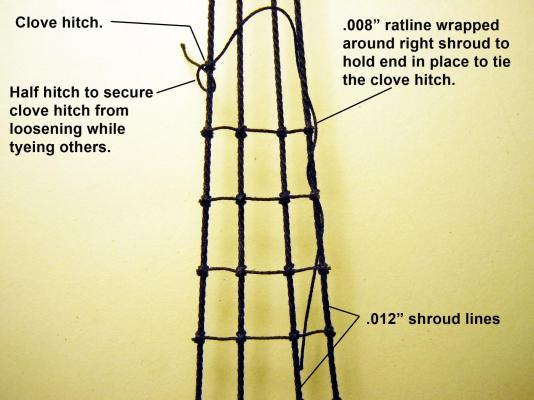
Just a quick update on the ongoing addition of ratlines. I finished up the second level added the bars for the third level. I will need to order some more Black .008" line that I ran out of. One thing that I will share for newcomers like me to doing ratlines is how to deal with the short lines that have a mind of their own. What I did was wrap the end of the line around a shroud before starting the clove hitch to hold the end while tying. I also tied a half hitch to hold the clove hitch from loosening while tying the rest. Here is a view of the second level of ratlines in place. I then added the ratlines to the futtock shrouds as well. These were a little tricky working on an angle. Here is an overall so far. Now to decide whether to use the brown .008" line that I have for the third level and paint them black or wait for the new order to arrive.

- 440 replies
-
- 11
-
-
- niagara
- model shipways
- (and 1 more)
-
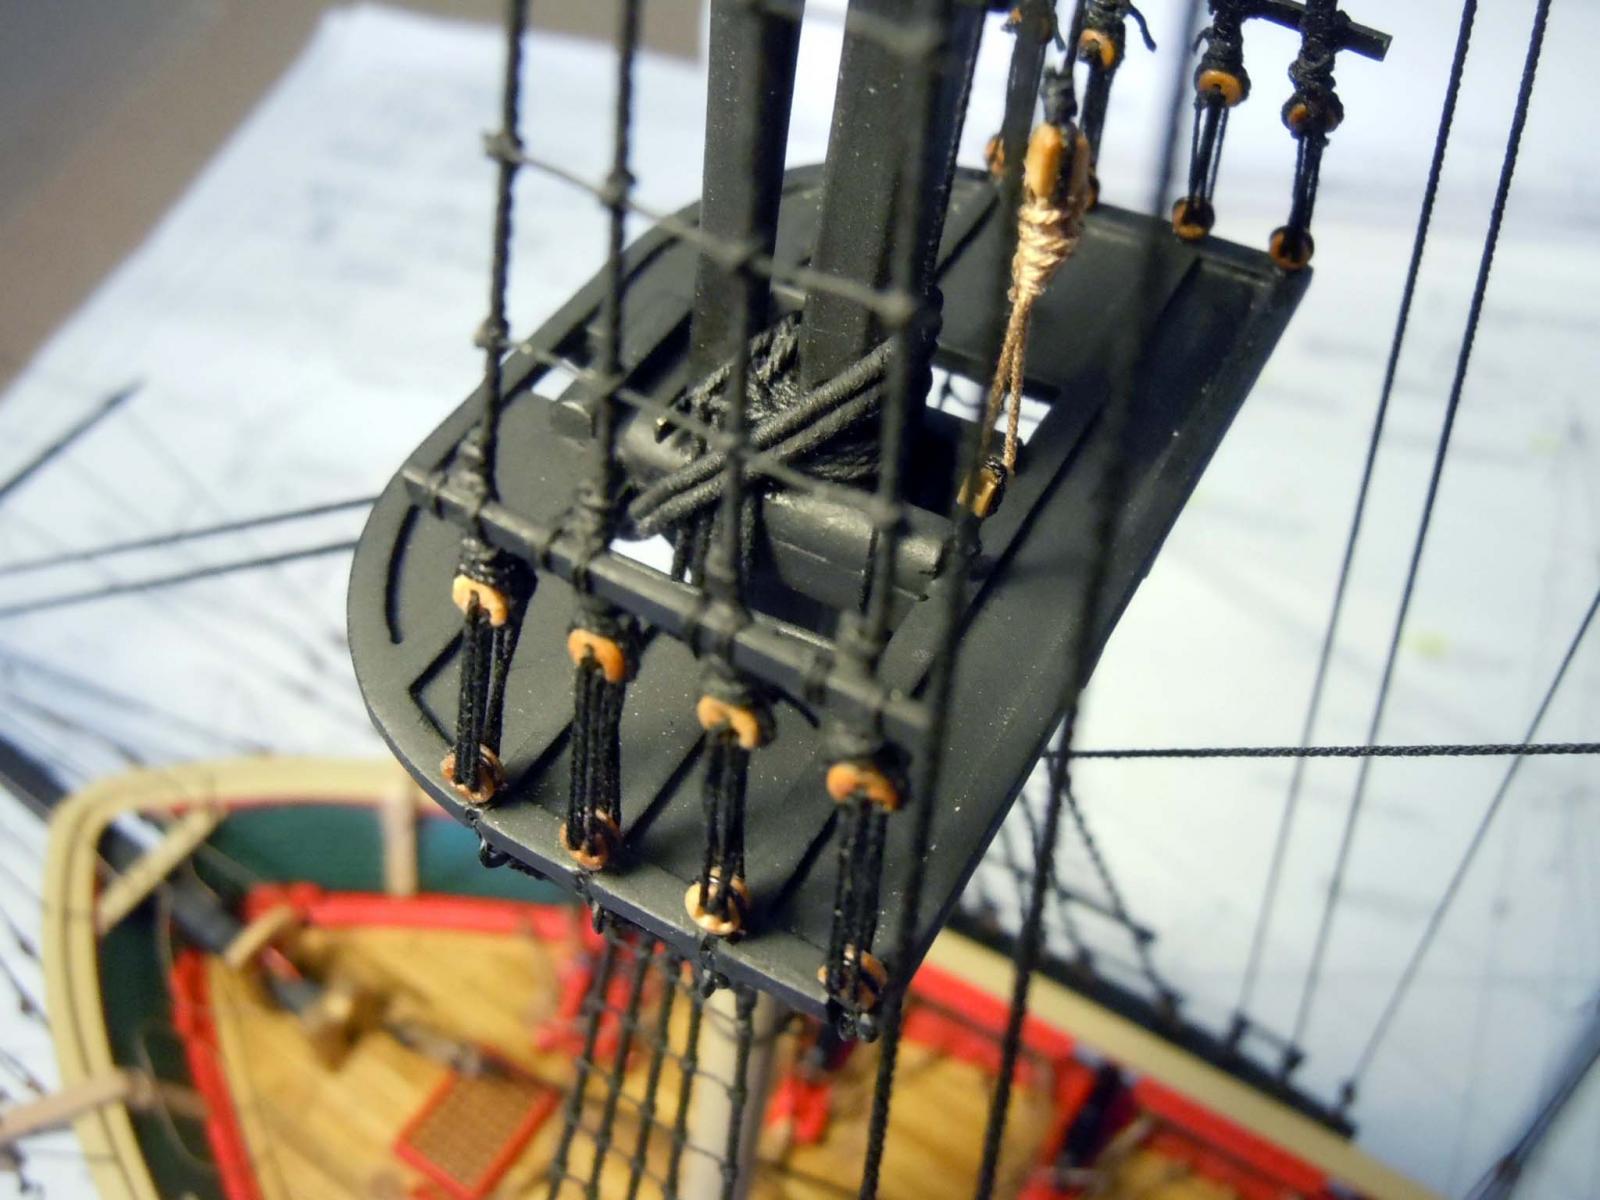
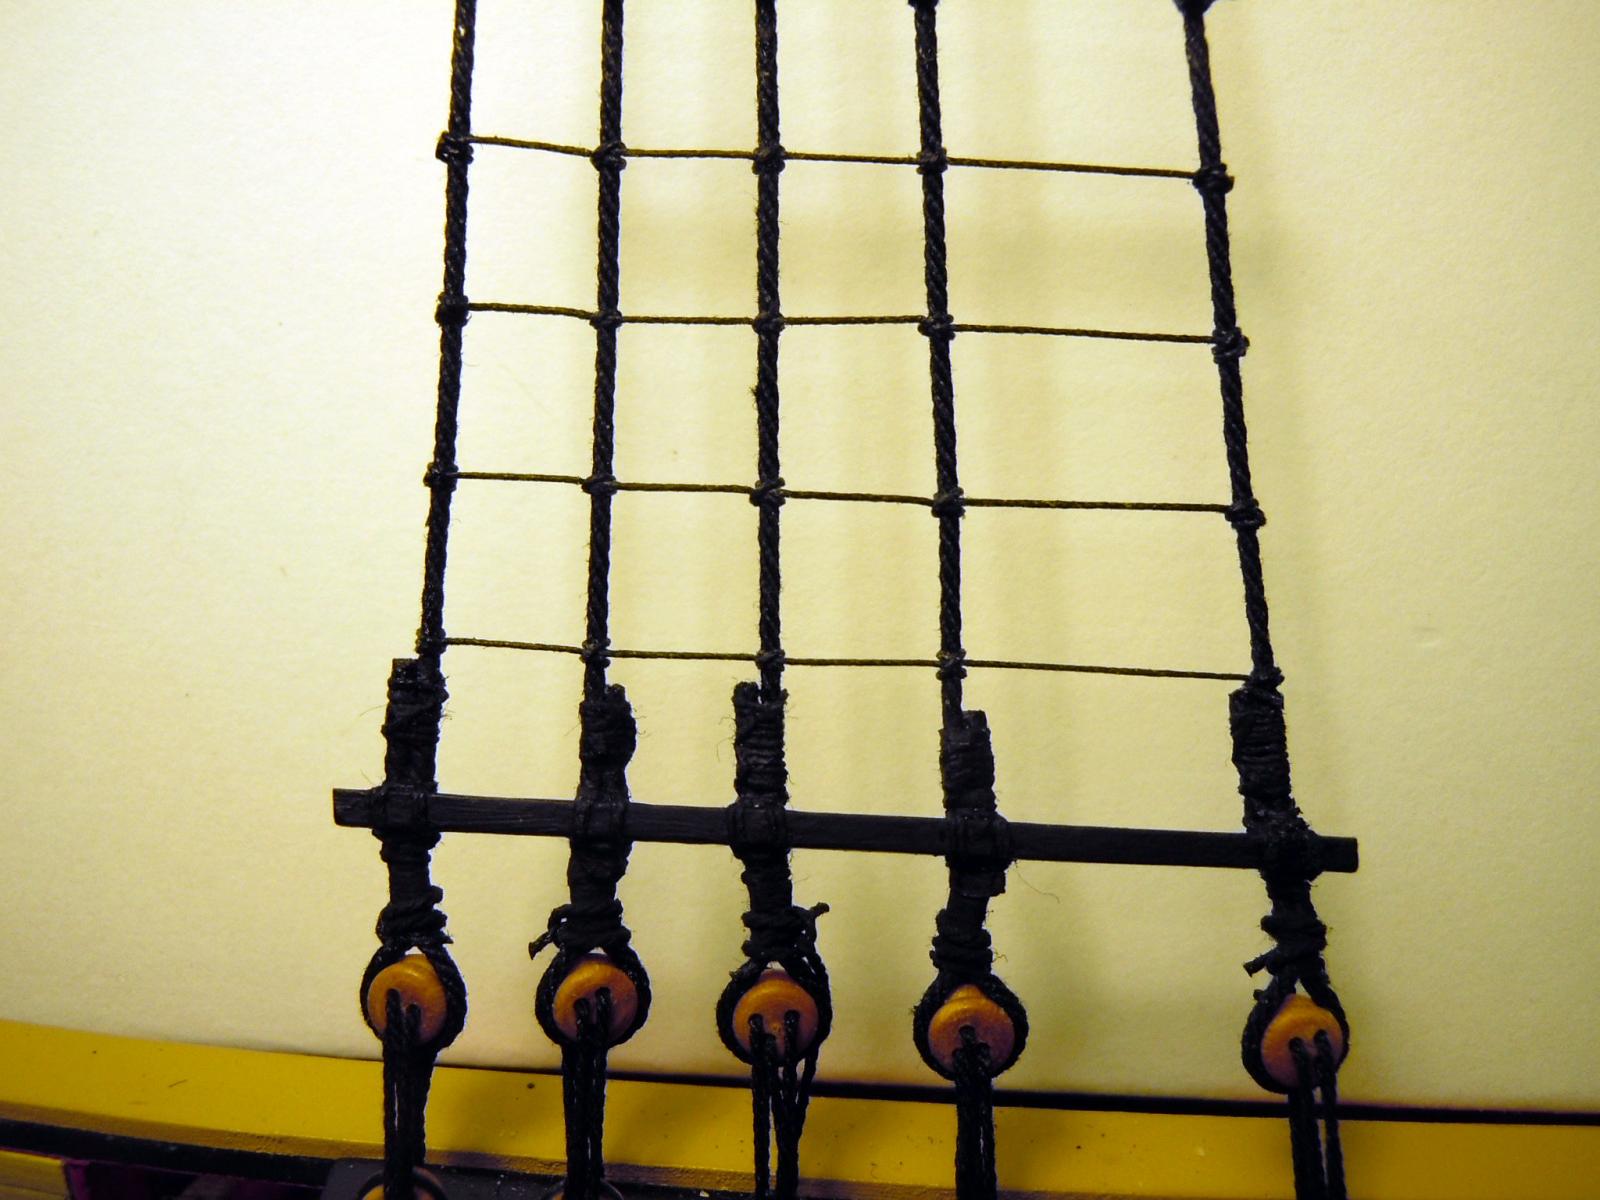
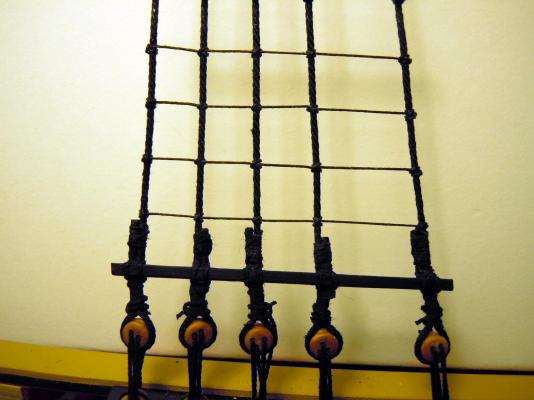
Finished the lower level of ratlines all 828 of them. Here is a closeup that shows the distinctive diagonal of the clove hitch with the outboard hitches being tied off with a half hitch. The real challenge was consistency of tension so as not to pull or distort the shroud lines while attaining a relatively straight section and a tight clove hitch. Once each section was completed I painted them using Ultra Flat Black sprayed into a disposable 1 oz. cup and applied with a brush. This replicated the tarred finish which is hard to photograph up close with black on black. Here is an overall looking down on the lines. Now I am starting up the second level which will have .025" shroud lines and 3/32" deadeyes. A bit of advice for those new to ship building like myself; the kit deadeyes burst apart when trying to drill out for the .012" line because they were so dry so I added the shroud line first, seized it using black thread and then I oriented the holes as required and then added a drop of CA all around the deadeye. The CA wicked in the grain of the super dry wood and hardened it for drilling out. Here is a view of the main mast upper shrouds minus the bar; in tightening the deadeyes I noticed they took a natural twist which I think is why the bars are added to keep them all oriented forward. Back to the shrouds.

- 440 replies
-
- 12
-
-
- niagara
- model shipways
- (and 1 more)
-
George, Thanks! Tying the .008" black rope to the .045" black rope really calls into play one's depth perception, patience, dexterity and kenothesis(awareness of body in space) to consistently tie them without damaging the existing structures, especially the davits. I am pondering whether or not to add the bowsprit safety lines which I understand are on the replica but not the original. Any thoughts from others would be appreciated.
- 440 replies
-
- 3
-
-
- niagara
- model shipways
- (and 1 more)
-
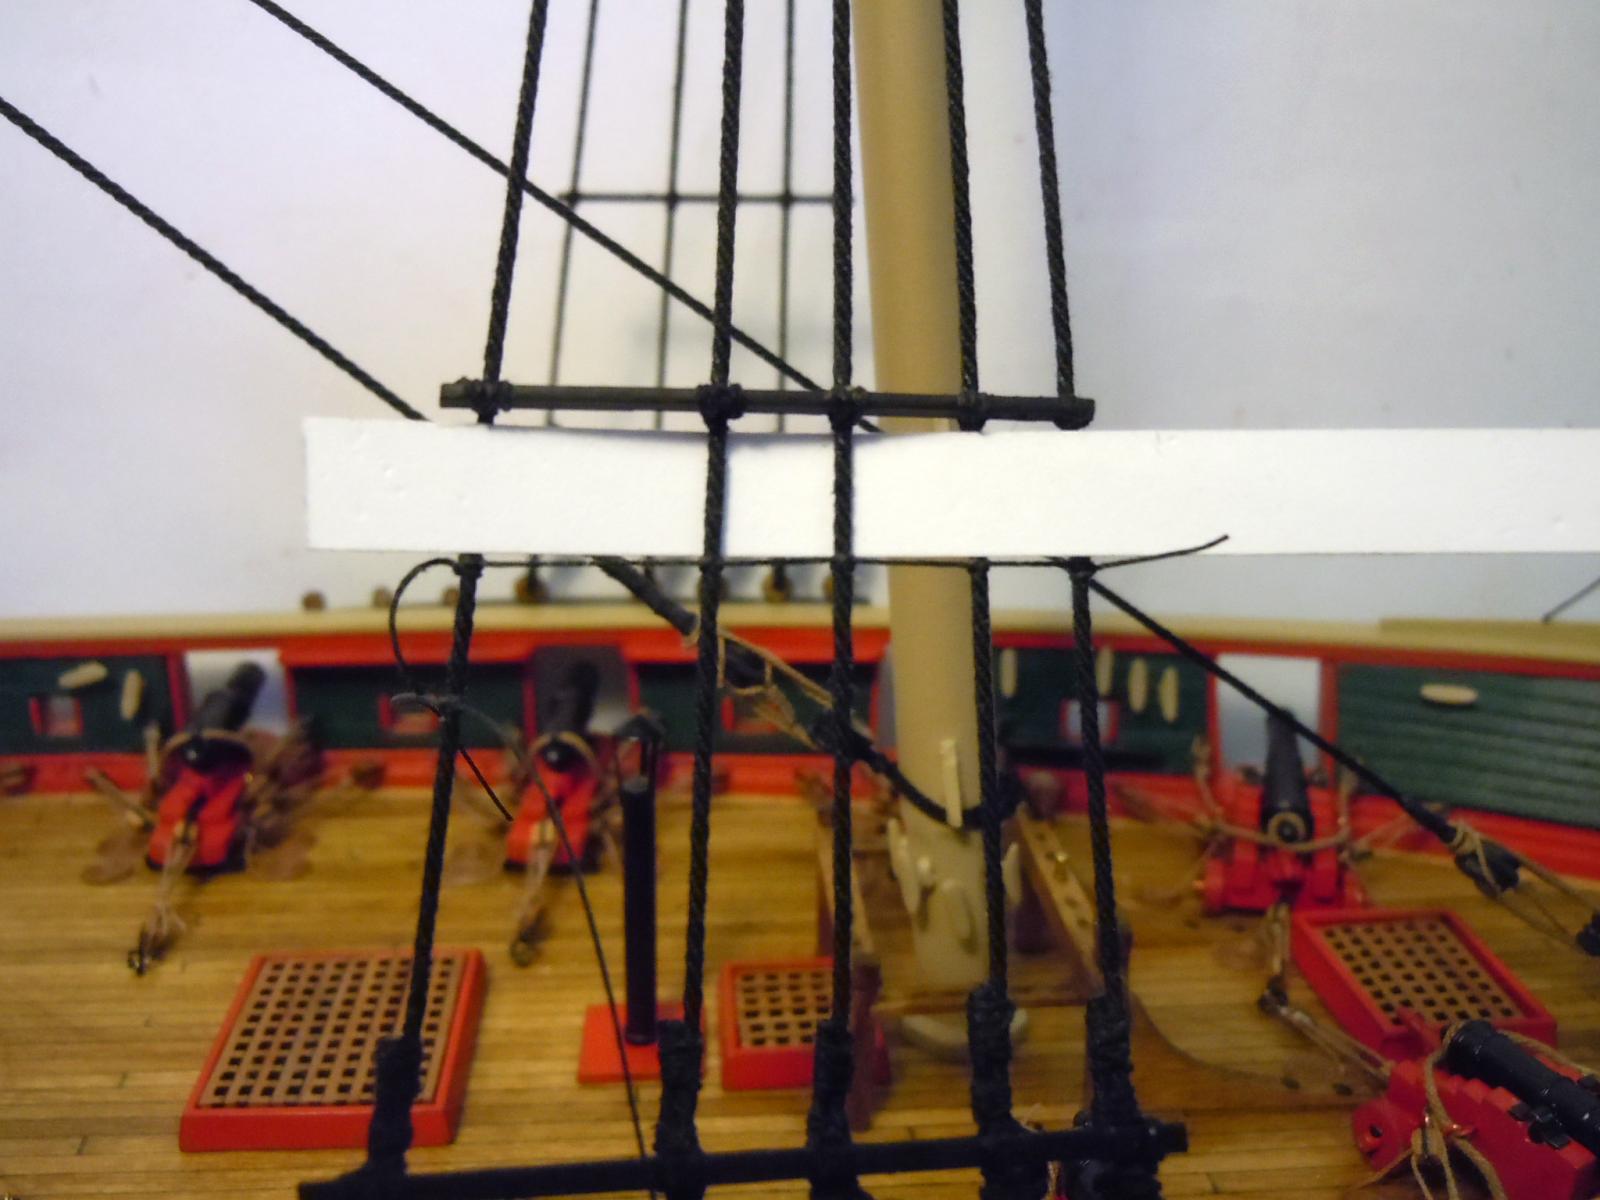
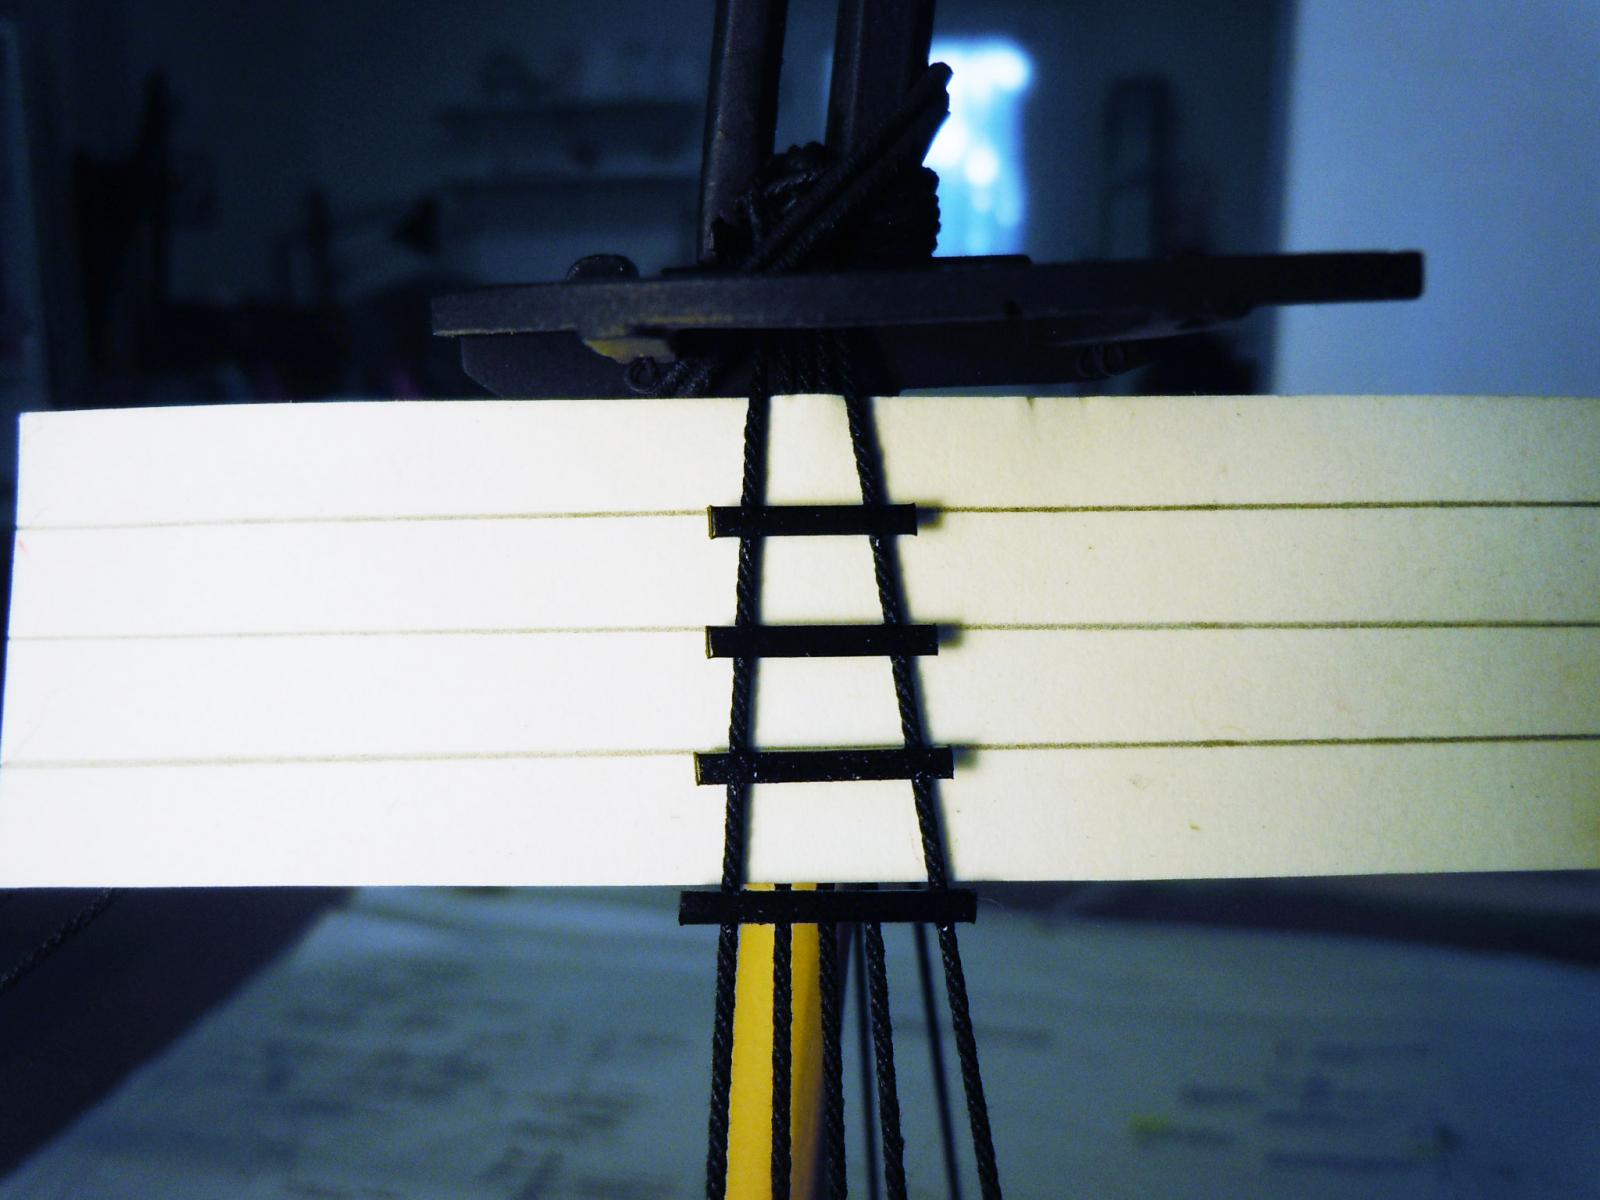
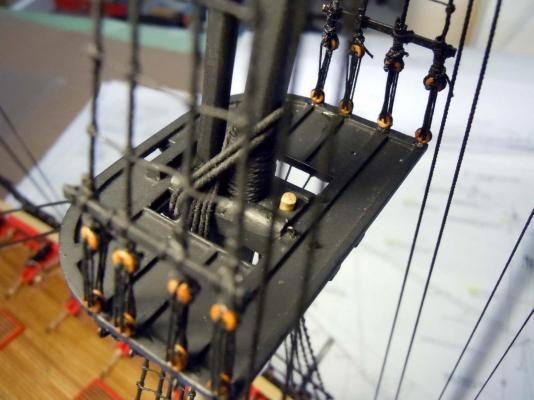
Back to building and added the 16 futtock shrouds. The shrouds required hooks that attached to the eyebolts and these I made from brass using looping pliers. Lines were first seized to the hooks and then indexed behind the wood bar and seized to the shroud. I then started to add the ratlines using Chuck's .008" rope. I used the lower wood bar as the starting point and worked down and then up from the bar. I cut a 1/4" wide card stock strip as a spacing gauge. The gauge worked quite well being weaved in and out of the shroud lines to adjust the spacing much like a weaver using a loom. Here is the gauge in place. Here is the first section completed with the ends on each side only completed with a clove hitch and half hitch, while the middle lines having a clove hitch only. In total 207 clove hitches tied. Once the ends were tied a drop of CA was added to the ends only and once dried the ends were trimmed off. I then painted all the lines with the Ultra Flat Black to simulate the tarred effect. Now back to finishing the other three sections.
- 440 replies
-
- 10
-
-
- niagara
- model shipways
- (and 1 more)
-
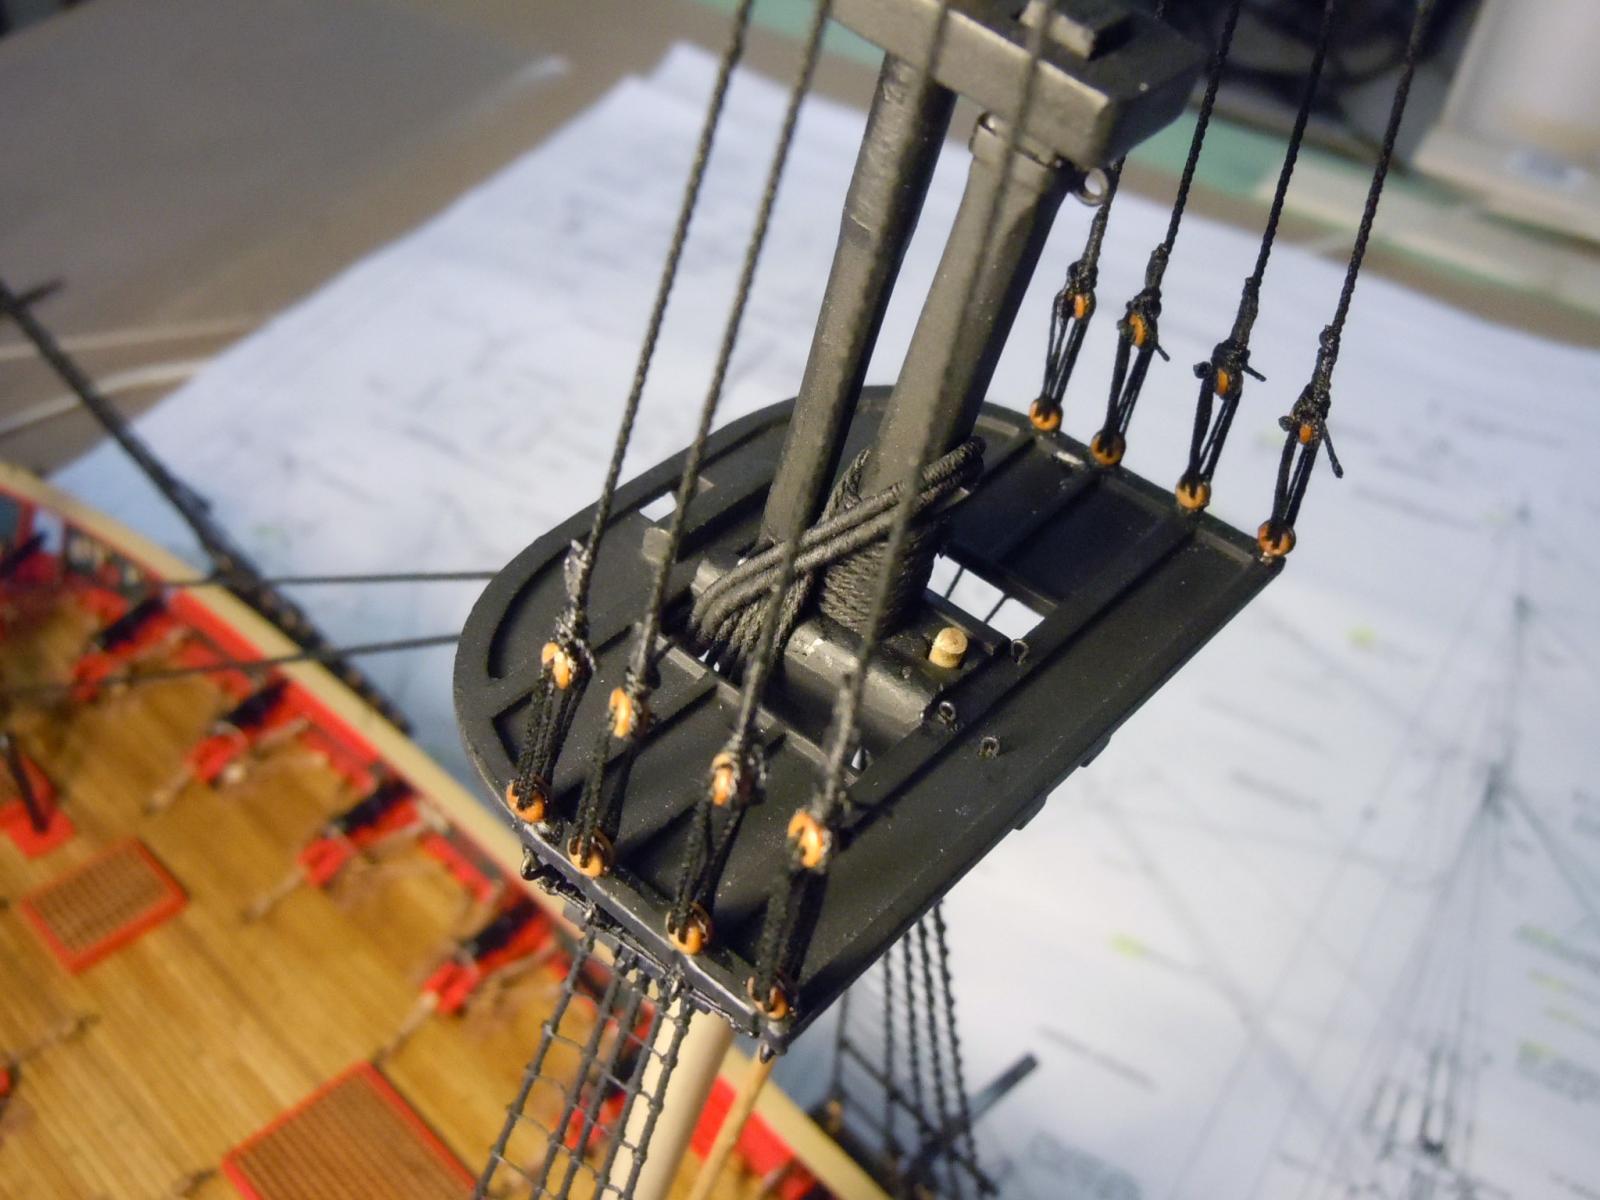
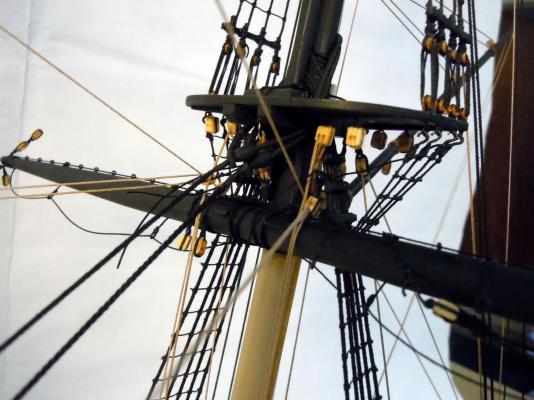
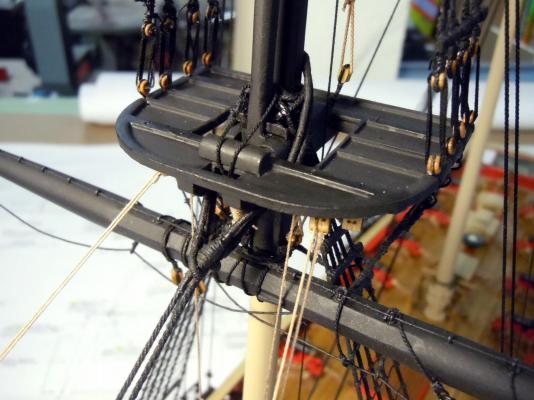
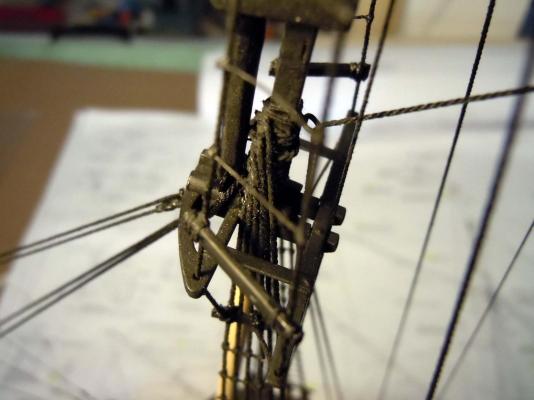
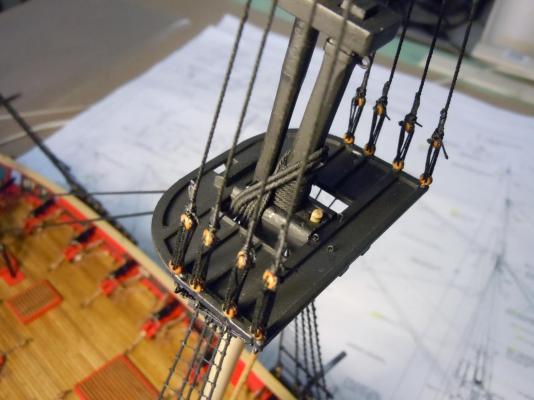
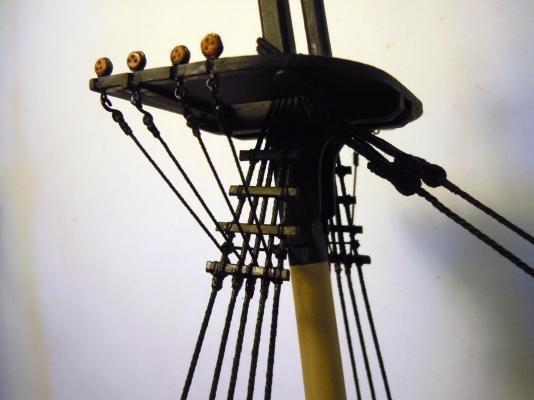
Added these wood braces at the top of the shrouds (I do know know the name of them) they are shown on the replica ship but not shown on the plans. Then I added the catharpin using a small brass ring for the thimble. Here is a picture and it is a bit difficult seeing black on black especially doing the lashing with thread. I used card stock with the lines drawn parallel and pressed between the top of the shrouds and mast to use to align the wood parts. Next to add the catharpin to the foremast and the rest of the deadeyes then make the brass hooks needed for the futtock shrouds. Very good friends from Ohio stopped by so building will come to a halt while they are here.


- 440 replies
-
- 8
-
-
- niagara
- model shipways
- (and 1 more)
-
David, in the same selection of Ultra Flats the Sand is a great match for Buff, Sand is what I used on the masts; just wish I had found it earlier in this build.
- 440 replies
-
- 3
-
-
- niagara
- model shipways
- (and 1 more)
-
David, I painted them using Krylon Ultra Flat spray paint. Here is a link. The ultra flat gives it that tarred look. The CA adhesive gives the joints a bit of a shine that I find objectionable and this works perfect. http://www.krylon.com/products/camouflage-paint-made-with-fusion-for-plastic-technology/
- 440 replies
-
- 2
-
-
- niagara
- model shipways
- (and 1 more)
-
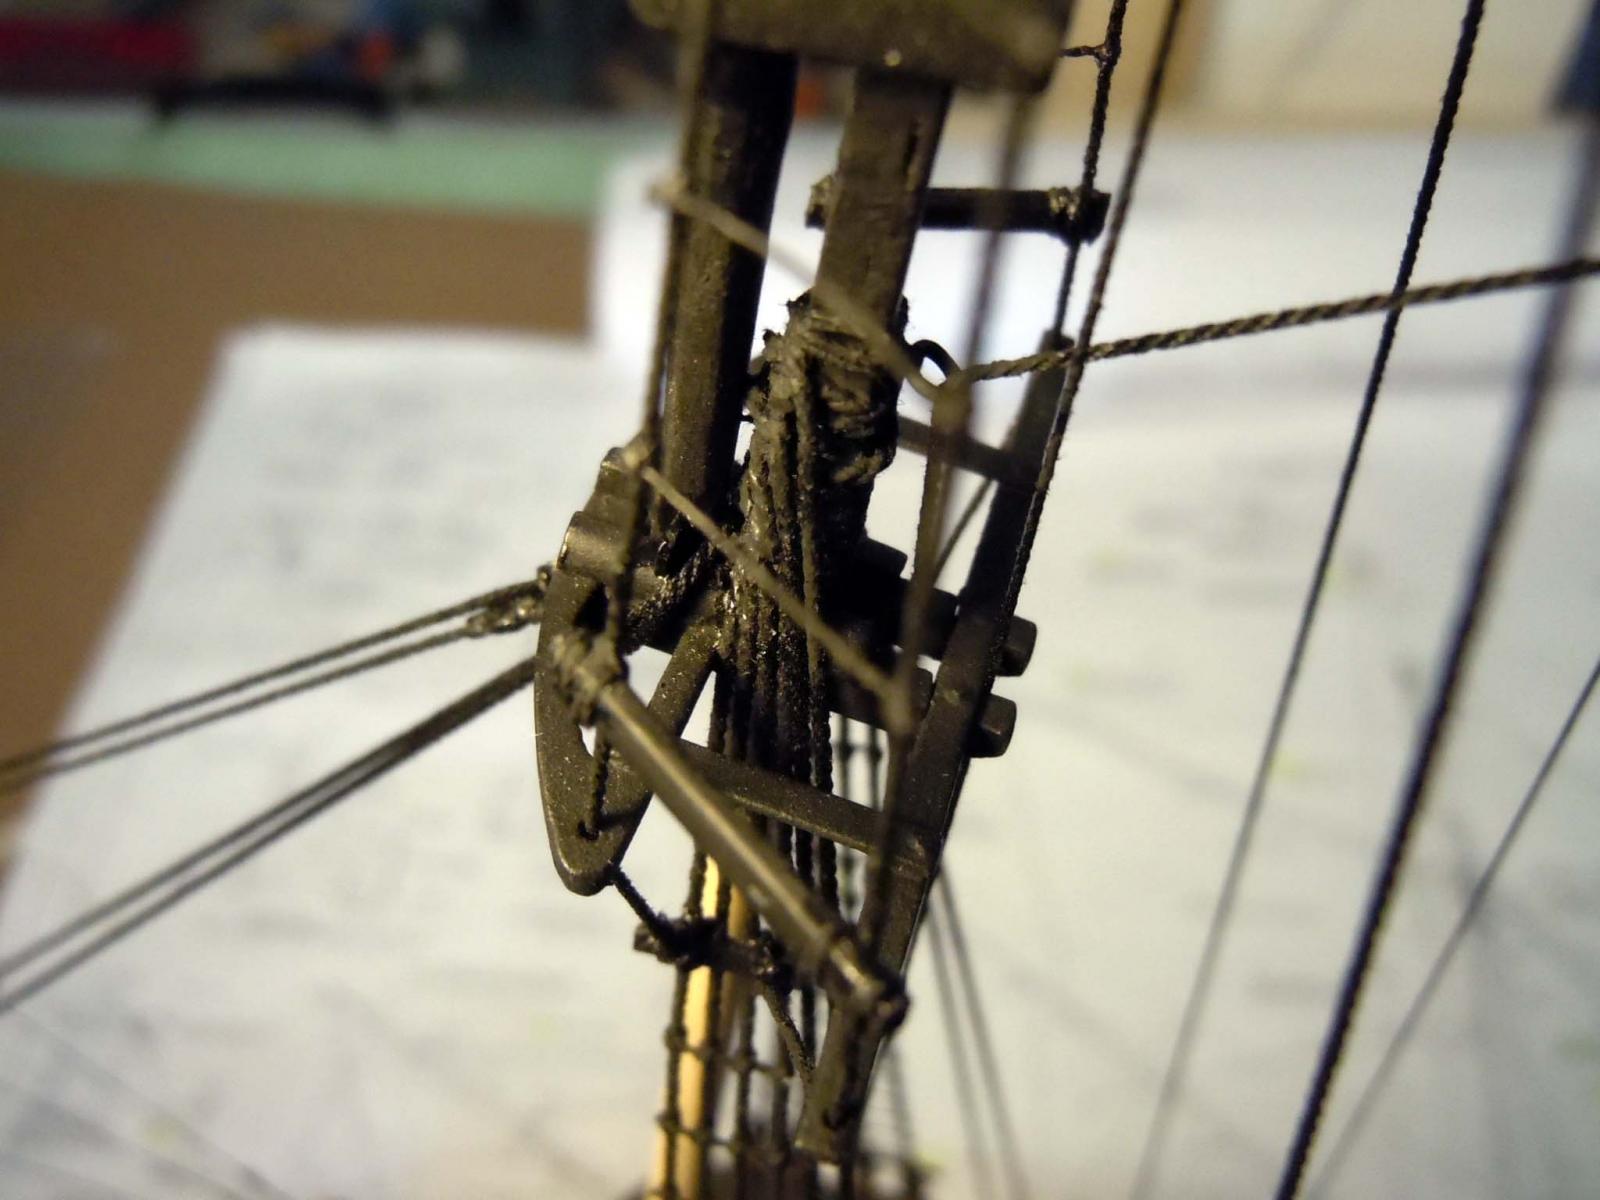
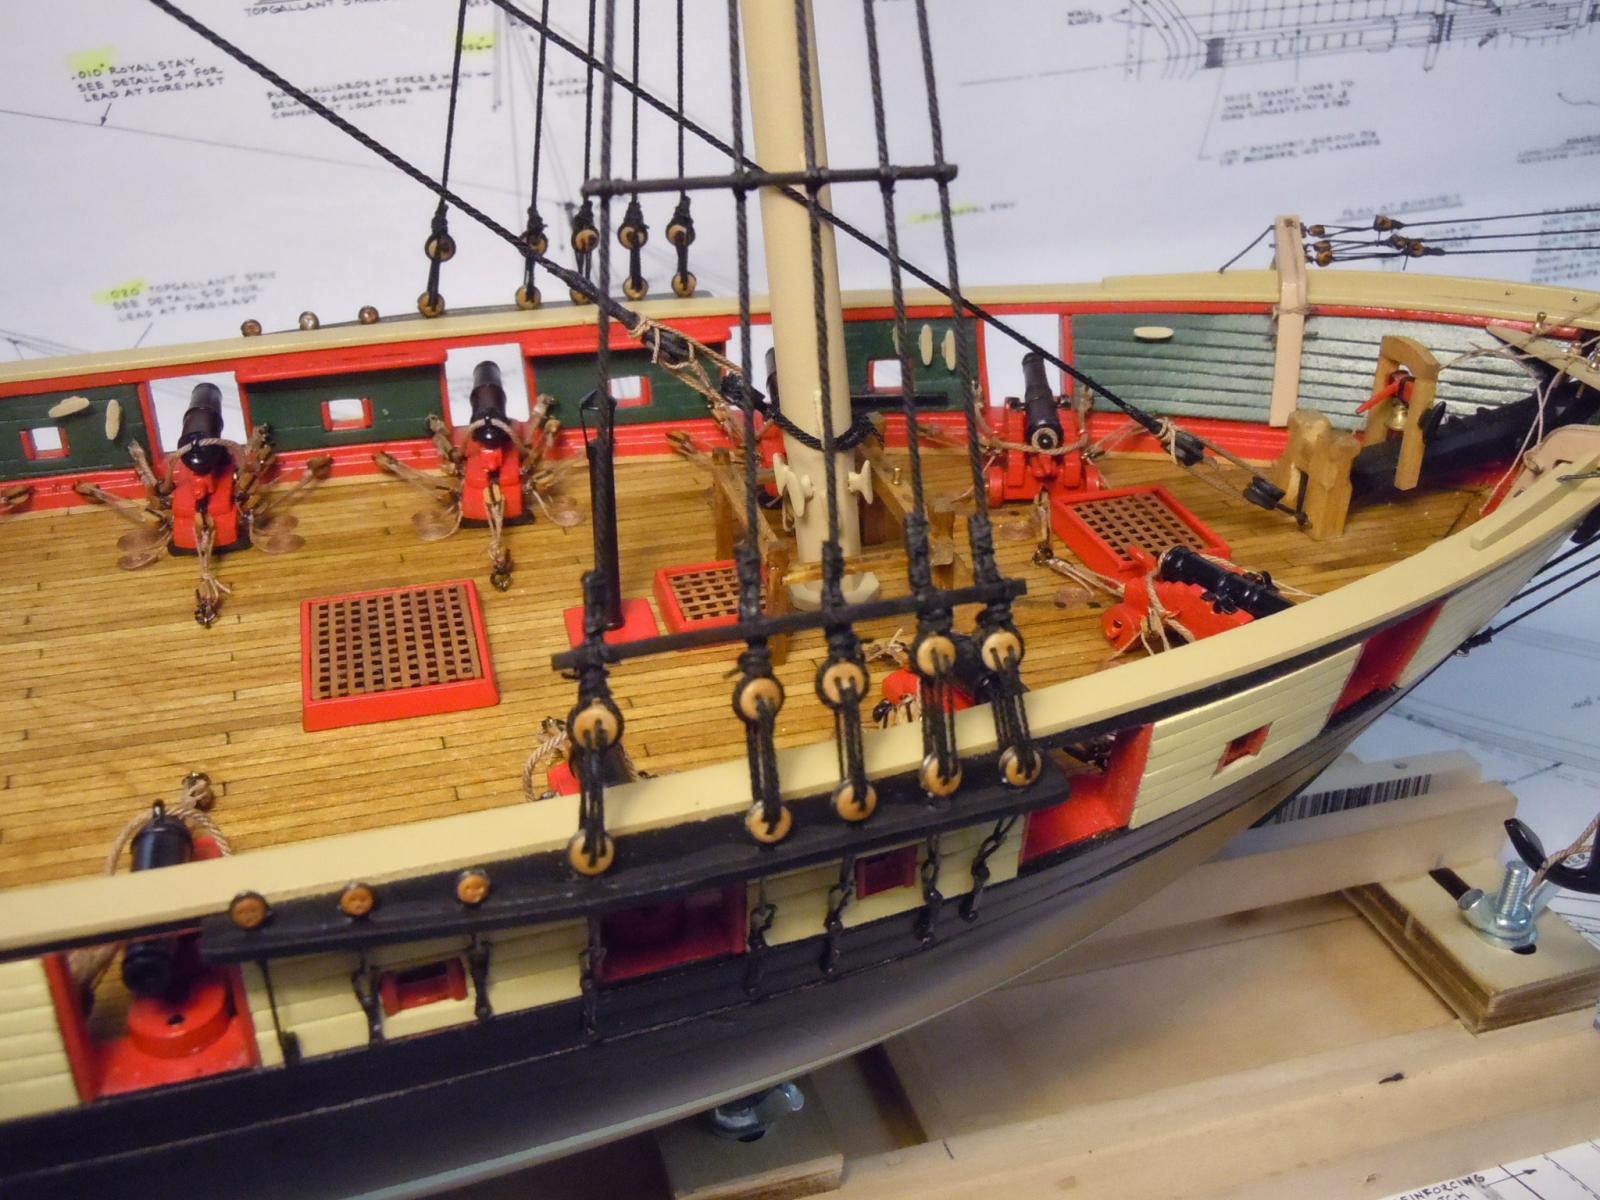
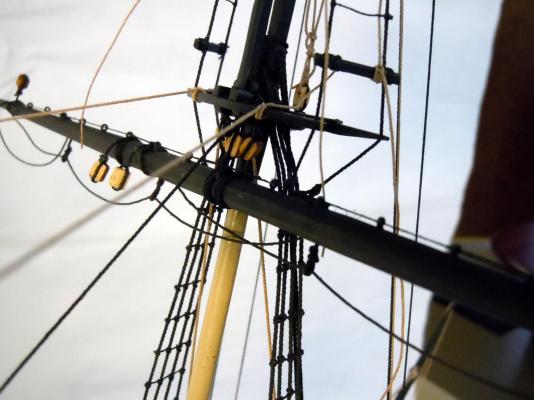
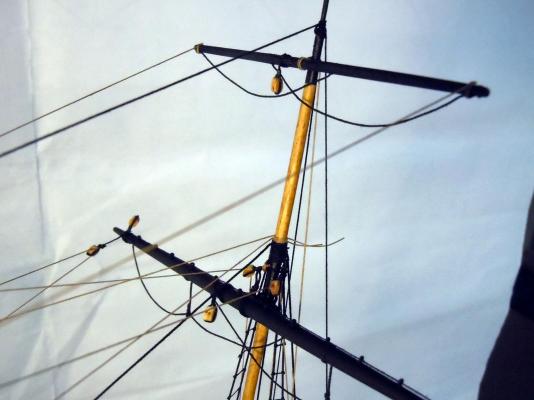
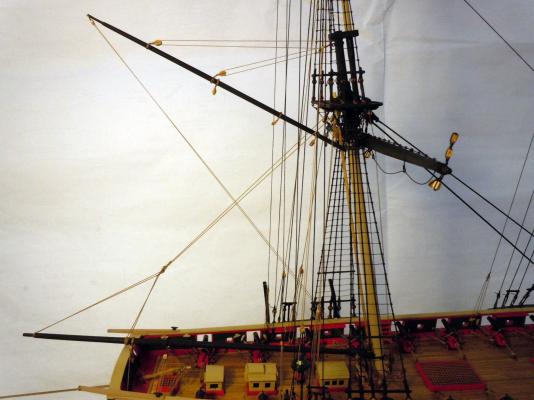
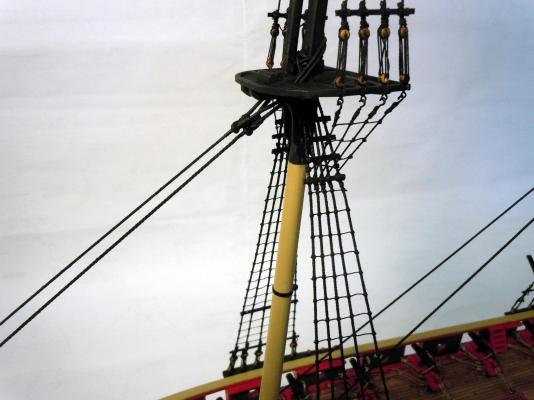
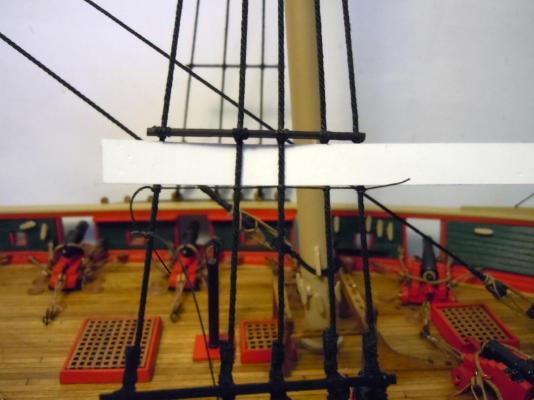
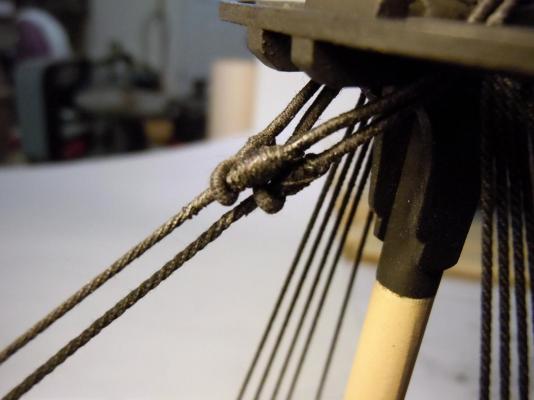
Completed installation of the foremast and main mast stay rigging which required a bit of serving of the lines using thread and my lathe setup. Here are the anchor points based upon the plans and replica ship references. For the lower stays I used .045" line and the upper stays were .035". I thought it best to rig the mast stays first in case there was any movement of the masts that would impact the shrouds so now the ratlines can be added along with the fairlead bars. The bars are lashed to the shrouds and here is an image of the first set so now I get to practice more lashing. Now to more lashing.


- 440 replies
-
- 9
-
-
- niagara
- model shipways
- (and 1 more)
-
Brian, you are safe with your choice; the average human eye can only distinguish down to .010" difference between objects.
- 831 replies
-
- 4
-
-
- Armed Virginia Sloop
- Model Shipways
- (and 1 more)
-
Brian, Great looking start on your rigging very crisp and clean!
- 831 replies
-
- 4
-
-
- Armed Virginia Sloop
- Model Shipways
- (and 1 more)
-
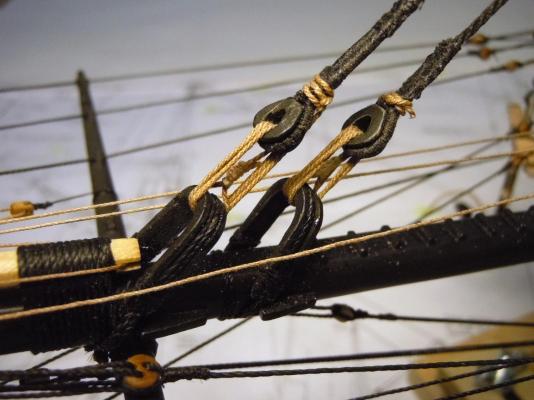
Dale, nice horizontal loom, in the early days of cars electrical wiring harnesses were bundled using a similar concept. I just attached the two foremast stays and started on the main mast stays. Here are images of them with detail images of the ends on how they are attached. Alas my mice are more basic than the one shown in the machine detail. Now back to wrapping rope.
- 440 replies
-
- 11
-
-
- niagara
- model shipways
- (and 1 more)
-
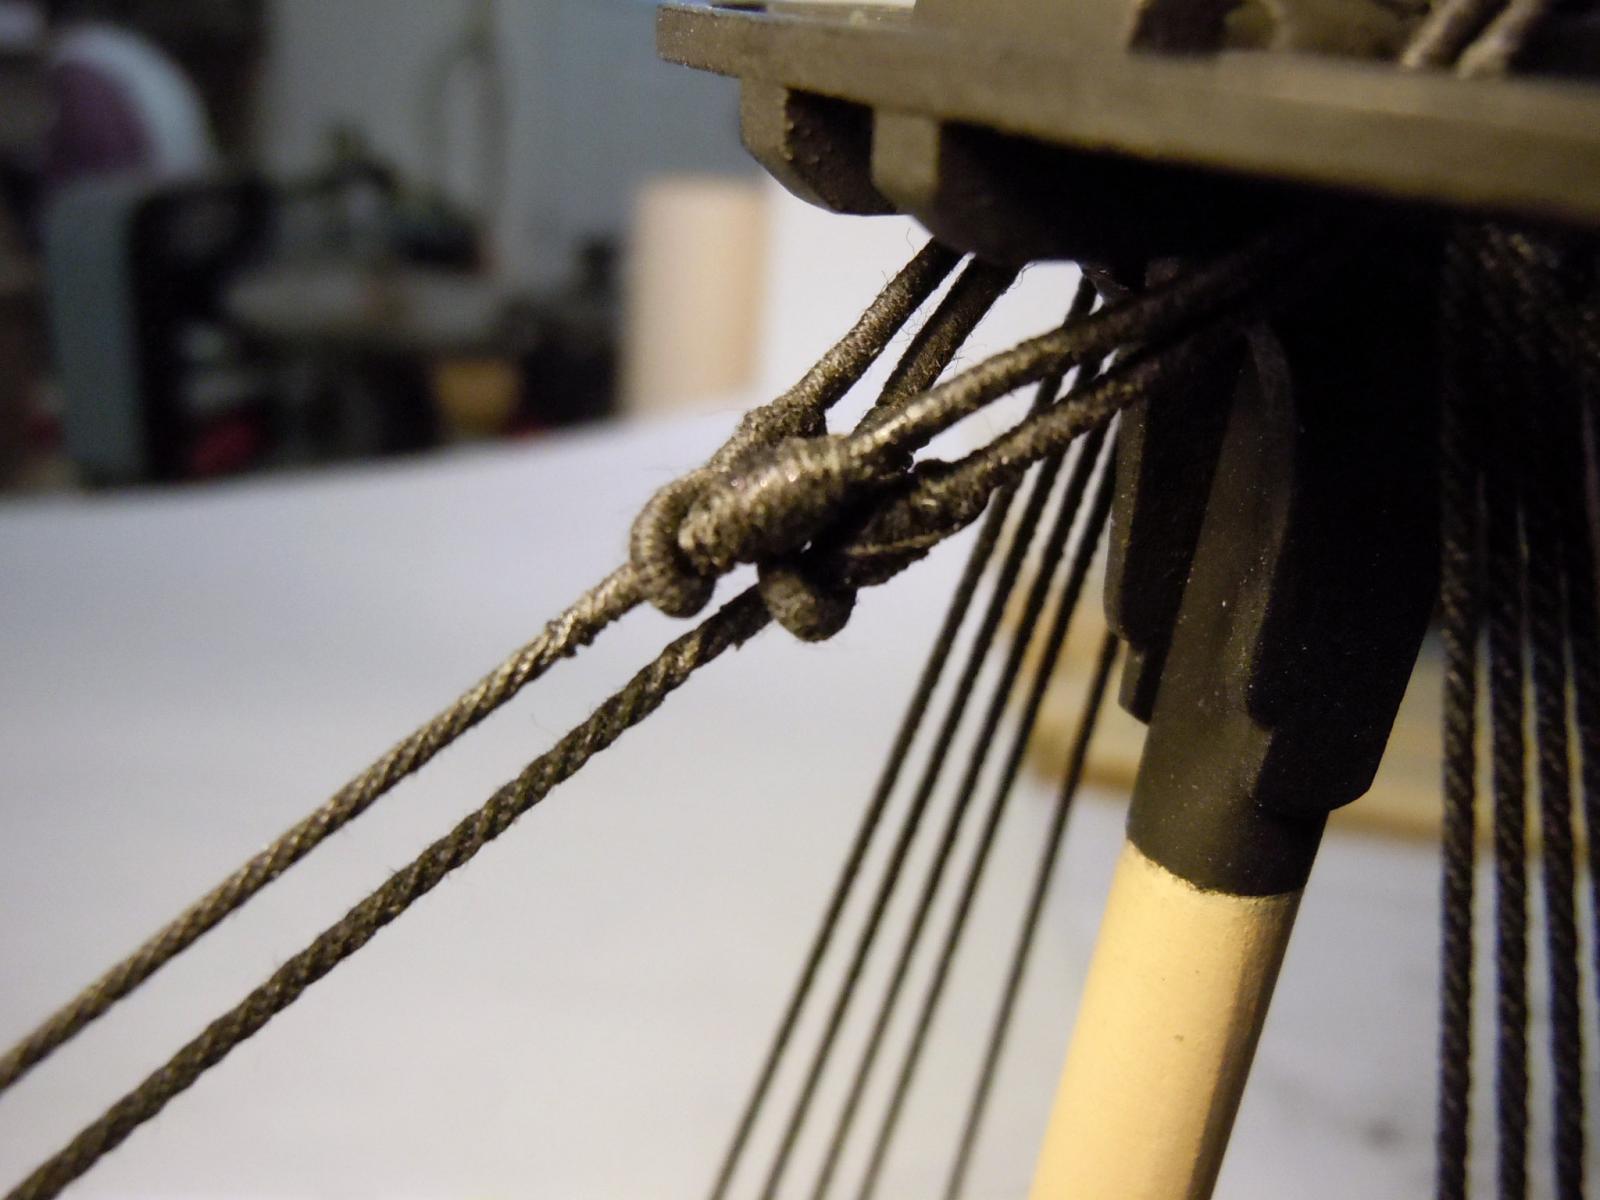
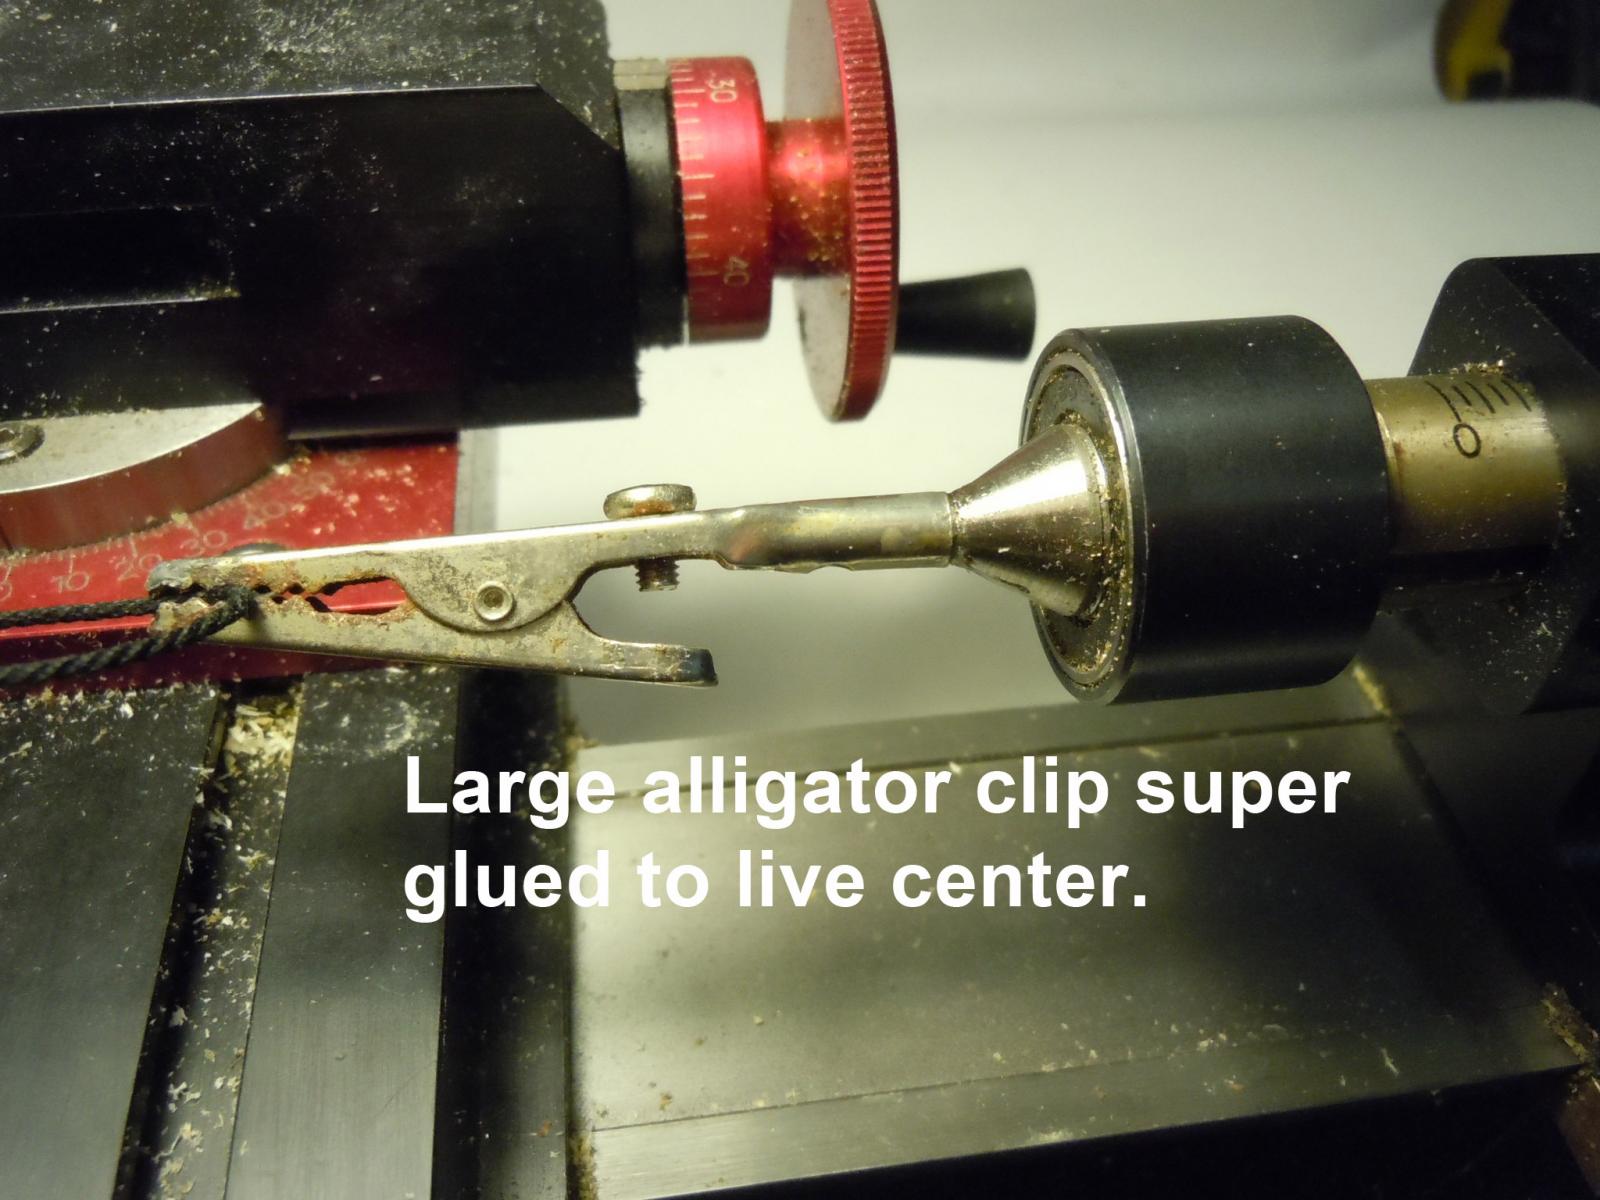
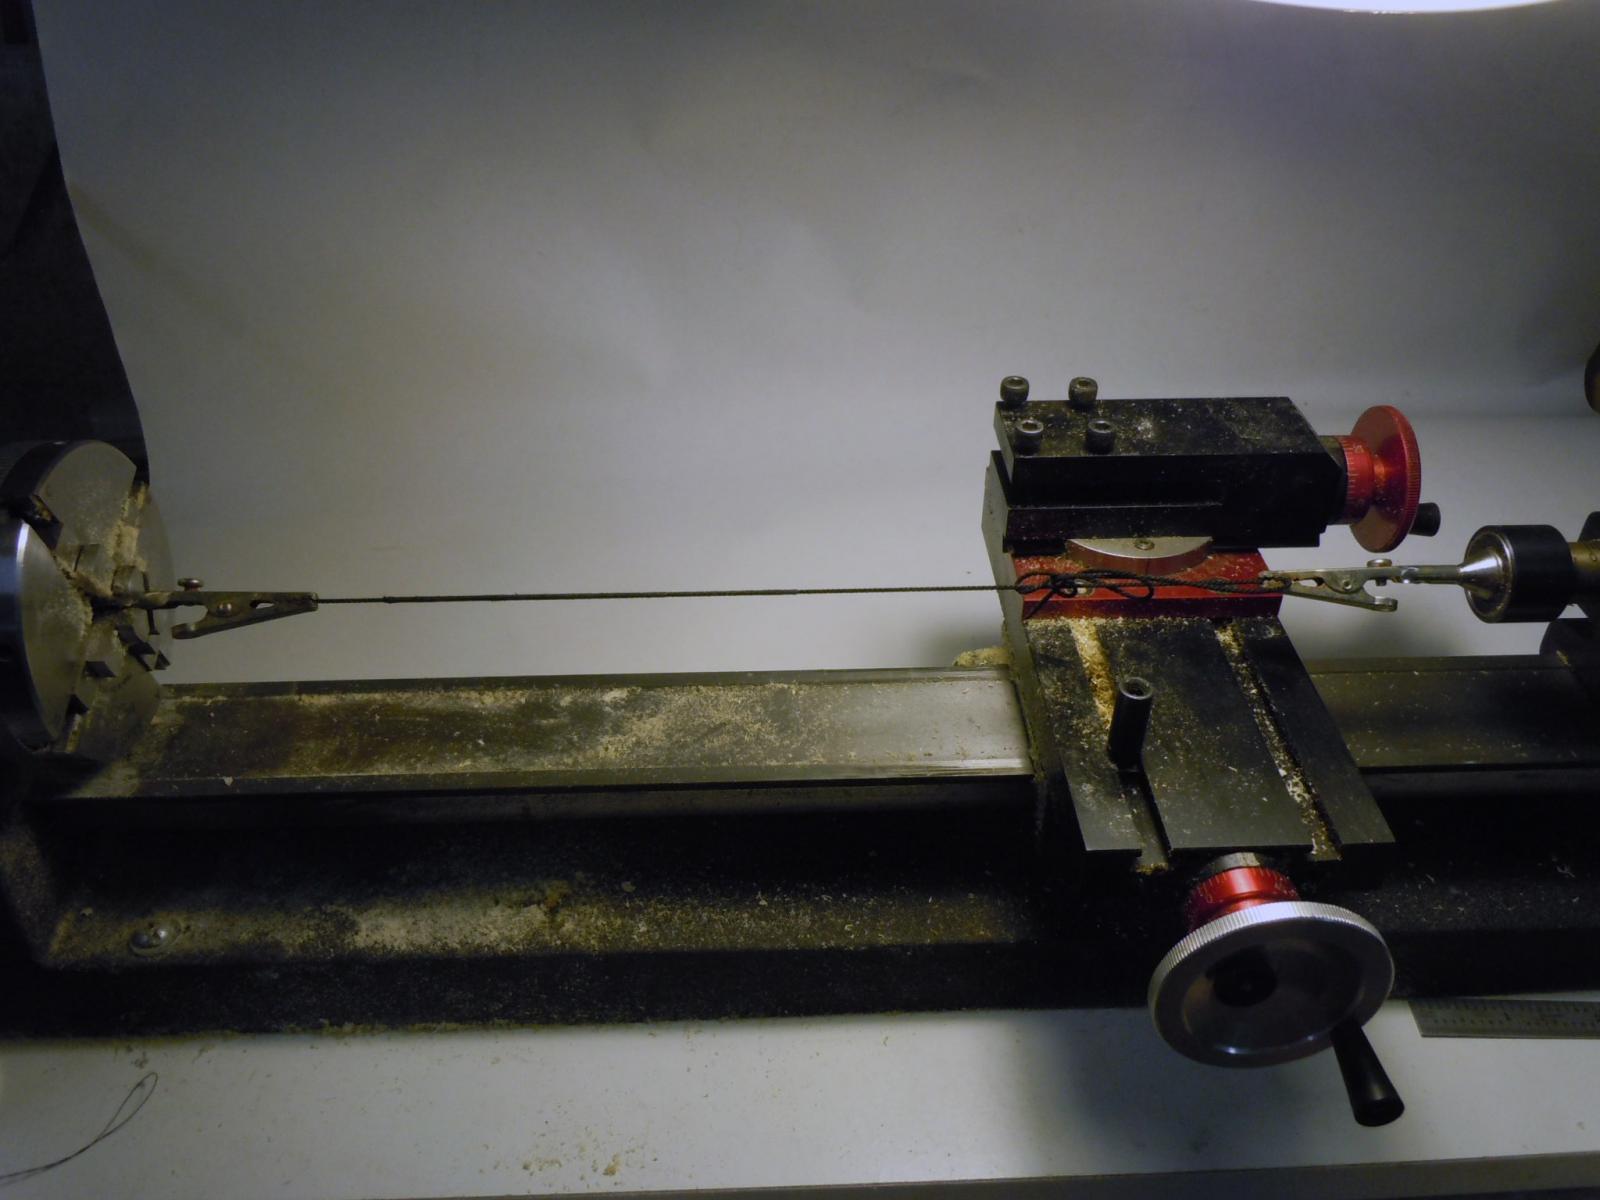
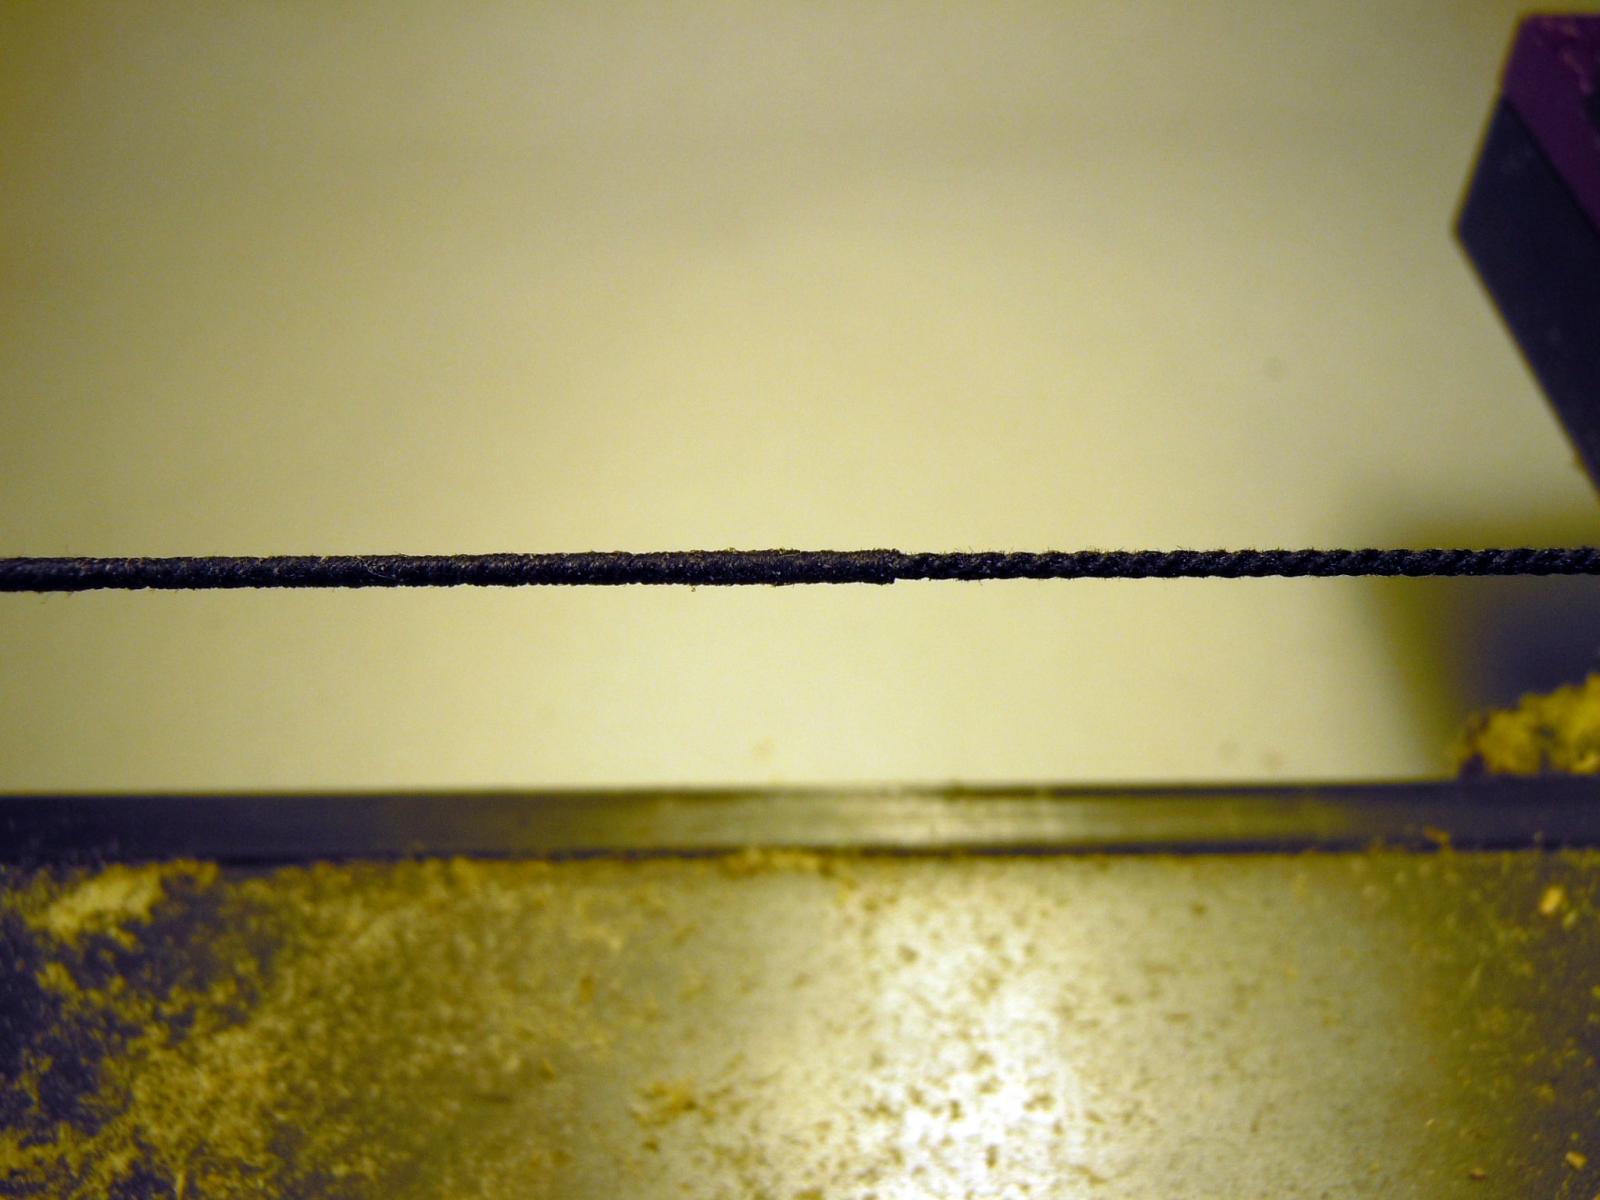
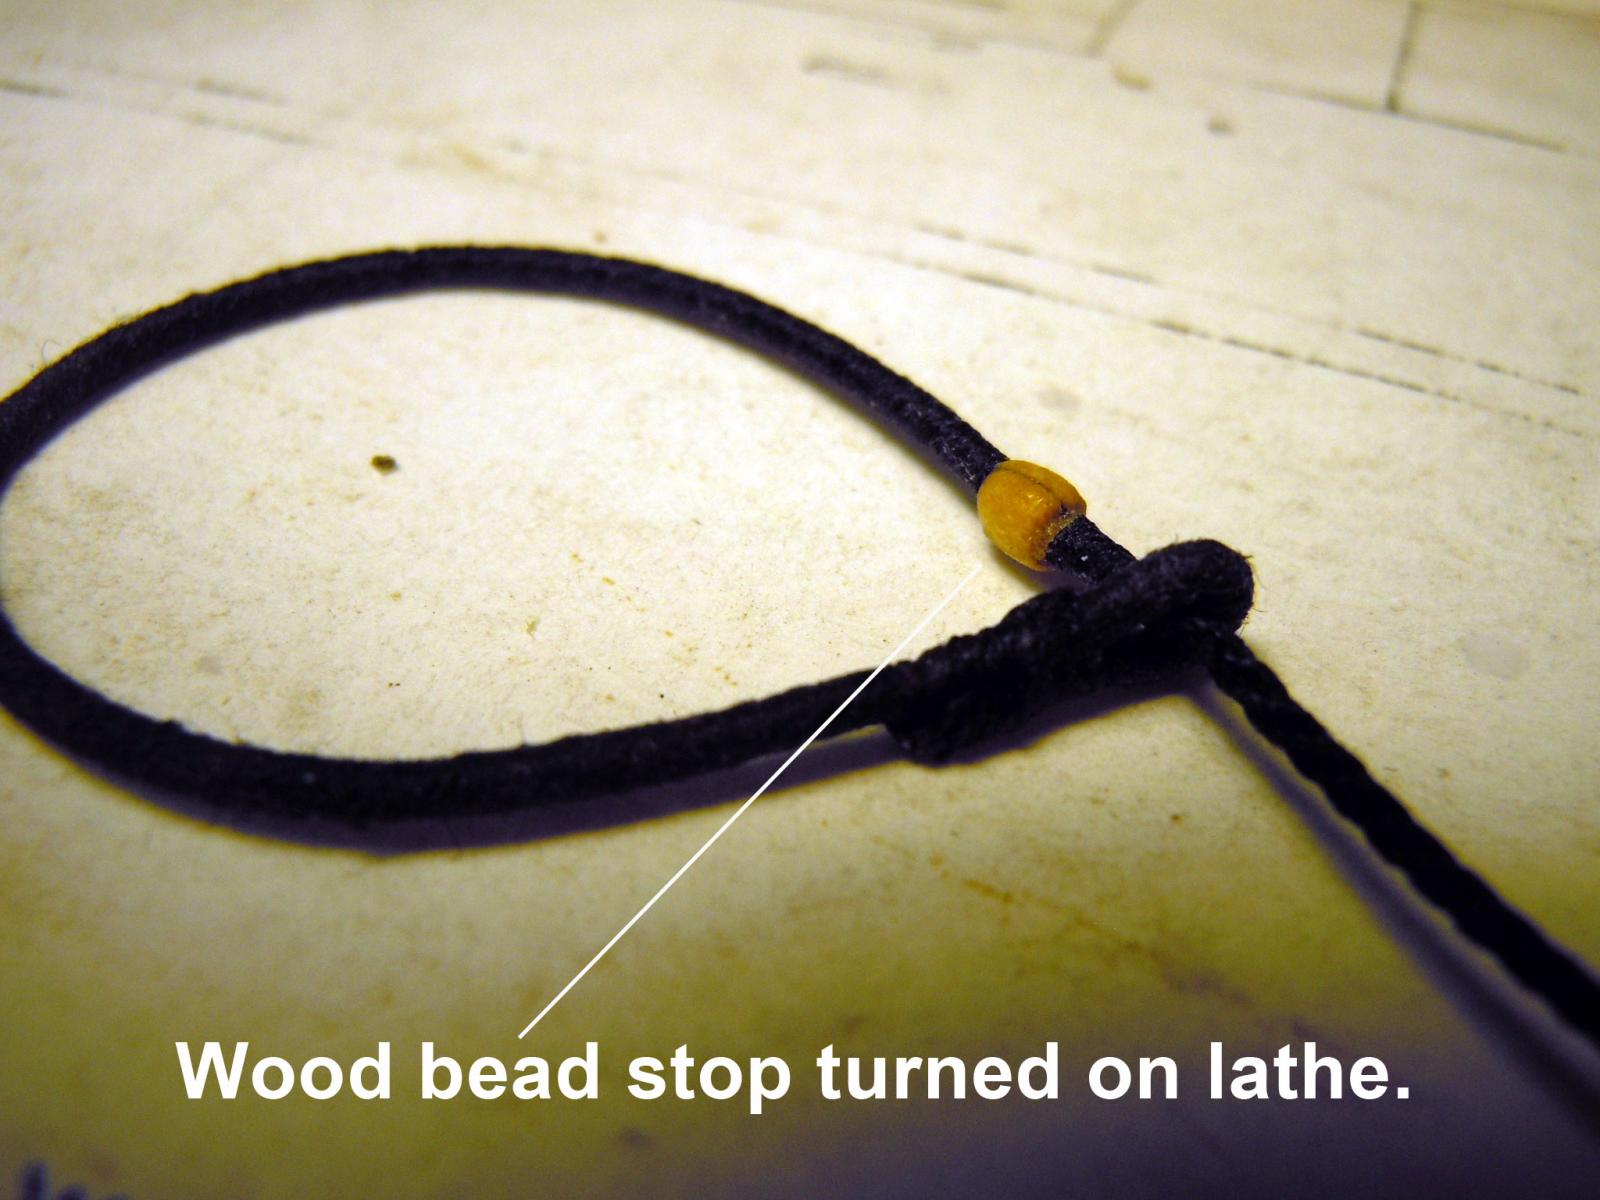
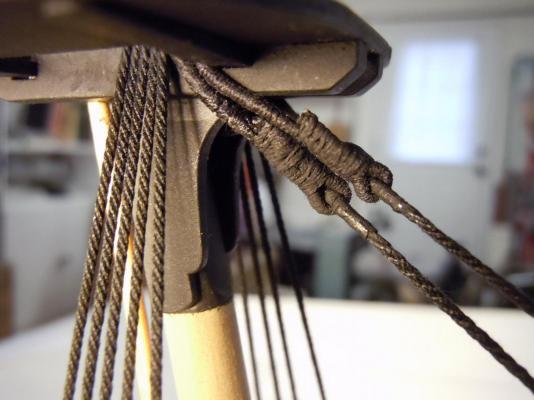
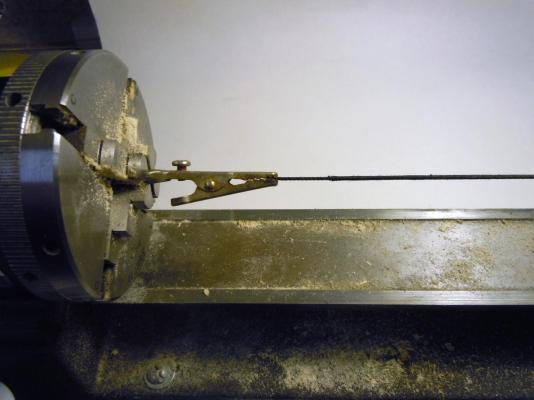
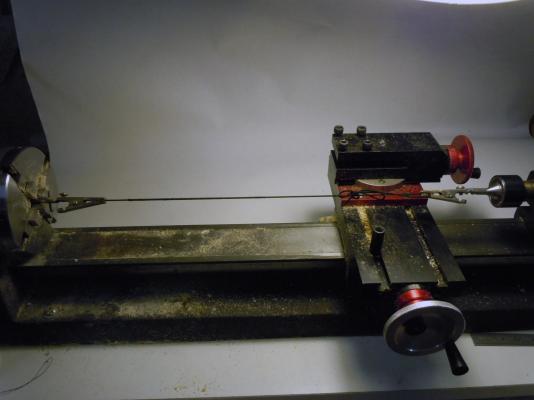
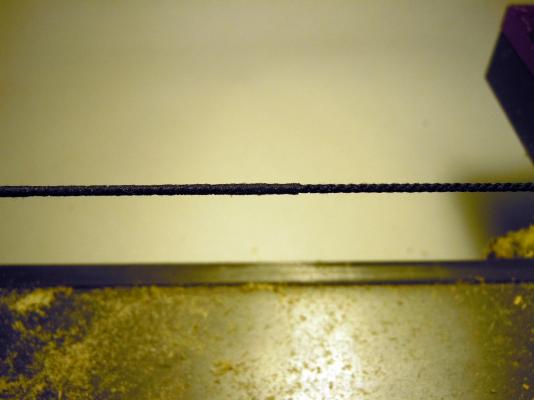
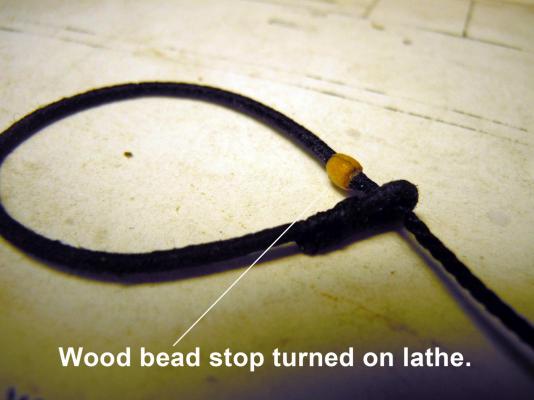
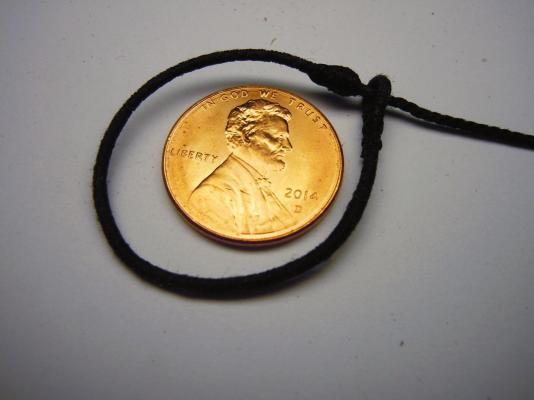
Dale great image of the mouse being made. What scale is that? I just finished making my mouse for the lower stay for the foremast. I also wrapped the .045" line with thread to replicate the original line. Here are images of the setup I used to wrap the line and the mouse with my Sherline lathe. I chucked a large alligator clip in the jaw and then super glued a clip to the live center to enable the line to turn while being wrapped as shown below. The thread was then attached to the jaw end of the rope and with a little tension on the rope with the thread I hand turned the lathe jaw which offered better control of the thread and wrapped about a 1/4" at a time and pushed the wrapped thread towards the starting end. Pushing it along the rope compressed it to a more uniform finish. The length wrapped for the loop end was 4 inches which included the loop and then painted with 50/50 mix of white glue and water. One caution is to check which way the rope was turned and wrap the opposite direction so as not to unwrap the rope when pressure is built up on the live center. Here is a detail of where the wrapped thread ends on the rope. When finished I checked the length of the rope needed and calculated that the bowsprit end needed 2 inches wrapped. Which was done the same way. Next the wood mouse was turned on the lathe; split down the middle and glued in place on the stay. The mouse was then wrapped using the lathe setup. Now there are three more mast stays to do.

- 440 replies
-
- 8
-
-
- niagara
- model shipways
- (and 1 more)