xken
-
Posts
841 -
Joined
-
Last visited
Content Type
Profiles
Forums
Gallery
Events
Everything posted by xken
-
 George, thanks for the link; great pictures. I have saved some already. Brian those books look great. I have the Brig to finish and then next the Constitution by MS; which of these two books would be the best to get?
- 440 replies
-
- 2
-

-
- niagara
- model shipways
- (and 1 more)
-
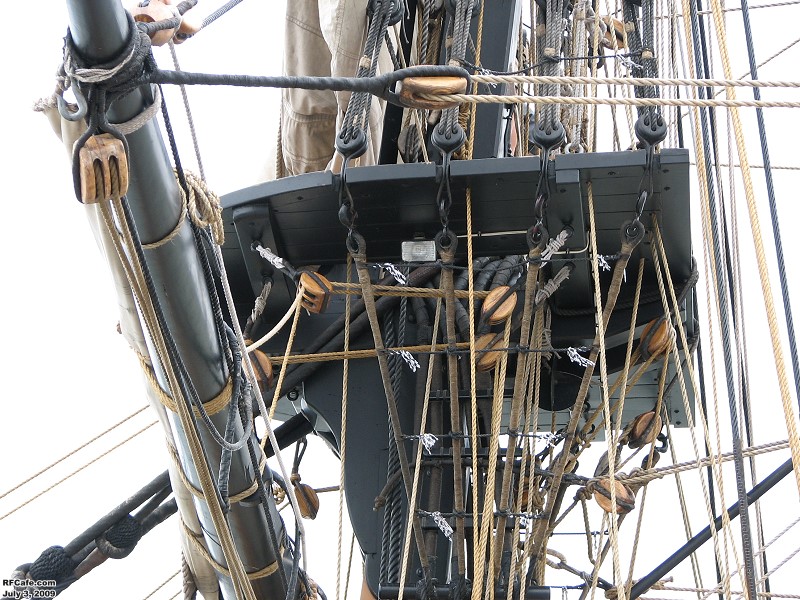
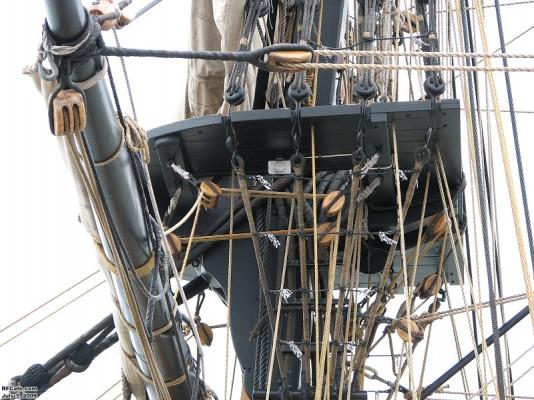
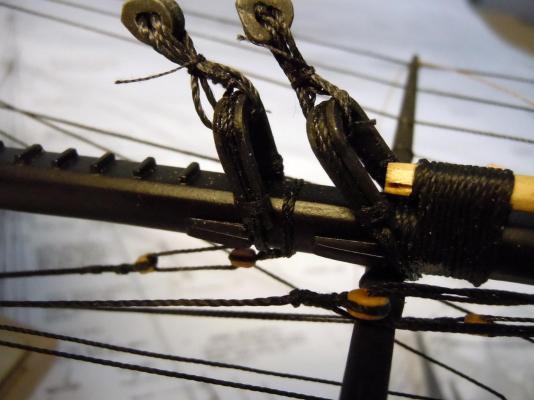
Brian, George thanks for the feedback. They are in fact belayed to the shroud which is the way I did it. I am moving onto the mast stays and here is a picture of where they attach at the mast. What is interesting is the variety of line colors from tan, brown, dark brown and again the darker faded gray in the blocks of in the top of the photo. Again, these kind of look like what George has described. I imagine these lines once rigged do not move much but are only tightened after stretching; hence the treatment described by George. It looks like the mast stay is fed back through a loop in the end with a stop in the line and then on down to the bowsprit in the case of the foremast. If anyone has a better picture or drawing of this detail it would be appreciated. Again thanks for the feedback and lessons learned. For now they will stay black.
- 440 replies
-
- 2
-
-
- niagara
- model shipways
- (and 1 more)
-
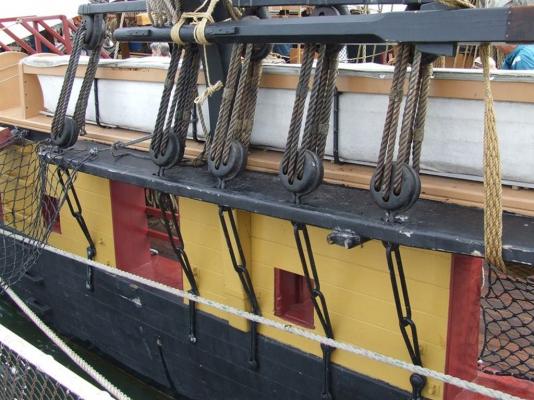
Here are the pictures I used for reference and I am guessing they were black to start with and faded shades of gray. I thought if they were brown they would have faded to a lighter tan color. Like you I struggled and even purchased brown line to do them then found these photos. If gray was available I would have ordered it to replace the brown. This was my reasoning. I only assume the replica may have done it correctly. Perhaps those with more knowledge could advise what the practice of the time period was.

- 440 replies
-
- 3
-
-
- niagara
- model shipways
- (and 1 more)
-
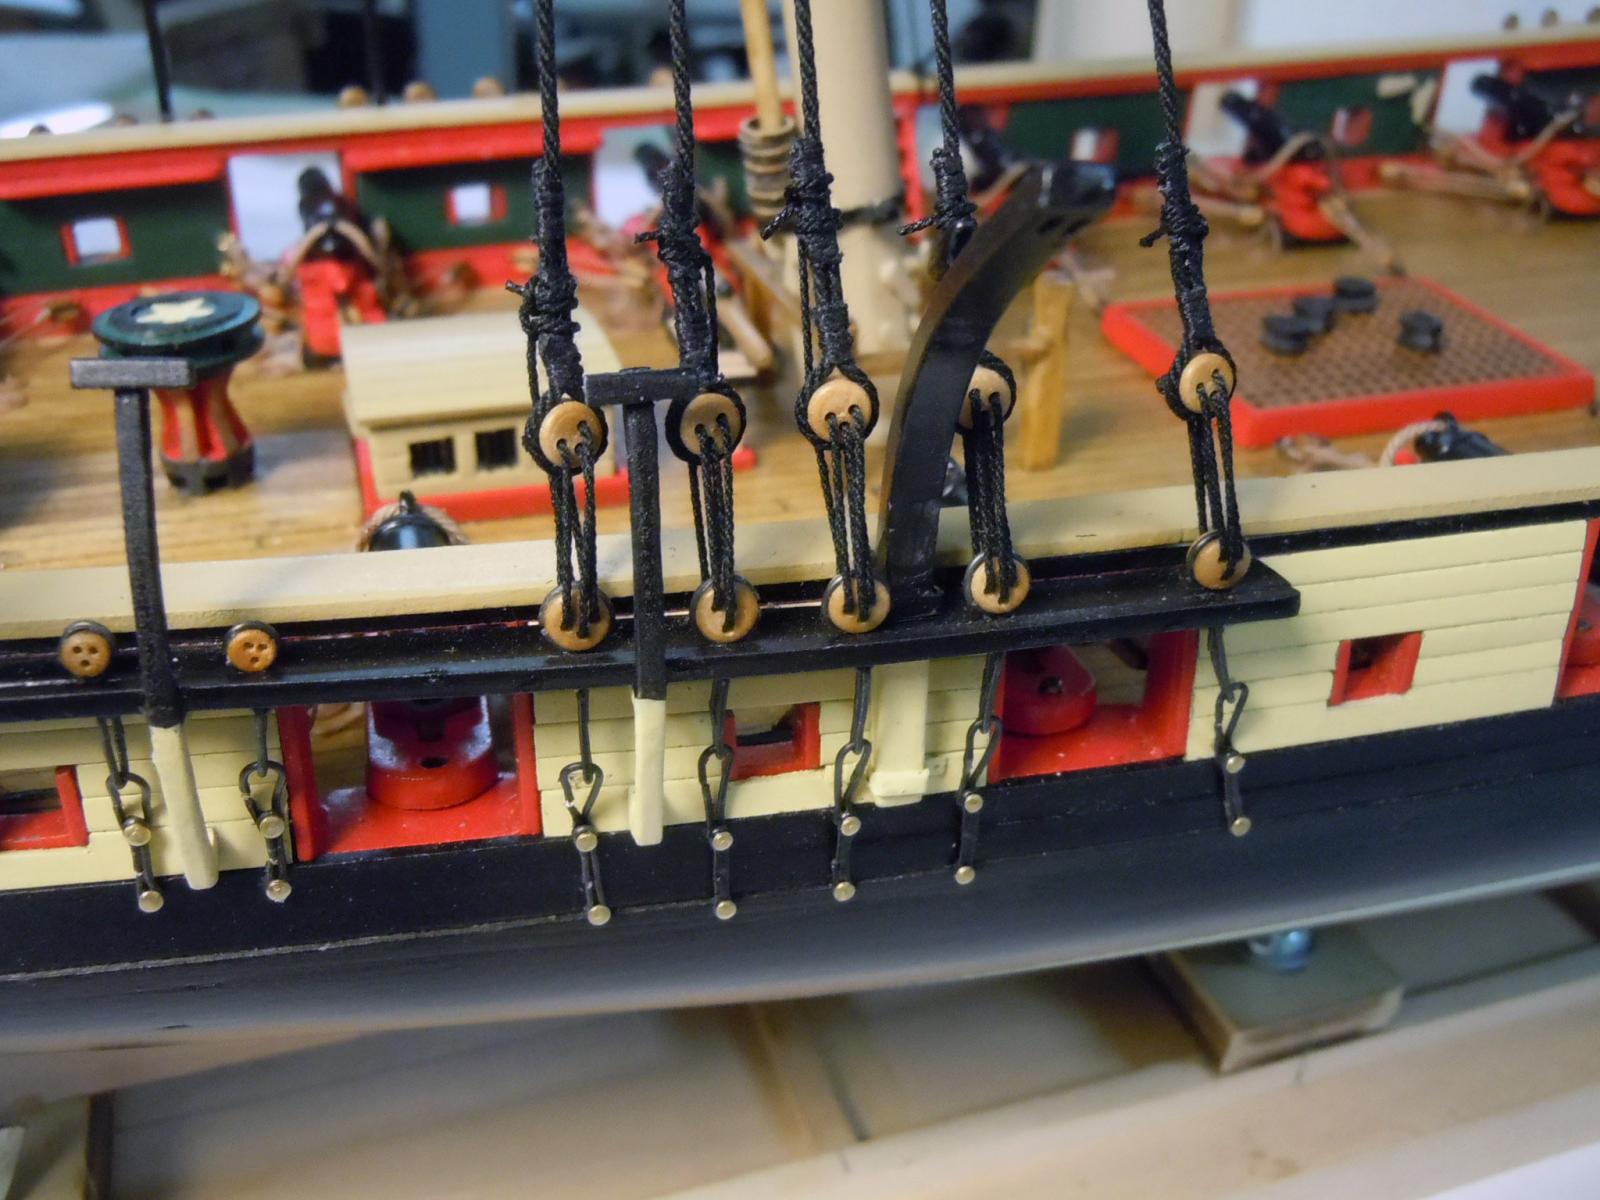
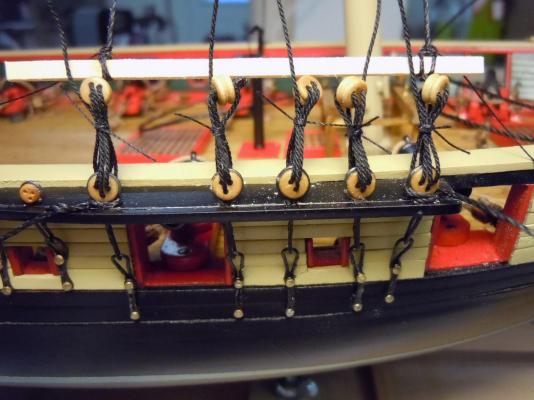
All the chain plates are in place and now adding the strops. I have managed to work around the davits without incident. Once all are in place I think I will add the mast stays before adding the ratlines. In checking around I have seen builds with the tackle lines brown; but the replica ship has grayed to charcoal lines which I am guessing were once black and have weathered so I elected to do them in black. Chuck's rope is a pleasure to work with compared to the kit supplied rope. I did run across a couple of references that stated to soak the kit ropes in hot water; which I may try sometime. Here is an in progress of the aft lines. Now to continue on with the rest.

- 440 replies
-
- 4
-
-
- niagara
- model shipways
- (and 1 more)
-
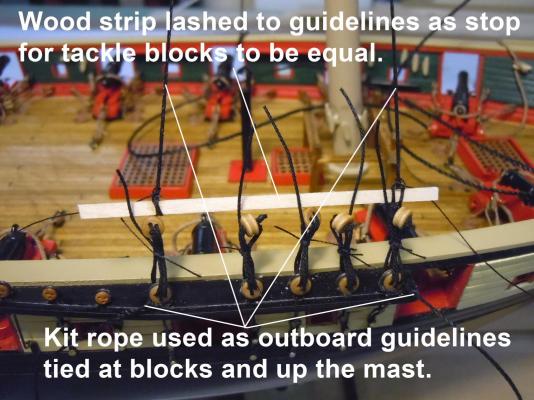
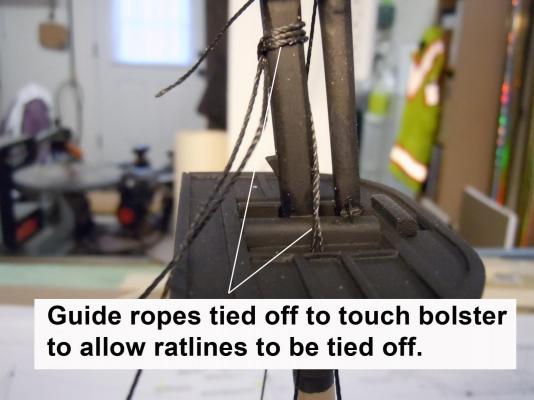
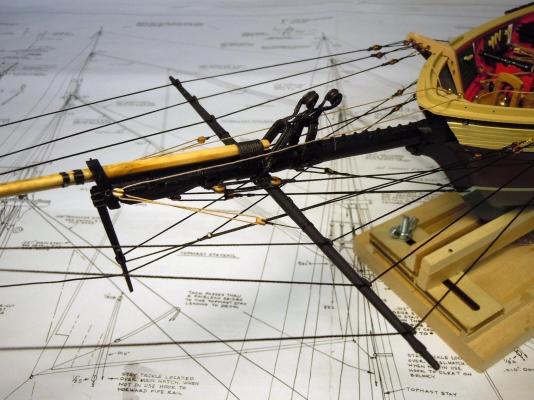
Chuck's rope order came in the mail today. We spent the weekend dog sitting our daughter's dogs at her house which gave me a chance to think about the ratlines and how to approach them. First I added two outboard guidelines using kit supplied rope rather than Chuck's rope. These were clove hitched to the bottom of the two outboard blocks making sure the holes in the blocks were clear; they were then tied off high on the mast touching the bolster to provide clearance for the ratlines to be tied. I also added a line to the port side as a counter tension line to keep the mast straight. I then lashed a wood strip to the guidelines the height of the tackle blocks needed so I had a reference point when rigging them. Here are a couple of pictures of what I did. This shows the first set in place. The three stays on the left with the smaller blacks will be rigged later. Next to add the lines. Look close and you can see the difference between the kit supplied lines and Chuck's.
- 440 replies
-
- 4
-
-
- niagara
- model shipways
- (and 1 more)
-
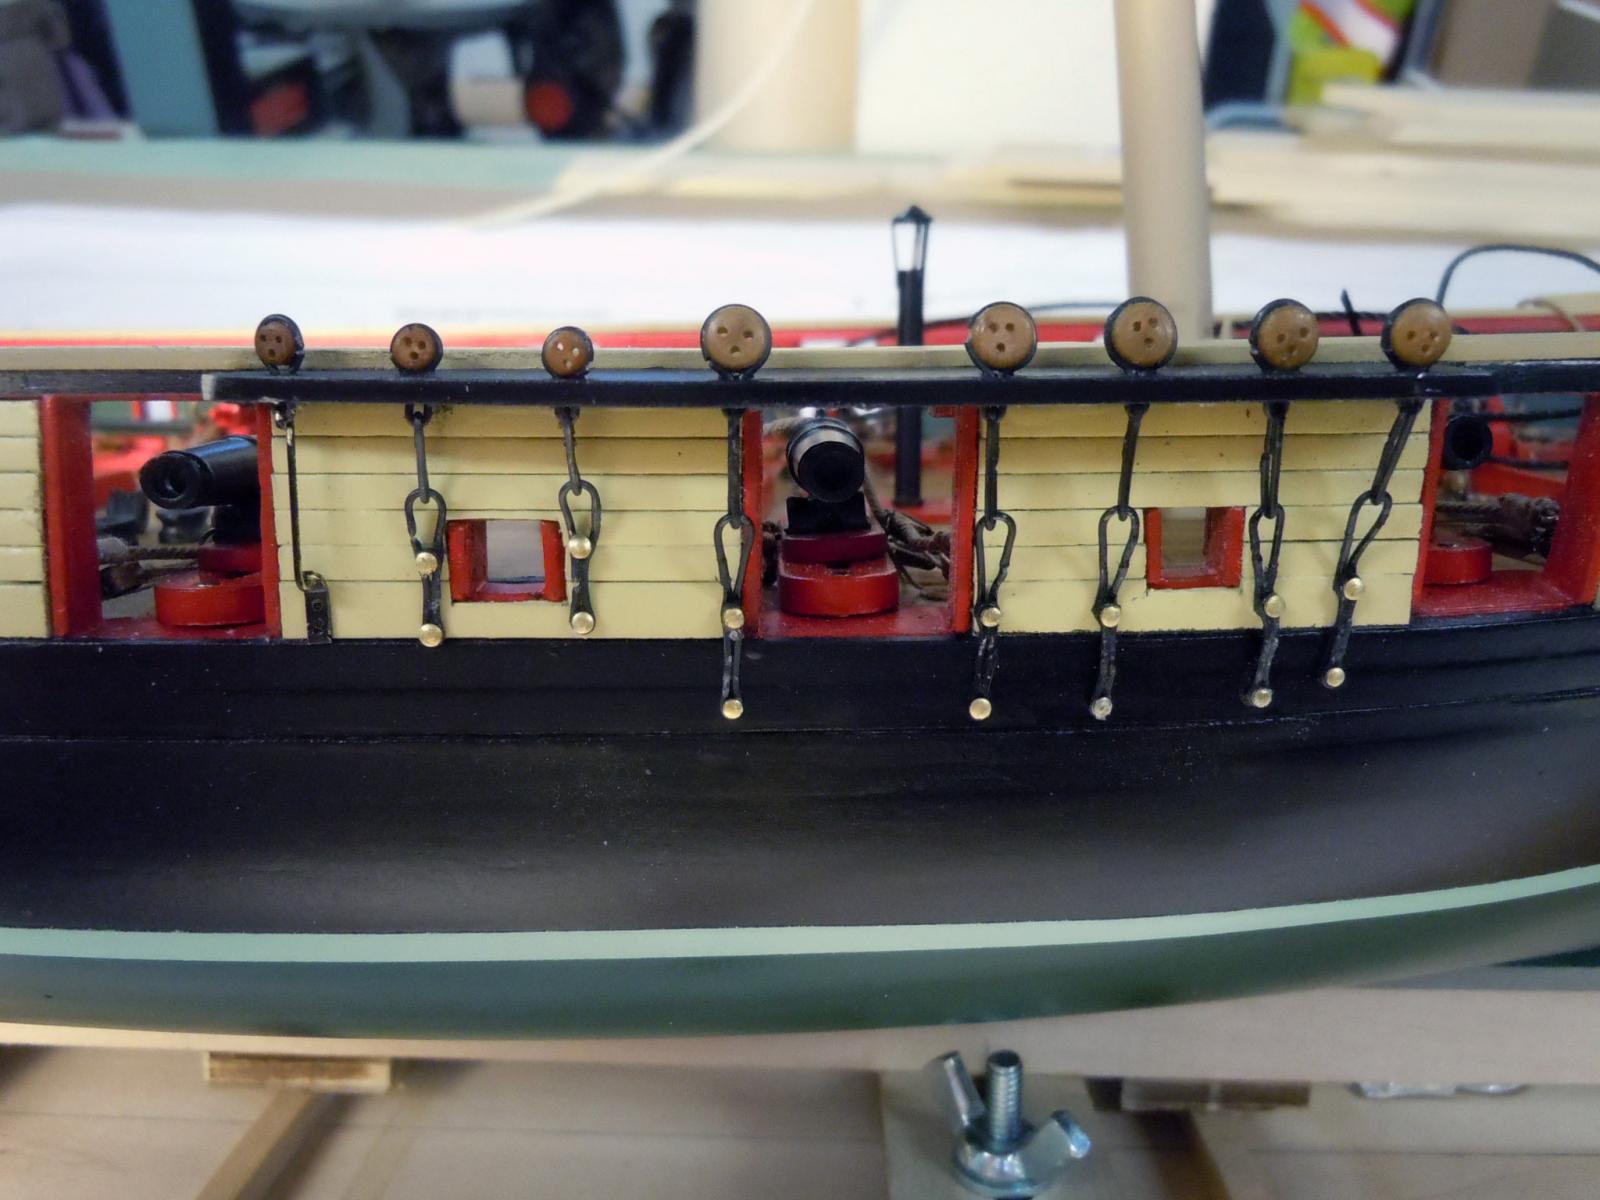
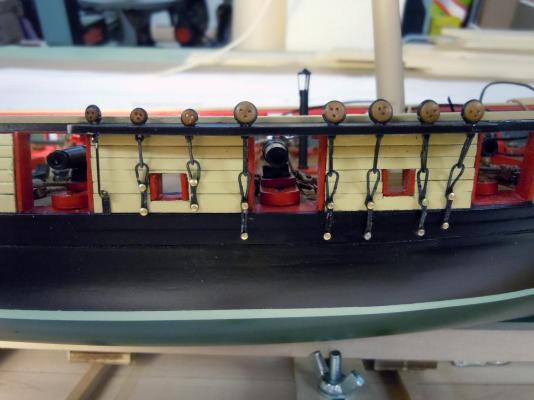
Installed the first set of chainplates on the forward starboard side and thought I would share a picture of them before adjusting and painting them. The carriage bolt heads are #8 pins, some of which came with the kit but not near enough for all positions needed. Fortunately I have a package of 500 from previous model builds. I thought it interesting that some were angled to avoid gun interference. I will be working on the rest until my rope order arrives.
- 440 replies
-
- 5
-
-
- niagara
- model shipways
- (and 1 more)
-
George, thanks again for the links; very interesting reading.
- 440 replies
-
- 1
-
-
- niagara
- model shipways
- (and 1 more)
-
George, thanks and yes I am leaning to doing them in place with the masts in place as well. I am also thinking of soaking the main vertical lines once rigged to the mast with 50/50 white glue and water to stiffen them and hopefully hold them straight. More feedback on how to do these would be appreciated or a link to others efforts on how they did them.
- 440 replies
-
- 2
-
-
- niagara
- model shipways
- (and 1 more)
-
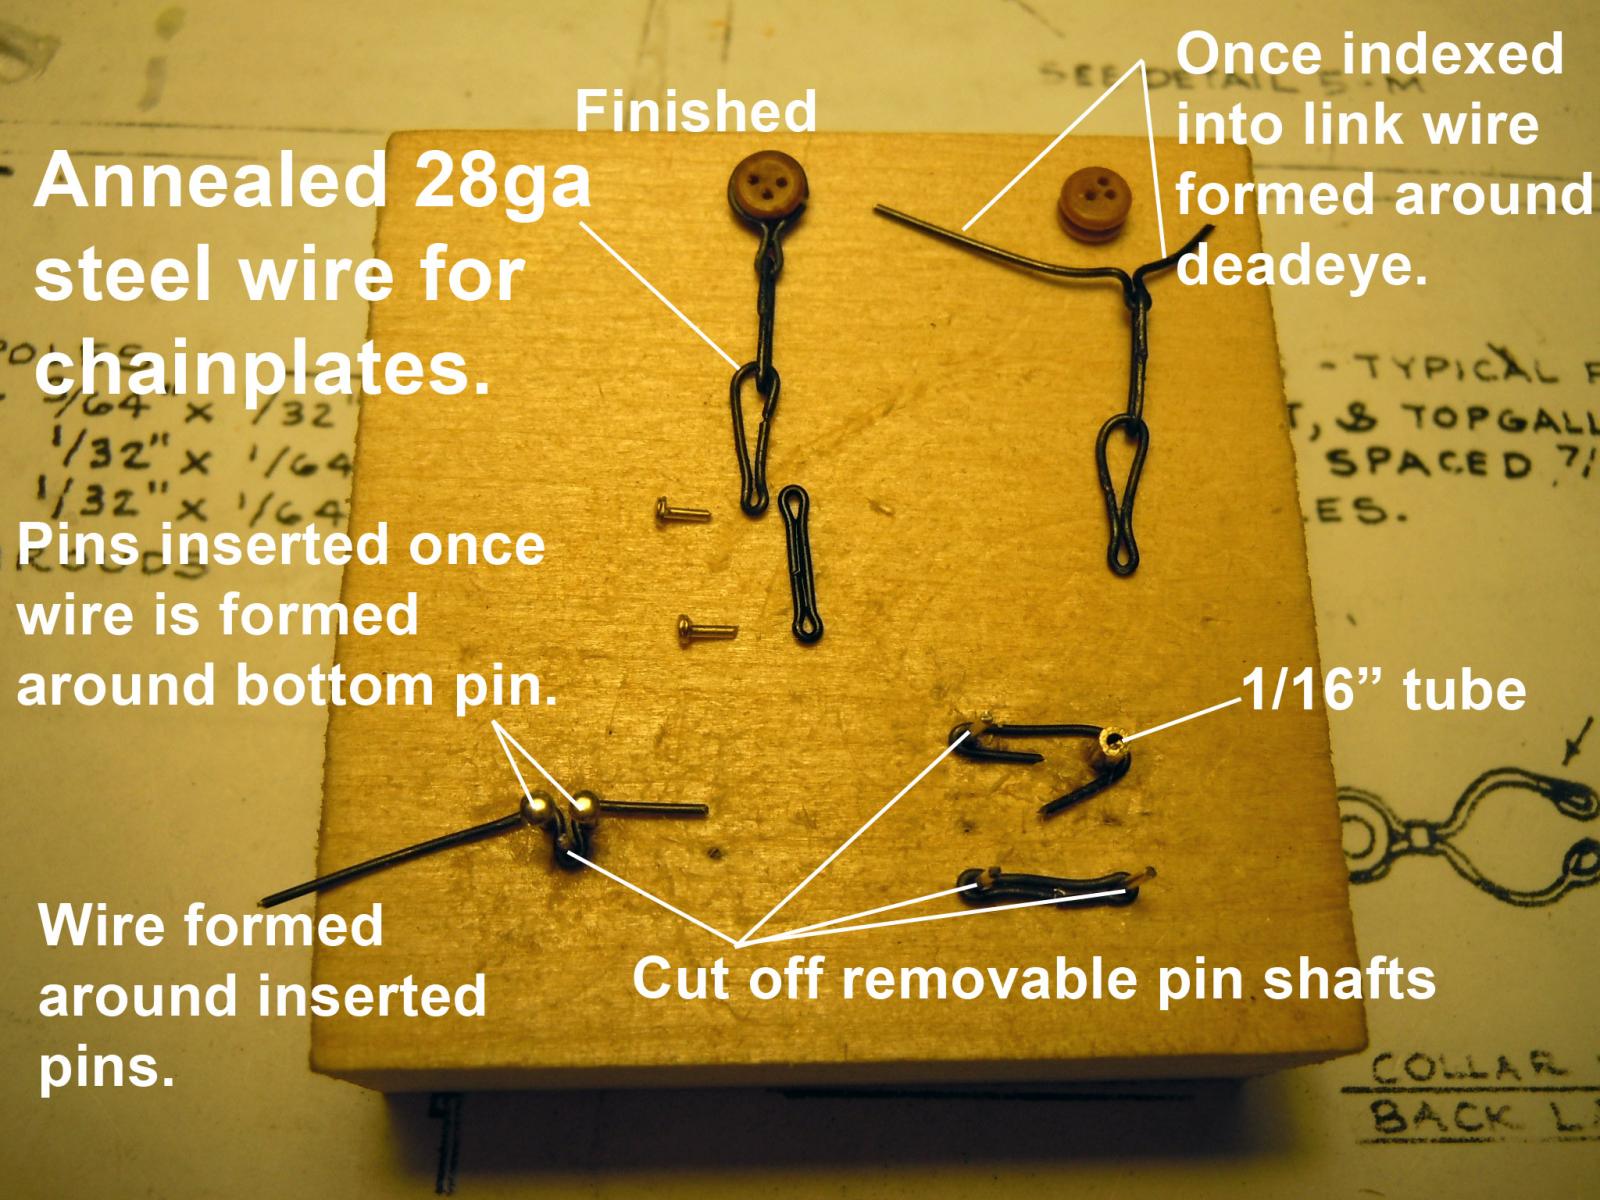
David, thanks for your reassuring comment about the anchors. Now I am in the process of fabricating the chainplates, the large ones are completed and I am moving onto the smaller ones. Here are the fixtures used to form the various parts. All the pins are removable to allow forming of adjacent parts as needed. Again slow tedious fabricating of the smaller parts. These will then be added to the hull once all the sizes are made. I have placed a large rope order with Chuck and am waiting for it to arrive; hopefully Monday or Tuesday. In the meantime I will finish up the rest of the chainplates and affix them to the hull and decide which way is easier to rig the climbing lines.

- 440 replies
-
- 5
-
-
- niagara
- model shipways
- (and 1 more)
-
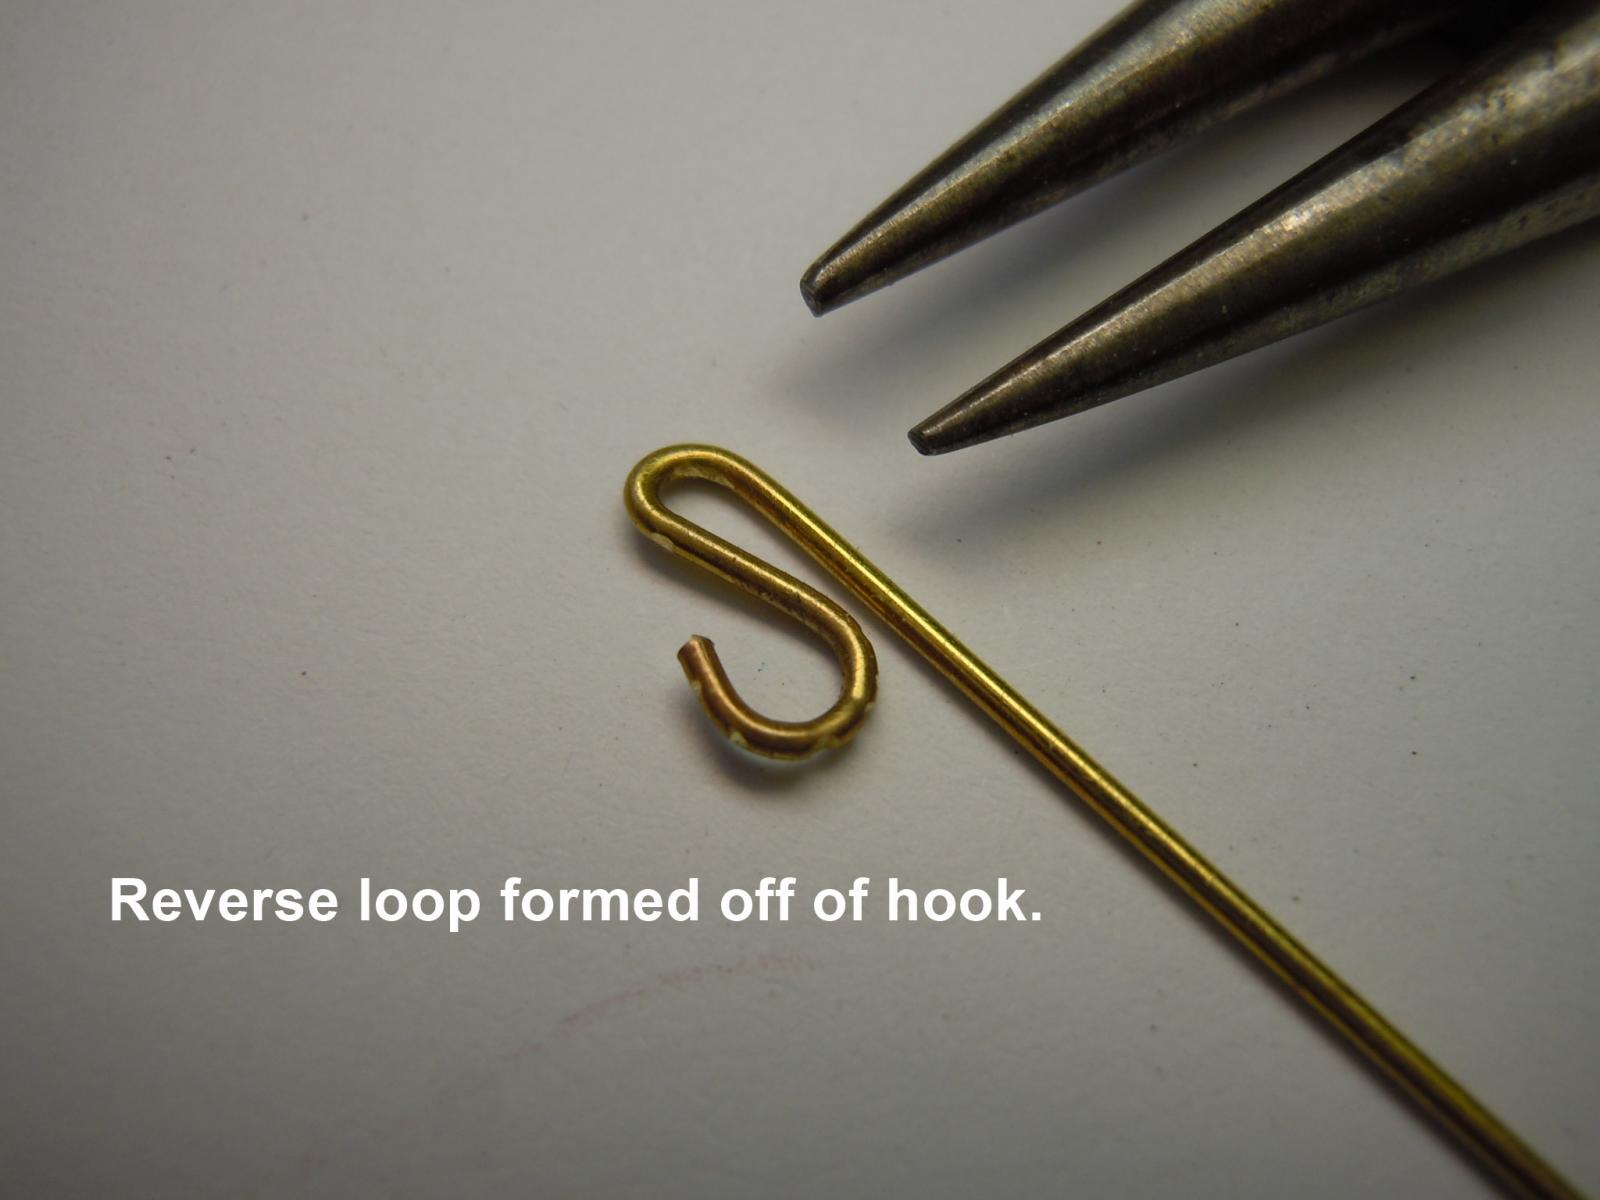
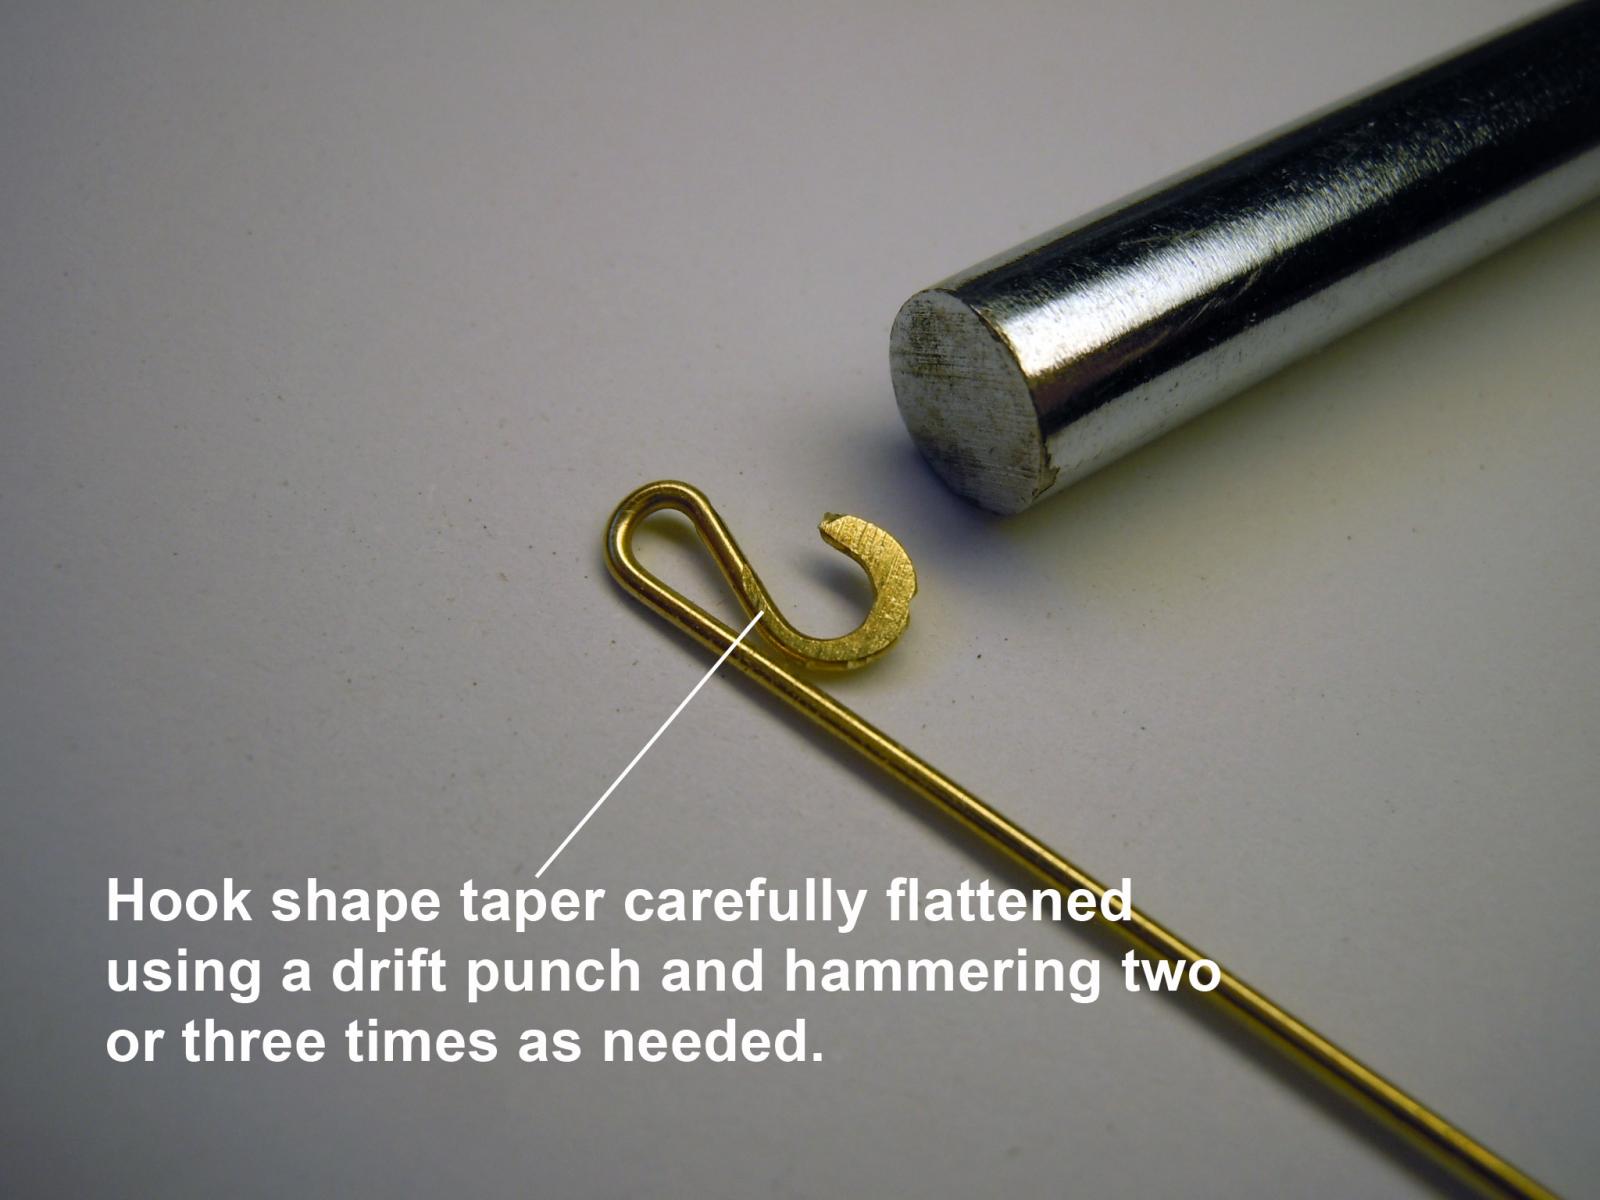
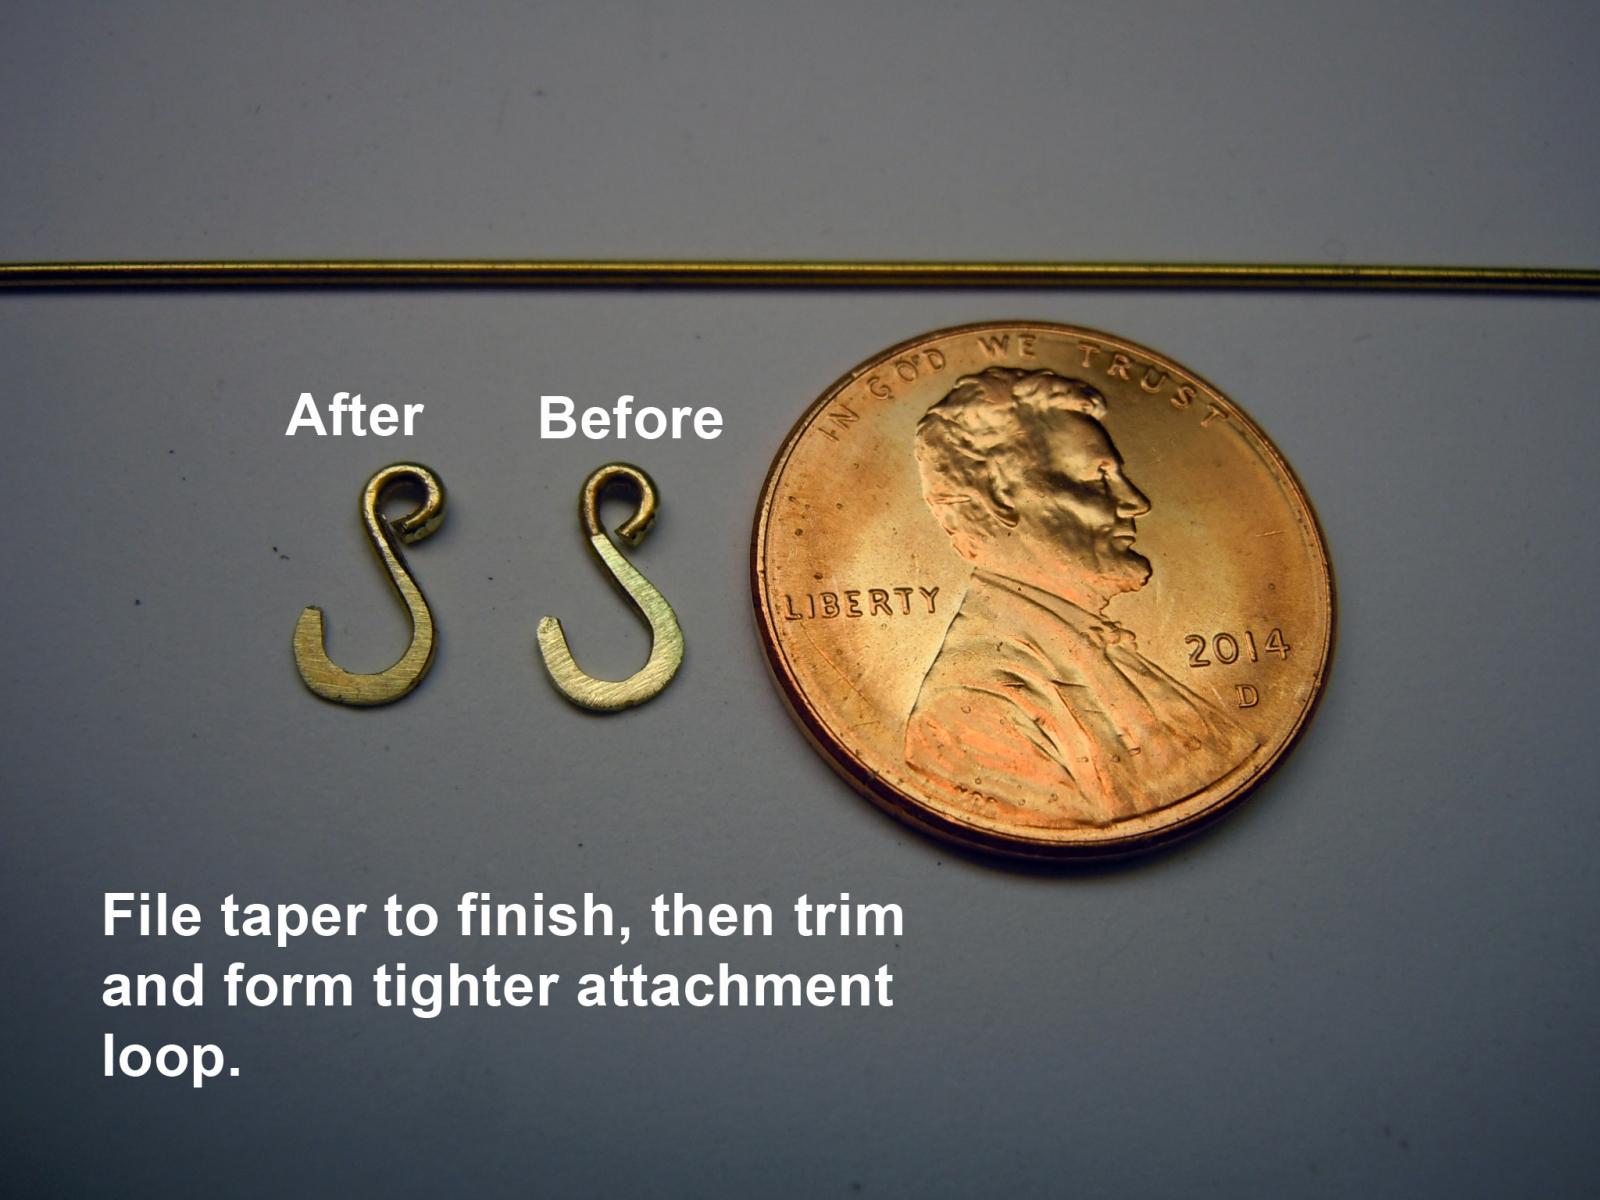
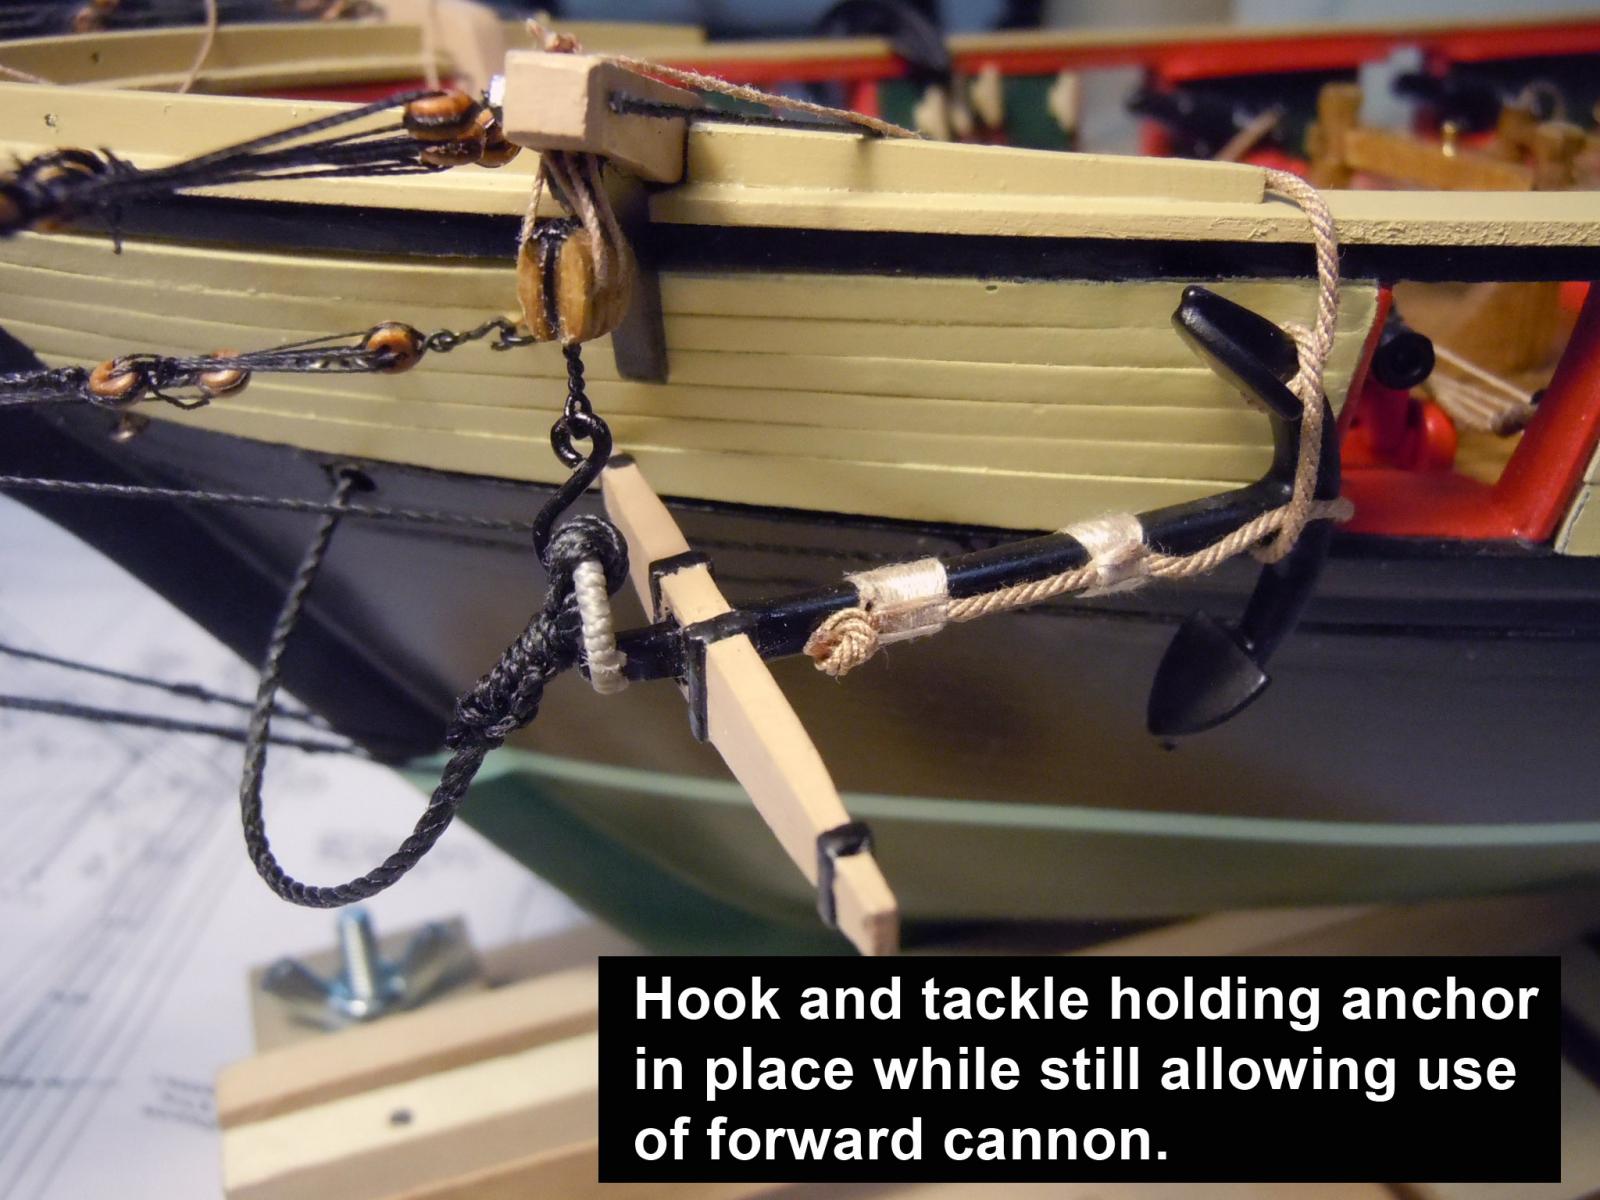
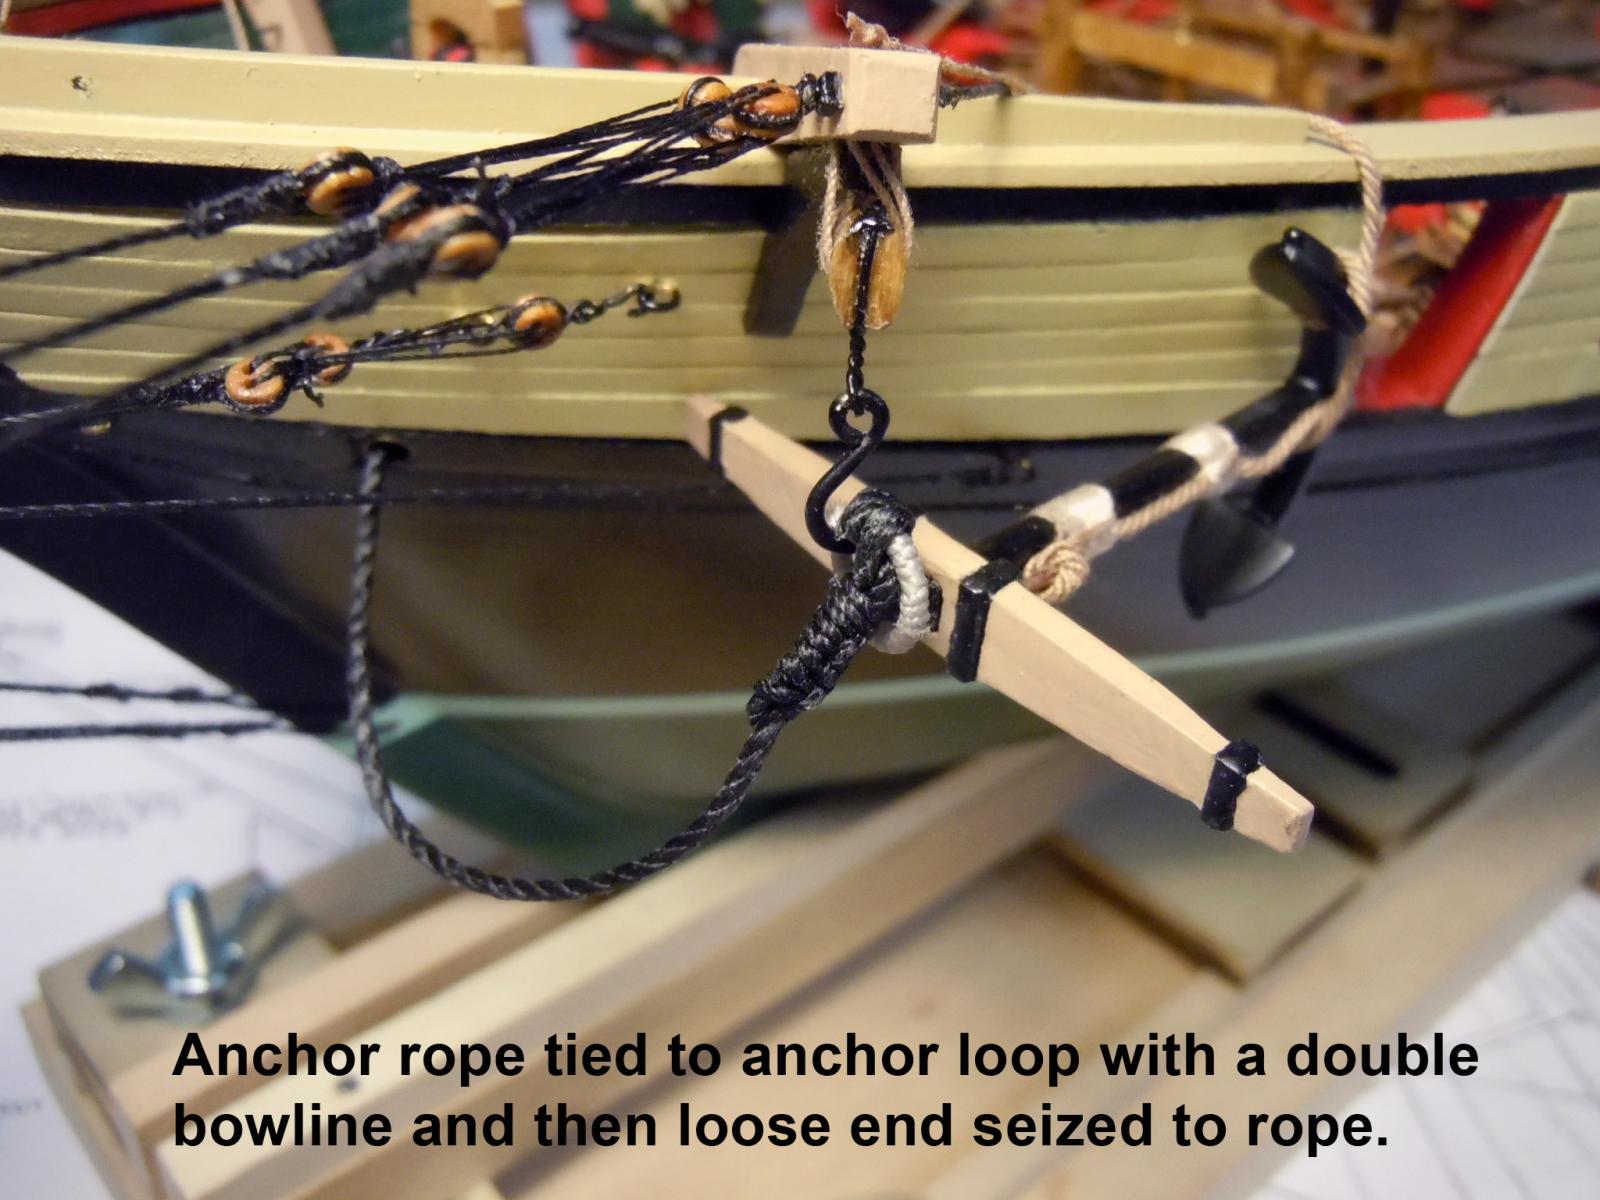
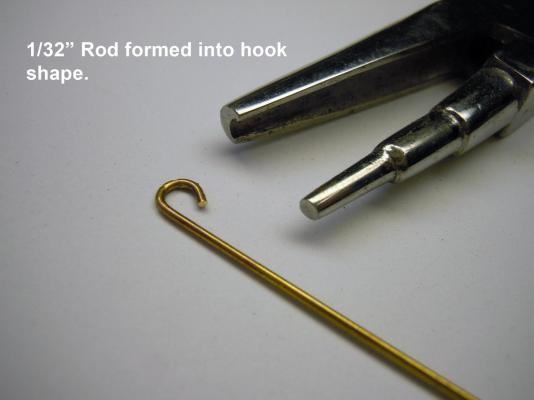
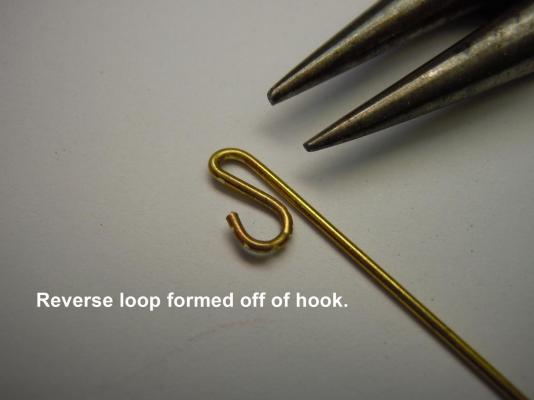
Checked on the anchors setup and the plans showed a couple of details with the anchor loop being suspended from a hook. Checked for the hooks and none supplied. So I made my own using 1/32" brass rod. Here are the steps in fabrication for the benefit of others. Keep in mind this process can be used for any size of hook. First I formed a half loop with ring pliers. The rod is being cold formed (not annealed). Then I used looping pliers to form a small half loop in the opposite direction. Next I used a 1/4" drift punch to form a taper down the hock loop. This requires holding the punch at a very slight angle down around the loop. The punch shoulder at the transition was cleaned up with a file. After satisfied with the hook the excess rod was cut off and the small top loop was finished by closing with the looping pliers. Here is a comparison of the two hooks to each other and a penny for size reference. Here is the anchor rigged to the bow with the cathead rigged to the block with the hook in place. The hook was attached to the block using the .020" black beading wire. I added the haul in rope that is seized to the anchor shaft based upon a reference photo that still allowed the forward gun to still be fired. This shows the double bowline that attaches the anchor line to the loop. Now on to the rigging of the second anchor on the starboard side. Does anyone have an image or drawing of what happens to the anchor rope once inside the bulwark? There should be a big coil for the two anchor lines.


- 440 replies
-
- 8
-
-
- niagara
- model shipways
- (and 1 more)
-
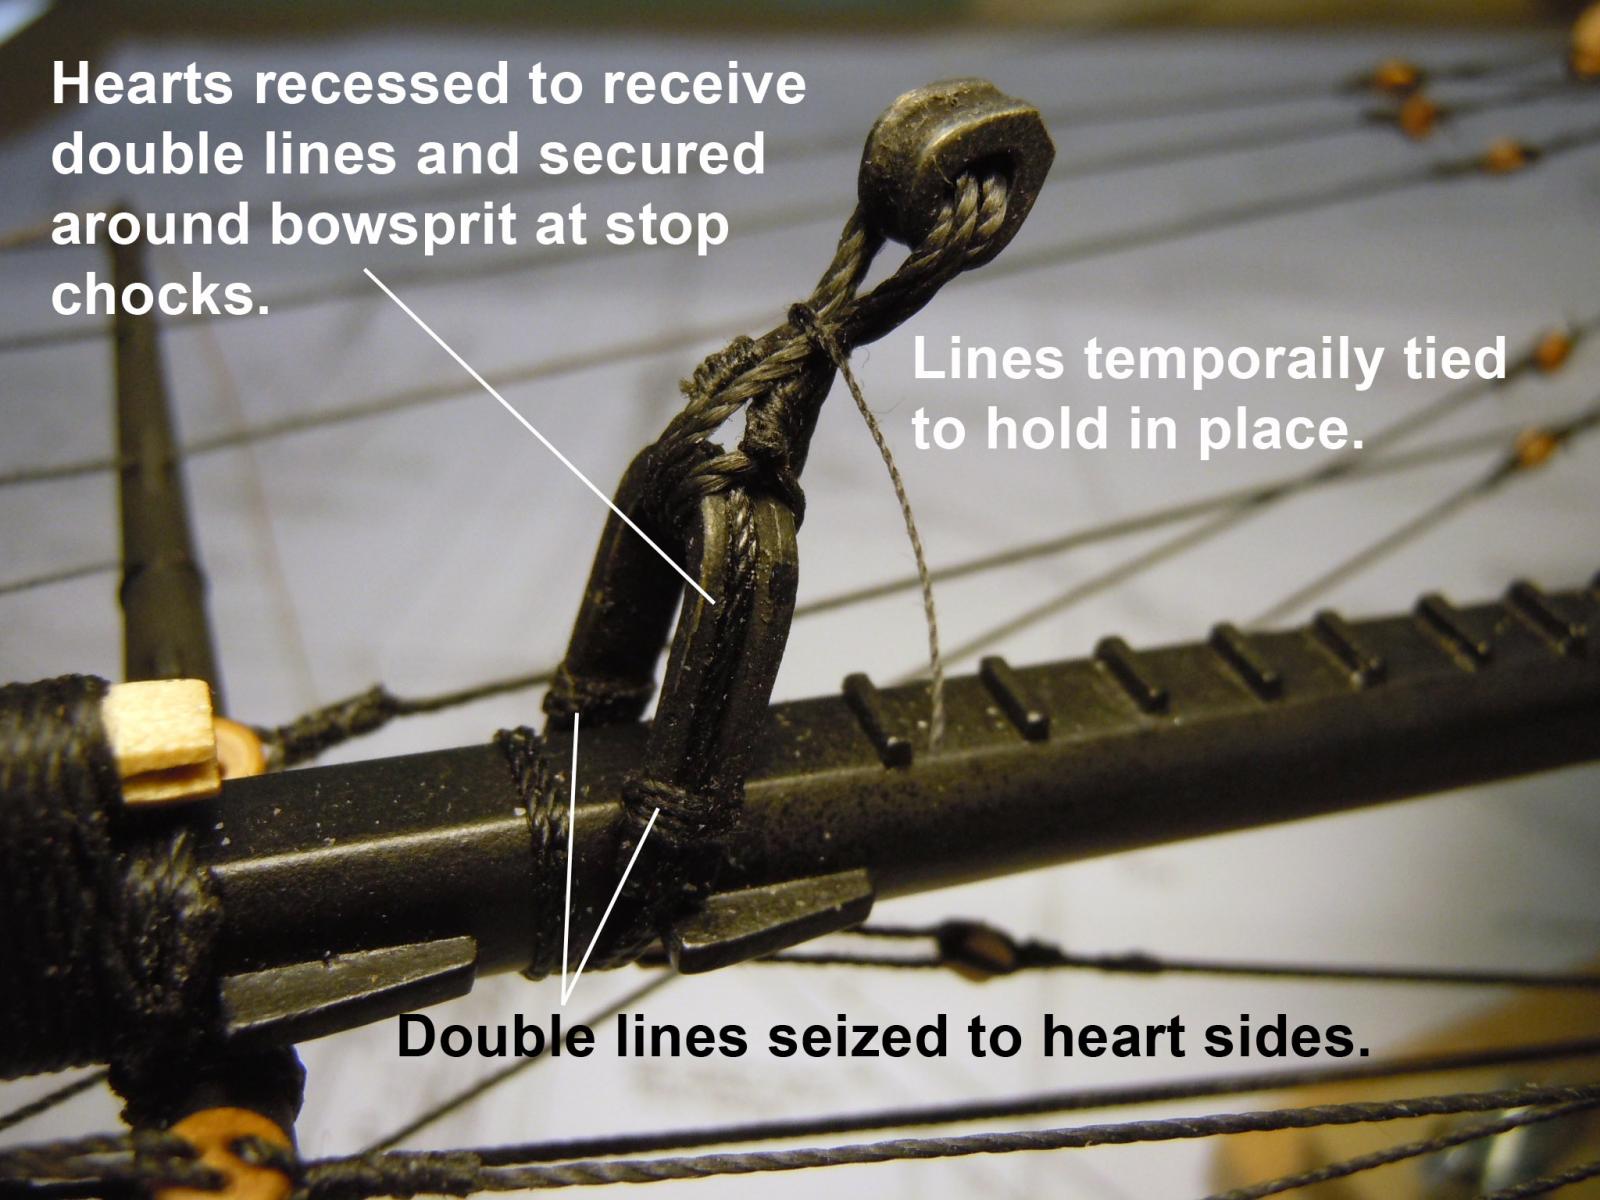
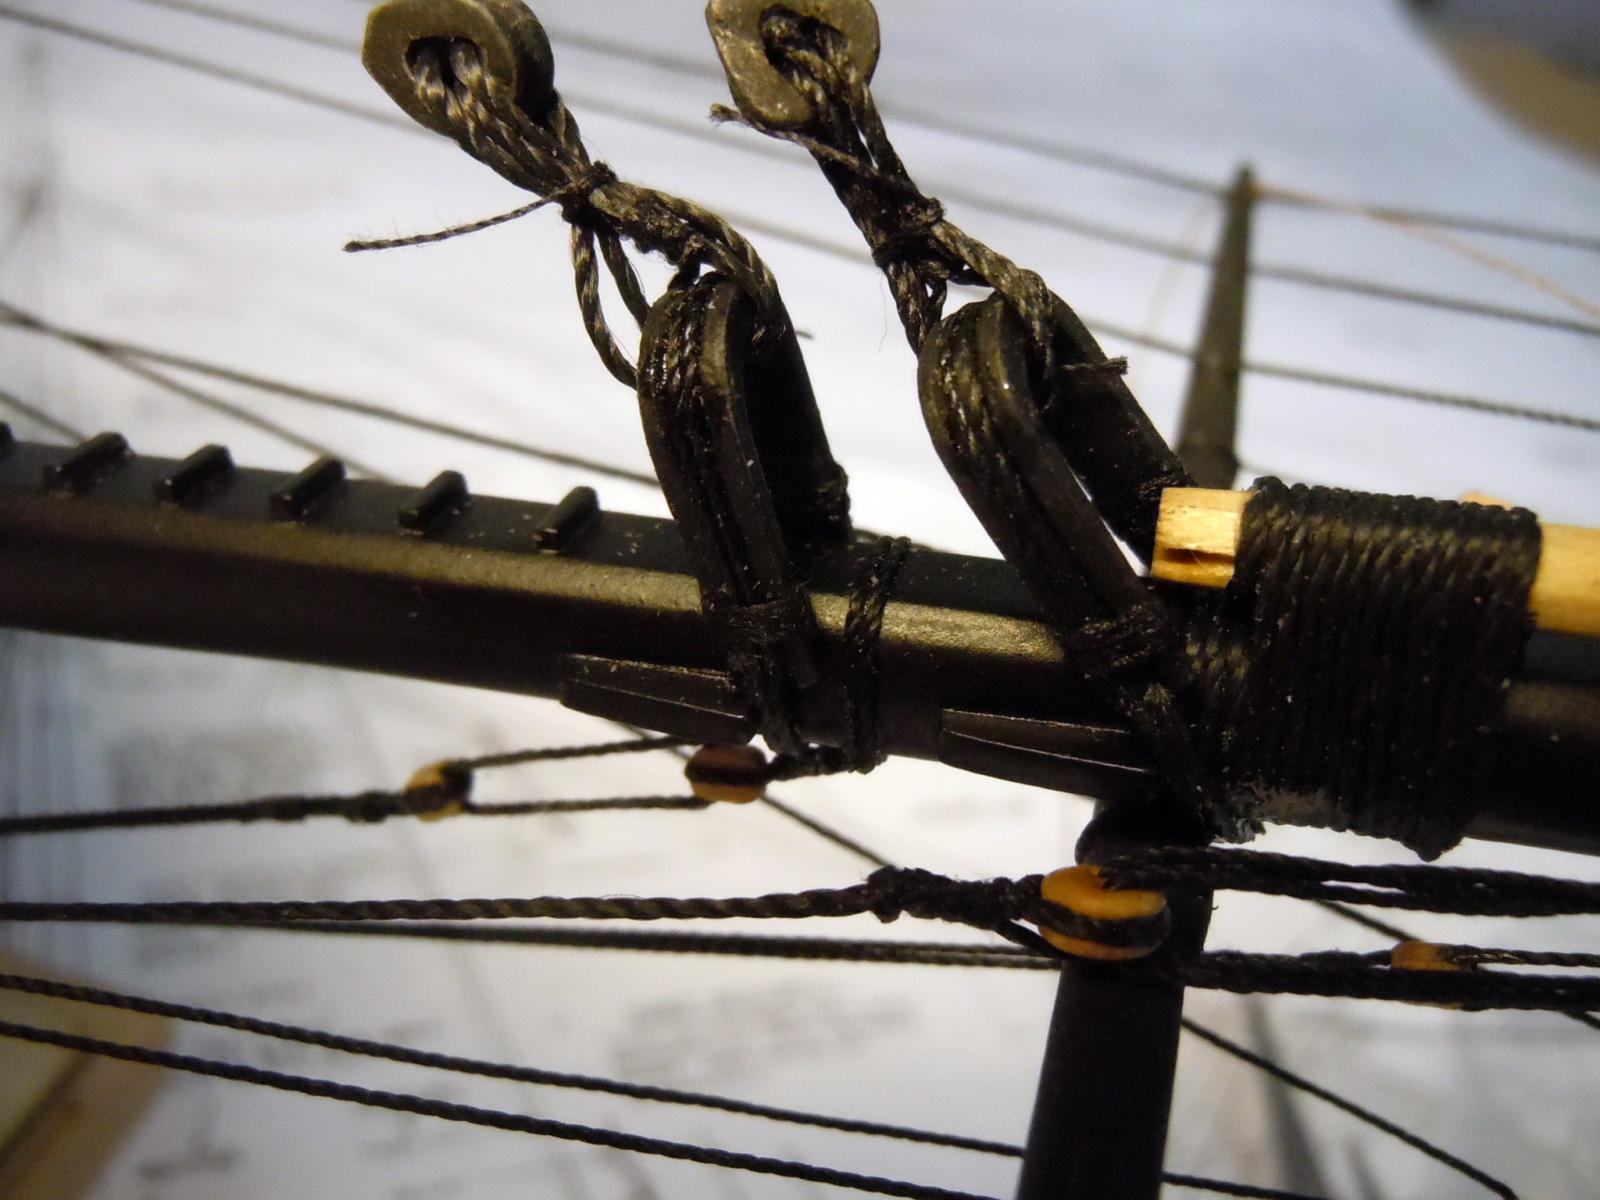
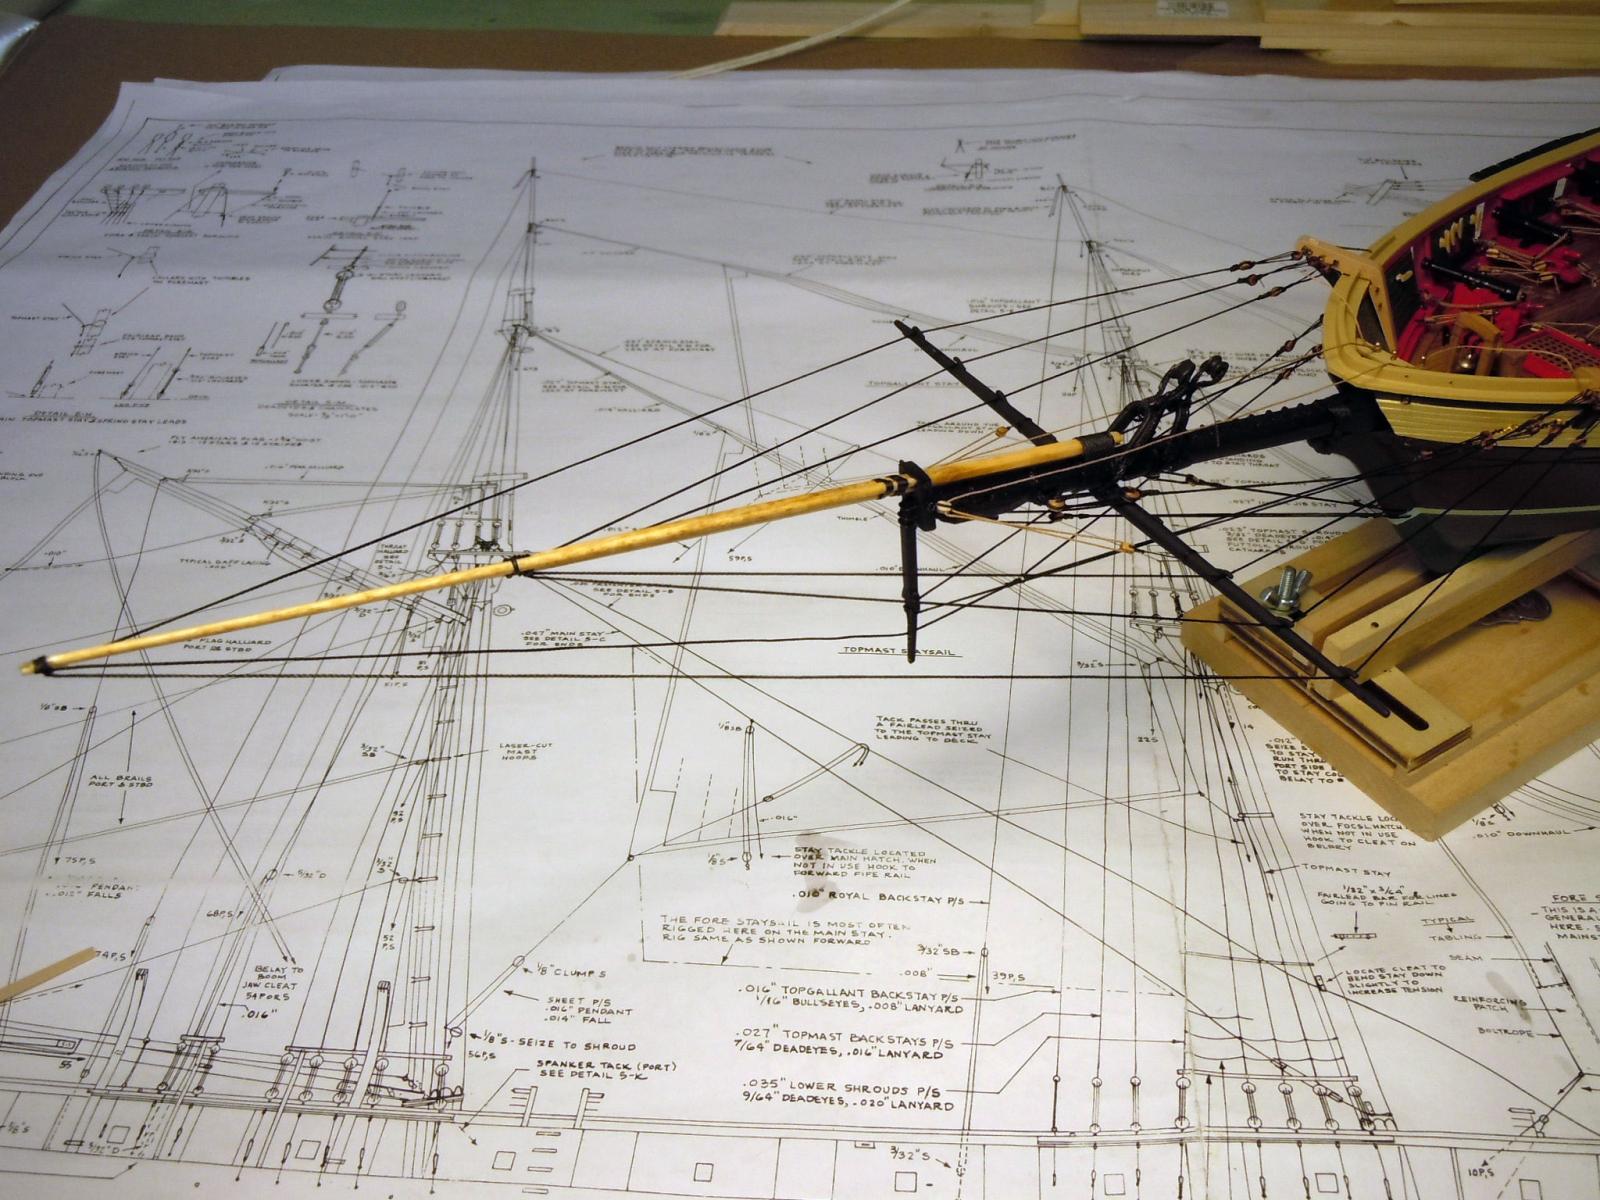
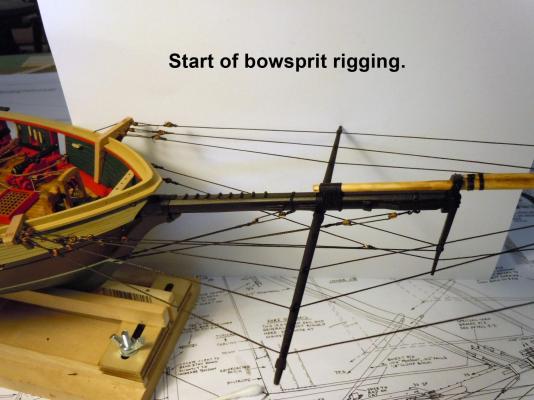
I have finished rigging the bowsprit as much as I can until the masts are added. Rigging the hearts for the preventer stays was a bit of a challenge working with the stiff kit supplied lines but here is a close up of the first one in place. Then the second. The challenge with these was seizing the loop and then seizing the end of the line to itself with black thread rather than the .008" line supplied. This shows the area of the bowsprit rigging with the hearts in place. While most of these are standing lines, I also added two of the brown running lines that are tied off at the bow lines with belaying pins. Here is an in progress of the bowsprit rigging to this point. The rest of the rigging will need the masts in place. Next I will address the anchors and tiller set up.


- 440 replies
-
- 9
-
-
- niagara
- model shipways
- (and 1 more)
-
Nigel, I concur with Brian on the size of the tackle blocks for the cannons; especially after seeing the ones on my Brig build completed. But that is part of the learning process.
- 270 replies
-
- 1
-
-
- red dragon
- artesania latina
- (and 1 more)
-
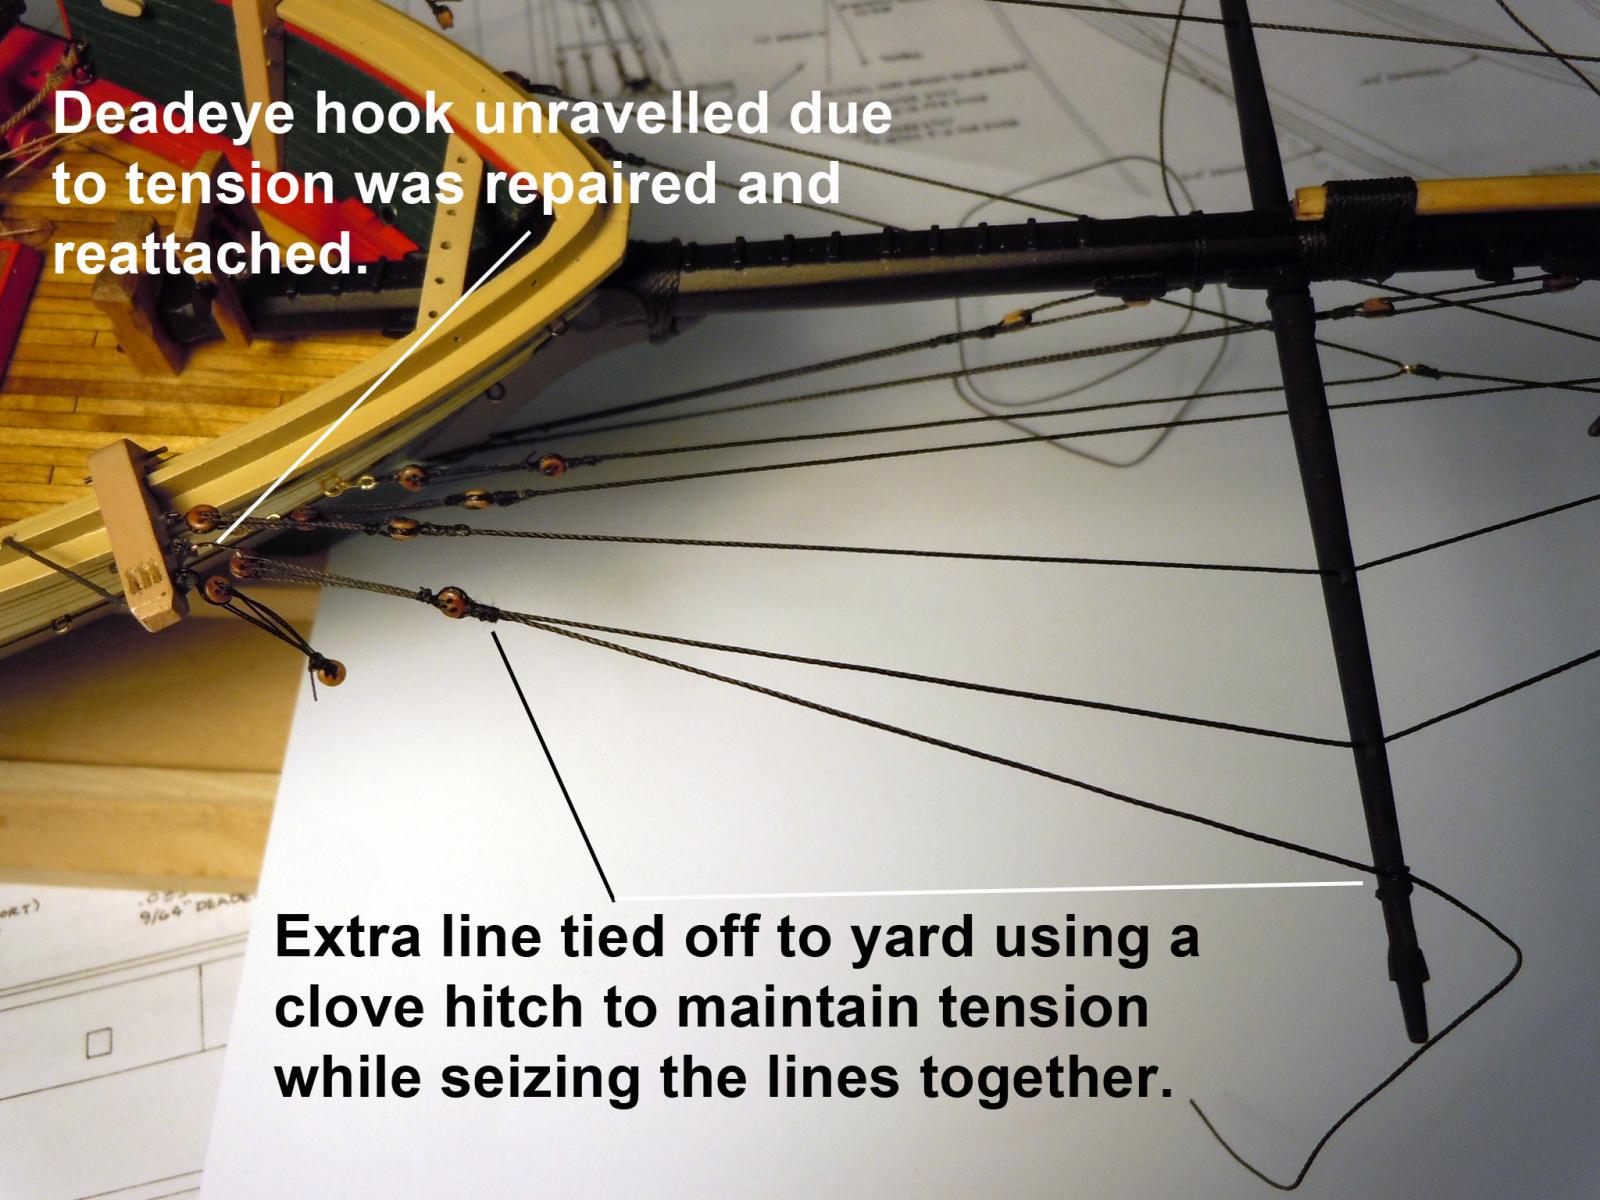
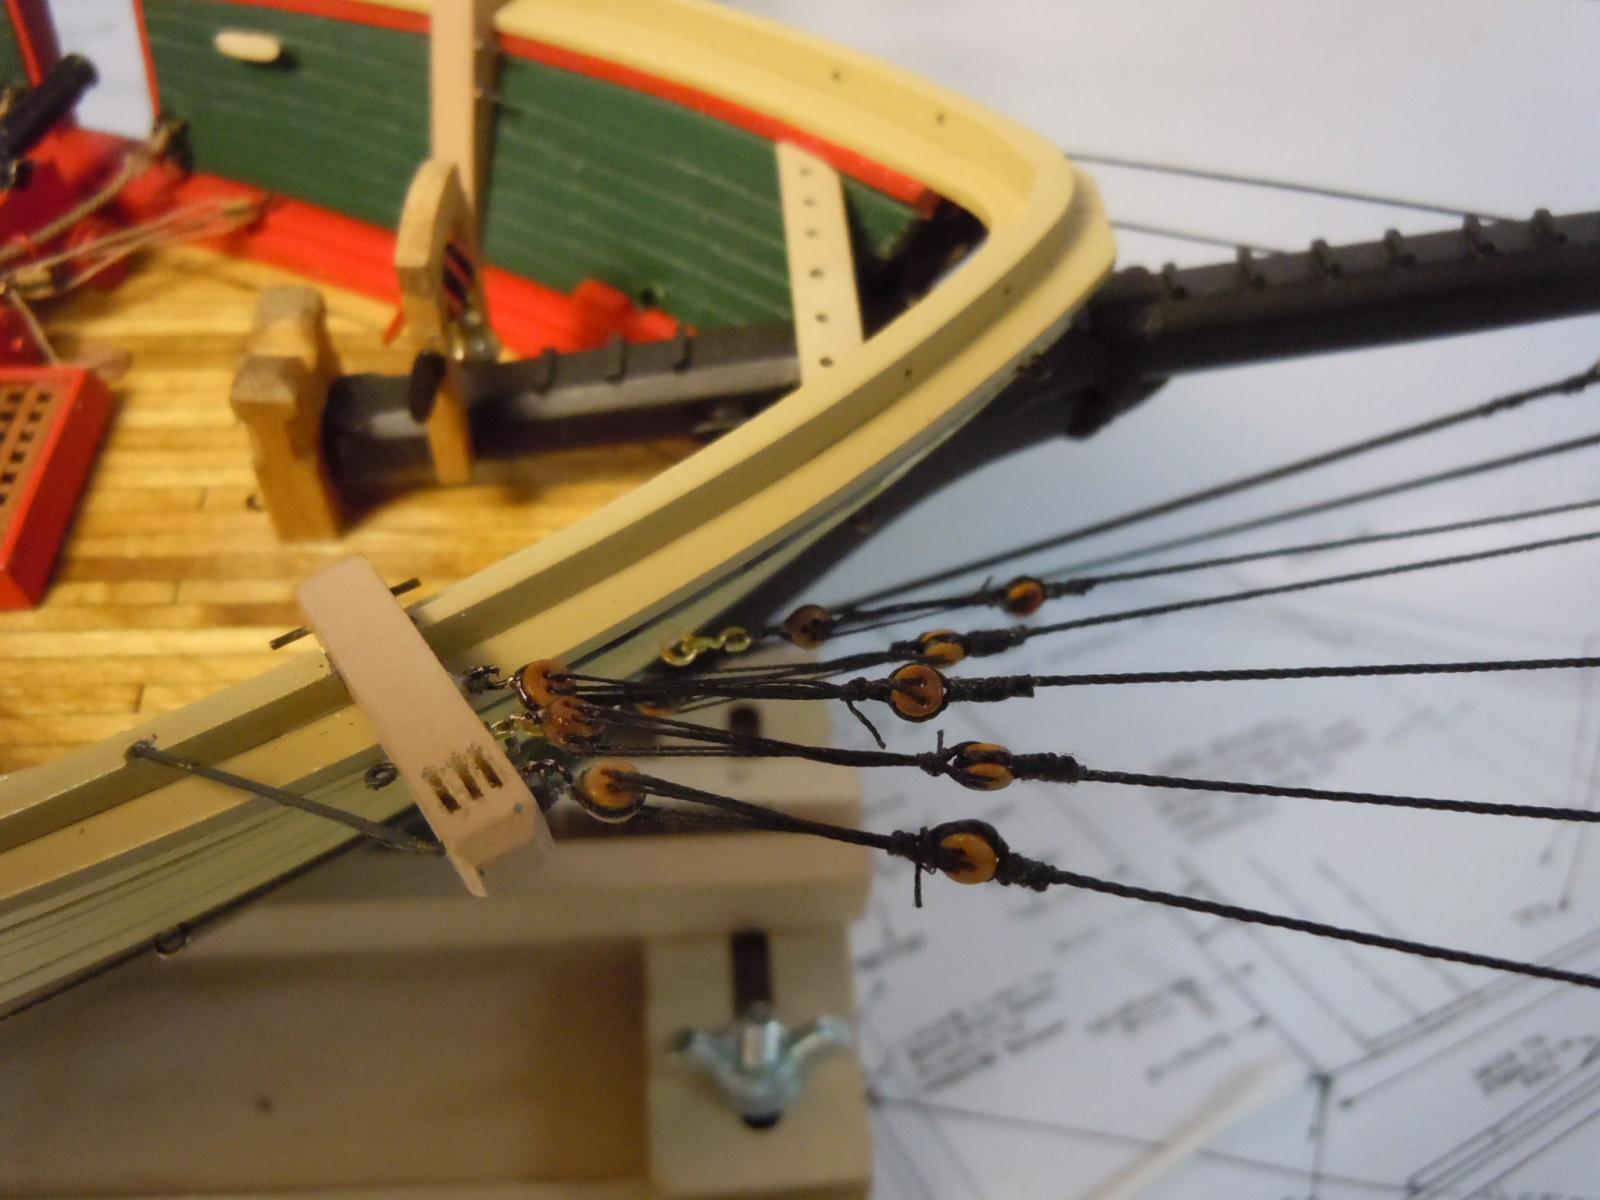
I decided to start the rigging process with the bowsprit to learn how to since this is my first attempt. For now I am using the kit supplied lines. I quickly learned that using extra line attached to the yard help hold the tension and keep the deadline in alignment really made things easier to seize. Of course my wife made sure my clove hitches were correct; she taught knotting skills to girl scouts and cub scouts for years when living in Ohio. Here is a picture of the extra line attached to the yard. I also learned to check my hook attachments; the CA had not completely set and started to unravel; It was repaired and I may have to go back to using brass instead of copper wire and allow the CA to set on the dead-eyes. This shows the dead-eyes at the cathead. Here is an in-progress image. I will do as much rigging as I can before adding the masts. The kit supplied lines are a challenge to work with and I will be ordering some more from Chuck as soon as I can figure out the sizes and footage required. I have learned quite a bit is just this short exercise of rigging and I am glad I started here and the "boss" will keep me in line with clove hitches. I achieved Queen Scout in Canada (U.S. Eagle Scout equivalent) an all the knot and lashing memories came back.


- 440 replies
-
- 7
-
-
- niagara
- model shipways
- (and 1 more)
-
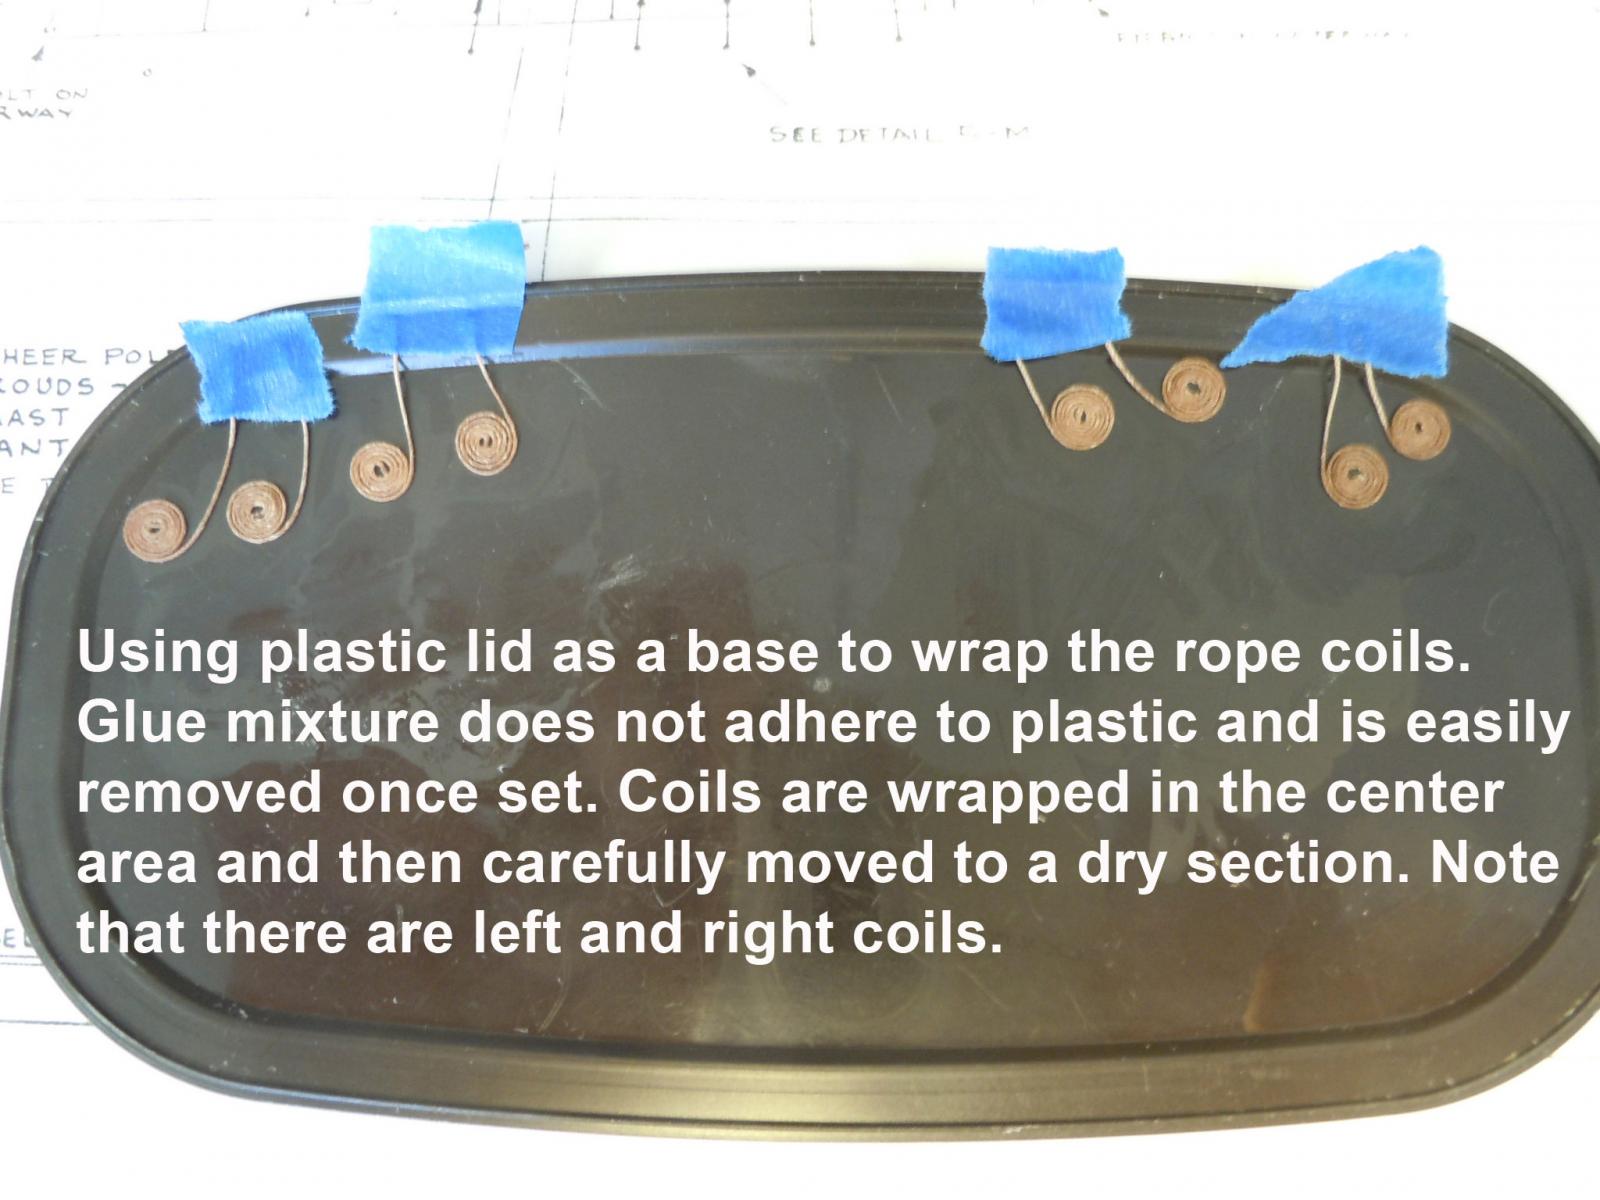
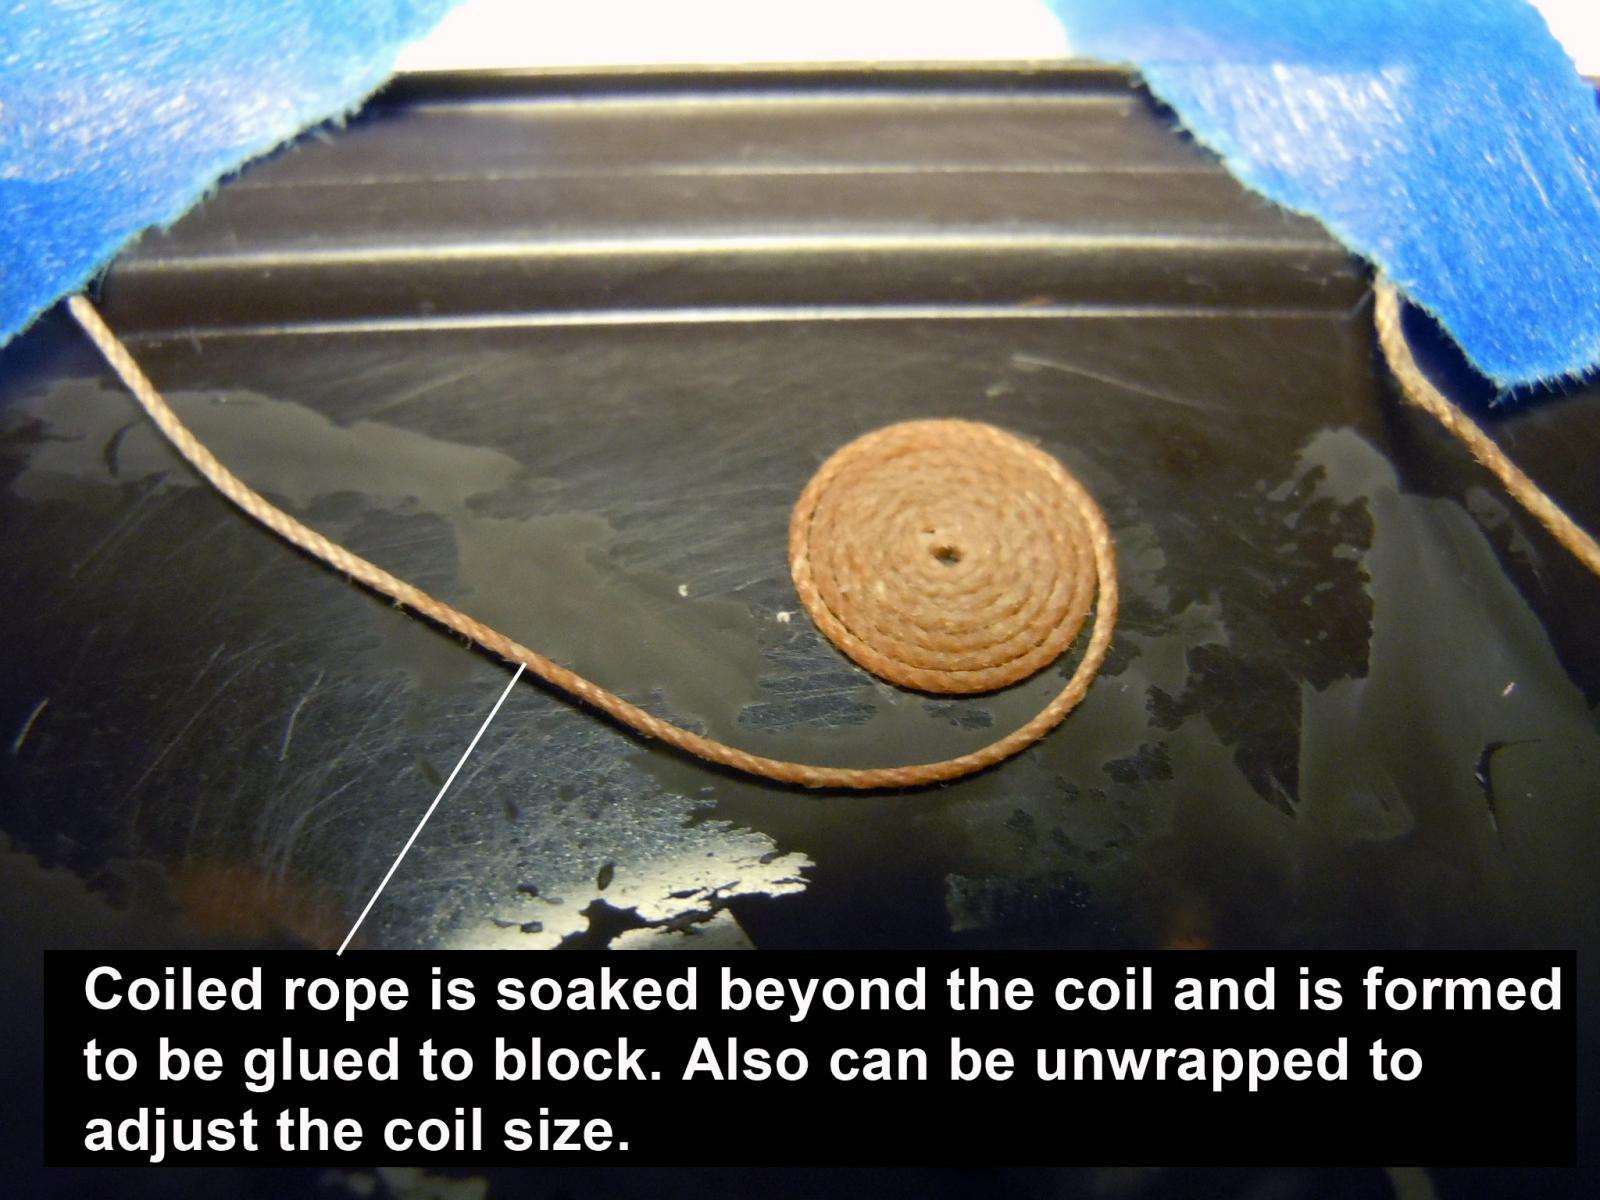
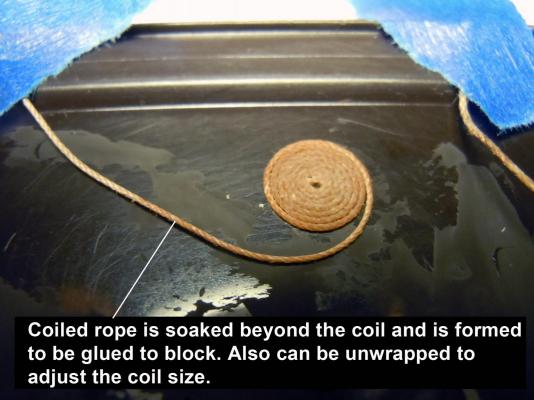
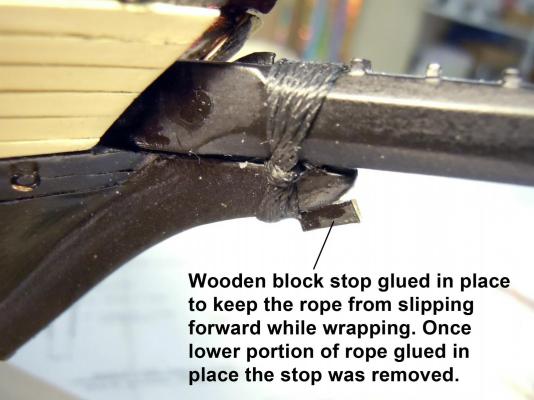
Finally finished all the carronade tackle lines and then tried wrapping the tackle in place on the deck with mixed results due to some lines being too short. Next time I will make sure that I have longer lines. I then dropped back to past experiences and wrapped the coiled ropes on a plastic polyethylene food container lid. I then found it very easy to do both left and right coils on the lid with the lines taped to the edge. Once completely set they are very easily removed. They can also be unwrapped to adjust the size. Here is a picture showing them setting on the lid and I can pick and choose the ones I am not satisfied with to replace on the deck. Here is a close-up of one. Here is a couple on the deck. I am moving on to the bowsprit and start rigging it and then the anchors. I think it might be wise to get all the deck related items completed before rigging the masts. I started the bowsprit by adding the gammon rope. At first they kept slipping forward as I tightened the rope so I added a stop block and completed the rope wrap and glued just the bottom side. Once the glue set I removed the stop block. Now to add the yard and rigging which should keep me busy for a while.


- 440 replies
-
- 7
-
-
- niagara
- model shipways
- (and 1 more)
-
Jack, it is working with the 50/50 and 1 drop of dish detergent which makes it smell better and it has broken down the capillary action. The ones I have done are in fact sticking to the deck fine. One point of advice for those who may follow is to be careful adding CA to the end of the tackle line. I am trimming off the end to just where it ends on the rope; which becomes the center of the coil. Also allow extra line when rigging there are a couple that I wish I had a little more length.
- 440 replies
-
- 3
-
-
- niagara
- model shipways
- (and 1 more)
-
Jack, thanks I will give it a try; I think there is something in the rope itself that may be added as part of the rope making process that causes the absorption to take a little longer. Maybe Chuck could share what is in the rope.
- 440 replies
-
- 1
-
-
- niagara
- model shipways
- (and 1 more)
-
Kurt, thanks for the tips; great idea in using a piece under the coil forming this will help keep the deck clean. Any chance you could post a picture of the turntable or a link to it? I like the assembly line concept; being new to this I am still learning and sorting out processes to make things work.
- 440 replies
-
- 2
-
-
- niagara
- model shipways
- (and 1 more)
-
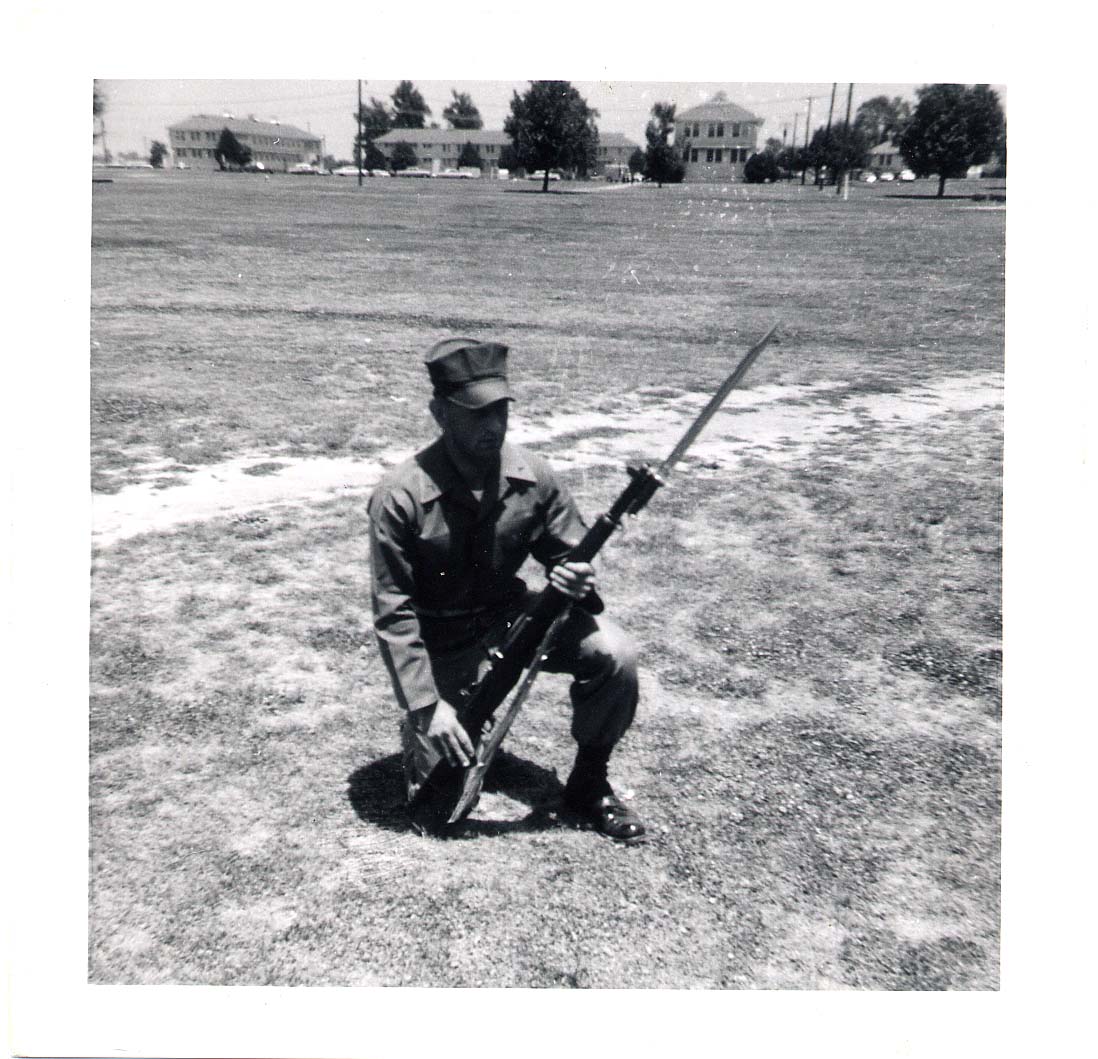
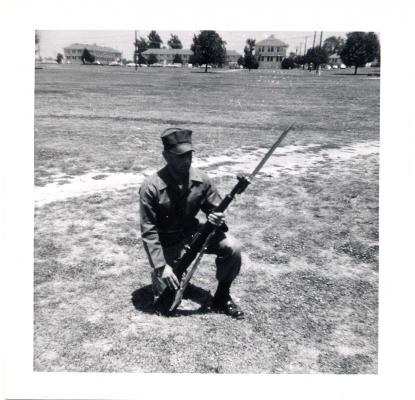
Brian, thanks for the tip; I have used that water/white glue mix with some planes I have built and will give it a try. Back in the day when I was in the Marine Corps Drill Team we used starch on our utility covers (hats) to form cover with crisp lines and maintain shape. Here is a picture from back in the day.
- 440 replies
-
- 3
-
-
- niagara
- model shipways
- (and 1 more)
-
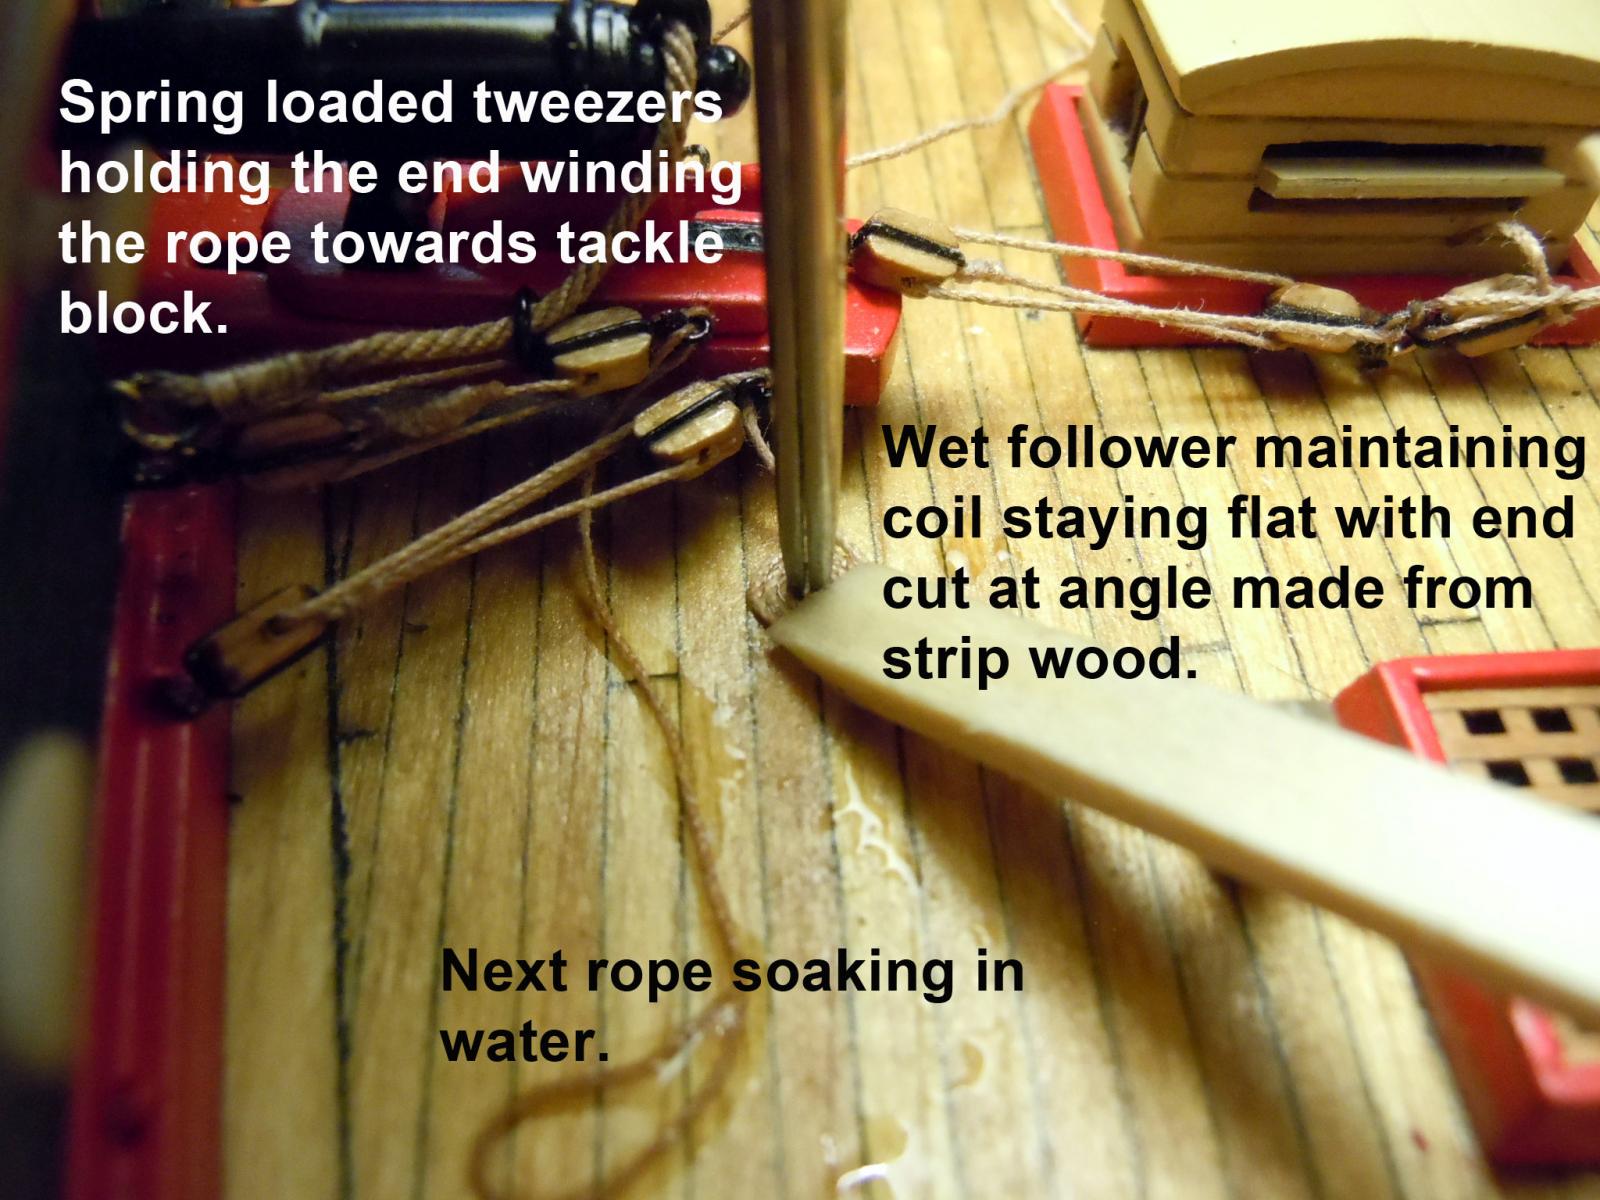
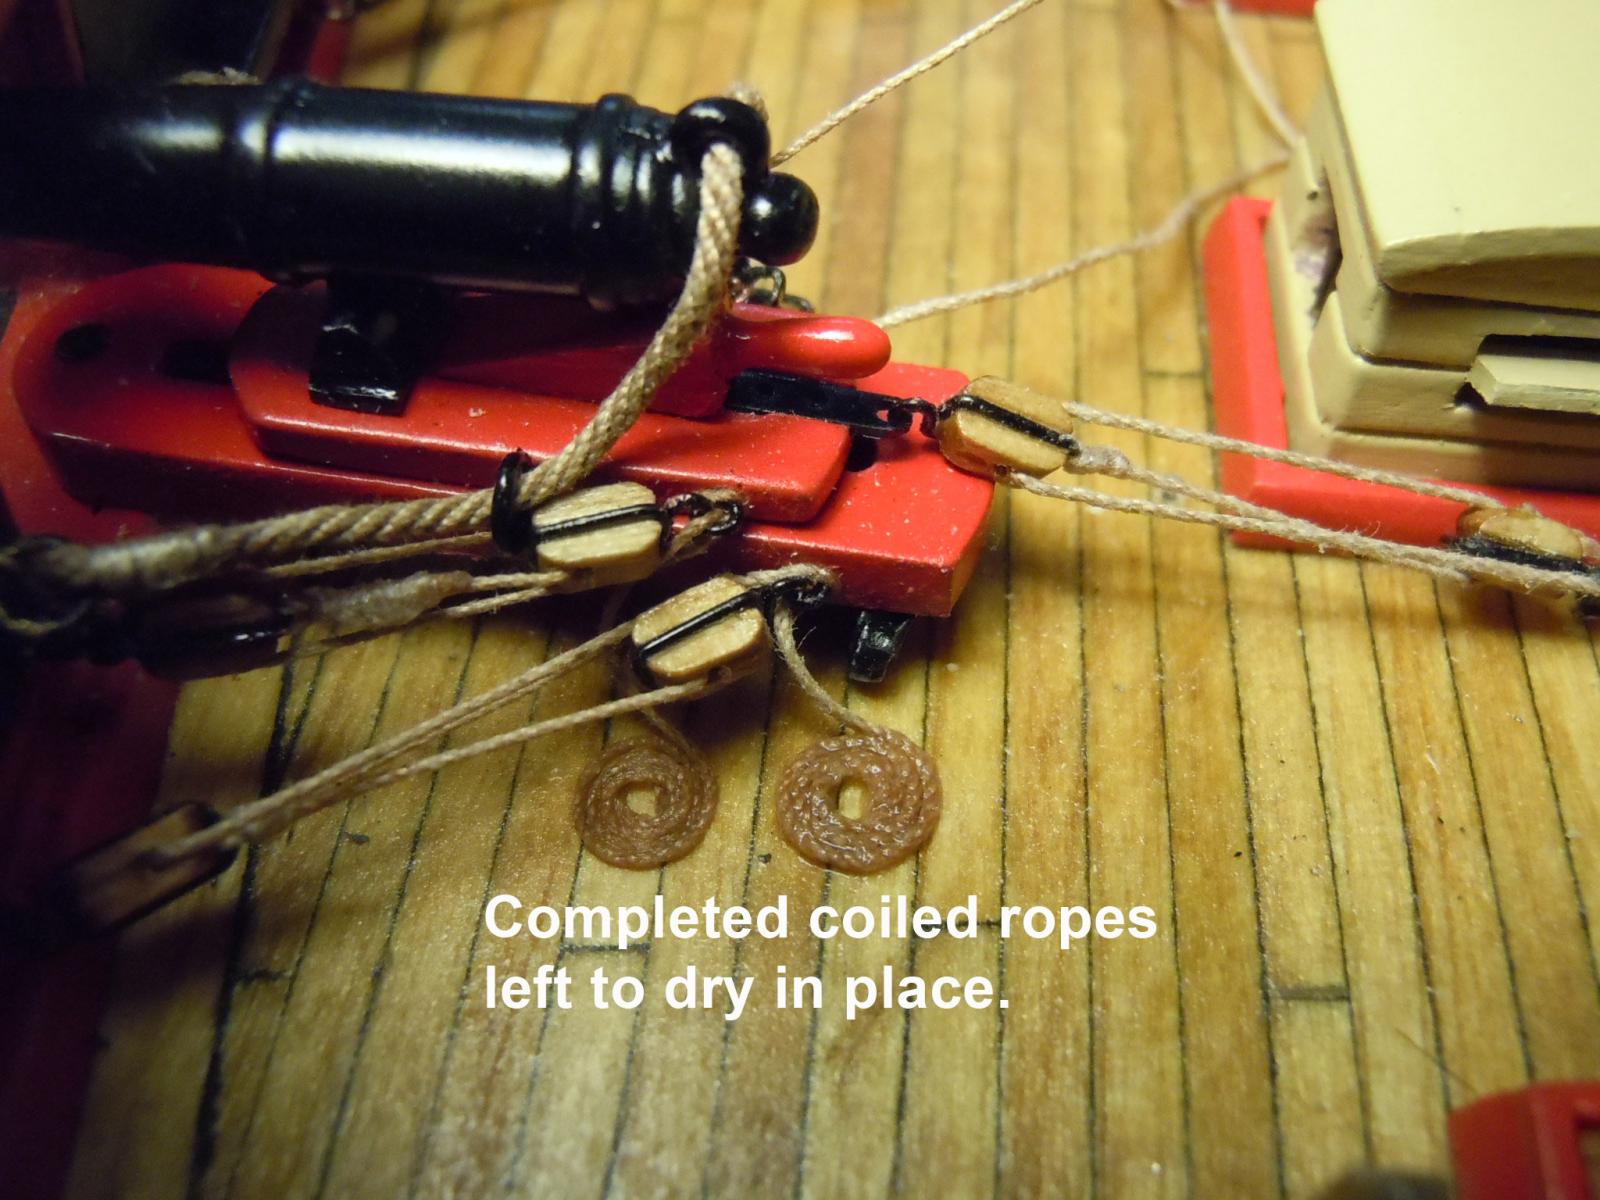
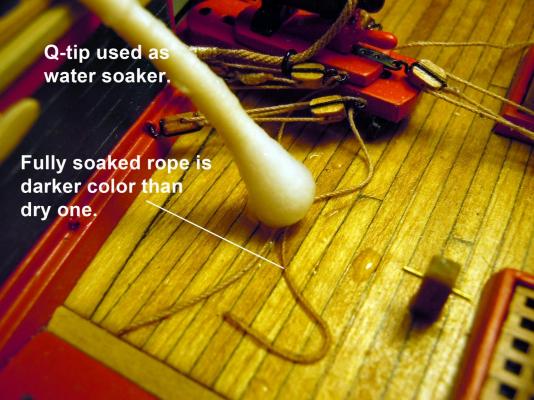
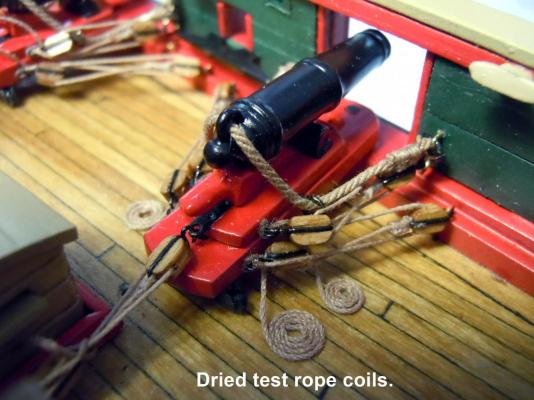
I finally finished all the tackle lines and then moved on to the coiling of the ropes. Each tackle line was seized at the eyebolts very carefully adding just a touch of CA to hold the rigging tight. Then each line was aligned below the eyebolts. Originally the plan was to then cut the rope excess off at this point and then add a separate coil. On pondering the situation with a bit of libation I figured what the heck give it a test try coiling them in place. First I soaked the rope with water using a Q-tip to add the water. While waiting for the rope to thoroughly soak I cut a piece of wood strip with an angle on the end that was also soaked in water. I also filed the end of spring loaded tweezers to a sharper point to reduce the size of the center hole of the coil. Here is the soaked rope. I then griped the rope end with the tweezers and slowly turned the tweezers while using the wood follower to keep the coil flat towards the seized eyebolt sliding across the wet deck. The follower was then positioned to very carefully release the tweezers without pulling the center out. Here are the wet rope coils in place being allowed to dry. Here they are completely dried overnight and the test looks successful. I now for the rest I will add starch to the water to work as a binder to hopefully hold the coils together and maintain the natural color of the rope. CA will darken the rope considerably. If someone else has a suggestion for a binder please share with me. Now to move onto a deck load of carronades. A lesson learned is that the next time I do this I will make sure I have ample excess tackle line. I may have some too short and will add a separate coil as needed. Coiling them in place maintains a consistent natural look. Looking forward to any advice other may have since this is my first attempt at doing this.


- 440 replies
-
- 10
-
-
- niagara
- model shipways
- (and 1 more)
-
Slowly working through the additional rigging of the carronades and securing the in haul lines on the starboard side. I modified the bent needle nose pliers and straight tweezers by filing down to slightly blunt points; this enabled working in and around the existing lines in place. Now onto the port side, and thinking of how to make the coiled lines. In one build it looks like the builder made a fixture using magnets holding the removable side in place which I think is really clever.
- 440 replies
-
- 4
-
-
- niagara
- model shipways
- (and 1 more)
-
George, Thanks, but more dental work is needed on the "teeth". After spending some time checking around I realized that two more lines per carronade still need to be added. Lines from the bulwark lower rings to the gun tackle eyebolts on the rear side of the carronade as shown below. Now that I better understand the mechanics of the carronade now and my education on ship building continues. However, the scale of the tackle blocks is out of scale with the plans indicating that 1/8" blocks are to be used. Had a scale assembly drawing been drawn this would have shown itself. I will continue using what was supplied in the kit. Now to add the rest of the tackle lines.
- 440 replies
-
- 5
-
-
- niagara
- model shipways
- (and 1 more)
-
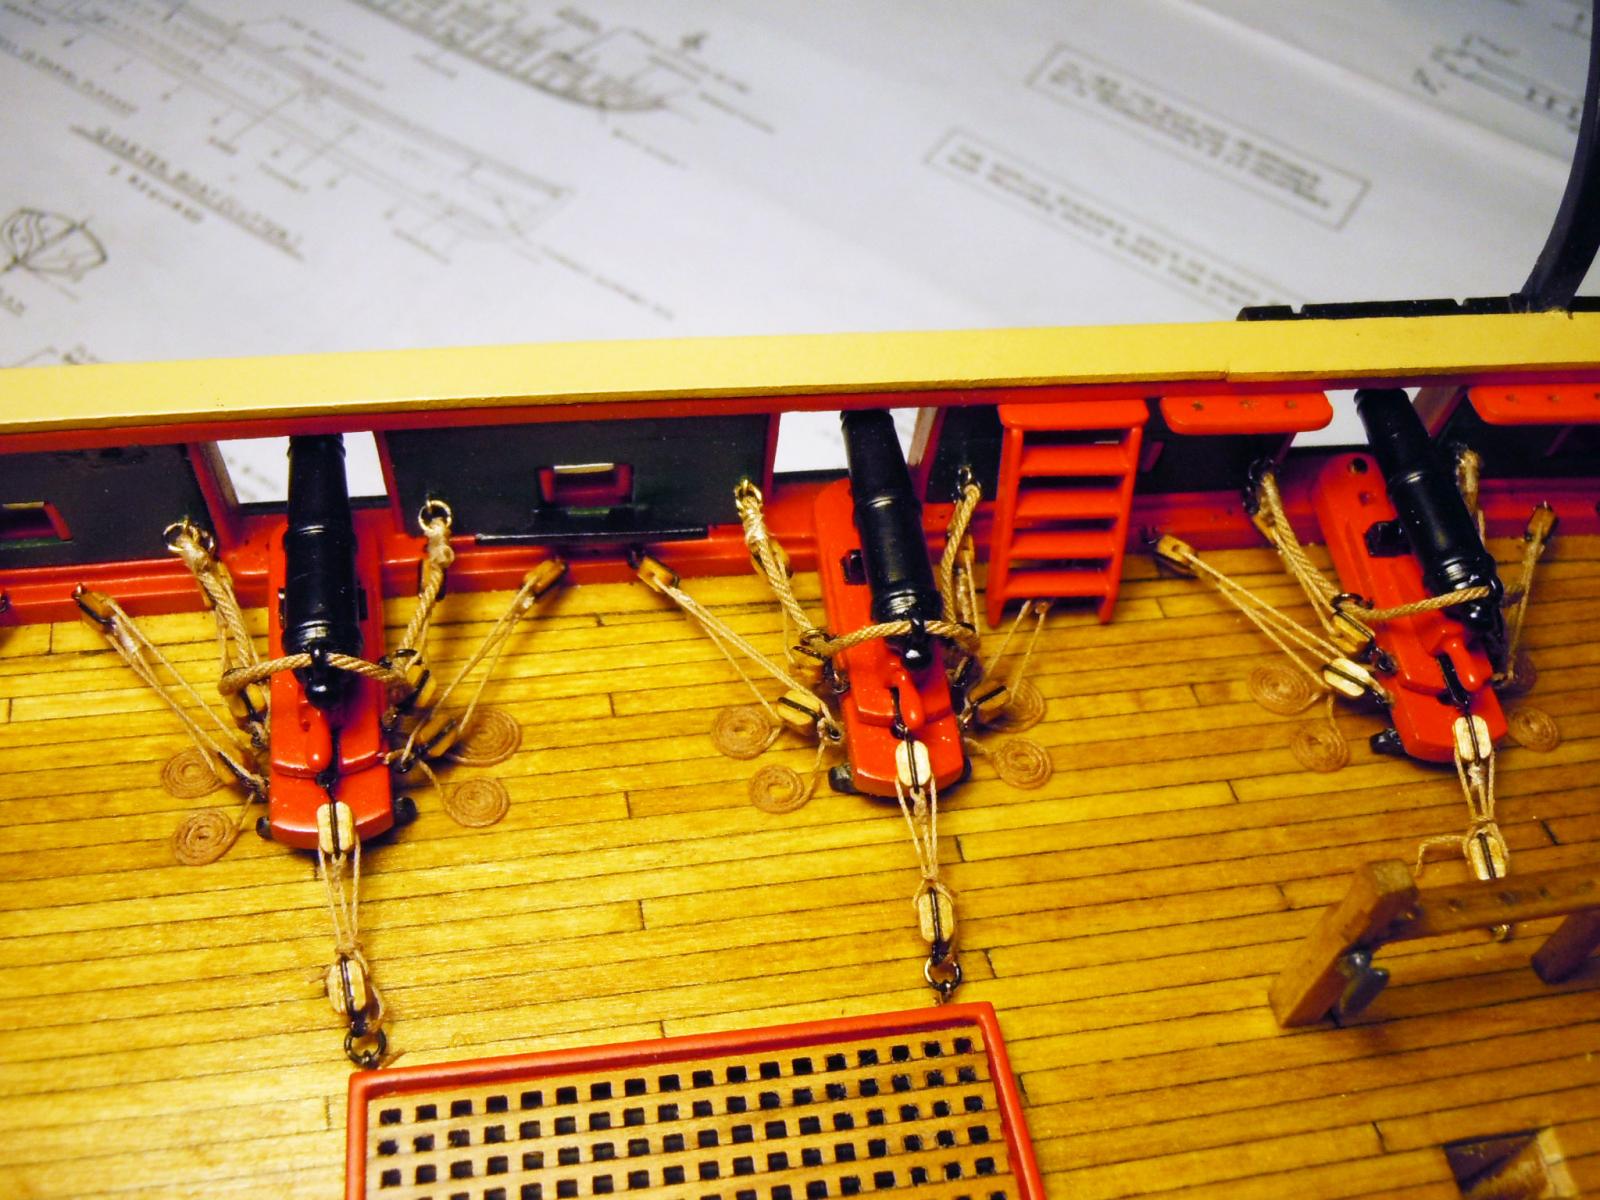
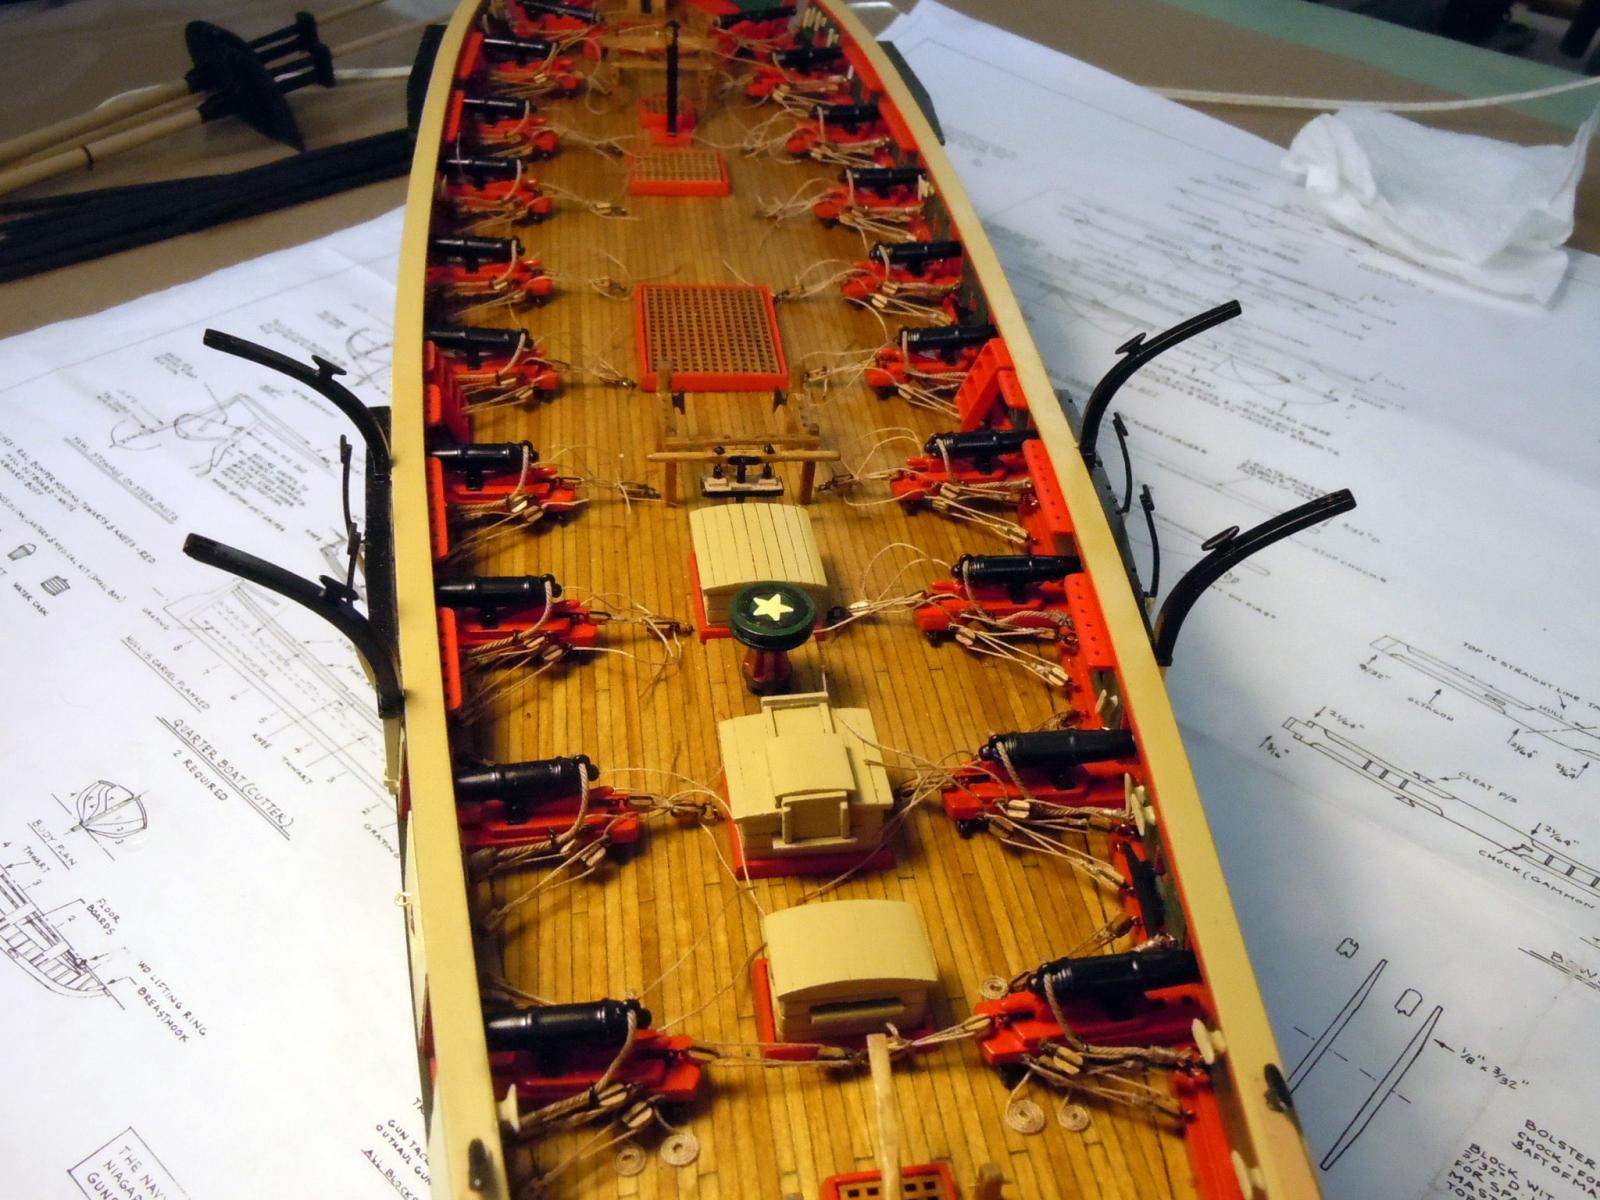
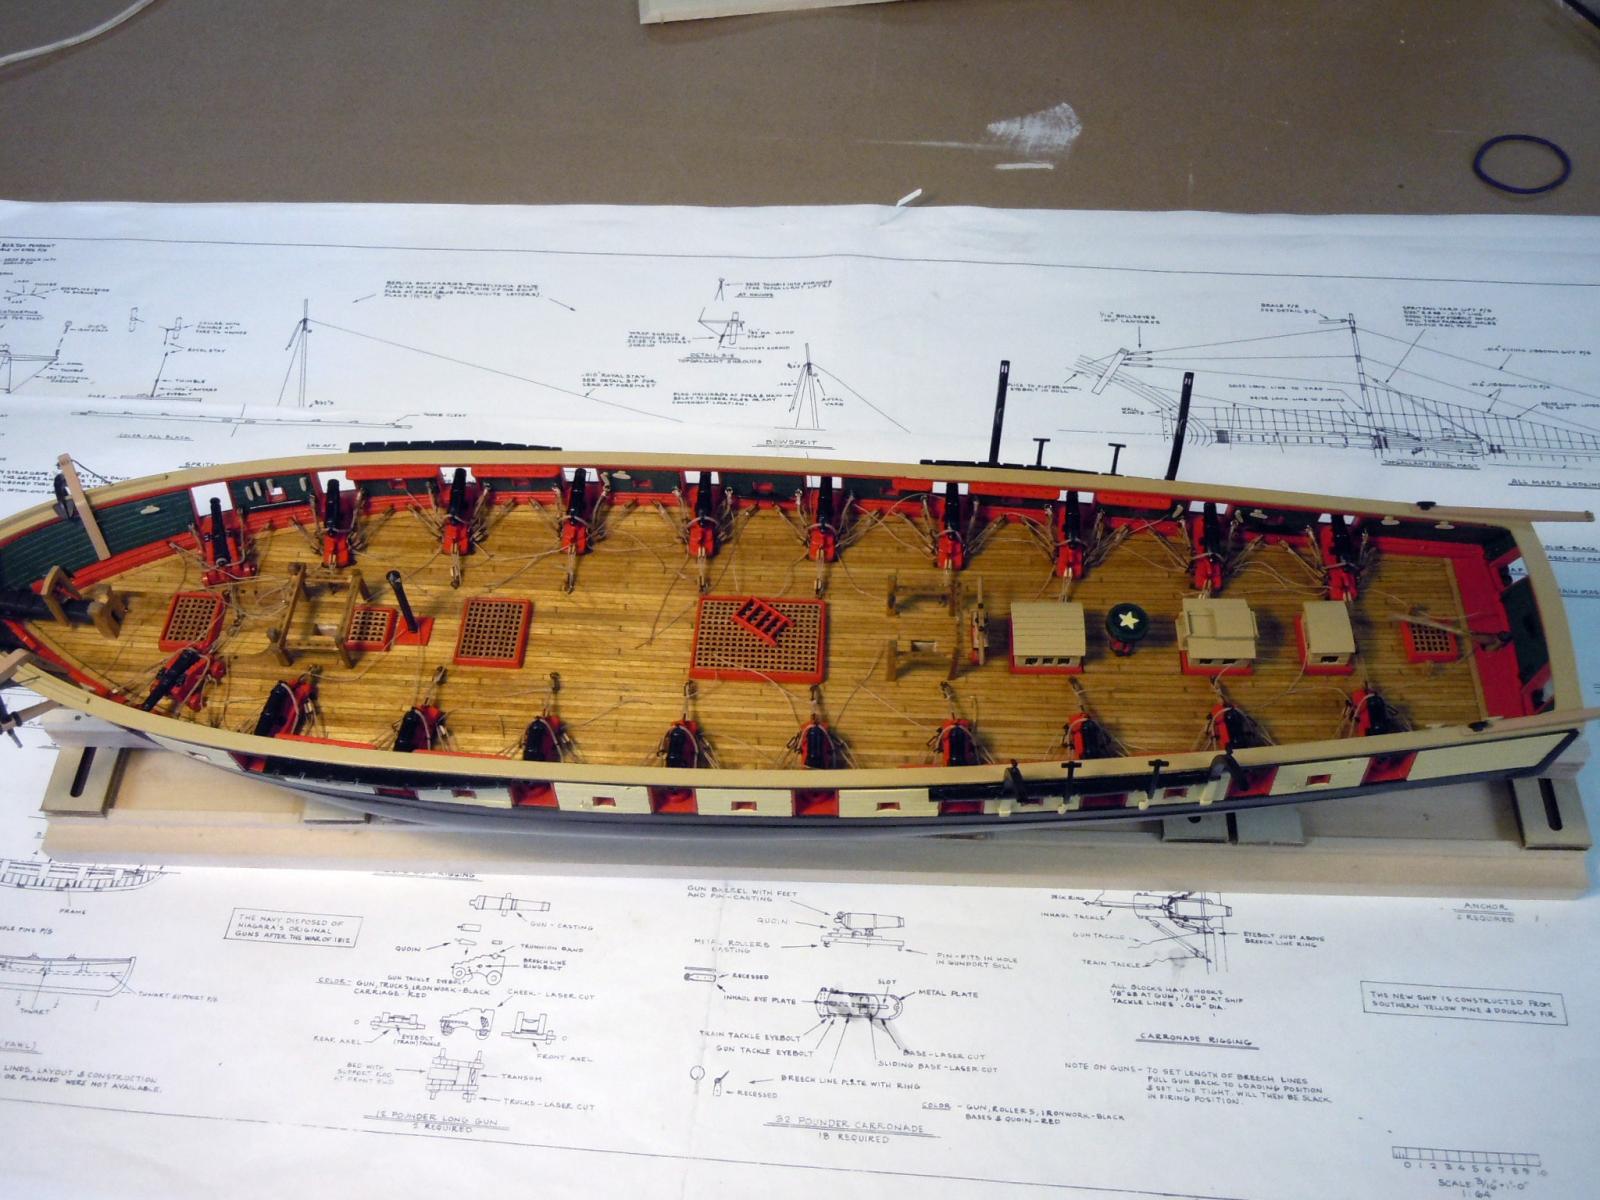
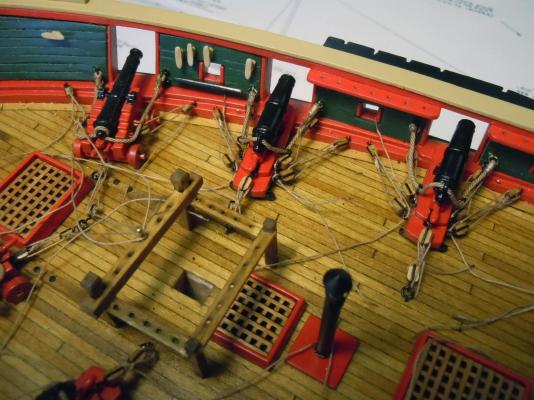
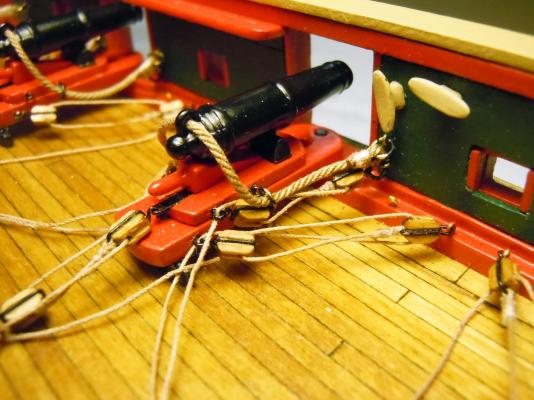
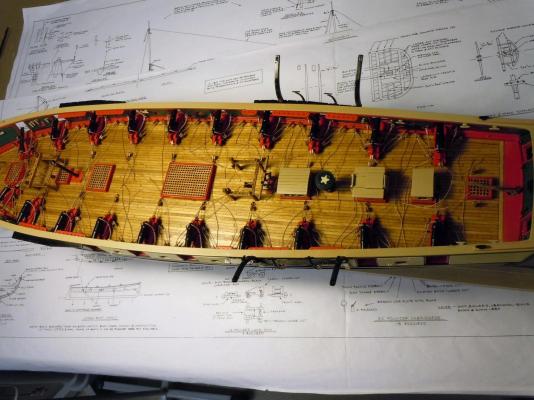
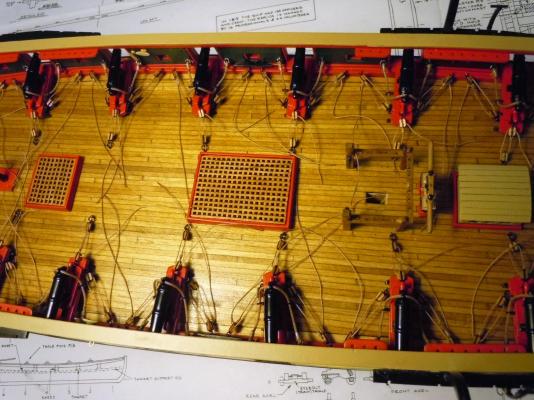
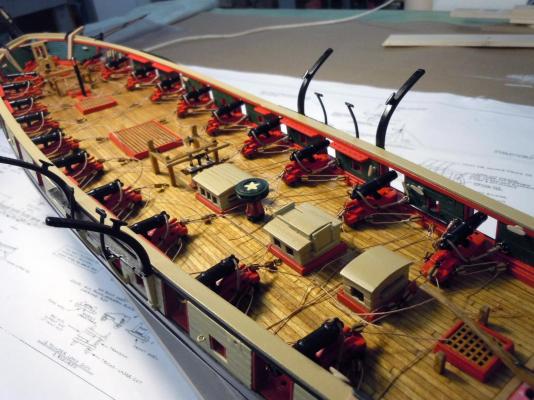
All the carronades have their tackle and in haul lines rigged and ready for attachment once I sort out where they are to be attached. I am guessing that the in haul lines are attached to the deck rings and then coiled to keep them in place and loosened for lateral adjustment. The tackle lines I am still trying to figure out where they are attached and then coiled. There are no details on the plans showing attachment details. Checking on the internet I have found several variations so now to see which would be best. Here are a couple of pictures and I must say that patience is really required.
- 440 replies
-
- 7
-
-
- niagara
- model shipways
- (and 1 more)
-
George, here is a link you should save for tools , etc. but this is the soldering boards that I use rather than a tile. Jack the need for heat sinks is based upon the proximity of other joints to be protected and so far I have really not had a need for them. When I think there might be an issue I may use a lower temperature solder like 50/50. The site below you may wish to explore for tools as well. http://www.ottofrei.com/Solderite-Soldering-Board-Hard-Compound.html
- 440 replies
-
- 3
-
-
- niagara
- model shipways
- (and 1 more)
-
George, yes as long as it is a high fired glaze, not a Terra Cotta one. Micro Mark offers a soldering surface that you can even pin into.
- 440 replies
-
- 3
-
-
- niagara
- model shipways
- (and 1 more)