HOLIDAY DONATION DRIVE - SUPPORT MSW - DO YOUR PART TO KEEP THIS GREAT FORUM GOING! (Only 13 donations so far - C'mon guys!)
×

liteflight
-
Posts
206 -
Joined
-
Last visited
Content Type
Profiles
Forums
Gallery
Events
Everything posted by liteflight
-
 Not so! the bamboo end grain Is just what it is, and is a perfect material for the job. If the shipwrights had had Sikaflex they would not have persisted with loose caulking, would they? Well apart from a few nostalgia buffs! fascinating build
 -
Kris. Good news! if you can cut 6" wide planks in, say 1/8 ply (or a bit thicker - what would be the next size up? 17.5/64ths?) you are cooking with gas! Your inclination is to use the frames proper attached to the keel - and you could glue /screw these the jig bulkheads so that they are removable (the jig bulkheads not the frames proper 🙂) The bulkheads of the jig need only be 6 inches wide - if really necessary they could have another shaped bit of 6 inch plank screwed/glued across the top (the dreaded hammerhead bulkhead!) to make more width Christian's jig is pretty much what I have in mind - I don't think you need hundreds of bulkheads, as the strakes pretty well take up a viking shape on their own!
-
Well done with the remake of the castles. What you had to do not what you wanted to do! and well done too with the halliard knights- perhaps you could start a bric a brac shop with discarded knights? I am practically certain that you have extensively researched the use of garden hoses as jury halliard. What a sensible way to get the hand position appropriate. It’s not clear if you were singing a Byzantine shanty as you hauled. Did they blow the man down? Or was that the task of the siphoneer? Glad you went with the action decision on the sails - it will be stirring to behold. And you can carve something less repetitive than 756 hunched rowers! You could, of course, carve each of them as the photos above! but not the hose
-
Thanks, Balclutha I have read all the Viking logs I could find, but would have to go back over them to find the relevant details of what they used. I seem to remember that someone (Jack P?) used a specialist railroad track pin I still have hopes of “rolling my own” from wire as per a video. Howsomever: I will still need to blacken them. Another learning opportunity! Im familiar with lacemaking pins as my family used to make lace, and I “liberated” some for my aeromodelling vices habits
-
There's NOTHING like stimulated wood grain! Angry triffid syndrome! Sorry. I intentionally misread your post. I was aware of most of the materials available, but did not have a strong expectation of printing oak In any case I do not currently have the skills (nor the CAD program) to model them for printing (or milling). I think I will whittle some in a hardwood (ochroma pyramidalis), so please don't mention that to the balsa-haters on the forum (I have Glyn Guests permission to use balsa as long as I use no finish on the inside!)
-
Thanks Kris I had not looked at the range of videos. I see that there are two down towards the bottom on the Gokstad Faeringen, which are the smaller boats with carved ends that I need to build! it may seem like heresy of the blackest kind, but the carved prow/stern shapes might be suitable for 3D printing. I wonder is it possible to print in northern oak? ;-}
-
I’m interested in rowing mechanisms, but only for a single or twin oarsman. My feeling is that trireme, galleys etc get rather too mechanical somehow. There is always a lot of interior mechanism that reminds me irresistibly of walking beam devices on old farm machinery I respect the brilliance of the builders, but it does not grab me I am imagining the scarfph as being about 2T long. The strakes are 1 mm, so about 2mm of scarf glued and clamped maybe with dummy rivets speaking of rivets I must reread the builds of my guiding lights, and rediscover where they got scale type rivet heads - and how to blacken them (in Australia under lockdown !) must learn more about Scarff-Dibovski gear. Unrelated but the discussion got me on a train of thought..... And that 2f Scarff also gave his name to the observers gun mechanism used on British 2 seaters in WW2 and way beyond
-
I recognise the material of the tree nails! That looks to me like end grain bamboo? if it is we (and Harold Underhill need a new shipbuilding term, “grassnail”
-
Indeed I did mean in the thickness, just like the piccie. that looks to me like a scarf not much Longer than the thickness of the strake, and each is riveted, and also no doubt “towed” and tarred, although I’m not seeing that. Since posting here I have been grabbed by a burning desire to make a model using the fully carved prow and stern parts. Not necessarily a mega- ship, but I have found faerings with 3 strakes and ends. And I have also confessed to youall my desire to make the sailing version of oseberg basically in the same size and construction, with the mods required to deal with radio control and non-scale water. if anyone is interested I have ideas for making really efficient square sails. Please no one mention Maltese Falcon, as she, too lies in my future (probably can’t afford the full size one)
-
Hi, Kris if you mentioned a baseboard I must have blinked. Your tall bulkheads I assumed would be fixed to a robust base board. My preference is for substantial square bits of wood 3/4 inch sq to be glued to the bulkheads and screwed to the baseboard As Louiedafly says you can also screw/ bolt the removable parts to the rest. this could also take care of the removability issue, as you could unscrew the end bulkheads (leaving them in the ship) and withdraw the rest of the planking jig) - having freed off the glued bulkheads (see later) I can’t help feeling there is a more elegant way of fixing your masterpiece of a keel to the formers than glue. But at the moment no bright suggestions. Incidentally are you familiar with balsa cement? Wonderful stuff and one of its best habits is that it can instantly dissolved with acetone even after many years. So that might be a type of glue to consider? Incidentally you can make your own, especially in a house with children of the two most numerous genders, as it is table tennis balls ( celluloid) Dissolved in acetone (nail varnish remover). Make sure you replace both after you have half-inched them to make glue. if you choose to use nail varnish instead you should choose a fitting colour and be wary of the “likes” you might receive 😌
-
I like acrylic varnish for soaking papier-mâché (there’s wonderful, the spellchick has put all the correct accents in) it’s readily available in the uk, as quick-drying indoor varnish, but in Aus. I have only found it in art shops, masquerading as “acrylic varnish” . Who knew? it can be thinned with water, or official thinners for acrylics, but that is not a great idea when we want the final part to be flat and wrinkle free.
-
Haven't heard of that one - I did know it as cack-handed (the idea doesn't bear thinking about), or now you're in Oz you'd be called a molly-dooker. Well, every day........... Each region of the UK has one or more names for being a leftie. My father from Cumberland always called it cack- handed ( completely different root to the cack, I fear, that you were alluding to) also corky-fisted (Leicestershire), caggyfisted (anywhere ooop north) and multitudinous other variations including corrie fistit or corriedukit in Scots. I suppose the dukes are hands or fists, and maybe that’s where the dooker bit of the oz phrase comes from. careful with the “molly” please 😁 in reality since we lefties have to live in a right handed world I’m pretty ambisinistrous Another step or two forward with the ship ( I incline towards names that might appeal to a powerful queen of refined taste, perhaps “svartr mor” ( my stab at black gull), rather than “wave leaper” or “ dolphin slaughterer” or other splendidly warrior like names i can see Q Asa saying to an aide “ get black gull ready and bring her round to the jetty provisioned within mead and popcorn for a 2 day outing”. Or wiking equivalent I have test-fitted both parts of one of the garboard strakes (gs) to find out how much overlong they are. This will determine the length of scarf joint between them and where it can be placed. They over lap by about 30mm, so that is how much I can stagger the joints on alternate strakes. The “Instructions” Have a pictograph that Might suggest a 45deg chamfer for the scarf - what I would call a 1:1 scarf. I will make it longer than that and might even add a backing doubler for the strakes that will never be seen again i have a dinky little Micromark belt sander* which with the right jigging make delicate and precise scarf tapers *great little tool which runs on 12 to 18 vdc. It’s drive transformer, like all Micromark things is 110vac only. It was a gift from my lovely Admiral decisions I will apply the first few strakes ( certainly the garboard) without staining them in advance. I have a feeling that It will be better to see clearly the fit and glueing line on bare ply In each pair of strakes one is fitted this way out, and t’other t’other way, if you see what I mean. So half of each strake has laser splash and dark spiders all over it. Not too problematic, but not difficult to have avoided if anyone had wished to avoid it. The mast fish is a certifiable Abomination as modelled by Billings. It is a load of laser cut ply bits glued together and rounded to a glorious organic shape. My guiding stars, JackP and VonKossa also consigned it to paperweight status and carved their own from blocks of treewood. I aim to do the same. Next the fairing
-
That looks like a very well faired hull to me, with just a tell tale line of char at the edges Next stop the planking?
-
Reminder to self! Between the two end frames at both ends of the boat there is supposed to be a laser-cut part from 4mm ply which is notched to fit the frames. The two ply pieces are what , as an engineer, I would call a "rattling good fit". In practice they fall out as the distance between frames is greater than the length of the part. I cannot have, I believe, placed the frames wrong, as they both fit laser-cut shoulders on the keel. All the frames were set vertical and square to the keel, so I am regarding this as a simple error of cutting. Surprising, as in many respects Billings have made most other parts fit well. Ah, weel; Nutat Jovem!
-
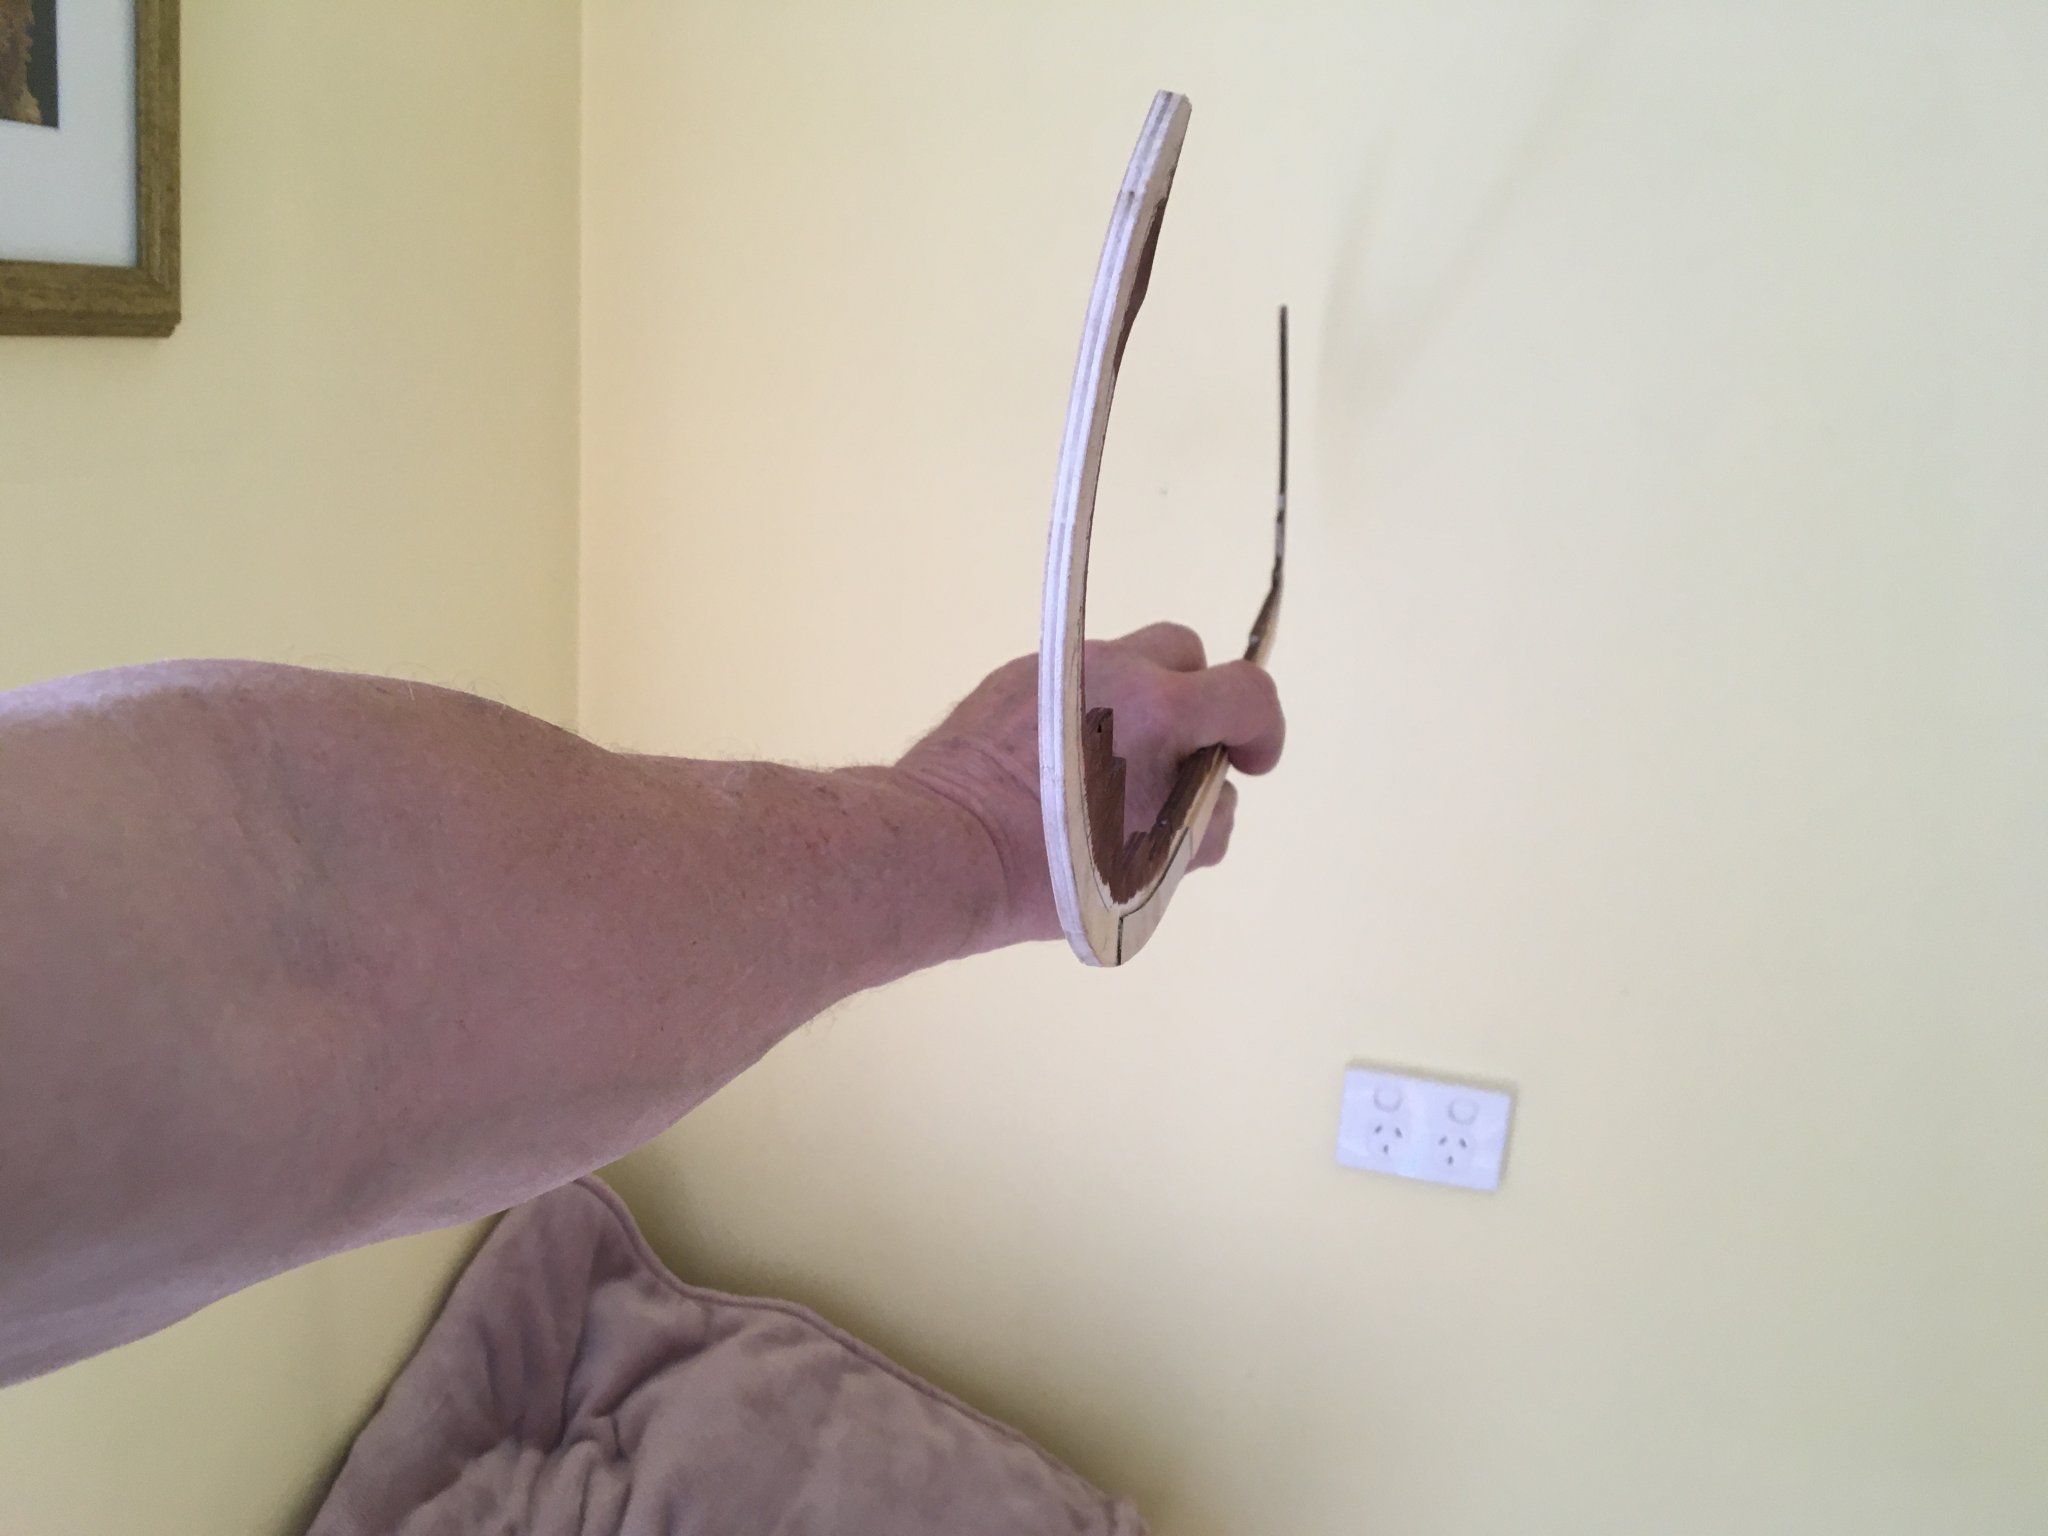
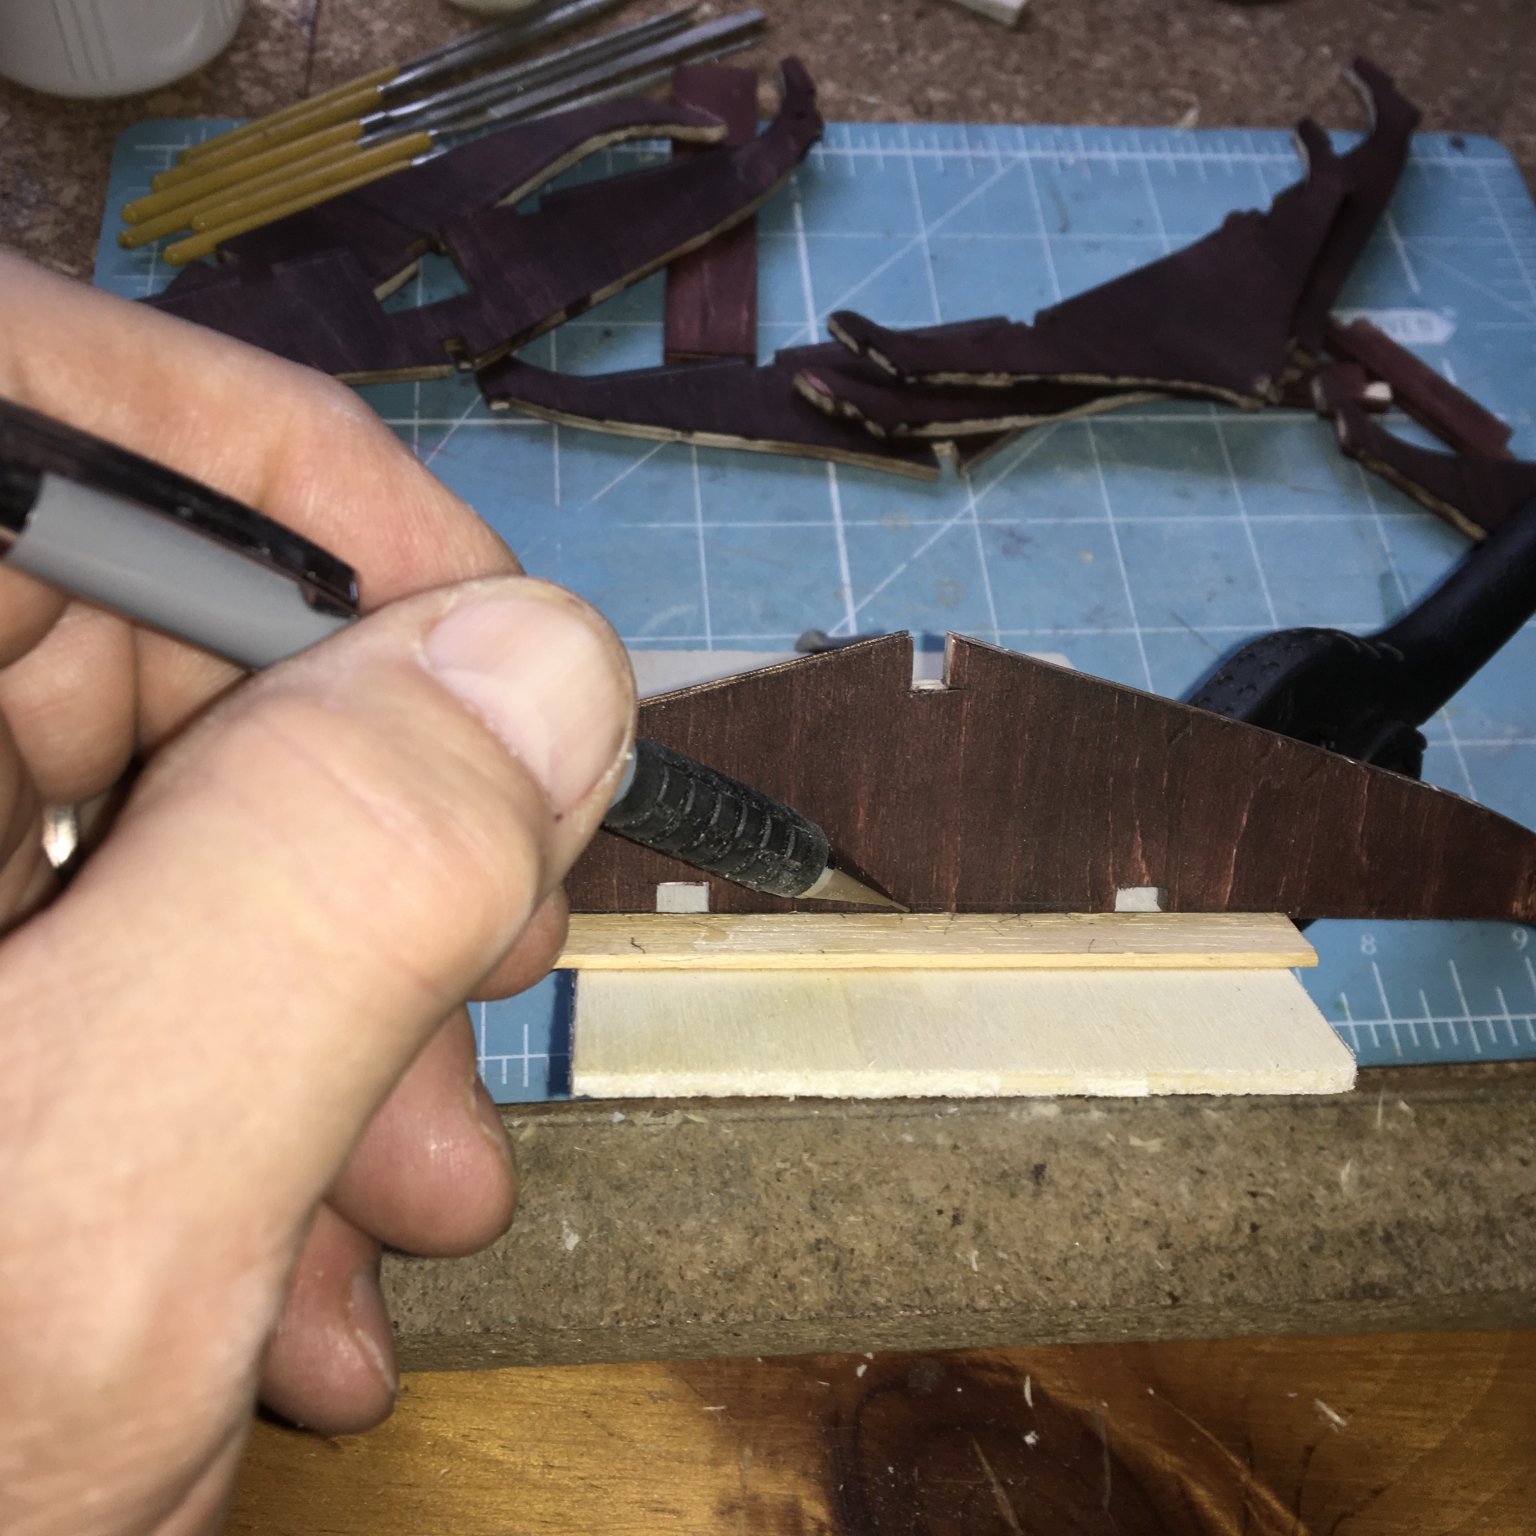
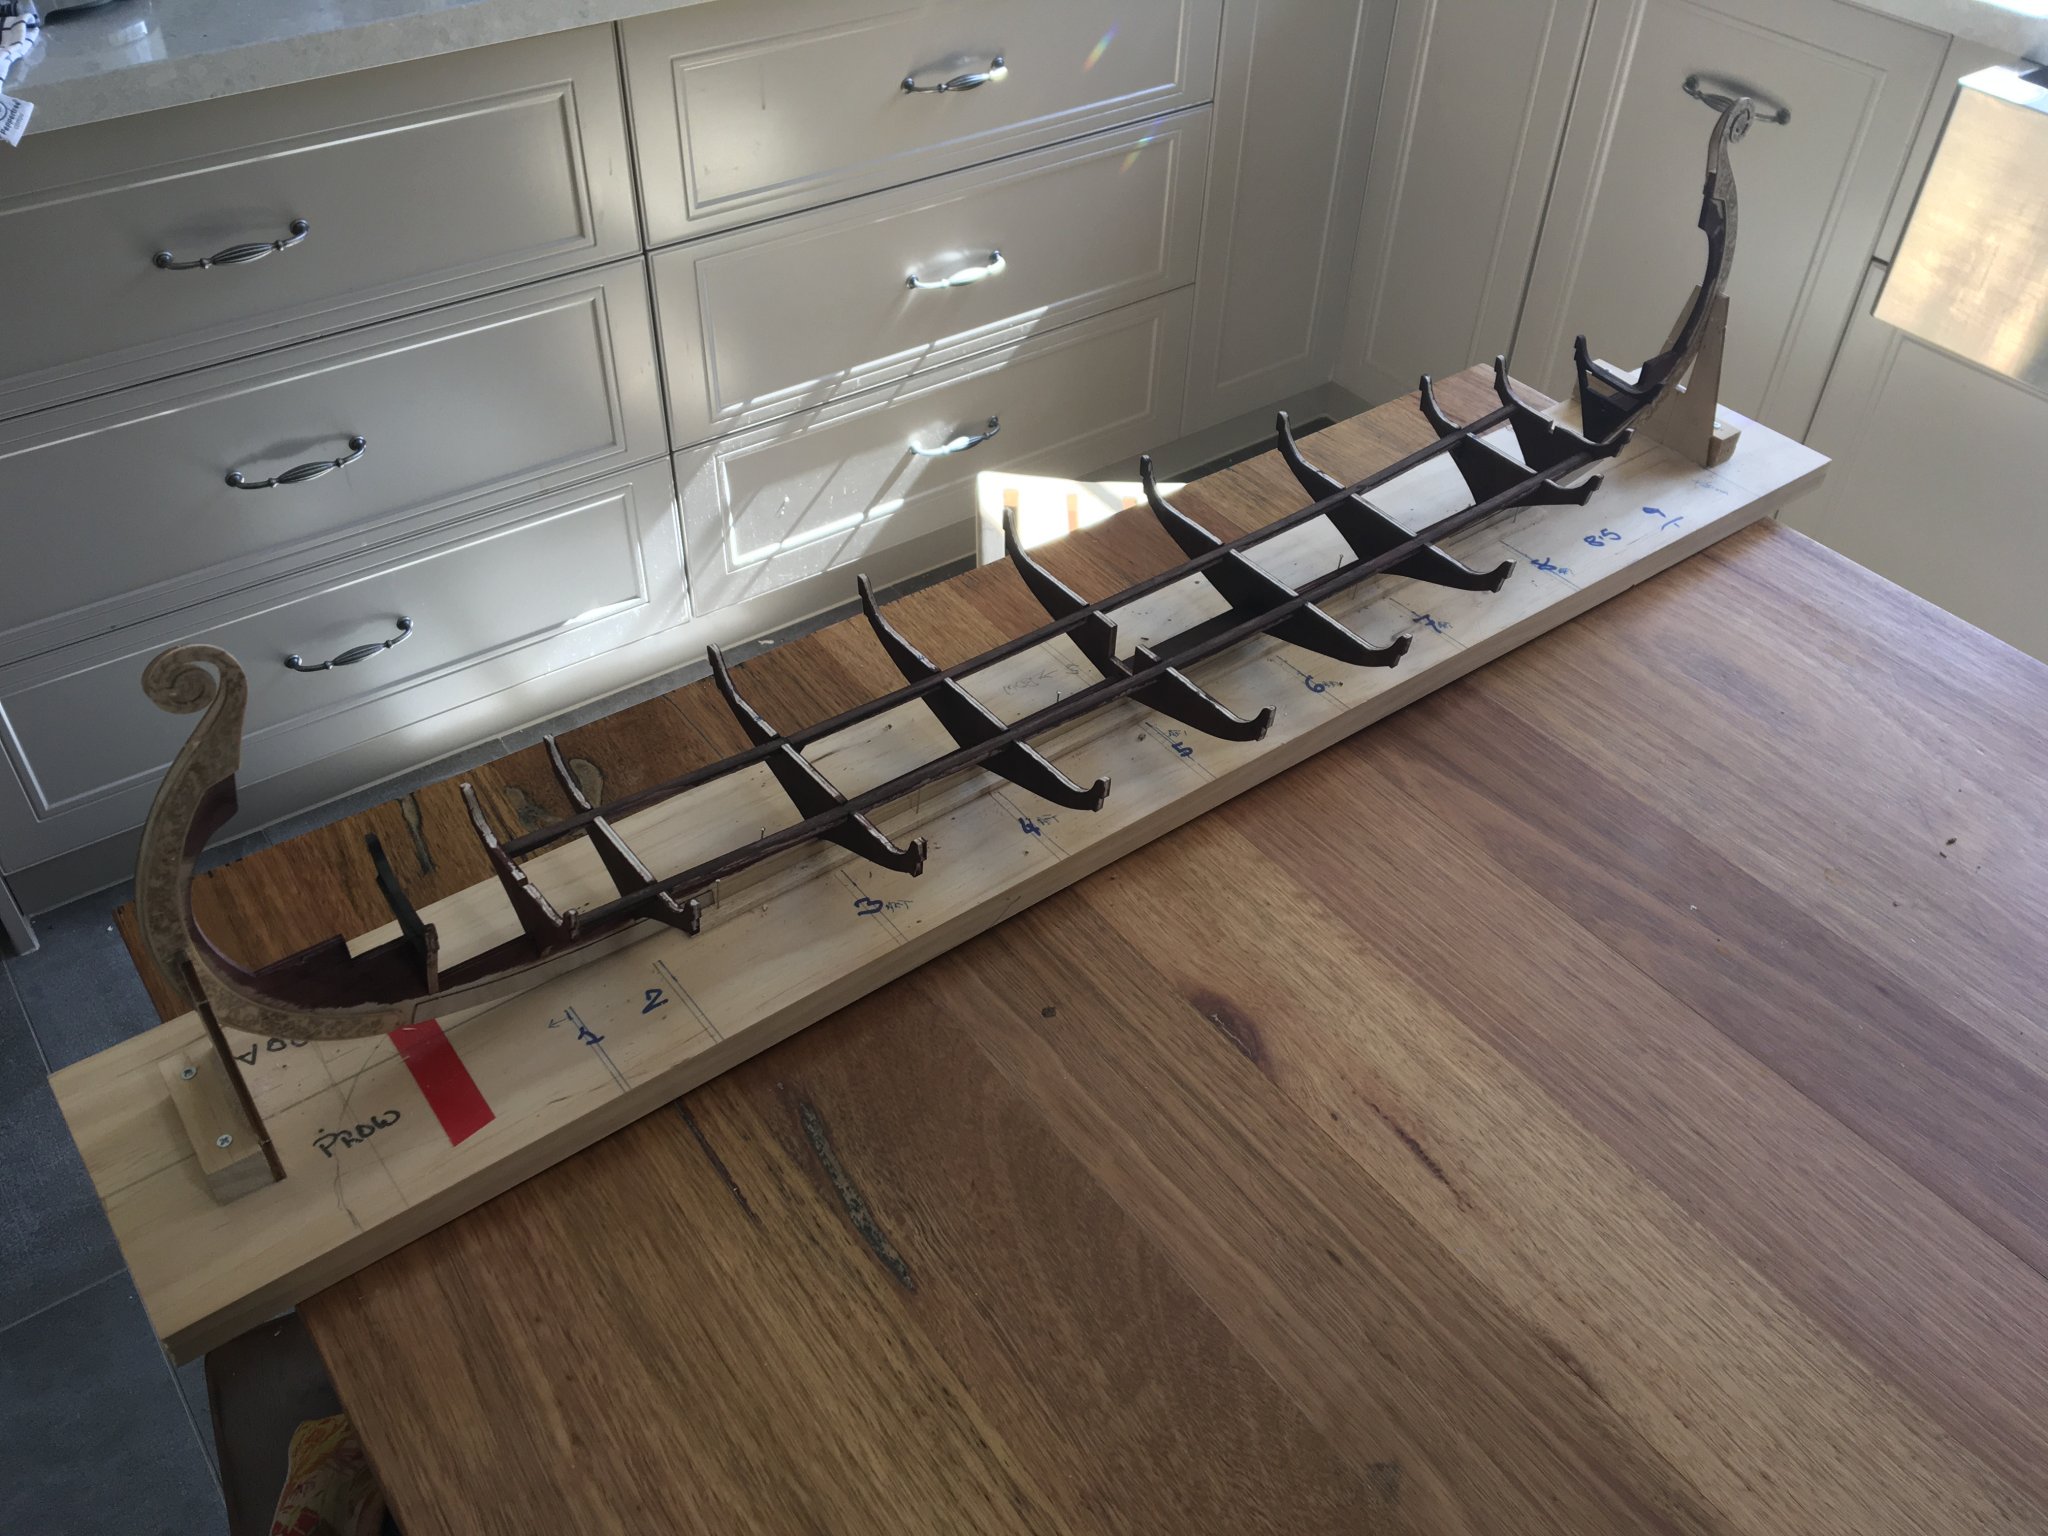
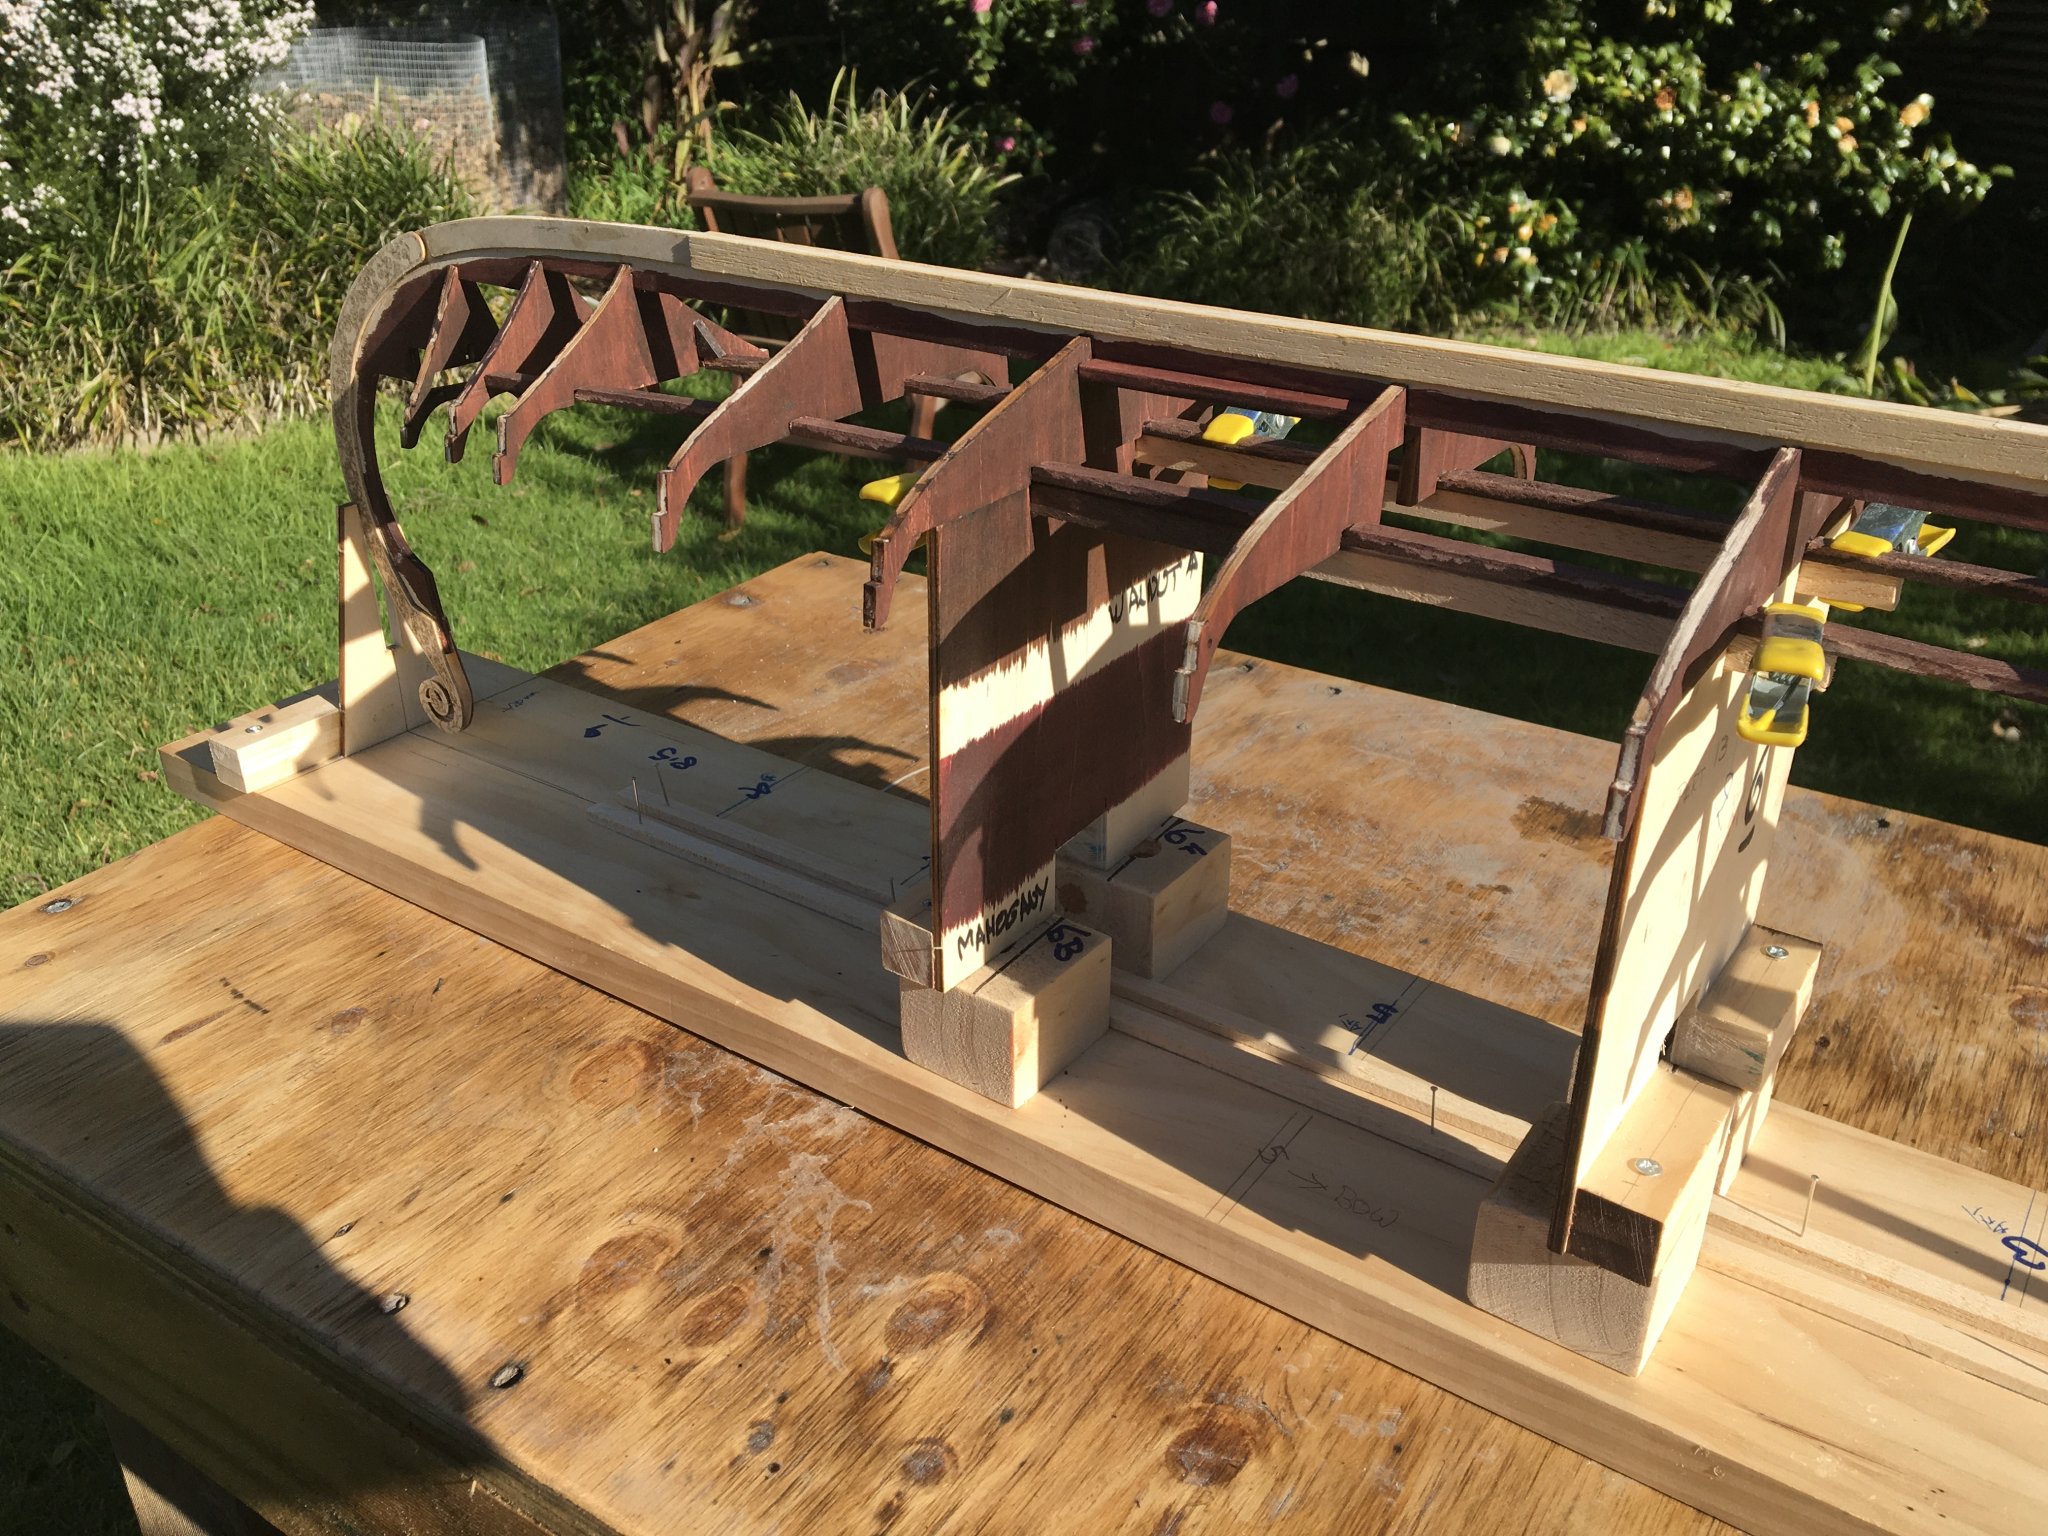
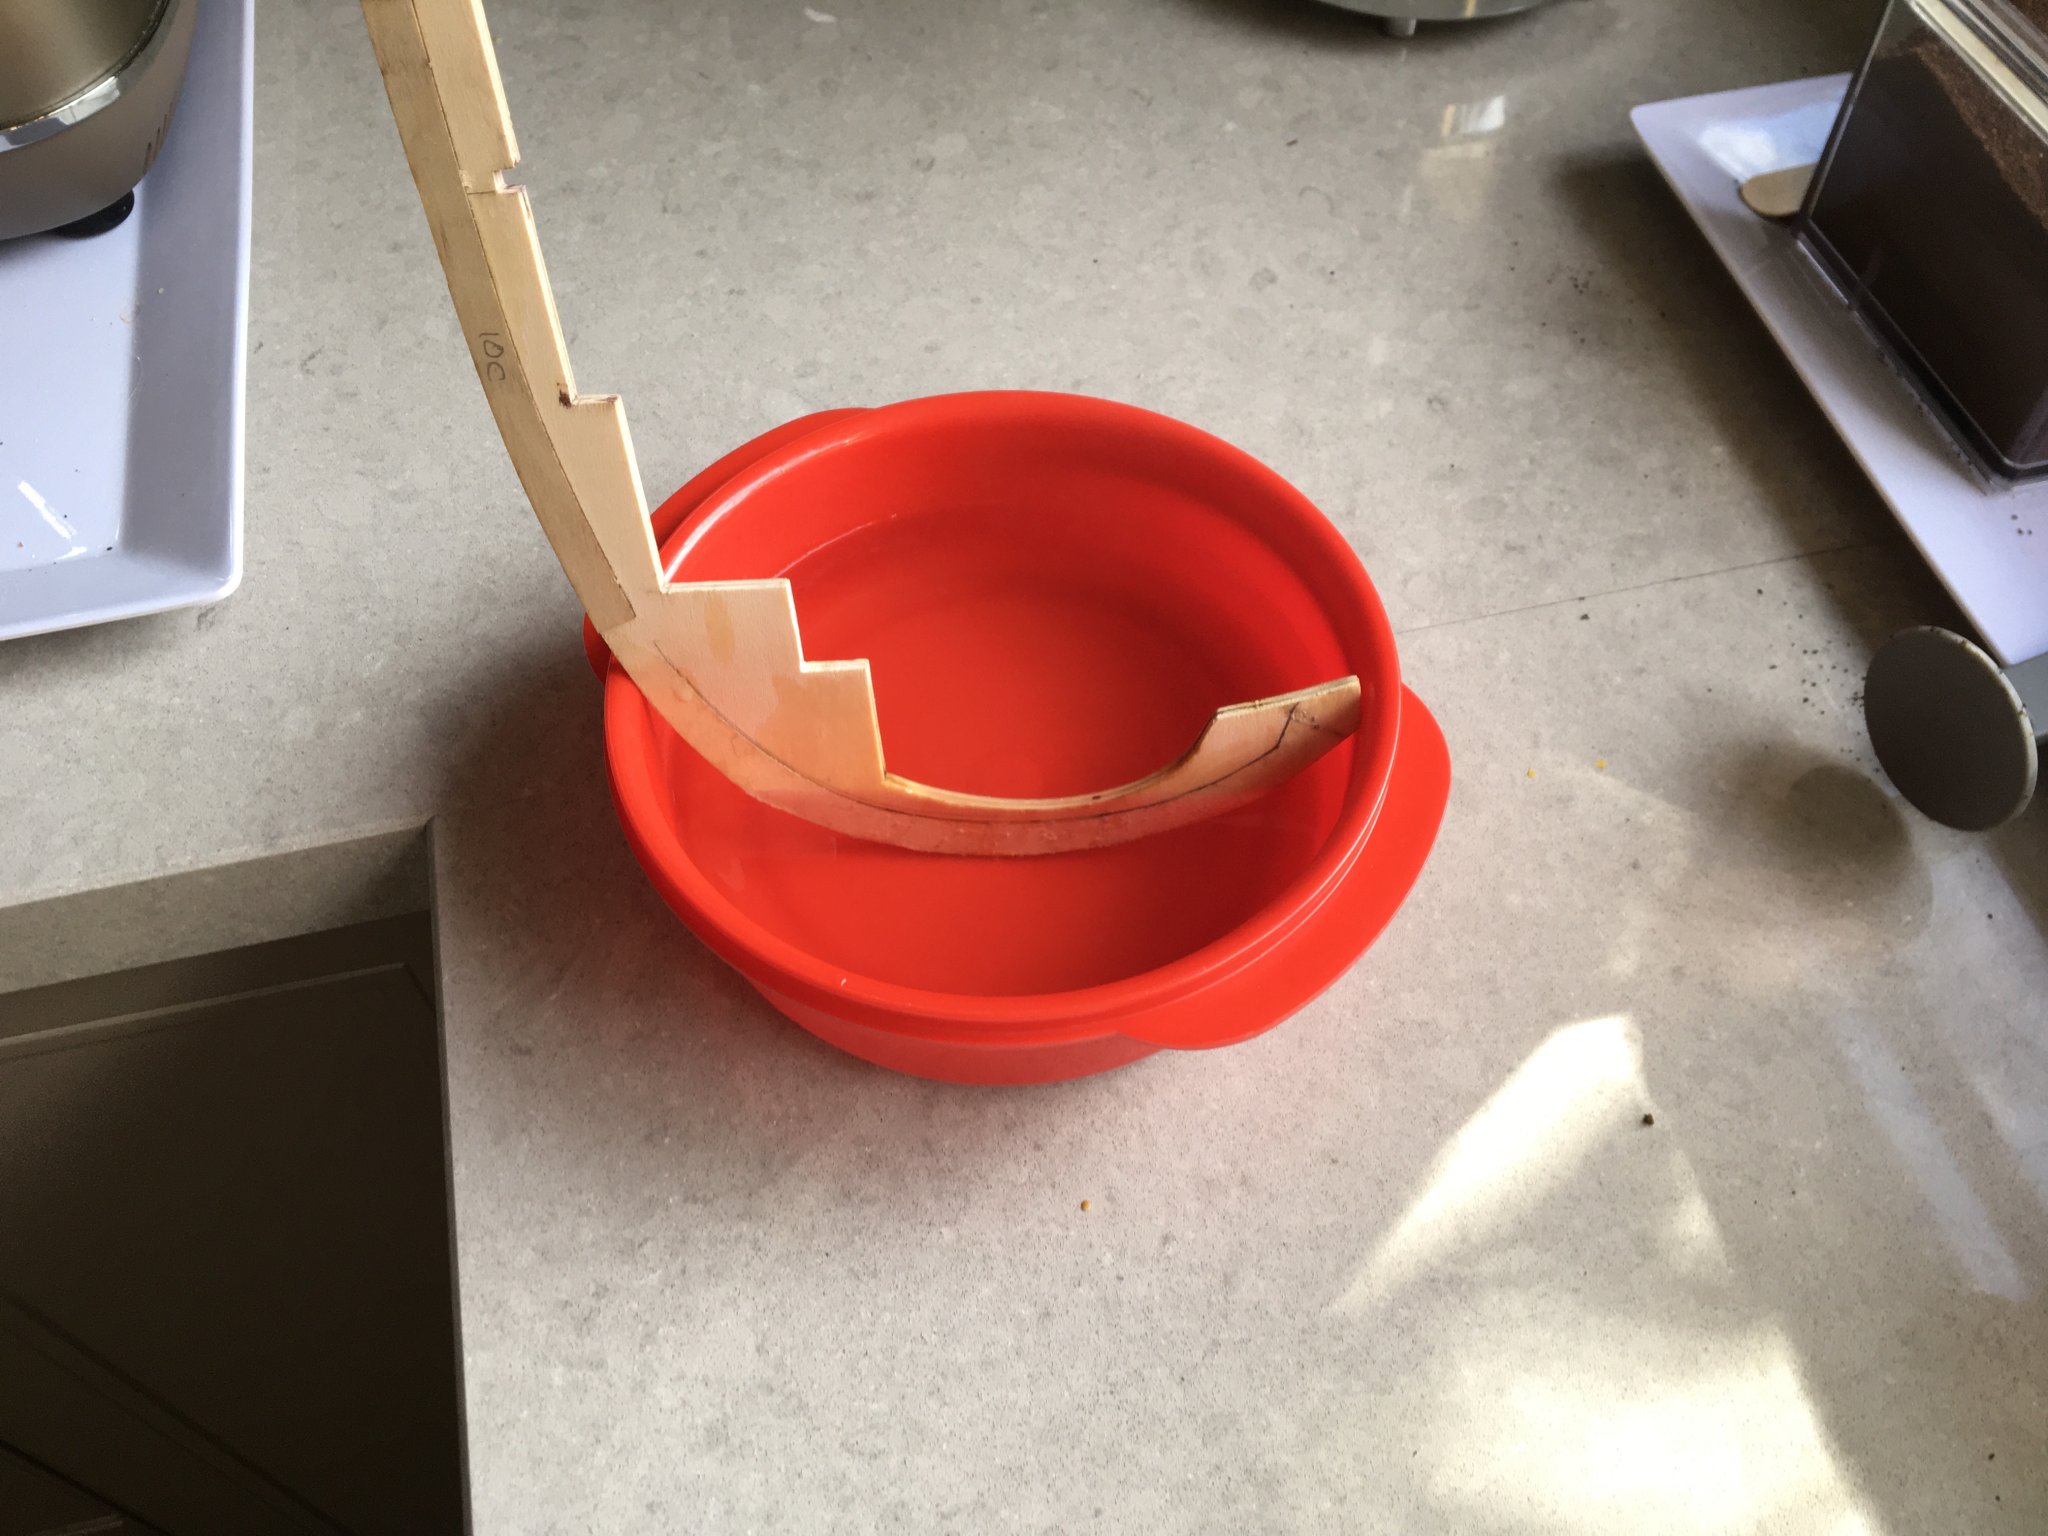
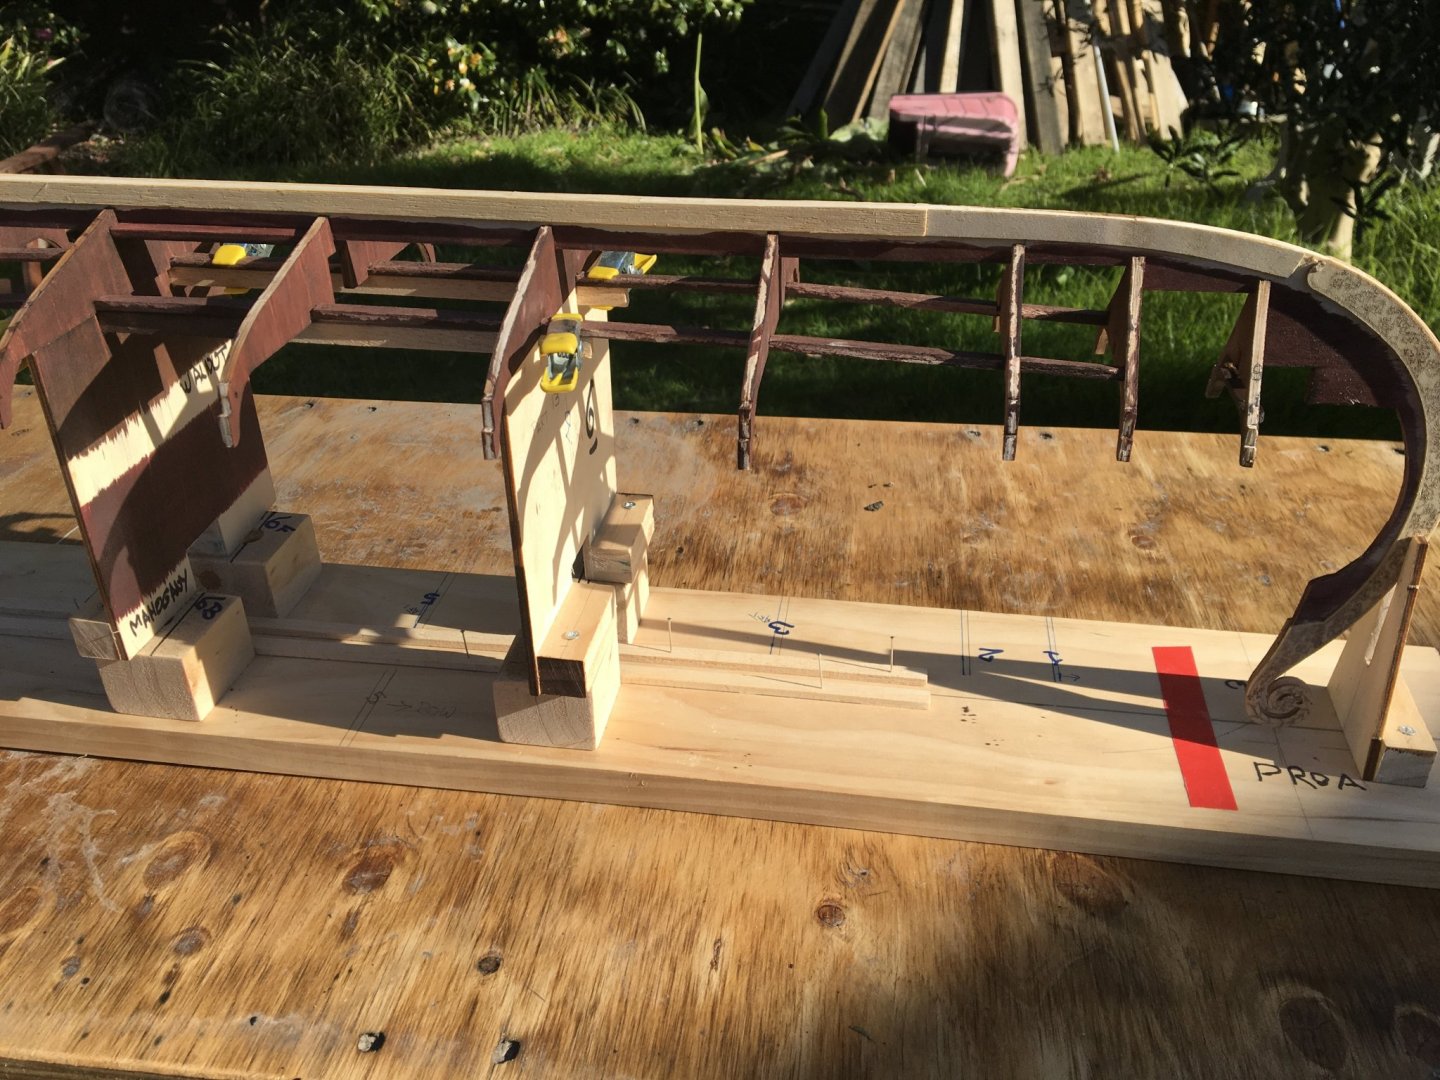
Kris, Glad it tickled you. Mind you none of this, as Louie-da-Fly sez is supposed to be fun! No doubt that is why he rigorously stamps out and eliminates redundancy: and any hint of levity! Progress with Osberg! This is how bent the prow was when I removed the prow and stern doublers. I WILL get it straight! And after a few sessions of hot (boiling) water and clamping with progressively smaller spacers it is now reasonably acceptable. The part is made of 5-ply but only the outer layers are the finish wood - the rest appear to be a very soft and porous wood. The prow now has just a small twist, so that the dragon is looking a few degrees to the side - no doubt looking where the ship is turning to. I may (or may not) try and eliminate this last twist I have pared the inner layer off the laser-engraved scrollwork, sanded it all smooth and glued all 4 of the main bits of dragon scrollwork to the keel. Also made a little jig and marked all the frames so that I can add a floor support which will land 1.8mm below the horizontal part of each frame This is a rather strange view of the marking going on - I am caggy-fisted (left handed for English speakers) the spacer used in the jig is , naturally a length of the 1.8mm obechi which will (probably) be used for the flooring. I am hoping that the regrettably open grain of the obechi will resemble the look of old riven (cleft) oak. Hoping is free! So after a second round of careful fitting of the notches on keel and Frames (the stain proved to have made several of the parts expand enough to prevent assembly) Unexpected! but lesson learned The kit supplies some parts to make an inverted jig for planking - laser cut ply parts to elevate the frame and locate the prow and stern. But by installing the scrollwork at this stage I need to modify the supplied jig to raise the whole support assembly by another 30mm so that the rather fragile dragons head scrolls do not contact the build board. Also by lowering the long stringers by the floor thickness I have "raised" them as far as the jig is concerned, but this is negligible compared with the 30mm for the scrolls. This is the inverted (planking) support structure . The ply plates are supplied, and they have a pair of 4 x 8 stringers which are clipped to the ship stringers with the yellow clamps shown (the "instructions" show clothespegs to hold them together. The stringers on the ship are showing some loss of stain - this is because the stain caused them to expand too much to fit the laser-cut slots in the frames. Rectified by sanding the sides of the stringers till they fitted correctly. I'm not too upset at the uneven look as I expected to do a considerable amount of making the staining look even, anyway. So now I believe that I am close to being able to start the planking. Trial fit of the garboard strake shows that it conforms well to the keel and rebate shape and the twist of near 90 degrees is no problem with mm ply. I will probably hot set the strakes so that the glue is not holding any large bending or twisting. I still have to fair the frames so that the planking can lie flat against all frames. This did not seem too severe when I tried the Garboard strake, even with the end frames. I expect to use a batten to establish a fair curve, and I have just taken dozens of tongues off Tongue and groove floorboards, so I think I have ready-made battens! I think that I read somewhere that the actual Qseberg strakes were approx 25 to 30mm thick. At 25:1 scale this translates to 1mm, so scale planking!


-
And after the diversion the castles are better and stronger, toooo. I have some faint recollection of an historic ship that you were building and contemplating the rigging of ( please excuse me for using a preposition to end a sentence with) I would apologise for inadvertently triggering the diversion, but I enjoyed it and hope that it was a valid therapy for “carvers thumb of the brain” and/or xylokastra blues. You followed effectively the aeromodellers mantra which is that following re-kitting (aka a tentpeg landing) you place the bits in a bag and do not look at them on that day. The next day, magically, they are not as badly comminuted and you can see the way to repair it.
-
Interesting weird eclectic knowledge that the denizens of this forum posess! not only on the detail of dromonry, but the far edges of linguistics as well. I feel in serious danger of learning several new things each day,! And at my age learning new stuff, even about boatbuilding, is a GOOD THING
-
I like the practical use of masking tape! Seems to work well!
-
Progress, and a few learning experiences on the ship ( wish I had a name, everything needs a name) Dark now, so no new photos good news - I have tried fitting the garboard strake, and it seems to want to belong, and the near 90 degree twist is easy in the 1mm ply good news - a quick inspection shows that the end frames will not need much fairing, but maybe more as I get up towards the gunwales Good news- the prow is near enough straight after some brutally honest discussion involving boiling water and clamps Less good news, - the ply snapped we discussed the required degree of straightness, but has been fully repaired less good news- the stain I had commenced using is the mixture of mahogany and walnut, not the walnut alone. AND it causes both the Billing’s ply and obechi to expand considerably! Unexpected, as it is spirit-based, but rectifiable Photos follow of the frames finally fitted, marking height on each frame for the deck support batten, the longitudinal stiffeners ( which I managed to break as a result of notching them to half their depth so that they clear the final floor Can’t find a way to drag images into text on the iPad, so I won’t photos in better order tomorrow

-
Thanks, Steven I also found the various paintings, and some of them are very “atmospheric” and would be inspiring I’m unsure about the policy on reproducing assorted pictures on this Forum Apart from the Maltese models for sale, most of the models seem to be the same one from, I think, Model Boats. The second and third references are similar rigs, and powerfully evocative to me. There is also an interesting wee triangular sail apparently flying from the sprits, or praps the captain’s bikini being dried after a refreshing swim? No, you wouldn’t. I learned this from my Father, who was a French teacher after the war. It’s not poetic and is far too simple to be thought about. Poetry? I don’t know any! Much In actual fact I don’t know how to forget any poetry, including all the hymns and songs ever heard!
-
I note the tidy nature of the workbench; and after all that carving. I note also, with intense curiosity, the Vegemite jar. A natural stain for a homespun rowers tunic? Lubrication for a thole pin? I also love the scale clothes peg and will have to go and create a venerable text On its use as a pseudoparrell.
-
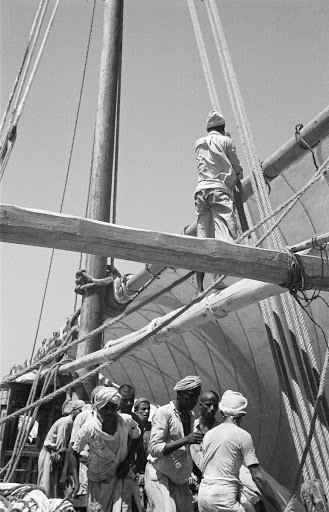
Steven Love the lateen pics. In my future lies a a sailing Luzzu. There was a plan published in one of the comics, but the sailing rig was a bit conjectural with two lateen sails and a headsail set on a bowsprit The picture of the unfurled (unbrailed) sail Would be hazardous in the extreme if the wind was coming abeam and rising. I can see that on the narrow beam if a dromon it would get snargled round Tholes, oars, coffee cup holders etc, as well as dipping in the water and becoming unmanageable. The captains (nautarchs?) would be well advised to douse the sails early and break out the sweeps. with your carving skills, the enterprising chap on a rope would be, I hope, fun and a relief from rows and rows of rowers! As to him swinging round; You could a)Cheat and wire the rope to stiffen it (I often use copper wire repurposed from transformers, etc) Or have him with an artifact slung over his shoulder which acts as a steady, or perhaps a long-stemmed rose held in the teeeeth to serve as a steady b) let him swing. How flukey are the winds indoors in Ballarat, eh? c) pose him like stout Cortez well up the yard gazing at something with a wild surmise ( I used to wonder if this was some sort of telescope, and why would it be so wild?)
-
What a relief! Now I understand all the baffled looks when I sang. If the sails would only be used for running with the wind astern or very close to that; there would be little need for tacking, or handing the sail round the mast. So the running rigging would be simpler as the decision would be “sail or not sail”. So I’m not sure about the rope you label as “vang” and it’s usefulness. I have sailed Thames Barges with a big sprit rig, and the vangs would only be used for close-hauled work. ( I have still not become quite reconciled to transatlantic use of the word to mean a kicking-strap, nor it’s pronunciation as spelled). But, especially in the Med, brailing would be important to kill the sail if the wind got into a sub-optimal direction. Dropping the halliard would be faster? But more messy and hazardous to keep the sail under control with the wind, say, on the beam. Do sail handlers really shin up lateen rigs to furl the sail (or release jammed brails ). Must do I suppose, and it would be a colourful addition to your dromon. Thinking a bit further, It would be a good place for a lookout, if not very comfortable, but it would not be impossible to have a semi-permanent canvas sling seat for a lookout. Kinder anyway than a bight of rope on bare feet. but this would only work if the yard was raised in the sailing position. And even a fully braided sail would present a severe windage to an unkind wind.
-
For my 2 denarii worth, she would look awesome with a pair of goose winged lateens. ( and no glue globs) Who knows if sail was used at the same time as oars (sweeps), but I would take a fair bet that it was done, because it could be done. So when you have completed the research and rig- could you fancy a quinquireme (port of registry Nineveh, last port of call: Ophir) with full and weary crew and peacock sound effects? I see you have a neat French bon mot as your signature. I am always puzzled by the French canadien song about “ Alumette, gentil Alumette , je te plumerai.....”. Or do I have something grabled?