CDW
-
Posts
7,755 -
Joined
-
Last visited
Content Type
Profiles
Forums
Gallery
Events
Everything posted by CDW
-
 What kind of veggies and flowers did you plant, Jack? We planted sunflowers and hibiscus hedges at my house this past week. They got rained on real good this afternoon.
 -
M-50 Israeli Sherman - FINISHED - MP Models - 1:35 Scale
CDW replied to CDW's topic in Non-ship/categorised builds
It will be a surprise. Thanks for the kind words OC -
M-50 Israeli Sherman - FINISHED - MP Models - 1:35 Scale
CDW replied to CDW's topic in Non-ship/categorised builds
Thanks Ken. Lots of ponies in the stable just waiting their turn to romp. Trying to decide now exactly what I'll build next. -
M-50 Israeli Sherman - FINISHED - MP Models - 1:35 Scale
CDW replied to CDW's topic in Non-ship/categorised builds
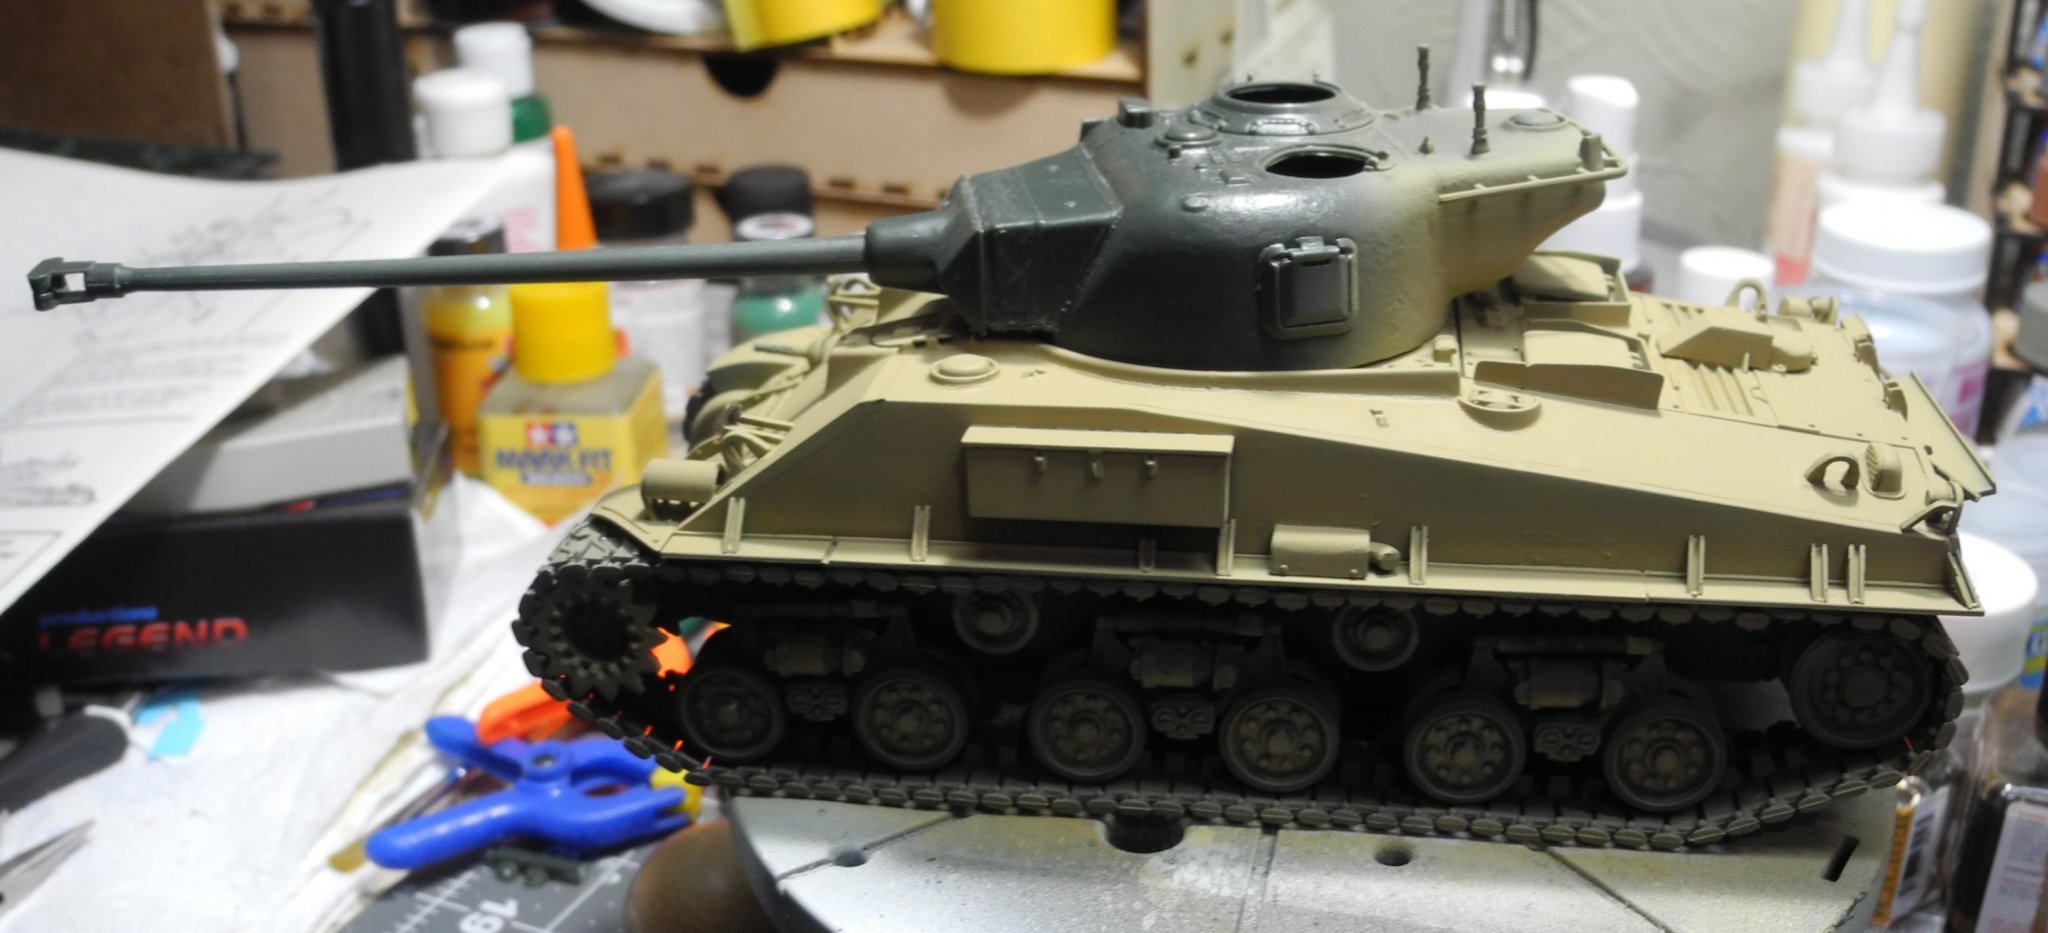
And also will add the 50 cal to the mount on top of the turret. 🙂 -
M-50 Israeli Sherman - FINISHED - MP Models - 1:35 Scale
CDW replied to CDW's topic in Non-ship/categorised builds
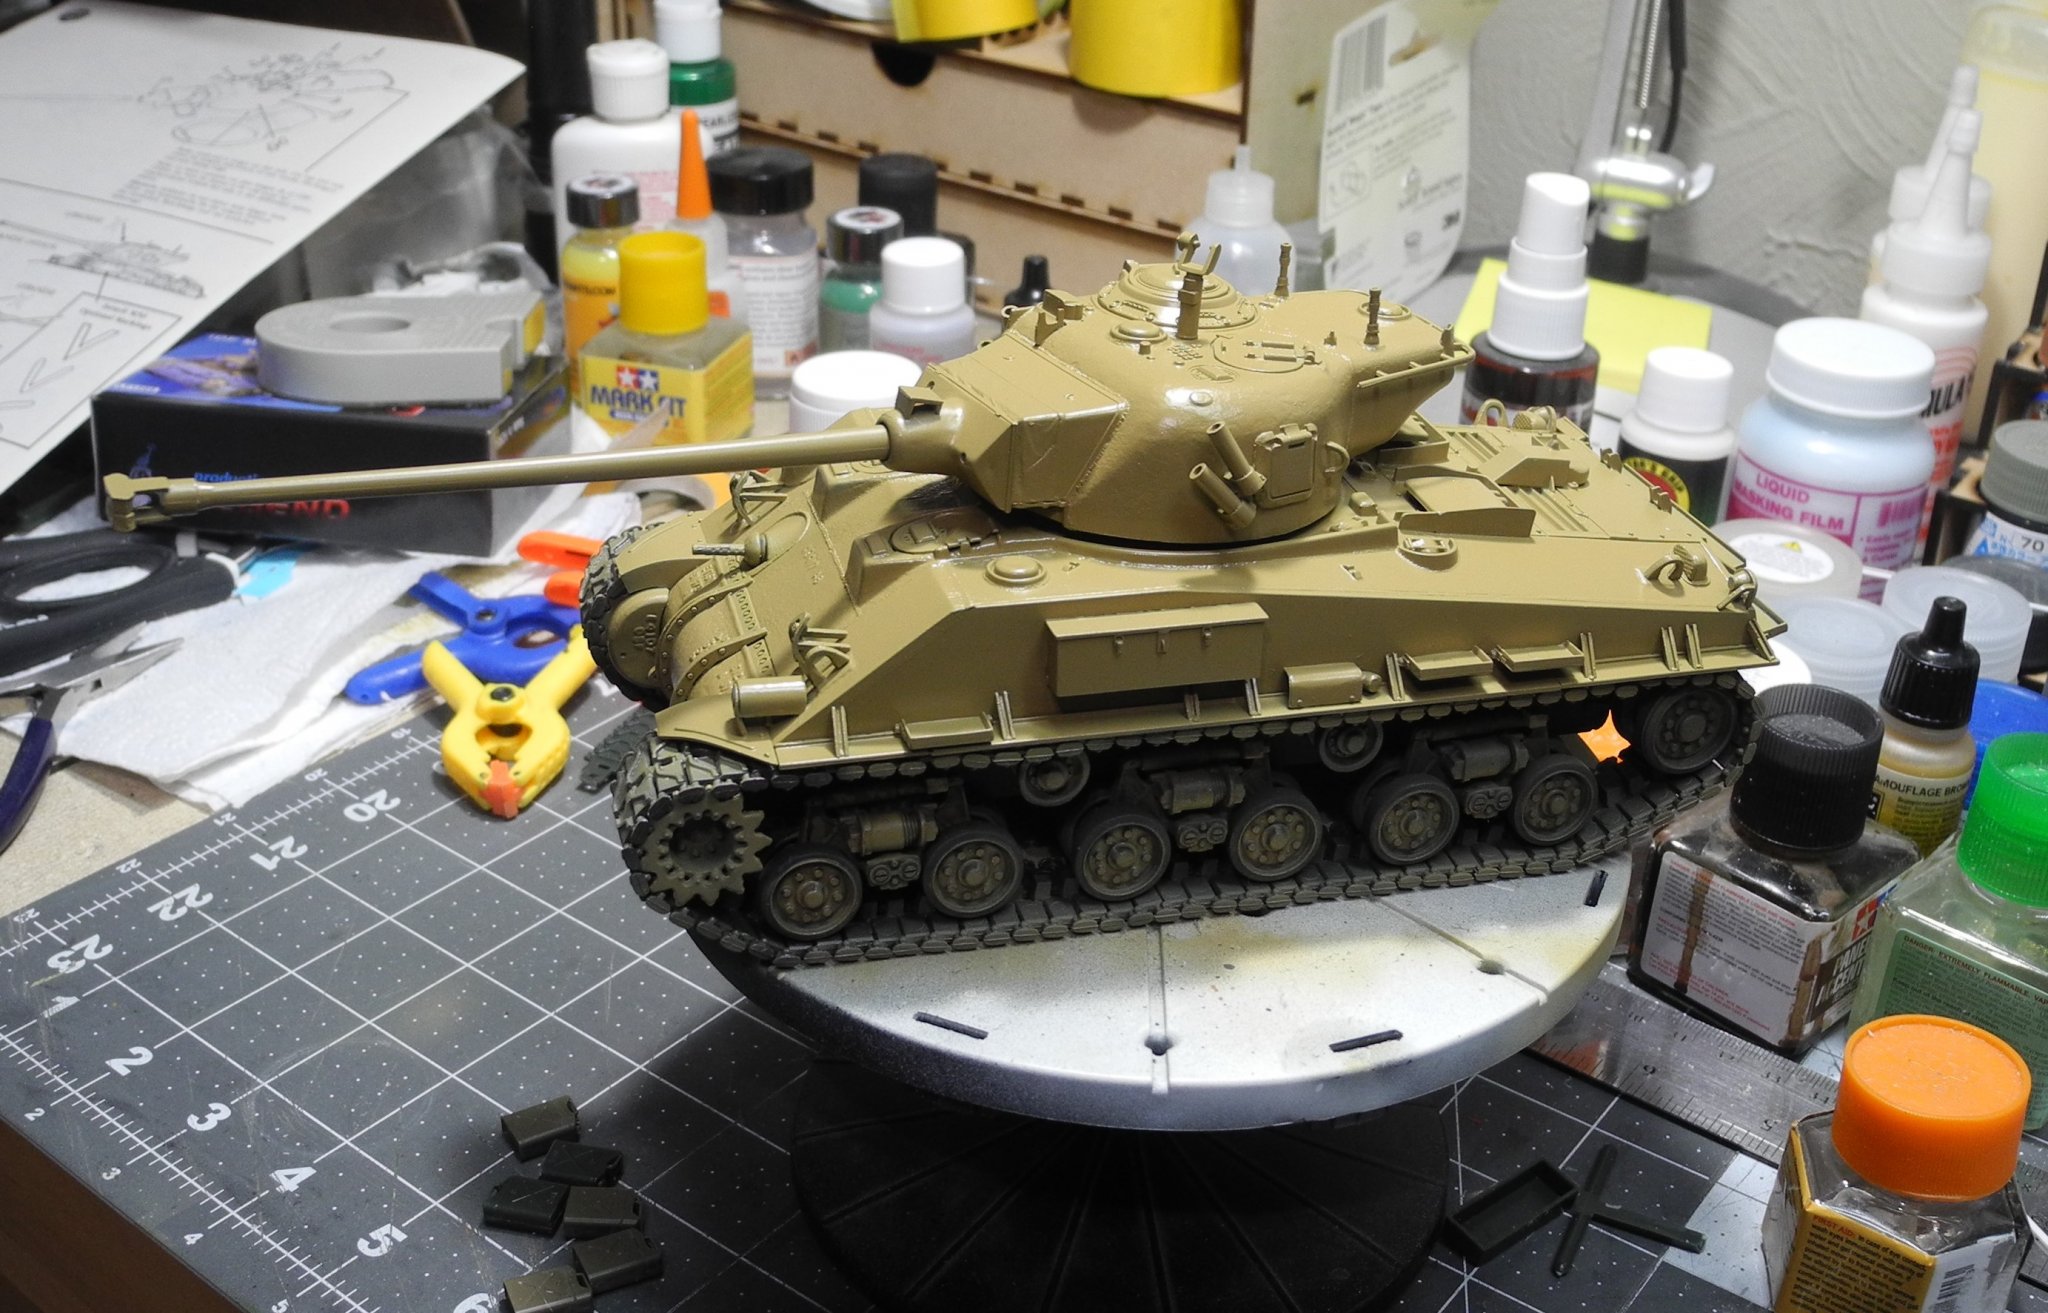
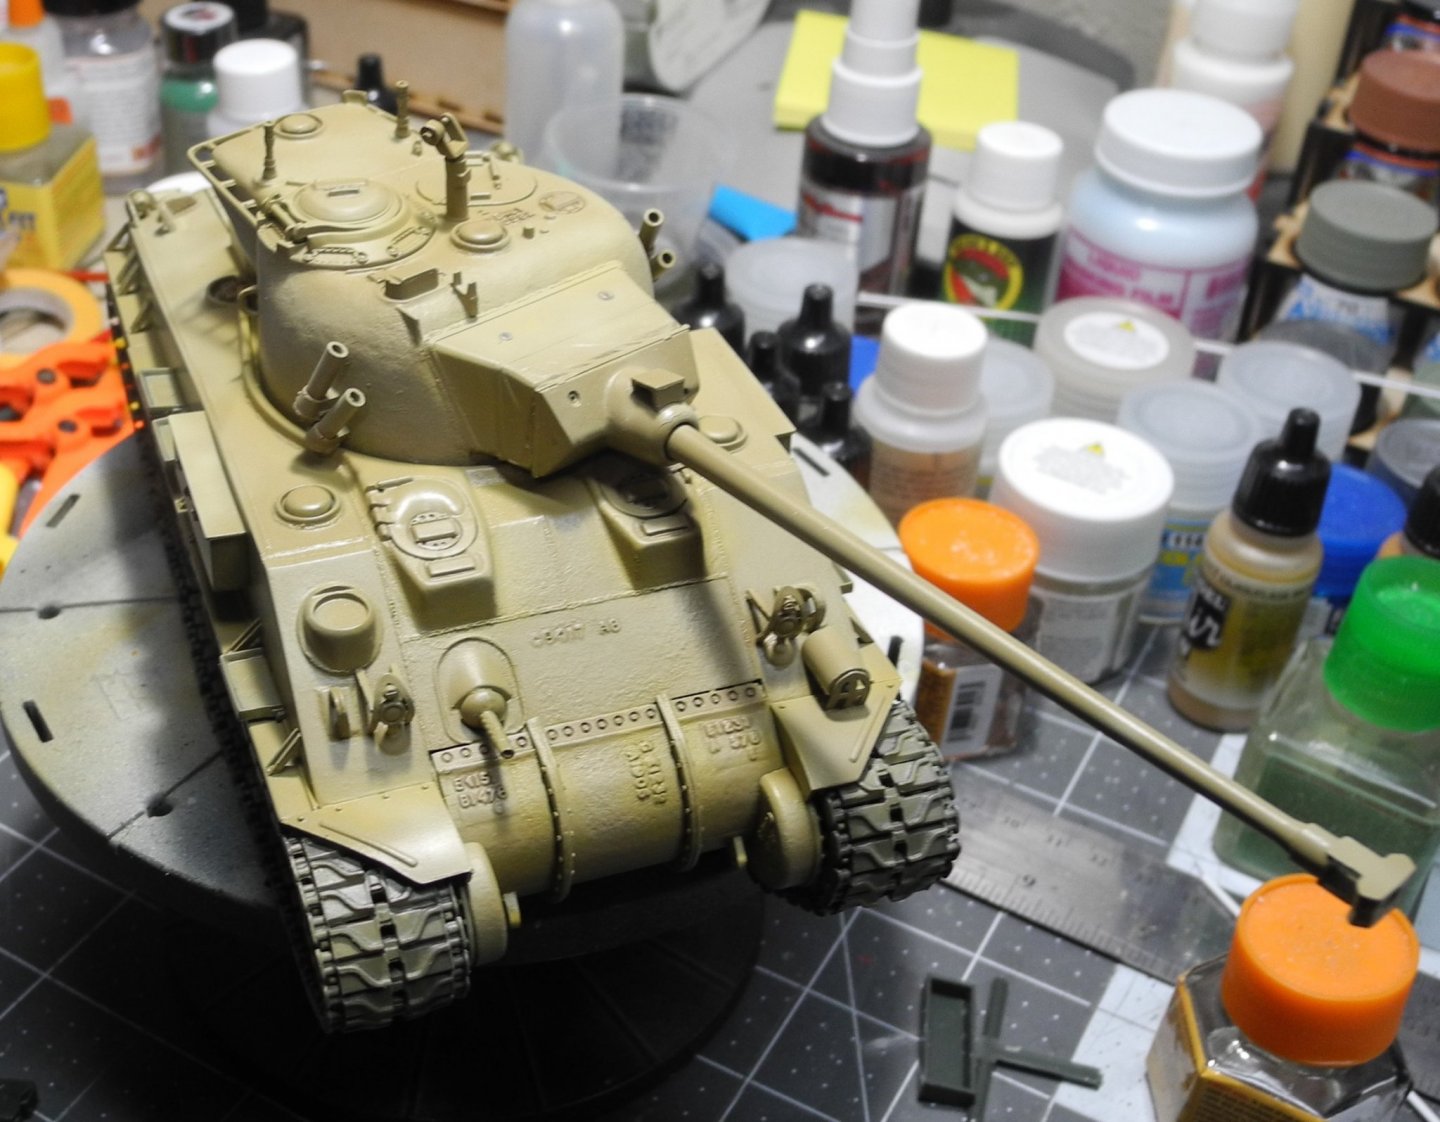
Just a few more steps and will call this one done. Need to add some tools, a couple of spare road wheels, a few extra track links, and a couple of decals; then an overcoat of matt clear over everything.

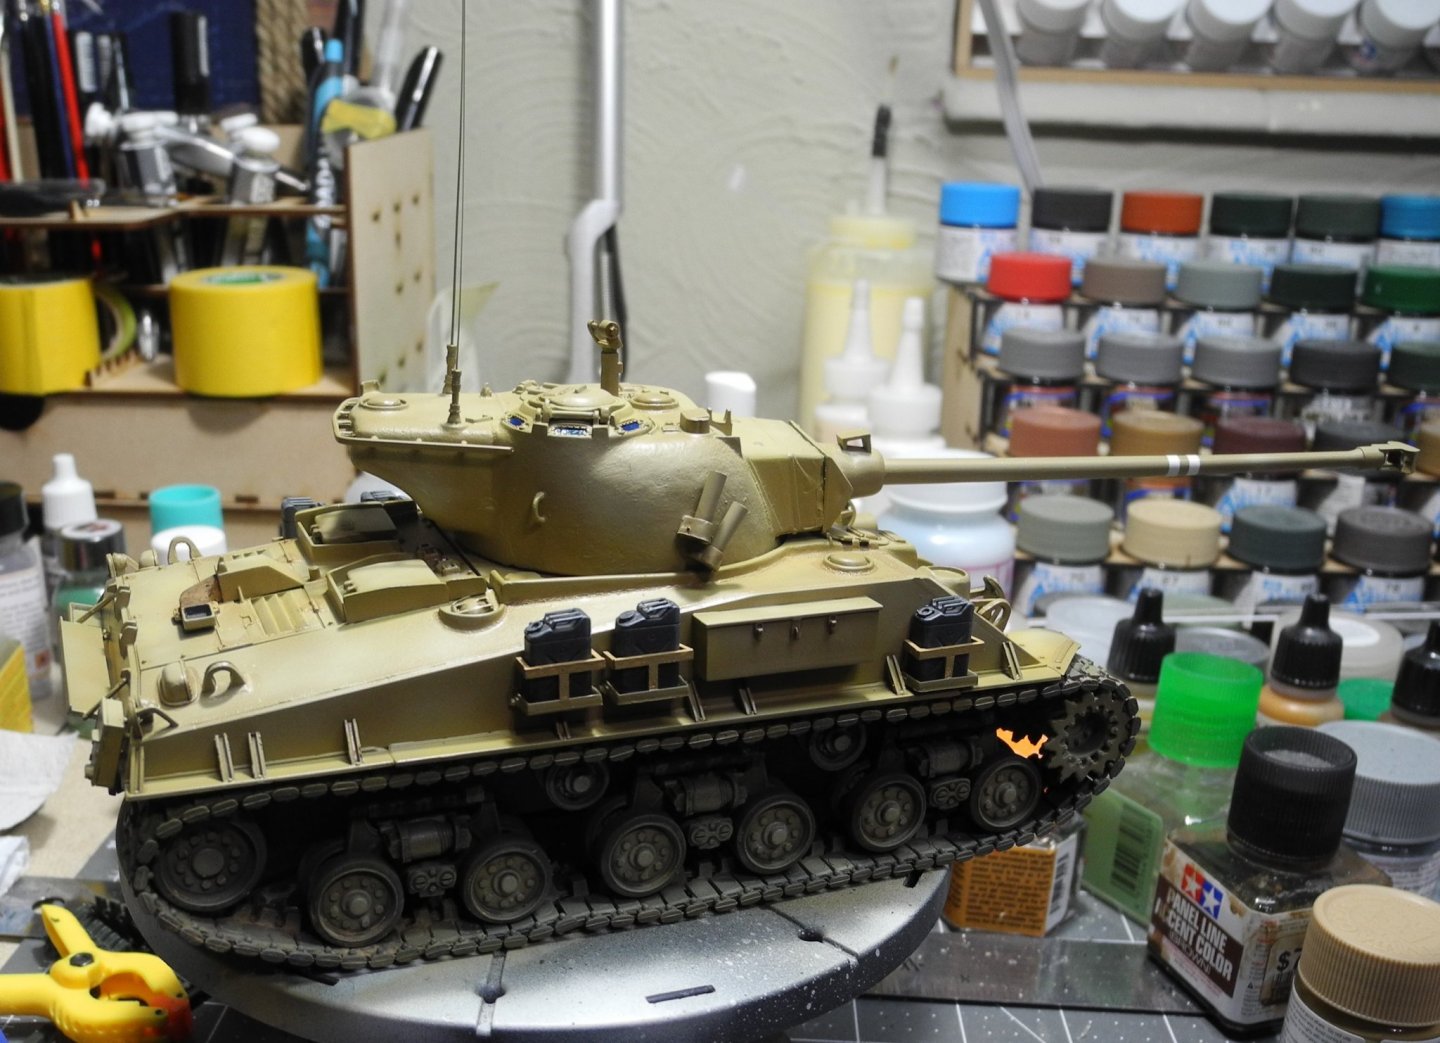

- 107 replies
-
- 14
-

-
Tiger 1 by marktiedens - FINISHED - Dragon - 1/35 scale
CDW replied to marktiedens's topic in Non-ship/categorised builds
I was at the local Hobby Town this week and noticed a new sign in the window..."no credit required, 90 day financing available". 😅 Those RC cars are so expensive, you have to finance them similar to a 1:1 car.- 125 replies
-
- 10
-
-
If you want to avoid the aftermarket jingo bop, read kit reviews before buying. There are a lot of models out there that can be built straight from the box to a very high standard, no aftermarket needed at all. People complained about the high price of Wingnut Wings kits, but the fact of the matter is, the kits needed nothing more than what came inside the box. Modern Tamiya kits are like that to a large extent, though they still manufacture and sell some kits that are very long in the tooth, and not quite as good as the more modern offerings. Somewhere, someone mentioned the 1:32 Italeri F-104's...aren't those a rebox of the Hasegawa ones? I do know Italeri did a wholly new 1:32 Mirage, I bought one and it's a beauty.
-
Going to be a very interesting build to follow EG. Looking forward to the build and your additions of aftermarket.
-
M-50 Israeli Sherman - FINISHED - MP Models - 1:35 Scale
CDW replied to CDW's topic in Non-ship/categorised builds
Thanks Denis. The rubber band tracks are a lot easier to deal with, but some tanks have a sag in the tracks which is hard to replicate with rubber band tracks. -
M-50 Israeli Sherman - FINISHED - MP Models - 1:35 Scale
CDW replied to CDW's topic in Non-ship/categorised builds
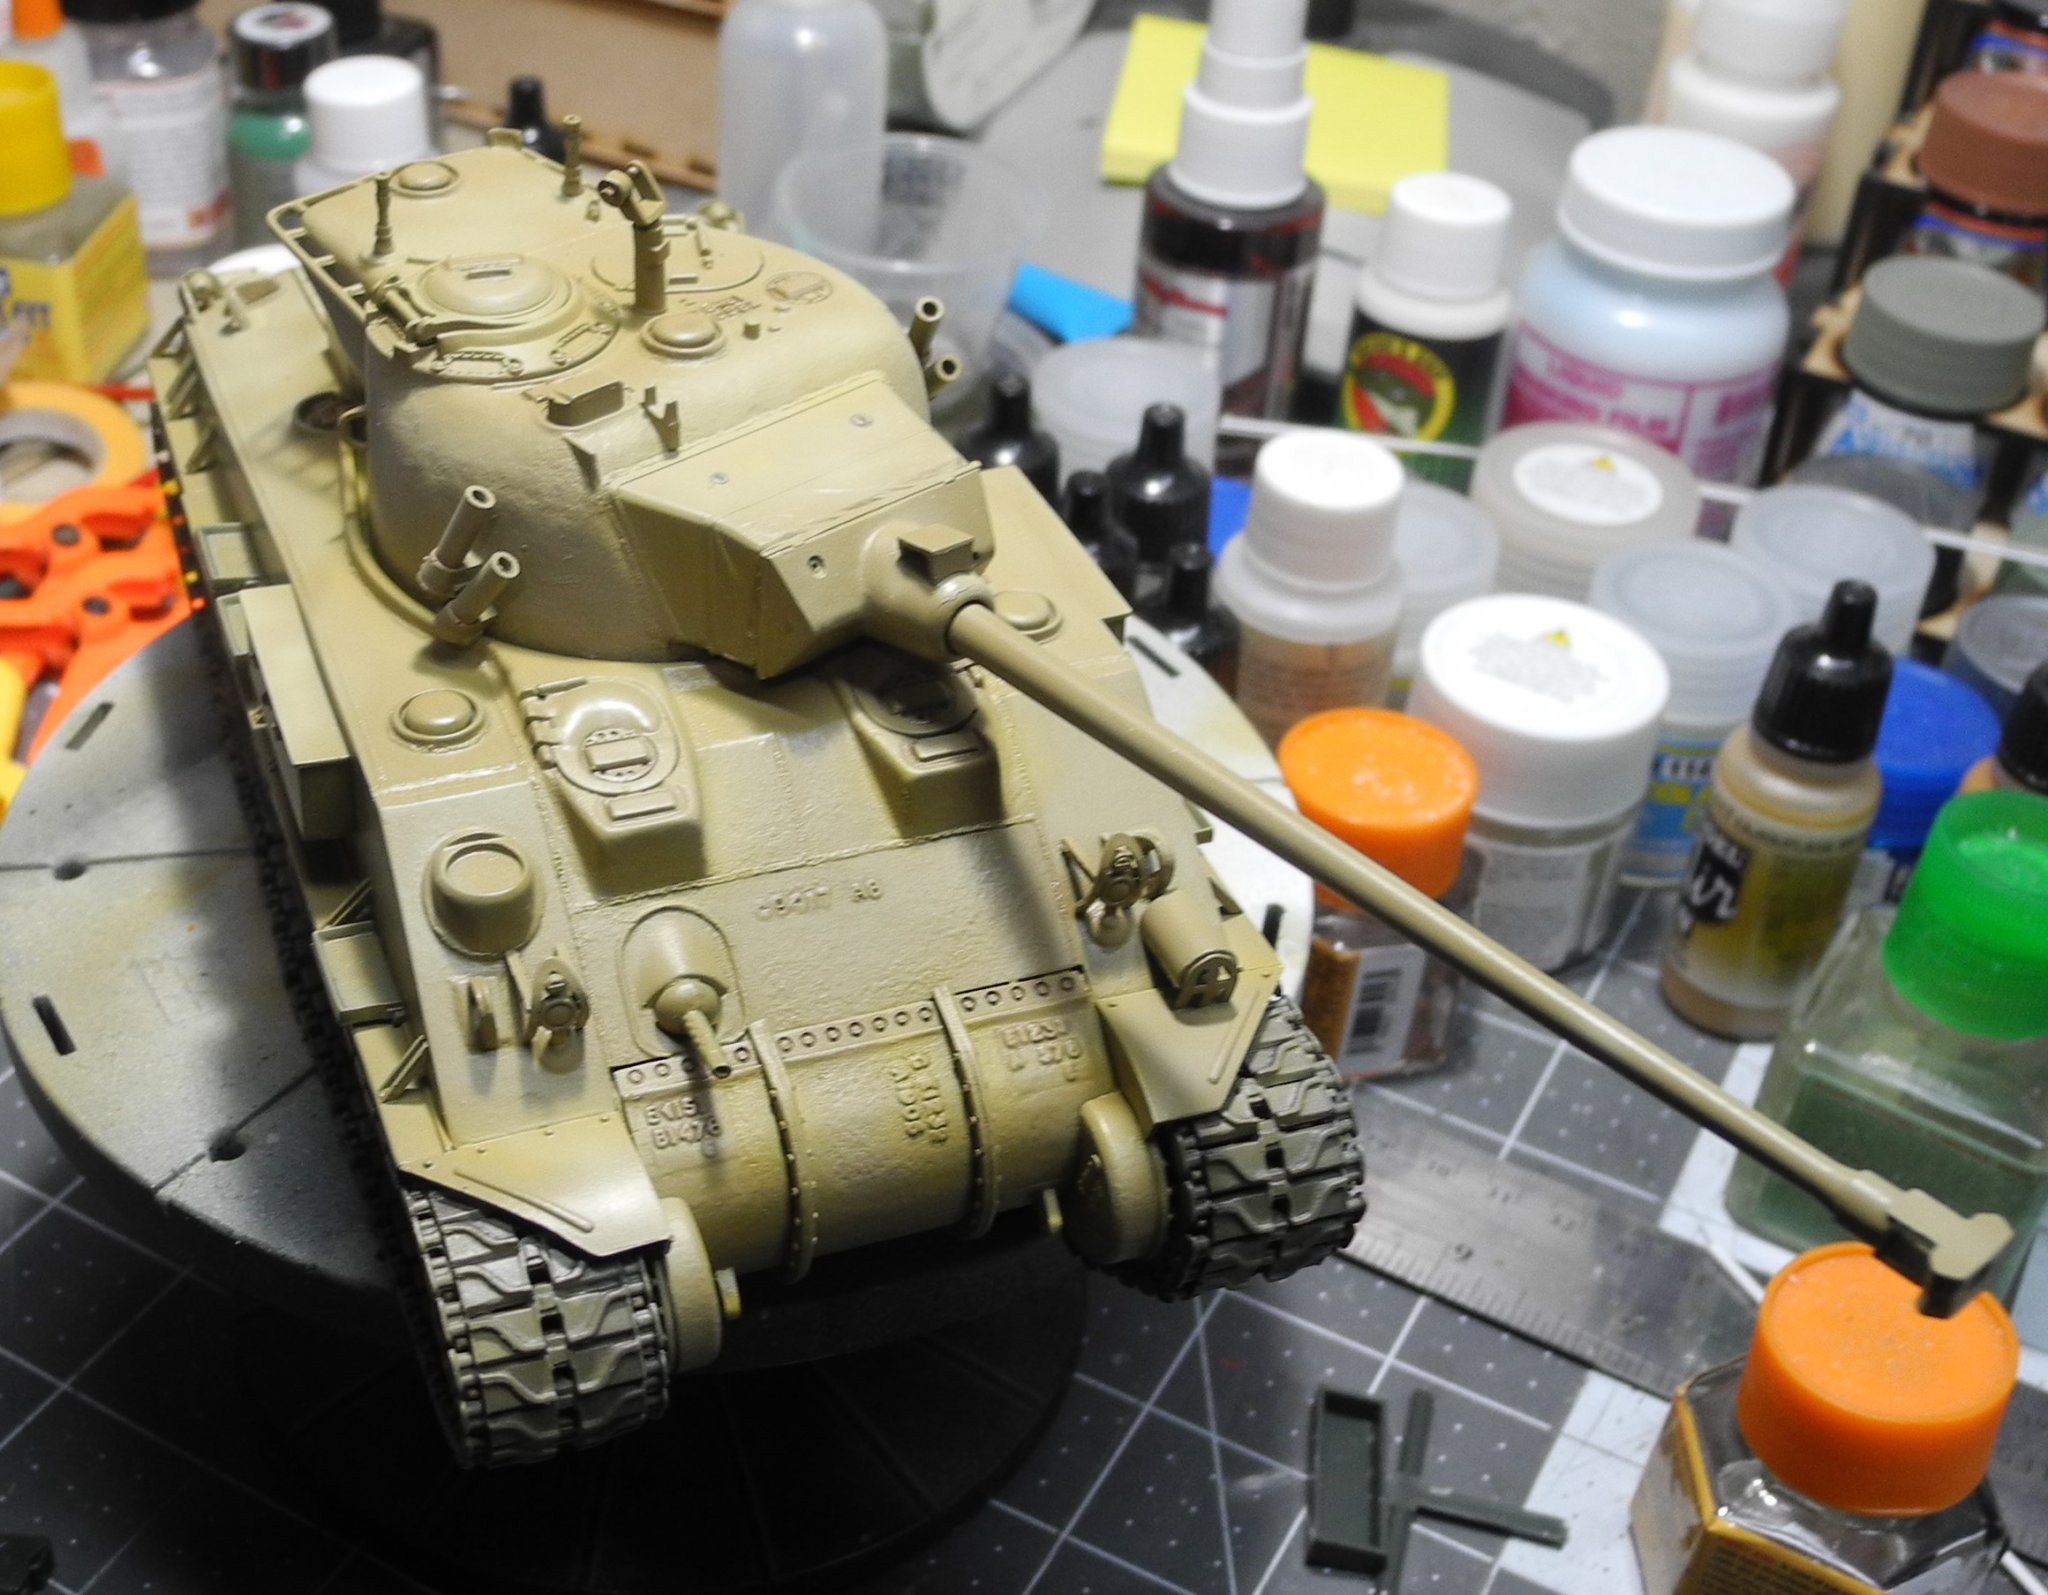
With color modulation
- 107 replies
-
- 11
-
-
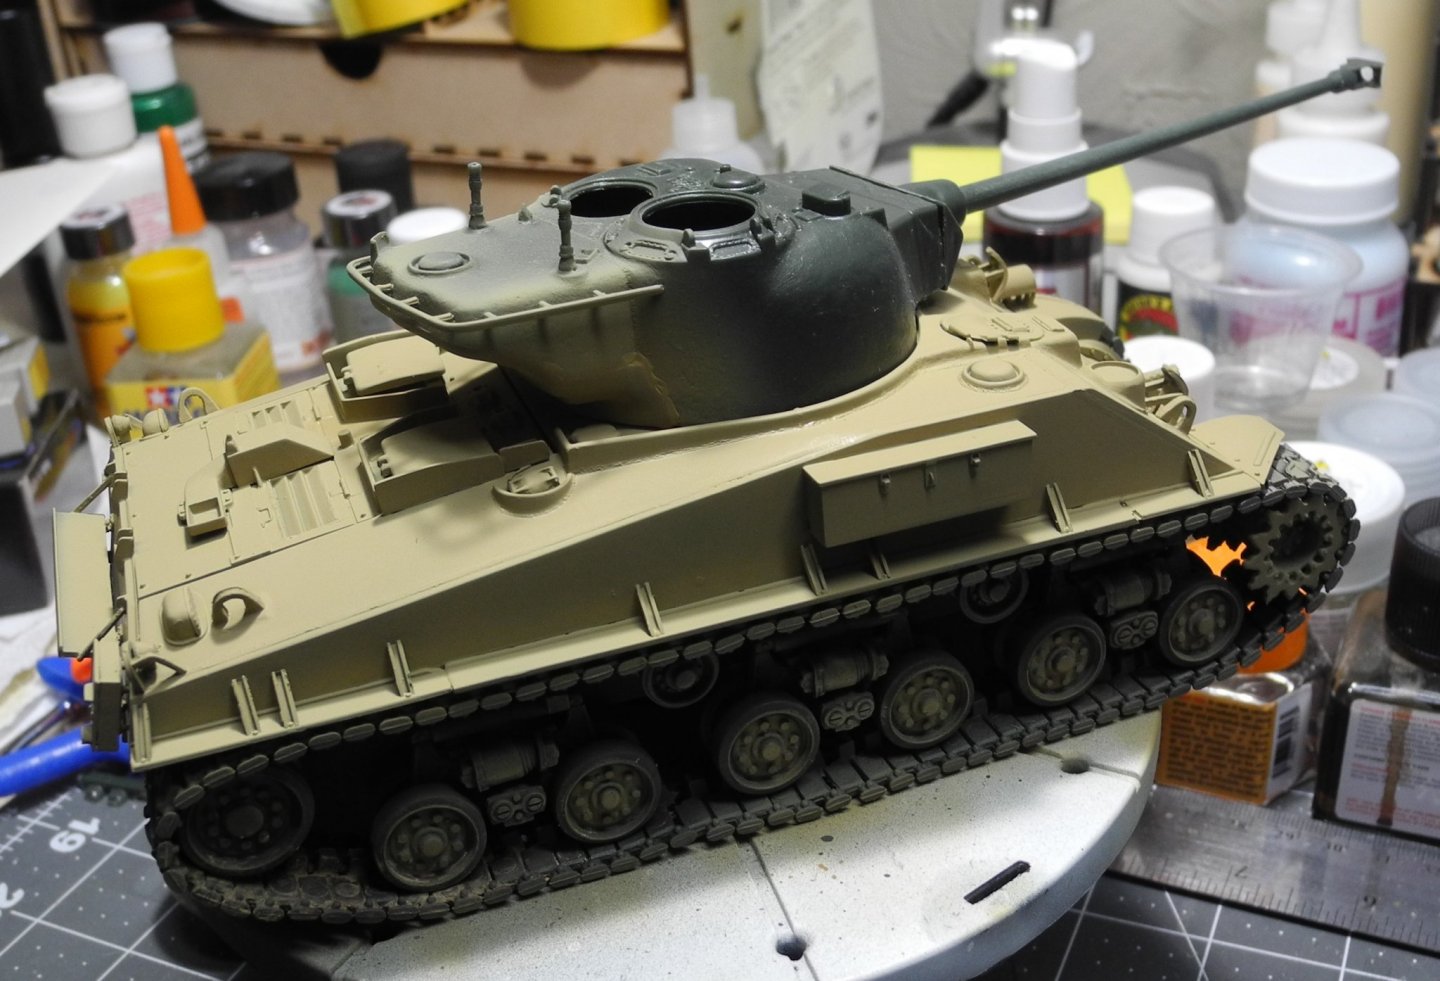
M-50 Israeli Sherman - FINISHED - MP Models - 1:35 Scale
CDW replied to CDW's topic in Non-ship/categorised builds
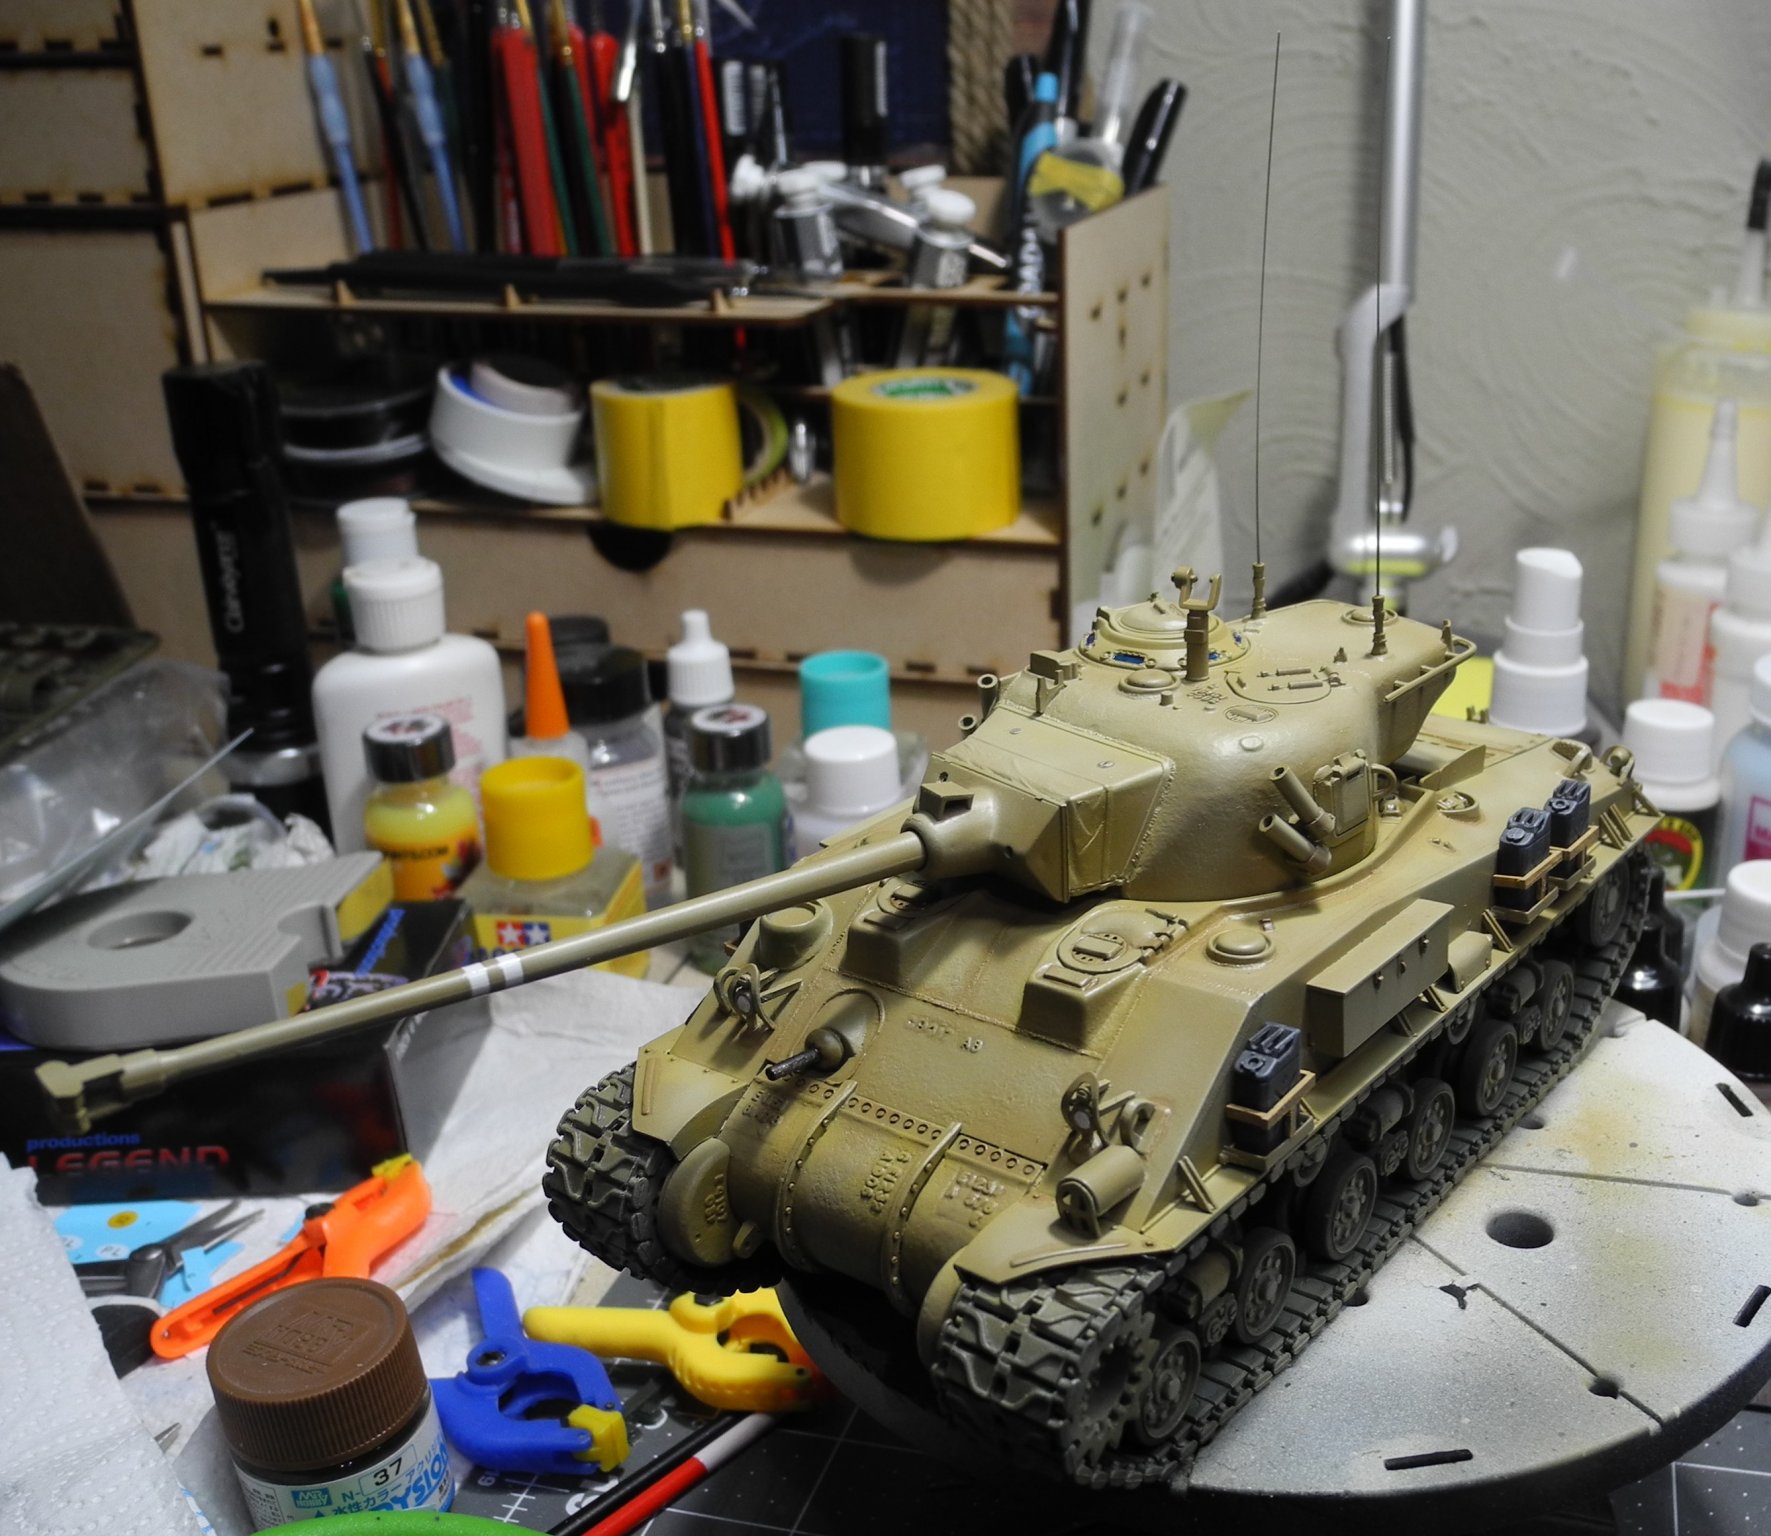
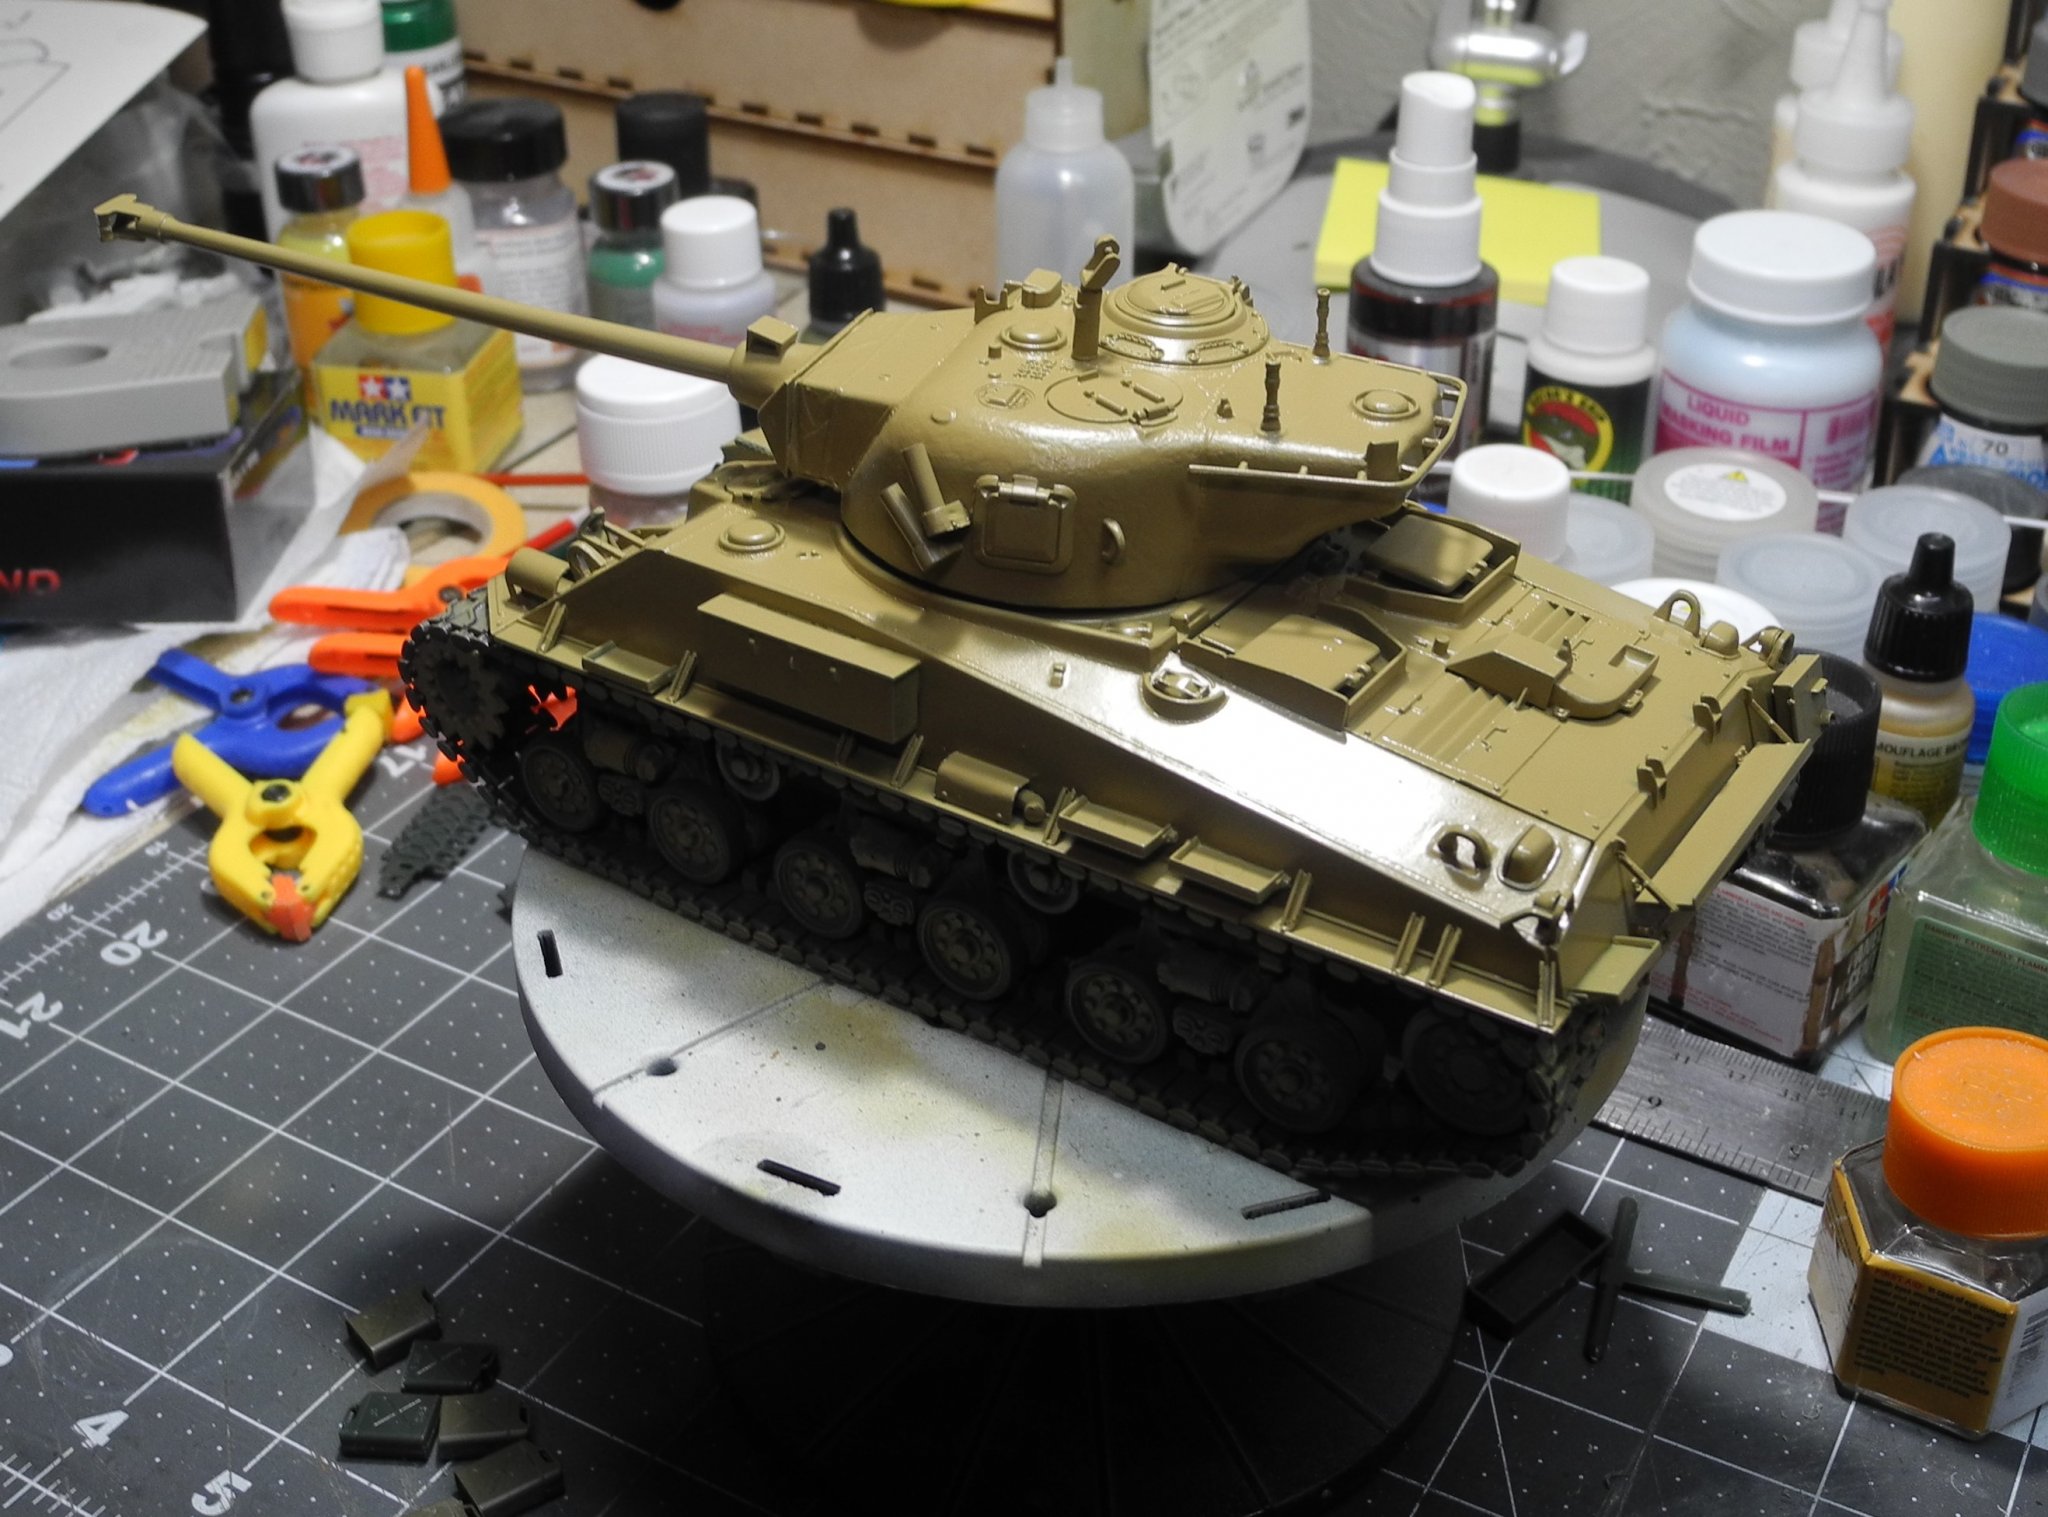
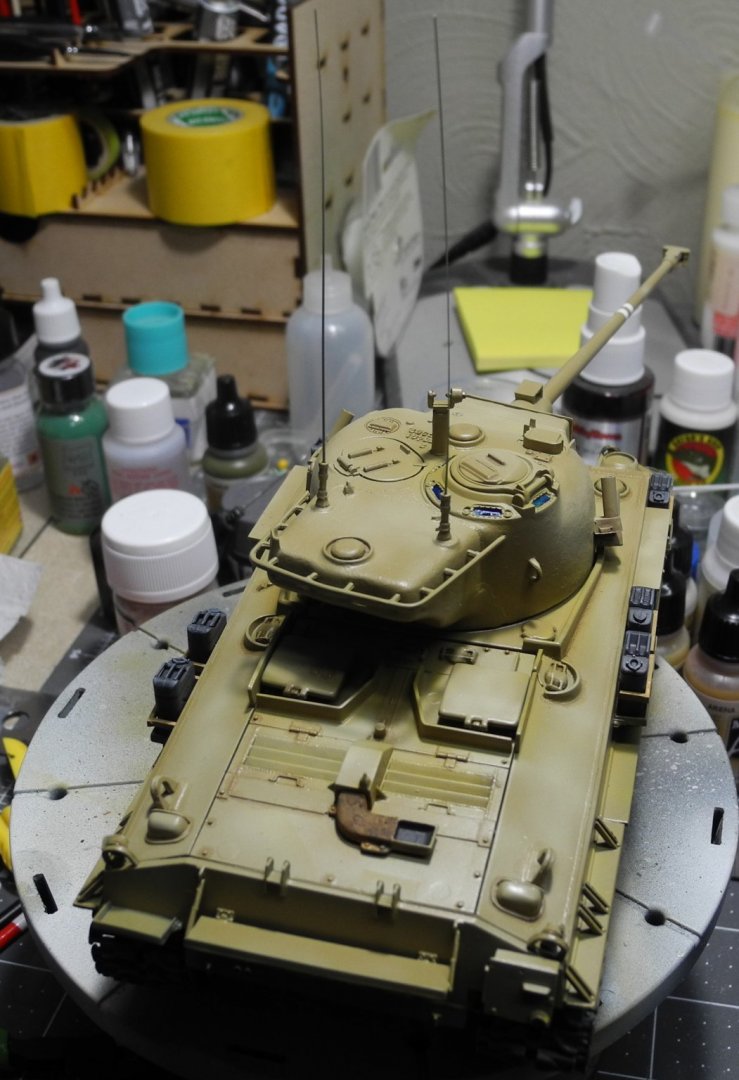
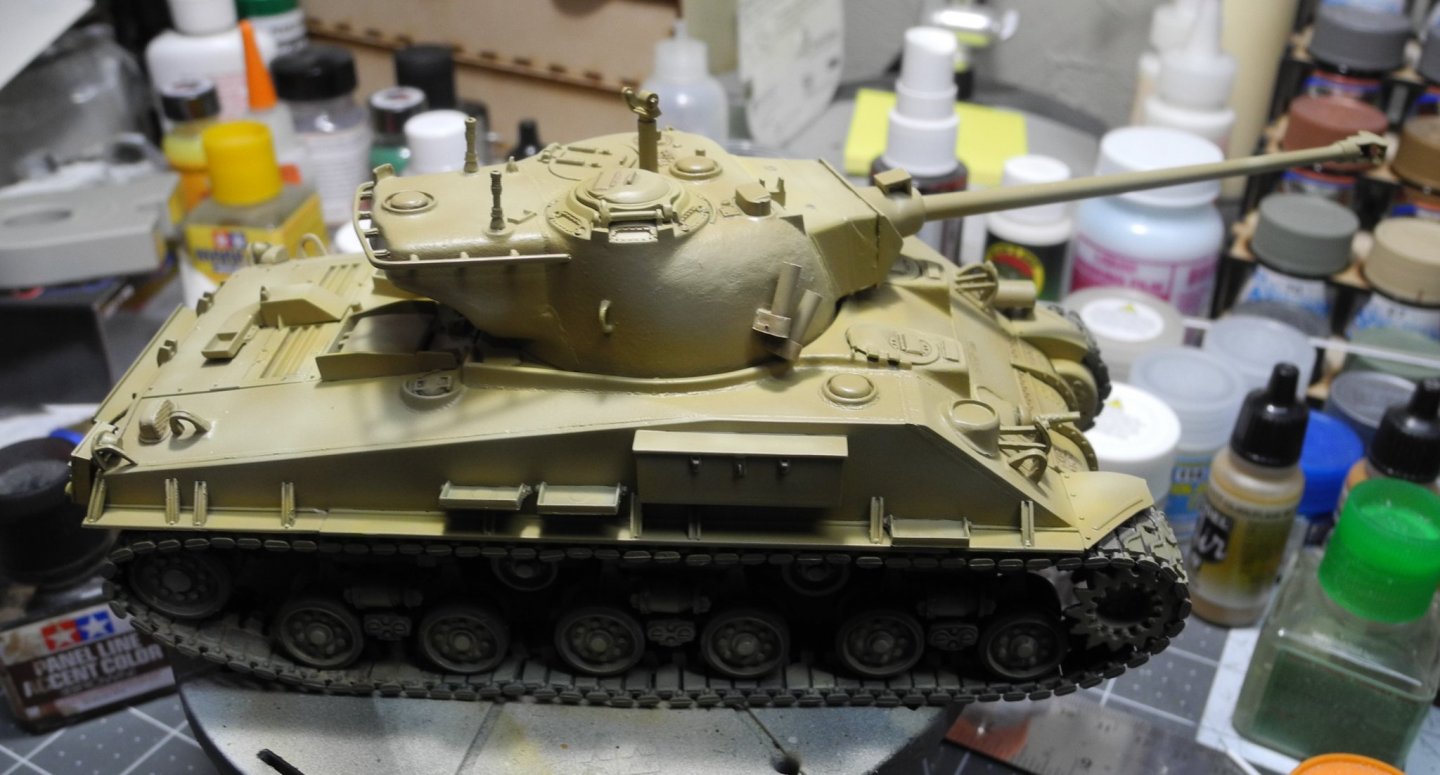
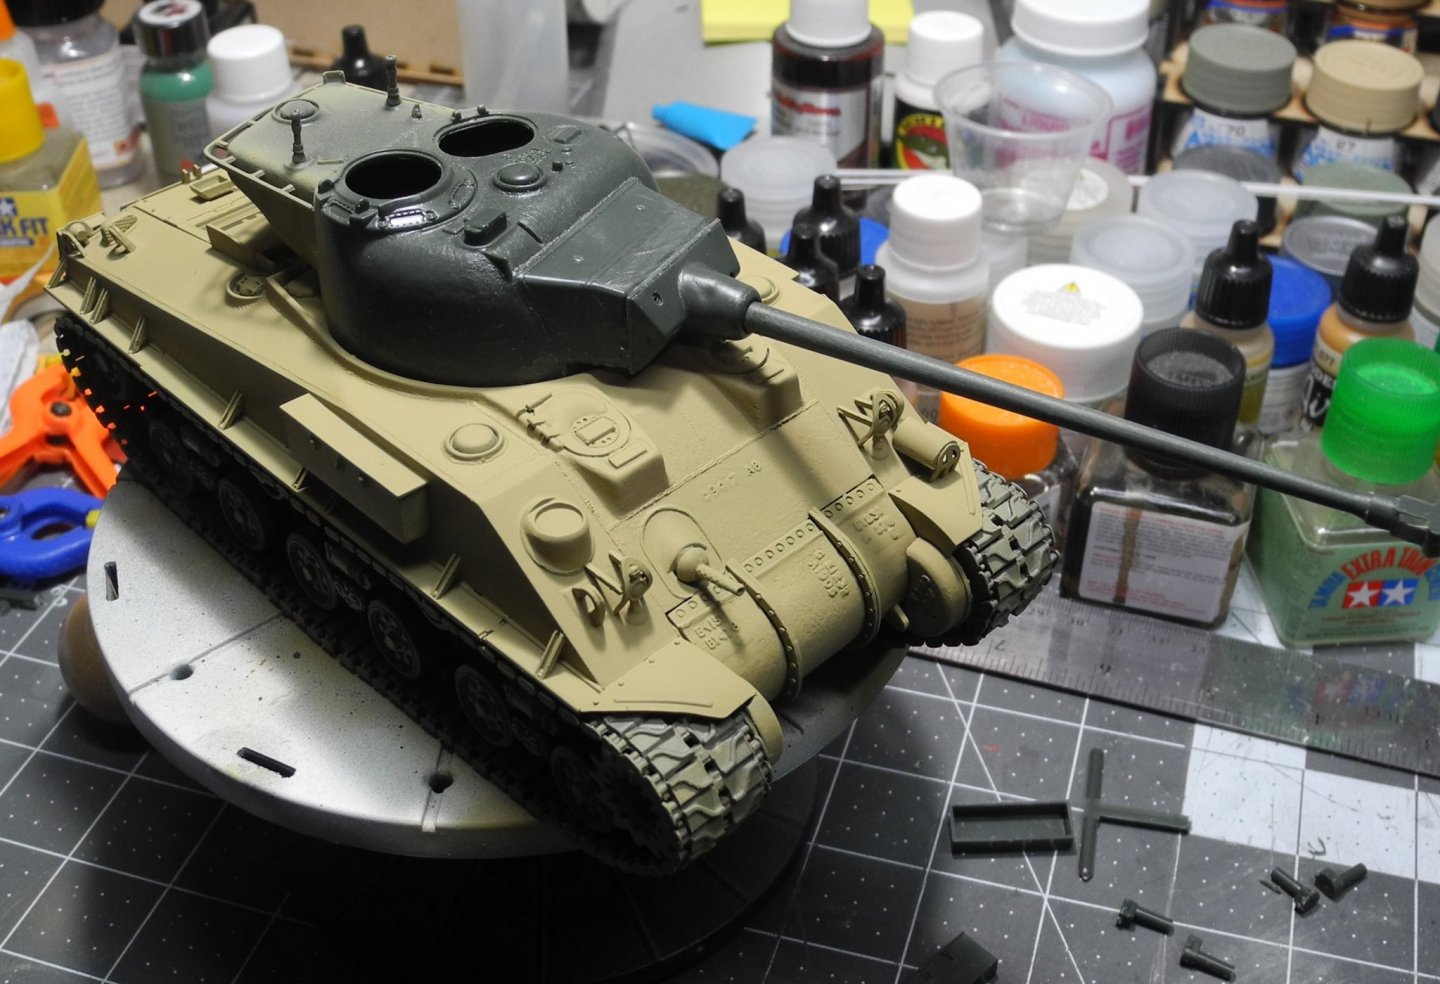
Here, everything is painted dark yellow and a clear coat has just been added to the entire model. Once the clear has sufficiently dried, will begin shading and color modulation.


- 107 replies
-
- 12
-
-
Tiger 1 by marktiedens - FINISHED - Dragon - 1/35 scale
CDW replied to marktiedens's topic in Non-ship/categorised builds
Great choice of kit for your plastic build, Mark. Beautiful model kit. As for color, I highly recommend this Mr Color modulation set for your Tiger. https://spraygunner.com/gsi-creos-mr-color-color-modulation-set-german-gray/ The set contains four jars of varying shades of gray along with a set of instructions on how to achieve the desired gray color modulation. Along with the paint, you'll need Mr Hobby 400 Leveling Thinner to reduce the paints. I said all that assuming you will be airbrushing your model. If you are using a brush, it's a whole different ball game. -
M-50 Israeli Sherman - FINISHED - MP Models - 1:35 Scale
CDW replied to CDW's topic in Non-ship/categorised builds
Love the British tanks, although at this time only have the Centurian...an IDF one. -
M-50 Israeli Sherman - FINISHED - MP Models - 1:35 Scale
CDW replied to CDW's topic in Non-ship/categorised builds
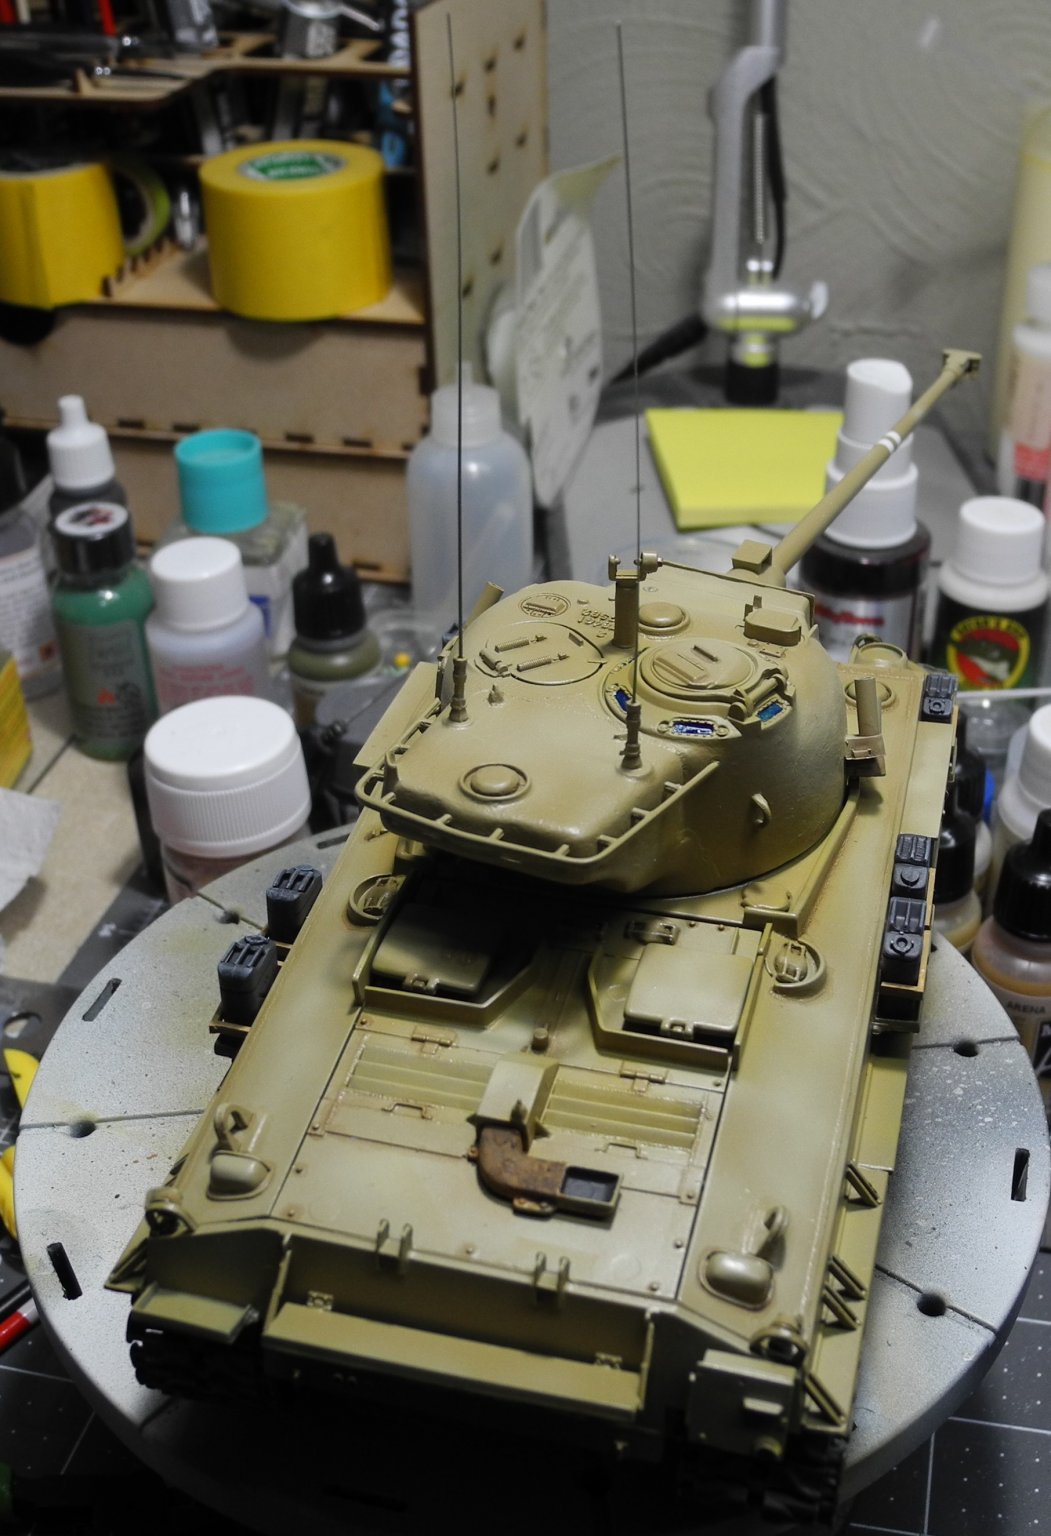
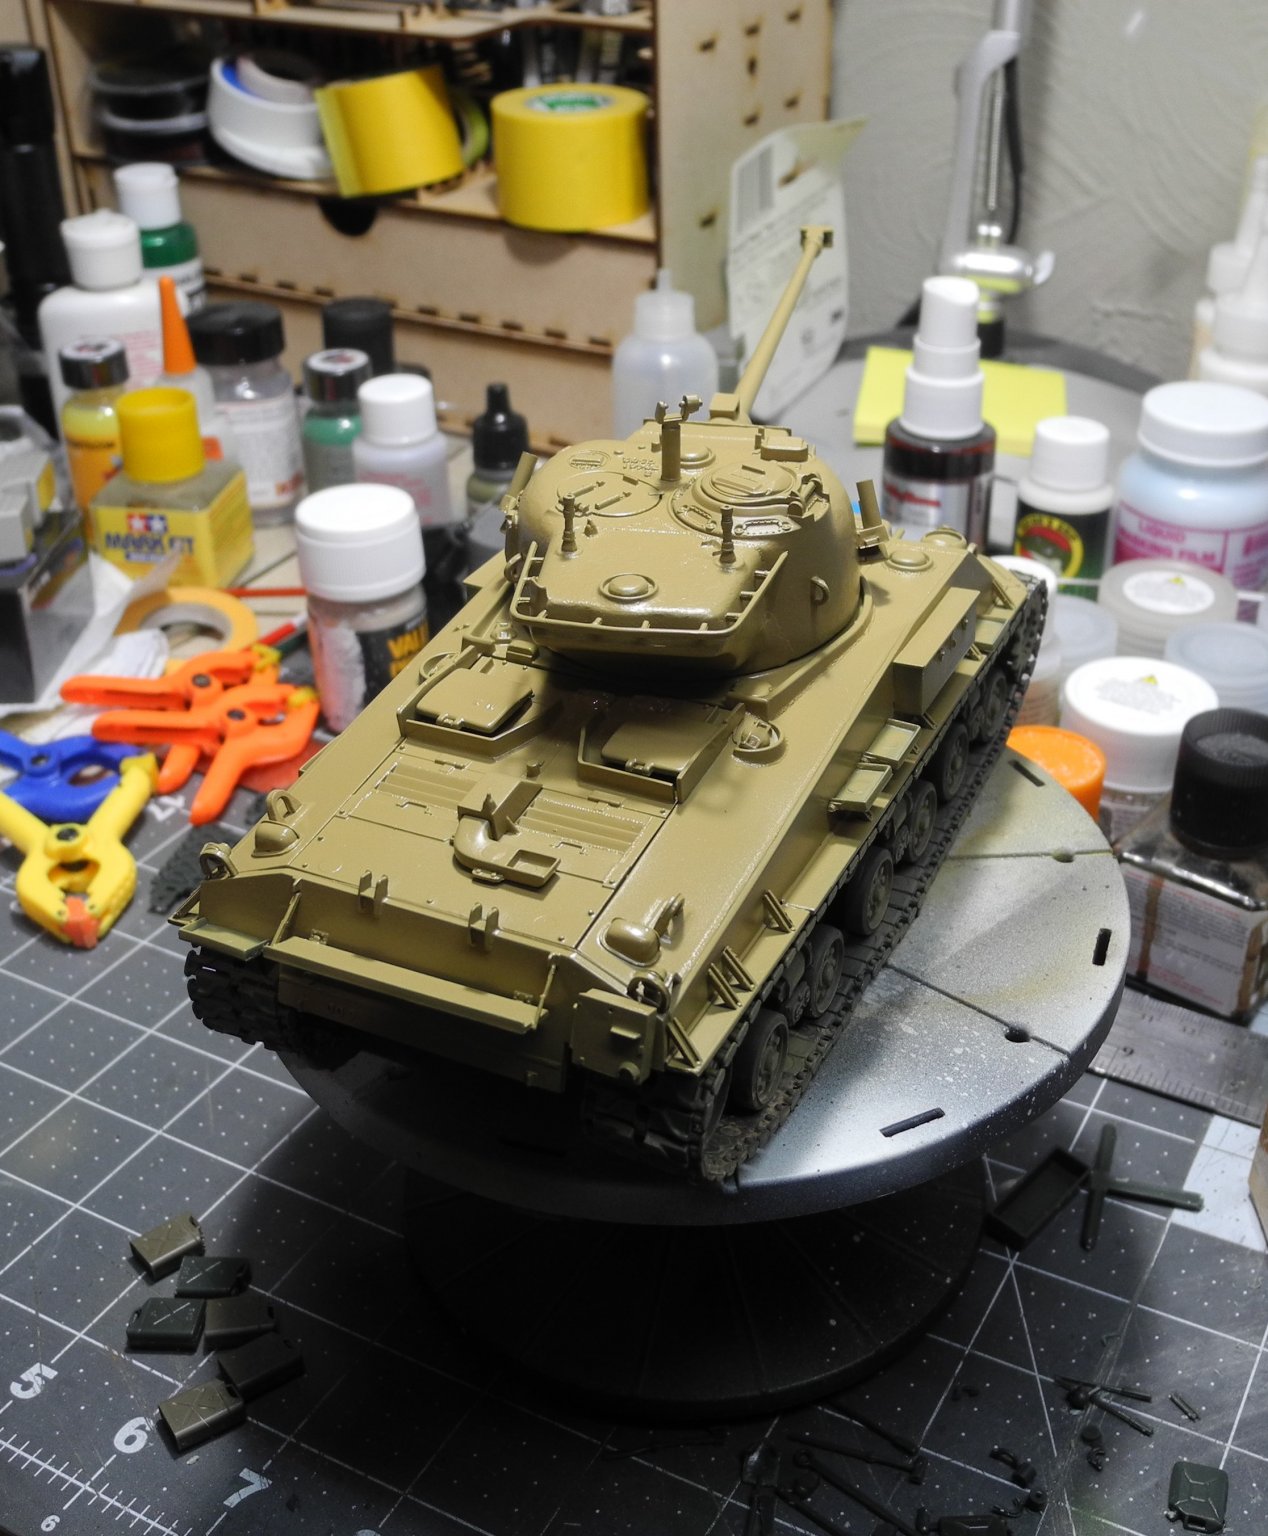
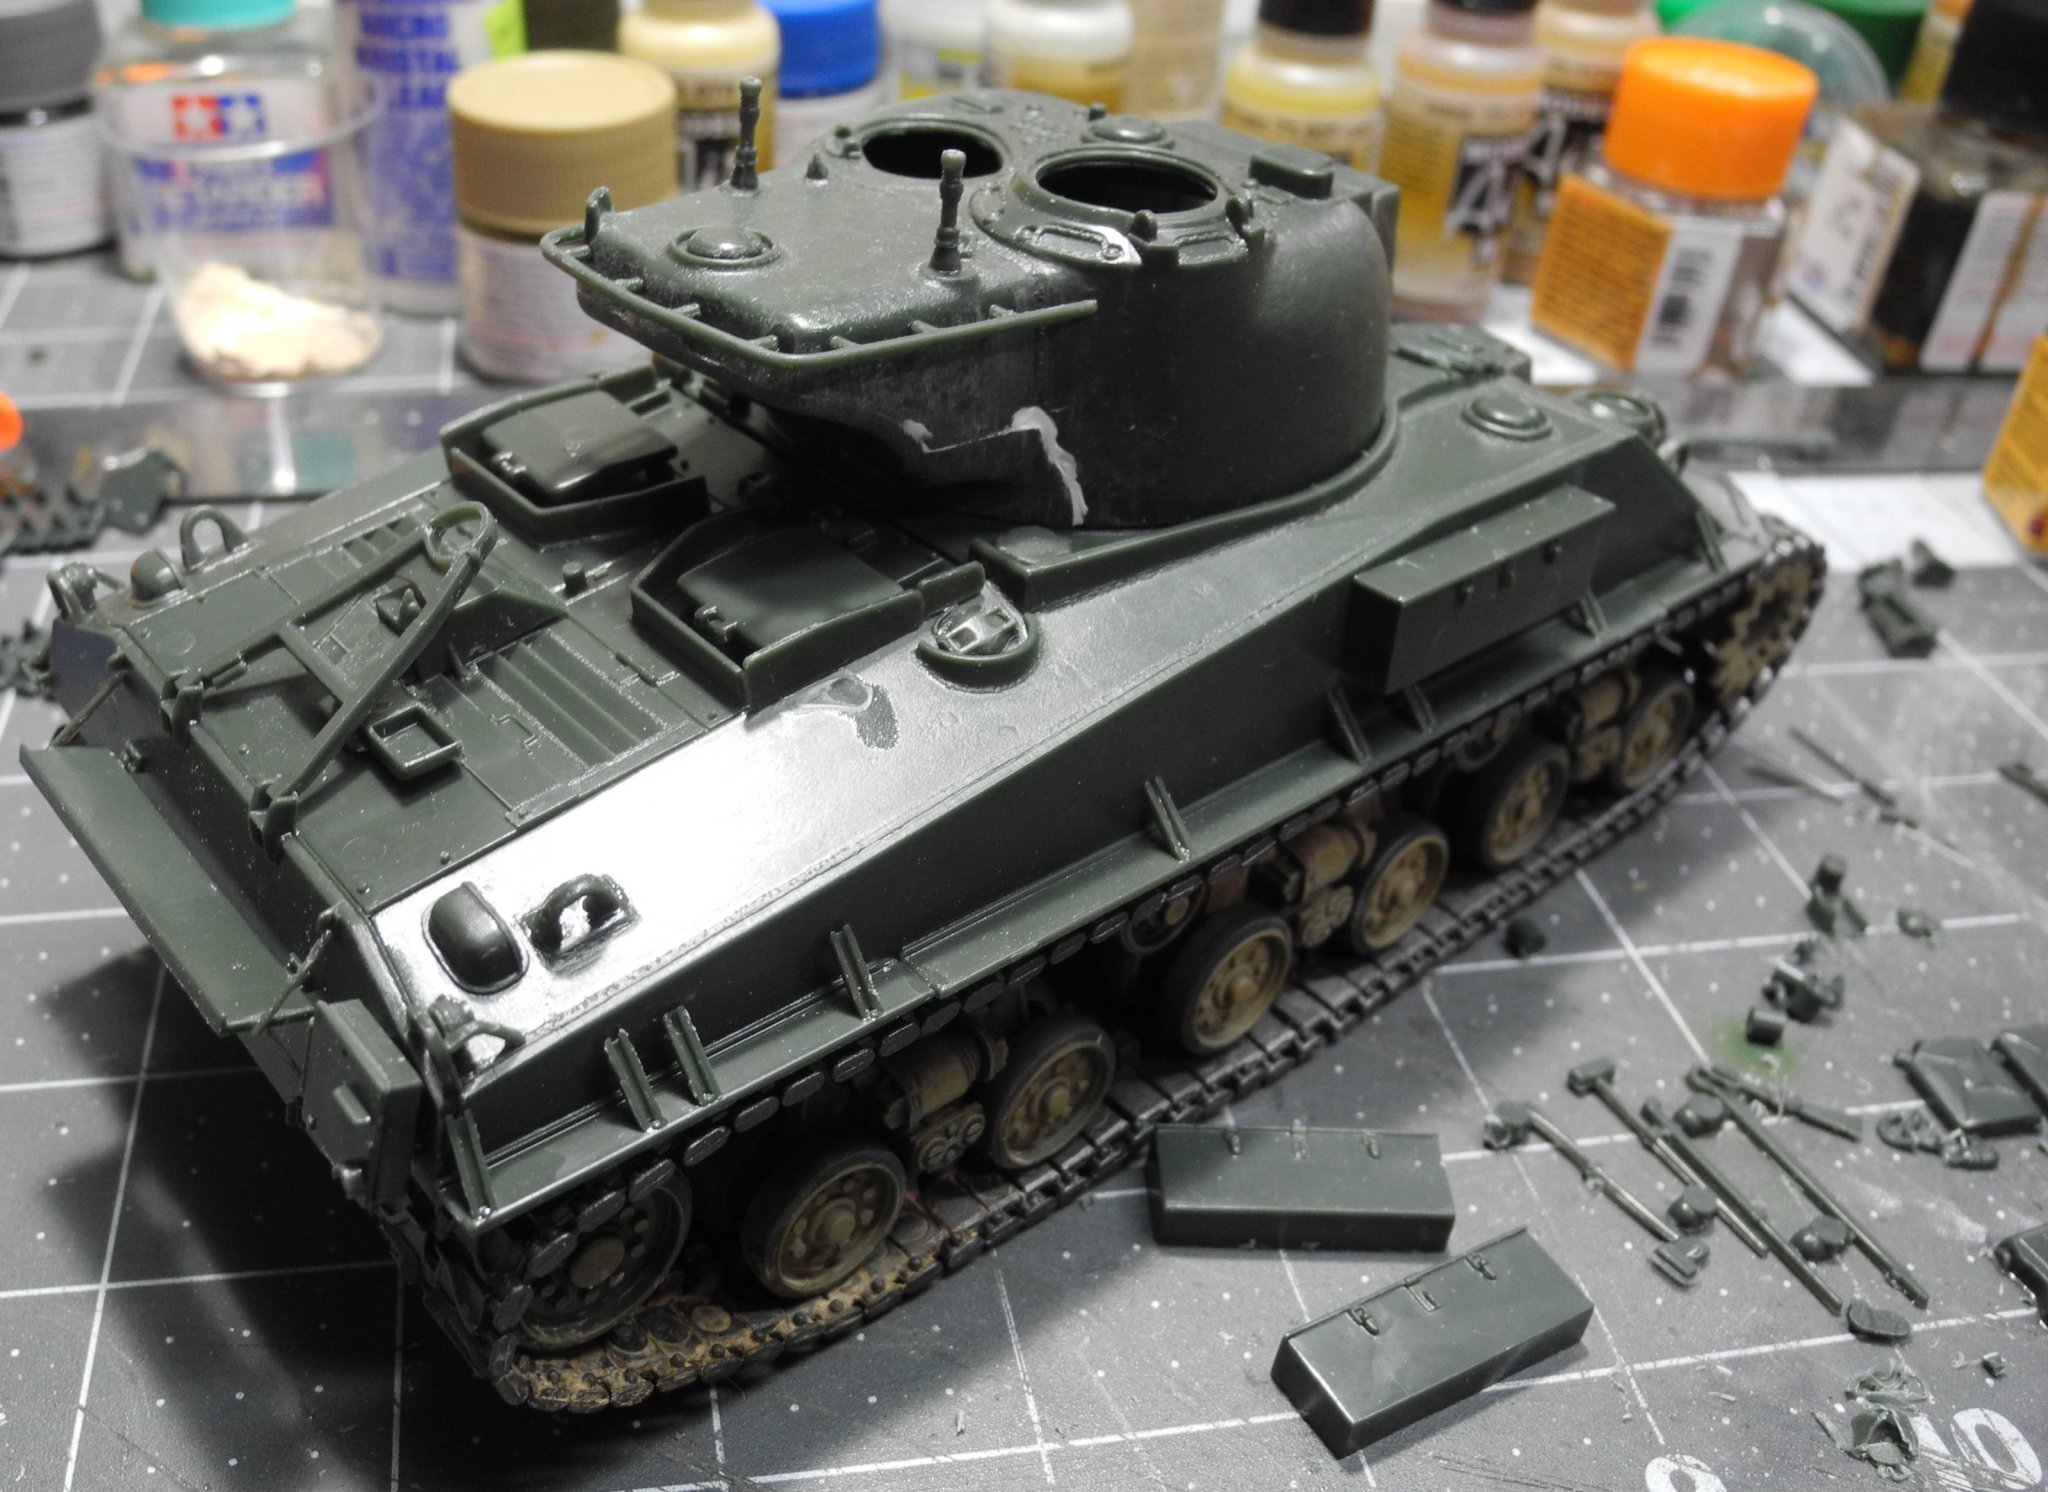
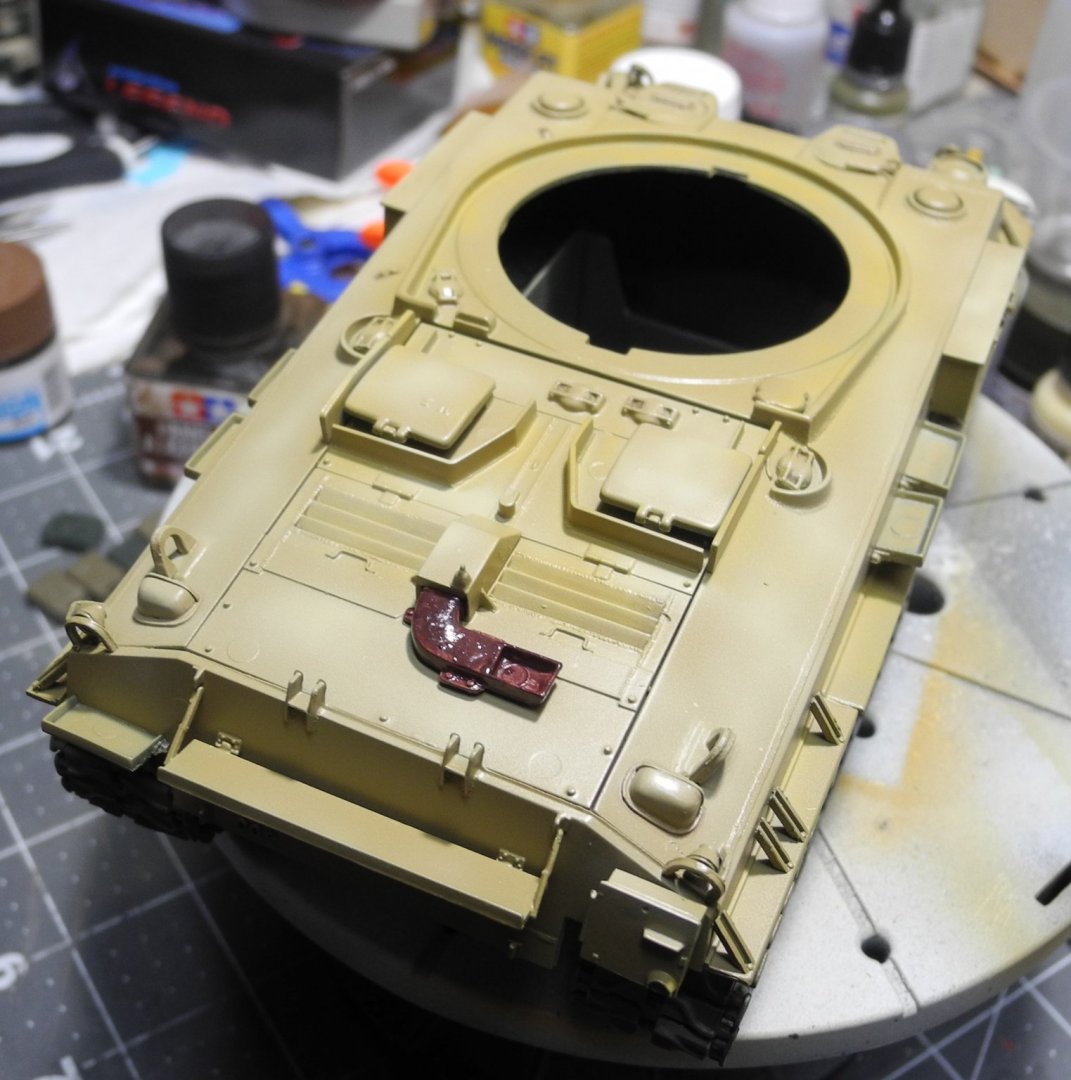
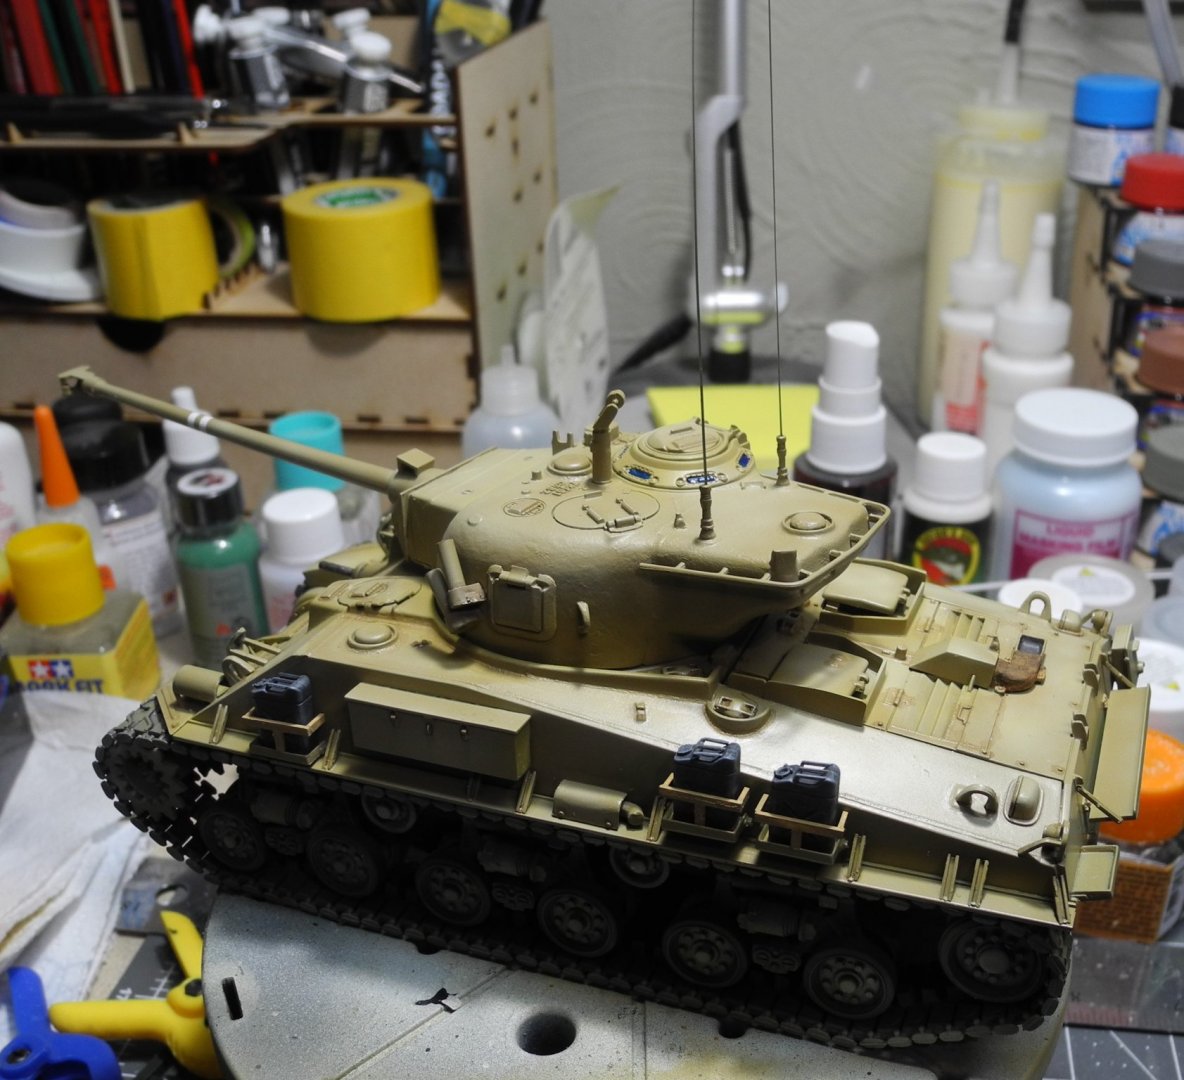
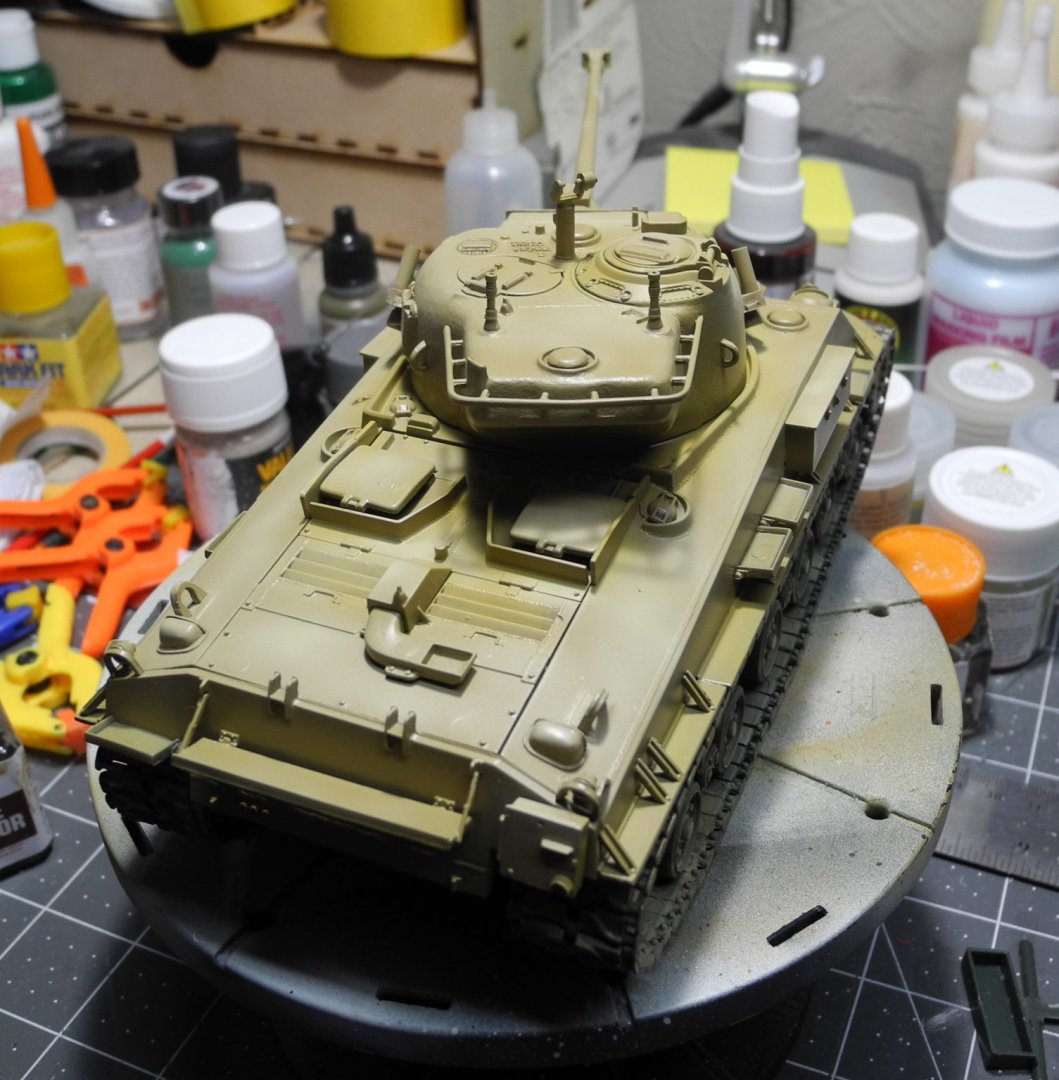
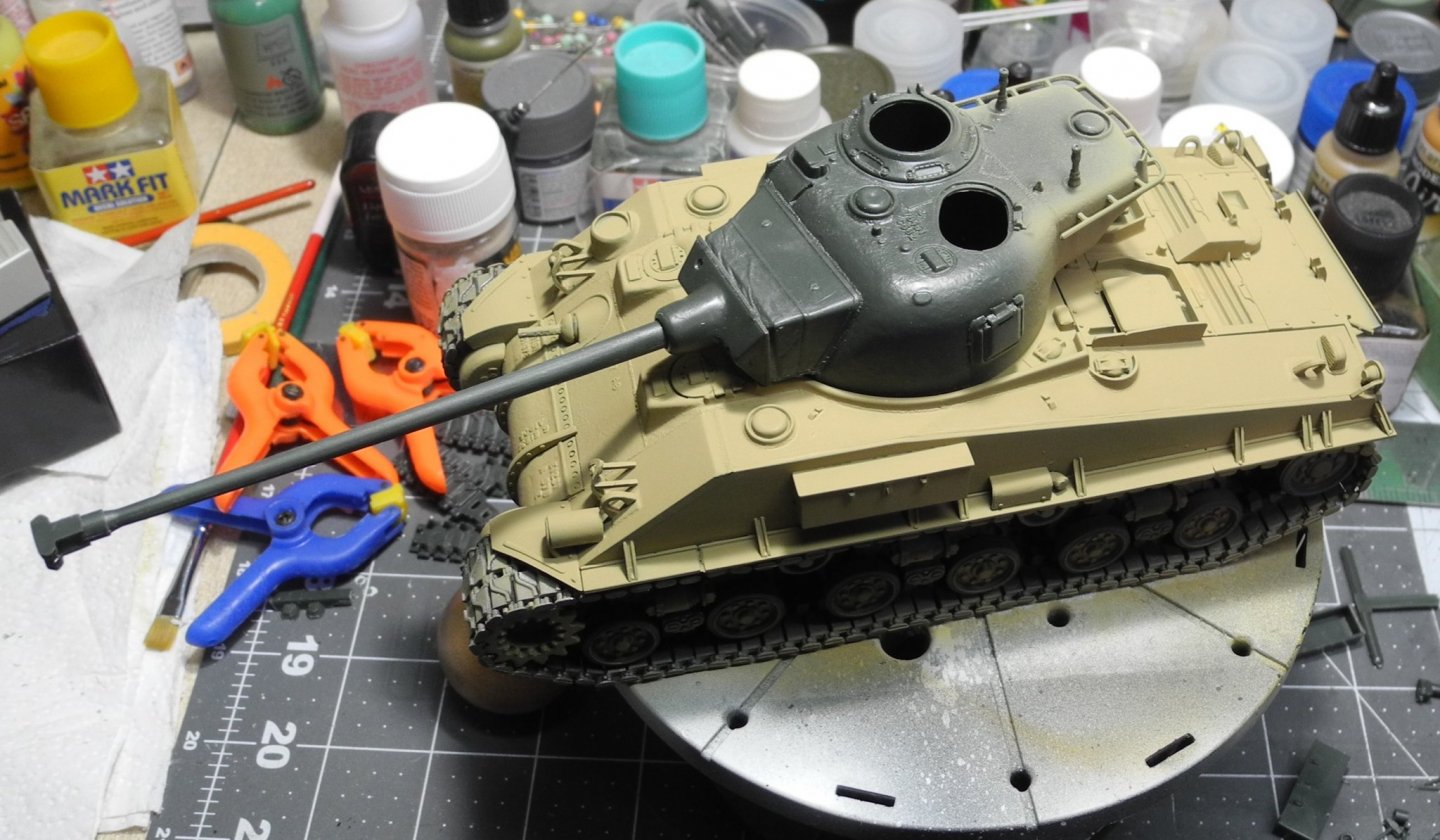
Here's the hull with primer and a base coat of Tamiya dark yellow paint. After detailing with washes and additional highlighting layers of paint, will begin adding accessories. And the turret is almost ready for paint, too.


- 107 replies
-
- 10
-
-
This Some decals don't like lacquer over top. But since it didn't give the other decals a problem, I suspect it's a matter of too heavy a coat. This is one of the limitations/difficulties of rattle can paint, a lack of flow control. Most of the time, decals will behave well to a light coat of clear lacquer, but a heavy coat will cause issues. It likely puddled here, which caused it.
-
You are having a string of bad luck on this one OC. I don't know any easy way to fix that in place.
-
M-50 Israeli Sherman - FINISHED - MP Models - 1:35 Scale
CDW replied to CDW's topic in Non-ship/categorised builds
One thing for sure...I would hate being a tanker. Cramped up inside all that steel, and can't even imagine how terribly hot it must have been inside in desert warfare. At least the modern tanks are air conditioned, but as all things do, the air conditioning probably breaks down from time to time and I would bet repairing an A/C system isn't a high priority in the big scheme of things. -
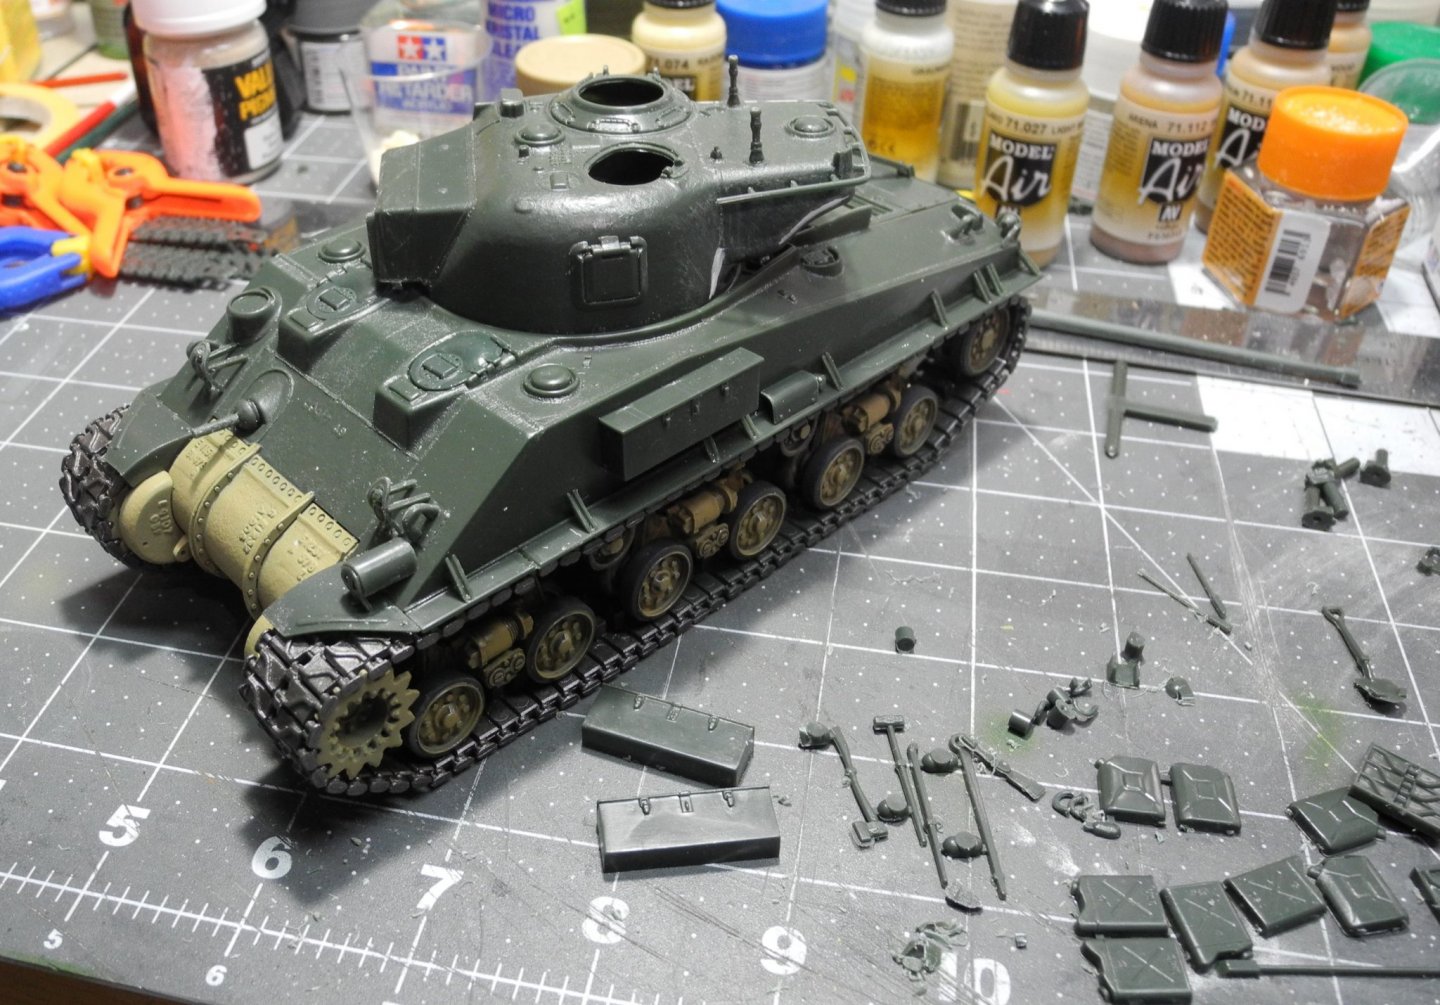
M-50 Israeli Sherman - FINISHED - MP Models - 1:35 Scale
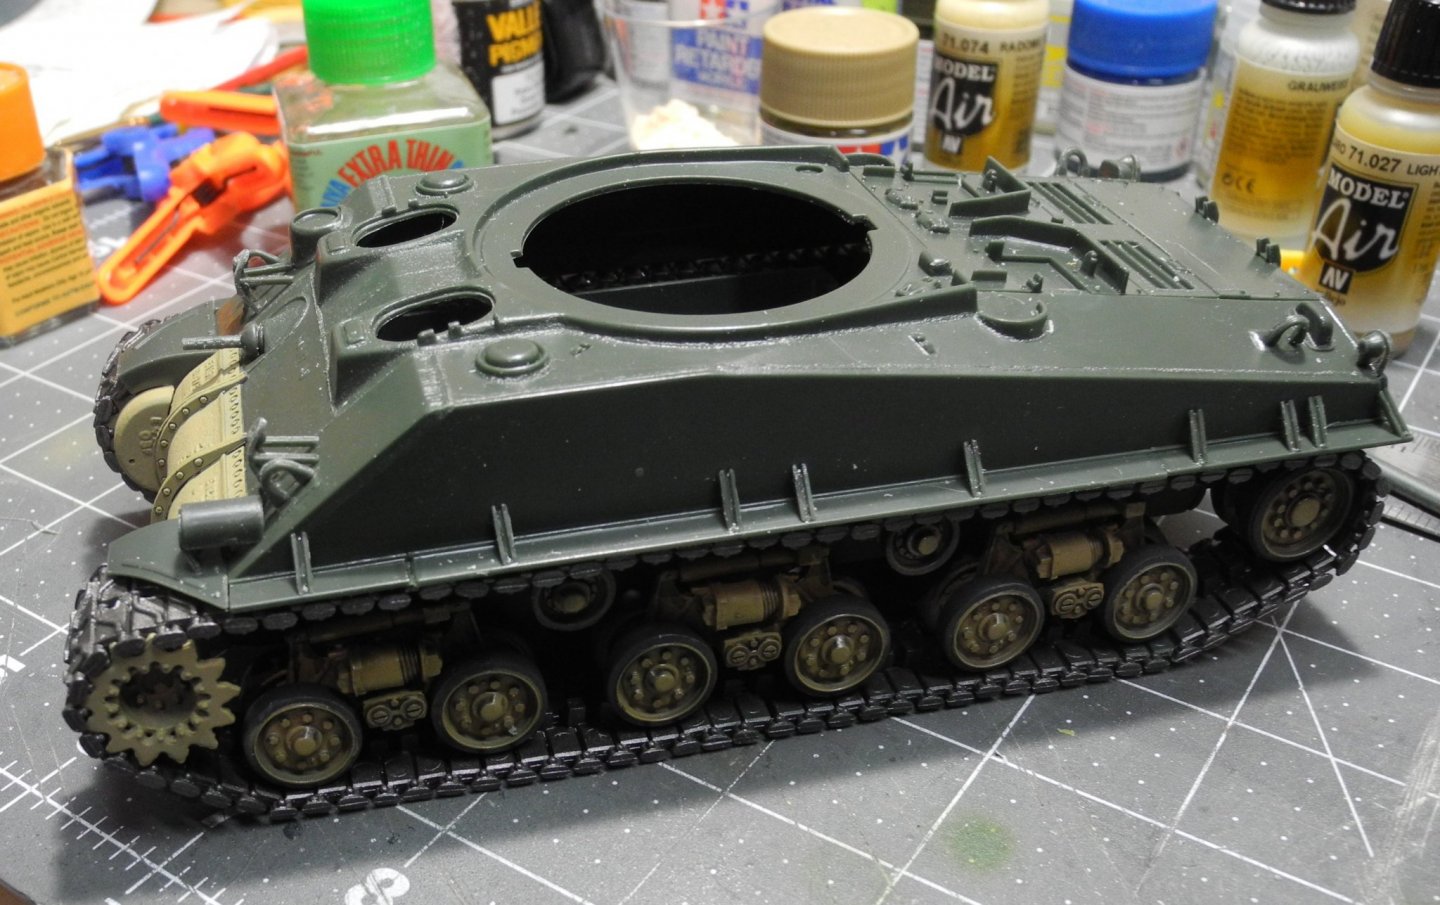
CDW replied to CDW's topic in Non-ship/categorised builds
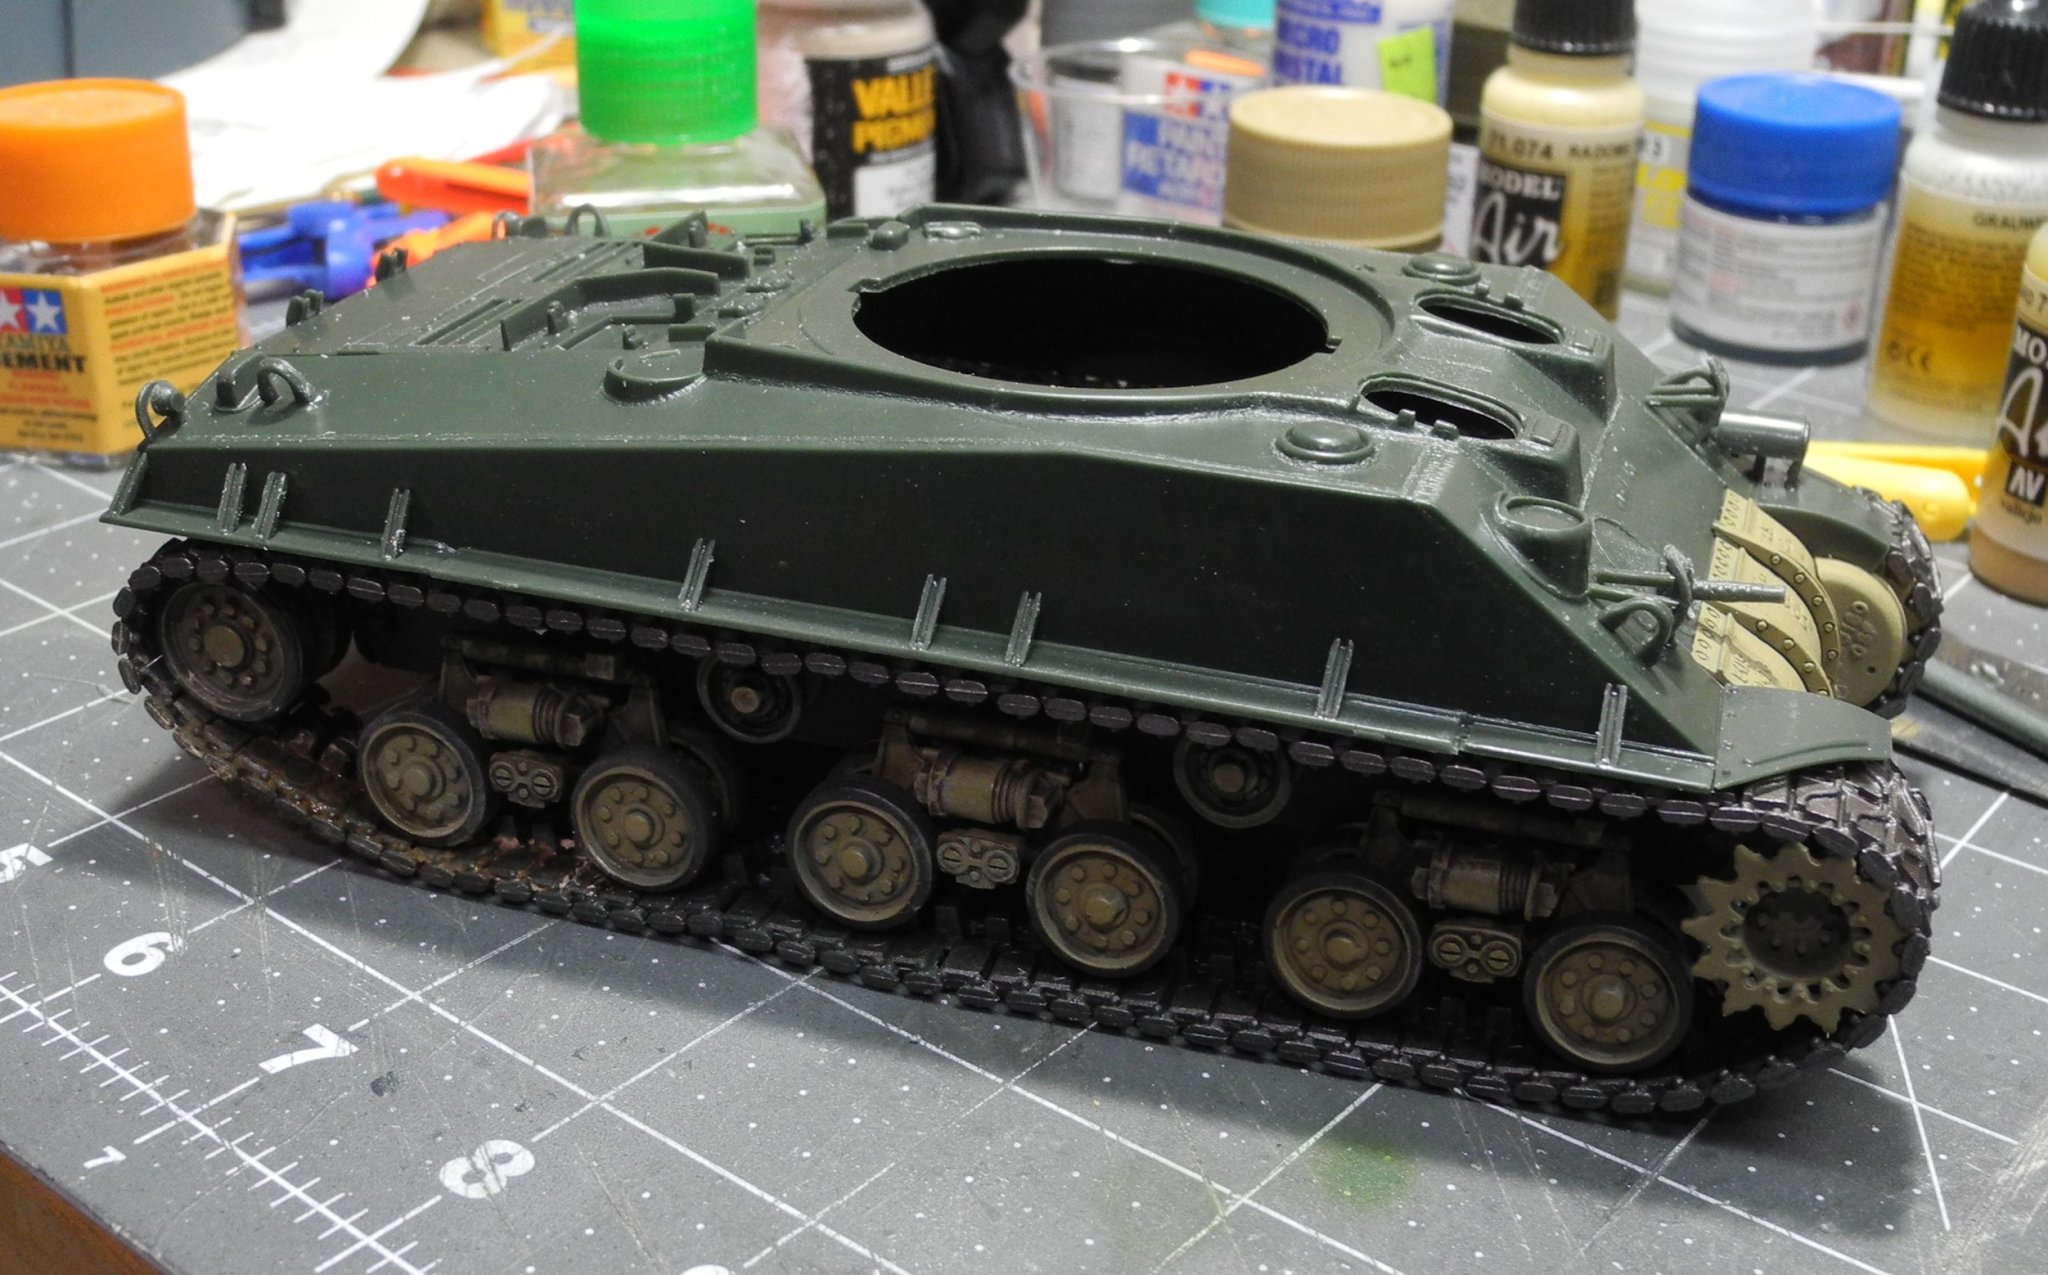
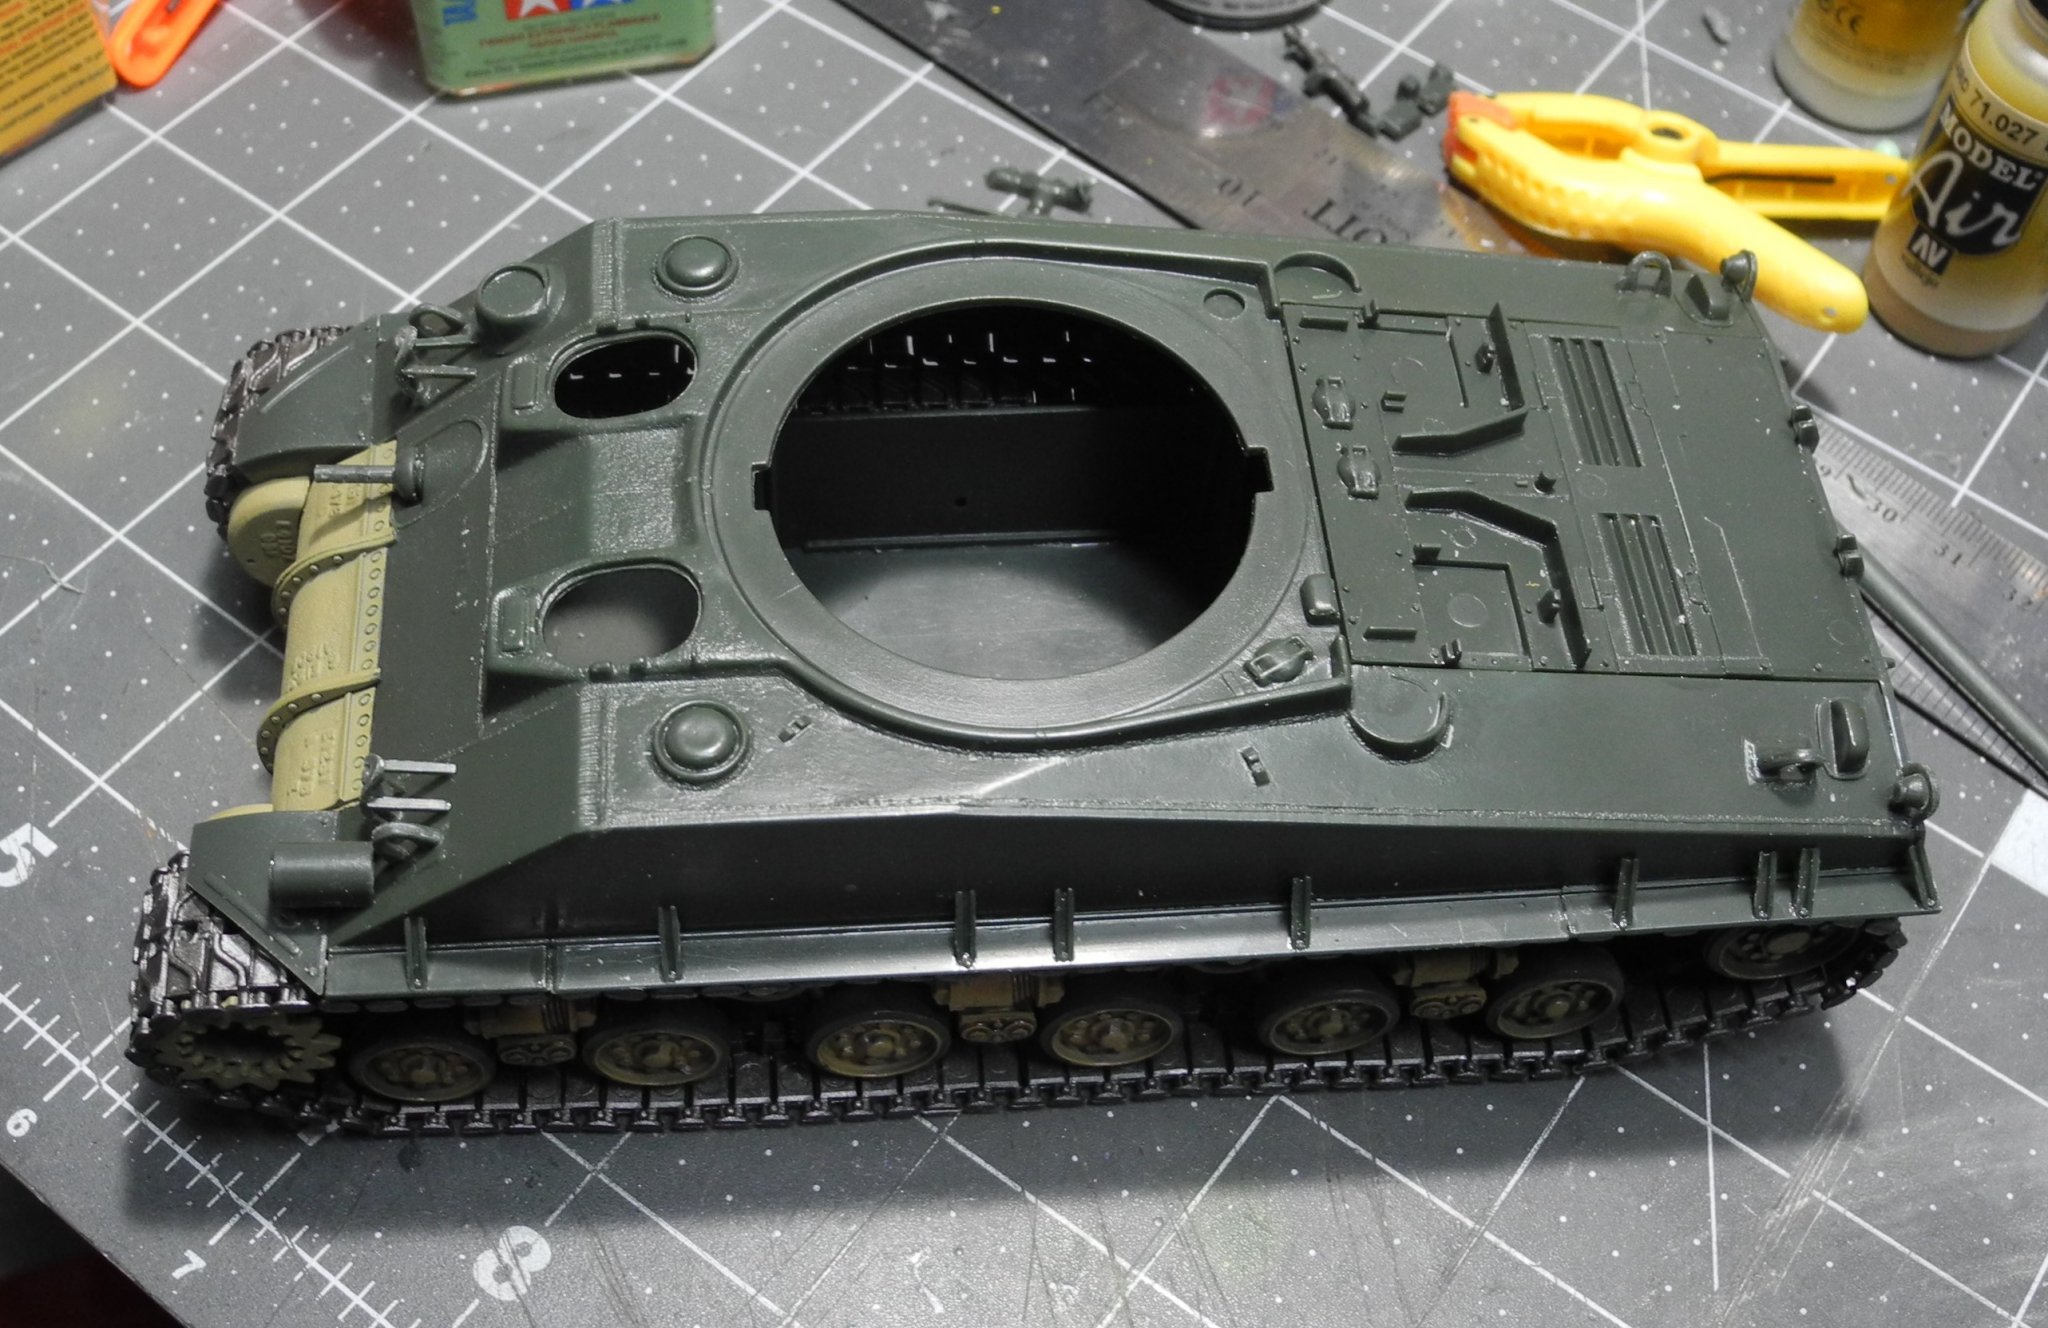
More details before primer and paint.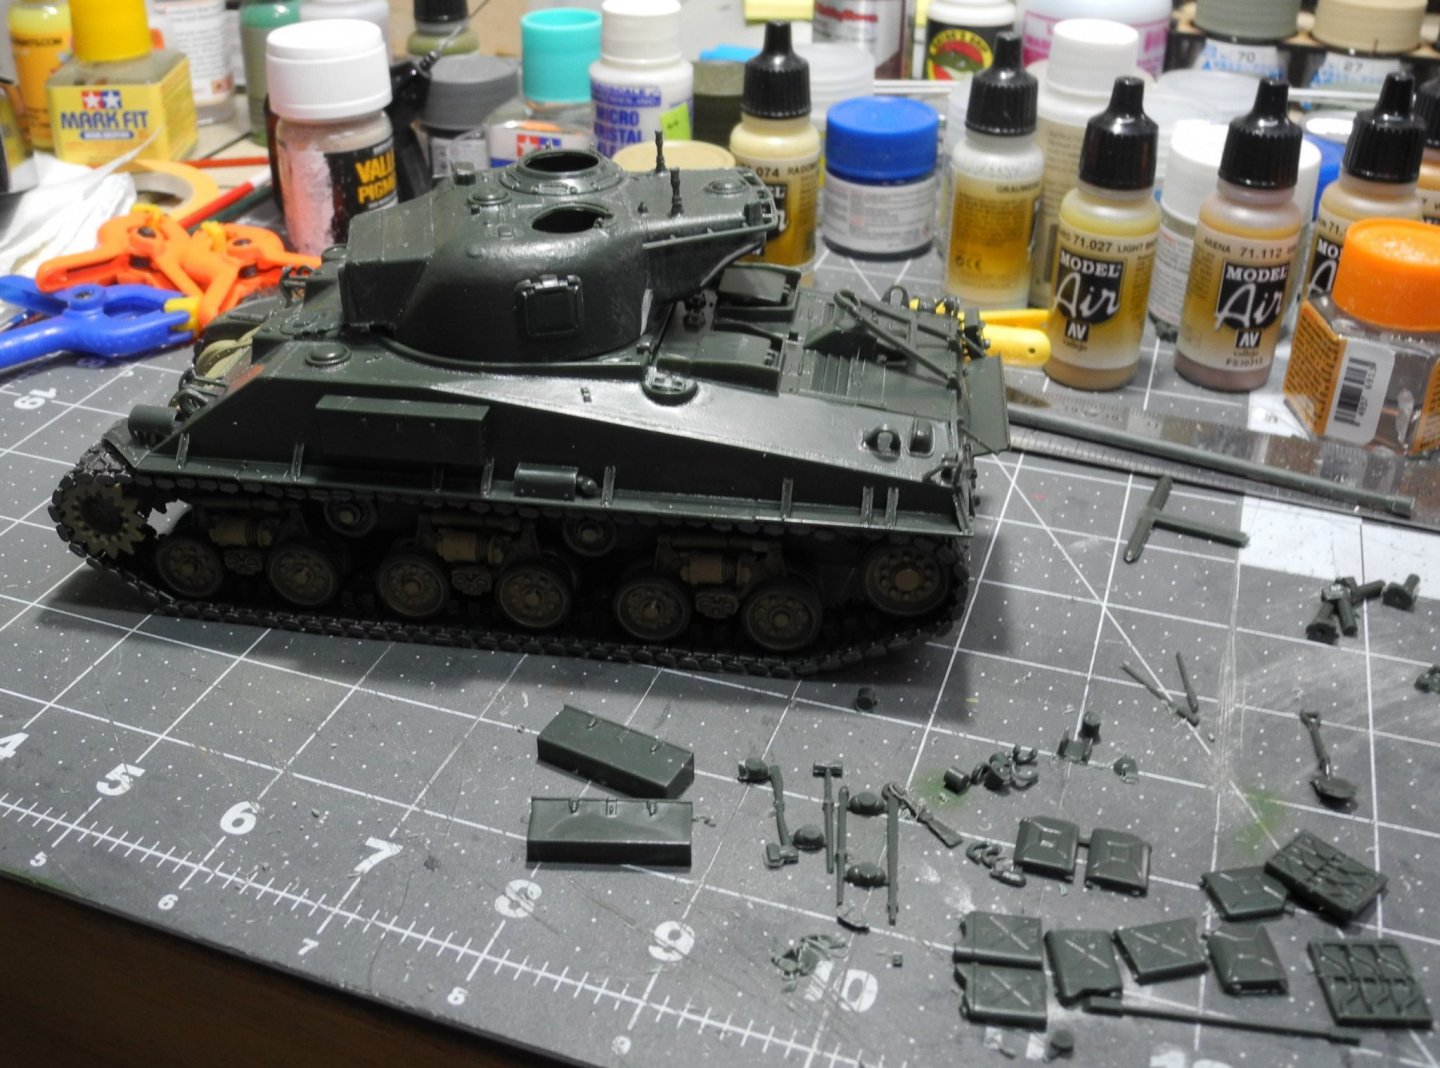

-
M-50 Israeli Sherman - FINISHED - MP Models - 1:35 Scale
CDW replied to CDW's topic in Non-ship/categorised builds
Thanks EG....glad you're here. -
M-50 Israeli Sherman - FINISHED - MP Models - 1:35 Scale
CDW replied to CDW's topic in Non-ship/categorised builds
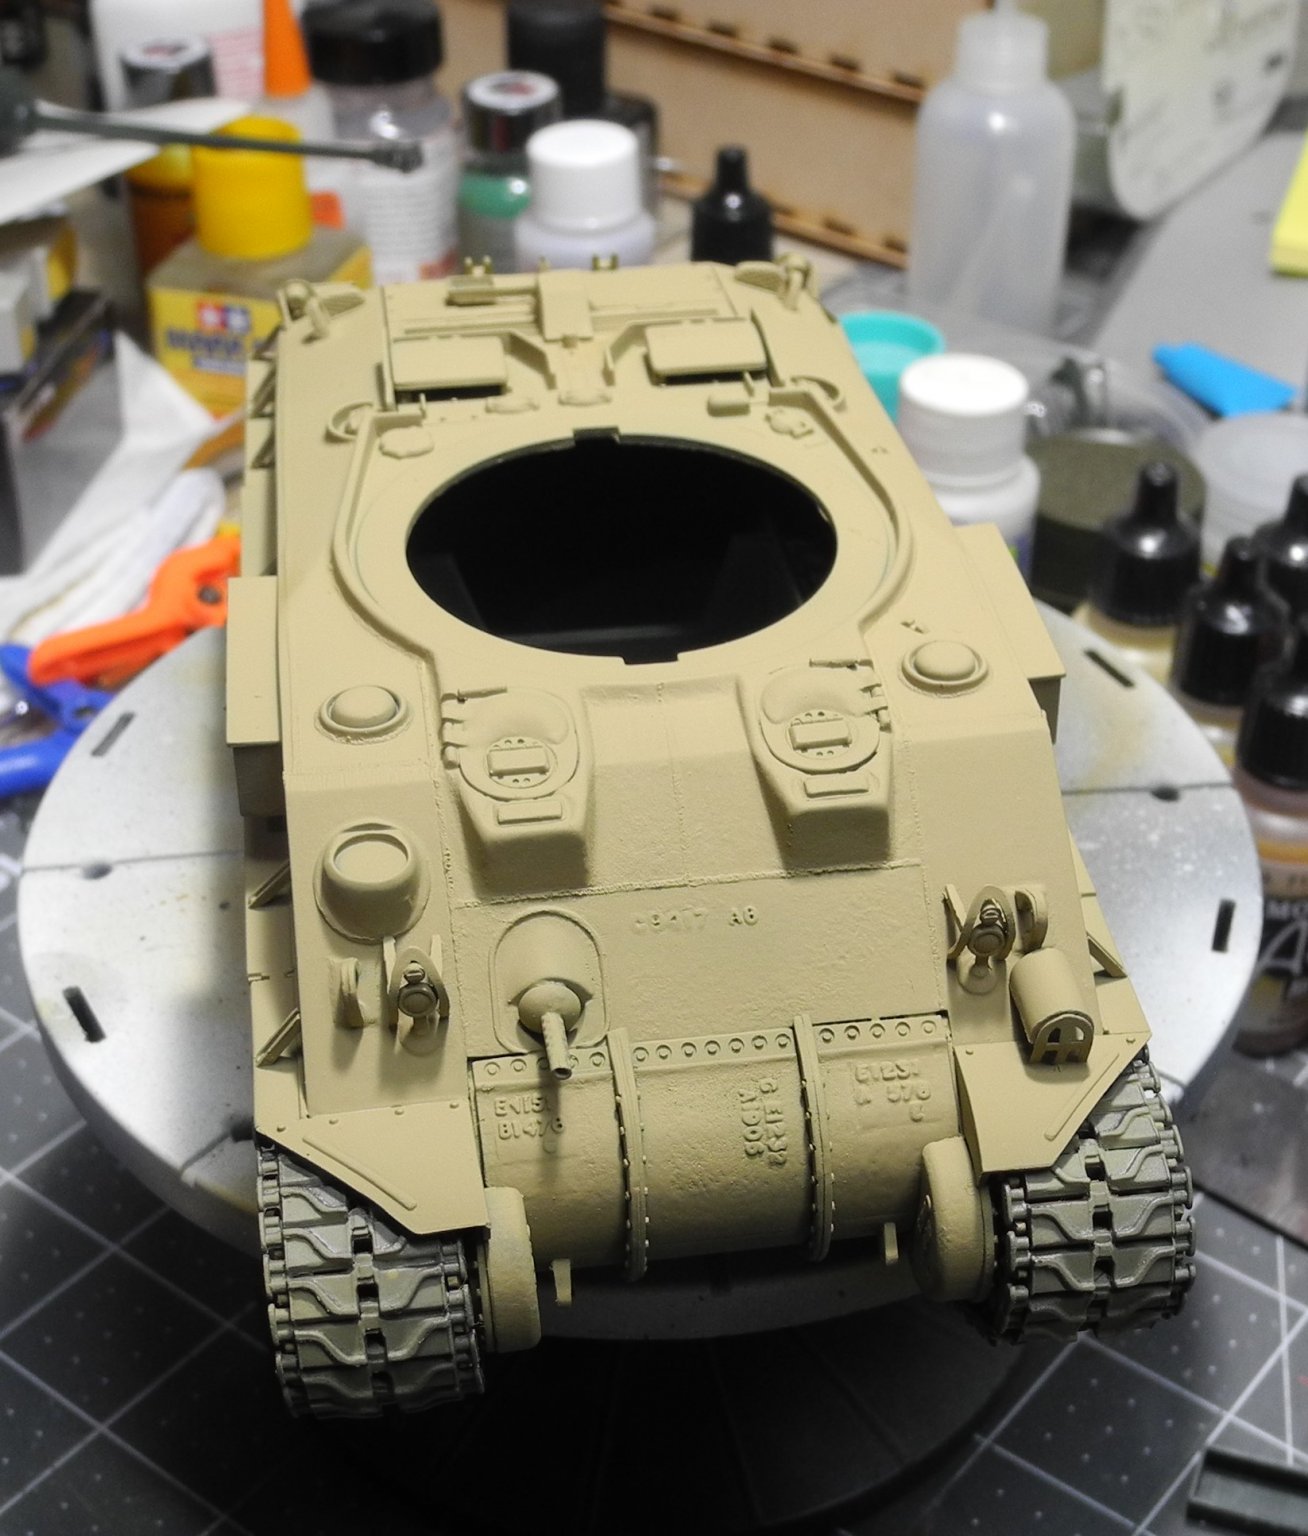
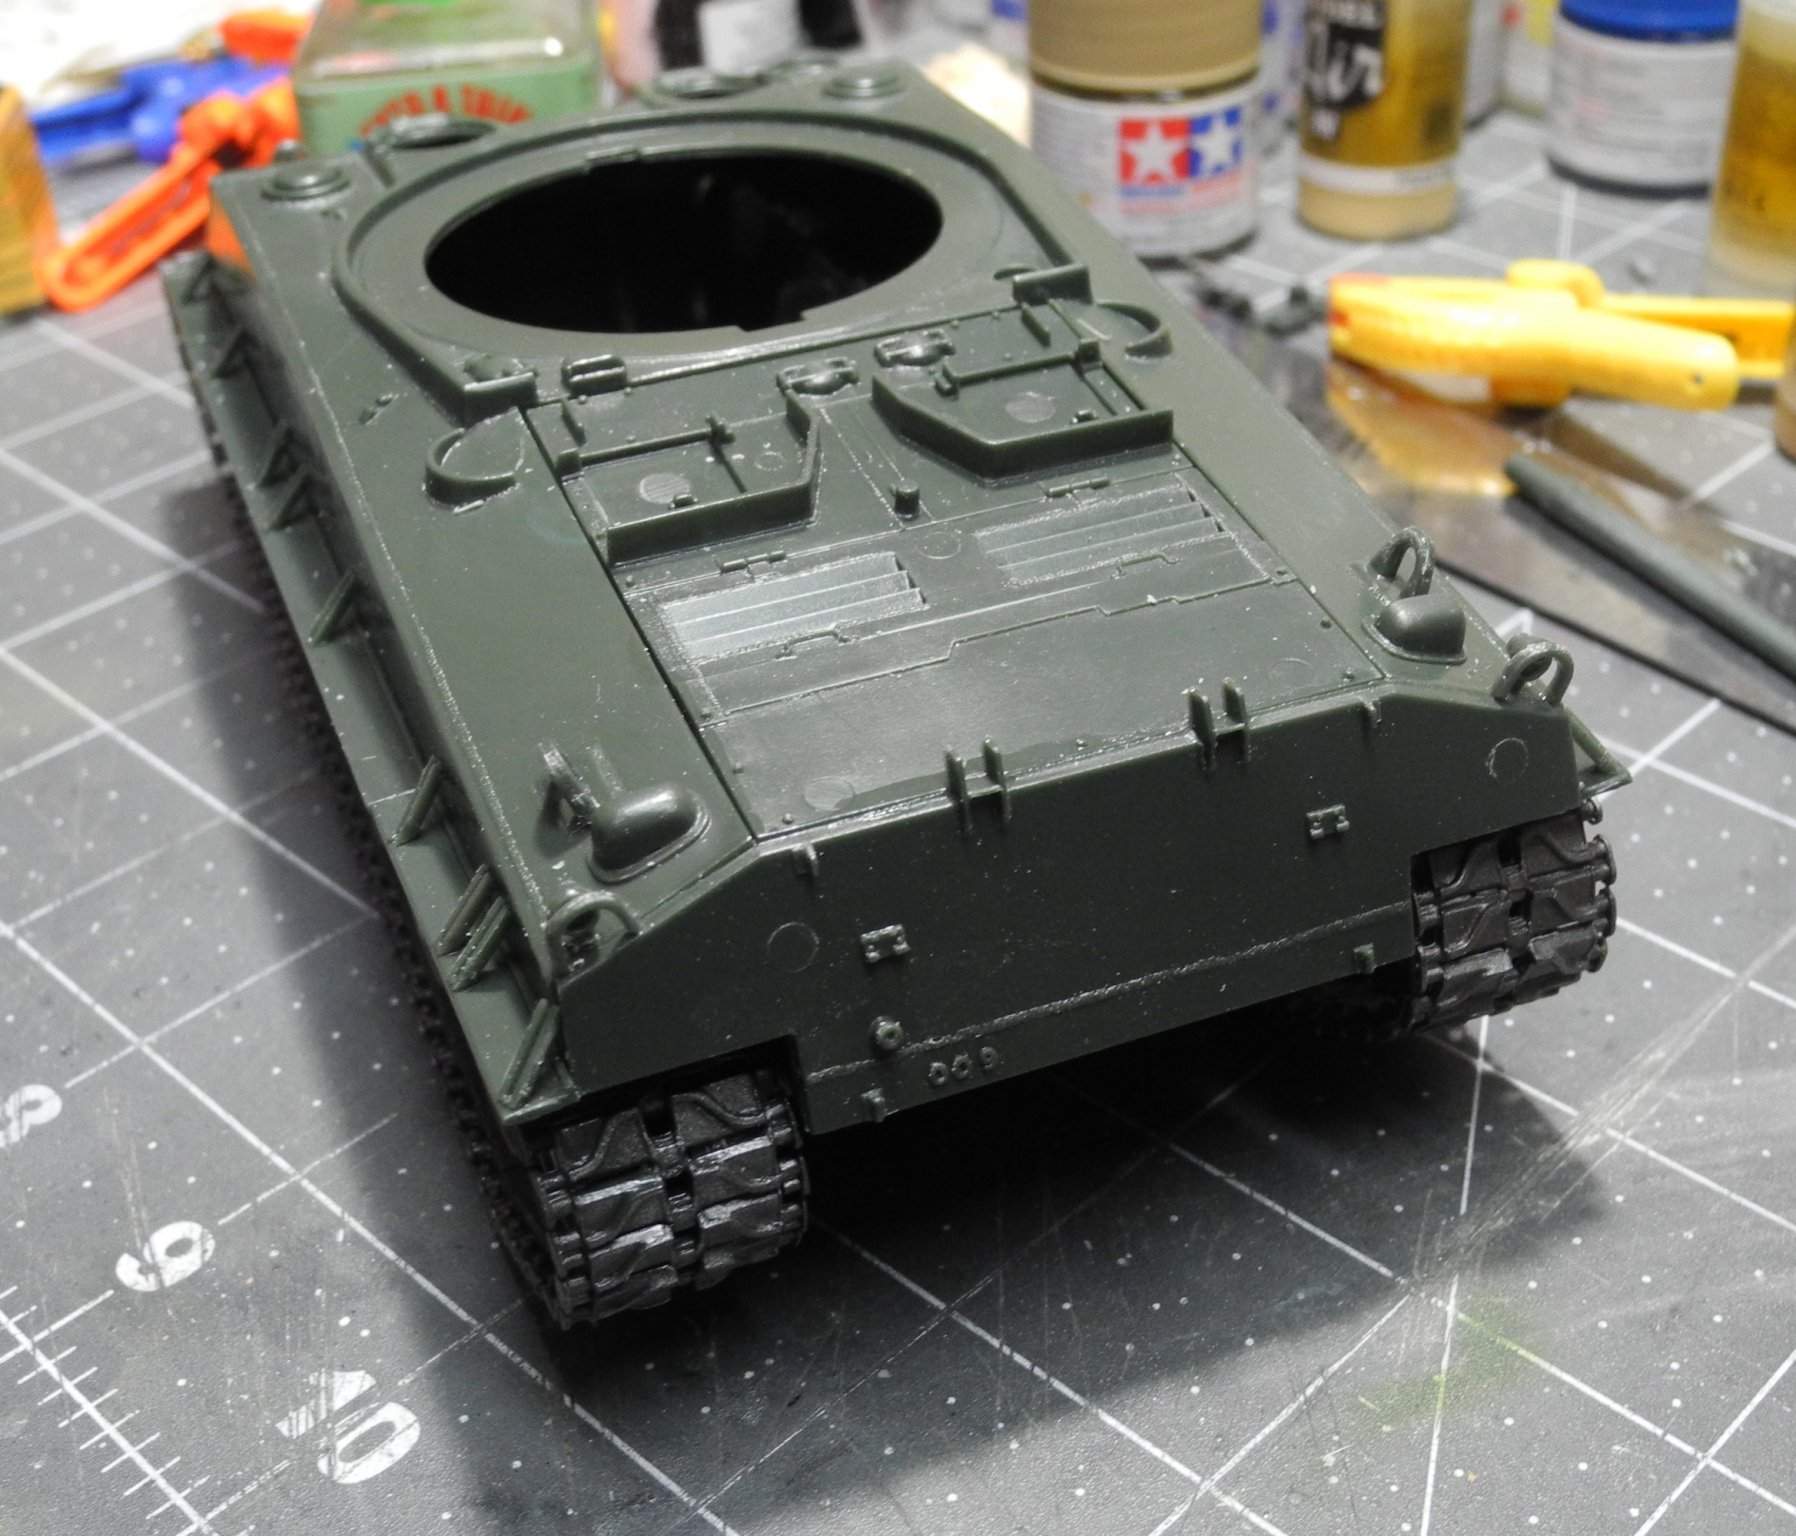
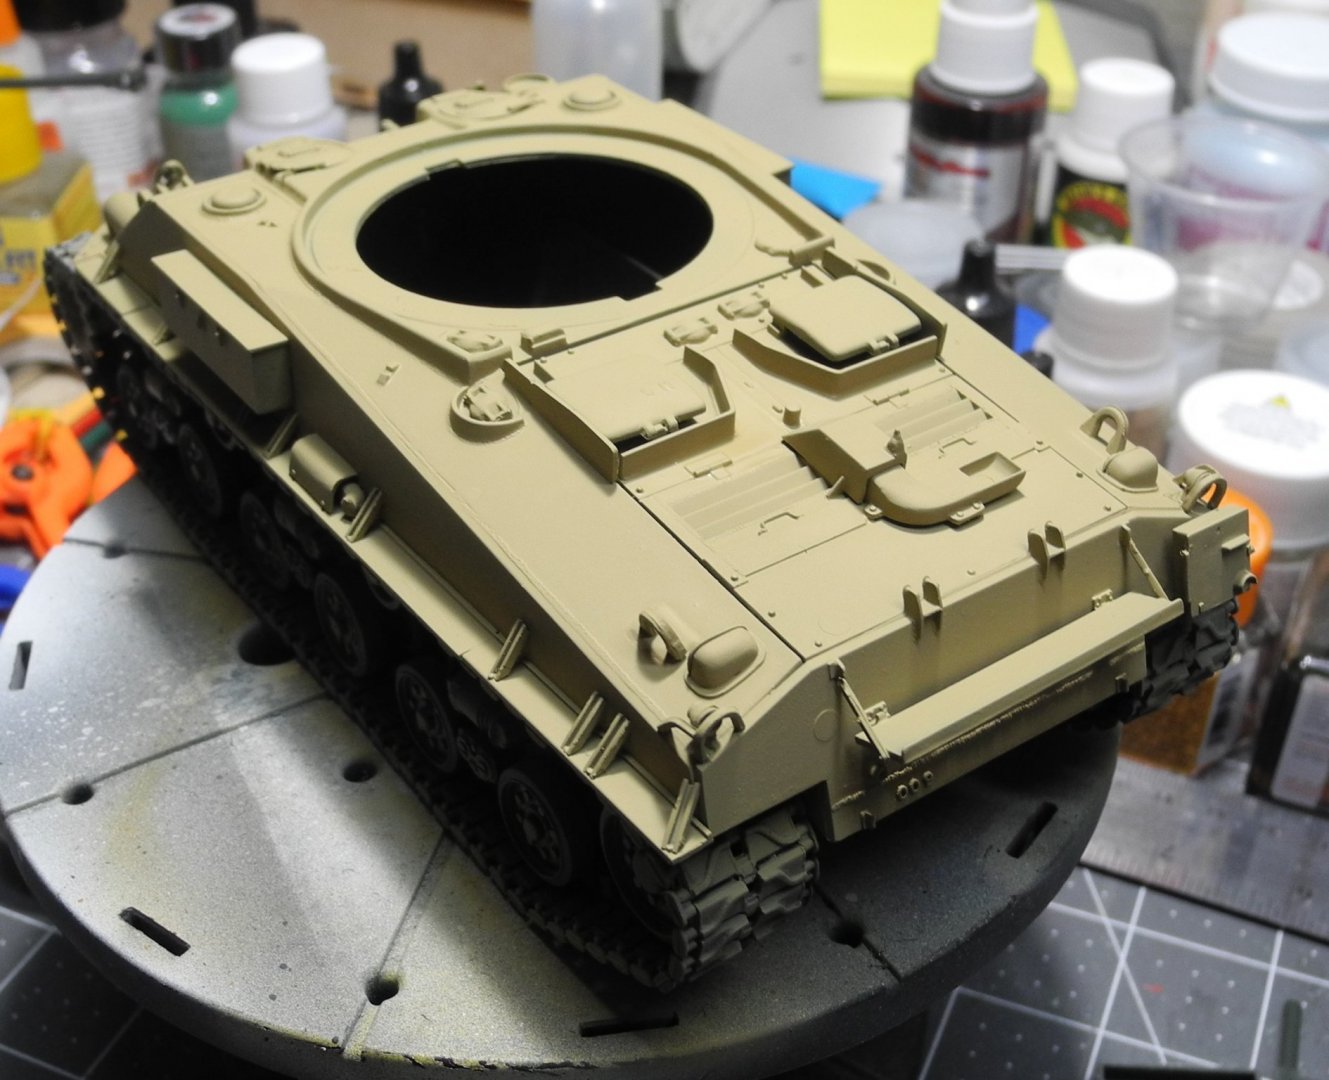
There's a lot more detail on the lower hull that I'm adding now. Plus, there is a set of stowage. Lots to see. -
B-25J Mitchell by Tom E - Revell - 1:48 Scale - PLASTIC
CDW replied to Tom E's topic in Non-ship/categorised builds
Very nice work, Tom. You're getting the hang of this quickly and it looks great! -
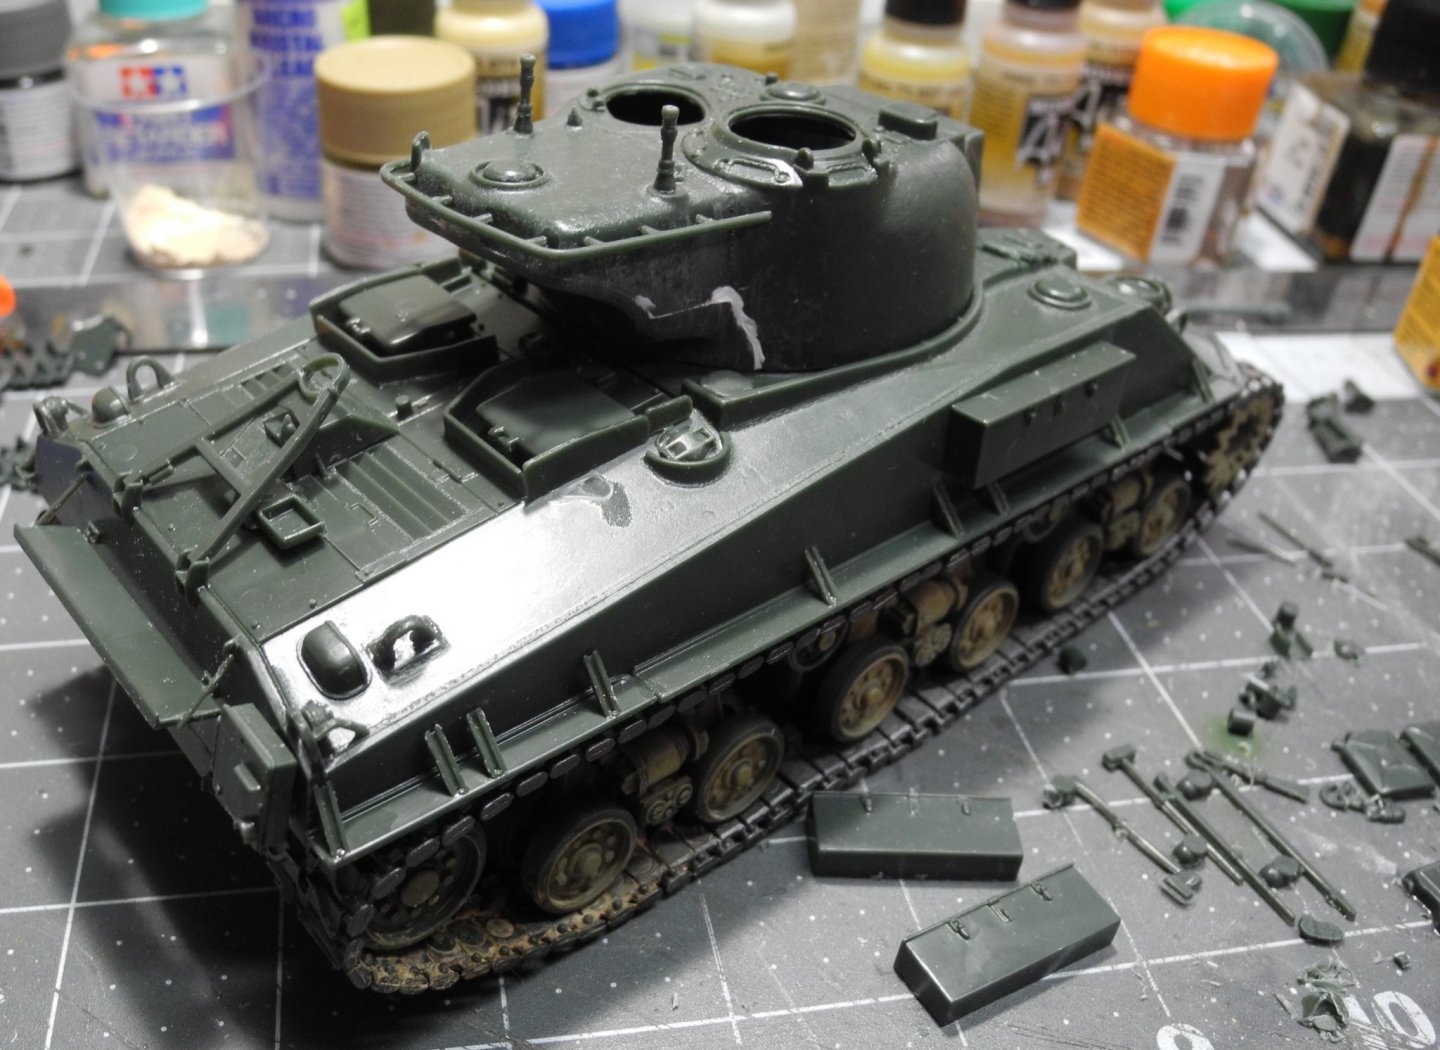
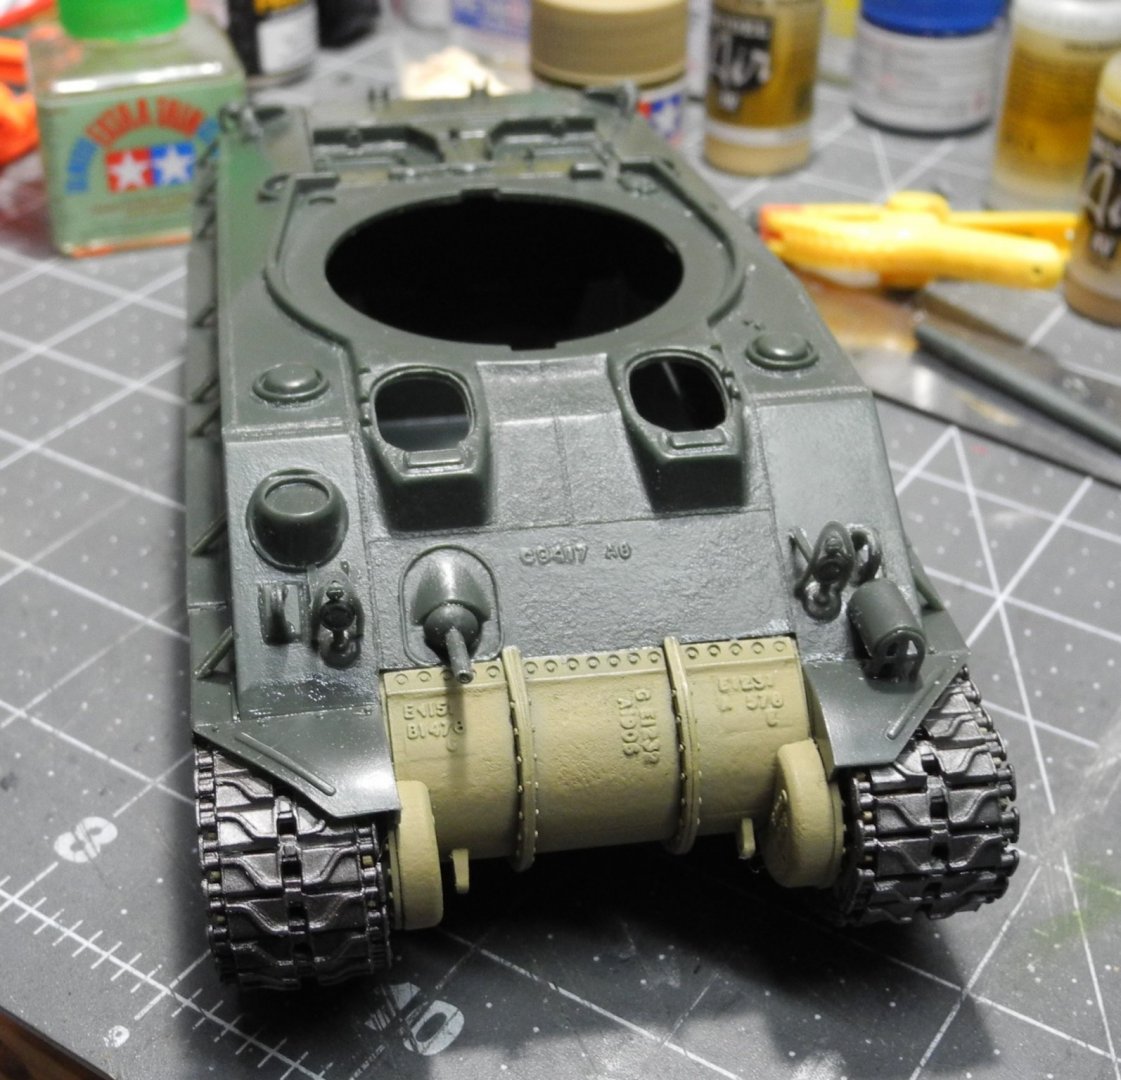
M-50 Israeli Sherman - FINISHED - MP Models - 1:35 Scale
CDW replied to CDW's topic in Non-ship/categorised builds
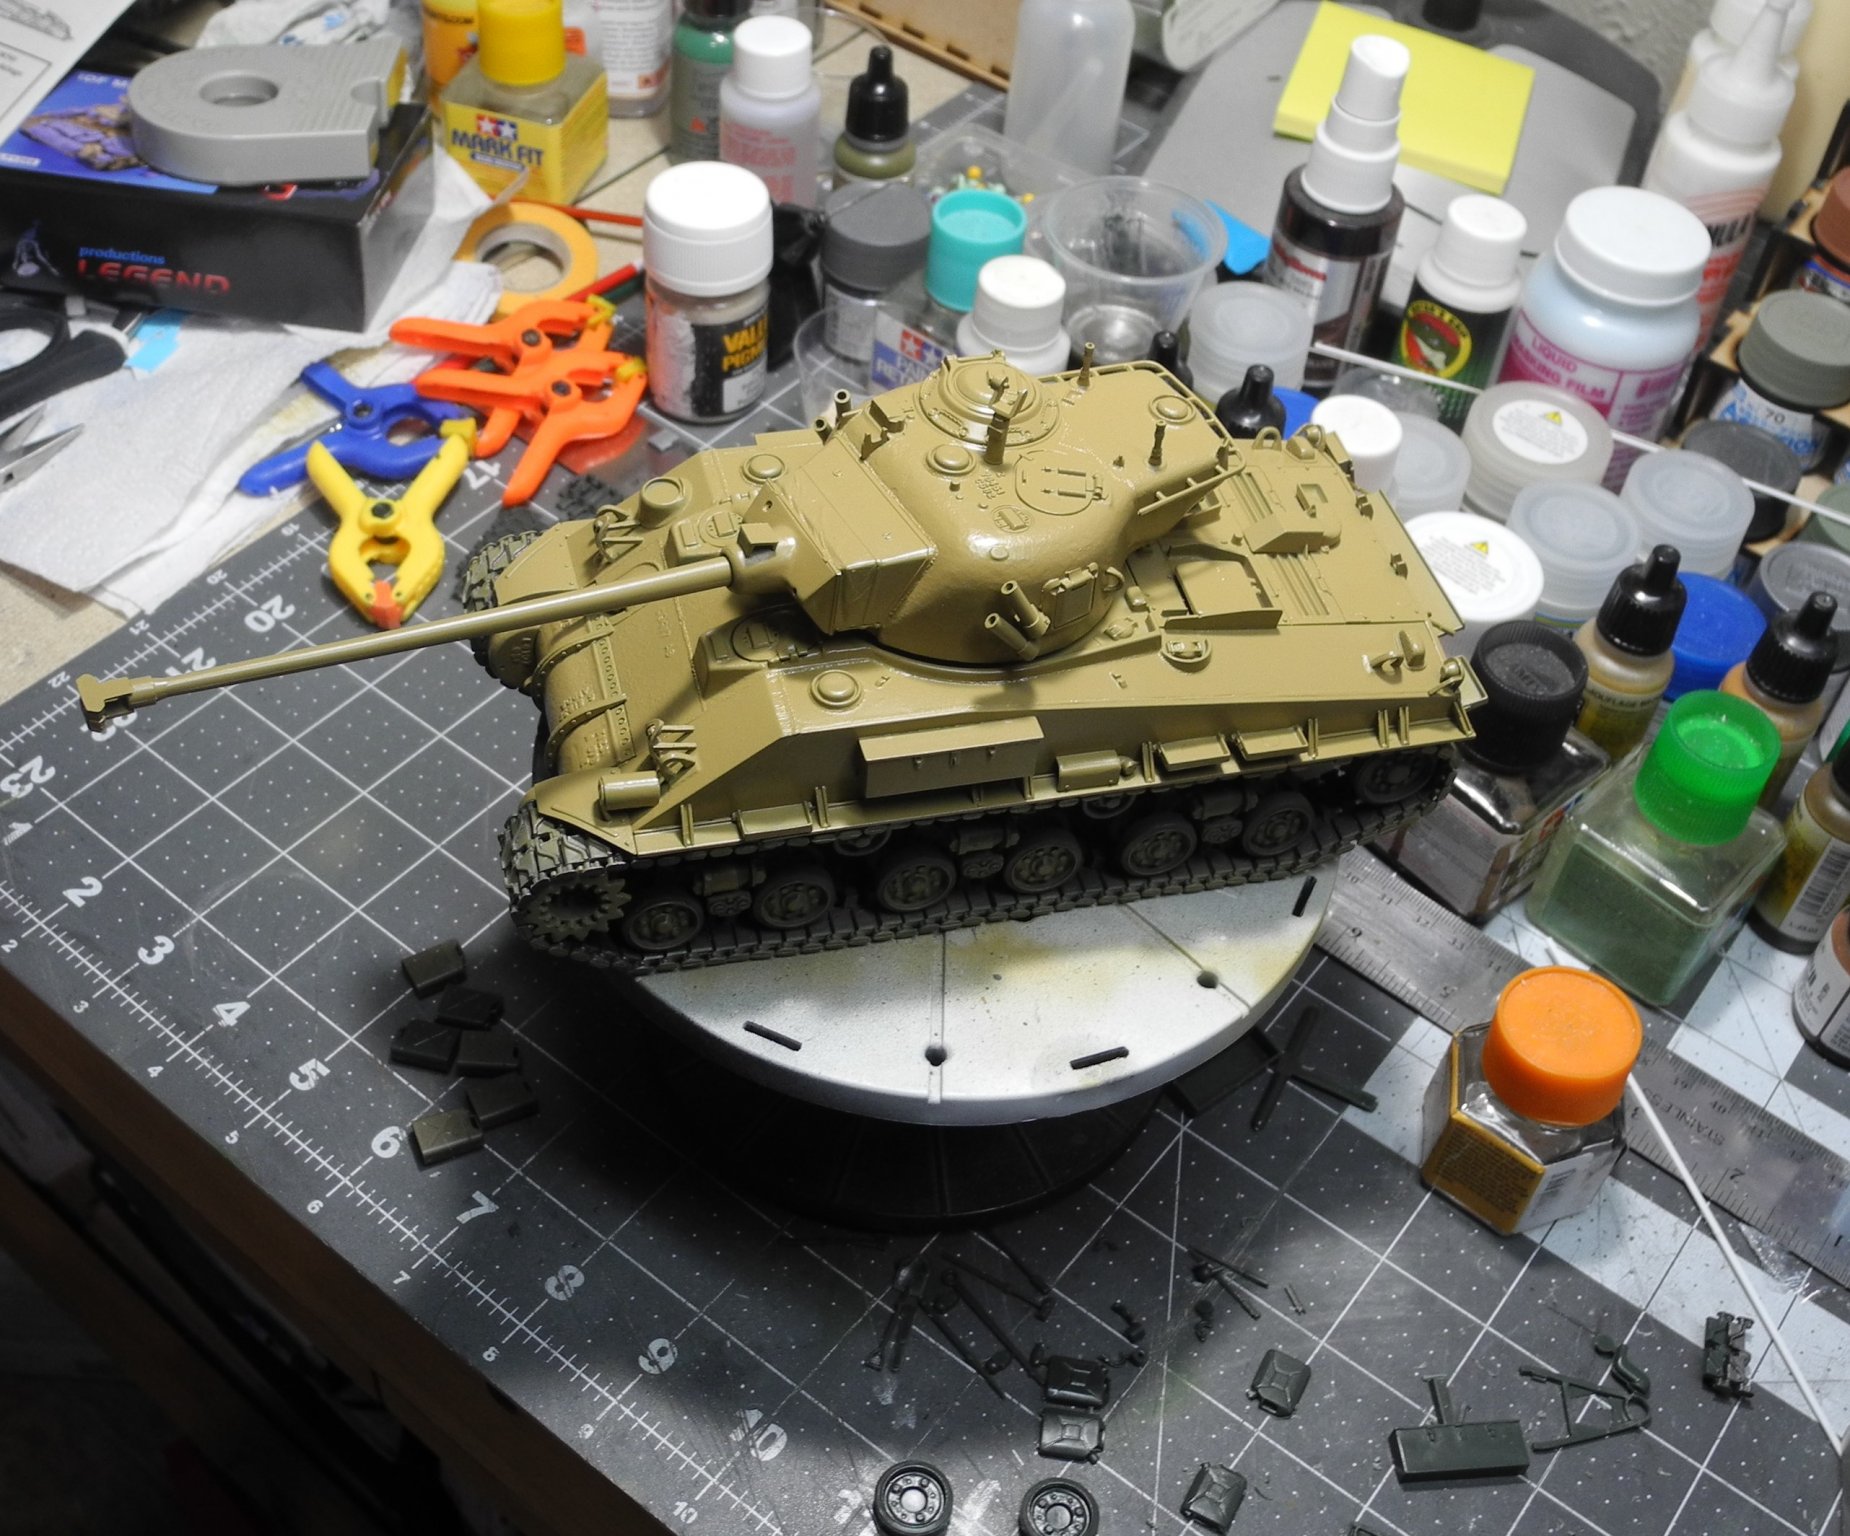
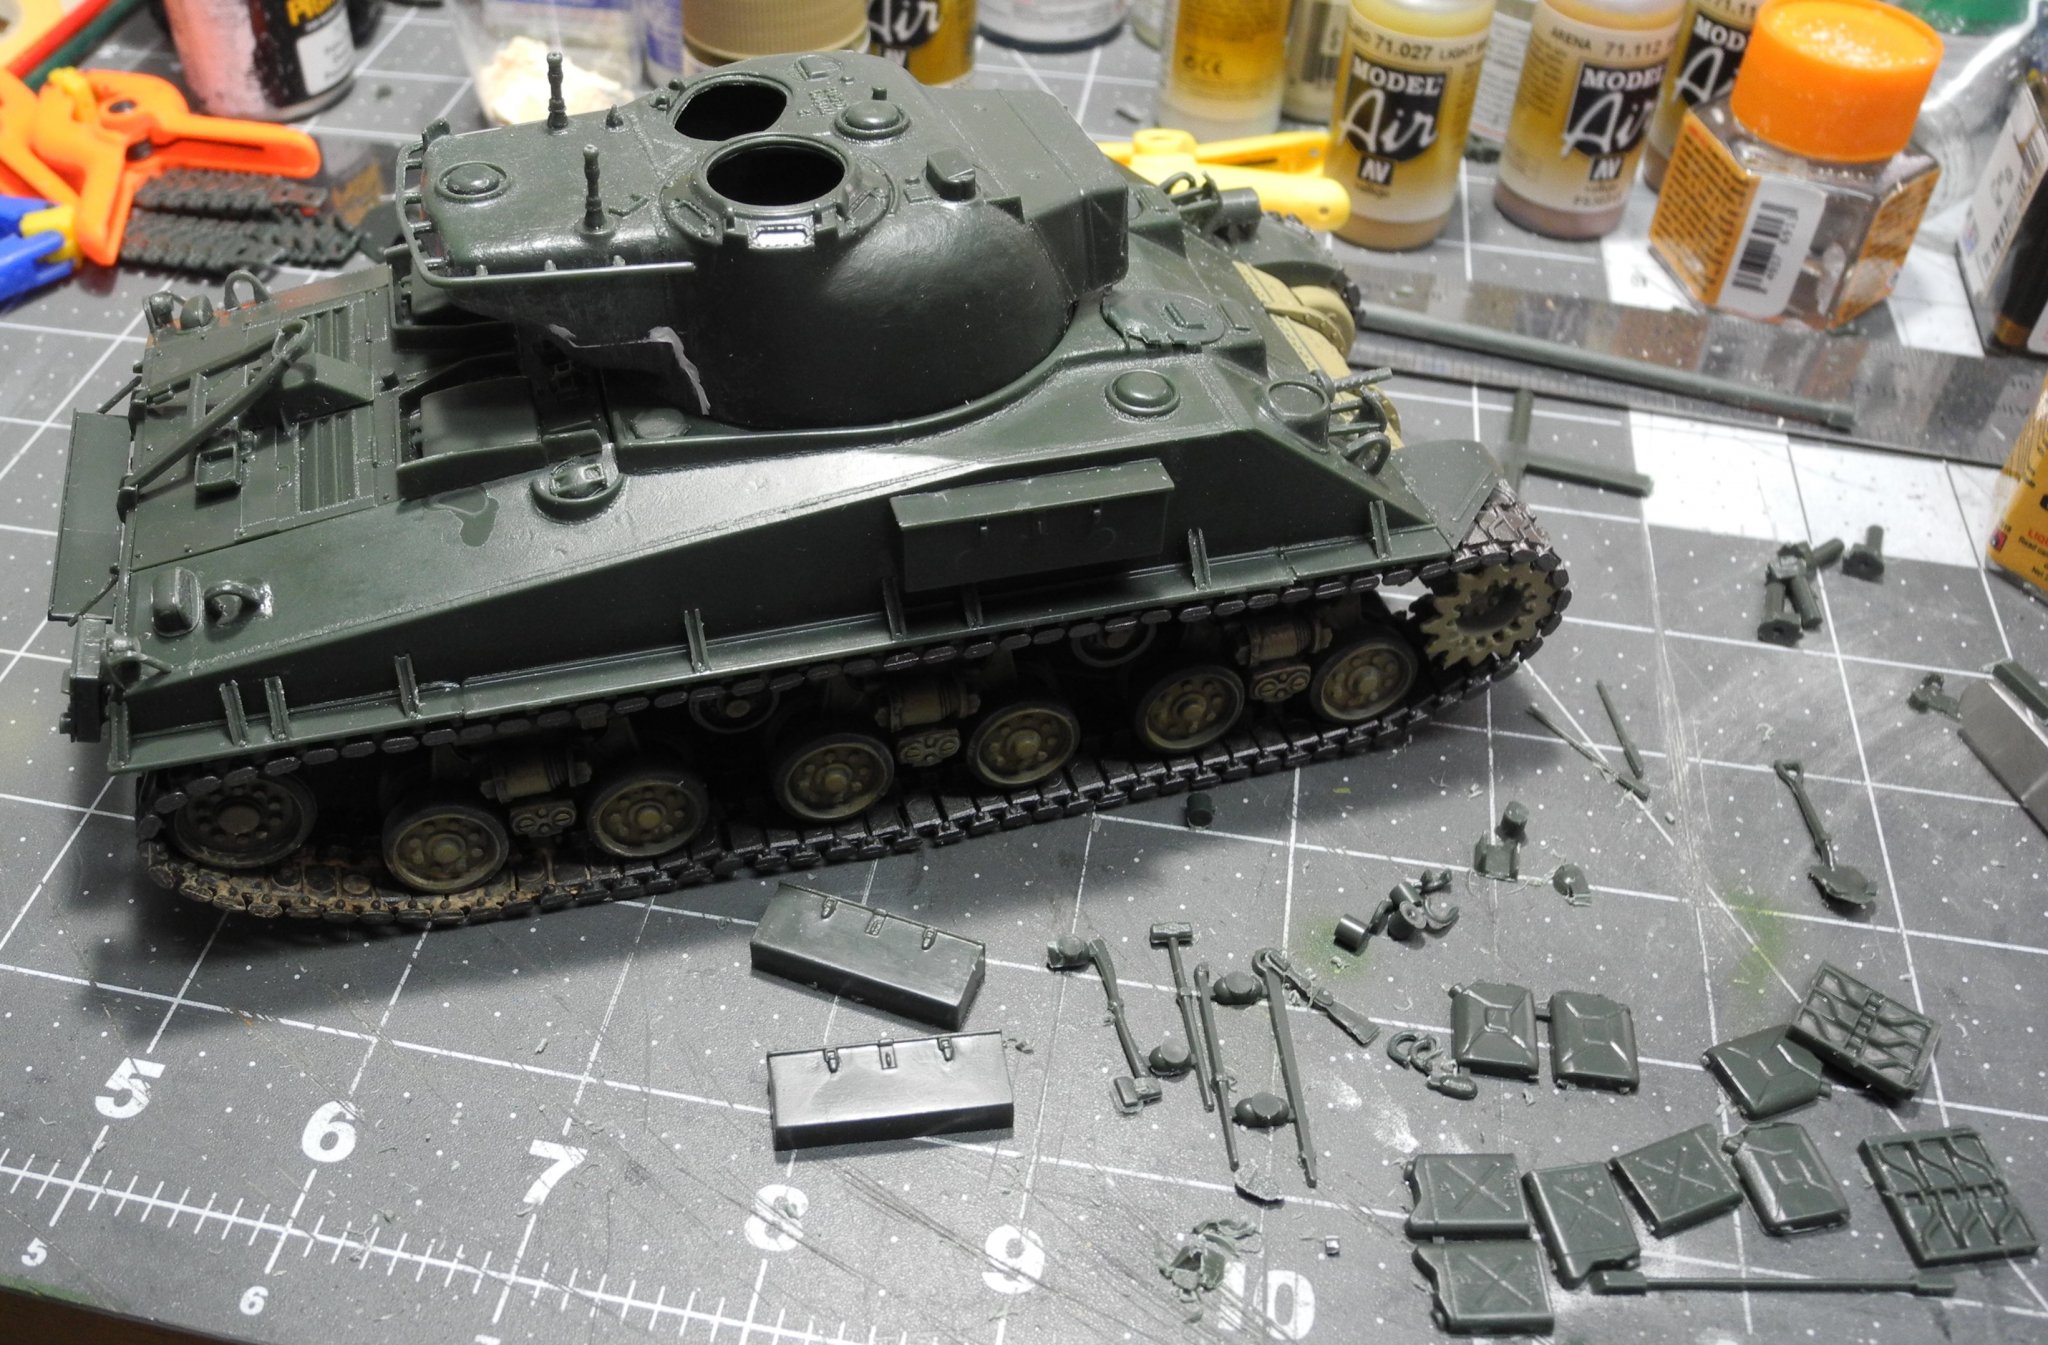
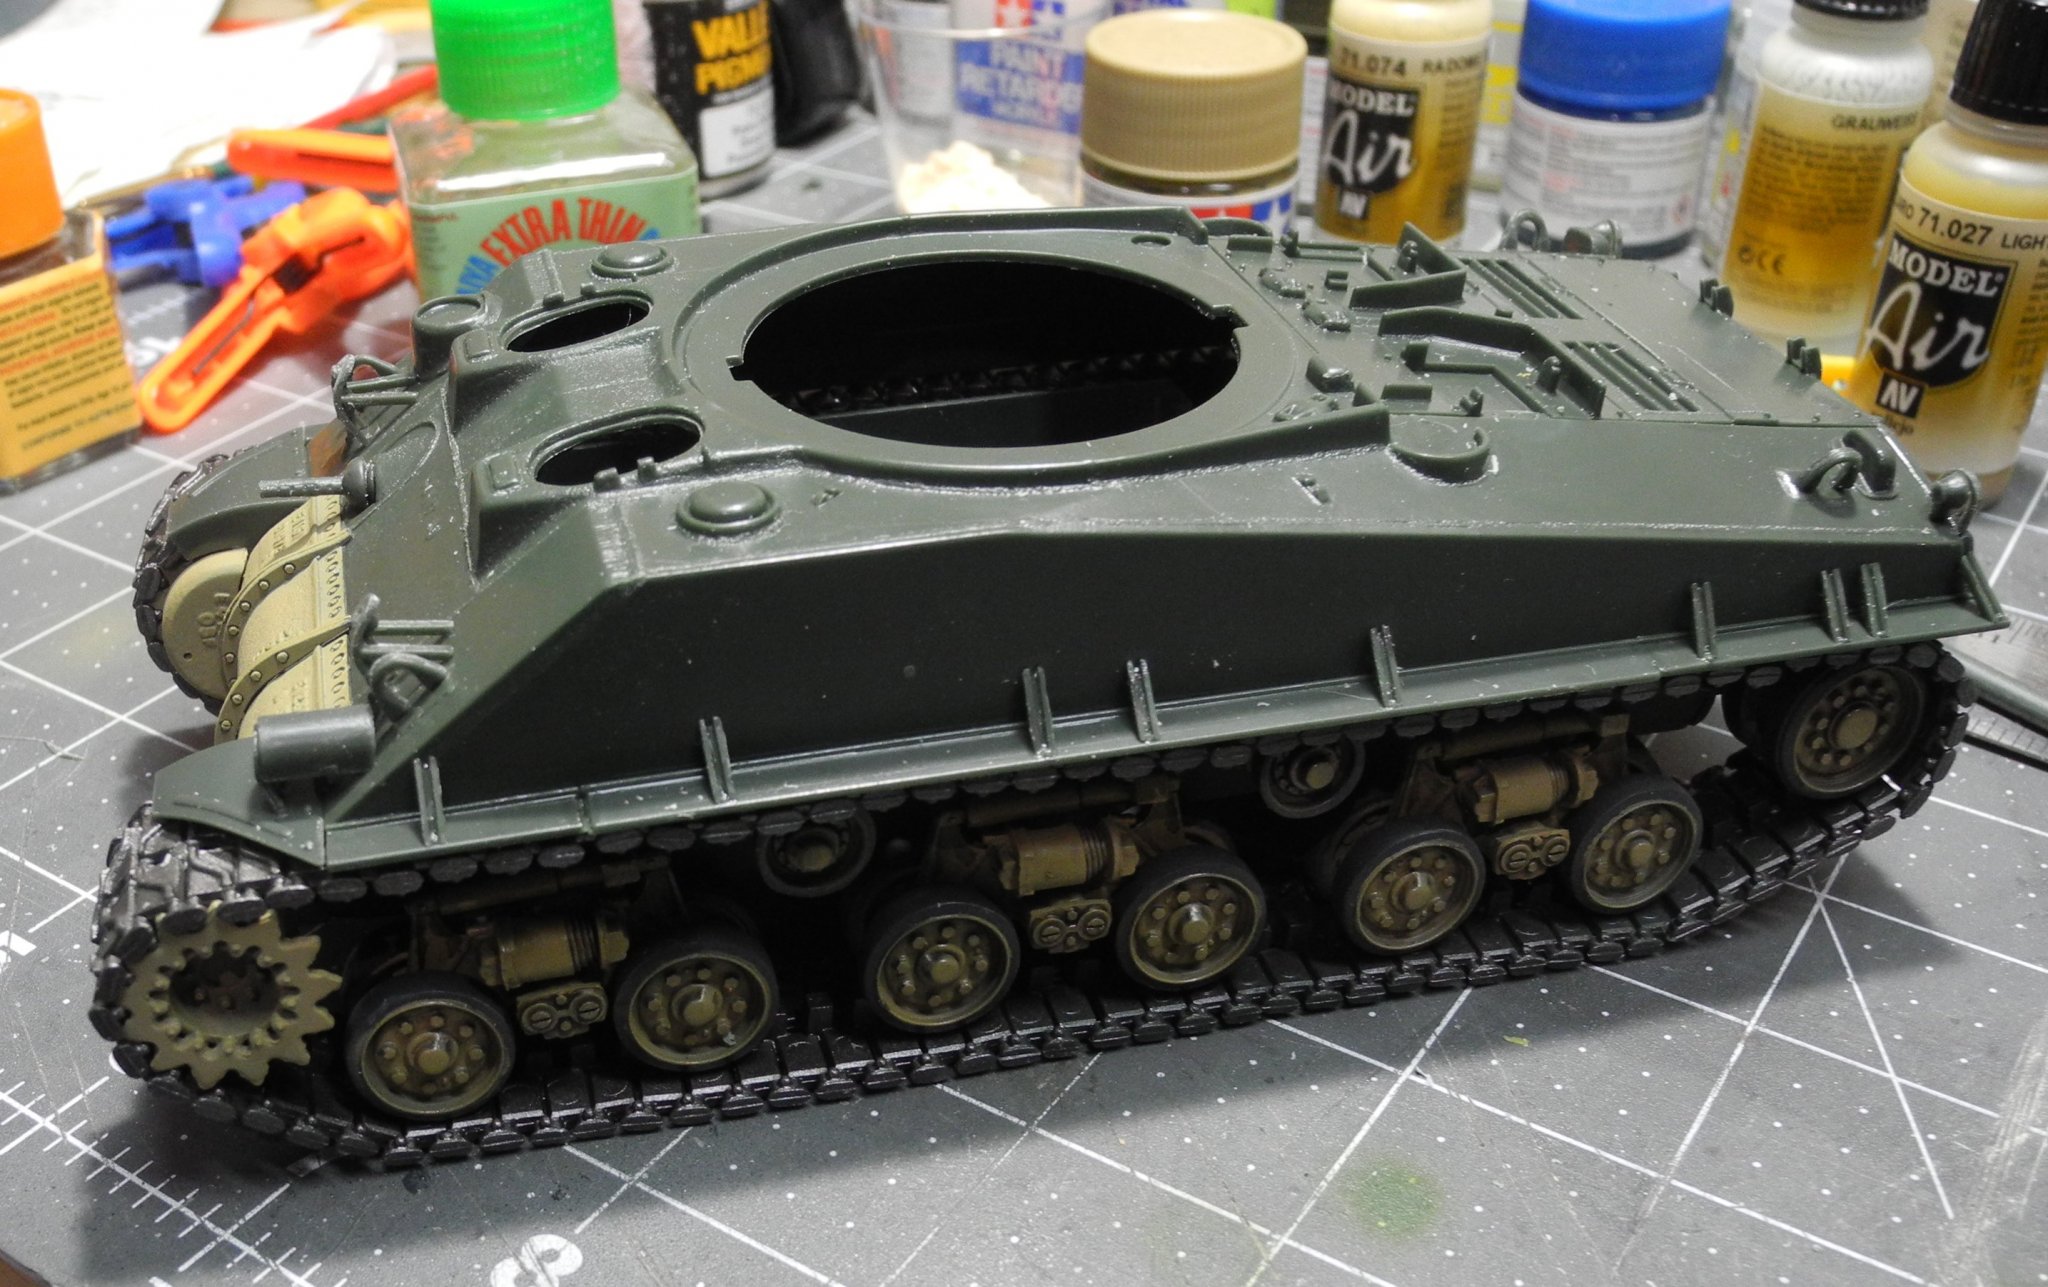
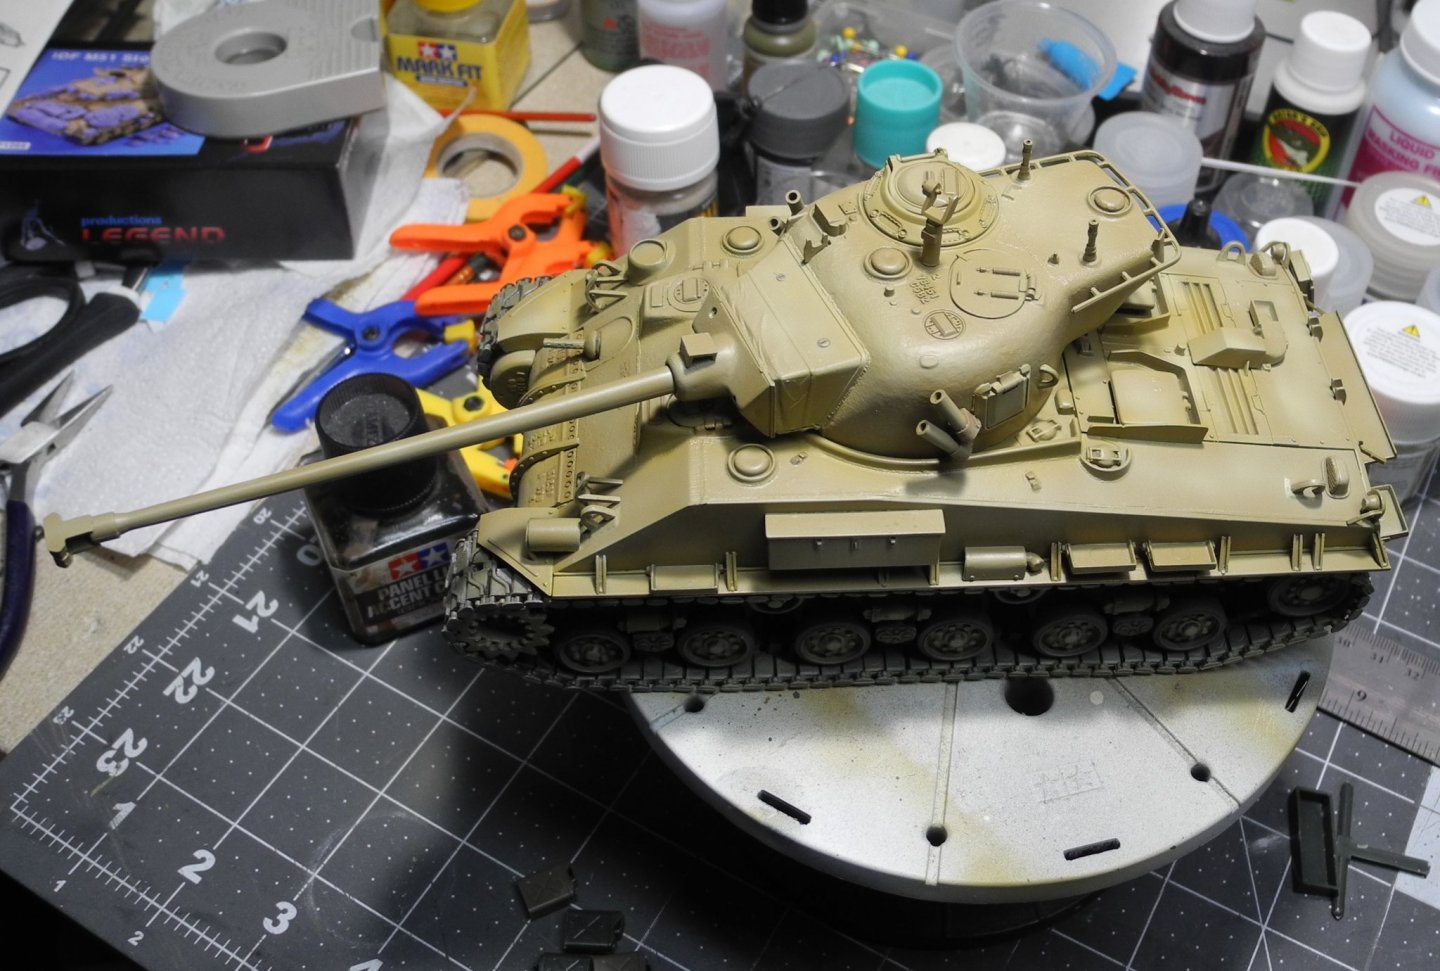
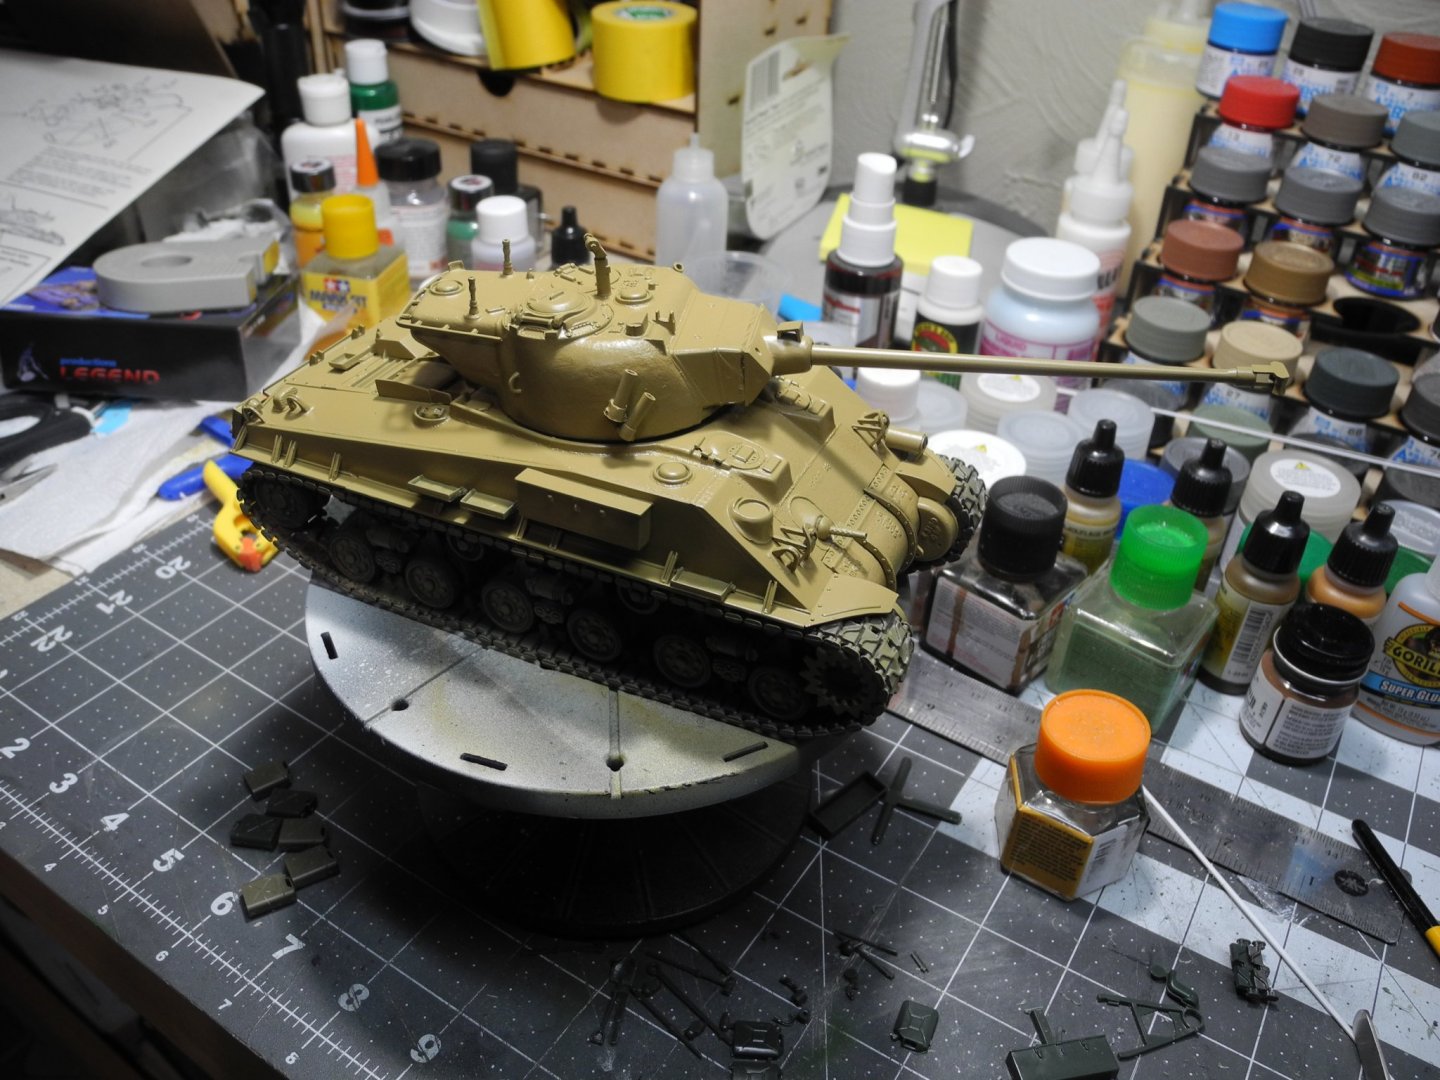
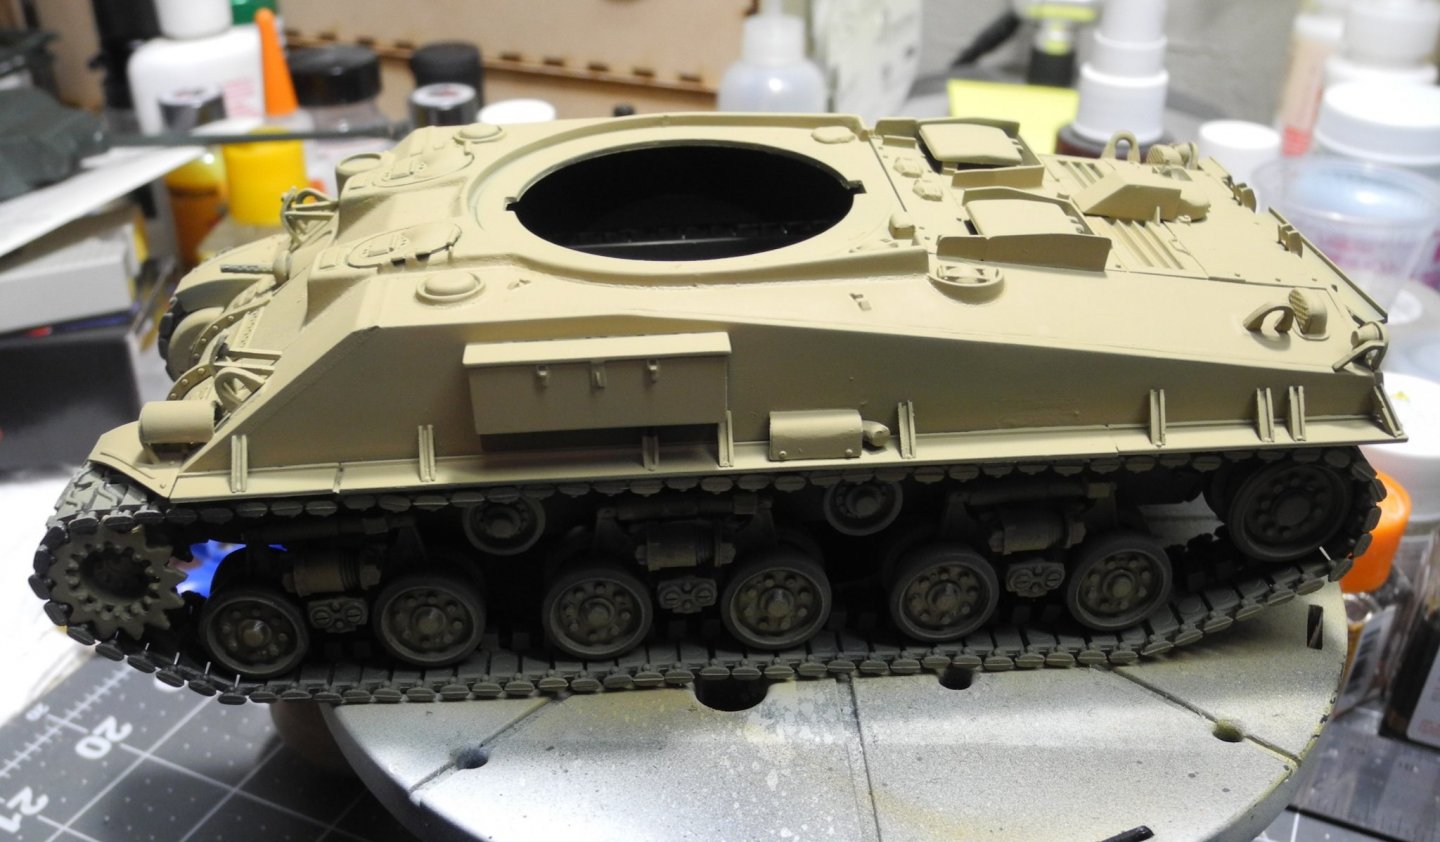
Thanks, Ken. It's fun working with an armor model as they are not as sensitive to painting errors as are automobiles, aircraft, and ships. None of the parts of this model are assigned a part number. All you can do is follow the crude pictorial "instruction" sheet, that's really more of a suggestion sheet as the correct part locations are very loosely shown. It helps tremendously to have lots of reference photos from other sources. Here, I started the assembly of the upper hull and finished another set of tracks before I ran out of gas for the day. It was a good rainy day for modeling, tomorrow will try to finish up the upper hull and start getting some paint on it.


- 107 replies
-
- 10
-
-
Beautiful model, Don. I appreciate you sharing it with us.
- 36 replies
-
- 3
-
-
- calypso
- billing boats
- (and 1 more)
-
Hey OC. Just found your build log. Beautiful model you're doing, and I like your choice of paint schemes.
-
Gotha G.lV by ErnieL - Wingnut Wings - 1/32 - PLASTIC
CDW replied to ErnieL's topic in Completed non-ship models
Right after reading this thread, I went out (virtually speaking) and bought a copy of "Marked for Death: The First War in the Air", by James Hamilton Patterson. It's an Audible book, and what I like to listen to while building my models. Usually I like Westerns, but it's high time I heard/read some WW1 aviation books!