
HOLIDAY DONATION DRIVE - SUPPORT MSW - DO YOUR PART TO KEEP THIS GREAT FORUM GOING! (Only 53 donations so far out of 49,000 members - C'mon guys!)
×

CDW
-
Posts
7,748 -
Joined
-
Last visited
Content Type
Profiles
Forums
Gallery
Events
Everything posted by CDW
-
 I have no experience with it whatsoever.
 -
Air compressors can be very noisy. The quieter ones generally cost more money. In a single room apartment you will definitely have to give noise some consideration.
-
The only thing I forgot to add, you'll need a hose adapter to fit on the badger for most airbrush hoses. The one it comes with is for aerosol cans, not a ab compressor.
-
The good news is, you don't have to spend anywhere near $200 for a good airbrush for applying primers or clear coats. This cheap single action Badger will work just fine for that, less than $30. As long as you have a double action airbrush for your finer work, you're all set. https://www.amazon.com/Badger-Air-Brush-Co-350-9-Airbrush/dp/B002MMQEZY/ref=asc_df_B002MMQEZY/?tag=hyprod-20&linkCode=df0&hvadid=167148482147&hvpos=&hvnetw=g&hvrand=10474912012377208463&hvpone=&hvptwo=&hvqmt=&hvdev=c&hvdvcmdl=&hvlocint=&hvlocphy=9012099&hvtargid=aud-801381245258:pla-310337030598&psc=1
-
I once bought this exact same airbrush from Amazon thinking I could use the large needle/nozzle to paint large areas. It was a huge disappointment in quality. The trigger was terrible, very stiff, not smooth. It actually caused my finger tip to ache trying to use it. On the positive side, Amazon refunded my money as soon as I shipped the airbrush back to them. As the old saying goes, you get what you pay for.
-
It's not an Iwata by name, but it's made in Japan and it's rumored to be made in the same factory as the Iwata. Excellent airbrush for large areas and primer. The price is great, too. High quality. Easy to get parts if needed. https://spraygunner.com/gsi-creos-mr-airbrush-procon-boy-ps-290-0-5mm-pistol-trigger-type/
-
Just a helpful video for my friends and fellow modelers. Yes, it means you might want to invest a little more in your hobby.
- 267 replies
-
- 11
-

-
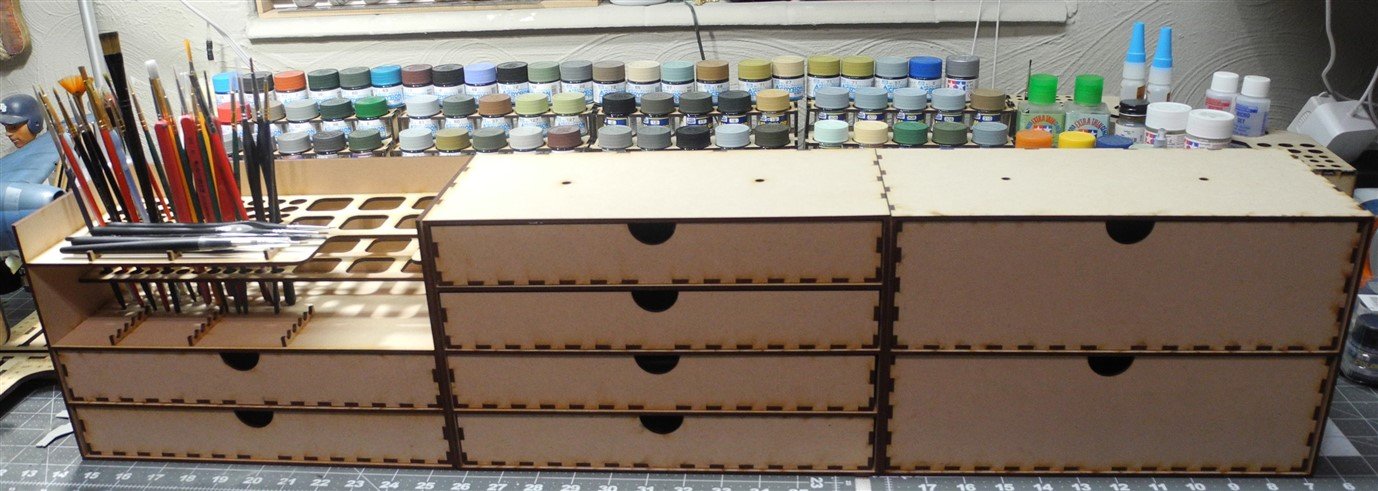
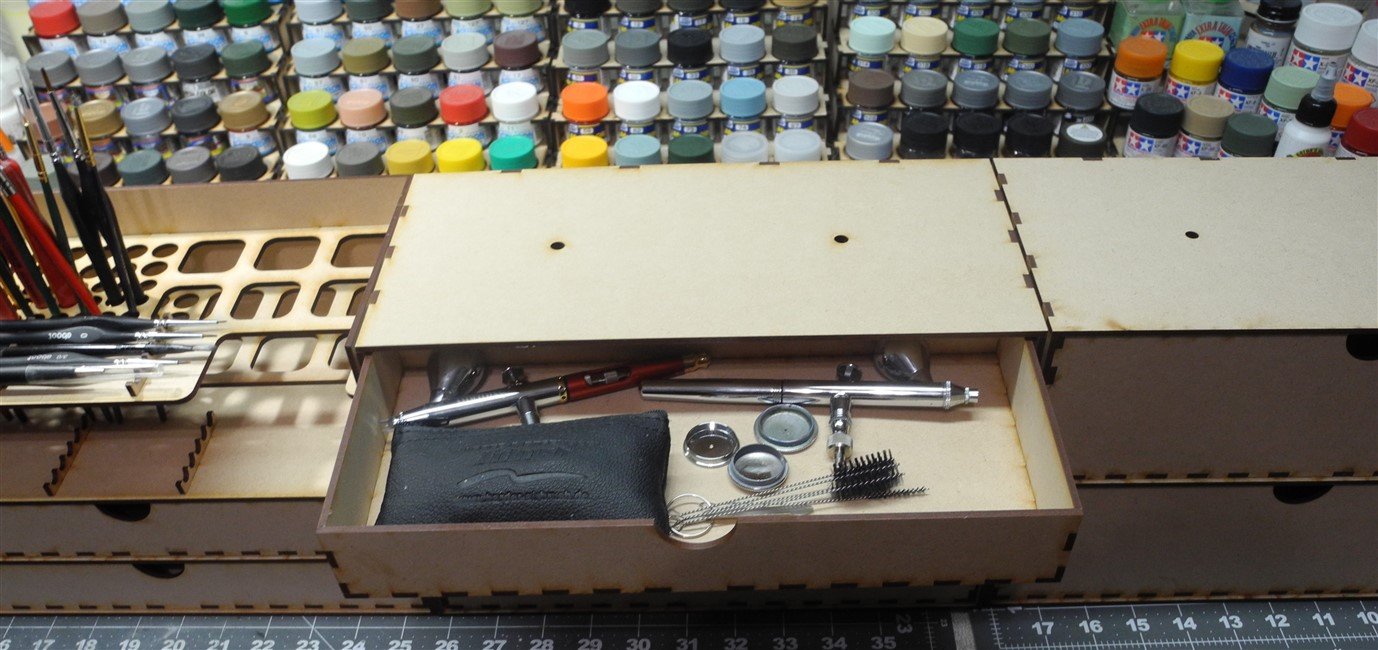
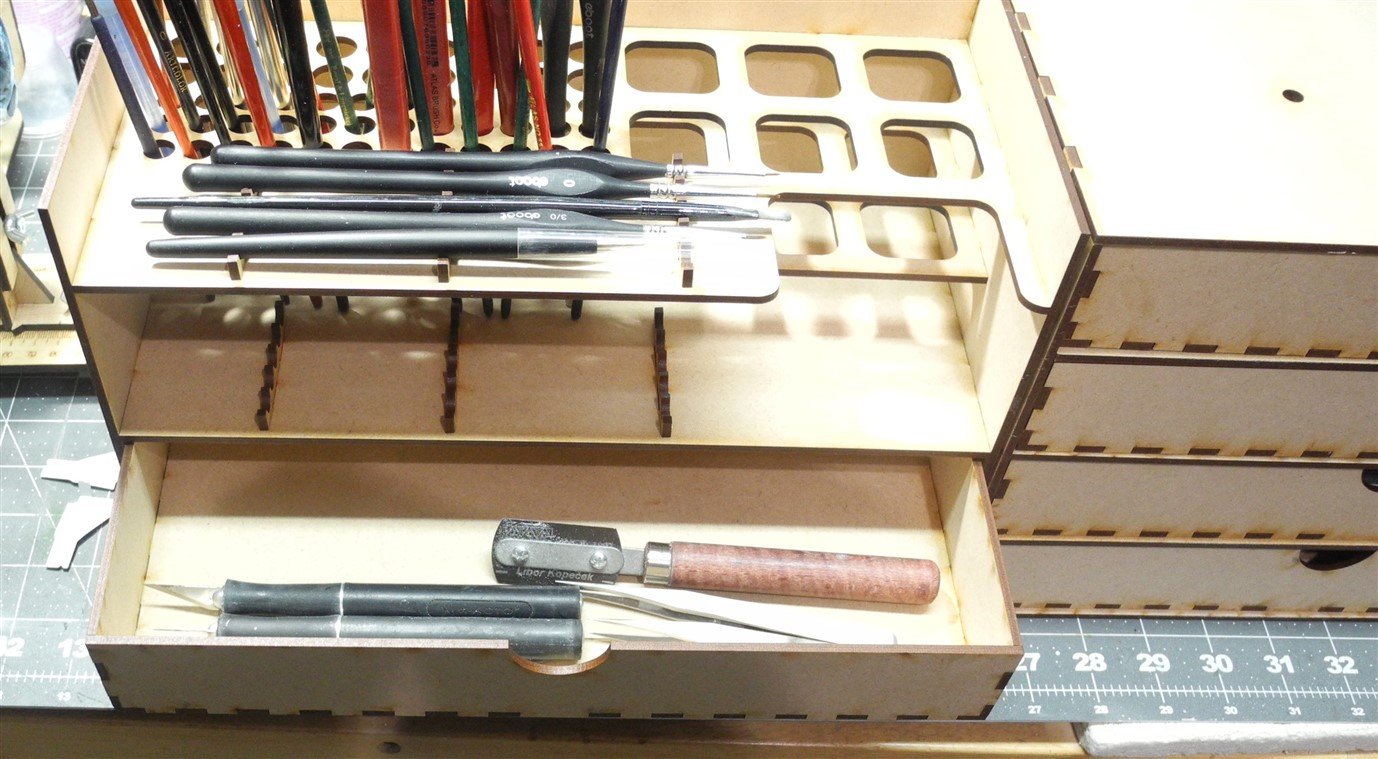
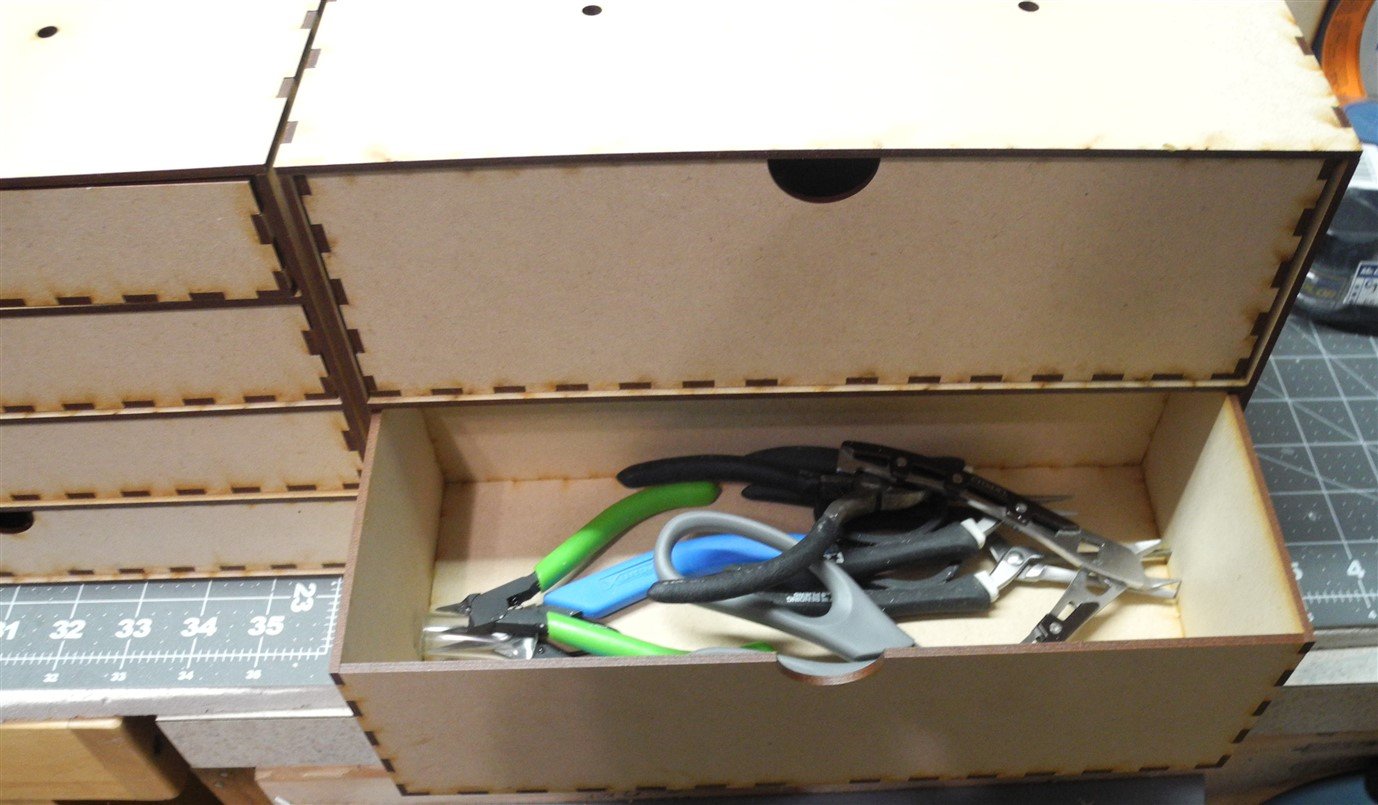
Thanks again for the likes and comments, much appreciated. I've been looking for a vendor who sells modular hobby tool organizers and finally found a very good one in Canada. www.tabletopgamer.com sells a line of organizer kits that they have designed and laser cut themselves. I found them on Etsy, but you can deal with them directly for a better price on their website. I ordered a brush and tool organizer with 2 drawers, another 2 drawer module, and a 4 drawer module. They are precision designed and perfectly laser cut. They fit together beautifully. With postage, all 3 modules cost around $70 with postage to USA from Canada. On the sides, bottoms, and tops of each module are 2 quarter inch holes for mounting magnets, then the units can be stacked on top of one another or side by side, held together by the magnets.
- 267 replies
-
- 14
-
-
The downside to great paint is that the great stuff is generally on the smelly side. Acrylics are low/no odor, but you just can't beat a lacquer finish. Figuring out how to get it inside without smelling up the home is a challenge. My work area is on the far side of the house, so the Admiral doesn't have to deal with it.
-
The paint work you've done looks real smooth, OC. You got the hang of it very quickly. It's going to look great the way you've masked it.
-
Thanks for the comments gentlemen. It takes that lighter shade of blue to give enough contrast to the navy blue so it doesn't look black. I got sidetracked today with a different project. I'll post some photos tonight of the "other" project. I think you'll like it.
-
After the decals go down, will give a similar treatment over the decals to age/weather them a bit. Still need to work the panel lines a bit, too.
-
Sikorsky CH-53 by mtaylor - FINISHED - Revell - 1:48 - PLASTIC
CDW replied to mtaylor's topic in Non-ship/categorised builds
When we retired, one of my best friends (now deceased) went back to Vietnam and Thailand and stayed for over a month. -
Sikorsky CH-53 by mtaylor - FINISHED - Revell - 1:48 - PLASTIC
CDW replied to mtaylor's topic in Non-ship/categorised builds
In psychological terms, it could be called the "old brain", one of three basic parts of our brain, this one being the most primitive. The old brain only concerns itself with three basic things...food, sex, and danger. It's in our DNA. -
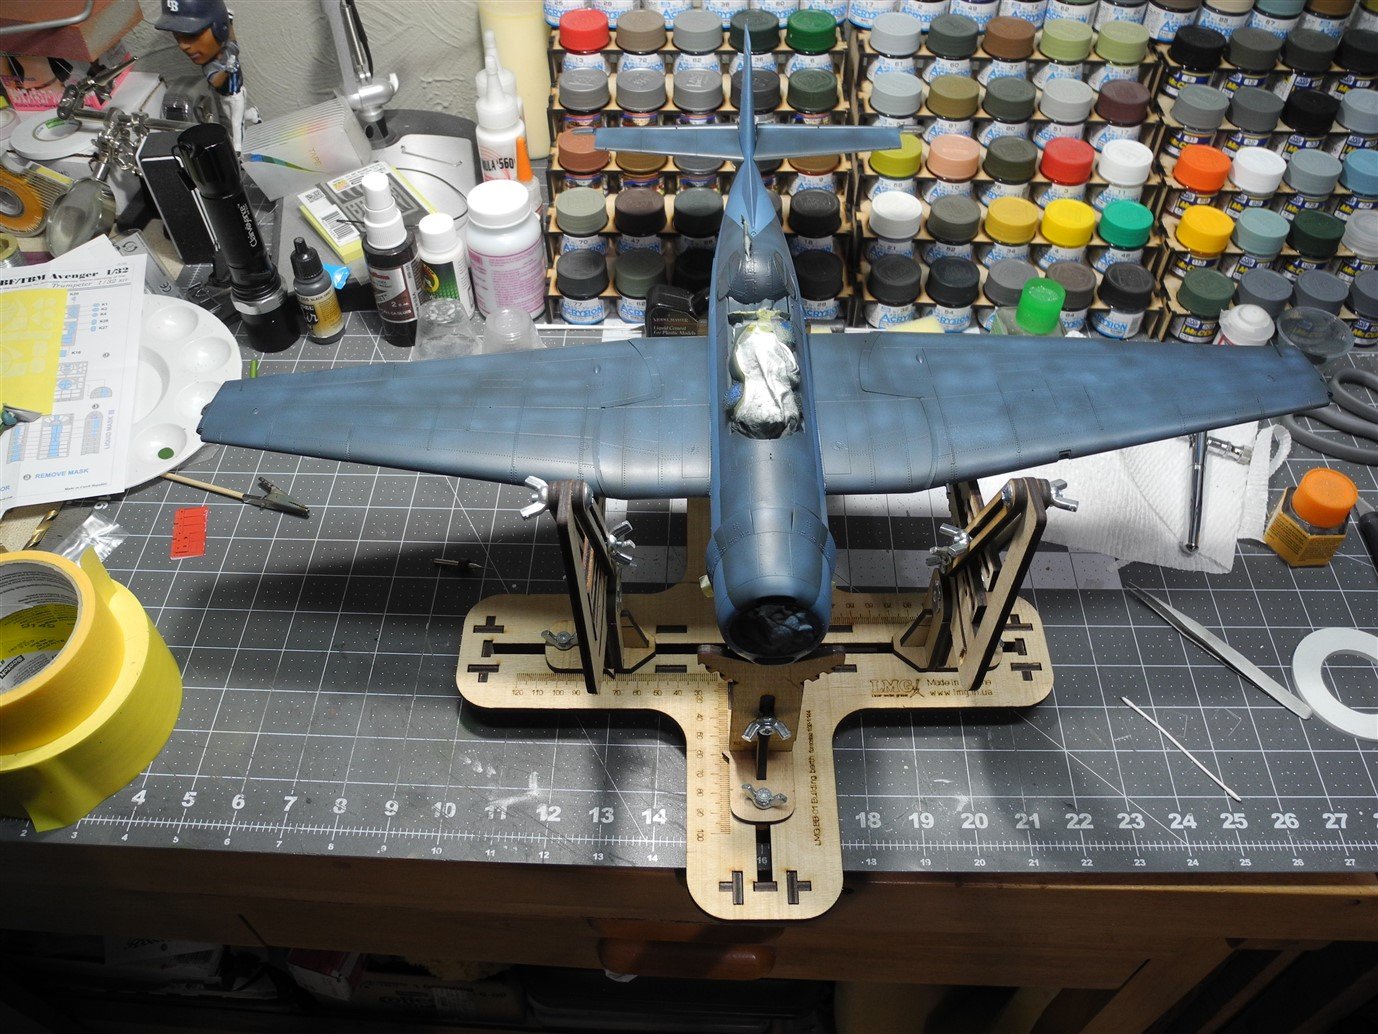
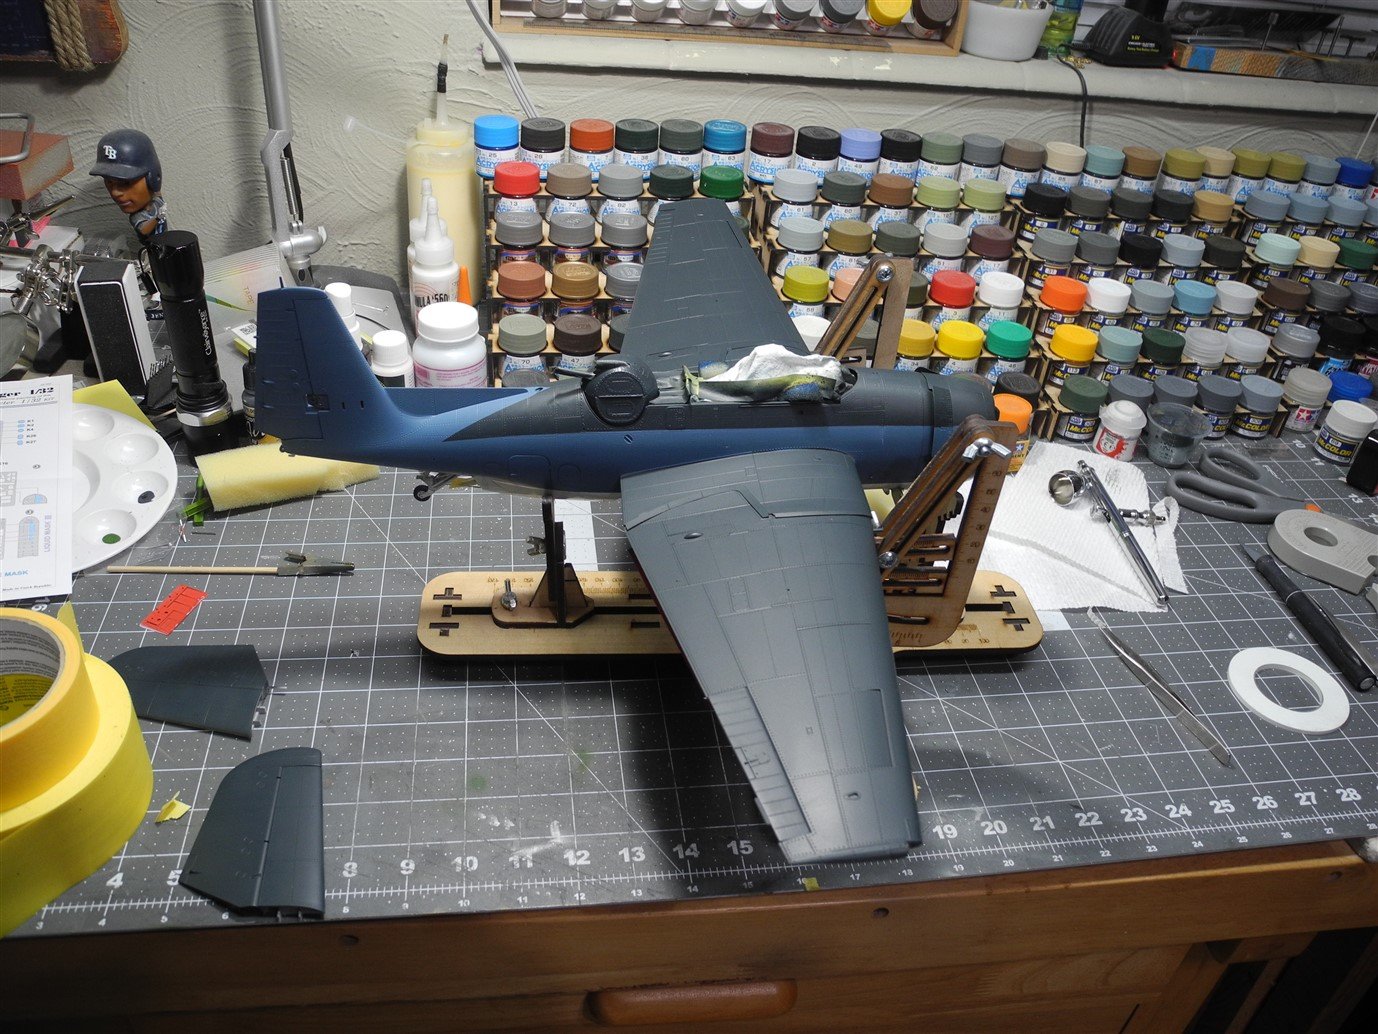
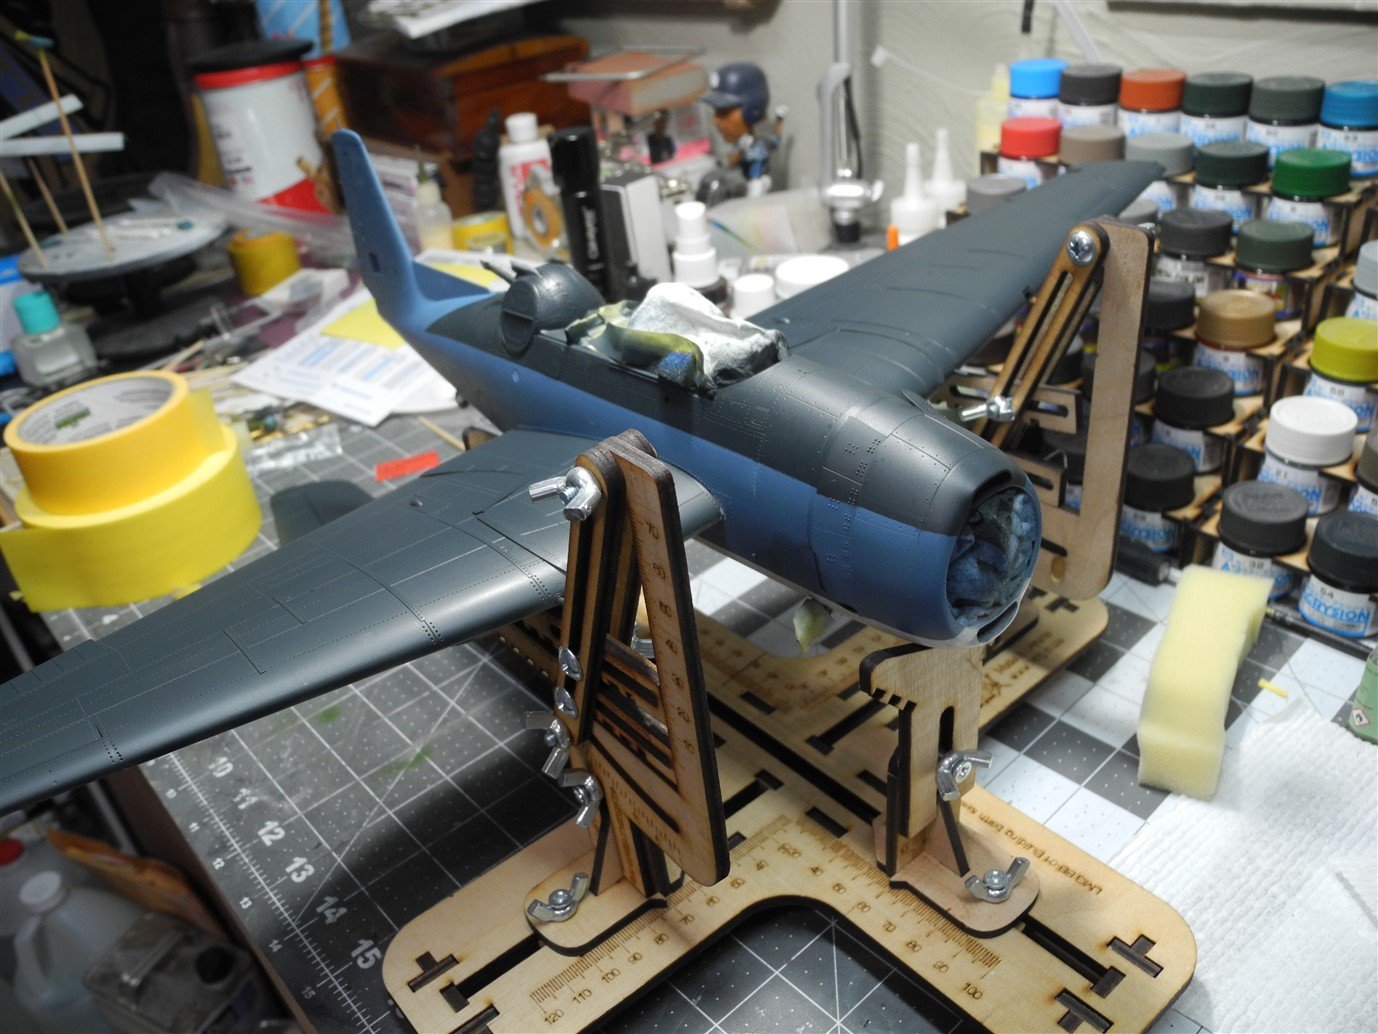
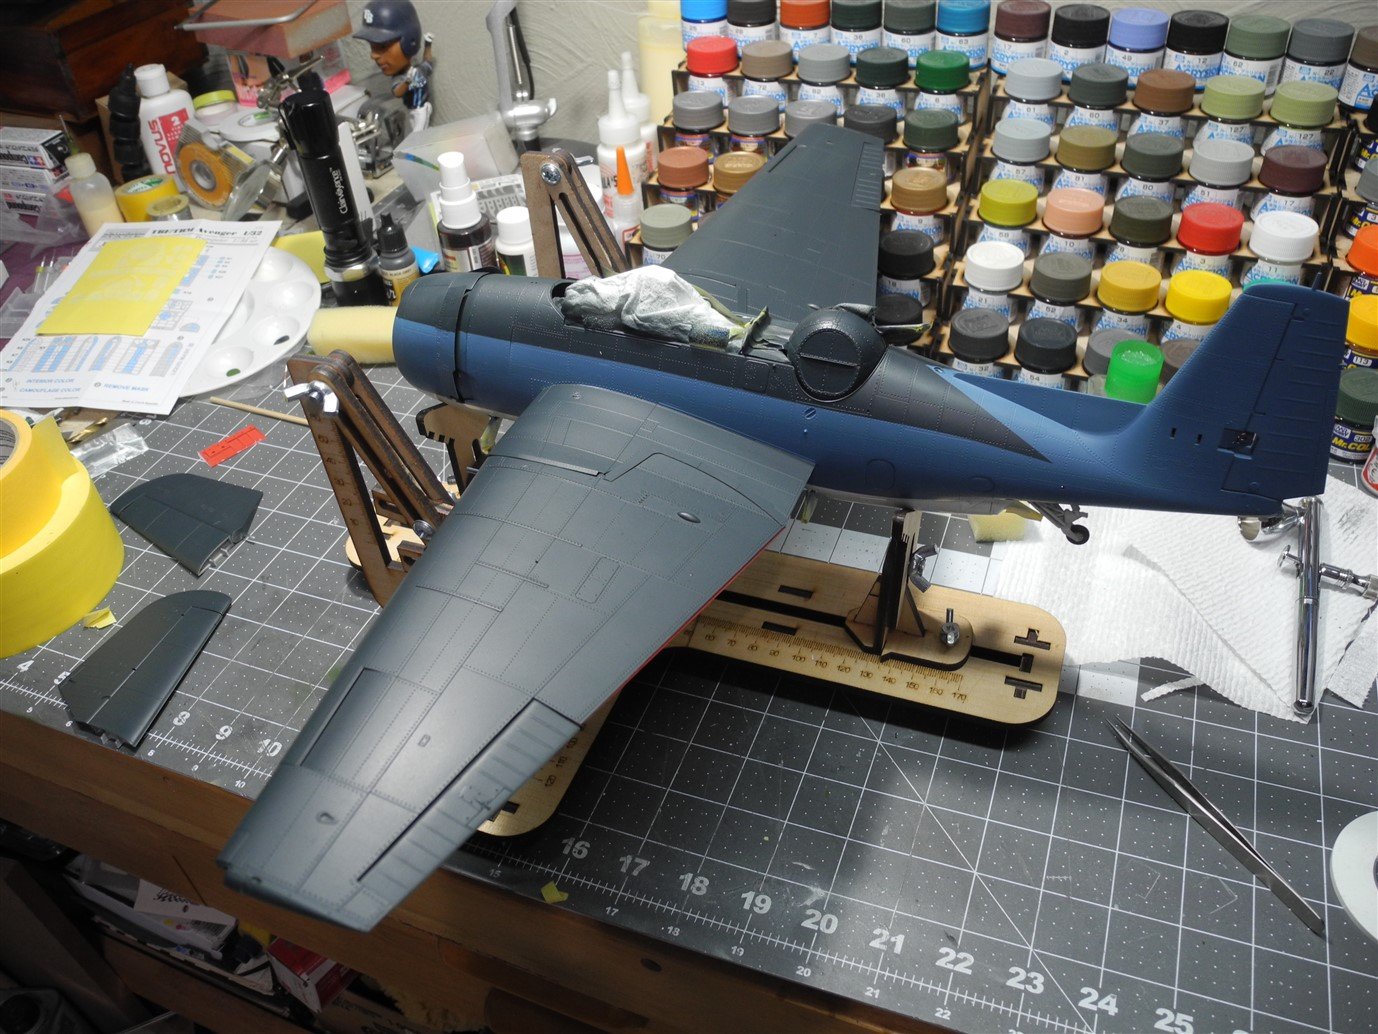
Here, I've highly reduced intermediate blue paint to apply to the navy blue to give the effect of sun bleached/salt stained panels and add some depth to the model. Intermediate blue mixed 1 part paint to 10 parts reducer, then misted lightly over various panels.

- 267 replies
-
- 18
-
-
Sikorsky CH-53 by mtaylor - FINISHED - Revell - 1:48 - PLASTIC
CDW replied to mtaylor's topic in Non-ship/categorised builds
Every time I think about this it makes me laugh... My brother and I were visiting our nephew at the water plant where he worked one night when we observed a bunch of armadillos foraging on the plant grounds. My brother said he heard they were good to eat and suggested we catch some, take them home and cook them up. After chasing them around for a half hour or so, we finally managed to catch a couple of them. They appear to be slow moving, but if you try to catch one, they can run like rabbits. We bagged them in a croker sack, took them home and started to clean them. These darn things are so well armored, and their claws so sharp, we couldn't find a way to kill/clean them that seemed worth the effort. So we gave up and released them unharmed. It was comical as heck. -
Bell UH-1H Huey By lmagna - Dragon - 1/35 - PLASTIC
CDW replied to lmagna's topic in Non-ship/categorised builds
I like what you've done with the cockpit, Lou. You're doing great! The pilot figures look awesome, very detailed. -
Beautifully done James. What are your thoughts on the Gaspatch turnbuckles, and what is the best way to anticipate the proper angle of the flying wires when attaching the turnbuckles to the wings? I assume there must be some "flex" available after they have been installed to get the precise alignment.
-
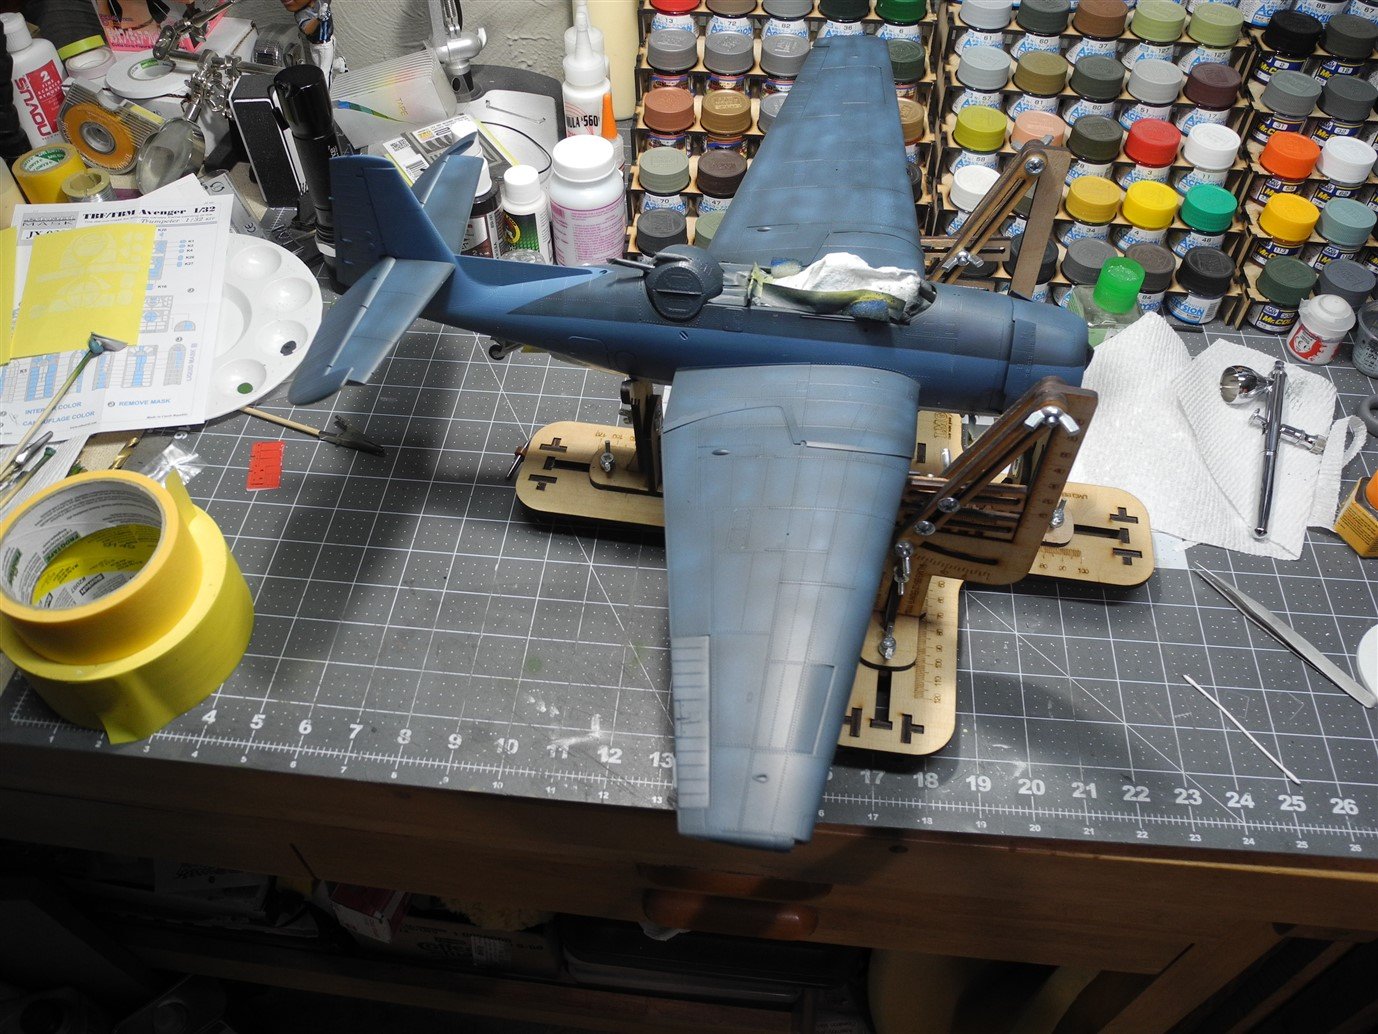
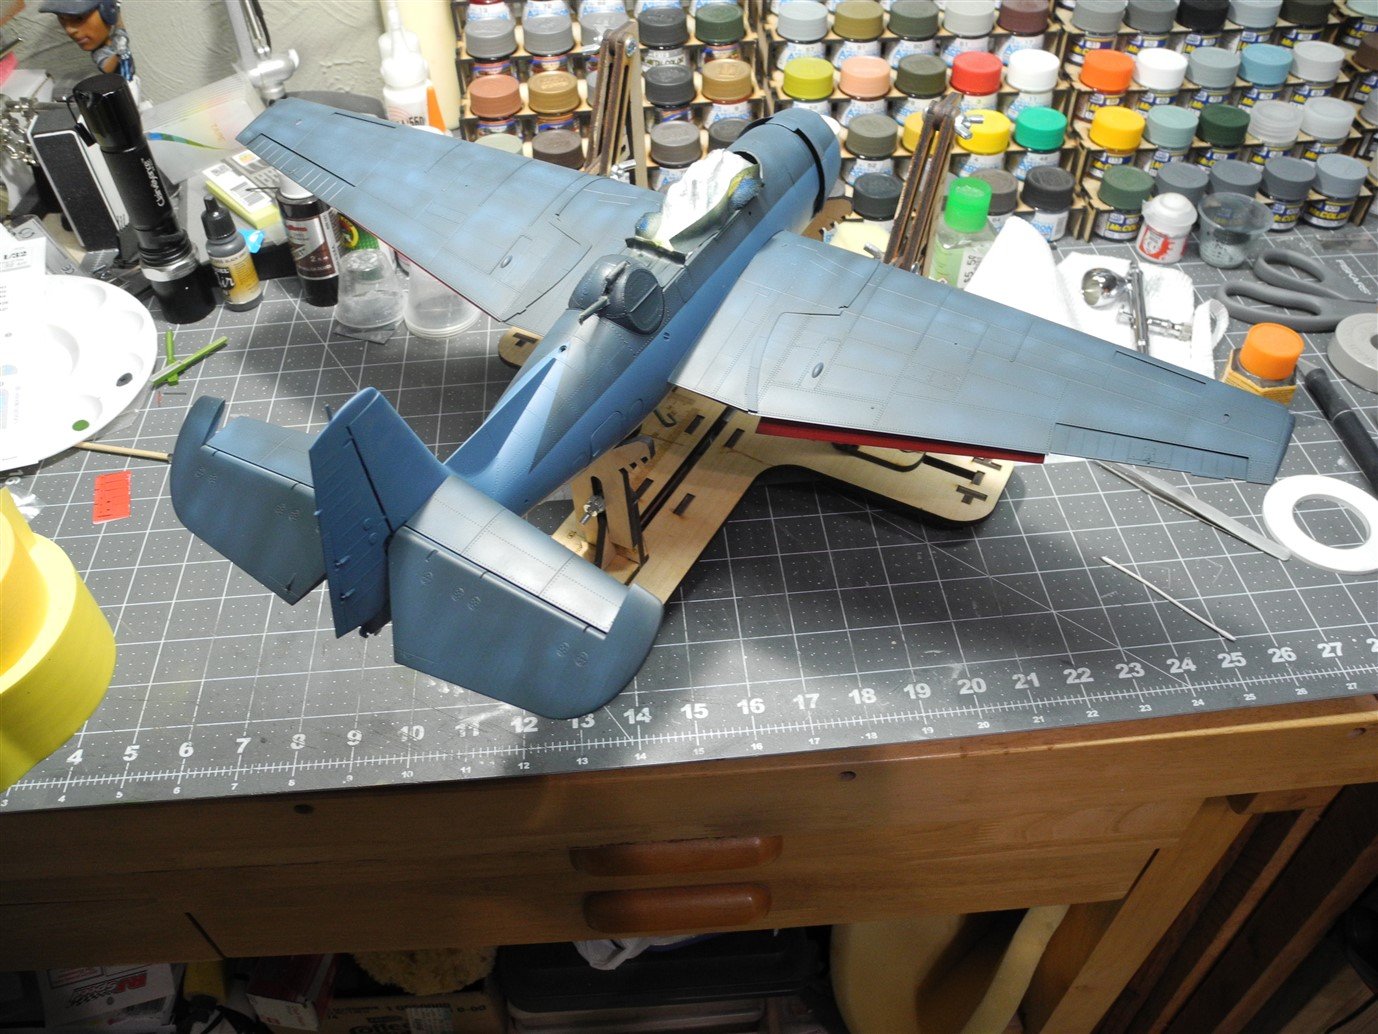
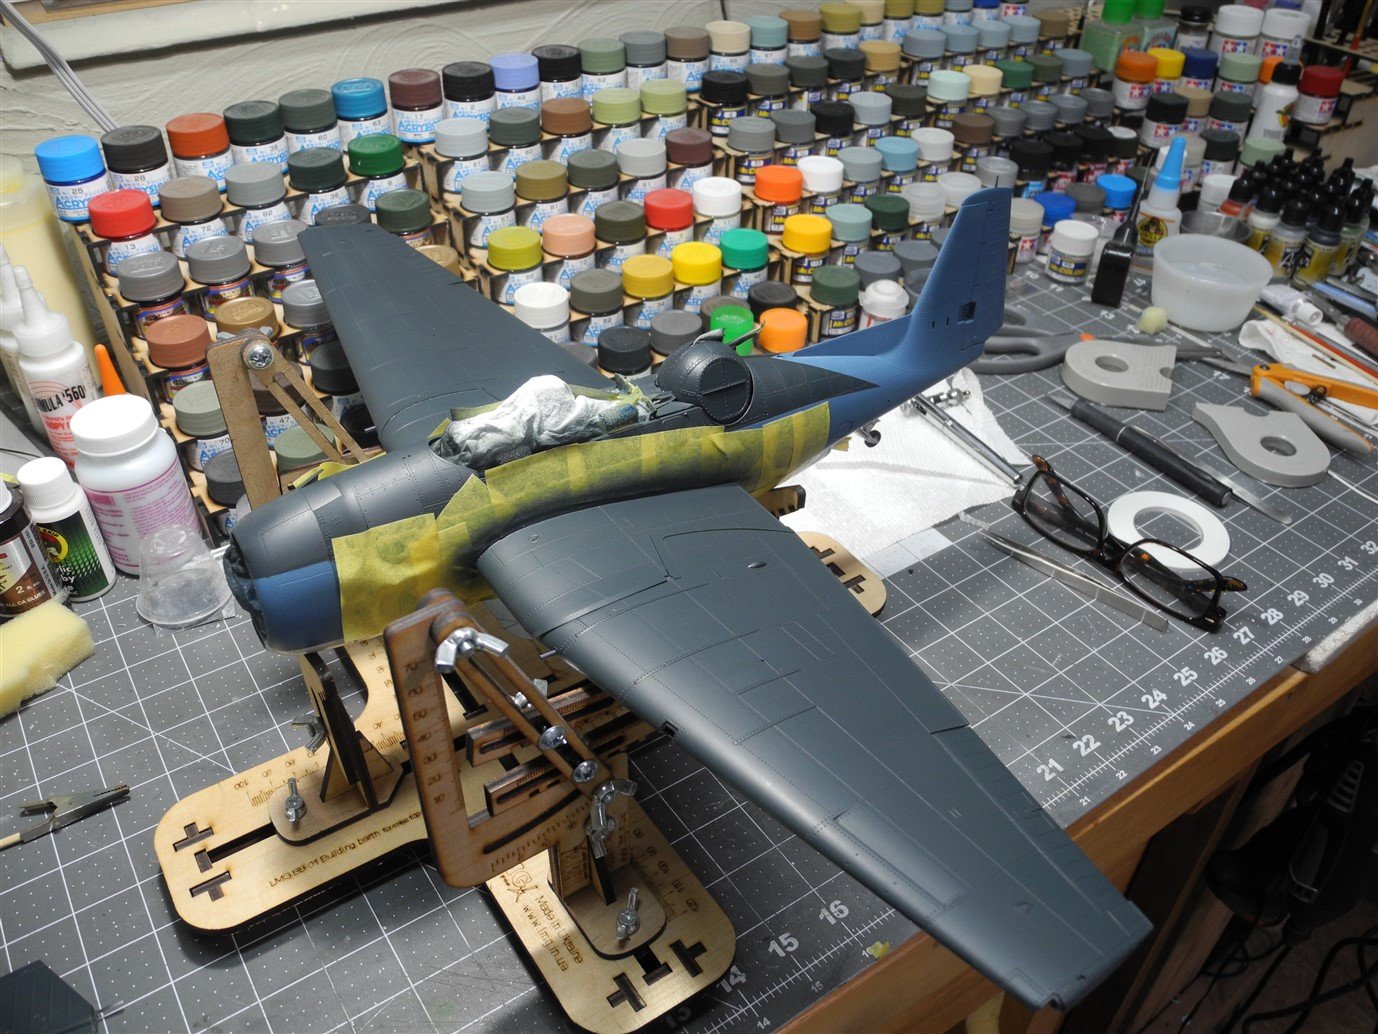
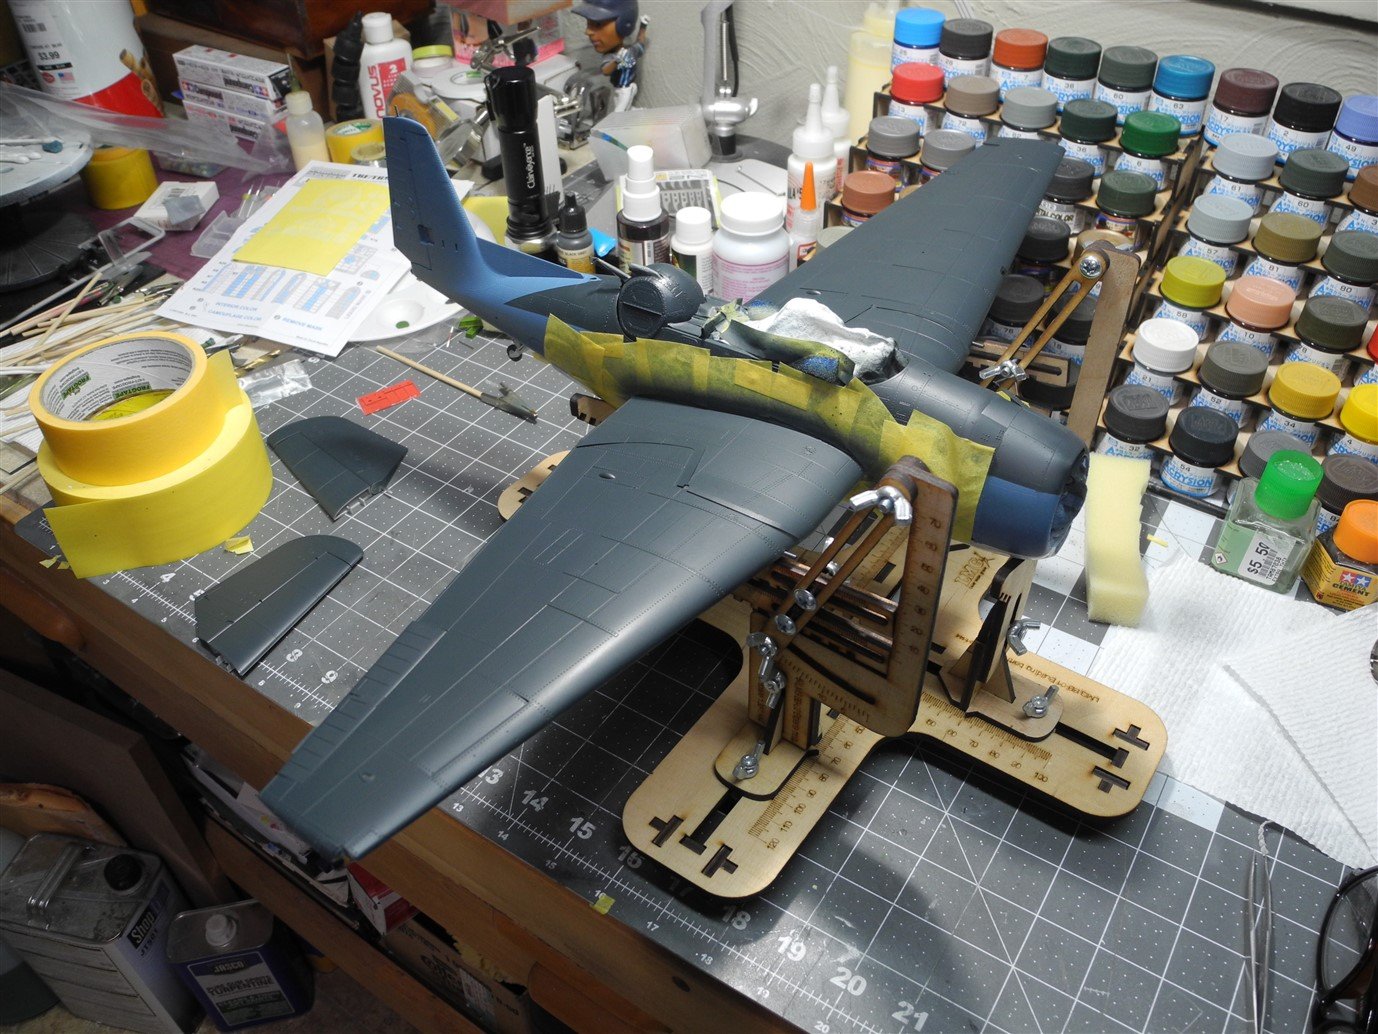
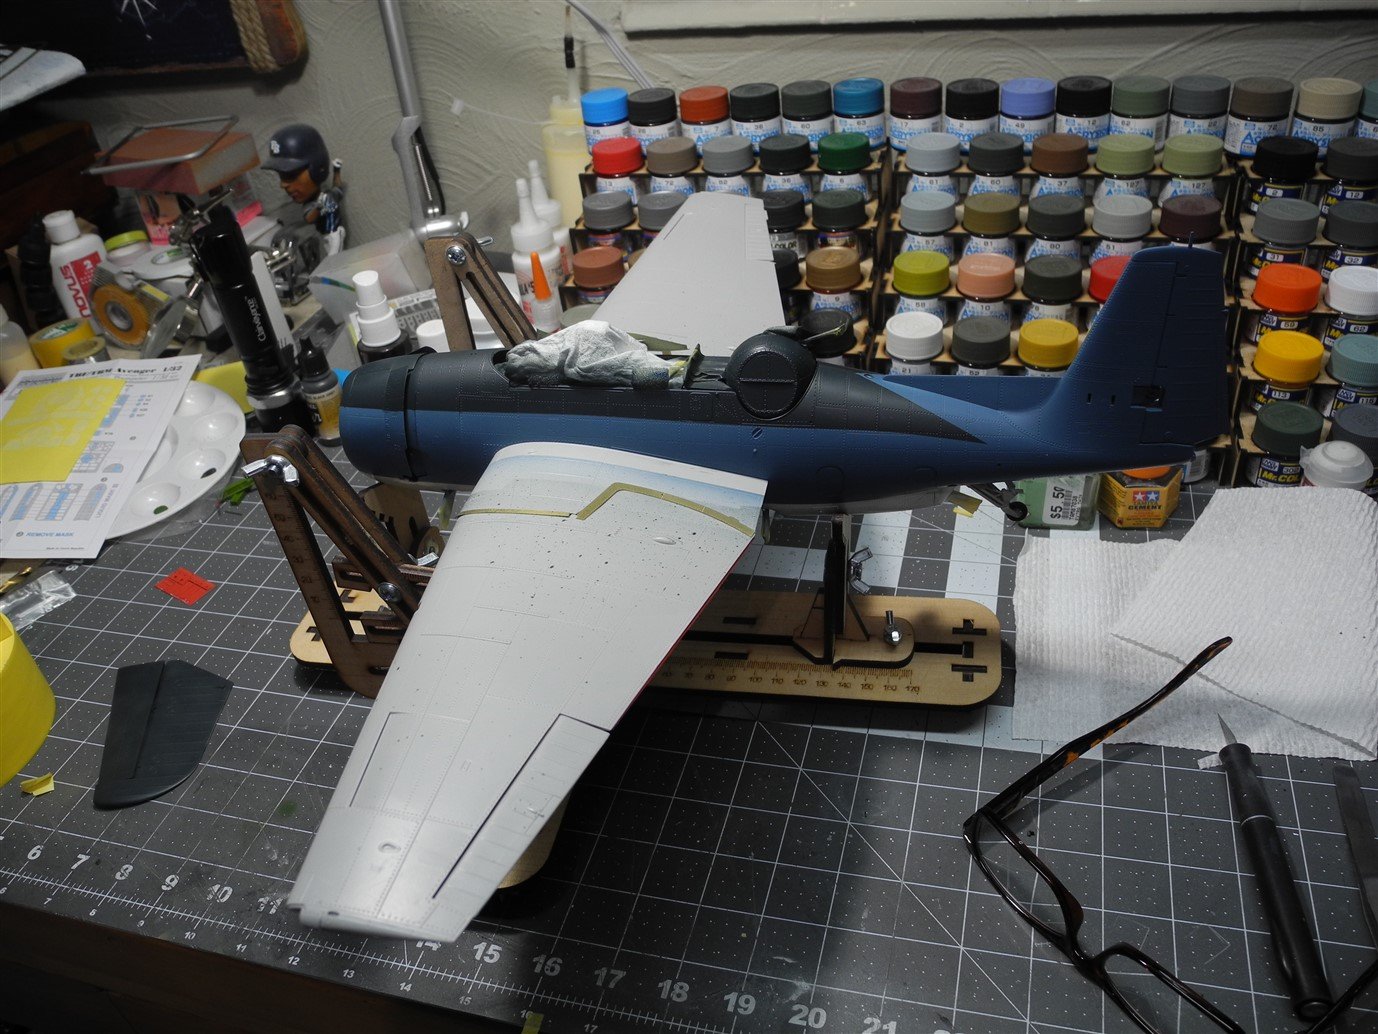
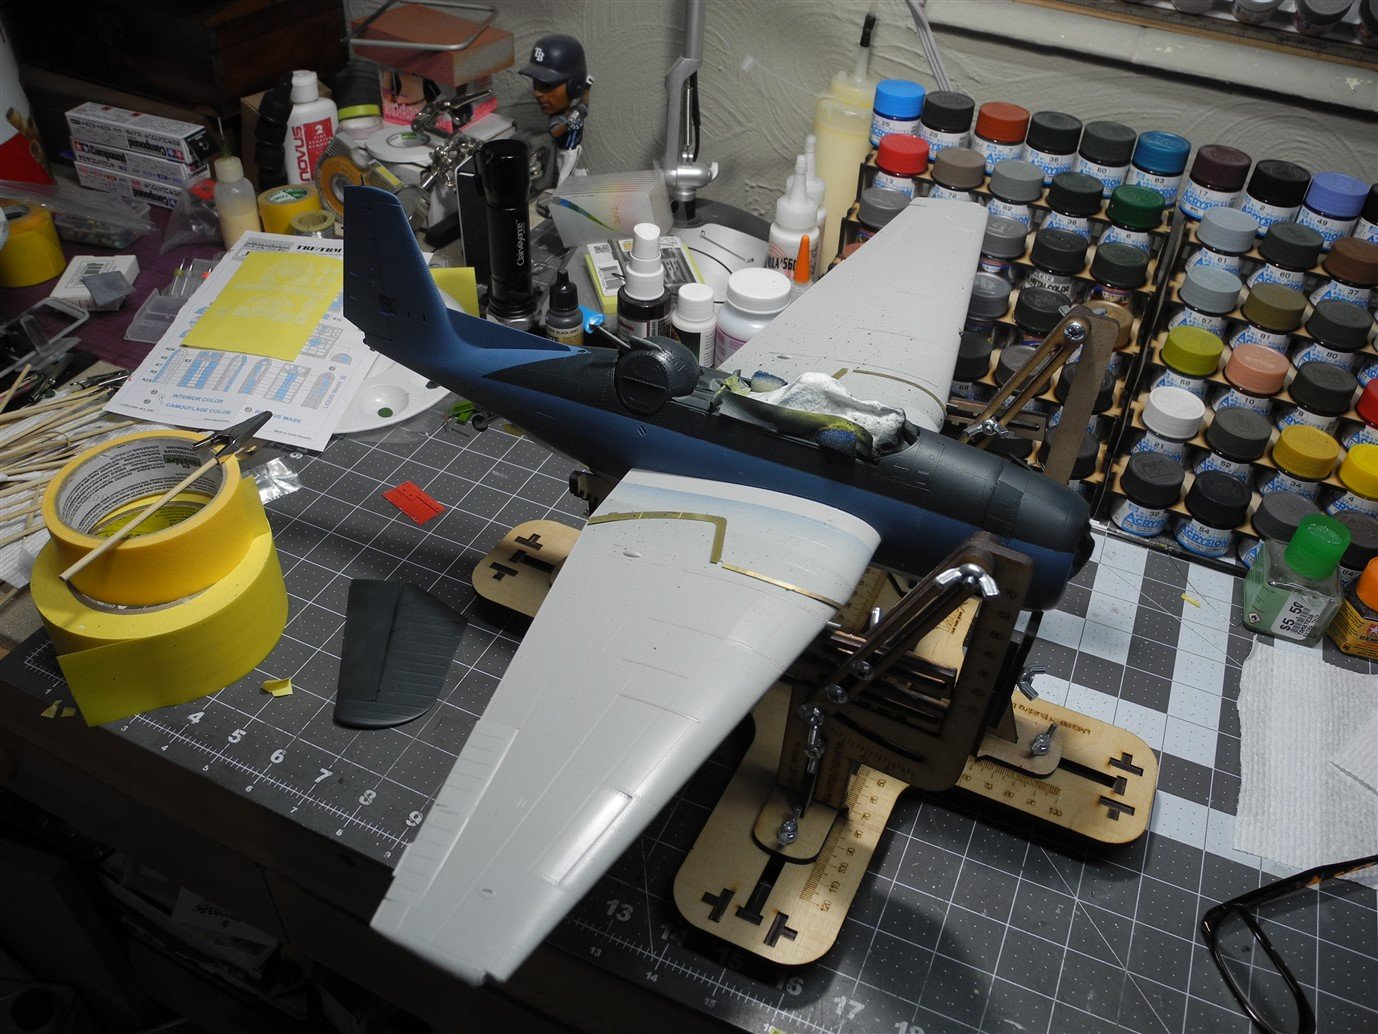
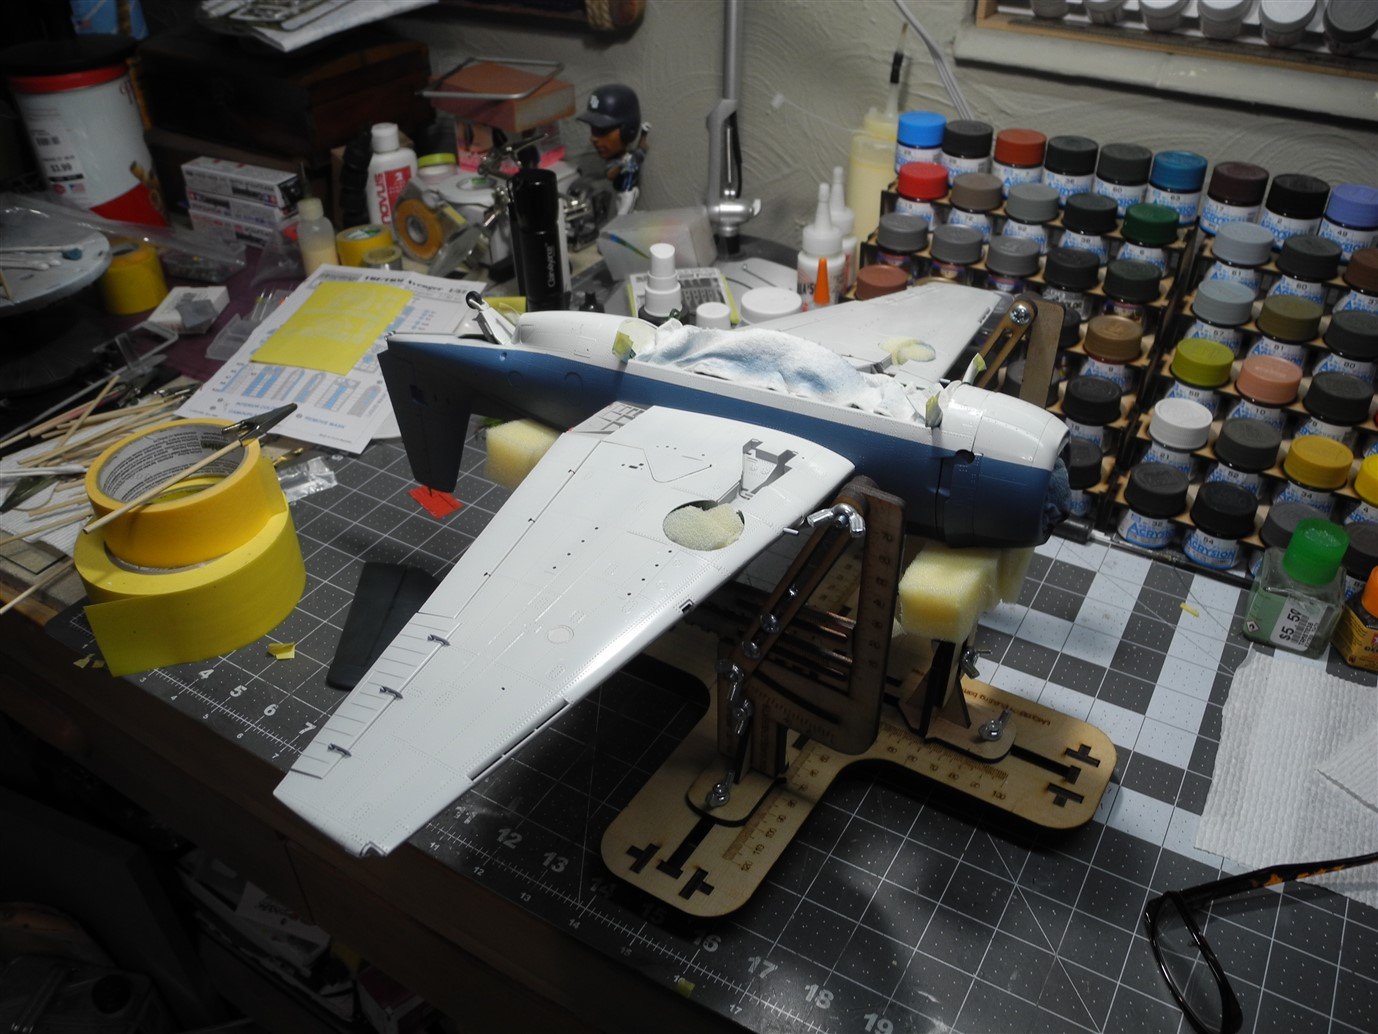
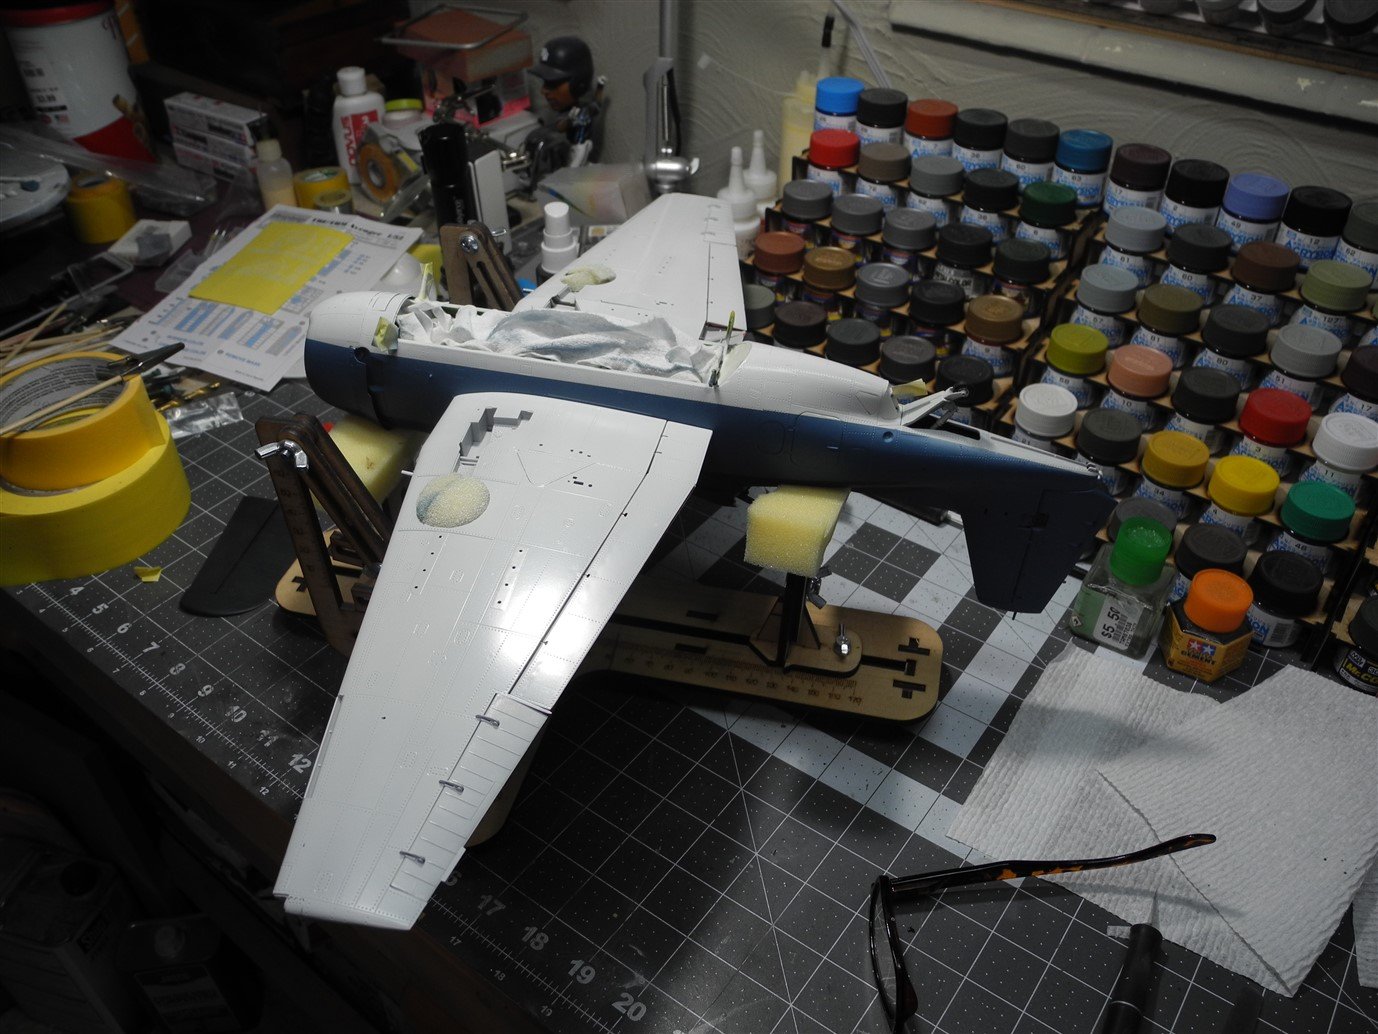
Got the wing roots masked, then the tops of the wings got painted. Photos shown are with masks attached, then masks removed.

- 267 replies
-
- 14
-
-
The top tri color is US navy blue, a very dark blue. The reason the ball turret looks all dark is because of the painting masks in place. Once masking is removed, all you will see is a dark blue framework with clear panels.
-
Not hot water! That will foul them for sure. You'll need lacquer thinner to clean them. Tamiya spray cans are lacquer, solvent based paints.
-
Many years ago, DuPont sold spray cans of automotive lacquer paints for touch ups and general painting. The paint itself was excellent, but what I loved were the unique spray nozzles. They were so smooth and shot a perfect "fan" of paint. They were the only spray cans I ever found that were equipped with these nozzles. I often wonder why other manufacturers never used them. They were absolutely fantastic for control and a smooth spray pattern. I hate to say it, but I detest the spray nozzles on Tamiya rattle cans. Can't tell you how many times I have had issues with their nozzles. Perhaps it's because their paints have set on the shelves too long, as you said.
-
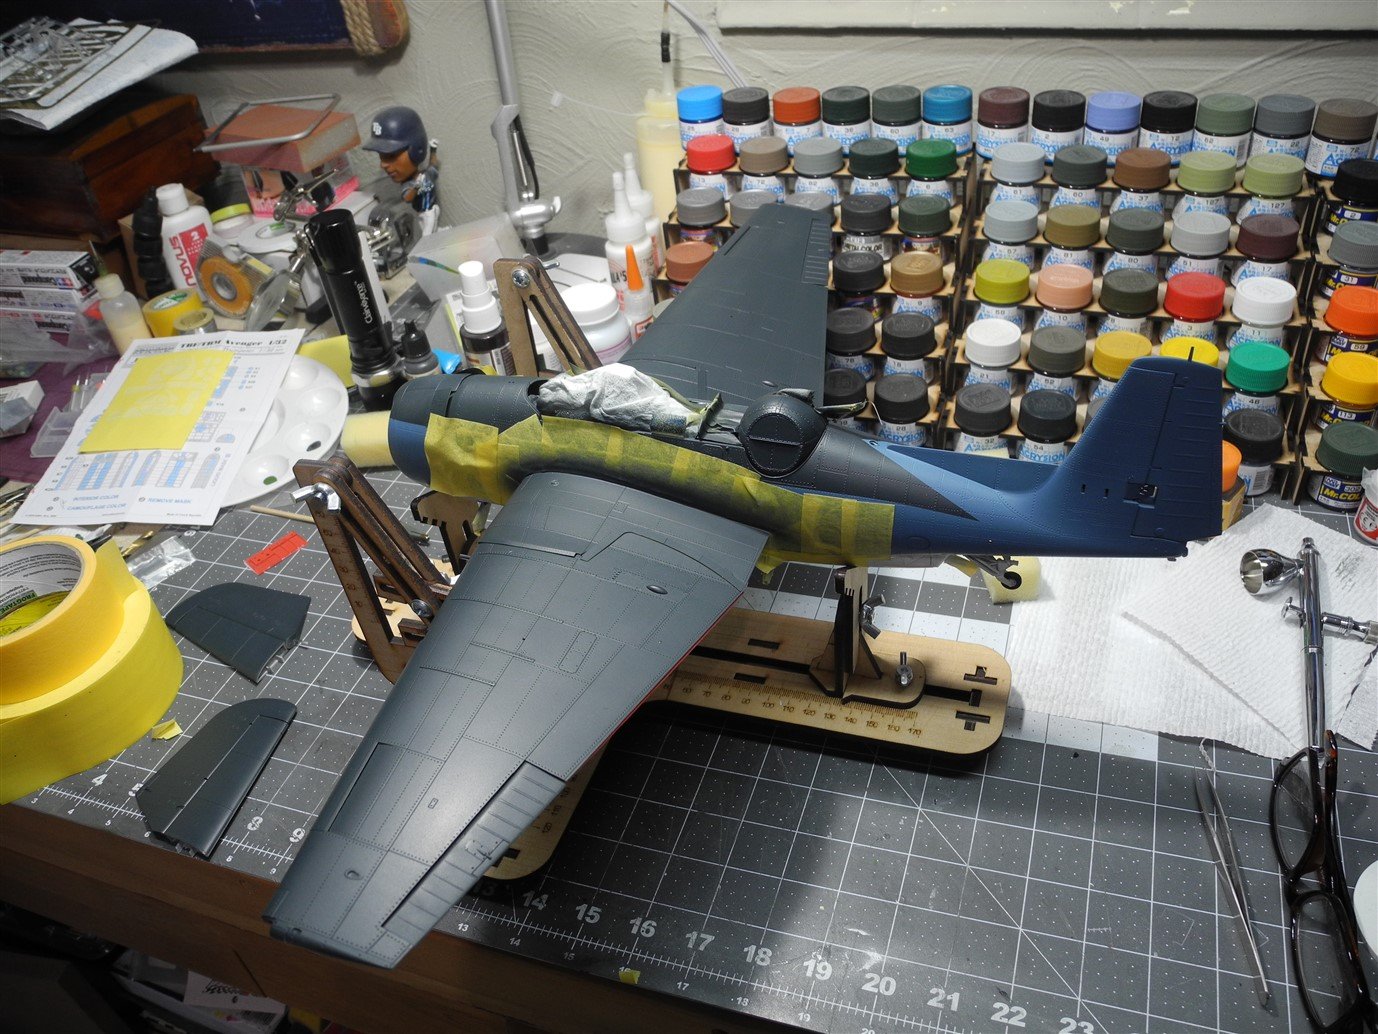
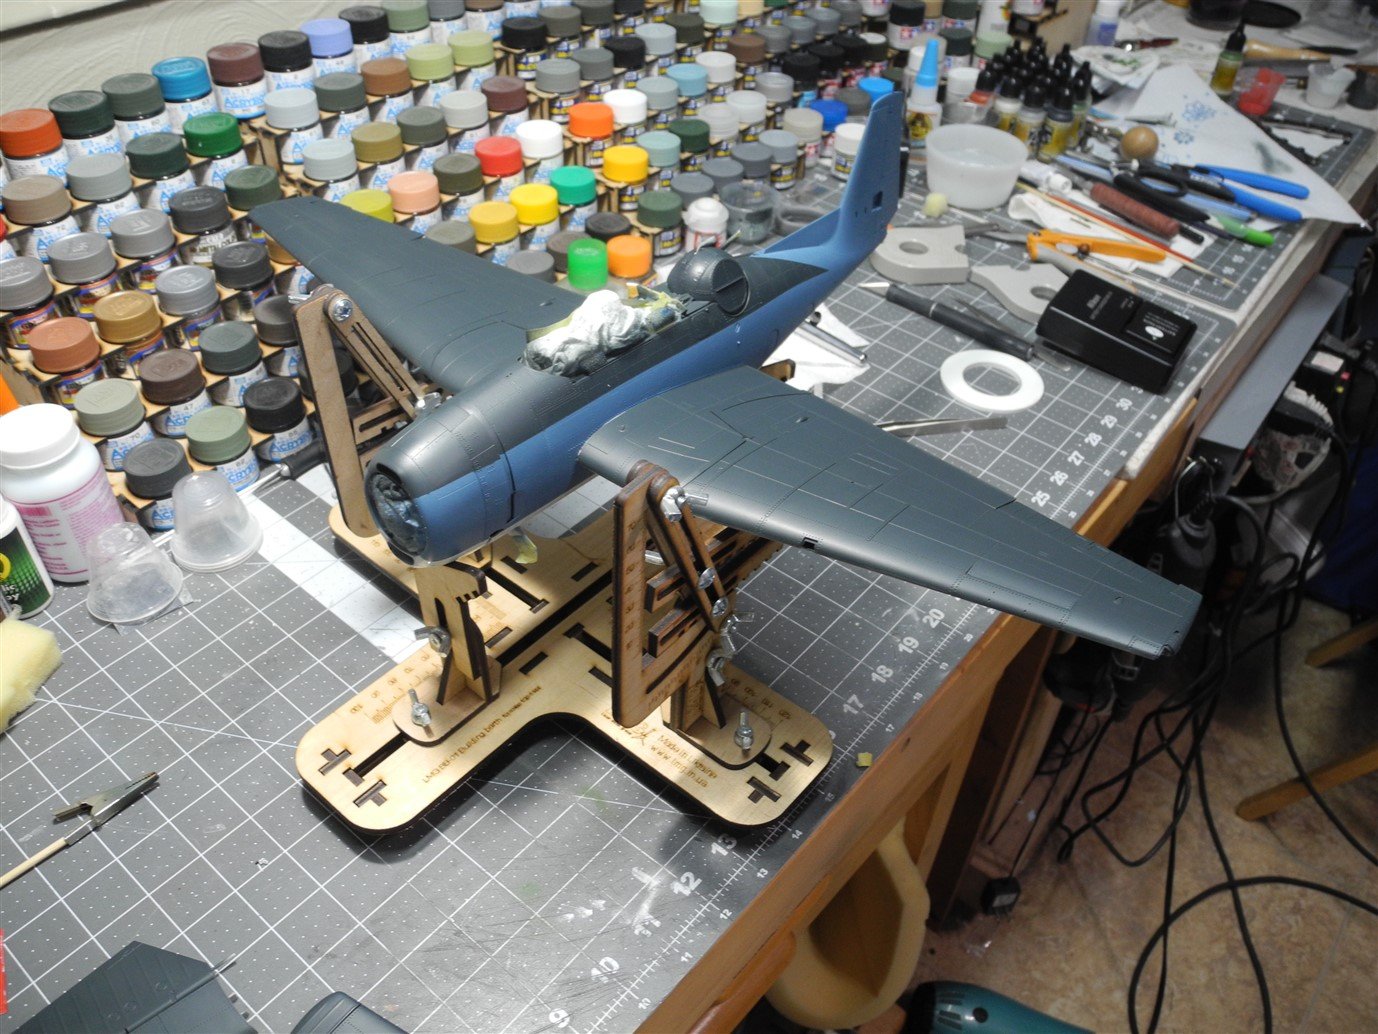
Next will mask the fuselage at the upper wing root, and then paint the tops of wings navy blue. This will complete the basic tri color camo scheme, but there are some details to paint and add before decals and weathering.
- 267 replies
-
- 13
-
-
Sikorsky CH-53 by mtaylor - FINISHED - Revell - 1:48 - PLASTIC
CDW replied to mtaylor's topic in Non-ship/categorised builds
I don't mind trying something once, most of the time. When I was a kid, was visiting my cousin's home (a ranch/farm) and when I looked inside their refrigerator, saw a strange looking big jar of "meat". When I asked my cousin what it was, she answered, "mountain oysters". When I asked why, she answered, "don't you love my lasagna?, well, that's part of the secret recipe." Similar happened when I ate several helpings of some delicious meat at my grandmother's house, then I learned I had eaten several large helpings of cow tongue. 😄 So yeah, I've learned to try things, but I do have my limits. Can't handle raw earthworms or stuff like that. 😄 -
Sikorsky CH-53 by mtaylor - FINISHED - Revell - 1:48 - PLASTIC
CDW replied to mtaylor's topic in Non-ship/categorised builds
Not sure it would be the same as donkey, but I ate horse once. Didn't care for it too much, stringy and rather tough meat.