CDW
-
Posts
7,755 -
Joined
-
Last visited
Content Type
Profiles
Forums
Gallery
Events
Everything posted by CDW
-
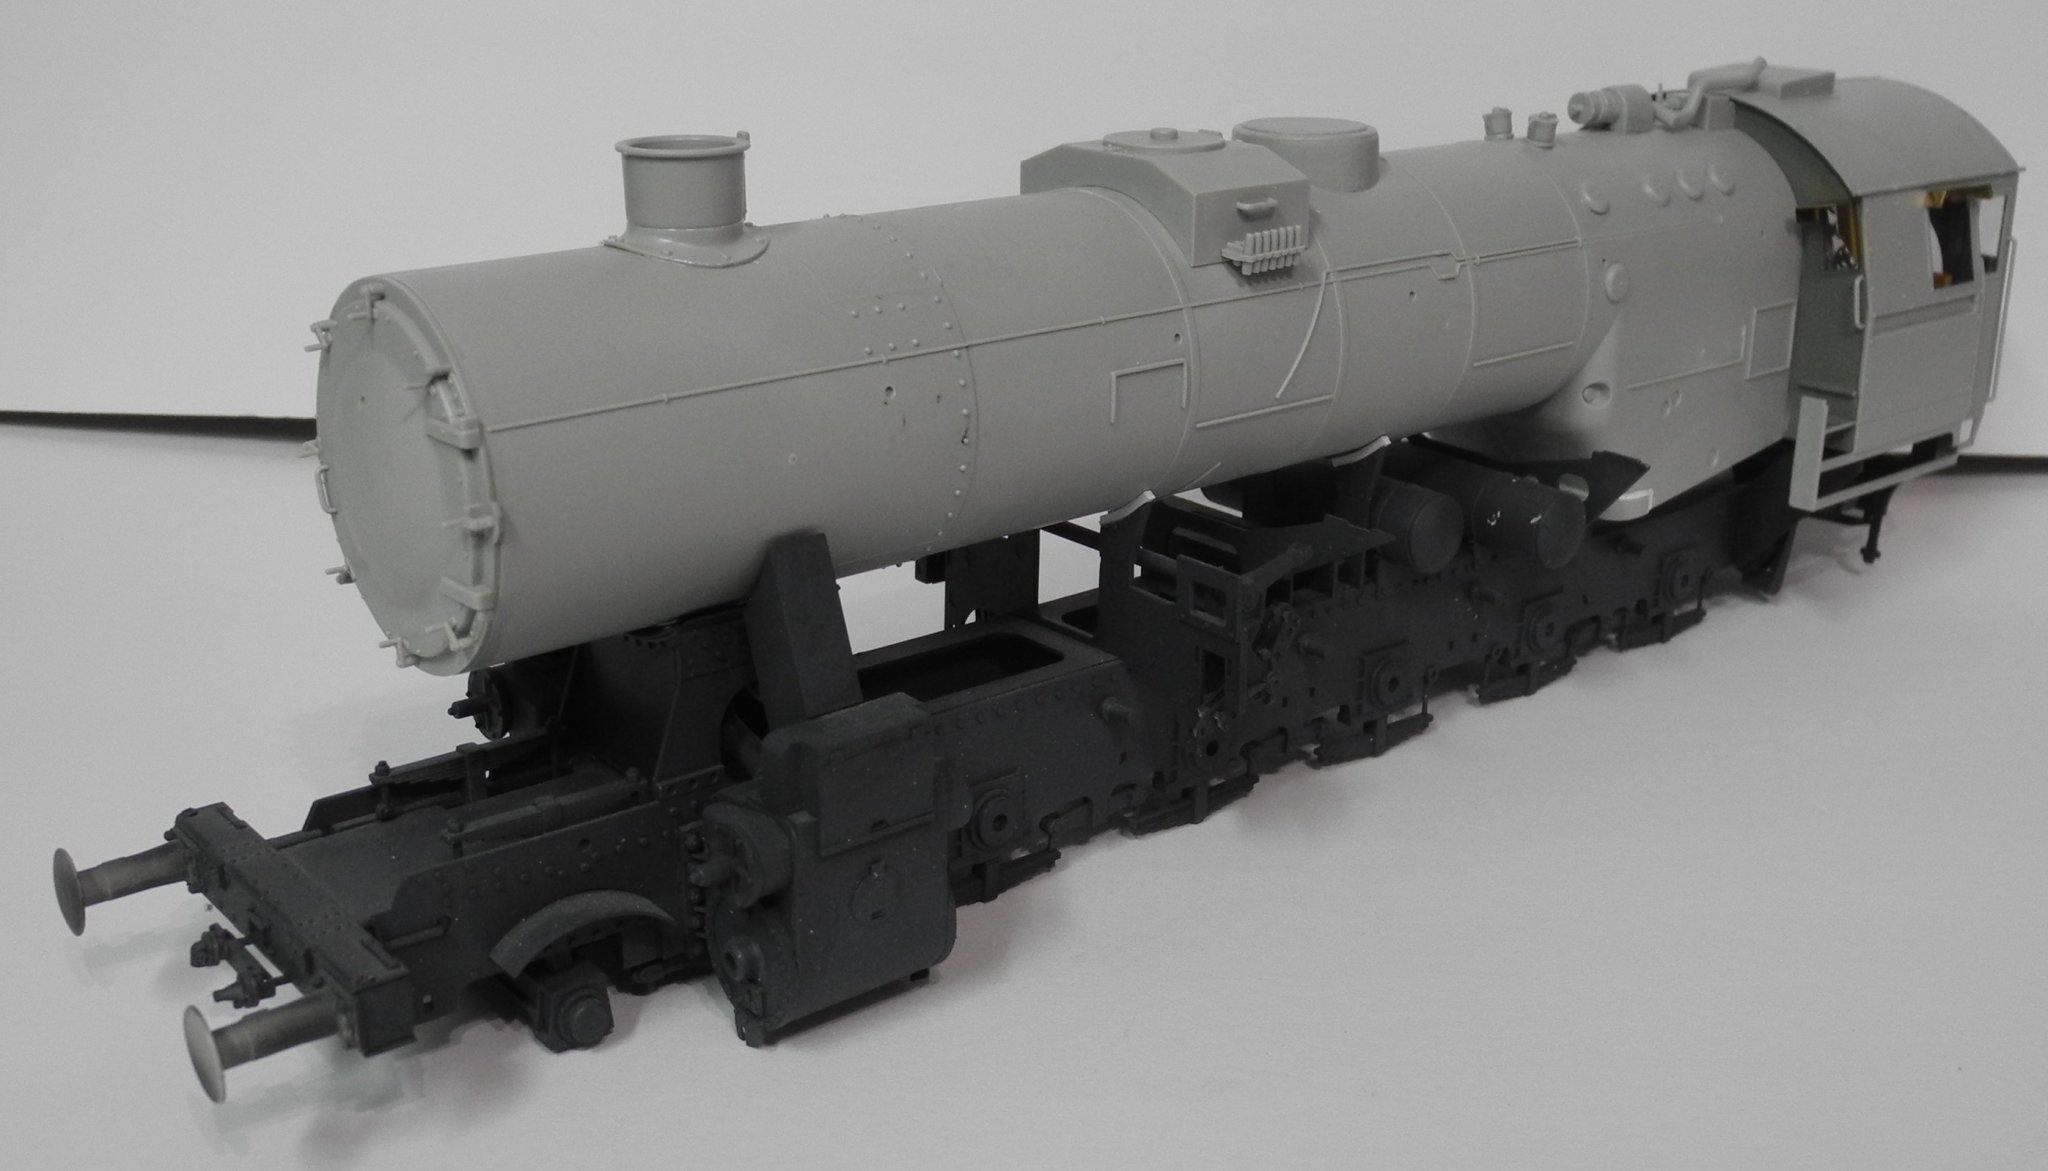
 Thanks for the kind words Jan. Right now, she's 41cm in length. With the coal tender, she should measure approximately 65cm total length.
 -
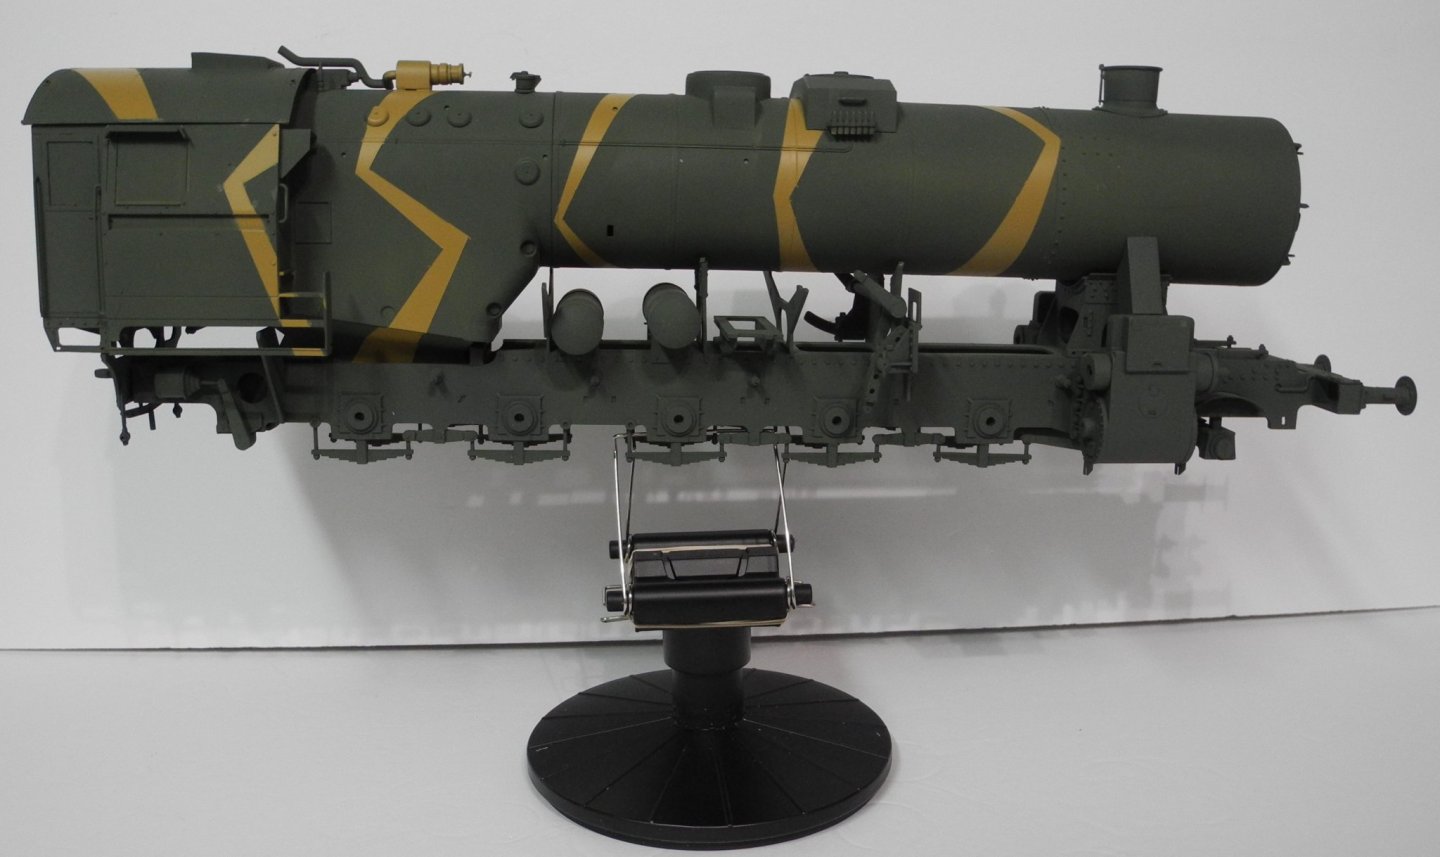
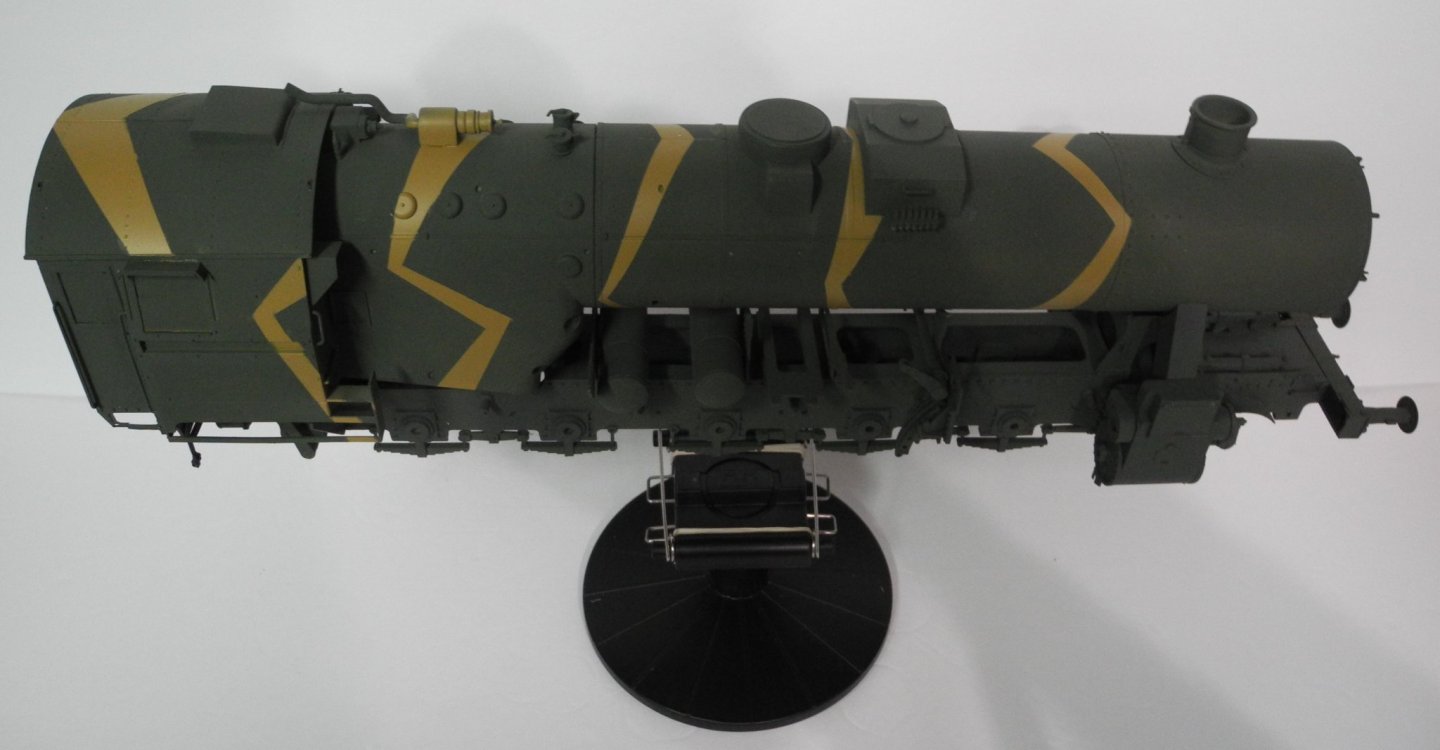
Thanks OC. In retrospect, I should have painted the camouflage once I finished each sub assembly, then assembled everything after the paint was dry and masking removed. Would have made it a much easier process rather than the way I did it. Live and learn but model on. 🙂
-
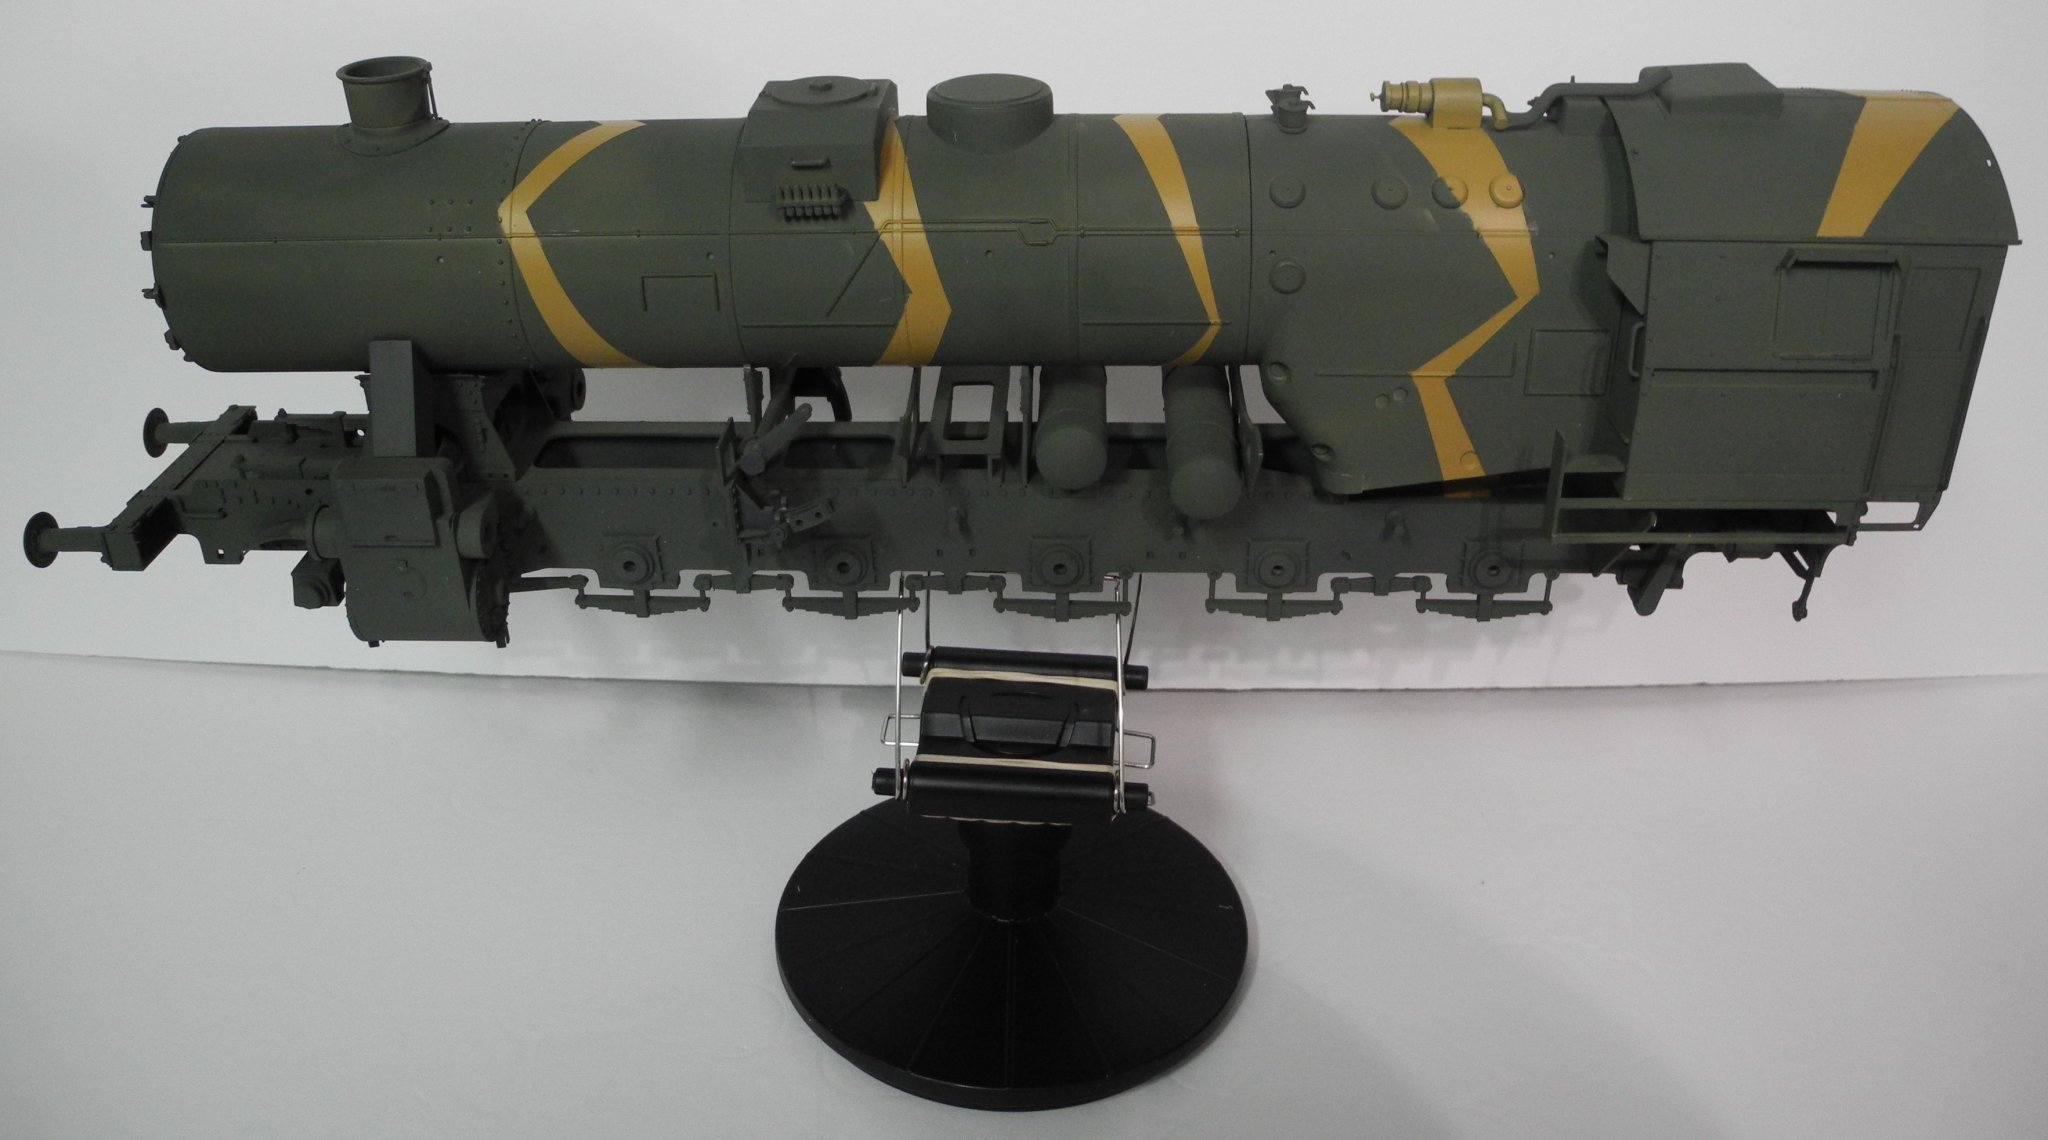
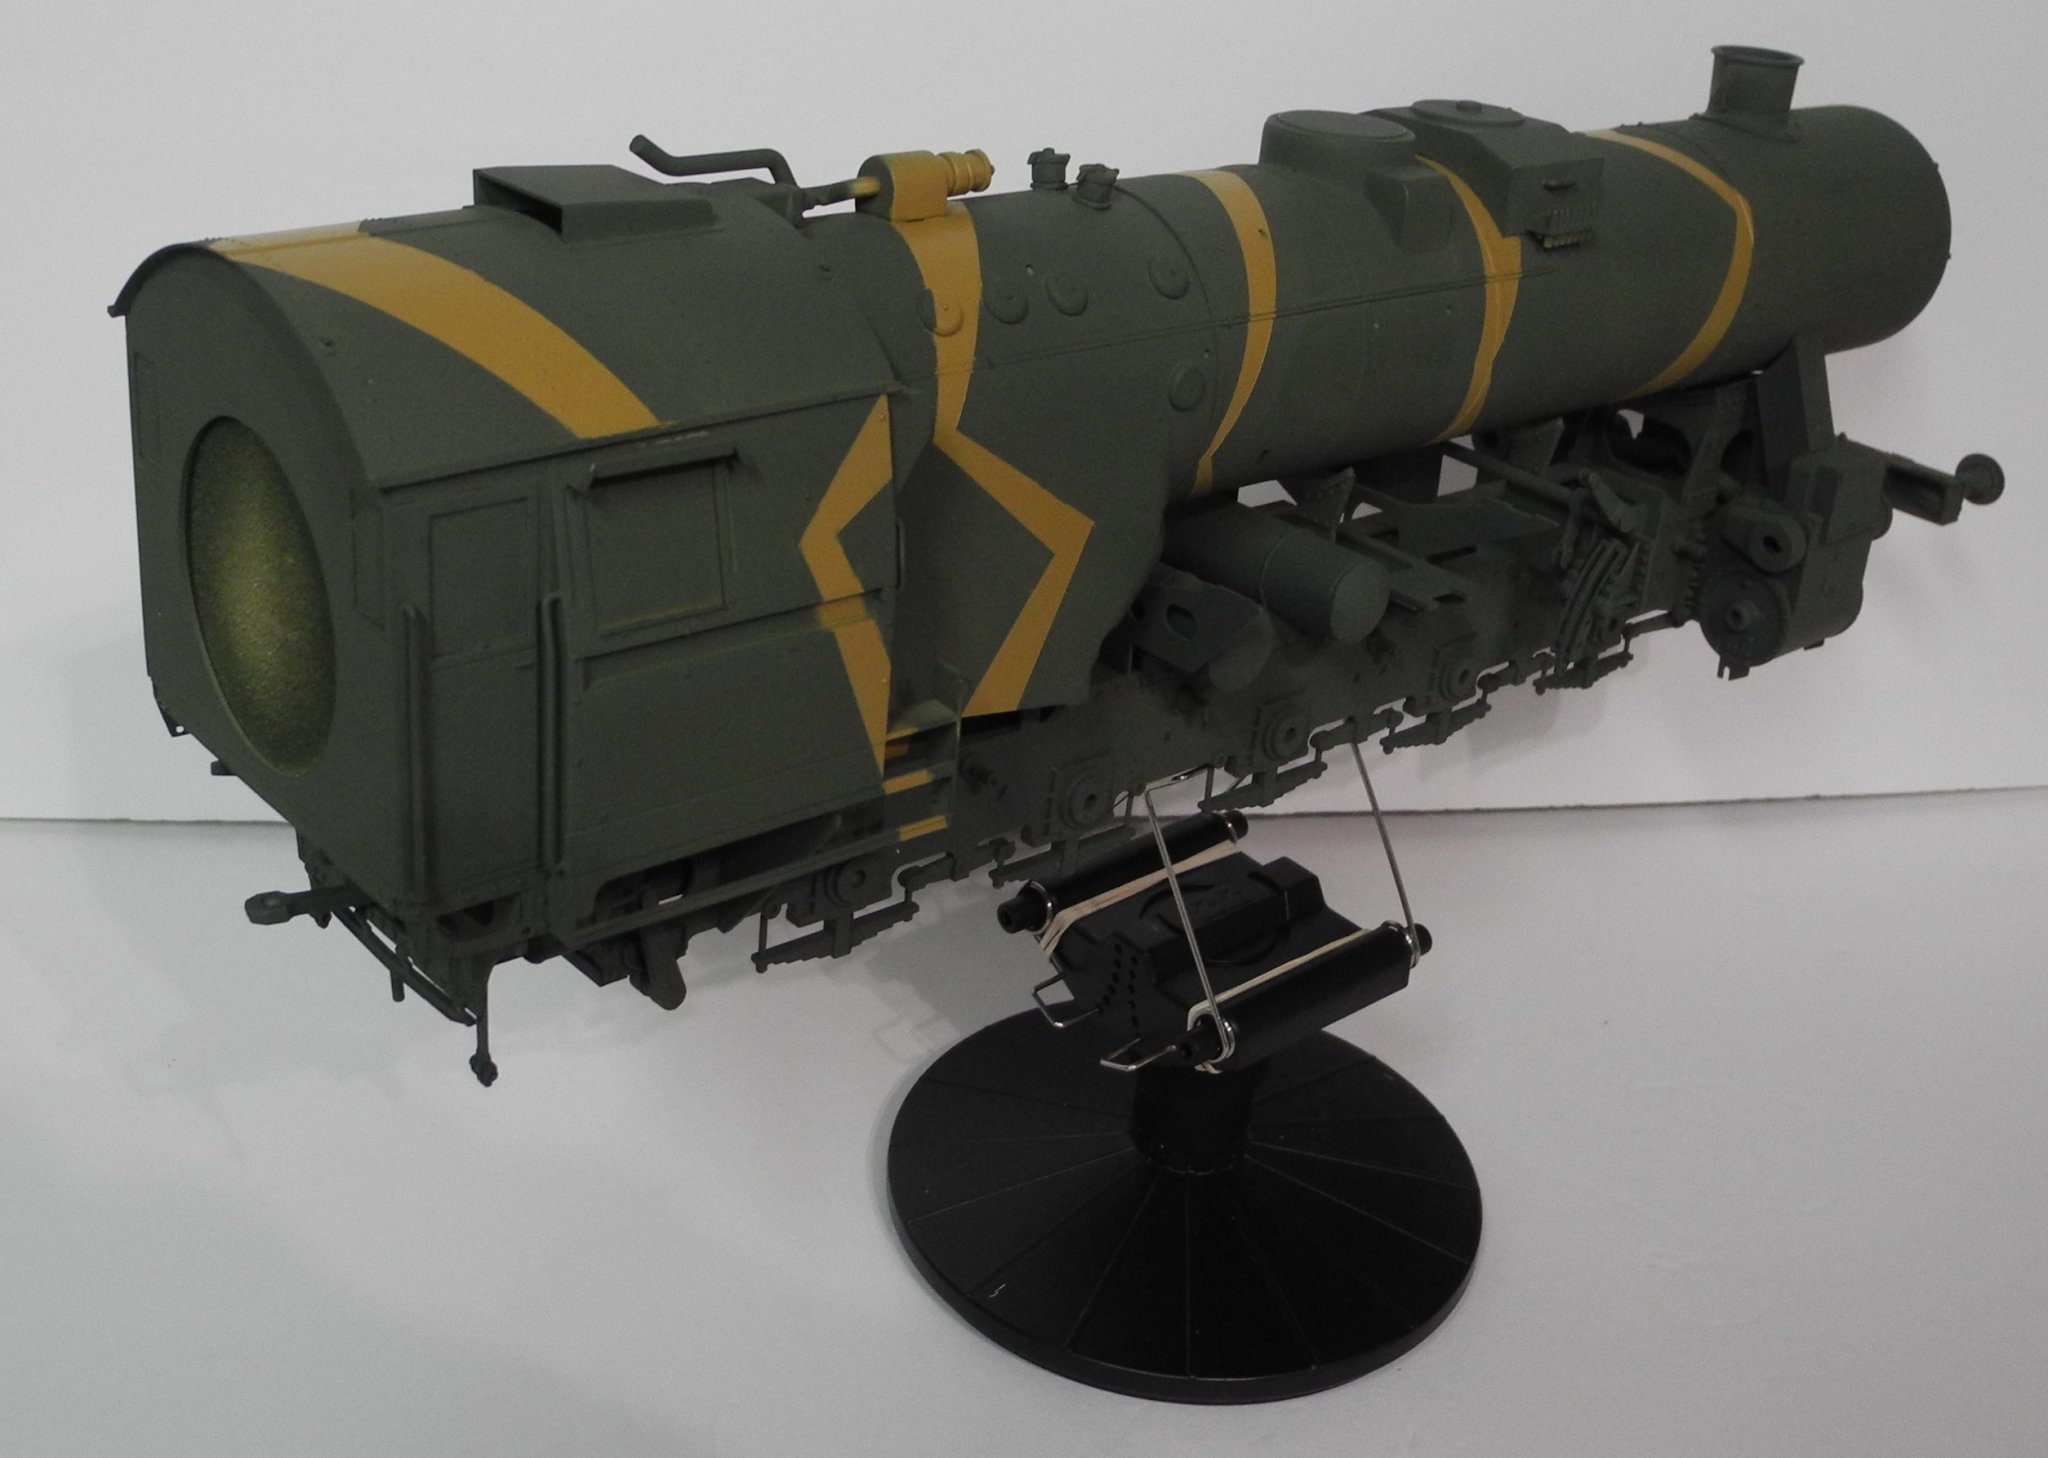
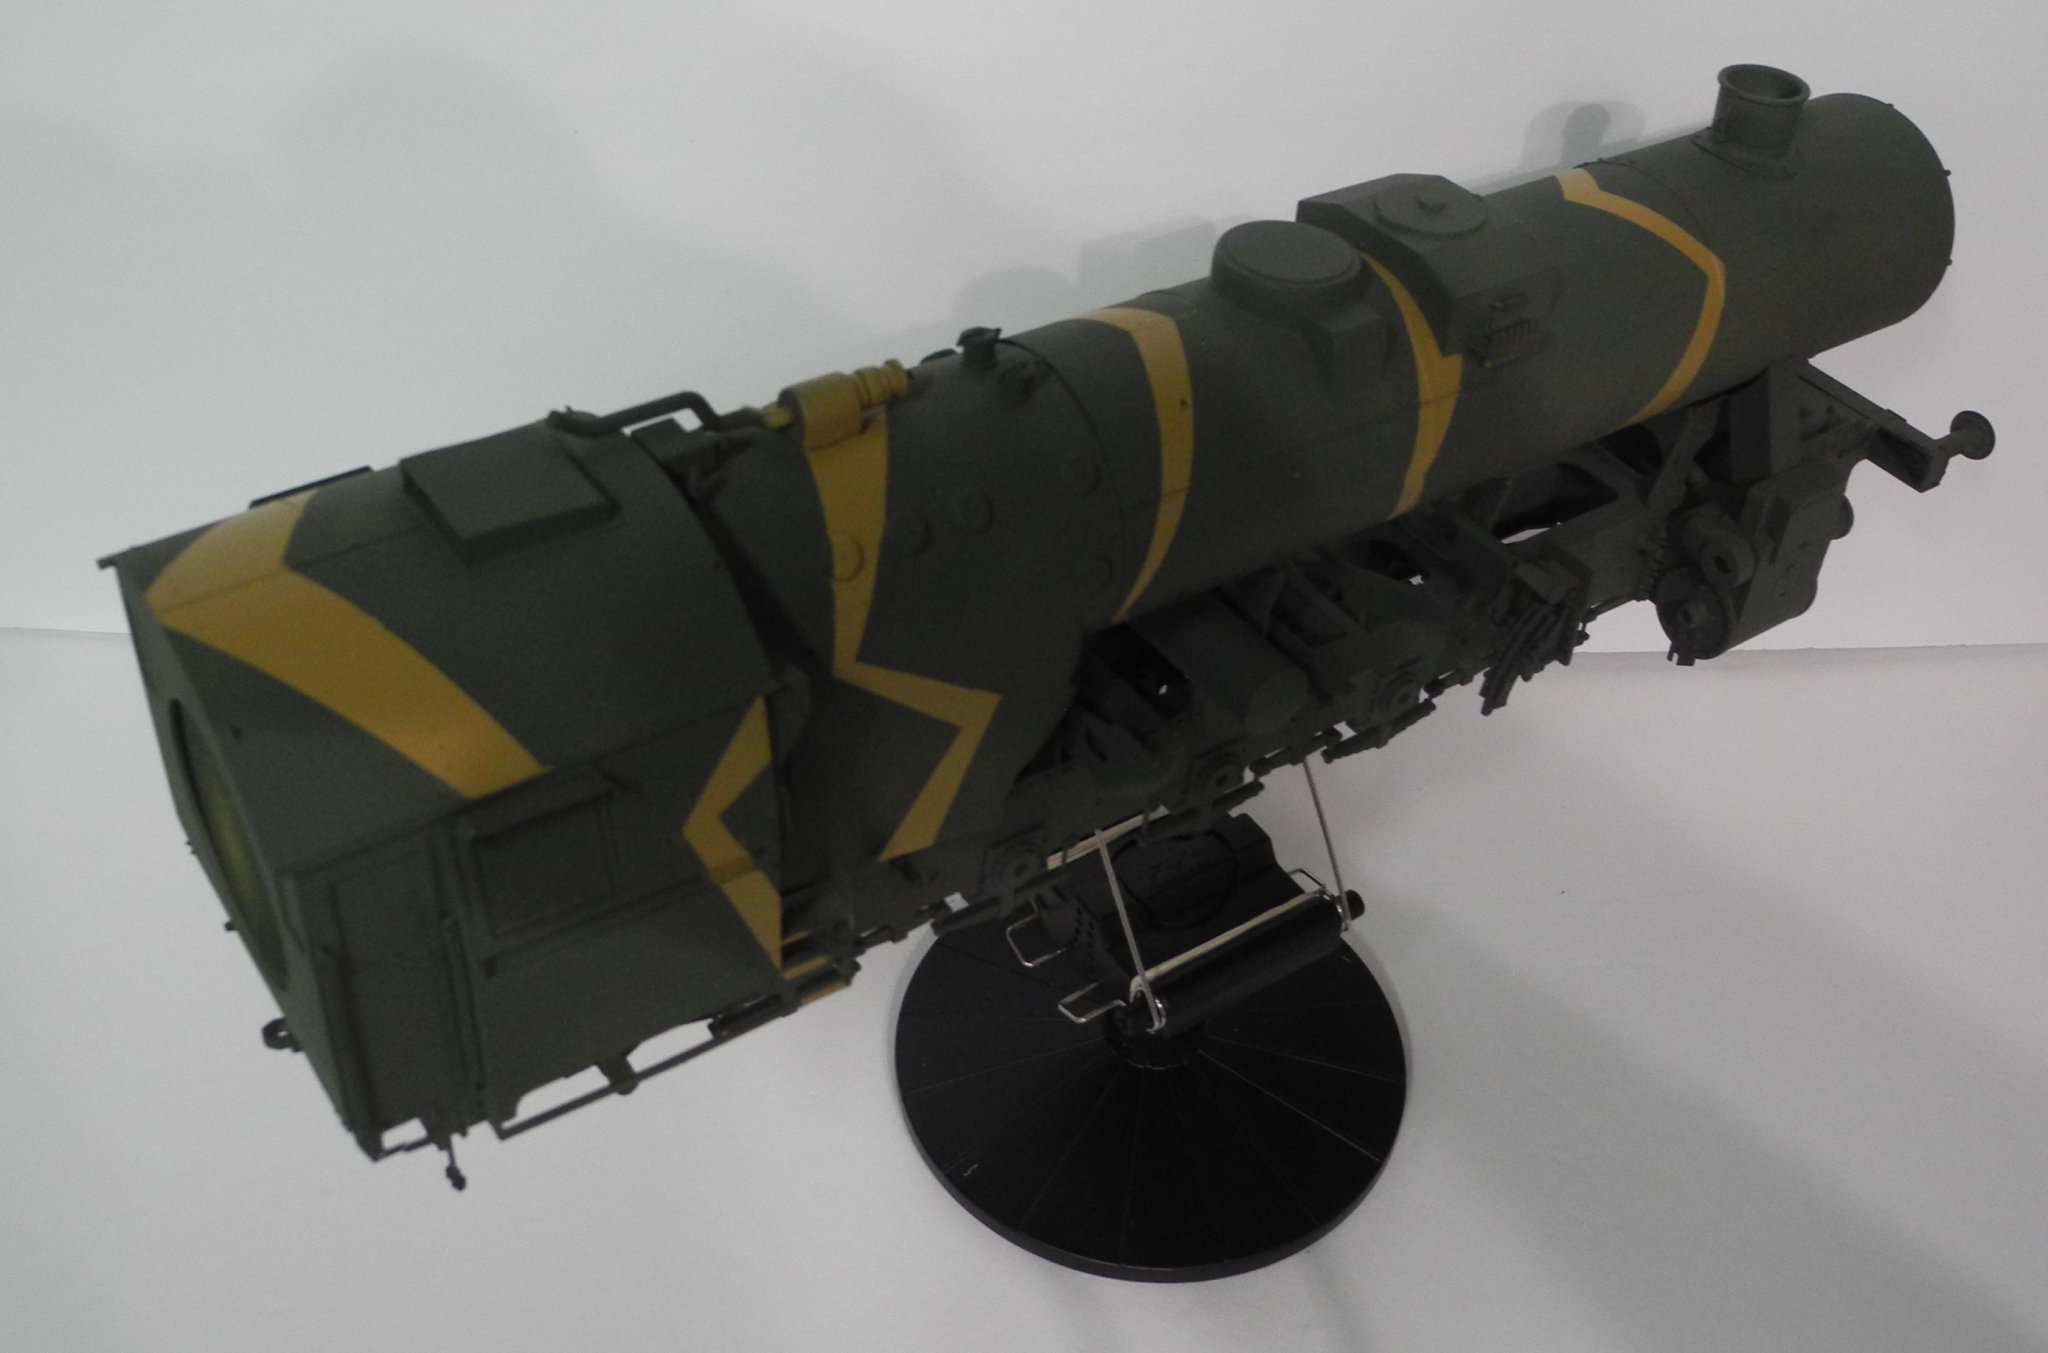
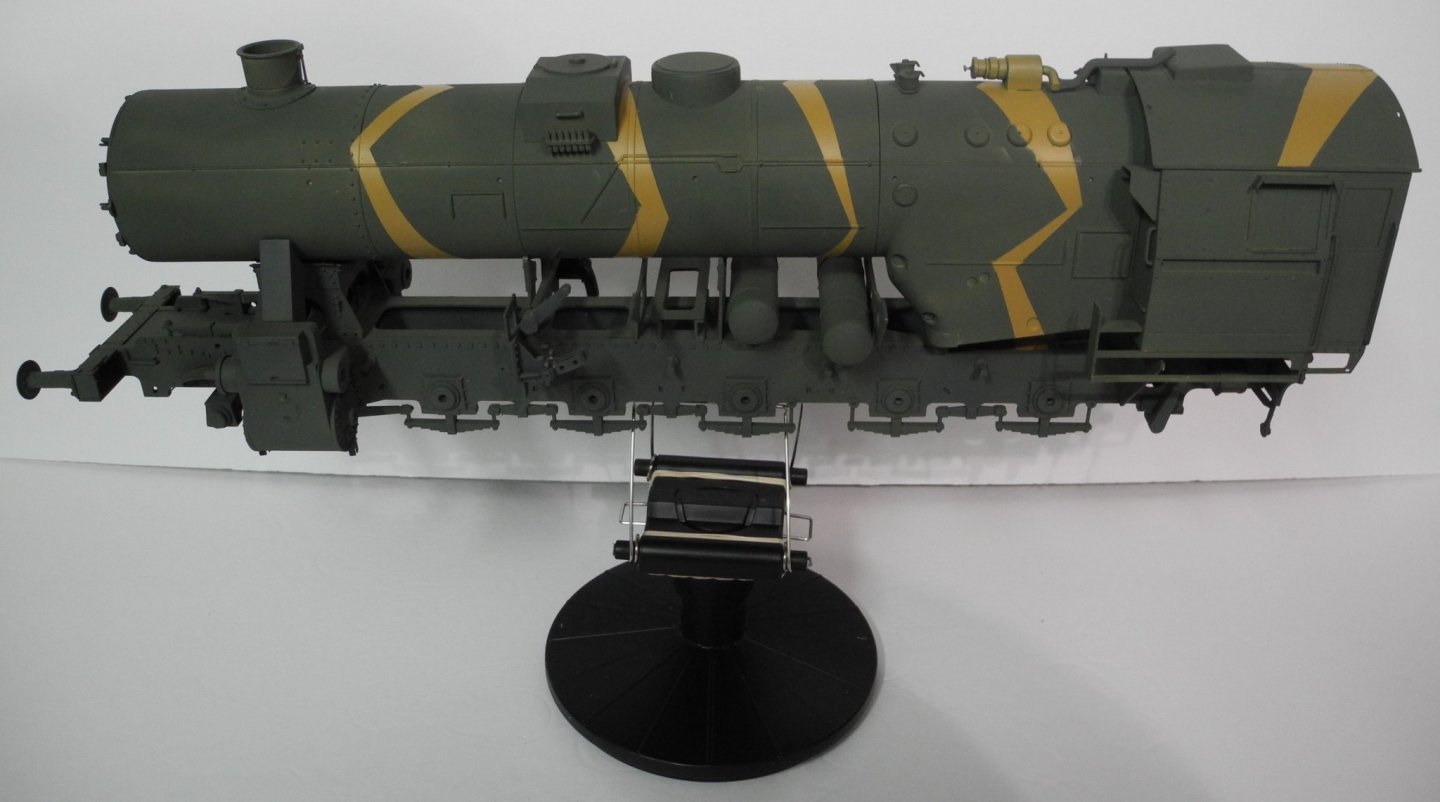
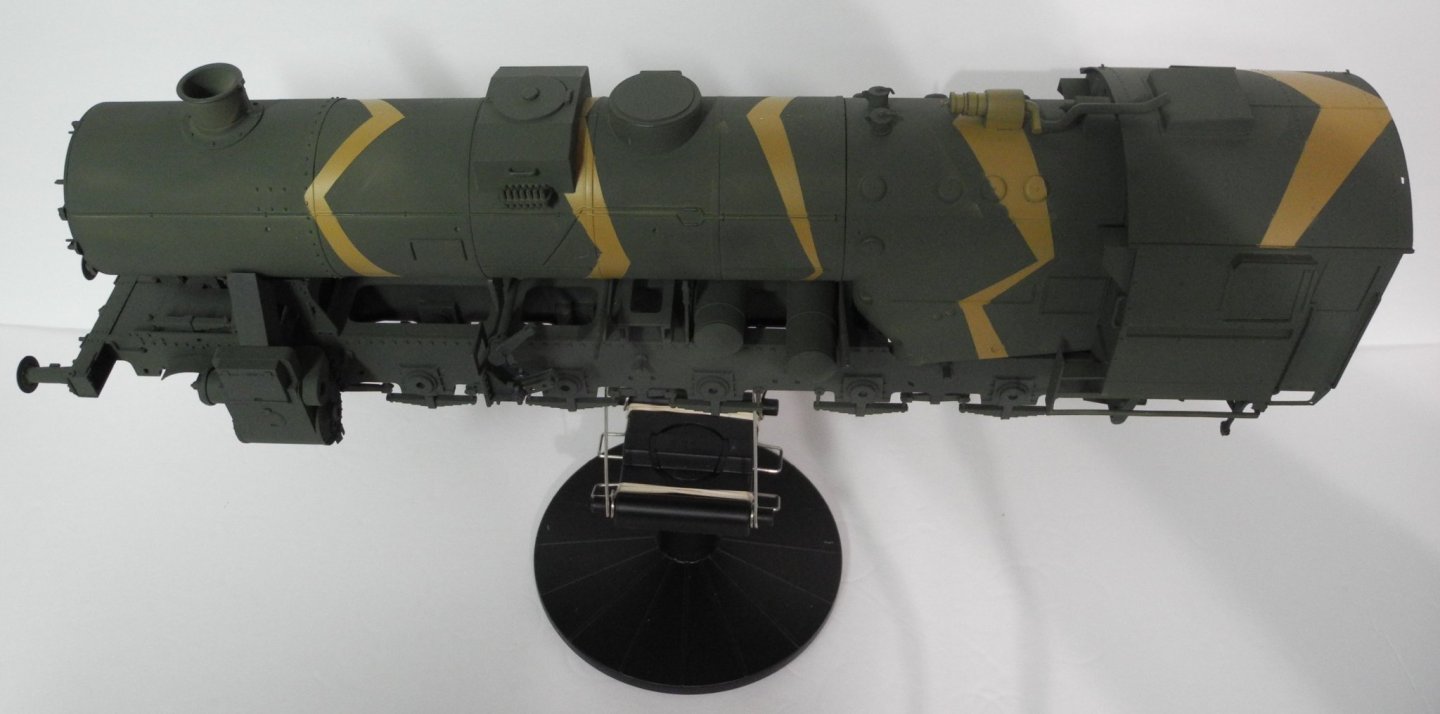
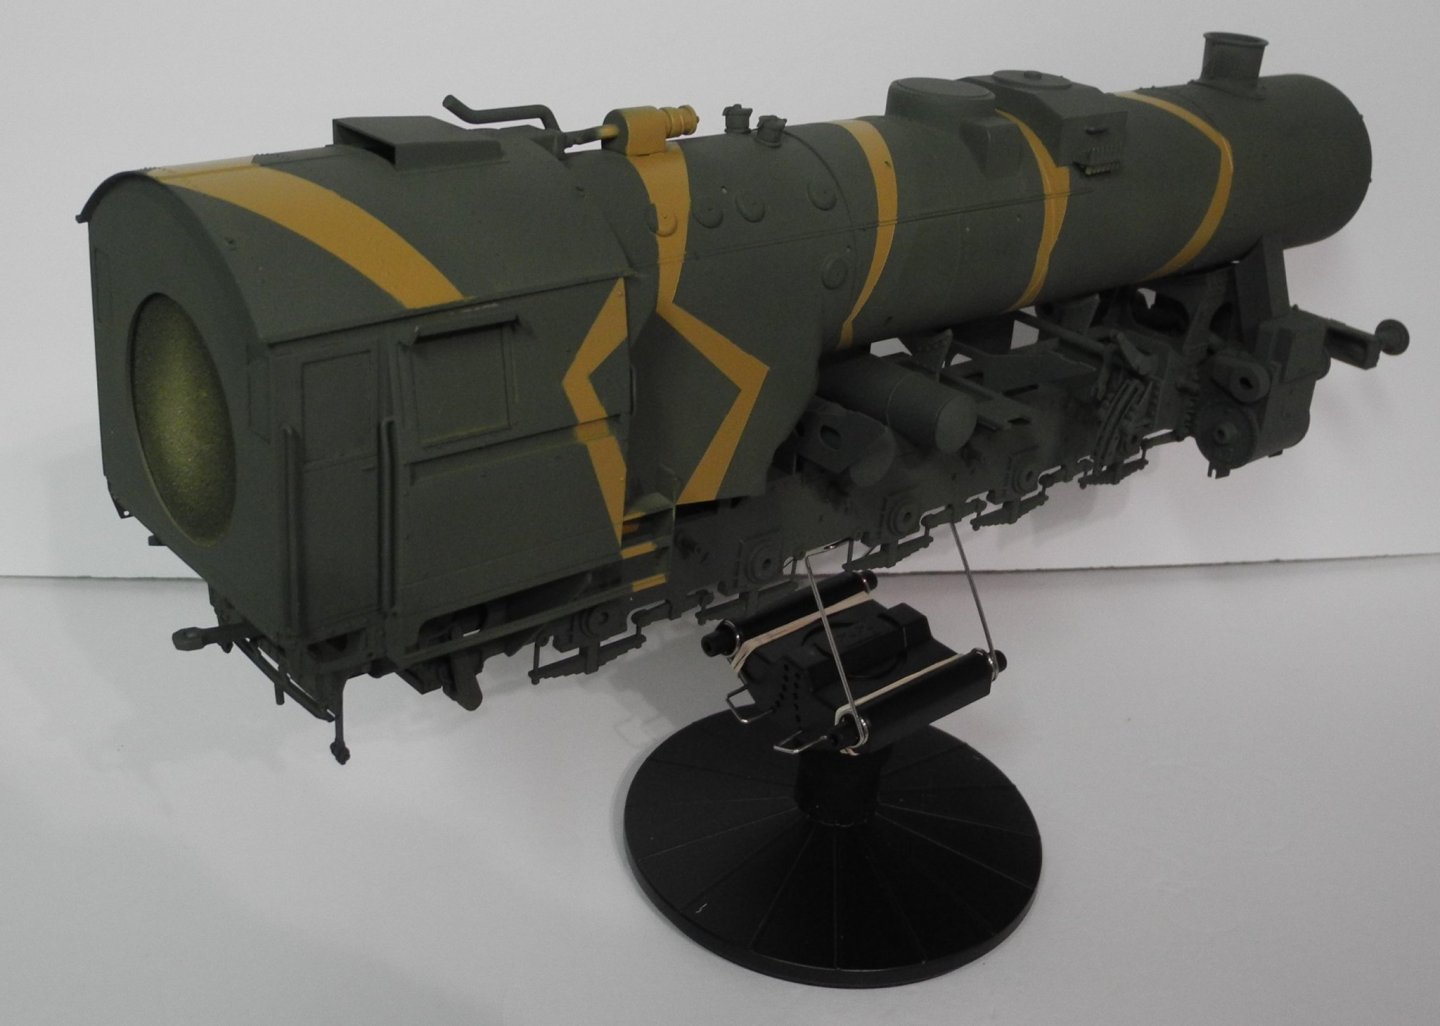
Tonight's review is my humble beginning on the Br-52 camouflage paint job. Colors are Tamiya field grey reduced with Mr. Color leveling reducer, and Vallejo Model Air middlestone shot straight from the bottle. Trust me, there was a ton of masking to do this little bit. Because of the details that later get added to the loco, it was essential to start the paint job now, as once the details start piling up it will be virtually impossible to mask it off for the camouflage. Most parts added later will need to be assembled in sub assemblies, then painted and installed.


- 92 replies
-
- 13
-

-
Thanks for sharing these awesome videos, guys. This locomotive is a beast. Would love to ride this train...better start saving for that trip. The good thing, this train leaves such a very small and minuscule carbon footprint. 😄😮
-
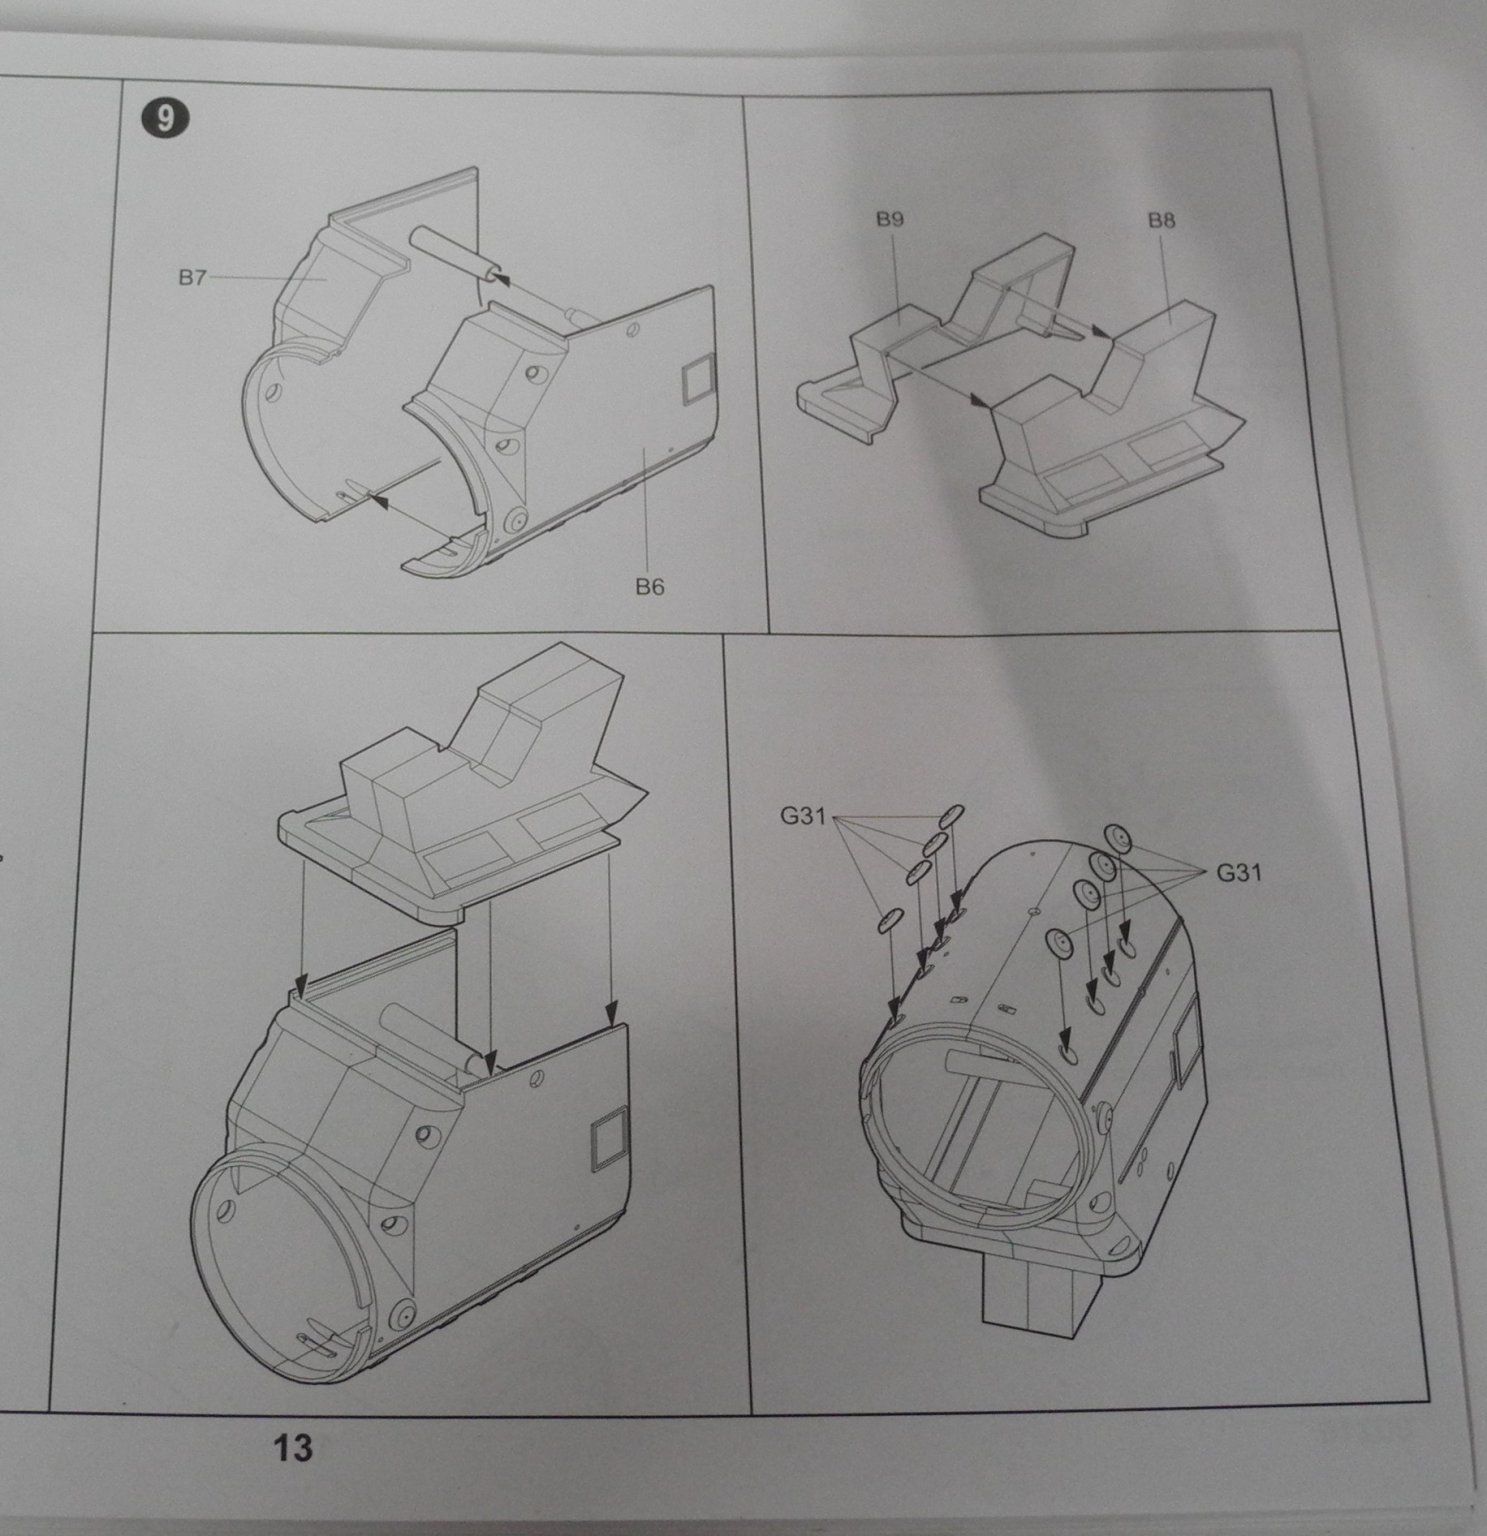
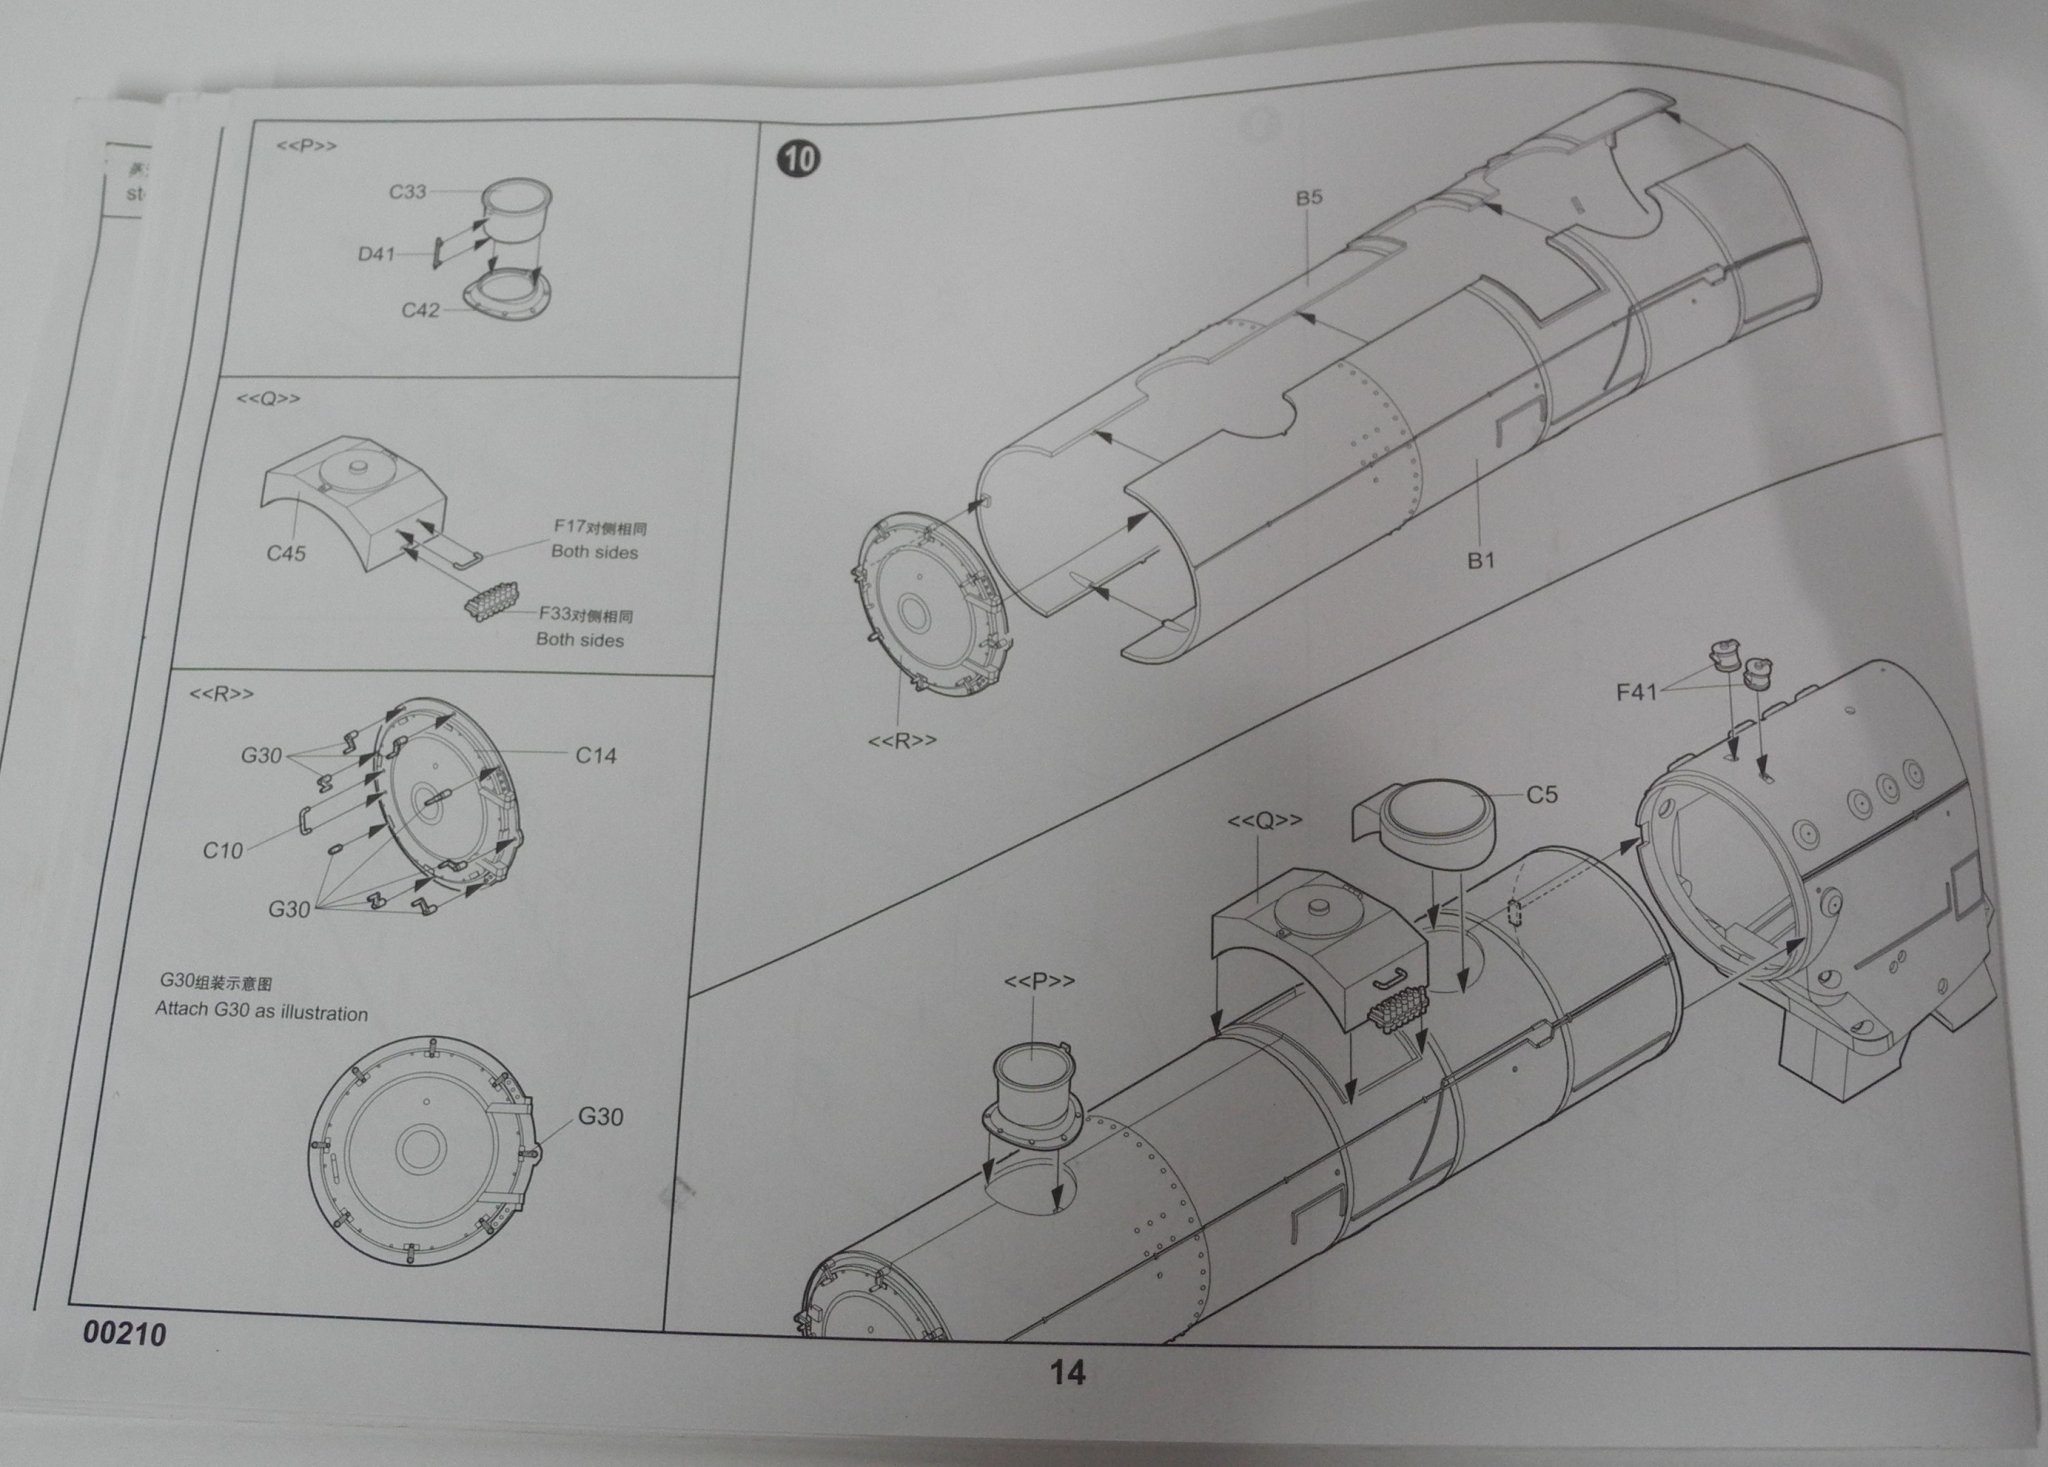
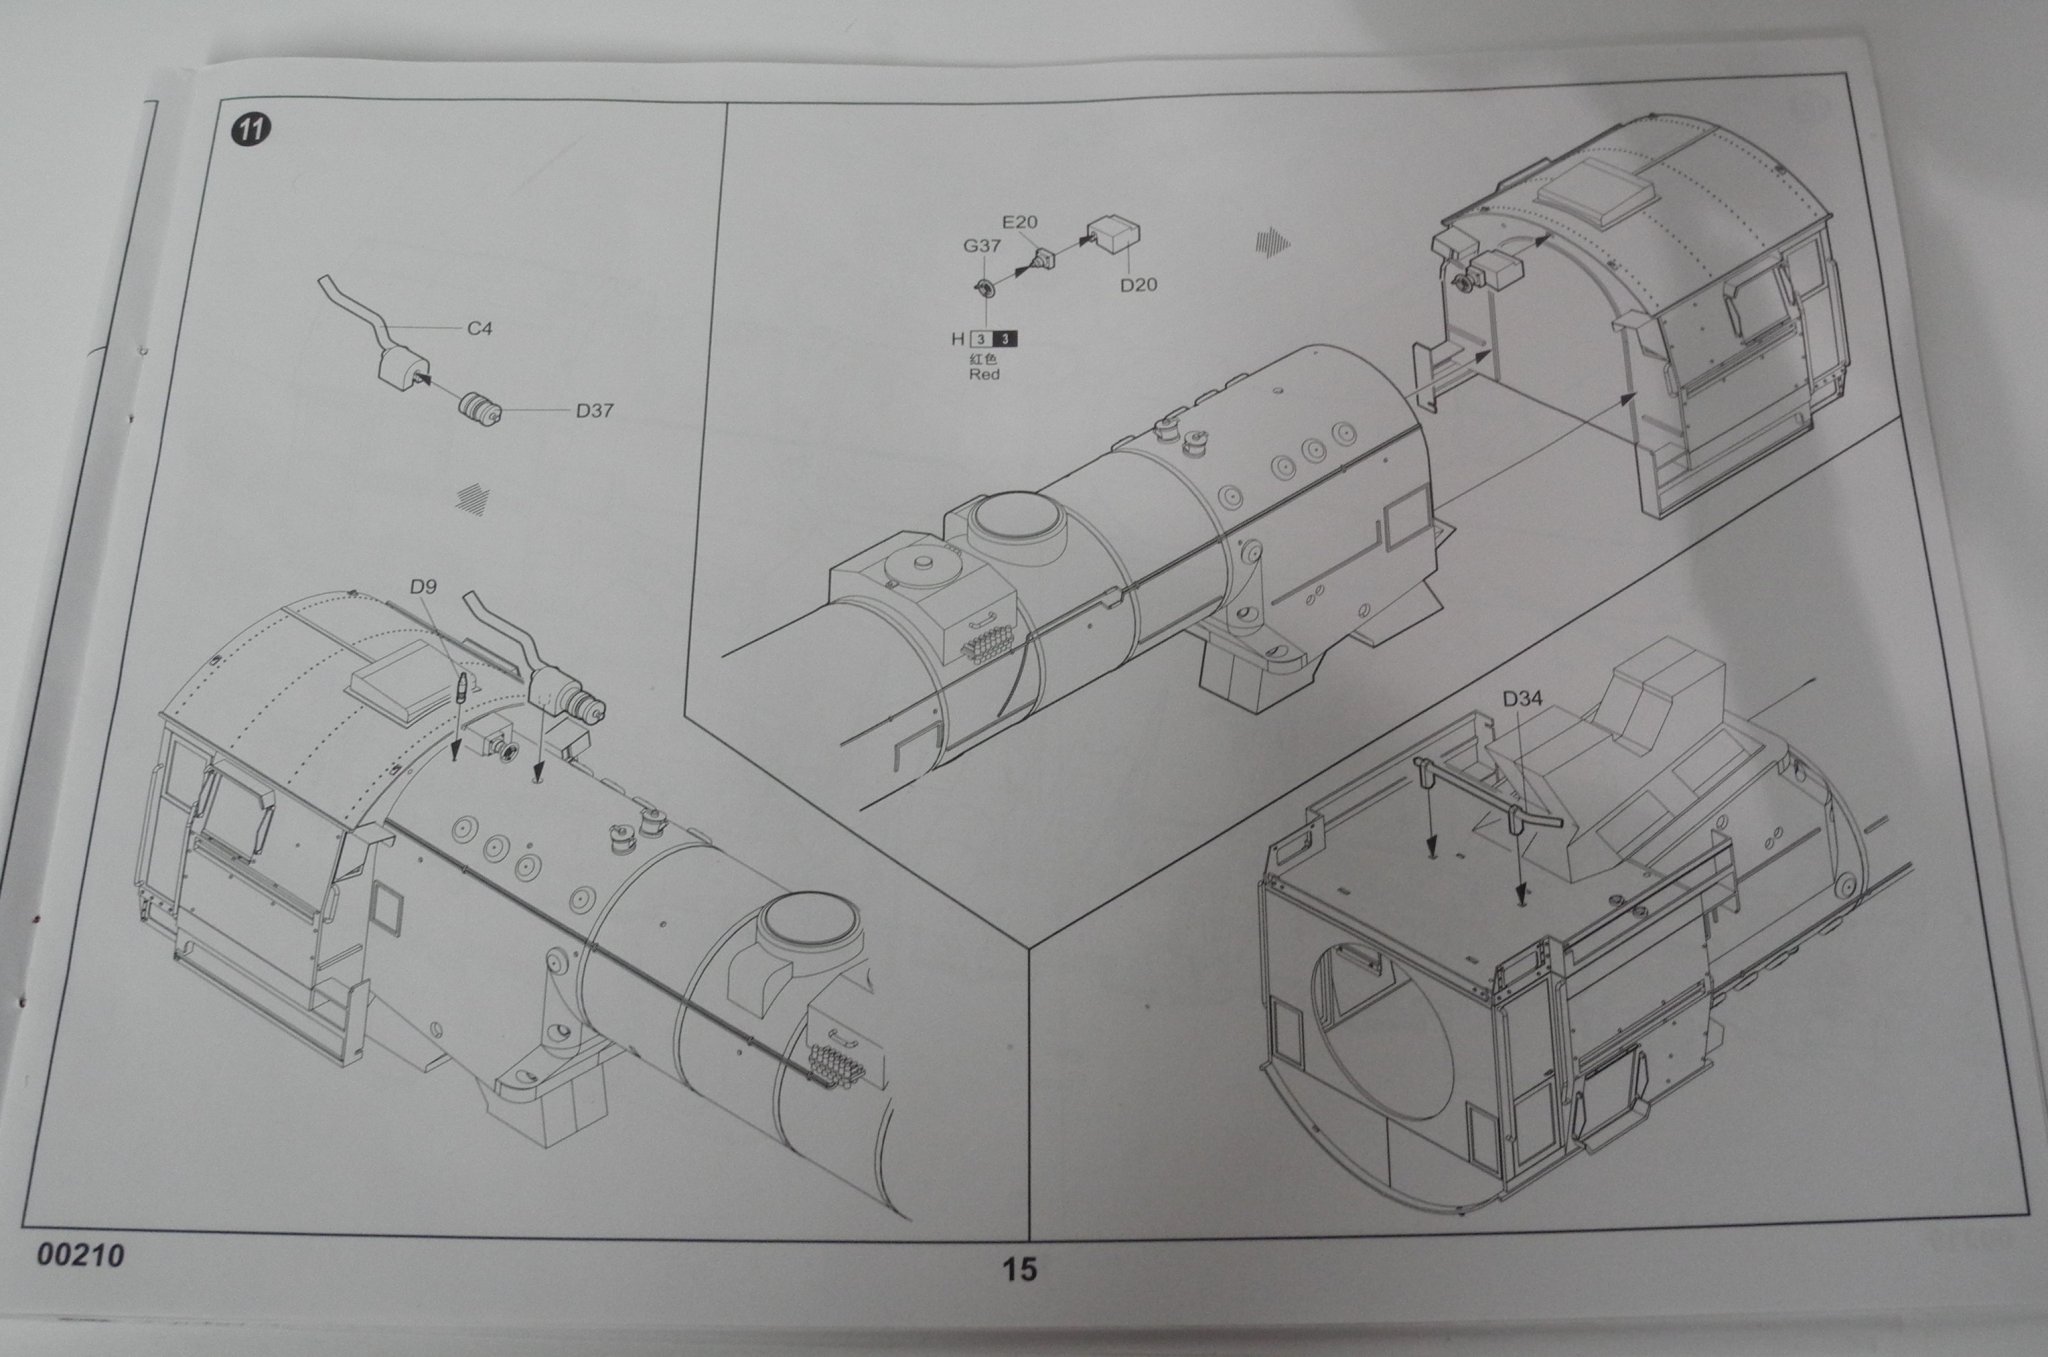
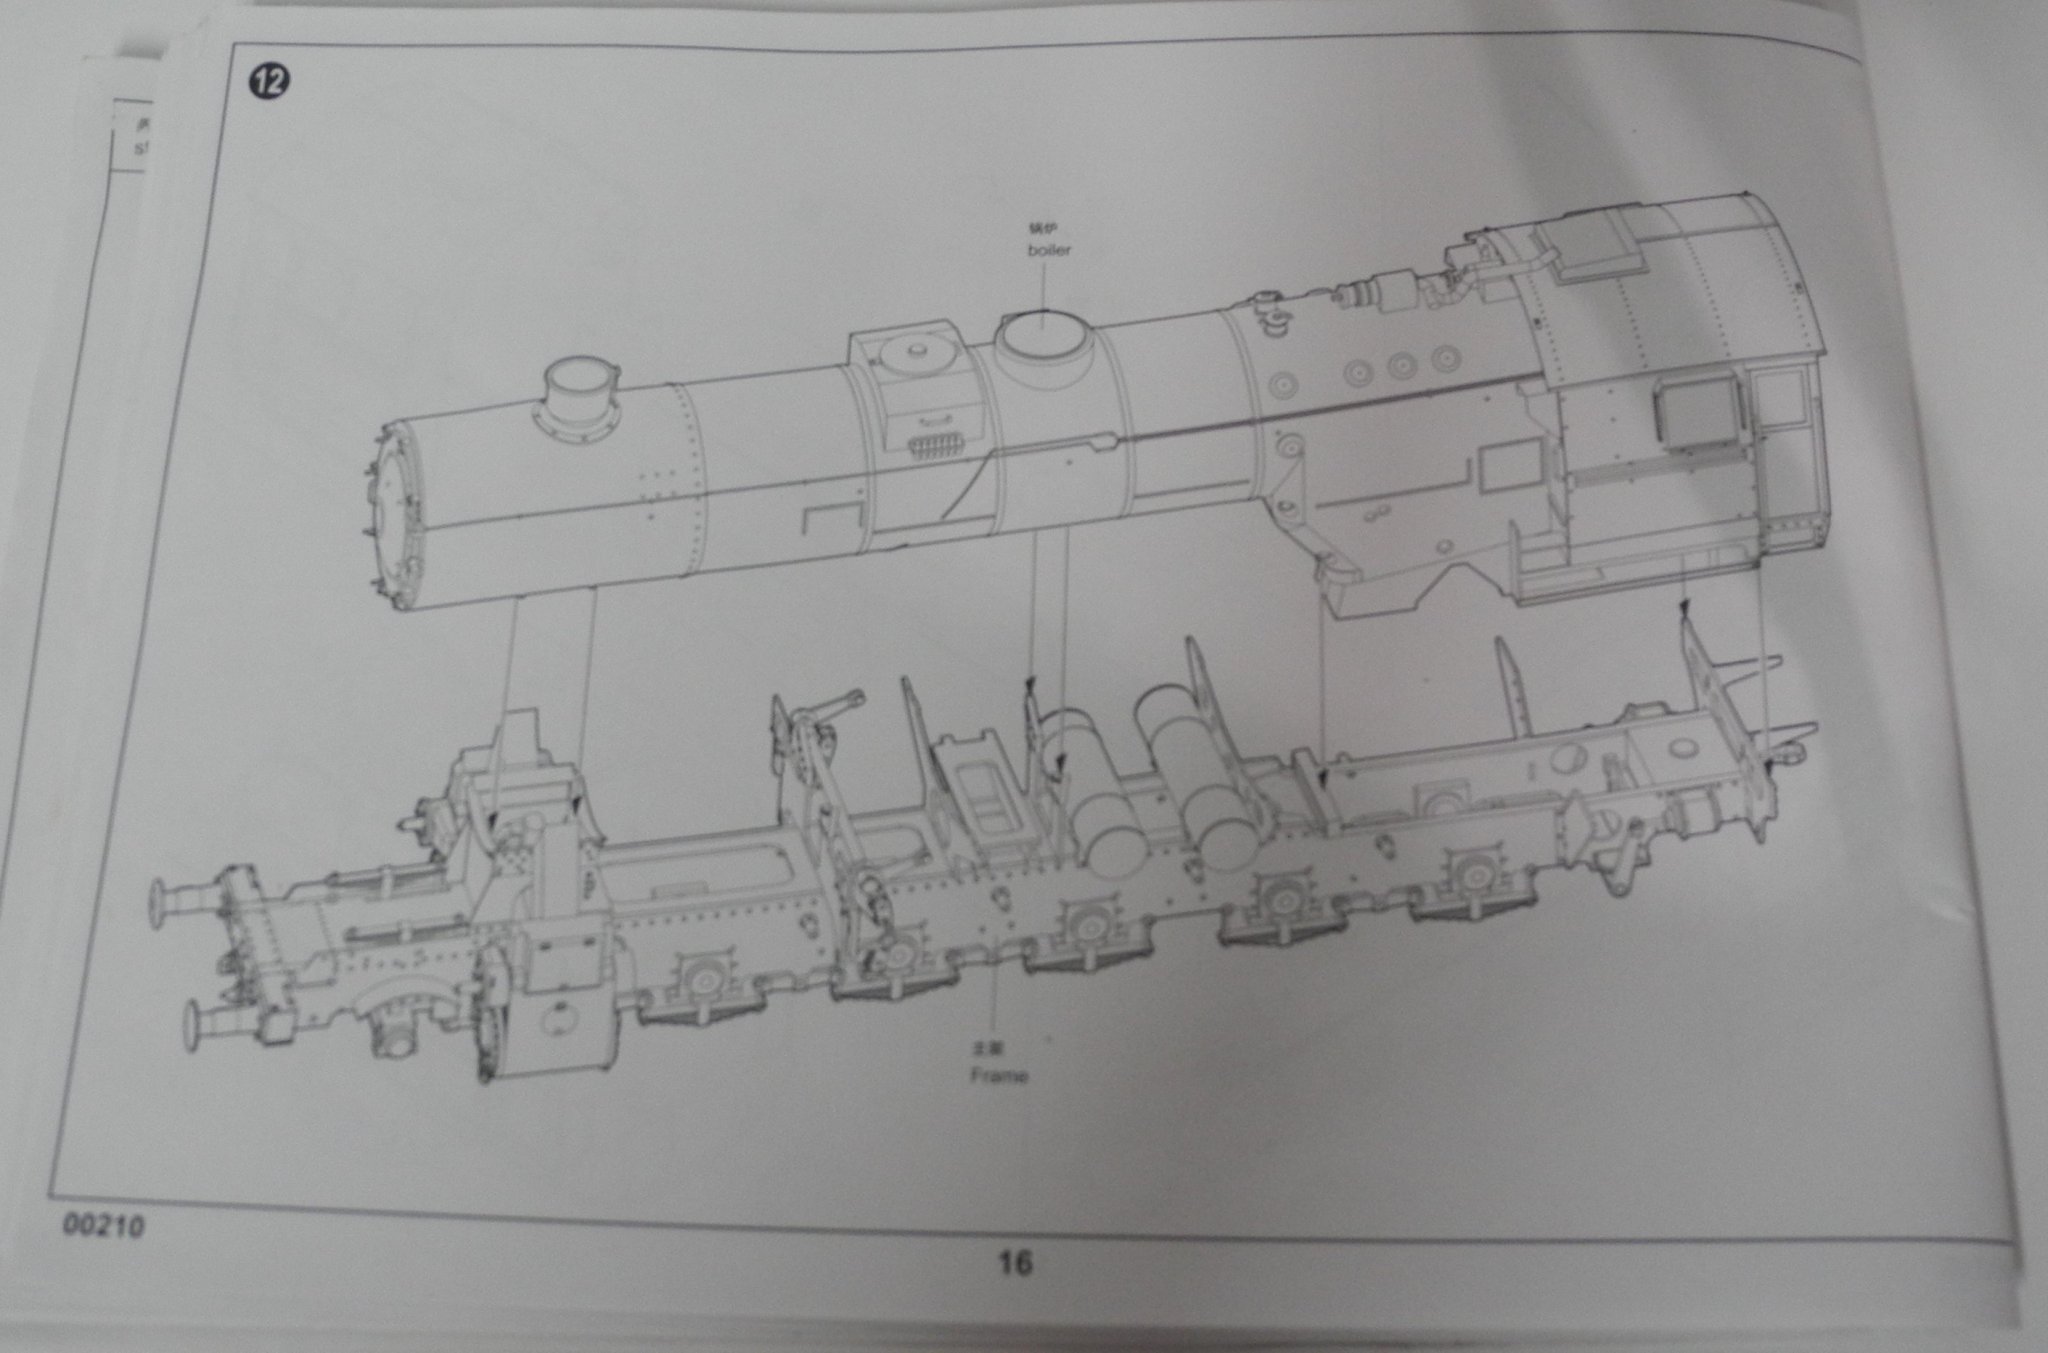
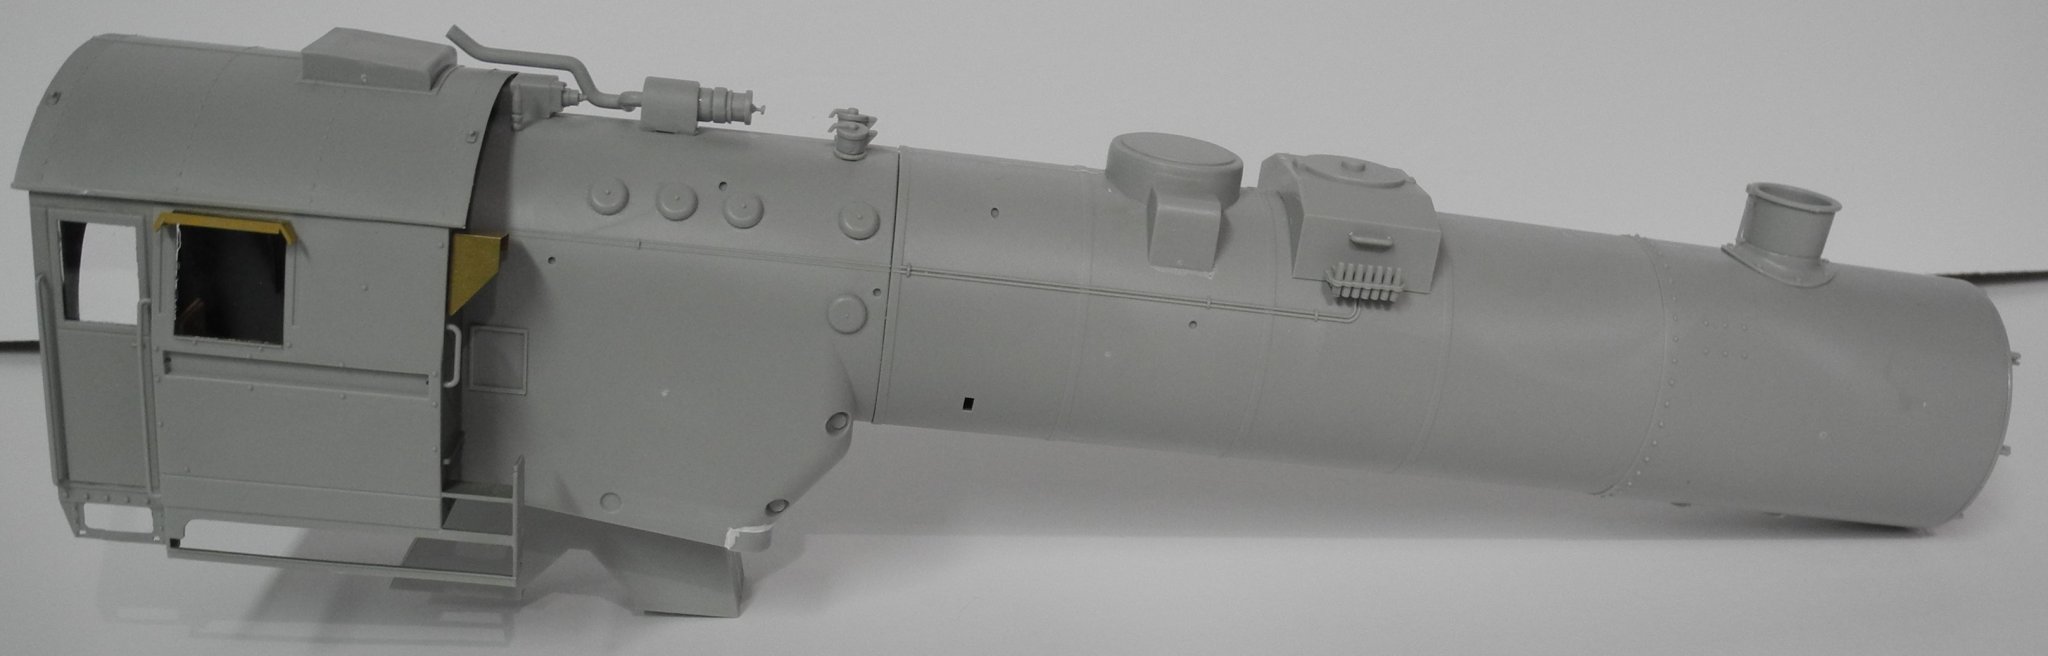
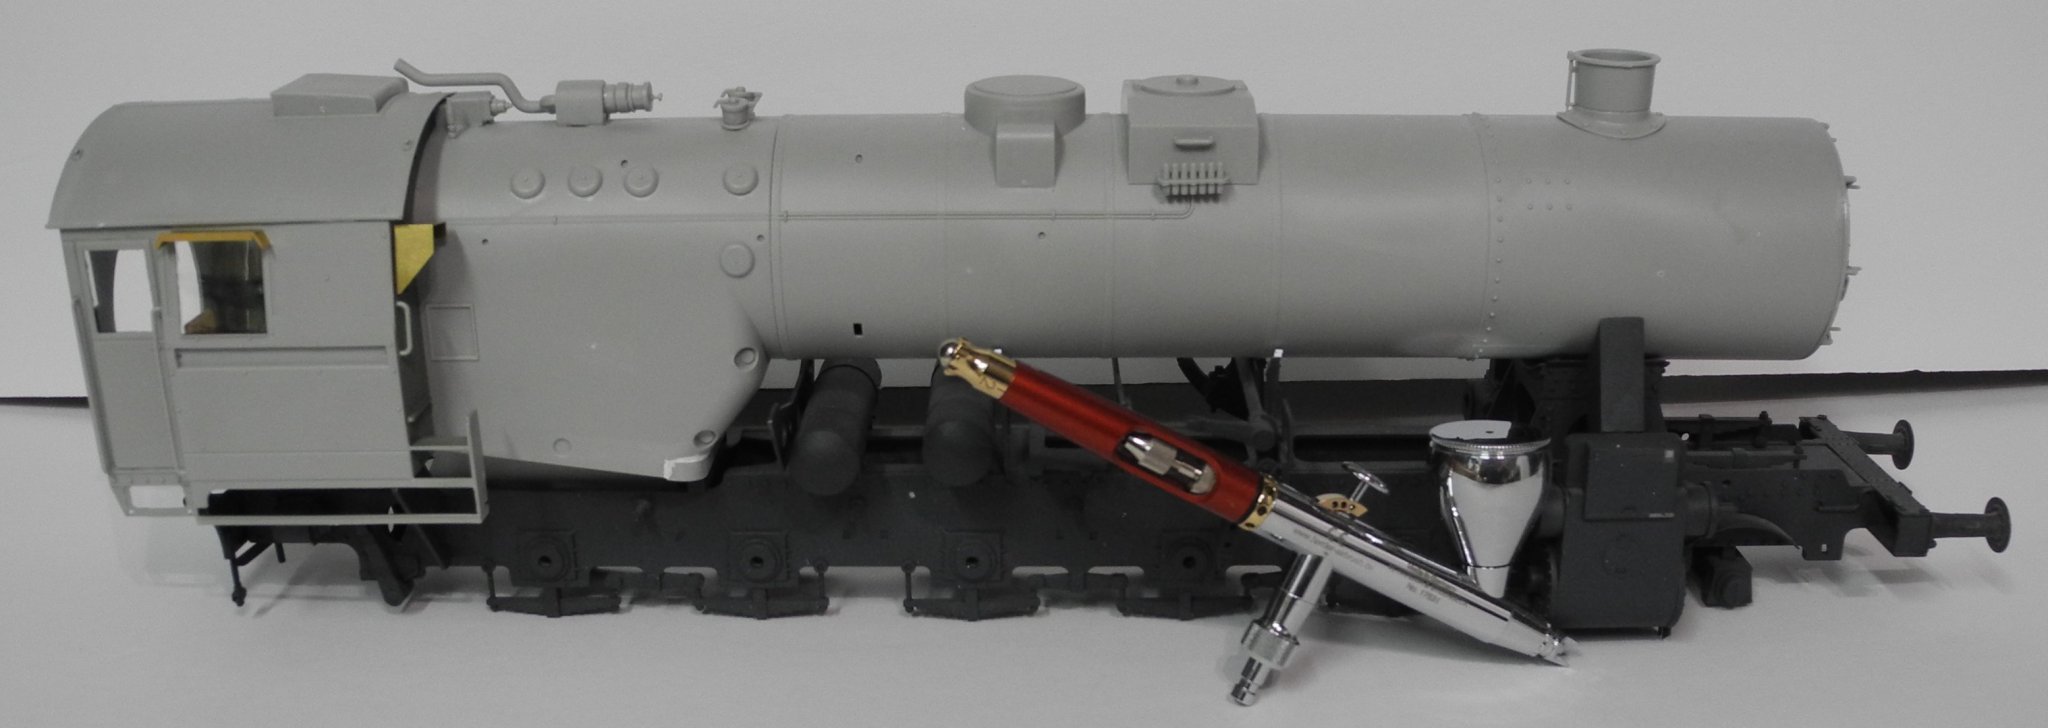
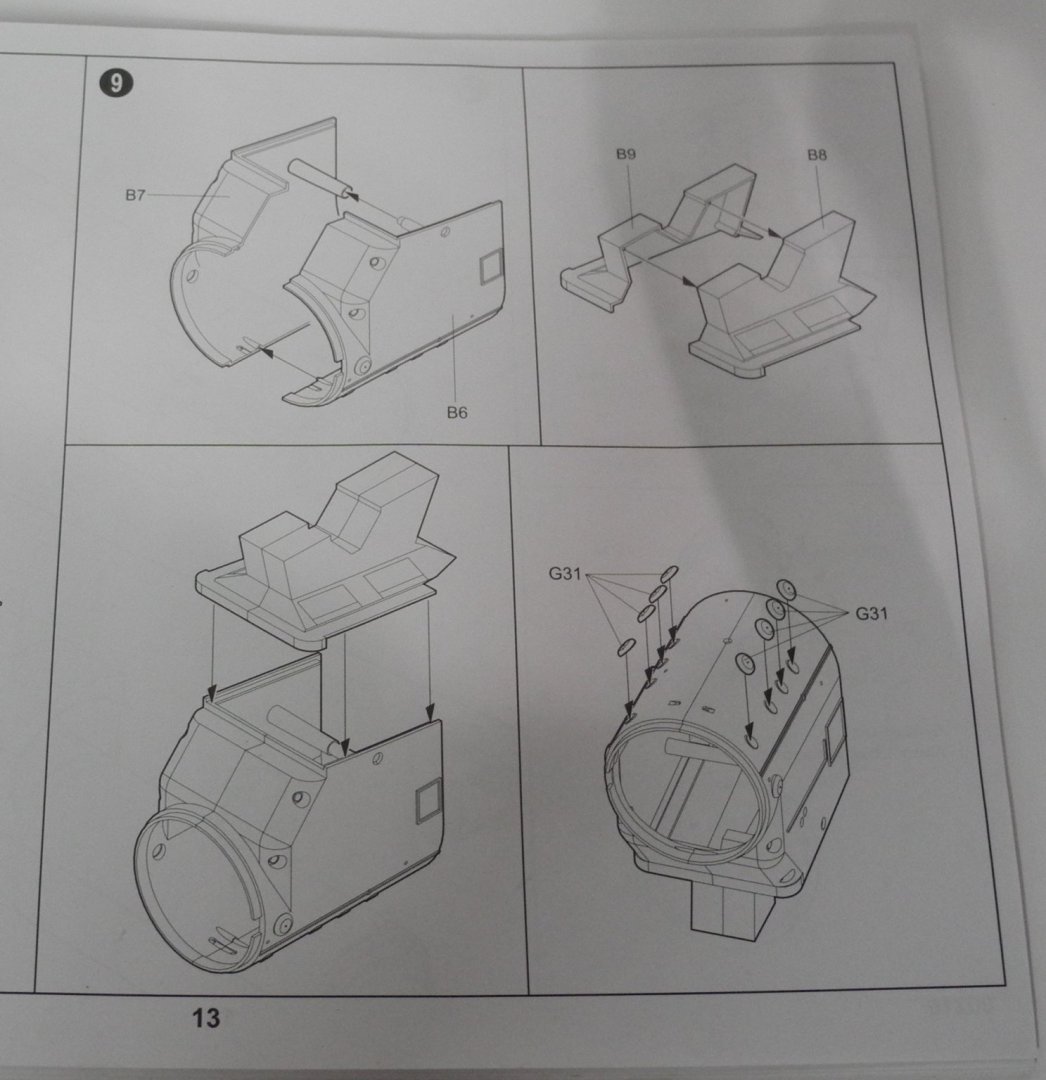
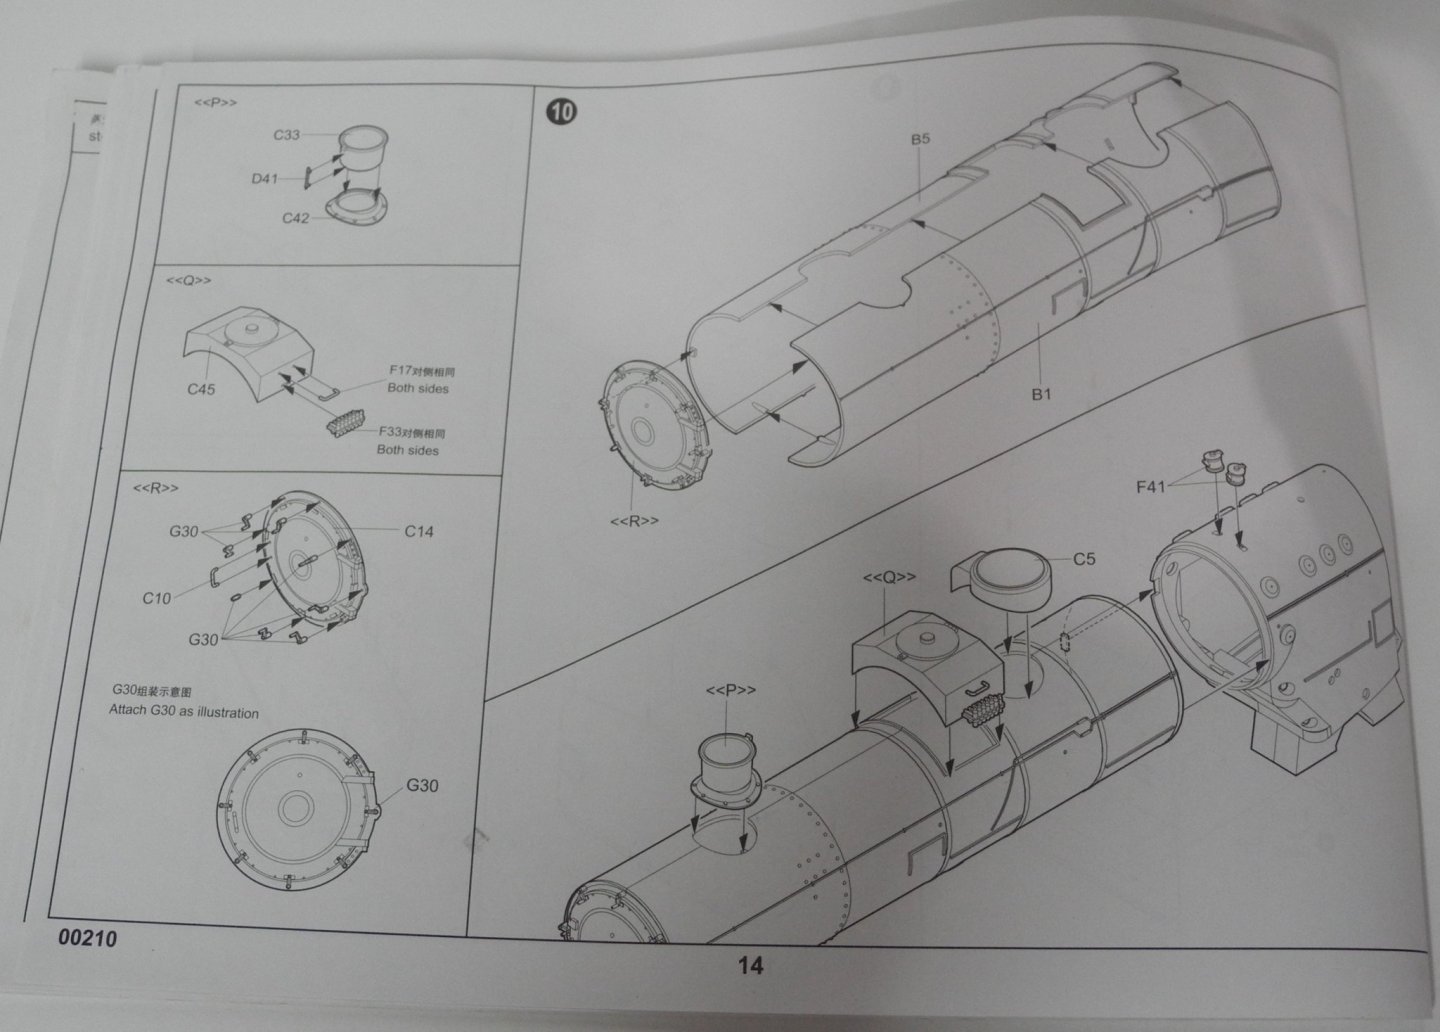
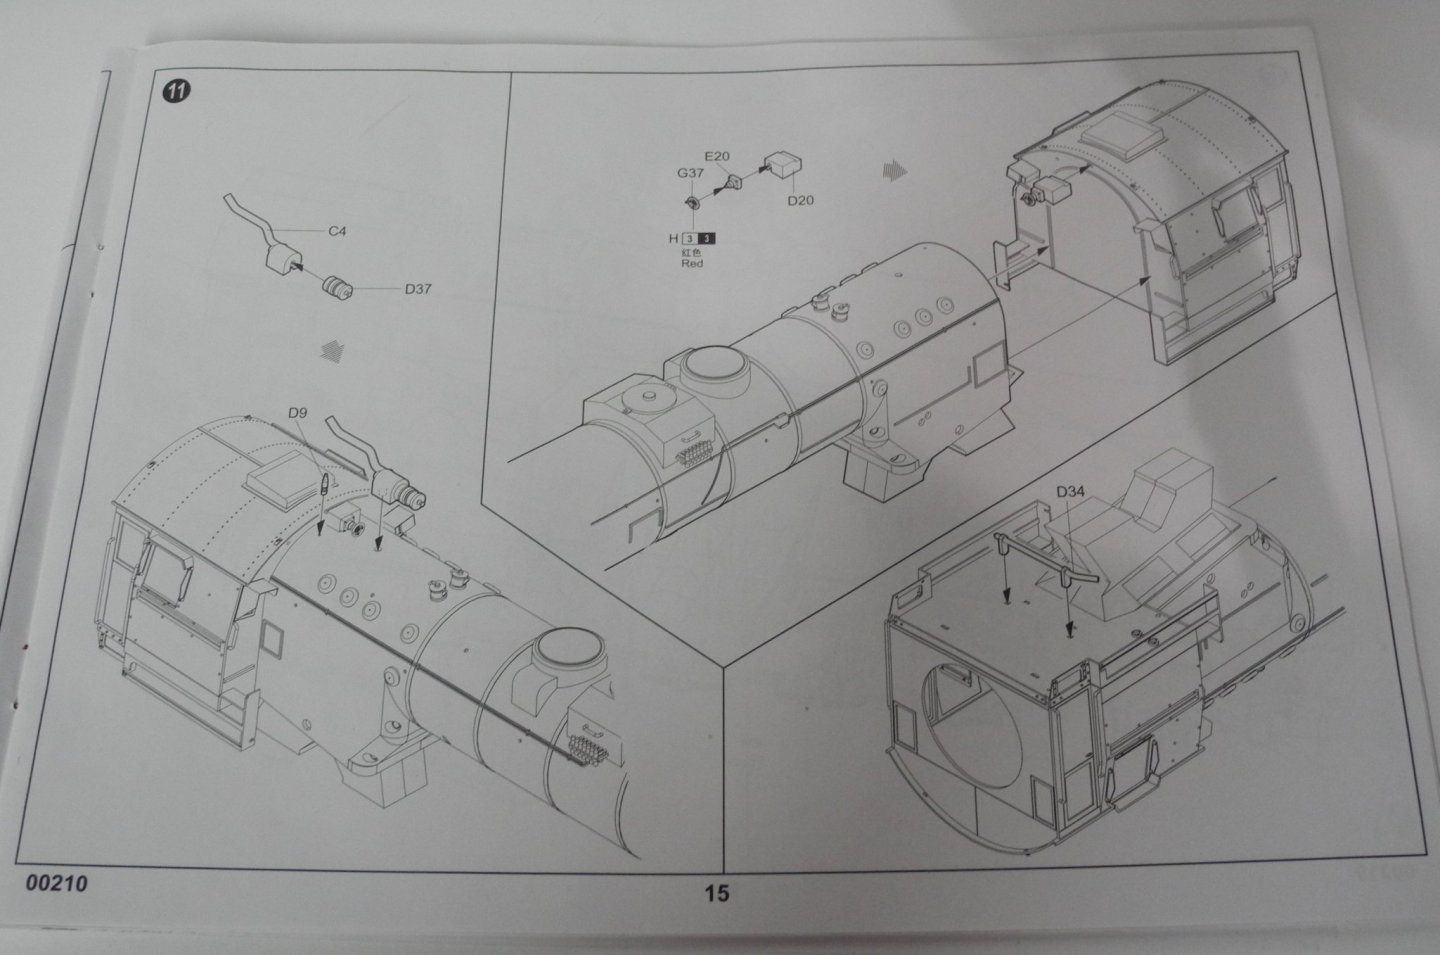
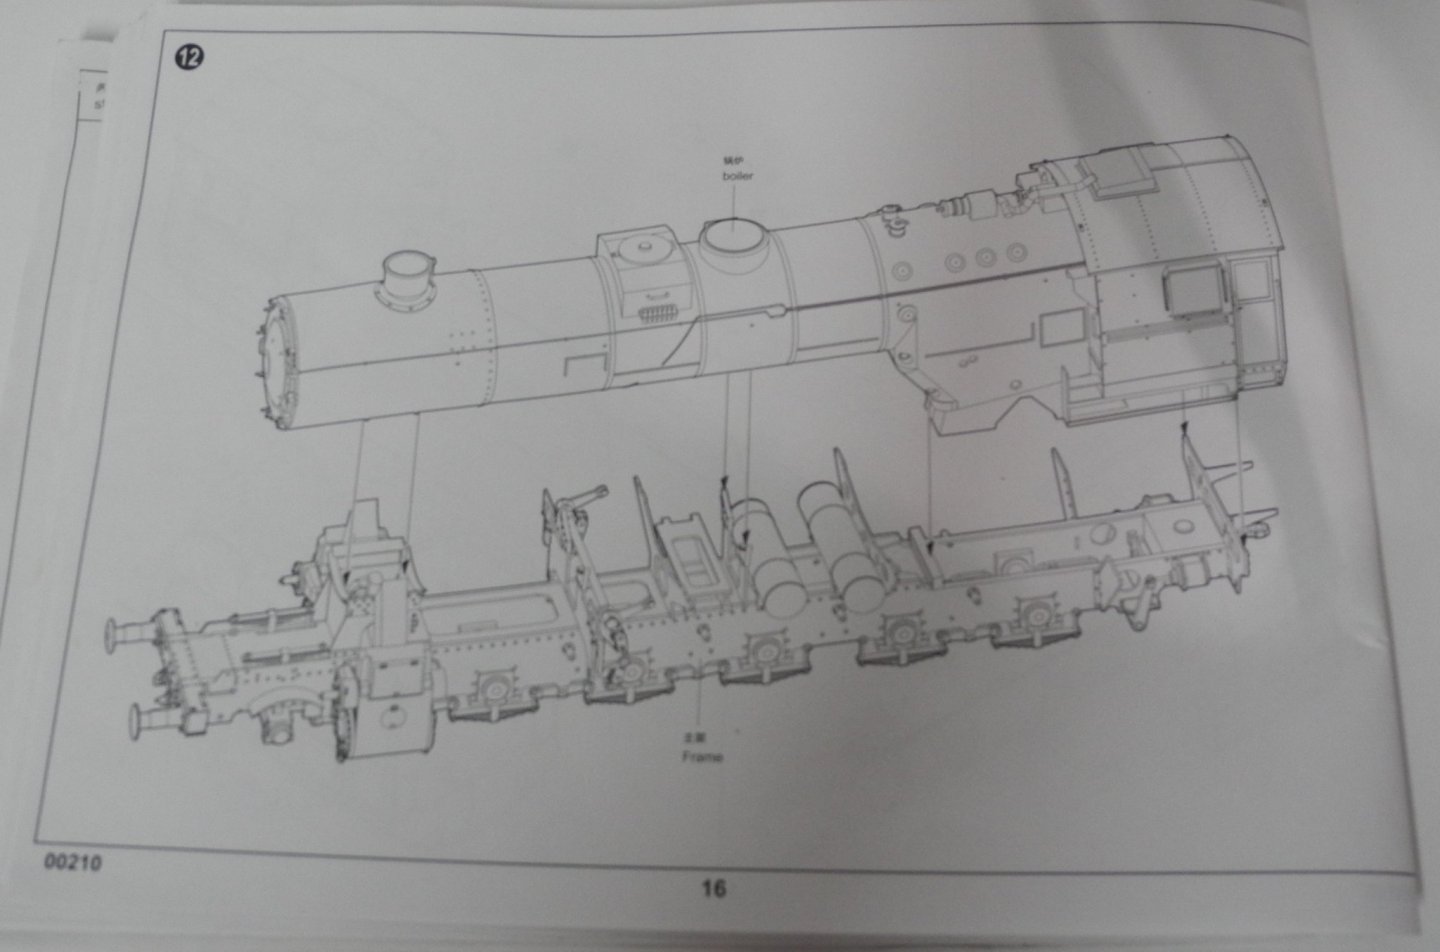
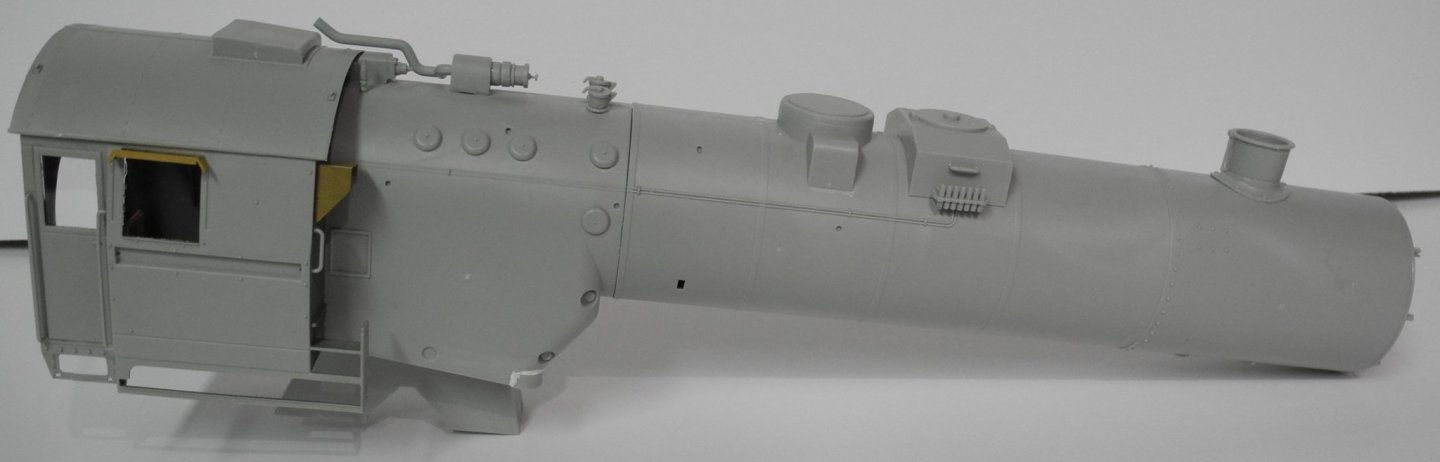
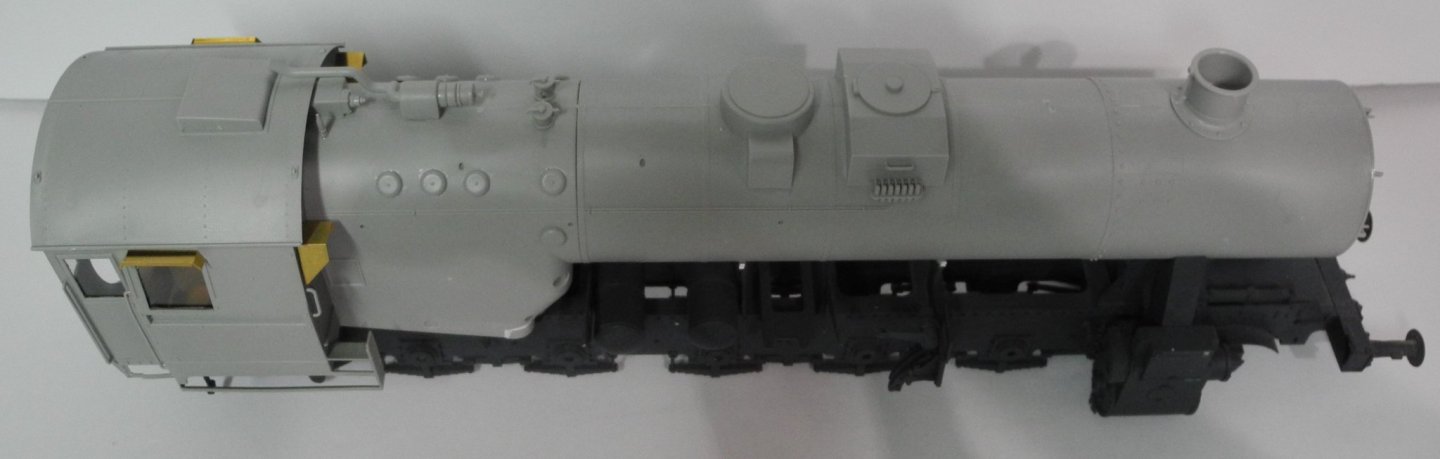
In tonight's review of my build sequence, we will cover steps 9, 10, 11, and 12. These are some photographs of the steps that were completed today. The last photo shows my H&S airbrush along side the Br-52, just to give some idea of the scale of this model. It's really huge at 1:35 scale, and this is without the coal tender or rail gun attached! A model like this will require a lot of space to display it, that's for sure. Very soon, I will begin painting the loco in the field gray and middlestone camouflage pattern. As a side note regarding construction/fit, the upright supports upon which the boiler rests upon the chassis supports were approximately 1 mm too short. Apparently, this is a manufacturing/engineering defect as others building this model have said the same thing. It's easily corrected by adding some strip stock as shims on the upright supports. If you look closely, you will see the white strip stock that was added in contrast to the light gray plastic of which the model is molded.


- 92 replies
-
- 12
-
-
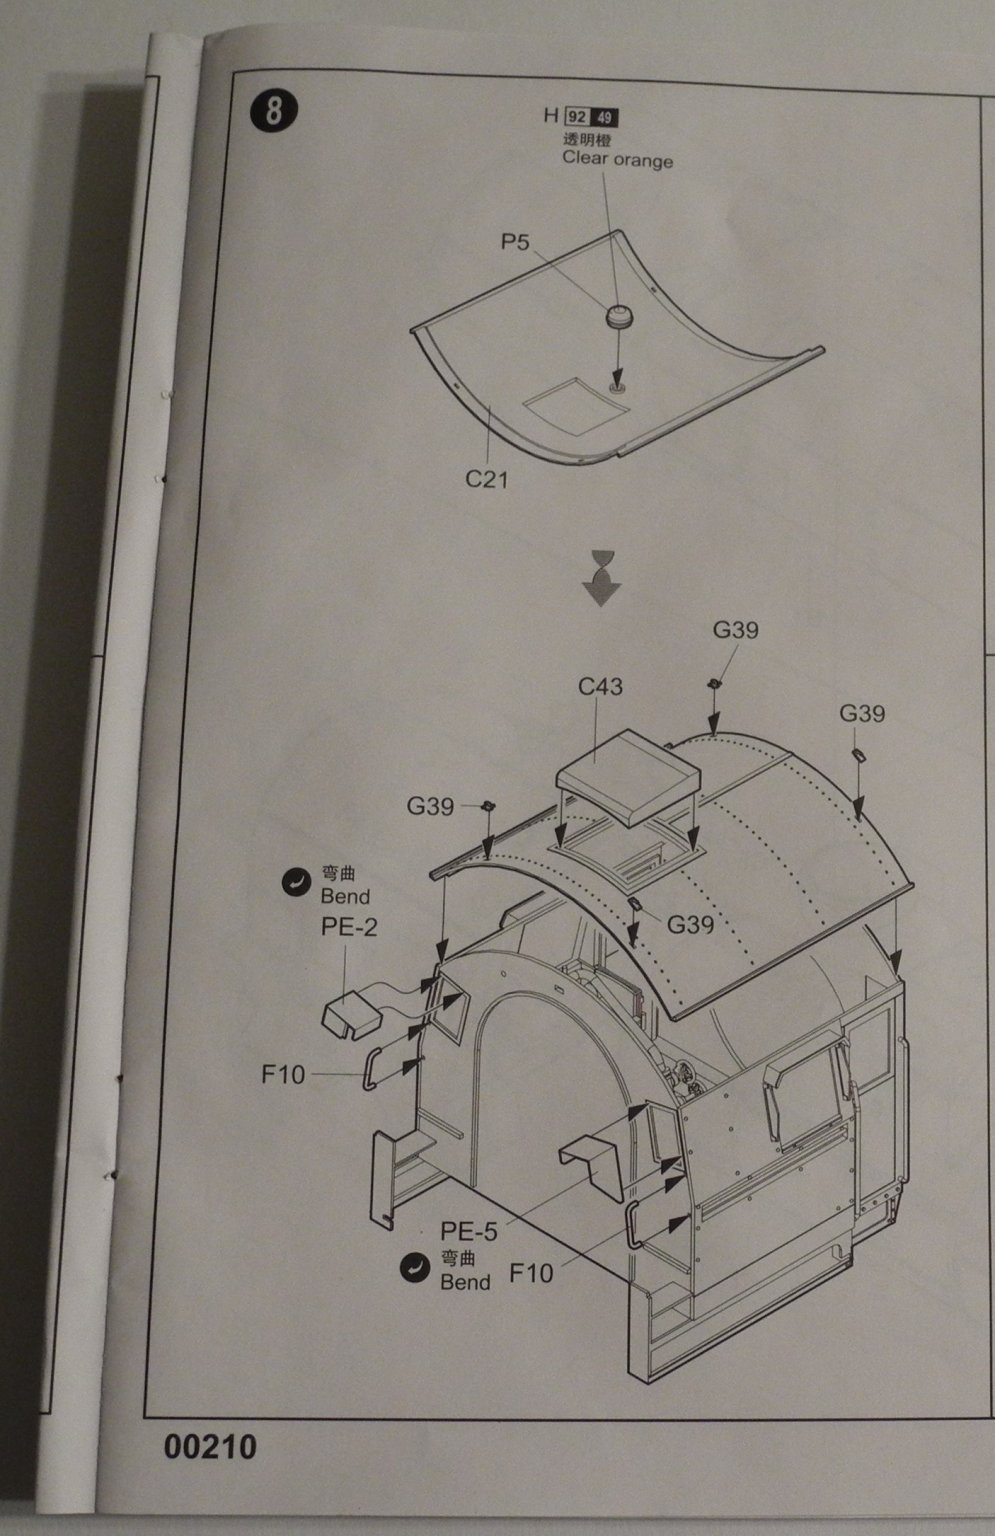
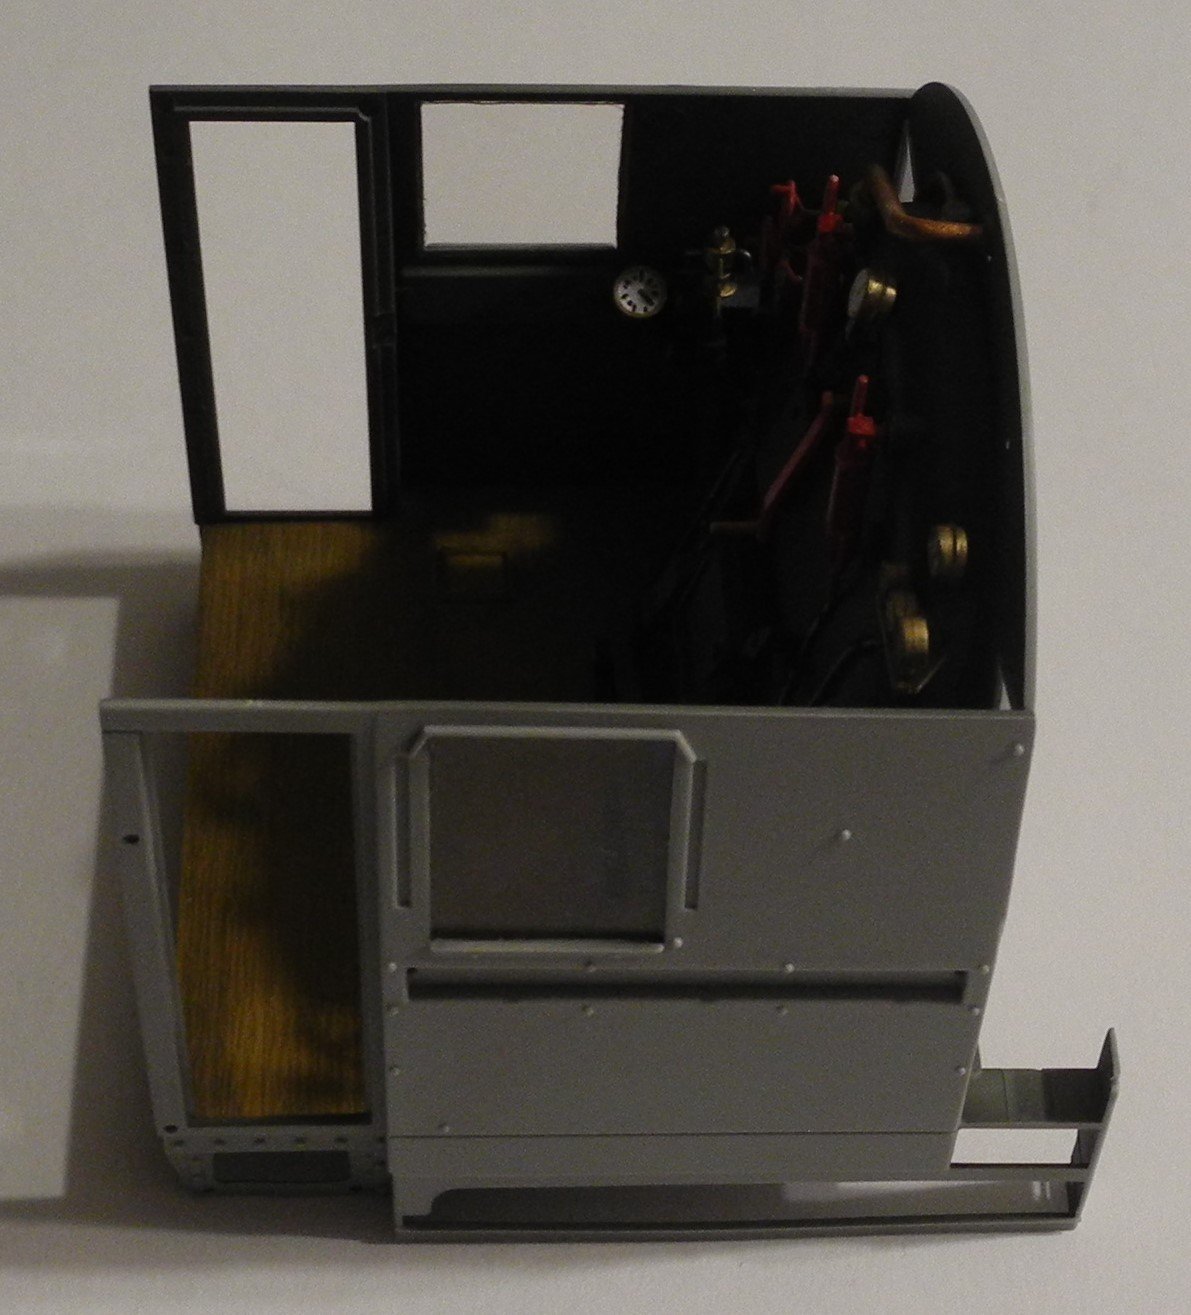
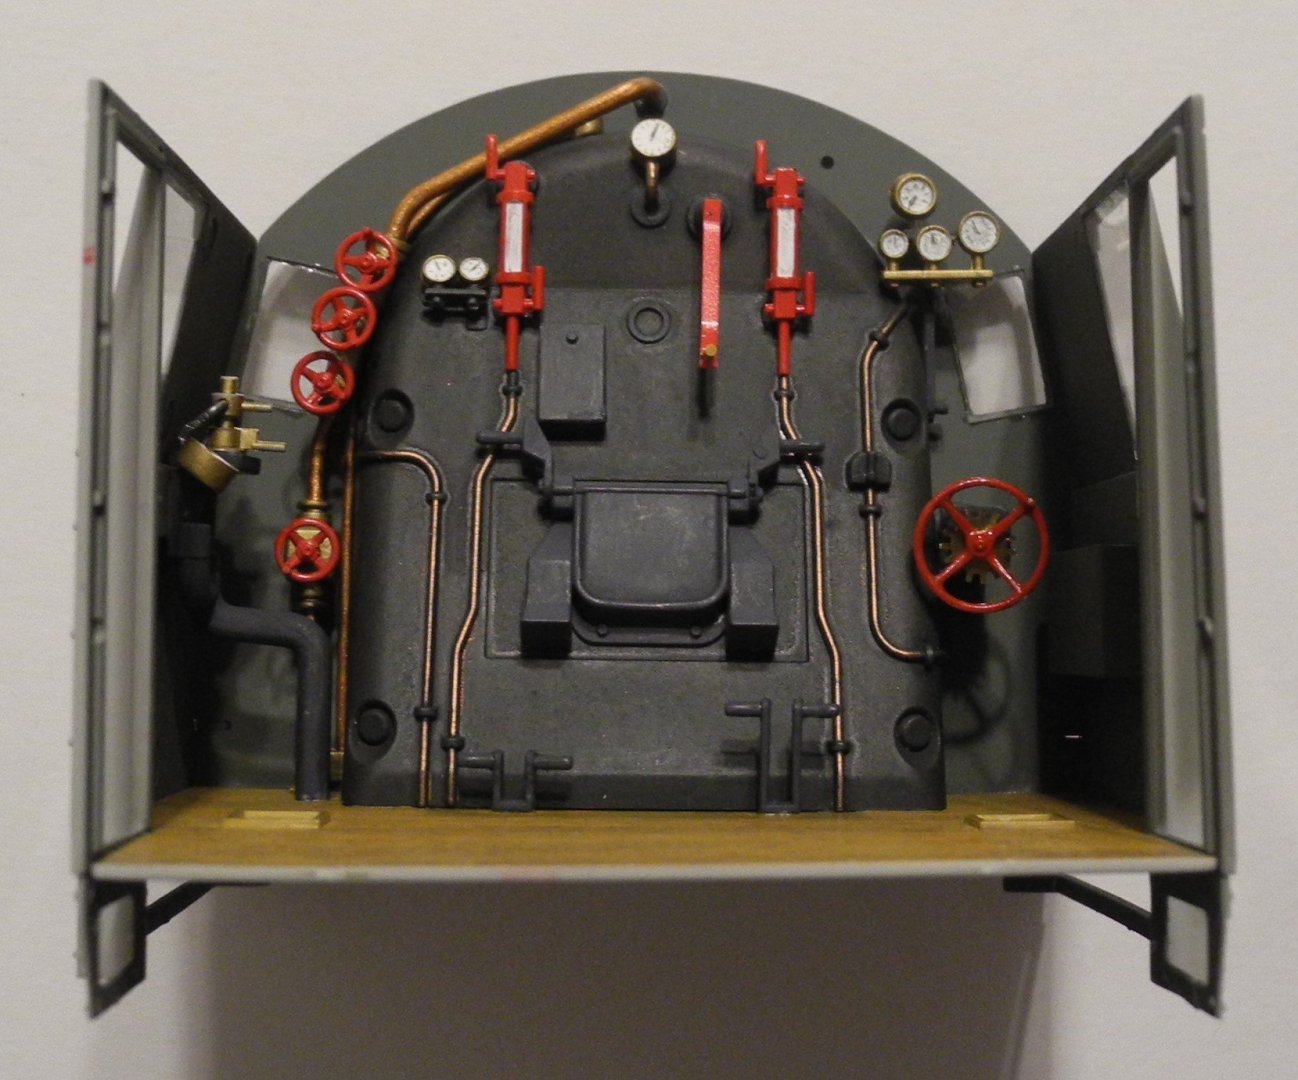
I see some vague similarities between the model and the cabin in the video, but certainly not exact. Trumpeter is well known for errors in their models, errors that drive some modelers nuts. Fortunately for me, I am not one of those modelers easily discouraged by details that are not exactly precise. Now if I was very familiar with a particular subject, it would probably bother me much more.
-
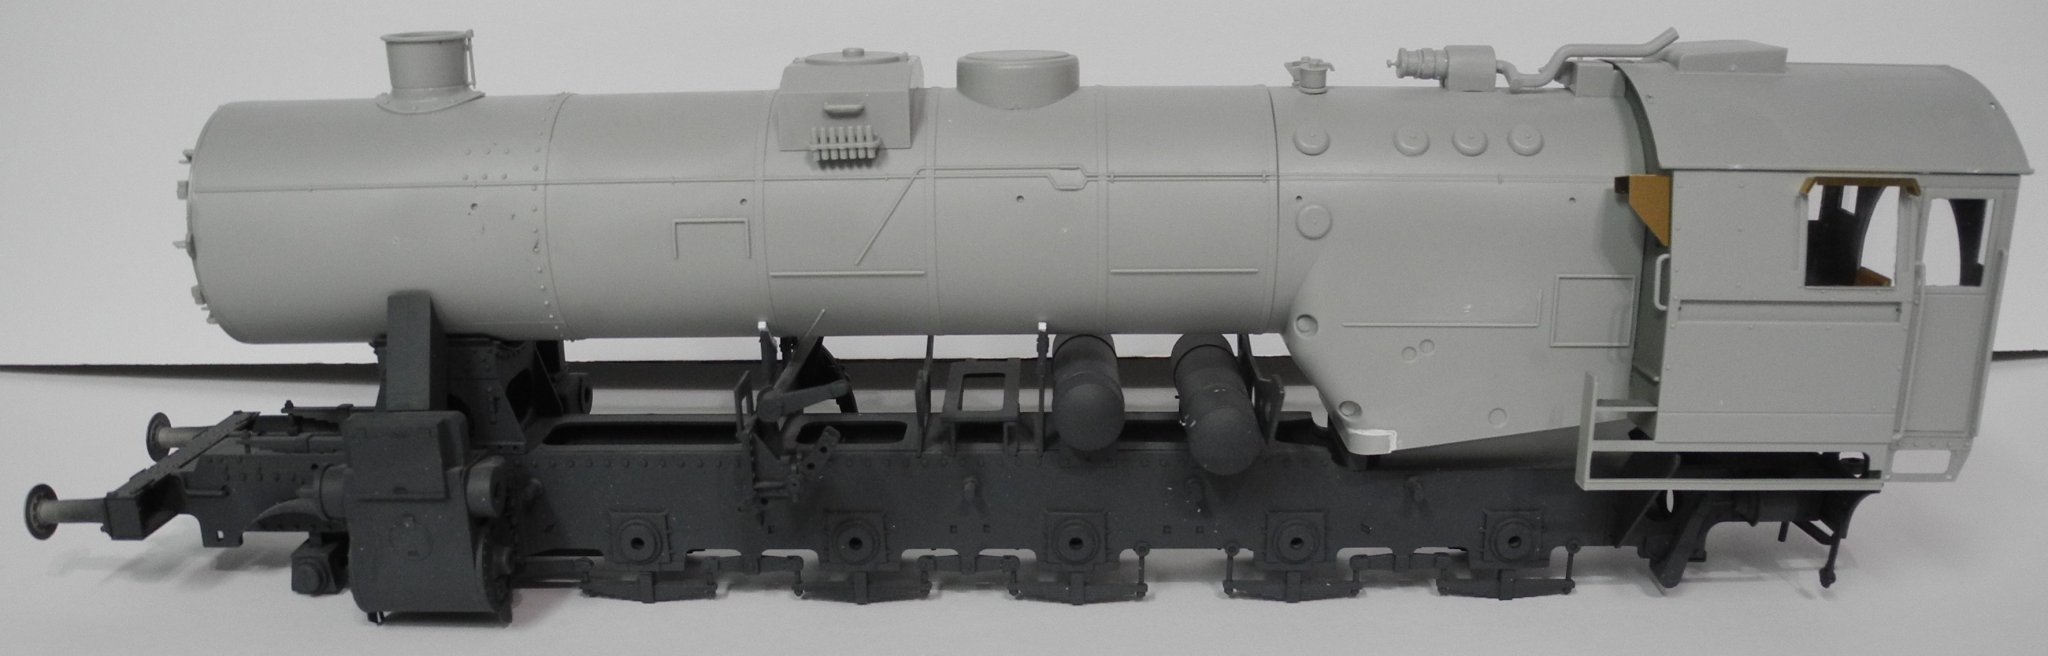
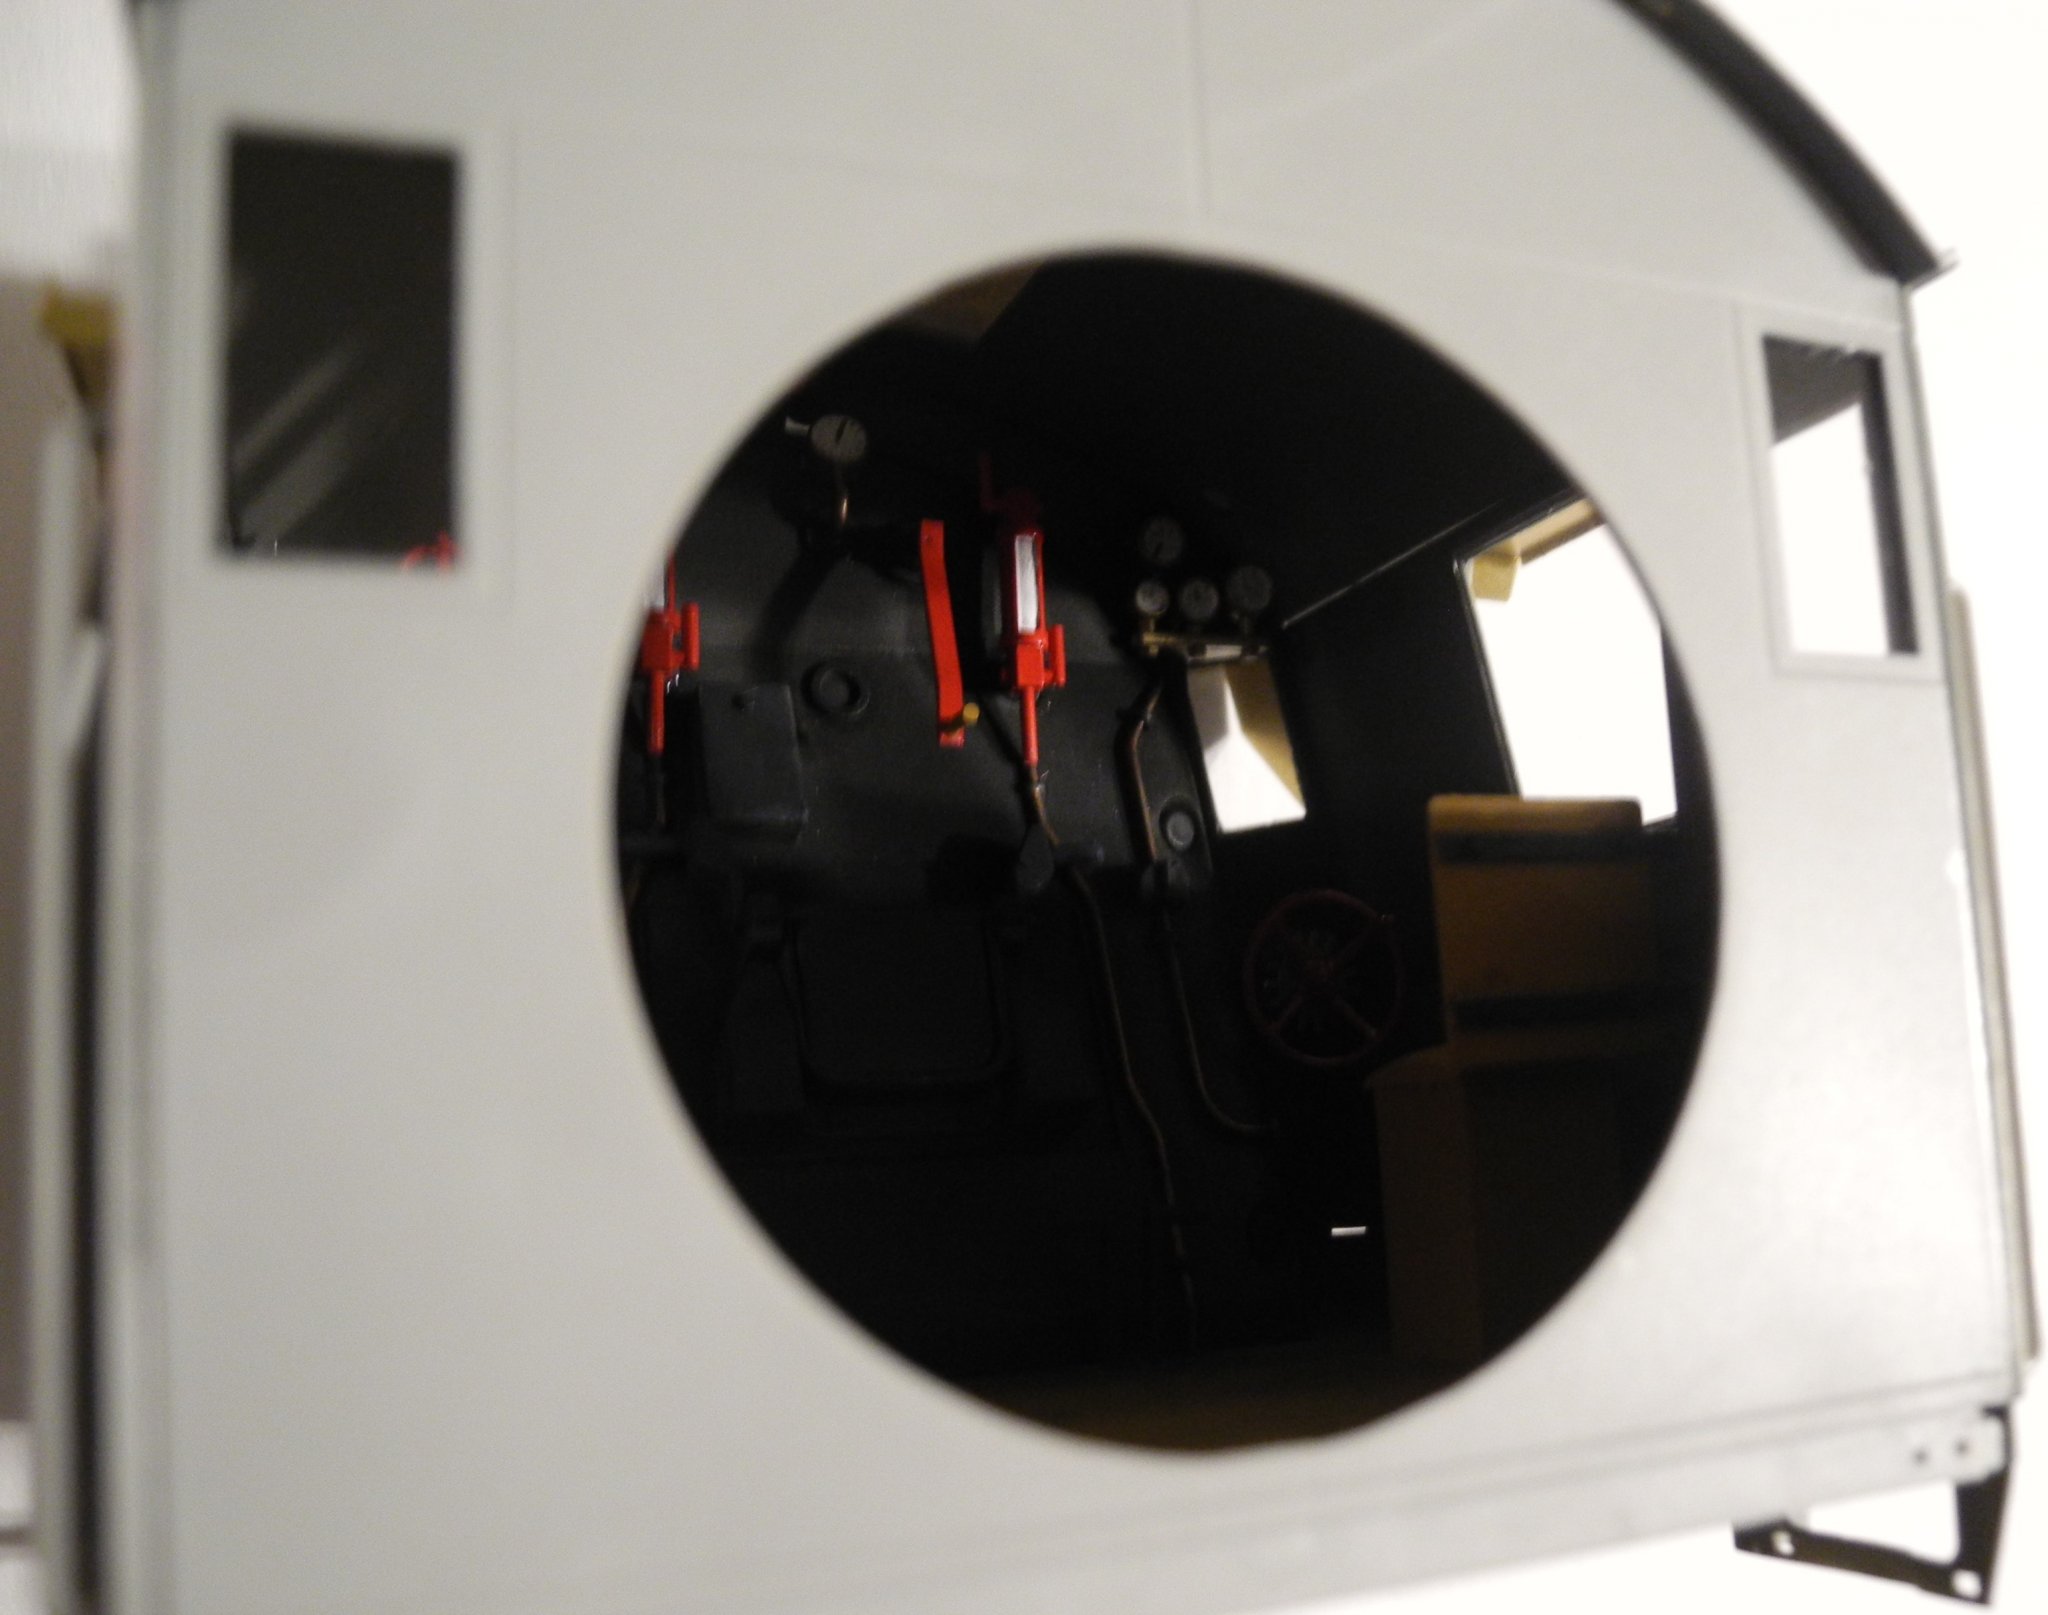
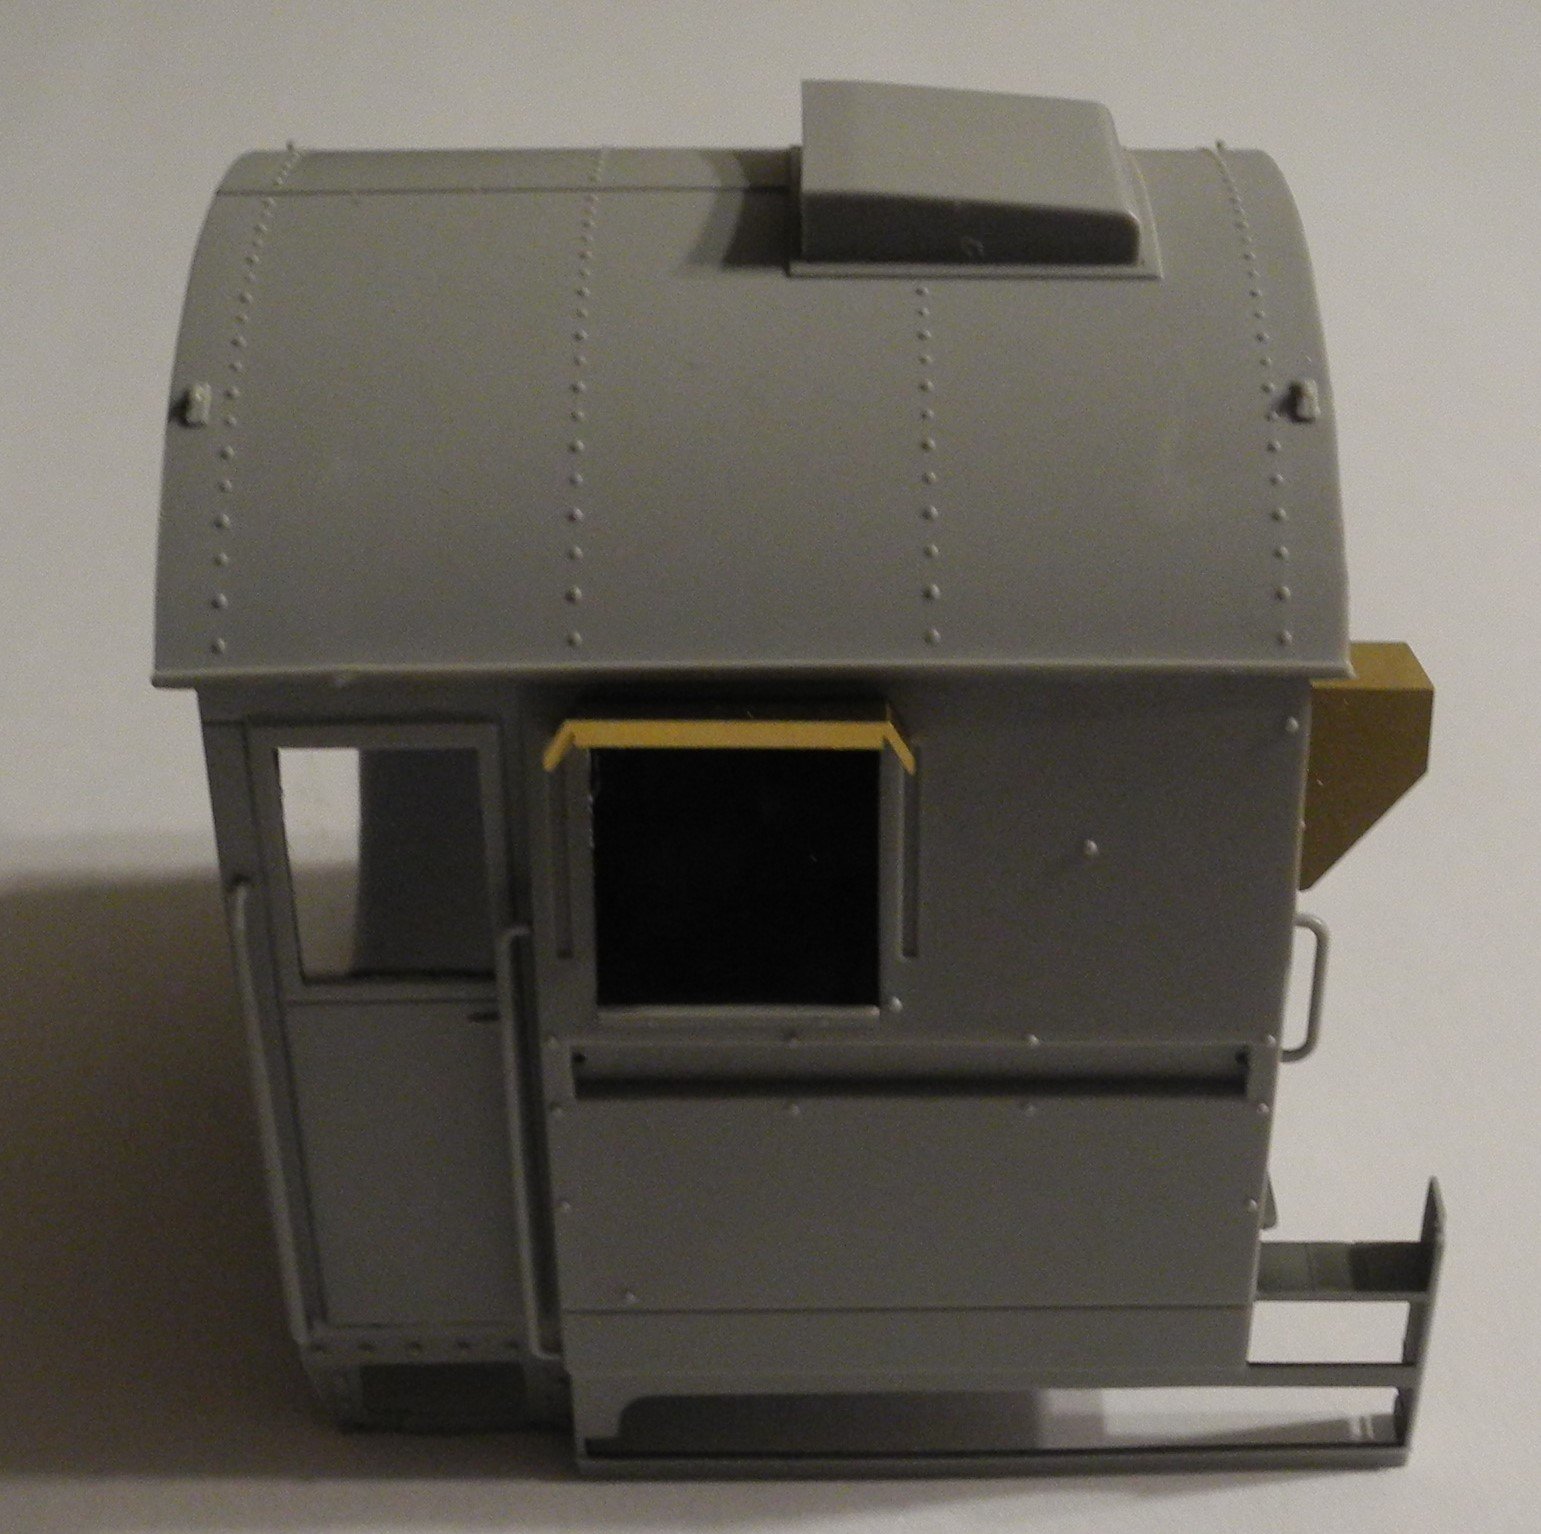
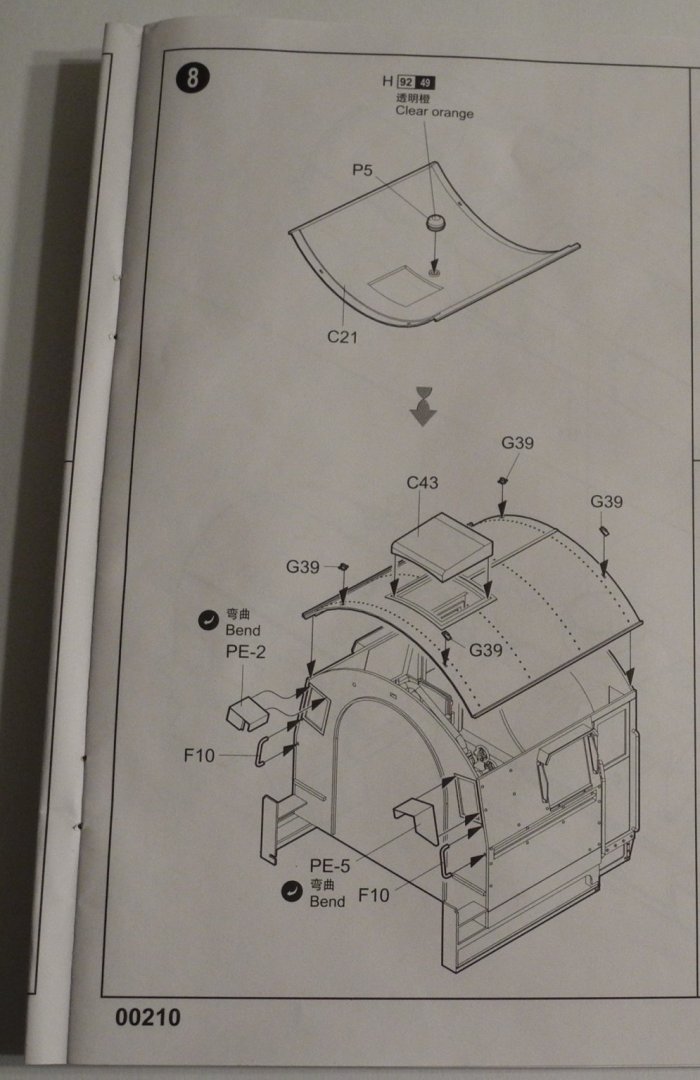
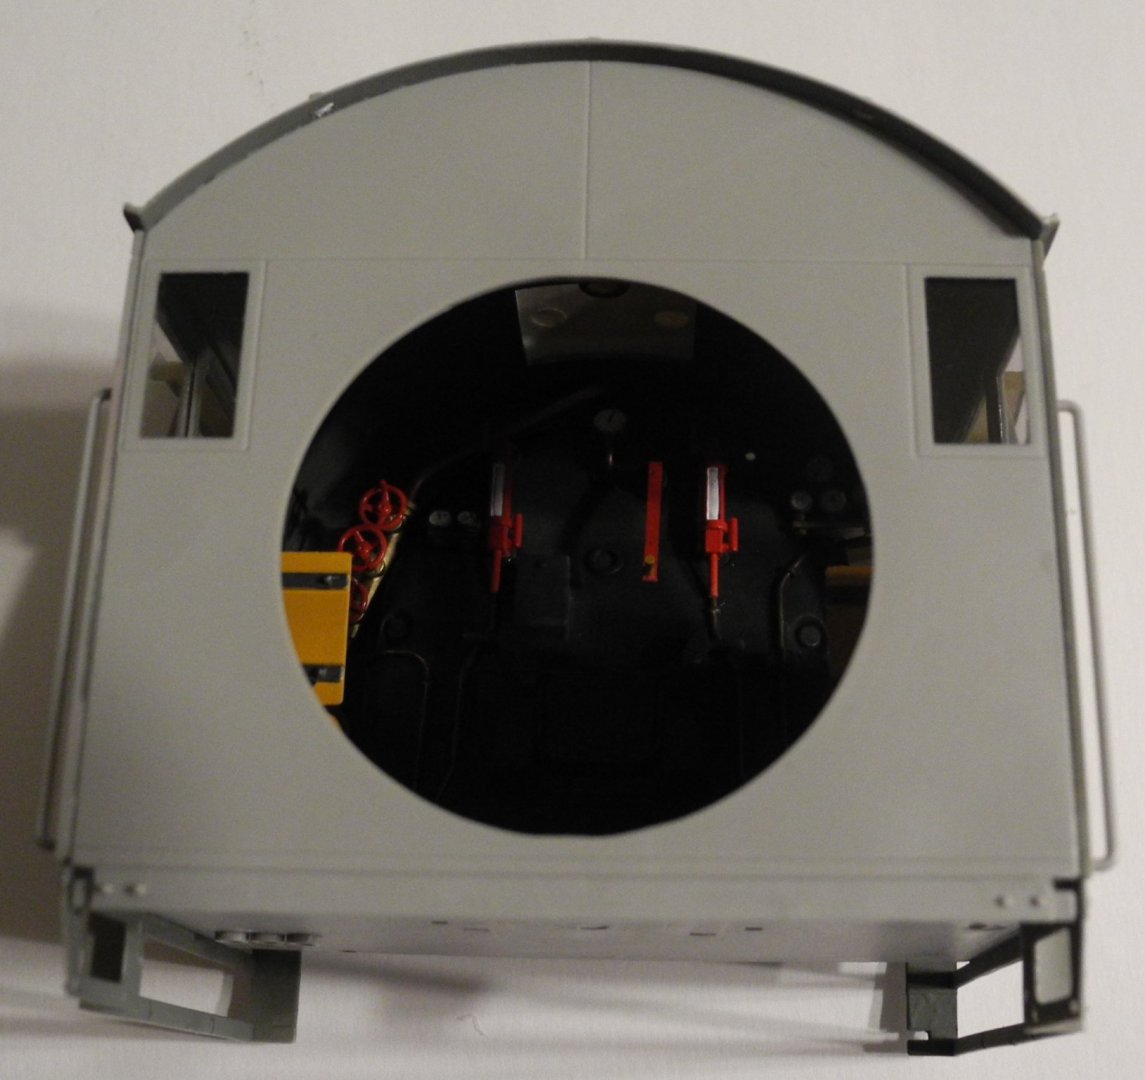
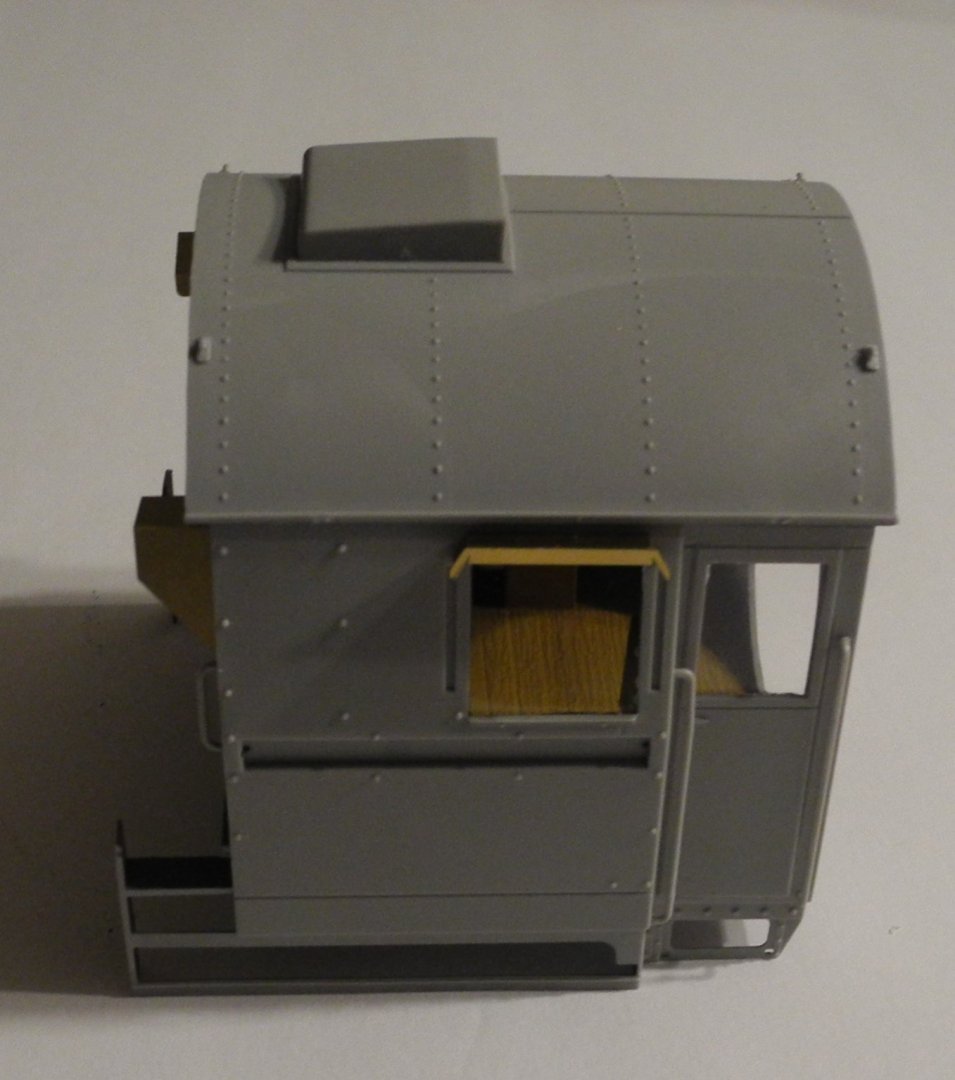
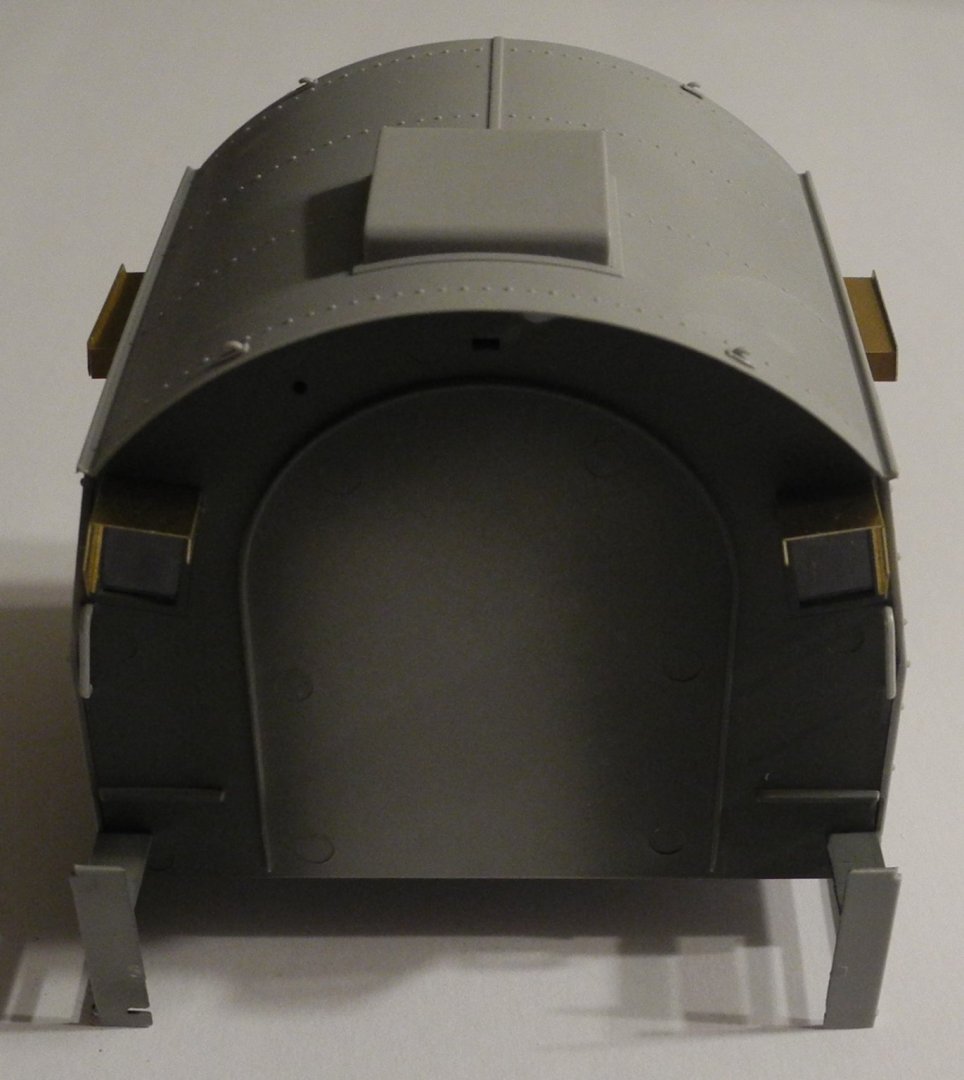
In this installment, we complete steps 7 and 8, finishing construction of the cab minus the four little clear vent windows which I will install after the exterior paint (later during construction). As I said yesterday, once the rear panel and roof are installed, it leaves a very small view of the cab interior details. After the coal tender is attached, even the small hole in the rear bulkhead will be sealed from view leaving only the windows to look inside. The stock kit parts are very well detailed and those details should pop out well after paint, washes, and dry brushing. I am looking forward to getting some paint on the model. It's going to be painted in the camo pattern seen in the first post, Field Gray and Middlestone. In my next installment, I will be covering multiple steps that finish up most of the boiler and firebox with these assemblies being mated to the cab.


- 92 replies
-
- 13
-
-
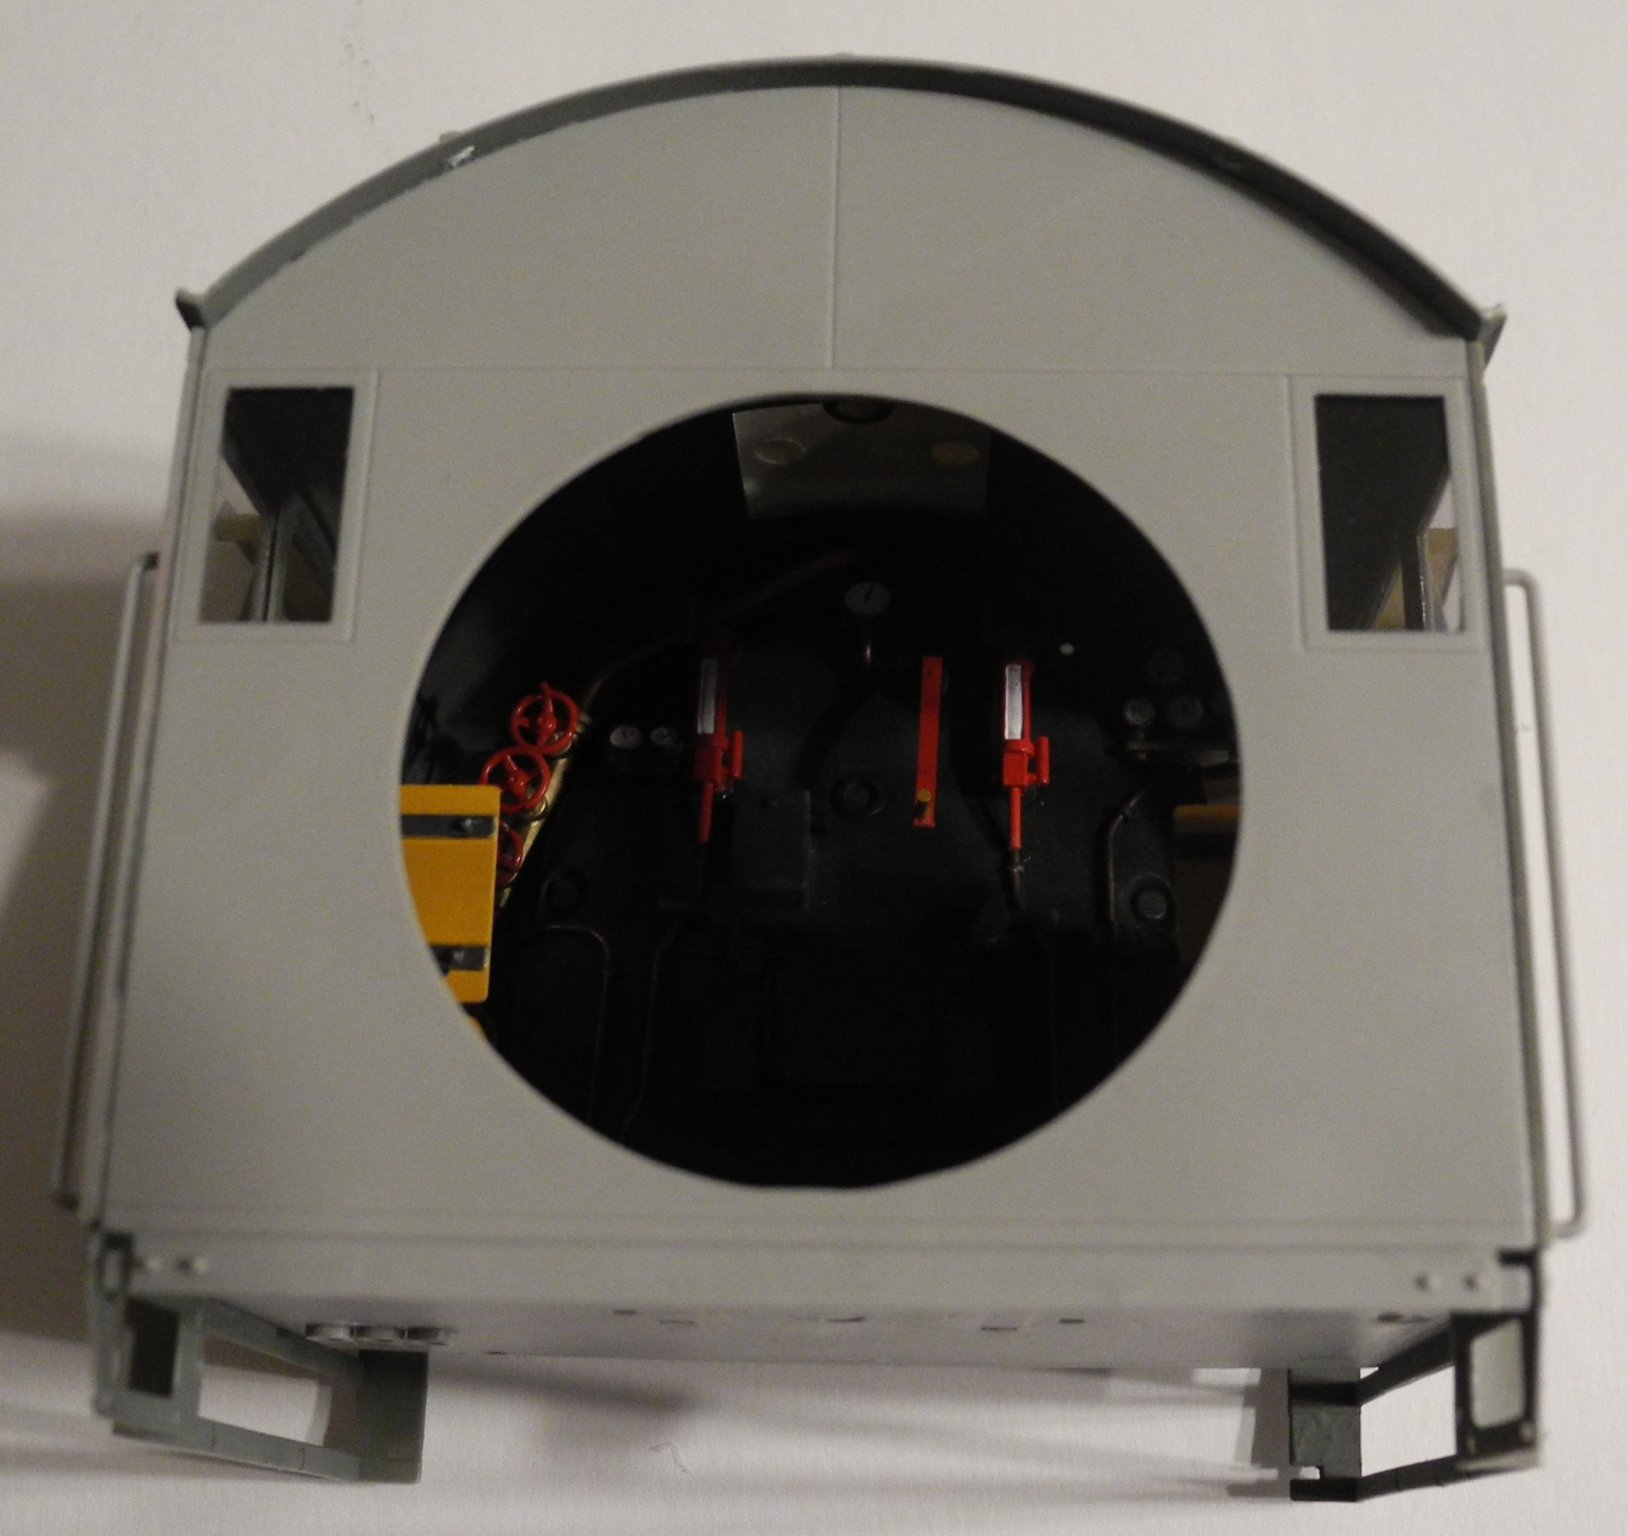
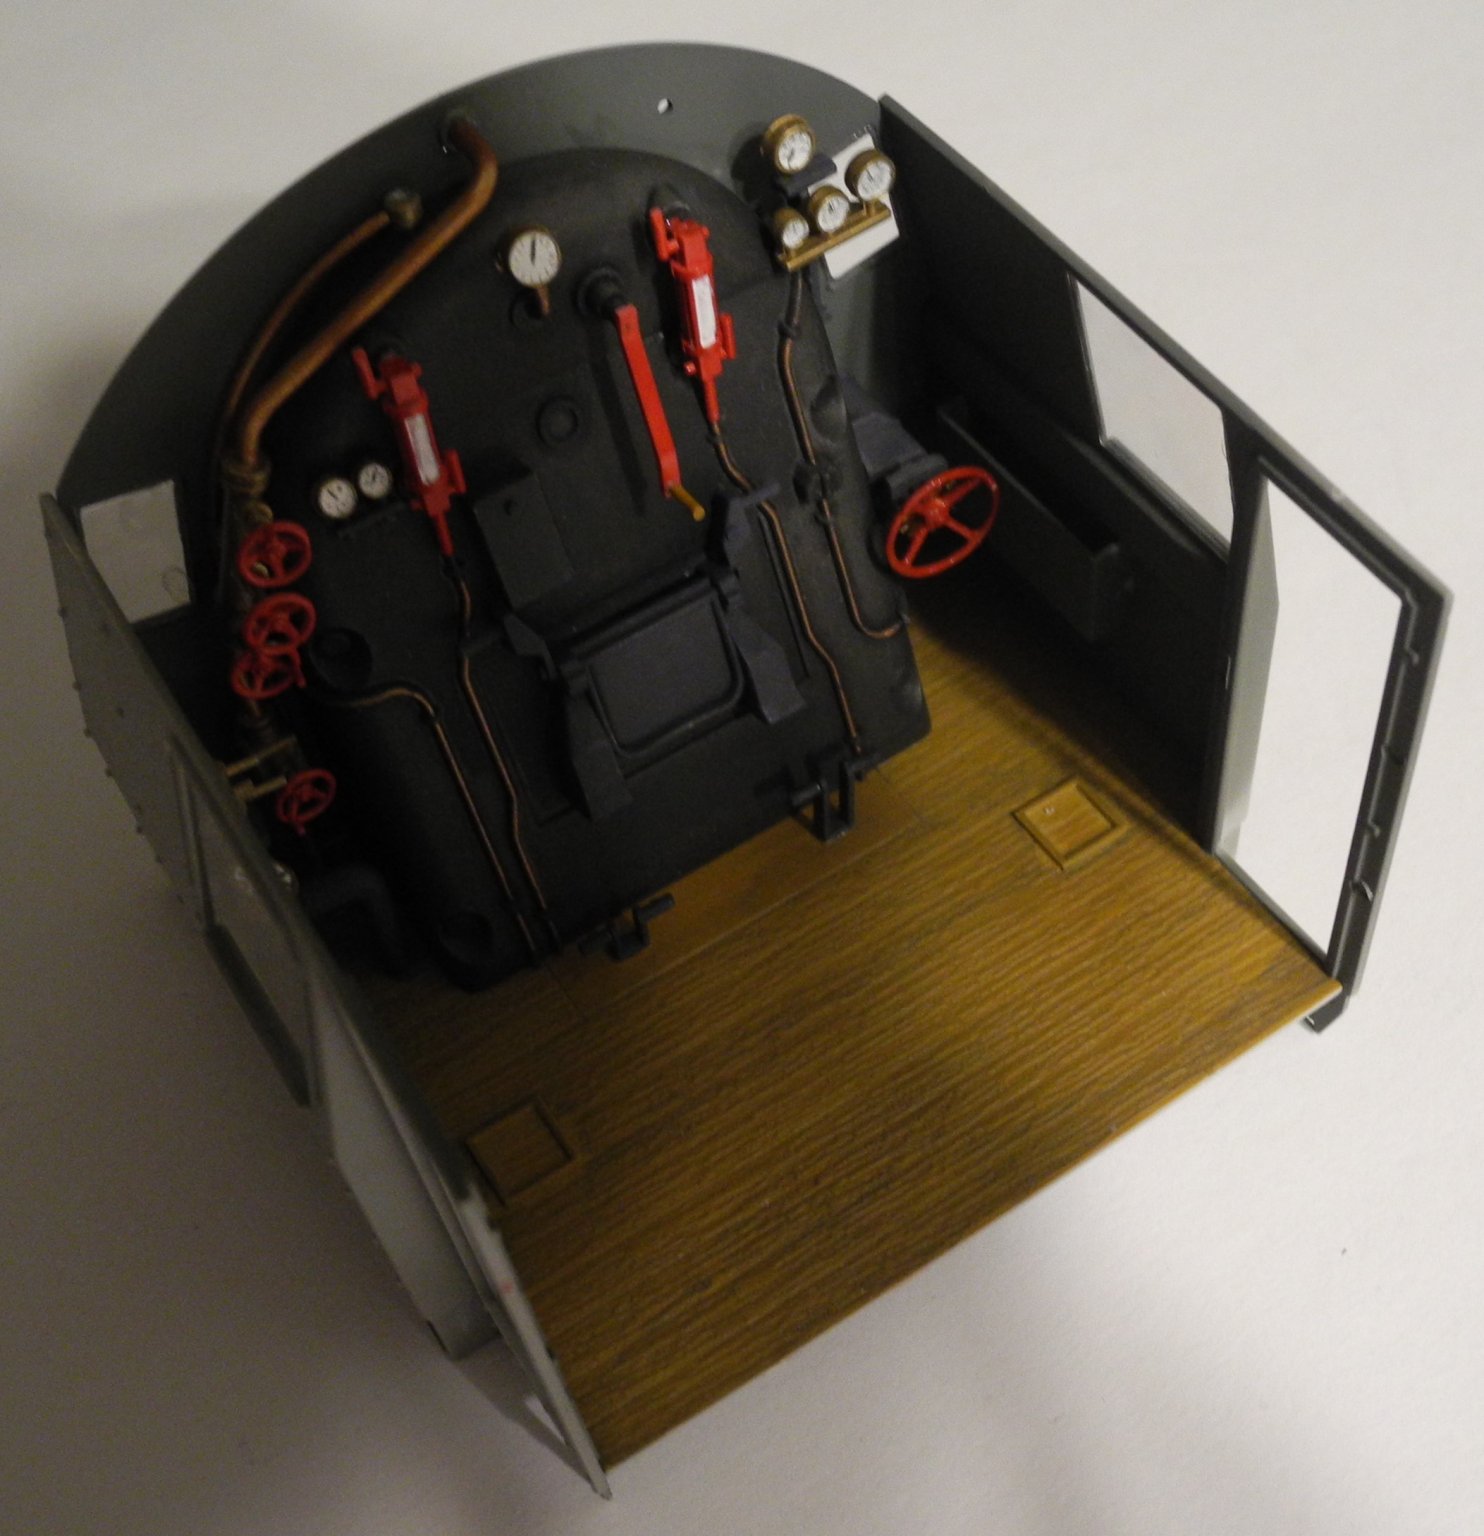
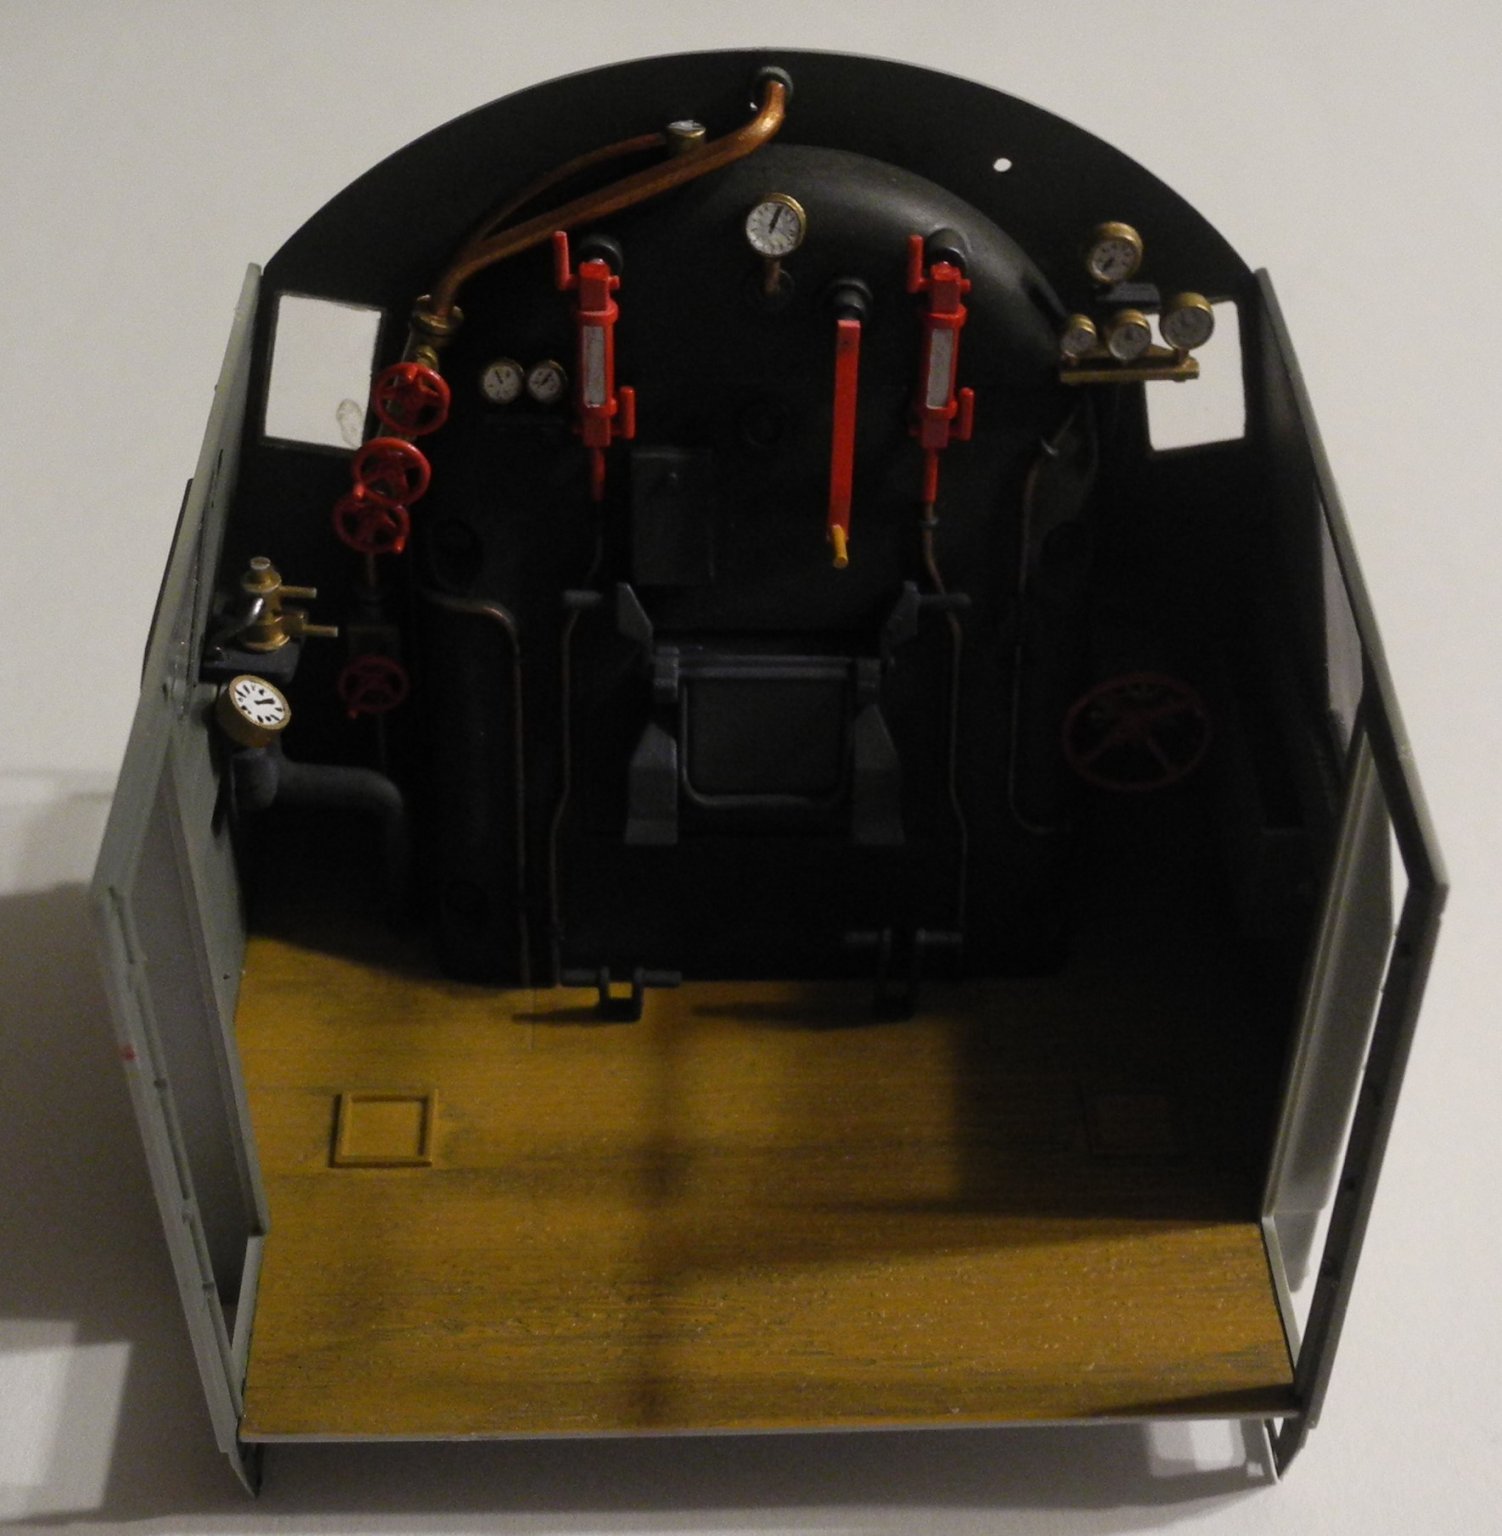
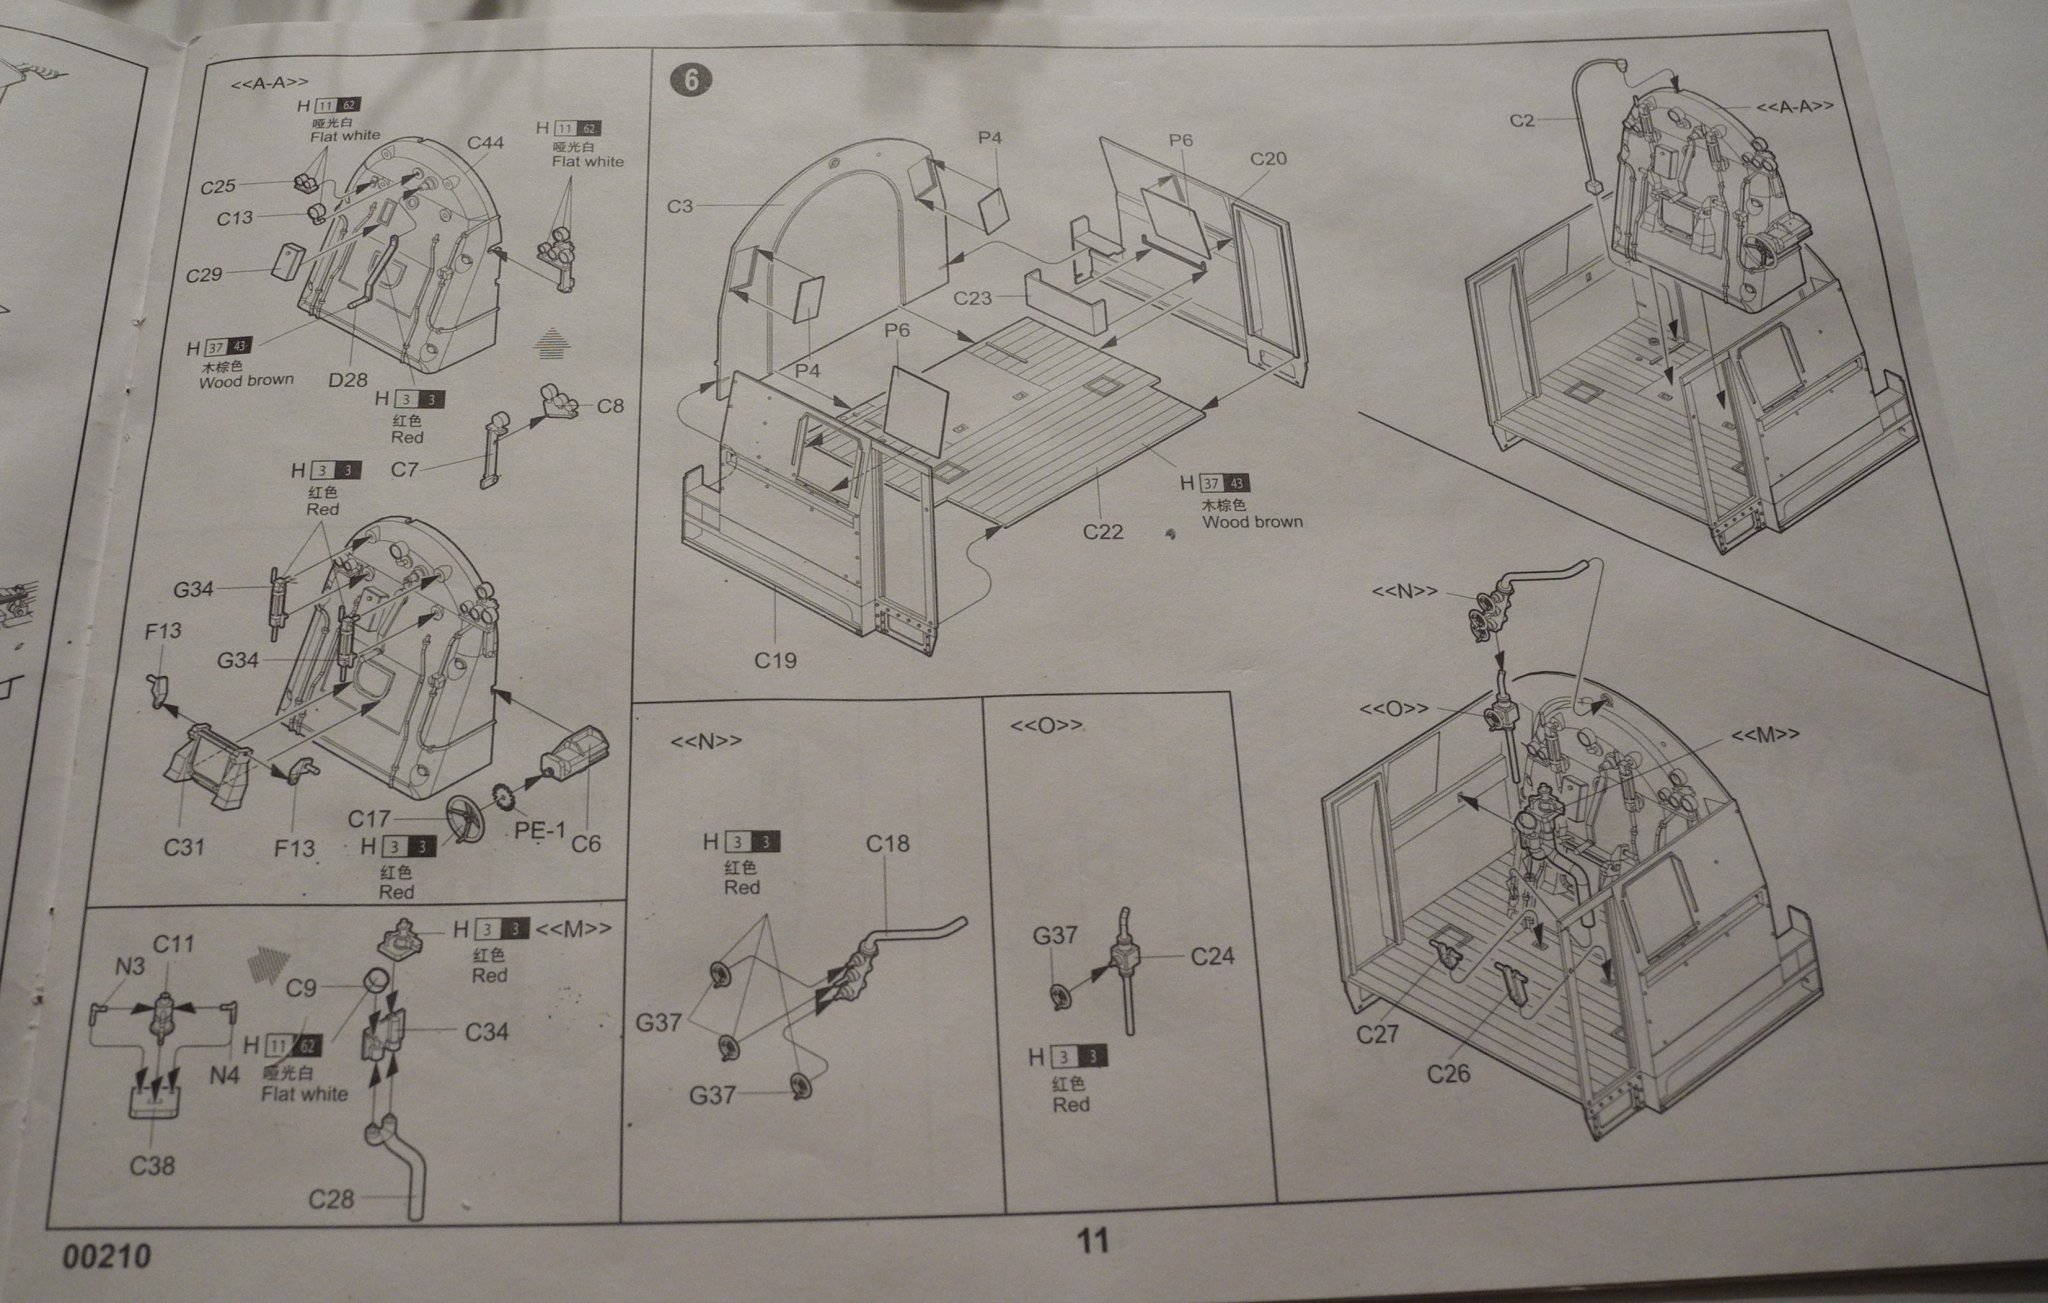
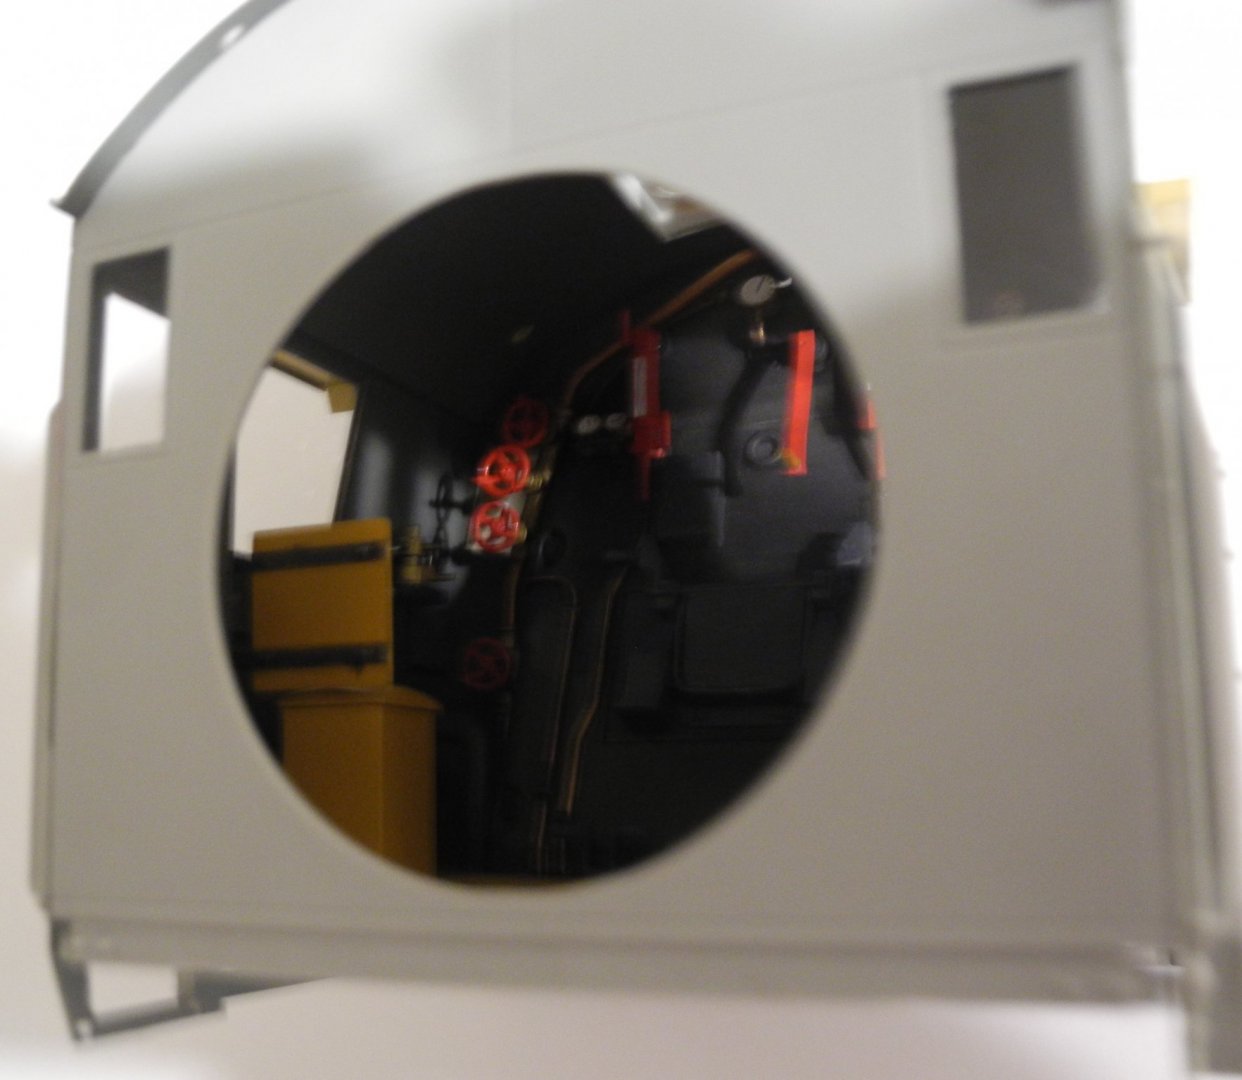
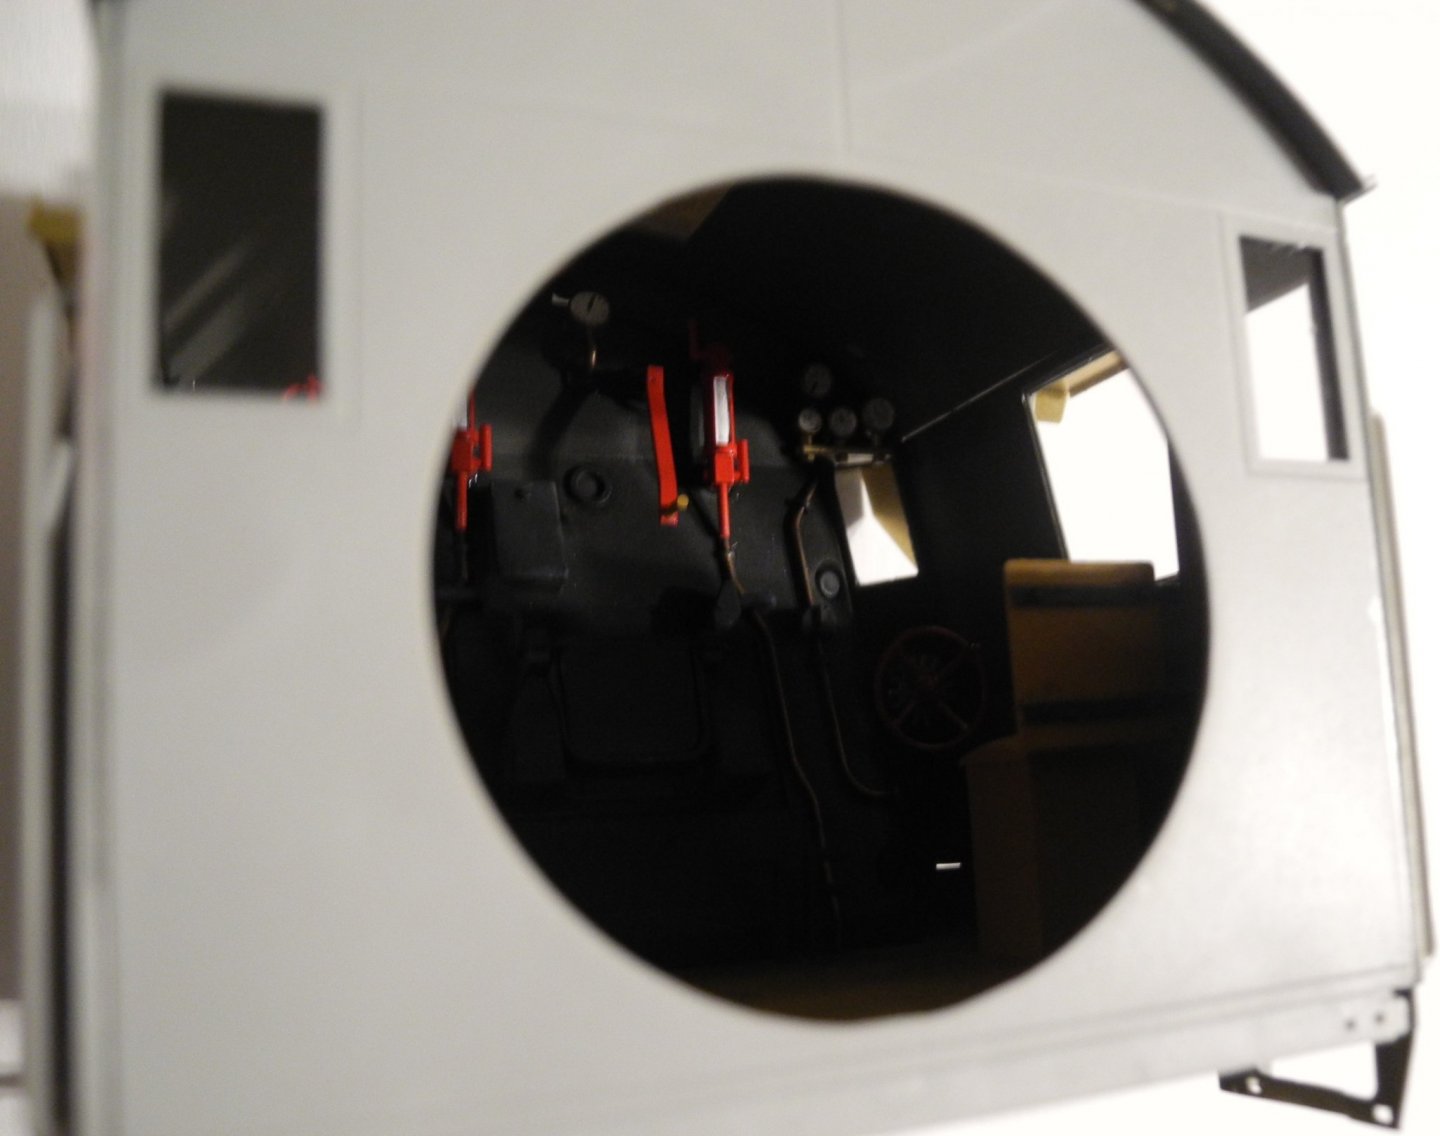
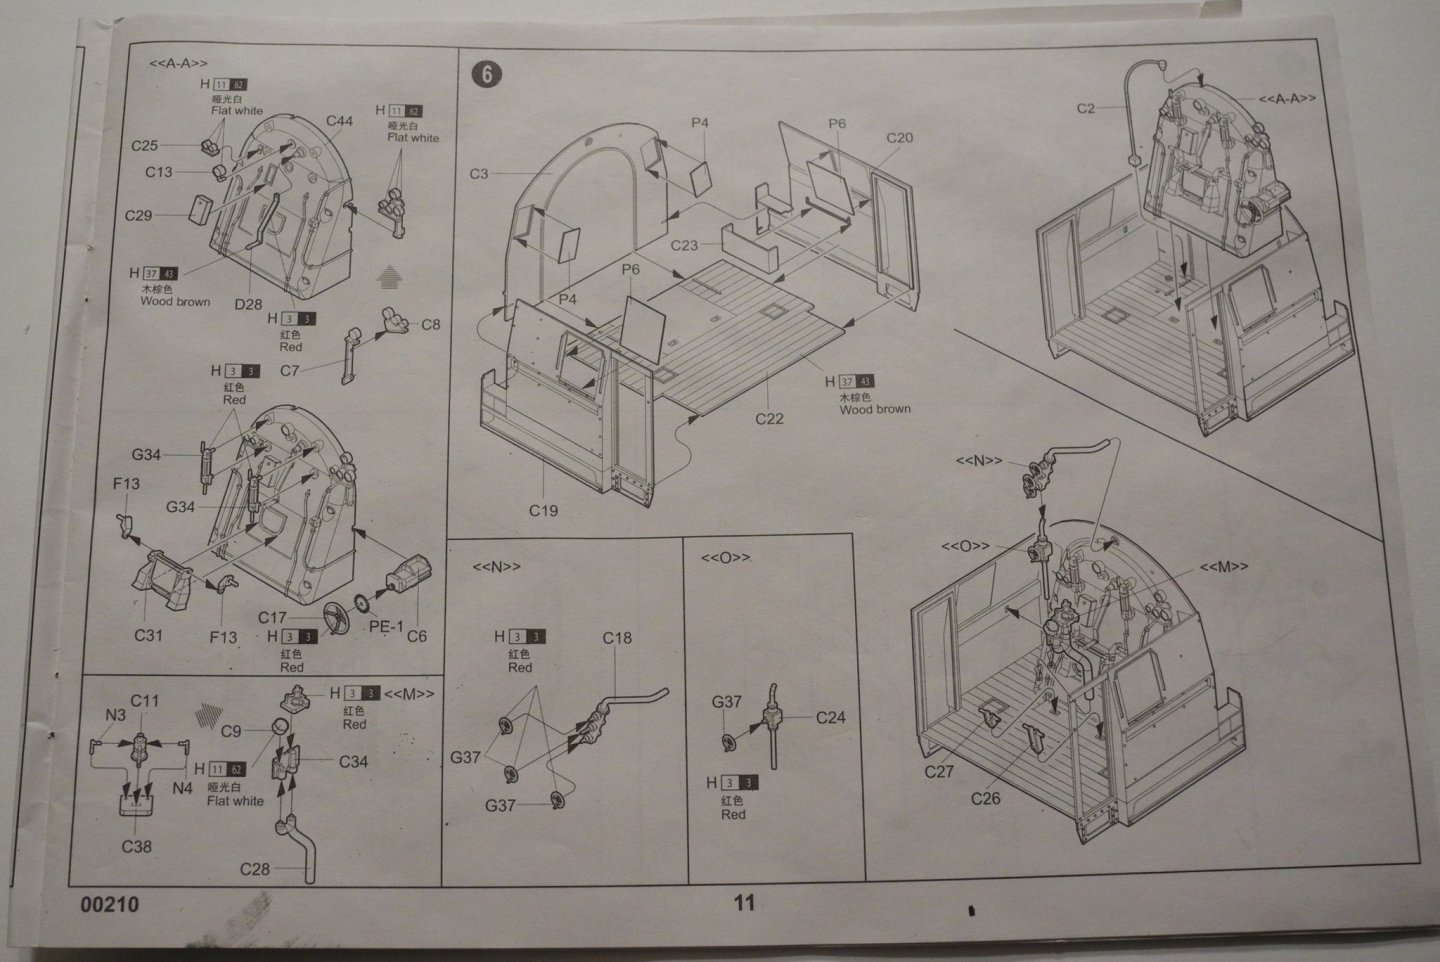
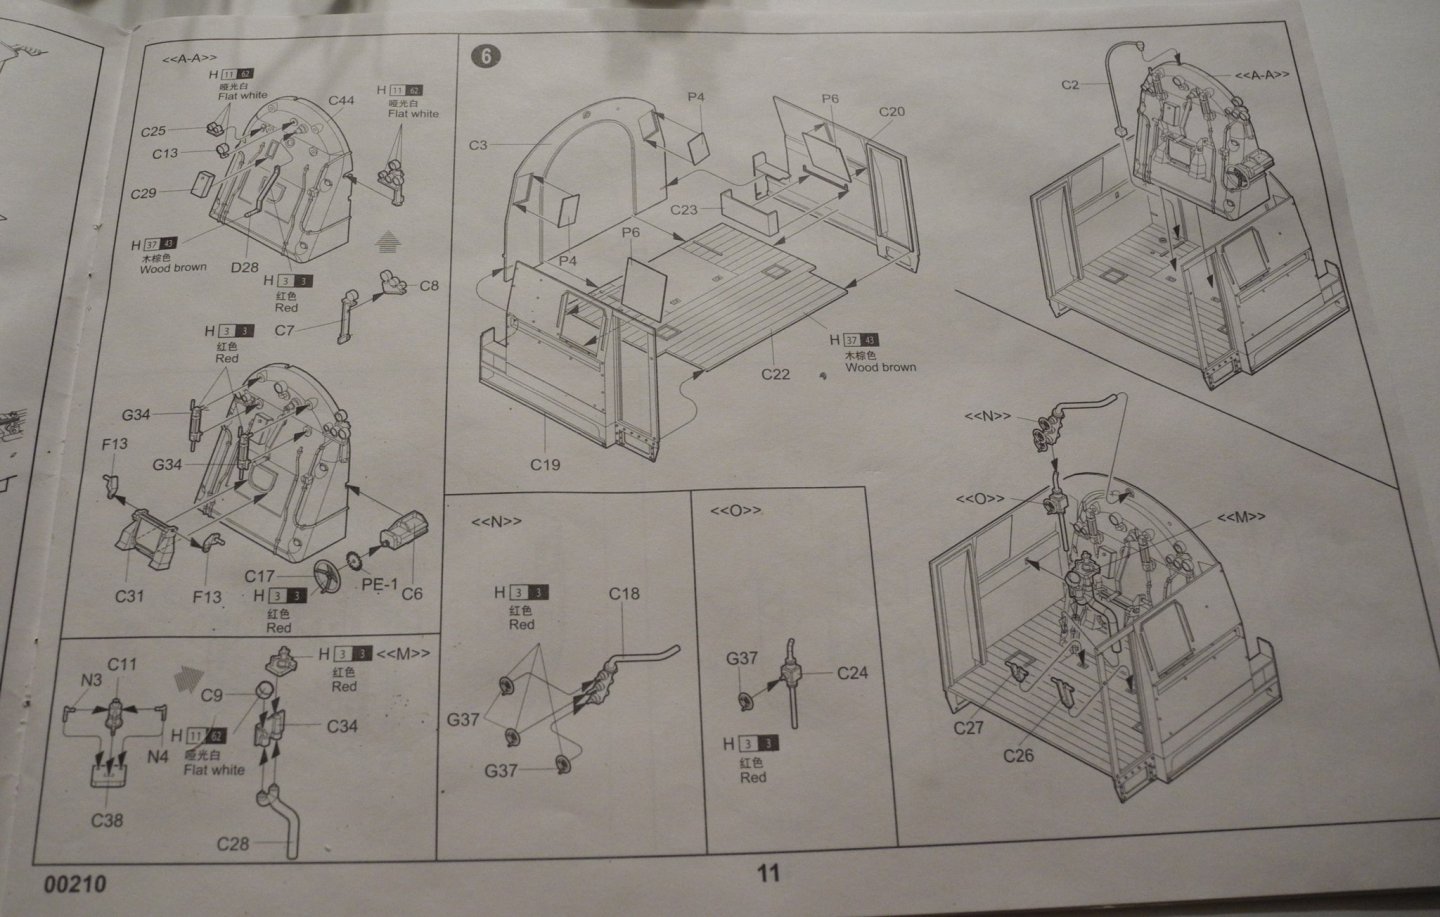
Thanks Denis. Here we go with another installment on the BR-52 German Loco Step 6 - the cab interior I will do some minor shading and detailing of the cab interior, but there's not much sense in going too far because it all gets pretty well covered up once the cab is finished with the roof and rear cab panel. There is very little I know about locomotives, so if anyone cares to call out exactly what the various cab interior components are, please do. Unfortunately, the plans give no call-outs to identify the various (almost 800) parts except for a part number.


- 92 replies
-
- 15
-
-
An incredible B-17 story...it's worth watching but beware, the graphics are poor. The story more than makes up for that.
-
Thanks guys. Every now and then, I have found projects that are nostalgic and basic provide me with a refreshing escape from long, drawn out projects that requires weeks/months to finish. This has been one of those quickies.
-
Hey you know if you use your 40% off coupon at Hobby Lobby, you can get the 1:48 Revell B-17G for around $20. That's a super kit, but large.
-
Hi Gene I have seen your model ship work and I hope you might consider sharing some of your work here on MSW. For anyone who has not yet seen Gene's work, you are going to be in for a real treat. 🙂 Gene is a humble guy but he is also a great modeler. Happy to see you here, Gene.
-
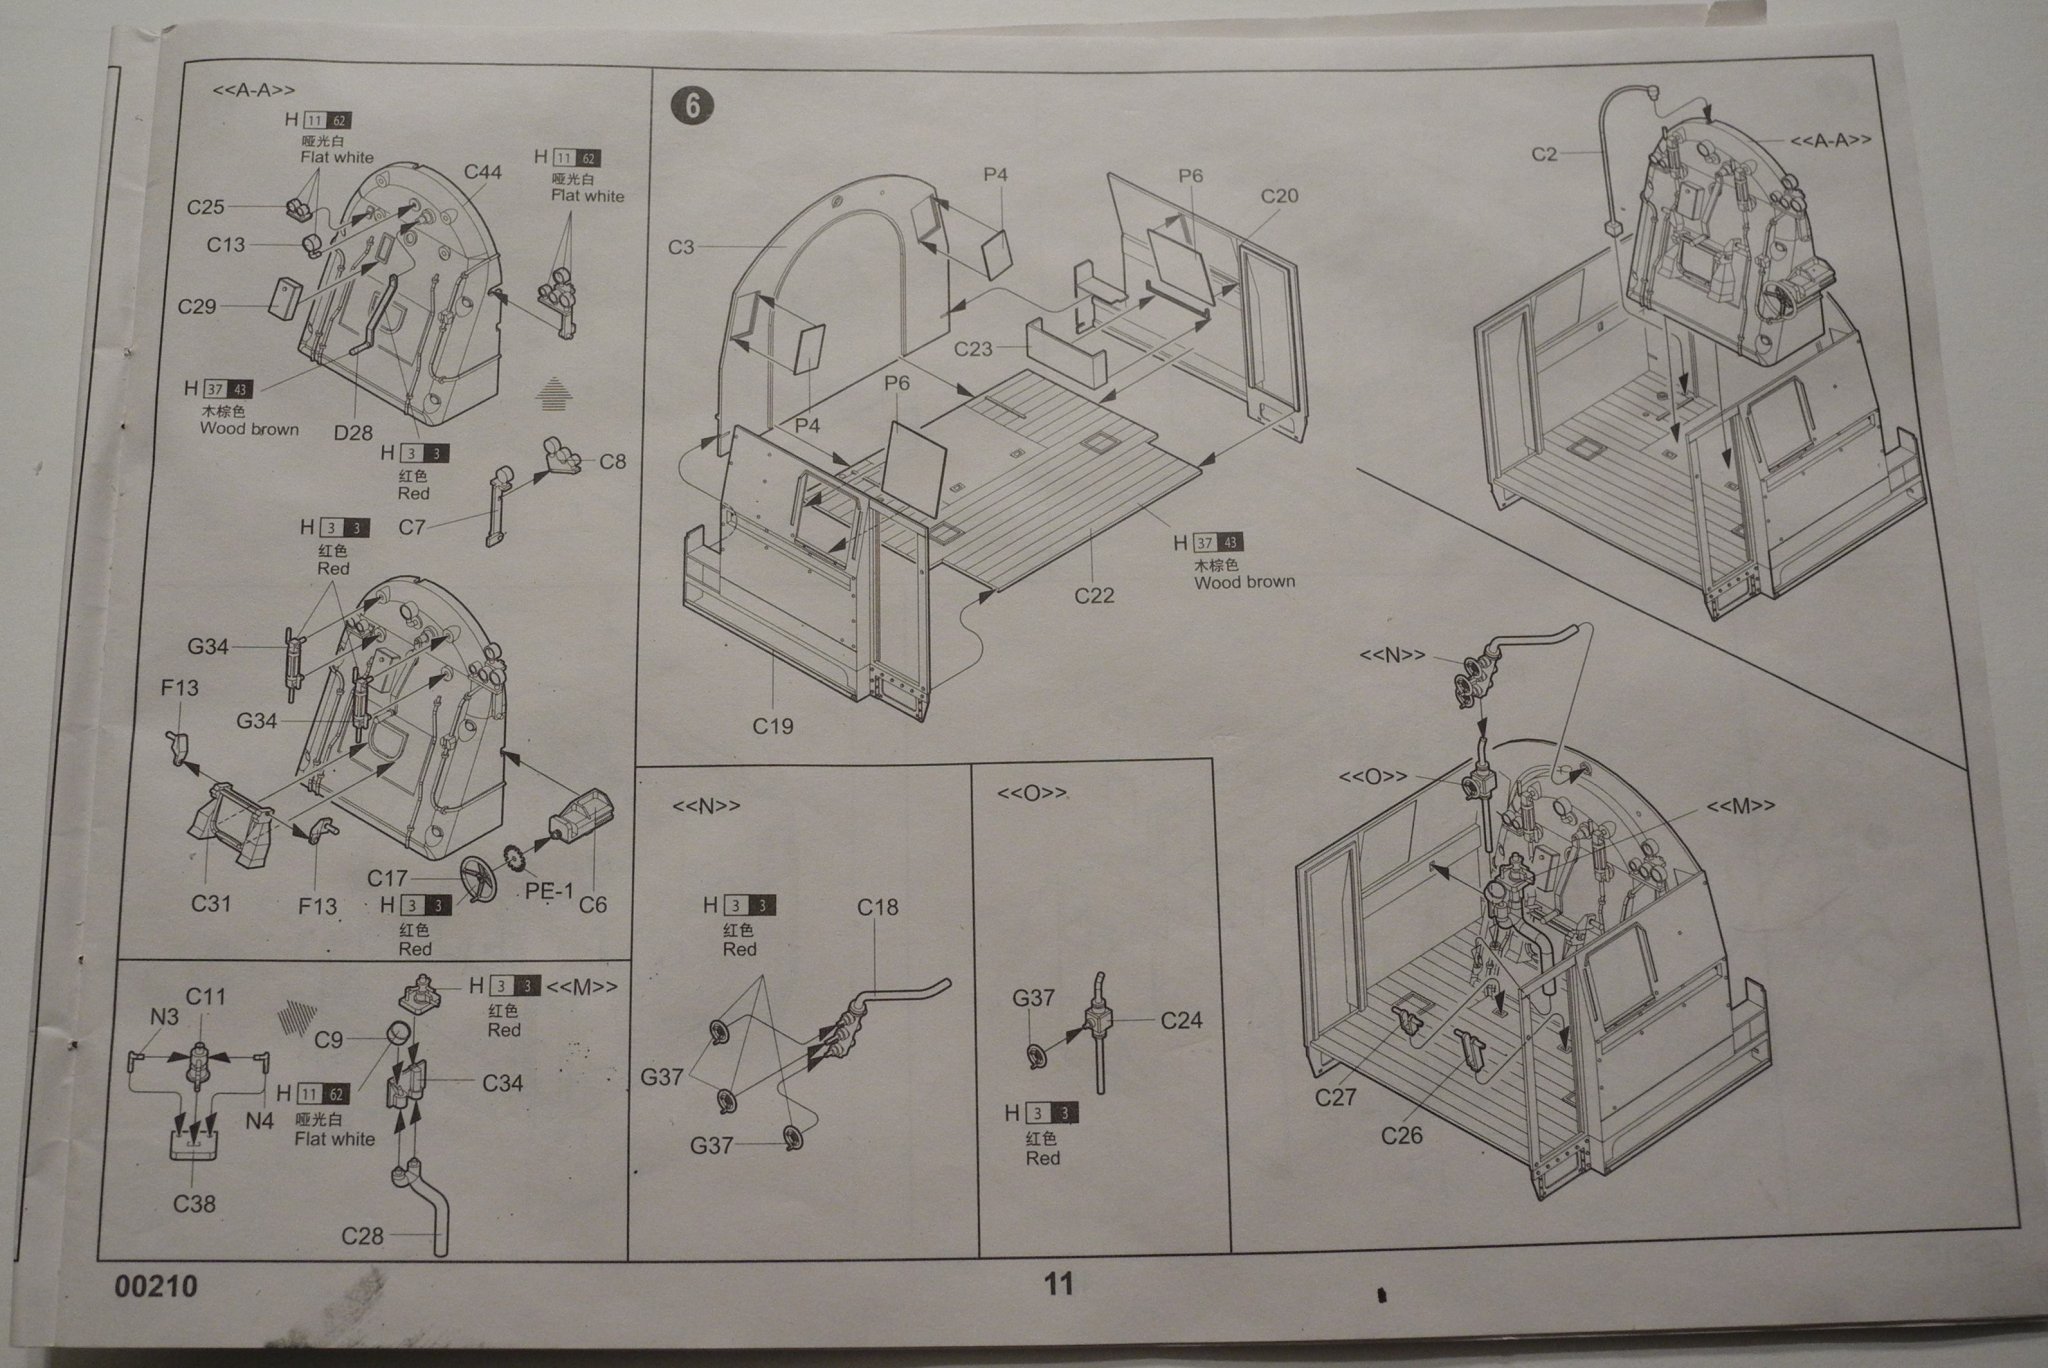
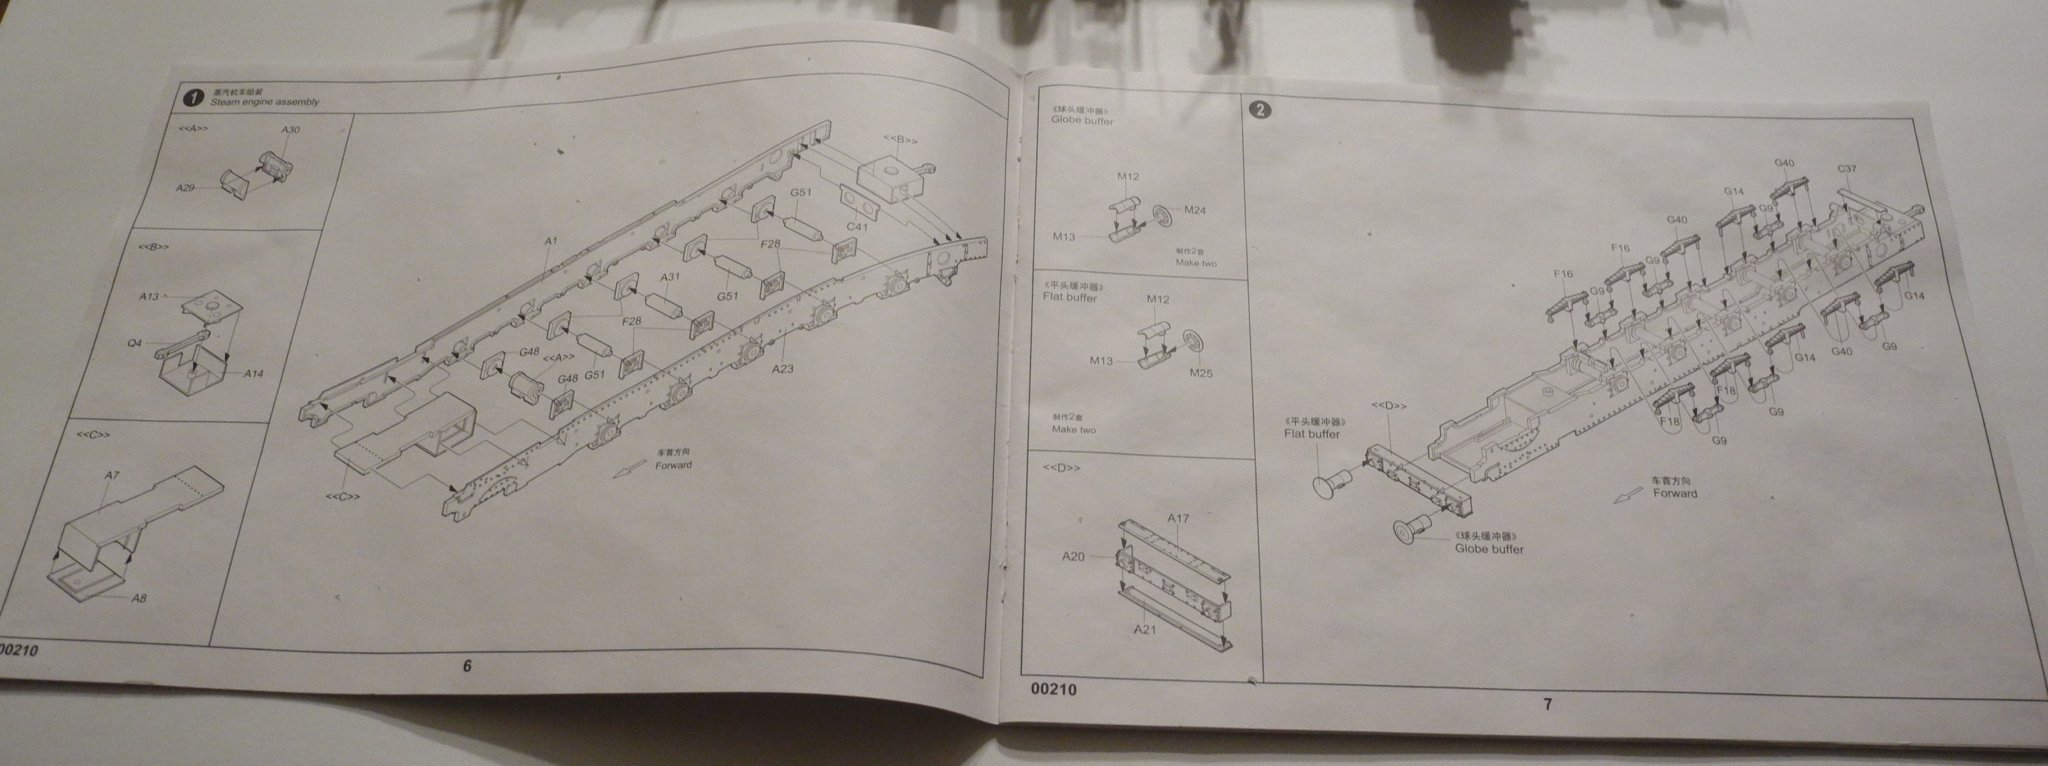
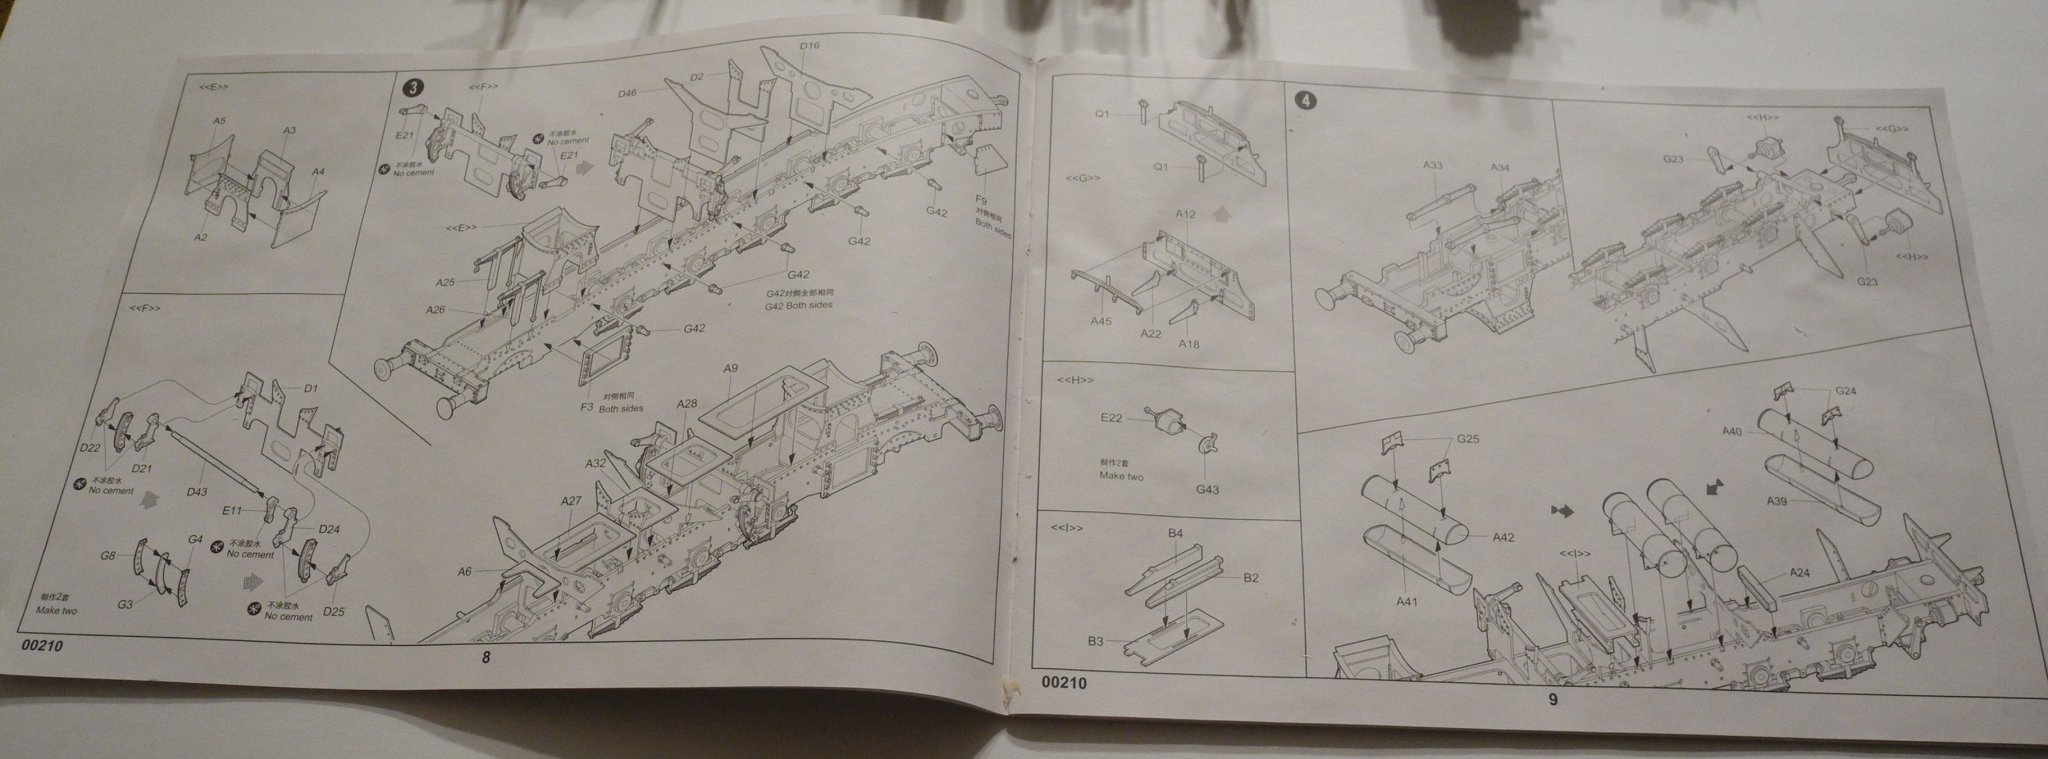
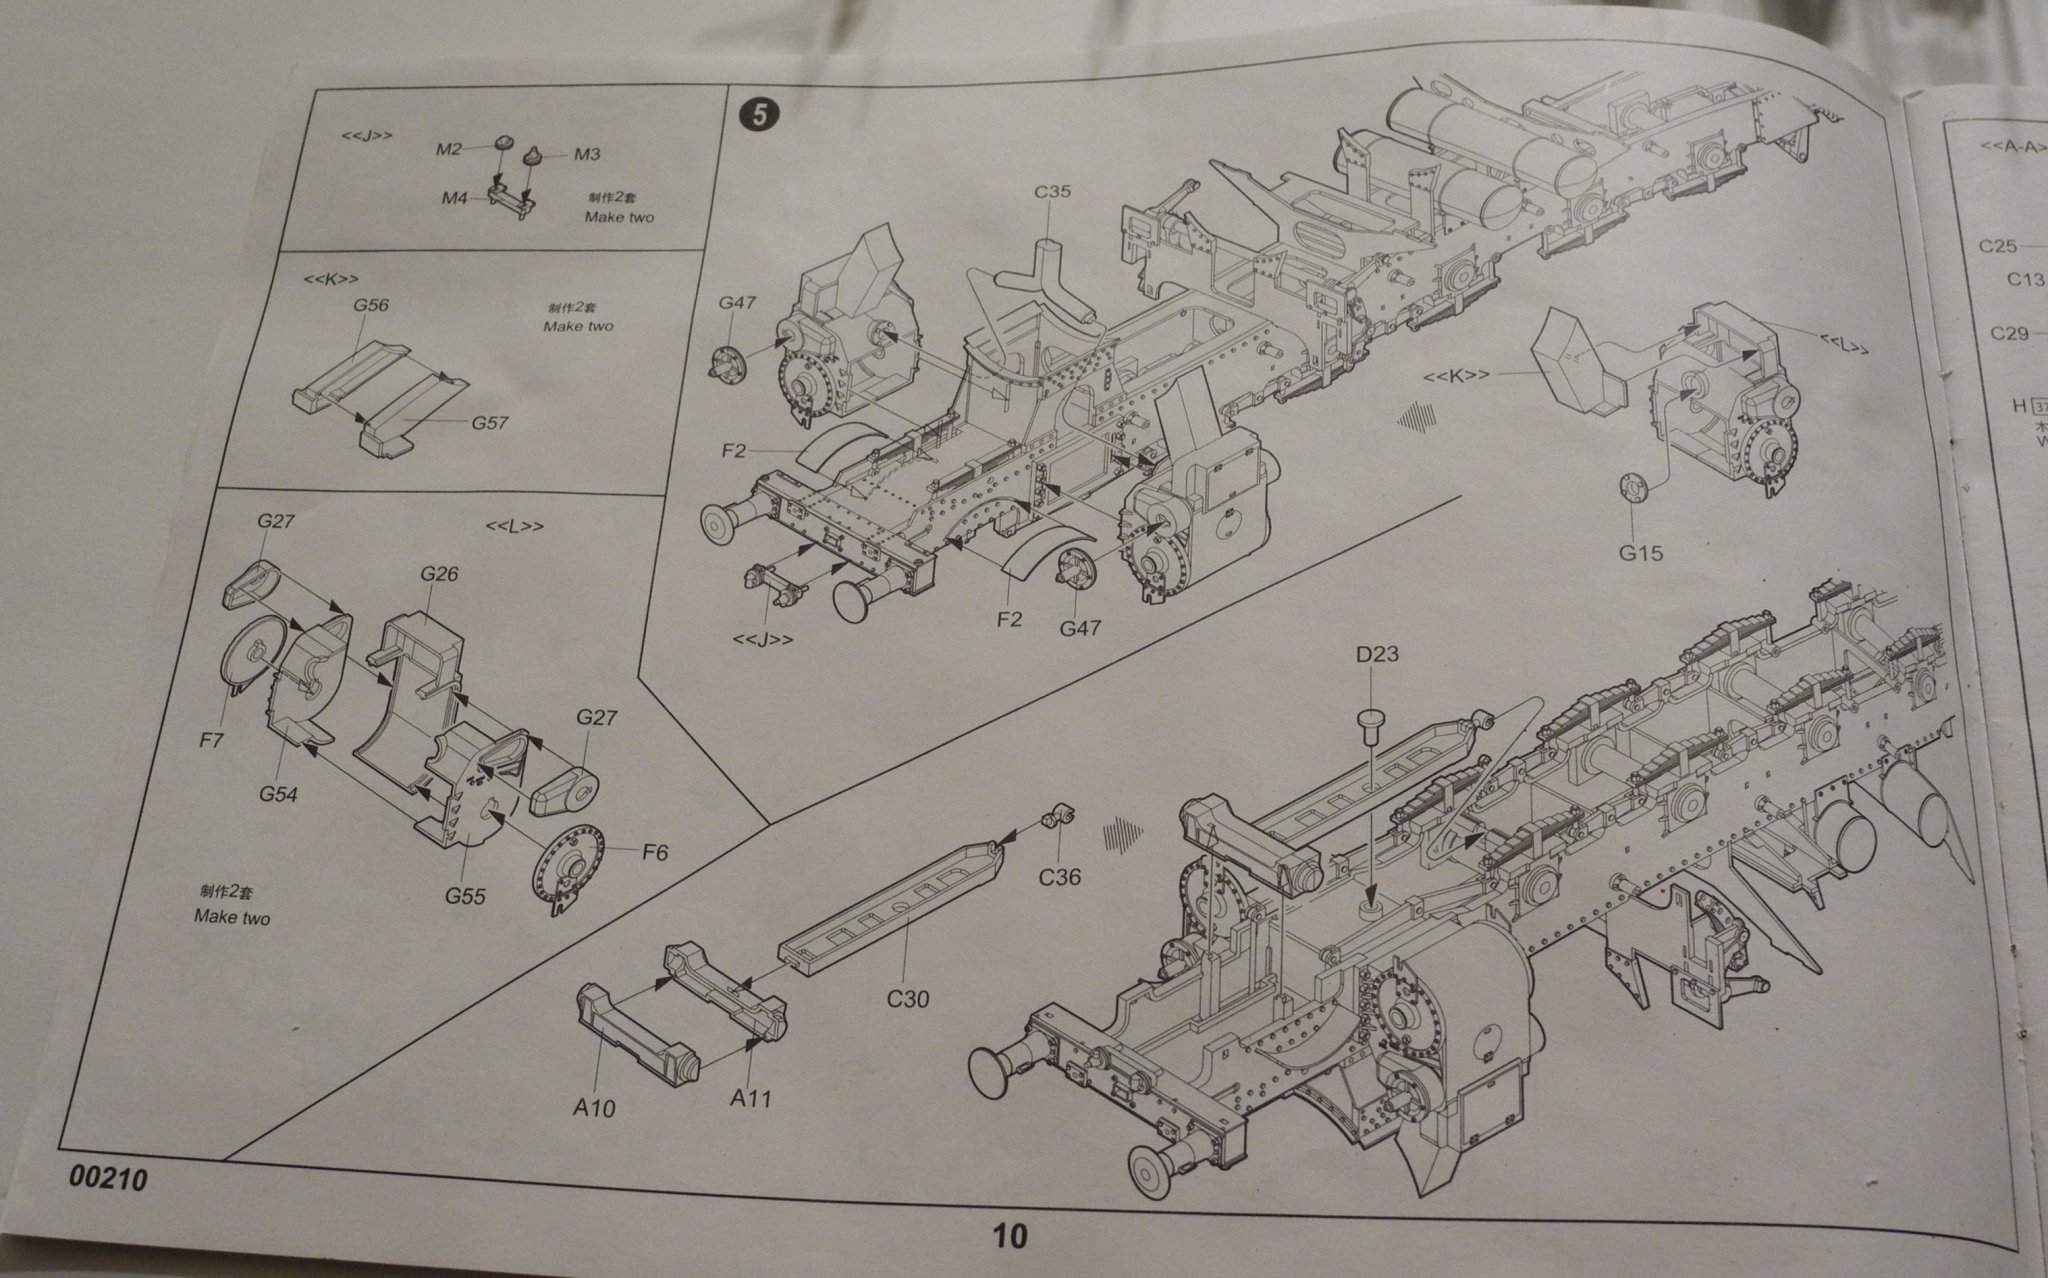
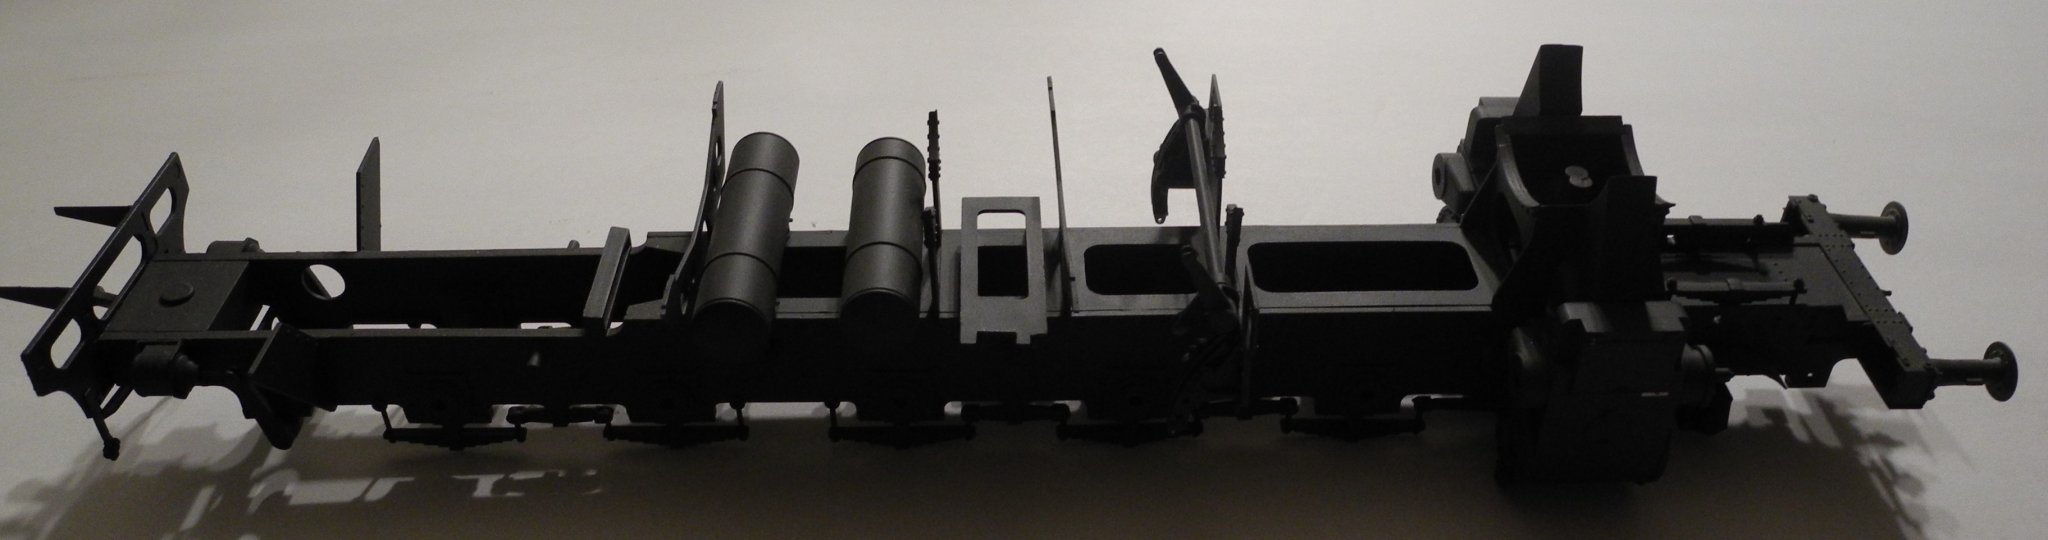
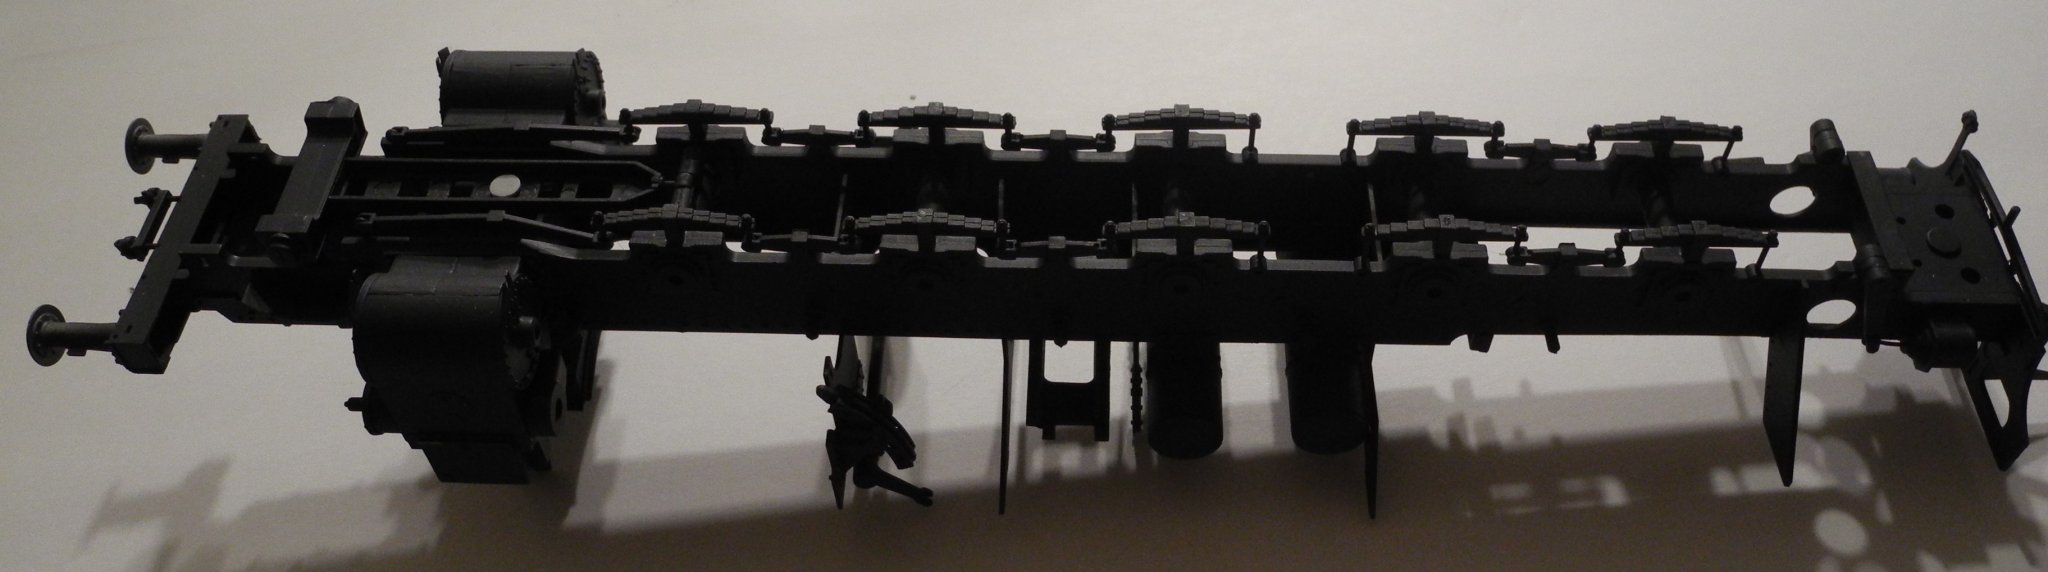
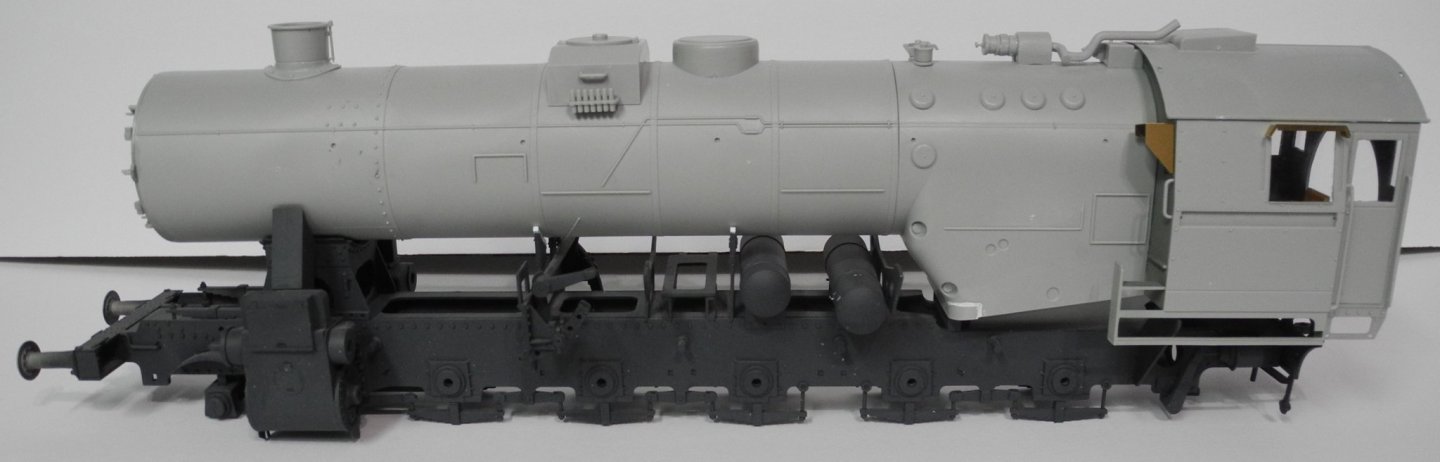
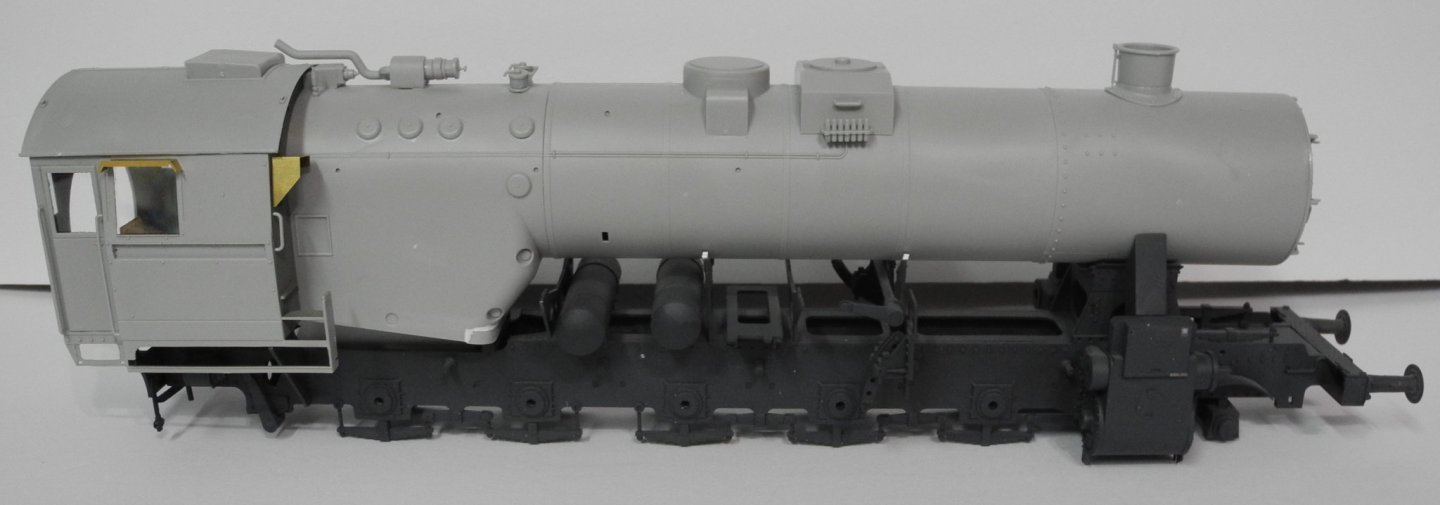
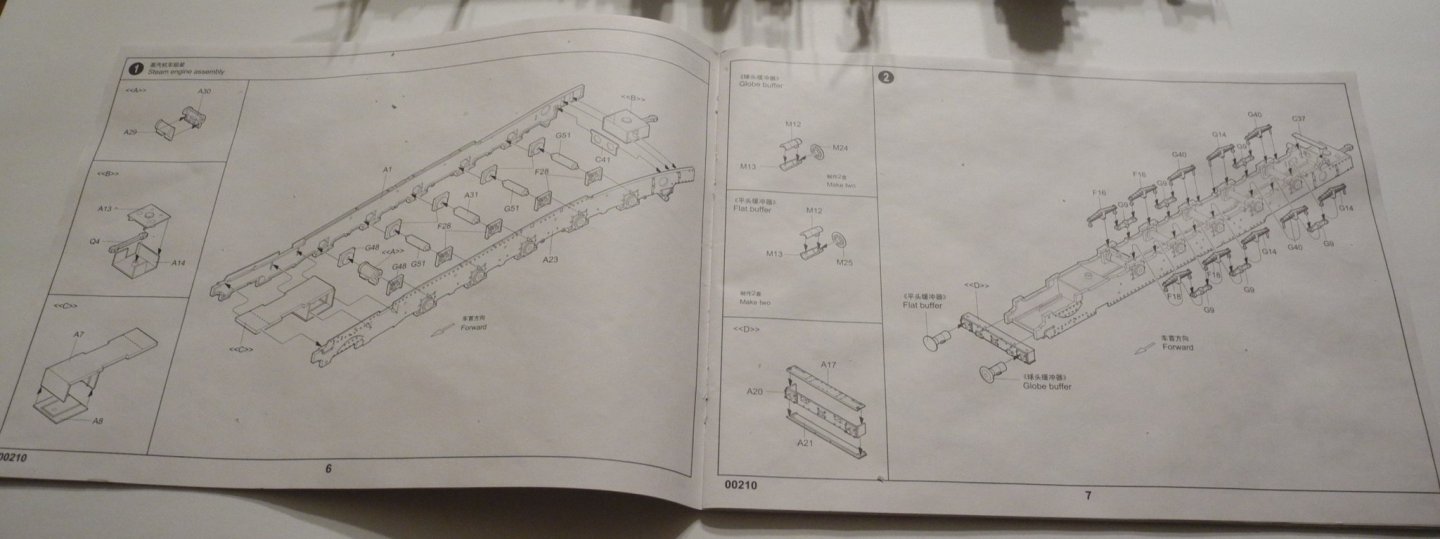
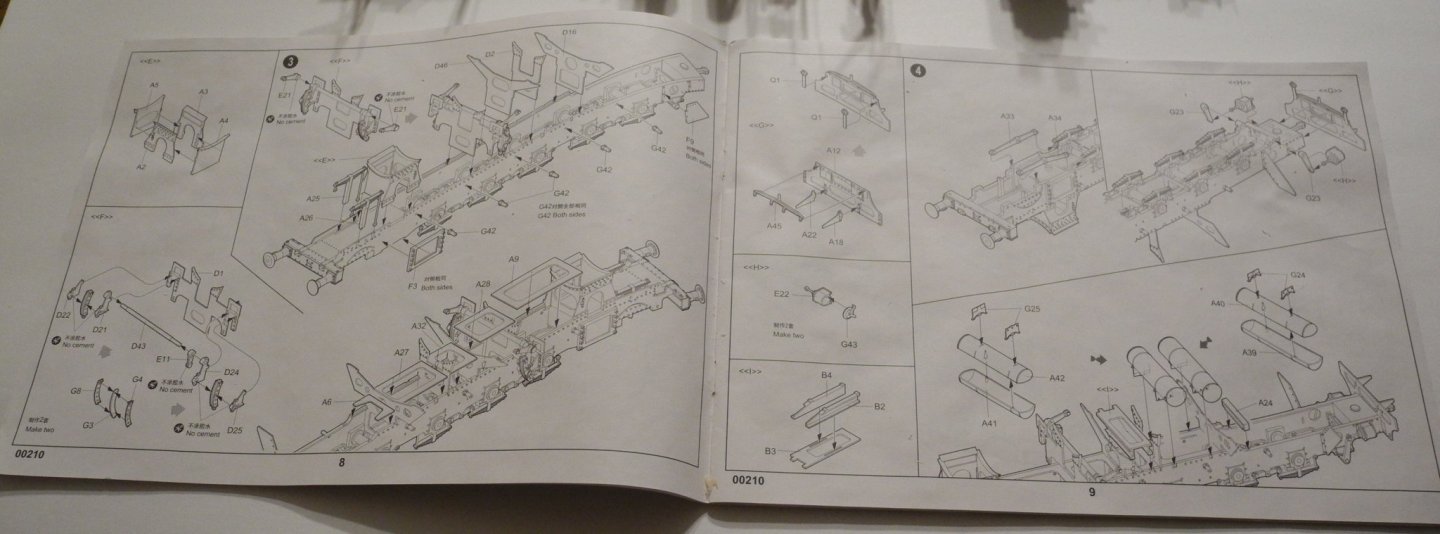
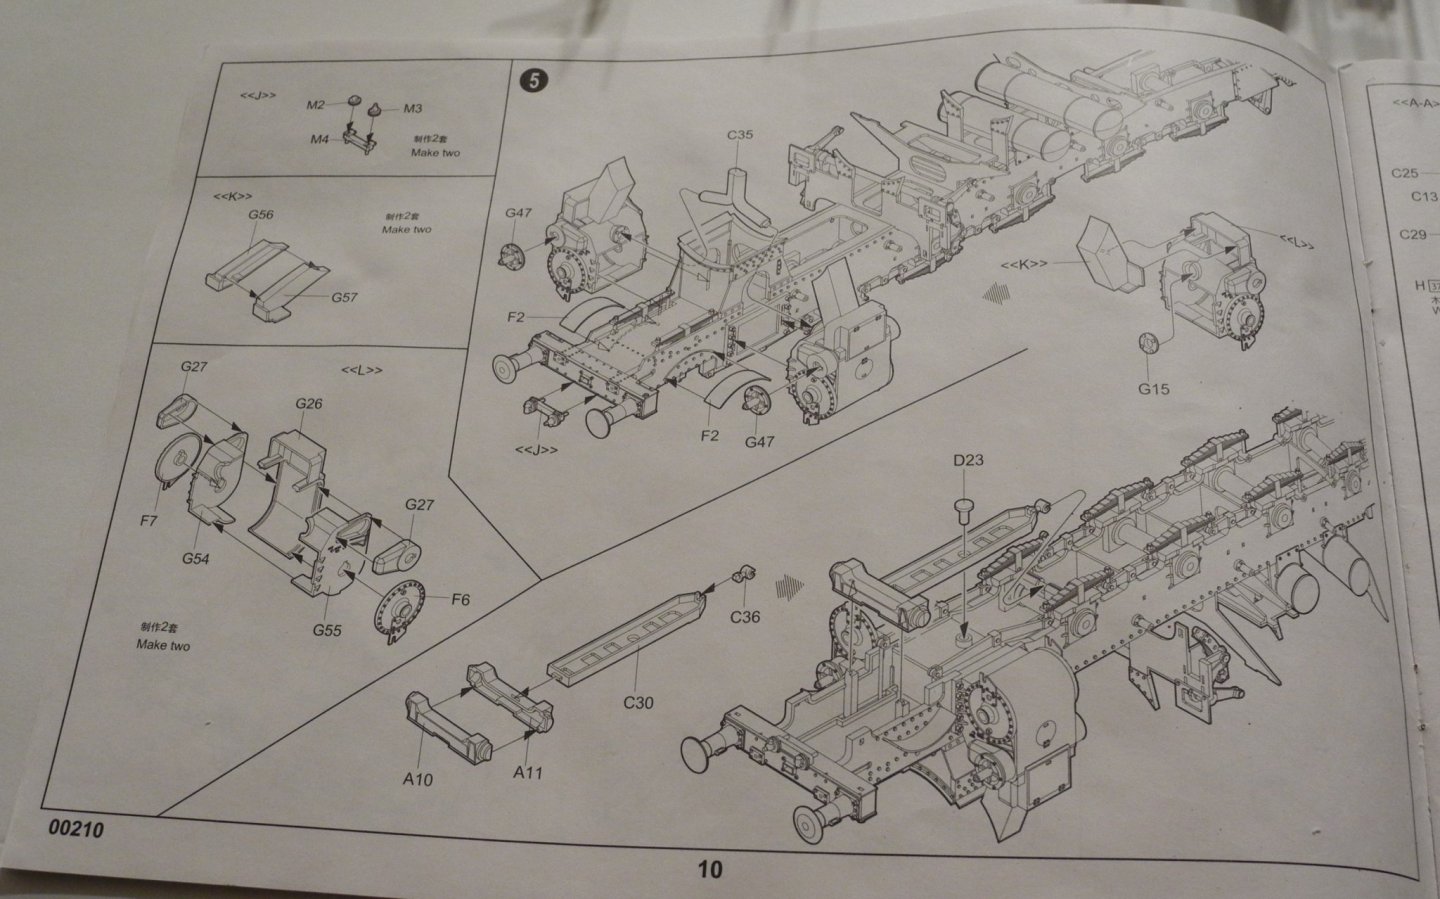
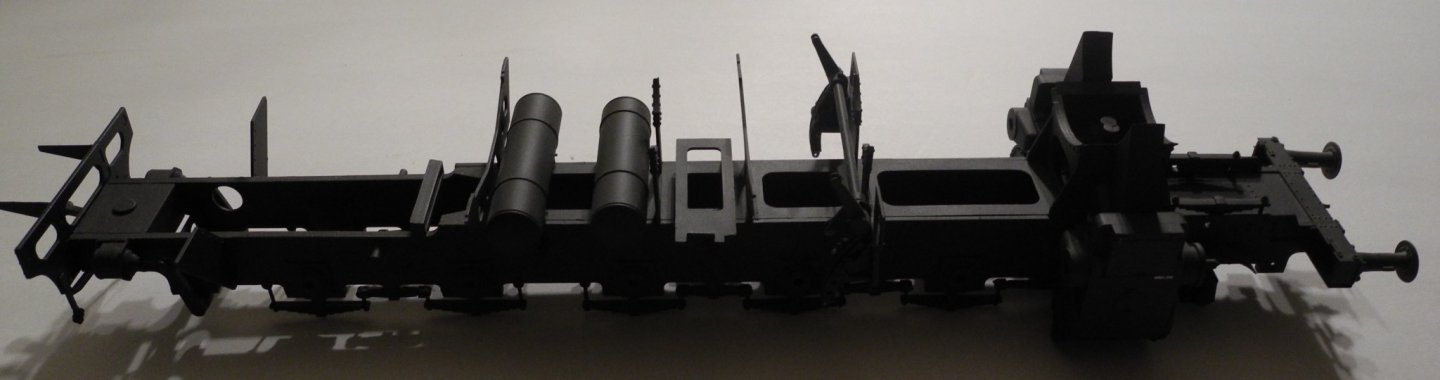
To begin with a proper starting point for this build thread, it seems appropriate to show what's been done so far. Following along with the kit instructions, began by constructing all the various parts of the locomotive chassis in steps one through five. After assembling the parts, gave everything a base coat of dark gray. It might be difficult to see in these photos, but the kit molded parts provide ample detail that will pop out once washes and dry brushing is done. In retrospect, photo etch for any of these component parts adds very little value as the kit parts are very good to my eye. And this brings me to where I left off with this kit...assembling and painting the cab. As you can see in the instructions (step six), the cab assembly provides quite a lot of detail straight from the kit. The first thing that stood out was the fact there is too much detail just to assemble the whole thing then paint. It's my intention to paint the inner cab pieces first, then assemble, then touch up after assembly has been done.

- 92 replies
-
- 13
-
-
Probably the black and steel, but I do like that camo. Definitely not the red and black, don't care much for that at all.
-
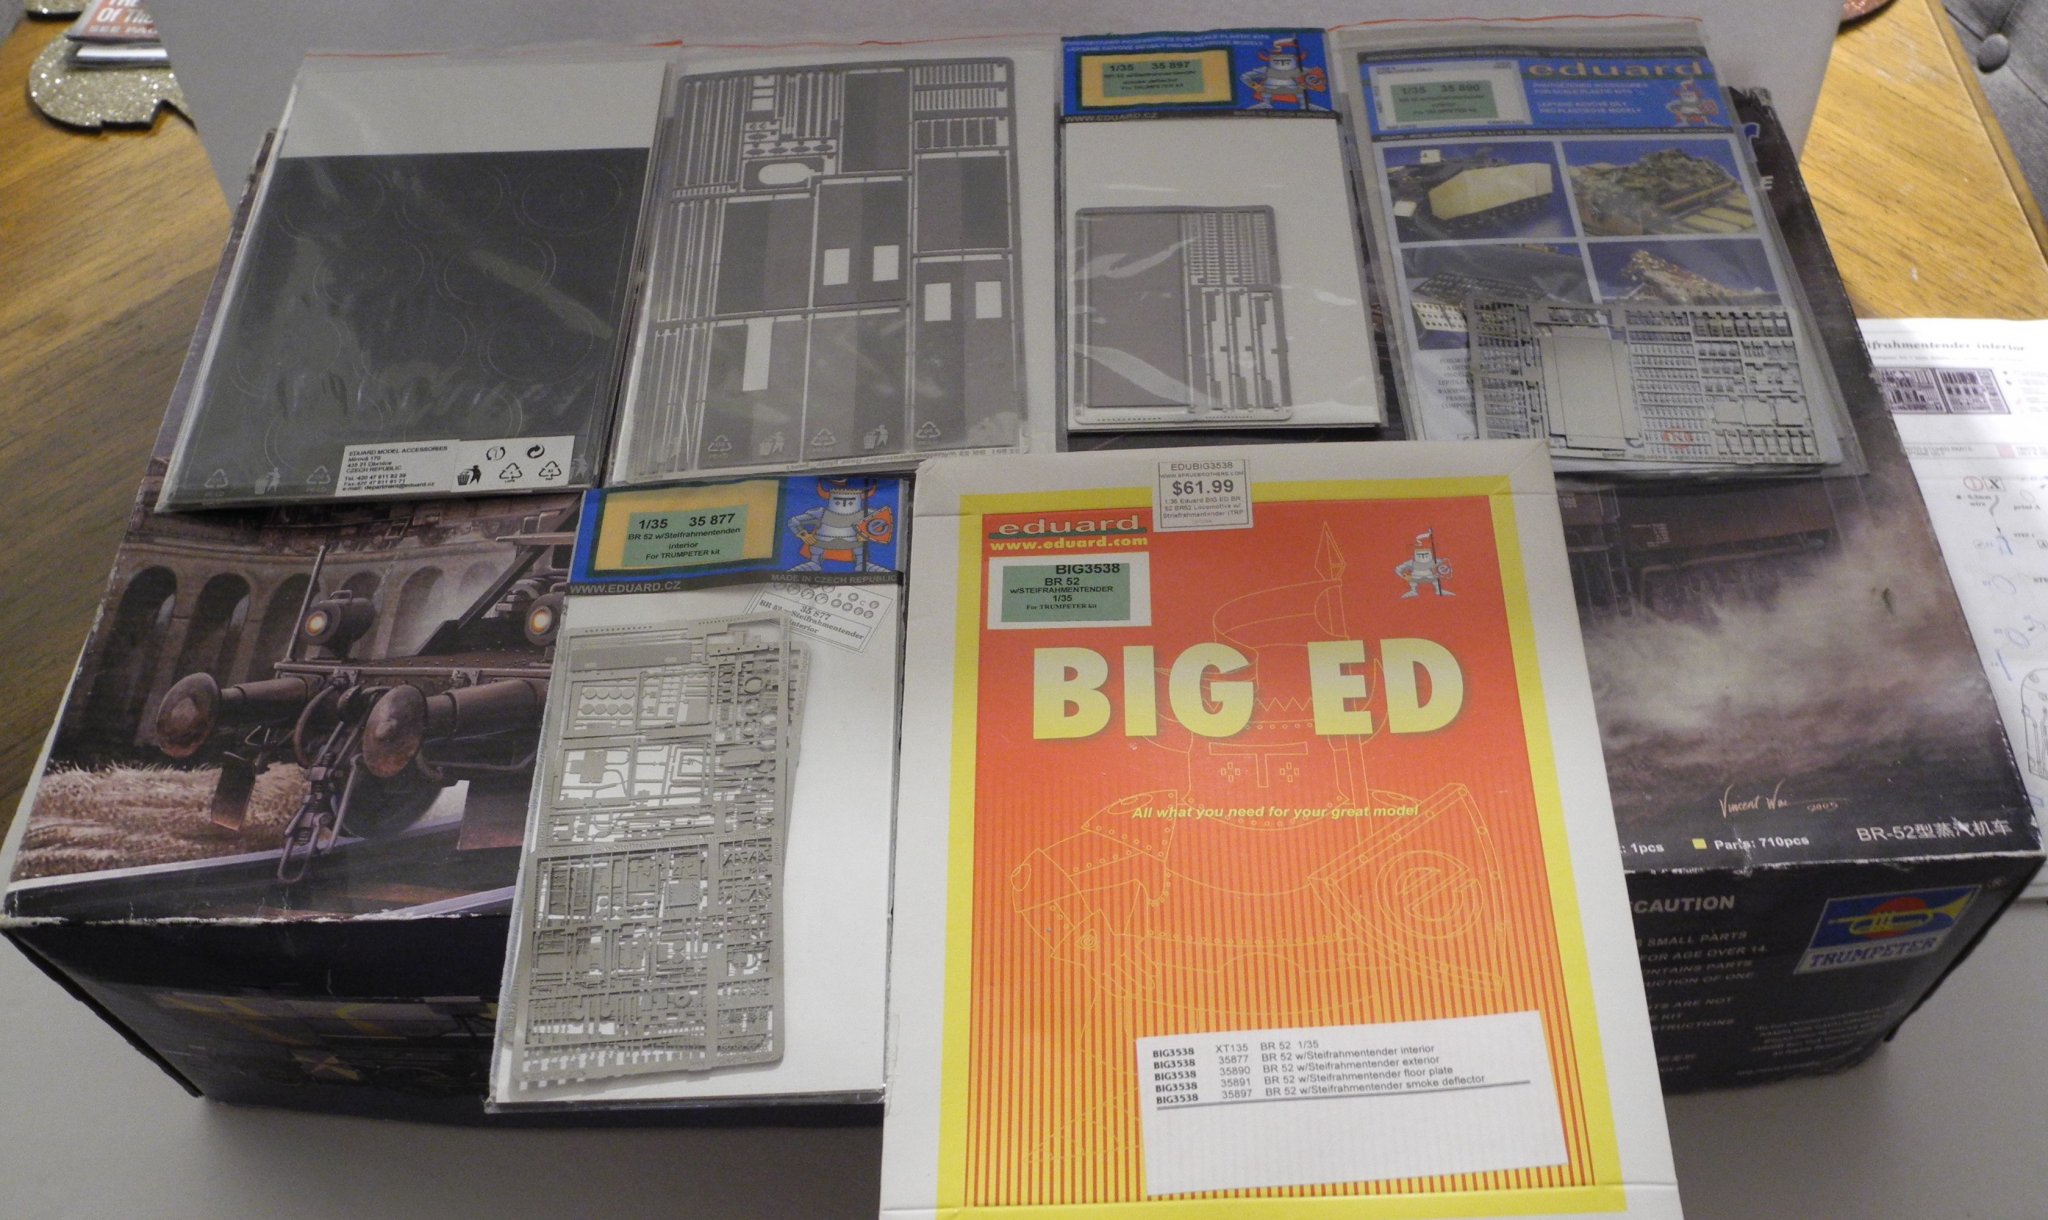
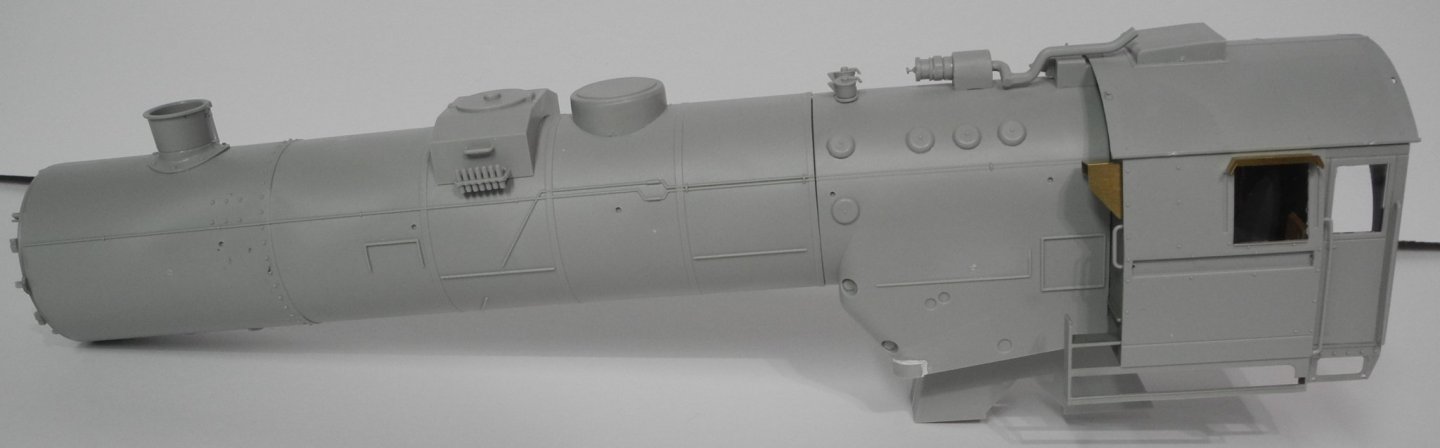
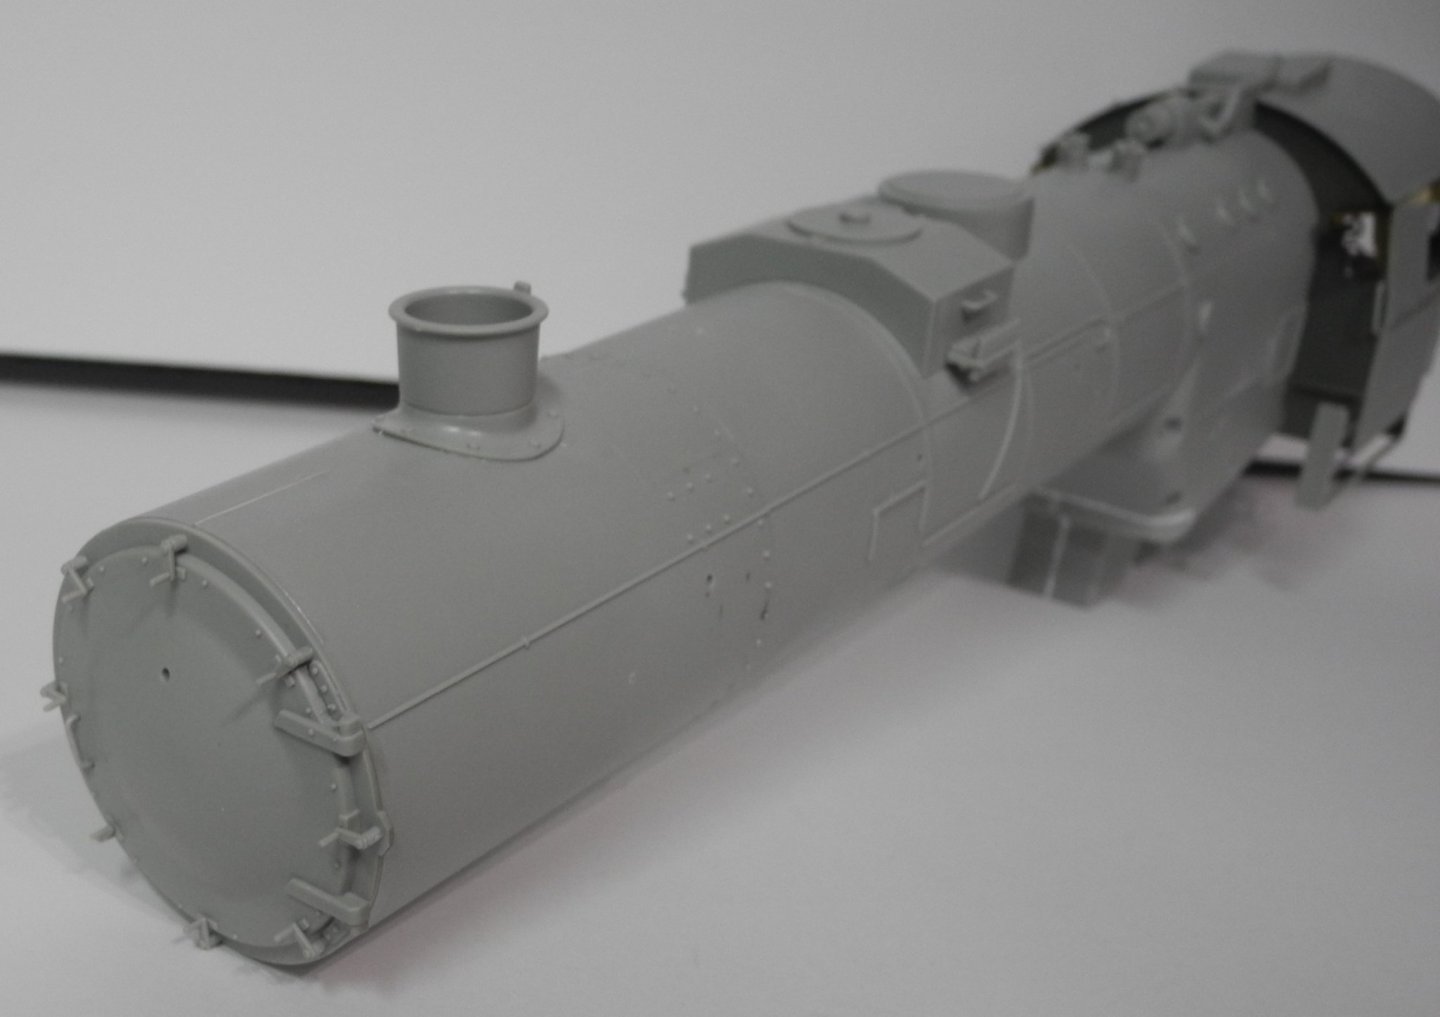
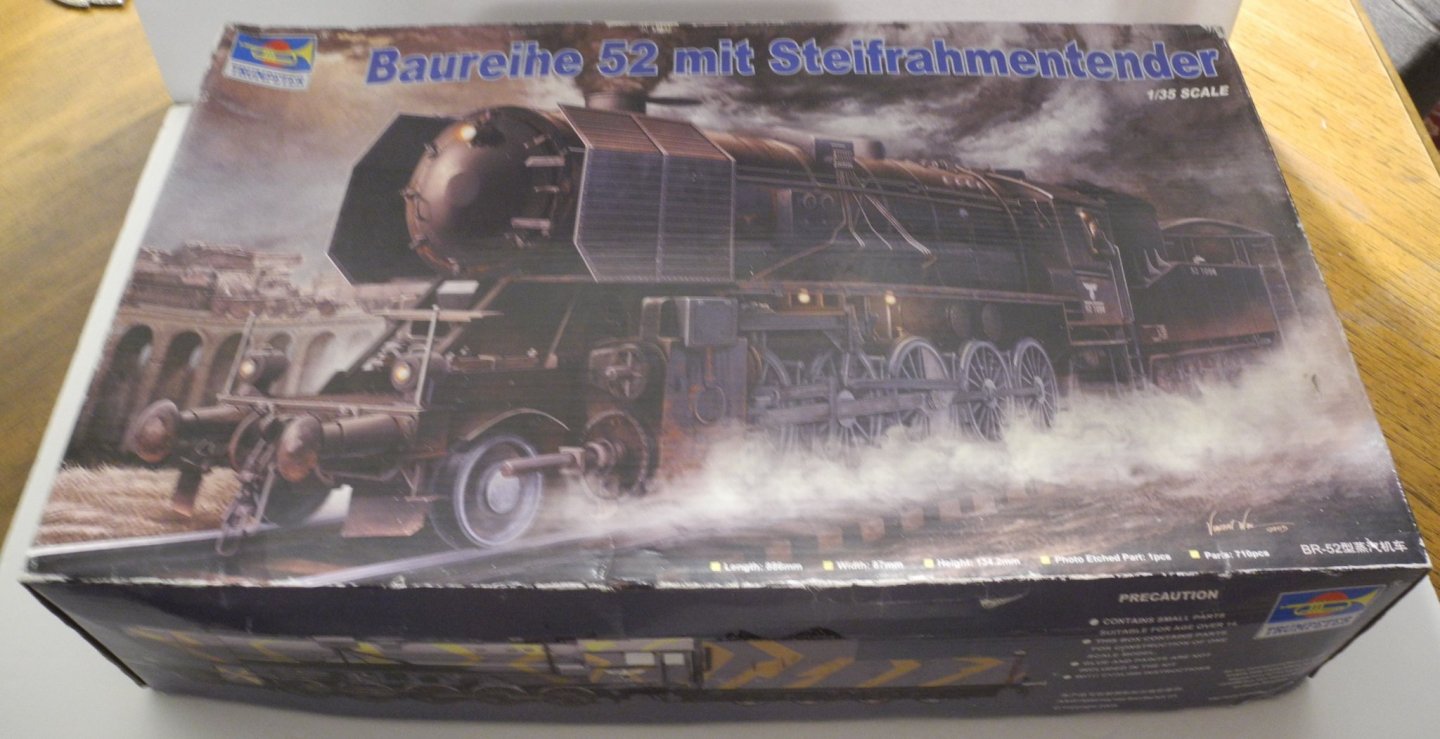
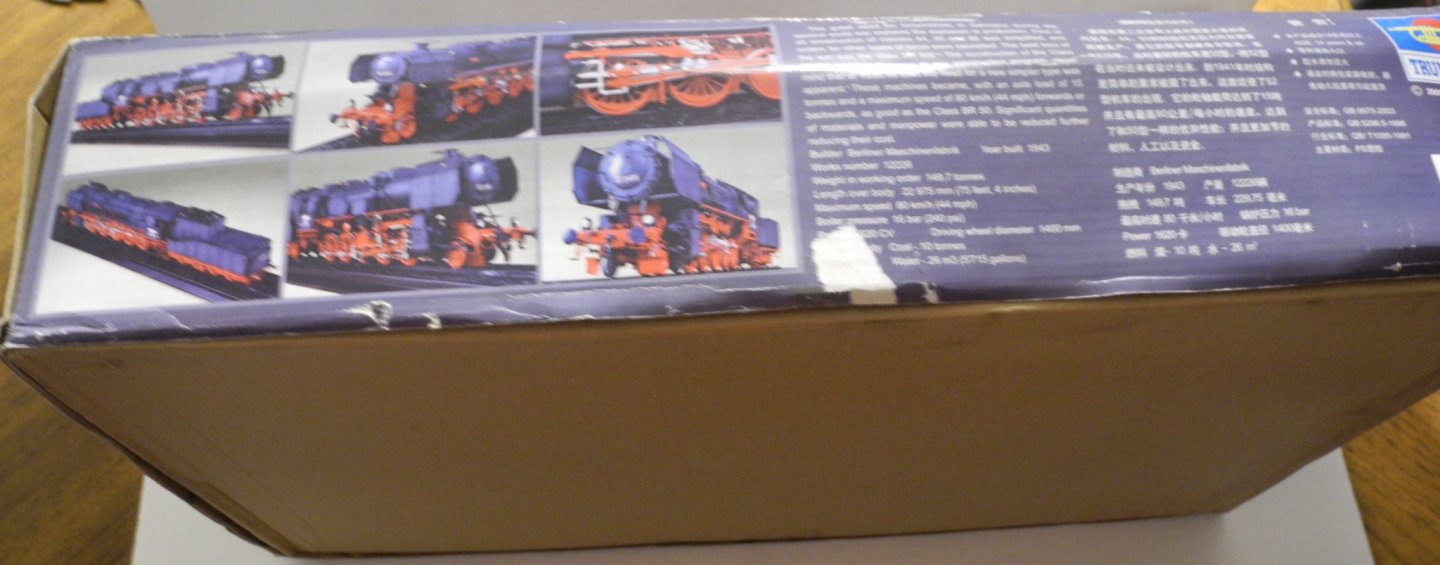
This 1:35 Trumpeter BR-52 German WW2 Steam Locomotive has been sitting in my pile of projects for a very long time. At one time, I started assembling the chassis, but for reasons I do not recall, my attention got diverted to another project. It might have been my dislike for Trumpeter's rendering of a complicated set of steam piping with vinyl molded parts, but in any event, it's just going to be a matter of scratch building the piping rather than using the lame Trumpeter kit parts. To enhance the model, I acquired the Eduard Big Ed photo etch set that includes all they do in photo etch for this model plus a set of paint masks. So, here we go, let's see what we can do with this one. Should finish as a very large display piece as it pulls a huge Leopold Rail Gun behind the coal tender. Don't know when I'll get around to building the rail gun though, that's a whole different animal.

-
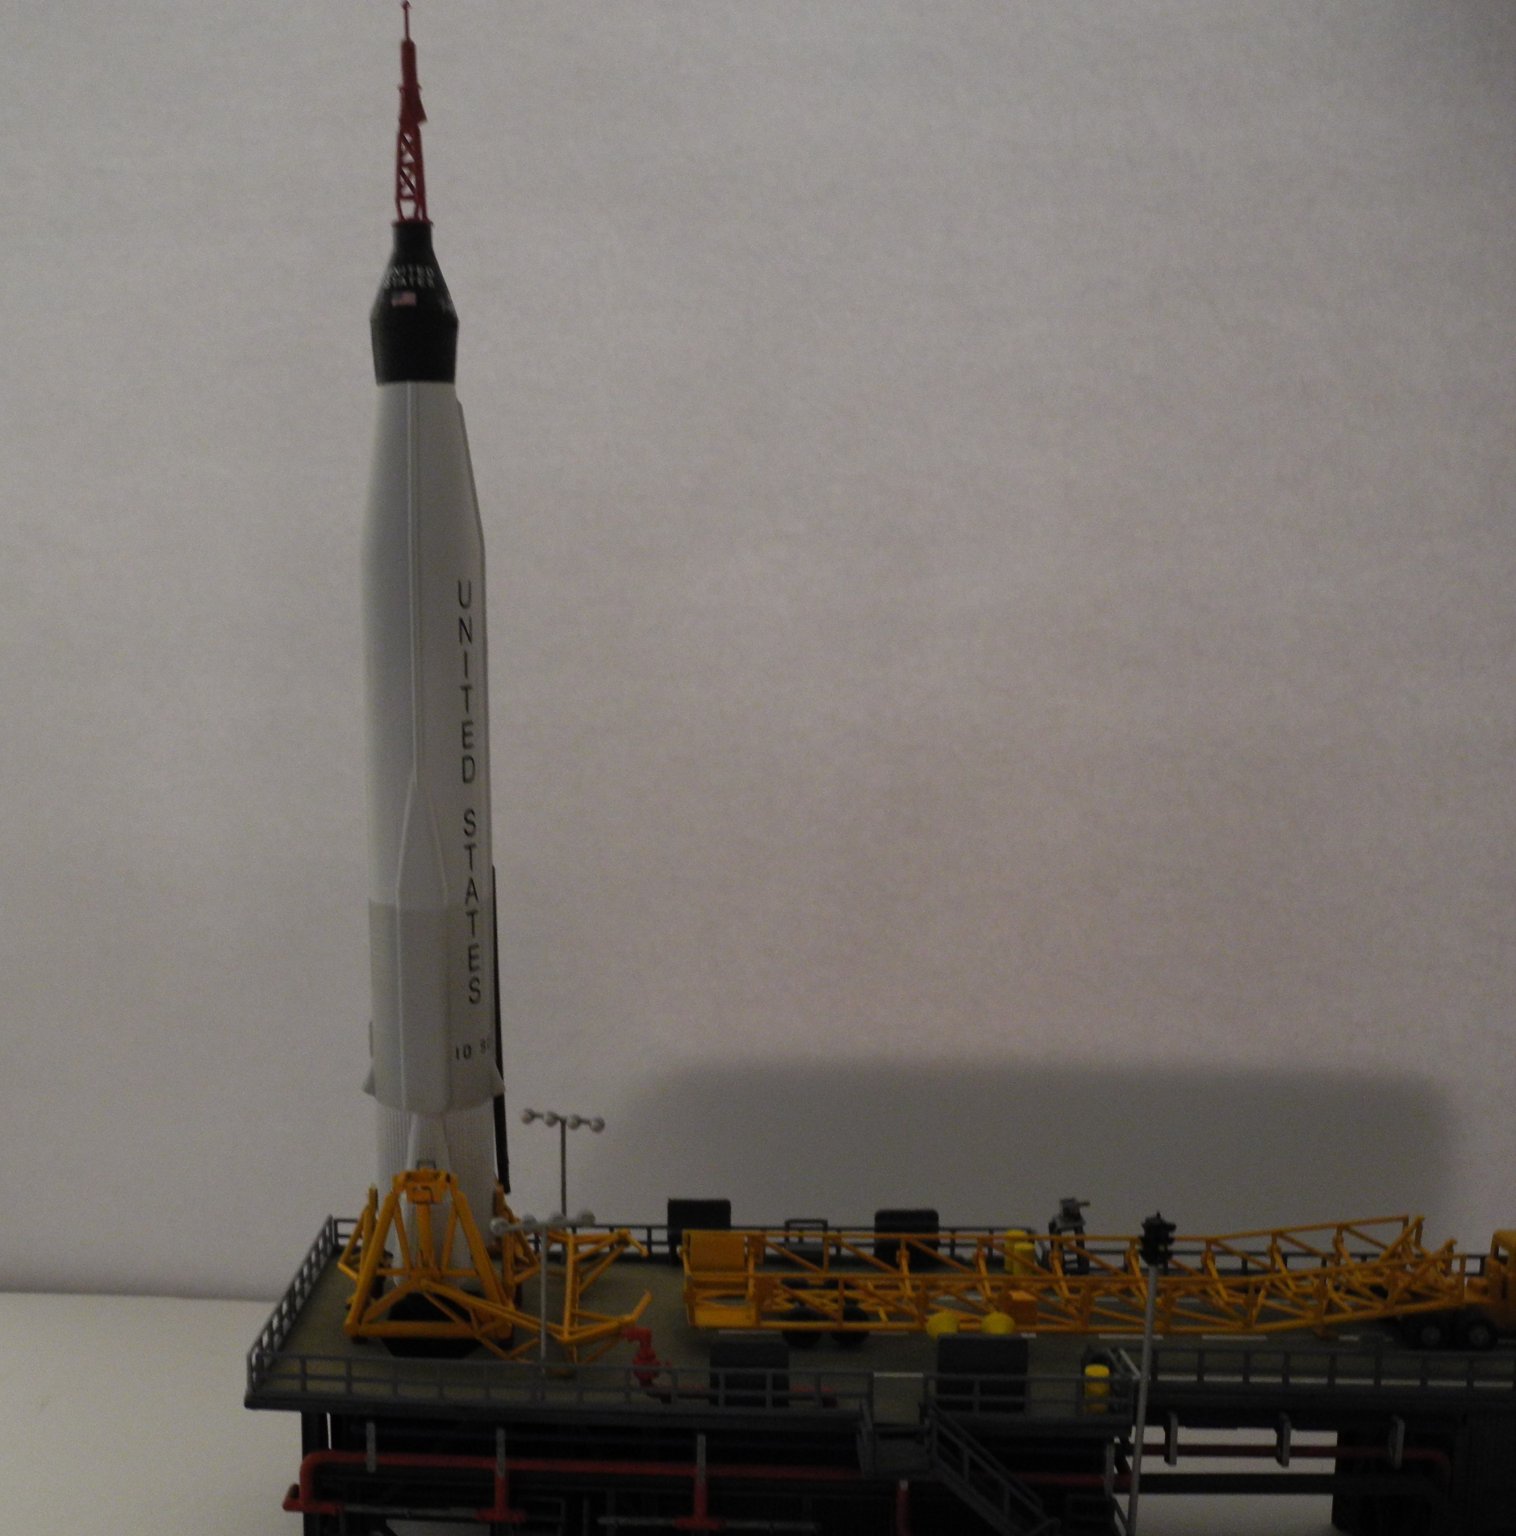
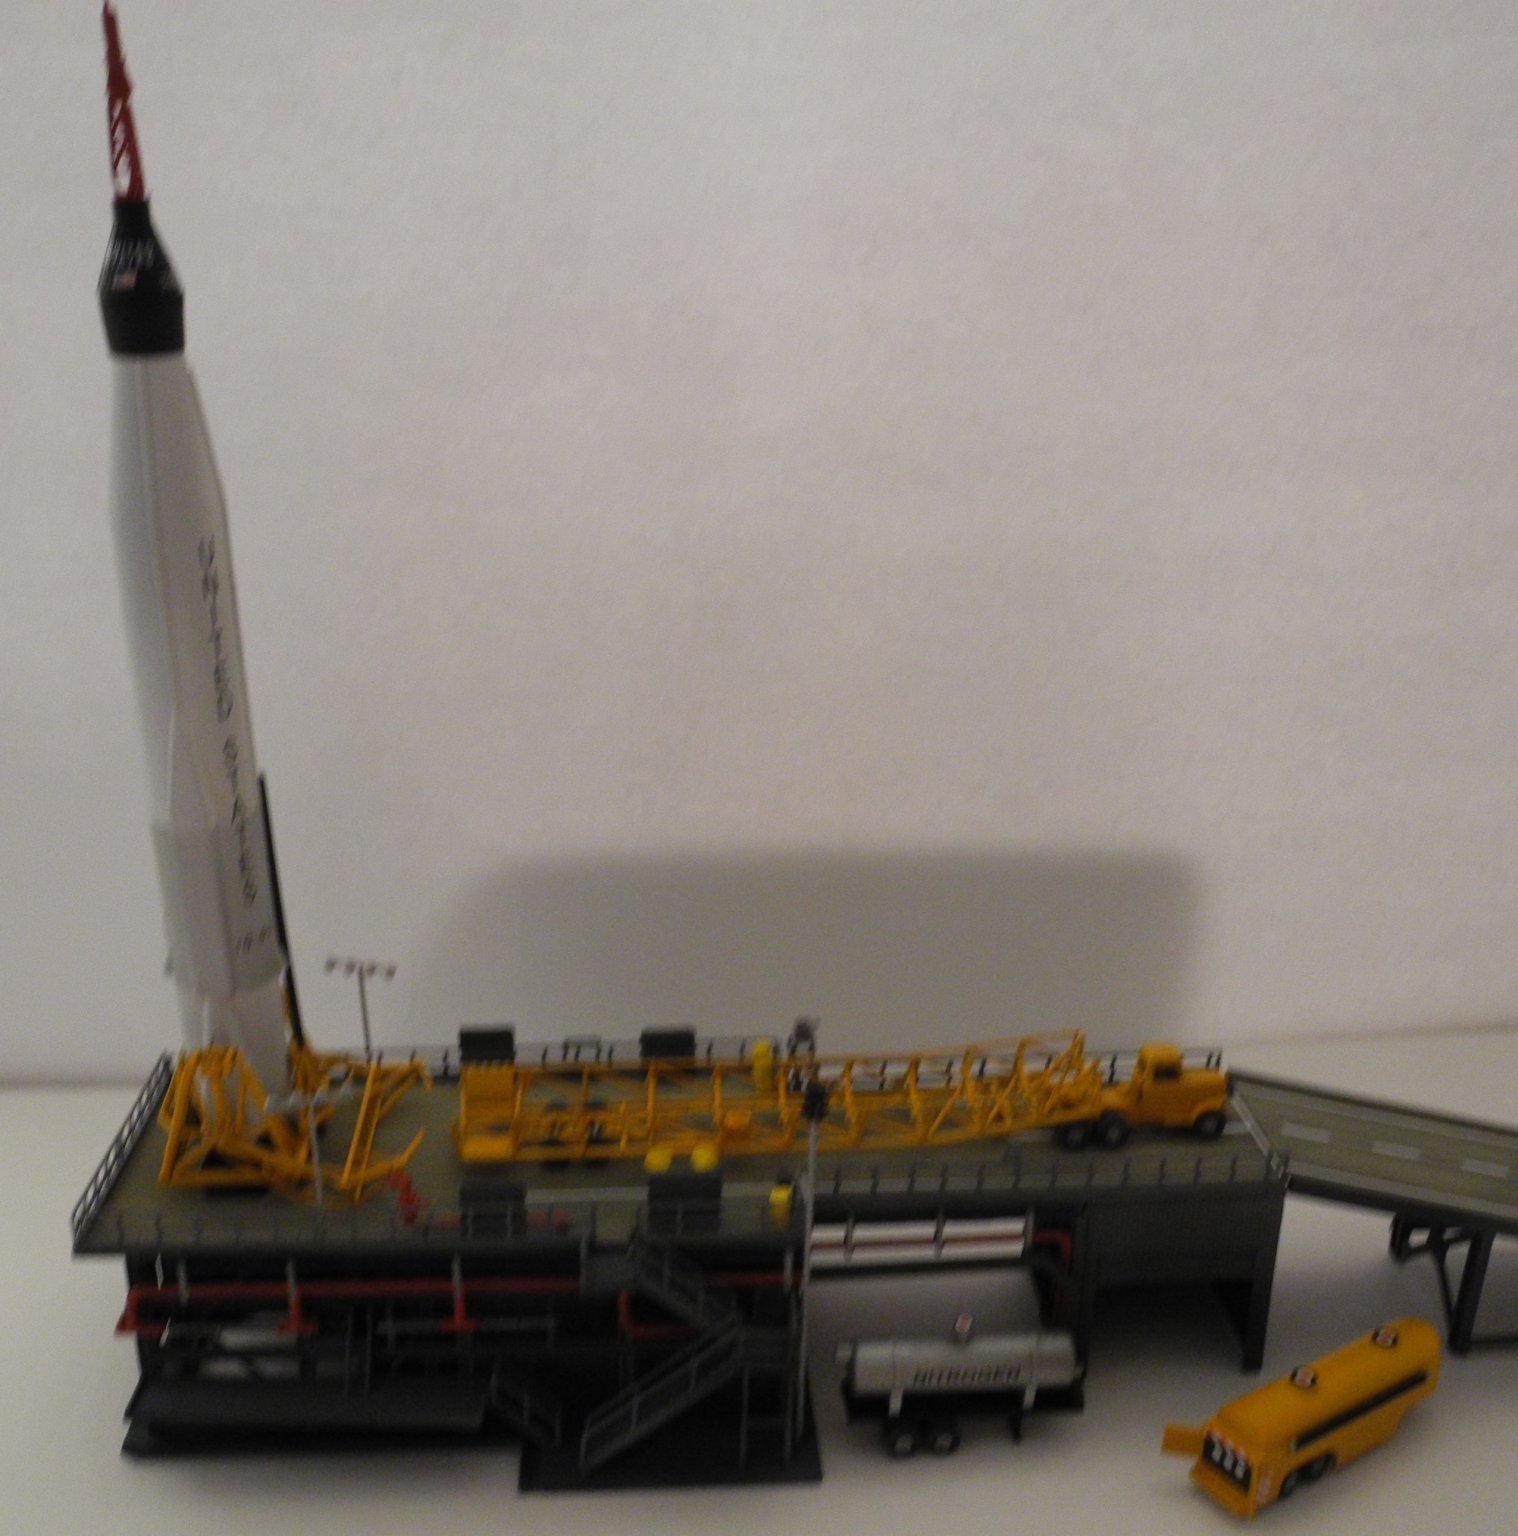
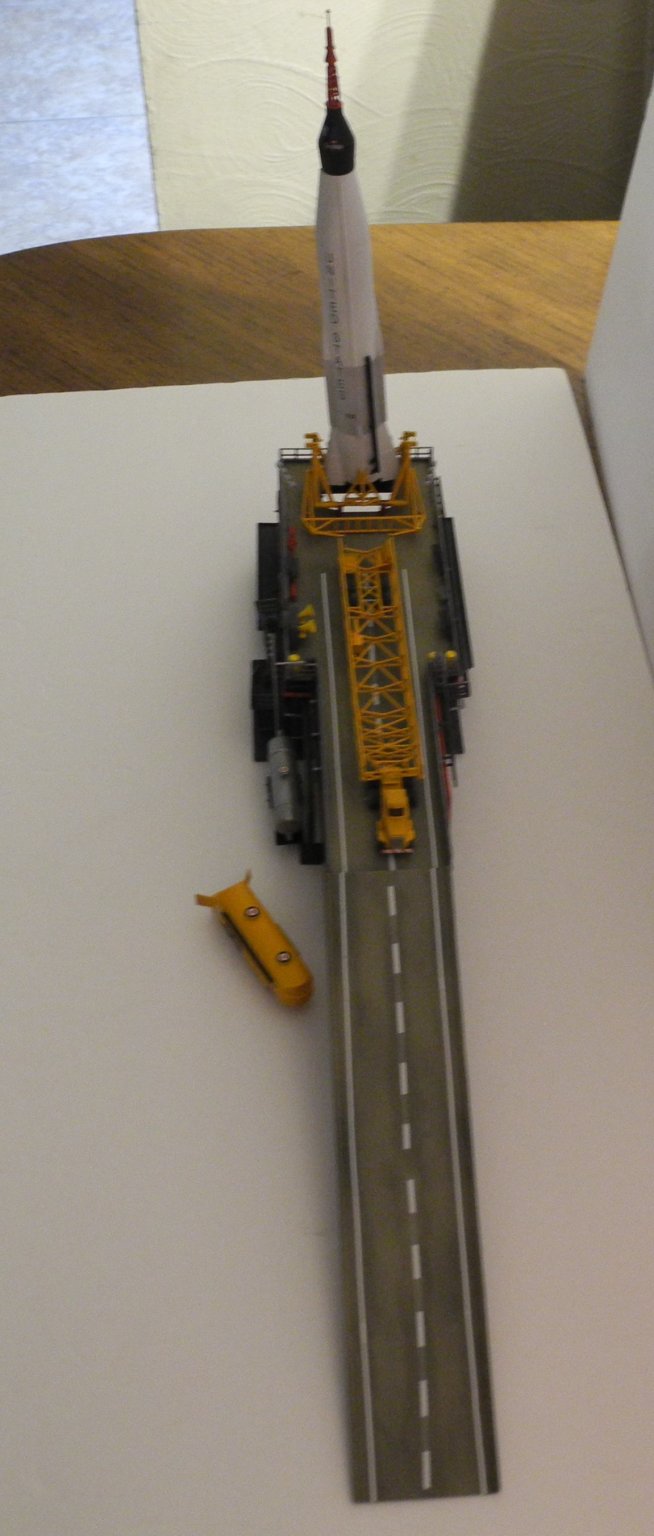
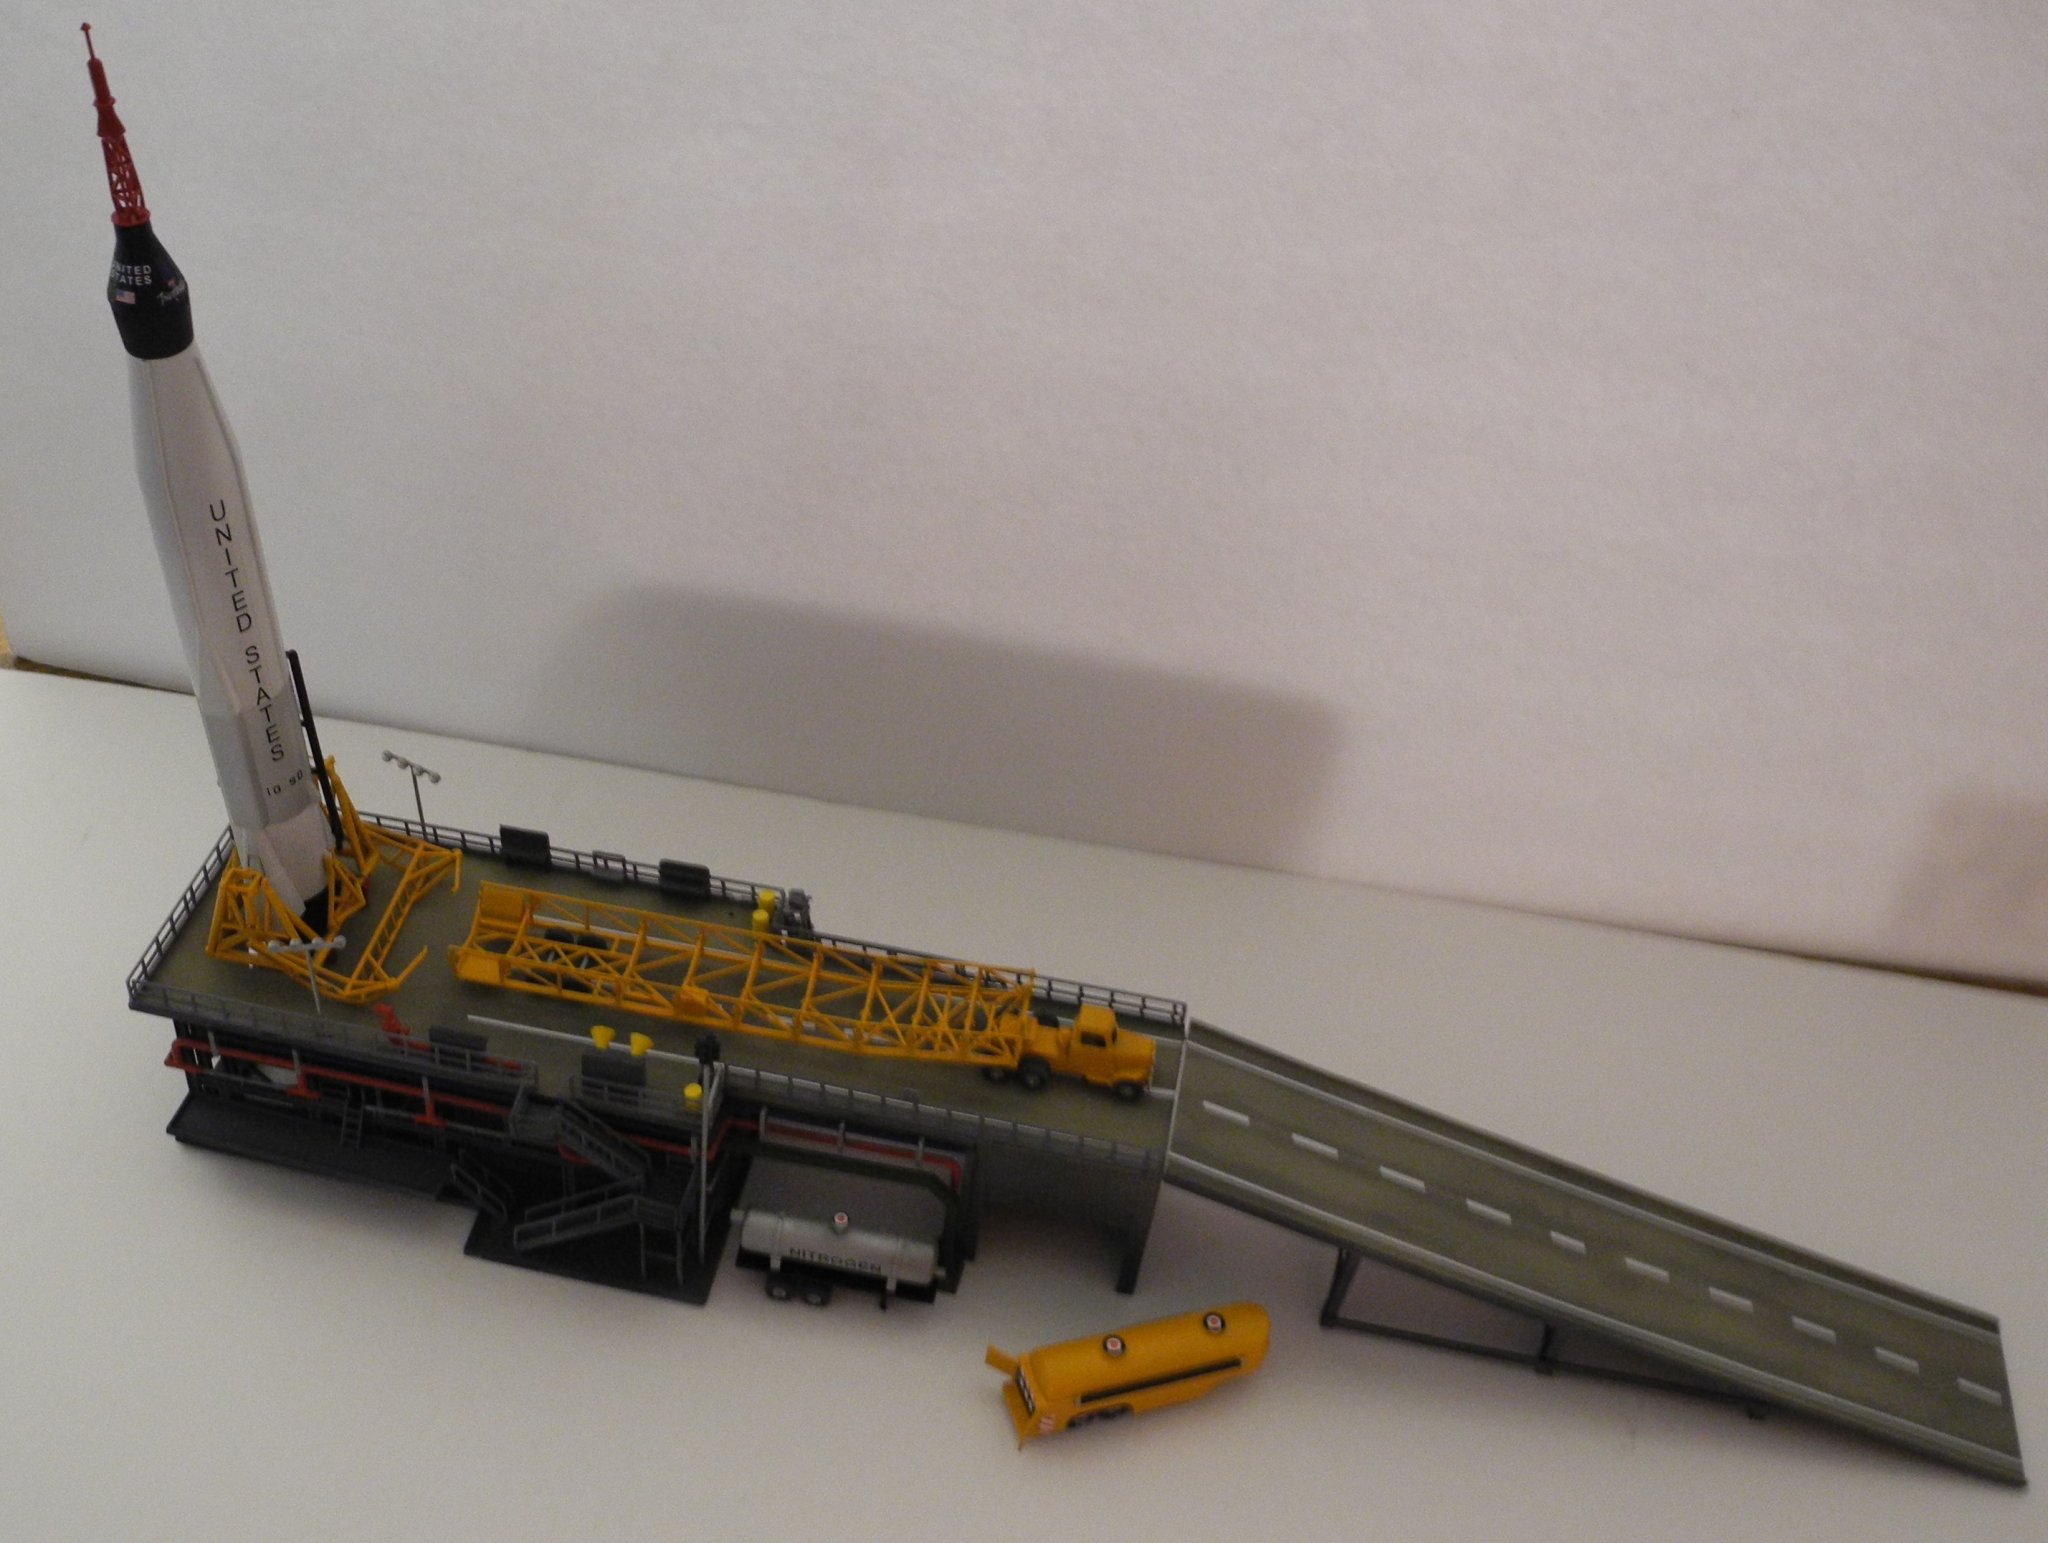
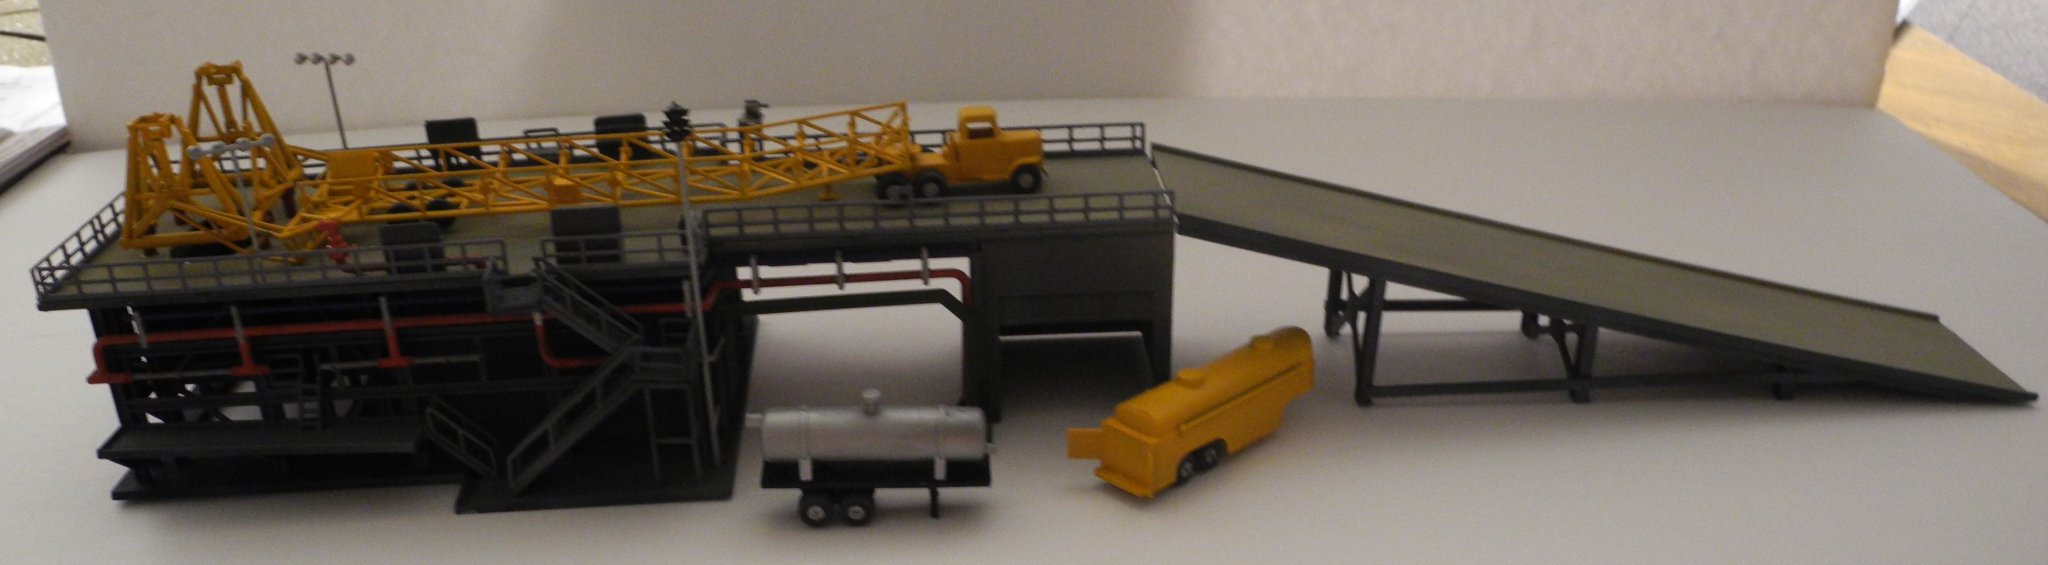
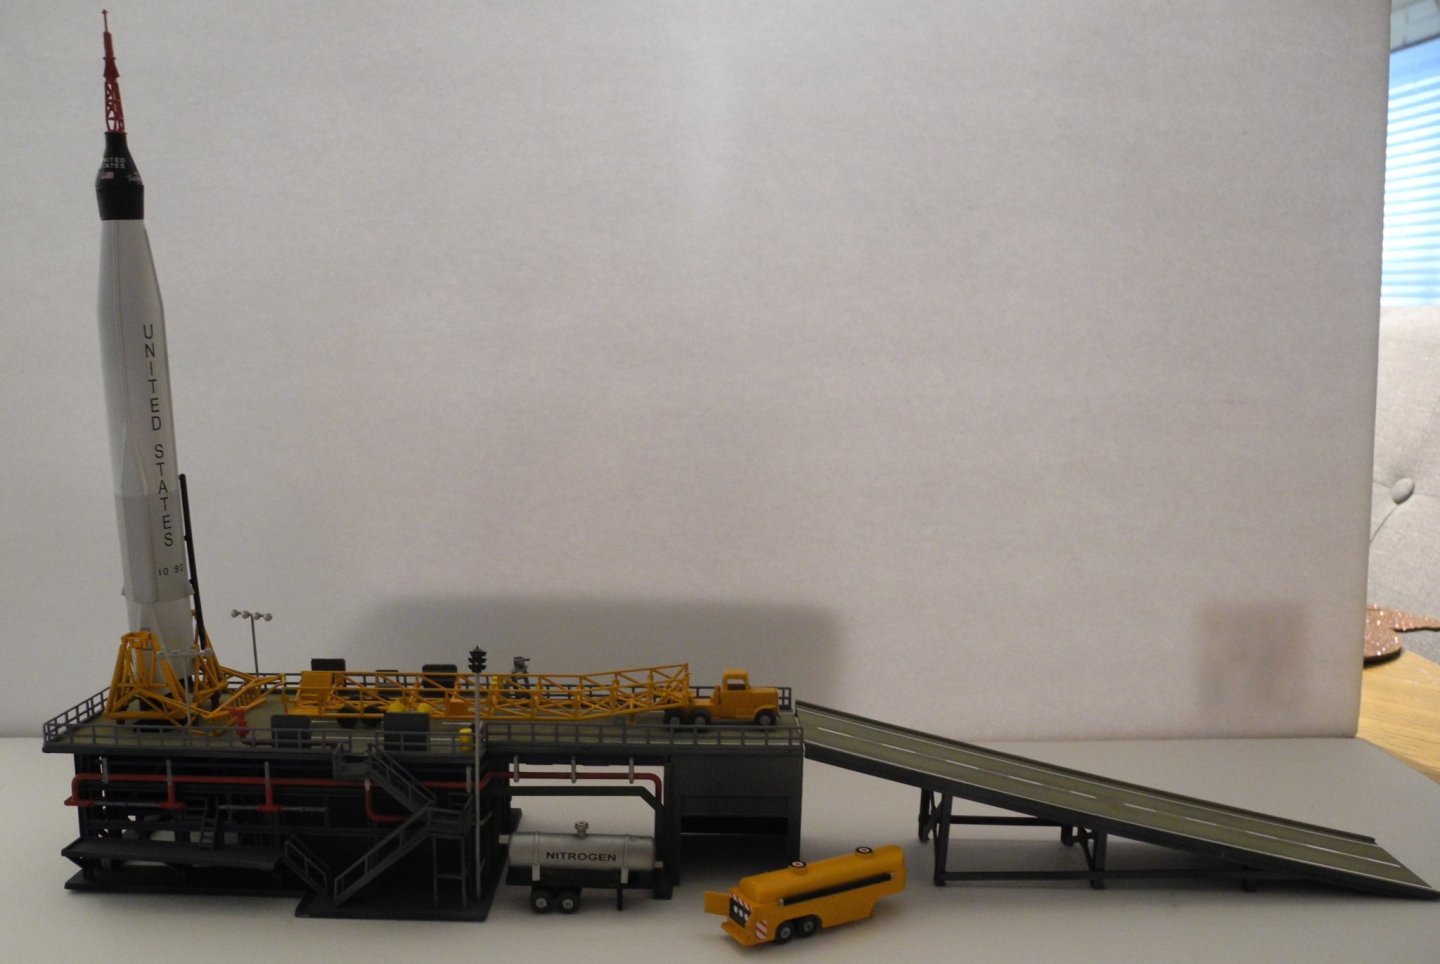
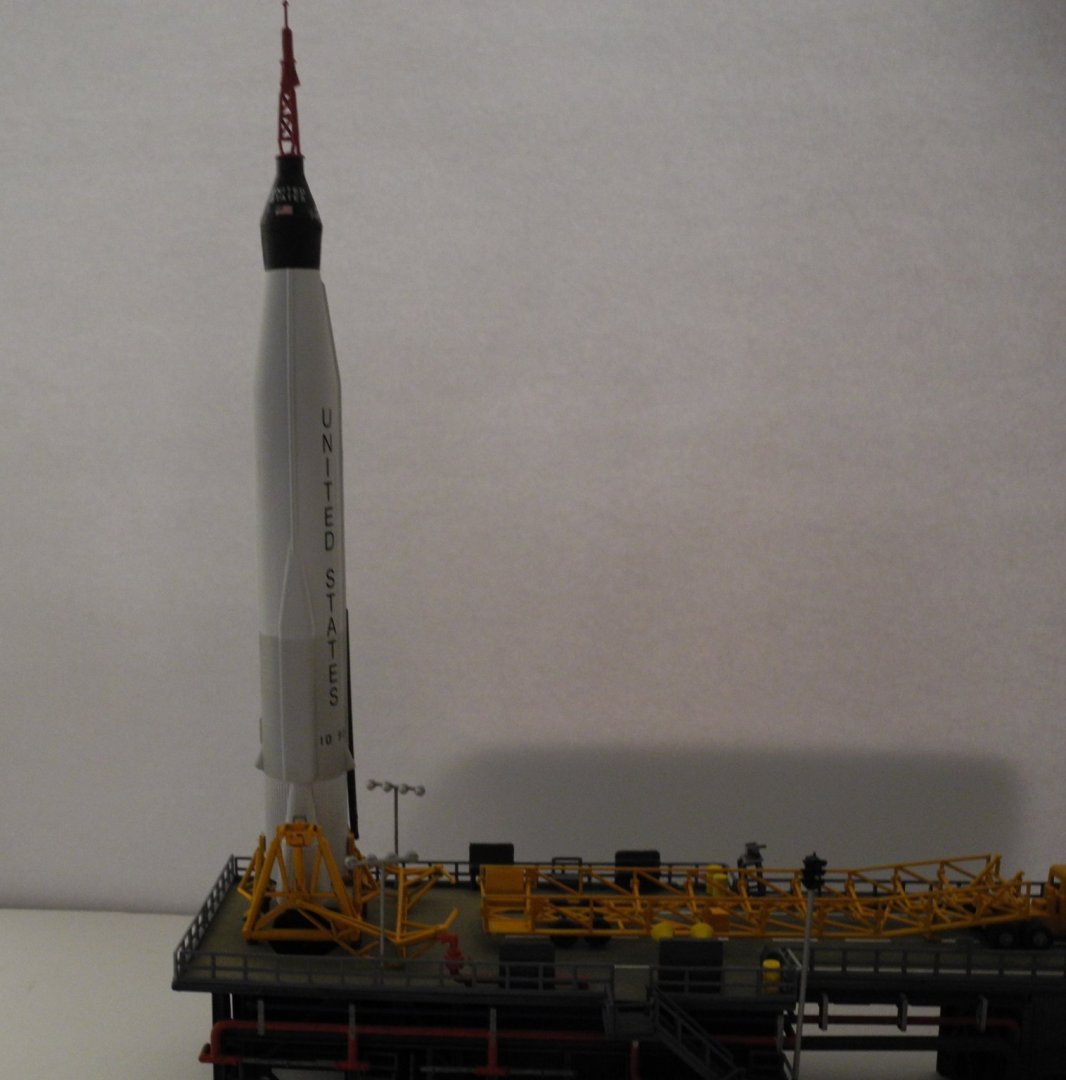
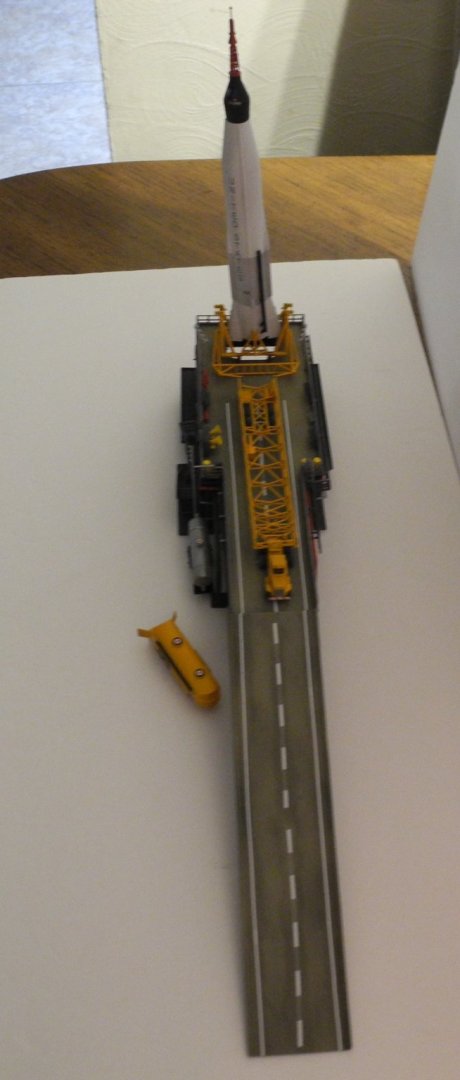
This will be my final installment and pics for the Atlas-Mercury Friendship 7 Everything is Go project. I am certain there are many details and wonderful extras that could be added to make this an even more remarkable model, but I am going to call this one finished. It's brought back a flood of good old memories and I have had lots of fun building and painting it but I'm ready to move along to something else now. I have a huge 1:35 scale WW2 German Locomotive I need to finish so hope to finish that one next. Stay tuned for more fun.


- 57 replies
-
- 13
-
-
Yes Sir, I sure do have one. I am certain you will be an extraordinary teacher for me, too. 🙂
-
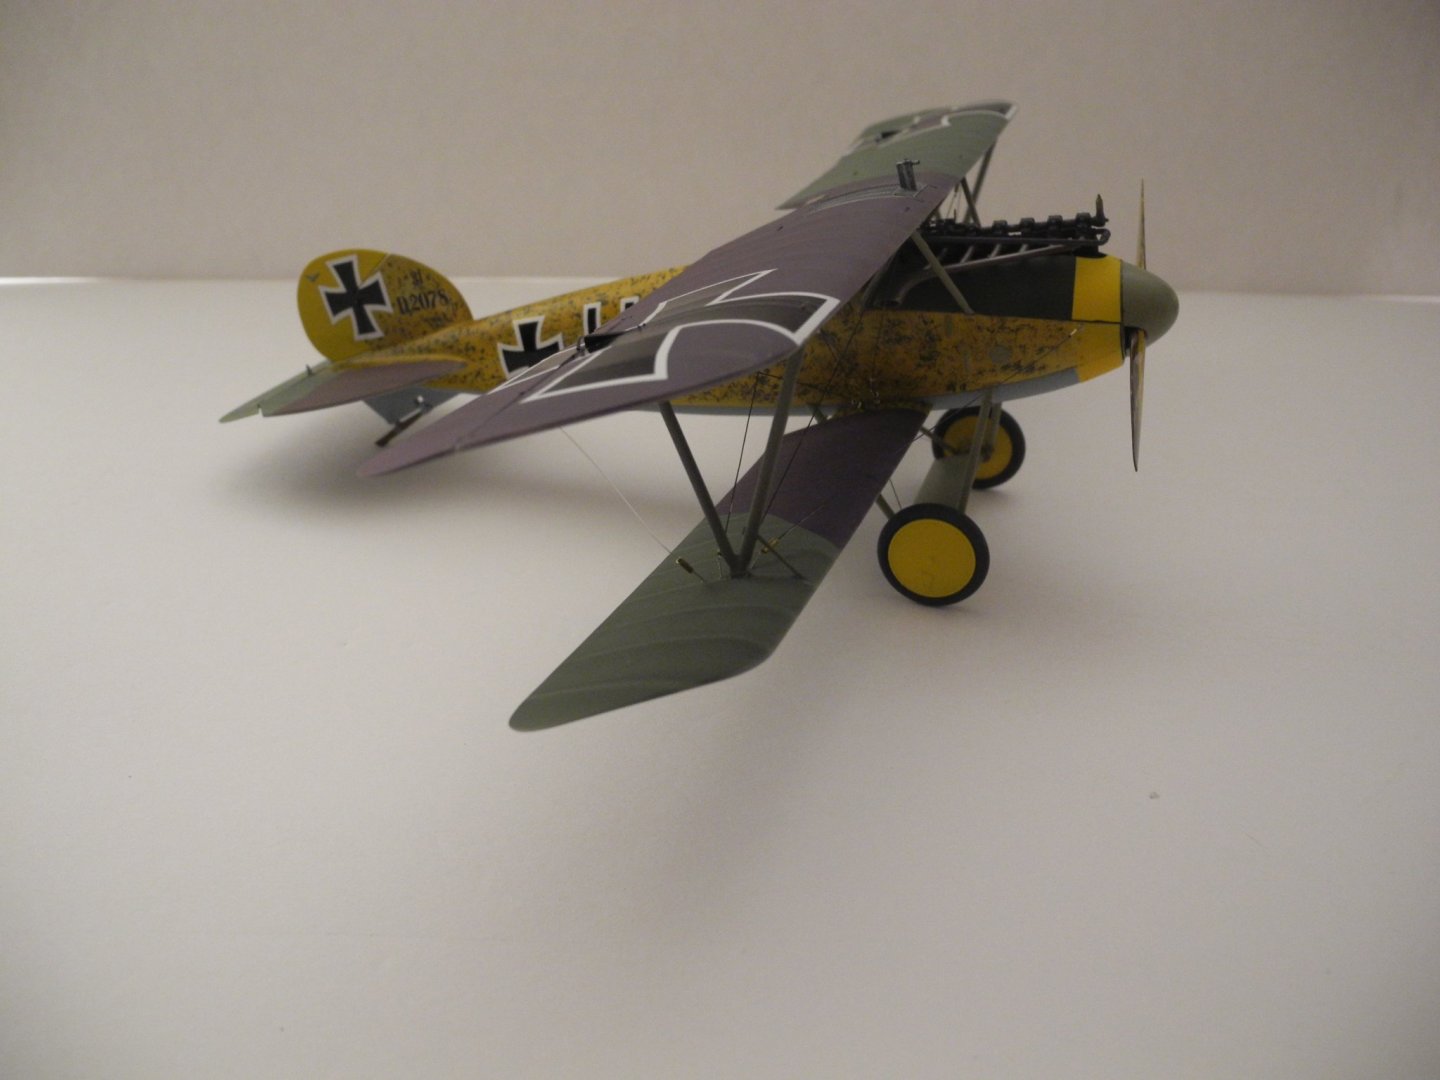
Buyers are out there and I have had moderate success selling built items I don't want to hang on to. There will be some things from time to time that buyers just are not interested in buying, but for the most part, everything I advertised sold for a buy-it-now price. Bear in mind, I make my kit/paint investment back with some cushion but in no way does it compensate for the hours spent in building the items. As an example, I sold this model for $275. I had about $120 invested with the kit and paints.
-
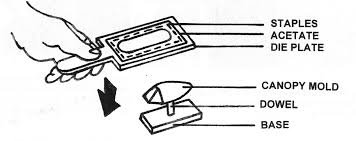
Yes, because most people don't own a vacuform machine. I have bought used ones before, but the vacuum pump is their Achilles heel. It's almost always dead on arrival. It's not terribly difficult to build your own vacuform platform, but most of us never get around to it thinking it's a bridge too far for one measly little project (but then there's a 2nd, a 3rd, or even more times when it could have been used).
-
One way to accomplish the task of creating a canopy for the rear gunner is a technique called heat plunging. As shown in the illustration, carve a wooden plug to fit the inside of your tail gunner position, then clamp a thin piece of clear plastic sheet in a frame as per the illustration. Heat up the plastic with a heat gun until it's soft and pliable, then quickly plunge your wooden mold into the plastic sheet and you will have created a window that will fit perfectly into your tail gunner's position. Aircraft modelers have been using this technique for many years to create plastic canopies for their models.
-
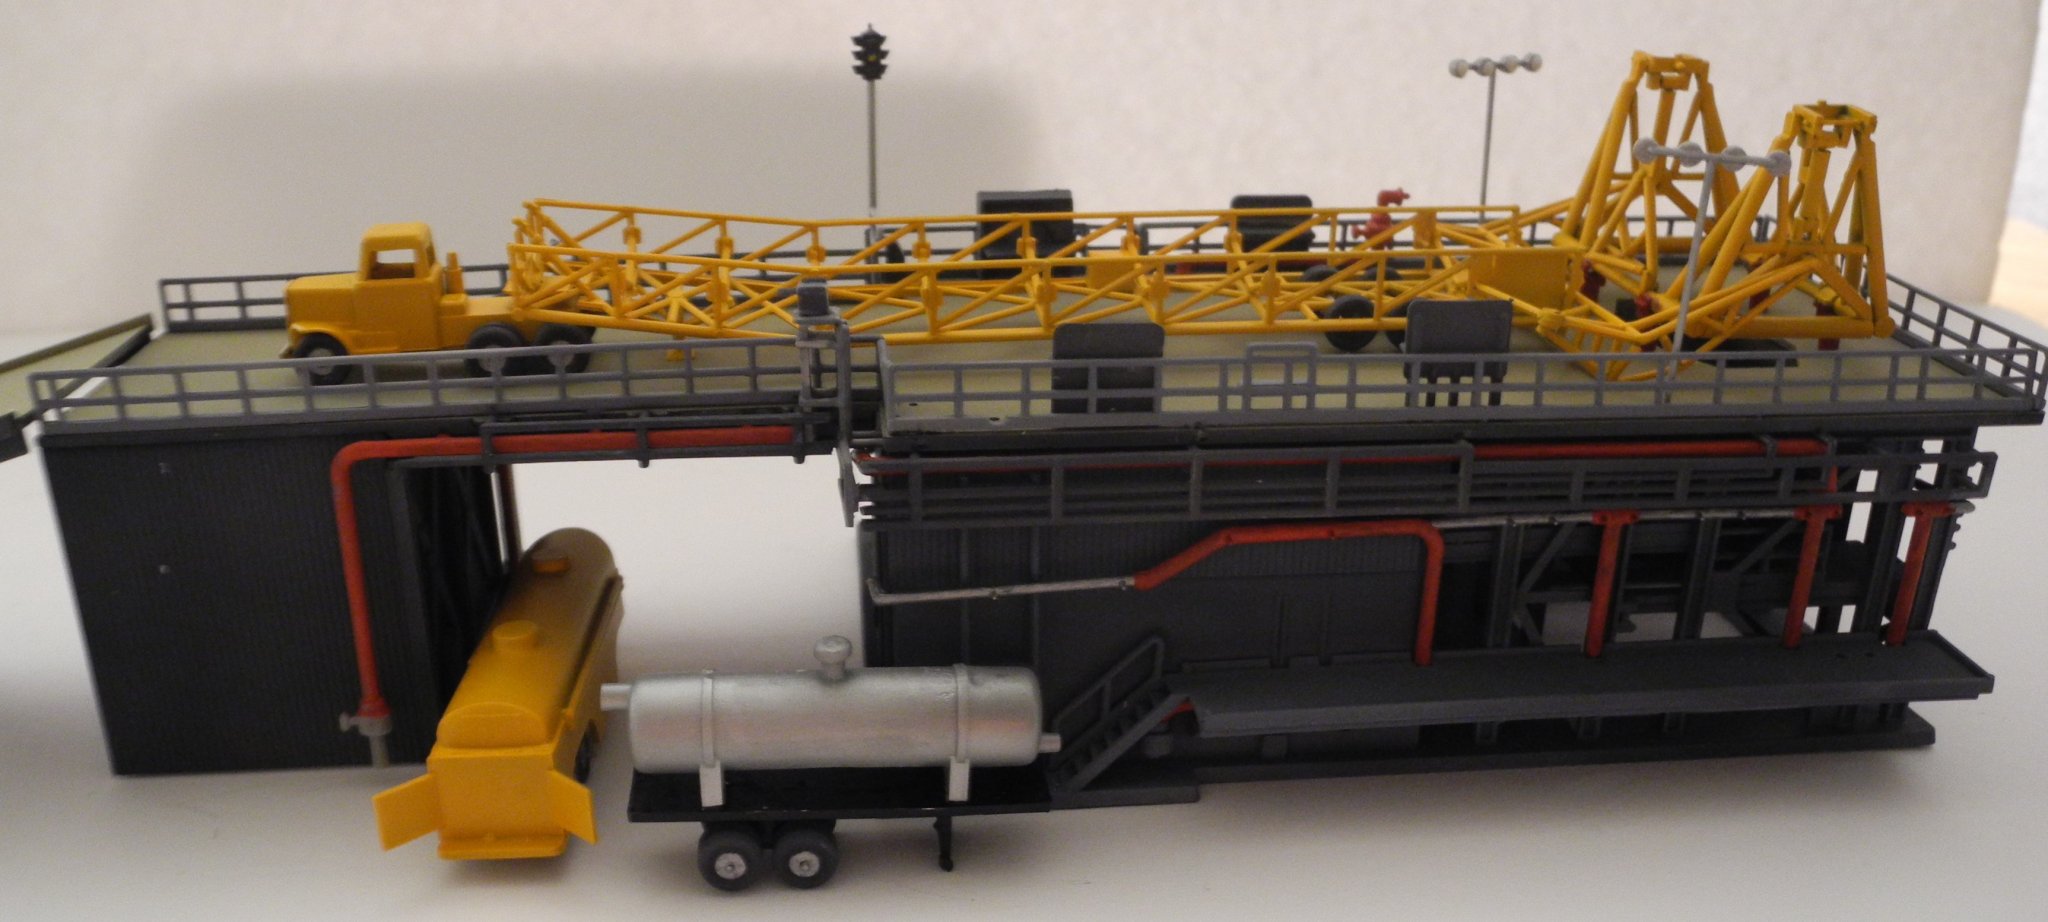
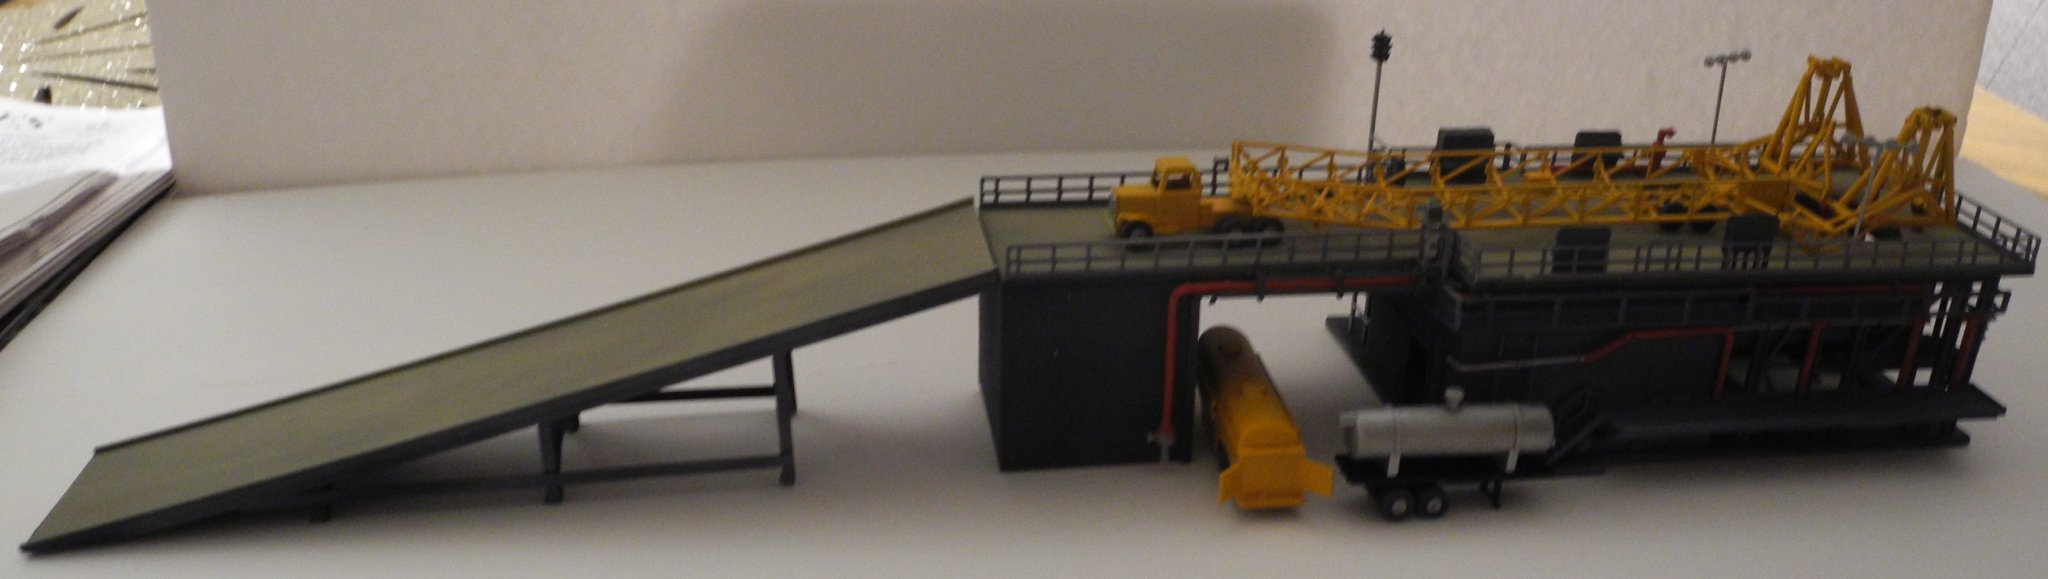
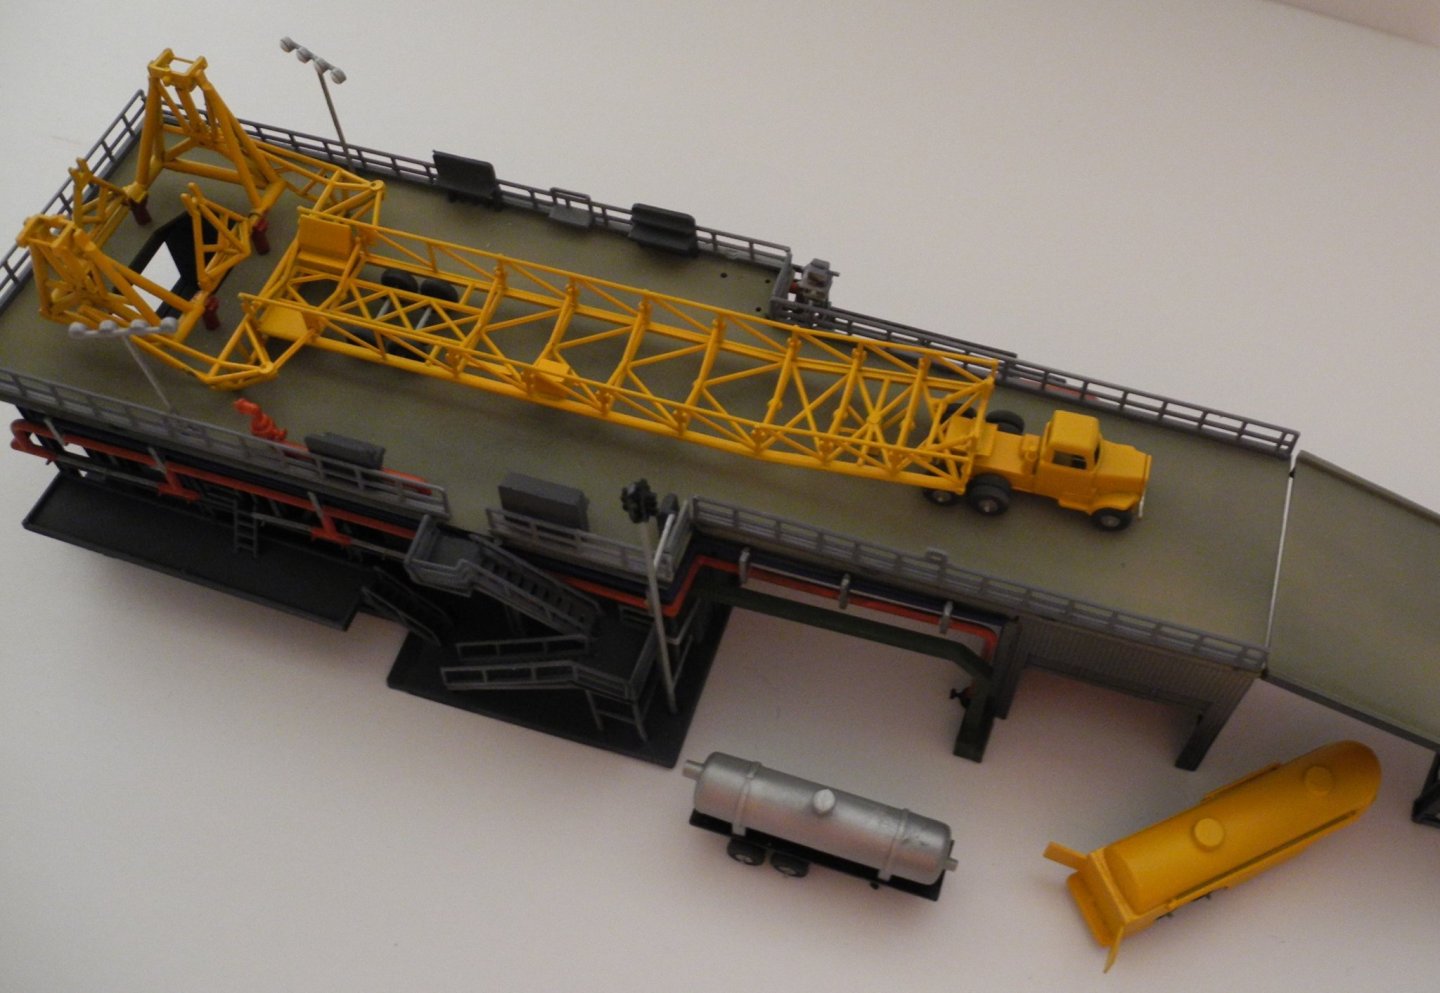
That's because the tractor is intended to move the rocket transporter and not the trailer I had posed it with. Seems to perfectly fit the width of the rocket transport.


- 57 replies
-
- 10
-