CDW
-
Posts
7,755 -
Joined
-
Last visited
Content Type
Profiles
Forums
Gallery
Events
Everything posted by CDW
-
 You're too kind Jonathan. Yes, she has replaced my rubber ducky, she makes bath time so much fun. 😎
- 63 replies
-
- 5
-

-
- revell
- harbor tug
- (and 2 more)
-
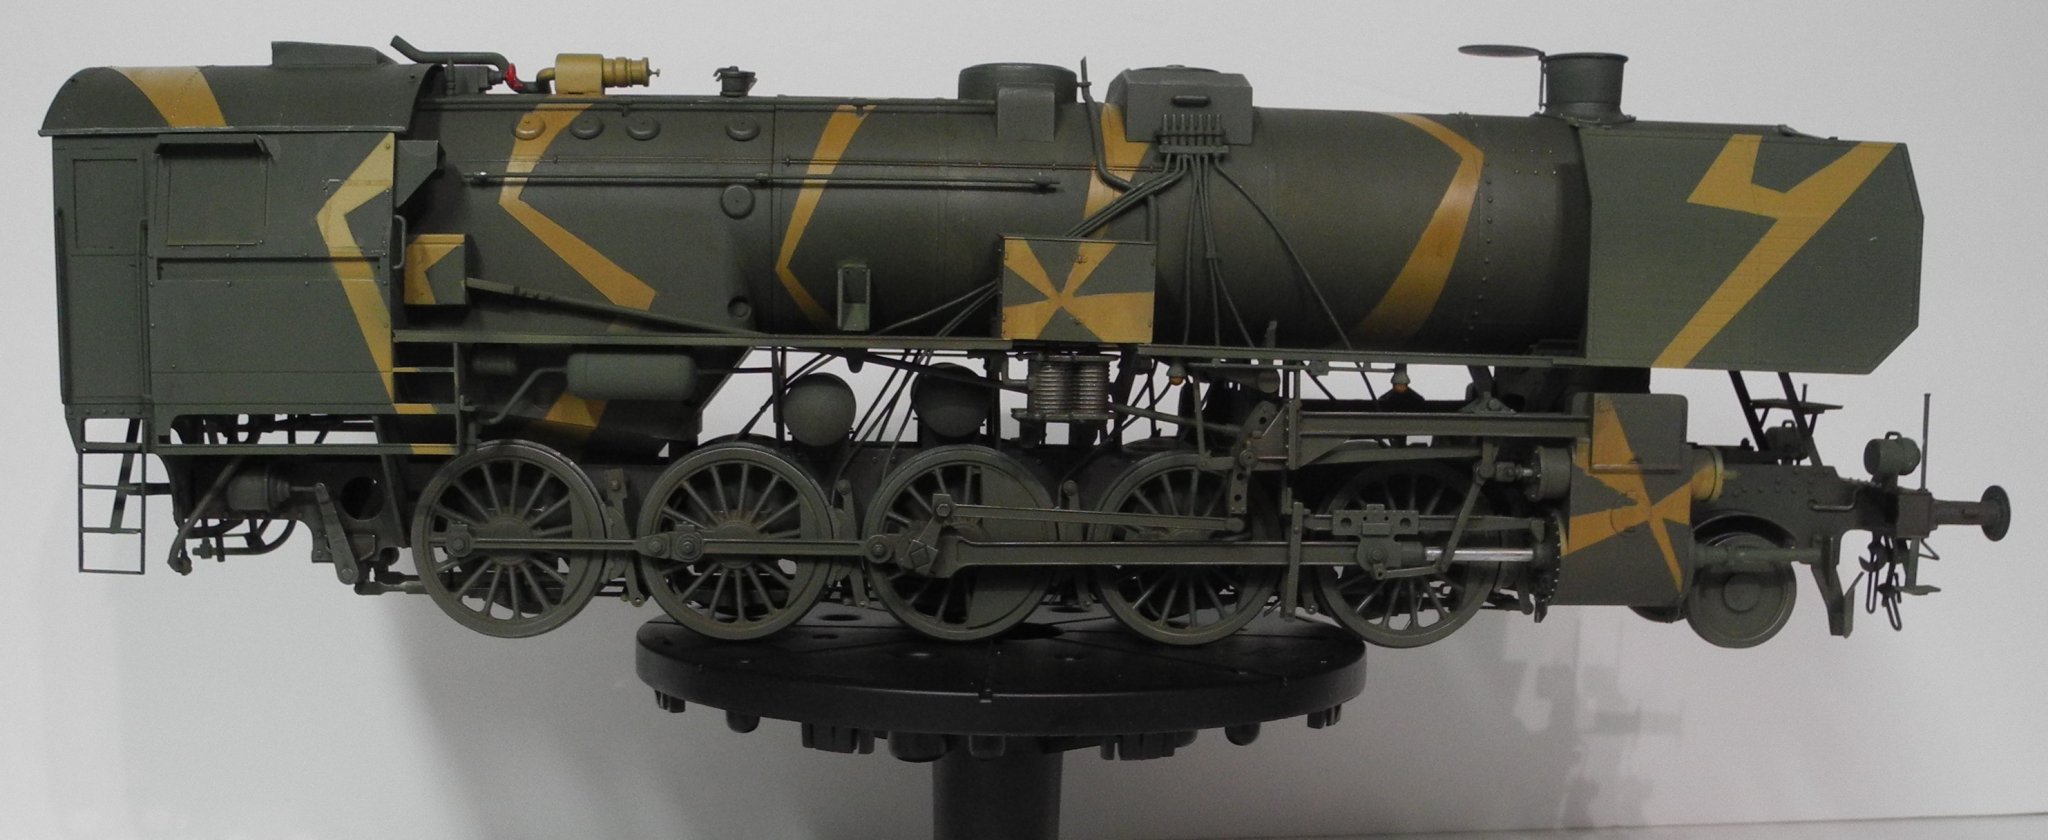
Lol, I should have read your post before I replied to Roger. I guess we have our answer...smoke deflectors. Your reply was on page 3, a new page.
-
Roger I've been told those are smoke deflectors, but I don't really know for sure.
-
I dunno for sure Lou, but I think you may have nailed the message behind the name.
-
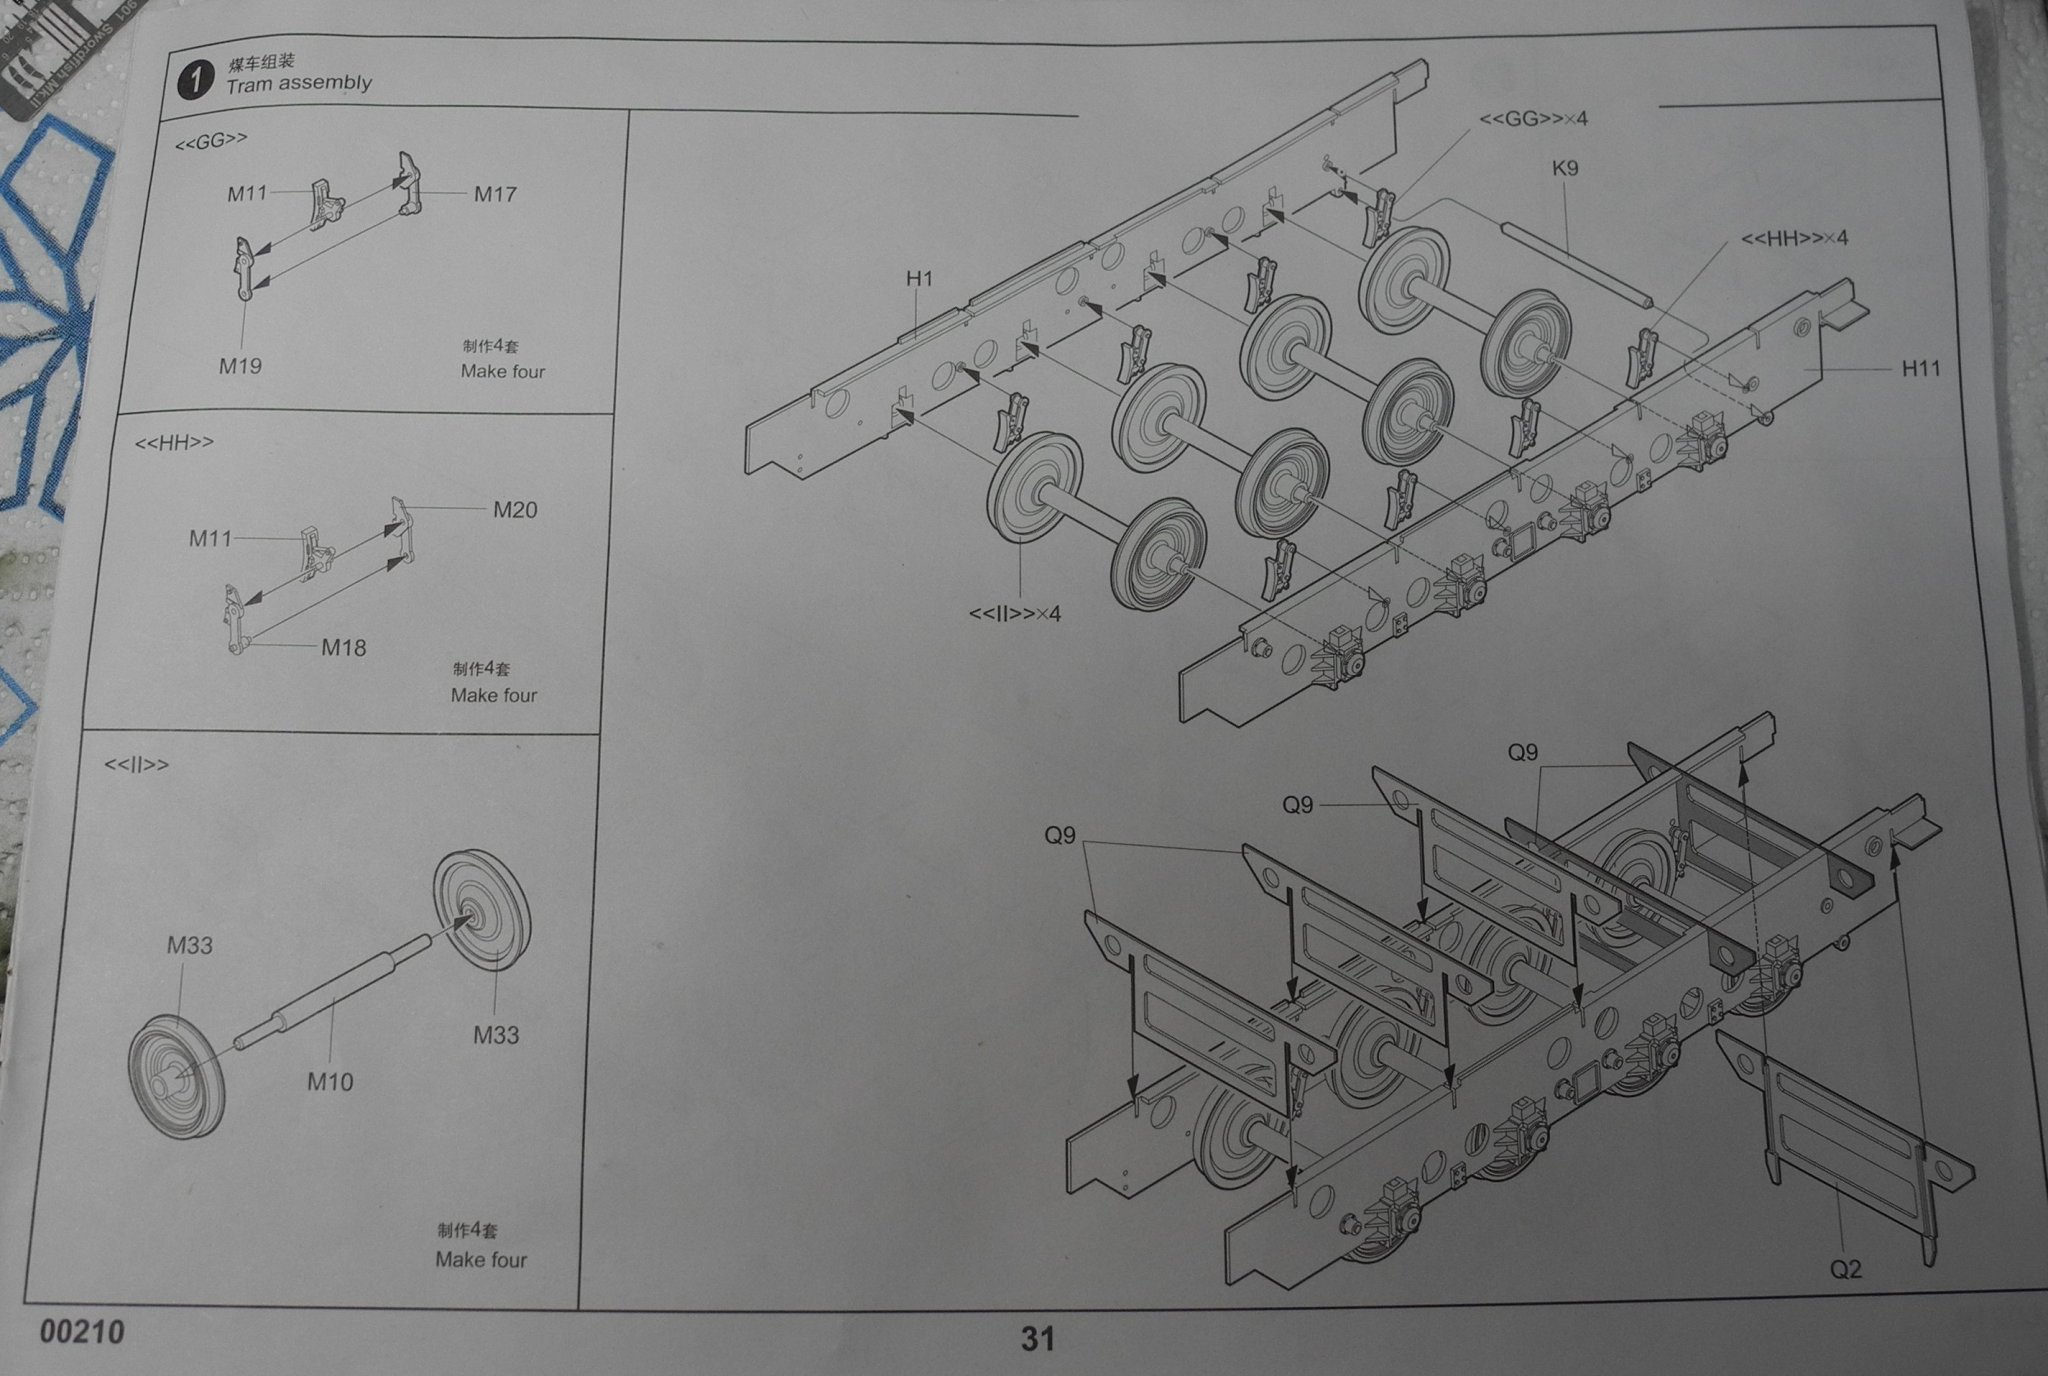
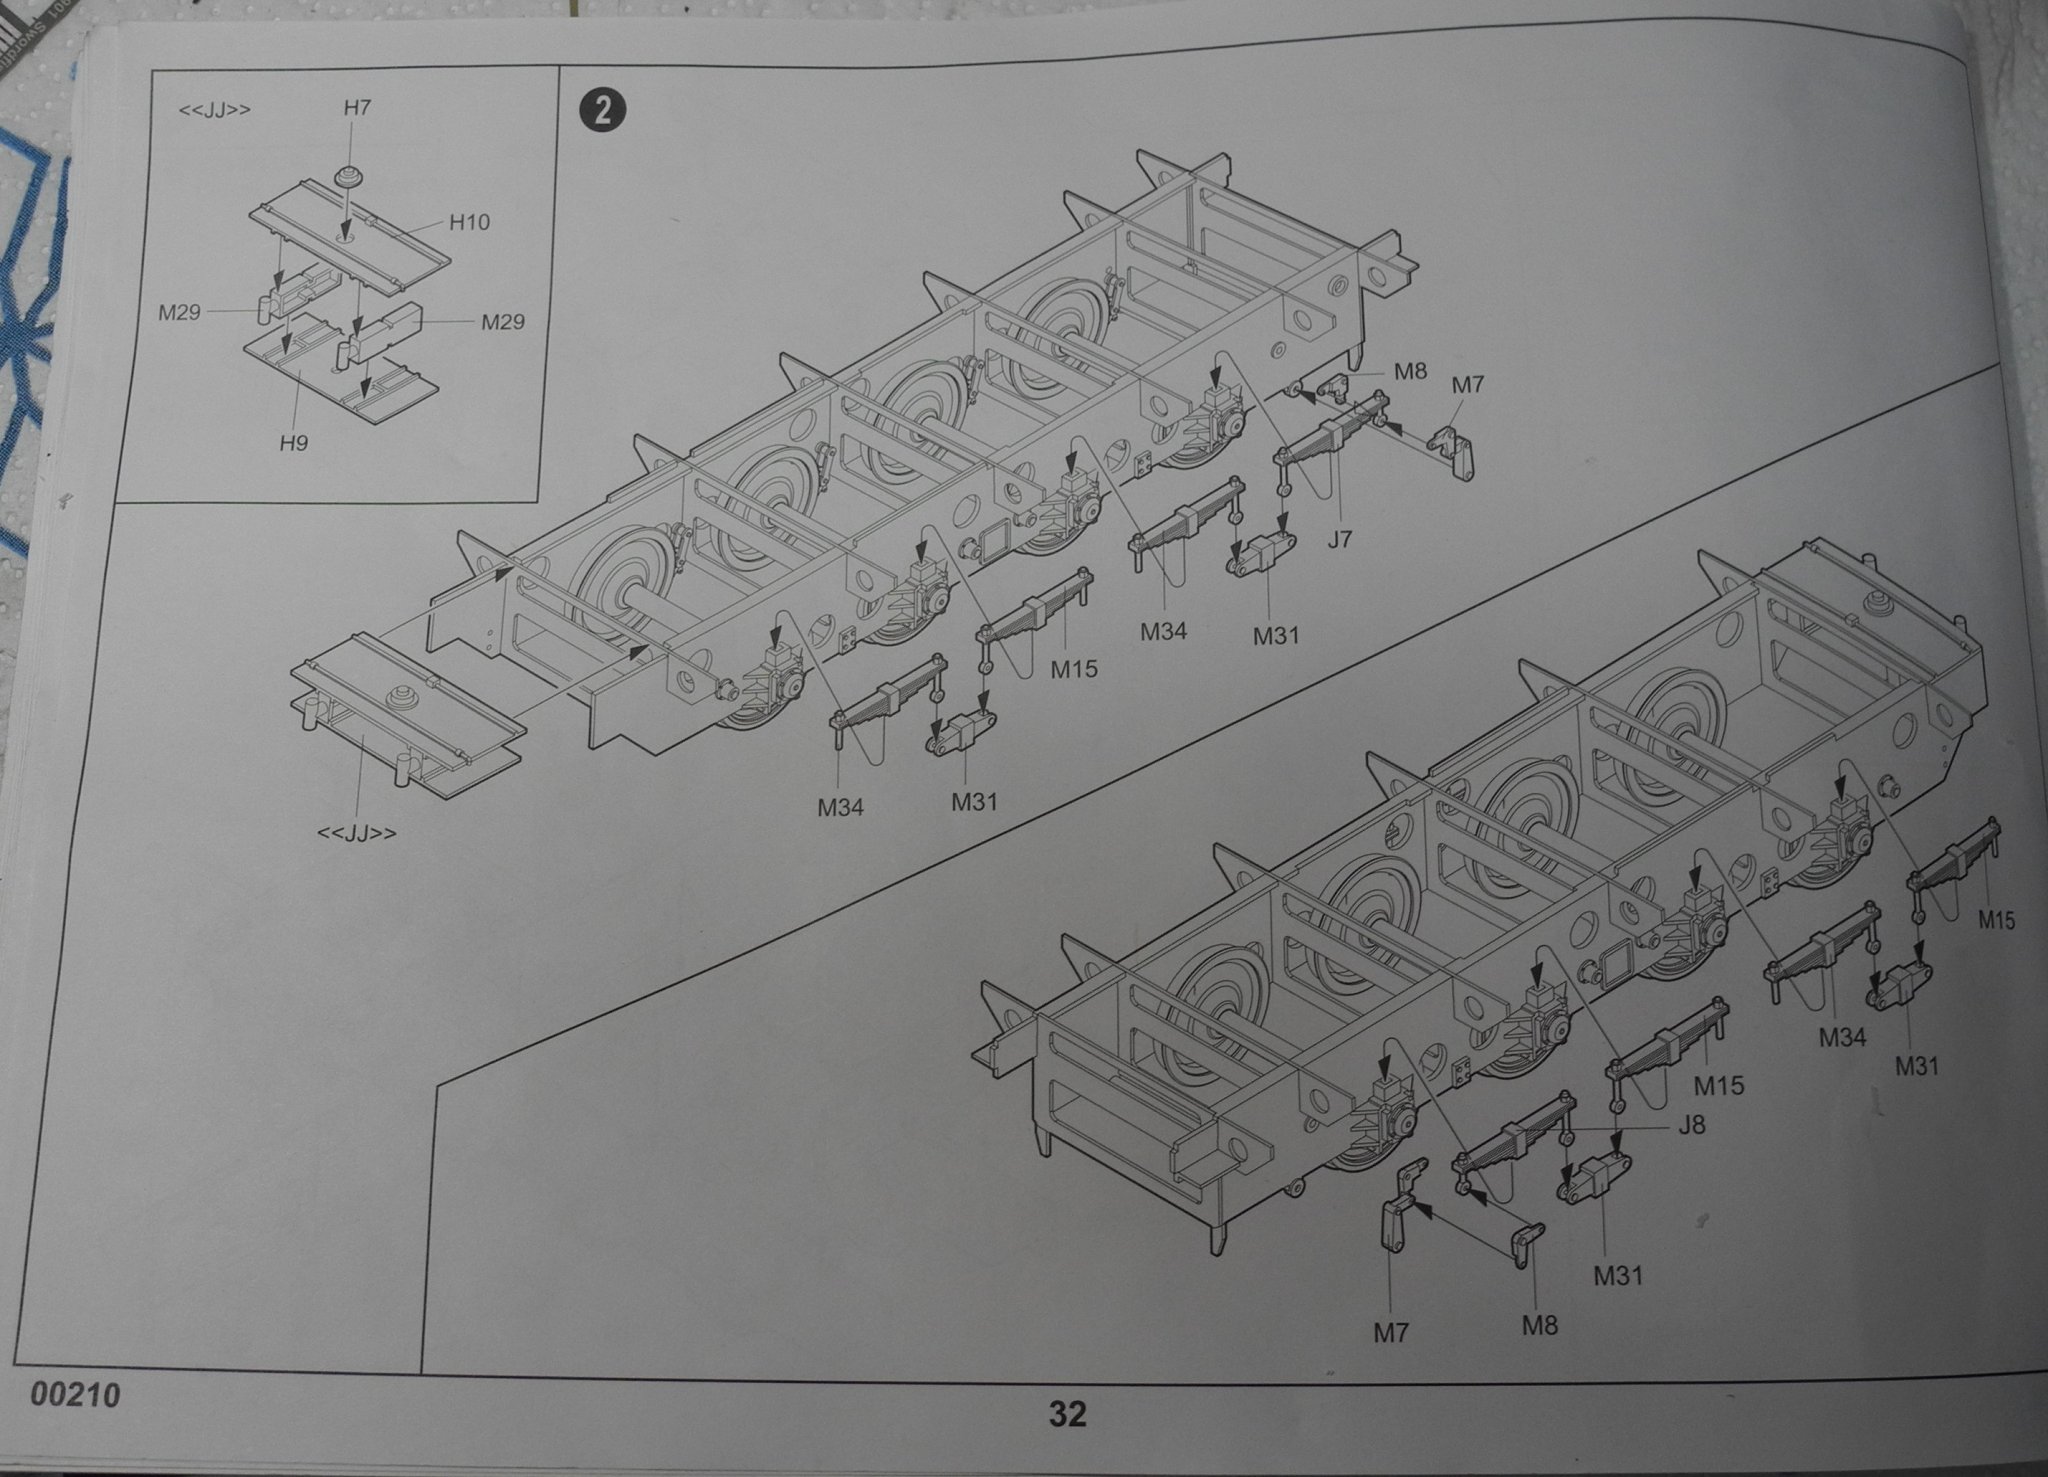
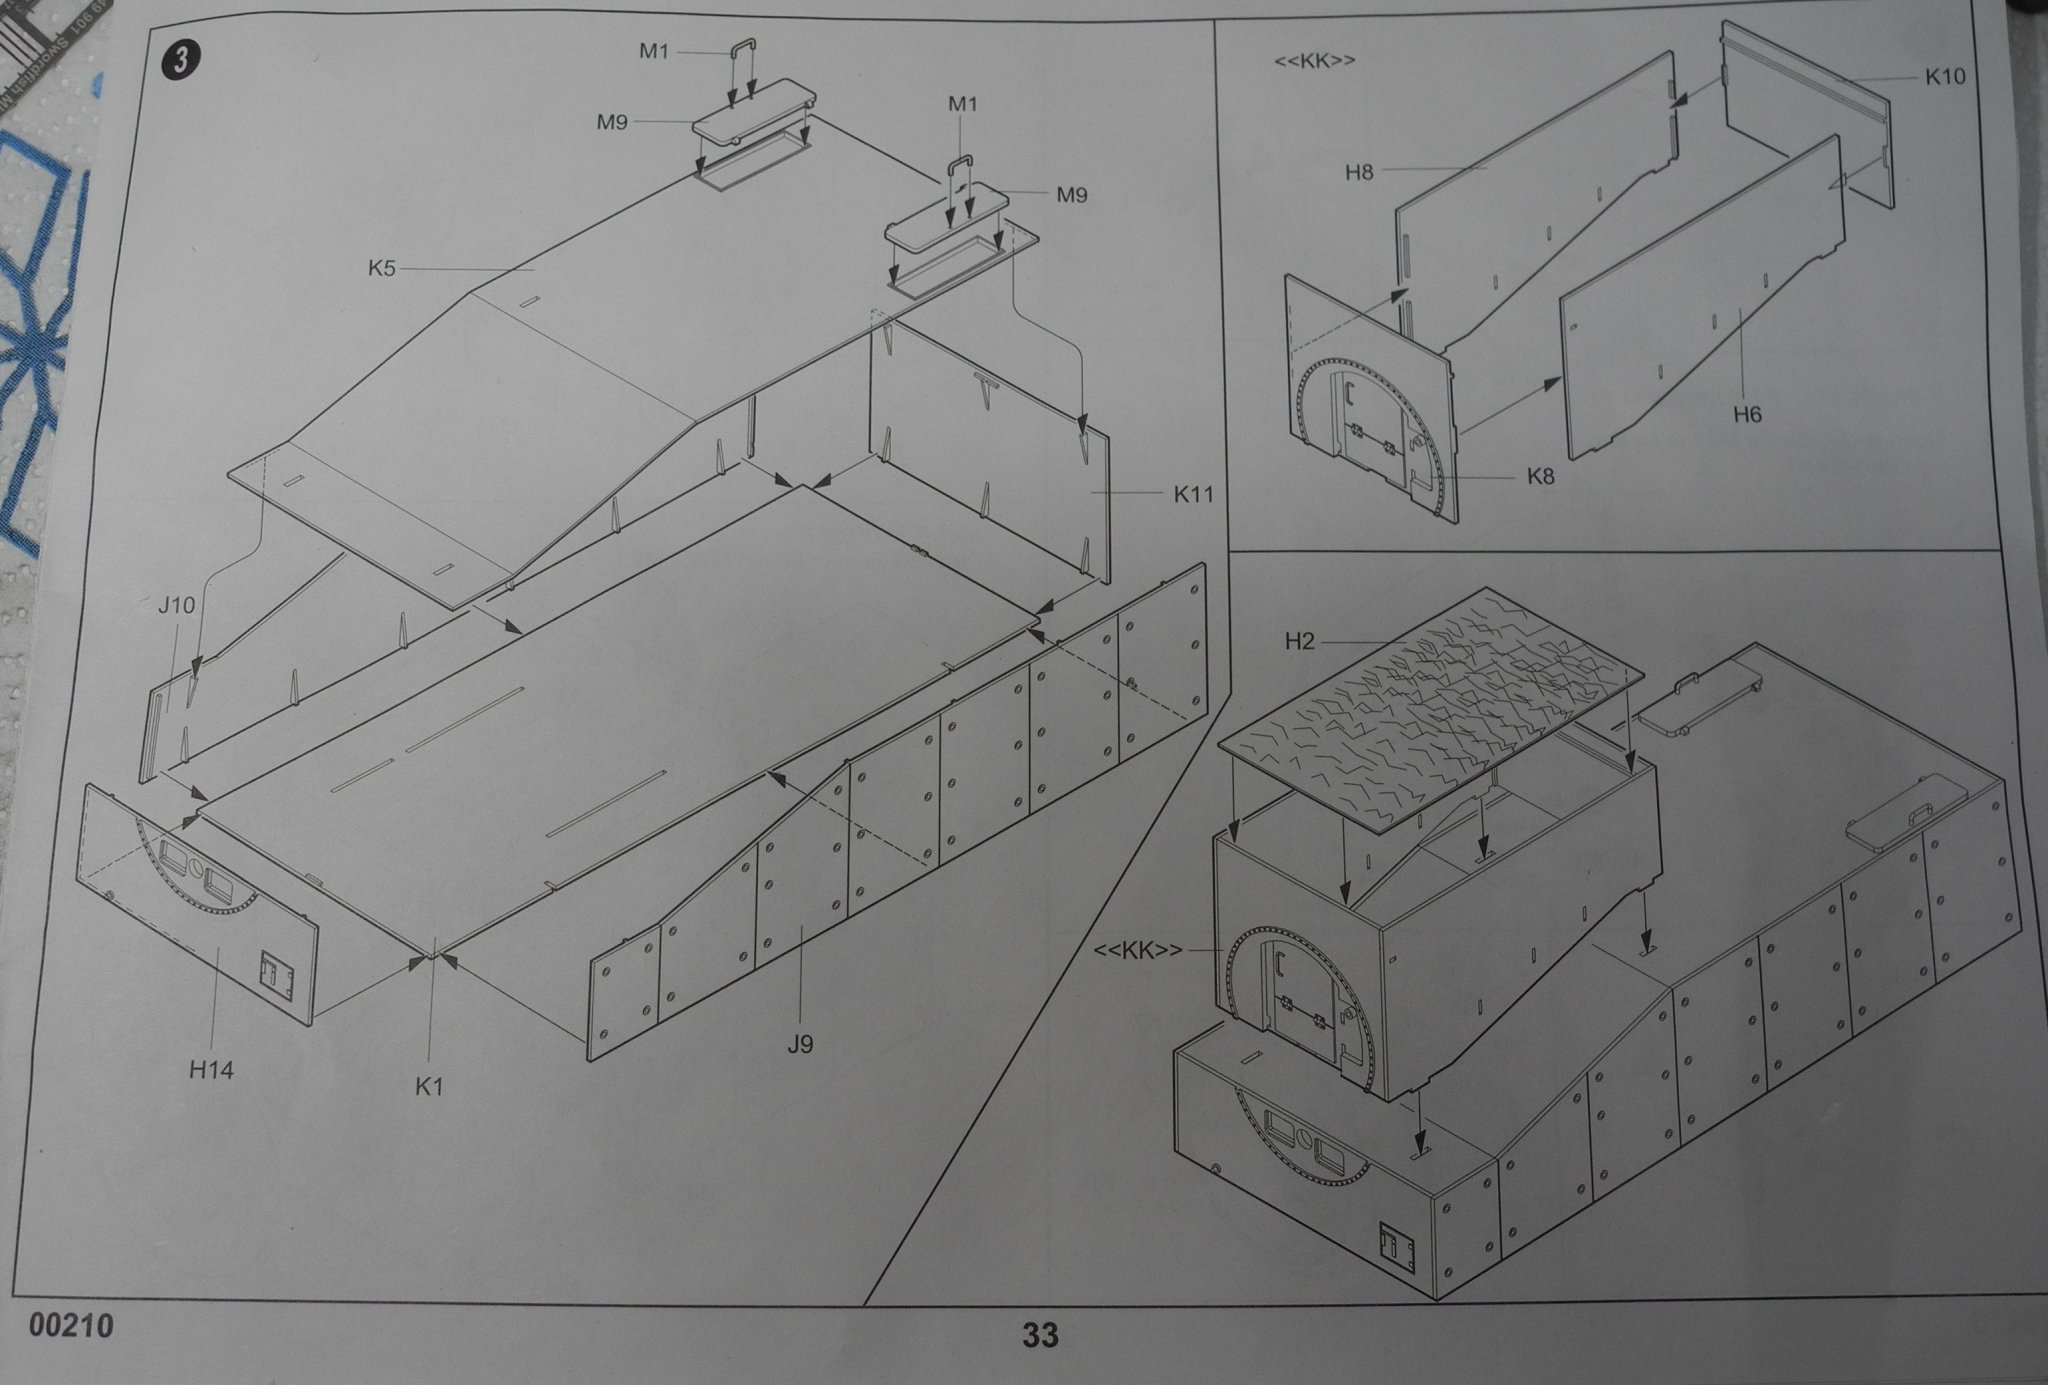
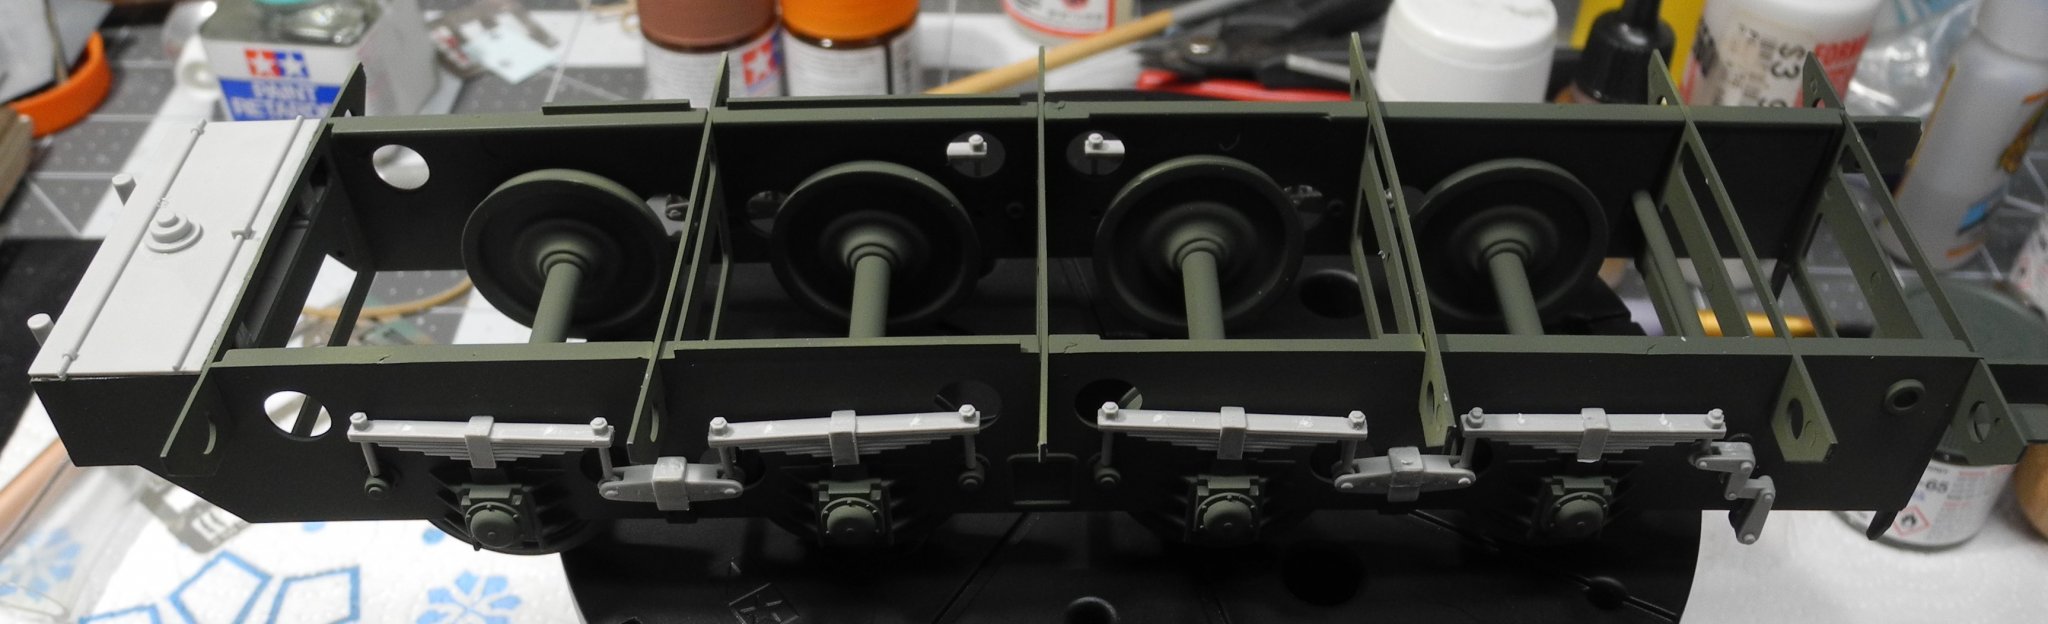
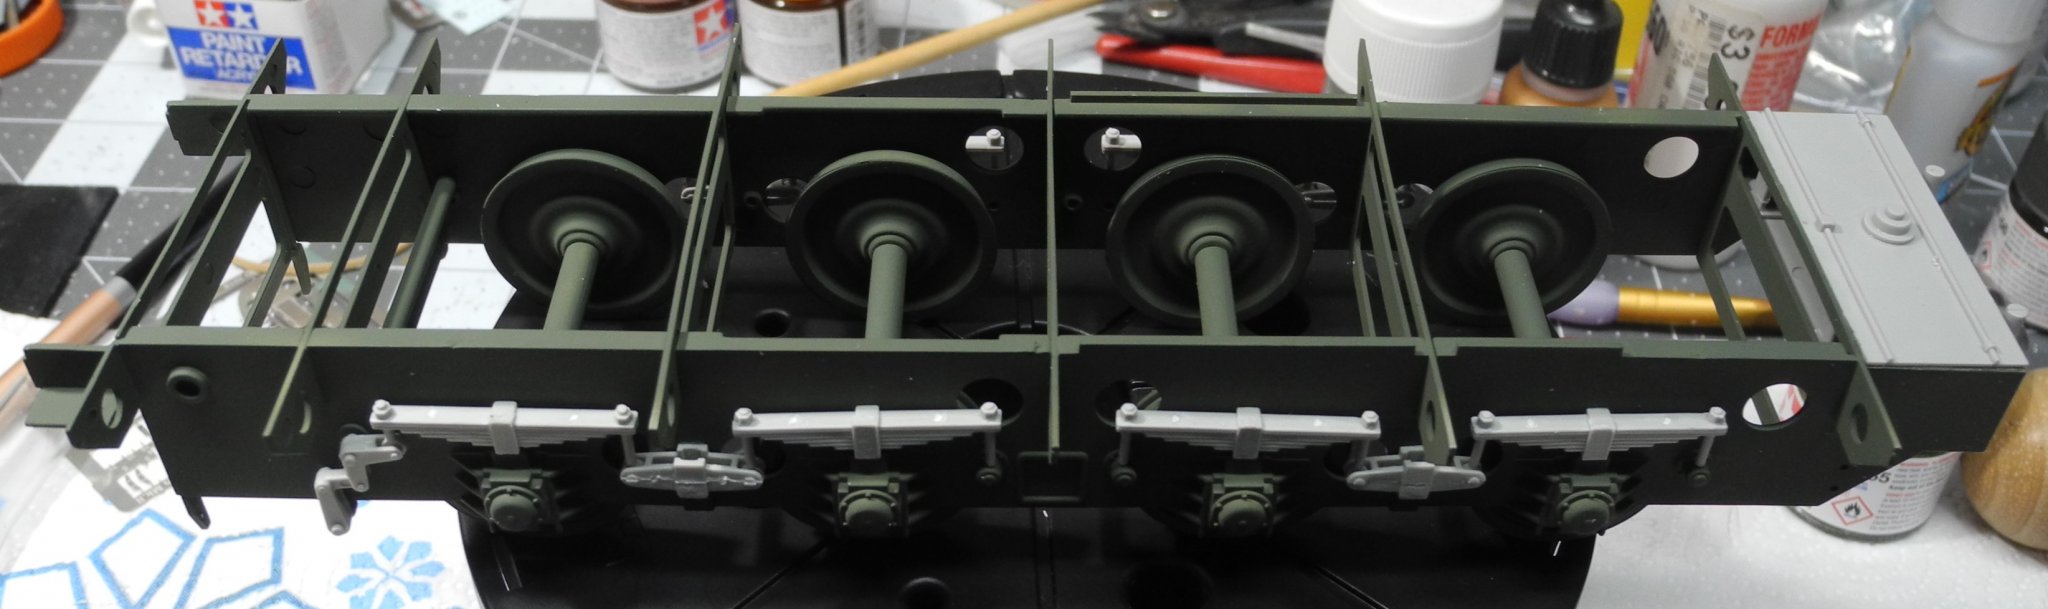
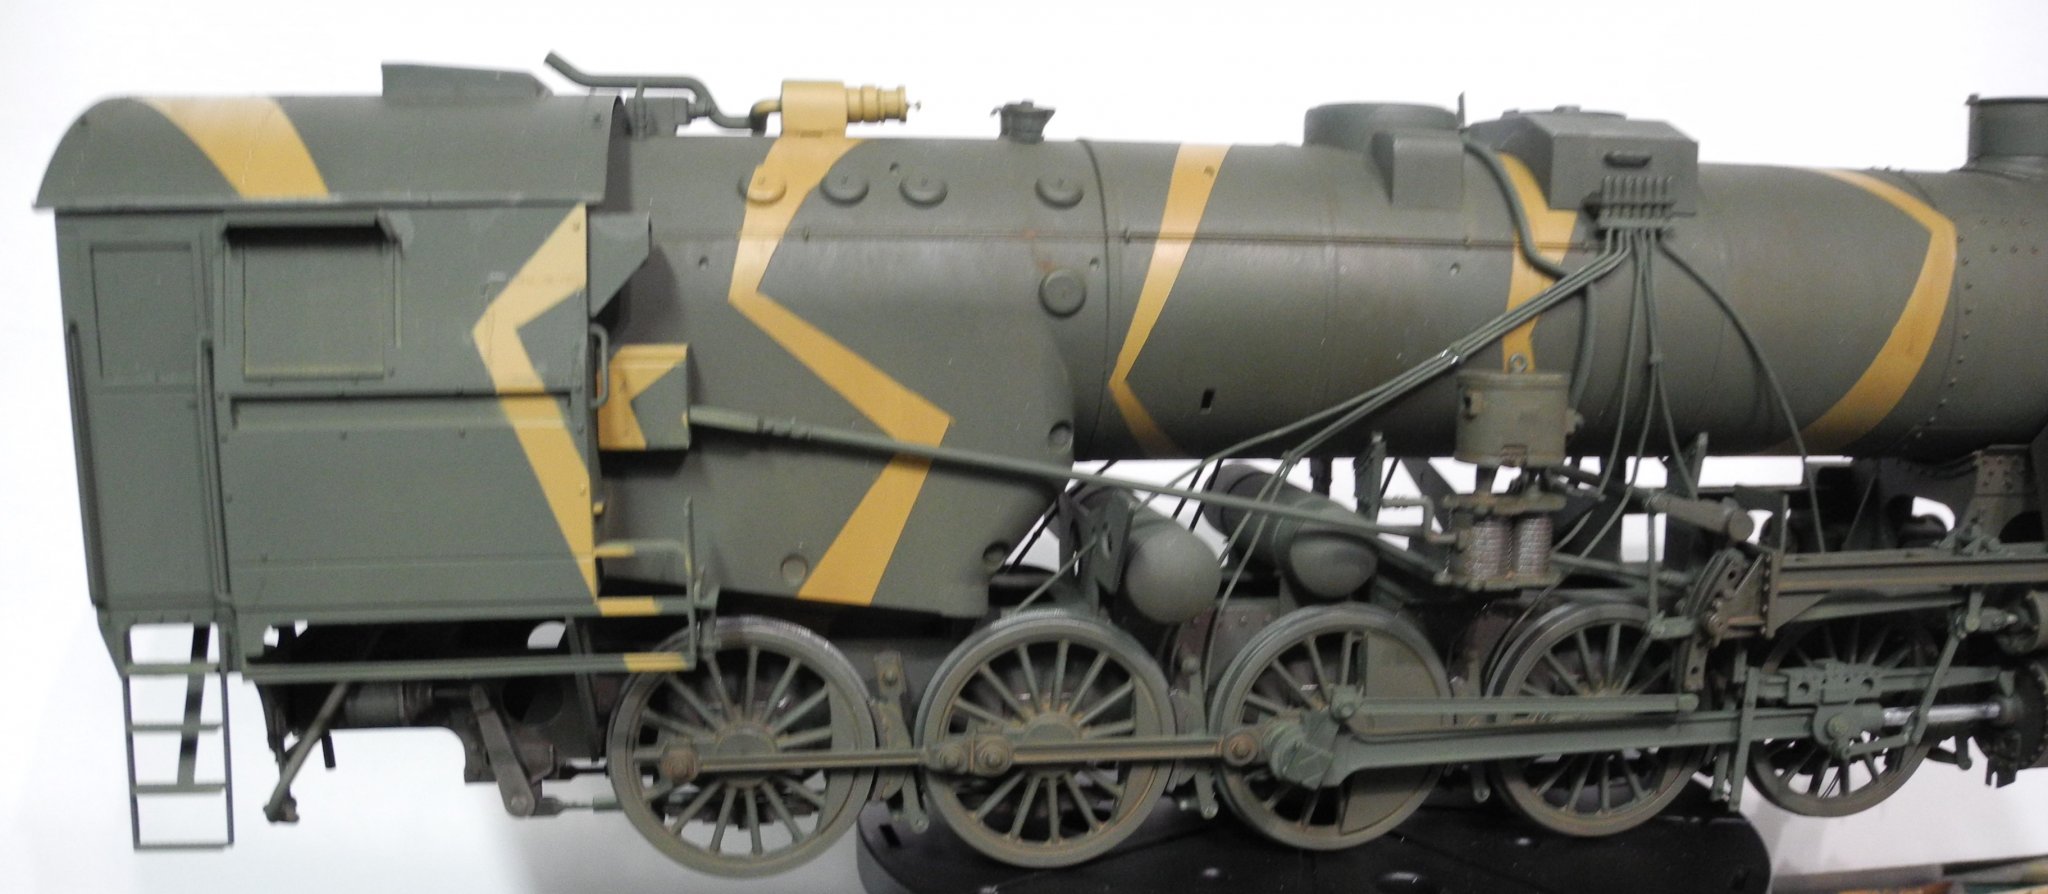
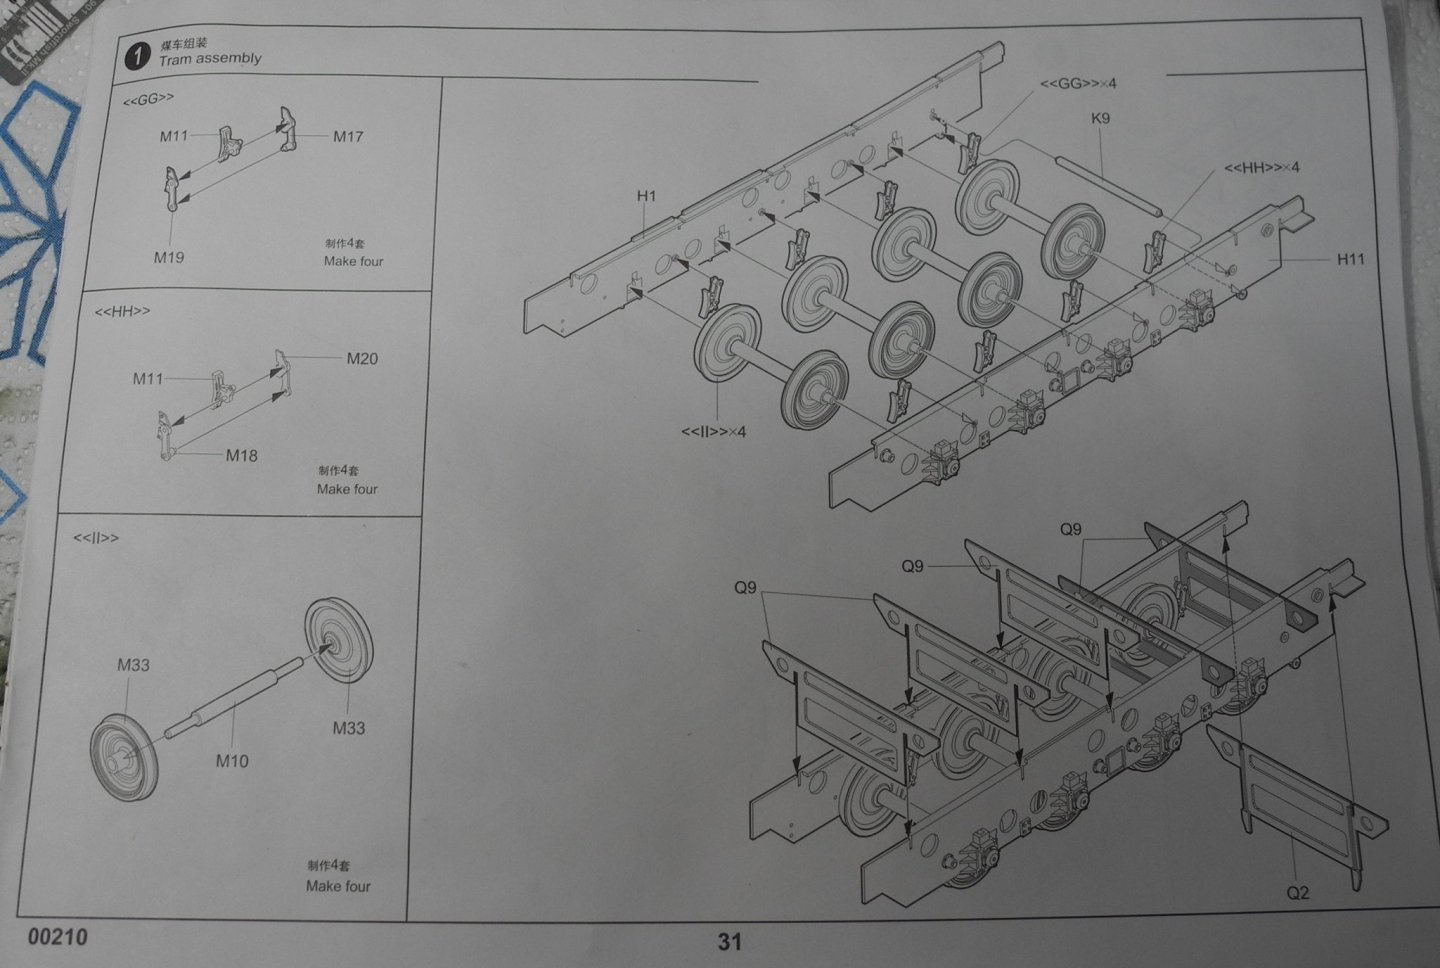
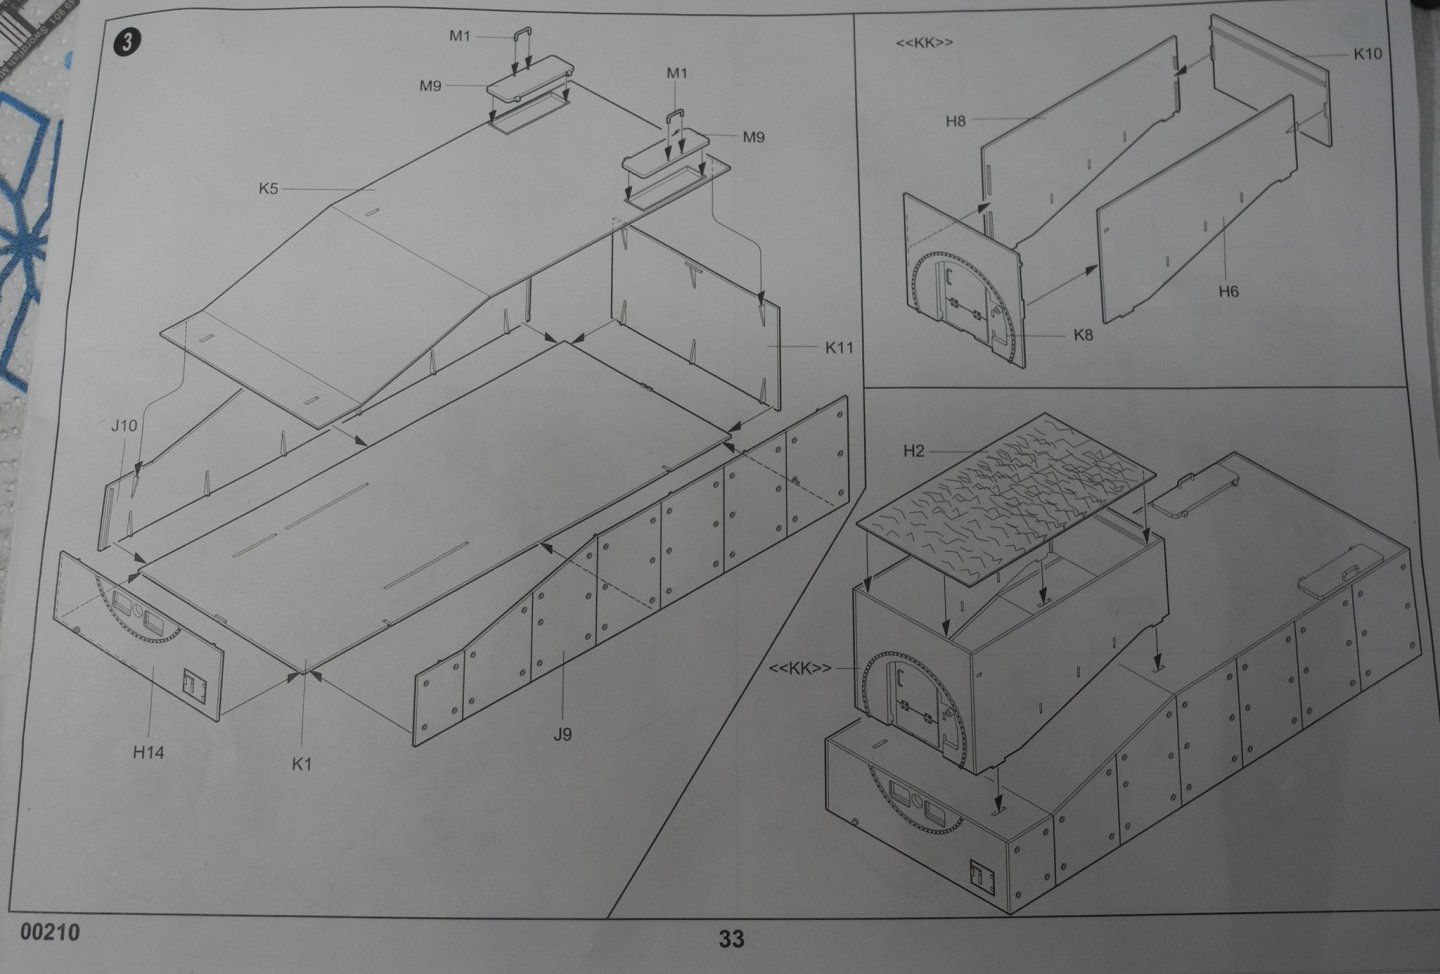
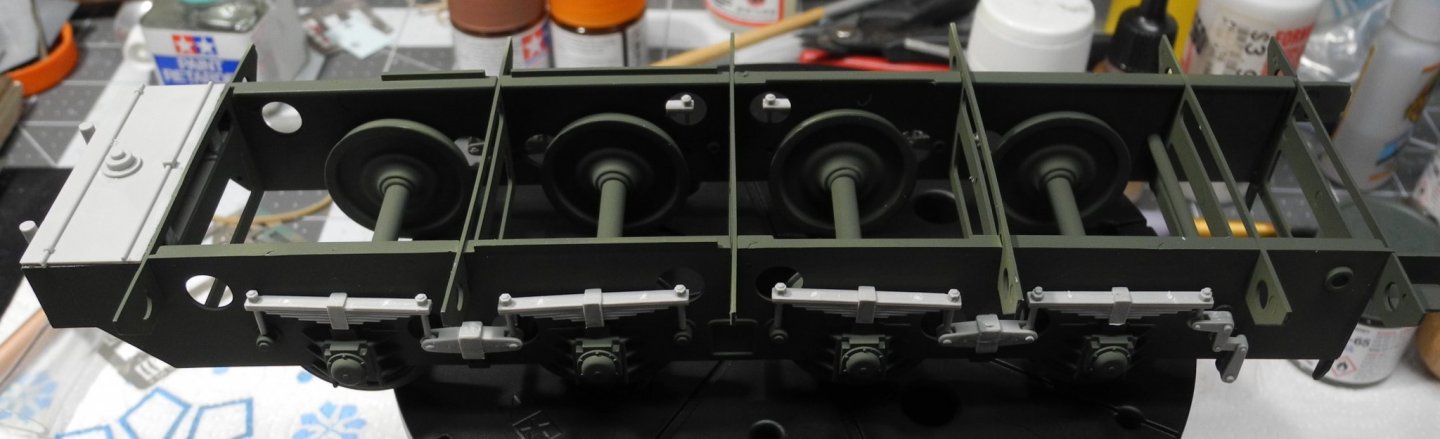
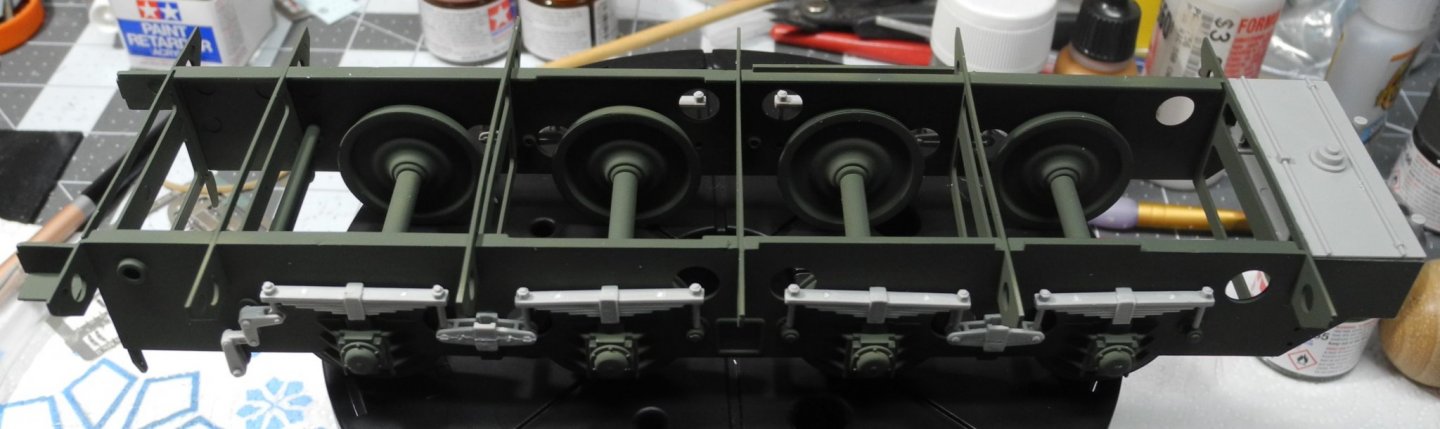
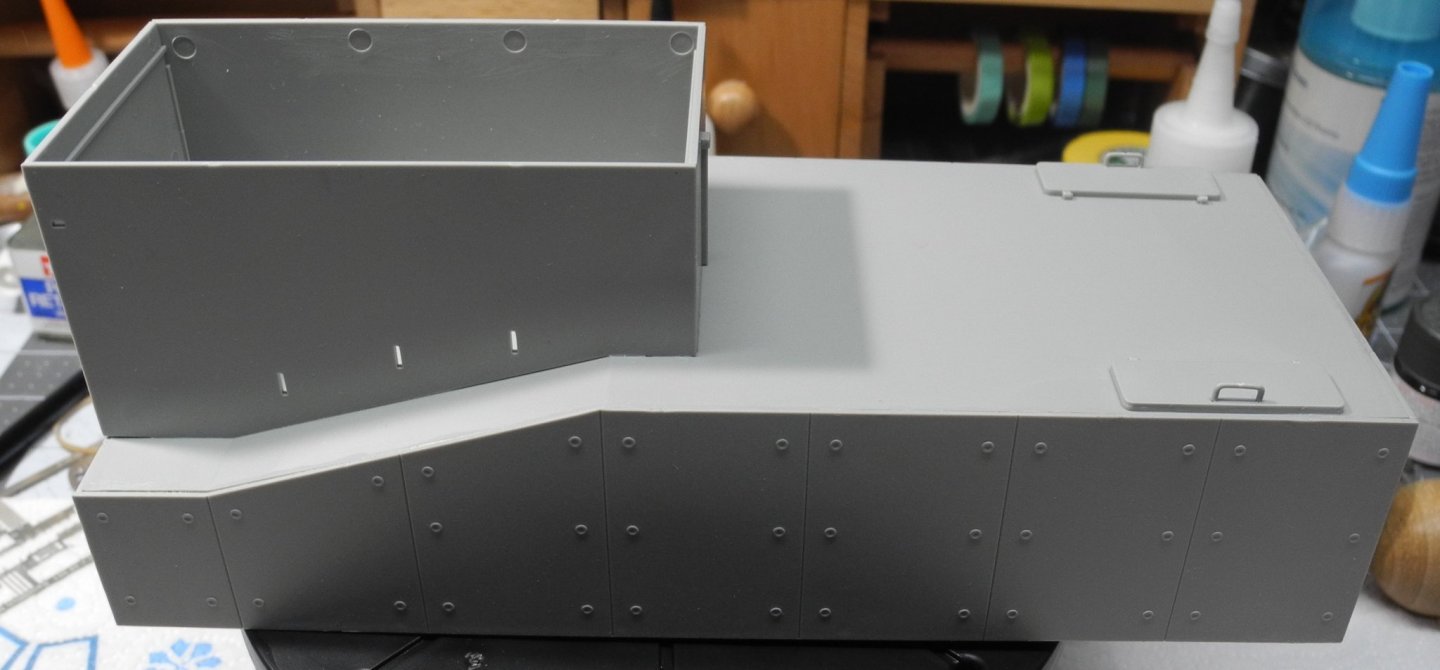
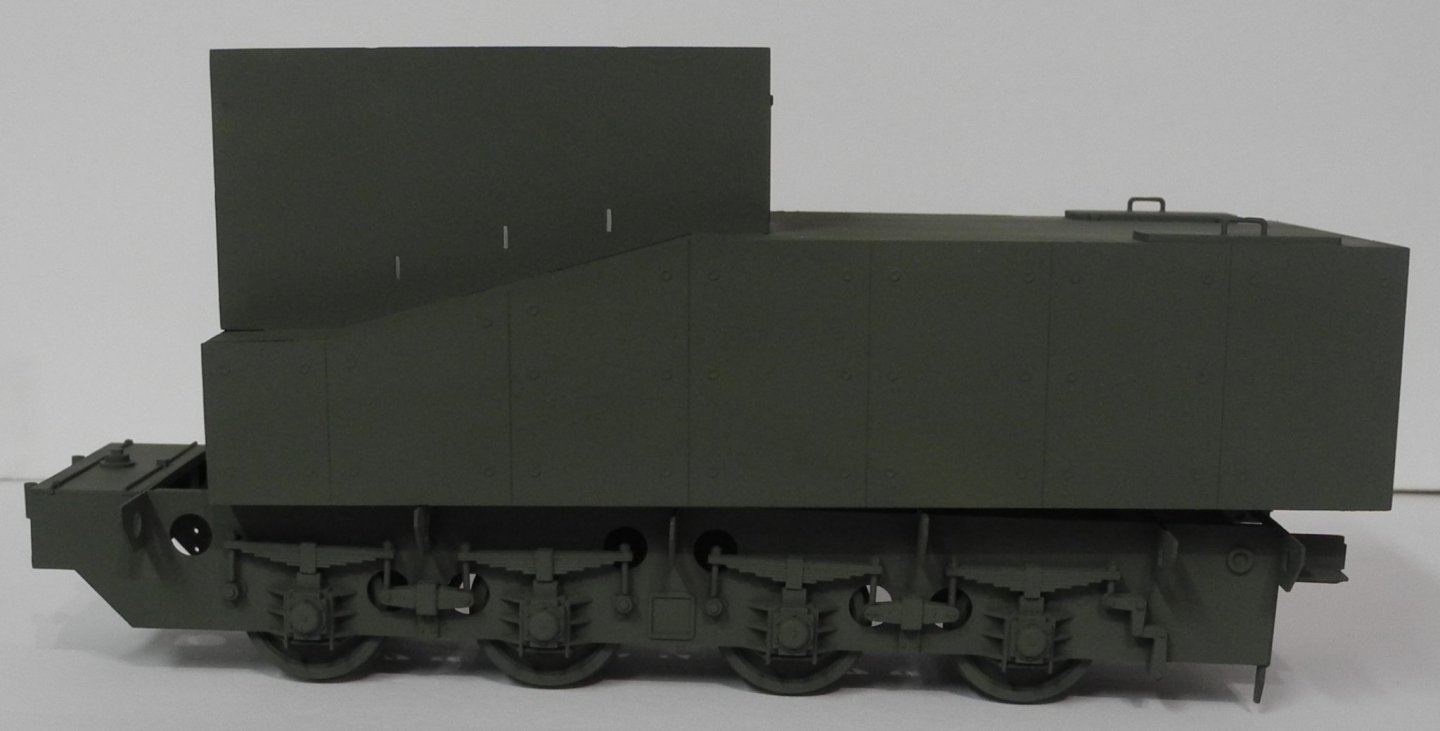
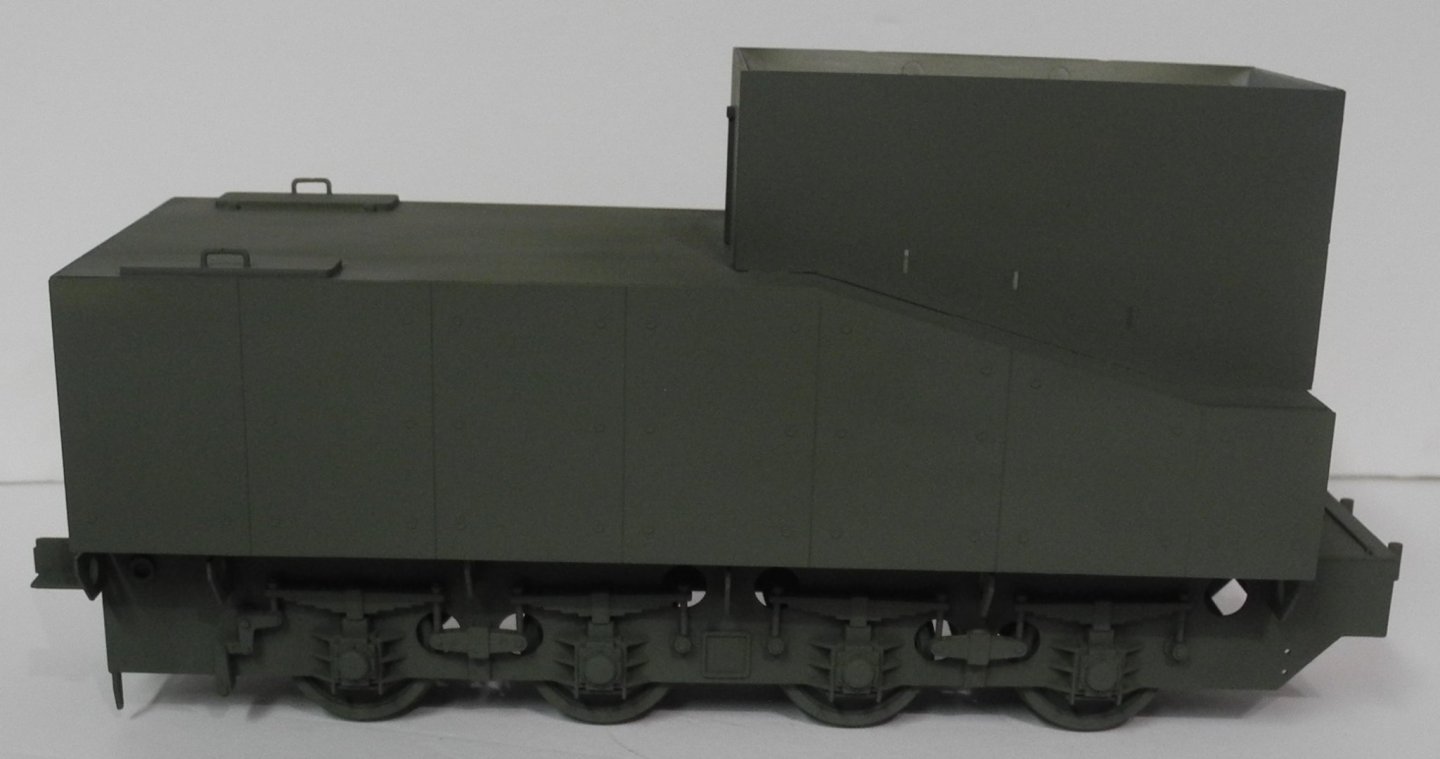
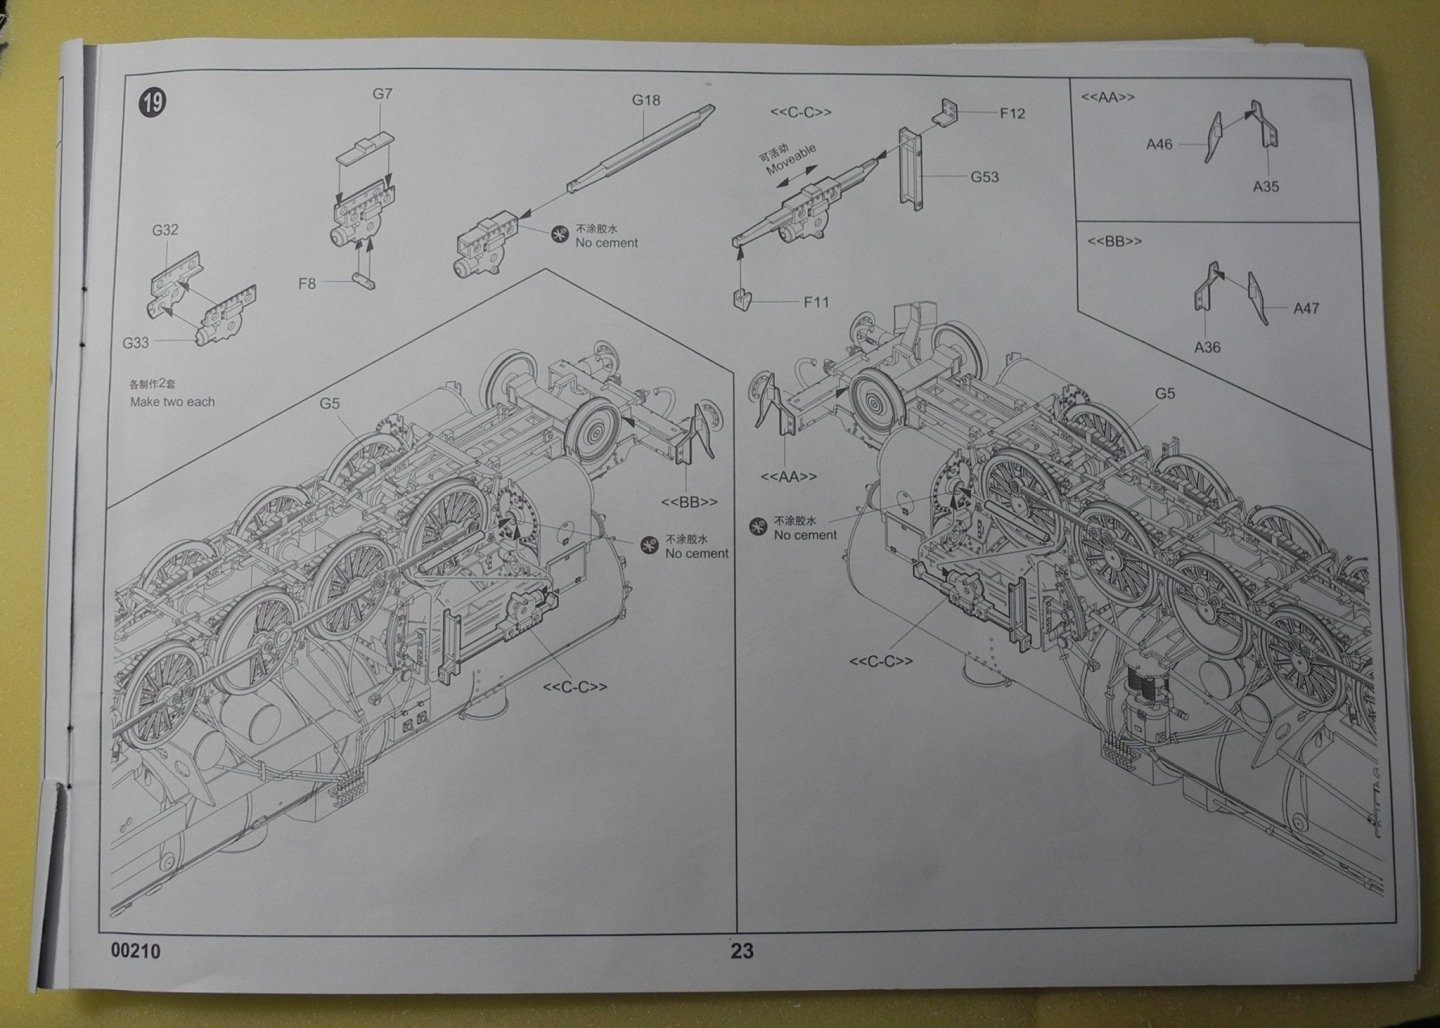
Today was the beginning of the coal tender construction. The focus was on steps 1, 2, and 3. The construction of these steps was very straight forward with no issues at all. Assembly went quite fast. After everything was assembled, gave it all the base color coat of field grey. I like the way Trumpeter gave a detailed rendering of the suspension on this model. It adds something to see in an otherwise dull part of the model. It's going to be a fairly quick build to finish this coal tender. Will probably go ahead and start the Leopold rail gun after the tender is completed so as to present the entire model as I originally conceived of it when I bought these items years ago. I think I've had these items in my to-do pile for 10 or 15 years. The model came out in 2005 and I believe I bought it when it first came out.


- 92 replies
-
- 10
-
-
Along with the whole of your model, your carvings are very impressive. Nice work Phil.
-
I'm not crazy about that red either. I followed the color call-out for those...maybe a dull coat would tone it down some. If not, I will paint over them with field grey.
-
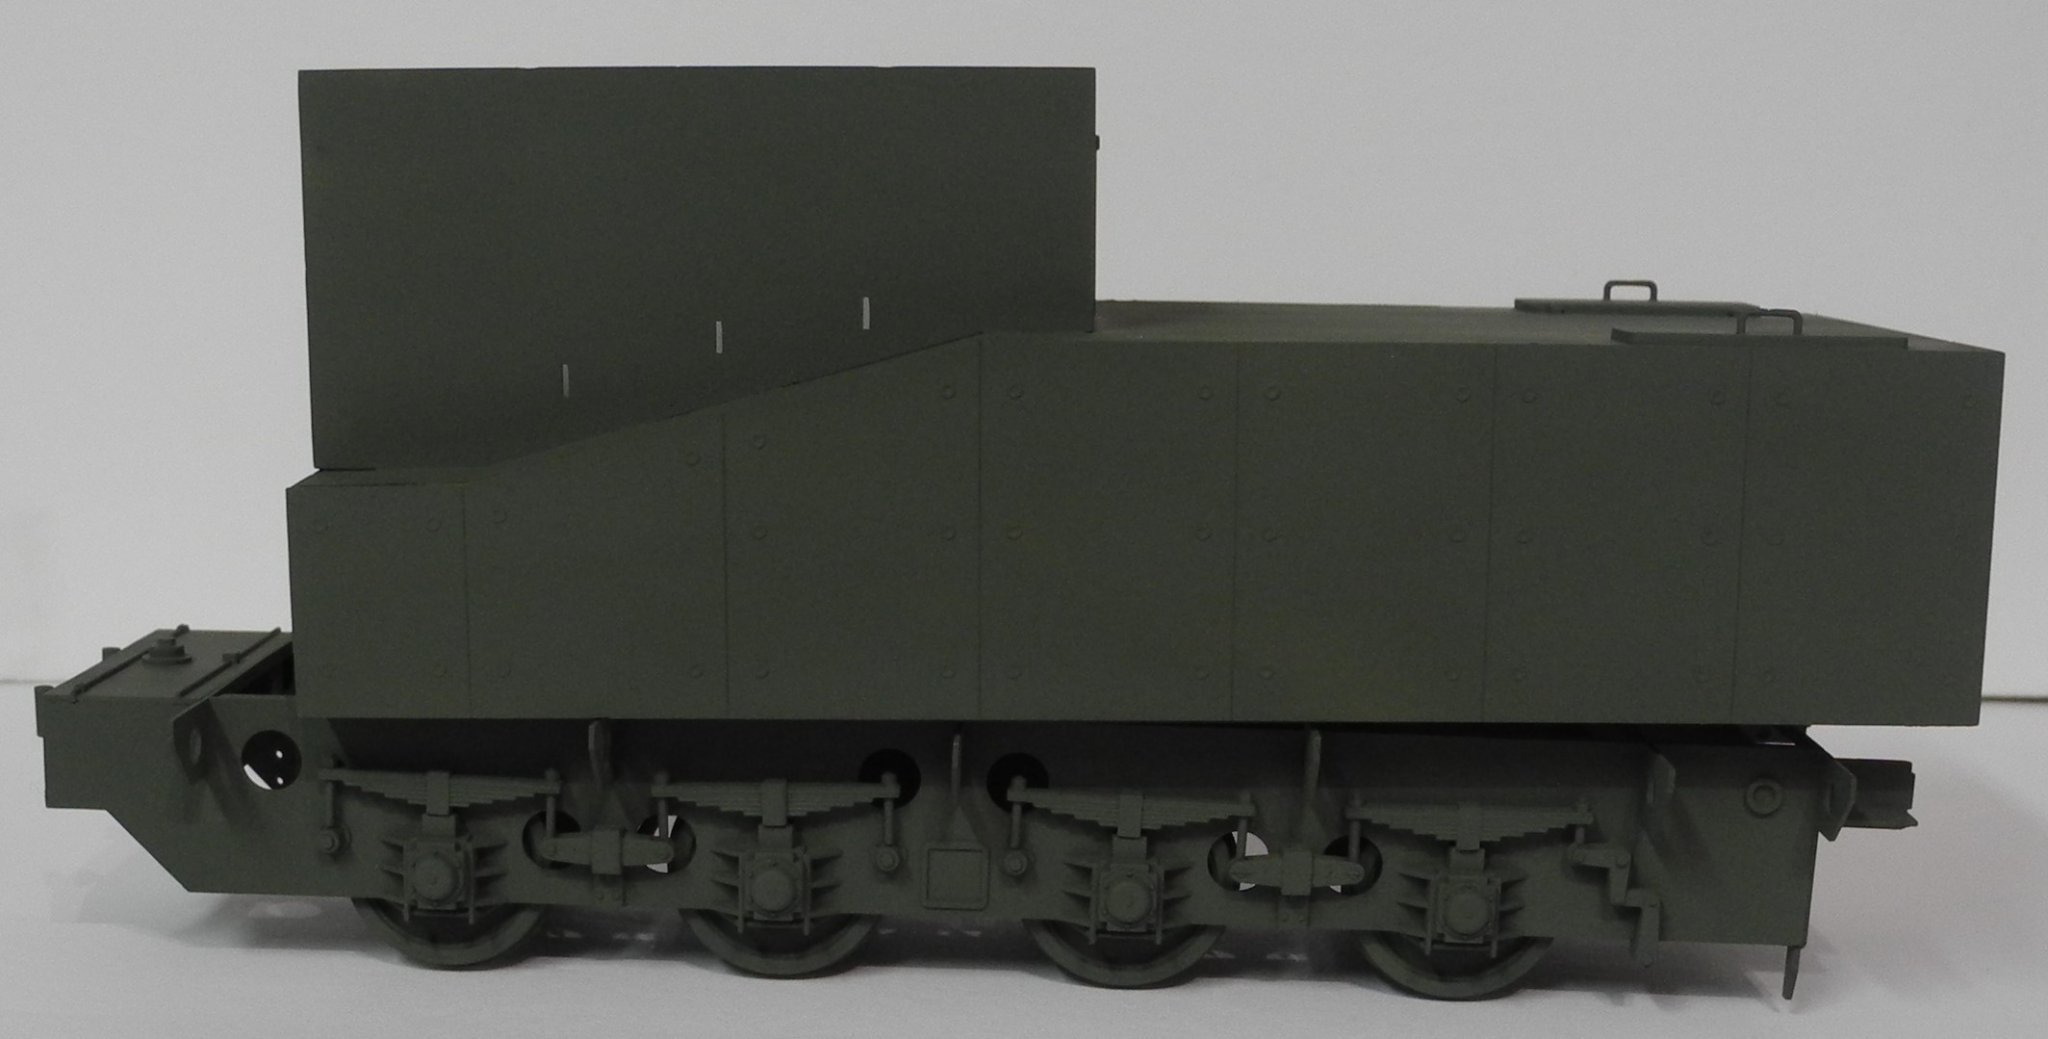
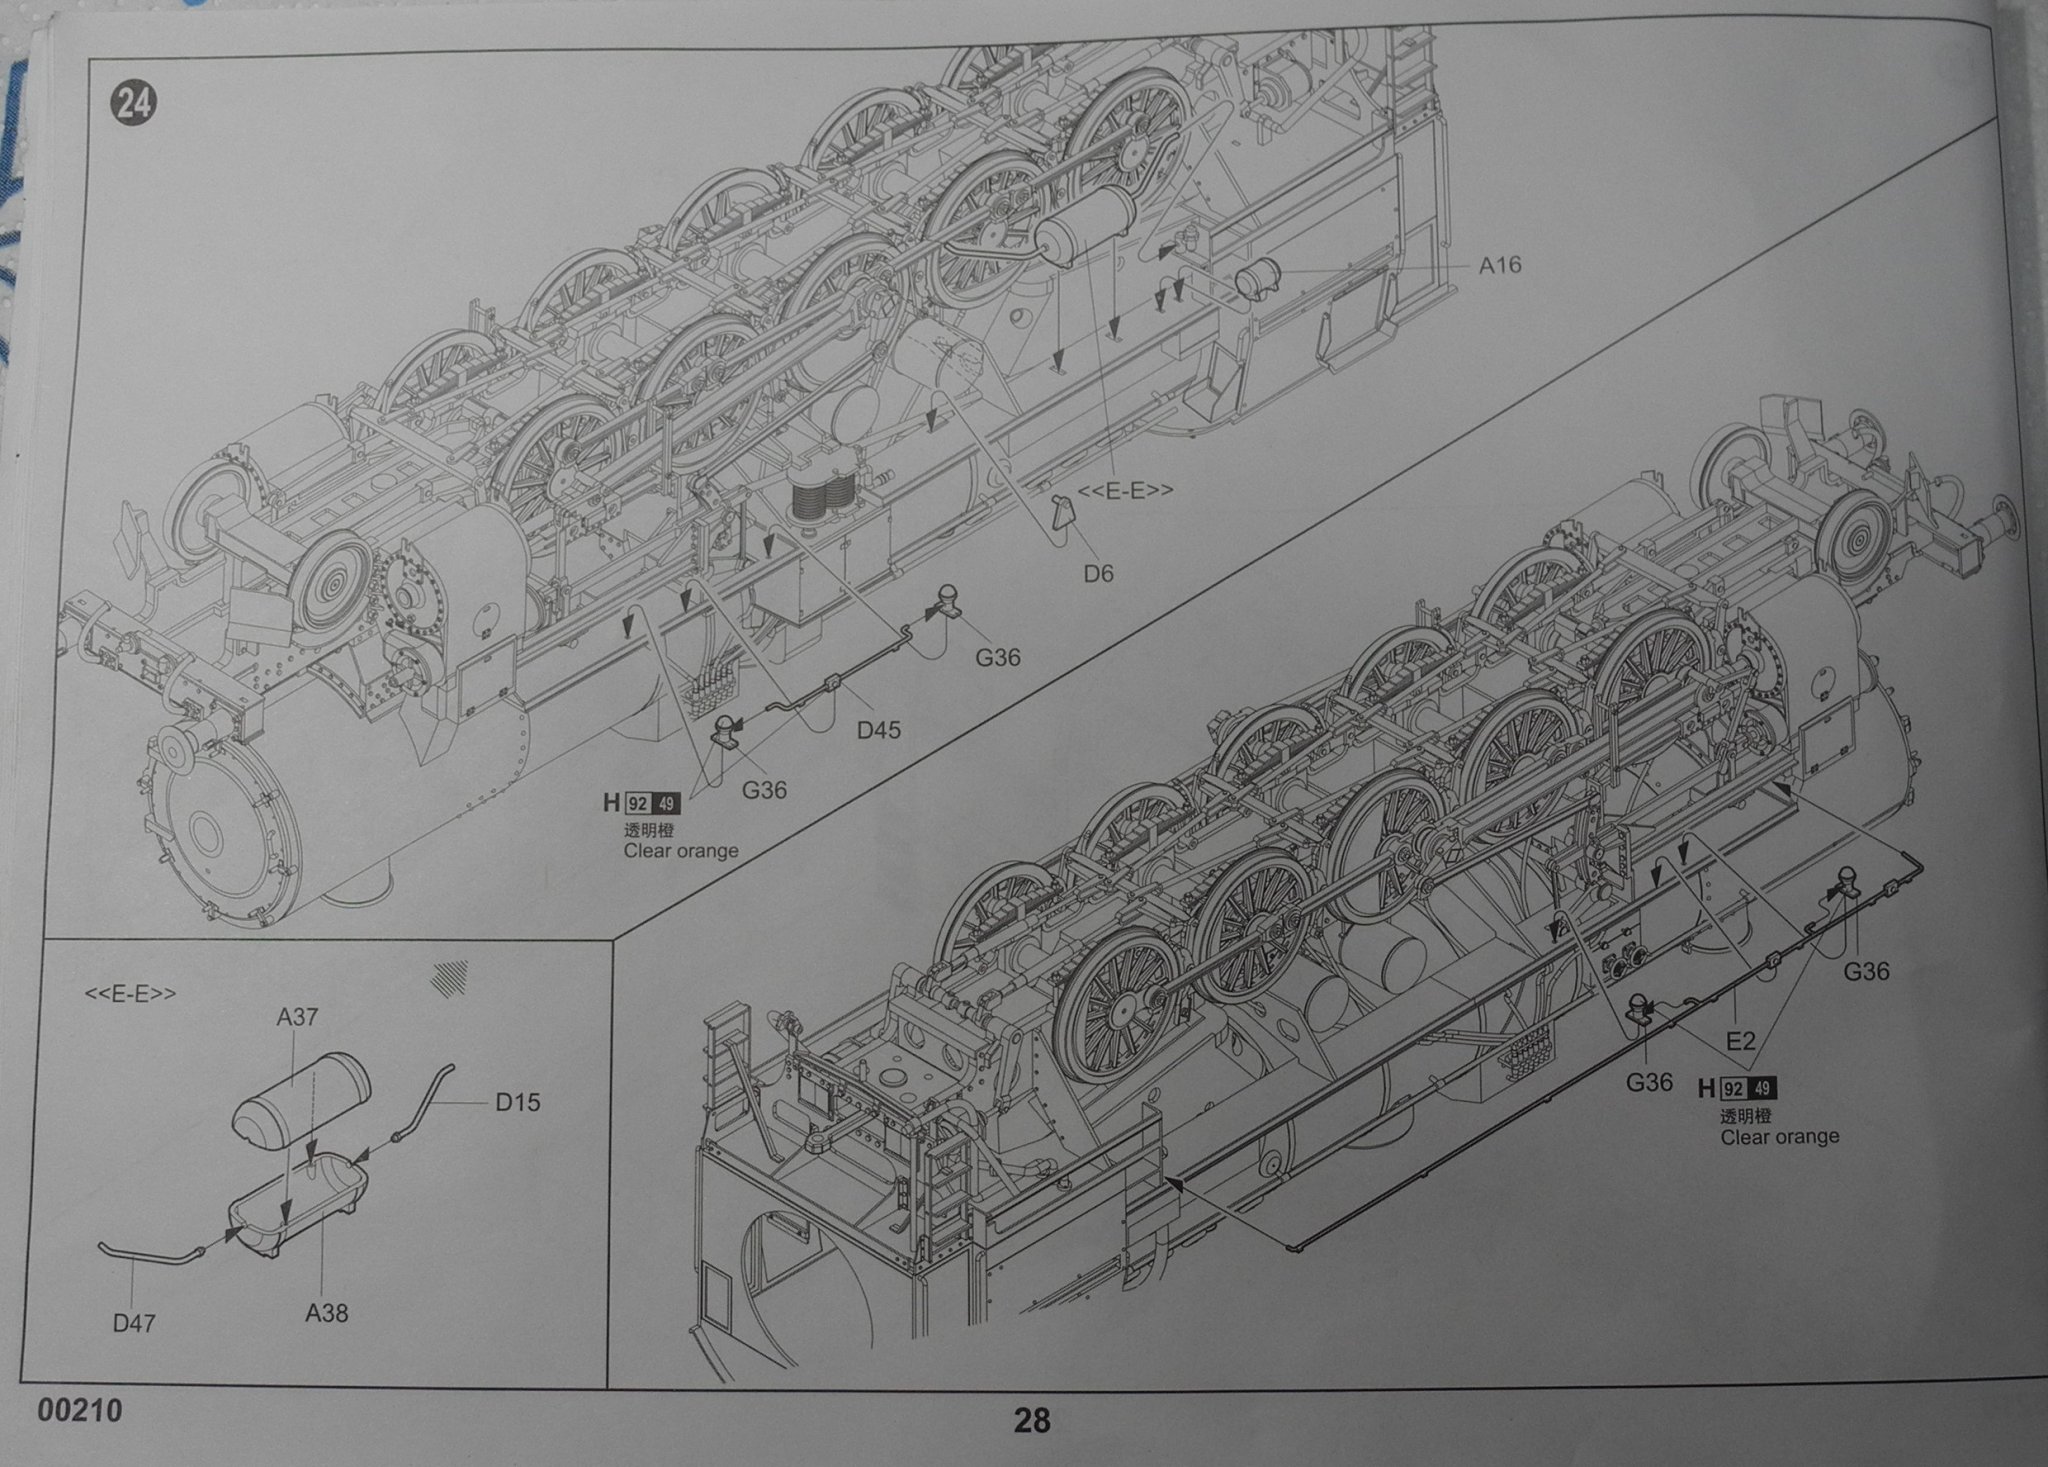
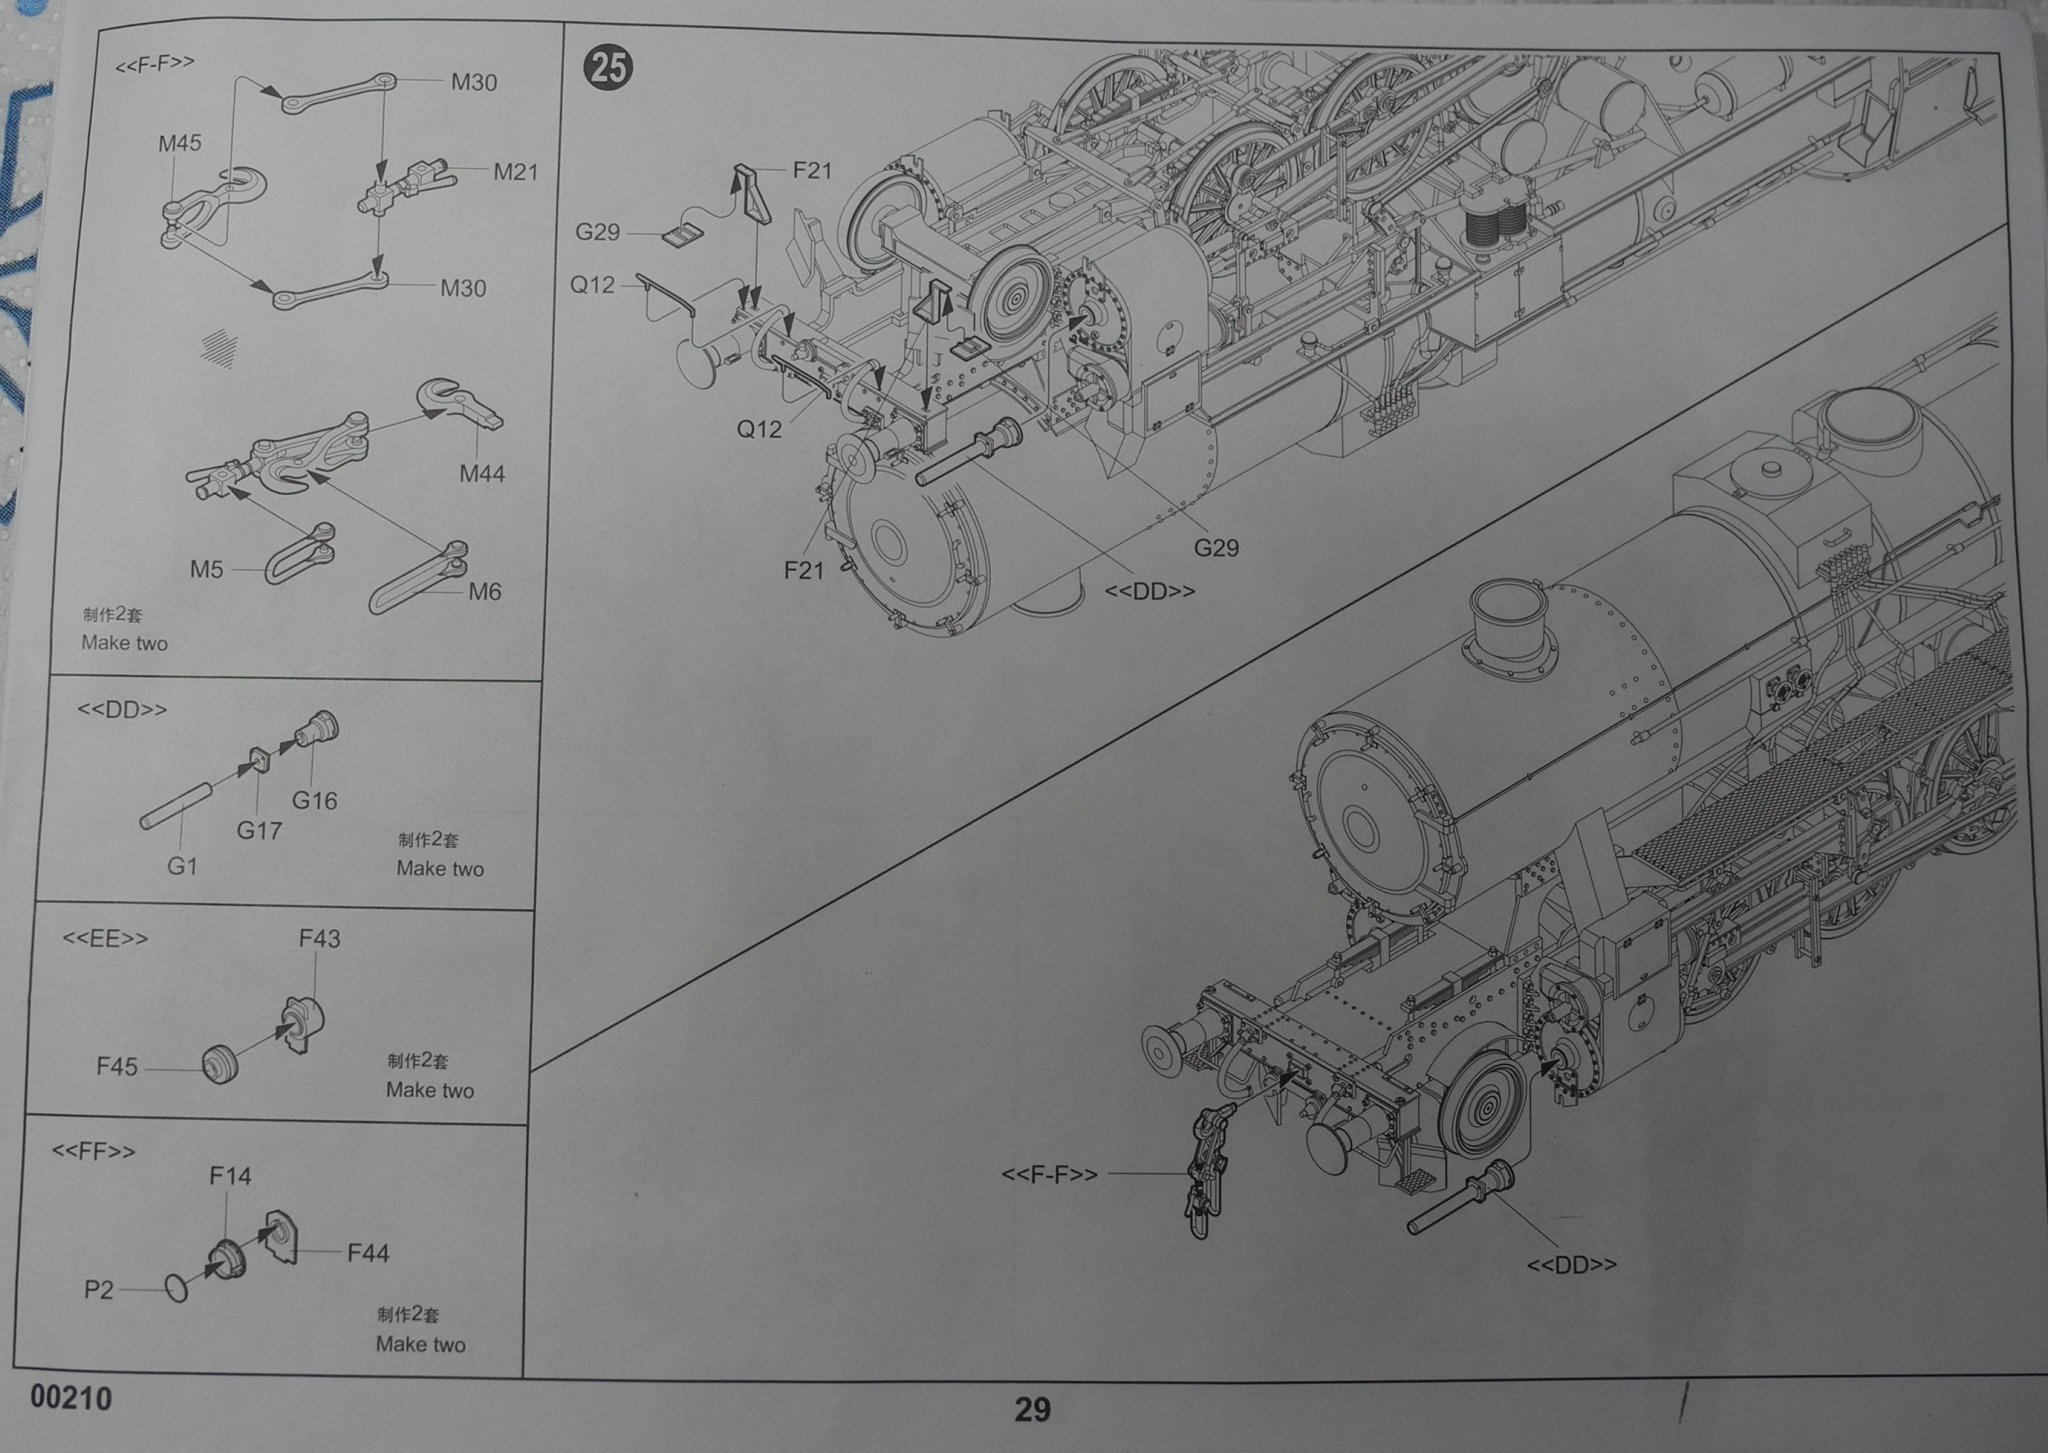
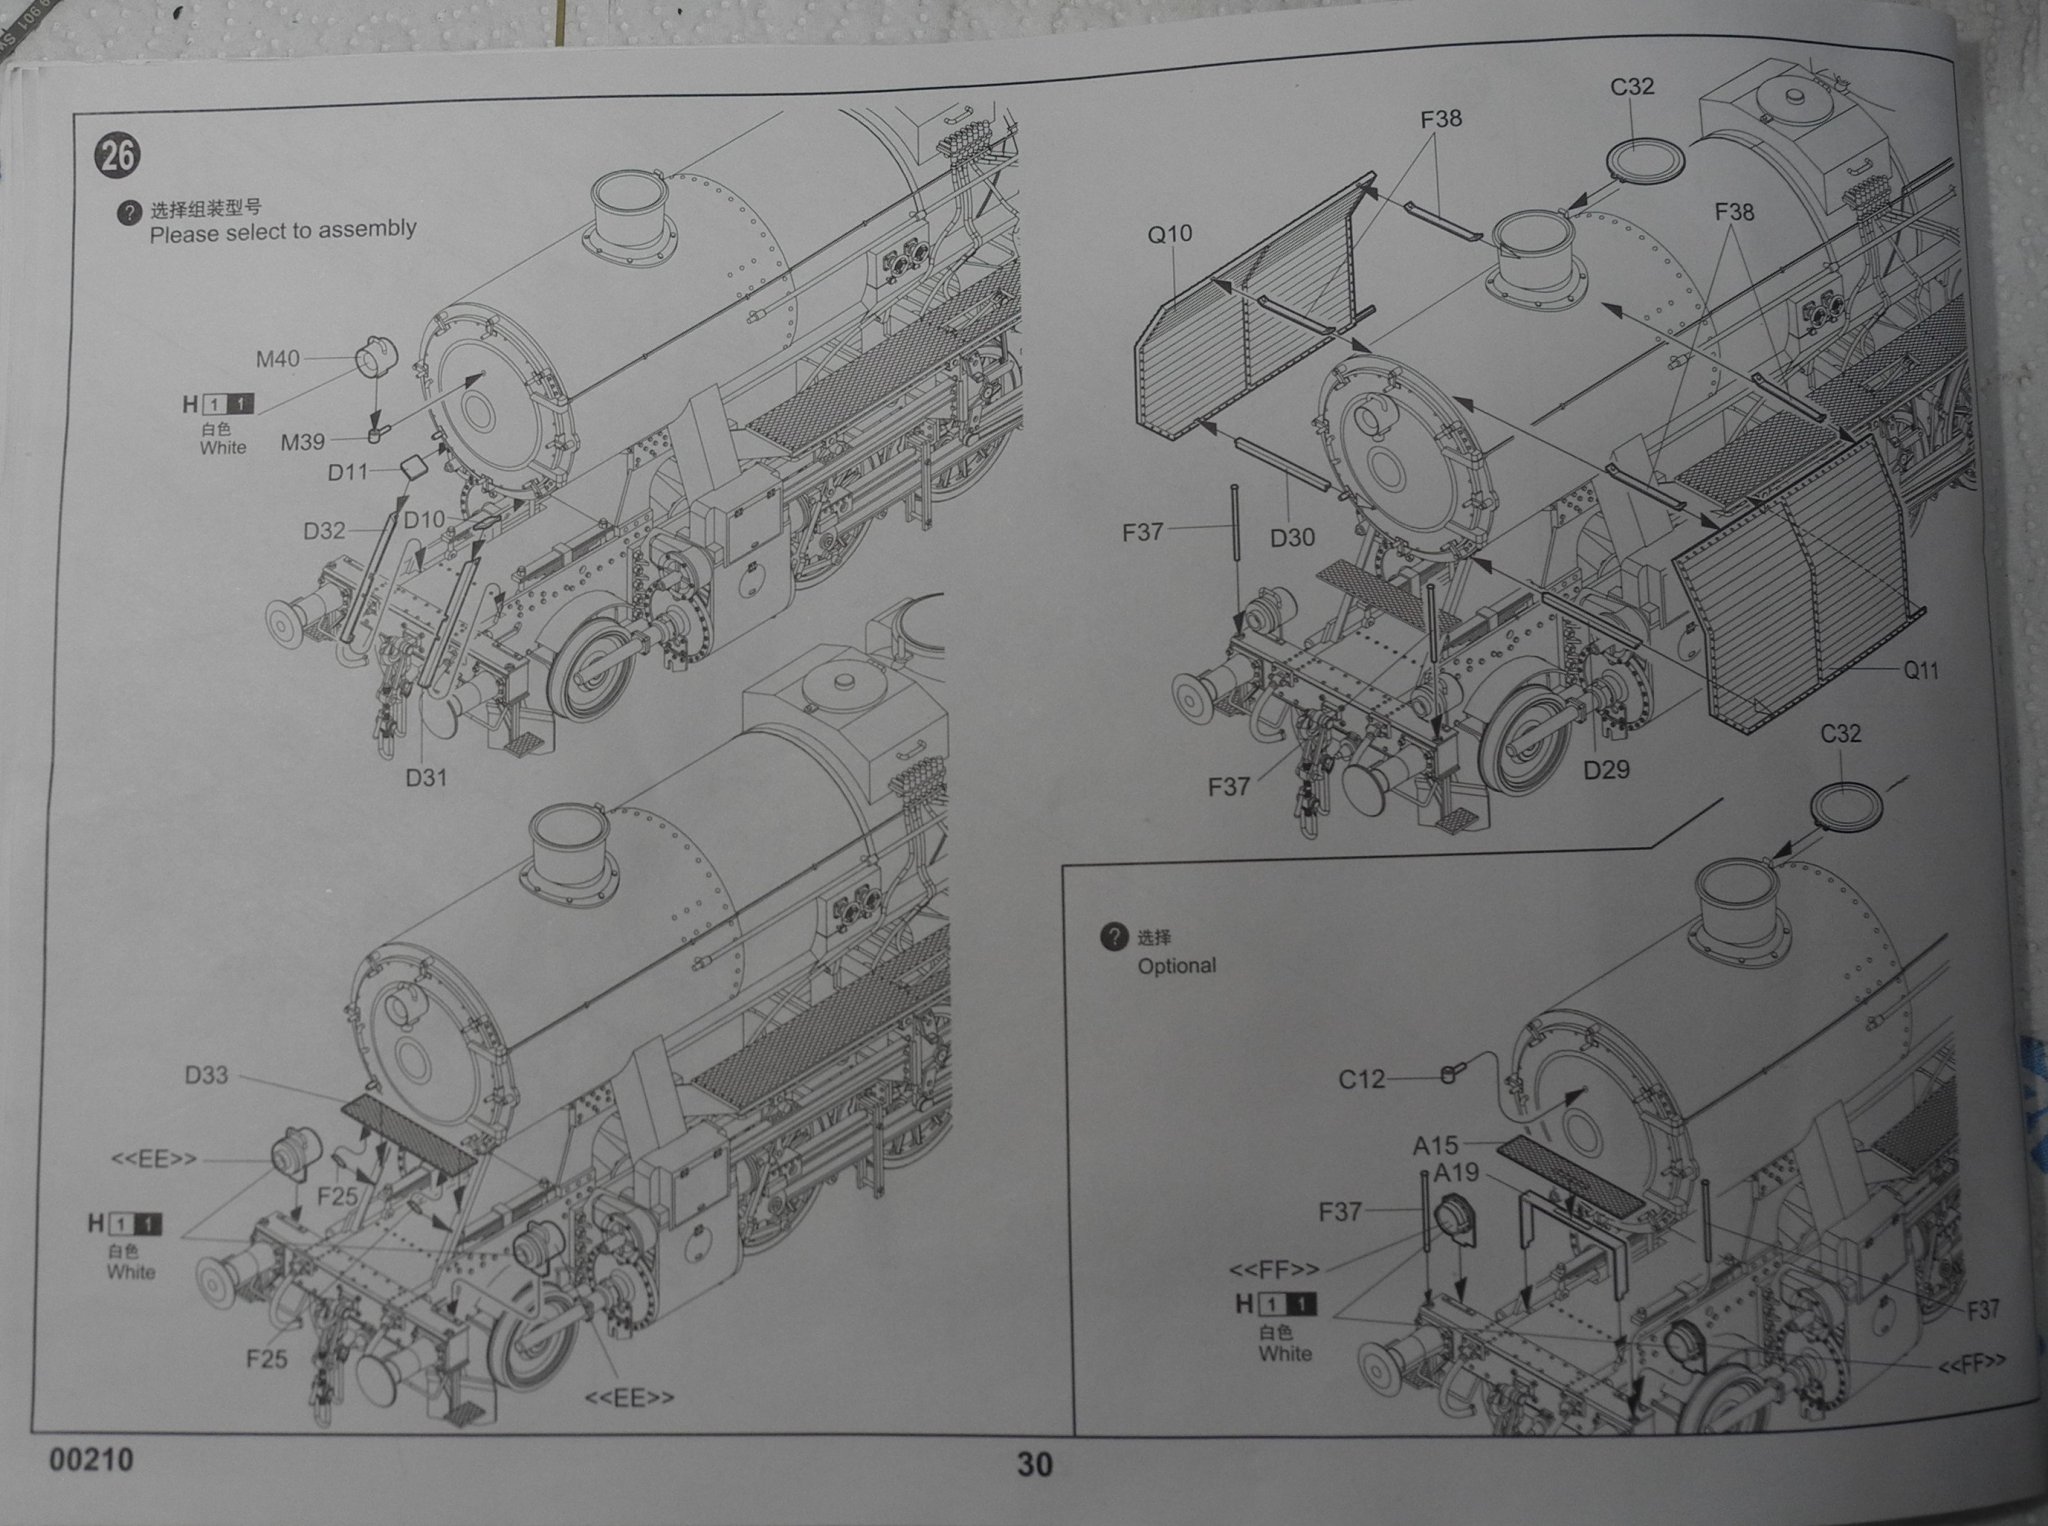
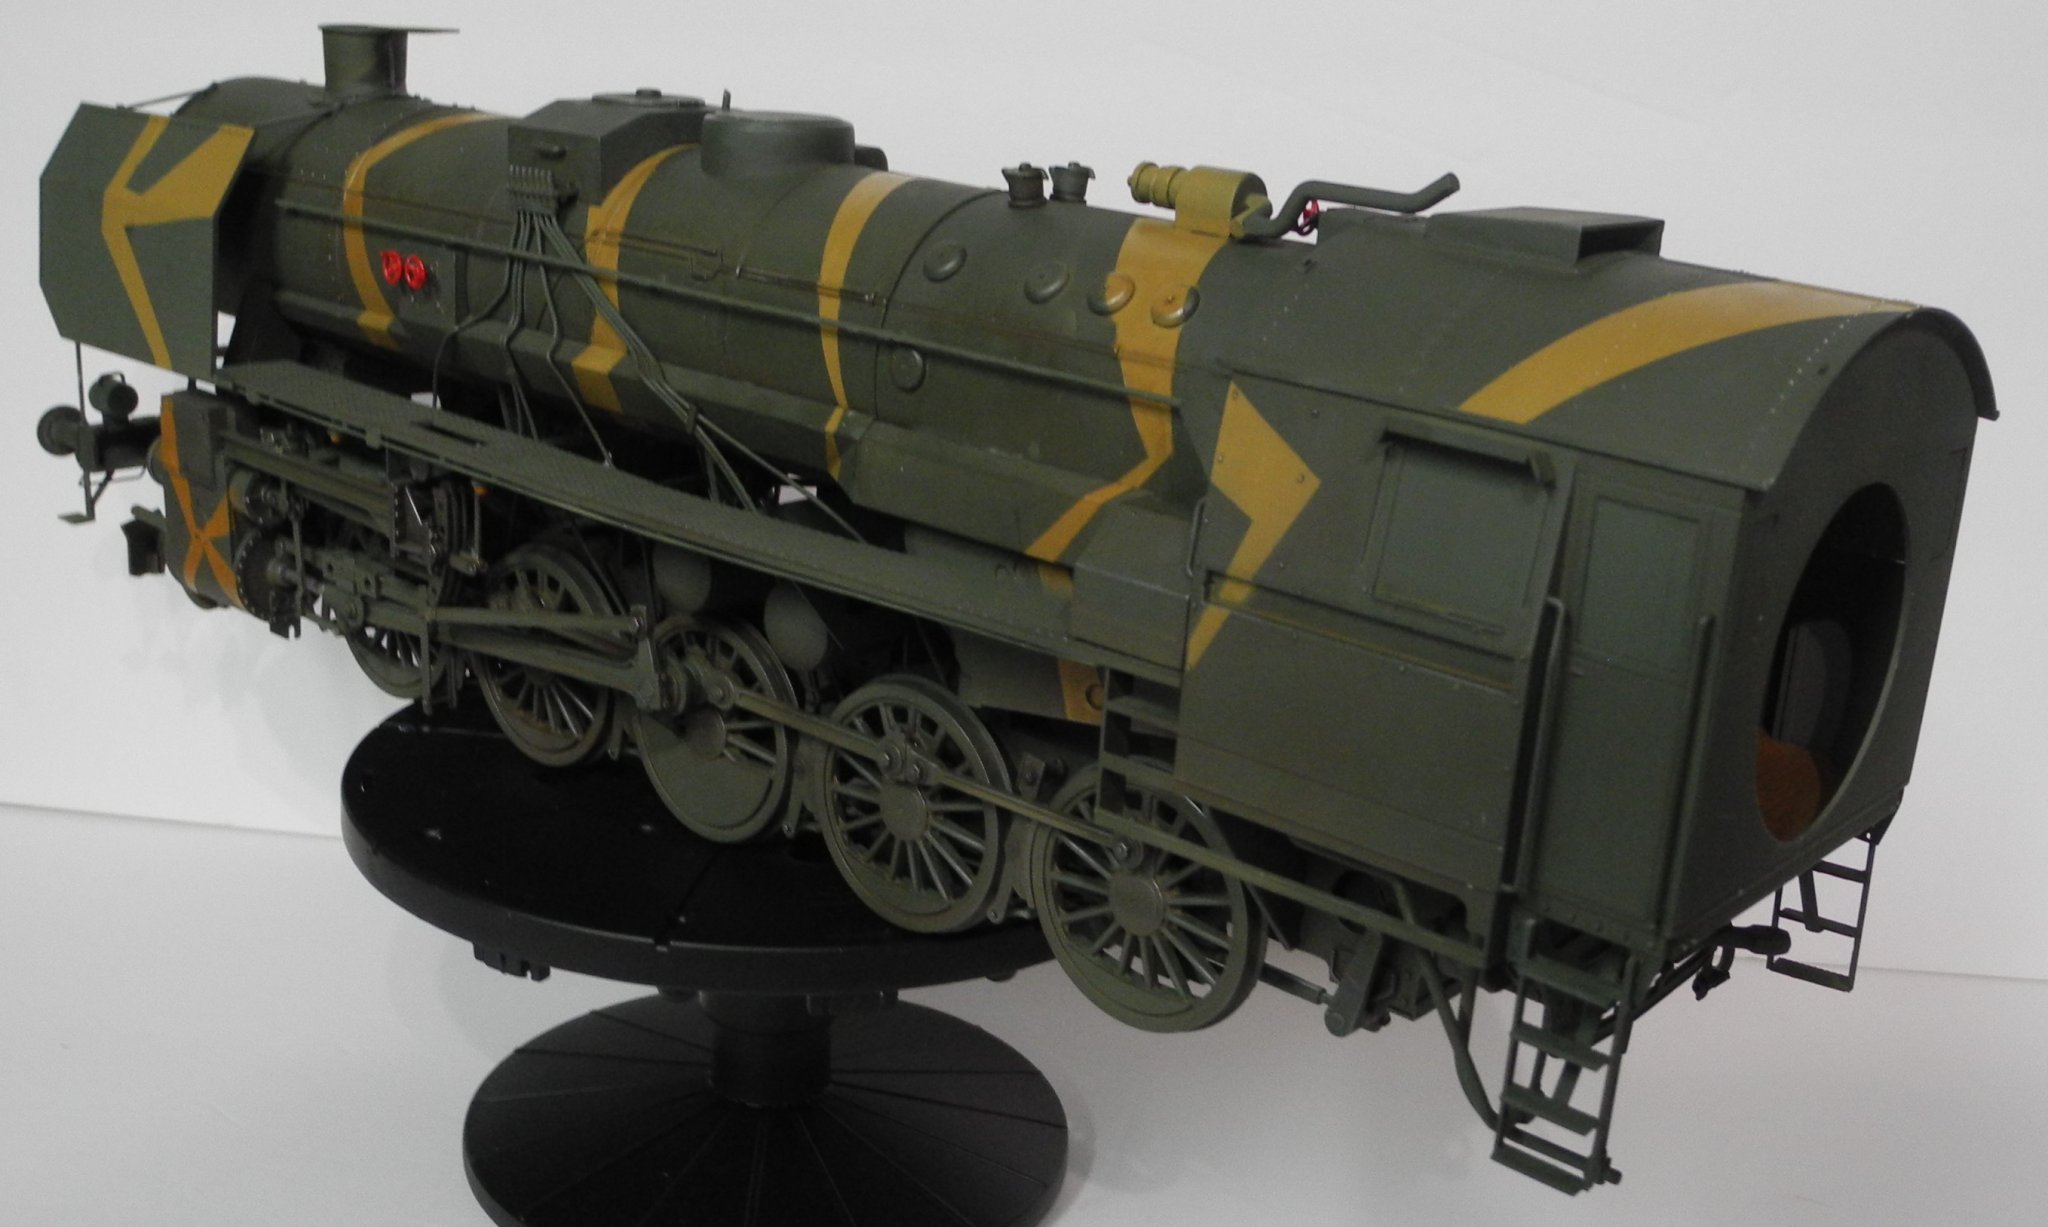
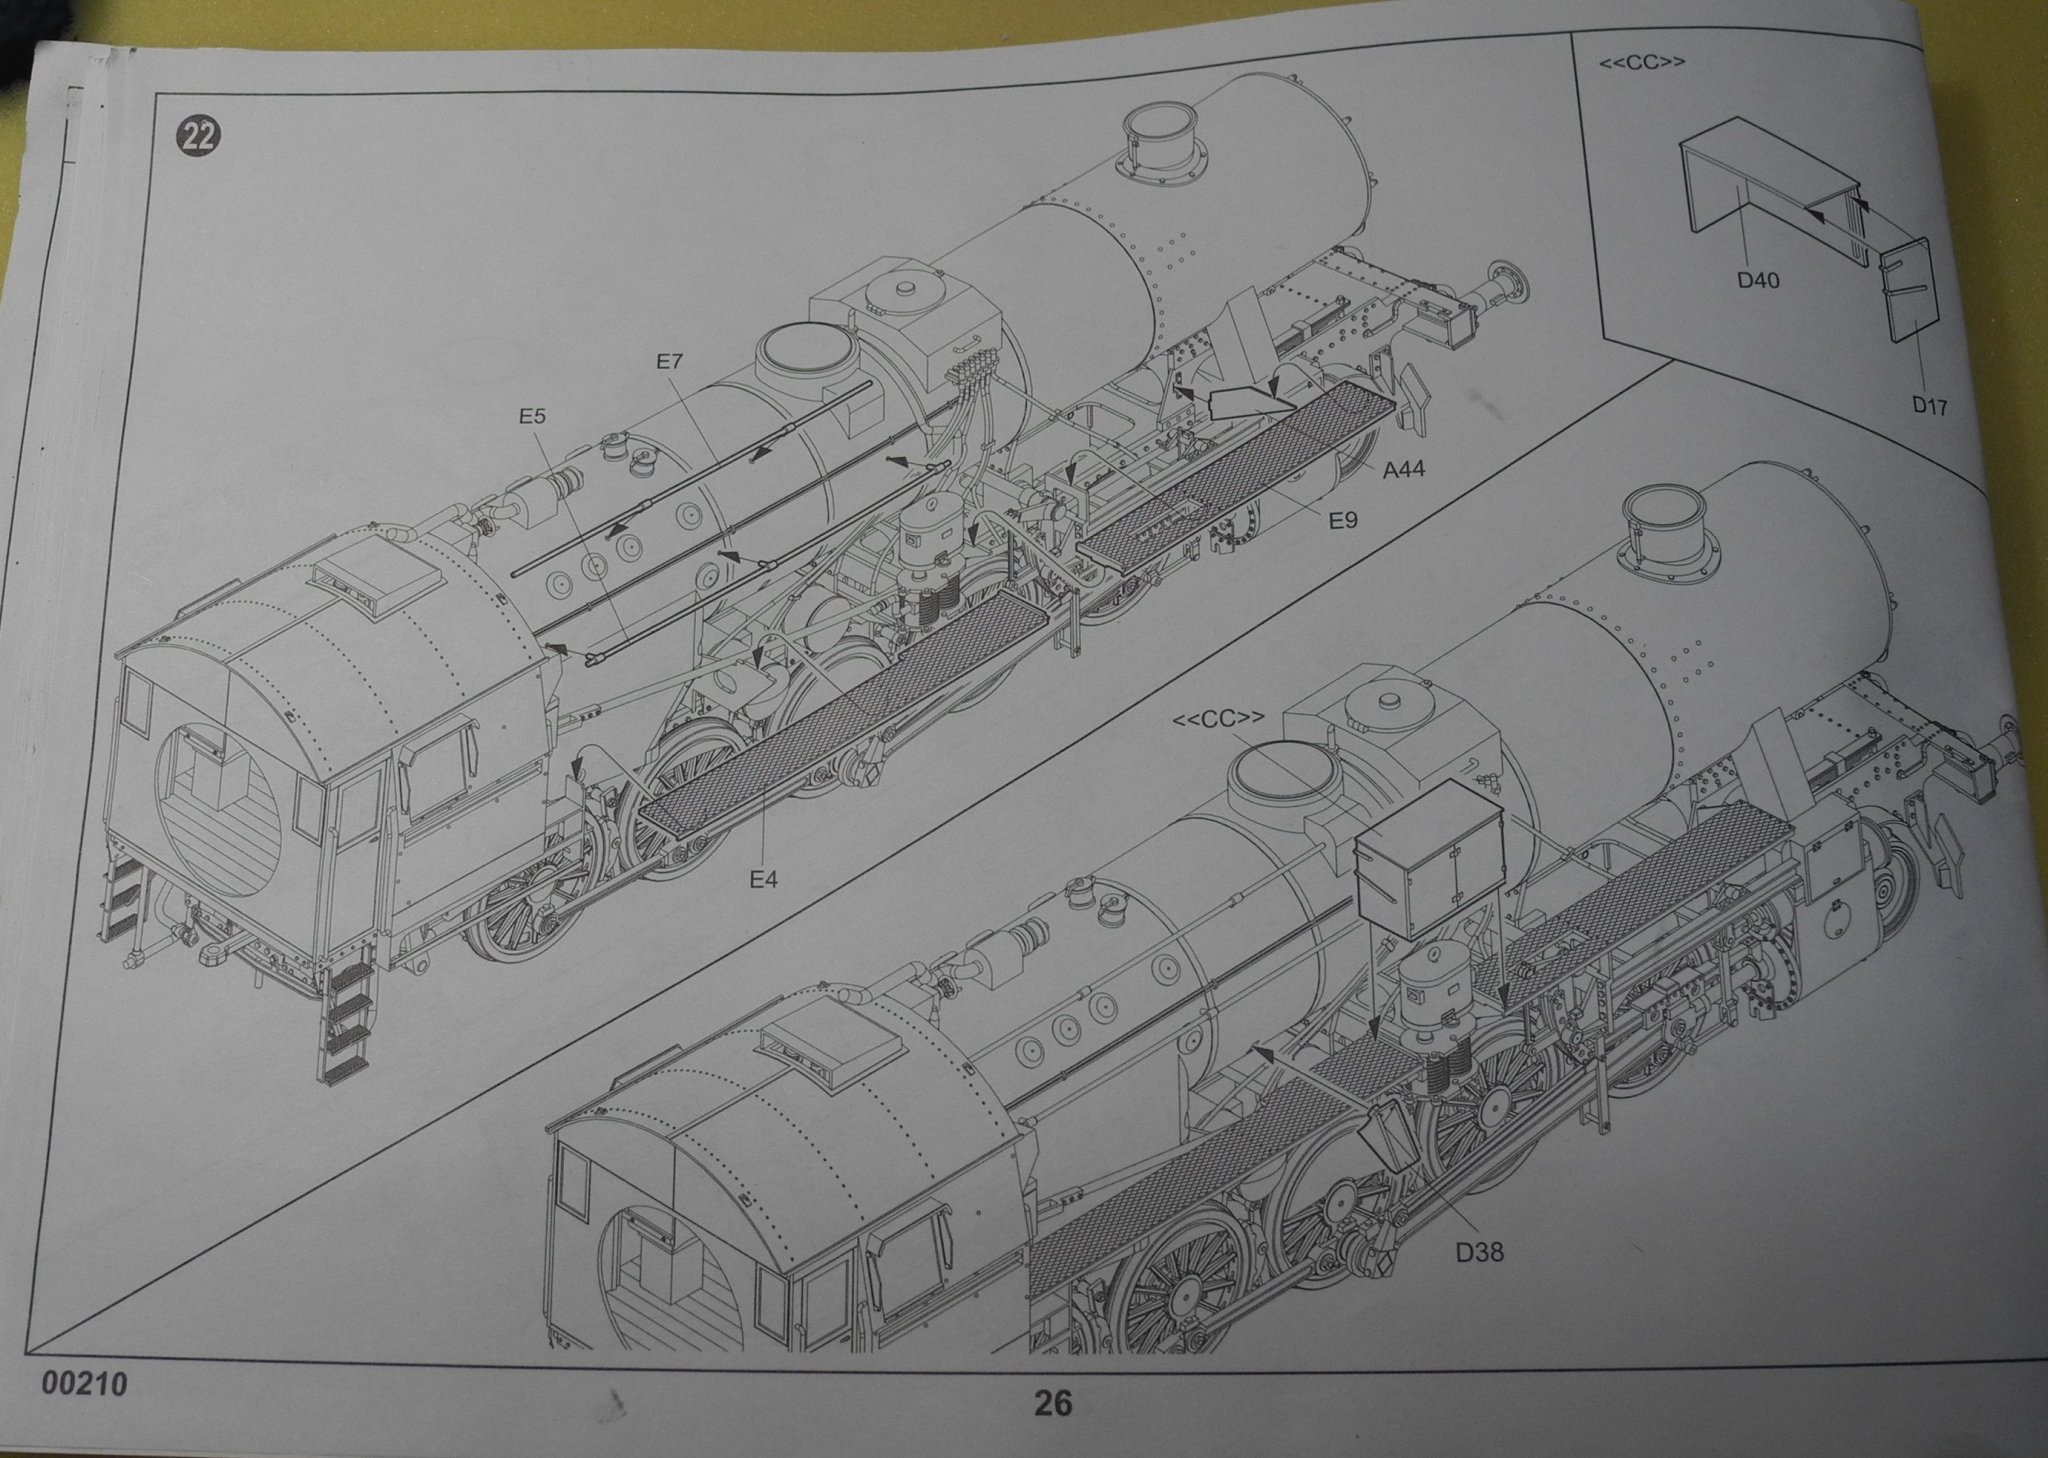
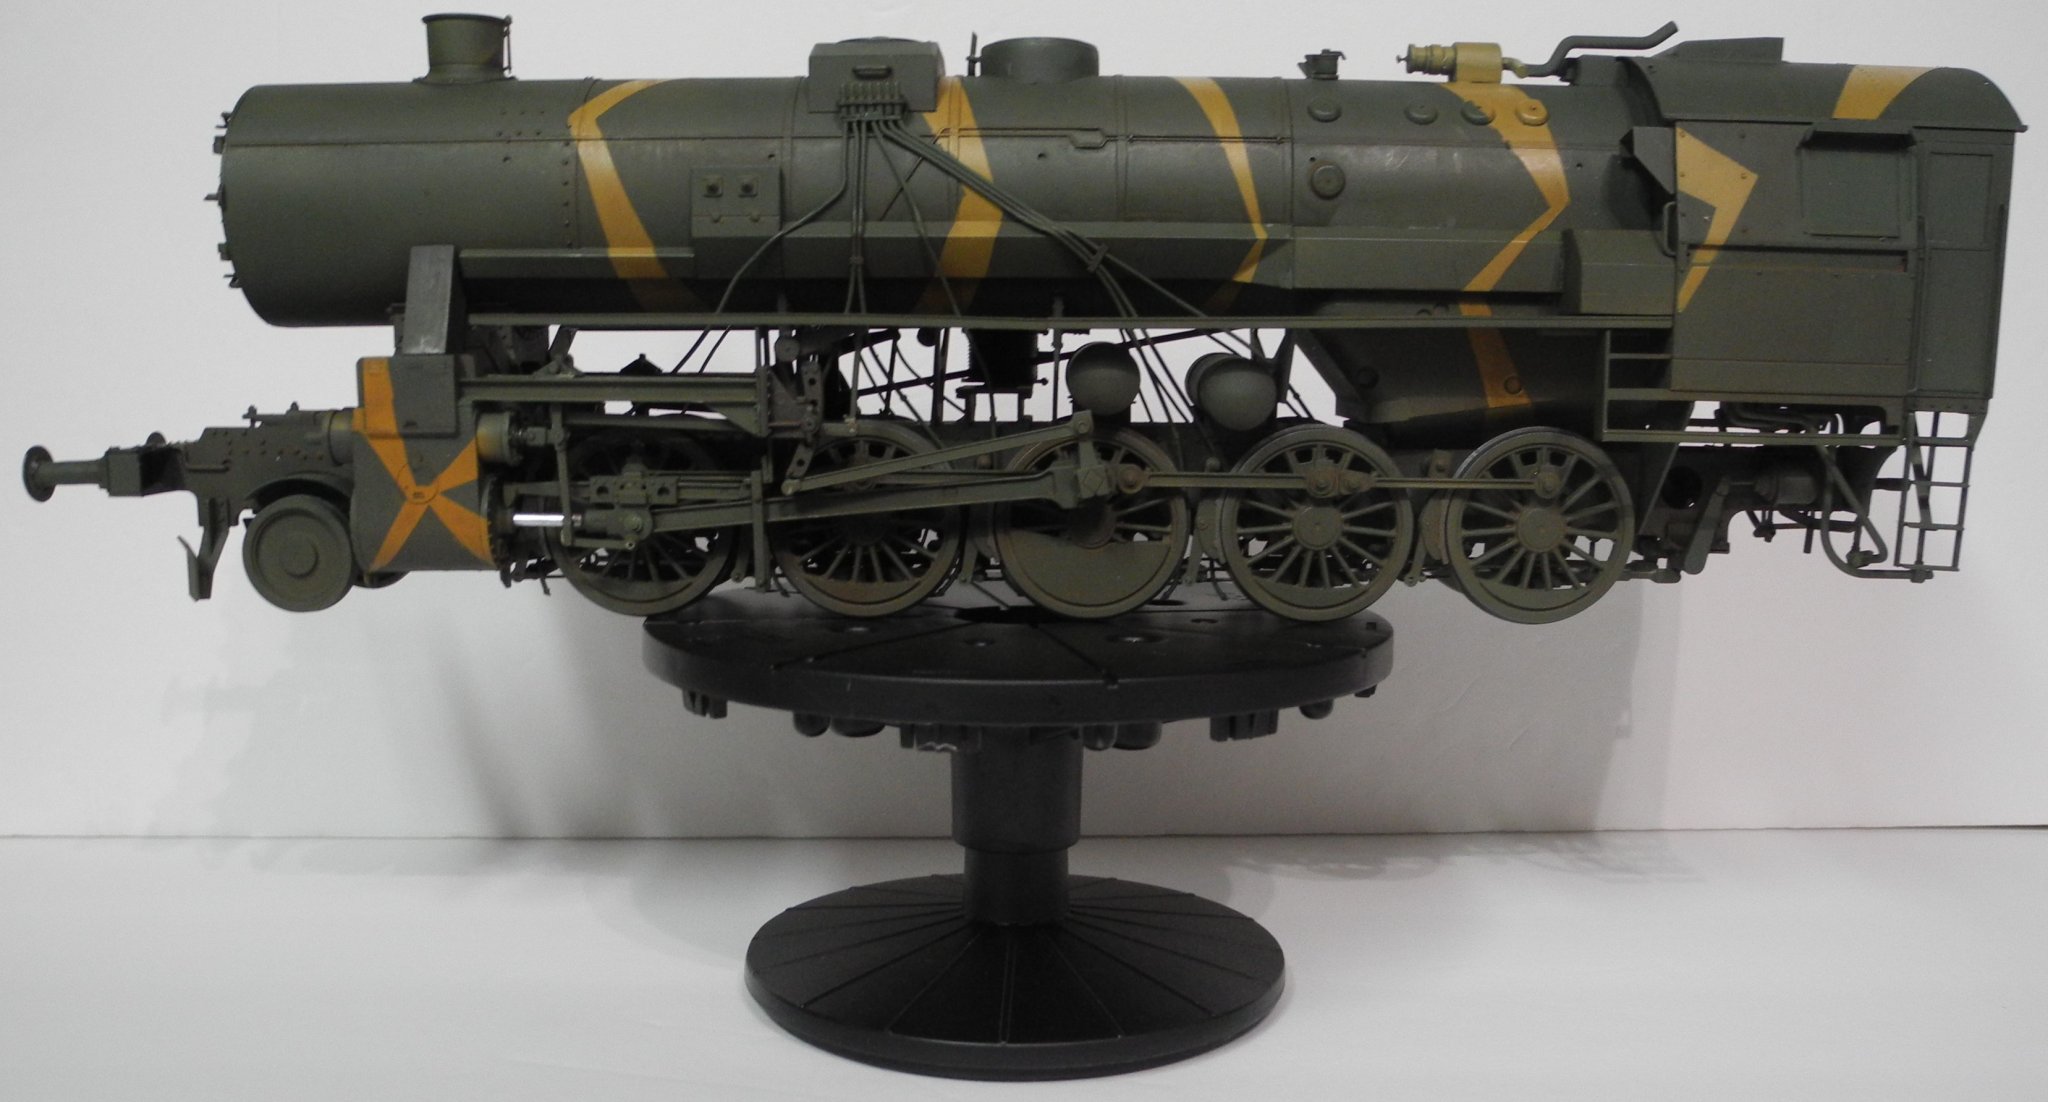
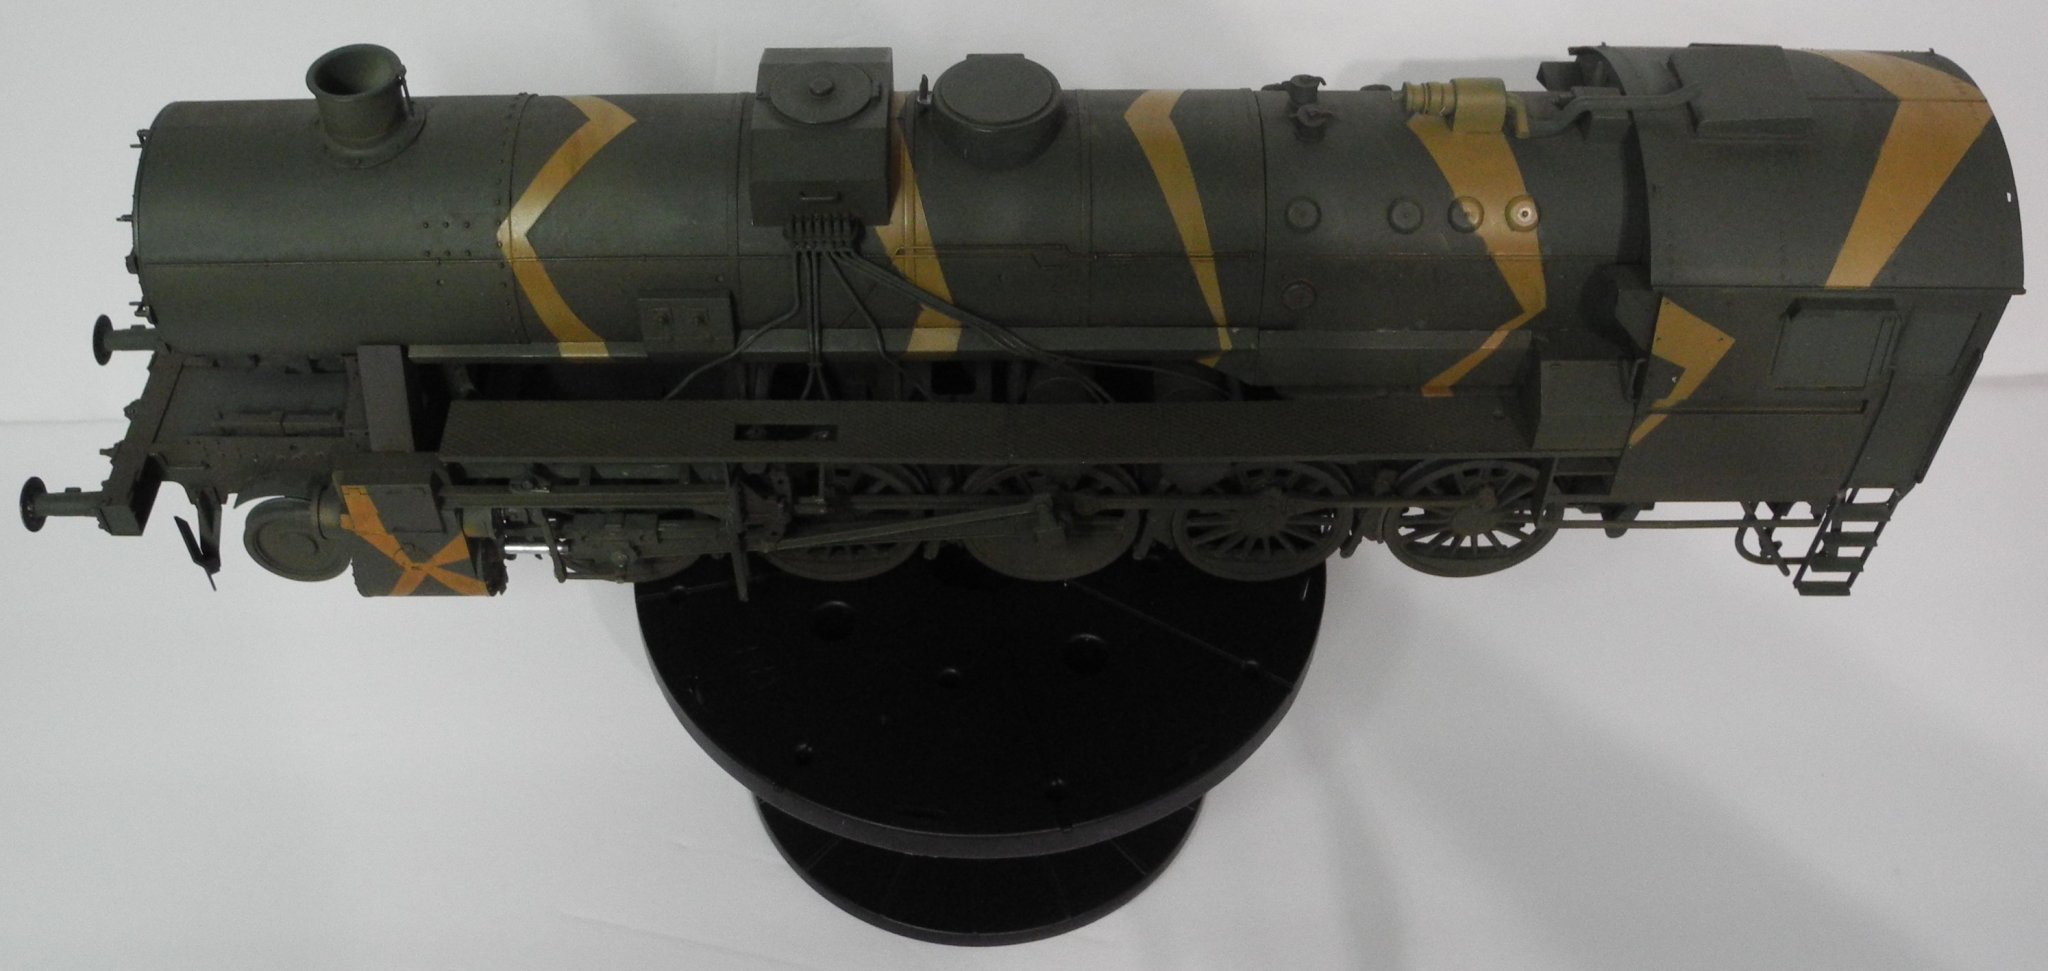
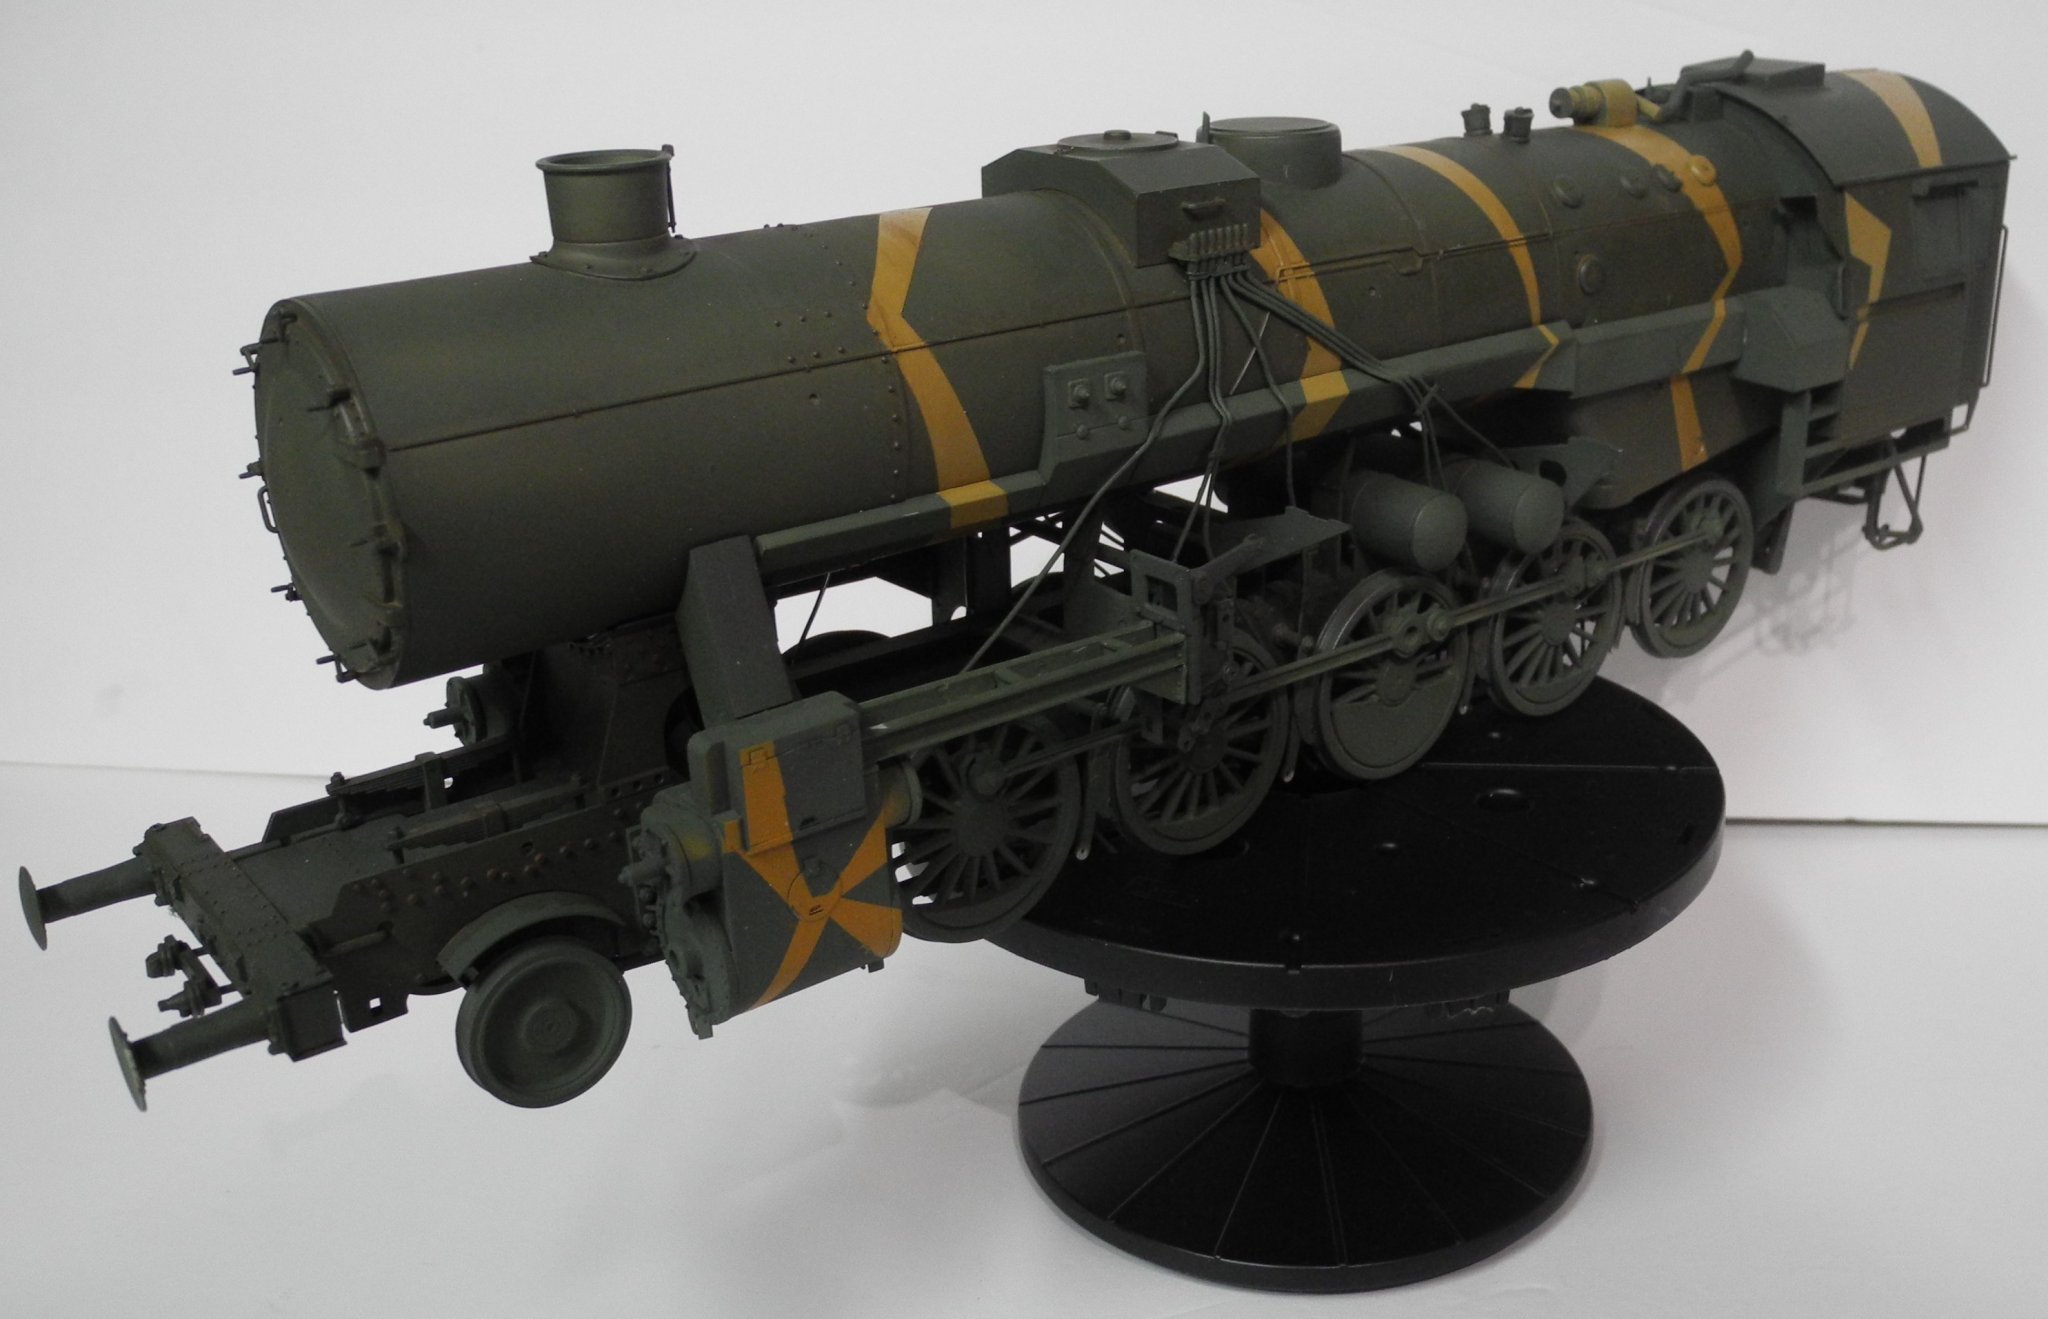
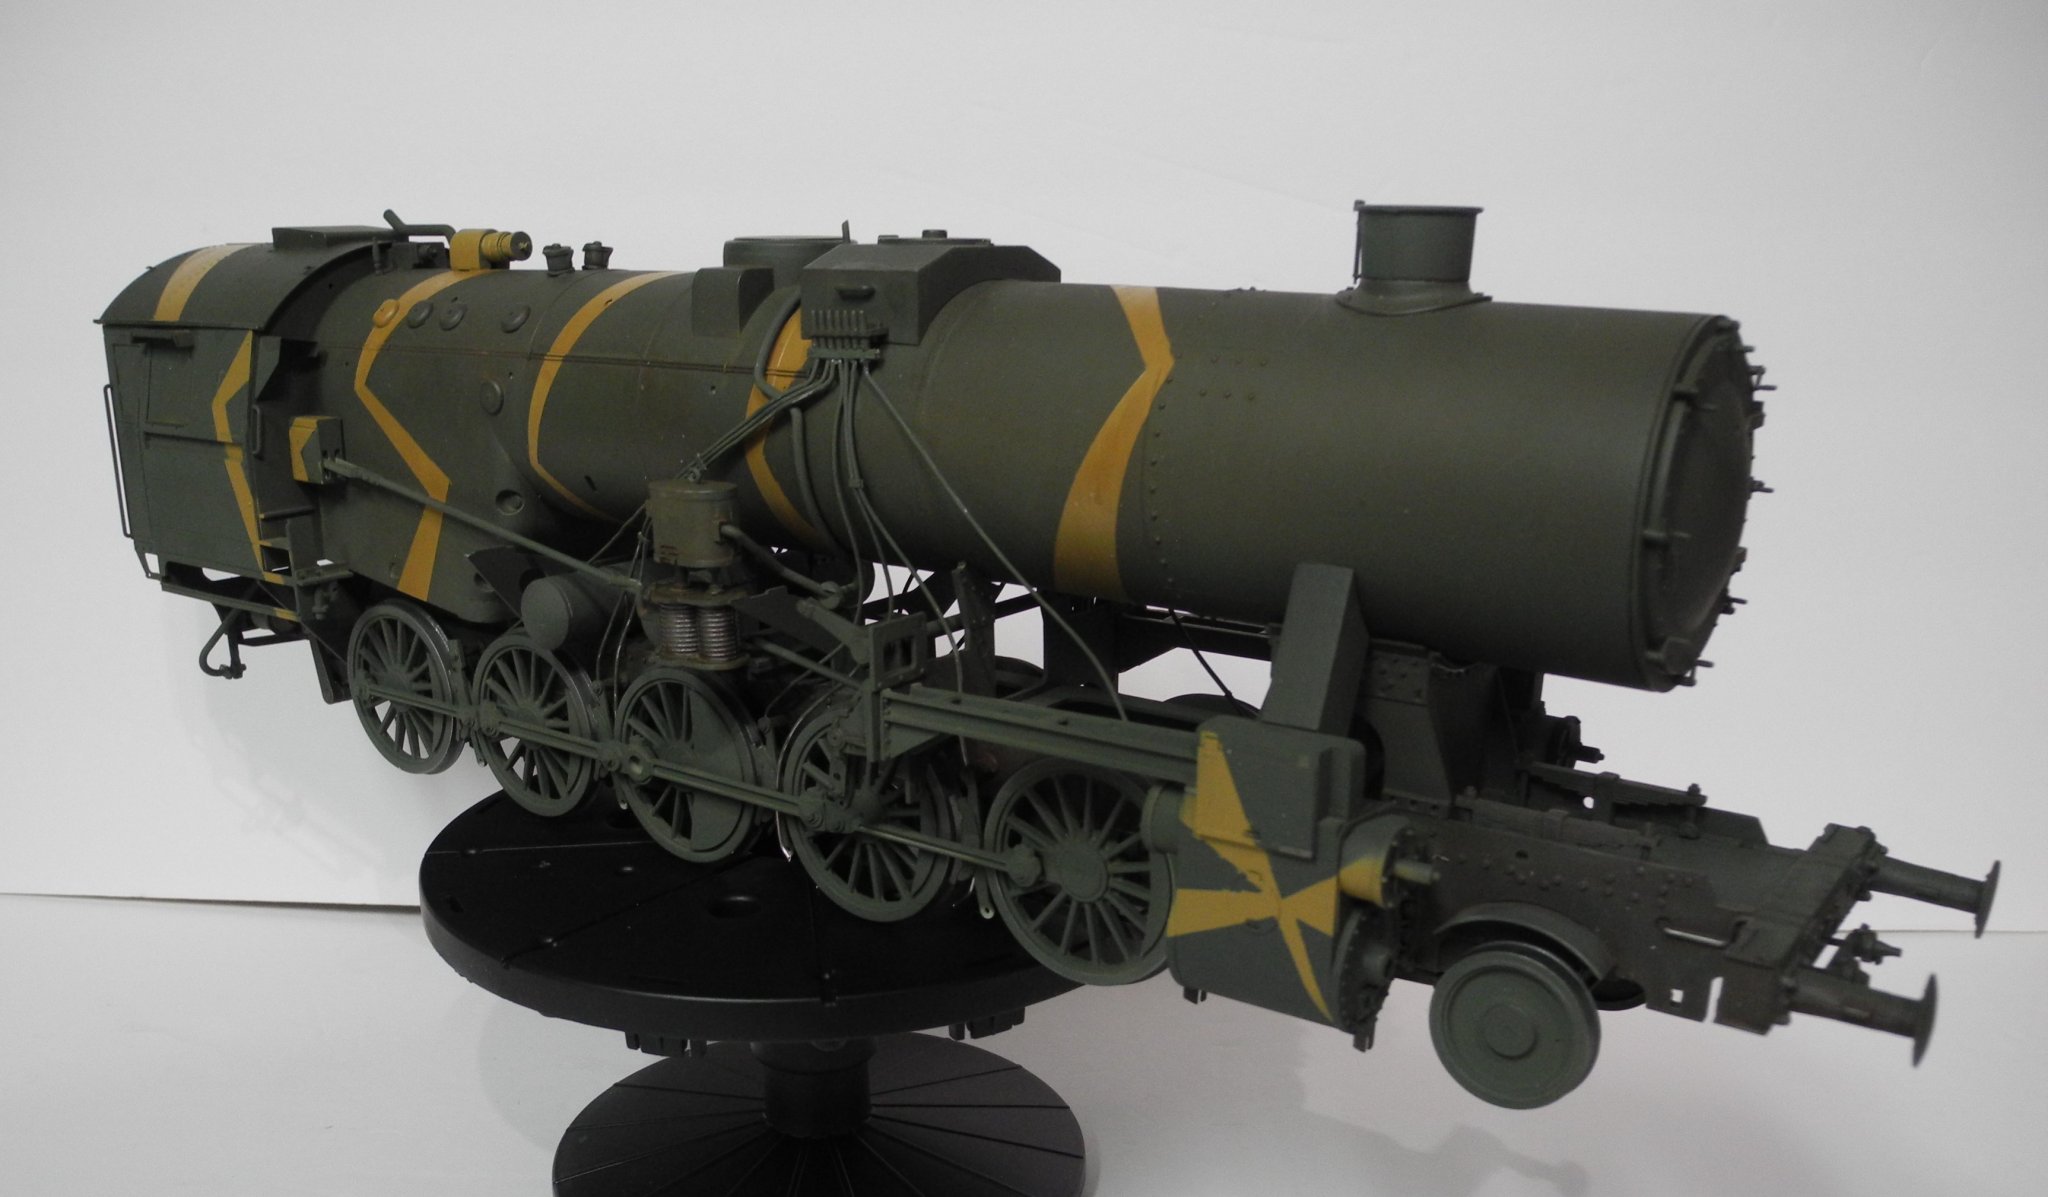
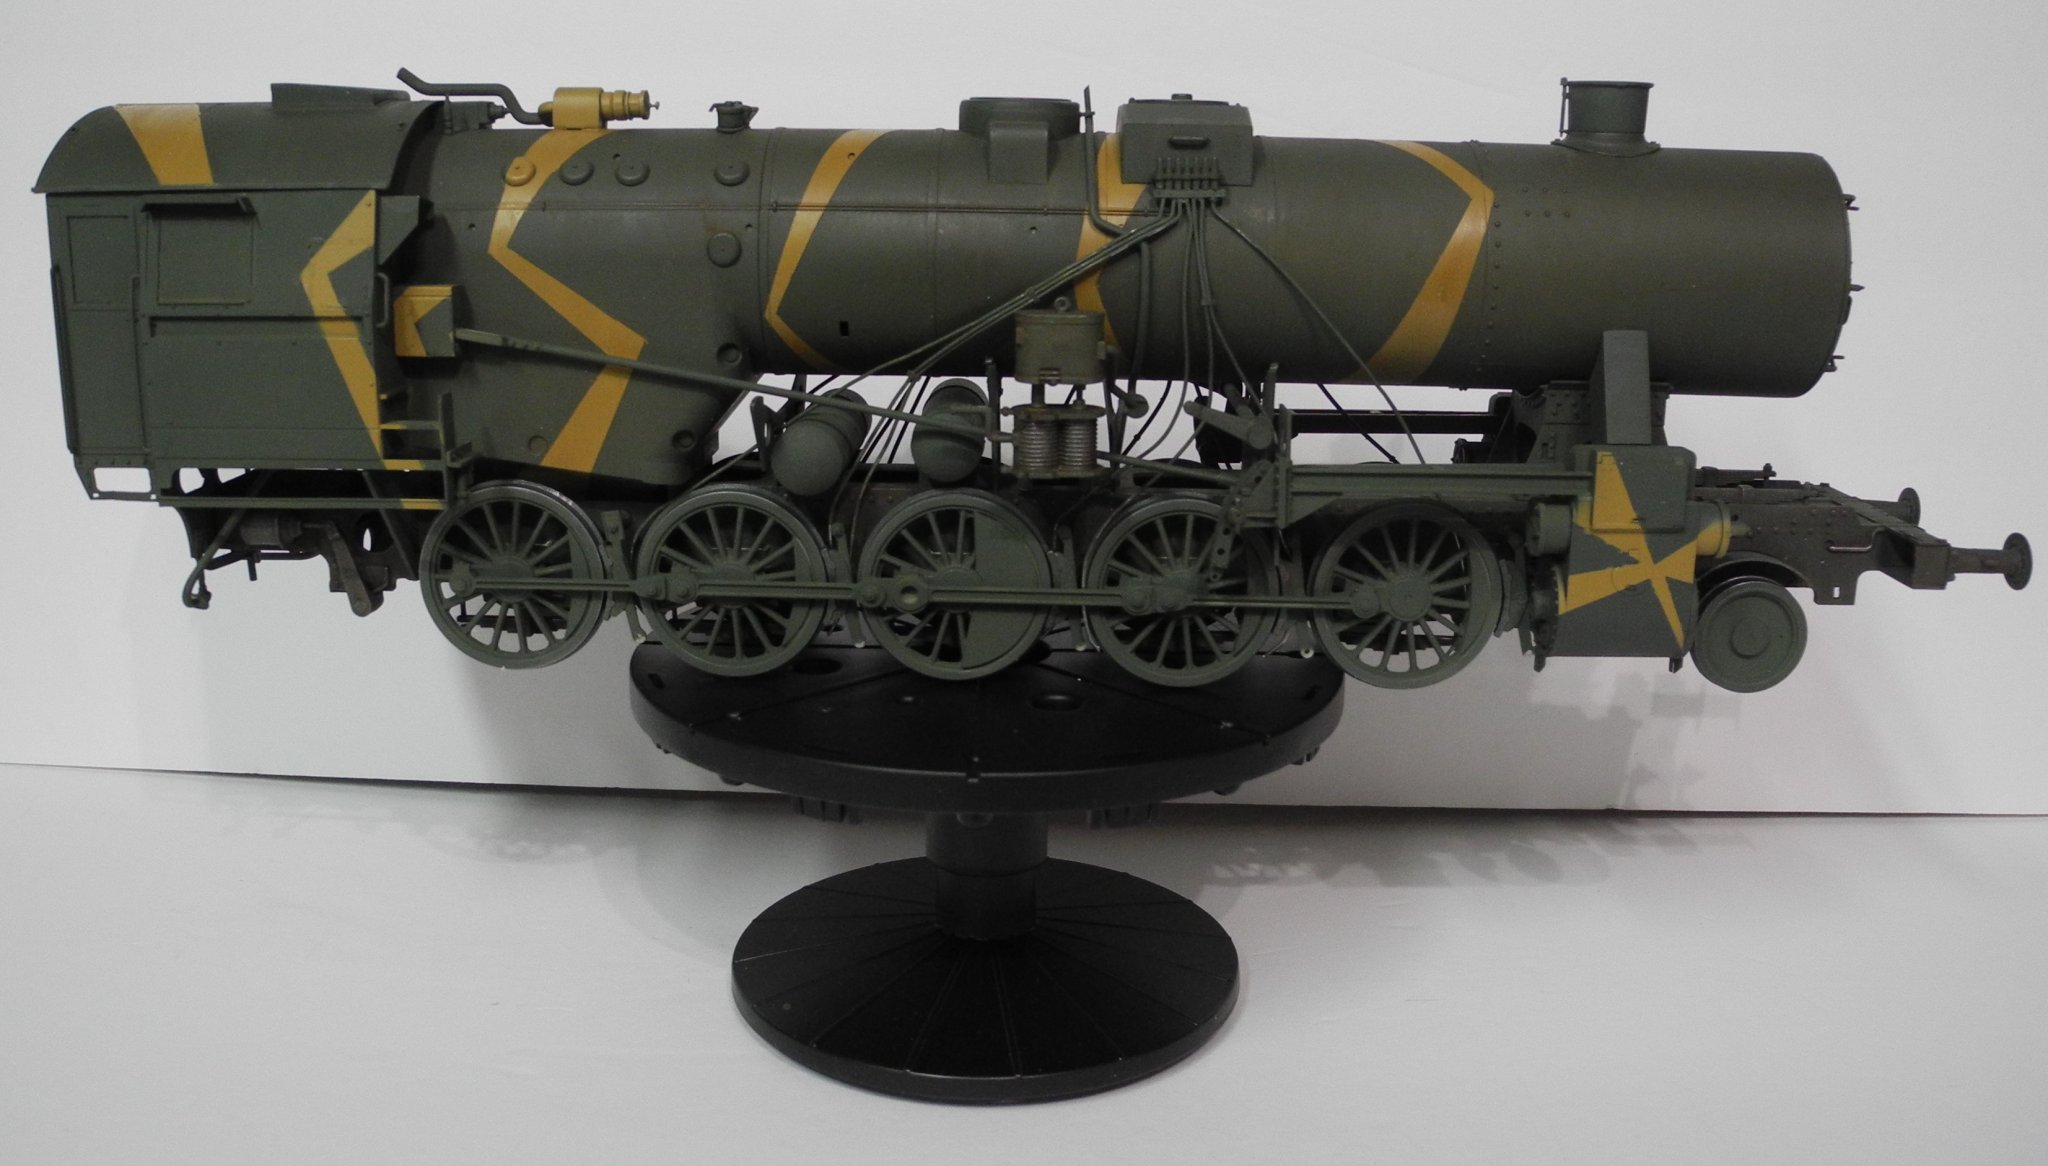
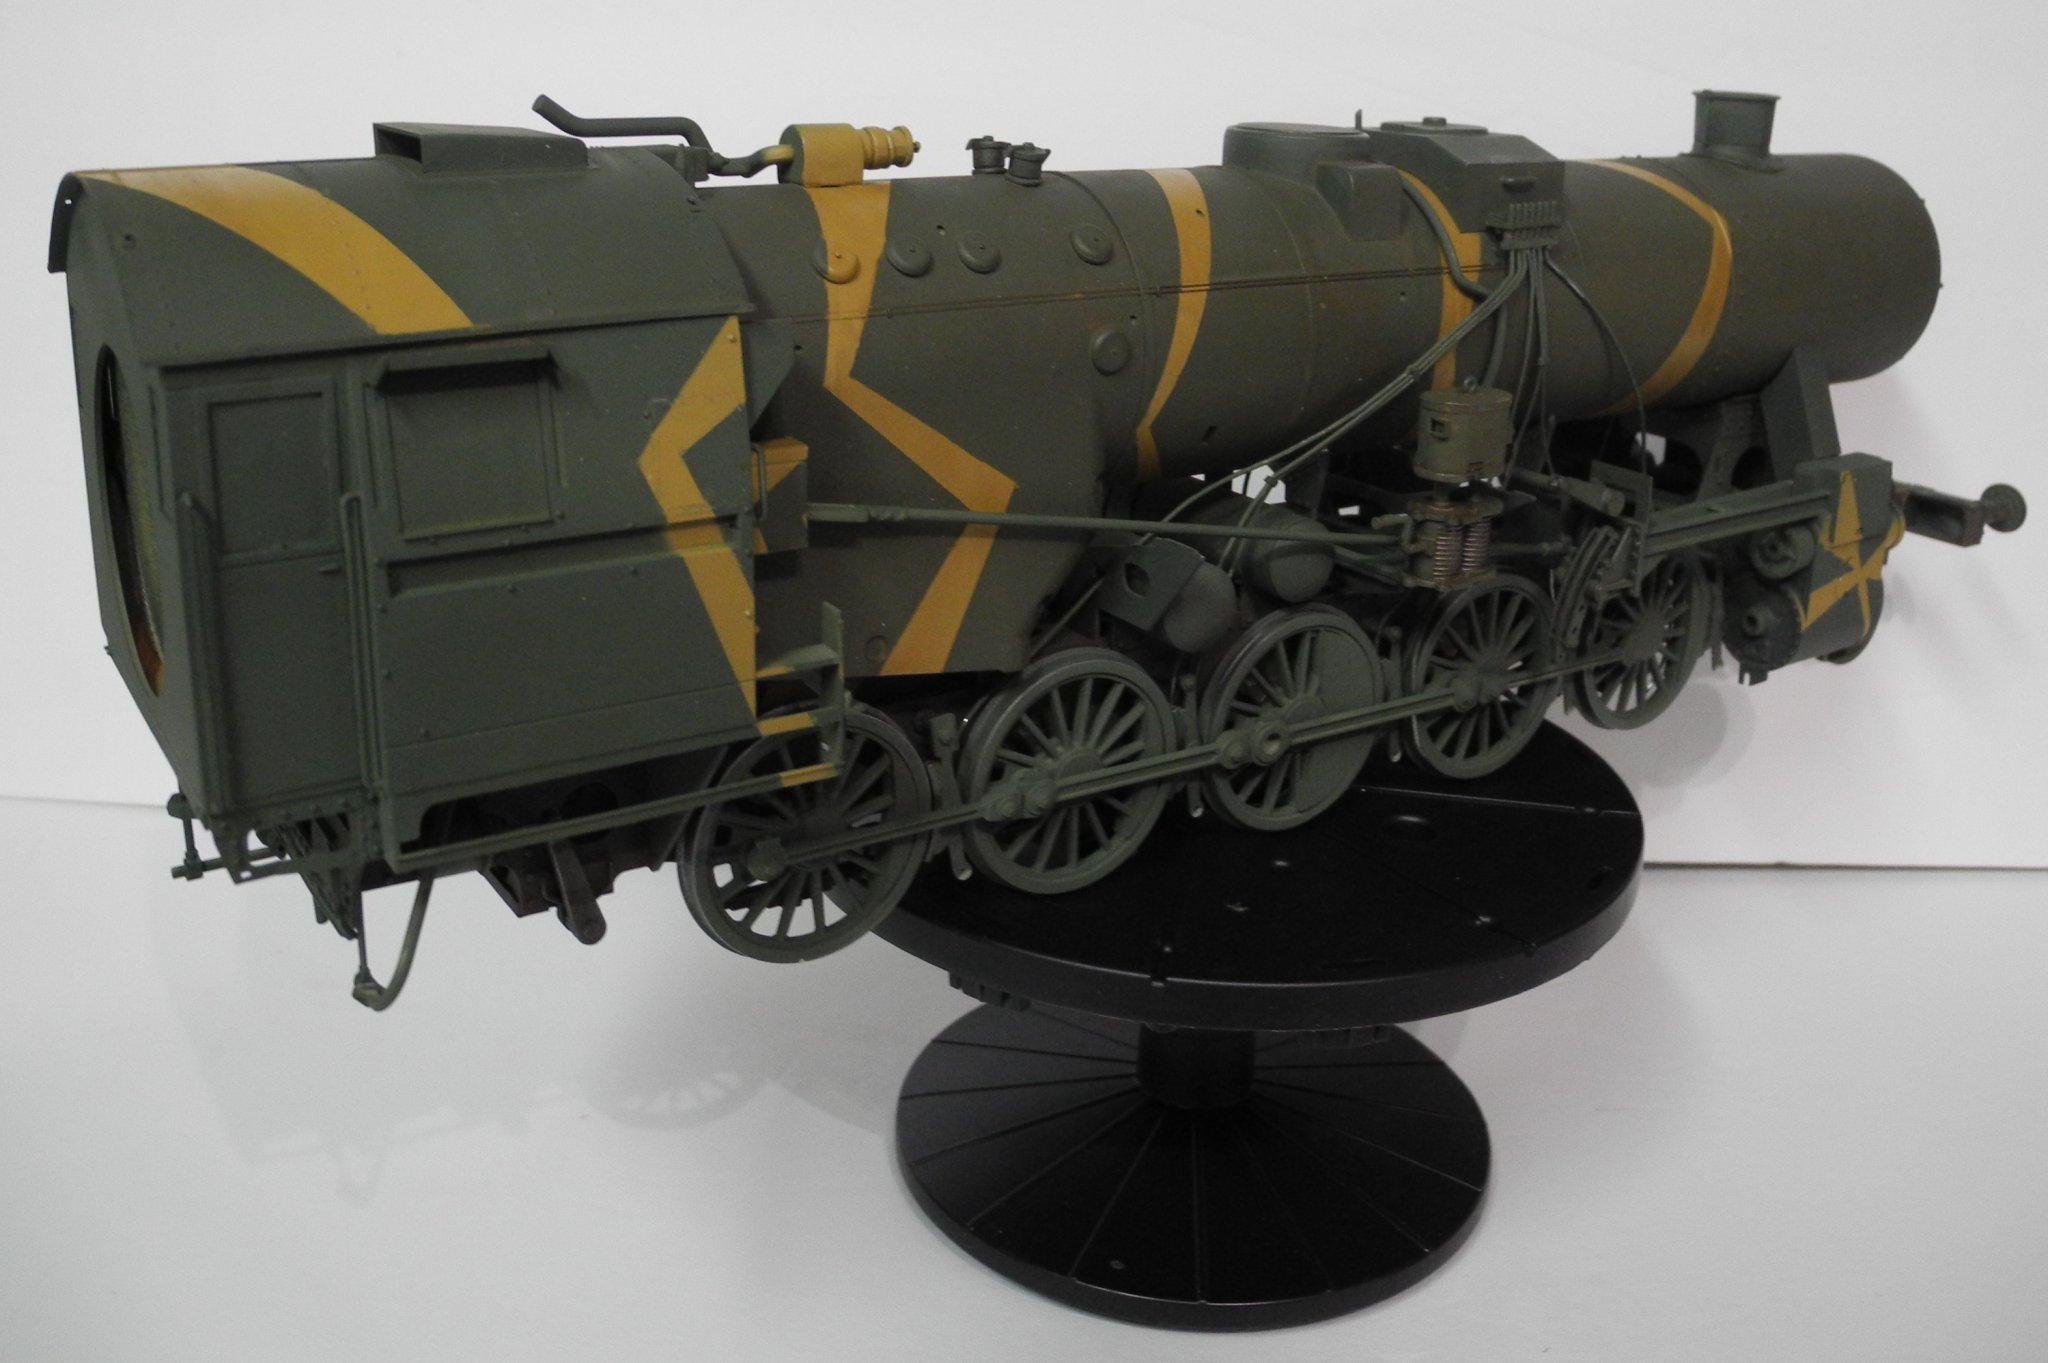
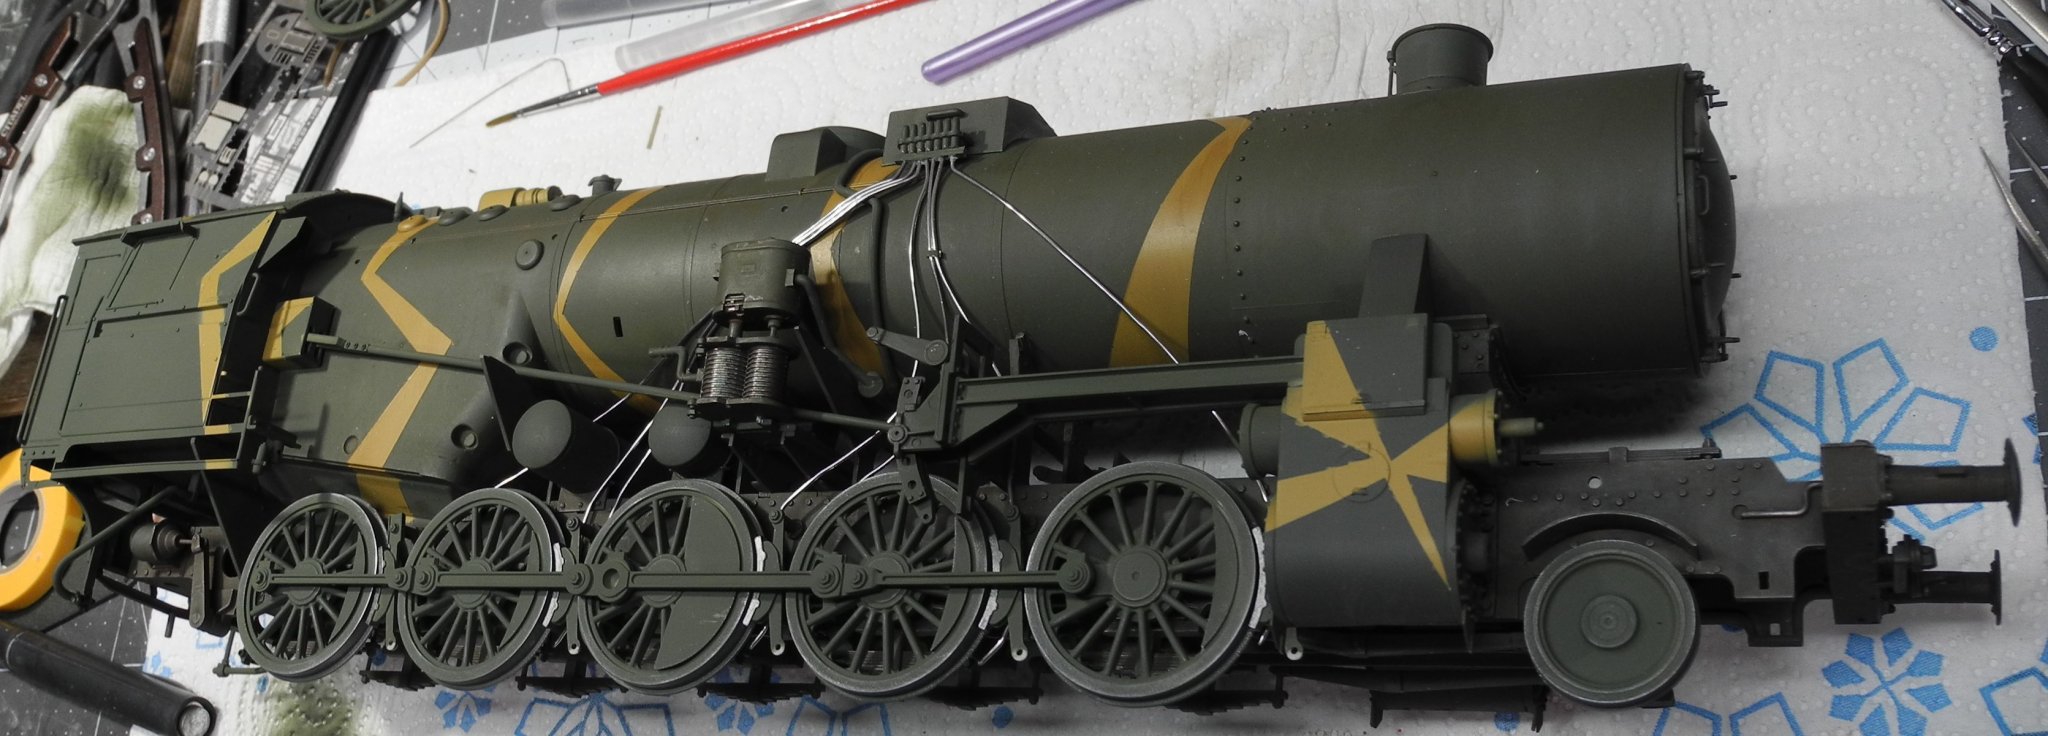
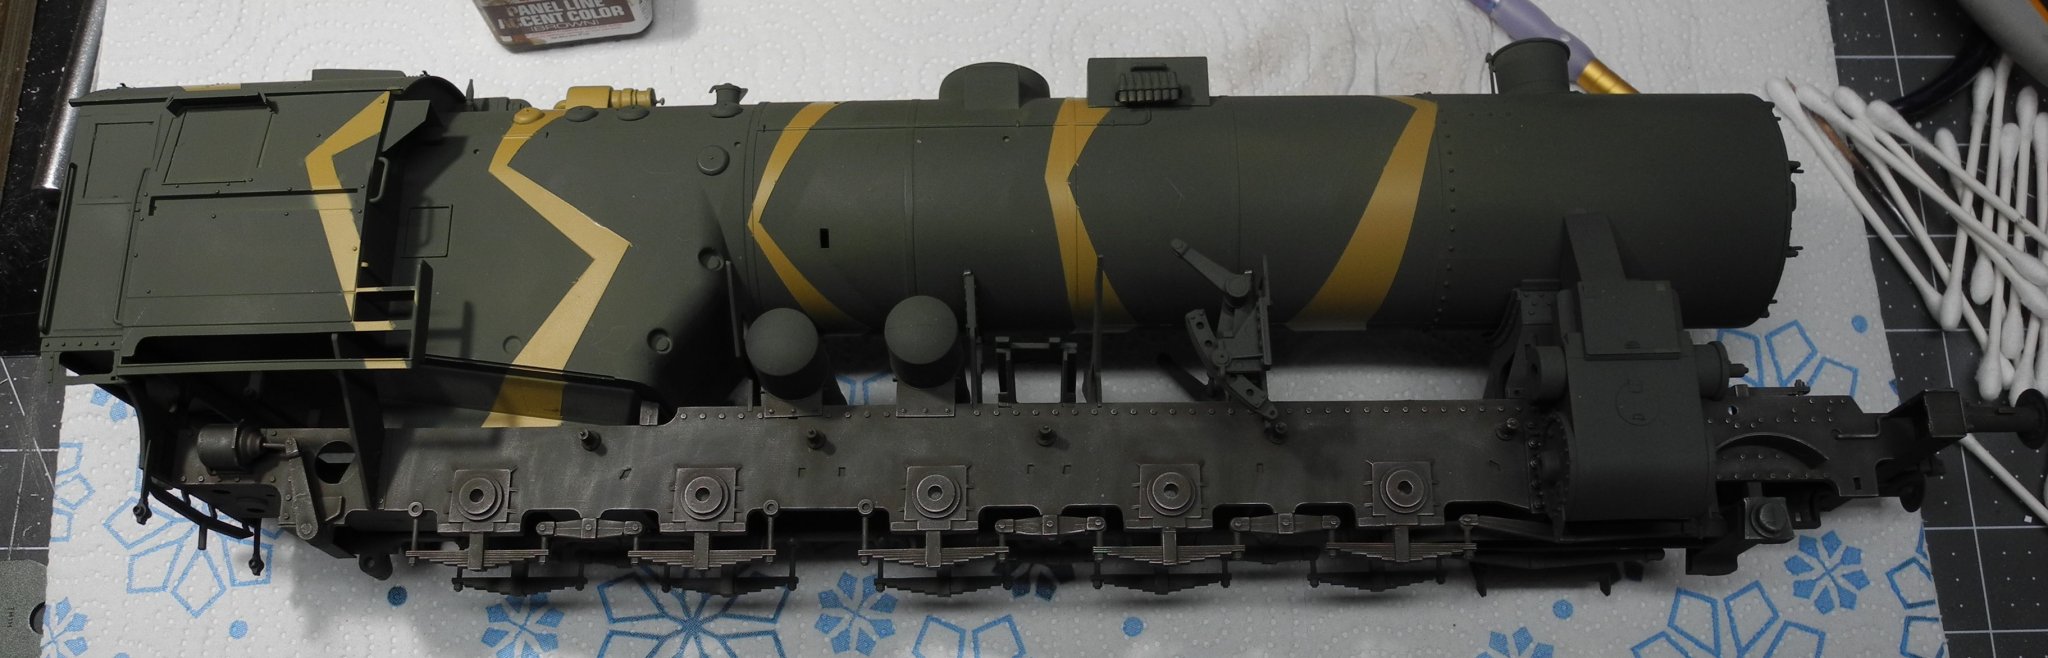
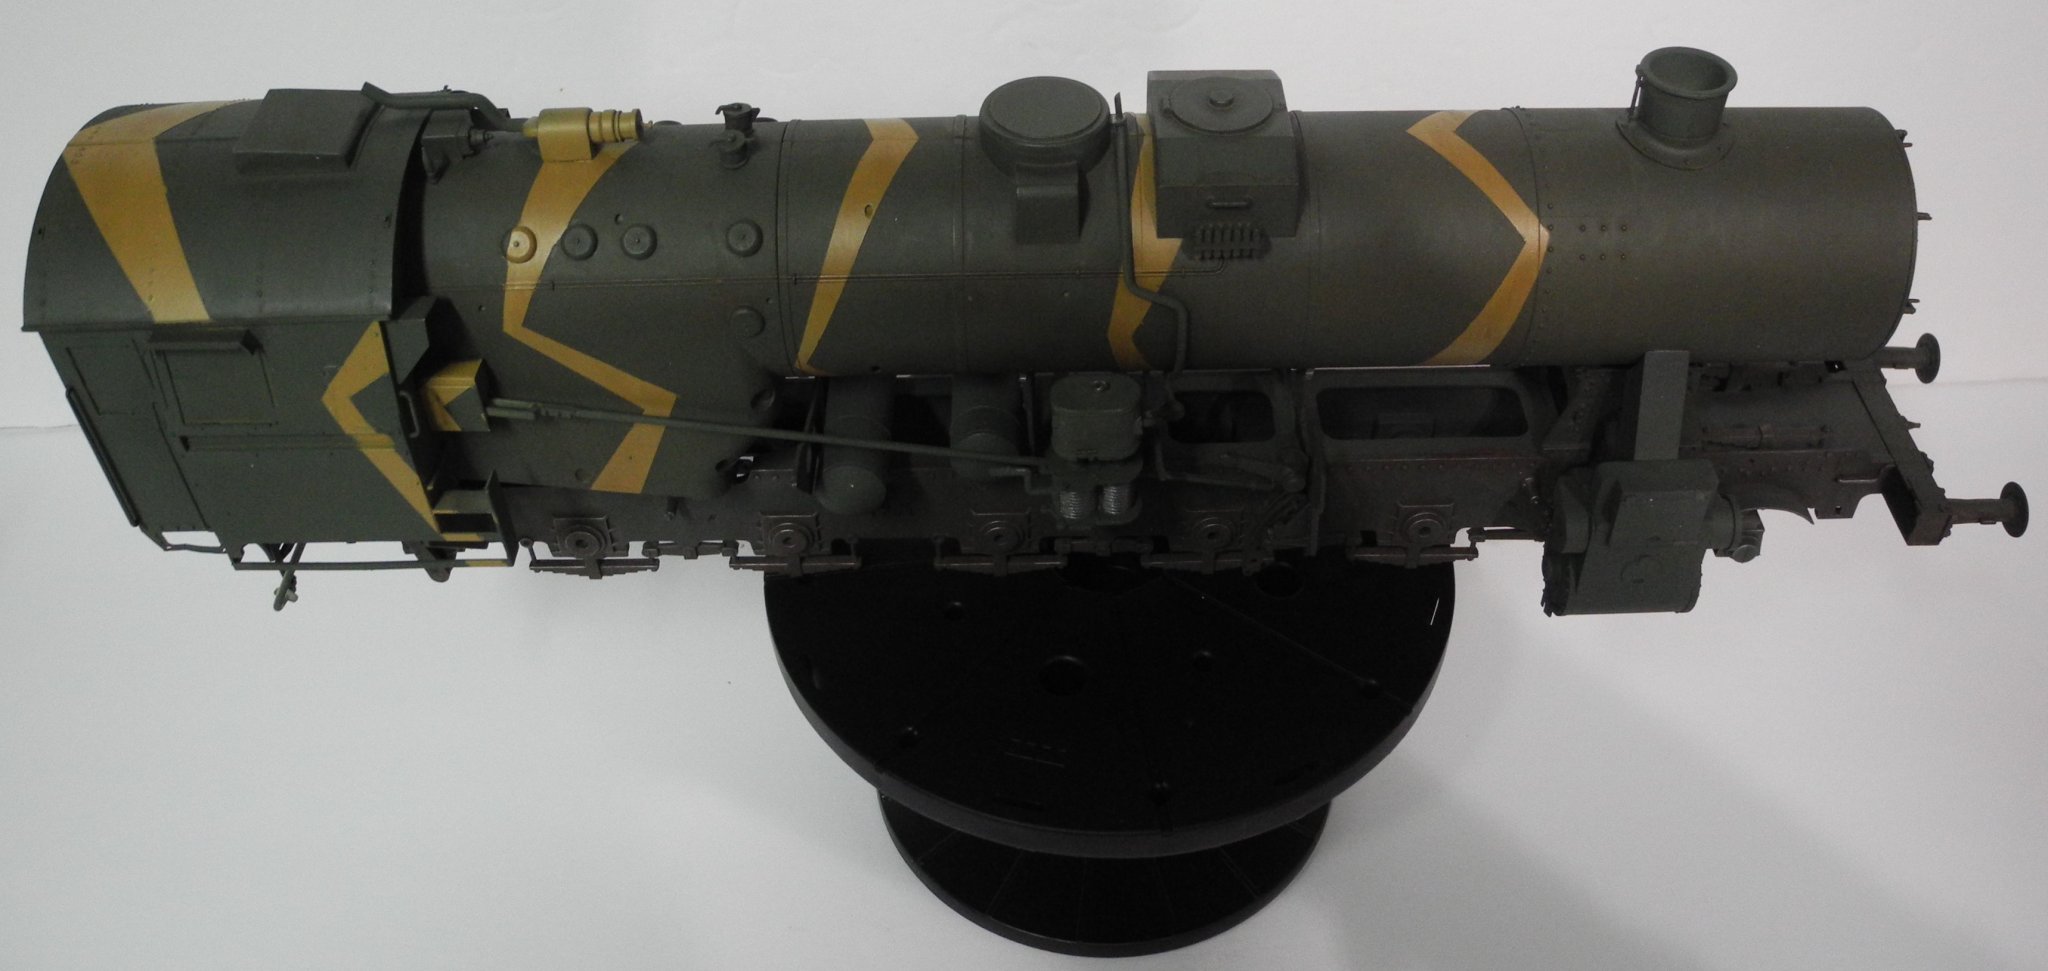
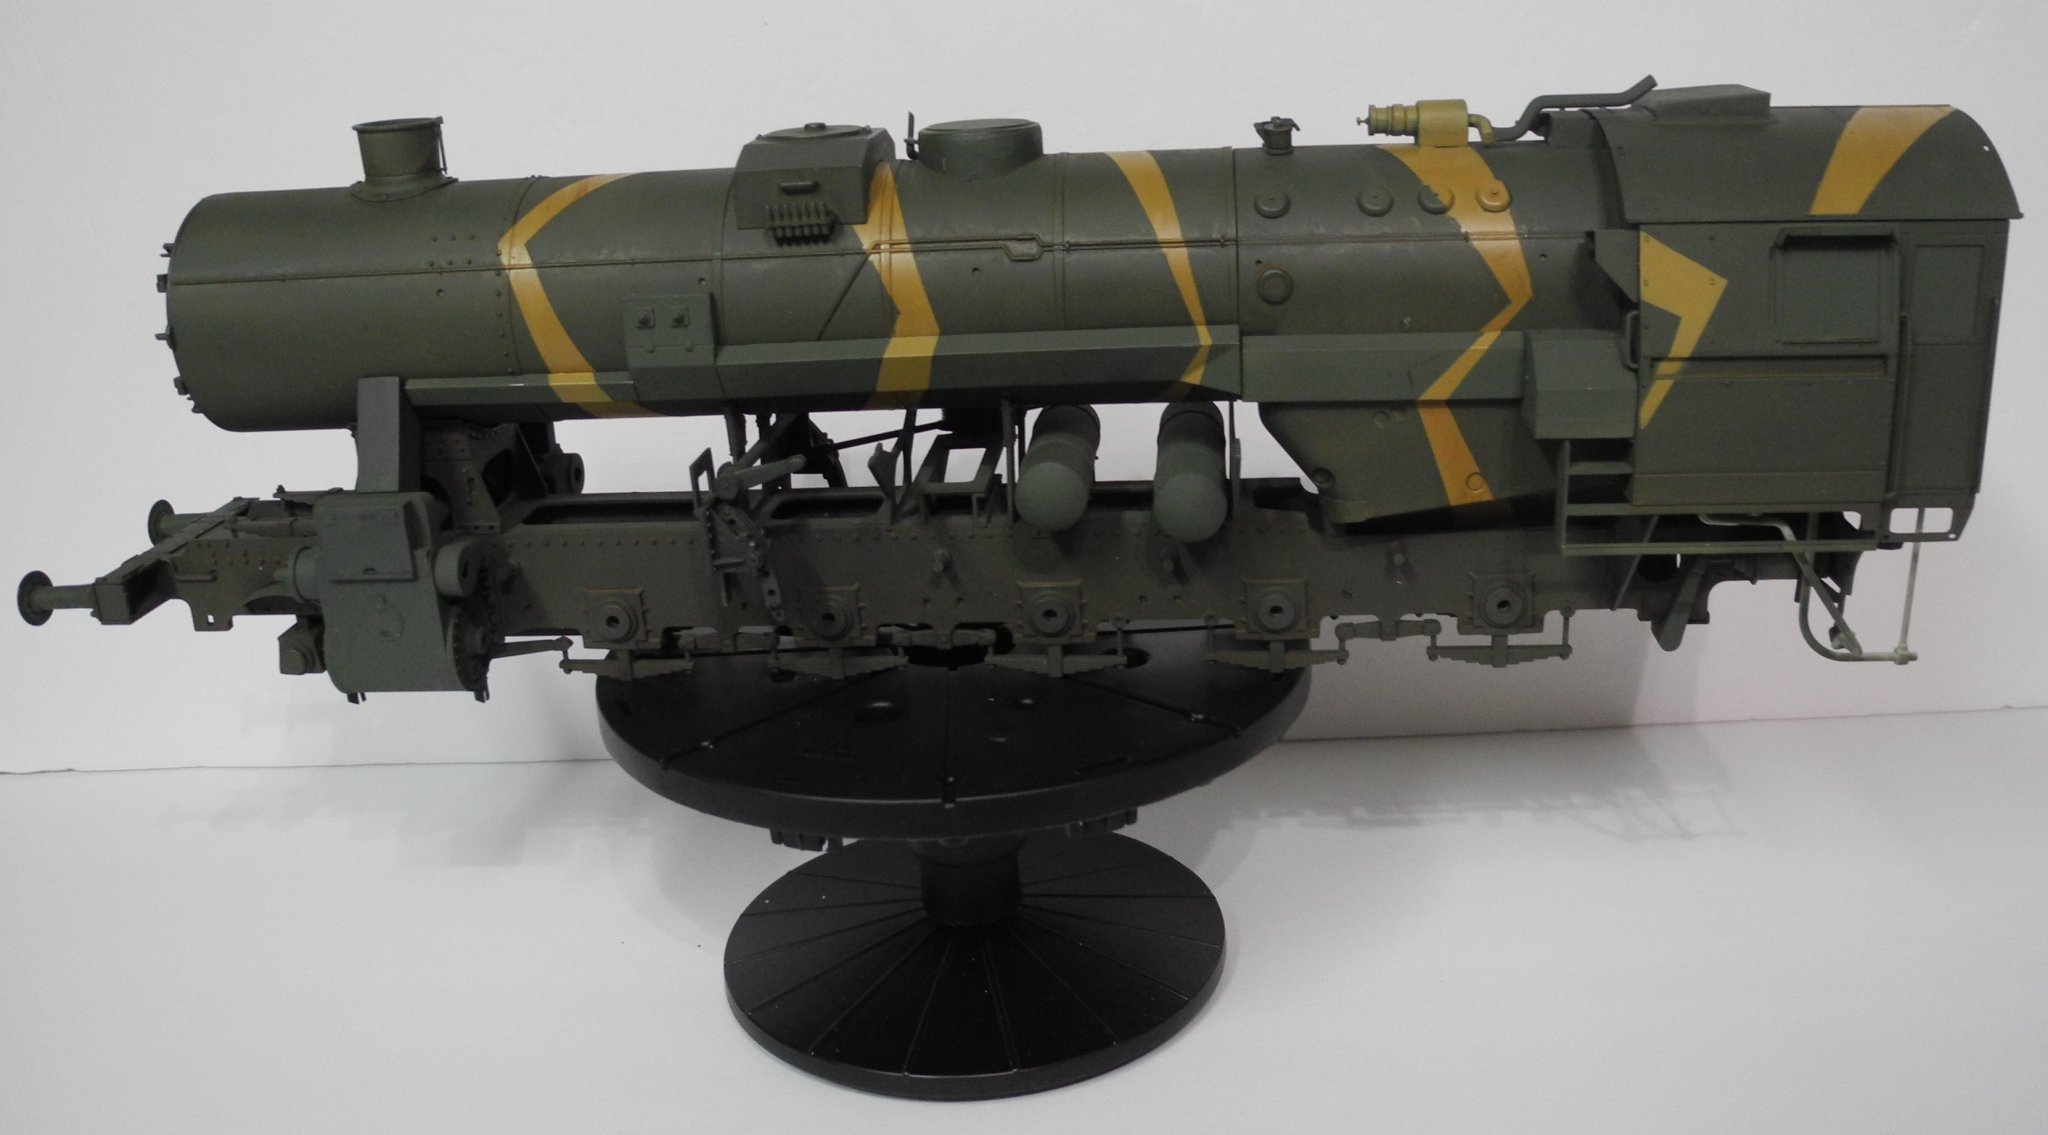
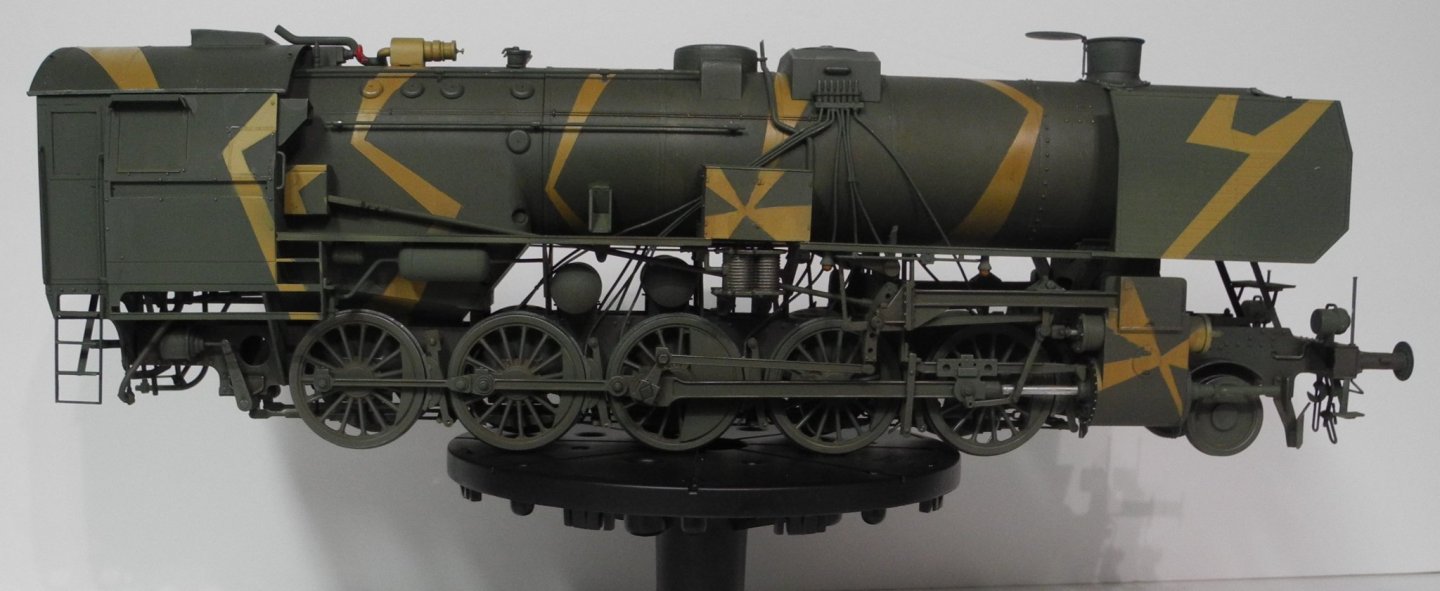
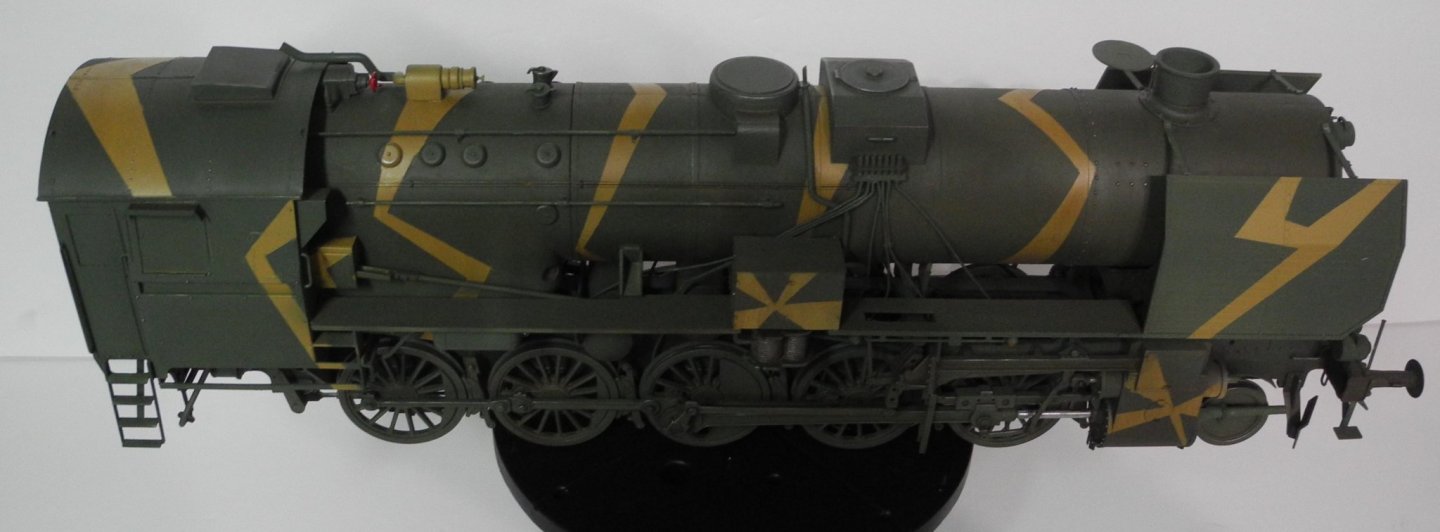
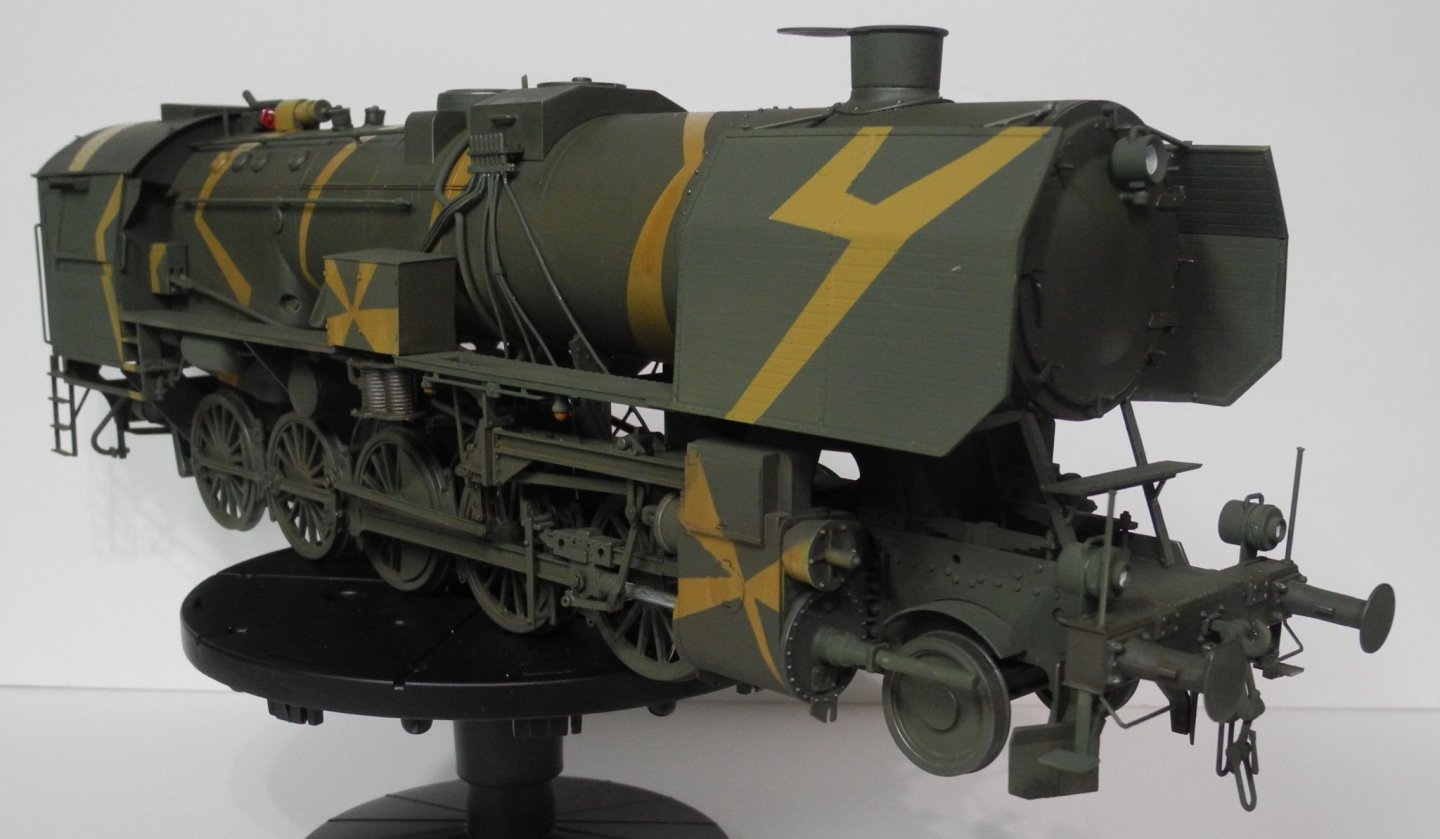
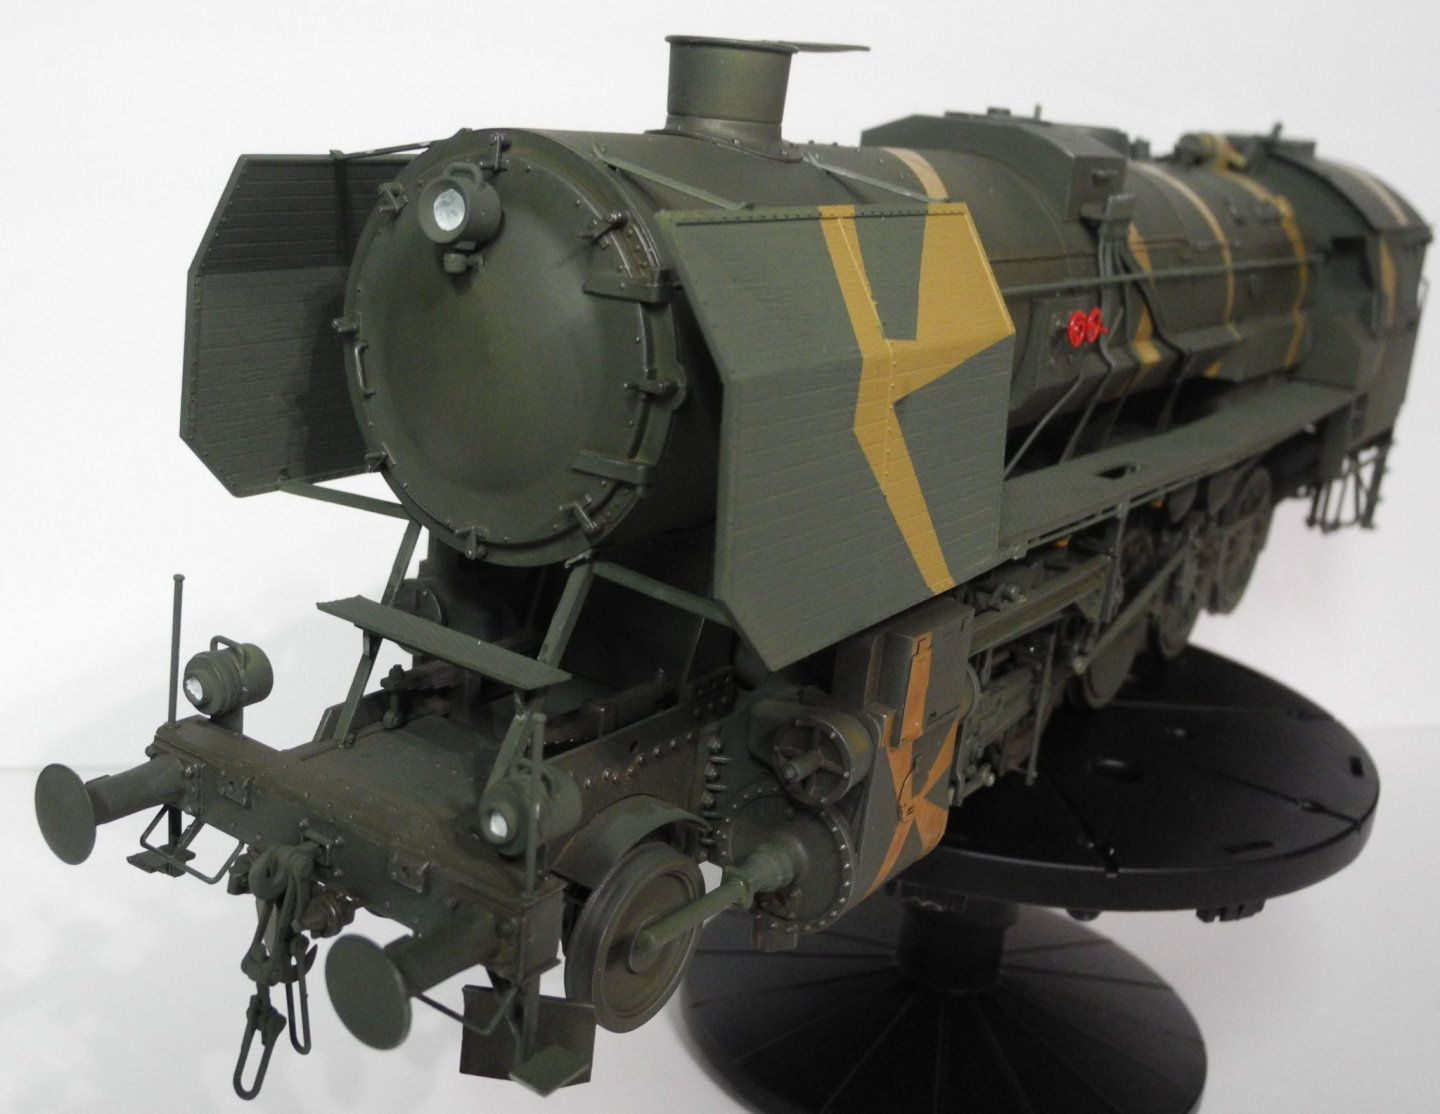
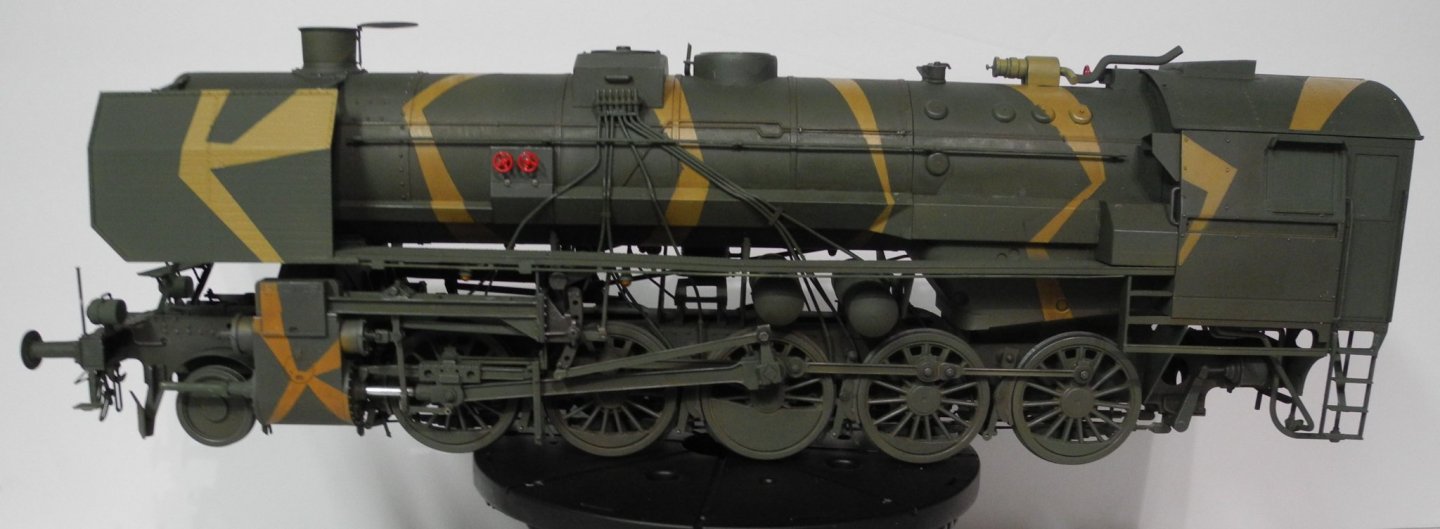
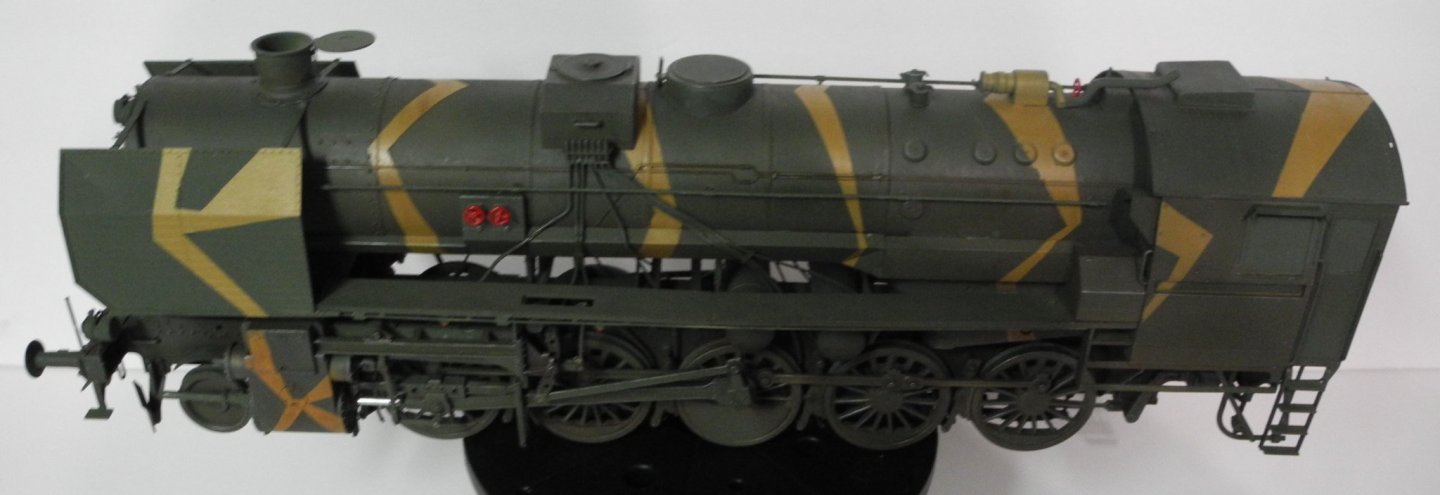
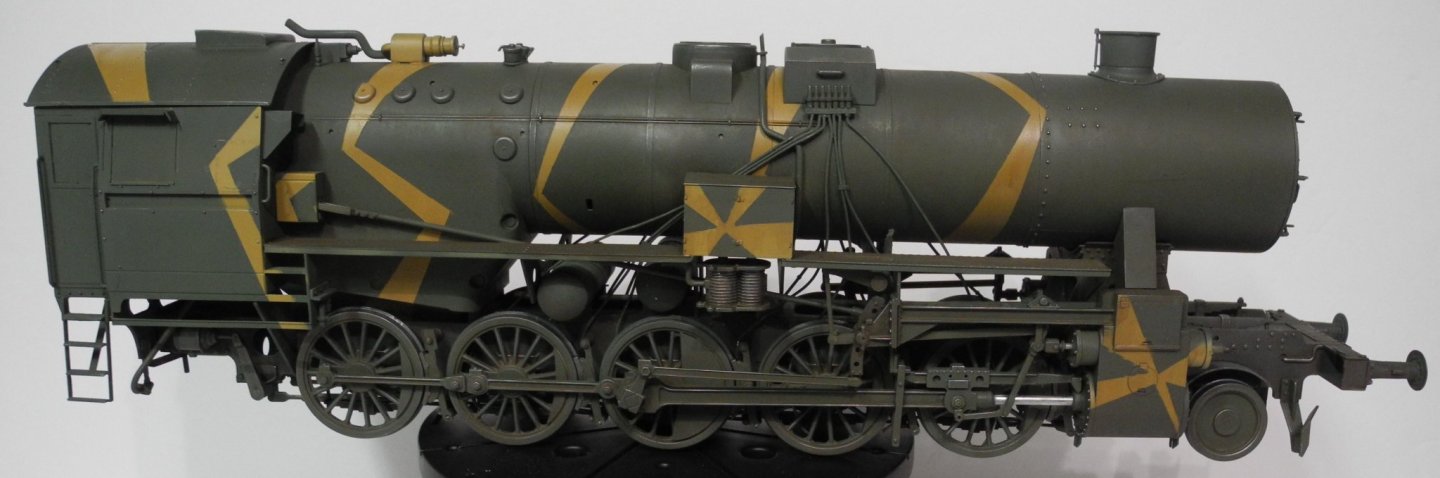
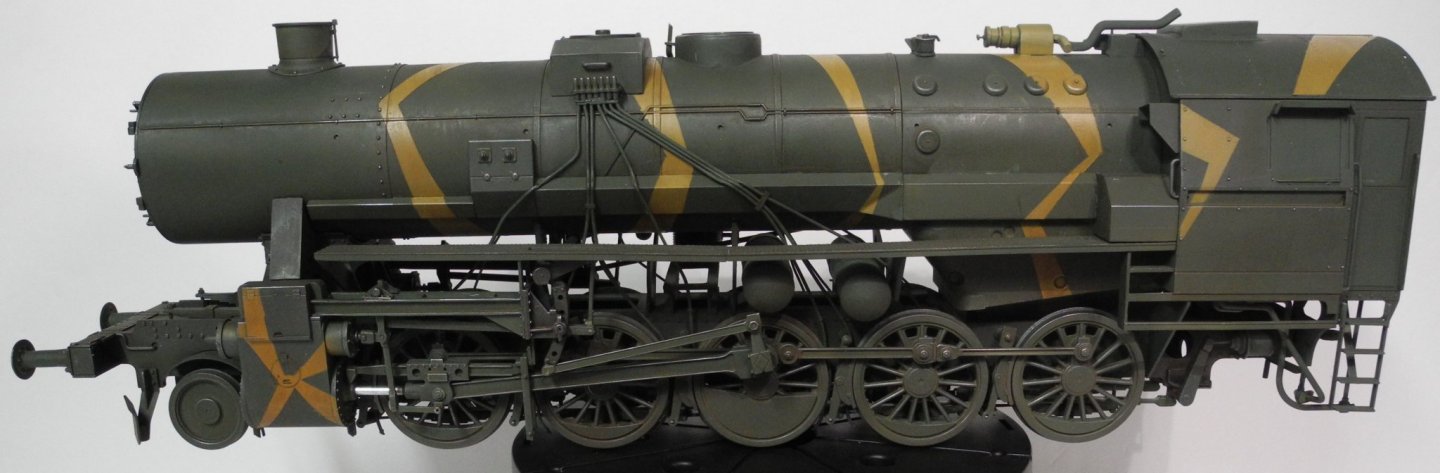
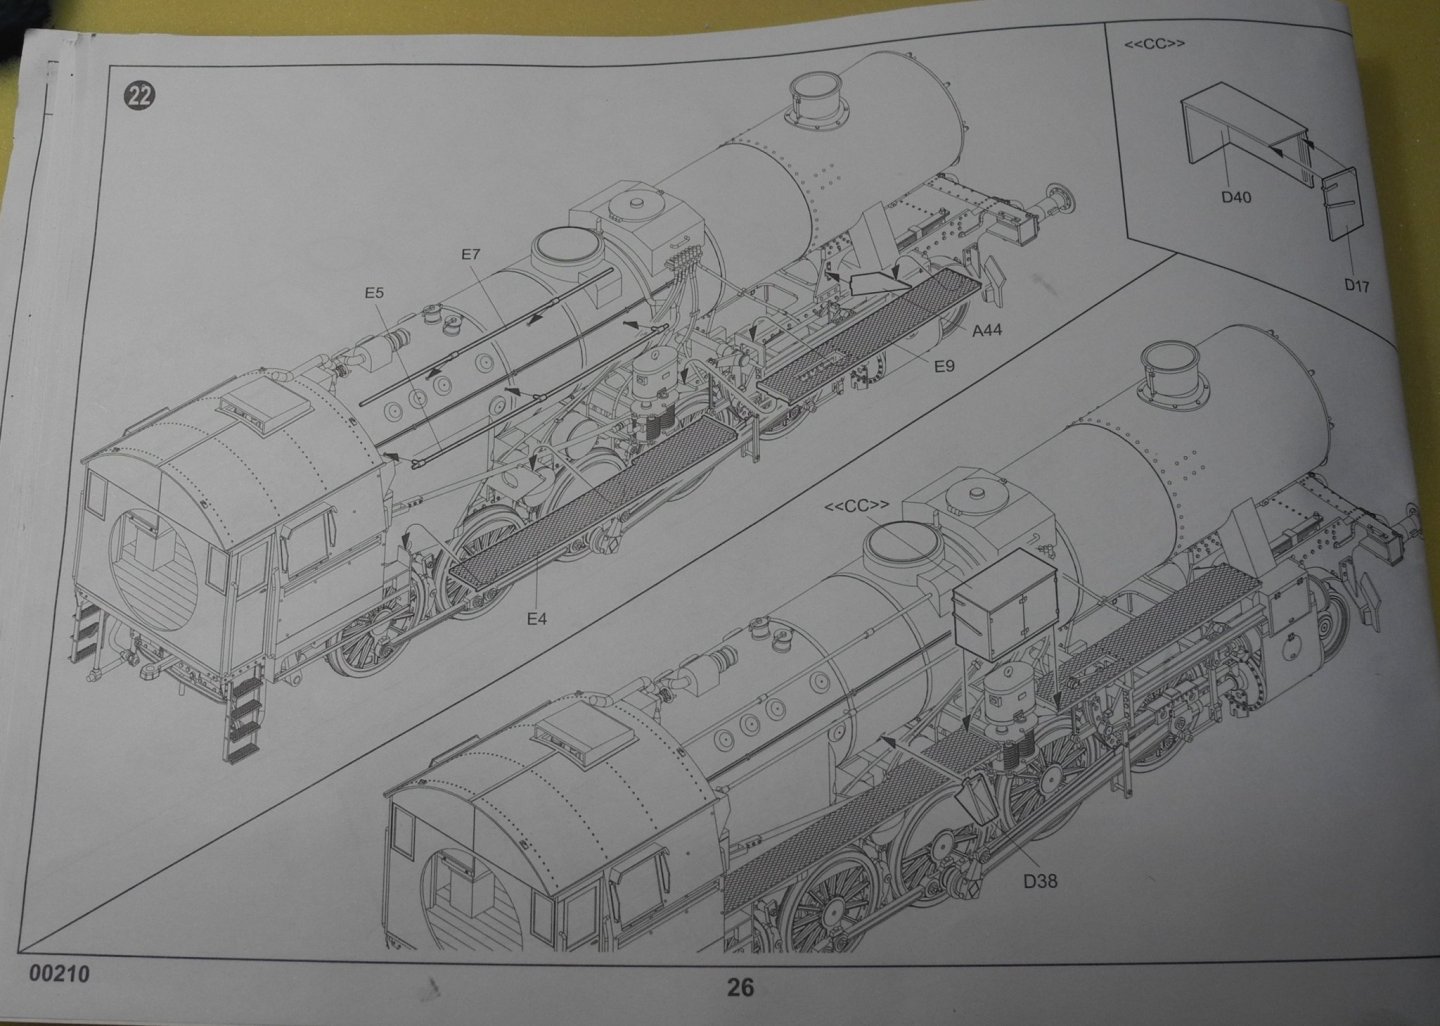
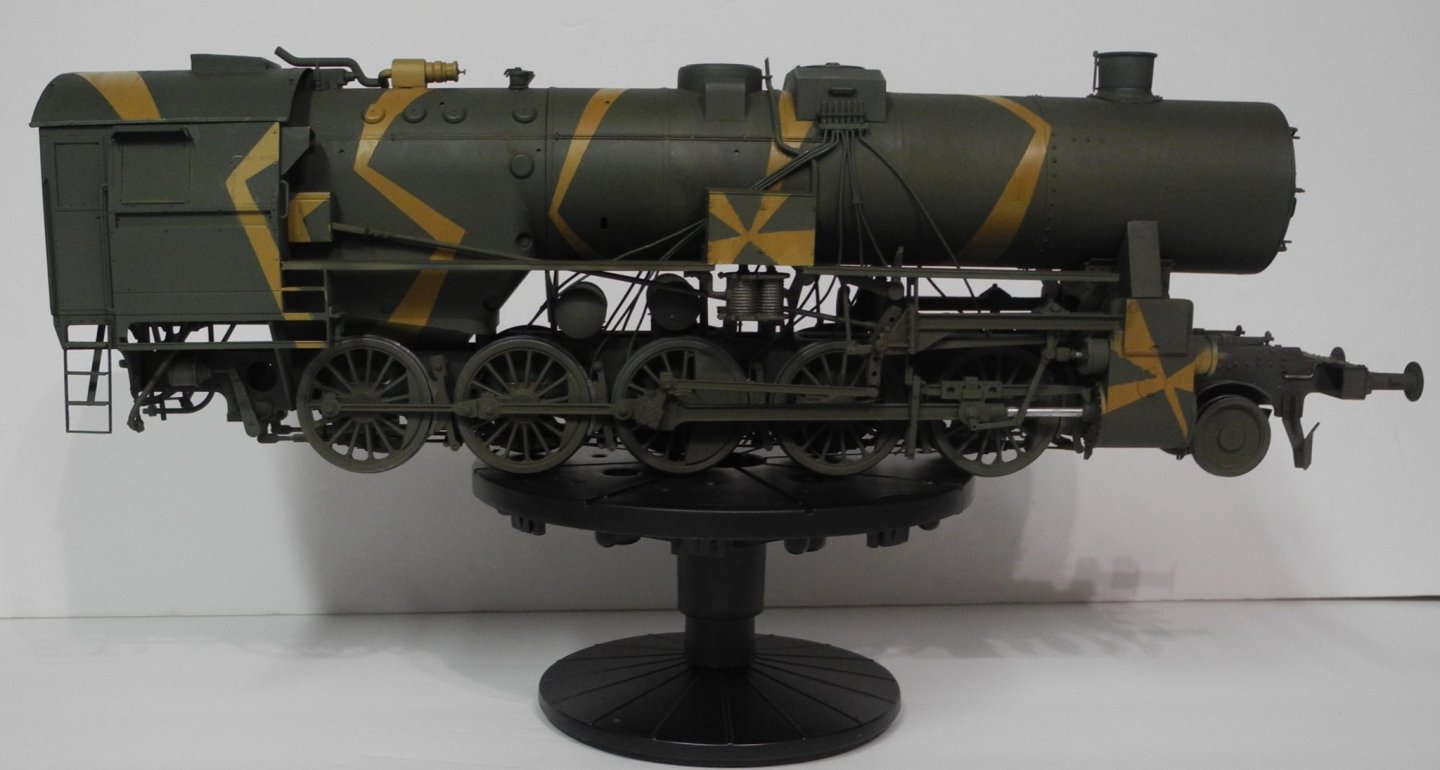
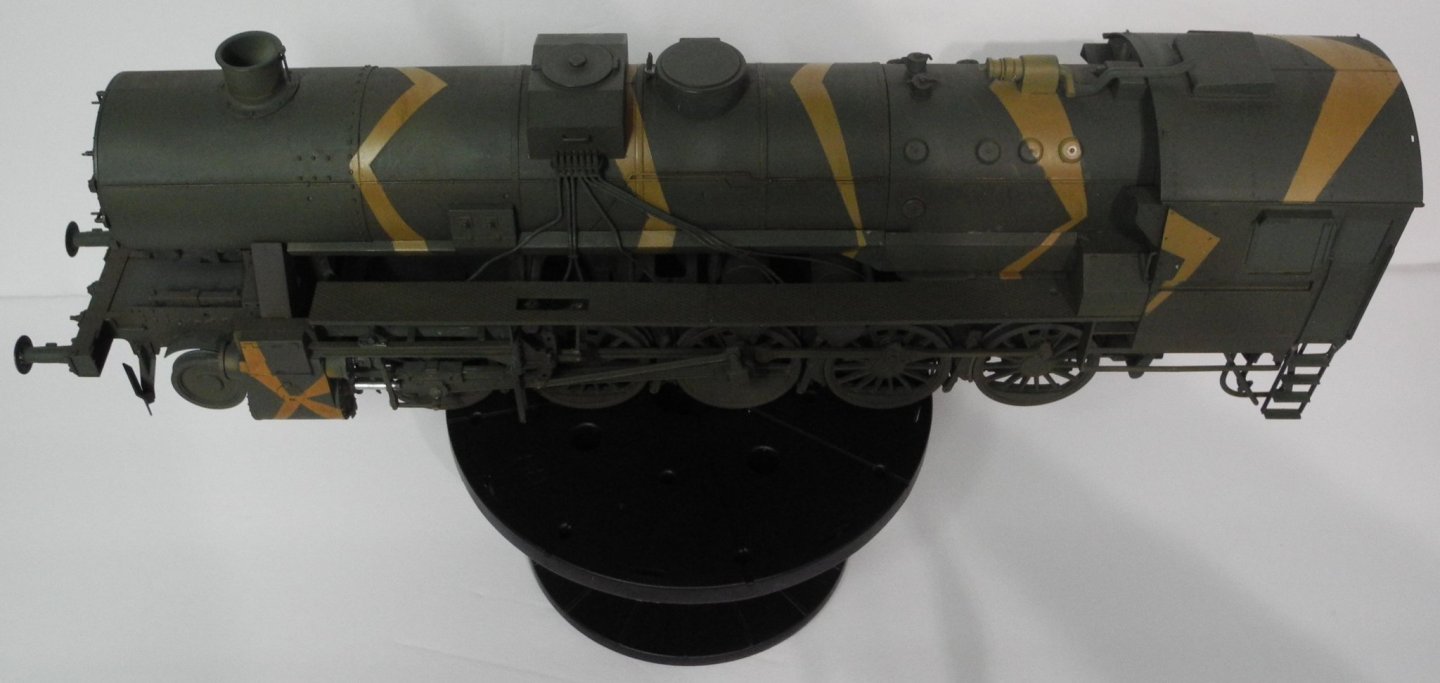
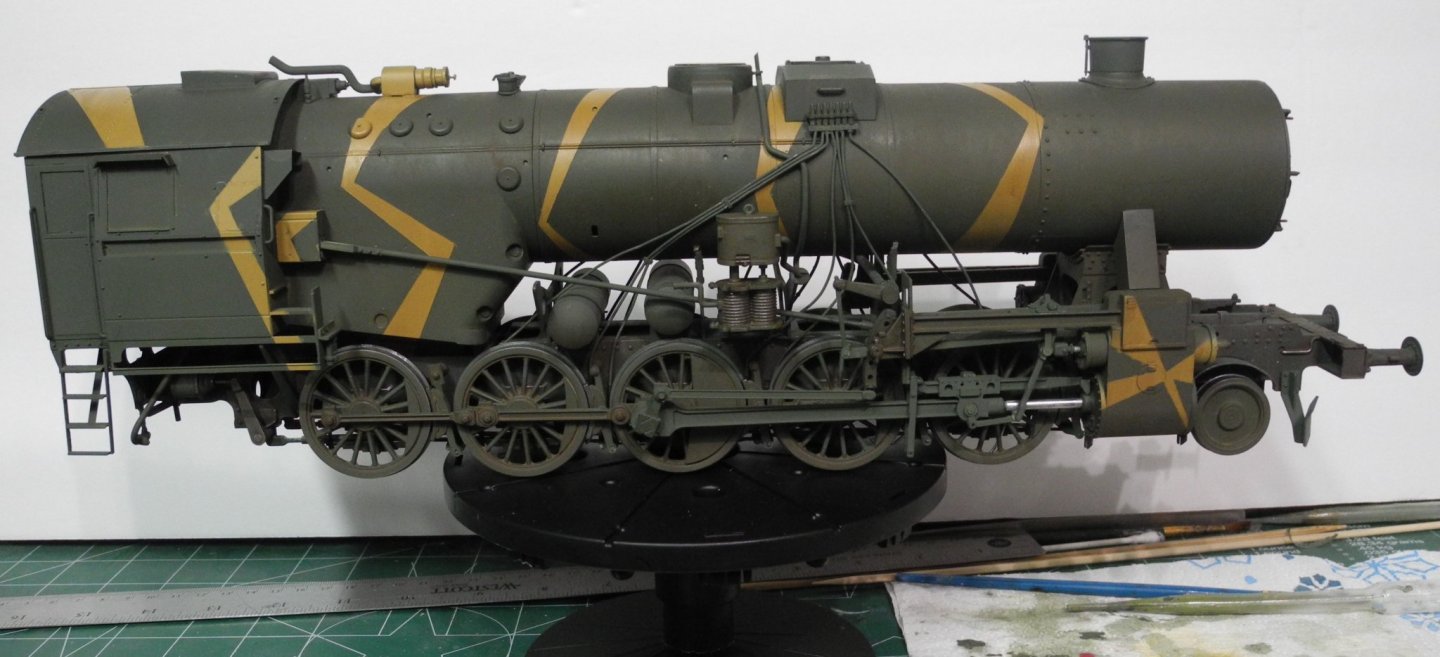
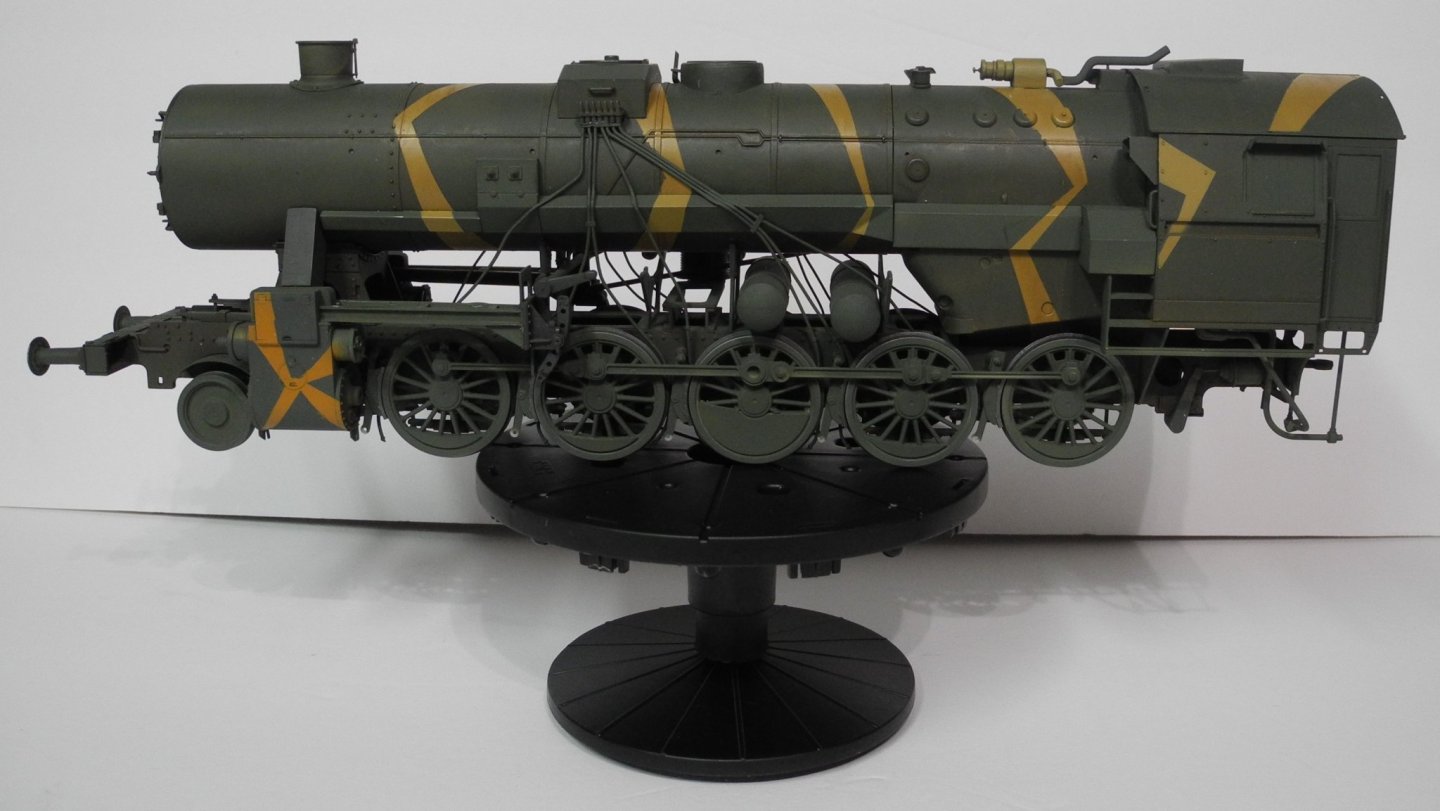
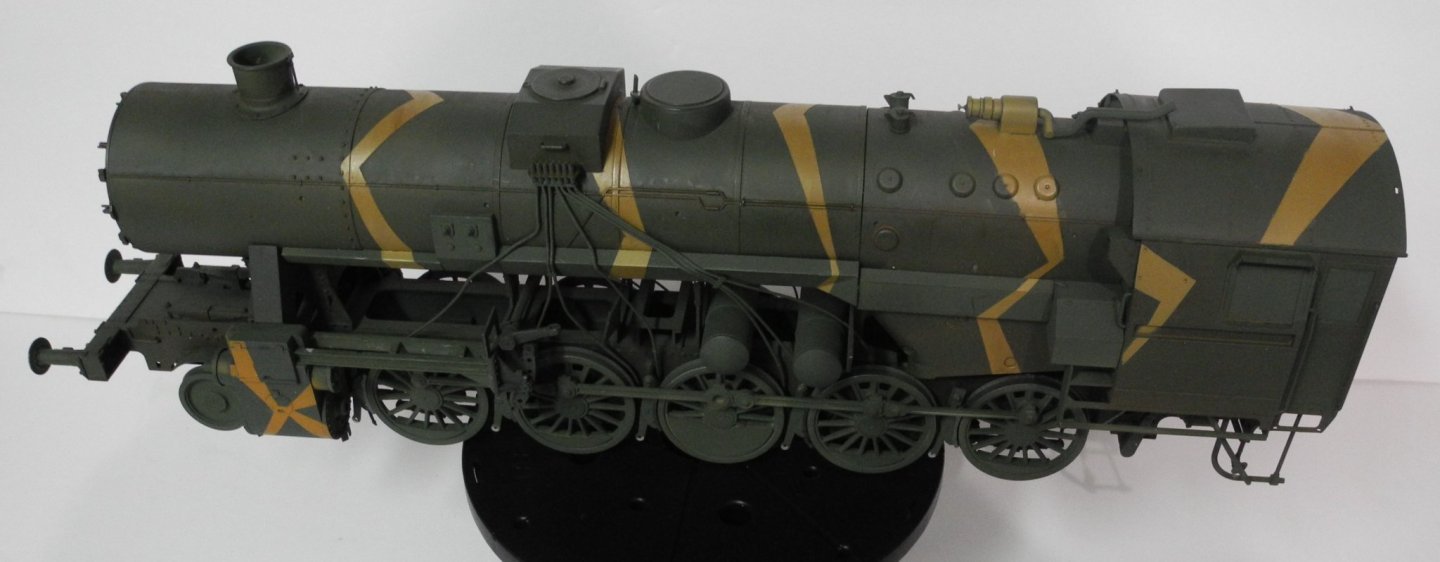
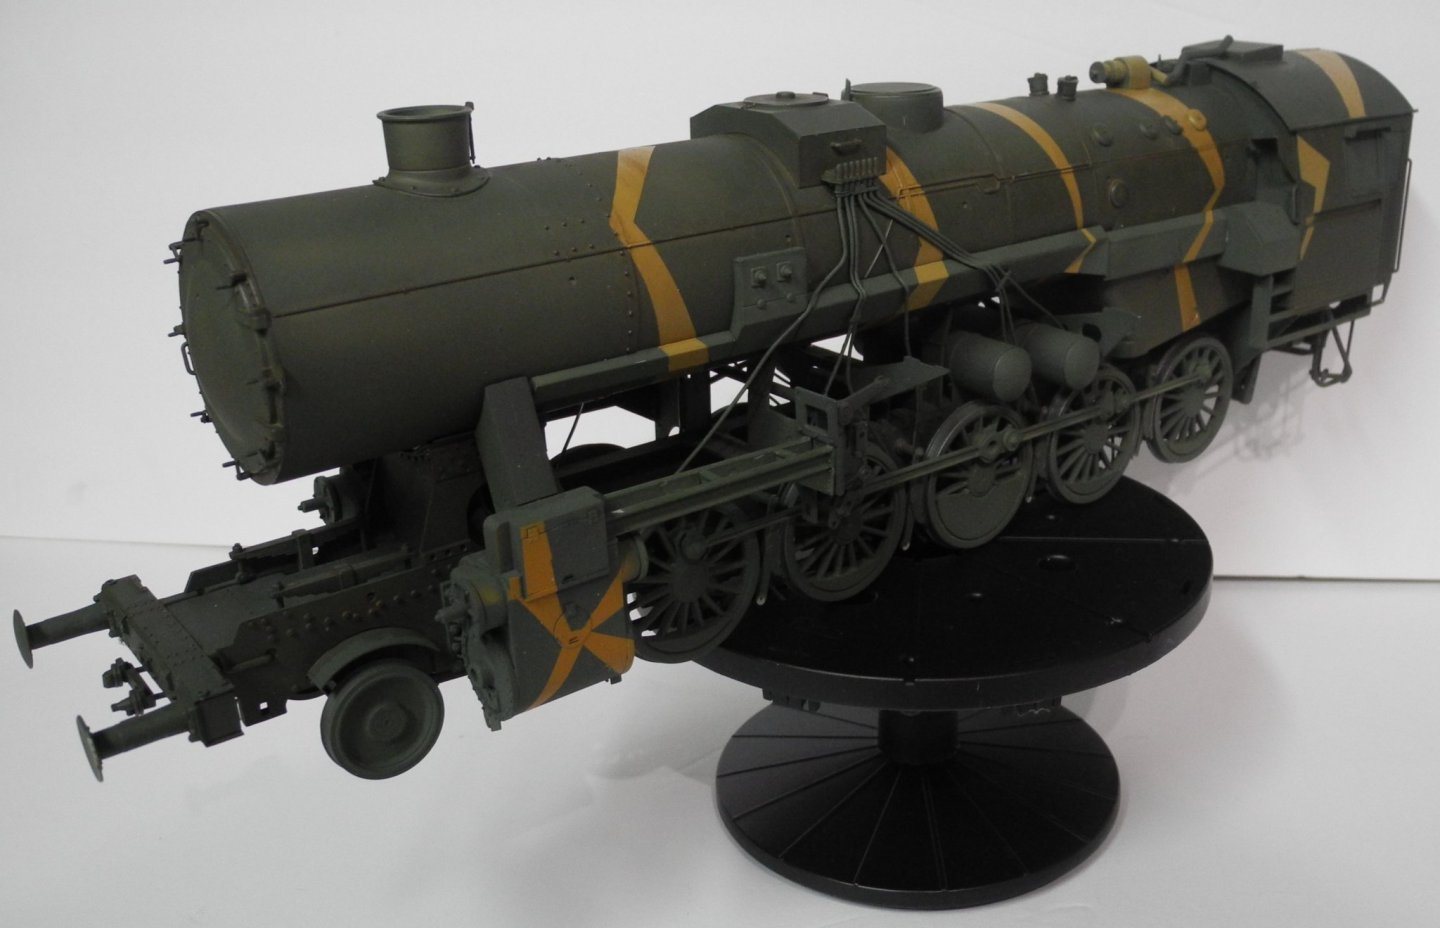
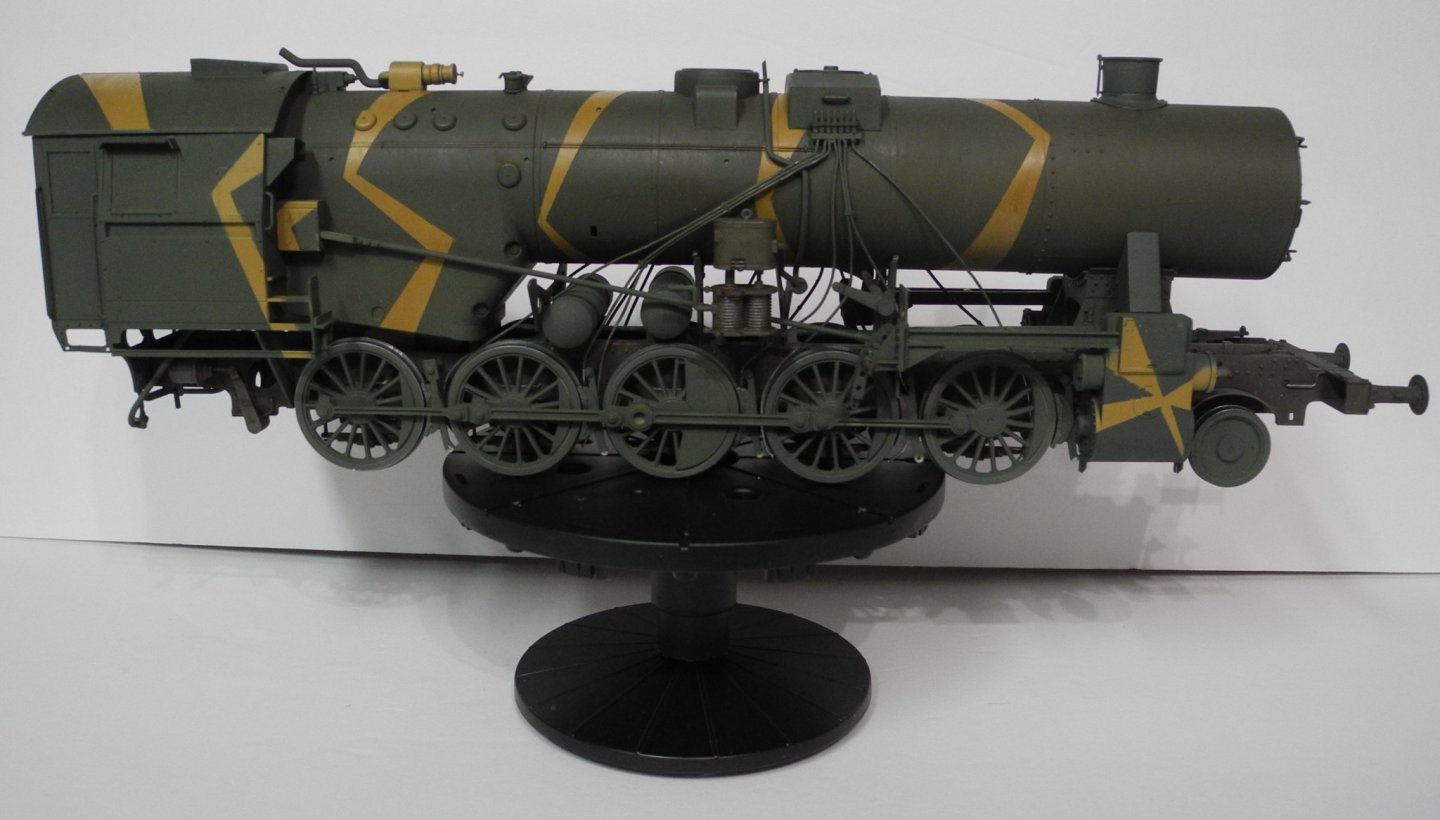
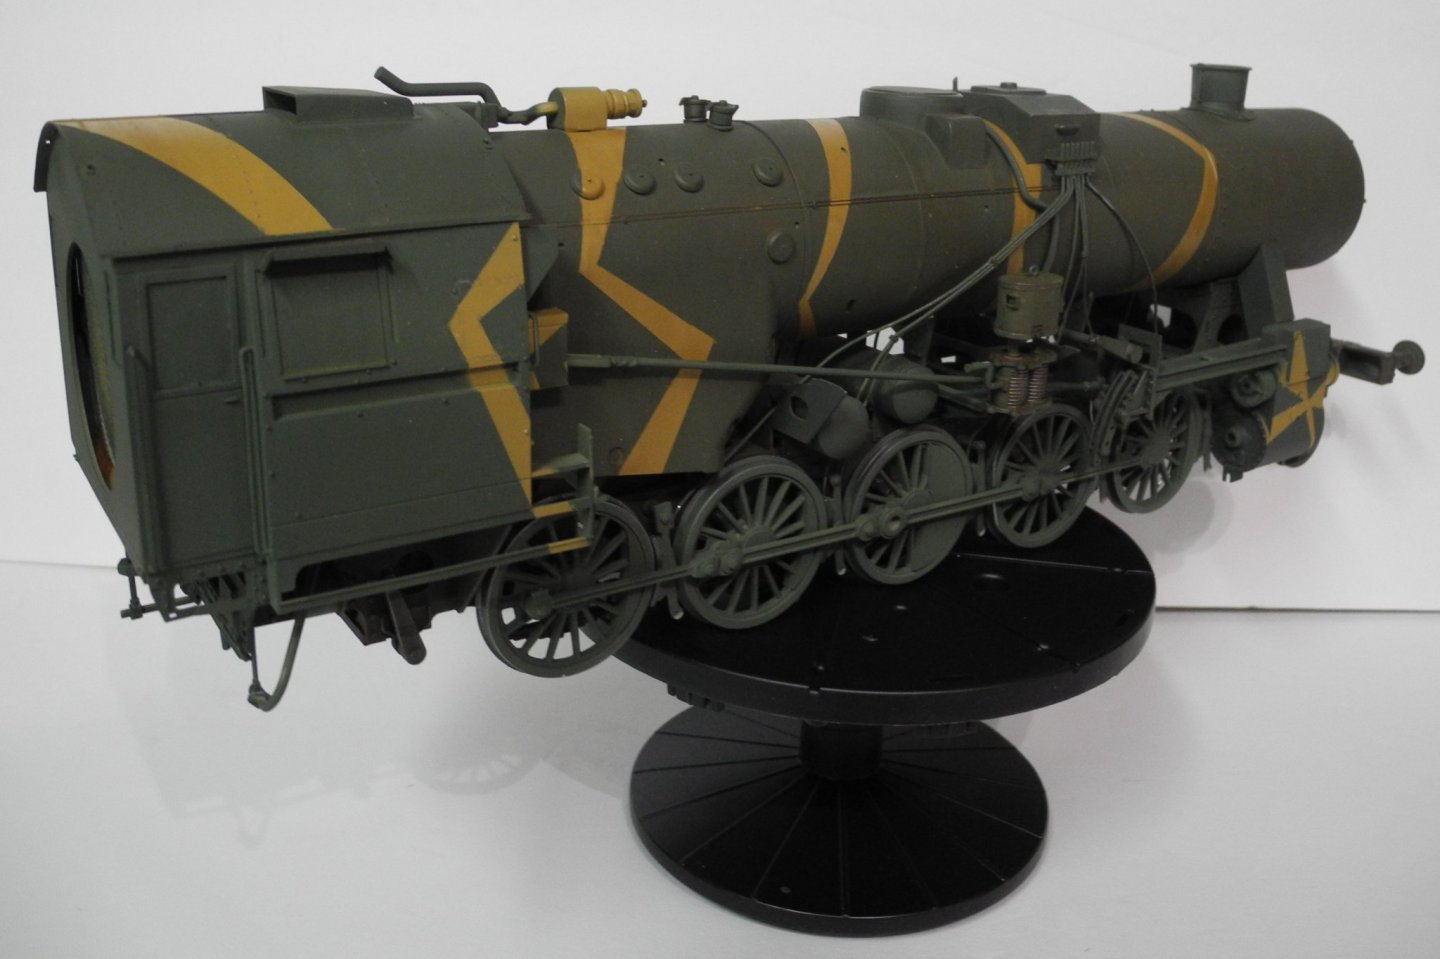
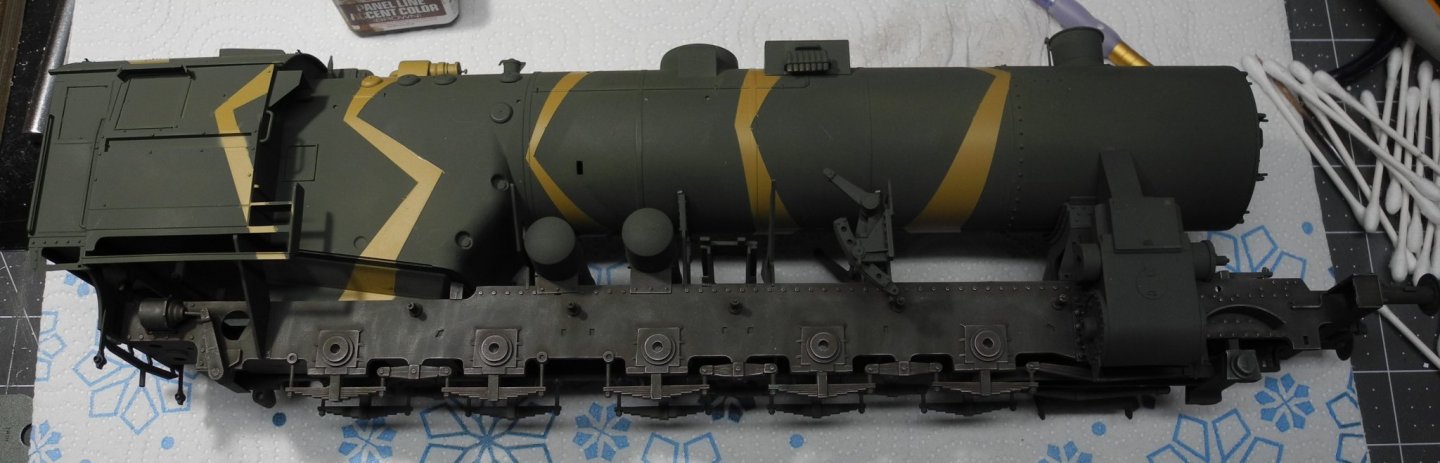
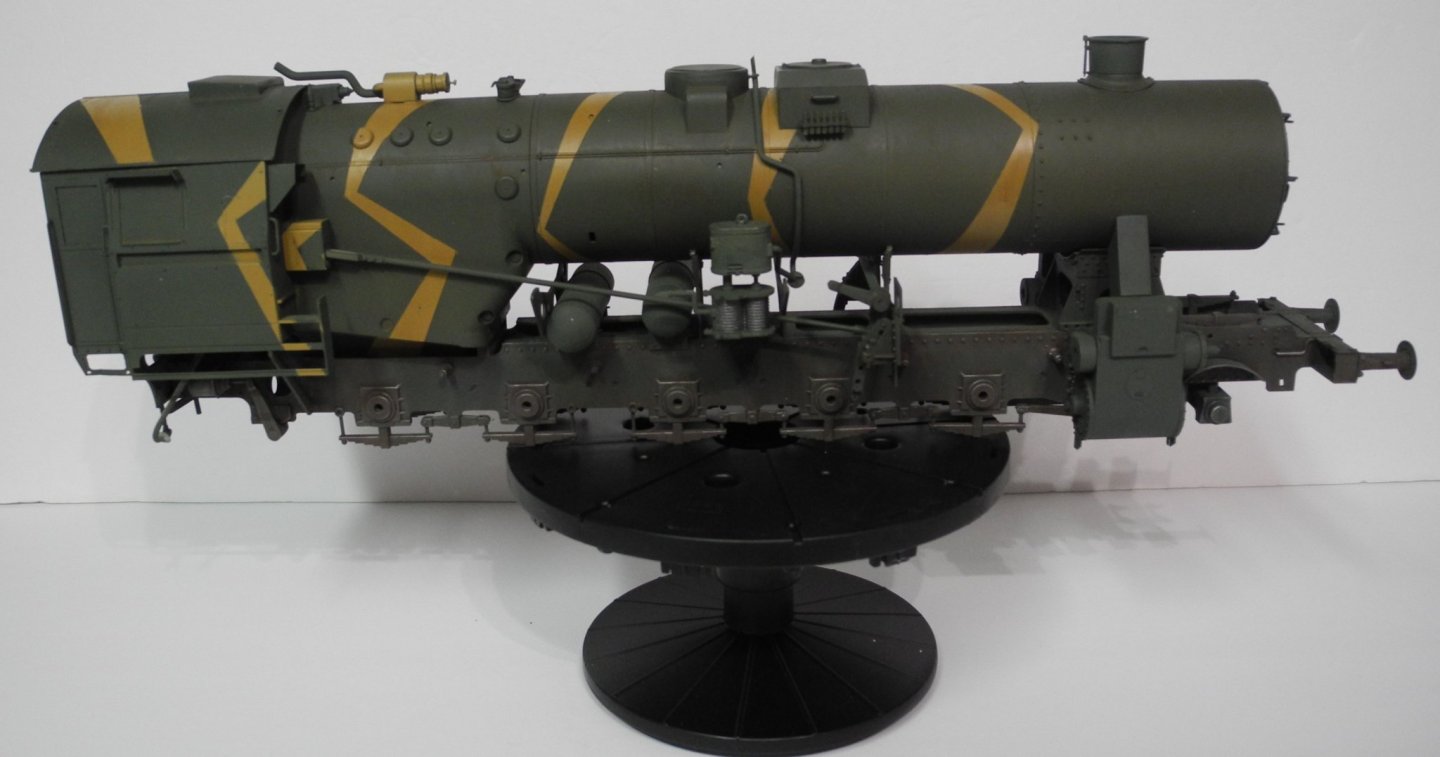
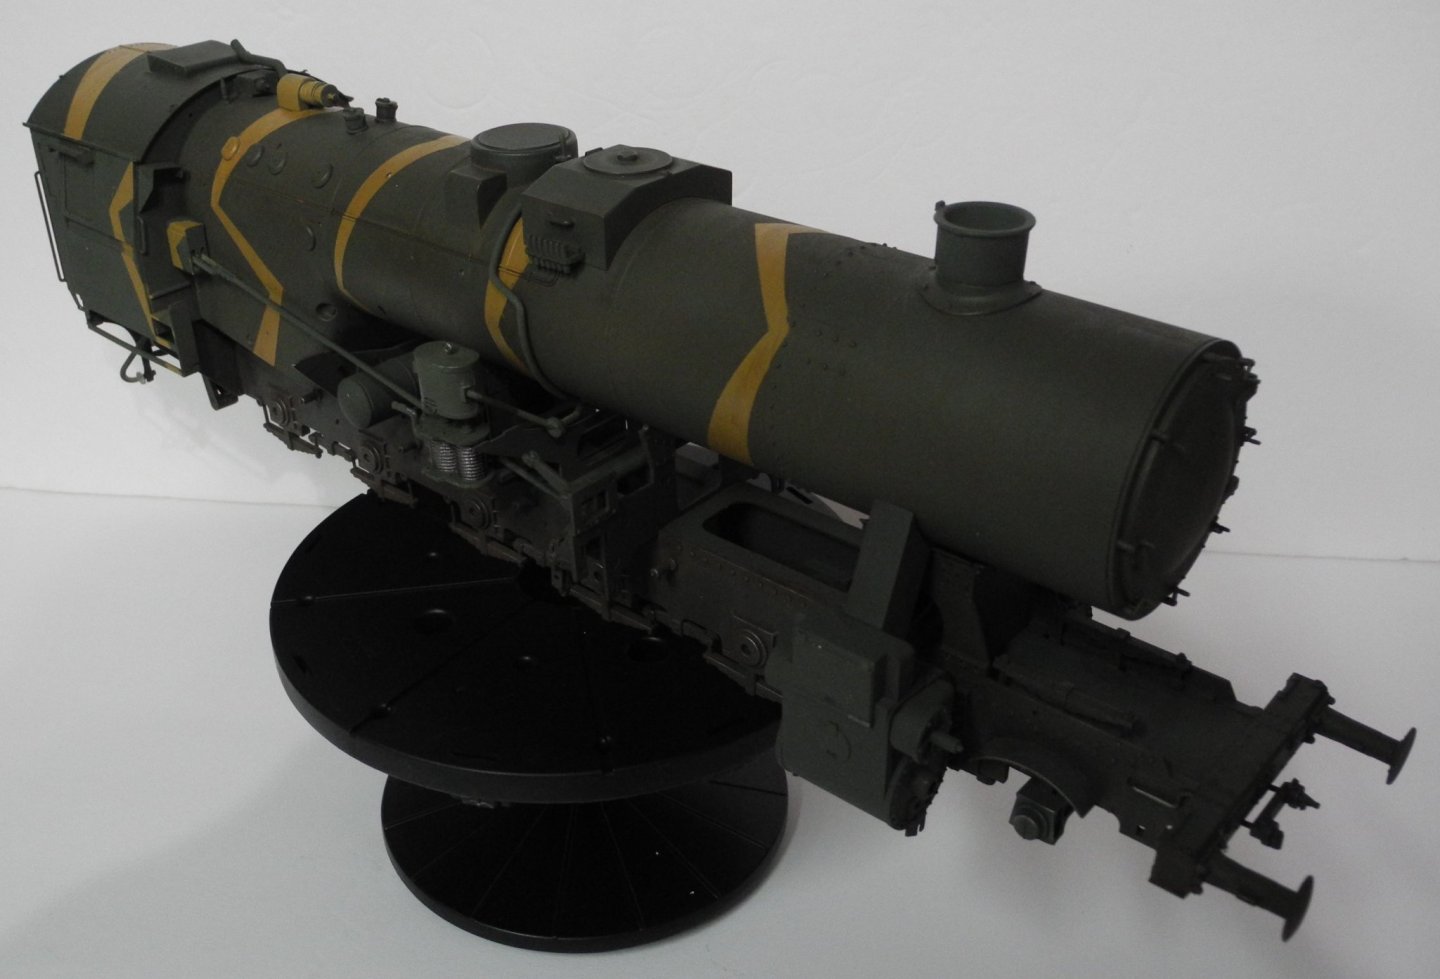
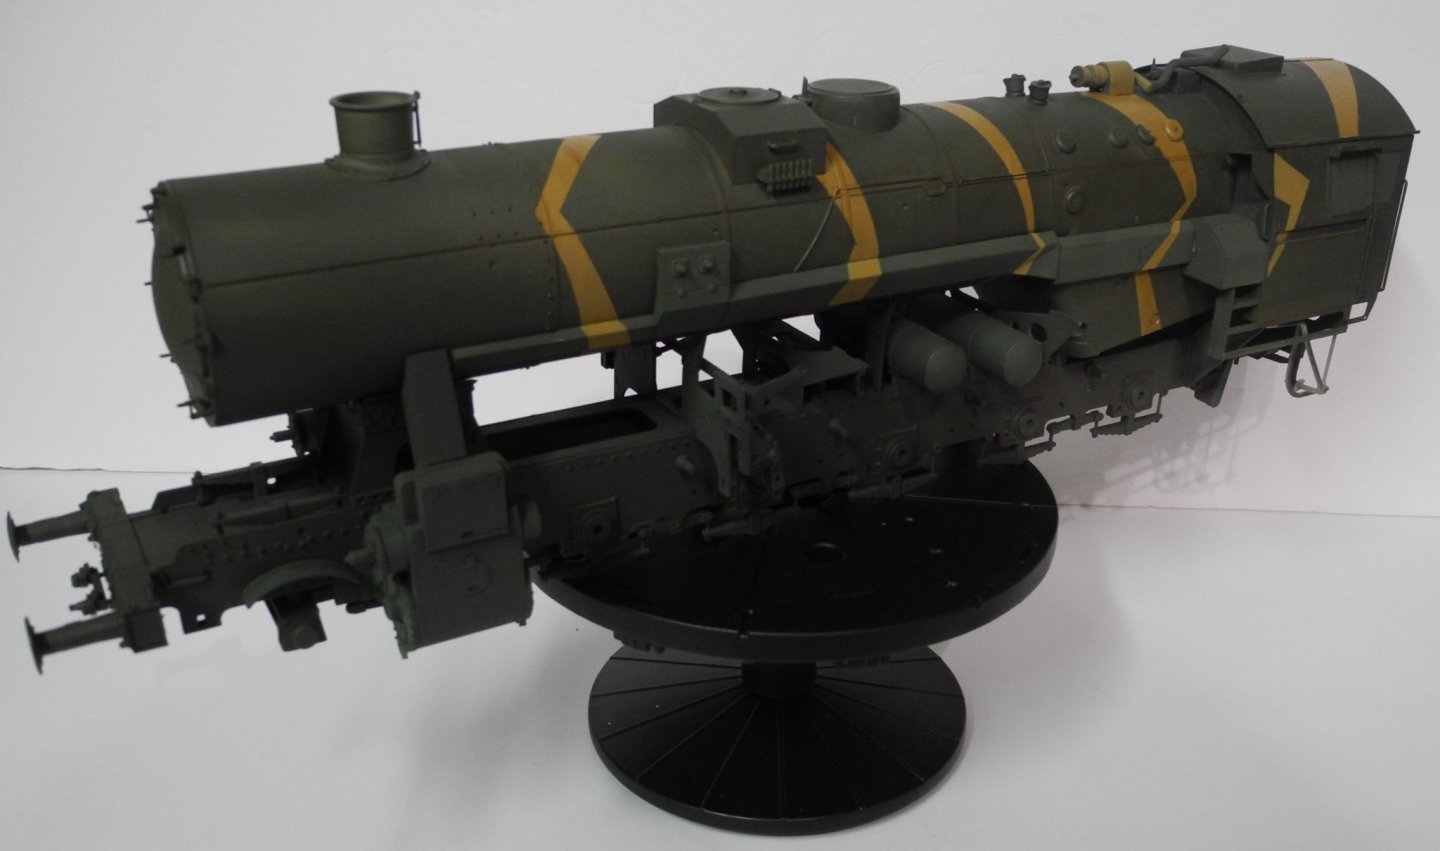
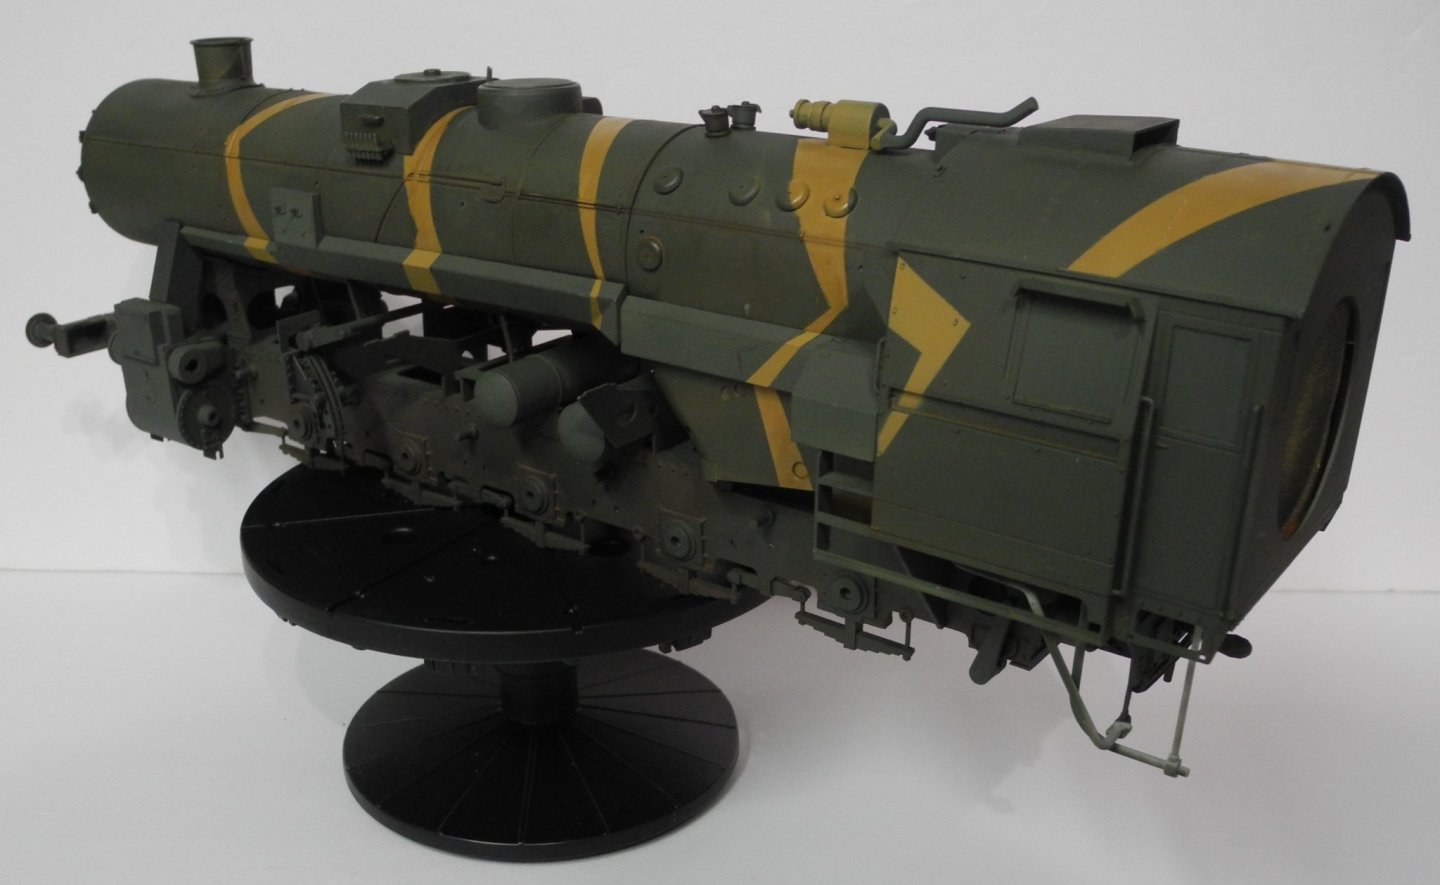
Thanks again for the comments and suggestions. Here, we've completed steps 24, 25, and 26. With these steps, general assembly and painting of the locomotive is now complete. Decals are yet to be added and will do so at the conclusion of building/painting the coal tender. There may be some detail painting added before it's all said and done, but there's still so much to be done with the coal tender, the Leopold rail gun, and possibly a flat car with an anti aircraft gun. All these of course will be displayed upon a set of track that also must be built and painted.


- 92 replies
-
- 11
-
-
Mike Which are you using, wood glue or epoxy to build your model? From what you said, I'm guessing you've had occasions where warping/twisting happened after gluing the two halves together. Any tips on how to prevent a warp or twist?
-
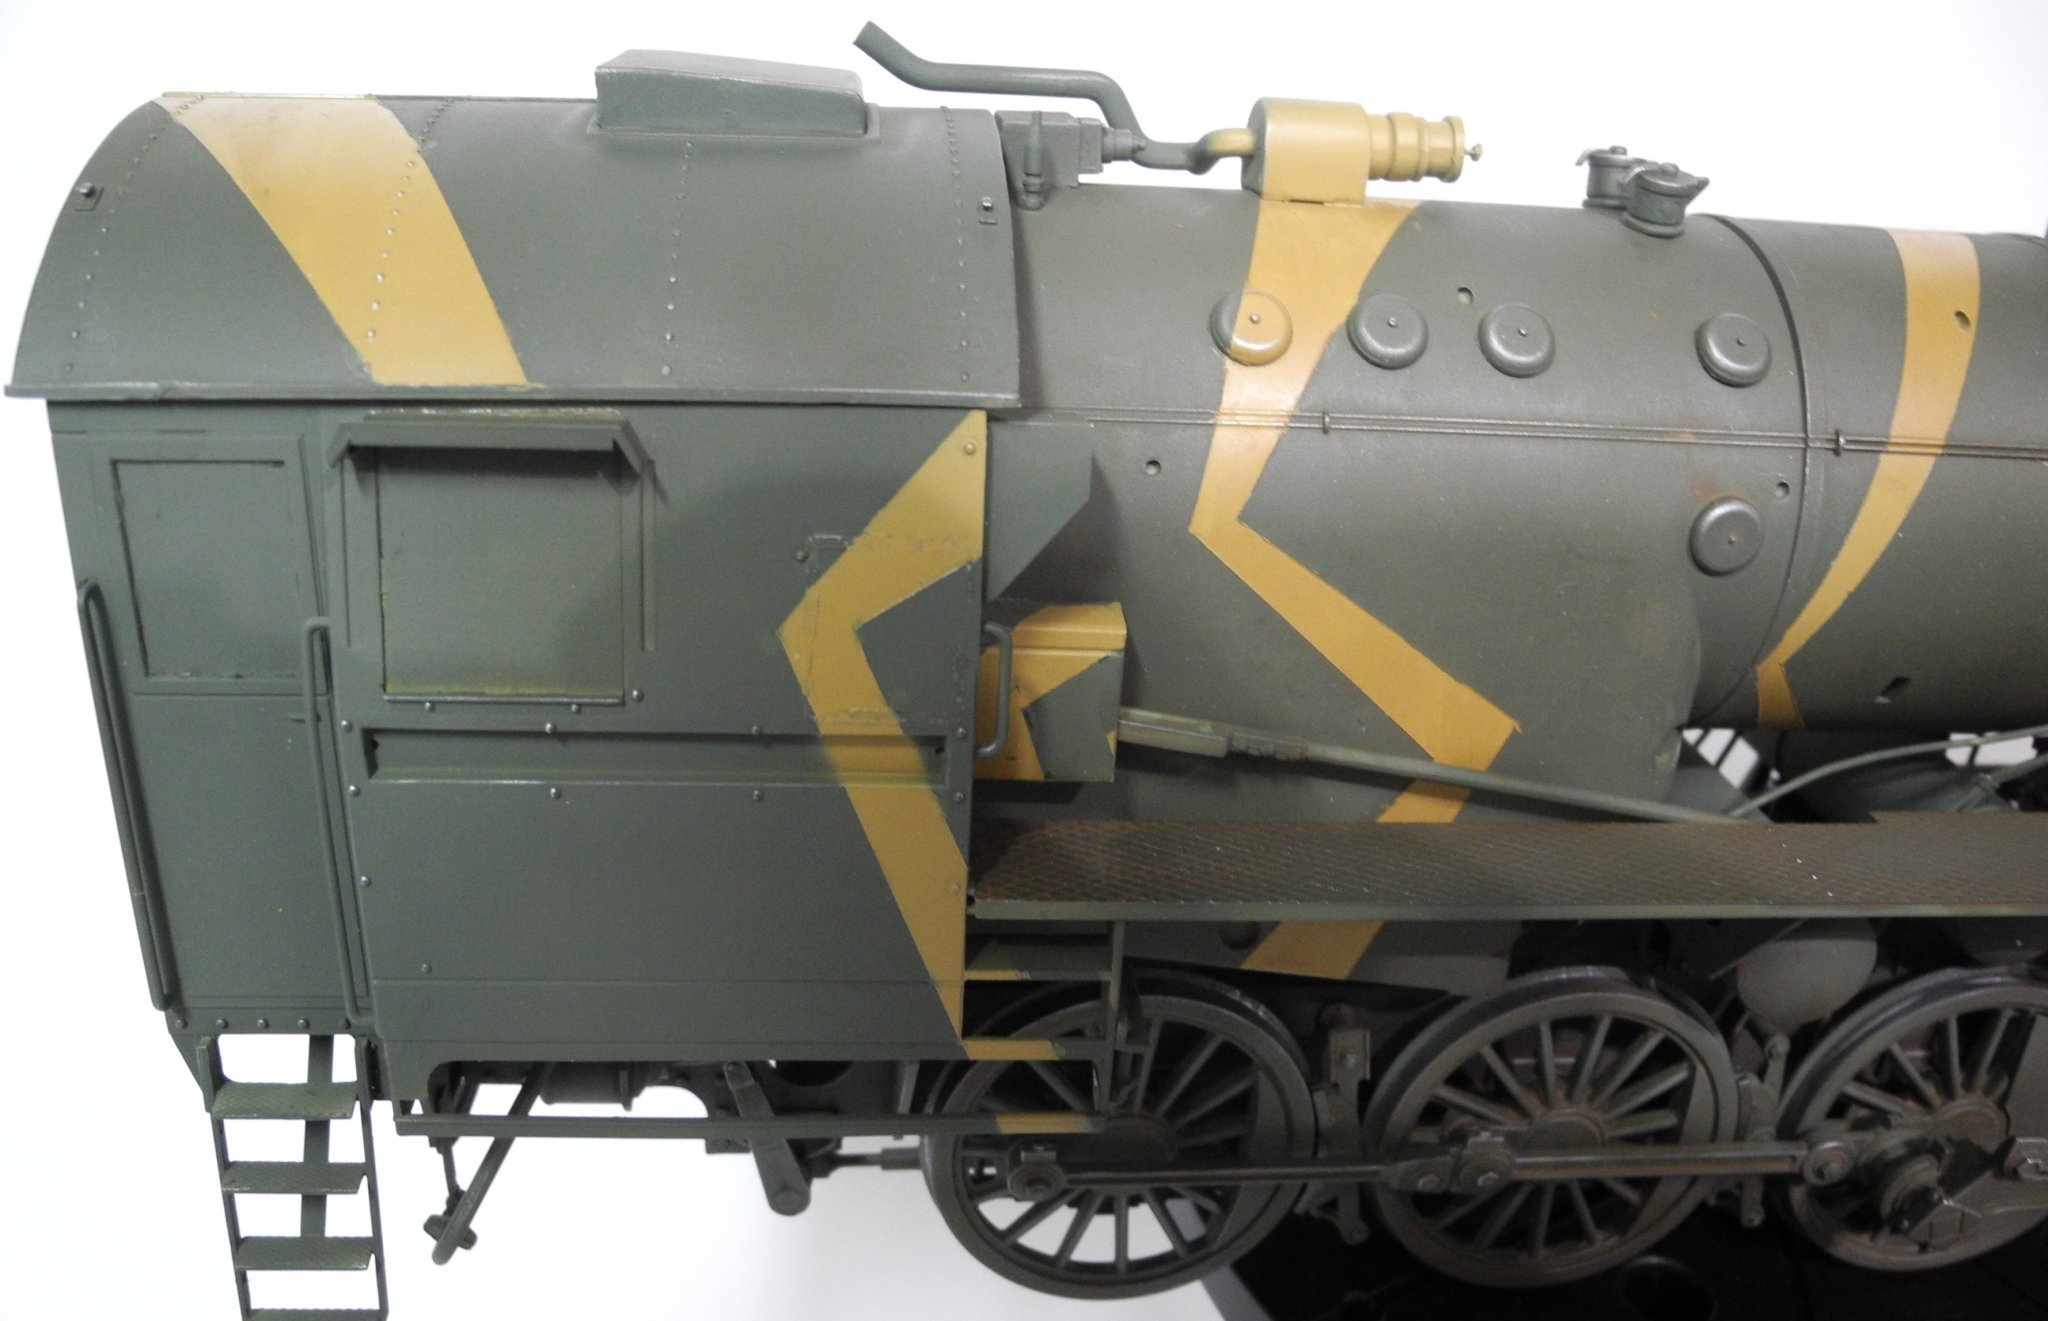
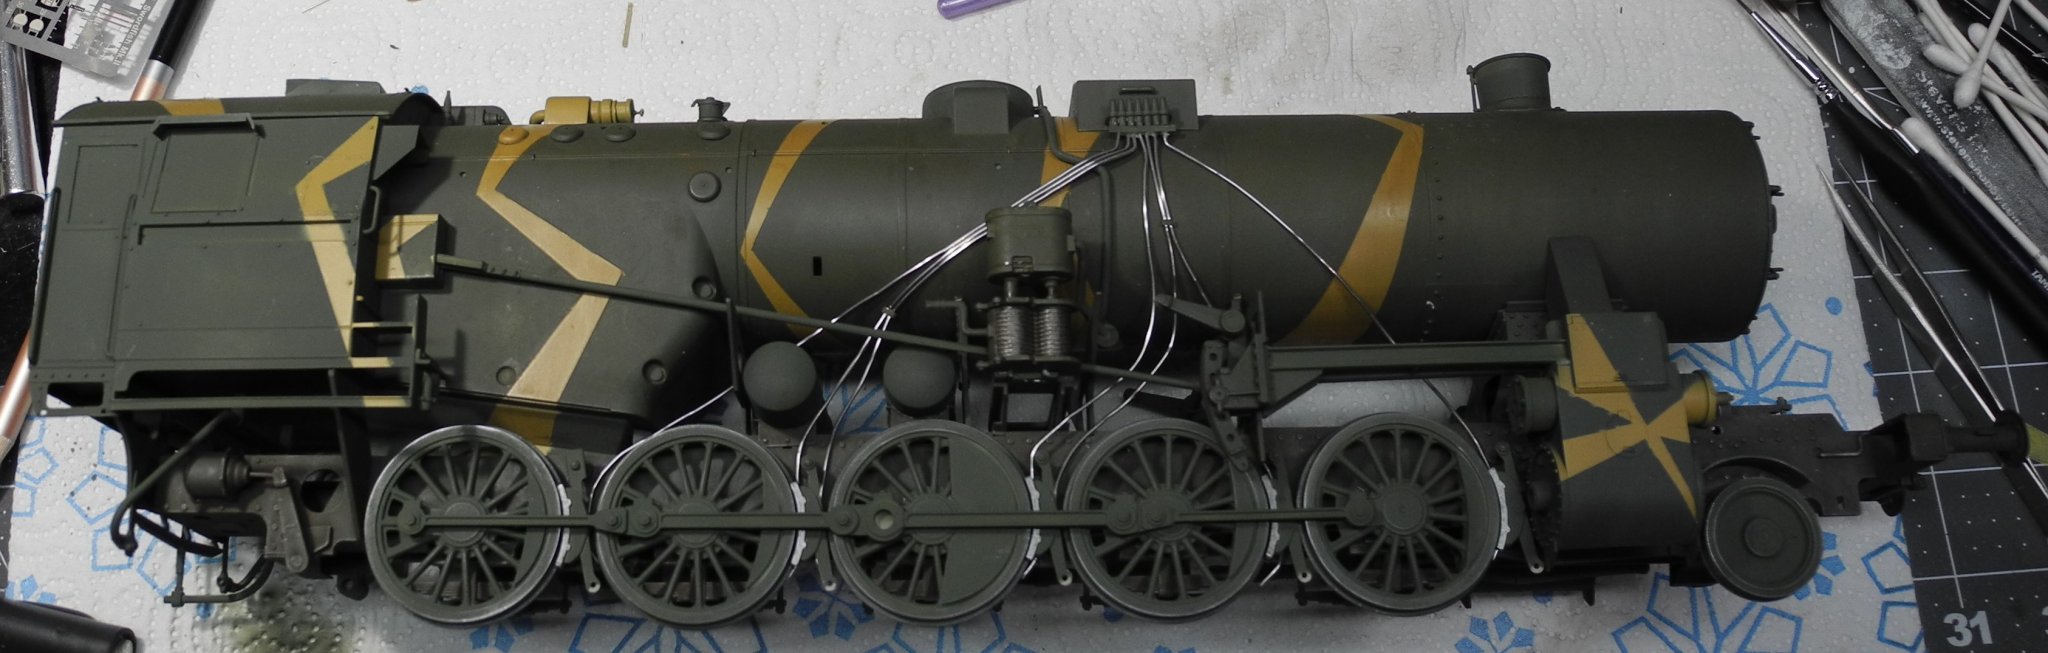
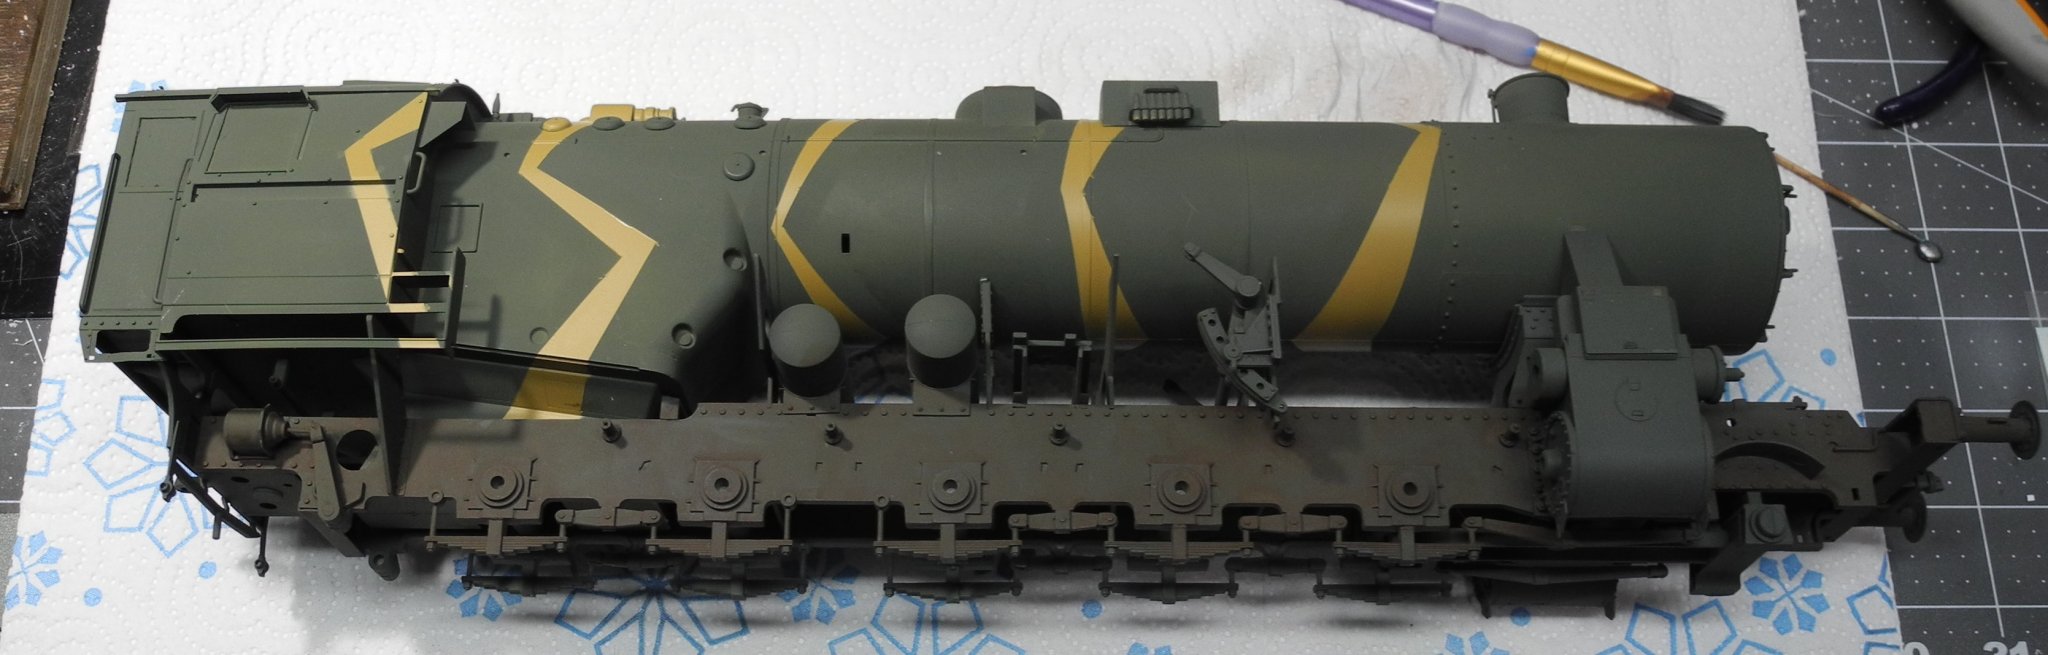
Yeah, I like the idea of having a mix of flat, satin, and maybe a shiny area or two. As well, all those pivot points on the drive mechanisms had oil reservoirs and would definitively show signs of oil/grease that had oozed out at those pivot points. I had plans to add all that at/before the end of the build. This right now is a mater of adding the layers of shading/color one layer at a time. So far, I have my dark gray base color, the main field grey color, a brown wash, then iron color highlights by dry brushing to bring out the bolts, rivets, and edges.
-
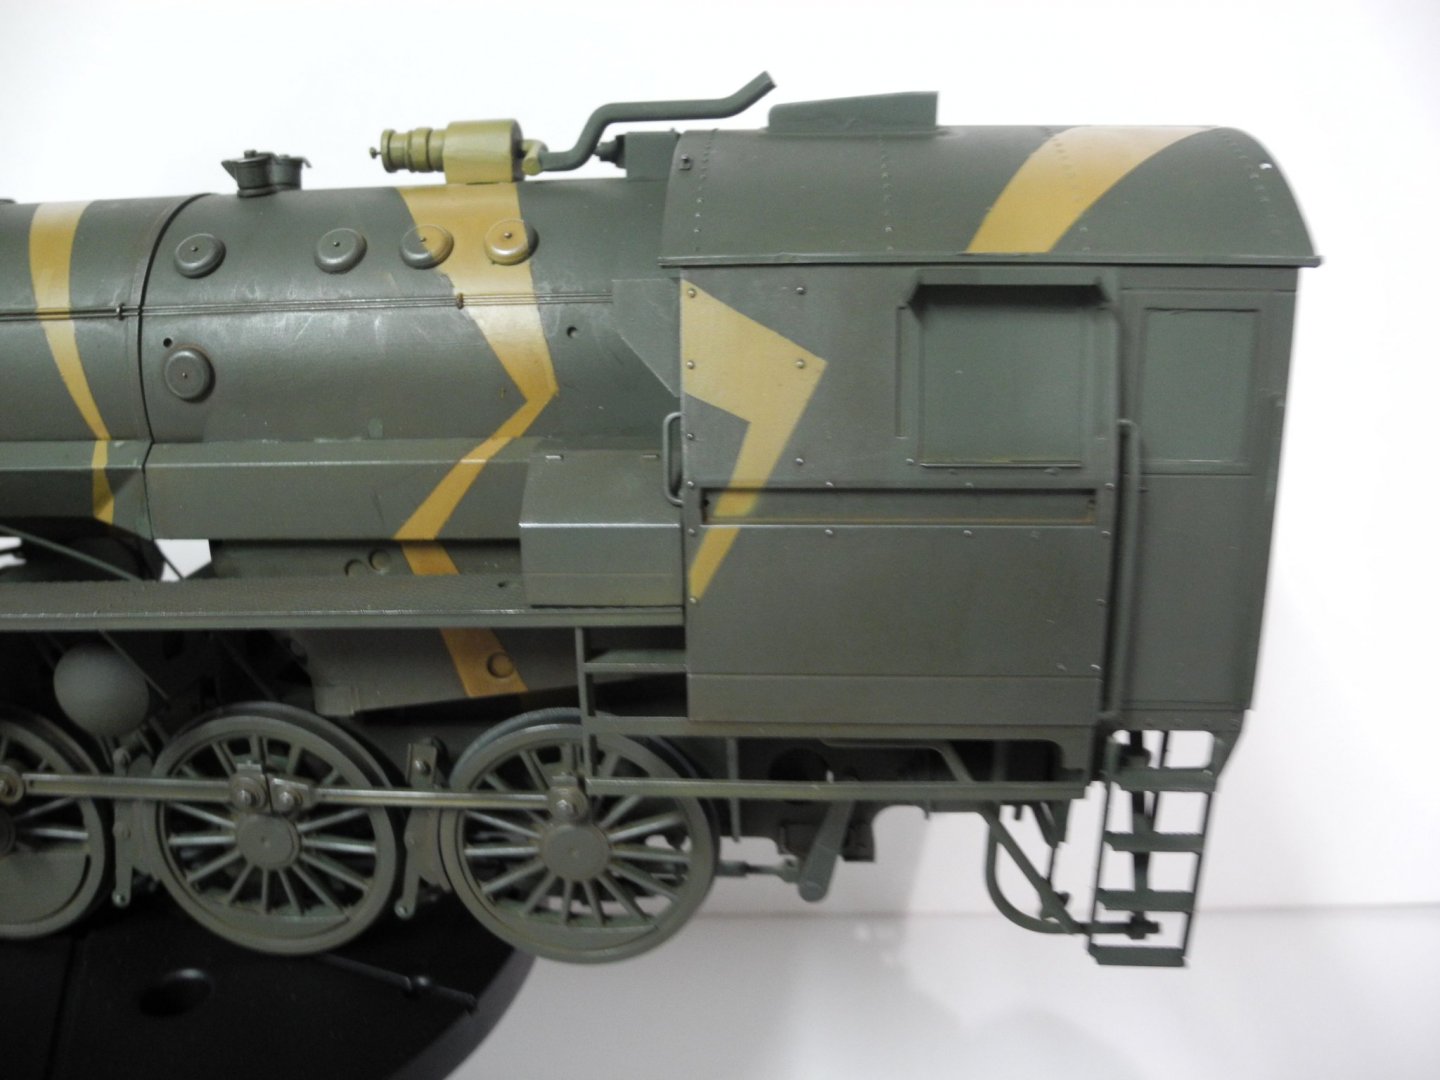
Applied some subtle dry brushing with iron (color) to bring out and highlight the rivets, bolt heads, and other raised details. Can you detect what was done in the photos? I wanted to keep it subtle, maybe it's too subtle?


- 92 replies
-
- 12
-
-
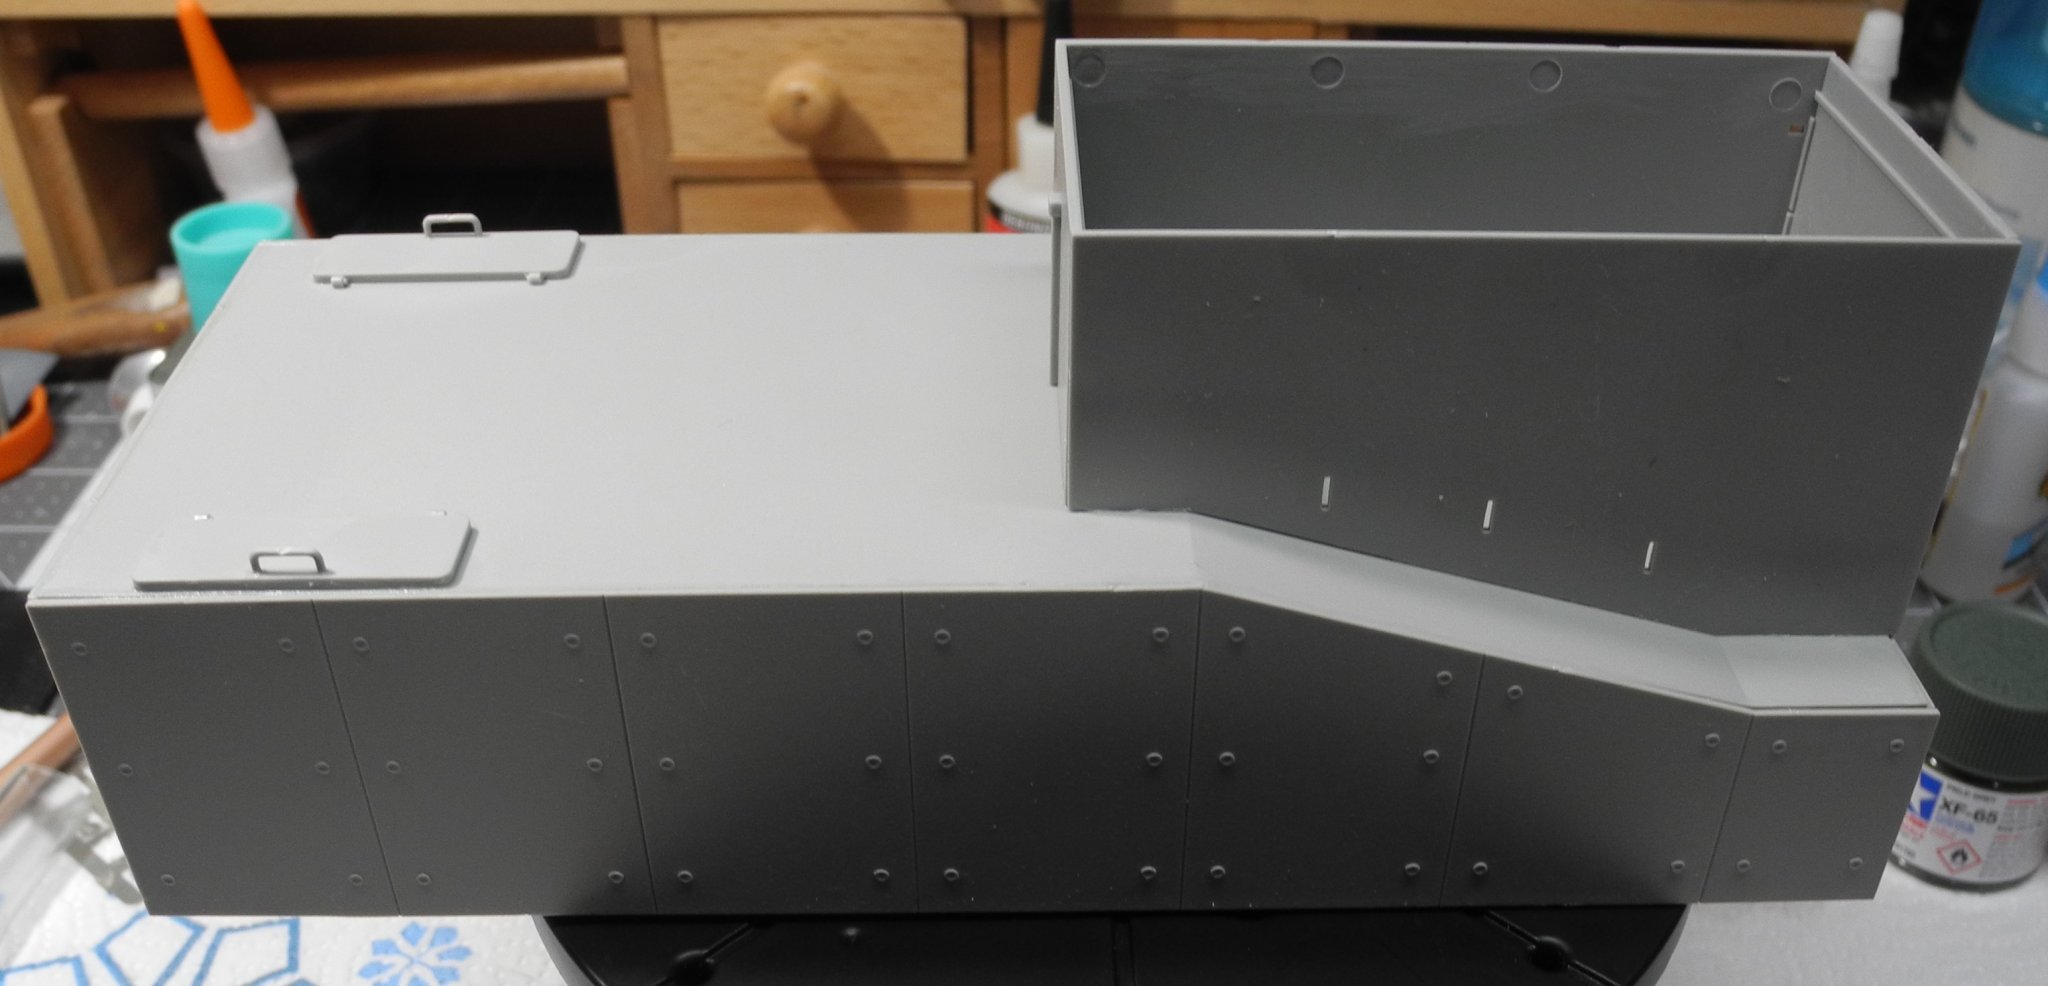
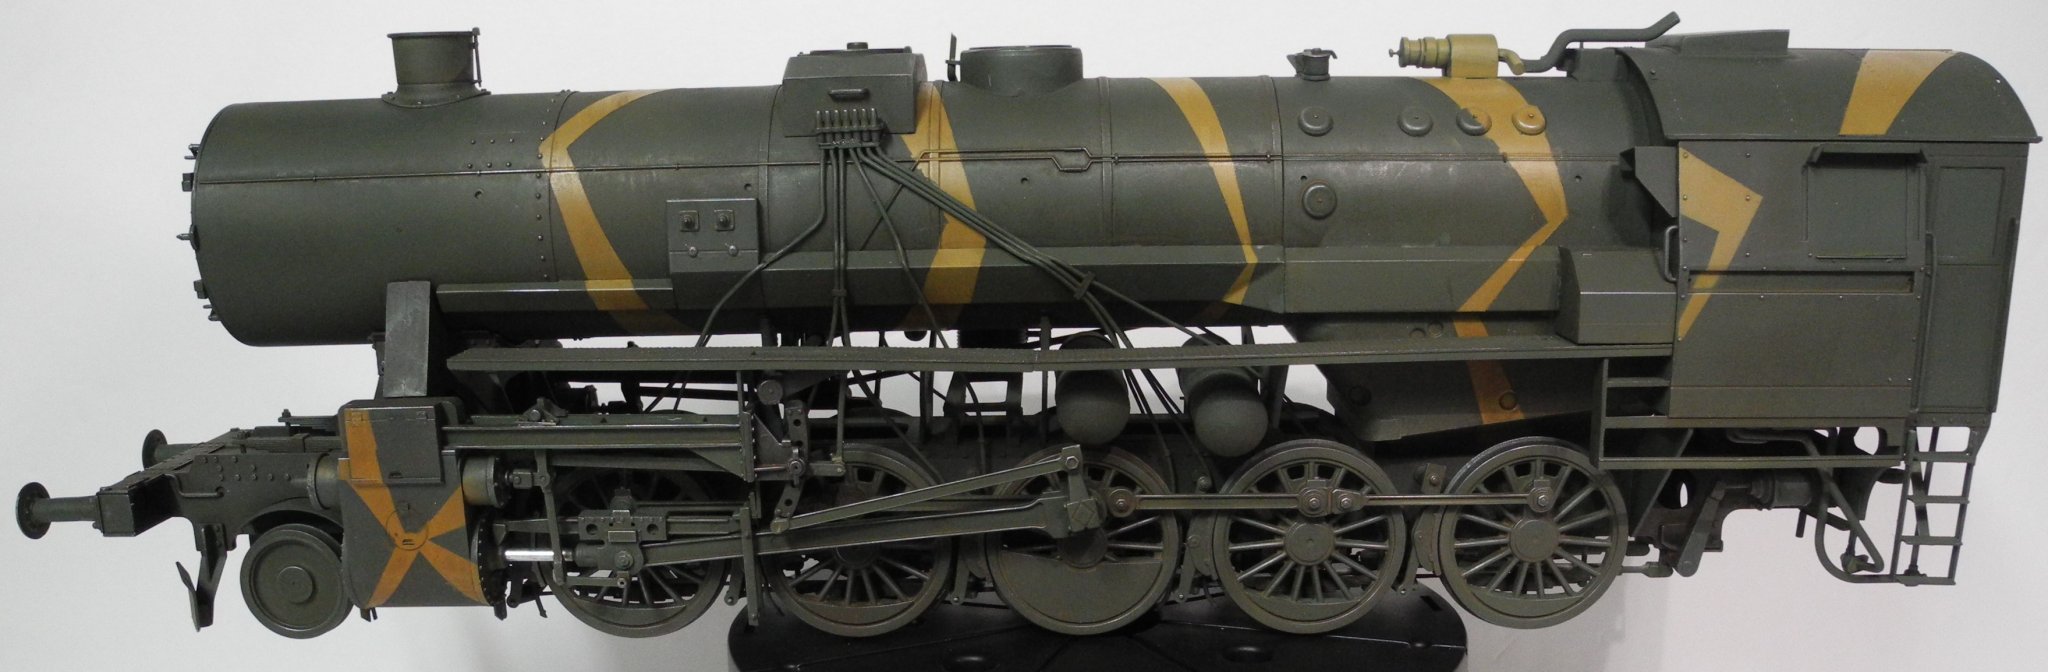
Steps 22, 23, minus the railings along the length of the boiler. Will add those last, once I do not need to handle the model to finish it. They will get knocked off for sure if I add them now. Builder's preference.


- 92 replies
-
- 11
-
-
Thanks Denis. I'm chuggin' along on this thing...some of the weathering I can't/won't do until it's all together and assembly completed. There's only a couple more steps to go before the locomotive is finished and it's time to start the coal tender. I've been eye-balling a short sided gondola car, to use it as the basis for a quad 20mm anti aircraft gun platform and put it at the front of the train. Also, I think this model needs some figures, so I am going to be on the lookout for something interesting in that regard.
-
Thanks for the primer, Ken. For a while now, I have been eyeballing Japanese steam locomotives. They had some very interesting looking machines, similar to the Br-52 but more modern I think. Certainly big locomotives, the Japanese ones.
-
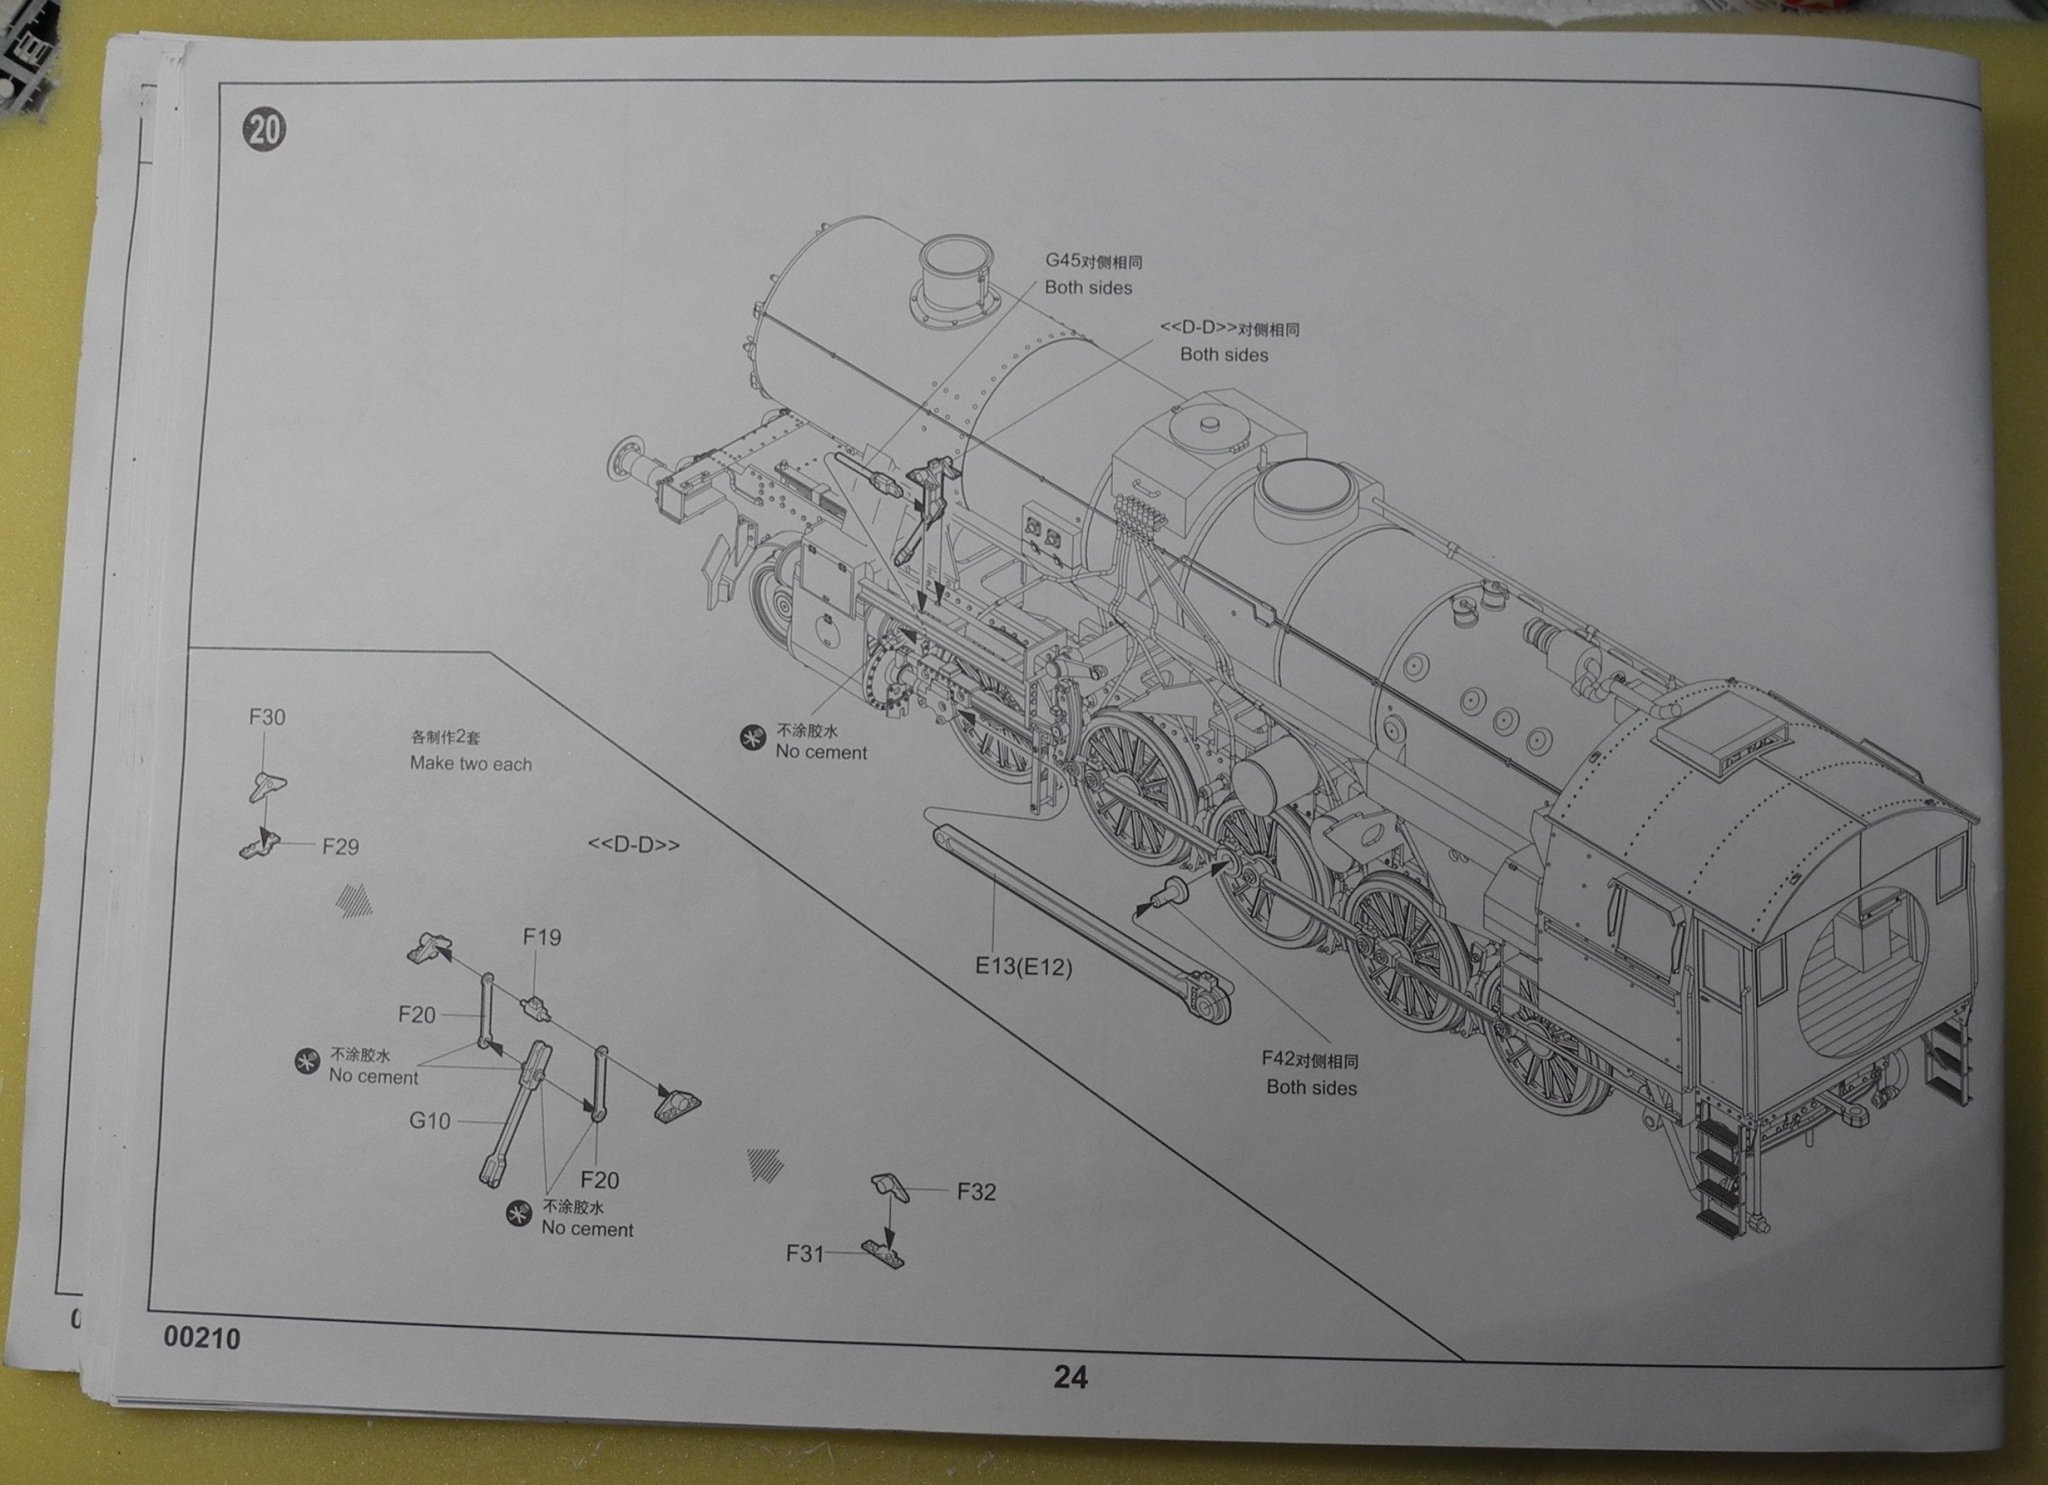
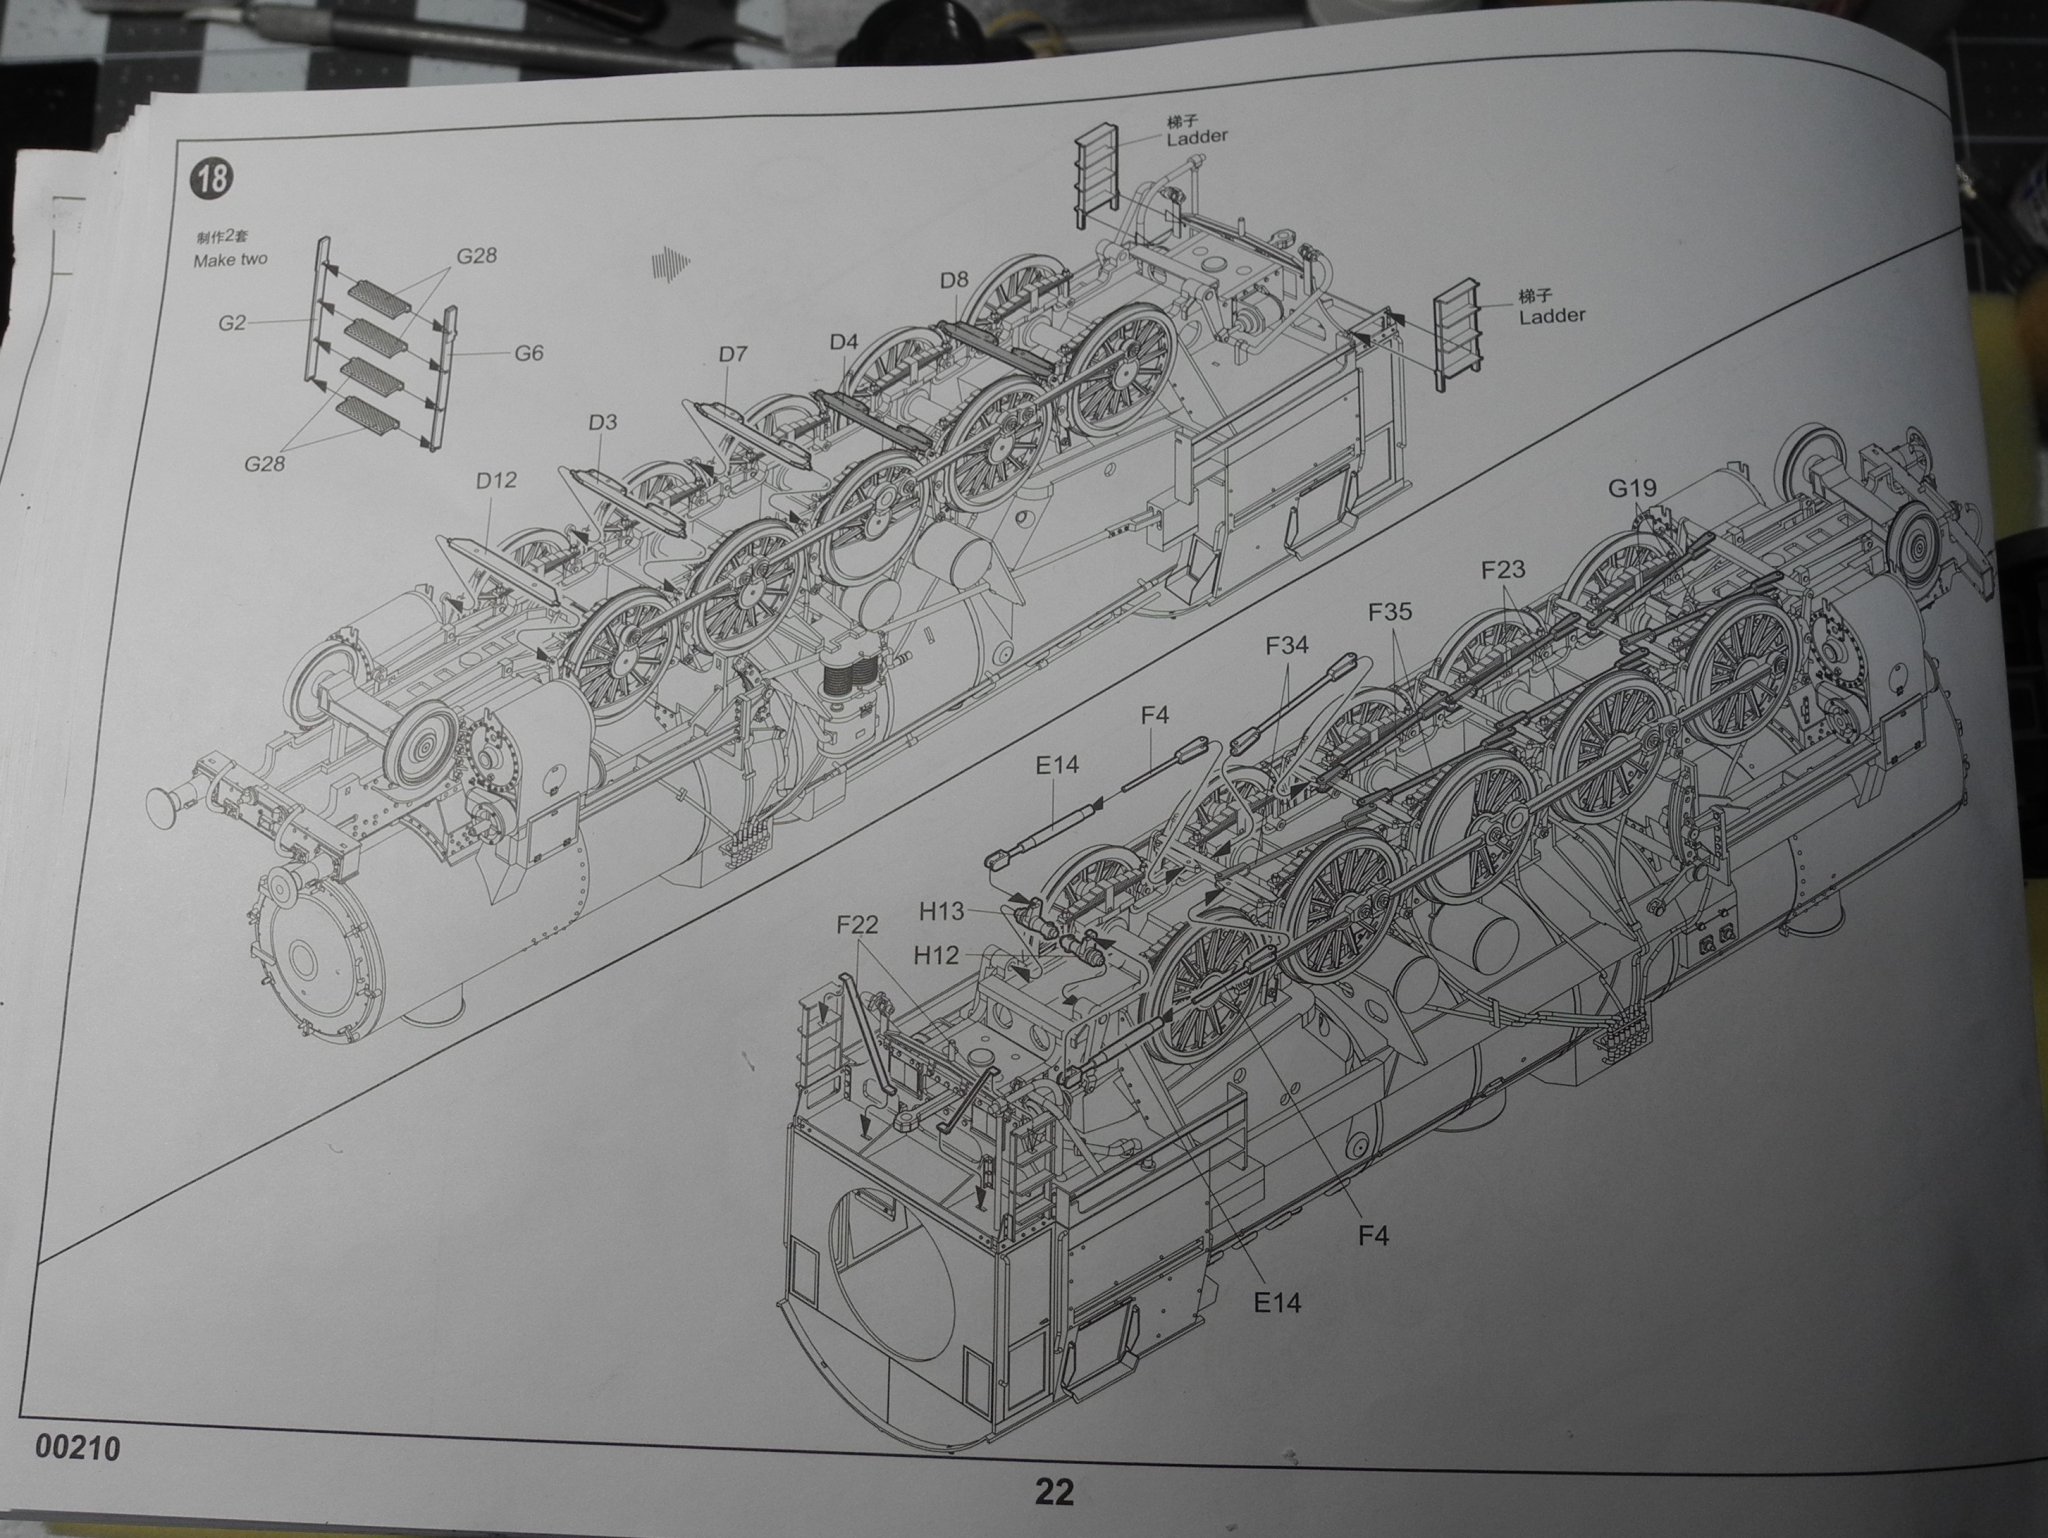
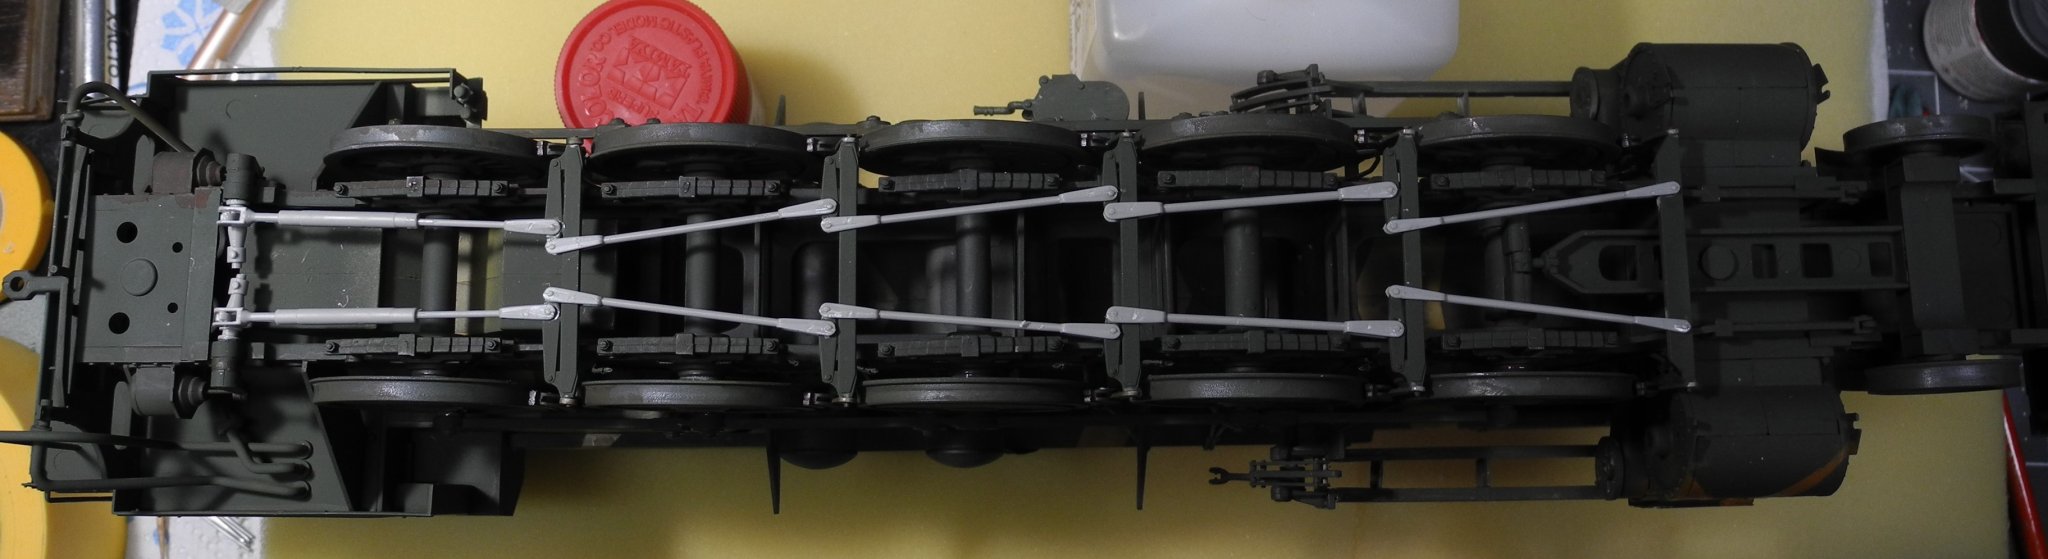
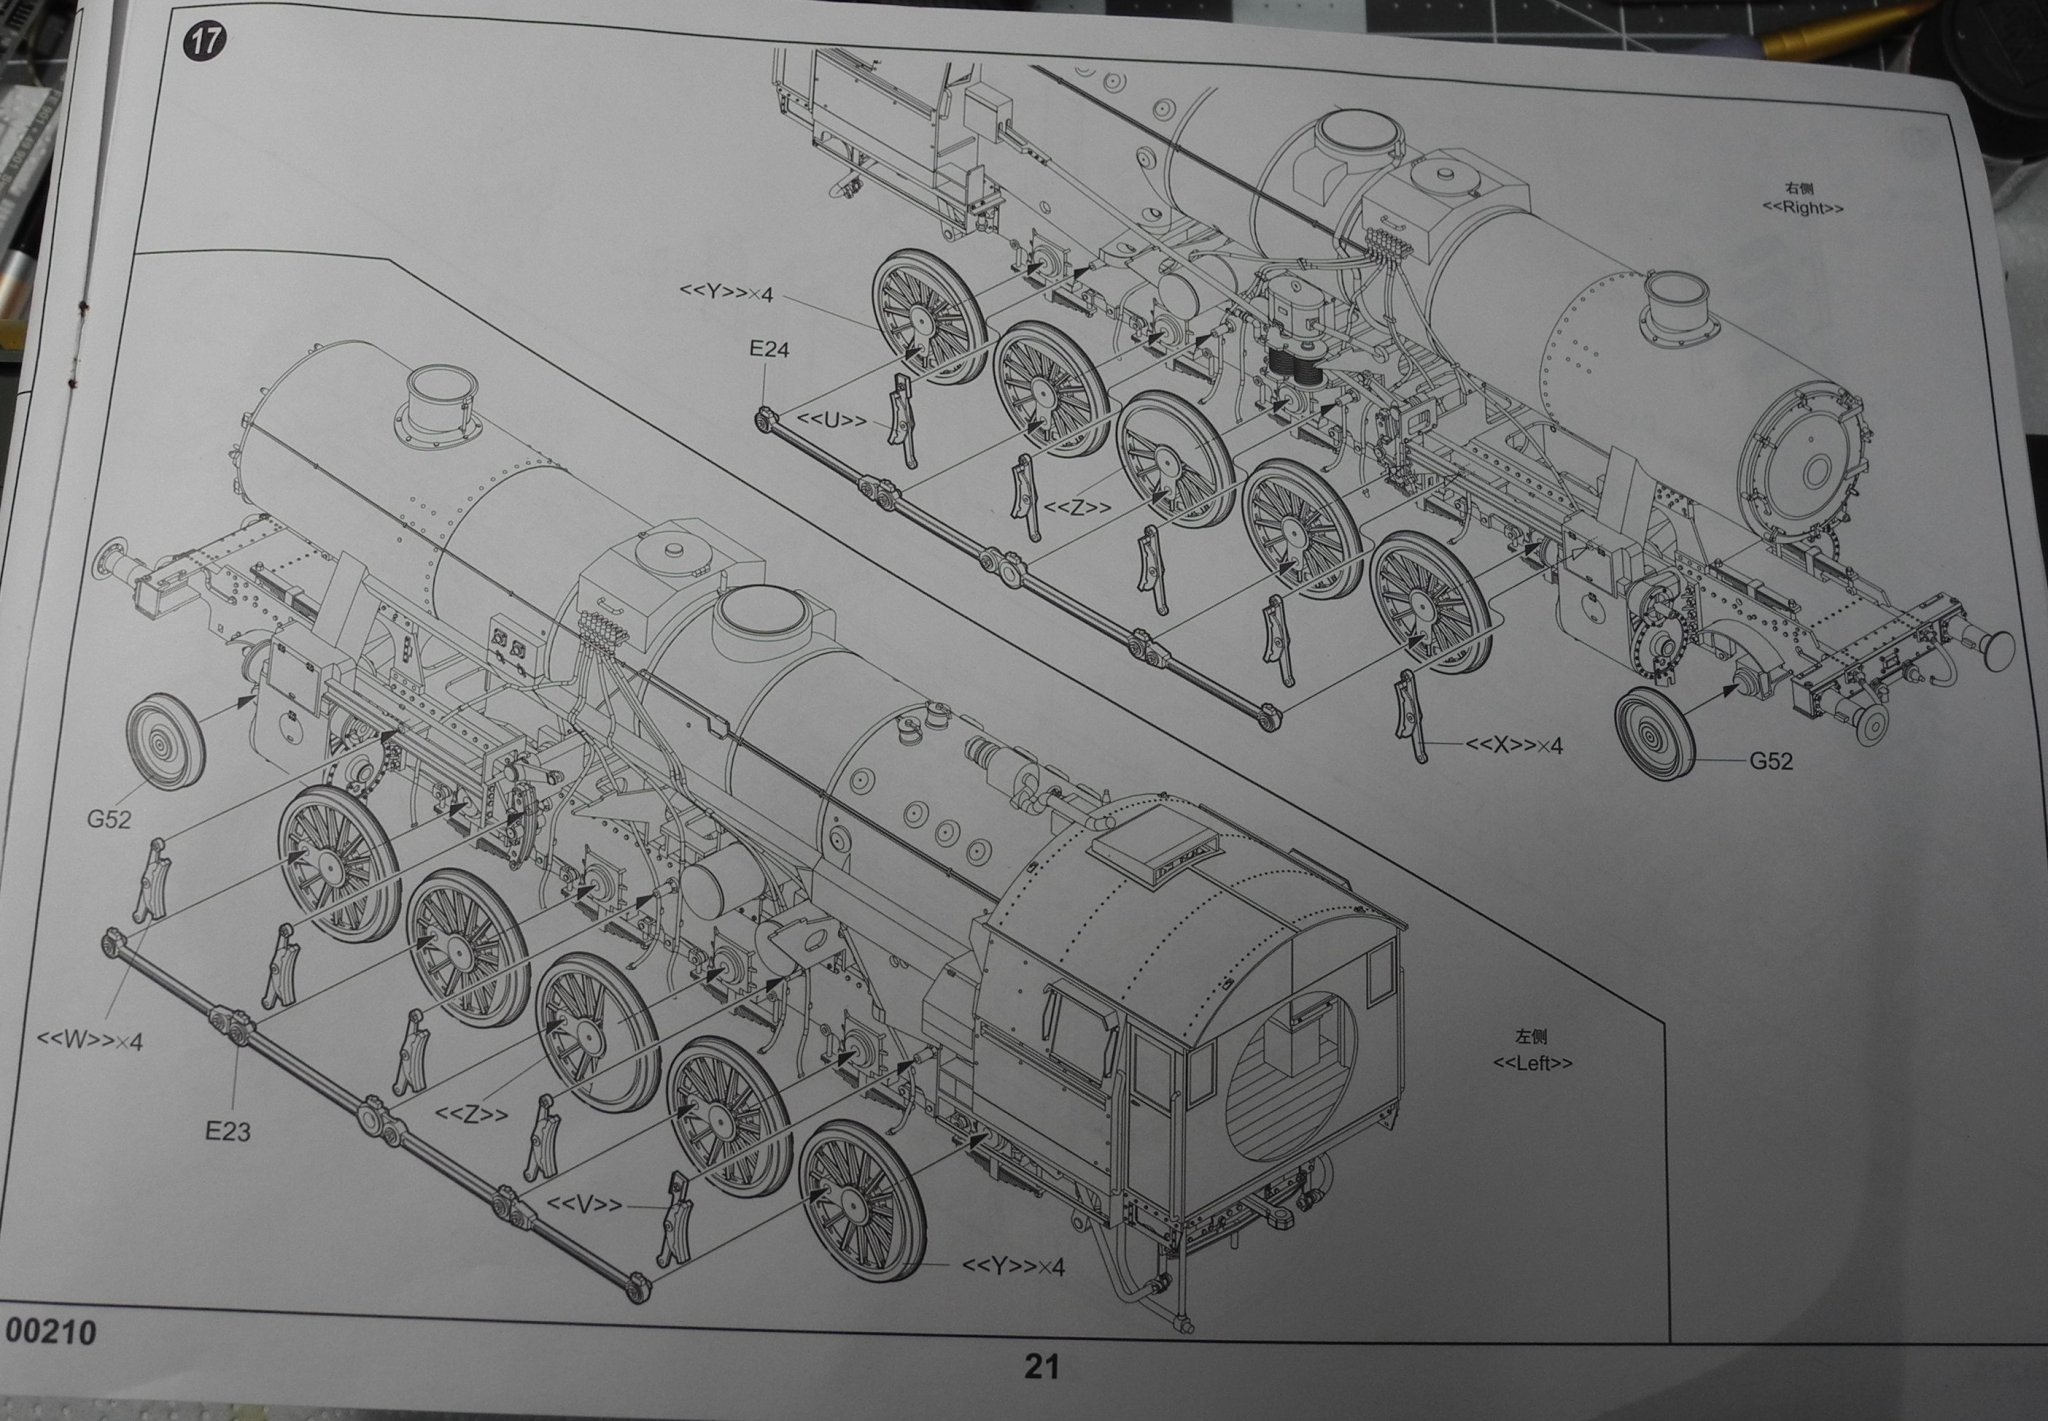
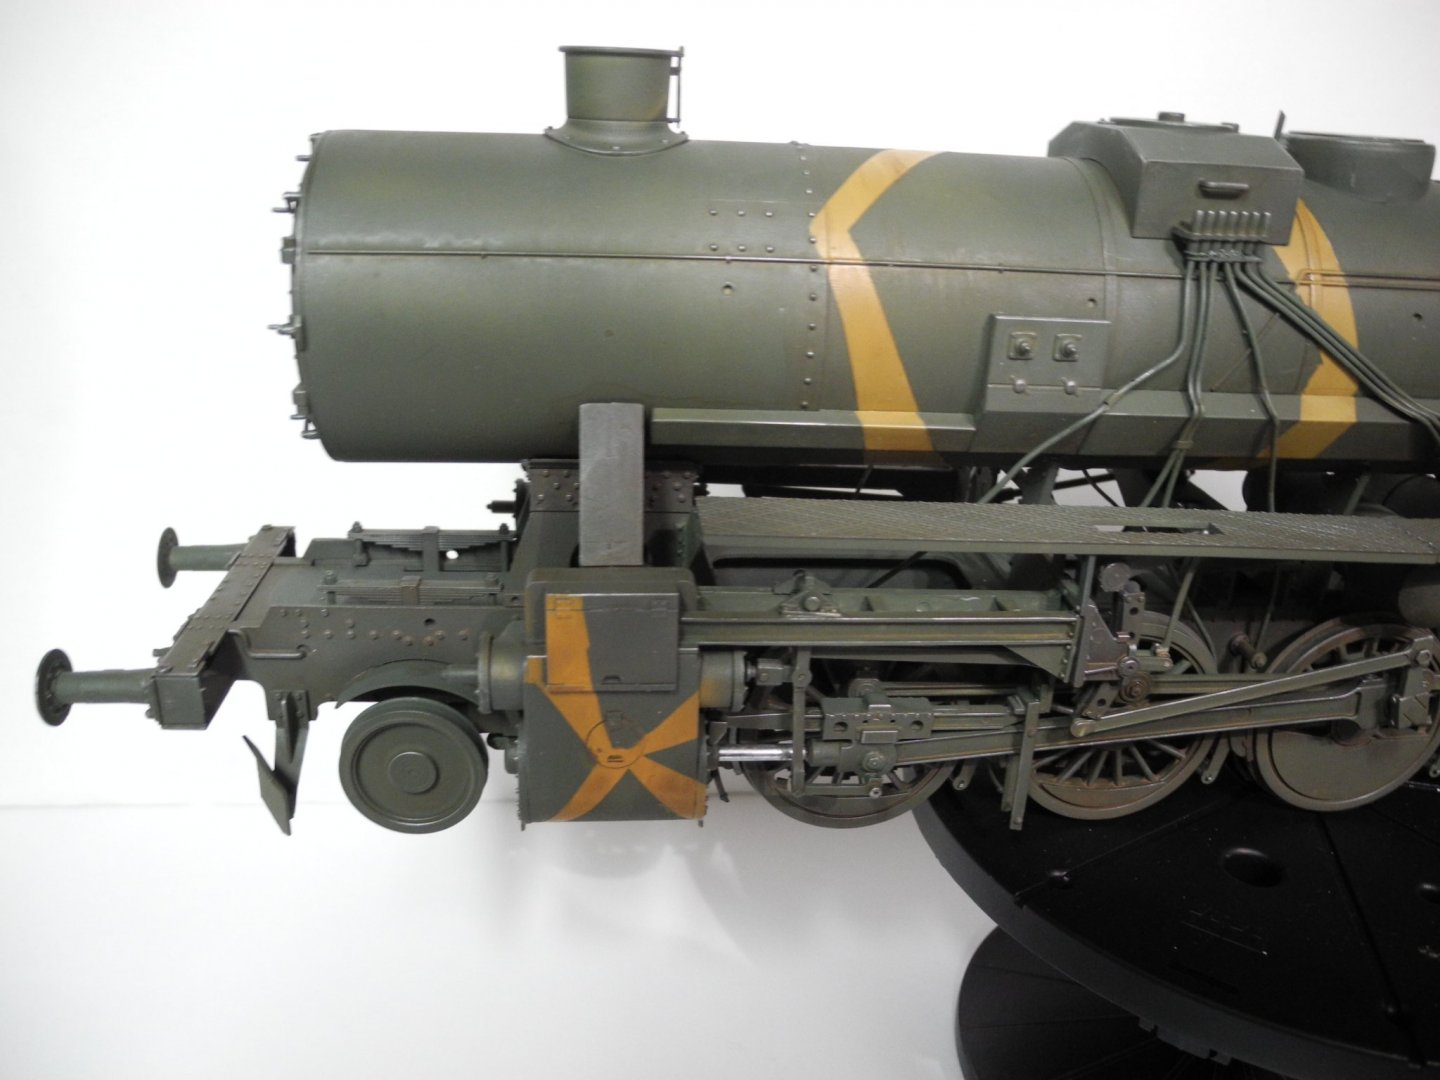
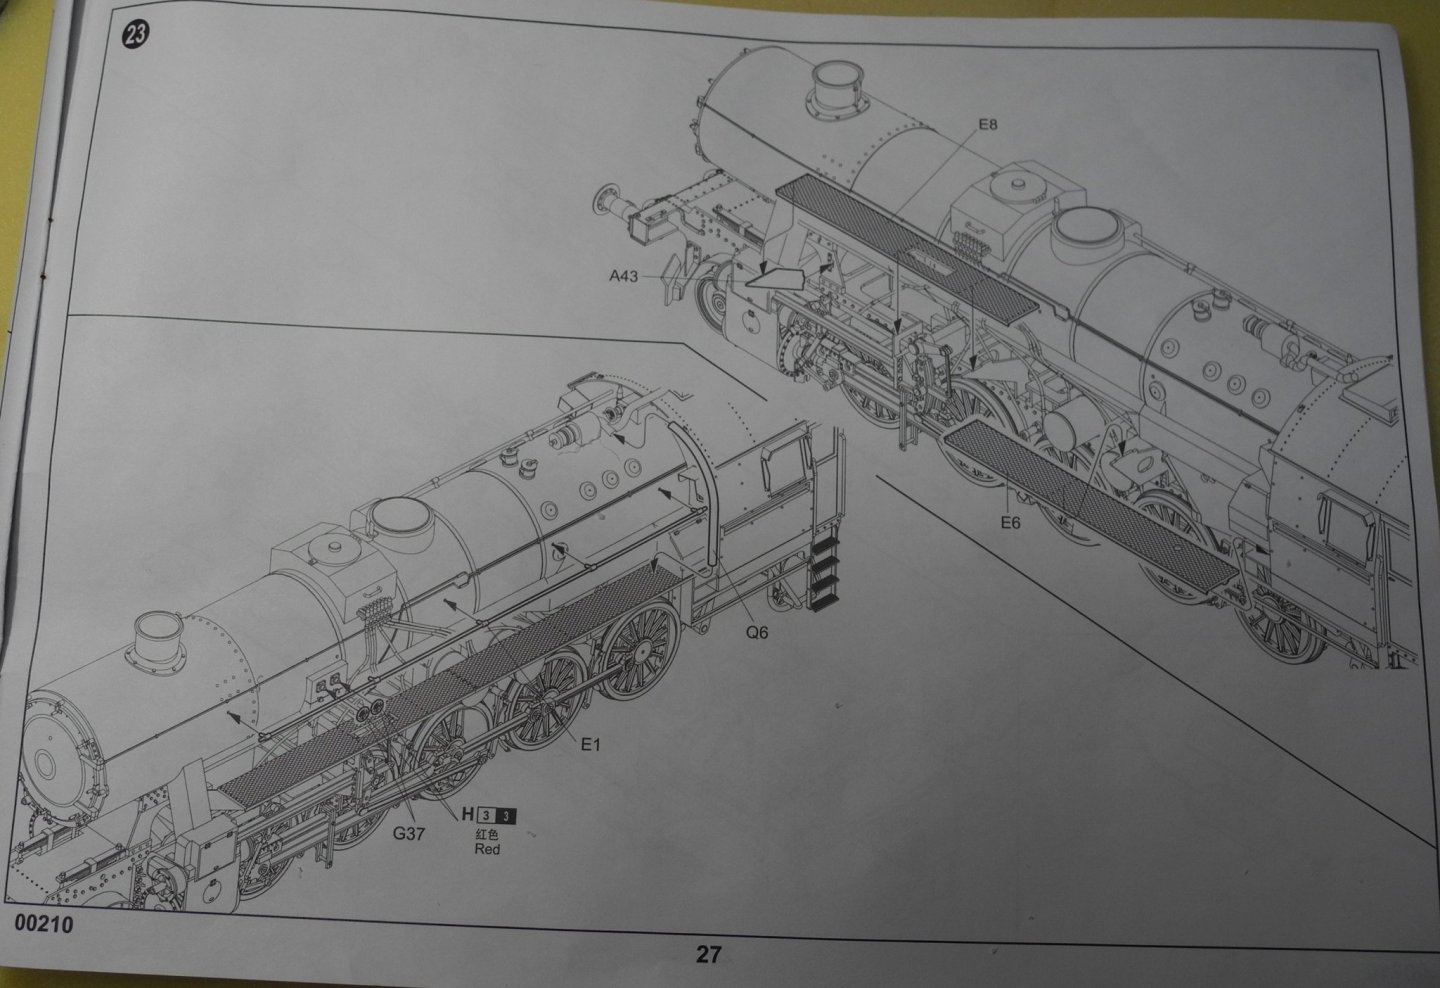
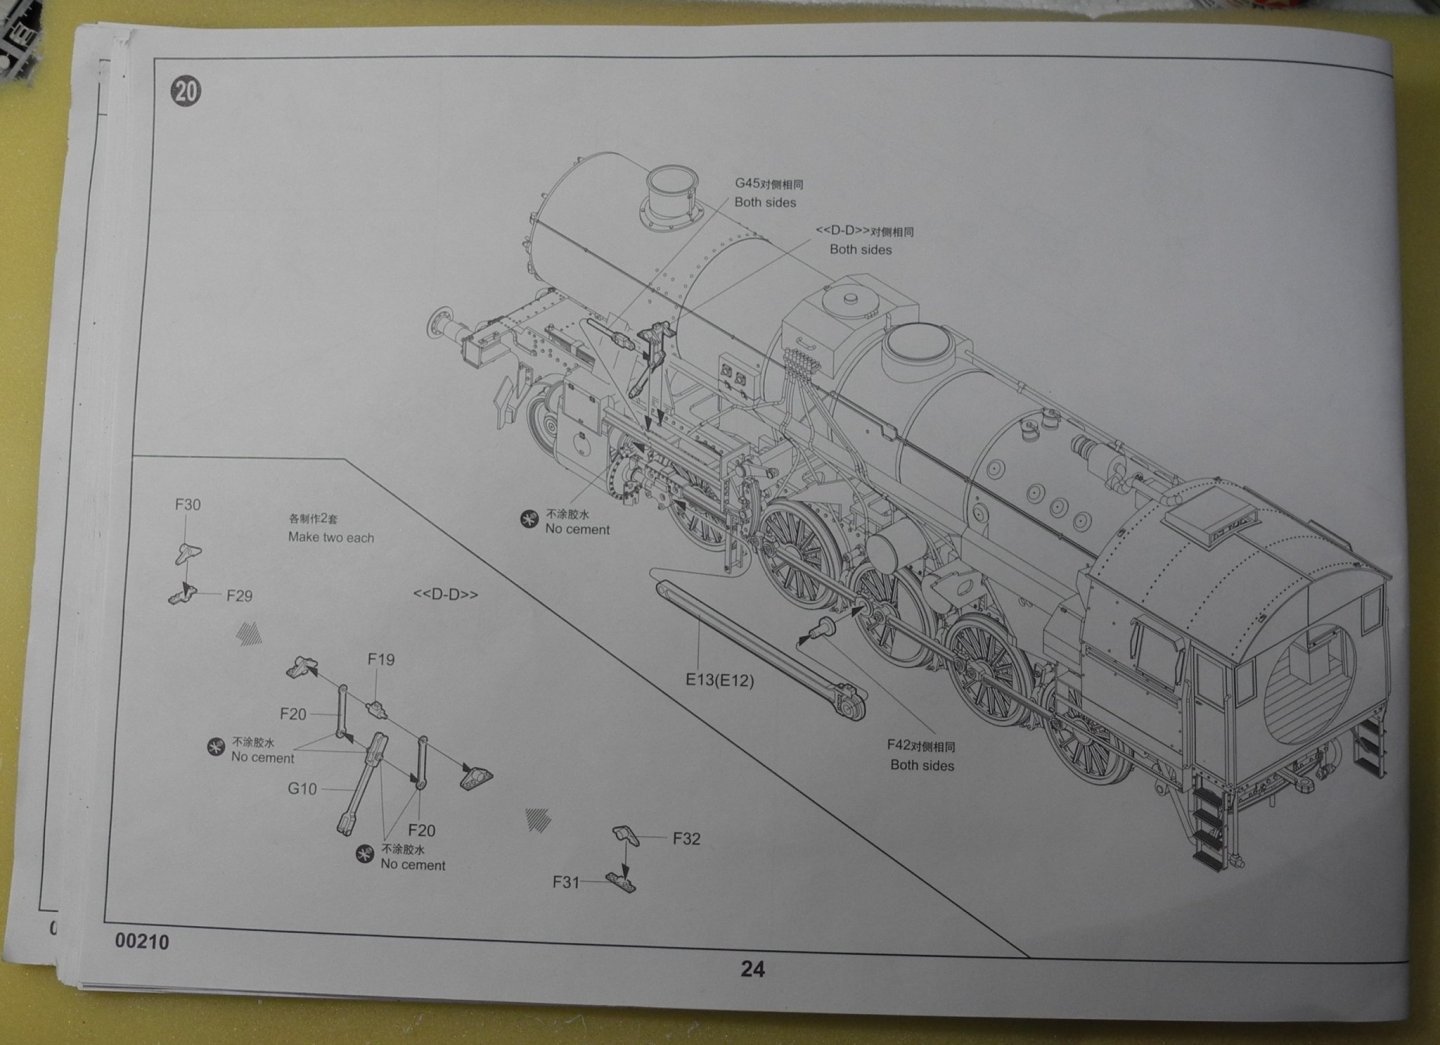
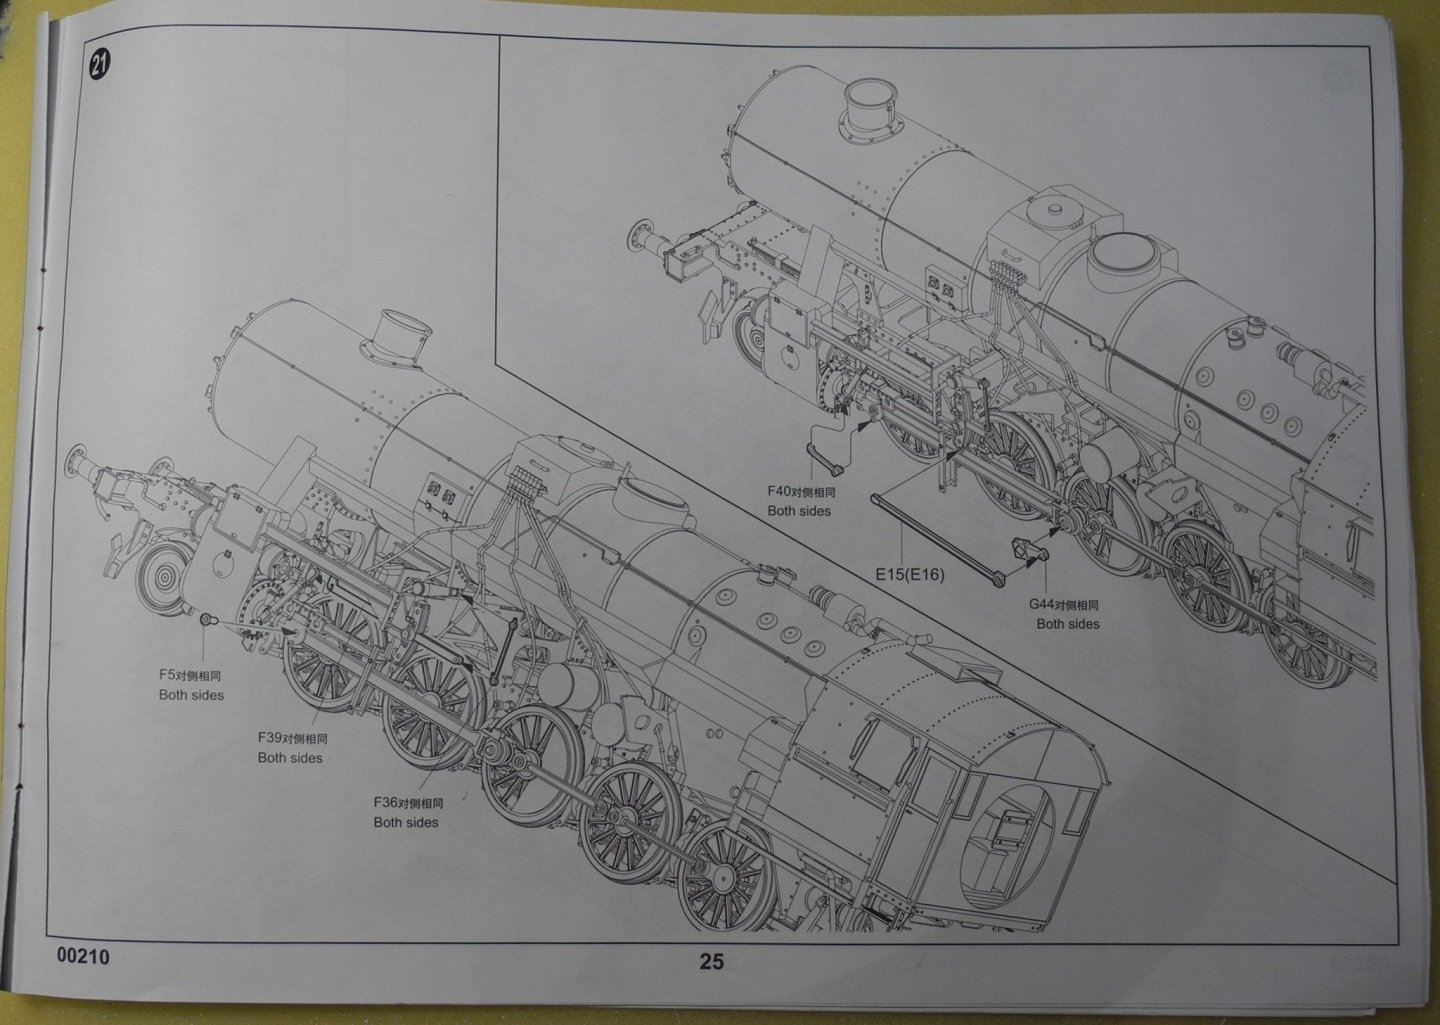
Steps 19, 20, and 21. The details are piling up with each successive step completed. Before it's all done, it's going to be difficult to pick up this model without running the risk of knocking off some small part. I suppose these are called the drive mechanism. Someone with more railroad knowledge will need to help me with terminology.


- 92 replies
-
- 10
-
-
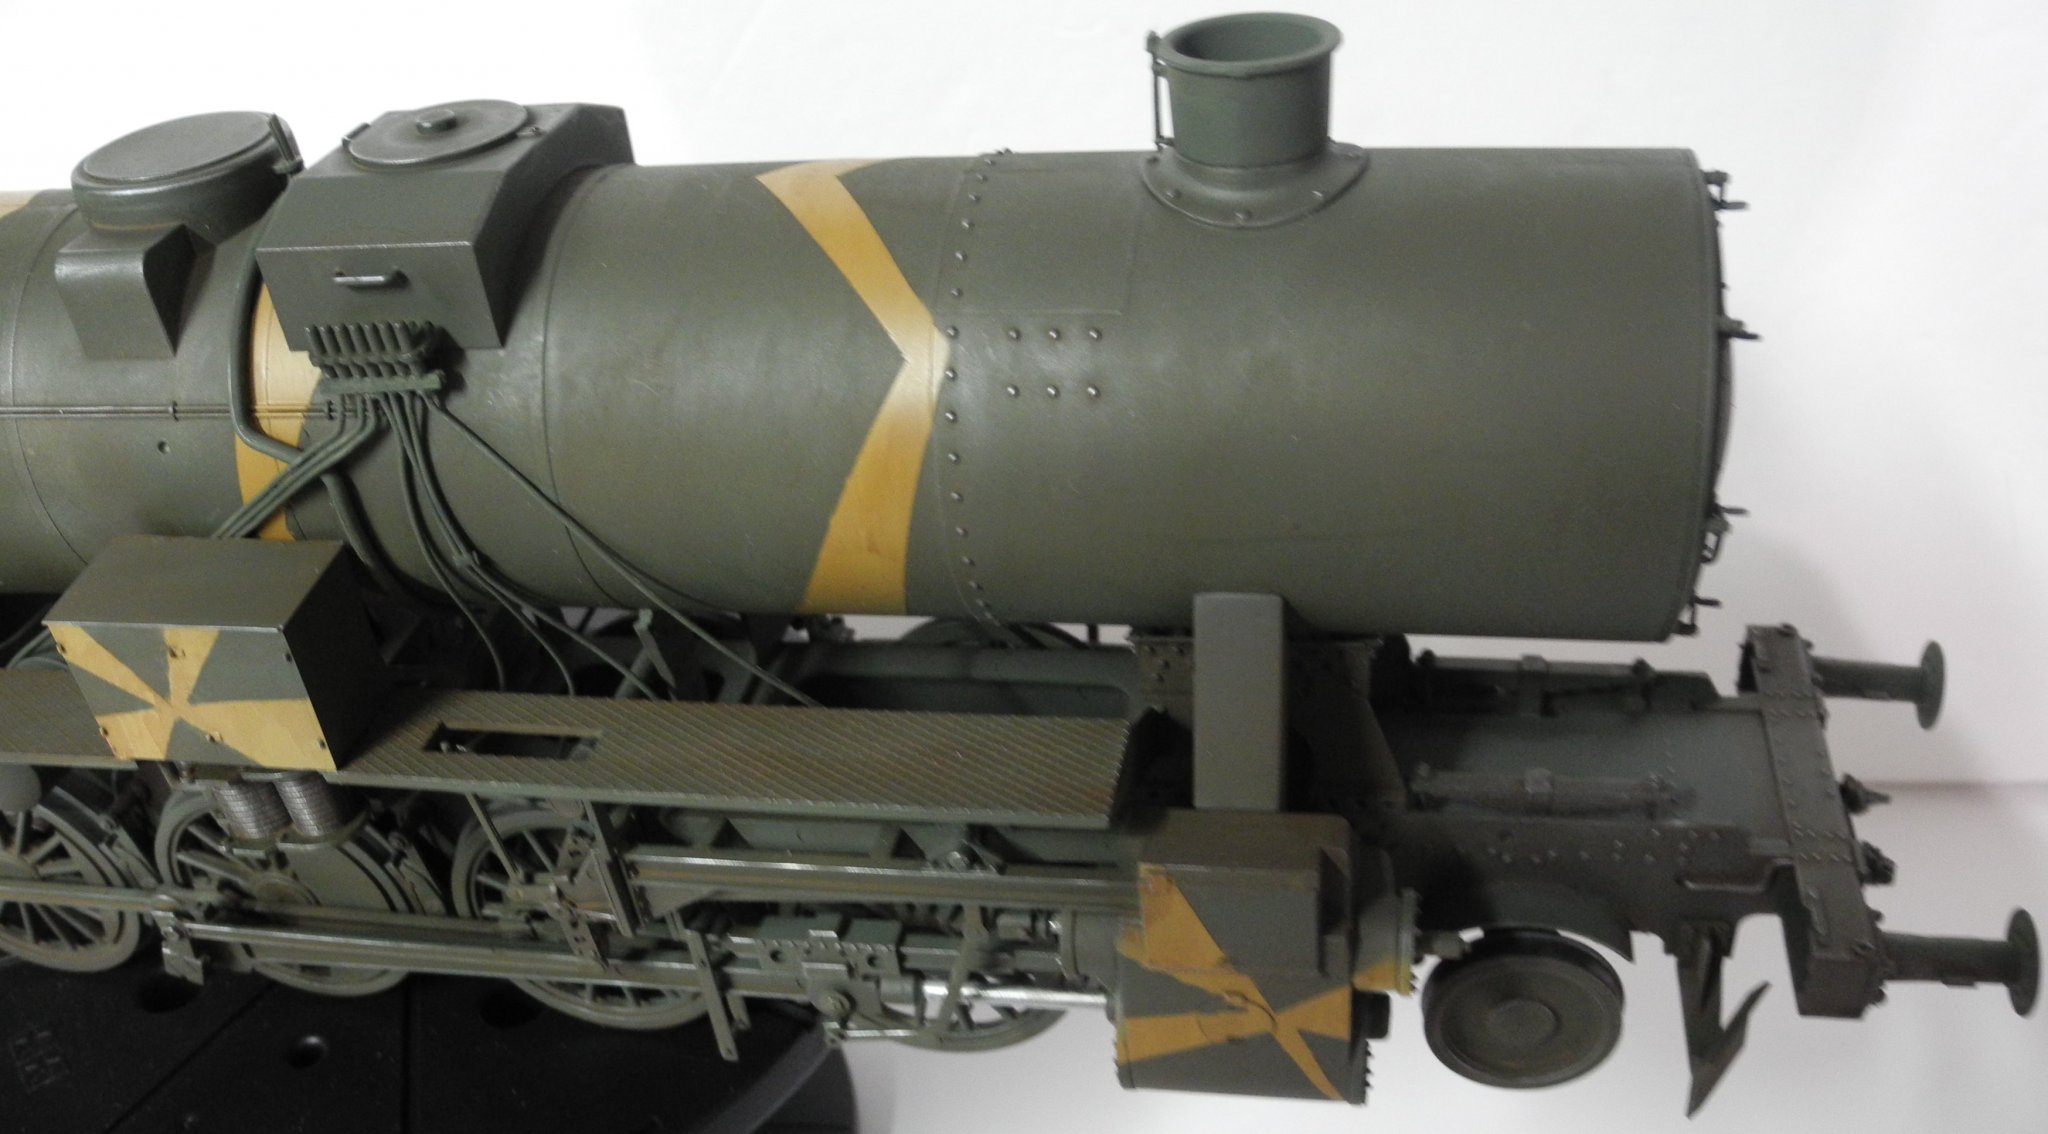
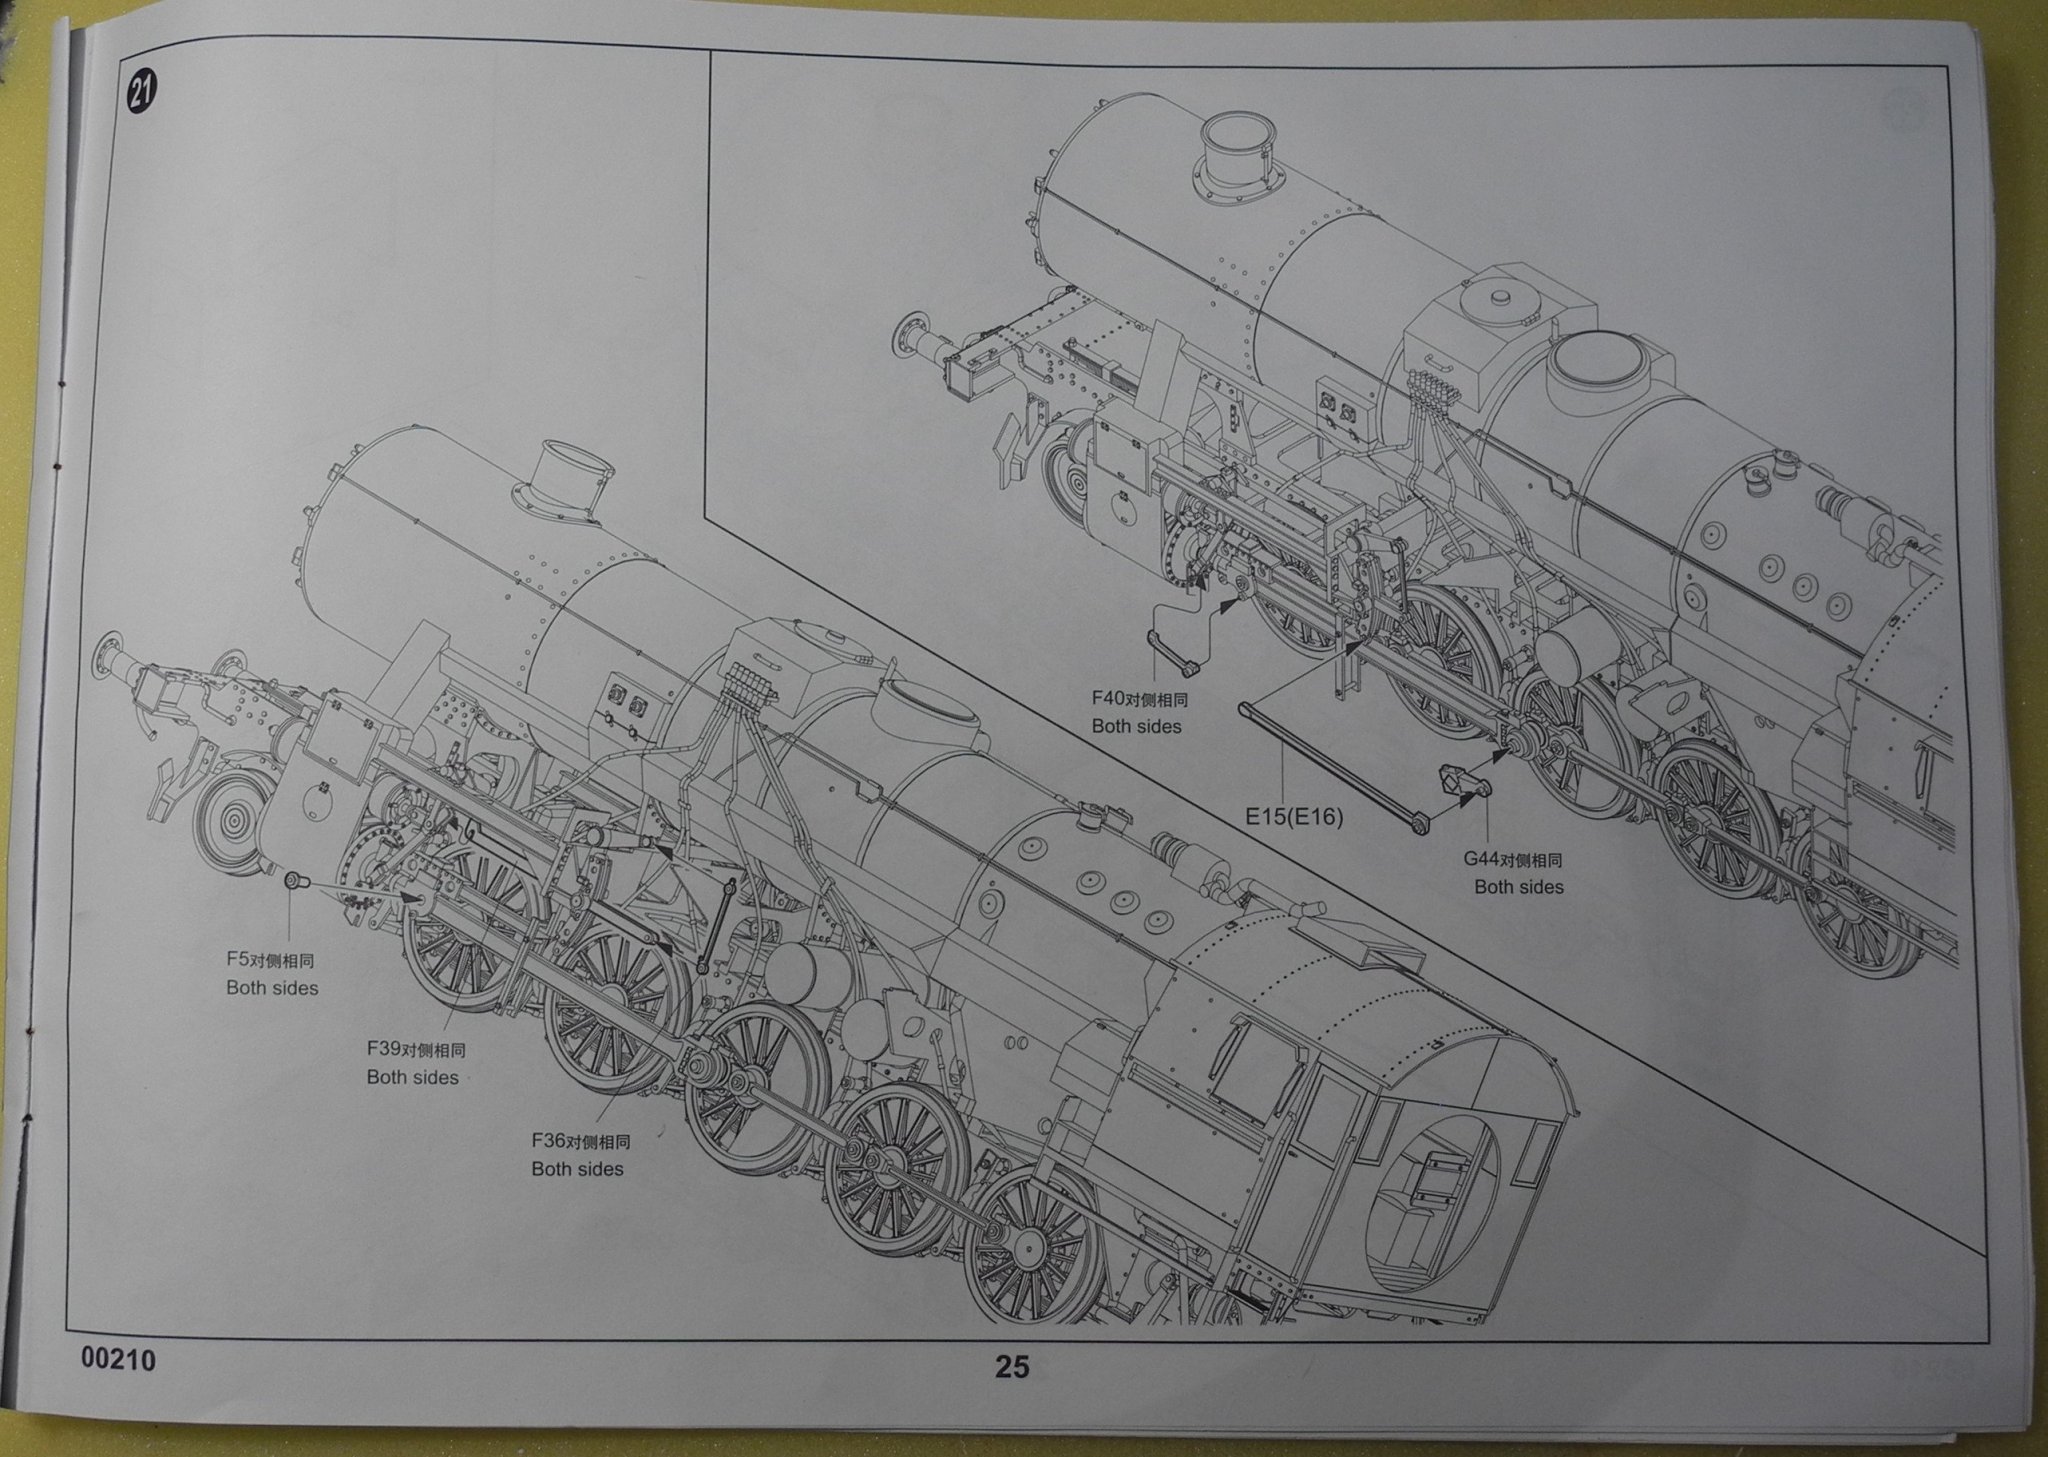
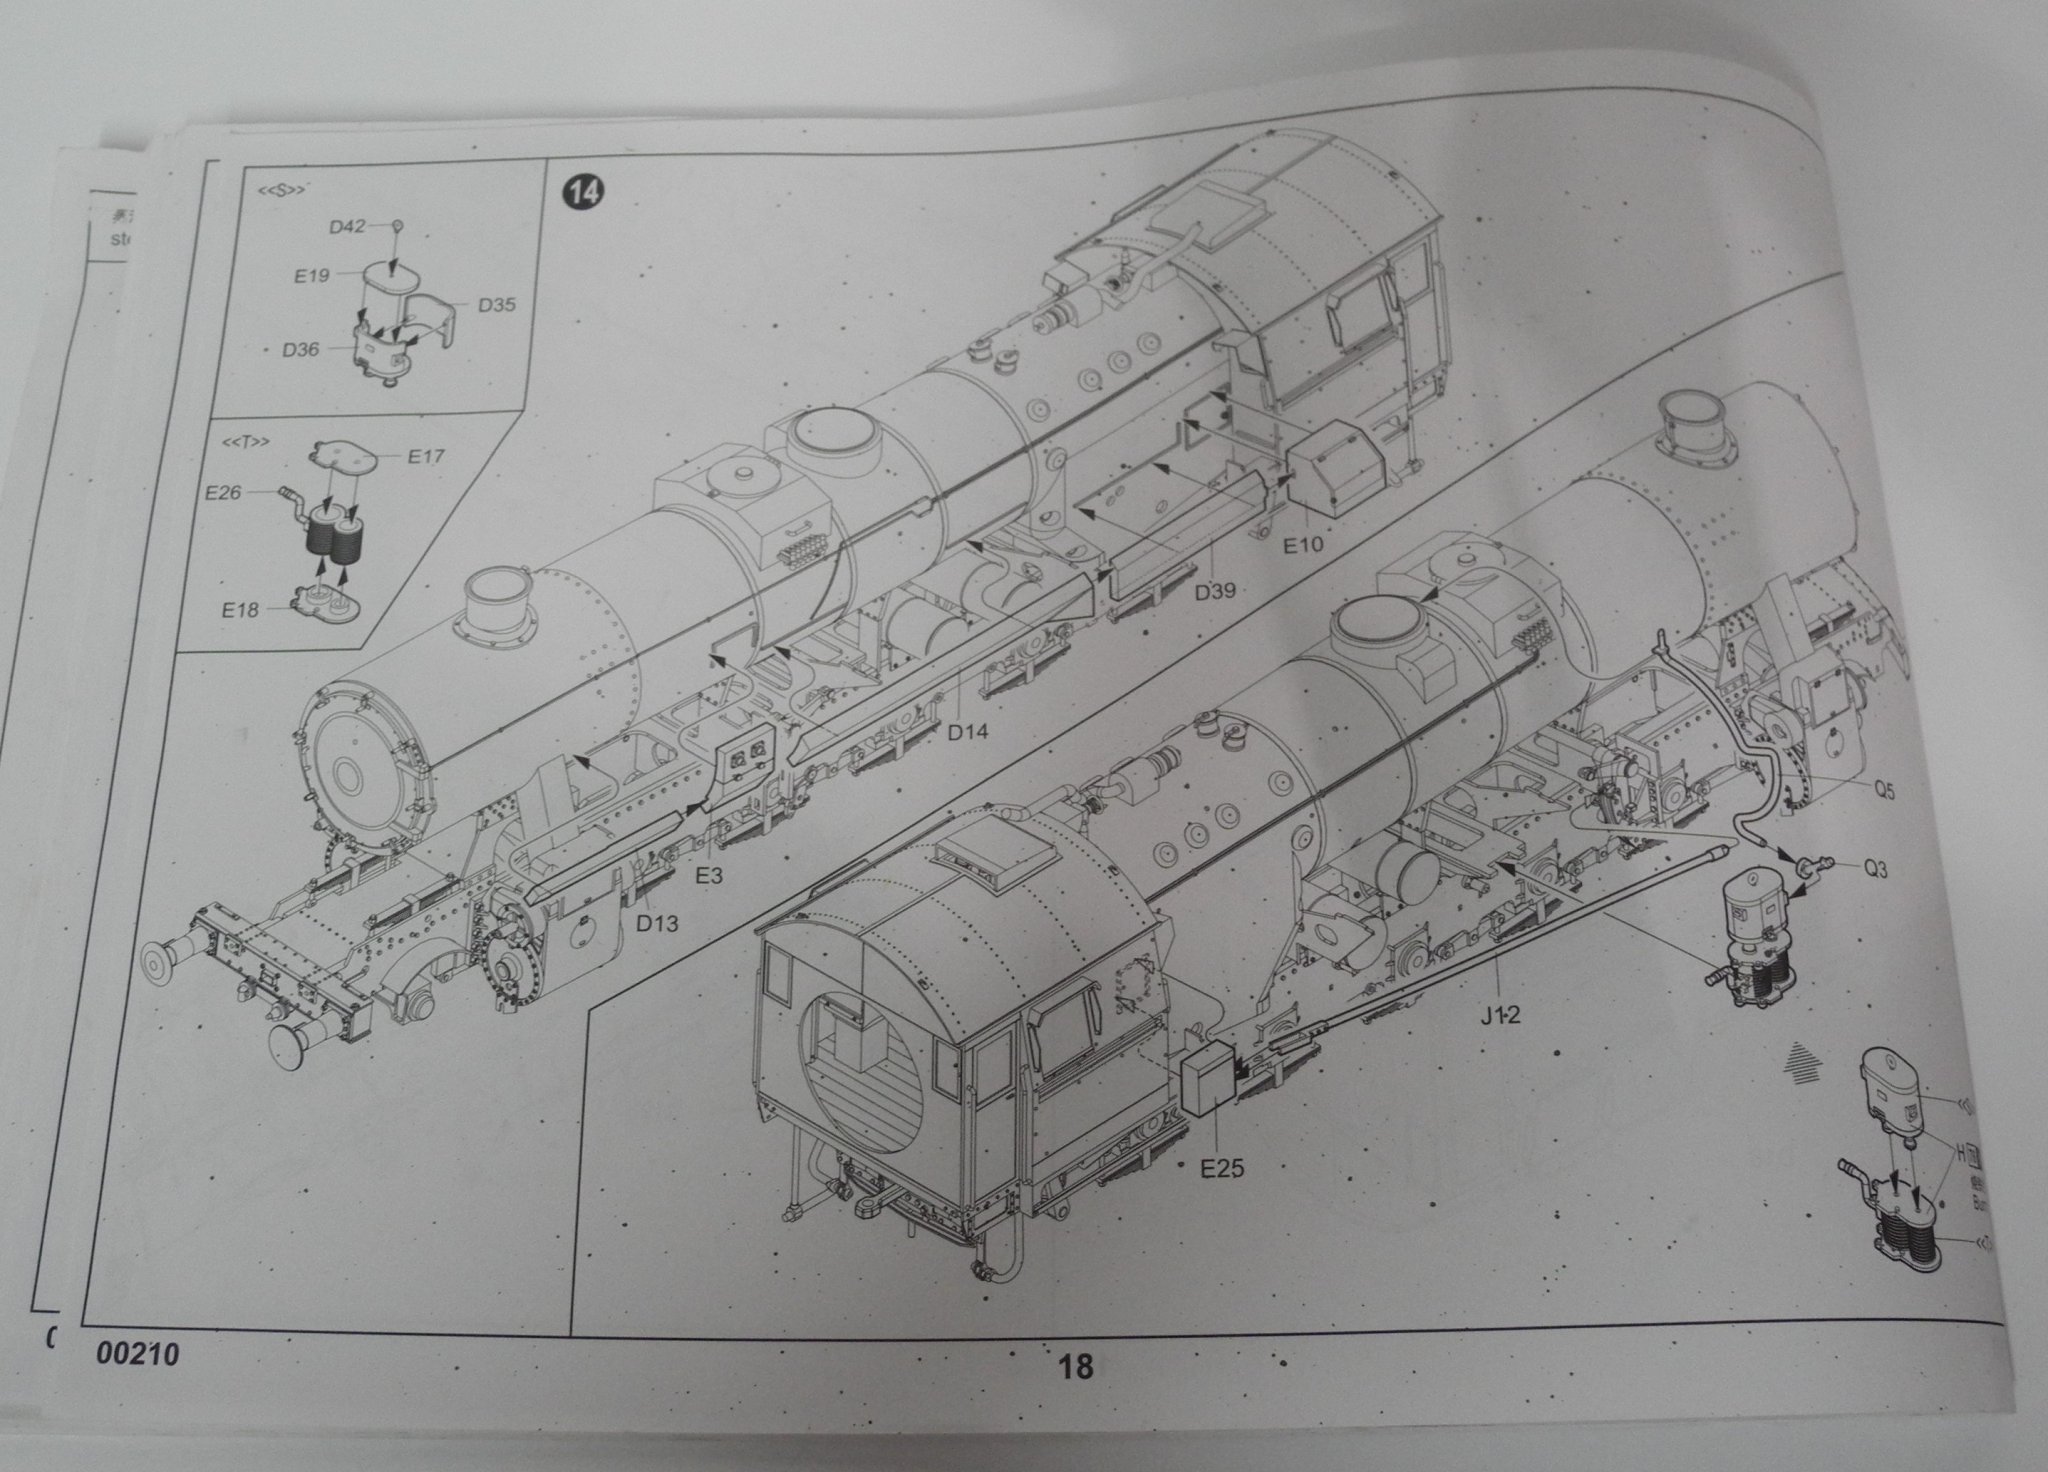
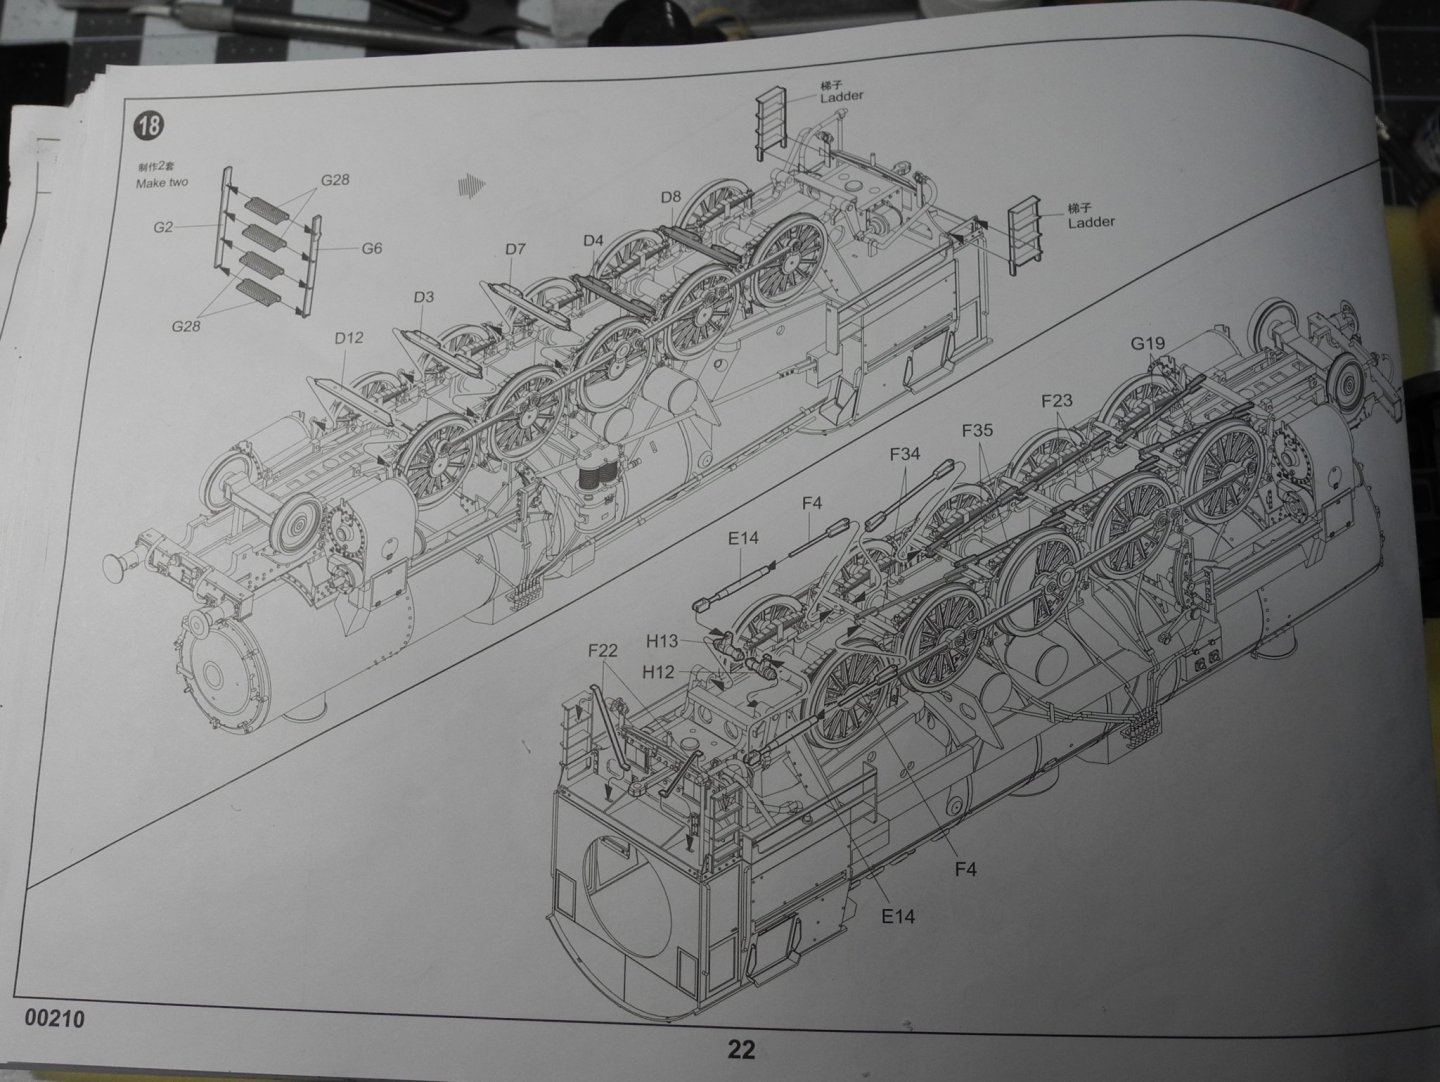
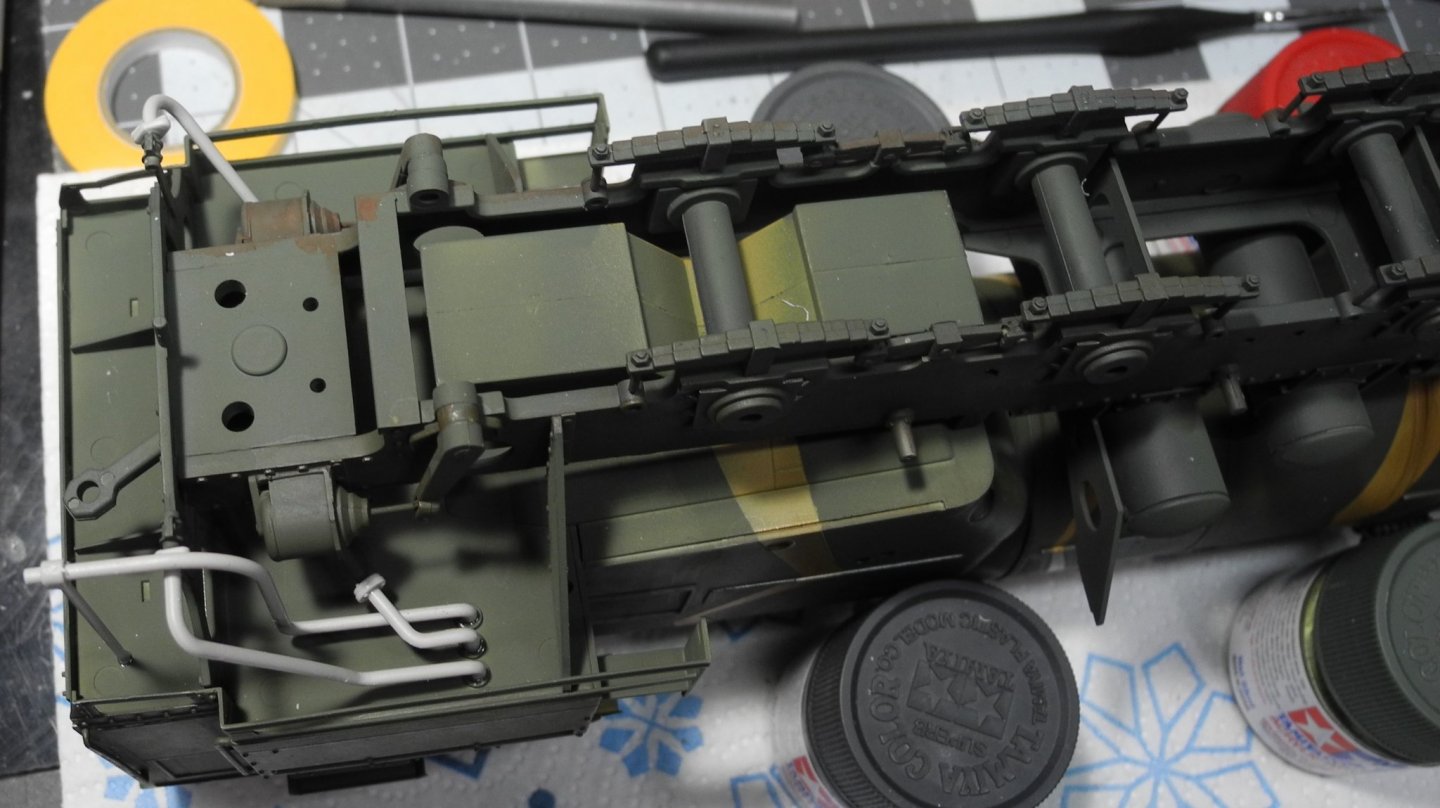
Step 18 involves construction of the brake linkage system, a couple of ladders and braces. The brake linkage system is well modeled with this kit. It appears the brakes were air (or steam) assisted. You can see the boosters at the rear of the loco tying into the linkage.
- 92 replies
-
- 12
-
-
Have you guys seen the Winnebago that's made from Lego like parts? I was very surprised how realistic it comes out. It's in something like 1:32 scale or something close to that. It has a numbers of well cast figures (including Dale) that are pre painted that come with it.
-
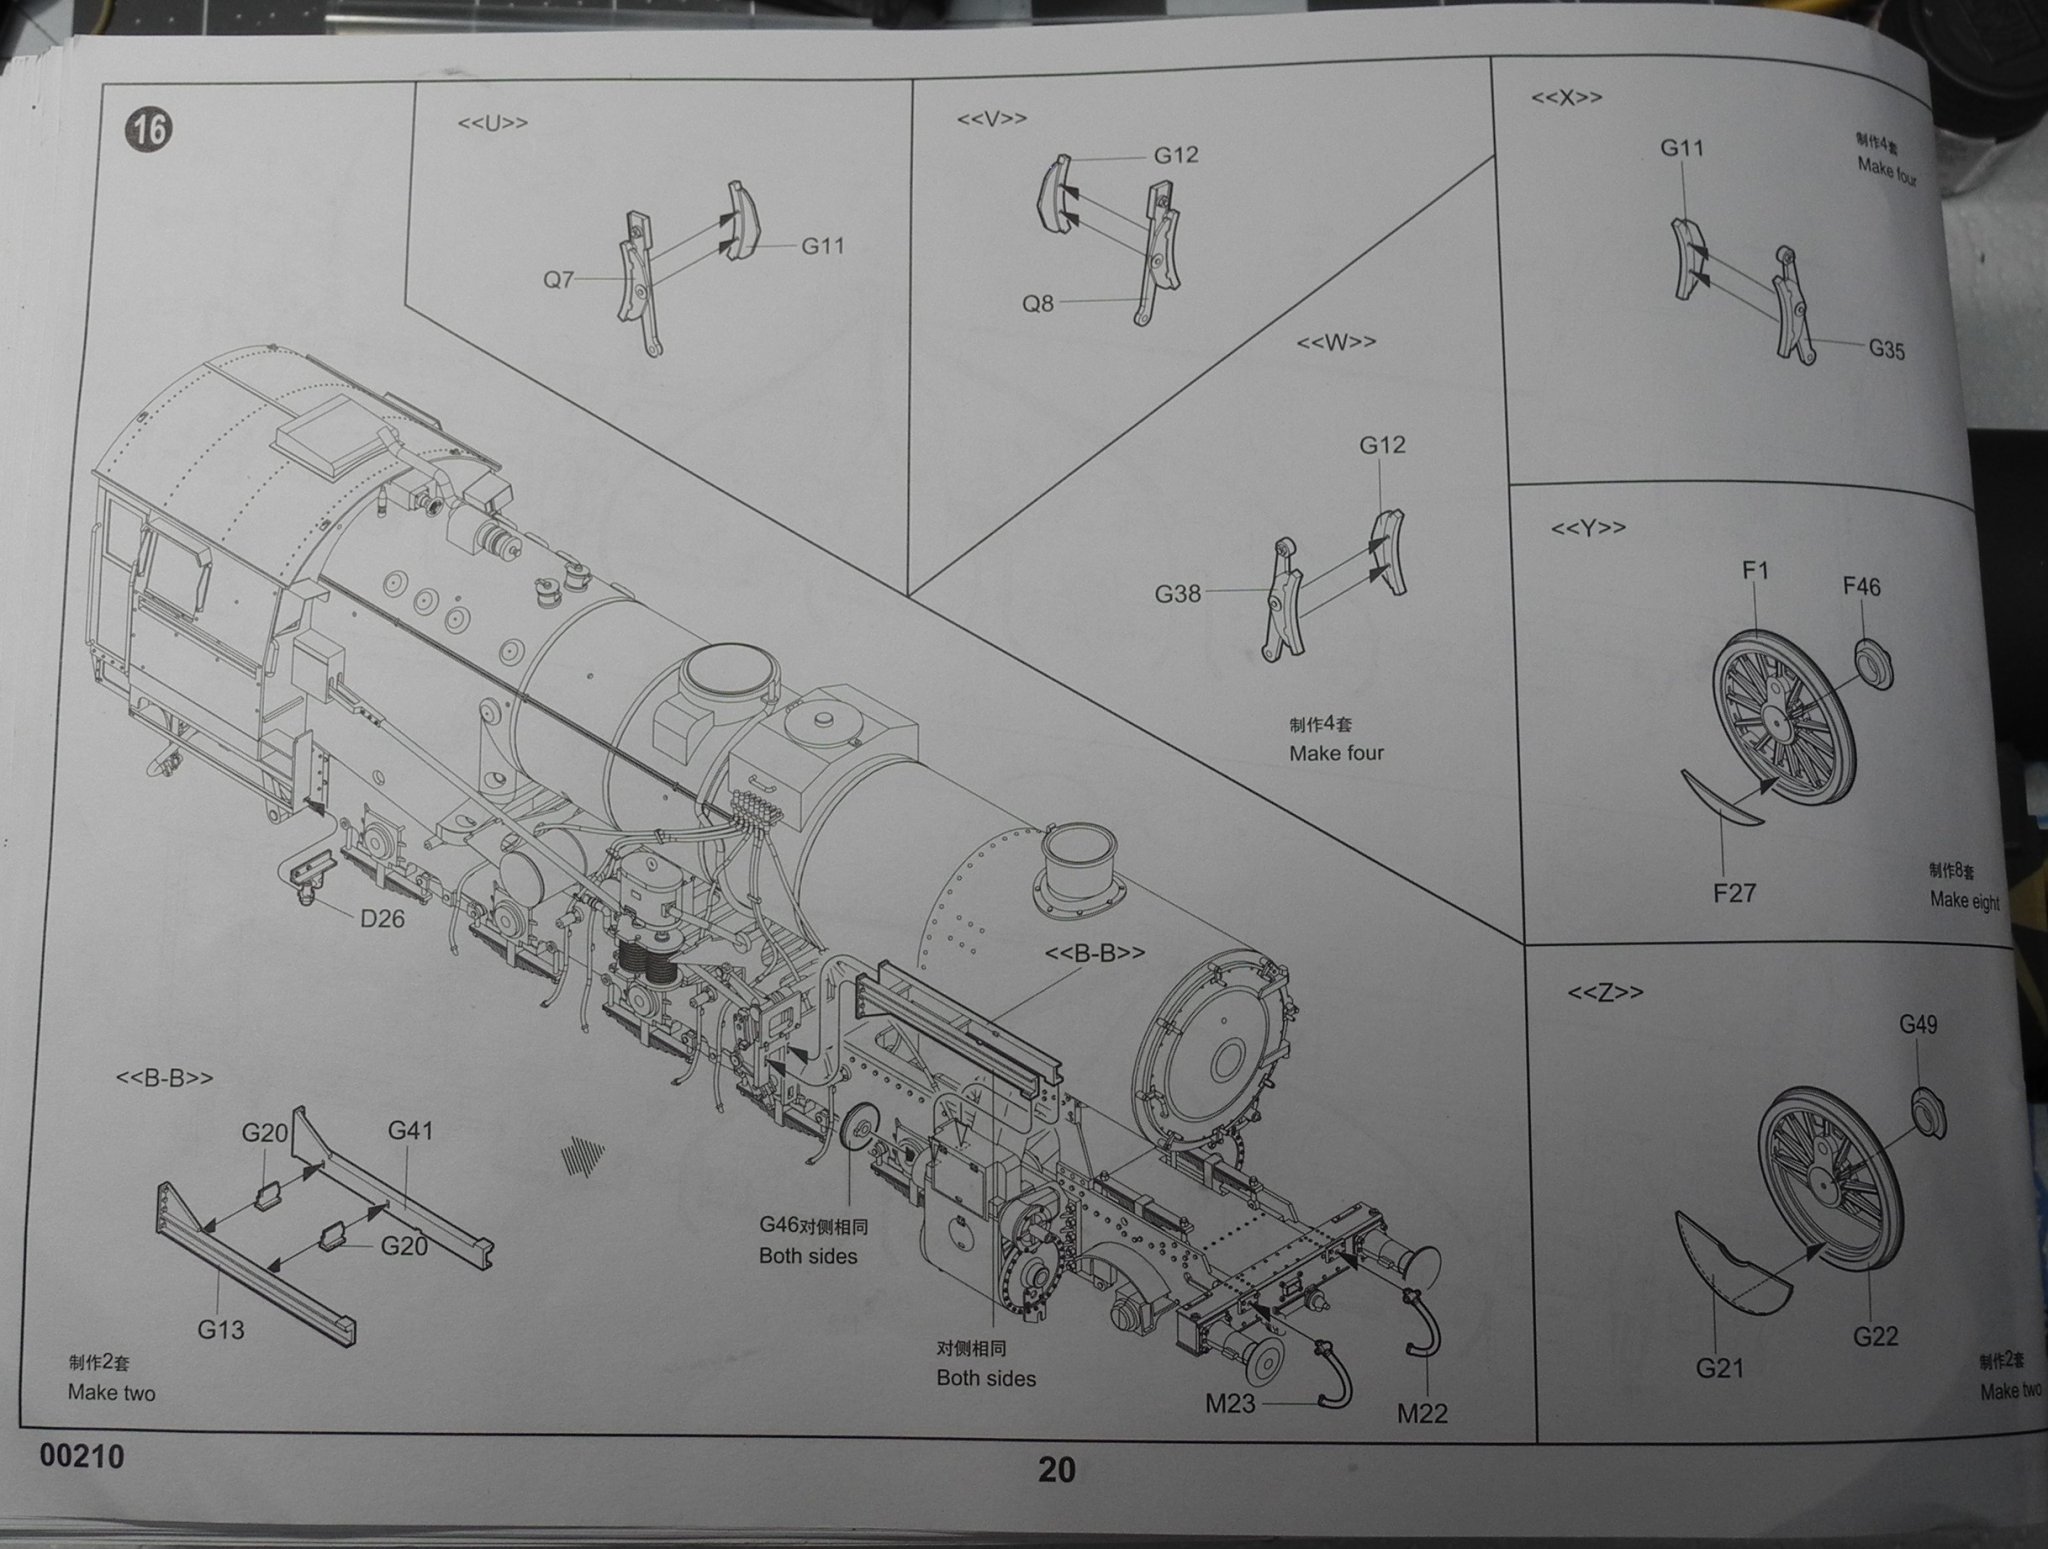
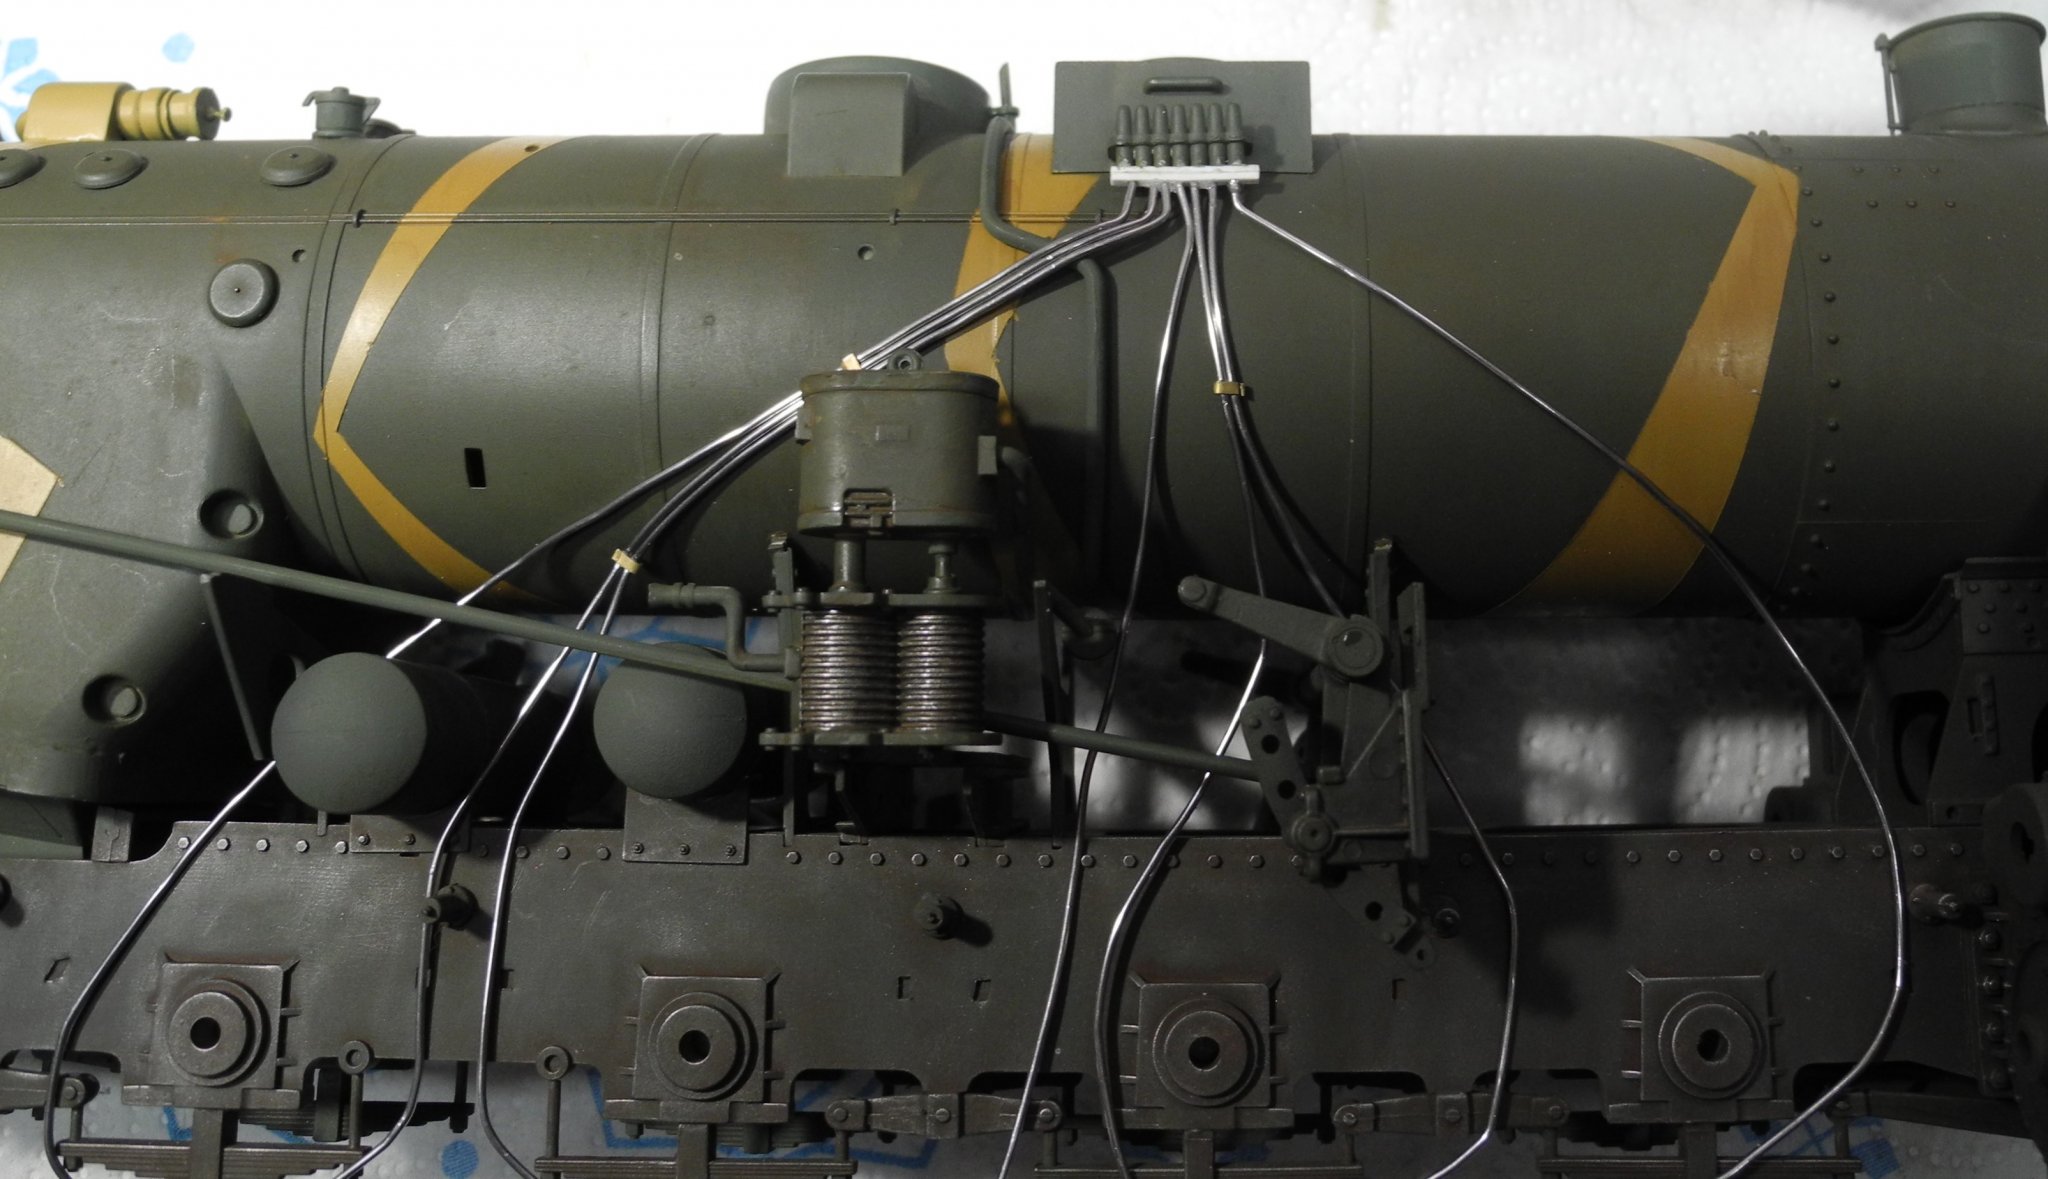
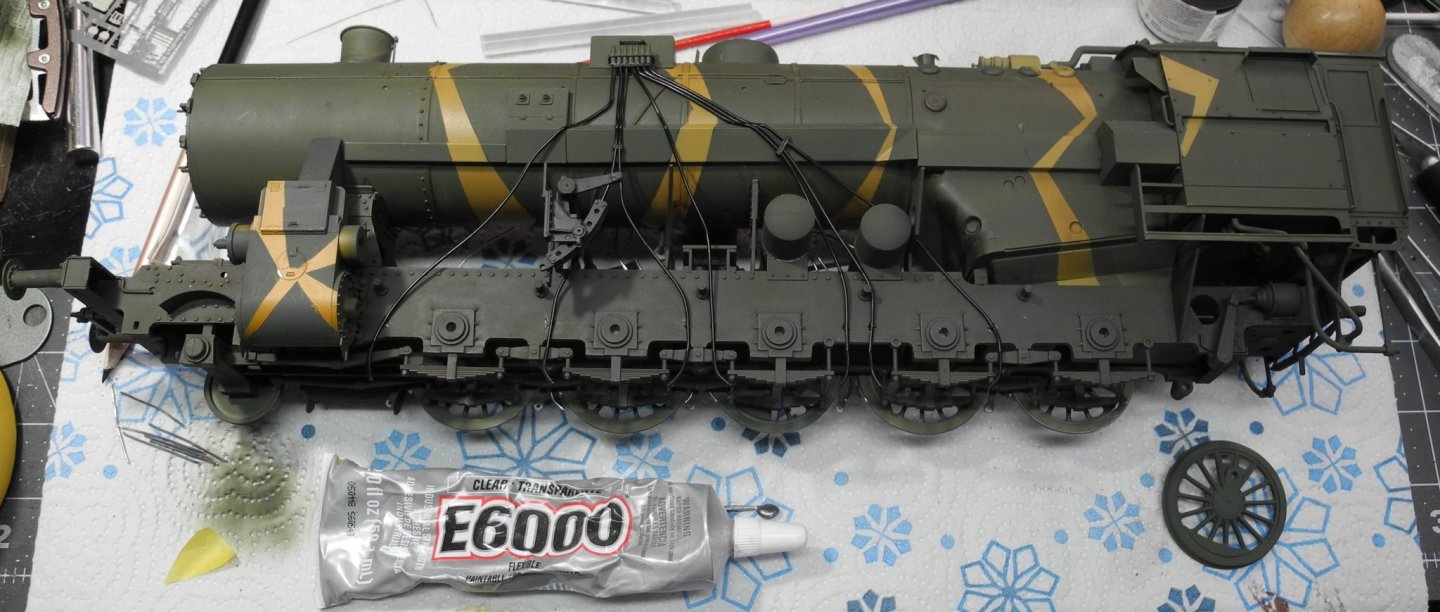
Thanks again for the kind comments guys. I need to take back some of the disparaging things I said about the Trumpeter vinyl parts...I did find a glue that worked with it. Perseverance pays off every now and then. 🙂 Here on this side is the Trumpeter vinyl piping using E-6000 glue to bond it to the plastic parts. I added the wheels and other parts to the side that was unfinished (steps 16 and 17). After this, will do some more shading and highlights before moving on to the next steps of construction.

- 92 replies
-
- 12
-
-
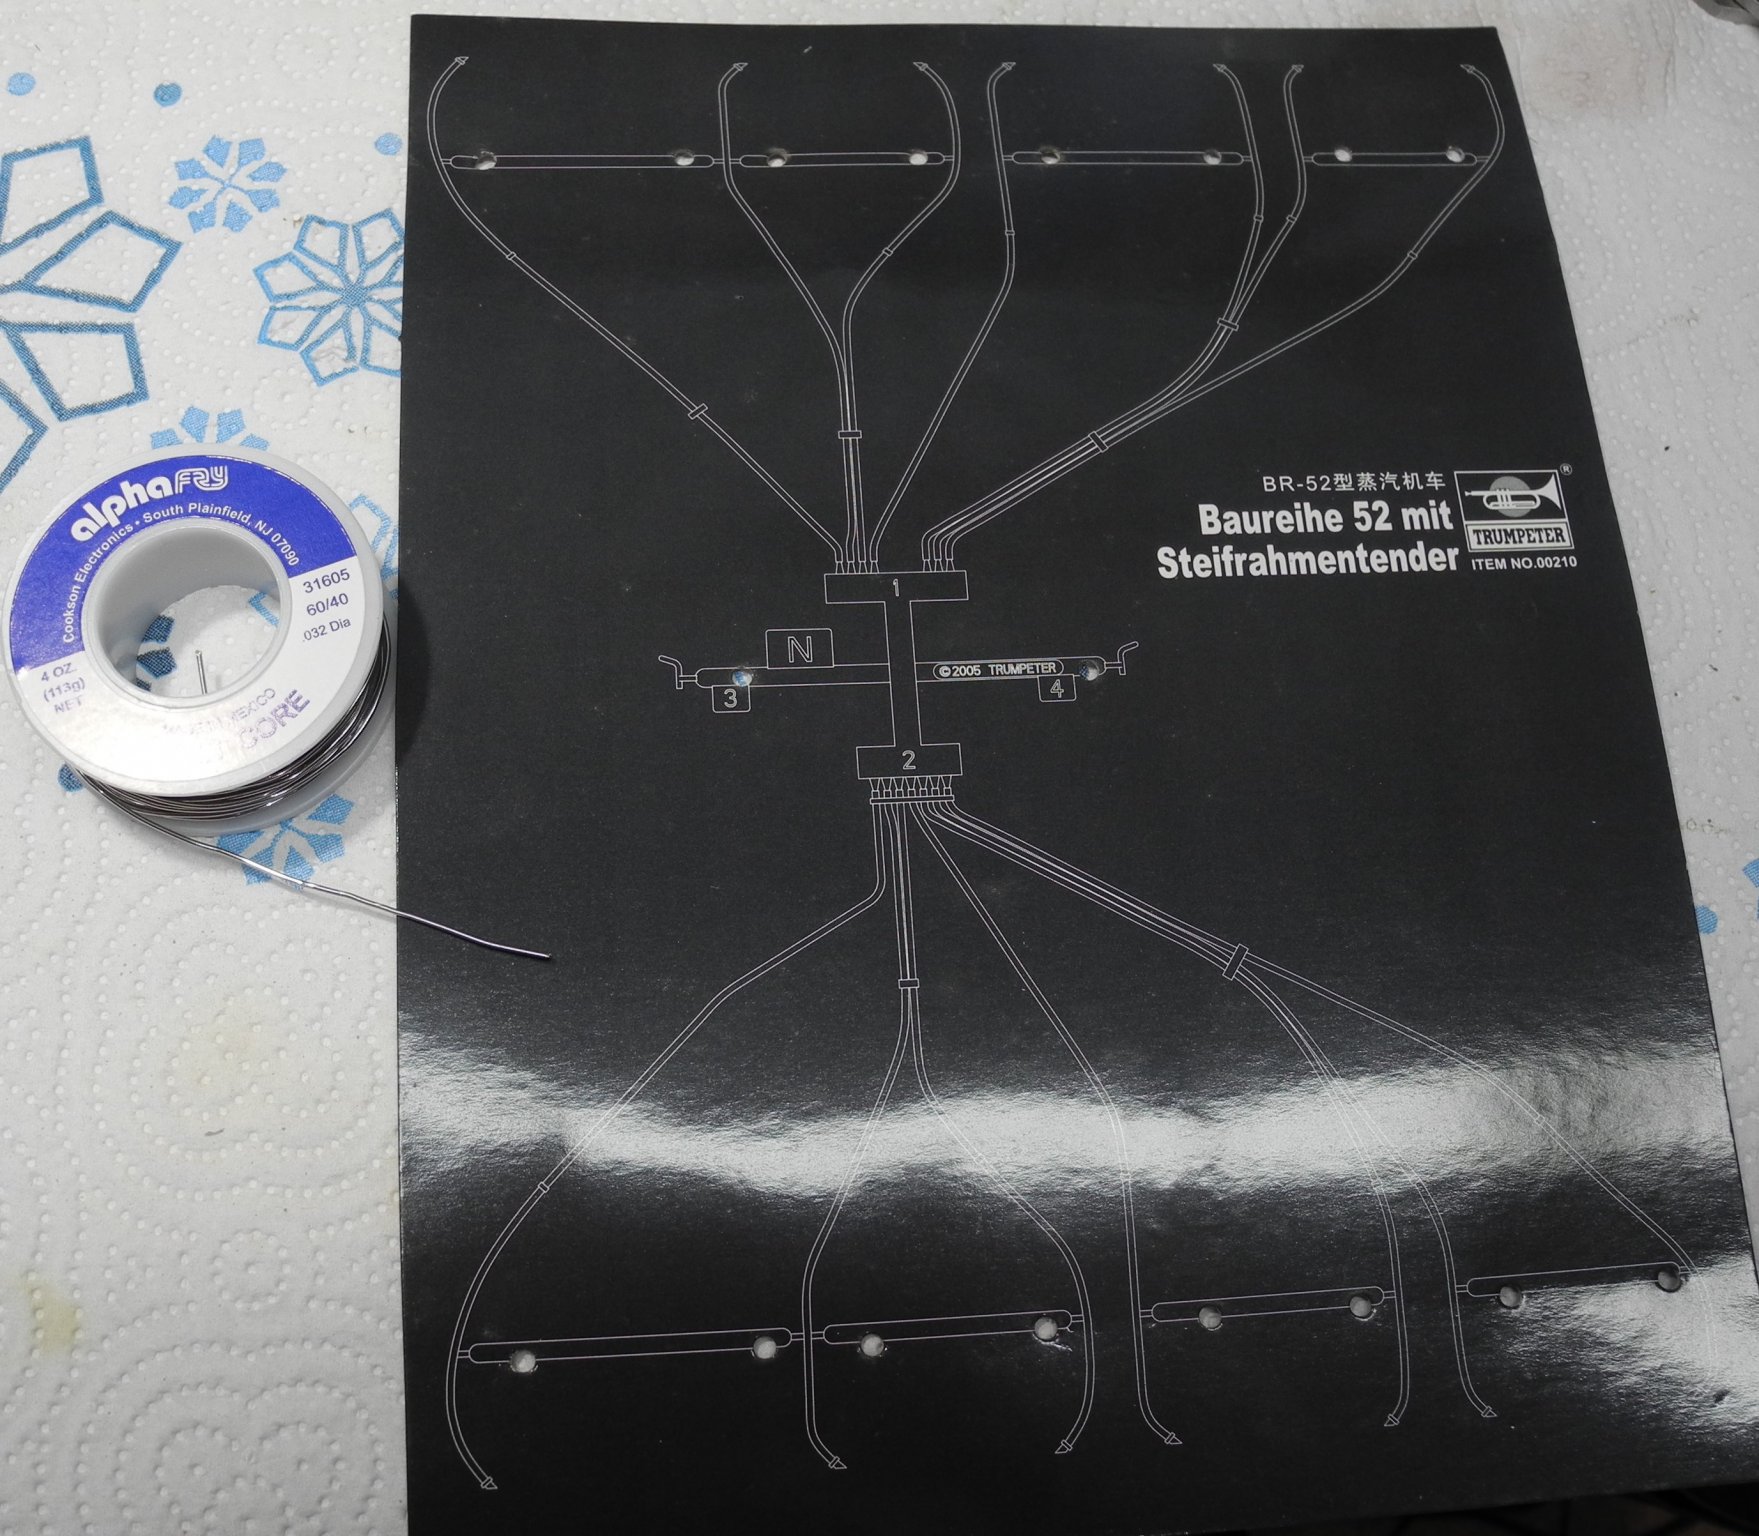
No, I don't know exactly. However, deterioration of the core is one thing and deterioration of the lead/tin quite another. I have no doubt the solder will be around longer than probably either you or I. However, it's suitability for joining a bond as solder has a short shelf life. I have some very old solder around and deterioration of it has not happened in more than 10, maybe even 20 years.
-
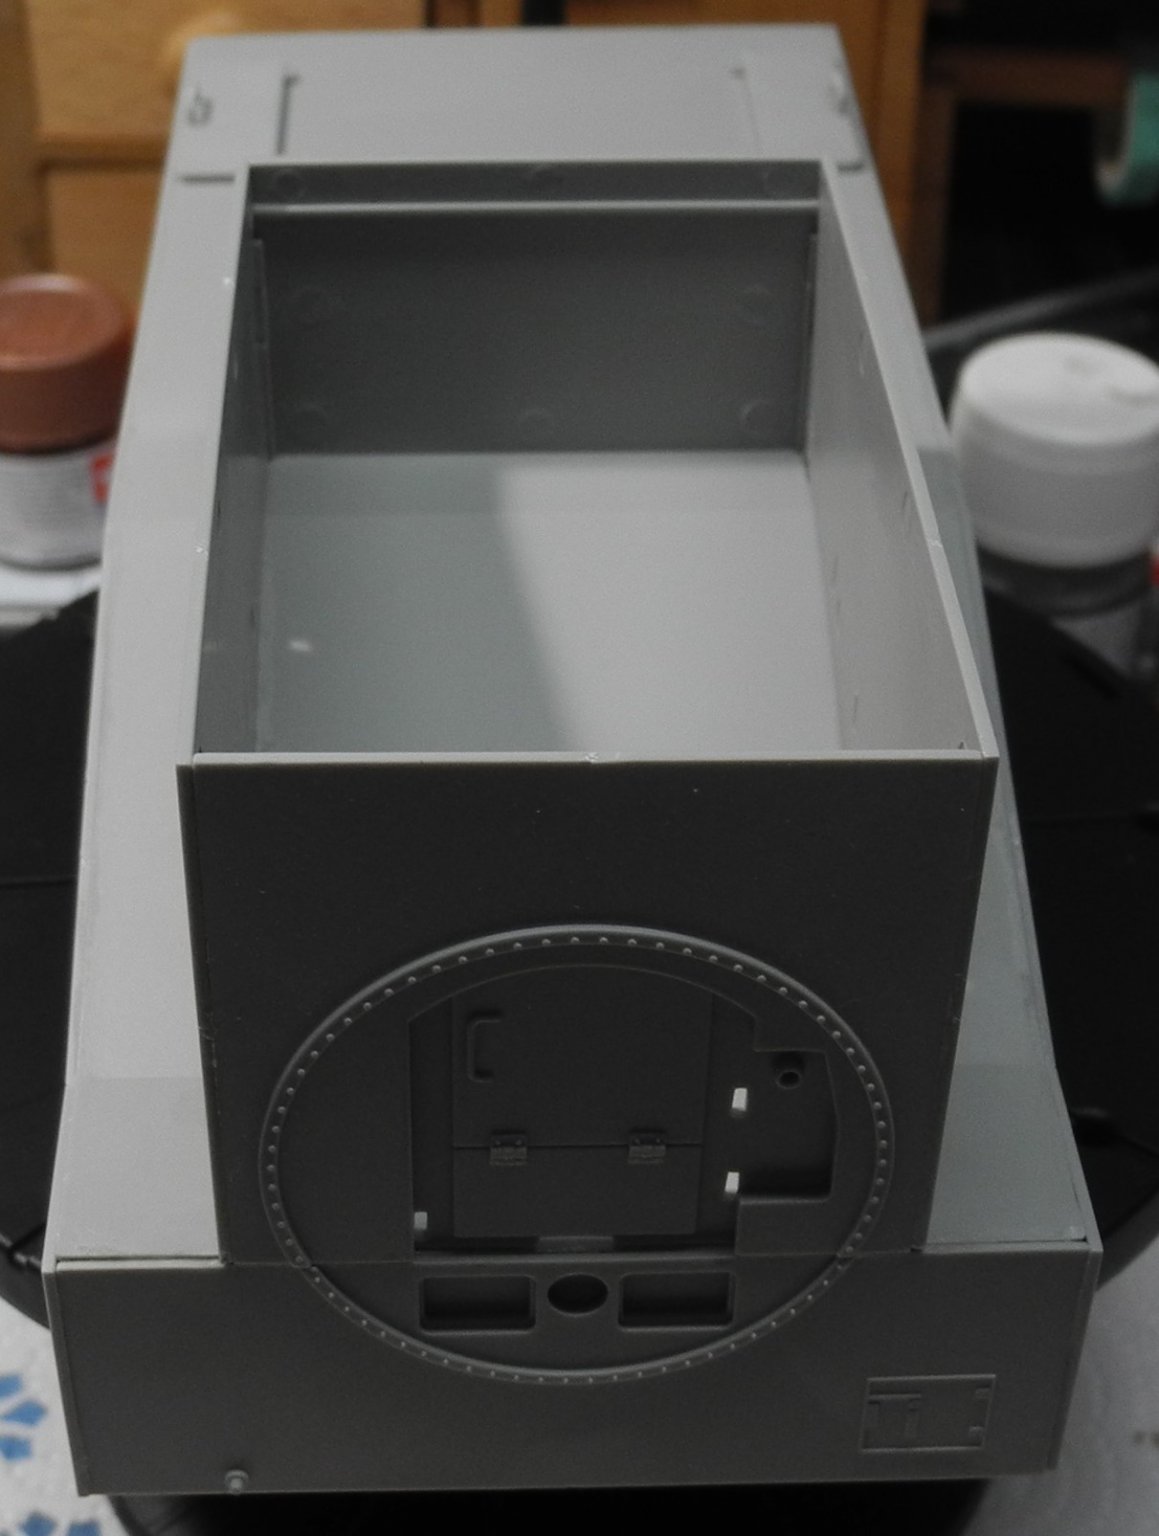
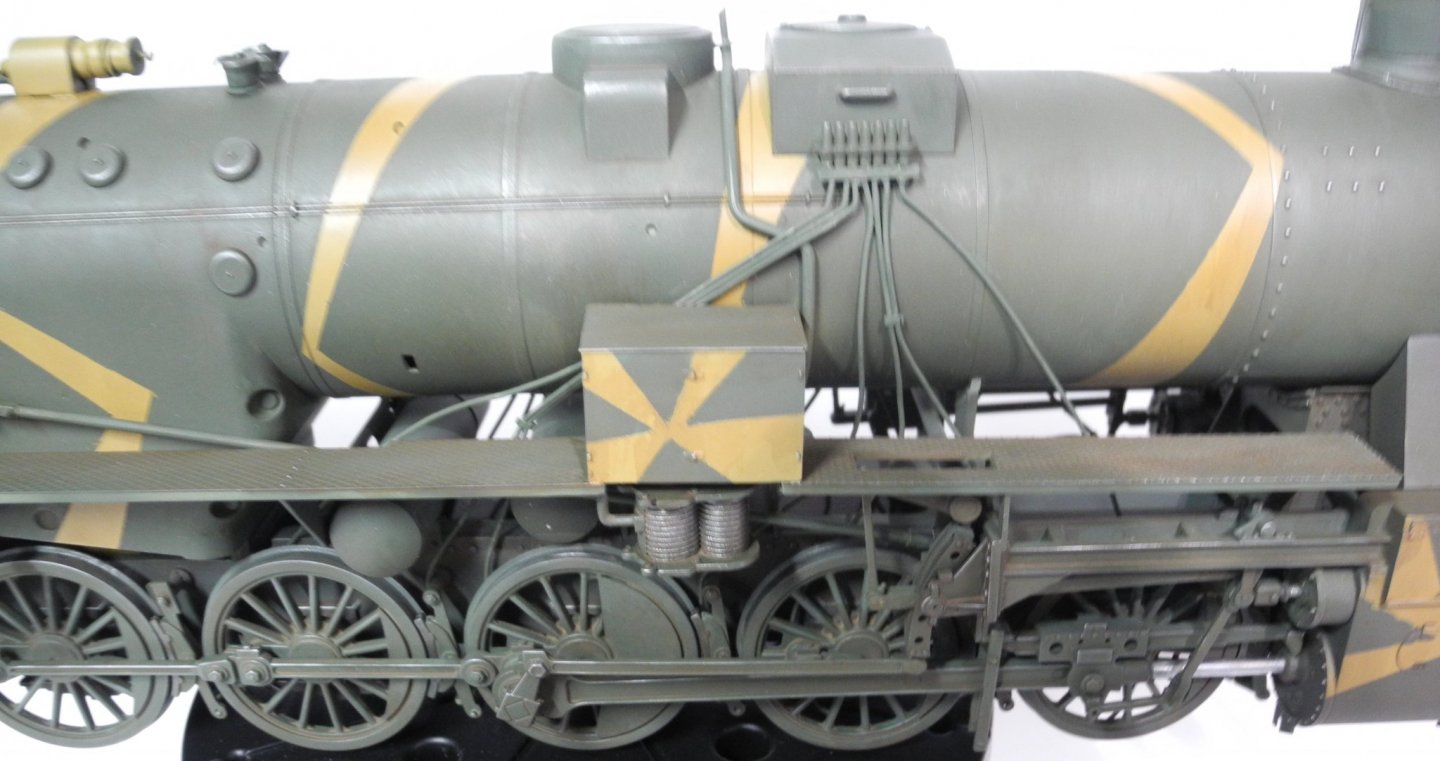
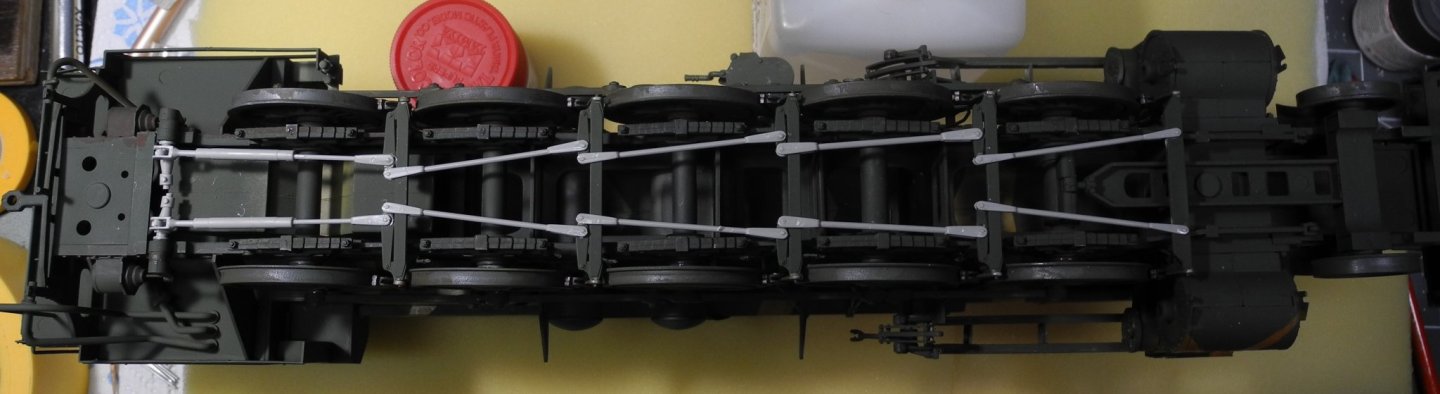
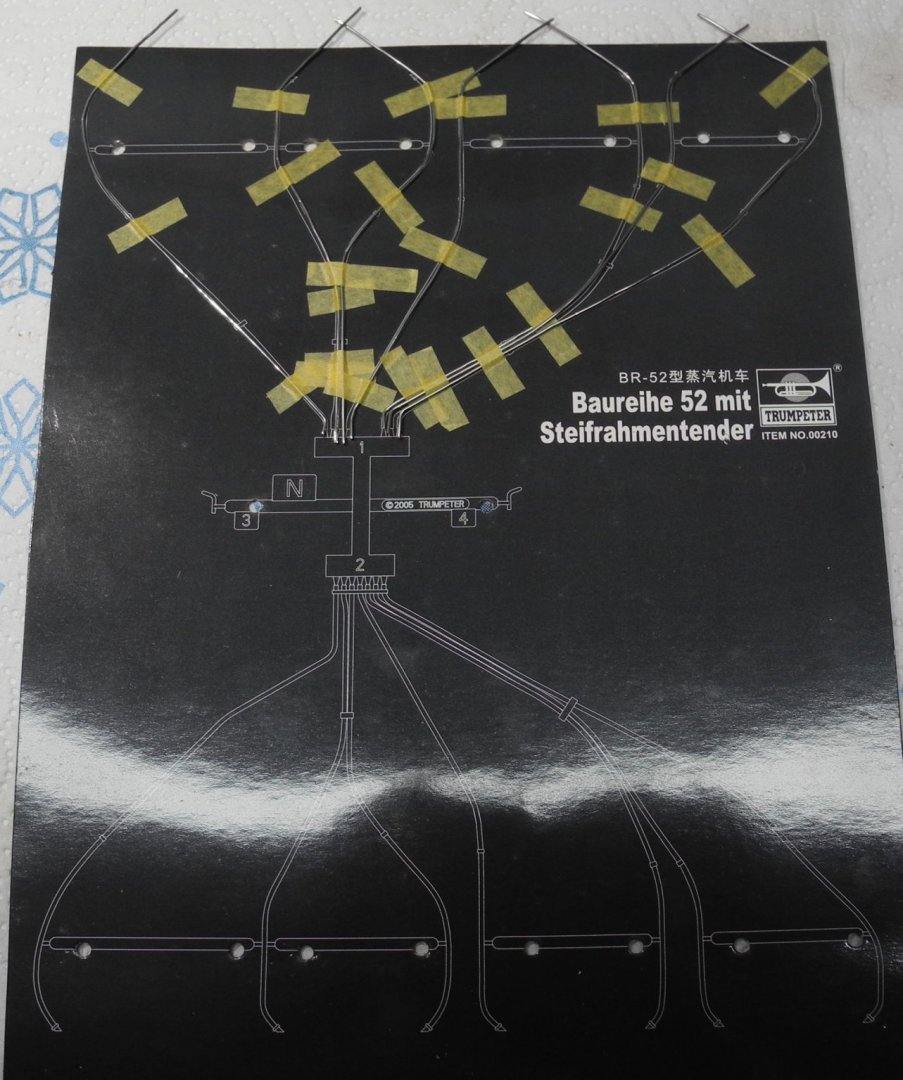
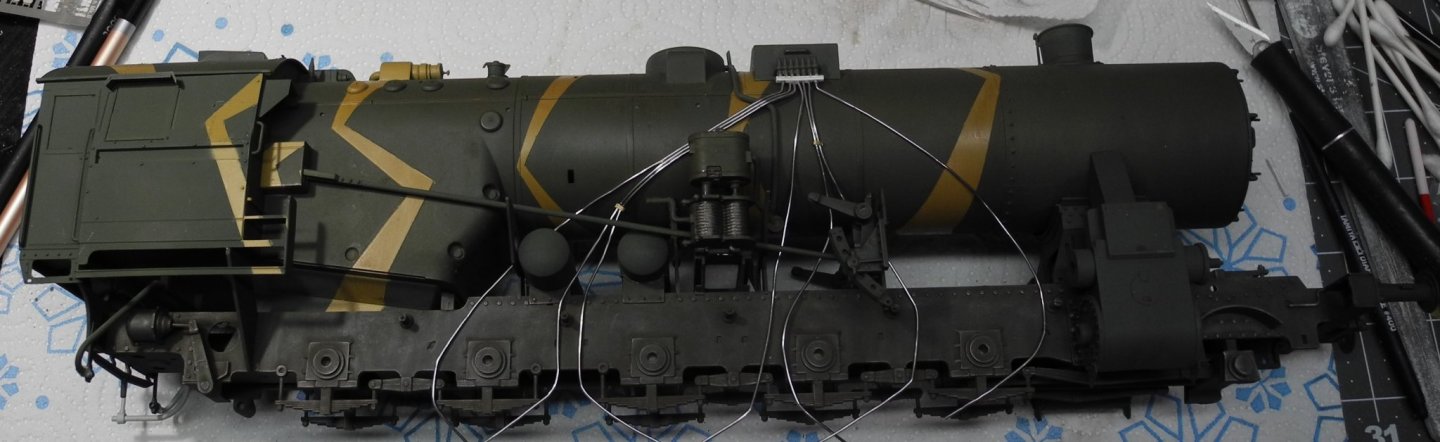
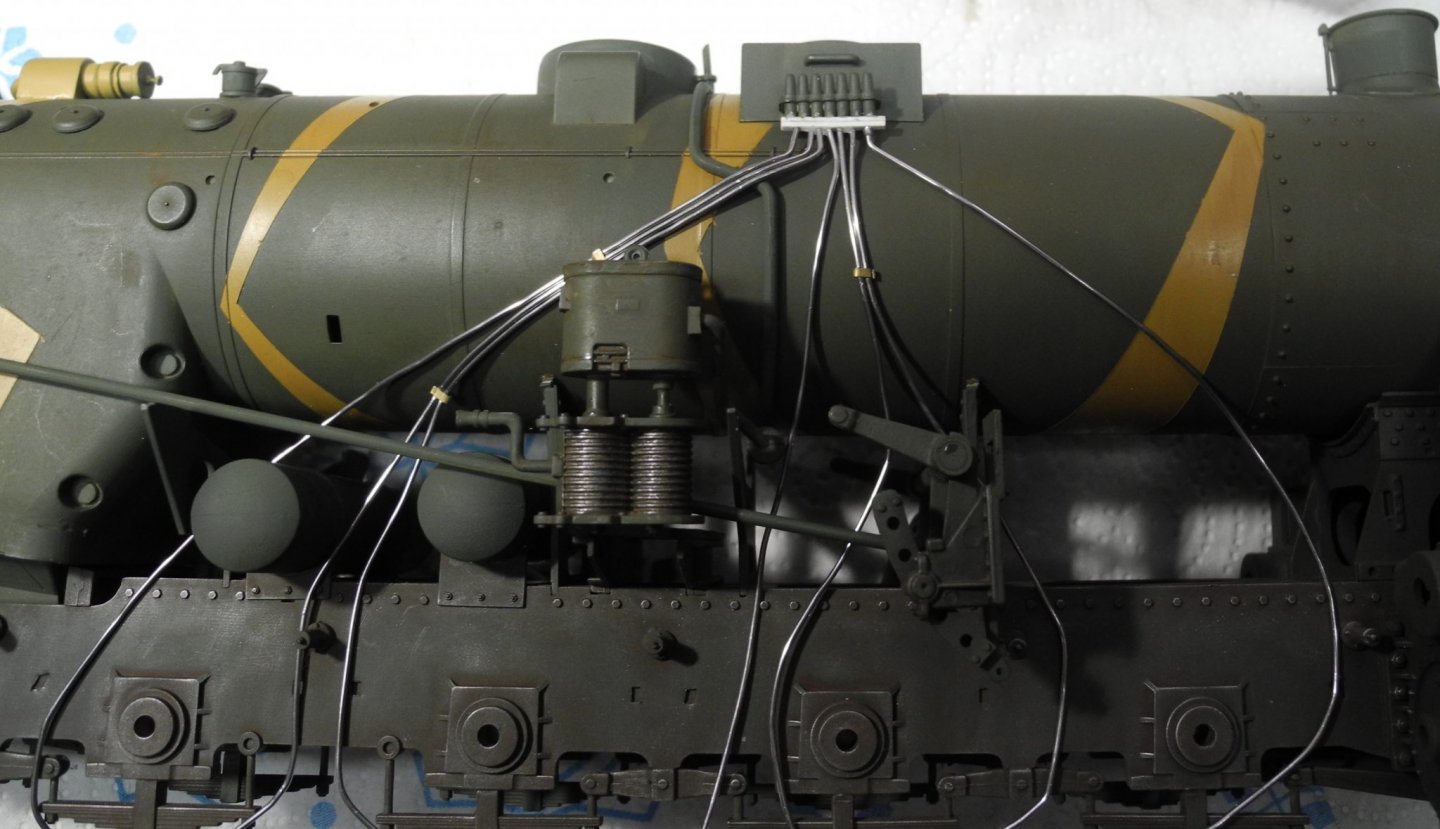
Oh, by the way, I am told the purpose of the piping was to distribute sand upon the track rails ahead of the wheels...to give traction when needed, like possibly in snowy/ice conditions. Once the wheels have been installed, the piping will be cut to the appropriate lengths.
-
Step 15 calls for installation of pre-formed piping from the kit. The kit piping is cast in a vinyl material that cannot be glued, making it totally unsuitable. To work around this conundrum, I am using thin solder to re create the piping with the kit parts as a template. If I had some appropriate sized soft copper wire, I could have used that in lieu of solder but solder is nice because of how pliable it is. The bands that hold the piping together are made from scrap photo etch sprue. A header was made from styrene plastic strip stock.


-
Our admirals may have been born on a Friday, but it wasn't last Friday. 😄
-
Thanks Denis. To be totally honest, the money spent for the Eduard photo etch set was a waste as the kit itself has more than sufficient detail. It was aggravating that neither the kit nor the Eduard set contained the instrument dial faces for the cab interior. Made me wonder how the heck they could have missed that detail? 95% of the photo etch is redundant and does not enhance the model to a sufficient degree to make it worth the time and effort to put it on. Even their paint masks are rather useless for me as they were made to create the two-tone paint work for the red/black version wheels. Didn't even include masks for the windows. 😕
-
The focus today was on steps 13 and 14. The loco was given a wash, then the various parts in steps 13 and 14 were added.


- 92 replies
-
- 12
-