CDW
-
Posts
7,756 -
Joined
-
Last visited
Content Type
Profiles
Forums
Gallery
Events
Everything posted by CDW
-

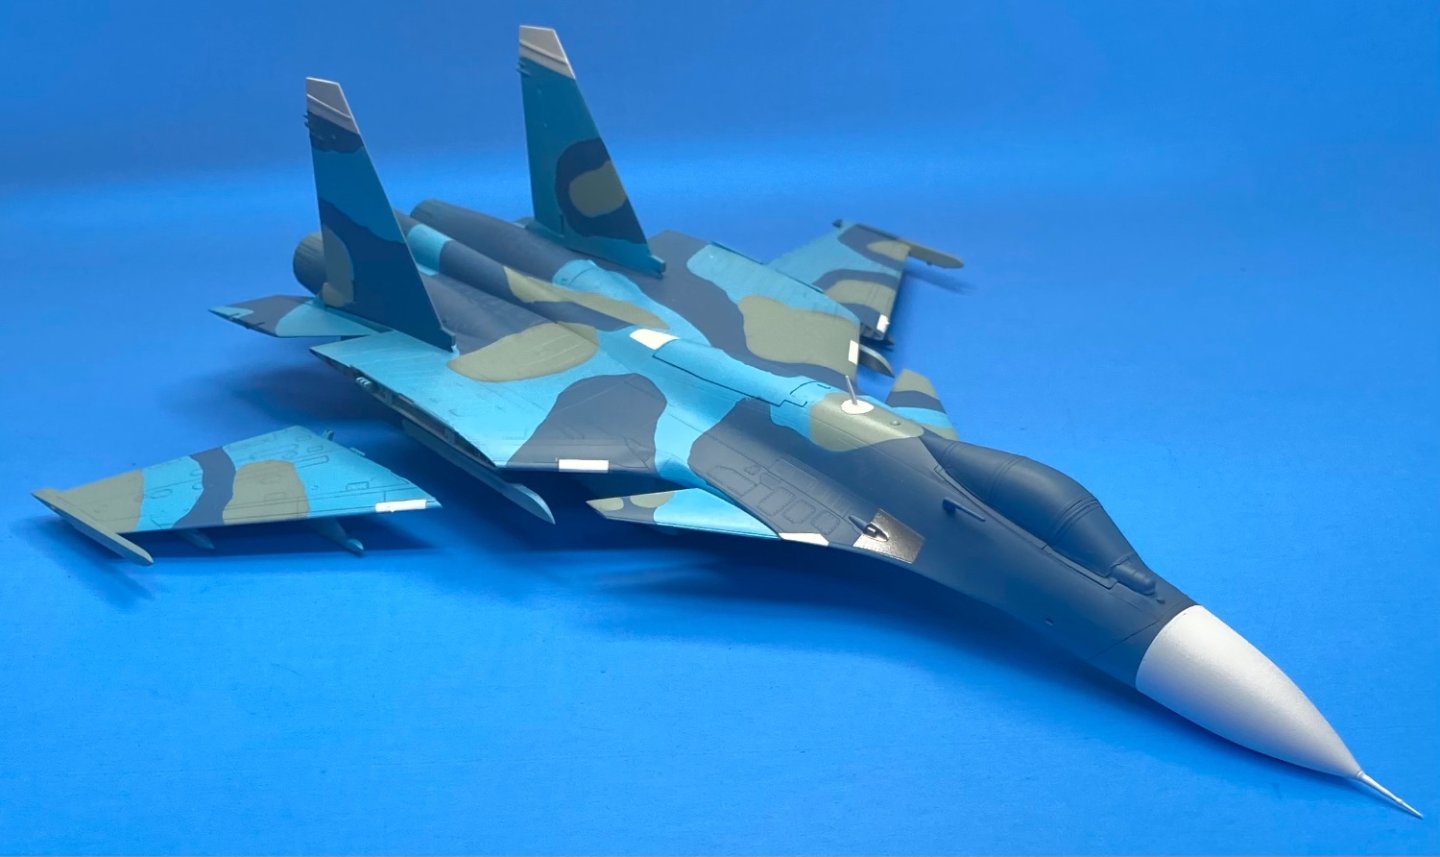
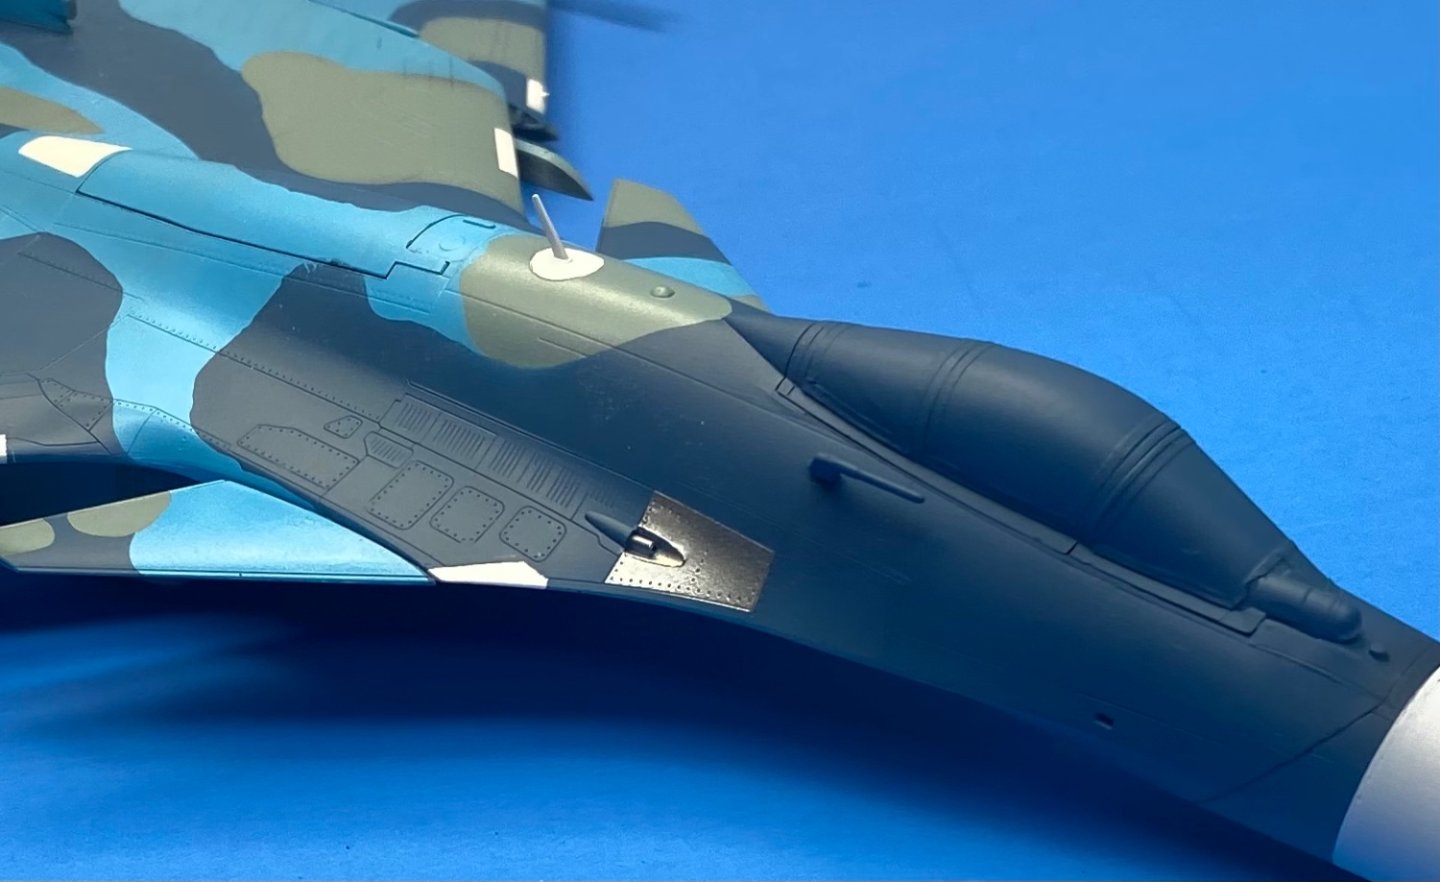
Russian Su-33 Flanker D by CDW - FINISHED - Trumpeter - 1:72 Scale
CDW replied to CDW's topic in Non-ship/categorised builds
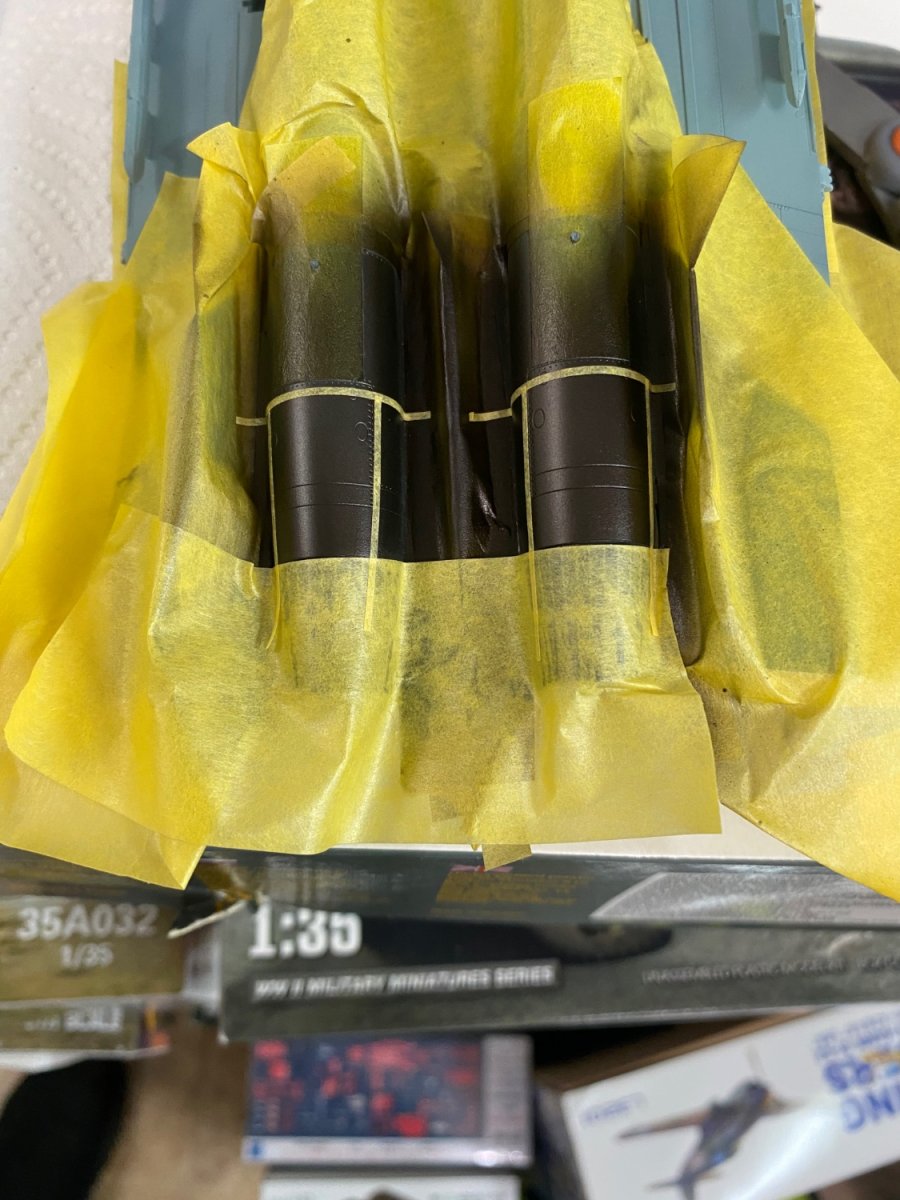
Getting started on the weapons, a lot of details to add.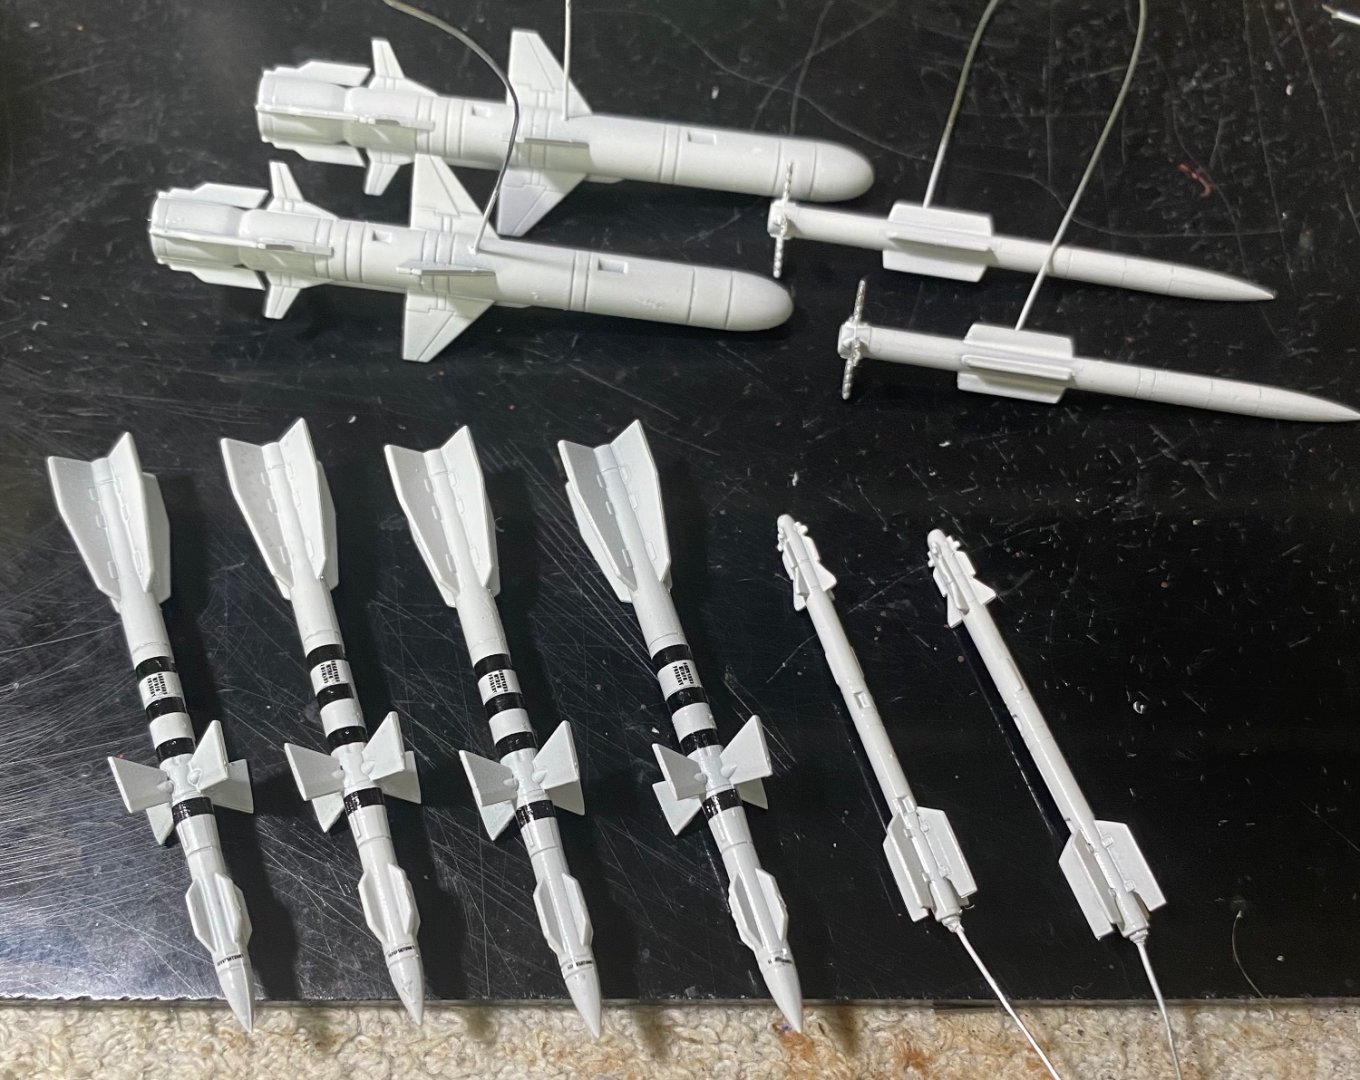
- 148 replies
-
- 13
-

-

-
U.S. Tractor D7 “Tow Cat” by CDW - FINISHED - MiniArt - 1:35 Scale
CDW replied to CDW's topic in Non-ship/categorised builds
Thanks for the kind words and for looking in. -
Russian Su-33 Flanker D by CDW - FINISHED - Trumpeter - 1:72 Scale
CDW replied to CDW's topic in Non-ship/categorised builds
Lol… I’ve even fallen for some of the sci-fi stuff which I will unveil later on. So many interesting subjects, so little time.- 148 replies
-
- 10
-
-
Russian Su-33 Flanker D by CDW - FINISHED - Trumpeter - 1:72 Scale
CDW replied to CDW's topic in Non-ship/categorised builds
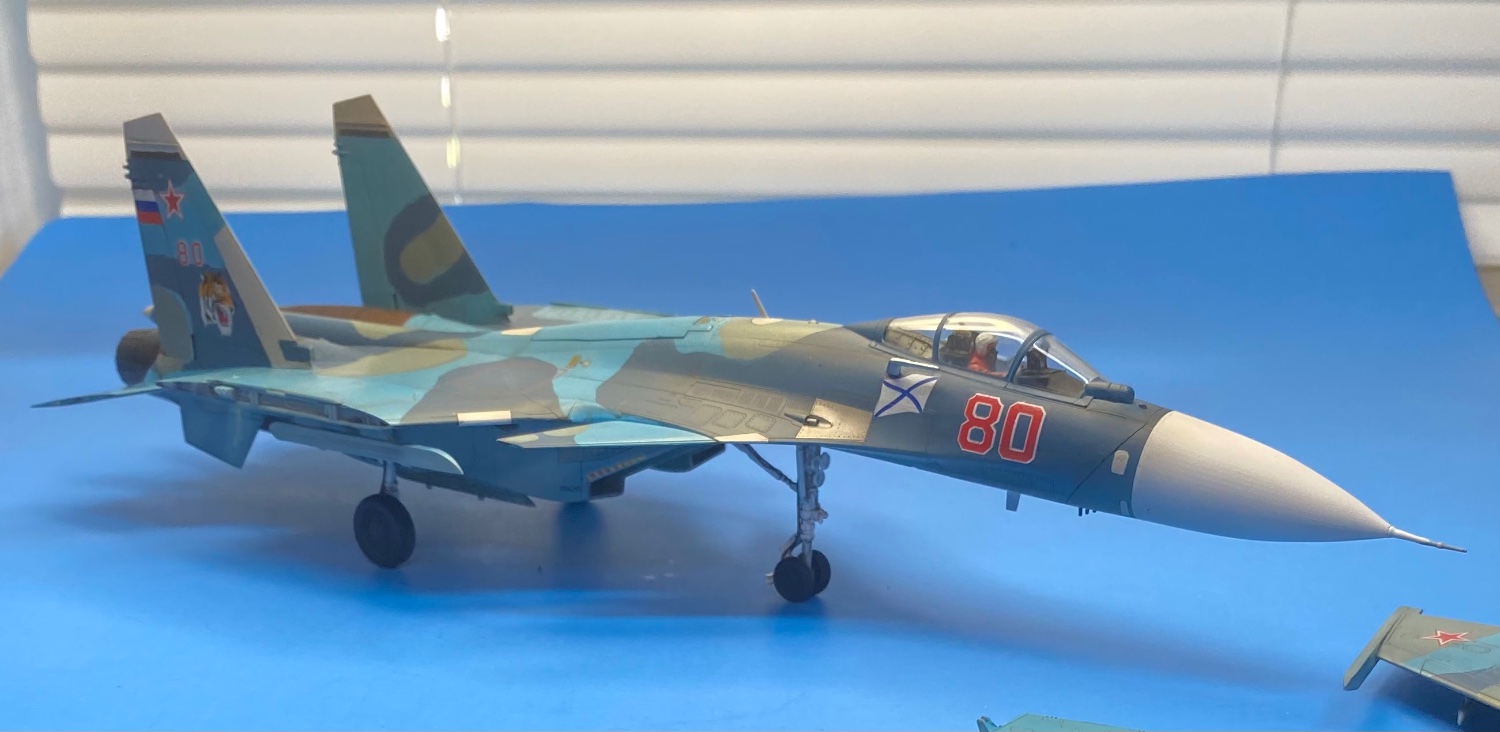
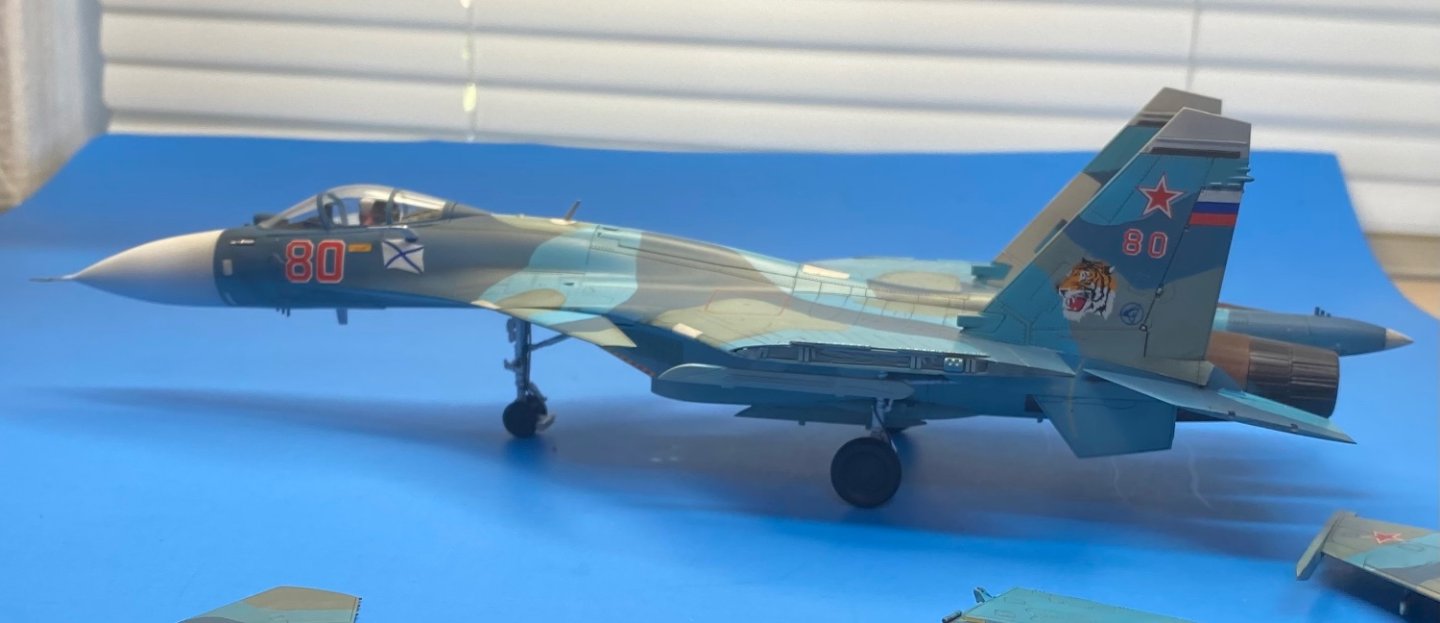
She’s got legs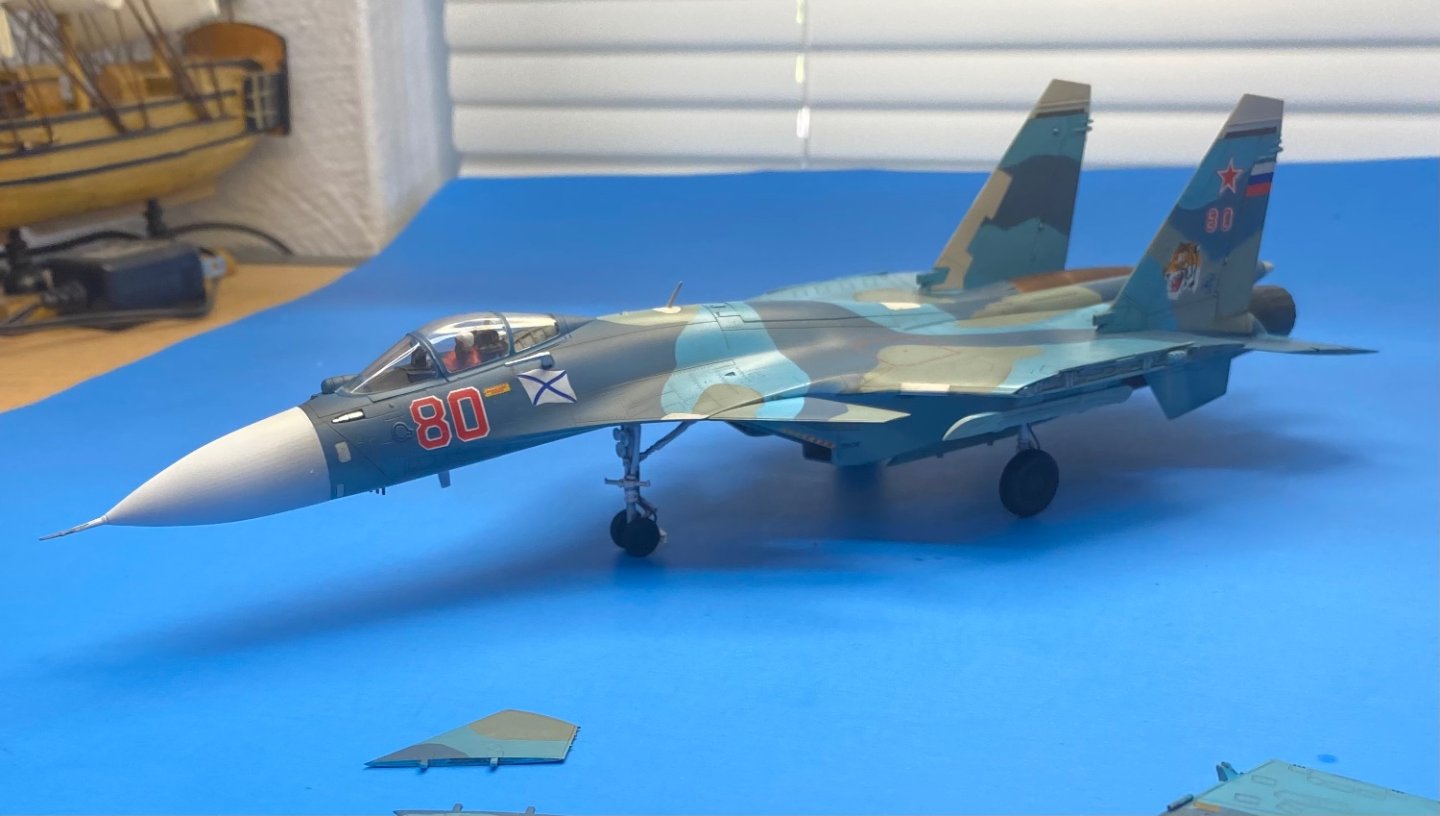

- 148 replies
-
- 13
-
-
-
Russian Su-33 Flanker D by CDW - FINISHED - Trumpeter - 1:72 Scale
CDW replied to CDW's topic in Non-ship/categorised builds
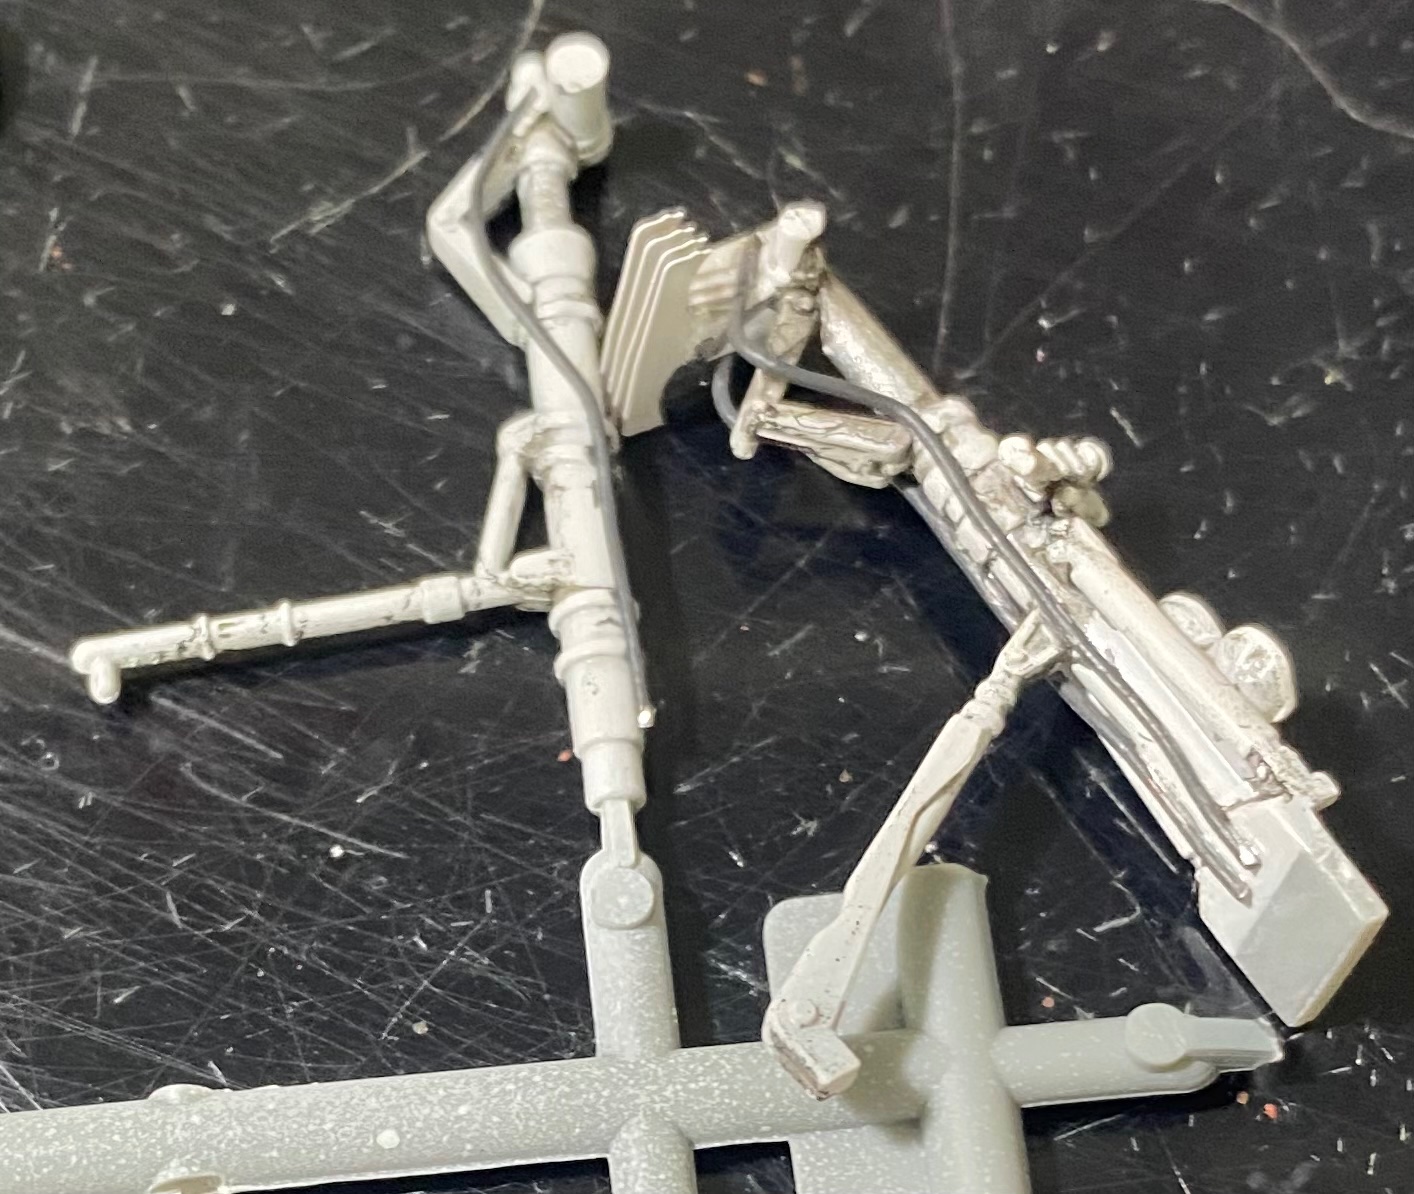
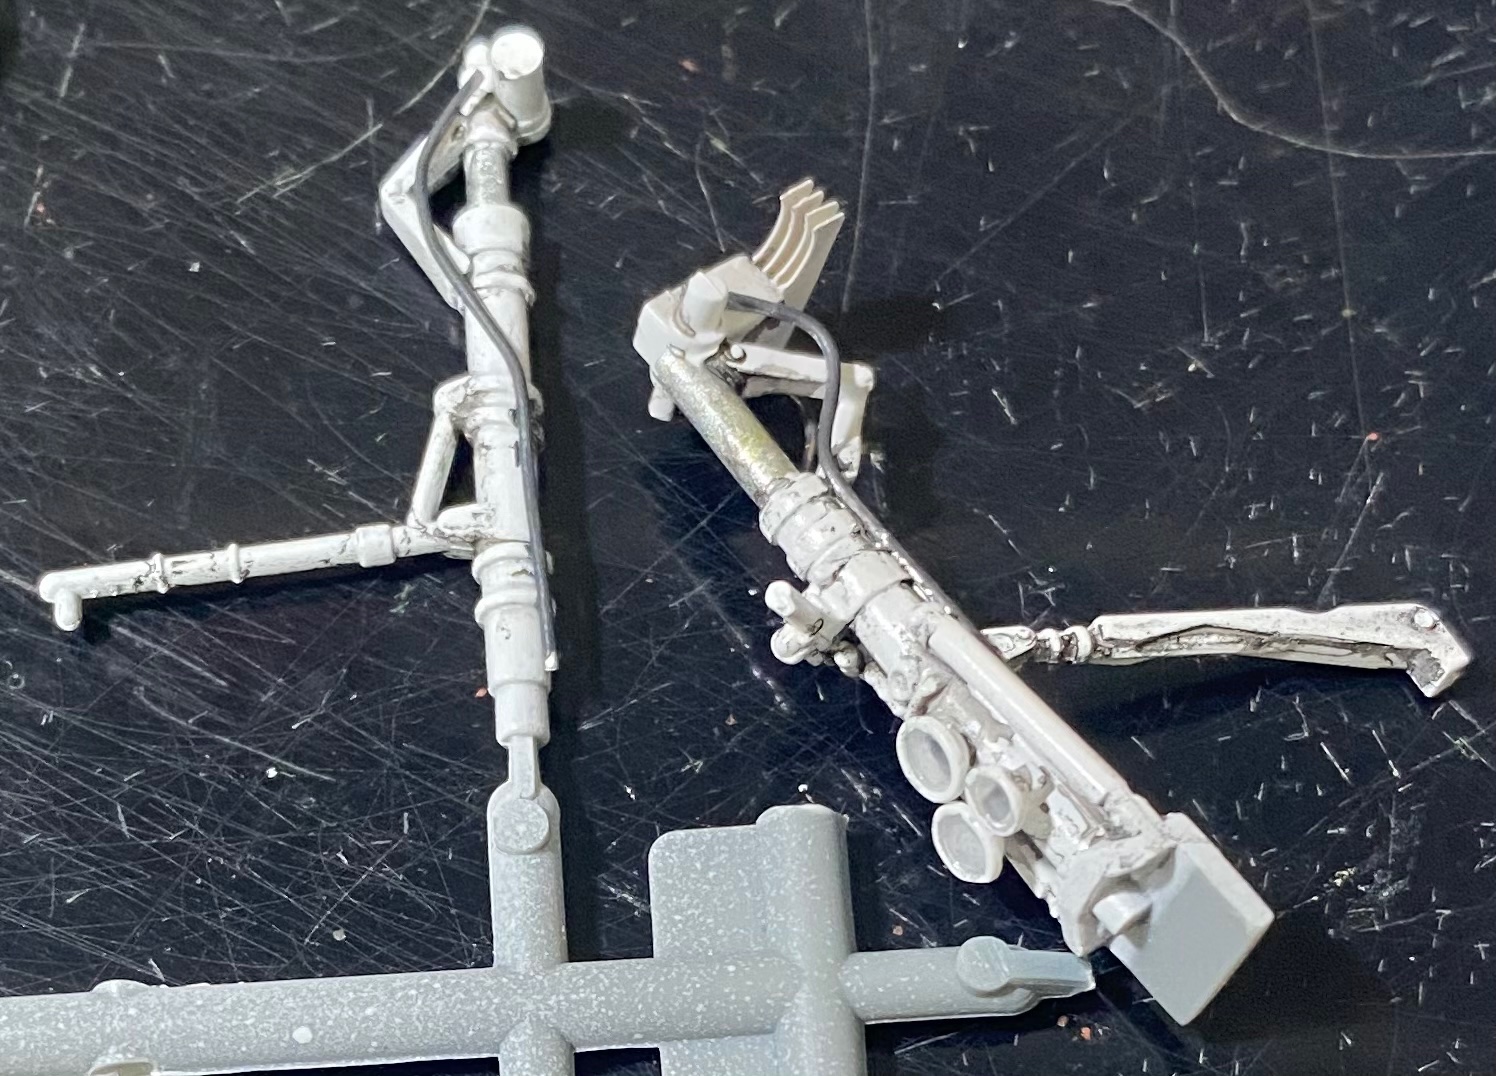
To dress up the kit LG a bit, added brake lines from .5mm lead wire.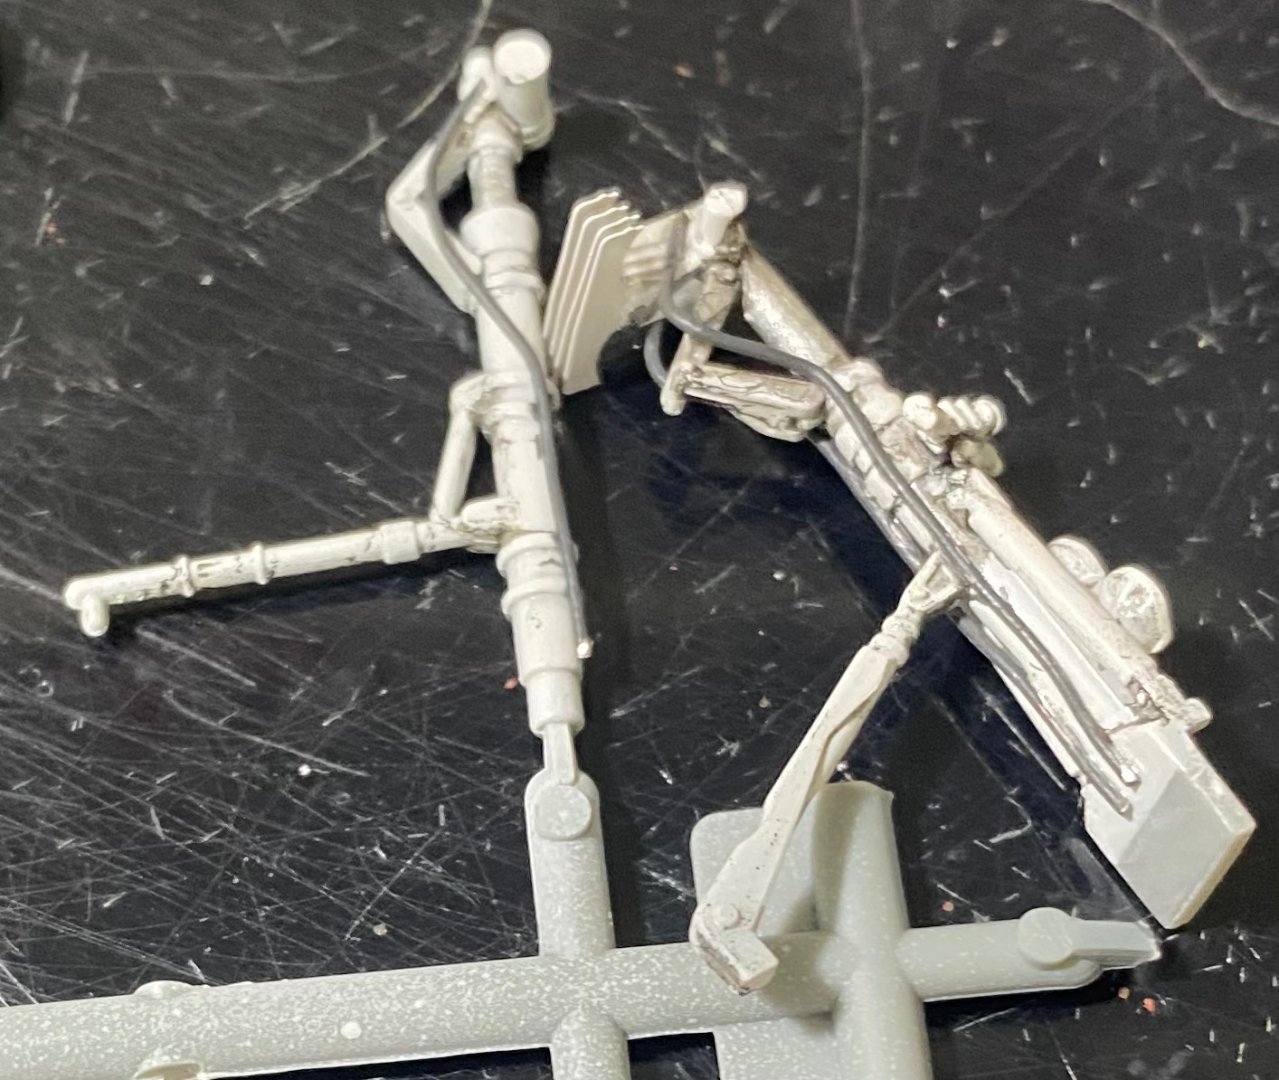


- 148 replies
-
- 10
-
-
Russian Su-33 Flanker D by CDW - FINISHED - Trumpeter - 1:72 Scale
CDW replied to CDW's topic in Non-ship/categorised builds
Not sure if he’s up to the task, but this pilot is in the driver’s seat.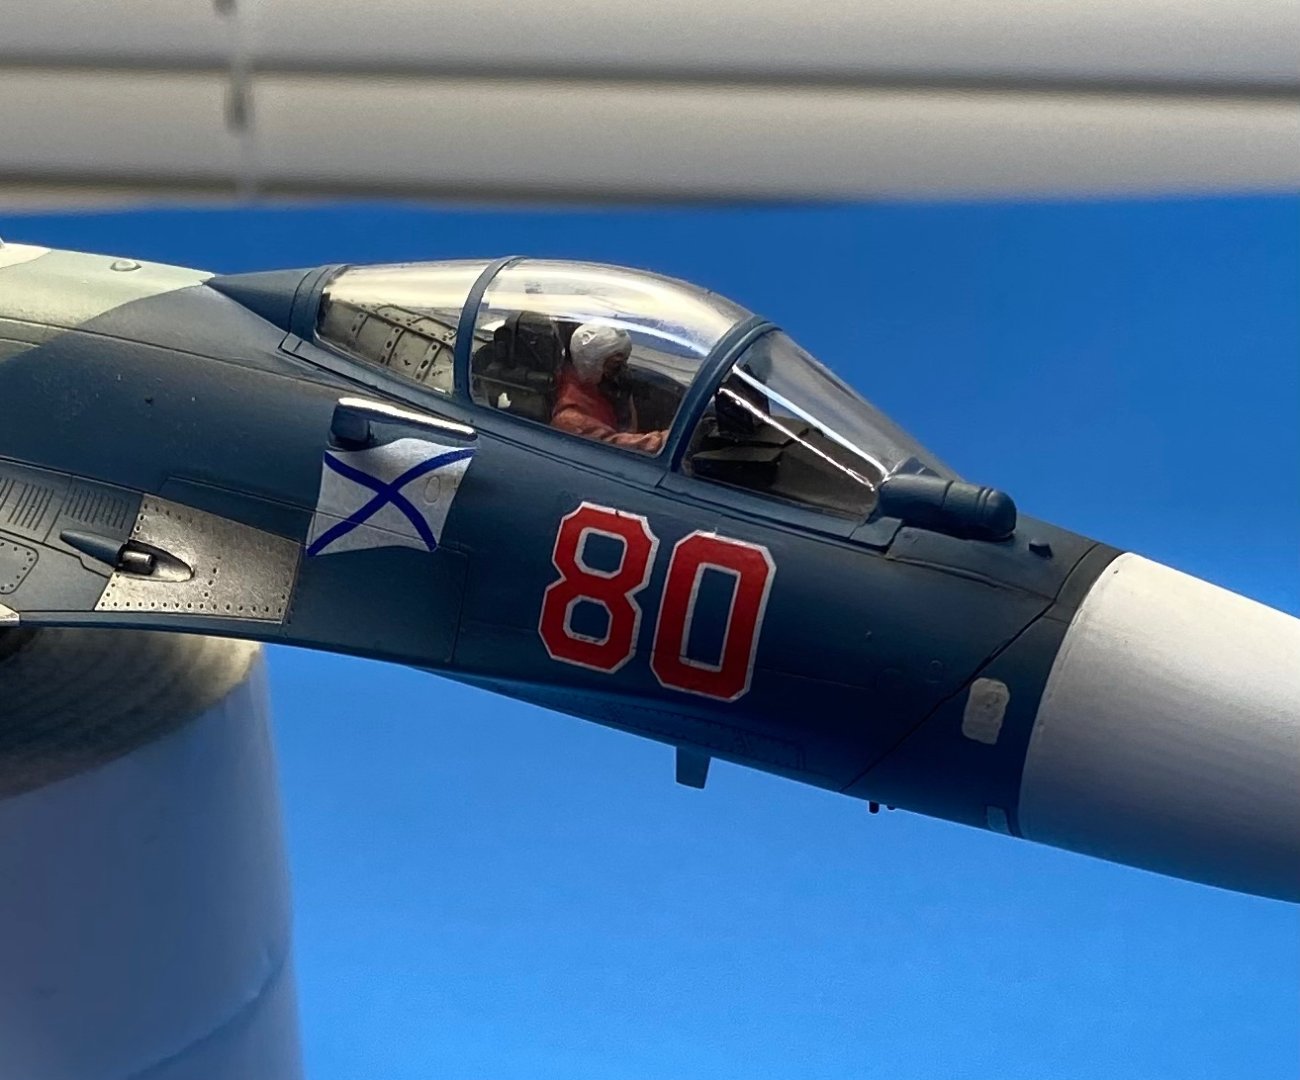
- 148 replies
-
- 11
-
-
Russian Su-33 Flanker D by CDW - FINISHED - Trumpeter - 1:72 Scale
CDW replied to CDW's topic in Non-ship/categorised builds
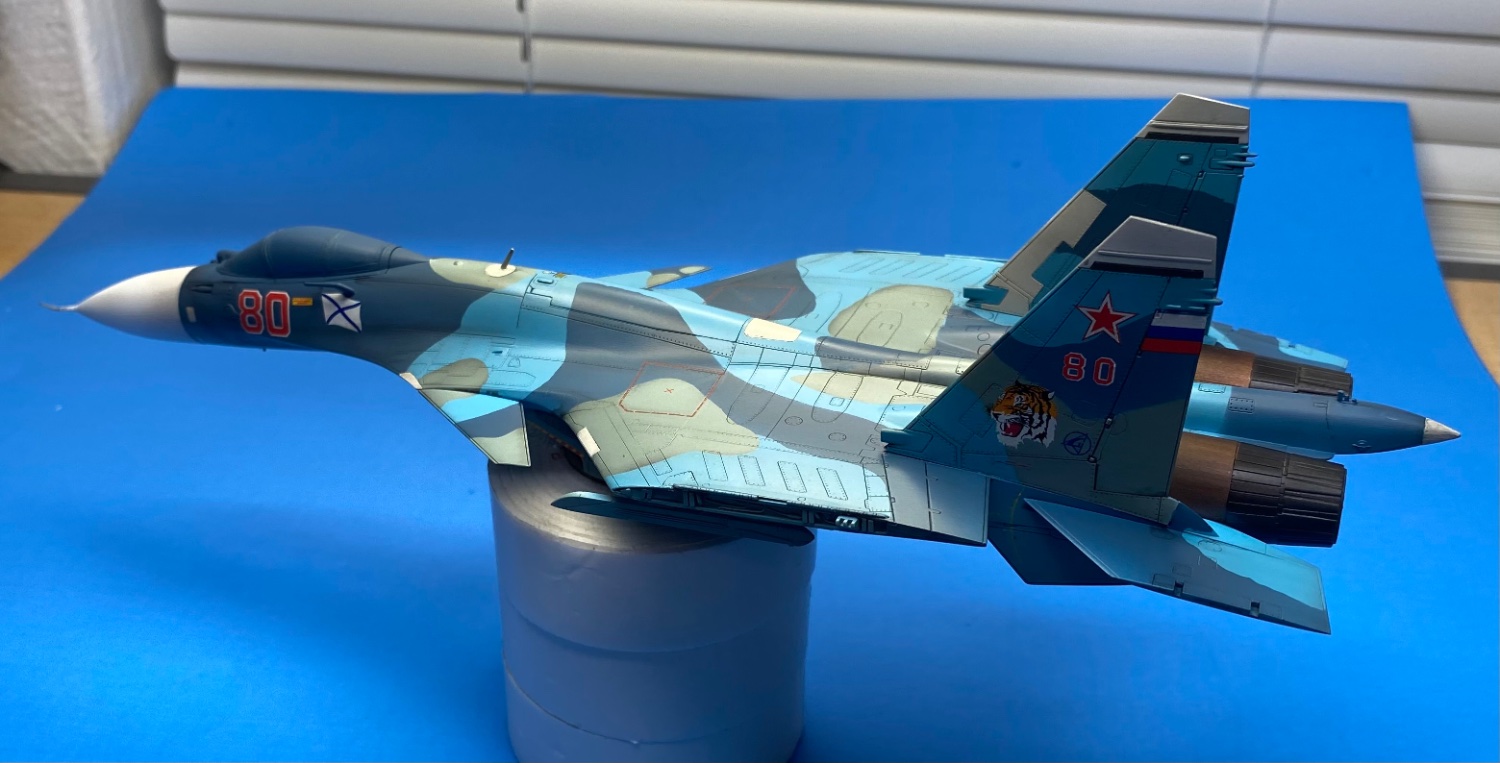
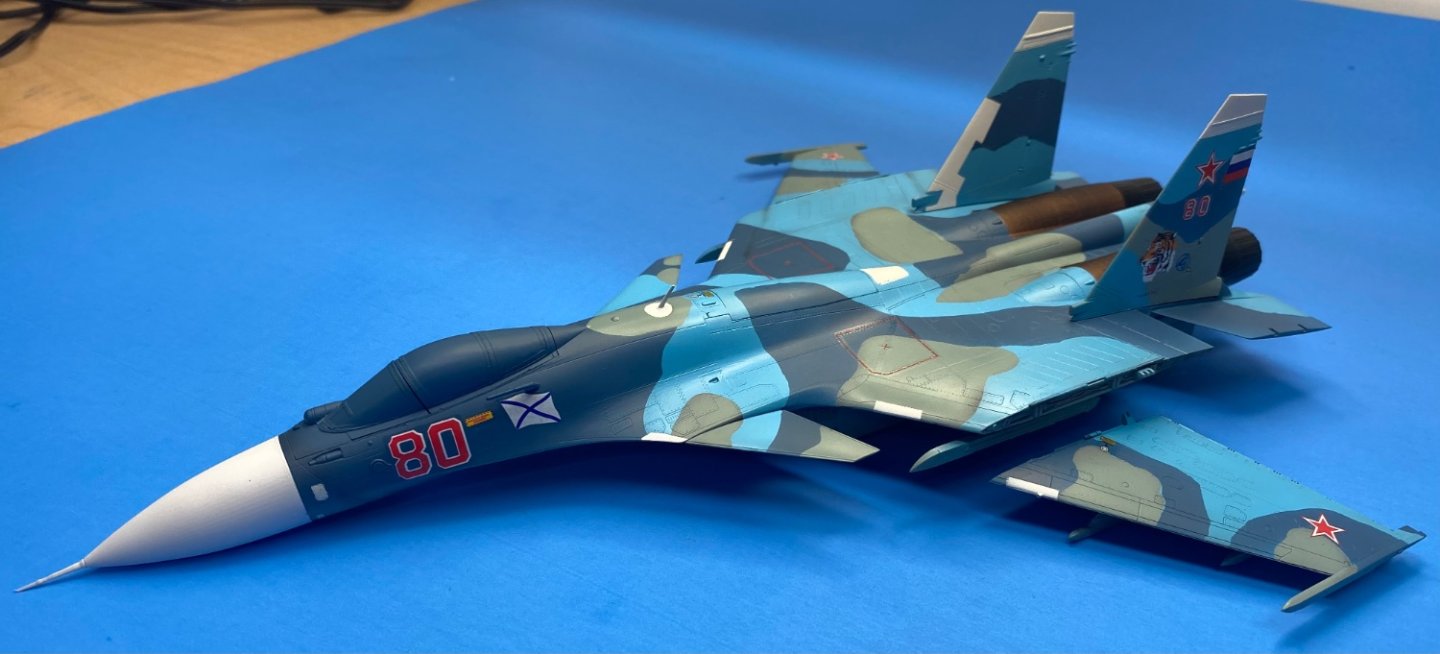
Thanks Ken. This being a naval fighter, it’s going to carry an interesting mix of air-to-surface missiles along with air-to-air and a data link pod. The Russians have the KH-59 cruise missiles, a slow, low flying missile, and the KH-31 hypersonic missiles designed to take out ships as well as ground targets. For air defense, R-77’s, R-27”s, and R-73”s. -
Russian Su-33 Flanker D by CDW - FINISHED - Trumpeter - 1:72 Scale
CDW replied to CDW's topic in Non-ship/categorised builds
Thanks Alan. It has been a lot of fun doing it. -
Russian Su-33 Flanker D by CDW - FINISHED - Trumpeter - 1:72 Scale
CDW replied to CDW's topic in Non-ship/categorised builds

-
Russian Su-33 Flanker D by CDW - FINISHED - Trumpeter - 1:72 Scale
CDW replied to CDW's topic in Non-ship/categorised builds
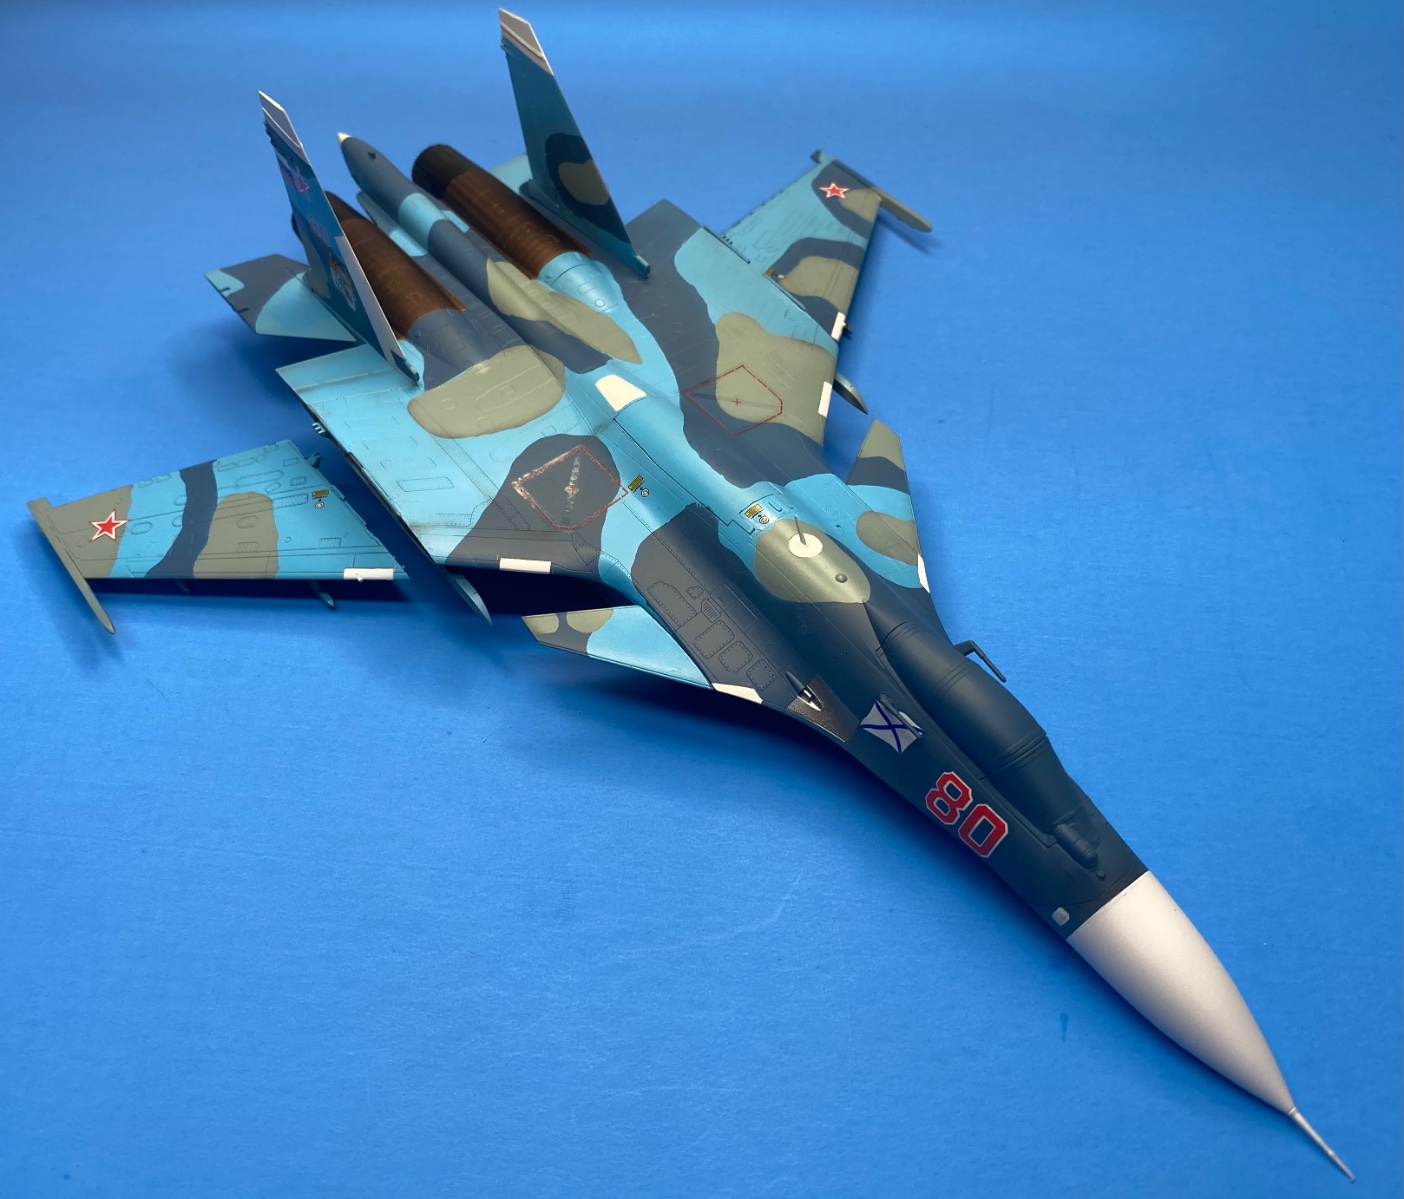
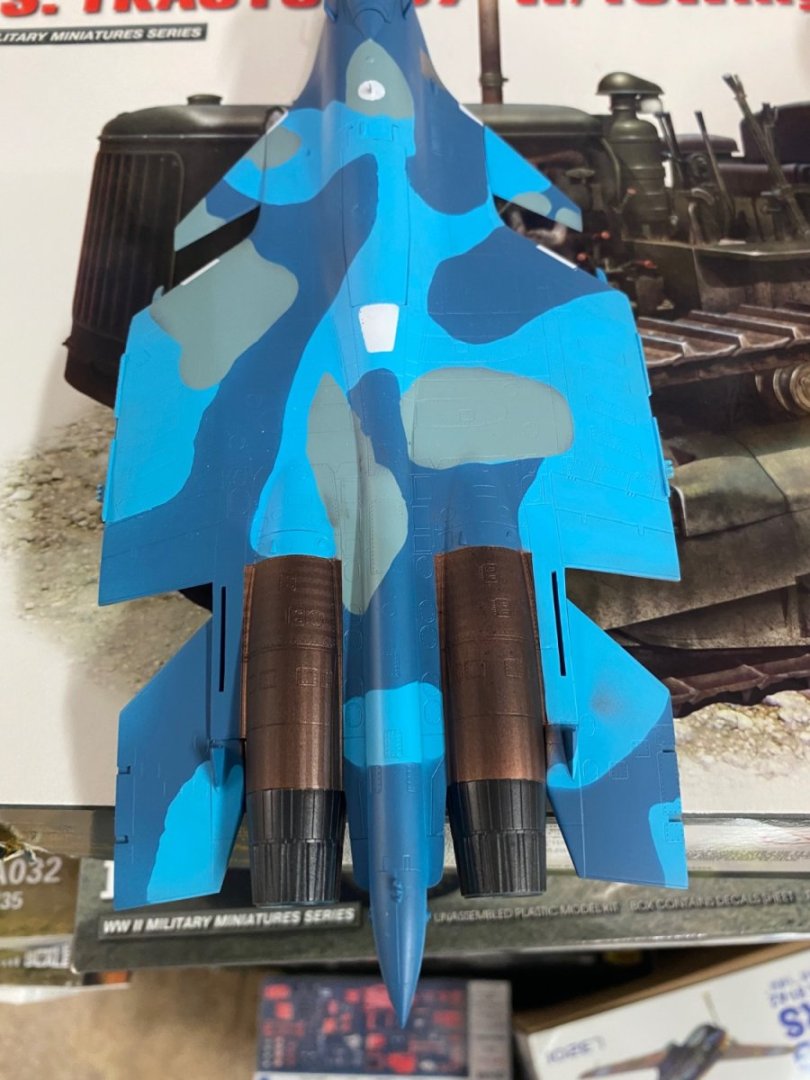
Feels good to finally have the tail feathers glued on.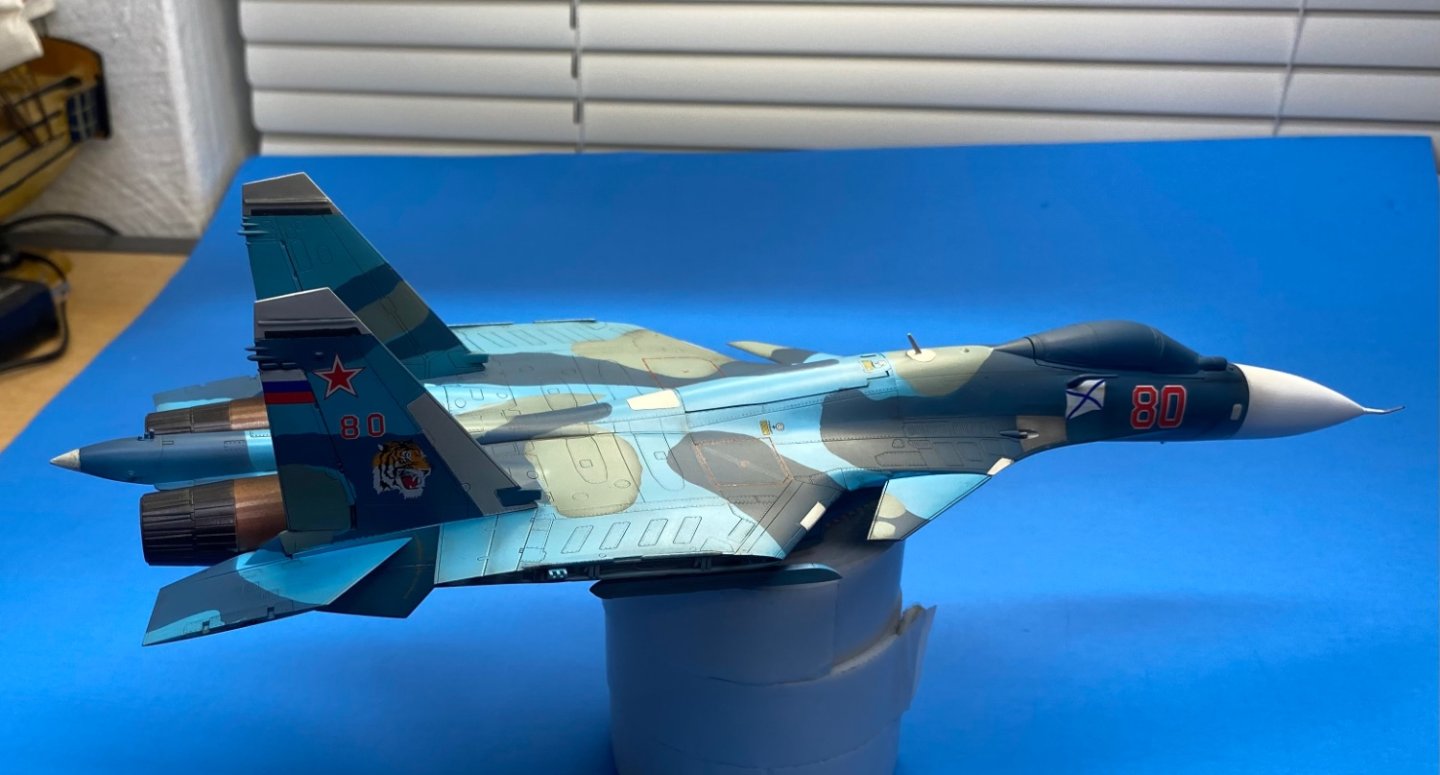

- 148 replies
-
- 11
-
-
-
Russian Su-33 Flanker D by CDW - FINISHED - Trumpeter - 1:72 Scale
CDW replied to CDW's topic in Non-ship/categorised builds
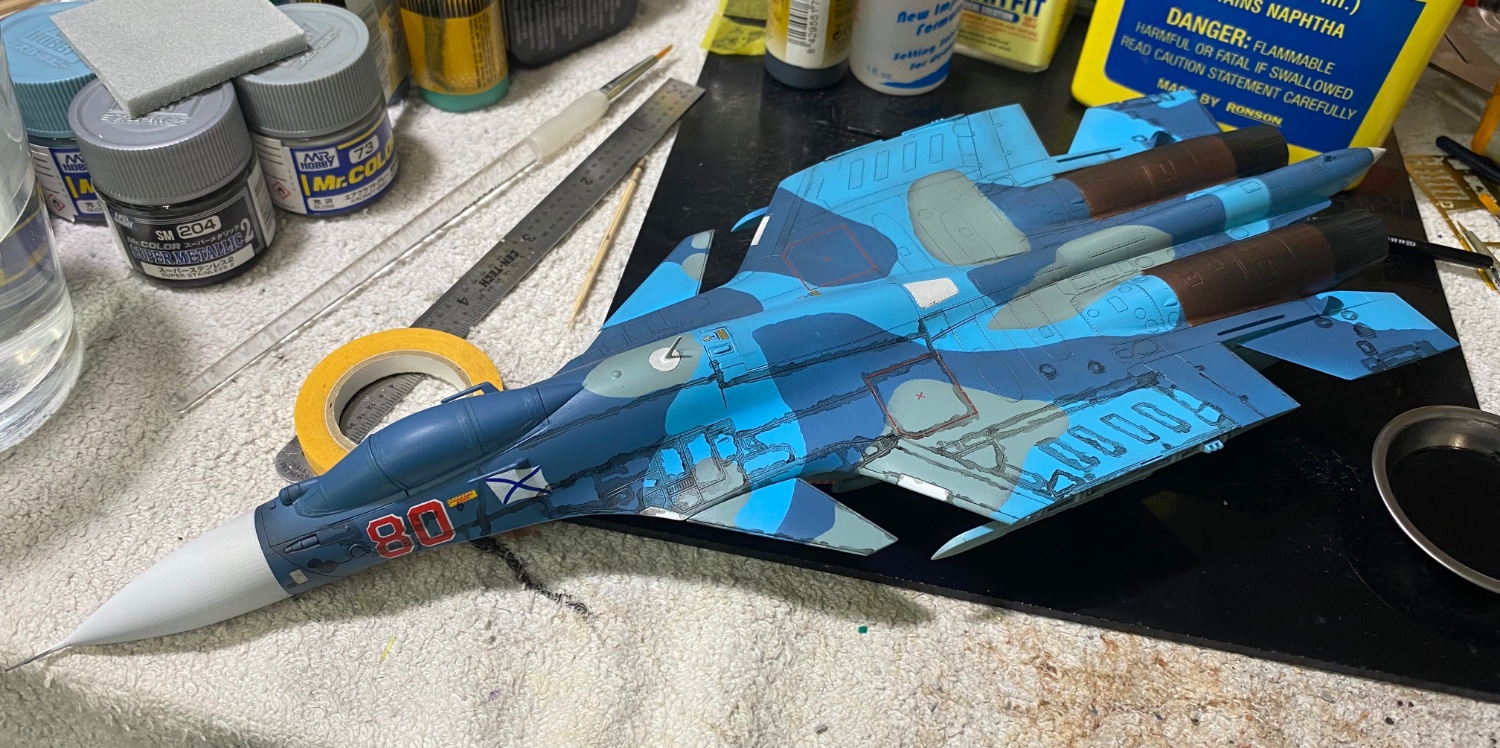
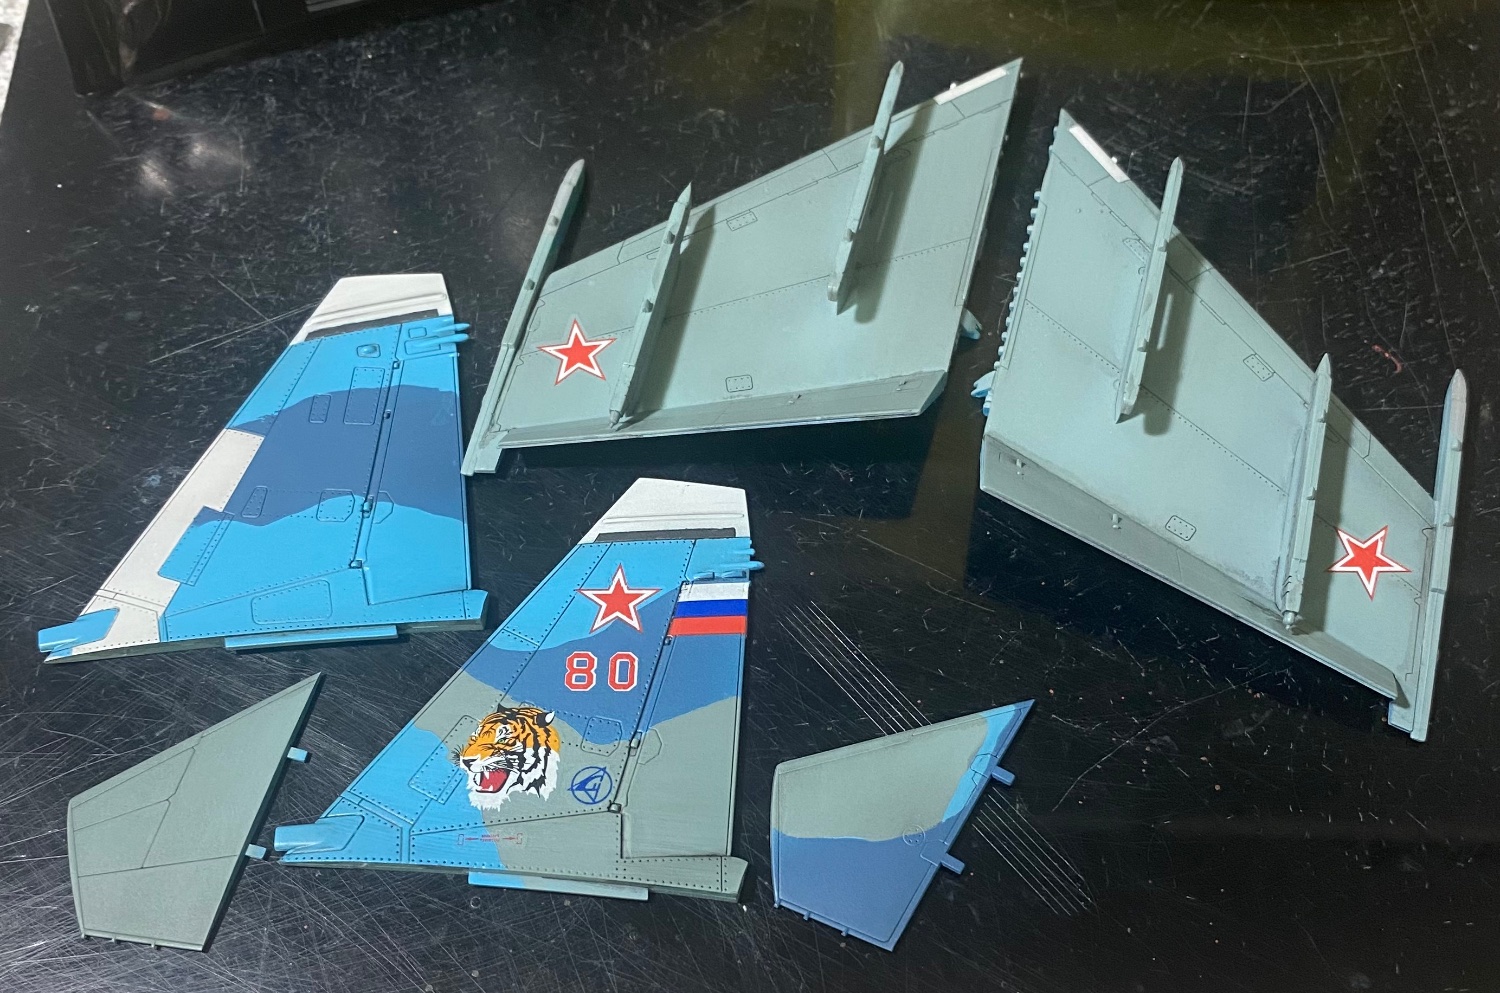
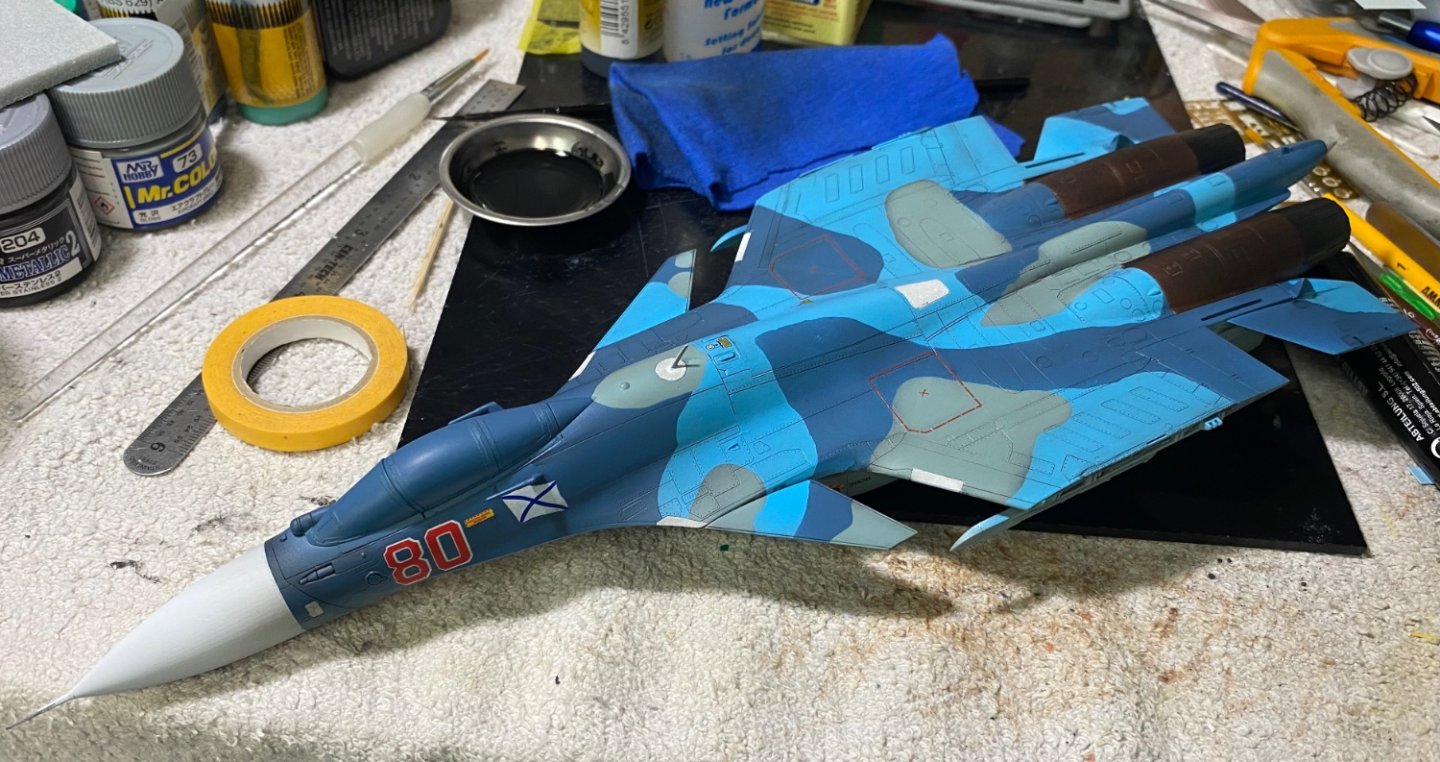
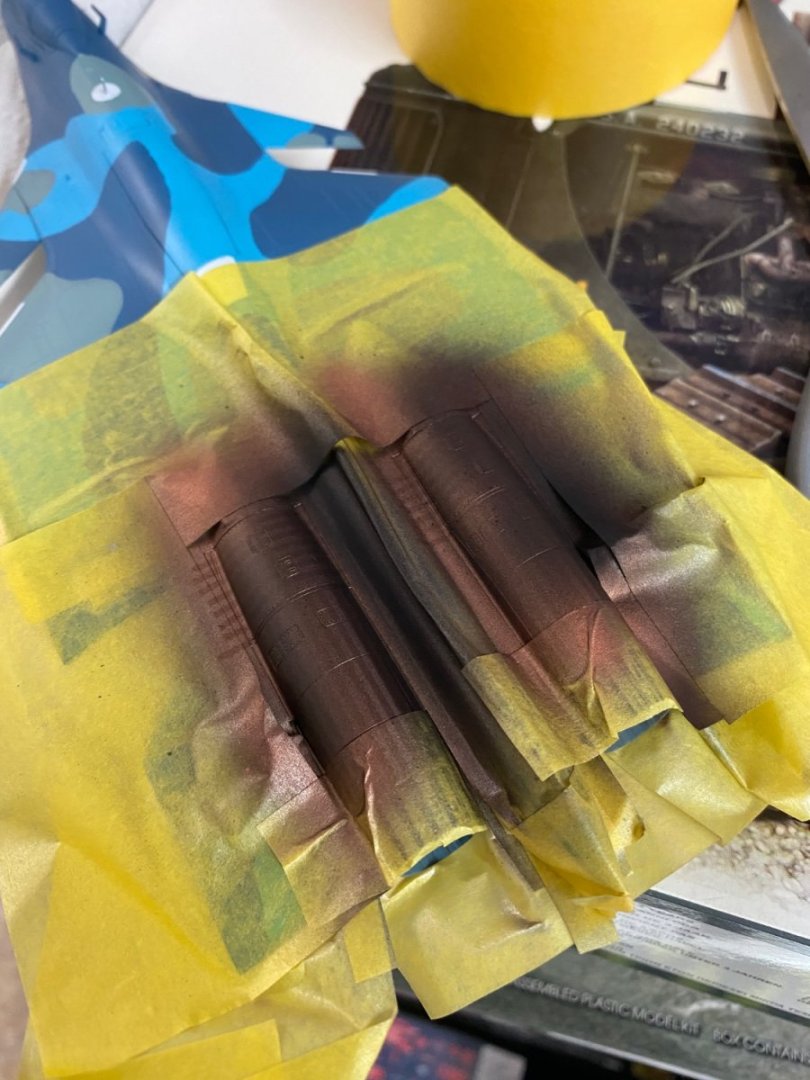
This wraps up the panel line wash and weathering. A few touchups needed here and there. Broke a couple of small parts and will need to replace them.

-
Russian Su-33 Flanker D by CDW - FINISHED - Trumpeter - 1:72 Scale
CDW replied to CDW's topic in Non-ship/categorised builds
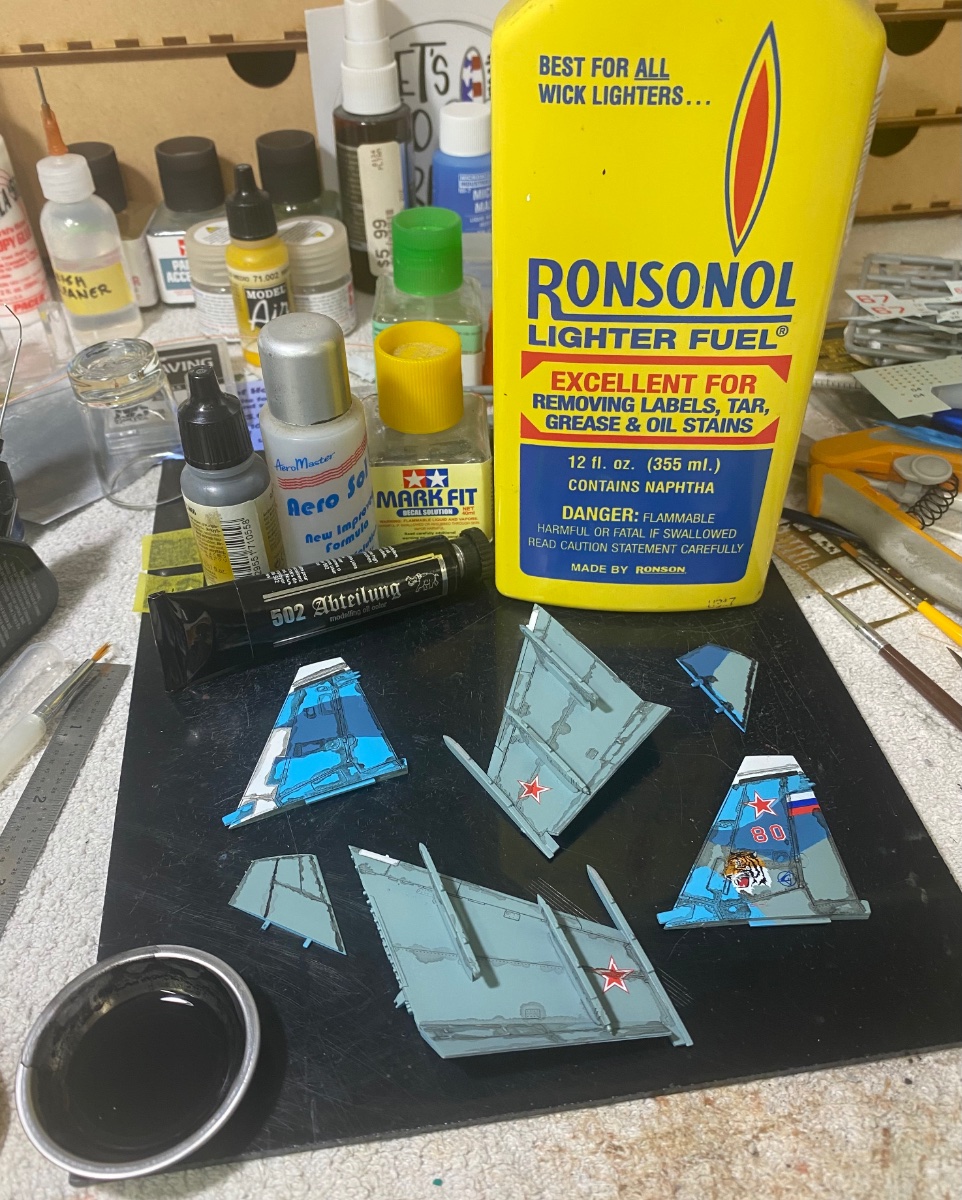
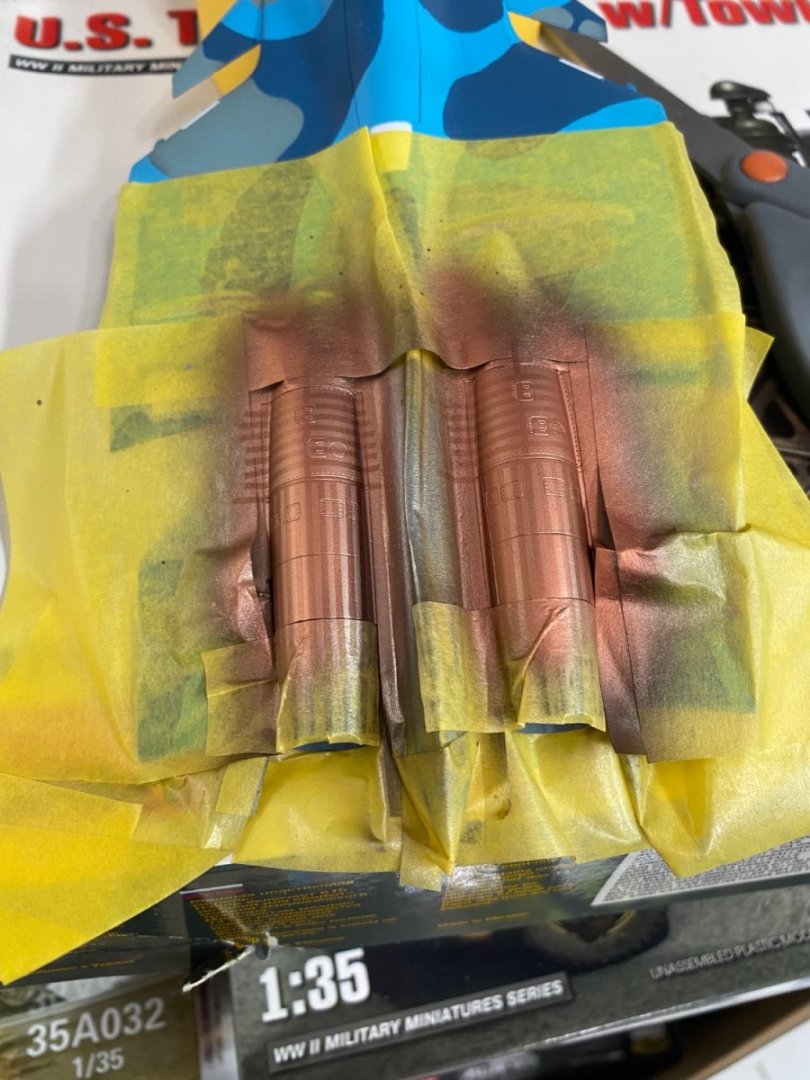
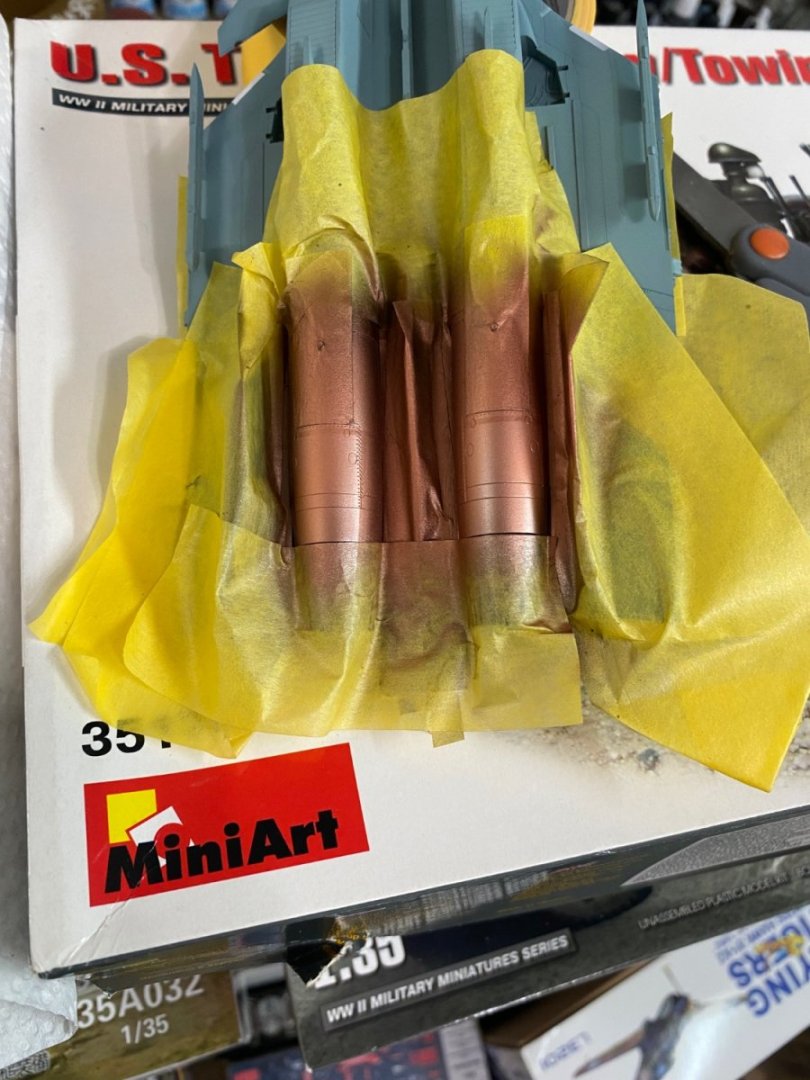
Thanks OC The ingredients for an oil panel line wash Lightly dampen a rag with white spirits and give it all a good wipe down (in the direction of airflow) There are various products one could use to reduce artist oils for the panel wash, but here I chose lighter fluid. Besides being an excellent product to reduce the oil, it contains naptha which dries more quickly than other products such as white spirits. It's a builder's choice, whatever works well for you, use it.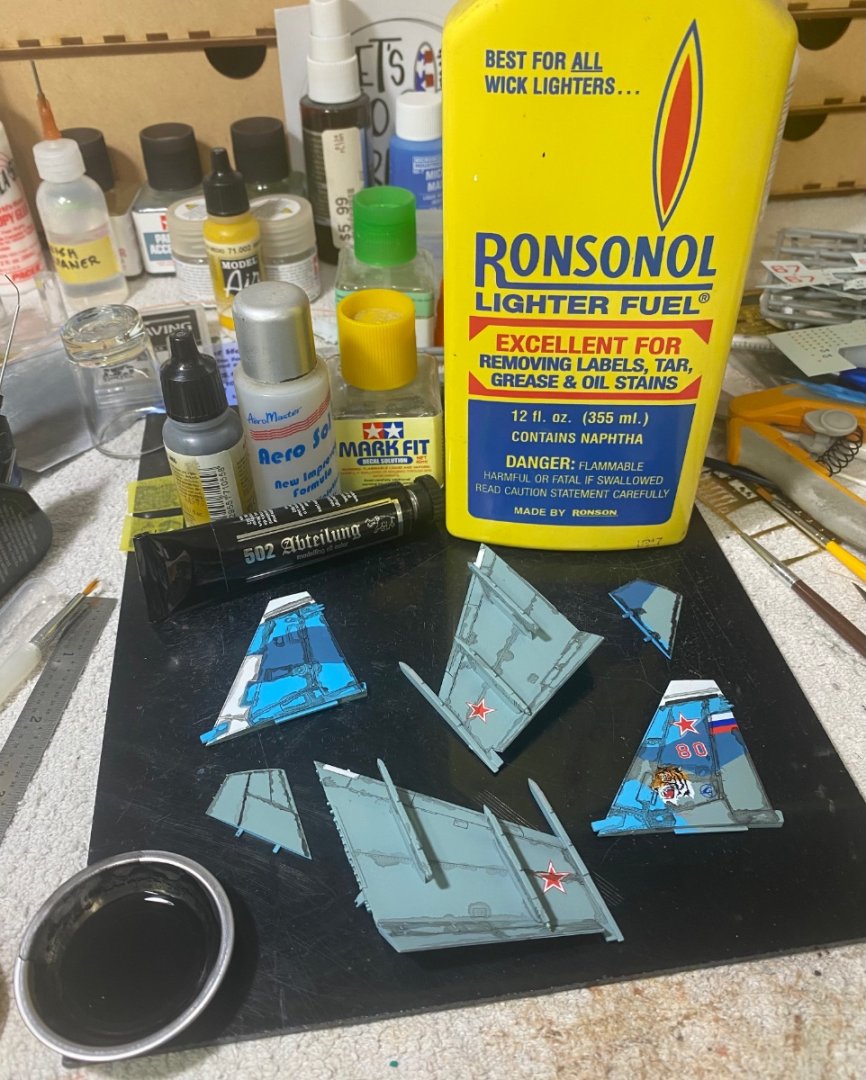

-
Russian Su-33 Flanker D by CDW - FINISHED - Trumpeter - 1:72 Scale
CDW replied to CDW's topic in Non-ship/categorised builds
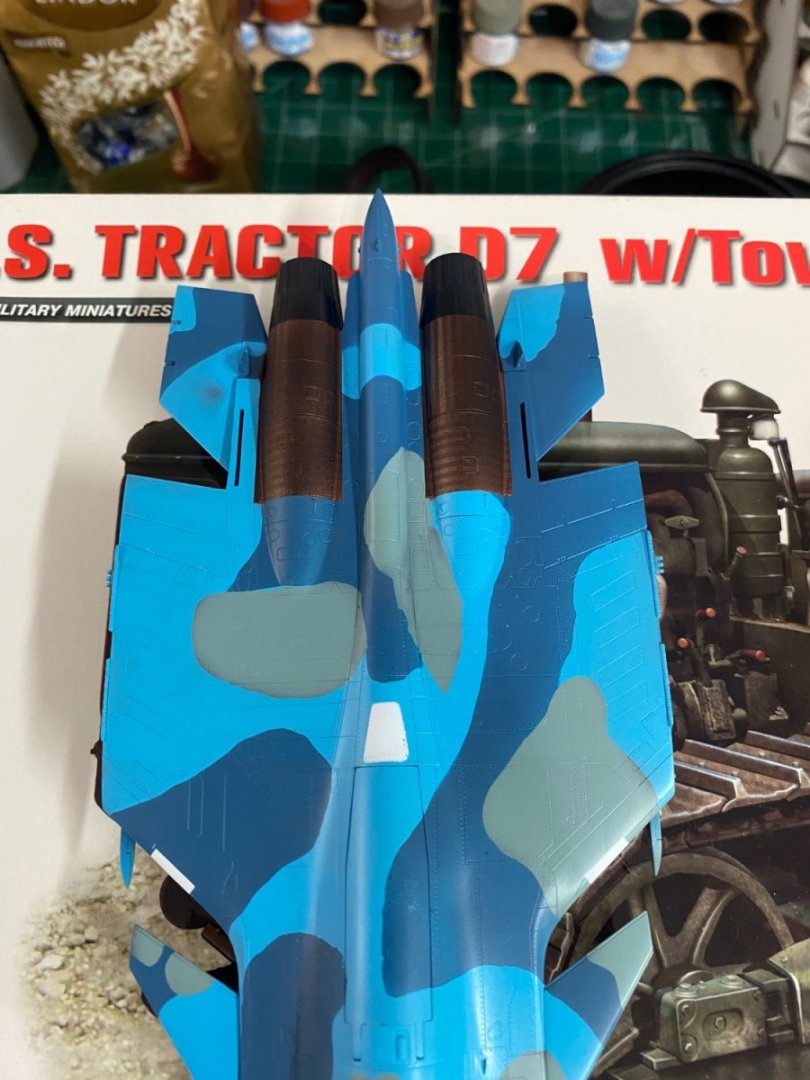
Thanks EG. I learned that technique from a fellow modeler a few years ago. I should have mentioned the metallic colors used were lacquers. Alclad II and Mr Color. The Mr Color copper color was highly reduced to keep it somewhat translucent. Of course the Alclad colors are translucent straight from the bottle. One day I am going to try this technique using acrylics but on something scrap, first. Not sure about getting a translucent finish using acrylics. I put on all the decals I intend to use on the airframe then applied some Solvaset. Will let them thoroughly dry before proceeding with panel lines detail. There remain a LOT of weapons needing detail painting and decals as well as the landing gear and doors. Fun 🤩


- 148 replies
-
- 12
-
-

-
-
Russian Su-33 Flanker D by CDW - FINISHED - Trumpeter - 1:72 Scale
CDW replied to CDW's topic in Non-ship/categorised builds
Thanks OC. It’s been fun -
I saw where Model Expo is offering this kit for $399 on their website. Seems a fair price for something like this IMO. For those who want upgraded details but are put off by the cost, I just noticed that the Pontos update set for the 1:200 USS Enterprise is a mere $549, and that's more than the cost of the model kit itself which sells for about $475. Hey, it is what it is.
-
Russian Su-33 Flanker D by CDW - FINISHED - Trumpeter - 1:72 Scale
CDW replied to CDW's topic in Non-ship/categorised builds
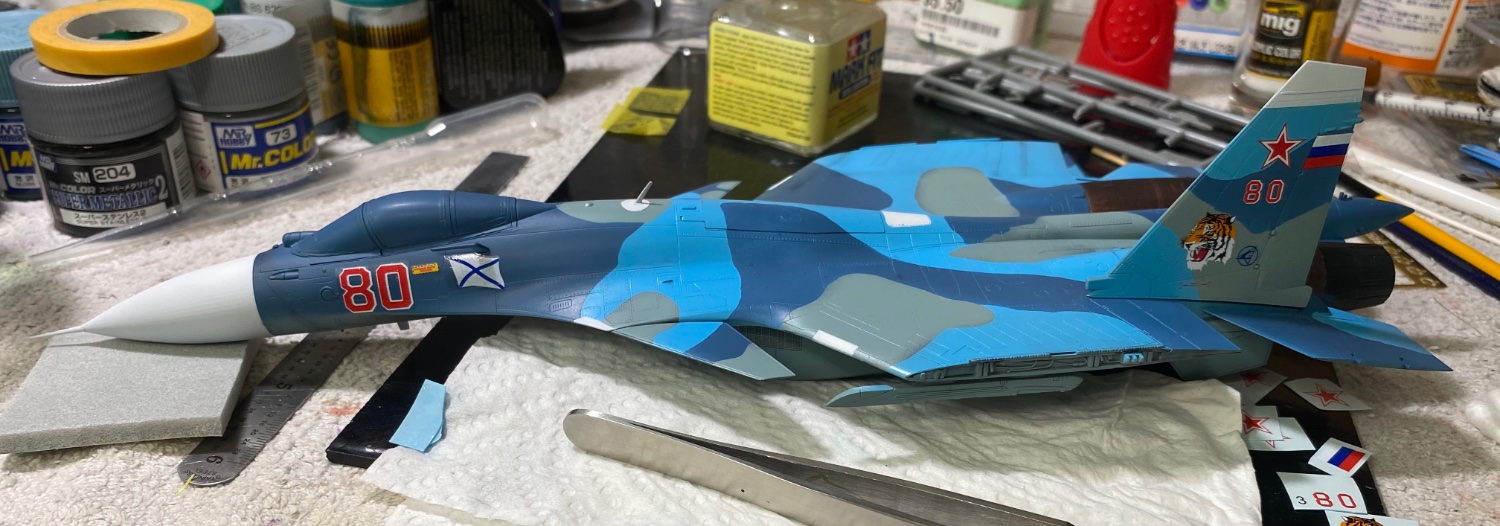
Thanks Ken. Its decal time.
- 148 replies
-
- 11
-
-
Russian Su-33 Flanker D by CDW - FINISHED - Trumpeter - 1:72 Scale
CDW replied to CDW's topic in Non-ship/categorised builds
- 148 replies
-
- 13
-
-
Russian Su-33 Flanker D by CDW - FINISHED - Trumpeter - 1:72 Scale
CDW replied to CDW's topic in Non-ship/categorised builds
- 148 replies
-
- 11
-
-
-
Russian Su-33 Flanker D by CDW - FINISHED - Trumpeter - 1:72 Scale
CDW replied to CDW's topic in Non-ship/categorised builds

- 148 replies
-
- 10
-
-
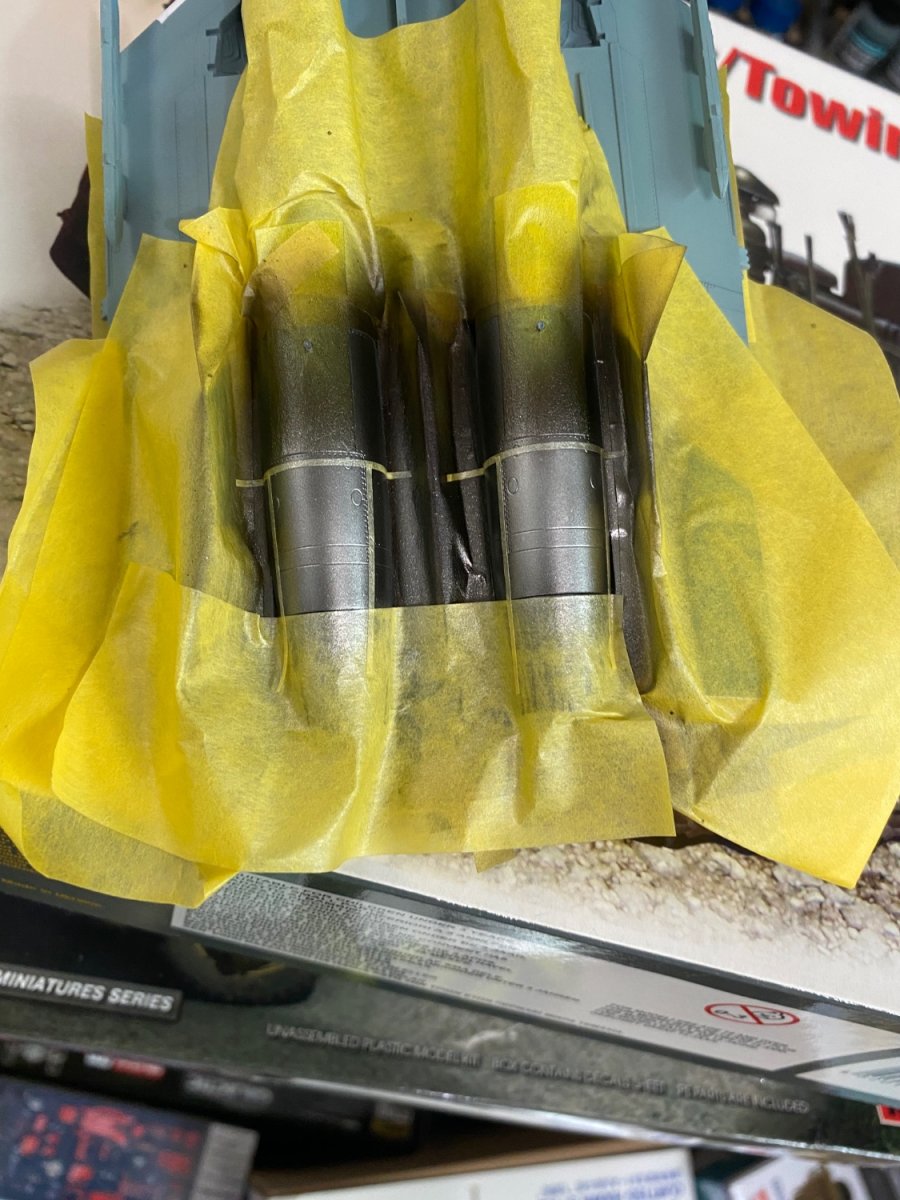
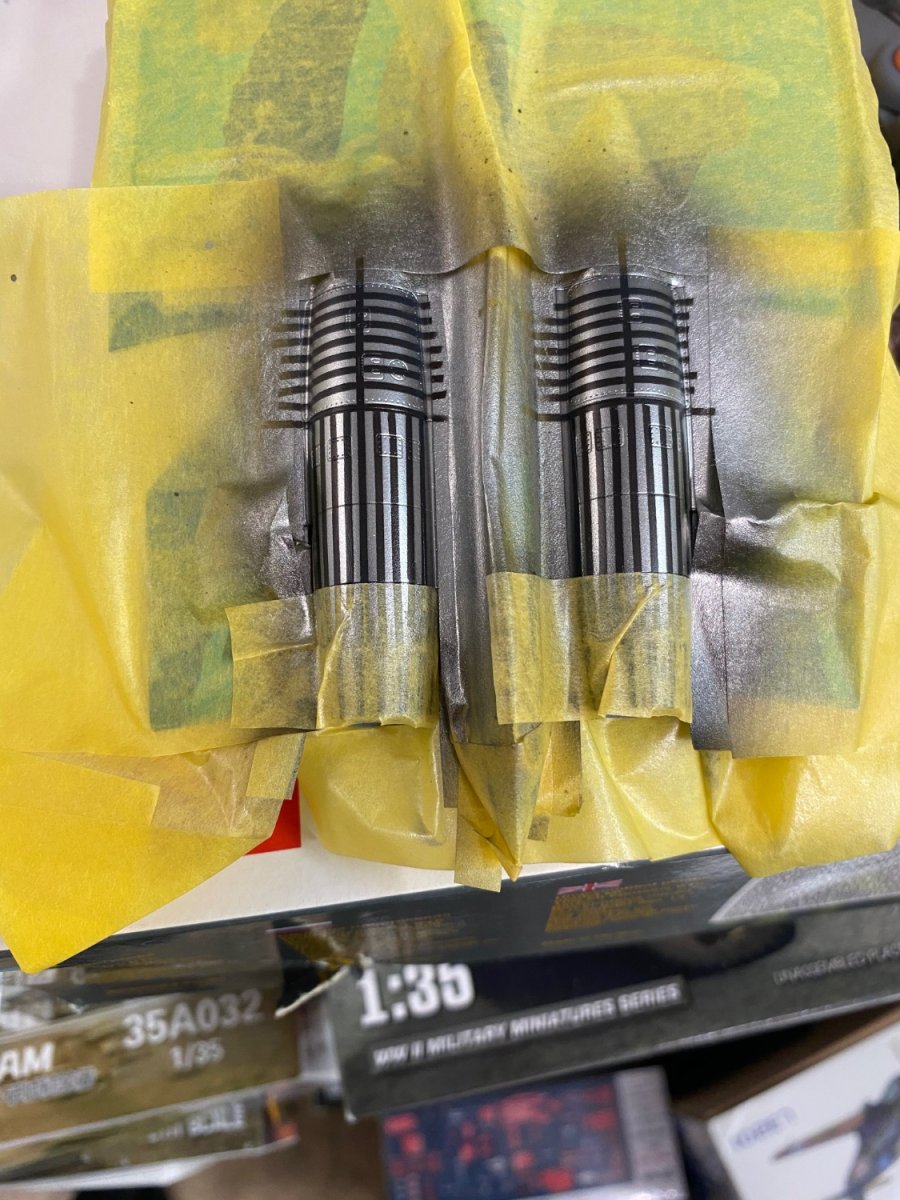
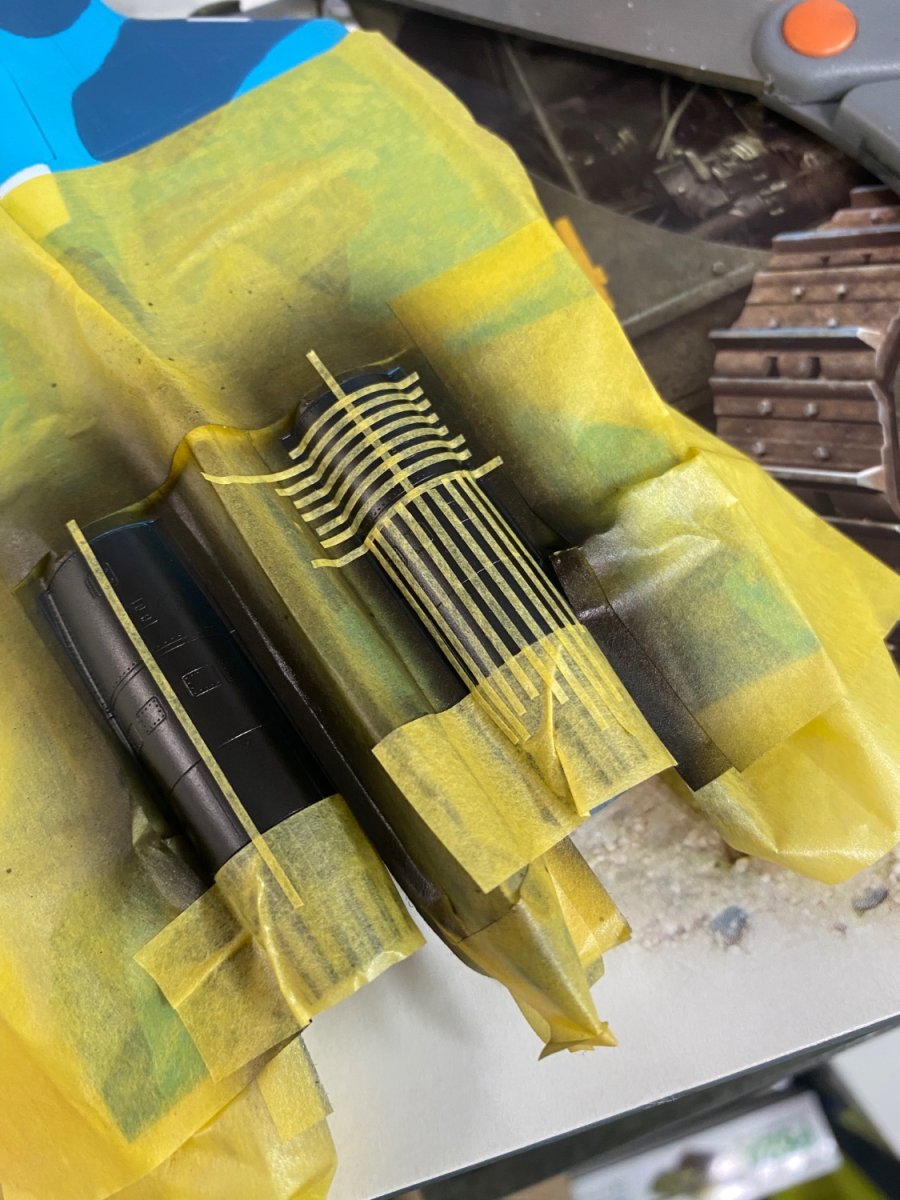
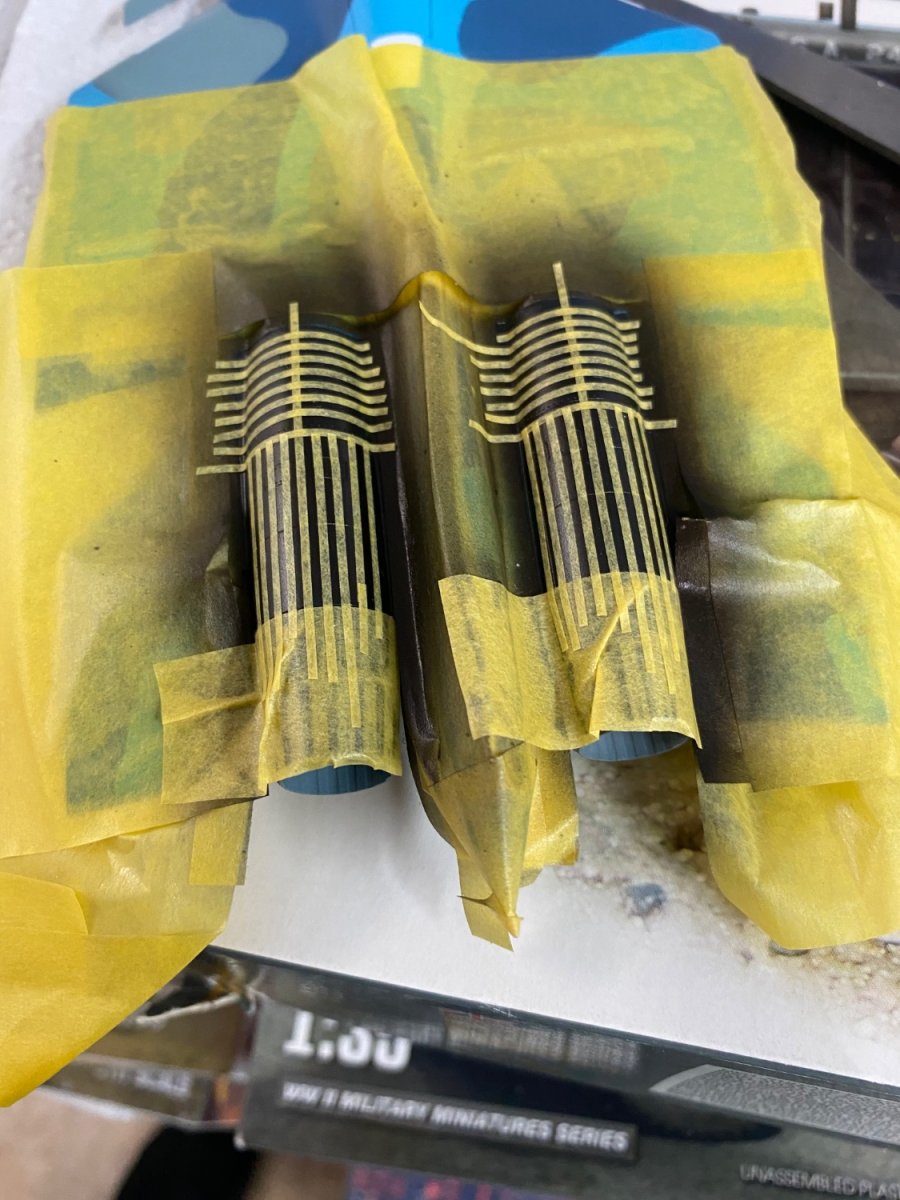
Russian Su-33 Flanker D by CDW - FINISHED - Trumpeter - 1:72 Scale
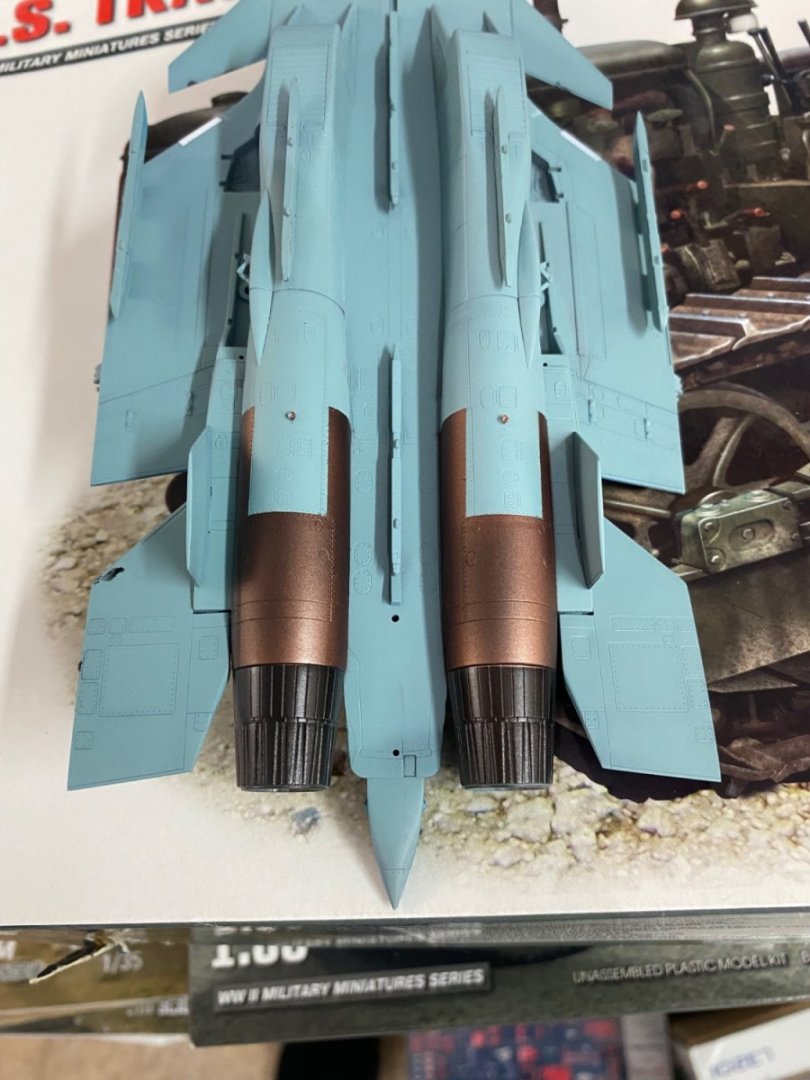
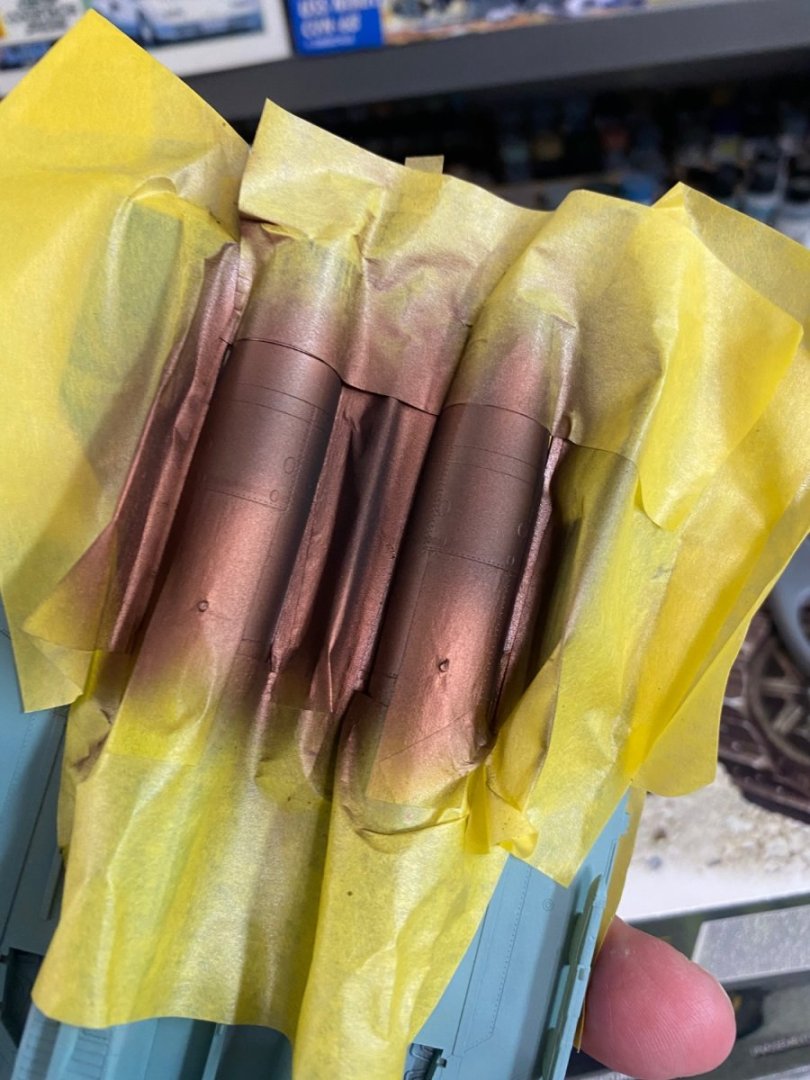
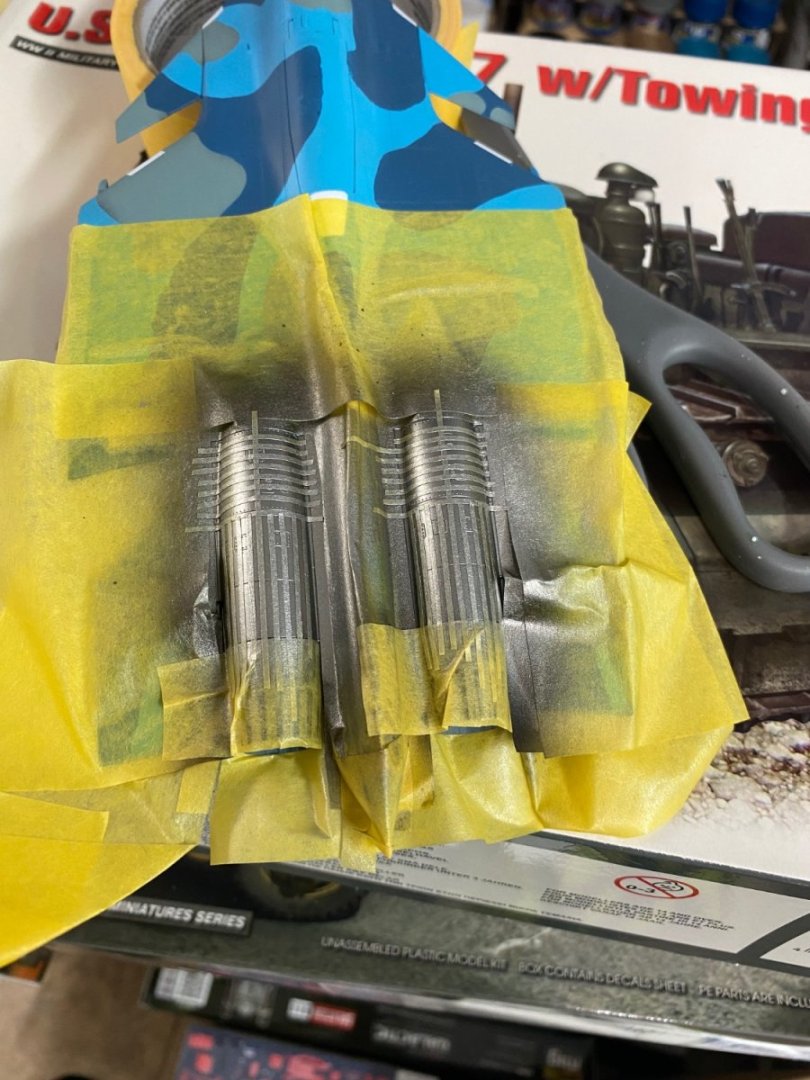
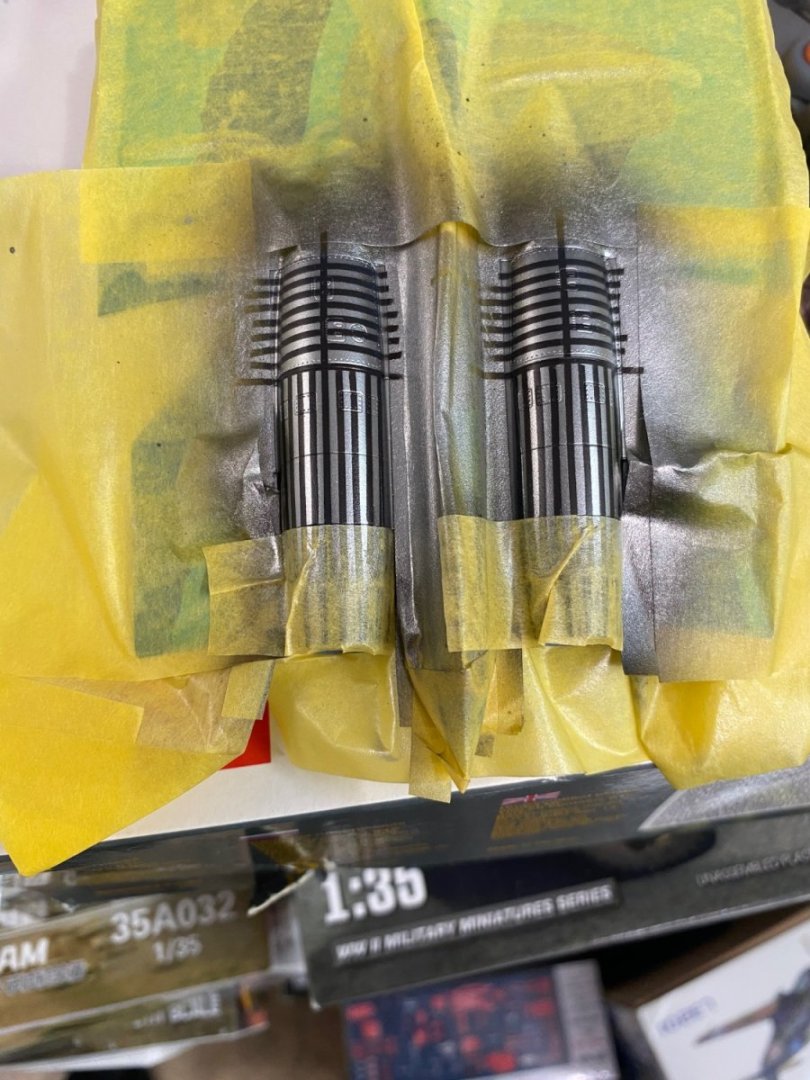
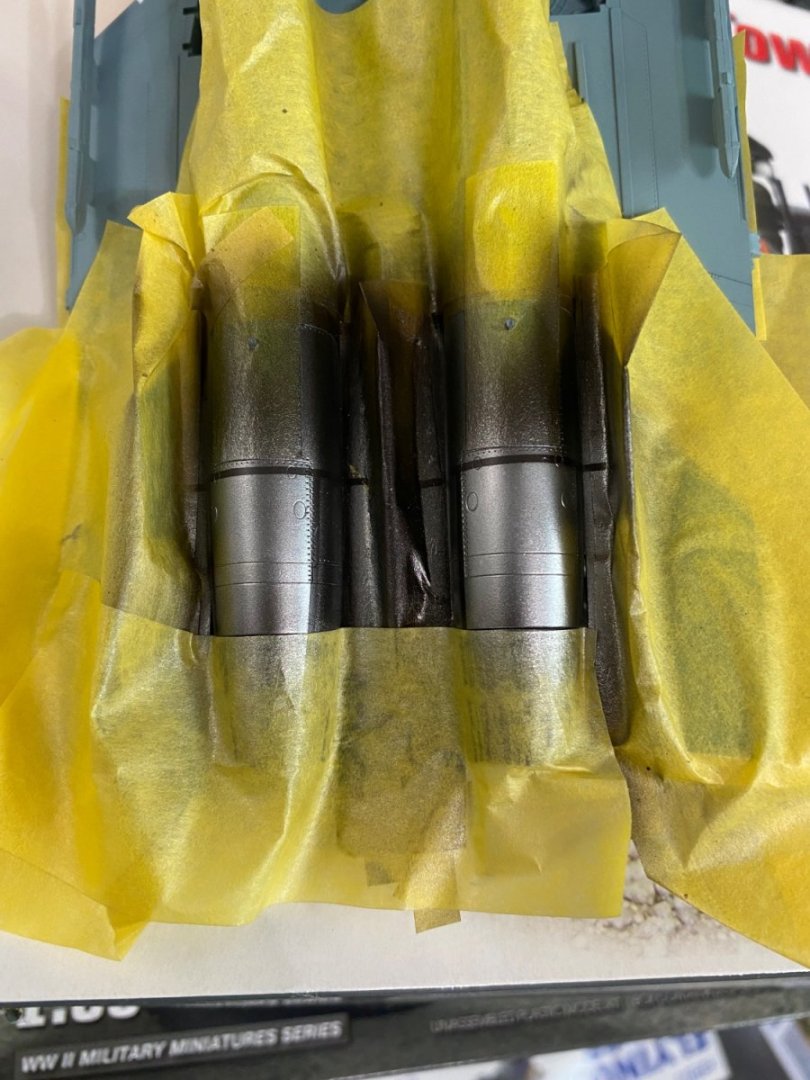
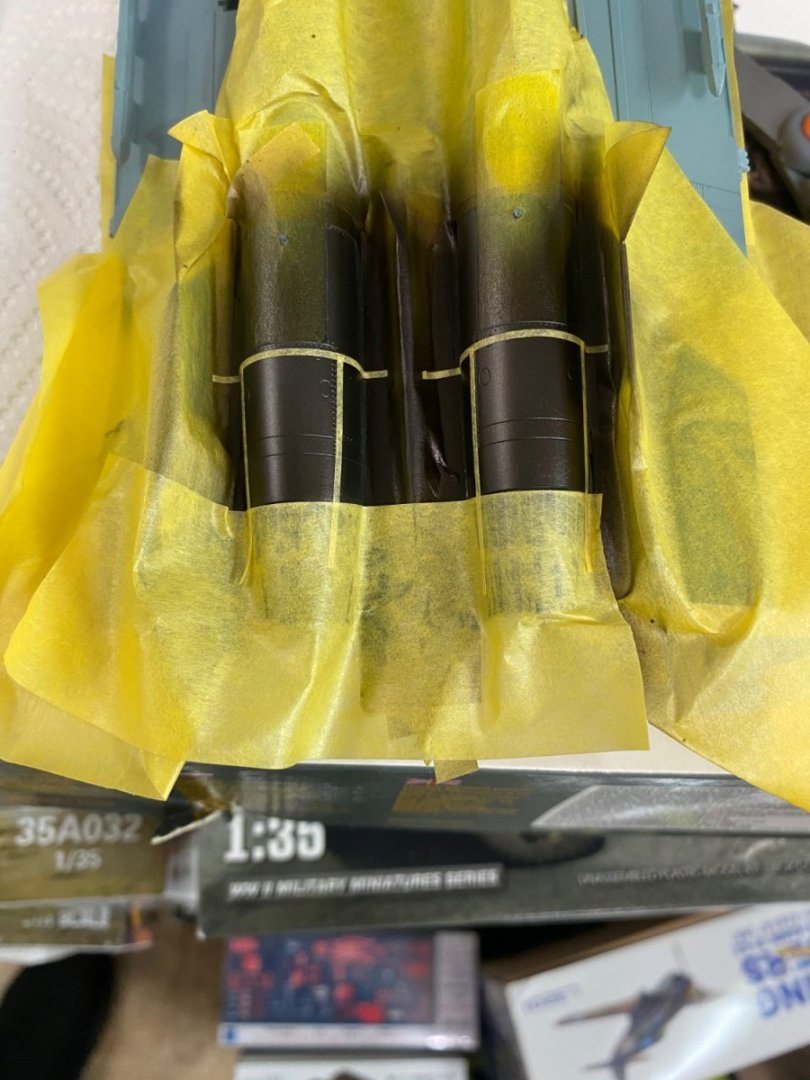
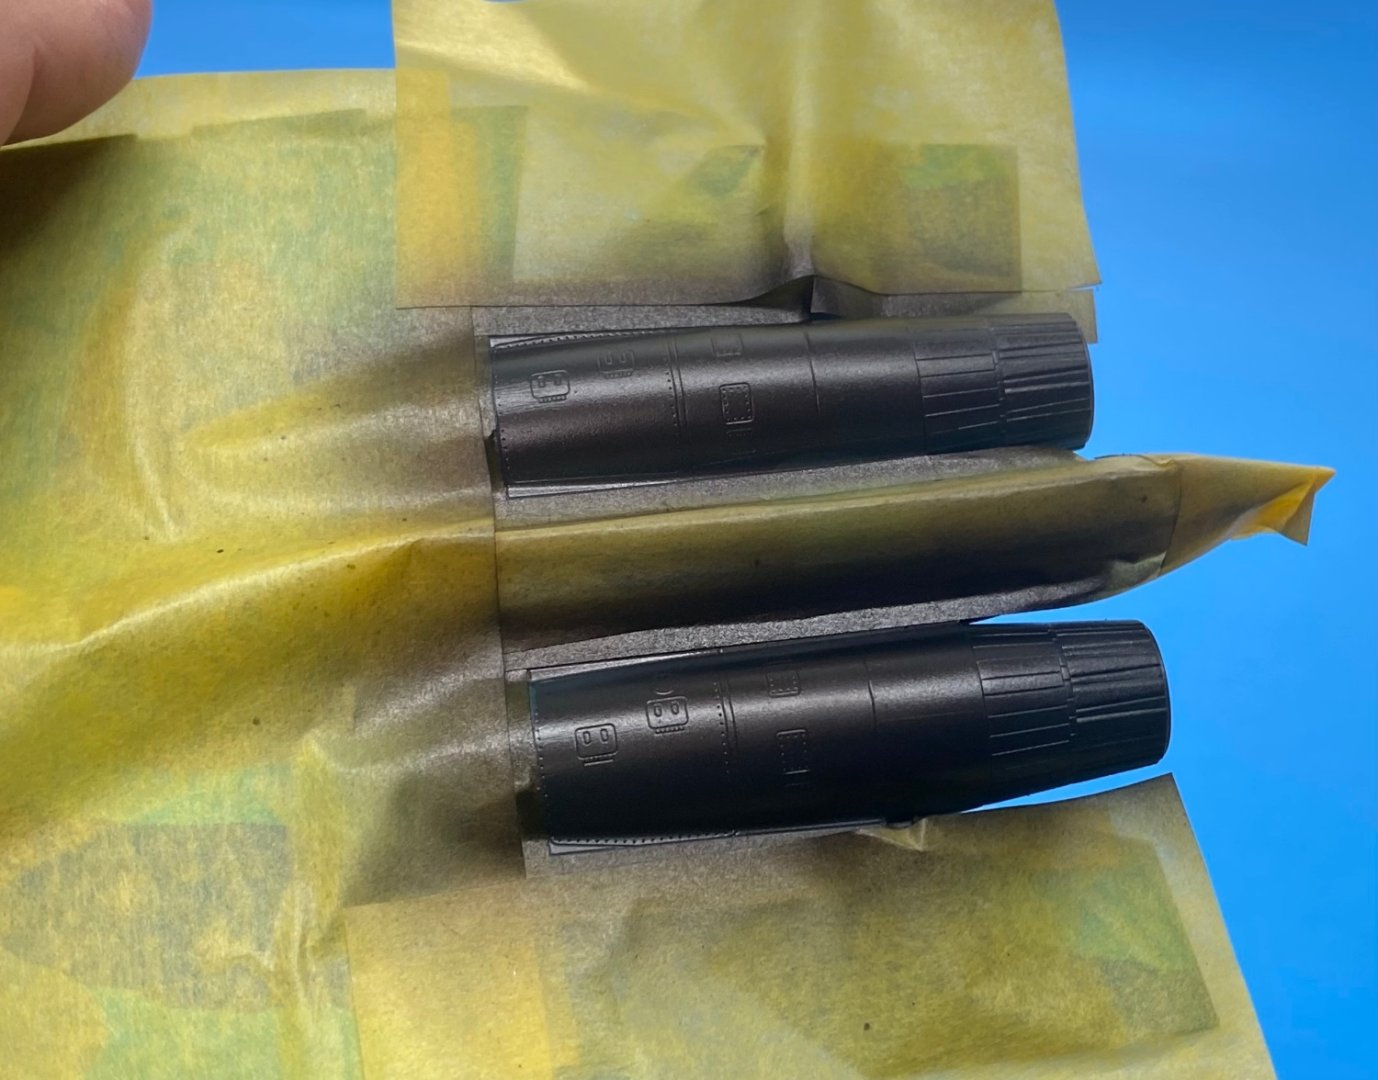
CDW replied to CDW's topic in Non-ship/categorised builds
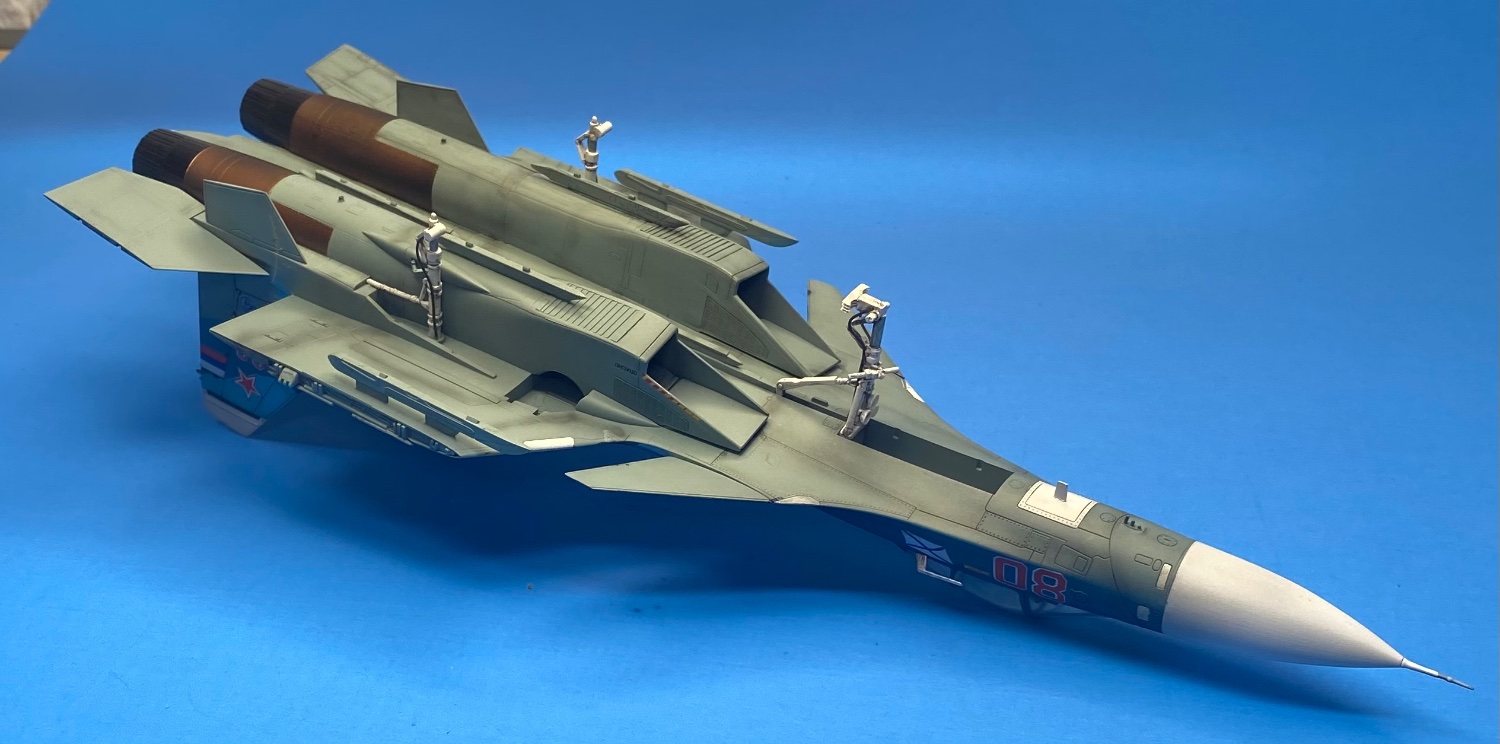
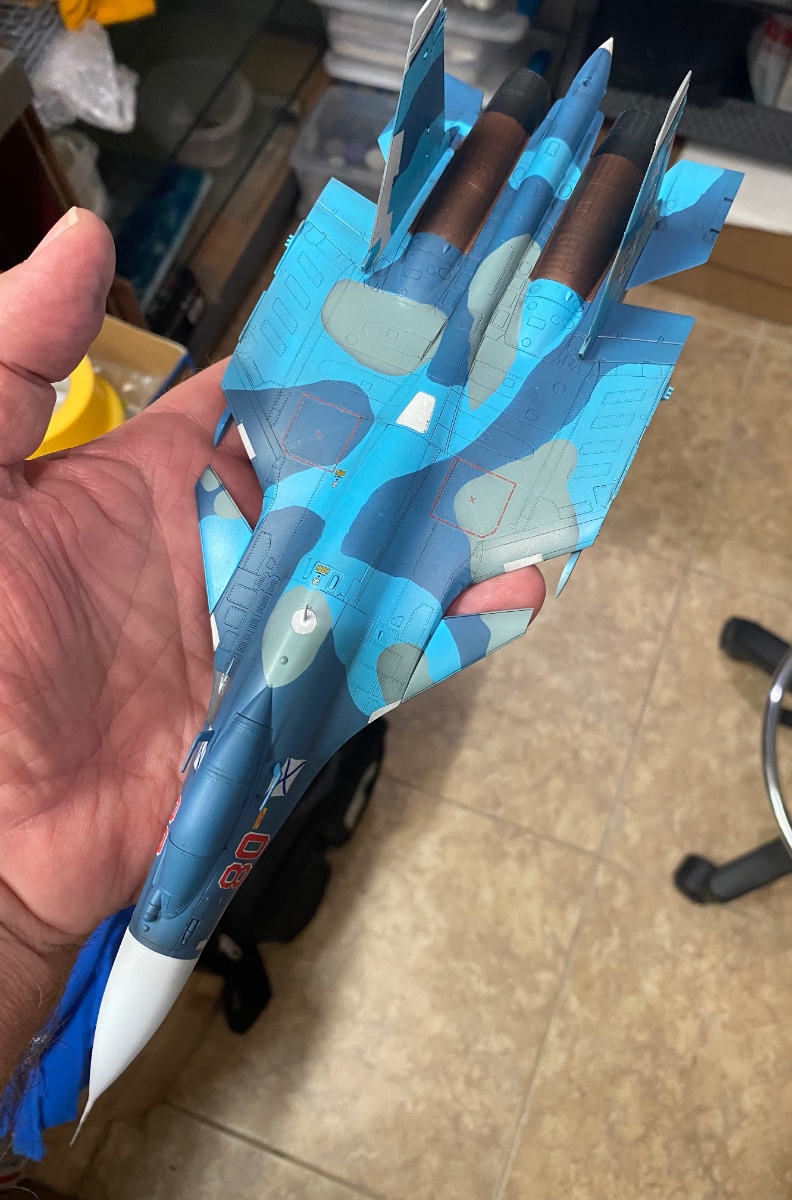
The engine painting sequence. A bit of errant paint slipped through my masking on top of one horizontal stabilizer but will fix that up with the airbrush later.

- 148 replies
-
- 10
-
-
F-86F-30 Sabre by Egilman - Kinetic - 1/32nd scale
CDW replied to Egilman's topic in Non-ship/categorised builds
We all are traveling a similar road EG, but sometimes we are not as aware of our situation as you are now. Even then, the road may have twists and turns hidden from view, so keep hope alive always. You are in my thoughts and prayers. -
Russian Su-33 Flanker D by CDW - FINISHED - Trumpeter - 1:72 Scale
CDW replied to CDW's topic in Non-ship/categorised builds
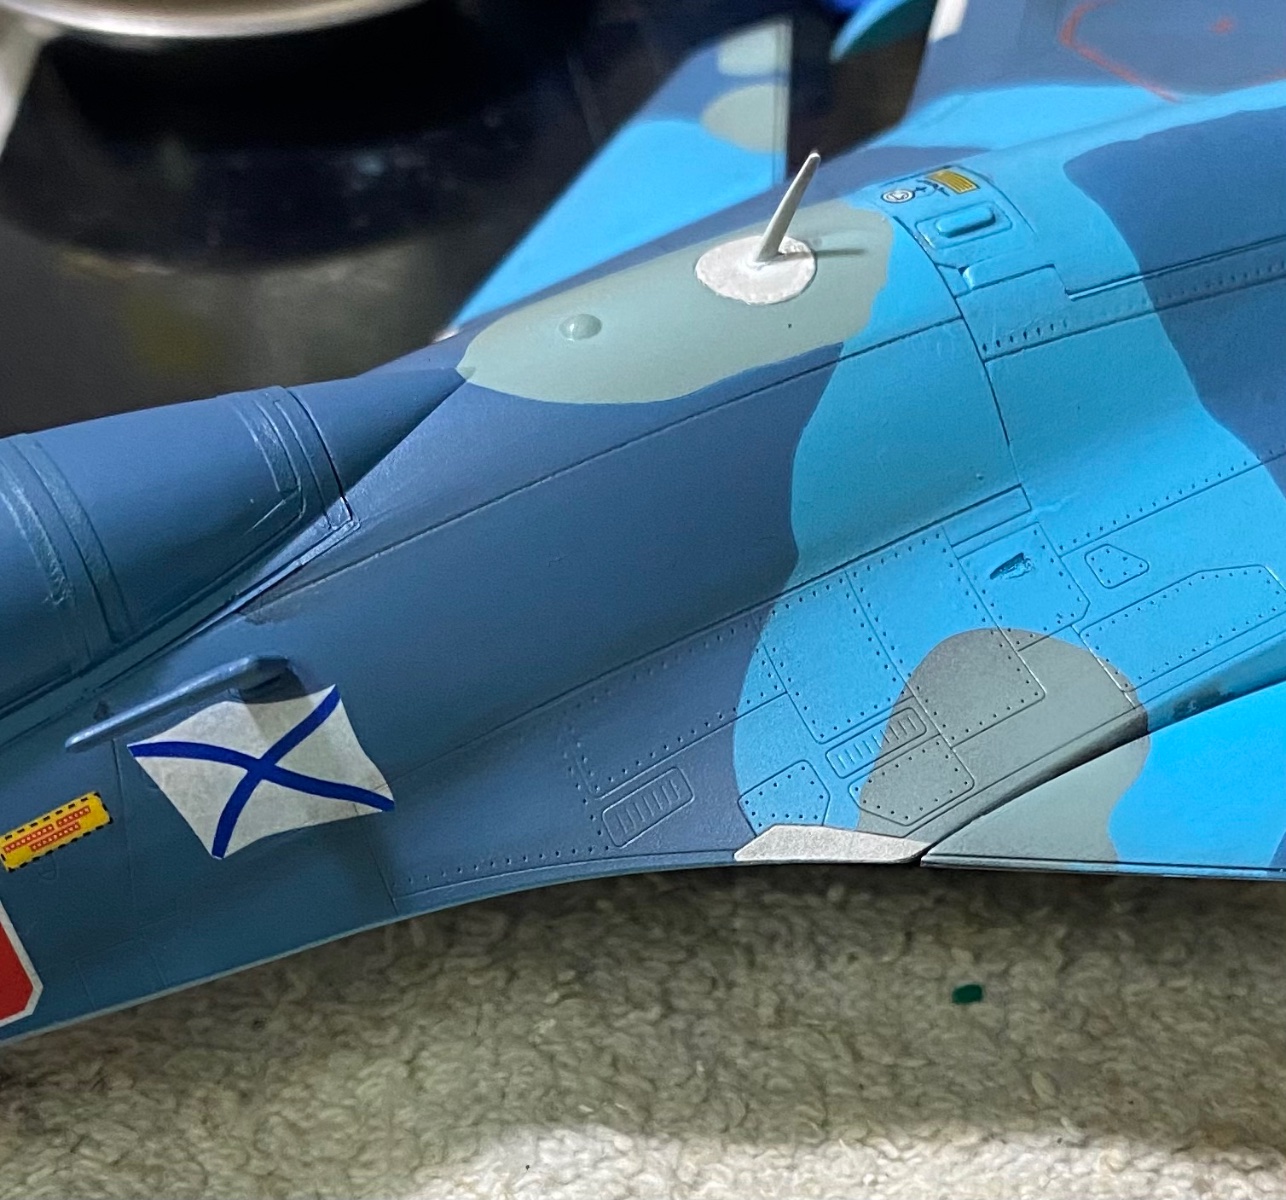
Still working on the small details that must be masked and painted. Maintenance panels.
- 148 replies
-
- 13
-
-
Russian Su-33 Flanker D by CDW - FINISHED - Trumpeter - 1:72 Scale
CDW replied to CDW's topic in Non-ship/categorised builds
Nice haul Alan! A man after my own heart. -
Russian Su-33 Flanker D by CDW - FINISHED - Trumpeter - 1:72 Scale
CDW replied to CDW's topic in Non-ship/categorised builds
Yes, that's the process. Tedious work but in the end looks fantastic.