Stubby
-
Posts
61 -
Joined
-
Last visited
Content Type
Profiles
Forums
Gallery
Events
Everything posted by Stubby
-
 @JacquesCousteau - I looked through some of your previous builds; I would say you have a great sense of color! But to answer your question, I just used PowerPoint for the artwork. I imported a photo of my previous build for the one picture, and one of the line drawings from your research for the other.
-
@Jacques - I am planning on planking the deck of mine as well but still considering how to go about it. The kit supplied deck is 1/32" thick and the planks I am using are 1/16" thick. If I used both with no sanding that would make the deck 3x as thick as the kit allows - this would affect the coaming, the cabin bulkhead, and the side planks, as you noted. I'm still deciding how to tackle it. Obviously, some sanding will be in order.
-
Echoing what others have said - the planking looks fantastic. I notice that you skipped installing the deck, which in the kit directions comes before planking. Does this affect the hull fairing at all? Are there other considerations for the planking meeting the deck height?
-
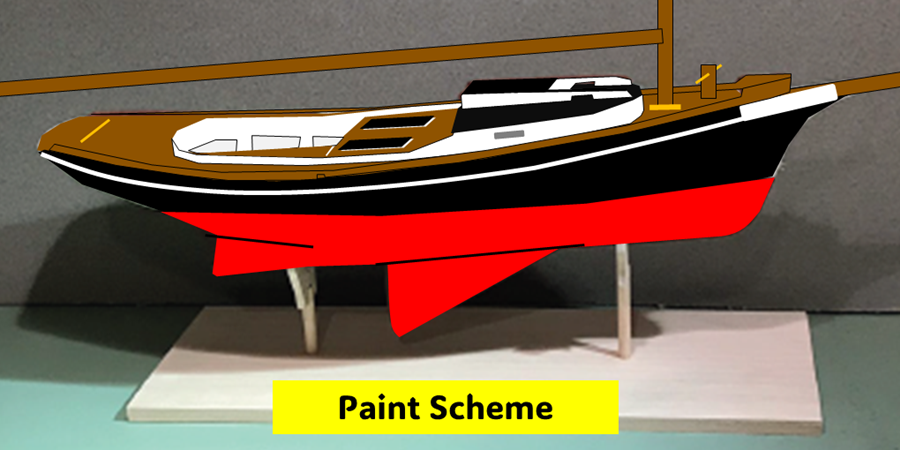
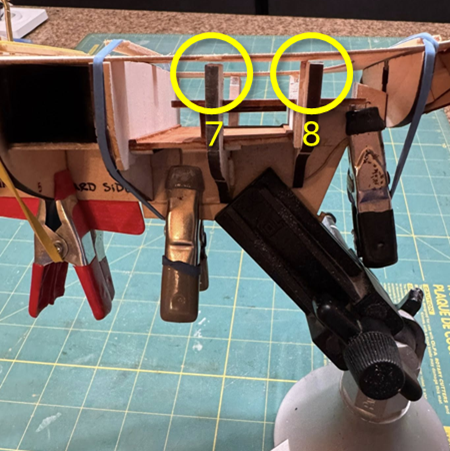
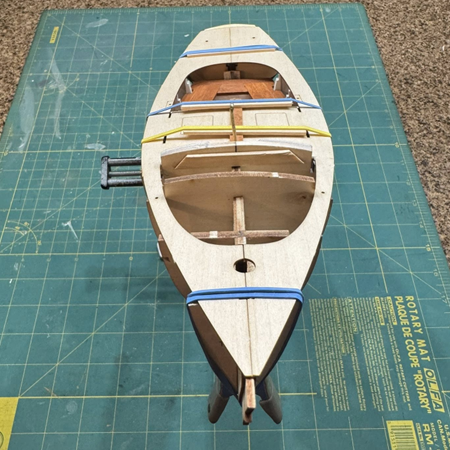
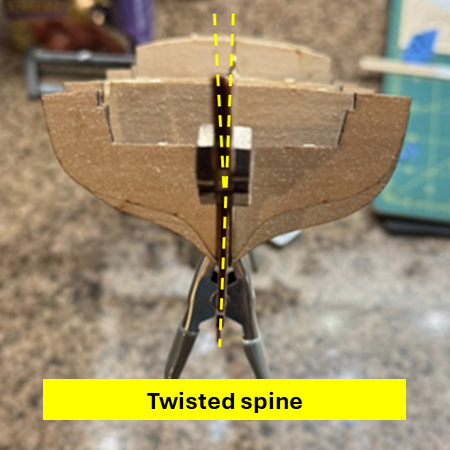
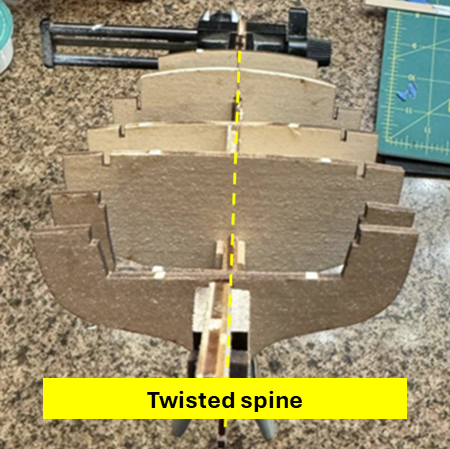
I was a little discouraged by the continuing twist in the spine, so I distracted myself with some peripheral things while I thought about what to do next. One of those things was to play with a paint scheme. For my last build I used the paints that were recommended for the kit – though I changed it up a little. It looks okay, but this time I wanted something with a little more pop. I’m going to go with a black and white scheme with a red waterline and a stained deck. I also played with building out the cabin hatch, the sliding hatch runners, and the cockpit seats. I also did a little painting to get areas that would be difficult later in the build. Finally, I made myself continue and put together and installed frames nine and ten. Then I dry fitted the deck to get a good assessment of the twist. I was pleasantly surprised. It’s not perfect, but it’s much better than my last attempt. The deck does not sit flush on frames seven and eight, so some fairing will be required. Frame ten will also need to be sanded down as it protrudes above the spine and interferes with the smooth flow on frame nine as well. My main concern is that frames seven and eight may have been installed too low, and that will affect the aft combing, which sits on those two frames. If that's the case, I'm sure it can be addressed with shims and/or filler, but it will be a pain to do that and keep a clean look.


-
I love the level of research you are putting into your build! Looking great Jacques!
-
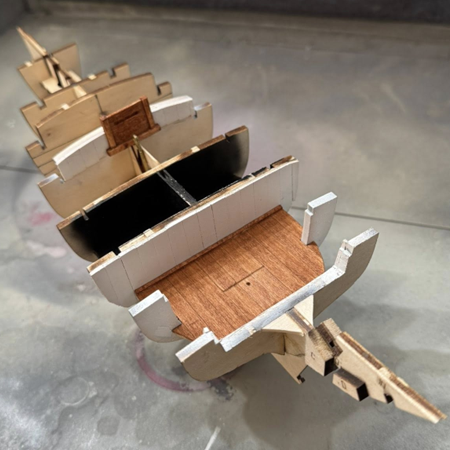
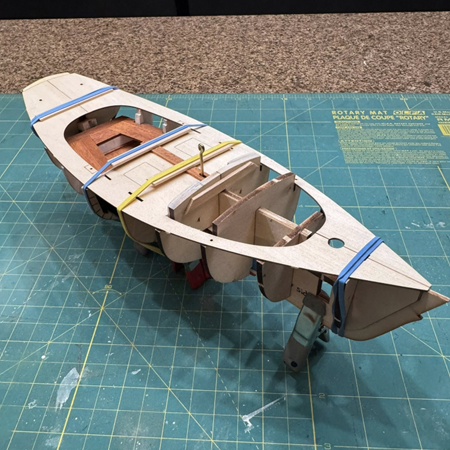
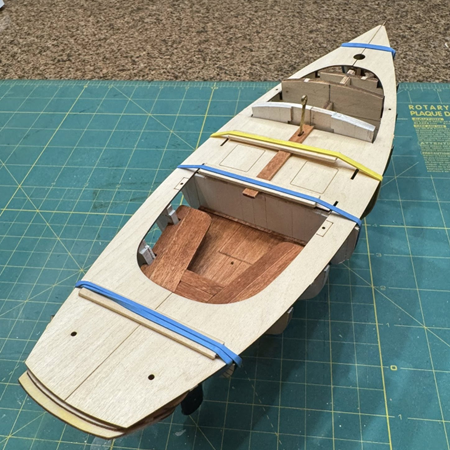
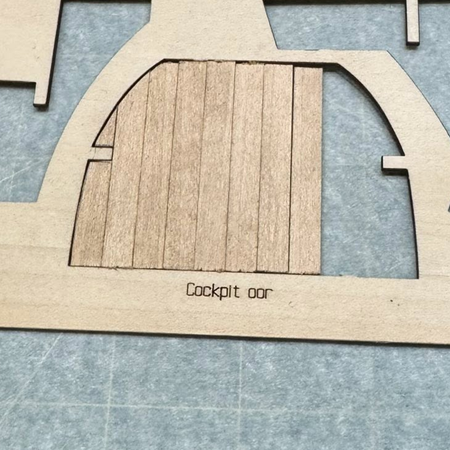
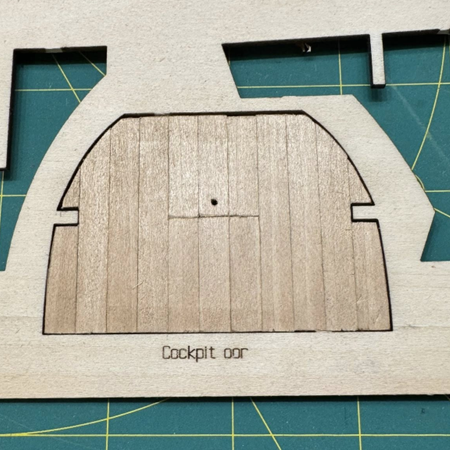
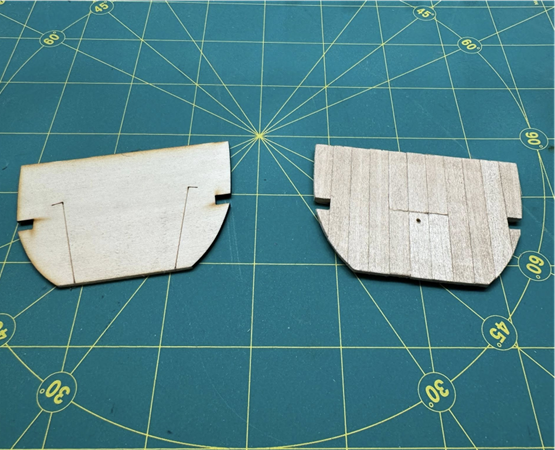
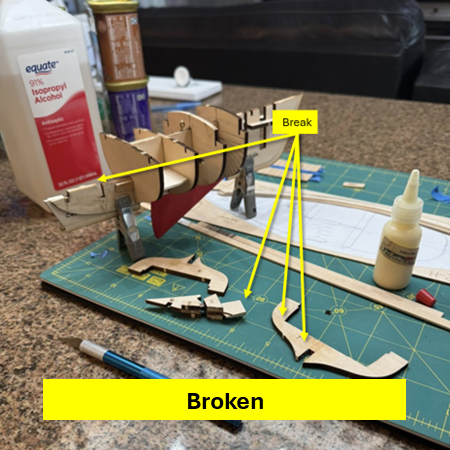
Inspired by JacquesCousteau’s research and kitbash of this design, I thought I would play with the idea of planking the decks. I started with the cockpit floor using the laser cut template as a guide. I like how it came out, but I’m still working out how everything will go together and be painted/stained. I noticed that the twist was worse than I thought. I decided to remove frames 7 and 8 to see if I could straighten it out. I used 91% Isopropyl Alcohol to dissolve the glue, then attempted to separate the parts with an X-Acto knife, and then tried to pull the frames off. Apparently, I did not wait long enough for the glue to dissolve, or I didn’t fully separate the piece first, or I used to much muscle to pull at the frames and I ended up breaking the model in several places. The spine snapped off at frame 8 and frame 7 broke into three pieces. Nothing was destroyed however, so I was able to glue it all back together and the twist looks much better.
-
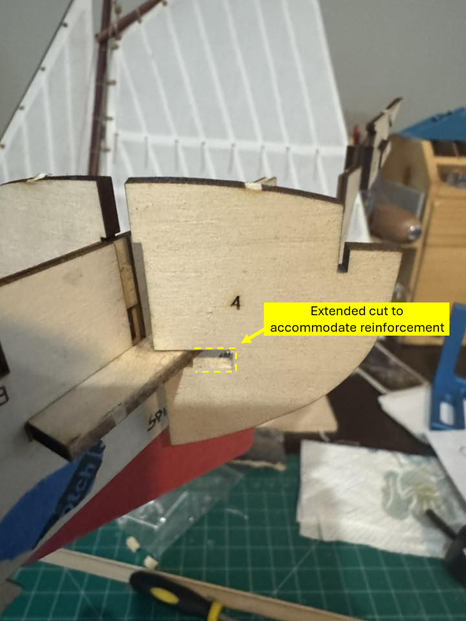
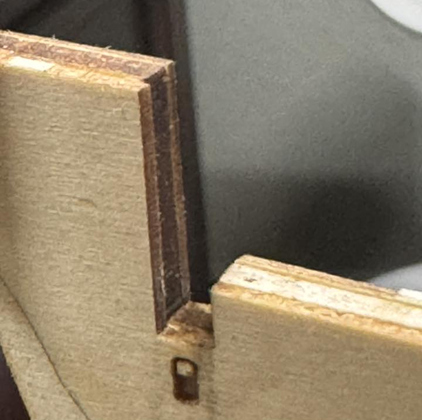
So, a little more complaining about the centerboard: The rod pictured in the instruction book looks much smaller than the one included in the kit. Had I noticed this earlier I would have used a piece of smaller scrap rod that I have on hand. I slightly tempted to swap it out now, but I suspect I’ll just break something as I did in the last build. So I’ll live with it. Also, while dry fitting the frames I found that my proposed “up and locked position” for the rod is blocked by frame 5, and likely will be even more restricted with the deck in place. So, I guess the two positions are down and up with some slight wiggle room fore and aft. Step 5 - The Bulkhead Frames No build log for this model would be complete without pointing out that the horizontal slots on frame 4 are cut too small to fit over reinforcing piece B. I decided to extend the slot in frame 4 rather than cutting a new slot into piece B because I think it is a little easier, but I think either fix would work. I really do think this is a good kit, but before I’ve even started framing, we’ve found that port and starboard are conflated in the wood sheets and the directions, sheet 7 and eight are mislabeled, the laser cut centerboard channel is misaligned, and frame four does not fit properly. Again, it’s a great little model, but it is a little bothersome that we need to occasionally second guess the instructions. On top of that, my parts list says that the kit was put together in October 2024 – I see these same issues in build logs from 2020 and before. I would think these issues would have been corrected by now. Just to show that not everything is the kit’s fault though, here is my latest mistake. As I began to glue in the frames, I found that it was difficult to maintain a right angle to the spine, and where the frames were tight it induced a slight twist. Looking closer I found that although I thought I was being careful and even used the provided spacers, I was did not properly line up the the multi-piece spine. As a result, I will have to sand the channels even, which will make them larger, and the frames won’t be seated as tightly. It will take a little more care and work to ensure the framing is done properly. Frames 3, 6, and 9 have laser engraved markings on them to assist with planking alignment. To make sure they remain visible after fairing the hull, I extended the markings and made sure they faced the widest beam – aft for frame 3 and forward for frames 6 and 9. Somehow on my last build I did precisely the opposite and managed to sand away pretty much all of the markings, leaving them essentially useless. Still trying to prove to myself that I've learned something!

-
Really cool planking. I'll be interested to see how it paints up. I really like the idea of an open well - I may use that one. 👍
-
I think on the full size boat the retracting centerboard simply enables a shallower draft for pulling pots in shallow water or docking at the pier. I imagine the real centerboard is gravity driven, which is why I suspected a lock would be necessary. It "locks" on my model in as much as it's a snug fit, but it's in the early stages - we'll see how the deck changes things.
-
I'm toying with some ideas, but I haven't committed to anything yet beyond color scheme. I did briefly look at your kitbash build and it is intriguing. I'll have to look closer when I have some more time.
-
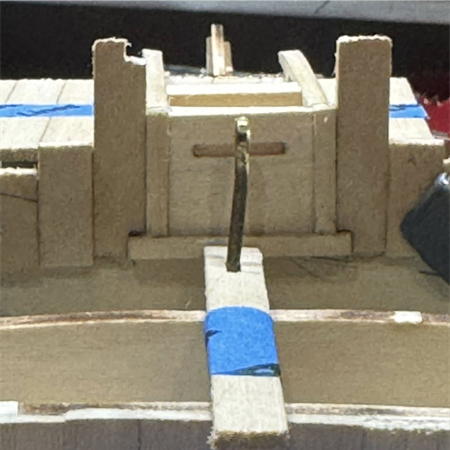
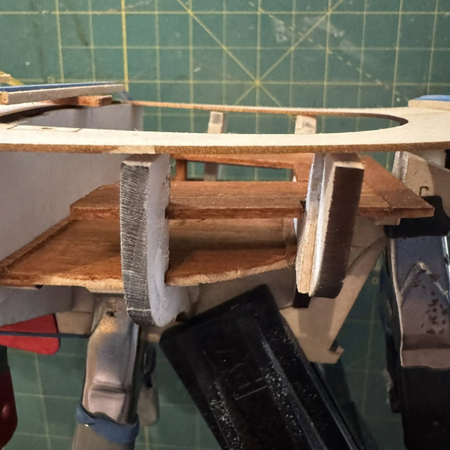
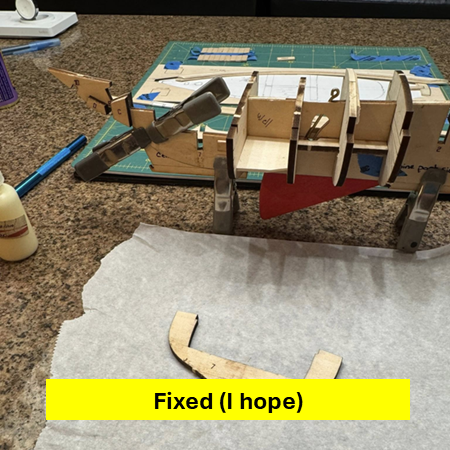
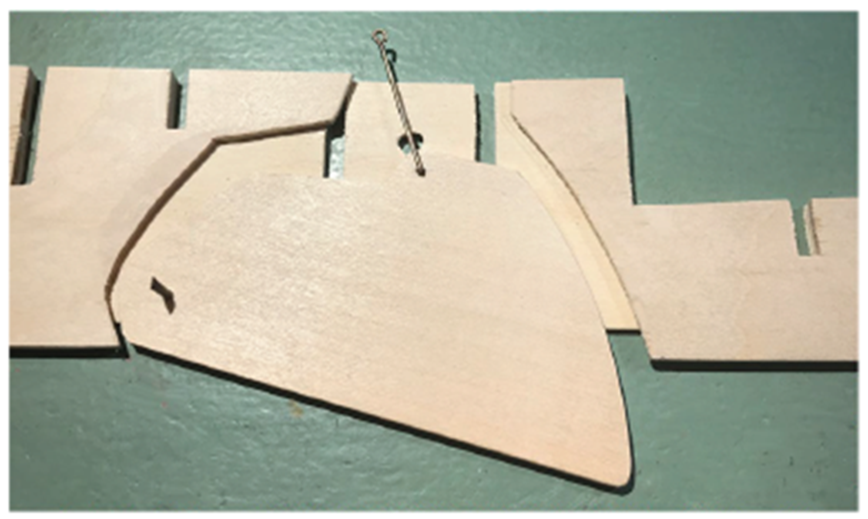
Next comes the reinforcing pieces. This is where the laser engraved markings help. I was able to line up the reinforcing pieces on my last build without the markings, but it took a little guess work and some extra shaping. While installing reinforcing piece B, I found that it blocked the lever for the centerboard from moving freely, so I cut out a piece of B to allow for it. While doing this, I broke off the free-floating piece astern of where the lever sits. This was not an easy fix. I’m finding that this dynamic swing keel centerboard is a lot of work. Upon consideration, I think part of my problem is that I misunderstood how the lever is supposed to work. Thought it slid back and forth across the deck enabling a mechanical pivot to raise and lower the centerboard. Upon reflection, I think it is a three-position lever as shown below. Is this the way others interpreted it? The photos in the directions never show the lever up.


-
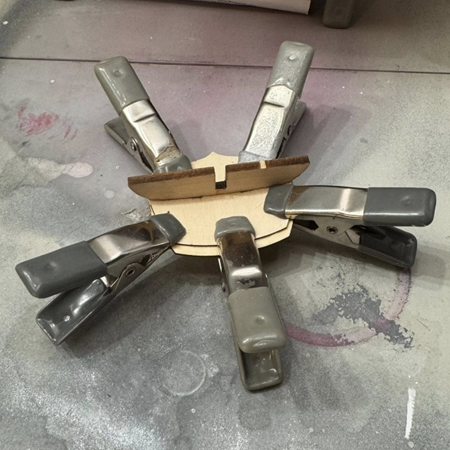
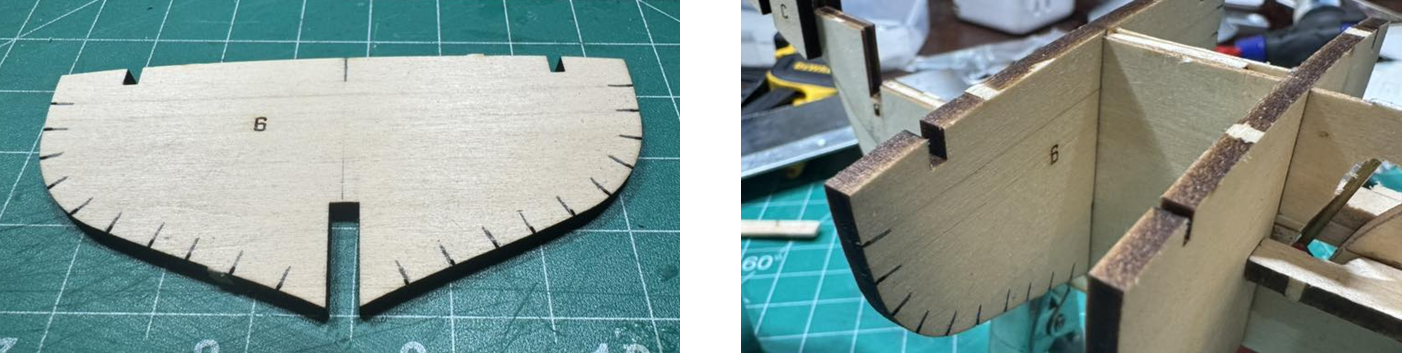
Model build started Sunday, 4 January 2026. Steps 1 through 4 – The central spine, centerboard, and reinforcing pieces The spine is constructed from five separate pieces to accommodated a functional swing keel (centerboard). The outer pieces, “spine starboard side” and “spine port side” are incredibly thin and should be handled with care. I also note that the laser etched markings on the piece are on what would be the inside of the spine; if constructed as labeled, those markings will be covered and of no help. The photos in the instruction book don’t show any markings, and in my last build I did as the directions dictated, but I later regretted it. This time I will reverse port and starboard so that the guide markings remain visible for future steps. In doing this I will also have to mirror how the centerboard is mounted to use the proper cutouts. The last time I did this build, I botched the handle for the centerboard and ended up breaking the centerboard where the handle is attached. In that case I just left the handle off but installed the pin anyway; the centerboard still swings up or down, but it’s physically moved - not by using a lever. This time went more smoothly. I annealed the brass rod, and it bent (relatively) easily. As was the case with my last build however, there is an issue with the kit. The laser cut parts are slightly off (or not large enough) from where the handle needs to slide. This requires enlarging the slot on both outer spines. This wasn’t difficult, but again, the pieces are very delicate – especially where the laser cut markings are. I did end up breaking one small piece, but it was easily repaired. I decided to paint my centerboard before installation to ensure no unpainted area showed on the completed model. This worked well before, though it probably isn’t entirely necessary. I also used a piece of painter’s tape to hold the swing pin in place. It will be covered by planking later and this way I don’t have to worry about the pin falling out. The lever looks like it’s installed properly… we’ll see. The operation still seems wonky to me. I used weights when glueing the pieces together. Some people have used clamps, and it seems to work well for them. I thought that weights might be better at preventing a twist in the spine. I did have a couple of places along the edge where the glue didn’t grab, so I went back, reglued, and clamped them just to target the connection. NOTE: As you see in the pictures, I wrote the name of the piece on the wood as I removed them from the sheets. An astute Sailor will note that it says “spine port side” on what appears to be the starboard side. This is because of the previously mentioned mix up with etched markings. Yeah, it bothers me too, but it will be covered by the planking.


-
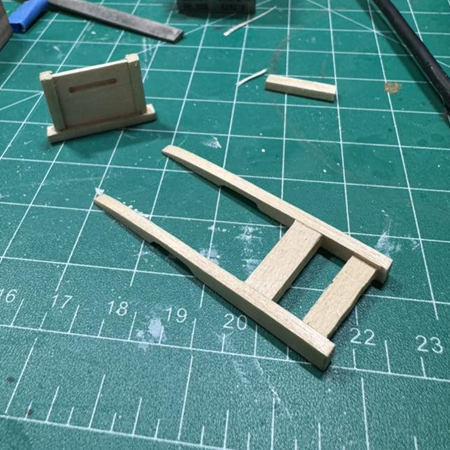
So as noted in my largely unnecessary TLDR post, I received a Muscongus Bay Lobster Smack by Model Shipways for Christmas in 2024. Although I have recently completed the very same model, I’m going to undertake a “do over” to explore the progression of my skill level with something to compare to. I began by inventorying the contents of the kit and reading through the instruction manual, noting which piece of the kit goes with which step of the build. As previously noted by others who have built this kit, there are some issues. Laser cut sheets 7 and 8 are mixed up in the description and in the instructions. It’s good to note this now so that you aren’t racking your brain later. By some oversight the slide guides for the cabin door are not included in the kit, but this is an easy thing to construct from scratch. There are some other issues as well, but we will address them later in the build.

-
This is going to be one of those “too long didn’t read” (TLDR) posts, so feel free to skip it – It won’t be necessary to the upcoming build. I have a long, though not extensive history with model ship building. I first built the New York Pilot Boat “Phantom” from Model Shipways in 1998. It was the first and, until recently, the ONLY project that I ever finished. After that I bought and began the “Benjamin Latham”, also from Model Shipways, and got about half-way through until my own frustration and life got in the way. Setting that project aside, I started some smaller projects with the hope of developing my skills (and patience) to move forward with the hobby – I have two such projects on this board that though not abandoned, remain incomplete. Twenty-six years after my initial build I decided that I really need to start at the beginning, so I found the Model Shipways Shipwright 3 Kit Combo Series, which offered a progressive difficulty and complexity. After about a year (life is still happening) I managed to complete all three. It was a great learning experience and, though I made several mistakes throughout, I worked through them and picked up some valuable skills in the process. Honestly, I forgot about this blog until I was almost finished with the Muscongus Bay Lobster Smack. That was unfortunate because I’m sure that the collaboration would have been very helpful. I did go back and look at other builds for some tips while completing my own and was both enlightened and encouraged by the work of others. Now that I have COMPLETED these three projects, my new goal is to COMPLETE a project while documenting my progress on this board – hopefully with the help, collaboration, and criticism of other builders, and possibly to their advantage as well. To achieve this goal, I’m going to build another Muscongus Bay Lobster Smack that I received for Christmas in 2024. It is a nice, fairly straight forward build that uses a myriad of skills. It will also be a good way to see the progression of my skill, give me the opportunity to correct some of the mistakes I made on the first build, and maybe try some new things with a better understanding of the desired result, since I have already done it once. In any event, here goes nothing.

-
Beautiful build. I have a half built Latham that I started 30 years ago but never finished. I'm not sure if I even have all of the pieces after four moves in the interim, but I would love to finish the project. Marking for future reference.
-
Very impressive build! Marking this for later reference...
-
Great build and very detailed log. Marked for reference.
-
Impressive build. Marking for reference.
-
Great job and informative log. Marking for reference!
-
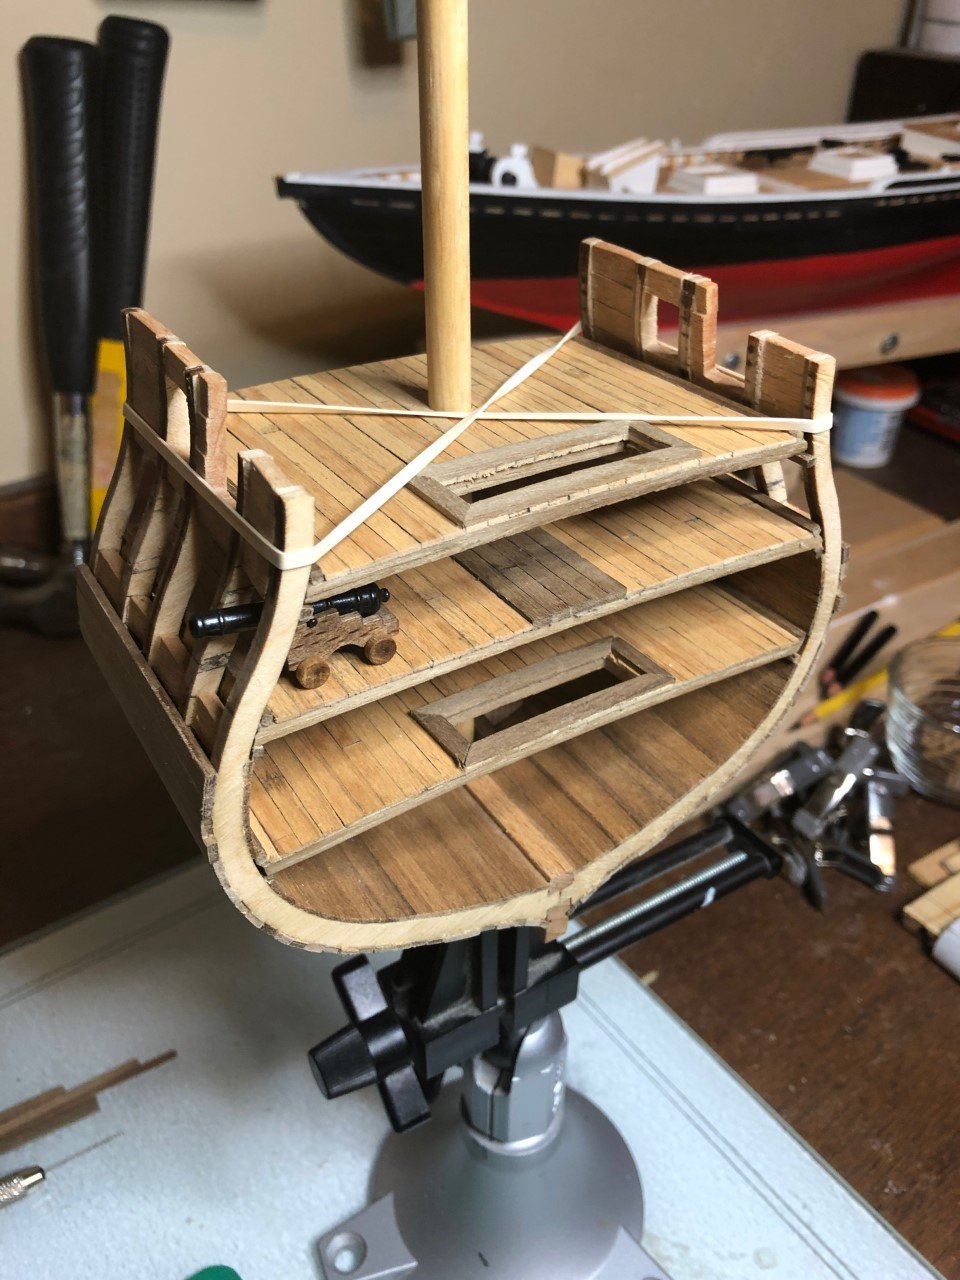
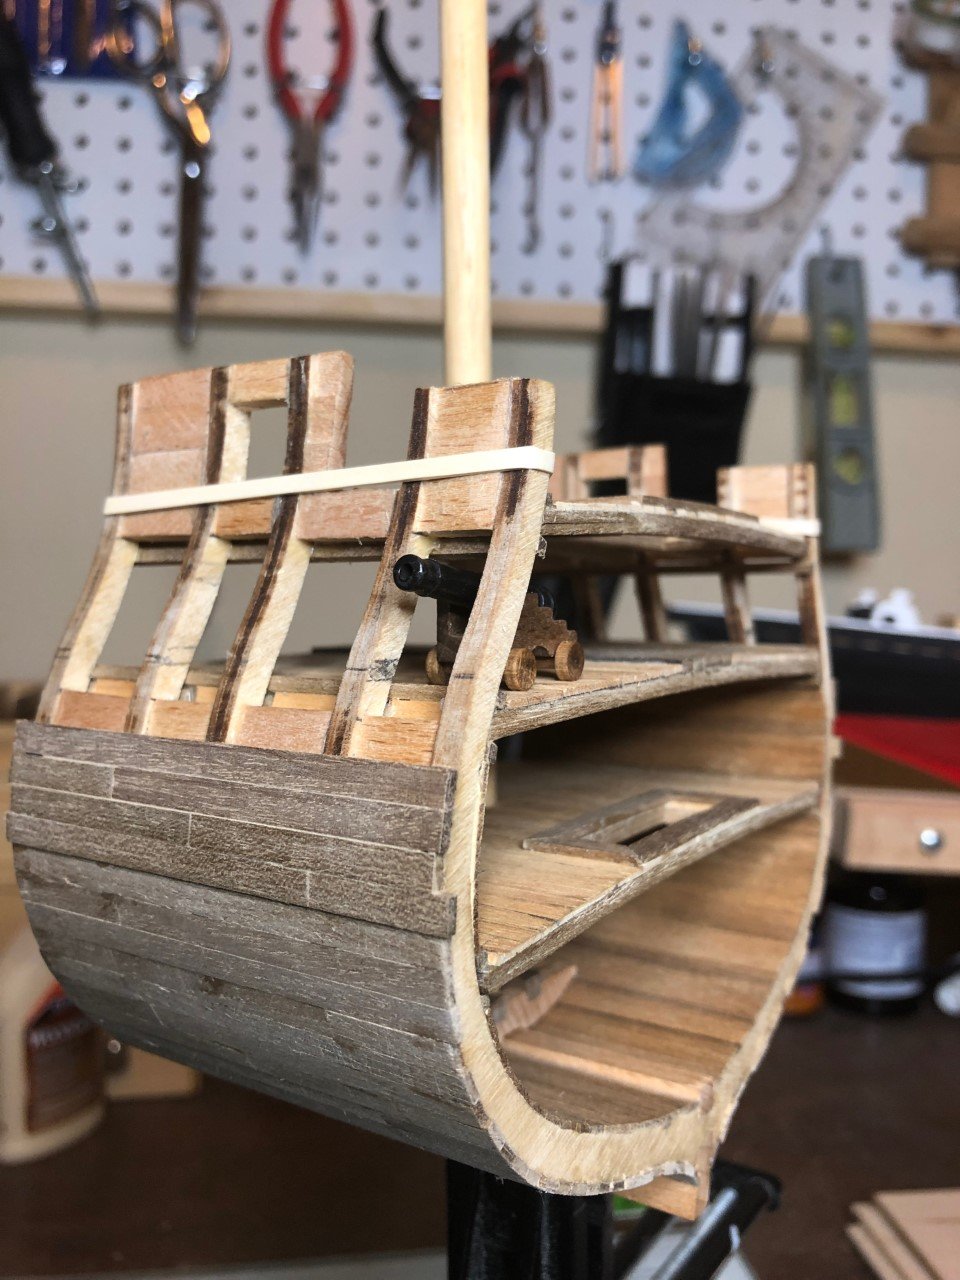
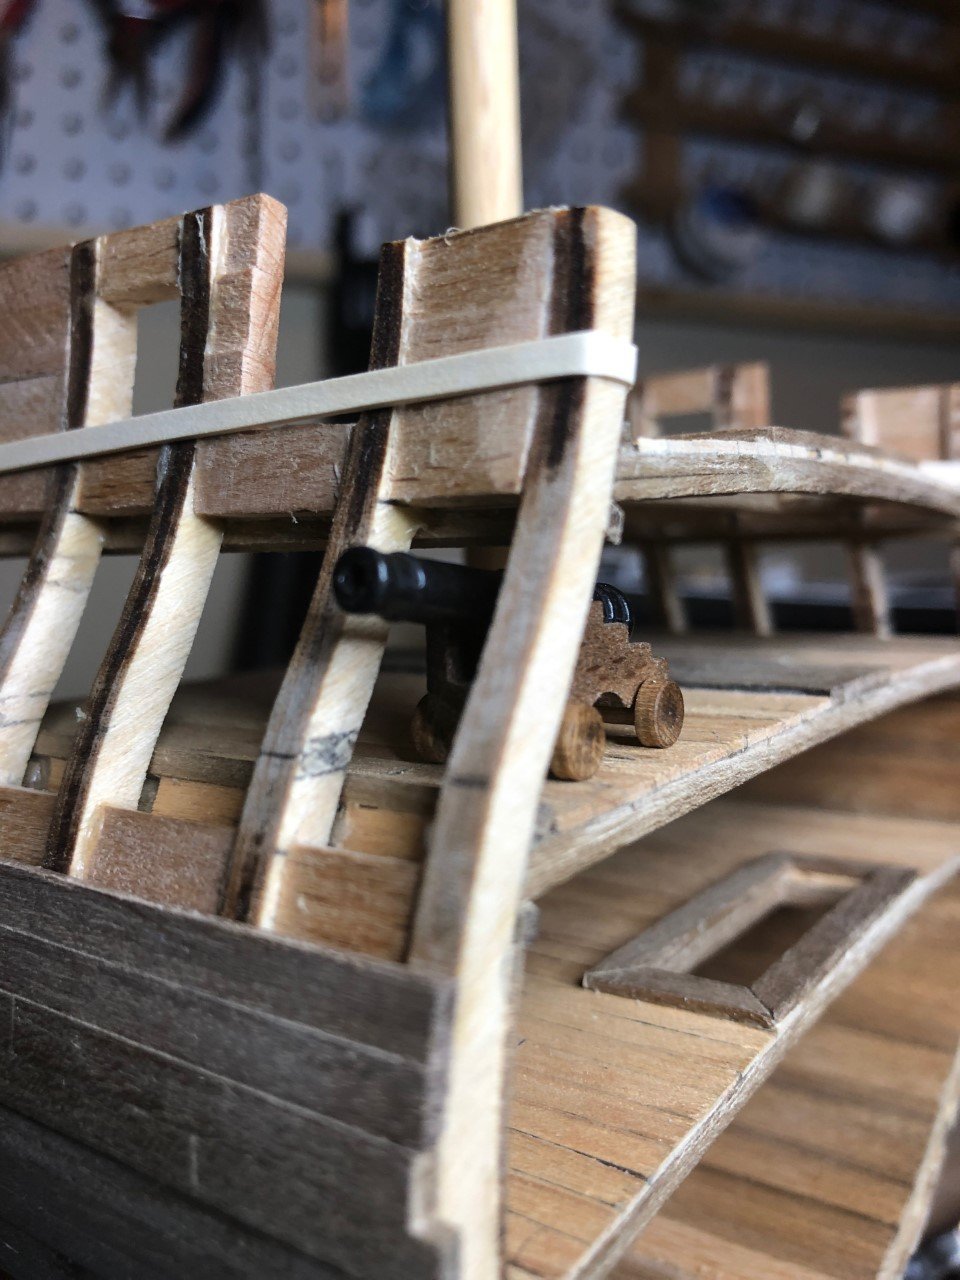
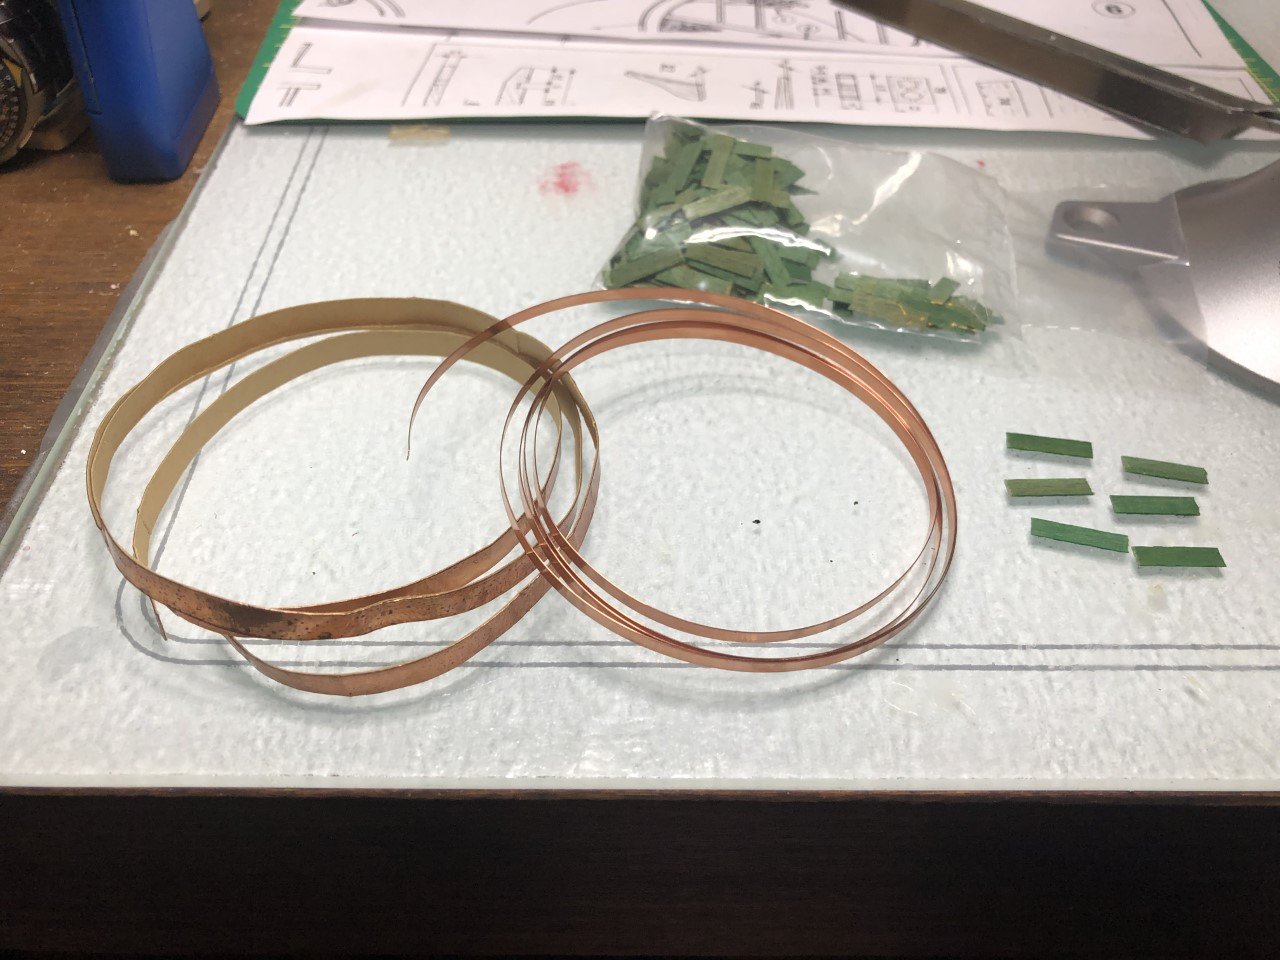
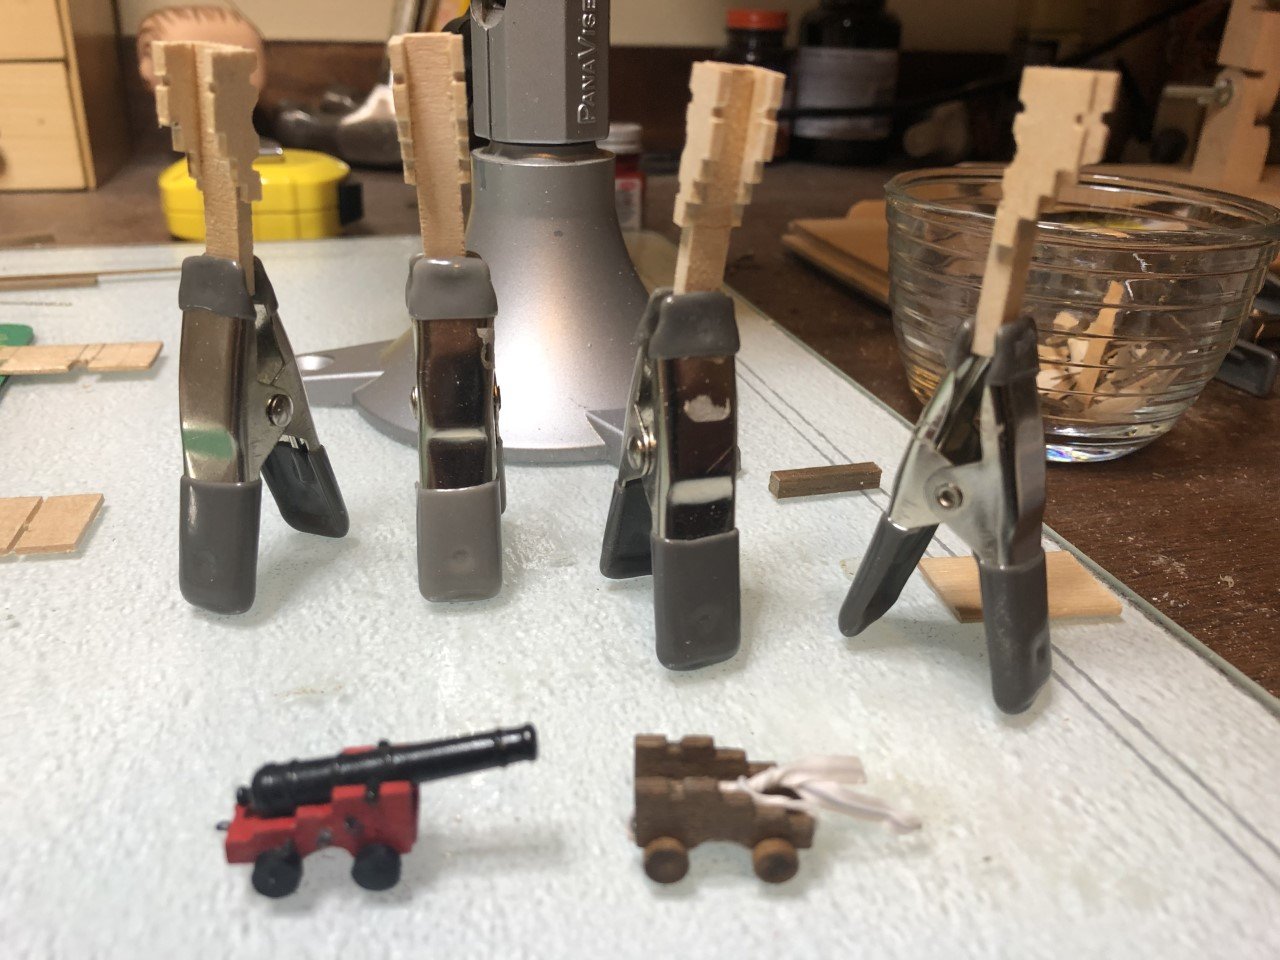
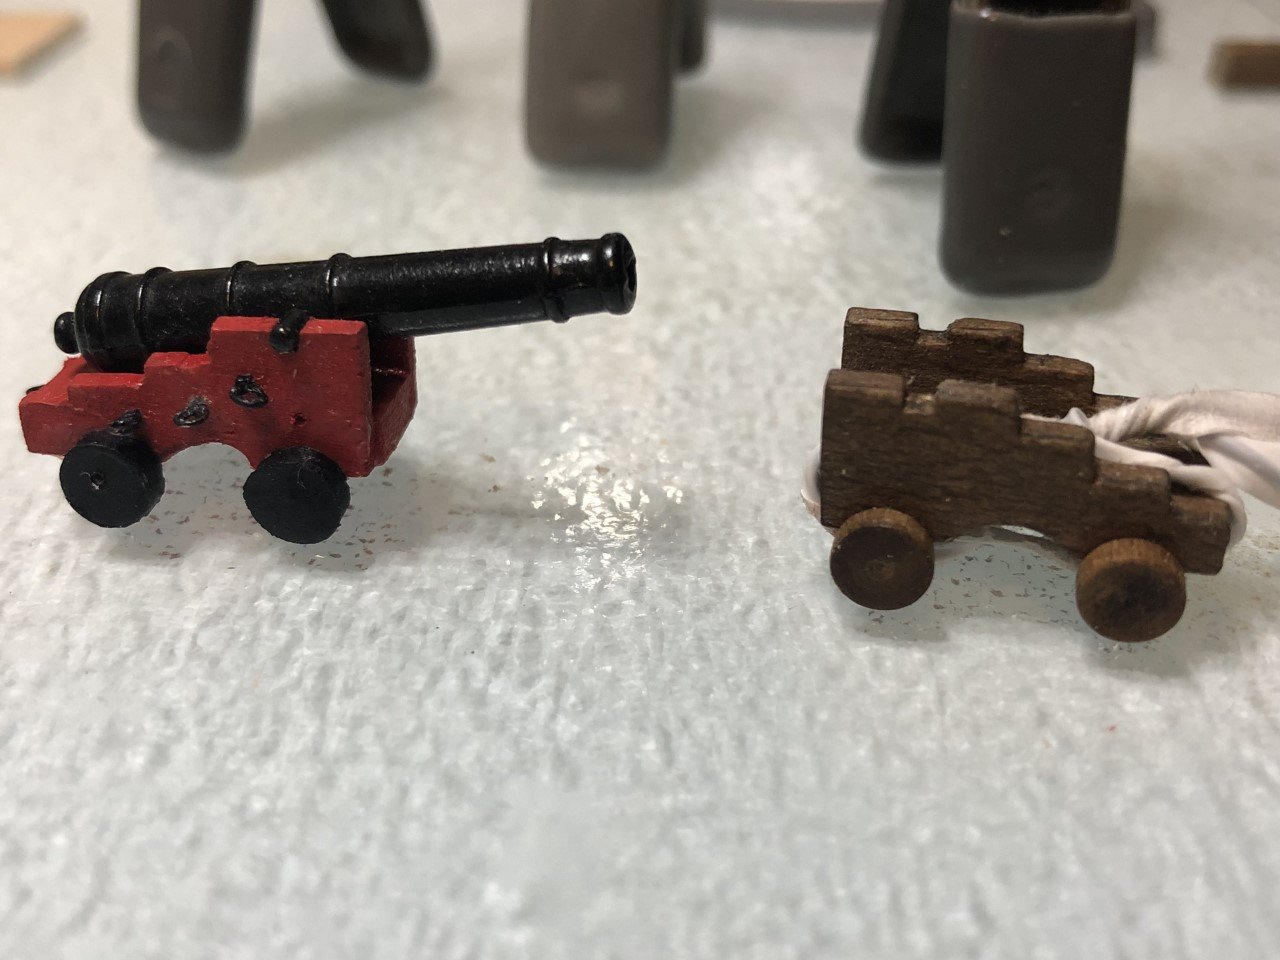
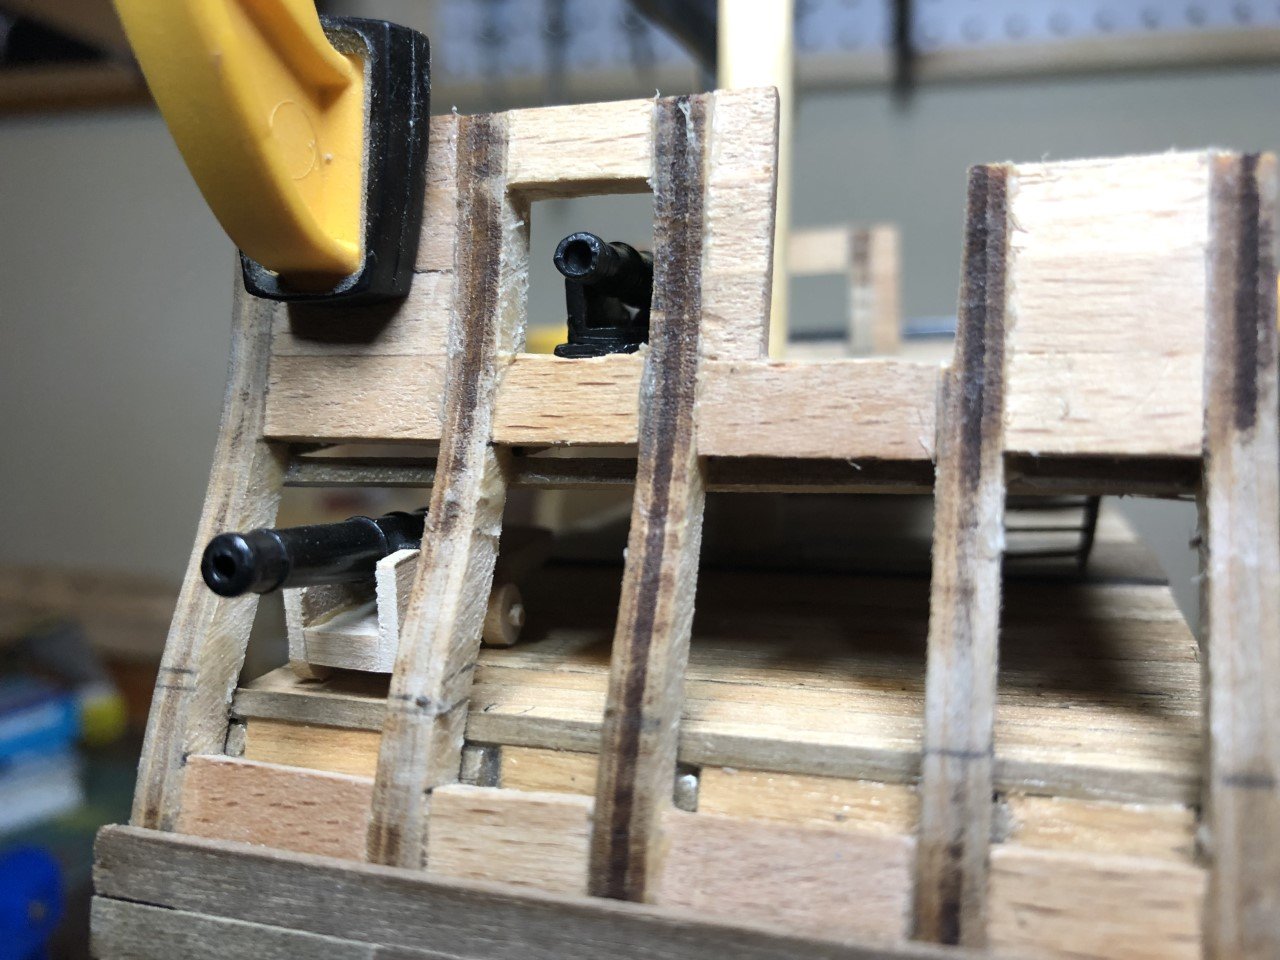
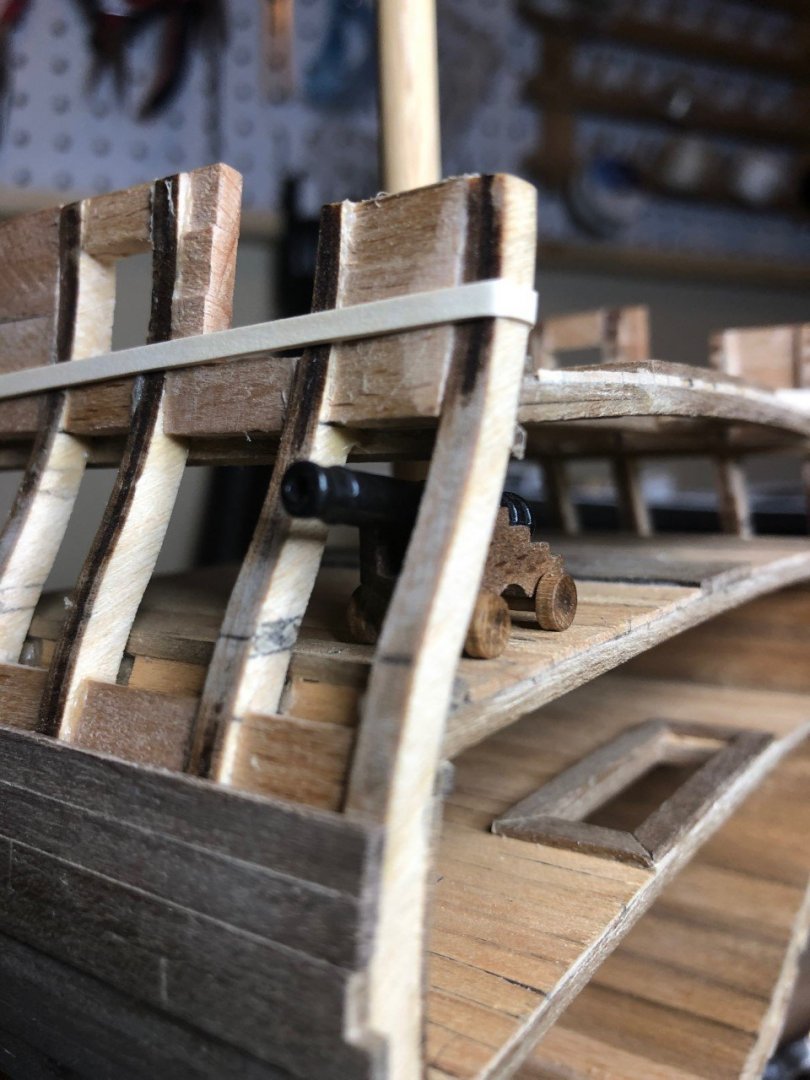
I was out of town last week, so I didn't have much time to work on the model. Before I left though, I ordered some copper tape to copper the hull. Apparently I misread the description, because instead of getting the stick-on copper tape that I was expecting, I got a strip of copper. I considered using it anyway, but cutting, shaping, and filing the copper would probably be beyond my capability at present. I ordered a replacement this morning - hoping I got it right this time. I'm sure I'll find a use for the copper strips at some point in the future. The picture below shows what I thought I was ordering (left over from a previous build), what I actually got, and what came in the kit... I built a platform to receive as ladder down to the hold/bilge. I think I like it, but maybe it takes up too much room. Still getting used to it. I also toyed with making new ladders; it wasn't easy with the very fragile wood included in the kit, and I'm a little worried that I am using too much of it up experimenting. I did finally find a method that worked okay. One thing that has bothered me for a while it the placement of the ports on the gun deck; the cannon seem to sit high. I made some gun carriages (out of scrap) to play with the placing. I'm toying with the idea of just lowering all three decks. At this point none are glued in, but it would take some effort and creative fabrication to widen the top two decks. Alternatively, I could just make the cannon carriages shorter - but I was hoping to rig them, and making the carriages smaller leaves less room for block and tackle fittings. Still mulling it all over... The dark brown carriage is the one that came in the kit.


- 11 replies
-
- 2
-

-
- constitution
- mamoli
- (and 1 more)
-
md1400cs - I do plan to copper the lower hull, but the older kit that I have doesn't come equipped with it; I'll have to order some. I'm debating whether to get the adhesive copper tape/strips or pre-formed copper plating. Do you have experience with either/both? I'm also considering putting portholes on the third deck. There are three on each side in the model plans, but there is no fitting in the kit. Looking at others who have completed the model, I don't see any with the portholes. If I go that route, I'll have to purchase/fabricate some sort of fitting.
- 11 replies
-
- 2
-
-
- constitution
- mamoli
- (and 1 more)
-
JesseLee, I've been inactive for quite a while, but I have been occasionally checking in on your work here - it is exquisite. Beautiful work and a fantastic build log!
- 1,306 replies
-
- 5
-
-
- syren
- model shipways
- (and 1 more)
-
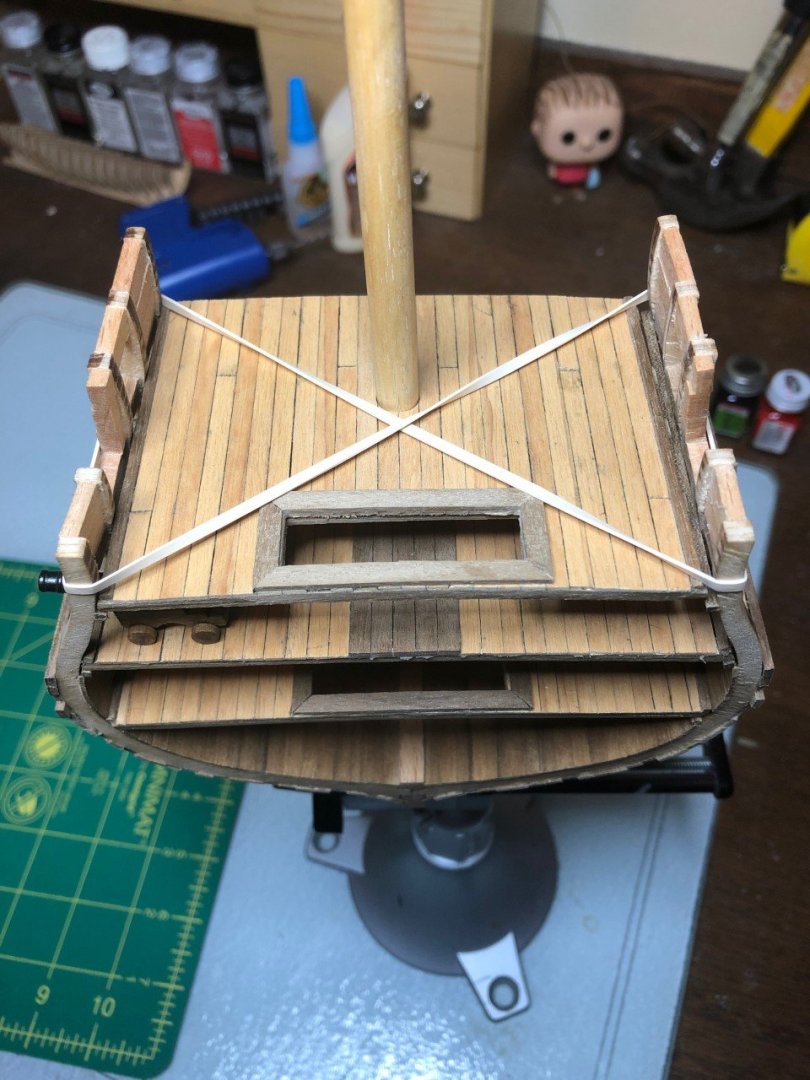
So, three and a half years is a pretty lengthy hiatus from working on my models. Glad to be back though after going back to school and finishing a degree. I have done a little work - mostly recently, and thought I would post a progress report. I finished building all three decks, drilled the hole for the mast and built the mast foot. I also cut the hatches. The hatch to the hold is closed in the model plans, but I thought I would like it better open. I created a new problem for myself however, because it's quite a distance from the third deck to the bilge. I'm thinking about building a platform to receive the angled ladder (like the one between the first two decks) and then making a vertical ladder or two to climb down to the bilge. I had originally marked out the gun ports in accordance to the model plans, but read that some other people had noted that the measurements were off. Placing a cannon of the gundeck to assess the gunport placement, I can see what they are talking about. The original port placement was certainly low. The required one seems high. but I guess it will have to do. I was happy to see that later versions of this model are supplied with copper adhesive for the bottom rather than the crazy green strips that came with the model. That doesn't help me, though; I'll have to order some adhesive myself. Here's hoping that I can be a little more focused and consistent in completing this model.


- 11 replies
-
- 3
-
-
- constitution
- mamoli
- (and 1 more)
-
I haven't been very active on the board since I went back to school, but I check in from time to time and I am never less than very impressed by your work Jesse. I have an untouched Syren kit that I am certainly going to build in the near future. You can bet that I'll be referring to your build as I attempt to emulate you (right after I finish my Benjamin Latham and my Constitution cut away). Great work!
- 1,306 replies
-
- 6
-
-
- syren
- model shipways
- (and 1 more)