HOLIDAY DONATION DRIVE - SUPPORT MSW - DO YOUR PART TO KEEP THIS GREAT FORUM GOING! (Only 72 donations so far out of 49,000 members - Can we at least get 100? C'mon guys!)
×

figuerres
-
Posts
236 -
Joined
-
Last visited
Content Type
Profiles
Forums
Gallery
Events
Everything posted by figuerres
-
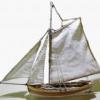 thank you all for the comments, sorry I just saw them so I will reply now. I got the bug to start the hull on the Fair American so I have this on hold till I get the bug to finish it :-) the masts are not fixed right now, they are in the holes and free to move a bit, the final placement is very much a 90 degree angle I think. I hope to get more finished on this one before too long.
 -
Using Blacken-IT
figuerres replied to fnkershner's topic in Painting, finishing and weathering products and techniques
just to add a bit to this: what we all call "Brass" is an alloy that is made from copper and zinc, but the alloy can have other metals or minerals in it that alter how it takes to the blackening treatment, this I think is also why some of us have great success and one model kit may blacken better than another. some of the things that may be in Brass include Lead, Silicon, Tin, Iron, aluminum and even arsenic ! I have some so called "Brass wire" that came from a local craft store that will not blacken at all in blacken it while other brass turns just fine. and if you solder then you also have to look at what is in the solder you use... which can be some of tin, silver, lead and other stuff... -
Erik I think you should check this out, 3 volt watch/ clock batteries that are small and led's that have a flickering variable light level: http://www.modeltrainsoftware.com/3v.html http://www.modeltrainsoftware.com/flickering-led.html they have other ways to provide power such as ac adapters etc...
-
Erik, if this kit is like most then I think you may want to spend a bit of time before you assemble the bulkheads and look at the plans and where you can cut out holes in the bulkheads and even in the center bulkhead / false keel board. you can cut away a *LOT* of the wood and still have plenty of strength for the planking and such.... you could have enough open space to light all the gun ports and hatches with say 5 or 6 led lights put them along the center keel bulkhead so they send light out to the hull and that way it will not be real bright right where the gun ports are but will provide enough light overall.
-
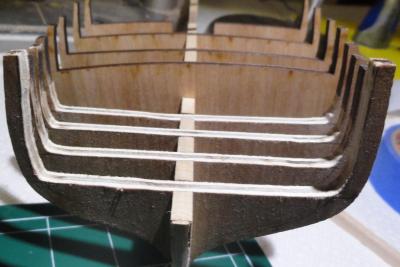
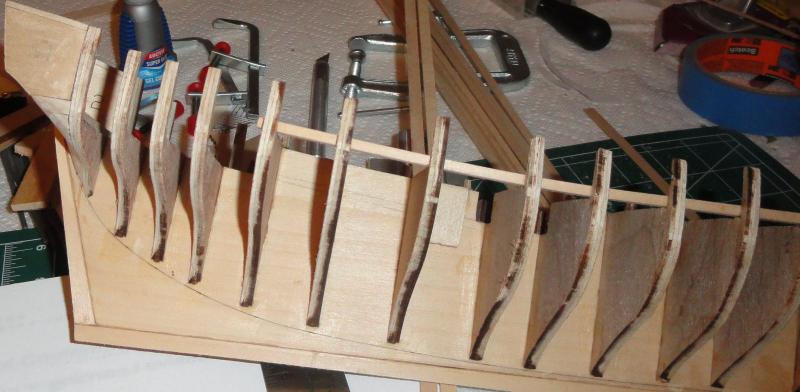
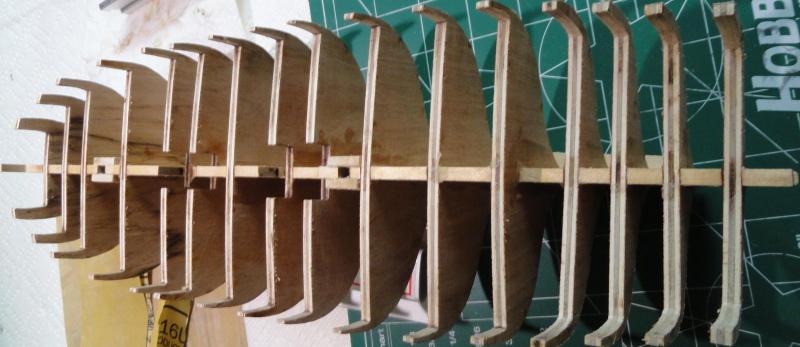
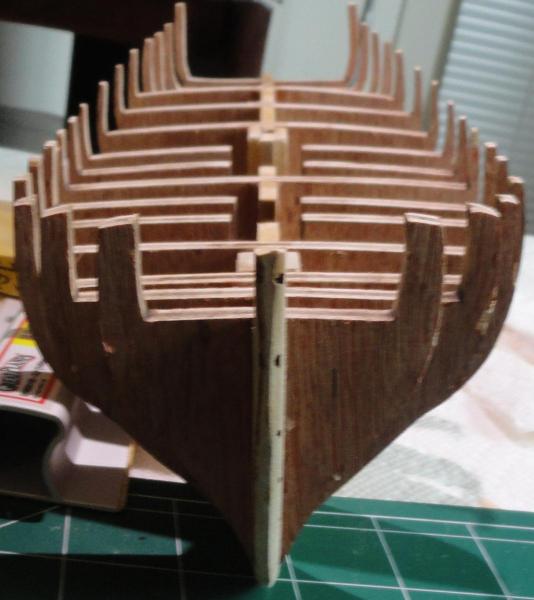
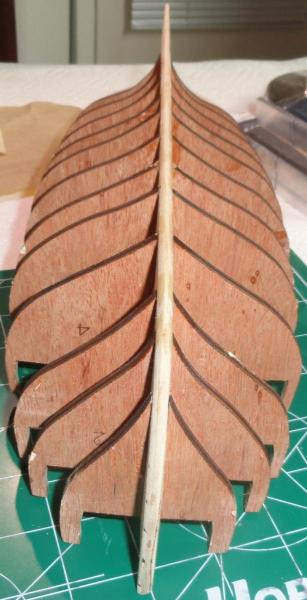
Almost ready to start planking the hull... just need to fair the frames some more and fix a spot where the keel is not quite right.

-
Lanterns
figuerres replied to figuerres's topic in Discussion for a Ship's Deck Furniture, Guns, boats and other Fittings
Tom linked to the same place I linked, I will have to order from there to see , they have lanterns that are made for other kits that are not solid cast parts, the top and bottom are cast and the sides are a brass etch part that you bend to shape the "open" part of the lantern, that is how some of them are made from a look at the pictures. others are pre made but look like they have plastic for the "glass" not sure if they are all plastic or part metal. -
Lanterns
figuerres replied to figuerres's topic in Discussion for a Ship's Deck Furniture, Guns, boats and other Fittings
thank you, one of the ideas I am thinking about is very much what you just described, possibly I can use the supplied cast part to make a mold for the replacement lantern, use that to cast a part that I can then drill out , carve etc.... -
Lanterns
figuerres replied to figuerres's topic in Discussion for a Ship's Deck Furniture, Guns, boats and other Fittings
the kit part is not broken. it is a solid part. what I want to do is make or buy a lantern of the same size and style that I can put a small led light inside of. for example I may be able to use one of these: http://www.cornwallmodelboats.co.uk/acatalog/caldercraft_lanterns.html looking for other ones like that before I buy one .... trying to find the best match to the ship etc... -
I have the MS kit for the Fair American and I am wondering if there are any ways I can get a replacement part for the aft lantern for my model, possibly one that can be rigged with an led light. I found one site that has a lot of parts from kits for sale but not having the parts in hand to compare it's rough to know if they are worth buying .... using the plans the size I need to match will be 15mm tall and 10mm wide for the body of the lantern that is without any decorate cap or base. on the drawings is shows what looks to be a six sided lantern with each side being made up of 4 panes. I have seen what looks like one kit part that makes a lantern from parts but it does not show the assembled lantern so I can't tell for sure how it looks. my kit has a cast Britannia metal part. I am not sure if I can use that part to make a better part some how ? any ideas ? anyone know of a source for parts ?
-
WOW..... I recall doing some plastic kit ships when I was a teen.... what you are doing I WAY beyond the "plastic model" level ... at this rate I would love to see what you would do with one of the top end wood kits.... OMG!!!
- 237 replies
-
- 2
-

-
- cutty sark
- revell
- (and 2 more)
-
What is your favorite hand tool(s)??
figuerres replied to Modeler12's topic in Modeling tools and Workshop Equipment
use an old fashion leather strap - like the old barbers used for the strait razors for touch up, or an old fashion whet stone / oil stone for times when it's really dull. all you want to do with the stone is work that top edge the one facing up in your picture and hold the face flat to the stone, push away on a long even stoke a few times. that's it. just keep that angle flat to the stone, if you get a slight "lip" on the wrong side then just one pass on that side. it's not hard to do really and you can get a crazy sharp edge in no time at all. -
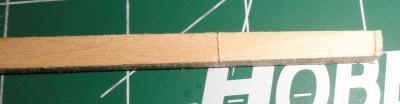
Nice!! a lot of carpentry cuts work with the "mirror image" trick in a few variations....
-
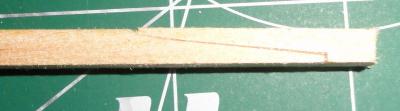
I think the correct spelling for that is "Scarf" I can not say that I have done this but I would start by stacking 2 planks and cut the as one then flip one around and they will match up, that will be part of how to do it. I would probably start with a simple miter angle / diagonal cut then snip or and off the end for that part. then carefully cut out the "inset" that makes the "Hook" catch.
-
Good work! looking forward to seeing more of it shape up...
-
I am not 100% sure but I think what Erik means in the tittle is that the kit he built is not sold any longer, he has been re-posting his build log due to the server crash and this build is now complete, the LSS kit is what you see, the hull framing and such for the navy to see how the vessel might be built if they want an actual ship built.
-
from the info you posted I see a left and right dolphin and a bird on the top and on the bottom with the wings in different poses. the top one looks kind of like a hawk hovering before it dives. the bottom looks kind of like a dove rising. at least that is what I see in the first photo where you lay out the design. just not sure I can get that good at carving that small ..... will have to see I know there is a book on how to do the small carvings I may check out.
-
Hmmm..... you might be better off looking for a machine that has the kind of control you want if you do not know how the electronics work. there are a few ways that the speed control might be done for a given tool and the issue is that if you try to do it the wrong way it might make the tool fail sooner than it should under normal use. the more basic controls will be to vary the amount of power the motor gets, if it's a simple motor then that should not be a problem. but some tools may have a speed control that works on the duty cycle / and or PWM of the power and lowering the input power on them might just fry the electronics. you might ask the Mfg of the tool about the control you want and see what they say.
-
very nice! carving the side window ornaments - wow! the MS kit I was not even sure what they were supposed to really be... must give that part some thought on my kit build....
-
well if you use LED's that run off the watch battery then you should not be changing them very often.... possibly not for several years. even with triple a cells I bet you can go a year. LED - esp small ones only need a small amount of power to run and do not waste power the way incandescent bulbs do. incandescent bulbs give off a lot of power in the form of heat and that is wasted energy. LED run very cool - less waste energy and less "draw" from the power source. this will also depend on how long per day / week / month you run the lights.
-
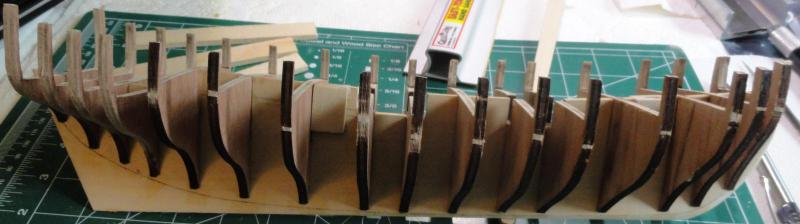
basic bulkhead / frame is together, next to shape the fore and aft blocks.... Mast Slots have blocks that will need to be drilled out a bit to make them round.
-
by the way - start a build log so we can both see what we are doing and others can also follow us.... I should be finished with the bearding line / rabbit for the planks and starting to assemble the hull and shape the fore and aft blocks over the weekend.
-
the keel length is a "known issue" with the kit. in my kit the gap is about 1/4 of an inch and I have used a scrap of wood from the same billet to make up the gap. MS is really good about replacing parts when you ask but I think they could also have better quality control before they send stuff out. in my bluenose kit I had a Britannia cast part that I had to have them replace. the rest of the hull parts in my kit have been very good fits, one bulkhead was perhaps 1/16th of an inch off and I did a spot of rough sanding to fix that.
-
keep this in mind, on a real ship how much could they really bend the planks ? now I have not done a large number of models but so far I have found that a 10 minute soak for the basswood is all I need. the way the planks lay should follow the shape such that most of the plank is nearly flat. only in a few places should most hulls have much of a bend to deal with.
-
if I understand you have a hull and you are adding a second layer of planking, are you getting gaps in the second layer ? or you have gaps in the first layer ?? first layer gaps you may be able to plank over and keep going if they are not too bad. but a finish layer of outer planks you should have free of gaps. possibly get some scrap wood and do some practice on the planking methods before you go further ?? or there are some low cost kits that you can get that may help build skills ?
-
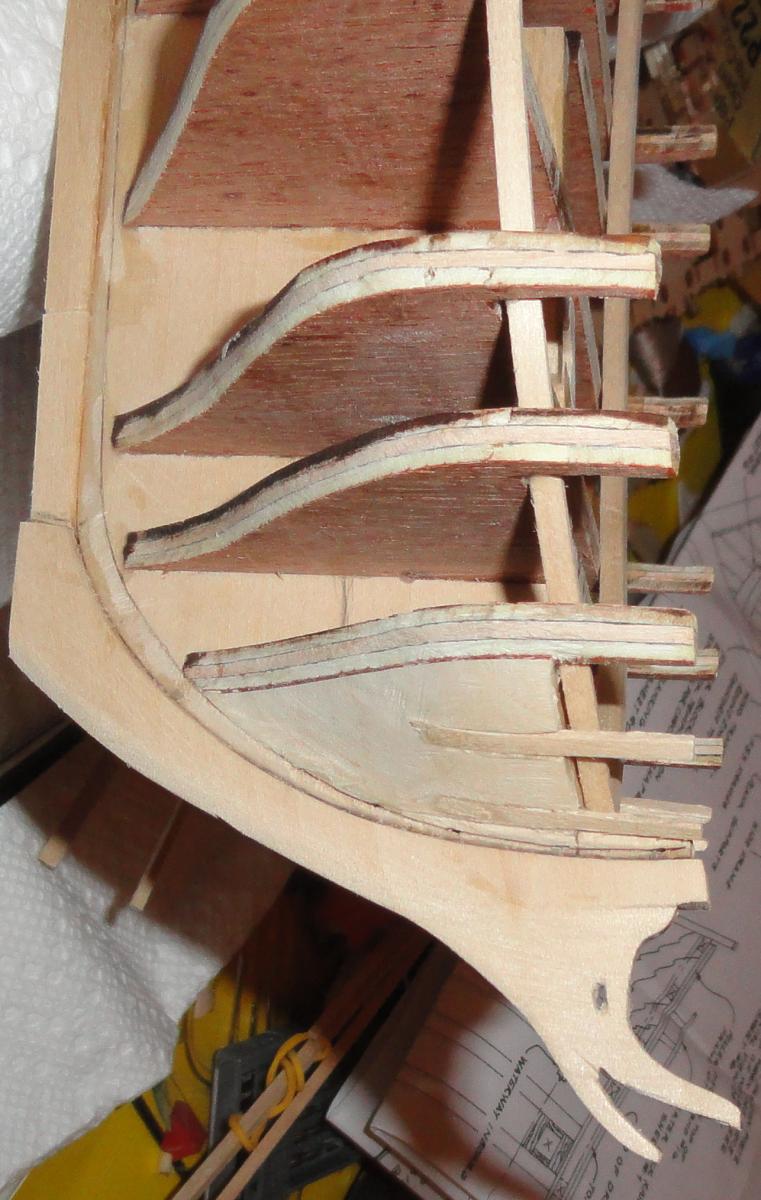
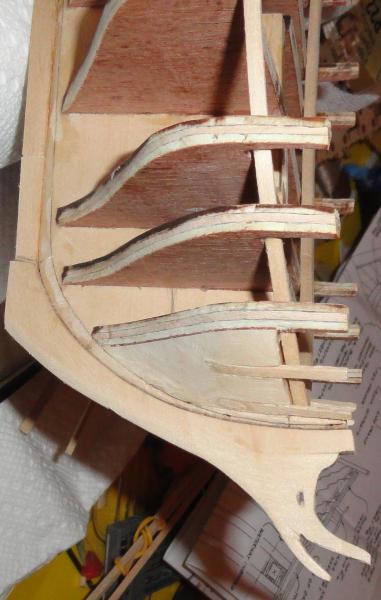
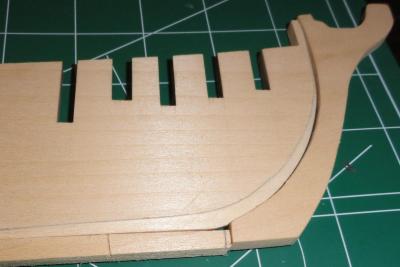
almost done opening up the great cabin ... just need to square up the bottom corners of the frames.