figuerres
-
Posts
236 -
Joined
-
Last visited
Content Type
Profiles
Forums
Gallery
Events
Everything posted by figuerres
-
 I agree, the doors and ladders - just one of each for this size seems better. and trying to fit the last 2 cannons so close to the plans great cabin also seems to be something that would not work in a real ship, make the cabin a bit smaller and then they fit and should work.
 -
in my case I have not yet built this part, I have been working on some details of the gun ports and the cannons and the quarter badges (the fancy windows on the aft port and starboard that look into the great cabin. but I think I know what you are trying to figure out and I will see if I can help, I may build my set and then I can give comments. for now I can say that the 3/16 x/ 3/16 x 24 is not part of the hatches. also look at the plans the sheet is not numbered but it has several views of the hull with a lot of details, it shows the hatches and the "coamings" from what I see you have a few ways you can build them depending on how detailed you want them and if you want to be able to lift them out or glue them in place. have you ever made a picture frame or a door frame ? this is very much like them. more later when I have some time ....
-
that very object has been a puzzle to many folks. I think it was some kind of container that might have held something the pilot / captain needed. but that is just an idea. seems like it was not lashed down to the deck but was it kept on deck while at sea or only when ready to dock ? Heck it might even be a place to sit next to the wheel ?
-
also at places like model expo watch for the web specials and other promos they run, I have gotten kits from them at half off some times, for example: http://www.modelexpo-online.com/product.asp?ITEMNO=MS1458 $50 for the kit that normally is $109 not bad for a starter kit. well ok that one is not a beginners level kit but I hope you get the idea....
-
Have there been changes to Model Expo Support?
figuerres replied to rtropp's topic in Wood ship model kits
just called and spoke on the phone with them and they said a new hire was made and they are working on a backlog of requests with the new guy. so give them some time to get the new guy up to speed. -
for planking and other stuff you can get plenty of cut wood. the bulkheads and keel - does it have a plan sheet that you can copy ? use that to cut out bulkheads and keel from some blank stock. not easy but you can do that and not have to mess with the old wood. make some copies of the plans and use them to guide you on cutting from blank stock.
-
also is it possible the green is the wood color ?? some of the wood can have a green color and I wonder if the wetting just brought out the color that for some reason did not show when dry. is the color in the wood or is a green growth on top of the wood ? if you touch the wood is it dry or damp to touch? if you sand it does it come off or it the color in the wood ? take a sample and cut it and use a magnifying glass to look at it, mold or fungus should have a surface on the outside of the wood, will look different that the wood fiber structure.
-
Documentaries of interest to MSW Members - moved by moderator
figuerres replied to Kevin's topic in Nautical/Naval History
knowing how soft balsa is I picture a metal cable as acting like a saw with the flexing at sea ... -
probably just a ship's name that may have been used many times, then later the US built a ship by that name and it is the one we all think of.
-
thanks! I have found that the plans seem to have a small error in the dimensions and I also mis-read part of the instructions and that has made me re-work the upper hull from the main whale to the top of the hull. soon I will have the gun ports cut and then it will be all good and I can seal and paint and the re-worked parts will be hidden :-)
-
Gunports and the printed plans, been re-working some errors I made in building the hull but I am also seeing that the 2-d paper plans when used on the 3-d model have a few issues with not quite matching up.... fun!
-
while it may not be good for models that is some good wood and I am sure you can get some money for it if you check around, if I had the right space and machines I would take some of it to finish a trunk I have but I need it pre milled to like 1/4 inch thick boards, and I do not have any way to cut it down to that size.
-
lighting installed and the wood to try and carve my own trim for the quarter deck windows has arrived! wow ... got to take some photos and post them soon....
-
sail powered submarine - moved by moderator
figuerres replied to Kevin's topic in Nautical/Naval History
wow, what a story that must have been for the guys on that sub to tell others... and how many would not believe it on hearing it. -
FAIR AMERICA KIT BUILD - moved by moderator
figuerres replied to cruiseholidays1's topic in Wood ship model kits
in my log I have not yet done that part but will soon be working on it. http://modelshipworld.com/index.php?/topic/28-fair-american-by-figuerres-modelshipways-148-kit/ if you start a log and post there with details we can try to work it out. I have my hull planked and the main deck planked and need to update the log this weekend as I move along. in my case I am making the great cabin open on the inside so my build is not exactly how the kit plans did it. -
well I changed my mind, the hatches will have a bit of below deck lighting after all.
-
I am building a model shipways Fair American and have been working on a few bits of kit bashing. I like what rafine did with his build: http://modelshipworld.com/index.php?/topic/1114-fair-american-by-rafine-model-shipways-kitbashed/page-3 he could only say that he had an old model railroad street light for his. right now I have two different ones that are about right but each has some problems. the two I have are a set of Lionel lights part number 6-24156 and a set of Rail King / MTH part number 30-1062 of the two the Lionel are slightly smaller and closer to scale. but they do not have the framework to look like metal strips that held the top and bottom together. also they have a very simple top and bottom for the lamp. the Rail King parts have a more ornate look , if they were just a bit smaller they would be perfect! both are "O-Scale" and the difference in size is very small. So far what I have is using some of the parts from each I will have one lantern that I think will end up looking right. I am replacing the bulb that came with them with a small yellow led that has a random flicker to look more like an oil lamp. when I get time I will post some pictures of the two types of lamp and my results. the final lantern will be part of my build, here is a link to my build log http://modelshipworld.com/index.php?/topic/28-fair-american-by-figuerres-modelshipways-148-kit/
-
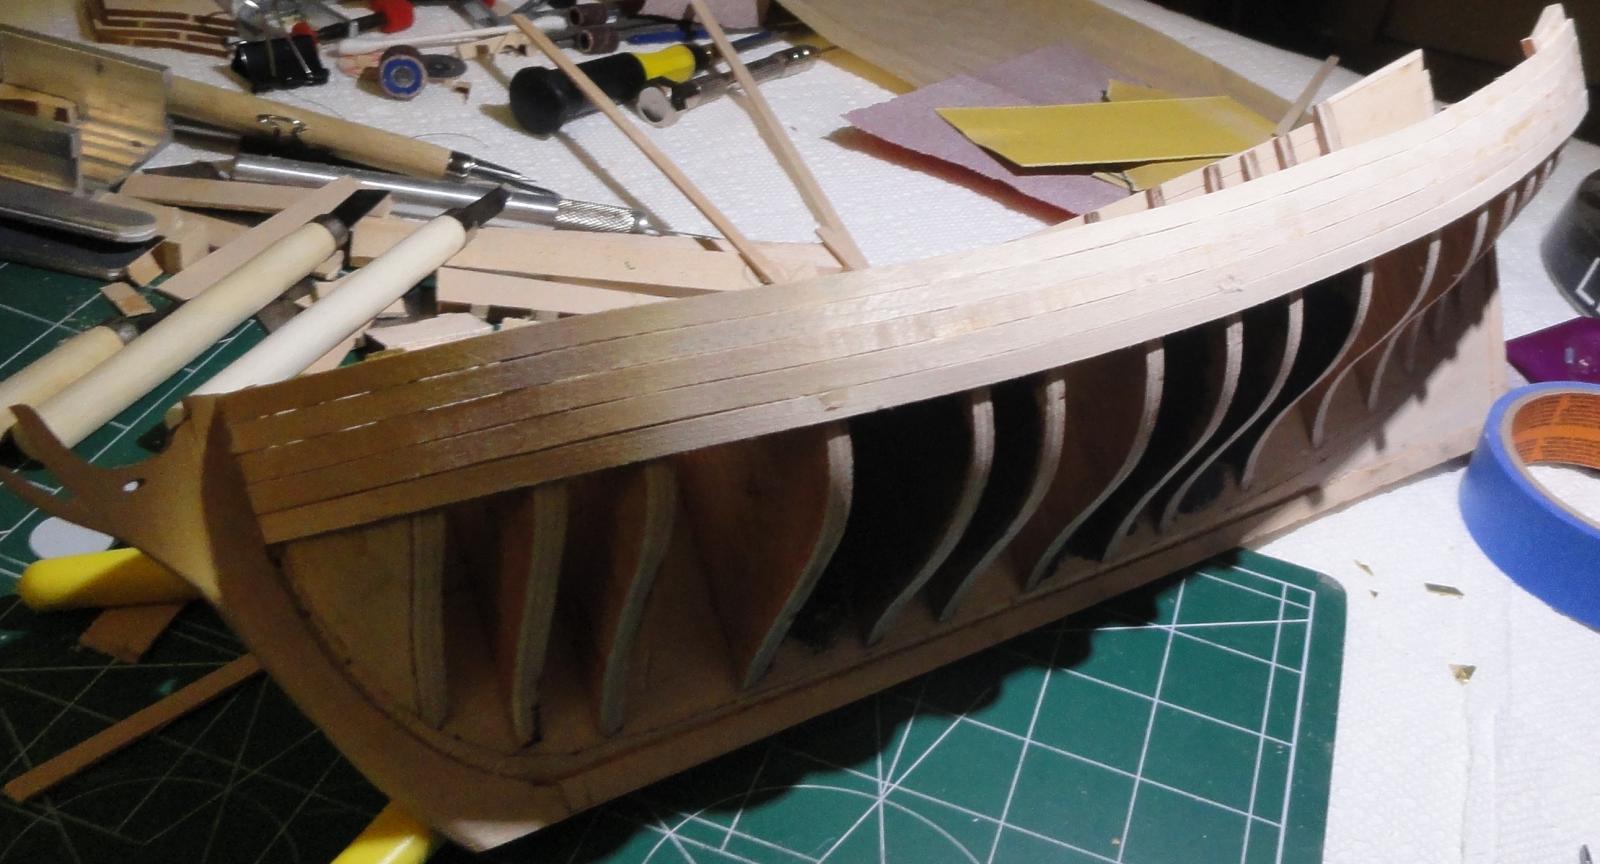
Hull is almost completely planked now, ordered electronics and waiting for them so that I can fit in the wiring for the cabin and stern lamp lights before I close in the hull. found two different model rr lamps that may work for the stern lamp, have to get them and see which is the right size.
-
WOW!!!! my mind is reeling from how that detail was done..... OMG!!
-
No photos right now but hull planking is happening ... should be done soon. this is my 3rd hull and I still do not get my planks to fit as good as I would like so this will be a hull with wood filler and painted... some day I will get it to the point where I can do a nice looking bare wood hull ... Getting better at it but still a ways to go.
-
OMG!!!!!!!!!!!!!!!!!!!!!!!
-
Using Blacken-IT
figuerres replied to fnkershner's topic in Painting, finishing and weathering products and techniques
Nope, I hit it with 100 grit a bit and do dice. I was using that wire to hold a bunch of small parts together so not a big deal. I am thinking there is some metal in that wire that is hard to blacken. note: that wire came from a local Michaels craft store in the jewelry area. the wire I get with model kits has taken to black with no problems -
rafine: did you make that aft lantern or buy it from somewhere ? it sure doe not look like the cast part from MS.
-
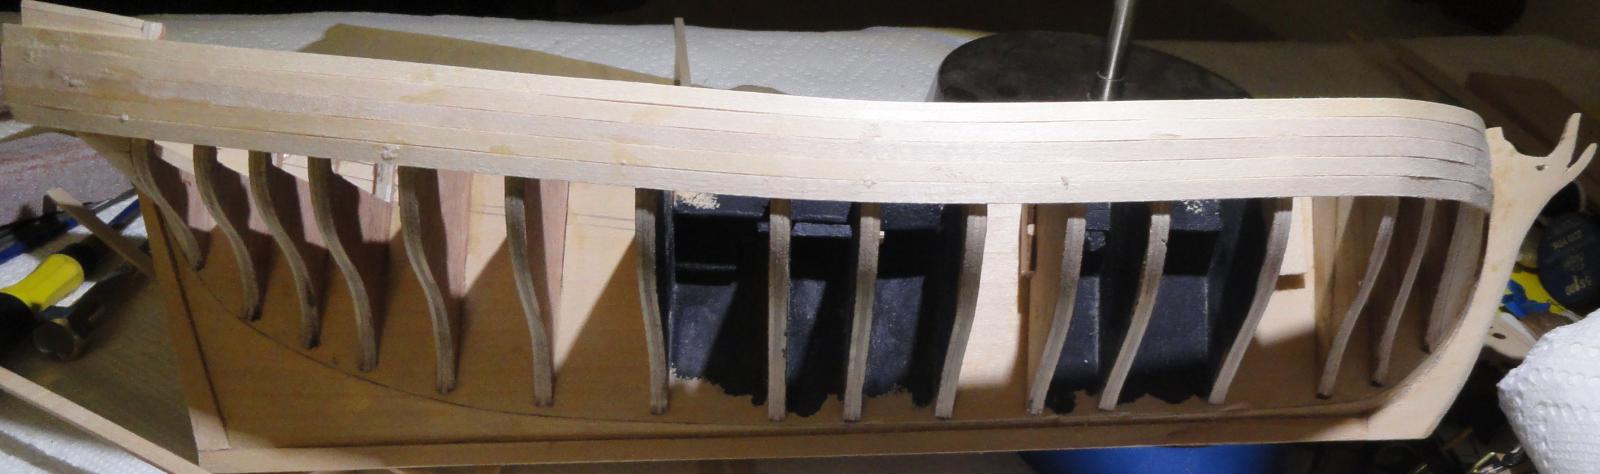
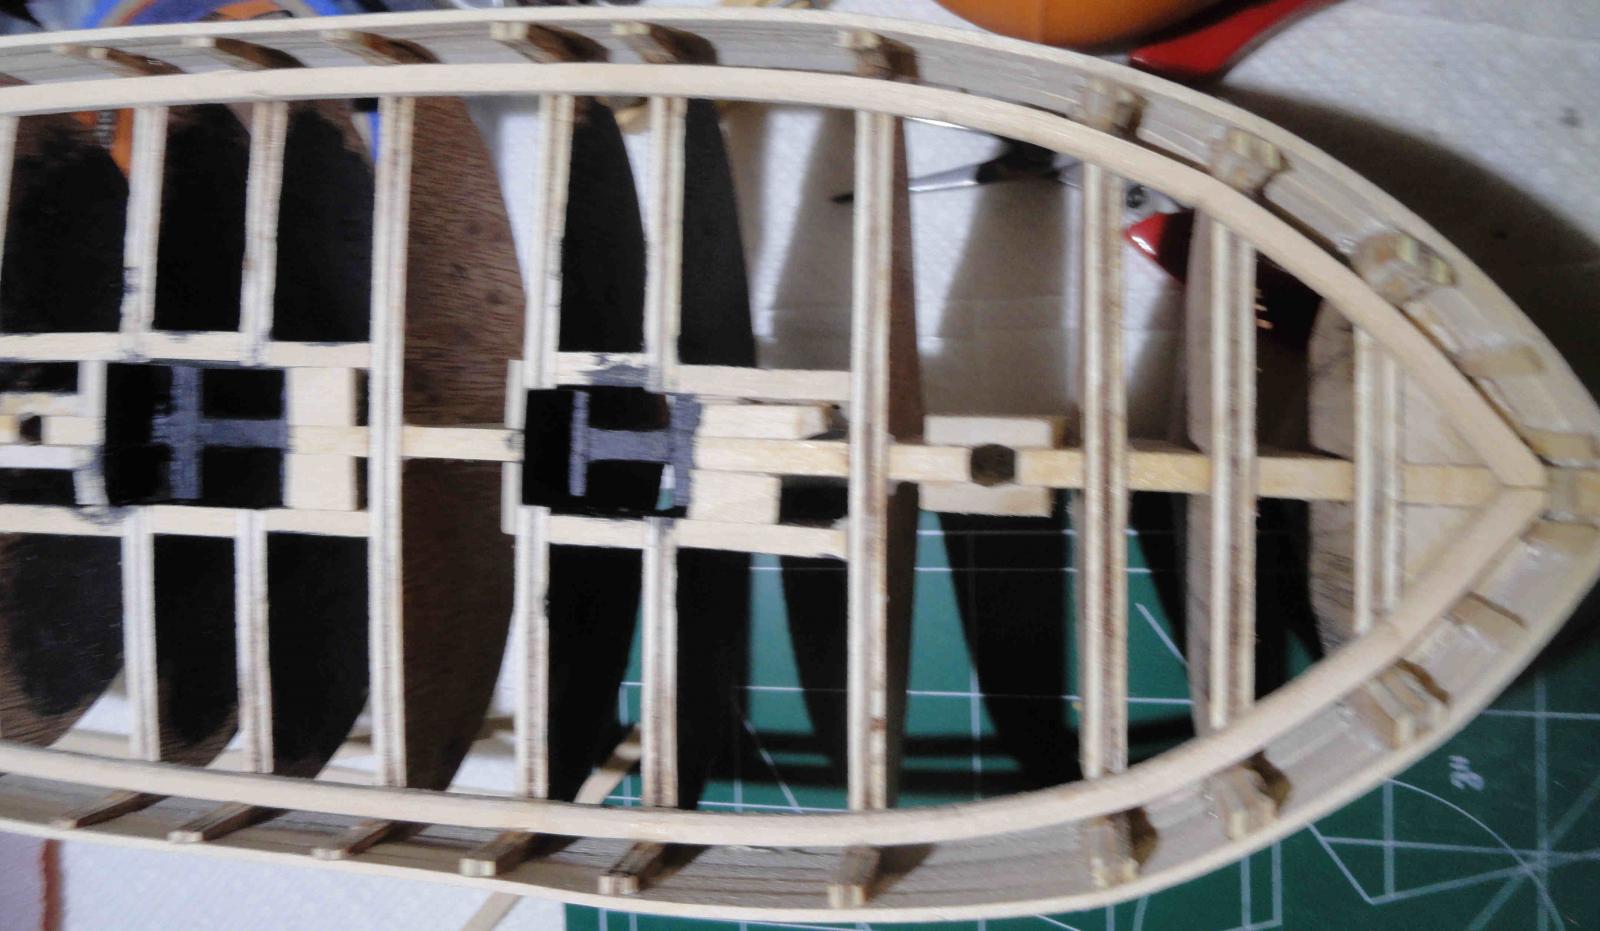
first few hull planks laid... not that the areas where the hatches will go have blocking and the area under them is painted black. while I am going to light the cabin I will leave the hatches dark.


-
Nice work all around! I like what you did with the wall and door for the great cabin, might do that on my build....