HOLIDAY DONATION DRIVE - SUPPORT MSW - DO YOUR PART TO KEEP THIS GREAT FORUM GOING! (Only 24 donations so far out of 49,000 members - C'mon guys!)
×


mikiek
-
Posts
2,276 -
Joined
-
Last visited
Content Type
Profiles
Forums
Gallery
Events
Everything posted by mikiek
-
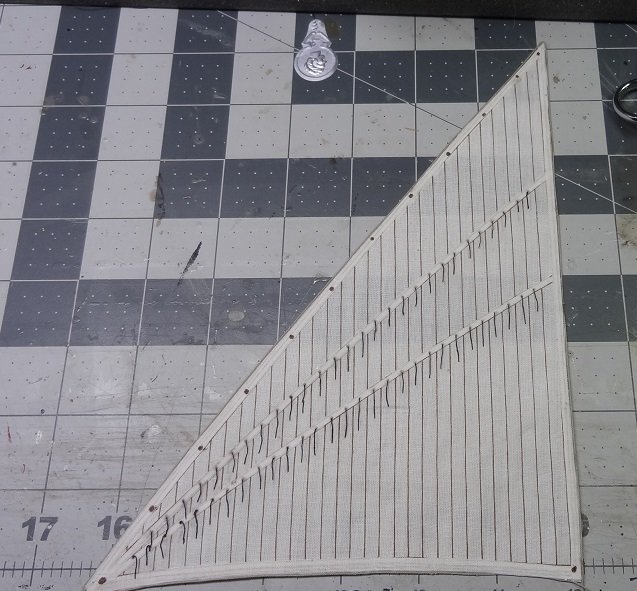
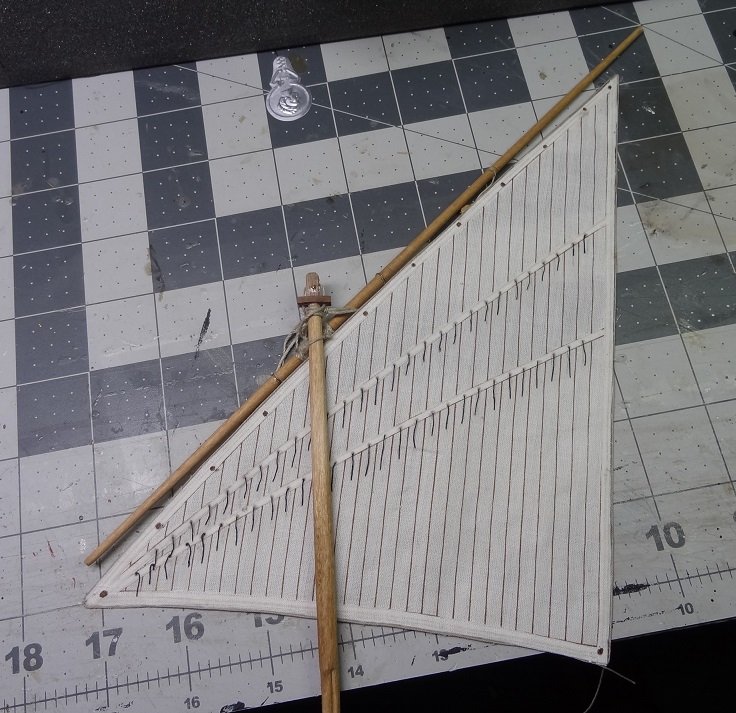
 Thanks for stopping by Per. I appreciate your comment. The problem with "the picture" is there are no size details. As usual, there were not many rope diameters supplied and no size specifications in the picture so all the ropes were just a guess. No order to the installation either. I guess I'm going to lace the sails to the yards before I step the masts. I also need to shape the sail a little. It's flat as a pancake right now.
 -
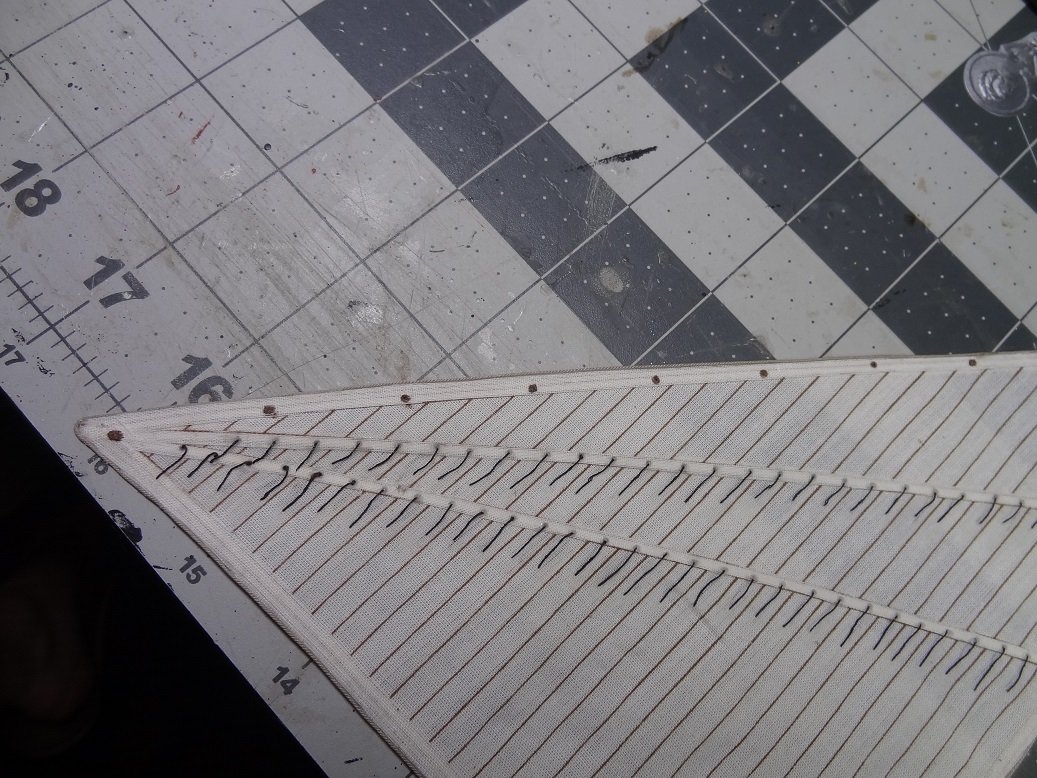
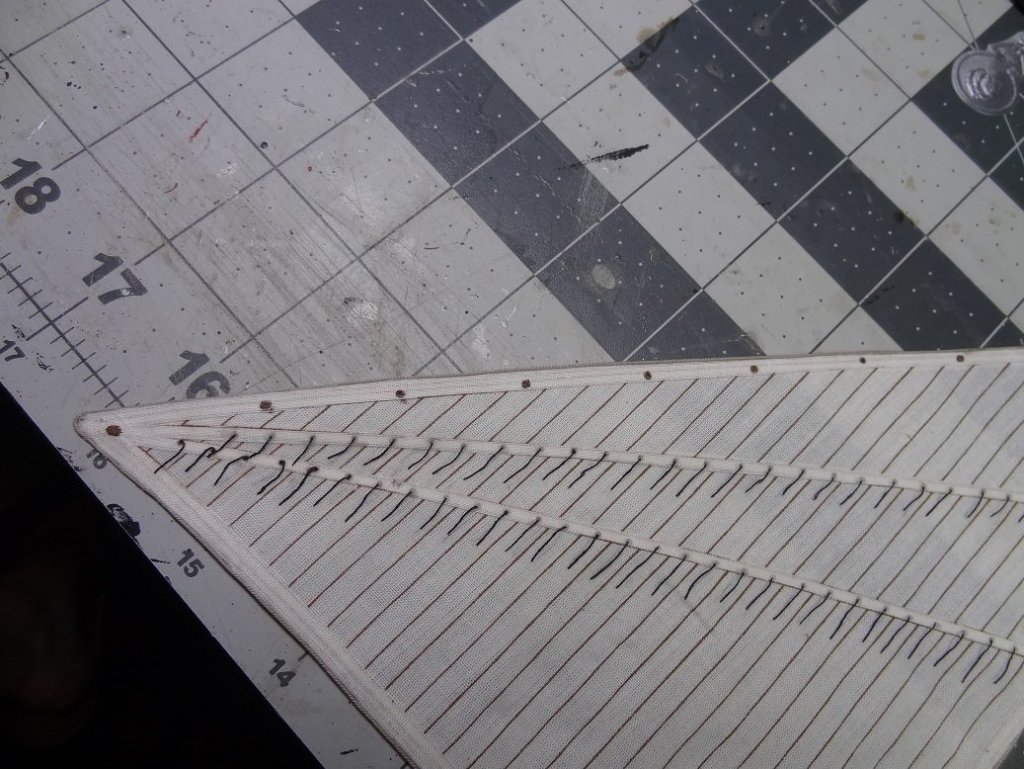
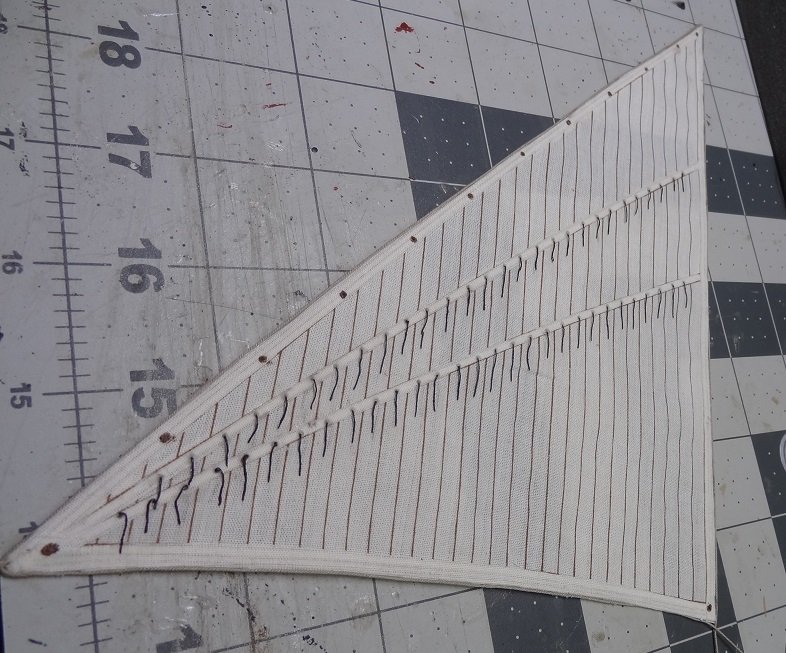
Back to rigging for Me and My Arrow. Anybody remember that one? The instructions are so poor here. Essentially "do like the picture". I'm not sure the order of things but sooner or later I'll have to hang the sails so today I put together one of the kit supplied patterns. I've researched some and read several threads here at MSW. I got some ideas, but didn't want to go to a lot of trouble with this. I played around with paper (for about 5 minutes) and decided I didn't want to go there. Finally I decided to try the material and pattern in the kit. There are 2 lateen sails. I've done 1 mainly as a trial, just to see what worked and what didn't. When I get it finalized I'll post some steps when I do the other one. One thing I did pick up on from a post and I agree completely. It's real hard to keep all the parts in scale. Some things would have to be really small to be accurate. I would prefer to show all the parts so a viewer could get an idea how it all worked - even if that means making some parts larger than they should be. Within reason of course. The telltales on this sail are an example. I would have had to use very thin fly tying line to be accurate. I used some sewing thread instead. I'm really hoping for some critiques on this sail. It's the first one I have ever made. It seems OK to me but who knows?
-
Maybe a good tavern across the street? I'm just glad they seemed to cooperate with each other. There had to be some egos floating around.
-
Elijah - I can already see how your boat building skills and problem solving abilities have improved from Phantom to this build.
- 228 replies
-
- 3
-

-
- gunboat
- model shipways
- (and 1 more)
-
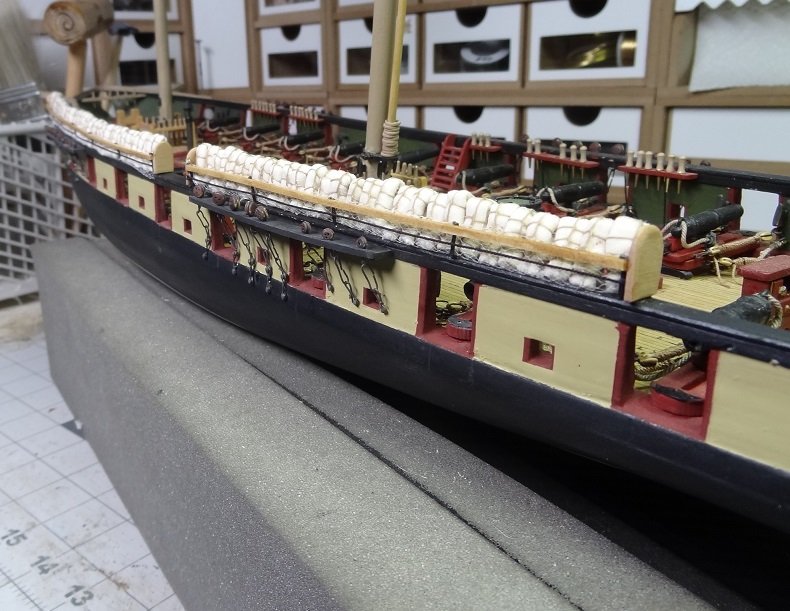
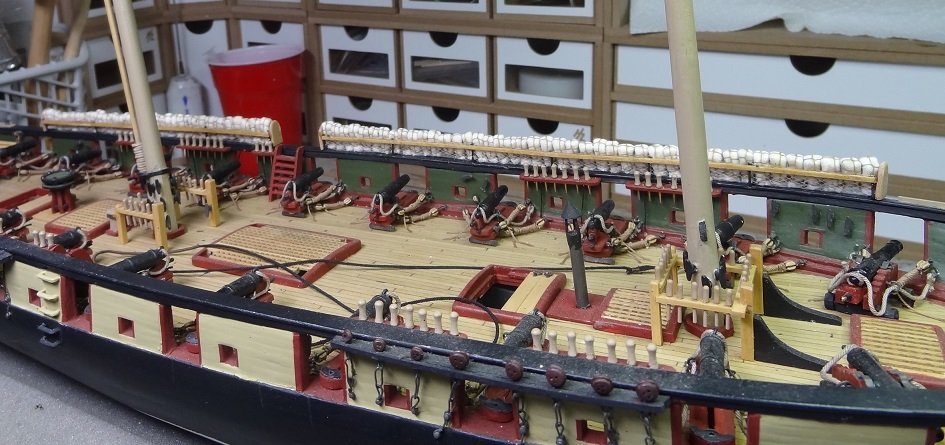
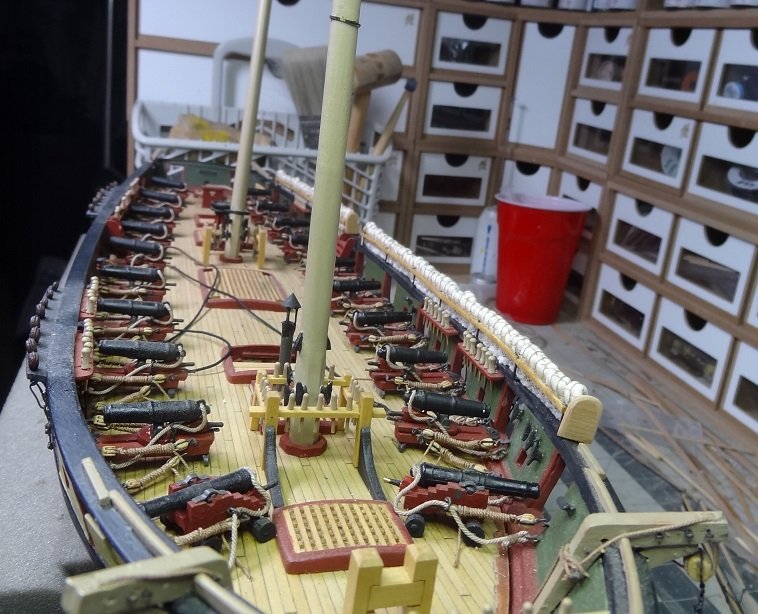
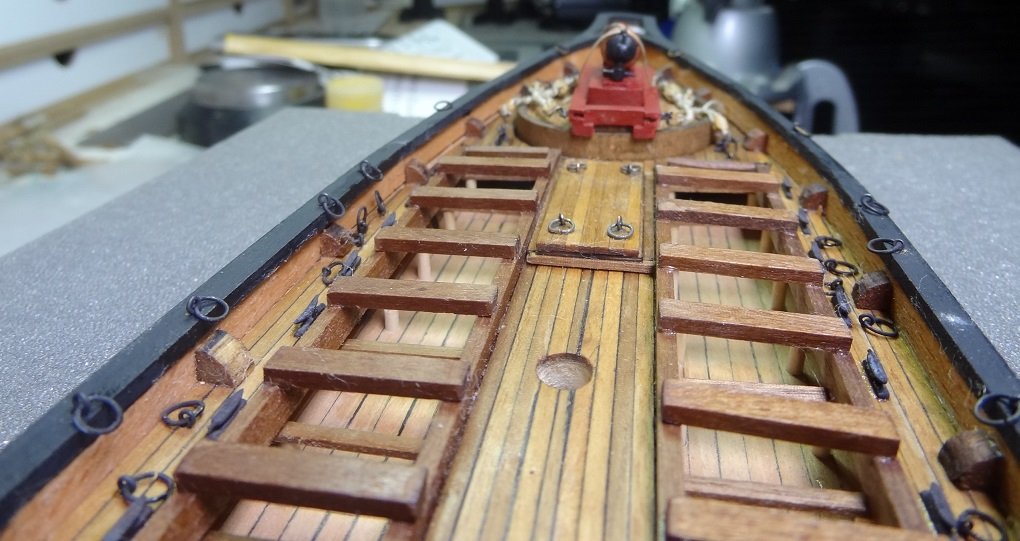
Joel - an observation on your comment. It was incredibly monotonous work. Probably worse than the gun tackles. Interestingly, it seems that this type of boring task is what adds the most life to a build. At least to my eye. That one pic taken from the bow at almost deck level, highlighting the hammocks and the guns. The two most tedious and monotonous pieces of work make it look like a ship to me not a model. Especially right now since you can compare sides with hammocks and without.
- 843 replies
-
- 4
-
-
- niagara
- model shipways
- (and 2 more)
-
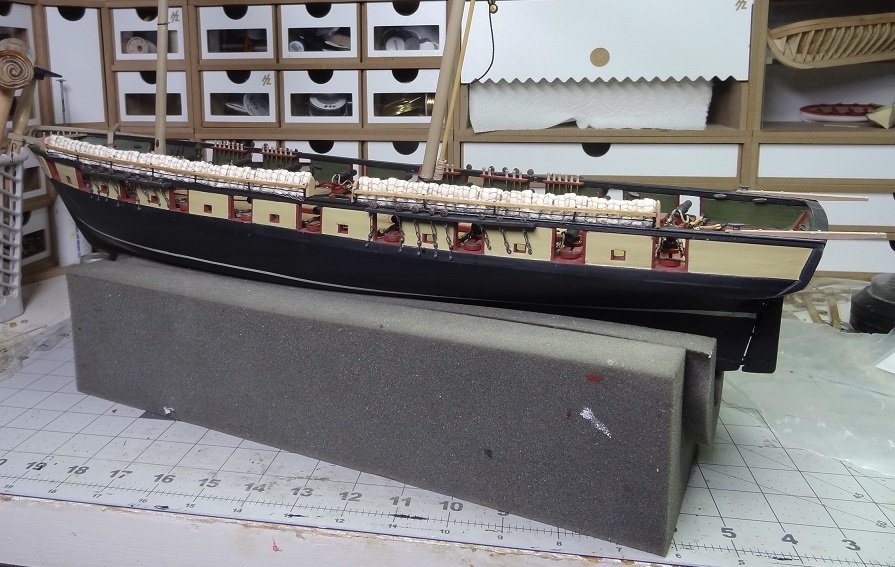
Thanks for the comments and likes from you guys. I think you hit it Joel - monotony. No doubt that's why it's taking so long. A few notes from thoughts after I posted: I had a real concern about the shrouds having space the clear the hammocks. I even shortened the width a little - in scale they should have been 9/16" wide, I made them about 3/8 hoping when I doubled them over they wouldn't be too tall in the stanchions. As luck would have it, I made the stanchions wider than they needed to be. This allowed me to place them at a slight angle - the bottoms a little bit outwards to the tops. In other words instead of placing them slanted bow to stern I was able to slant them inside out. The good news is there is plenty of clearance for the shrouds So I will have a design decision when I begin the starboard side as to using the same width for the stanchions or reducing that a bit. I've also noticed from the pix that I will need to redo the pieces of wood at the ends of the trough. They look kinda silly hanging over the rail like they do. Does anyone know the nautical term for this part? Was going to Google to get an idea of what they should look like.
- 843 replies
-
- 2
-
-
- niagara
- model shipways
- (and 2 more)
-
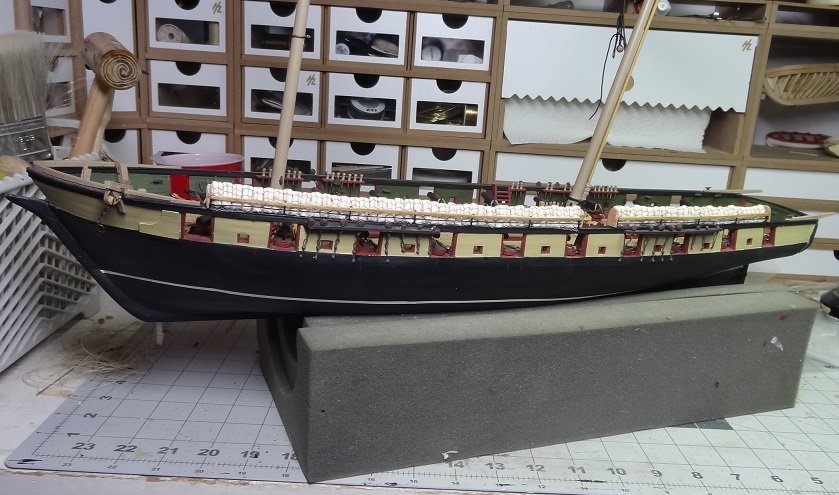
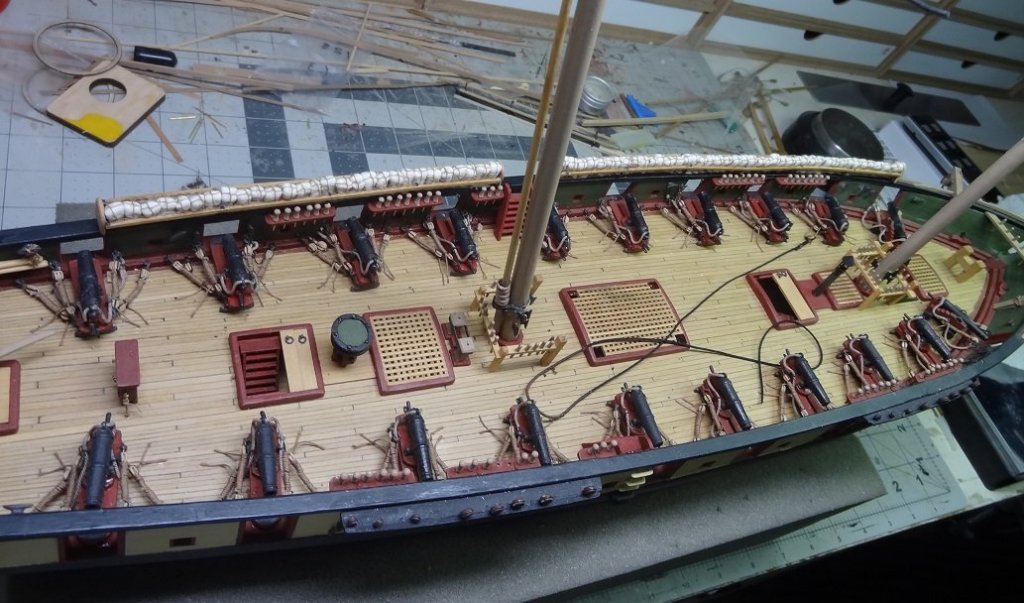
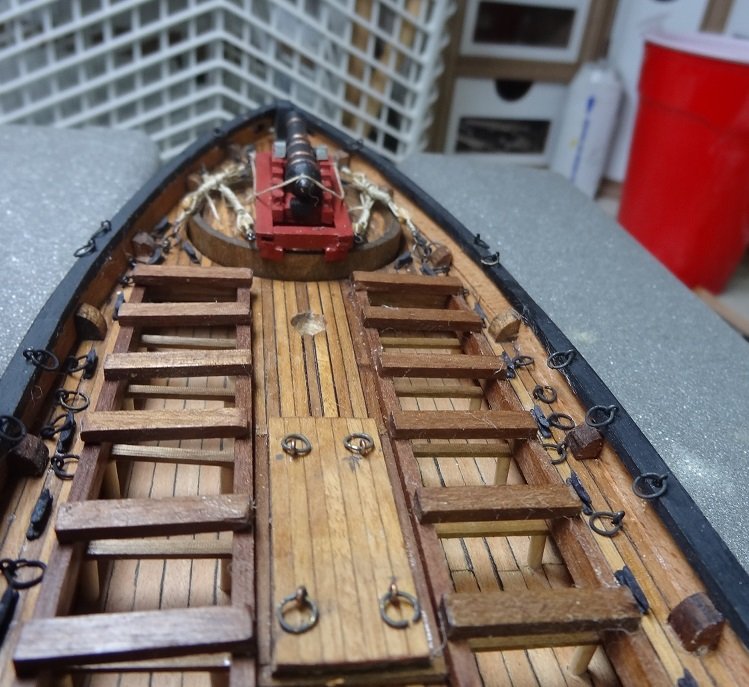
Hey everyone - we had one of those gorgeous days today so I opened up both ends of the garage and went to work. Hammocks, hammocks and more hammocks. I've been working on those on and off for some time now. And I am HALF WAY finished tonight. From cutting the fabric to binding them up each one takes about 4-5 minutes. And there are 71 shown in the pix below. I would also include some wastage, as I began the final placement maybe 10% of them were either too big/small or just looked bad and did not make the cut. I glued them in place with a little CA. My goal there was a good even row, the tops in good alignment. A close inspection will show that in order to do this, some of the bottoms are barely touching the rail. Even with all that there is still not perfect alignment. As I have stated previously, this is how they will be displayed on my Niagara. I don't plan on wrapping them in a cover or anything like that. At least half the crew can sleep now
- 843 replies
-
- 7
-
-
- niagara
- model shipways
- (and 2 more)
-
Right Per - I will use Don's idea and try first with sand in some zip lock bags. If I can't get enough weight out of that I can throw in a large fishing weight. When she's riding level, I will weigh the ballast and fashion something more permanent.
- 96 replies
-
- 1
-
-
- tugboat
- Tippecanoe Boats
- (and 2 more)
-
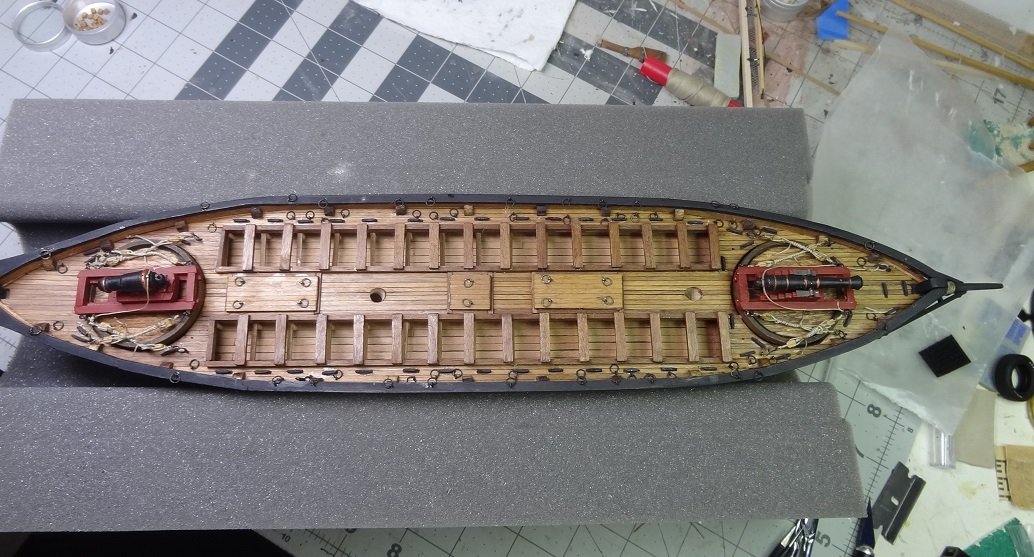
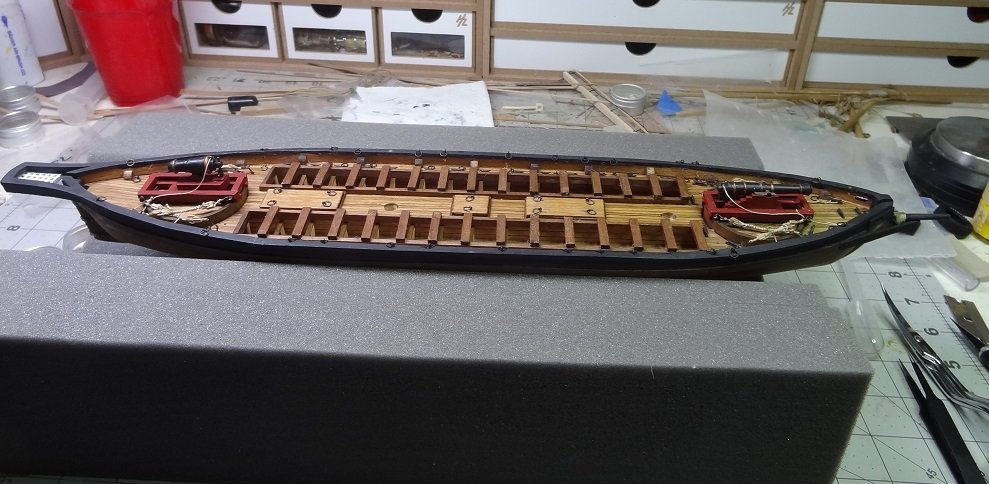
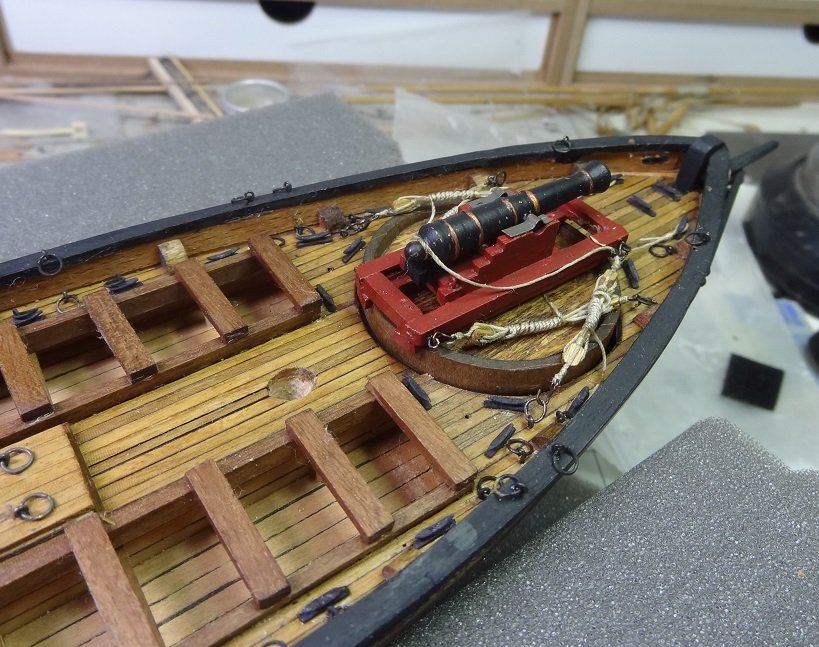
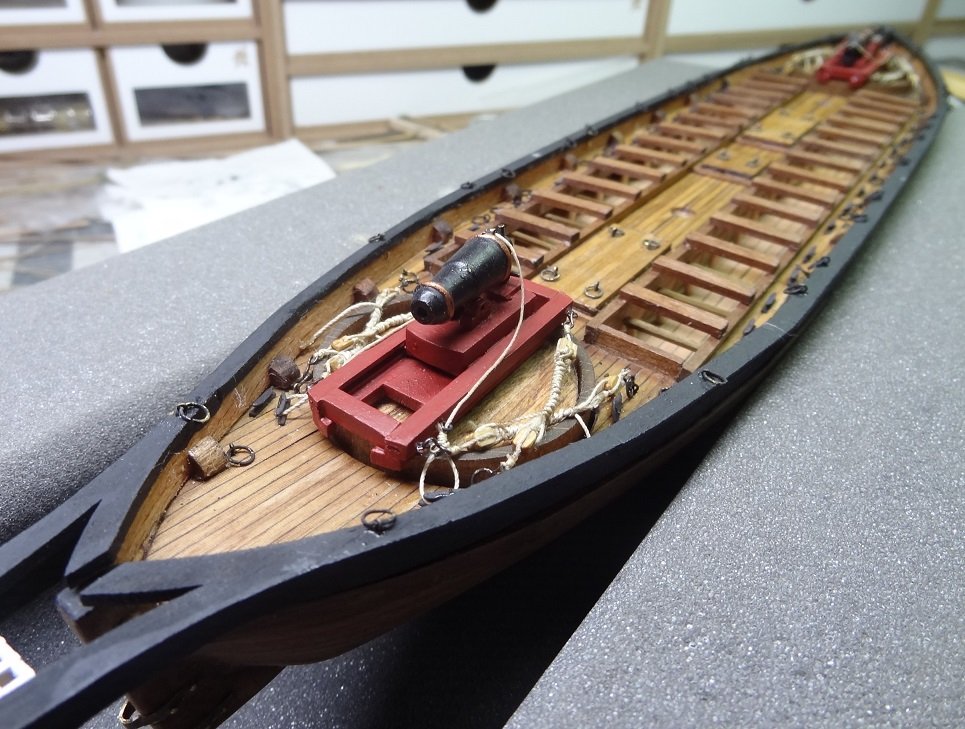
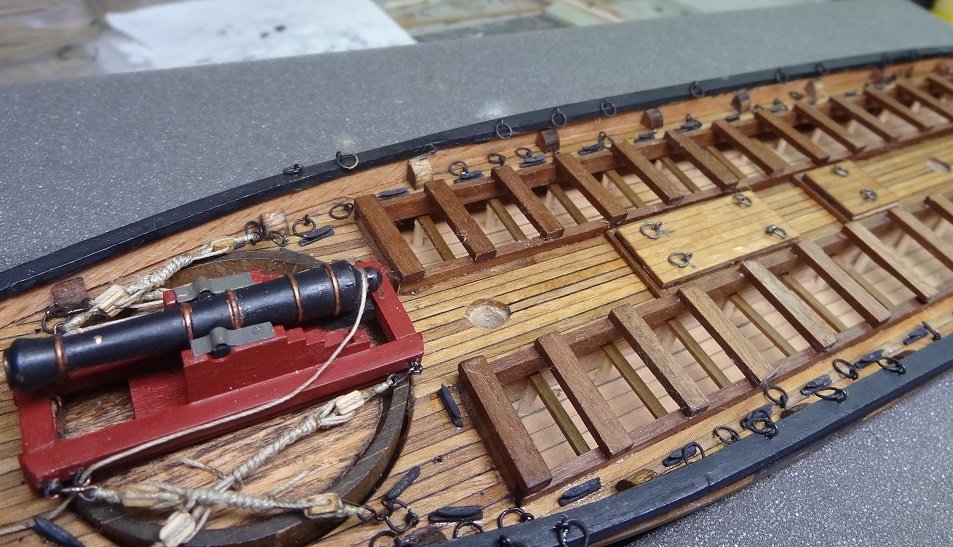
Made a concerted effort to get some work done on Arrow today. I think I have overwhelmed myself lately with various projects - models, RC sailboats and RC speedboat. That last one is a new direction. It's an RTR (ready to run) so there's no real build, but in less than a week I've managed to almost destroy it. Cracked it up on a wall, I've now learned fiberglass repair. Smoked some of the electrical components - now waiting for replacements. When it works, it's a thrill. 60+ mph. Back to reality. I believe I have finished installing the deck hardware and have rigged the 2 guns on their platforms. This rigging really cluttered up the area, so in an effort to clean it up some the gun tackles are frapped and I rearranged the fasteners. Here's what she looks like: I've started looking into sails and all that goes with that. That's the next big step.

-
Didn't think of that Carl - actually shaping the weights. I could get some big fishing weights (usually round) and flatten them out some. Sounds easy enough. Just need to determine how much I need.
-
Don - that might be at least a good temporary solution. A couple of ziplock bags. Great idea. At least I could figure out how much weight I need. Access inside is great. The entire deck structure comes off and there's a good 5"x8" opening. I should have had my camera today. Rescue number 2. Was RC sailing with friends and a hat blew into the water. I sent the tug after it.
- 96 replies
-
- 1
-
-
- tugboat
- Tippecanoe Boats
- (and 2 more)
-
Yes Carl - that is the plan. My fear is it may take a lot. This tug is quite buoyant. What did you use for lead when you added it? The motor sits in the bow area so I will need to have 2 equal weights that I can epoxy to the hull on either side.
- 96 replies
-
- 1
-
-
- tugboat
- Tippecanoe Boats
- (and 2 more)
-
I couldn't agree more. No frills. Only what was needed to sail the boat or fire the guns. I still chuckle when I remember Joel's comment regarding the skylight at the stern. He felt that was never built and "Commodore Perry would have to read by candle light".
-
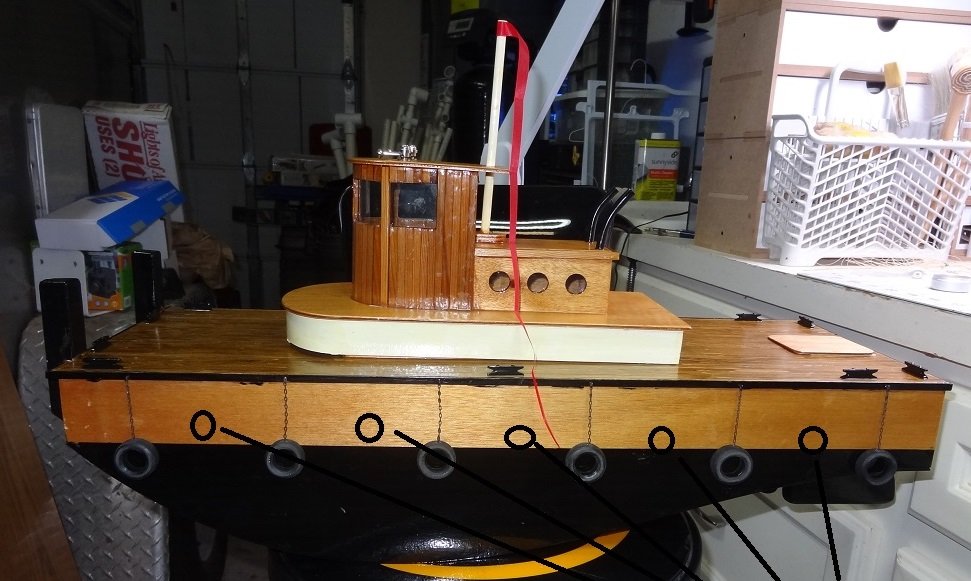
OK Carl - Unfortunately at the moment the tug is riding quite high at the bow. I need to get that resolved so that I have a true waterline. I probably should have held off on painting the lower hull until I had that waterline. I think even when I get the hull floating level the black painted part will not be totally under water. So I don't have a real mark where the waterline is. I think if I can get the bow down, the tires should be in about the right place.
- 96 replies
-
- 2
-
-
- tugboat
- Tippecanoe Boats
- (and 2 more)
-
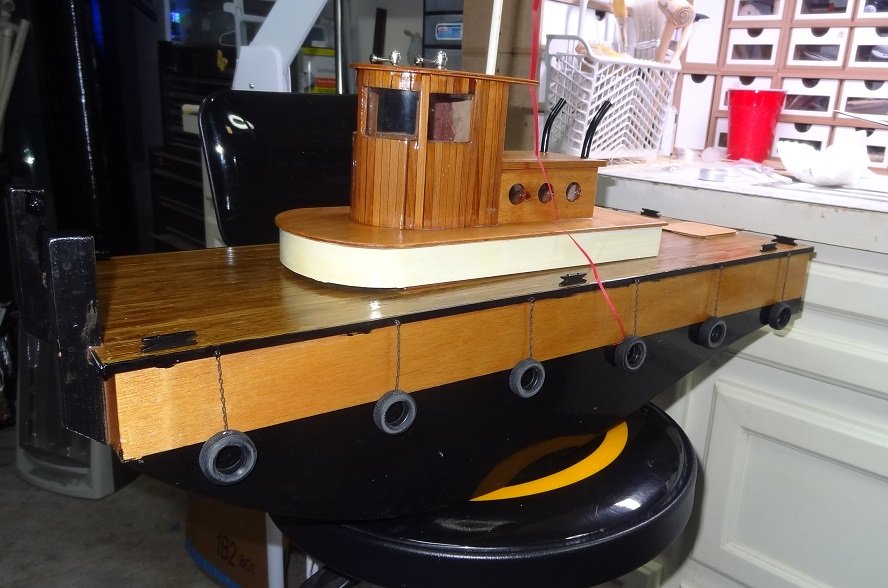
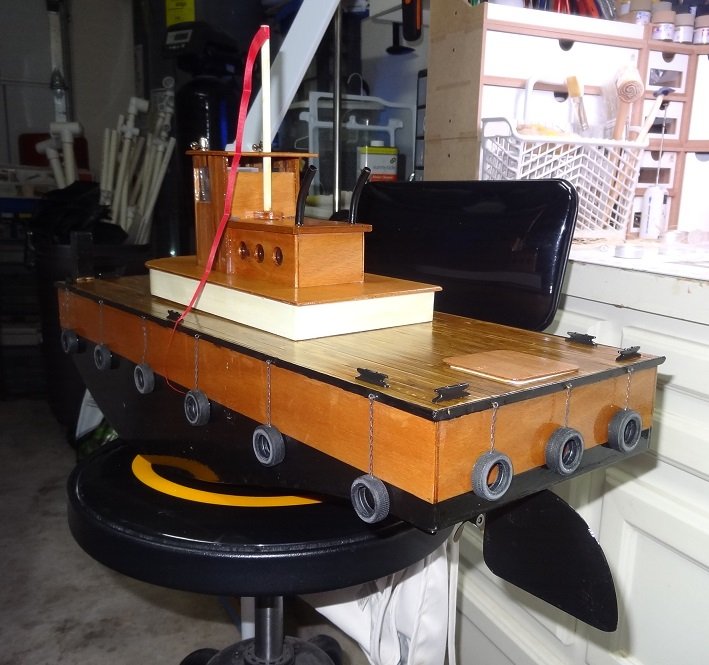
EJ, Don - thank you for the kind words. It was a fun build and as EJ says I can get her wet. She's riding a little high at the bow which seems to make the steering a little goosey. I'm considering adding some ballast to bring it down some. I did get some tires so here's a few pix of that. I'm thinking about adding some more. Maybe in the gap between each and a little higher up.
- 96 replies
-
- 2
-
-
- tugboat
- Tippecanoe Boats
- (and 2 more)
-
Absolutely. Even had it's first rescue last week. I've posted a few finished pix, however just this week I was finally able to get some scale model car tires so I've hung those around the sides. I'll add a few new pix.
- 653 replies
-
- 4
-
-
- trabakul
- marisstella
- (and 1 more)
-
All good ideas JCF. I will experiment. The ribbon is called for in the instructions. Why? I don't know. I will be poking a lot of holes in the upper edge of the sail to lace it up to the yard. So strength might have something to do with it. How would you apply paper to a sail edge and keep it so the sail is workable?
-
Thanasis - how do you cut your cloth? It looks so neat. I always end up with frayed edges and threads sticking out. Perhaps the better question is what kind of cloth do you use? Keith - What color do you use for the tape? I like the idea but those are some pretty gaudy colors in the video
-
Looking good Mike. I think you made the right choice on the panels.
- 129 replies
-
- 2
-
-
- finished
- model shipways
- (and 1 more)
-
Matt - I think your curved base will work. Just keep in mind you may want to taper the long edge of the sticks you put on top. When you put planks on a curved surface the long edges don't butt up against each other the same way as when they are laid on a flat surface. Without tapering you will get a little gap between edges. You have a good start on your bulwarks, but I hear those timberheads crying to be bumped Good idea stopping until you are ready to plank the bulwarks. I think I probably broke every timberhead on Niagara ar least one time. Matt - I think your curved base will work. Just keep in mind you may want to taper the long edge of the sticks you put on top. When you put planks on a curved surface the long edges don't butt up against each other the same way as when they are laid on a flat surface. Without tapering you will get a little gap between edges. You have a good start on your bulwarks, but I hear those timberheads crying to be bumped Good idea stopping until you are ready to plank the bulwarks. I think I probably broke every timberhead on Niagara ar least one time.
-
All those little details really add life to the build Don. Great execution on your part.
- 653 replies
-
- 5
-
-
- trabakul
- marisstella
- (and 1 more)
-
This sorta goes along with this other post. Regarding a lateen rig, instructions for Arrow say to get some ribbon, fold it in half lengthwise and glue around the edges of the sails. It sounds reasonable, would add some strength and would eliminate the need to hem the sail. However this is the first time I've heard of this technique. Does anyone have experience with this?
-
Very cool Tom!! What a great display.
-
Most lacquers and varnishes will form a hard coat layer in/over the surface. You're sealing the wood. The oils you mention don't do that.They soak into the surface but don't provide much in the way of protection form dings and the like. One thing I can just about promise you is your hull will get beat up before you are finished.
-
Natural will come the closest to doing almost nothing. One thing about stain/finish recommendations - the same stain can look very different on various species of wood. I've never used mahagony so I couldn't tell you what the Natural will do on that. I will say that Natural is useful enough to buy the small can and just have it around. You also could just pass on a stain and got straight to a lacquer or varnish. To me the color you have doesn't need any help. I would just put several coats of matte varnish on it and leave it at that.
- 50 replies
-
- 1
-
-
- artesania latina
- Virginia
- (and 2 more)