HOLIDAY DONATION DRIVE - SUPPORT MSW - DO YOUR PART TO KEEP THIS GREAT FORUM GOING! (Only 72 donations so far out of 49,000 members - Can we at least get 100? C'mon guys!)
×


mikiek
-
Posts
2,276 -
Joined
-
Last visited
Content Type
Profiles
Forums
Gallery
Events
Everything posted by mikiek
-
 I have not given up!!! Haven't posted to this log in a while. I've had this ridiculous debate with myself over the size rope to use for the tackle - literally lasting for weeks. Plans call for .016 - my choices at hand are .012 or .018 . Either 25% too small or 13% too big. Had this been over general rigging I would have opted to go along with conventional wisdom and choose .012 but on the guns I just don't think .012 looks beefy enough. Also with the tackles frapped the .018 looks much better. So there you have it. I didn't realize how much that was stressing me out until it was over. Between the gundeck build (yes I am seeing another kit) and some family matters, it has been an effort to work on prepping and stropping blocks/hooks and line. But it is progressing. Also realized today I only have half the carronade sleds built.
- 843 replies
-
- 3
-

-
- niagara
- model shipways
- (and 2 more)
-
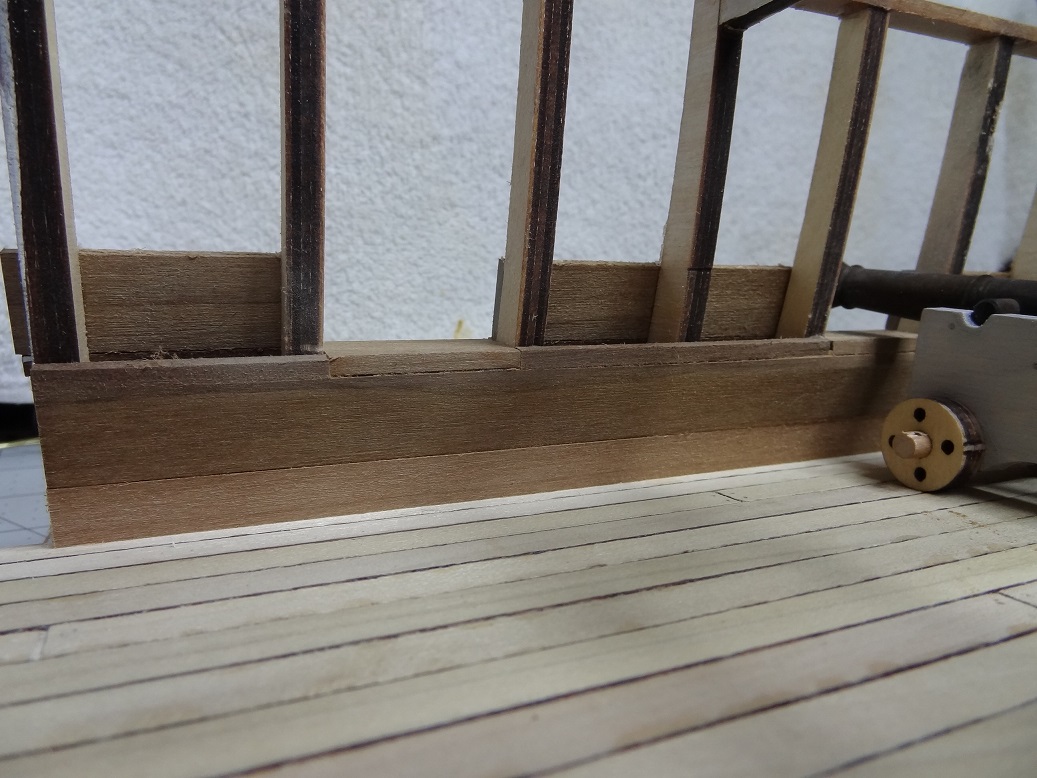
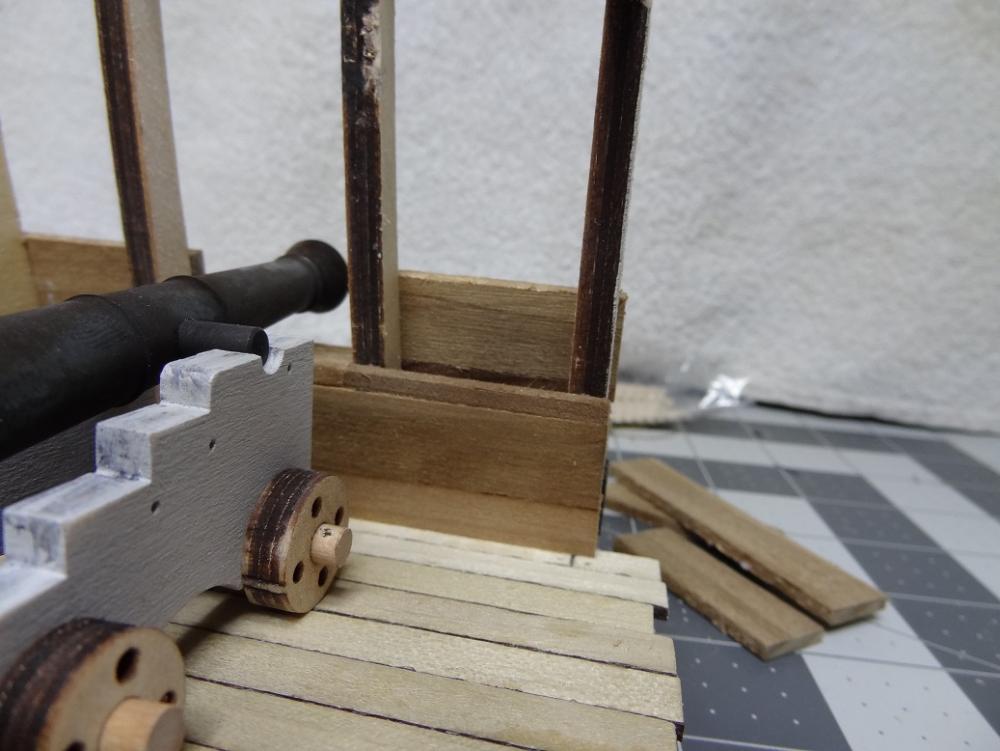
I have come to realize this afternoon, that the space between frames that make up the sides of the ports is about 33mm. If I screwed that up when I installed them, at least I was consistent. Had been working under the assumption that they were 30mm apart and that 2 of the 3x15 planks (shortened of course) would make my square. Then the upper sill would close out the port. I've taken a little different approach on the hull planking so far. As I have mentioned previously, the exterior has a 3x15, then part 5B, then a 3x15. On the interior, I laid 1 3x15 first. Then in a trial, I started building up what would be the next plank by adding pieces of strip until the top edge was level with the outer edge. It turned out that I needed a plank 11mm wide, so I ripped one and glued that on top of the first 3x15. So at this point the top edge of the inner and outer planking are the same height. Not sure how I managed it, but I ended up with 2 pieces of scrap 3x15 that fit exactly in between the port frames. So those became the lower sills. Then to bring the upper planking edges up to the sills I laid pieces of a 3x3 strip. So at this point the inside and outside upper plank edge are level. From there I had hoped to lay 2 strakes of 3x15 pieces, then do the upper sills just like the lower. The best laid plans........ So now I am left with 2 options. Between the 2 3x15 strakes I can lay another 3x3 strip. That would make port height & width the same. It would also probably look a little goofy as those strips are off color with the bigger planks. Or I could just leave as is. My ports would not be perfectly square but with all the other stuff around them I don't know that 2.5-3 mm would be noticed. Of course that means my port doors will have to be sized to match, but I have to do that anyway. I'll probably go with option 2 unless anyone can come up with a reason not to. Here's what it looks like up to now (gun is just roughed out and used for positioning):

-
OK - sounds like maybe I should rip a plank to make the 3x3's so they match better. Is there supposed to be caulking between the hull planks?
-
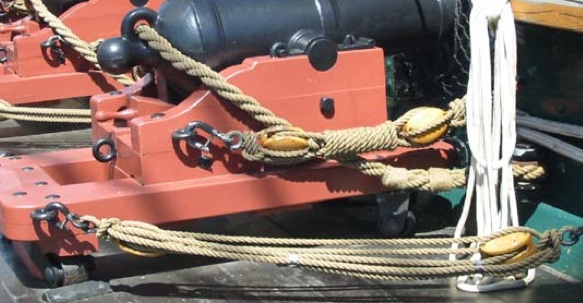
Scott - if you are referring to the carronade pic I think it comes from Constitution. There are several of us Niagara builders who are at, or just completed the gun setup, and we have had a lot of good discussion on part/rope sizes as well as what to do with the excess rope for each gun tackle. The pic shows one technique for dealing with it called frapping (the upper tackle). Of course there is always coiling too. Both methods were used, even on the same boat. For display, it's purely a matter of preference. I think it is fair to say both are historically accurate.
- 843 replies
-
- 2
-
-
- niagara
- model shipways
- (and 2 more)
-
Hey Scott - good to see you back into it again.
-
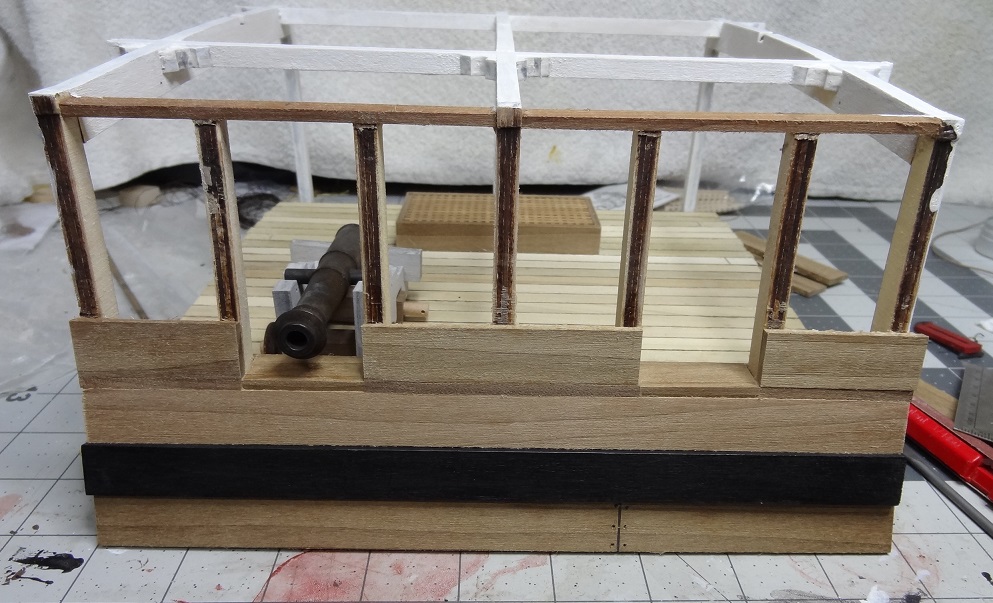
Thanks Mr Pucko - got that down. I like your color scheme too. Was just building one of the guns so I could get the ports situated around the barrel. The box cover had the carriage and wheels stained. Don't like trying to do that on laser parts. However, the box cover appears to show an even different planking scheme. From bottom up, 3x15, part 5B, 3x15, then a thinner strip, then short 3x15's at the ports. Mr Pucko, it looks like you have some thin plank strips on your interior? I get the feeling I should just put a completed gun (at a reasonable attitude) up to the hull and then figure a 30x30 port around that.
-
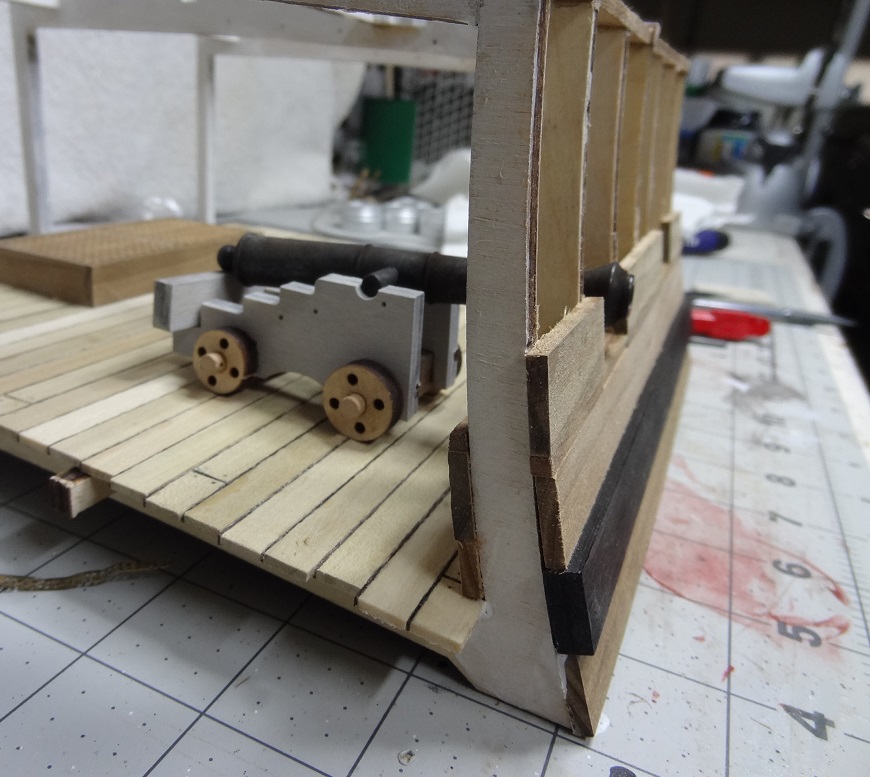
A couple of questions if I may. At the ports It looks like both Bob and Paul notched the 3rd exterior plank up for the sill of the ports. A couple of pics in the instr show a full plank - in fact they seem to show both full and notched. And of course the interior will be different - looks like probably notched. I have probably missed it again but I don't see anywhere that states the measurement of how high up the ports begin. Also the 2nd exterior plank - or really laser cut part 5B. Bob did you glue yours on top of a regular walnut plank? I don't see that in the specs.
-
OK Bob - I'll take a close look when I get back in town. I'm kicking myself for not bringing it with me. Of course that rings of ship-o-holic.
-
Actual guns historically were 12 pounders I believe.
- 648 replies
-
- 3
-
-
- niagara
- model shipways
- (and 1 more)
-
Paul - I'm out of town again and don't have the kit in front of me. I started on the external last nite and seem to recall that both plan and instr. called for 1 3x15 walnut plank at the bottom, then the thicker laser cut piece 5B on top of that. Then finish out with normal walnut. Hope I haven't misread them again. You also have me thinking it's probably smarter to plank the interior first.
-
Truly exciting Chuck! I just picked up the Long Boat and Pinnace kits. Lately, the idea of a smaller subject that still has good detail has been appealing. This one follows suit. My credit card is ready Better get ready the day this hits the market.........
- 269 replies
-
- 4
-
-
- Queen Anne Barge
- Syren Ship Model Company
- (and 1 more)
-
Thanks Nirvana - I keep forgetting about steel wool. I have been sanding it a lot and it just doesn't seem to be getting any better. A new sanding medium may be just the ticket.
-
Lose the final product if you want, but don't lose that knowledge I'm still counting on you guys for help with my version of this kit. Very well done by the way This is a cool build. I don't have enough builds under my belt to contemplate giving away the fruits of my efforts. That may change when I run into the 'lack of display space' problem Good luck on your next adventure!
- 206 replies
-
- 4
-
-
- battle station
- panart
- (and 1 more)
-
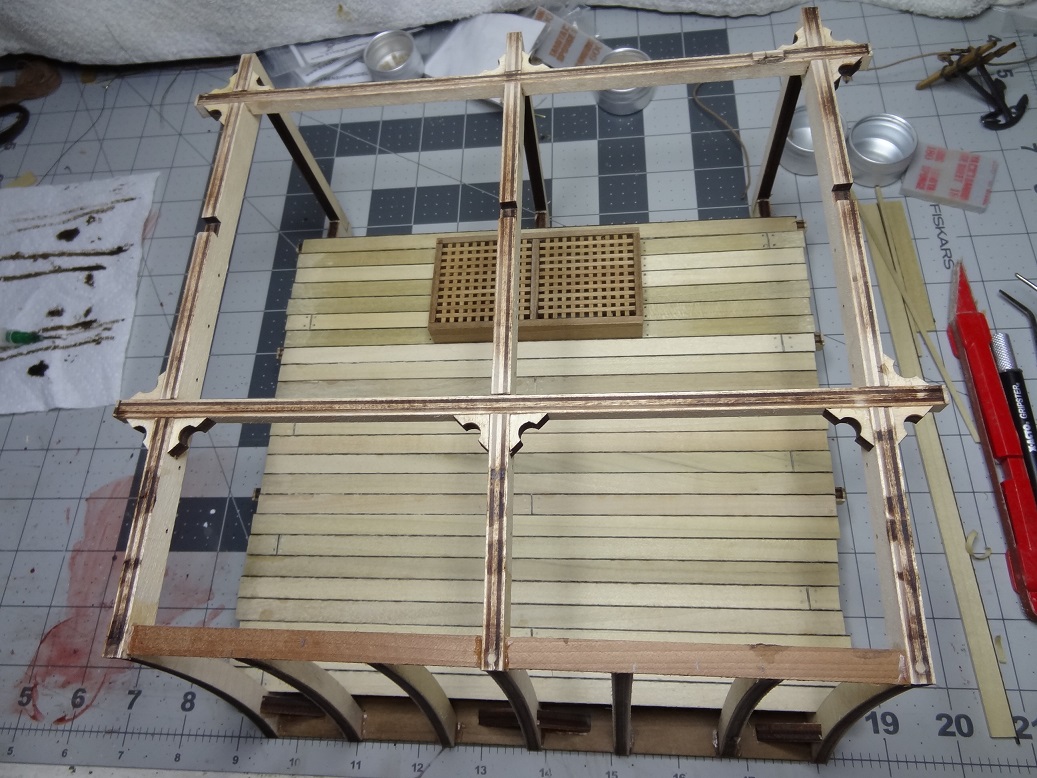
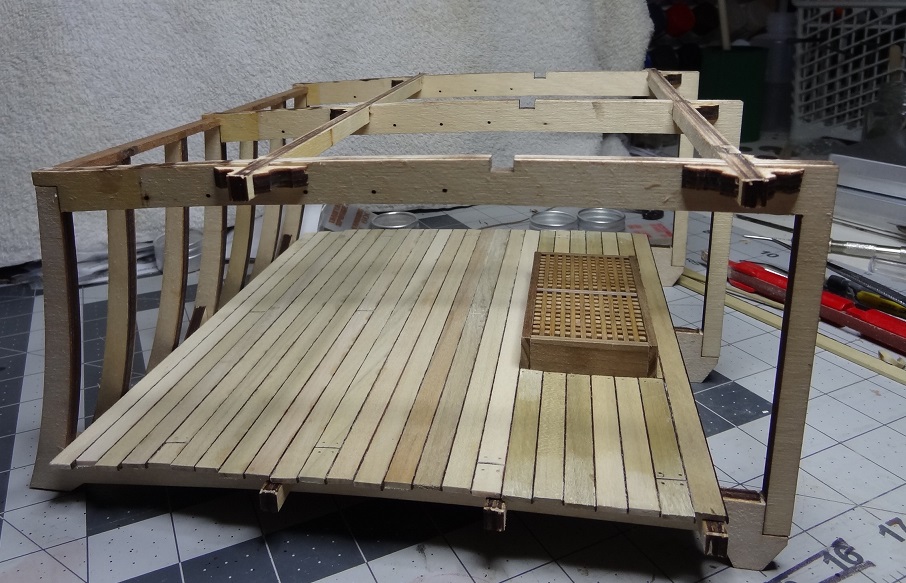
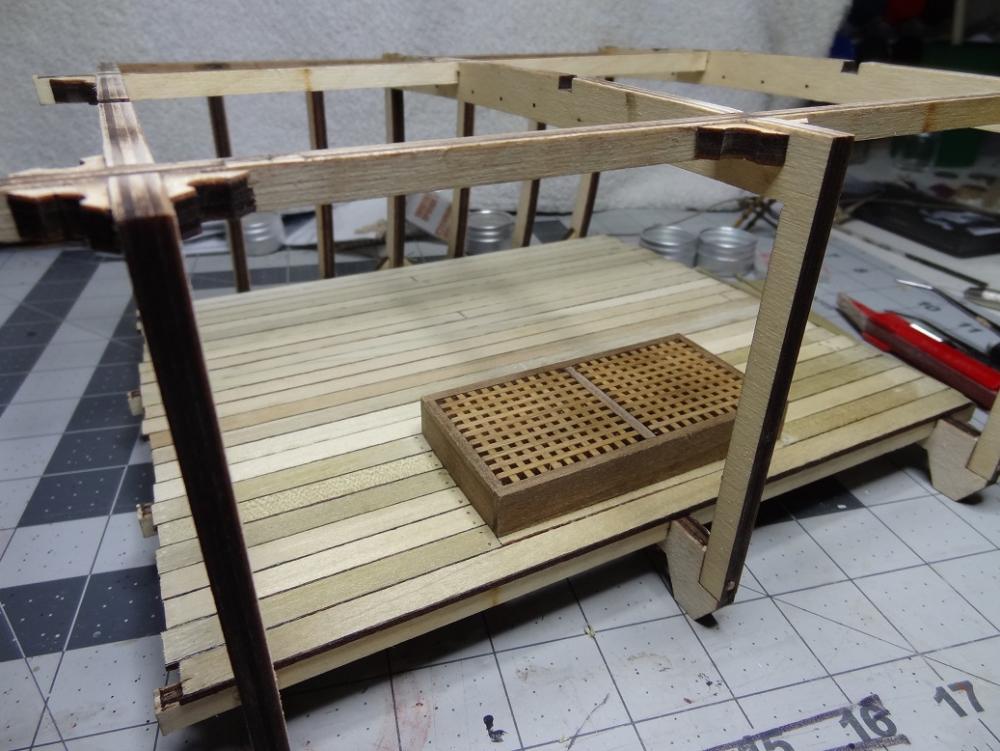
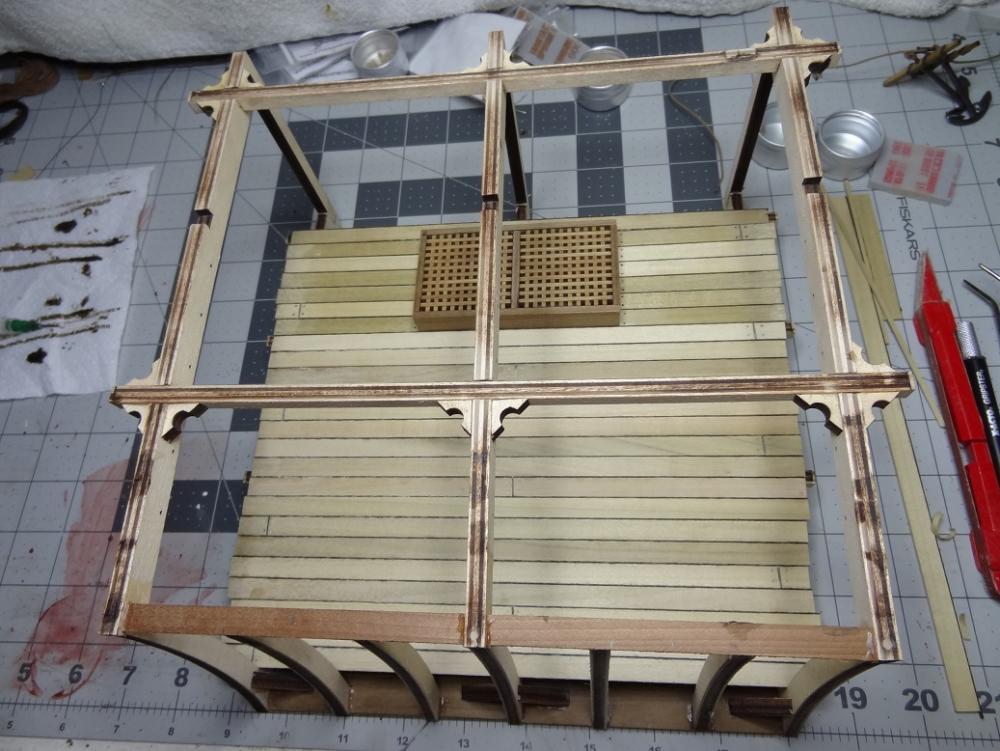
Have finally gotten around to finishing the gun deck planking. It went smoothly overall. I am somewhat disappointed with the caulking strips. The pix don't show it (for once) but they look a little raggedy and rough. If I had it to do again I would not take that approach. It appears the next steps are to plank the hull frame. I am debating whether to do that now or wait. It seems like this will further limit my access inside the gun area. I think there is quite a bit of stuff I could do before the planking. I'm curious to hear what you other builders of this kit did.
-
Good ideas Roger - I probably make way too much and use those little plastic cups and mixing sticks (which add to cost). Just a smear on a piece of paper sounds better. If it starts to get gummy just do it again.
-
NP - we gotta take care of each other. You know with that wonderful weathered look you are going to have to figure out how to 'weather' the copper as well. I'm excited for you Elijah! That was a big step you just completed. We always take a bit of a risk when we color any part of the build - paint or stain. No matter how we envision it, there is that possibility that reality doesn't match it. You made an 'executive' decision and came out a winner.
- 701 replies
-
- 5
-
-
- phantom
- model shipways
- (and 1 more)
-
Ulises - I wouldn't argue with anything you said. I use TiteBond Mould & Trim which is thicker and has a lot of tack. Usually 30 seconds of holding in place is enough. I used that on my hull planking and most planks didn't even need clamping. And it doesn't run at all. As far as epoxy, I wasn't griping so much about the waste - it's cheap enough. But for metal to wood I usually make the part then glue, make the part then glue,...... Having something ready made in a tube is a convenience. With epoxy, it is usually dried out by the time I am ready to glue the second part. Probably just poor planning on my part. I suppose I should make all the parts and then spend one session gluing them. I also did pick up some 30 minute epoxy. Haven't tried it yet but it is supposed to stay usable longer.
-
VERY cool!!! I think you made the right choice. You know you can also apply stain with a paint brush too. A detail brush can help get the color into small gaps. You can also sand between coats. I think where there are lighter spots could be from glue or filler. While those are usually described as paintable/stainable they rarely end up looking exactly like the wood around it. Anyway, your observation is a good one. It does look weathered. Don't forget the lacquer or varnish. If you want NO sheen then use a matte. Satin will usually give you just a hint of shininess. Either will do well. I would recommend doing that - hull and deck - before moving on. Your build is really looking nice!
- 701 replies
-
- 5
-
-
- phantom
- model shipways
- (and 1 more)
-
If you like the variances in color now then probably 1 stain will do it. If you feel that any surfaces need lightening then maybe more than one. Keep in mind going edge to edge with different rubs isn't easy. Joel showed me some stain pens by Minwax. Those would be good if you decide on more than one. Better control. Don't know if a brick & mortar will have those but they are online.
- 701 replies
-
- 4
-
-
- phantom
- model shipways
- (and 1 more)
-
Fantastic job! If you do fill, you have 2 choices. Some will cover the entire hull and smooth it down. Others, just fill gaps as required. Your work looks good enough as is, so I would recommend the 2nd option. Leave that raw wood as much as possible. Big sigh of relief and accomplishment!!!
- 701 replies
-
- 6
-
-
- phantom
- model shipways
- (and 1 more)
-
Man that must be a load off! Seeing all that makes me think your pinrails should probably go in next. They have these wire supports under them that fix into the waterway. Before it gets any tighter at the bulwarks.
- 648 replies
-
- 3
-
-
- niagara
- model shipways
- (and 1 more)
-
Question for the group. If the upper tackle in this pic is frapped. What is the bottom one called? Or at the very least how is it done?
- 843 replies
-
- 5
-
-
- niagara
- model shipways
- (and 2 more)