

Jsk
-
Posts
279 -
Joined
-
Last visited
Content Type
Profiles
Forums
Gallery
Events
Everything posted by Jsk
-

Review Le Coureur 1776 - Shipyard 1:72-scale Laser-Cut Card Model Kit
Jsk replied to catopower's topic in REVIEWS: Model kits
Thanks for the review. I haven't acquired any of the Shipyard models yet but am sorely tempted. They certainly seem to be the be pinnacle of card models. I suspect they're a bit out of my league for now but eventually I'll break down and get one (or more!).- 12 replies
-
- 2
-

-
- Le Coureur
- Shipyard
- (and 1 more)
-
He does look a lot like Richard Burton.
-
What a lovely little gem of a model! How did you manage to train spiders to do the rigging for you?
-
Looks like you're getting down to last steps. She looks great!
- 288 replies
-
- 5
-
-

-
- Card
- Pre-Dreadnought
- (and 3 more)
-
Just so! At the time I was working weekends and had a couple of weekday off when the Admiral was at work. 😉
- 106 replies
-
- 5
-
-

-
- digital navy
- v108
- (and 3 more)
-
I've been out of touch for a while. But this turned out superb!
-
Have you tried Necroscoping? A couple of years ago I was designing a Zeppelin model (there's an old build log on the Paper Modelers forum under the user name 'Kugelfang') and I used the technique to laminate some pieces. Basically, I took plastic from a zip lock bag, sandwiched it between the two pieces of card I wanted to laminate, encased the whole thing in a folded piece of 20# paper and ran a medium (or low?) temperature iron over it to melt the plastic and bond the two pieces of card stock together. It also added considerable rigidity to the piece--which is why it might be worth trying. As a matter of fact, when I get back to my skipjack build I think I'll try this technique for the frame of the winder which will be similar to your support girders. Just a thought....
- 106 replies
-
- 4
-
-

-
- digital navy
- v108
- (and 3 more)
-
BTW, 'Lo! was the nickname of Ernst Udet's fiance Eleonore Zink. He decorated several of his WWI fighters with her name. They married shortly after the war but soon parted. Udet was a notorious womanizer. Here's a link to a genealogy site with a picture of Ernst and Eleonore: https://www.geni.com/photo/view/6000000032874351324?album_type=photos_of_me&photo_id=6000000032876947921 After the war, among other activities, Udet became a stunt flier performing live and in the movies. One of his signature tricks was to snag a handkerchief from the ground with a wingtip of his plane traveling at speed. A consummate flyer and bon vivant, he was out of place as an administrator in Herman Goering's Luftwaffe and committed suicide in 1941. It appears that Eleonore survived until 1947.
-
Good luck, Dave. Iteration 2.0!
-
Sargon II by king derelict - FINISHED - Art Girona - 54mm
Jsk replied to king derelict's topic in Non-ship/categorised builds
Looks to me like Sargon is pointing accusingly at his pet cat after it destroyed his latest attempts at rigging a model ship. 'Bad kitty! Bad kitty!' -
Lo! 'Du doch nicht!' Well, actually, yes you! Go, Chris, go!
-
Thanks again, guys. I've got all sorts of ideas bouncing around in my head as to what I want to do on the next build. But... patience. No more building until the move. Though, I do have a couple of resin 1/700 civil war ships to paint. That will have to do for a while.
- 37 replies
-
- 2
-
-
- Baltimore
- heinkel models
- (and 2 more)
-
Thanks, GPP! Yeah, I'm going to have to try that. Do you use a brush on sealant or spray? I don't tend to use spray anything as the Admiral has some respiratory sensitivity to almost anything aerosol. I didn't treat the card in any way on this build. Since I'm using a laser printer I think it will also help protect from scratching the toner off the card, too. One of the reasons I didn't do anything on the Baltimore was because it was mostly white so I figured it wouldn't be too bad. However, a lot of the pre-dreads are black and I think that would just be a nightmare to deal with.
- 37 replies
-
- 2
-
-
- Baltimore
- heinkel models
- (and 2 more)
-
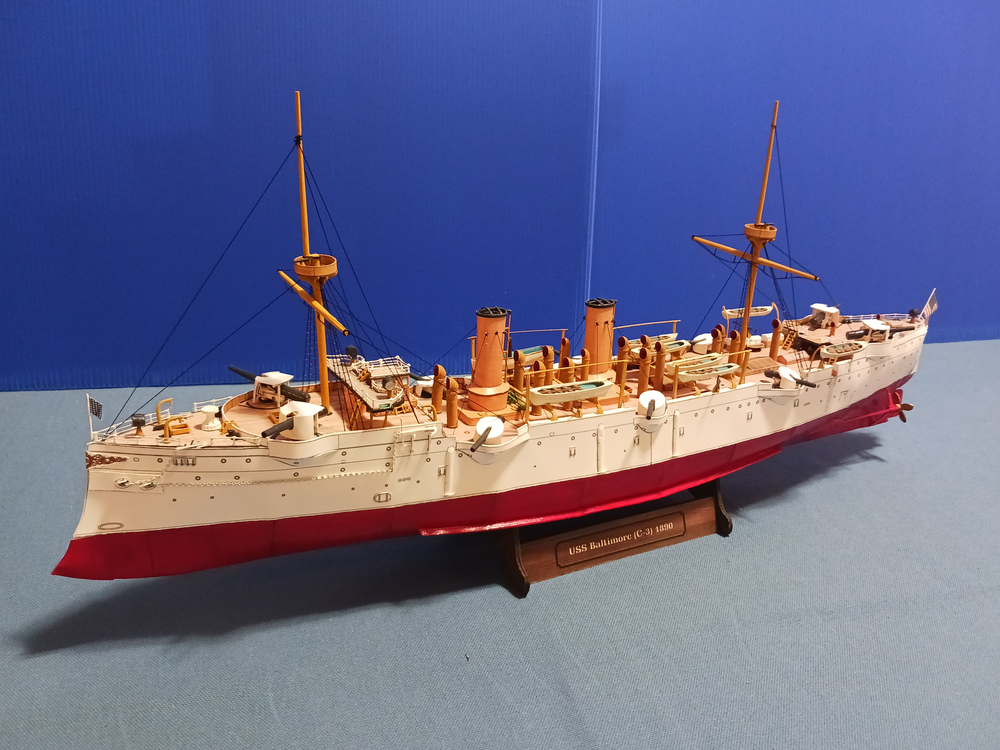
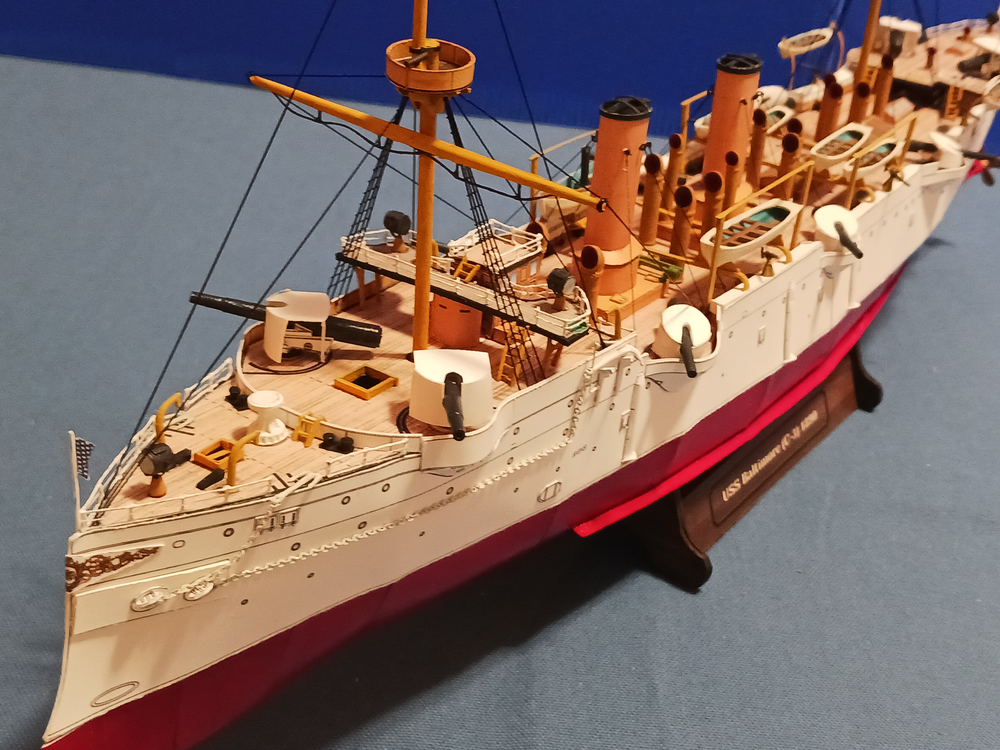
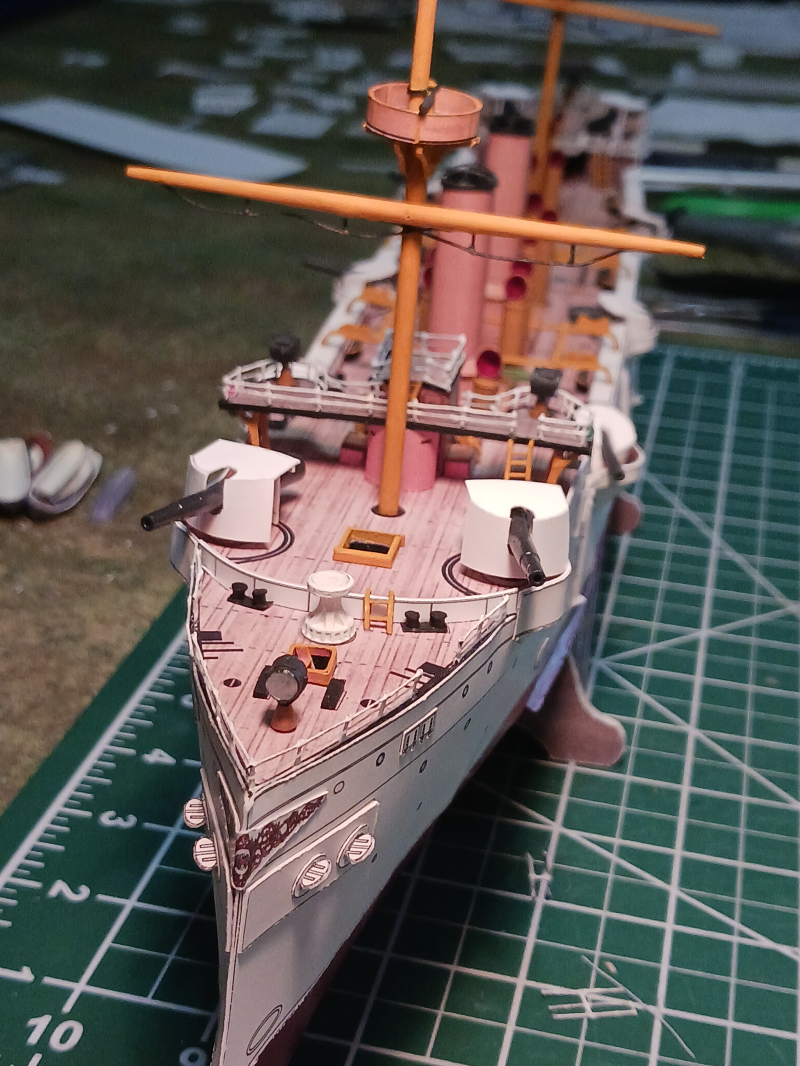
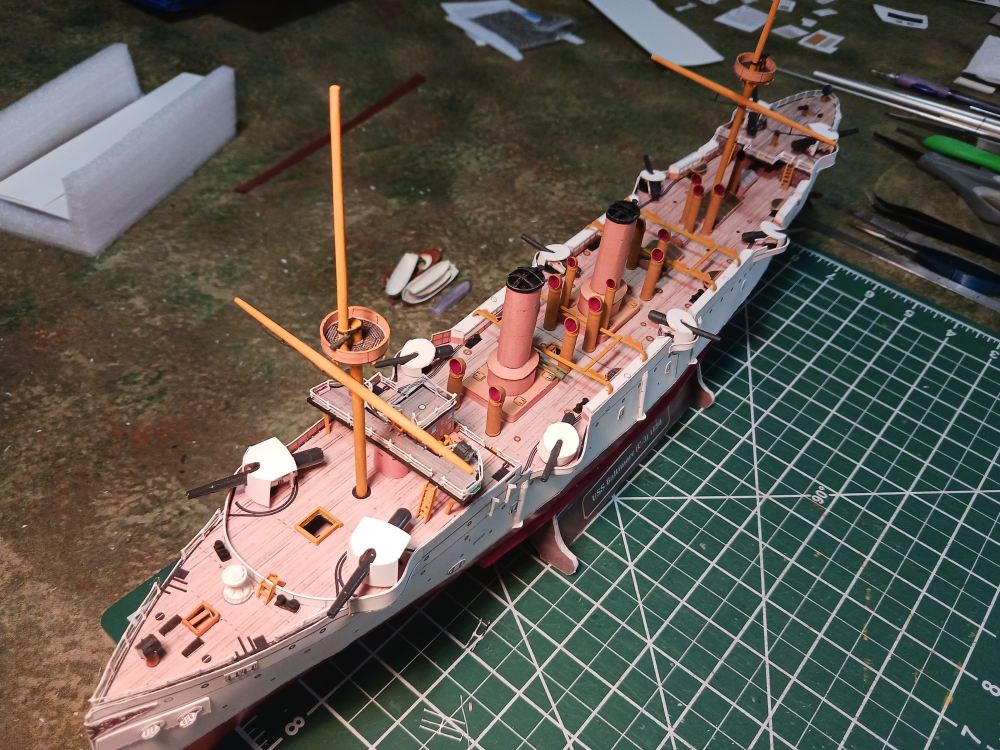
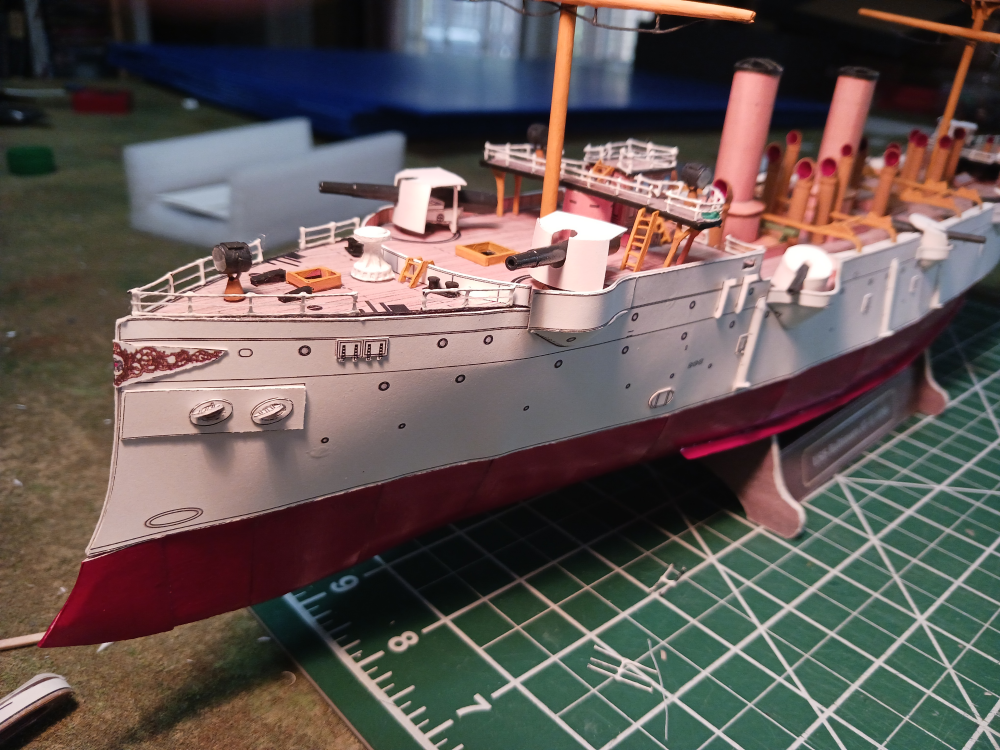
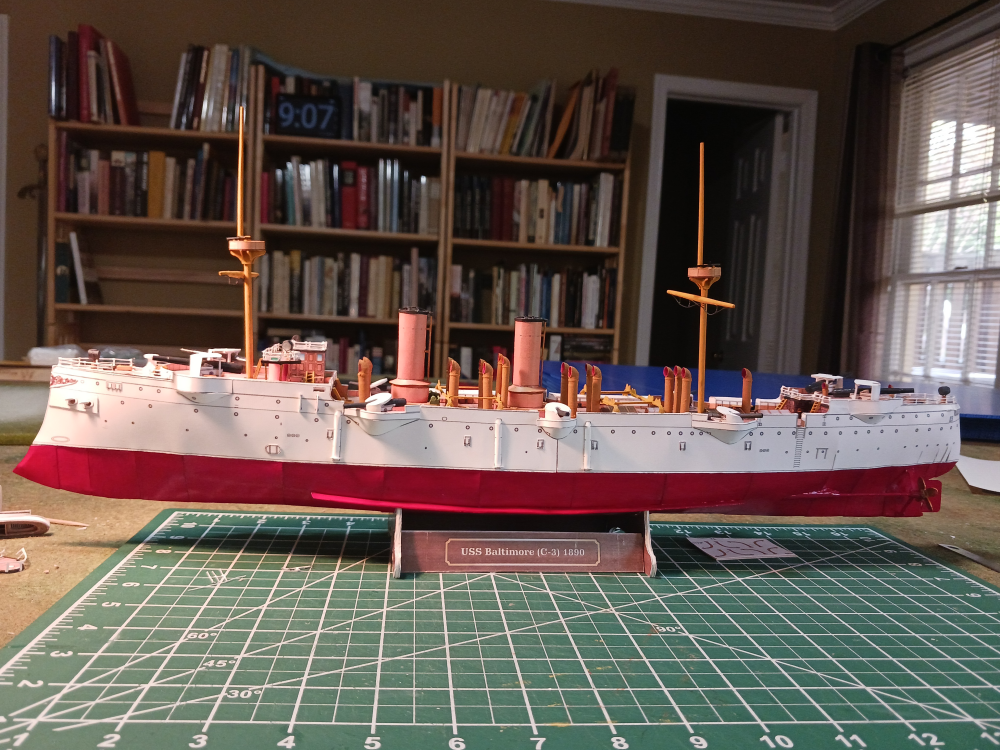
Well, she's launched! I have some mixed emotions for this build. Like always, by the end I was tired of working on it. But over the past several years I have worked hard to break the habit of having unfinished projects laying around. I used to be really bad about it. Then I started by telling myself that I would not buy any new books until I finished the one I was currently reading. Then it worked its way into my figure painting hobby and by now I always try to finish what I start. Still... I'm glad this one's finished. We're planning on moving in October so I won't be starting any new modeling projects until we get settle into the new place. I won't have as much hobby space in the new house so I'm sure there will have to be some adjustments. So the good and the bad of the Heinkel USS Baltimore kit. Keep in mind that I built the electronic version which I had to print myself. There is a physical print of this kit and laser cut formers are available from WAK. I did the roll-your-own version. 1) Like many modern card models the design is very precise. Perhaps too precise... at least for someone of my skill level. I found many of the small parts just too frustrating and difficult to make from card. Luckily, I could compensate by virtually modeling most of these parts and having them 3d printed. In fact, I found the 3d modelling one of the most enjoyable parts of the build. 2) Again, like most modern card models the instructions are only average. They mostly consist of images of the assembled model (or sub-models) with the part numbers picked out. So while the builder usually knows what goes where, the sequence of putting them there is left to the imagination. It does require some thought in order to avoid tripping over previously installed parts. Though the model carries a very simplified rigging scheme, the instructions are particularly vague about the rigging. It gives no indication as to how the various lines attach to the hull, etc. In fact, the lines are barely discernible in the instructions. I did refer to some of the numerous images of the Baltimore available on-line but I have no idea if my interpretation is anywhere close to accurate. In short, there's plenty of scope for independent research with this model. 3) Not a attribute of the electronic kit, per se, but I need to pay more attention to the card/paper I use. Certainly some of the smaller parts would have been more achievable if I had printed them on thinner stock. But for some reason it didn't even occur to me until very late in the process. I printed everything on, IIRC, 110# index card which I've had for several years. I found that the card itself de-laminated much too easily! Even now i'm afraid the ventilators will pop off the deck and take the top layer of the card with it. It's sort of like gluing together a plastic model after painting it. Its integrity is only as good as the paint adherence. 4) I'm not very happy with my build quality. There's just a lot of sloppiness when I look at the details. Overall, there are plenty of details on the model so the individual gaffs are somewhat overwhelmed by the 'busyness' of the whole thing. Still, I don't think I'll be building a case to protect this particular model. Not to mention, with the upcoming move I was feeling pressured to complete the model and rushed through some steps that would have benefited from doing more research on the actual ship. Overall, though, I have several more Heinkel models in my virtual stash and look forward to building them. Heinkel models are a rich source for ironclads and pre-dreadnoughts and they fill a niche not available anywhere else. I've seen several examples built by builders much more talented and experienced than me and they can be truly inspirational models. In the shipyard for the final fitting out: Beauty shots ("No close ups, Mr. Demille, no close ups!):


- 37 replies
-
- 7
-
-
-
- Baltimore
- heinkel models
- (and 2 more)
-
Very interesting vessel. I'll bet you've got a USS Vesuvius in the works, too.
-
USS Brooklyn ACR3 by Haze Gray - 3D Printed
Jsk replied to Haze Gray's topic in - Build logs for subjects built 1851 - 1900
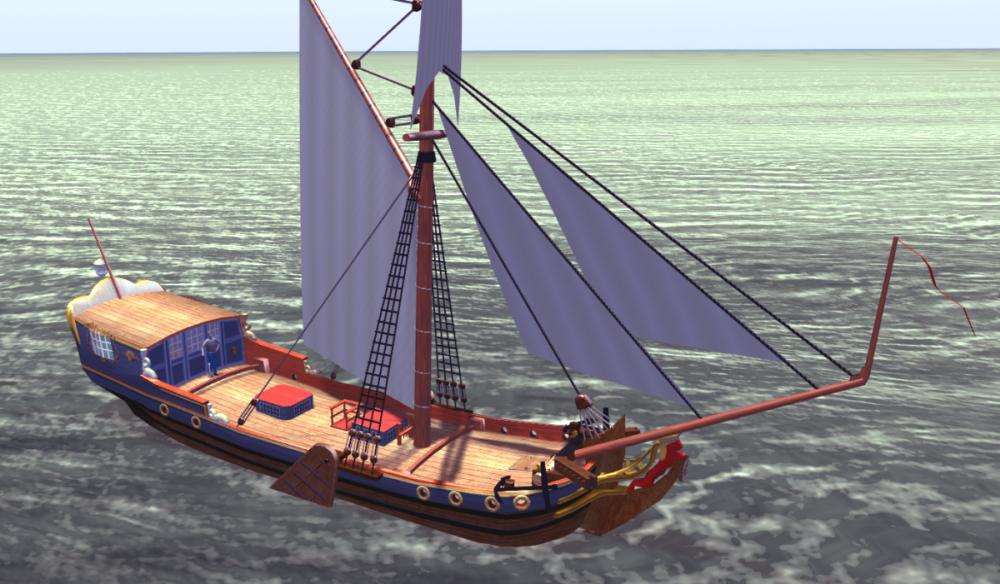
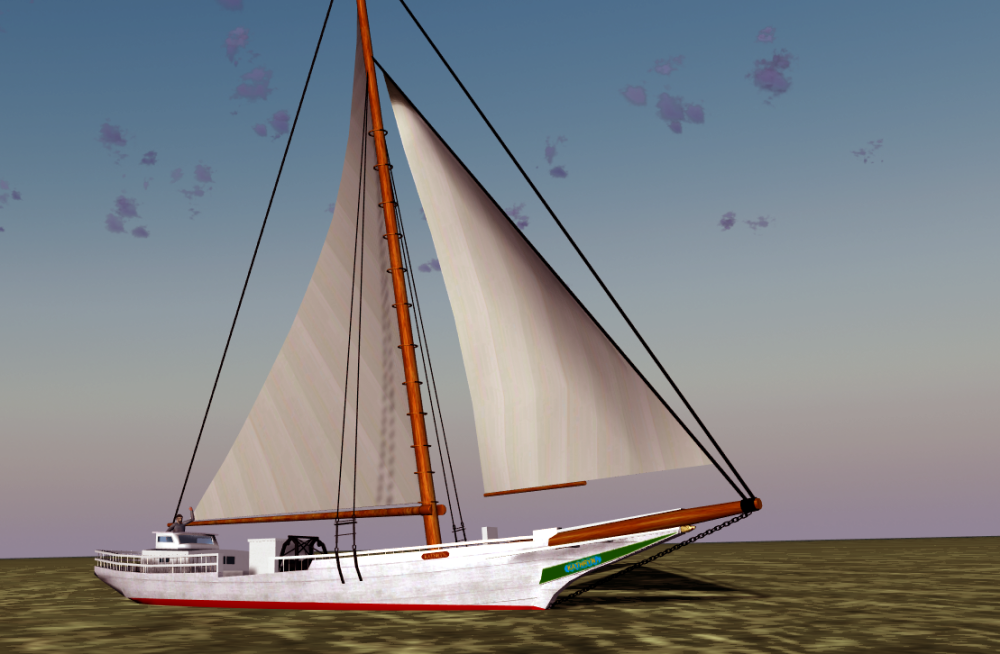
Wings3d (www.wings3d.com). My 'Go To' modeling application. Many years ago I started out making models for the old Virtual Sailor simulator. So, they were necessarily low poly. The simulator is pretty much defunct at this point so a few years ago I had a go at converting my models into driveable/sailable ships for the open source flight simulator FlightGear (or 'FloatGear' in my case!). I was progressing fairly well when life interrupted and I drifted back towards other hobbies. Still, I had some success in getting the Olympia, skipjack Kathryn and my Statenjacht models into FGFS. I could never quite wrap my head around the physics needed to make them perform as they should but they weren't too bad for people unfamiliar with the real thing. I keep telling myself that someday I'll return to FloatGear because the world DOES need a decent open source sail simulator.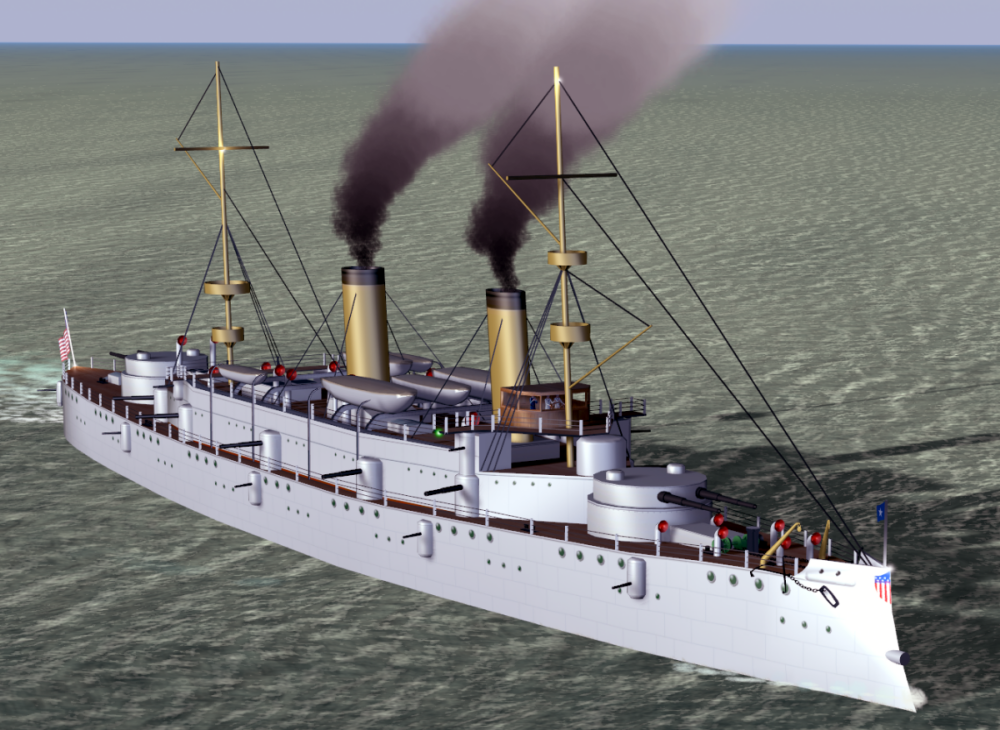
-
Congratulations on getting the Albatros launched and fitted out. Your last post makes it sound like a series of unfortunate events but this has been one of the most educational logs I've read. You've shown that what started out long ago as a rather mediocre model can be turned into a work of art and an educational tool. Now you need to list all the things you did right! A much longer list, I bet!
-
The drummer is looking really good. I'm not so sure about Athena, though. I like the owl (wasn't it named Buboe or something like that?). The rest of the sculpted details look a little soft and undefined.
-
USS Brooklyn ACR3 by Haze Gray - 3D Printed
Jsk replied to Haze Gray's topic in - Build logs for subjects built 1851 - 1900
I'm right there with you on the Brooklyn. Love the tumblehome and three stacks!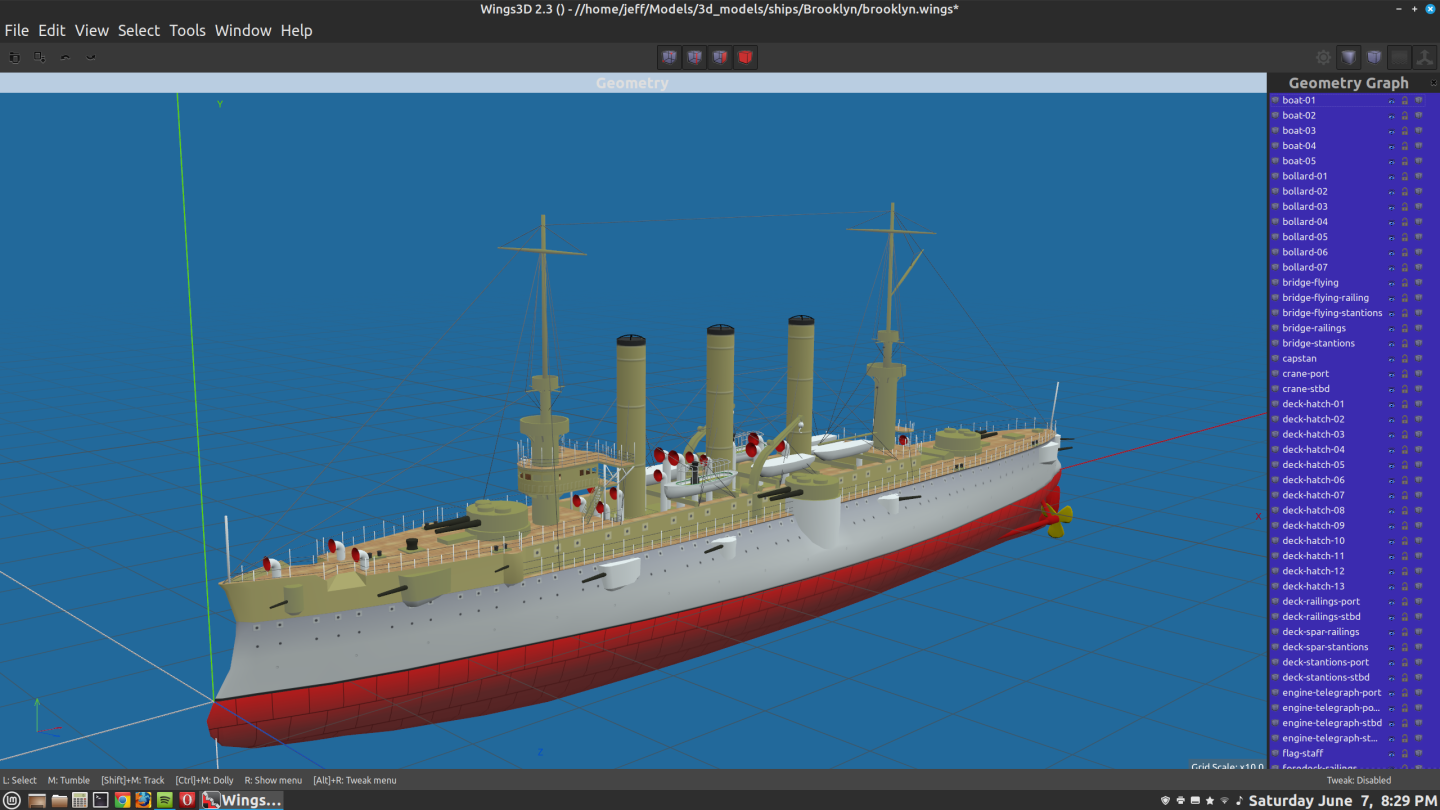
-
He is looking good! Unseemly seams seem to be the bane of figure painters.
-
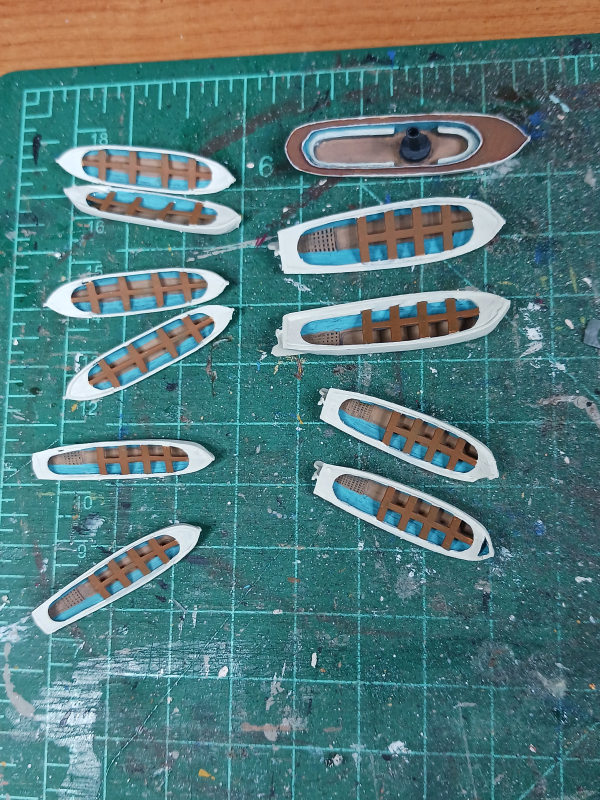
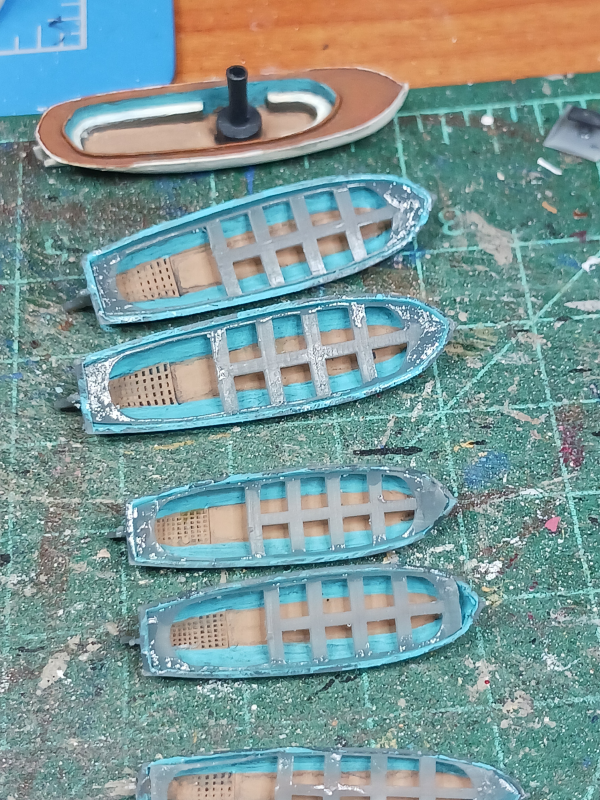
It's been a busy couple of months. The Admiral and I are intending to retire in October. We purchased a house in a neighboring state and we've been spending weekends there getting ready to renovate the kitchen and baths and paint the rest of the interior. Never thought I'd have a 'weekend house'! Co-workers are calling it my beach house but the ocean is still an hour away. They have an exaggerated view of beaches! Still getting small things done on the Baltimore, though. I had more detailed boats printed up. They've been assembled and painted. I've attached the anchors and associated gear and the flags. Made the ratlines but not yet attached them. In fact, today I added eye-bolts to the funnel stacks and deck and will probably get the guy-wires put in this week. After that I think the only bits left are permanently stepping the masts and rigging them, making the guard rails over the hatches, and finally gluing on the boats and finishing the davits.
- 37 replies
-
- 3
-
-
- Baltimore
- heinkel models
- (and 2 more)
-
What, are you psychically aligned with Kathryn? Did she cry out to you in anguish as i binned the model just this morning as I attempt to clear my man-cave for an upcoming move. 😉 No, not finished. I decided I needed more hands-on experience before scratch building. I pull up the computer files every now and then and make a tweak here and there but I think I have several more kits enticing me more. For now....
-
CA (cyanoacrylate) "super glue"
Jsk replied to Dr PR's topic in Modeling tools and Workshop Equipment
Yeah, I've never had a good experience with the little tubes of CA. It wasn't until I acquired a bottle of Gorilla Glue that I found CA to be a reliable option. I also found that the Gorilla smelled less than other brands. I acquired the two bottles of 'GH1200' glue over a year ago because they were much cheaper than Gorilla and they're still going strong. I also discovered that the thin glue had a much stronger odor than the thick. When using the gel I typically put a glob on a piece of aluminum foil and use a toothpick to apply it. For the thin, I do use one of the thin micro nozzles that can be slipped over the bottle's tip. That also cuts down on the odor. Nevertheless, the older the glue, the longer the drying time.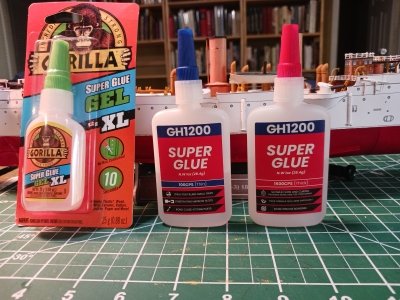
-
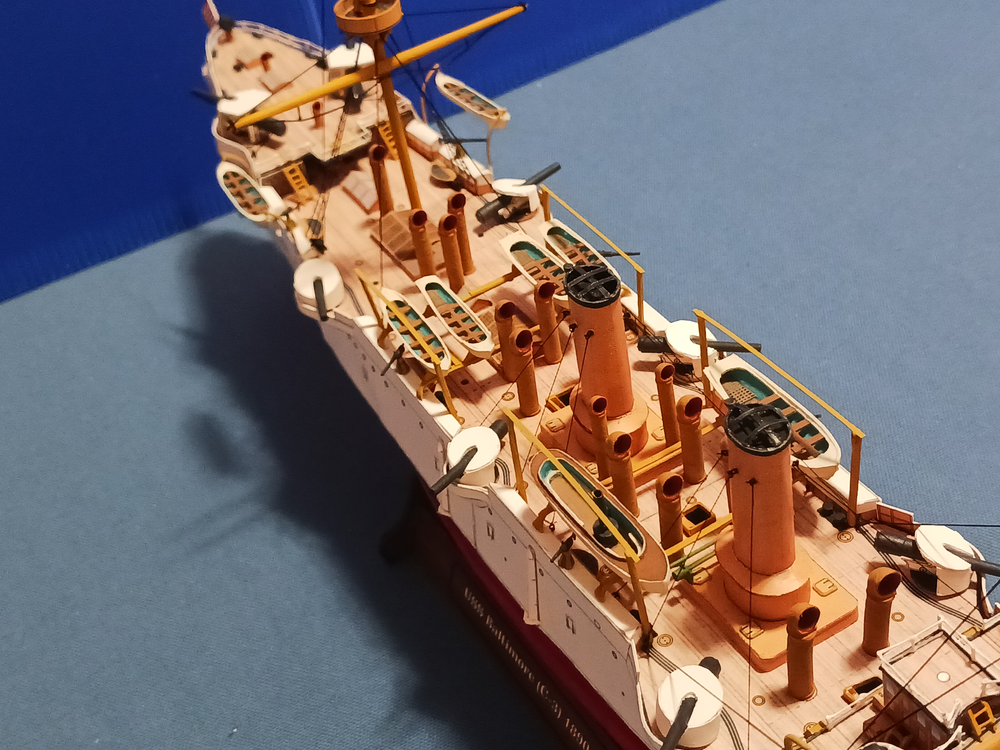
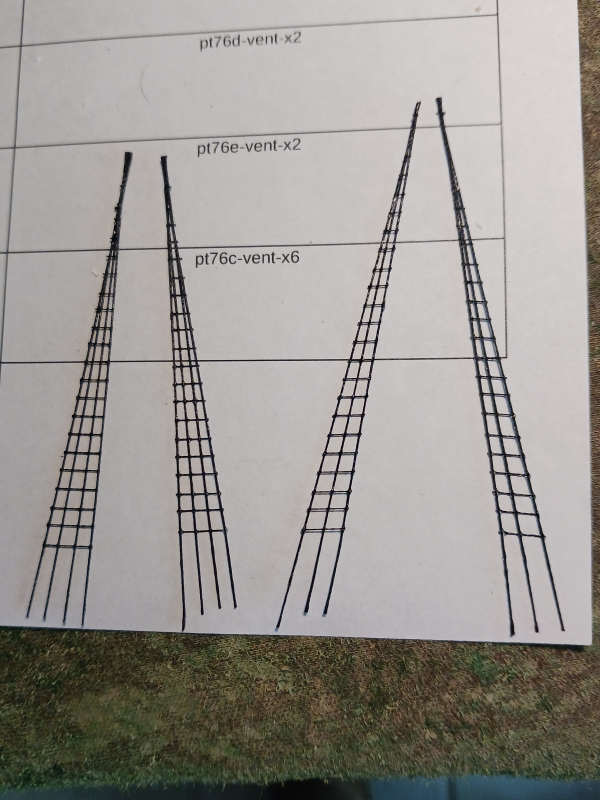
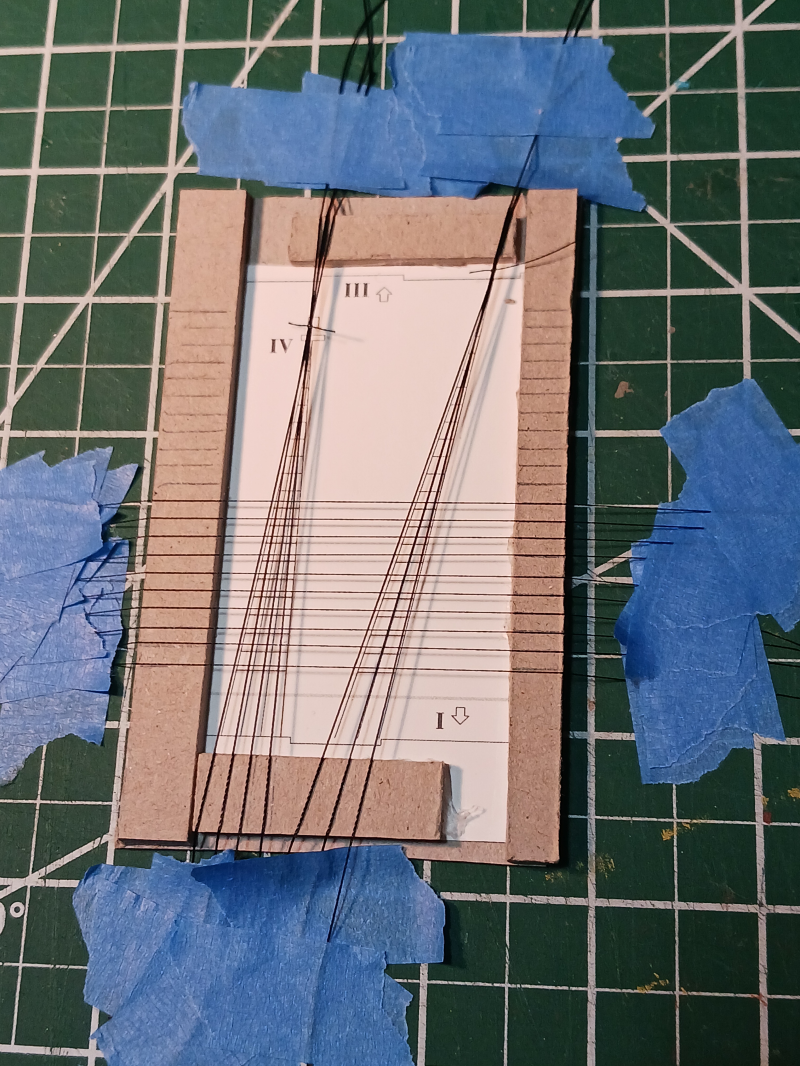
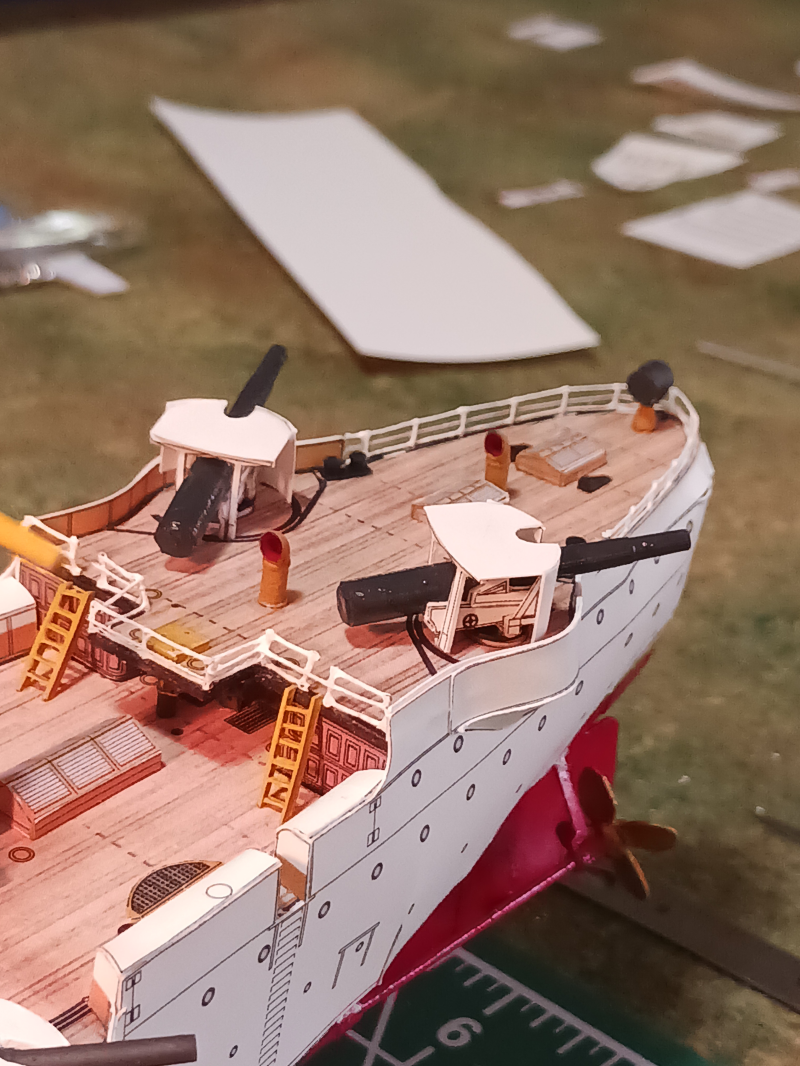
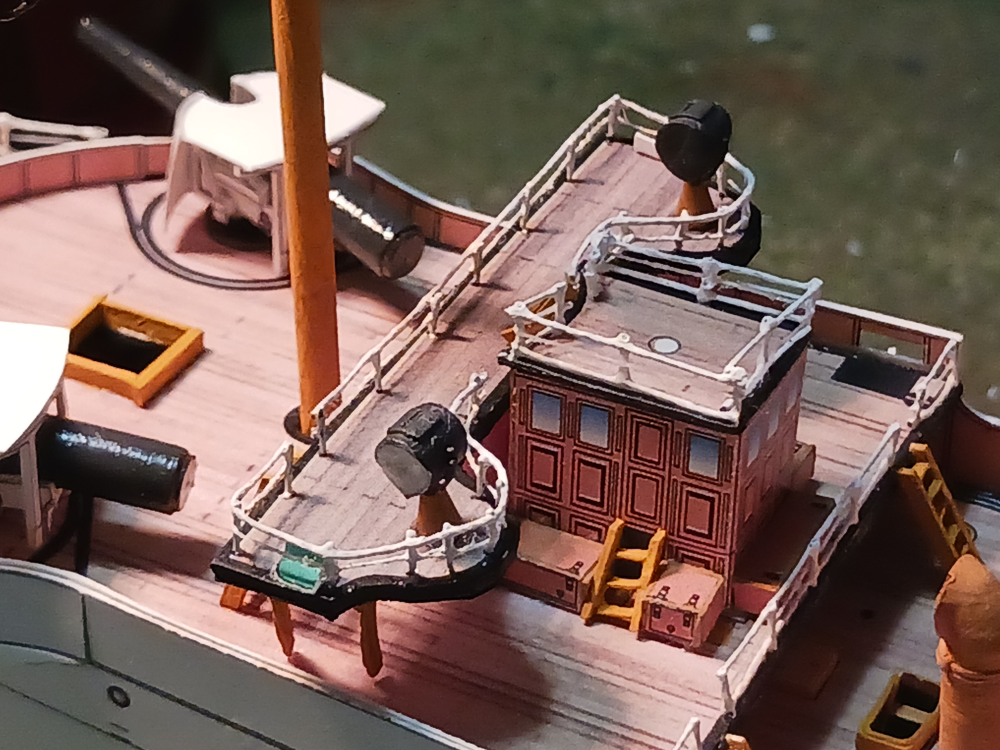
Phewwwh! The railings were quite the ordeal! The glued & painted thread railings worked OK for straight or gently curved sections. But I simply could not get it to form tighter curves such as those around the search light platforms. So I tried @GrandpaPhil's method of cutting the railings out of card. Nope! Not for me--my hand-eye coordination won't let me go there. So what I ended up doing for the bridge was cutting 28 gauge wire into approx 5/16th inch lengths to use as the posts. I then drilled holes along the perimeter of the bridge and glued them in. I then stiffened some thread by coating it with PVA and letting it hang straight with a weight on the end until the glue was dry. Then I could wrap the stiffened thread around the posts to form the railings and glue it in place. There were a couple sections where I had to glue in individual lengths of railing but they were few. Not horrible. I do like the look of the shorter rails than the kit calls for, though. Looking at photos makes me think the railings changed fairly frequently on the Baltimore. Sometimes they seemed taller in order to rig awnings, other times they look shorter. Maybe there was some sort of 'modular' system that allowed the rigging of awnings? Anyway... glad that's done. I'm really getting down to the small details now.

- 37 replies
-
- 3
-
-
-
- Baltimore
- heinkel models
- (and 2 more)
-
Really looking good, Phil. Your paper railings came out much better than mine. I had to revert back to the thread technique.
- 288 replies
-
- 7
-
-
-
- Card
- Pre-Dreadnought
- (and 3 more)

