

Gerald Spargo
-
Posts
69 -
Joined
-
Last visited
Content Type
Profiles
Forums
Gallery
Events
Posts posted by Gerald Spargo
-
-
-
-
-
-
I know I've been gone for awhile. I don't have internet on my computer. Only internet I have is this little phone. I have been working on my Phantom though, just getting use to this phone so can get active on this site again.i Hope this works, lol. I also have the deck furniture built. I will post pictures of those as I install them, if this works out.

- daveinosaka, Elia, Turatopgun and 5 others
-
 8
8
-
Oh don't worry Kurt, I've not stopped. Just ended up with a bunch of other stuff to do. I have a tutorial on weathering, but I need to redo it, cause I have found some better ways of doing some of the weathering, since I started.
-
Hey John, can't wait to see your rigging going up. Just don't let that Morgan curse get to you. I'm looking forward to getting to the running rigging.
-
My chopper's the same way, but the true sander next to it takes care of that problem.
-
Hey Scoot, thanks for that pic, that has got to be an awesome site in person.
John, the way I take it, is whaling ships would pick up new whaleboats from different builders to replace damaged ones where ever they docked at, so they could continue on with they're voyage. So they probably were not all the same.
docidle, I don't mind at all if you copy what I am doing.
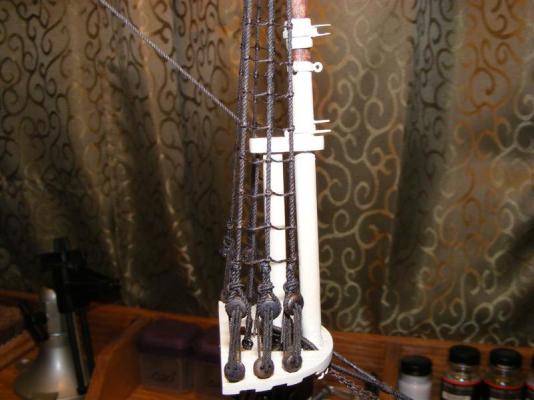
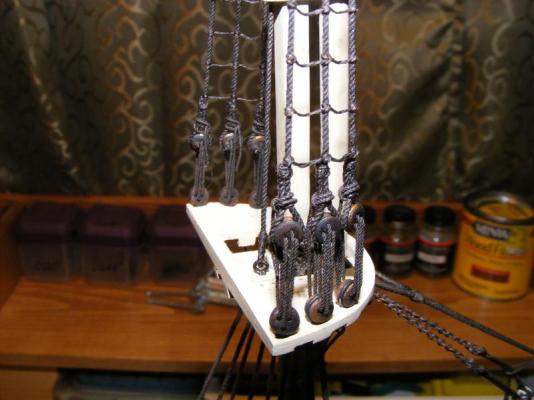
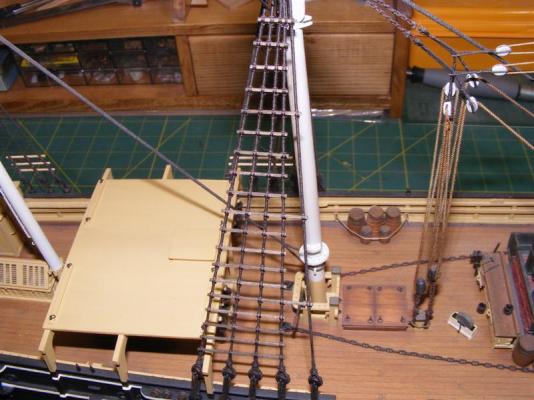
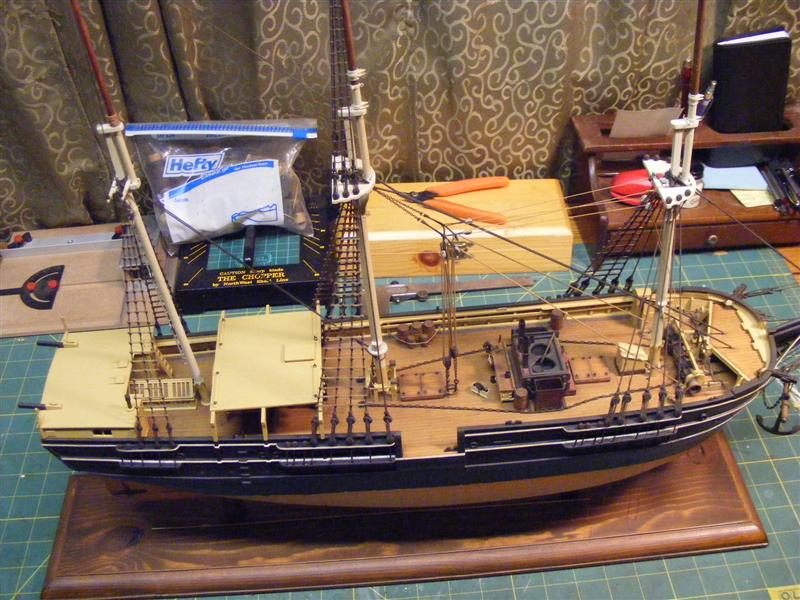
I'm on the home stretch with the lower shrouds.

I made a change on the way though. I was every once in awhile stretching the distance of all 5 shrouds with the battens, because that's what the plans showed. But, I couldn't find this in any of the photos that I have. So I removed that part of the batten.

-
It would just be a matter of how much work you want to put into it I guess. Making your own, makes the rope look more realistic. It also gives you the satisfaction of making your own rope, just like you made all the other parts on your ship. All that scratch building of everything on that deck doesn't have to stop with the wood, and metal. It can continue with the rope, all the way to the top of the mast. In the end, it would just make you all that much more proud of what you accomplished.
I don't mind making my own rope, but it wouldn't bother me to much to use kit rope either. I made my own standing rigging because I couldn't do what I wanted with the nylon rope that came in the kit. The lower shrouds that are served, are the actual kit rope. Didn't see any reason to make rope, just to cover it up with serving. The rest of the standing rigging will be handmade though. Running rigging, I'm thinking about using kit rope. Not necessarily Model Shipways though. I don't like how the nylon hangs onto that bend it gets from being wrapped around those plastic tabs.
I did use Model Shipways rope on my Bluenose ll, and I thought it looked fine.
Now with that all said, we also have Chuck. If you want more authentic rigging, but don't want to make it, then we can get it from Chuck, and let him do the work.

-
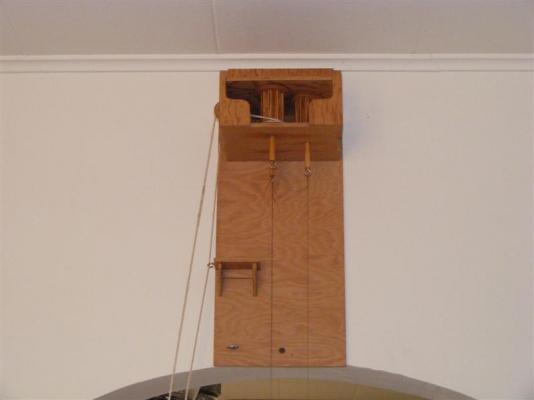
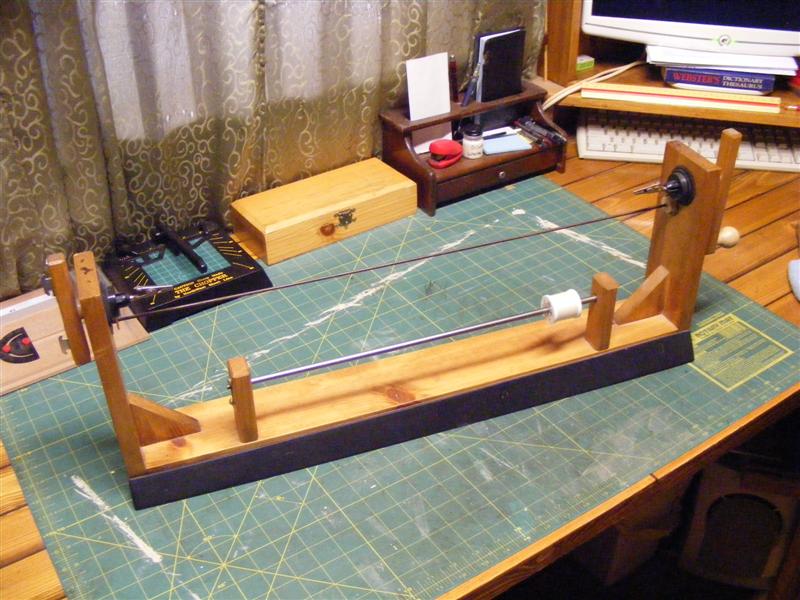
This is my vertical ropewalk that I use for making my rope.
- mtaylor and MarisStella.hr
-
2
-
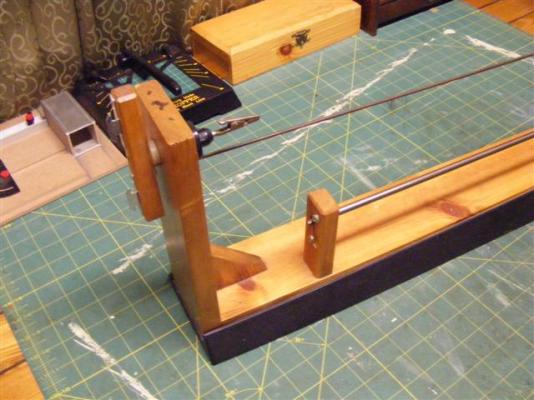
I used a serving machine that I made years ago when I first started the rigging. Made of wood, and old printer parts. There is also a rope with an alligator clip that goes with it so I can serve short lines too.


- mtaylor and MarisStella.hr
-
2
-
Yep, in my signature now.
-
Already have it up John, and slowly trying to get some work done on it. I like the work you've done on yours, and ya, I would like to see those missing pictures.
-
-
Thanks everyone for the kind comments. It will be nice to see more Morgans being worked on. I may not get a whole lot done this weekend. I have part of a garden getaway to get put up in the backyard. I need to get up what I've got built so far, cause I'm plum running out of room in the shop.
-
Well, I'm not far very fast. By the time I get to do anything in the evenings, I have enough time to tie on 3 battens.
Hope to be able to commit more time to my build at some point.
- russ, mtaylor, Mirabell61 and 1 other
-
4
-
Thank you Robert, I love detailing.
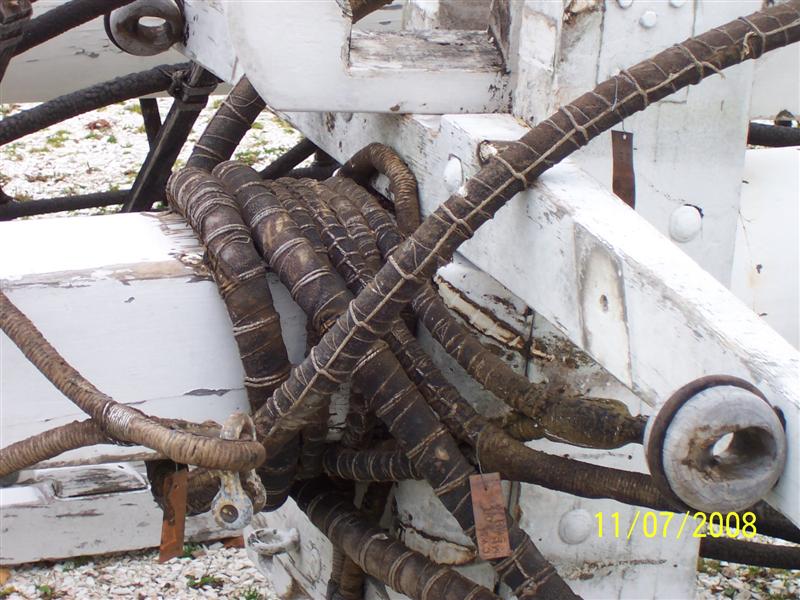
Well...............the first picture should explain why you might want a display case for your model. That is bad.
It did clean-up well though. So now I'm all setup, and working on it again. Looking, and working with small stuff again is going to take some getting use to again. Had to use my own seizing instructions to get going, couldn't remember how to tie the battens on.
-
I have a lot of pictures of the Morgan that friends have sent me from all the forums I have been on, and from the internet. These ones I just posted came from Wayne, who I think is still a member here on MSW. If there are any particular photos you want, I may have them, and could send them your way.
-
Thanks John, definitely a model, I would have loved to have see the actual Morgan before its restoration.
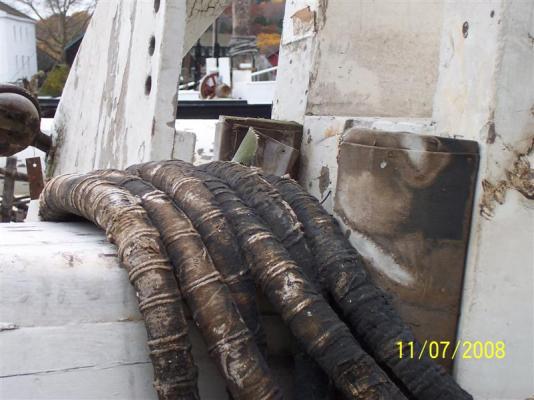
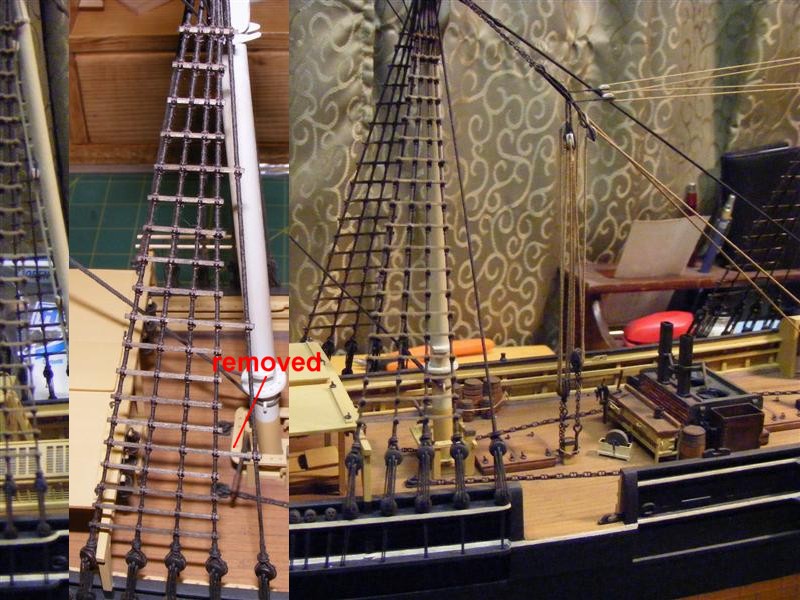
Now as far as the real ship, here is something I tried to duplicate, but decided not to go ahead with. Could be a challenge to someone else to try though. In these pictures, you can see how the old rigging was parceled around the mast. I simulated this with masking tape, and a little bit of serving like it is in the picture. With a little weathering, it looked really cool. But, since masking tape tends to dry out really bad, and fall apart, I figured I probably shouldn't risk the potential fix later on. I couldn't find anything else that would work at this scale, so I abandoned the idea.

-
-
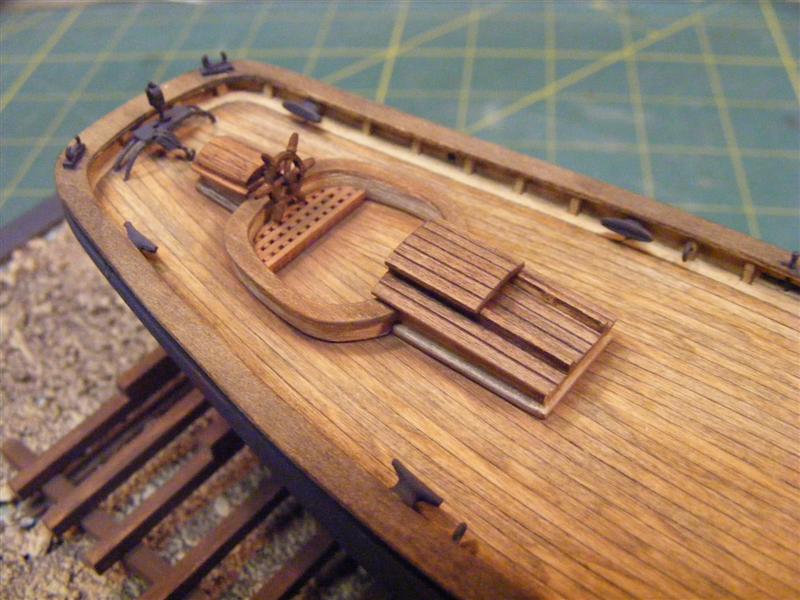
Actually Tim, there will be 7 of these on the Morgan.
-
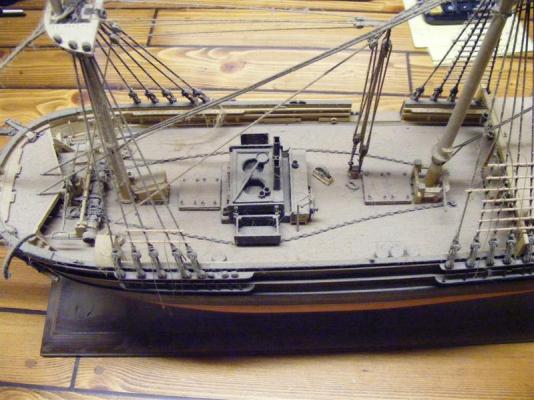
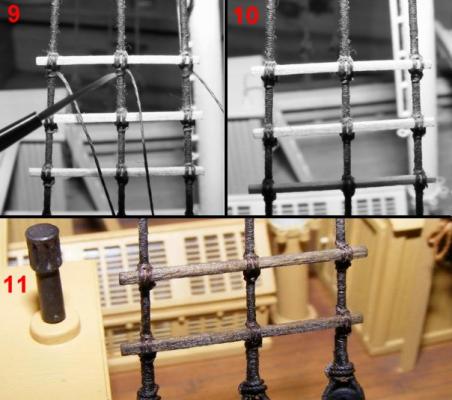
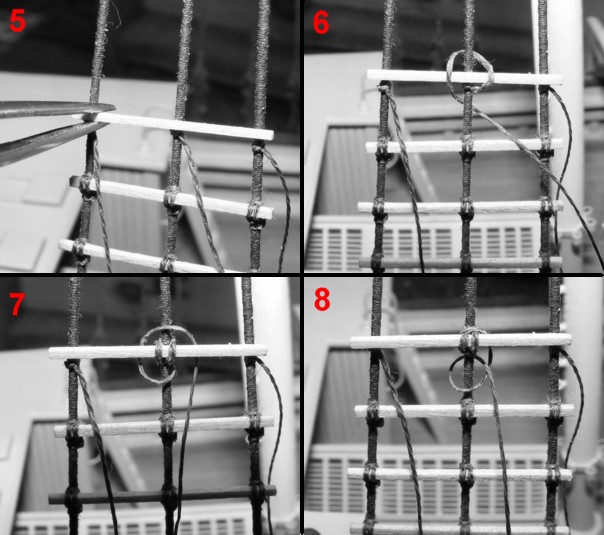
Lashing The Lower Shroud Battens
The Morgan had wooden battens instead of rope ratlines on the lower shrouds. Instructions will show that they are tied on with a diagonal lashing, they where actually tied on with a square lashing. The battens are spaced the same as regular rope ratlines are spaced. On this model that would be right around a 1/4'', so that is the spacing I use. This is how I found it easiest to tie the battens onto the shrouds without actually gluing them to the shrouds.
LETS GET STARTED: (Done in gray-scale for clarity.)
Material I am using is 2 strands of DMC dark brown embroidery floss (waxed), and 1/32''x 1/32'' basswood strips.
Step 1: To get the first batten in place, I measure up from the deadeye channel the same distance as on the plans. After this first measurement, I didn't find the plans to be of much help for spacing. The thickness of the battens are 1/32'', and all the plans show are single thickness lines. So after the first measurement from the deadeye channel, I space each succeeding batten a 1/4'' from the last one I did. At that measurement, I tie the end of a 6'' length of floss to each shroud, using a clove hitch knot.
Step 2: I dab a little diluted white glue to the knots.
Step 3 & 4: Cut off the small tails of the floss.

Step 5: I cut each batten at least 1 mm longer than the width of the shroud. A little longer wouldn't hurt, as it give you more room for lashing. I hold in place, right at the top of the knots, and wrap the floss around it. I start with a shroud in the middle so the batten won't twist away while lashing it.
Step 6: The first wrap pulls the batten, and shroud together.
Step 7: The second wrap tightens, and holds the first wrap.
Step 8: I finish off with a half hitch under the batten, pulling it tight.

Step 9: I now apply a dab of the diluted glue onto the half hitch knot under the batten, and just barely touching the batten with the glue as I do this to prevent the batten from sliding out of the lashings. Important thing, is not to get glue on the battens, that will show up later.
Step 10: Cut the remaining floss, and there is enough to do another batten.
Step 11: To put a finish on the battens, and floss, I applied a coat of Micro-Mark age-it easy brown, and 2 coats of Micro-Mark railroad tie and bridge stain. These worked well for me, as this is the same solutions I use to color my rigging. The battens could be finished before rigging them. I find it easier to do it afterwords.
- jwvolz, bhermann, Mirabell61 and 4 others
-
7
-
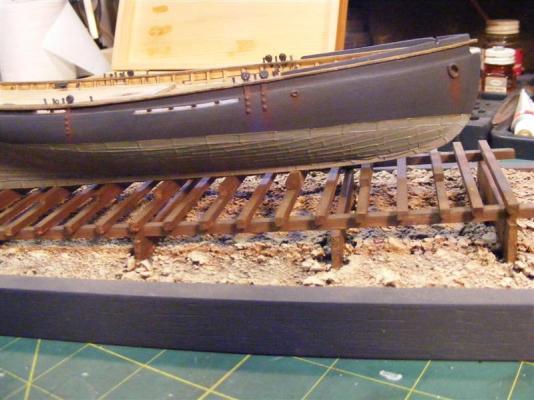
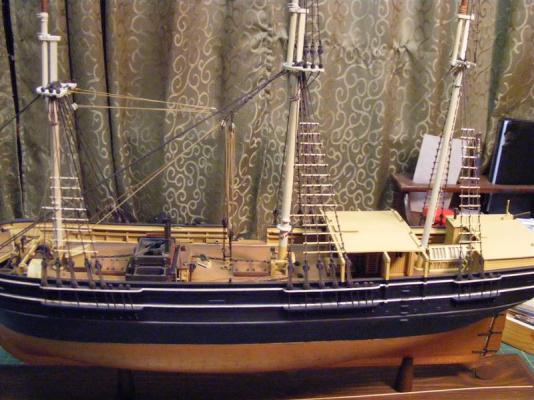
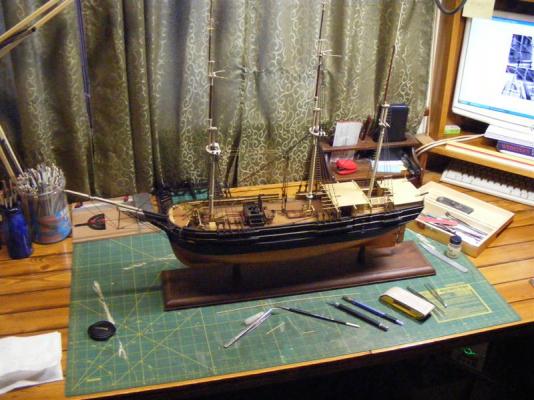
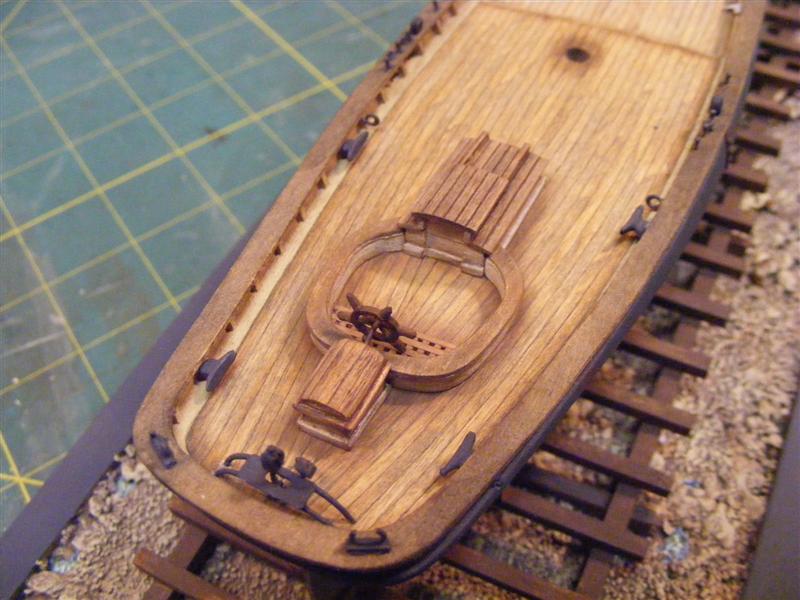
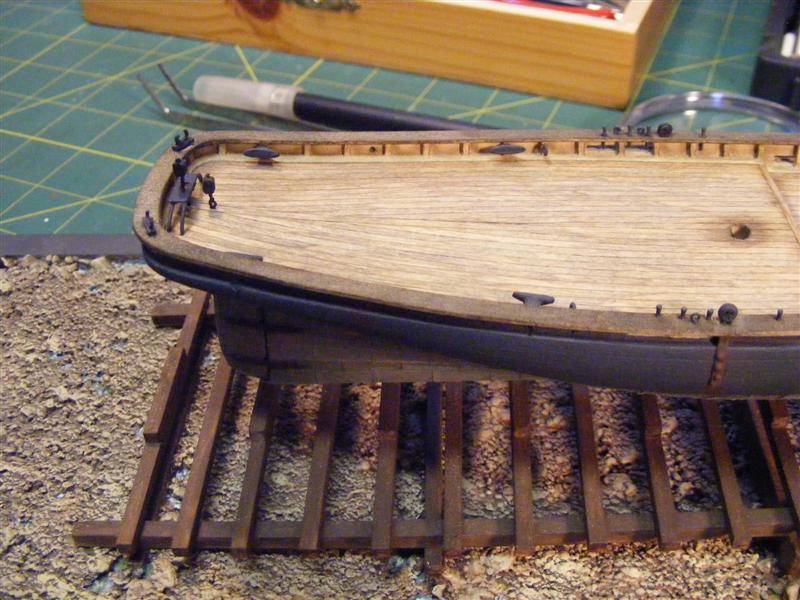
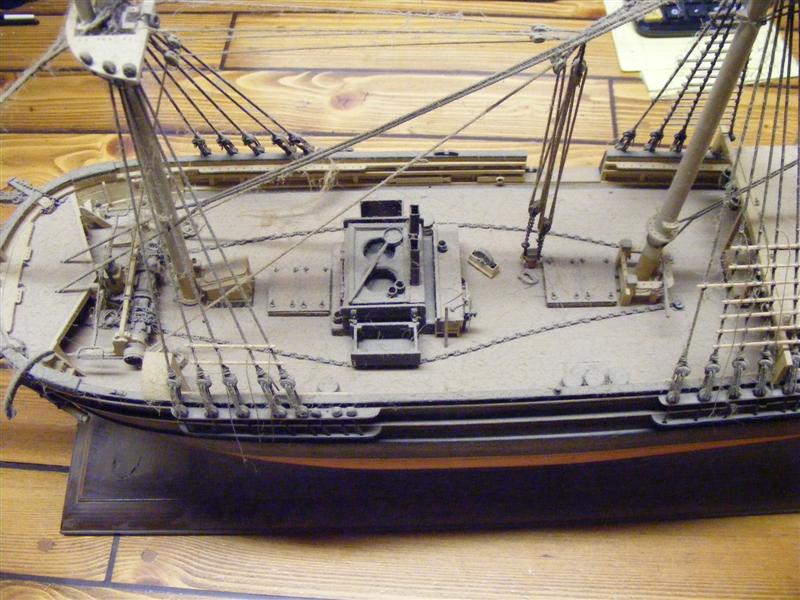
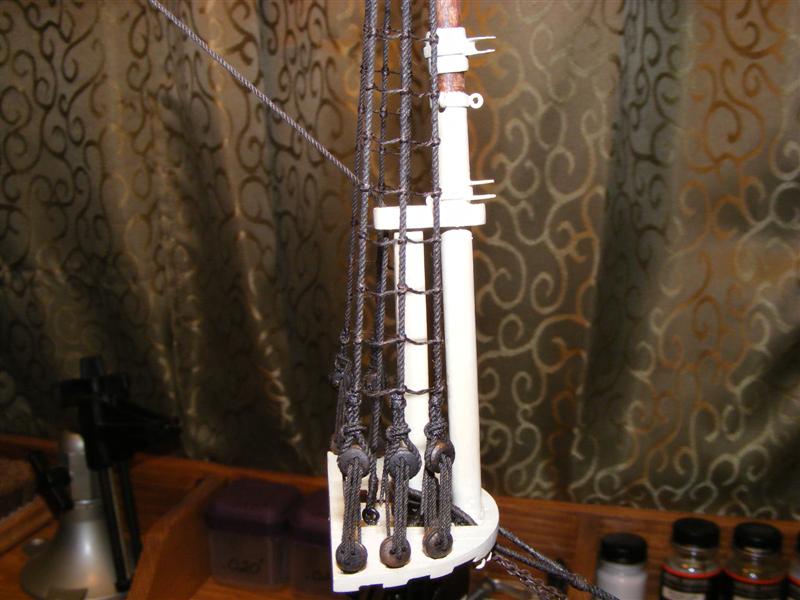
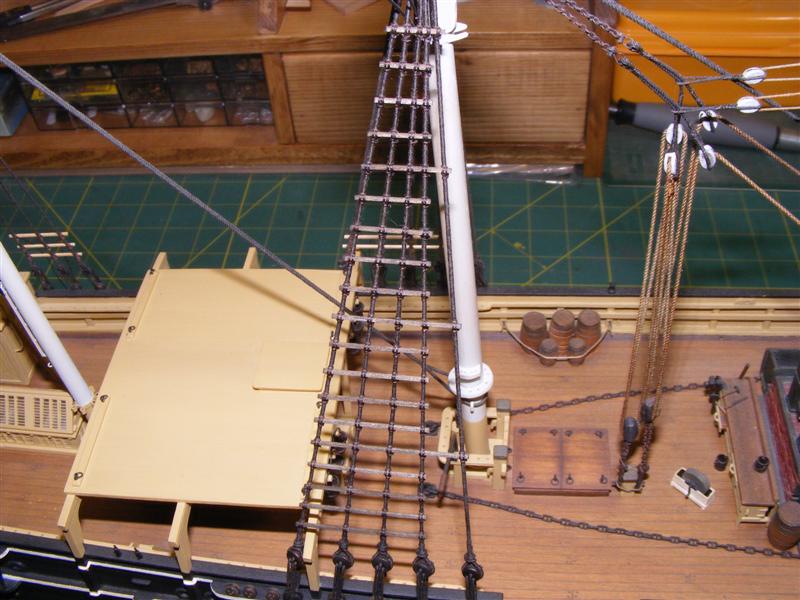
This is where I am at on my build. I am working on the ratlines, and lower shroud battens.
- rafine, boatntrain, mtaylor and 1 other
-
4


Charles W. Morgan by David Lester - Model Shipways - 1/64th scale - FINISHED
in - Kit build logs for subjects built from 1801 - 1850
Posted
Hi David, wonderful build, everything is looking great. I was cutting the boats in half when shaping them, made it a lot easier.
I like what you did with the hoops. In that same picture you showed of the actual hoops, has anyone noticed that some of the ropes are siezed in the same manner. I played around with that idea with the plumbing tape, and it does work, but it's also rather time consuming.
BTW, the reason I suggested not to use acrylic paint on the tryworks, is because it smears when wiping the spackling off, and turns it pink.
Keep up the great work. I've been enjoying watching these Morgan's come together on here, and seeing all the great ideas. Me of course have fallen way behind.