
Supplies of the Ship Modeler's Handbook are running out. Get your copy NOW before they are gone! Click on photo to order.
×


AntonyUK
-
Posts
1,182 -
Joined
-
Last visited
Reputation Activity
-

 AntonyUK reacted to mikeaidanh in Gun Deck Cross Section by mikeaidanh - FINISHED - Panart - 1:23
Back again.
Internal planking round the gun ports and adding a waterway.
I decided to set the cills of the gun ports into the planking as.....
....and make a template for the trenailing. The trenails in these planks are simple plugs with no structural component.
Planking progress....
....and adding a waterway not in the kit plans.
Inside planking completed.
Back shortly,
Mike.
-
AntonyUK reacted to mikeaidanh in Gun Deck Cross Section by mikeaidanh - FINISHED - Panart - 1:23
Back for more. This time it is the gun deck planking.
Before the planking can be fitted a hatchway and grating must be made.
The next image shows my jig for laying out the planking, working out the butt shift and trenailing.
As this deck will eventually be almost completely covered by cannon and various other fixtures and fittings I am not going to caulk and trenail properly but simply fake these features. The caulking will be black pencil edging and the trenails indentations in the planking made with the Patent Trenail Marker as per the other build that I mentioned in the intro to this one. I have, I think, improved on the original concept of the PTM by the addition of my impact centre punch!
Now the planking is laid out on the jig, the butt shift joints are all marked up and the trenails have been punched in.
Laying planking commences....
....and completes with the fitting of the hatch.
Back later.
Mike
-
AntonyUK reacted to mikeaidanh in Gun Deck Cross Section by mikeaidanh - FINISHED - Panart - 1:23
Back again.
The following photos show the curved rib sections and my spacers used to position them. as the spacers cannot be seen after planking they were glued in place. The ribs were found to be a tad short and have been corrected.
The gunnel cap can also be seen here.
Making the Whale. Showing scarffe joint and black card caulking .
Fitting the first plank and adding the whale.
The whale has been treated with ebonising stain but I find it unconvincing. I will see what it looks like later and think again.
A drilling template for the trenails.....
....makes the job straightforward.....
....and soon completed.
The whale having another coat of stain but I am still not happy. Maybe polishing will improve it. The large trenails in the whale are a mess and will be replaced.
Polish applied to see how it looks. Ok, but the whale is still not right.
Back soon.
Mike.
-
AntonyUK reacted to mikeaidanh in Gun Deck Cross Section by mikeaidanh - FINISHED - Panart - 1:23
I am building this model for a friend who reads O'Brian almost continuously. With the model on his reading desk aiding his imagination i hope he will be transported into the world that he finds so fascinating.
I will not be strictly following all aspects of the kit instructions but using some licence to delete, modify or add as I see fit. Historical and physical accuracy will suffer for this and I imagine there will be not a few wry smiles at some of my decisions but I crave indulgence as this is not meant to be an exact depiction but more an instrument of imagination.
At some point in the past I came across a build of this model, not in MSW, that contained some interesting additional aspects. I cannot remember where I saw it but I have remembered and incorporated some of the ideas from that build. I doff my cap in acknowledgement to the builder.
Here we go.
The preceding images show the main framework construction. Keeping this element square was very simple using a build board and the engineering blocks.
The frames have been stained. A decision I later regretted and had to undo.
Back soon.
Mike.
-
 AntonyUK got a reaction from nobotch in The Byrnes Saw "inside and around"
Hi Markus.
Very intresing mods.
I have done the splitter mode on my saw. For use on the TCT blade only.
But I find this very useful when cutting very thin strips
The Splitter should only be the same thickness as the blade Kerf..
But even this is not needed if you feed in the timber straight.
I can see that this topic might be usefull to Jim.
Regards Antony.
-
 AntonyUK got a reaction from WackoWolf in The Byrnes Saw "inside and around"
Hi Markus.
Very intresing mods.
I have done the splitter mode on my saw. For use on the TCT blade only.
But I find this very useful when cutting very thin strips
The Splitter should only be the same thickness as the blade Kerf..
But even this is not needed if you feed in the timber straight.
I can see that this topic might be usefull to Jim.
Regards Antony.
-
AntonyUK reacted to nobotch in The Byrnes Saw "inside and around"
My "Jim Saw" it arrived this week a mere 19 days after having placed the order!
Although this little beauty would work out of the box I have scheduled some task-specific add-ons of which I have completed three so far.
The first one is a provisional splitter (permanently integrated in a zero clearance insert) which in the first place served to figure out the dimensions of its parts but also is fully functional:
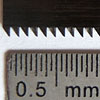
The splitter itself is made of "1 mm" birch plywood which in reality is 1.2 mm thick. This is the perfect thickness for the 36 teeth blade whose disk is a bit over 0.9 mm and which leaves a kerf of about 1.5 mm. As plywood is not really stiff I did not want to make it too big. I hope it will do its job until I'll have made a better one. Even if noise is on the low side with the Byrnes saw, the next modification I made reduces noise . The belt guard is made of a sheet of aluminium which acts as a resonator. So I lined it inside with some cardboard (glued on with epoxy). This was my standard procedure for silencing the tower case of all computers I ever owned. In the following pictures you also can see how the belt guard can be slid off and on after only loosening four screws through dedicated holes, without completely removing them - a feature I almost always missed on computer cases... You can further see that the more expensive of my two Phillips N°1 screwdrivers did not fit through the holes, I had to use the cheaper one which obviously complies better with international standards!
I don't like spinning parts that theoretically could be touched by accident, even if it is very unlikely to happen. This is why my third modification was covering the opend side of the belt guard, leaving open only a slot big enough to grab the axle with a wrench when changing the blade. The cover fits snugly but gets secured with a single screw which only has to be removed (3 full turns) when changing the belt - that is, almost never. I thought the following picture might be an interesting view for those technically inclined who are lusting for a Byrnes Saw
Well, I think that's it for today.
No, wait! I forgot to say that after having made a few cuts it really looks like this saw will meet my high expectations I had. A couple of long and thin rip cuts were all within half a tenth of a millimeter tolerance, without having used any more sophisticated add-ons than a to the "fence extension" clamped short fence, and the zero clearance insert with splitter.
Cheers,
Markus
-
 AntonyUK got a reaction from GLakie in HM Cutter Cheerful 1806 by Chuck - FINISHED - 1:48 scale - kit prototype
Hi Chuck.
That's a tidy workshop that's full of interesting bits ... Not Crap.
I wish I has access to a large work area like yours. I bet more than 80% of the modellers here would like the space
Regards Antony.
-
AntonyUK reacted to Chuck in HM Cutter Cheerful 1806 by Chuck - FINISHED - 1:48 scale - kit prototype
I think the fore most shroud would do the most damage. Its a mystery. There are other cutters I have examined and its usually both the fore shroud and the aft shroud or none of them. I have never seen just the aft one served.
The way the stay is rigged with two deadeyes....plain with three holes is also a curious detail I have not seen before. I am going with the more tradition rig. Based on the Surly in the other museum.
Chuck
-
 AntonyUK got a reaction from AON in Naval Cutter Alert by AnobiumPuncatum - Scale 1/36 - POF
Hi Christian.
Is this what you are referring to ?.
http://www.craftsmanshipmuseum.com/BuildingAlert.pdf This is a link that is already posted on your build.
Looking forward to you continuing this build..
Regards Antony.
-
AntonyUK reacted to Chuck in HM Cutter Cheerful 1806 by Chuck - FINISHED - 1:48 scale - kit prototype
Not to get to off topic...
But just a few...Boy am I lazy today. I am crapping up my own build log to boot!!!
Great Republic by Boucher...1912
-
AntonyUK reacted to Chuck in HM Cutter Cheerful 1806 by Chuck - FINISHED - 1:48 scale - kit prototype
And just to round out the images of where I spend 10 - 12 hours per day...
This is the other side of the shop which is in my basement...yes I know it is an absolute bloody mess. In total its about 25 feet long and 18 feet wide with that little hallway which leads to my kids man cave.
This is my block making station where yesterday I finished up milling 2000 2mm blocks. Theres a lot of sawdust on the floor....and my shop mascot snuck in the picture. You can see a drill press behind my hi-tech dust control system...the fan. , Byrnes saw and Sherline mill.
This is one half of my rope making station...You can see one half of that cheapo ME ropewalk on the table as well as all of the scraps from making a few thousand feet of rope over the last few days....I WANT TO BELIEVE.
I will be bringing all of that rope making stuff to St Louis to do a demo for the NRg Conference. I will be showuing how I make 20 - 23 foot lengths of rope on that little Model Shipways rope walk....thats how I make all of it.
And then looking down the length of my basement and down the 30 foot long hallway to the other end of the rope making station. This is where I make my rope. Nothing too terribly exciting. Alond the wall is my library and a bunch of old models...including the 18th century model that I should really find a better place for. There is another old Dutch model there too that is crying out for some love and restoration. I have no idea what it is but looks about 60 - 70 years old. Maybe. By God I have to tidy up this place...there is crap all over. I am embarrassed.
-
AntonyUK reacted to Landlubber Mike in Can i live without a BYRNES TABLE SAW
I think like everything else there are trade-offs. I bought Jim's table saw, disc sander and thickness sander earlier this year. Are they essential? Probably not if you like building models straight from the kit. I'm moving more towards scratching/bashing, and each of these tools have been of immense help to me thus far. I especially love the disc sander, which is one of those items where I wonder how I could ever do modeling without it.
Once you decide if you have have the need for a tool like these, then there's always the price/quality factor. You pay a premium for these tools (in my opinion, not too high relative to comparable machines from Proxxon and Micromark), but I have to say that they are built like tanks and should be the last tools like these I will ever need to buy. Plus, Jim provides incredible customer service. Case in point, I sent him an email asking a few questions a few months back, and he called me over a holiday weekend, without prompting, to walk me through things. It's really hard to find that level of customer service these days.
I don't know if these tools will make me a better modeler, but now I can't blame my tools (or lack thereof)
-
 AntonyUK got a reaction from Erebus and Terror in Can i live without a BYRNES TABLE SAW
Hi Boyd.
We can all live without luxury things.. But it's the best out there..
So much so I am considering in investing in a Thickness sander from Jim.
I use a much larger saw to rip my timber into manageable bits then into the Byrnes saw to finished size.
Most of the time I need only very light sanding as the finish is soooo good.
Regards Antony.
-
AntonyUK reacted to gjdale in Can i live without a BYRNES TABLE SAW
Okay Boyd, since you asked, you need one! And no, you can't live without one. There now, feel better?
Yes there are others that would possibly do the job, but the difference is, the Byrnes saw is an absolute joy to use. It will bring a smile to your face every time you use it. And after all, don't we do this hobby for enjoyment? It will certainly come into its own when you start scratch building, but even kit bashing will give it a serious workout. If you're looking for it to "pay for itself", it will do that if you mill your own lumber to size - eg buy sheet stock from Hobbymill and rip it down to size. BUT, you don't buy one of these works of engineering art to pay for itself. You buy one because you can! And for the sheer enjoyment of using it.
So, have you placed your order yet?
Oh, and don't forget to order the Byrnes Disc Sander at the same time. That brings almost as big a smile to my face, and probably gets used even more frequently than the saw.
Let us all know when you've pulled the trigger on this/these. :)
-
 AntonyUK got a reaction from PeSt in Are solid hull kits respected?
Hi.
My story of a solid hull.
Me at the time was at the tender age of 10.. Doing my normal thing in the morning befor school I would look around our local coves for any driftwood that might have come in during the night.
In doing this one day I found a hull of a ship made out of solid wood.
I picked it up as it was the only thing that got washed in that night.
One of the locals was a model ship builder and spotted me walking through the village with it and called me over.
This turned out to be a very good carving that he insisted that I should continue building it.
With his help this model was completed and is now on display in the local pob.
Solid hulls are not easy and are used by masters for model ship building.
The hull was just over 27 inches long and had all the decks shaped ready.
This was my start into this hobby.
Regards Antony.
-
 AntonyUK got a reaction from RFP in Are solid hull kits respected?
Hi.
My story of a solid hull.
Me at the time was at the tender age of 10.. Doing my normal thing in the morning befor school I would look around our local coves for any driftwood that might have come in during the night.
In doing this one day I found a hull of a ship made out of solid wood.
I picked it up as it was the only thing that got washed in that night.
One of the locals was a model ship builder and spotted me walking through the village with it and called me over.
This turned out to be a very good carving that he insisted that I should continue building it.
With his help this model was completed and is now on display in the local pob.
Solid hulls are not easy and are used by masters for model ship building.
The hull was just over 27 inches long and had all the decks shaped ready.
This was my start into this hobby.
Regards Antony.
-
 AntonyUK got a reaction from GuntherMT in Are solid hull kits respected?
Hi.
My story of a solid hull.
Me at the time was at the tender age of 10.. Doing my normal thing in the morning befor school I would look around our local coves for any driftwood that might have come in during the night.
In doing this one day I found a hull of a ship made out of solid wood.
I picked it up as it was the only thing that got washed in that night.
One of the locals was a model ship builder and spotted me walking through the village with it and called me over.
This turned out to be a very good carving that he insisted that I should continue building it.
With his help this model was completed and is now on display in the local pob.
Solid hulls are not easy and are used by masters for model ship building.
The hull was just over 27 inches long and had all the decks shaped ready.
This was my start into this hobby.
Regards Antony.
-
 AntonyUK got a reaction from mtaylor in Are solid hull kits respected?
Hi.
My story of a solid hull.
Me at the time was at the tender age of 10.. Doing my normal thing in the morning befor school I would look around our local coves for any driftwood that might have come in during the night.
In doing this one day I found a hull of a ship made out of solid wood.
I picked it up as it was the only thing that got washed in that night.
One of the locals was a model ship builder and spotted me walking through the village with it and called me over.
This turned out to be a very good carving that he insisted that I should continue building it.
With his help this model was completed and is now on display in the local pob.
Solid hulls are not easy and are used by masters for model ship building.
The hull was just over 27 inches long and had all the decks shaped ready.
This was my start into this hobby.
Regards Antony.
-
AntonyUK reacted to RichardG in Are solid hull kits respected?
I've been a member on this site for 4 months and looked at a few hundred build logs. Some I liked, some I didn't as much. My likes and "not so much likes" were the subject matter, never the person, or form, or size, or scale, or material, or period. Even those where the actual ship wouldn't be one I would build, I've clicked the "Like this" when I've seen work (or words) that impressed me.
This is a hobby (and a slight obsession ). As far as I know there is only one rule - enjoy what you are doing.
So go for it!
All the best,
Richard.
-
AntonyUK reacted to Chuck in HM Cutter Cheerful 1806 by Chuck - FINISHED - 1:48 scale - kit prototype
I have already received the gunnades (carronades on carriages) for this model. Thought I would share some photos. These are turned brass just like the cannon I carry.
These are actually all ready to go...along with the carriages which are also already laser cut. I am getting there...havent built one yet though.
Chuck
-
 AntonyUK got a reaction from FrankWouts in HM Cutter Cheerful 1806 by Chuck - FINISHED - 1:48 scale - kit prototype
Hi Chuck.
Been waiting for this one
Will follow this build with great interest.
All the best.
Regards Antony.
-
AntonyUK reacted to Magnus in HMS Pandora
Hi,
finally the third HMS Pandora now. I started this project years ago and it was suspended quite a while. At the beginning of this year I did revisit it and finalized it. I am currently doing the first big render tests and put first results on YouTube:
Some photes of the same setting here:
-
-
 AntonyUK got a reaction from GTM in emergency steering chains
Hi GTM.
Found this in The Arming and fitting of English Ships of Ware 1600 - 1815
Looks like they just end on a ring bolt.
Regards Antony.