HOLIDAY DONATION DRIVE - SUPPORT MSW - DO YOUR PART TO KEEP THIS GREAT FORUM GOING! (Only 72 donations so far out of 49,000 members - Can we at least get 100? C'mon guys!)
×


Modeler12
-
Posts
1,716 -
Joined
-
Last visited
Content Type
Profiles
Forums
Gallery
Events
Everything posted by Modeler12
-
 One step at a time. I am not familiar with what you describe, but at least to the best of my knowledge, square sail sheets (such as topsails) are usually fed down to the spar below it. They go through a sheave in that spar and then towards the mast, before they go down to the deck. In you case that can be done before the topsail and spar is raised. Braces could be handled the same way. The problem might be that all of a sudden the wind catches the sail, so the sheets and braces better be ready for that. But that is no different than with other sails. Does that make sense? Or I am not with it? BTW if there are no ratlines, would a boatsman chair help? There is always a way to get up there.
 -
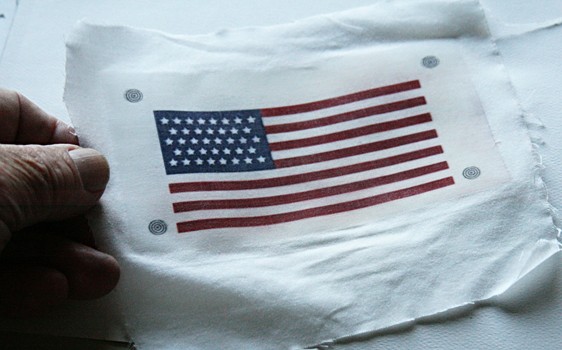
Here is an old post that deals with making flags on cloth. http://modelshipworld.com/index.php/topic/89-making-cloth-flags/?hl=%2Bmaking+%2Bflags
-
Henry, I will do the same as you suggested. Lead block to the top etc. But believe me, you have been a wonderful source for details. Thanks again. Keep warm.
- 732 replies
-
- 2
-

-
- constitution
- model shipways
- (and 1 more)
-
But I like to talk, Steve. I did as George suggested and hope I did not lose my friends.
- 732 replies
-
- 2
-
-
- constitution
- model shipways
- (and 1 more)
-
Whow, George, Thanks. Something new to learn and do!!!!!!
- 732 replies
-
- 1
-
-
- constitution
- model shipways
- (and 1 more)
-
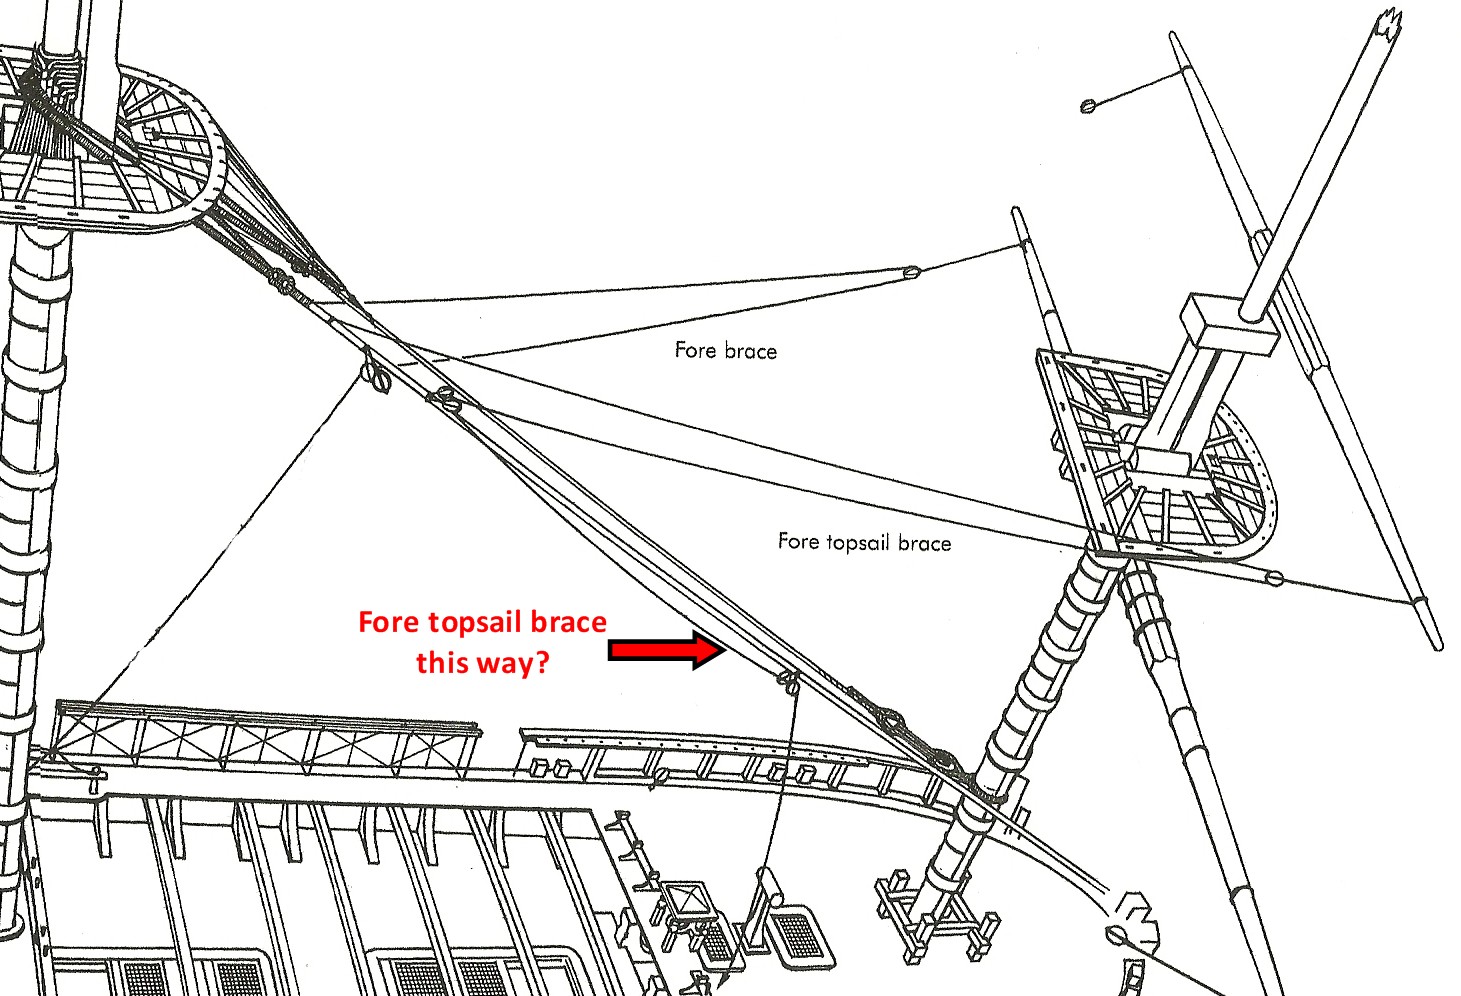
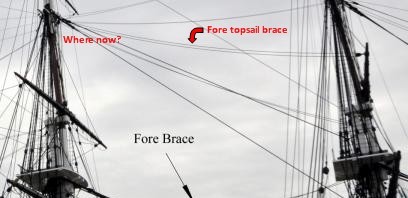
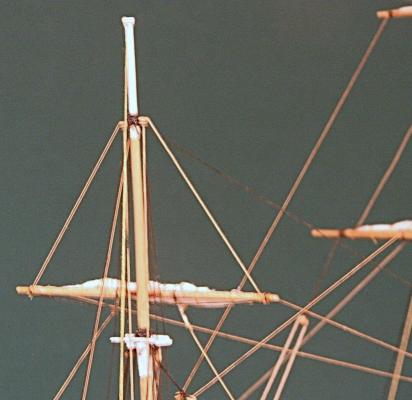
Henry (or others familiar with the ship) here is another question about the rigging of braces. Pardon me Henry, I 'stole' part of your picture below, and I hope you don't mind. But towards the top you can see another brace. It is the fore topsail brace (two actually). But it is not quite clear where those lines go after they come back from the fore topsail yard. They will come down, I hope, (like Newton's apples), but how? The plan shows arrows pointing down. Petersson's drawings are much more complicated. But how is it on the Connie today? Are there more fairleads or bullseyes involved? Otherwise, I would think we have the same problem as I mentioned above with the fore jack braces interfering with the sail below. ?????

- 732 replies
-
- 1
-
-
- constitution
- model shipways
- (and 1 more)
-
I was not aware of that. I have read all, I hope, so how do I empty this thing? This post will not have any destruct information, I hope.
- 732 replies
-
- 2
-
-
- constitution
- model shipways
- (and 1 more)
-
Perfect, Henry. That is just about where I put my eyebolt and block. Now the line clears the jack and sail (should it be raised). In the plan there would have been trouble. Meanwhile I am going to study those pictures some more to see what other goodies you might have revealed. For example, you show the spanker sail in the furled position. That is not for my Connie, but will come in handy for my next project With all the bad weather you guys are having, how did you get those nice shots?
- 732 replies
-
- 1
-
-
- constitution
- model shipways
- (and 1 more)
-
Need a realistic belaying plan for the USS Constitution
Modeler12 replied to Modeler12's topic in Masting, rigging and sails
Indeed, Bill, that plan is there and when I looked at it in a couple places, it makes more sense than the one I have. There are lots of examples and I won't go into that right now. But every ship has its own, I am sure. So, I rest my case with the nice post made by Tom above. -
Need a realistic belaying plan for the USS Constitution
Modeler12 replied to Modeler12's topic in Masting, rigging and sails
I have the book, but did not correlate. I looked at the sections about 'standing' and 'running' rigging and did not see a 'belaying plan'. But that was a cursory look. Page ??? I retired from a government sponsored lab and don't use acronyms; no more than I have to. We are now talking with the end of this glass of wine in sight. Dinner is fillet of fish, pan fried, with left over lunch chow-mein and a fresh veggie, to be determined shortly. Correction, I did find the plan on pages 118 and 119. I will study this tomorrow and see if it is the same as what I have. You'r OK Bill. -
Need a realistic belaying plan for the USS Constitution
Modeler12 replied to Modeler12's topic in Masting, rigging and sails
Sorry, Bill, after a glass of wine right now, I don't remember what the AOS is. Keep in mind I am one of those people who still don't use FYI and others such. -
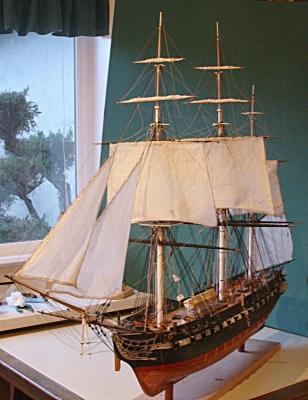
Tom, a suggestion. This is well into the future for you, but I think important to remember. When I installed some of the posts and fife rails on the deck, I simply glued them to the deck without any further thoughts. Then when I was doing the rigging some of the lines going up the mast put enough upward stress on those 'simple' glue lines to break two of them off. I ended up drilling a hole in the bottom of the posts and inserted a brass pin. A similar hole in the deck and some epoxy and it was fixed. However, it would have been a lot easier and less stressful on me personally if I had made the posts longer and inserted them through the deck with some kind of attachment from underneath. This is also the reason I use epoxy on almost all eyebolts. CA just does not make it. I do have a question about your model and plans. You show and have part of the gun deck showing, whereas mine is like the ship is now in Boston. The kits were made by the same company, but I am wondering when that addition of the lower deck was made. I really like yours because it gives a much better feeling of what all those guns below are about. How do you stow the large boat?
- 1,350 replies
-
- 2
-
-
- constitution
- model shipways
- (and 1 more)
-
Need a realistic belaying plan for the USS Constitution
Modeler12 replied to Modeler12's topic in Masting, rigging and sails
The two belaying plans are quite different. On mine there is a whole section on the bulwark foreward, for example, that is dedicated only to the studding sails. Yours, shown above, has this for a variety of other lines. That is the only one I looked at. -
Need a realistic belaying plan for the USS Constitution
Modeler12 replied to Modeler12's topic in Masting, rigging and sails
I will blow this up and compare it with the one I have. But, at any rate, Frankie gave me a good answer and I will go ahead and go by the plan I have. I am sure there must be several different belaying plans depending on the age and time. But when a sailor knows the one for his ship it must have been hard to adjust when going to a different ship. -
Comments like this will always get you a reply, John. The only serving I have ever done was when playing tennis and being on a jury. I have not done any on my Connie. However, like you said, there was a discussion about this here some where. Perhaps you could post this in the general discussion area or do a 'search'.
- 732 replies
-
- 2
-
-
- constitution
- model shipways
- (and 1 more)
-
Rich, if you don't mind, I have a couple suggestions. Before adding the sails to the spars, make sure all the blocks, sheaves, jack stays, etc. are in place. The same applies to the masts. There are several blocks that are used to rig the sails, some of which are attached to the mast, underneath the tops and some to the yards. Do as much as possible on the workbench. Likewise add as much as you plan to use to the masts. You have the shrouds and main stays in place, but there are a lot more that go to the top and other locations along the masts. I am referring to the backstays, some of which go to the channels along the sides. add them to the mast, but you might leave them slack until you are satisfied the whole thing comes together right. Do the spanker sail first. This sail is attached to the extra 'mast' right behind the mizzen mast with hoops. Once it is in place, it is mostly out of the way for the rest of your work. To attach the square sails to the yards, use needle and thread to lash the top of the sail around the spars. Space them to correspond to the jackstays (if you decide to add those). When it looks right, use a thin line of PVA glue along the edge of the sail to bond it to the spar. I would try this first on one of the smaller sails, of course. Are you planning to add reefing lines to the sails? What about the lines such as bunt, leech, clue, reefing tackle and sheets? That is a lot of work for all those sails. Try to get hold of Petersson's book 'Riggin Period Ship Models'. It is excellent. Not too many words, but lots of invaluable pictures. Like I said, I hope you don't mind me making these suggestions. Your work on the ship is marvelous, very sharp and crisp. Keep up the good work.
- 1,756 replies
-
- 3
-
-
- constitution
- constructo
- (and 1 more)
-
You are tutin right, Bill. I have not seen what you are doing with your display-case lately, but I am sure it will be a beaut. That will be another project for me. But, just like you, I am somewhat familiar with putting pieces of wood together to make a display case. Glass . . . . ???? I will consider what you did, but in my case, I only have to be 'careful' on five sides . . . the back is against the wall.
- 732 replies
-
- 1
-
-
- constitution
- model shipways
- (and 1 more)
-
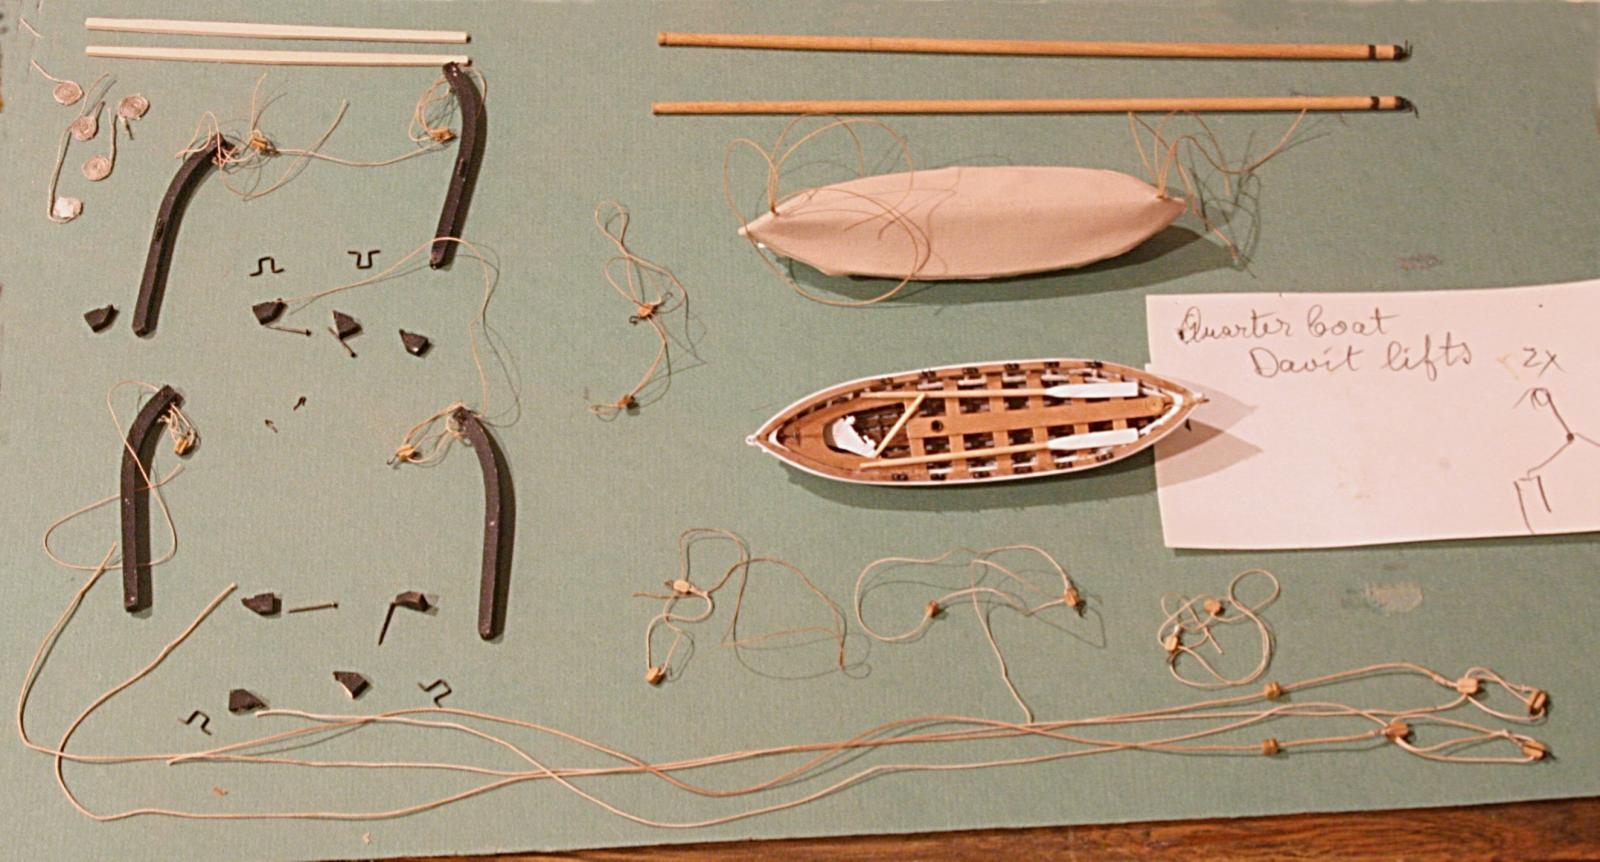
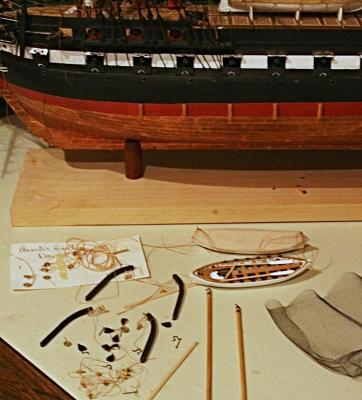
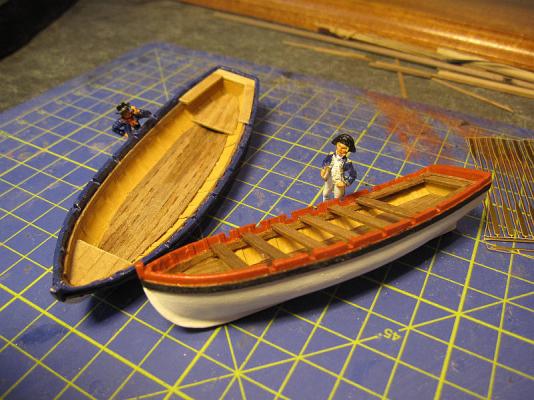
Here is a more detailed lay out of all those pieces I had saved. Besides the two boats, of course, there was all the hardware to mount them to davits. I may have to change a couple blocks on the starboard side with the better ones from Warner Woods West, but all and all it was nice to have these pieces. Some of these parts go to the outside of the rails and some mount to the channels (see drawing 5 center left). I was surprised to find all the hardware (memory fades after 70).

- 732 replies
-
- 7
-
-
- constitution
- model shipways
- (and 1 more)
-
In a plastic bag from long ago, I found the two whale boats and a bunch of other gear that include the davits and rigging for those boats. I had put this together more than a year ago and just wanted to refresh my memory what to do with them. Since this model will be against a wall, the port side is less important and will have a whale boat that is covered with tarp, as shown. It still will suspended from the davit system per the plan. The other boat will be on the starboard side. It is a bit more interesting with the seats and other details. The plans are good in locating and providing details about where and how to mount them. OOPS wrong picture I just want to make sure there are no other 'situations' (eg the main braces). BTW the black netting to the right in the top picture will be used for the hammock holders along with the brass parts in the kit. The two poles (shown vertical below) are studding booms that will be attached next to the hull. In this case they will be more of a decoration because I am not including the studding booms that go on top of the spars sticking outboard (or will I??). Now it is a matter of doing all the repair and other things I have talked about.

- 732 replies
-
- 6
-
-
- constitution
- model shipways
- (and 1 more)
-
OK, this is what I have thus far: A bunch of wooden slats, some guns, some cloth and lots of memories of how I put them together. But I am not yet done. I am sure Captain Steve is wondering about the whale boats. And others will say that there are those hammocks on the top rail. I have patience (or is it patients?) and will continue installing a few more things.
- 732 replies
-
- 7
-
-
- constitution
- model shipways
- (and 1 more)
-
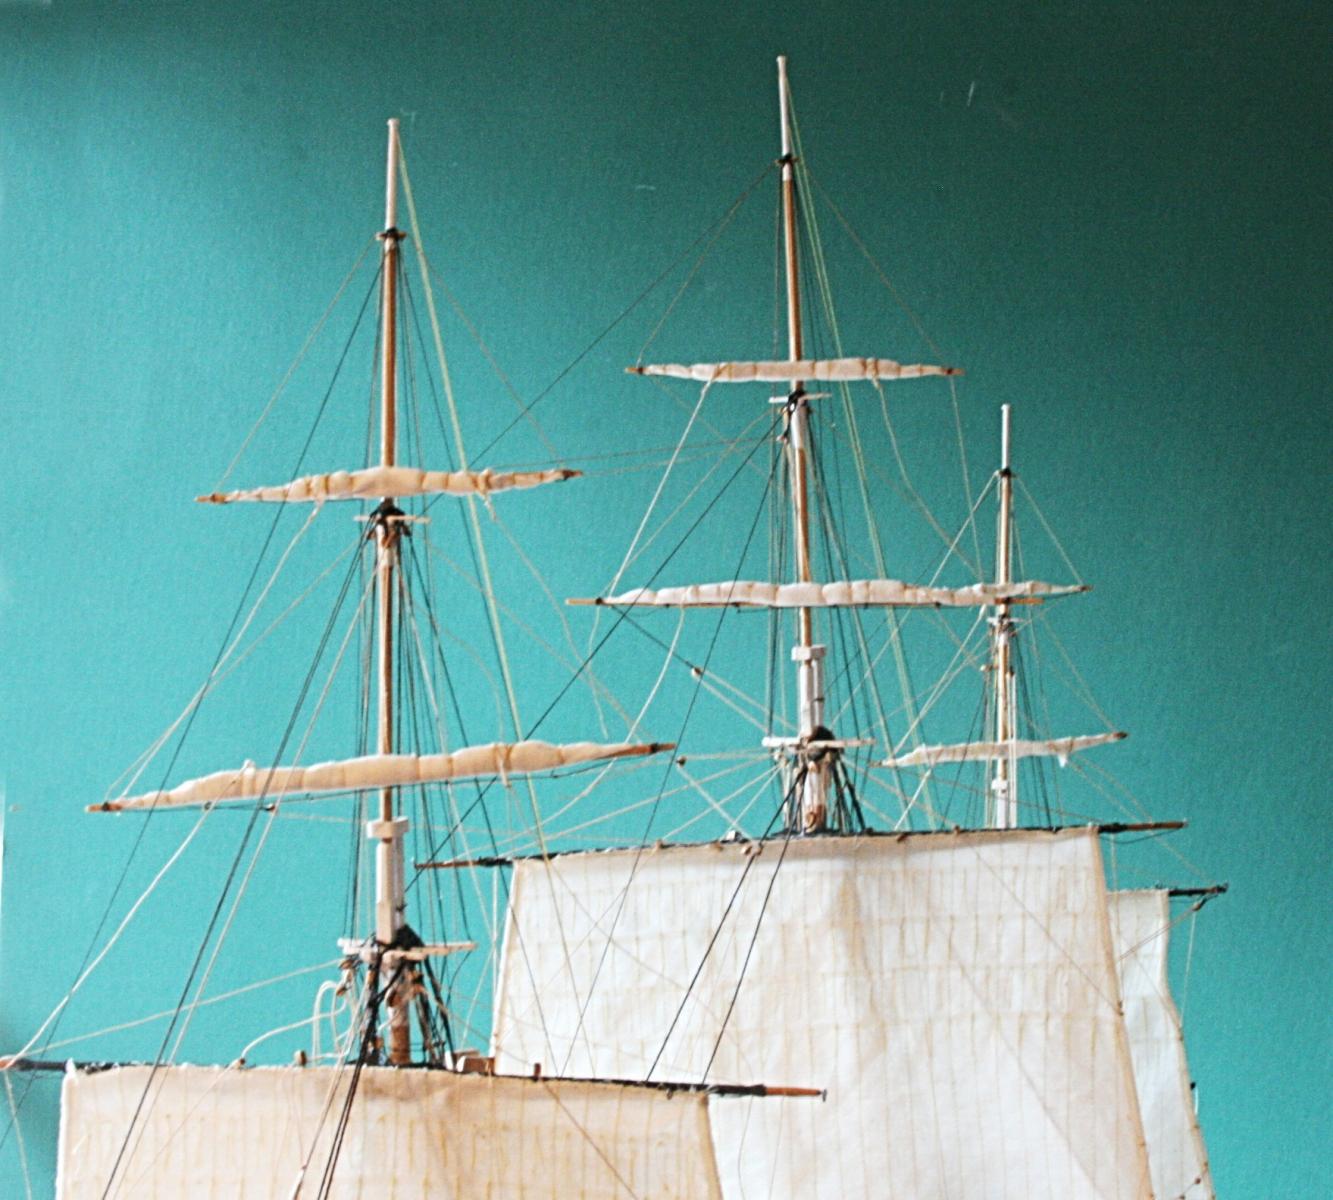
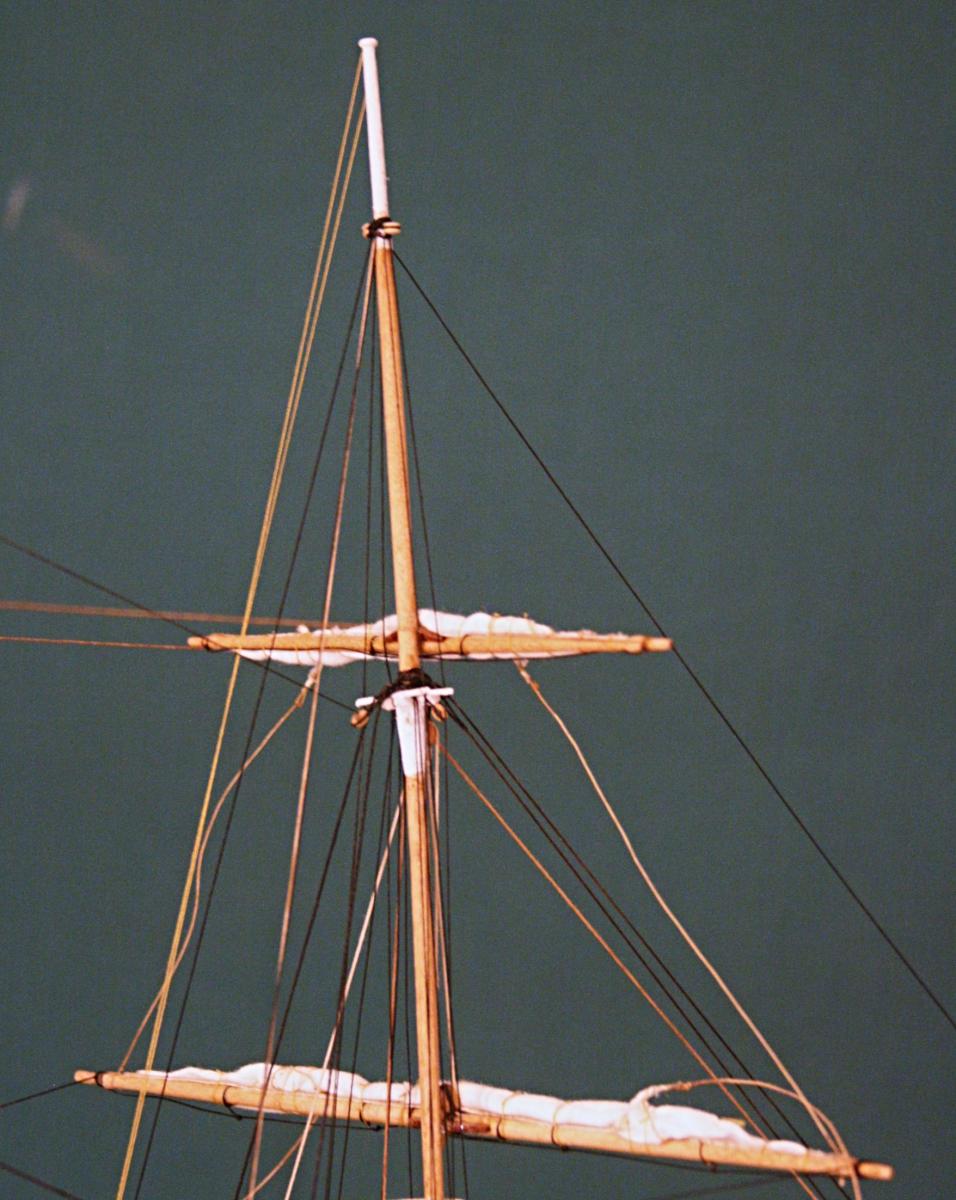
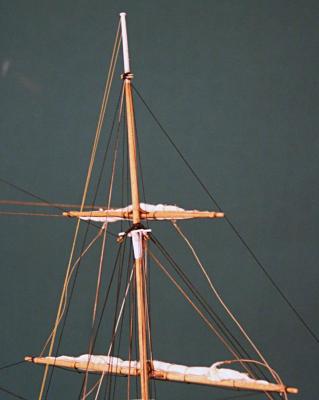
Fore top sail in place and most of the lifts installed. Lots of clean up and some repair is in order. Then it is a matter of 'filling' and fine tuning the set of the sails. BTW the picture doesn't show a lot of the lines (contrast?), but there are lift lines on top .

- 732 replies
-
- 6
-
-
- constitution
- model shipways
- (and 1 more)
-
Need a realistic belaying plan for the USS Constitution
Modeler12 replied to Modeler12's topic in Masting, rigging and sails
Thanks fellows. I have sent an email to Bluejacket asking for details. Their website makes no reference to the plan. Now that you mention the bulleyes, it makes more sense that the lines go to the pinrail. I have seen that being done with other lines. So the plans are not as wrong as I suspected. -
I have been working on my Conny kit from Model Shipways for quite some time and keep running into problems with the belaying plan. I would like to know about other or more accurate plans than provided with the kit. To be sure, the eight large drawings and plans that come with the kit are very good and cover all or most aspects of the construction, as long as you don't add sails. Right from the start I decided to add six sails with all the various lines that go with that. However, when belaying some of these lines, such as the bunt, leech and reef tackle lines, they are directed to go to awkward places. For example, the lines I mentioned, are belayed (per the plan) to fife rails that are along the bulwark instead of straight down along the masts. This creates interference or rubbing against either the inside or outside of the tops, depending on which way you go from the blocks above. I have also had some problems with the location of the topsail braces. The drawings show them attached to a futtock shroud which in my opinion is the wrong place to impose large stresses. I covered that in my build log. So, my question is: where could I find a better belaying plan? Can I get the current one in use from Boston?
-
Thank you guys. Indeed the lifts on top really stand out. I will do the same with most of the others, but the topsail would be difficult. Besides the sails would tend to hide the lift lines when viewed from the bow. Now I will continue and stop when the rigging is almost done.
- 732 replies
-
- 1
-
-
- constitution
- model shipways
- (and 1 more)
-
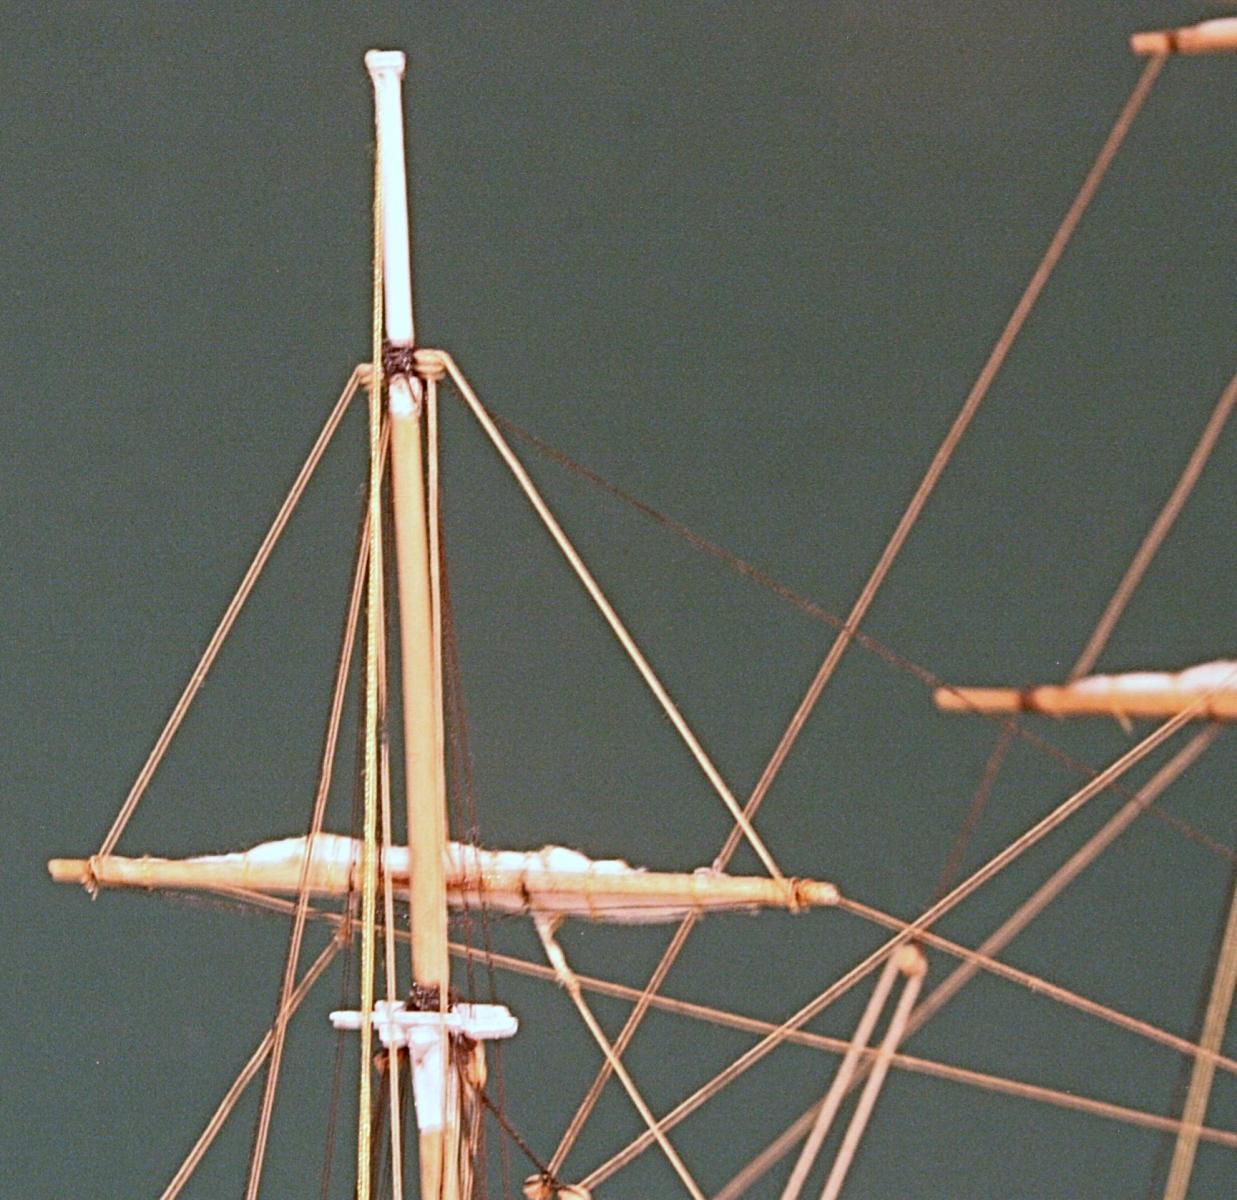
Well, Henry, like I said, I will be adding those lift lines per your suggestion. Here is a start This looks much better than the royal on the fore mast below. That poor guy didn't get a lift yet. I must admit that at this stage I am taking a few shortcuts (cheating actually) and hide the 'belaying points'. As you can see the 'blocks' on top are actually bullseyes; they are really the same size (camera angle I guess). But now I have to finish what I was doing before on the fore . . . . ????
- 732 replies
-
- 4
-
-
- constitution
- model shipways
- (and 1 more)