HOLIDAY DONATION DRIVE - SUPPORT MSW - DO YOUR PART TO KEEP THIS GREAT FORUM GOING! (Only 72 donations so far out of 49,000 members - Can we at least get 100? C'mon guys!)
×


Modeler12
-
Posts
1,716 -
Joined
-
Last visited
Content Type
Profiles
Forums
Gallery
Events
Everything posted by Modeler12
-
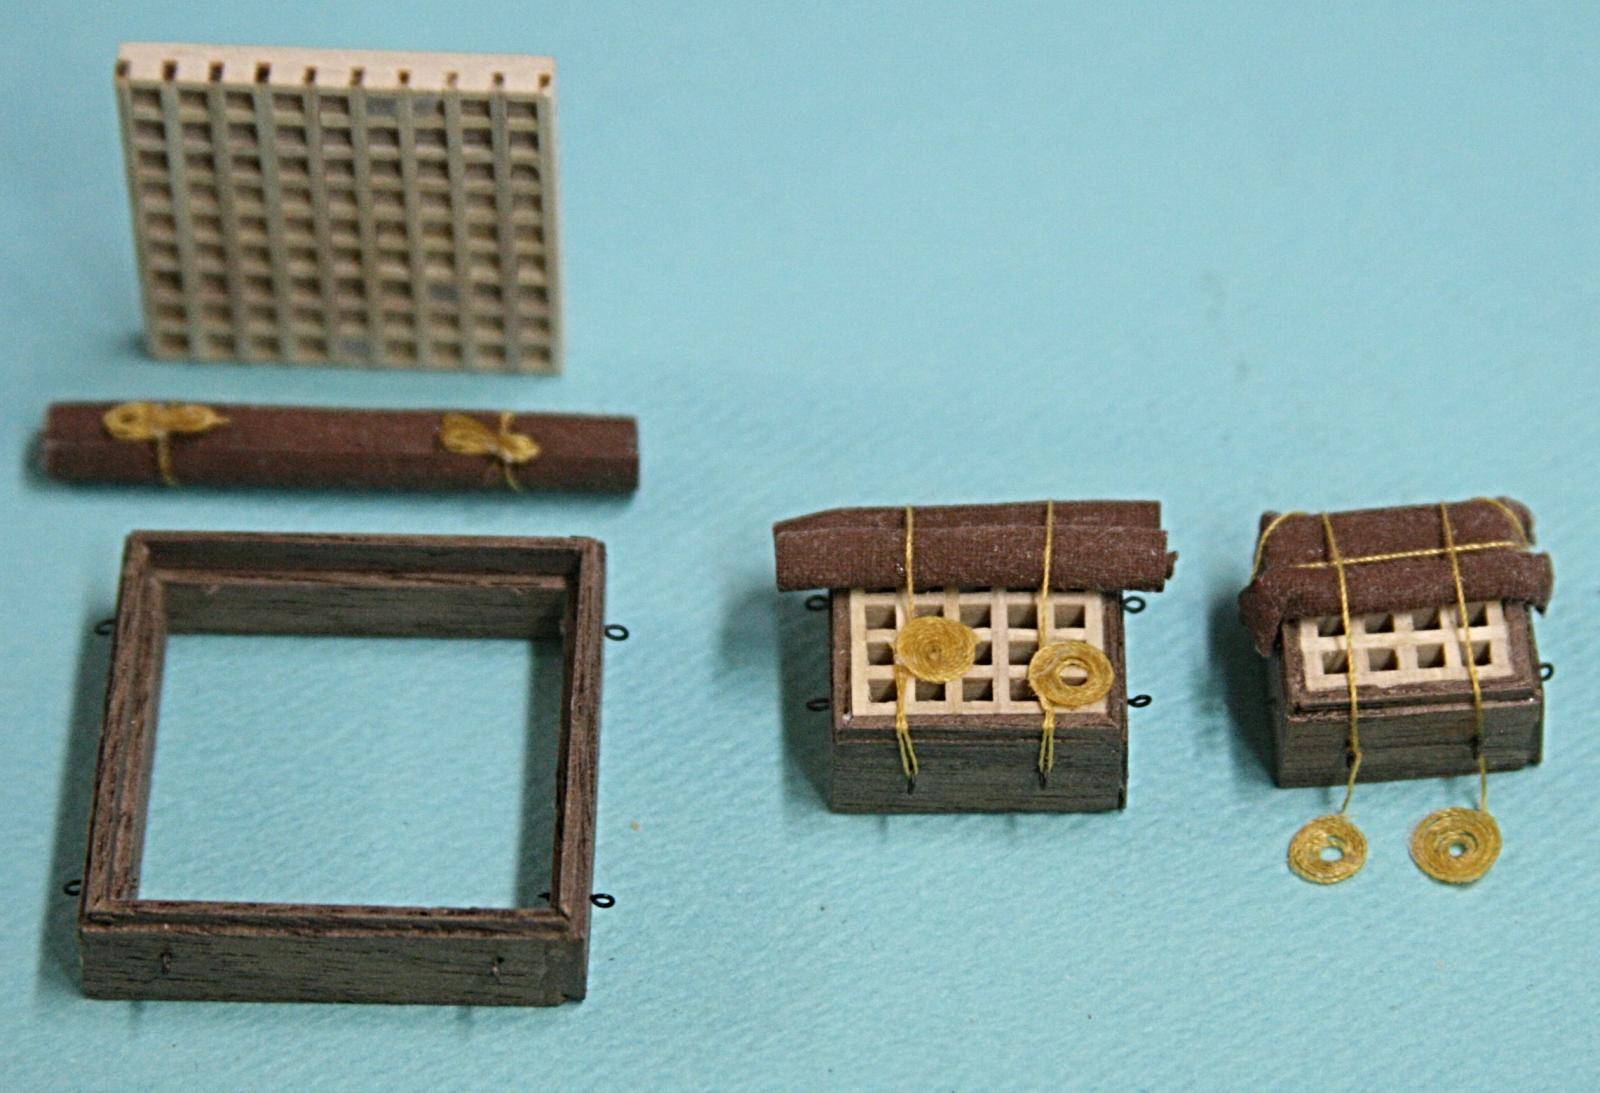
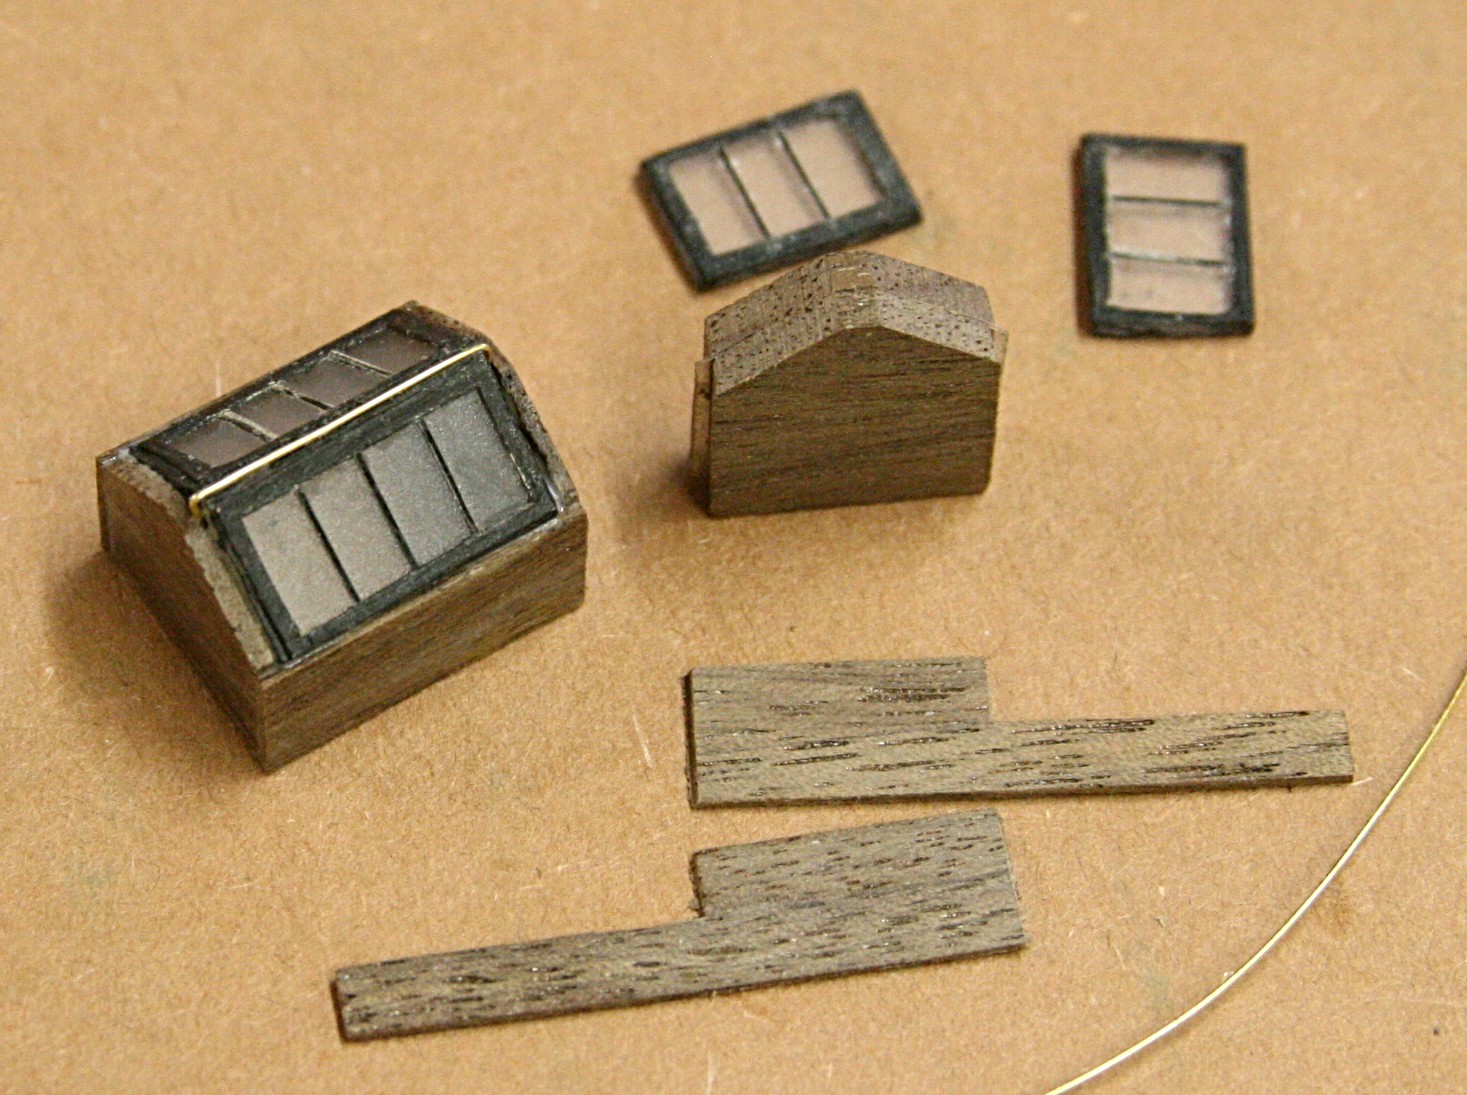
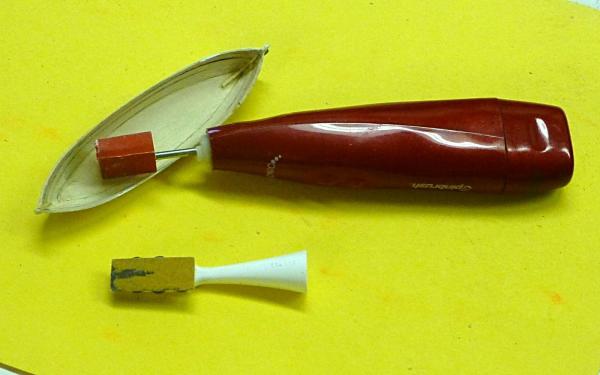
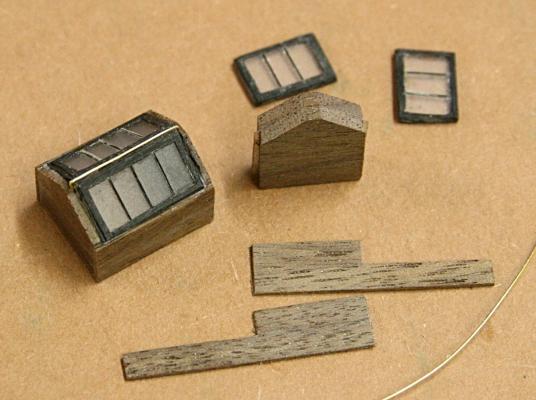
The USS Constitution kit has four boats that are made up by laminating pre-cut sheets as shown below. To get rid of the extra wood inside is a bear. I have used chisels, diamond coated bits in a dremmel like tool and then still had to do a lot of hand sanding. Some time ago I took an electric toothbrush, cut off the bristles and glued on a piece of sandpaper. Now I went a step further; took a piece of dowel, adapted it to the electric gismo, flattened one side, added sandpaper and voila . . a nice sander for tight spaces. Just don't let the kids get hold of it.

-
 Steve, I wouldn't bet on that. These boats have a lot of detailed work to be done. Here is part 2 of the videos. I thought by now I would be doing the insides, but then it turned out that there were 'details' that took longer. The picture below is when I blackened the gudgeons for the two rudders. I am holding off with the pinnace for a while. The next step is to paint the hulls, finish the tarp on one of the whaleboats, etc.
- 732 replies
-
- 4
-

-
- constitution
- model shipways
- (and 1 more)
-
Making the boats. I don't know how this is going to work out, but I thought it might be of interest to show how I started with making the boats for the Conny via the video below. This may not last long because there is some extra work involved. But it is another way to cover a lot with one post. You do have to turn on the sound . . . .
- 732 replies
-
- 2
-
-
- constitution
- model shipways
- (and 1 more)
-
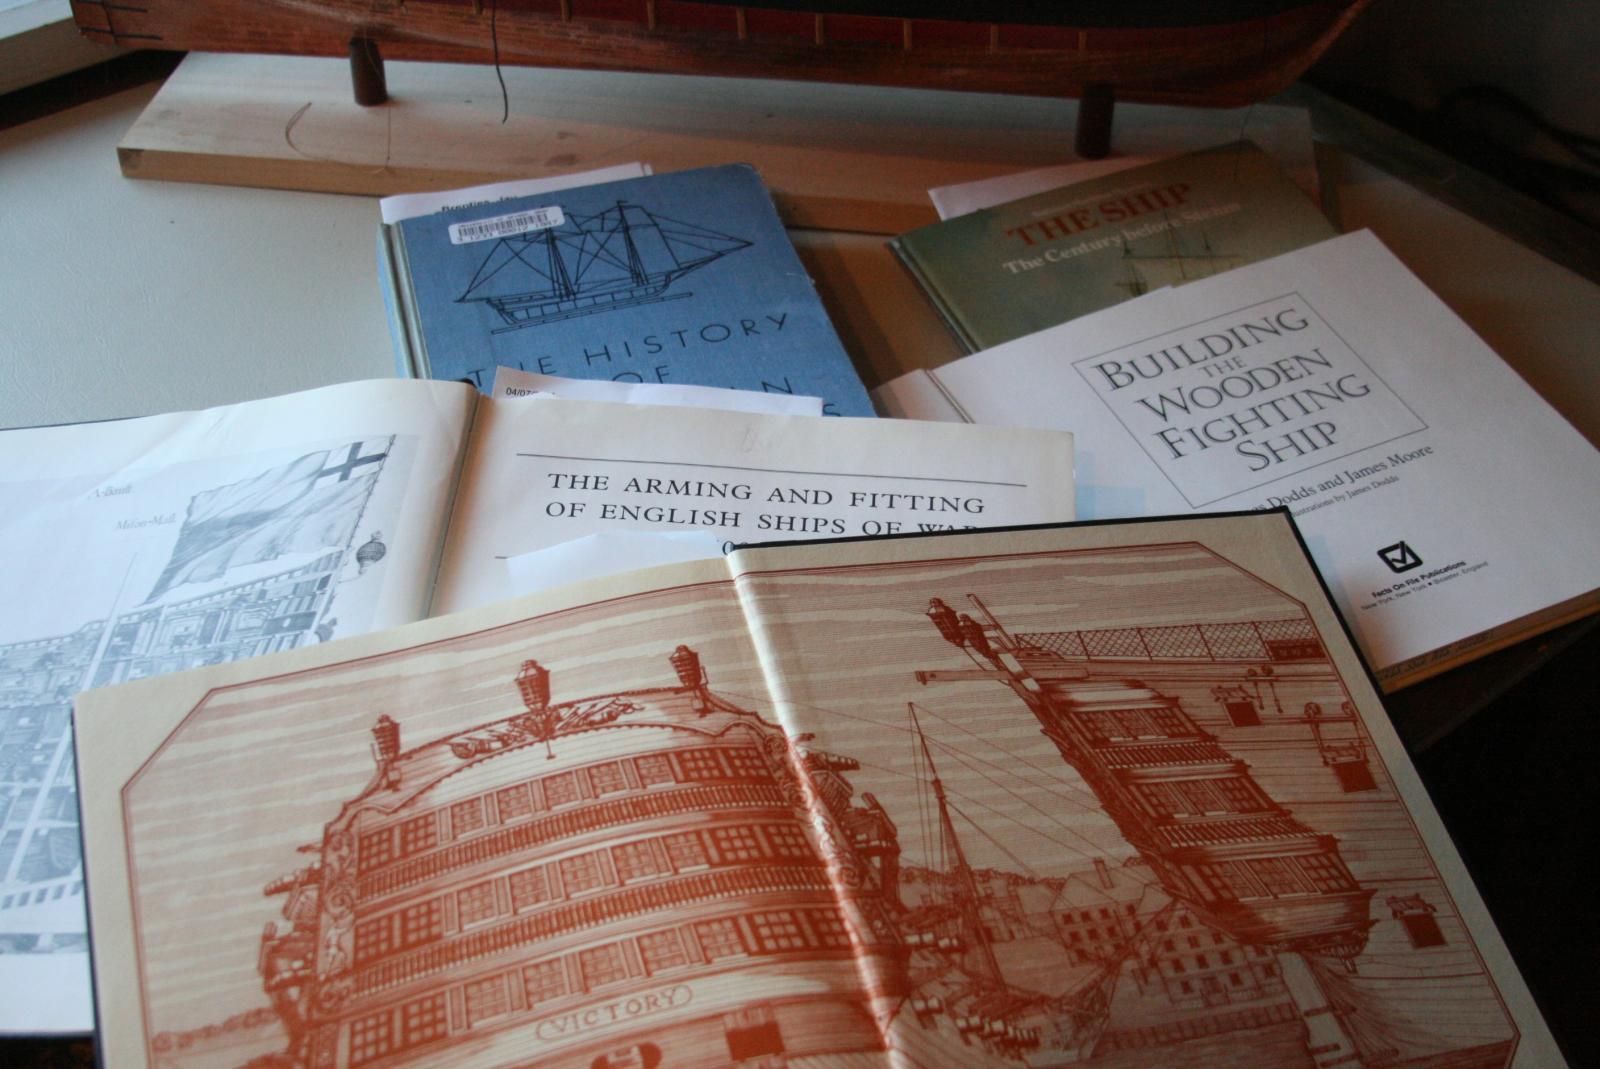
I posted this earlier below but thought it might be better here. In California, Nevada and Utah we have a system called Link+ which allows me to order books from libraries throughout those states. Below is a sampling of five books I have from different libraries. I ordered them online and it took about ten days when I was notified by my local library that they were ready for pick-up. Perhaps other states have a similar arrangement and I would suggest checking with your librarian. I found this to be a great way to review books before I bought my own.

-
what is the ideal modelling table?
Modeler12 replied to AON's topic in Modeling tools and Workshop Equipment
Alas, I have to create saw dust in the same area where I do the ship rigging. But one thing I did right. I used part of sheet of 3/4 inch particle board covered with a white laminate for the table top. It gave me a really hard and flat surface and I can find little pieces real easily. In fact. I even painted the floor around the table white also. Instead of an island, my main work area is a peninsula with lots of tool storage underneath (similar to what Remco showed above). This gives me access to at least three sides of the model and some place to put tools and supplies towards the wall on top of the workbench. In a way I wished I had incorporated some kind of 'Lazy Susan', or turn table, because I have turned the model around soooo many times during the rigging. But then again, I use this space for other projects that are more 'rigid'. Meanwhile I just have to continue turning the base and duck every time it comes around. -
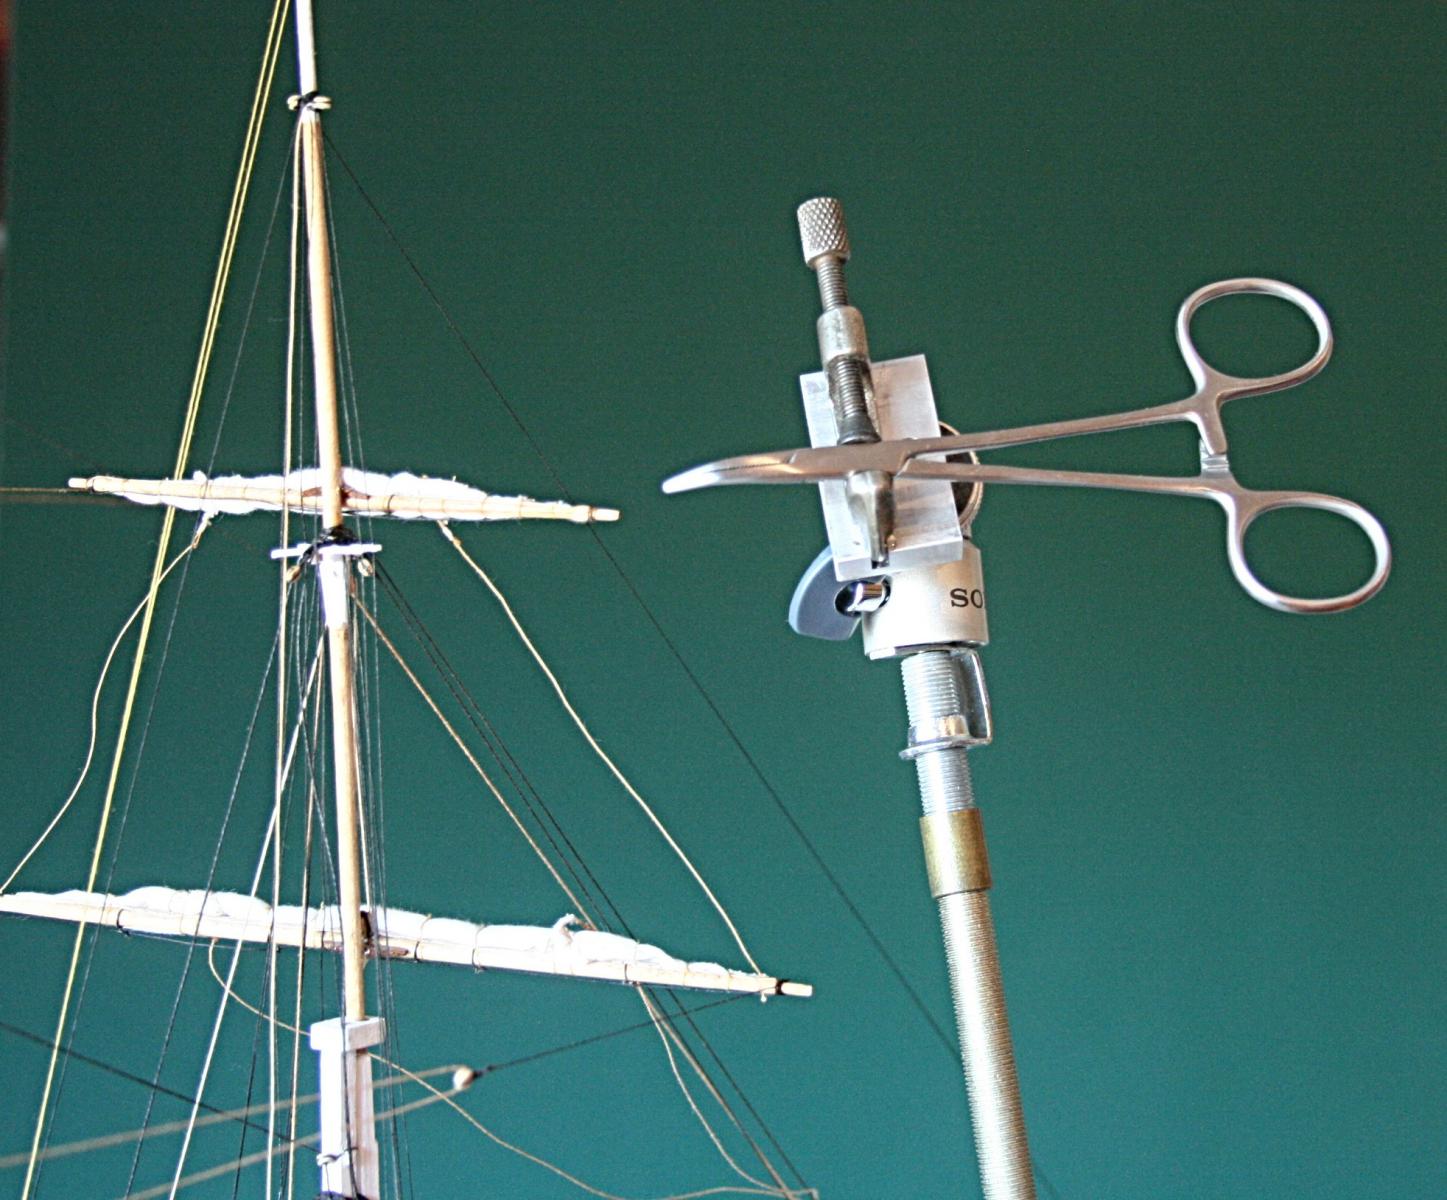
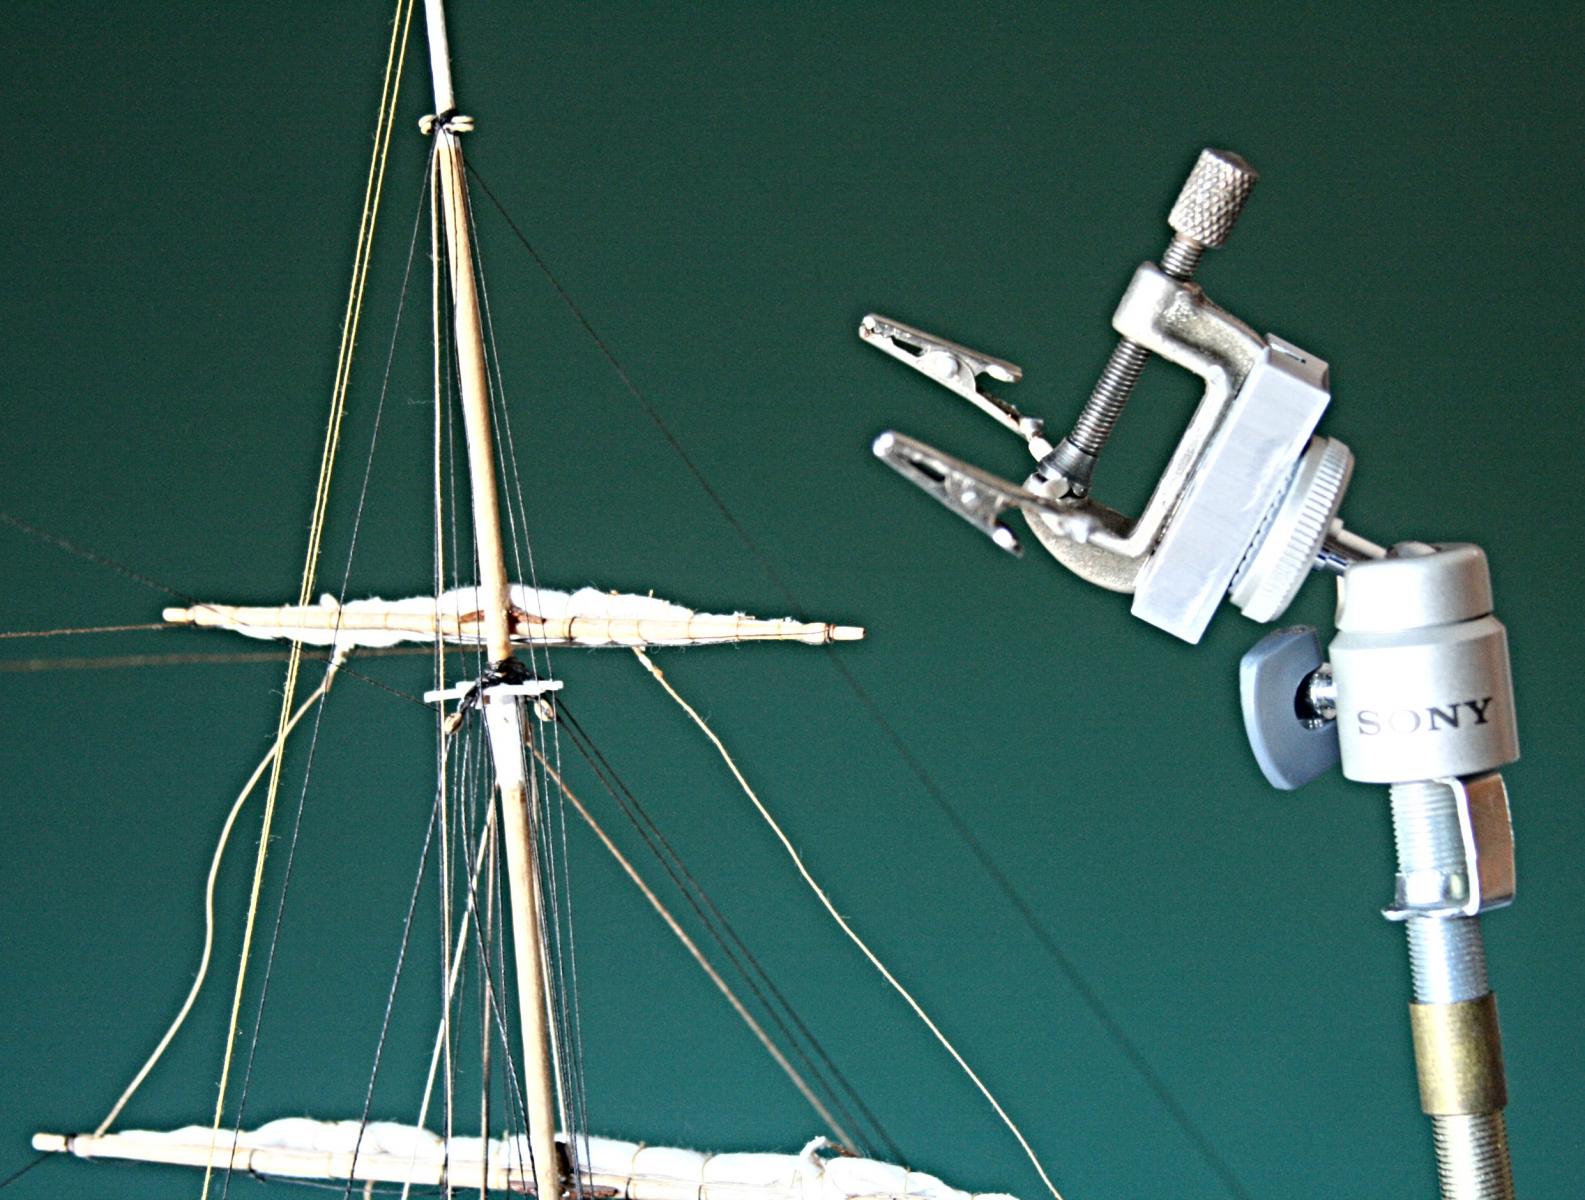
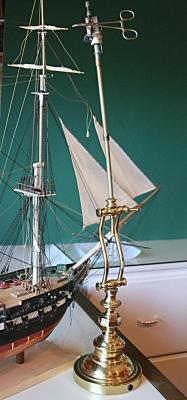
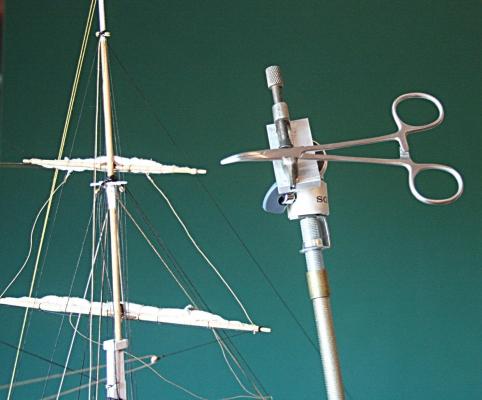
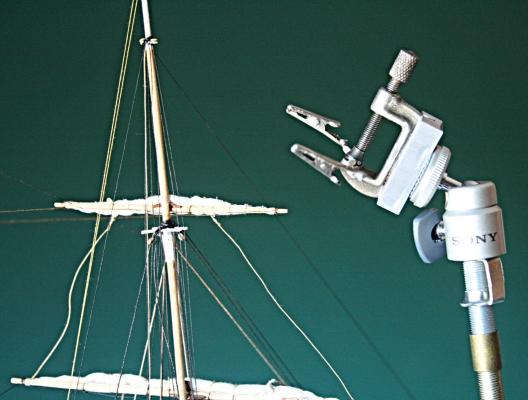
I got this idea from J. Ponto. In the past I have had problems seizing or attaching blocks to spars or other places that are high up on the ship. I took an old desk lamp, gutted the cord and socket and replaced that with some extensions and a special fixture on top. I had this small Sony tripod that I never use, took off the legs and adapted it to a small C-clamp. Now I have numerous ways of twisting, turning and reaching those awkward places with a hemostat or other tool that clamps as shown above. In order to use it at deck level, I simply take off one or two of the extensions. Thanks Ponto.
-
- 4
-
-
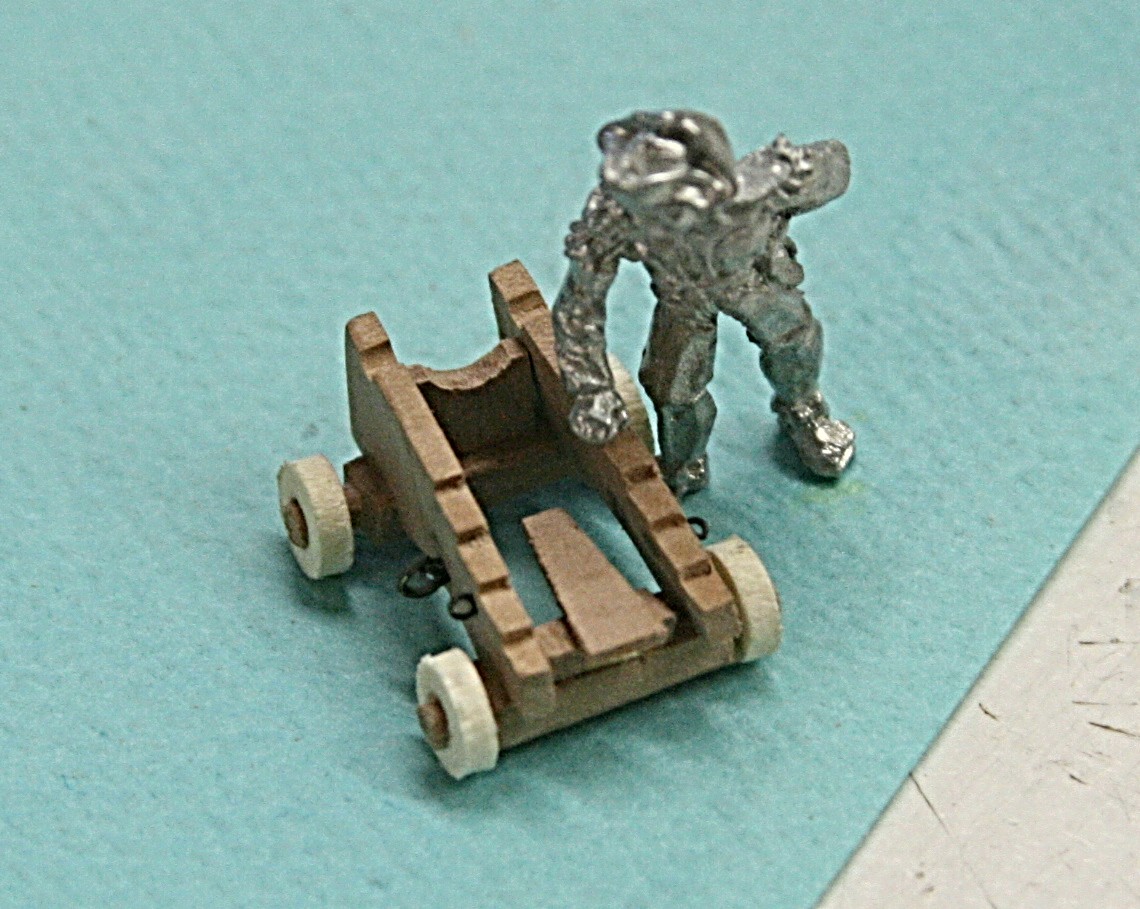
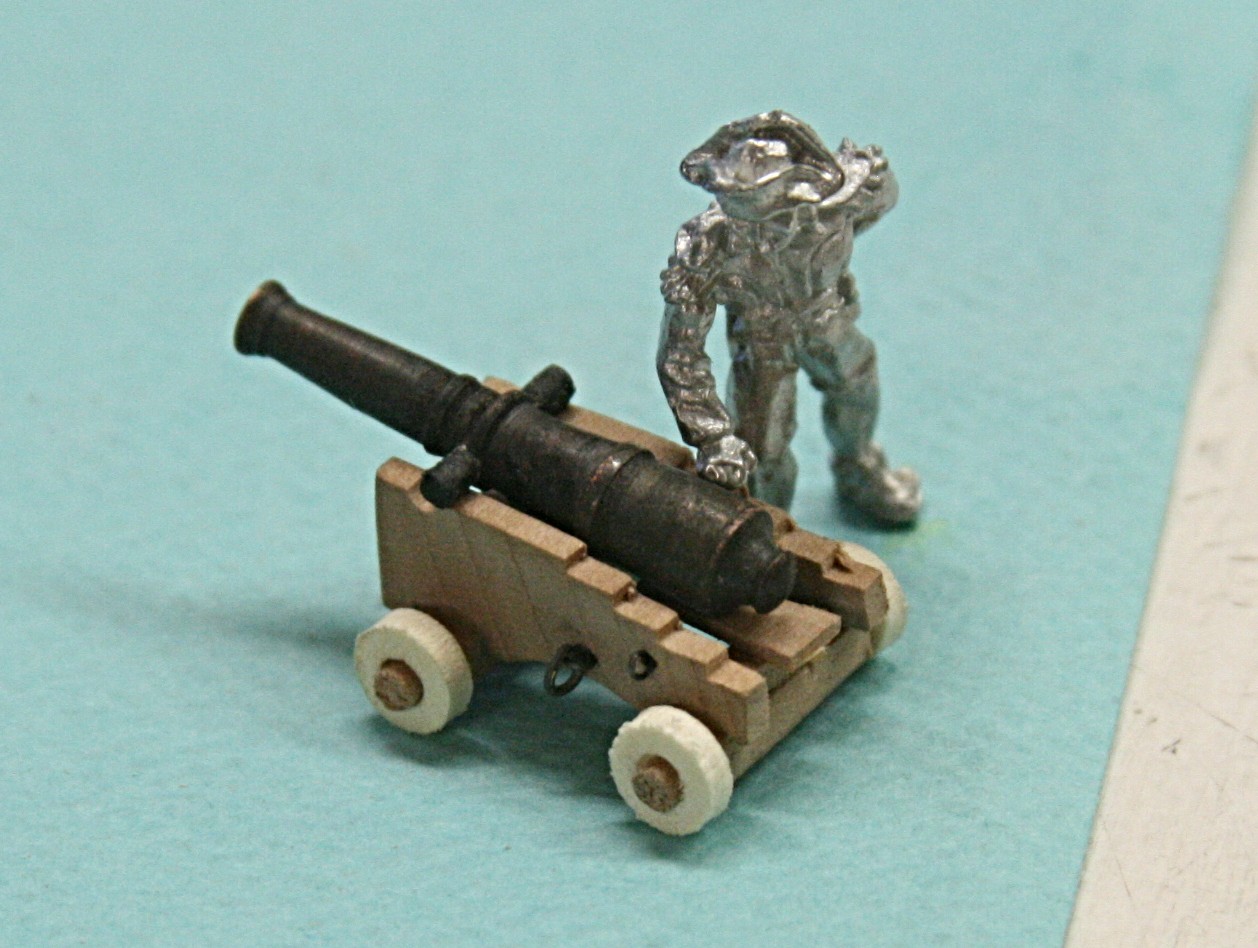
After seeing what Michael in Santa Monica has done with his Vasa I am a bit ashamed to publish this new video, but here it is any way. I wanted to make 16 guns that are only 6 pounders for my next project. They are very small, but here I try to show how I went about this. Oh, you might turn up the sound for this. They are not yet finished, need new barrels, etc.
- 12 replies
-
- 18
-
-
One comment: Beautiful!!!
-
Come on guys. You are making me blush. I do enjoy putting together some videos and I am working on another one right now.
-
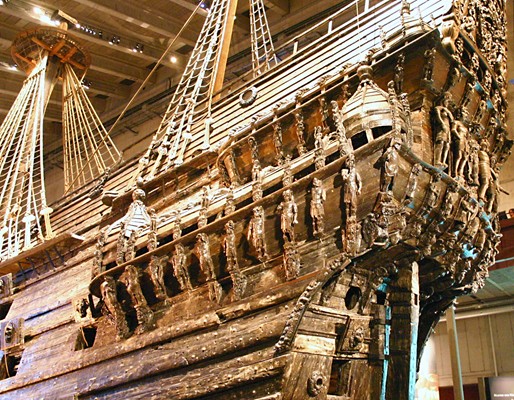
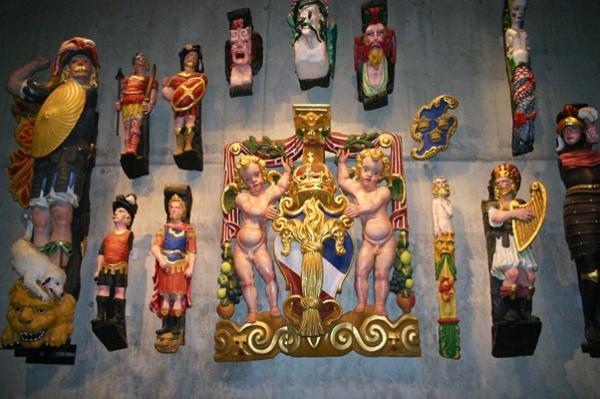
Sorry about the mix-up, Michael. I should have realized that you are working on the Vasa. I am sure you have seen lots of pictures and perhaps the original in Stockholm. My wife and I were there a number of years ago and saw the remains. What struck me at the time (before ship modeling) was the extra-ordinary care that went into carving (and painting) those details. After all this was a war ship. Here are a couple pictures from our visit. Now I am sure you are going to include those in your model, right?
-
I have used walnut for some of the deck 'furniture'. I like the contrast it provides from the lighter colored deck planking. Of course, it is all for straight parts, but I have no problem with cutting it into thin strips.

-
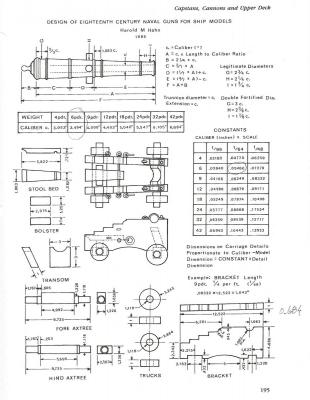
It seems that you are modeling a French or other than British gun carriage. If not, perhaps the following might help. The drawing shows the pin through the axle approach also. Oops, I thought it did.
-
Try this one:
-
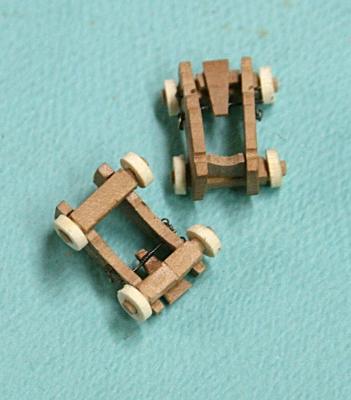
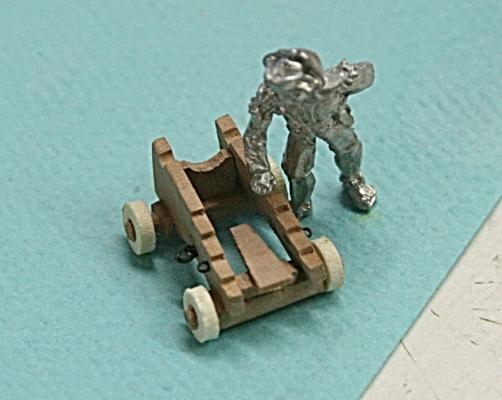
One more picture and then I will hold off until I get some better gun barrels. Below I installed the support rods for the tapered platform. The 'up-side-down' view is to show that the rod is held in place with a dab of CA. I now also decided to fix the wheels in place after some cleaning, etc.
-
I need advice on a rotary tool
Modeler12 replied to jdiven's topic in Modeling tools and Workshop Equipment
Here is my two cents worth. I have had this Monkey Ward's 'rotary tool' for probably fifty years. It still works great, but I have used it sparingly. It comes in handy when I need to drill a bunch of small holes. So I adapted it to my old drill press and I can use the quill accordingly. Whether or not the speed is adjustable does not matter to me (10,000 or 30,000 rpm, who knows what is the best for what???) Unlike others here I don't use it too much 'free-hand', but I use it more on either my mini-mill or drill-press as shown below. The transition from 'large wood working' to 'tiny stuff' takes a bit of adjusting. But you will find lots of satisfaction in creating the 'small stuff'.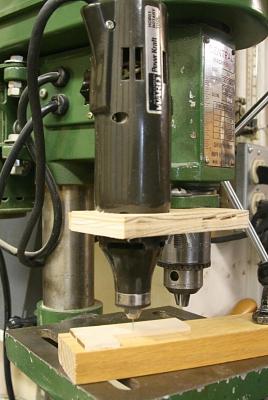
-
Sorry, Mahuna, the one I showed came from my father-in-law who used to have a die casting shop. I inherited that one and several others, but I have no idea where they came from originally. However, have a look at what is available from McMaster. I just plugged in 2 inches for the length, but there are lots more to choose from. http://www.mcmaster.com/#end-mill-cutters/=rgbit2 Oh, you have to use the column to the left and plug in the length you want.
-
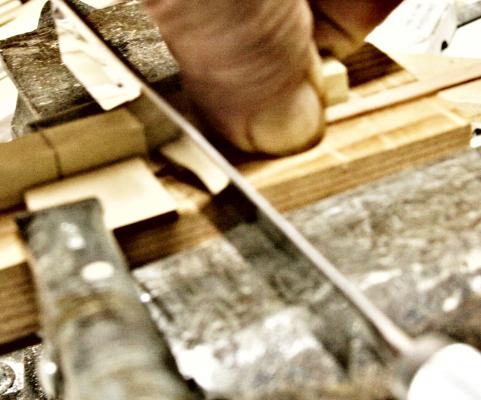
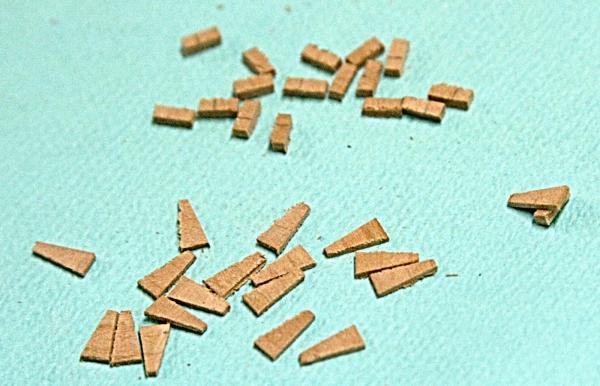
One more thing about the carriage assembly. When I have to make more than two or three of one kind, I like to make some fixtures to cut and assemble. For the tapered 'platforms' I cut a groove at a slight angle from horizontal in the wooden 'miter box' and then cut the pieces with a stop. Sorry the picture above is not very clear, but I hope you get the 'picture'. Then it is was a matter of assembling the 'platform' and the bolster pieces as one unit (see example to the far right below). Those simple assemblies are then going on top of the rear axle. I know Henry Ford would cringe at the sloppy lay-out but it worked for the 16 or so I had to make.
-
The carriages are coming along ok. I still need to add the tie rod that holds the front of the tapered platform and a couple other small items. Keep in mind that the width of these carriages is only about 1/2 inch. I may bite the bullet and buy some better barrels.

-
Try this https://www.google.com/search?q=wood+identification&tbm=isch&tbo=u&source=univ&sa=X&ei=lX5CU5-mE4Kb2wXZ_IFw&sqi=2&ved=0CFIQsAQ&biw=1024&bih=643#facrc=_&imgdii=_&imgrc=ONizFFy9KLD-wM%253A%3Bs27GId967k1FeM%3Bhttp%253A%252F%252Fwoodmagic.vt.edu%252FImages%252Factivities%252FCwalnutL.jpg%3Bhttp%253A%252F%252Fwoodmagic.vt.edu%252Fhtml%252Factivities%252Fwid2.htm%3B385%3B478
-
Michael, if you are quoting this (or, perhaps an original thought on your part,. . . great), we have to remember that 'real wooden ships', small or large, can be indeed a treasure. And when we build a model, we hope that it will be saved by some of our kids or others, with or without our names as the modeler.. However, if it is a 'real' ship (or boat as I used to have), it is not a living thing but a 'pleasure'. I had many of the latter in the San Francisco Bay. Sorry, I just had to throw this out.
-
CA glue and metal fittings
Modeler12 replied to cdogg's topic in Metal Work, Soldering and Metal Fittings
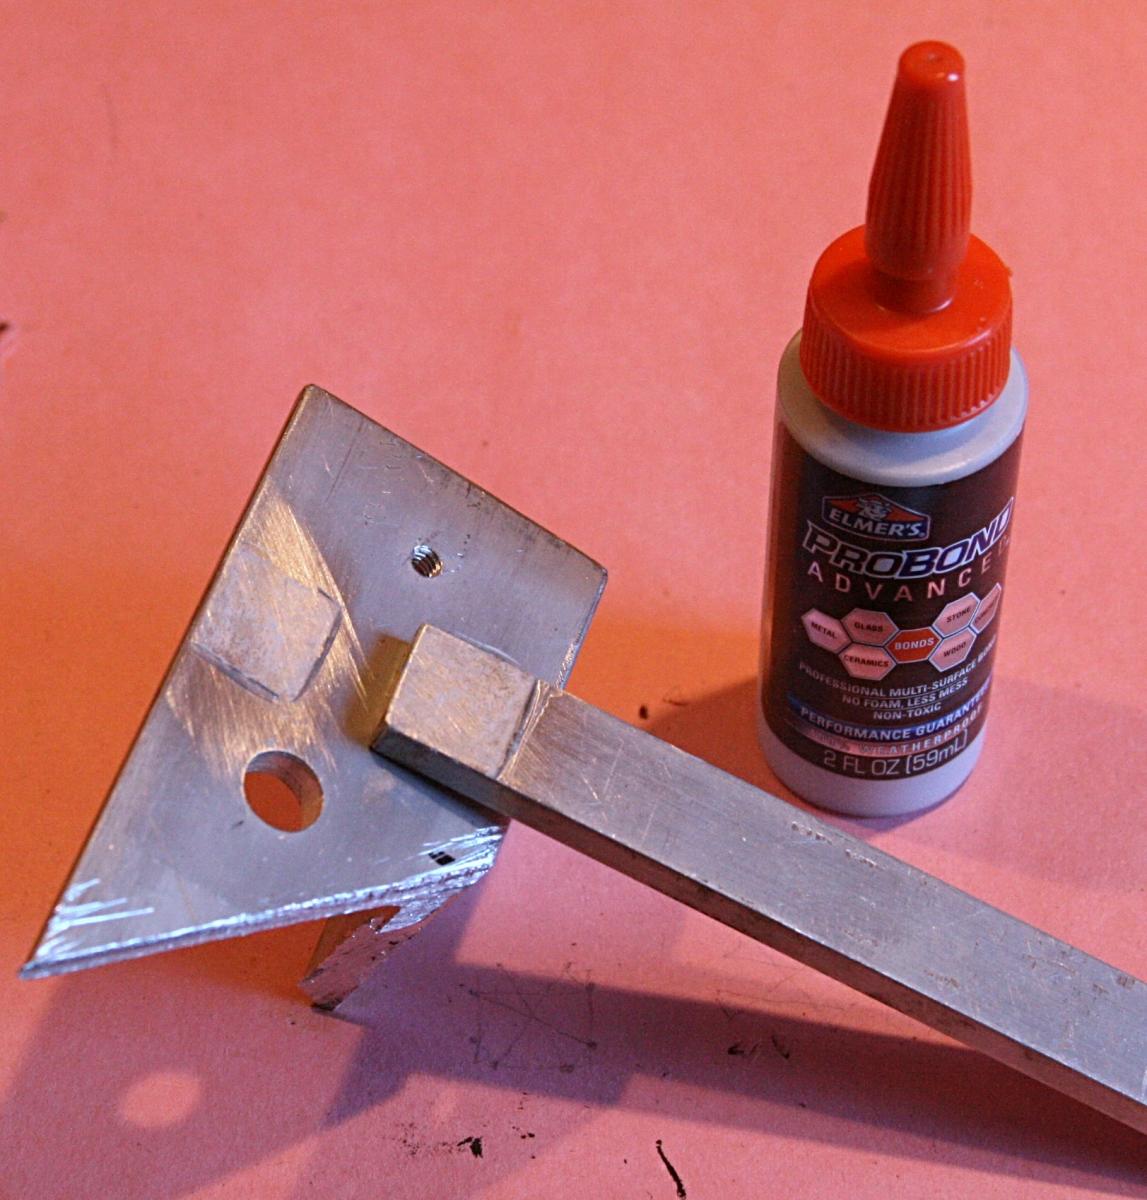
One more vote against PVA for bonding metal. Elmer's just came out with a 'New Product' called Probond Advanced. It is touted to bond almost anything to anything but even the MSDS gives no clue what it actually is. All they tell you is 'not available'. I bought some and bonded wood to wood. It was no better than Titebond II. Besides, the price for a 2 ounce jar was more than the 8 ounce Titebond. Then I bonded two pieces of aluminum with a 3/4 x 3/4 inch overlap. I followed the instructions (sanded the two surfaces, clamped them and let it cure for 24 hours). When I grabbed the two, the bar fell right off in my hand. Epoxy is the way to go for metals.
-
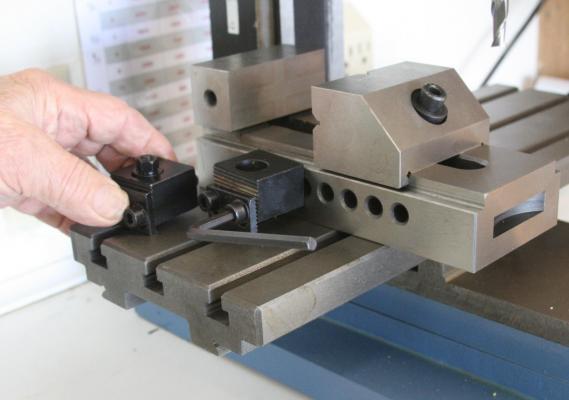
Martin, I am sure you realize that the clamps also need the T-slot nuts and a couple screws to hold the clamps to the table. Mine actually have some grooves in the back and another matching plate so I can apply leverage to the downward force. It is similar to the slotted clamping blocks that are part of another accessory. I also must admit that a mill needs several different cutters, clamps, parallel plates and more, adding to the cost.
-
What is the name for the netting under the bowsprit
Modeler12 replied to HKC's topic in Masting, rigging and sails
You might go to a fabric shop such as Joann's. I bought some 'netting' that I used for the Constitution railing nets and also for the railing on the tops and it looks about right.
-
The problem with this wire is also that it is too stiff. As you know, Ulises, I have to be able to twist and bend it in order to make those tiny eyebolts. I am going to order some of the copper wire from McMast Carr and give those a try. Again, I prefer steel because it should be stronger. Thanks all of you for your suggestions.
-
I like it, Mark. I noticed some slots in the upper hull planking. I assume those are for the channels?? Thus far I don't see anything that requires a 'steal'.