
HOLIDAY DONATION DRIVE - SUPPORT MSW - DO YOUR PART TO KEEP THIS GREAT FORUM GOING! (89 donations so far out of 49,000 members - C'mon guys!)
×


Brucealanevans
-
Posts
450 -
Joined
-
Last visited
Content Type
Profiles
Forums
Gallery
Events
Everything posted by Brucealanevans
-
 Good fix. My clamp pieces however fit perfectly as supplied ( to my great relief ) so some model to model variability likely at play here.
 -
I used putty as well. With some trimming of the pieces it worked well, and the precise window cutouts were thus preserved. You also need to watch carefully the spacing for the trim strips so that there is proper room for the decorative photo etch strips.
-
Several have now asked, so the plans are spoken for. thanks all.
-
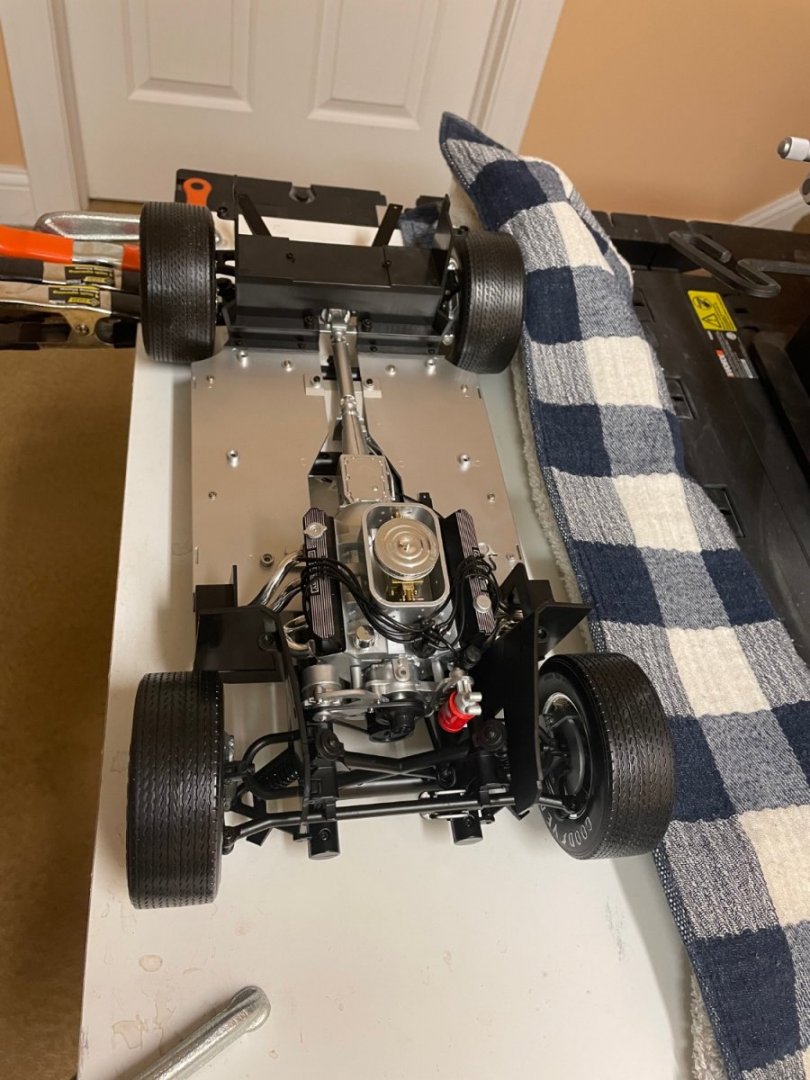
Hmmm Forgot to include the chassis in the picture:
-
Thought I’d post my progress on this. A detailed log exists here so I won’t repeat it. This represents 9/12 packs. The last 3 are on their way to me. Always have been fascinated by this car, and this is as close as I’ll get. Fantastic detail and great fun ( but yes, expensive).

-
Just paying it forward. Have received much help on these forums, for example when looking for detailed upgrades to the stock Chaperon build.
-
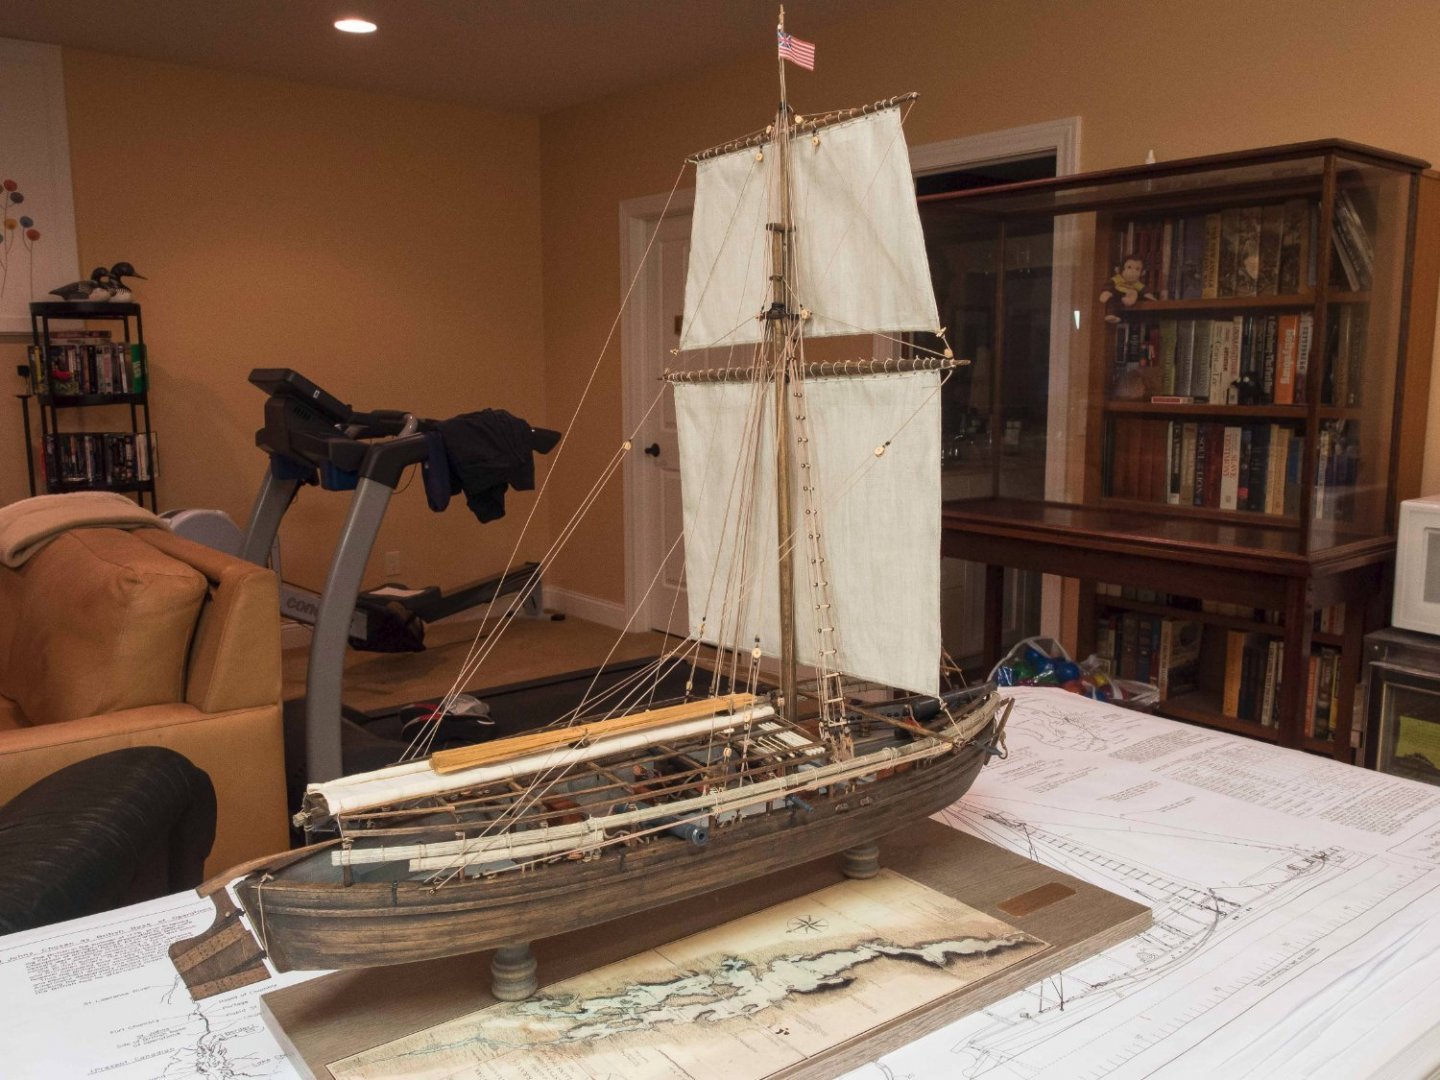
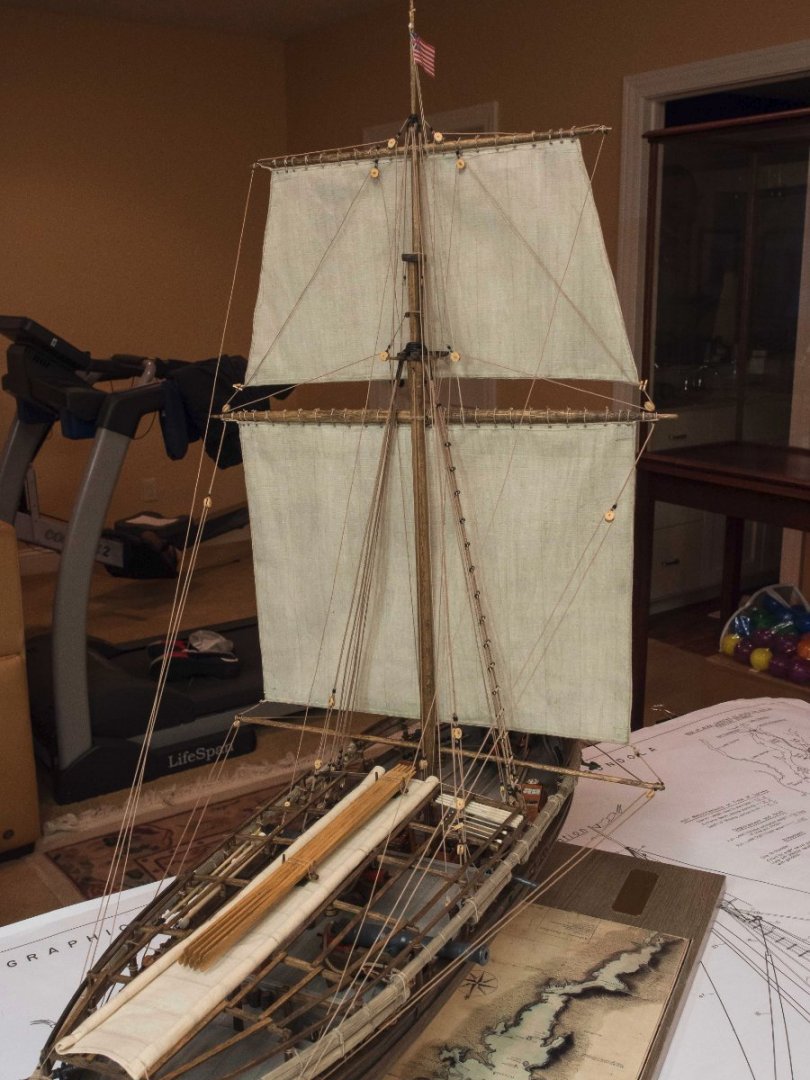
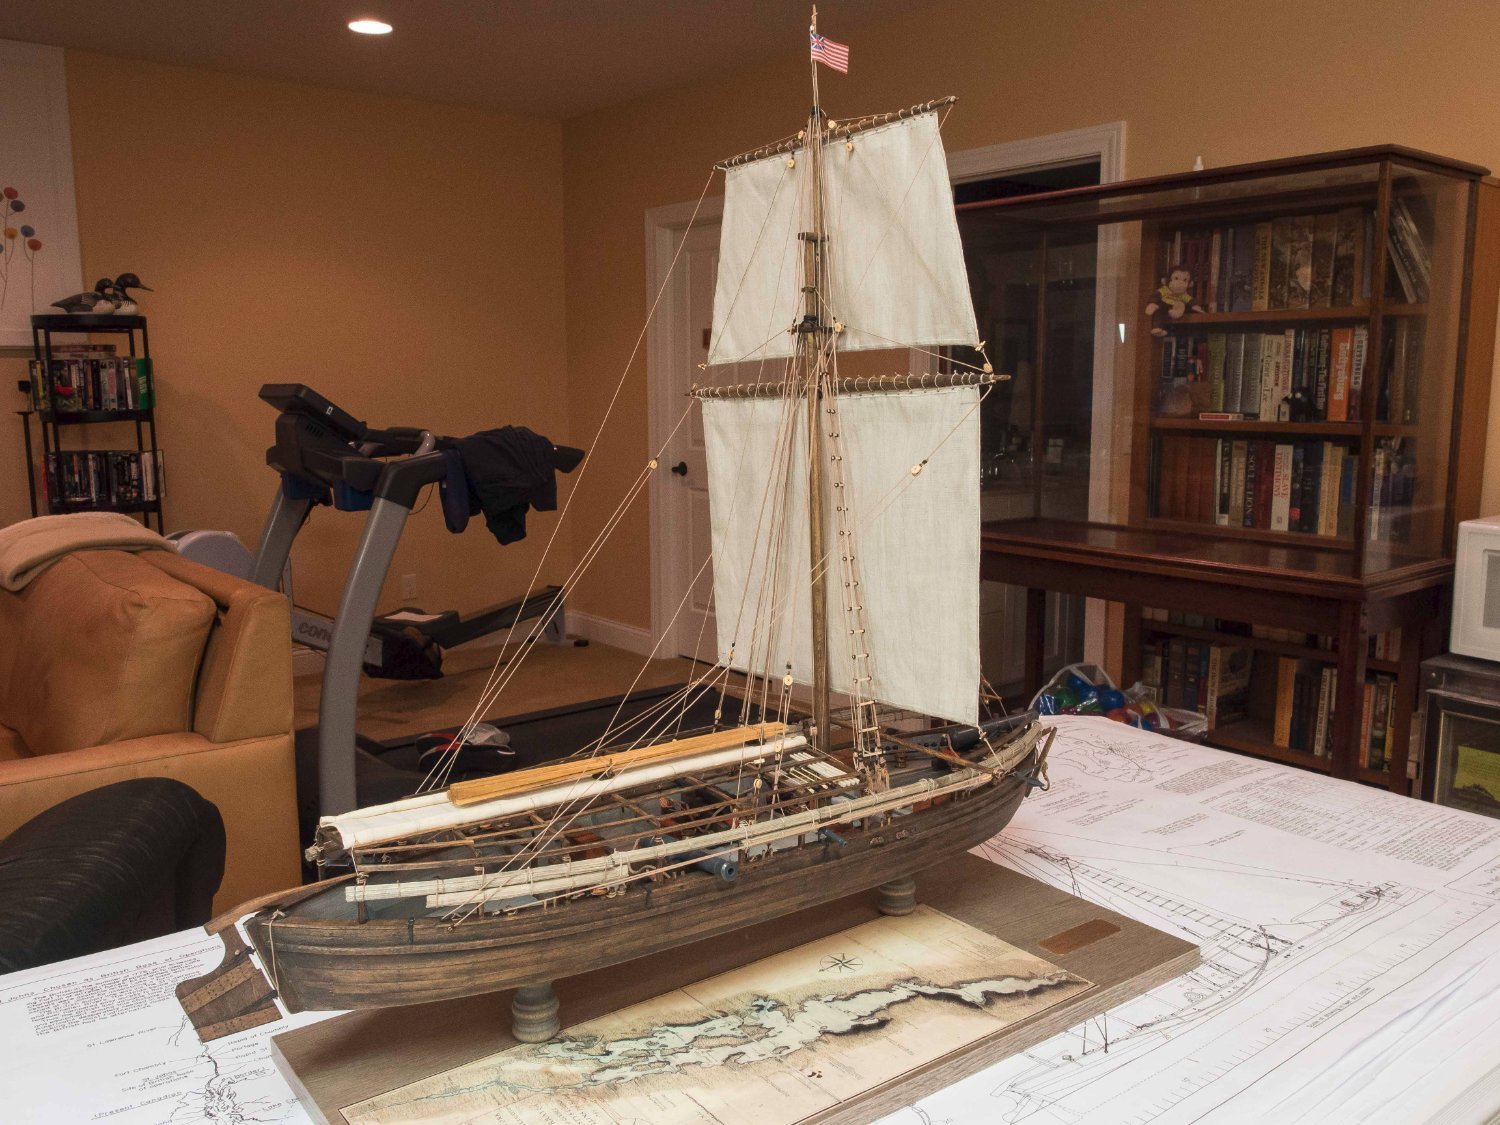
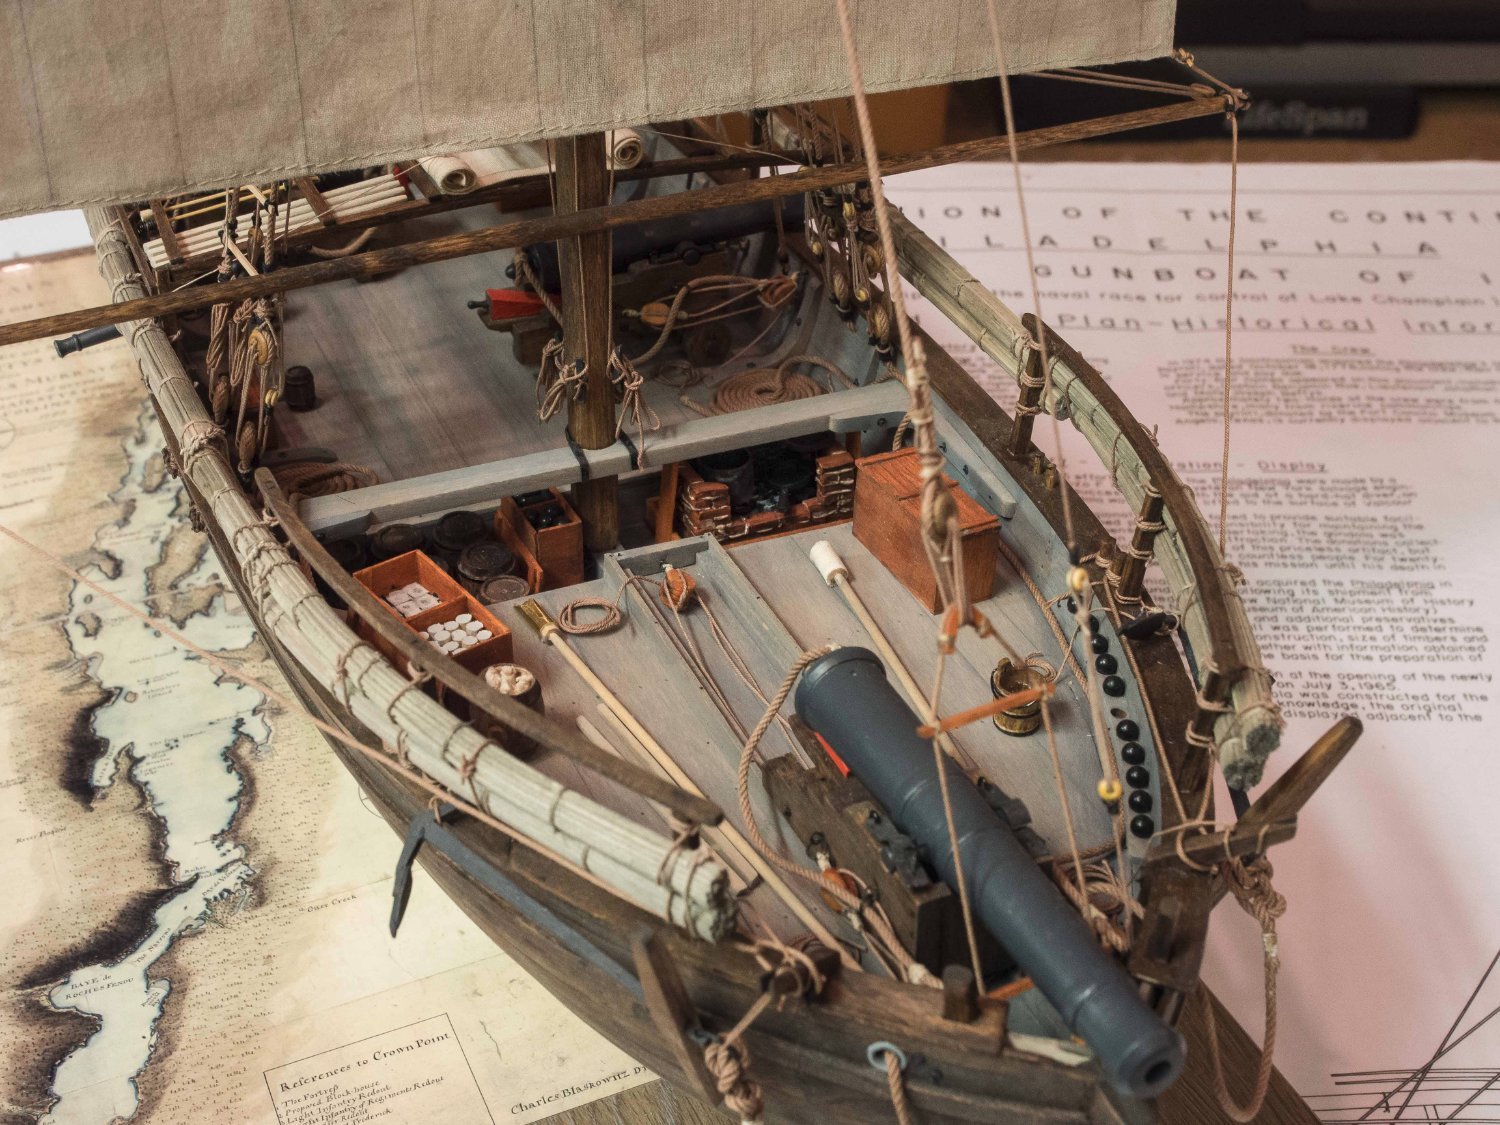
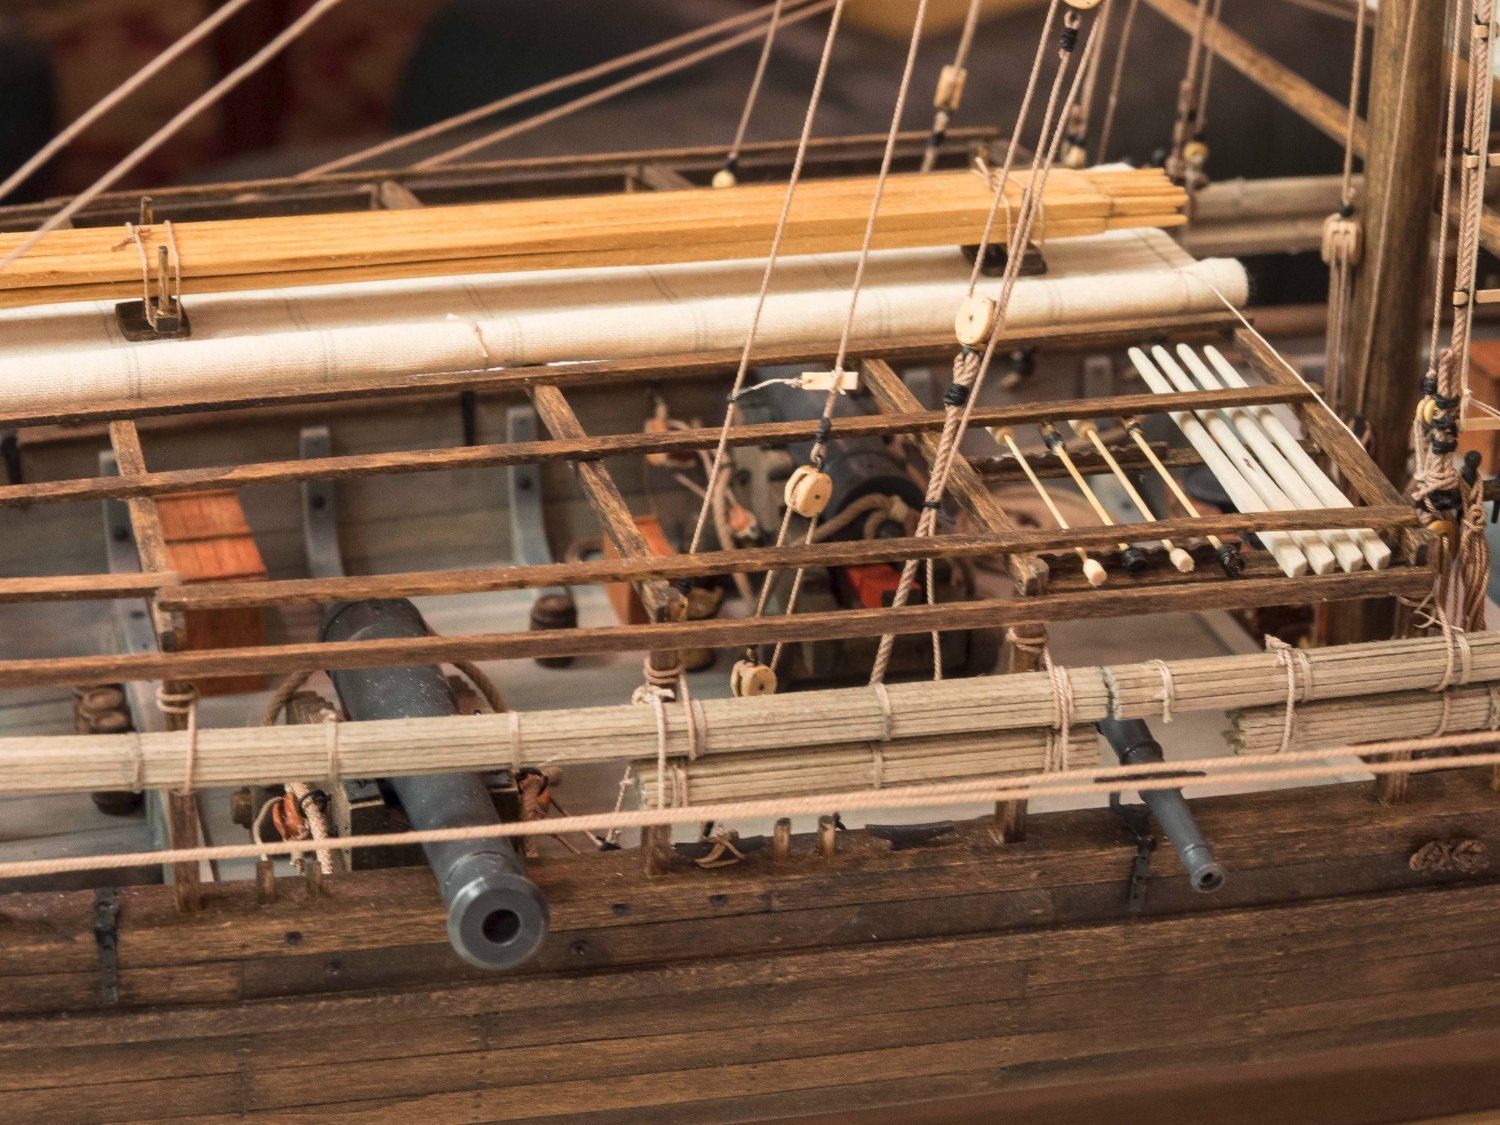
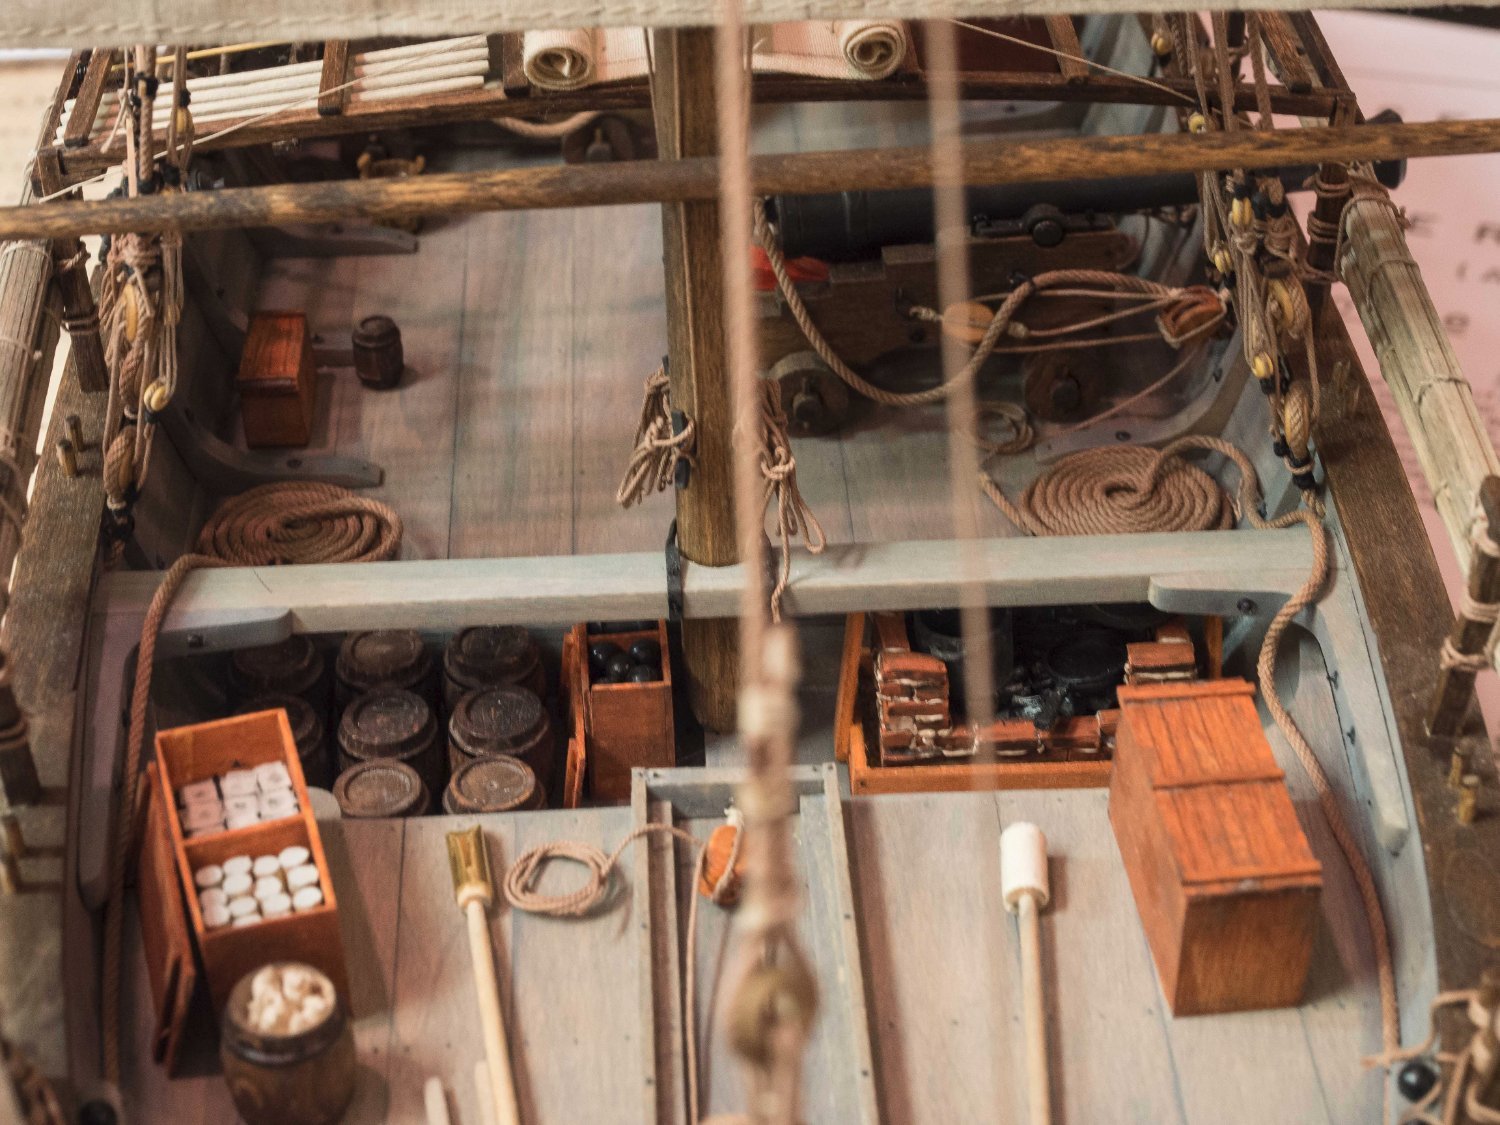
I have full set of plans I got from the Smithsonian when I was building the Philadelphia. I got the plans because I wanted to detail the build including full sails, rigging, and the fascine protective barriers made from wood bundles. These plans were apparently used to construct the reproduction. I came across them while I was cleaning up my stash. I am willing to gift these for the price of a mailing tube and postage to anyone who is interested in a detailed build of this model. They were not cheap! PM me if interested. Here is what mine looks like using these plans:


- 7 replies
-
- 11
-

-
Thank you! Very happy with it - I often just stare at it taking in the details. The ships boats add a lot. Great kit, design, and instructions. Highly recommended but truly an advanced build not for the faint of heart.
-
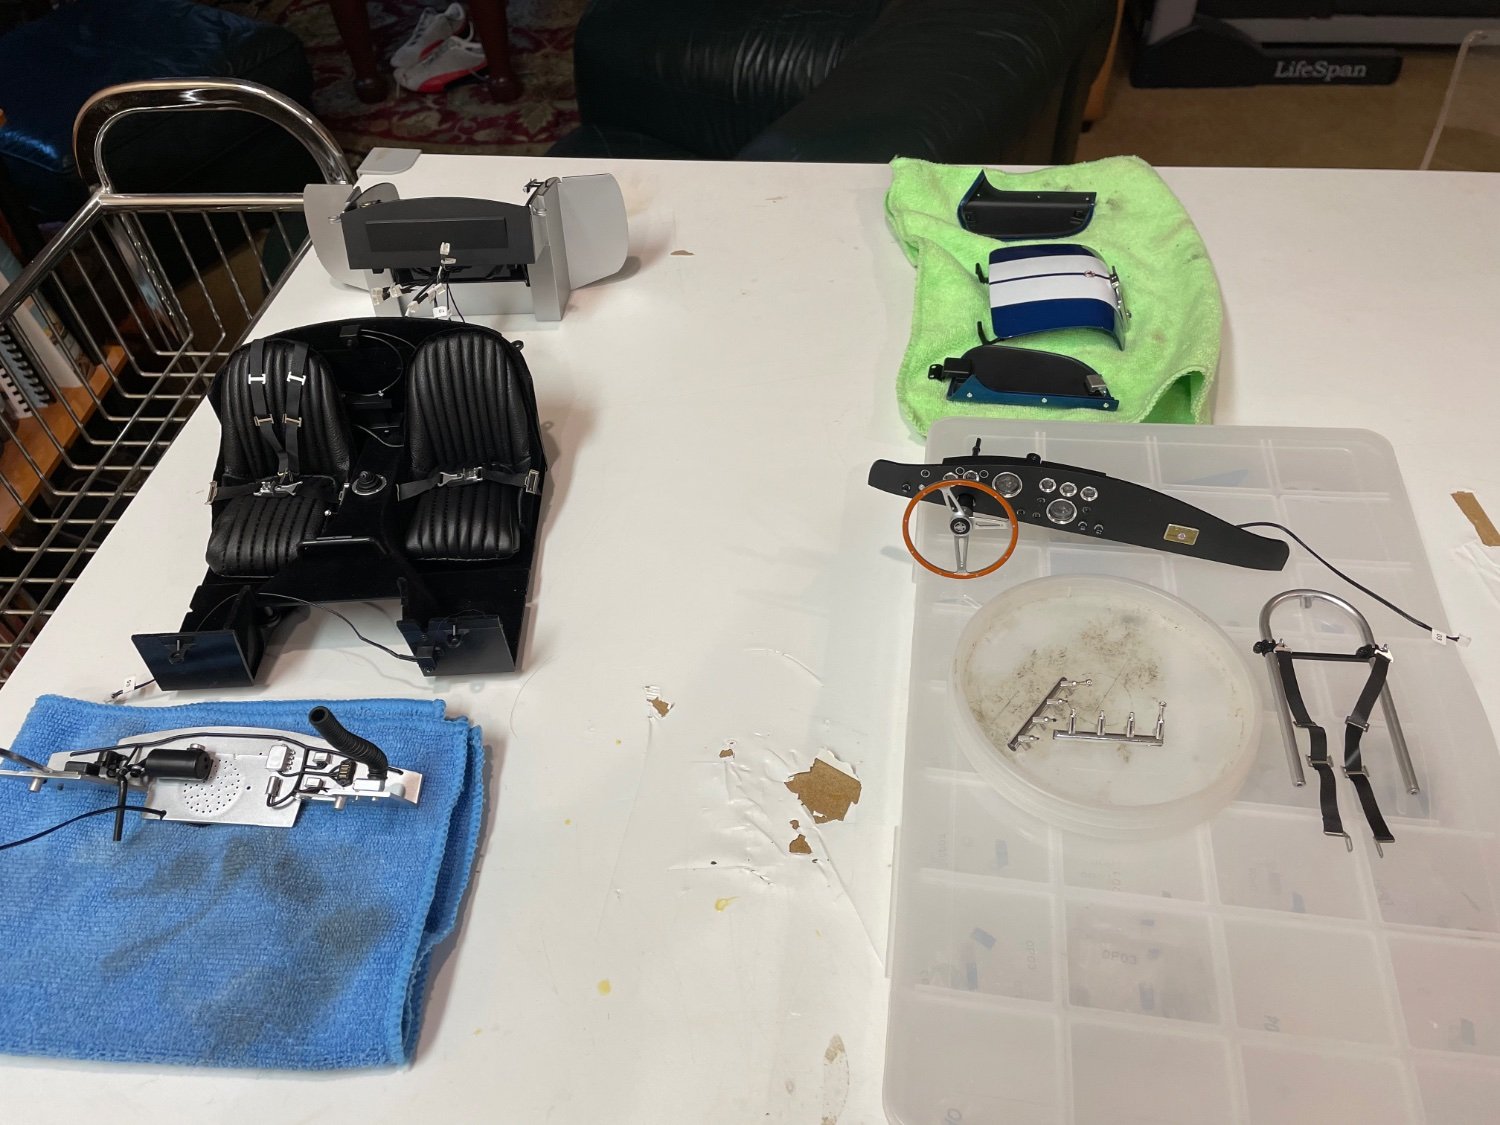
Thanks for the comment. I’m quite proud of the finished product. I’m taking some time off from ships to work on my Agora Models 1/8 scale Cobra S/C with 3 monthly packs stacked up (7-9 out of 12). Shipyard is all cleaned up. Next will be Amati 1/32 Fifie Motor Fishing Vessel. Out of display room at home so this will live in our Marblehead Massachusetts place when done. The Morgan was my first complicated build - great looking ship.
-
Mounted the ship's boats and fixed two small things I bunged while doing so. At the end of a leisurely 2 1/3 year journey - this model is now finished! Interestingly I tried to order a brass plate from an Amazon seller I had used for my other builds. It (or their police bot) refused to accept "Confederacy" by policy. So it's titled "United States Frigate 1778". I suppose I could have worked on getting the name on it, but at this point I didn't feel like it. So here are some final views:
.thumb.jpg.7f668f838d33cc6c5f91d2b3c92012ab.jpg)
.thumb.jpg.60f6763b61616a66903d823f127f3ac0.jpg)
.thumb.jpg.42148d05efcc8c0c1c378e2c8d673d4b.jpg)
.thumb.jpg.778116ed1cfb32698e4cc2fda322bd2f.jpg)
.thumb.jpg.917e35983e67877237d8233e827e4c1a.jpg)
.thumb.jpg.7c3f55c1ab35a928937c55559eacc670.jpg)
.thumb.jpg.2949ce8add069f925a67df4728204496.jpg)
- 126 replies
-
- 12
-
-
- Finished
- confederacy
- (and 1 more)
-
And here are the two of them, ready for mounting onto the ship. I'll bring her out of her case down to the shipyard for the process.
.thumb.jpg.cf284416c98fa3af906e27fbabdf0be4.jpg)
- 126 replies
-
- 6
-
-
- Finished
- confederacy
- (and 1 more)
-
Finished the pinnace! These little boats took me longer than I expected them to take.
.thumb.jpg.2db00e826c90aafe0d34b2117b44680f.jpg)
- 126 replies
-
- 7
-
-
- Finished
- confederacy
- (and 1 more)
-
Finished the first of the two ships boats: The Longboat. A bit of a challenge at this scale. The planking job was iffy but the final product looks OK. Tomorrow I start on planking the Pinnace.
.thumb.jpg.b2d5482d0fb958b7c34f4df56816d814.jpg)
.thumb.jpg.66adaacd332684bf1890379fd7148197.jpg)
- 126 replies
-
- 7
-
-
- Finished
- confederacy
- (and 1 more)
-
Yeah, those little boats are absolute bast***s to plank, at least for me. Going very slowly and hoping sanding will improve the looks.
-
Thanks to all for the likes and comments. Good new year to all!🎉
-
Looks great! Congratulations.
-
Thank you sir. I put in a few extra hours as I got close. Did the anchors yesterday and today as the last bit and lashed them in place 2 hours ago. will take a well earned brief break before dealing with the boats. They will be so visible I want to do a careful job.
- 126 replies
-
- 1
-
-
- Finished
- confederacy
- (and 1 more)
-
A big moment! After 2+ years the Confederacy itself is done. Still have the ship's boats to build, but it's great to see the ship itself finished. I'll move it up to its case, clean up the shipyard, and start to work on those 2 ship's boats. Overall I'm pleased with the result, even with the warts most of which only I notice. The most complex thing I've built, and I doubt I'll be making anything this hard (more accurately, this complex) again. Here it is:
.thumb.jpg.a9d84c957e7b21f2141464b0b983547d.jpg)
.thumb.jpg.2b78445f2defae131527ef4487e30cc4.jpg)
.thumb.jpg.58df9324a25b92cb970b03a3e9b2eed3.jpg)
.thumb.jpg.3fb943ee49a7baca6440fa87a9516c78.jpg)
.thumb.jpg.e73da8d39e916fa797e077dda90a03a7.jpg)
.thumb.jpg.3d51d6b02ff4f6d23ec3f5501b56af82.jpg)
- 126 replies
-
- 13
-
-

-
- Finished
- confederacy
- (and 1 more)
-
Gangways now in place. I STRONGLY suggest installing the gangway hanging knees BEFORE installing the channels, chainplates, and cannon port covers. I followed the sequence in the instructions instead, and found it very difficult to install the knees without being able to brace my fingers against the exterior hull to accurately hold the knees in place both to shape them and to apply appropriate pressure while holding them in place accurately for the glue to "grab". Also, necessary to install "from above" as a more deck level approach difficult to impossible due to hands, tools, and arms interfering with the fragile hull structures on the other side. Plus, several cannon port covers were inadvertently snapped off and had to be repaired. I'm not really happy with the placement of the knees but it will do. Now for 4 gangway stairs.
.thumb.jpg.1ceec4bbeeff7b3dee8b43b009753e85.jpg)
- 126 replies
-
- 6
-
-
- Finished
- confederacy
- (and 1 more)
-
I have finished the exterior on the port side (my "practice' non-primary view side) today. I am actually very pleased with the photo-etch chain plates. I painted them all on the sheet, first with vallejo grey primer airbrushed on and left to cure for 12+ hours, and then airbrushed with model expo hull black suitably thinned and left overnight. This created a relatively durable finish. With a good sprue cutter the pieces are easily removed as needed. I put the deadeyes in by snipping the round part and spreading slightly, inserting the deadeye with correct orientation, and closing by pinching the base with a fine needle nose hobby pliers. Sealed the snip with a drop of CA and touched up when dry with some black paint. 2 cautions with the other pieces: those with holes for the nails required a gentle reaming of the holes to make certain the nails would drop through easily. I did this before cutting them free. I'm glad I thought to check before actually mounting them. The other caution is not to mix up the middle links that come in 3 lengths - I avoided this by removing them one at a time (or a few sets of 3) when needed and placing them in separate small trays. Once an entire chain was made, I mounted the deadeye in the channel groove, made sure it was pushed well in so as not to interfere with the subsequent trim strip and added a drop of CA. I found that friction alone was not sufficient to hold them in place when manipulating to mark, drill, and place the nails. With the deadeyes all mounted, creating and placing each chainplate "chain" was very easy and quick. A bit of black paint touch up where brass was exposed due to tweezers handling, and done. After that, glued on the trim strips to the channels, put in all the eyebolts called for on the plans, and retrieved by cannon port lids from their labeled card and glued them in. Care is needed (despite the pre-drilled holes for each) as the "pins" - the piece of sprue left on the hinges - is very fragile and buckles easily. One note: There are not nearly enough eyebolts included with the kit to even come close to all those indicated on the plans. So either make or buy lots of extras. I have trouble making them that small. So here is where things stand with the port hull done. I'll turn it around and finished the starboard side within the next couple of days as I have the techniques down now. Then I get to finish the waist detail, step the masts and lash the anchors. After that she goes in her case of honor till the ships boats are done.
.thumb.jpg.21f7d93dba0146a3b24635c52c81b8ed.jpg)
.thumb.jpg.8a54d4cd9cd5dc0f48da33b841ace1a8.jpg)
- 126 replies
-
- 9
-
-
- Finished
- confederacy
- (and 1 more)
-
Finished installing the skids, steps, and channels on both sides. The cannon port covers are done, with the holes pre-drilled - I will wait to glue them in until the chainplates are done. After all this time it is getting a bit exciting to be this close to finishing the model (aside from the ship's boats).
.thumb.jpg.973ff5c7eacc300941bf239c424b6b84.jpg)
.thumb.jpg.671705281b4ca3f5011c7437b314764a.jpg)
.thumb.jpg.c7748e186ac68ad70438d7c55c583276.jpg)
- 126 replies
-
- 10
-
-
- Finished
- confederacy
- (and 1 more)
-
In search of something different with each build (getting near the end of a two plus year journey with the USF Confederacy) this thread and one other made my decision. This will be my next build for display in our Marblehead Mass. home. Back ordered but will show up eventually. Thanks!
- 79 replies
-
- 3
-
-
- Fifie
- Victory Models
- (and 1 more)
-
Finished with the beakhead today! Since the railing was supported strongly on both ends with eye bolts, I decided to make the uprights from thin wire to make it easier to mount them into the main rail/false rail without splitting the thin wood. I am reasonably pleased with the overall look and more than reasonably pleased to have it done. I'm now looking forward to more simple if repetitive tasks to complete the outer hull.
.thumb.jpg.c1fe5469fa1c6e04e877ea8c8e176bac.jpg)
.thumb.jpg.e43100f7ec9f97a835fb340240437848.jpg)
- 126 replies
-
- 6
-
-
- Finished
- confederacy
- (and 1 more)
-
Finished adding the trim and the 6th timberhead, so the rails and timberheads are now done. Ready to advance to the next chapter to finish the beakhead structures. As usual, once one (me) struggles through a tough patch and looks at the less than perfect results, you think "well if I ever built this again or something like it (not going to happen) I now know how to do a cleaner, better job." I've never been so happy to turn the last page in a chapter. Tough being a perfectionist without quite the skills and experience and dexterity to get to that level. Overall, acceptable for home use and display and the admiral loves it so it's all good. She's pick out an unoccupied spot for display, although I'll have to drive it half way across the country. I find that after building something I have no desire to build something similar again. Getting old, and running out of display space despite 2 homes. I have a Caldercraft bomb vessel on the shelf, but I think I'm done with 18th/early 19th century warships so doubt that will ever be built. I have a Dusek La Real as the only other orphan in my stash but I don't feel like tackling that next as I gradually advance towards finishing this 2+ year build. Also, finished it will be huge and I don't think I have anywhere to put it. So I'll push that one off for the foreseeable. The Amati 1/32 Scottish fishing vessel Fifie has caught my eye, and would go well in our Marblehead home. I've ordered that and will jump it to the head of the list. Sought out build logs here to review/follow.
.thumb.jpg.c592ab1a1c3f4fbbe0ac867741e07909.jpg)
.thumb.jpg.4e54f18fc700c0045a6fe2c4f1950d3e.jpg)
- 126 replies
-
- 8
-
-
- Finished
- confederacy
- (and 1 more)
-
Thank you sir. Glad to have it behind me.


.jpg.1bd740bd6b06b3b1daa0d36823b7a083.jpg)
.jpg.af8a81526e3808acee0c9b0c85497e6b.jpg)
.jpg.73db6bd921c4549bbcb1c71b7f55cad5.jpg)
.jpg.e197a78b86756503c280a6426dbed469.jpg)
.jpg.340d41a3683c3474fc4ff889cbaa7a15.jpg)
.jpg.fd0d71b937144ef935462b78ded95156.jpg)
.jpg.e14c2d234684eddbe9379c46311bdd0c.jpg)
.jpg.3113a8c92e640d1b48ff0dedd2fb4da7.jpg)
.jpg.f994002dbccf6039746cc9711ae6cbbd.jpg)
.jpg.be377ebdd7283d393e30c677e6ed6692.jpg)
.jpg.b92907d23901db9c449c6193265c1f13.jpg)

.jpg.9f461b5c355c90370ca00c3dc65cca2c.jpg)
.jpg.5526d08fb15d1617575143196ab66401.jpg)
.jpg.5125facb7438f084ca04532338bb3d66.jpg)
.jpg.8177957d1d7711a68e9d2e4cfd3c4181.jpg)
.jpg.a127df0d1d323868fe8a36b56942c319.jpg)
.jpg.6400cece1e5ab9fb92f675e7ab118f62.jpg)
.jpg.079b3003f37be48ca1691dd7009c3de5.jpg)
.jpg.10176dea65591c4c6bbe35c0caf359ea.jpg)
.jpg.40824dc7e3047618c05b6e38fc58399a.jpg)
.jpg.f2ce4f113543023afaf42b40a9d2ccef.jpg)
.jpg.845be21e84aba4baad3081255ecaa937.jpg)
.jpg.a41336b426200204e0074b86fedbab77.jpg)
.jpg.3e6fada98ec5e43fcd9fc99f0c2082c2.jpg)
.jpg.1acb1e03af0be04f9fe4b17b07f0ac63.jpg)
.jpg.02d4985707a9ffd139572dd9cc90739c.jpg)
.jpg.61ec1f5e6c543101a797a6e96896b108.jpg)