DONATION DRIVE - SUPPORT MSW - DO YOUR PART TO KEEP THIS GREAT FORUM GOING!
×


RGL
-
Posts
5,539 -
Joined
-
Last visited
Content Type
Profiles
Forums
Gallery
Events
Everything posted by RGL
-
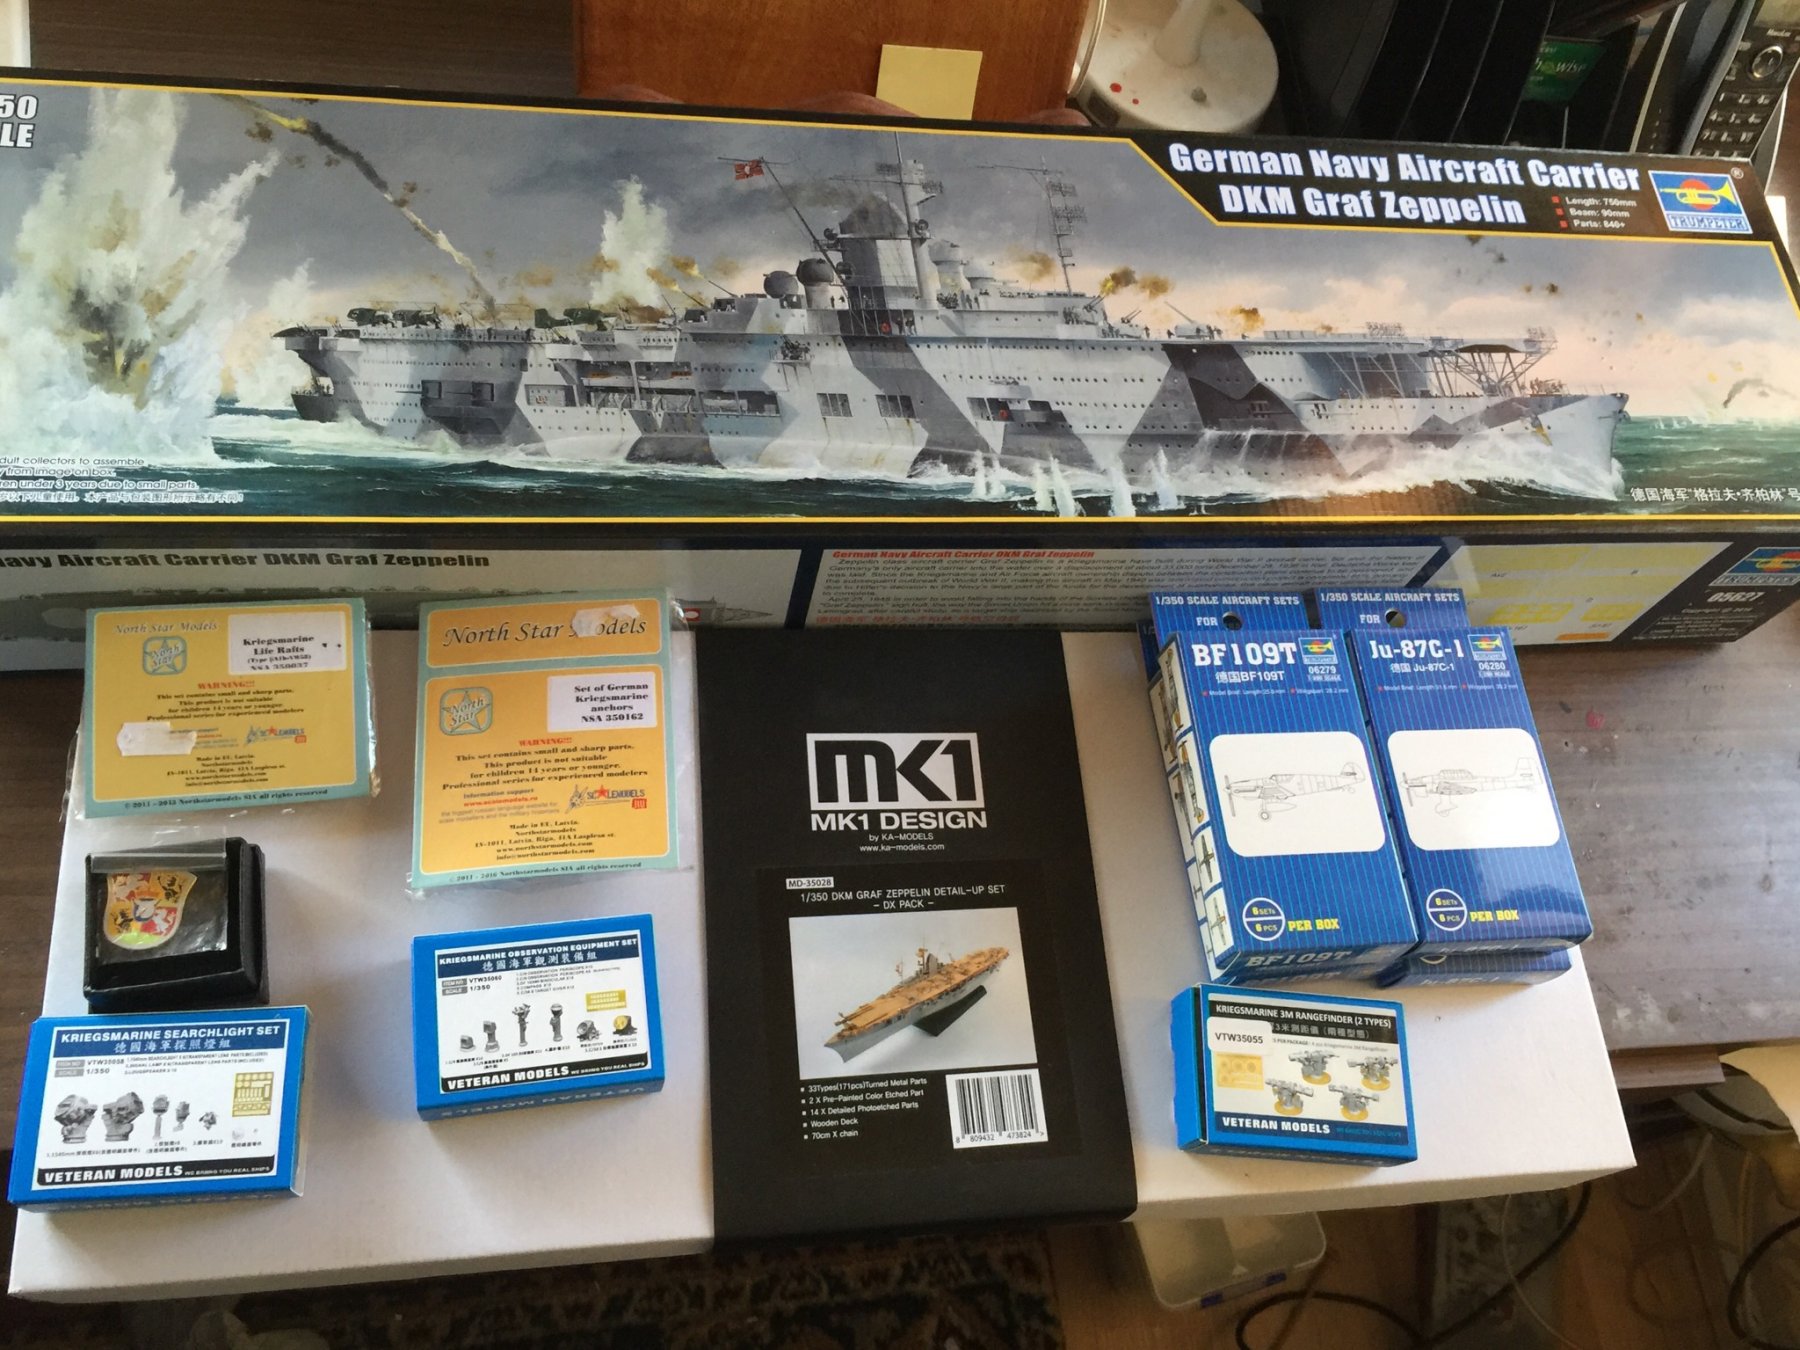
 Allegedly Trumpeter are going to make one as it’s in their upcoming projects in their catalog it they have a habit of falling through. I’ve seen the resin one and it’s a tad expensive.
 -
No#1 son will be Rowing all winter and #2 will be playing rugby, plus the Rugby World Cup will be on. We have a new dog on order as well so life is busy. I really want to build the CV1 Langley that Trumpeter has promised but not yet released. Maybe next year.
-
Vendetta was UK then went to Oz. France and Italy have some nice ships too. The Russian aircraft carrier would be a great build and now China is in the game too.
-
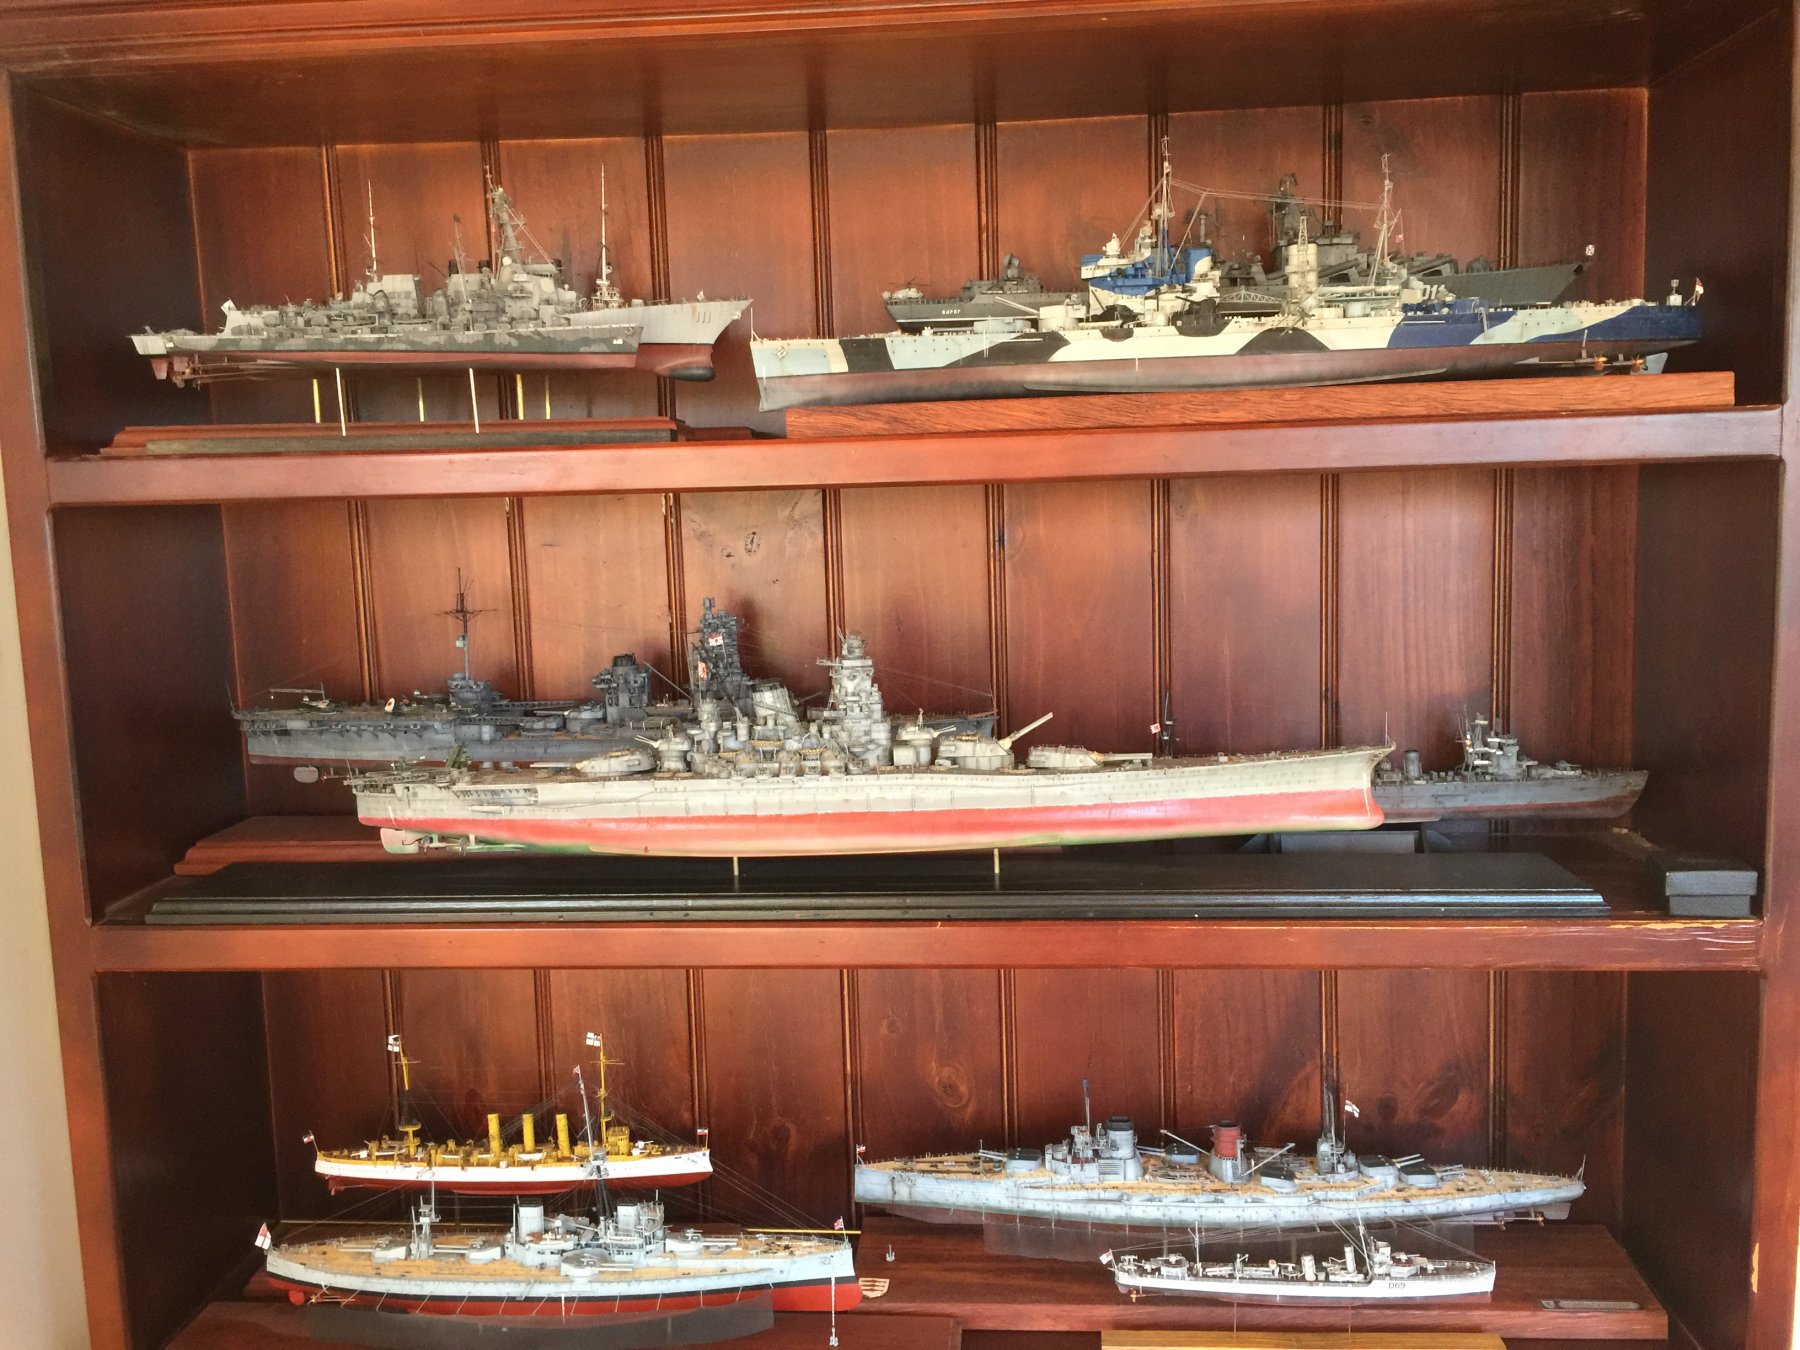
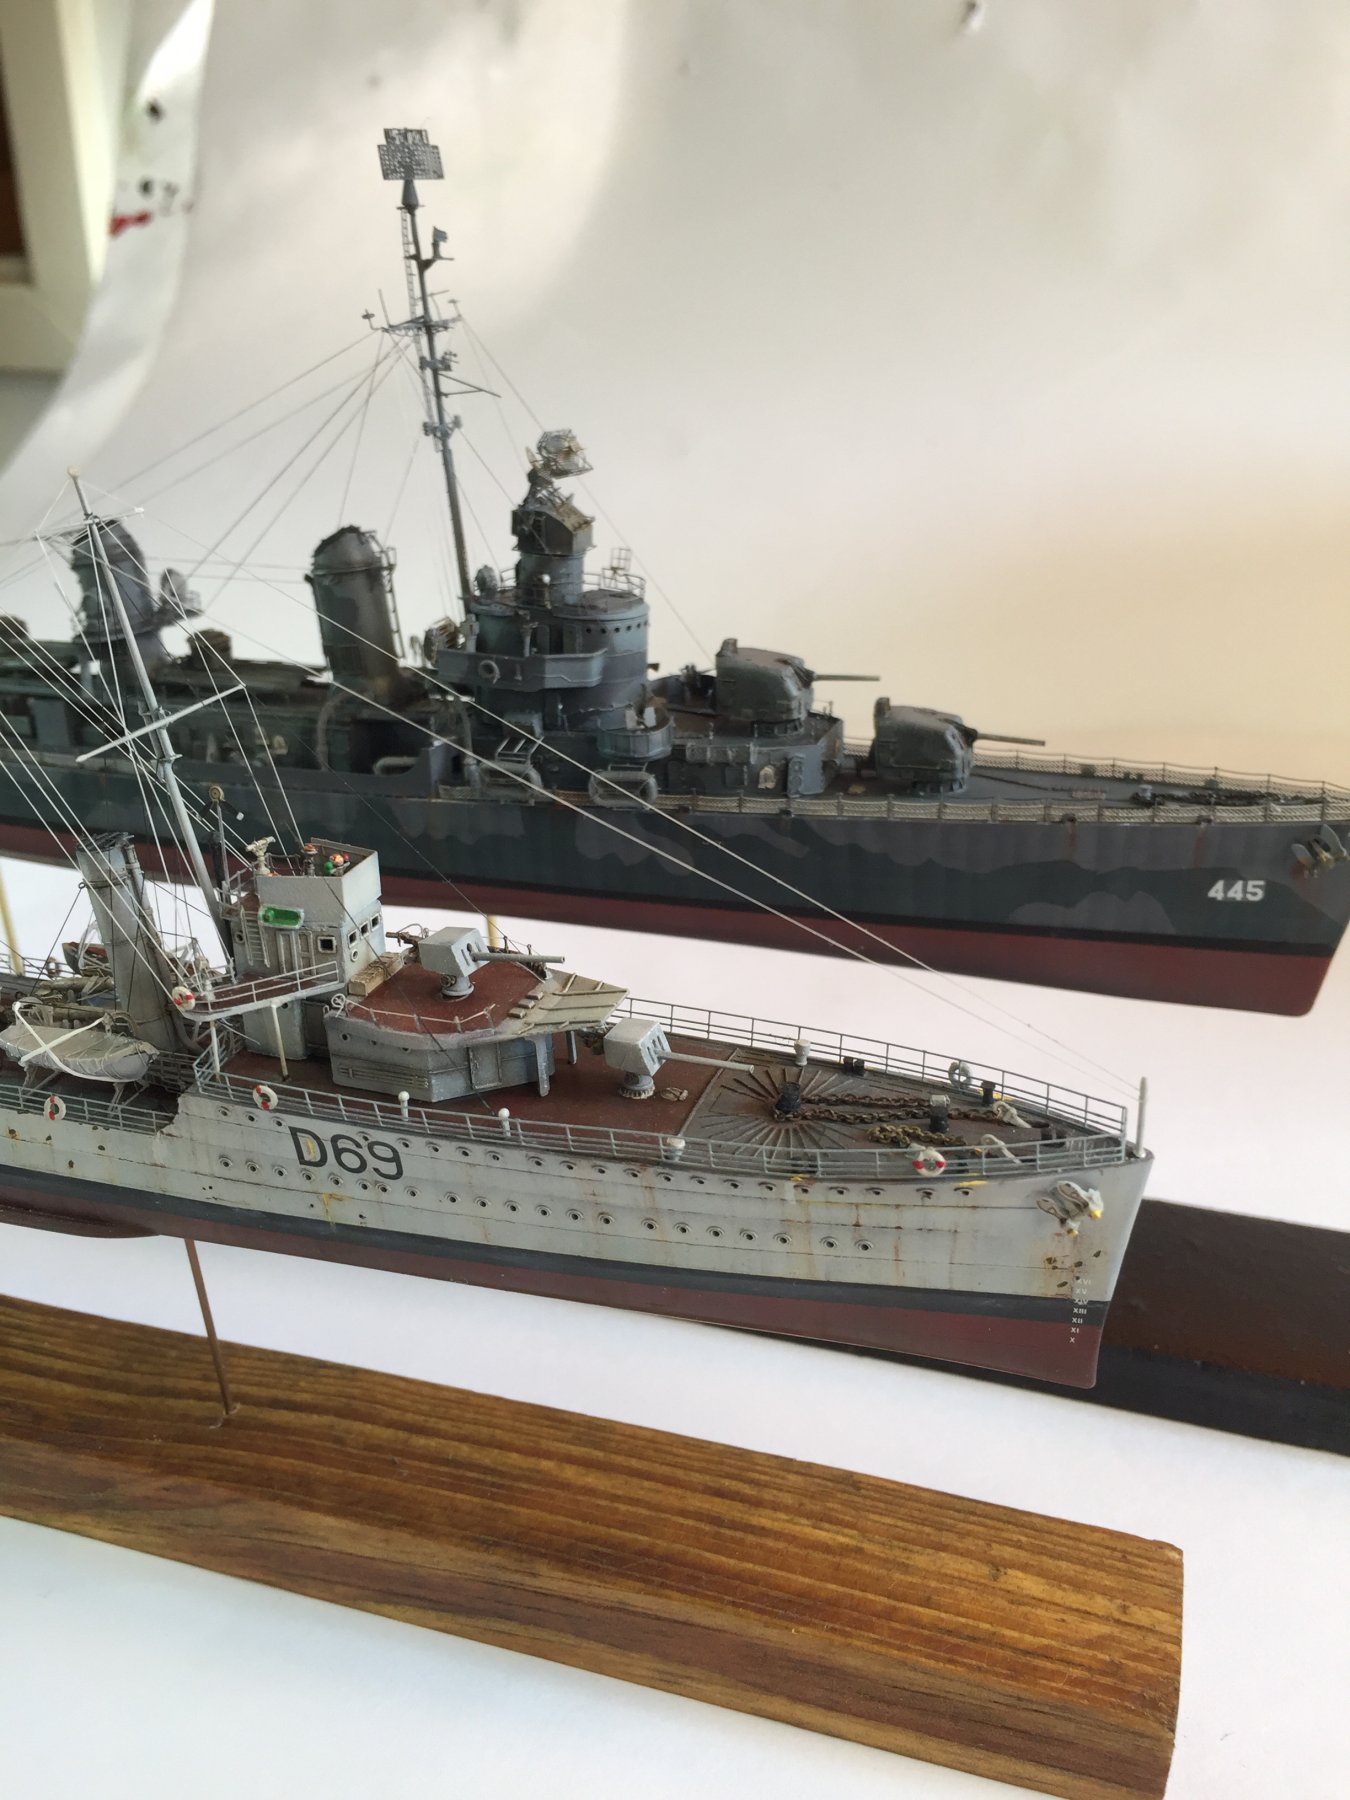
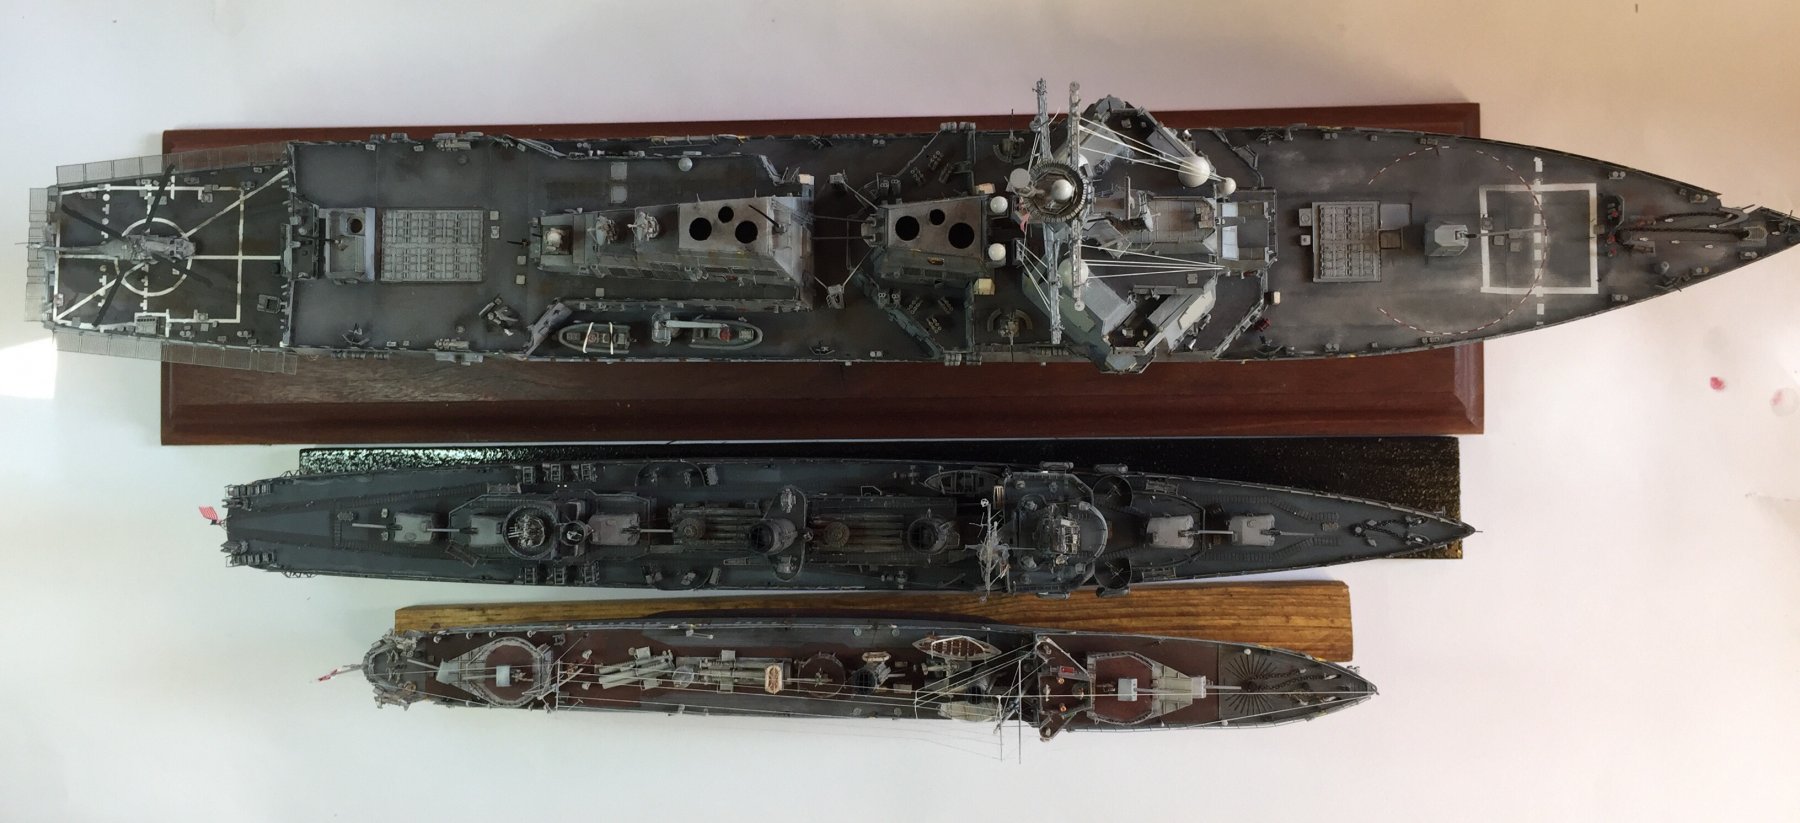
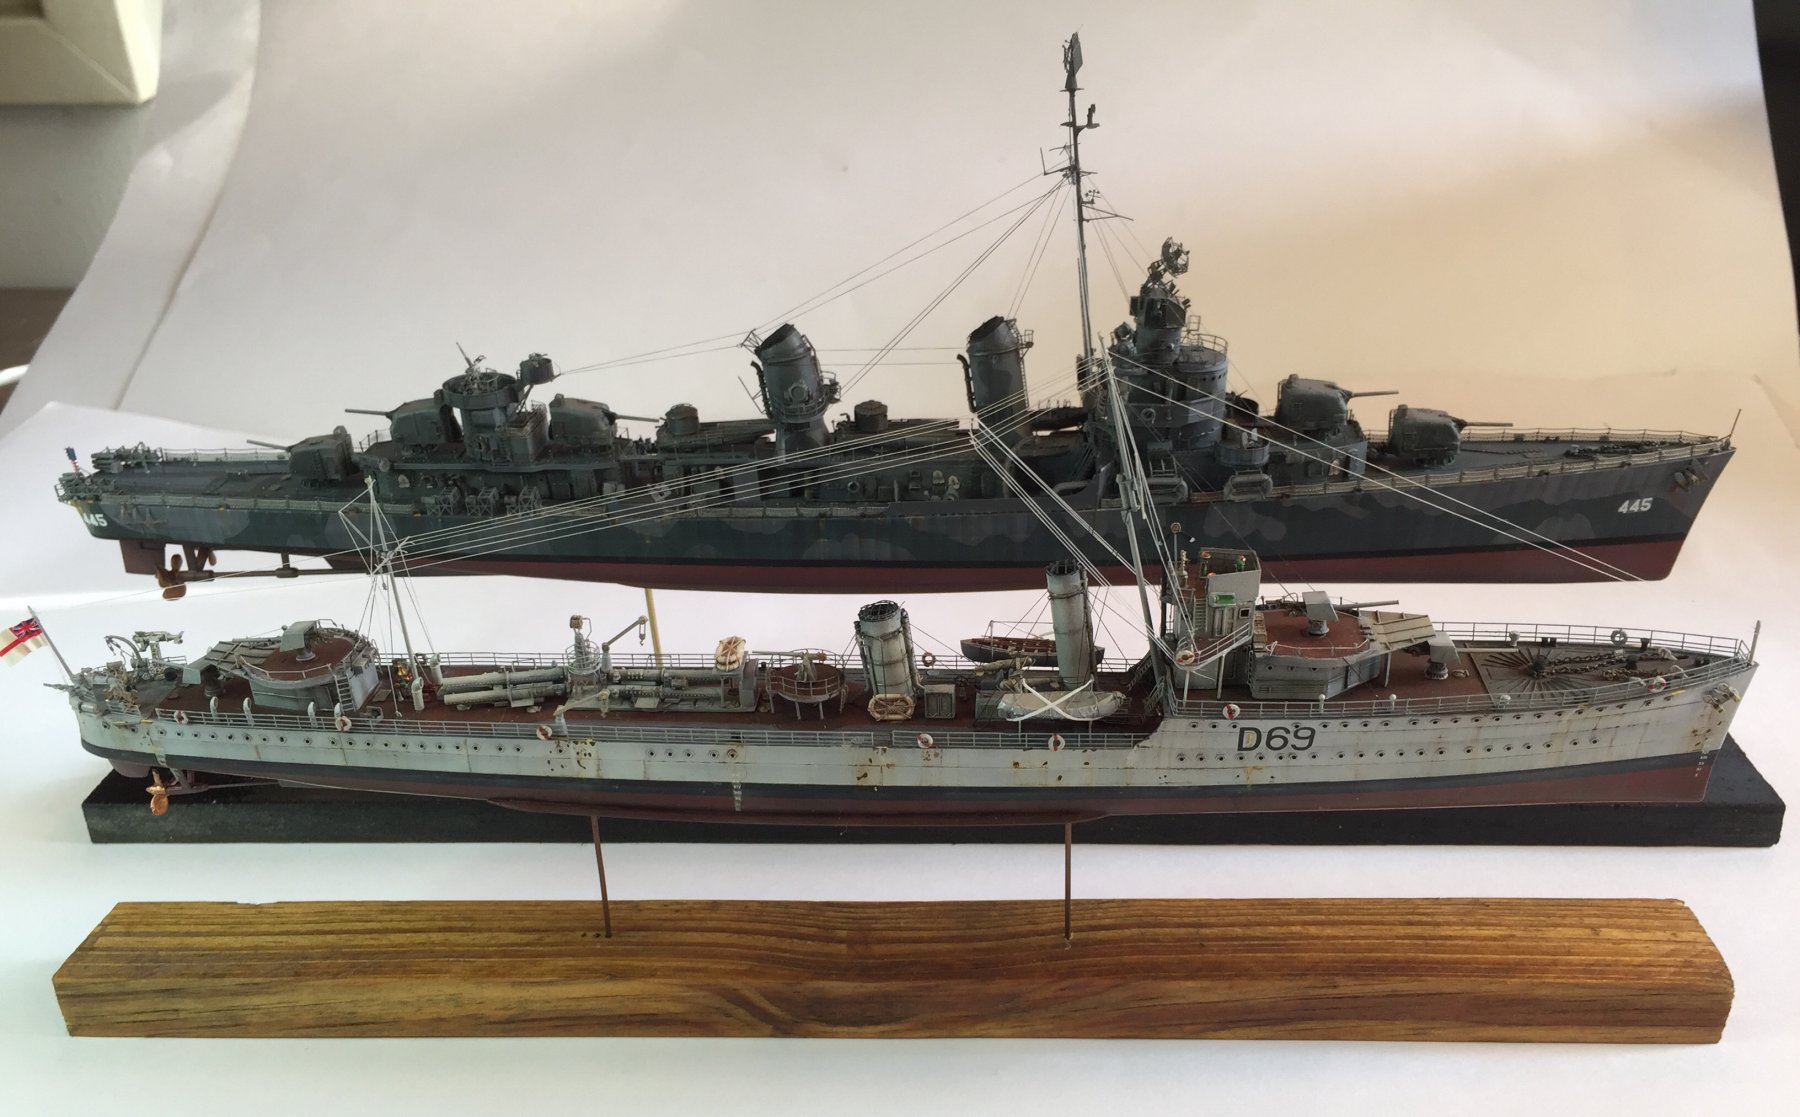
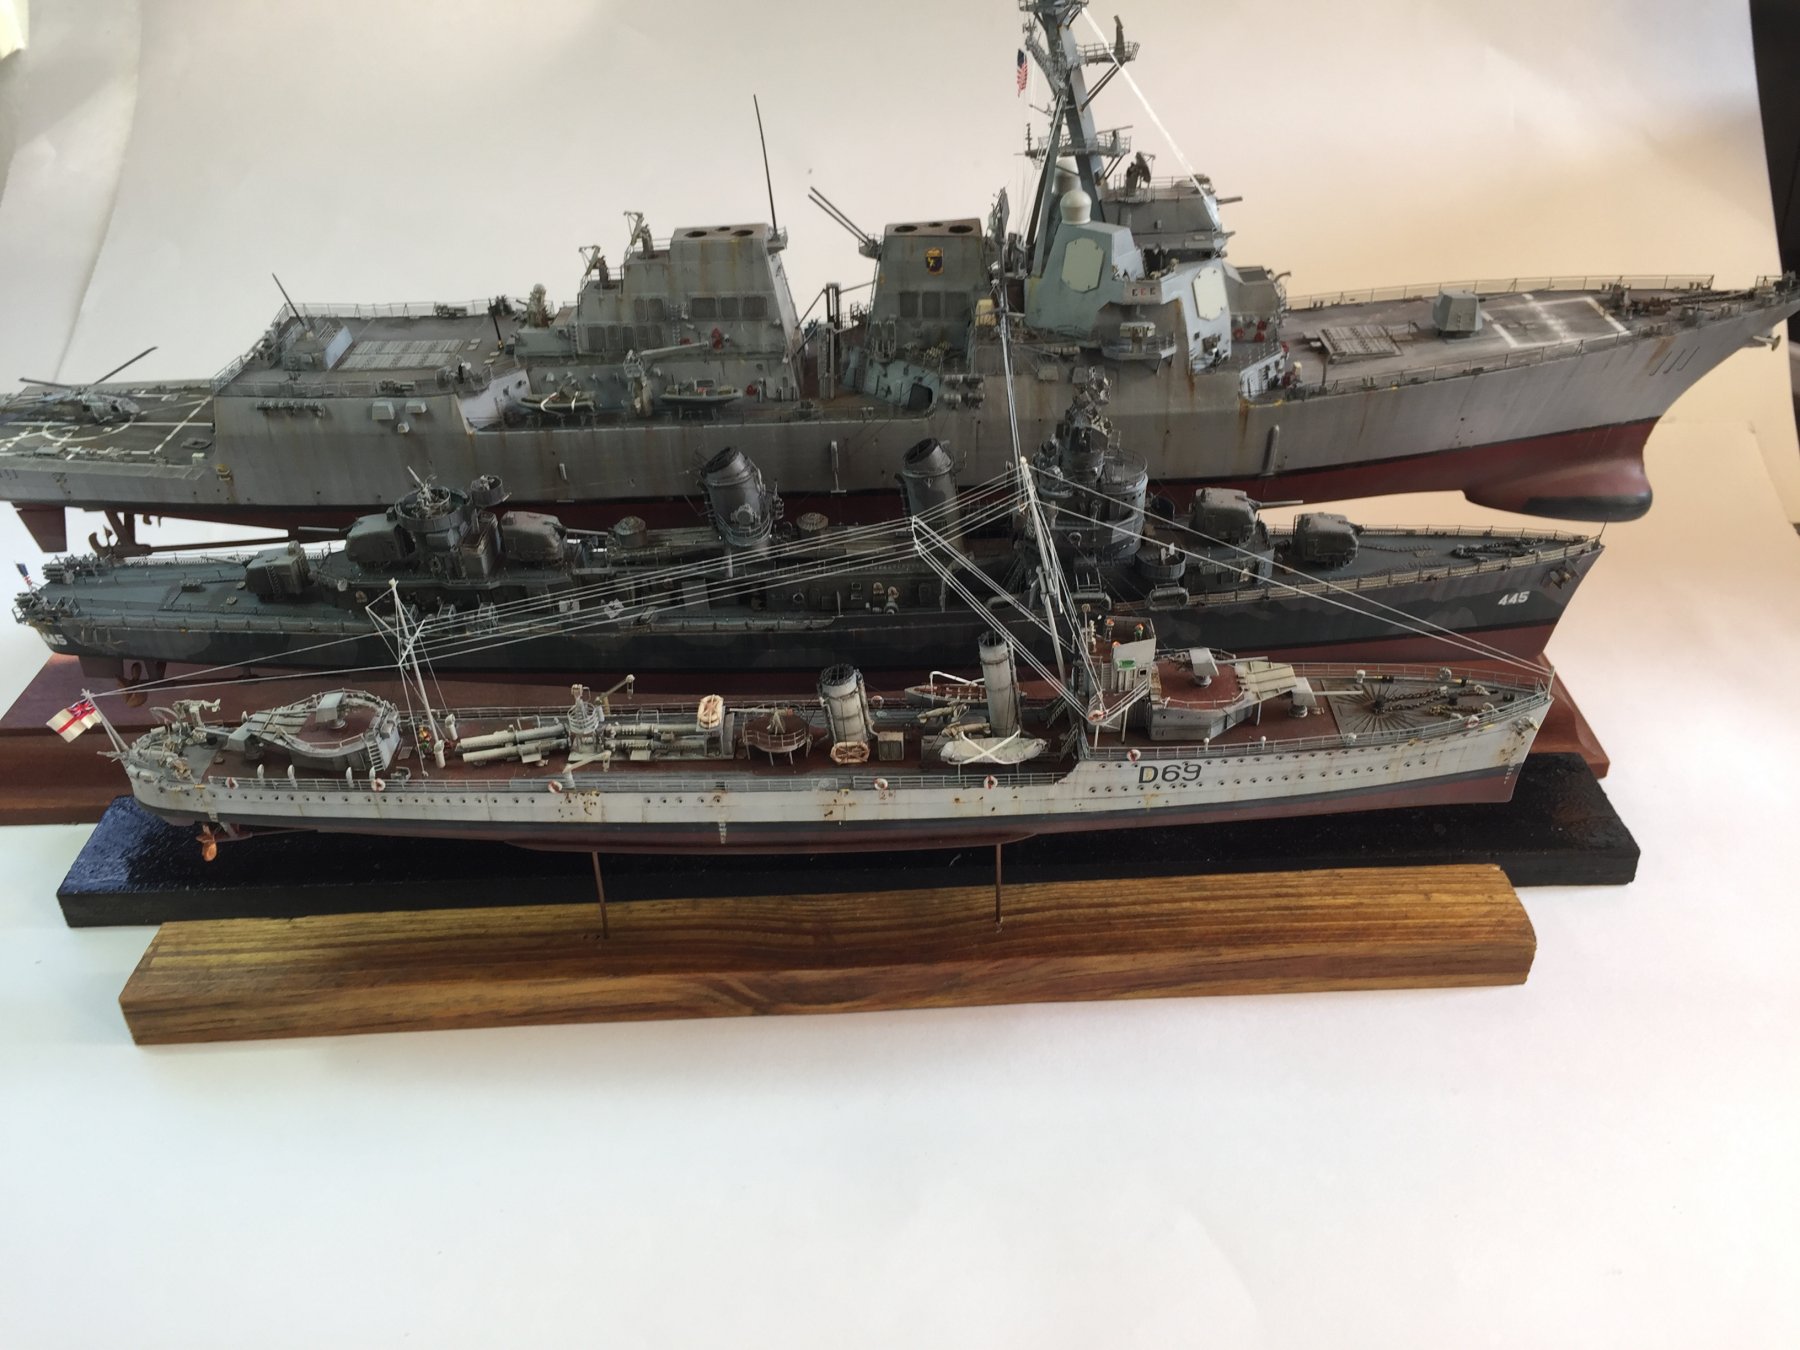
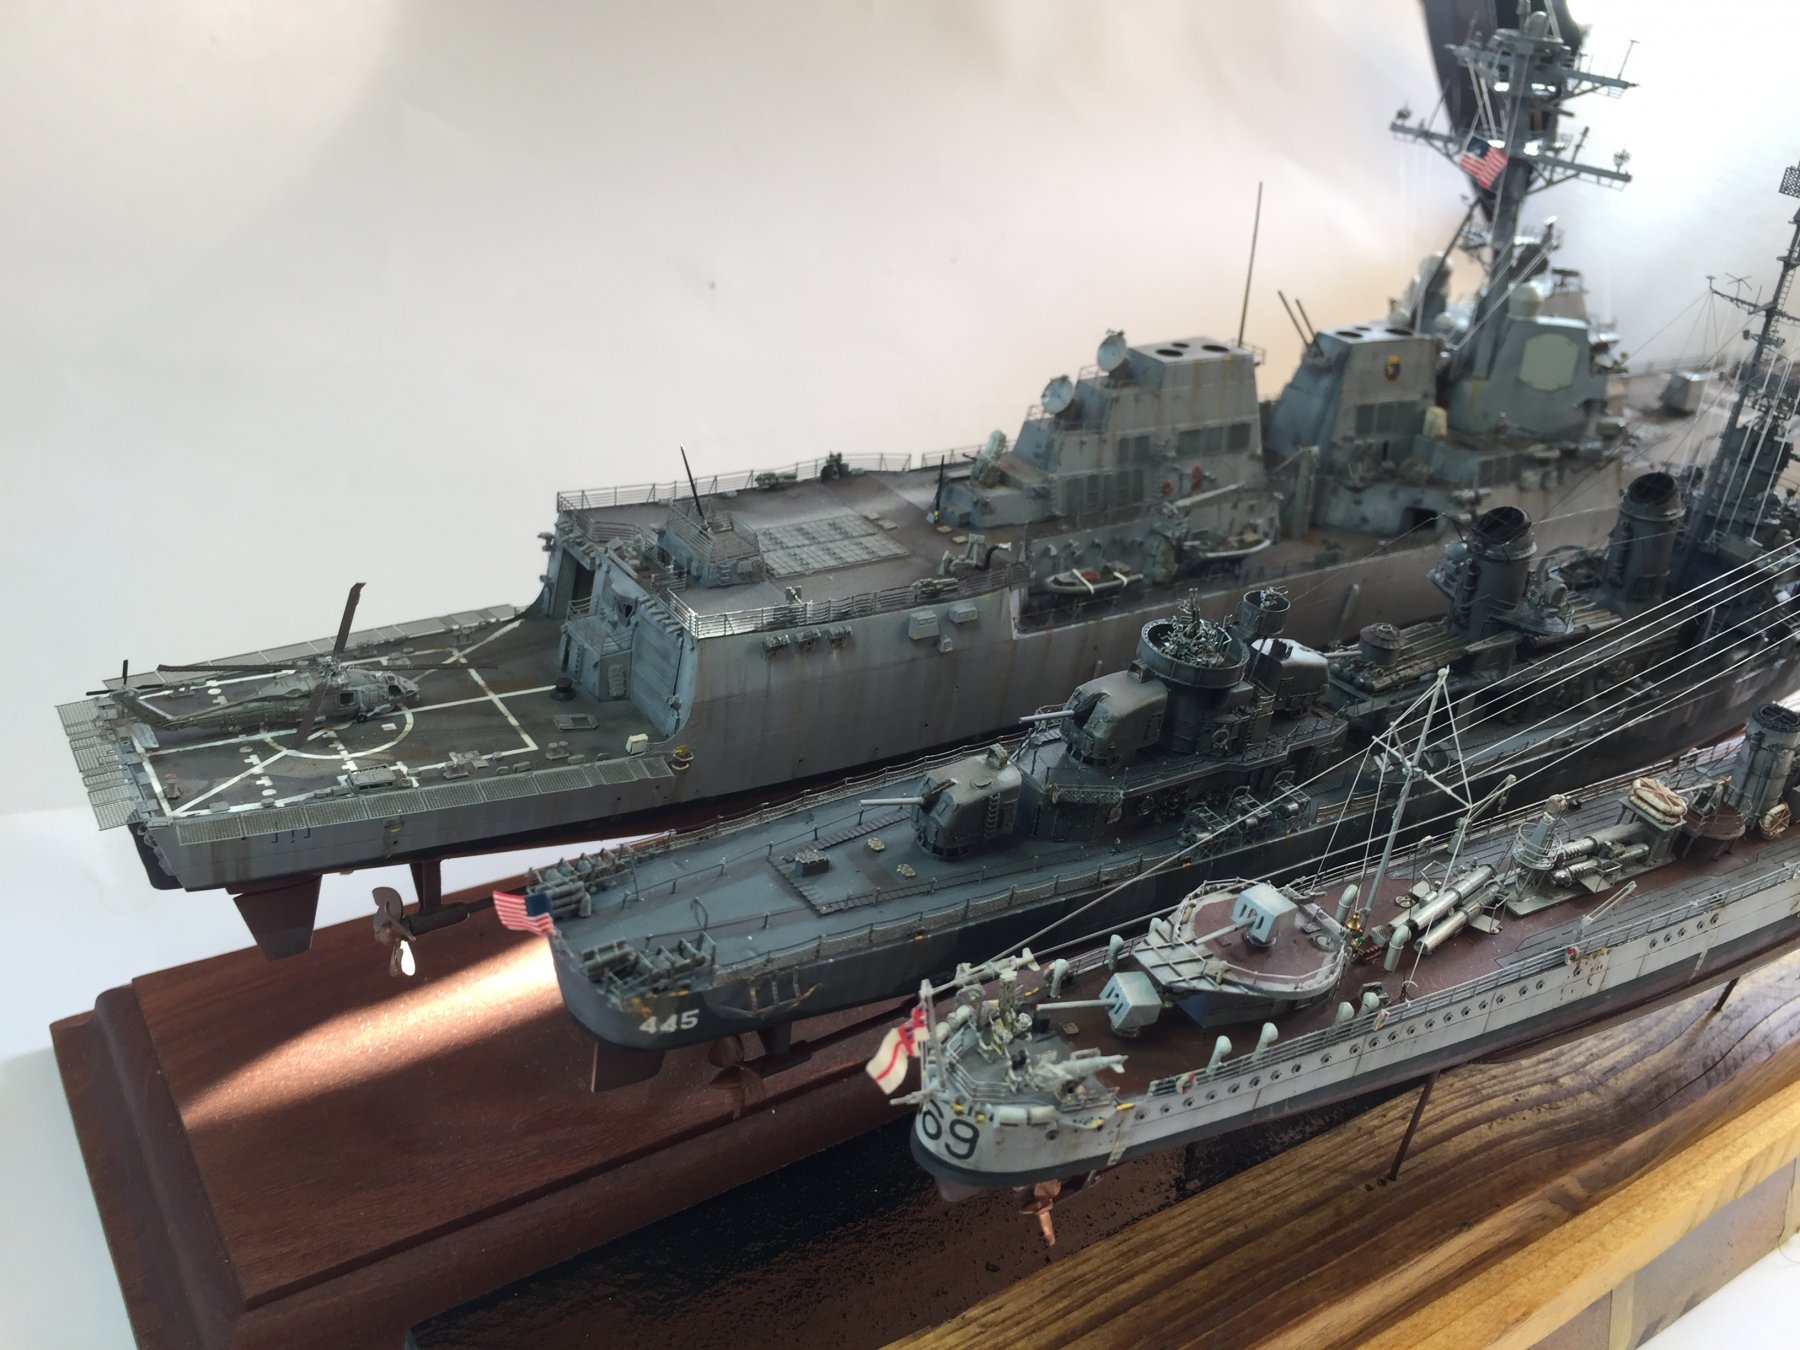
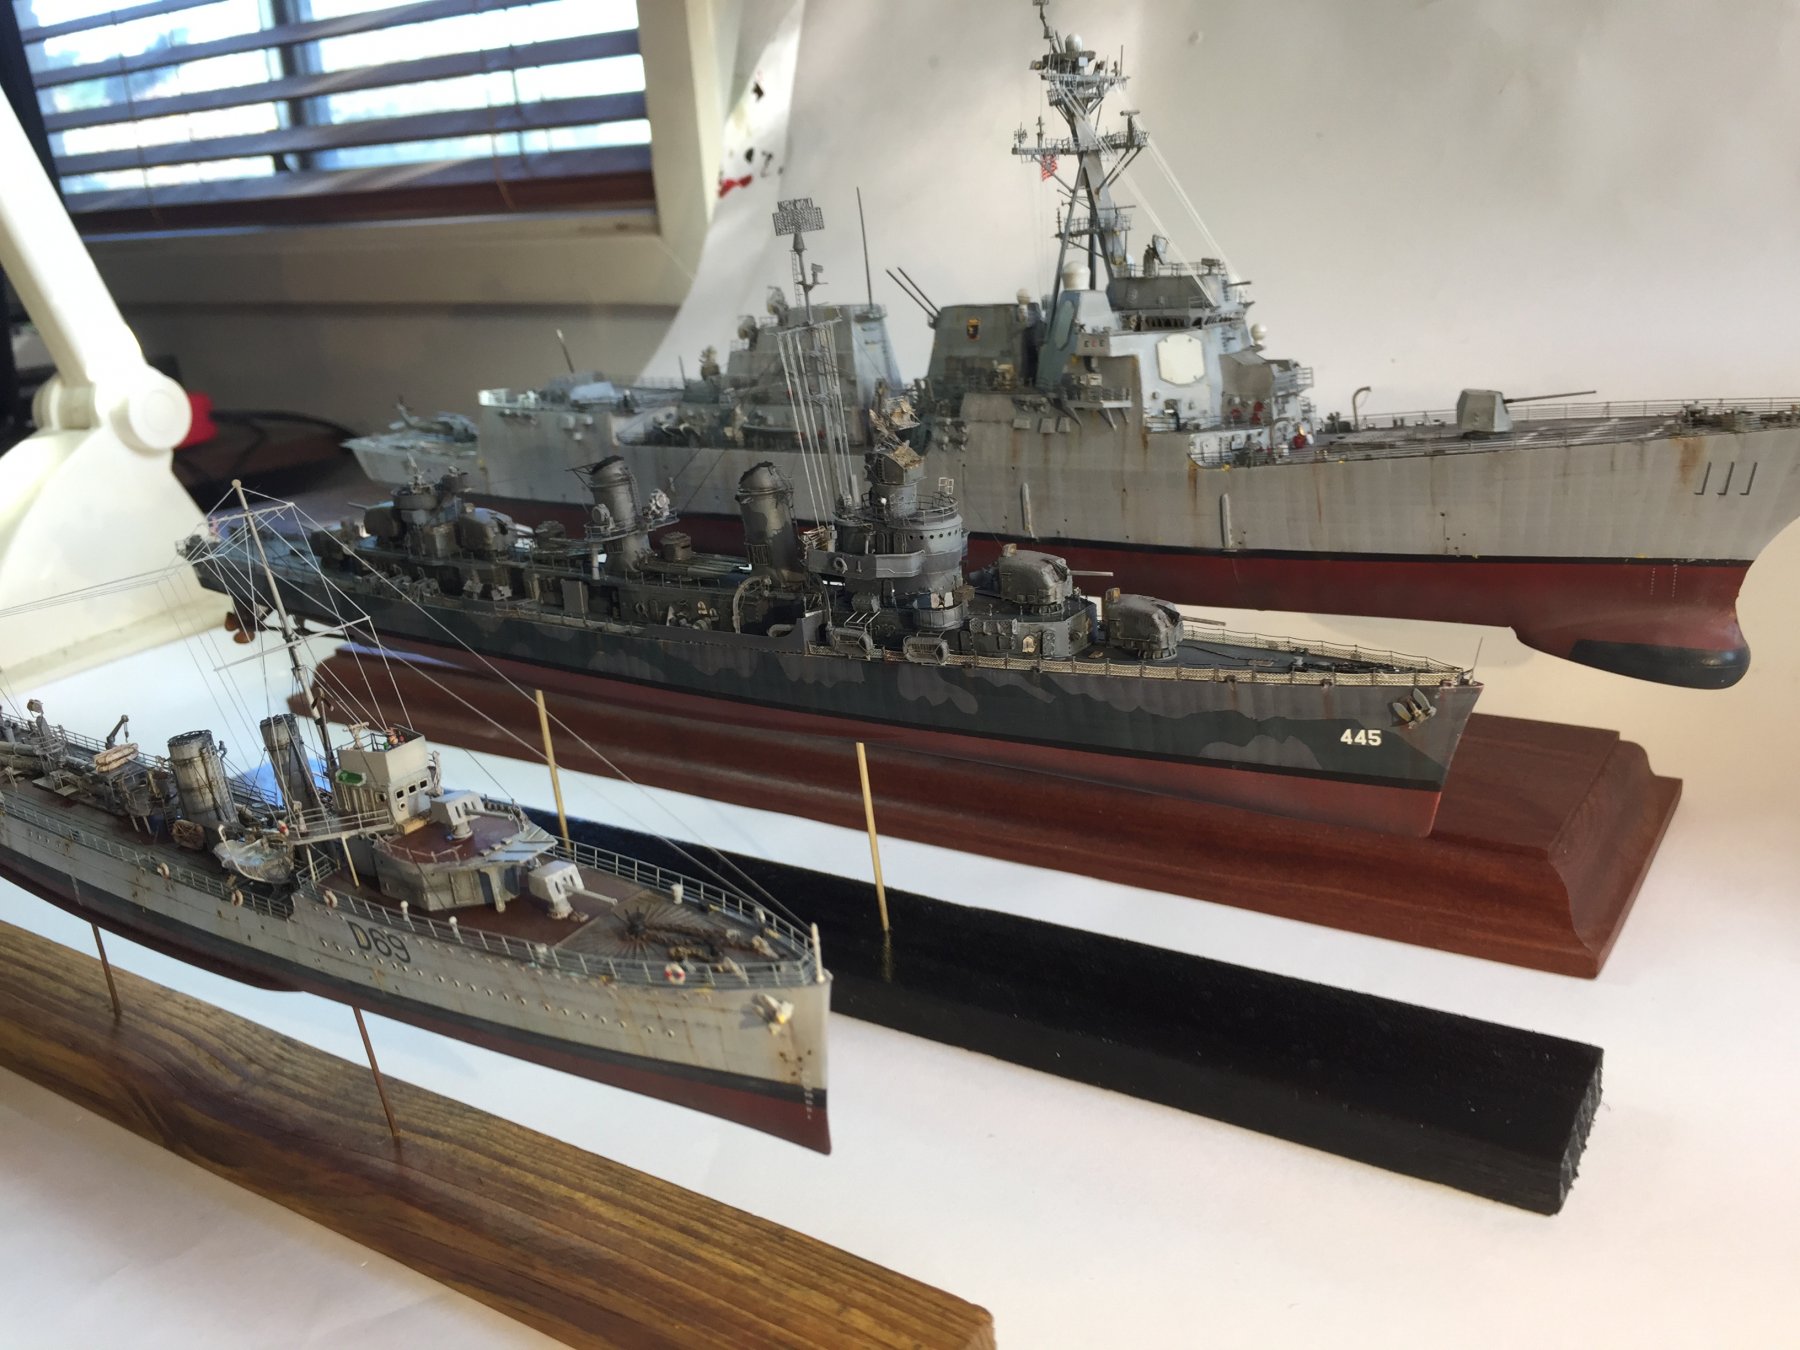
You’ll all be happy to know I have purchased the next kit, plus aftermarket and done the research. I like to do only three of each nation; so far Russia Varyag 1 Varyag 2 Germany SMS Emden SMS Seydlitz Britain HMS/HMAS Vendetta HMS King George v Japan IJN Ise IJN Isuzu IJN Yamato USA USS Spruance USS Fletcher so, that leaves a choice of Germany, USA or UK.
-
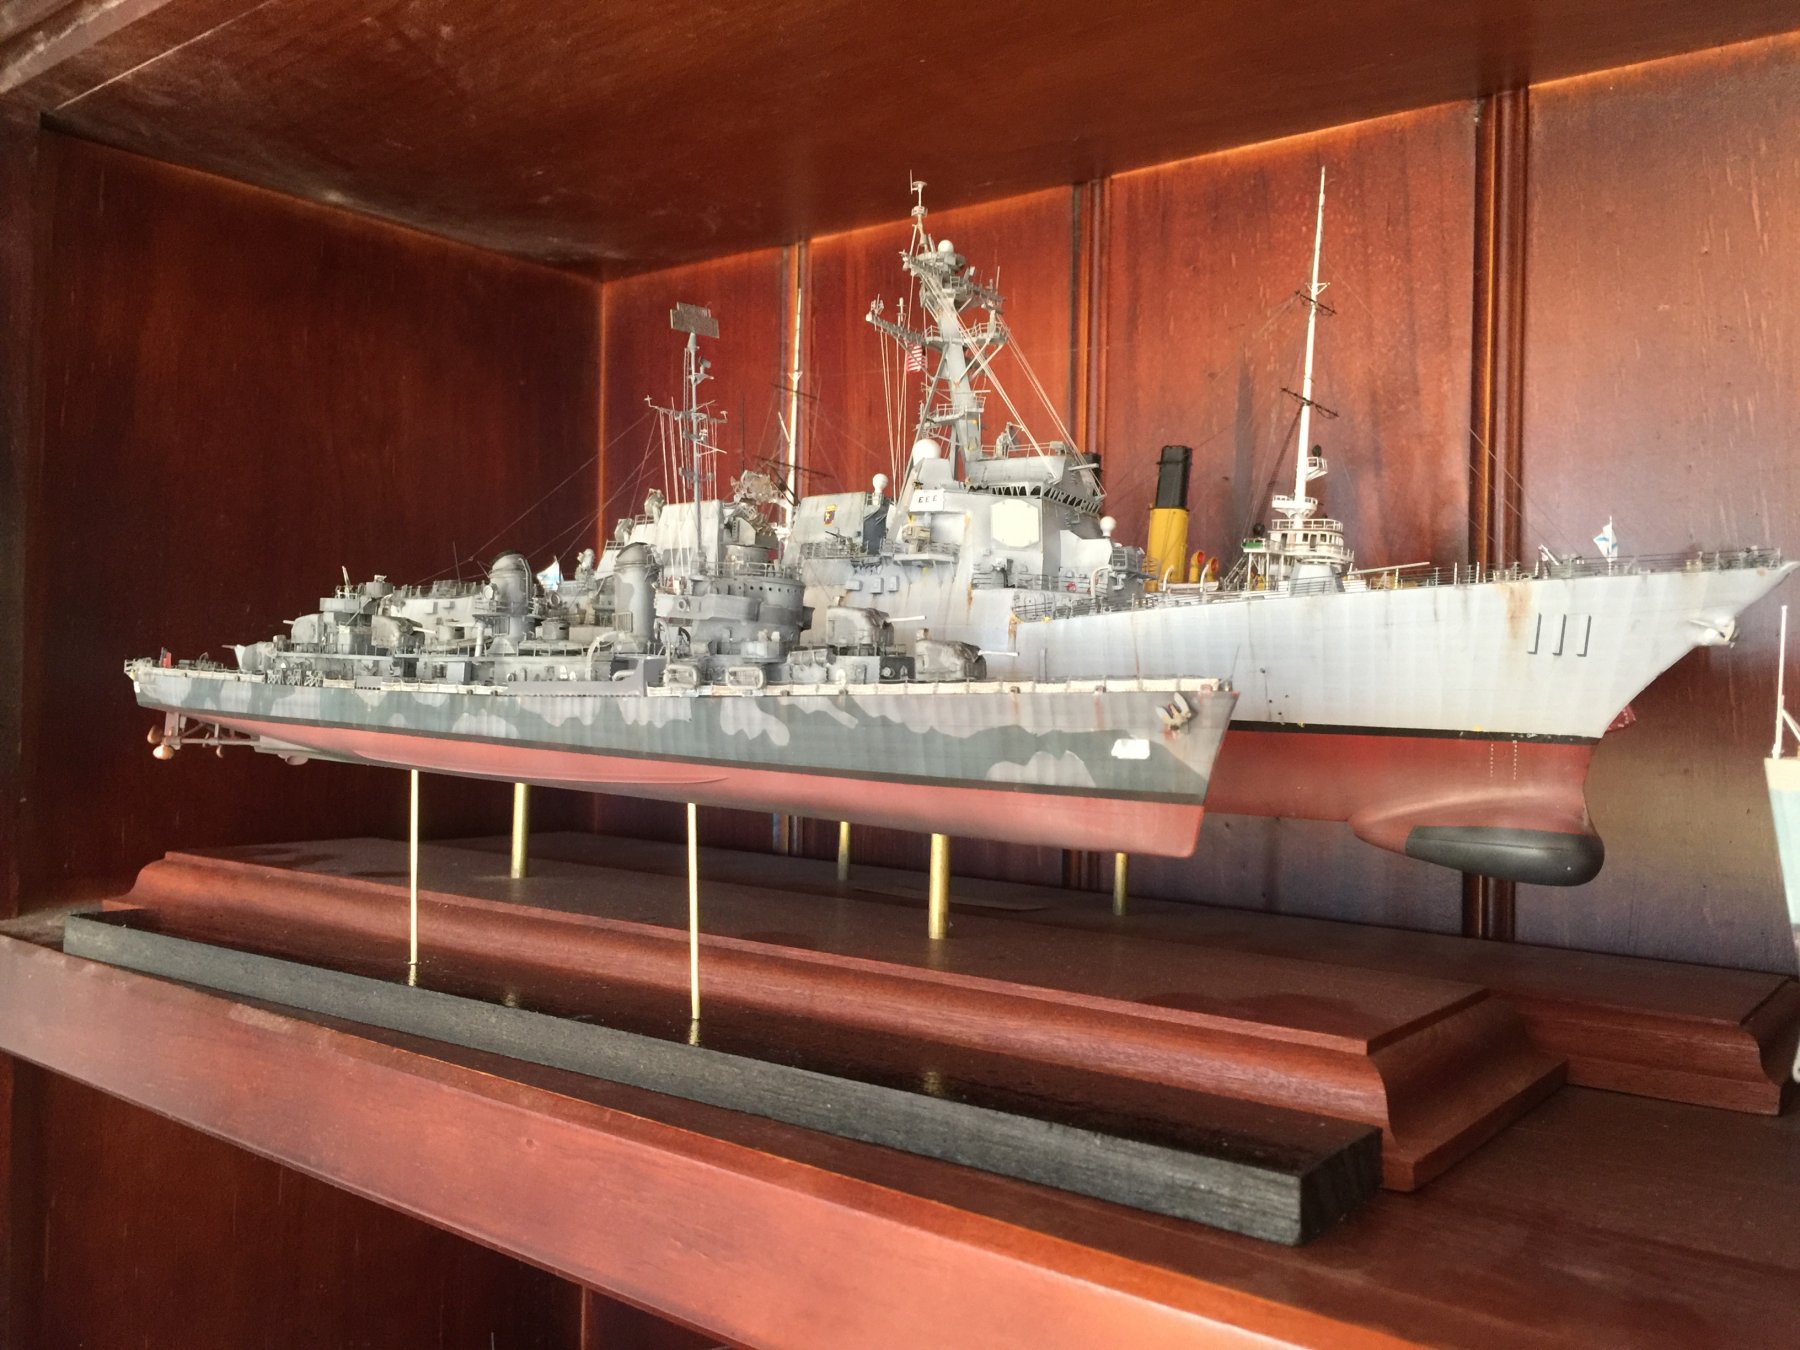
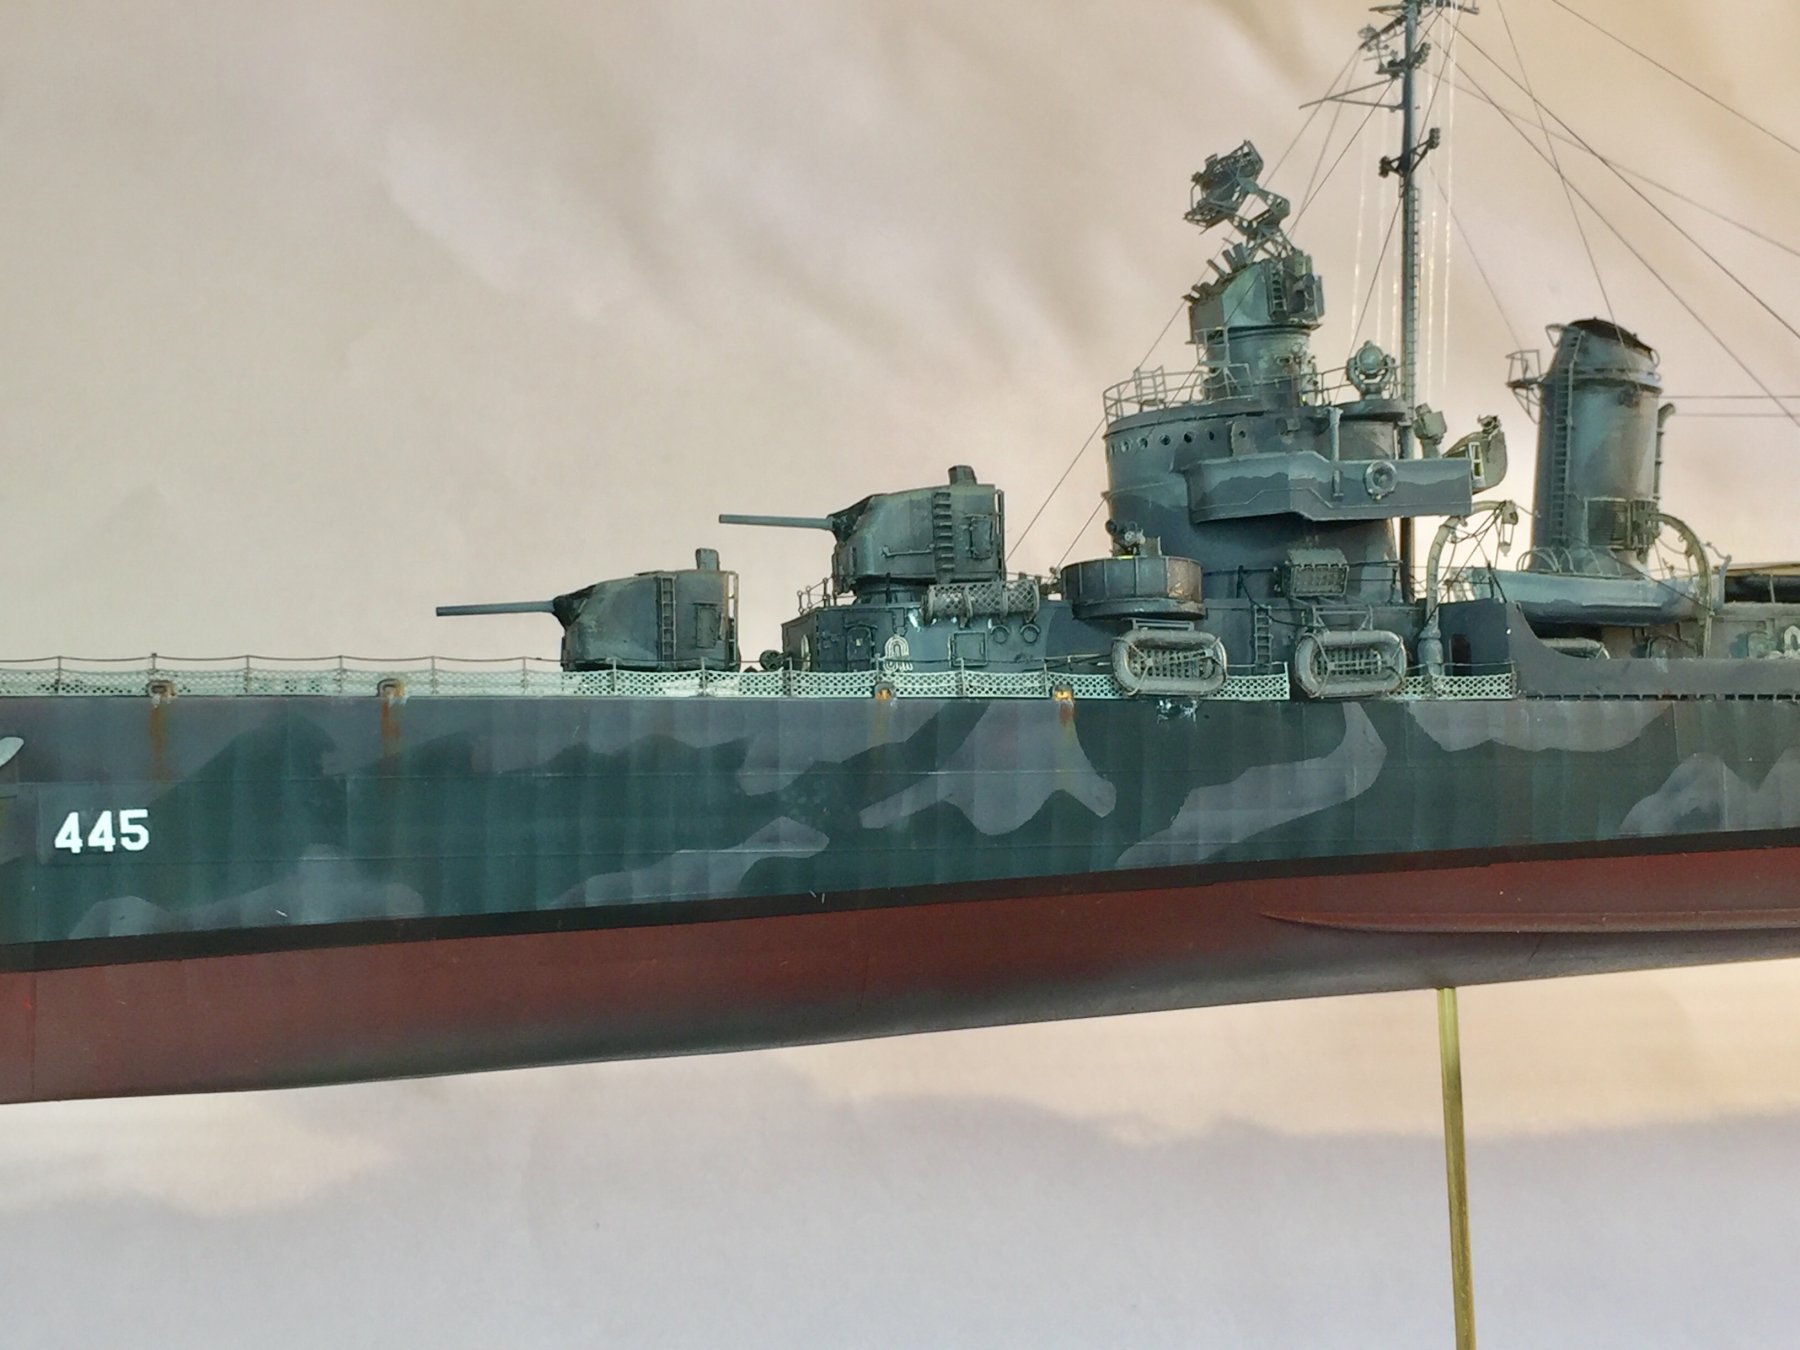
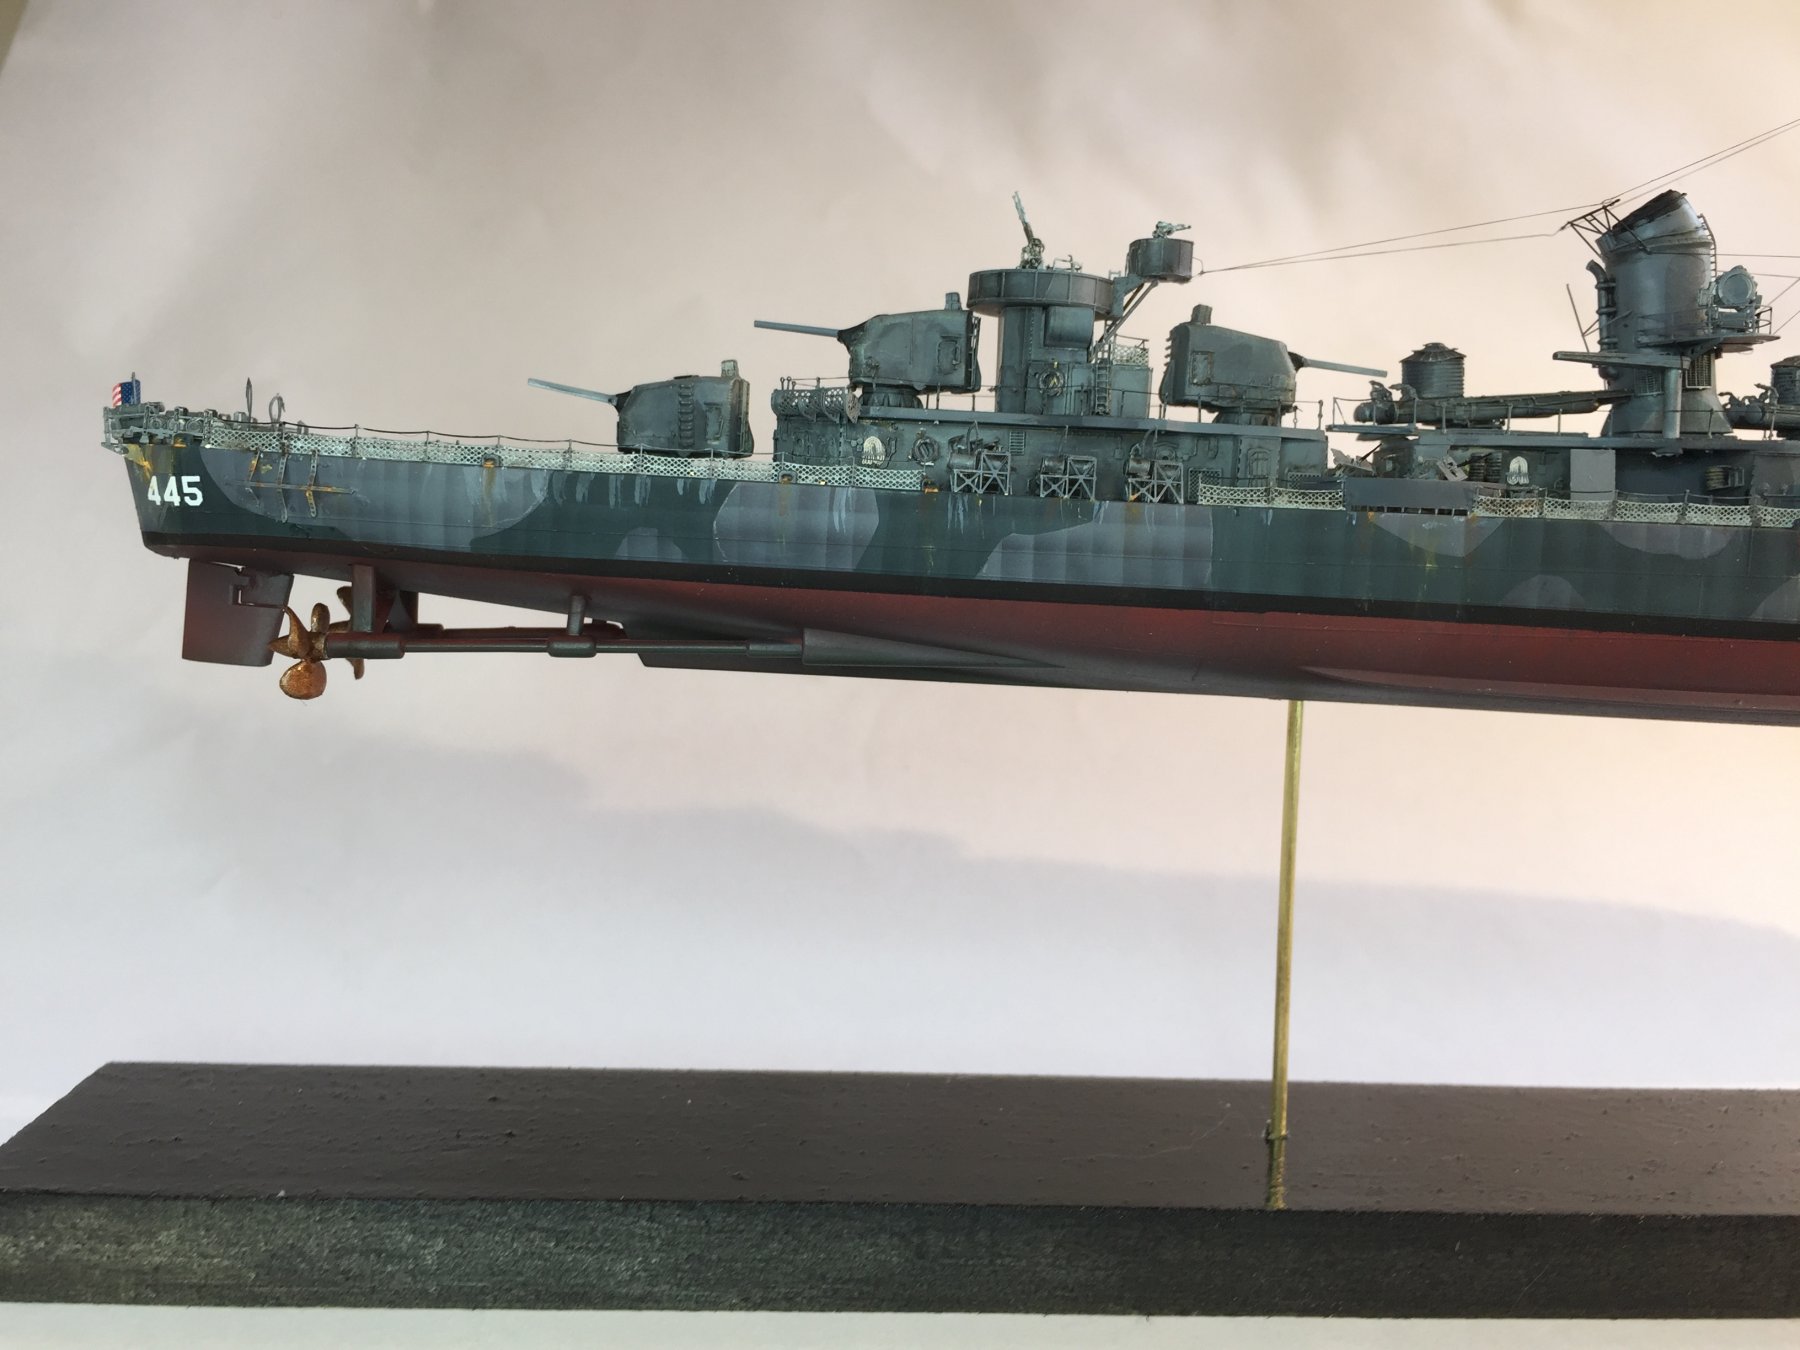
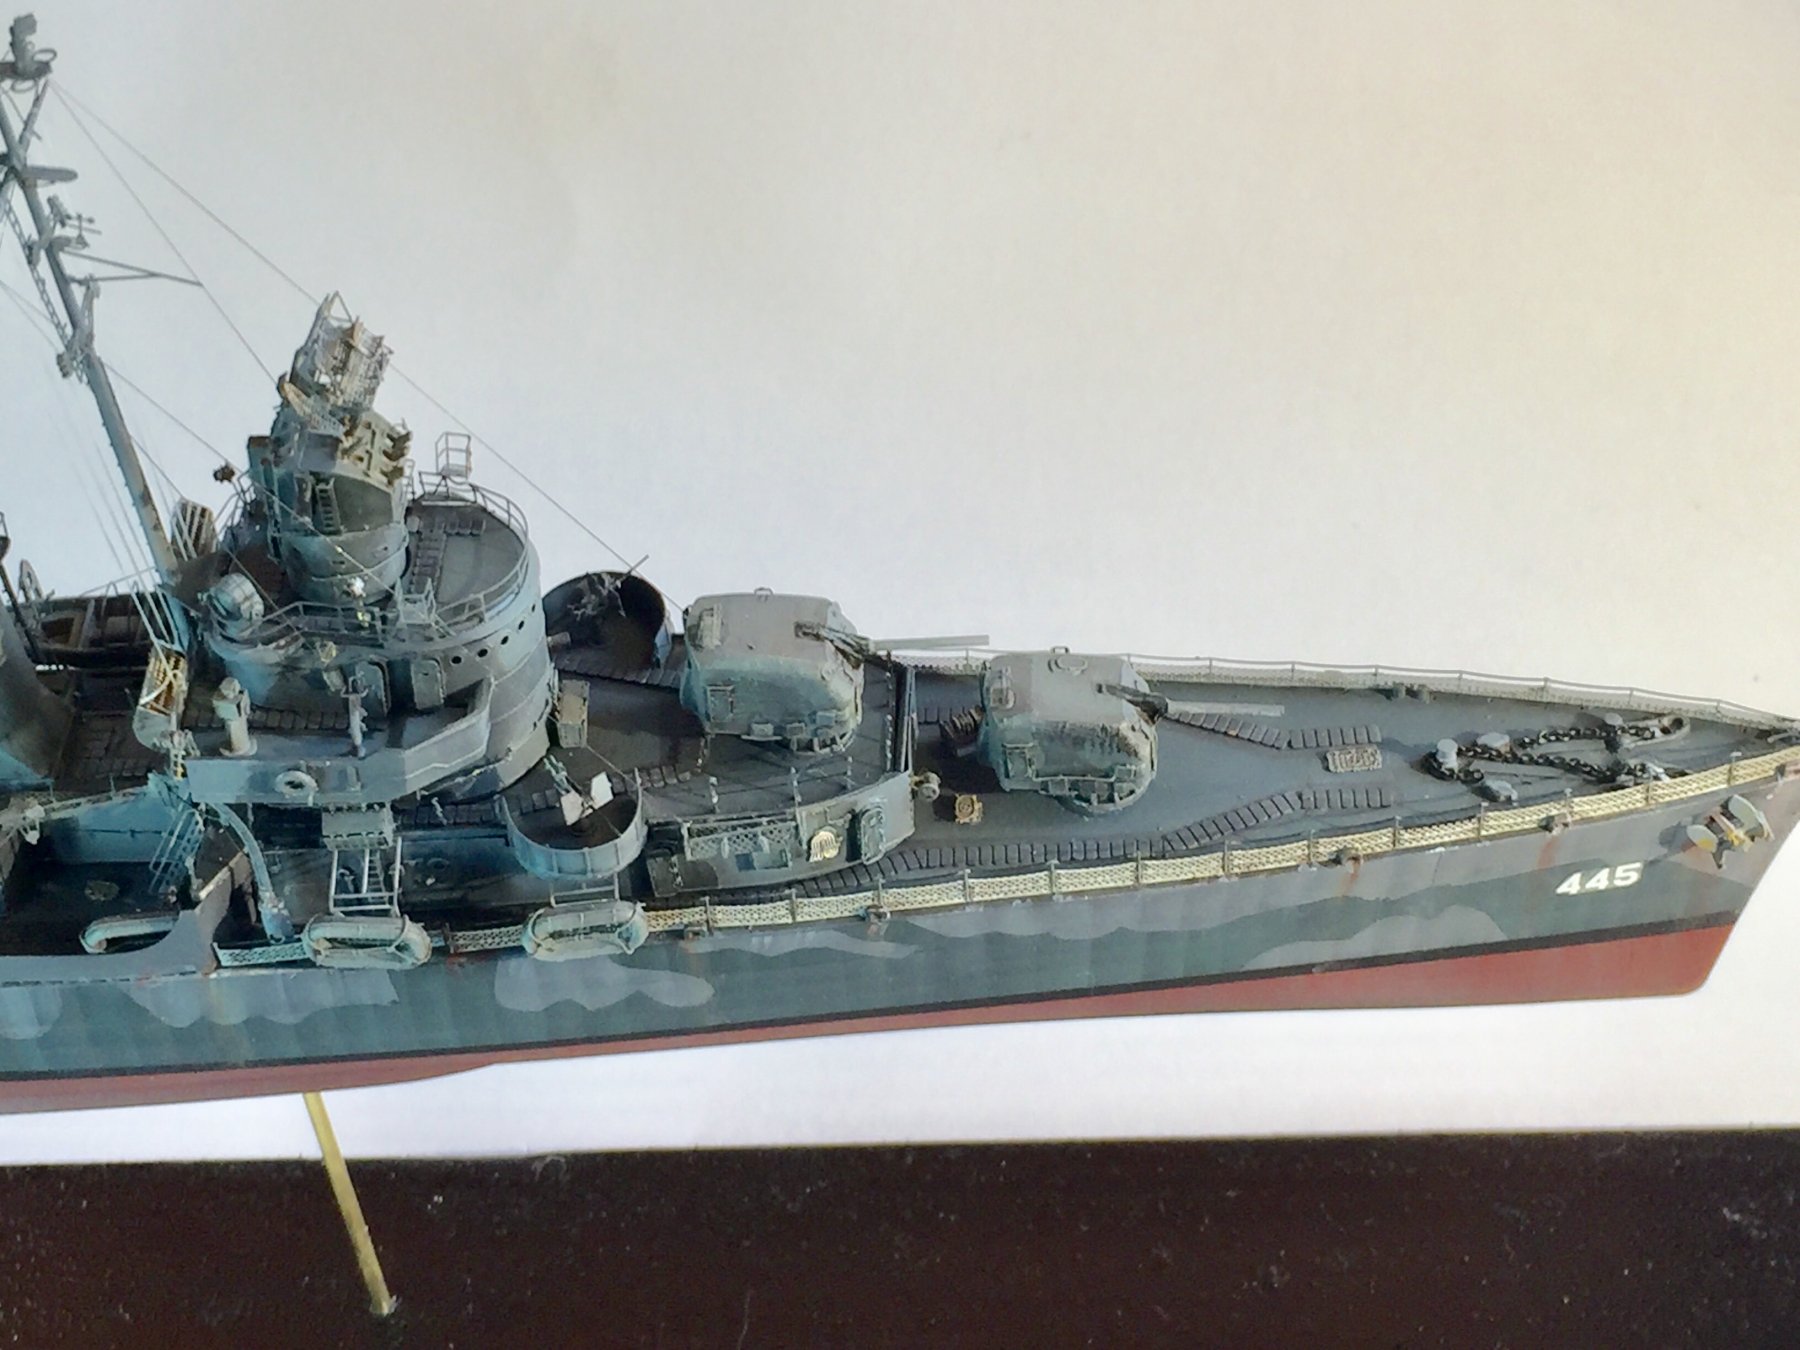
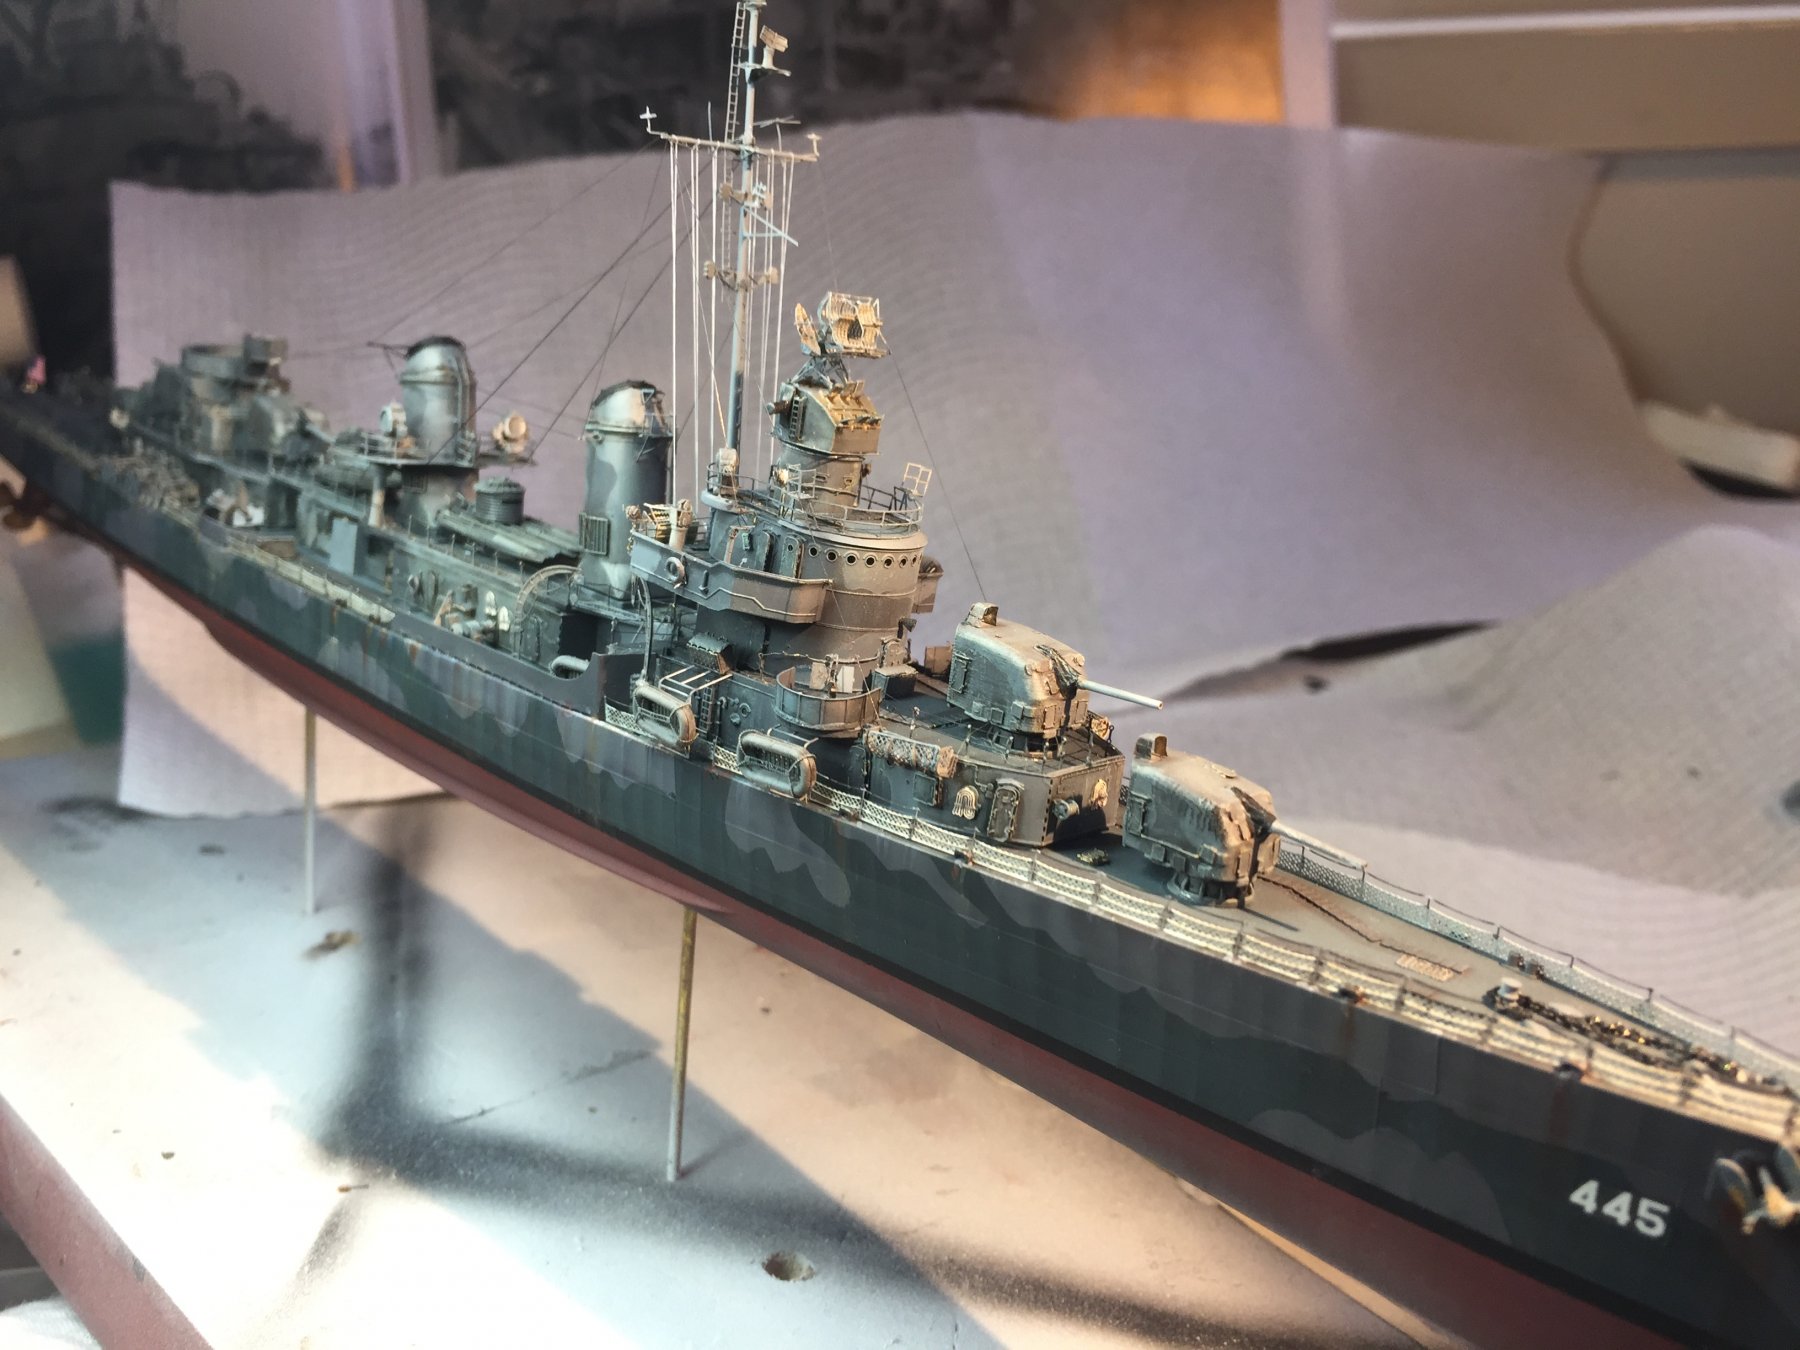
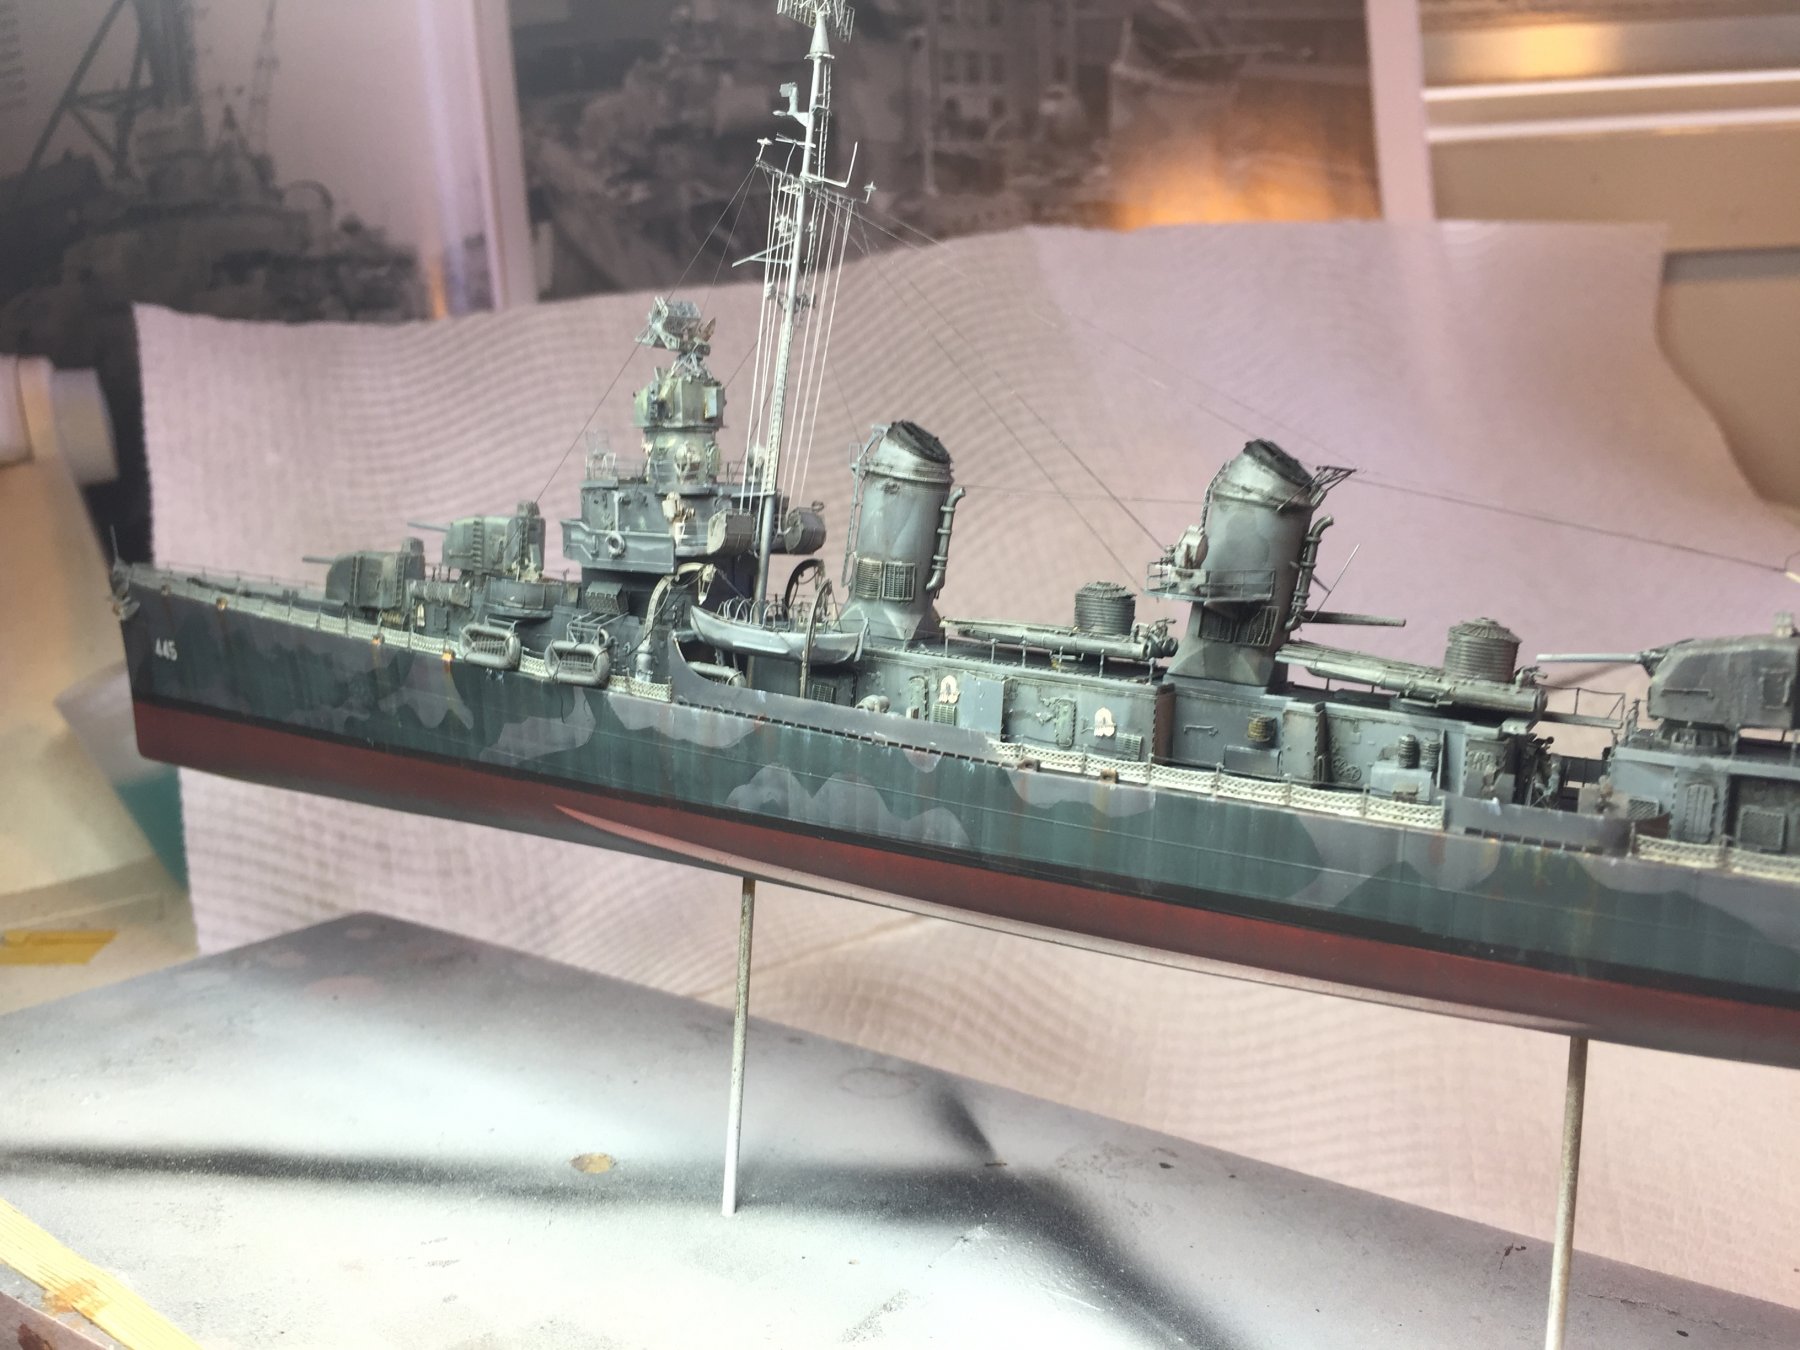
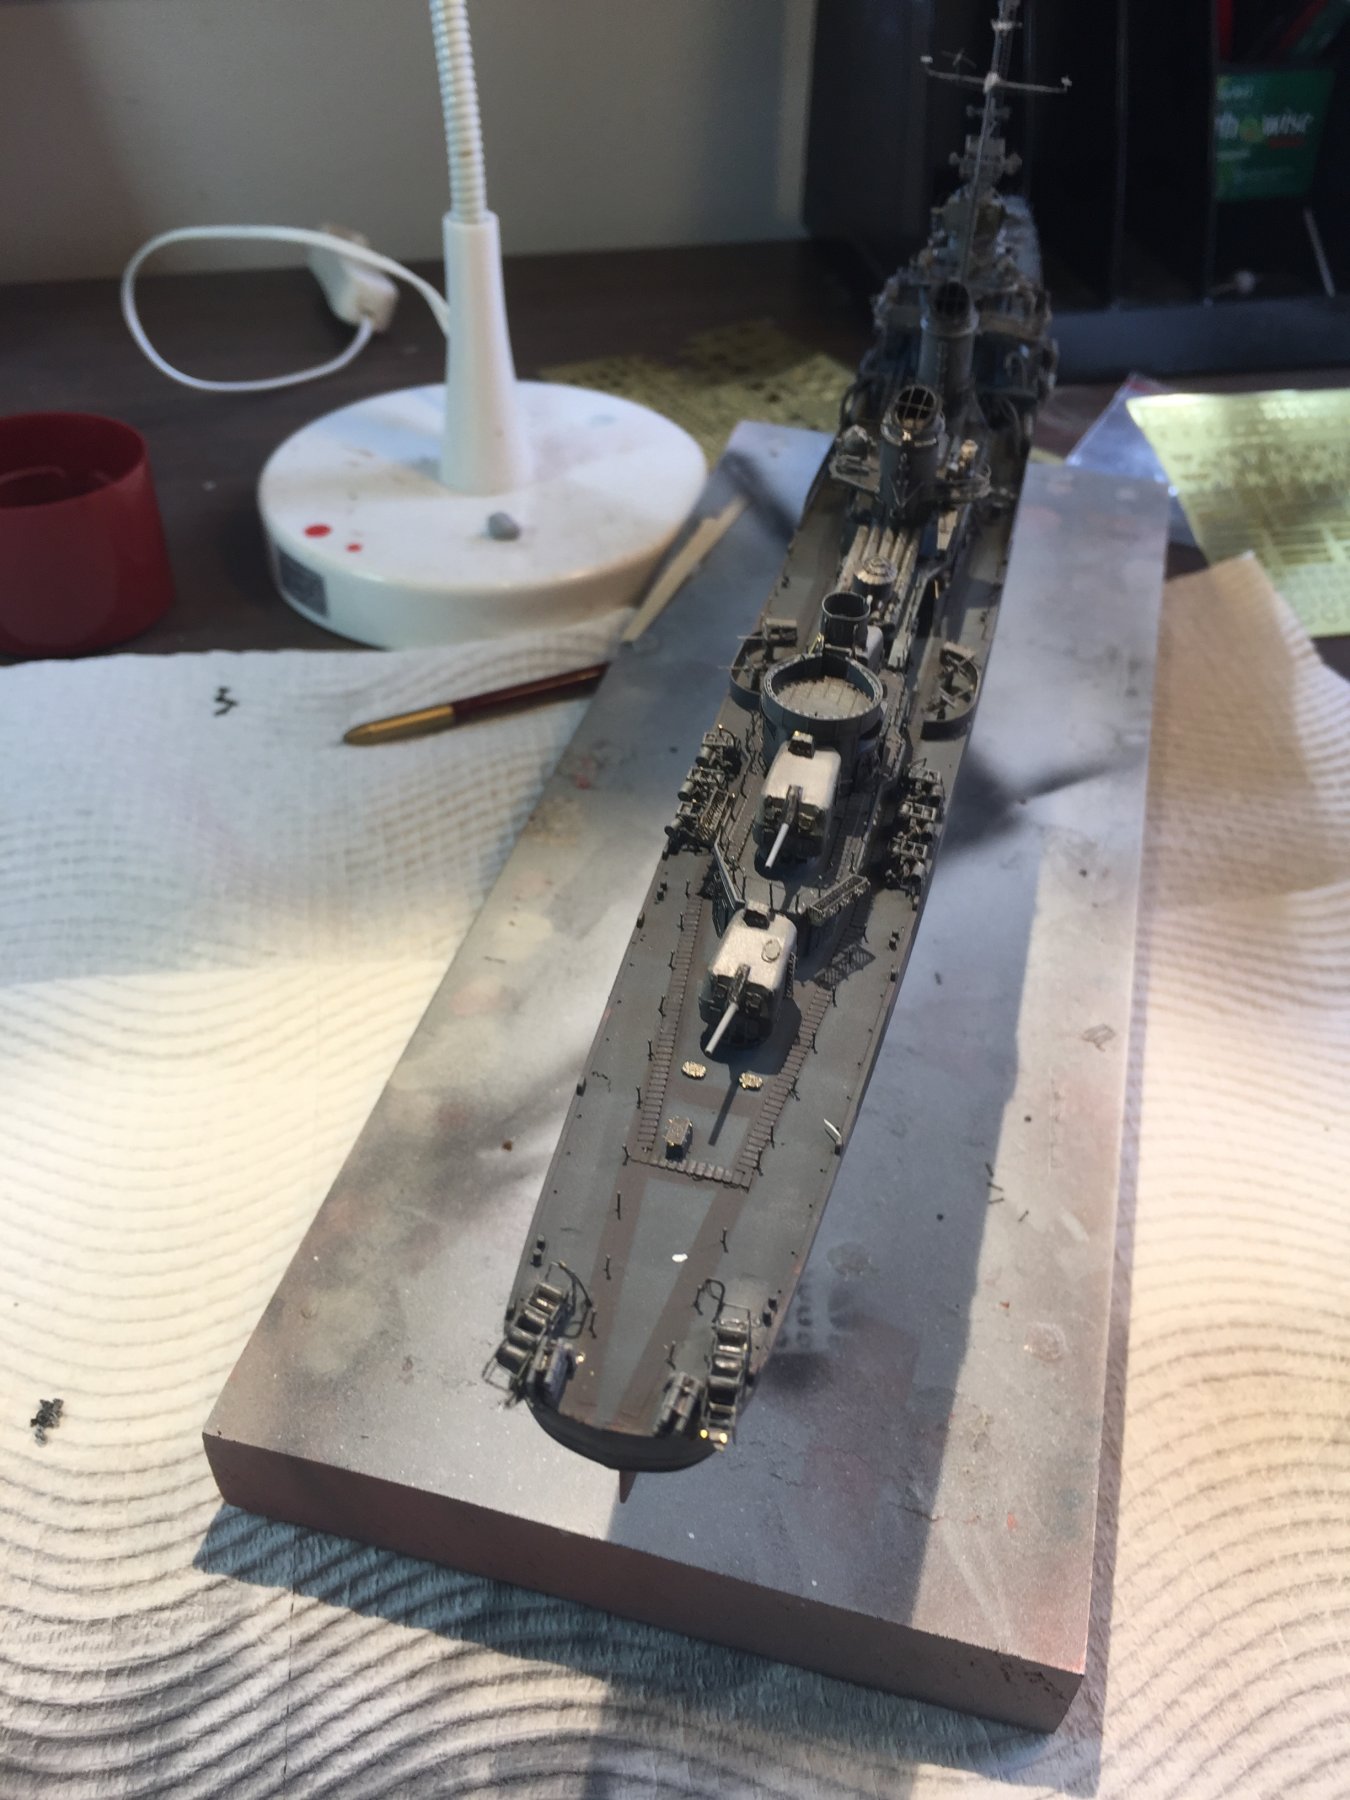
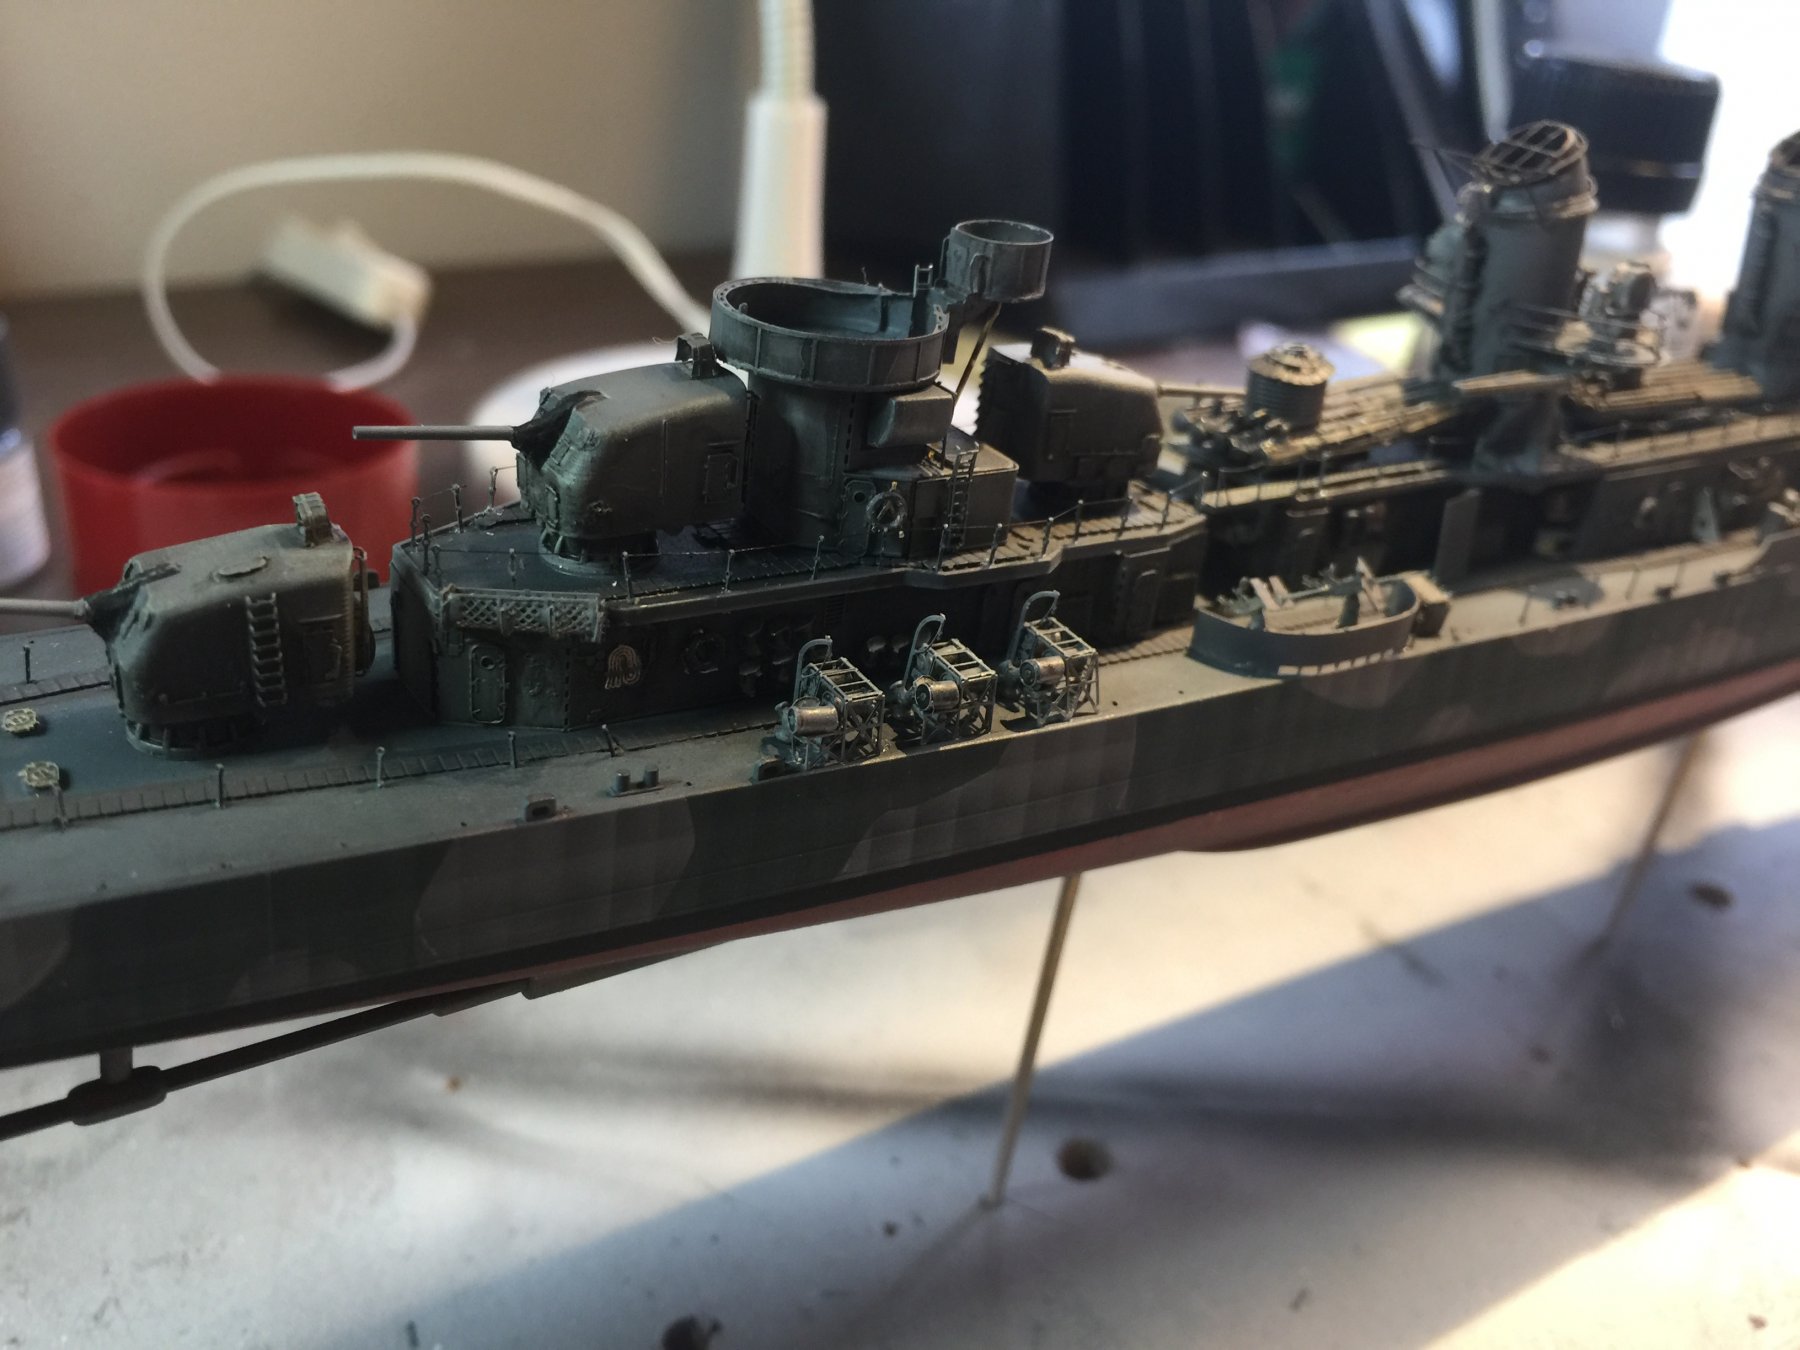
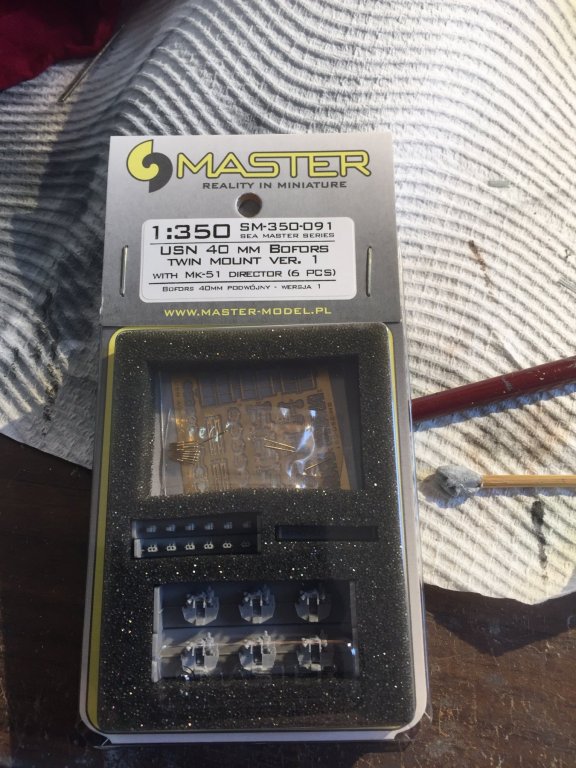
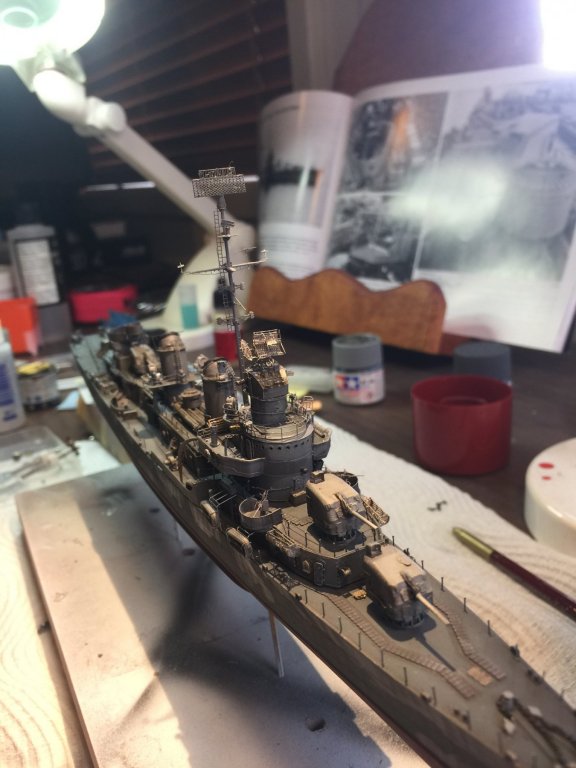
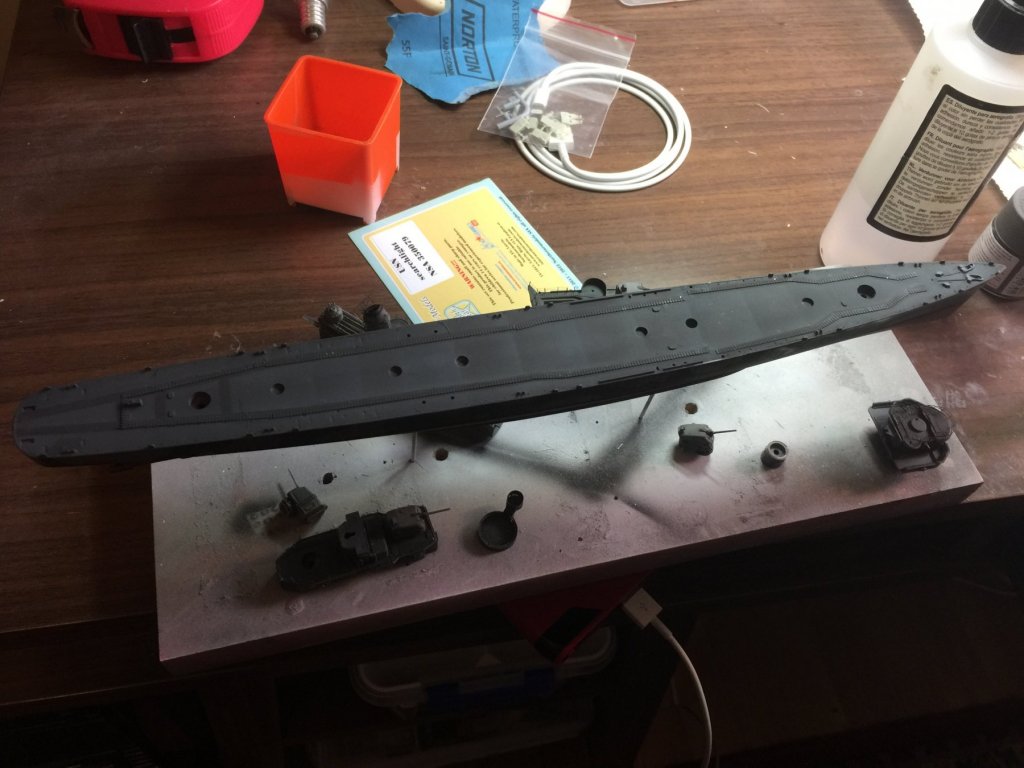
Last AA gun arrived. Very nice and easier than the 5 star offerings. The netting comes with the upgrade. As this is a 1942 build there is nowhere near the amount of AA Guns that came in later variants or upgrades.
- 194 replies
-
- 16
-

-
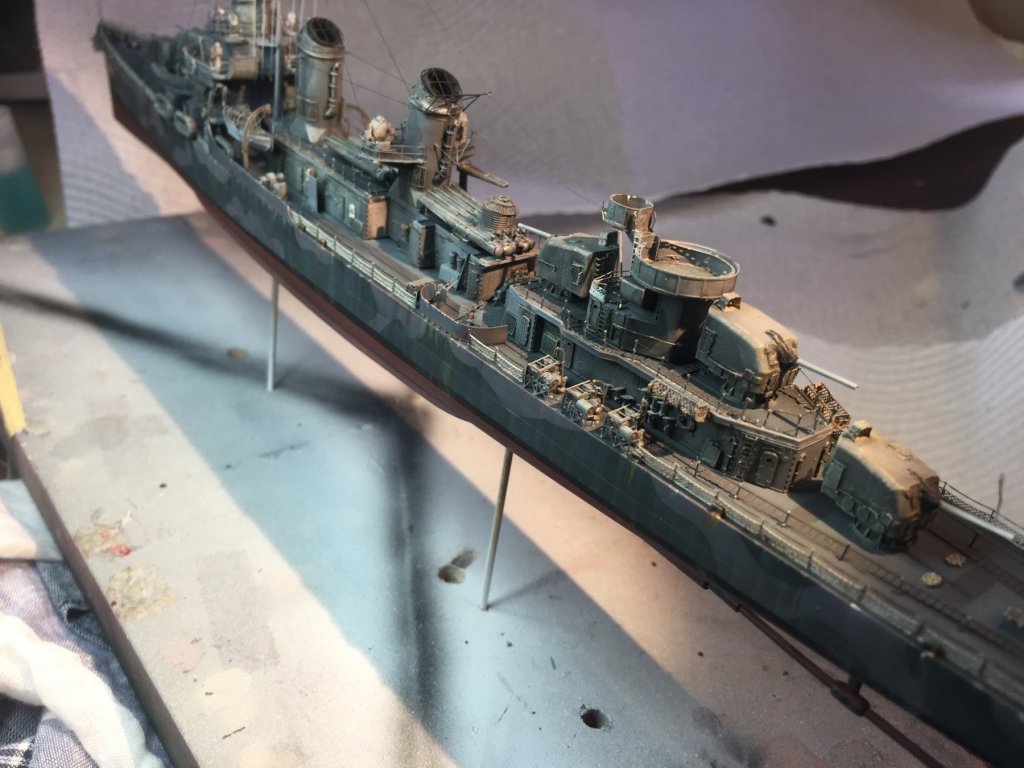
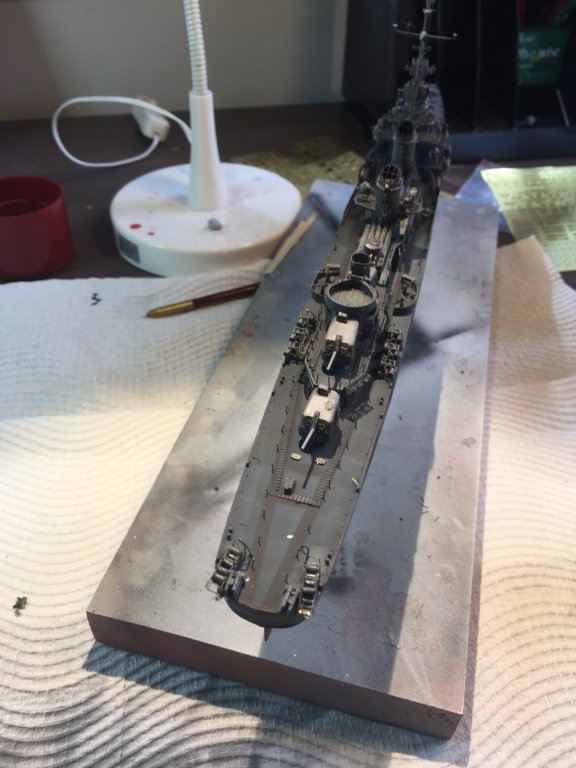
Light rust on the hull plus some salt. No more than that for this build. I just need the borfors to arrive. Went to a lumberyard and bought some off cuts for a base.


- 194 replies
-
- 19
-
-
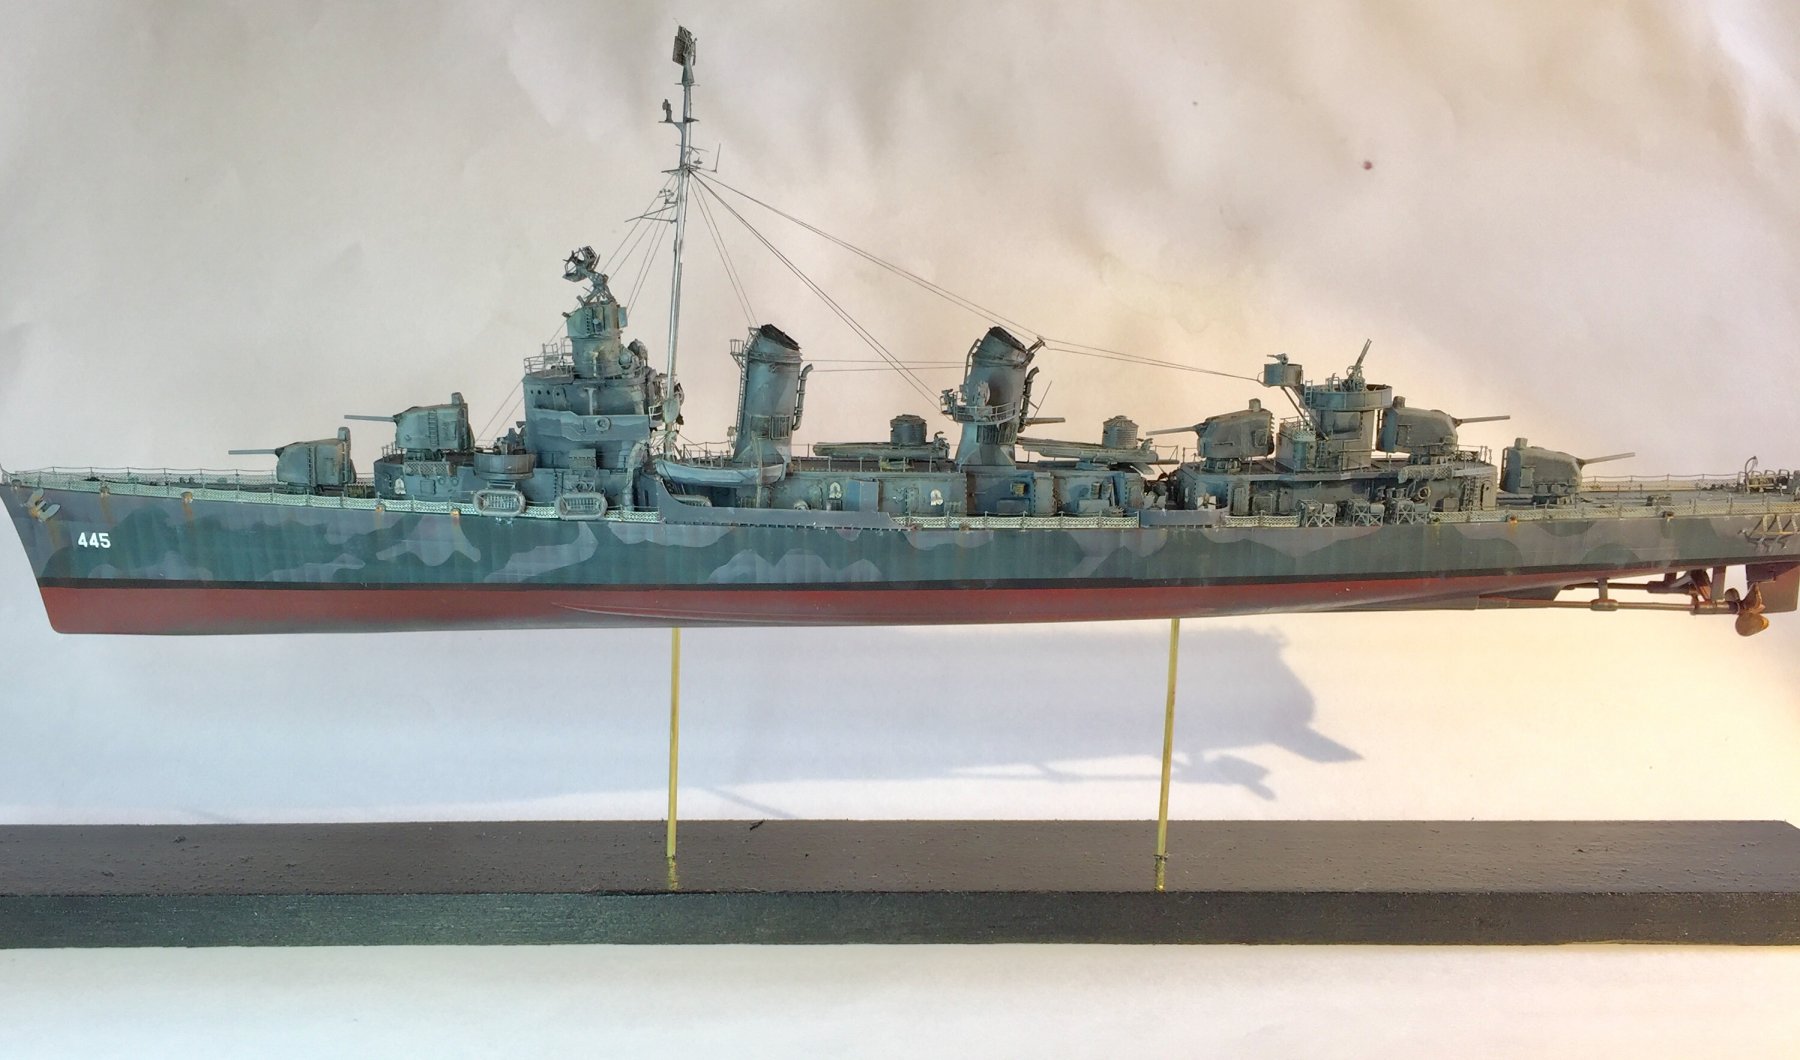
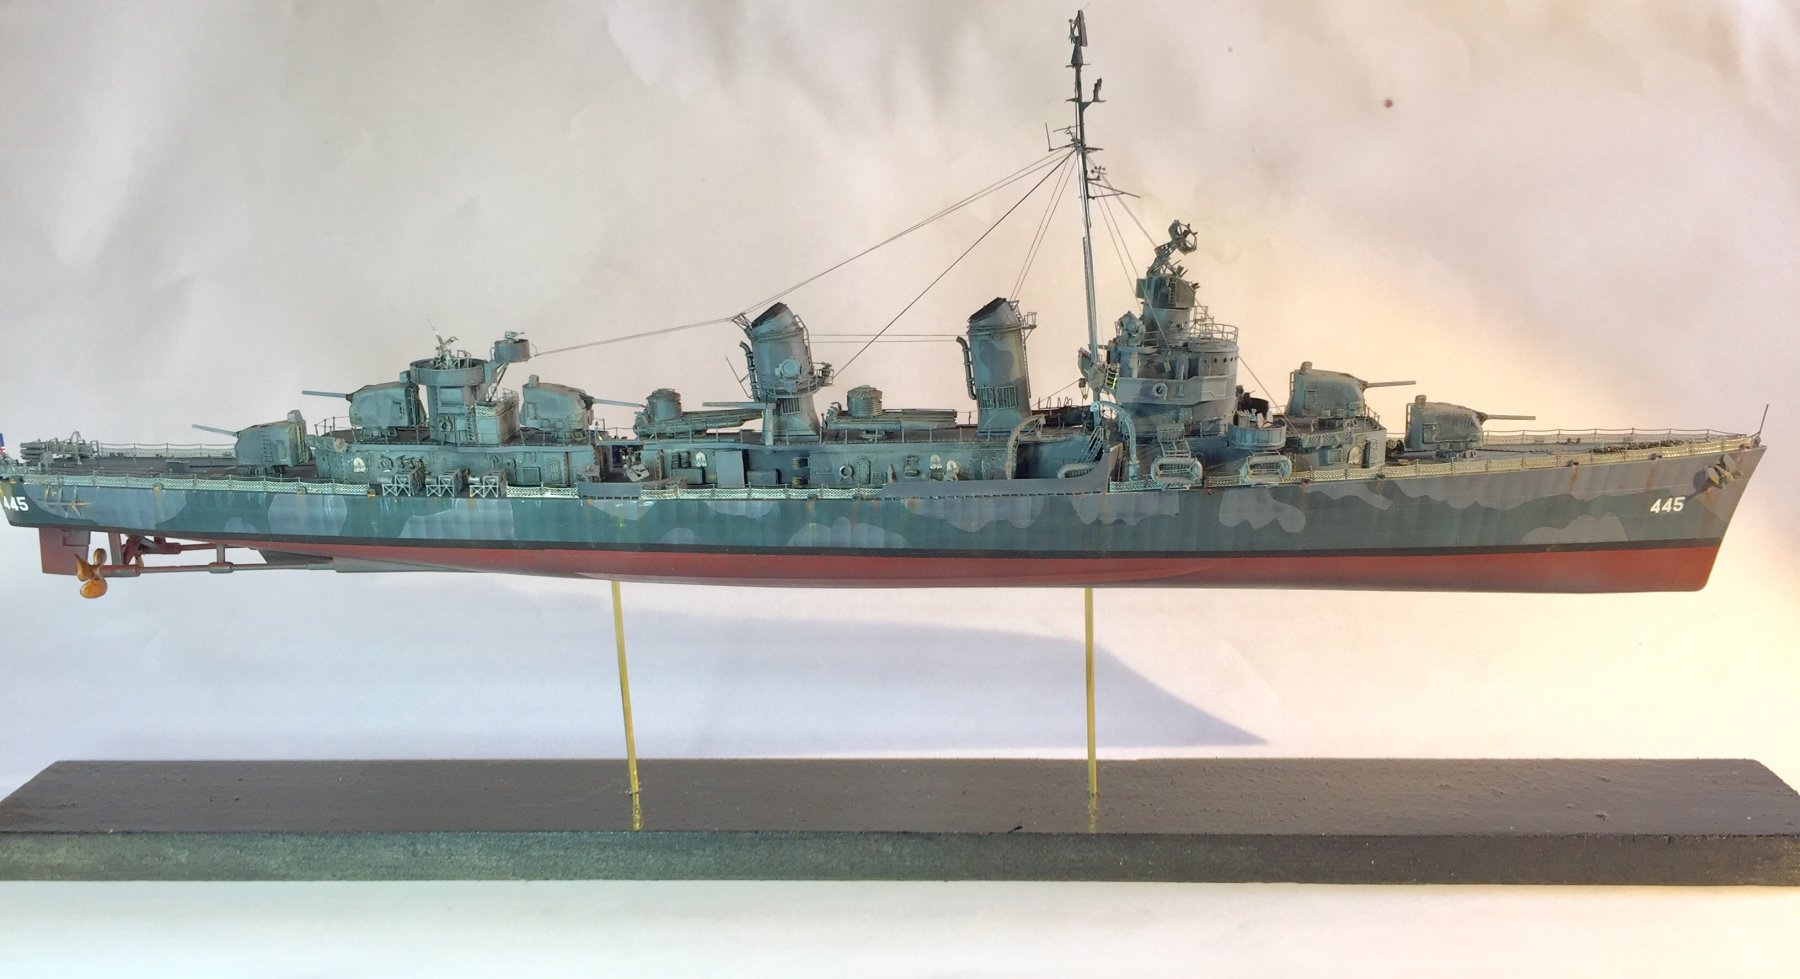
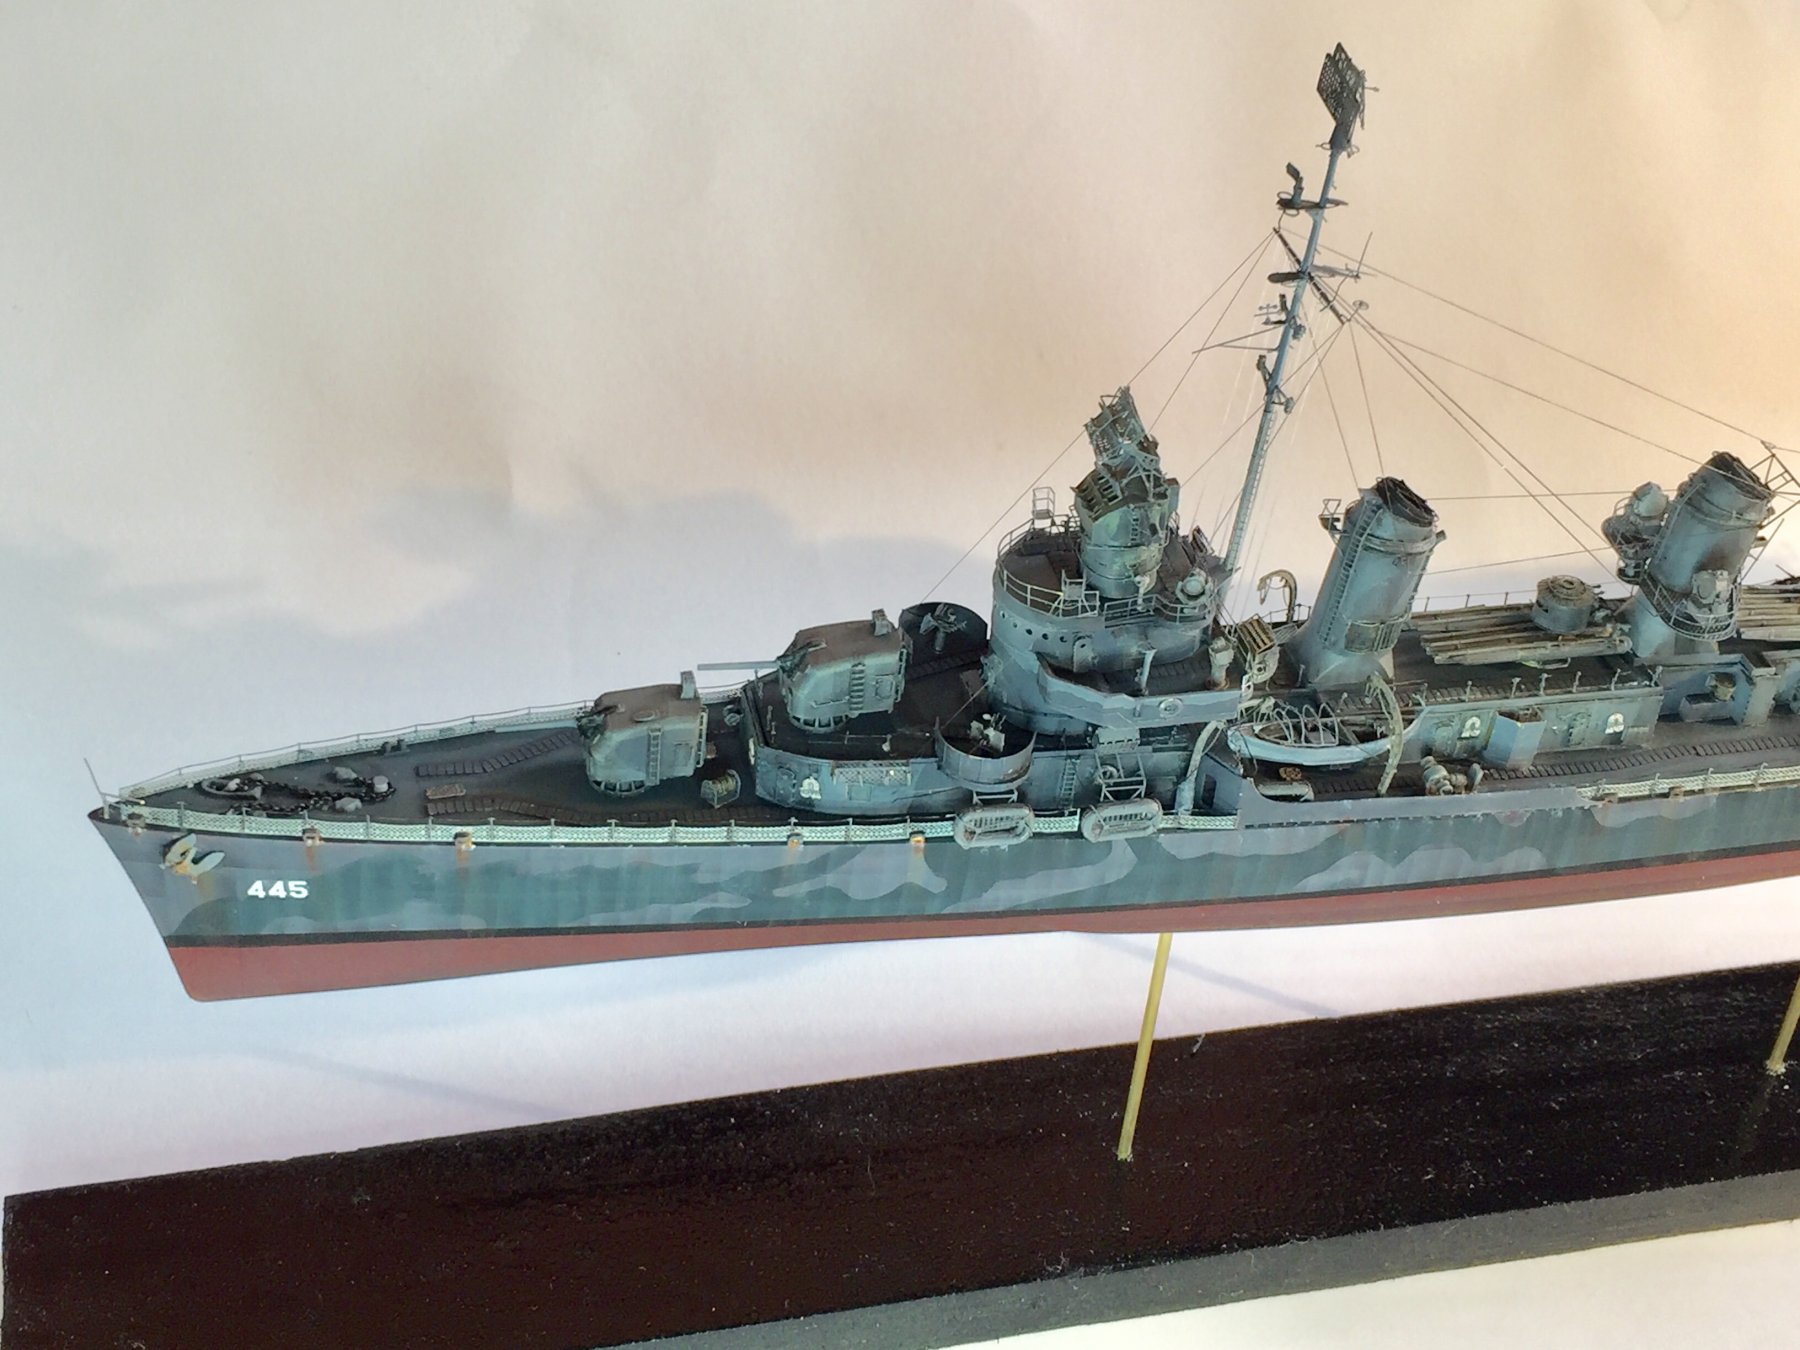
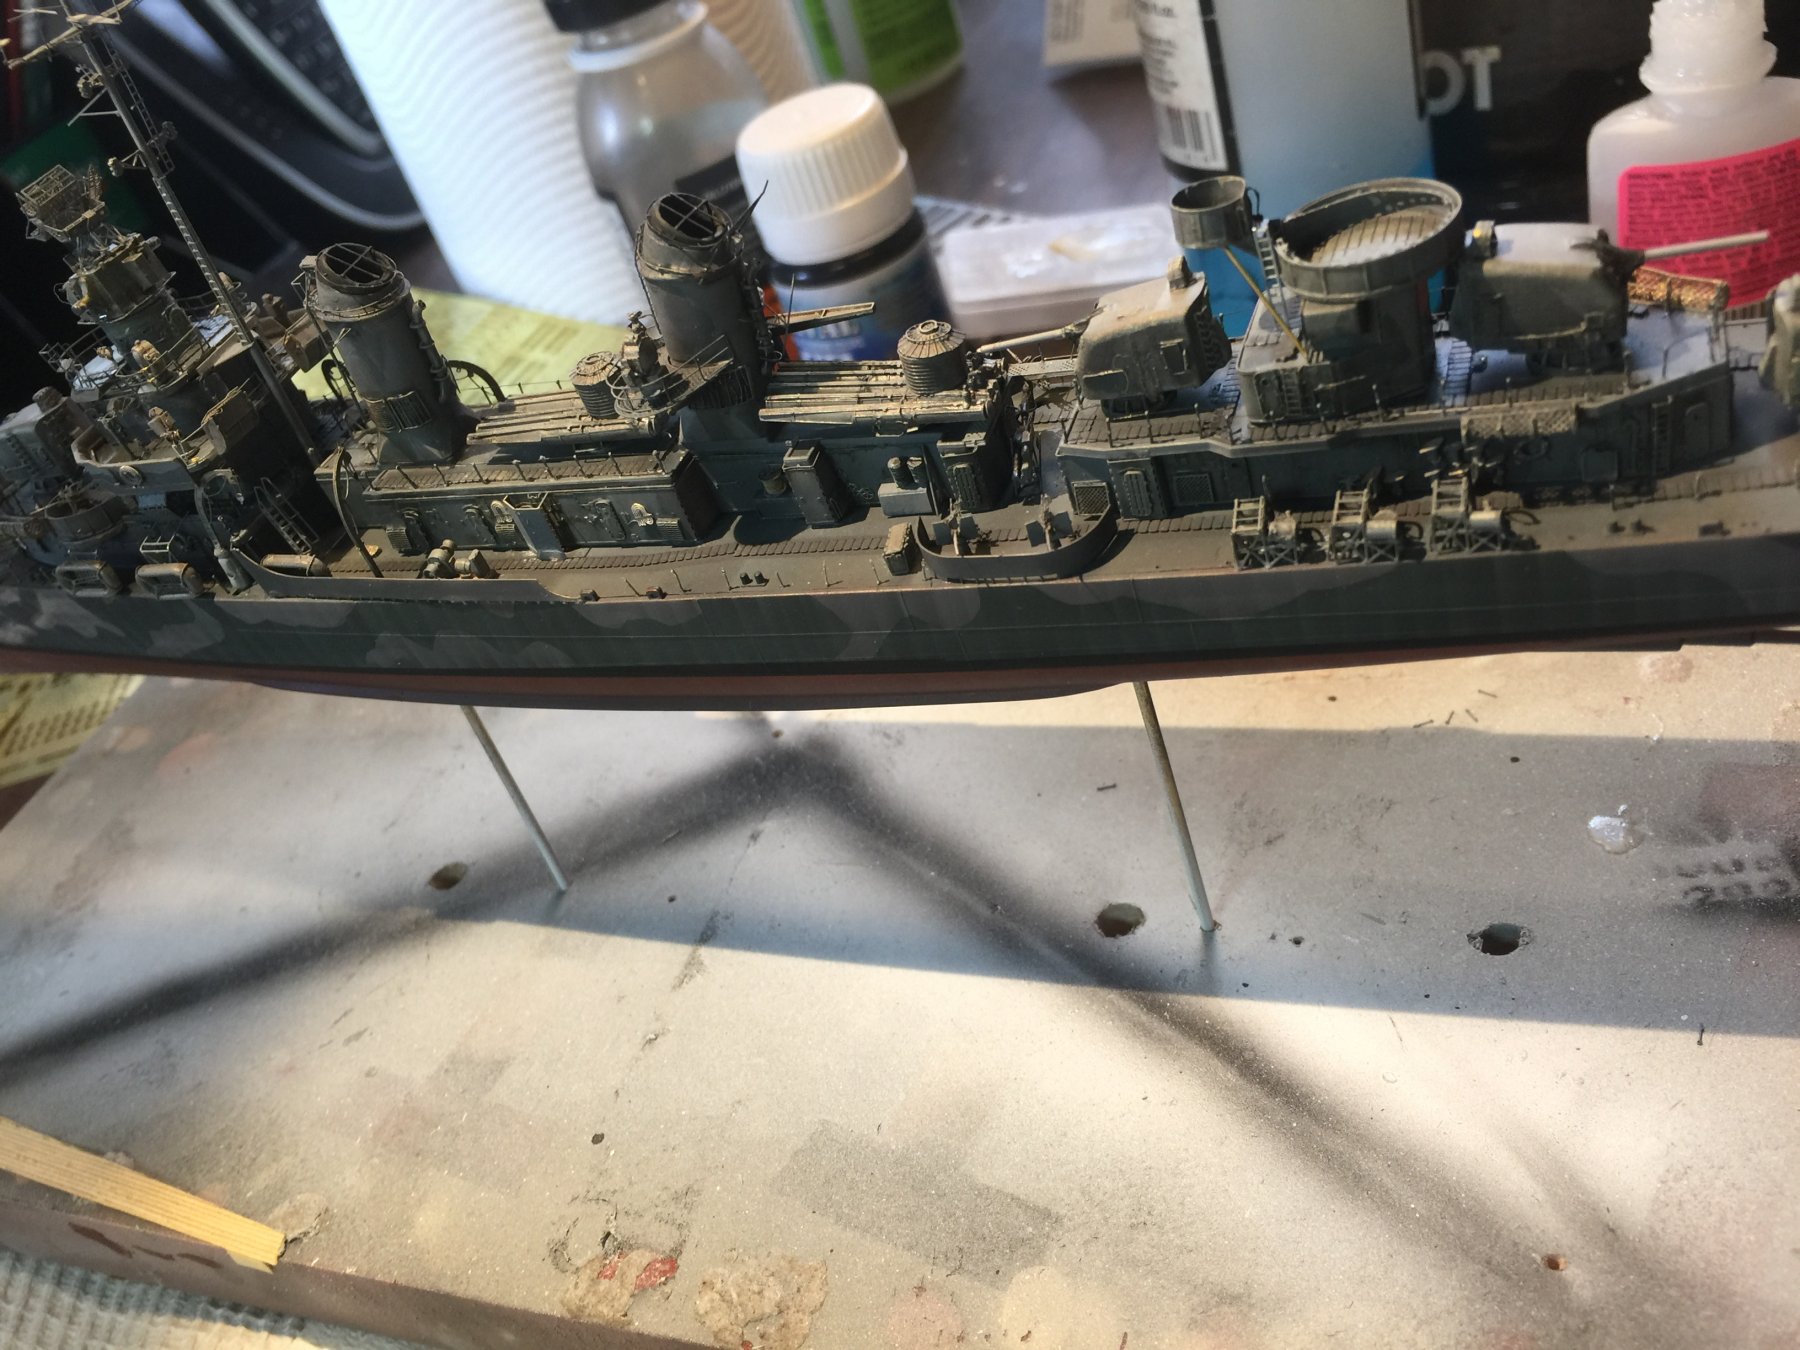
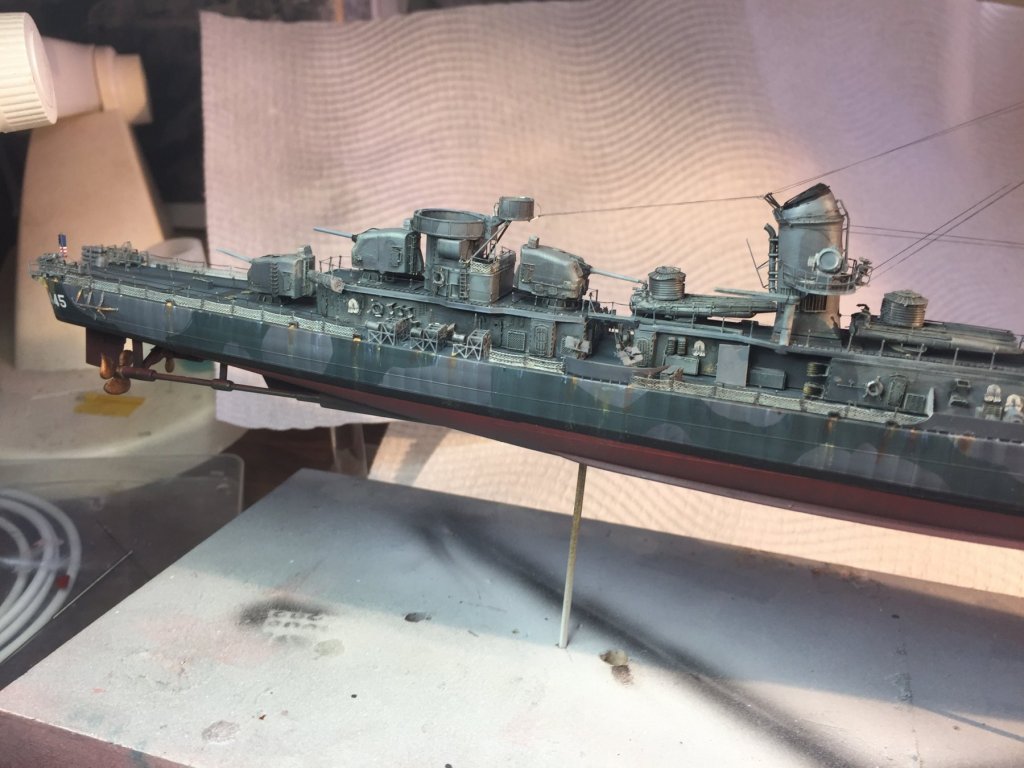
I think it’s lighting OC, this is such a dull paint job, I’ll do a better job on the final shots I promise. I kinda lost interest in this one about half way through as it’s a lot of plod. I’ll enjoy this build a lot more when I get to a bit of weathering.
-
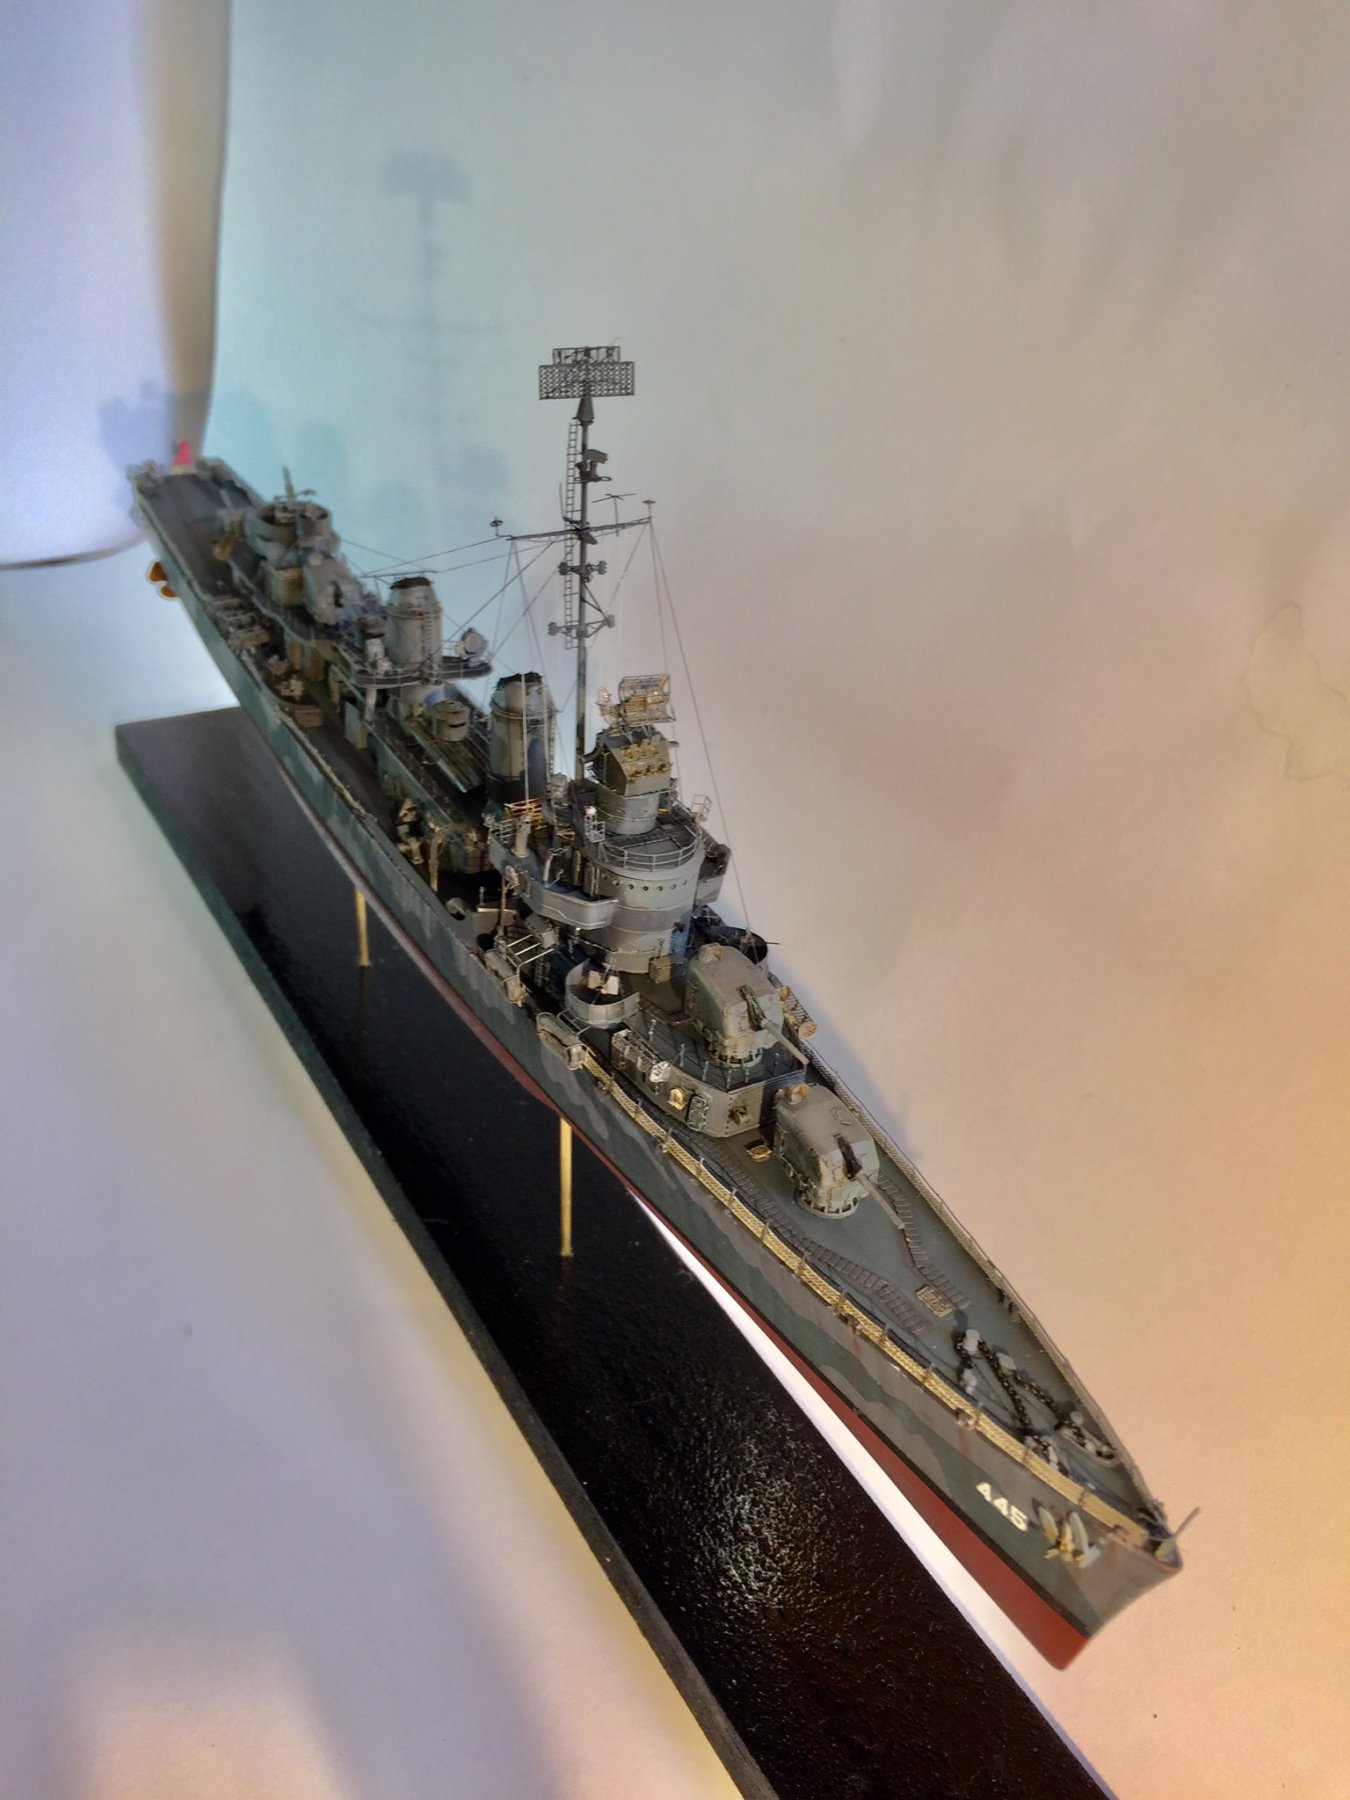
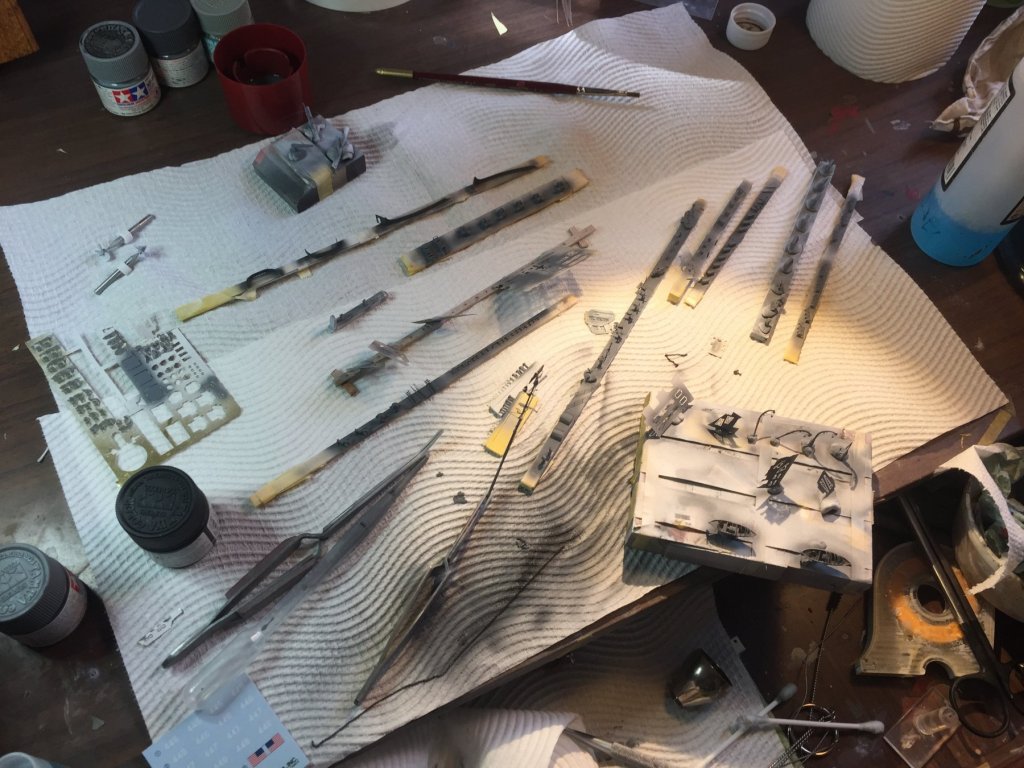
All the little bits thrown on, lots of touch ups to go, railings, and ship’s boats plus the last guns. Bit of rigging to go.


- 194 replies
-
- 19
-
-
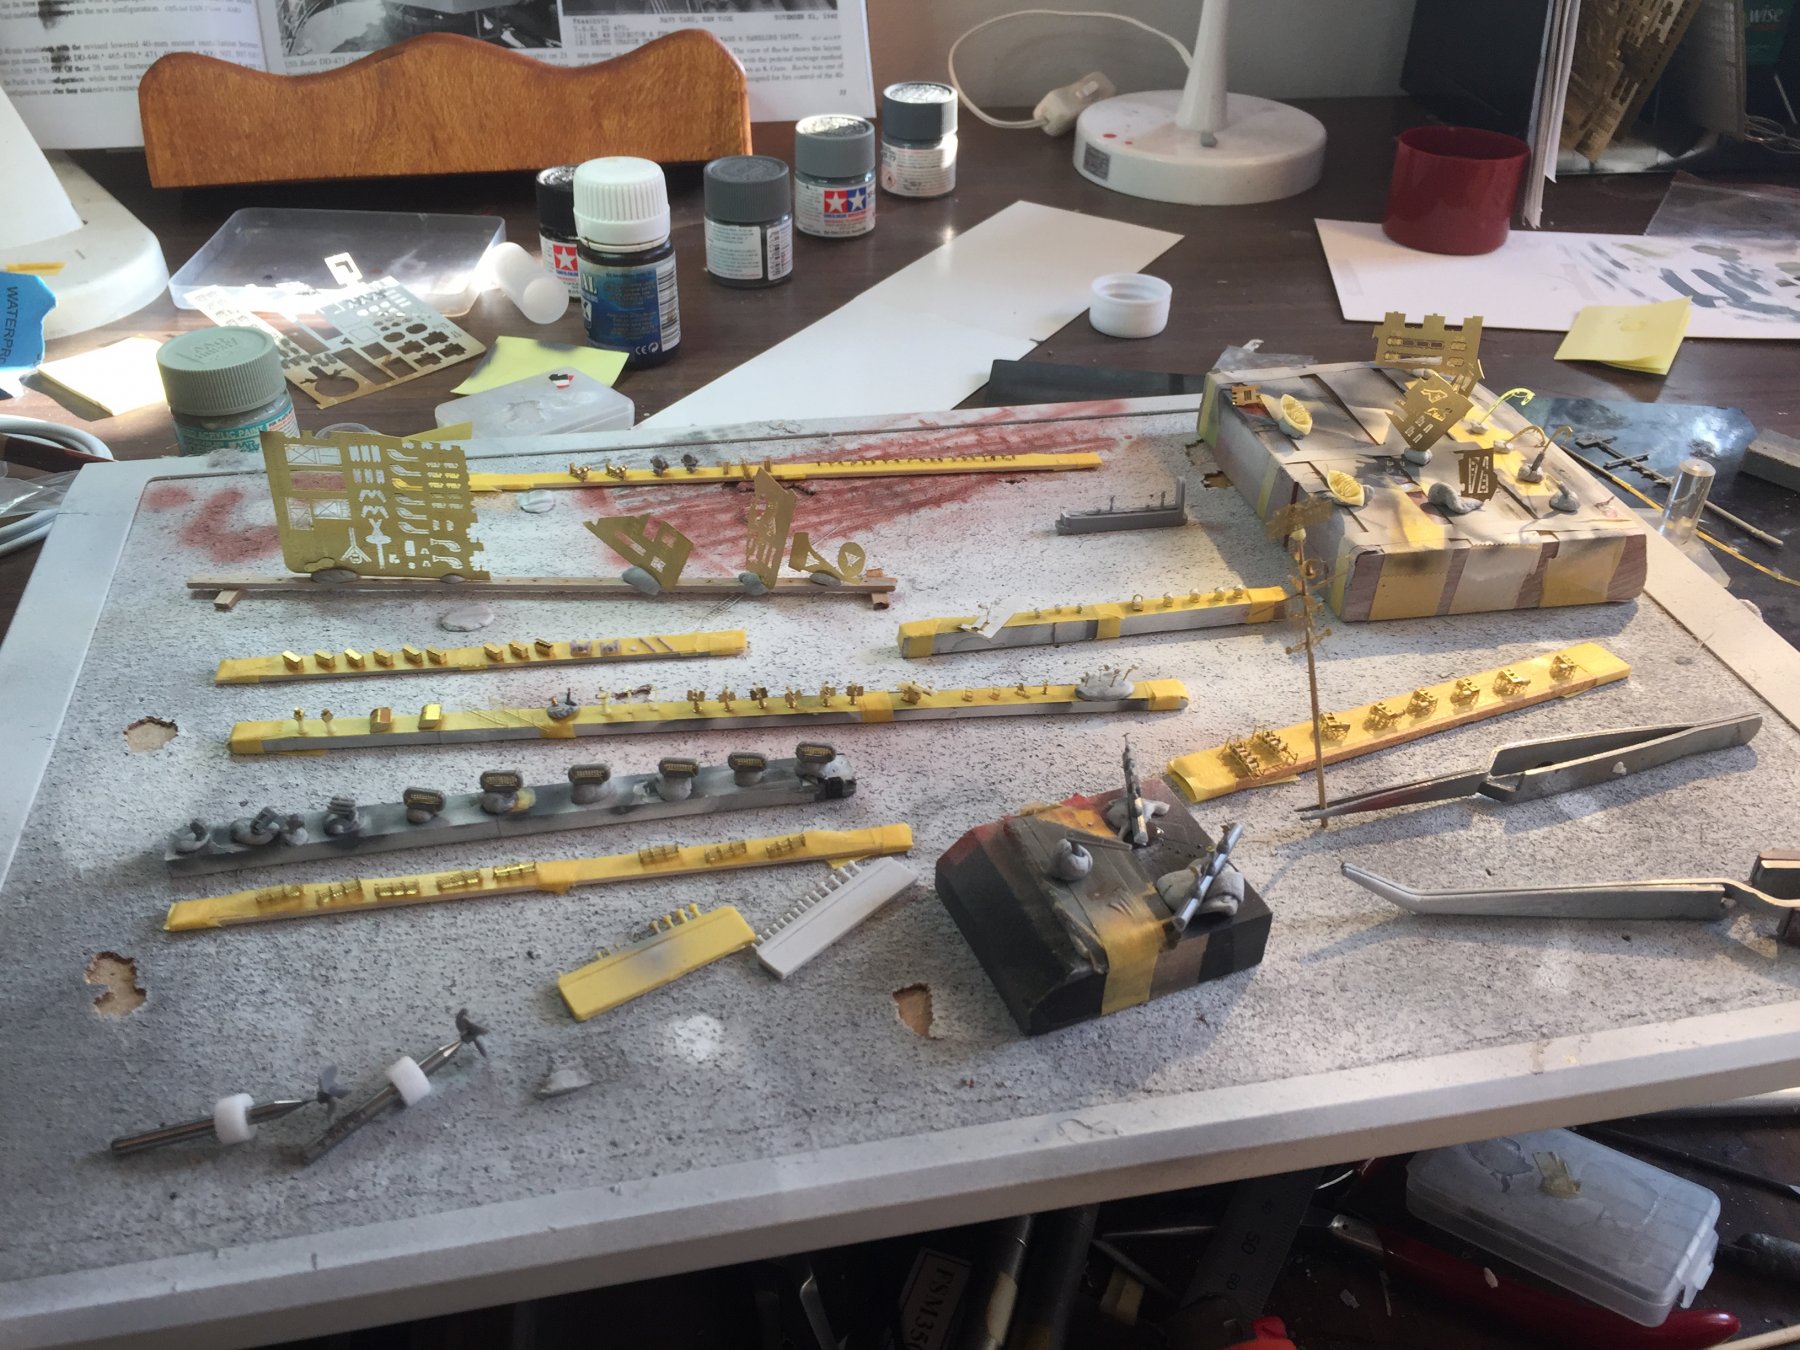
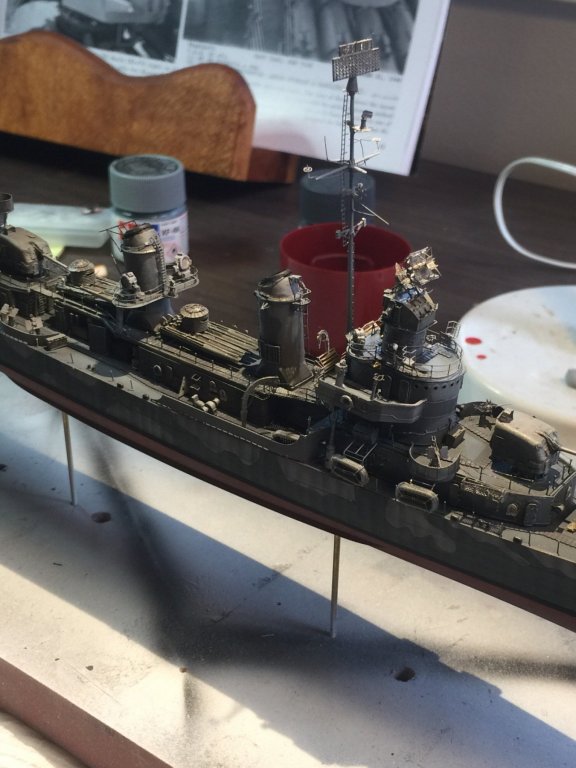
Decals are tomorrows job, I’ll just give them a matte coat prior to weathering. I’ve been quiet as all these tiny pieces have just taken forever to collate, plus work, dayshift and dropping #1 son off at rowing at 0545 every other morning. Wife, #2 son and dog off to the beach for the end of Autumn and Easter so I’m at home alone to finish this off.
-
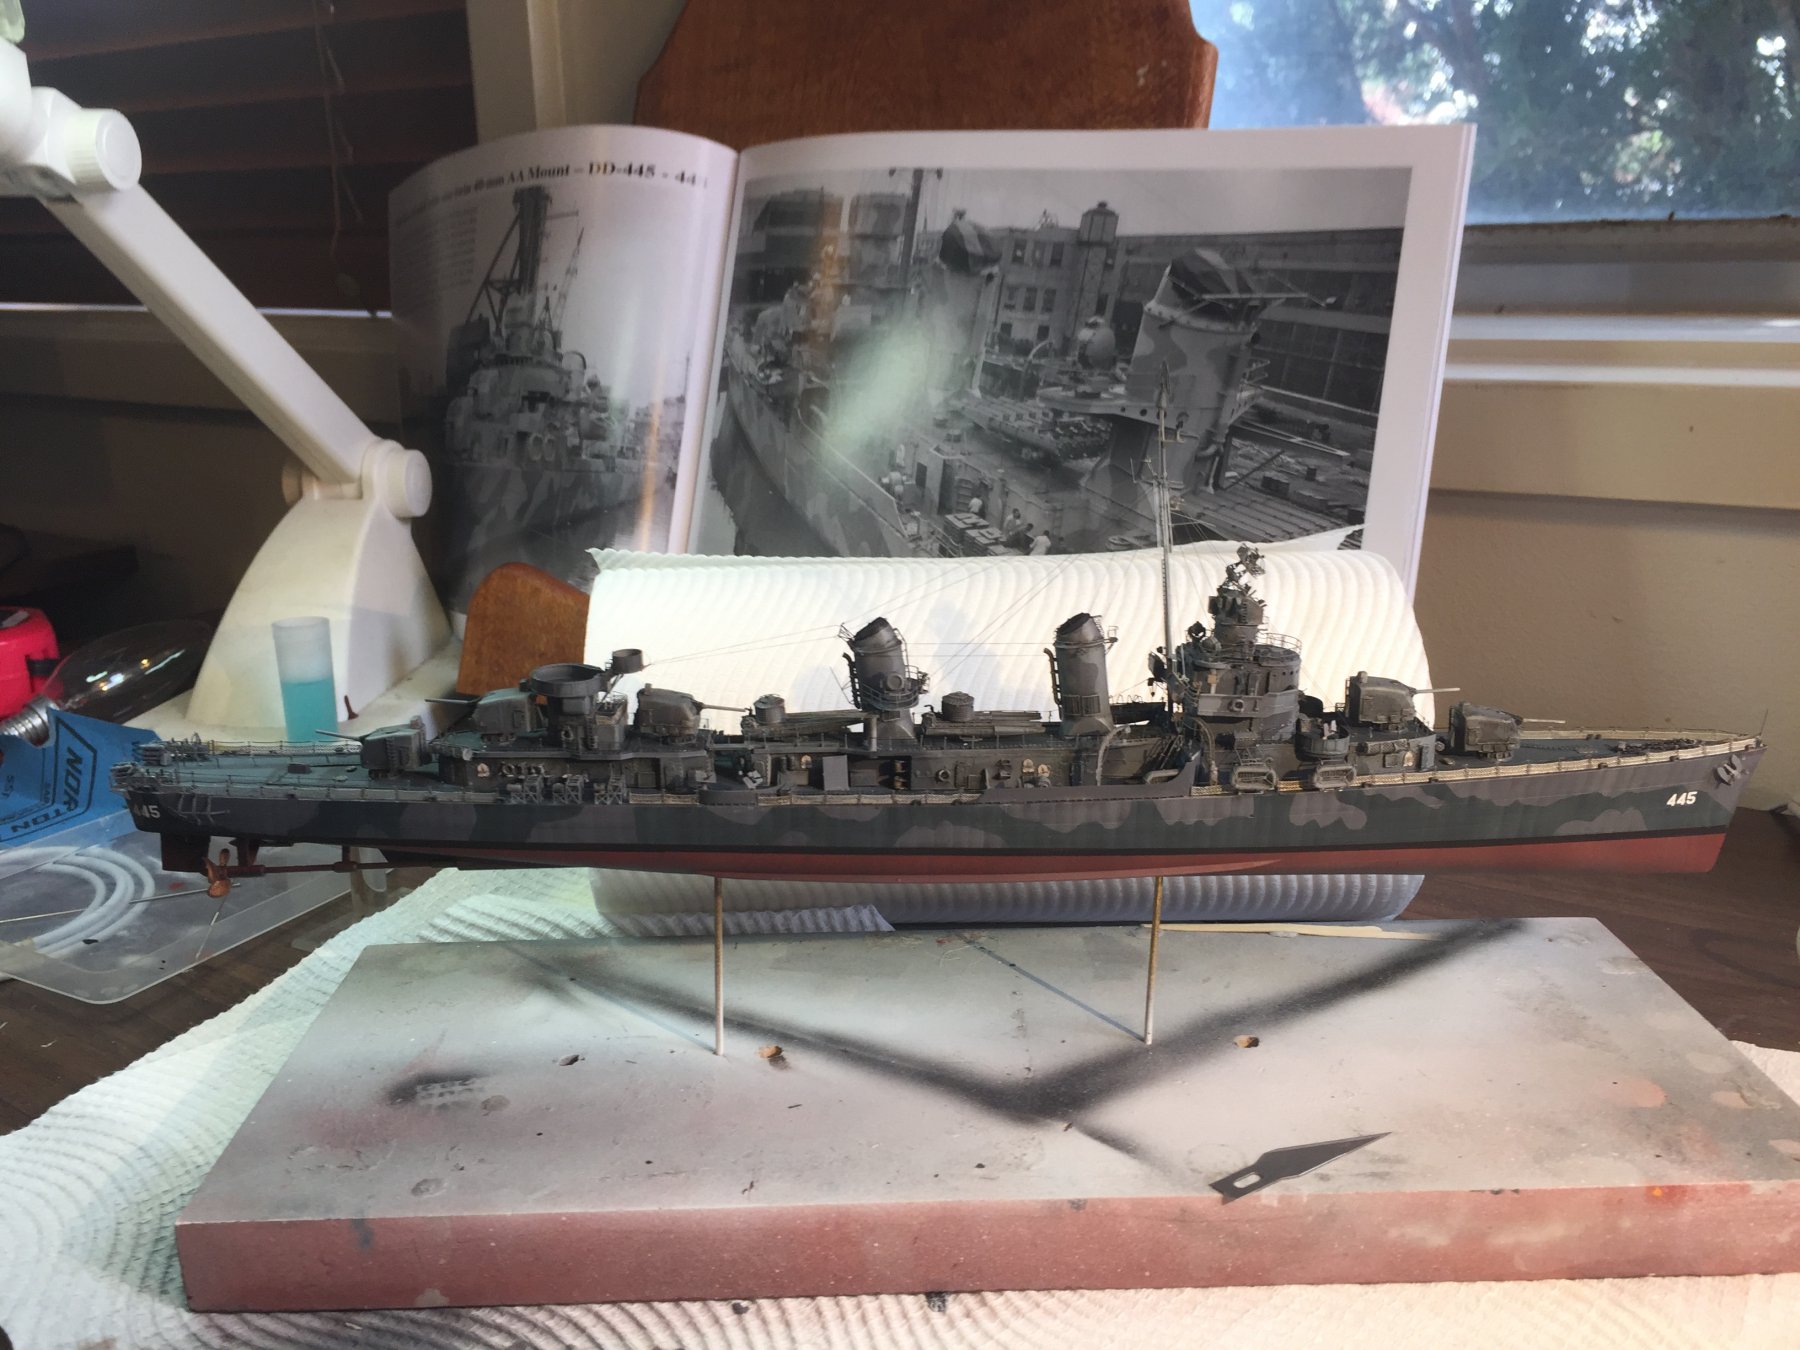
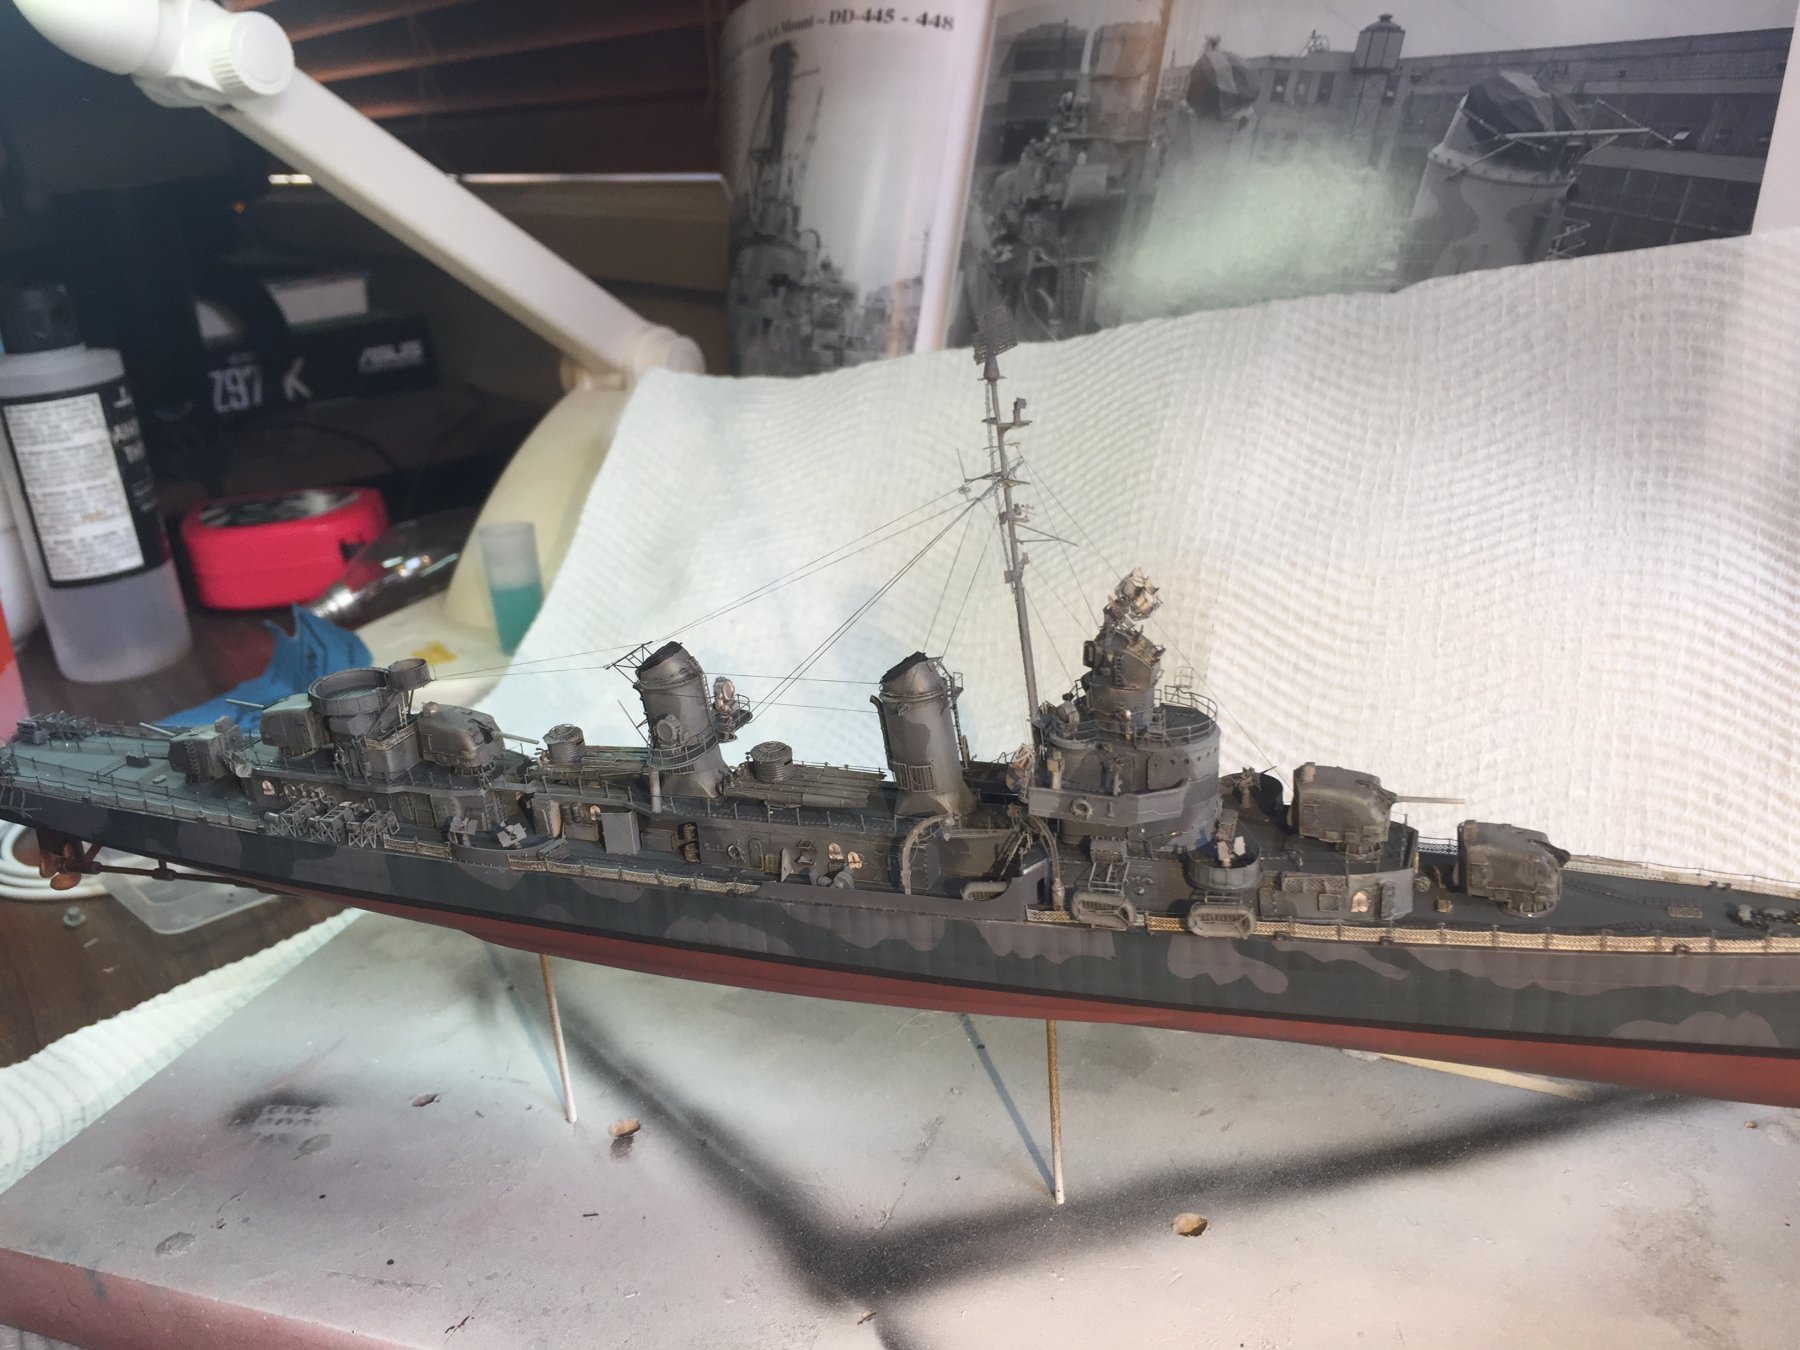
So, about 5 days of throwing everything left to go onto the ship together, primer coat then a grey coat. Tomorrow I’ll place the 445 decals on, then commence throwing everything on board. Should come together quickly now I expect. I completely stuffed the borfors and had to order another one.

- 194 replies
-
- 15
-