RGL
-
Posts
5,547 -
Joined
-
Last visited
Content Type
Profiles
Forums
Gallery
Events
Everything posted by RGL
-
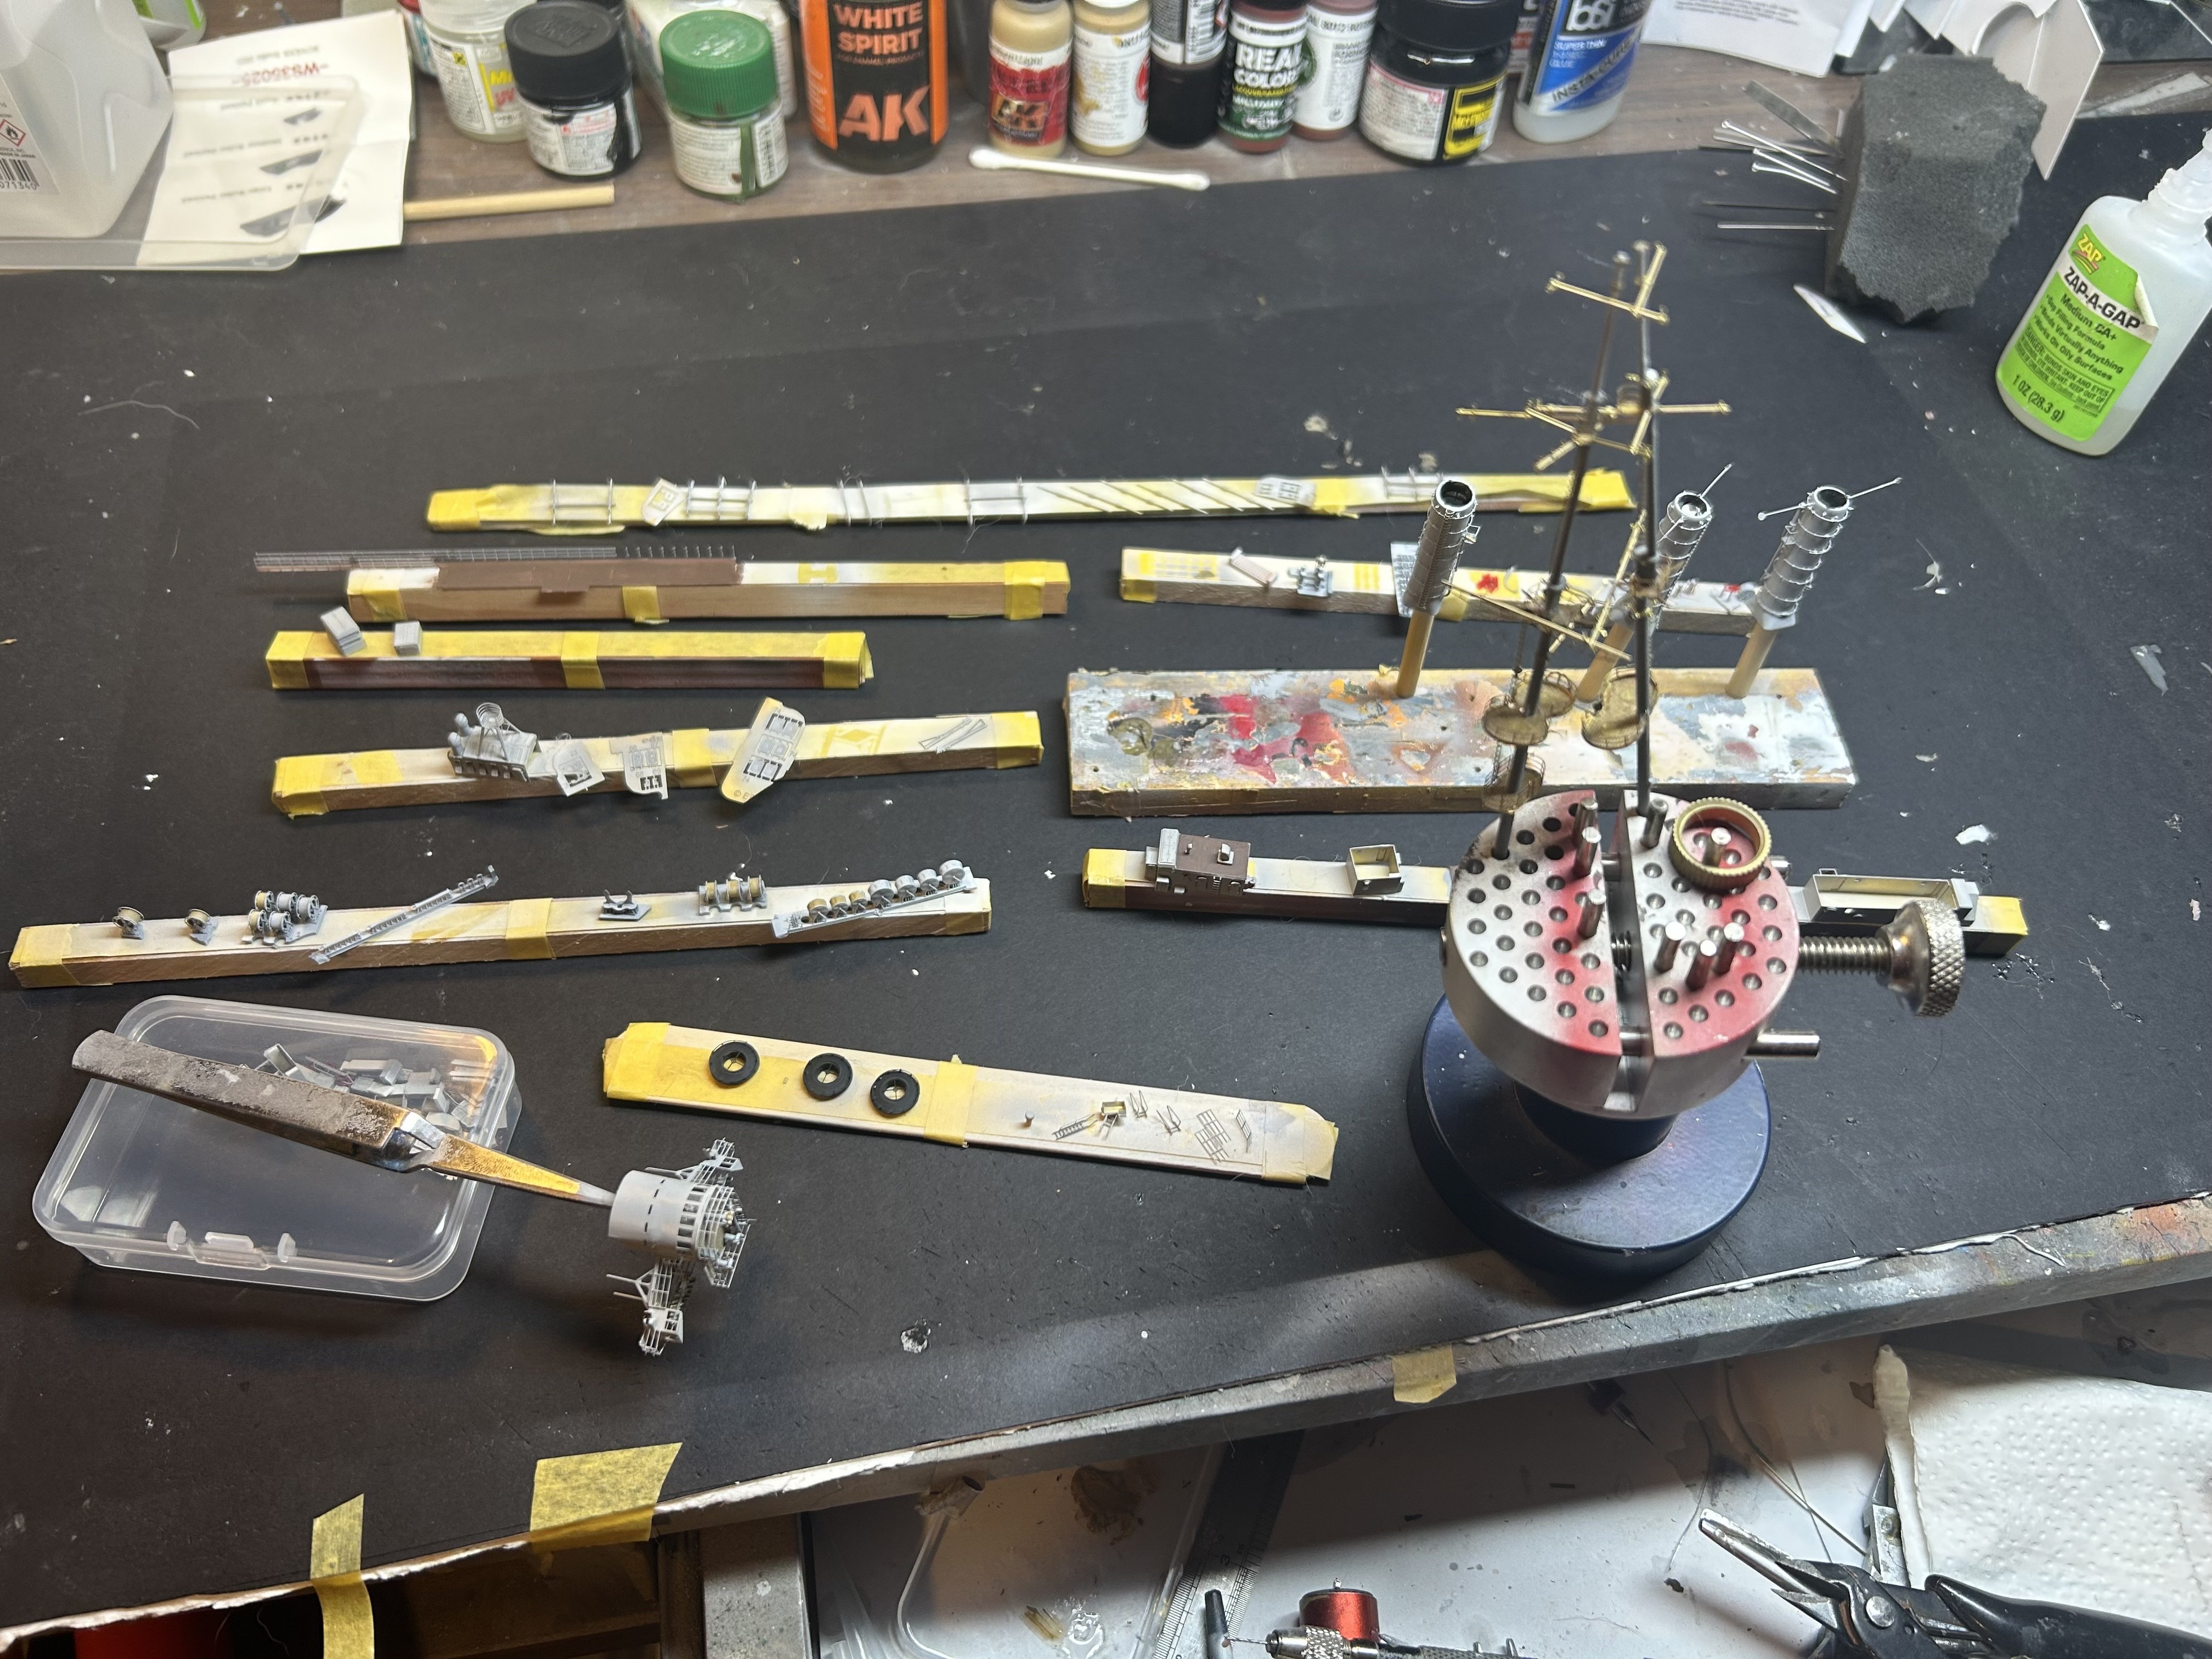
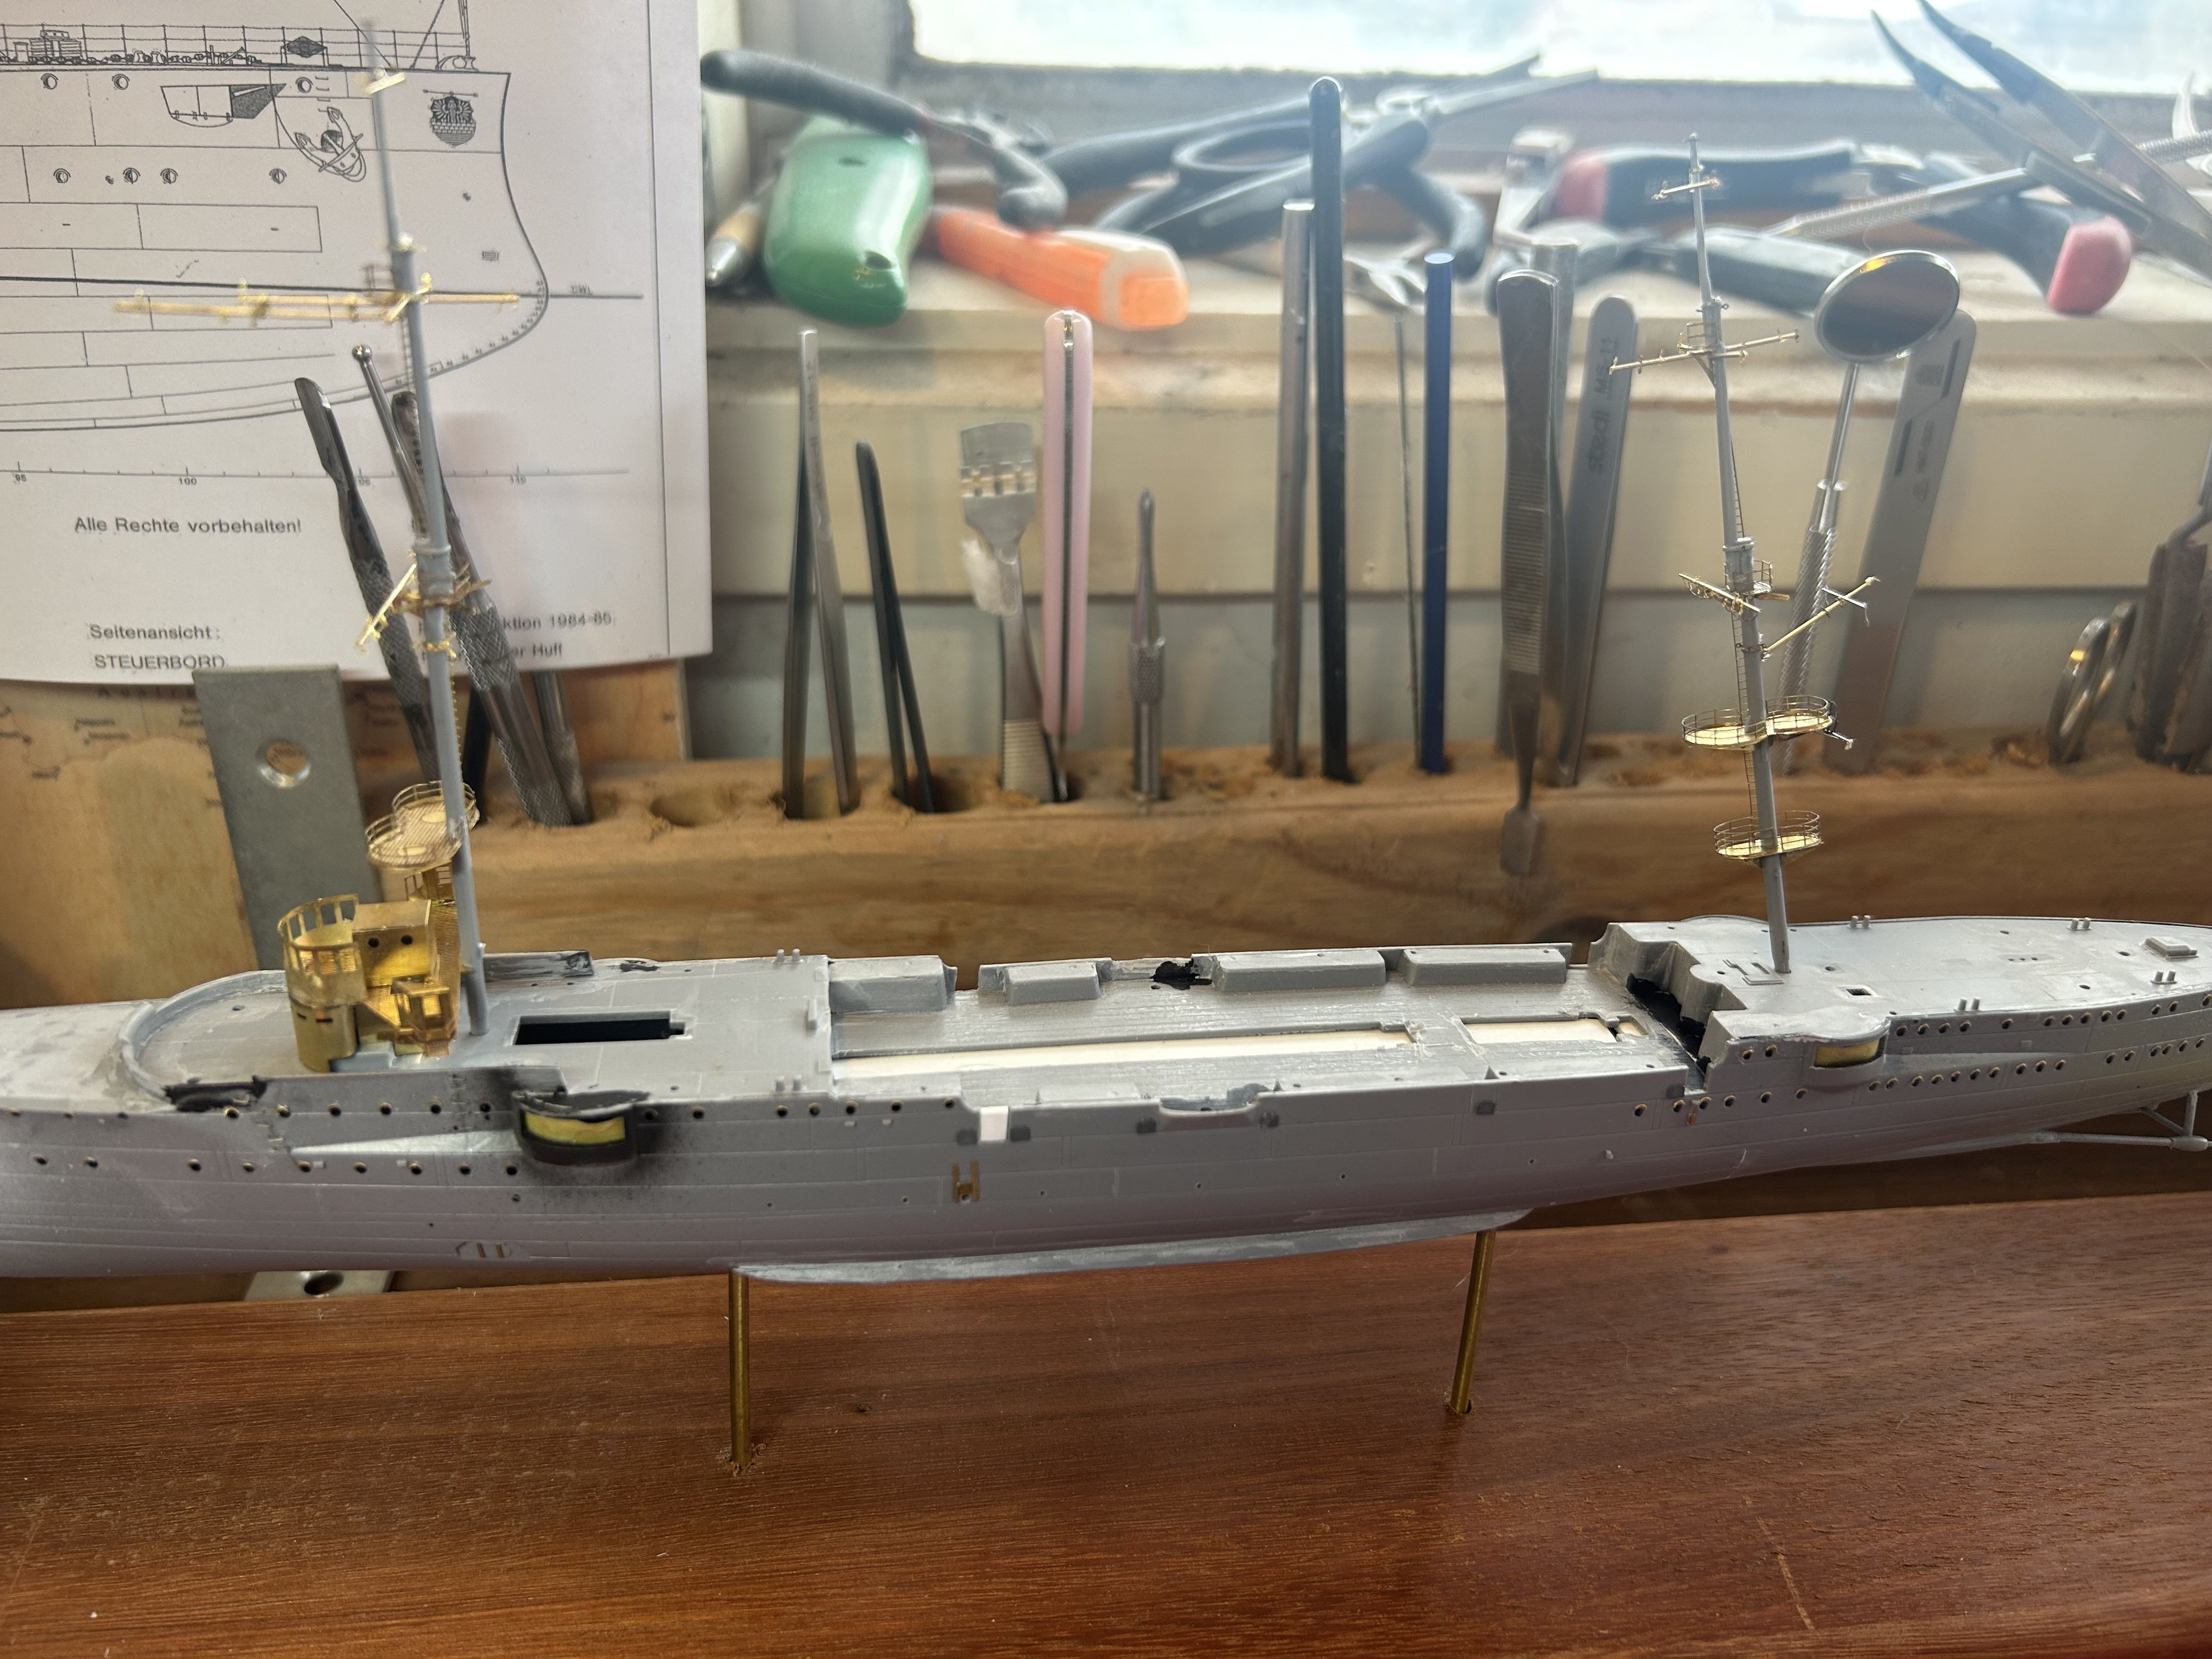
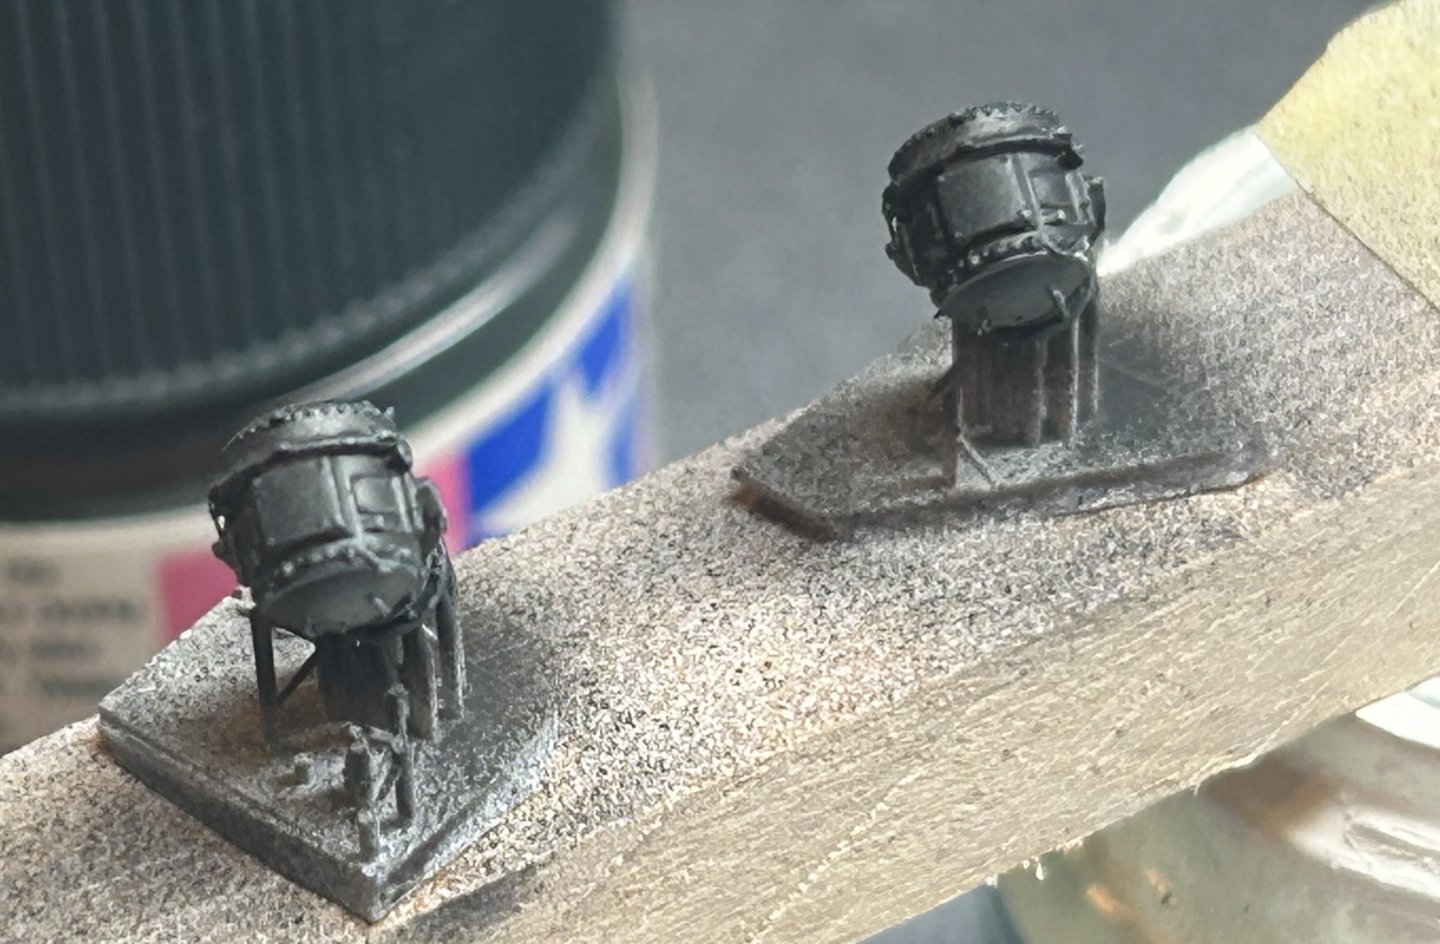
 3D printed search lights, scratch built search light controllers, masts painted and navigation lights added to the tops


- 81 replies
-
- 9
-

-
- Micromaster
- Eduard
- (and 4 more)
-
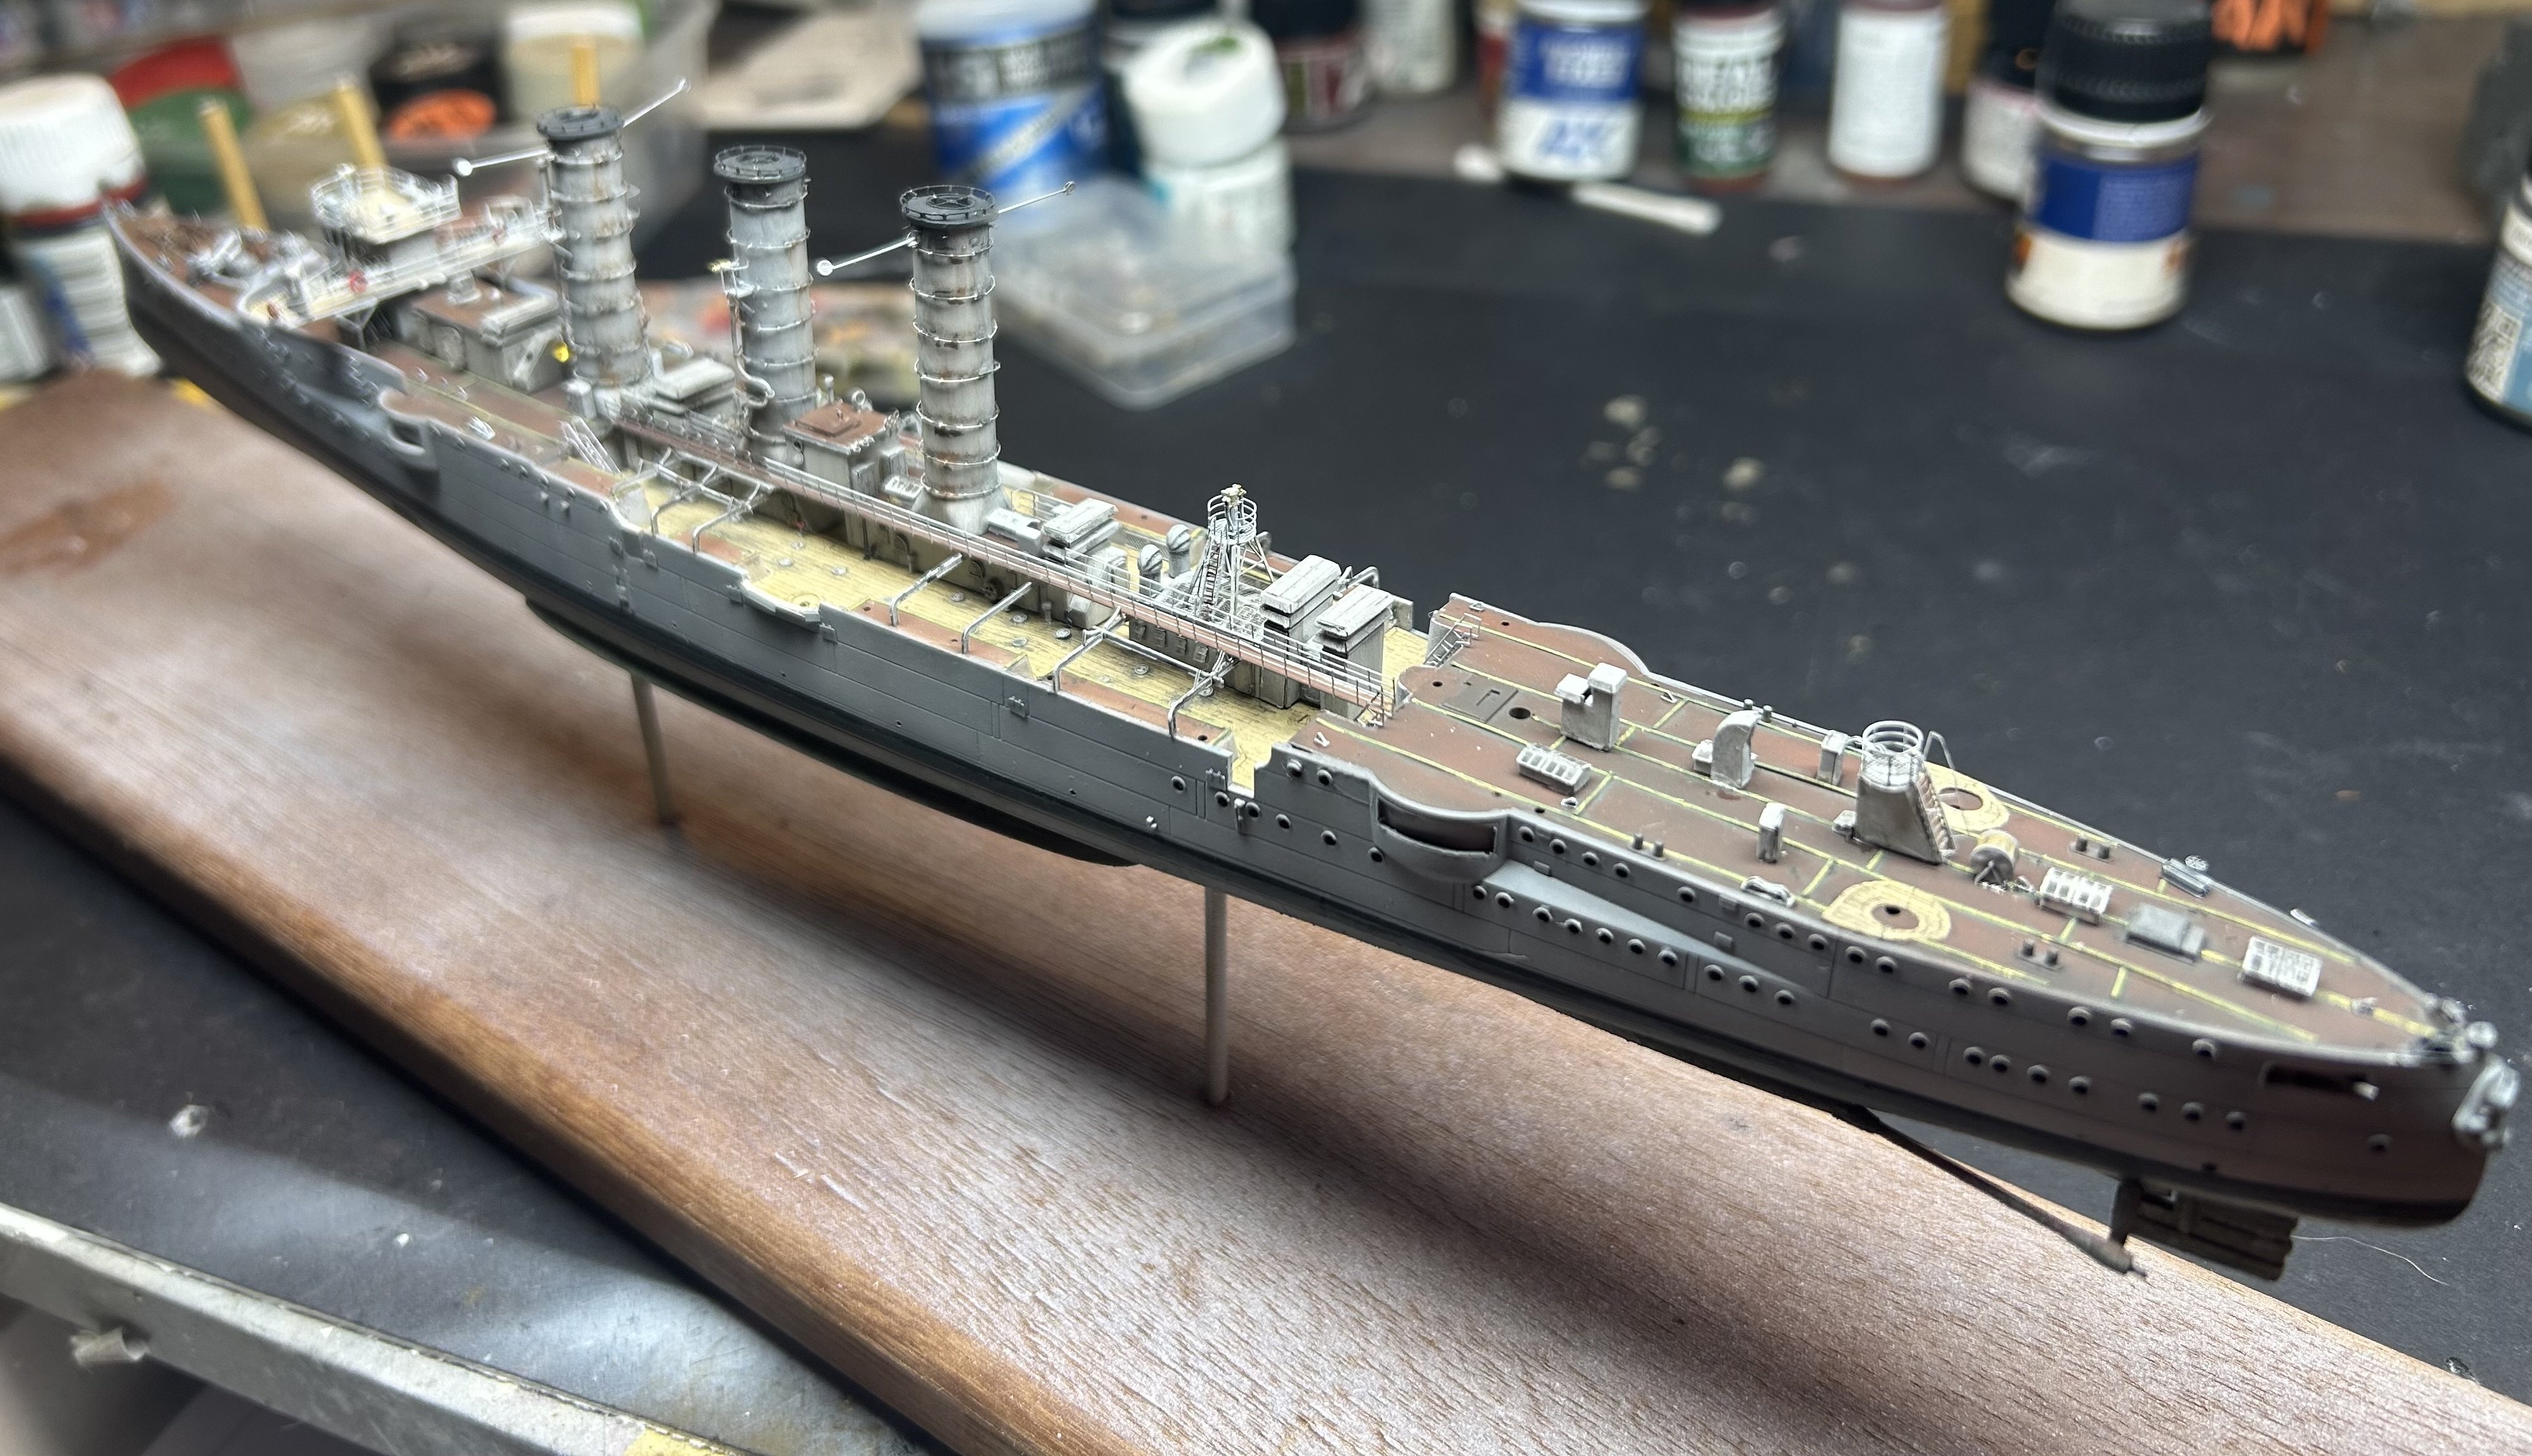
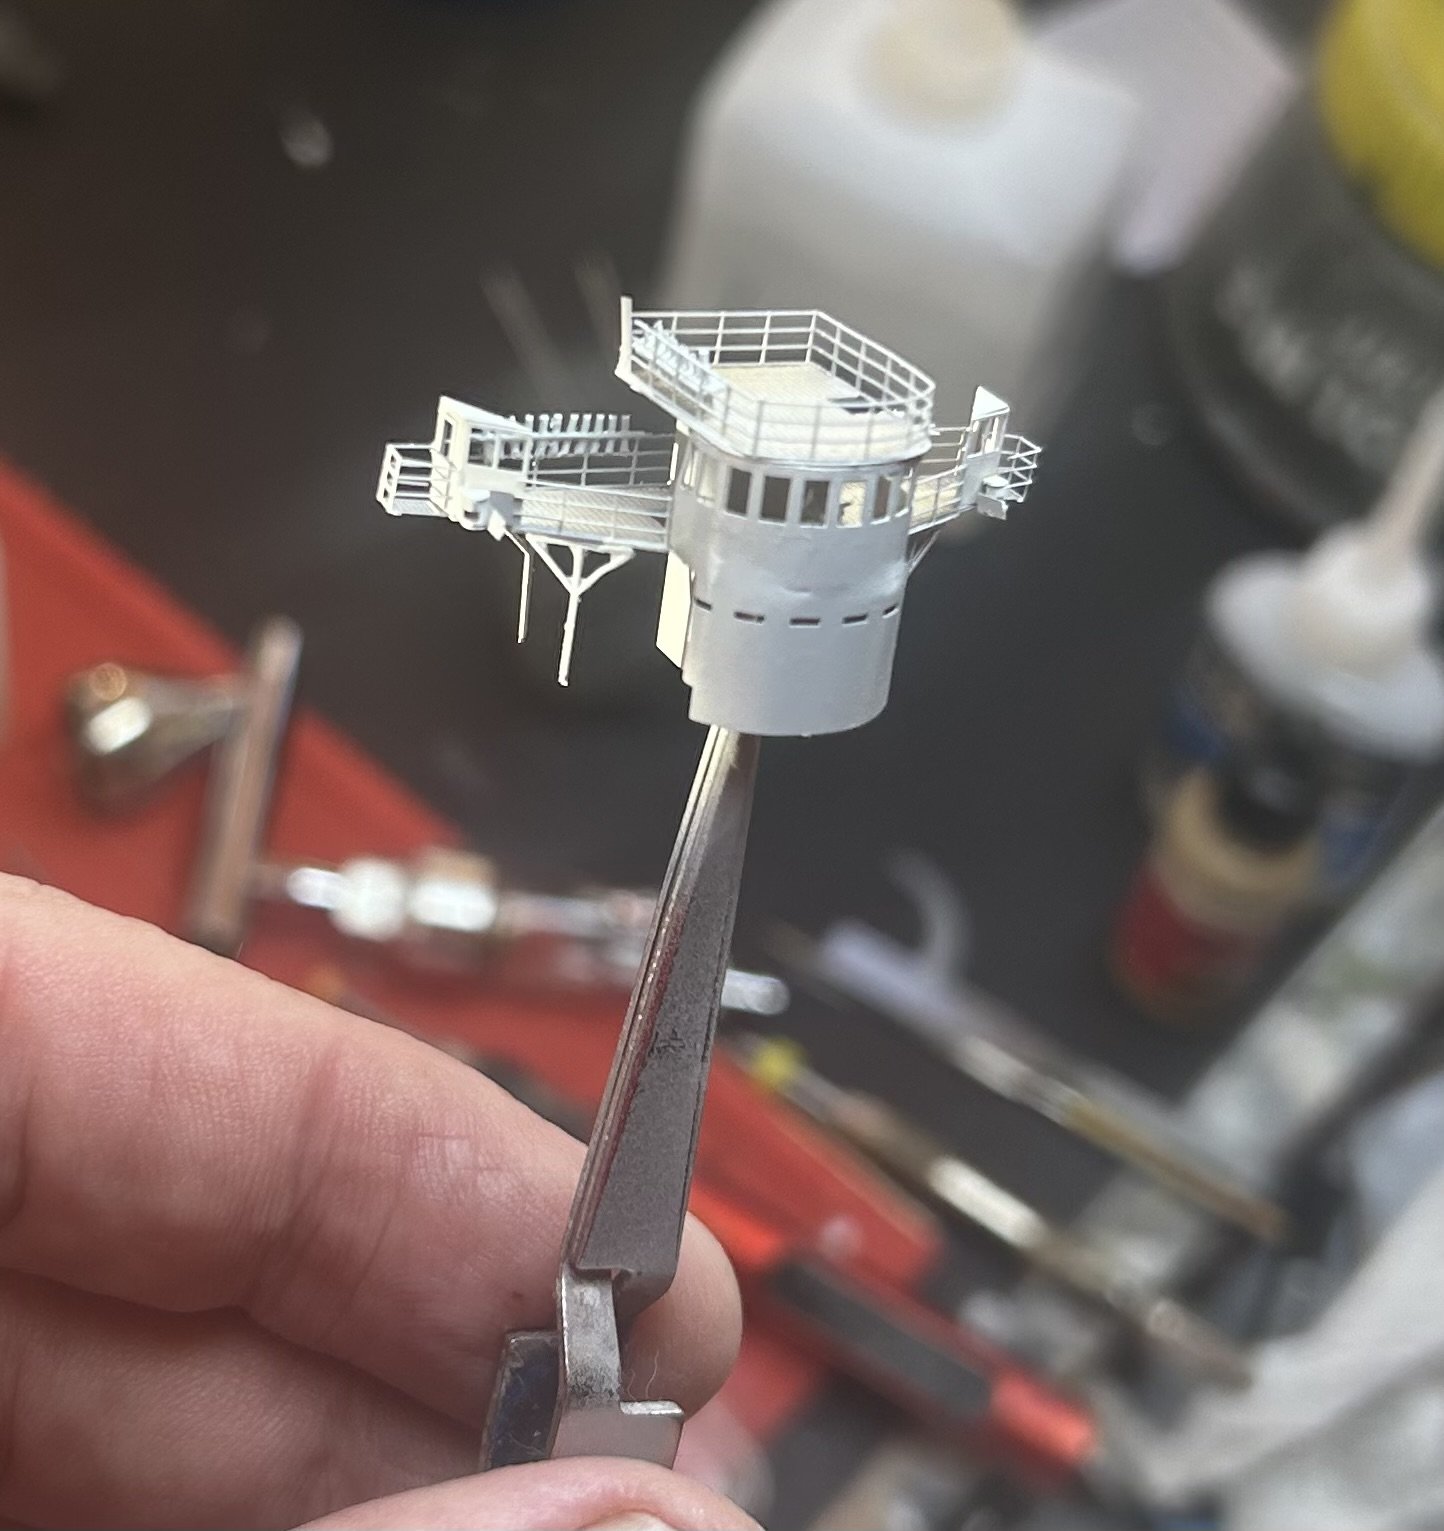
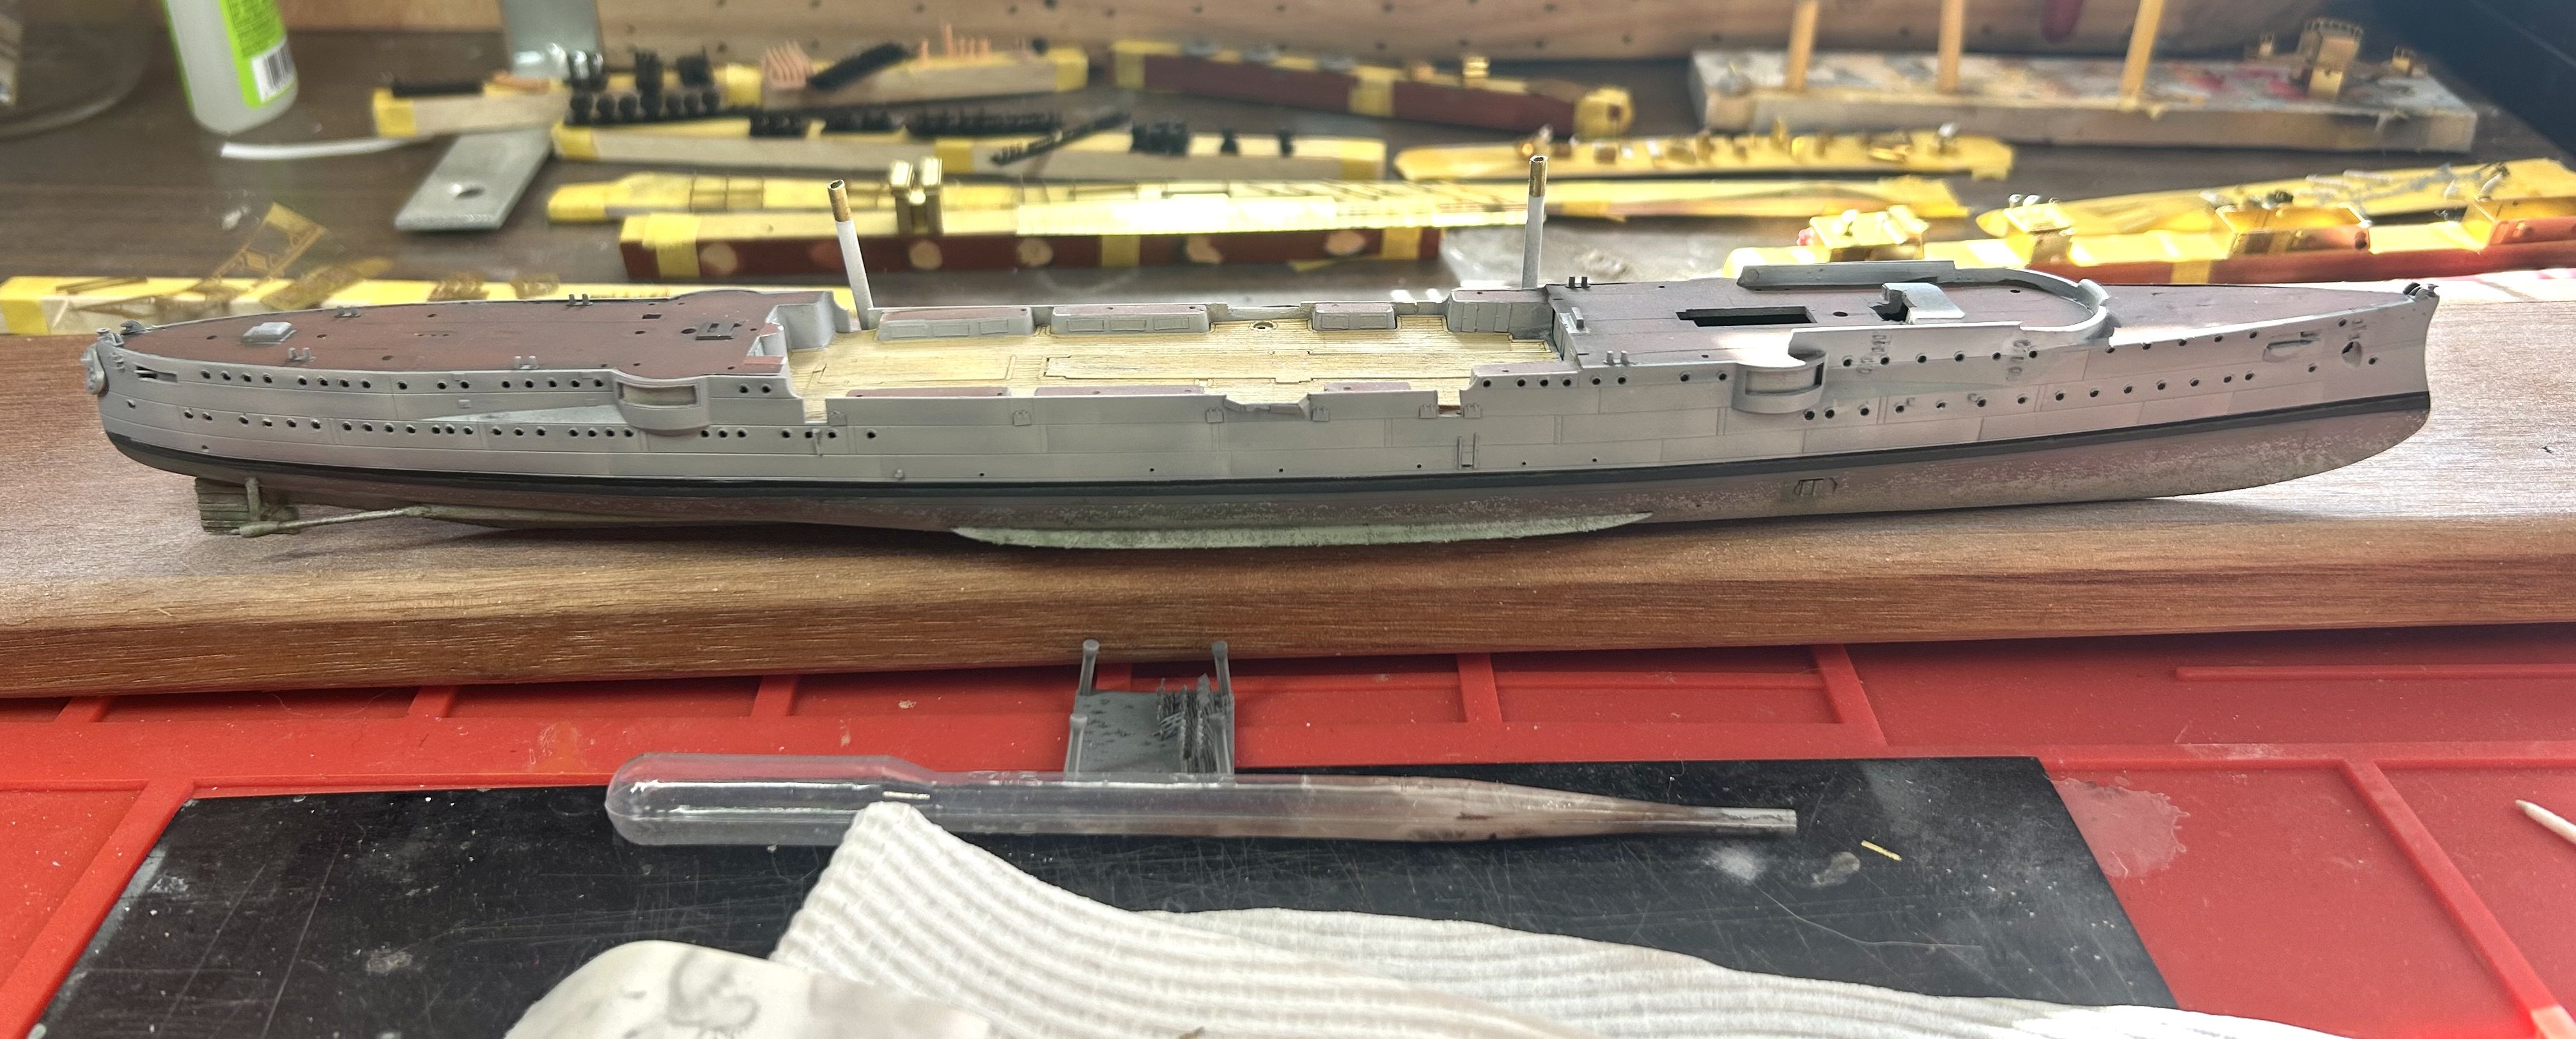
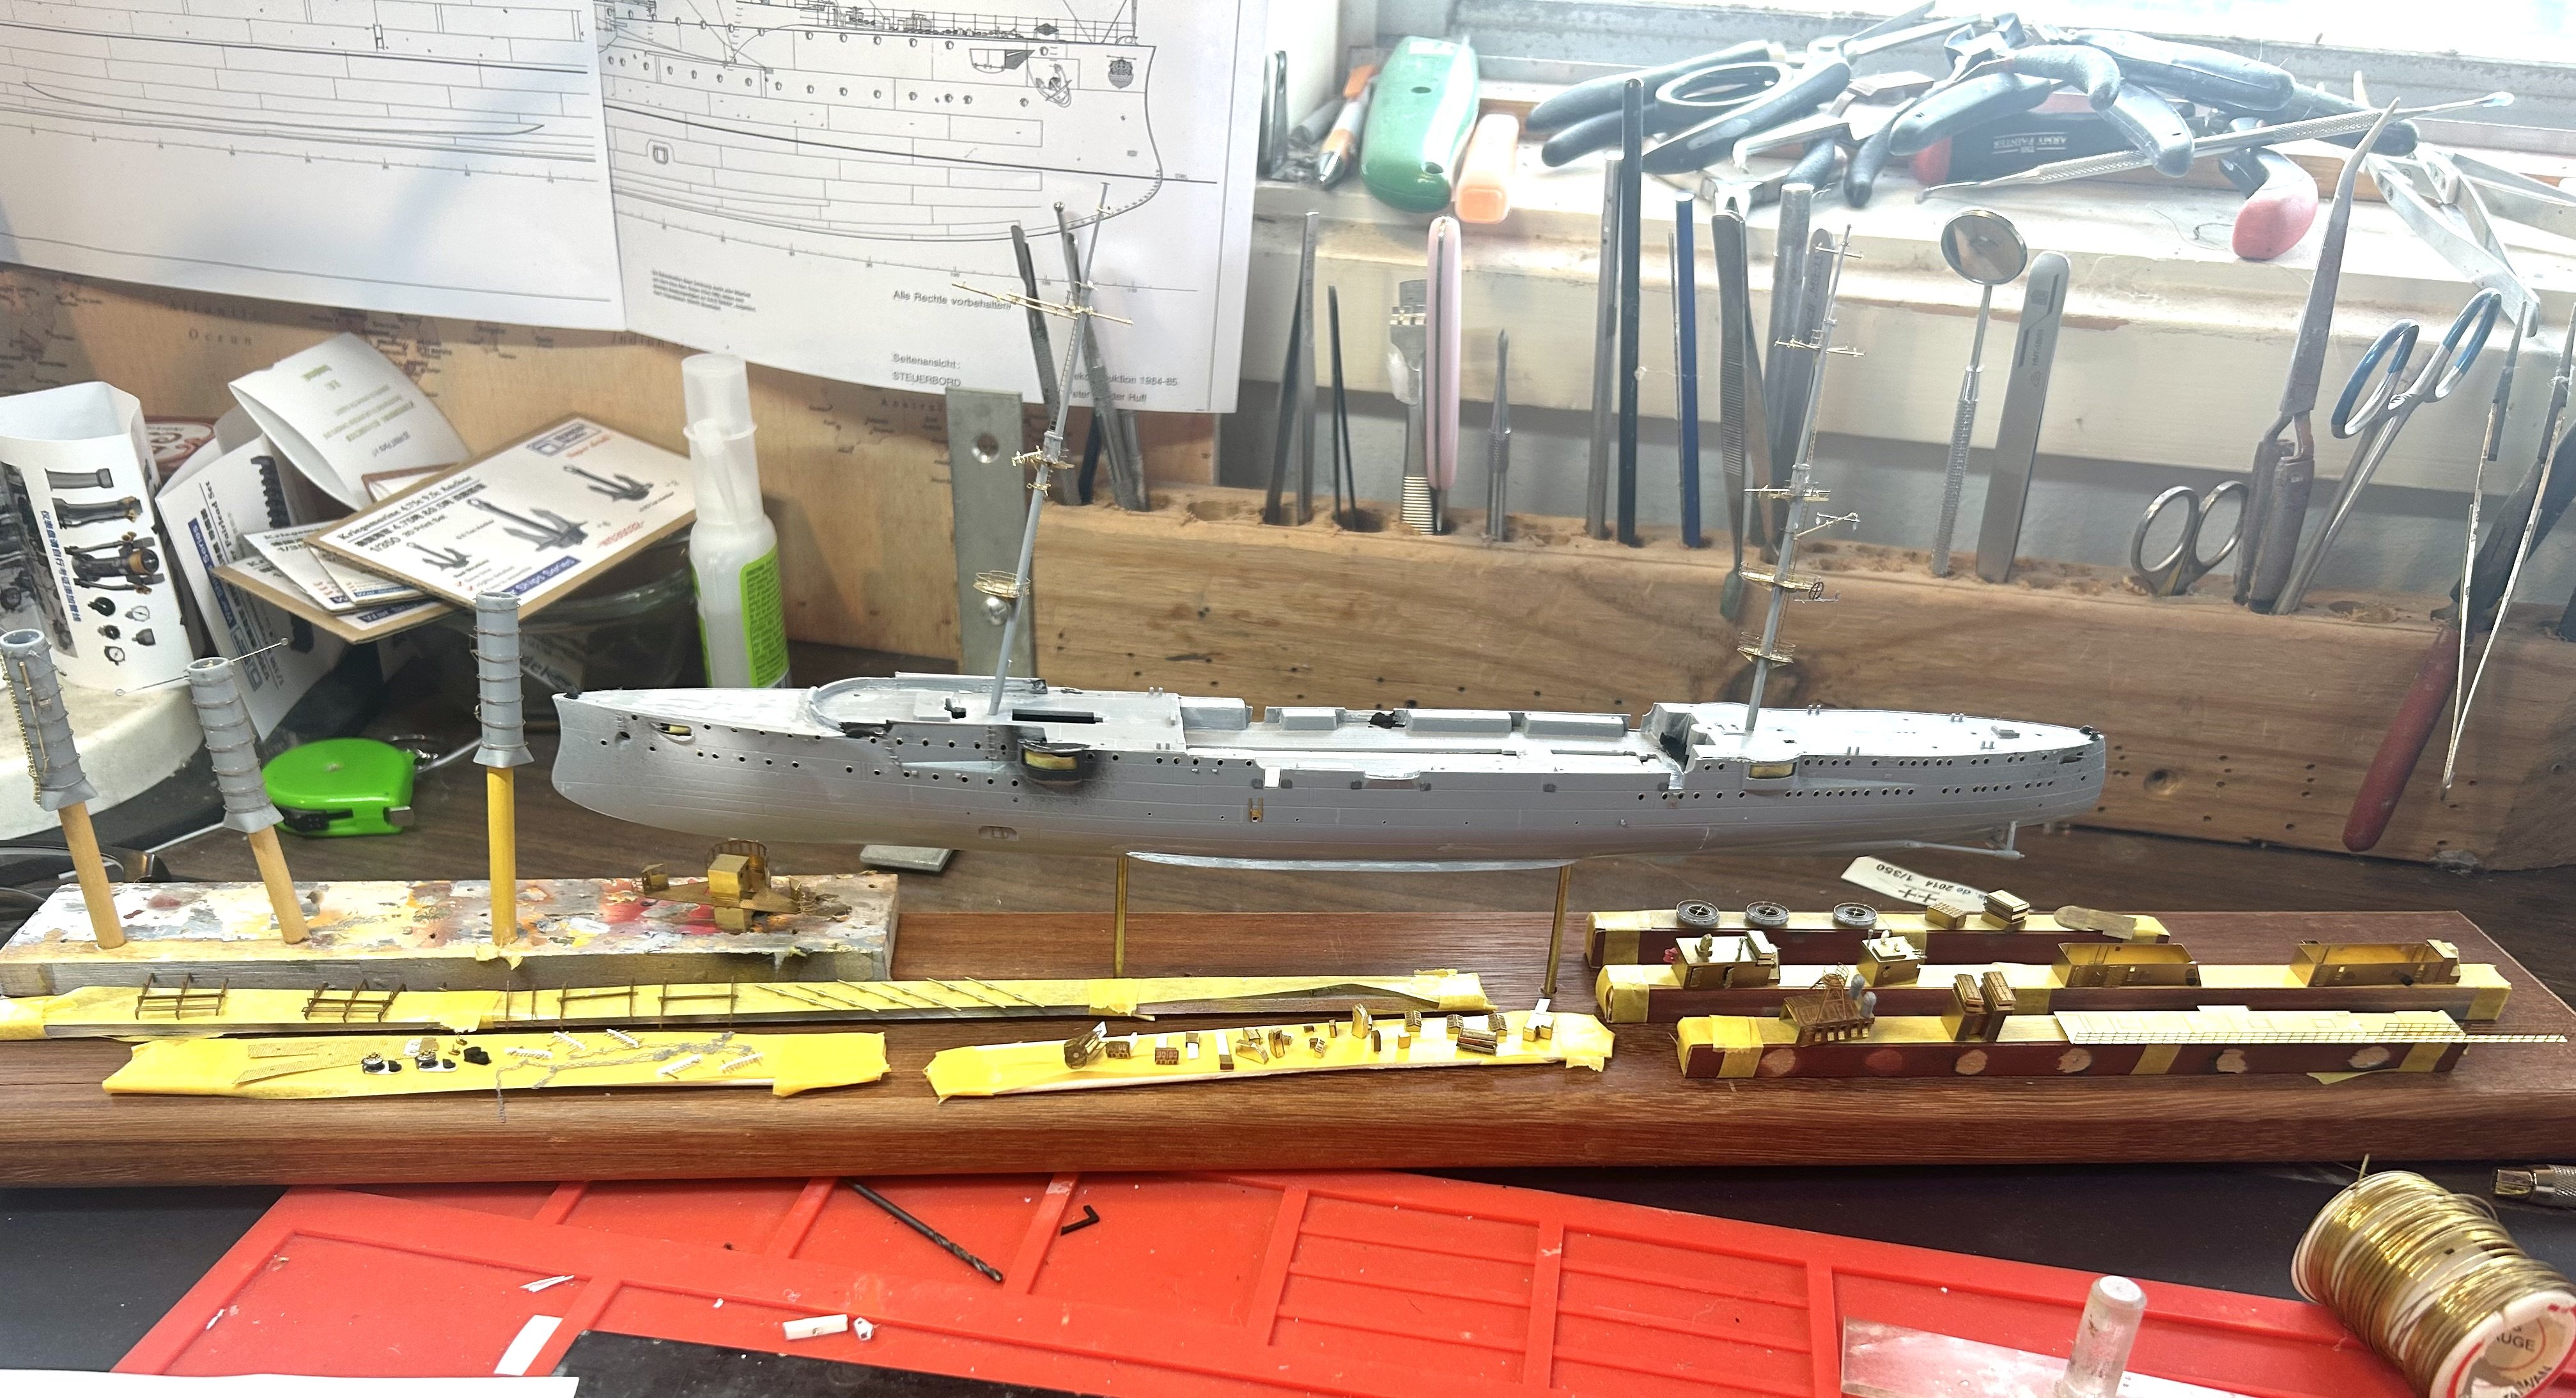
Starting to look like a ship! Funnels and bridge added, then a dry fit of the masts


- 81 replies
-
- 10
-
-
- Micromaster
- Eduard
- (and 4 more)
-
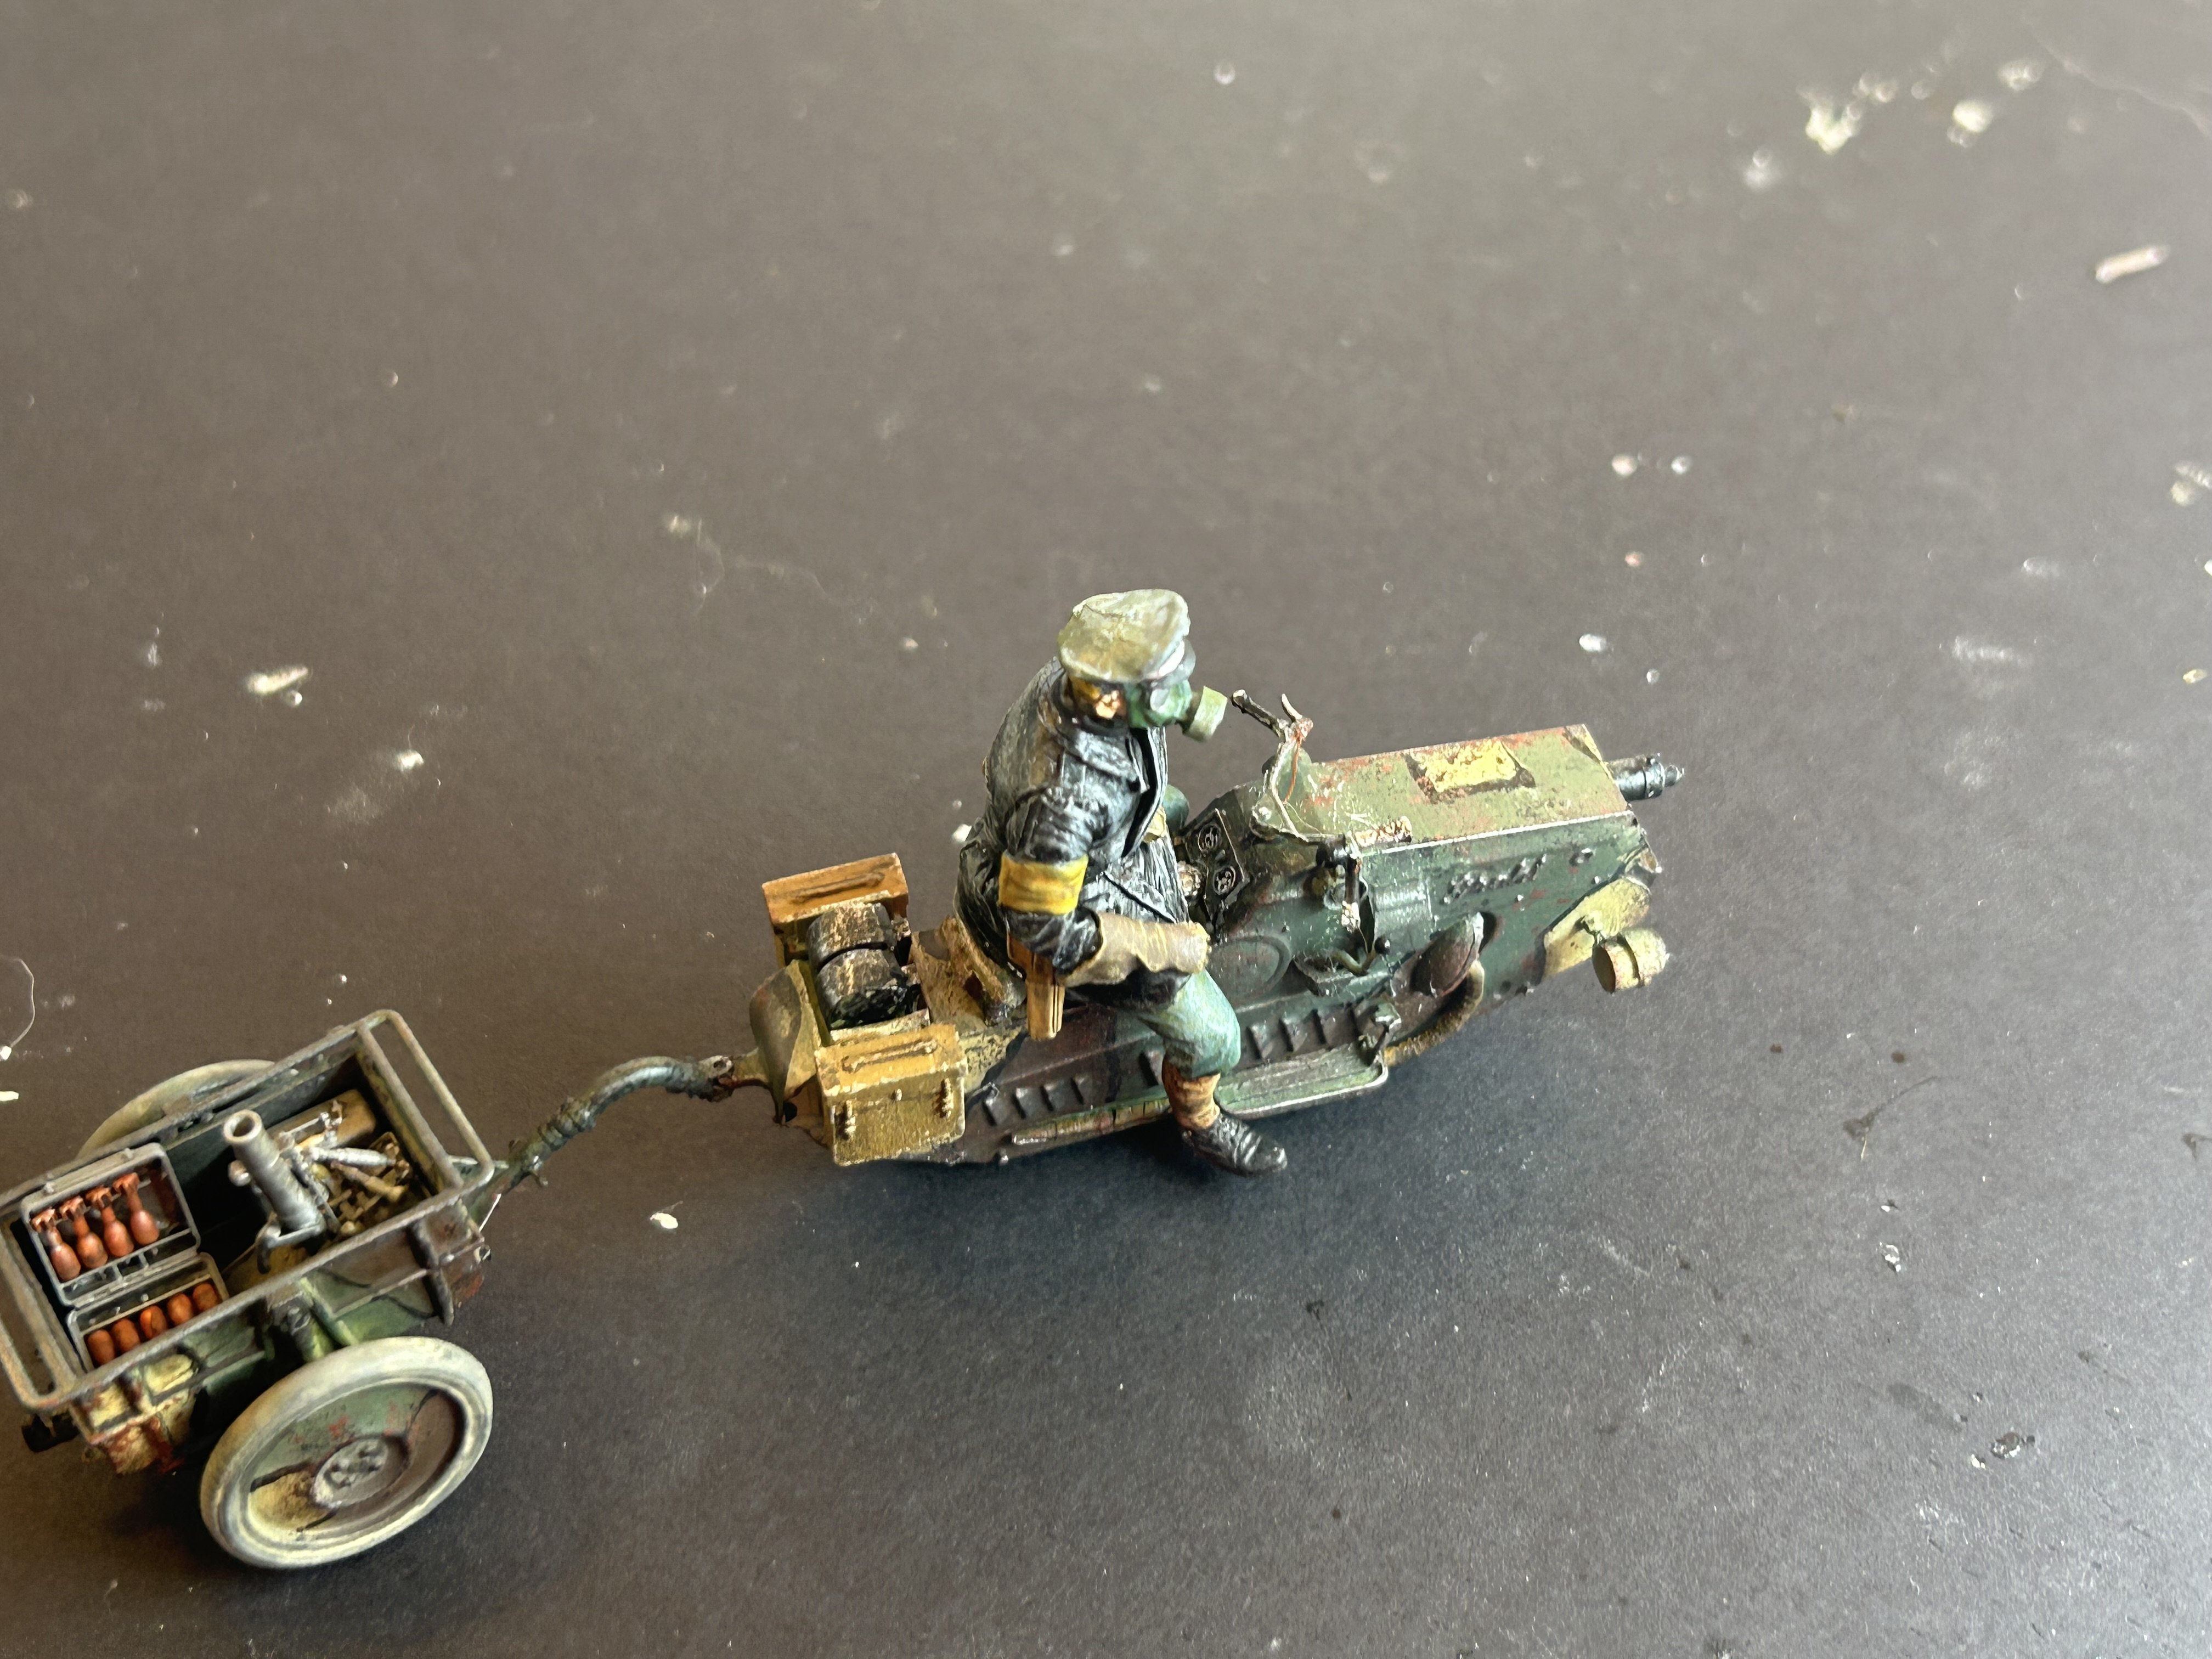
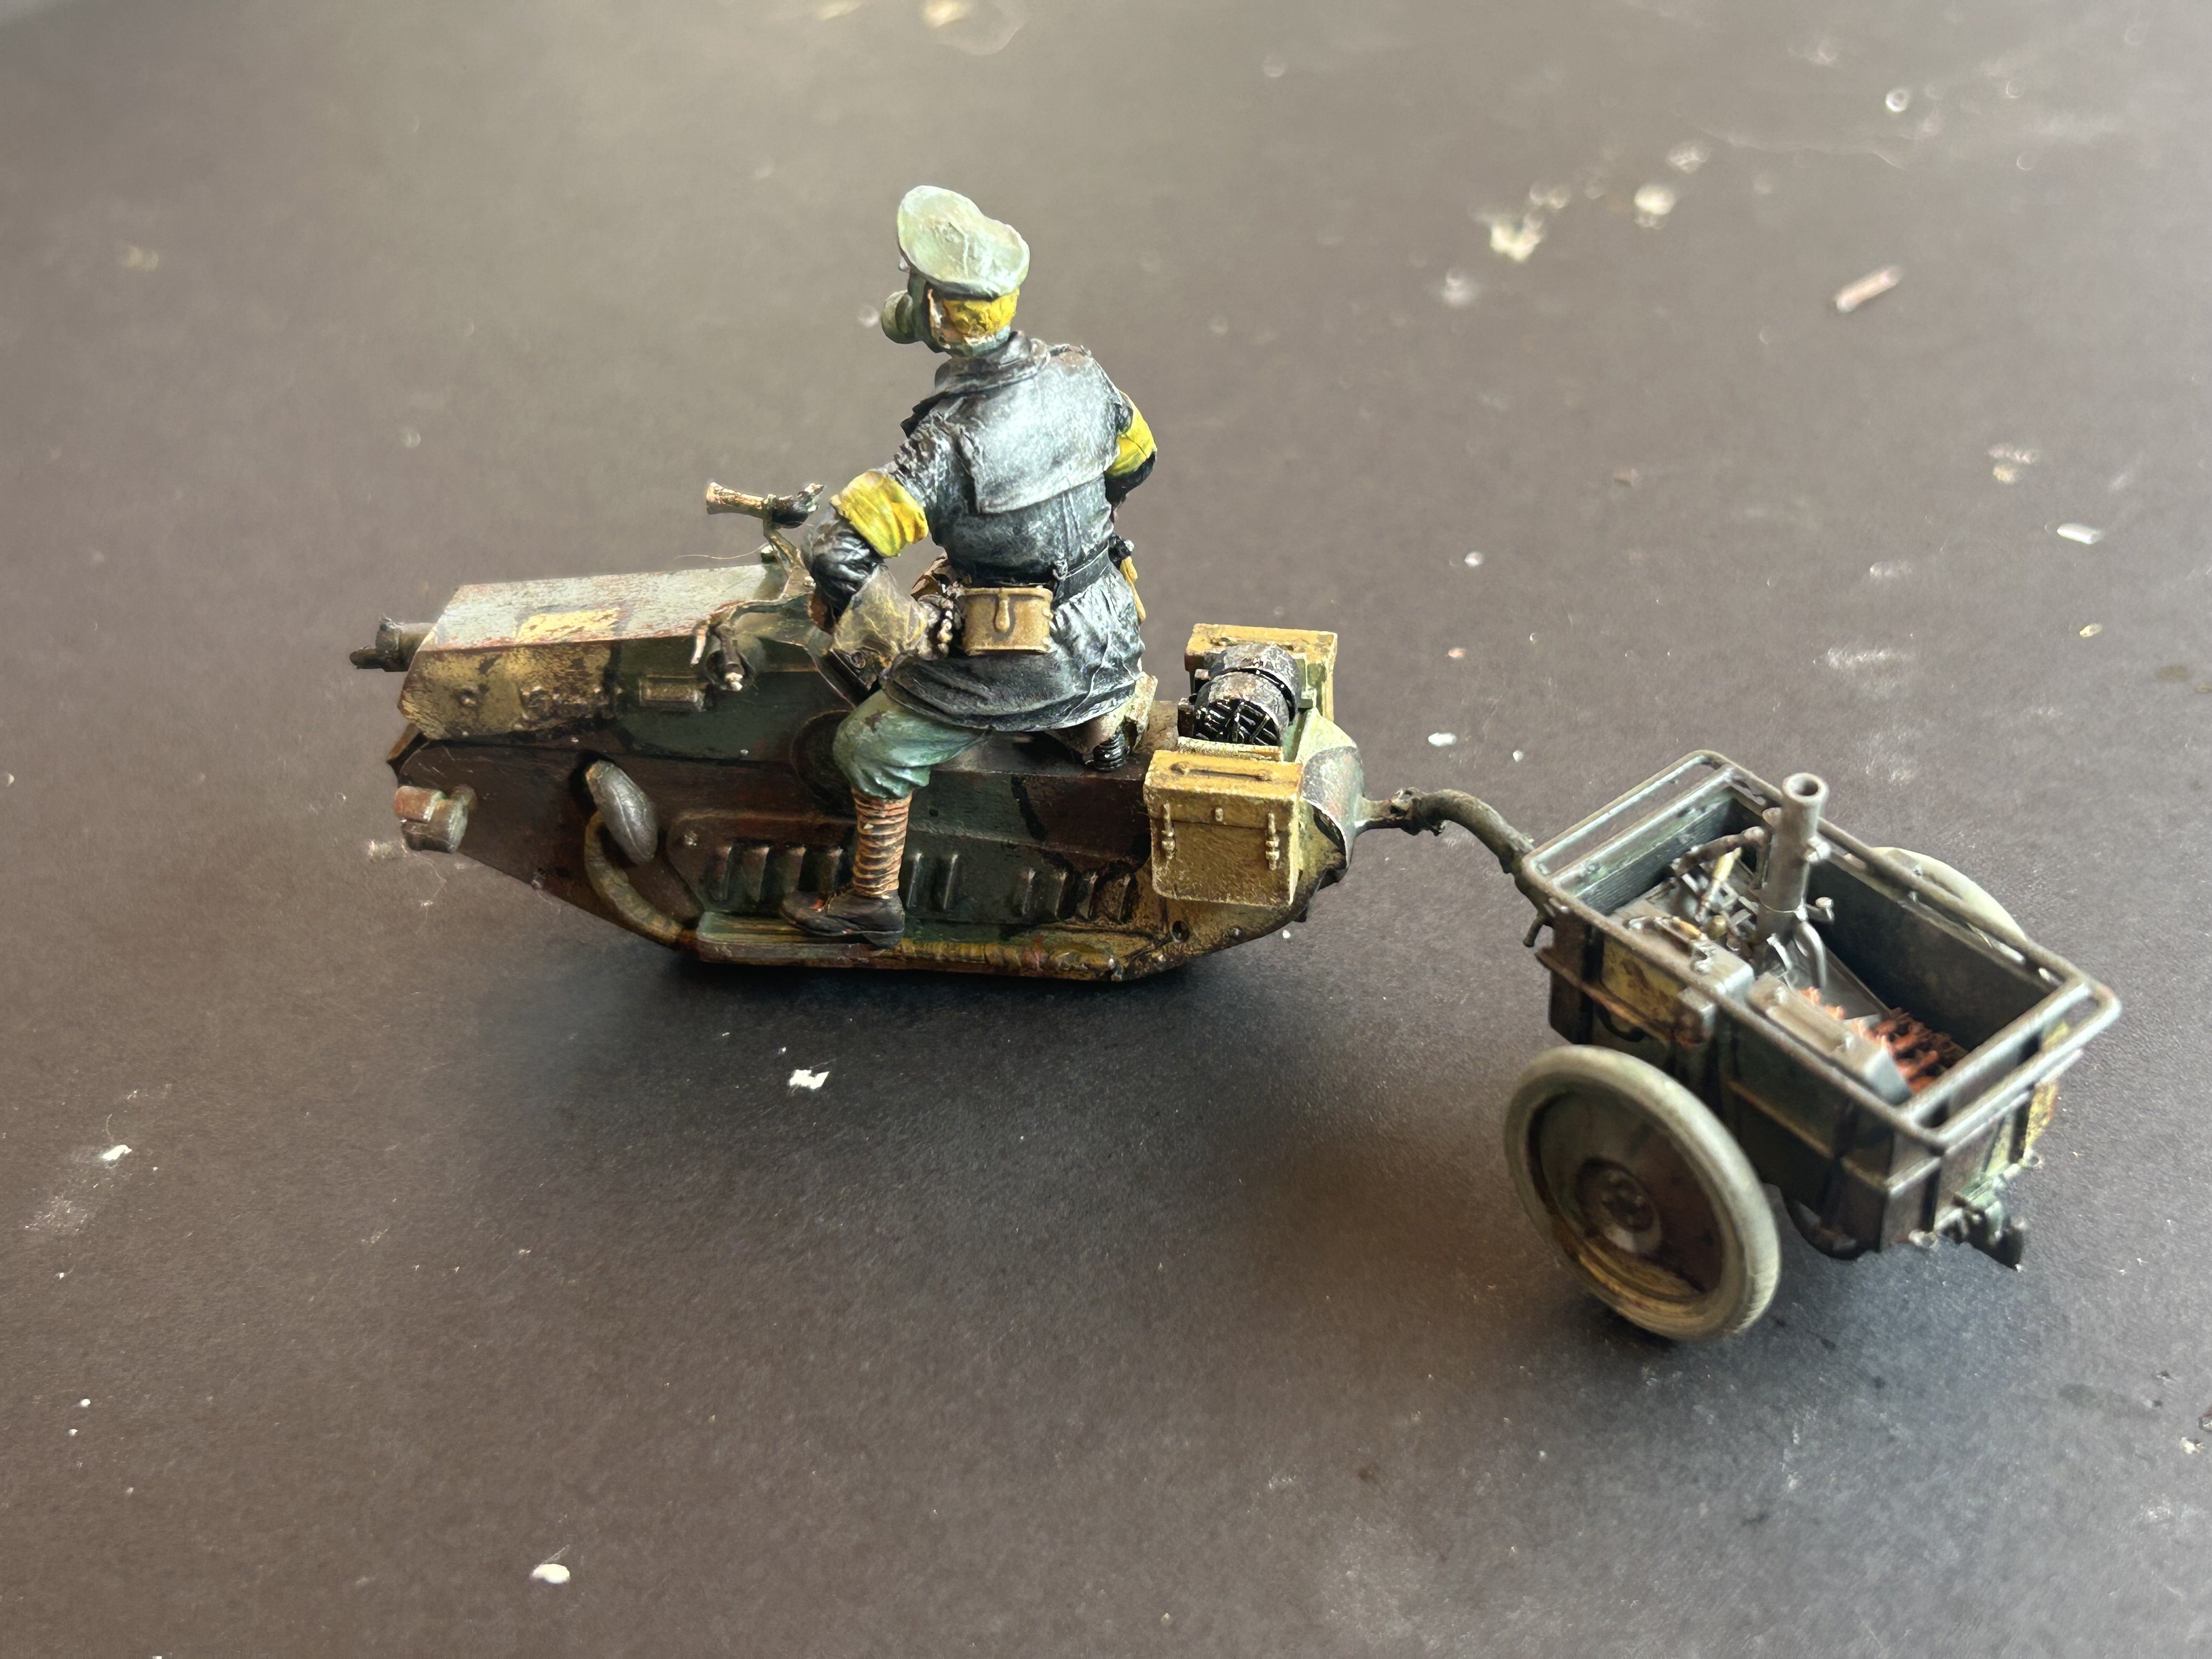
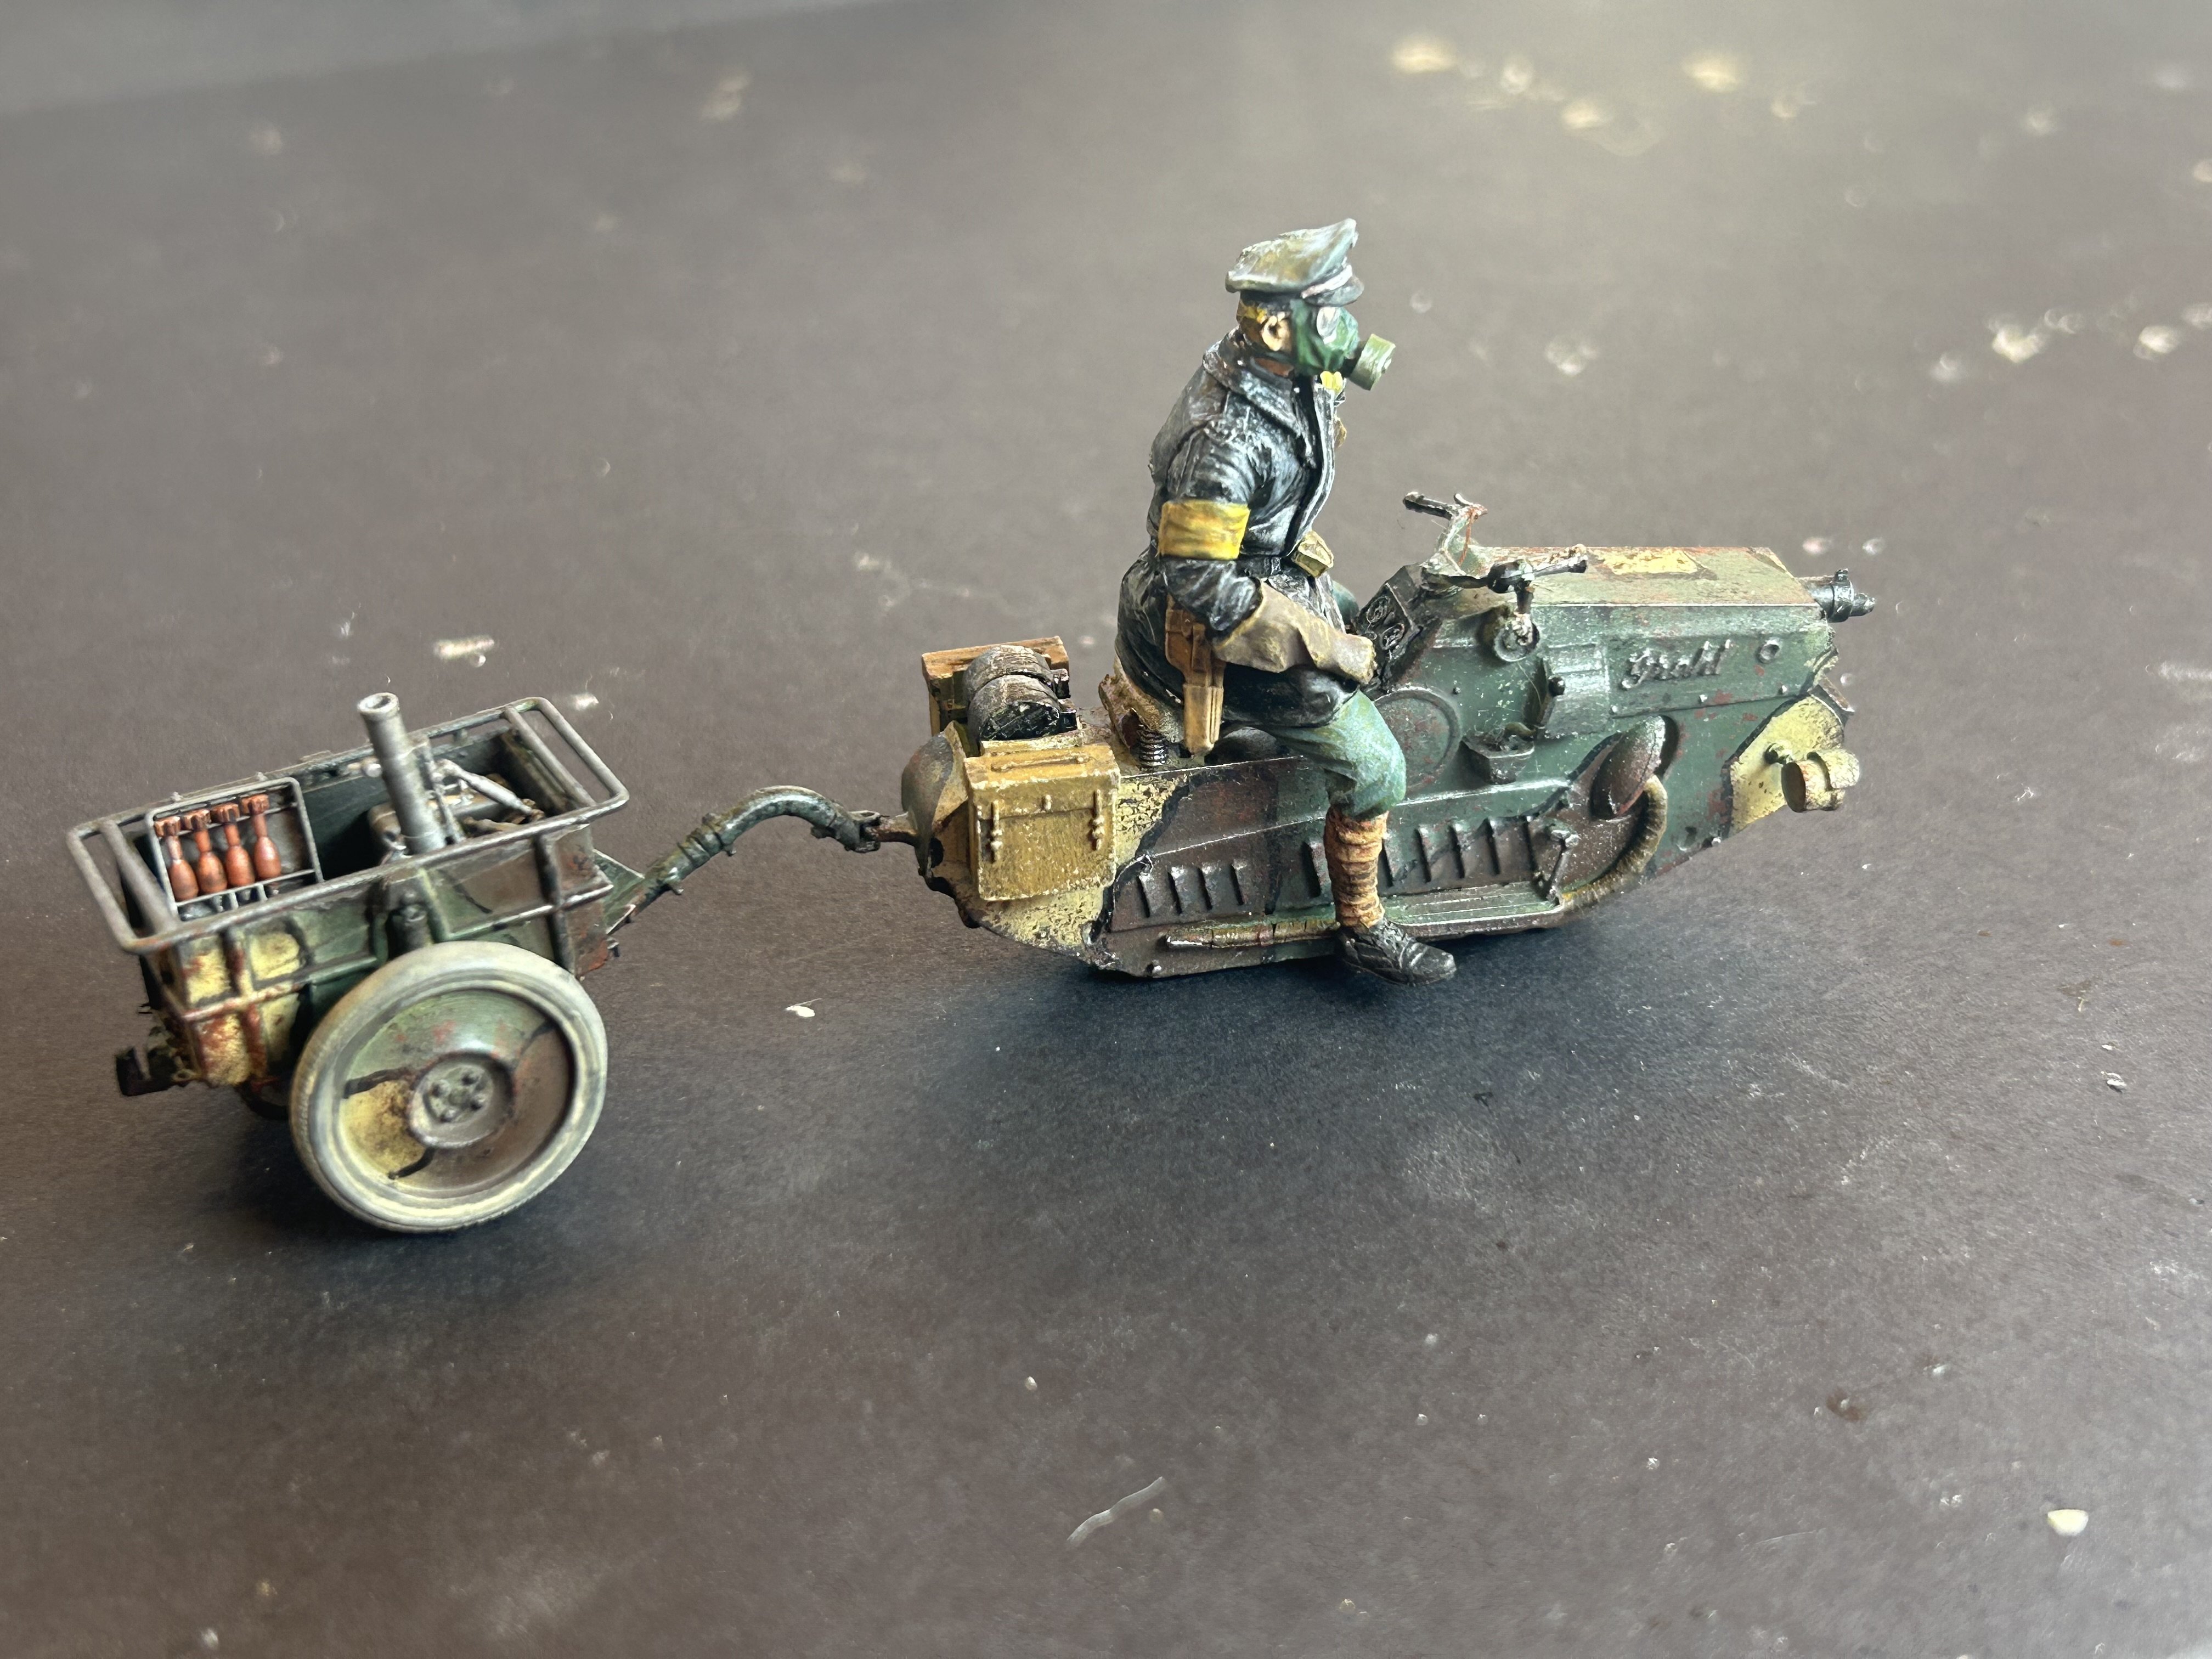
Flying Sd.Kfz.222 by RGL - HobbyBoss - 1/35 - PLASTIC
RGL replied to RGL's topic in Non-ship/categorised builds
Done, more weathering when the base is done


-
That’s coming up nicely, if I may make a suggestion, a few layers of close coat with some foam or spume layered between? Just use a rattle can
- 176 replies
-
- 2
-
-
- new orleans
- iron shipwrights
- (and 2 more)
-
Bridge done up with 3 fife rails scratch made. This is the silver grey colour which she had in 1914

- 81 replies
-
- 8
-
-
- Micromaster
- Eduard
- (and 4 more)
-
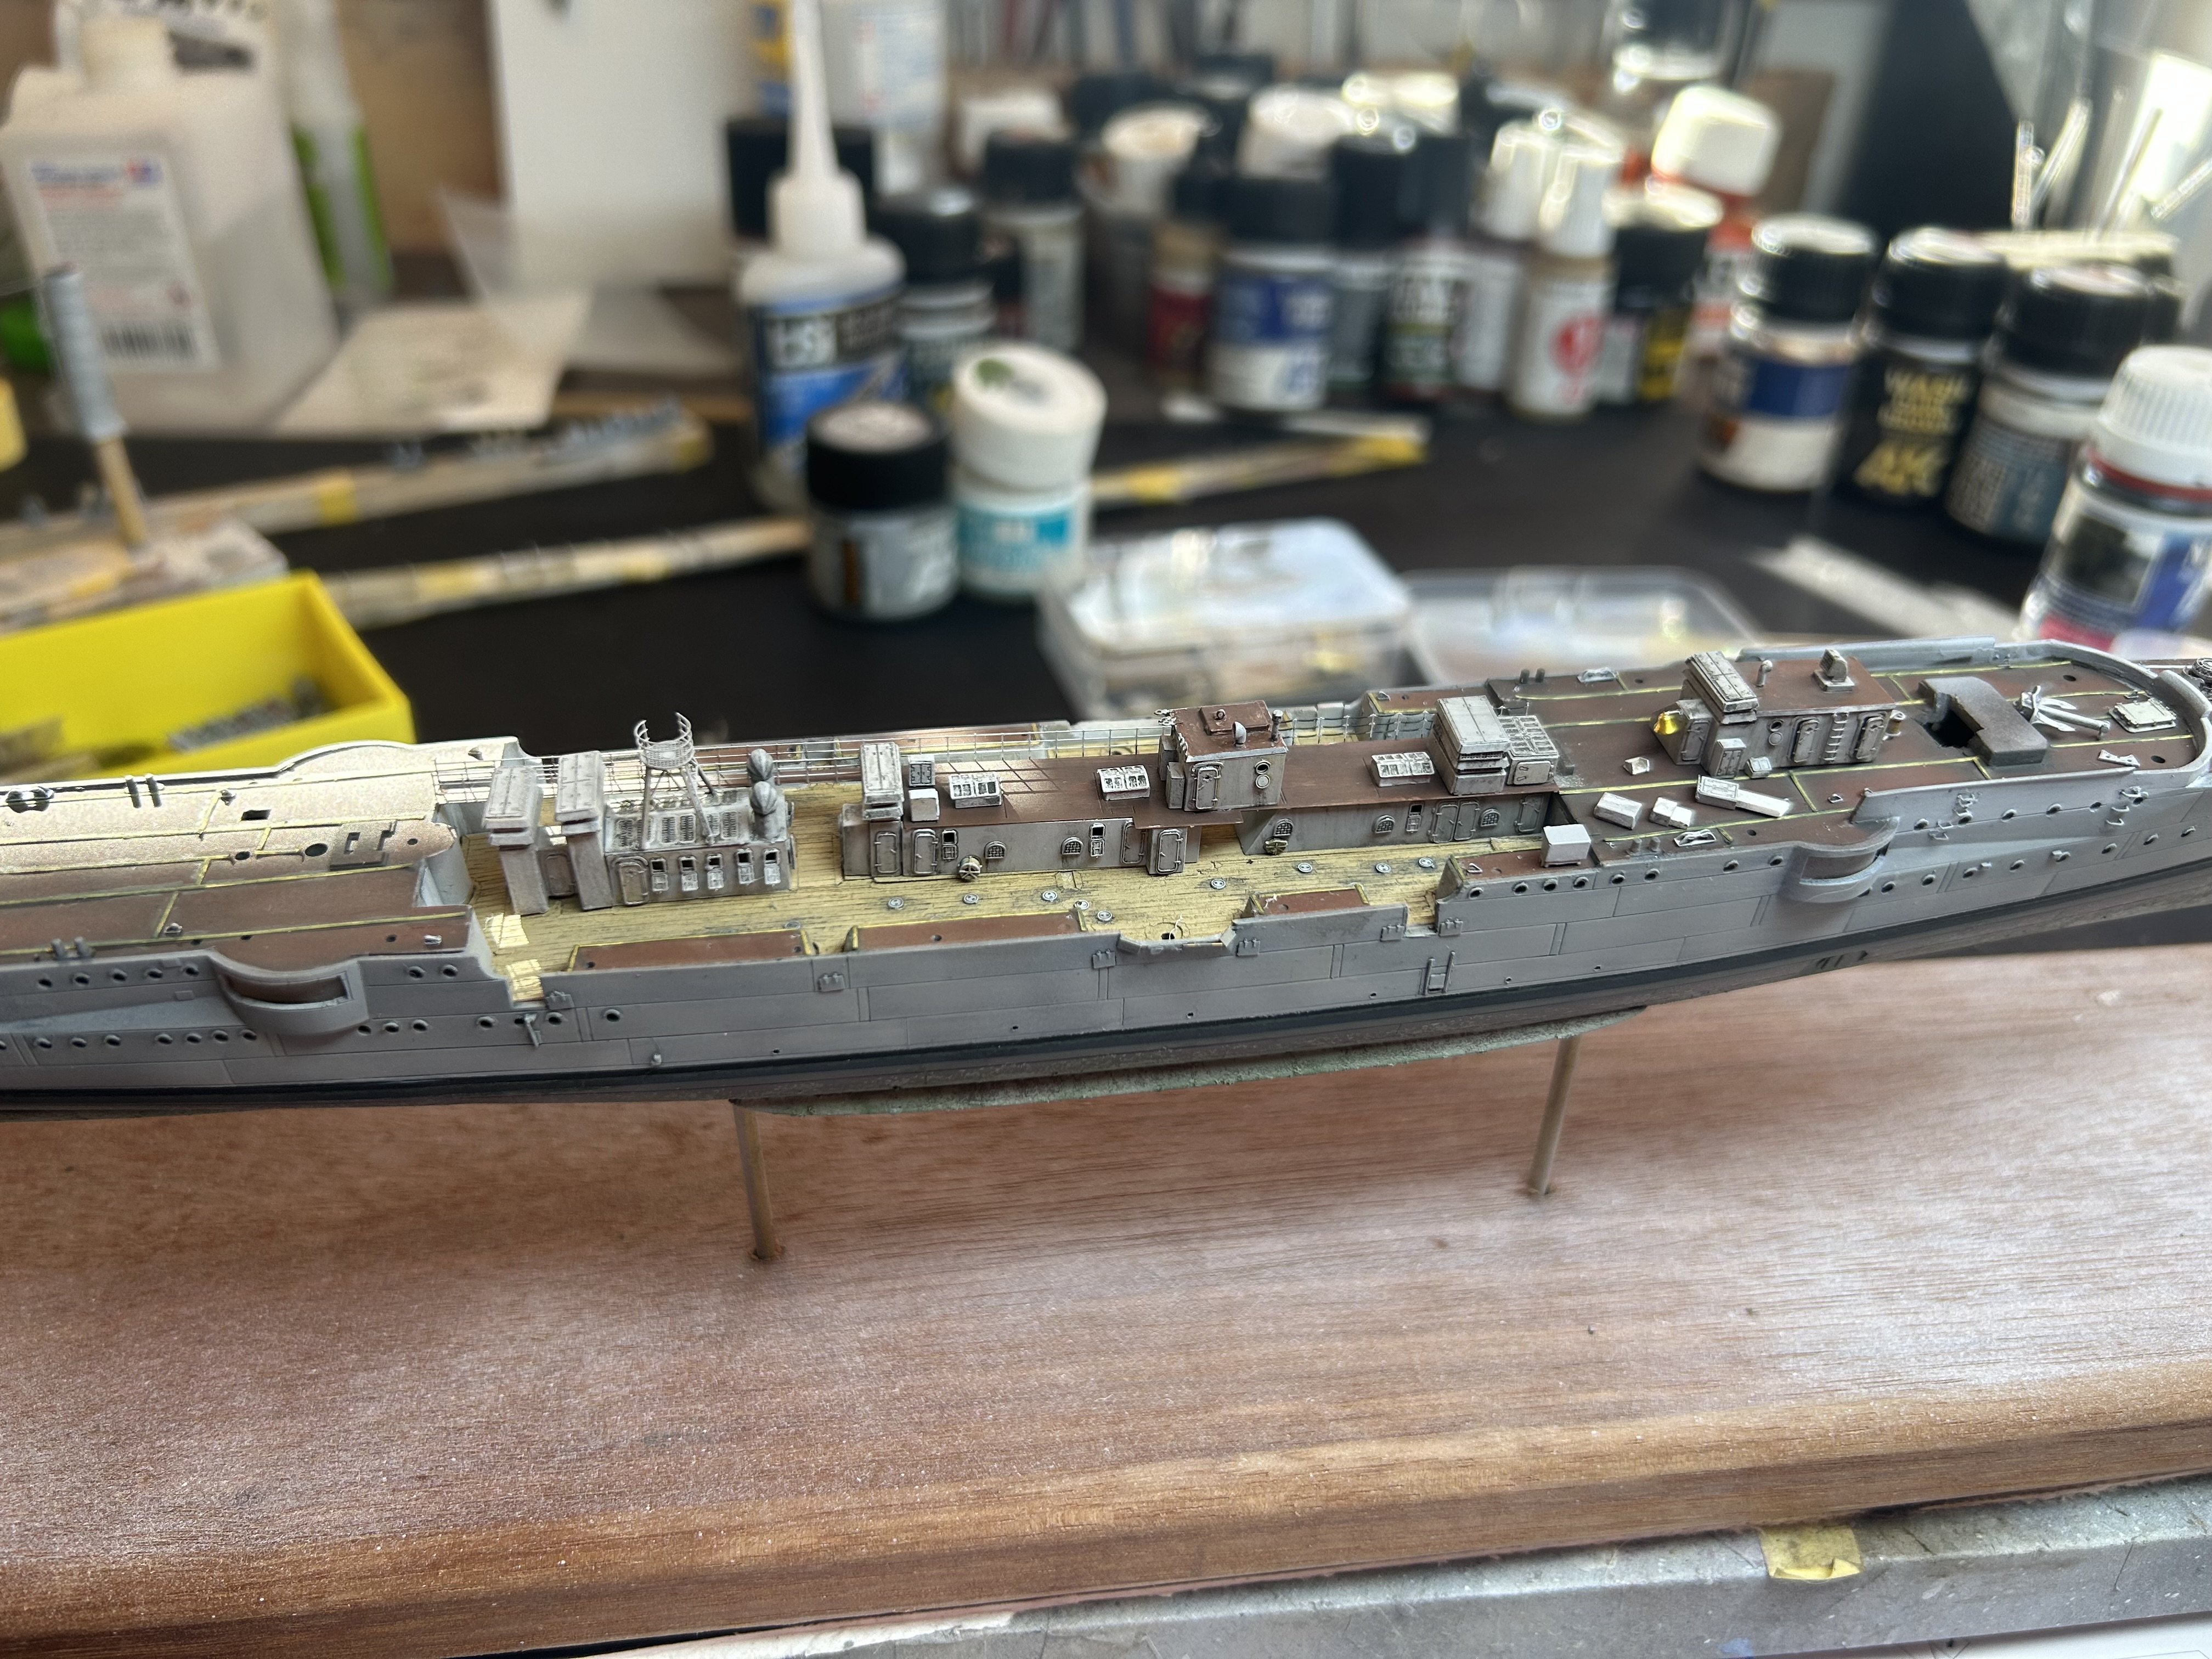
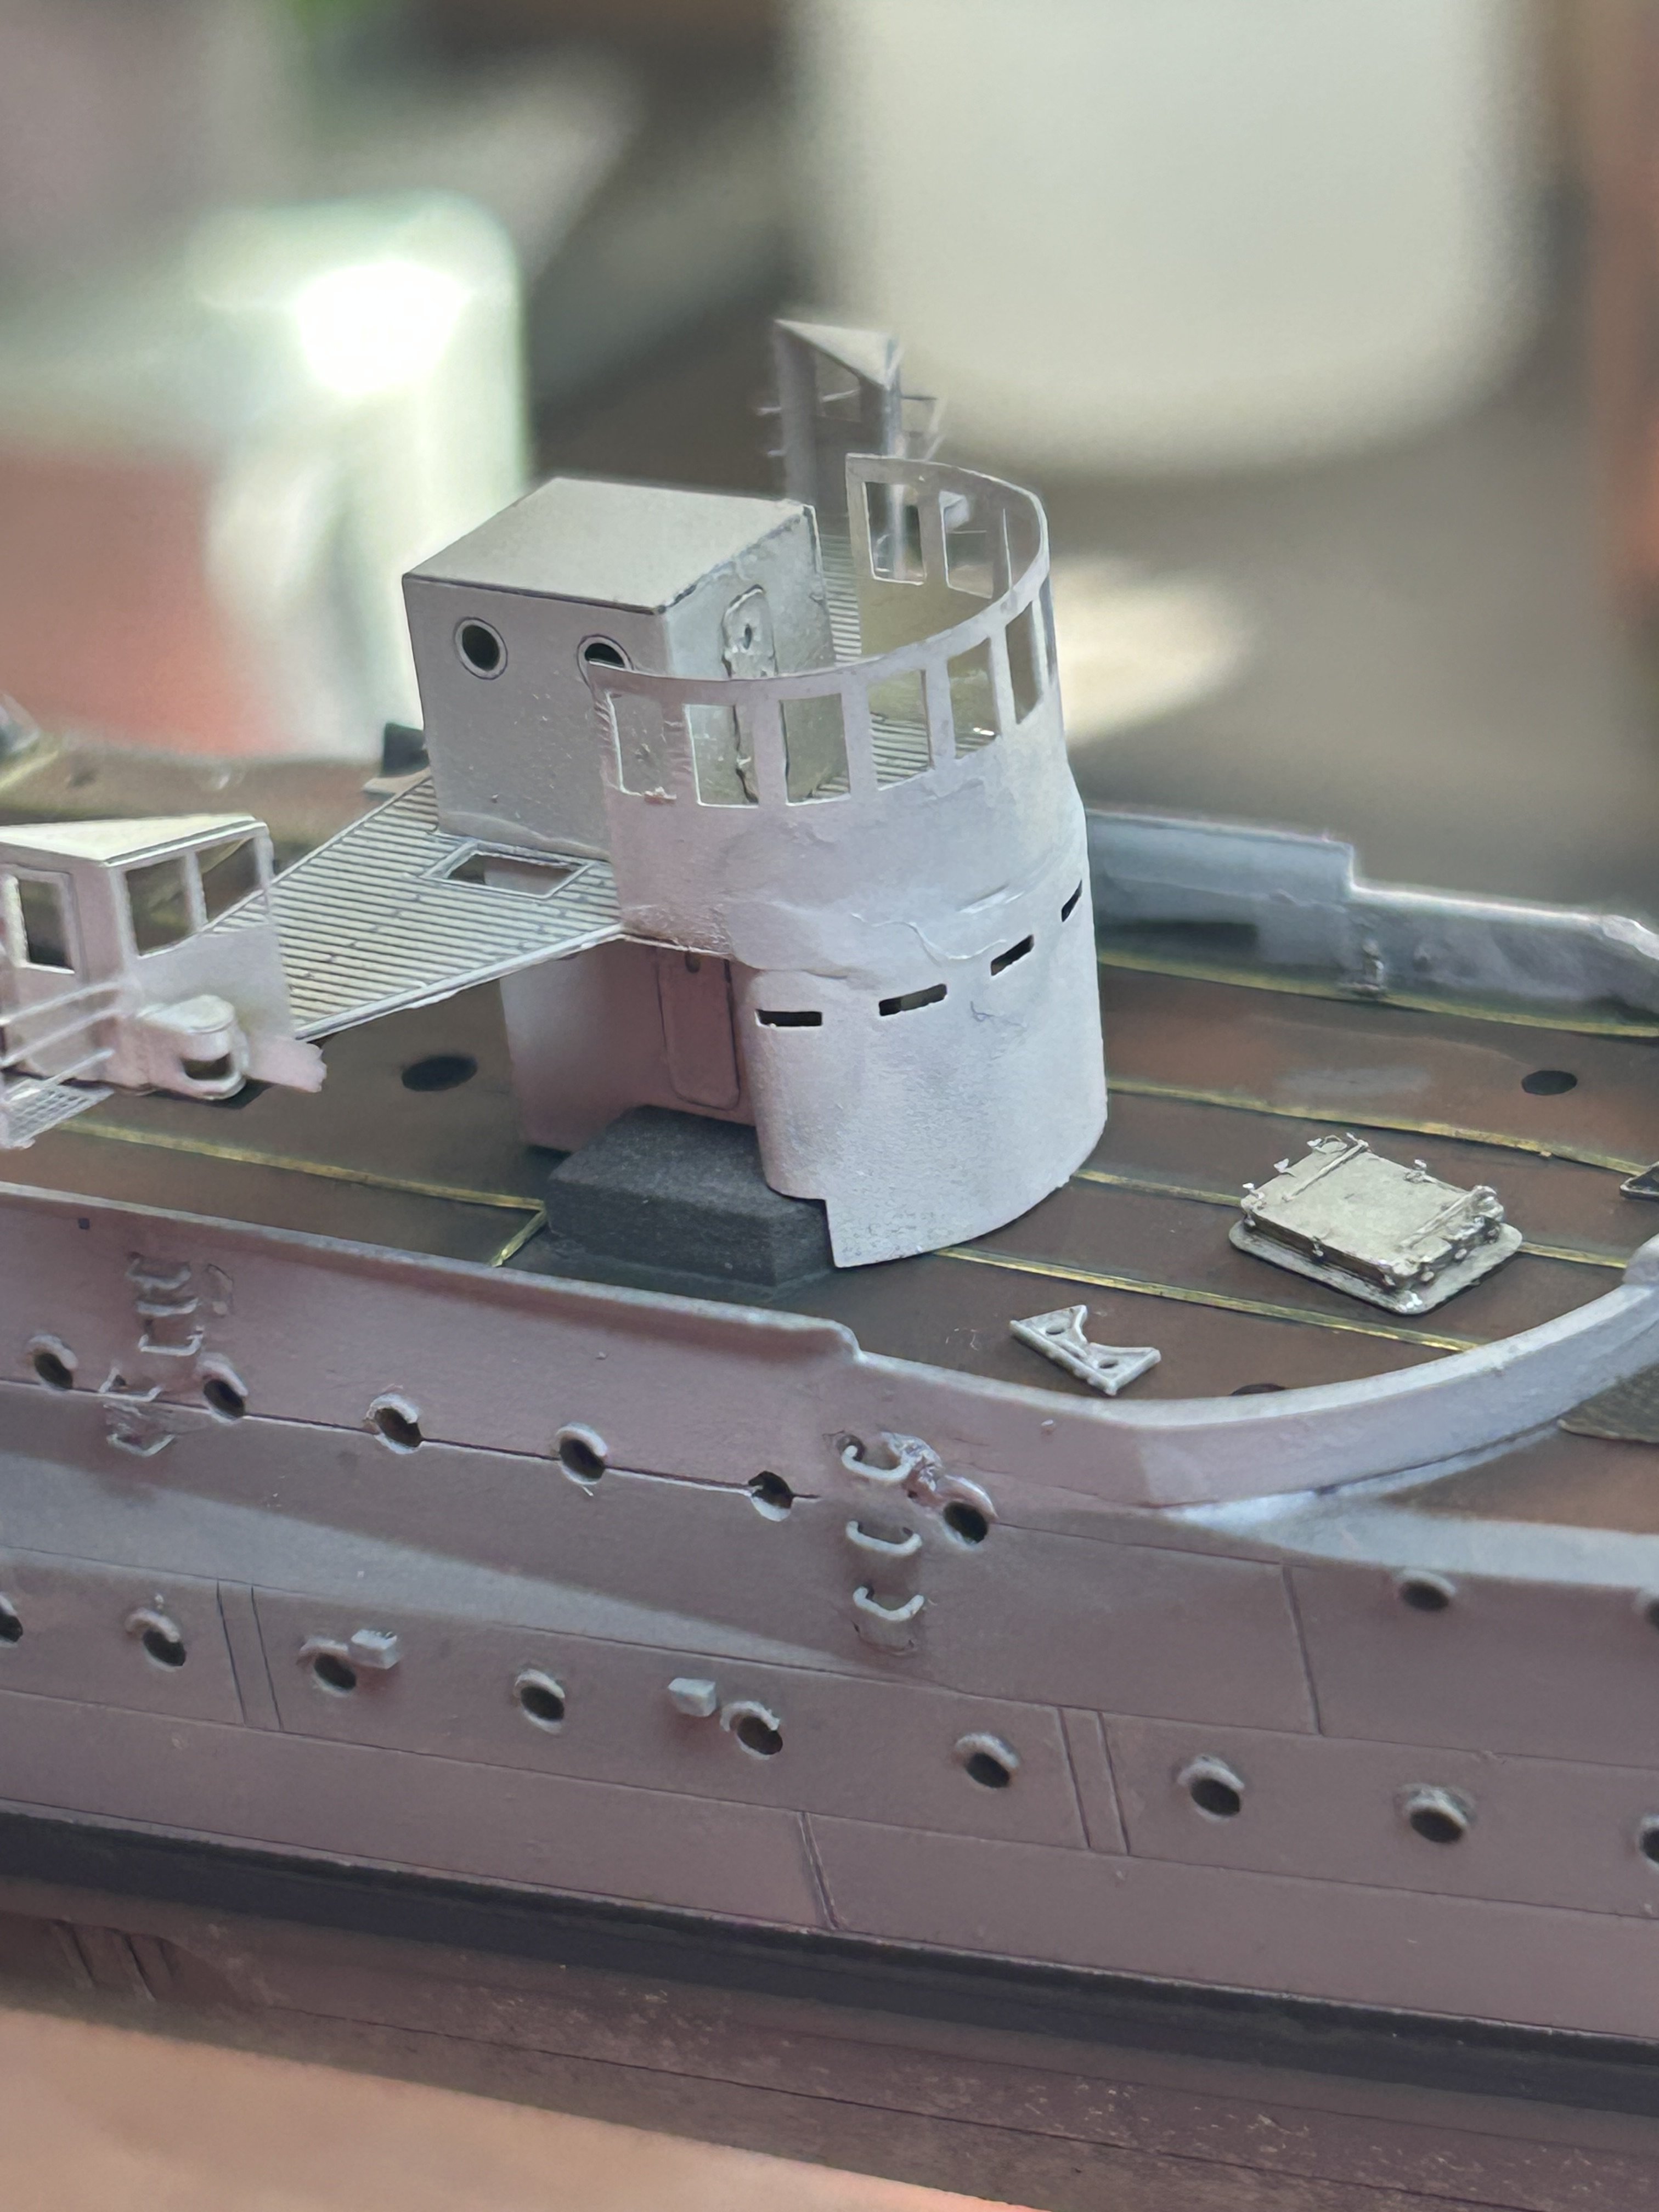
As you are aware, the brass is waaay to bright, so dulled down with some diluted green then a wash. Coaling scuttle’s added and a wash to dirty them up. By the time all the dockside dealings added this will just be background canvass.


- 81 replies
-
- 8
-
-
- Micromaster
- Eduard
- (and 4 more)
-
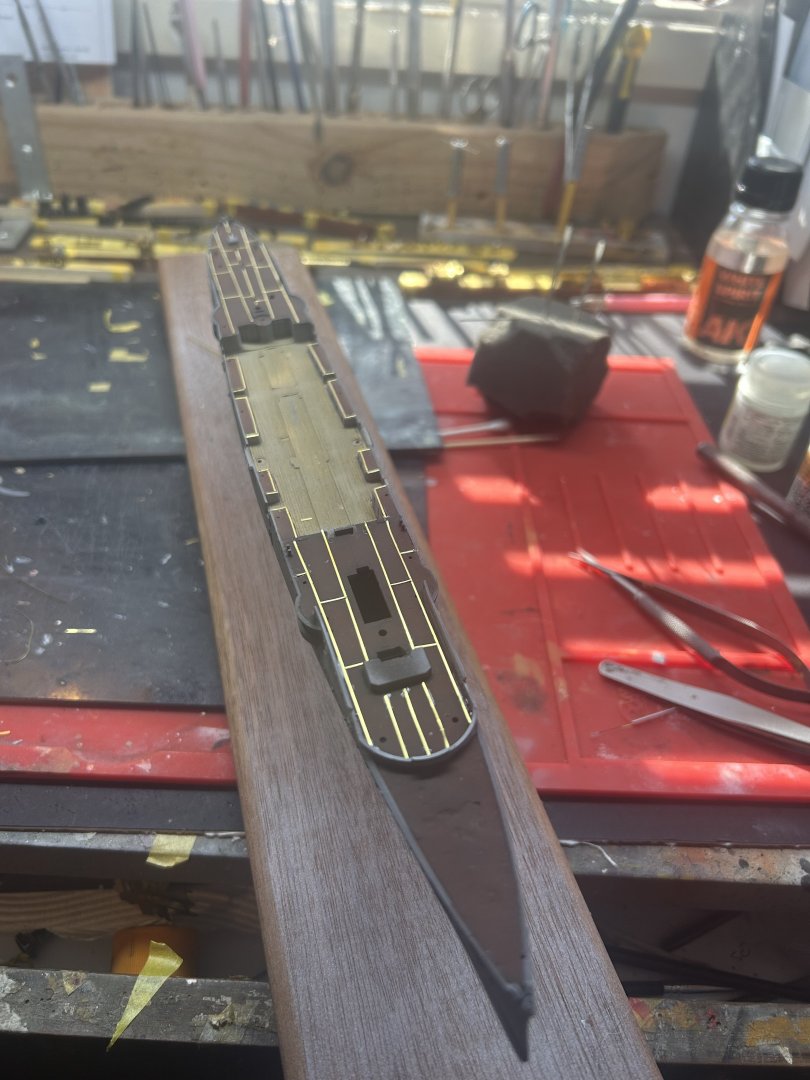
Brass linoleum hold down strips, next a flat coat and washes !


- 81 replies
-
- 9
-
-
- Micromaster
- Eduard
- (and 4 more)
-
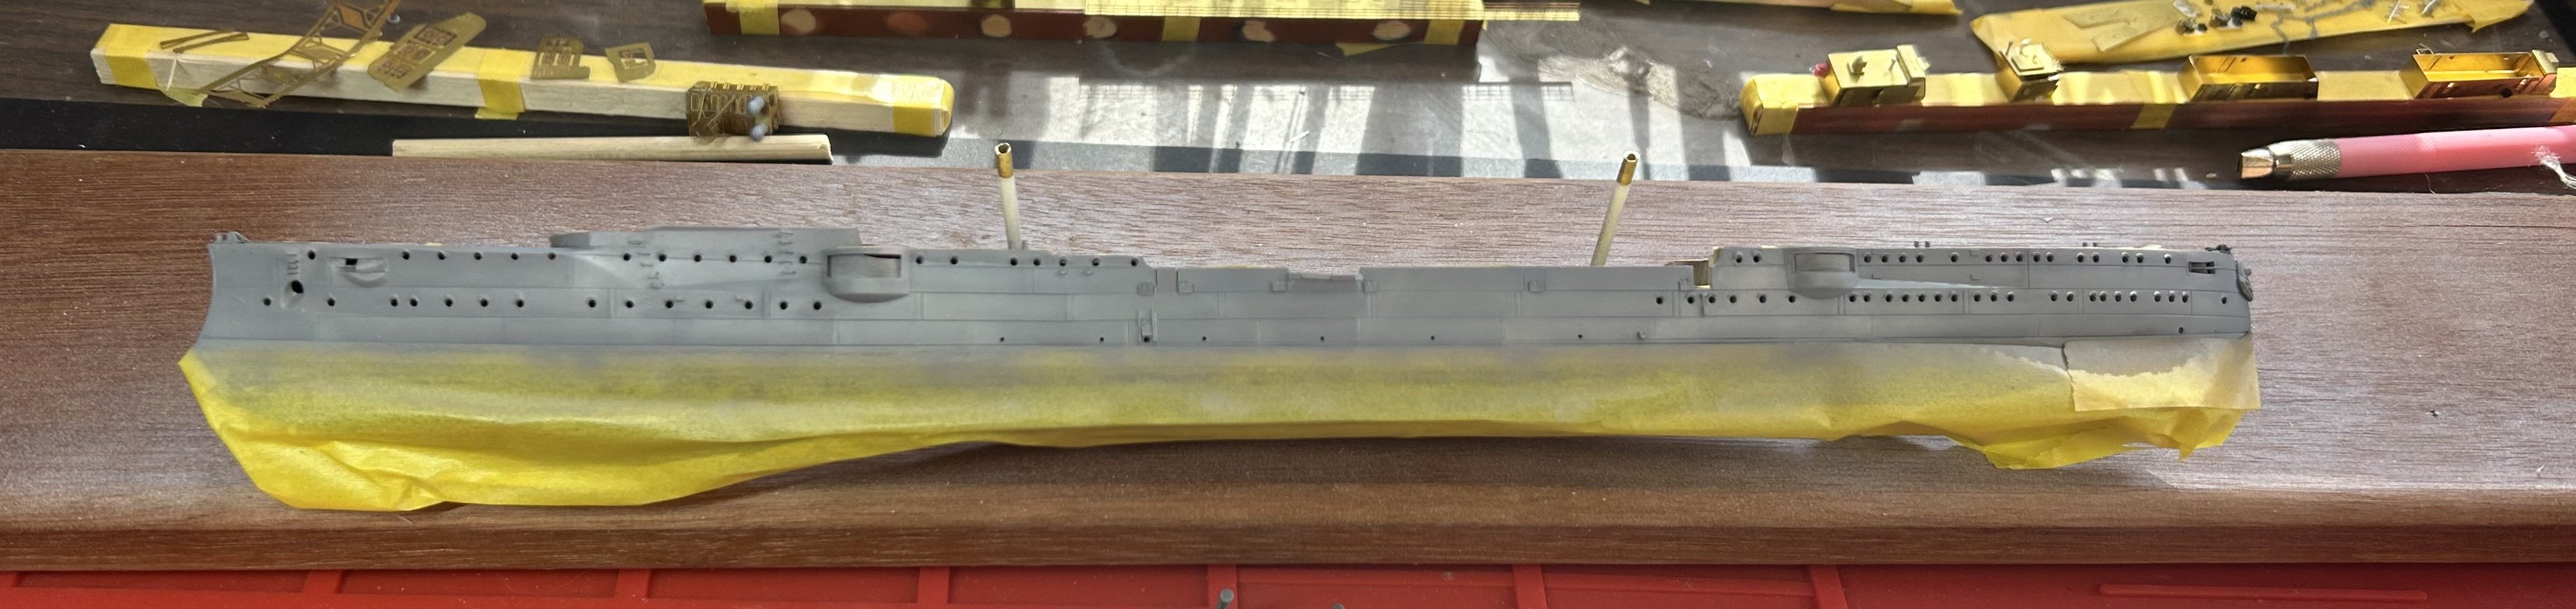
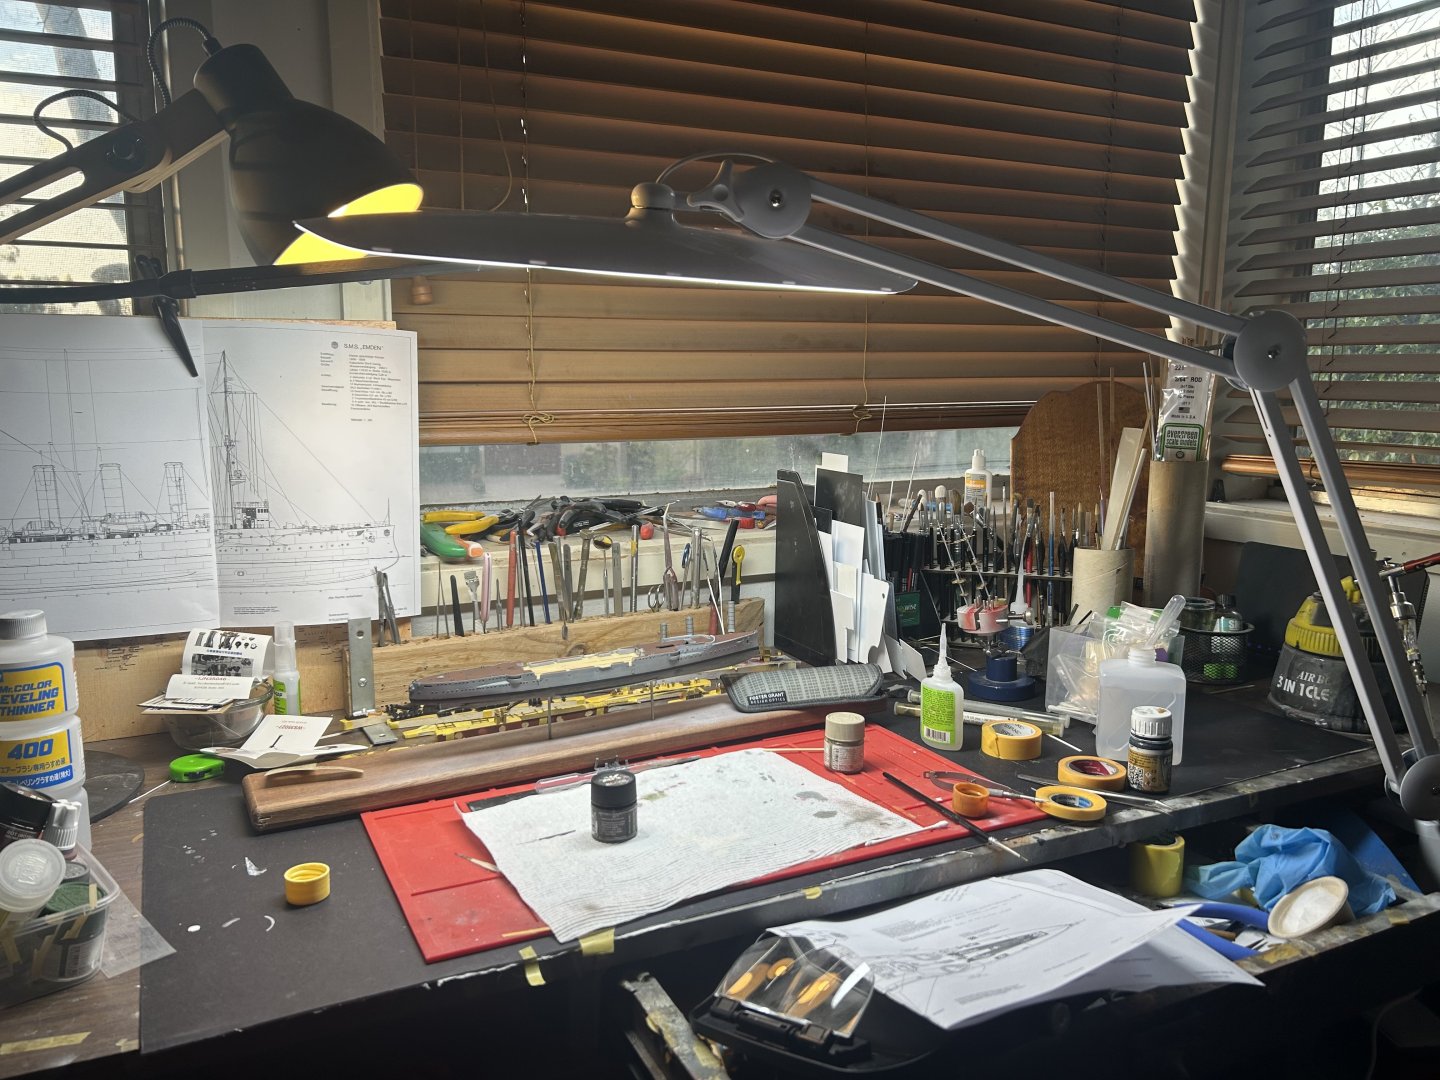
Got a new light, I’m constantly looking for better illumination Base coat down!
- 81 replies
-
- 13
-
-
- Micromaster
- Eduard
- (and 4 more)
-
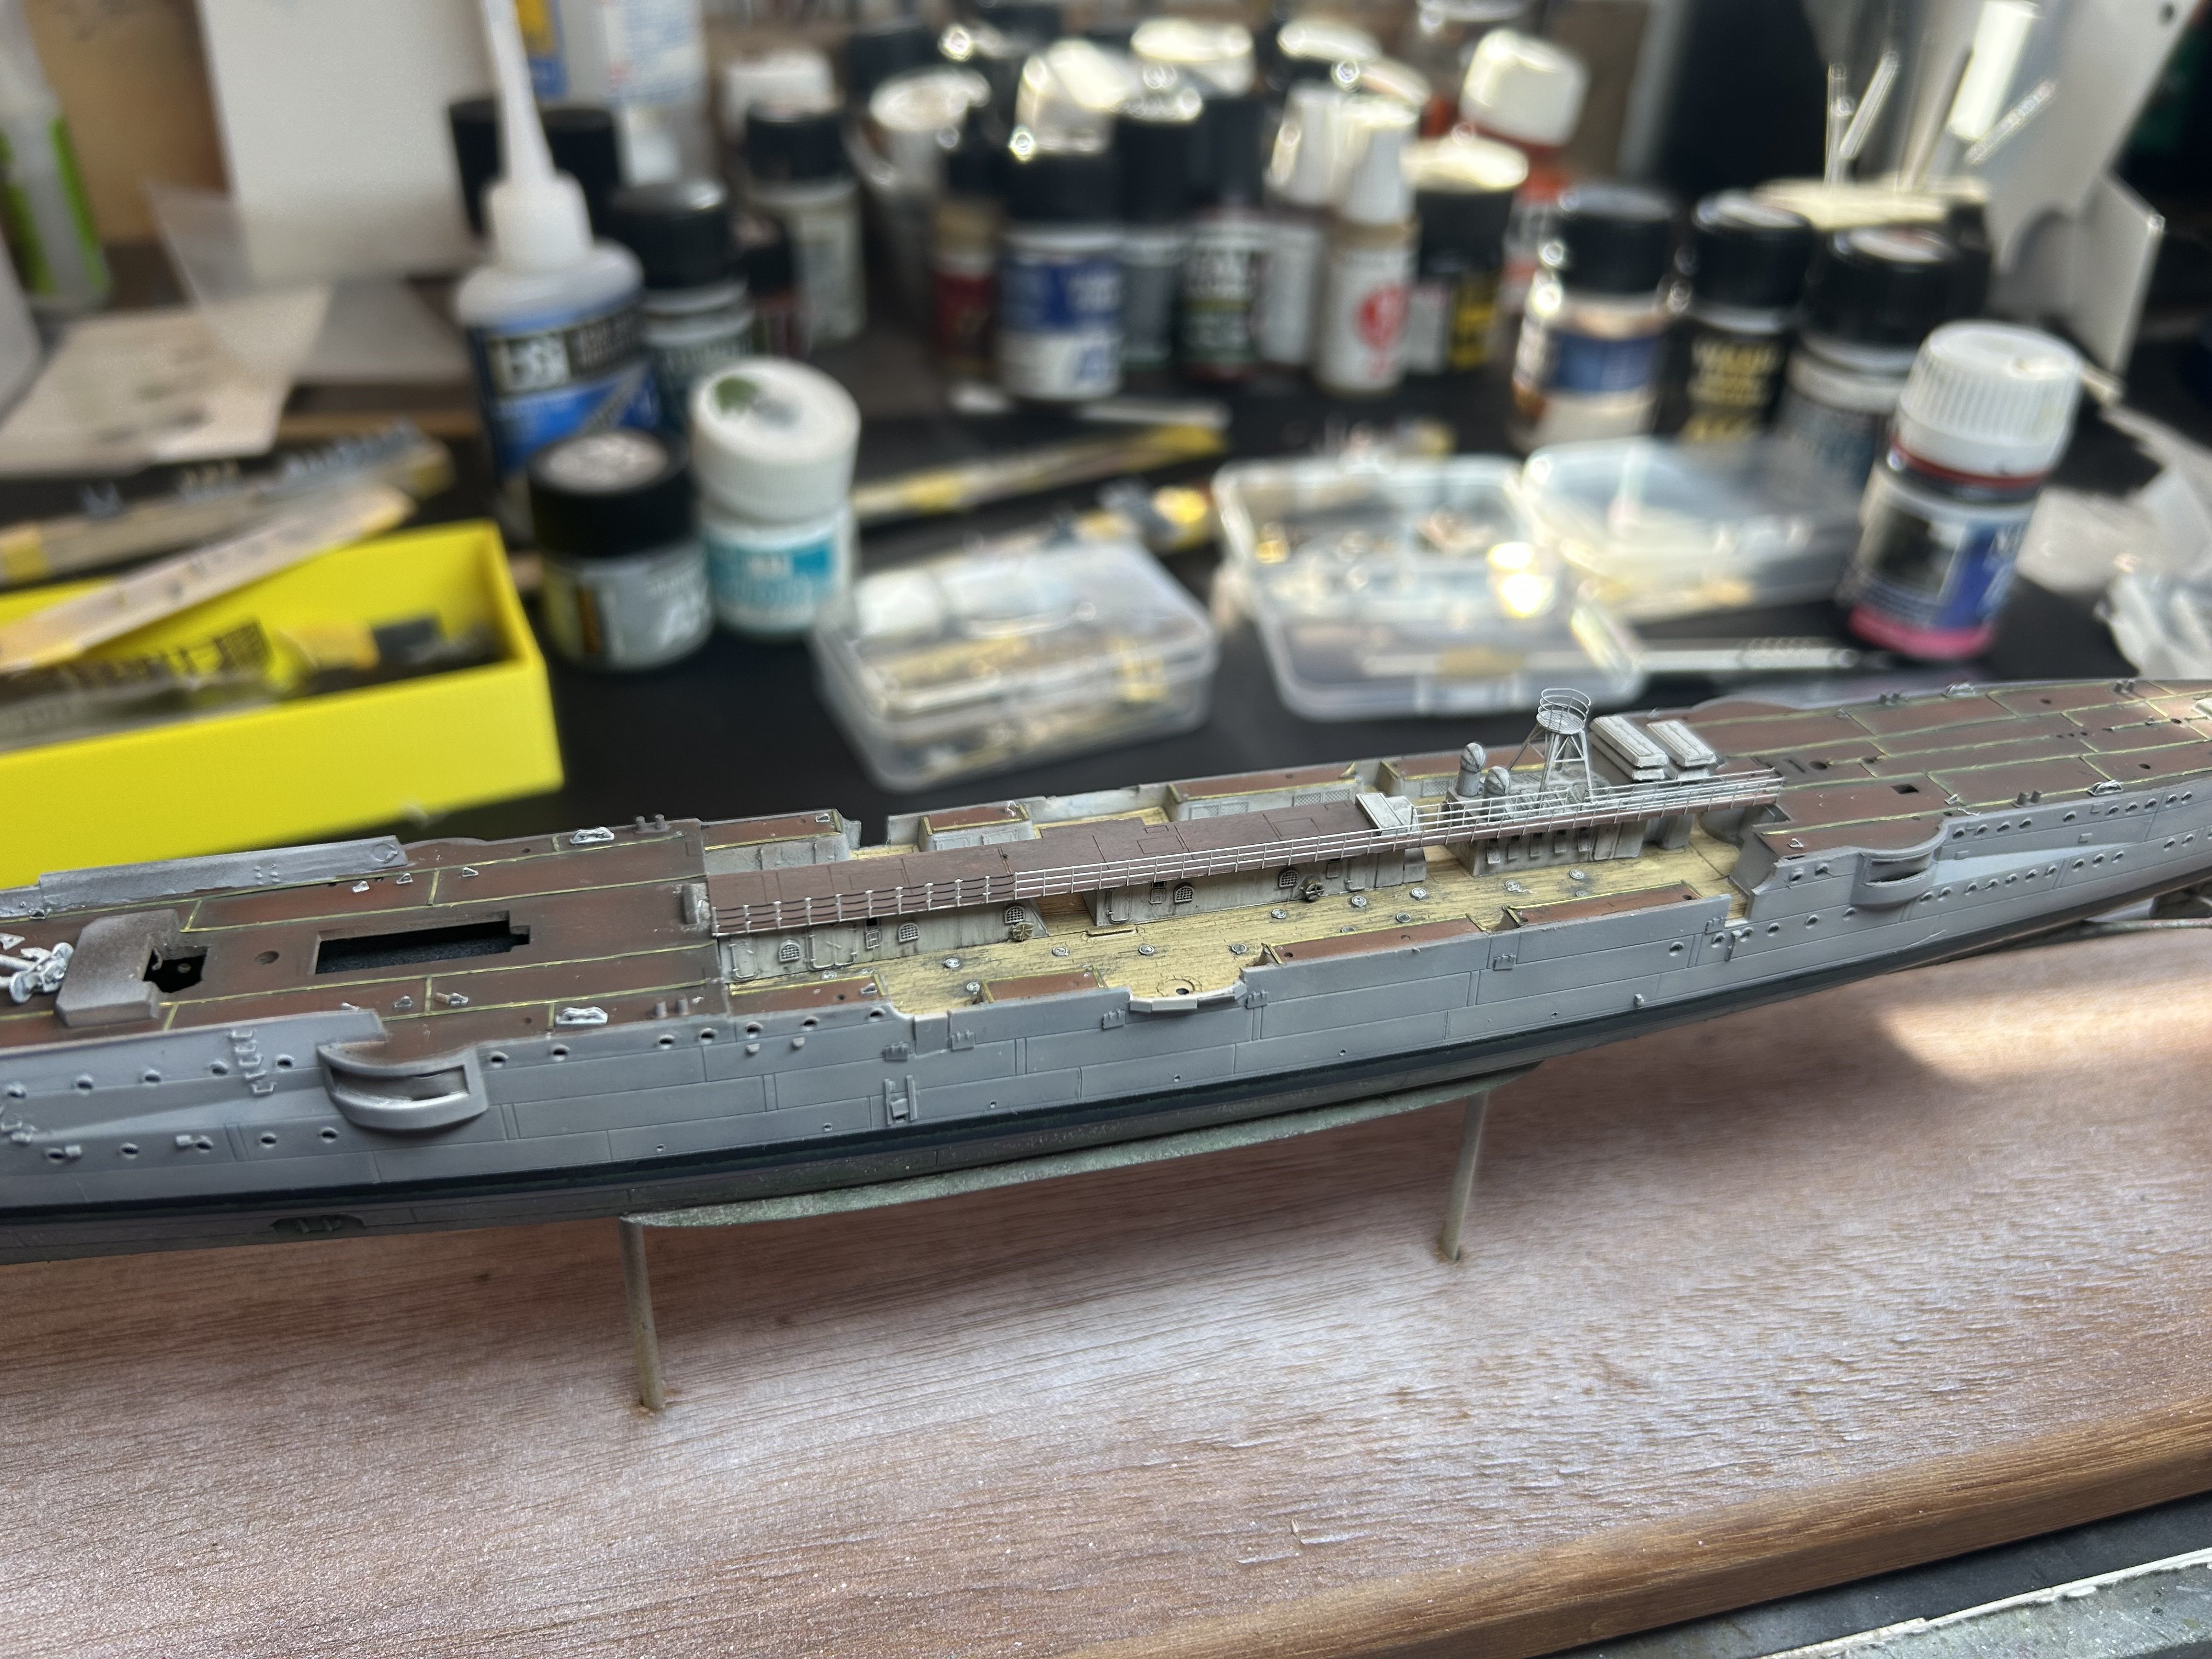
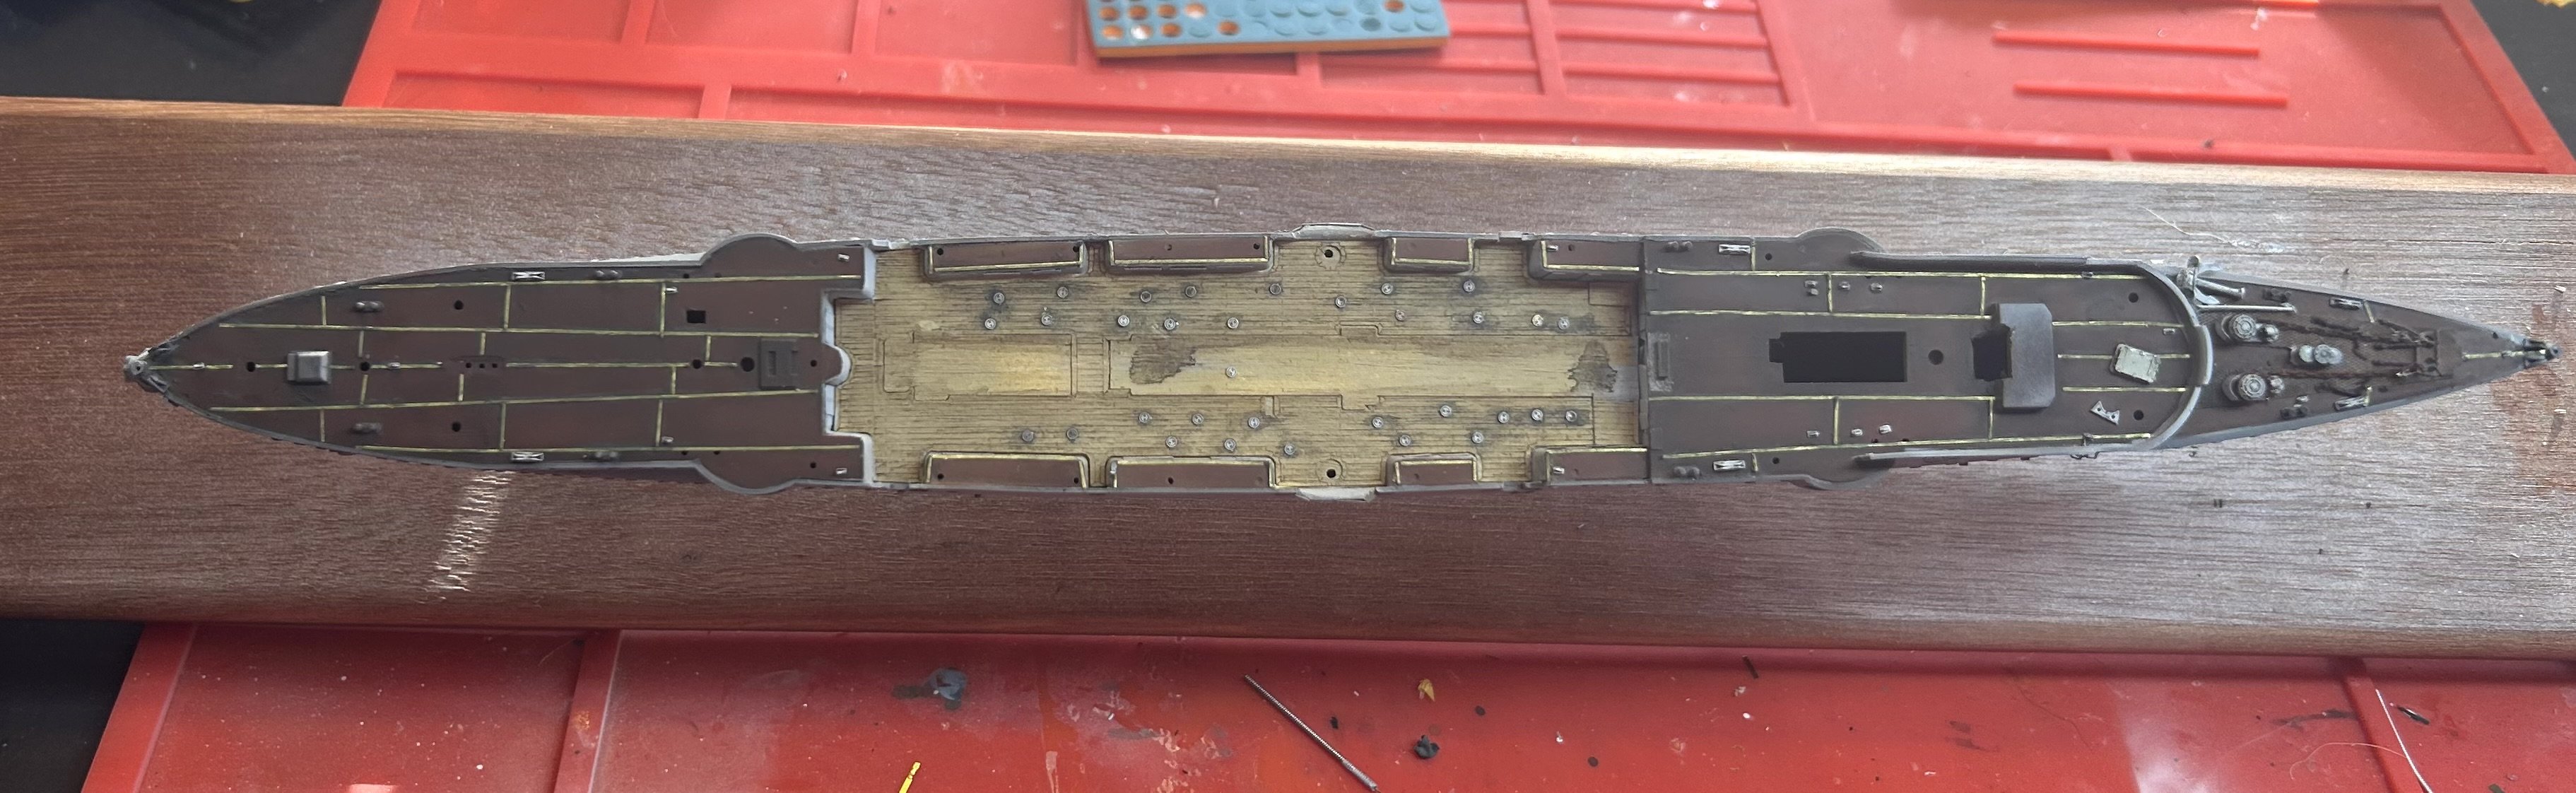
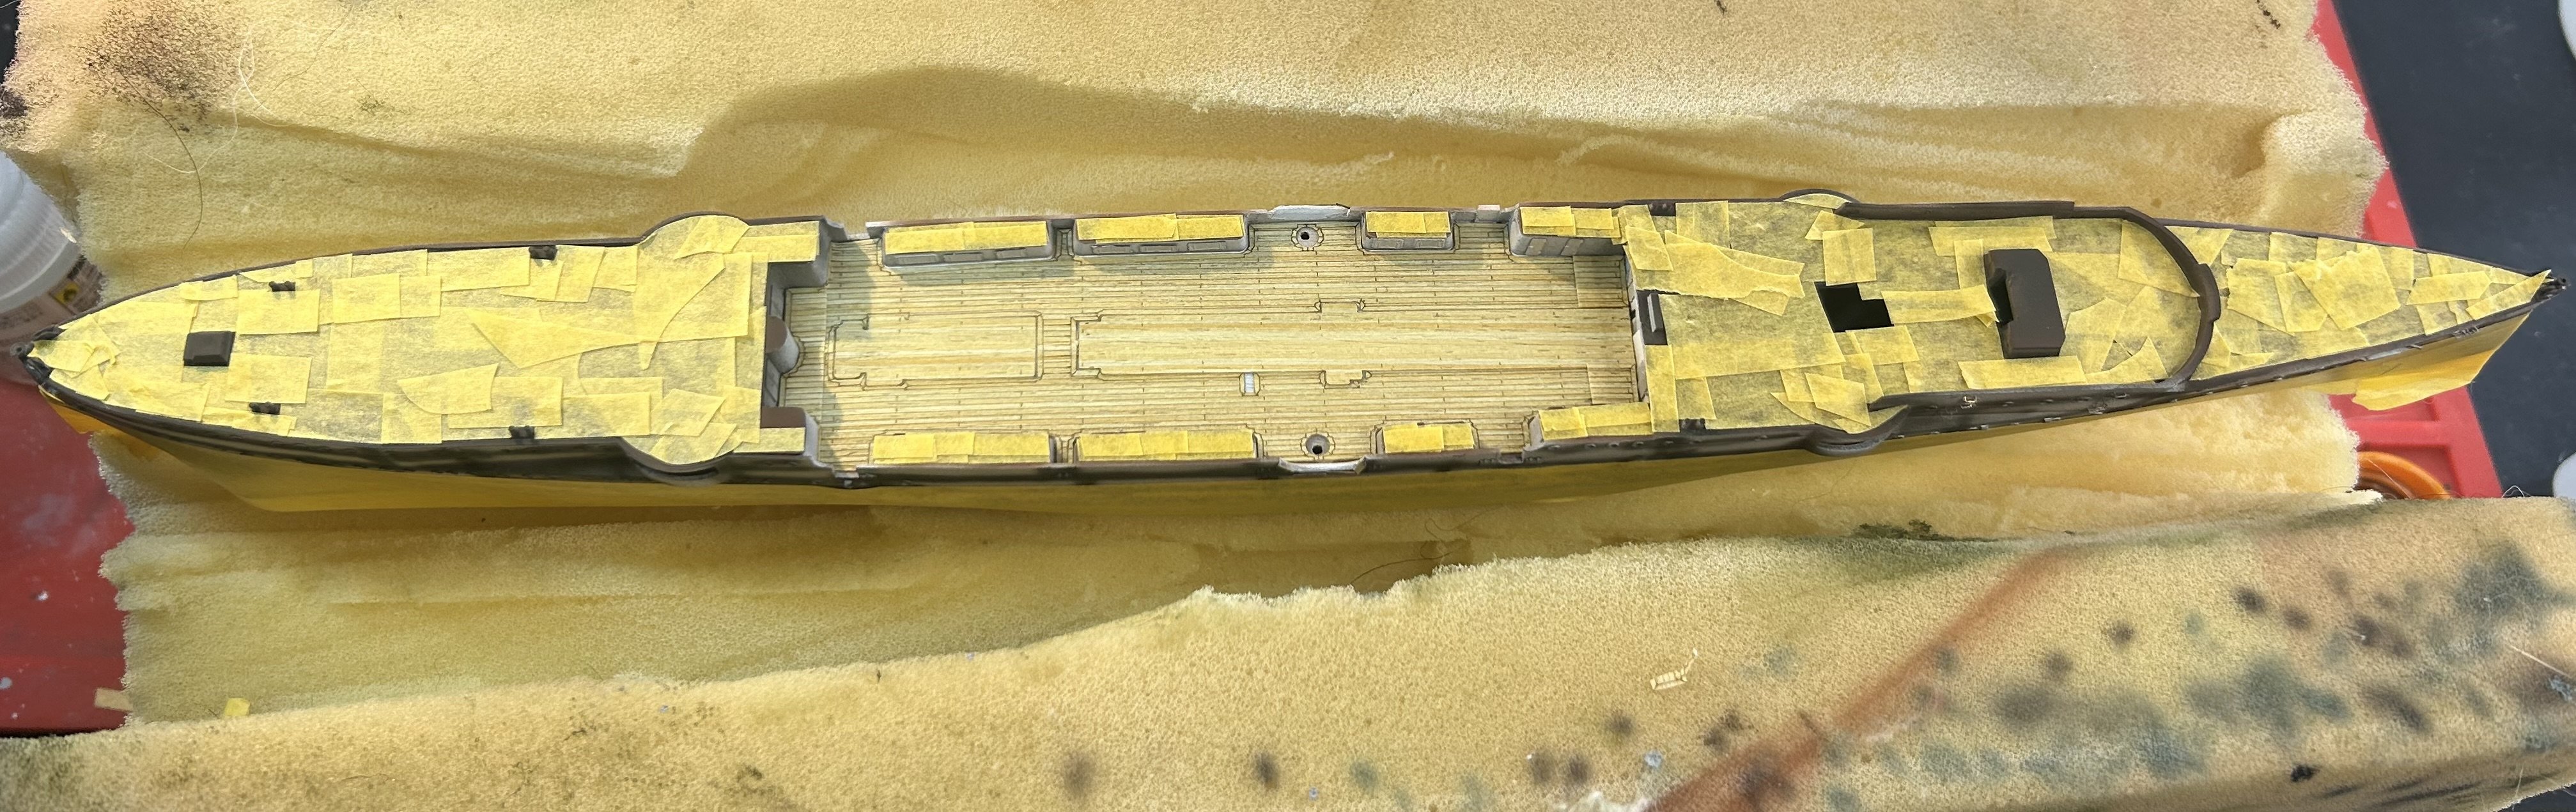
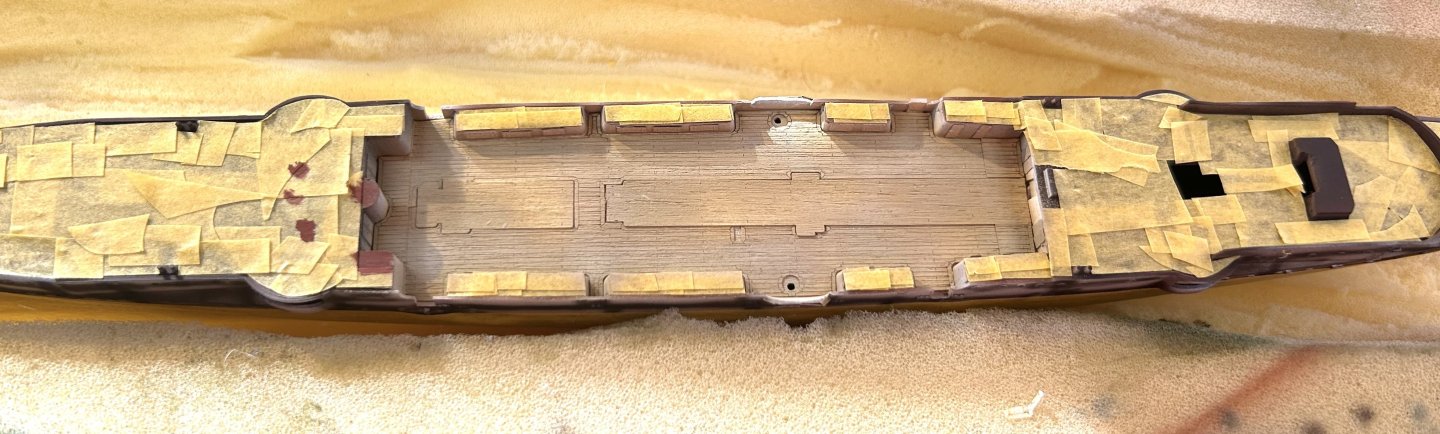
Wooden stick on deck. Sprayed with a tan to get rid of the pre chewed look. I’ll give it a clear coat so it can be weathered

- 81 replies
-
- 9
-
-
- Micromaster
- Eduard
- (and 4 more)
-
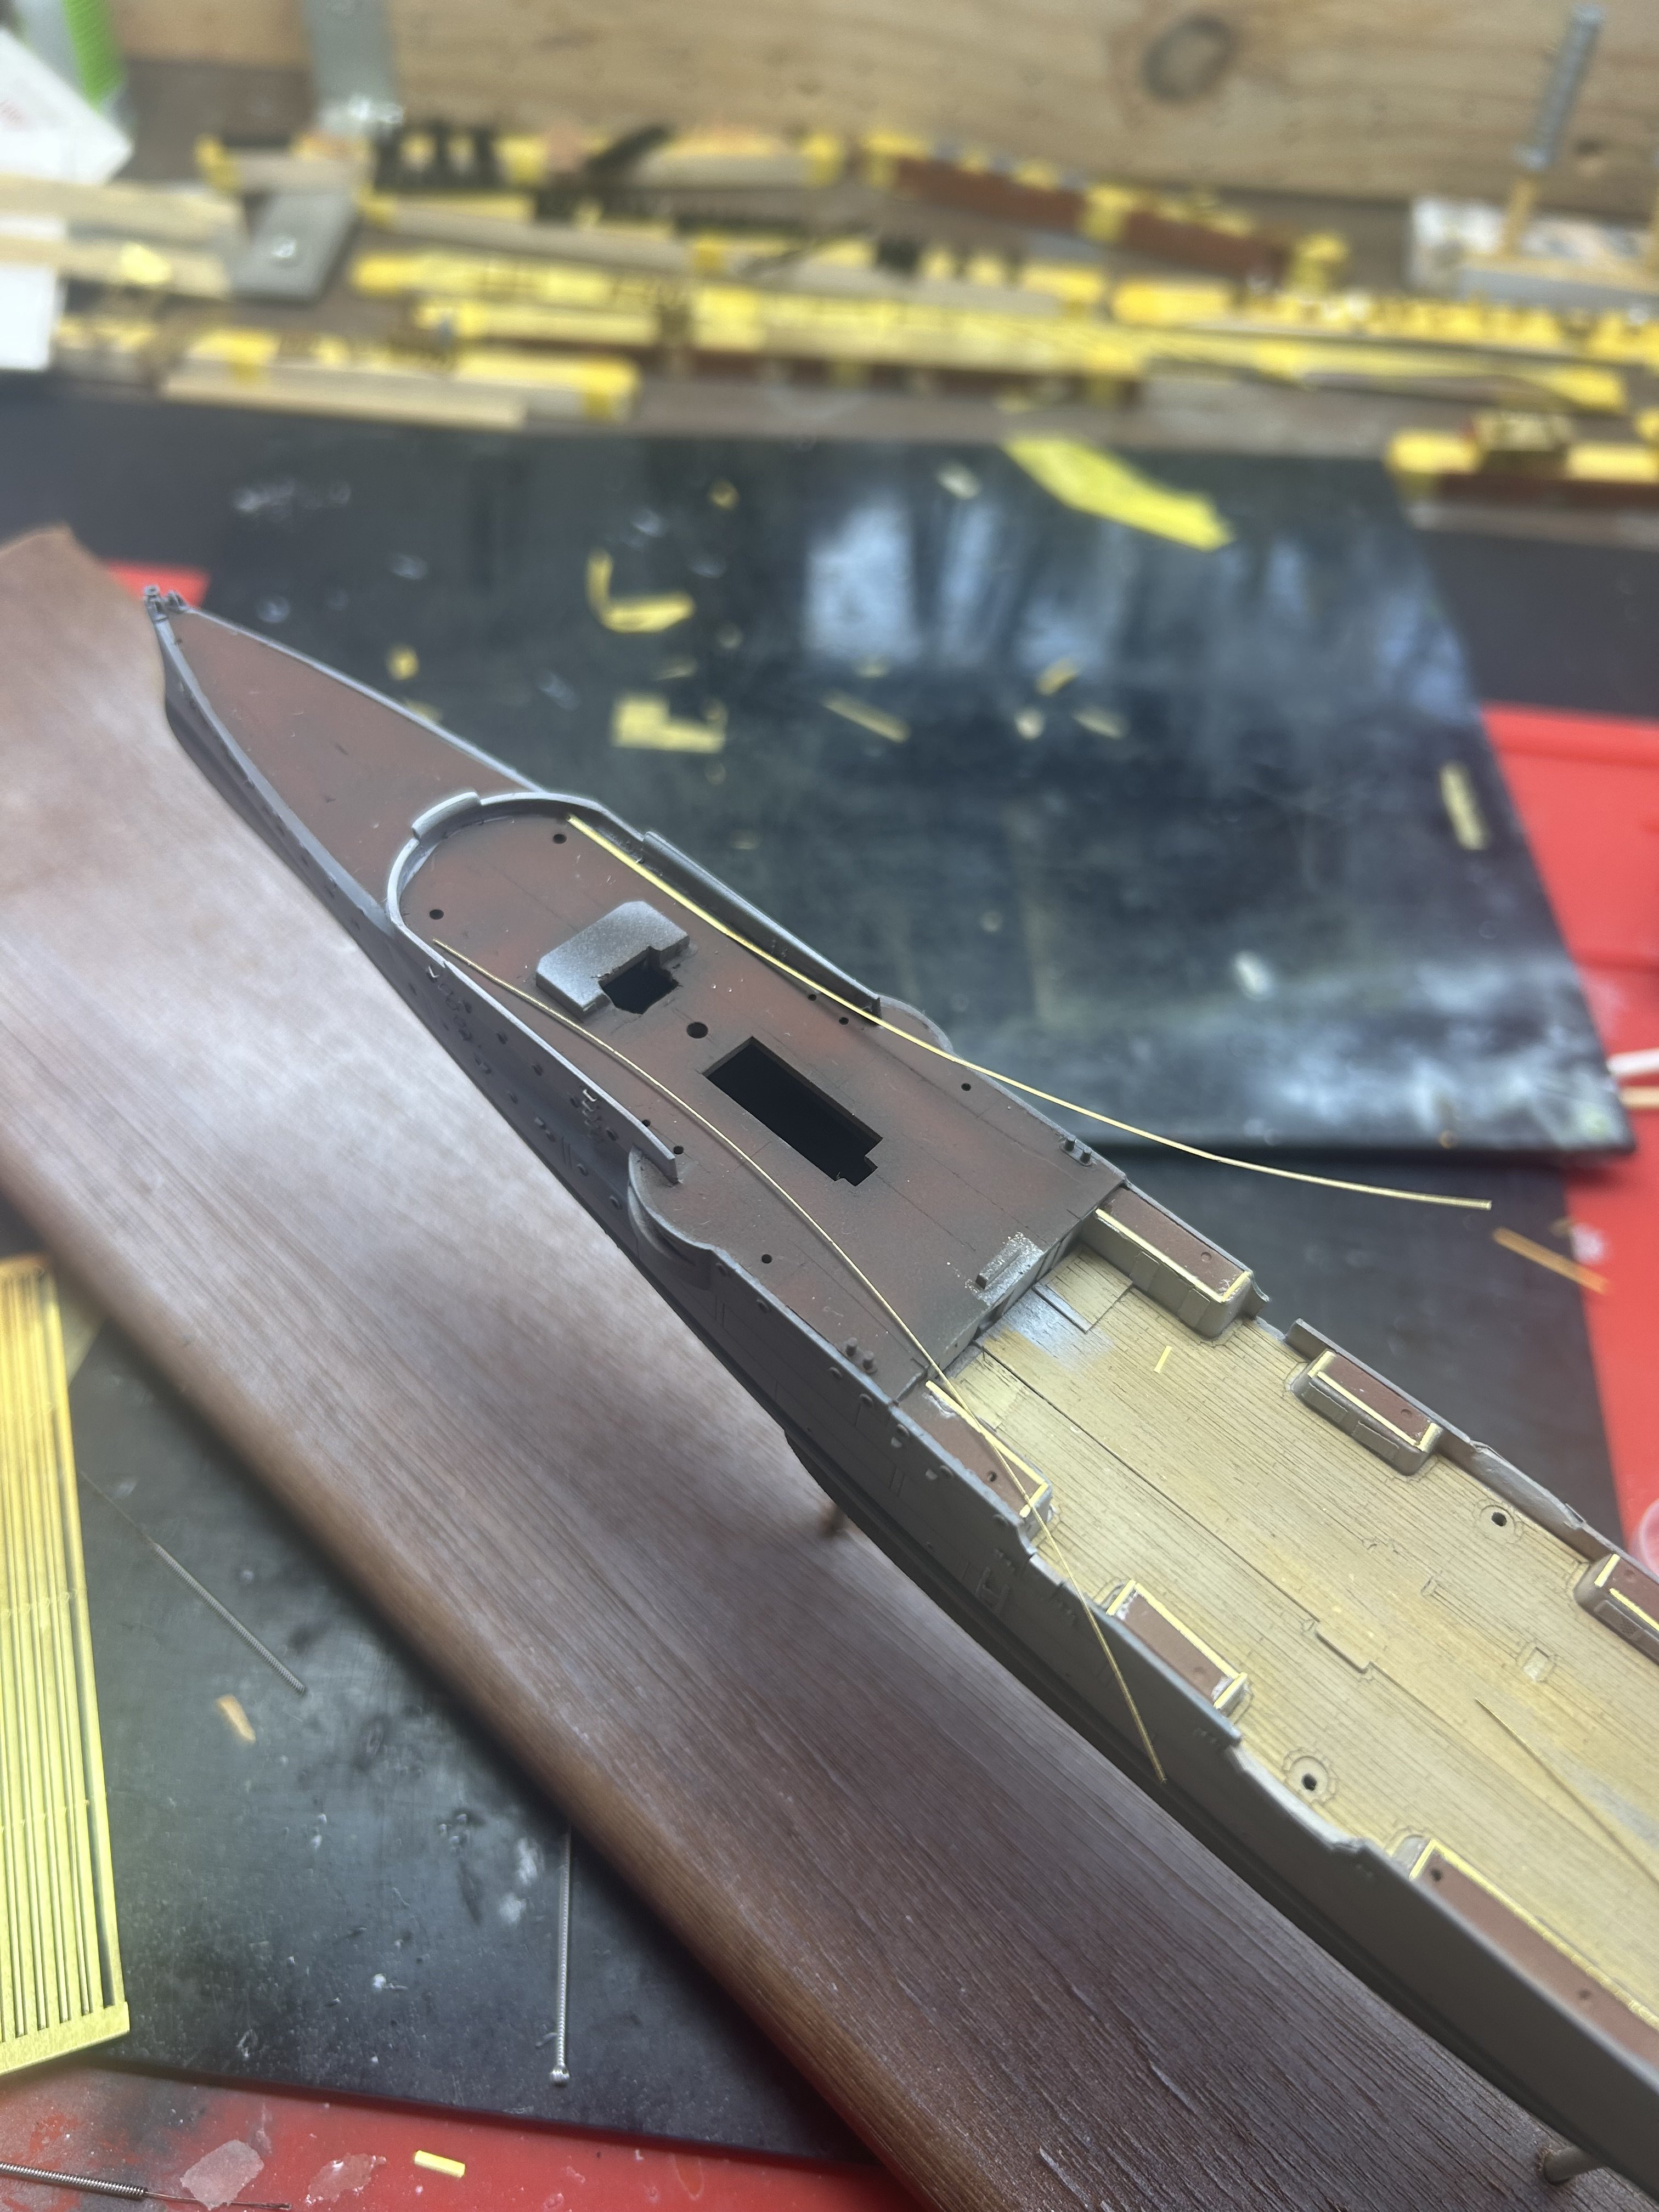
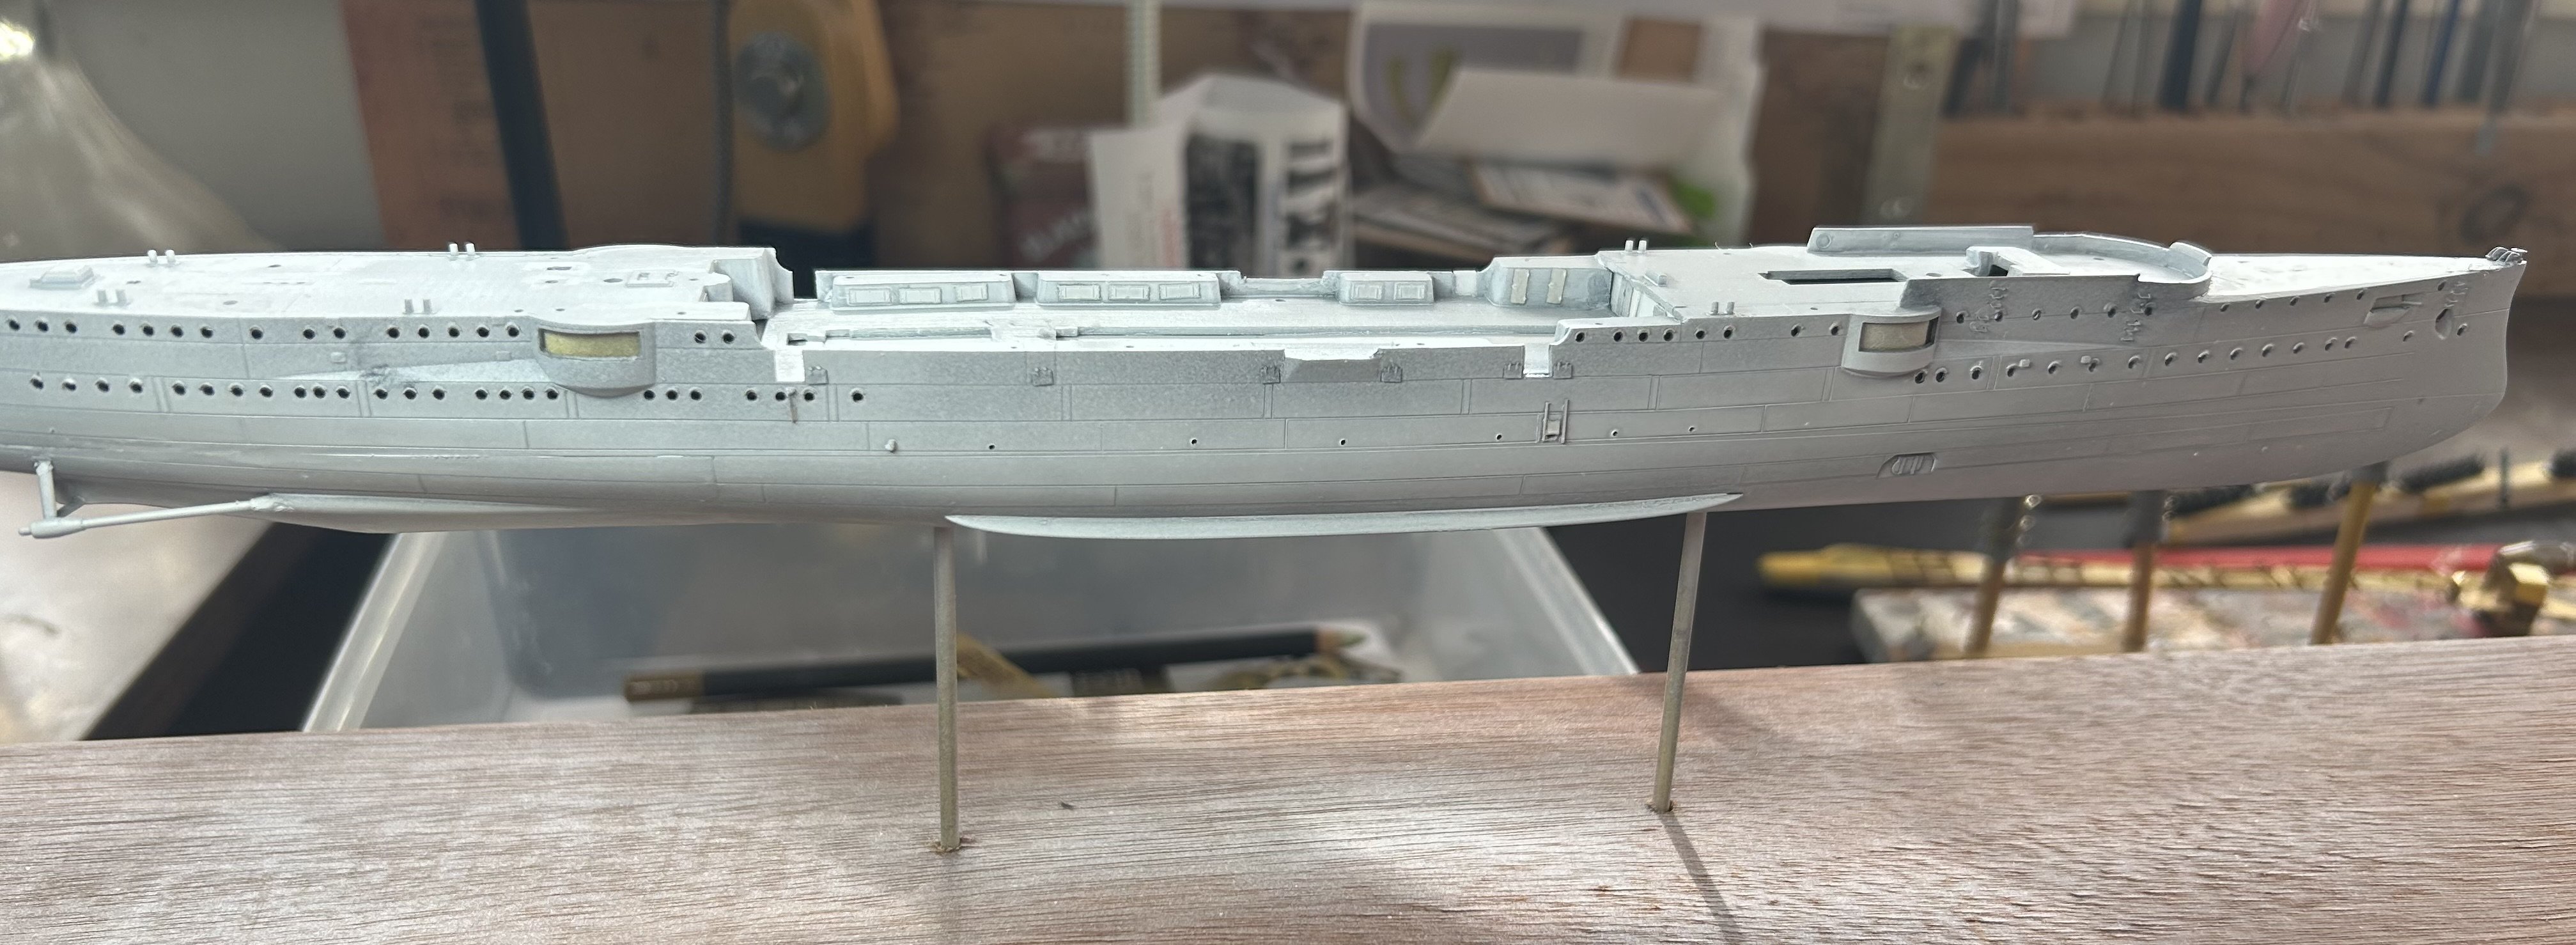
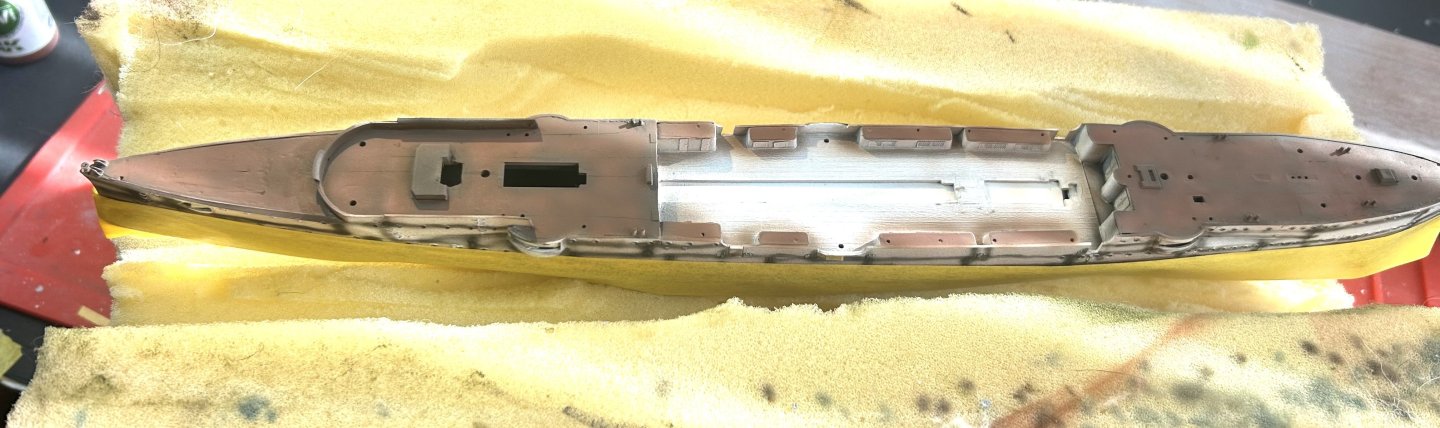
Emdens deck, two shades of brown; this was linoleum and I imagine it would get a bit of fade in the tropics. It comes up black in the old photos but would have been burnt. I’ve given it a clear coat and will mask it when dry. Next is to paint the hull before I can remove the mask and add the brass hold down strips

- 81 replies
-
- 6
-
-
- Micromaster
- Eduard
- (and 4 more)
-
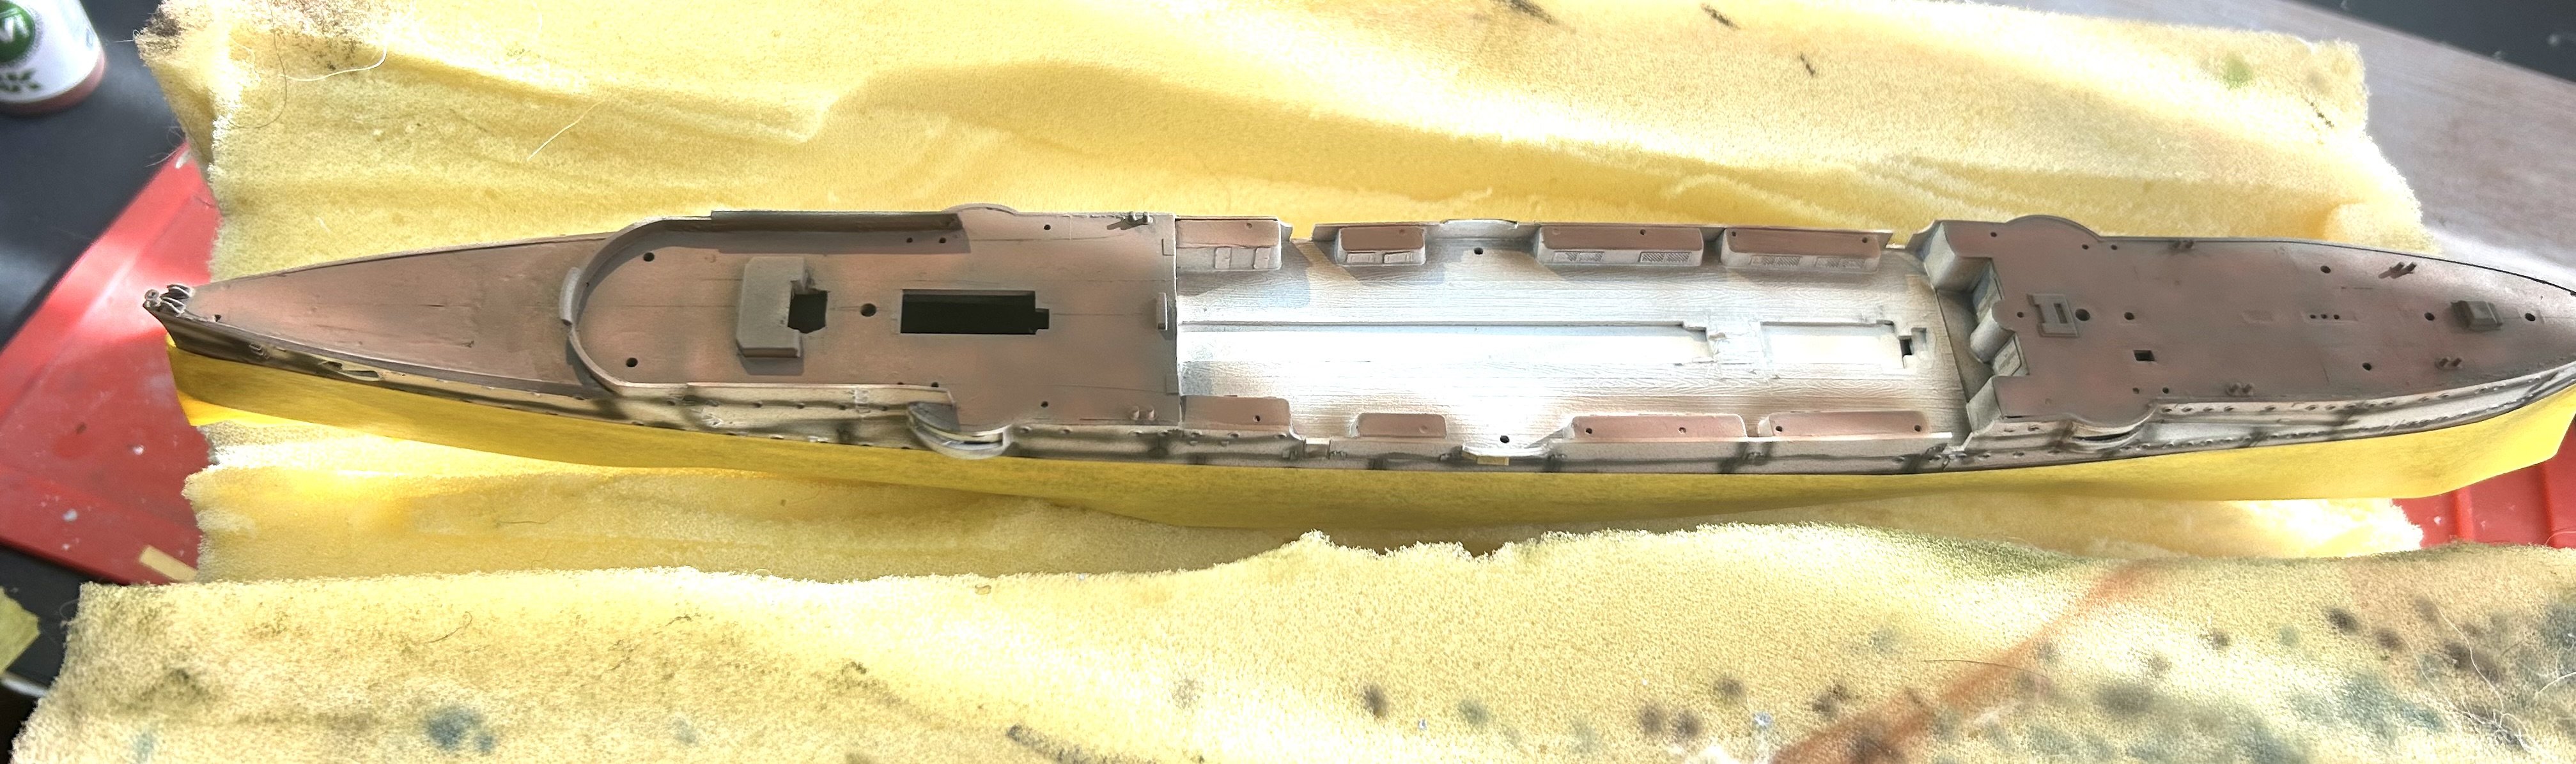
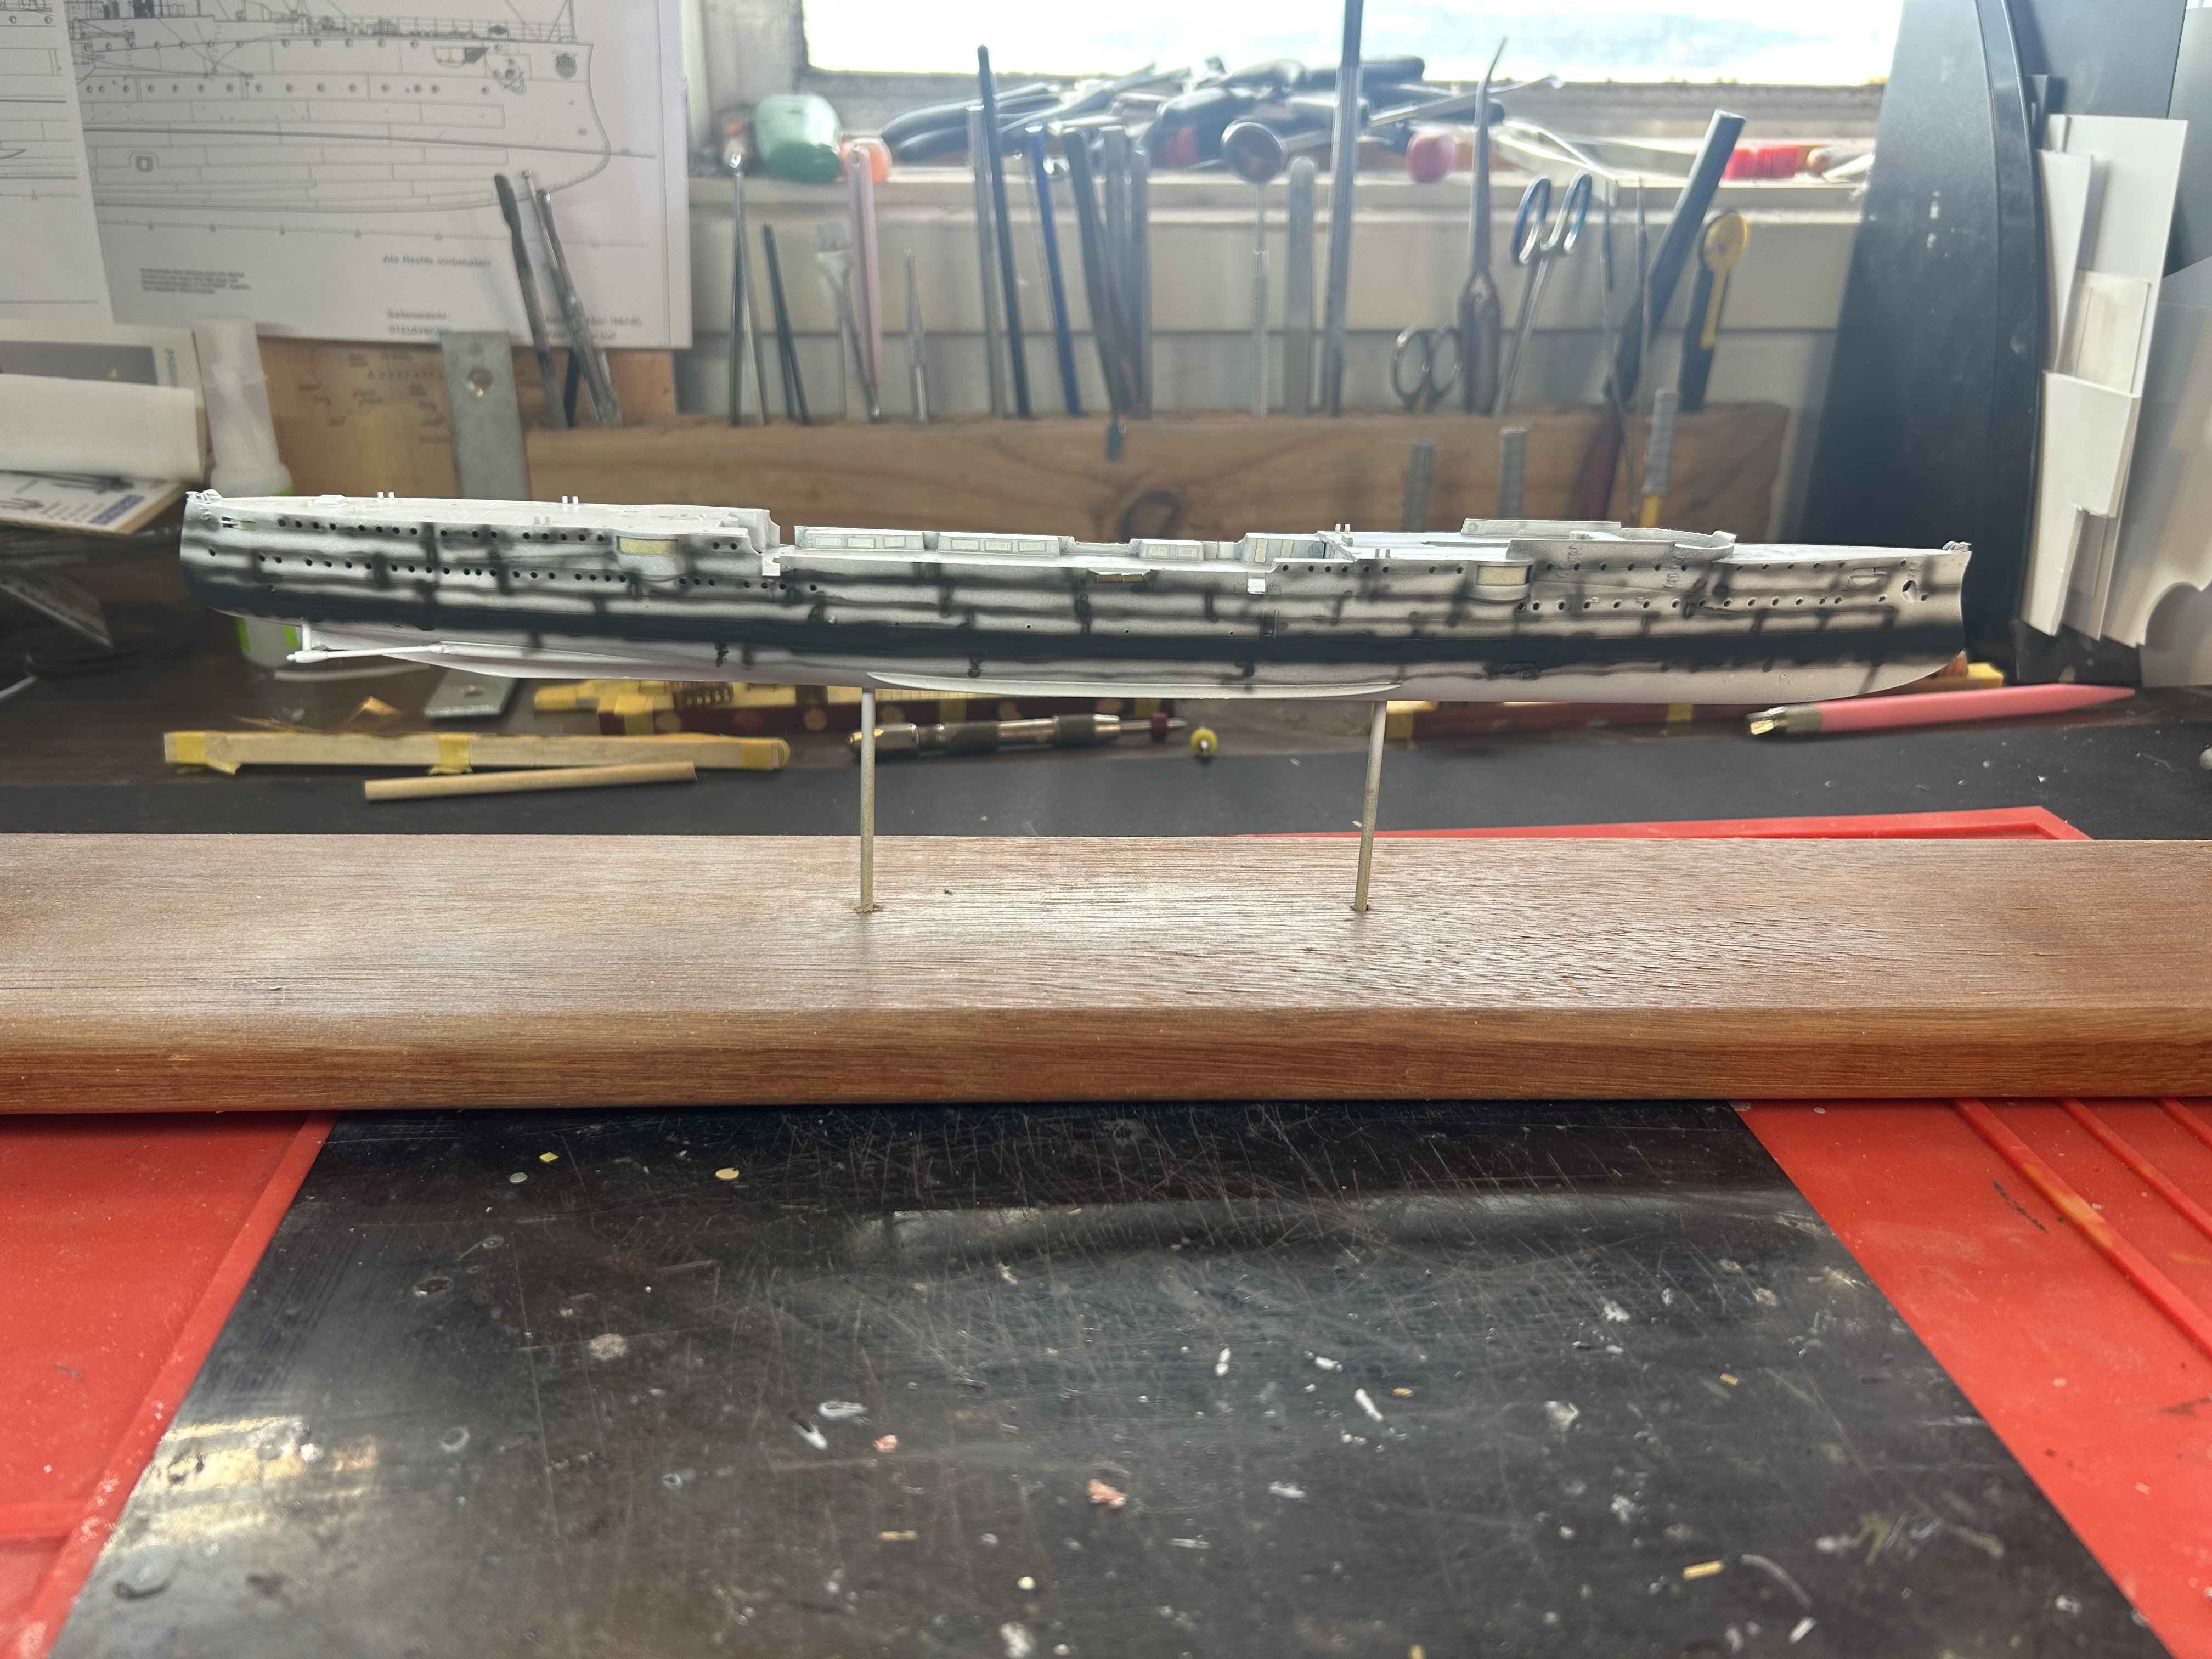
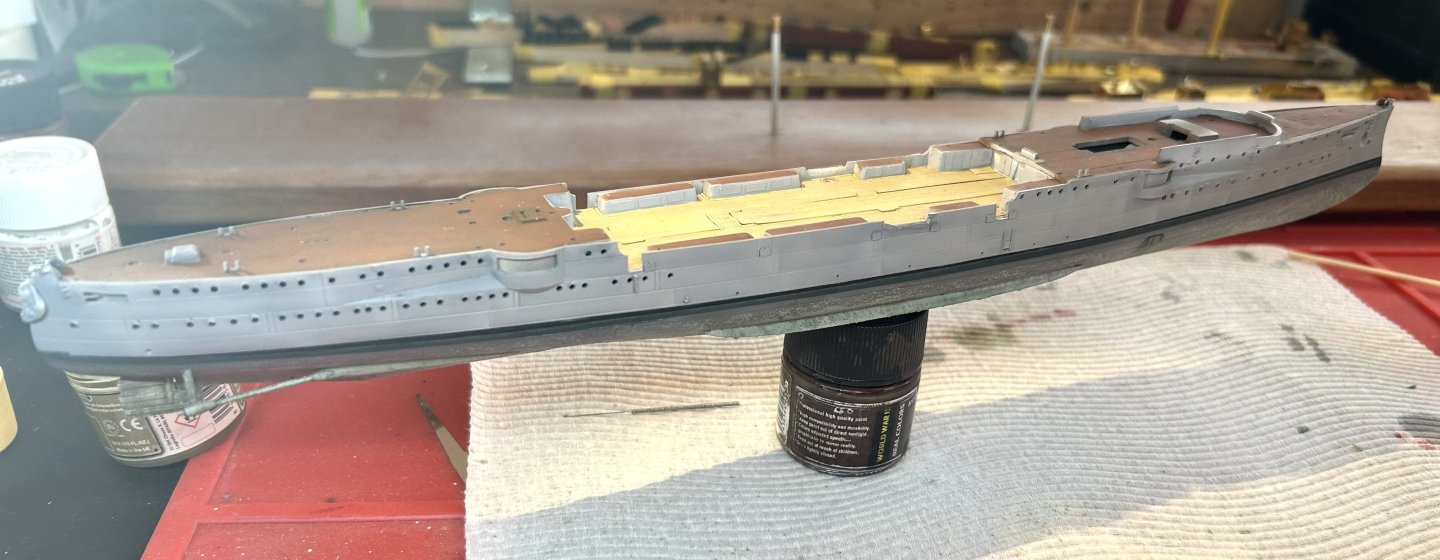
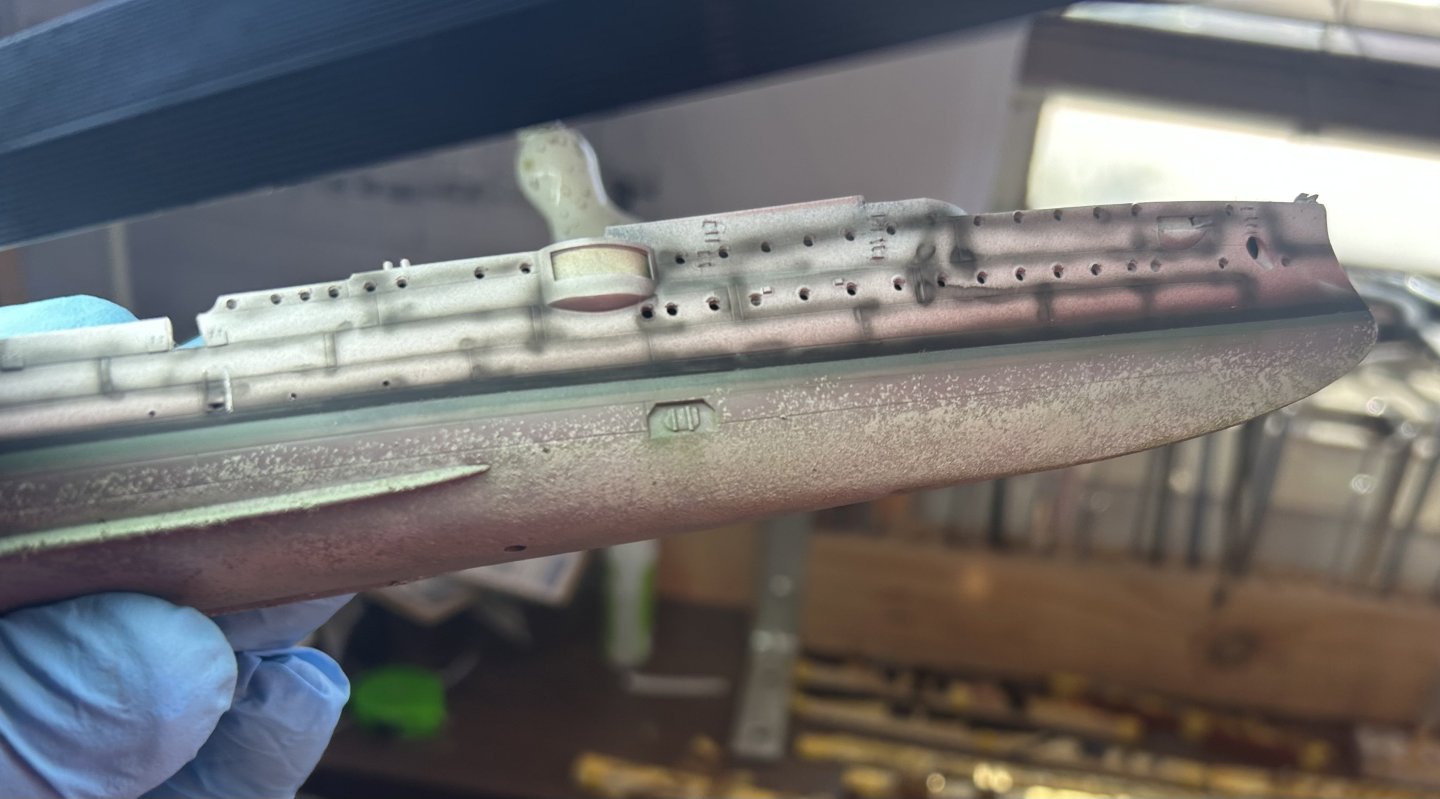
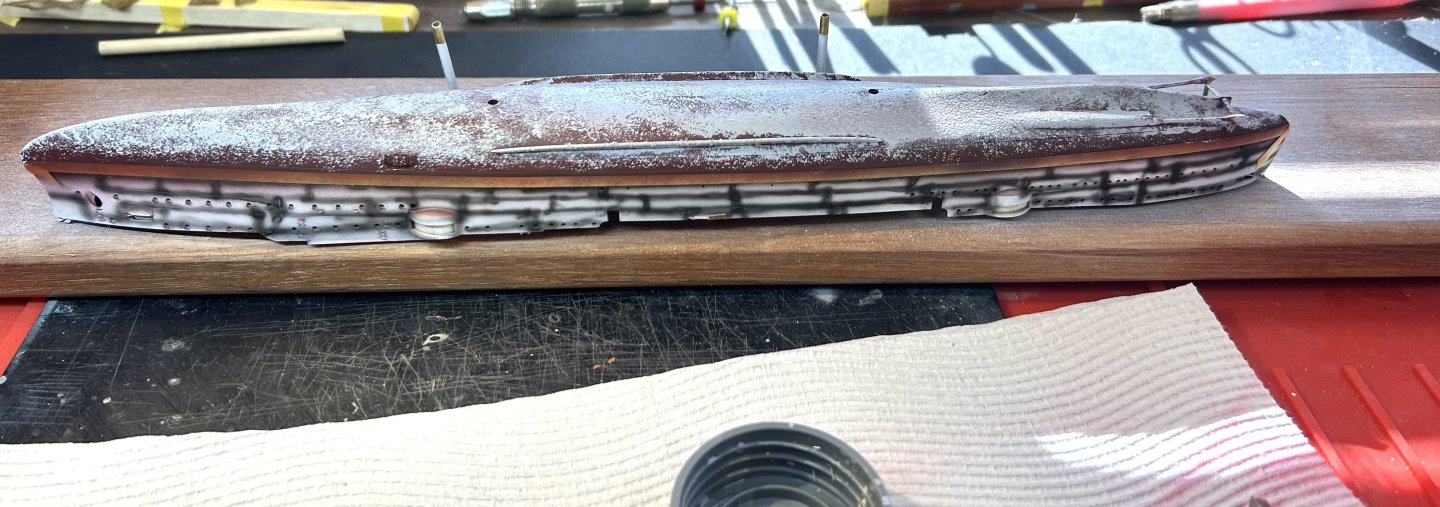
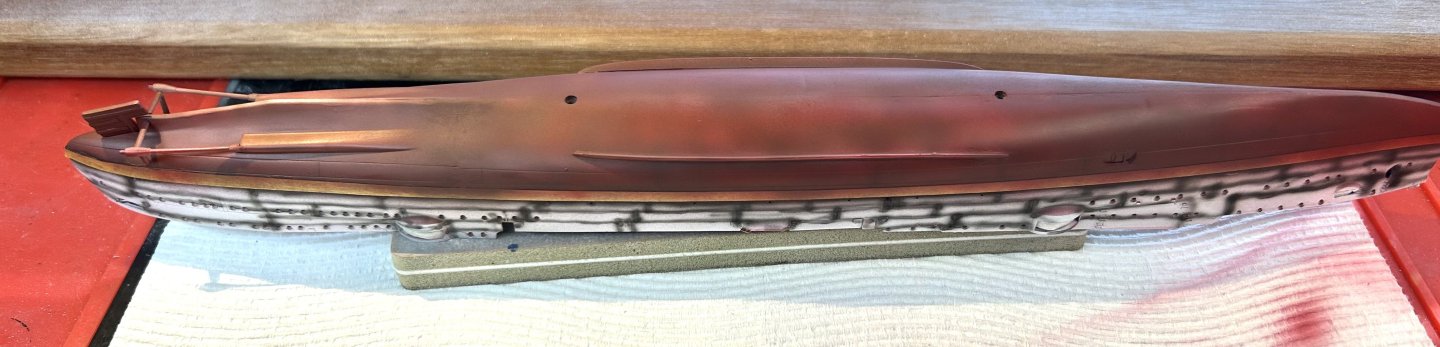
Continuing to work in the grunge, when upon close inspection I can see seam lines and putty. More sanding to do the patch work repairs and I’ll redo the boot strap and I want to make it a little more defined .


- 81 replies
-
- 5
-
-
- Micromaster
- Eduard
- (and 4 more)
-
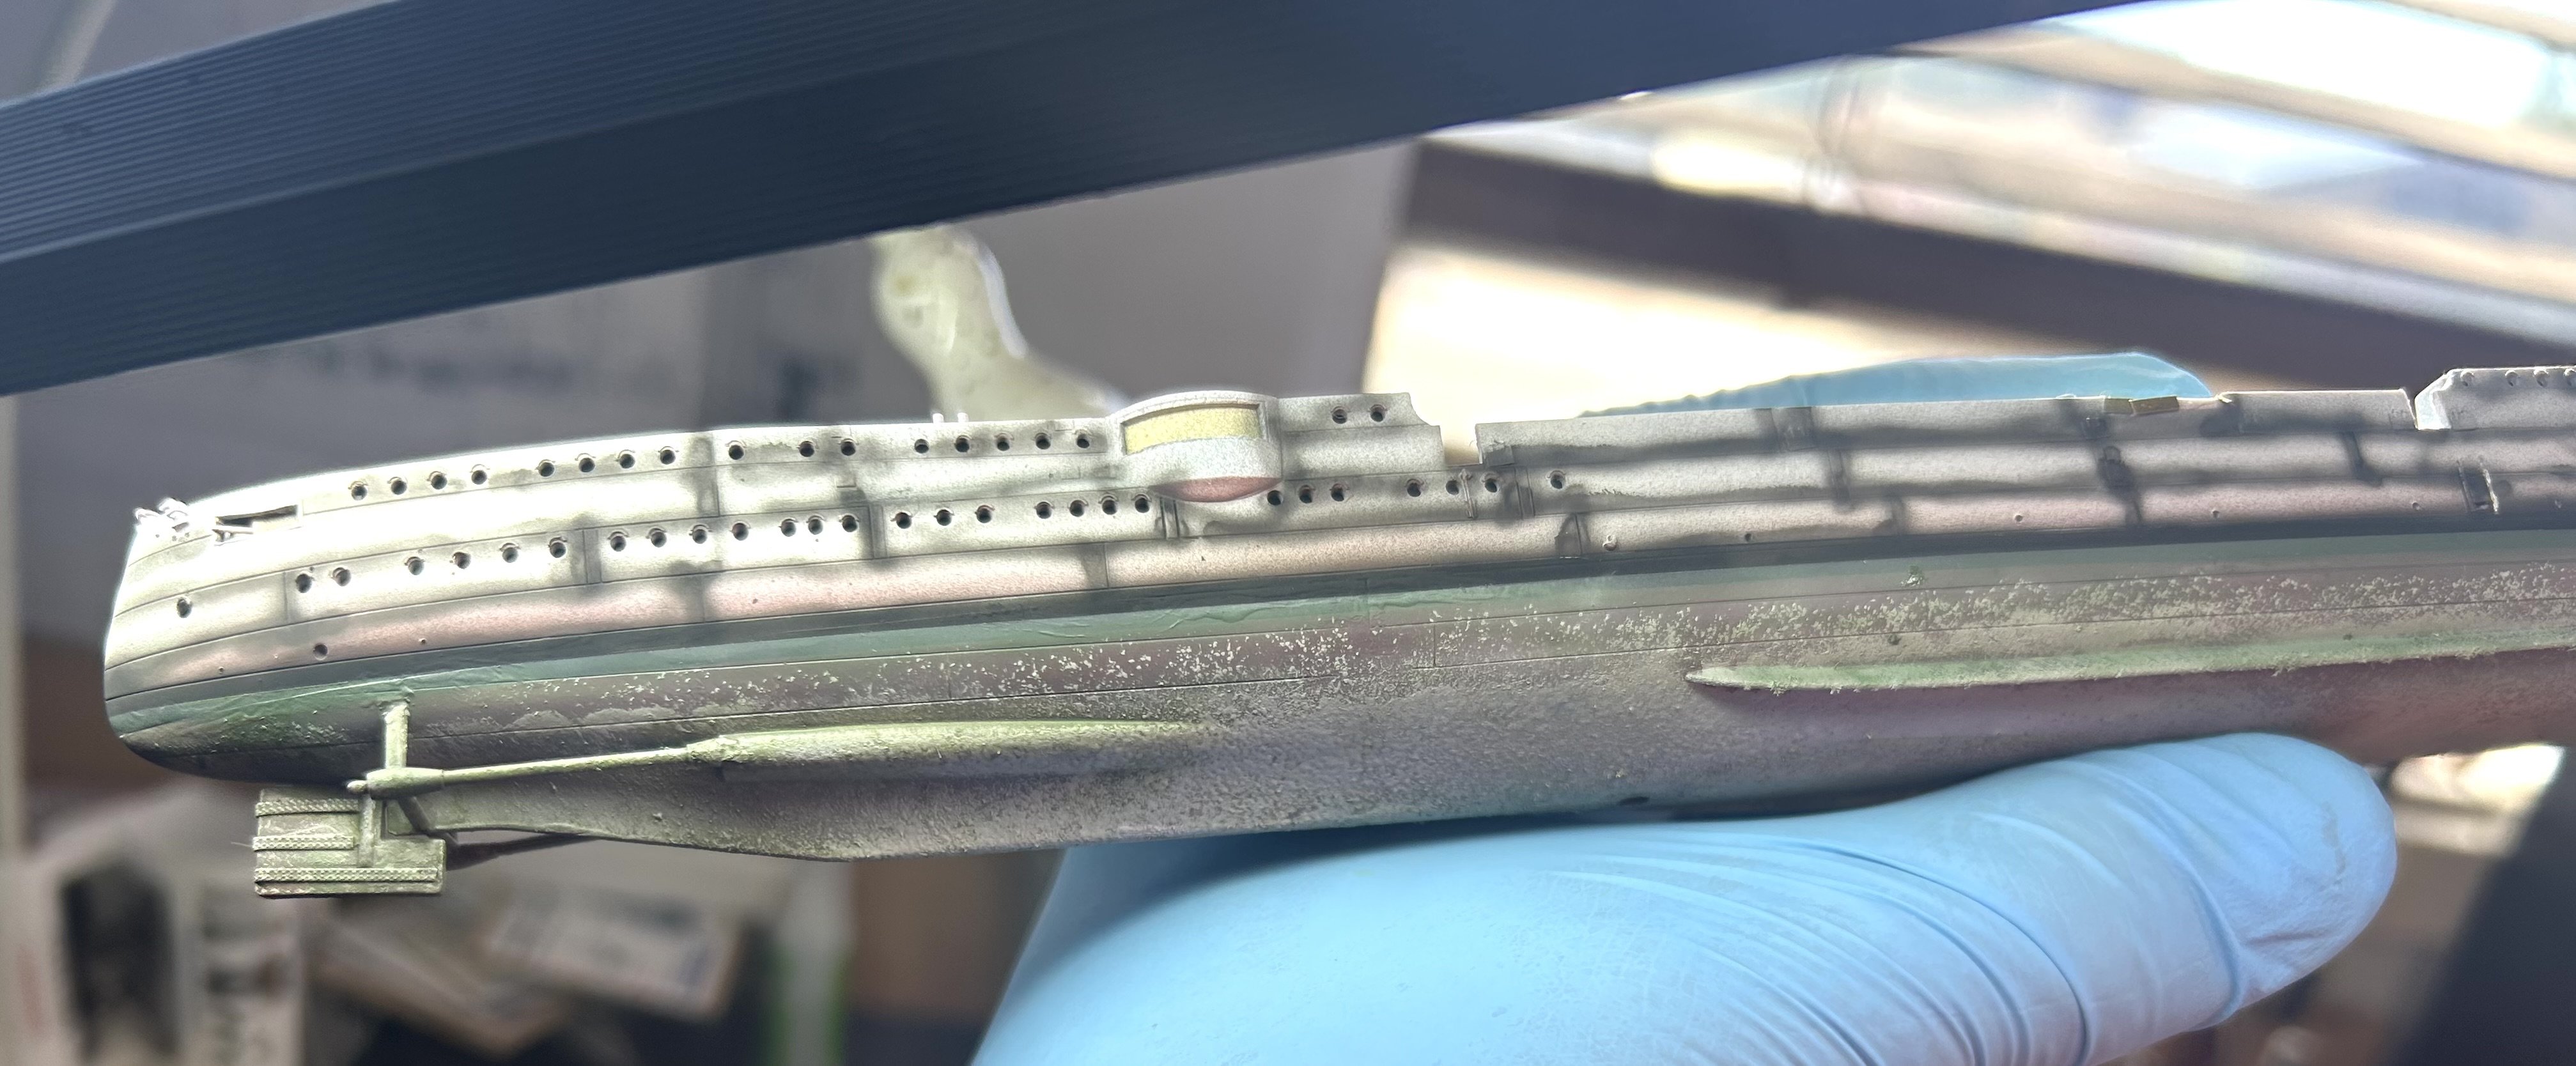
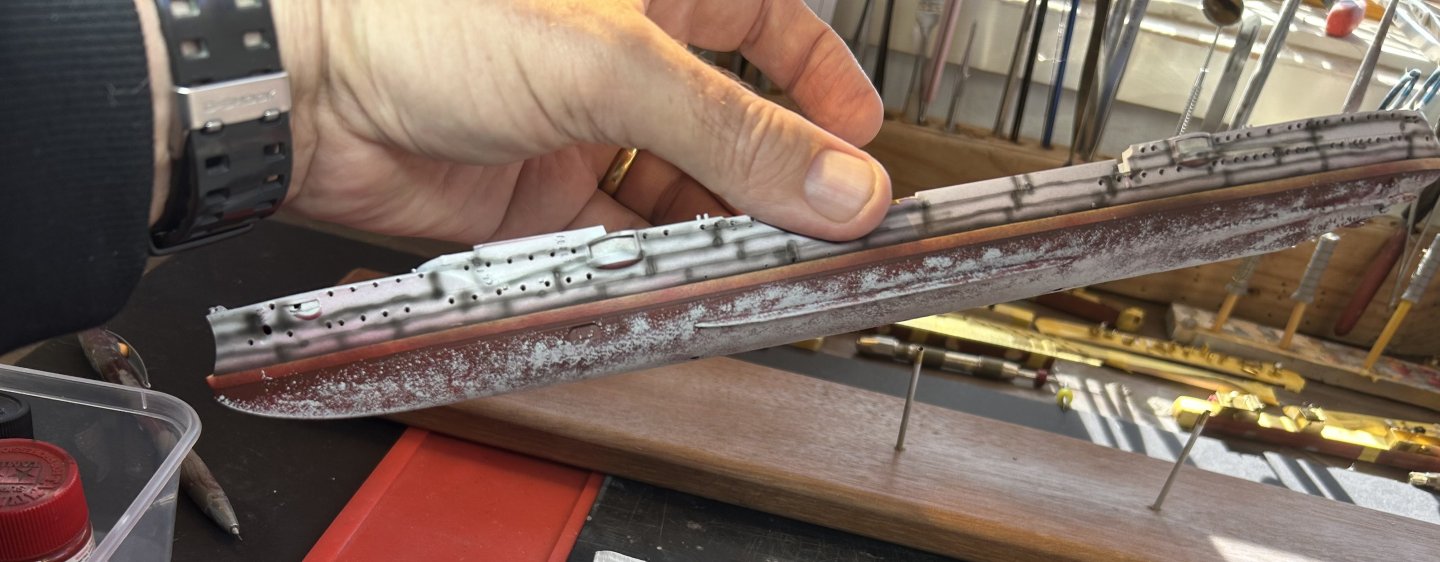
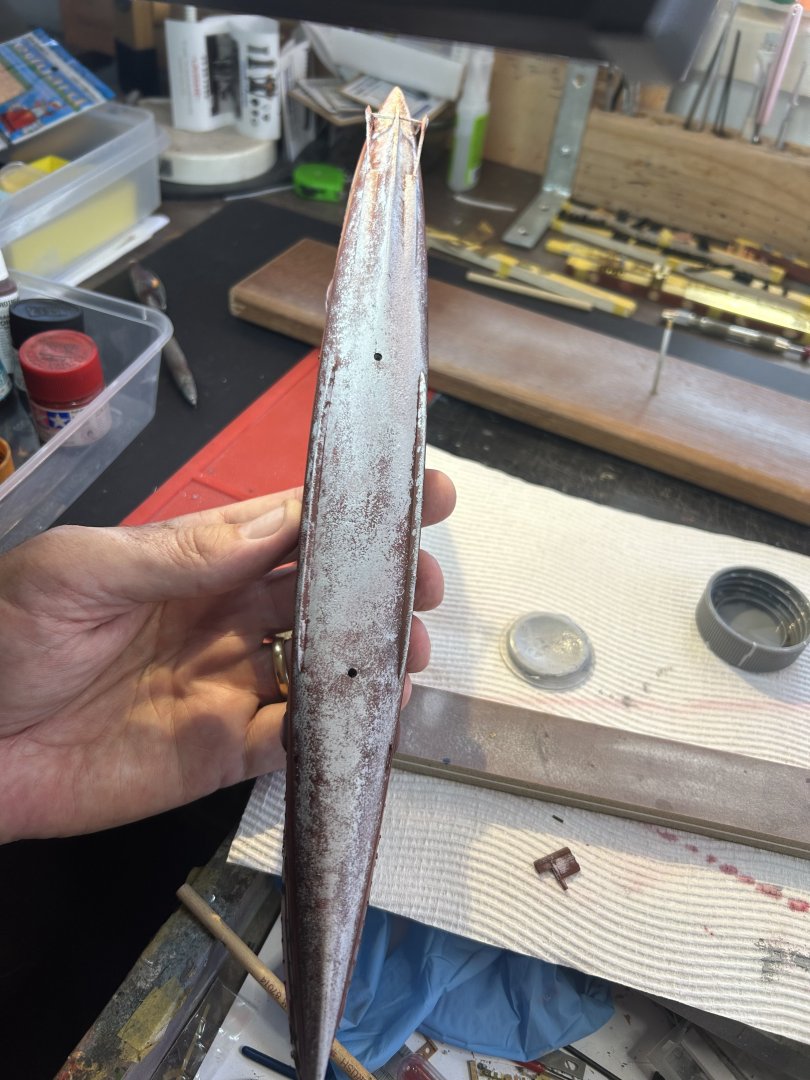
Starting on the alge. Given the scale it is sponged on and tomorrow I’ll start on layering overspray of black, grey and green
- 81 replies
-
- 8
-
-
- Micromaster
- Eduard
- (and 4 more)
-
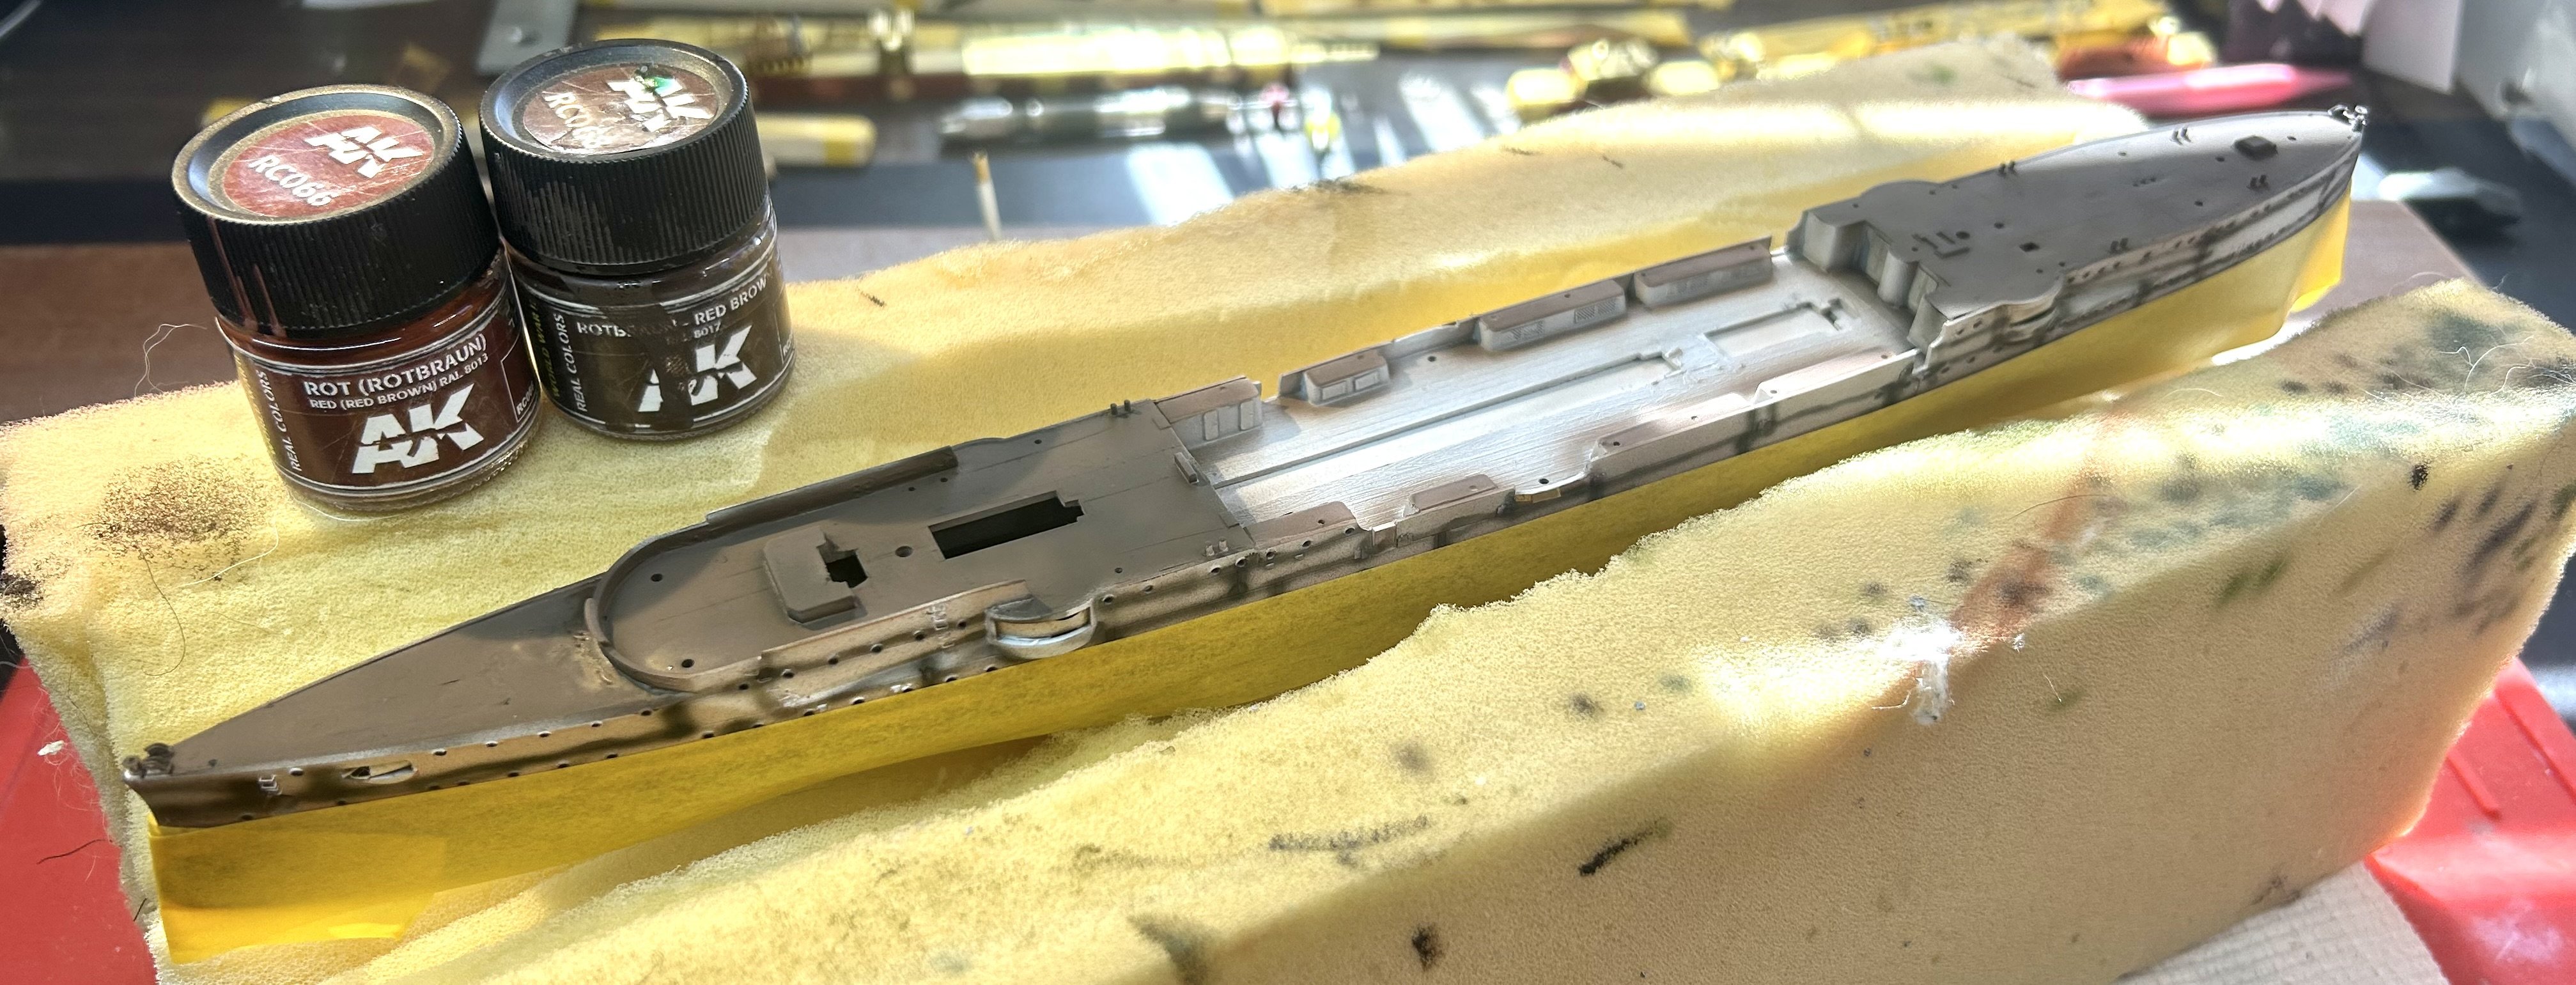
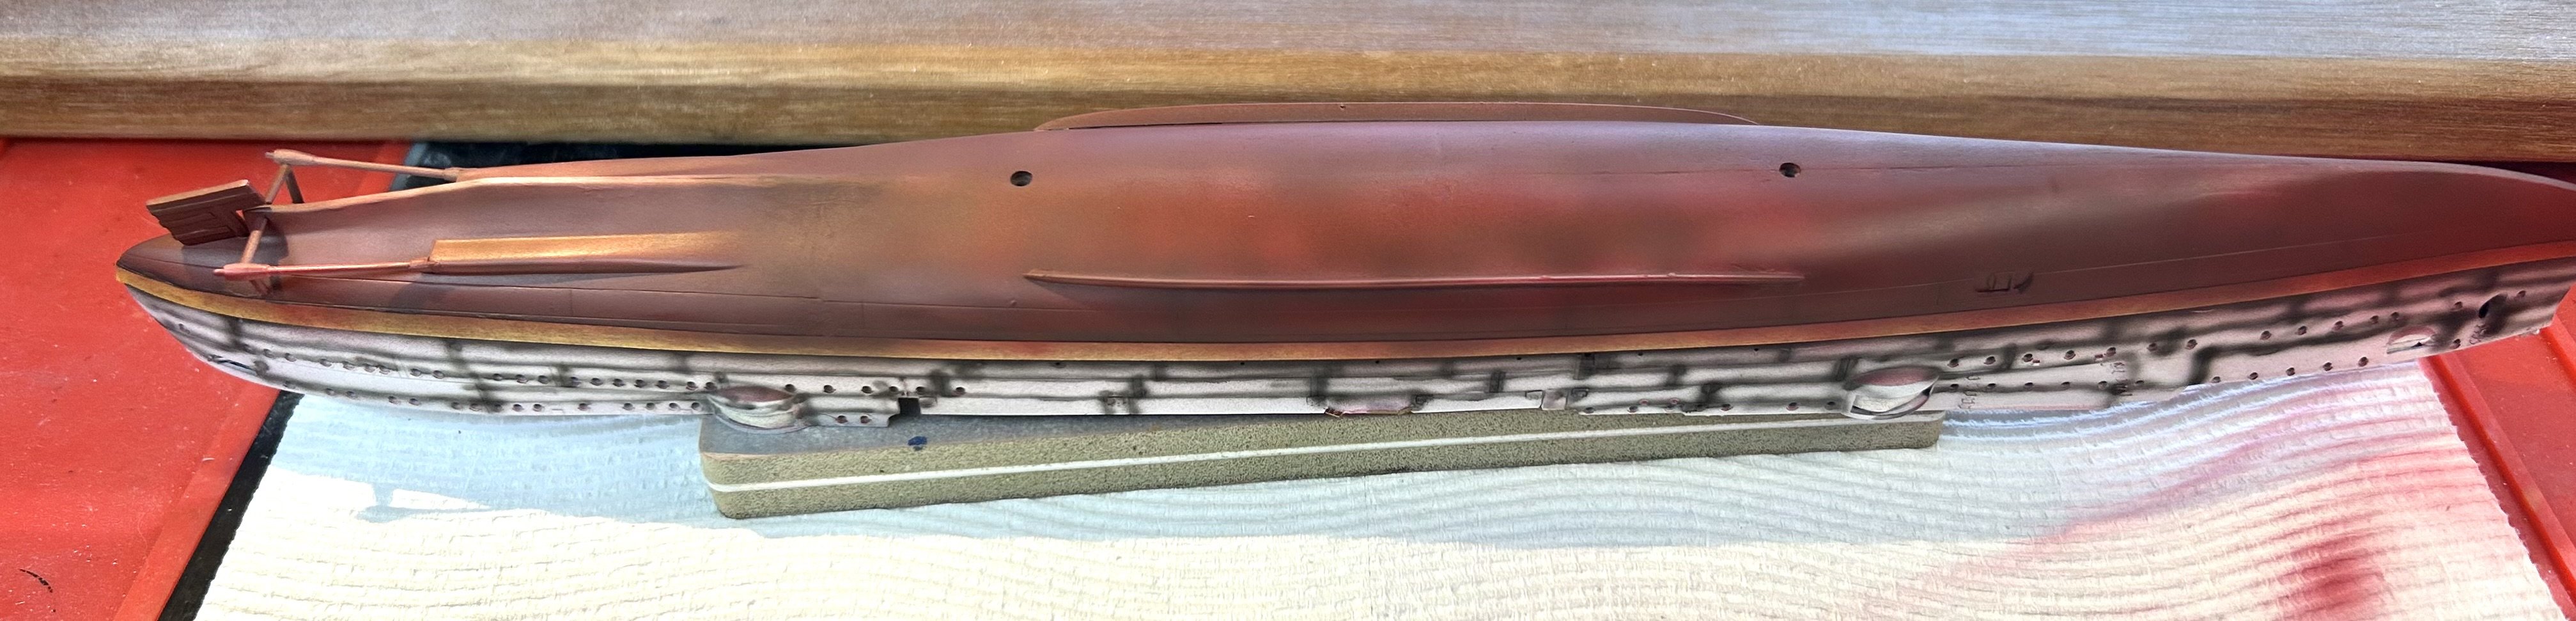
Starting in the lower hull, dark brown base, red overspray then pink fade. Next will be alge to a) cover up the sins and b) to make it look like a ship that travelled around the tropical South Pacific without frequent scrapes
- 81 replies
-
- 6
-
-
- Micromaster
- Eduard
- (and 4 more)
-
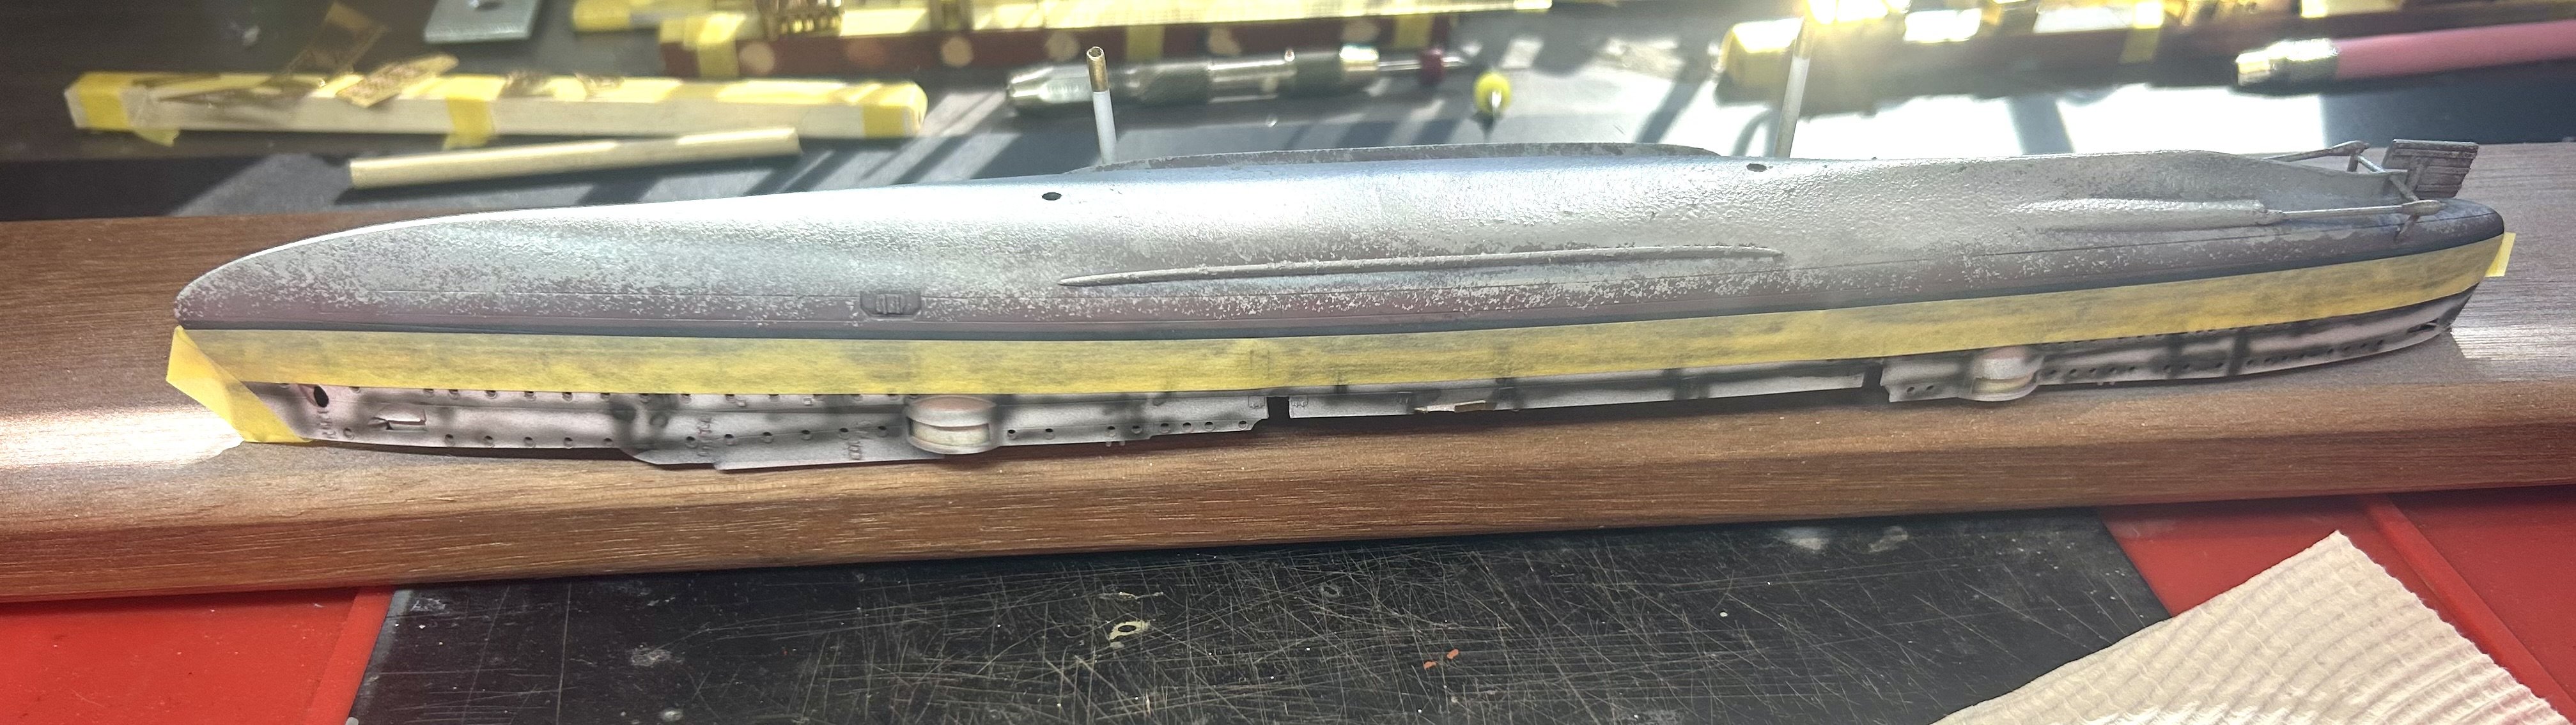
Boot strap done! I’ll let it dry for a day then mask it off.

- 81 replies
-
- 8
-
-
- Micromaster
- Eduard
- (and 4 more)
-
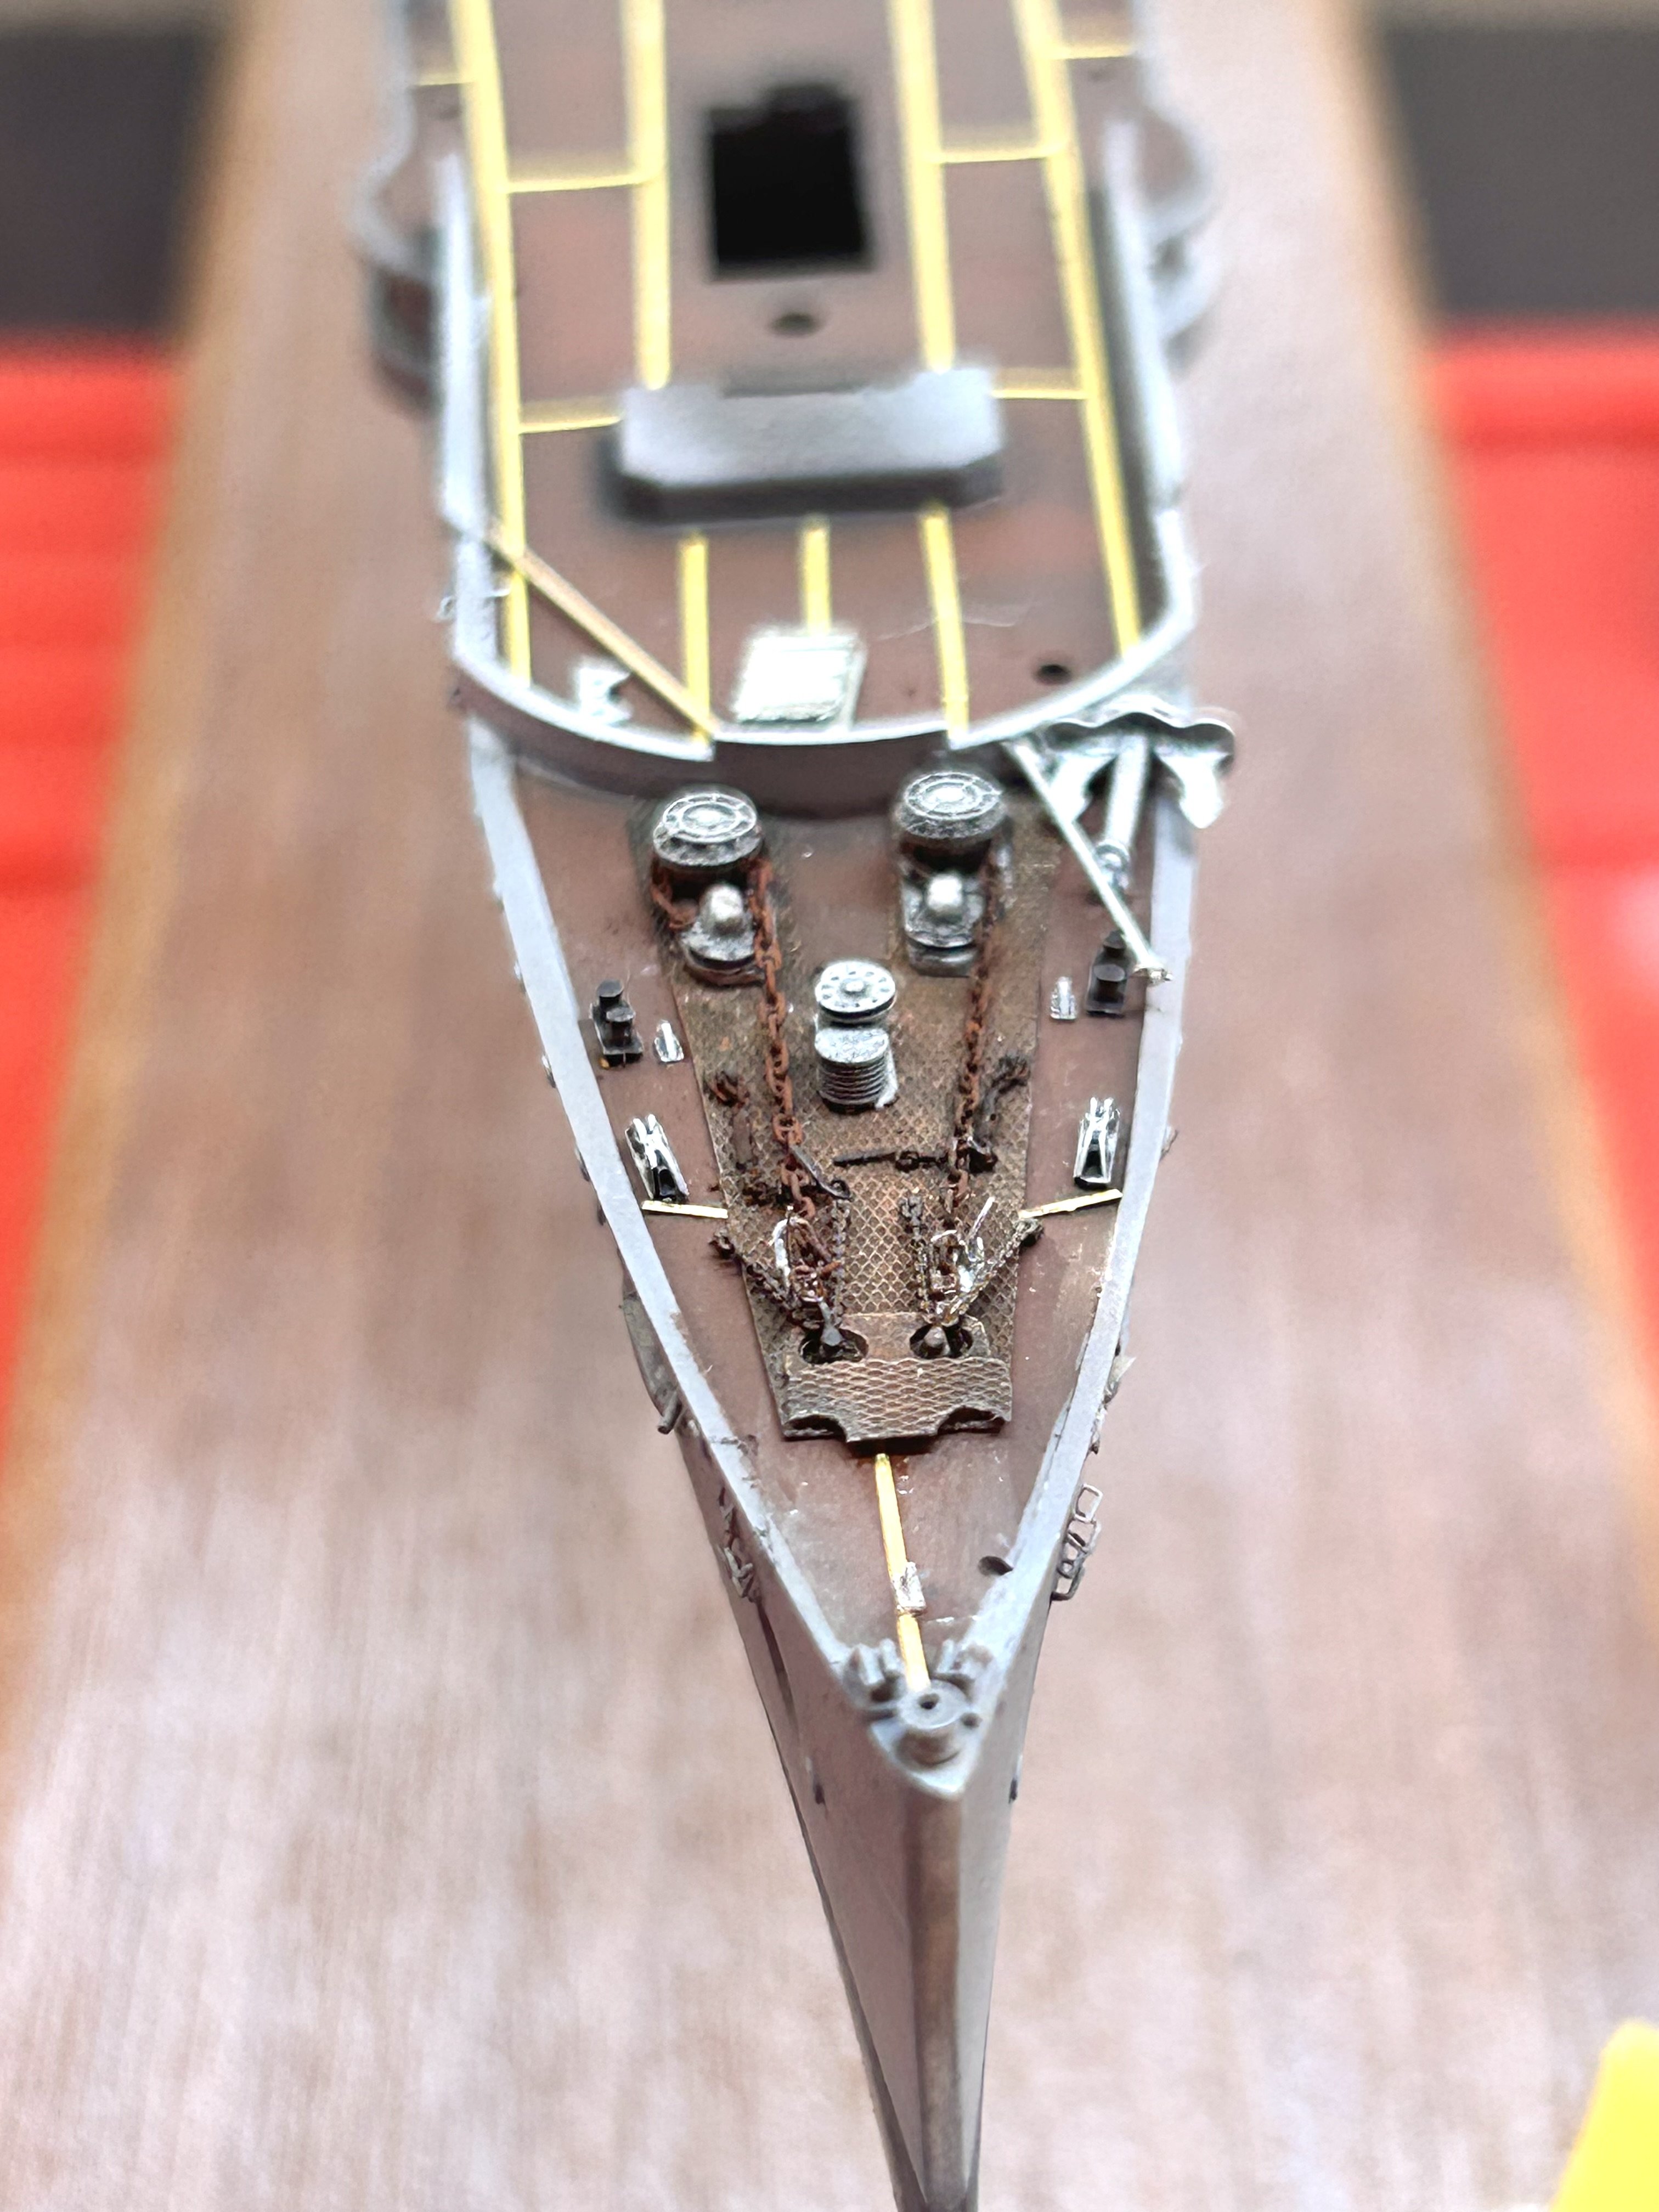
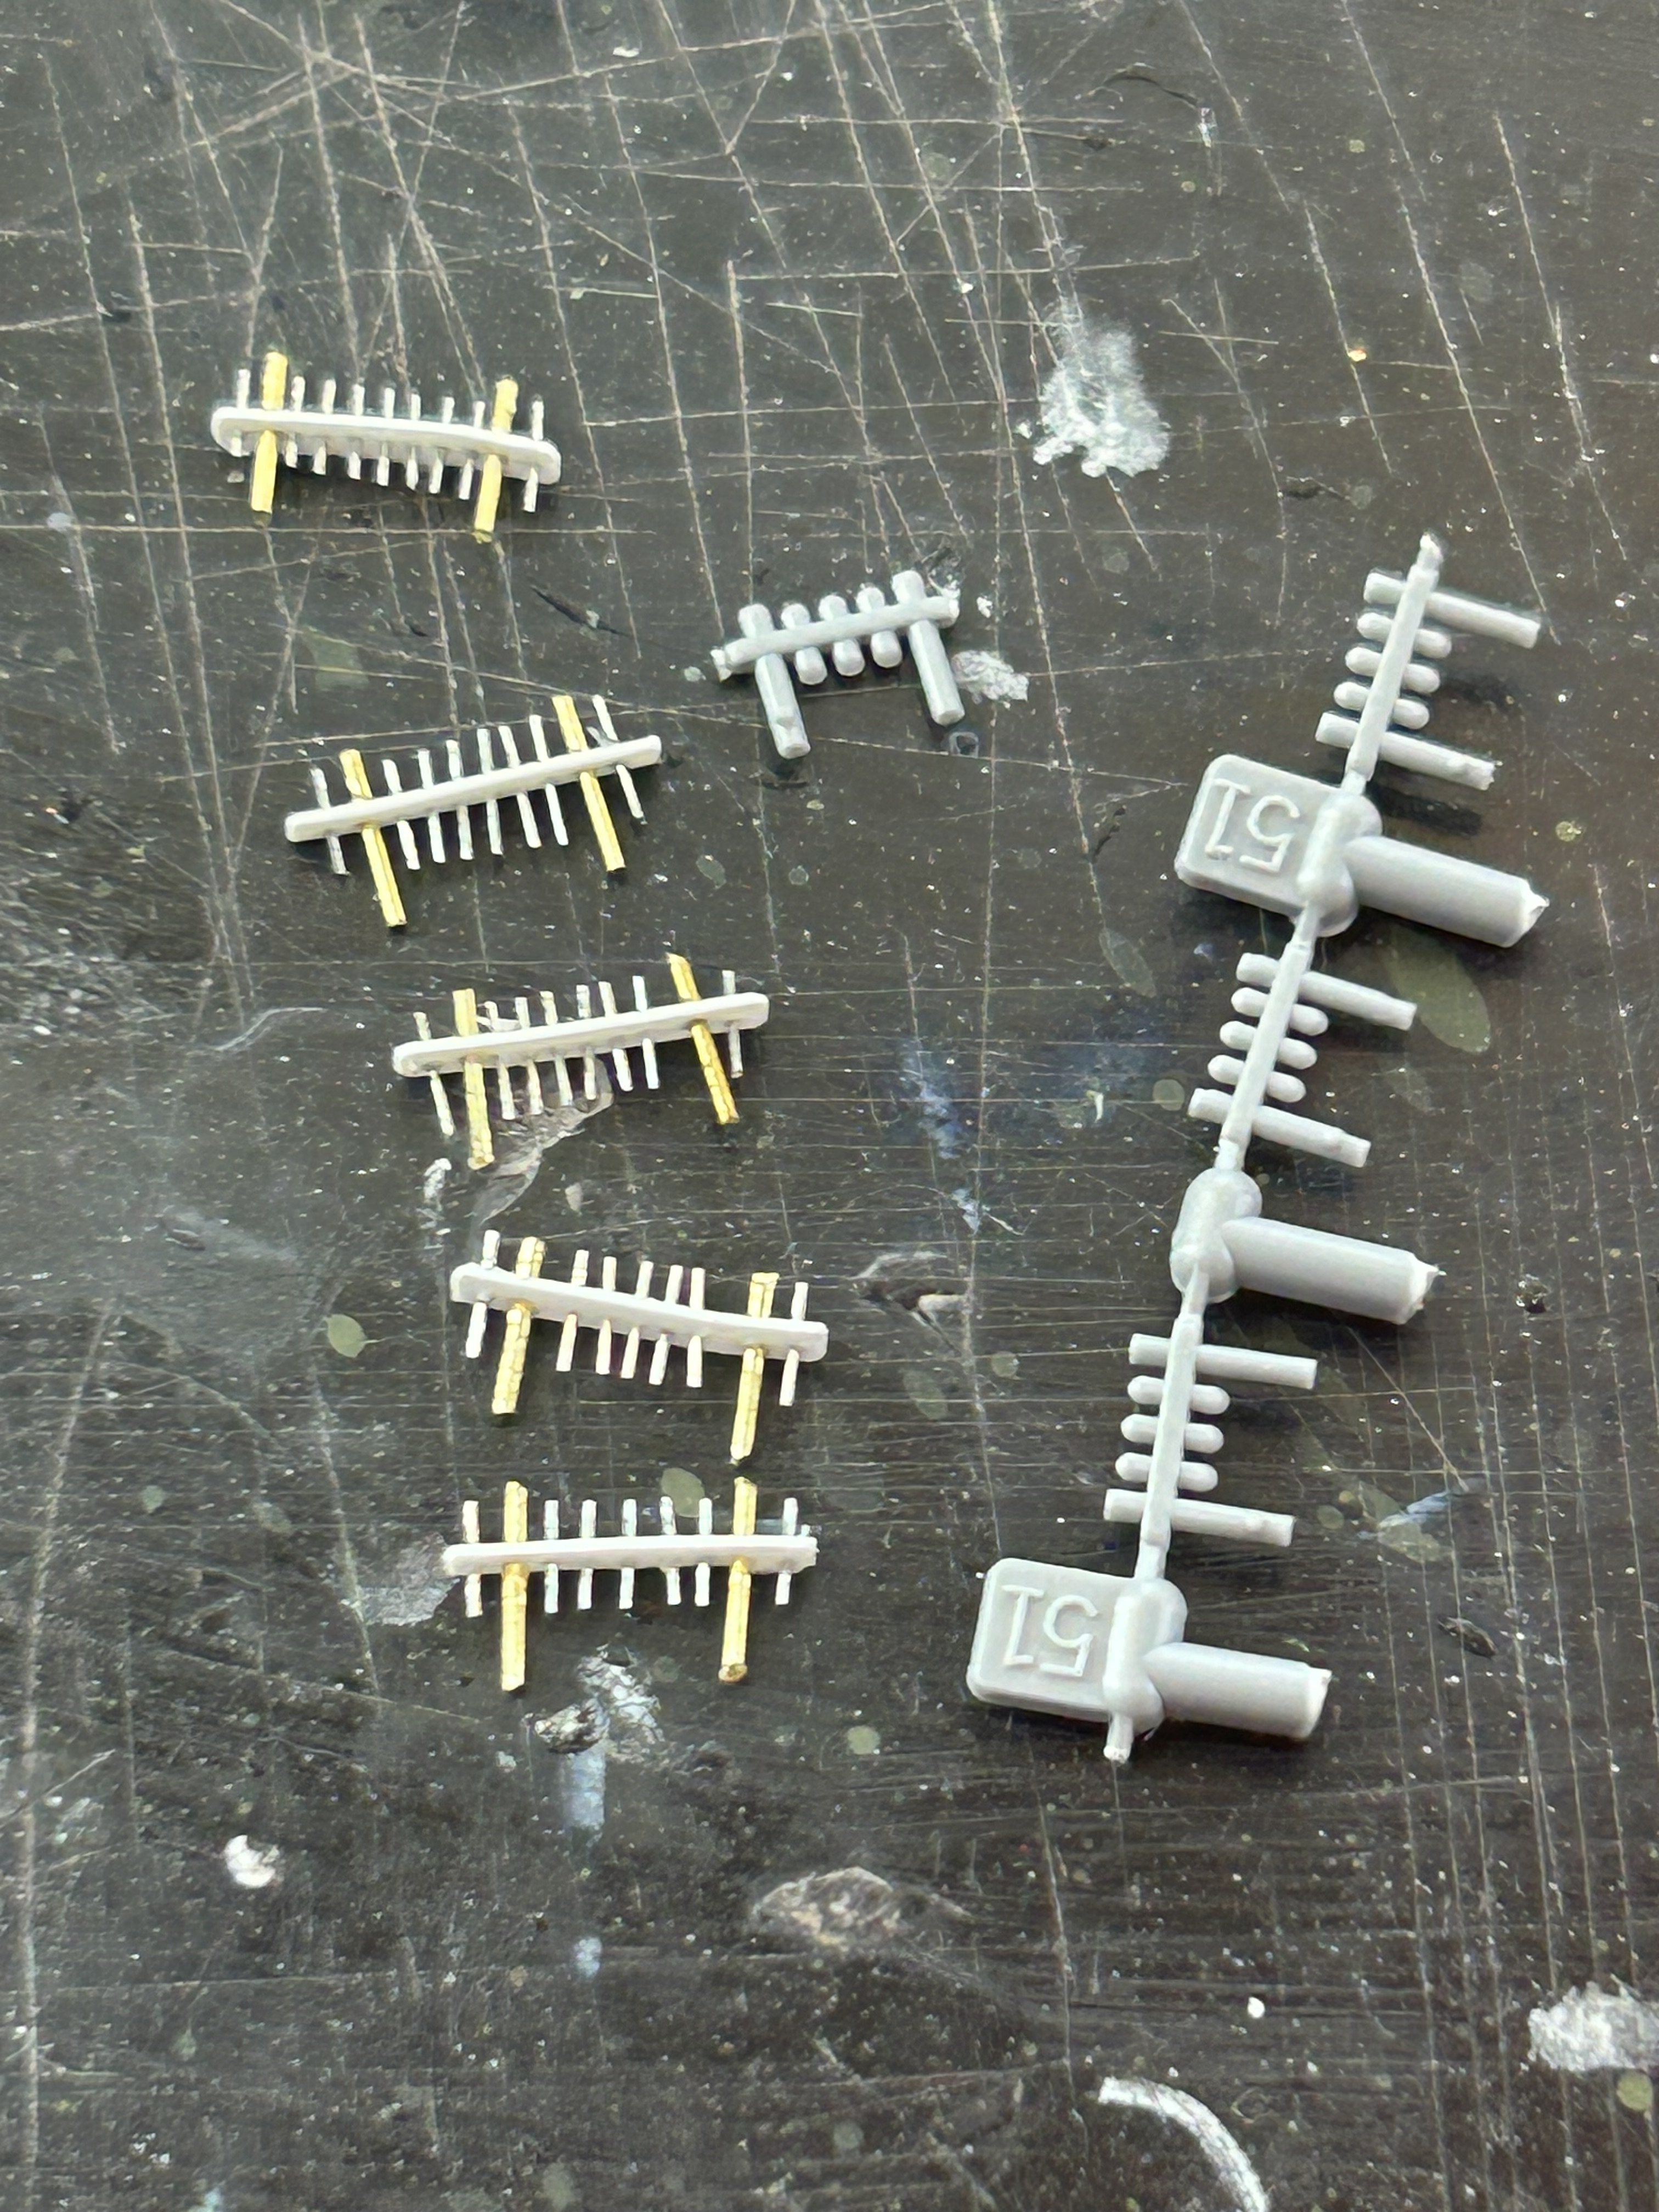
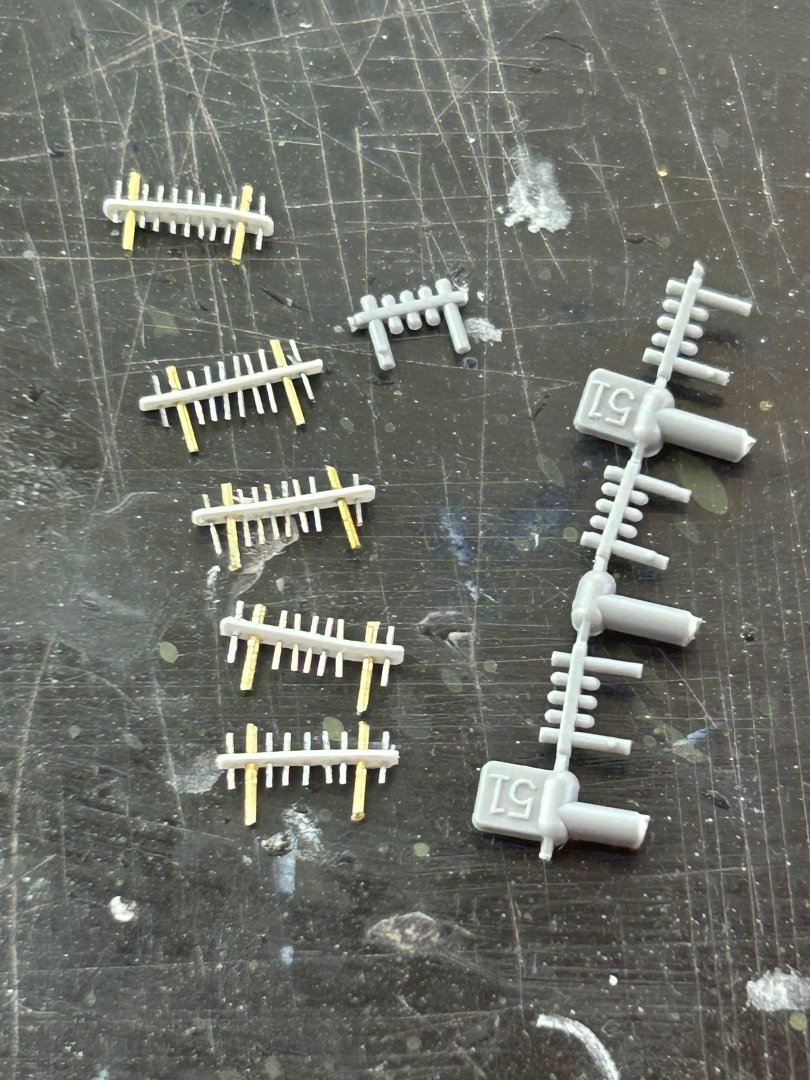
So today we did fife rails. The kit provides 4, it needs 5, a bit more surgery required but I think once painted they will look better than the grey blobs
- 81 replies
-
- 5
-
-
- Micromaster
- Eduard
- (and 4 more)
-
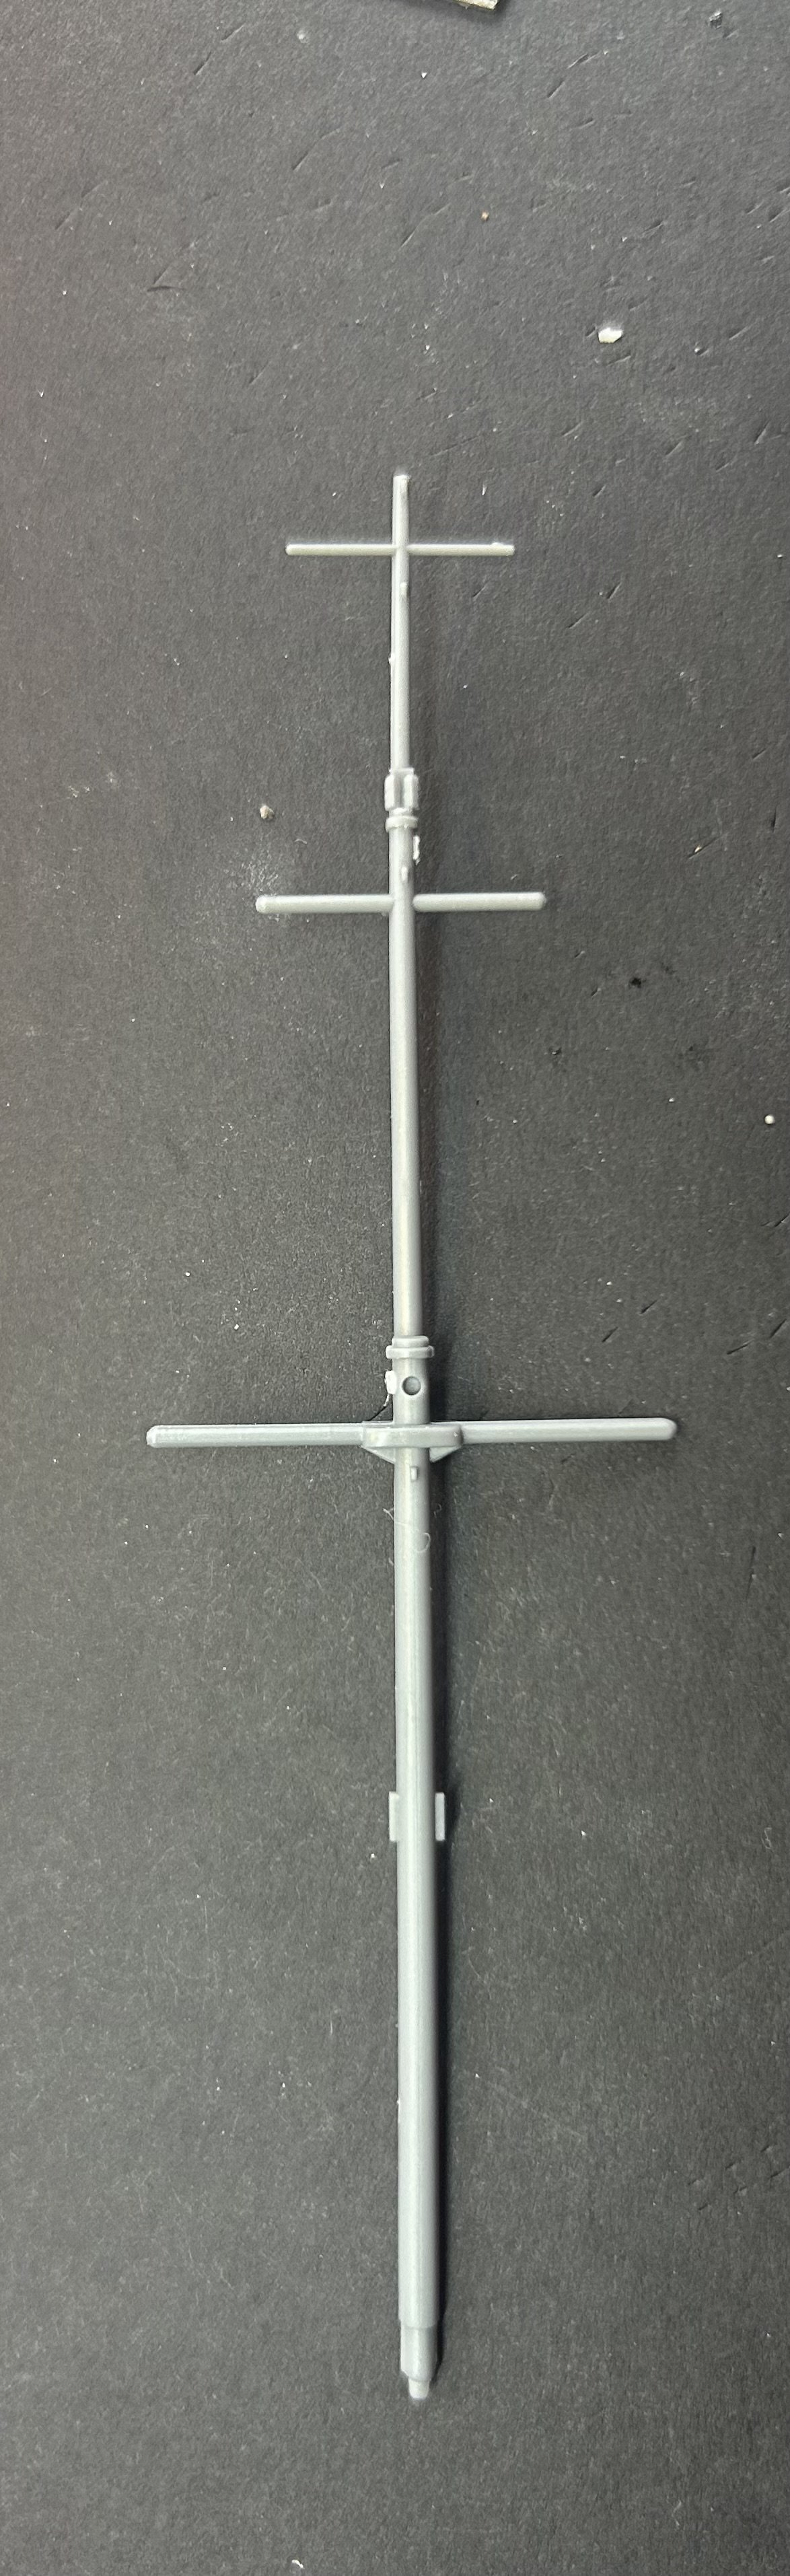
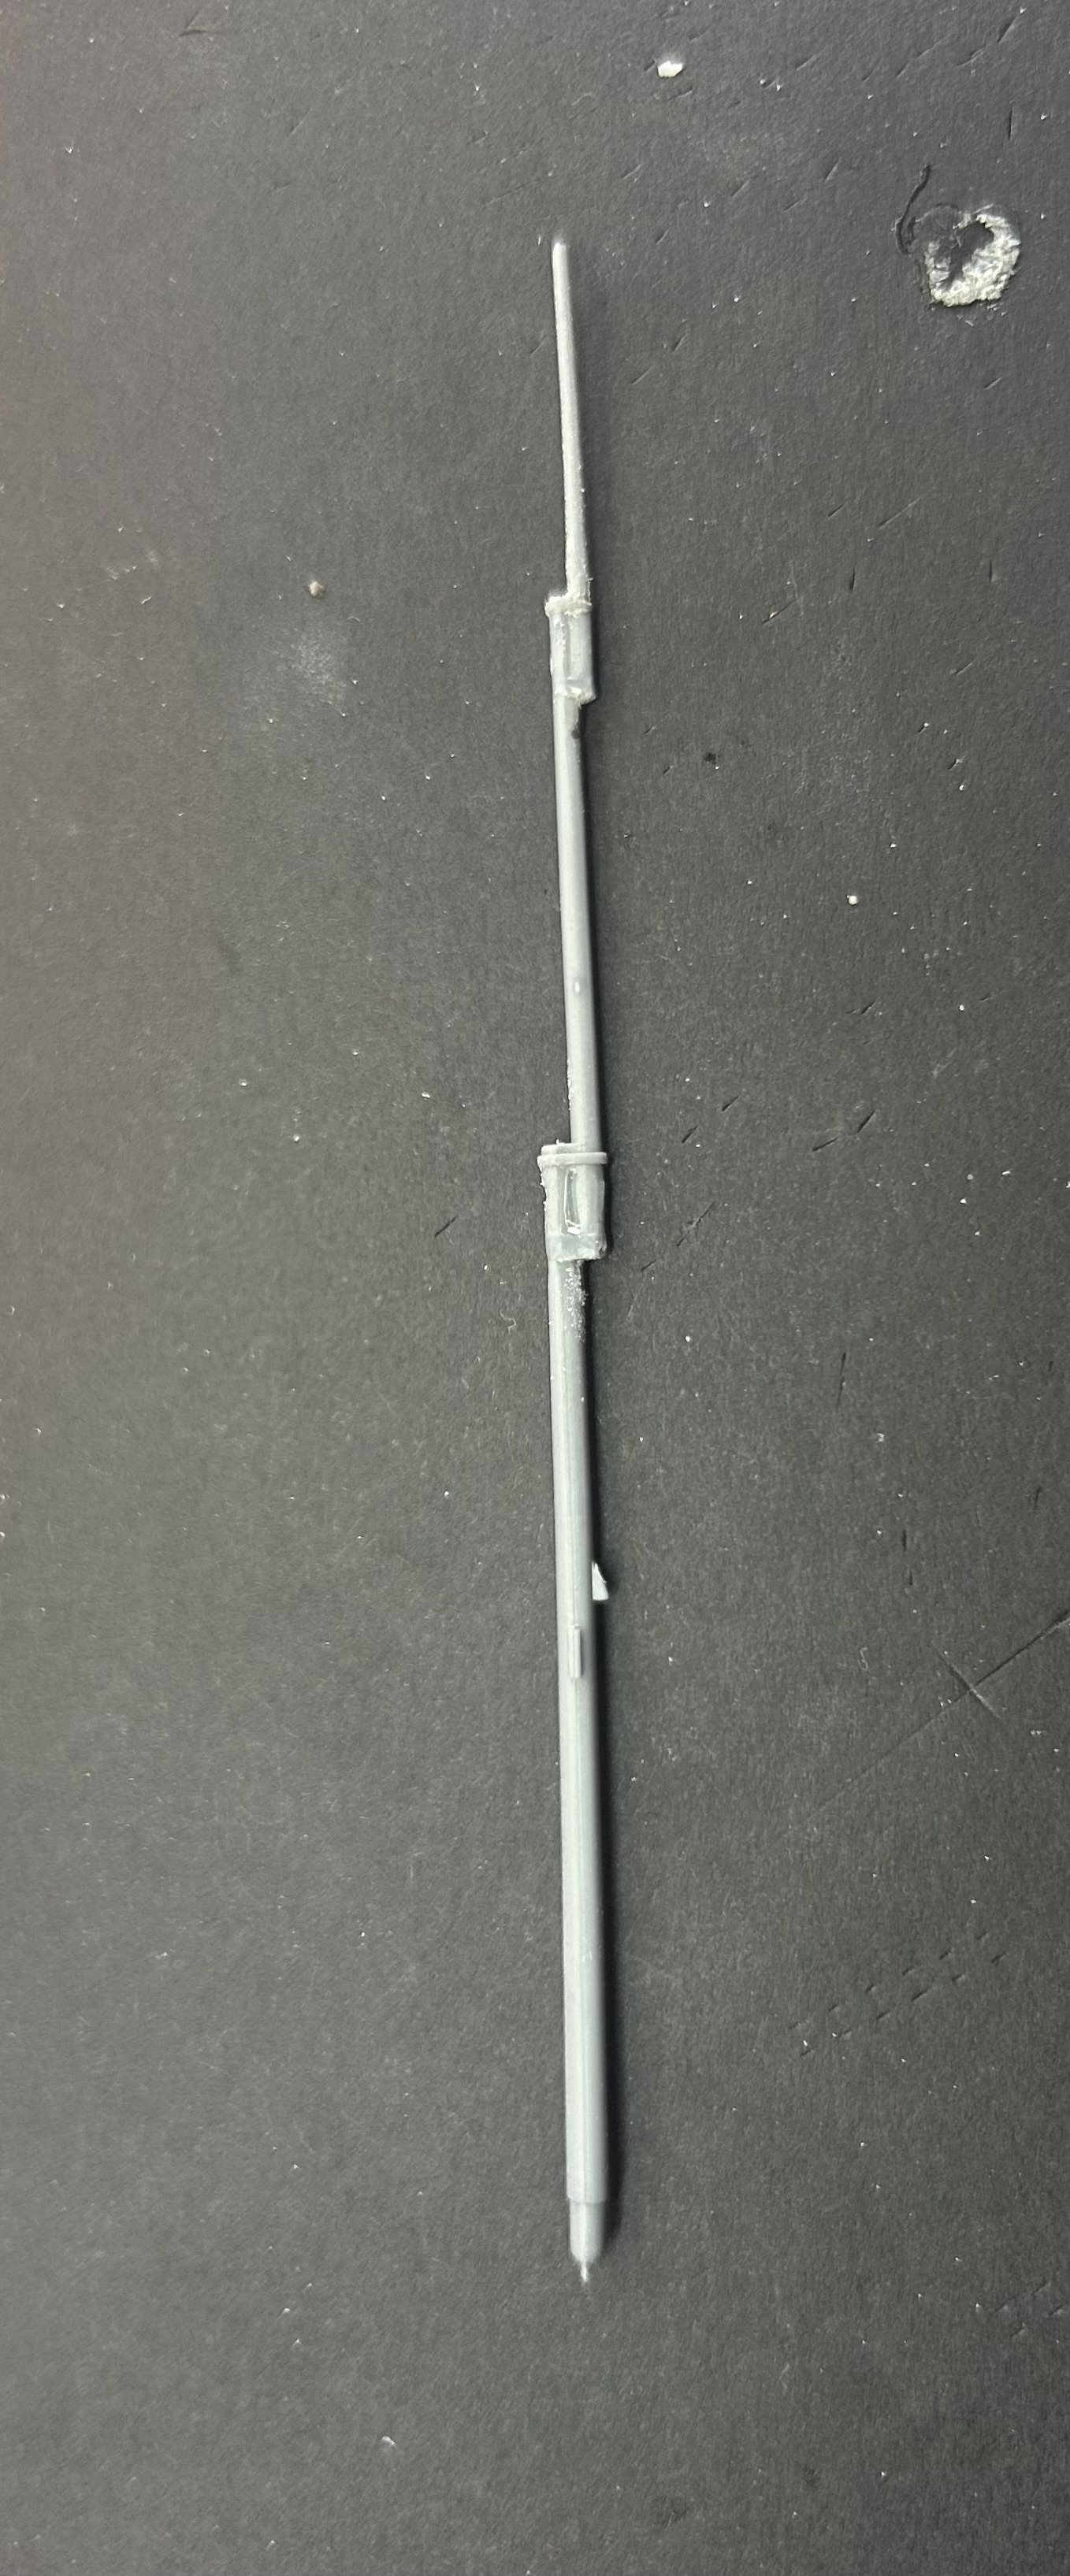
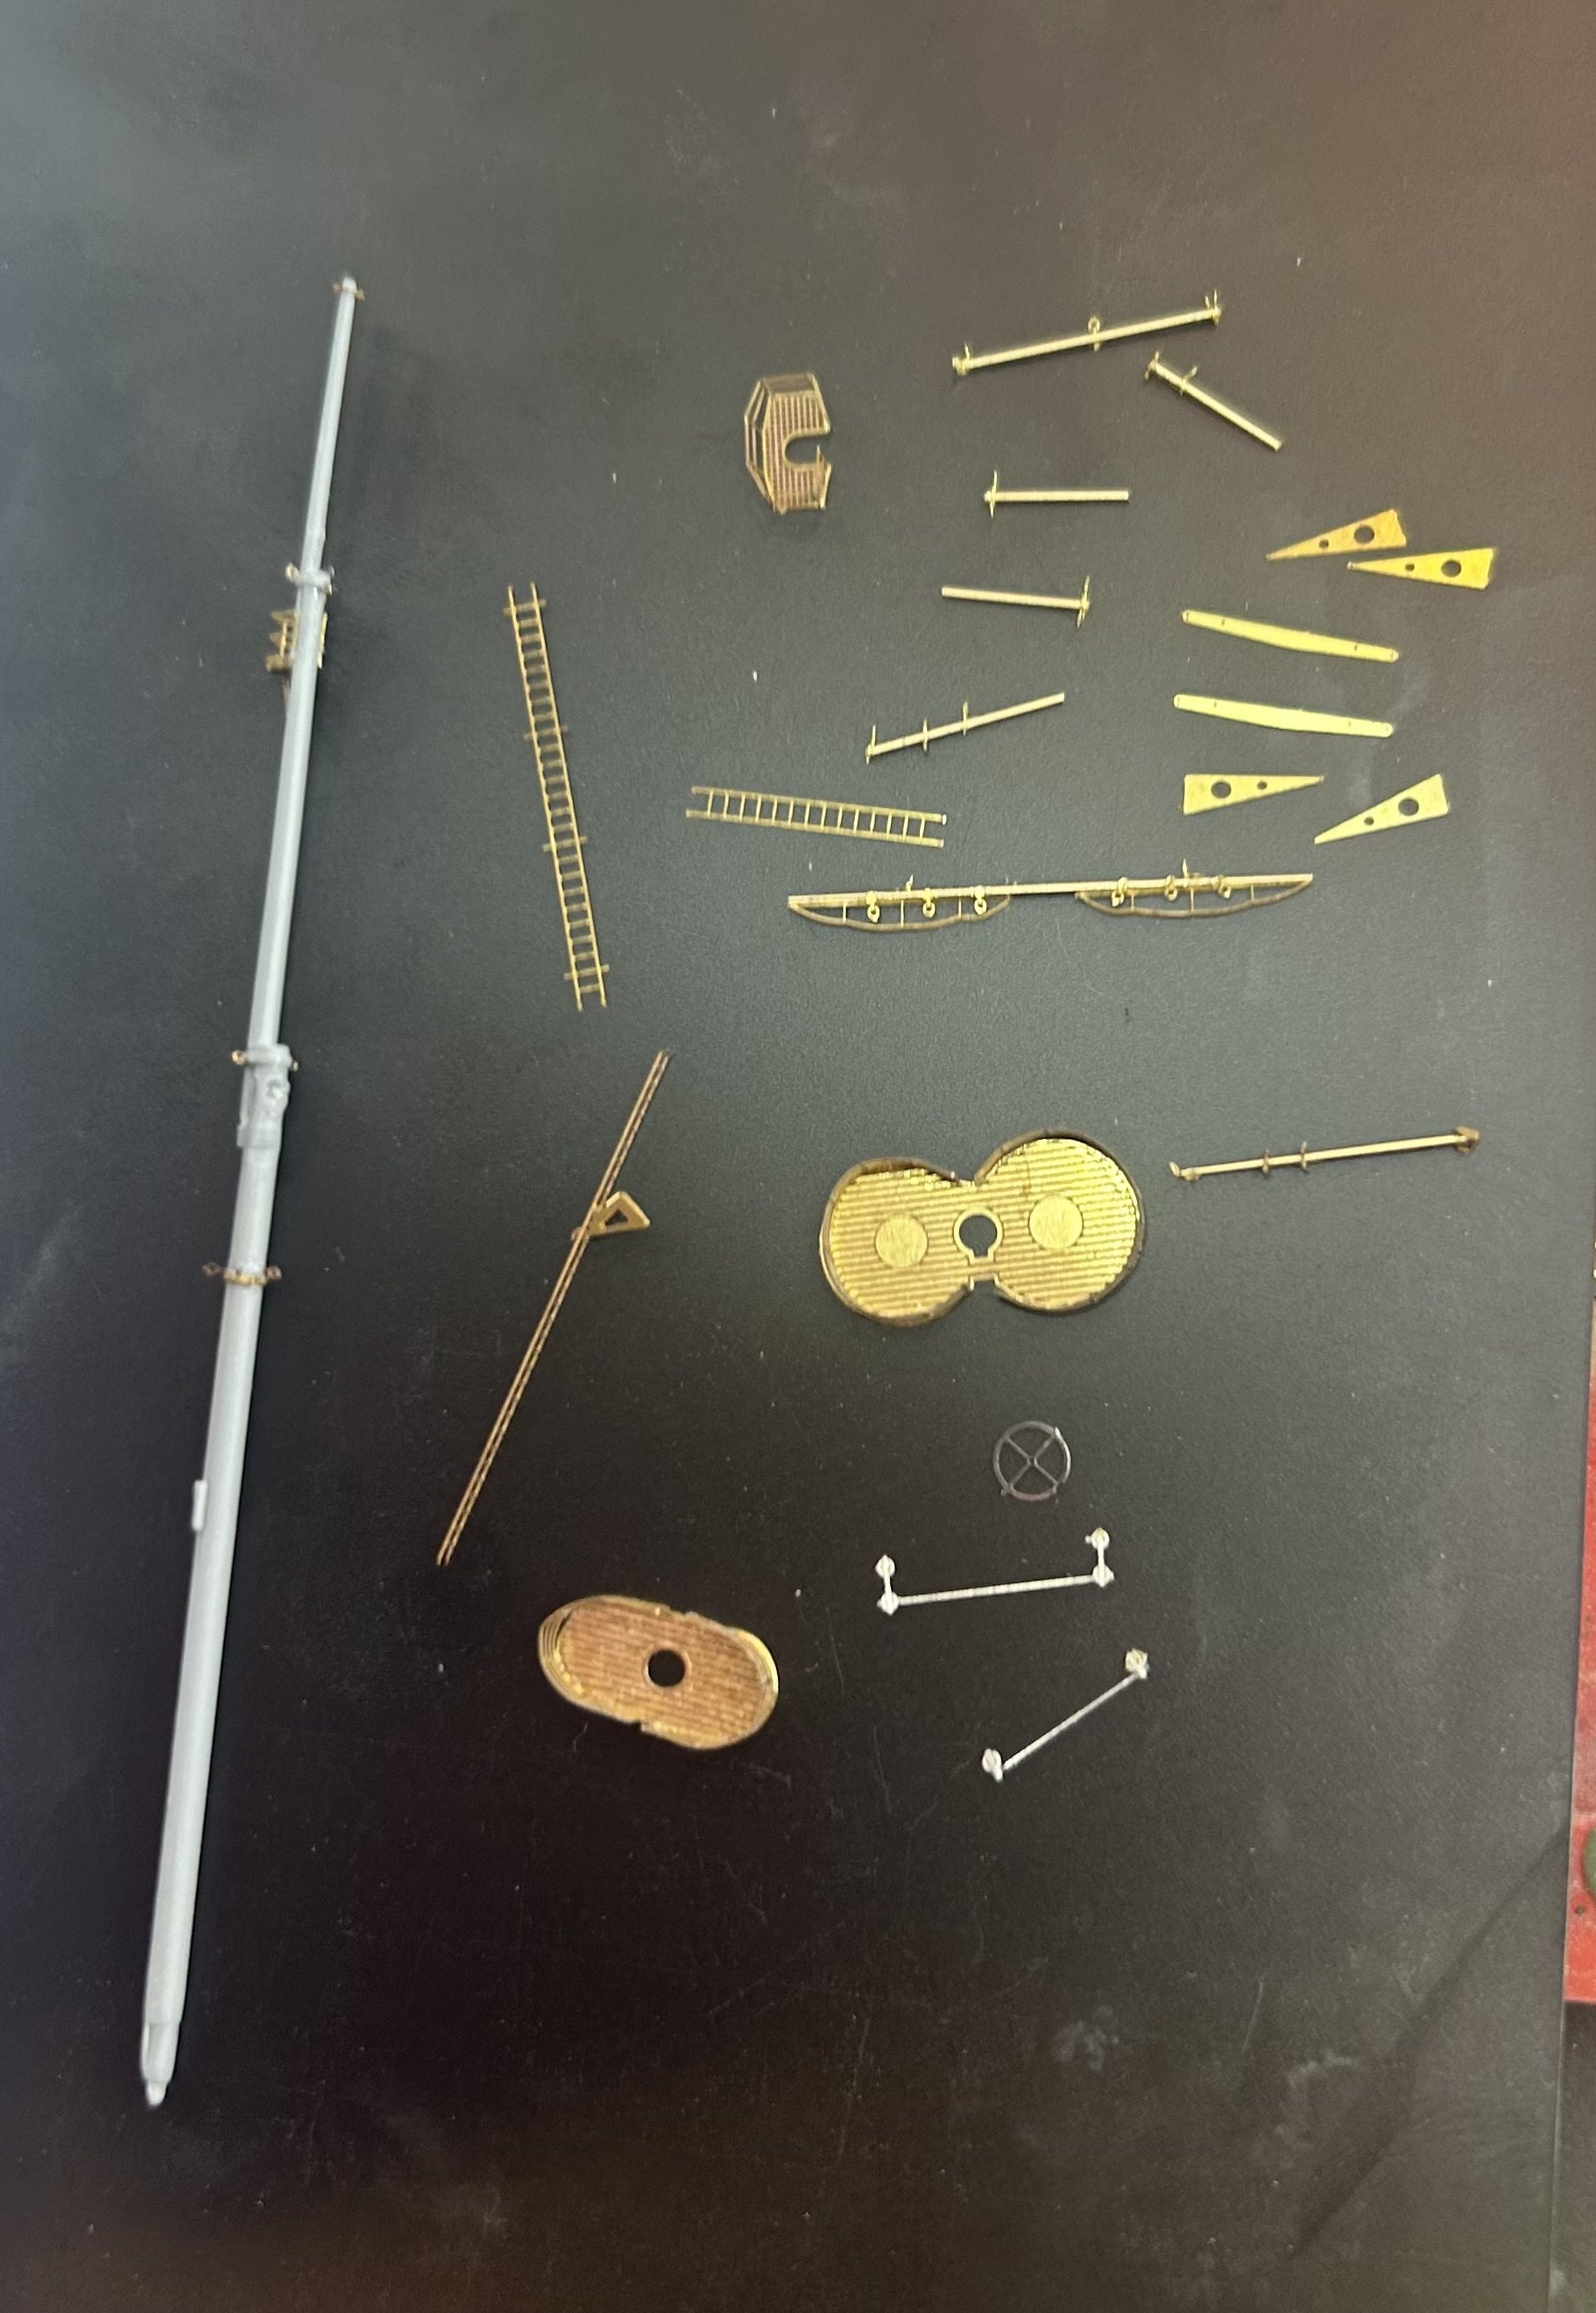
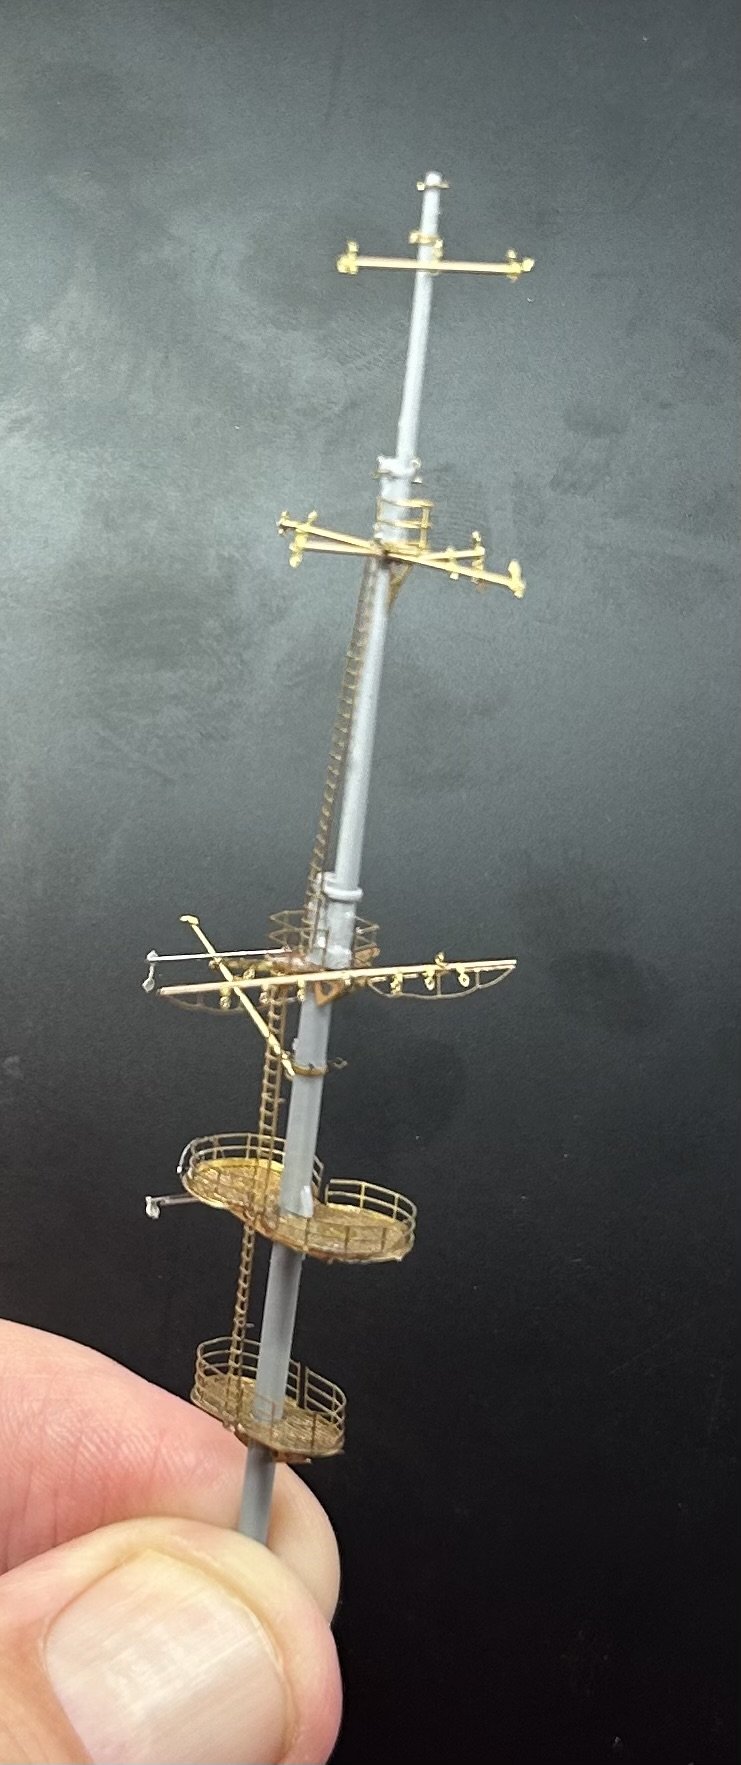
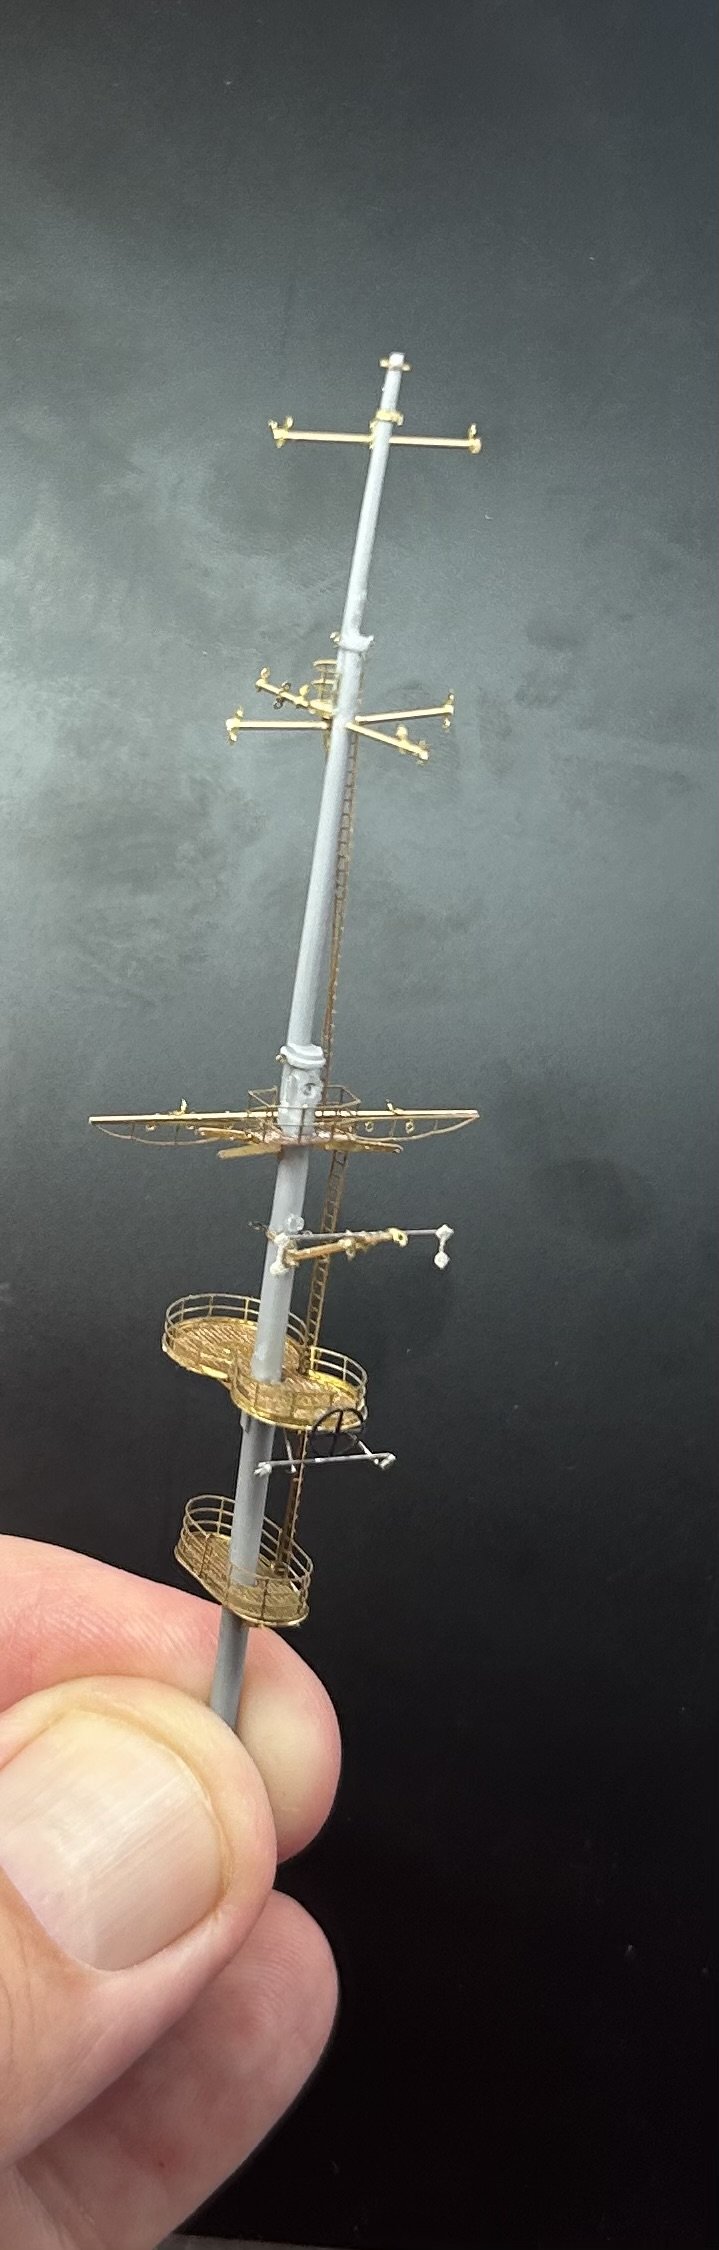
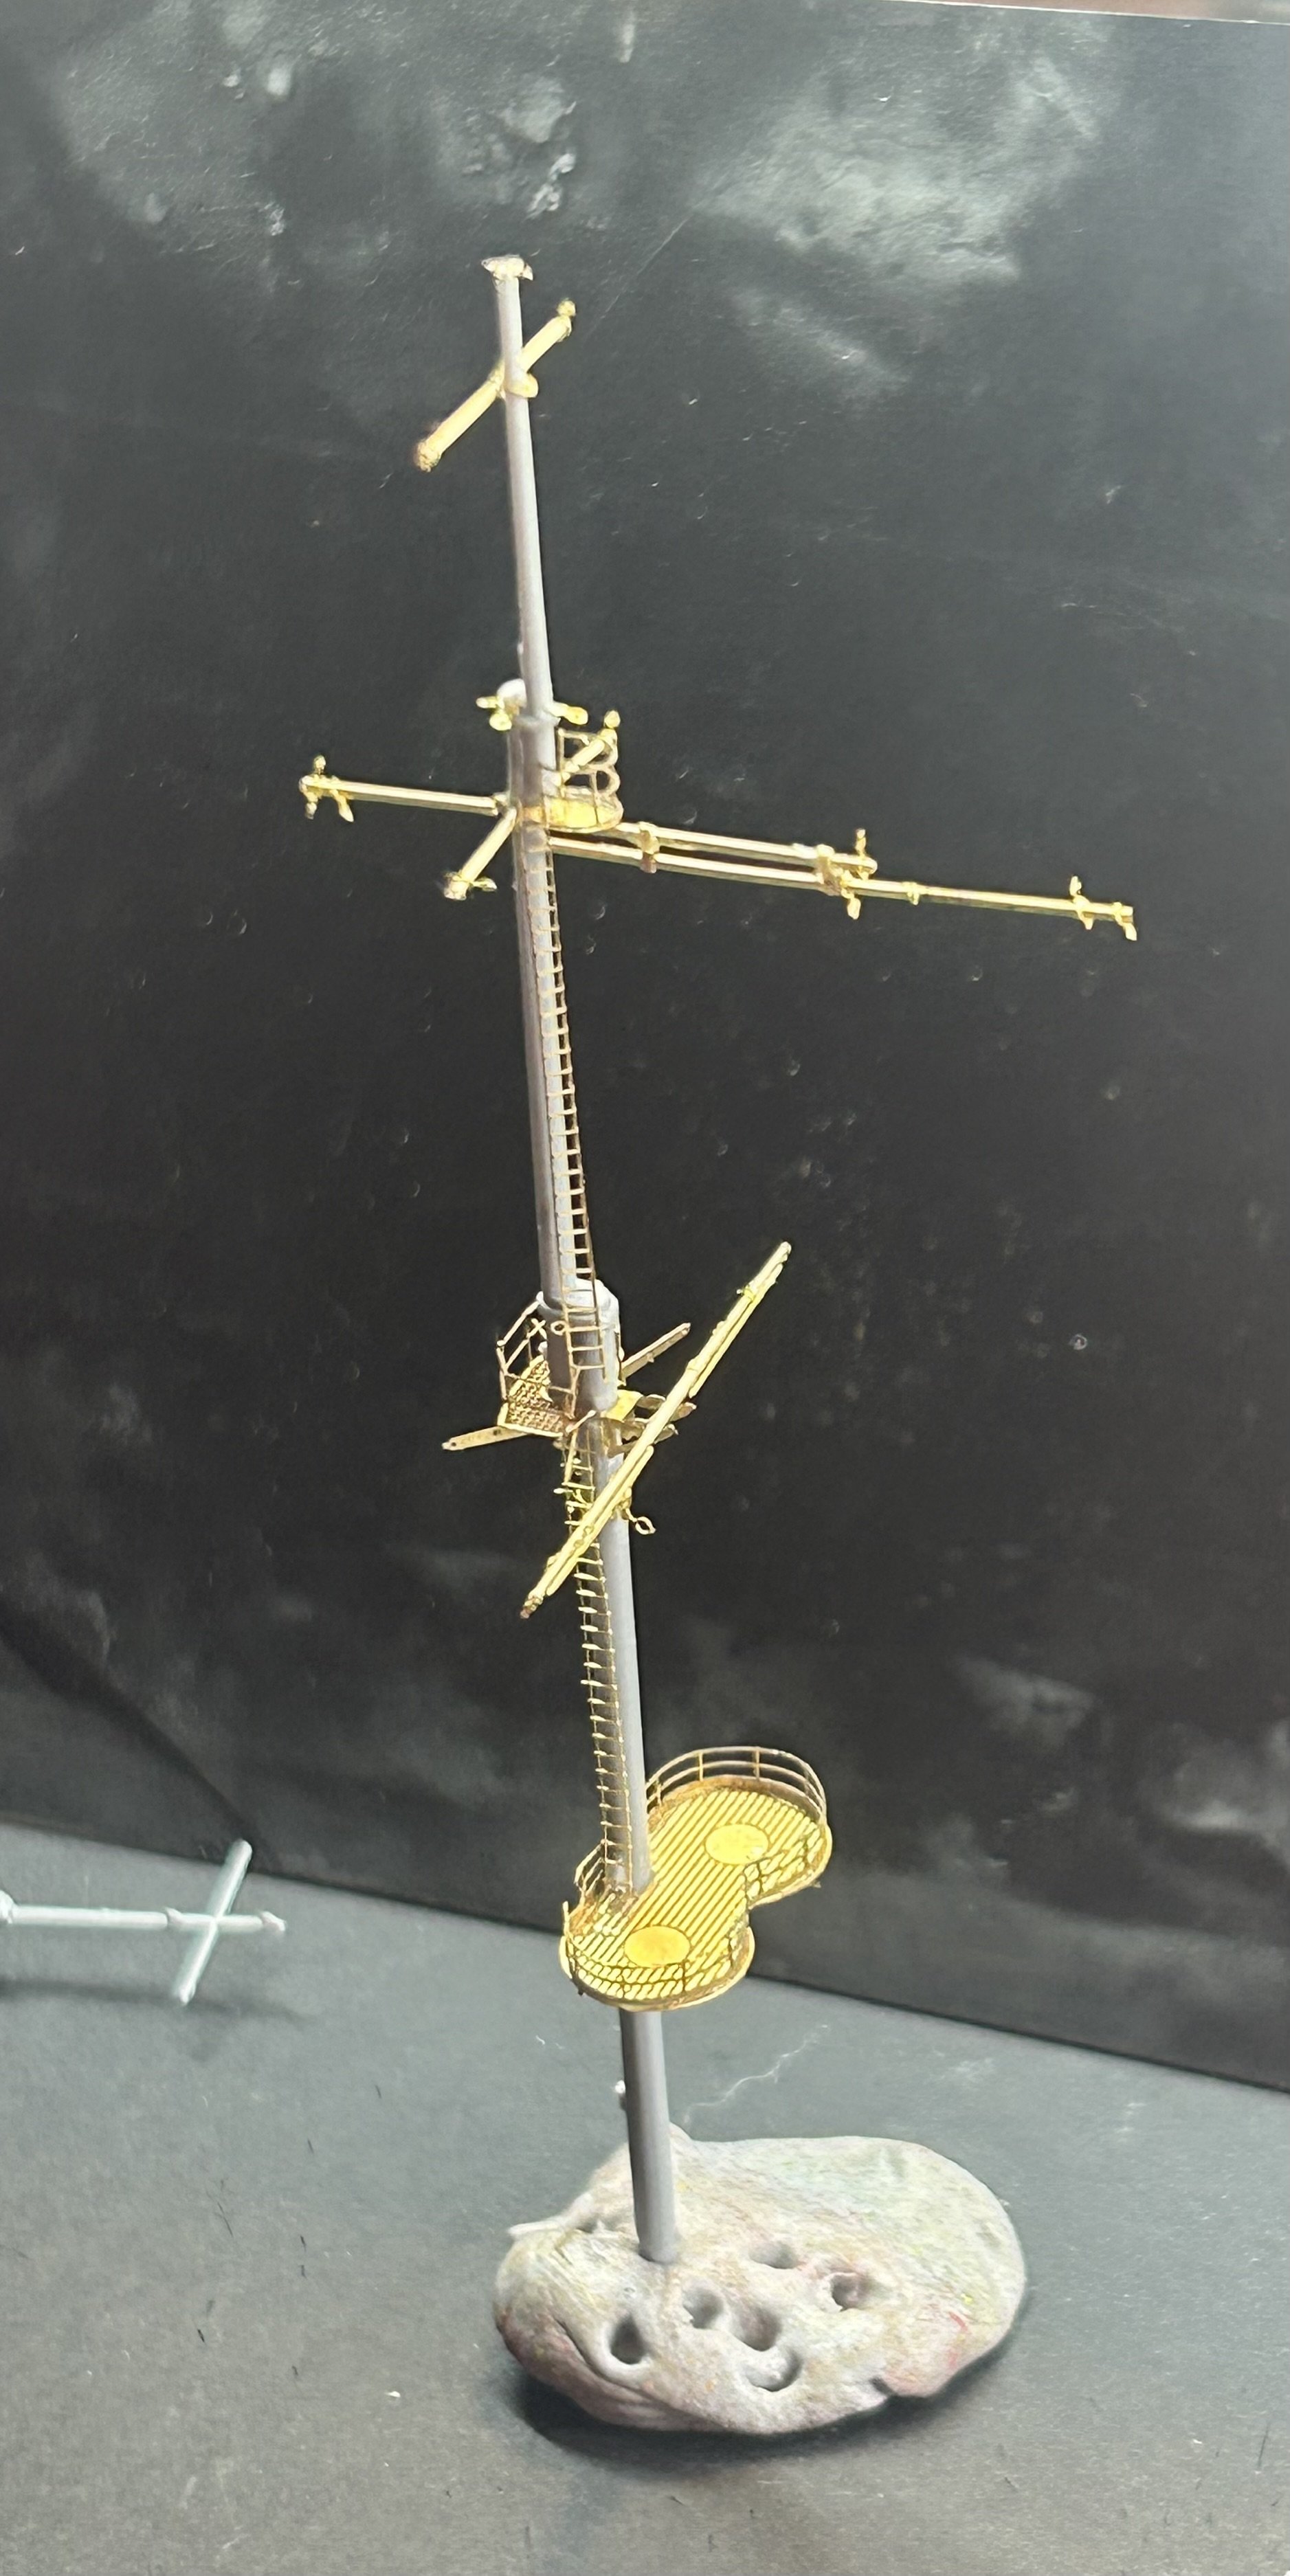
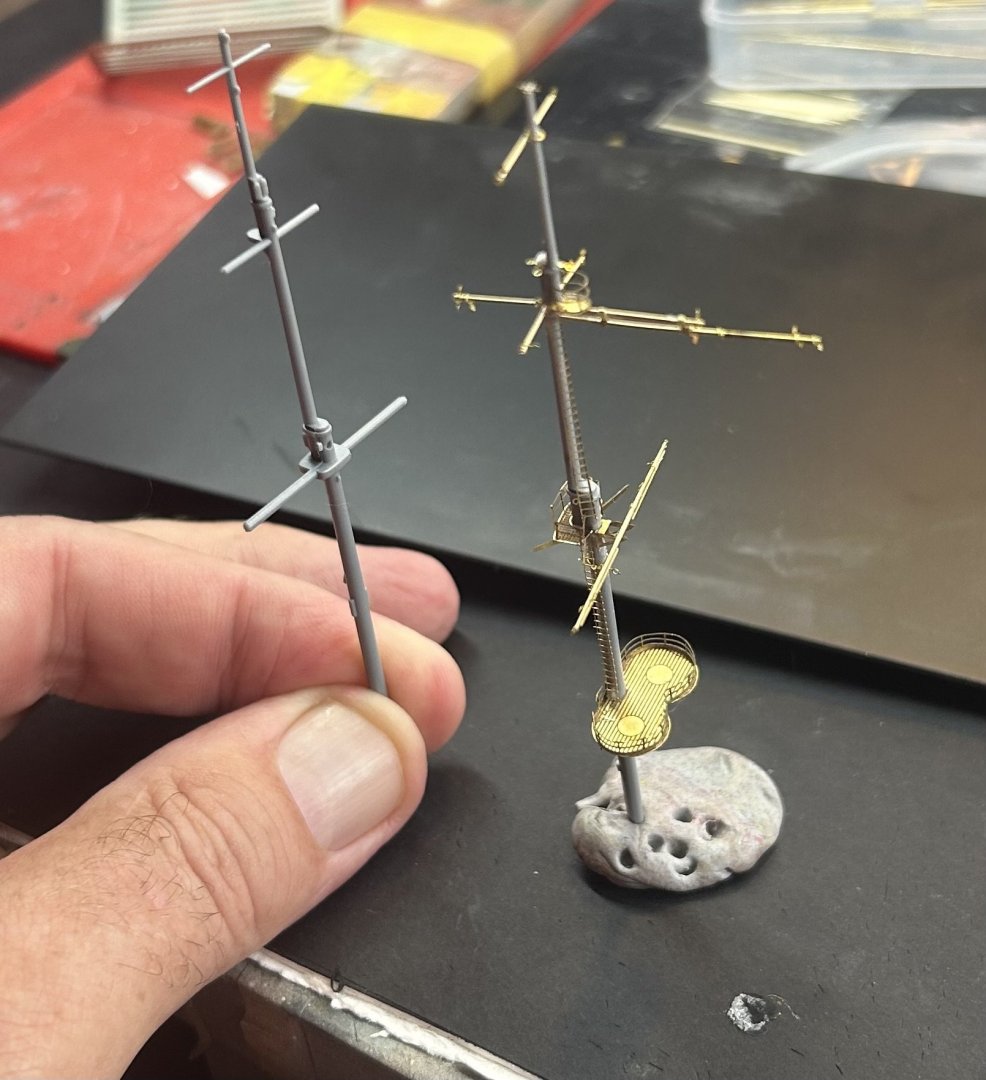
SMS Emden masts, 3 days and the formast is done, all the rigging points added sans navigation lights and search lights. For comparison the main mast !

- 81 replies
-
- 6
-
-

-
- Micromaster
- Eduard
- (and 4 more)