Walter Biles
-
Posts
356 -
Joined
-
Last visited
Content Type
Profiles
Forums
Gallery
Events
Everything posted by Walter Biles
-
 Ed, Could you please show a cross section drawing showing the planking and framing, if possible. I am interested in how the transitions were effected from the frames to the outer planking. Walter Biles
 -
Bob, Thank you. I am trying to come up with a good Tug boat name for this one. I want it to be descriptive of it's purpose, I have been thinking about "Lil Helper" That way if I need it to go on a recovery run I can just say something like "It's time for my LIl Helper" and I've said it all.
-
Thanks, Popeye, and Bob. Yes Popeye, one of them had the stern of the tugboat showing. I put the tug pix in the Samson build.
-
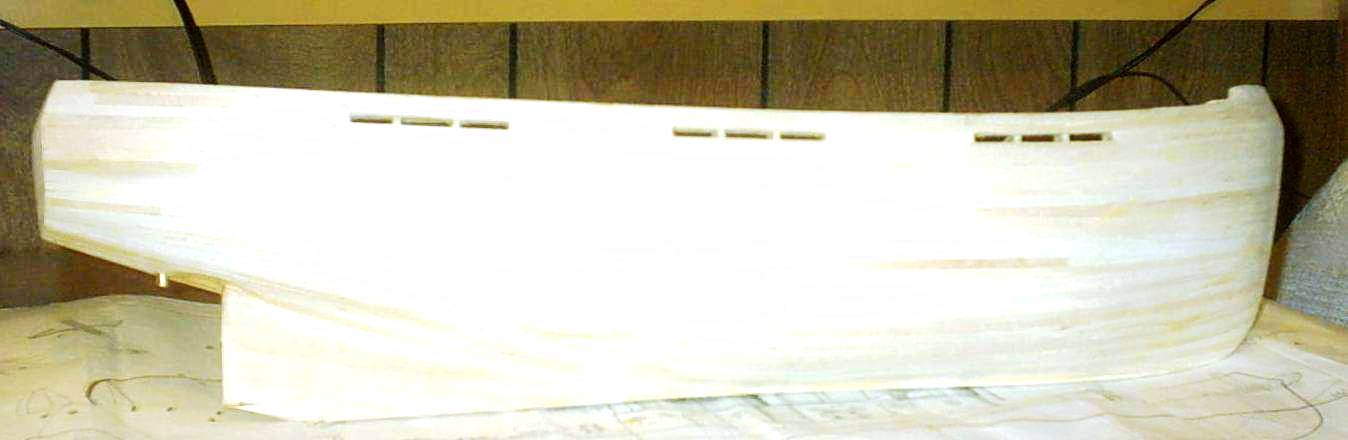
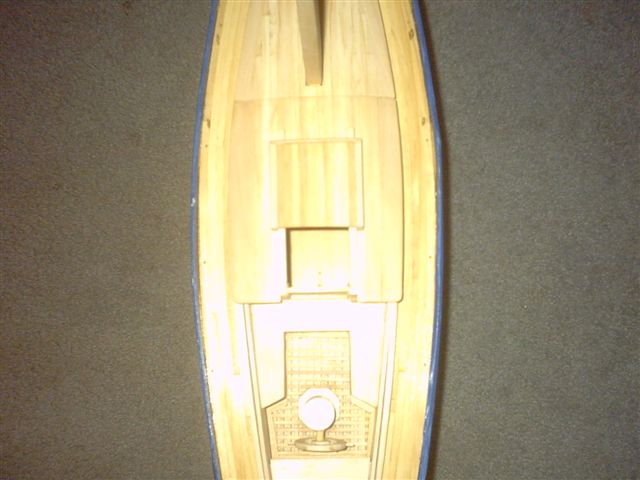
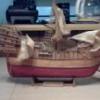
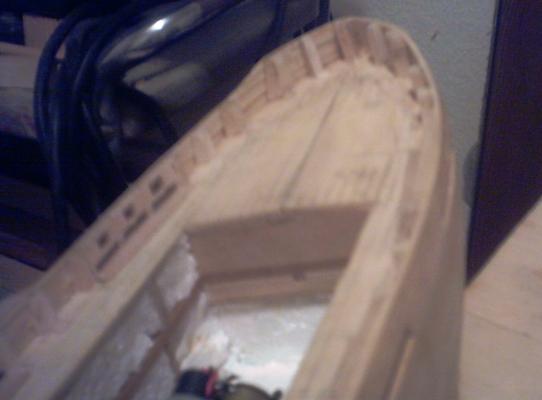
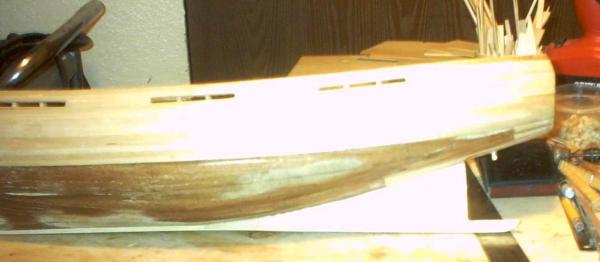
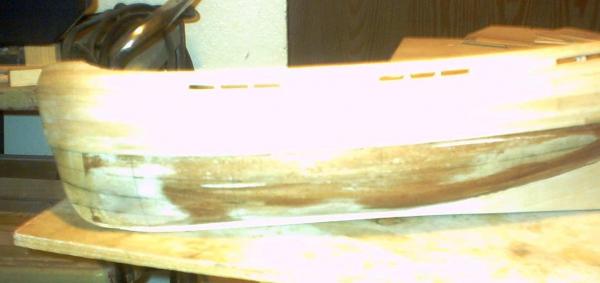
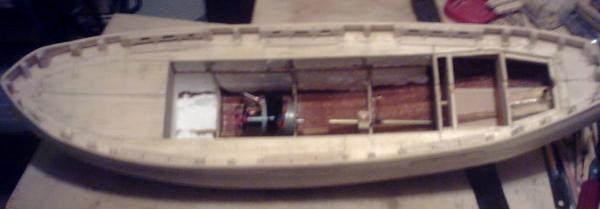
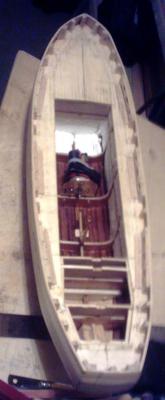
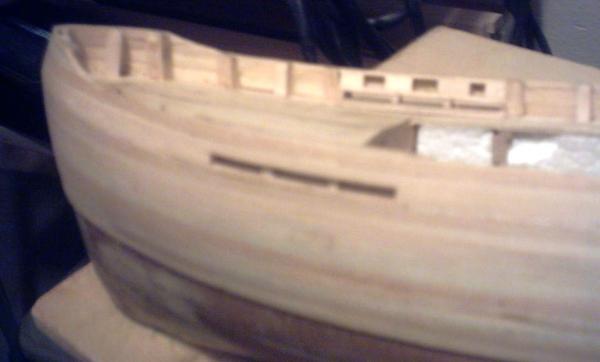
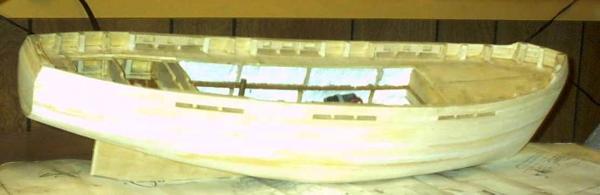
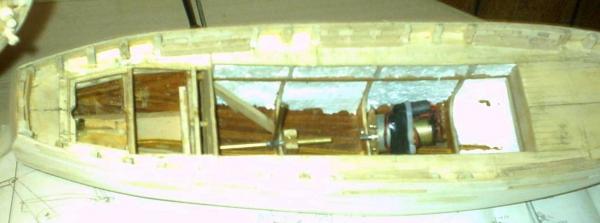
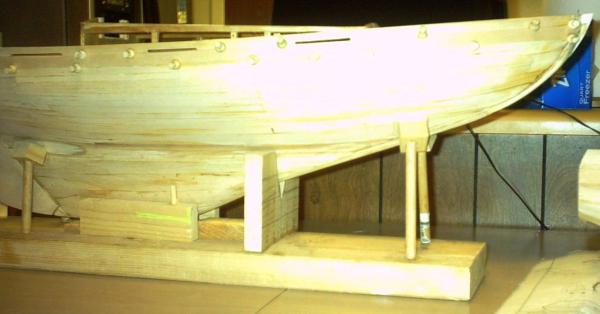
Here are some more pictures of the tug boat. Since I am modifying it considerable from it's original design, I am intending to rename it to a more appropriate name when I am done. This is the deck frame as it was originally structured and the pattern for the sub deck as it originally fit. I left the original deck structure after having strengthened it, and added an inch above that deck with new frame to raise the original height of the deck. This makes it with about 7 planks of freeboard instead of about 2 1/2. Here is a view of the frames rising out through the sub deck to make the bulwarks. They will be filly closed with allowance for the water to spill overboard. I added water drains along the edge of the deck to allow it to clear any shipped water more readily. The scale boat on a pond or lake would have been experiencing sea sized waves, and I did not want to get that into the control areas. I also restructured the after deck for a more squared ster n, which would be more able to be planked tightly. This is where my boom structure will be located also. Below shows the installation of the motor and prop shaft stuffing tube. The last shows the planking to almost halfway down. I have now finished the second layer of planking in 1/16" basswood as shown in the next 2 pix. This is about the only reasonably good picture of the motor and the stuffing tube. This boat is now as far as I can go for now. I'll be getting back to it as I can do so. Walter Biles


-
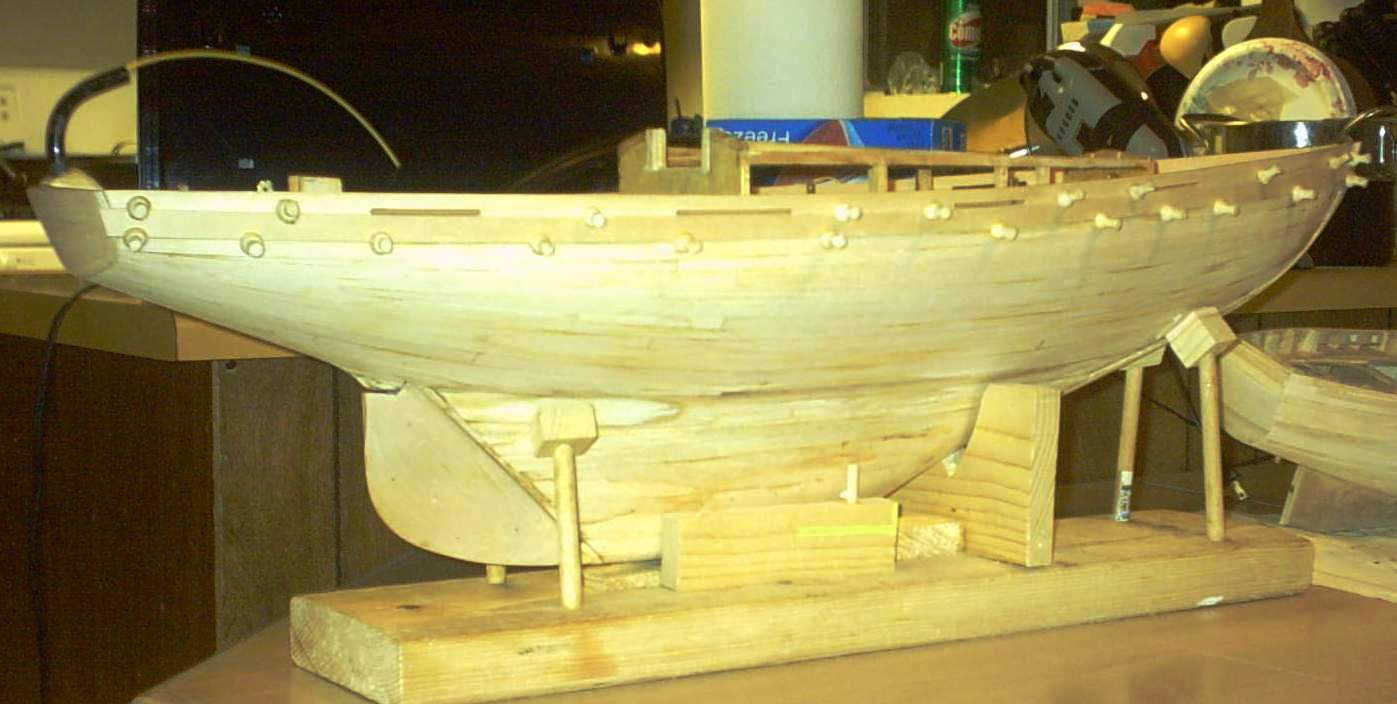
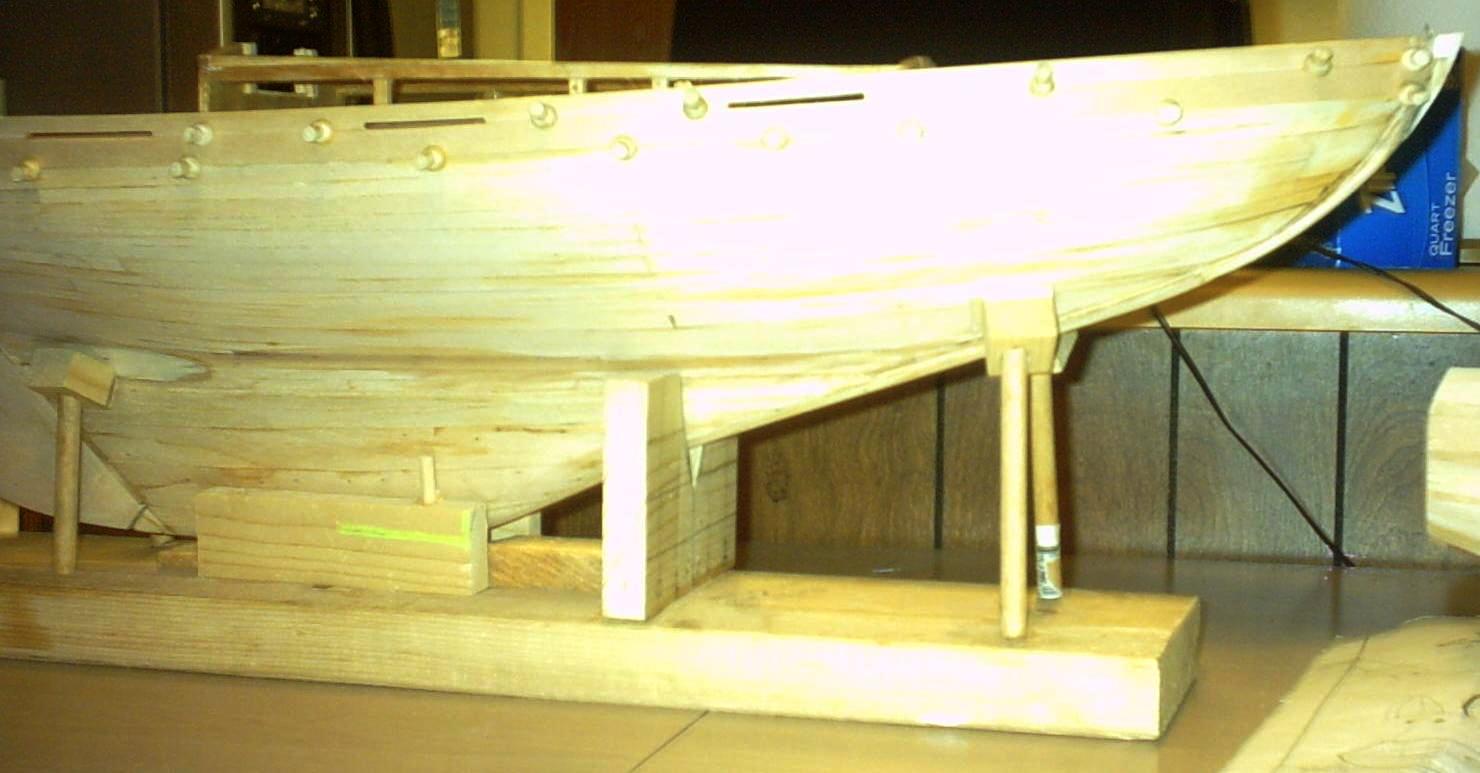
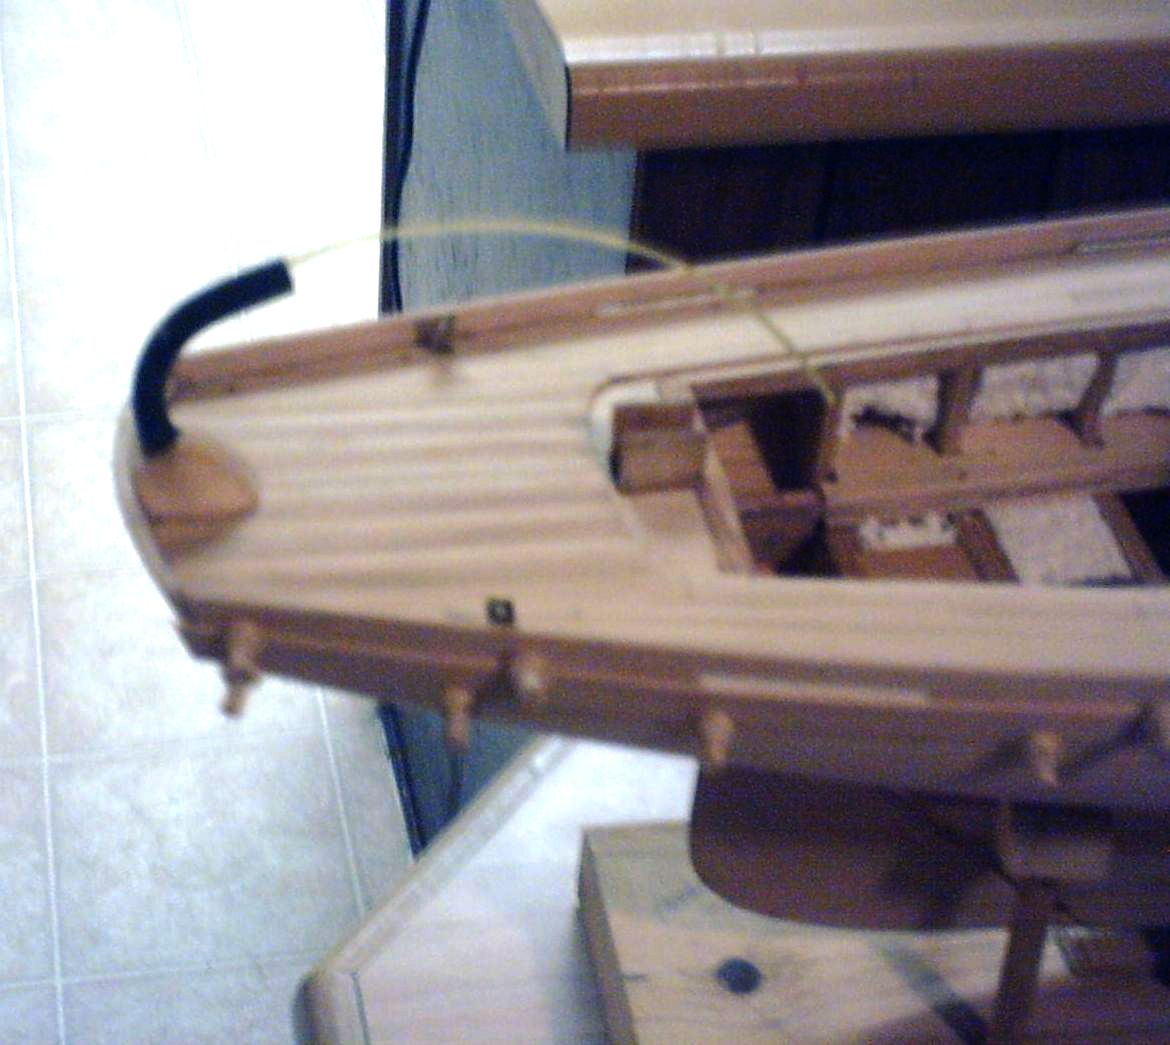
Here are some more recent images of my Meridea Build. Here are the first several planks starting down from the outside of the rail. You can see the drain ports through them in several places Here is where the flash worked on the approximate same view. This shows the line guide tube for the mizzen boom. It is cooler spider tubing. I threaded weed eater line through to the cabin so I can pull the lines through when I am ready. This shows the bow filler around the forestay anchor point. I have been working on this and have planking down to about the halfway point down the bulge, but I still have not gotten pictures of this. I have also been building up the thickness of the bulwark preparing it to hold the drilled mounting points for the stantion rails. I decided to change the mounts that I had previously settled on as they were lacking enough strength. Walter Biles


- 208 replies
-
- 5
-

-
- meridea
- repair ship
- (and 1 more)
-
Jaxboat, I agree that the glasses fogging can be a problem. There are things that you can get over the counter that can help that issue. Ask a pharmacist or eye doctor about what can be used on your glasses to help prevent fogging, also, a good fitting mask usually hase some sort of former to help prevent leakage. Many of those filter masks just have an aluminum strip that you can form to your nose to help restrict your breath from feeding back on your glasses, but some sort of antifogging spray or wipe can help keep the glasses from fogging from what does get up to them. I have been using Personal Protective Equipment for the last 3-4 decades because it was required for my job. You can find ways to make it work. Walt Biles
-
Water is one of our body's primary contents and one of our most necessary daily needs. However jumping in a lake and trying to swim to China without any care of the consequences can be lethal. Does that make you feel like swearing off water? Used in conventional ways, such as drinking it for proper kidney flushing, is definitely not bad for your health. It is a matter of using something in a reasonable and rational way. Dust is an irritant. If you are sensible and protect your lungs from the particuates, It will not make you cough. If you cough from being around it, use a filter. That is sensible. If it still makes you cough, then you may need to have a respirator that has filtering that prevents vapors or other toxicity of getting through. And make sure to clean off yourself before removing it so you don't ingest that stuff later. Proper Personal Protective Equipment can make a world of difference along with good sense. Walter Biles
-
Thanks Popeye. Thanks Bob, Happy New Year to you and your wife.! Walt
-
I have done a lot on my other boat, the Samson, and other than updating that one, soon, I am back to the Meridea to finish the second planking layer. I got the guide tube for the mizzen boom installed, and a pull line fed through it so I can pull the controls through it when ready, which made it possible finally to install the decking assembly which is now done. I need to take some pictures of the progress on this boat, but have already started to do the second layer of planking from the waterways working back down to where the main keel meets the bilge area, so the planking will be done. Then I should be able to finish the hull so I can ballast it. From there I could finish the internal compartment for the radio controls. Then I may be able to get the cabin walls assembly installed. Then that boat will mostly have to wait for a radio to go into it, so I can figure out the rest of it. Samson is now almost to that point now, also. However, I have two more builds planned for while they wait. I got the special price from Model Expo, so on Christmas day, I used some Christmas gift money from a couple of my siblings and ordered my first ever KIT boat model. (My first POF kit ever,also) The Emma C. Berry is now waiting for that day when I have nothing left to build. I also have enough information and planning to be nearly ready for a full scratch build of the Sea of Galilee boat. Walt
- 208 replies
-
- 1
-
-
- meridea
- repair ship
- (and 1 more)
-
Well, I finally got back to work on this boat. I have a bunch of pictures of it. I'll try to get them posted soon. I now have the double planking done on the hull. I also have the rudder shaft installed and ready for rigging a servo to it. I installed the prop shaft stuffing box and prop shaft and the motor. It will only turn about 180 rpm on the shaft, so I have enlarged the spacing for a 2" prop, which I hope will be 4 or 5 blades to maximize thrust. Walter Biles
-
Patrick, I do not know about the model, but Wikipedia does list a history and description of an HMS Ballahoo. Walter Biles
-
Hank, What will the models dimensions be when finished? I Can't remember any of the real ship's dimensions so 1:200 doesn't tell me much. Walt Biles
-
Ed, Merry Christmas and a Happy New Year I really admire your building board and how you are doing the ribband and spall spacing. With the various clamp on allignment fittings, you have a masterful assembly. I have recently added some of the simpler of the clamps to my tools. They are wonderful. I never realized how much trouble the store bought ones were to use until I got these made. Keep up the good work. Walter Biles
-
Narrowing down the field for first ship model
Walter Biles replied to Bill Hime's topic in Wood ship model kits
Bill, I too, come from a long line of artisans. Farmers, carpenters, block layers, stone quarymen, all had the passion to build something. Any of them were likely multiskilled and loved working with their hands. My dad was a farmer, which by description required many types of working skills, and he was as at home planning and doing the seasonal crop as he was in carpentry, concrete work, and woodworking. I don't think that he ever met a job that he couldn't feel confident that he could accomplish well. I grew up with a similar variety of skills and understanding. This is where I believe you are. I feel the same way about the many cabinetry and buildings as I do about the variety of models that I have produced over the years. My dad used to say,"It is not so important for you to have everything in mind regarding what you need to know to accomplish a job as it is to know where to find out what you need to know, even though it has been forgotten for awhile." If you can find it to refresh your memory, it can be as it once was. Useful and ready to use. I watch in awe of some of the mastery of ship construction knowledge that I have seen in this and our former site. I am capable as a carpenter, and a former SEA BEE in the Navy and have worked with shipwrights. Still I find new aspects of how to do things. I think you are right to assess your own experience and skill sets as to know where to begin. I am a scratch builder. I don't know when or where I learned how to do this, but I know I can do much as long as I can envision an outcome. GO FOR IT! Just keep reading and studying what others have done, and it can become a part of your knowledge and skills. I totally enjoy this hobby, and really appreciate that I am not on a deadline. A lot of times I may set it aside for a few days or months while I decide how I want to progress. The wood is patient. Sincerely, Walter Biles -
I have ordered some taps and dies for some Jorgenson style clamps. I will be going to town on Friday and will see if I can find the maple and the brass for the clamps. Walter Biles
-
Ed, I noticed you are saying the frames have an iron bolt represented by the black monofiliment. I seem to remember from somewhere, wasn't the keelson also bolted into the frame members? Didn't those interfere with each other, and how were they fitted so as not to weaken each member? Walter Biles
- 3,618 replies
-
- 1
-
-
- young america
- clipper
- (and 1 more)
-
Thank you Bob. I went ahead and added almost an inch to the deck level and gave it about a 3/16th" crown. I just extended the sides up and attached to the frame tops and just added a new bulwark around the edge. It will be shaped almost the same, just more consistent in height and angle. This gives me more battery and servo space also. Something I will probably need with that boom rig. I think I am going to have to do a winch drive, with a return line, so I can get the travel needed. I think if I take in from the returning slack I can feed it out to the top to control letting it down and vice-versa on lifting it back up. The only other things I will need will be a rudder servo, and a motor control. I am still looking for a prop to fit. It needs to be between 1 1/4" and 1 1/2". I need a bigger one at slower rpms to get the positioning control and once I make connection, enough power to move both boats with the towed one dragging. I don't expect at this time to do more than tow it back to shore. Unless I get a brainstorm how to do some robotics, and I don't have enough experience for that yet. I only had two planks above the waterline to the deckline. This should give me 6-7 plank strakes. I can now add waterways to get the water off the deck that may get there so it can't find a way inside. I think it looks more uniform in its deck line now. It still will not be near as deep as the boat is wide.
-
Bob, When you find this, I am wondering about whether I should try to use waterways around this tug boat or not. Near the middle of the boat the water level will only be about 1/2 to 3/4" from deck level which has no crown to it. Should I maybe just build up the gunnels and hope I don't ship any water? At this stage, I should be able to do just about anything I want with it. I could even add some framing and make the deck a bit higher, and with some crown, so I could use the waterways. I was a bit shocked when I measured off the waterline on the plan and marked the hull. I wonder if that is just one of those river tugs not meant for high waves. Walter Biles
-
Thank you Michael. I am going to build an A frame boom with an extention on it with a downward angled pin on the end of it, so I can back up near it, and literally drop the boom on it, to hook over the rail or sail rigging if it is capsized. I just want to make the boom long enough that I can keep the tug from tangling up in the boat, or whatever is holding it. I will also have a braided rope bumper over the nose and sides to be able to herd it back from trouble. Walt Biles
-
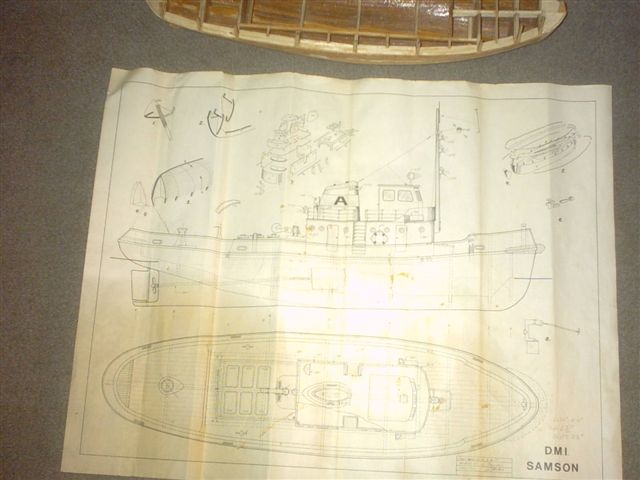
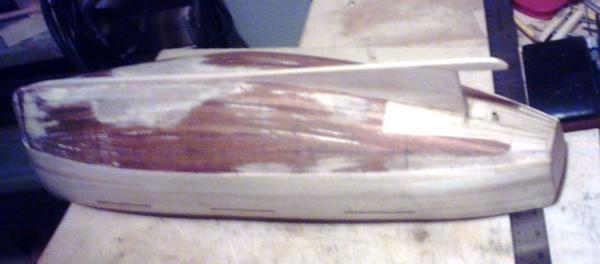
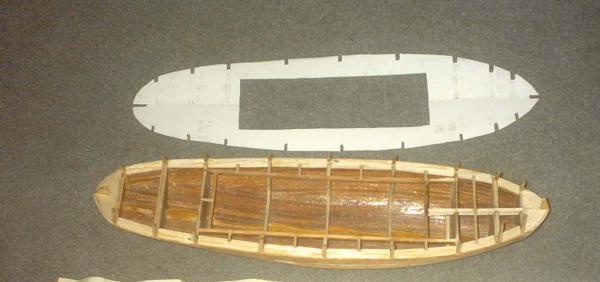
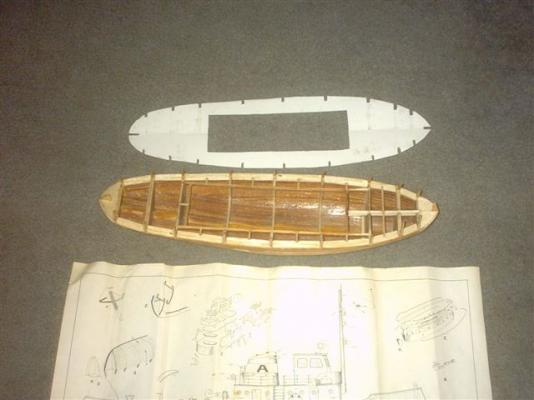
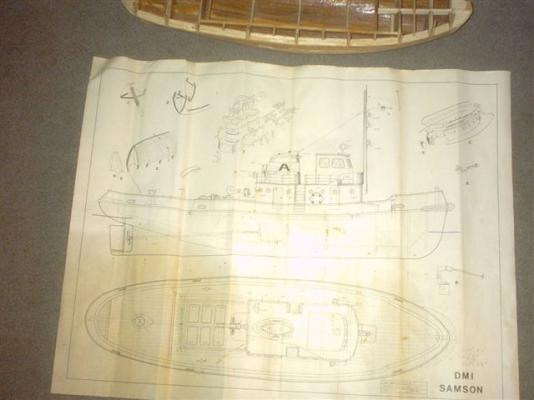
This Tugboat hull was given to me with a two-view sheet plan, started but never finished. I wanted to have a recovery vessel in case my RC sailboat capsized or got hung up in a lake or pond. A friend suggested it might be of use for that purpose. It will be a working RC boat, and specially re-designed for it's purpose. Pictures of hull and plan to follow when ready. The deck was badly deteriorated and poorly supported. I have torn all of it off down to a planked hull framework. I have started evening up and reinforcing the deck framework. This is its current condition. It has a slot through the keel for a prop shaft, and a place where a rudder would go behind the prop although it it will need to be framed for installation. The opening for the deck house should be okay now that it has been re-assembled and reinforced. Subdeck pattern Hull PLAN (All I have) Walter Biles
-
Thankyou, Popeye Now I just need to get the last of the planking done, and finish the inside work, and it will be ready for the radio. Of course I will still need to do the booms and rigging. Then I need to get busy on my Samson hull for my recovery vessel Bob gave me. I am going to put a boom arm on it to let down into either railing or rigging to drag my Meridea back to shore incase it gets hung up out on a pond. Walt
- 208 replies
-
- 1
-
-
- meridea
- repair ship
- (and 1 more)
-
Robbyn, I have a possible solution for the next time you need to drill a hole in something where it wants to wander. I use a sharp pointed rotary file bit (shaped like a christmas tree) for my dremel first to start the dimple for the later drill bit. It stays put better because it is so sharp on the tip and the file will widen the hole as it goes. I even had success where I had to drill on the edge of a glue line in wood trying to make my ships wheel. Just for your consideration. Walter Biles
- 773 replies
-
- 2
-
-
- san francisco ii
- artesania latina
- (and 1 more)
-
Thank you Bob, I may have to re-make the mainmast. It has taken a couple of warps. I'll try and straighten it, and if that doesn't work, I think I'll re-do the mast. That plywood I used was bowed, and I tried to straighten it by making the bows oppose each other, which was why I put more filler blocks into it. I do have another sheet that i found which is pretty straight. I didn't put wood seal on it prior to that wet spell awhile back. That wheel was supposed to be metal tubing, but I decided to try a wooden one. Actually, it came out better than I expected. It is just toothpicks, and 3/32" bass wood cut into the 1/6th curves for each side and sanded until they fit together. I put an overlap of the joints on the opposite side from the first and glued them together. When dry, I dremel drilled the holes for the toothpicks to go through, once I had the ring, and put a block in the center. I used a half inch pvc pipe cap and a short nipple of pipe for the post. I couldn't get through the storeage pile to get to my lathe. Anyway, the post is close to the original shape. The original post and wheel were burnished stainless and the wheel had no handles, it just had the 6 spokes in about 1" stainless tube all welded. I figure this will just be my wood version of the assembly. I just glued it in place. Actually the seat is oversize in order to have room for the rudder rigging, but who's to care? Over all I think my cockpit will do to represent my idea of it. I am going to have to put a boom vang on the main boom in order to keep it above the cabin and cockpit, if for no other reason. Walt Biles
- 208 replies
-
- 1
-
-
- meridea
- repair ship
- (and 1 more)
-
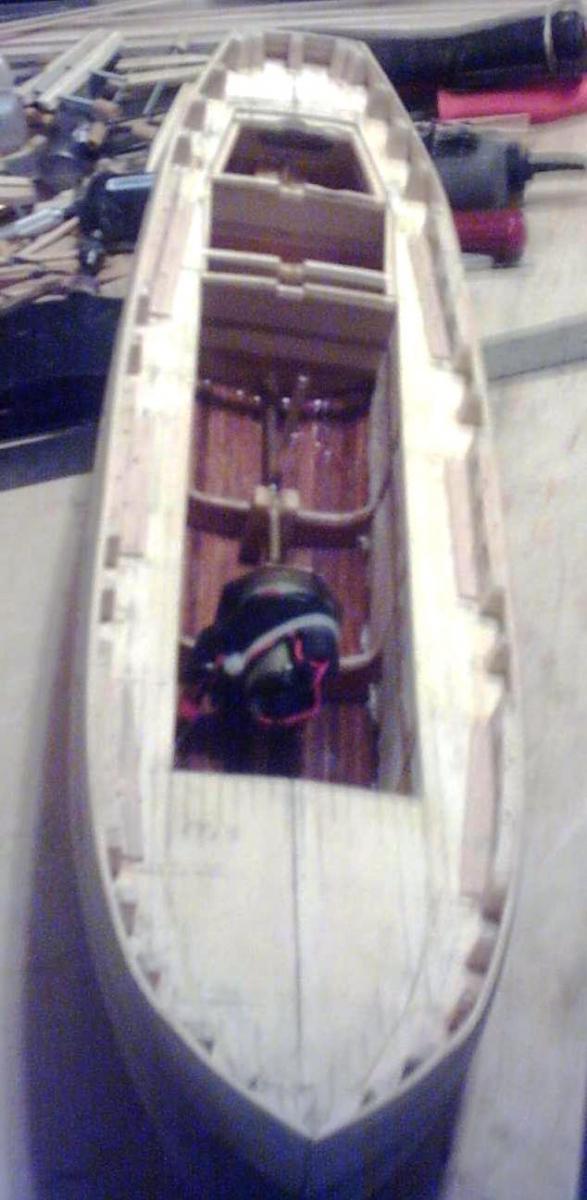
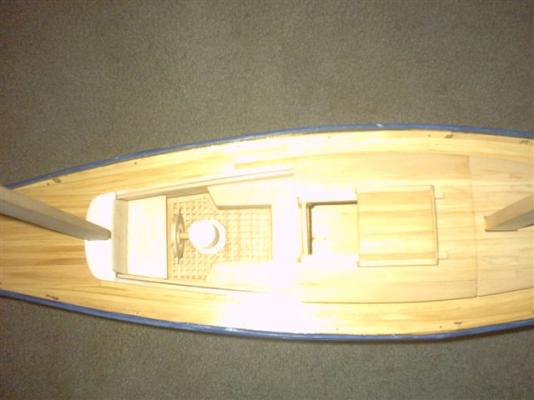
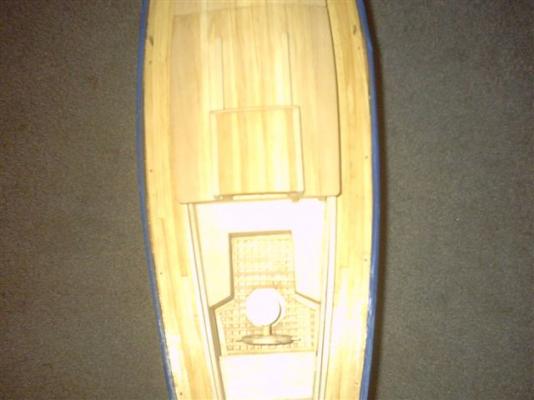
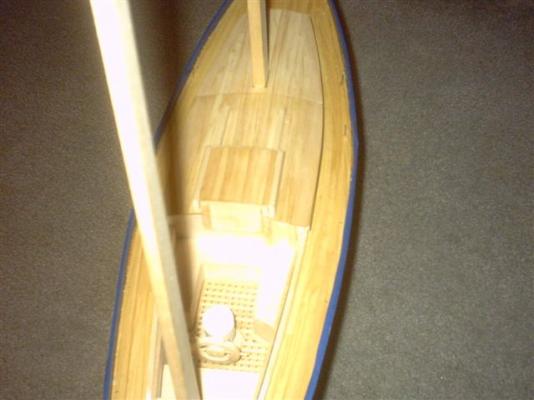
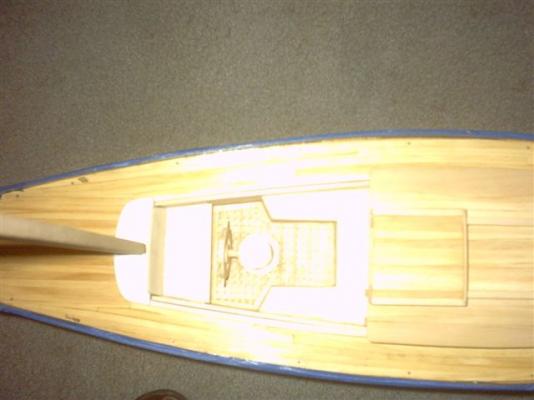
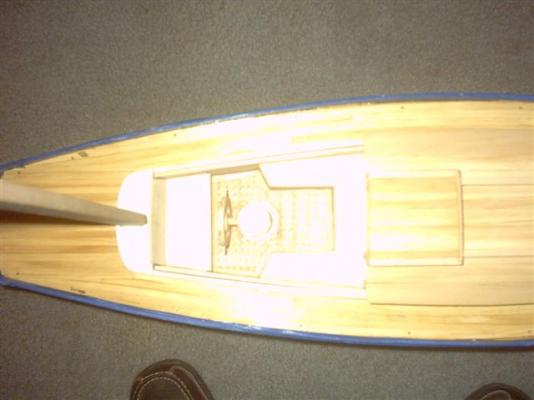
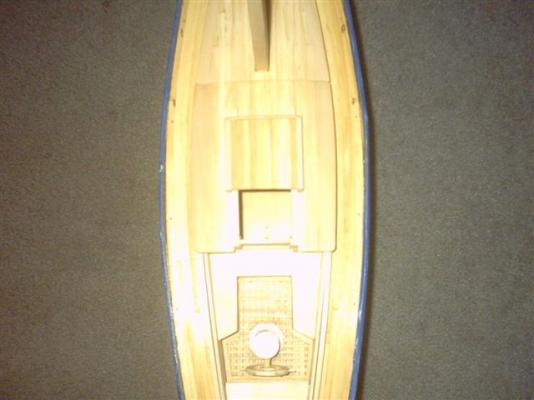
Here are my latest picture updates. This first one is the best picture showing the cabin companionway open and the cockpit area with its drain grid and ships wheel. The rest of these were my attempt to get a good detail of the cockpit, the last one with the companionway hatch opened. This next one shows the ships wheel better. I have been trying to get finished assemblies of the deck features. When finished the caprail will go on around the cockpit. I still have quite a bit of interior work to do, and I still need to do the second planking to the top. It is finally beginning to look like a boat, huh? Walter Biles
- 208 replies
-
- 3
-
-
- meridea
- repair ship
- (and 1 more)
-
Thalassa, It looks like it has the bulkheads already cut. A plank on bulkhead model is not that difficult to build. There are booklets in the Article Downloads section that can tell you most of what you need to know about planking. And a build log is a handy place to get all the tips and pointers you may need to get you through the build. Don't be afraid of it, you will do fine. I wish that any of my Bluenose kits had been even Plank On Bulkhead. I did two during my navy days. Walter Biles