MORE HANDBOOKS ARE ON THEIR WAY! We will let you know when they get here.
×


Bishophobbies
-
Posts
56 -
Joined
-
Last visited
Content Type
Profiles
Forums
Gallery
Events
Everything posted by Bishophobbies
-
 There are recliners on the front row - first come first served! Also unlimited popcorn (I accidentally typed potcorn - now wouldn't that be something!!!).
 -
Moving along nicely. I've used my wife's curling iron to make curves in soaked wood – it works fantastic. Latest photos:

-
Sergey - any more progress on the Phoenix?
-
Party foul!!! My bad about the country of manufacture. All I have been able to find is that this is produced by ex USSR manufacturers. Maybe someone can clarify.
-
Ok - thanks for the nice comments. Warm chocolate chip cookies and milk for those watching (I'm LDS so I don't drink). Here are a few more photos, this is a really nice kit so far.

-
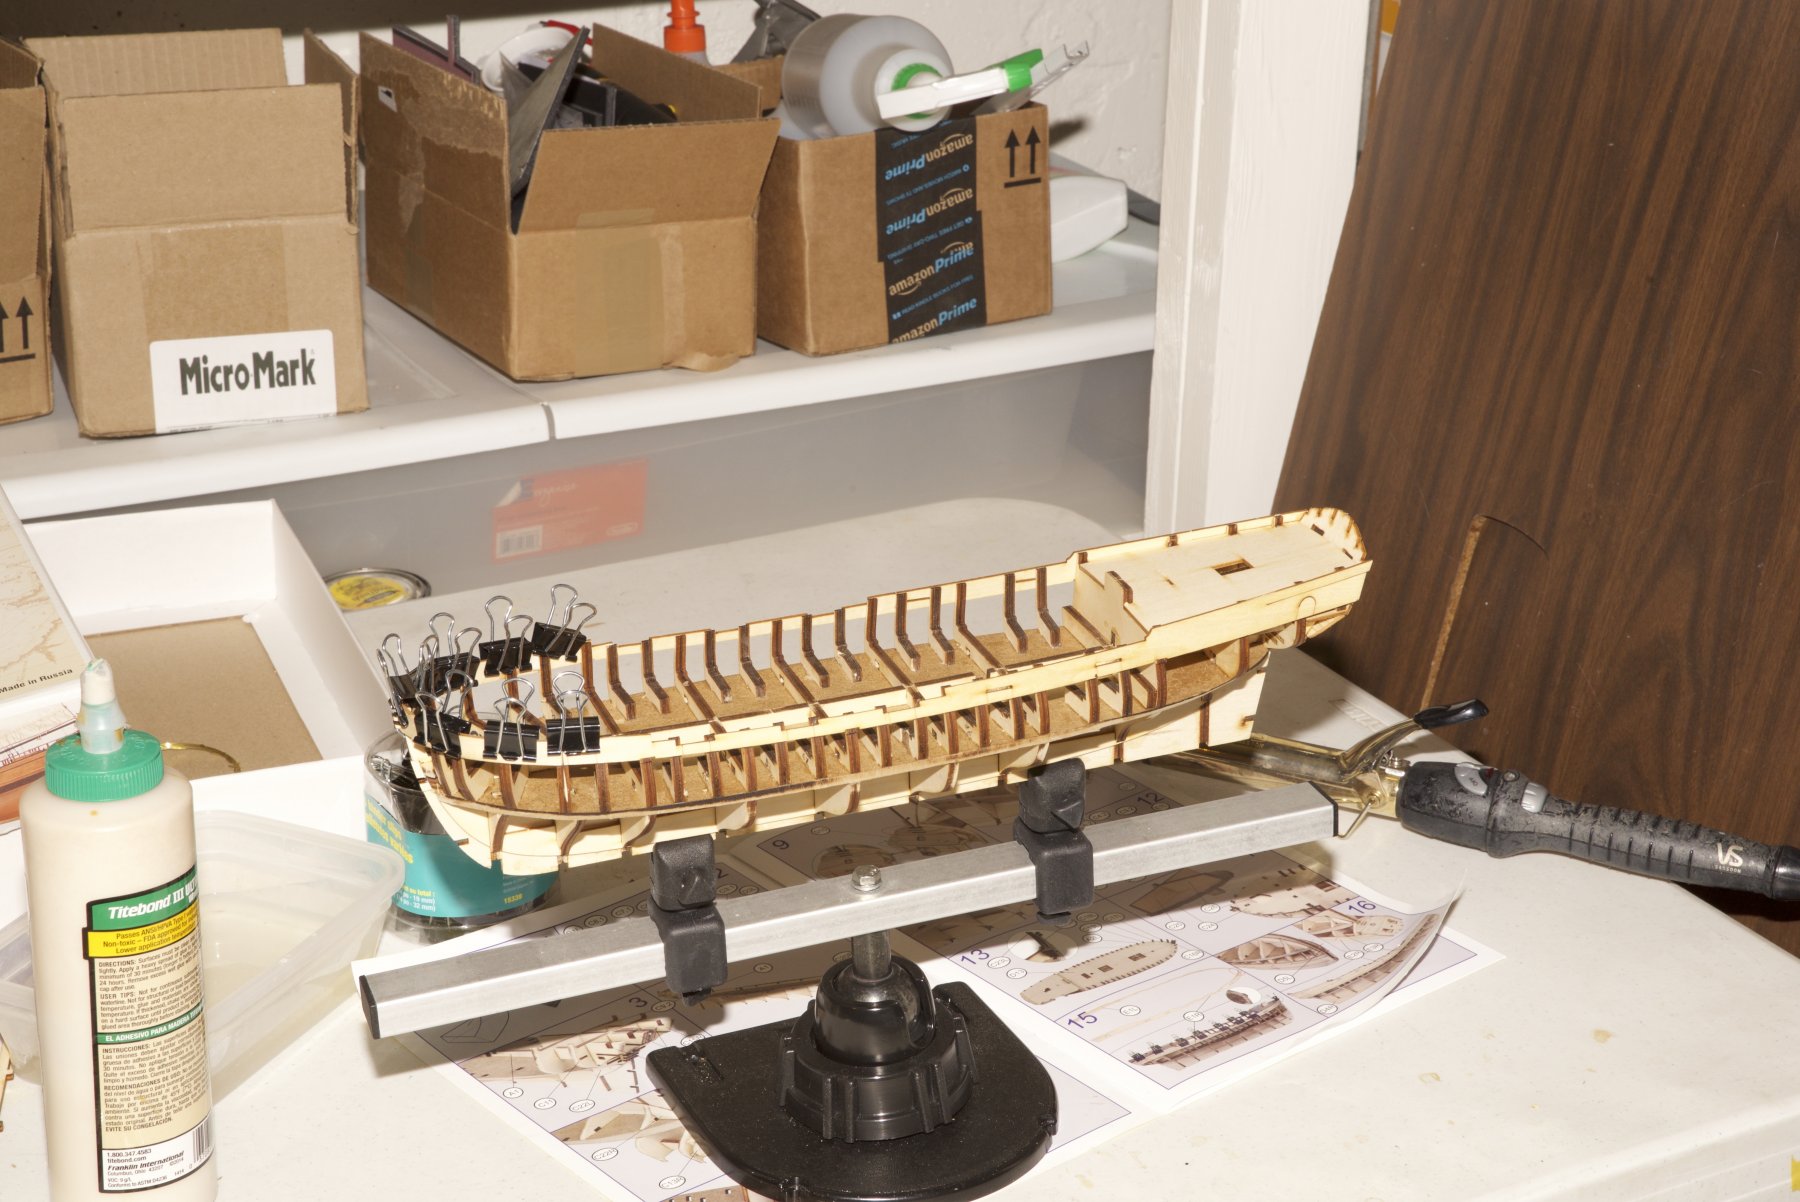
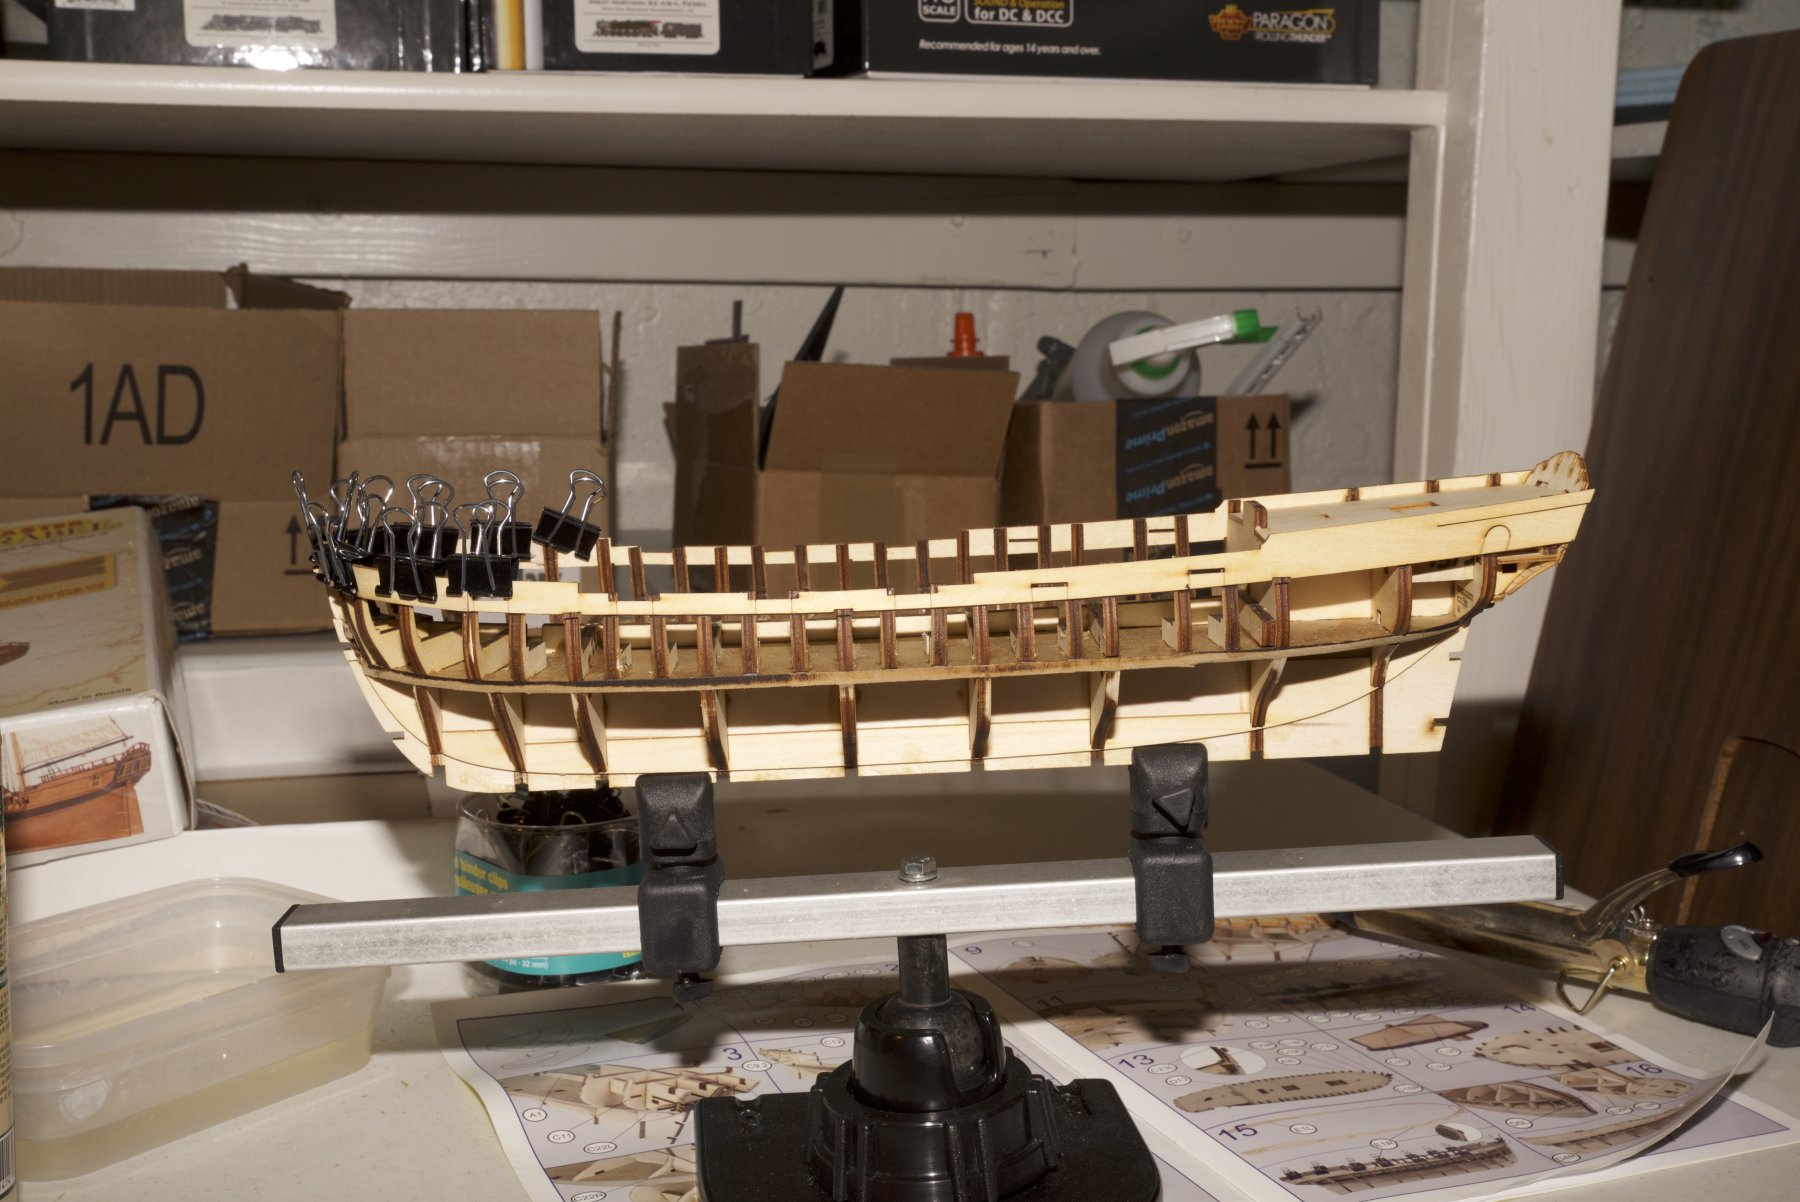
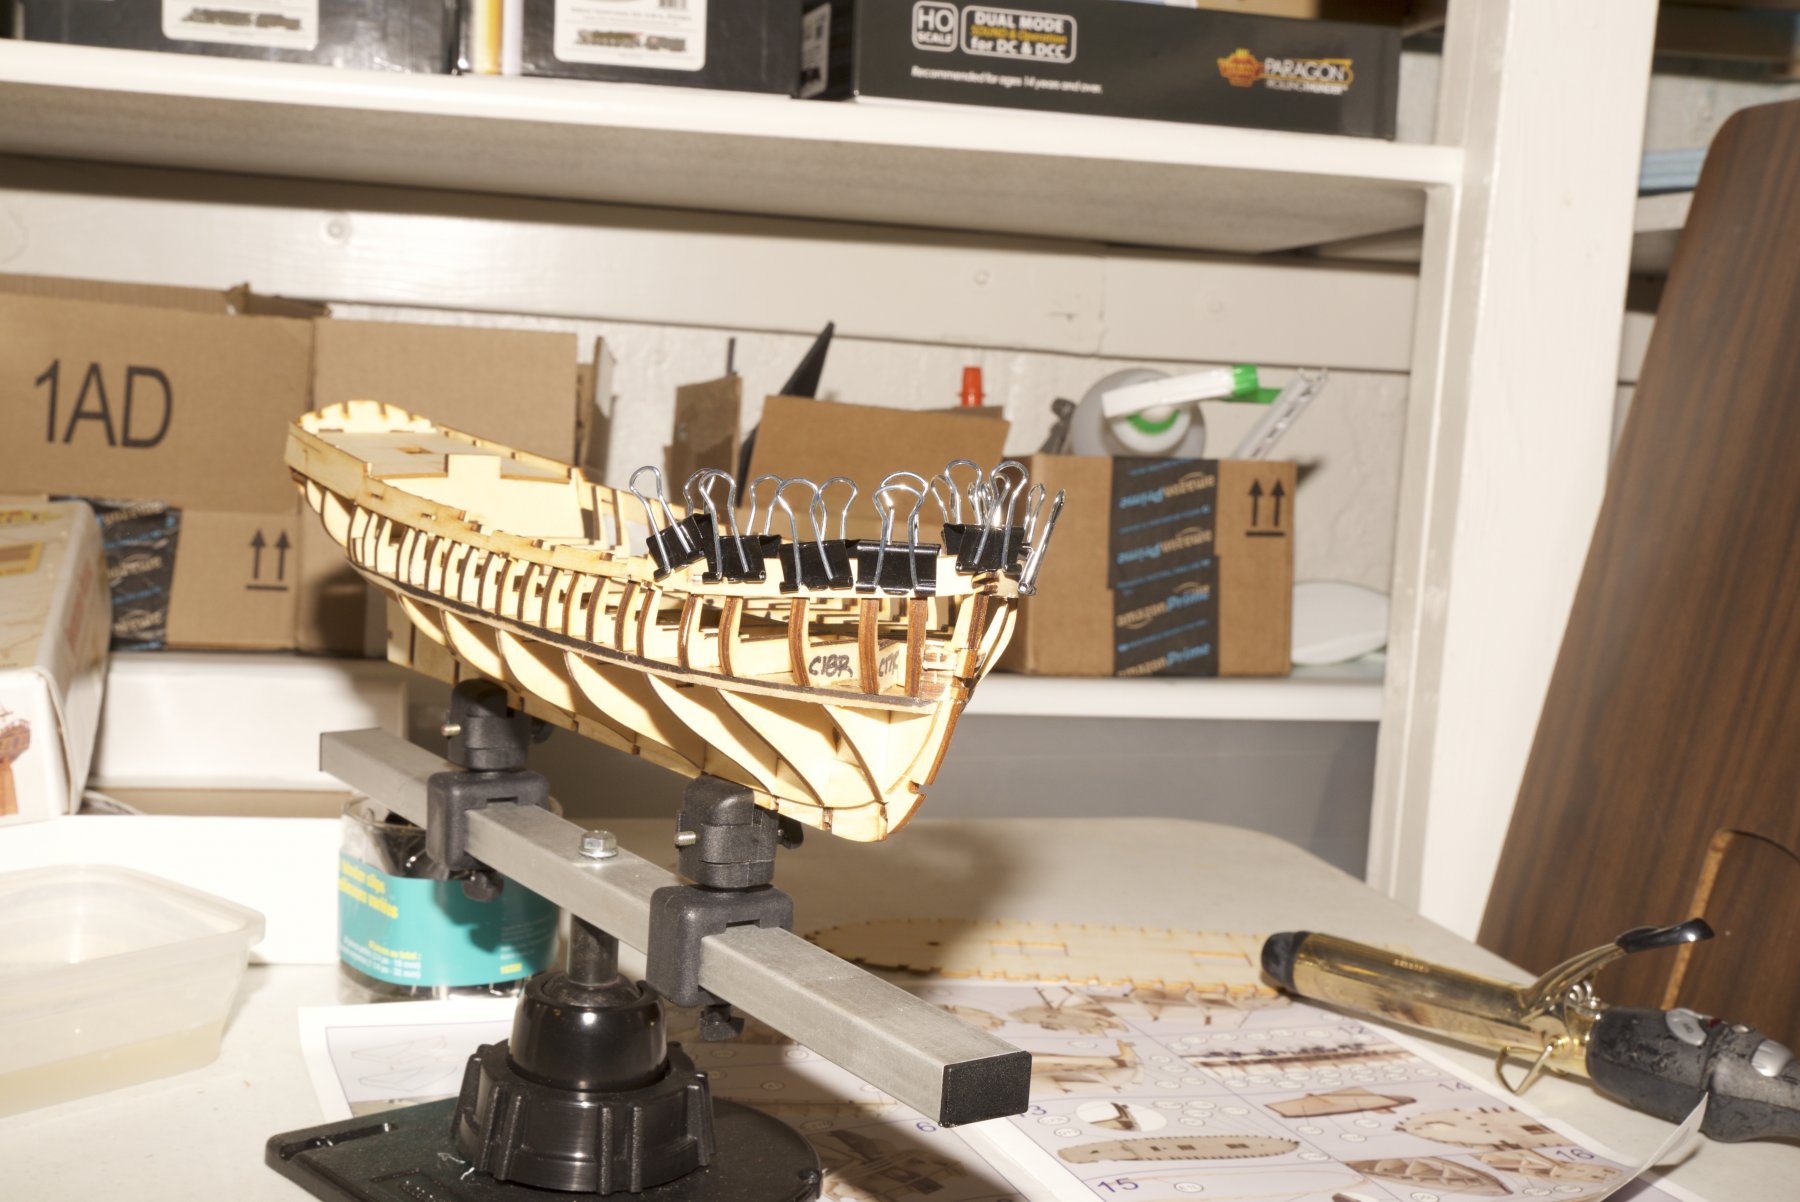
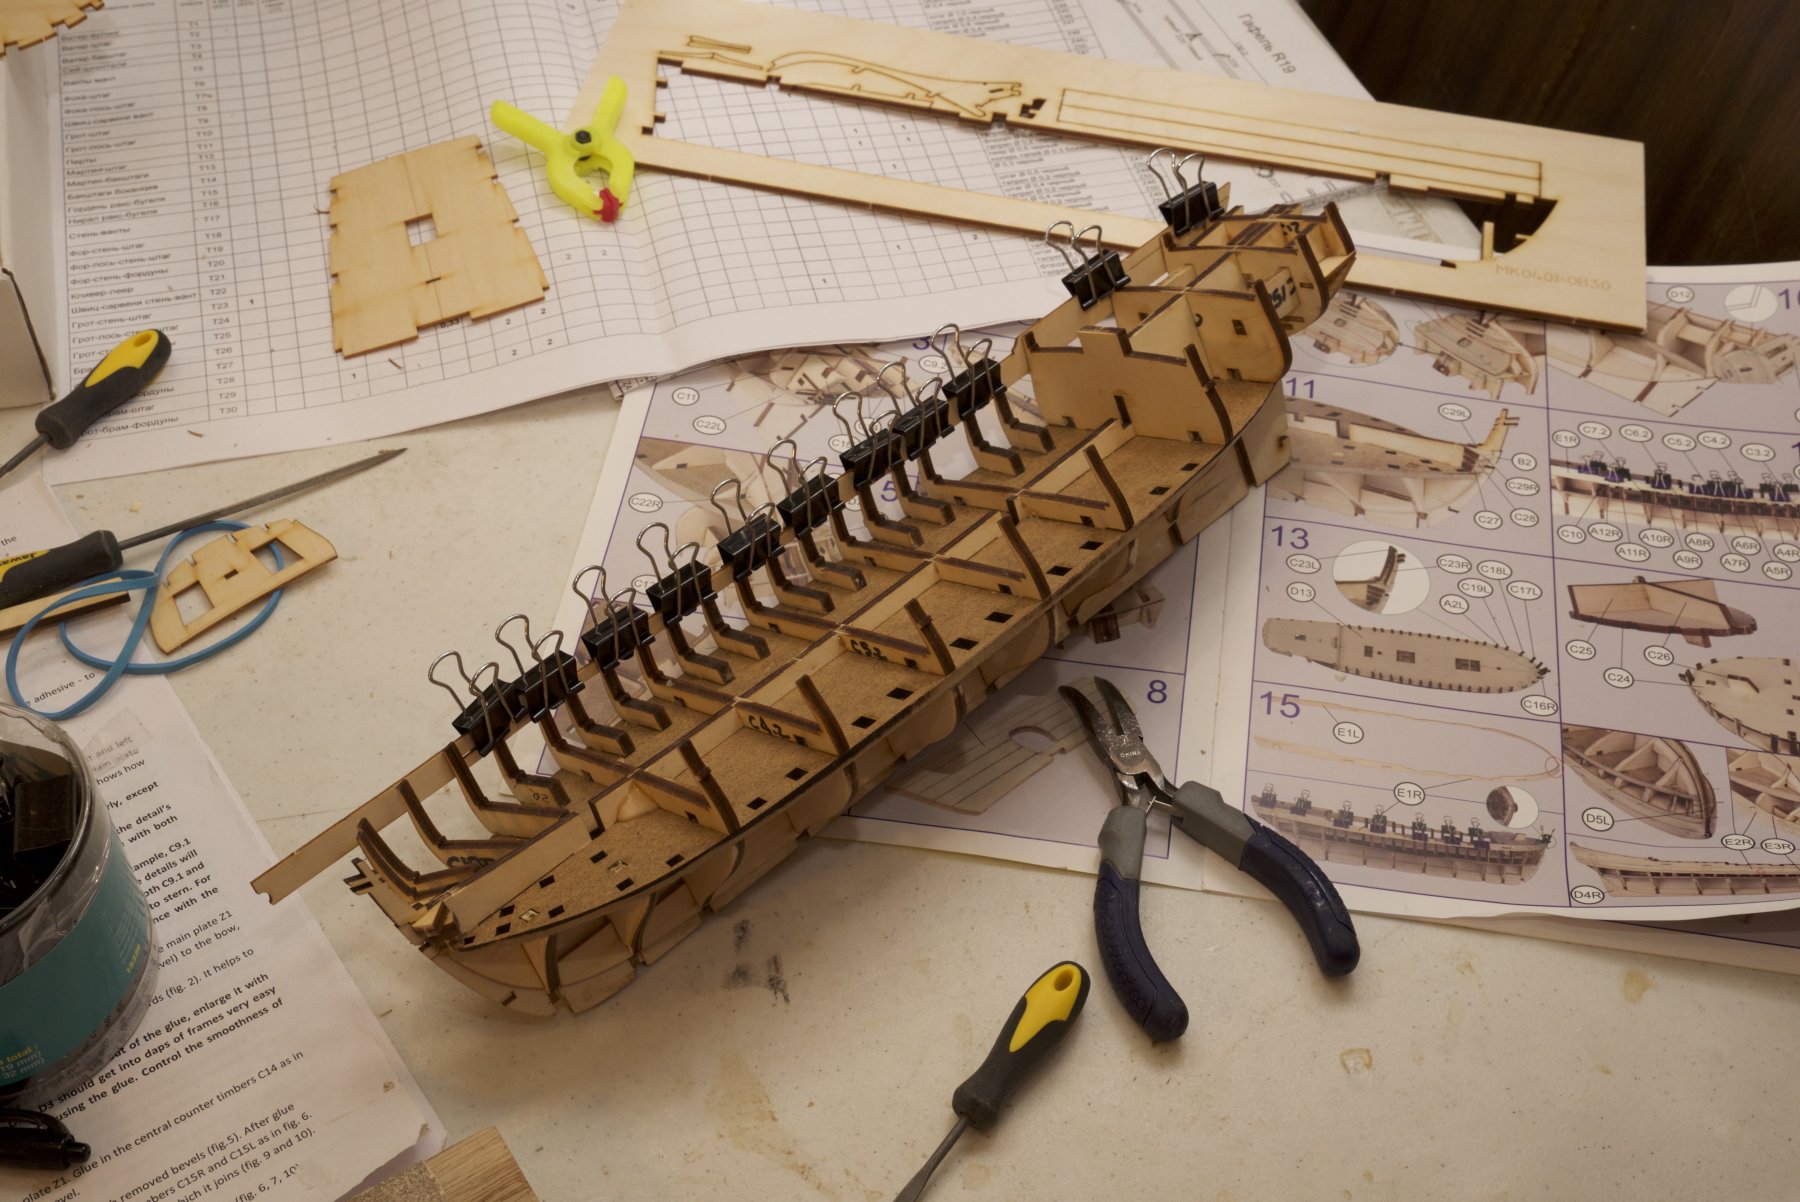
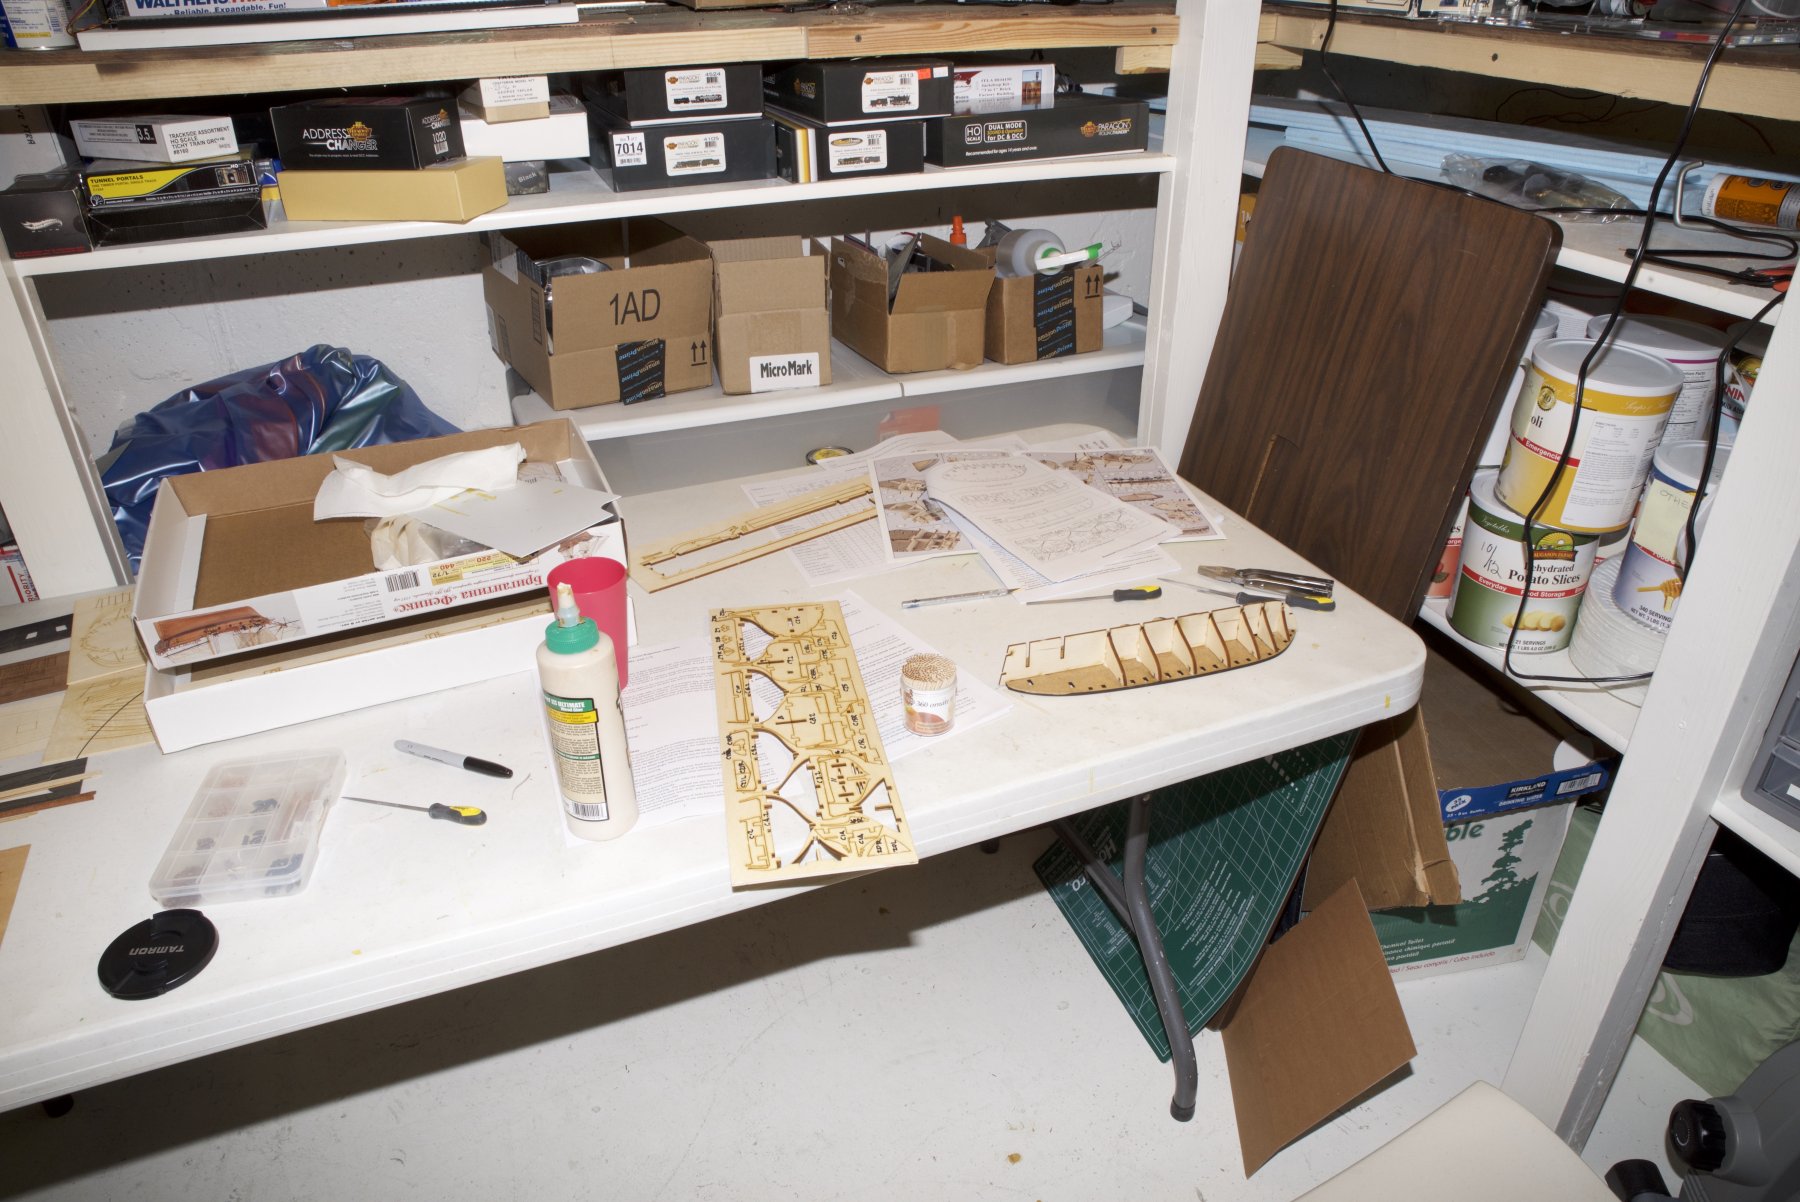
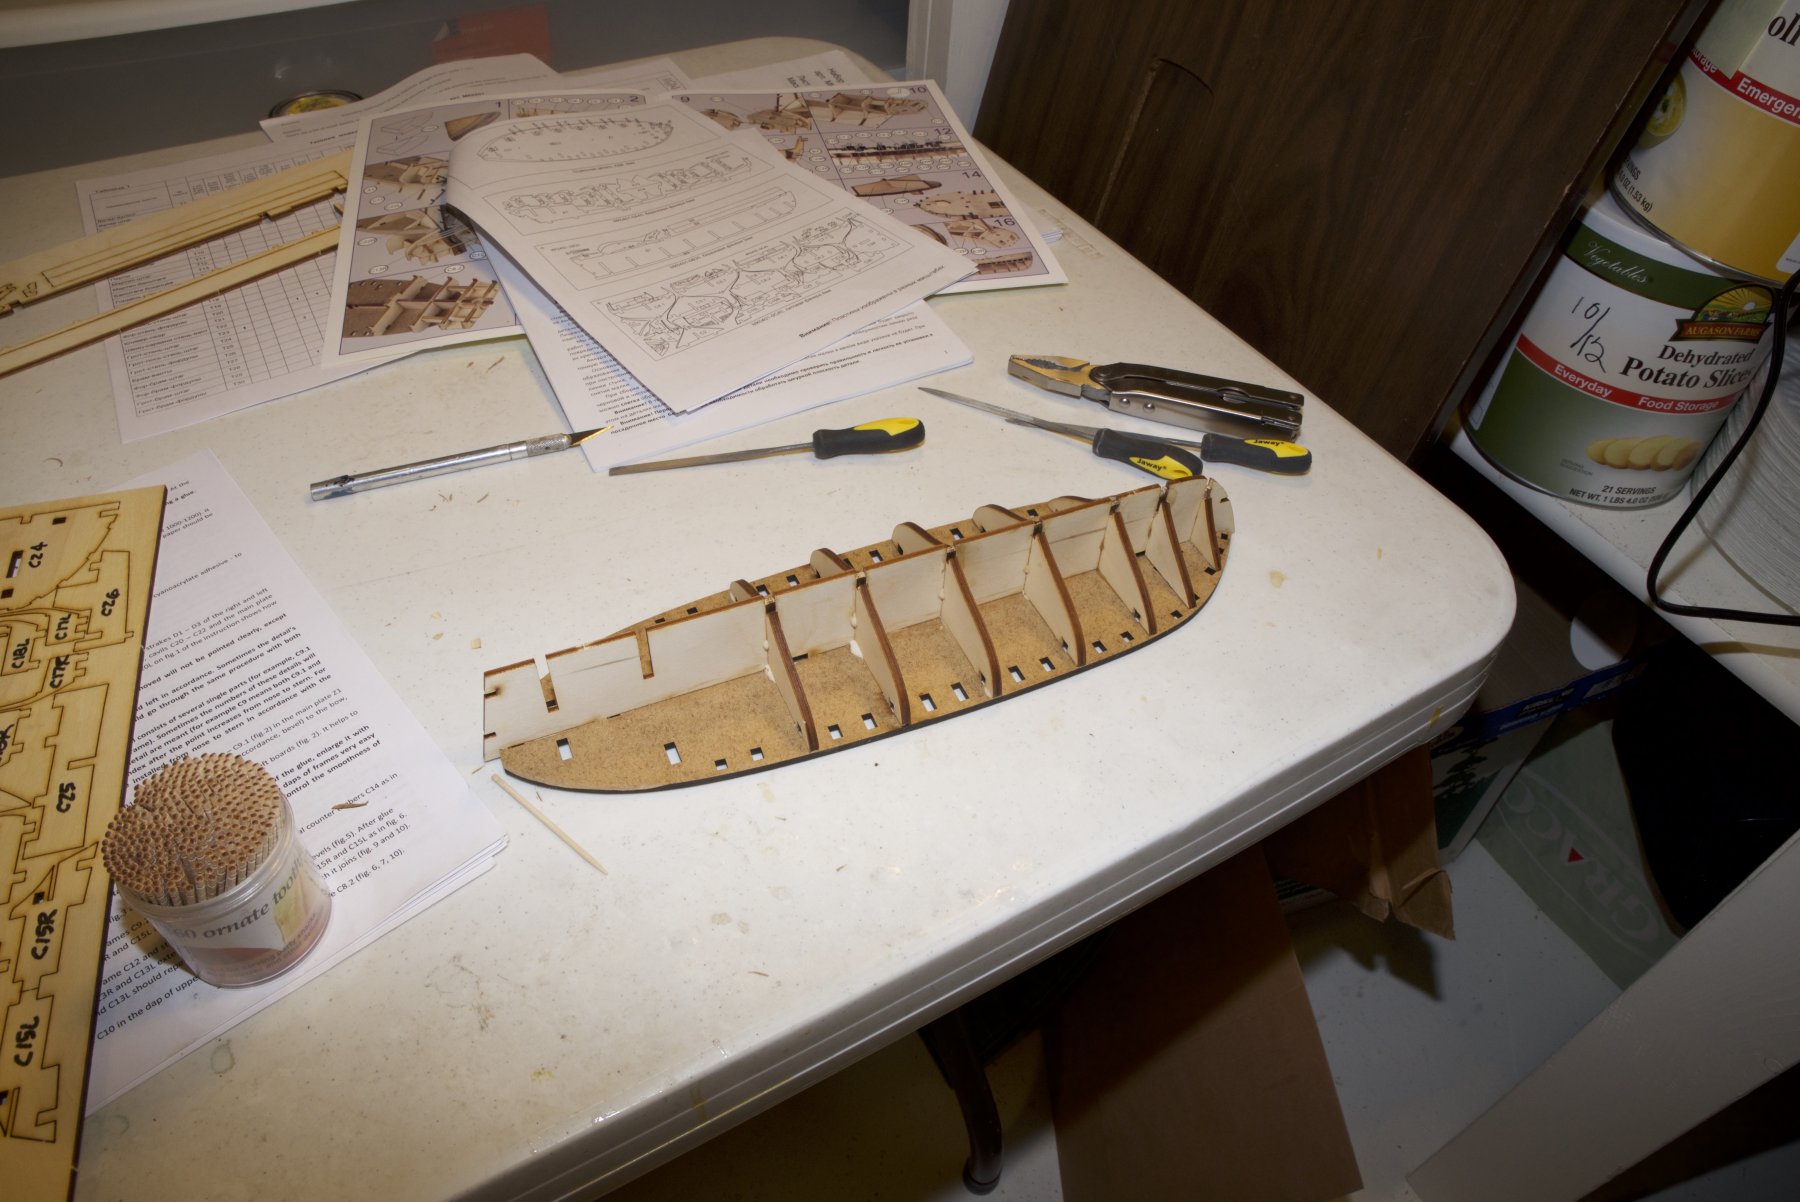
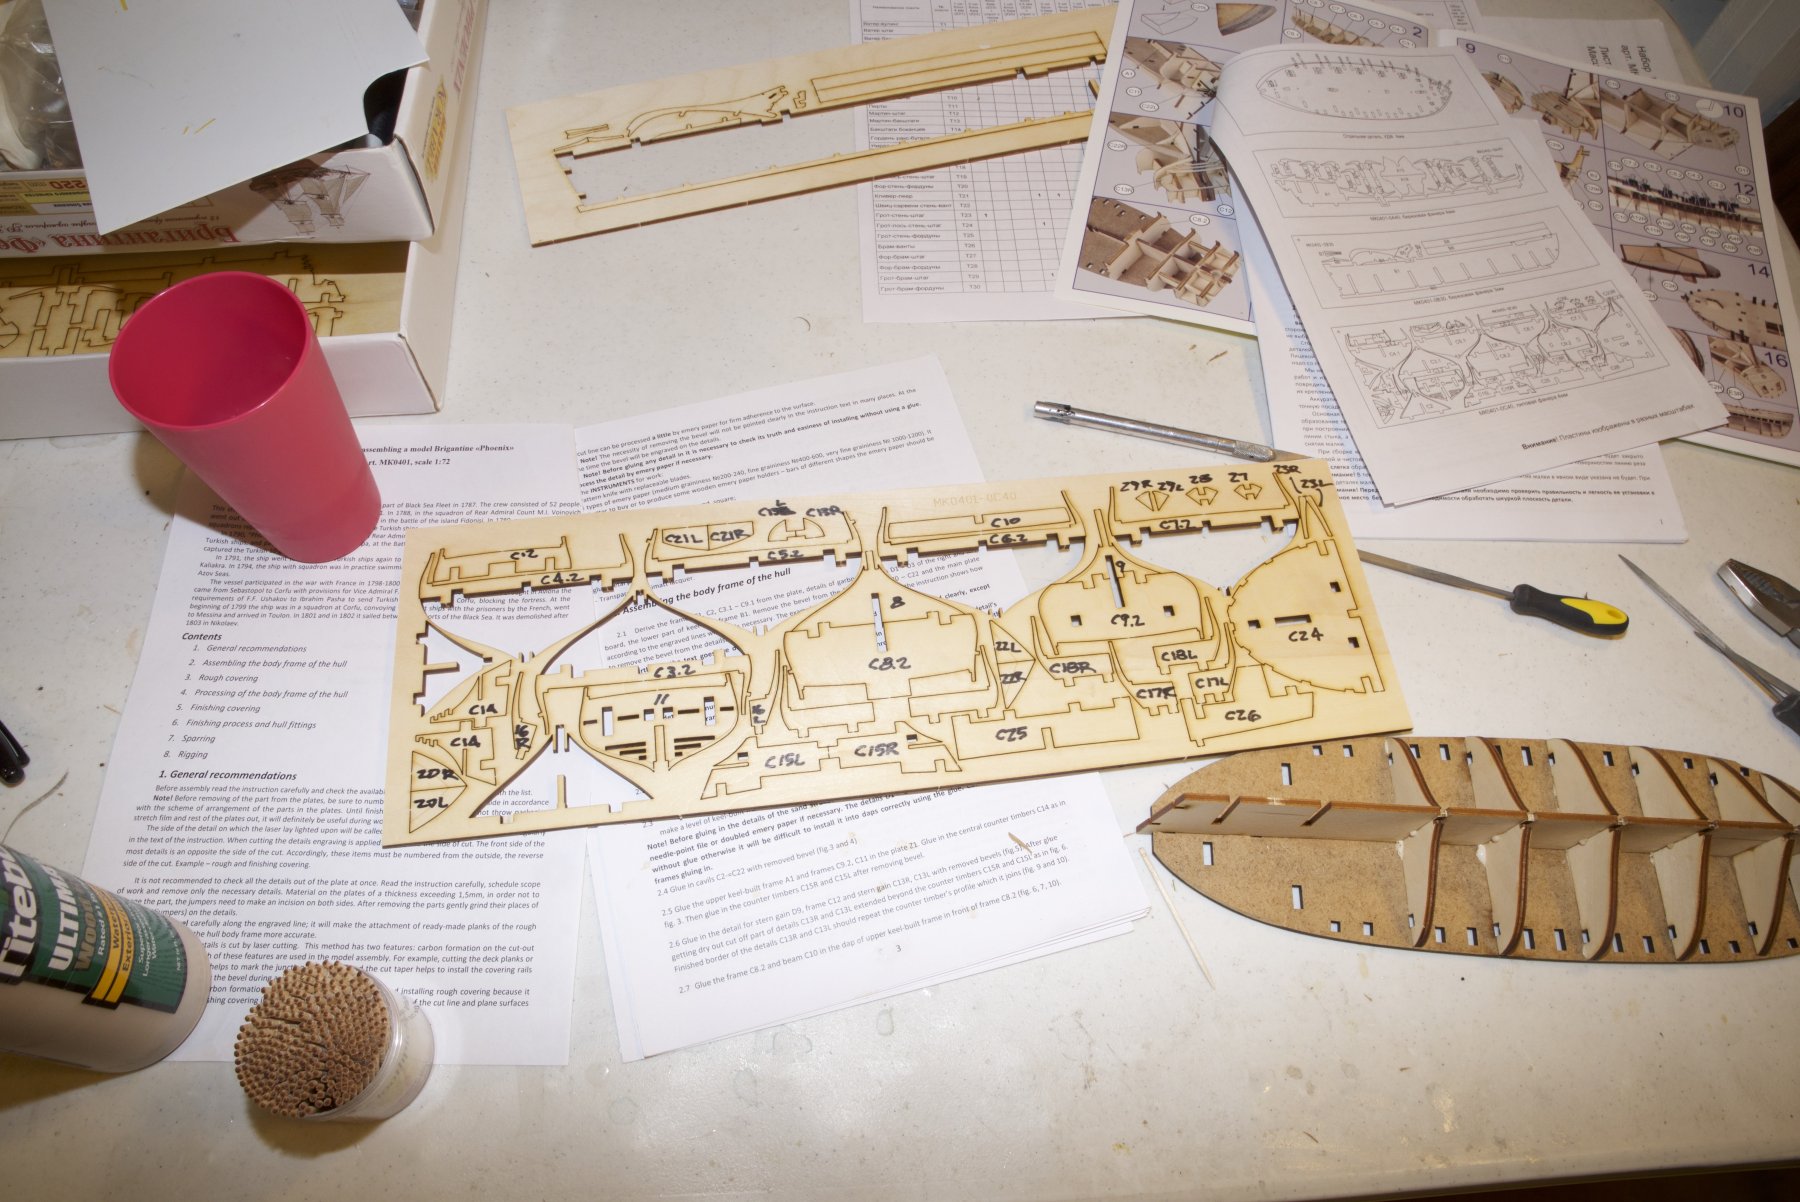
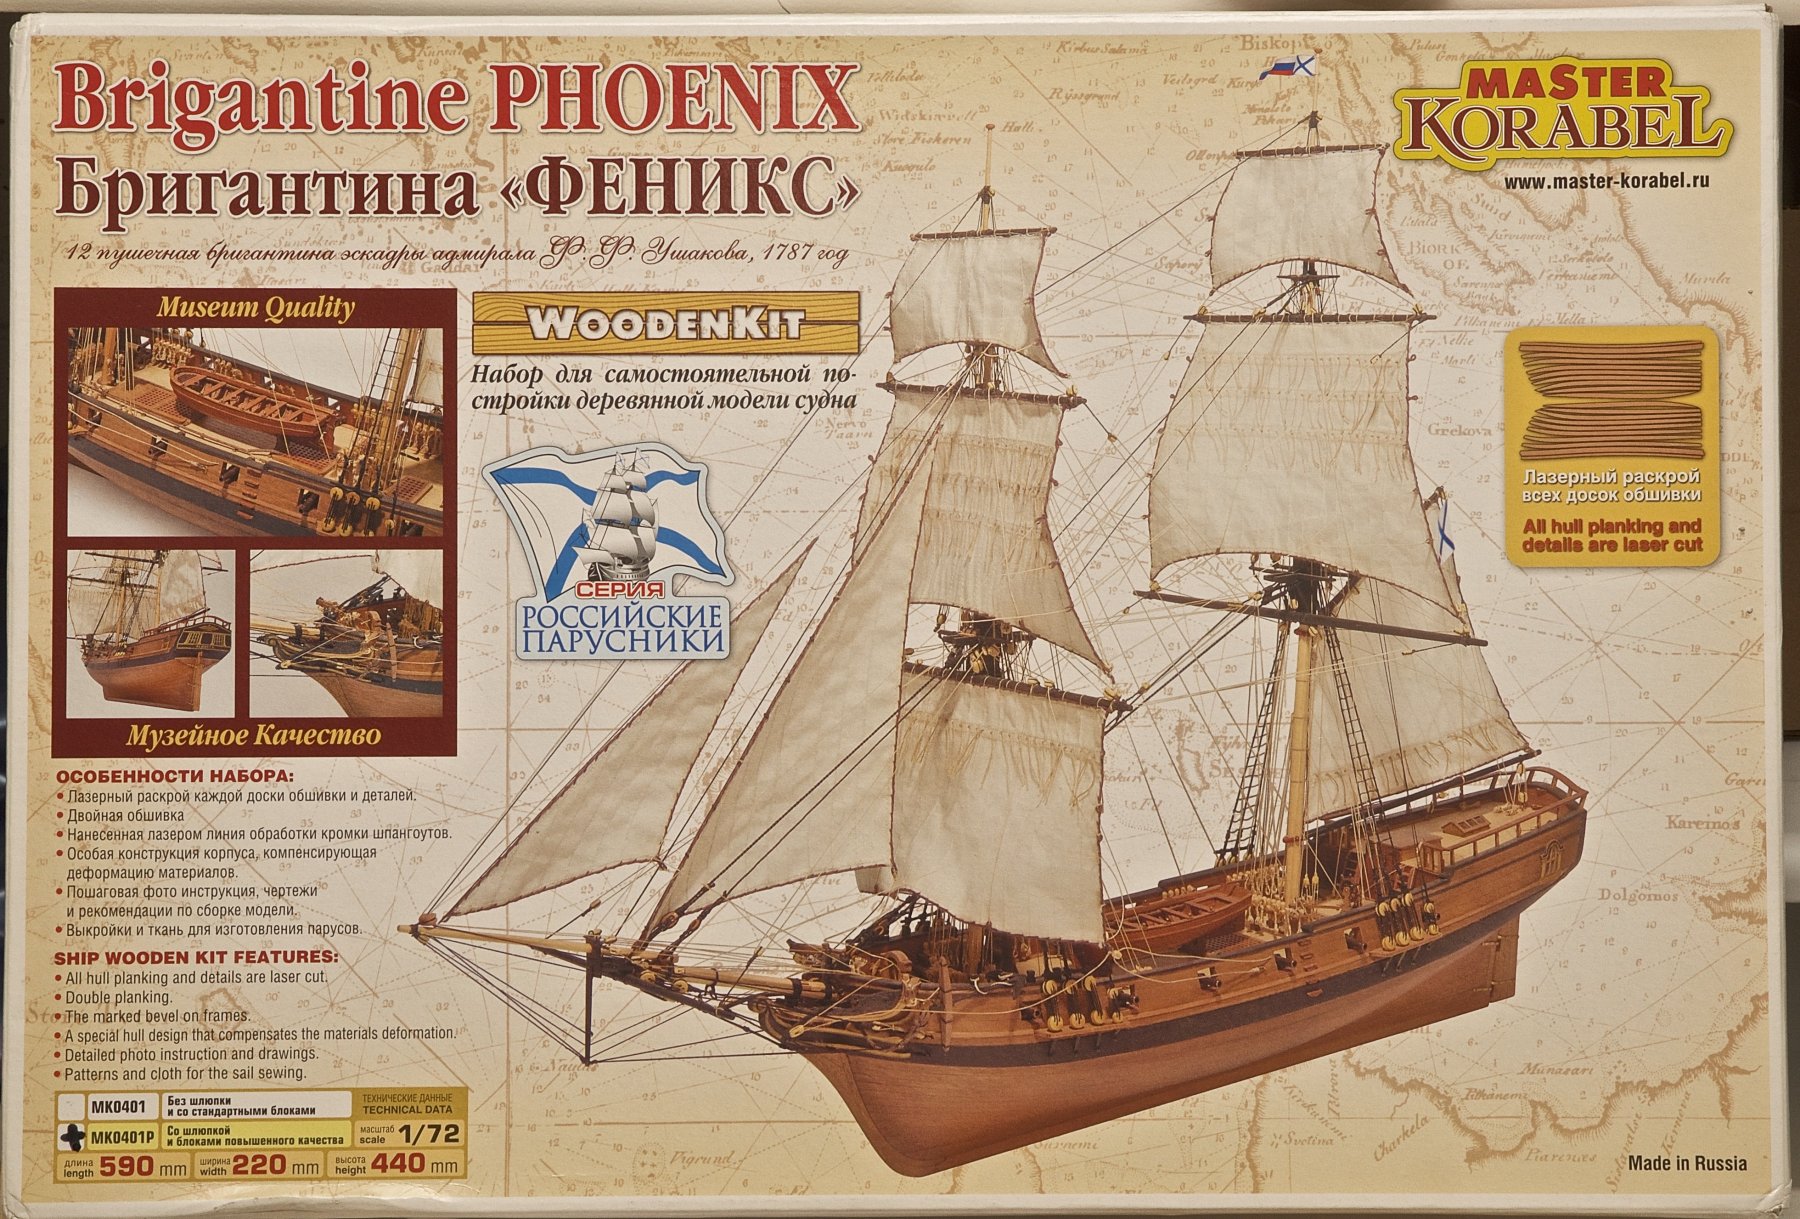
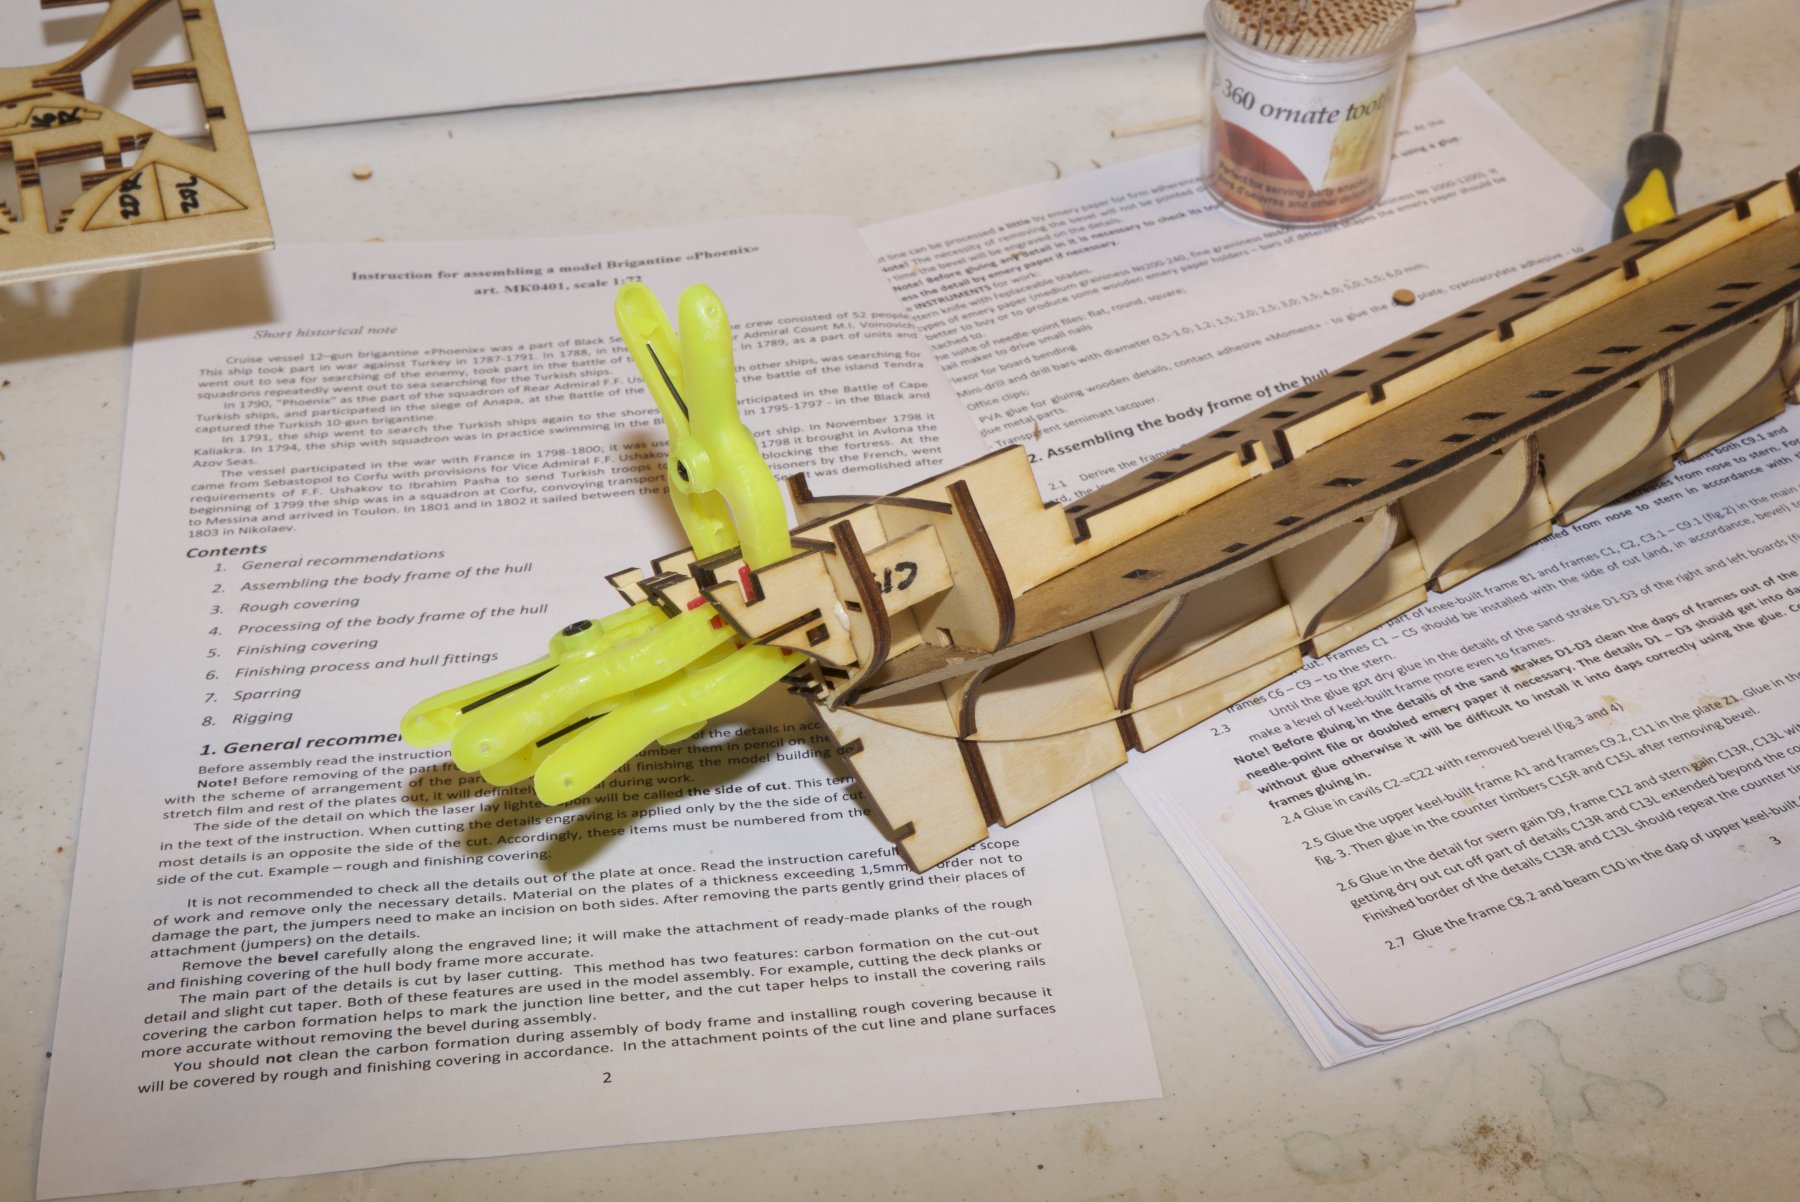
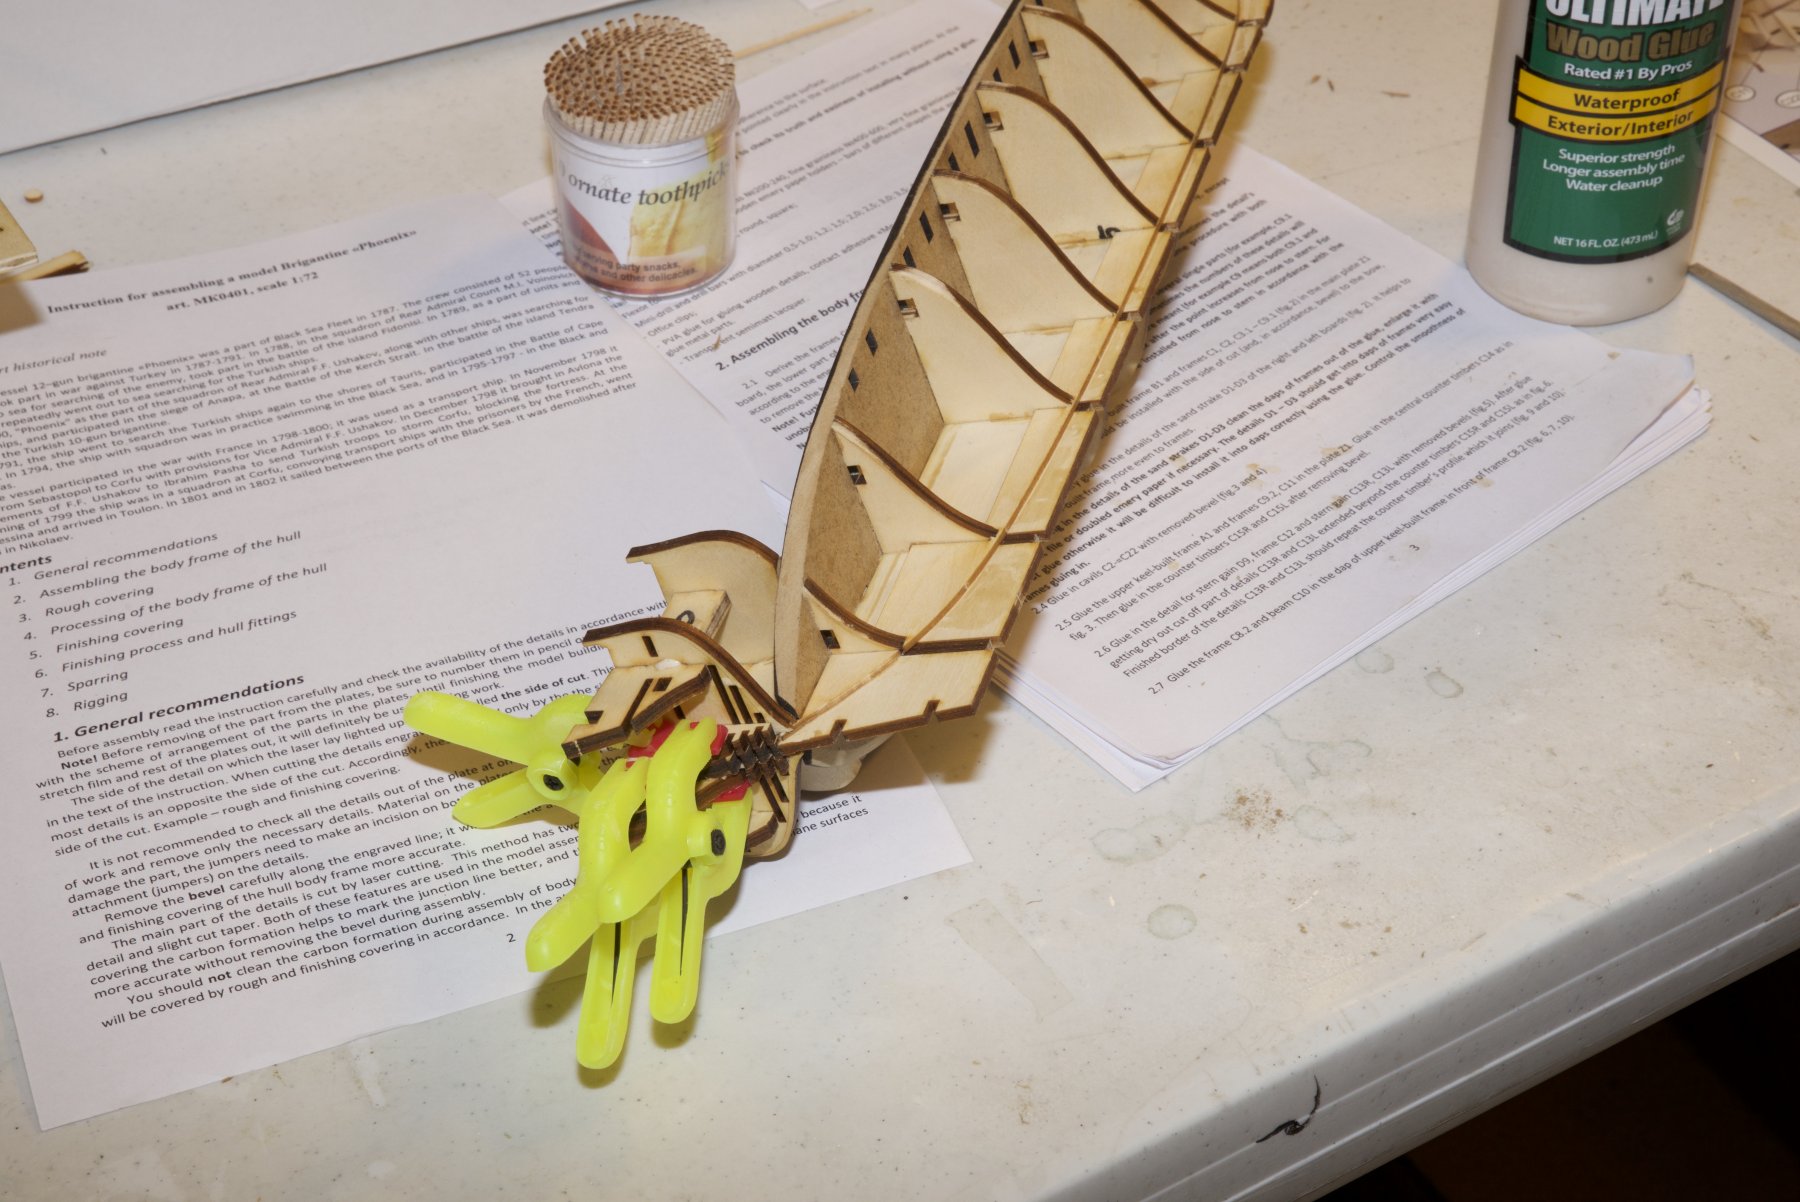
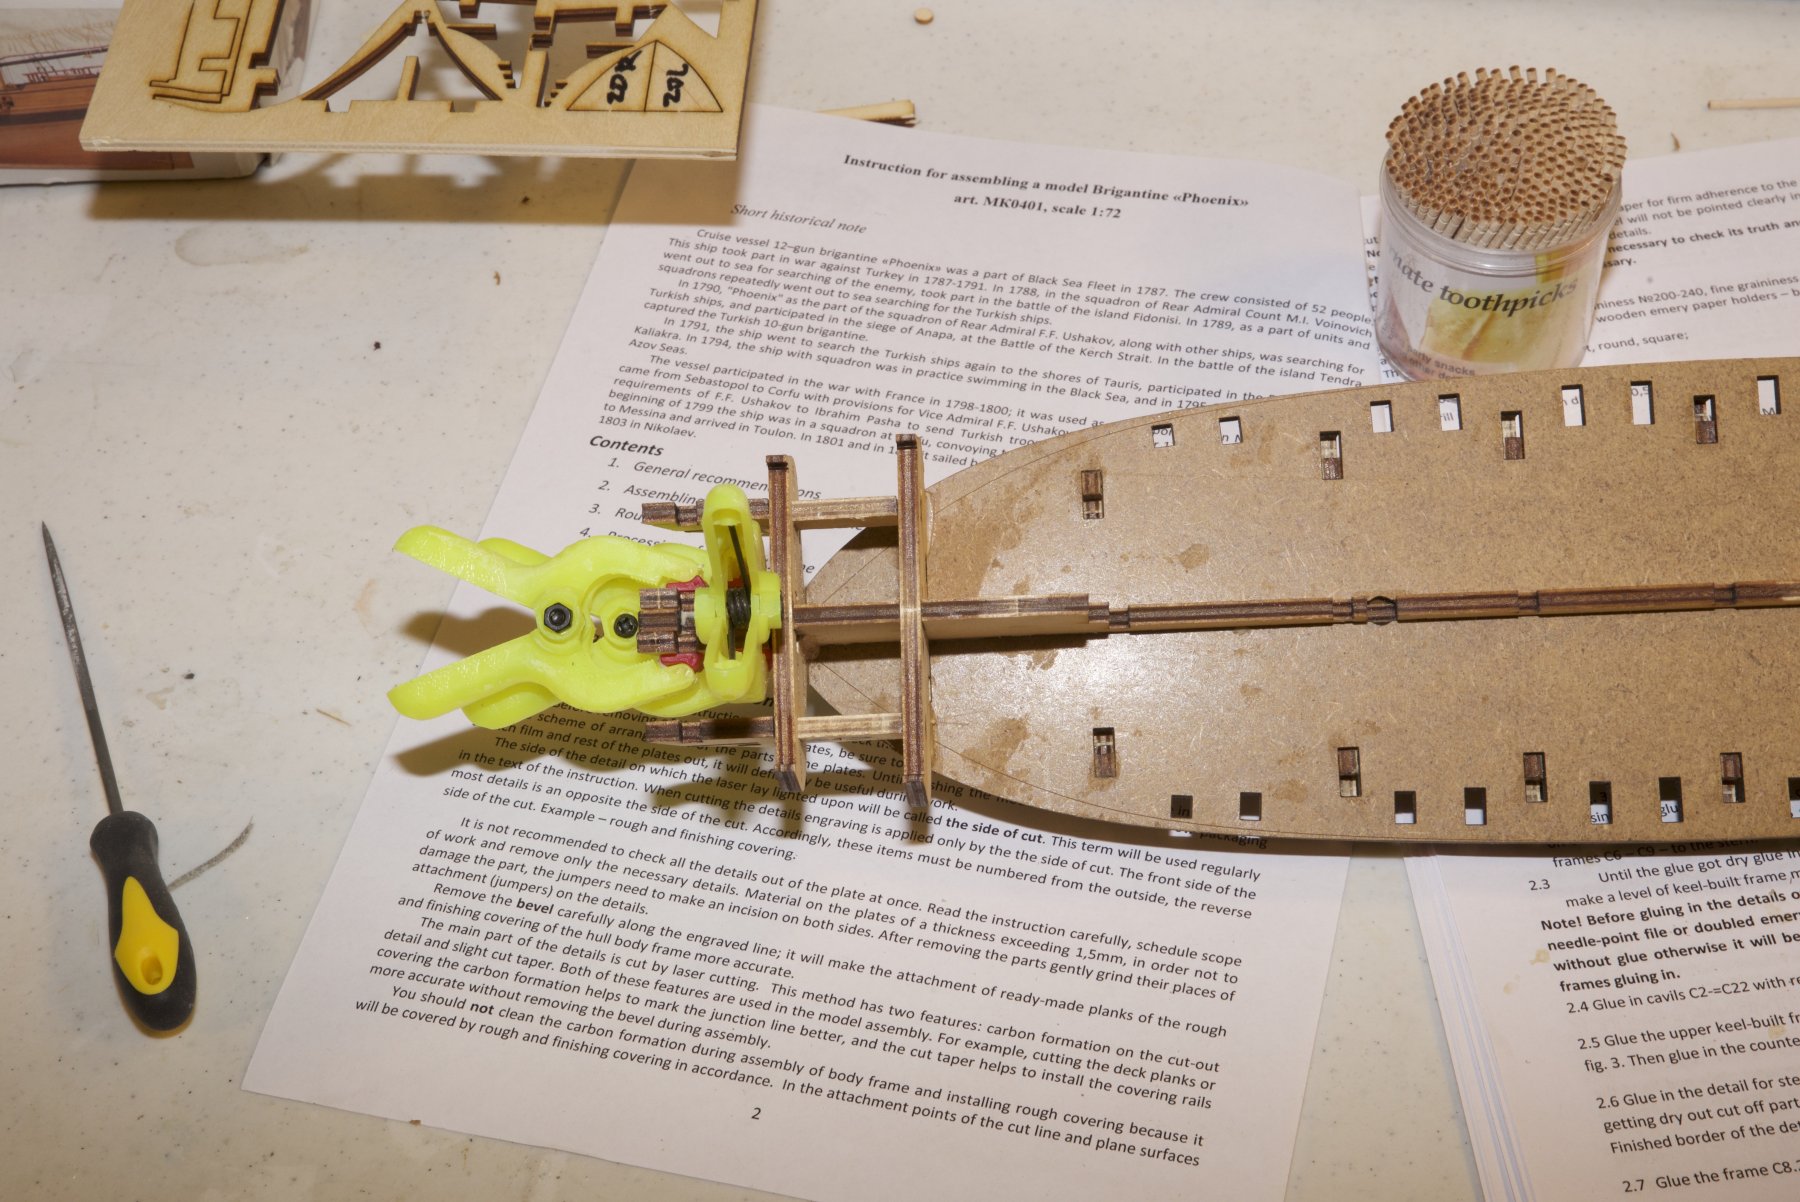
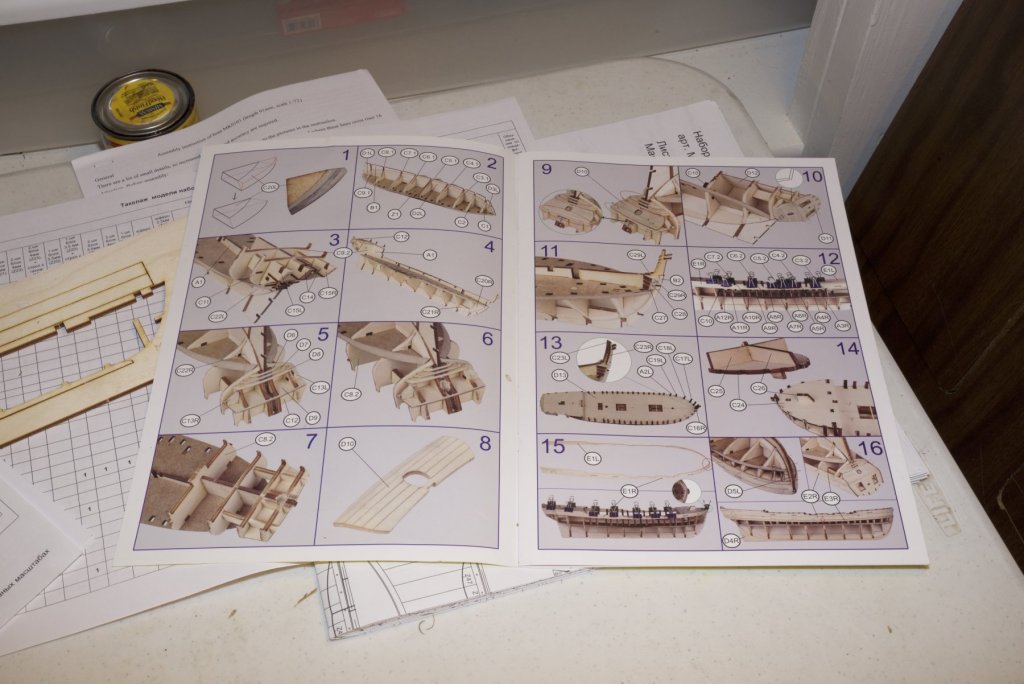
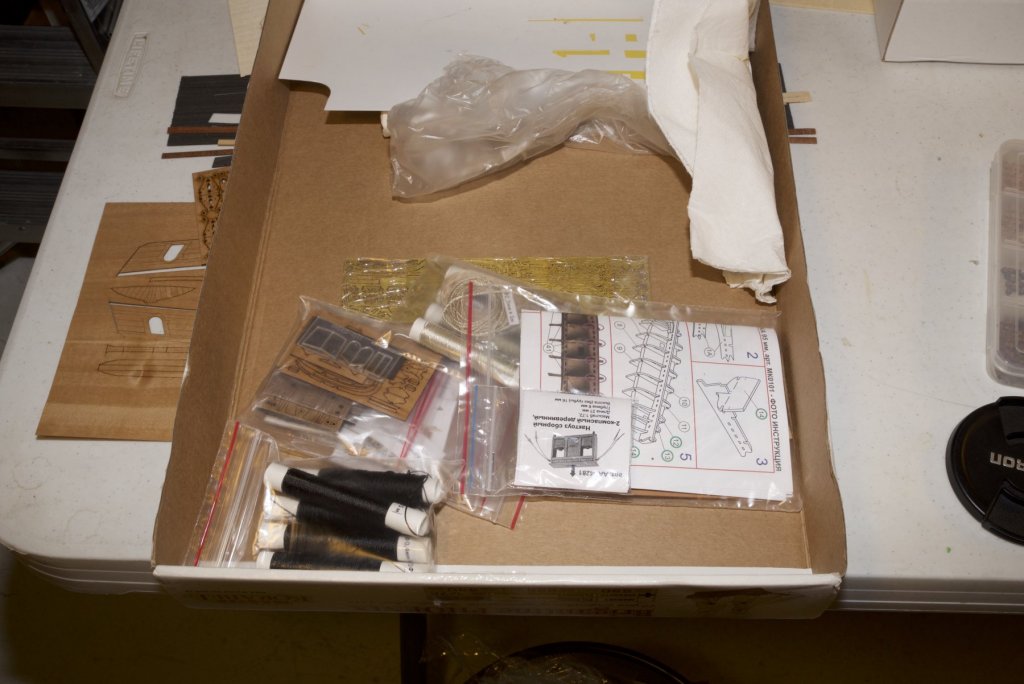
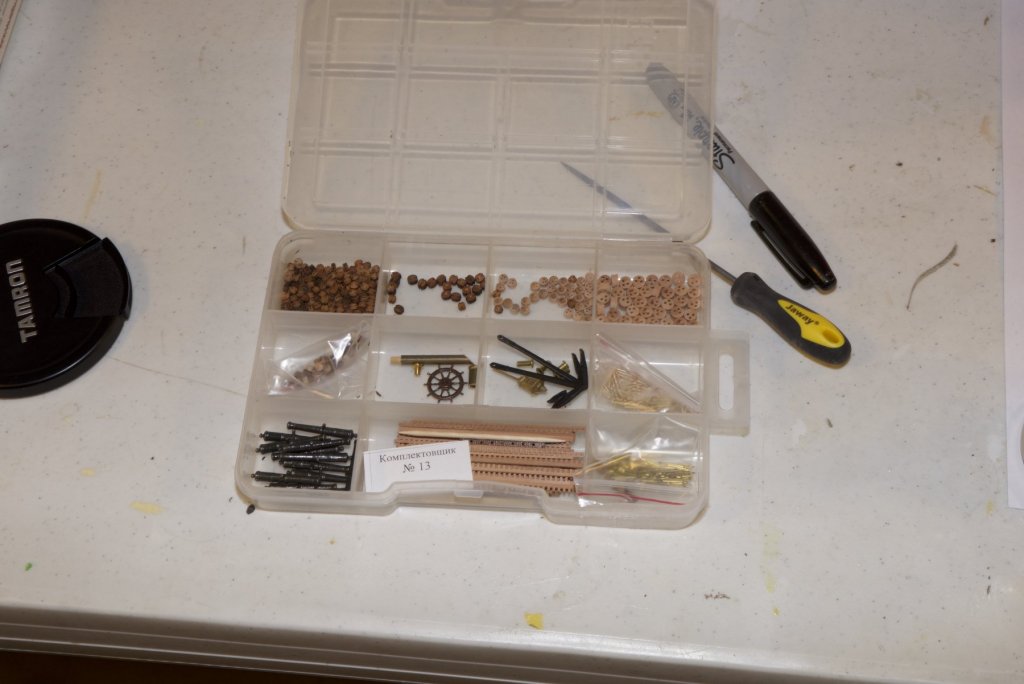
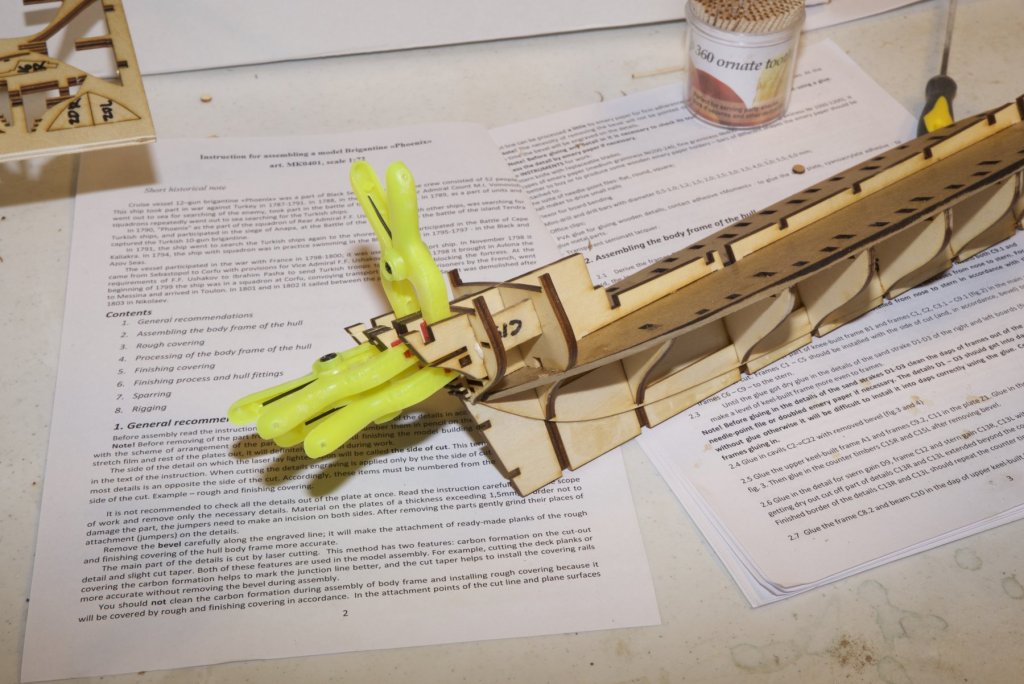
I would like to thank everyone that viewed and commented on my build. When you are involved in such a tedious hobby, any and all support is much appreciated. I also appreciate criticism that provides me information to improve my skills and model building. I have now embarked on another build - the Brigantine Phoenix by Master Korabel in 1:72 scale.
-
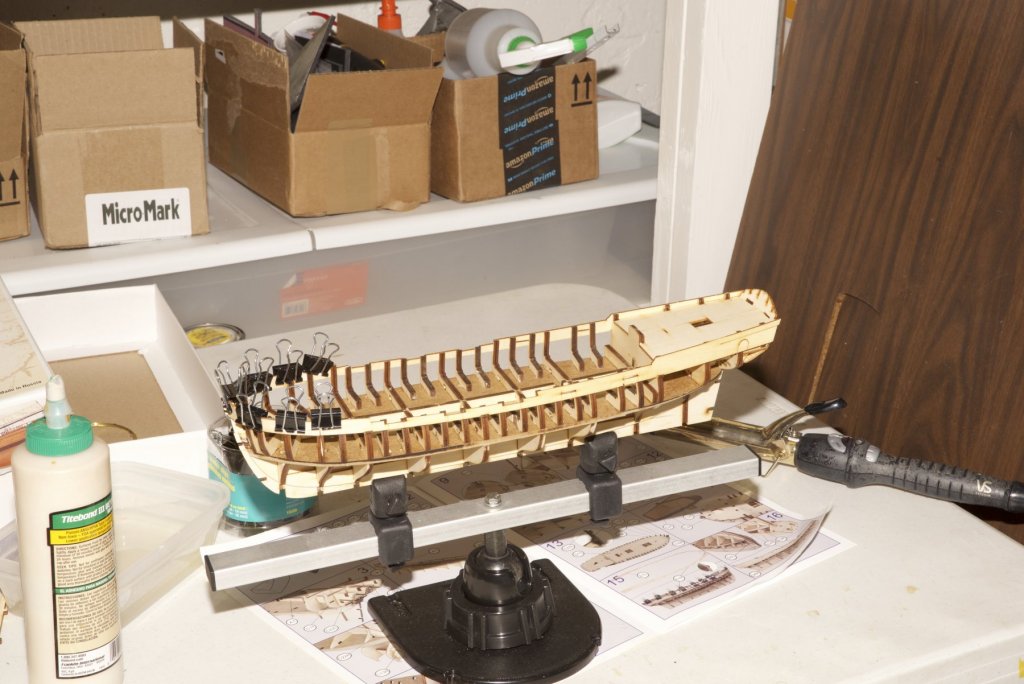
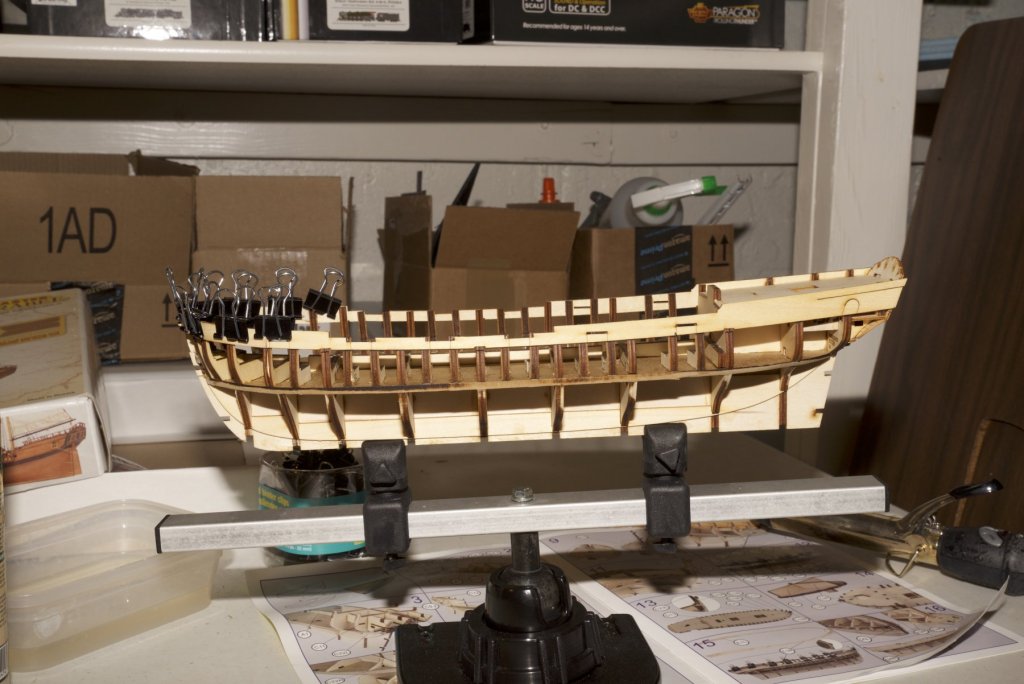
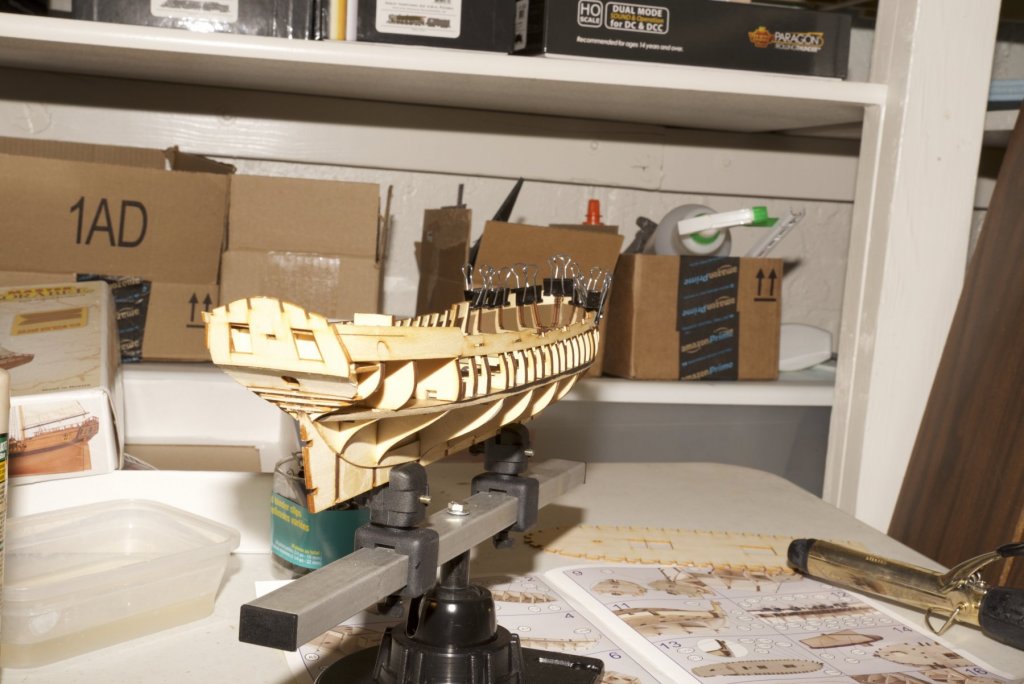
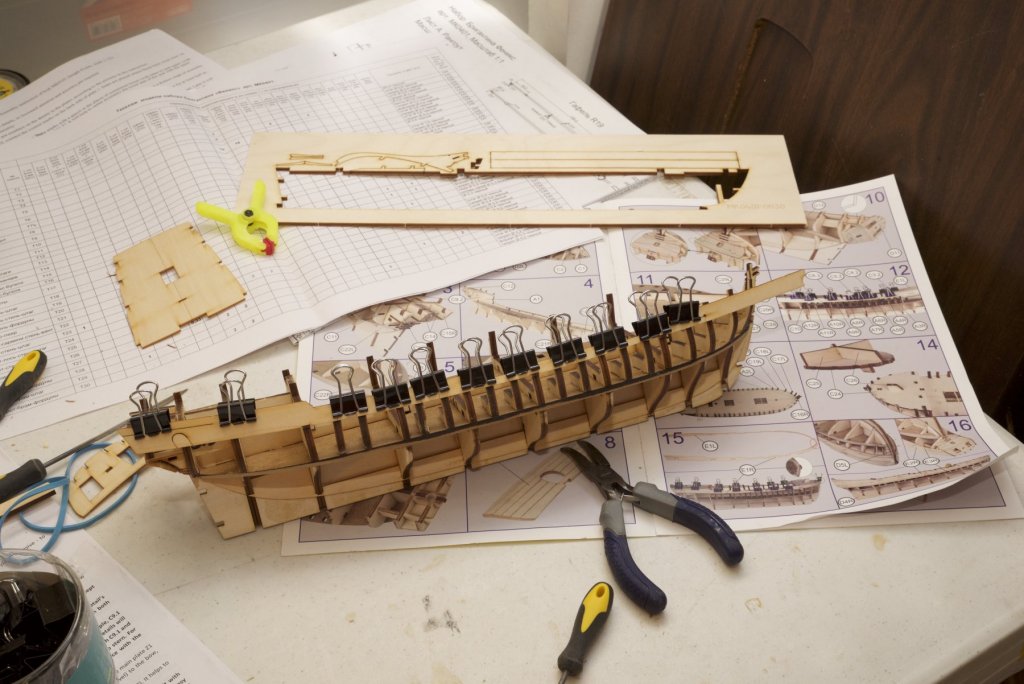
I purchased this a few months ago from a www.hobbyterra.com, it is produced by ex USSR manufacturers – it's very complete and very detailed, all parts are laser cut – even the outside hull planking. It has instructions in Russian, but I'm a little rusty so I'll refer to the picture diagrams and the English instructions. When it's finished it will be 590 mm long, by 440 mm high and 220 mm wide. So here are some pictures:


-
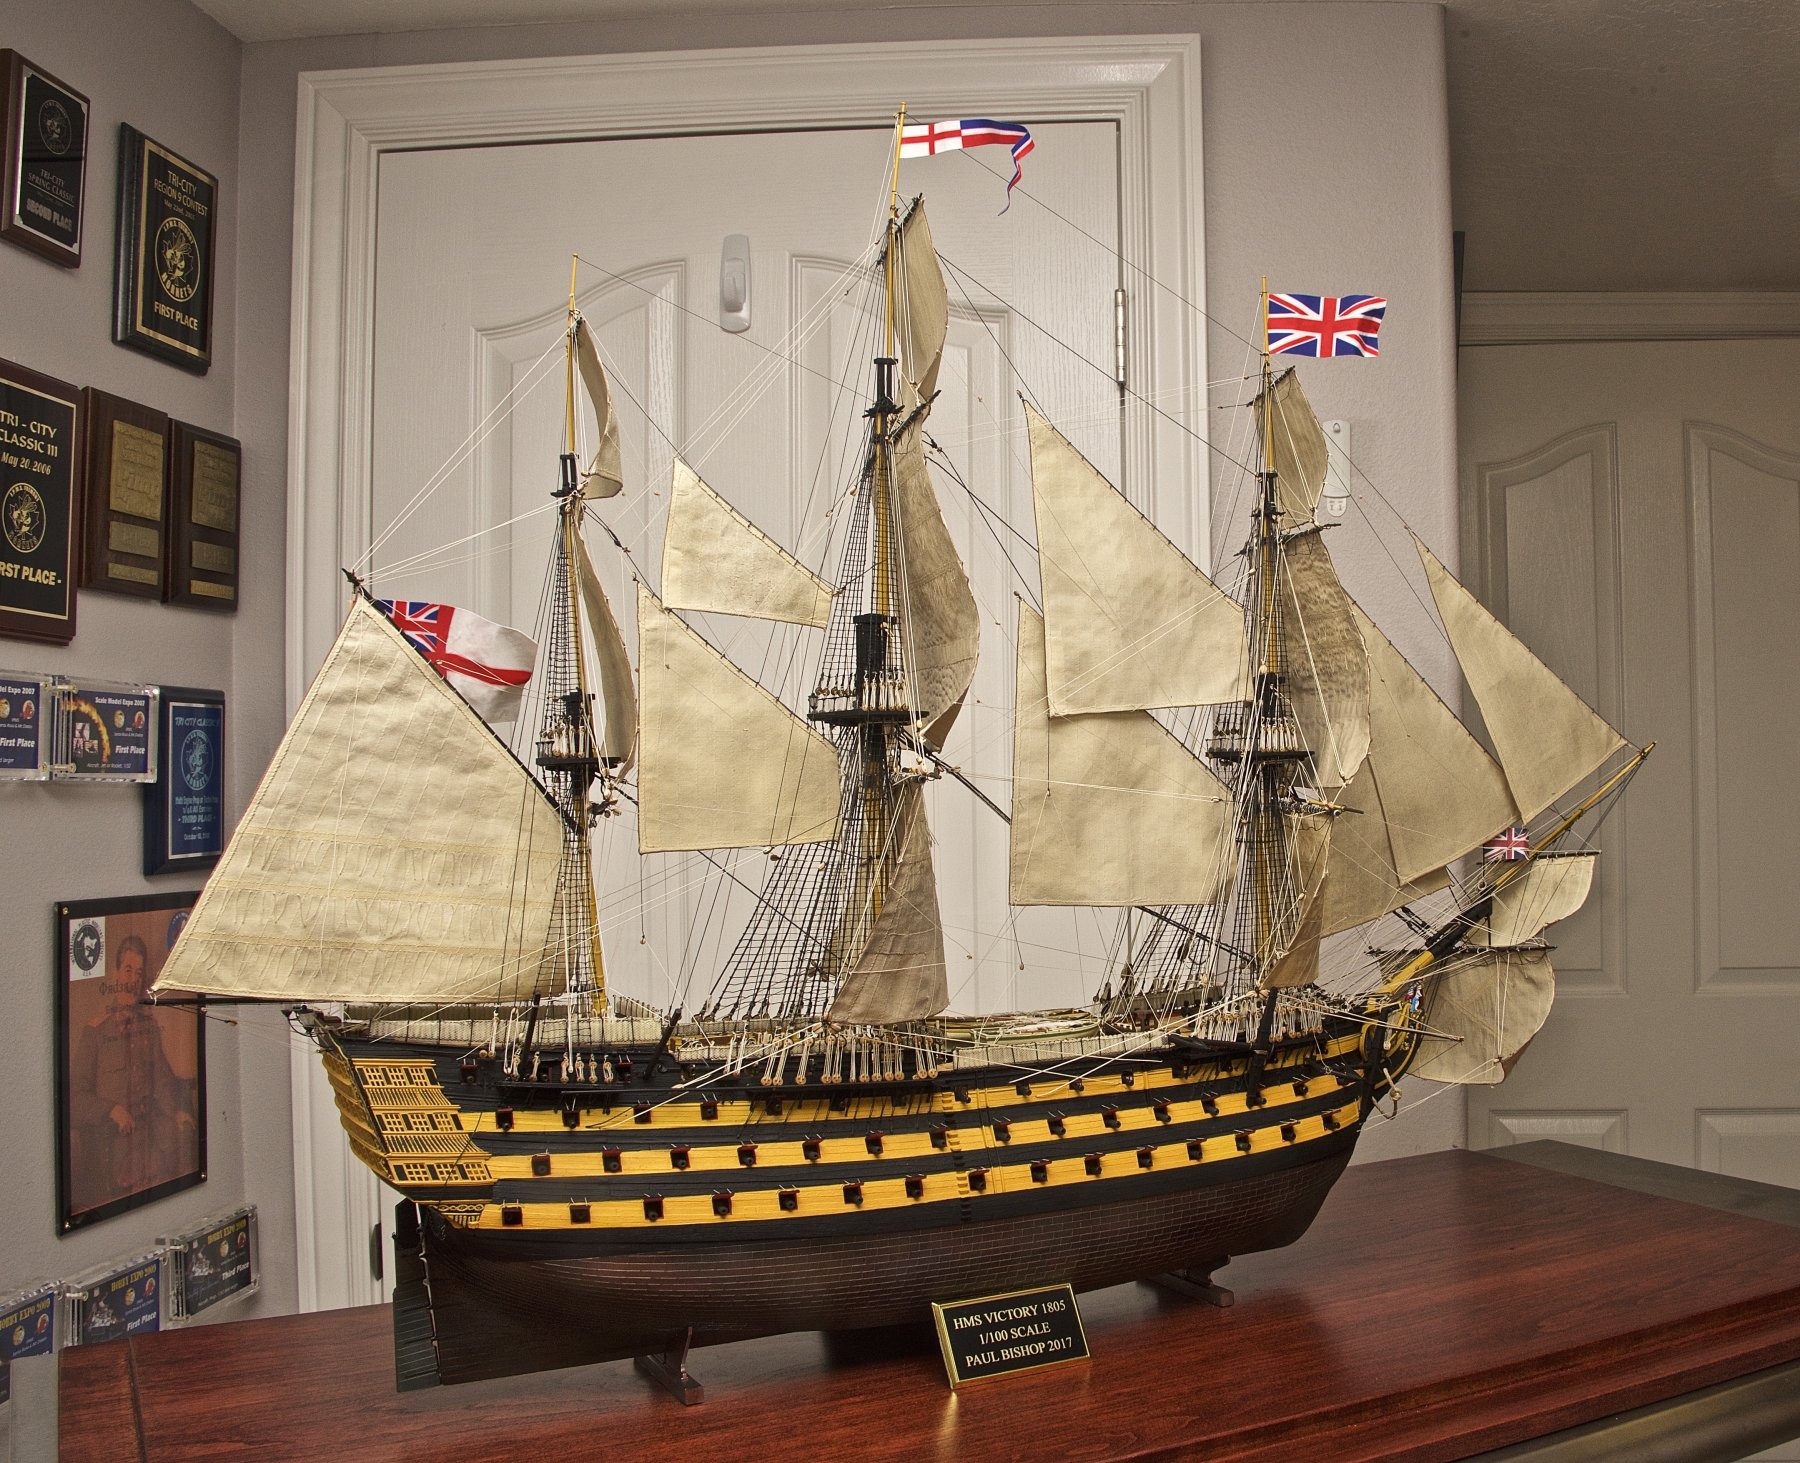
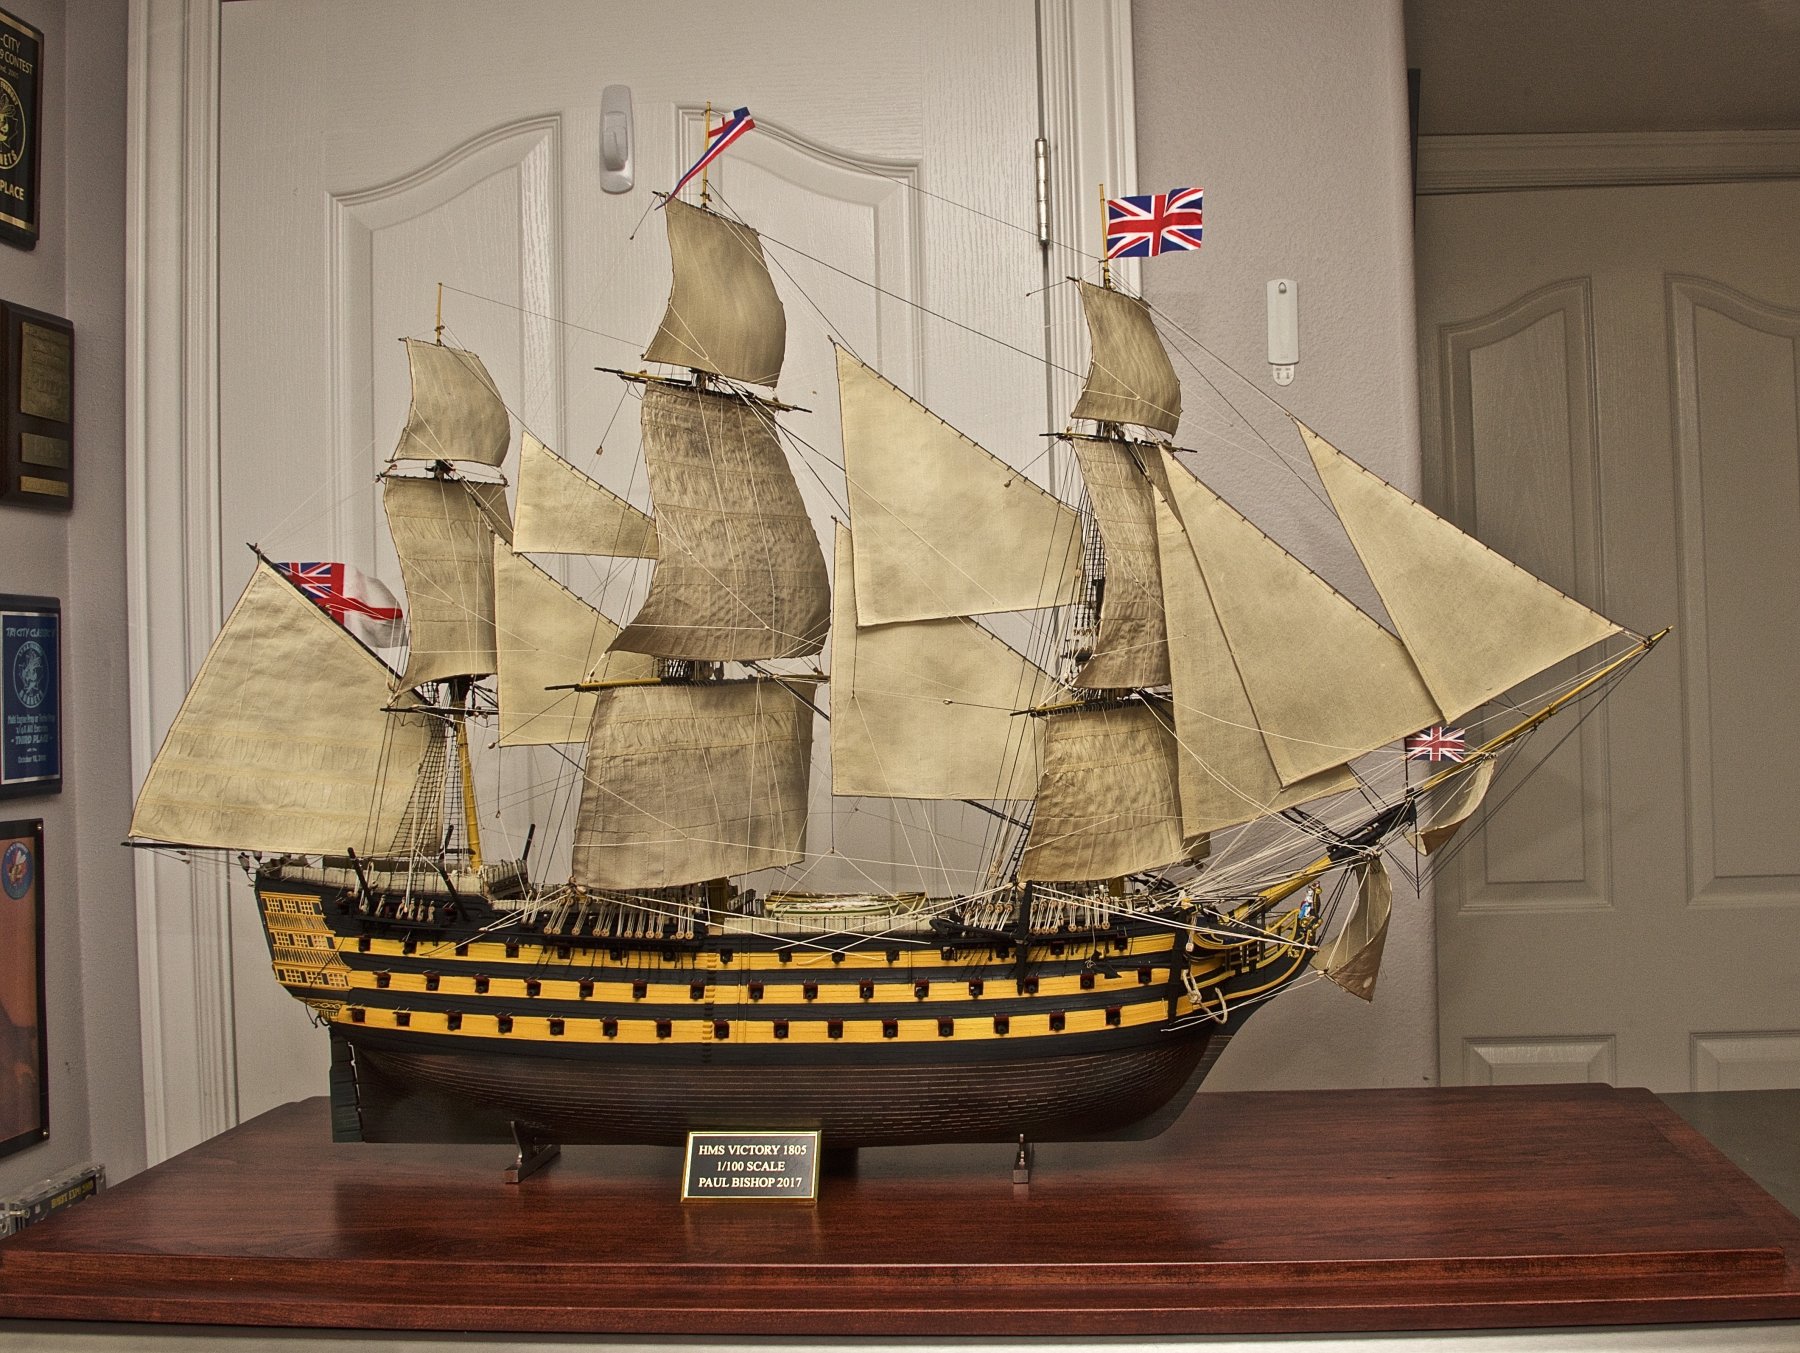
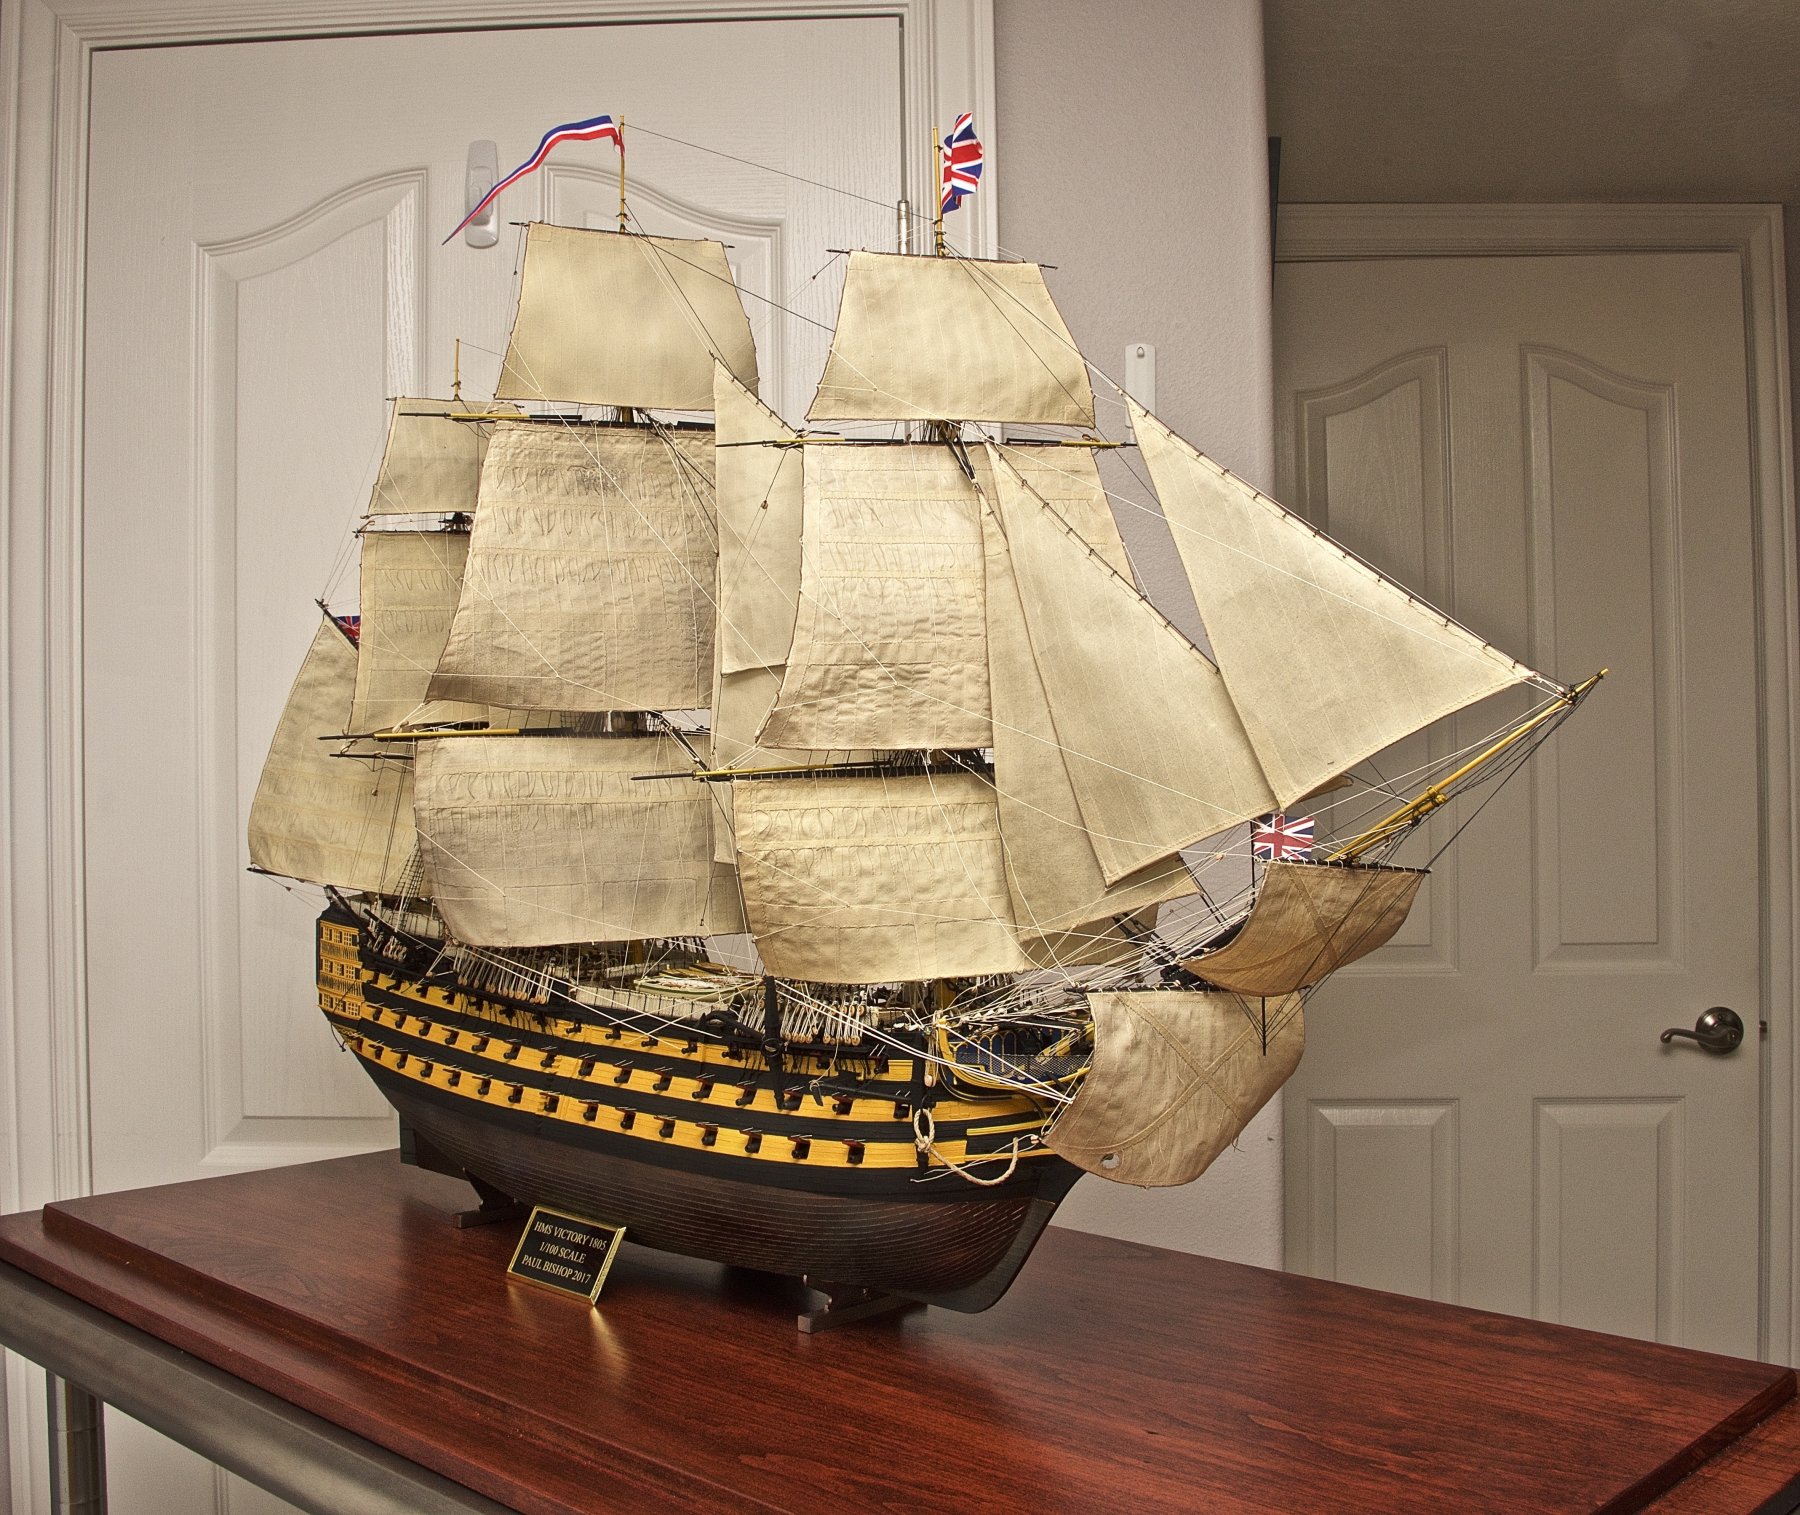
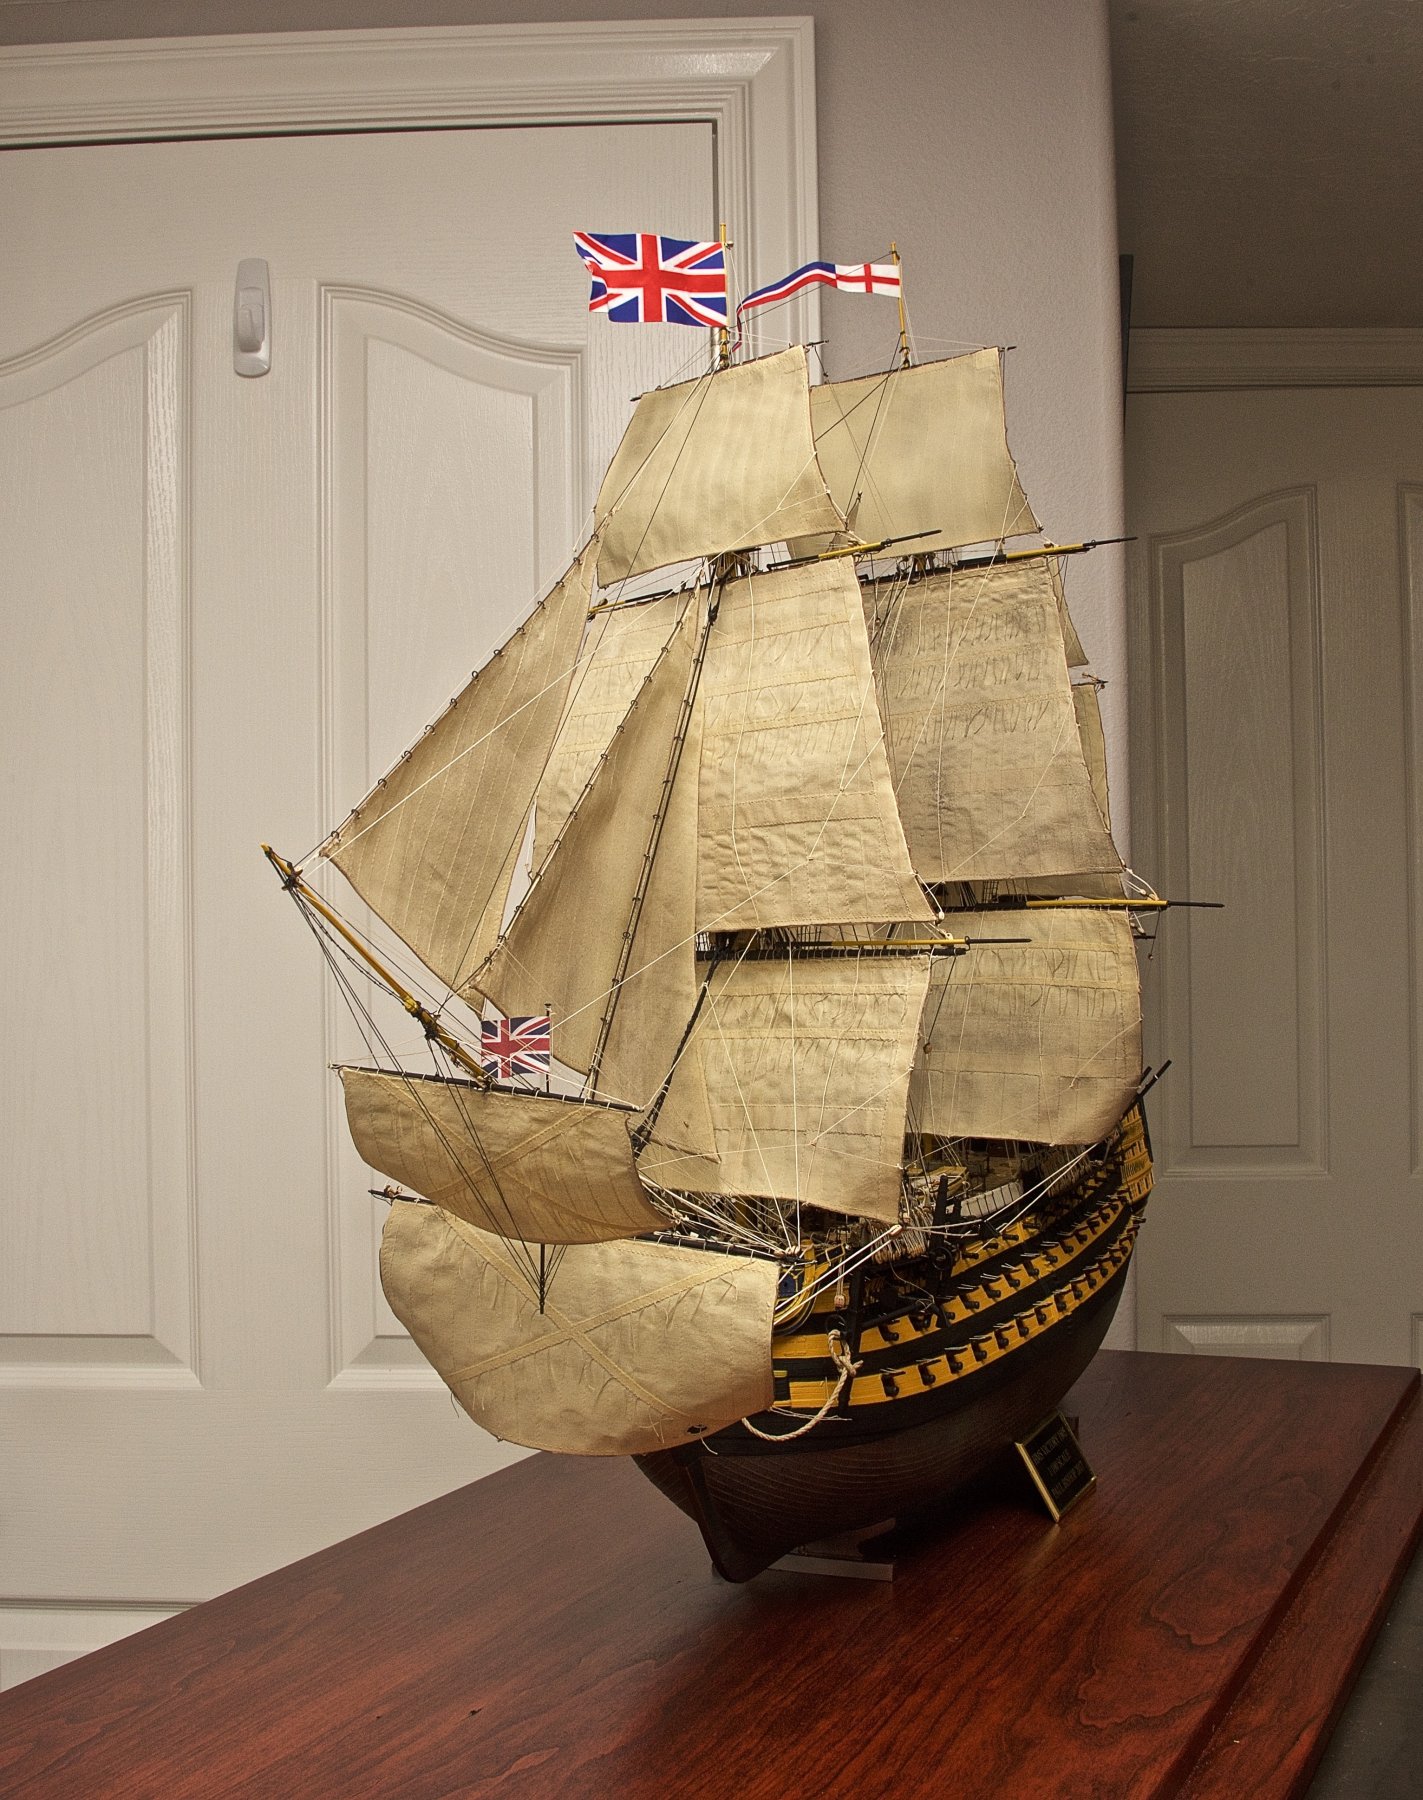
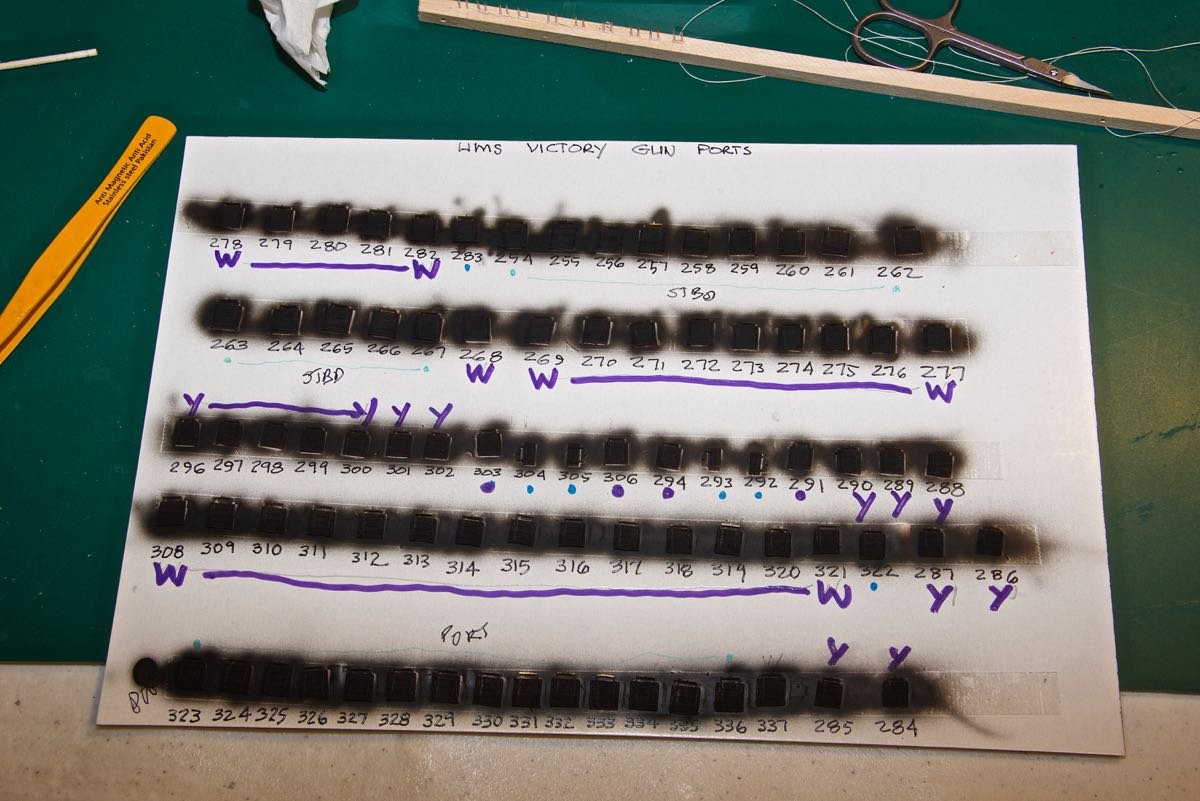
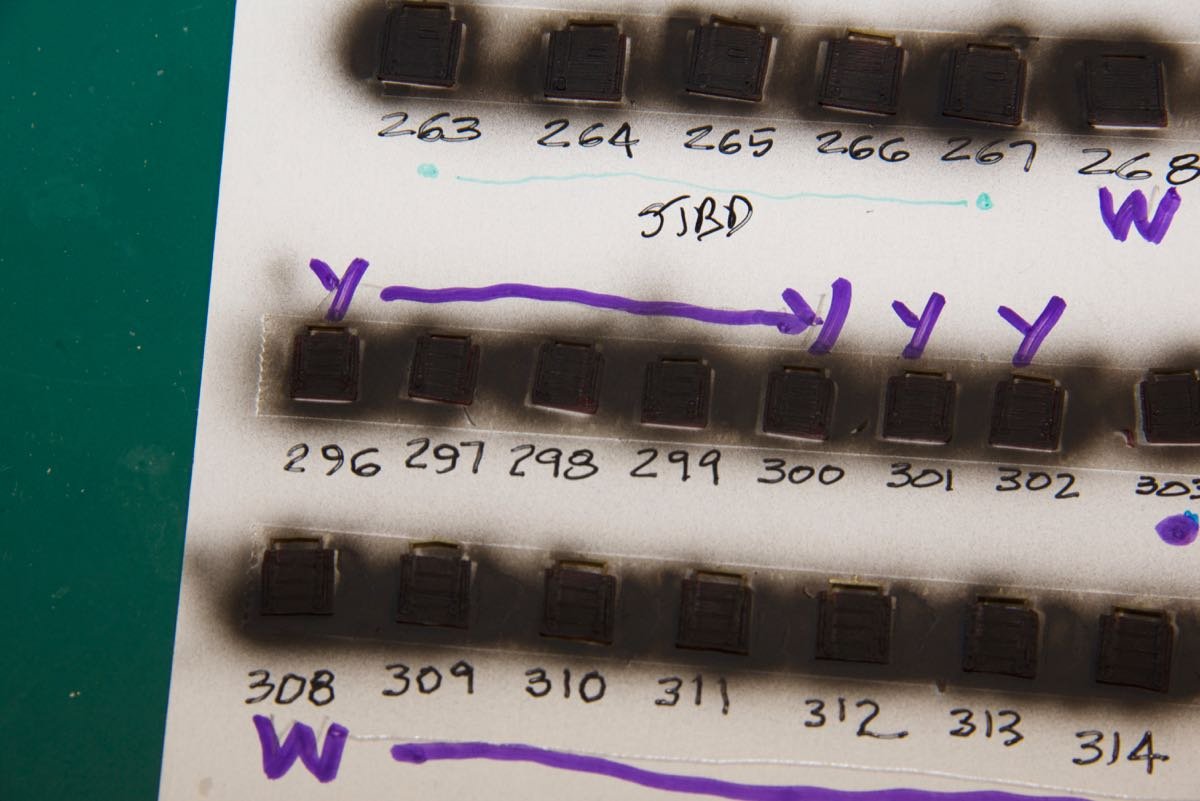
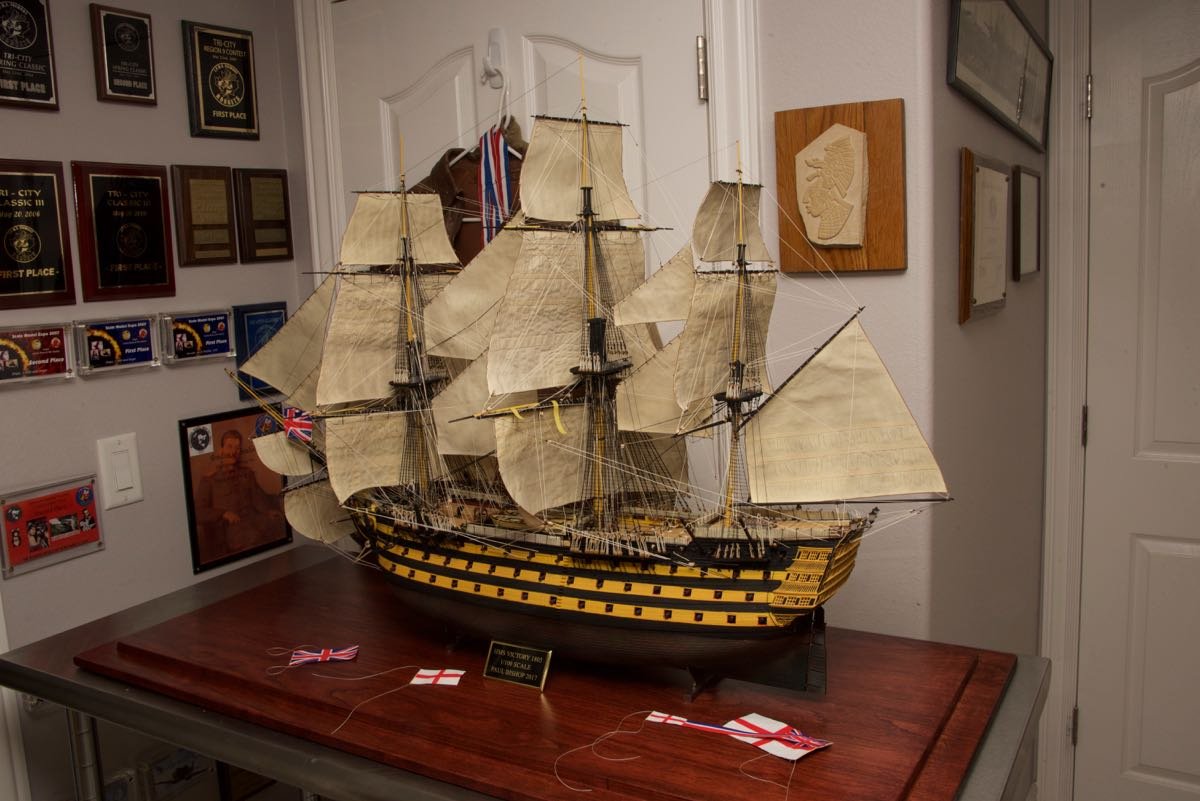
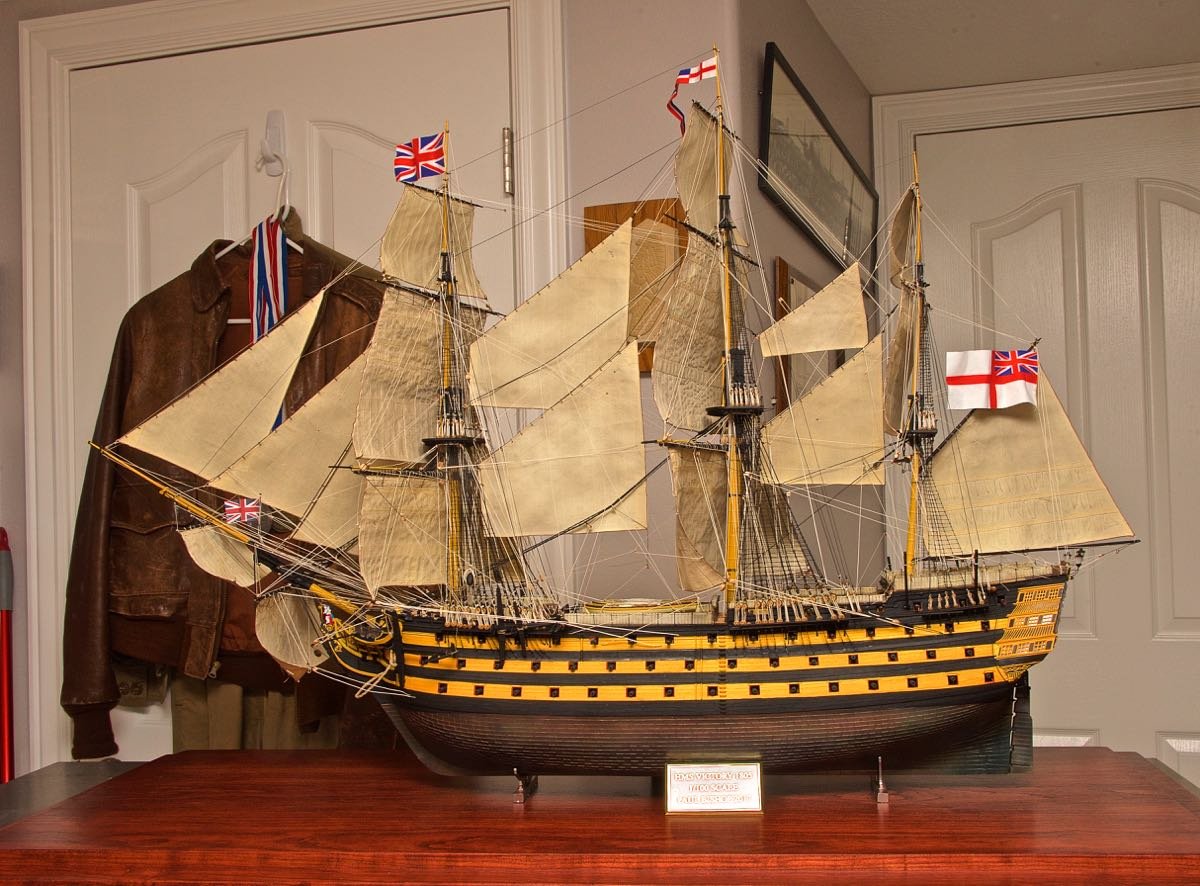
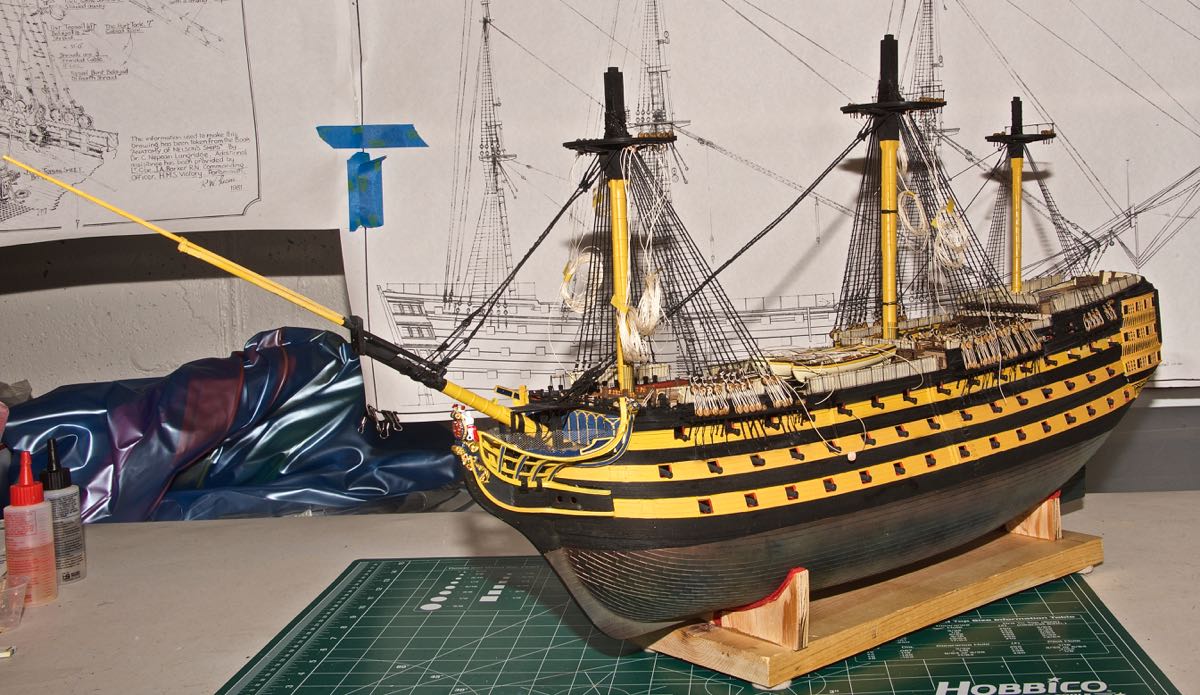
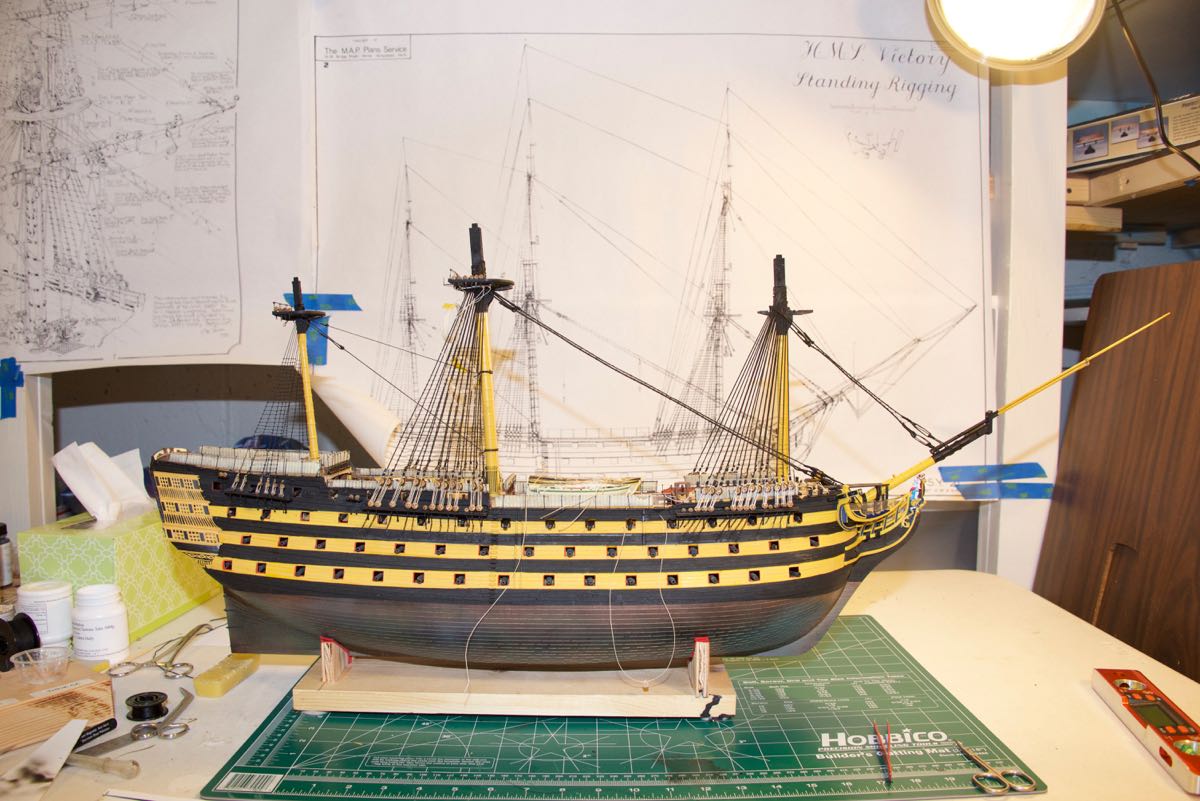
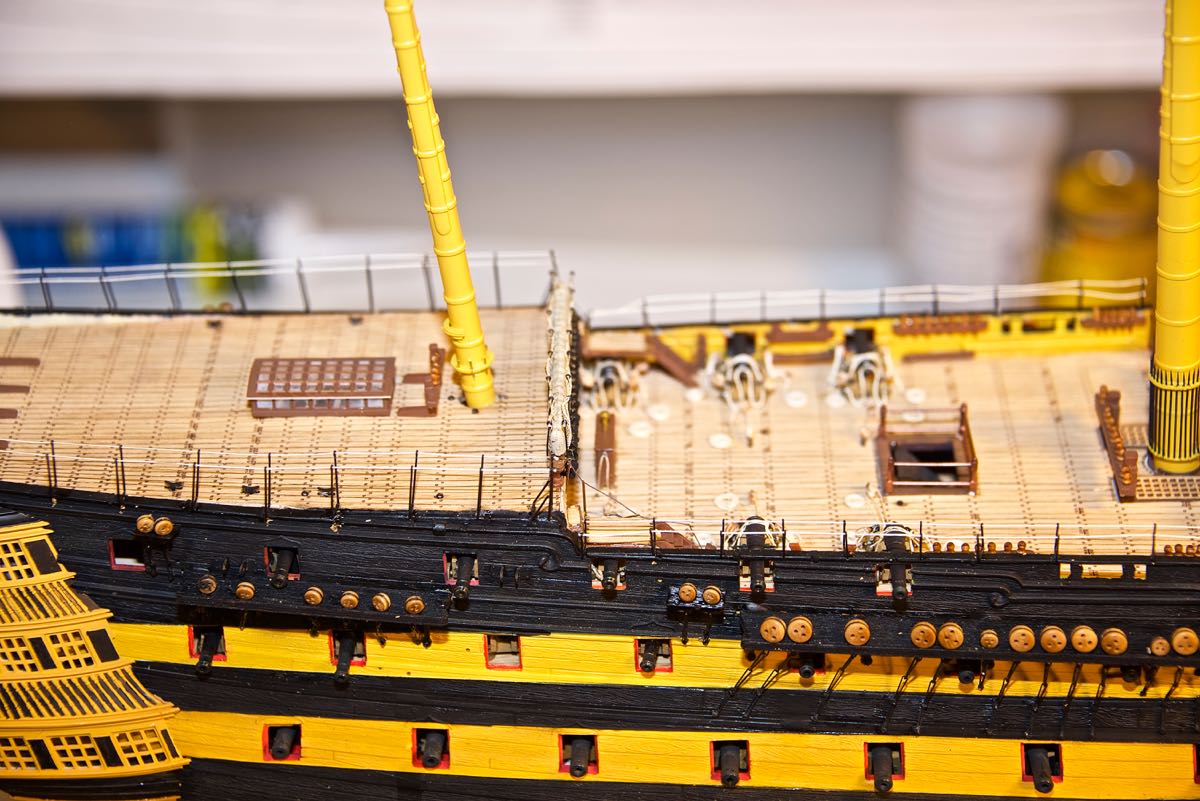
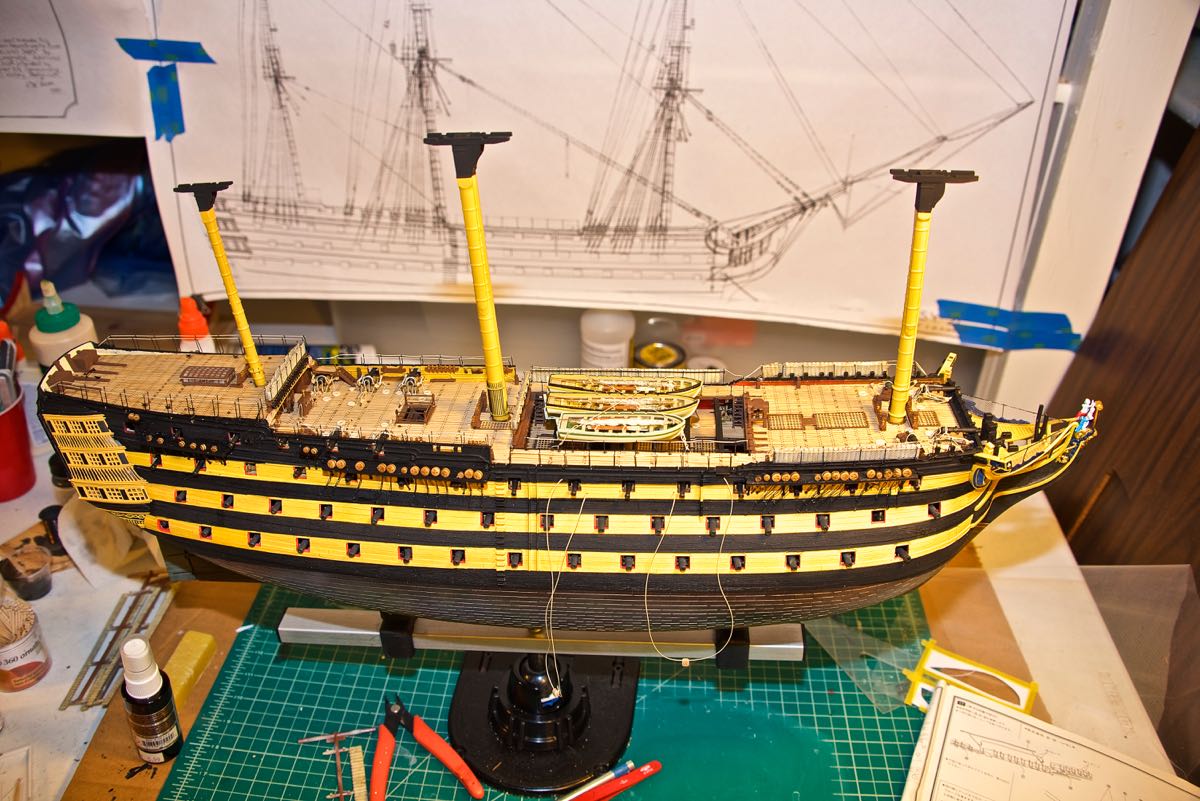
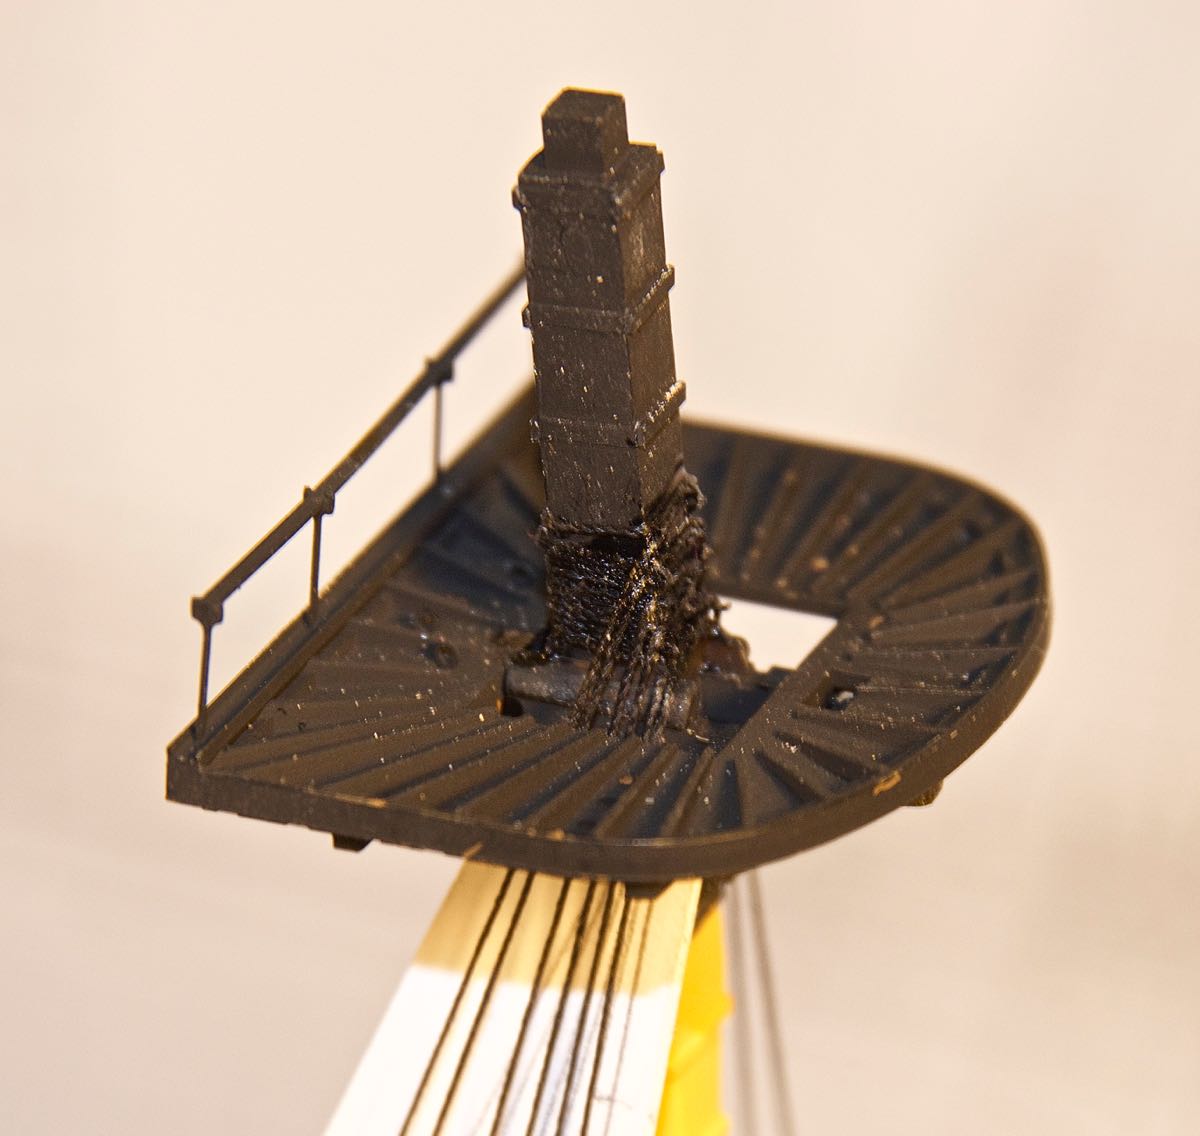
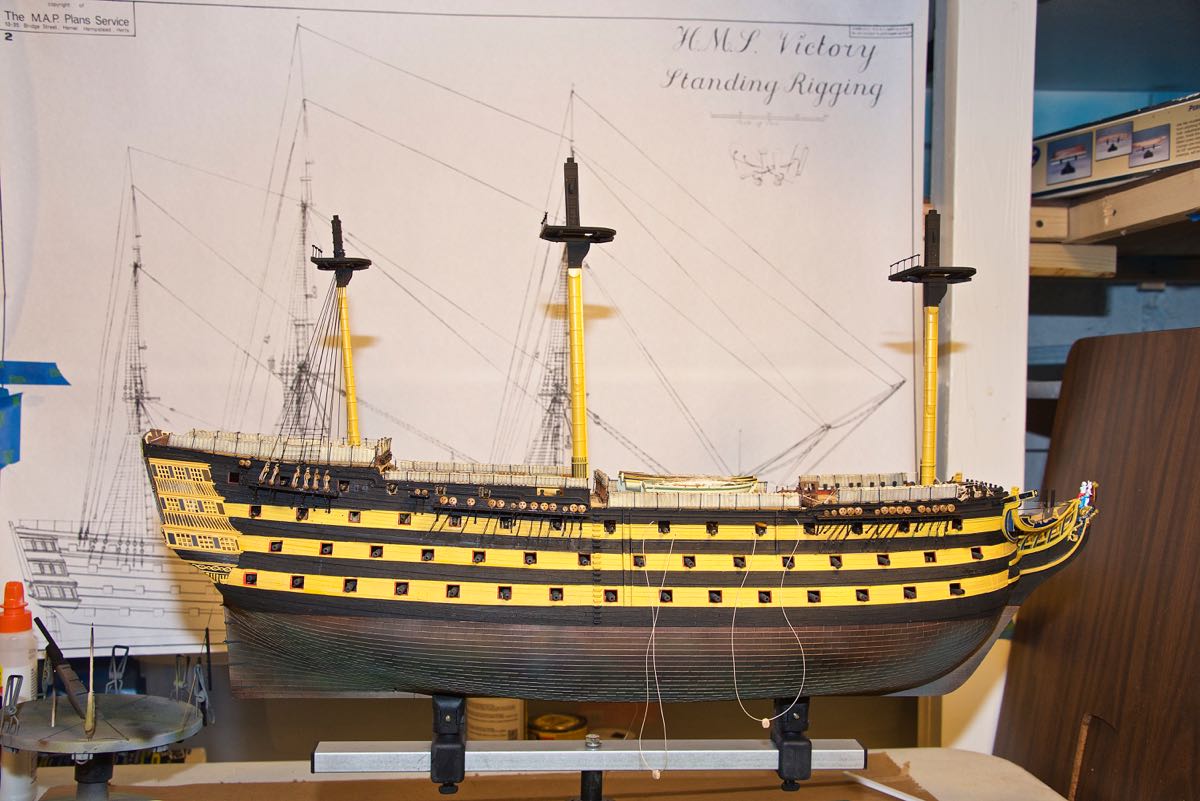
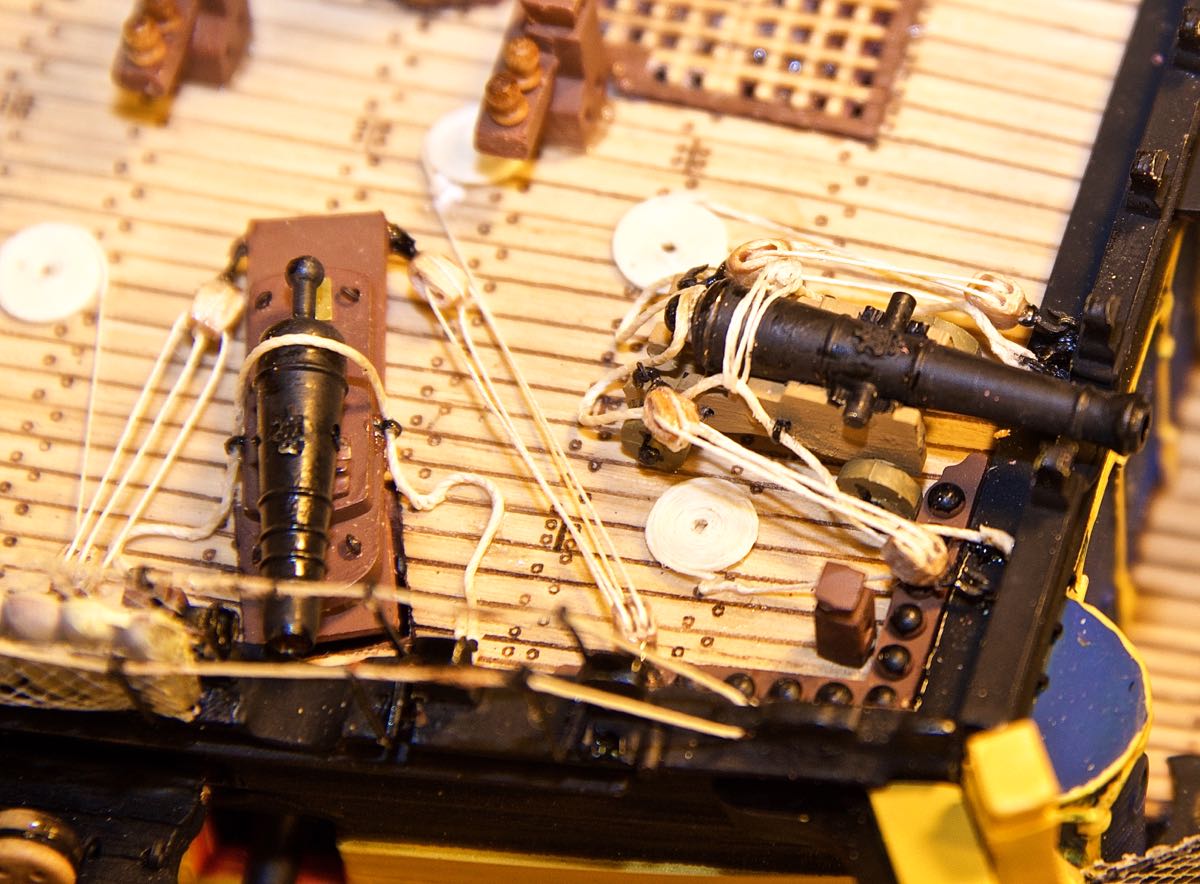
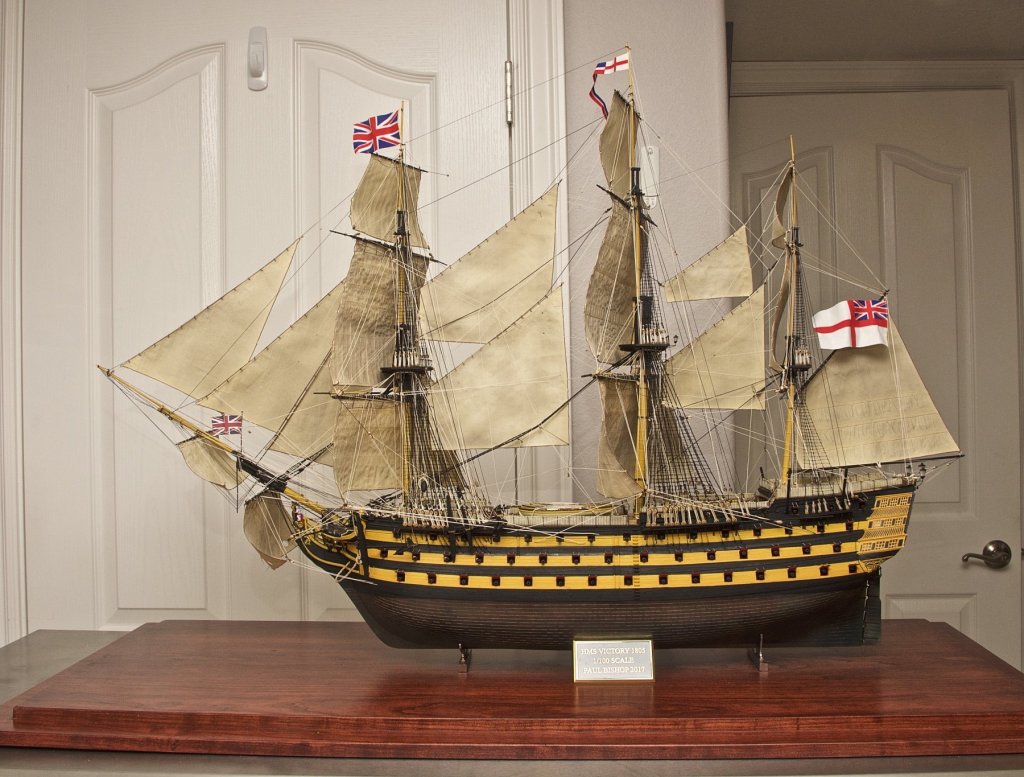
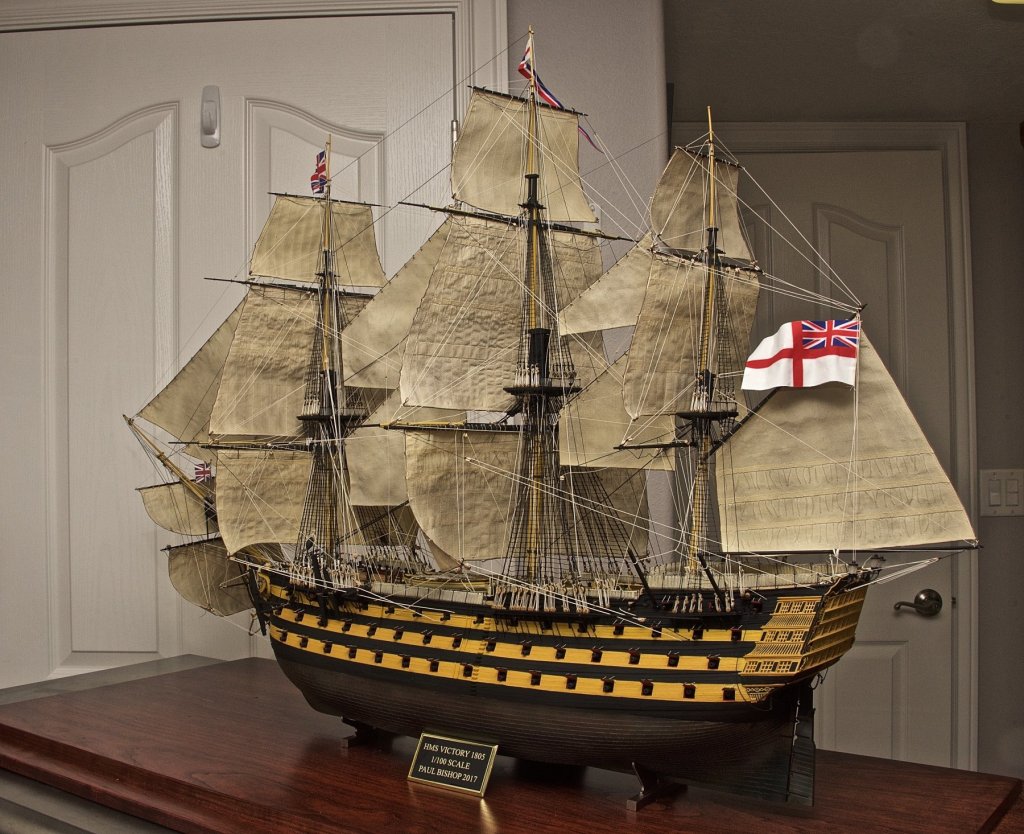
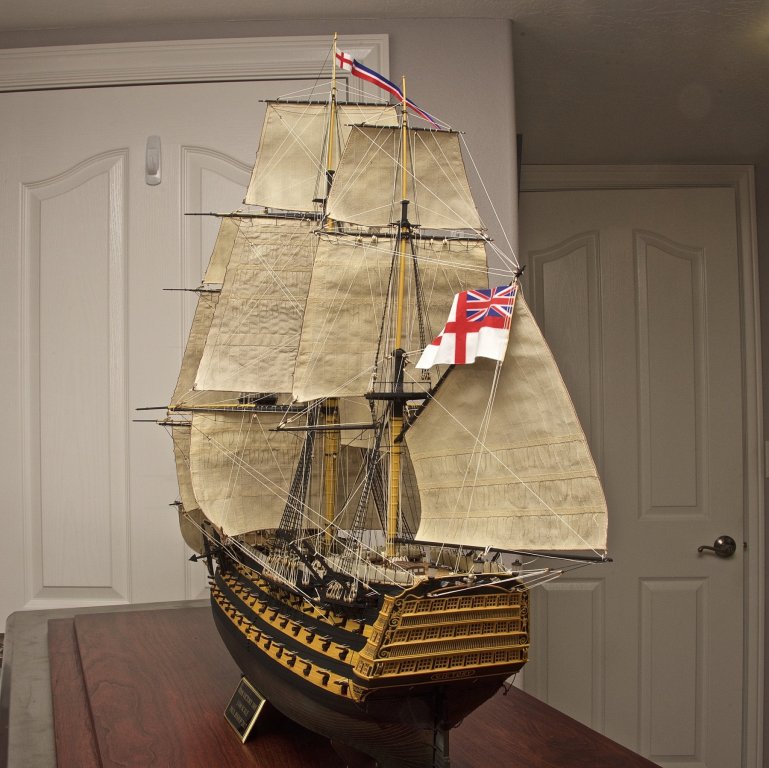
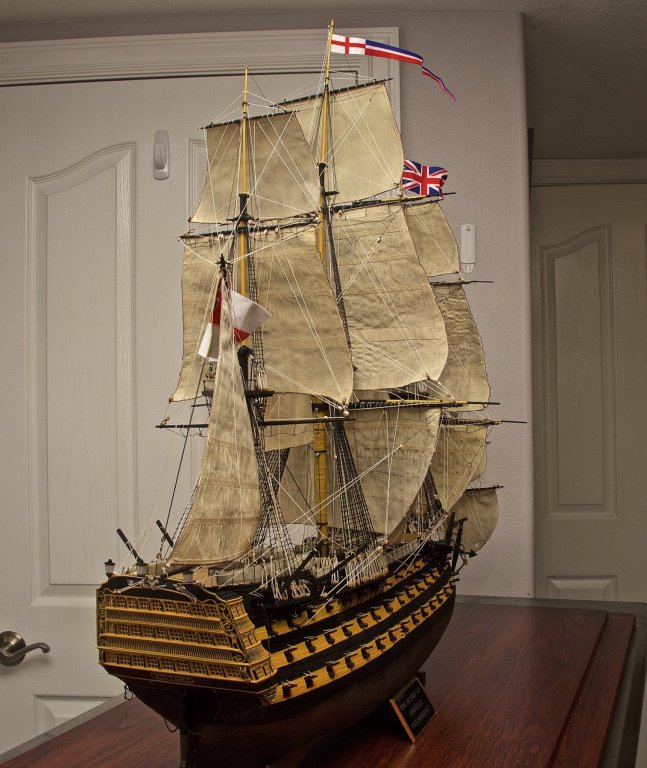
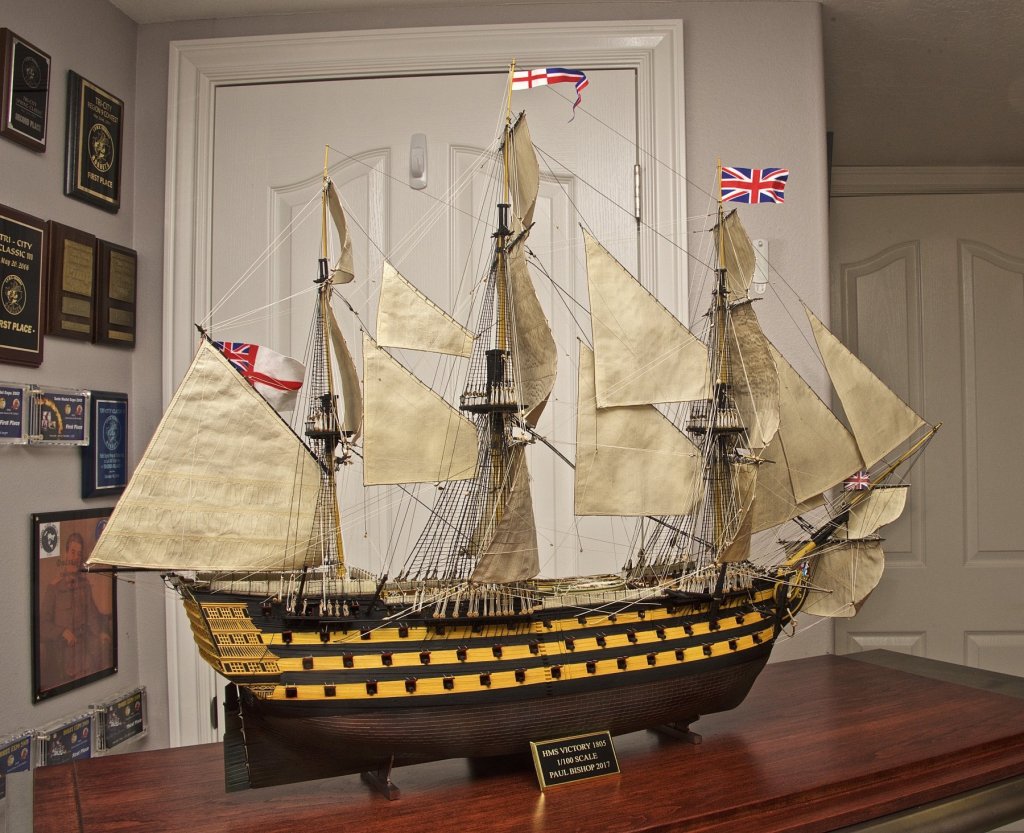
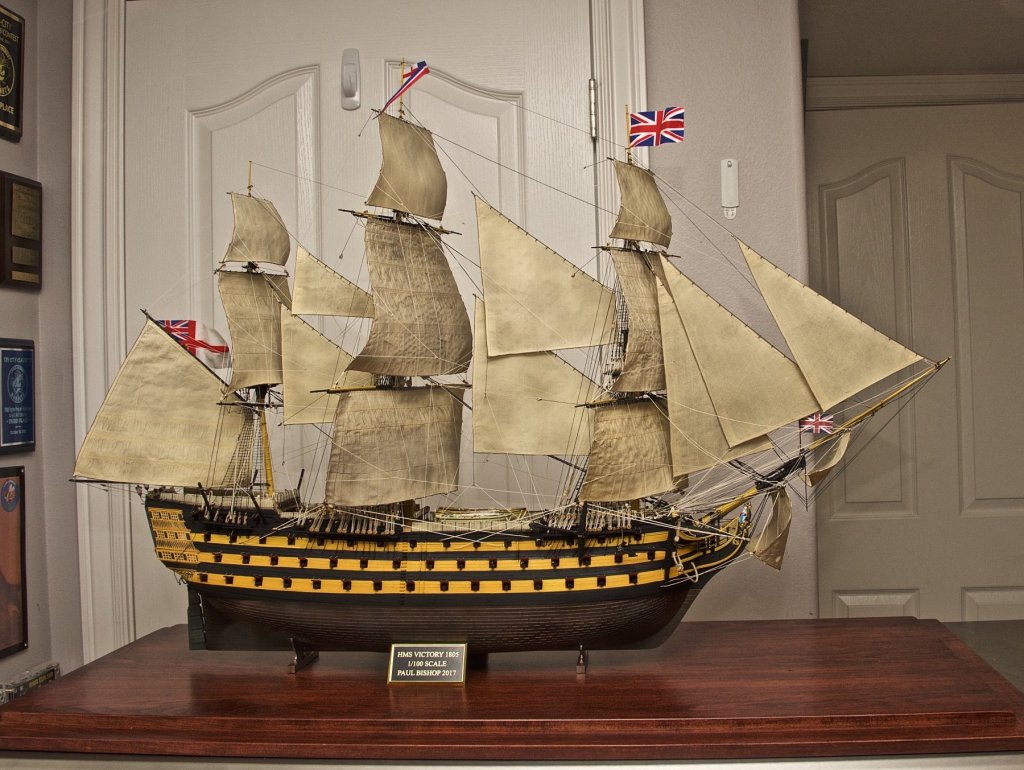
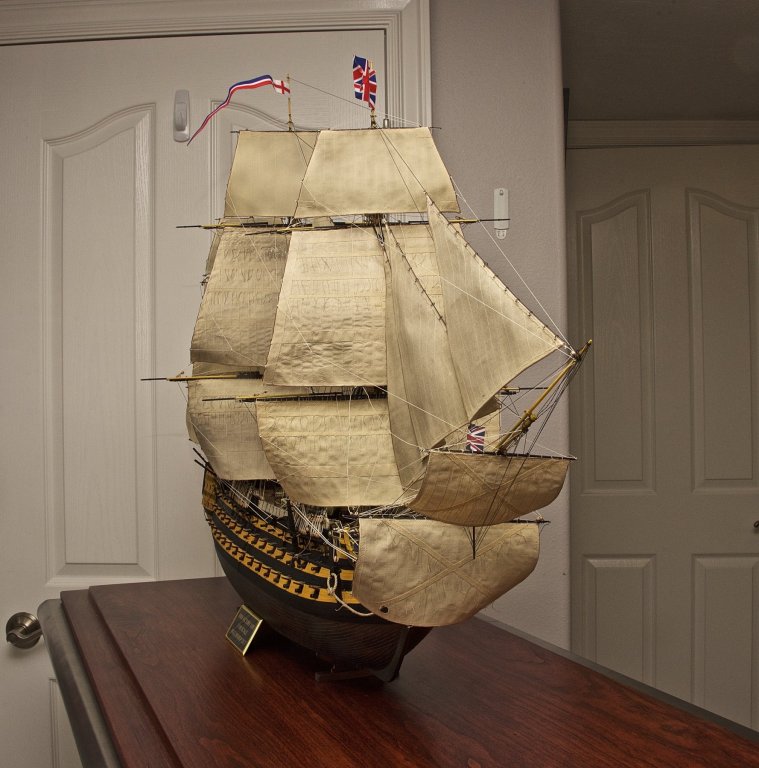
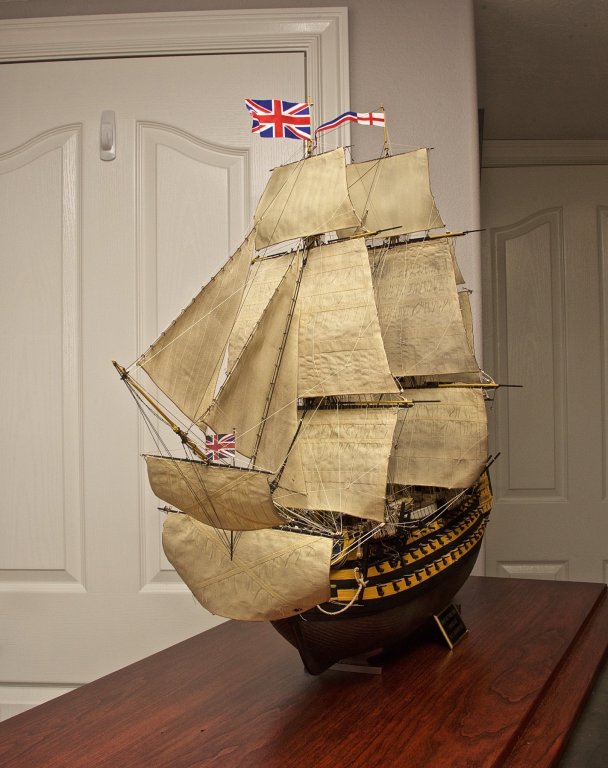
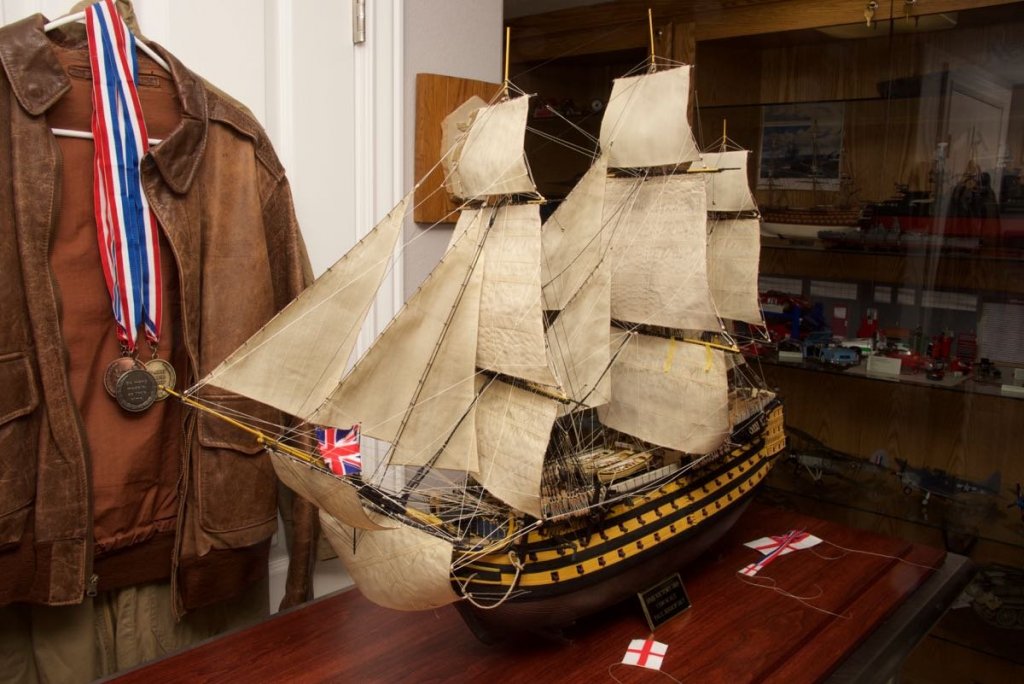
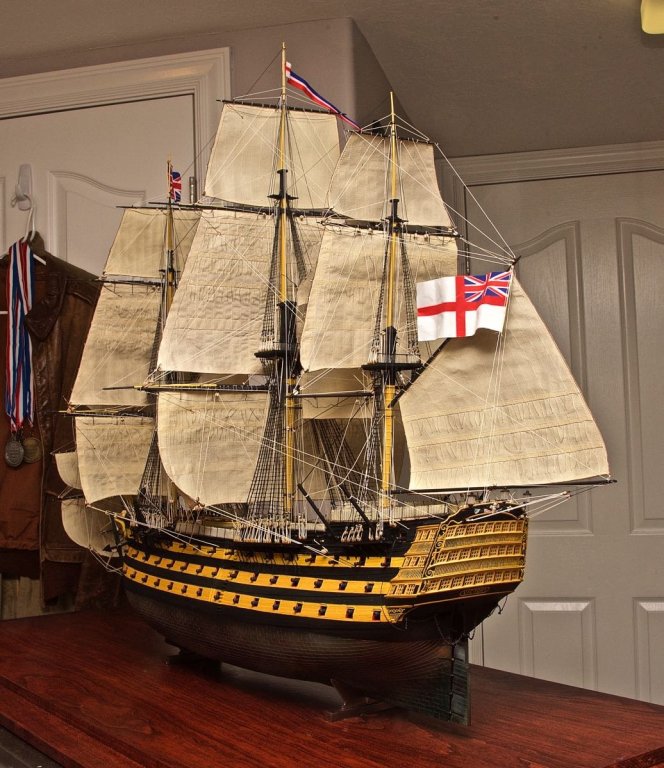
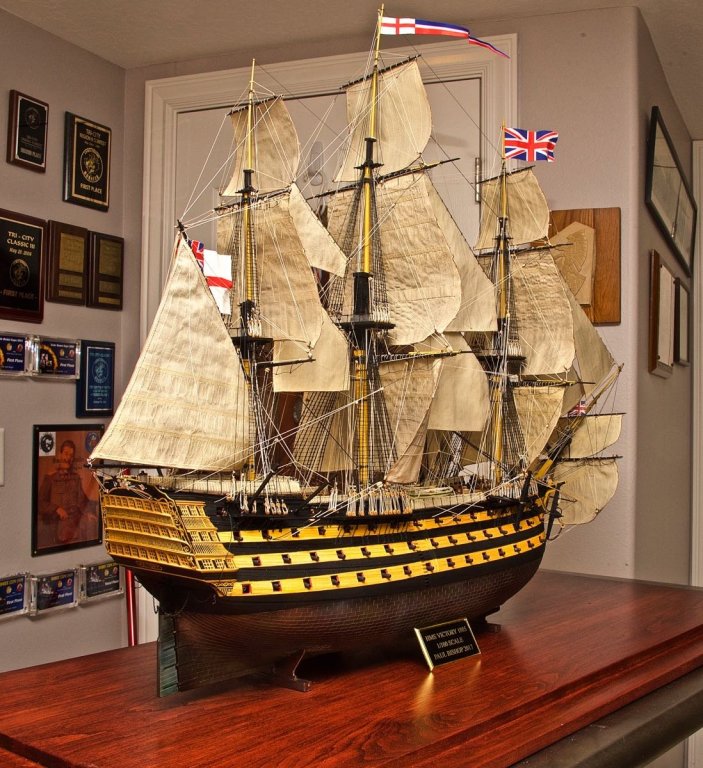
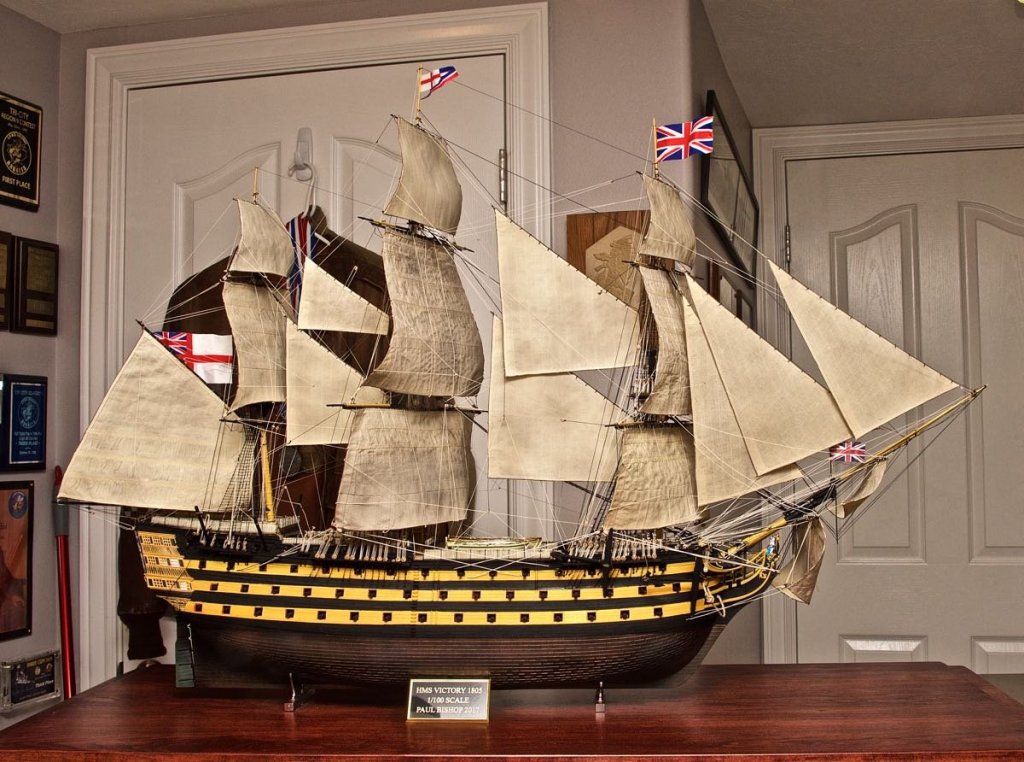
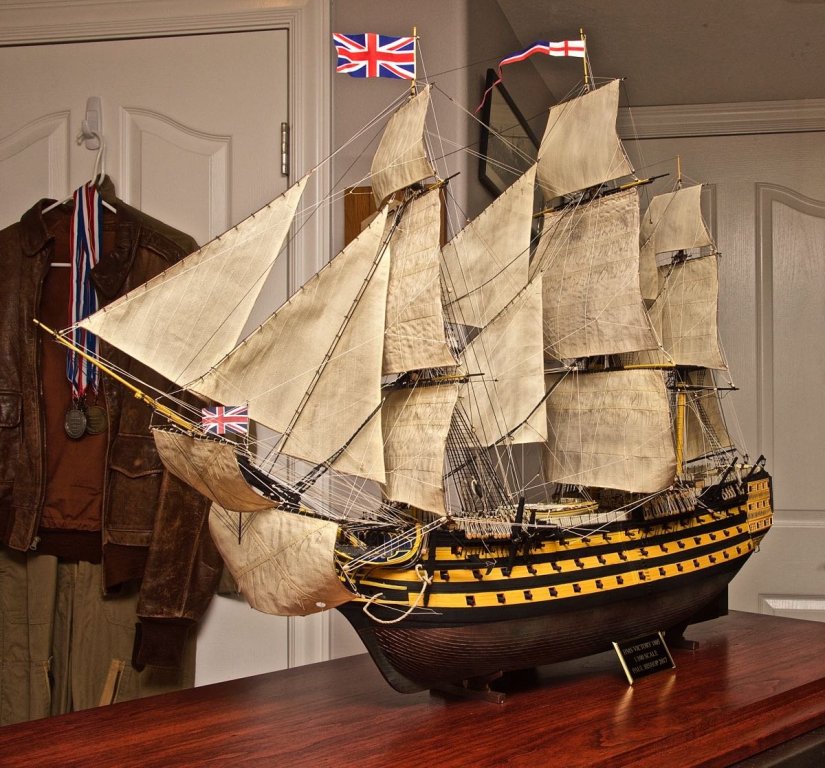
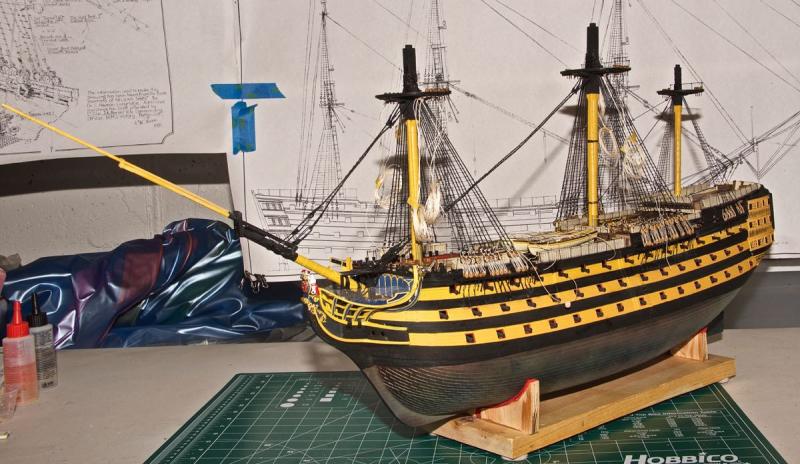
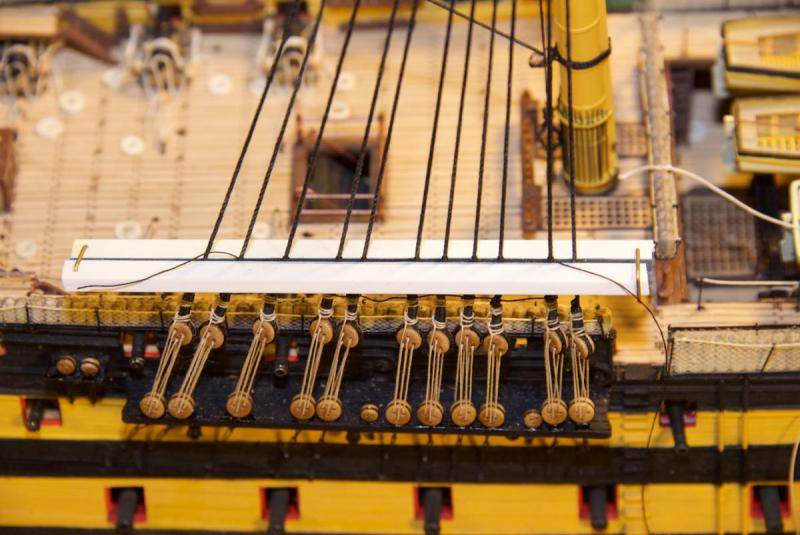
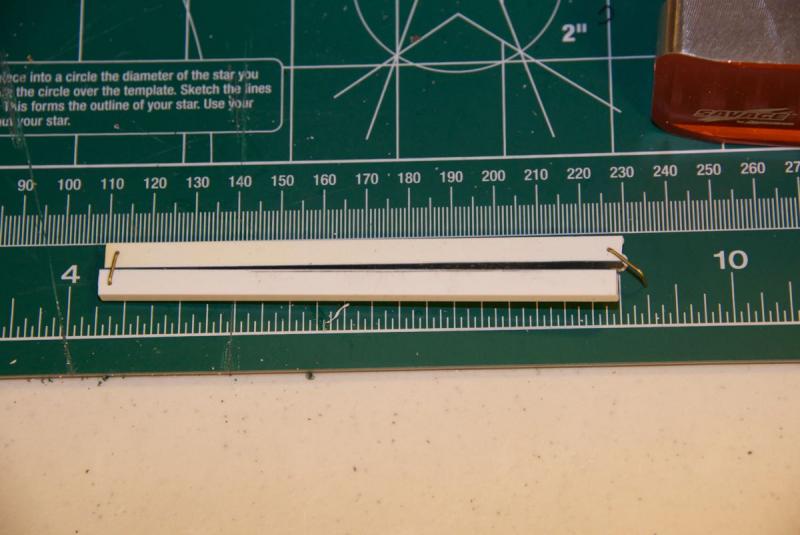
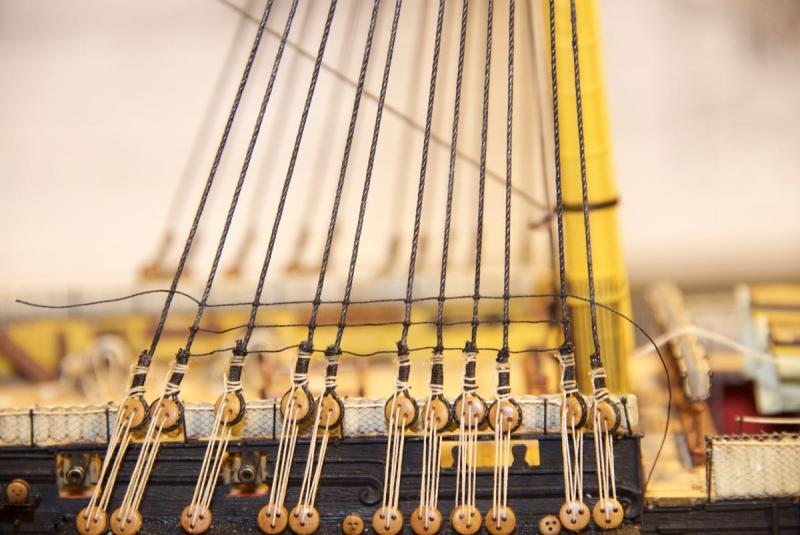
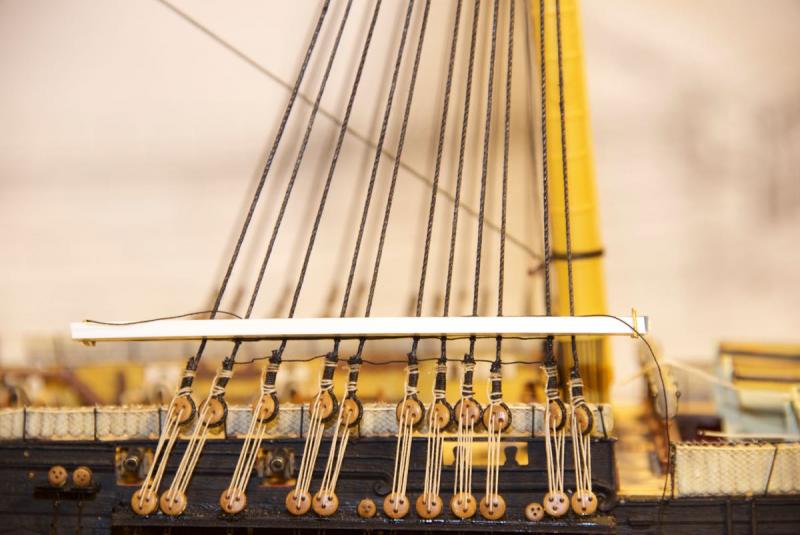
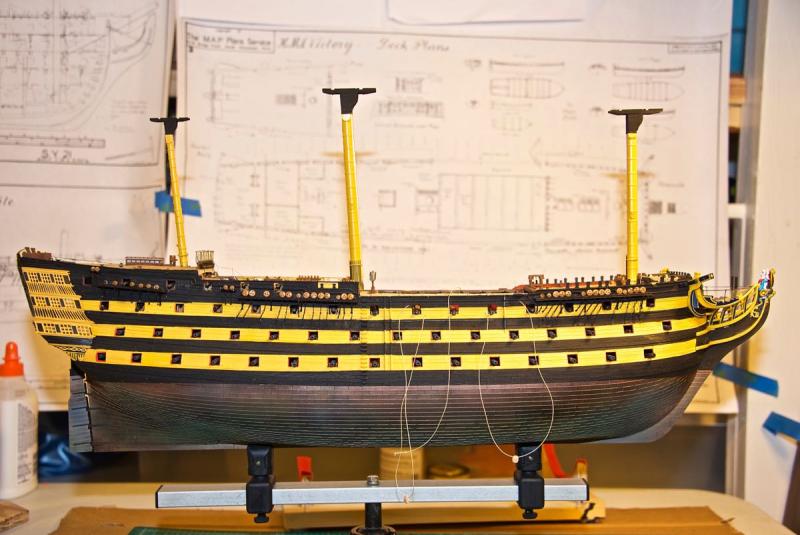
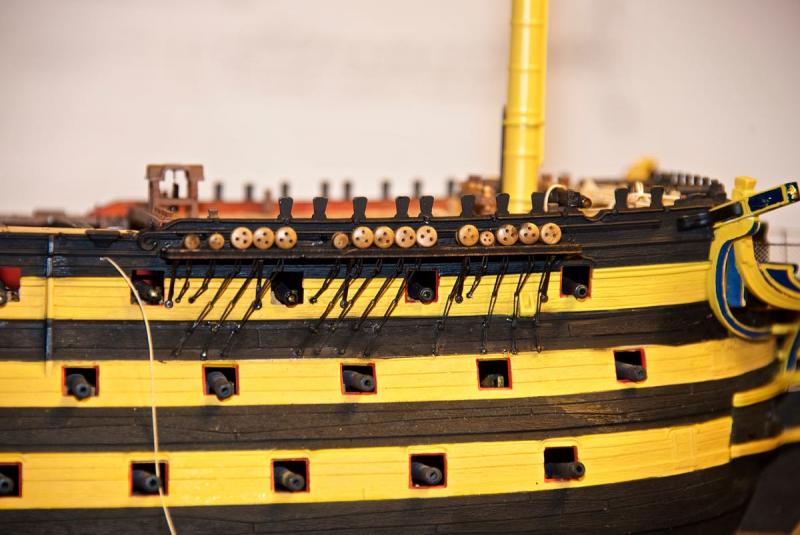
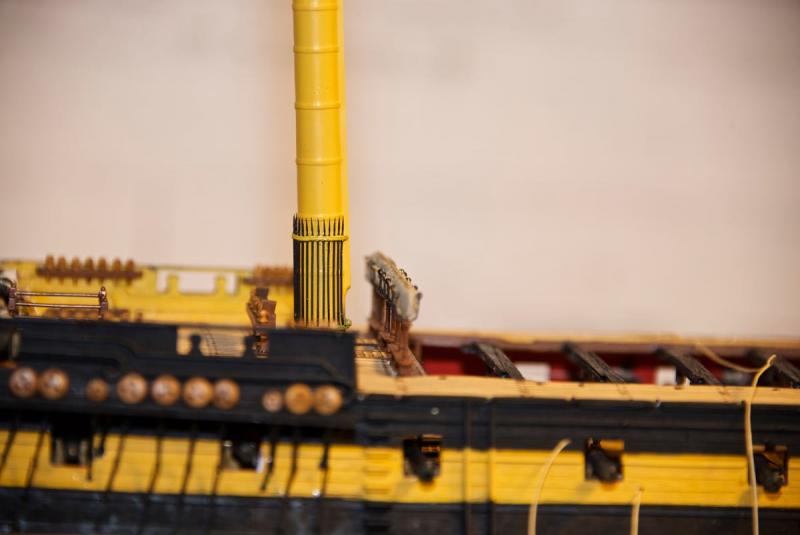
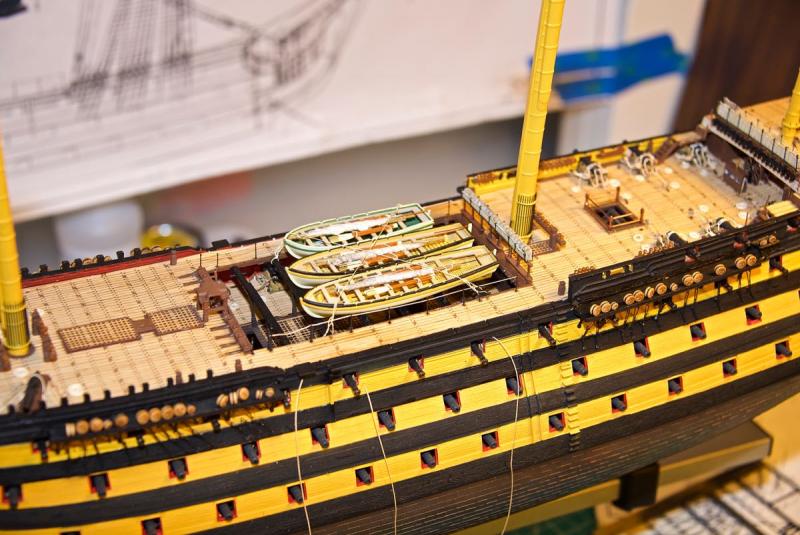
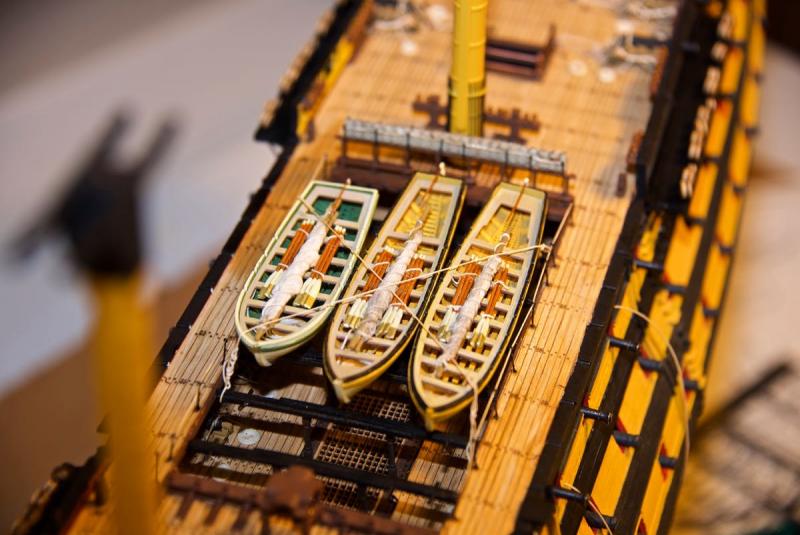
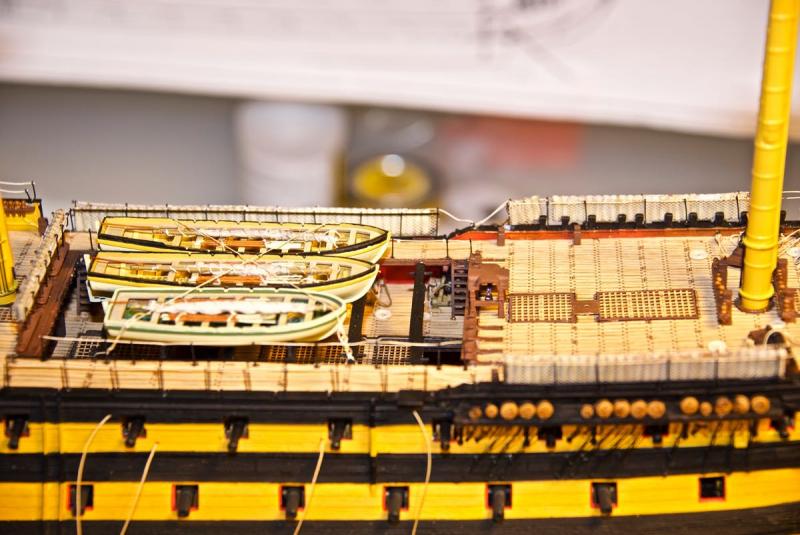
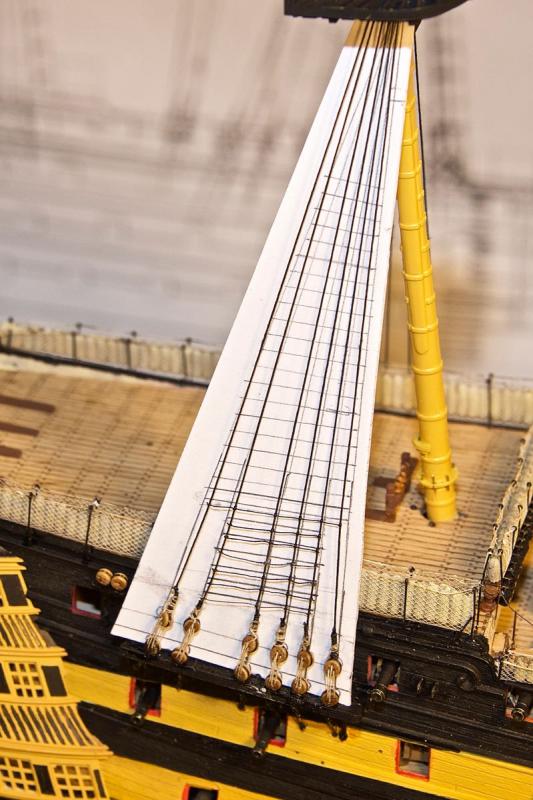
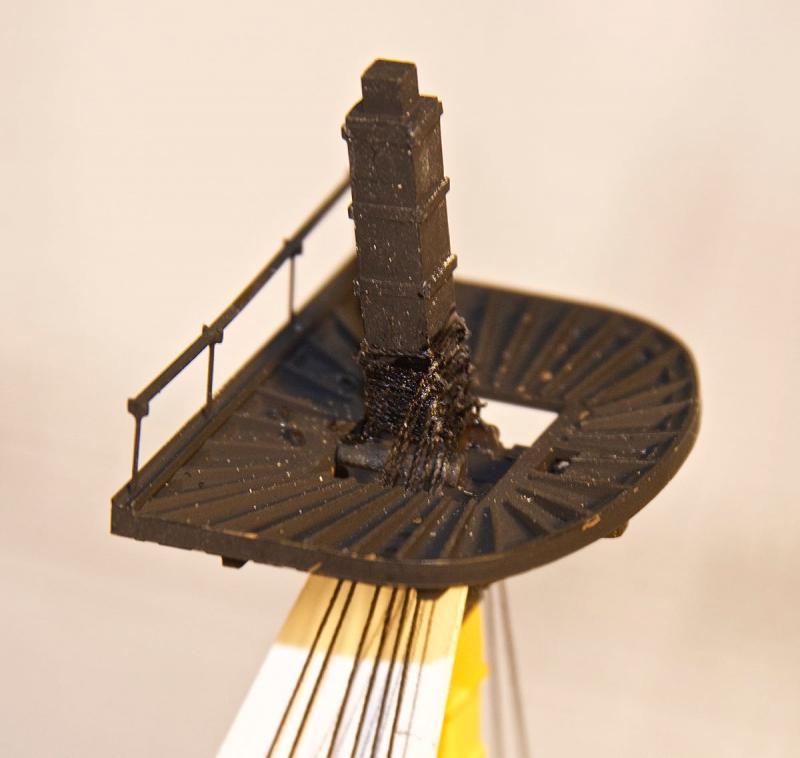
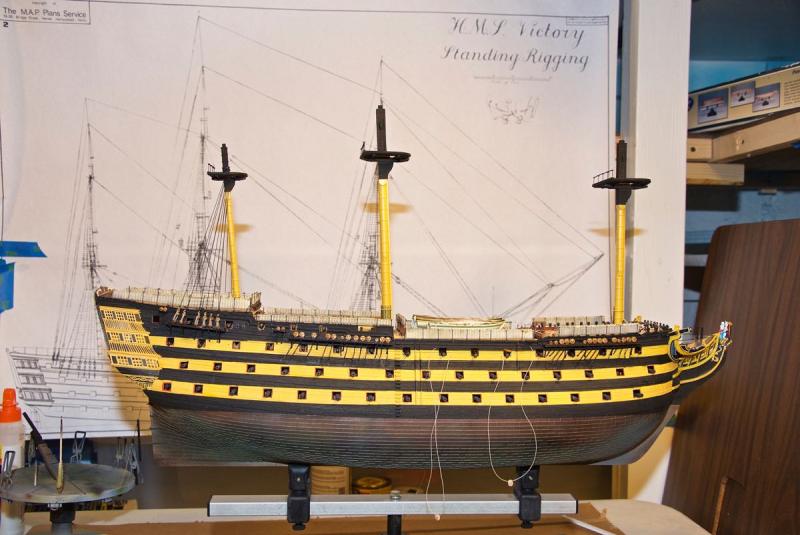
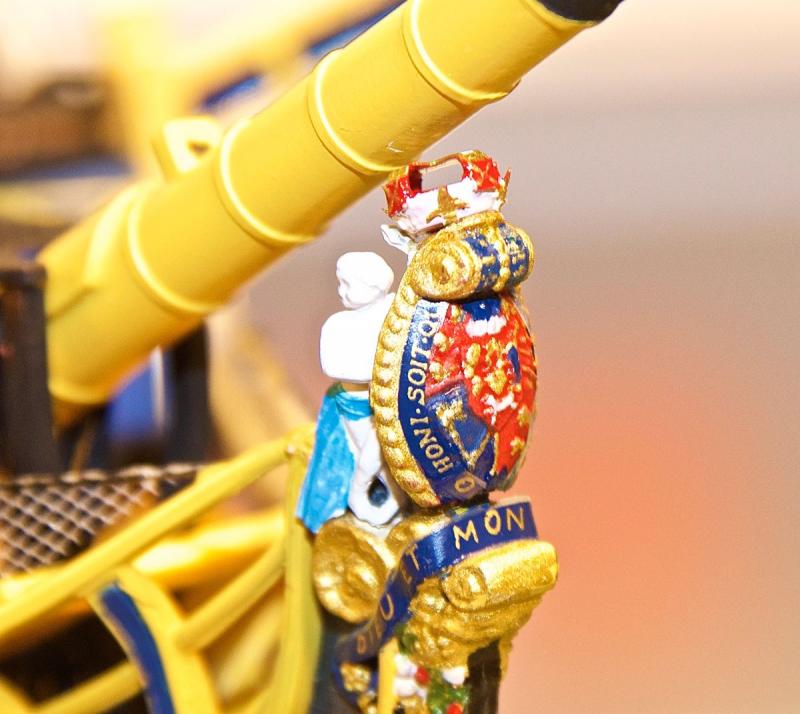
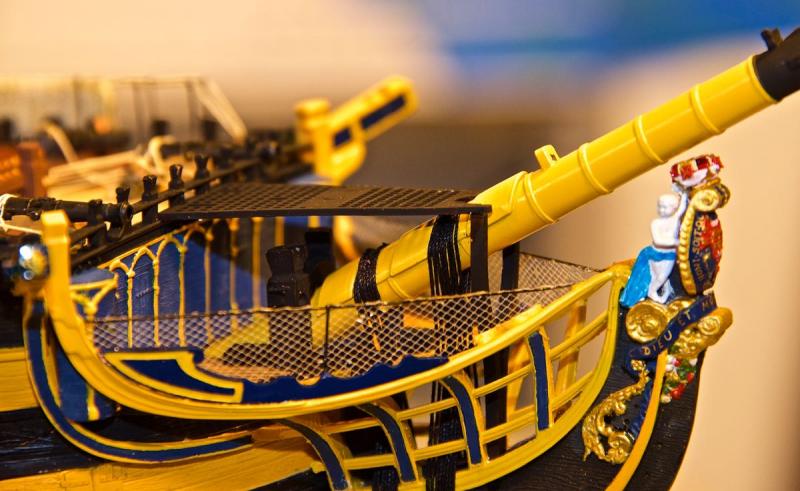
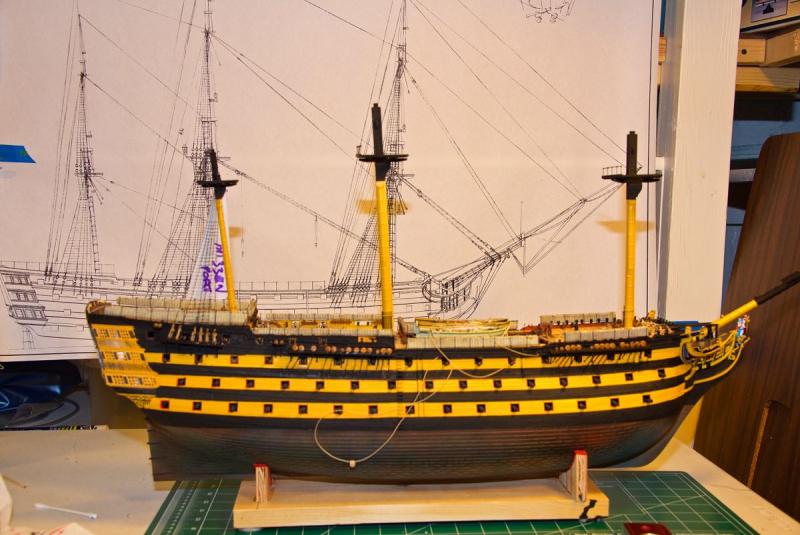
THE SHIP HMS VICTORY IS FINISHED!!!Today I finished adding the gun port ropes and then did some final touch up painting and straightening up a few things. Then a shot a final coat of Testors flat to kill any gloss spots from the CA glue. I can't think of anything else to do. The gun port ropes were the thinnest thread I had soaked in GAC-400 texile stiffener then cut to 8 mm lengths. That fit about 95% of the gun ports – the rest I trimmed down with scissors. They were glued with a little CA on each end then added with tweezers. It really didn't take too long. Eight months and seven days ago (about 247 days give or take) since I made the mad decision finish this thing. That's roughly 600 hours. It's been a long haul, but actually very comforting. My wife passed away 11 months ago and it was very nice to have something to really occupy my mind during the many long hours. I'm going to take a break (good timing since I have a lot of my kids here to visit) and think about what I want to start next.And here are the final pictures…..

-
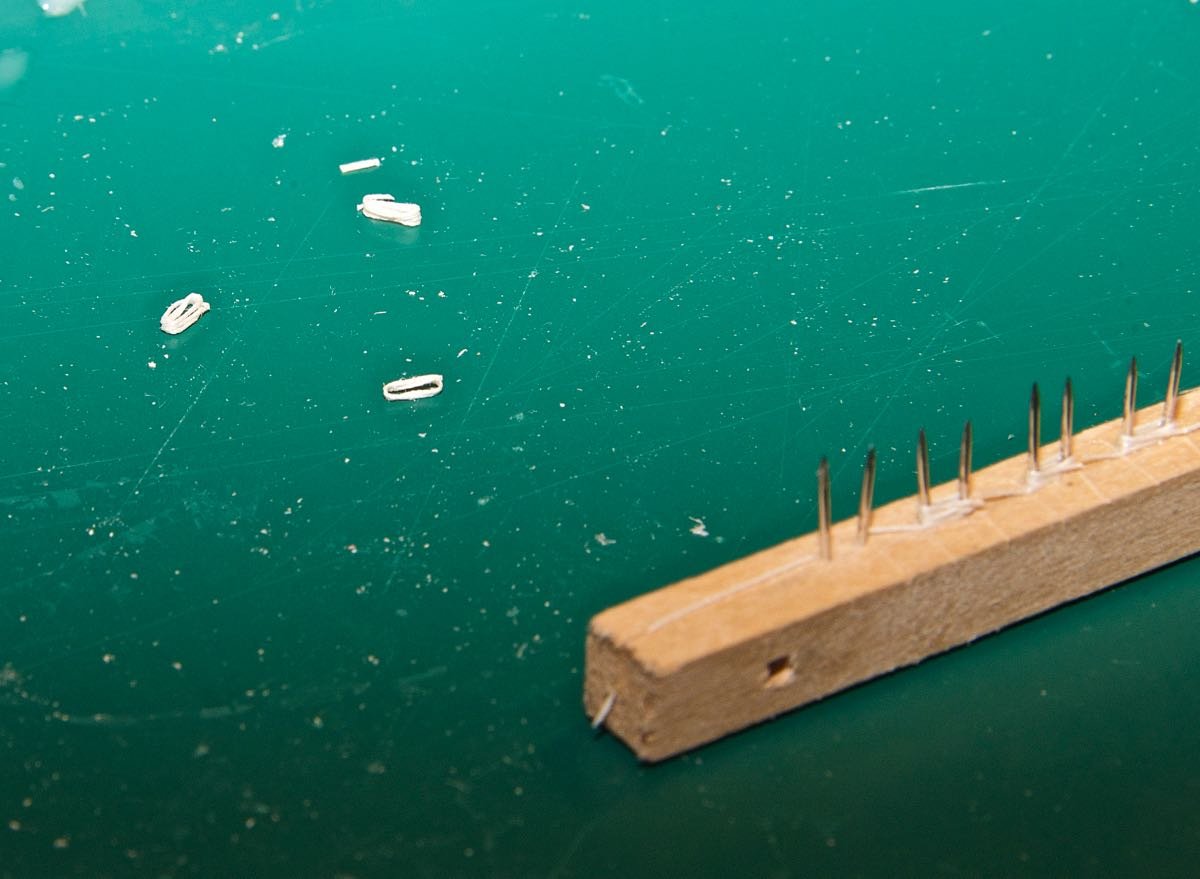
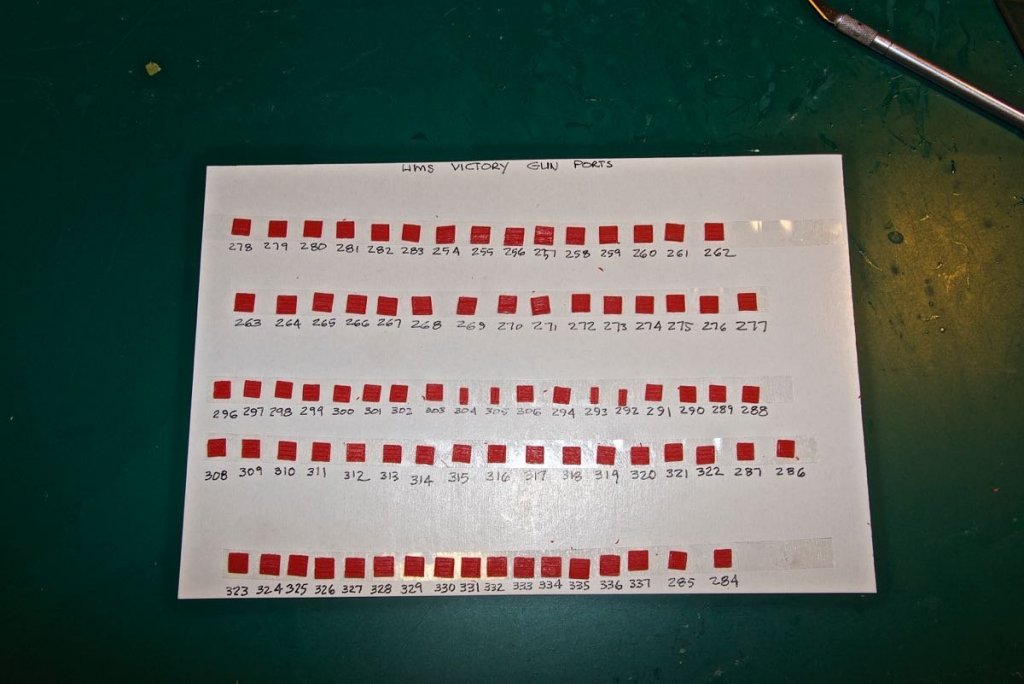
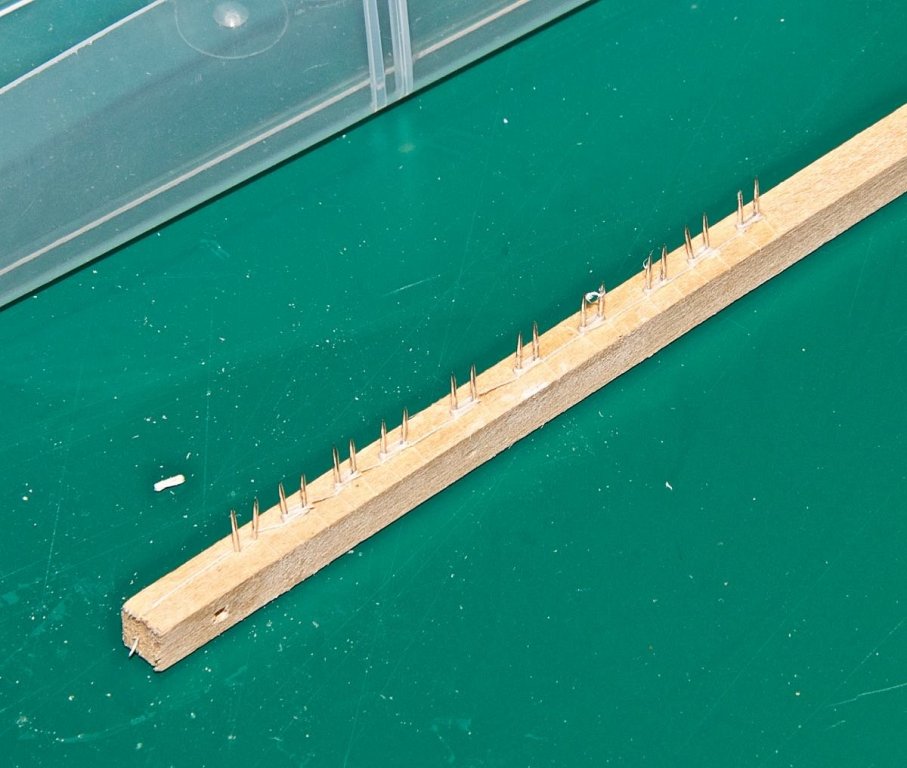
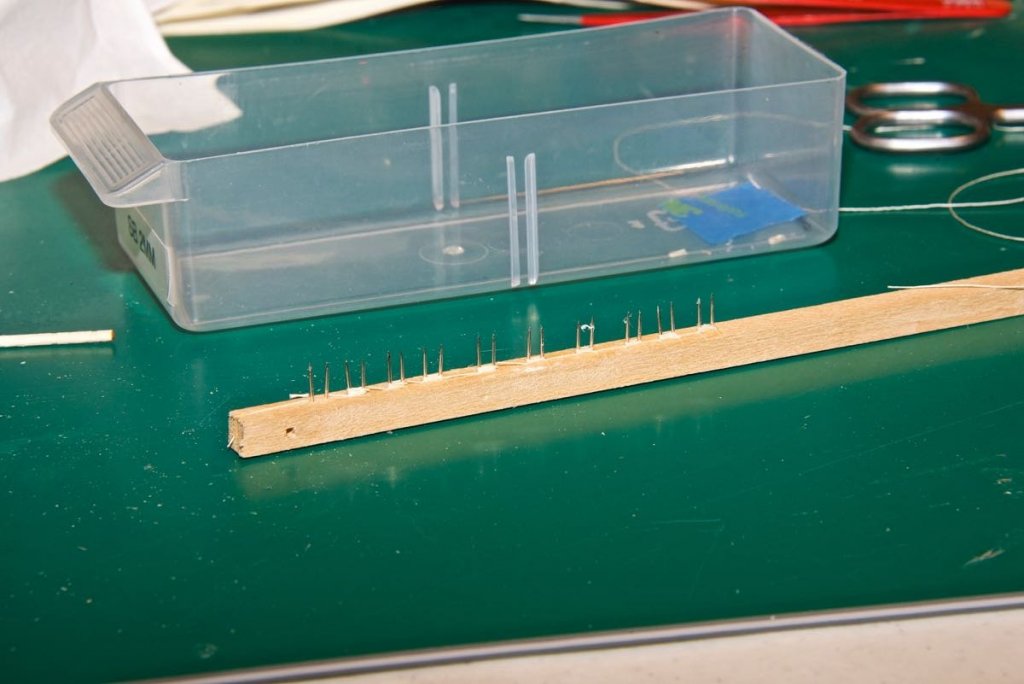
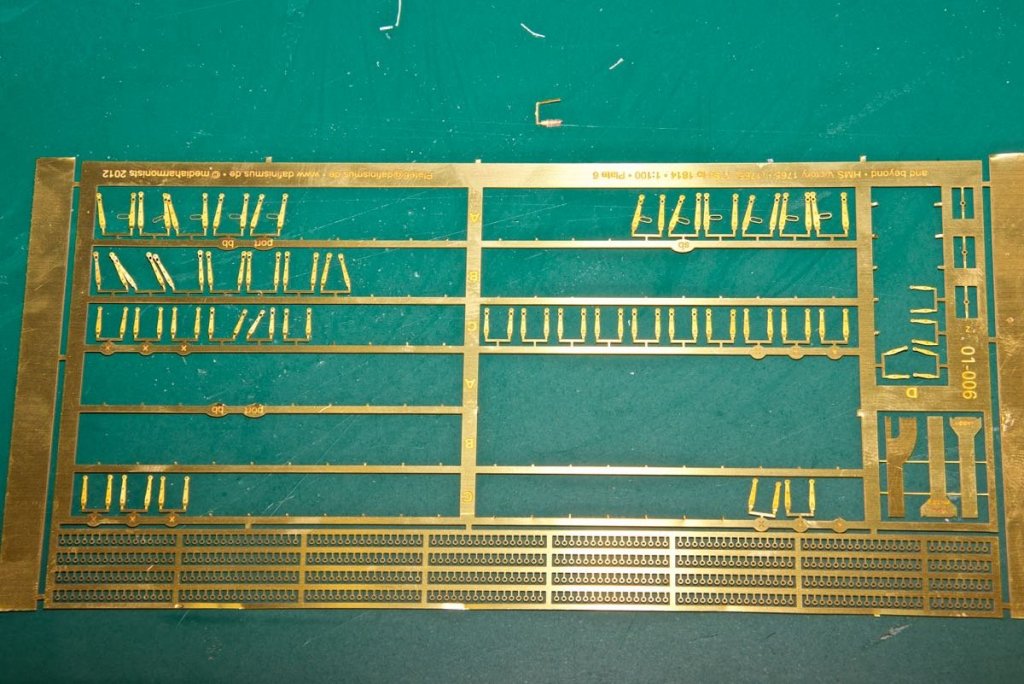
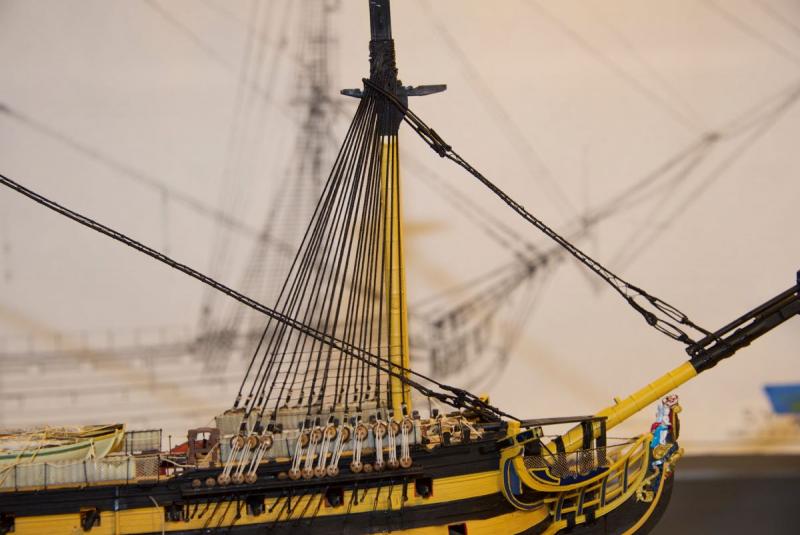
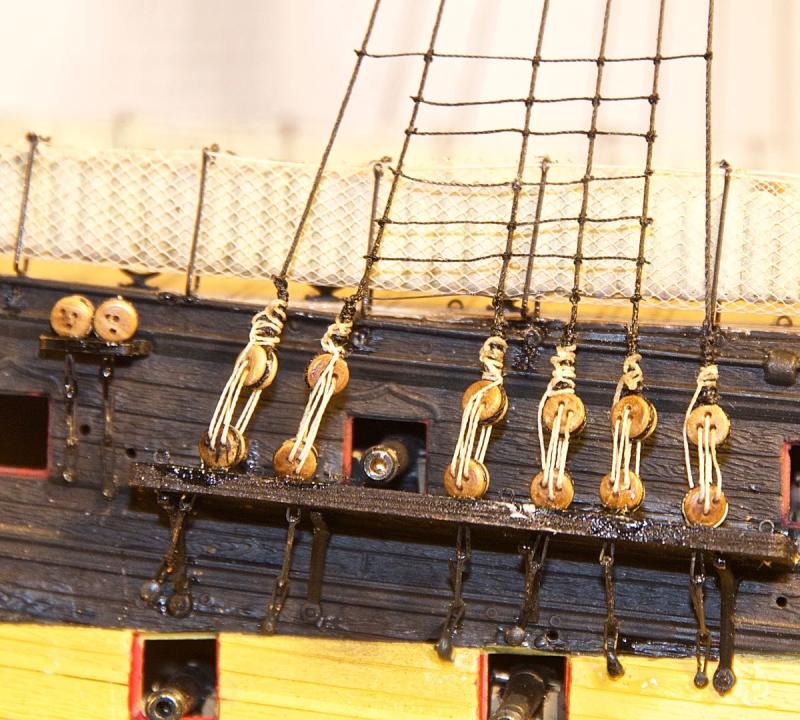
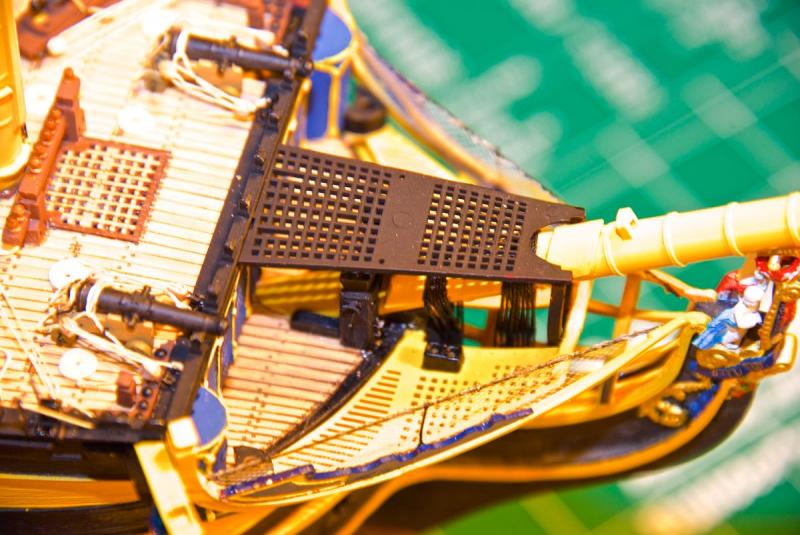
I've completed the gun ports and started on the rope coils to go over all of the belaying pins. I used diluted white glue to secure the rope coils, they are built up in groups of ten on the form. Here are the photo etch gun port hinges.


-
I purchased the Imai version of the Heller 1/100 HMS Victory back in 1985 from Model Expo for half price - $50.00. The instructions are a lot better then the original Heller one's. I have attached the PDF files if any one needs them. I just removed the staple and scanned the resulting pages at 300 dpi so each scan contains multiple pages. Cheers, Paul PAGE 1 2017_05_31_09_27_08.pdf PAGE 2 2017_05_31_09_28_56.pdf PAGE 3 2017_05_31_09_29_43.pdf PAGE 4 2017_05_31_09_30_20.pdf PAGE 5 2017_05_31_09_31_00.pdf PAGE 6 2017_05_31_09_31_41.pdf PAGE 6 2017_05_31_09_32_43.pdf PAGE 7 2017_05_31_09_33_22.pdf PAGE 8 2017_05_31_09_33_58.pdf
-
Steve - thanks for the video - I've used it in my build log on my website!! www.bishophobbies.com
-
Steve, Your Bounty is beautiful - my wife sewed up the sails for my Privateer Rattlesnake and they turned out great. She used what was called ballooner cloth. I don't know if you can get it now. Your comment about family members getting involved is so true - my wife passed away 11 months ago and it's great to look at that ship model and remember she was a part of the build. I thank you for triggering that memory. Regards, Paul
- 291 replies
-
- 5
-

-
- bounty
- billing boats
- (and 1 more)
-
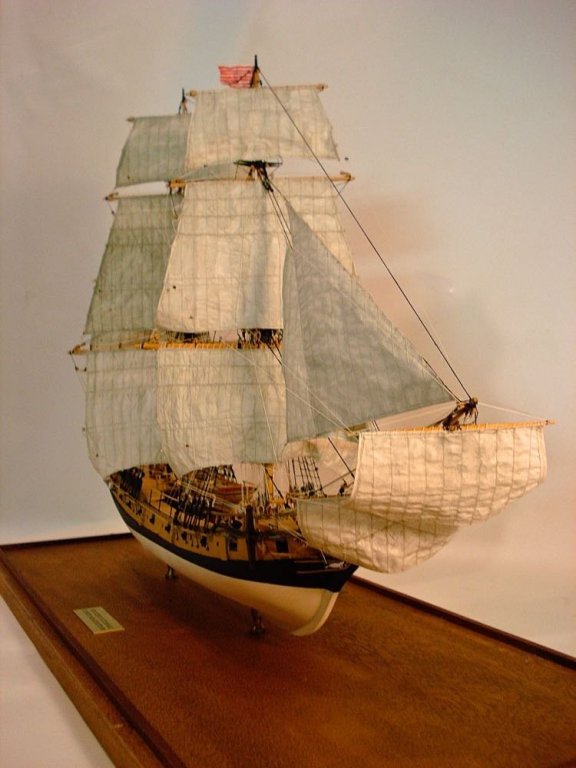
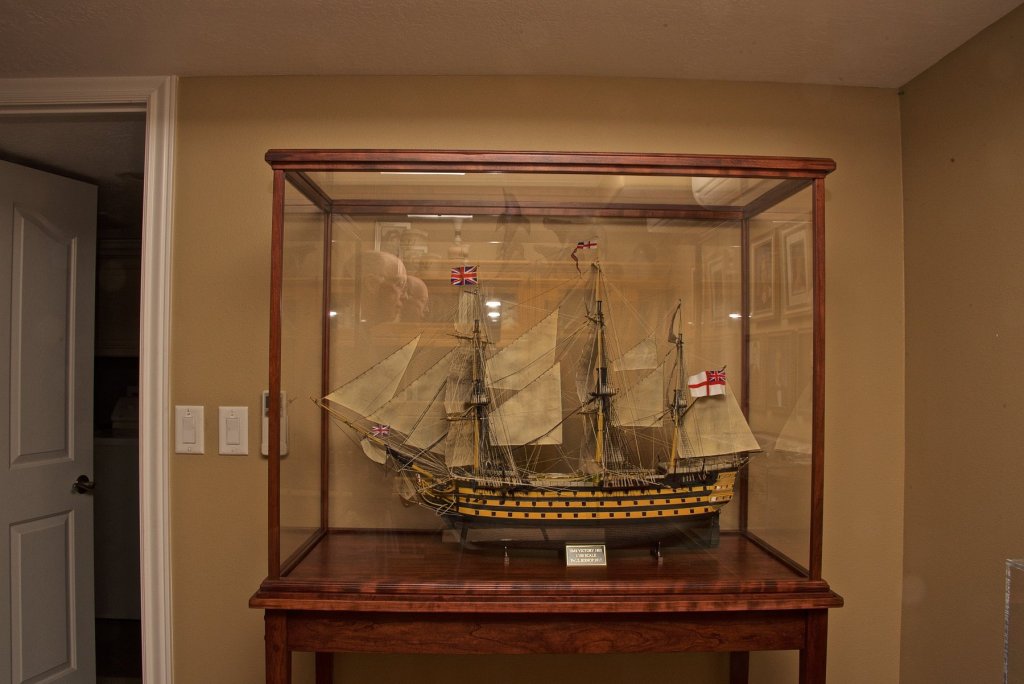
Steve, In fact I have the kit! I purchased it a few months ago as you can see from the pic. It would be great to build together. Have you one on the shelf? I have built one other wood ship model - the Model Shipways Rattlesnake which it finished in 1985. That took me 9 years to build - I built it at work during my lunch time. It is a solid wood hull, so the Surprise will be new ground for me. I'm kinda burned out right now, and I still have to do the gun ports and rope coils for the Victory, but it really looks grand in the case - see pic. I could conceivably start this in about 2 or 3 months from now, but your offer is definitely an incentive to start!! Regards, Paul
-
Thanks Steve - I'm looking at the Phoenix, but frankly I need a rest. I also need to finish the Victory gun ports and ropes.
-
Thank you for all of the very kind responses, and please excuse my remarks - just little frustrated. In leu of reposting perhaps I can steer everyone to my website that has the complete build log. I'm not long winded, but I've described many of the processes I used. There are three pages on my website dealing with this build: Page 1 http://www.bishophobbies.com/category/showcase/hms-victory/ Page 2 http://www.bishophobbies.com/category/showcase/hms-victory-page-2/ Page 3 http://www.bishophobbies.com/category/showcase/hms-victory-page-3/
-
No one ever commented on my posts, so I stopped posting here. Well - in 6 months still no one has commented on my post - maybe there is a bias here against plastic models. I've been posting elsewhere where I've gotten a lot of notice. I have finished the ship (except for the gun ports and rope coils to go over the belaying pins) and here are the final pictures.


- 24 replies
-
- 15
-
-
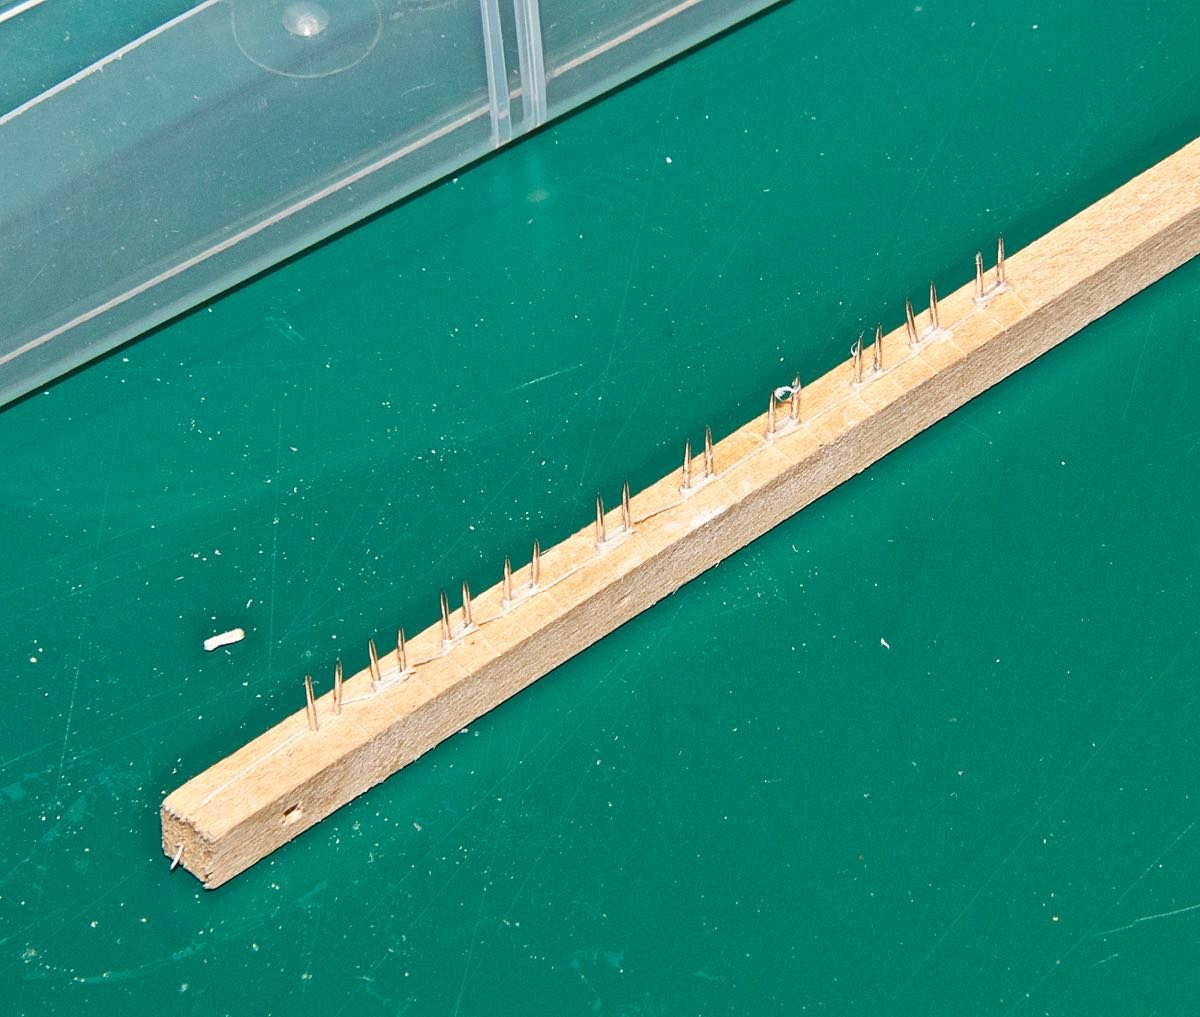
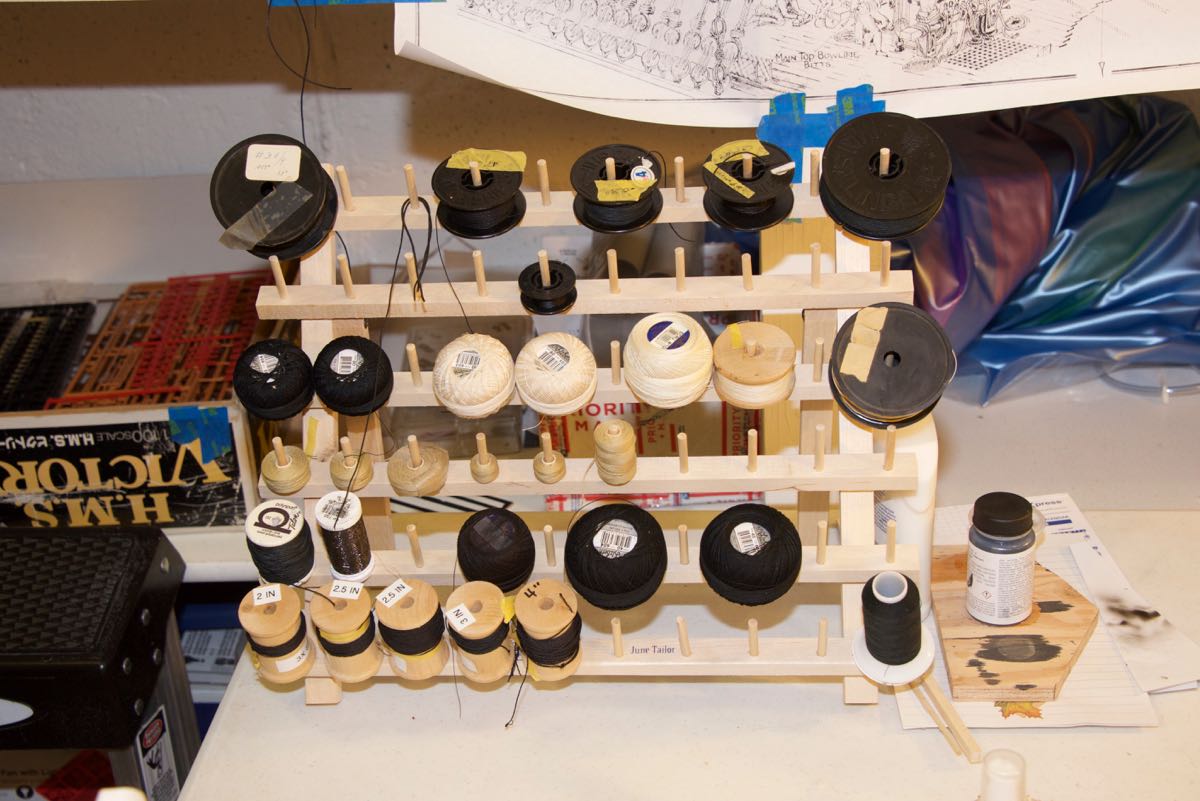
Hornet, That's a nice idea - I had a similar problem and ordered a sewing rack as pictured. I've found this to work out well for me.

-
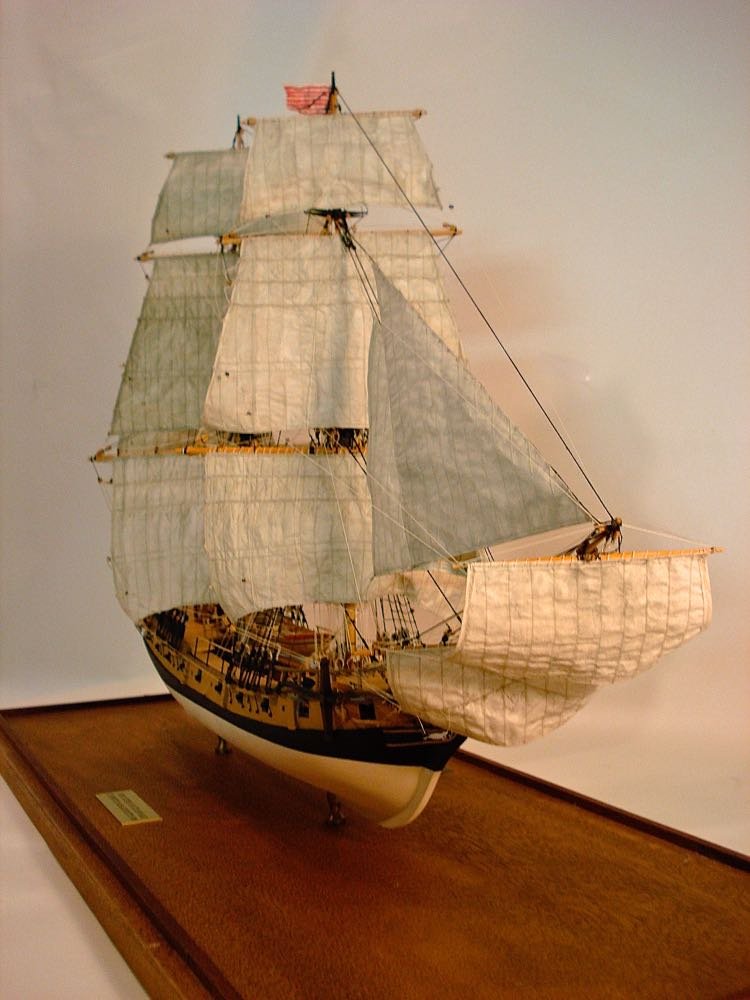
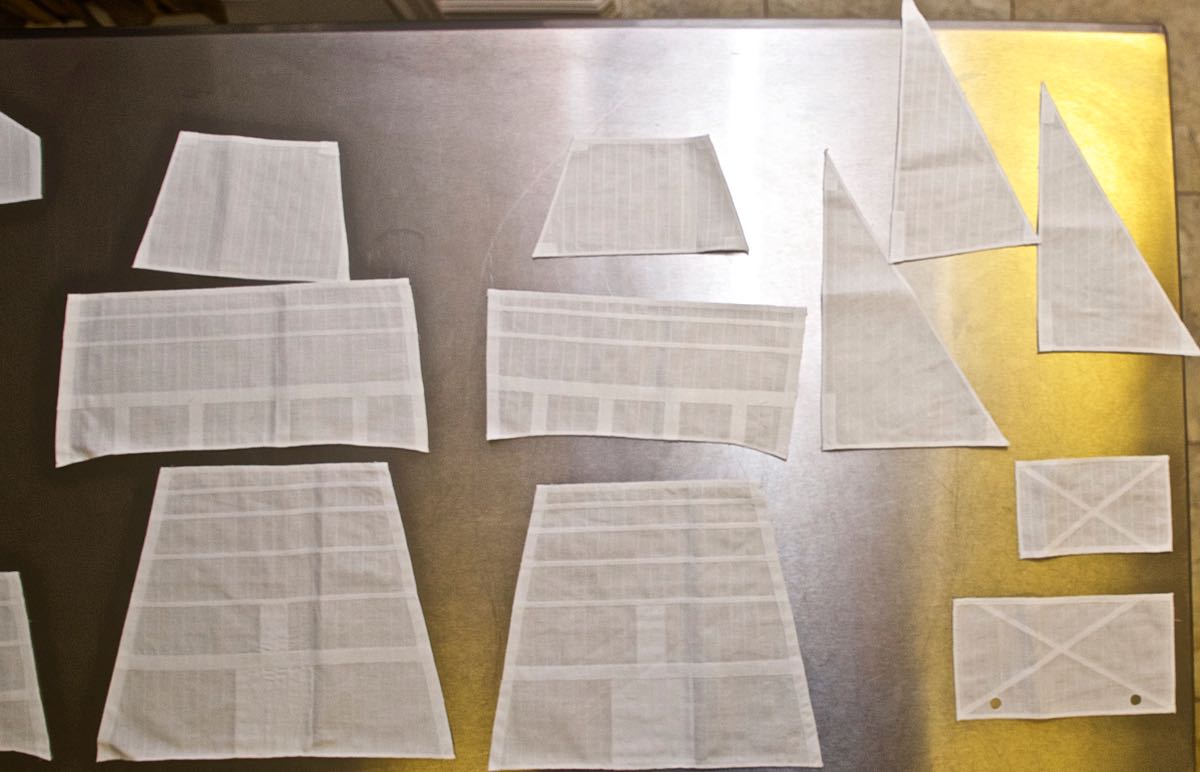
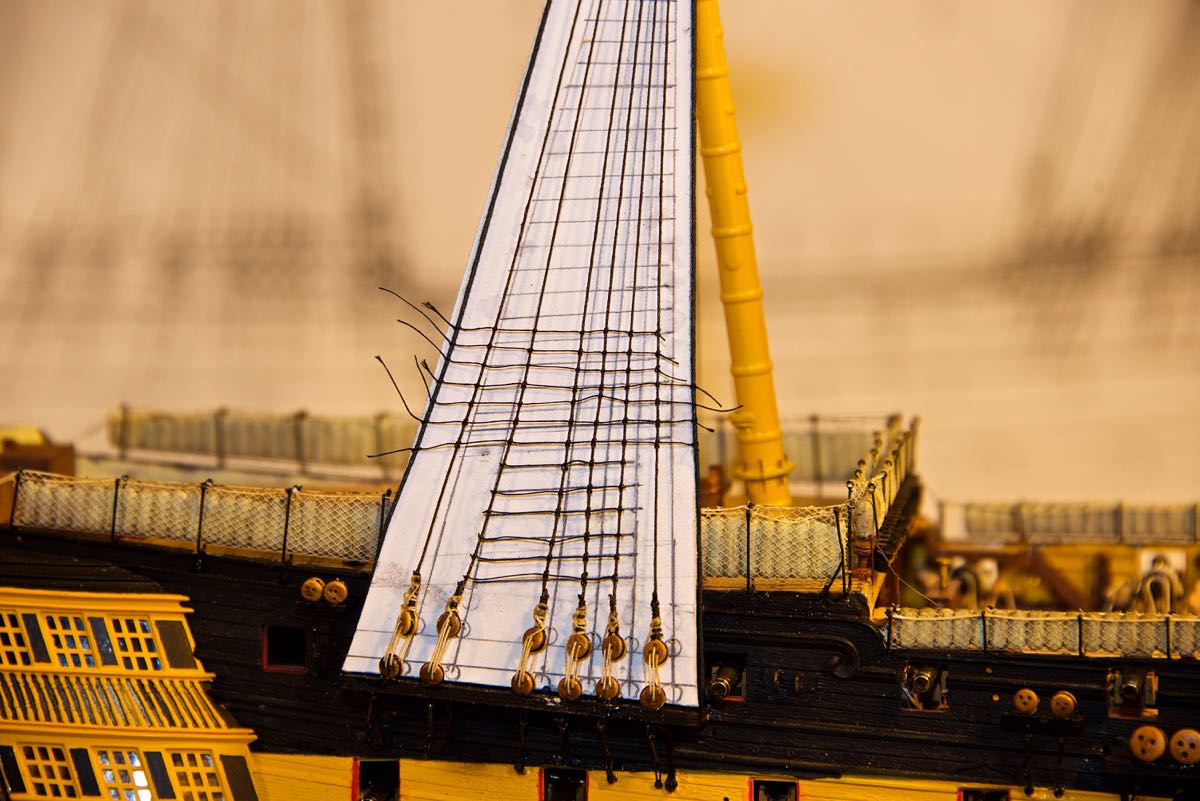
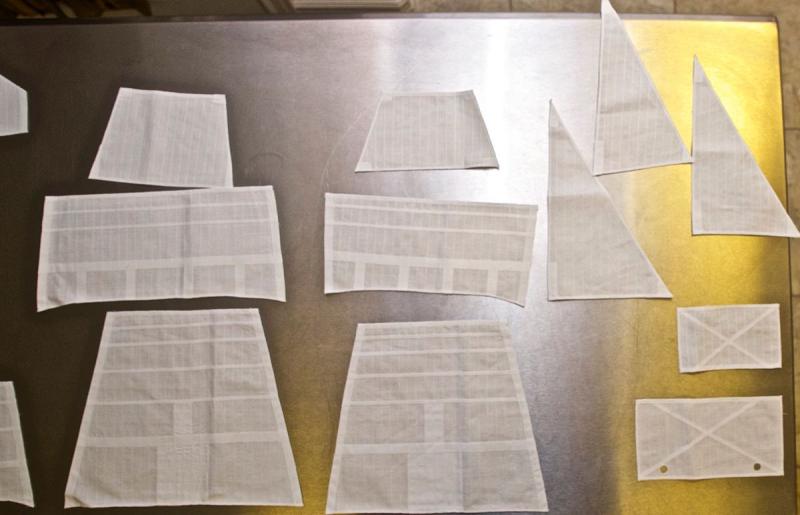
I'm currently building the Heller HMS Victory and have a set of aftermarket sails I want to use. When I built my Model Shipways Privateer Rattlesnake I added the sails after I had installed and rigged the yardarms and that worked ok - but the rigging on the Victory is more complex and perhaps it's better to attach the sails to the yardarms before they are installed and rigged on the ship. Any thoughts?

-
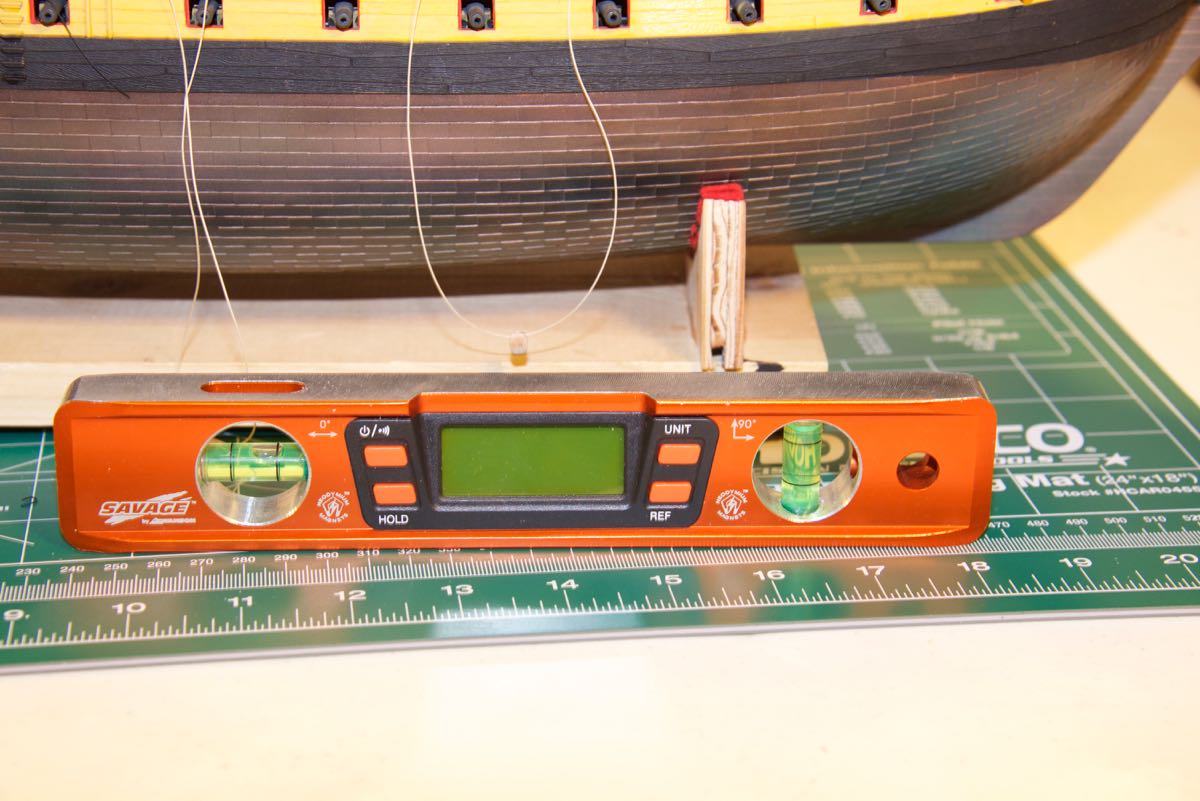
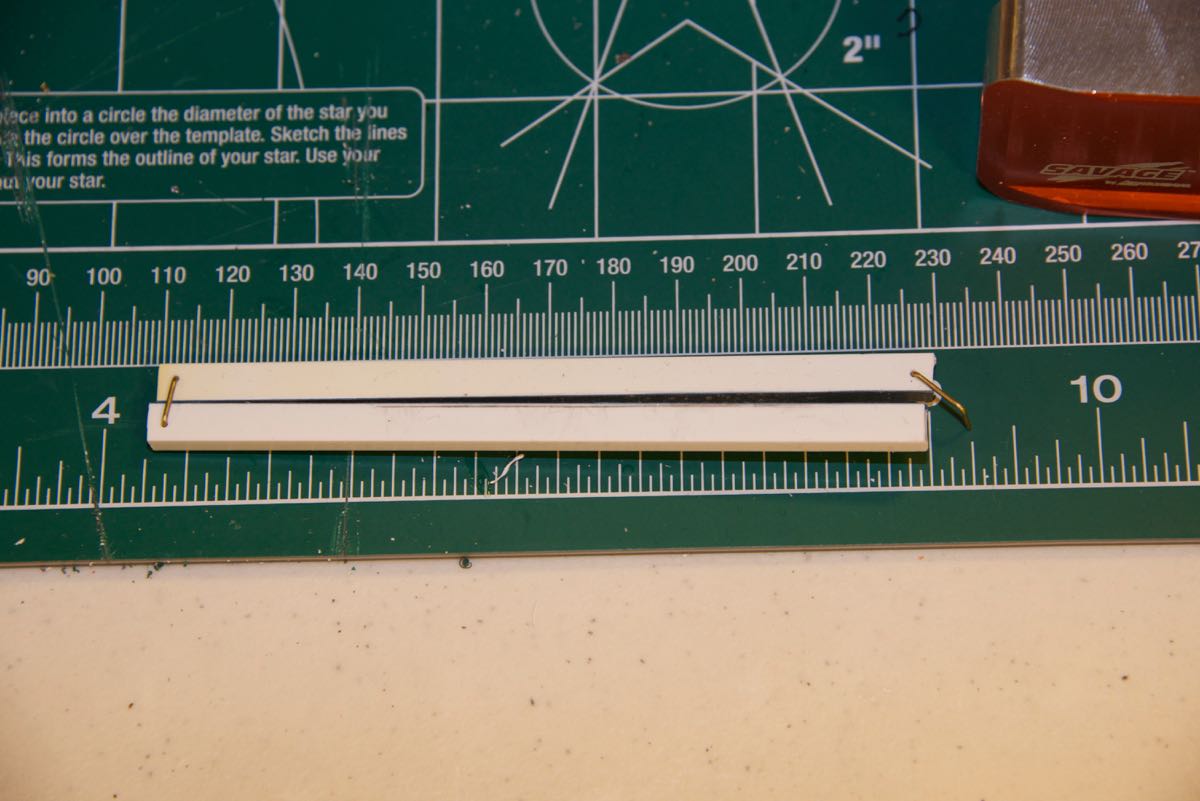
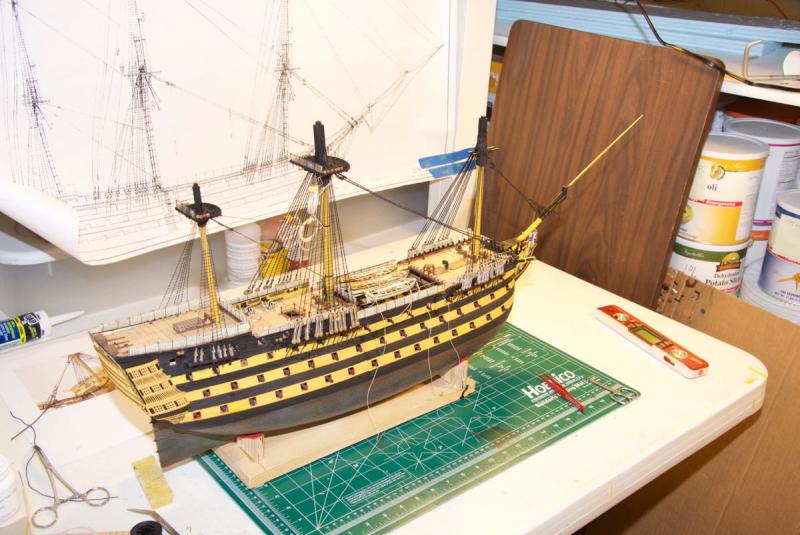
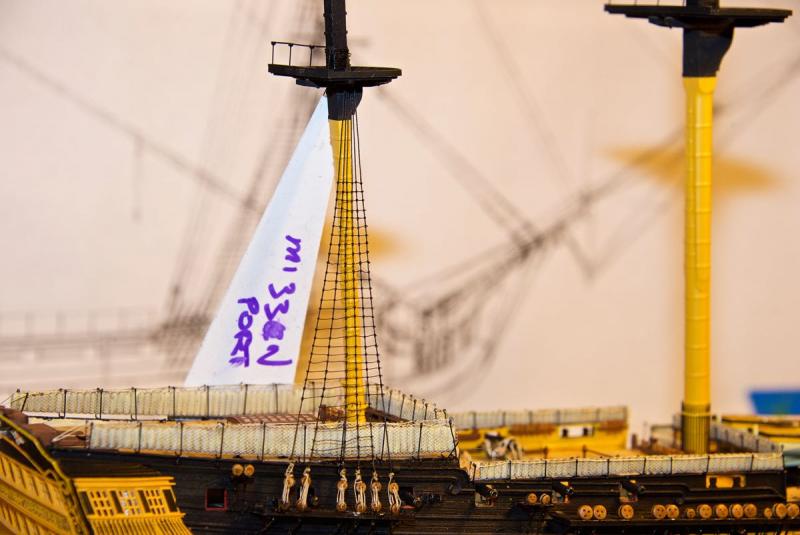
Here is an update on my Victory build. I've finished the ratlines on the mainmast and over half of the foremast. I've added the foremast lower stays and the bowsprit. I've made a very nice ratline jig (a modified version that I read about on this site), this has really worked well. It is composed of 3x6 mm Evergreen with fine sandpaper superglued on the 3mm side. The brass connectors at each end allow much easier placement than using clamps as described in the post on this site. I use the digital level to check the ratlines. The second section of the bowsprit is made of a solid brass rod, the third and outermost bowsprit section is made of a bamboo shiskabob stick that was sanded down by chucking in an electric drill. The original parts of the bowsprit, being made of plastic were much too flexible and would have posed problems when rigging.


-
Hi there, I've been working on this for a while - there is a full comprehensive build article here: http://www.bishophobbies.com/category/showcase/hms-victory/ Here are some pictures of where the build is at today:


-
Hi there, I've started a build log for this ship on my website: www.bishophobbies.com You can find the log on this page: http://www.bishophobbies.com/category/showcase/hms-victory/ I will post here to note my progress. Cheers, Paul
-
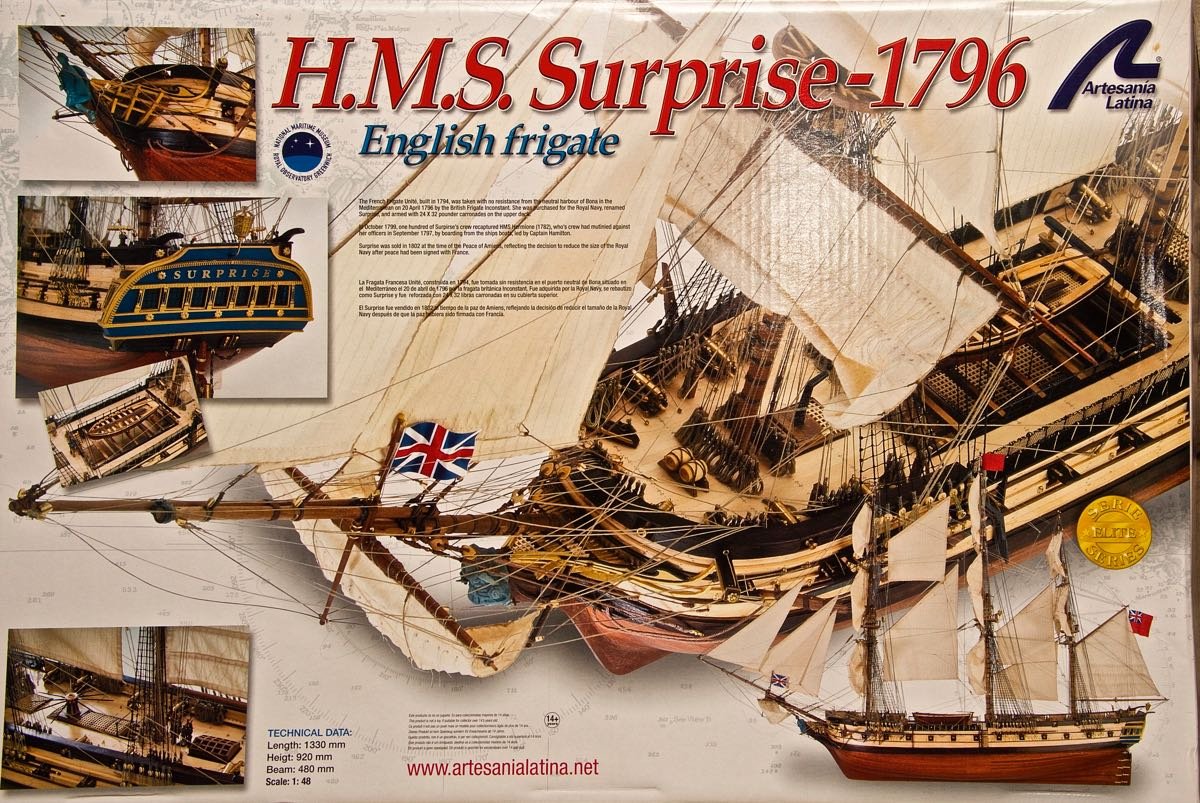
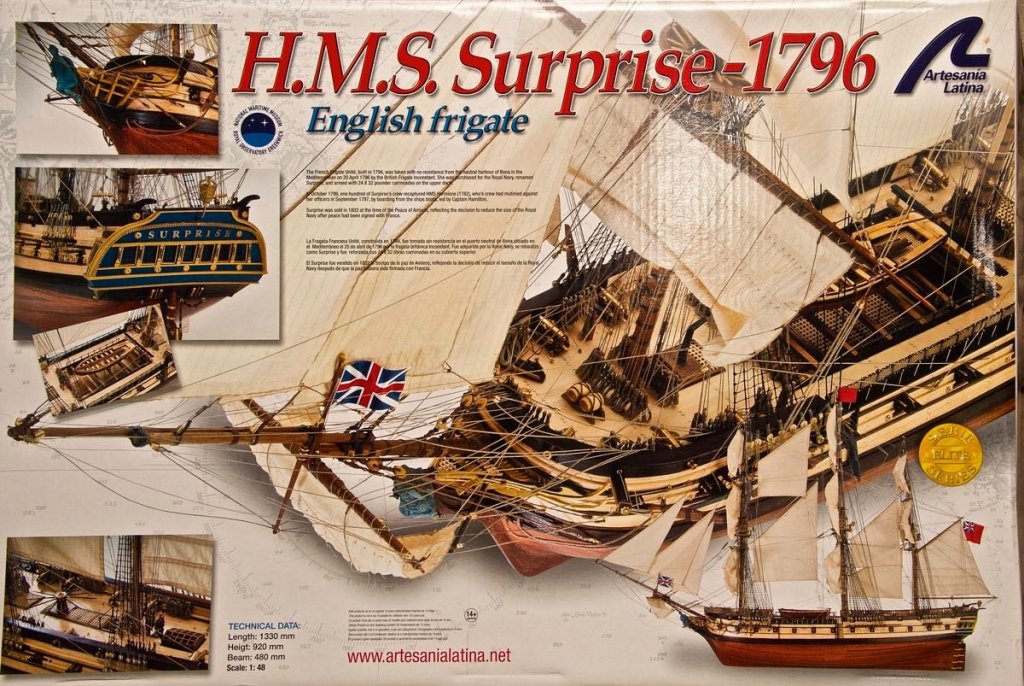
Just picked up the AL 1:48 HMS Surprise
Bishophobbies replied to DonInAZ's topic in Wood ship model kits
Hi there, I too just purchased the HMS Surprise from the (I think) same unnamed vendor for the same price! While the instructions have great photo illustrations, the text is very sparse. Can you tell me where I can get the free Deagostini instructions? Also does anyone know where I can replace the bow figure? It's just a blob. Thanks a bunch, Paul