mtbediz
-
Posts
1,190 -
Joined
-
Last visited
Content Type
Profiles
Forums
Gallery
Events
Everything posted by mtbediz
-

USS Constitution by mtbediz - 1:76
mtbediz replied to mtbediz's topic in - Build logs for subjects built 1751 - 1800
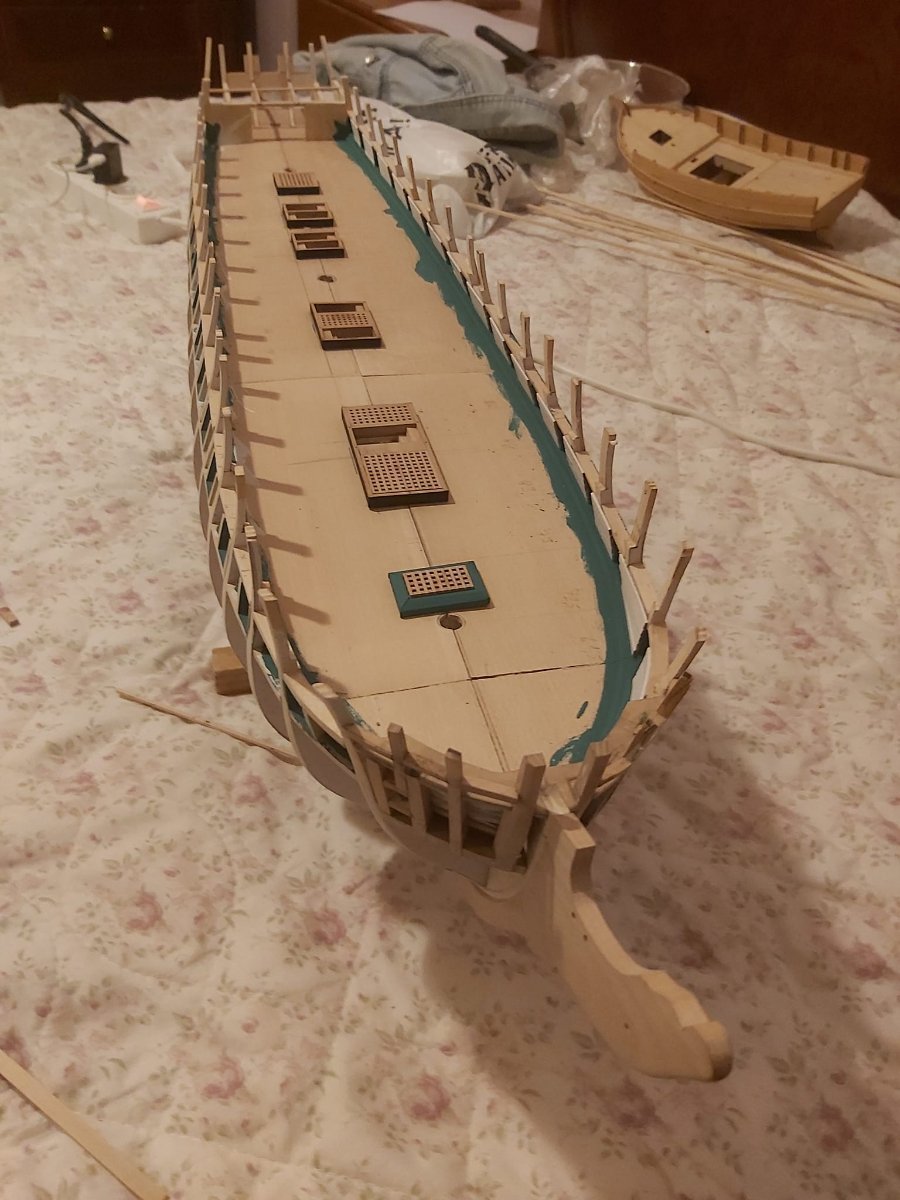
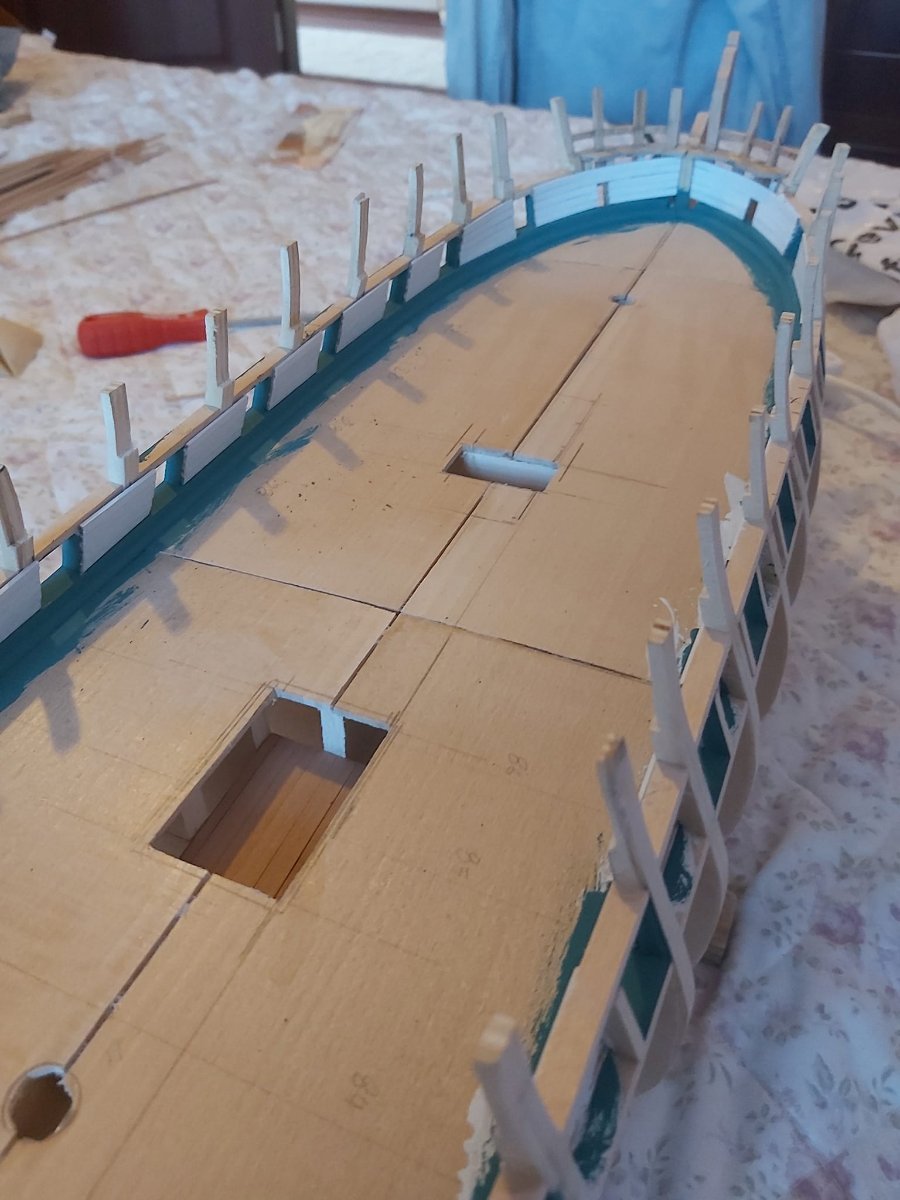
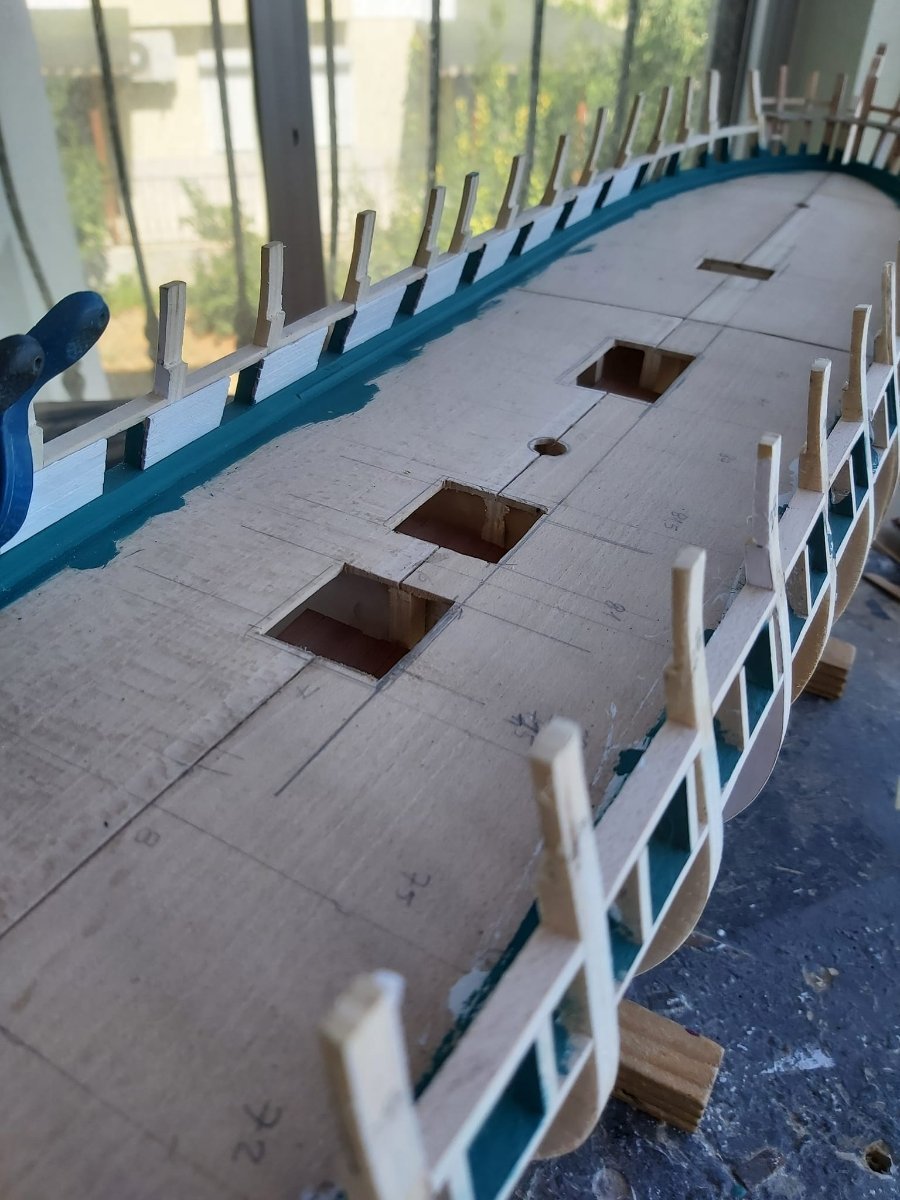
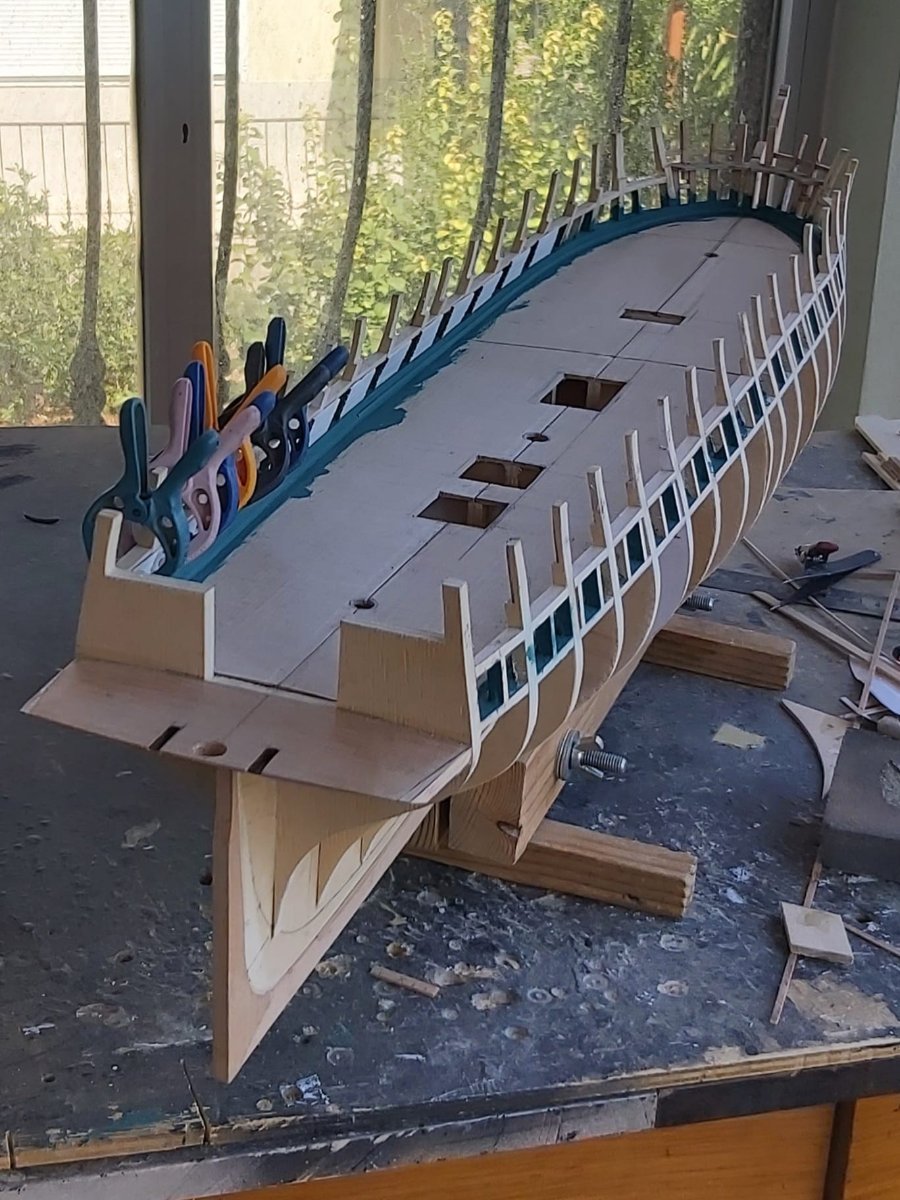
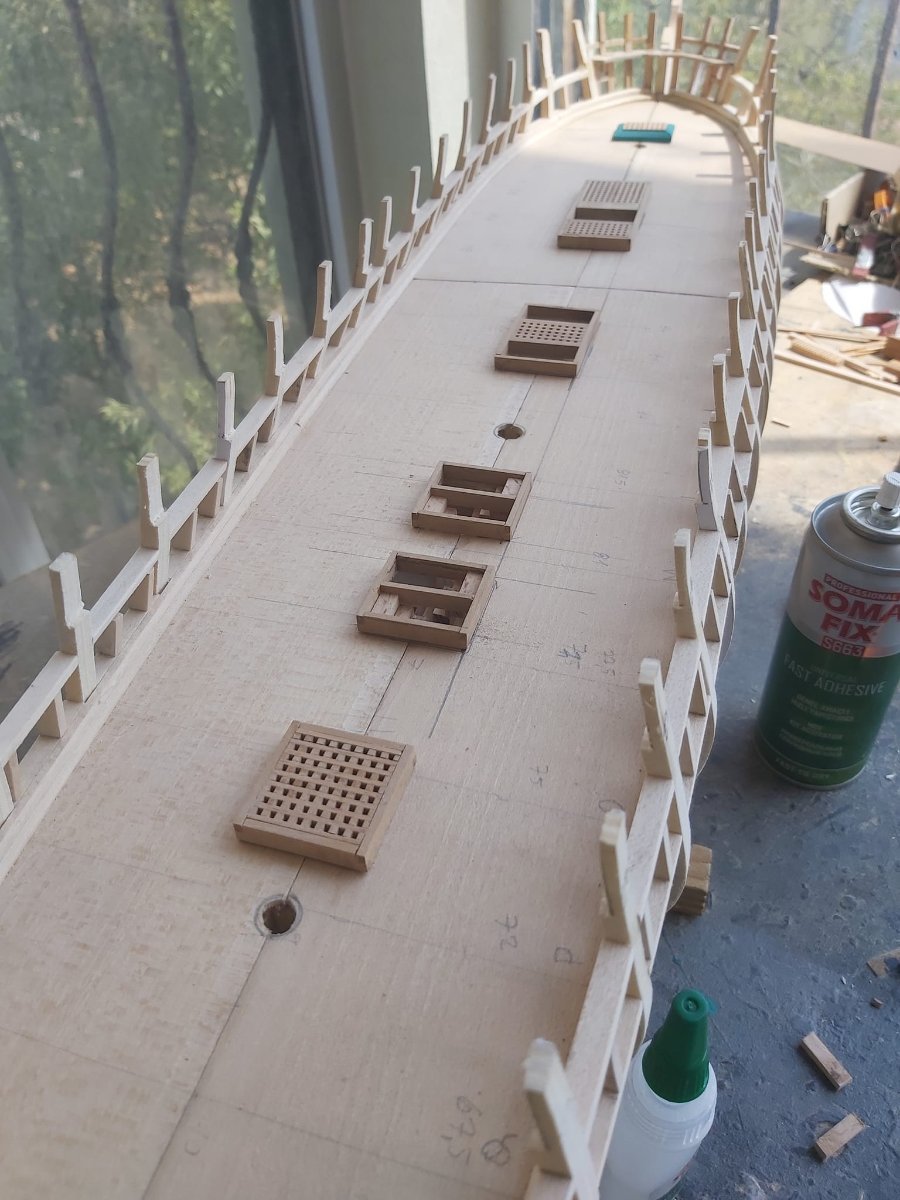
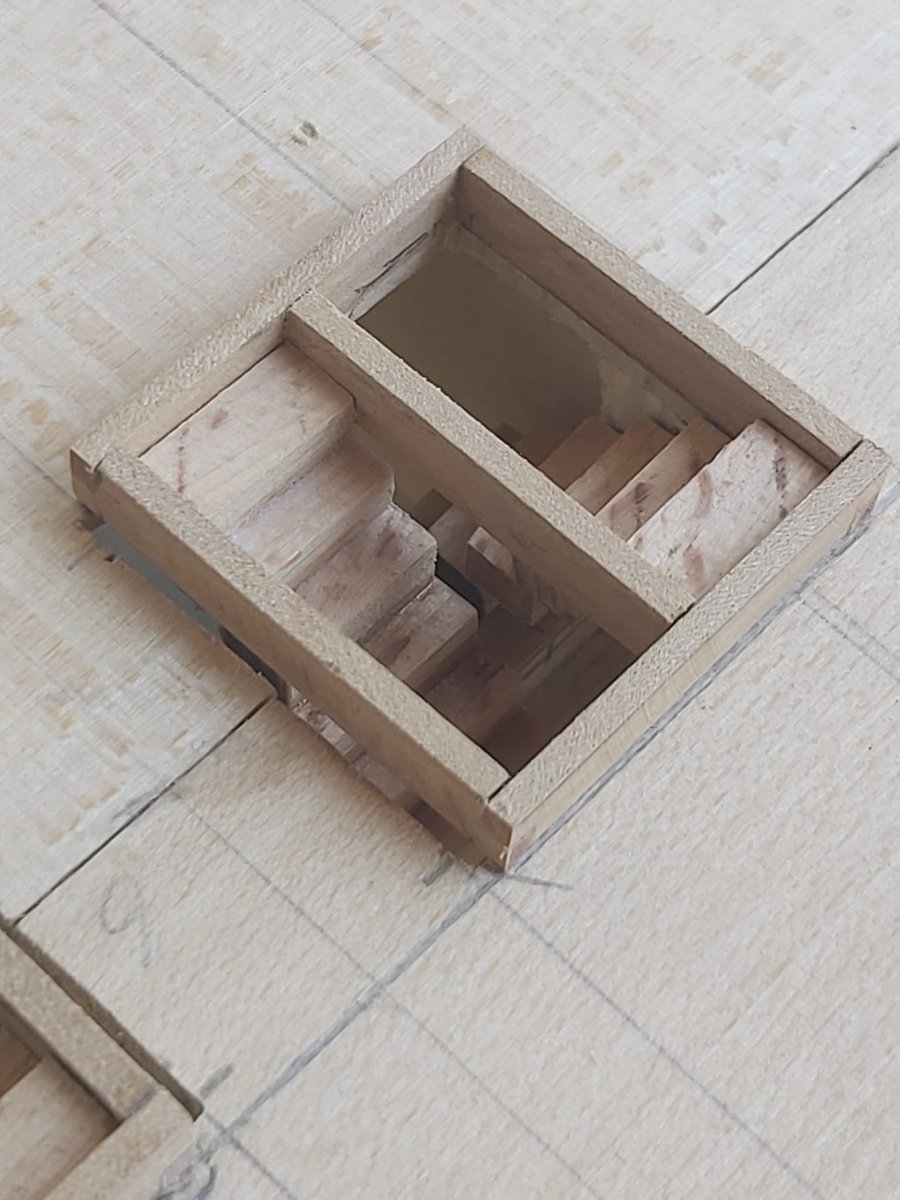
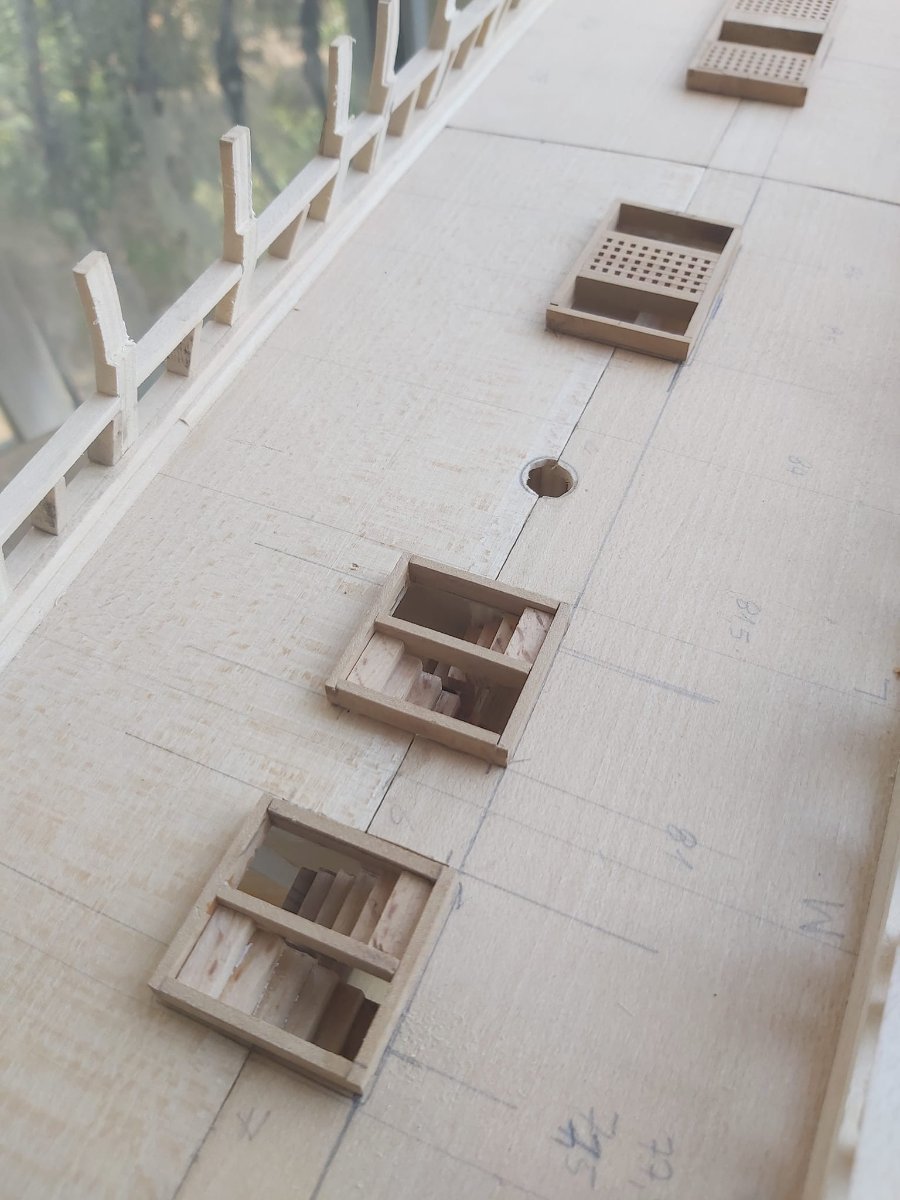
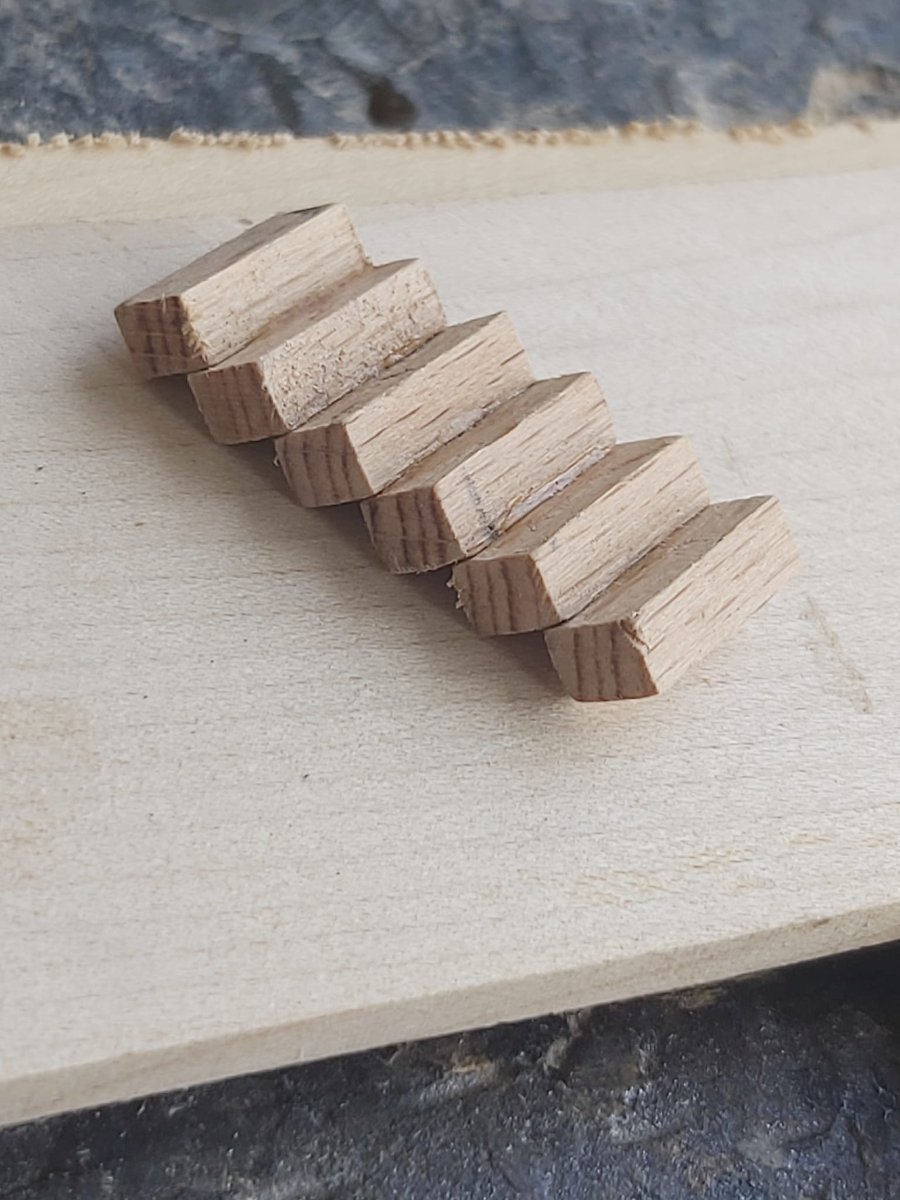
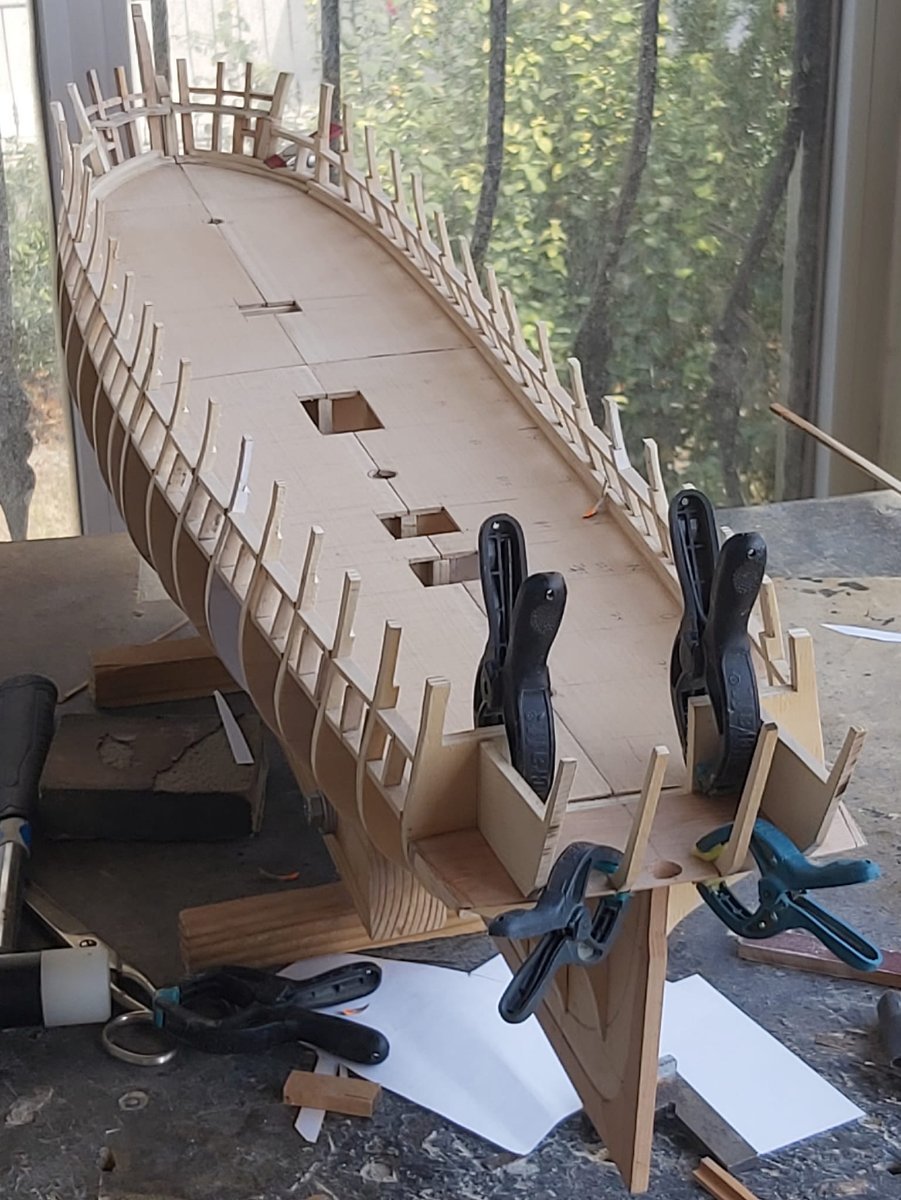
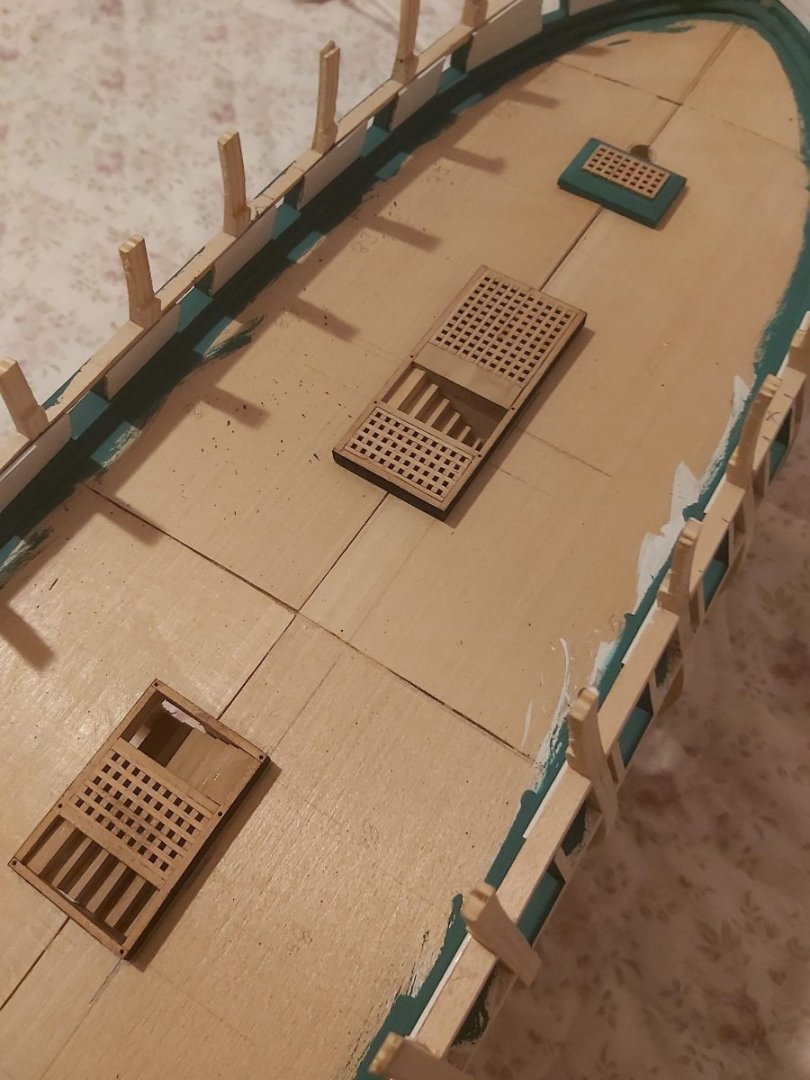
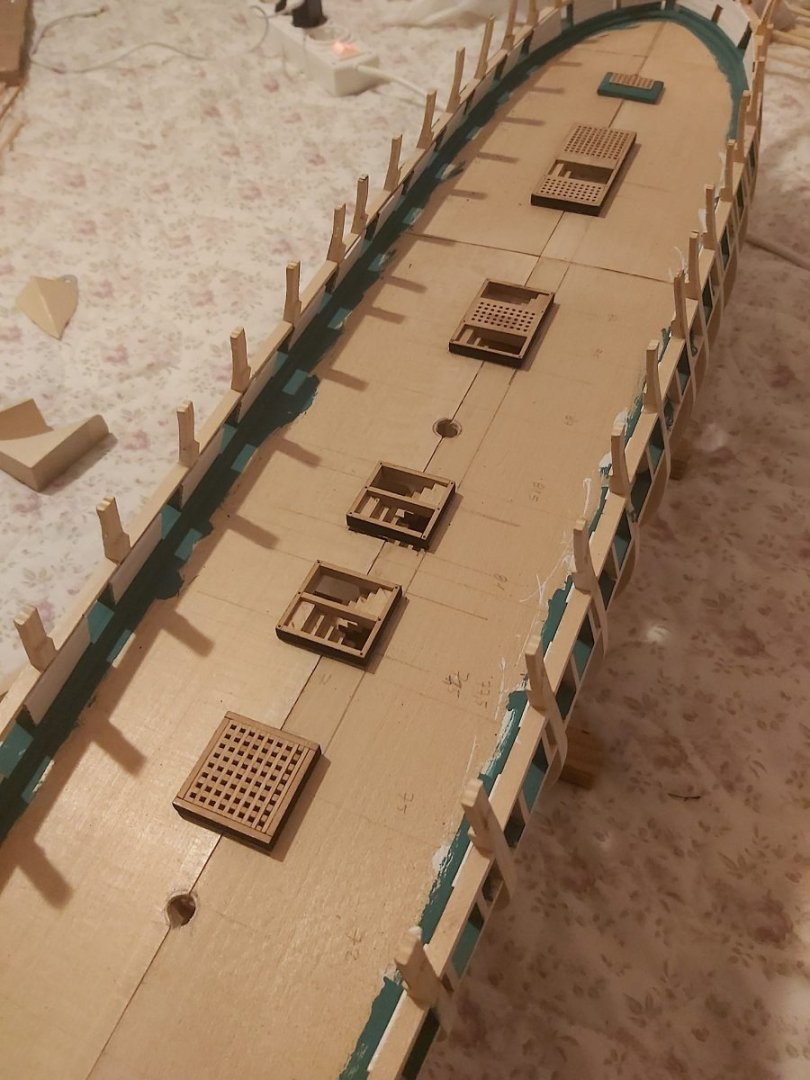
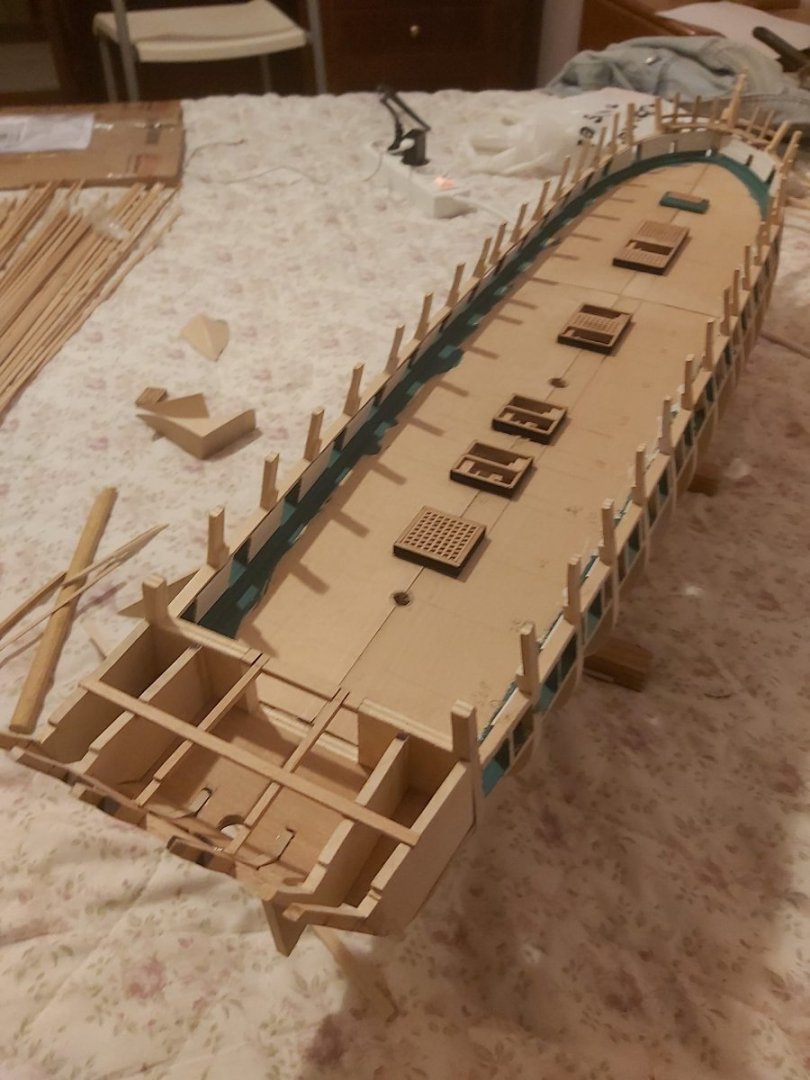
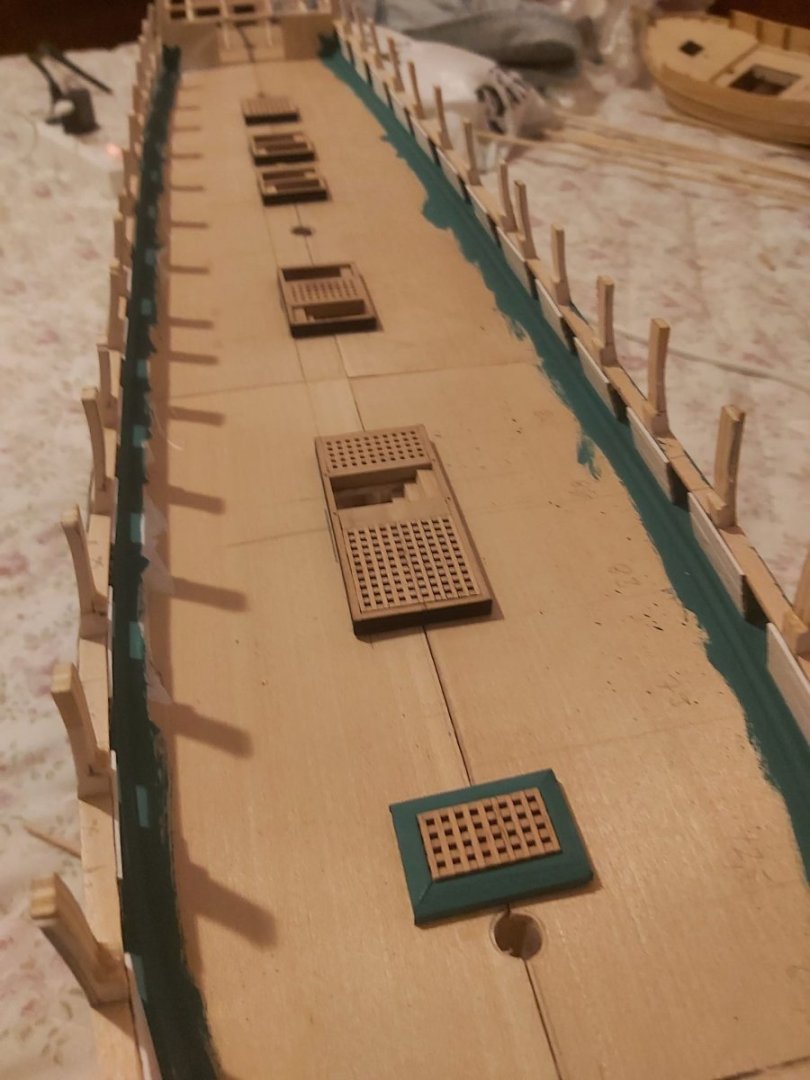
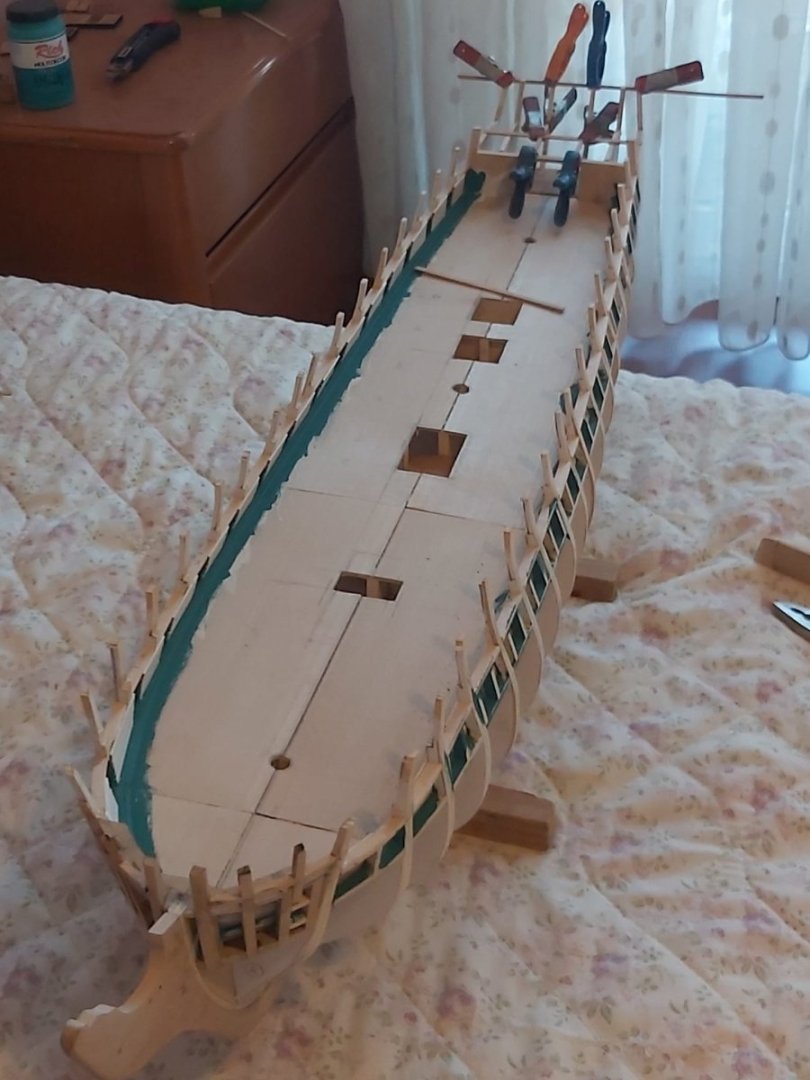
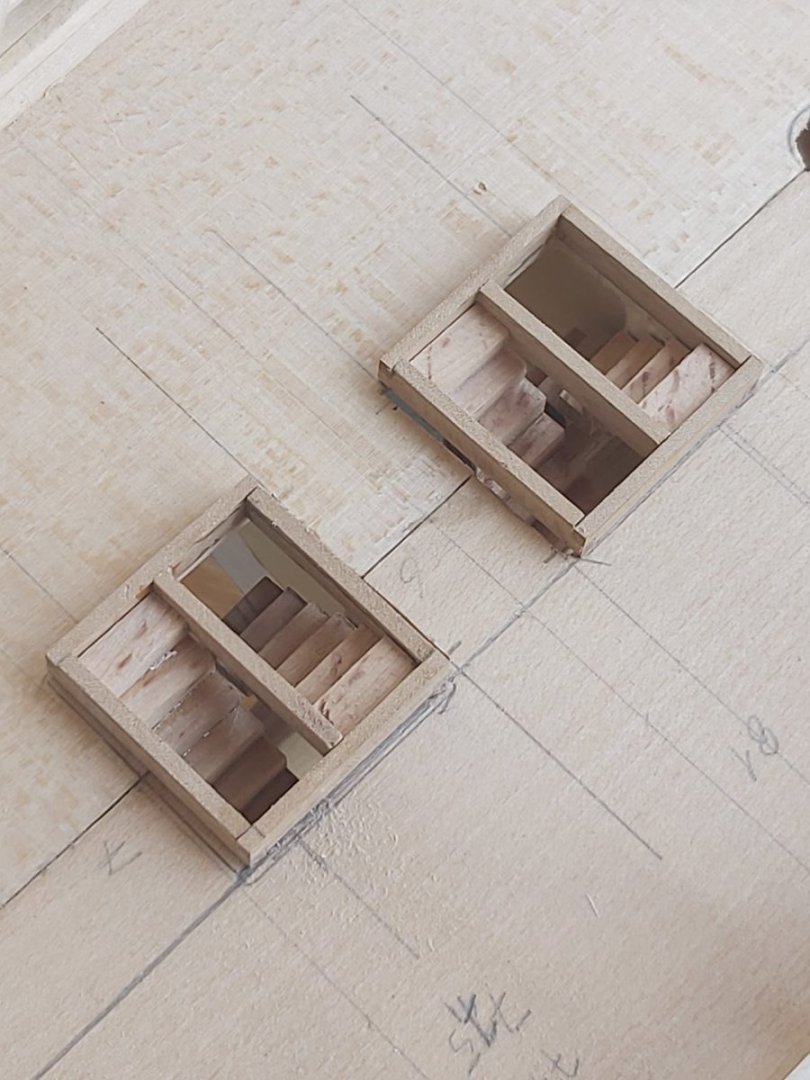
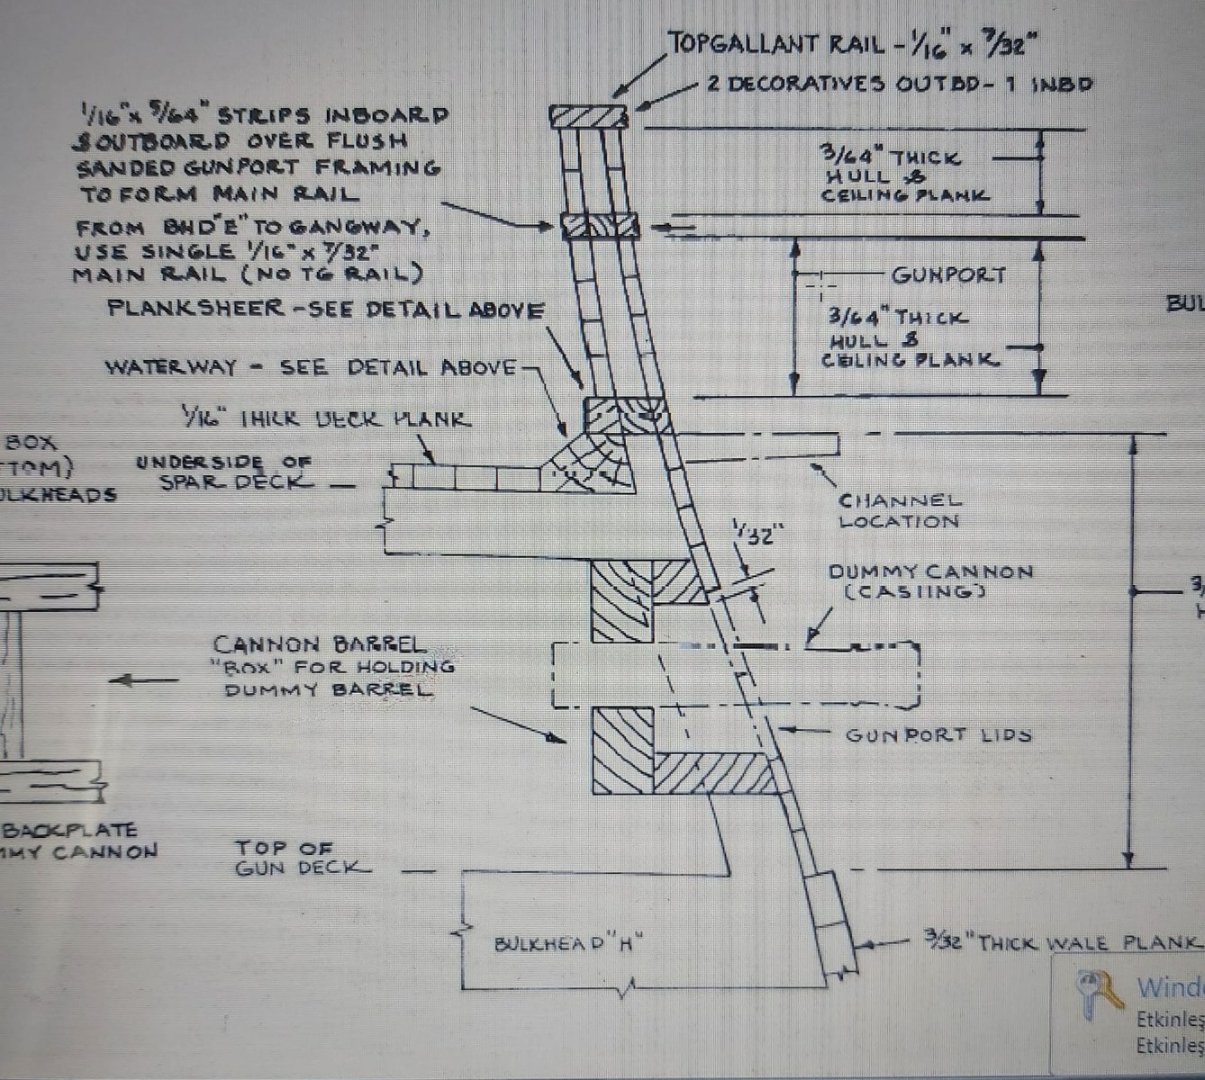
The gun deck hatches and ladders have been installed, I think it is time to install the gun deck planking now.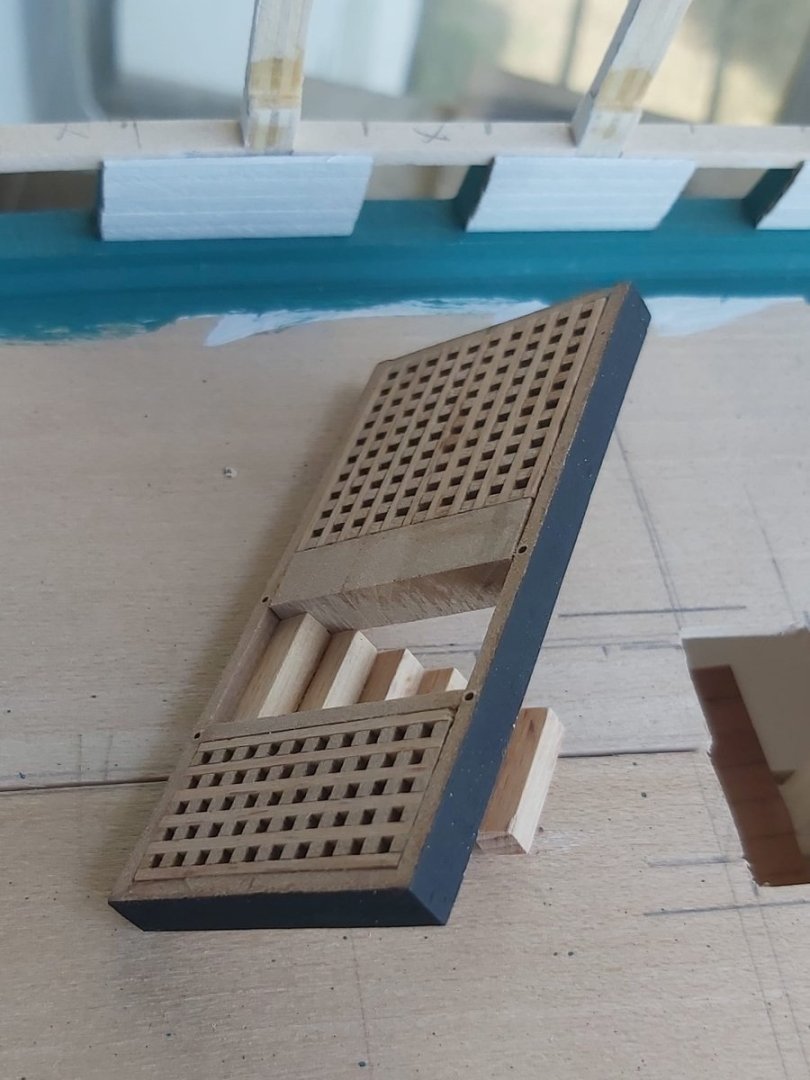


-
USS Constitution by mtbediz - 1:76
mtbediz replied to mtbediz's topic in - Build logs for subjects built 1751 - 1800
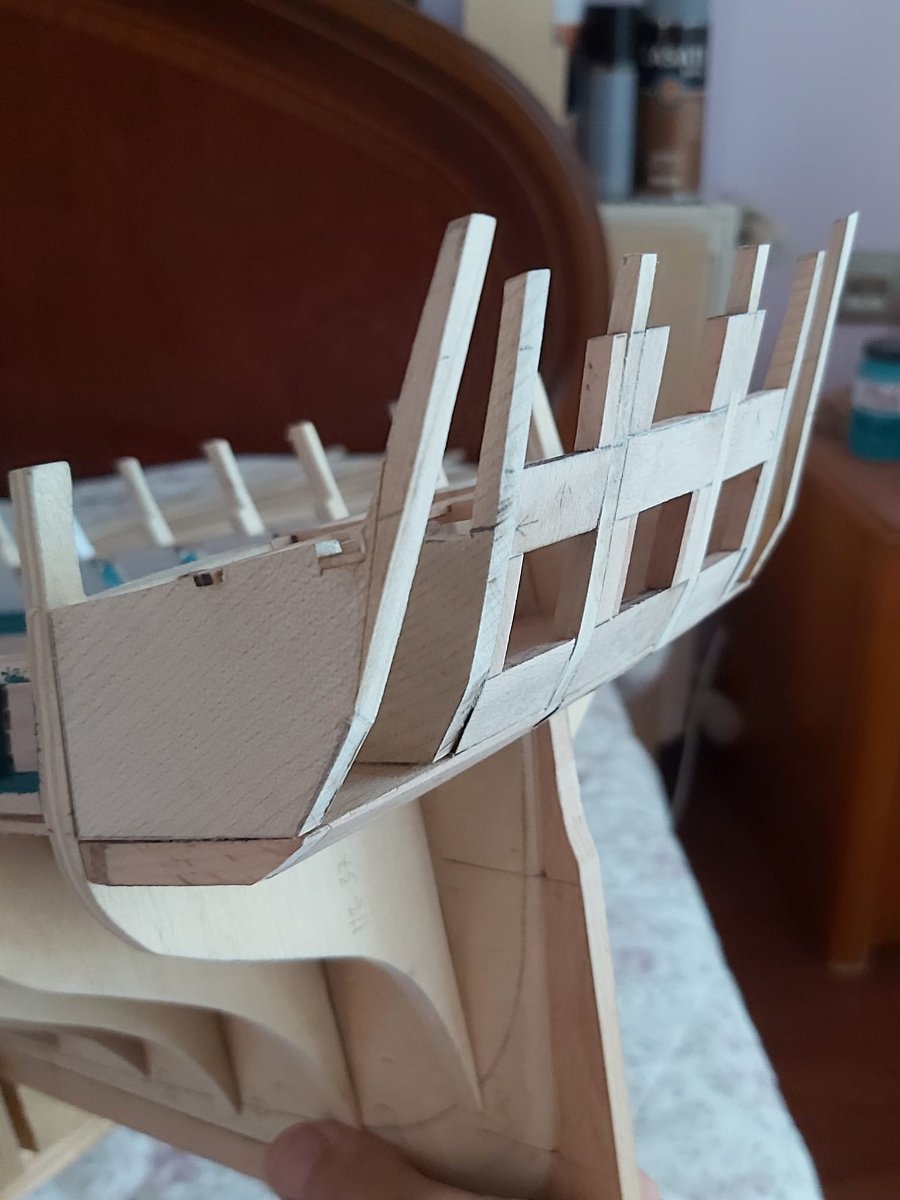
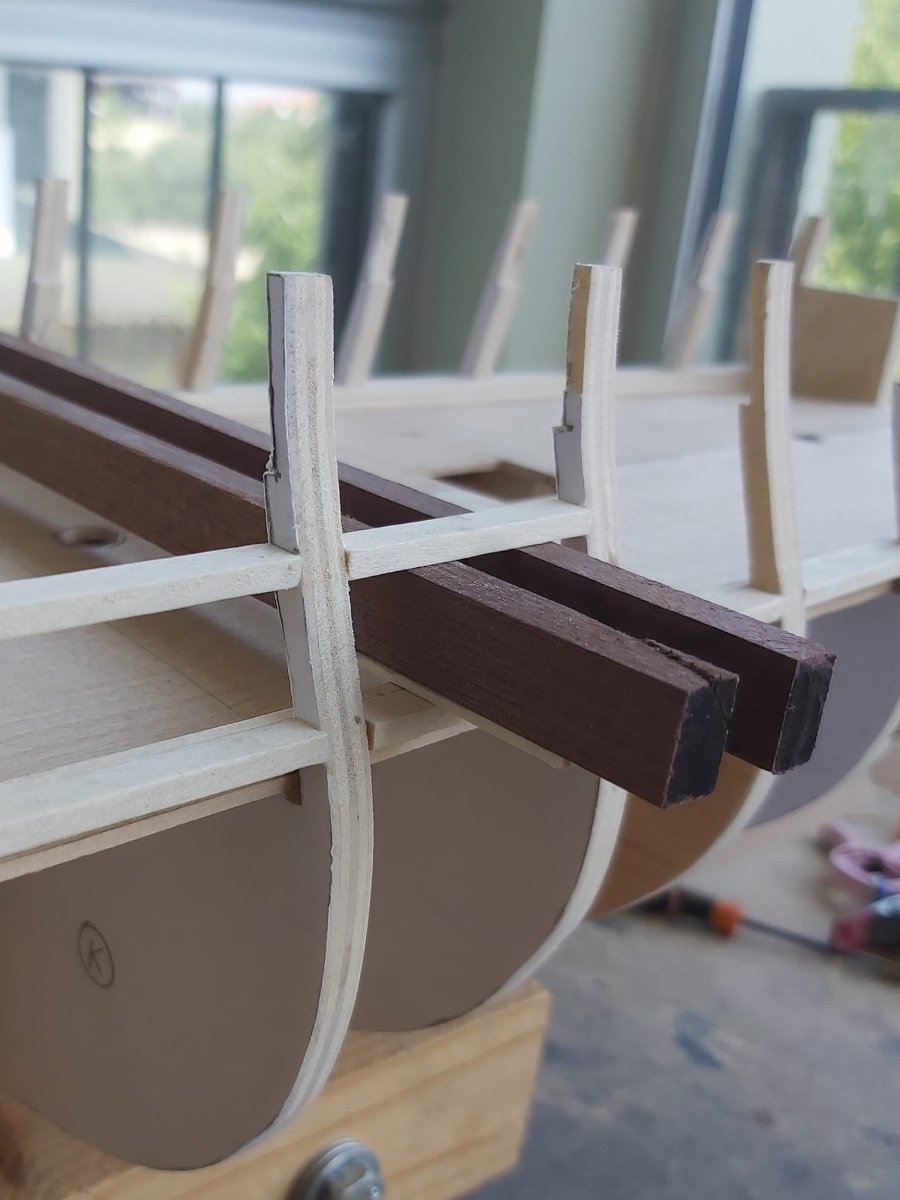
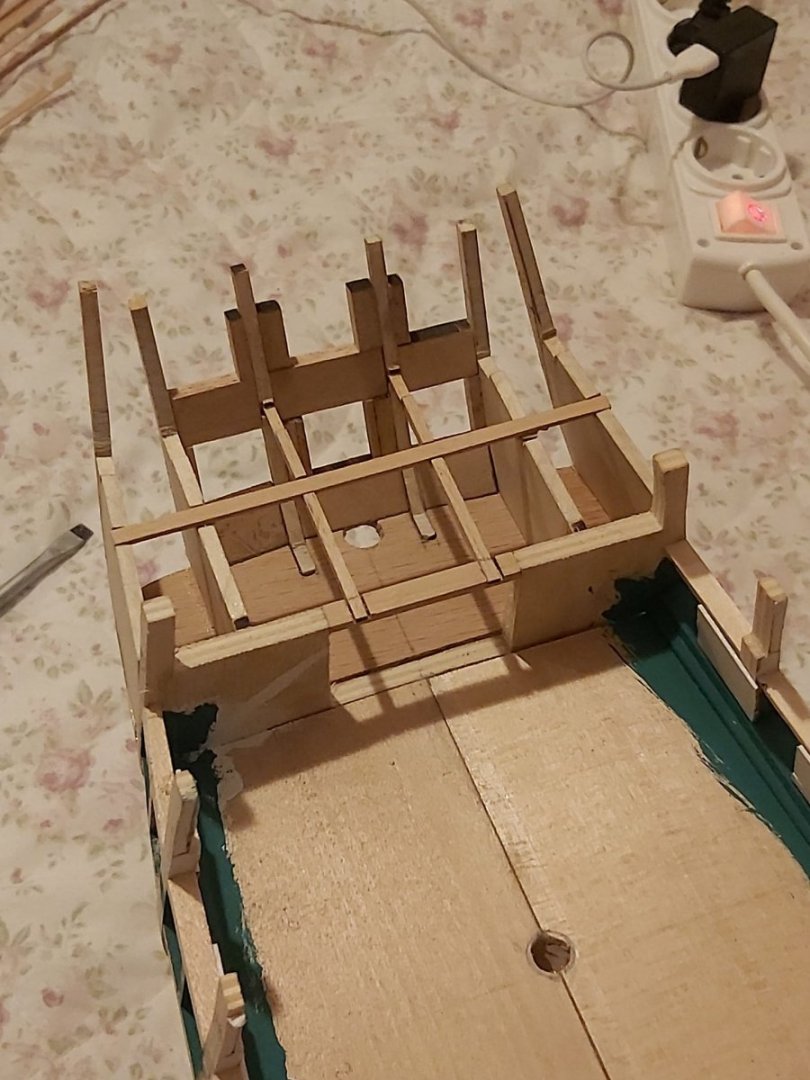
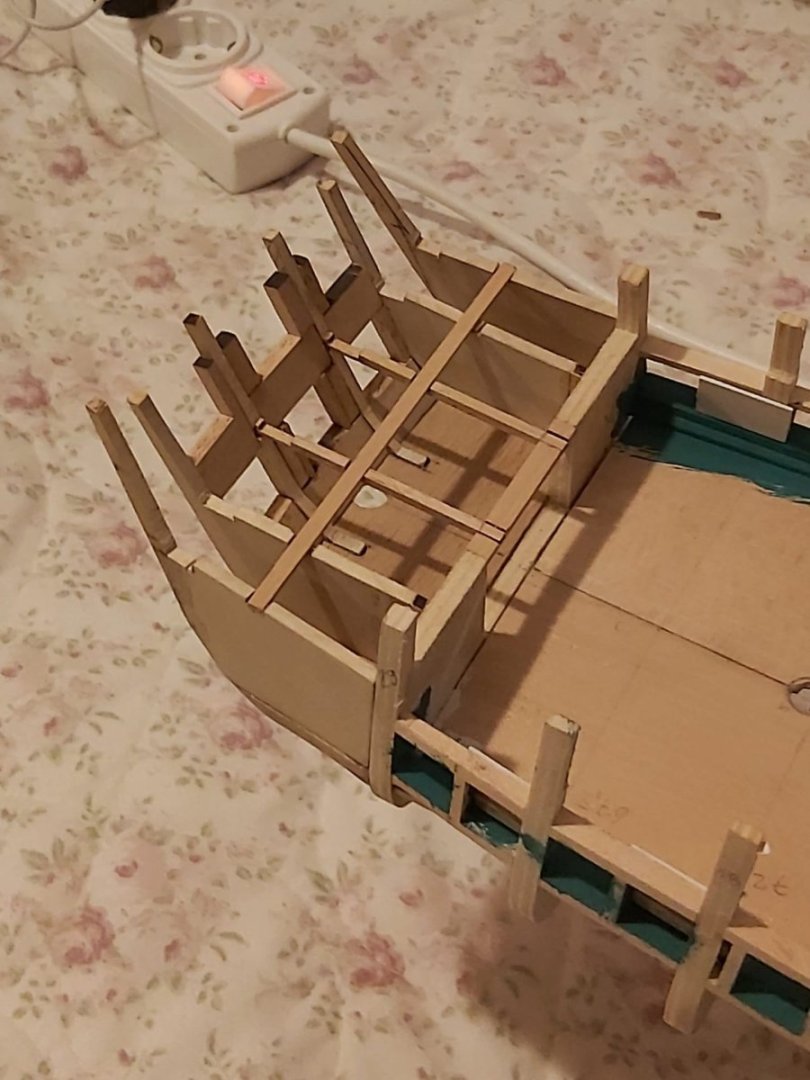
I built the framework for the stern windows and ports for the gun.

-
USS Constitution by mtbediz - 1:76
mtbediz replied to mtbediz's topic in - Build logs for subjects built 1751 - 1800
Thank you Phil. -
USS Constitution by mtbediz - 1:76
mtbediz replied to mtbediz's topic in - Build logs for subjects built 1751 - 1800
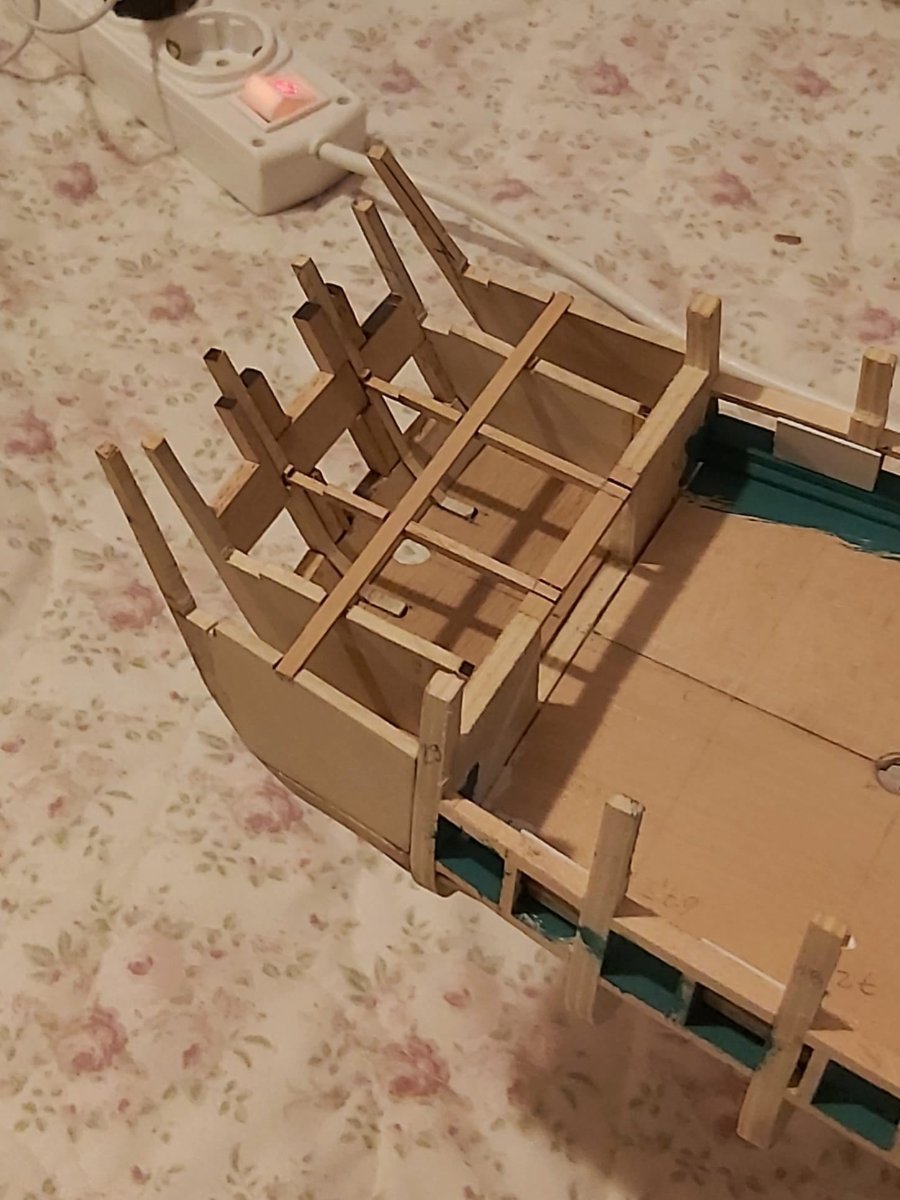
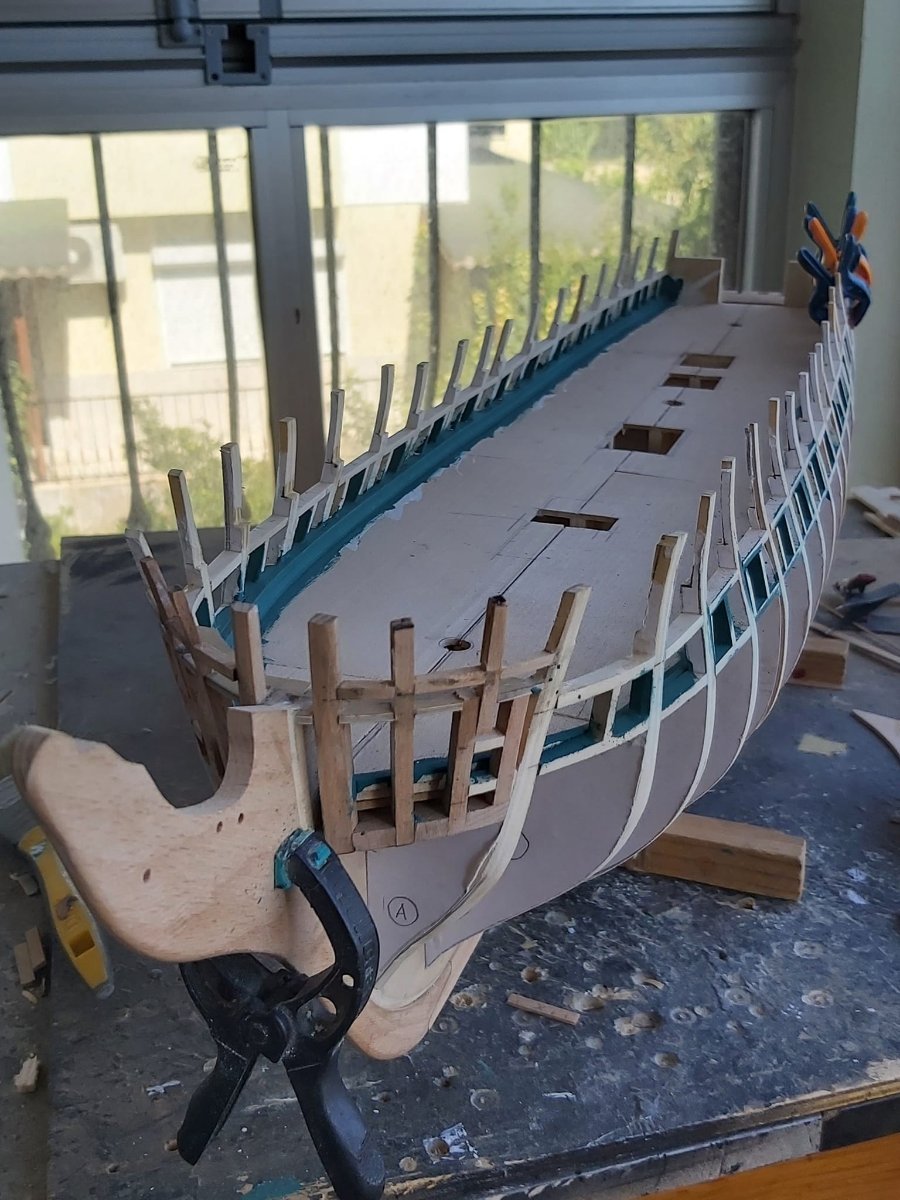
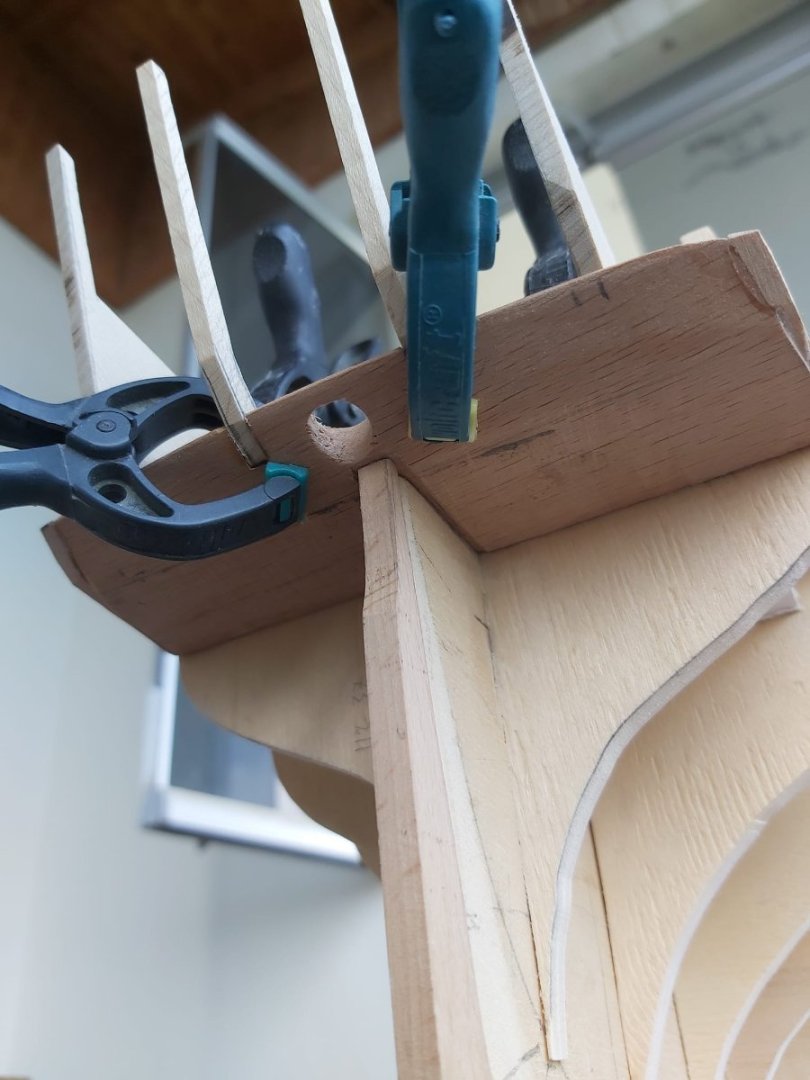
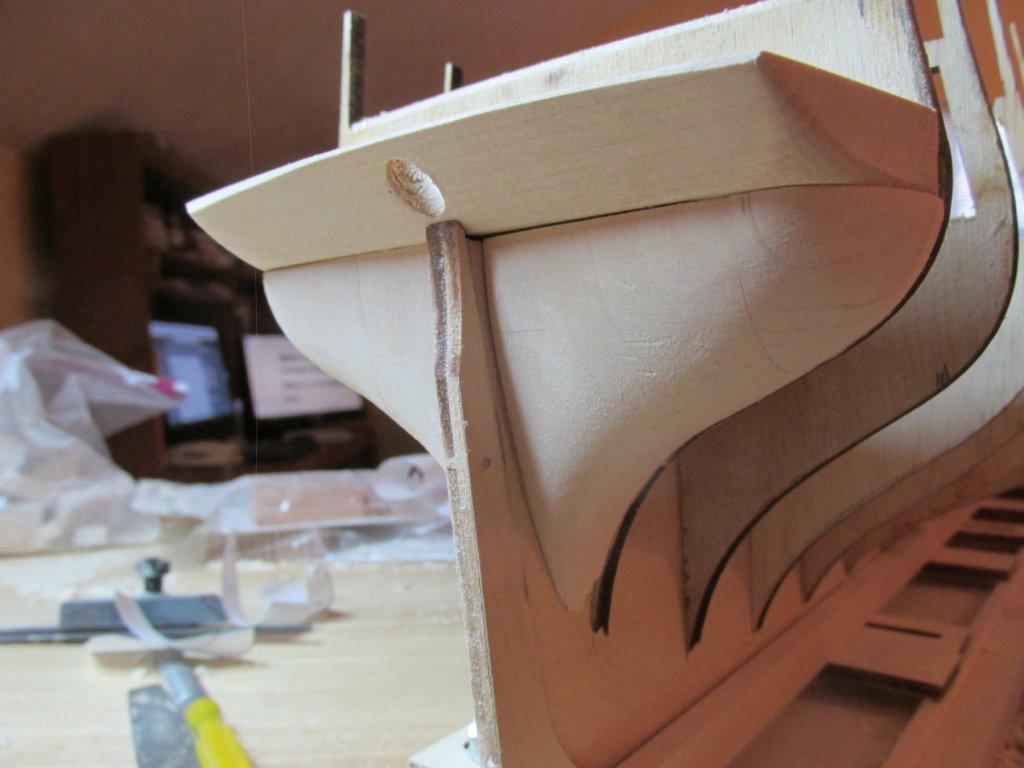
Most of the modelers who built the kit for this model mentioned the incompatibility of the stern frames in their build logs. I had to modify the outer frames on both sides, which was really incompatible, and align it with the others. Meanwhile, the inner planking of the deck side walls has been completed.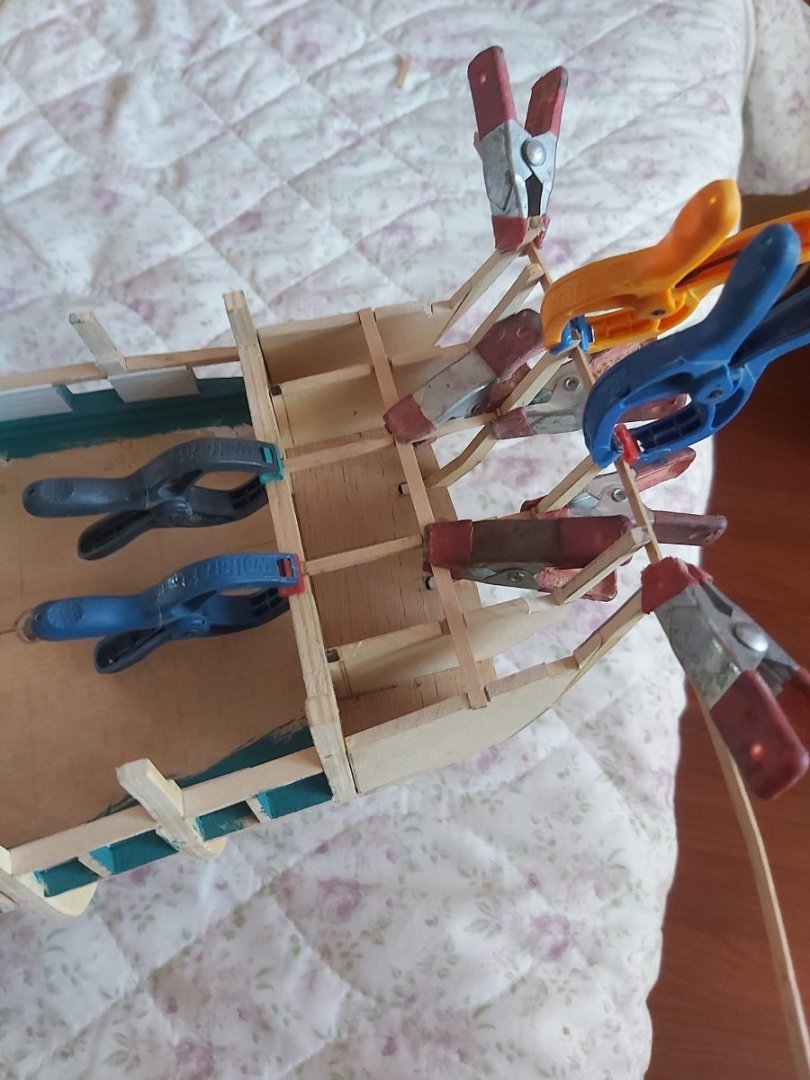

-
USS Constitution by mtbediz - 1:76
mtbediz replied to mtbediz's topic in - Build logs for subjects built 1751 - 1800
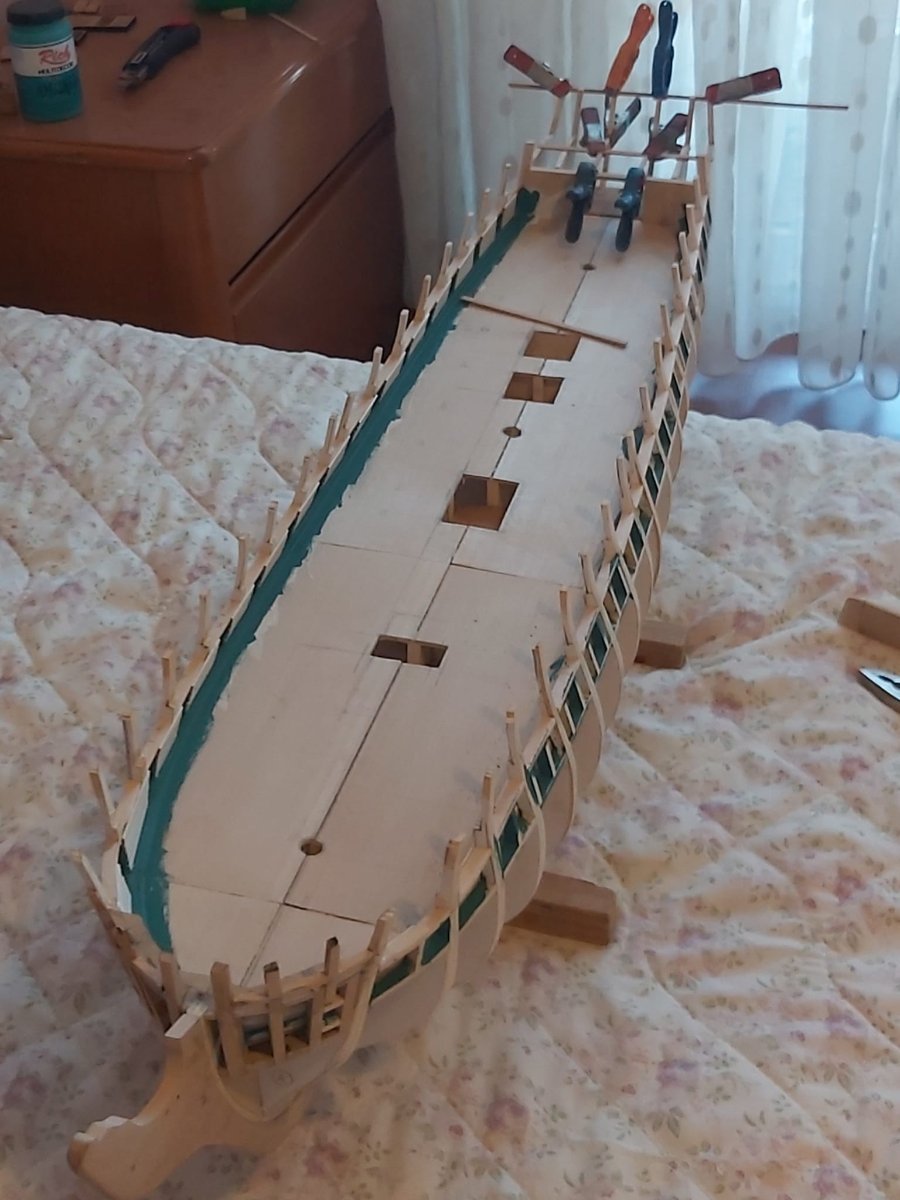
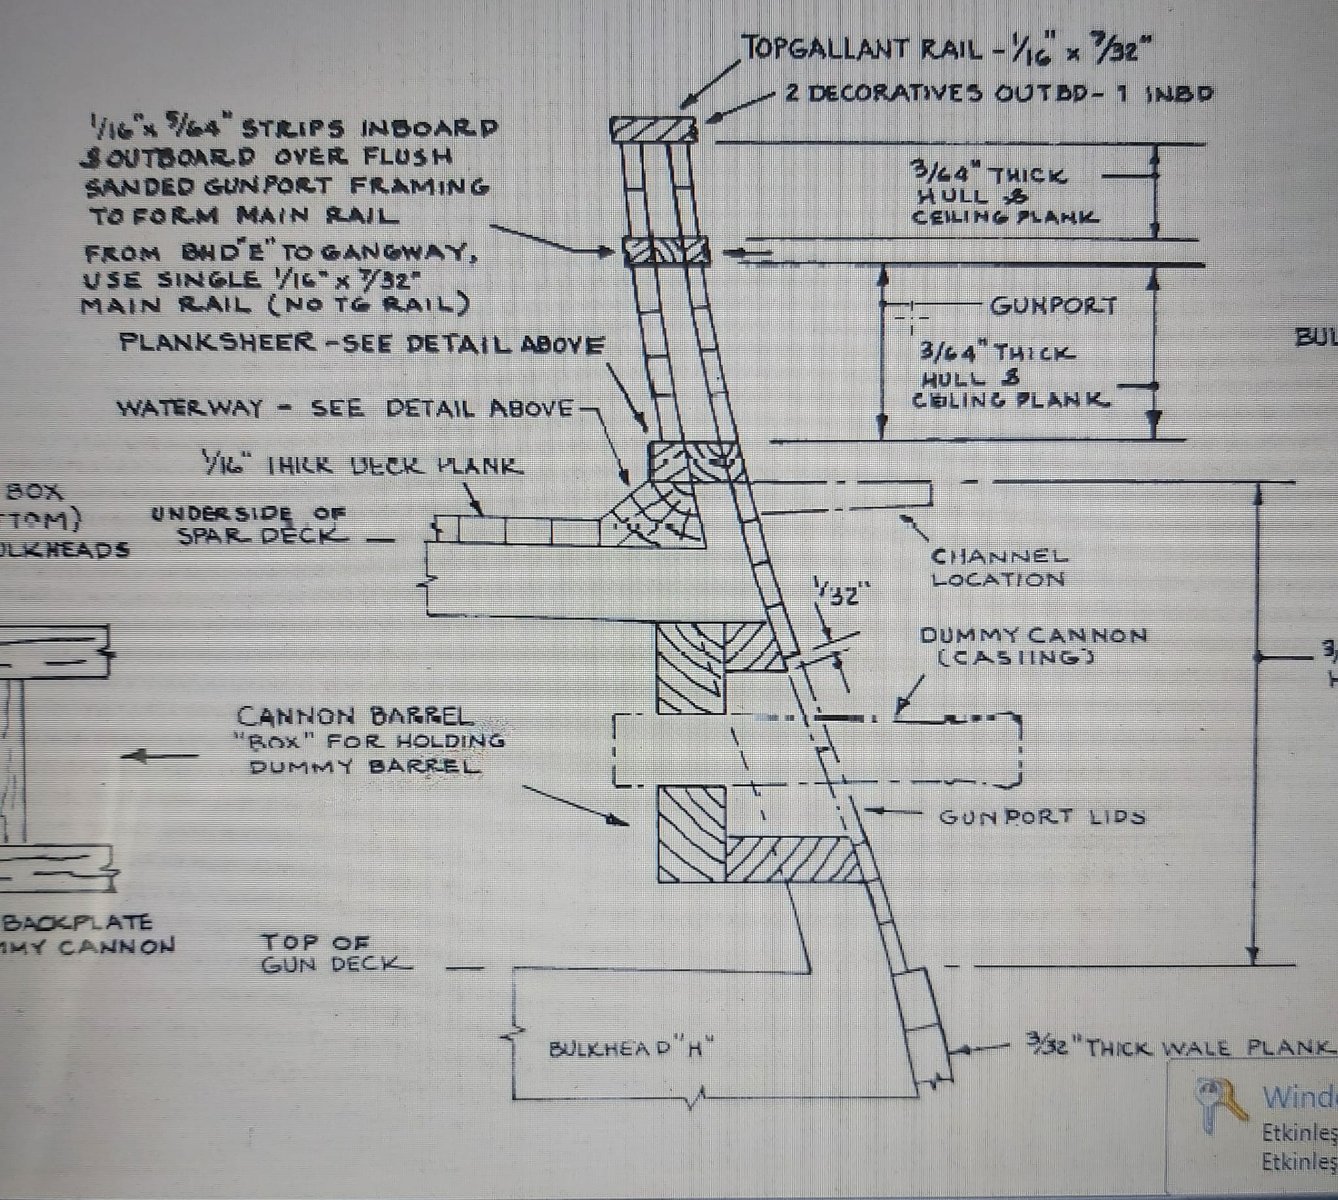
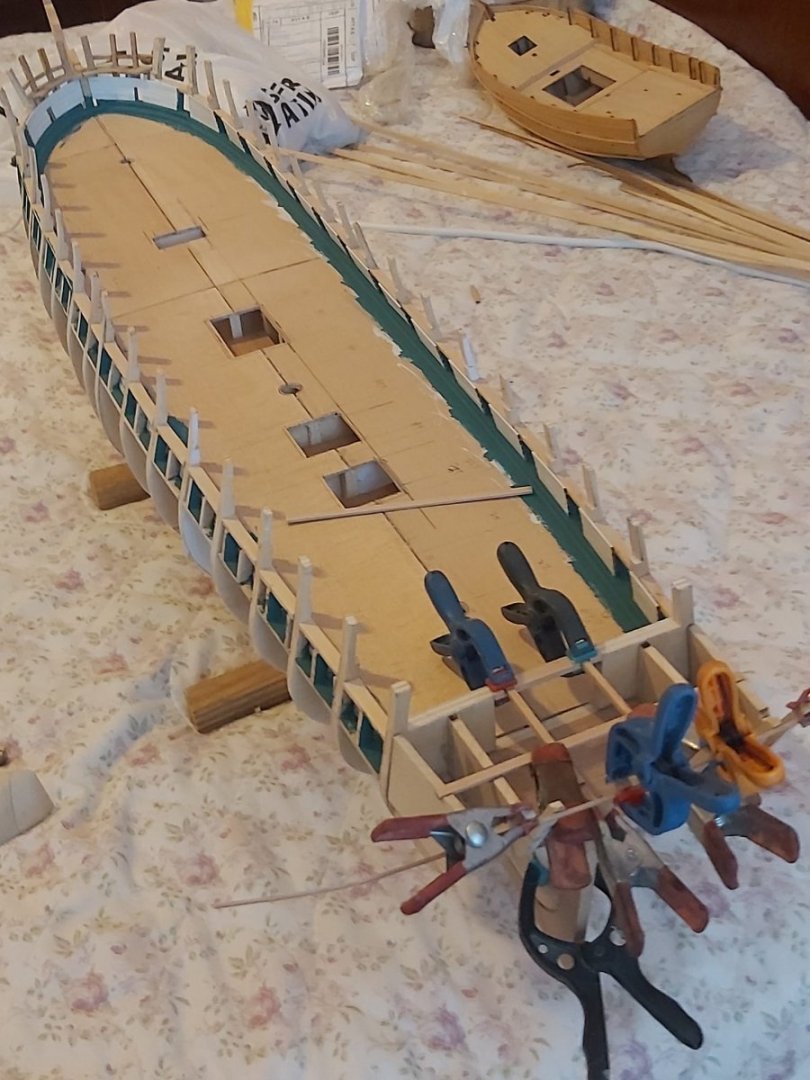
I painted the gundeck waterways green. The color looked different in the photos due to the lighting, but it is actually a darker green. I started doing the inner planking of the gundeck side walls. First, I cut the planks to the same size, paint them white and glue them between the gun ports.


-
USS Constitution by mtbediz - 1:76
mtbediz replied to mtbediz's topic in - Build logs for subjects built 1751 - 1800
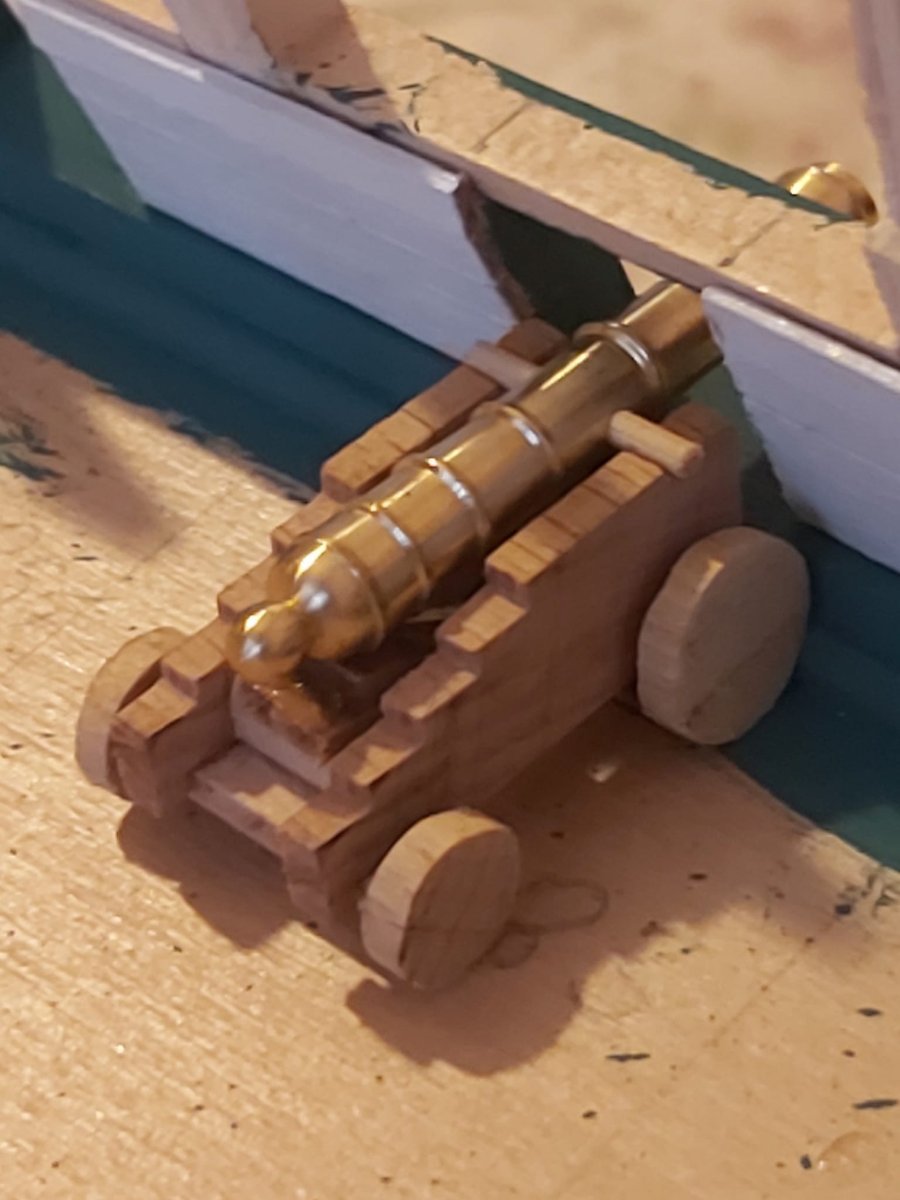
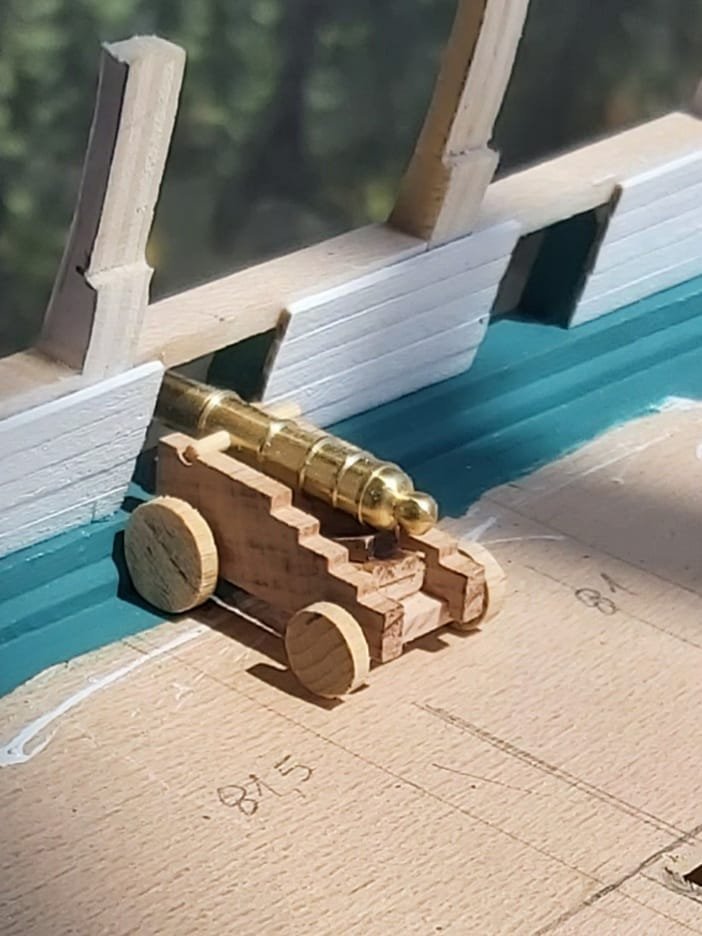
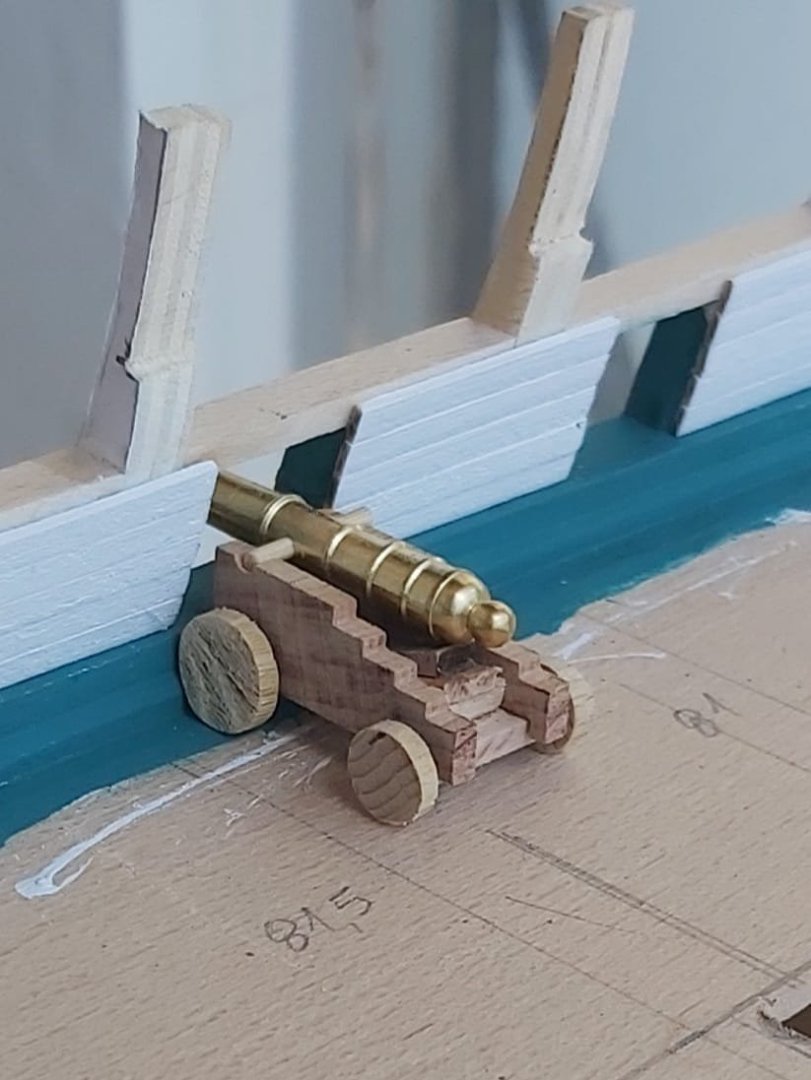
By the way, I wanted to make a prototype cannon carriage and test it.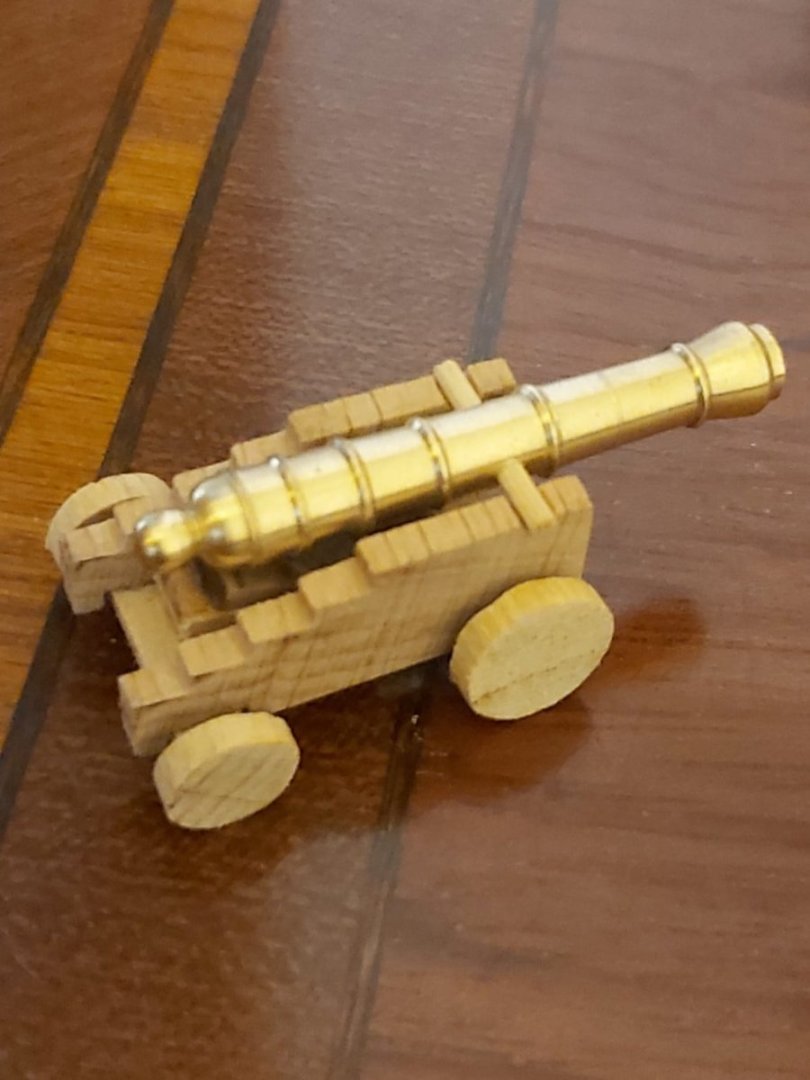

-
USS Constitution by mtbediz - 1:76
mtbediz replied to mtbediz's topic in - Build logs for subjects built 1751 - 1800
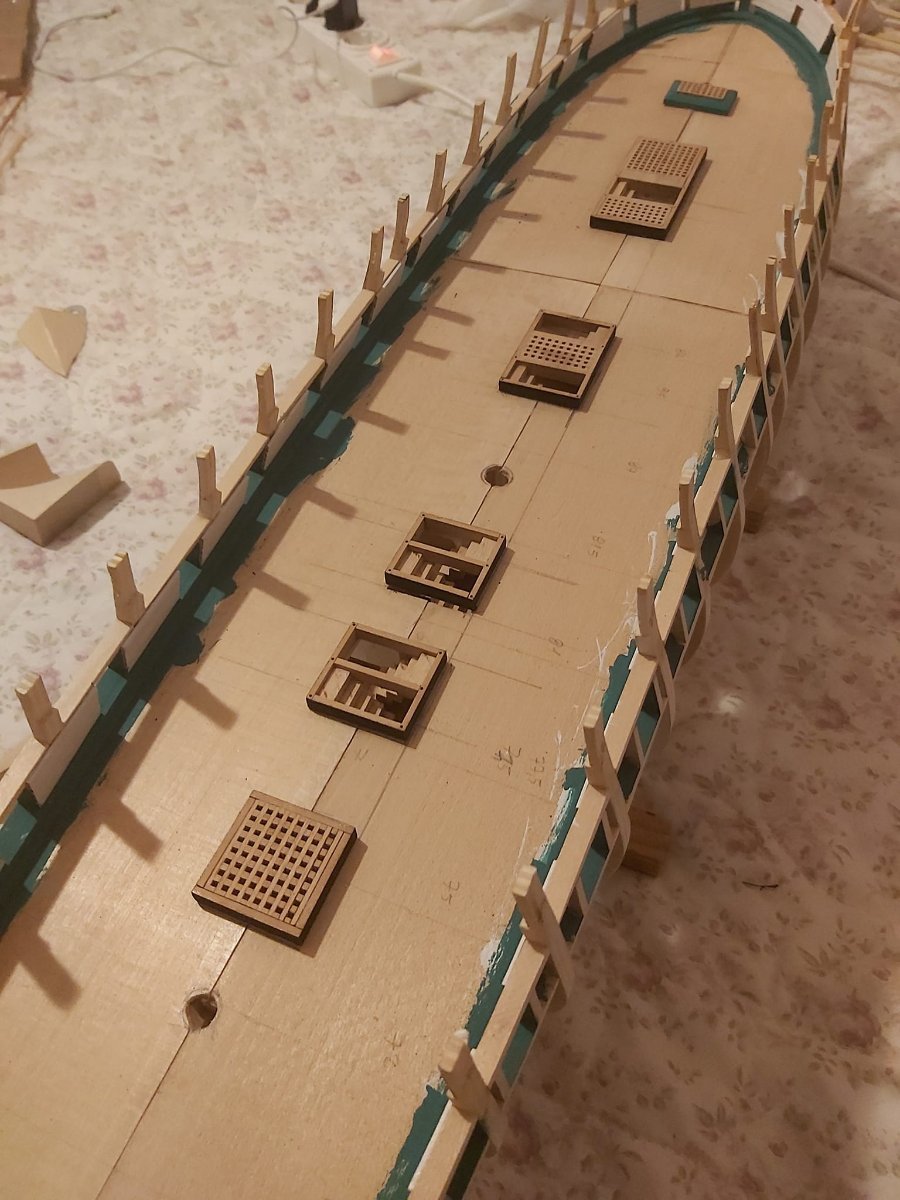
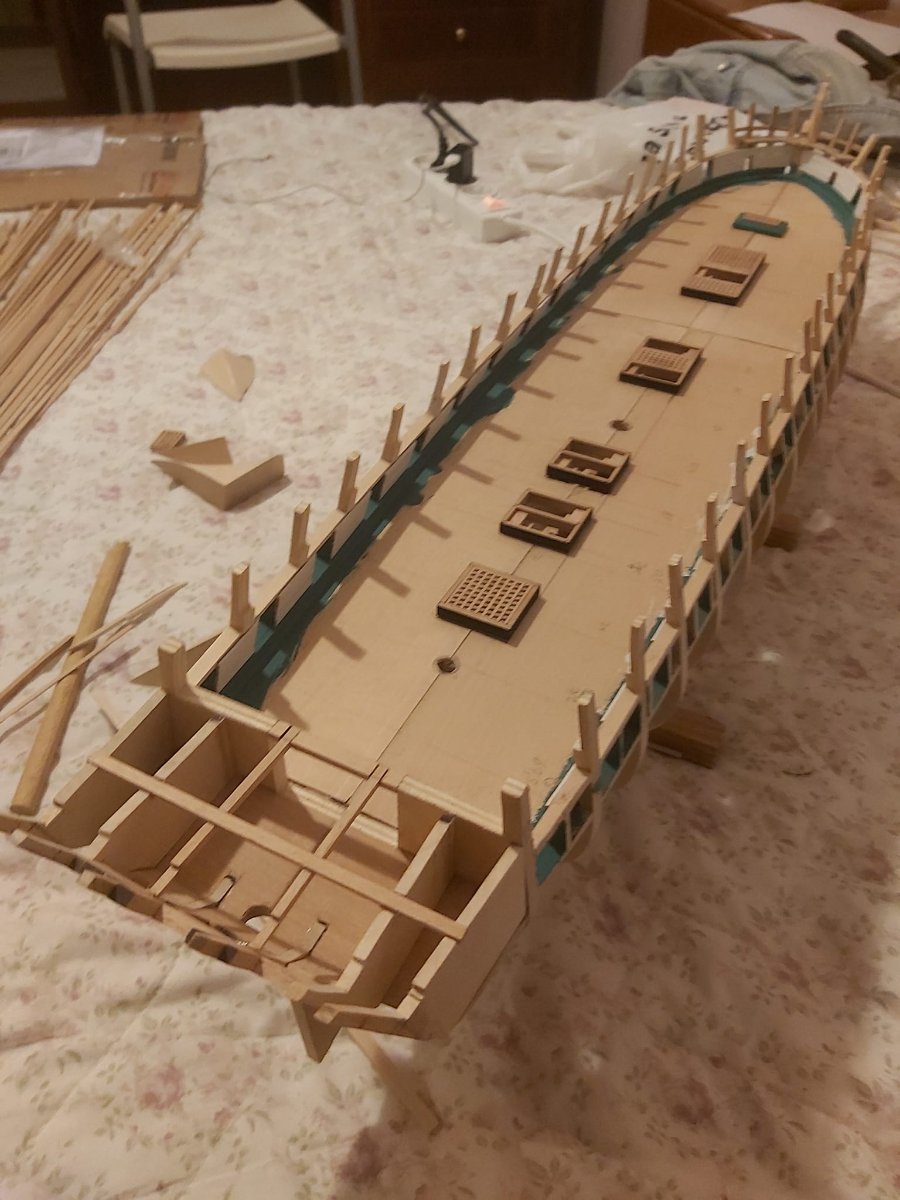
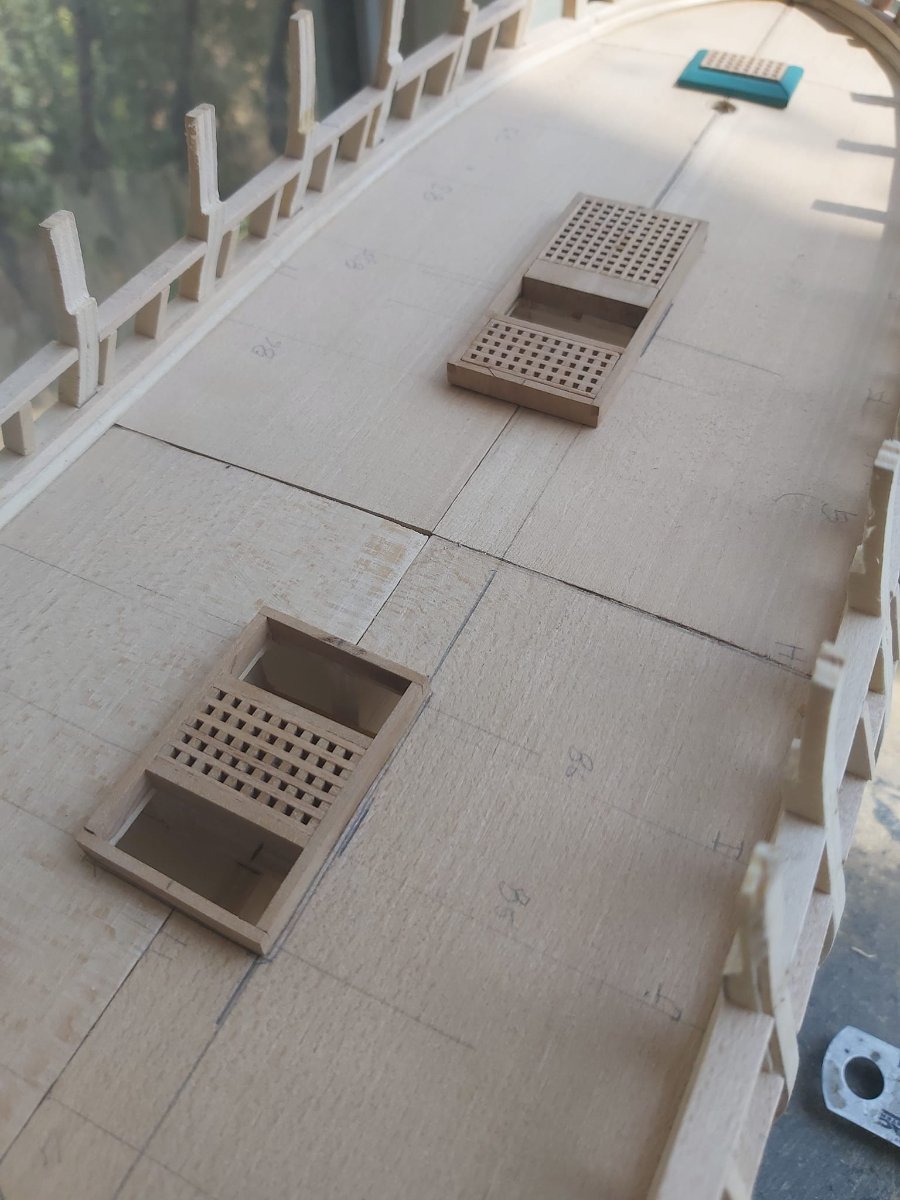
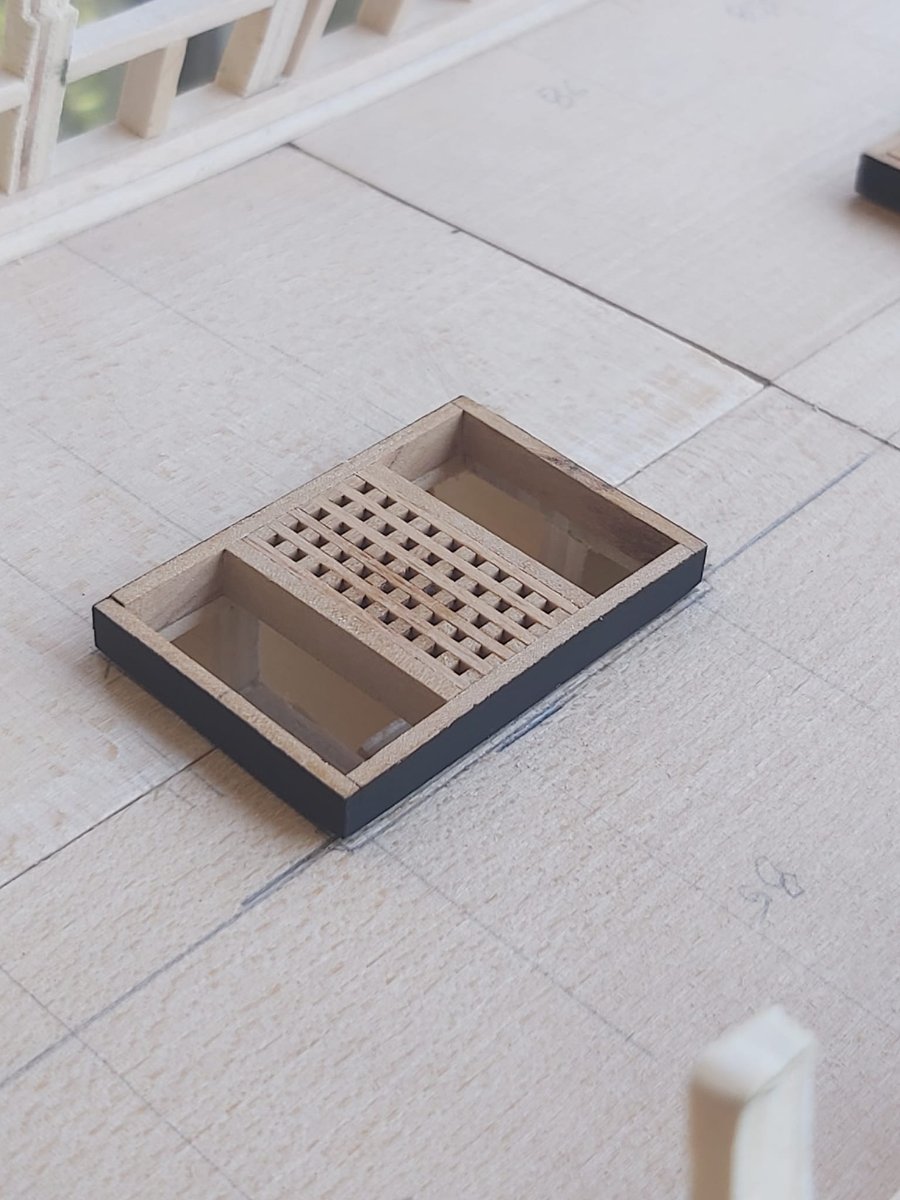
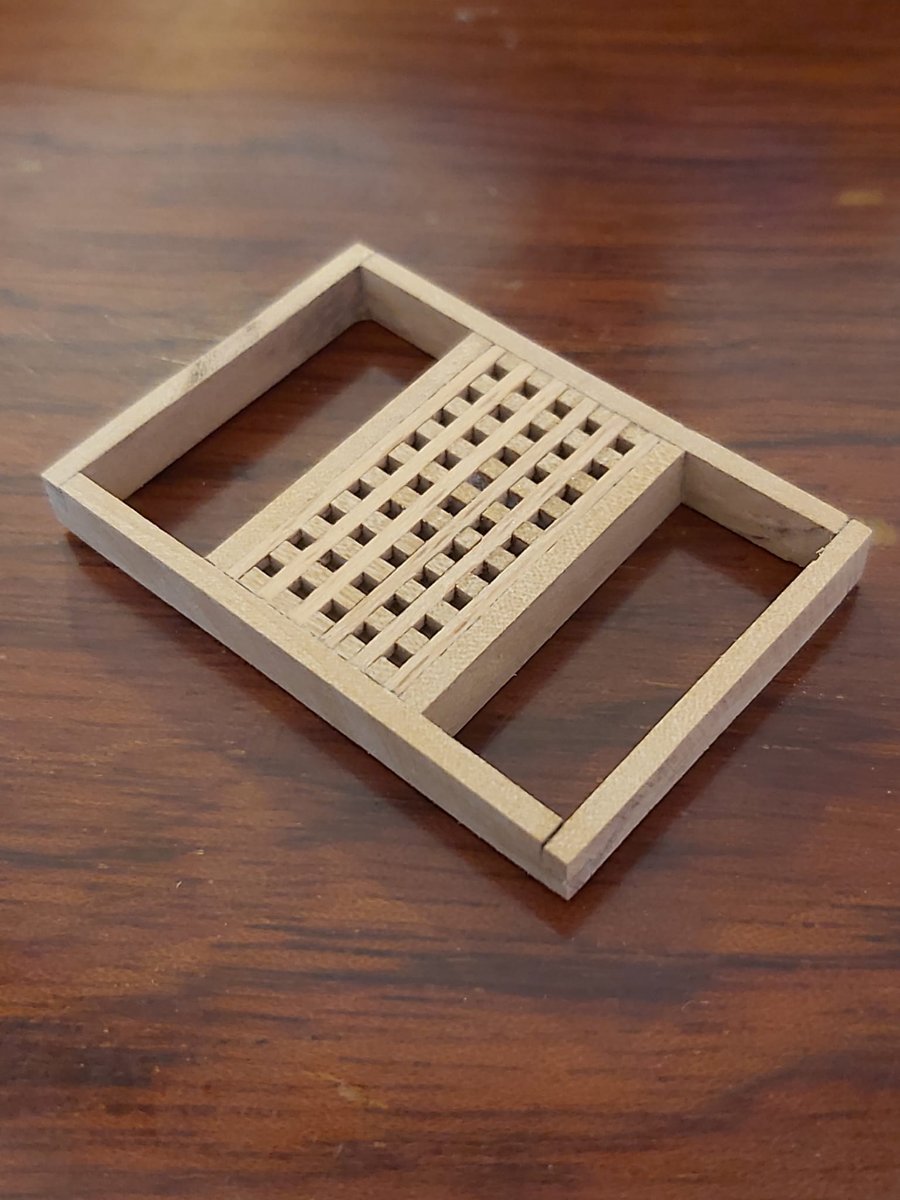
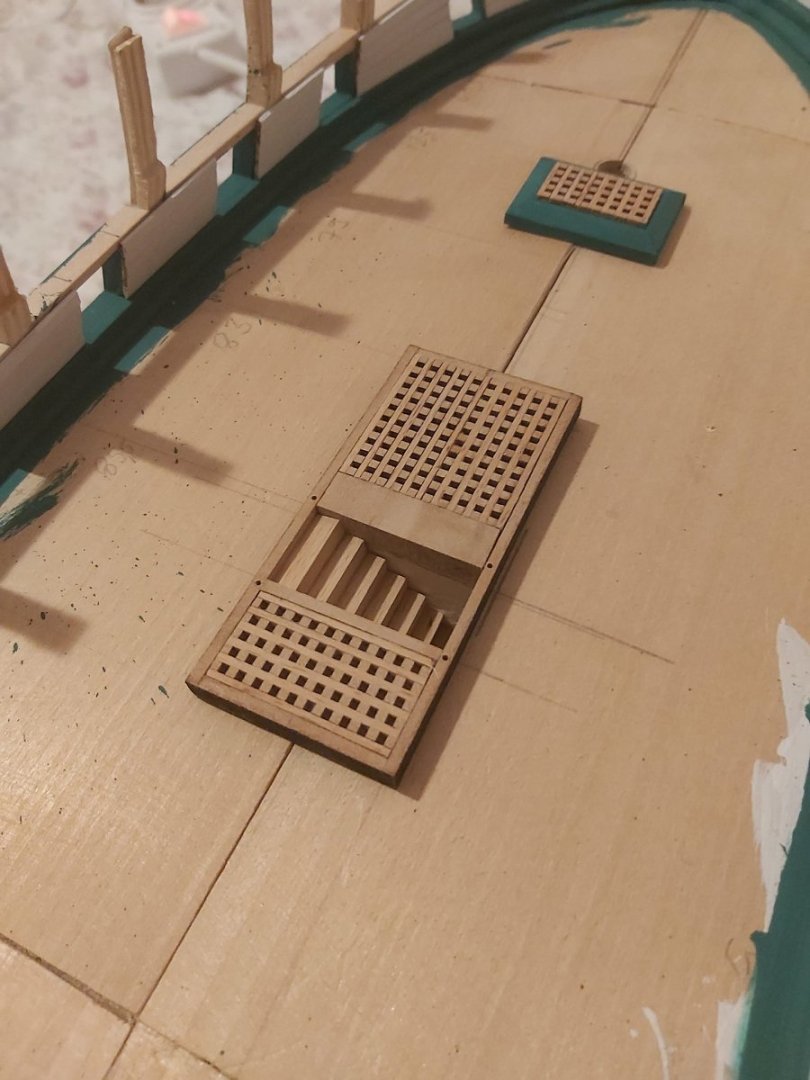
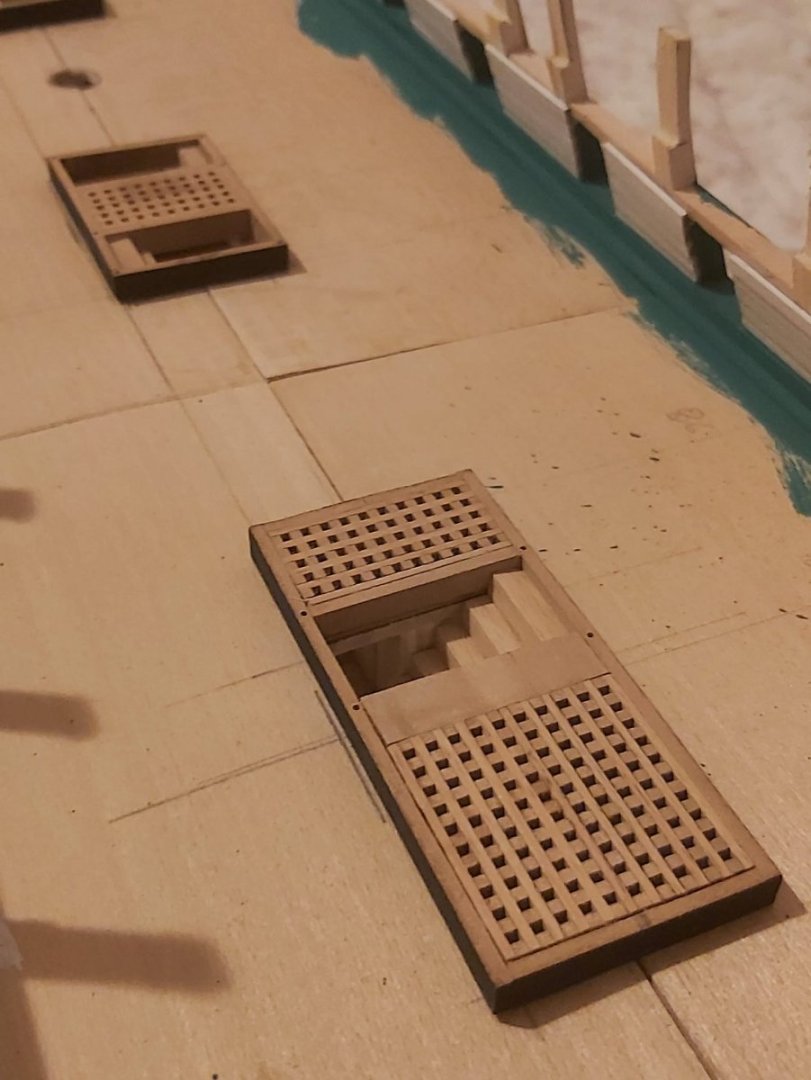
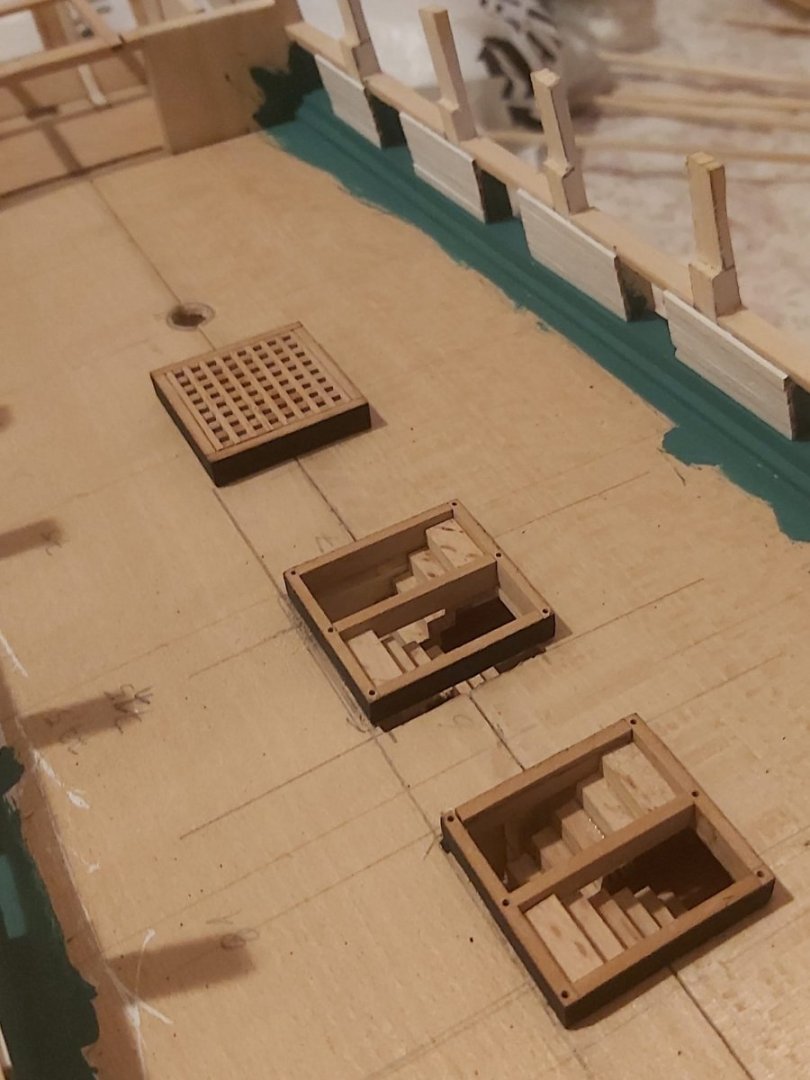
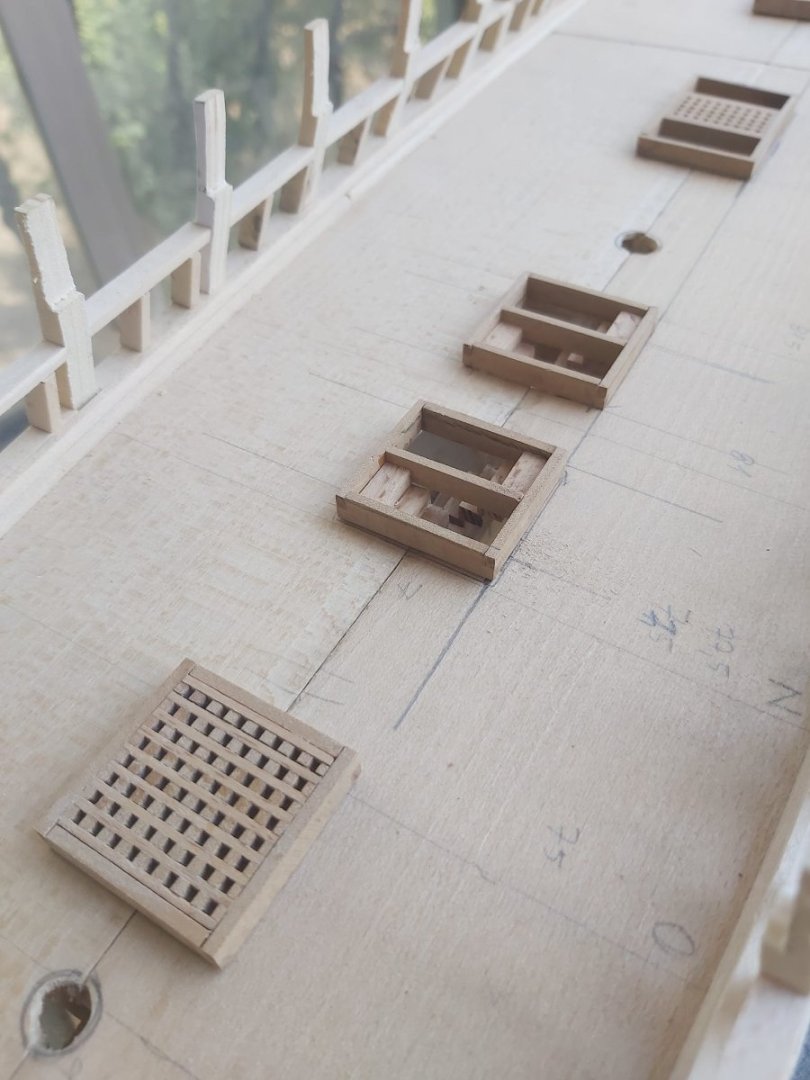
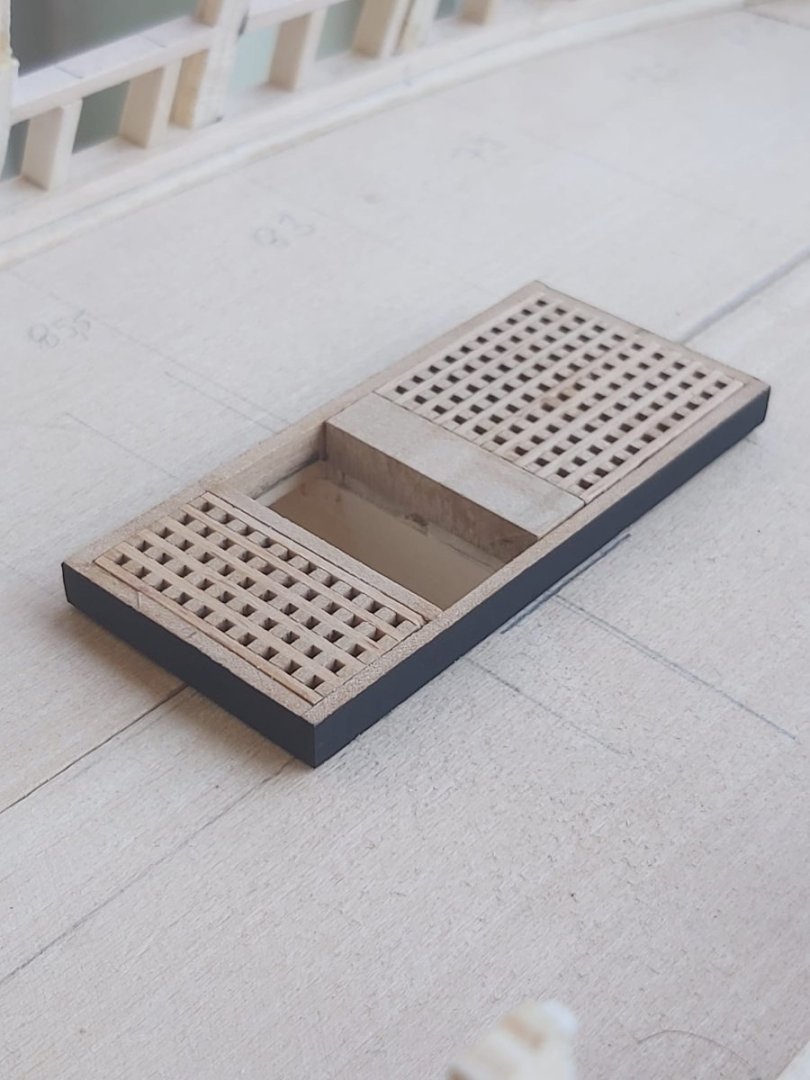
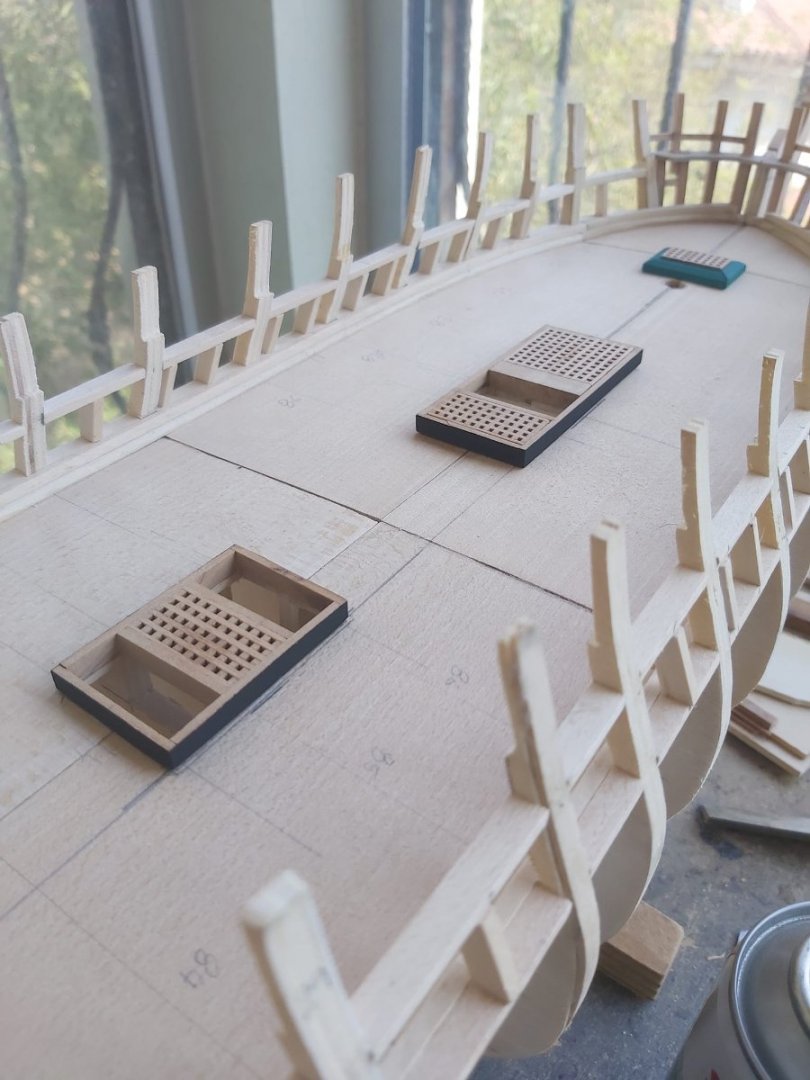
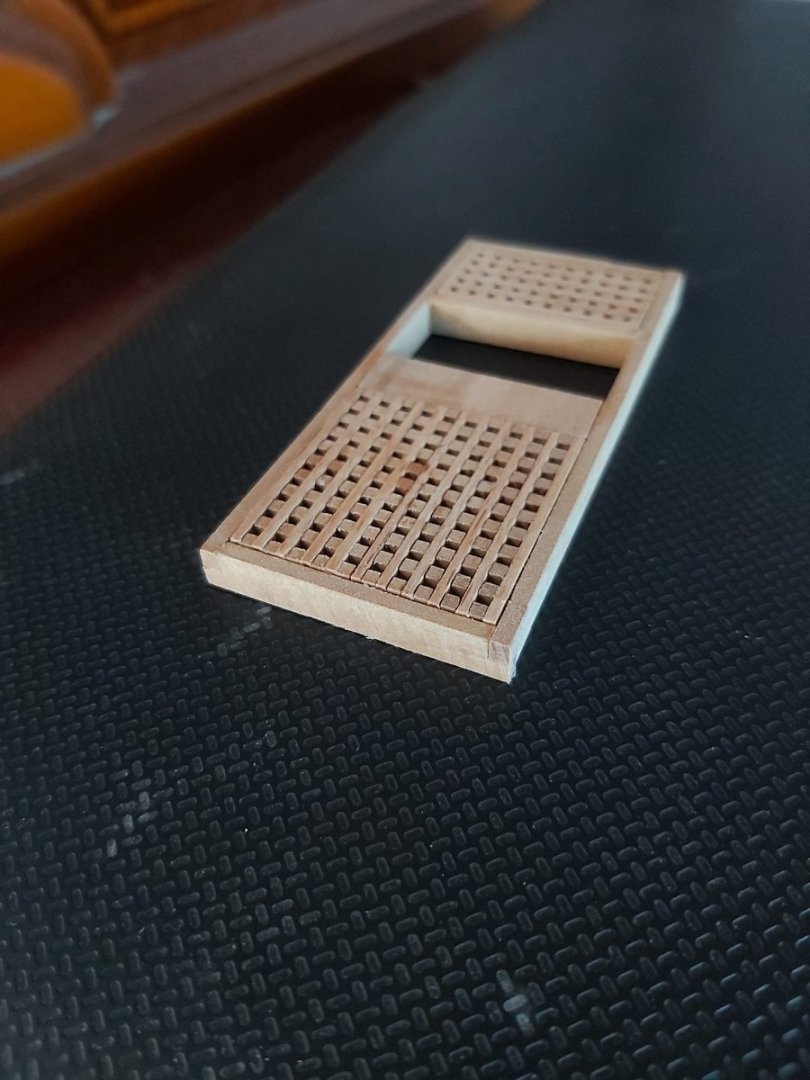
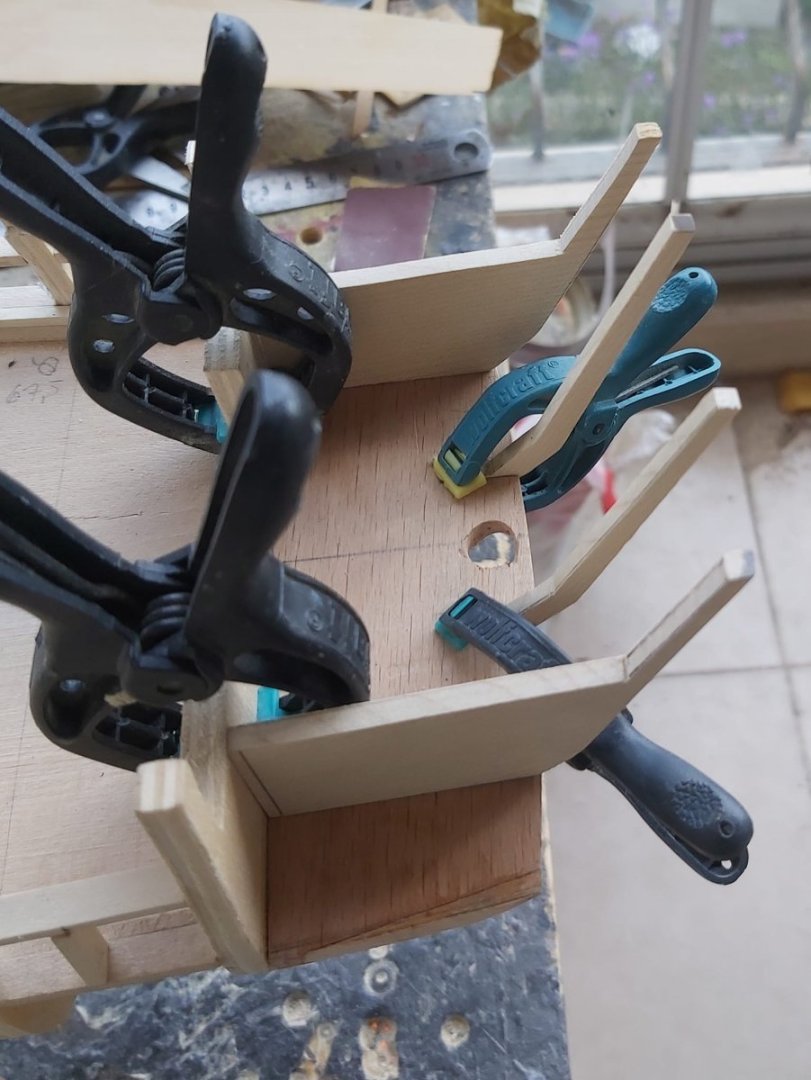
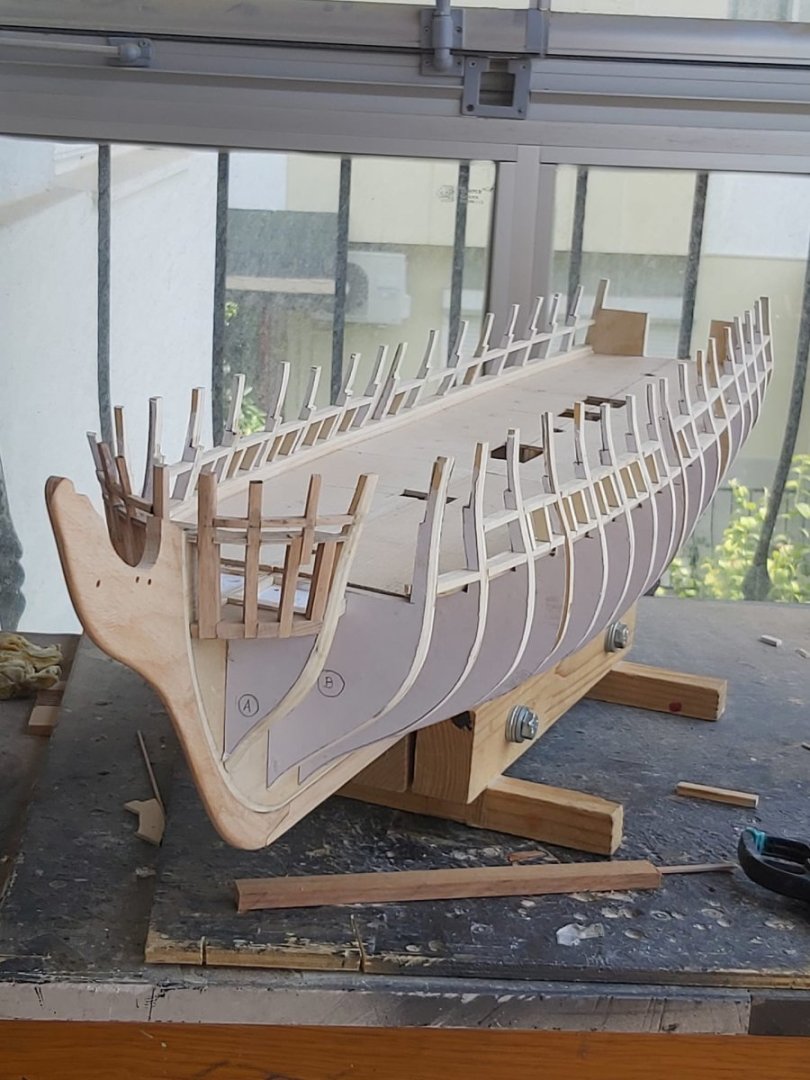
The openings on the gun deck (gratings, hatchways, and ladders) were constructed but have not been glued in place yet.


-
USS Constitution by mtbediz - 1:76
mtbediz replied to mtbediz's topic in - Build logs for subjects built 1751 - 1800
Thank you Gerson. -
USS Constitution by mtbediz - 1:76
mtbediz replied to mtbediz's topic in - Build logs for subjects built 1751 - 1800
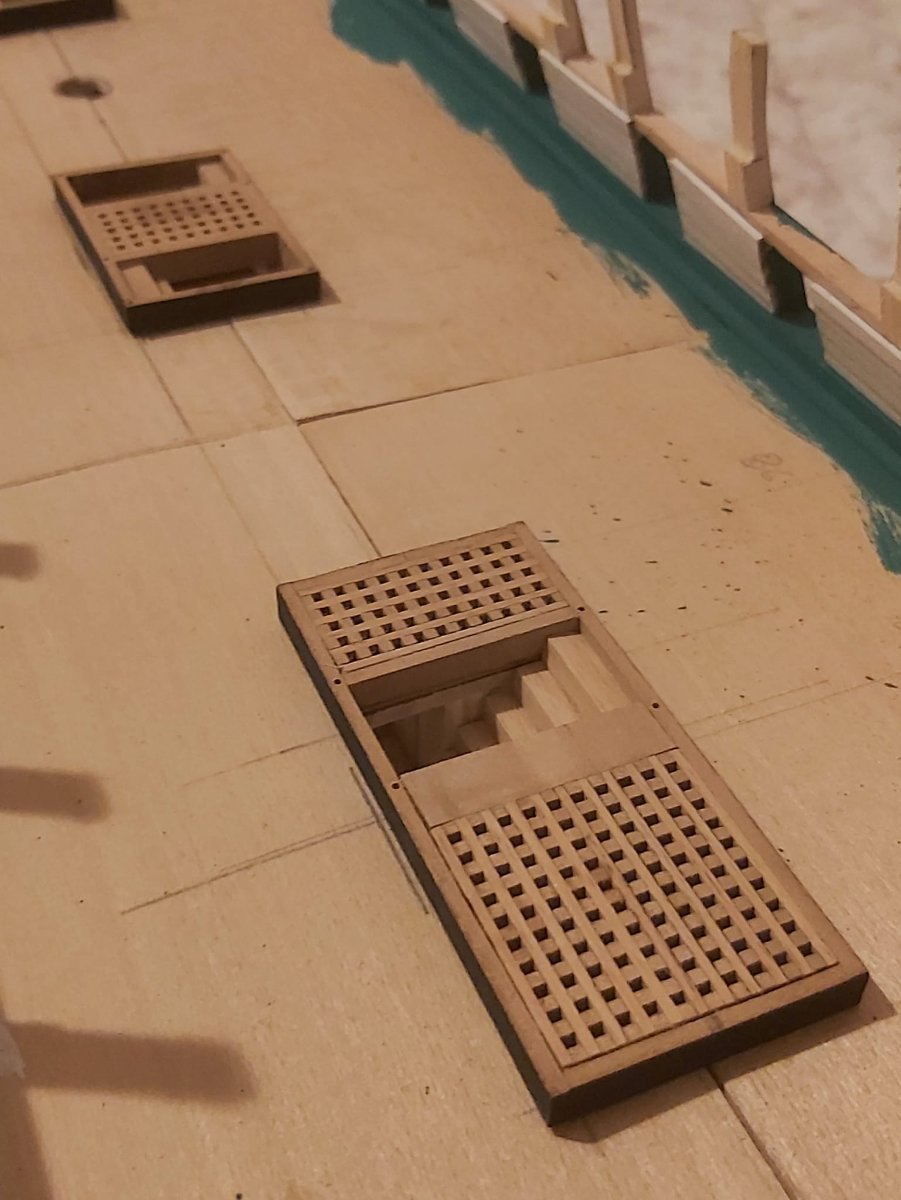
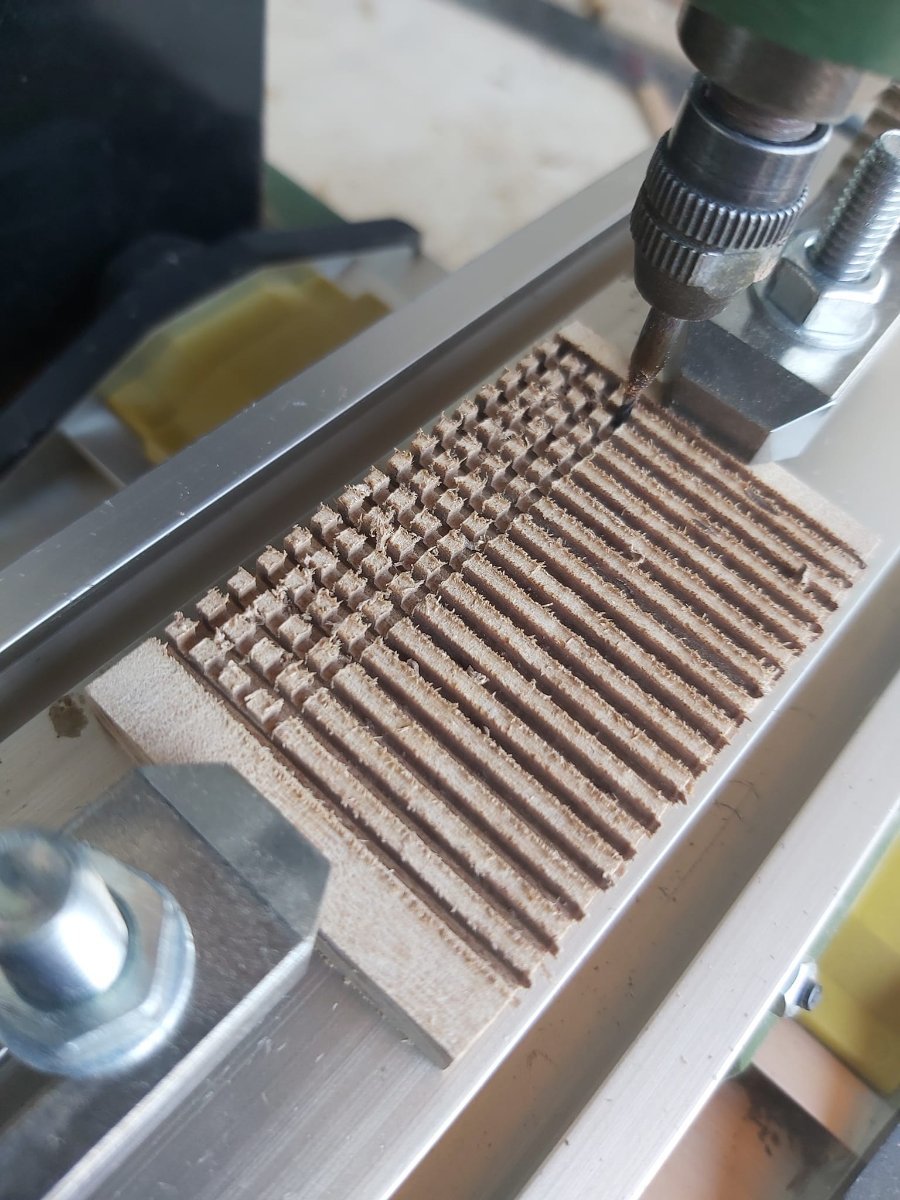
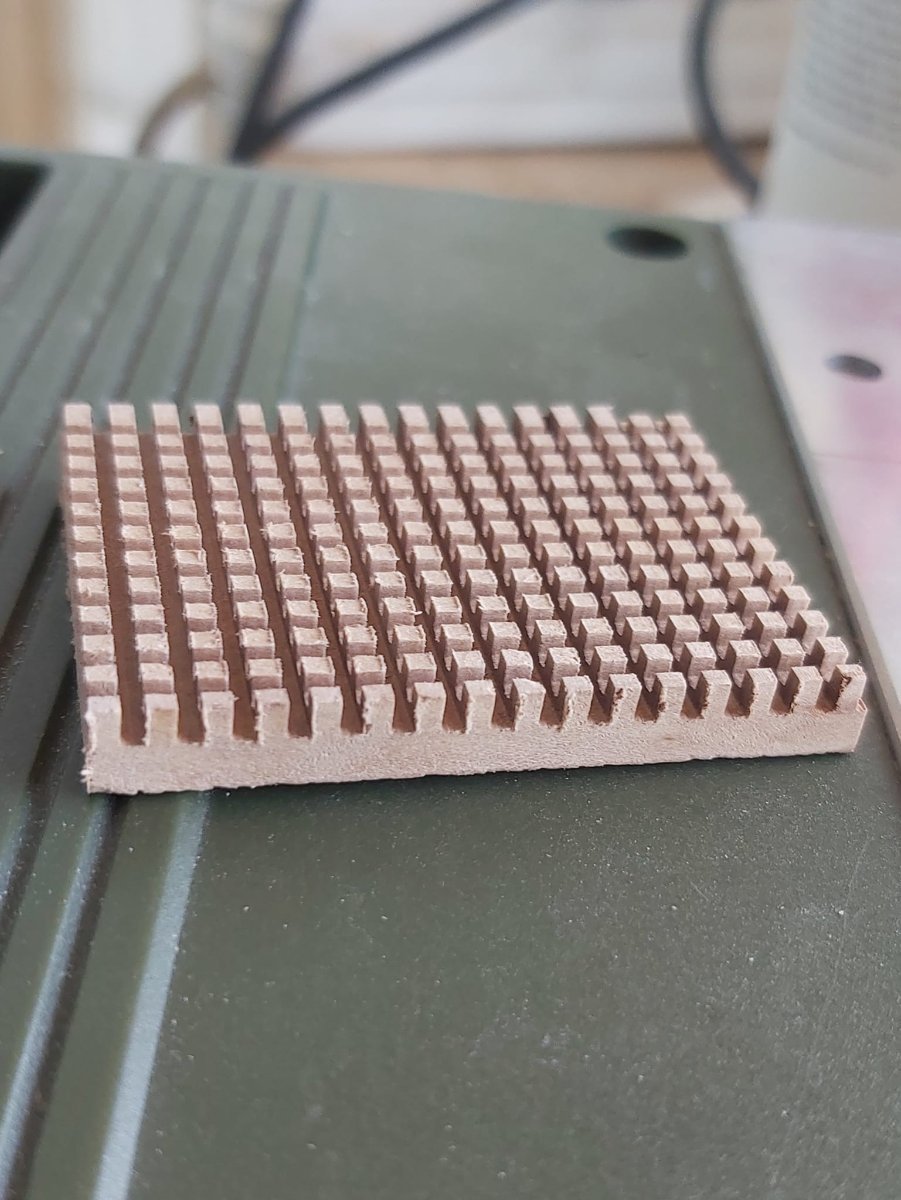
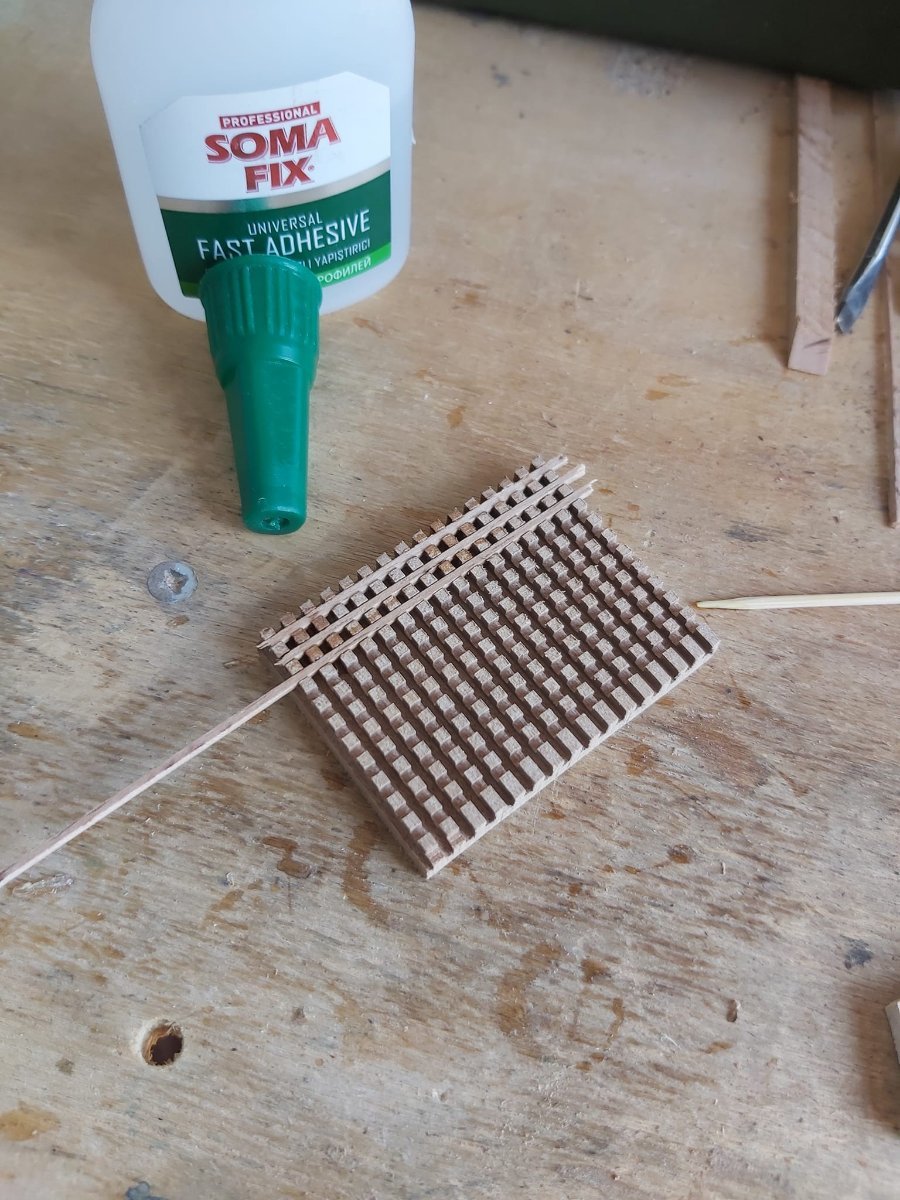
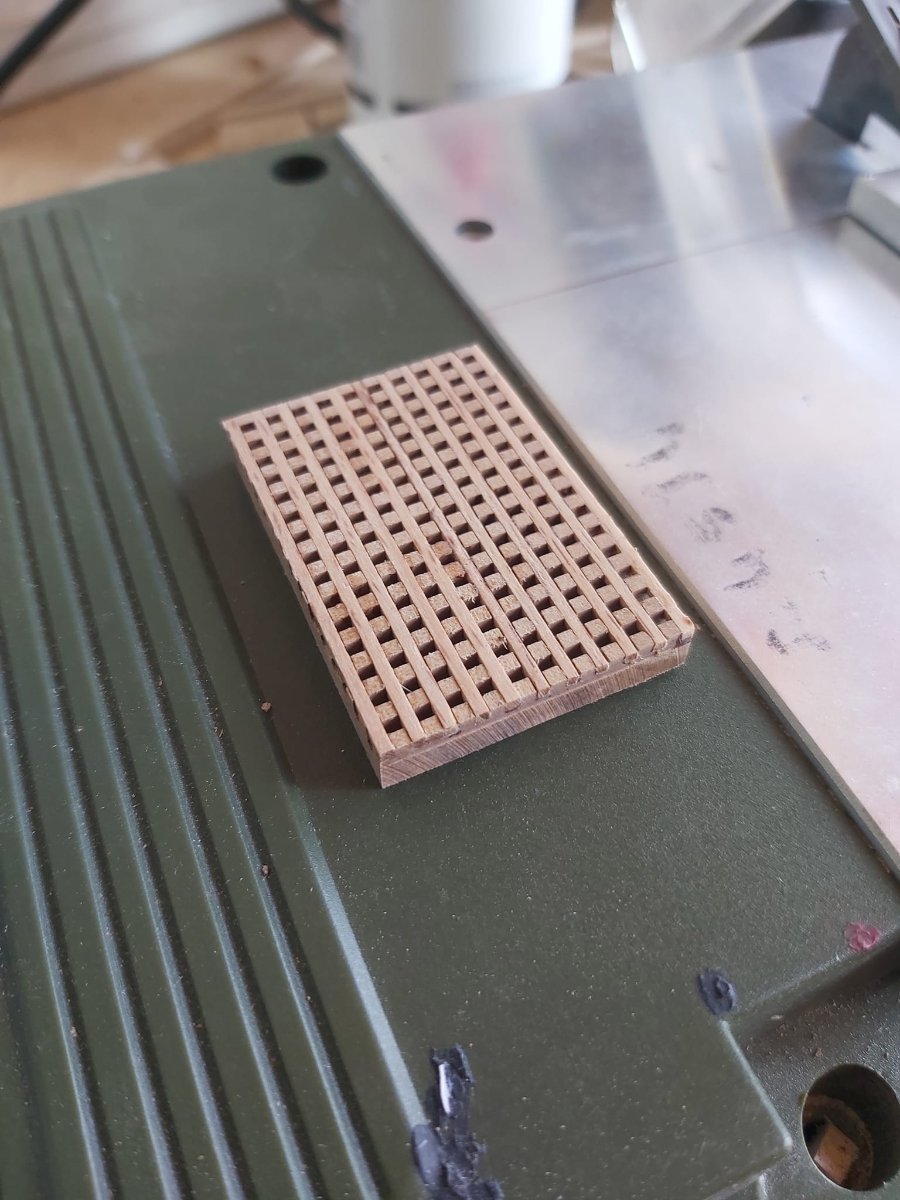
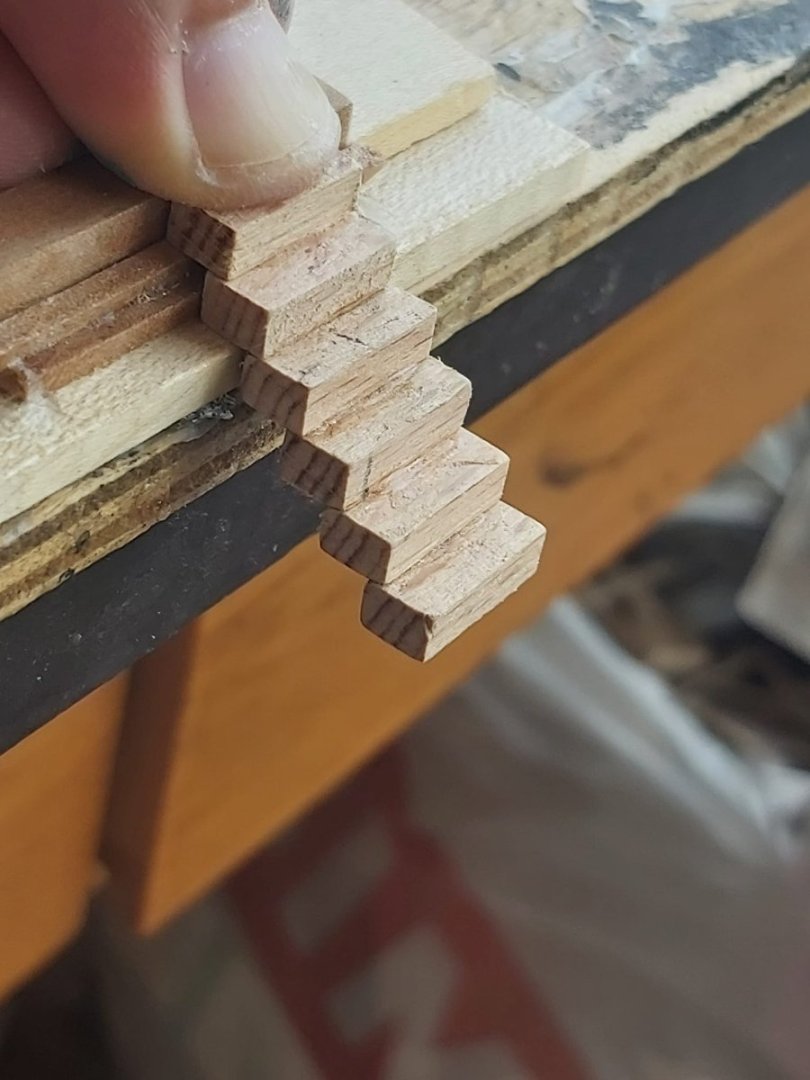
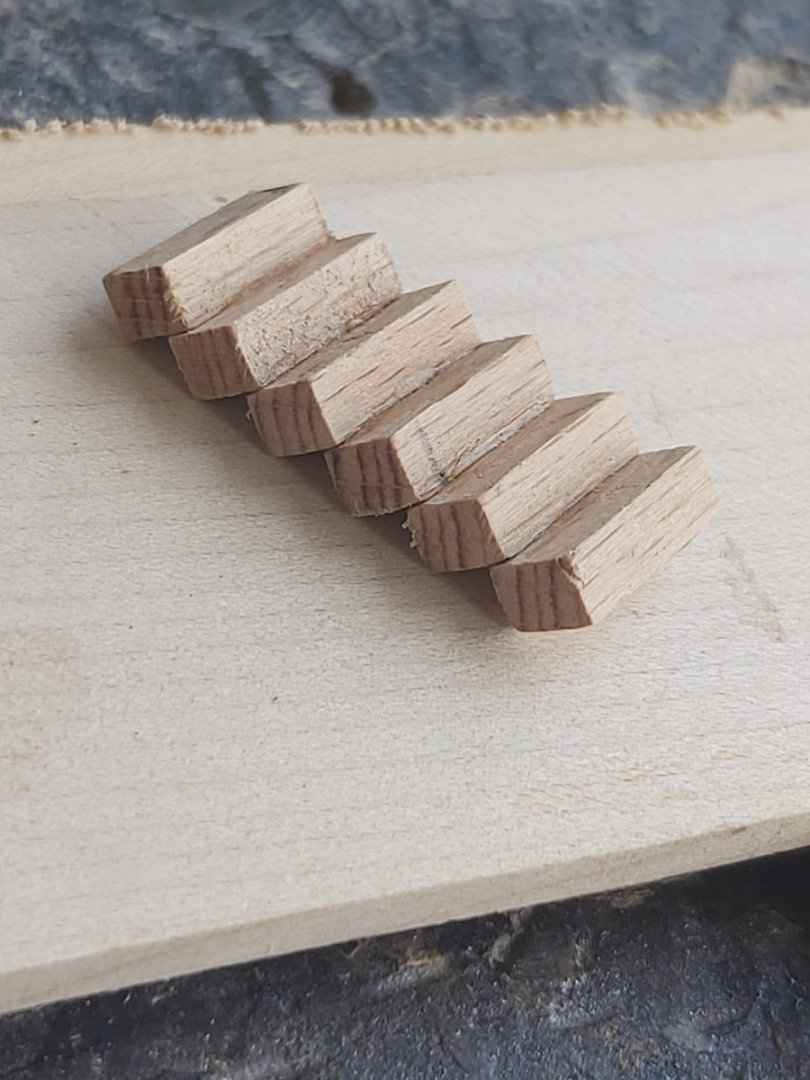
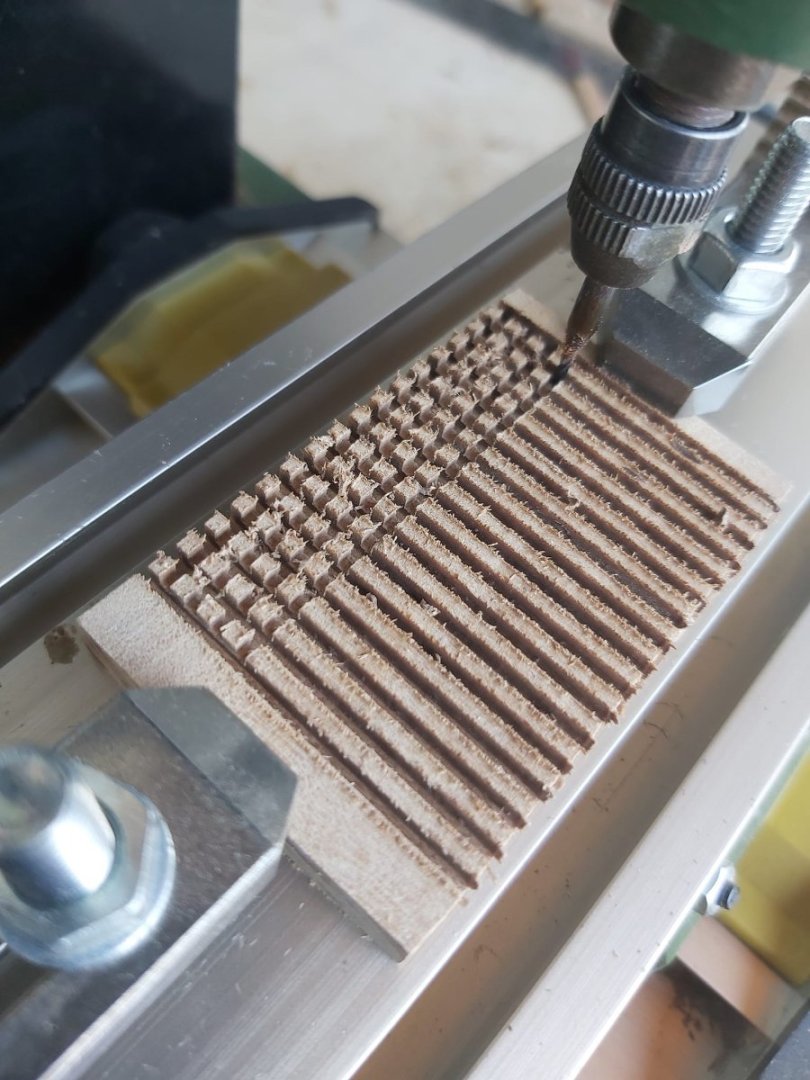
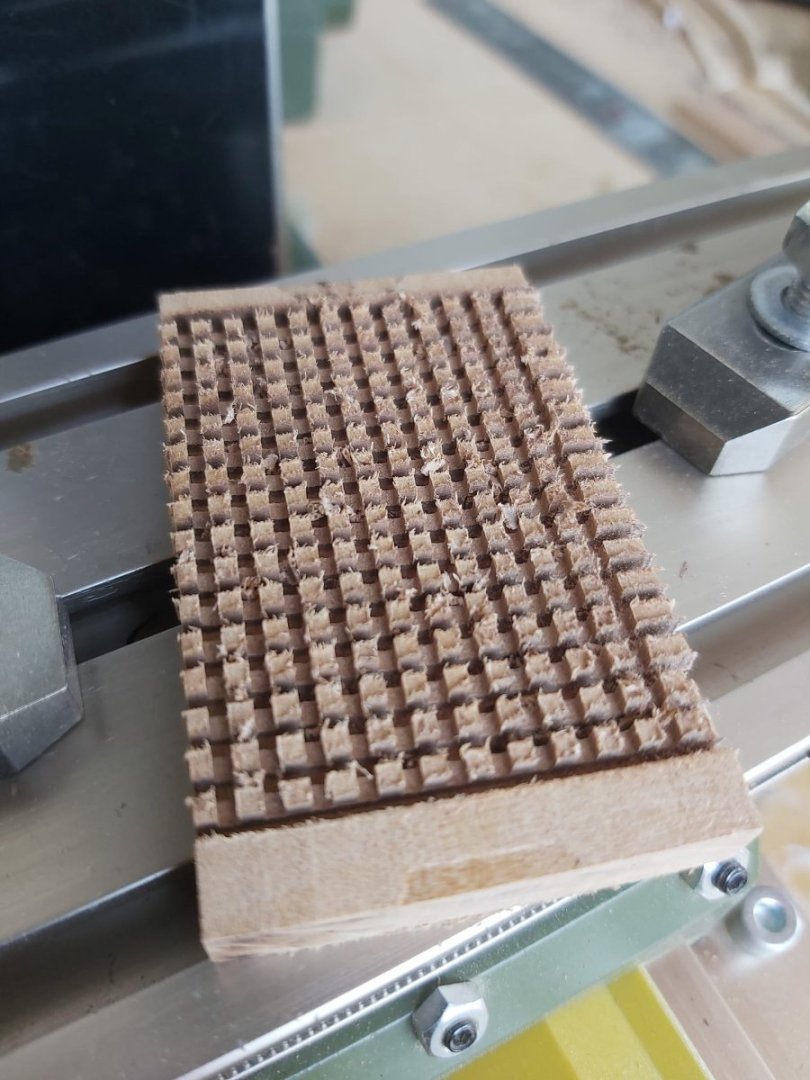
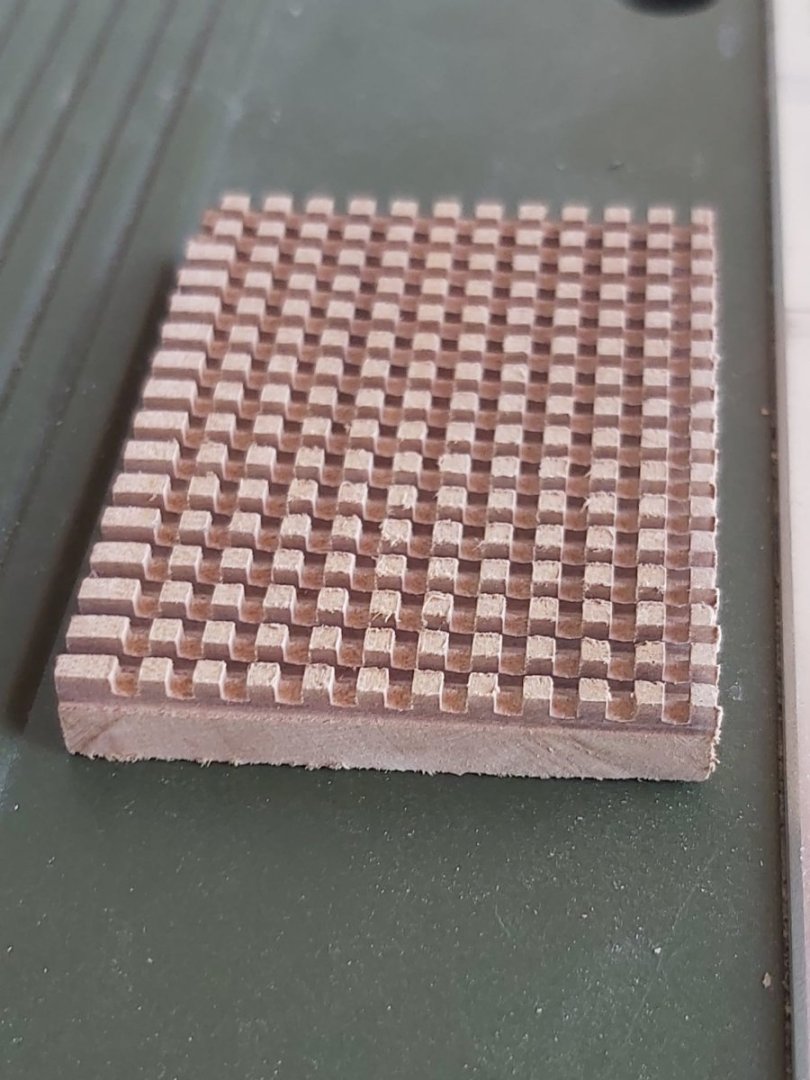
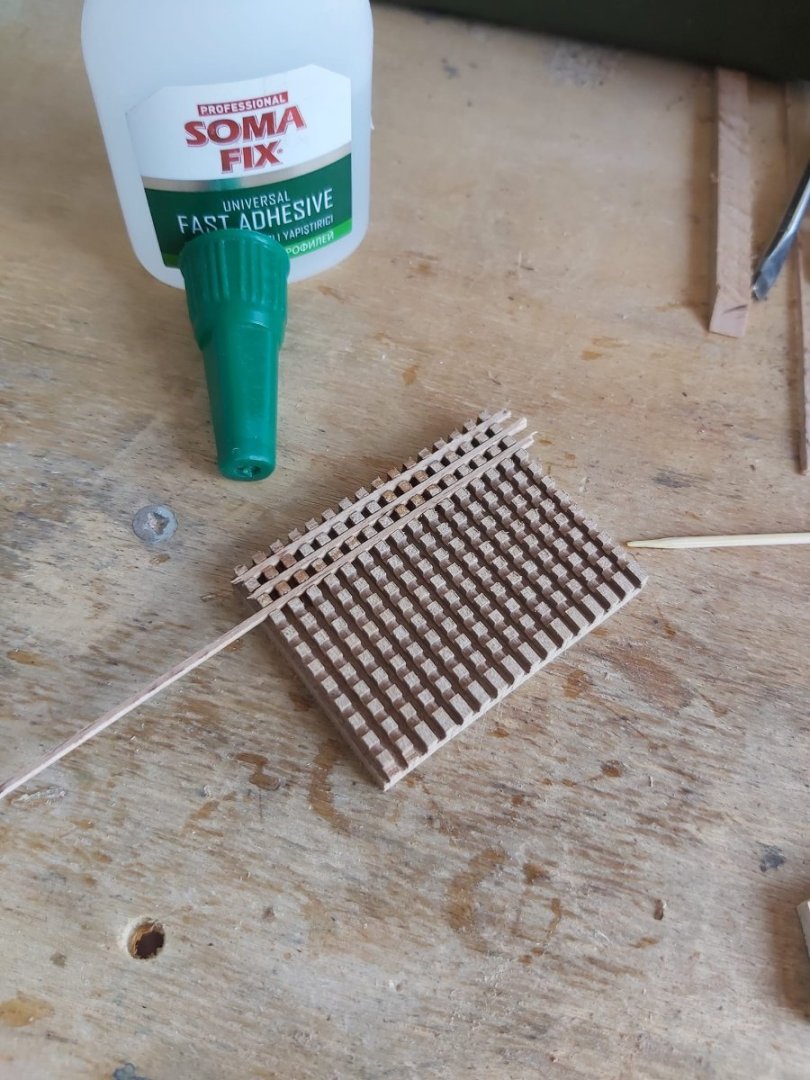
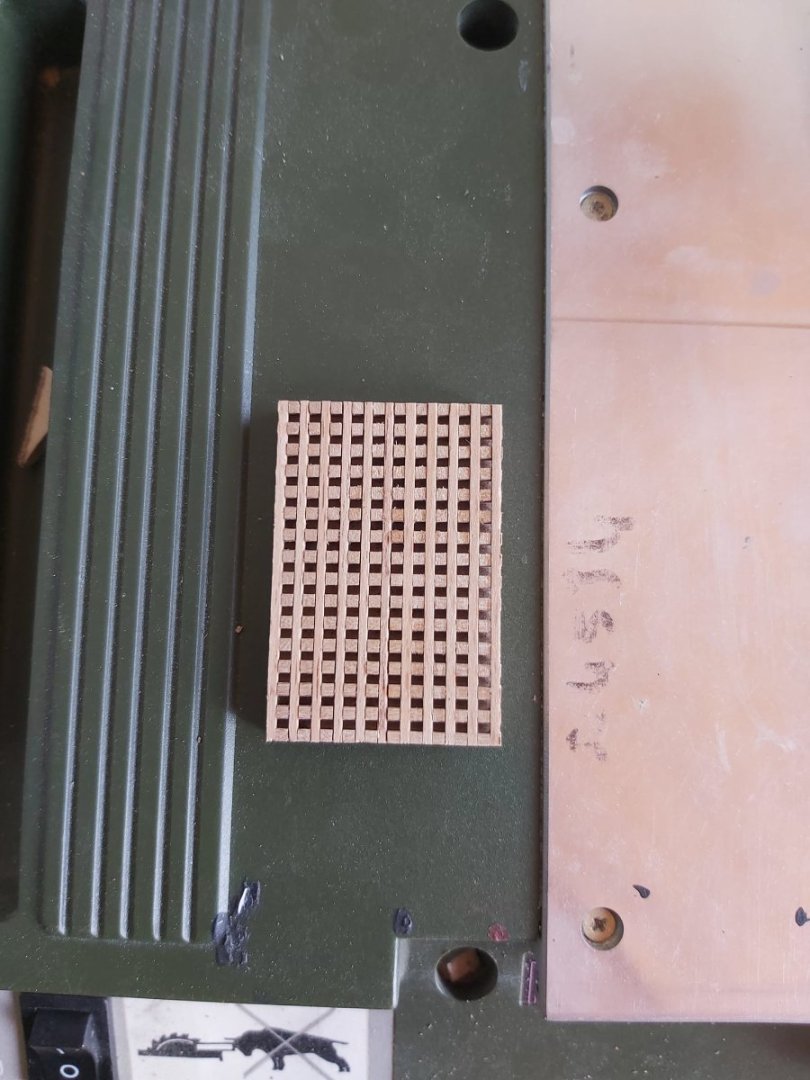
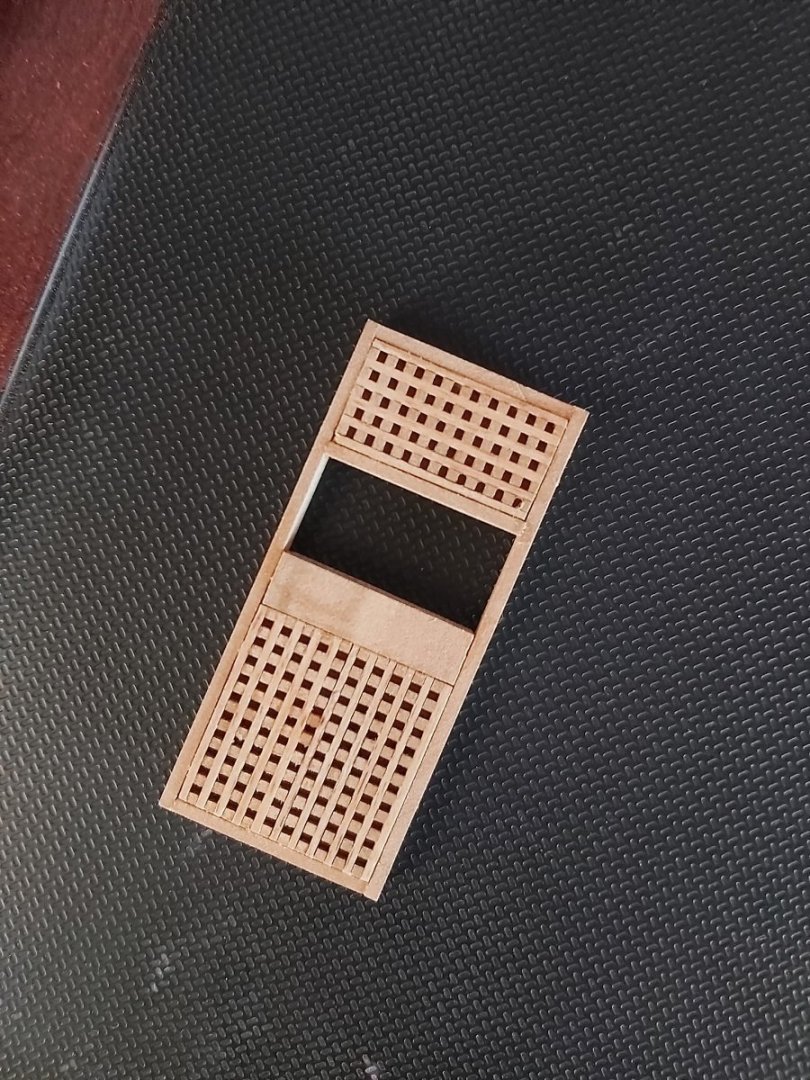
In my previous post, I mentioned that I made the gratings in a different way. This method gave both easier and more satisfying results. Of course, I am not the inventor of this method. I also saw it in another modeler's build log and I am sharing it here for my friends who do not know about this method. There is only one tip. The depth of the slots in the South-North direction and the depth of the slots in the East-West direction should be different so that a depth can be achieved.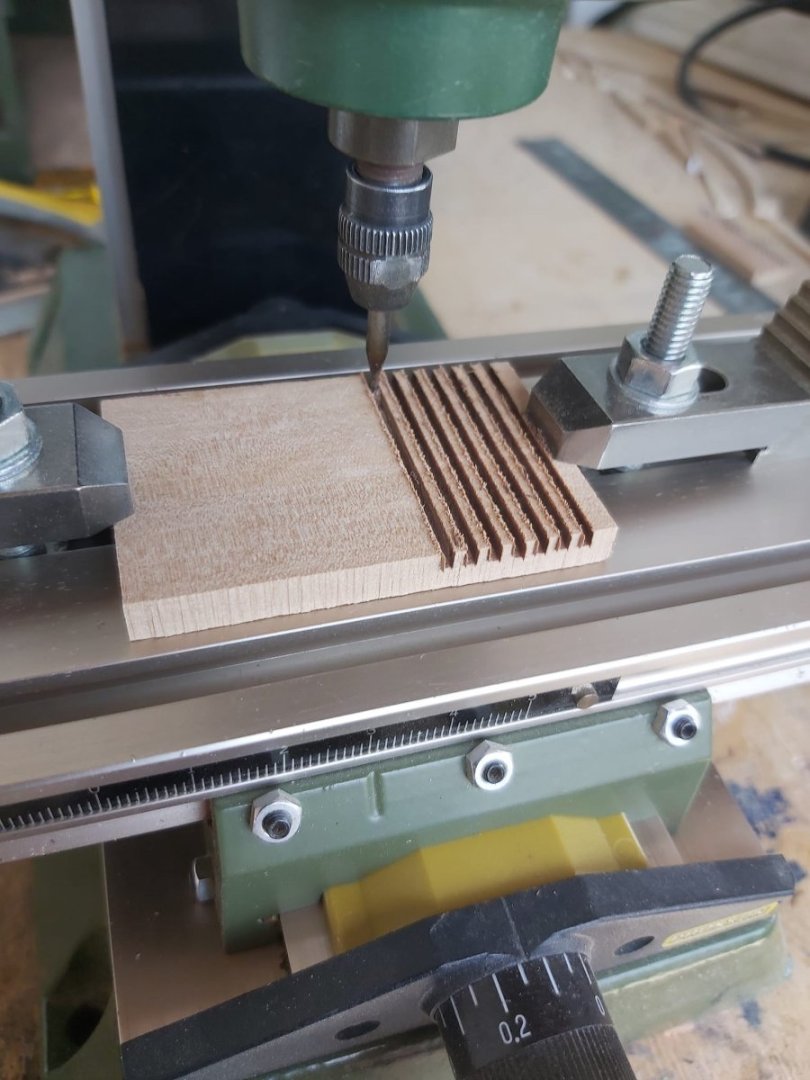


-
USS Constitution by mtbediz - 1:76
mtbediz replied to mtbediz's topic in - Build logs for subjects built 1751 - 1800
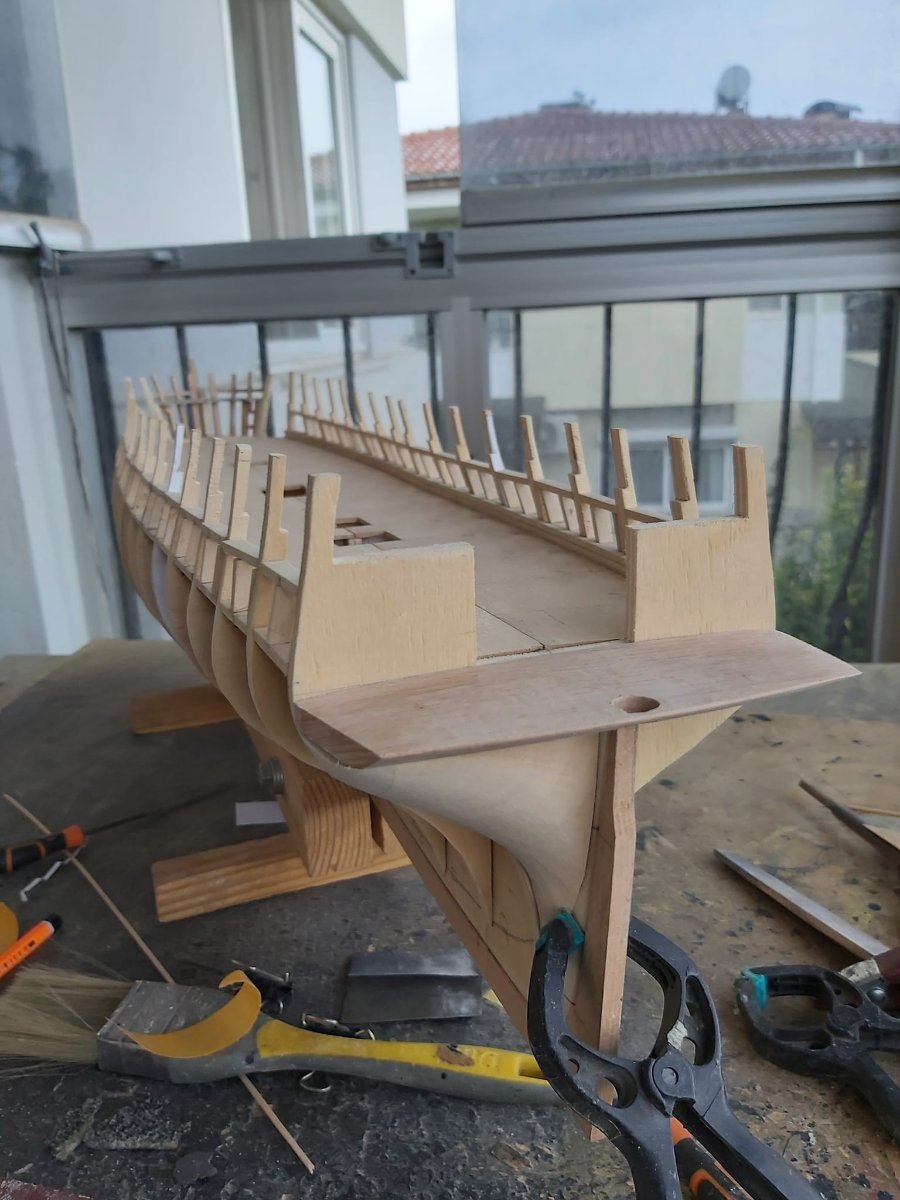
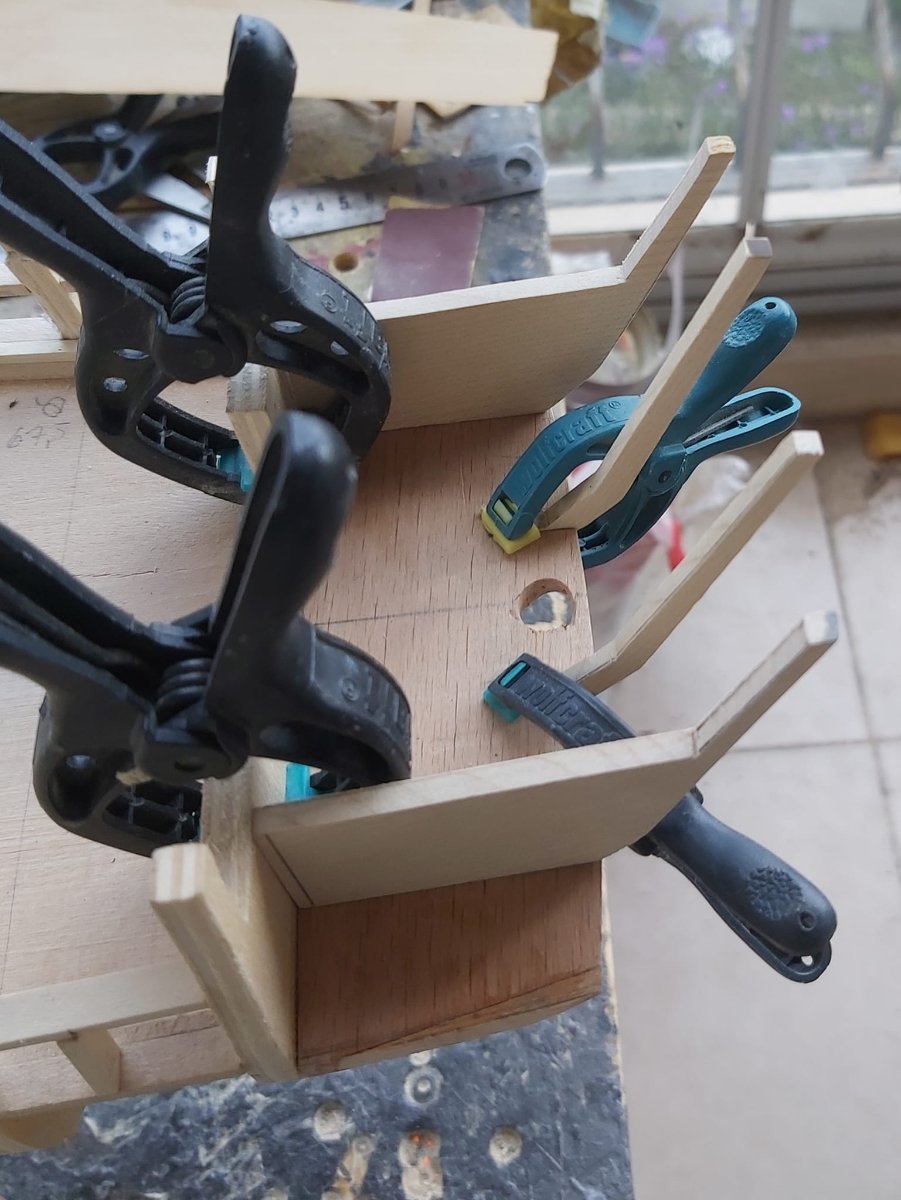
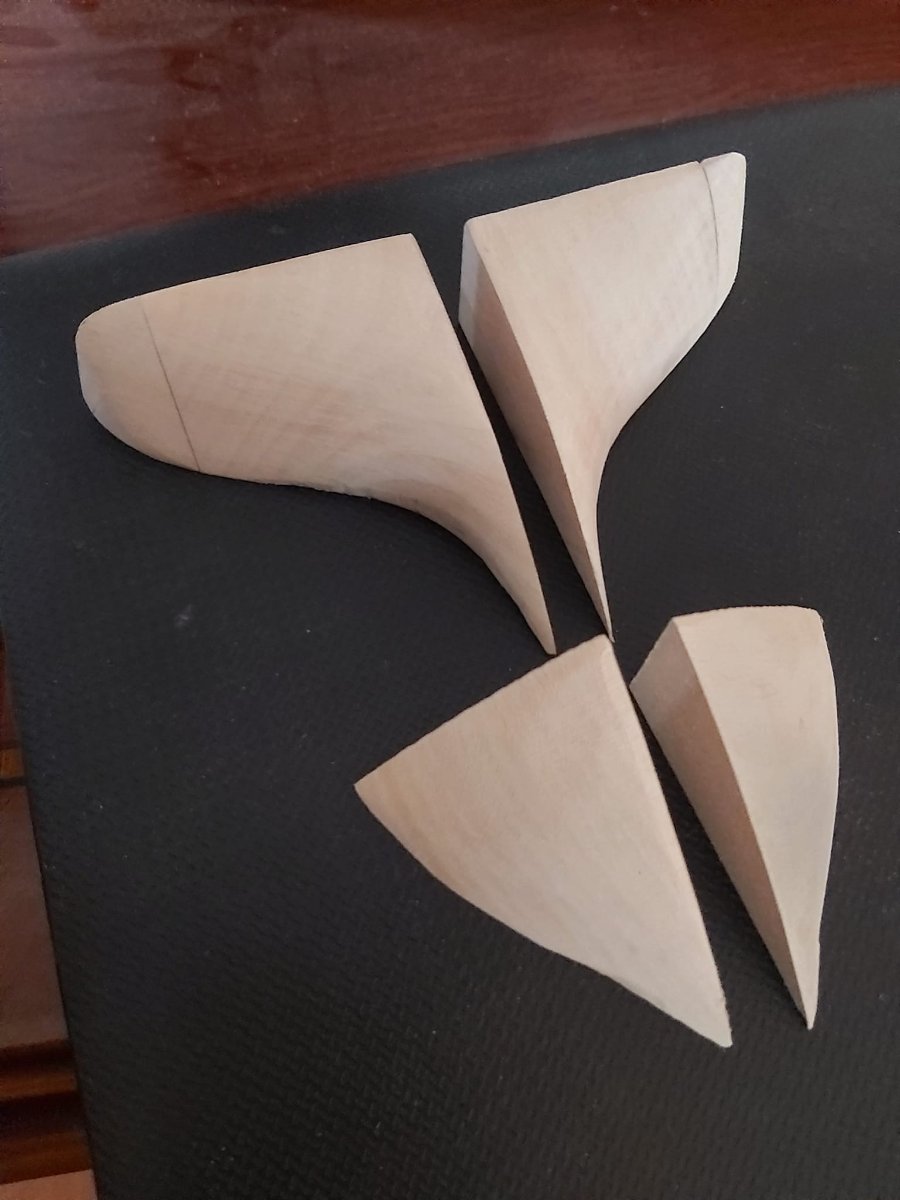
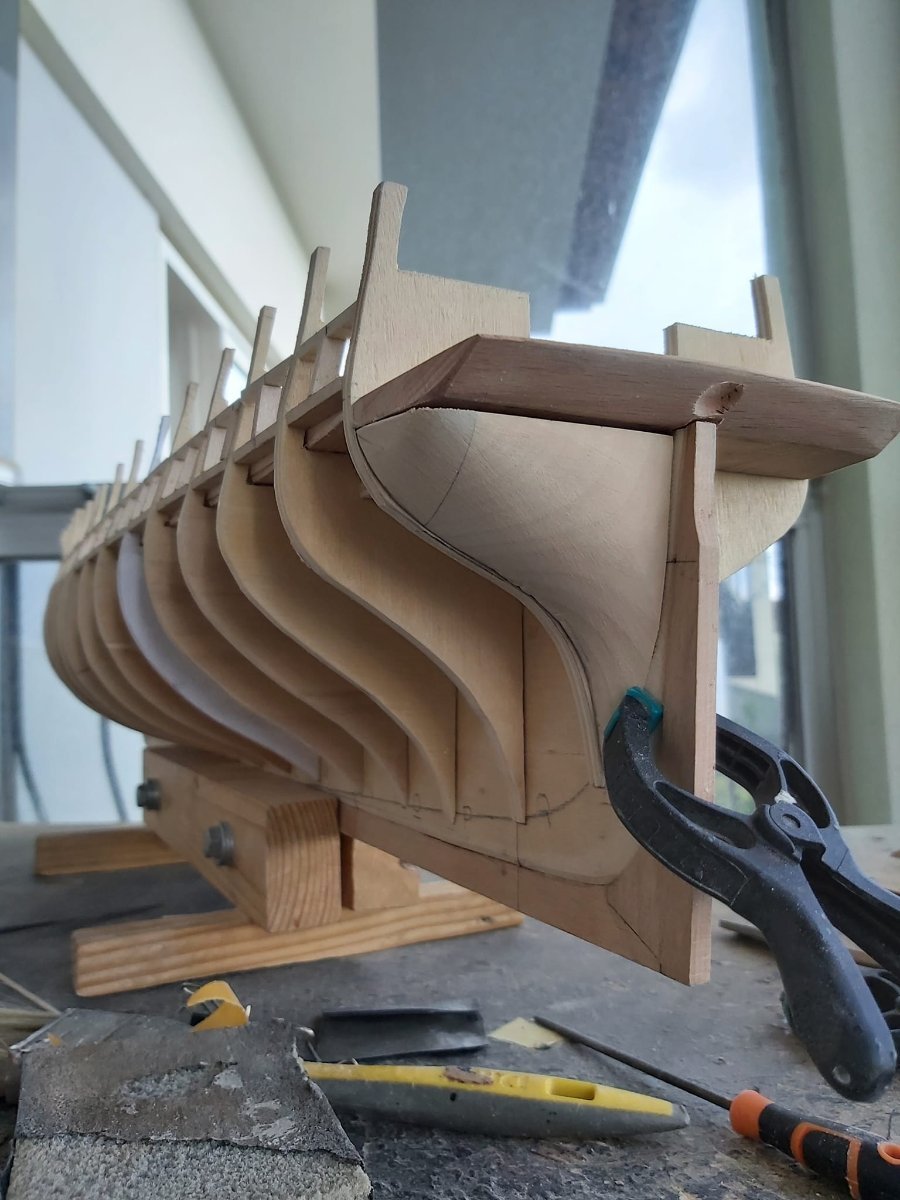
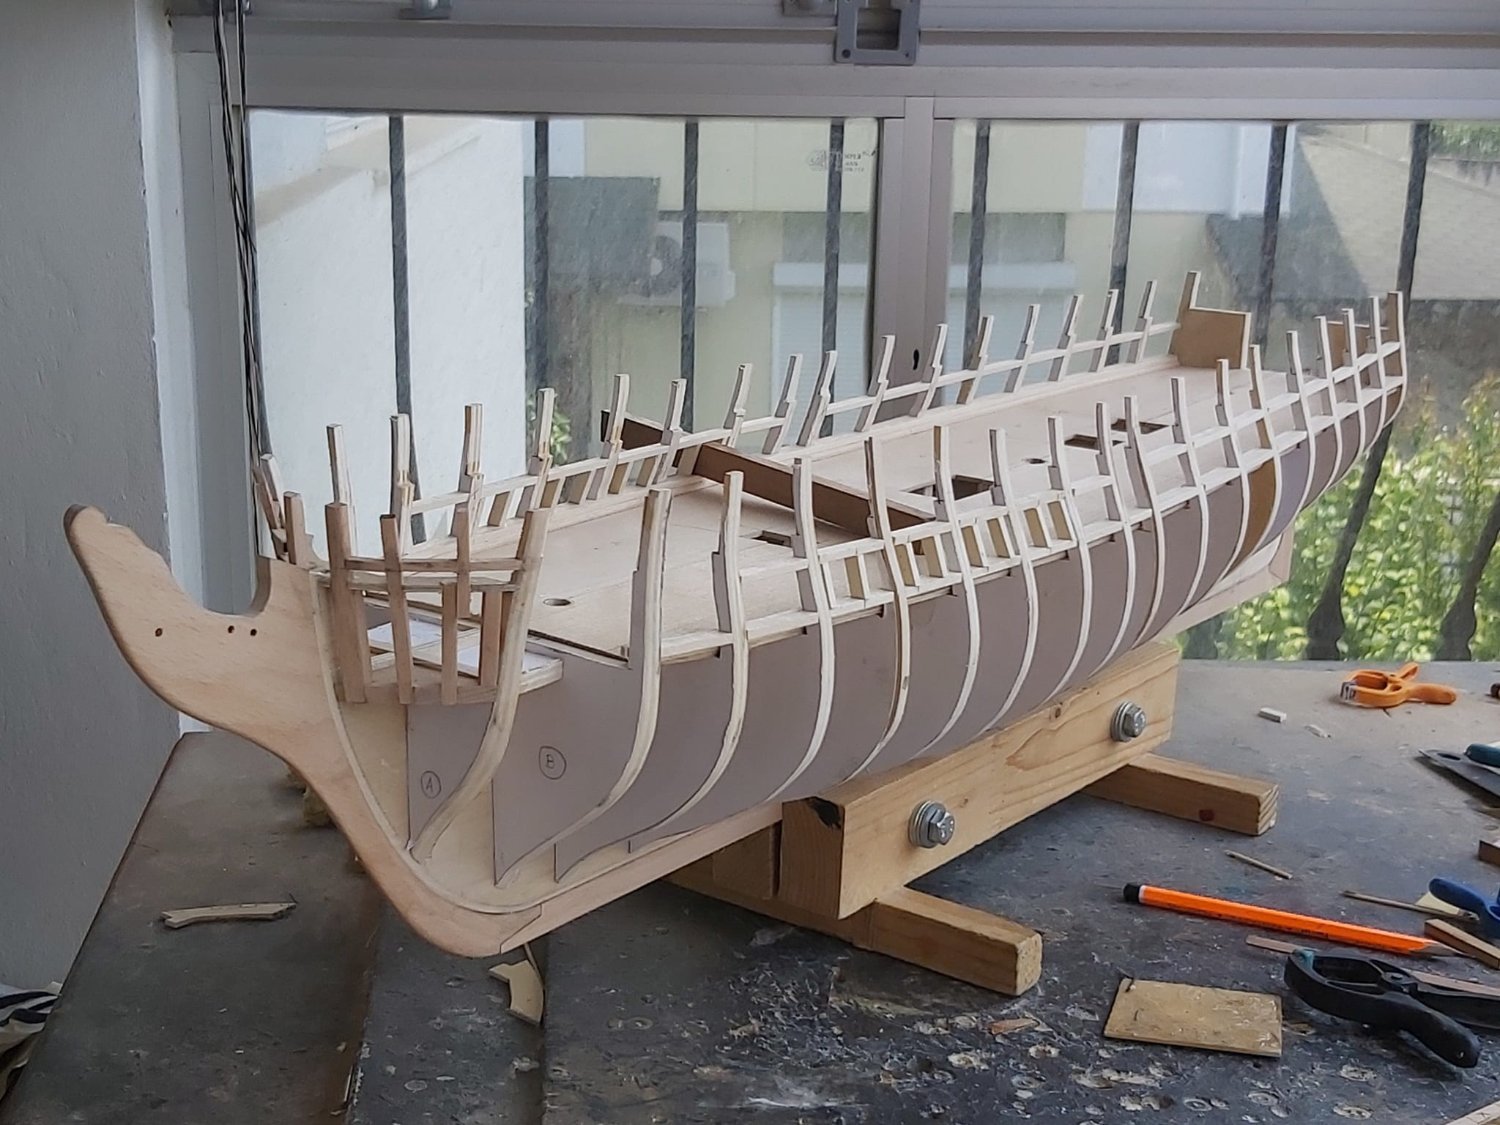
Hello friends. After a long summer break I feel happy to be back at my shipyard. Continuing the construction of Conny. The gun port frames on the gundeck are complete. The stern frames have been prepared but have not been glued in place yet. Since I'm going to make the captain's cabin visible, I modified the stern middle frames by going out of the plans. The filler blocks were made for the stern and bow. They have not been glued yet either. By the way, I tried making the gratings in a different way. I am quite happy with the result. It is also very simple to make and I will show you how I did it in my next posts.


-
You are welcome Sjors. I will be at my shipyard again at the end of this month.
-
Hi Sjors, 1 inch=25,4 mm 1/8 inch = 25,4/8 = 3,175 mm 1/16 inch = 25,4/16 = 1,5875 mm 1/32 inch =25,4/32 = 0,79 mm 3/16 inch =(25,4/16)x3 = 4,76 mm 3/32 inch =(25,4/32)x3 = 2,38 mm I hope this helps.
-
I haven't done the bowsprit yet. Due to the summer season, I paused the construction of my model until the end of August.
-
Yes, I agree about bowsprit tenon. MS kit plan also shows as you did.
-
USS Constitution by mtbediz - 1:76
mtbediz replied to mtbediz's topic in - Build logs for subjects built 1751 - 1800
I am in neighbour city Antalya right now. Normaly I live in Mersin, Turkey -
USS Constitution by mtbediz - 1:76
mtbediz replied to mtbediz's topic in - Build logs for subjects built 1751 - 1800
Thanks for stopping by Sjors. I will be away from the model until the end of August as I am out of town due to the Summer season. -
Hi Sjors. Bowsprit drawing is In the lower right corner of the sheet 6.
-
Hi Sjors, The diameter of the bowsprit is 10.32 mm (13/32 '') in the thickest part, but the bowsprit will be tapered forward and backward. By the way, Model Shipways' blueprint (kit plan) has drawing of the bowsprit.
-
Hi Sjors, you may consider to redo the stern fillers. Attached photo is from JSGerson's build log and shows the correct form of the stern fillers.
-
An extraordinary beautiful work. I also admire the way you use the electrical tools. I have a question if you don't mind. What kind of milling cutter is in the photo and what is its advantage? I apologize if this question has been asked and answered before. Thank you in advance.

- 589 replies
-
- 7
-

-
- le gros ventre
- cargo
- (and 1 more)
-
Good luck with your new build. Yes in this kit you have to make a lot of parts from scratch.
-
USS Constitution by mtbediz - 1:76
mtbediz replied to mtbediz's topic in - Build logs for subjects built 1751 - 1800
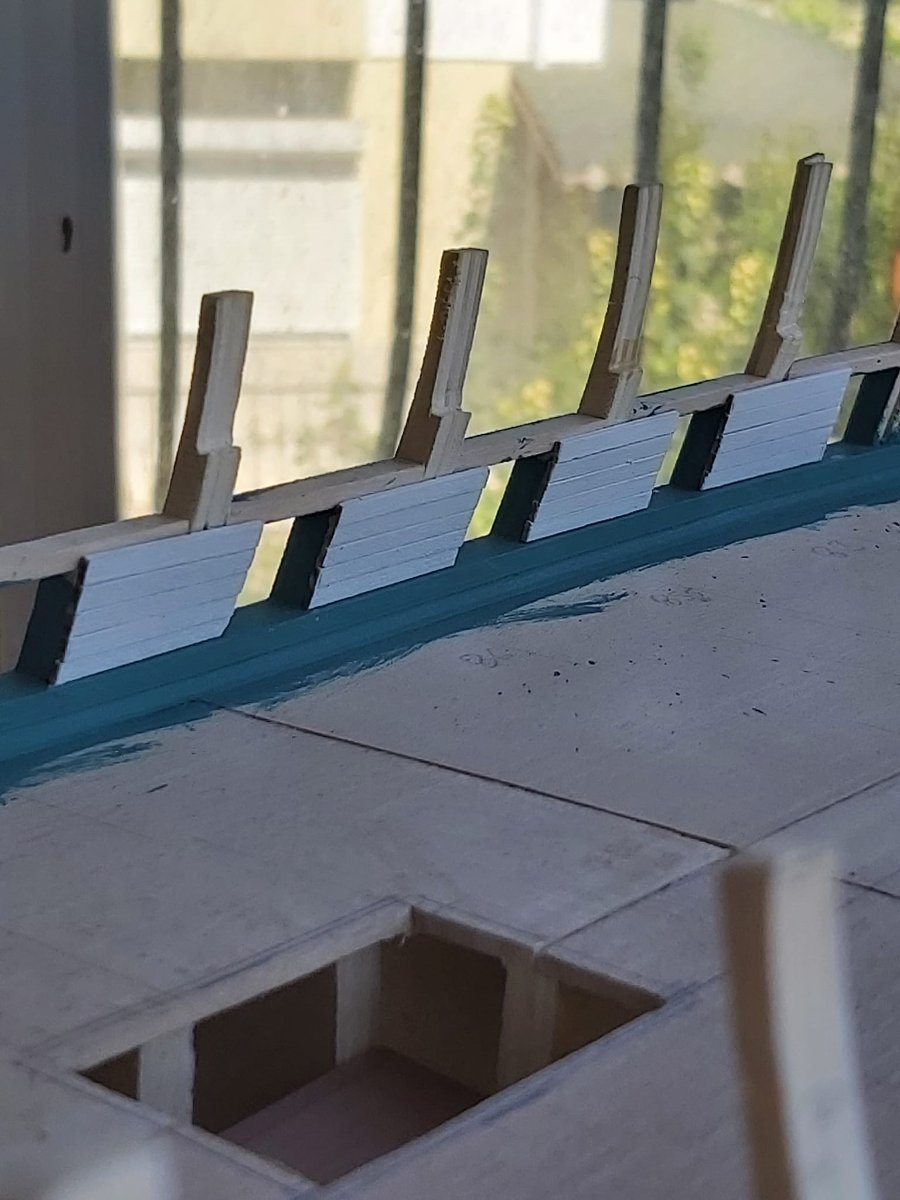
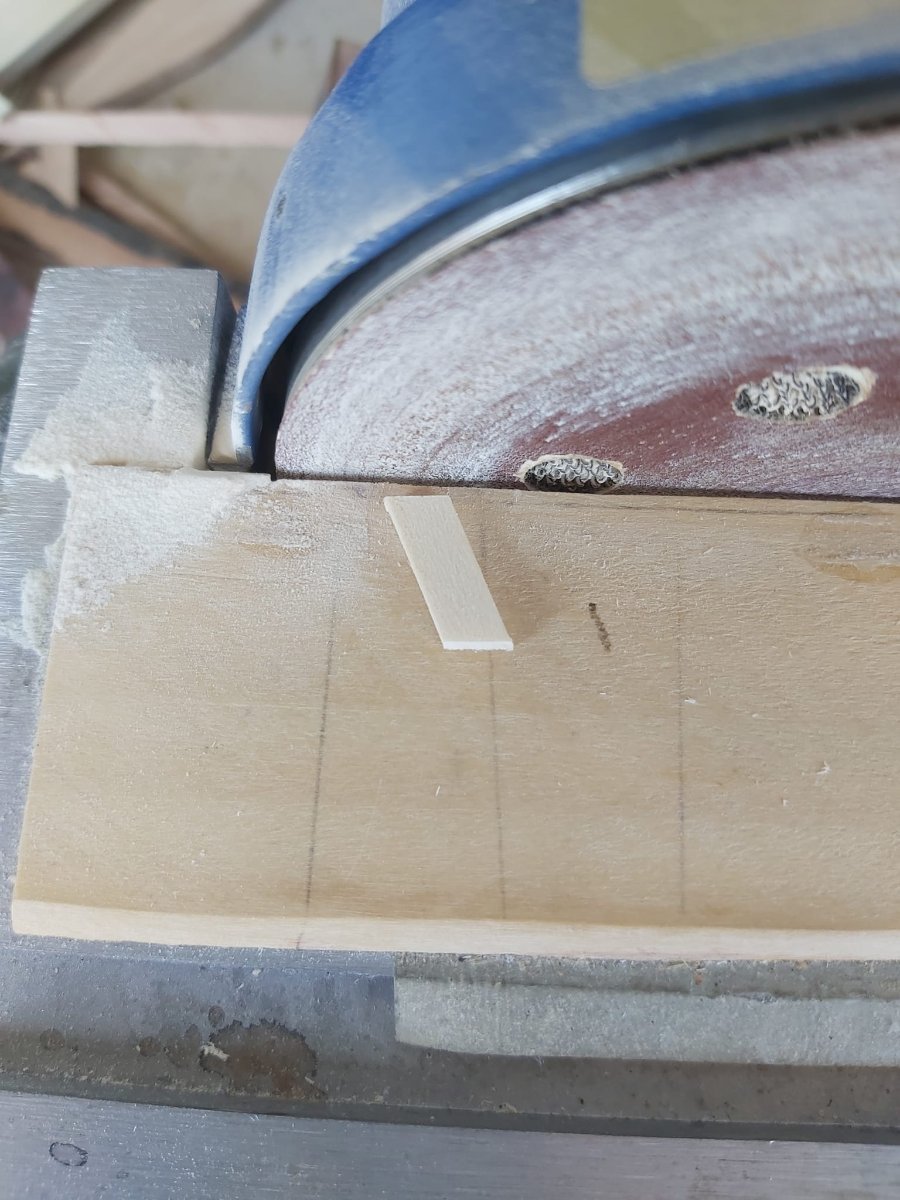
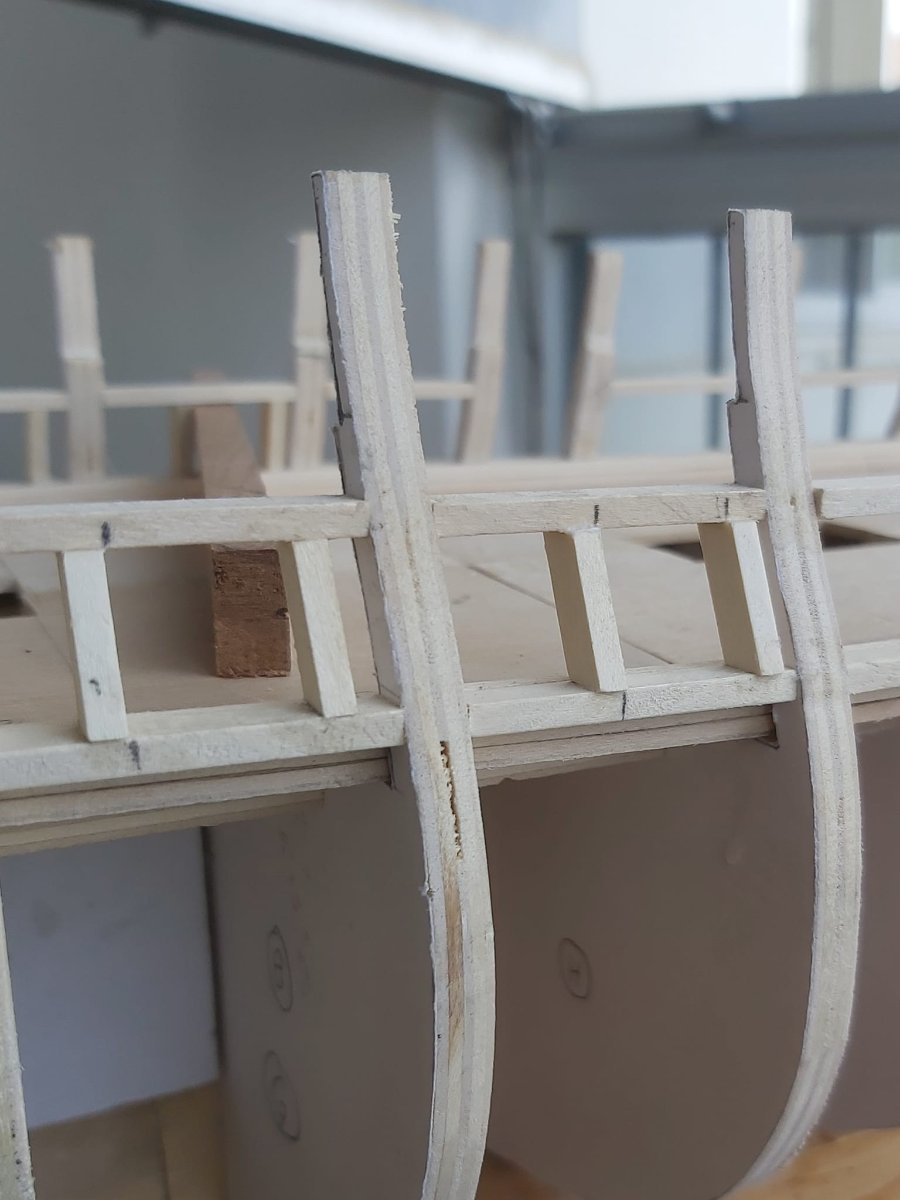
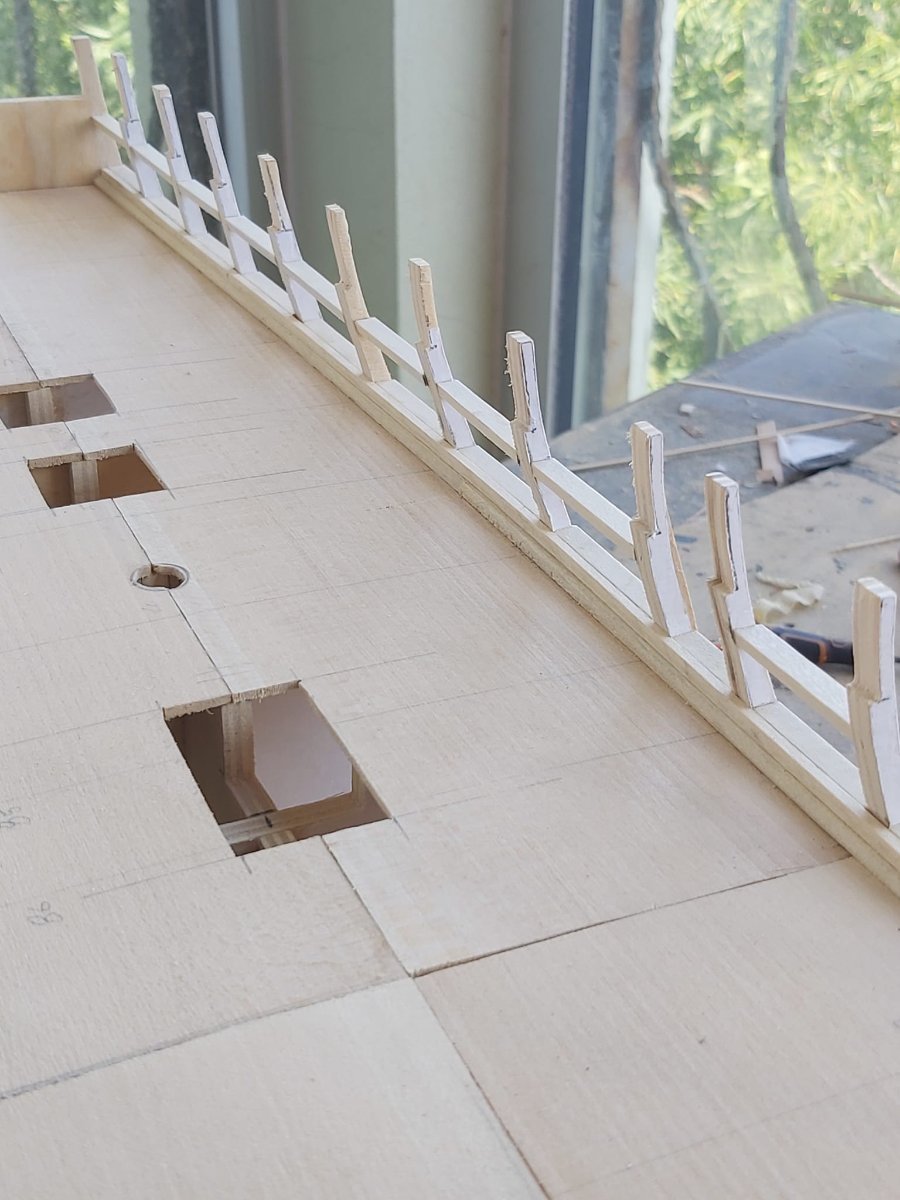
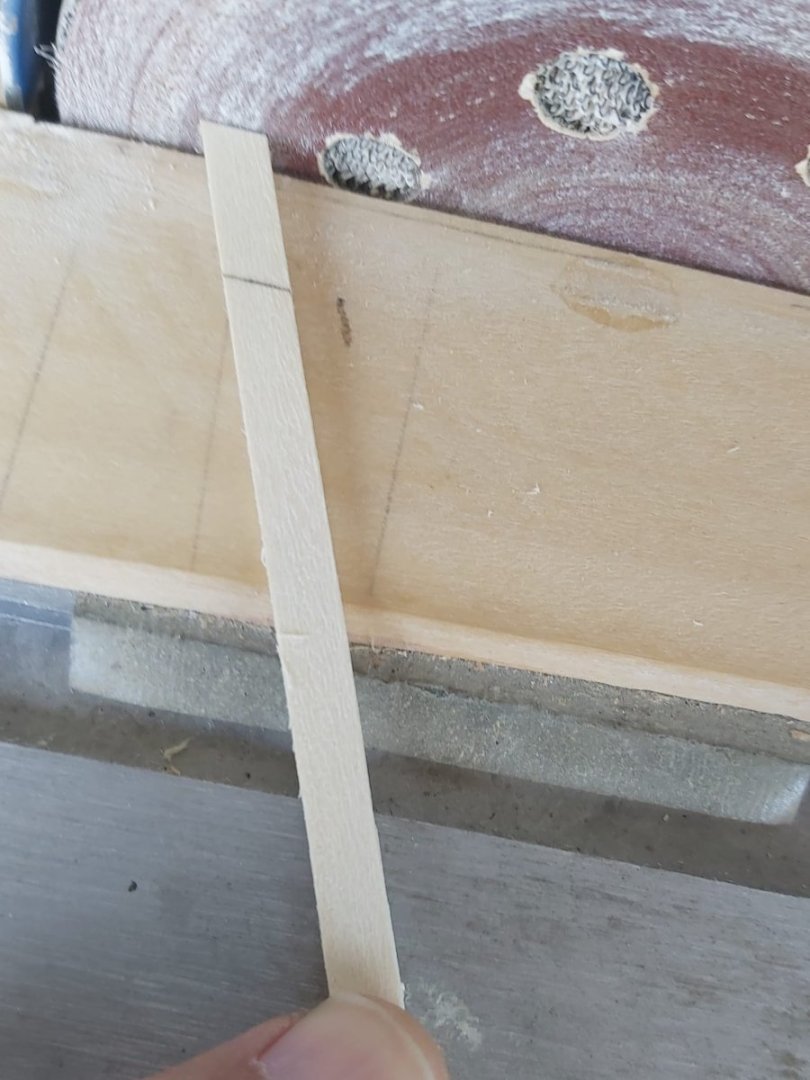
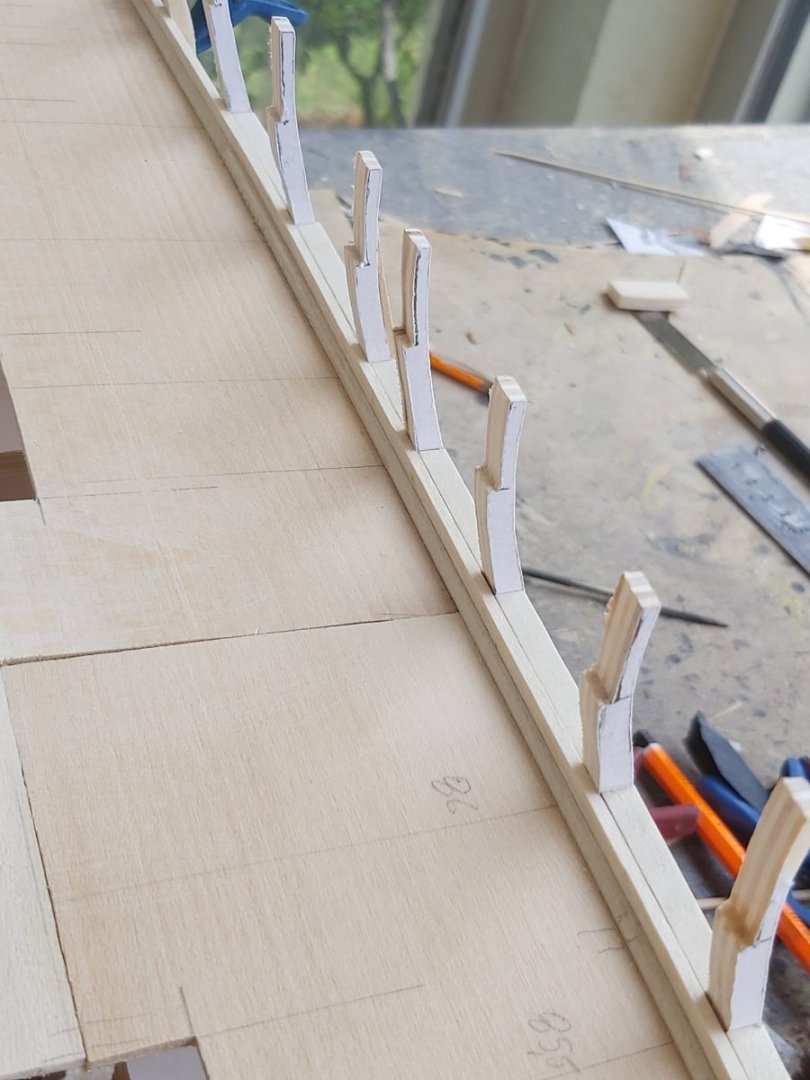
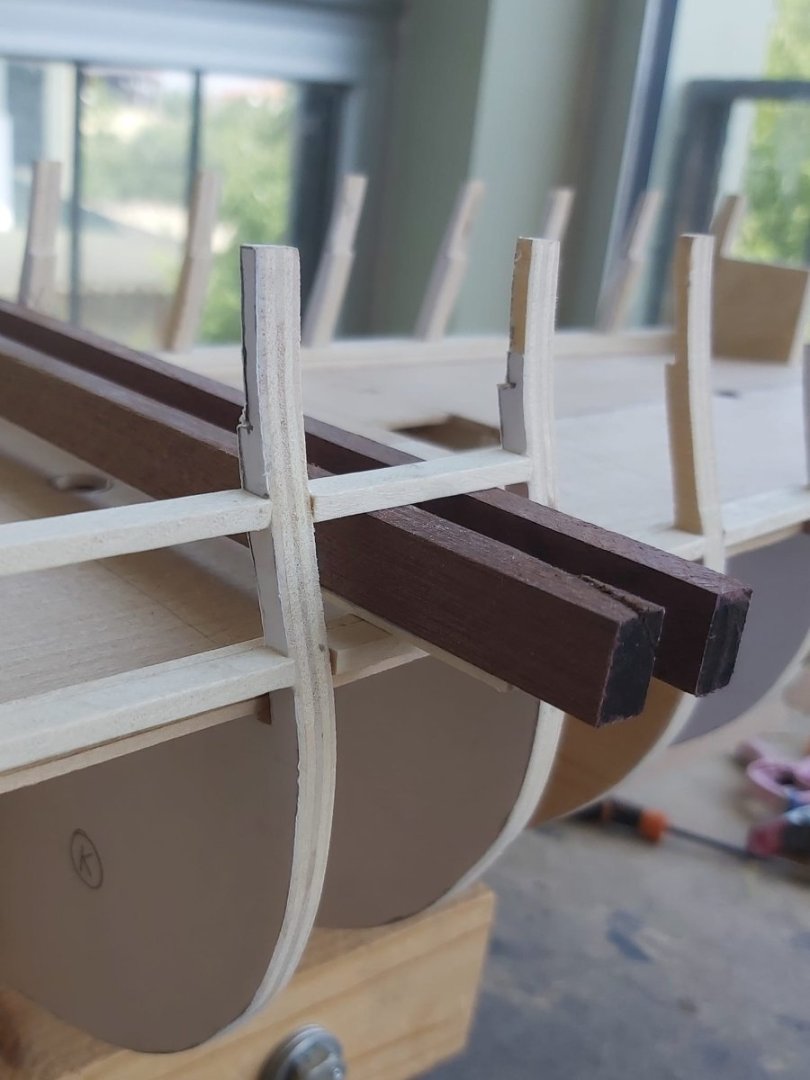
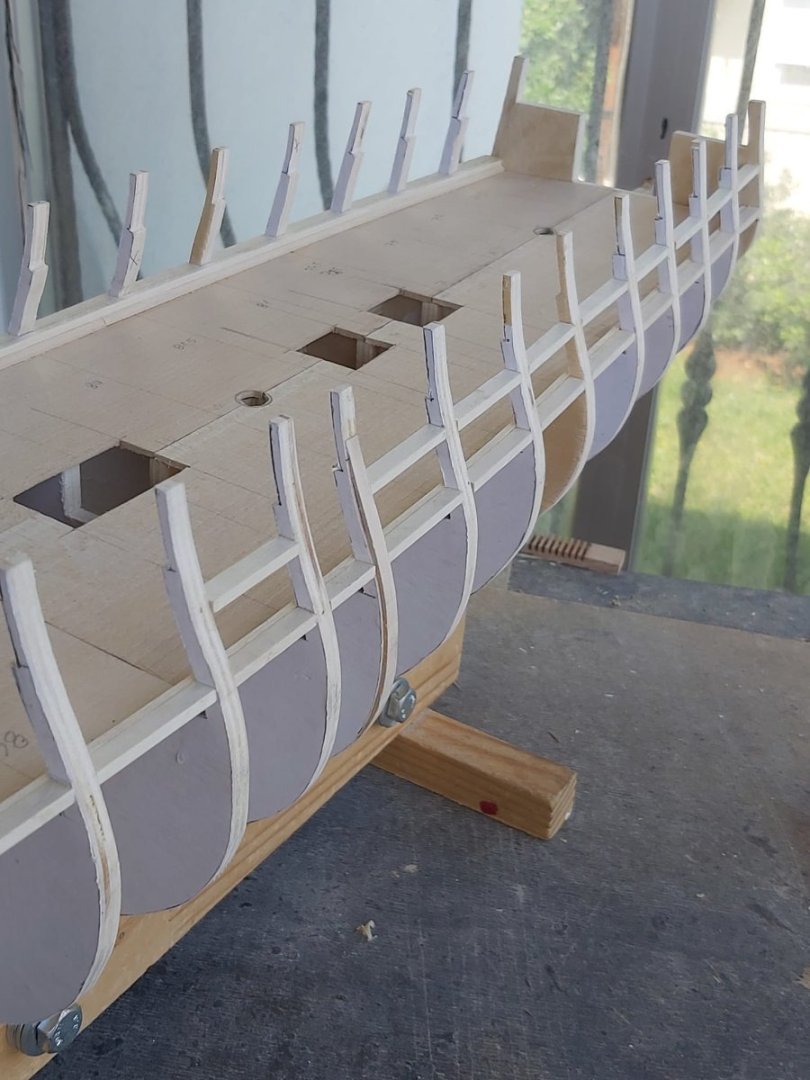
Gunport sides had to be prepared in a parallelogram shape to fit perfectly. Using the extensions of the gunport spacer as a template, I marked the side strips and shaped them with a disc sander.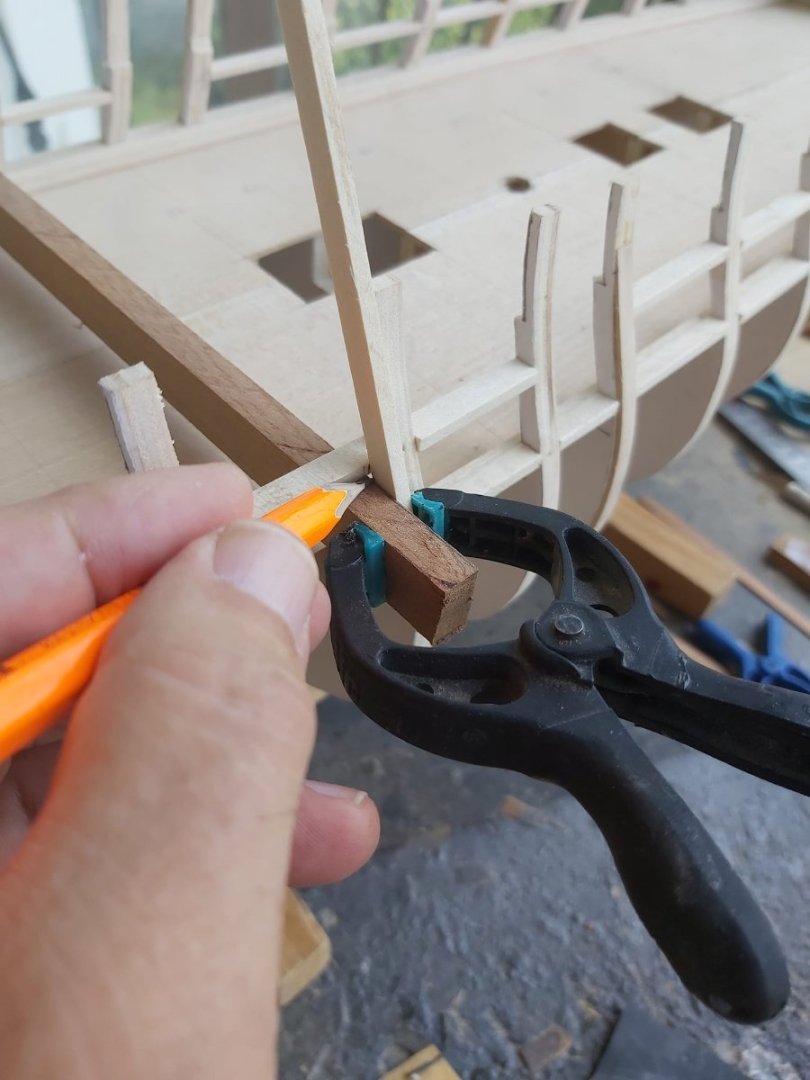


-
USS Constitution by mtbediz - 1:76
mtbediz replied to mtbediz's topic in - Build logs for subjects built 1751 - 1800
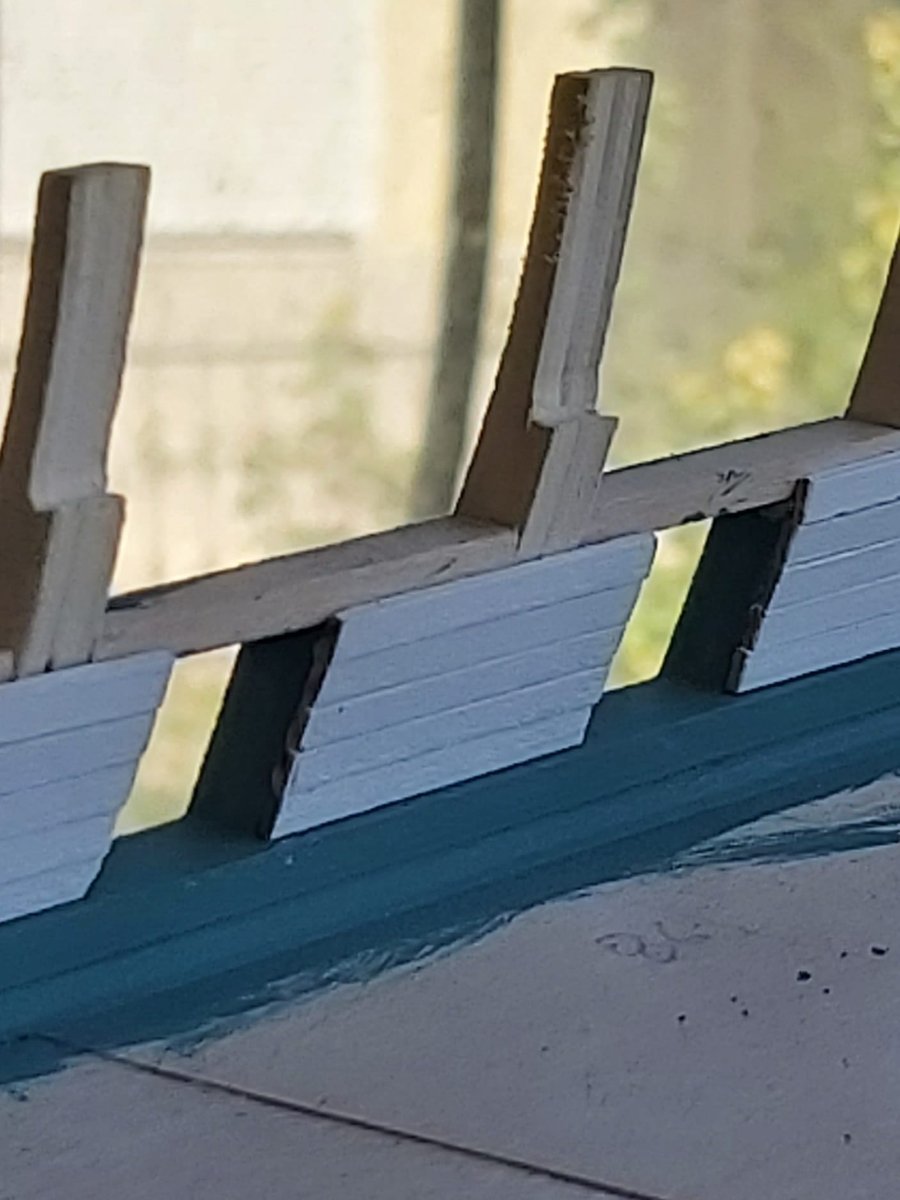
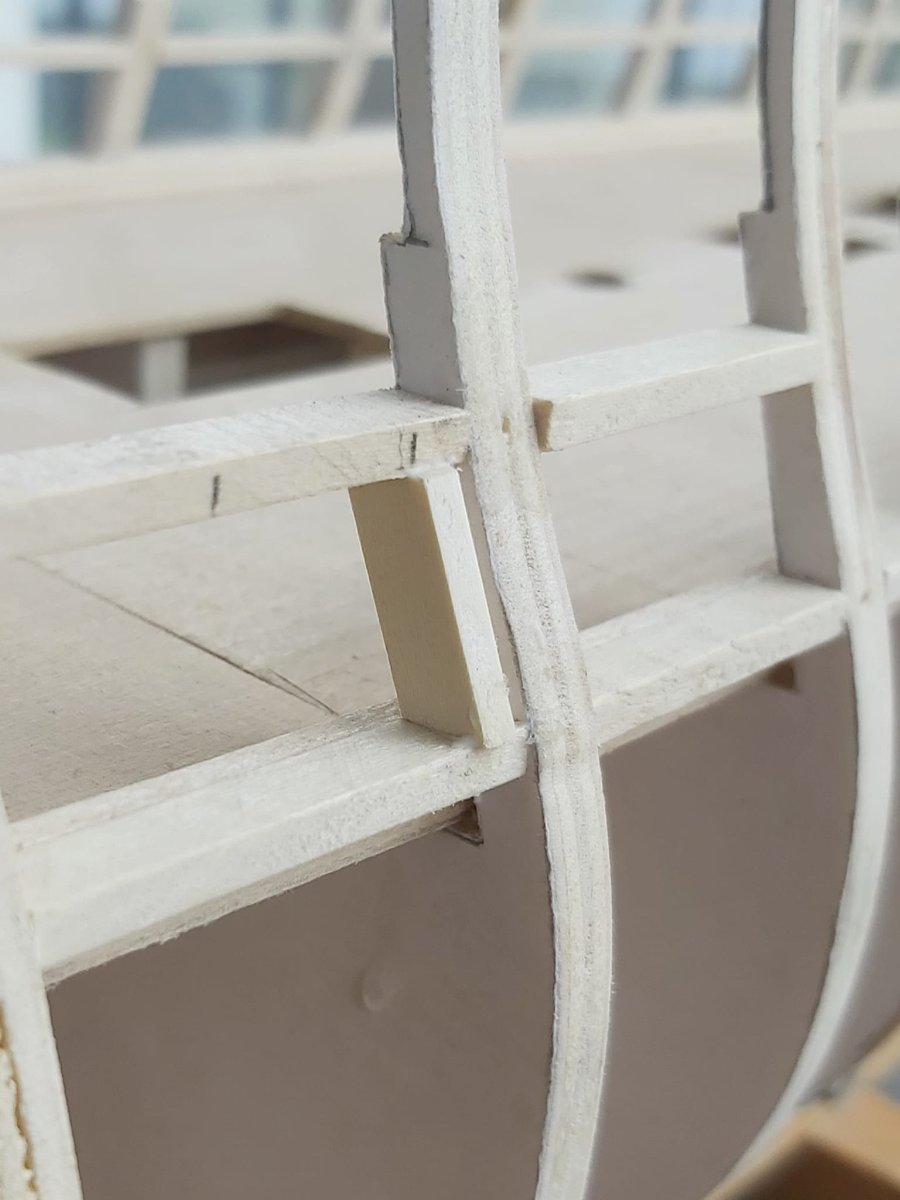
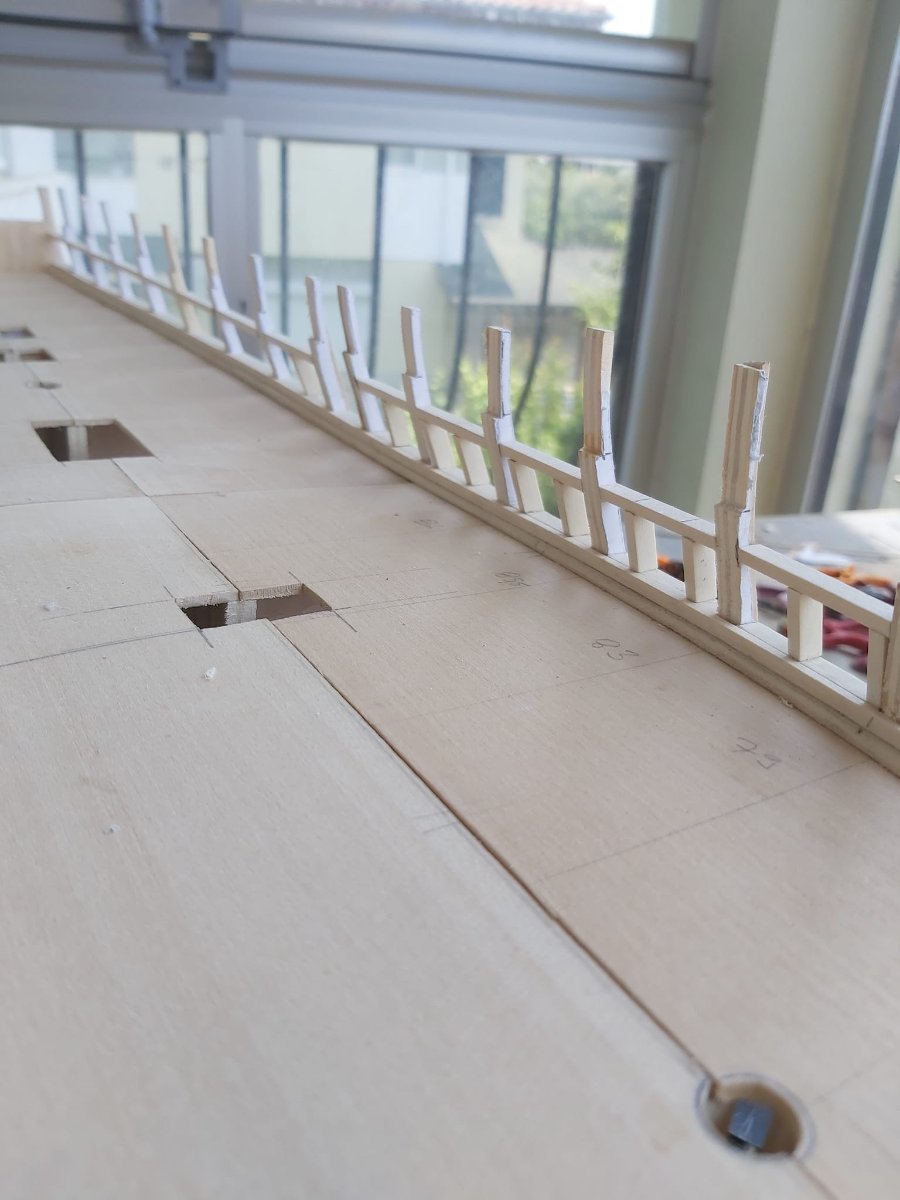
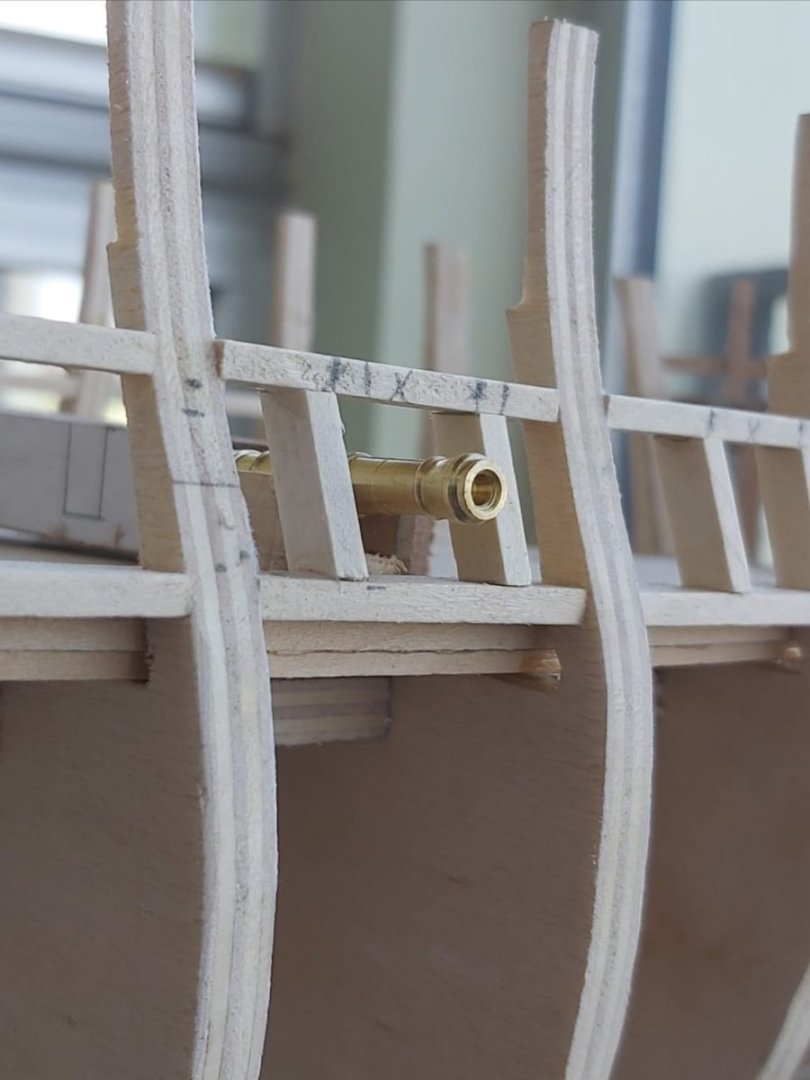
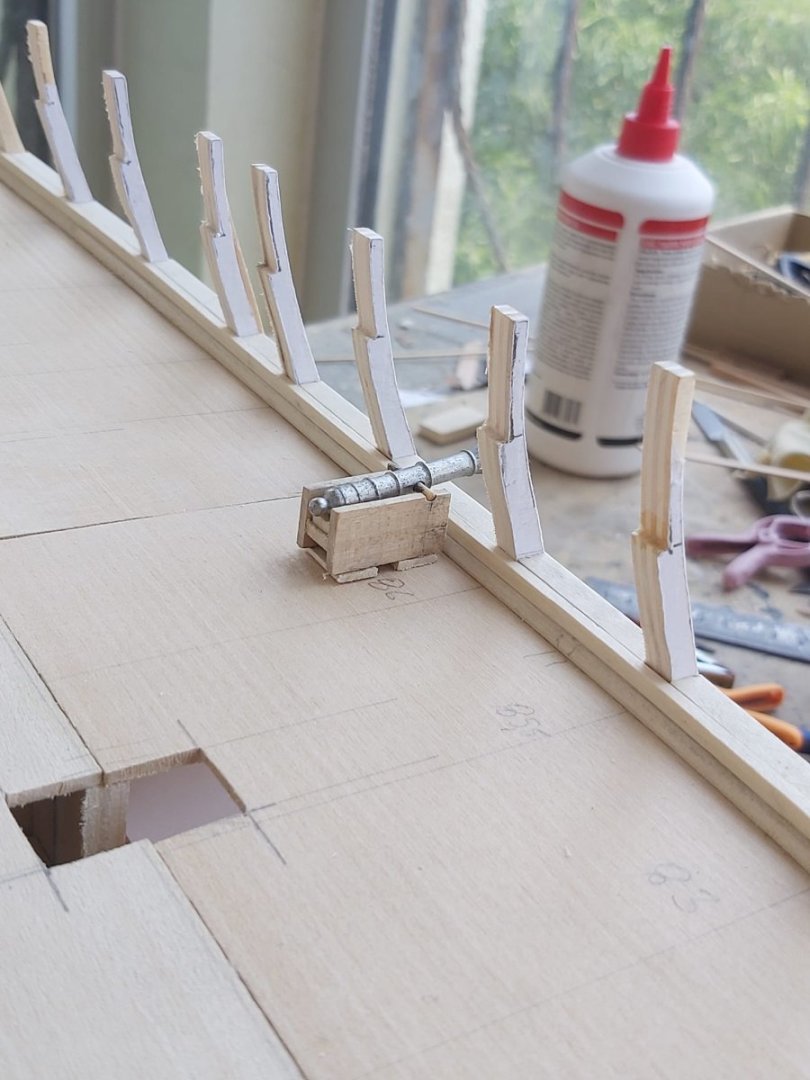
I started the assembly of the gunport headers on the gun deck by completing the waterways. Like other modelers, I used spacers to keep the headers at the same height. I will add the cannons with full rigged carriages instead of dummy cannons on the gun deck.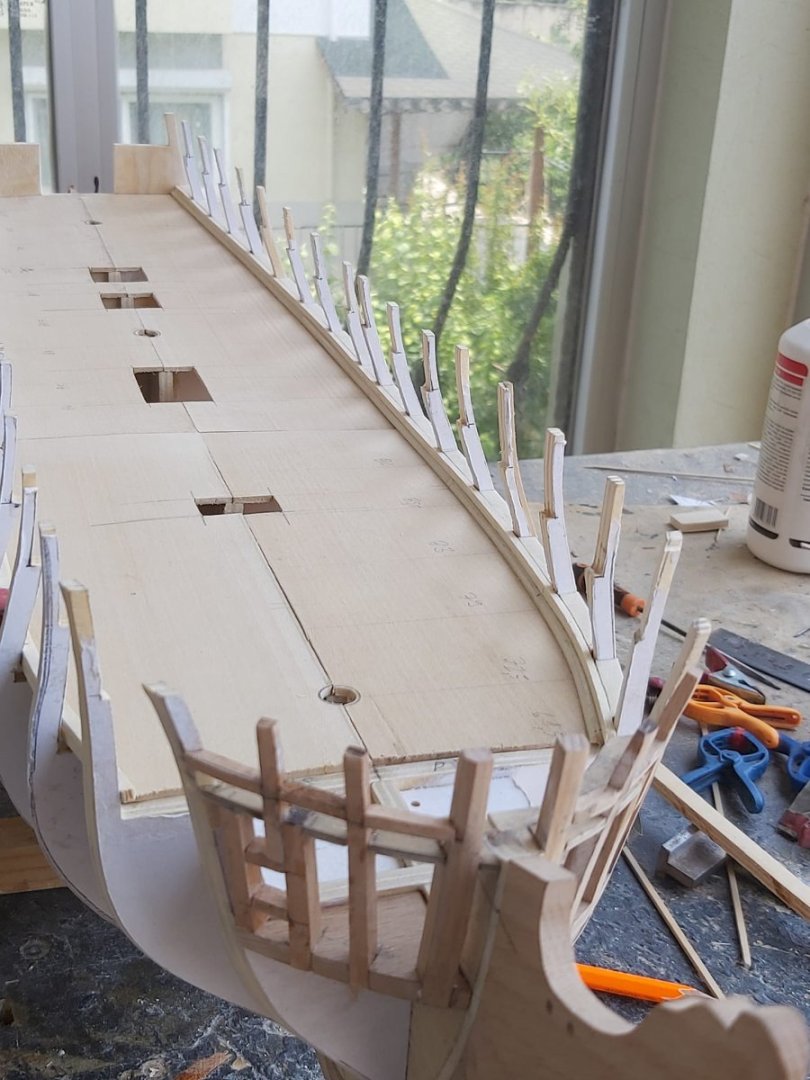

-
USS Constitution by mtbediz - 1:76
mtbediz replied to mtbediz's topic in - Build logs for subjects built 1751 - 1800
Thank you my friend. Do you have a build log? It would be interesting to follow for me.