mtbediz
-
Posts
1,339 -
Joined
-
Last visited
Content Type
Profiles
Forums
Gallery
Events
Everything posted by mtbediz
-

USS Constitution by mtbediz - 1:76
mtbediz replied to mtbediz's topic in - Build logs for subjects built 1751 - 1800
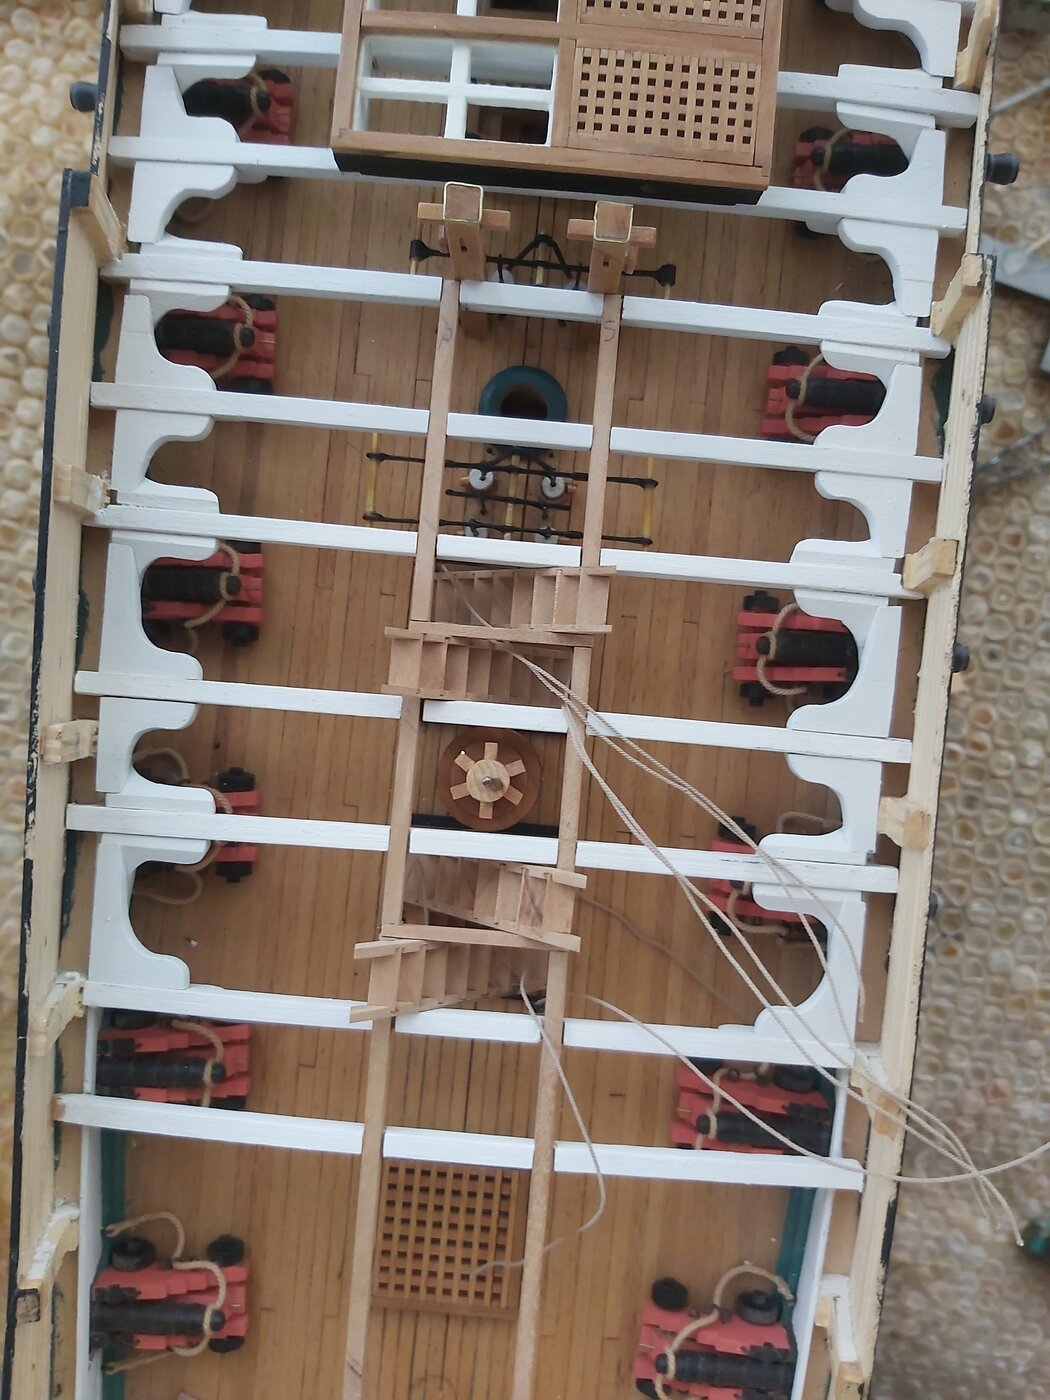
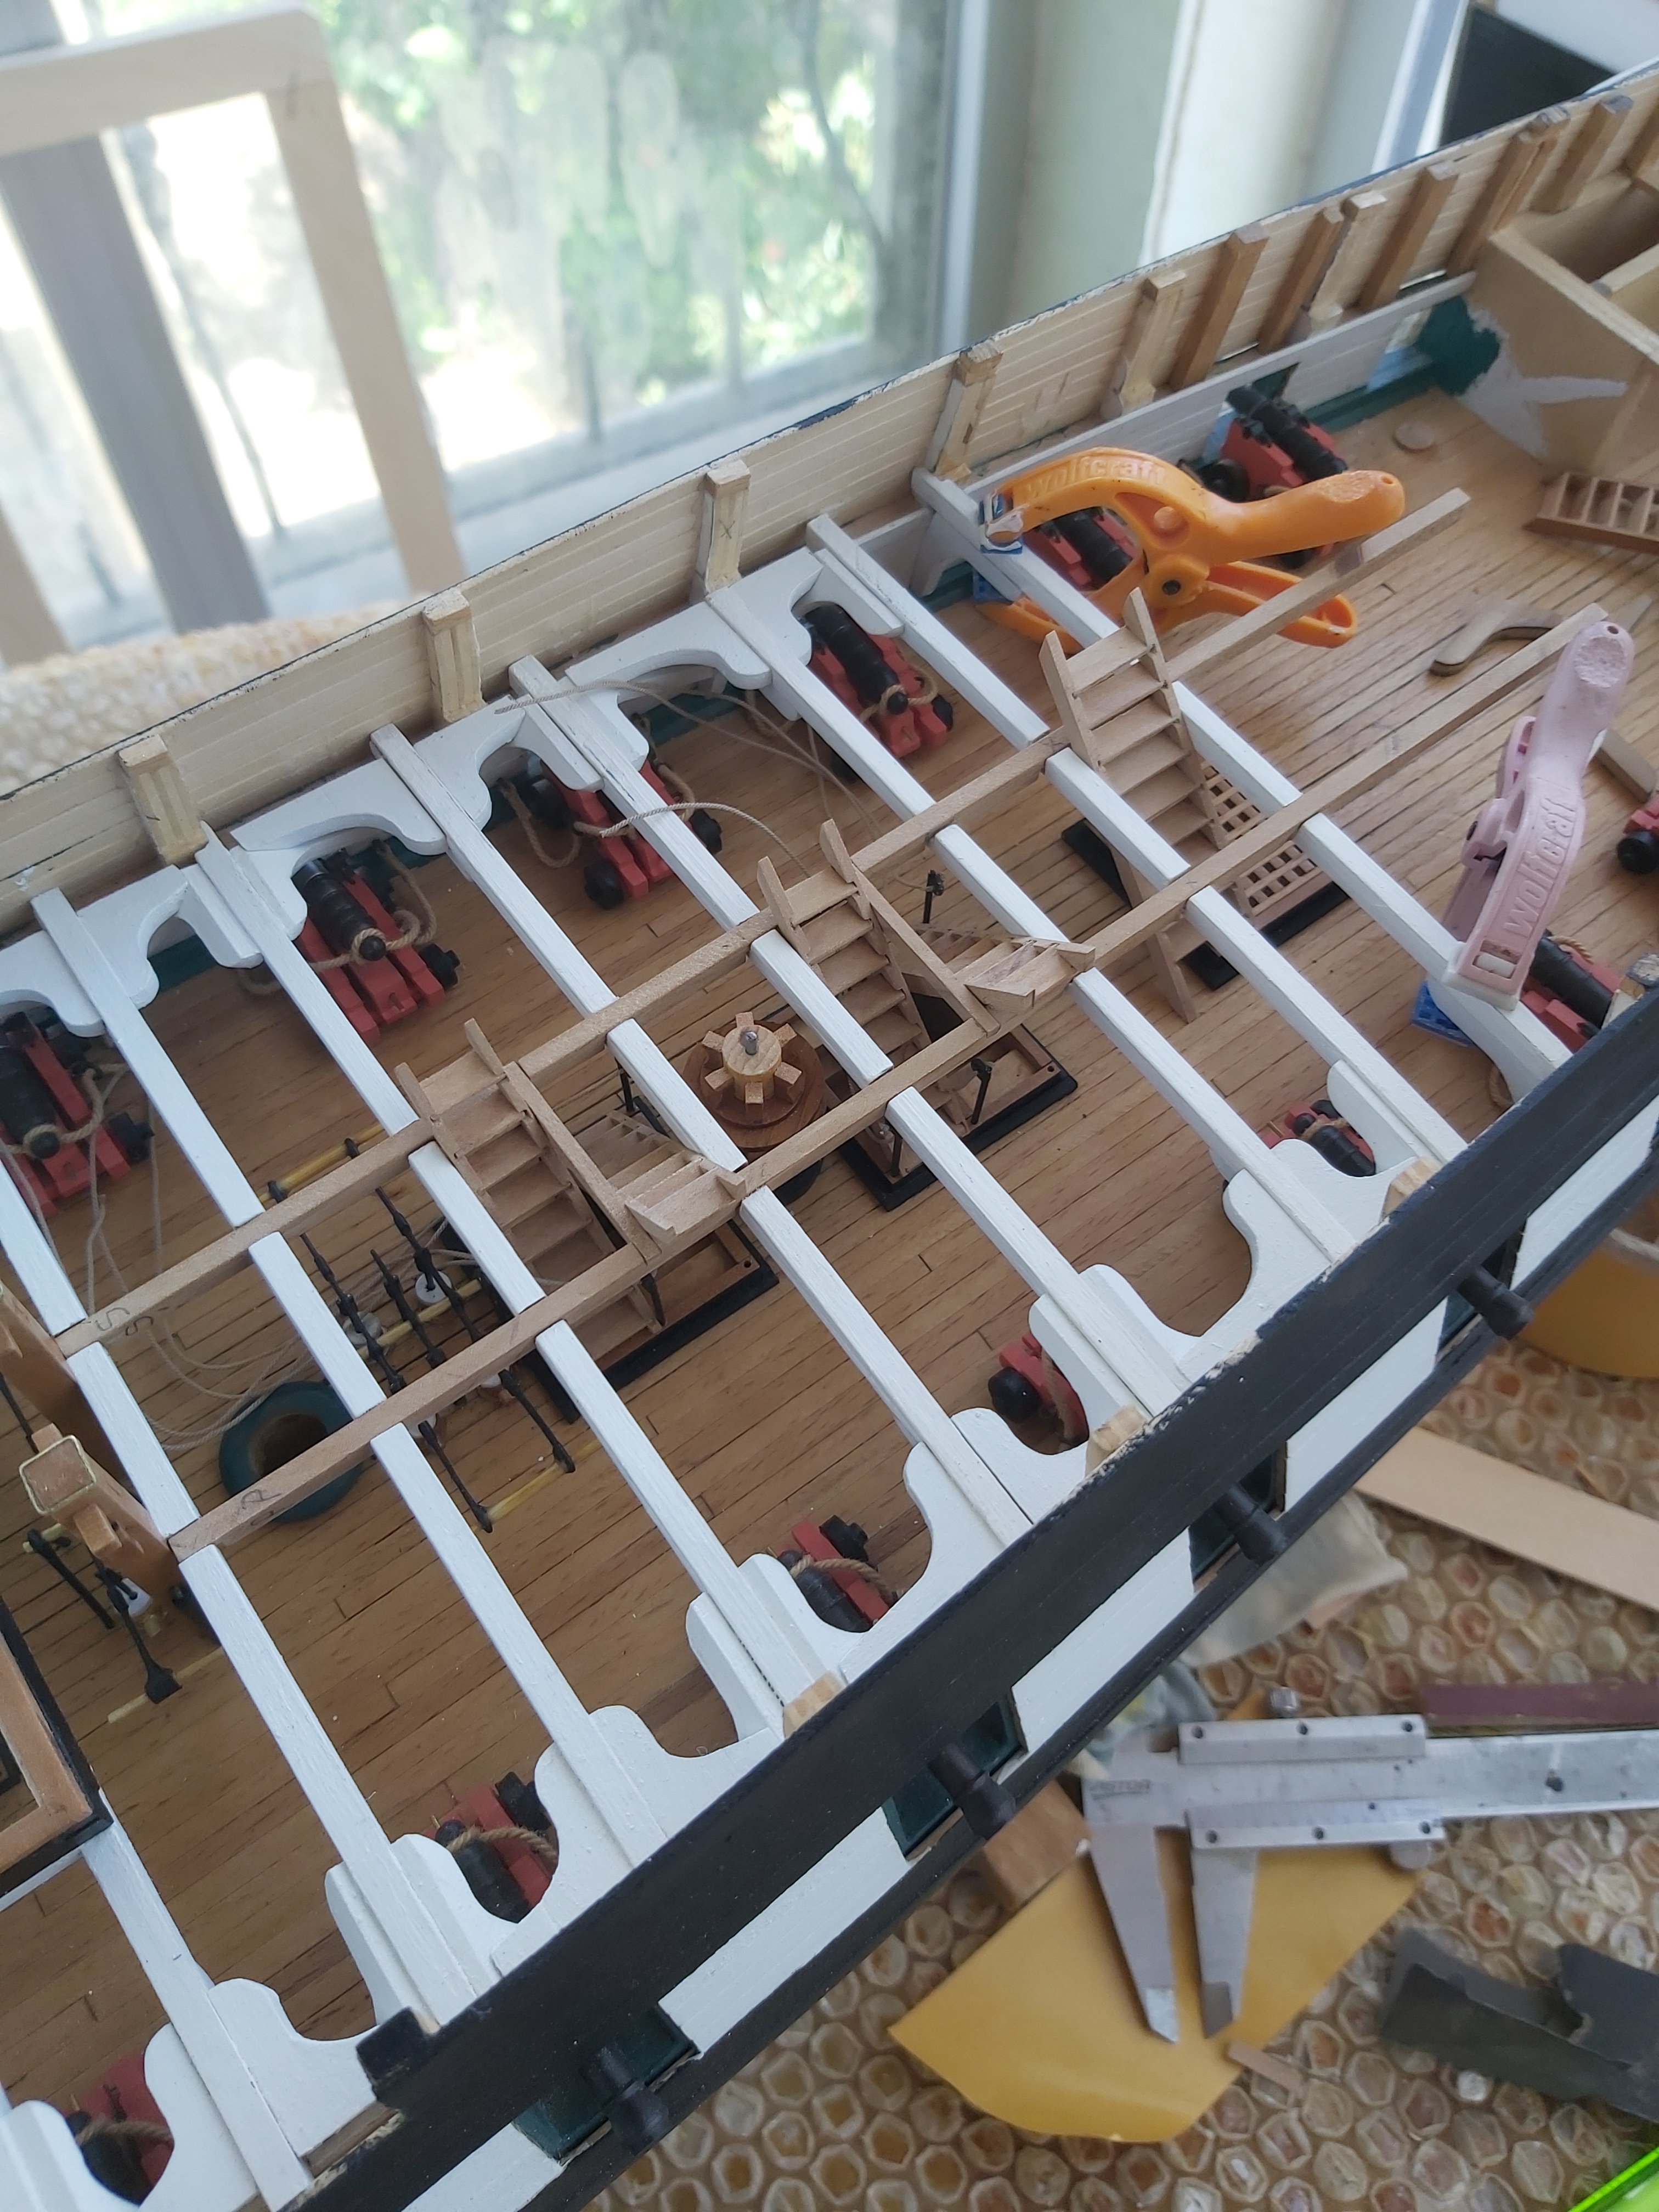
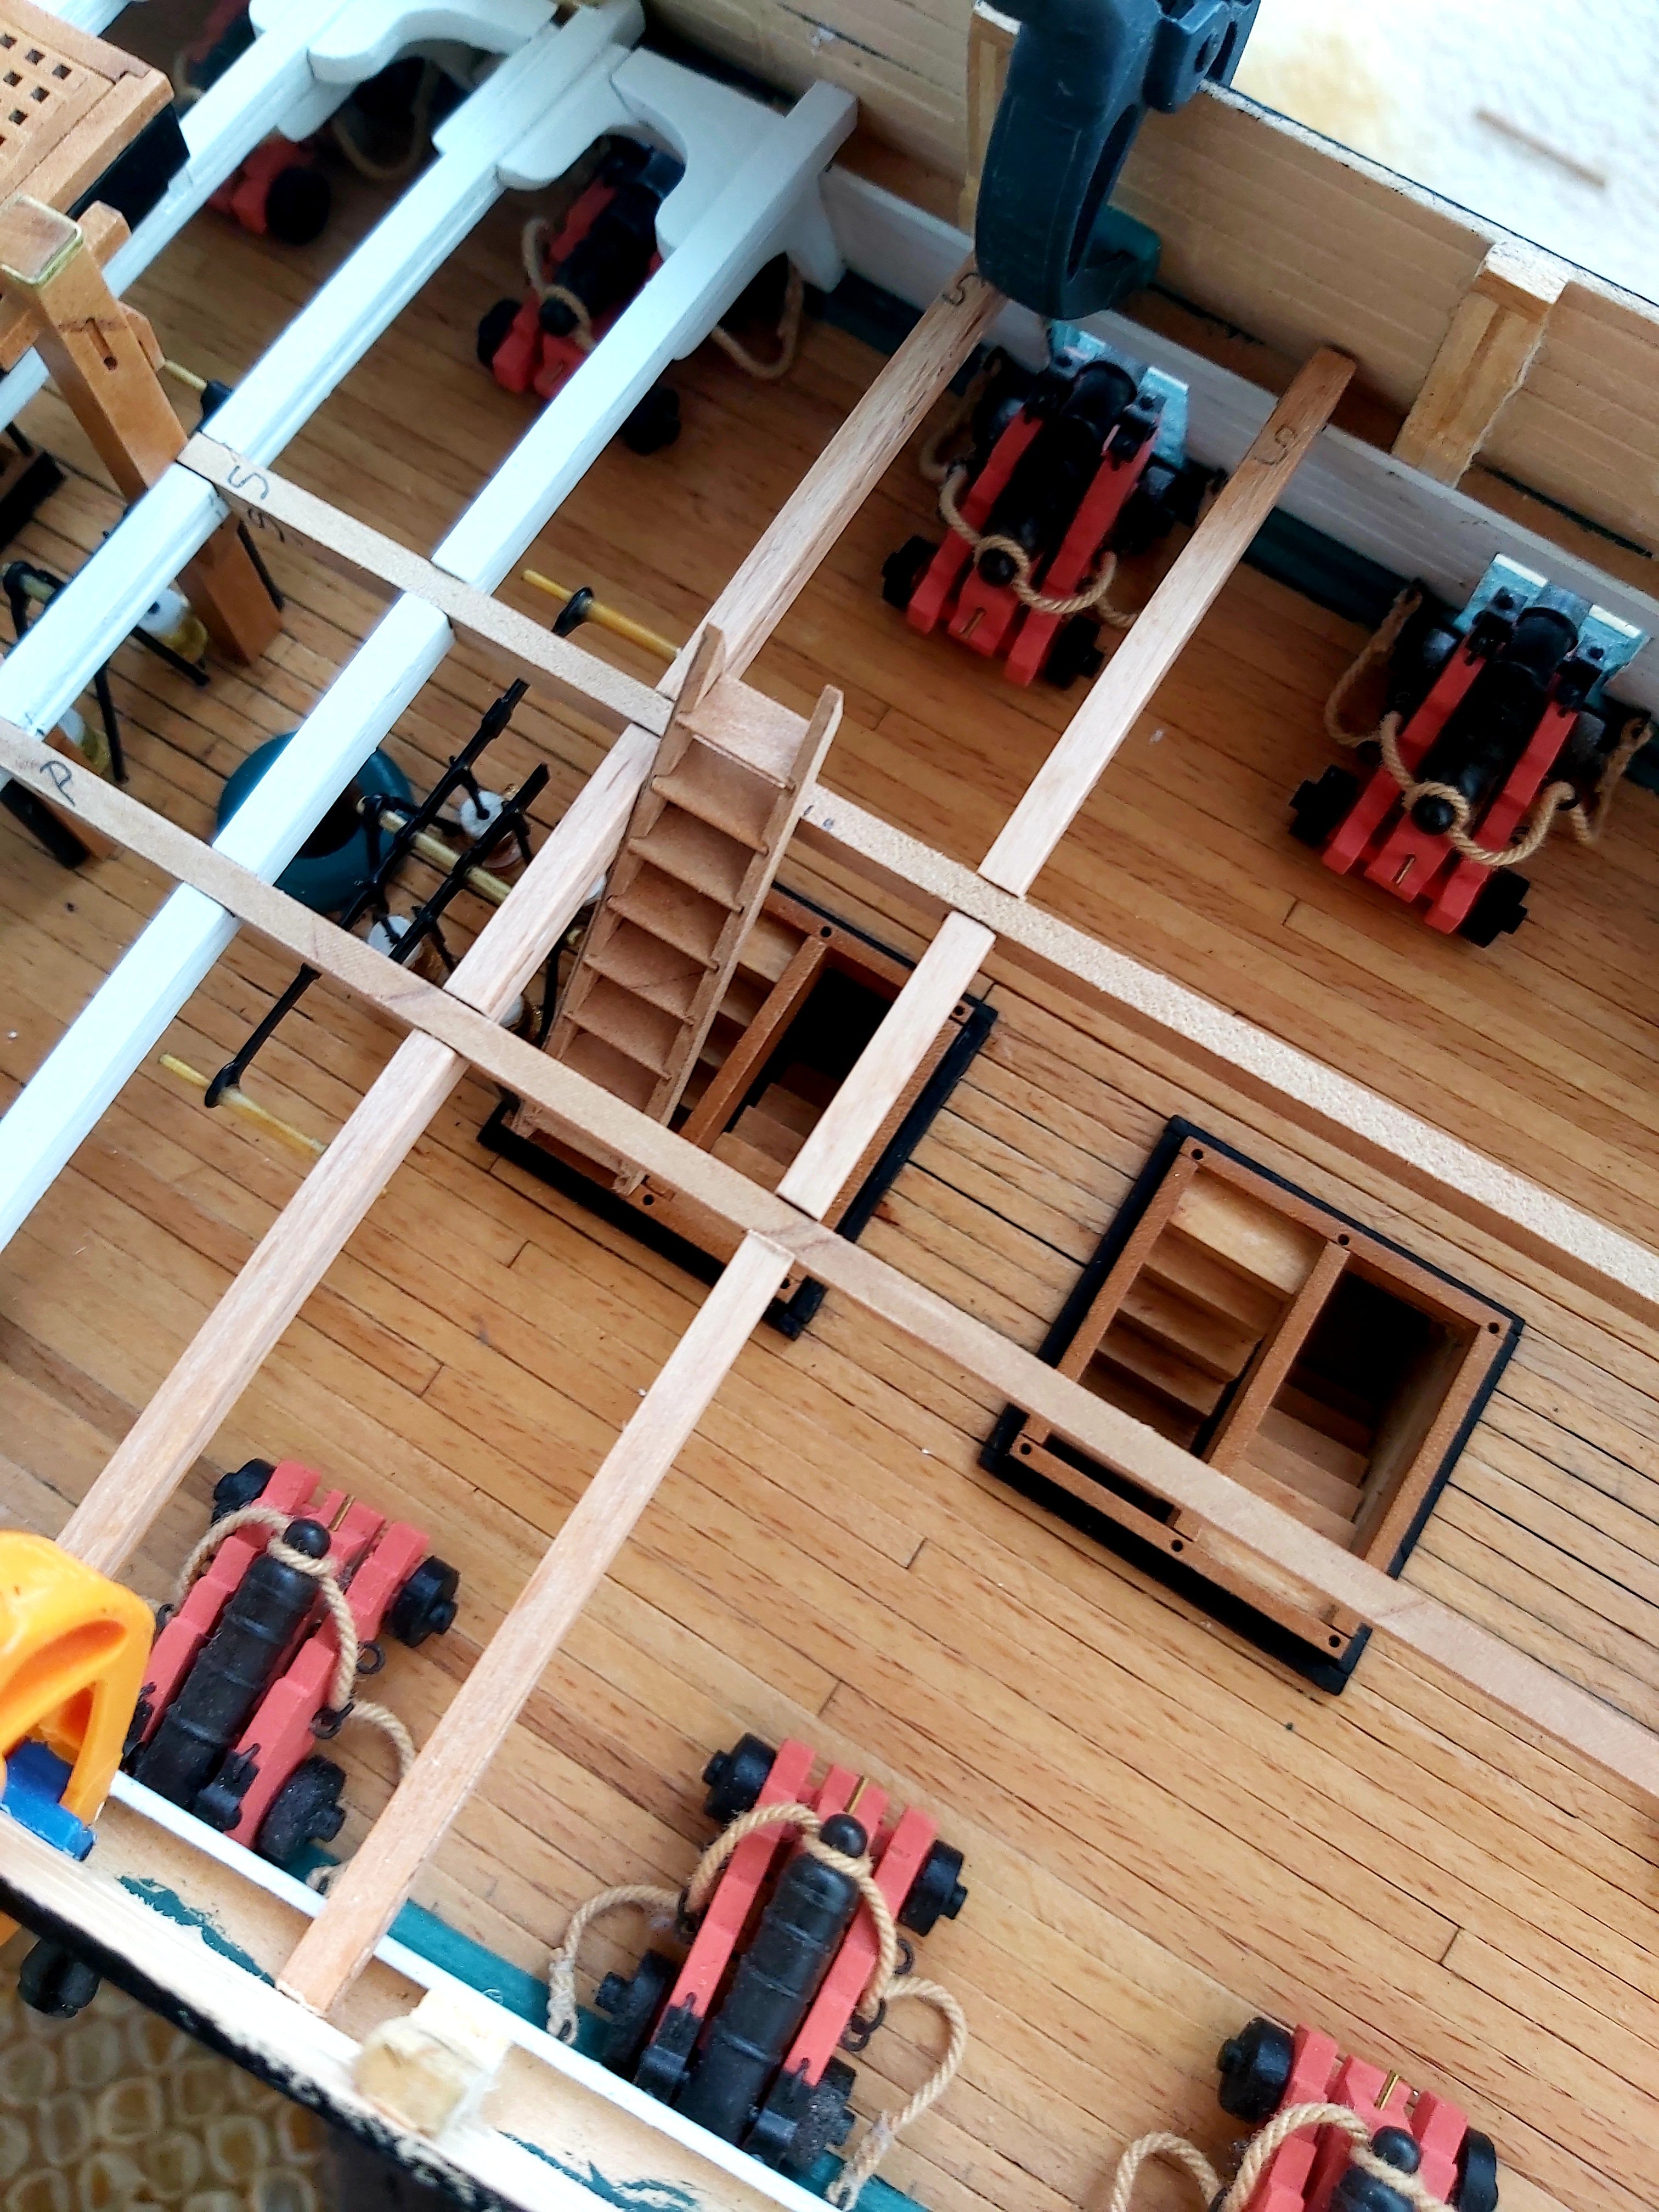
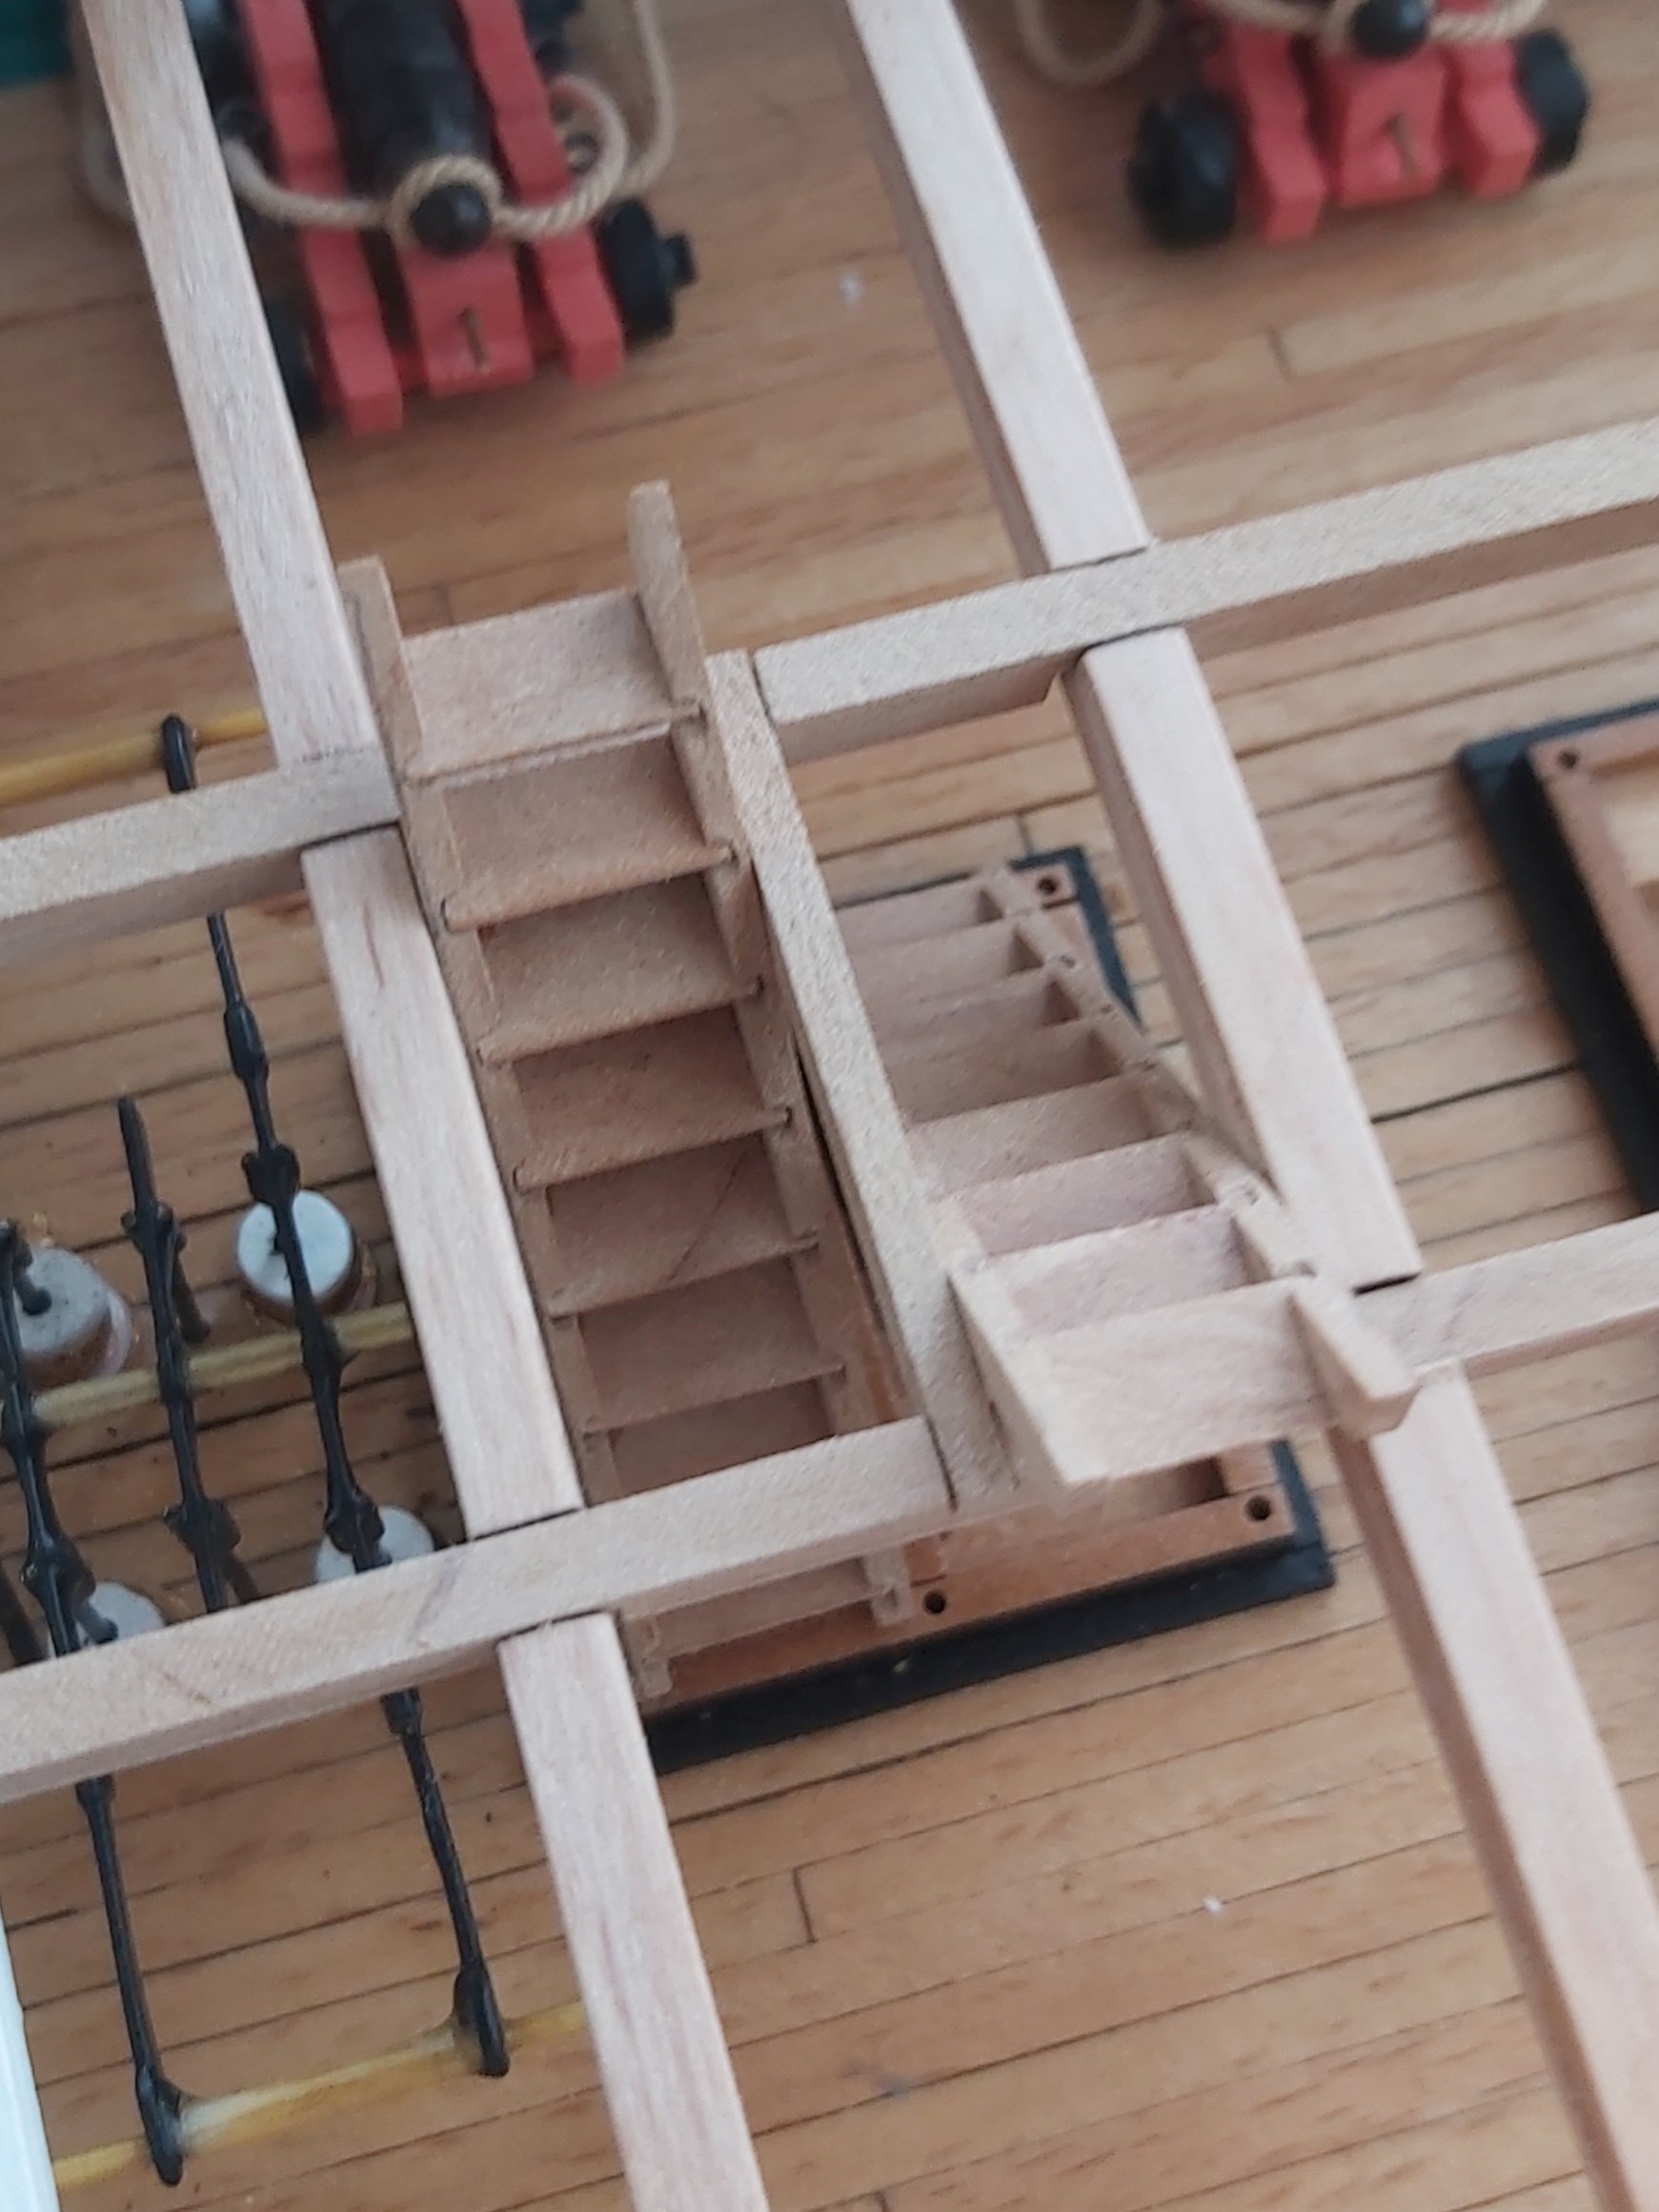
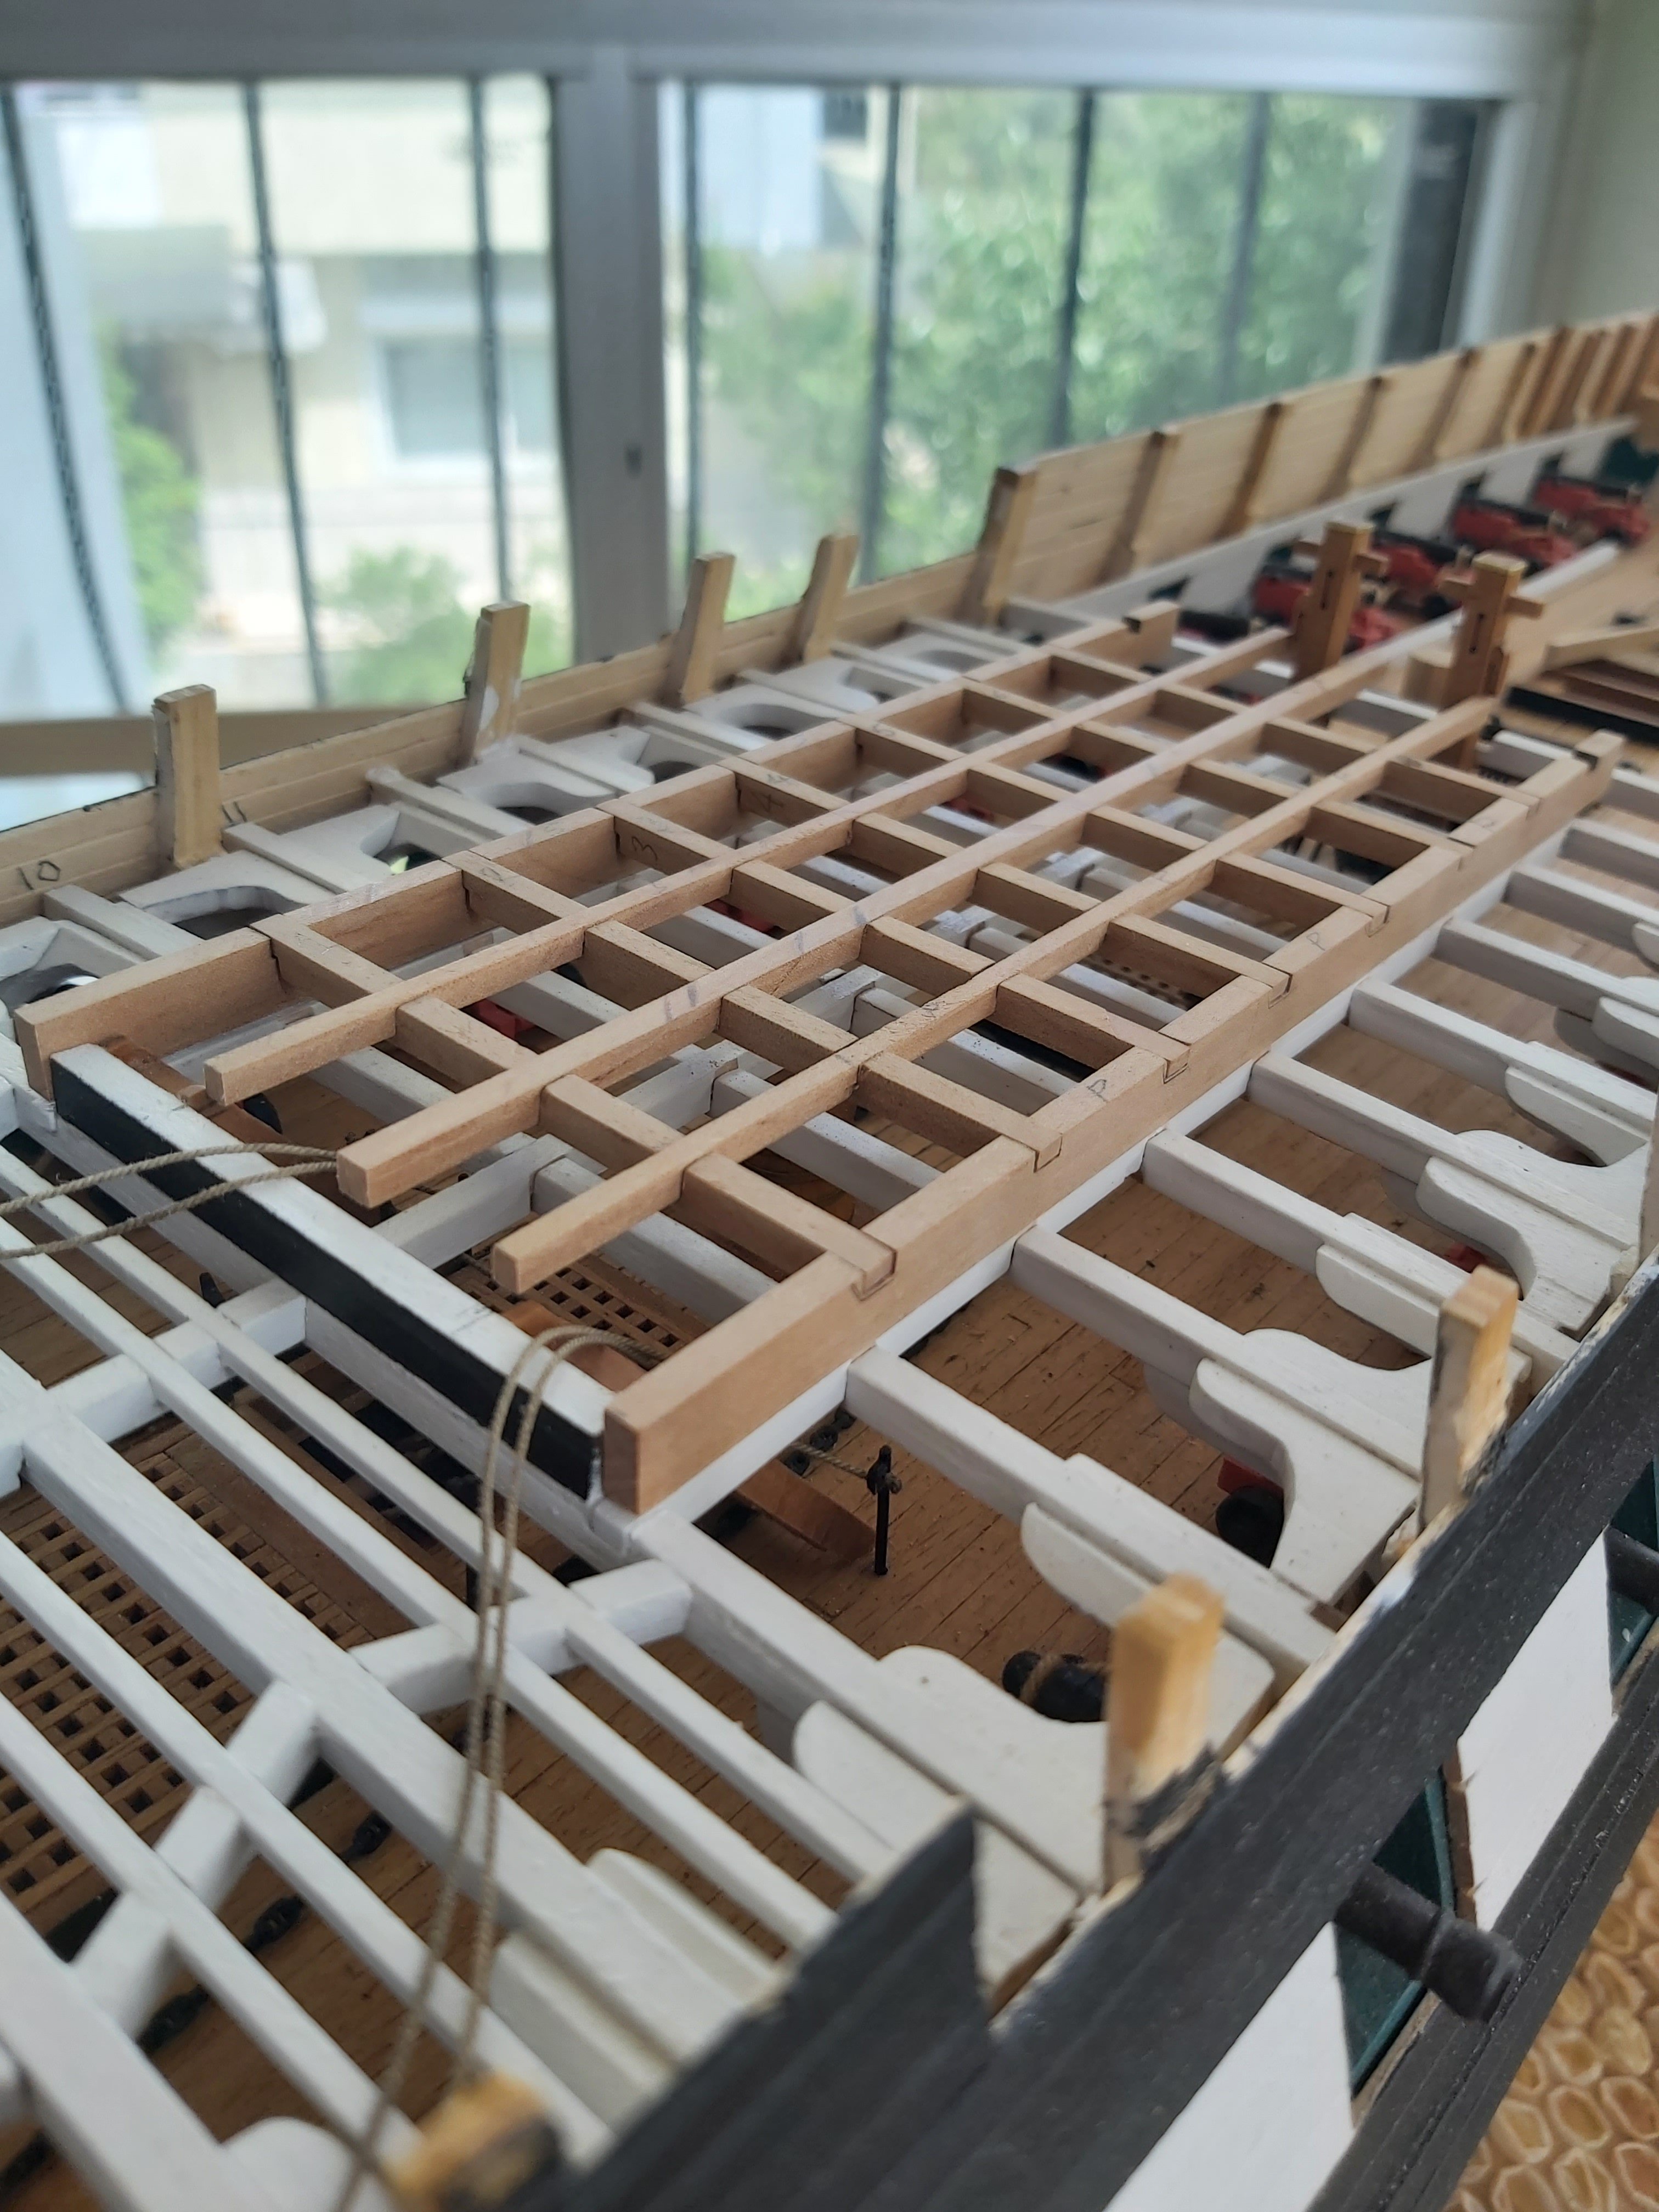
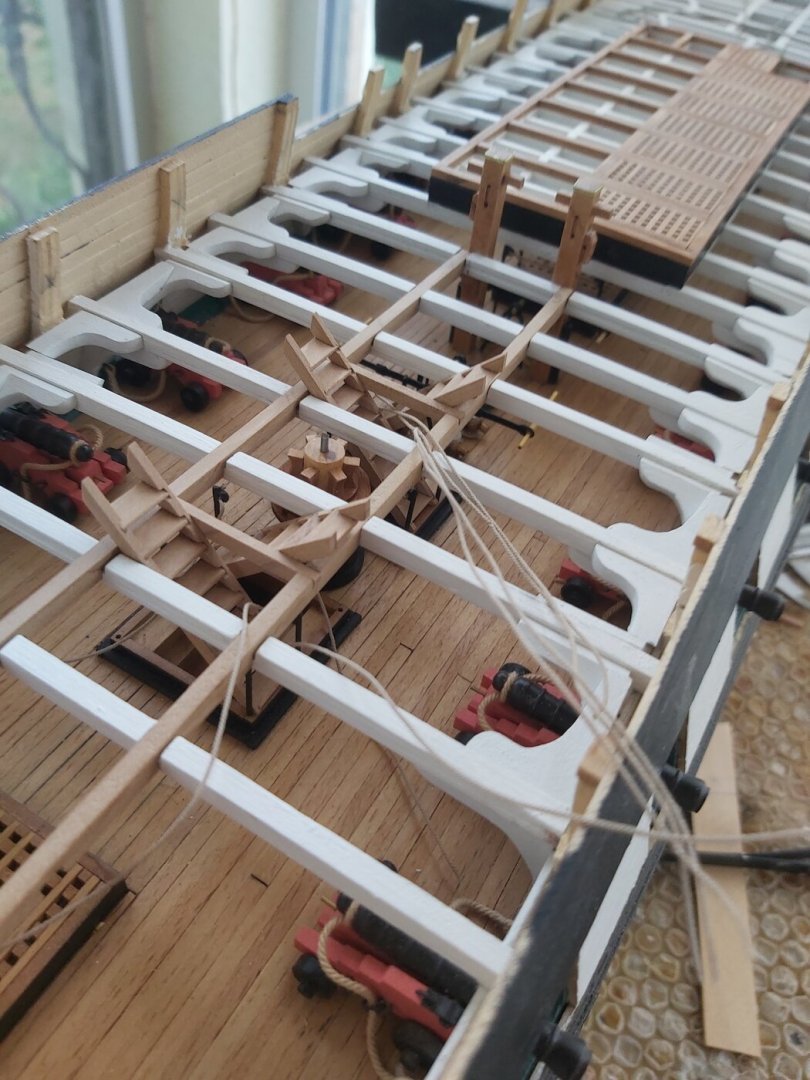
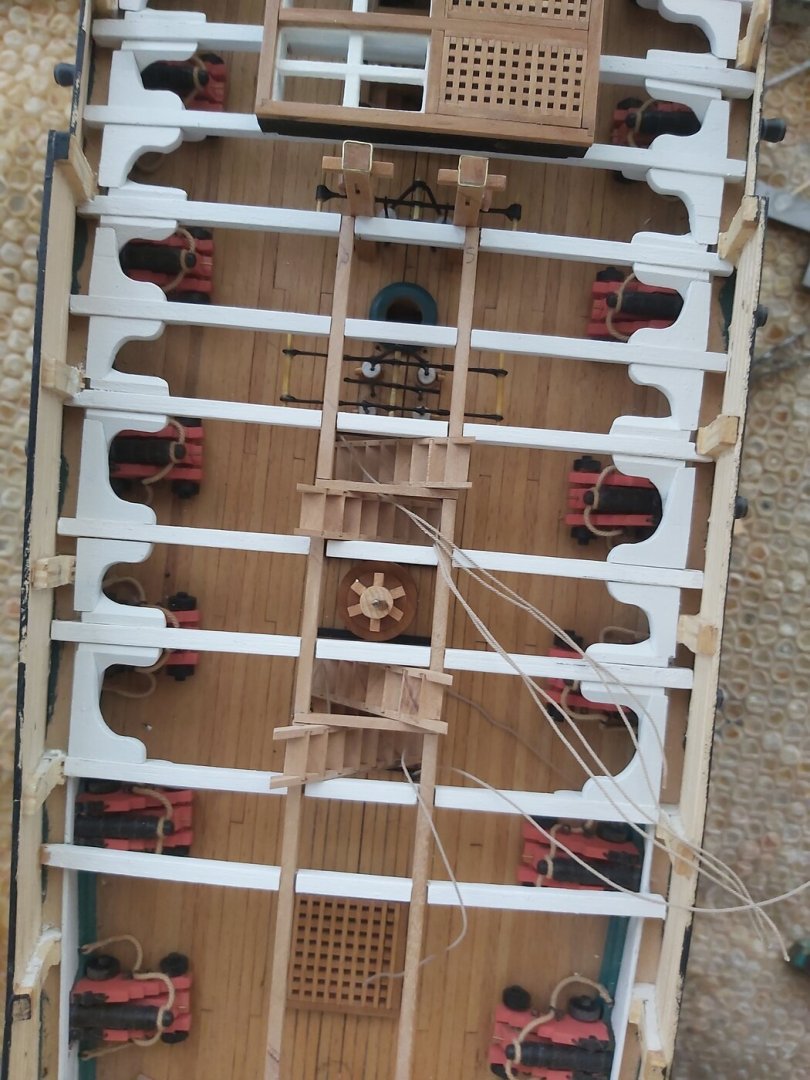
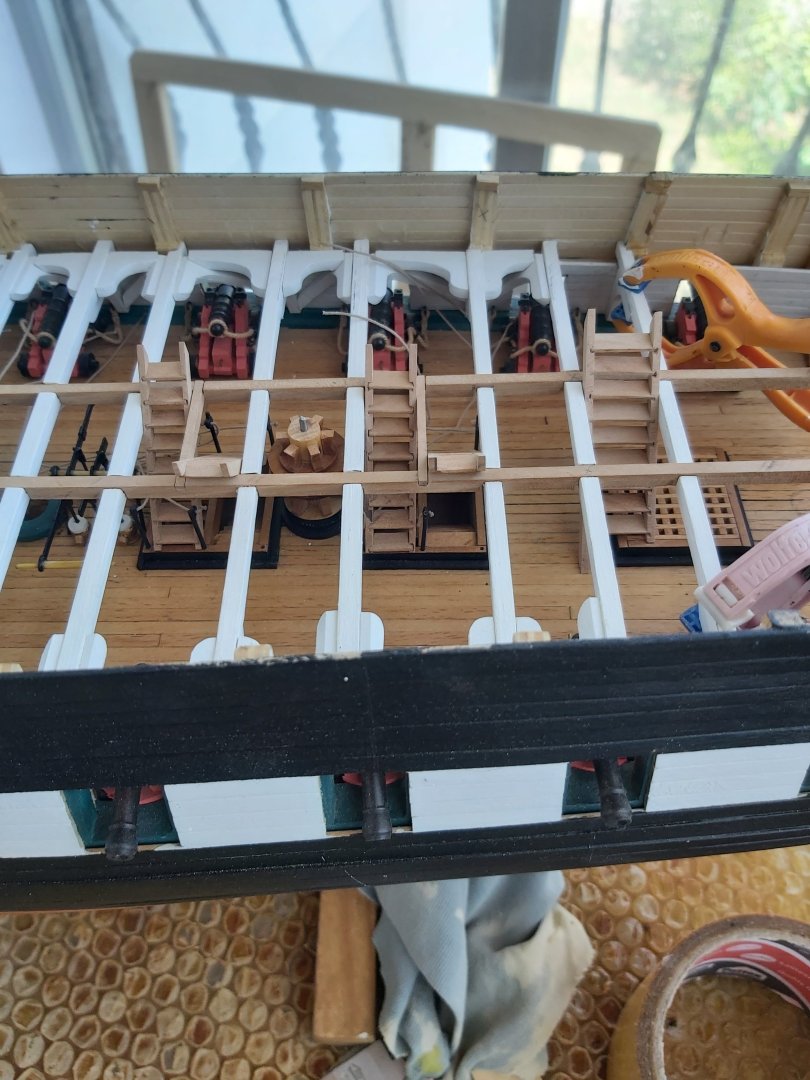
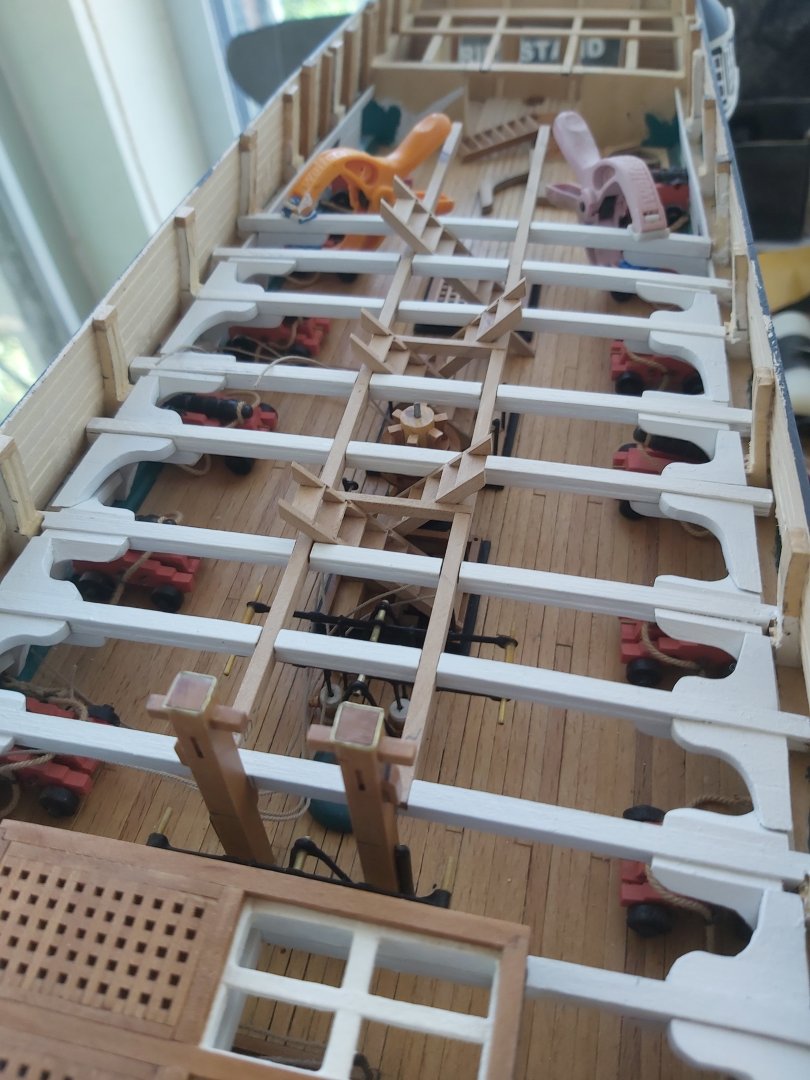
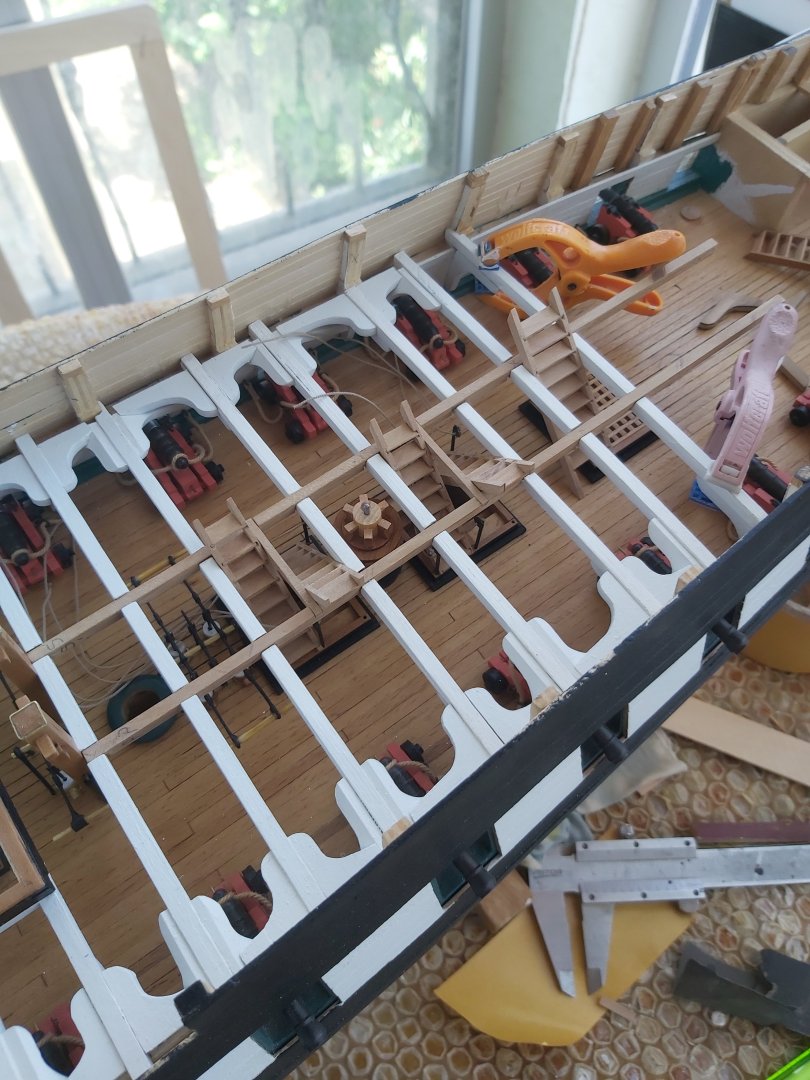
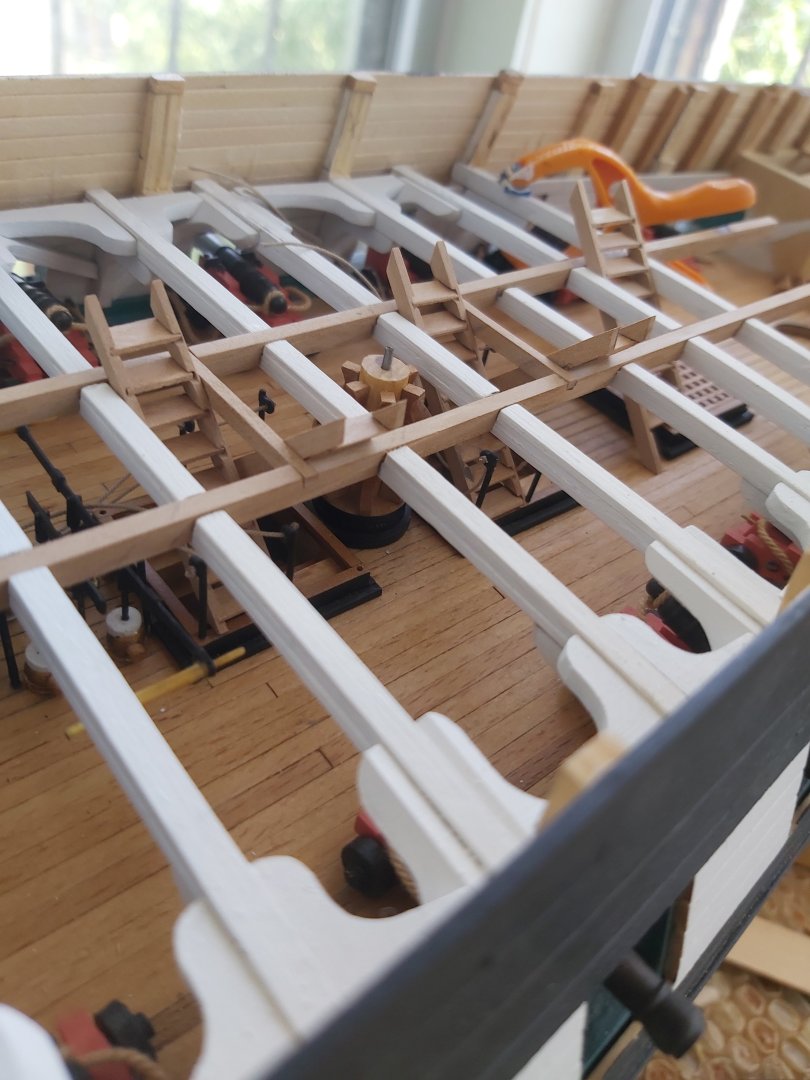
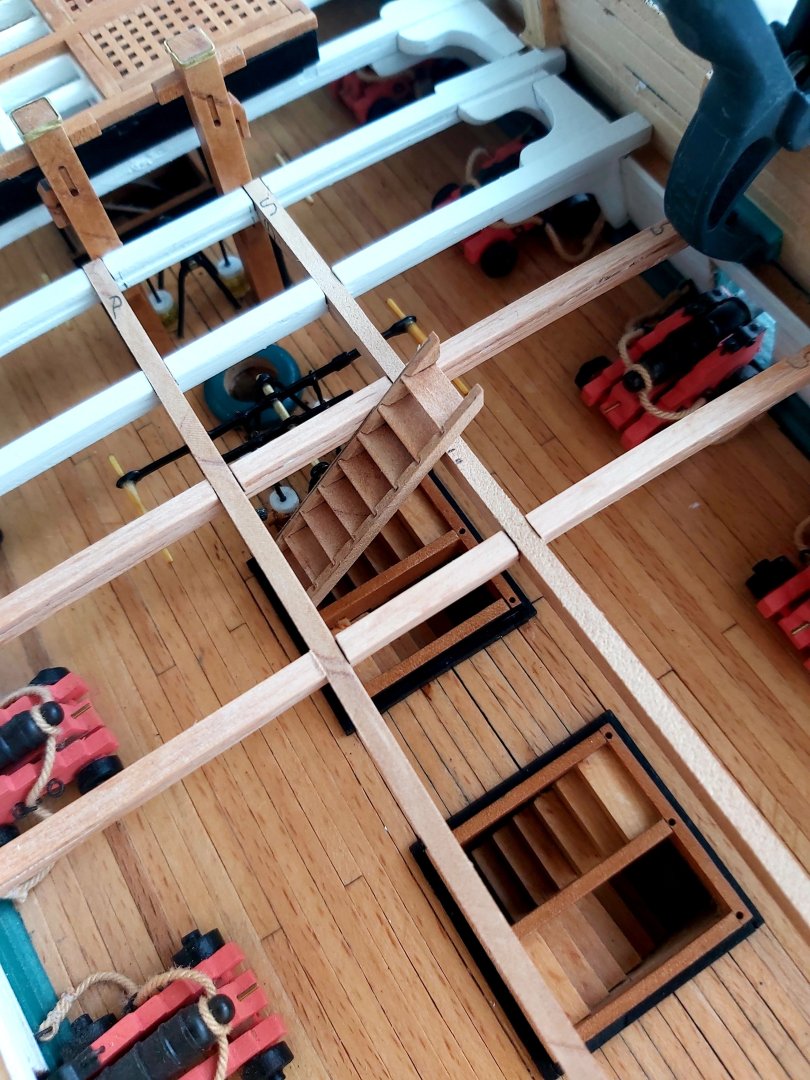
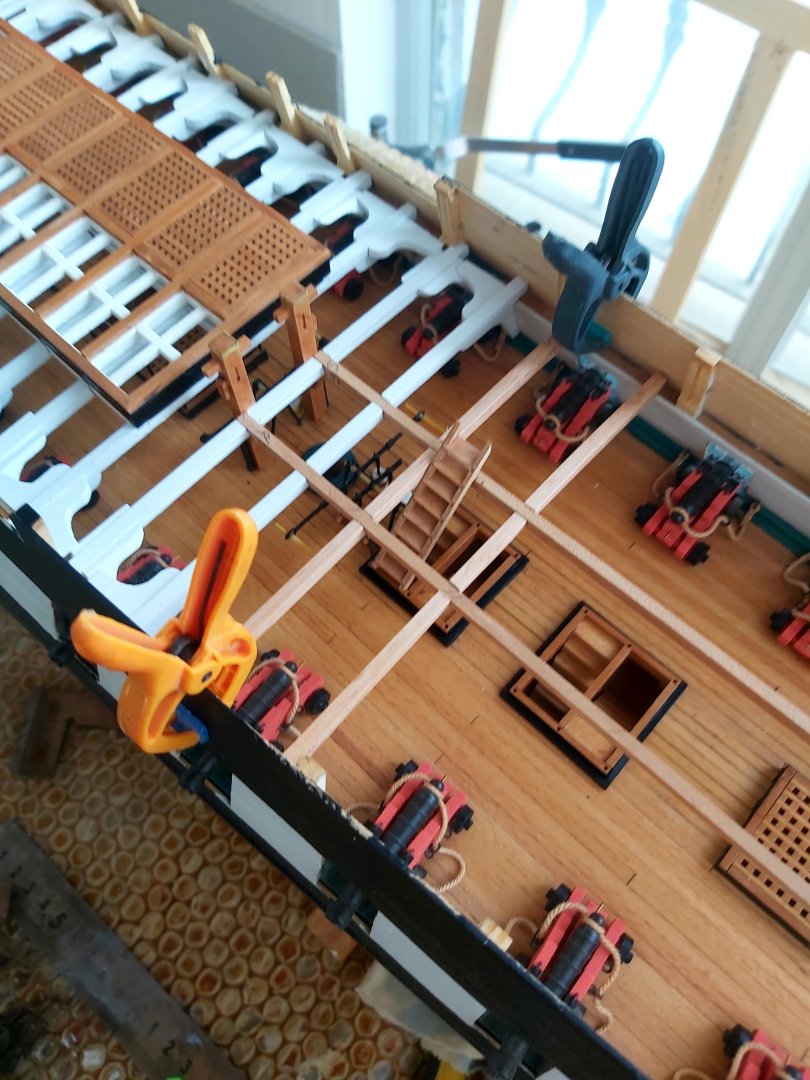
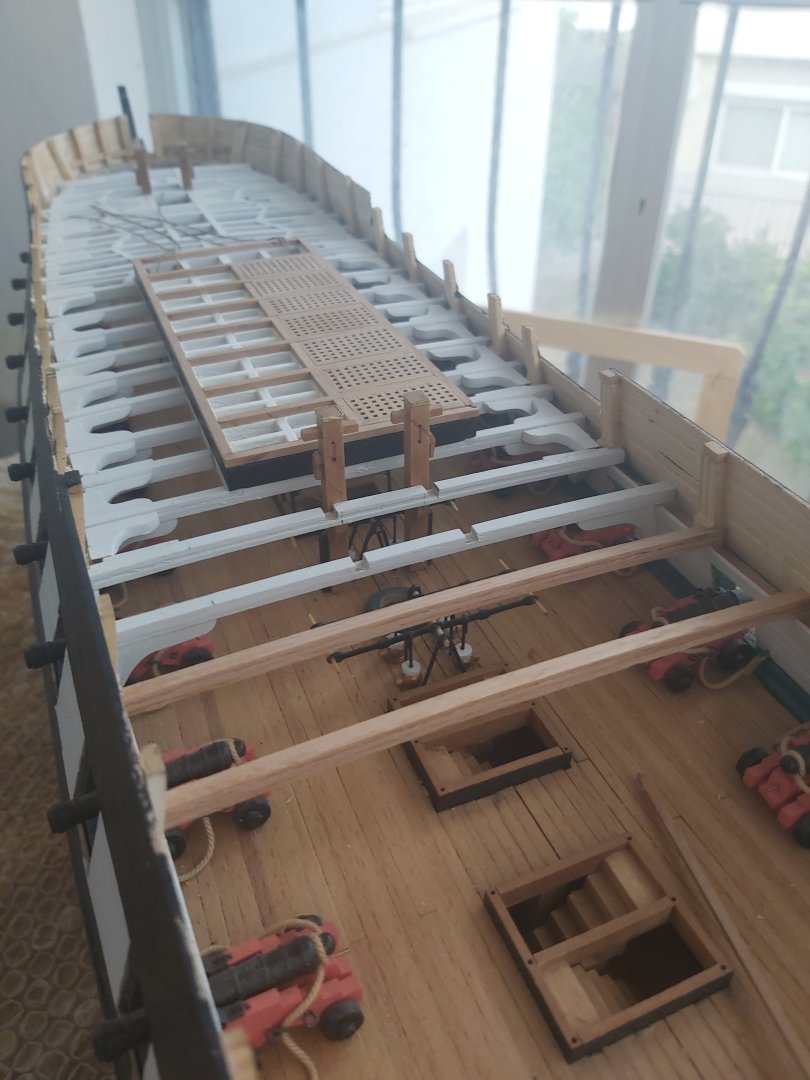
The ladders going from spar deck to the gun deck are in place for dry fitting.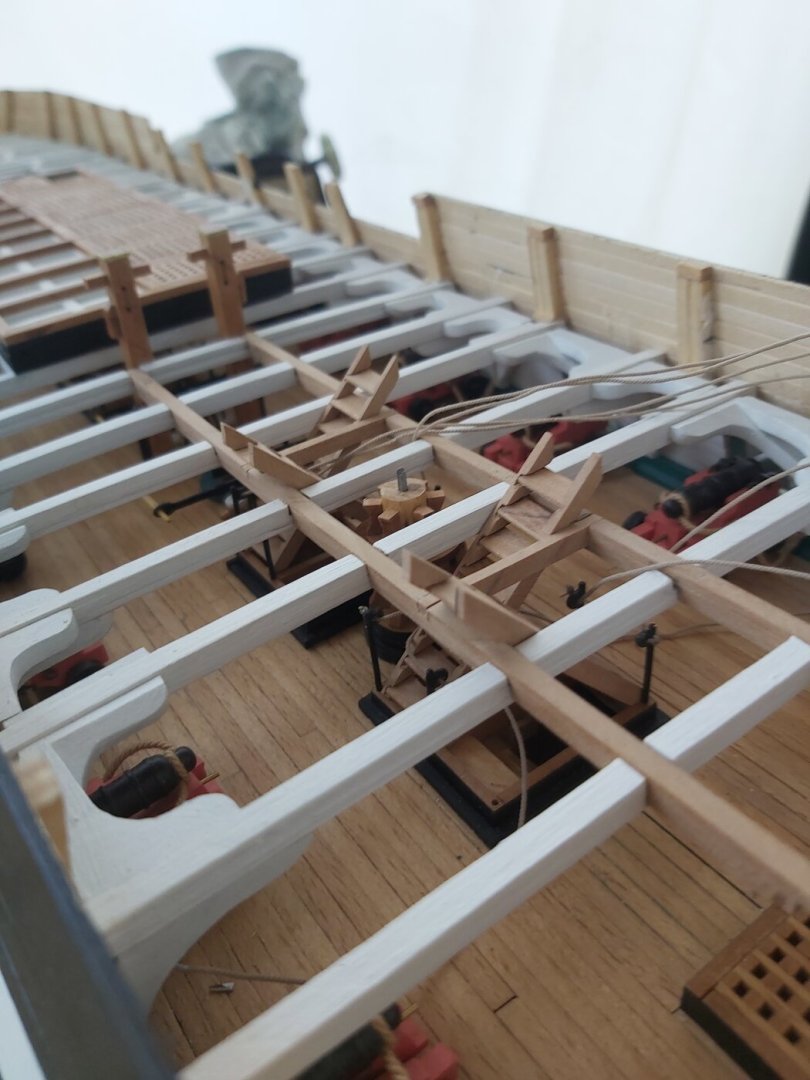


-
USS Constitution by mtbediz - 1:76
mtbediz replied to mtbediz's topic in - Build logs for subjects built 1751 - 1800
Thank you Tobias. -
USS Constitution by mtbediz - 1:76
mtbediz replied to mtbediz's topic in - Build logs for subjects built 1751 - 1800
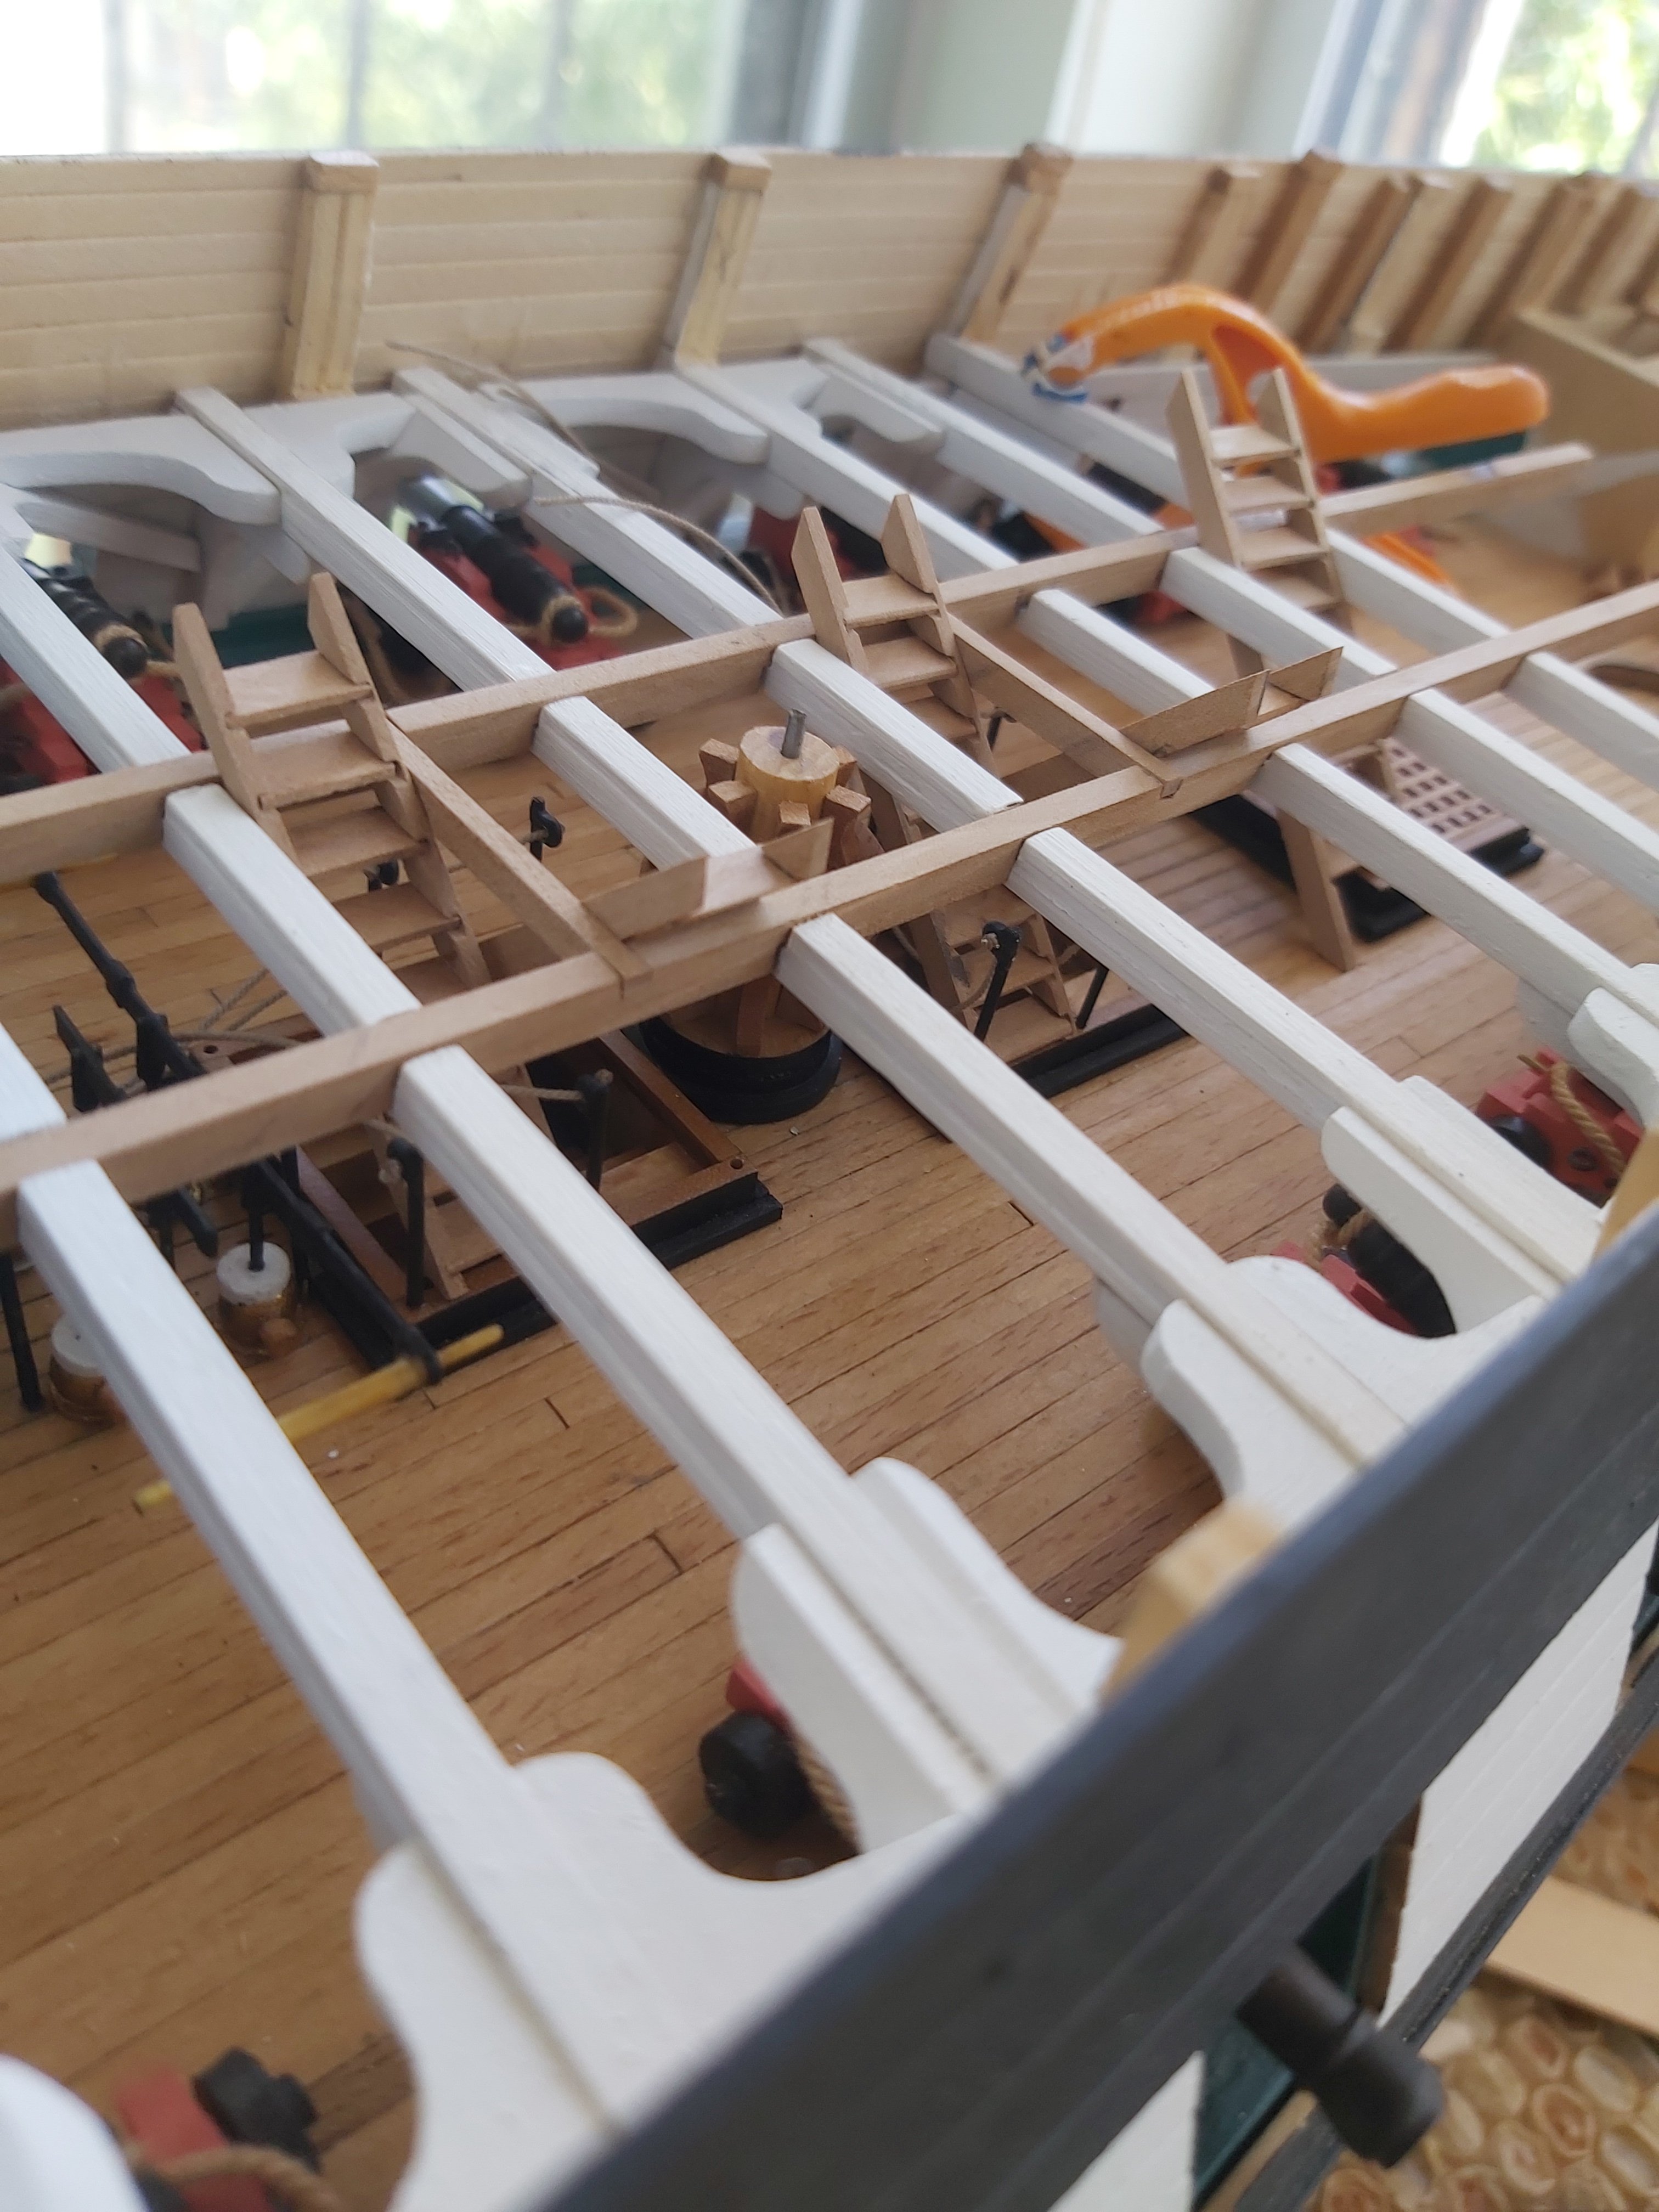
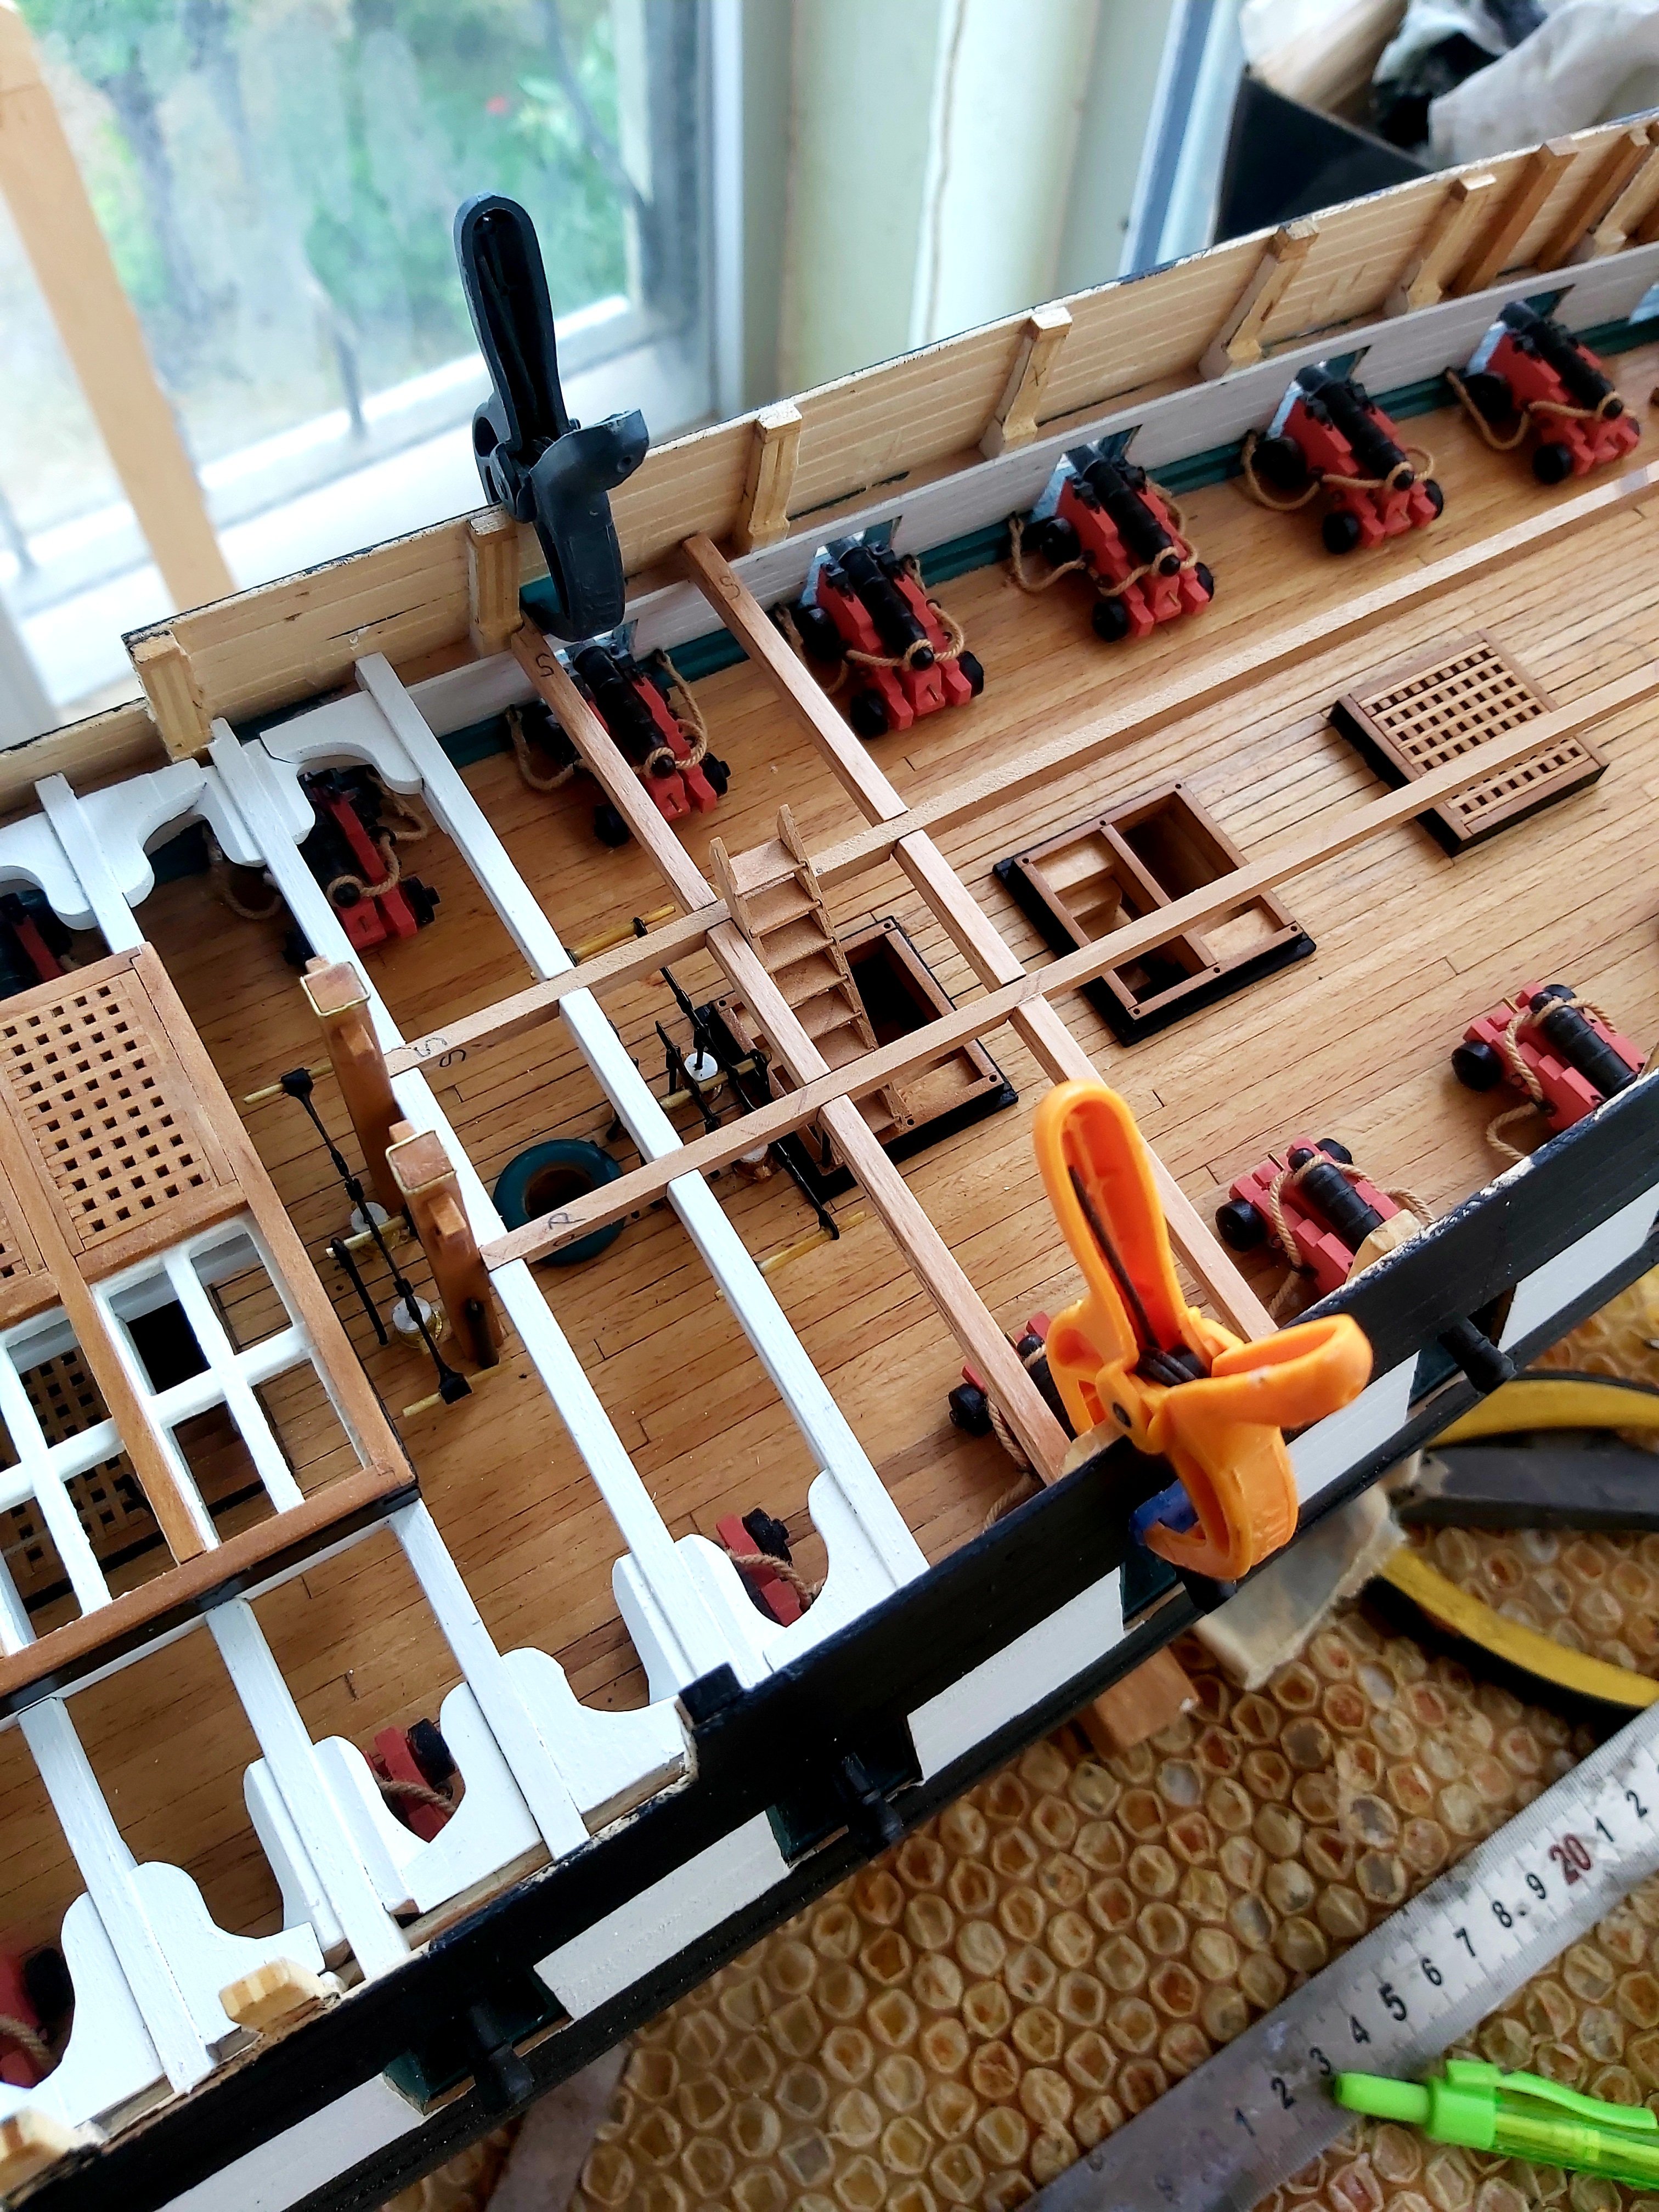
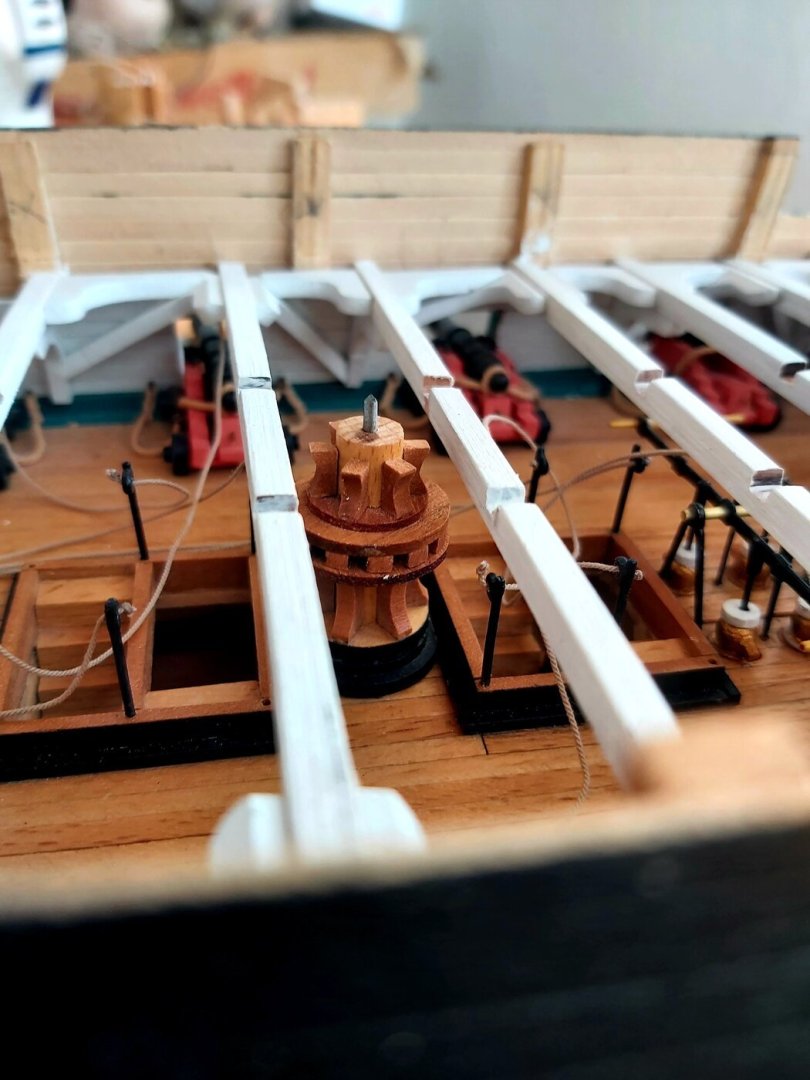
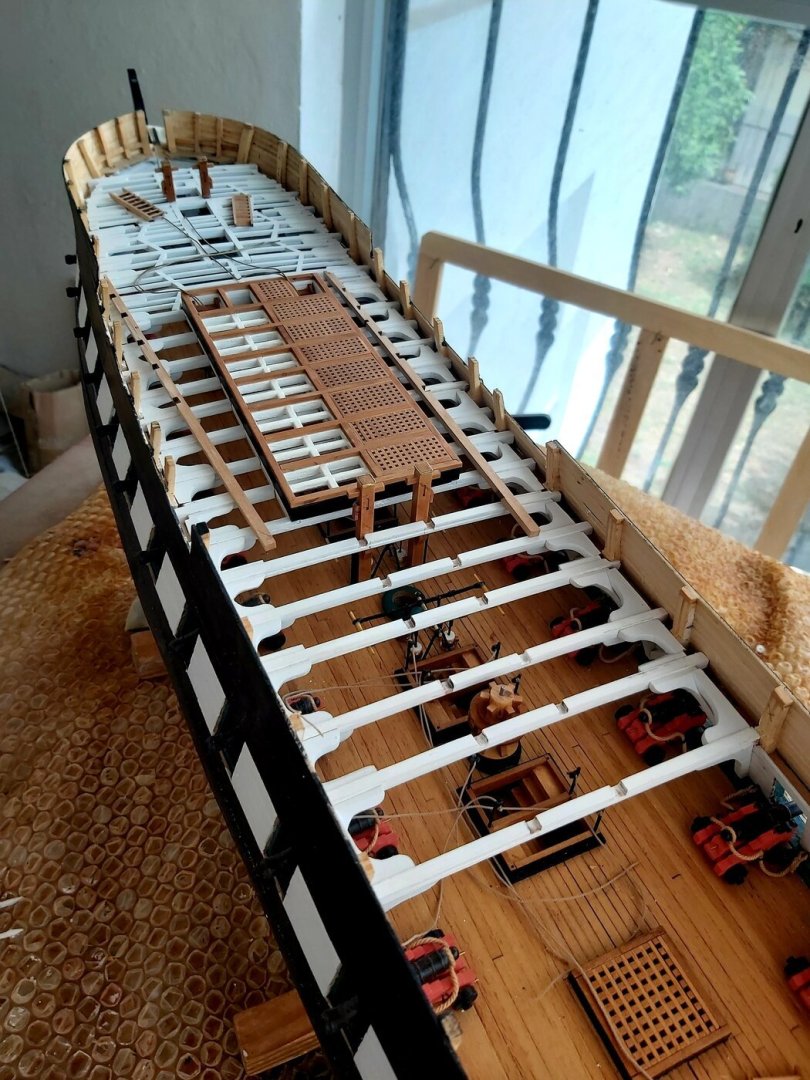
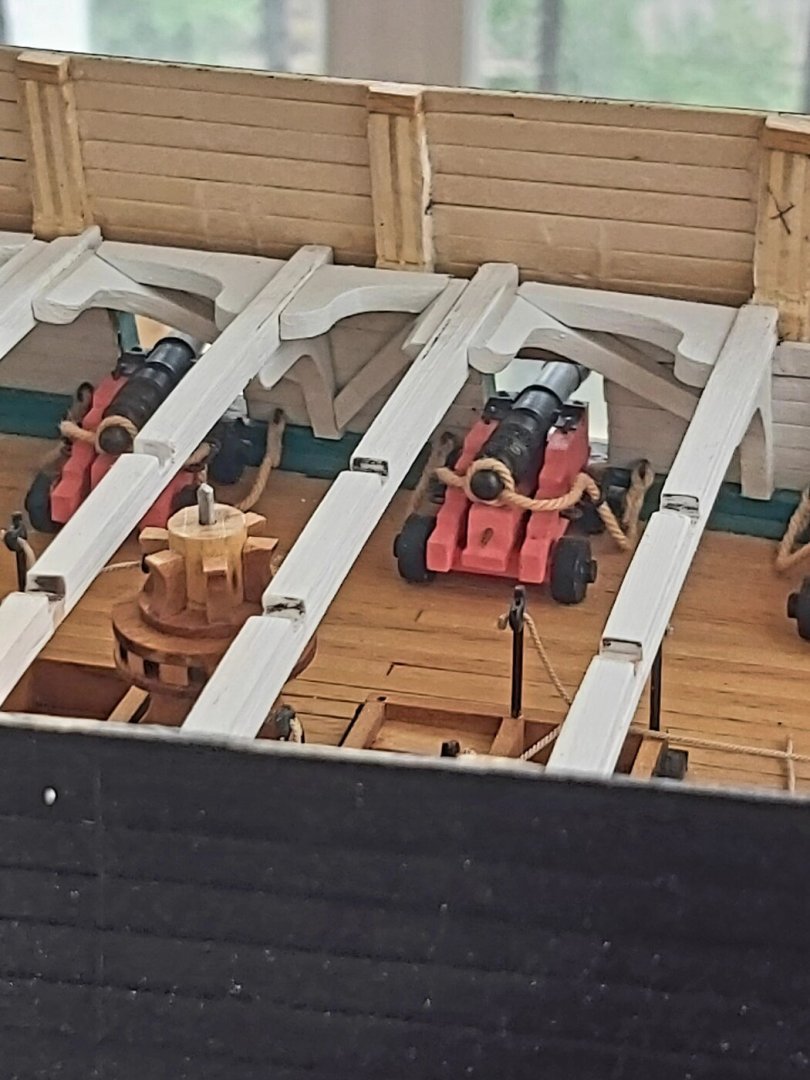
Installation of the spar deck beams continues. These need to be placed in harmony with the gun deck details.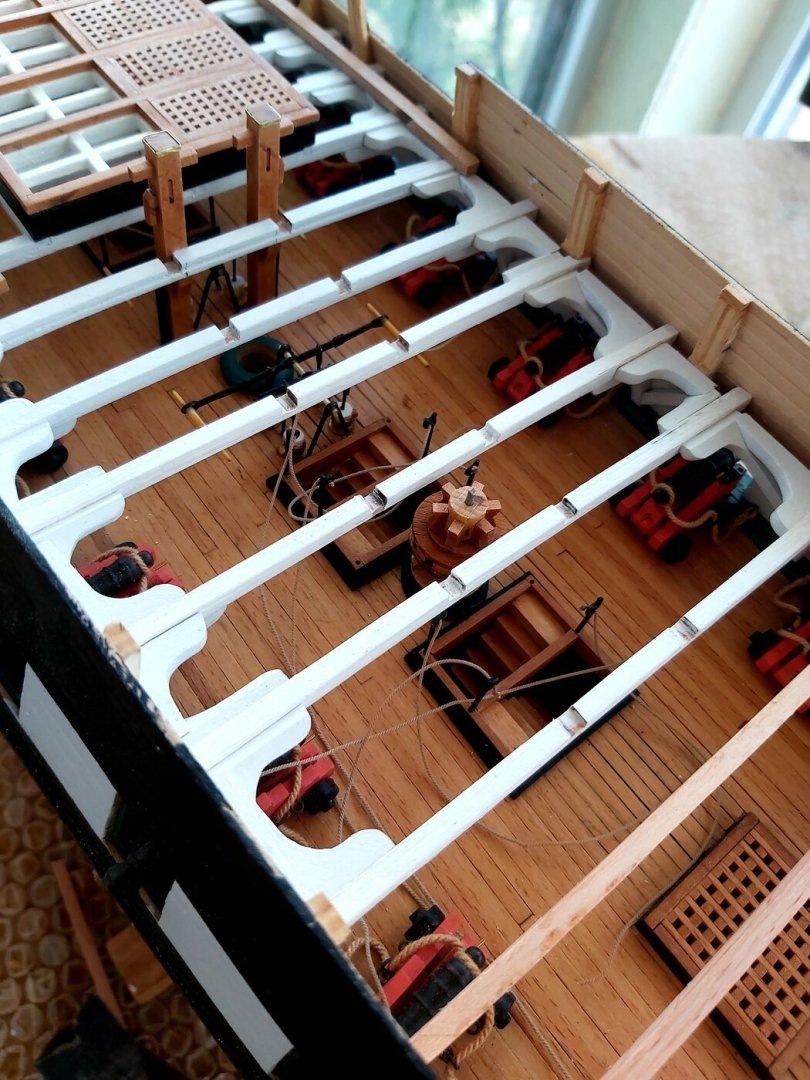


-
USS Constitution by mtbediz - 1:76
mtbediz replied to mtbediz's topic in - Build logs for subjects built 1751 - 1800
Yes Peter, it's a great machine. I think it is a machine that every modeler should have. I do most of my work with it. Ladders, gratings, gun carriages, blocks, precision drillings and many other things. -
Stanchions look nice Jon. Using brackets to support the stanchions is a very clever solution.
-
USS Constitution by mtbediz - 1:76
mtbediz replied to mtbediz's topic in - Build logs for subjects built 1751 - 1800
You are welcome Greg. -
USS Constitution by mtbediz - 1:76
mtbediz replied to mtbediz's topic in - Build logs for subjects built 1751 - 1800
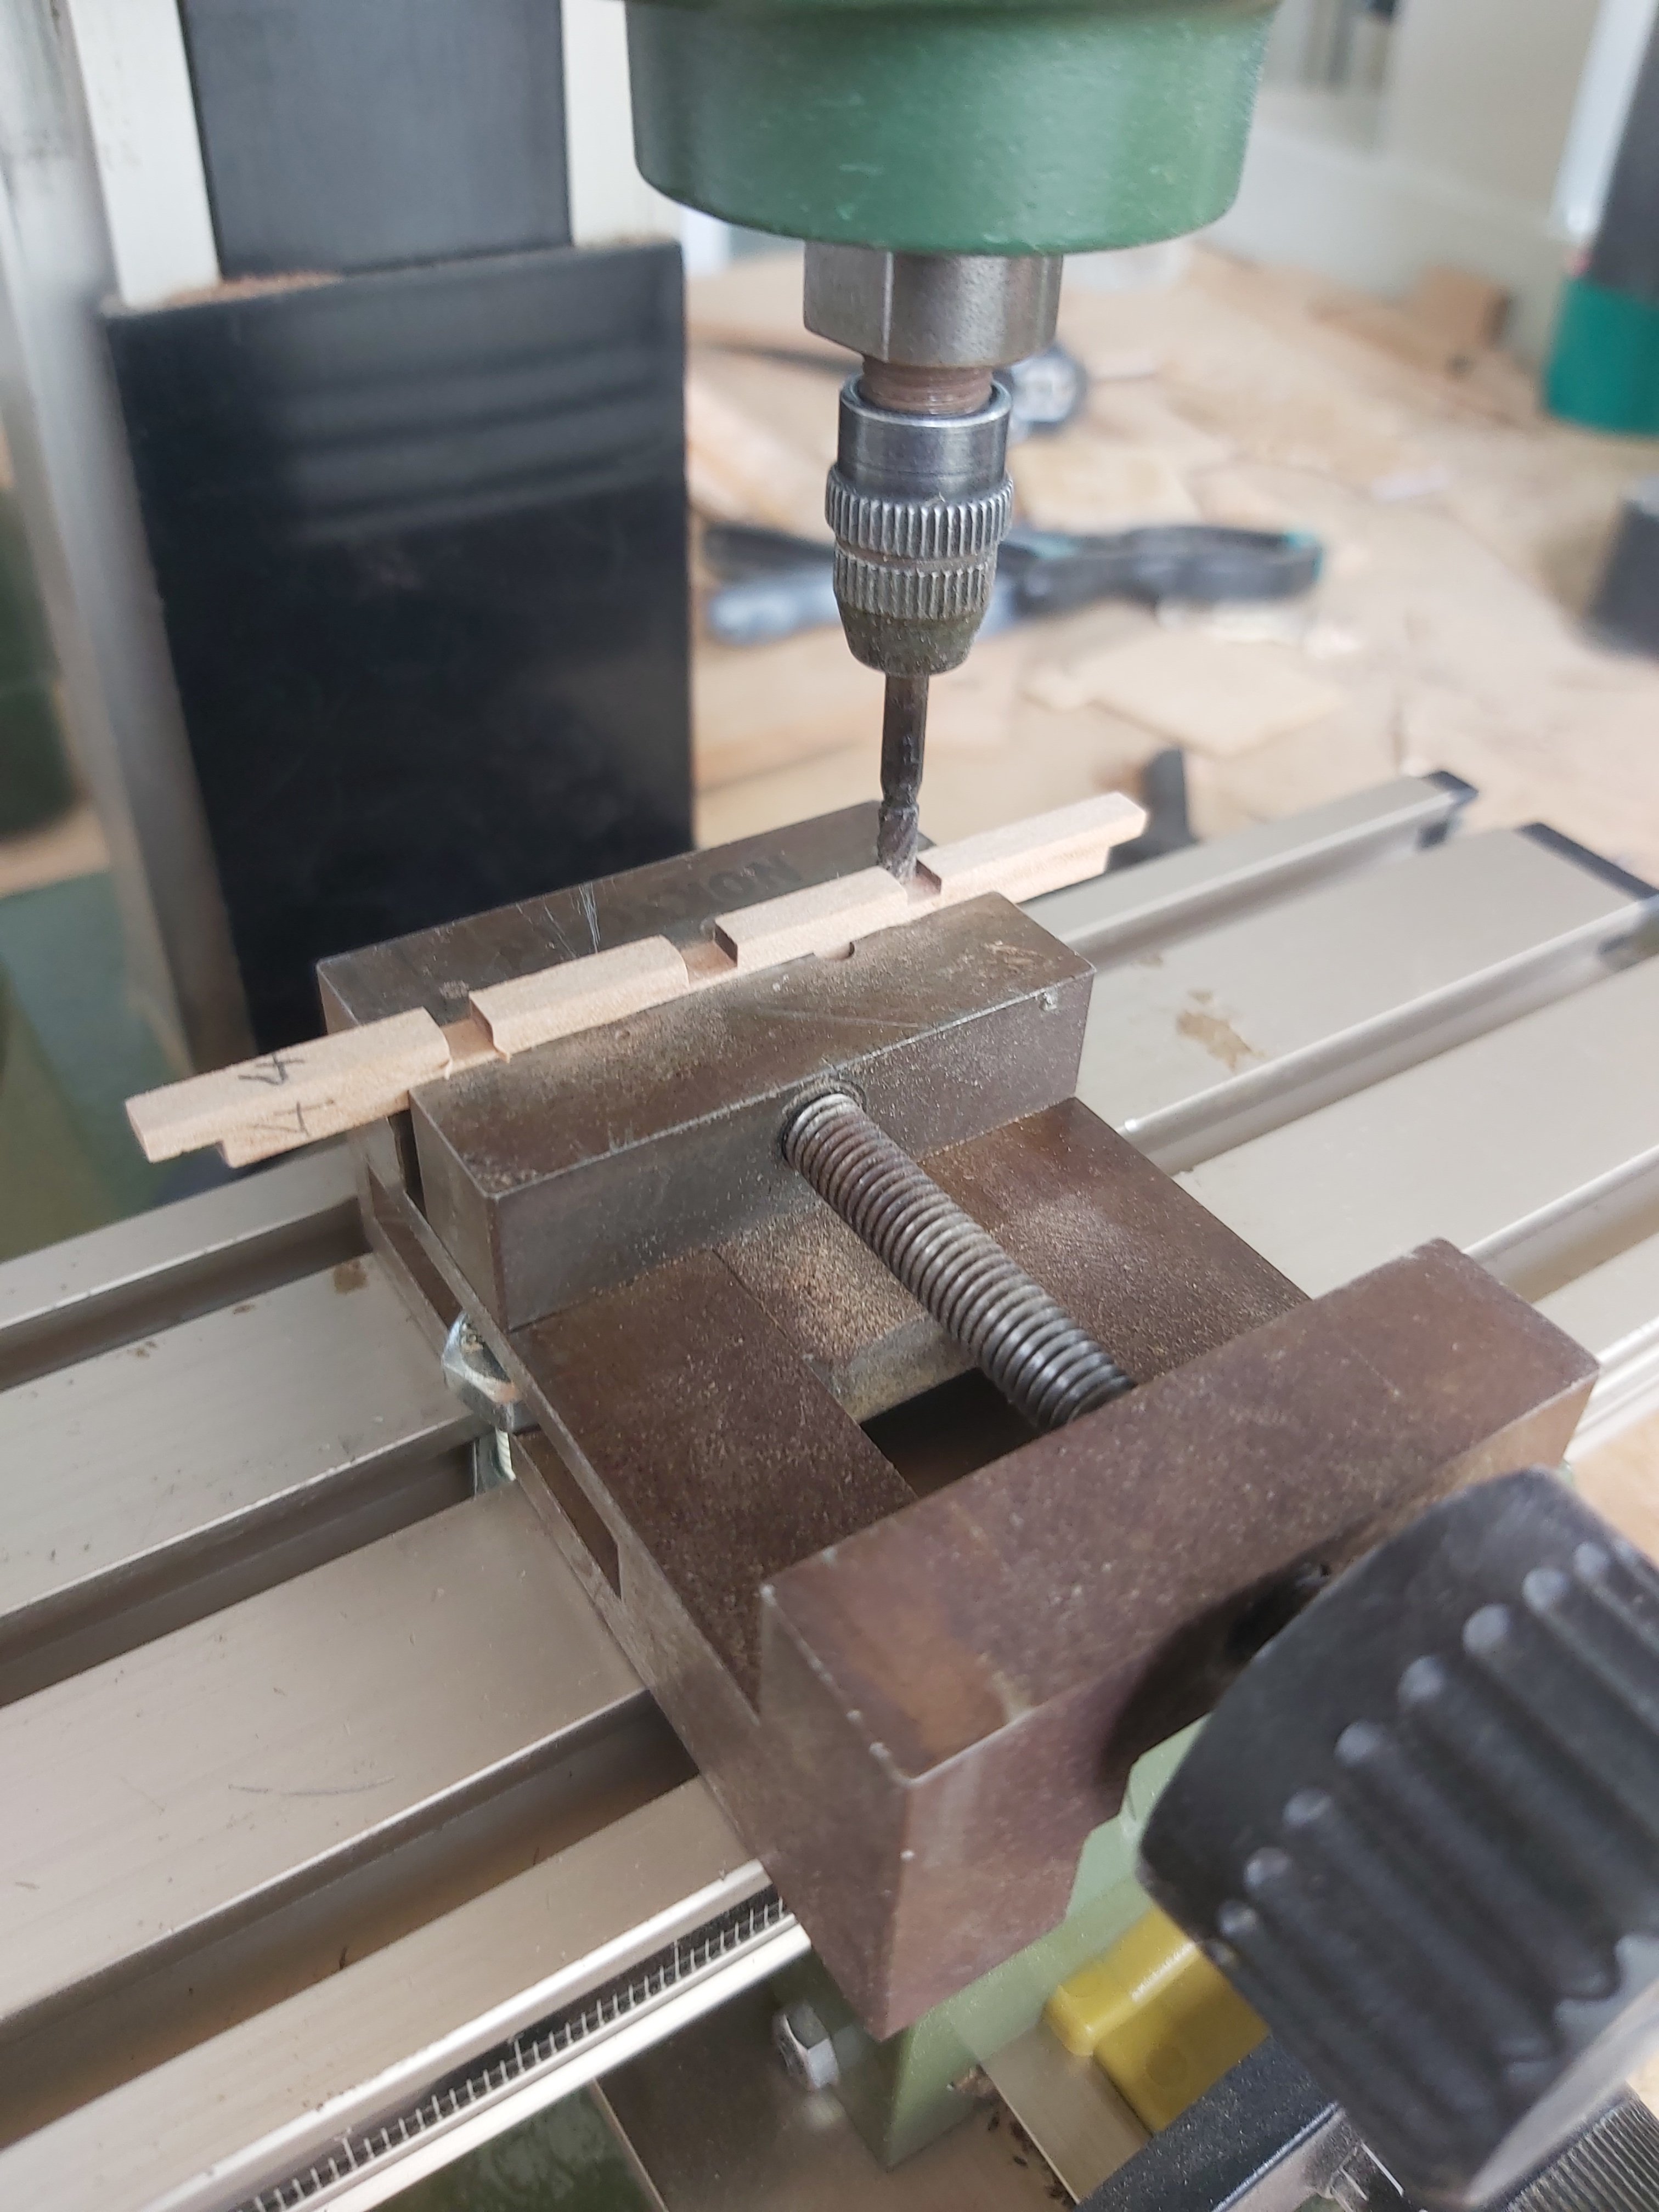
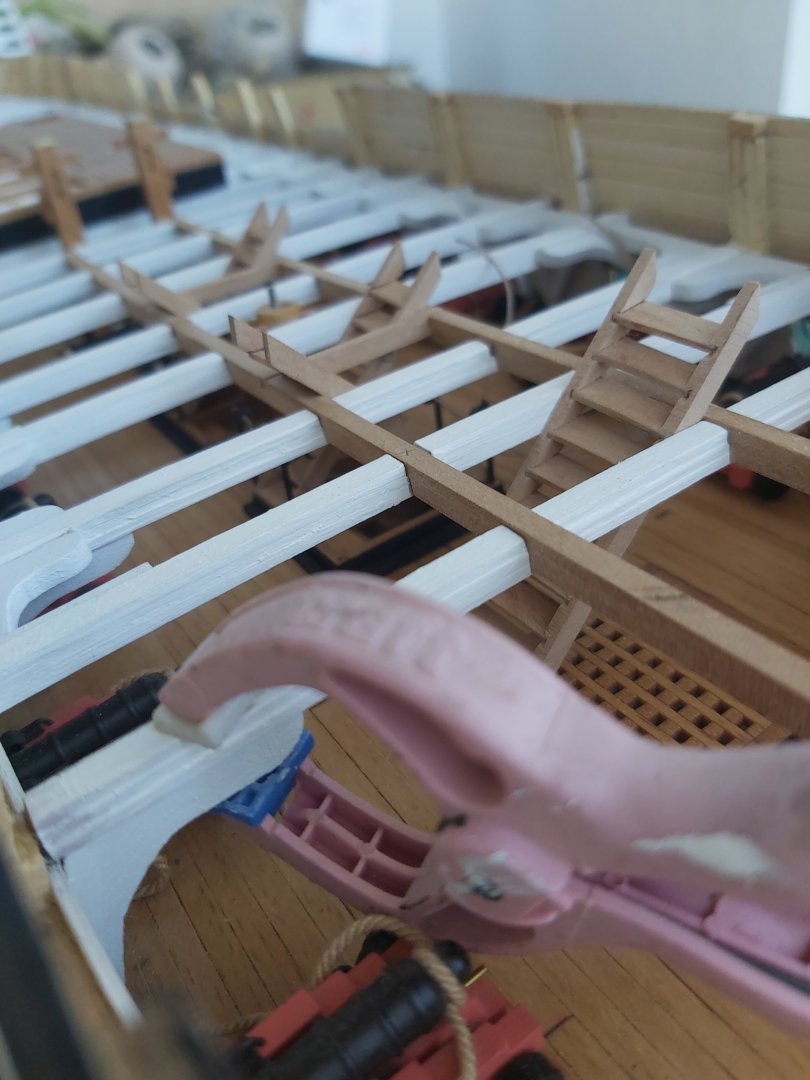
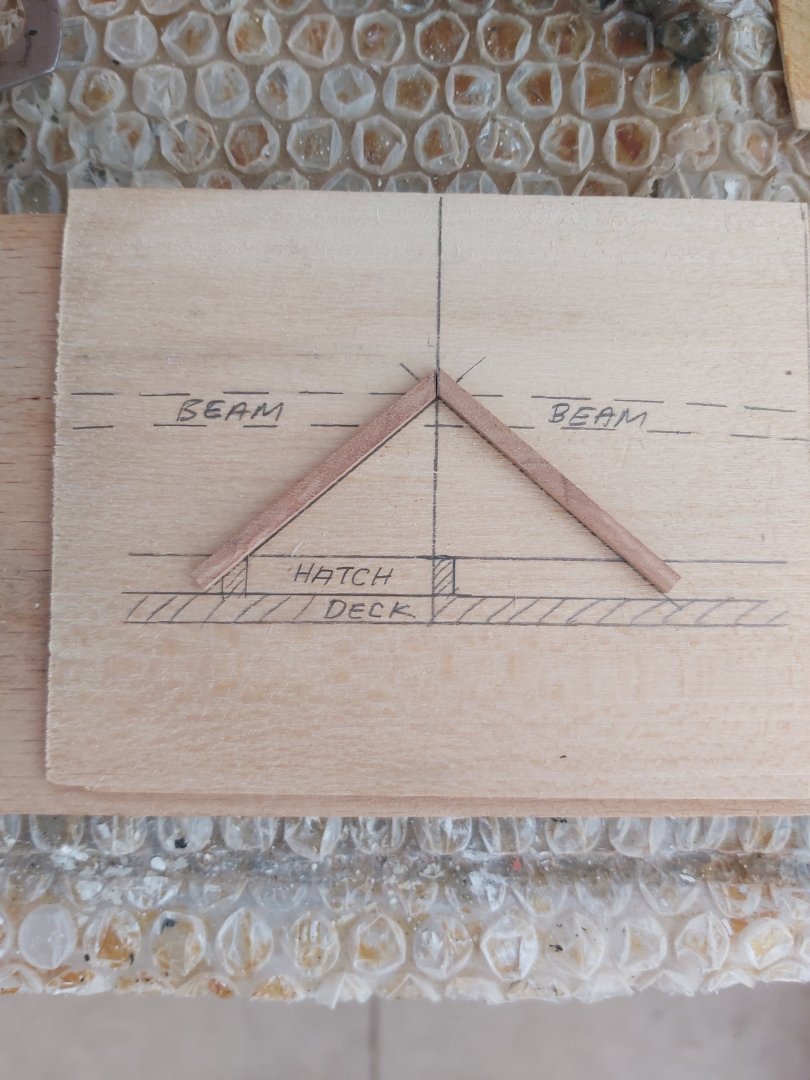
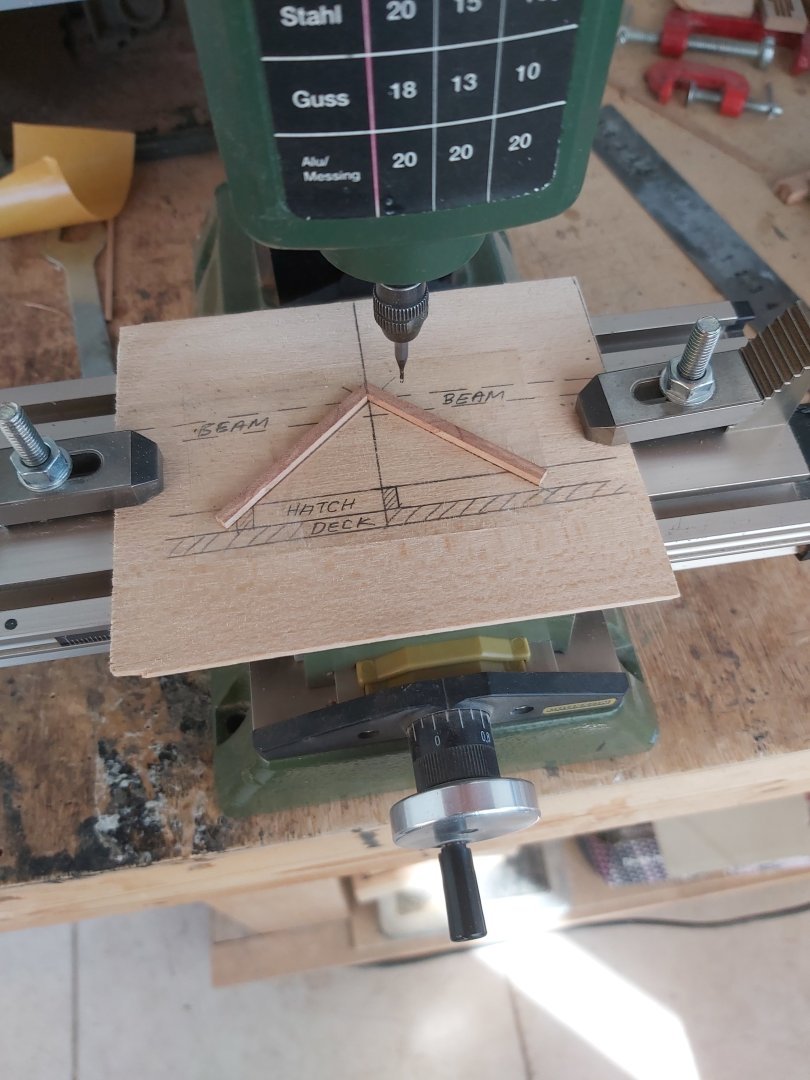
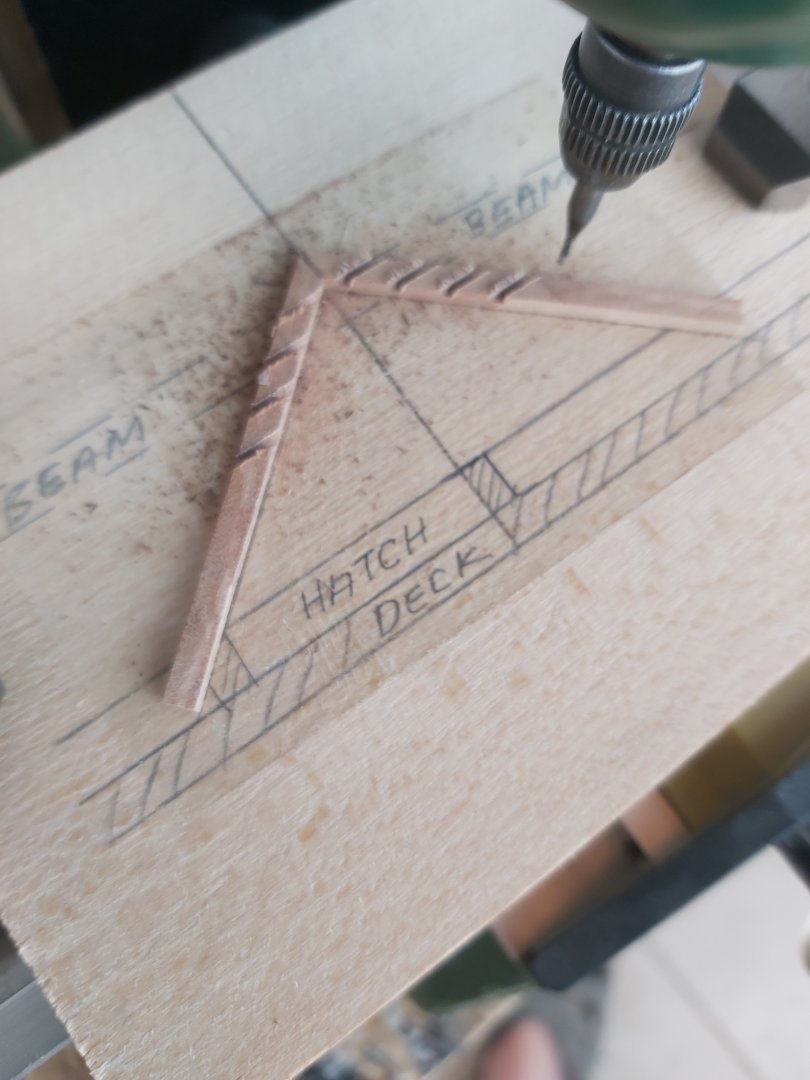
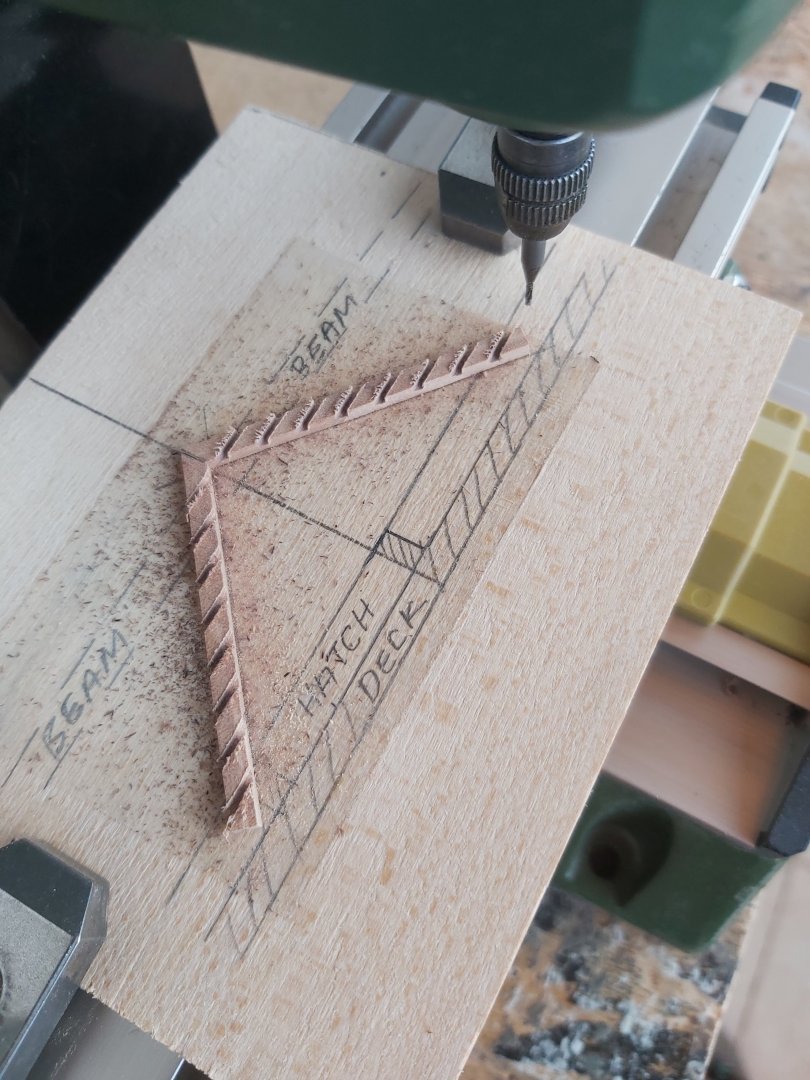
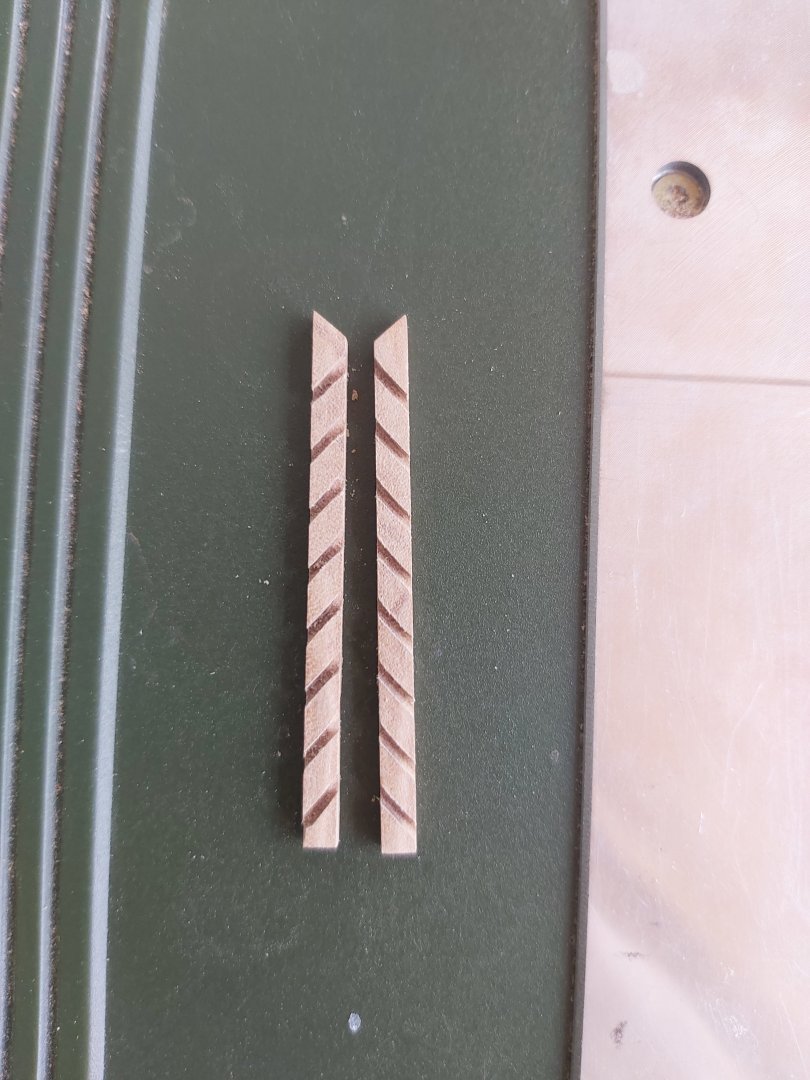
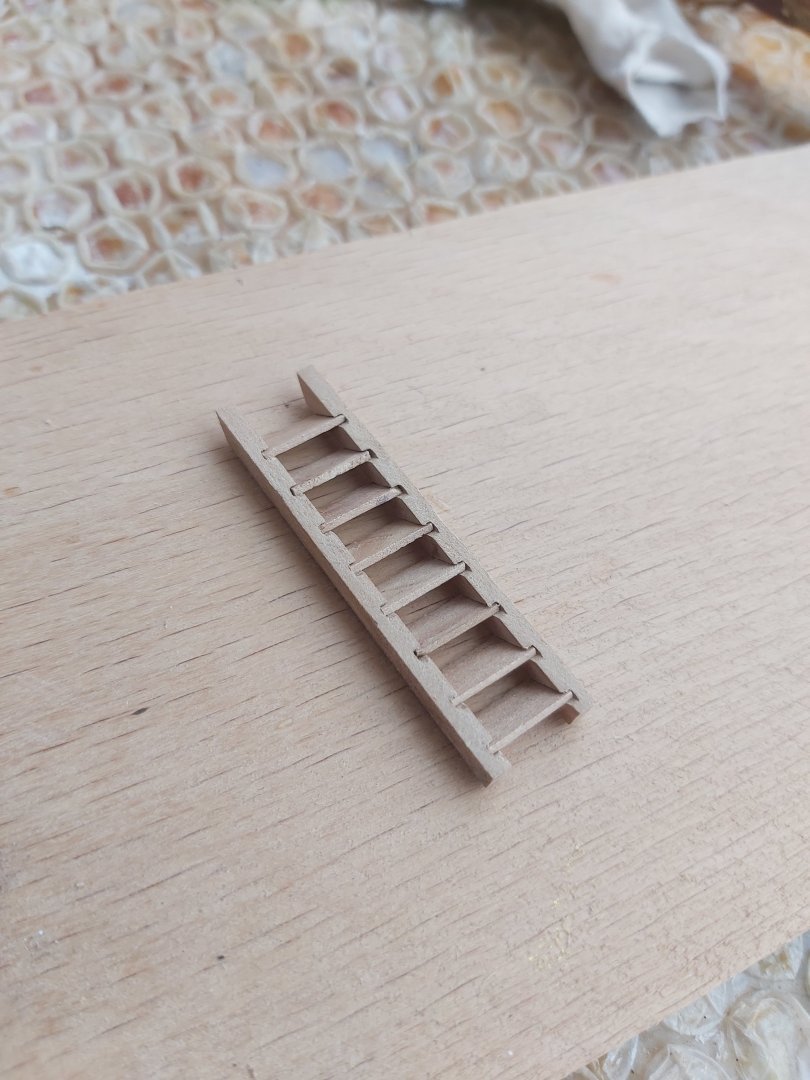
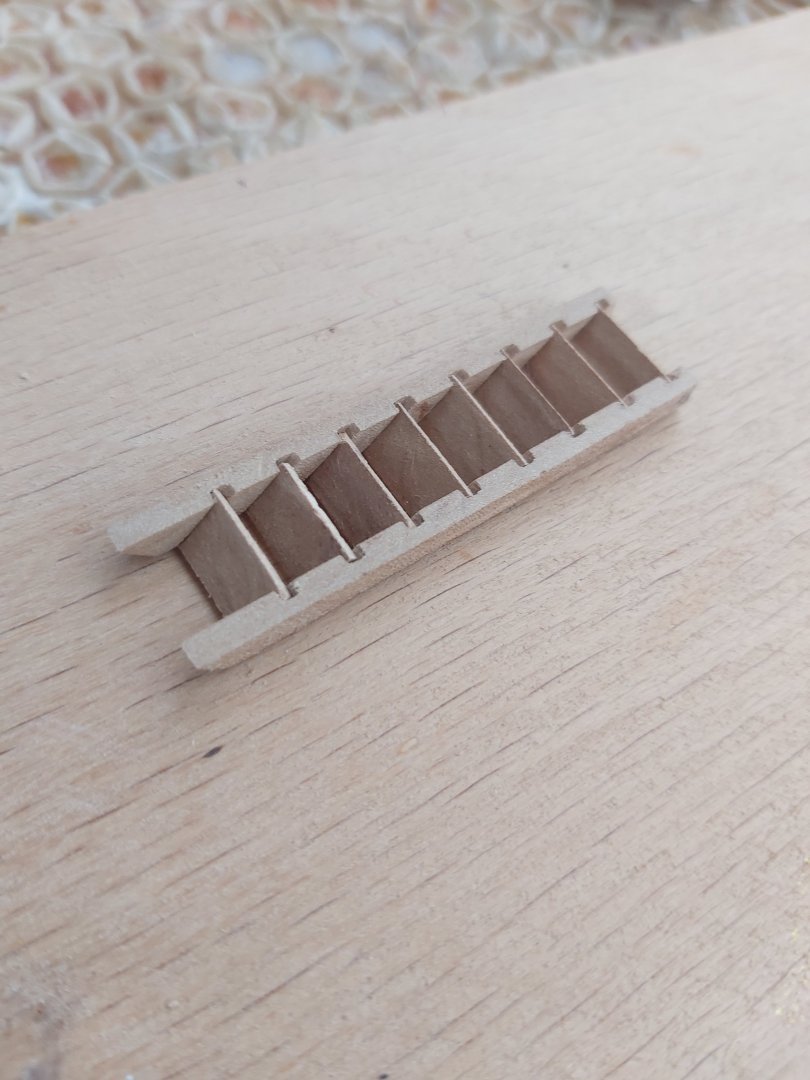
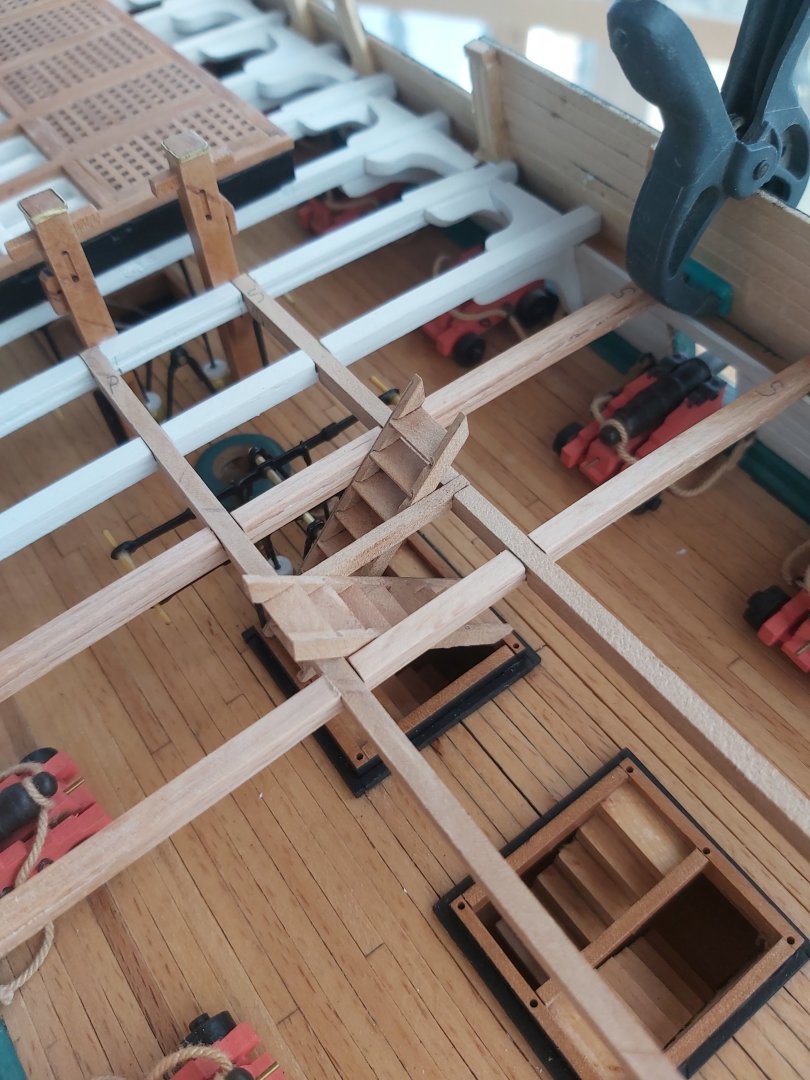
Hi Greg, I had made the ladders going down from gun deck to the berth deck in a way that did not match the real ladders at all (Take a look at my post number 26. I used an easy method). Frankly, I did not pay much attention to the angle of the ladders as they would not be so visible. Since these stairs would be completely visible I had to make them realistic. Because I don't have scale plans, I had to take the measurements from the model and for this I had to wait for the spar deck beams to be put in place. I transferred the measurements to the piece of wood in the photo, fixed the sides of the ladder onto it with double sided adhesive tape and made slots for the ladder steps with the milling machine.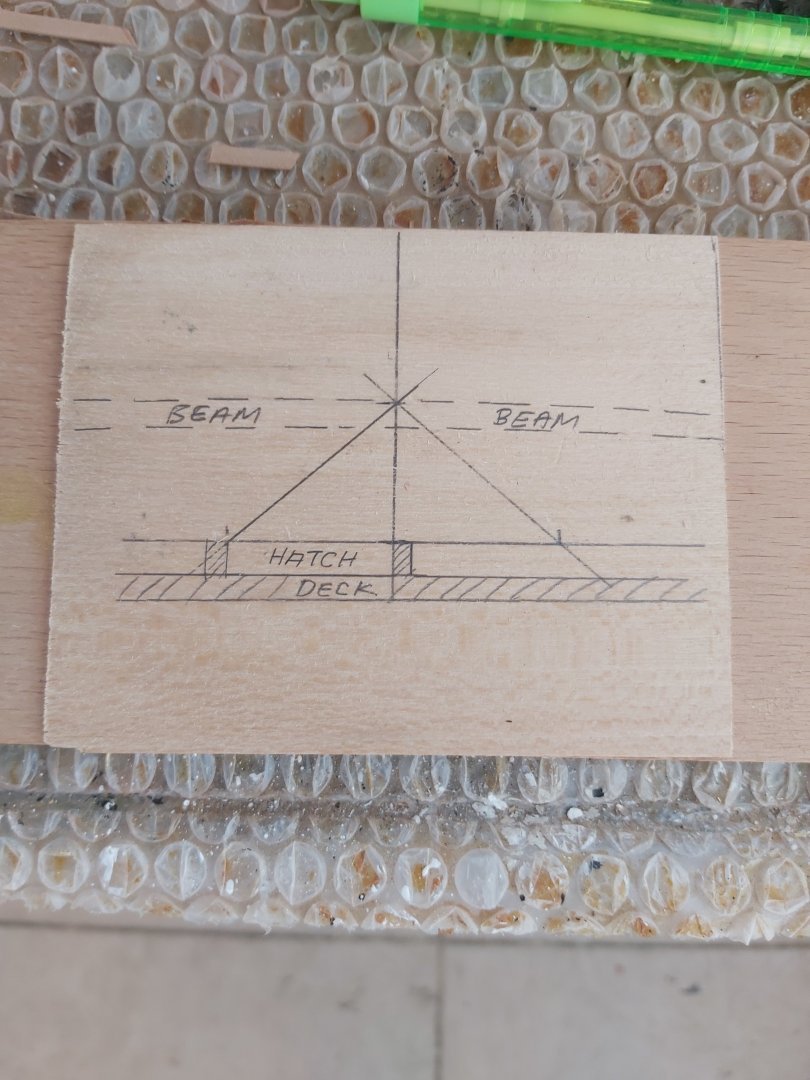


-
USS Constitution by mtbediz - 1:76
mtbediz replied to mtbediz's topic in - Build logs for subjects built 1751 - 1800
Thank you for stopping by and for your nice comment. -
USS Constitution by mtbediz - 1:76
mtbediz replied to mtbediz's topic in - Build logs for subjects built 1751 - 1800
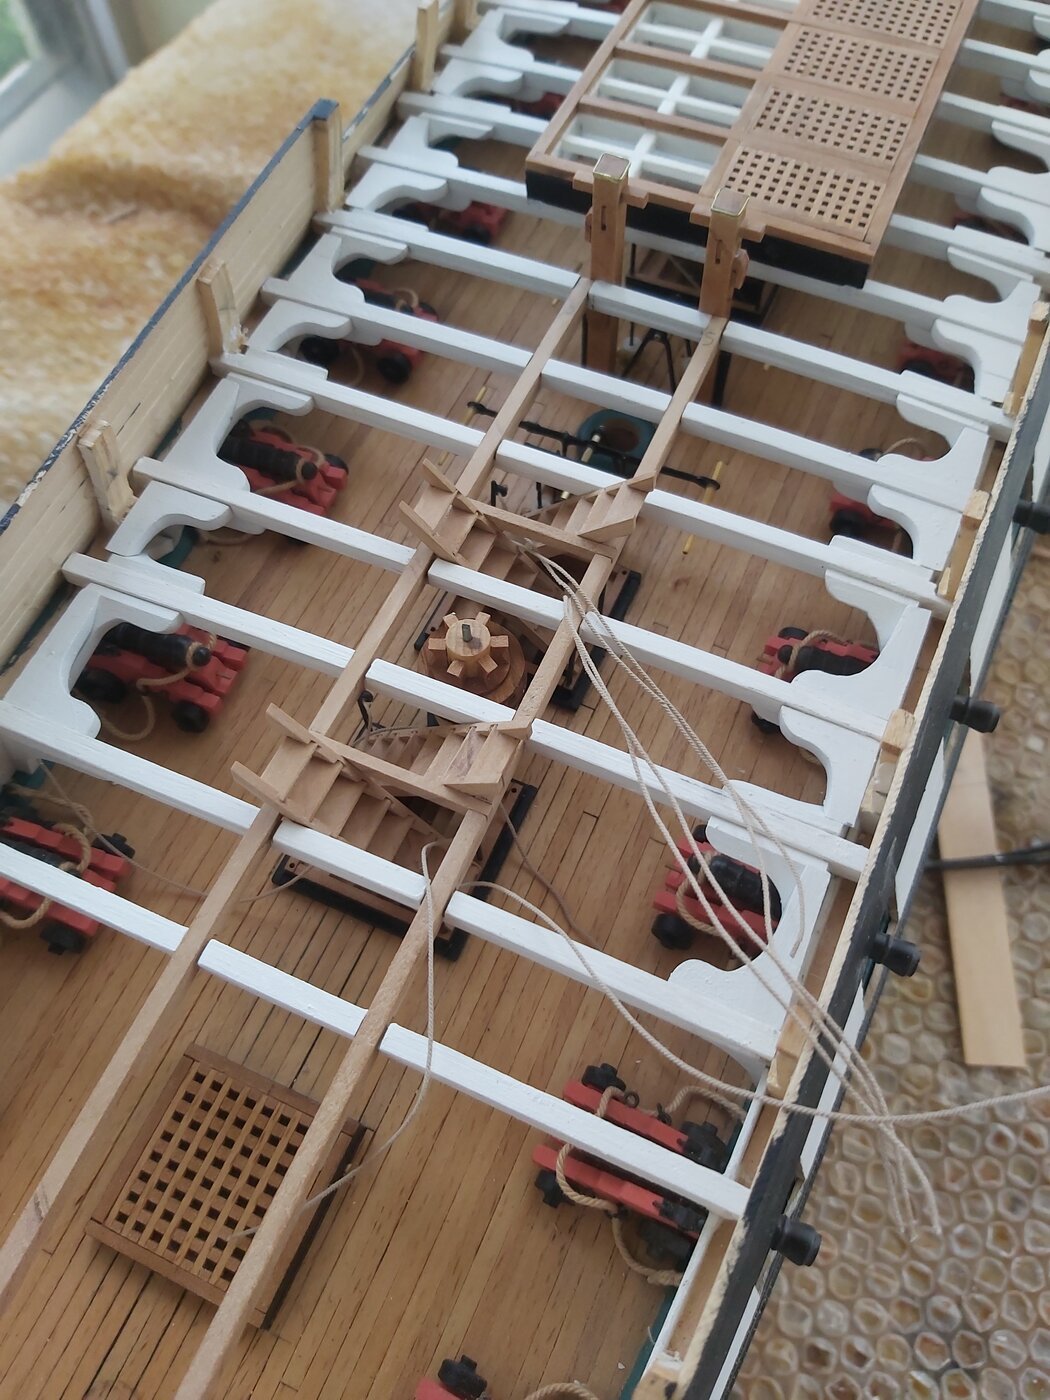
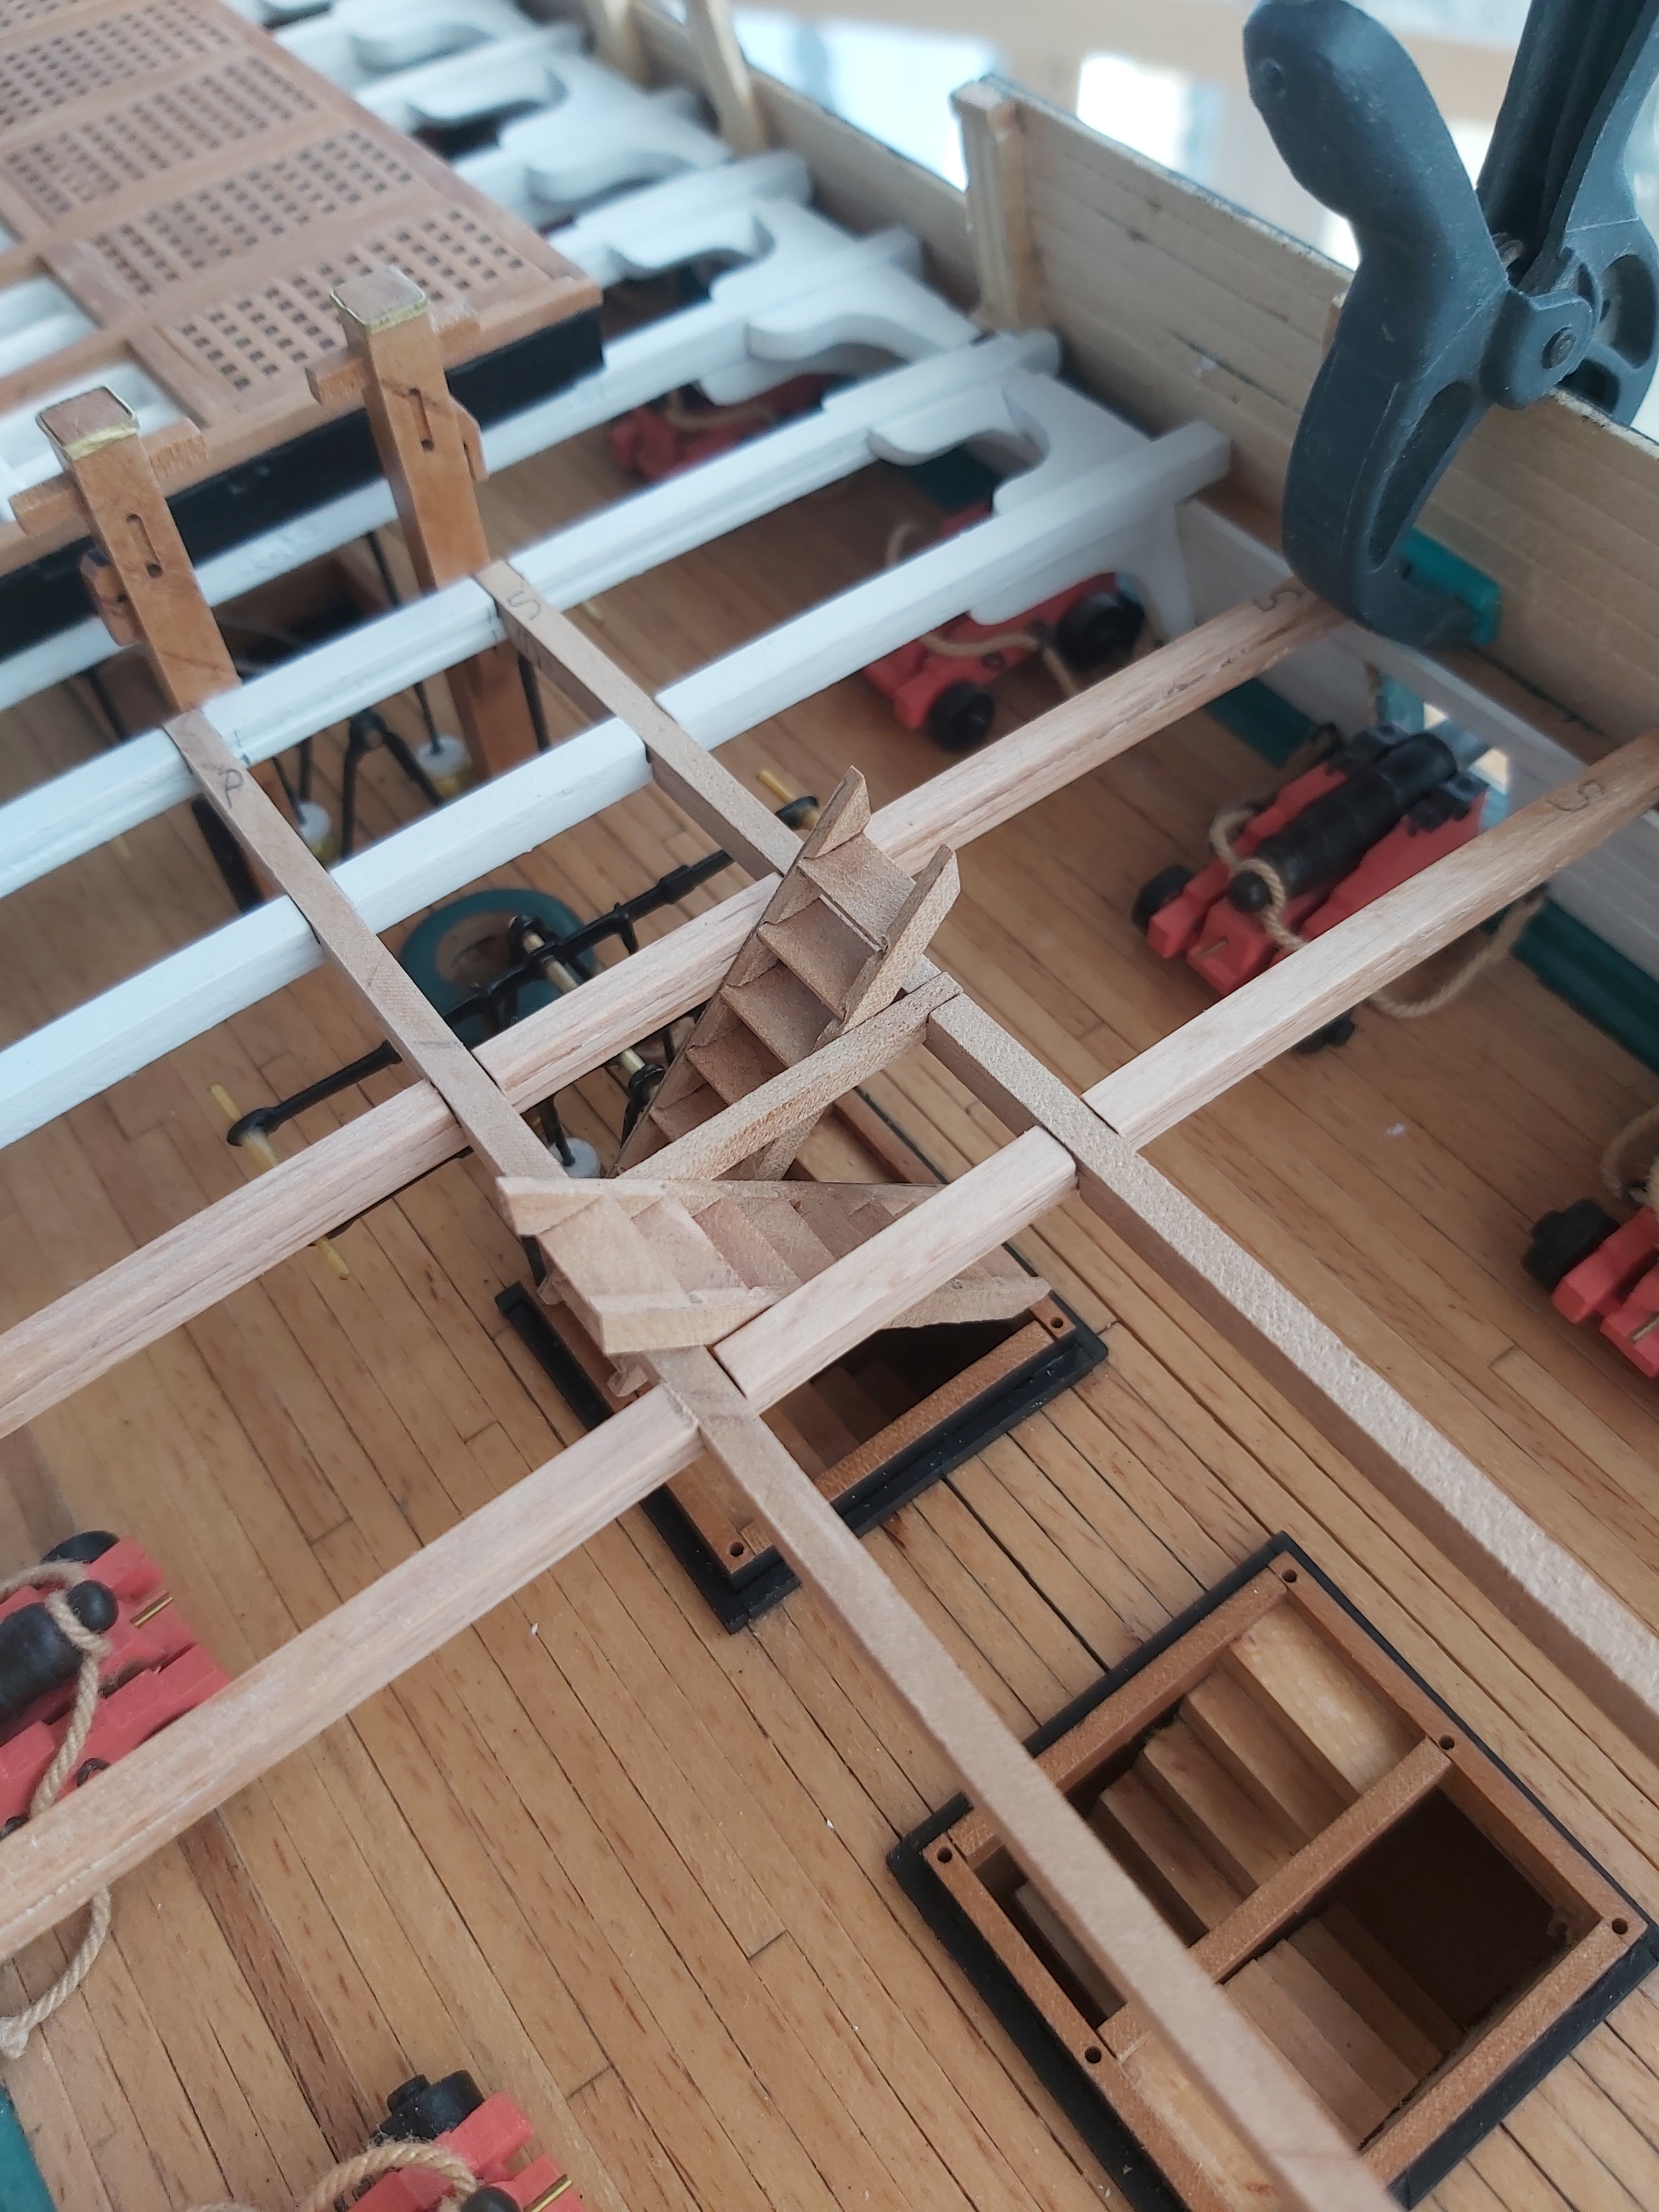
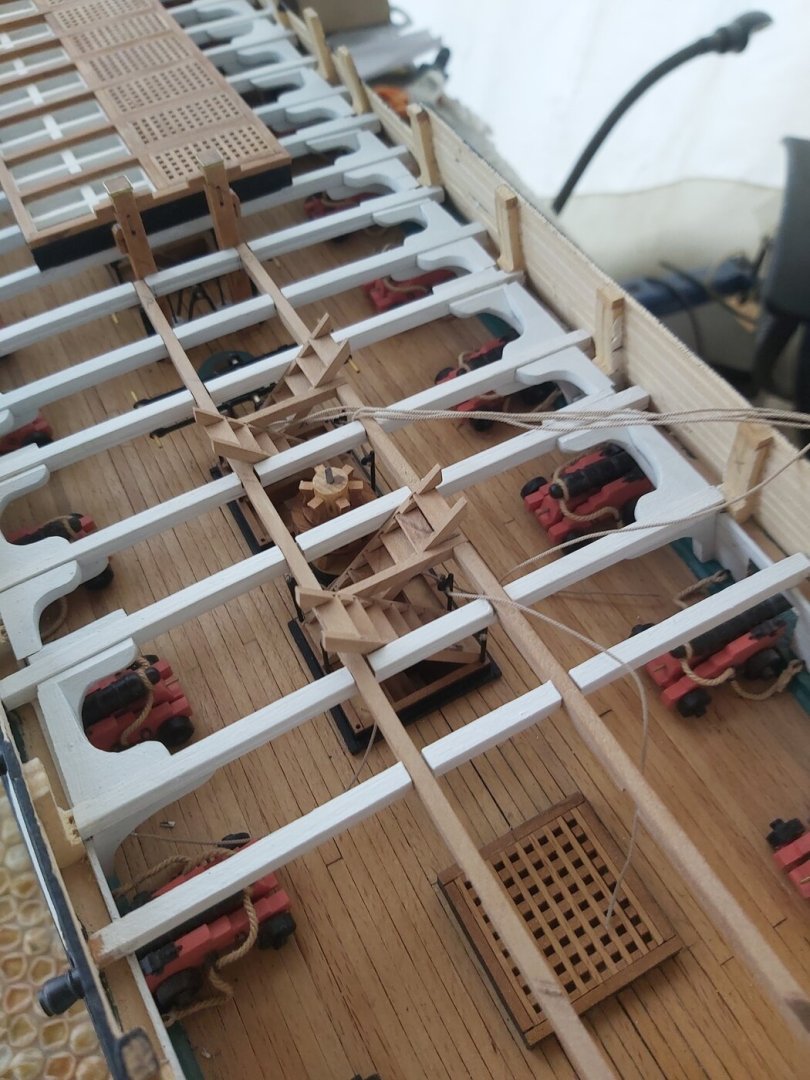
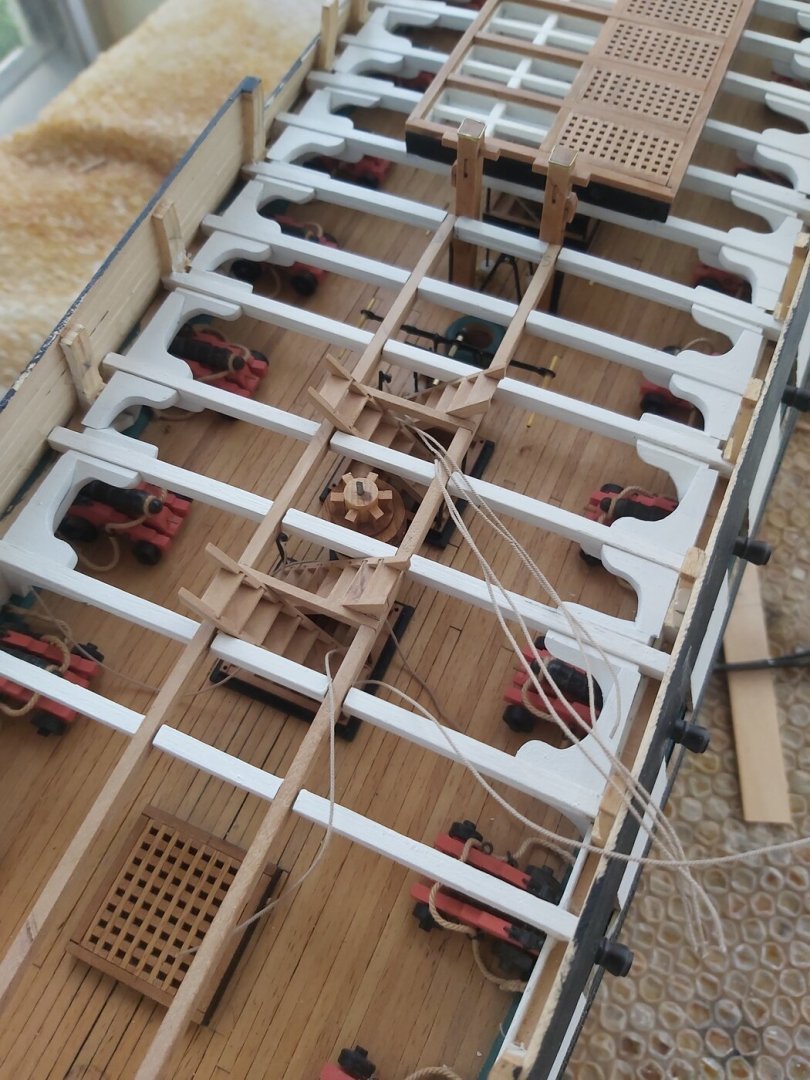
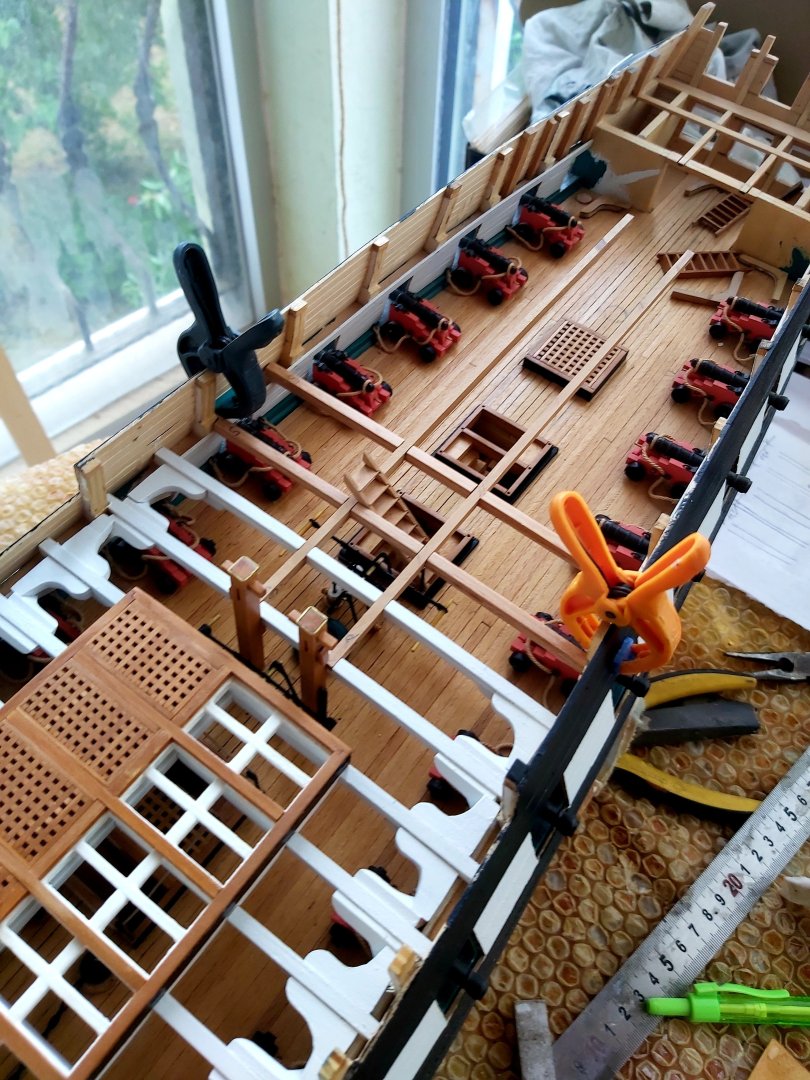
I started making the ladders passing through the spar deck hatches to the gun deck.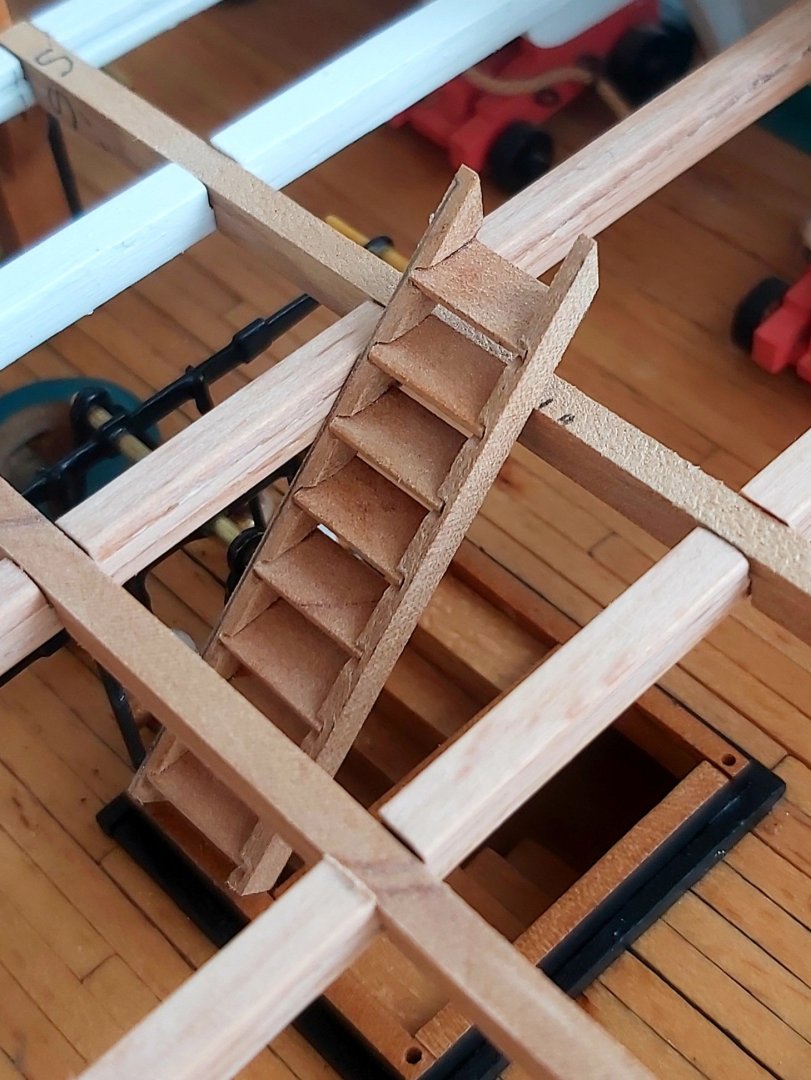


-
USS Constitution by mtbediz - 1:76
mtbediz replied to mtbediz's topic in - Build logs for subjects built 1751 - 1800
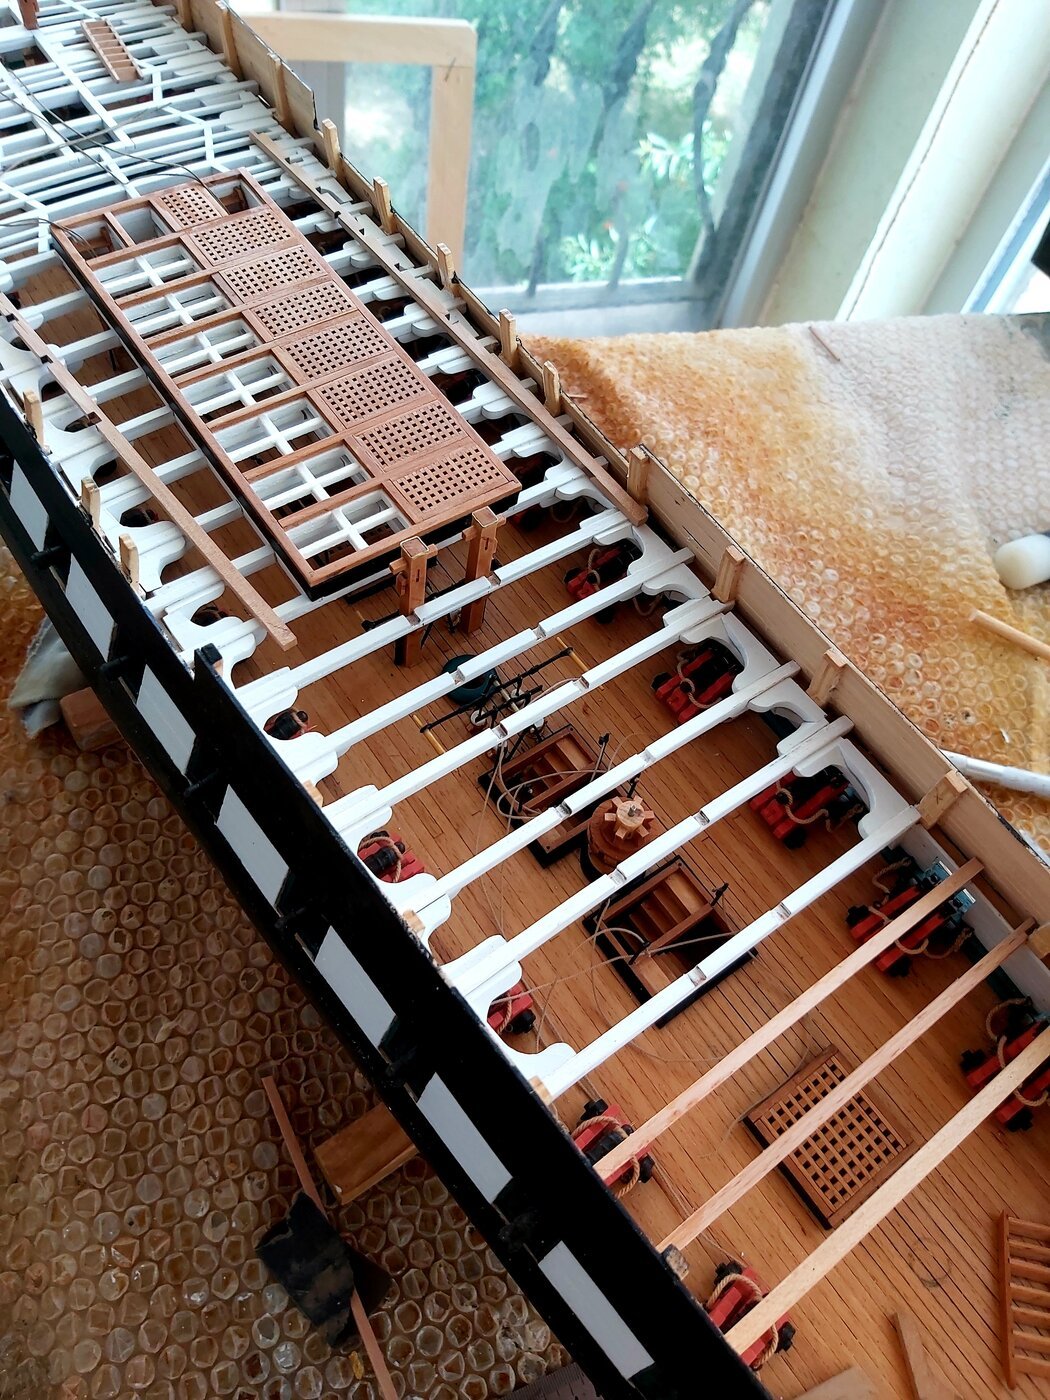
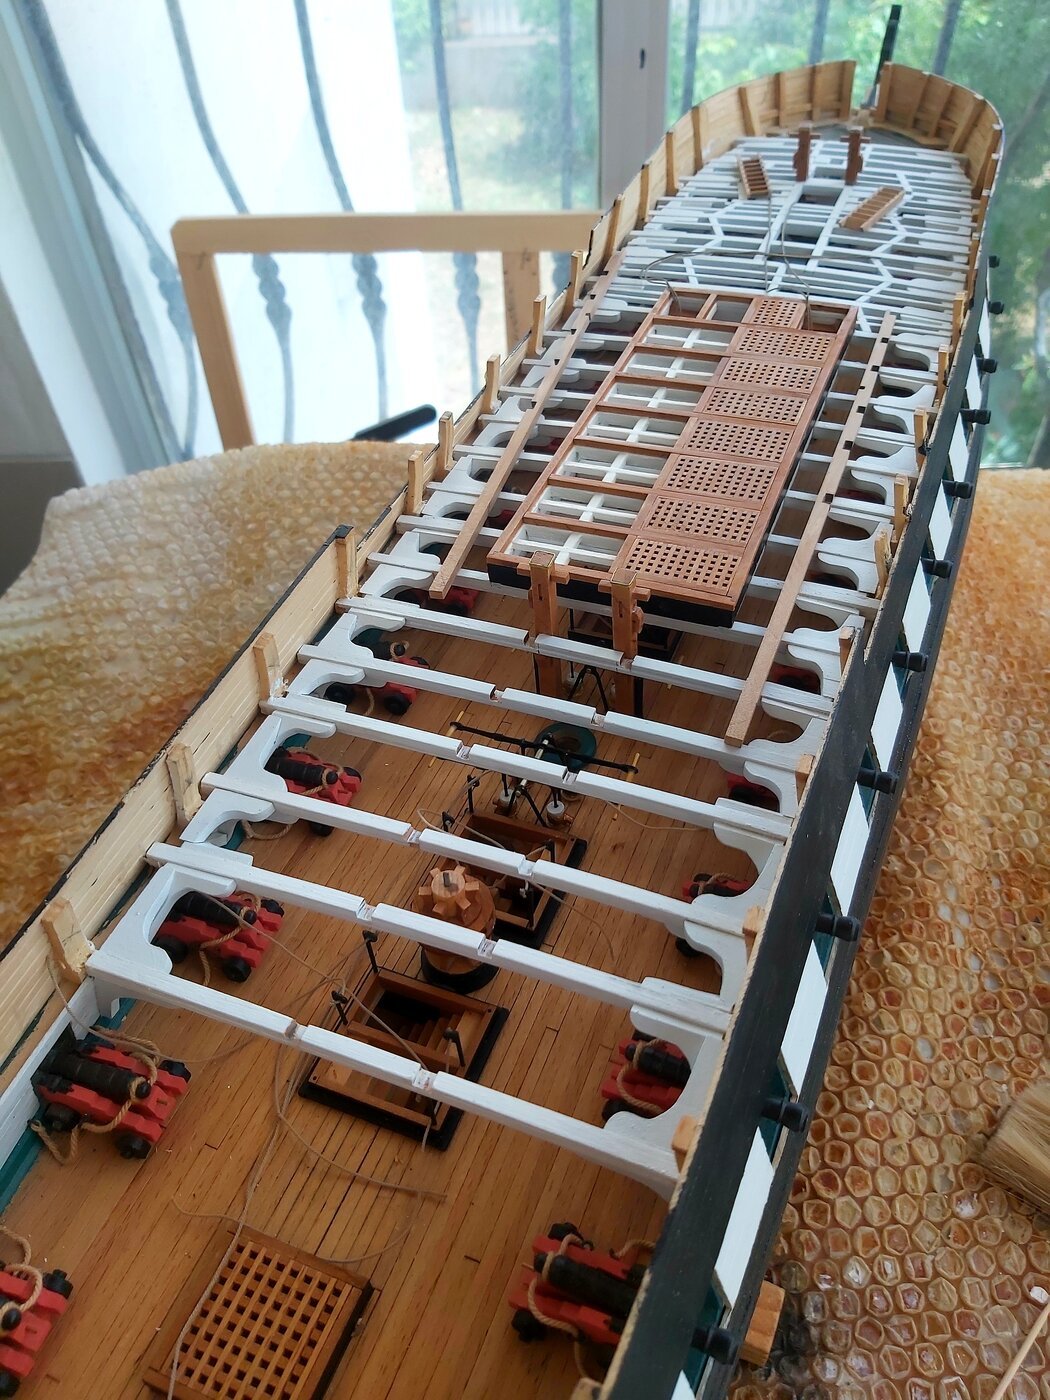
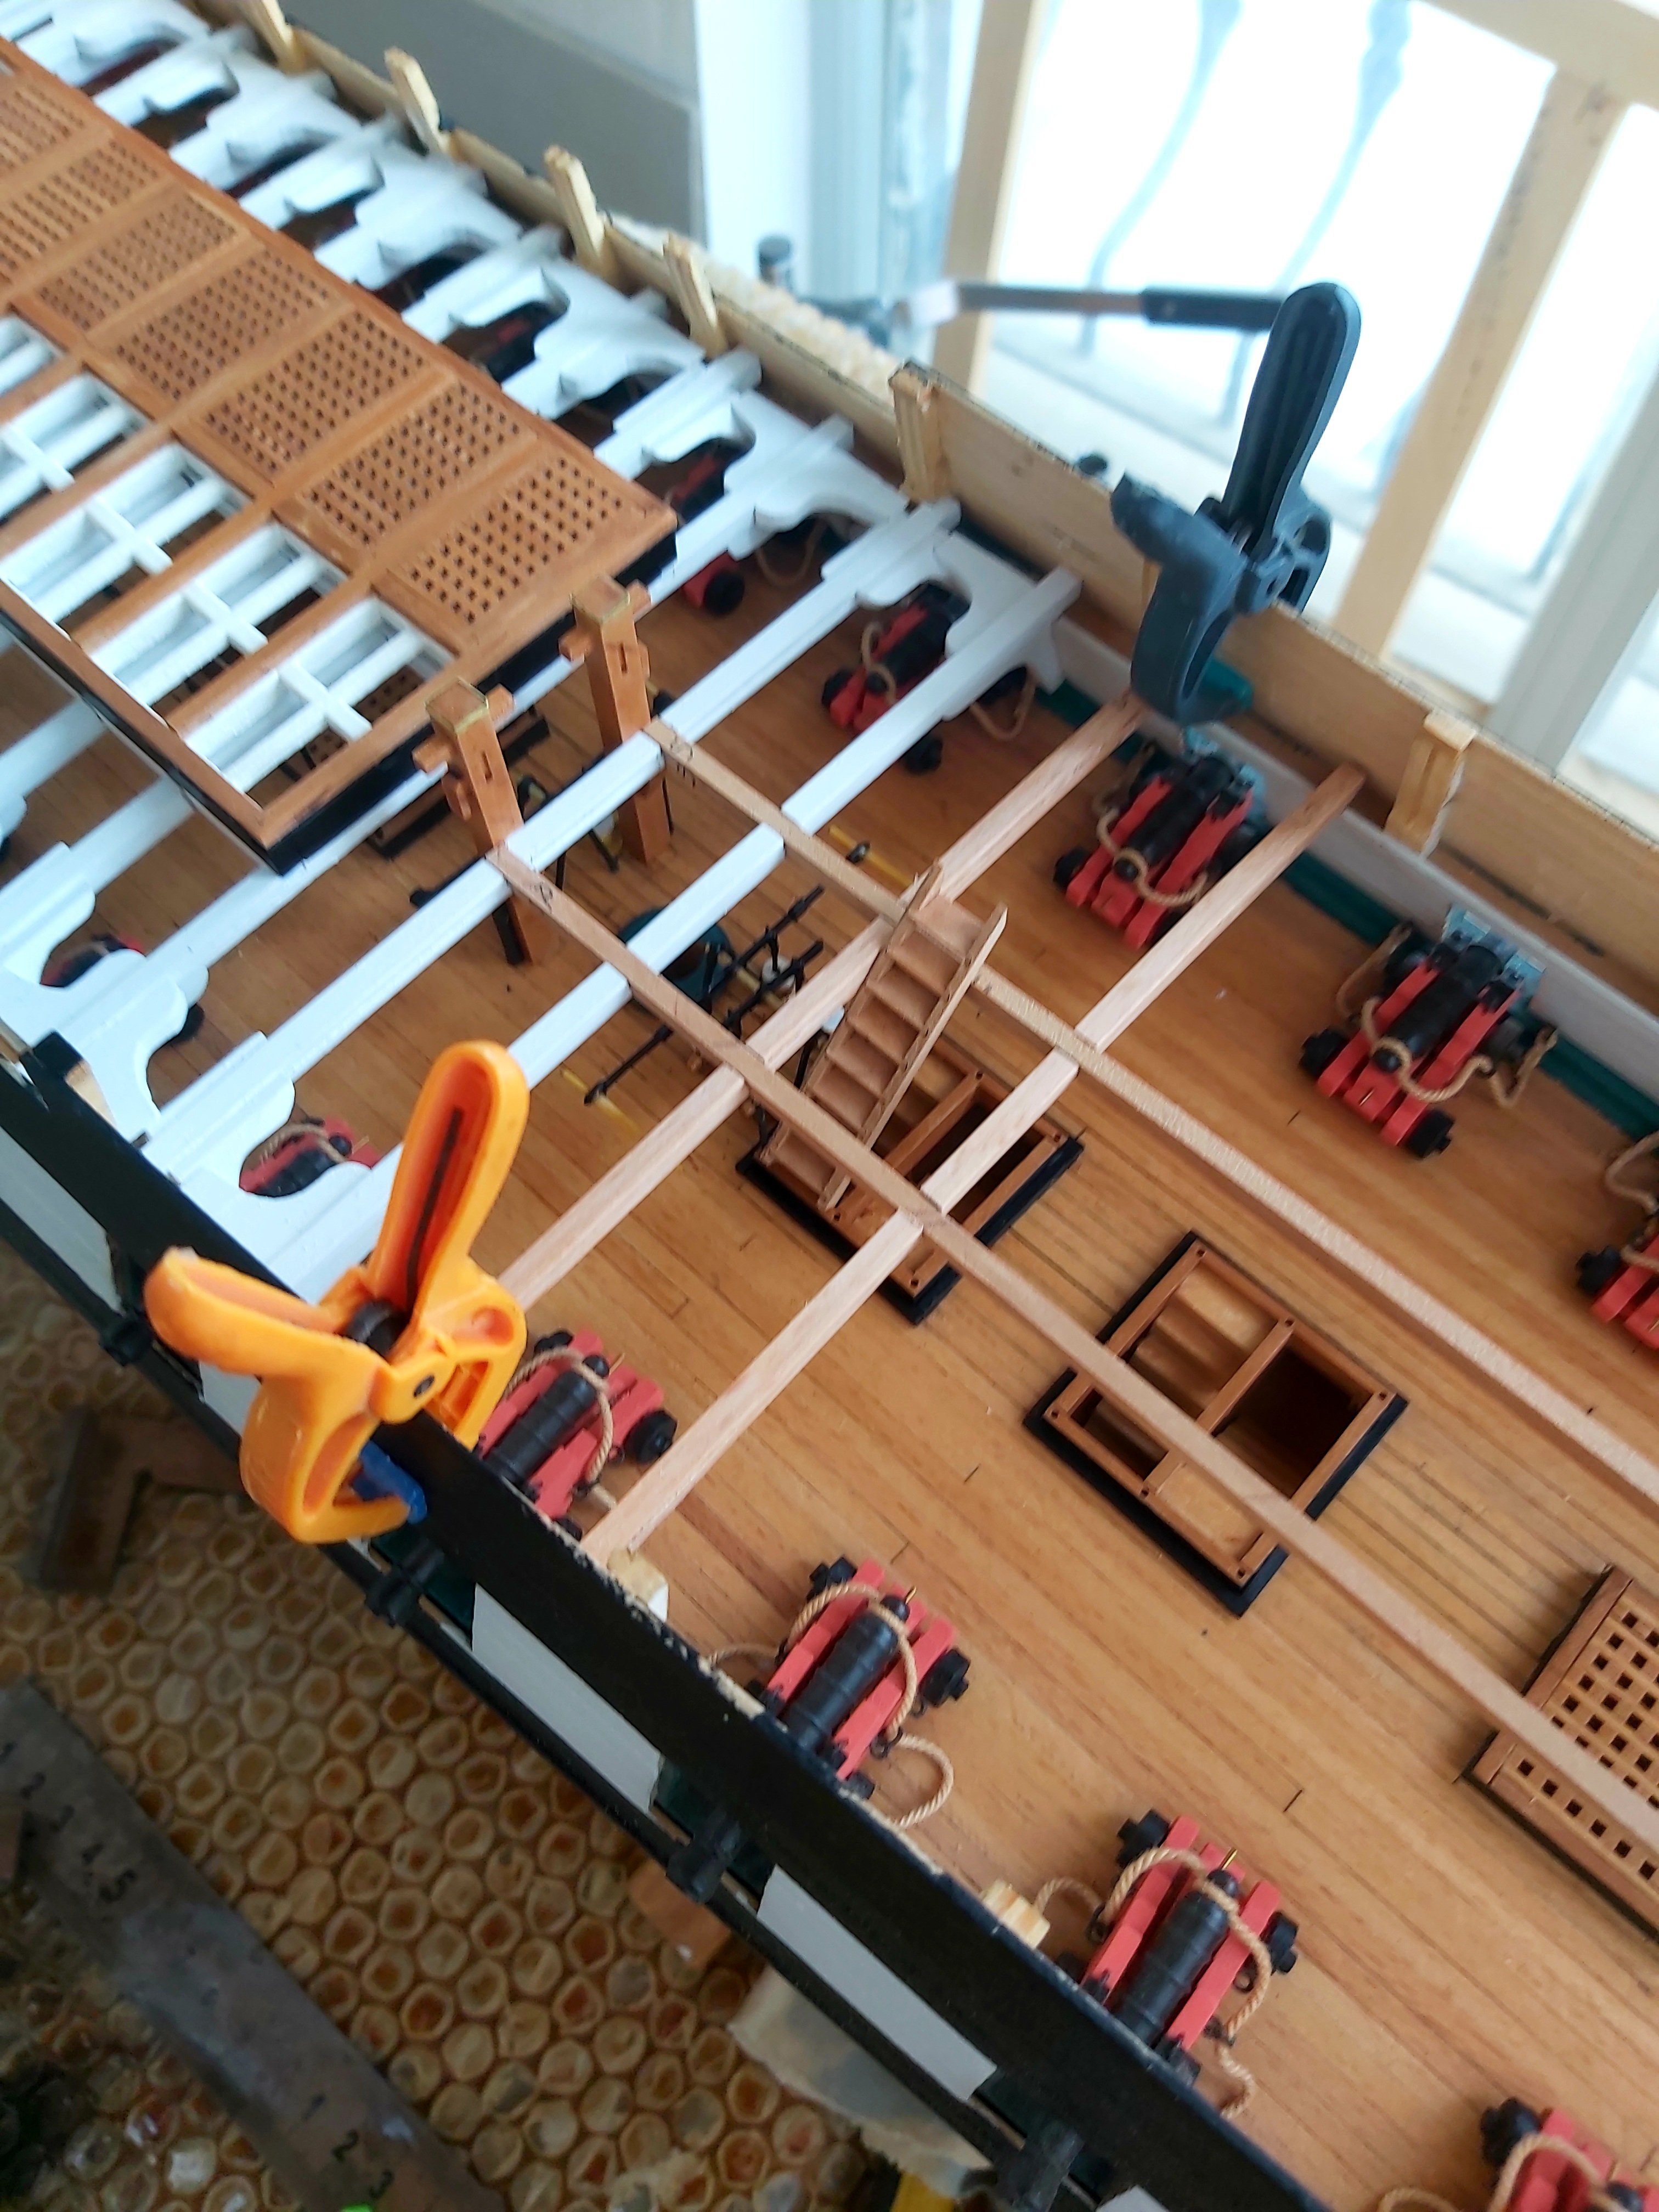
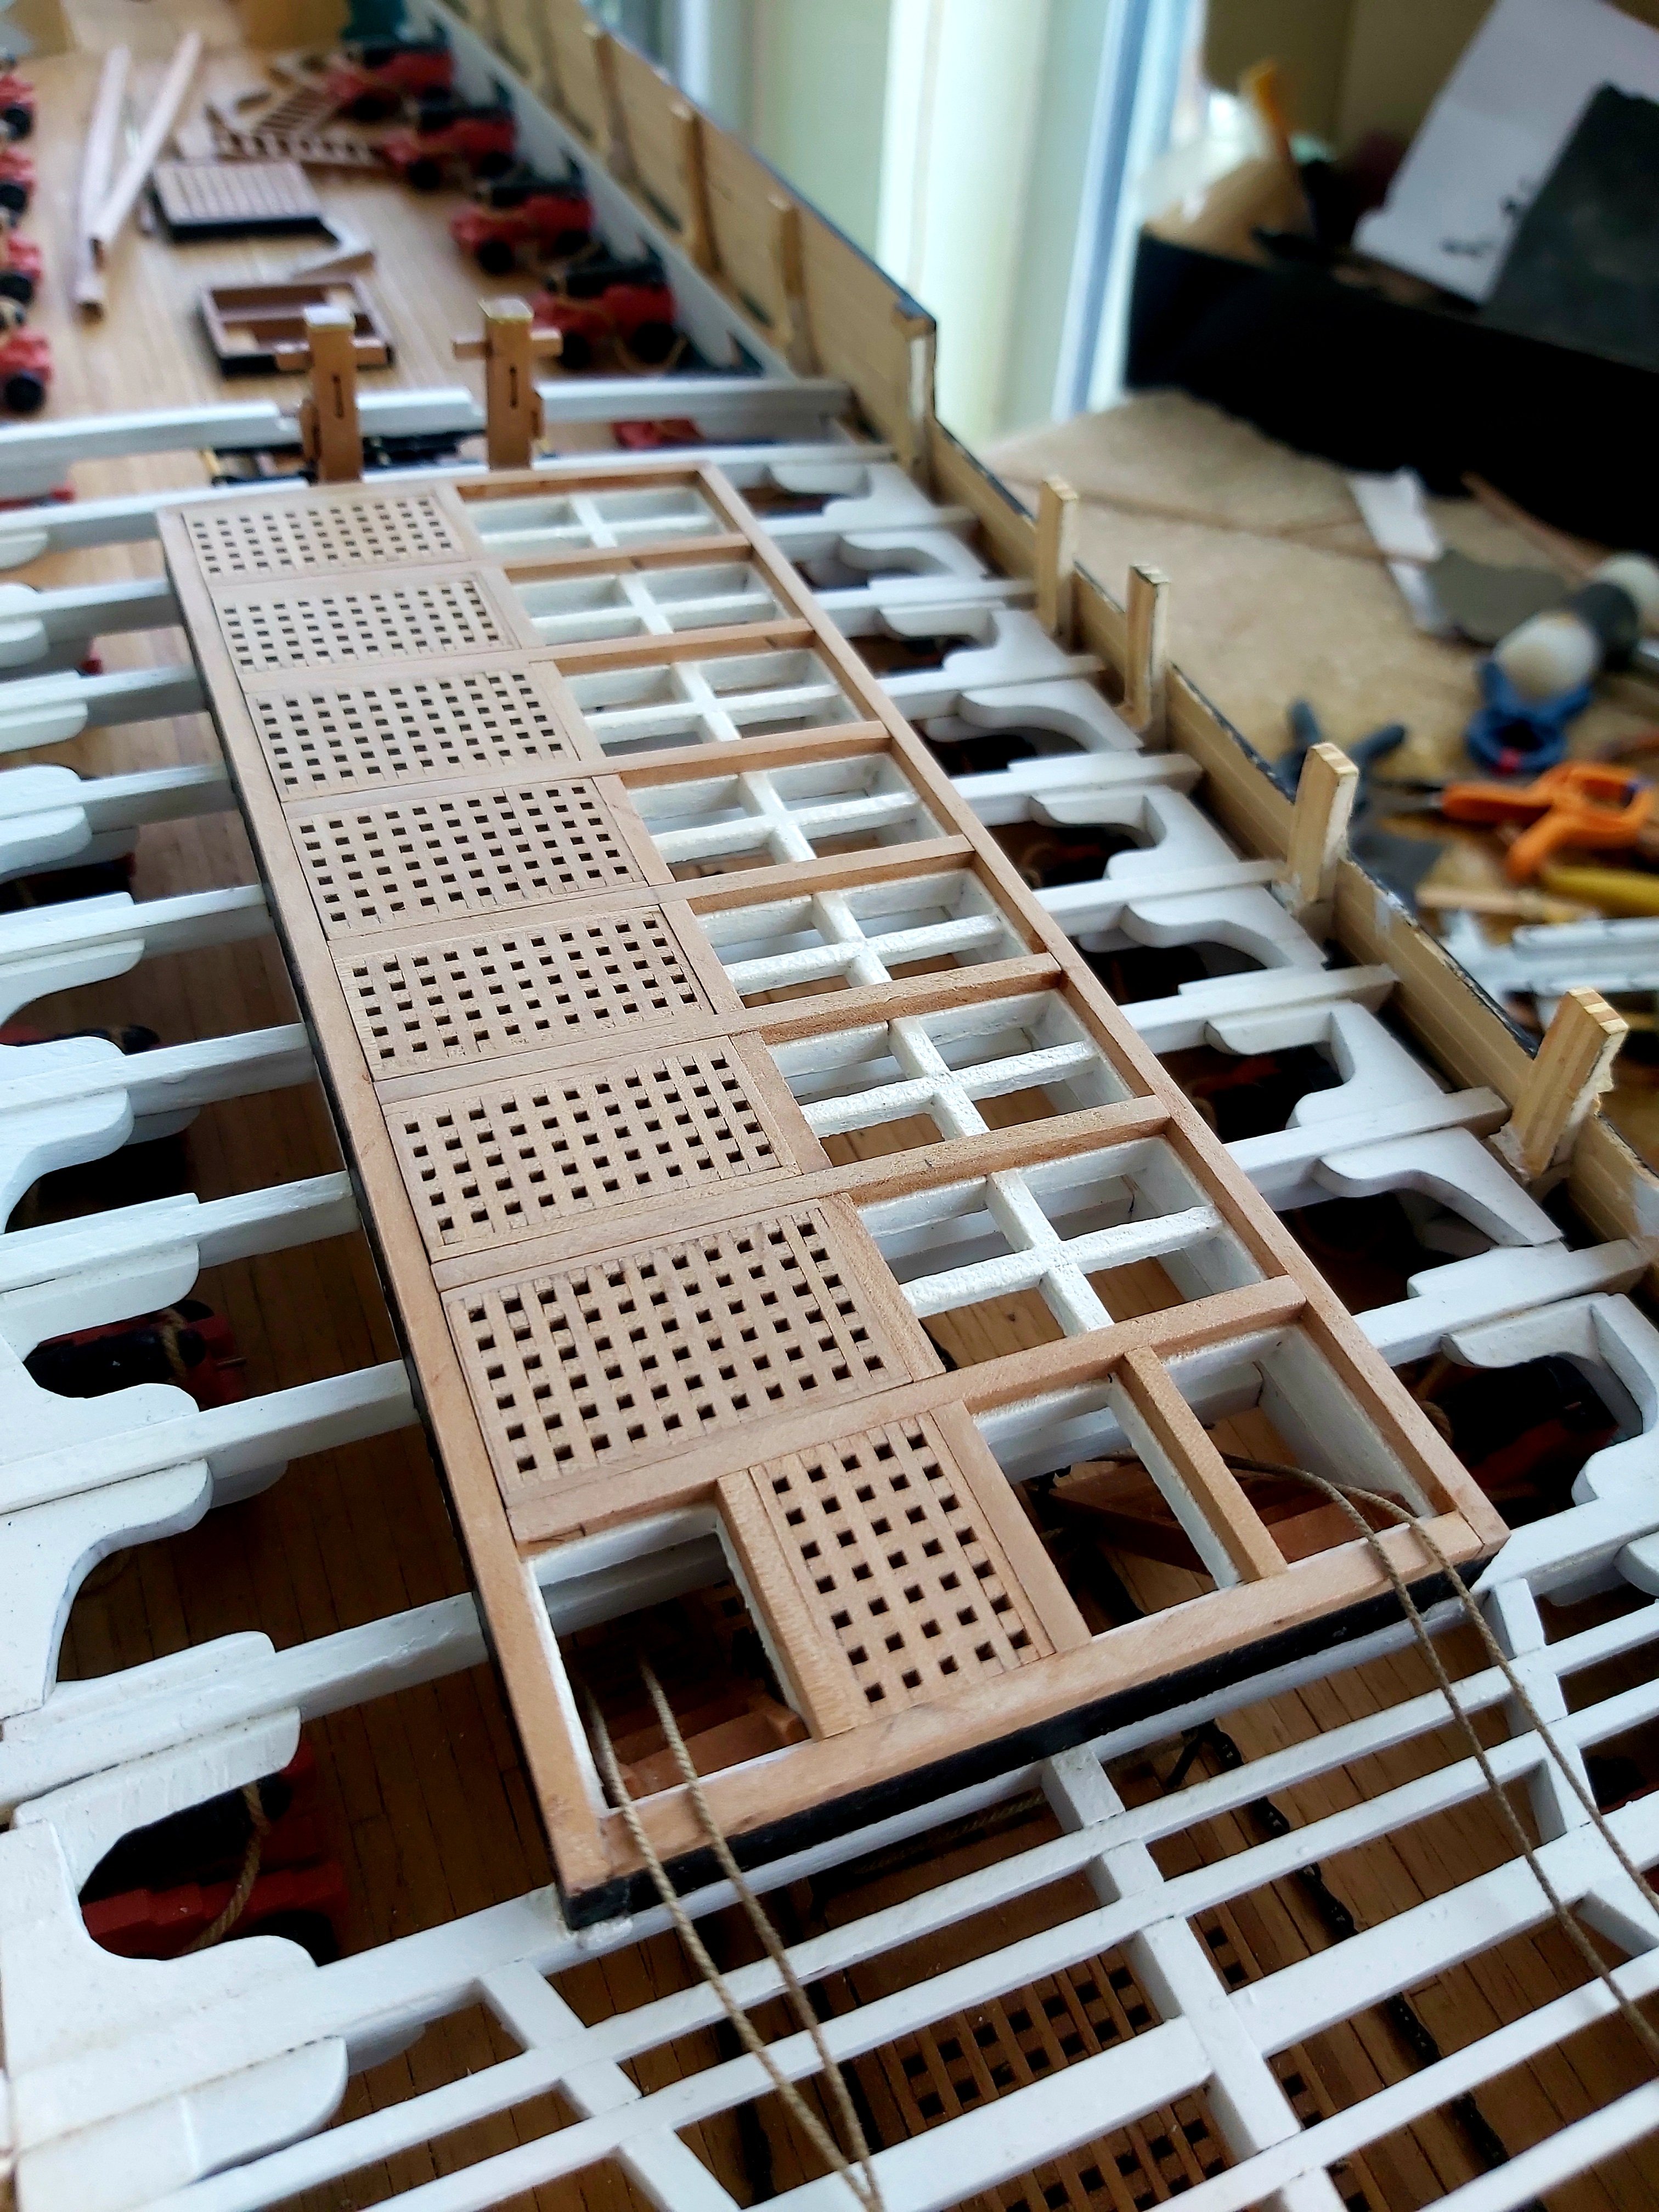
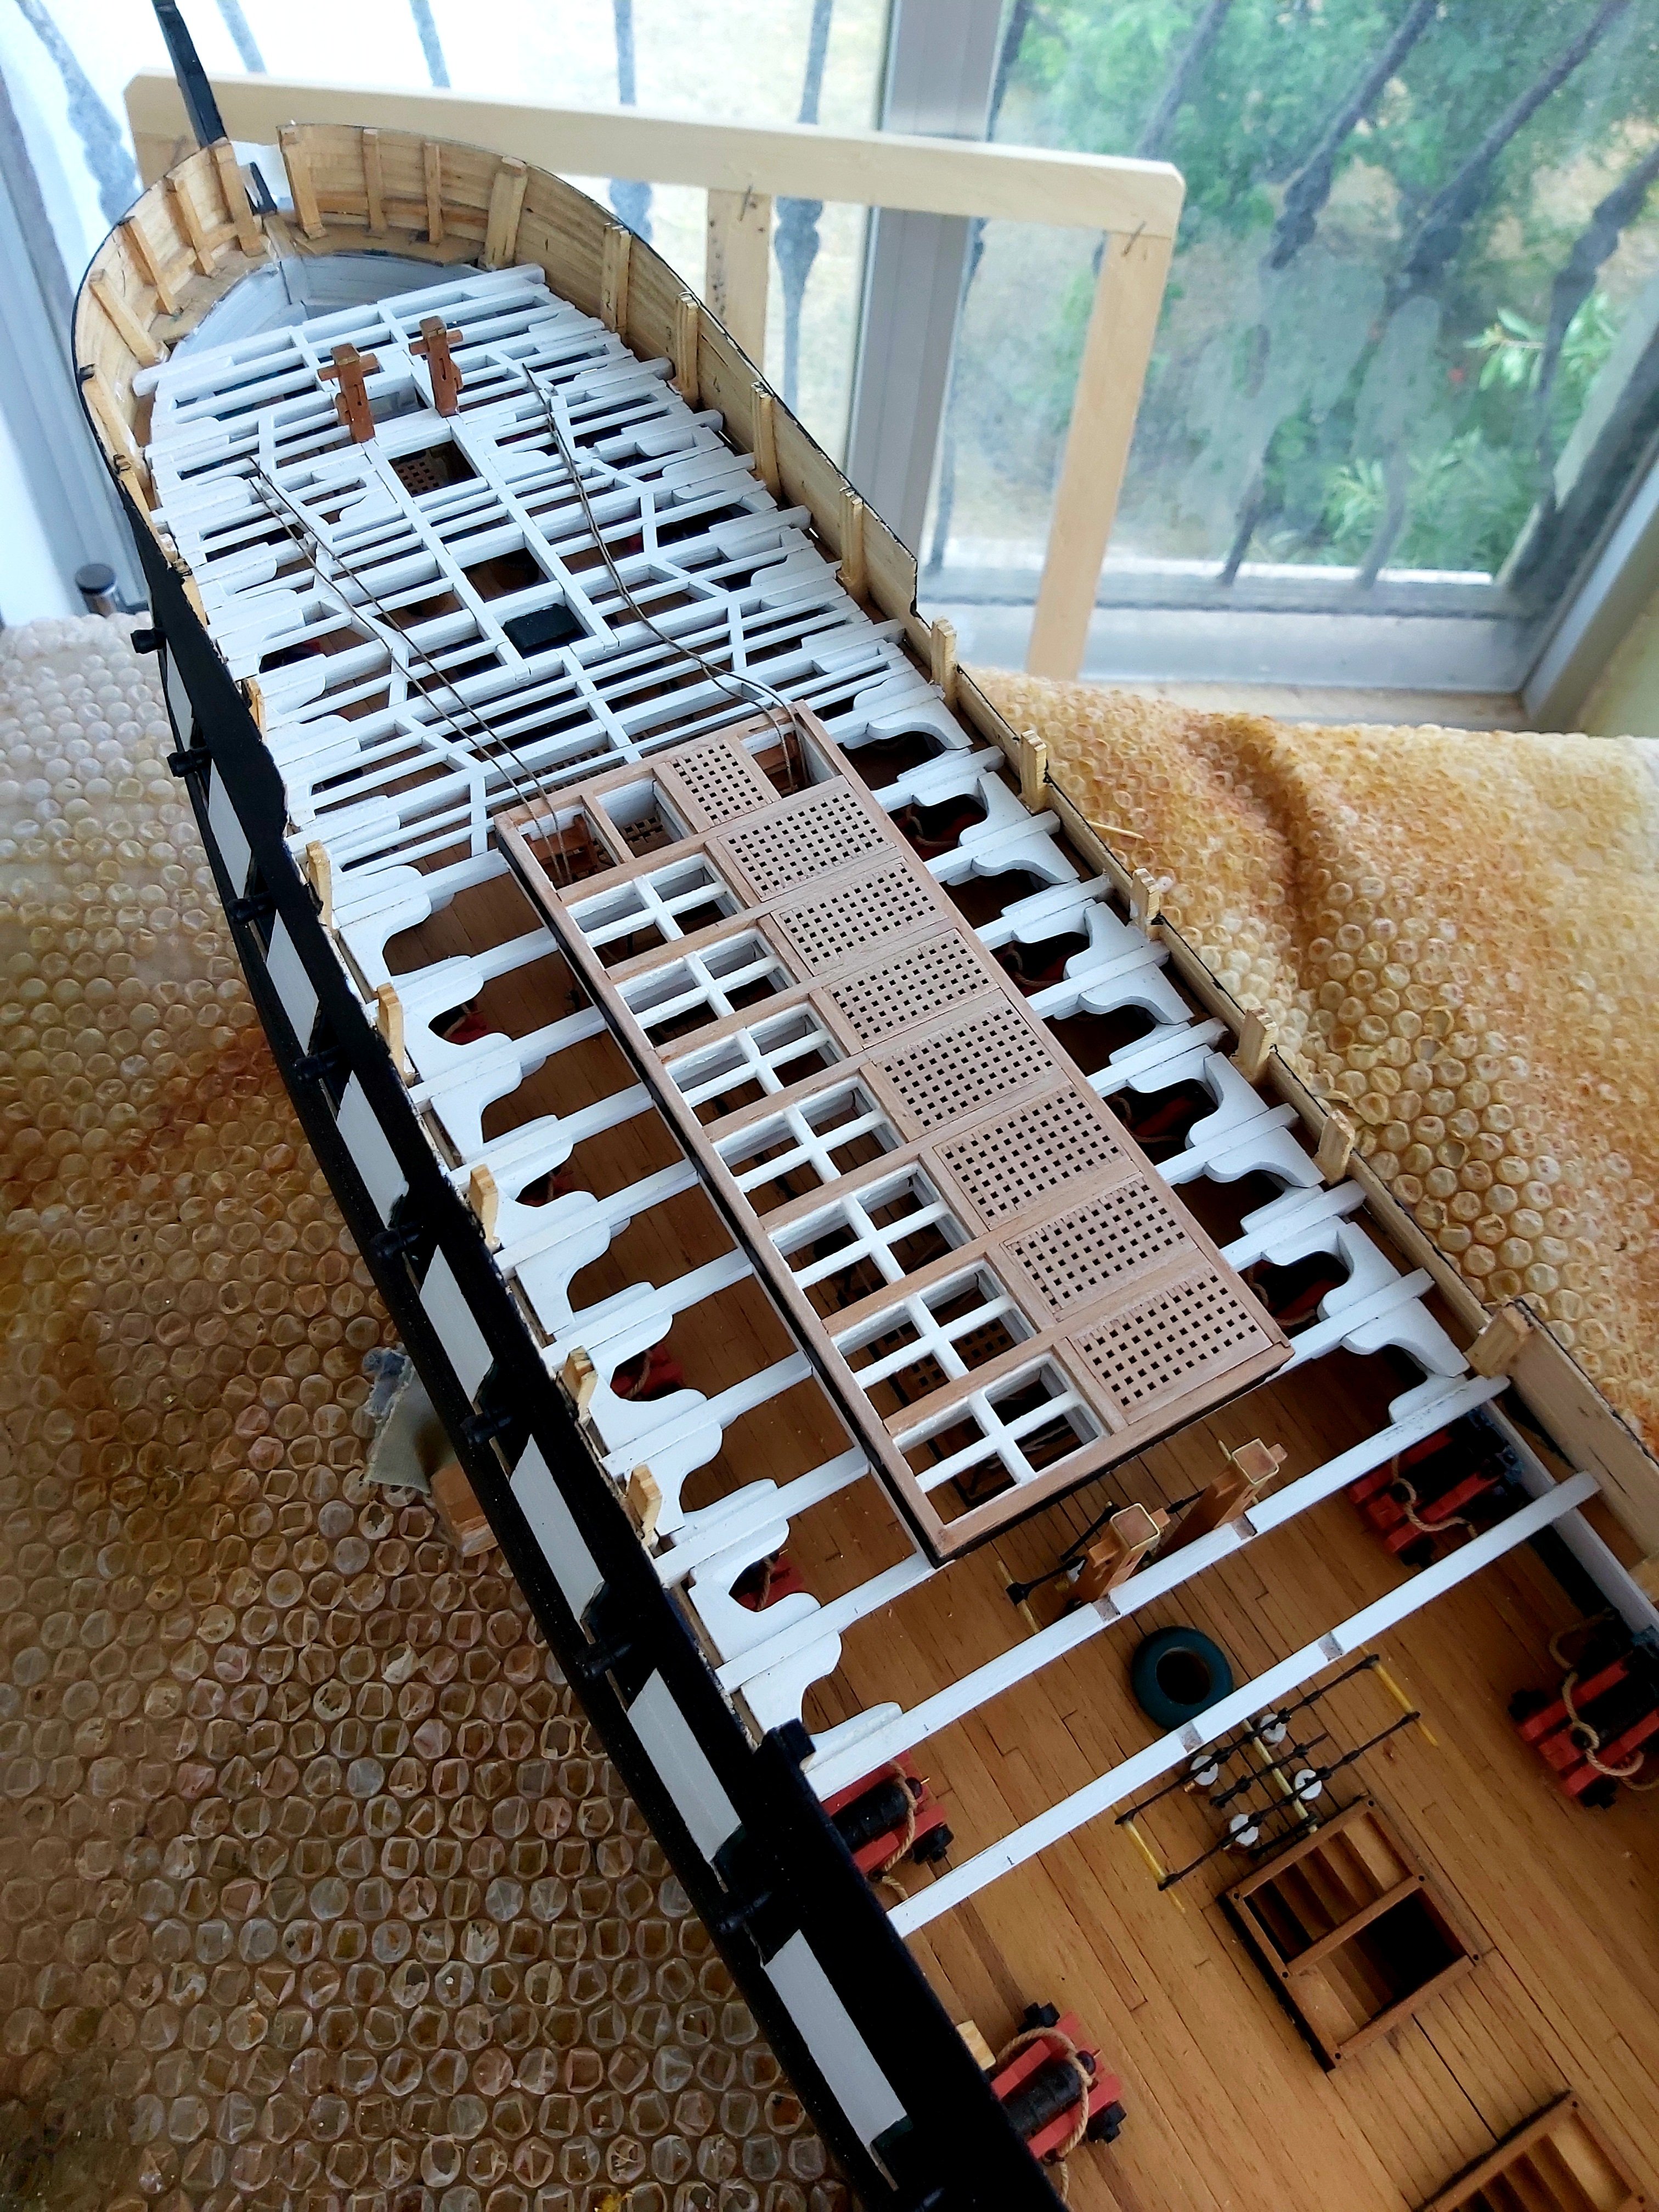
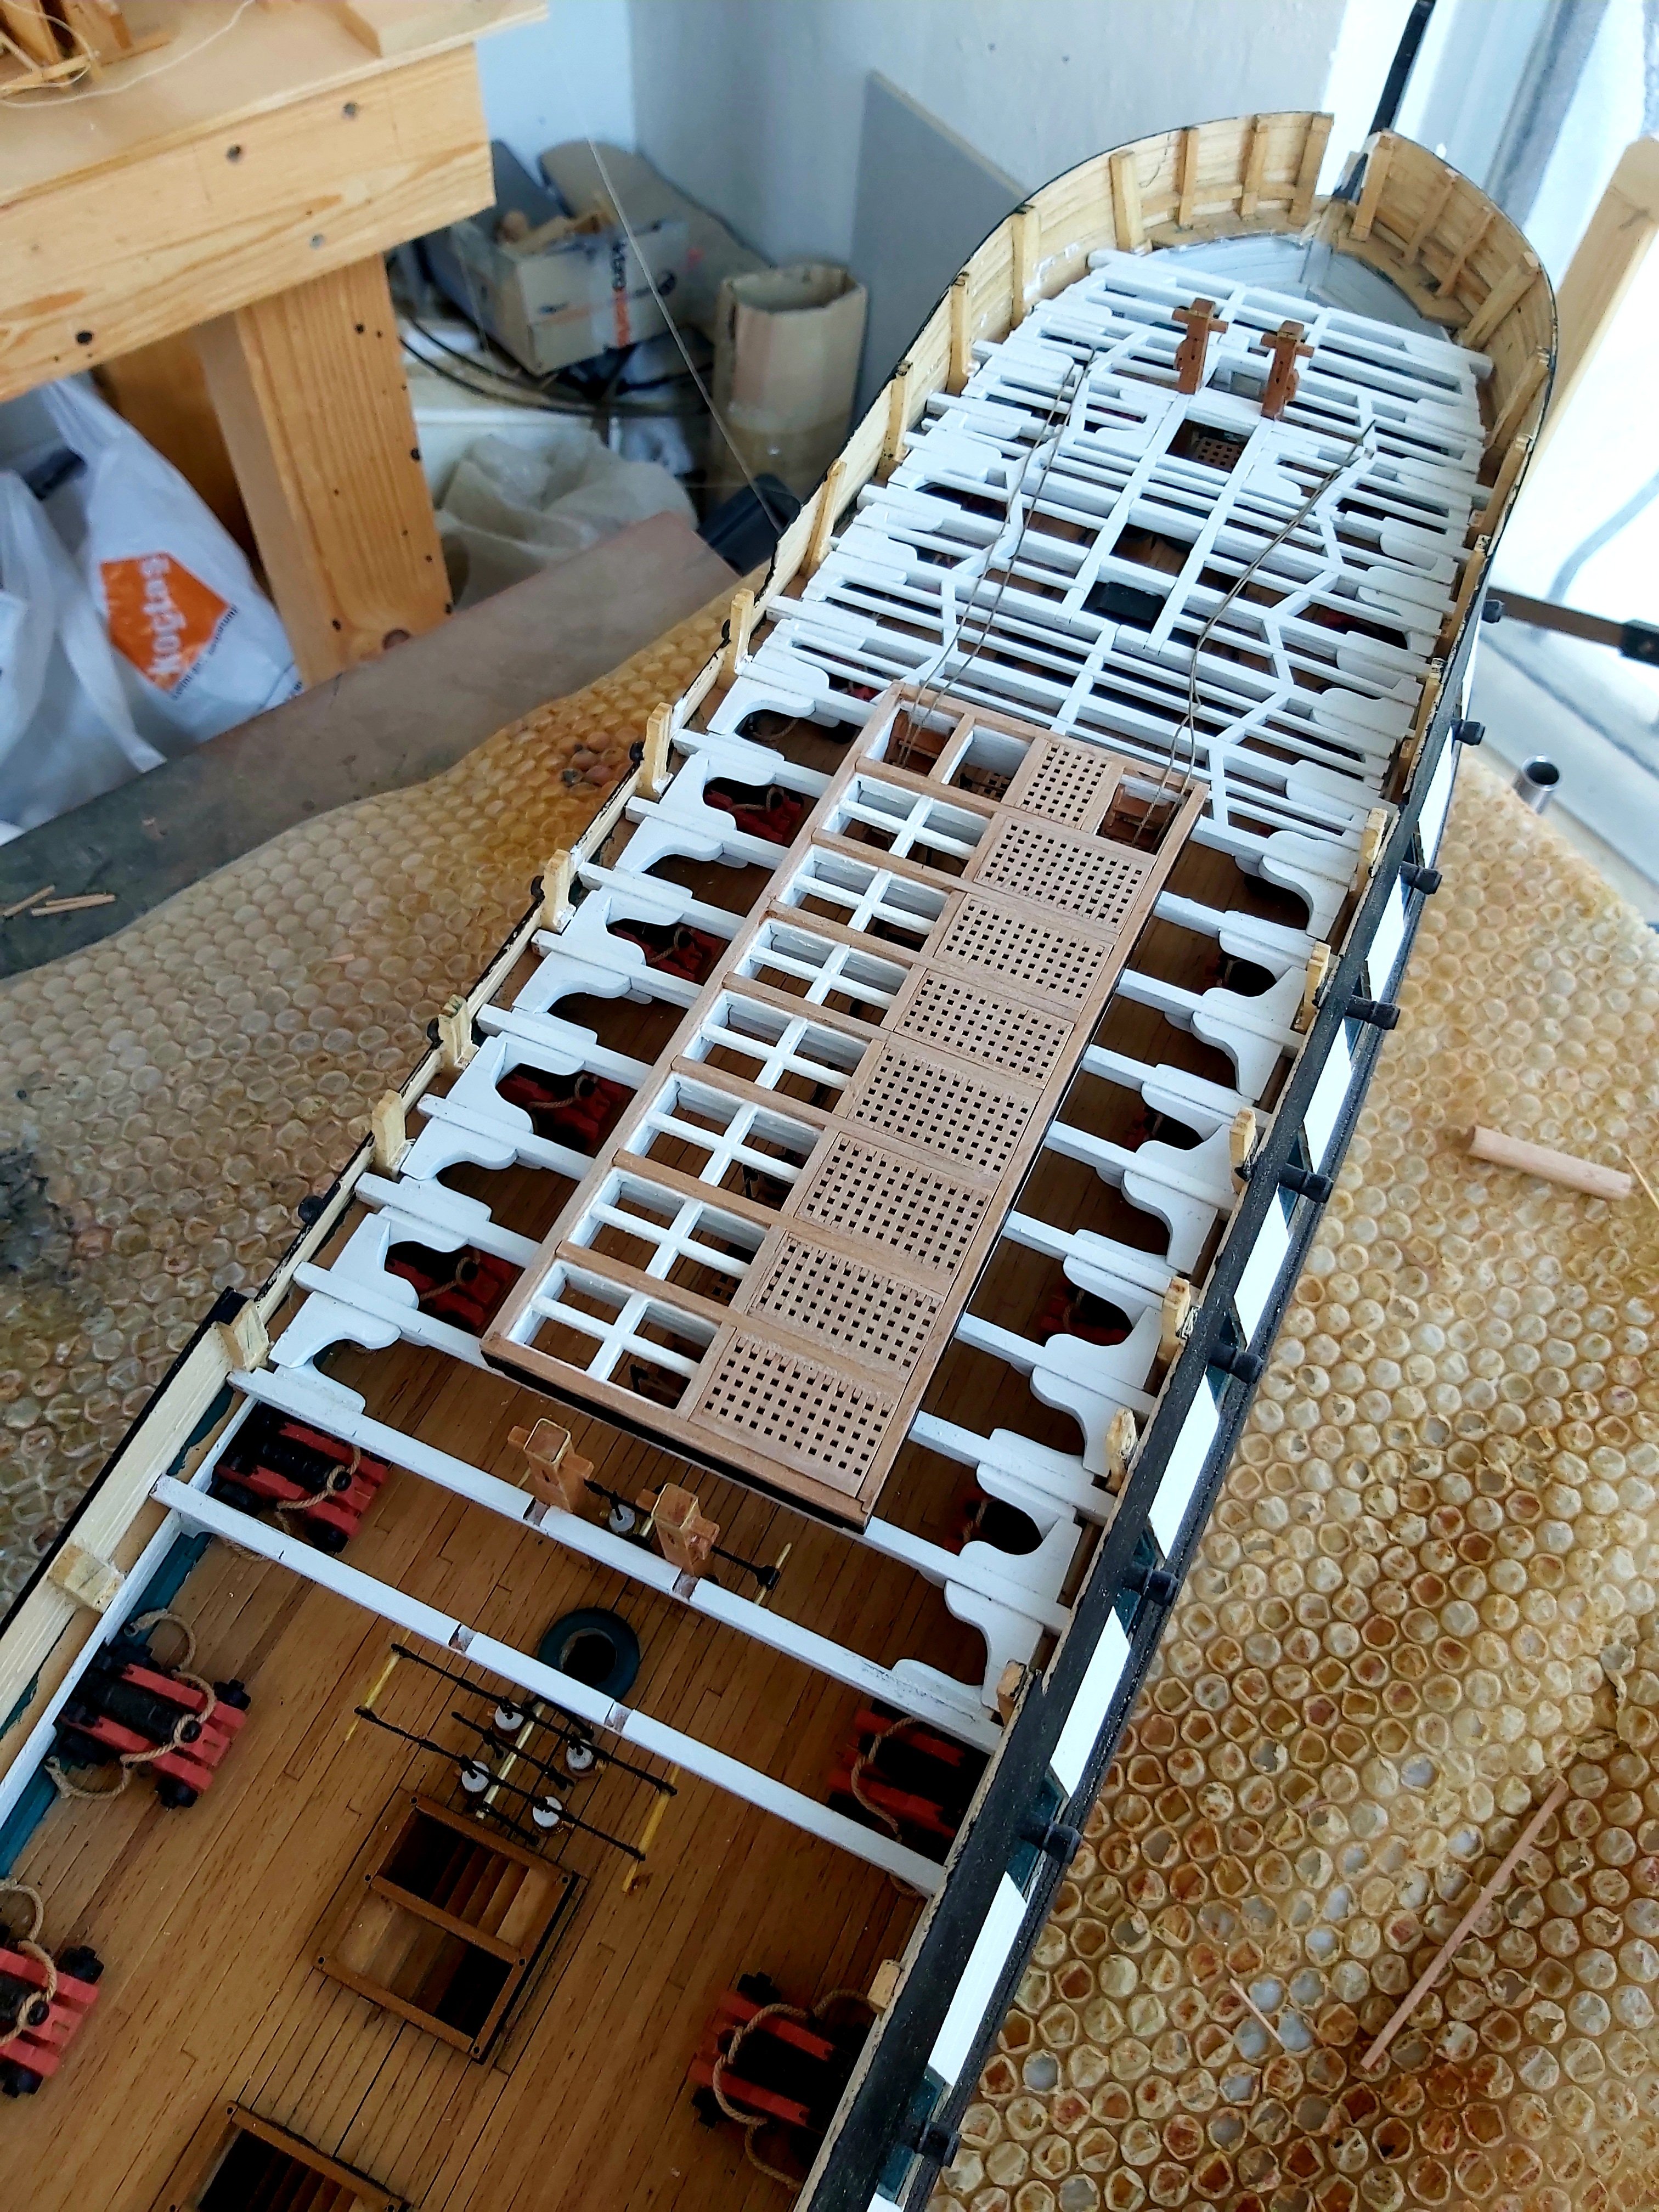
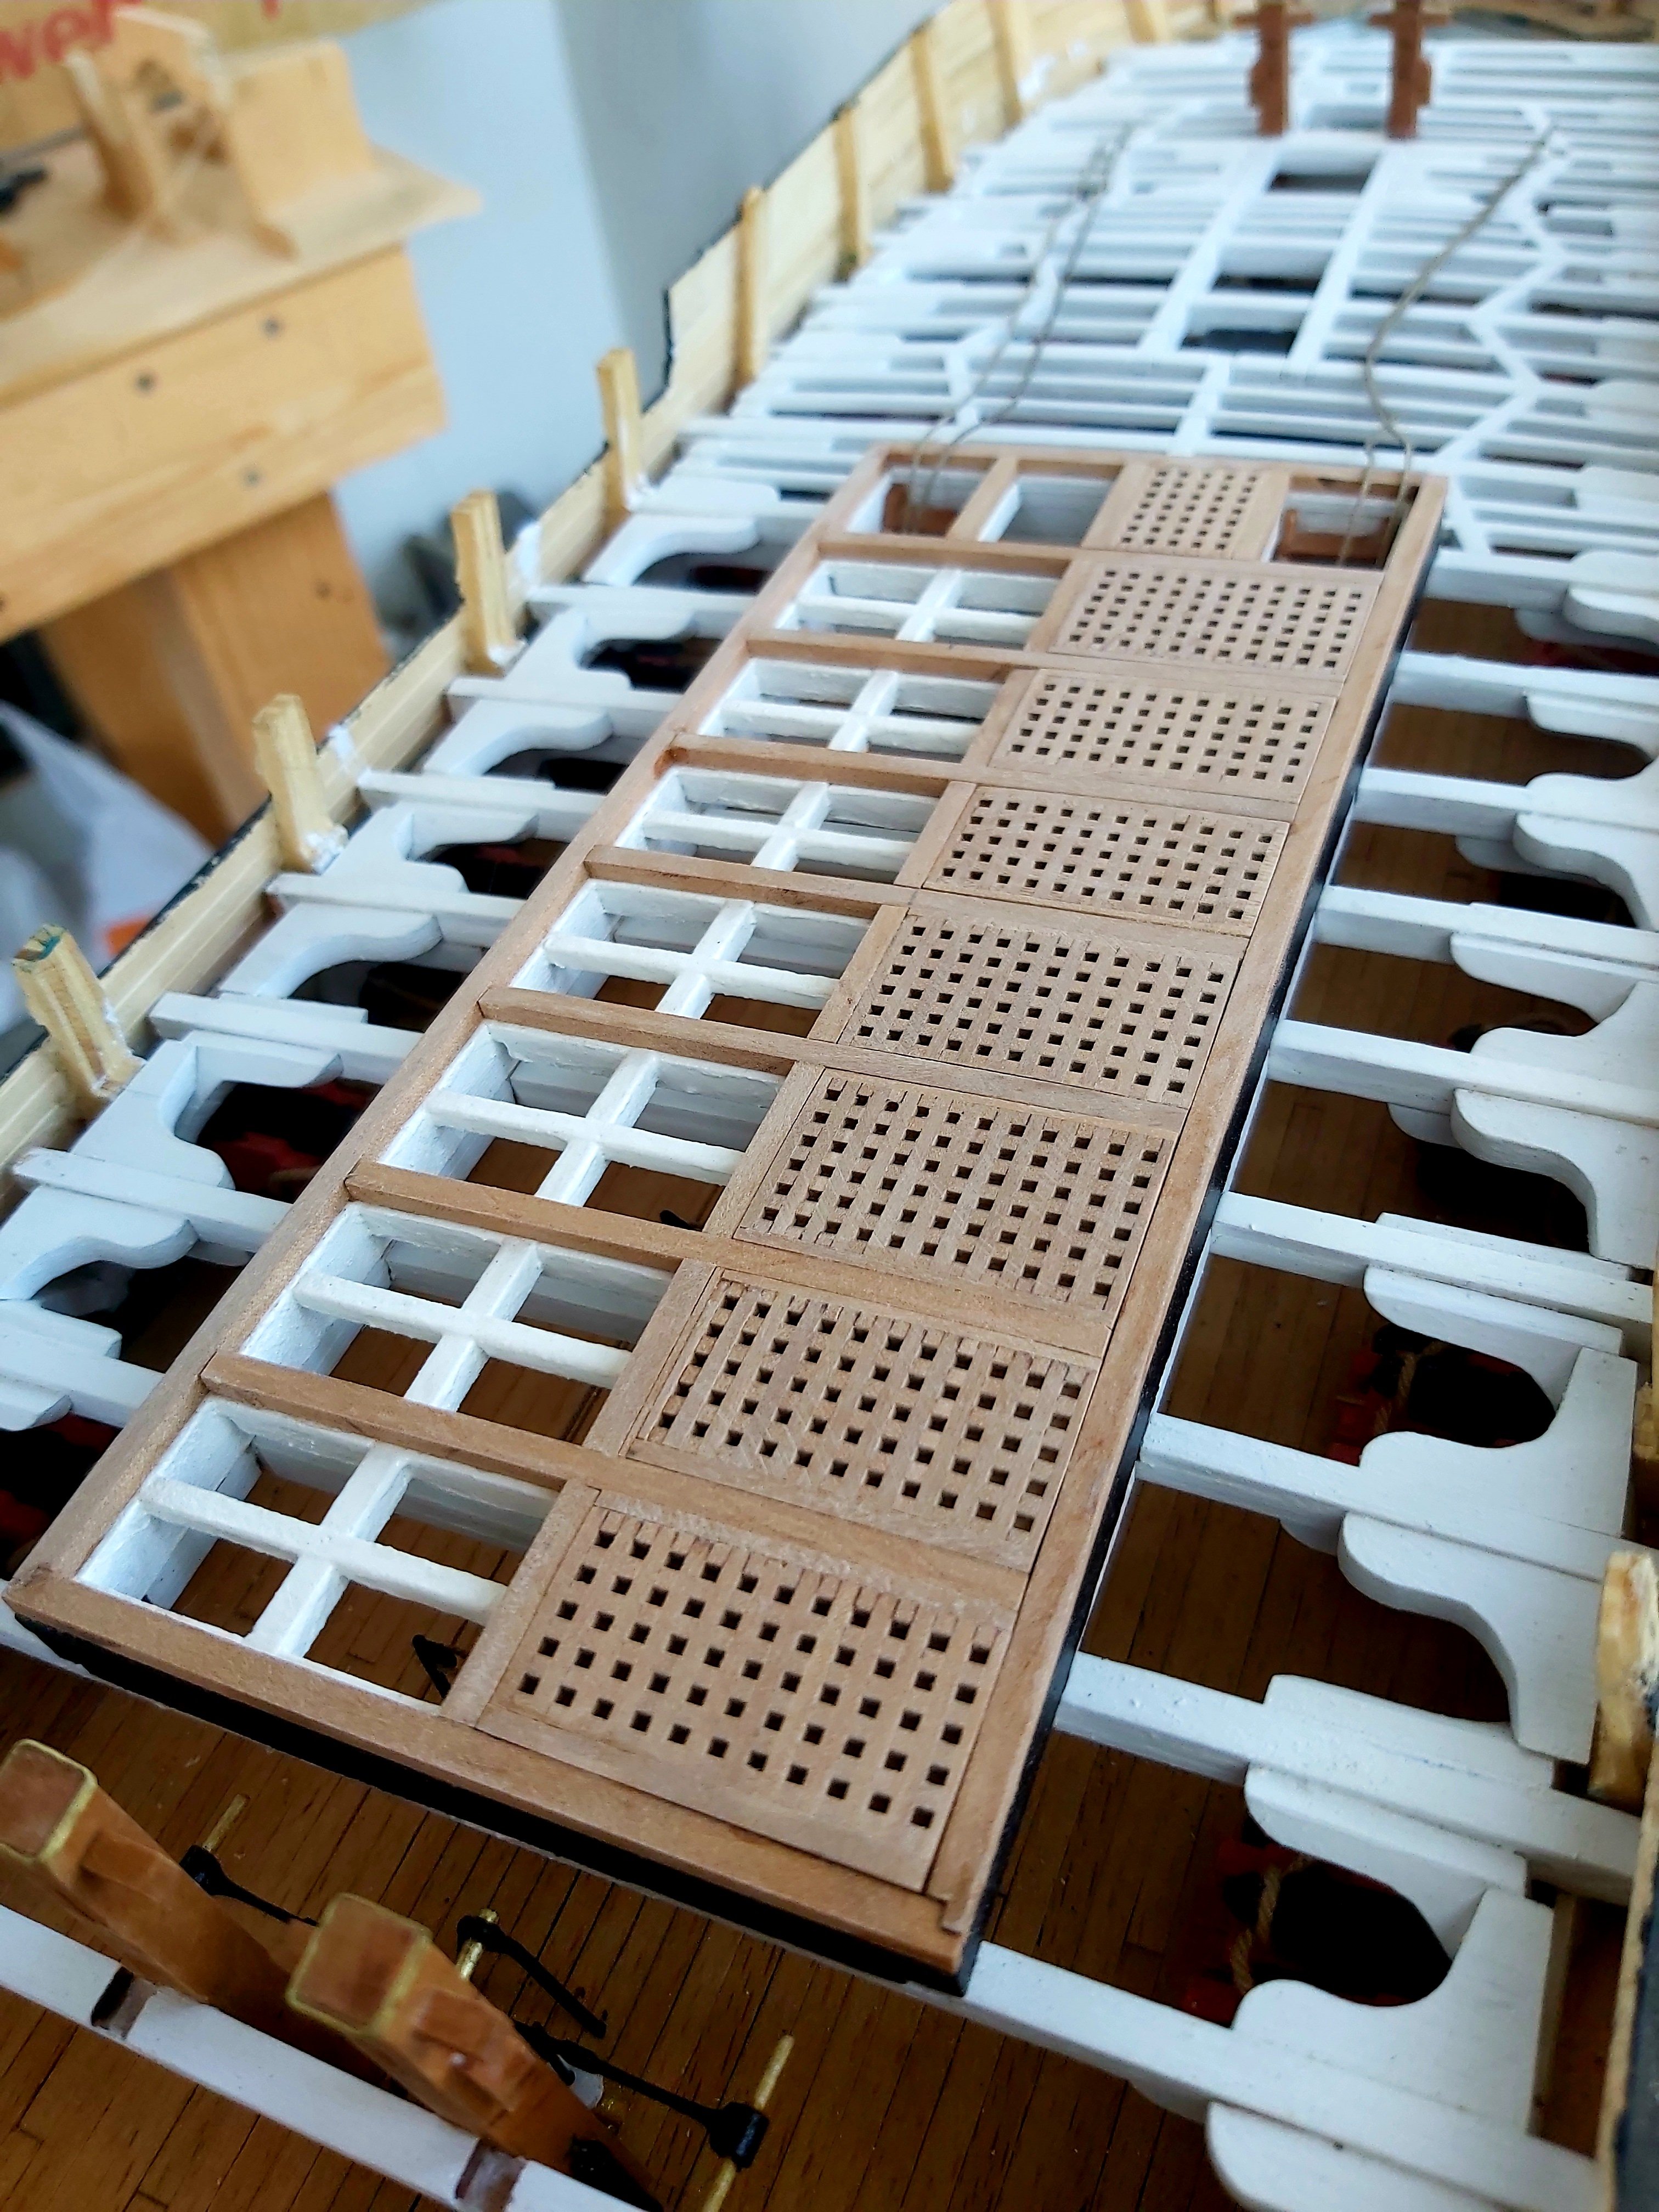
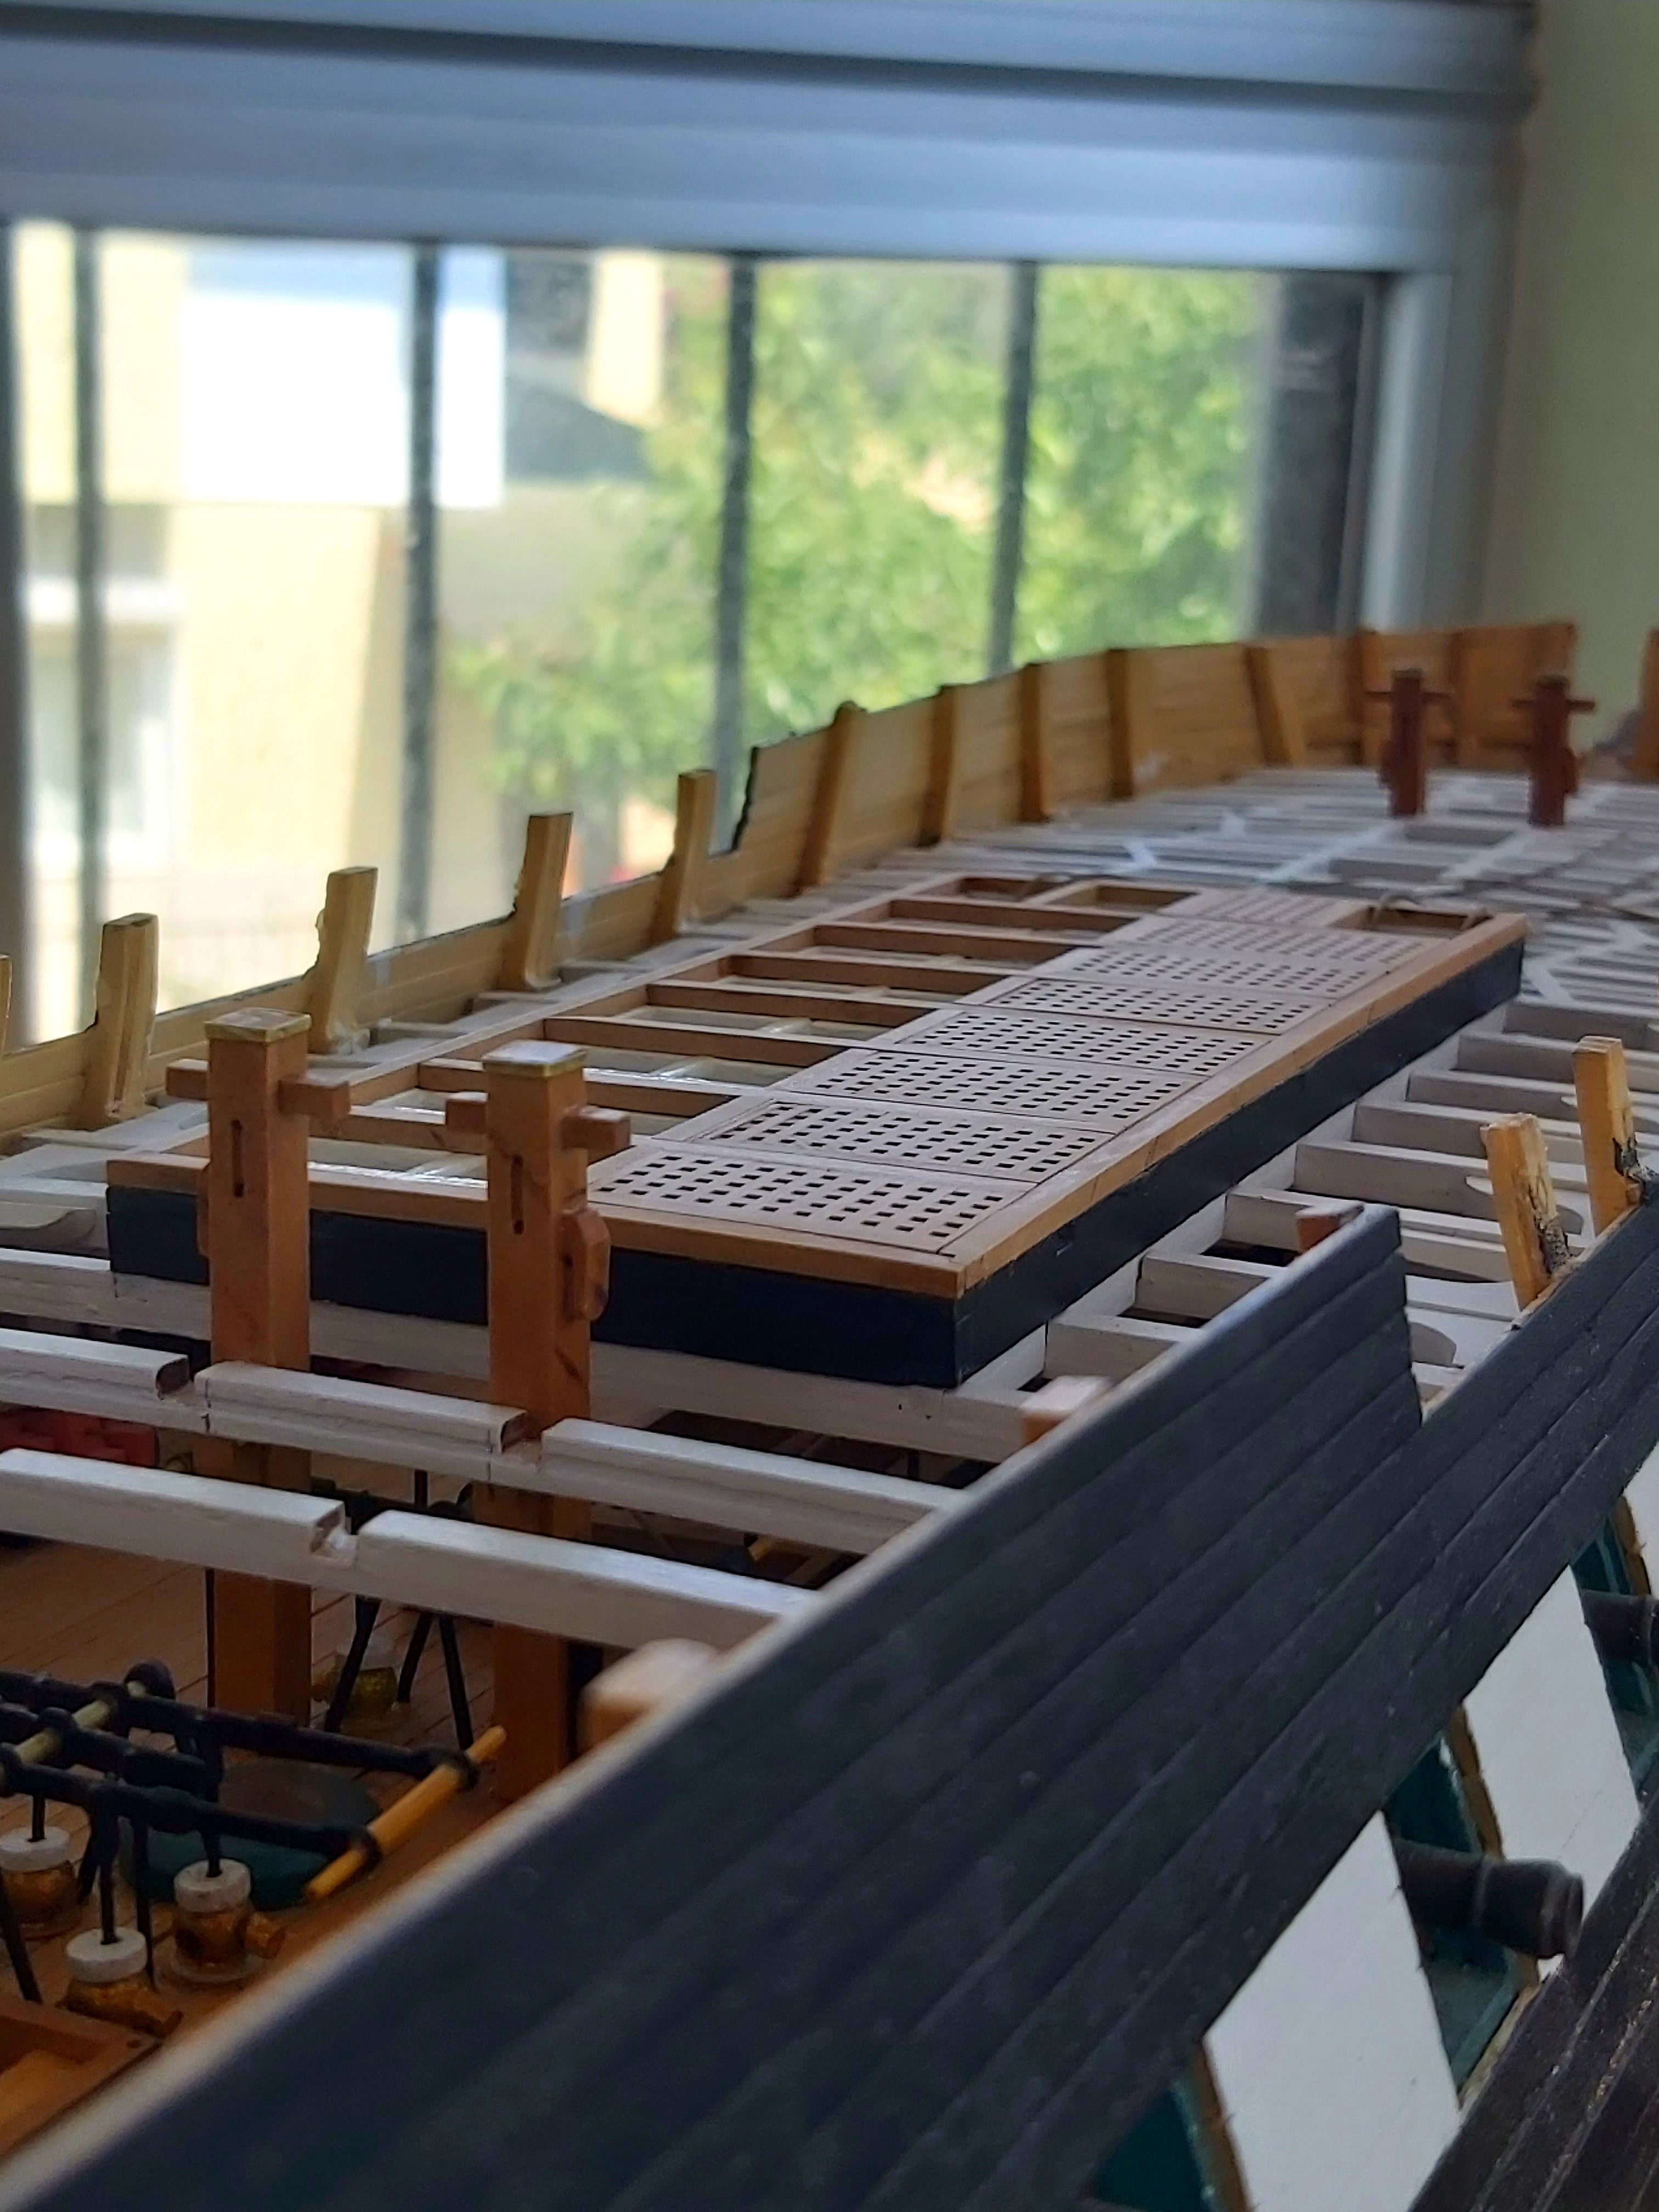
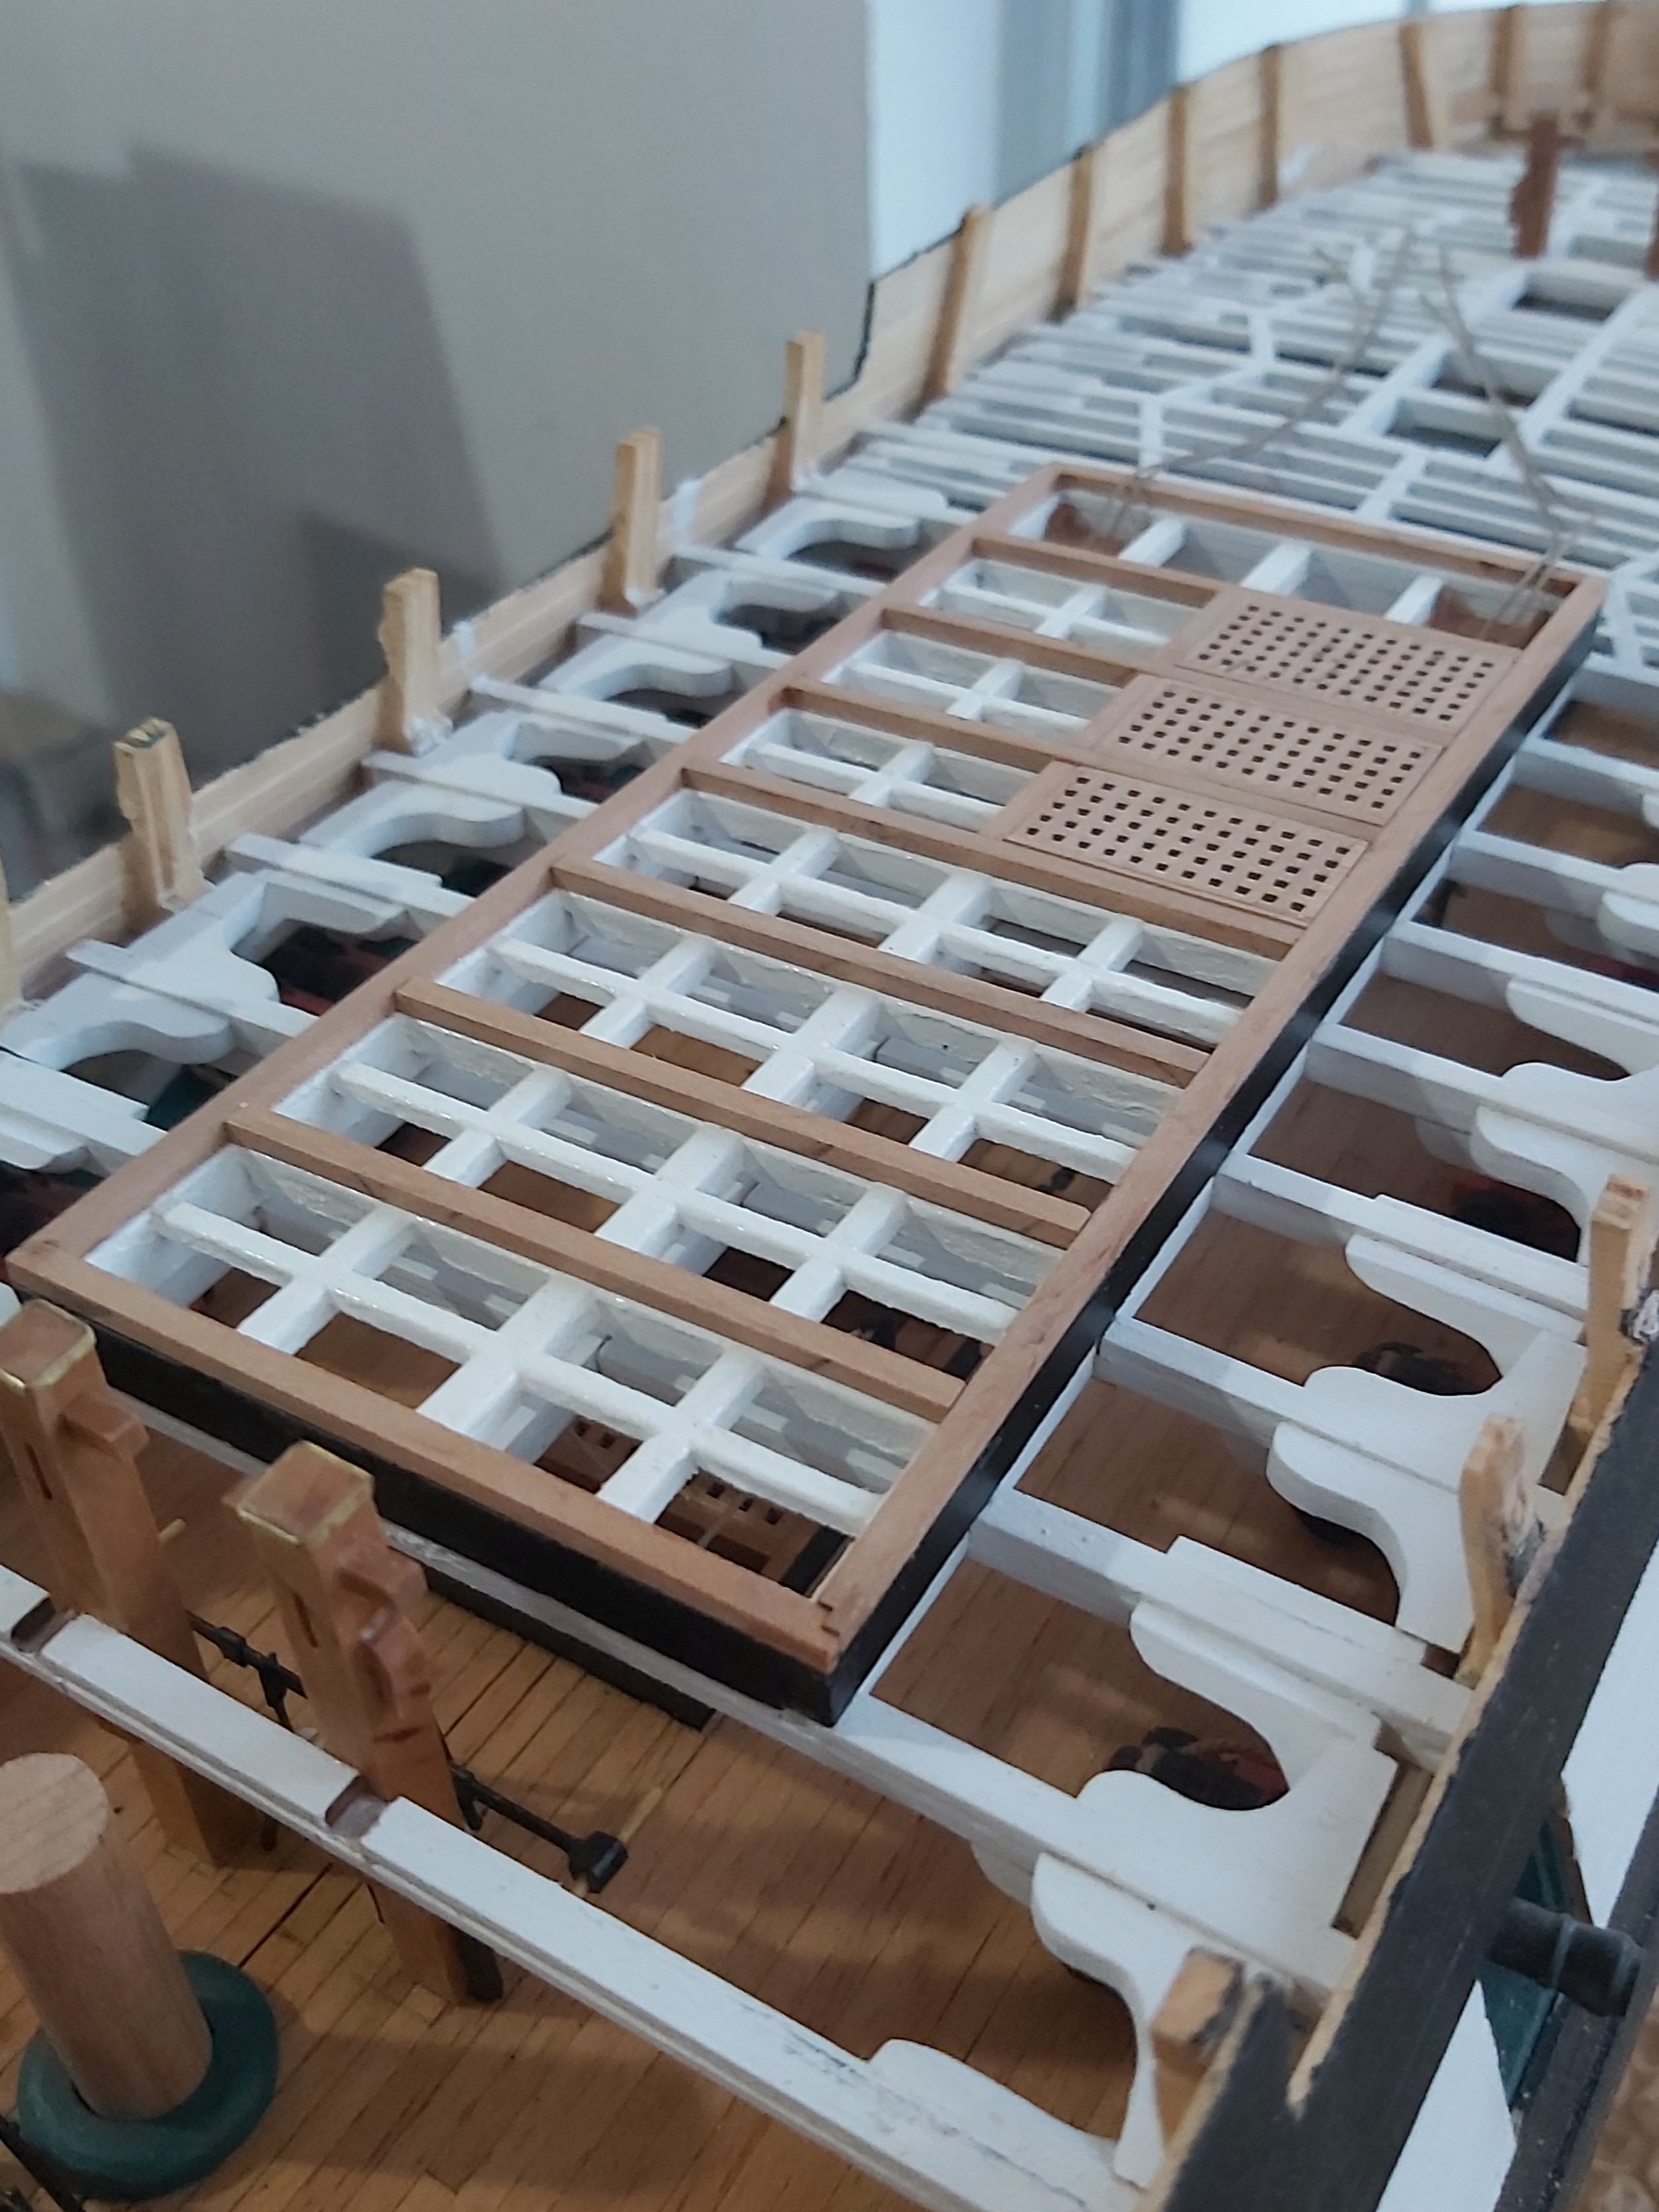
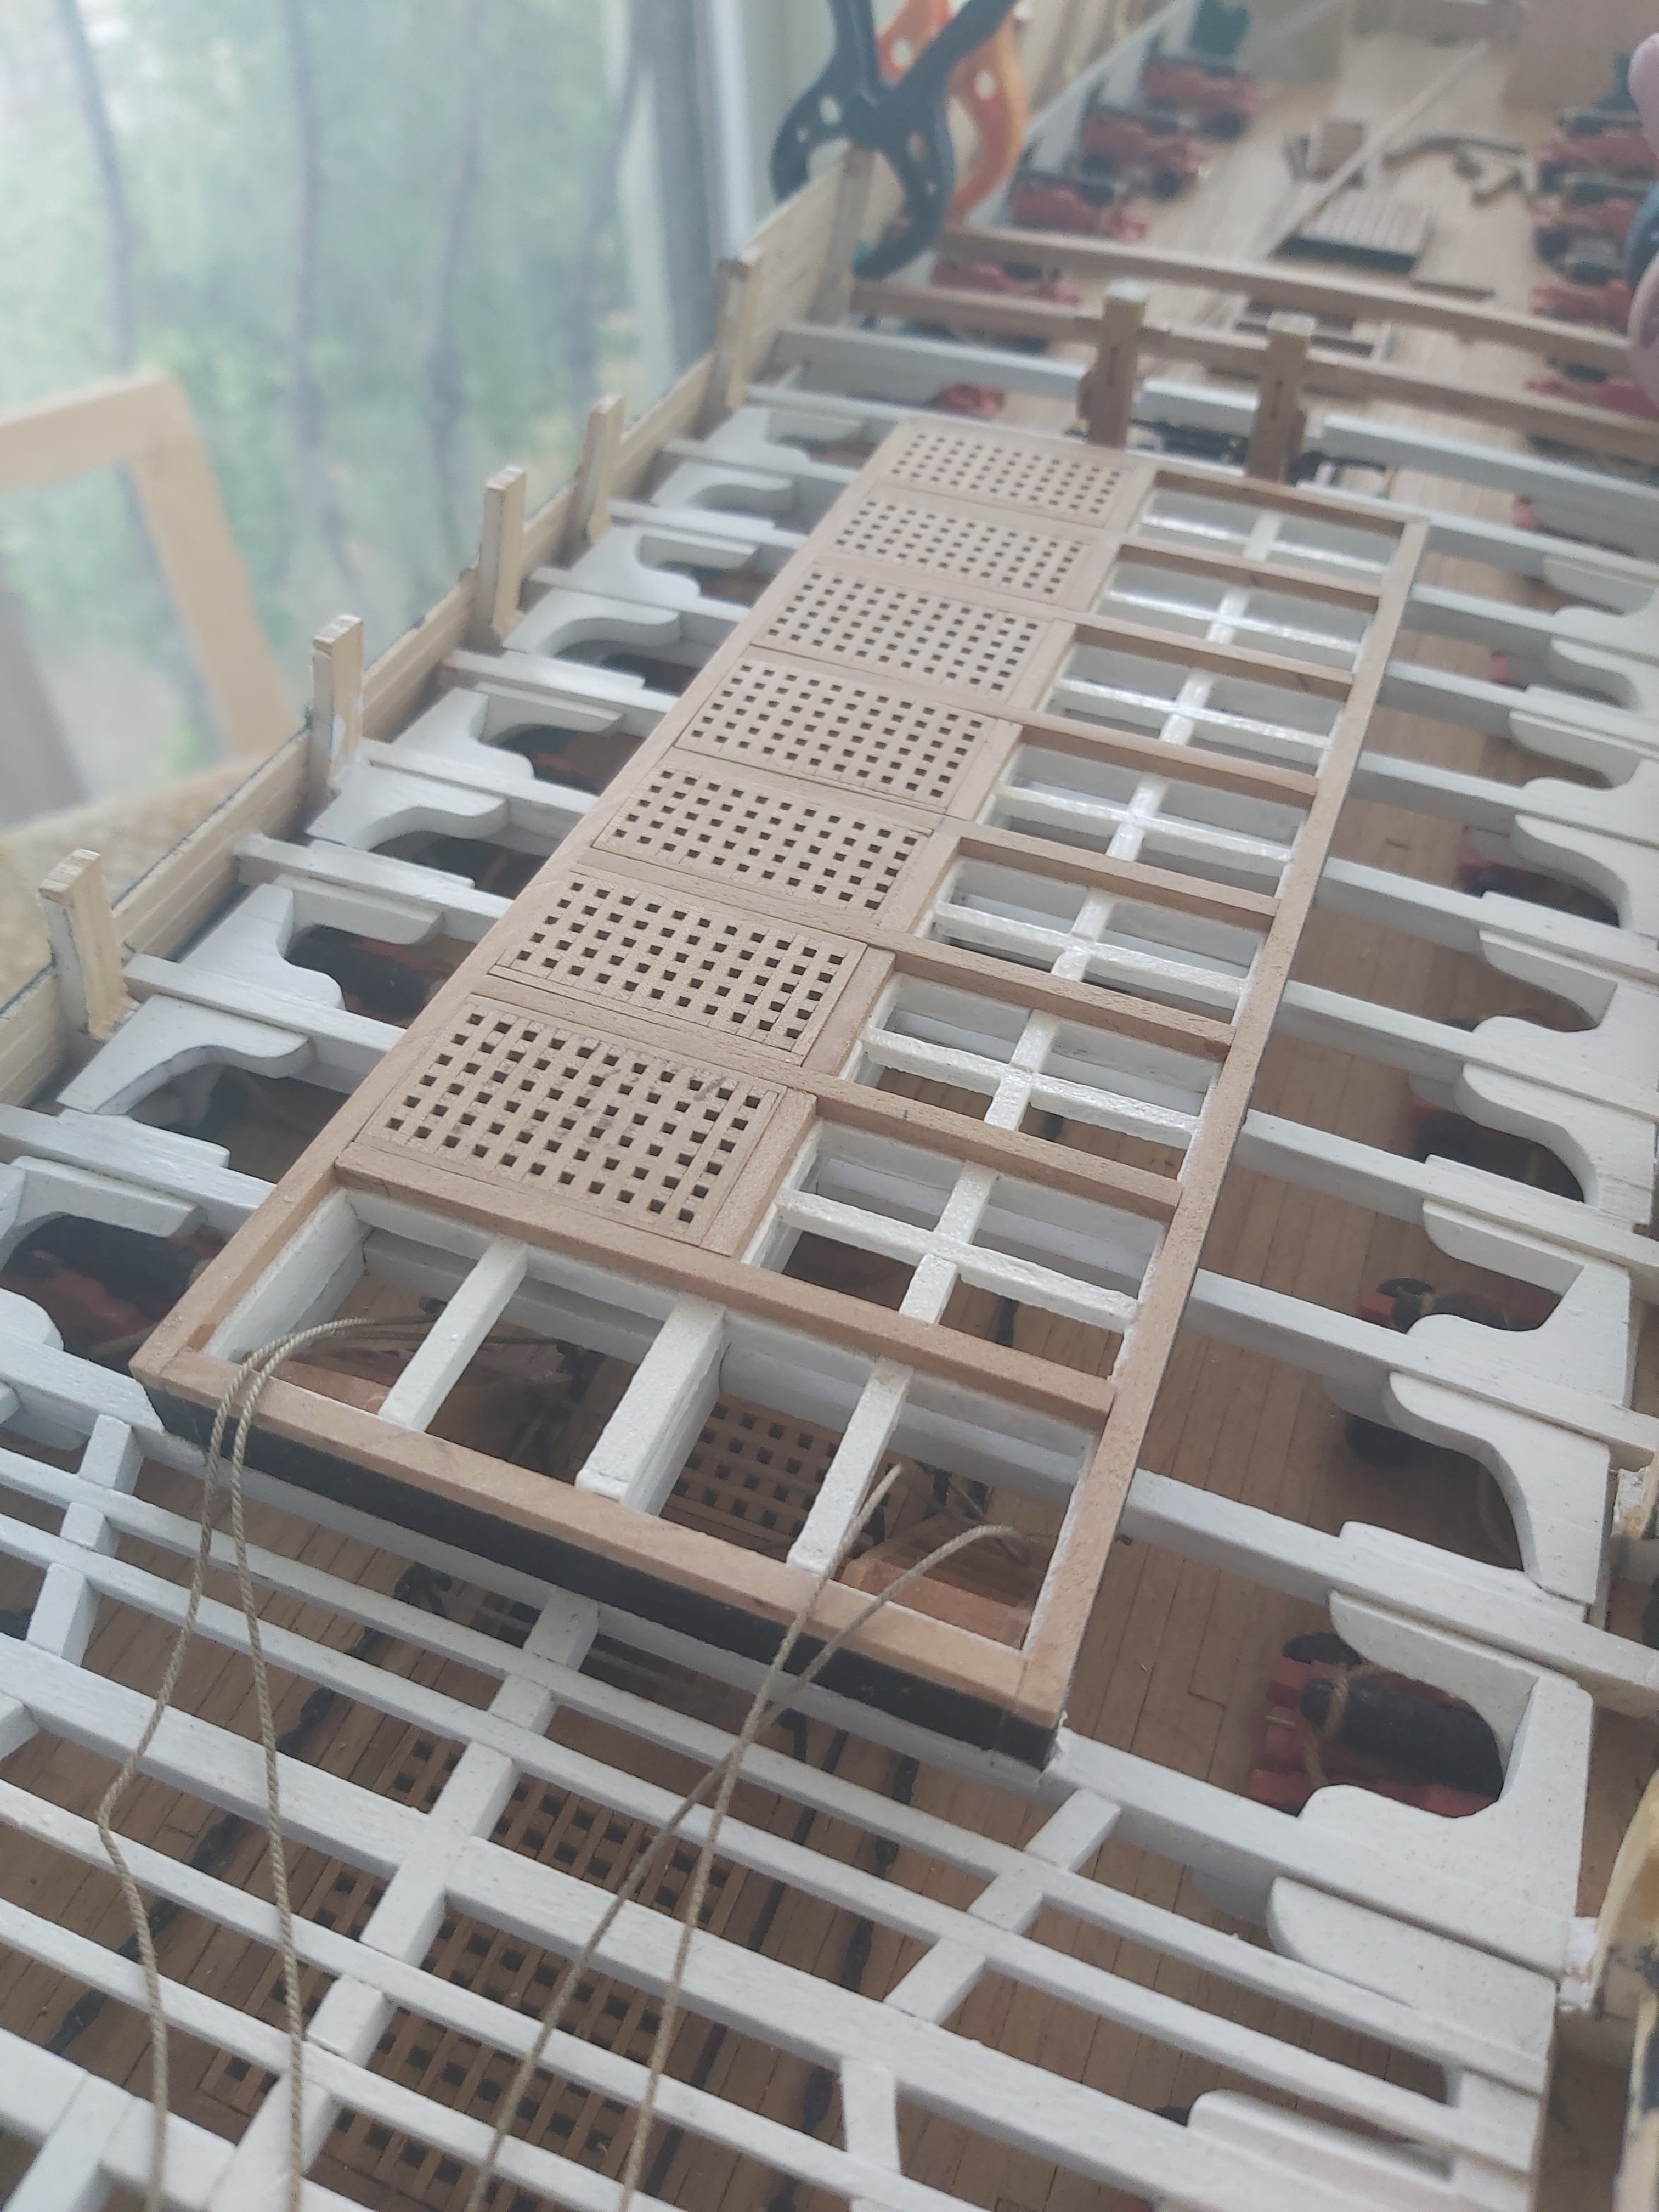
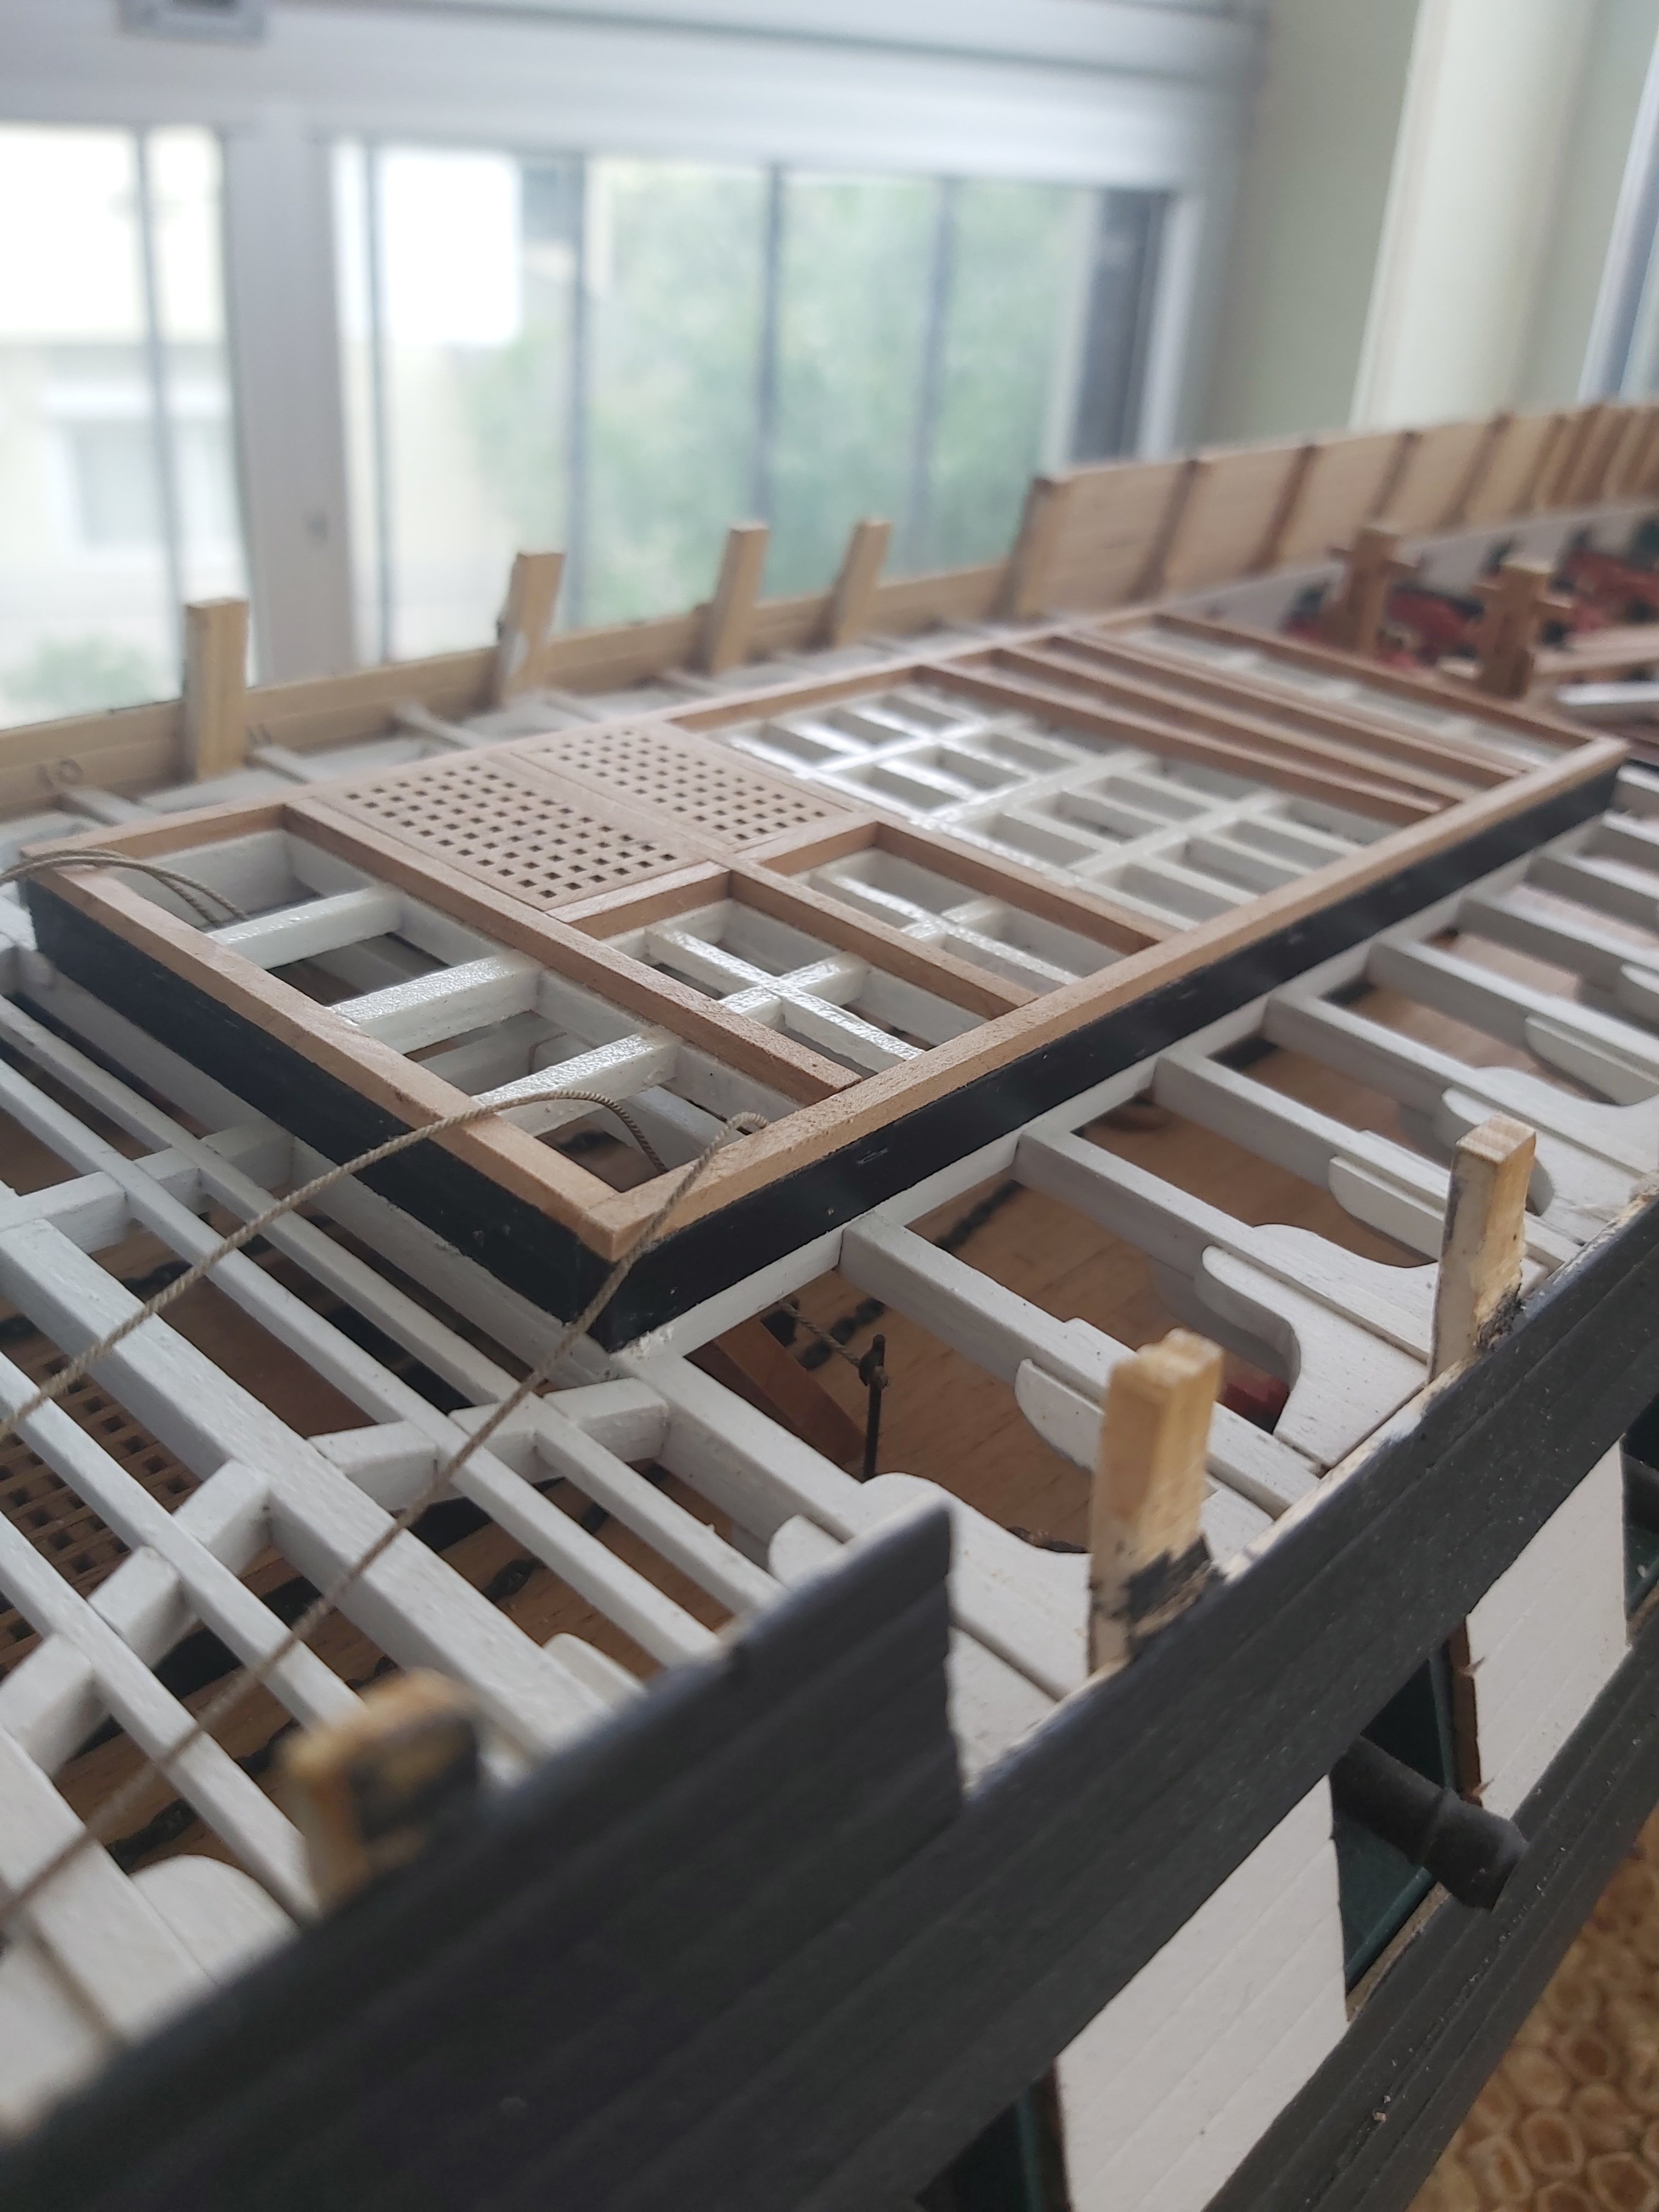
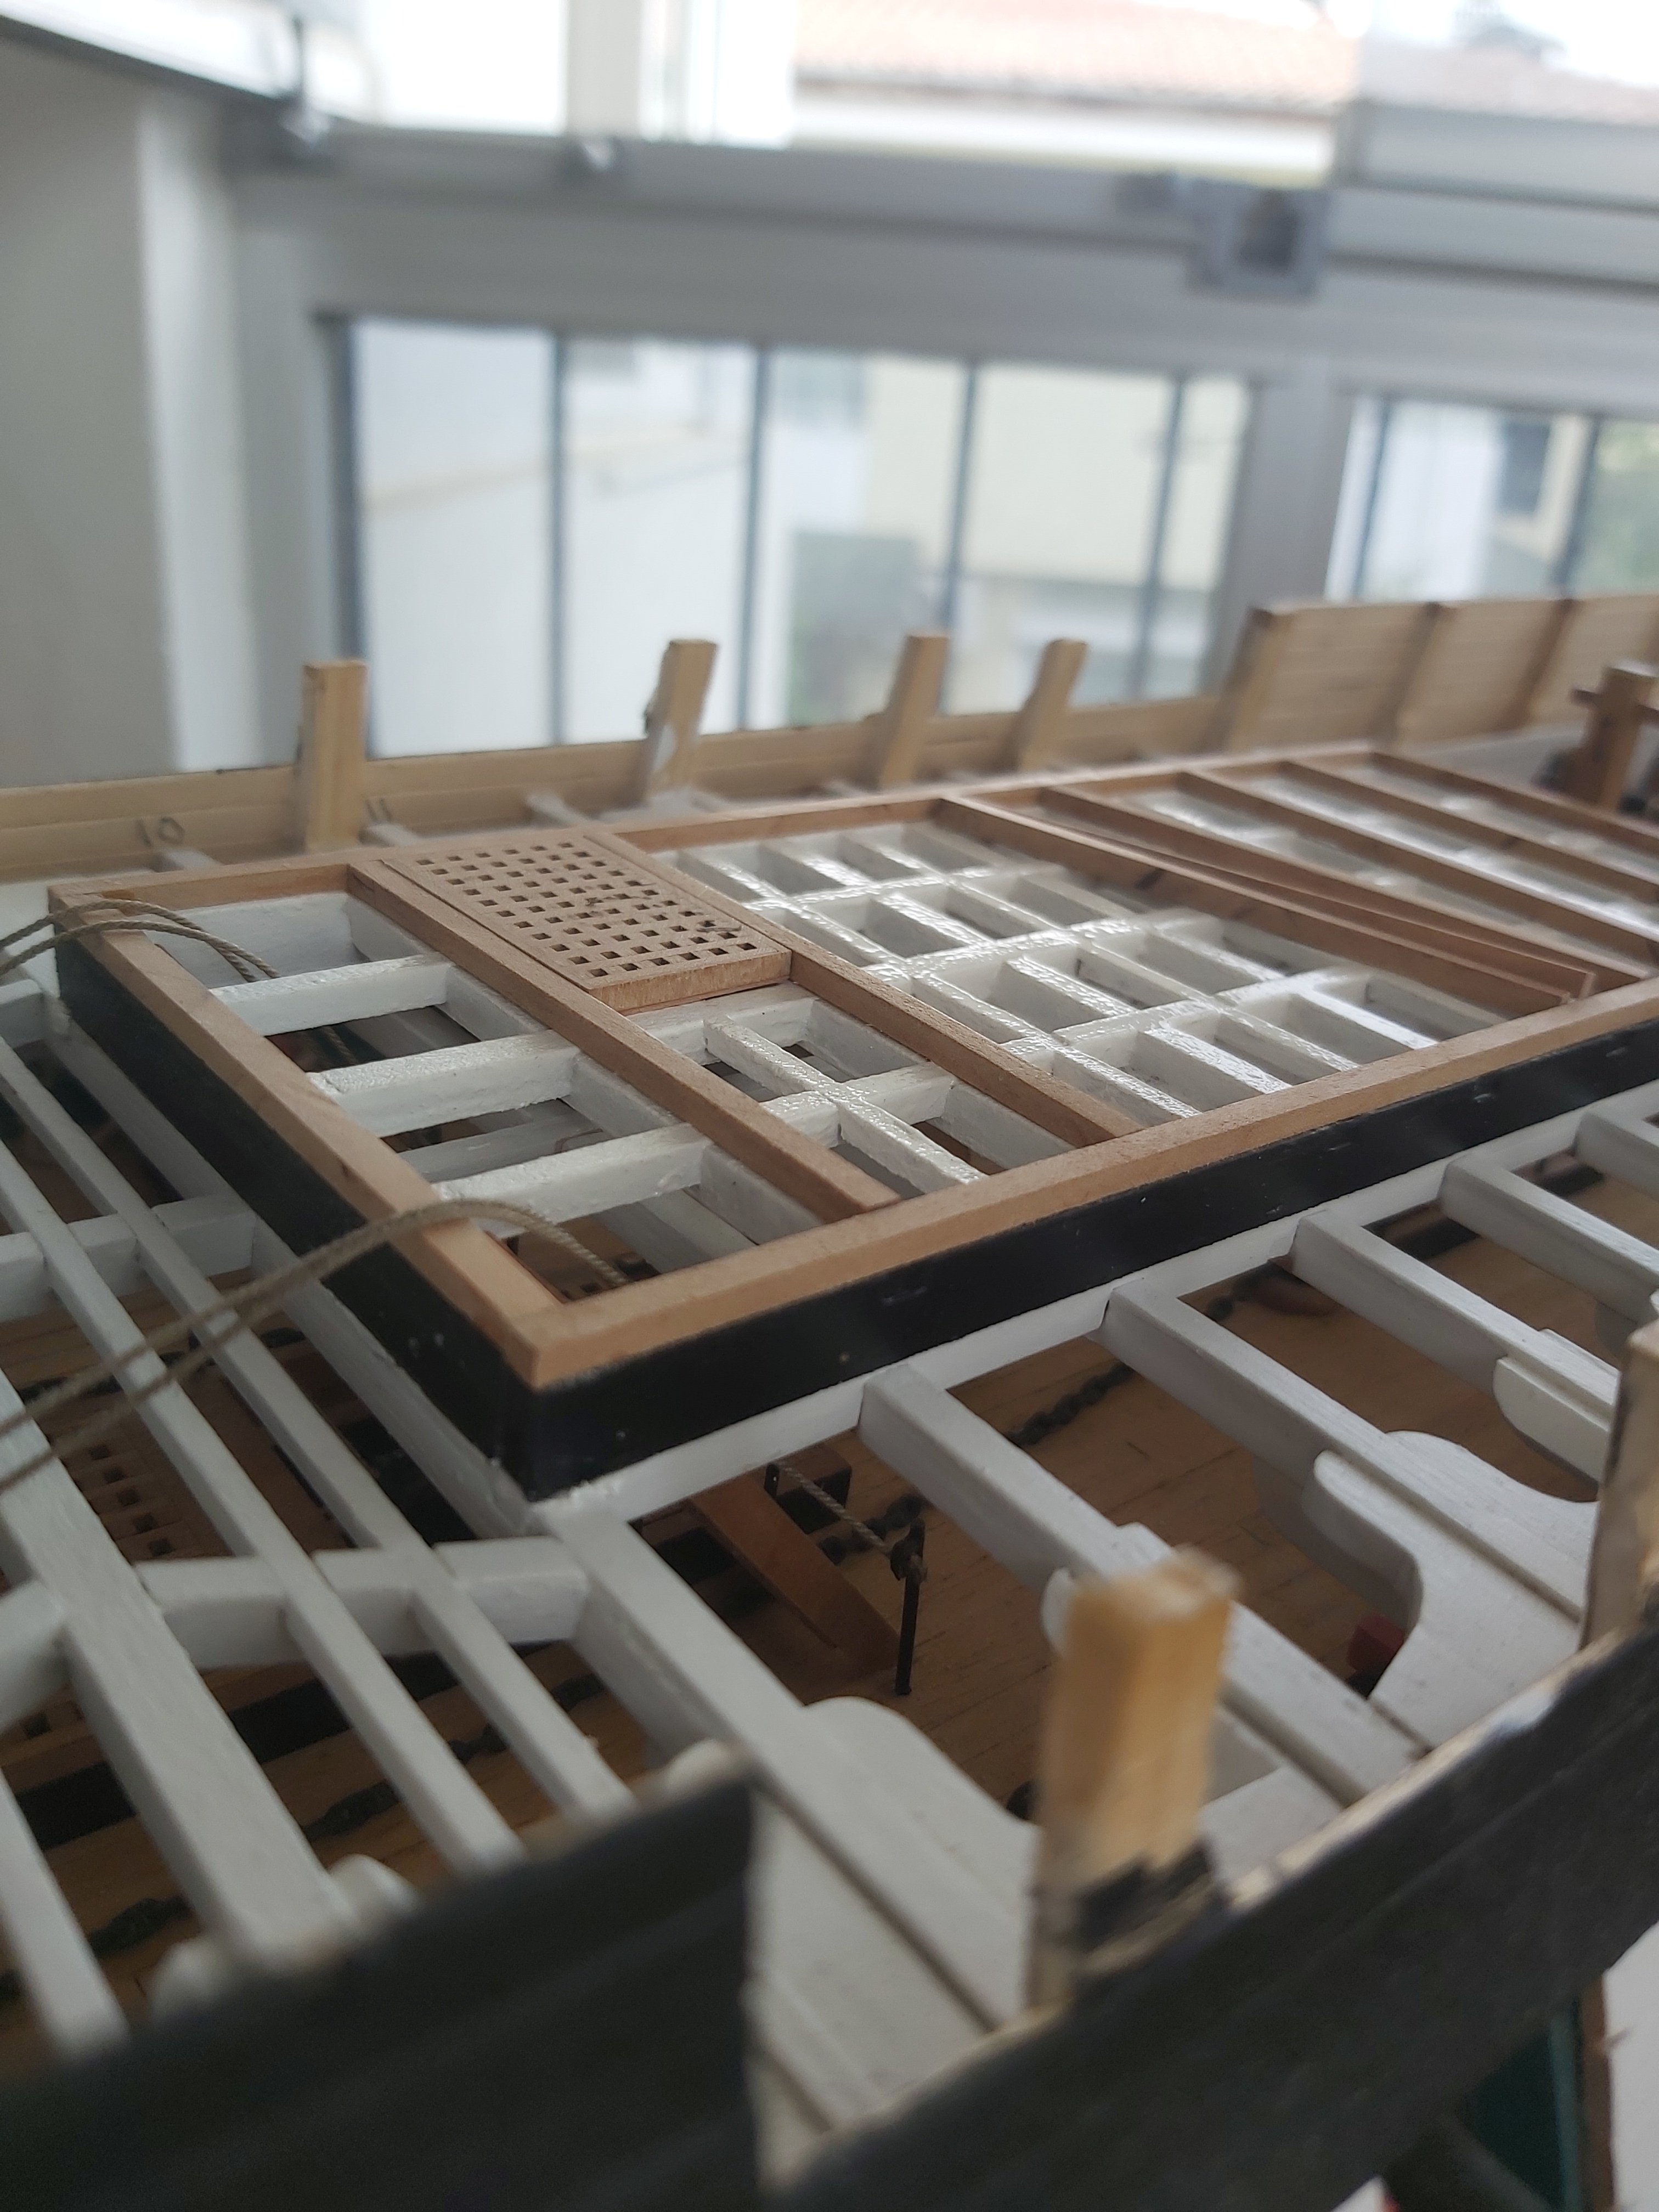
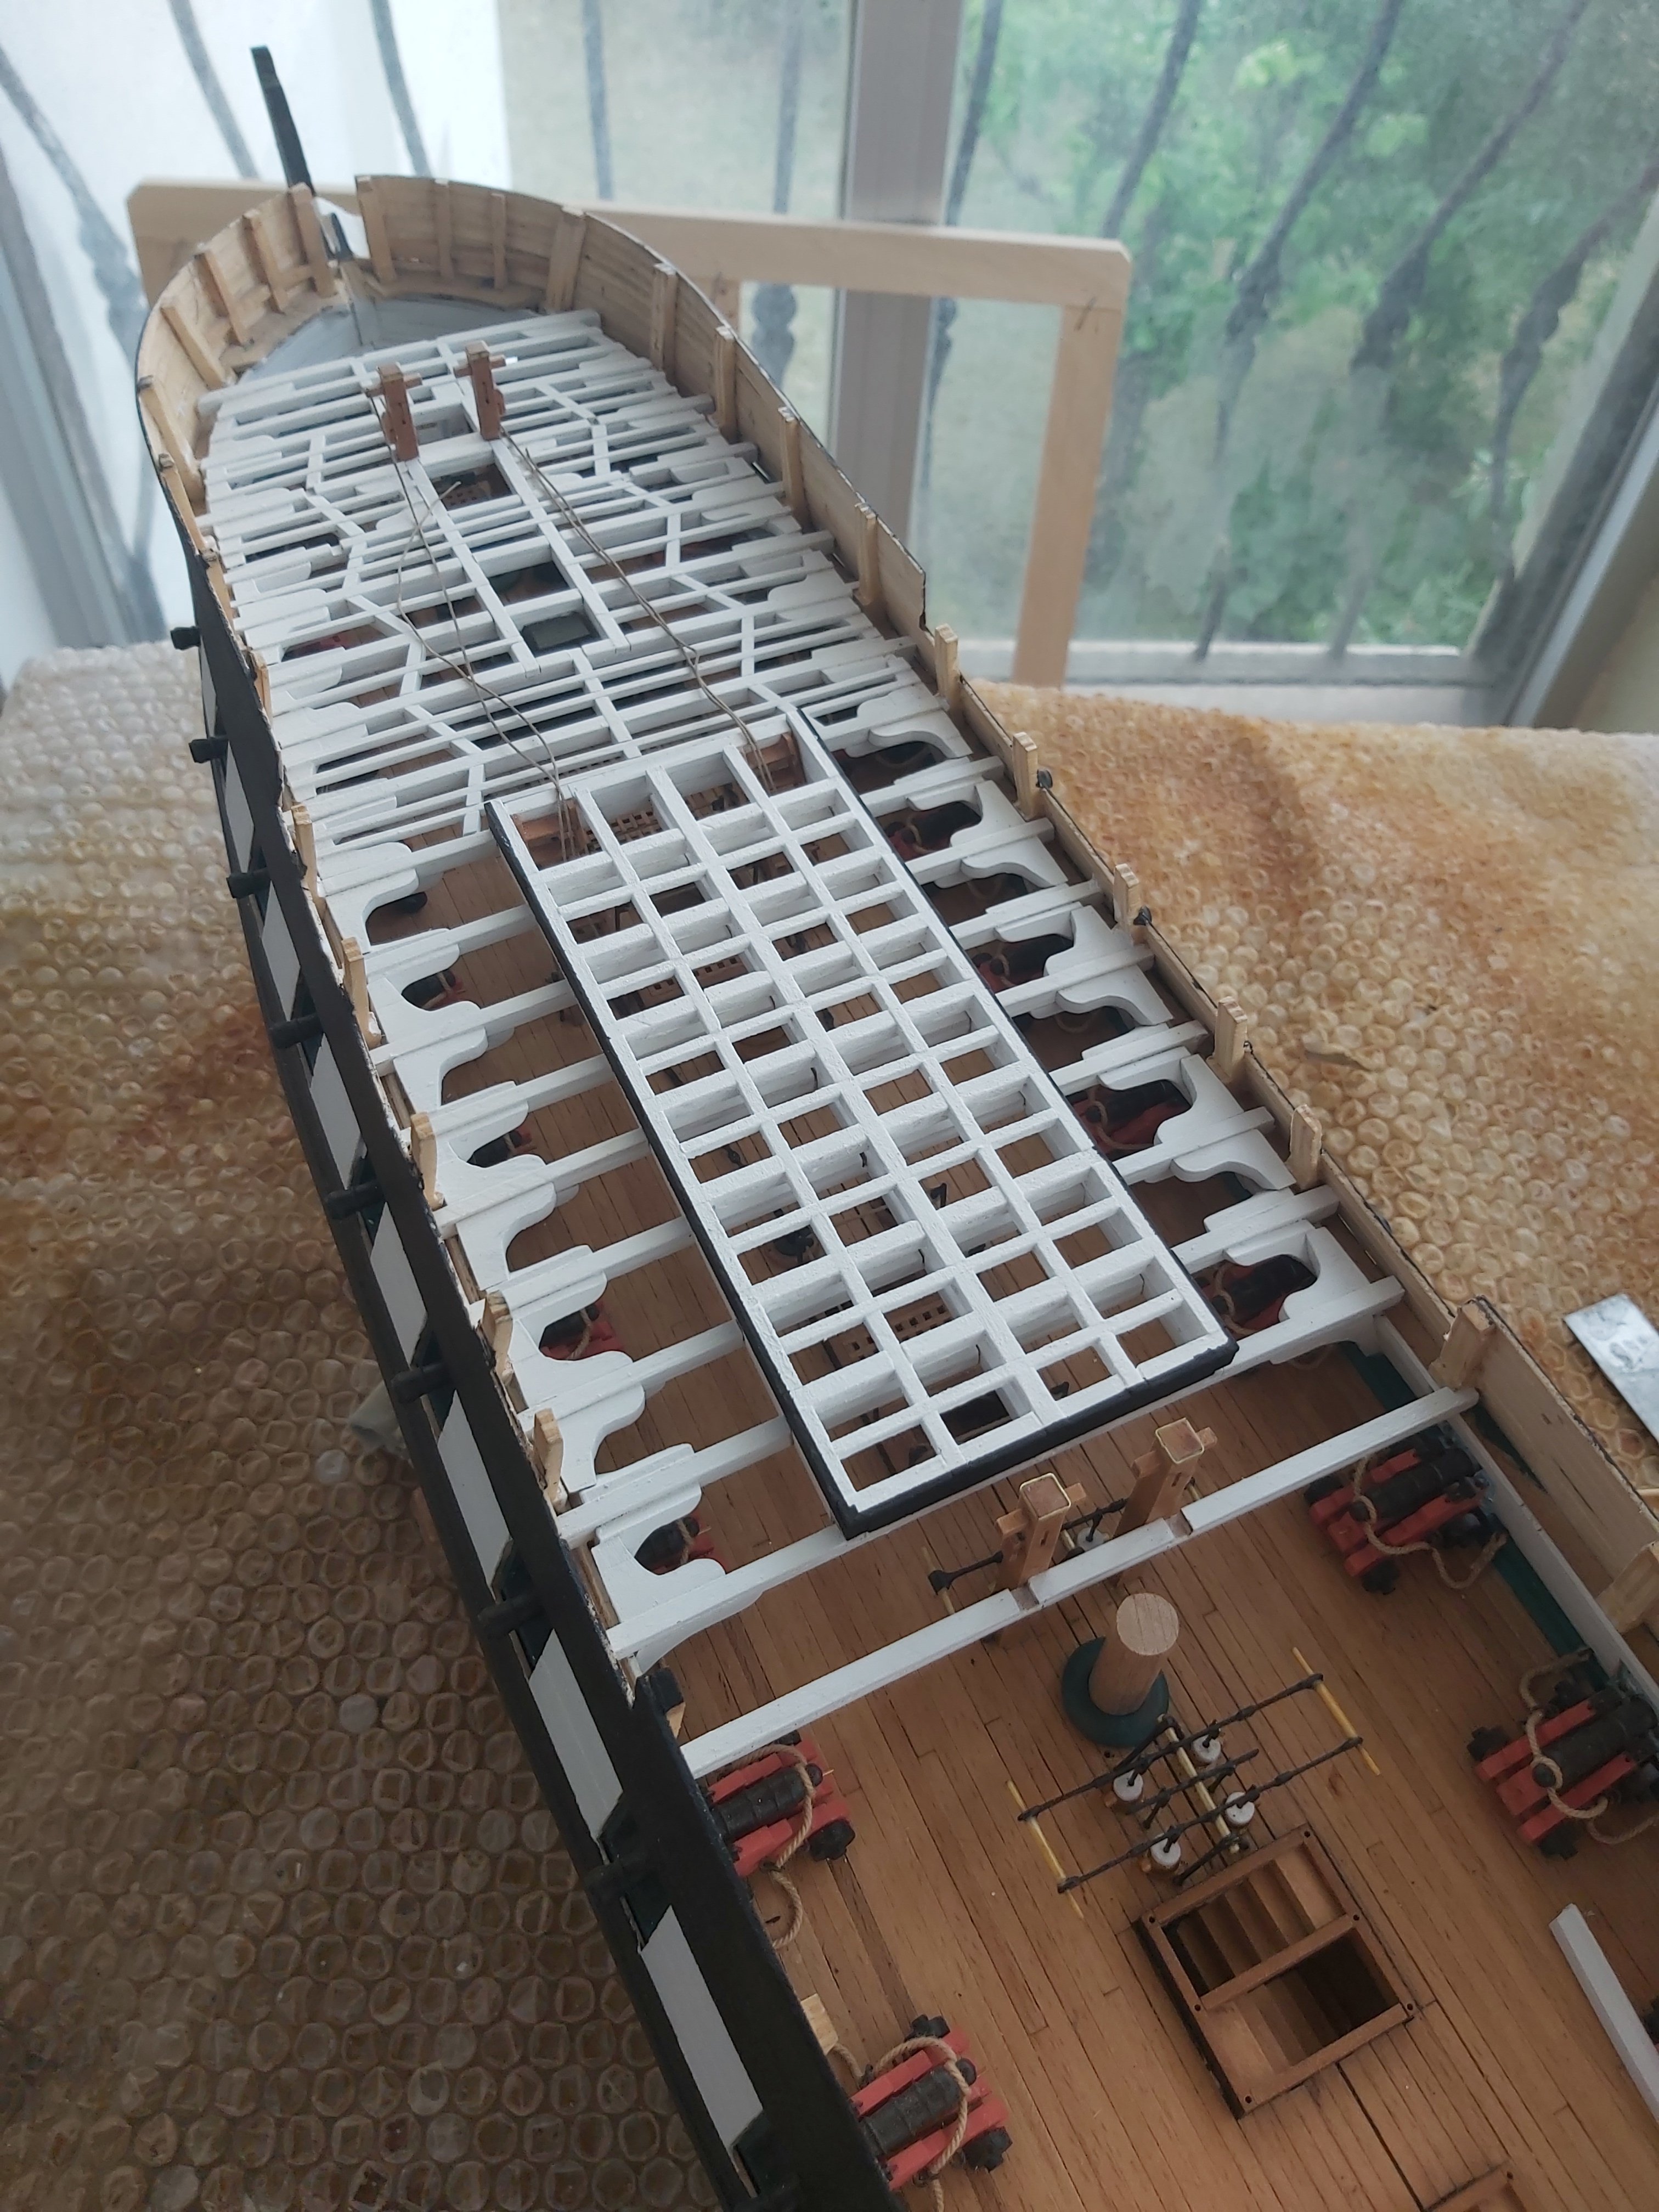
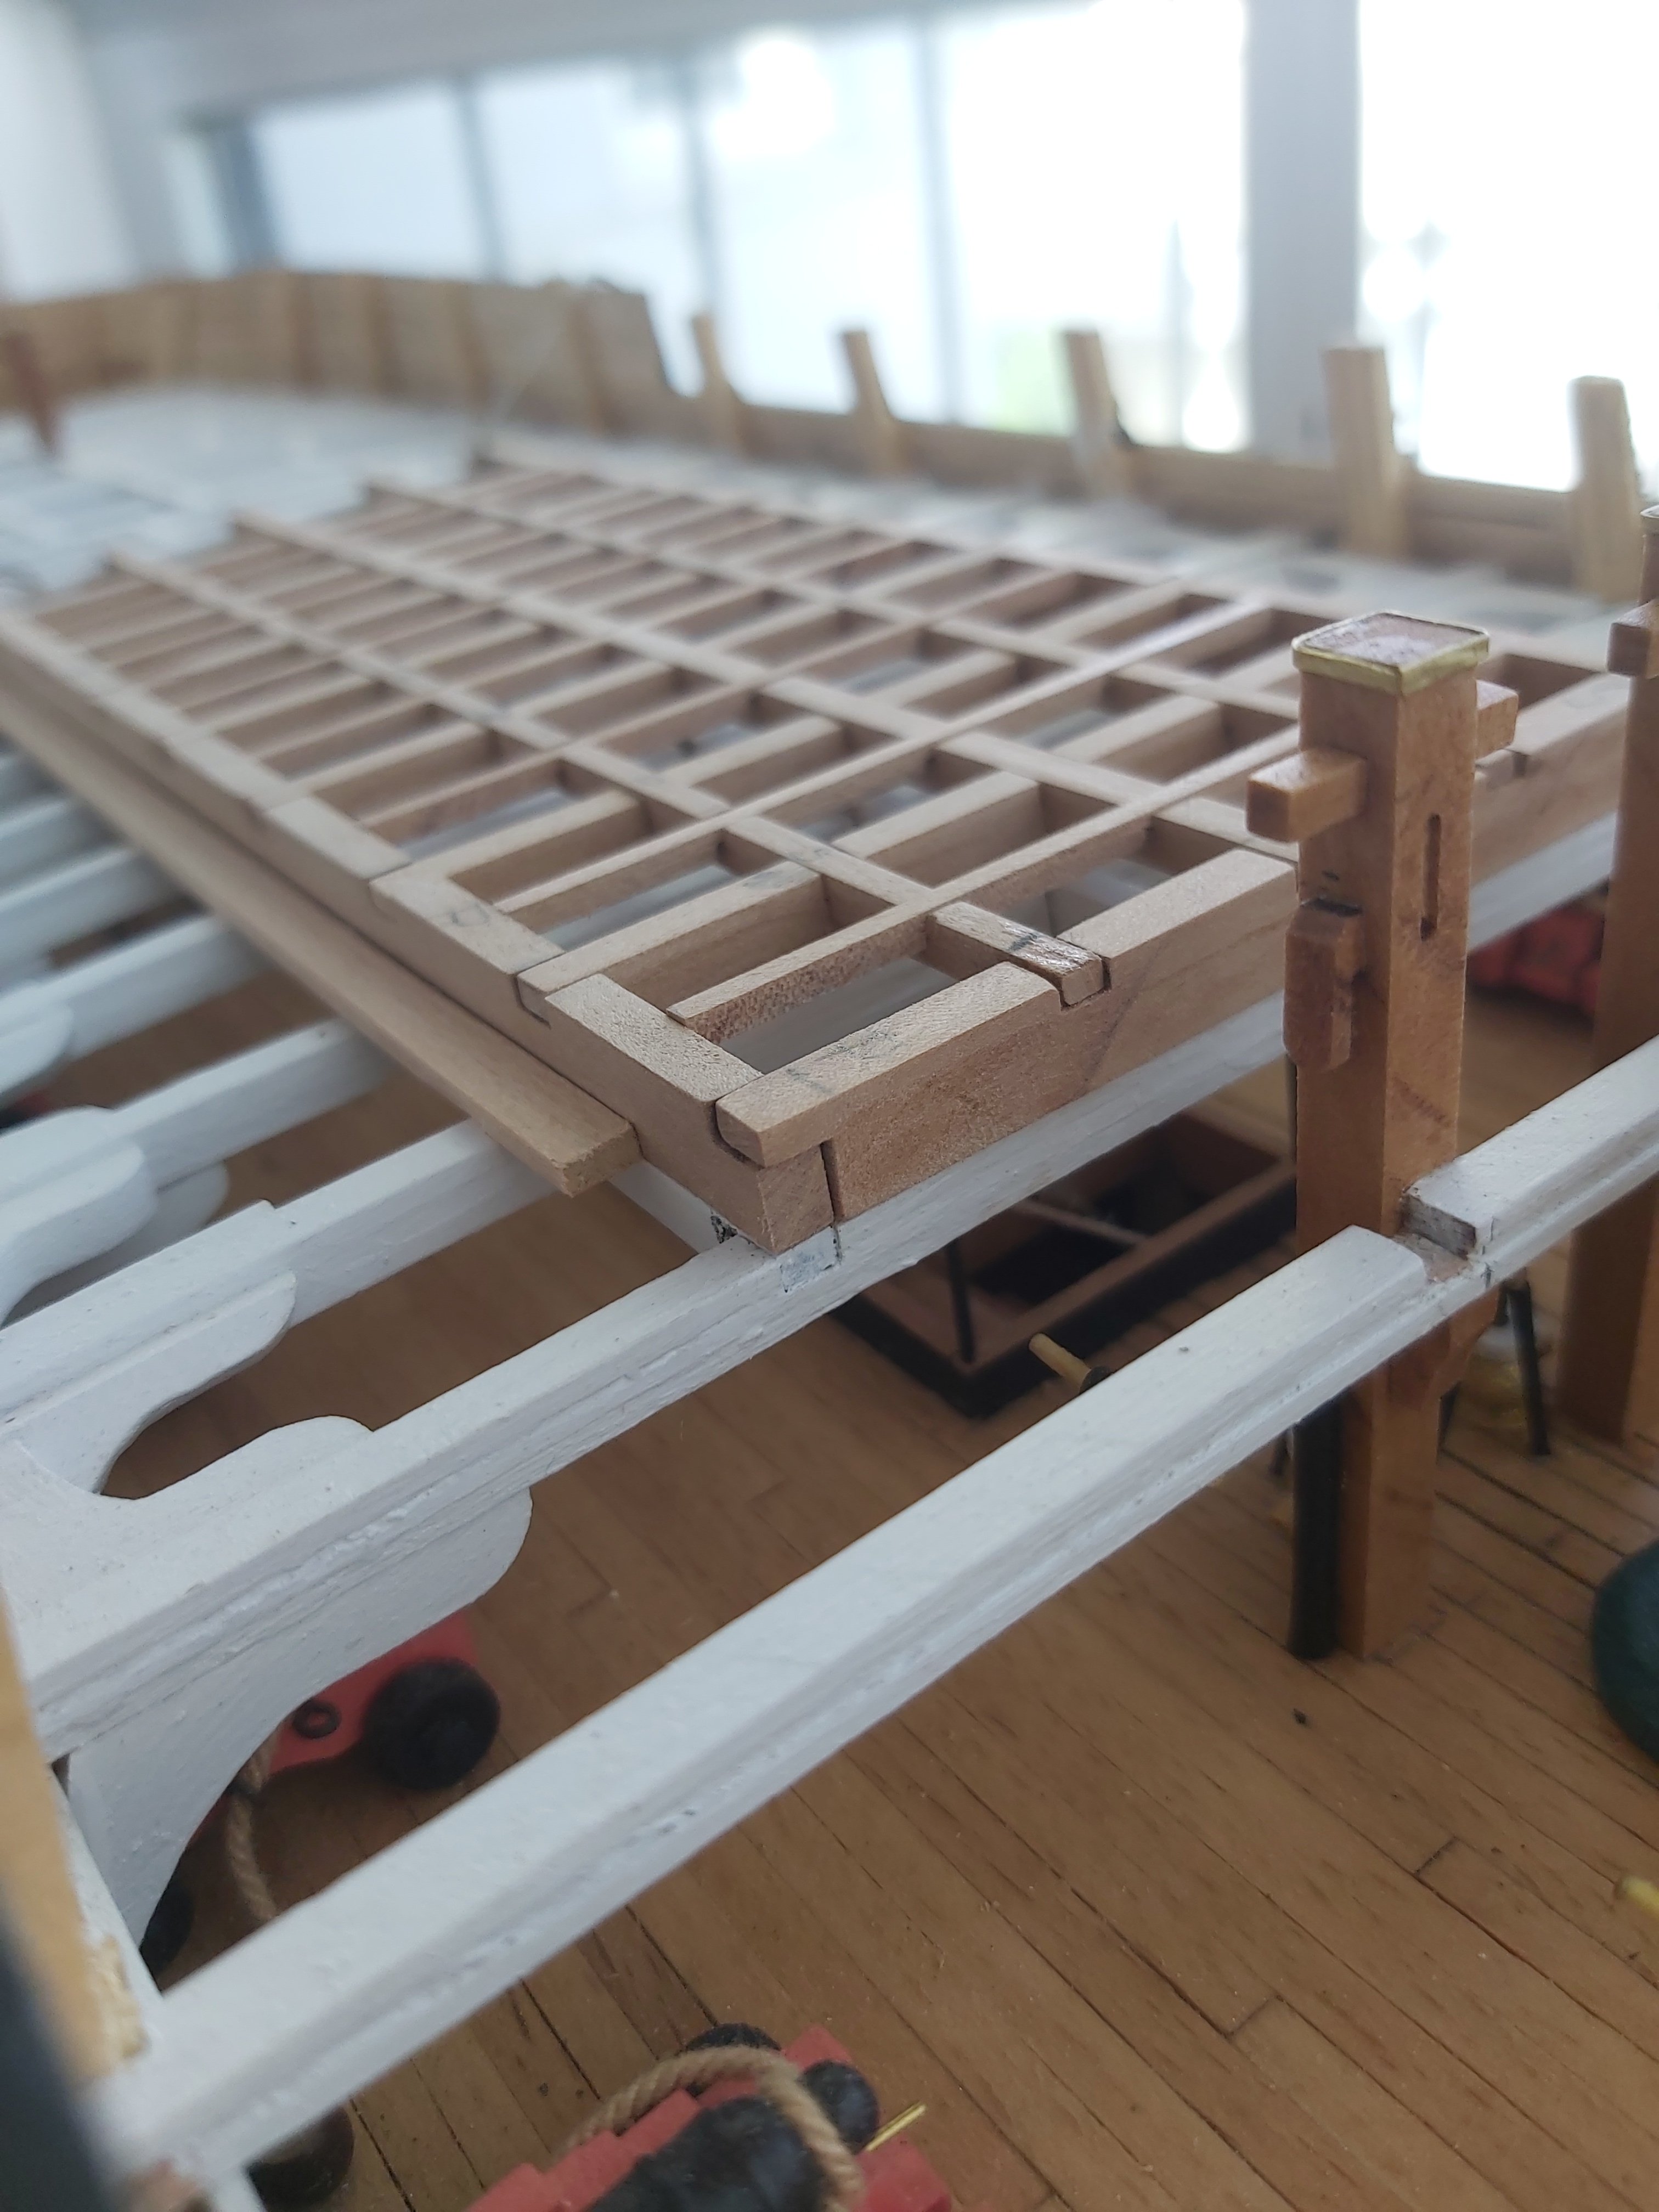
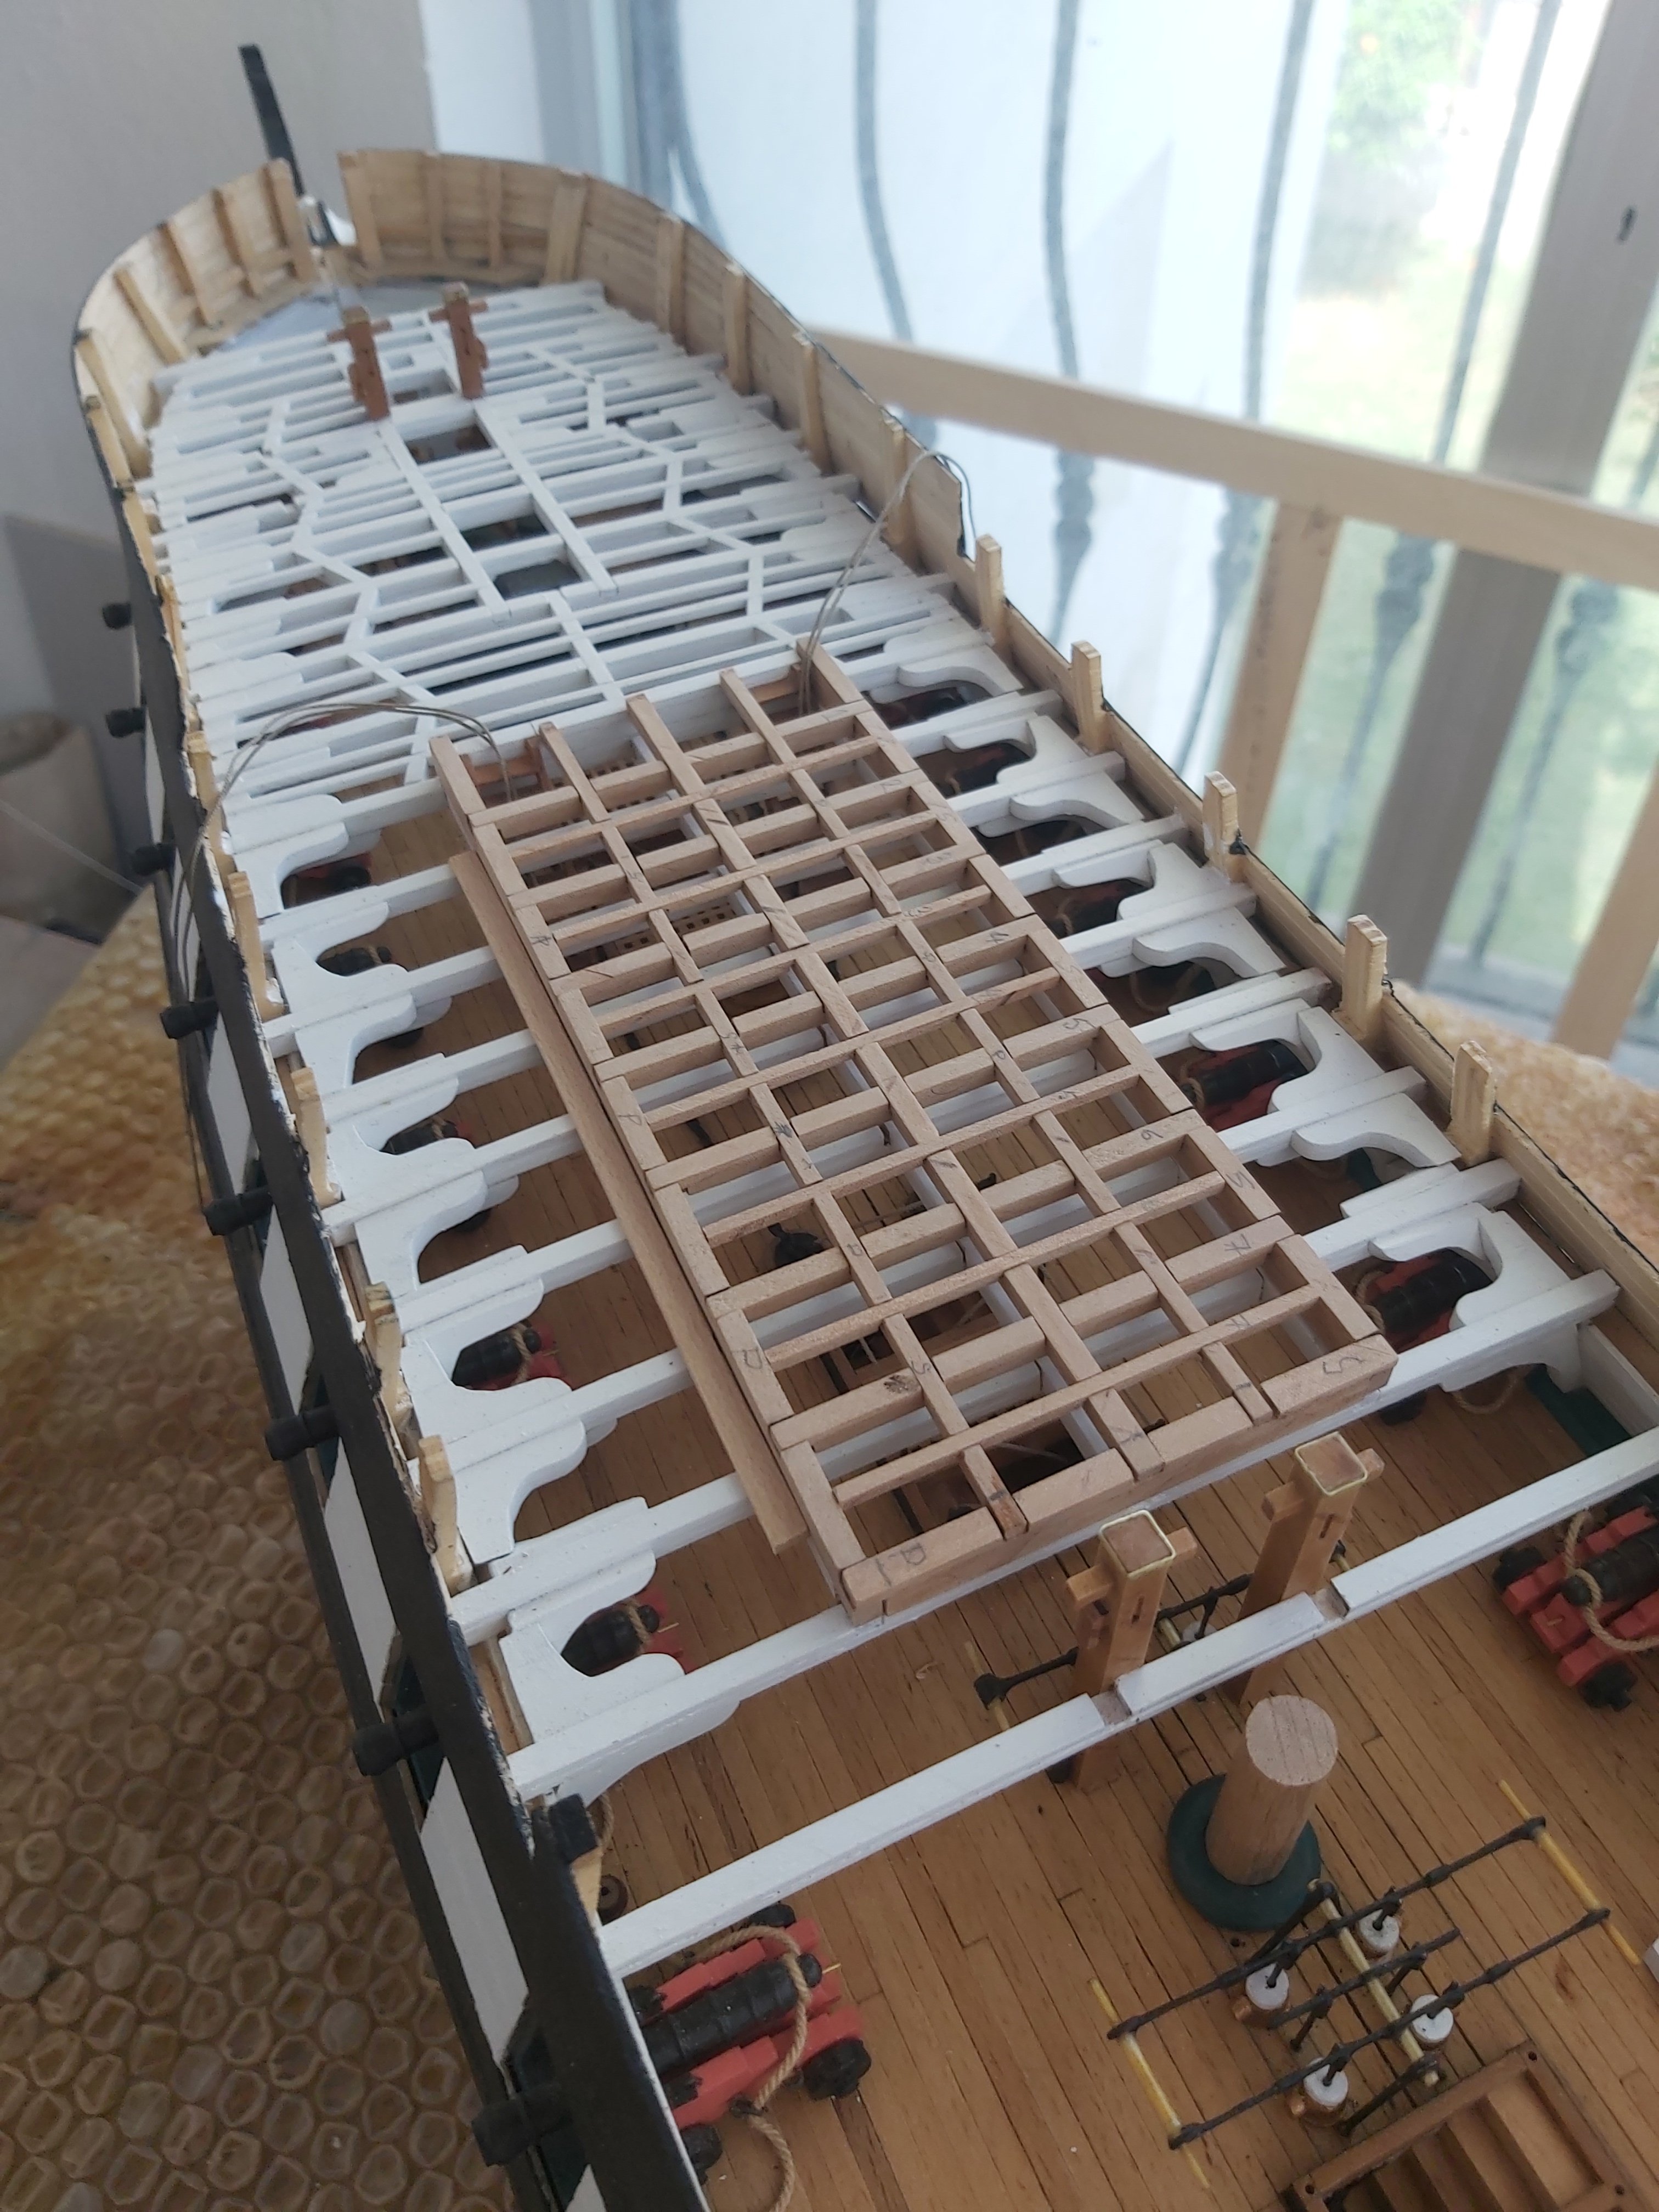
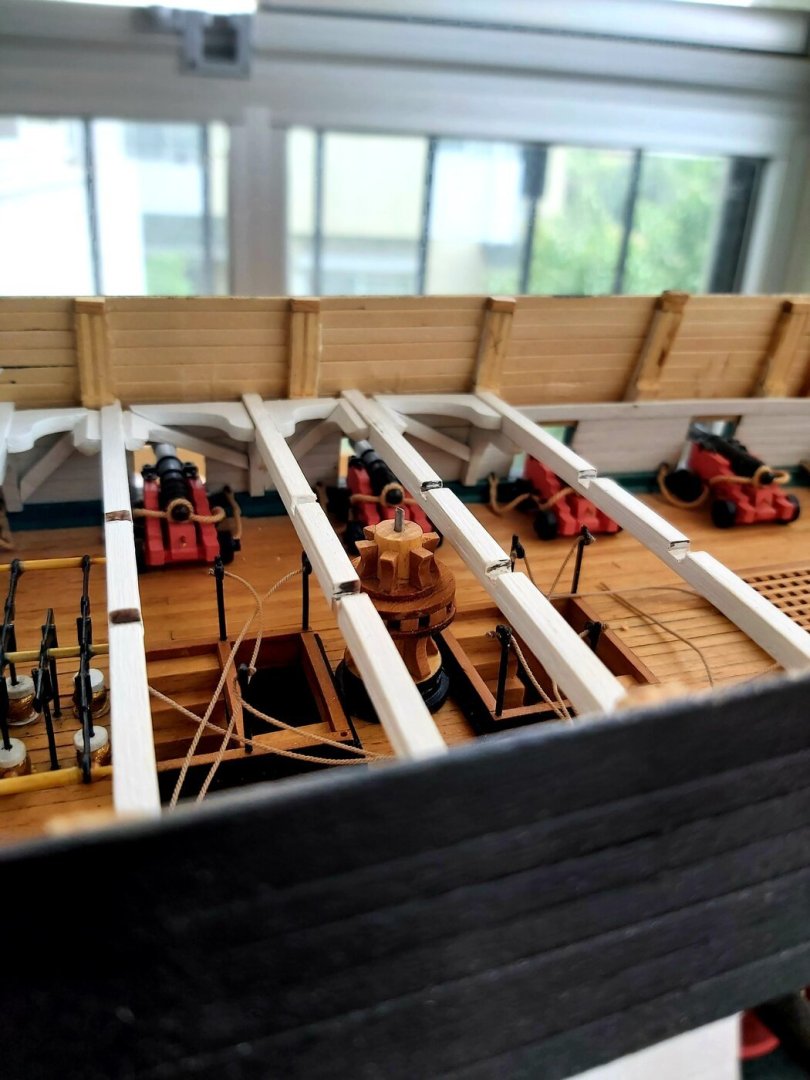
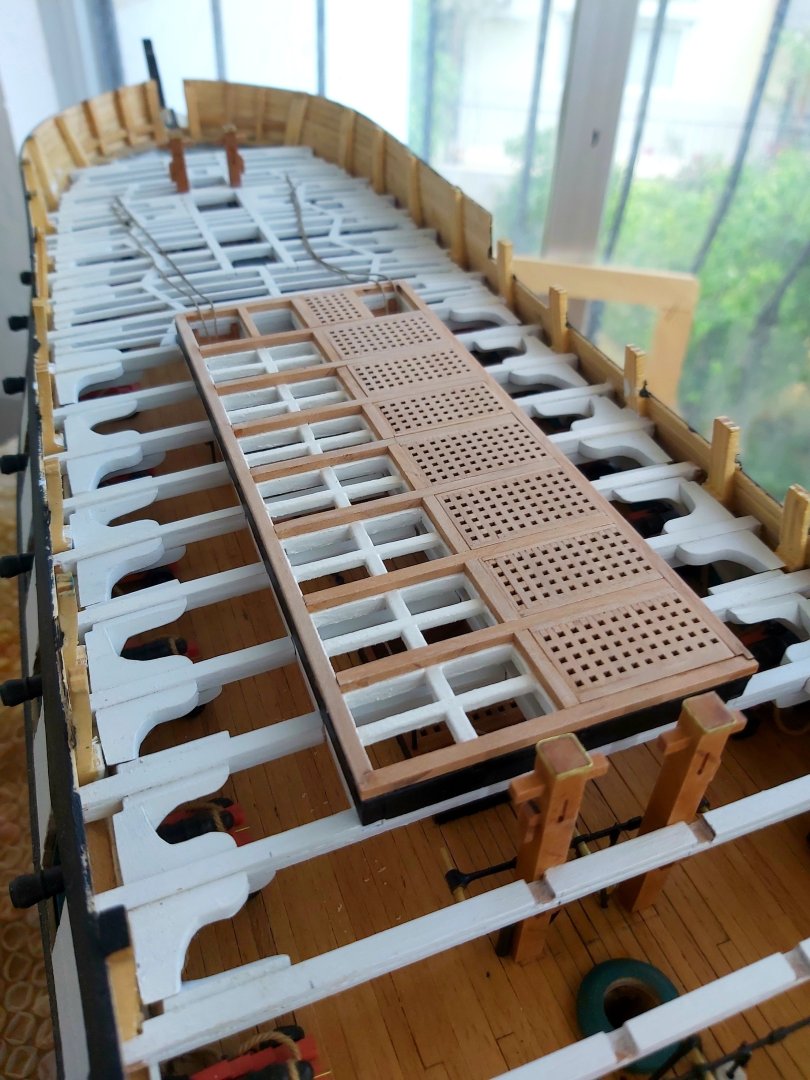
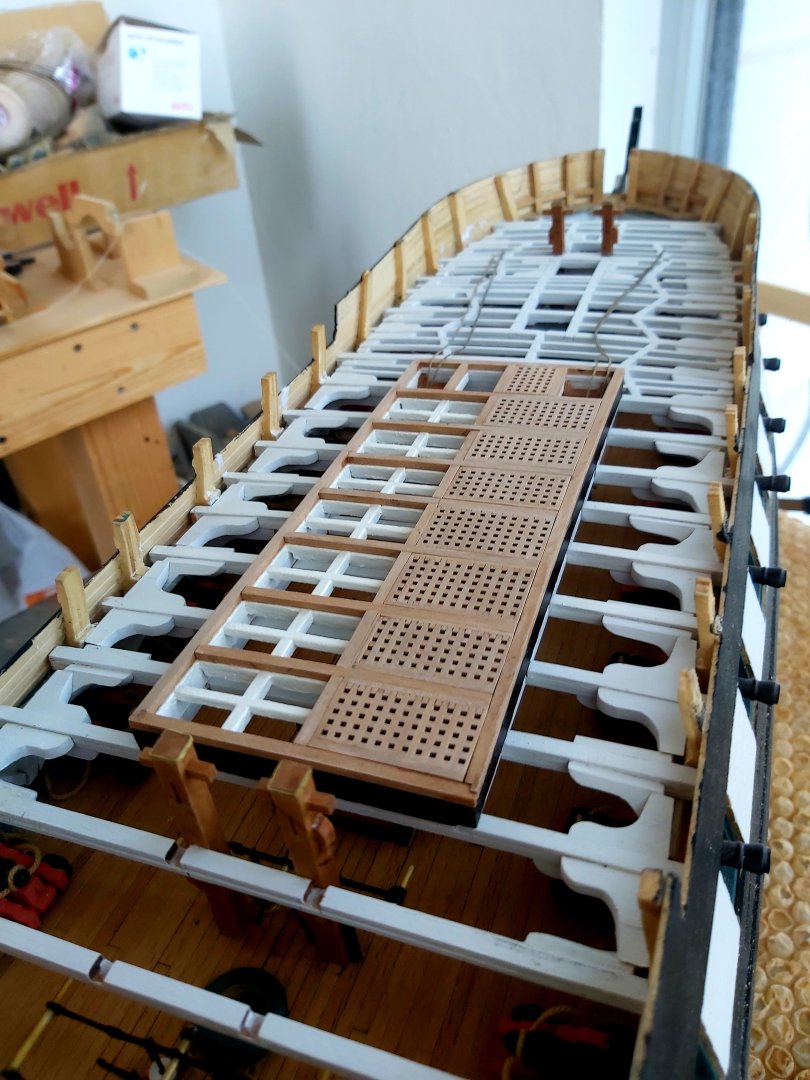
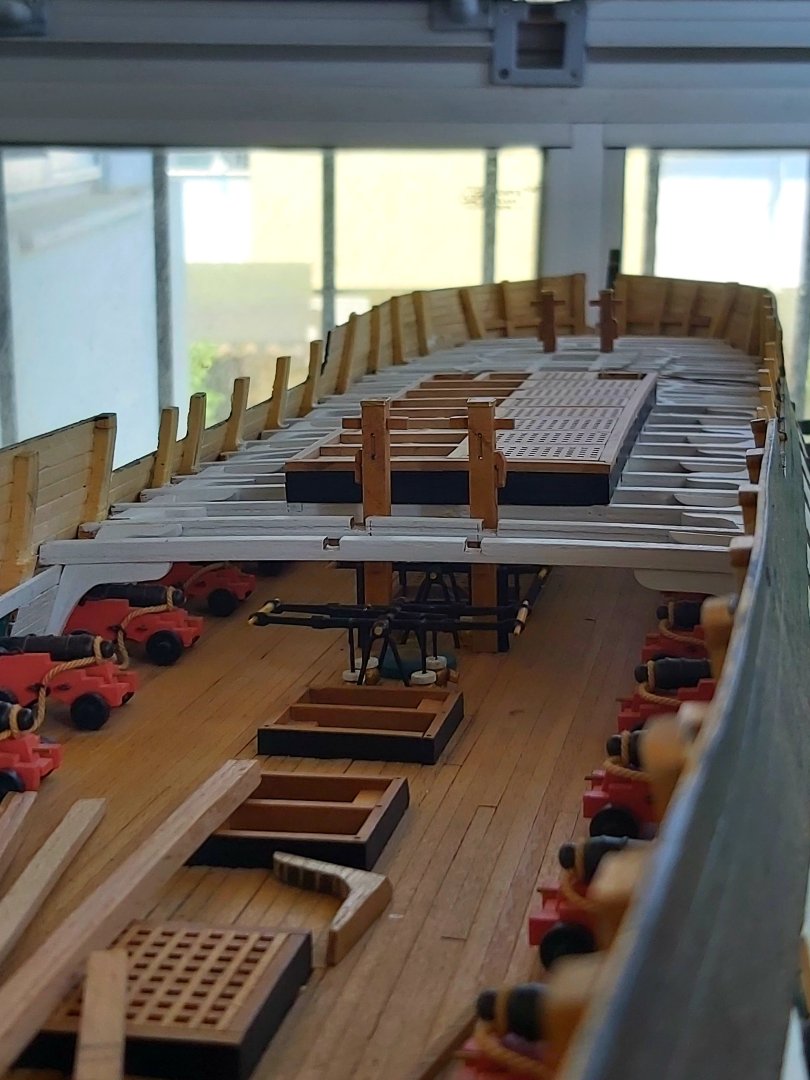
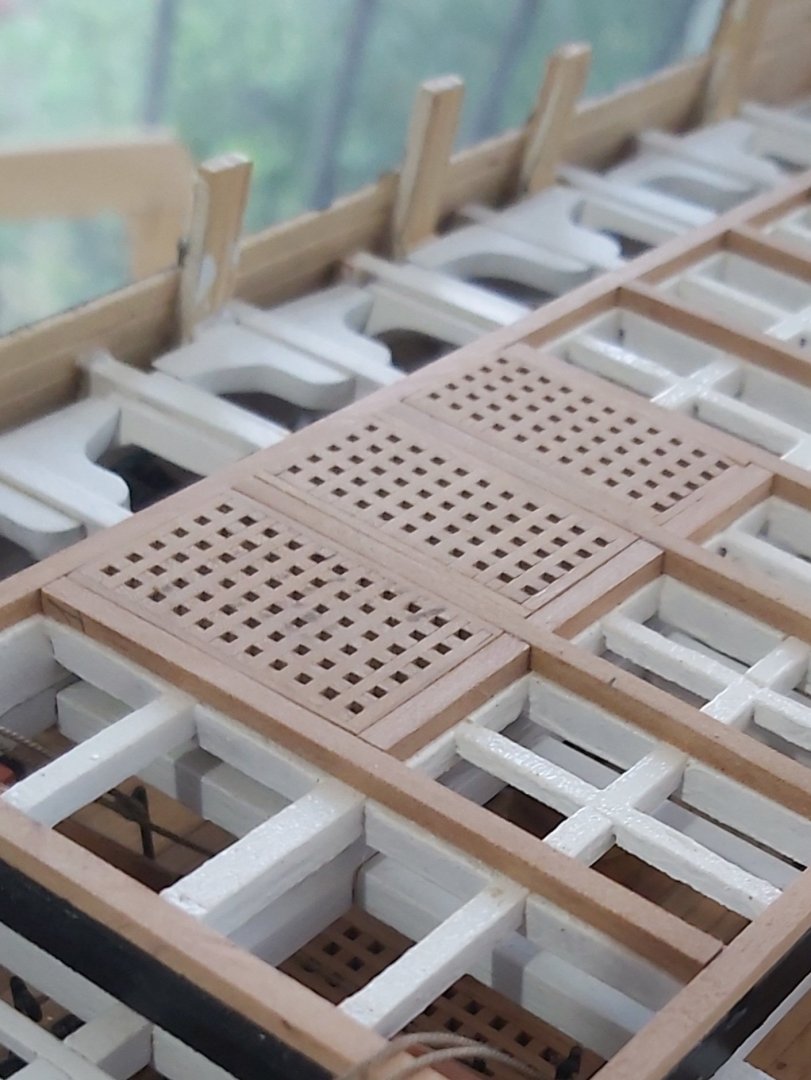
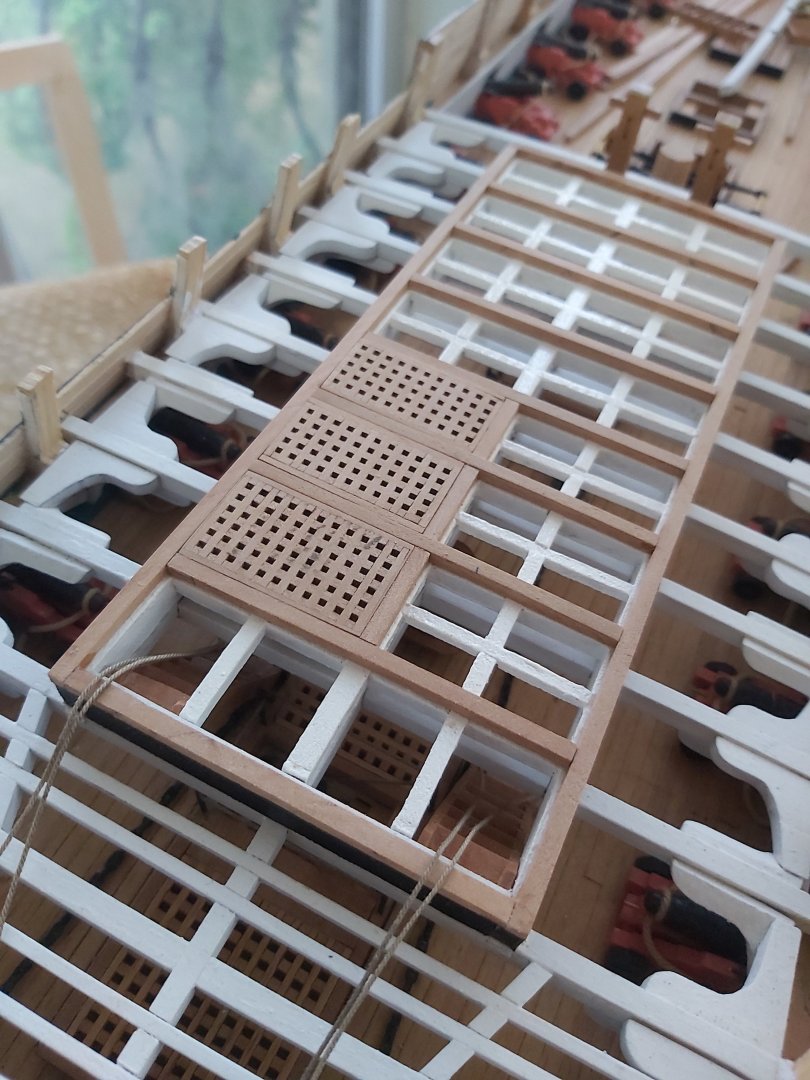
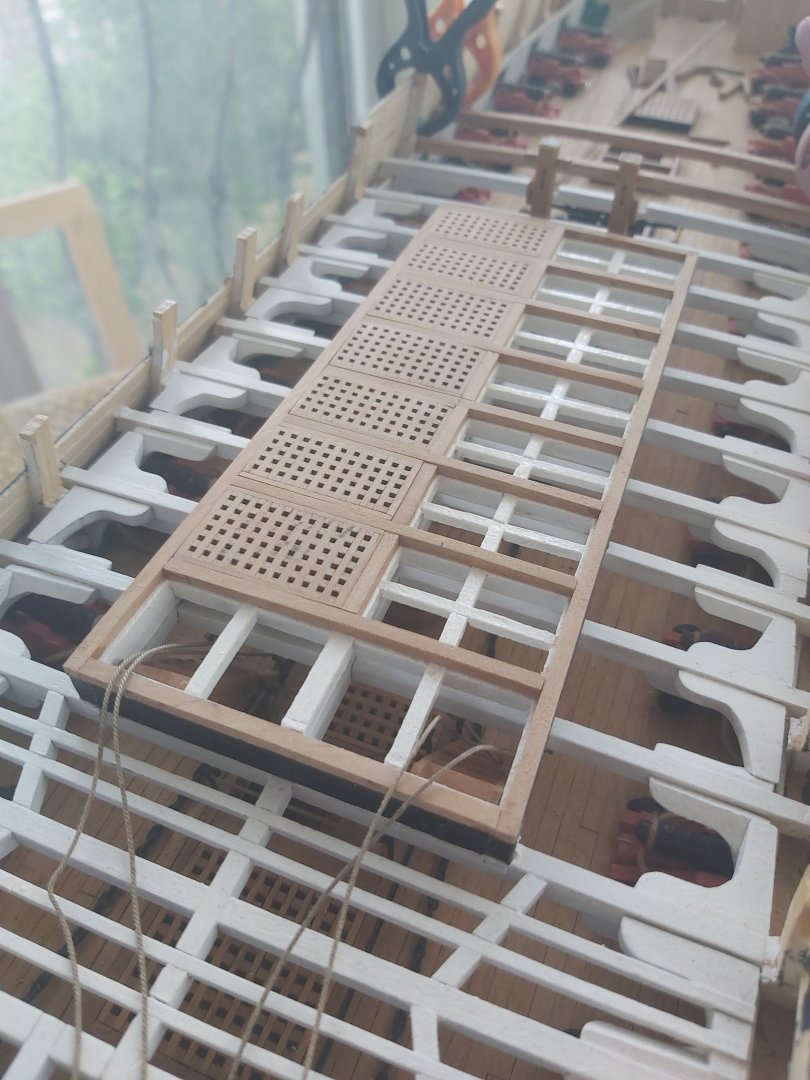
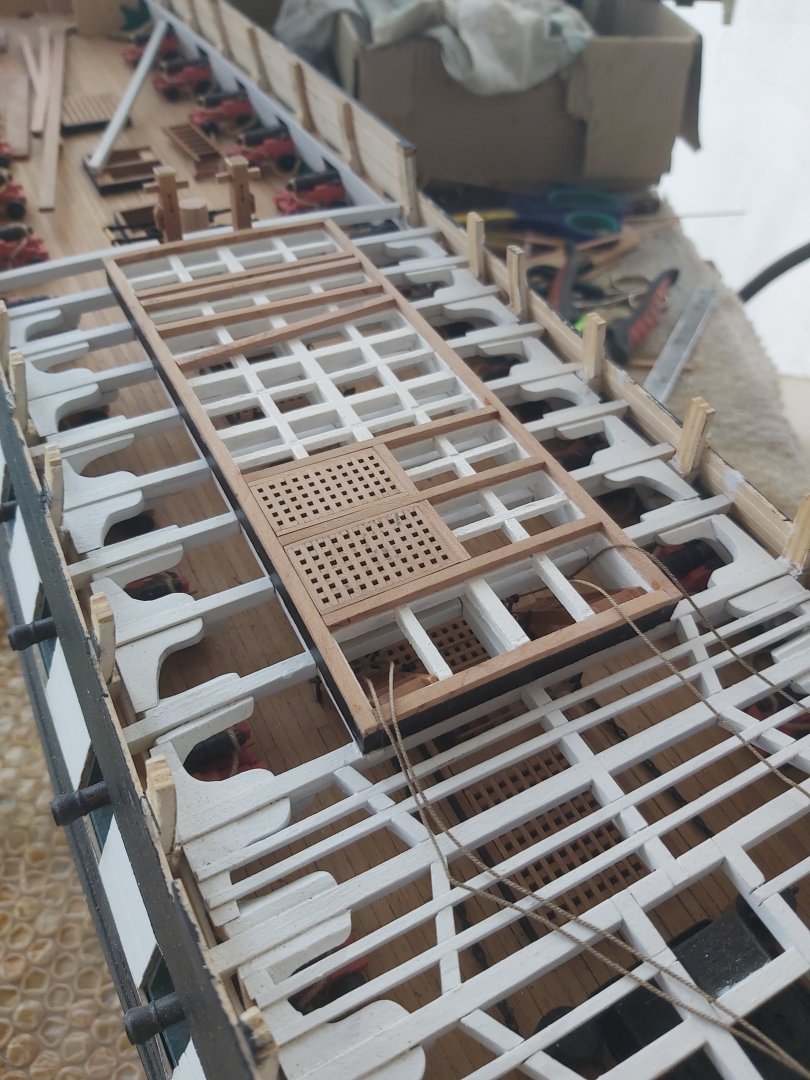
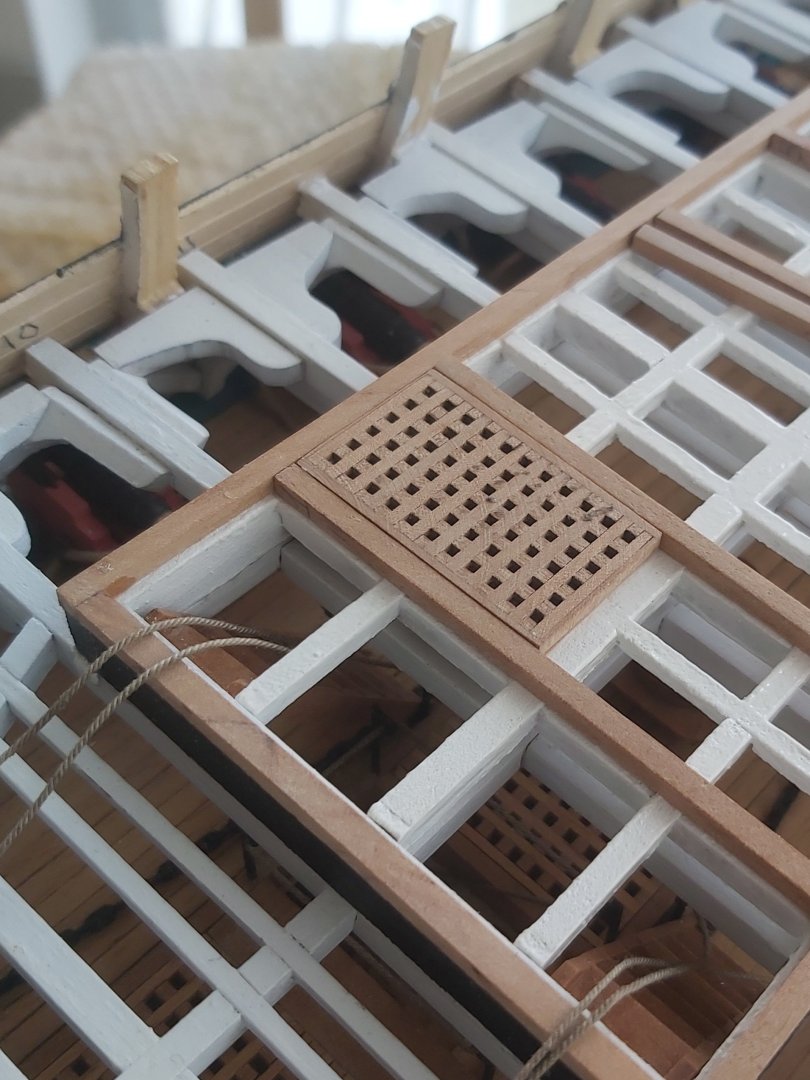
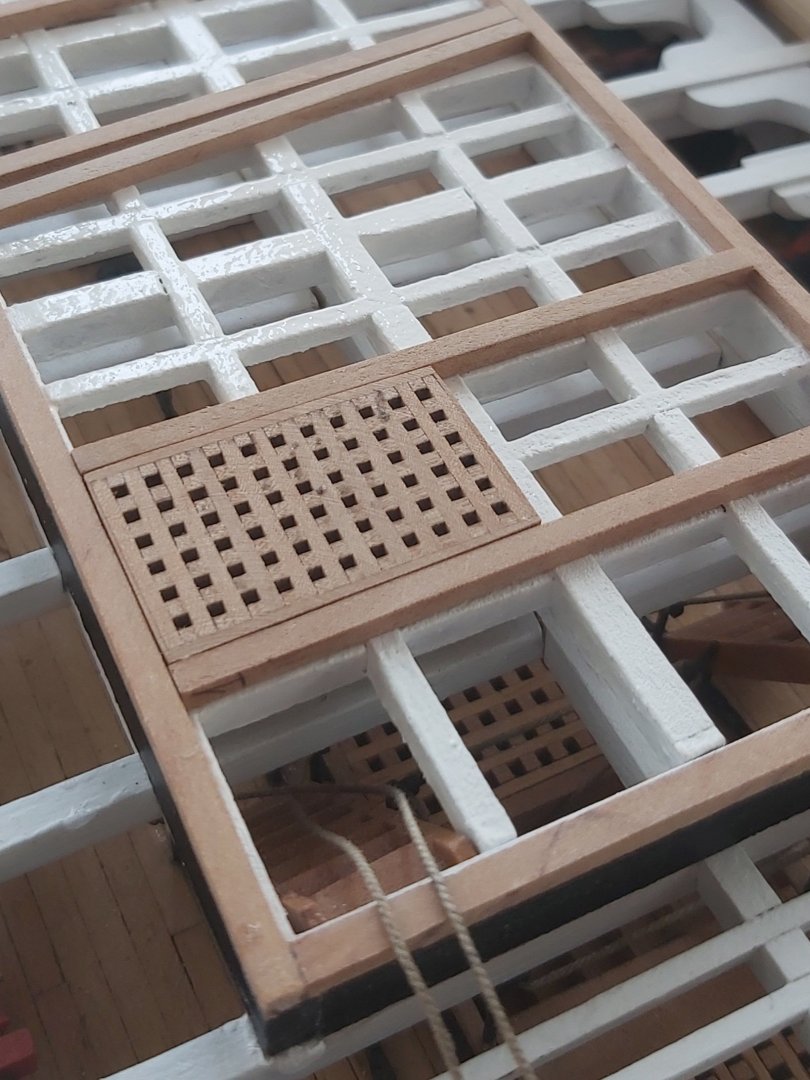
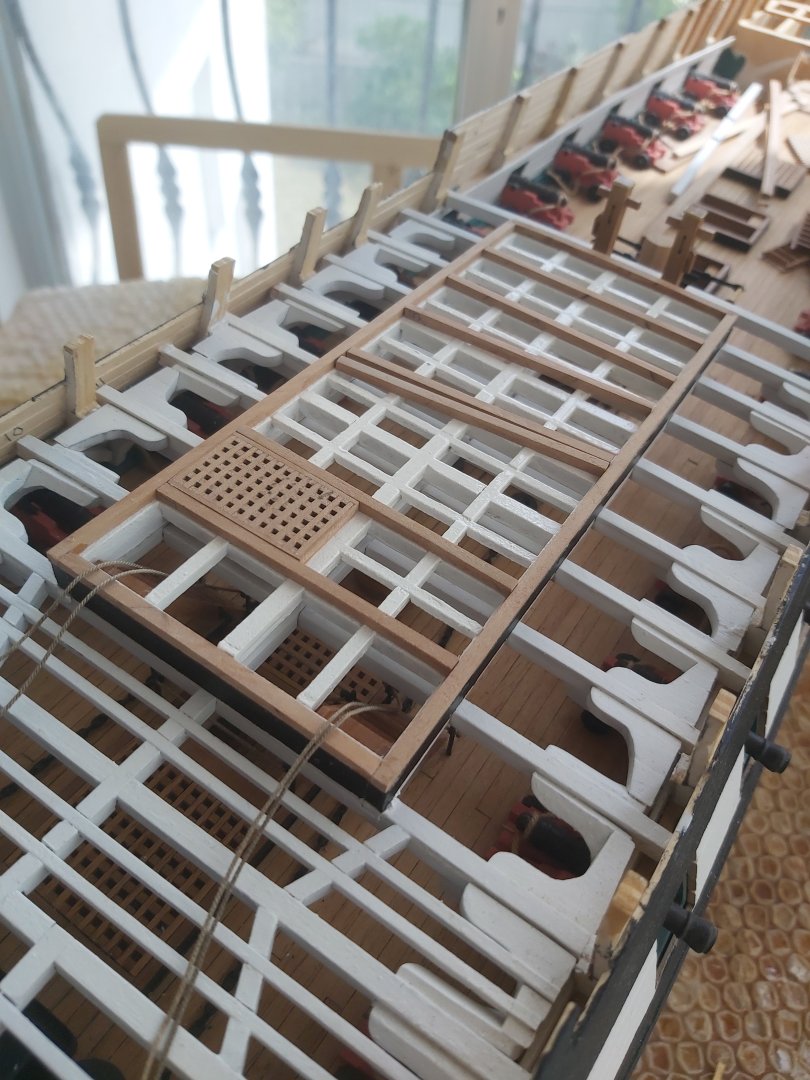
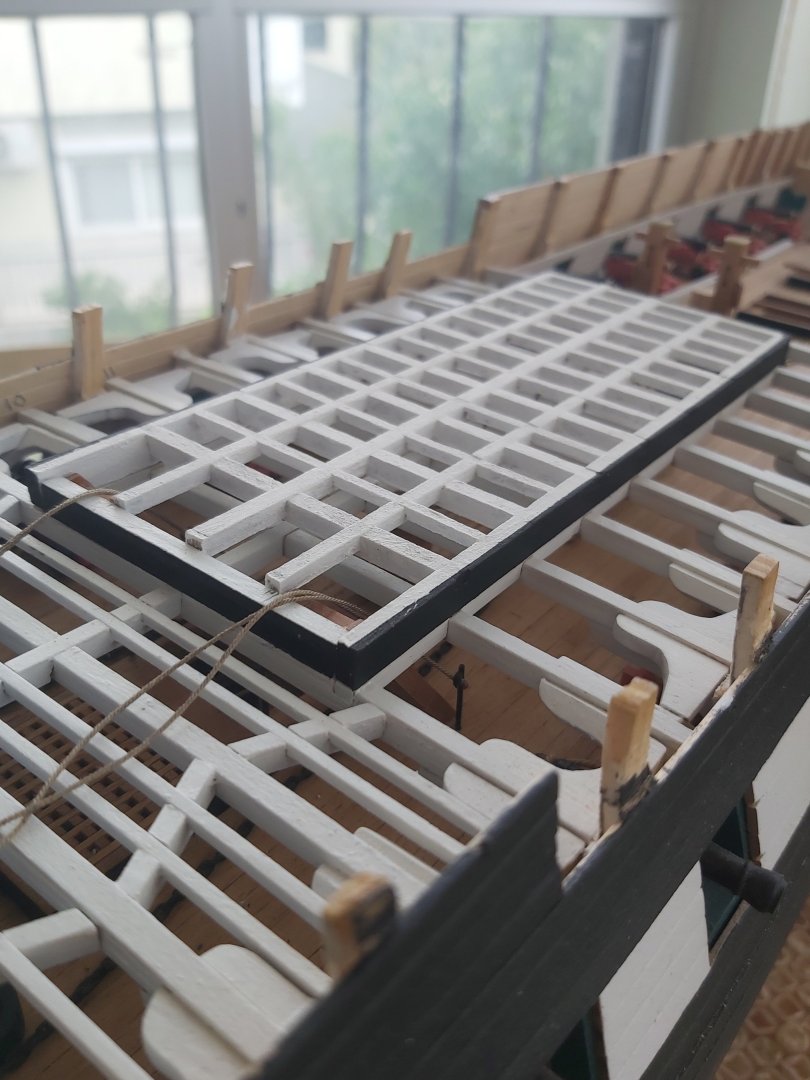
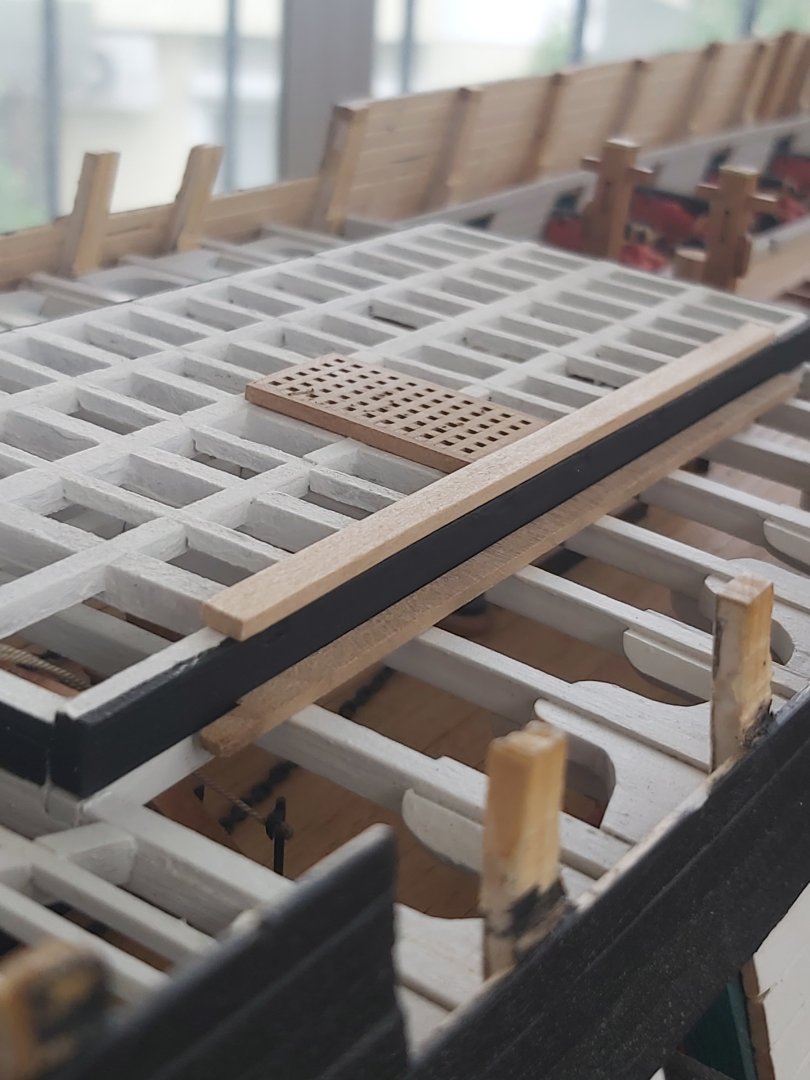
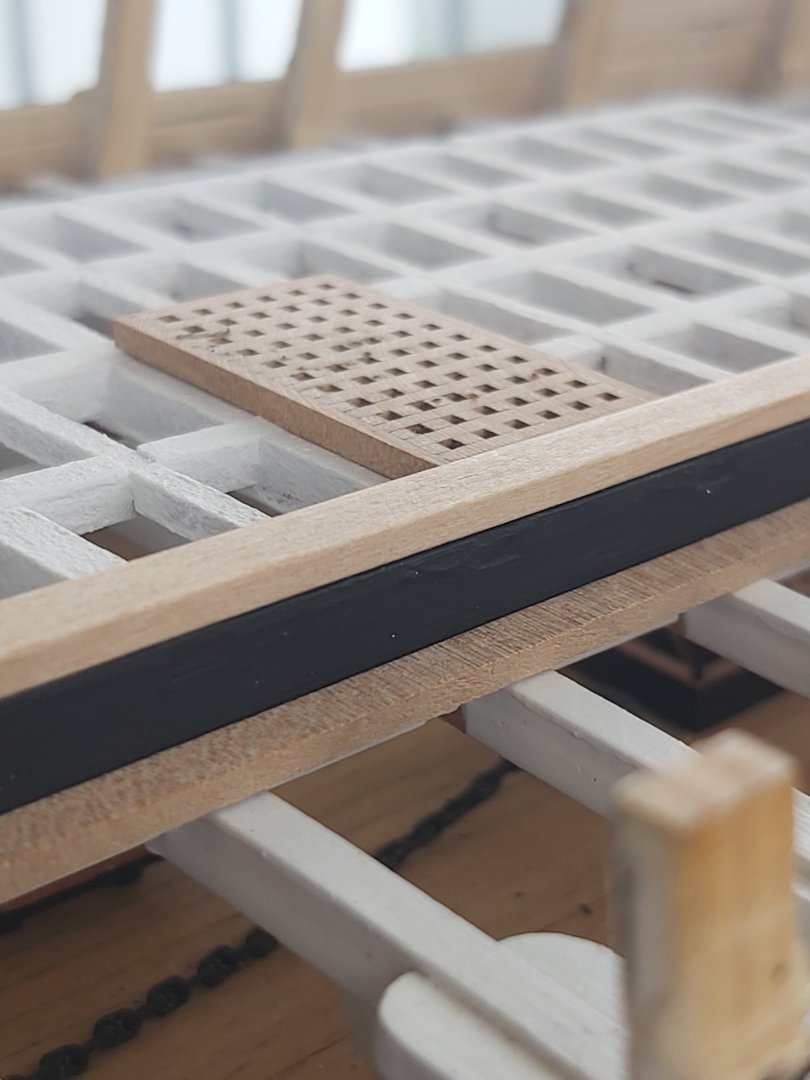
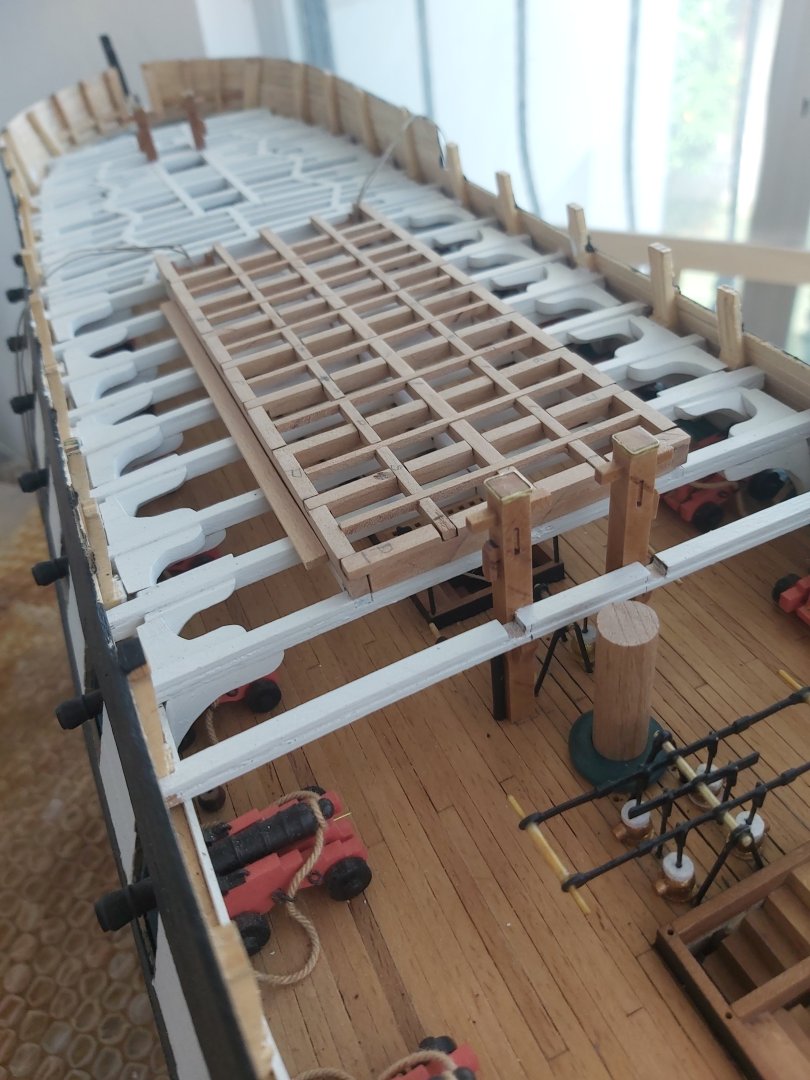
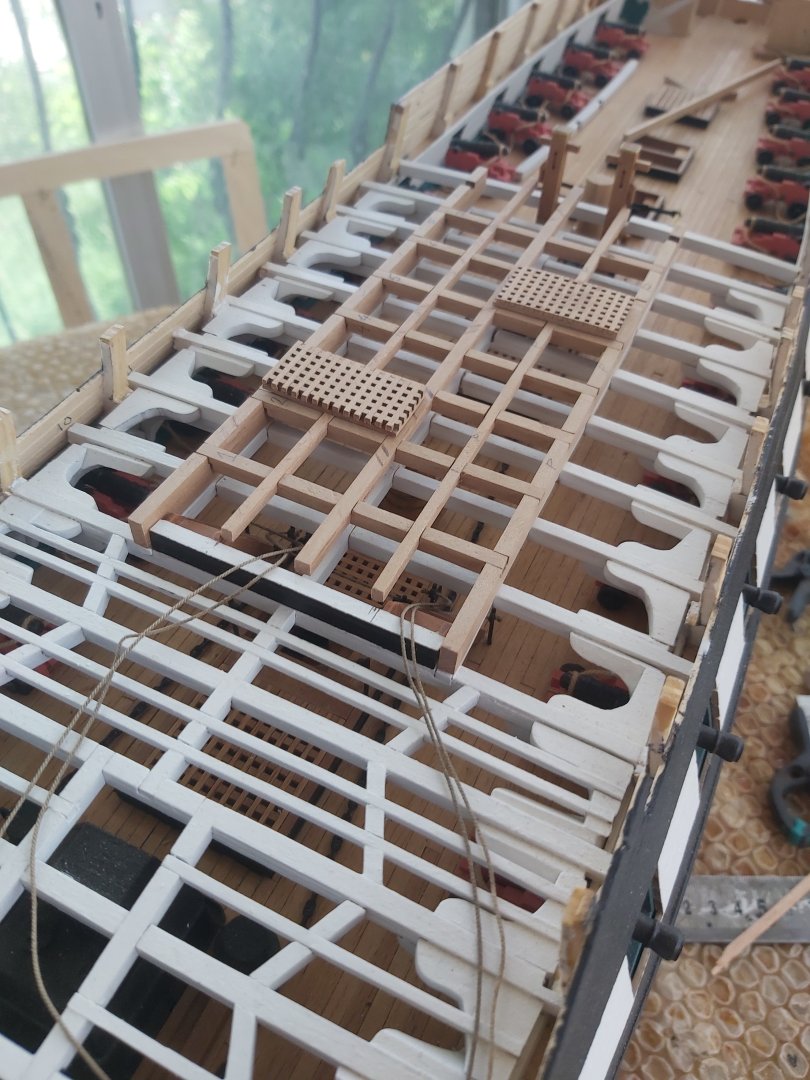
Main hatch coaming completed. As I mentioned before, only the starboard side has been covered with gratings.


-
I only use varnish on my unpainted models and I have no problem gluing things on them but I previously had severe gluing problems on a model where I applied tung oil.
-
Congratulations! Excellent planking, if I were you I wouldn't paint it.
-
USS Constitution by mtbediz - 1:76
mtbediz replied to mtbediz's topic in - Build logs for subjects built 1751 - 1800
Thank you so much Greg. -
USS Constitution by mtbediz - 1:76
mtbediz replied to mtbediz's topic in - Build logs for subjects built 1751 - 1800
Thank you Peter. Yes, I look faster than many modelers, but of course (I think) this is related to the fact that I spend more time on this job than they do and I don't have anything else better to do. -
USS Constitution by mtbediz - 1:76
mtbediz replied to mtbediz's topic in - Build logs for subjects built 1751 - 1800
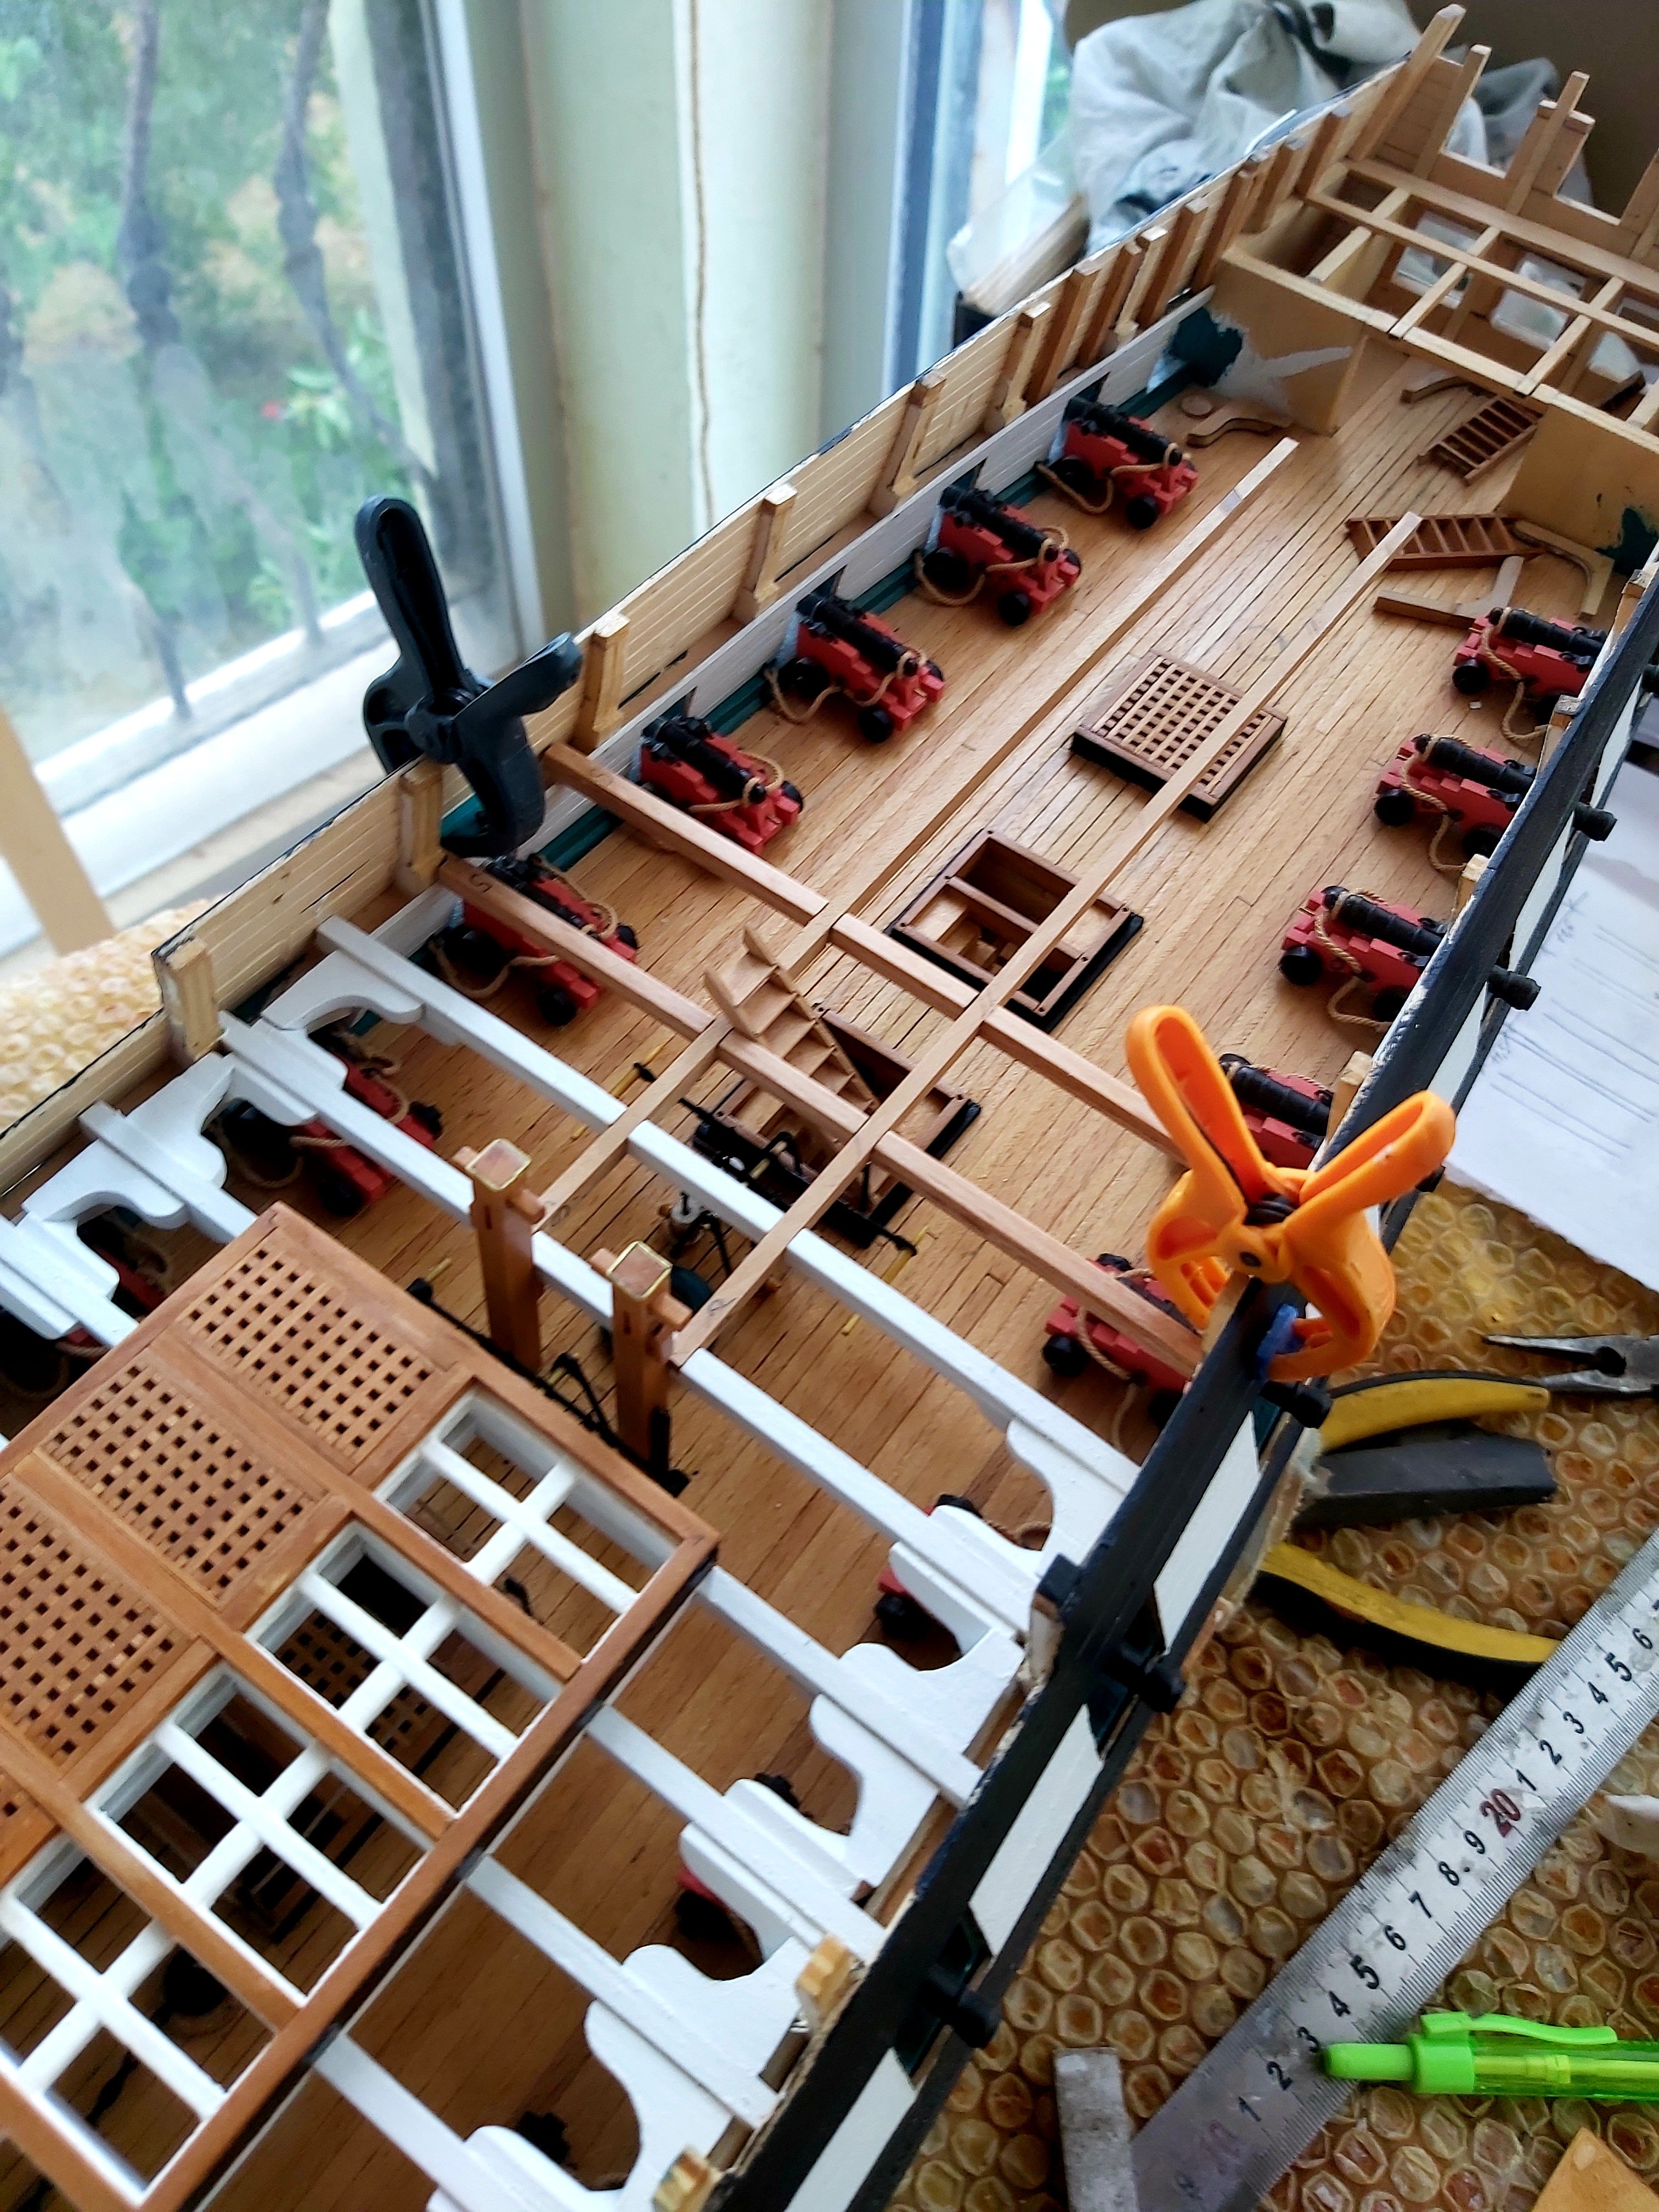
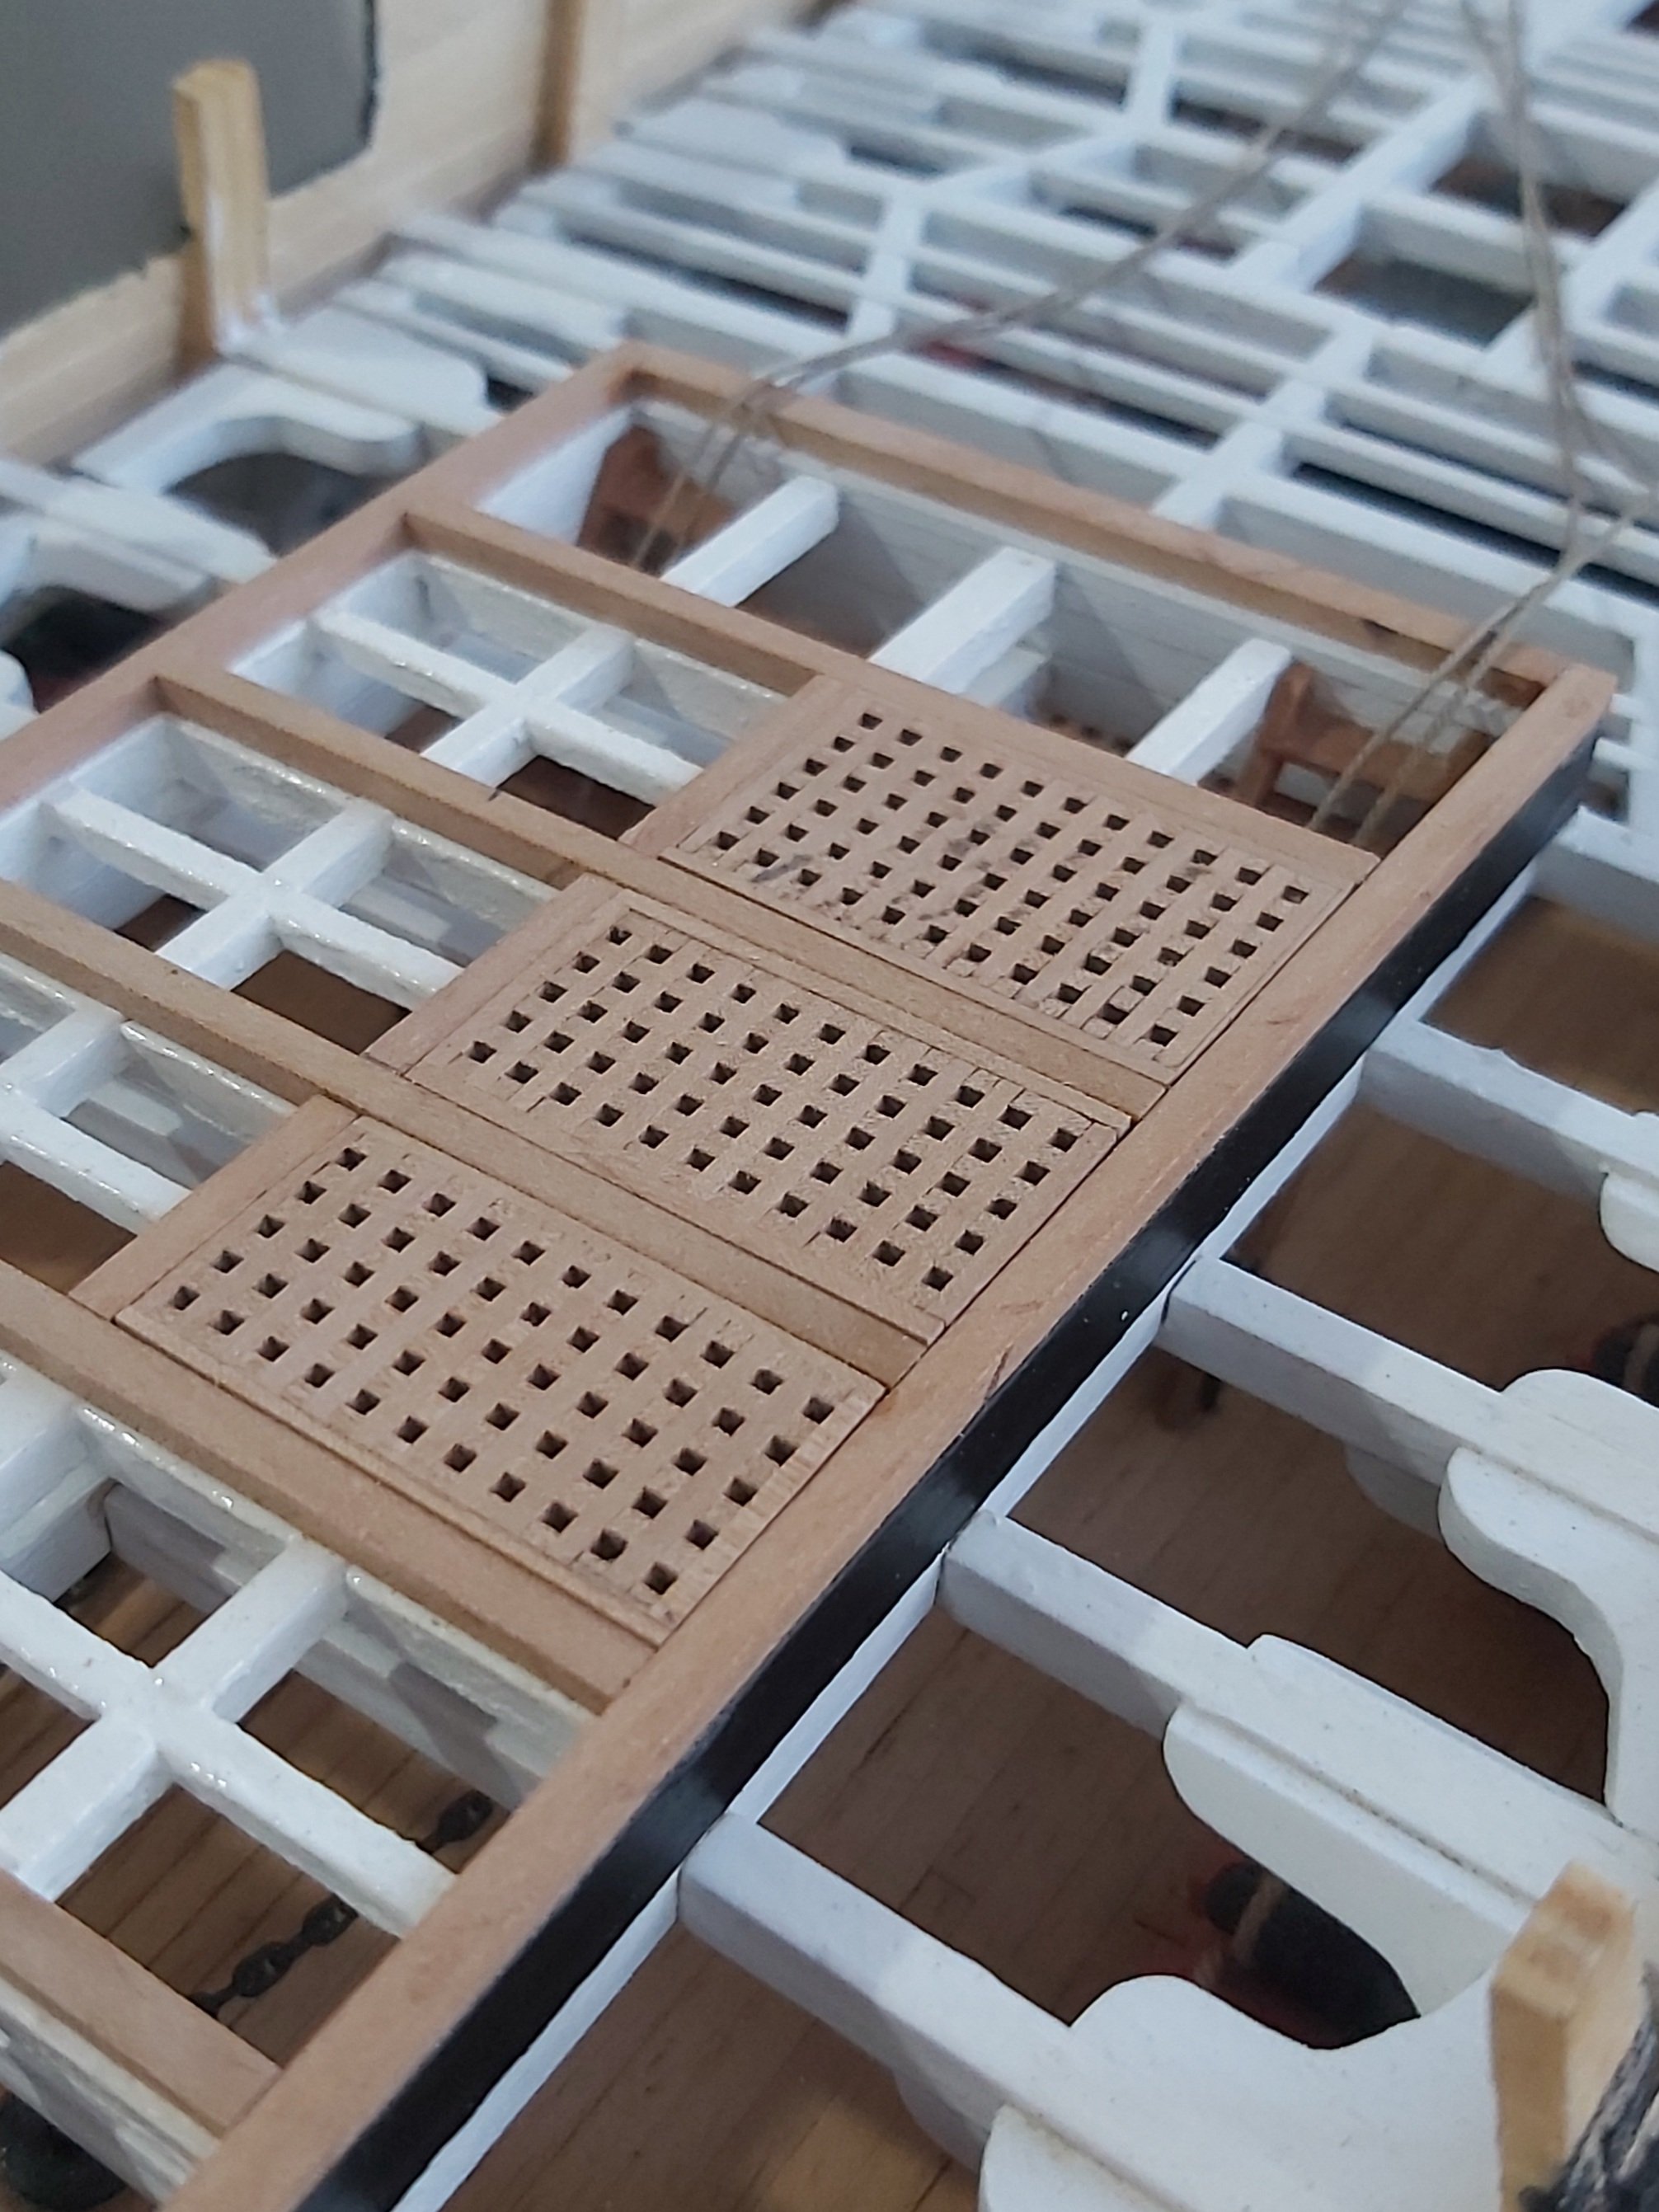
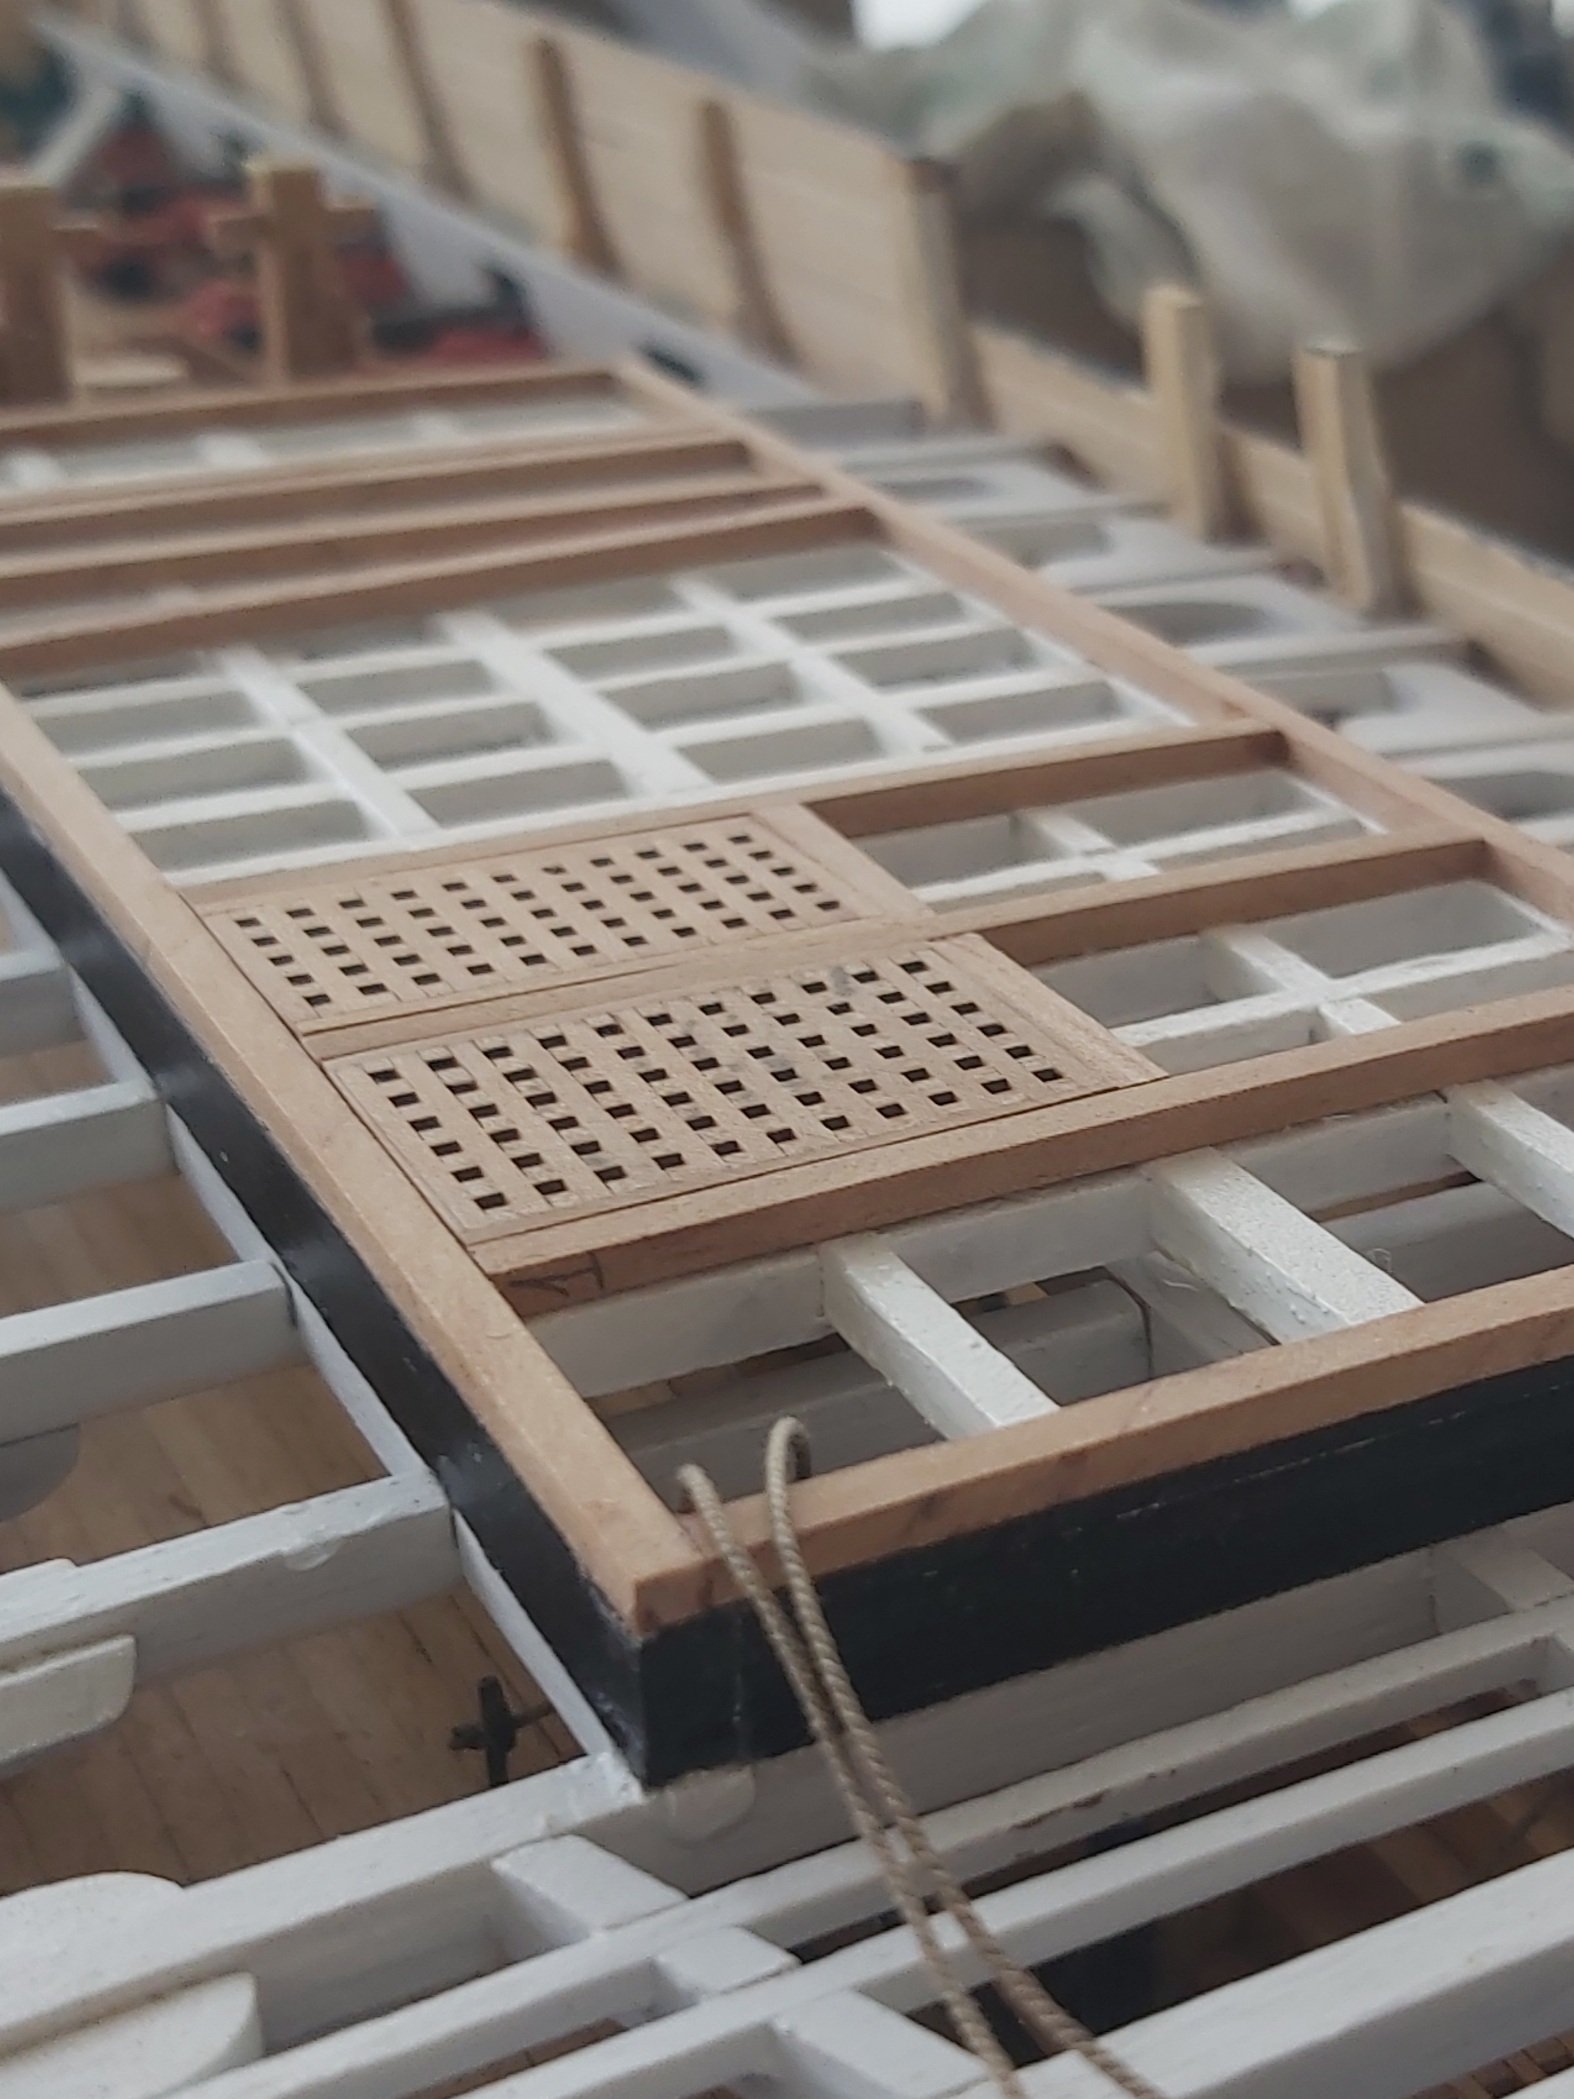
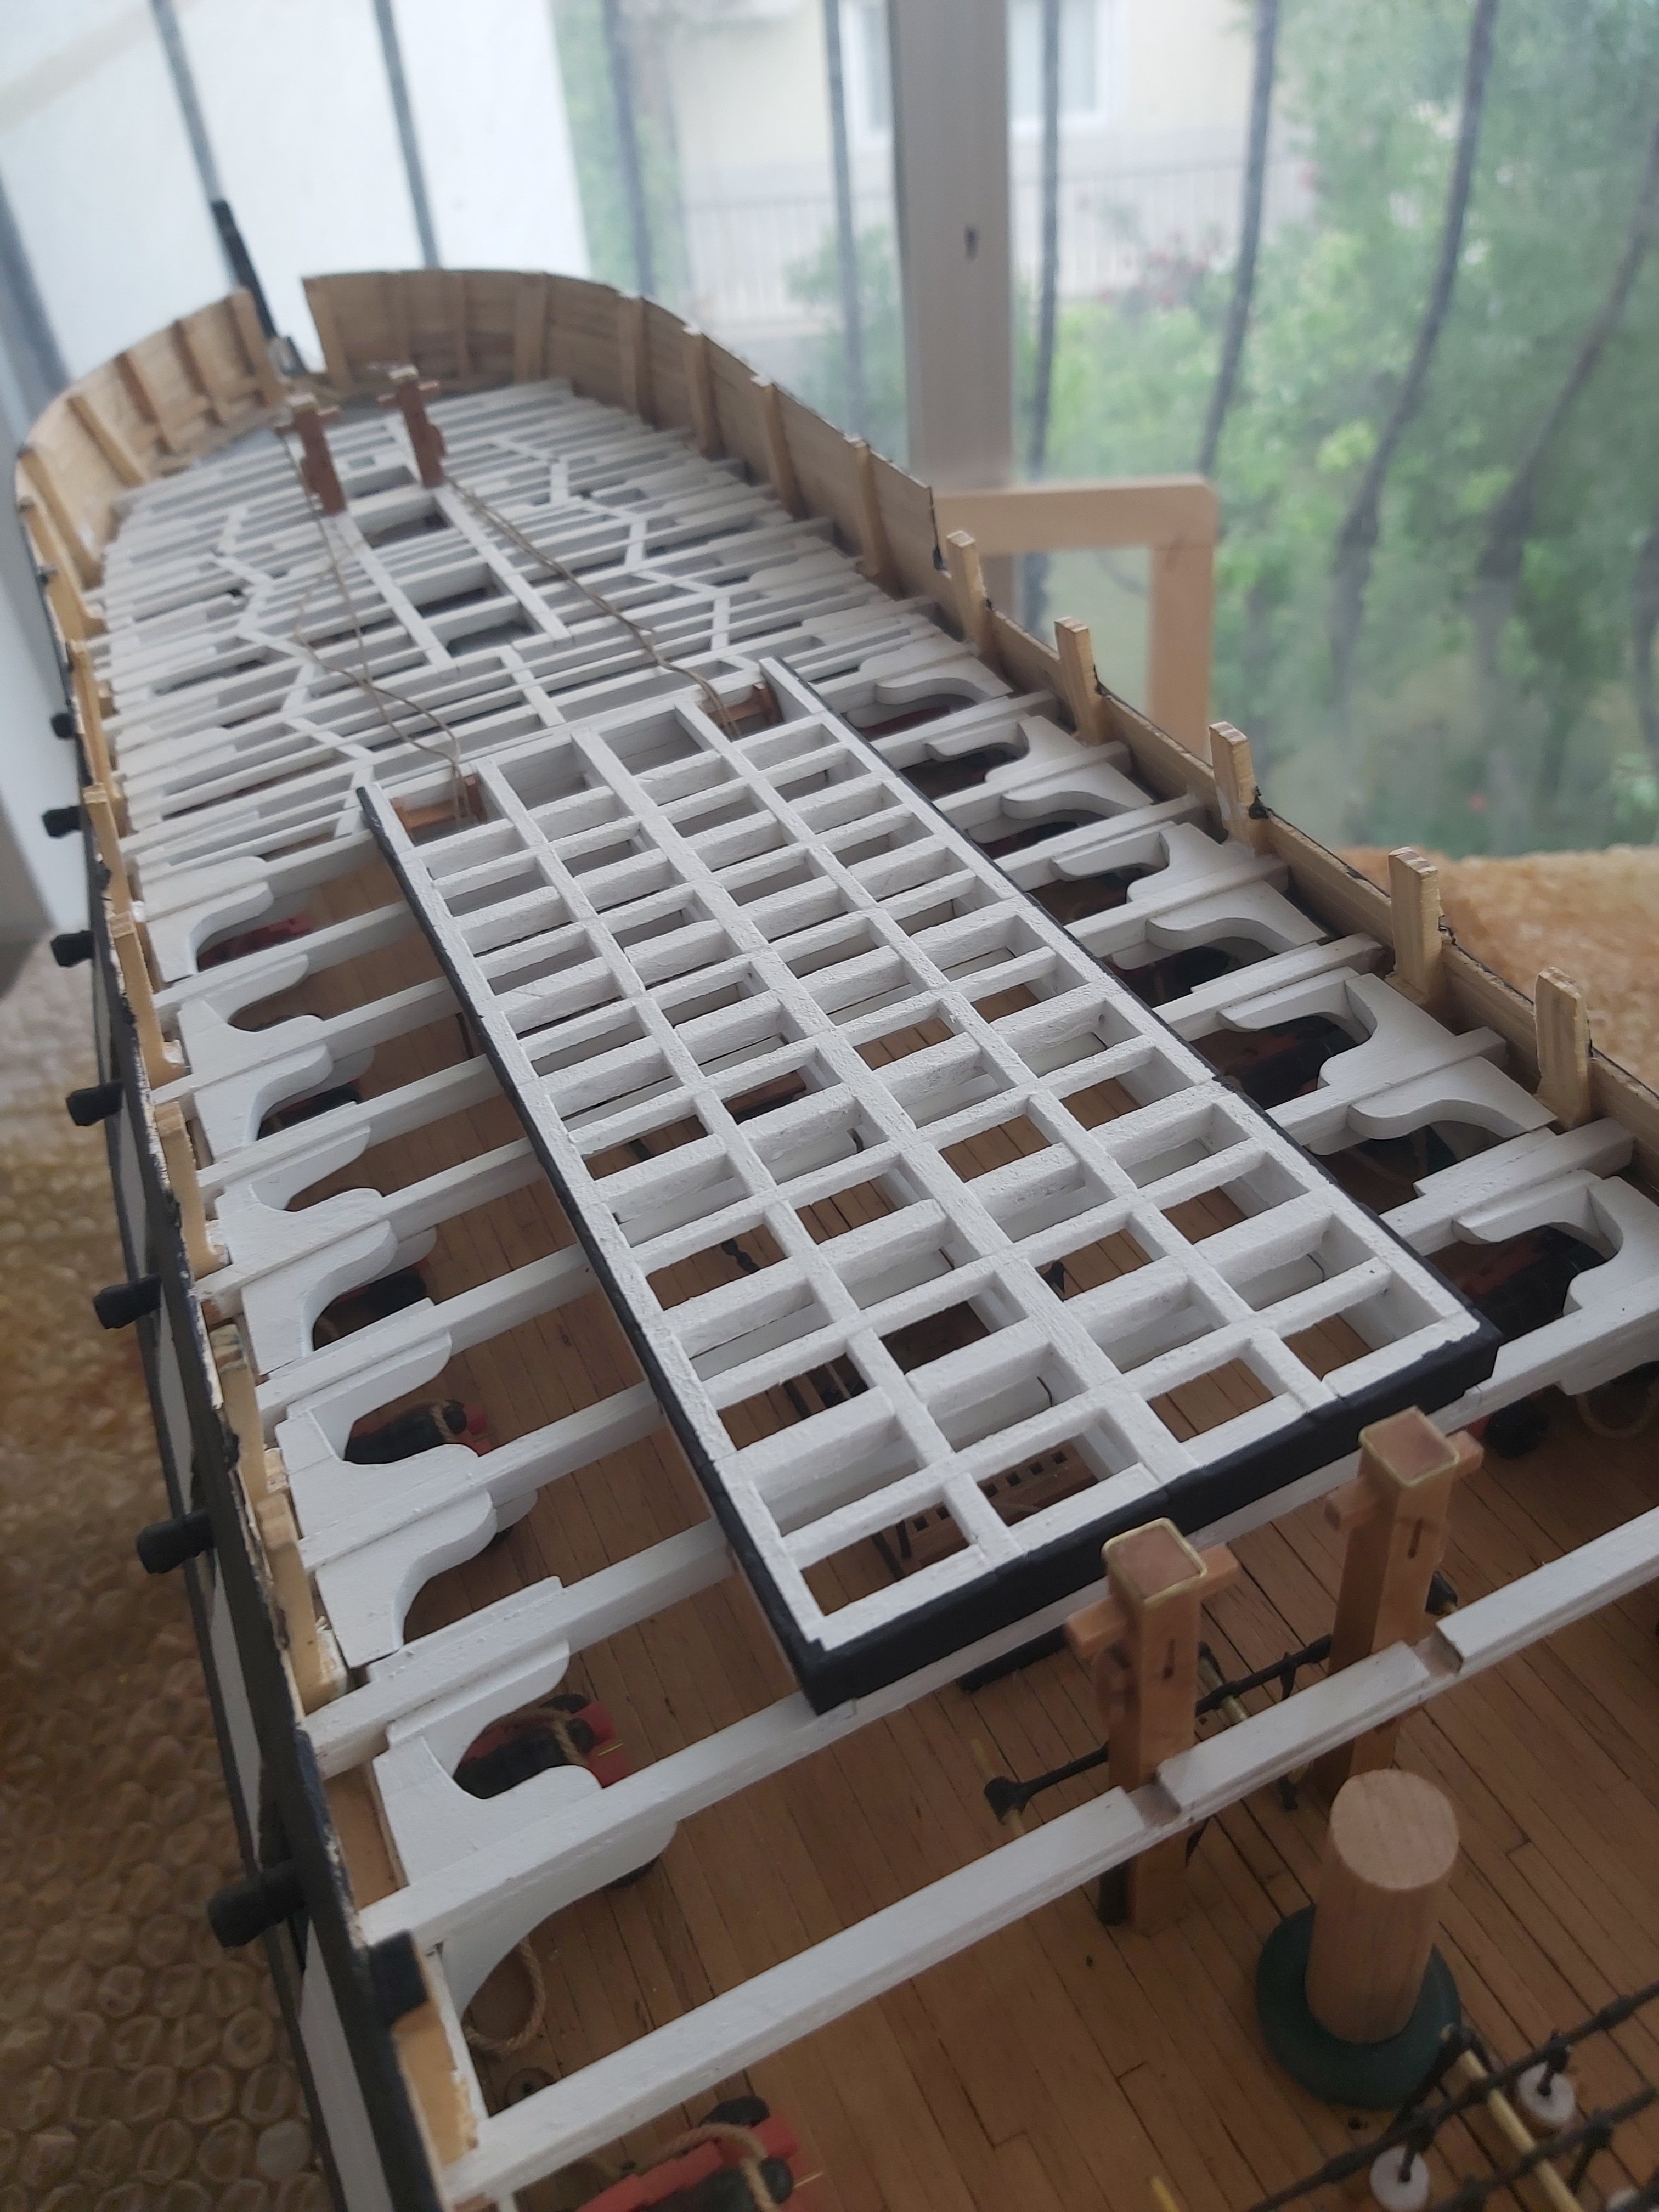
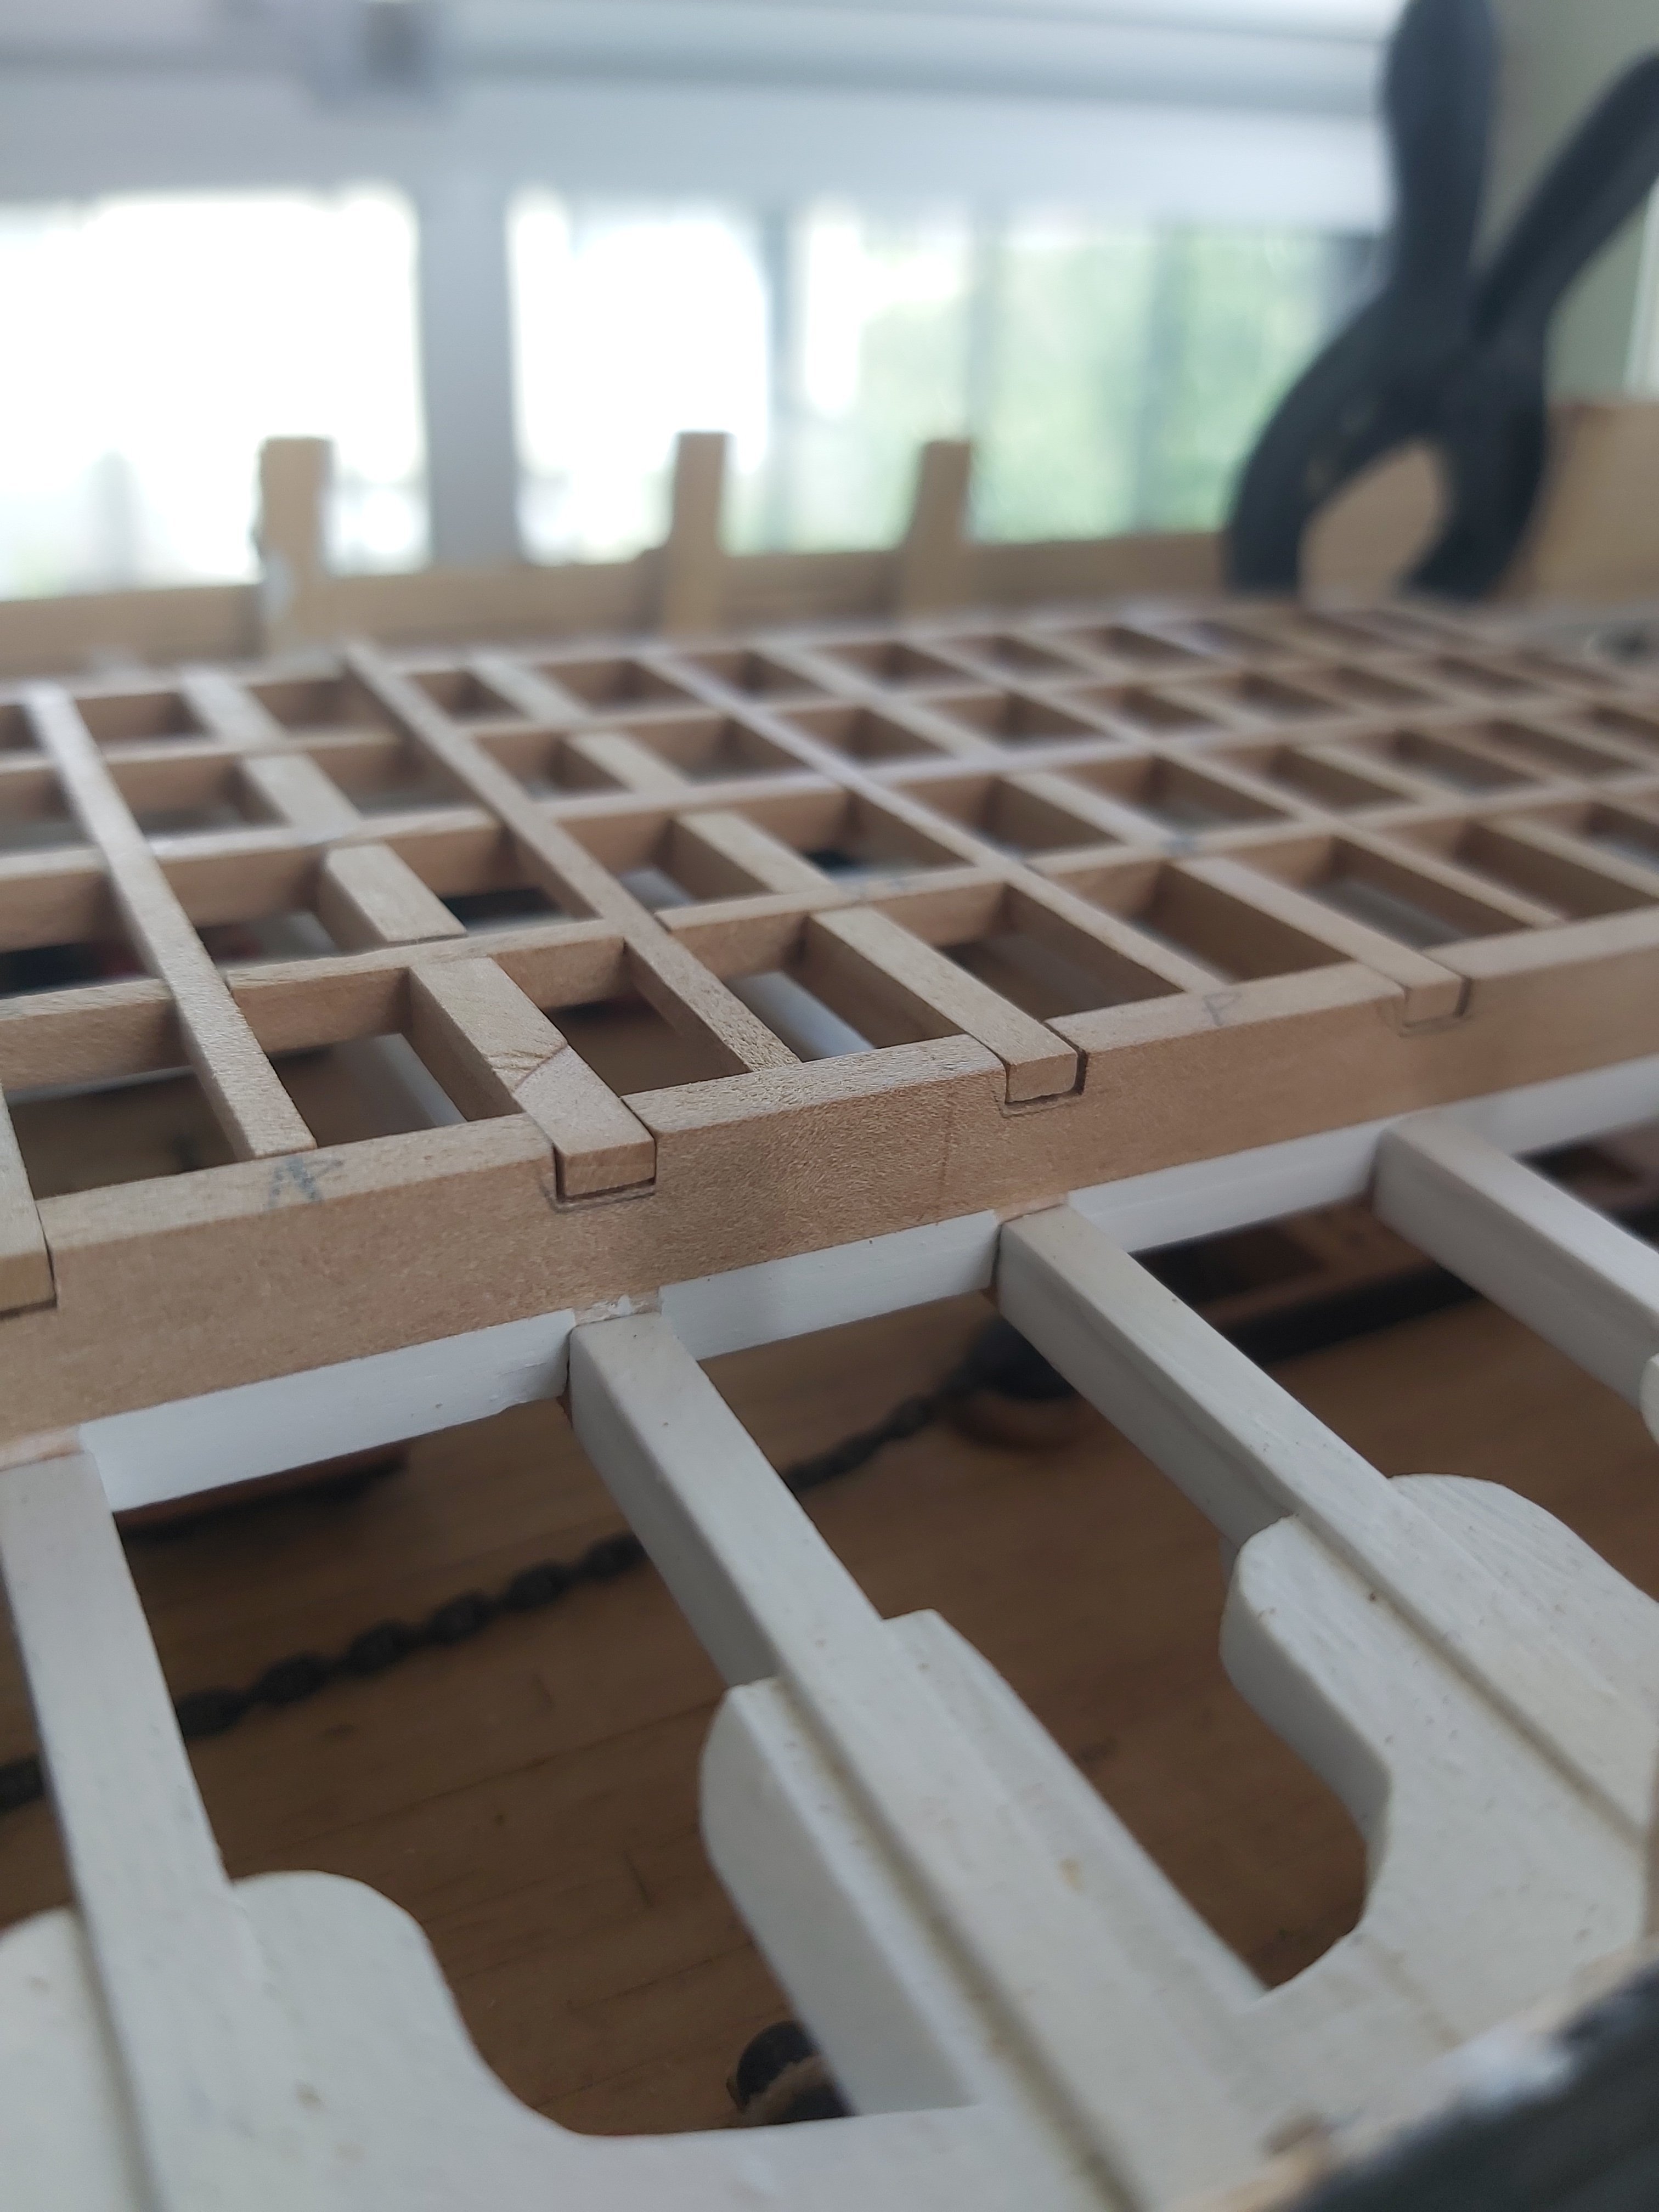
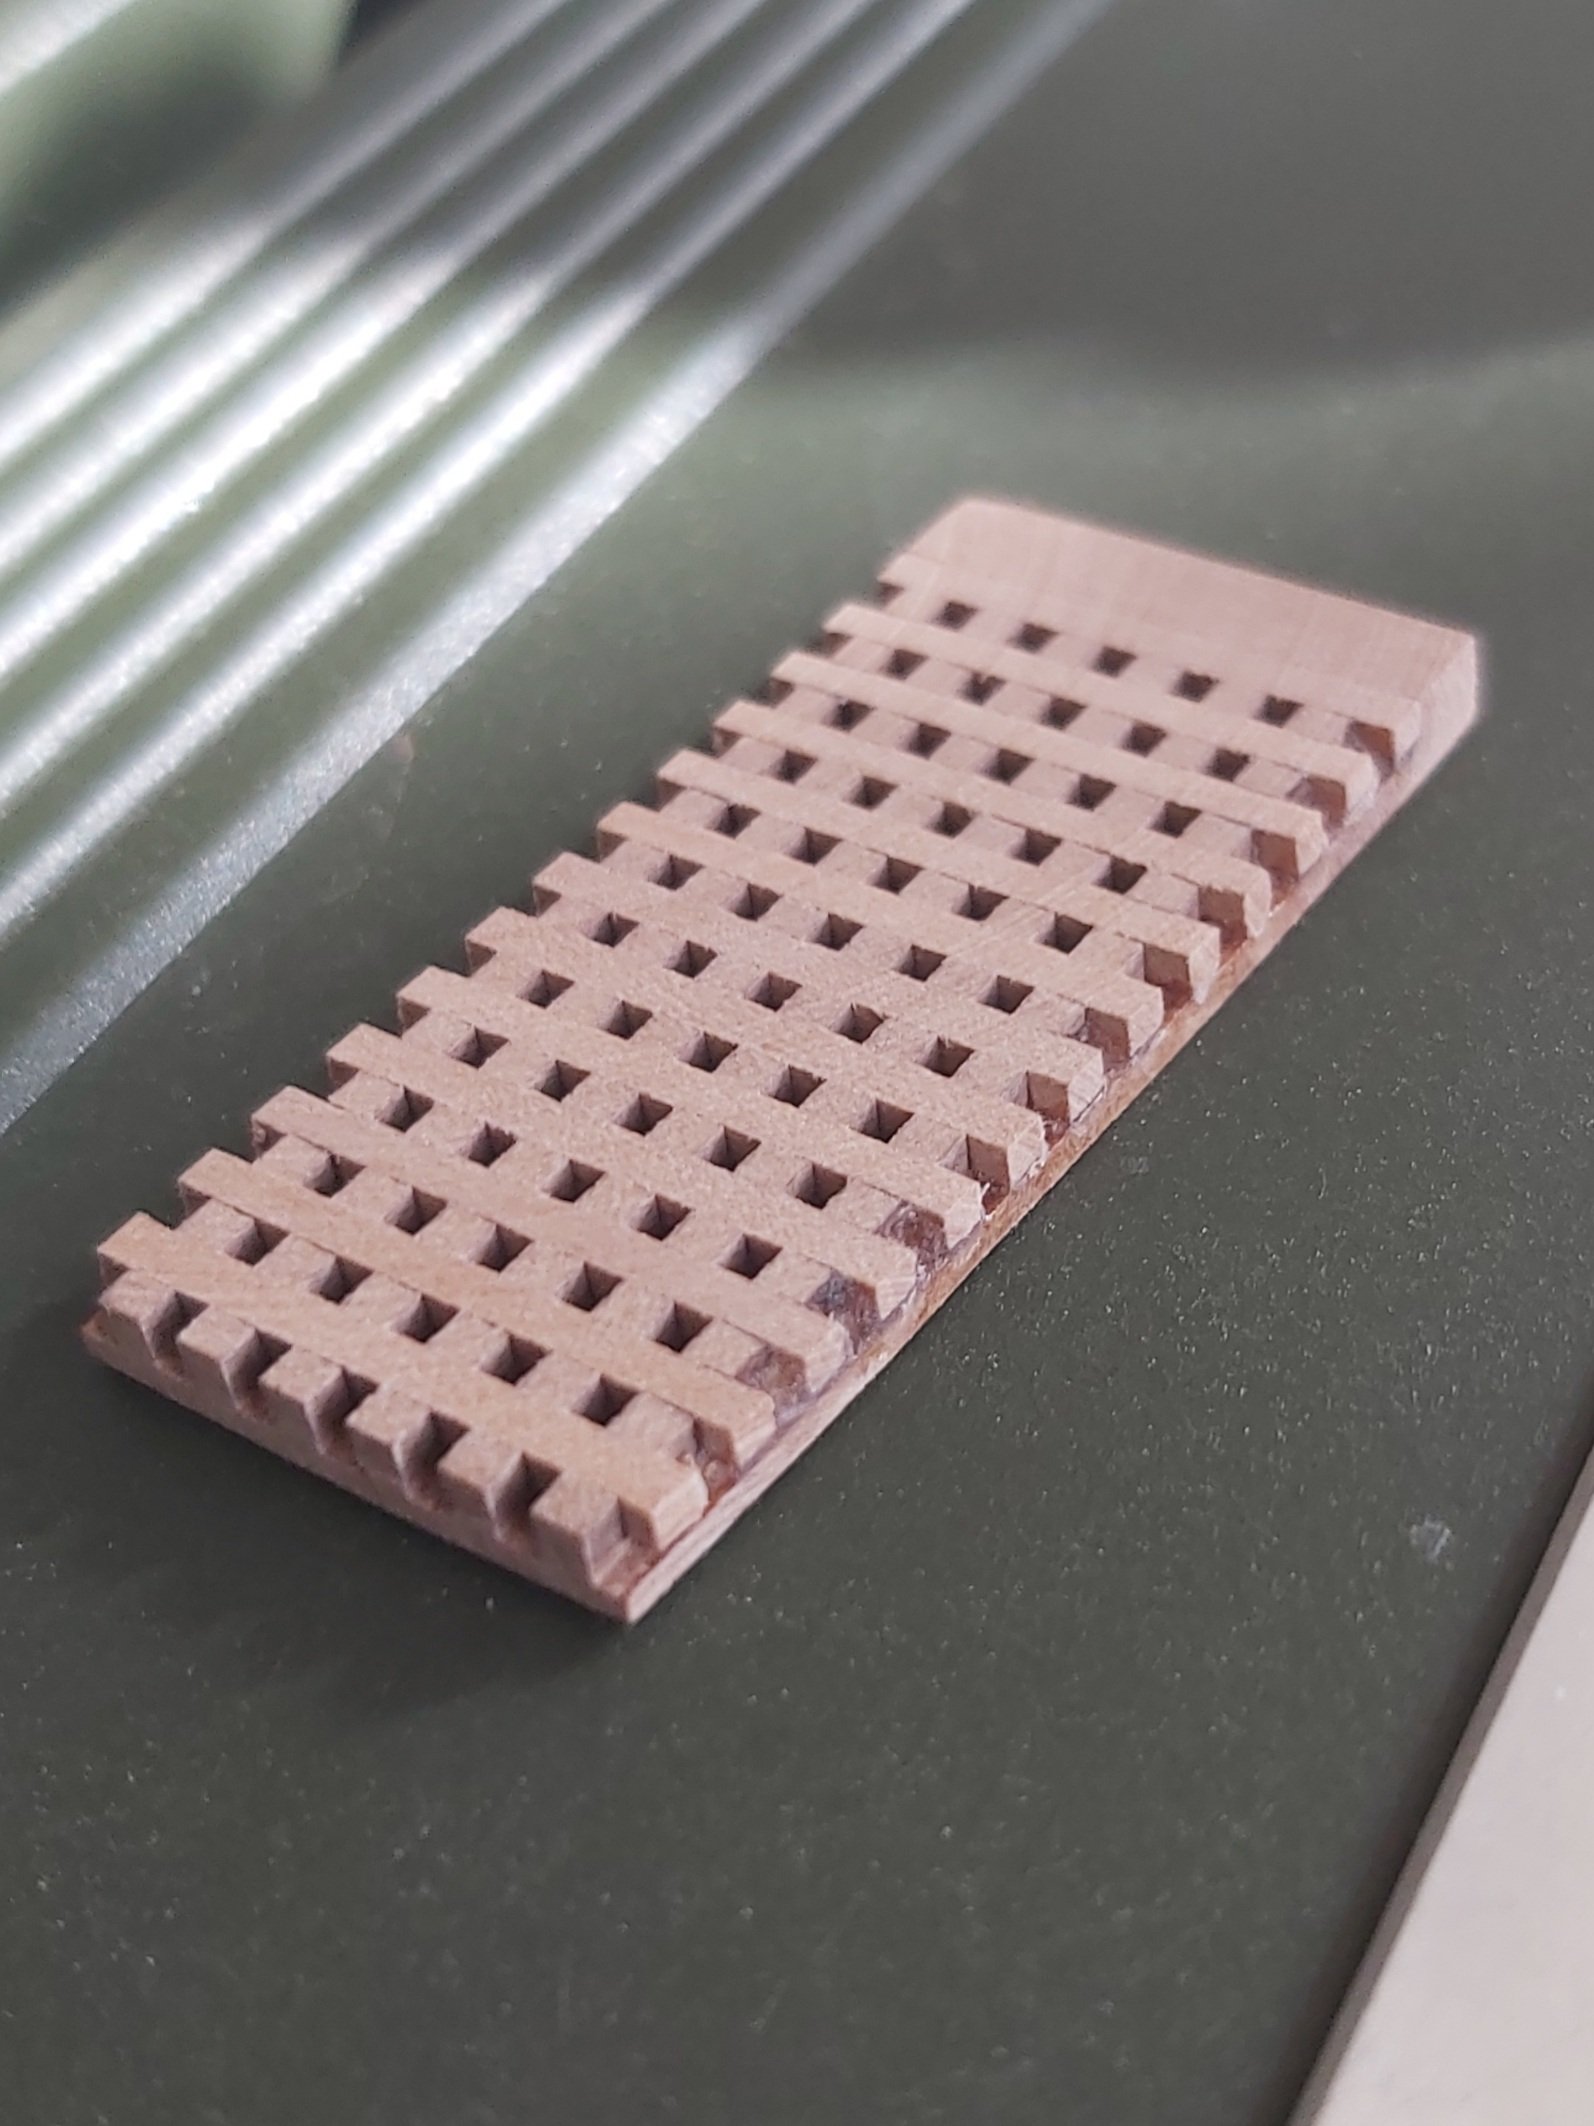
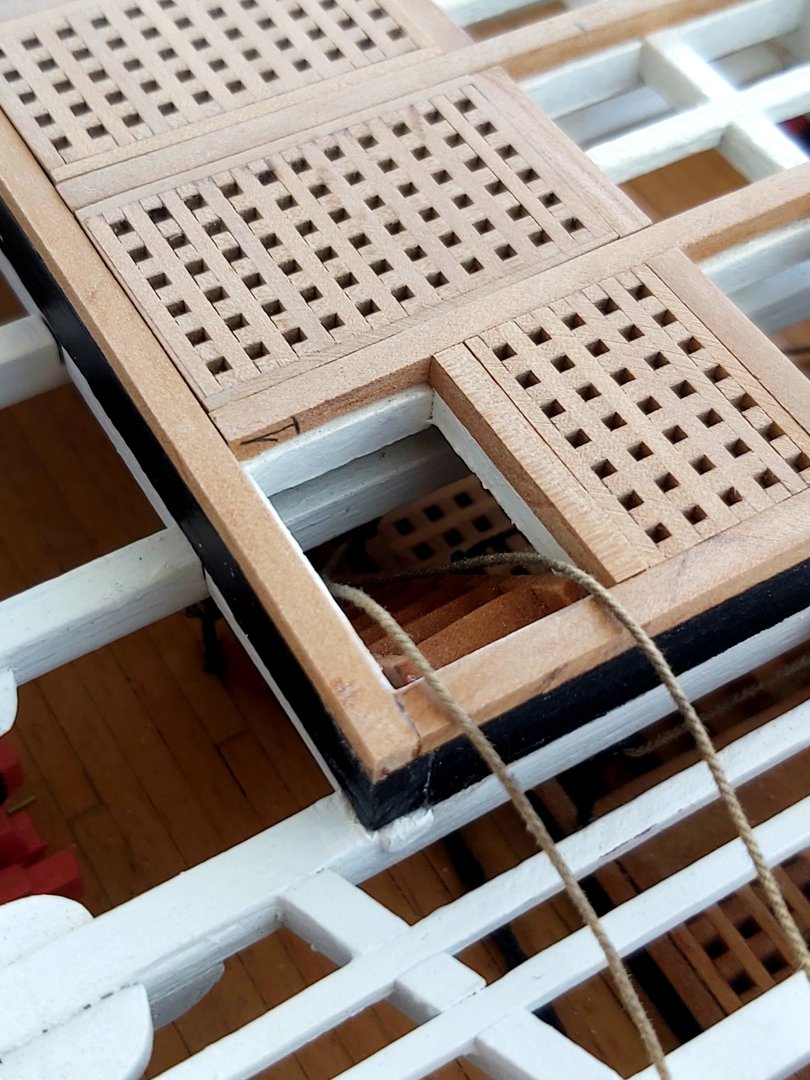
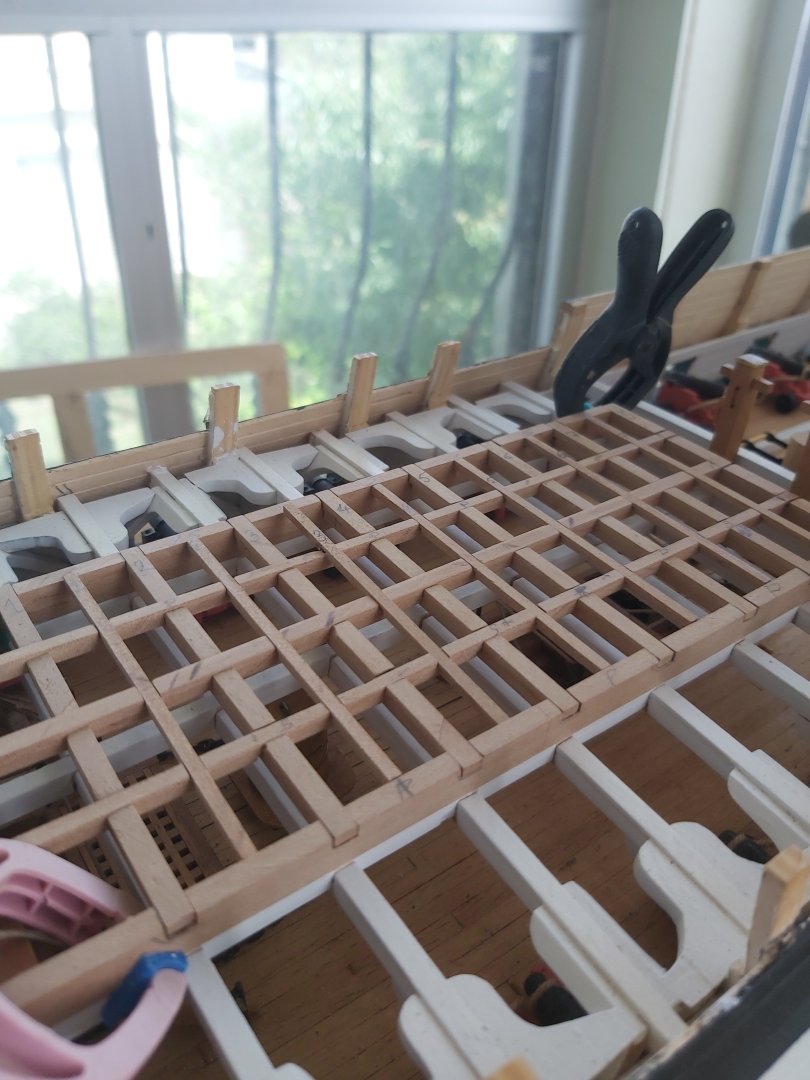
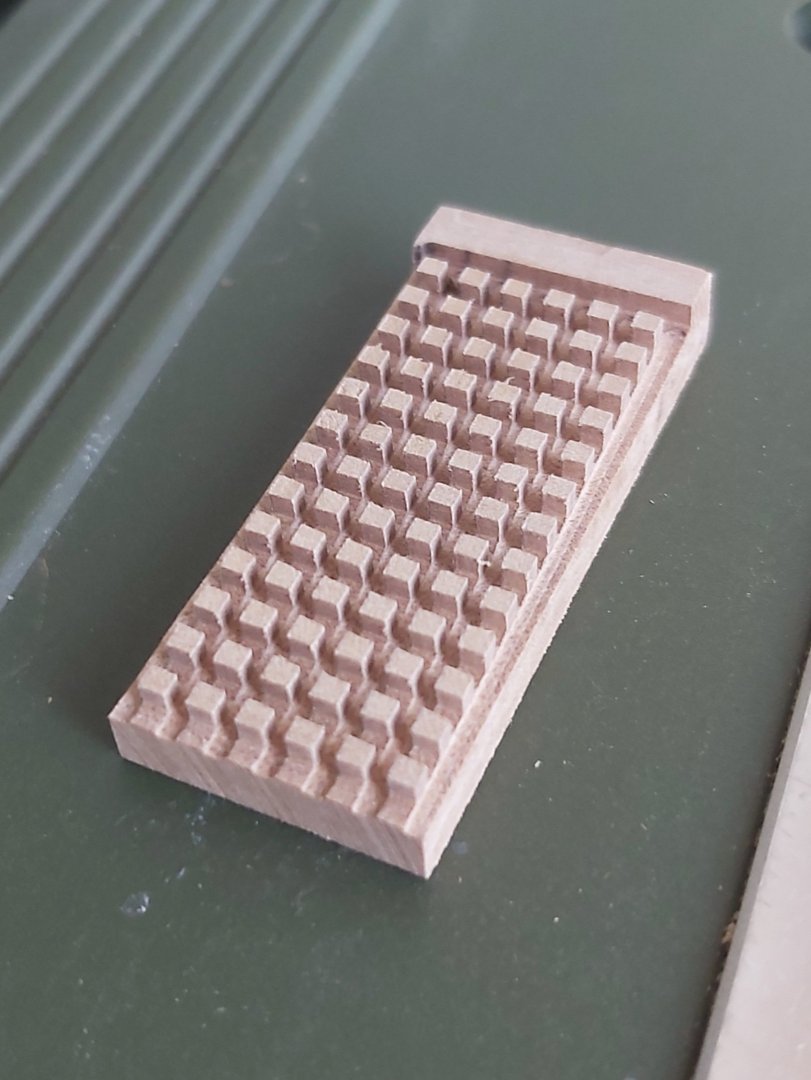
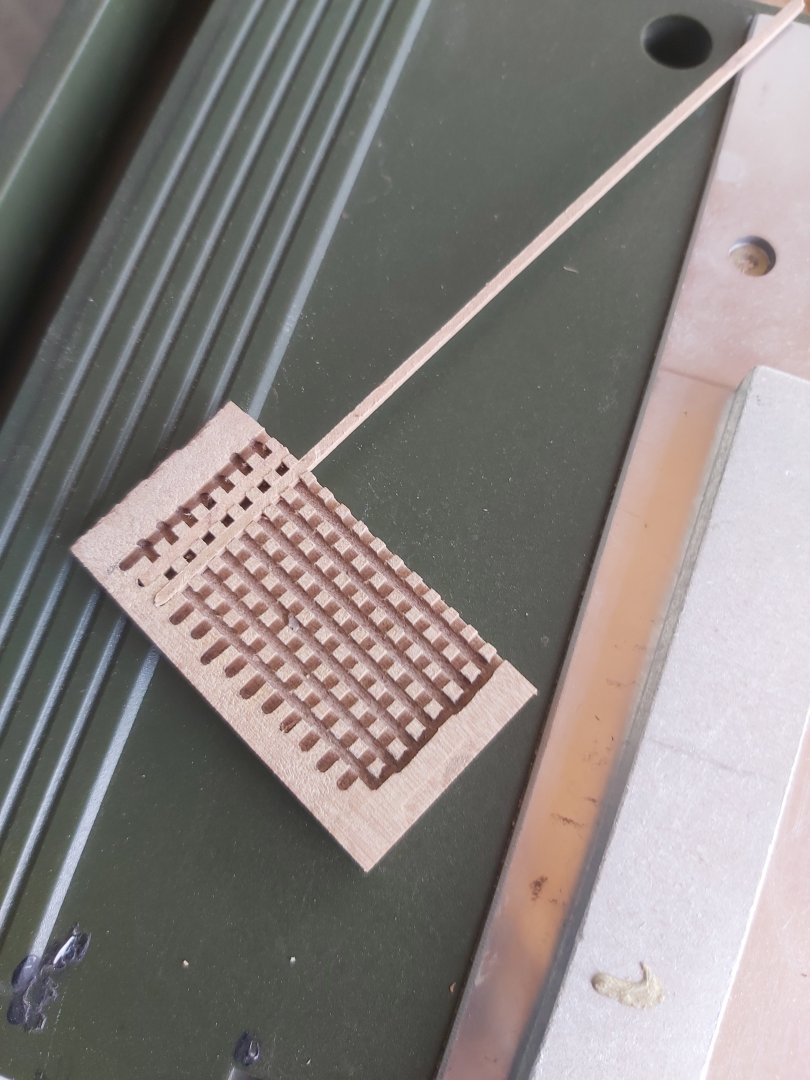
Since precise work is required, I can fabricate only one grating a day, in addition, I can make and assemble a deck beam and attached knees.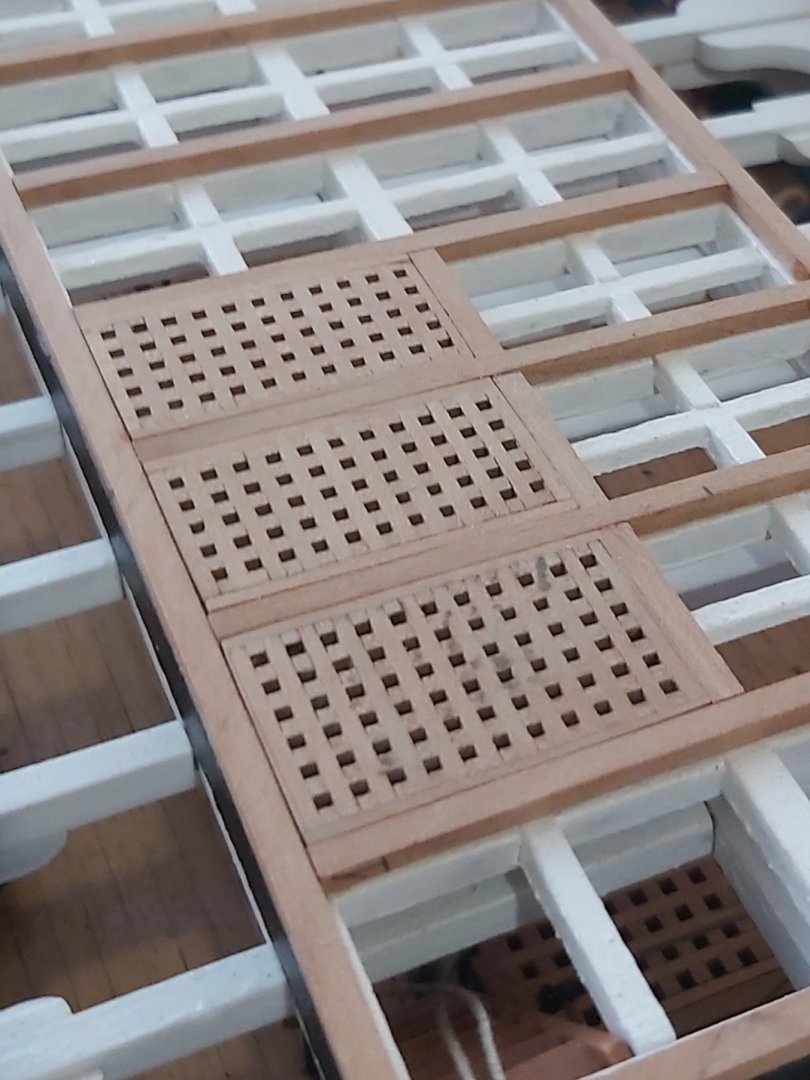


-
USS Constitution by mtbediz - 1:76
mtbediz replied to mtbediz's topic in - Build logs for subjects built 1751 - 1800
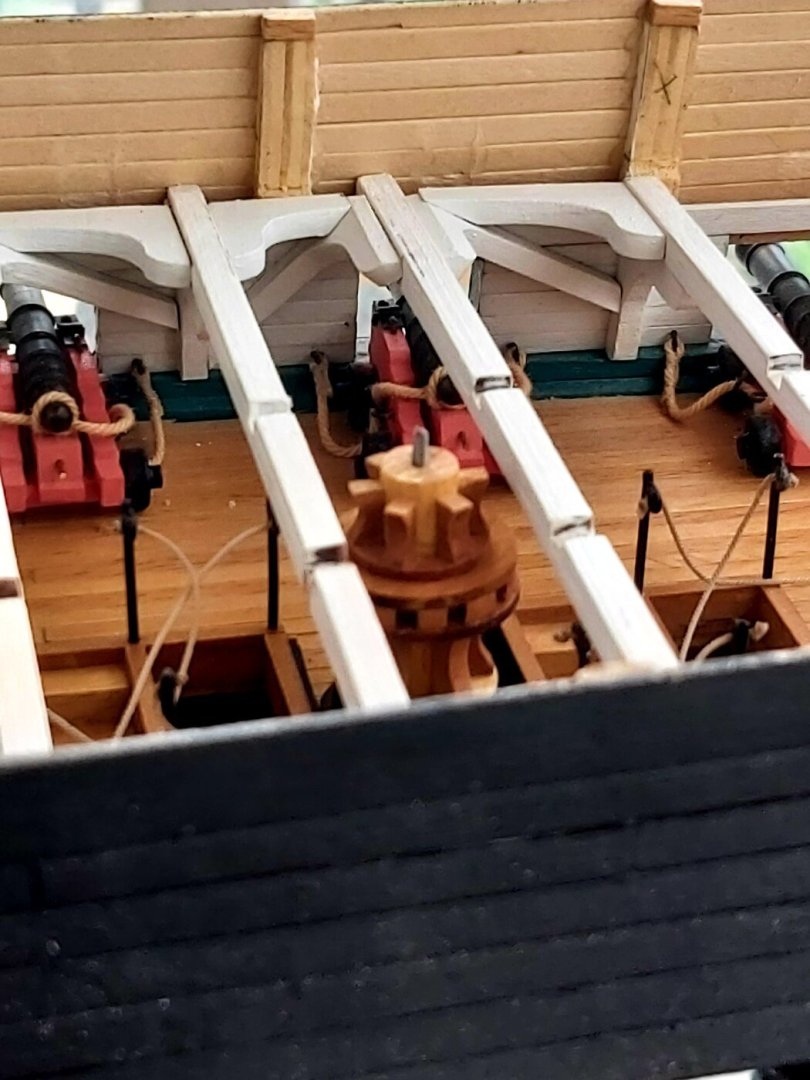
Some more pictures.

-
USS Constitution by mtbediz - 1:76
mtbediz replied to mtbediz's topic in - Build logs for subjects built 1751 - 1800
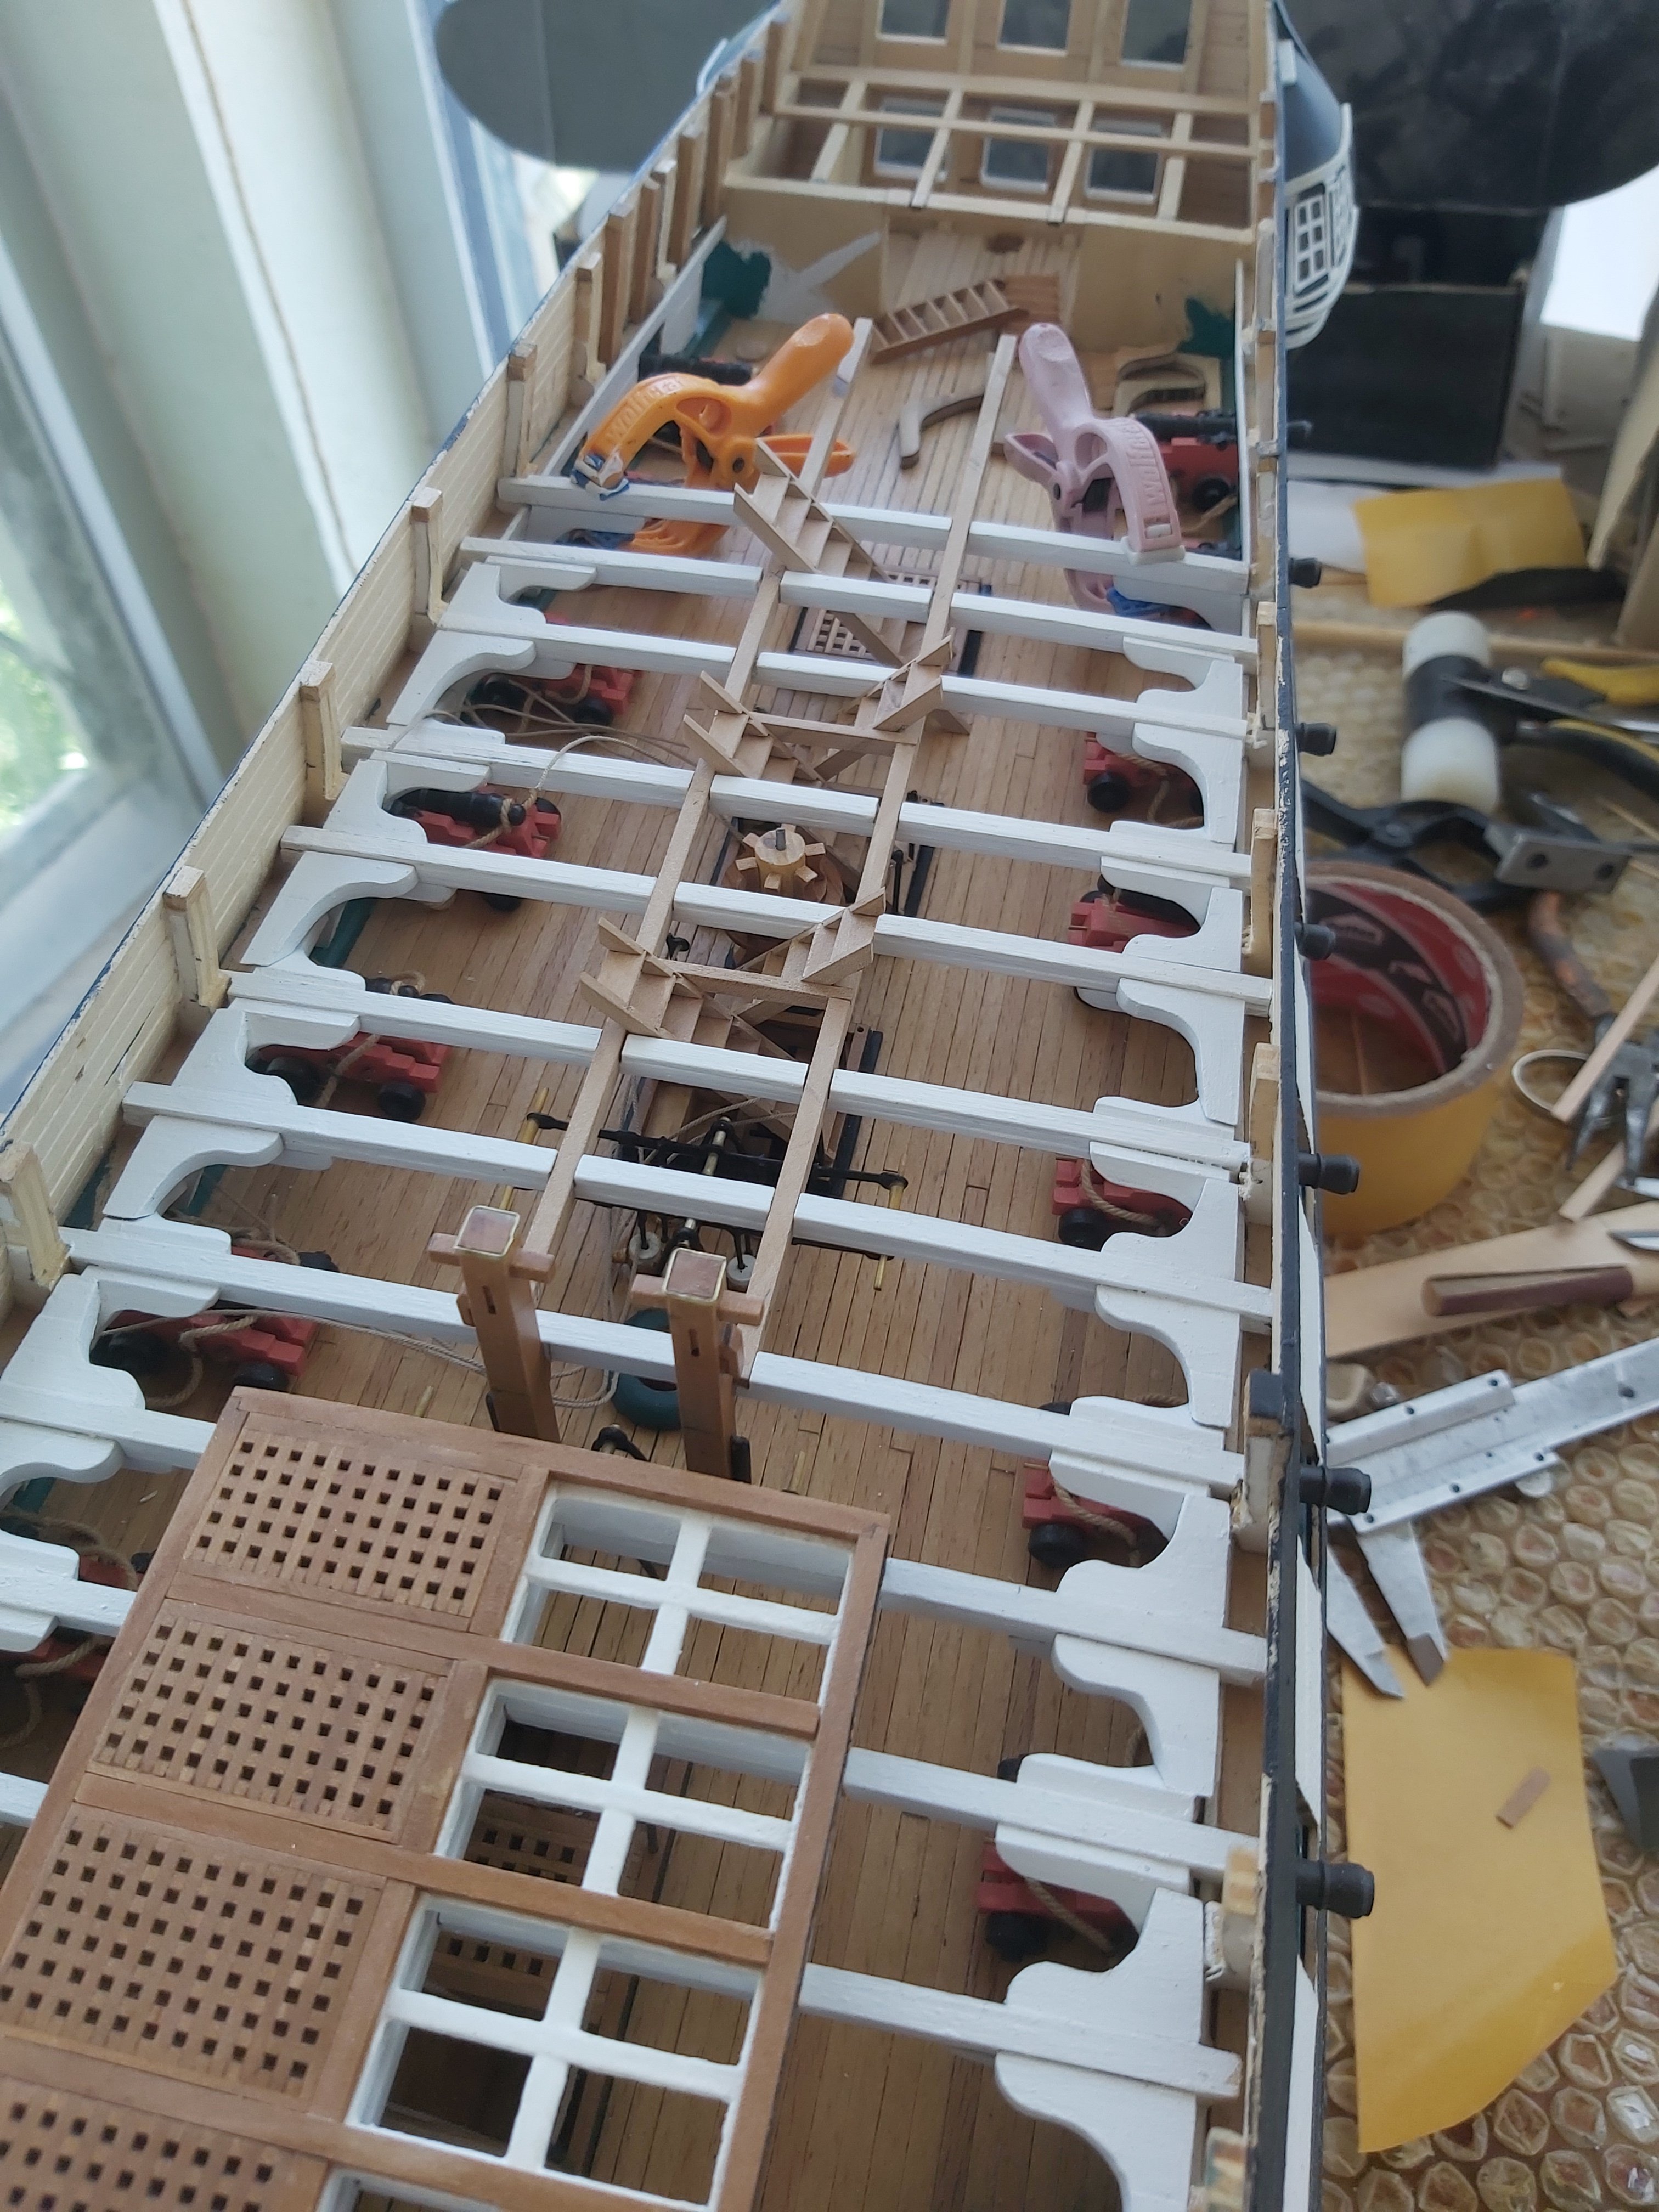
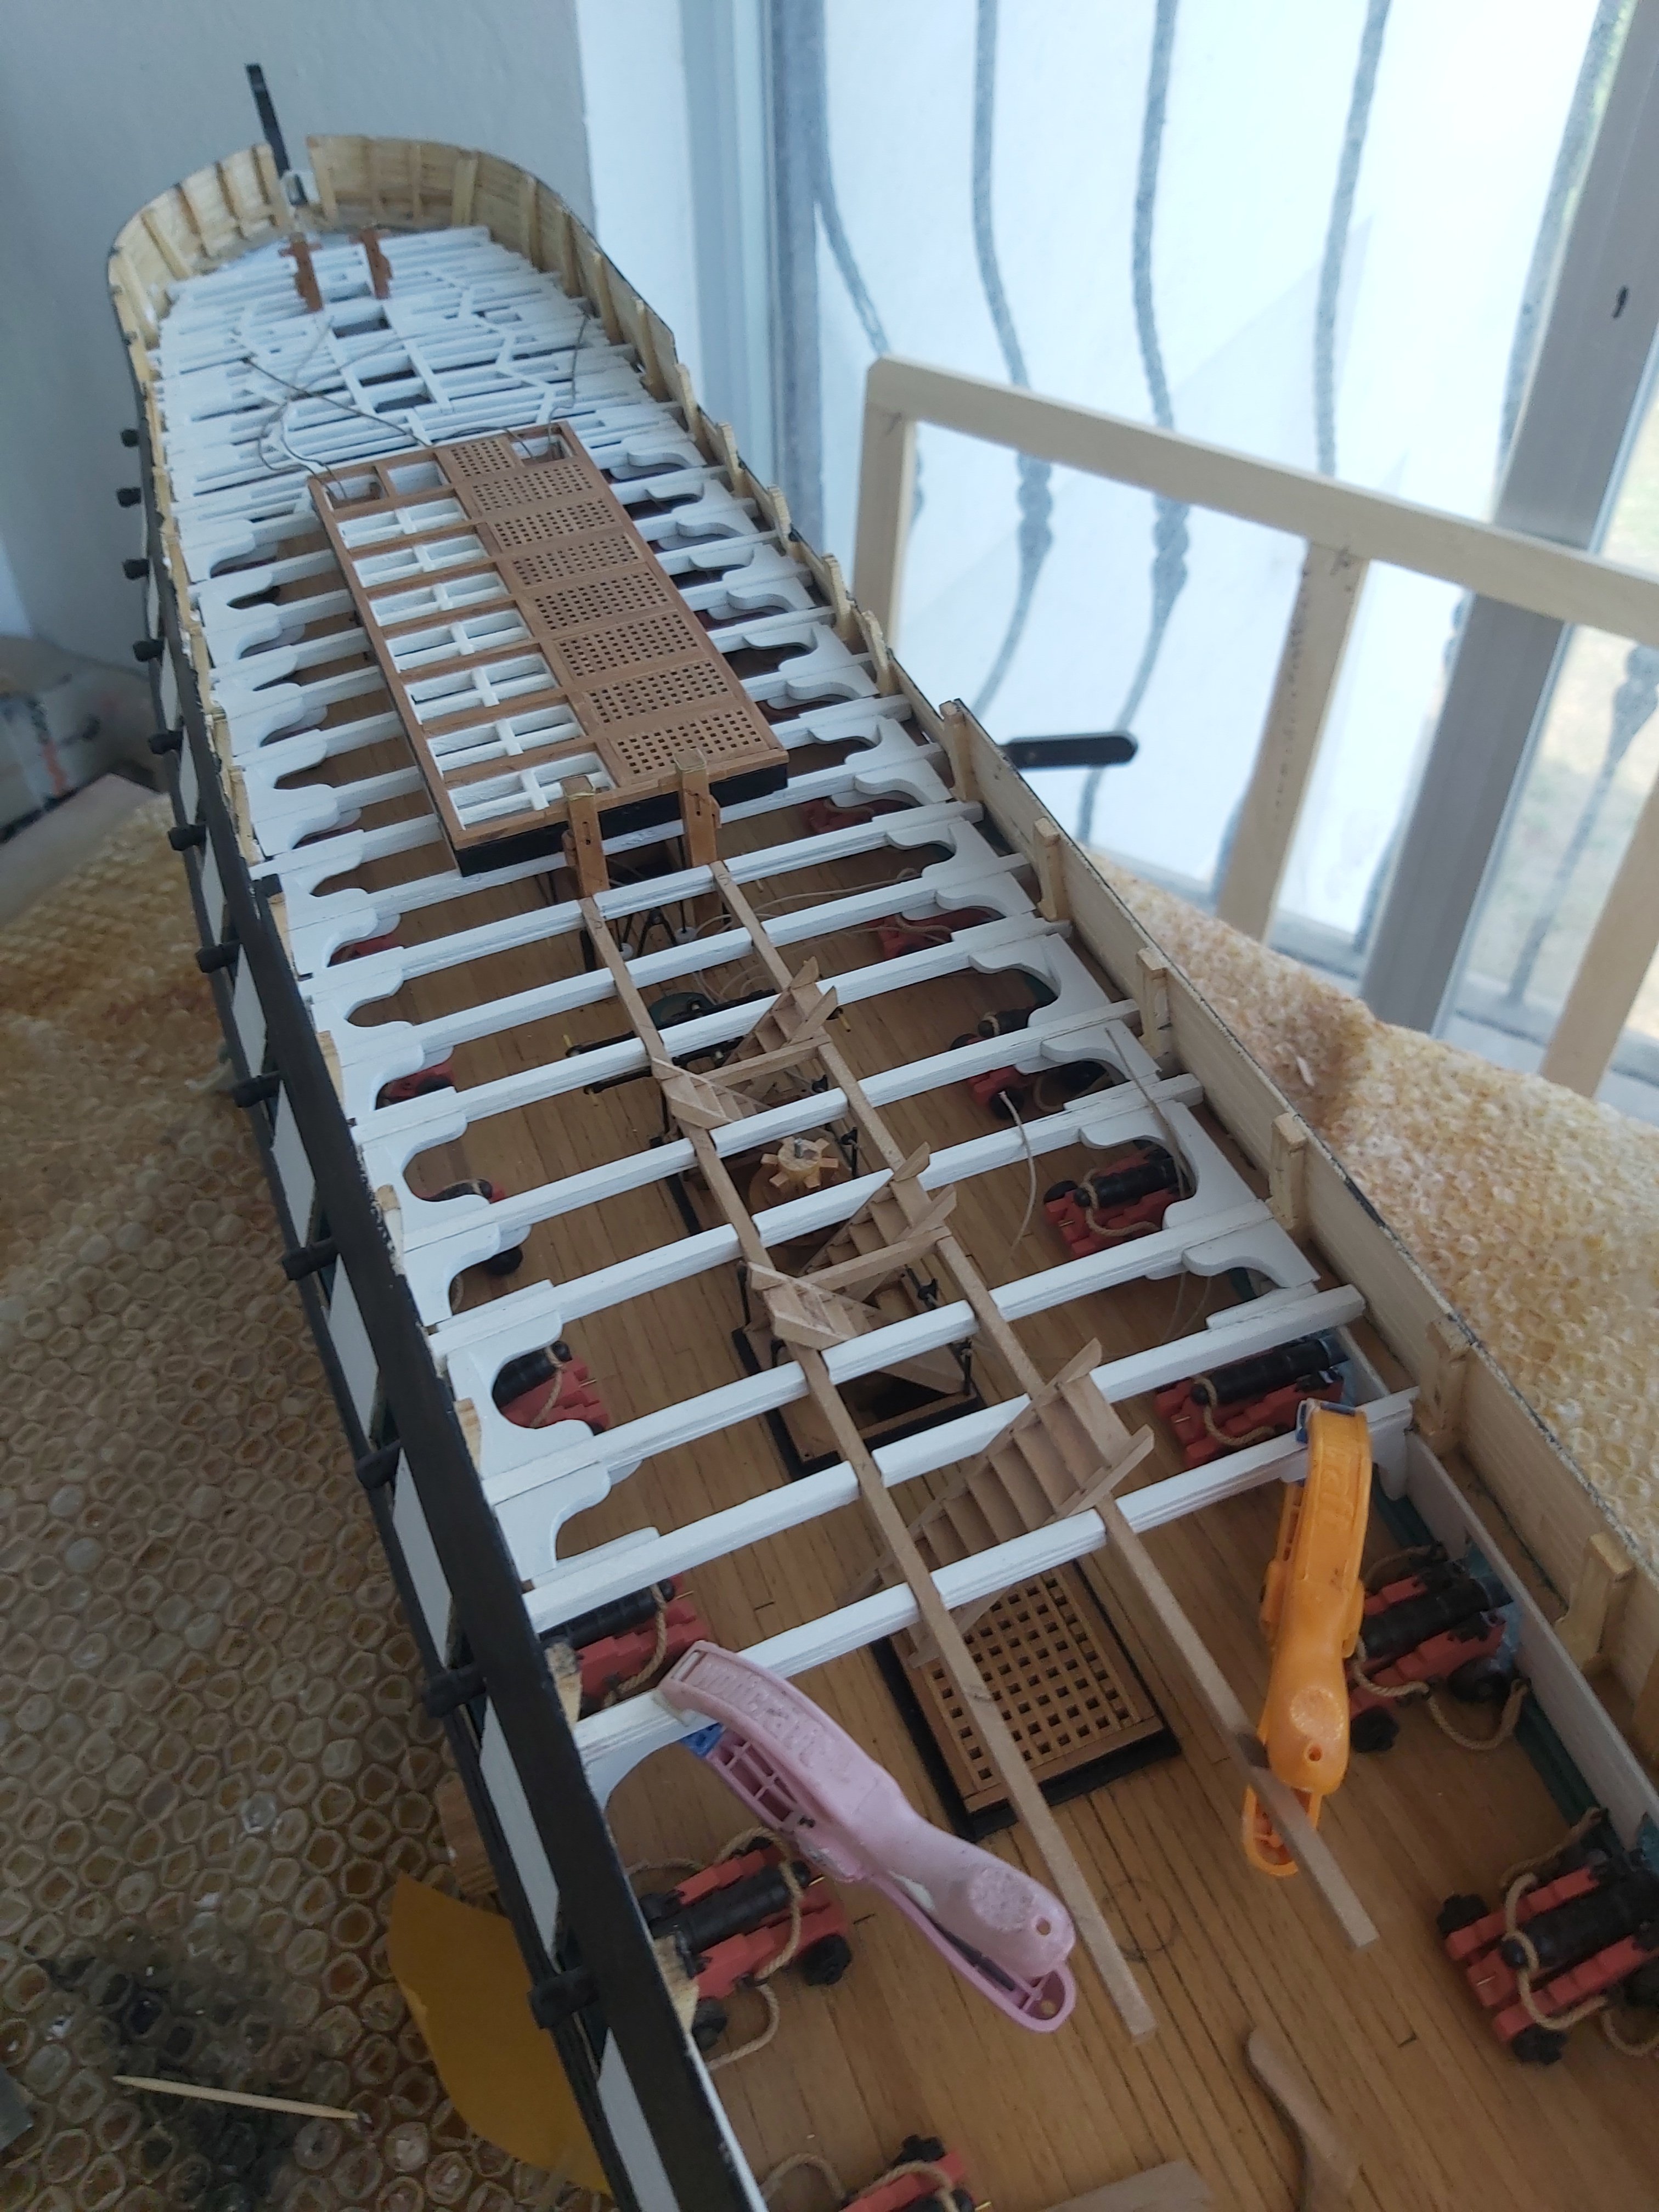
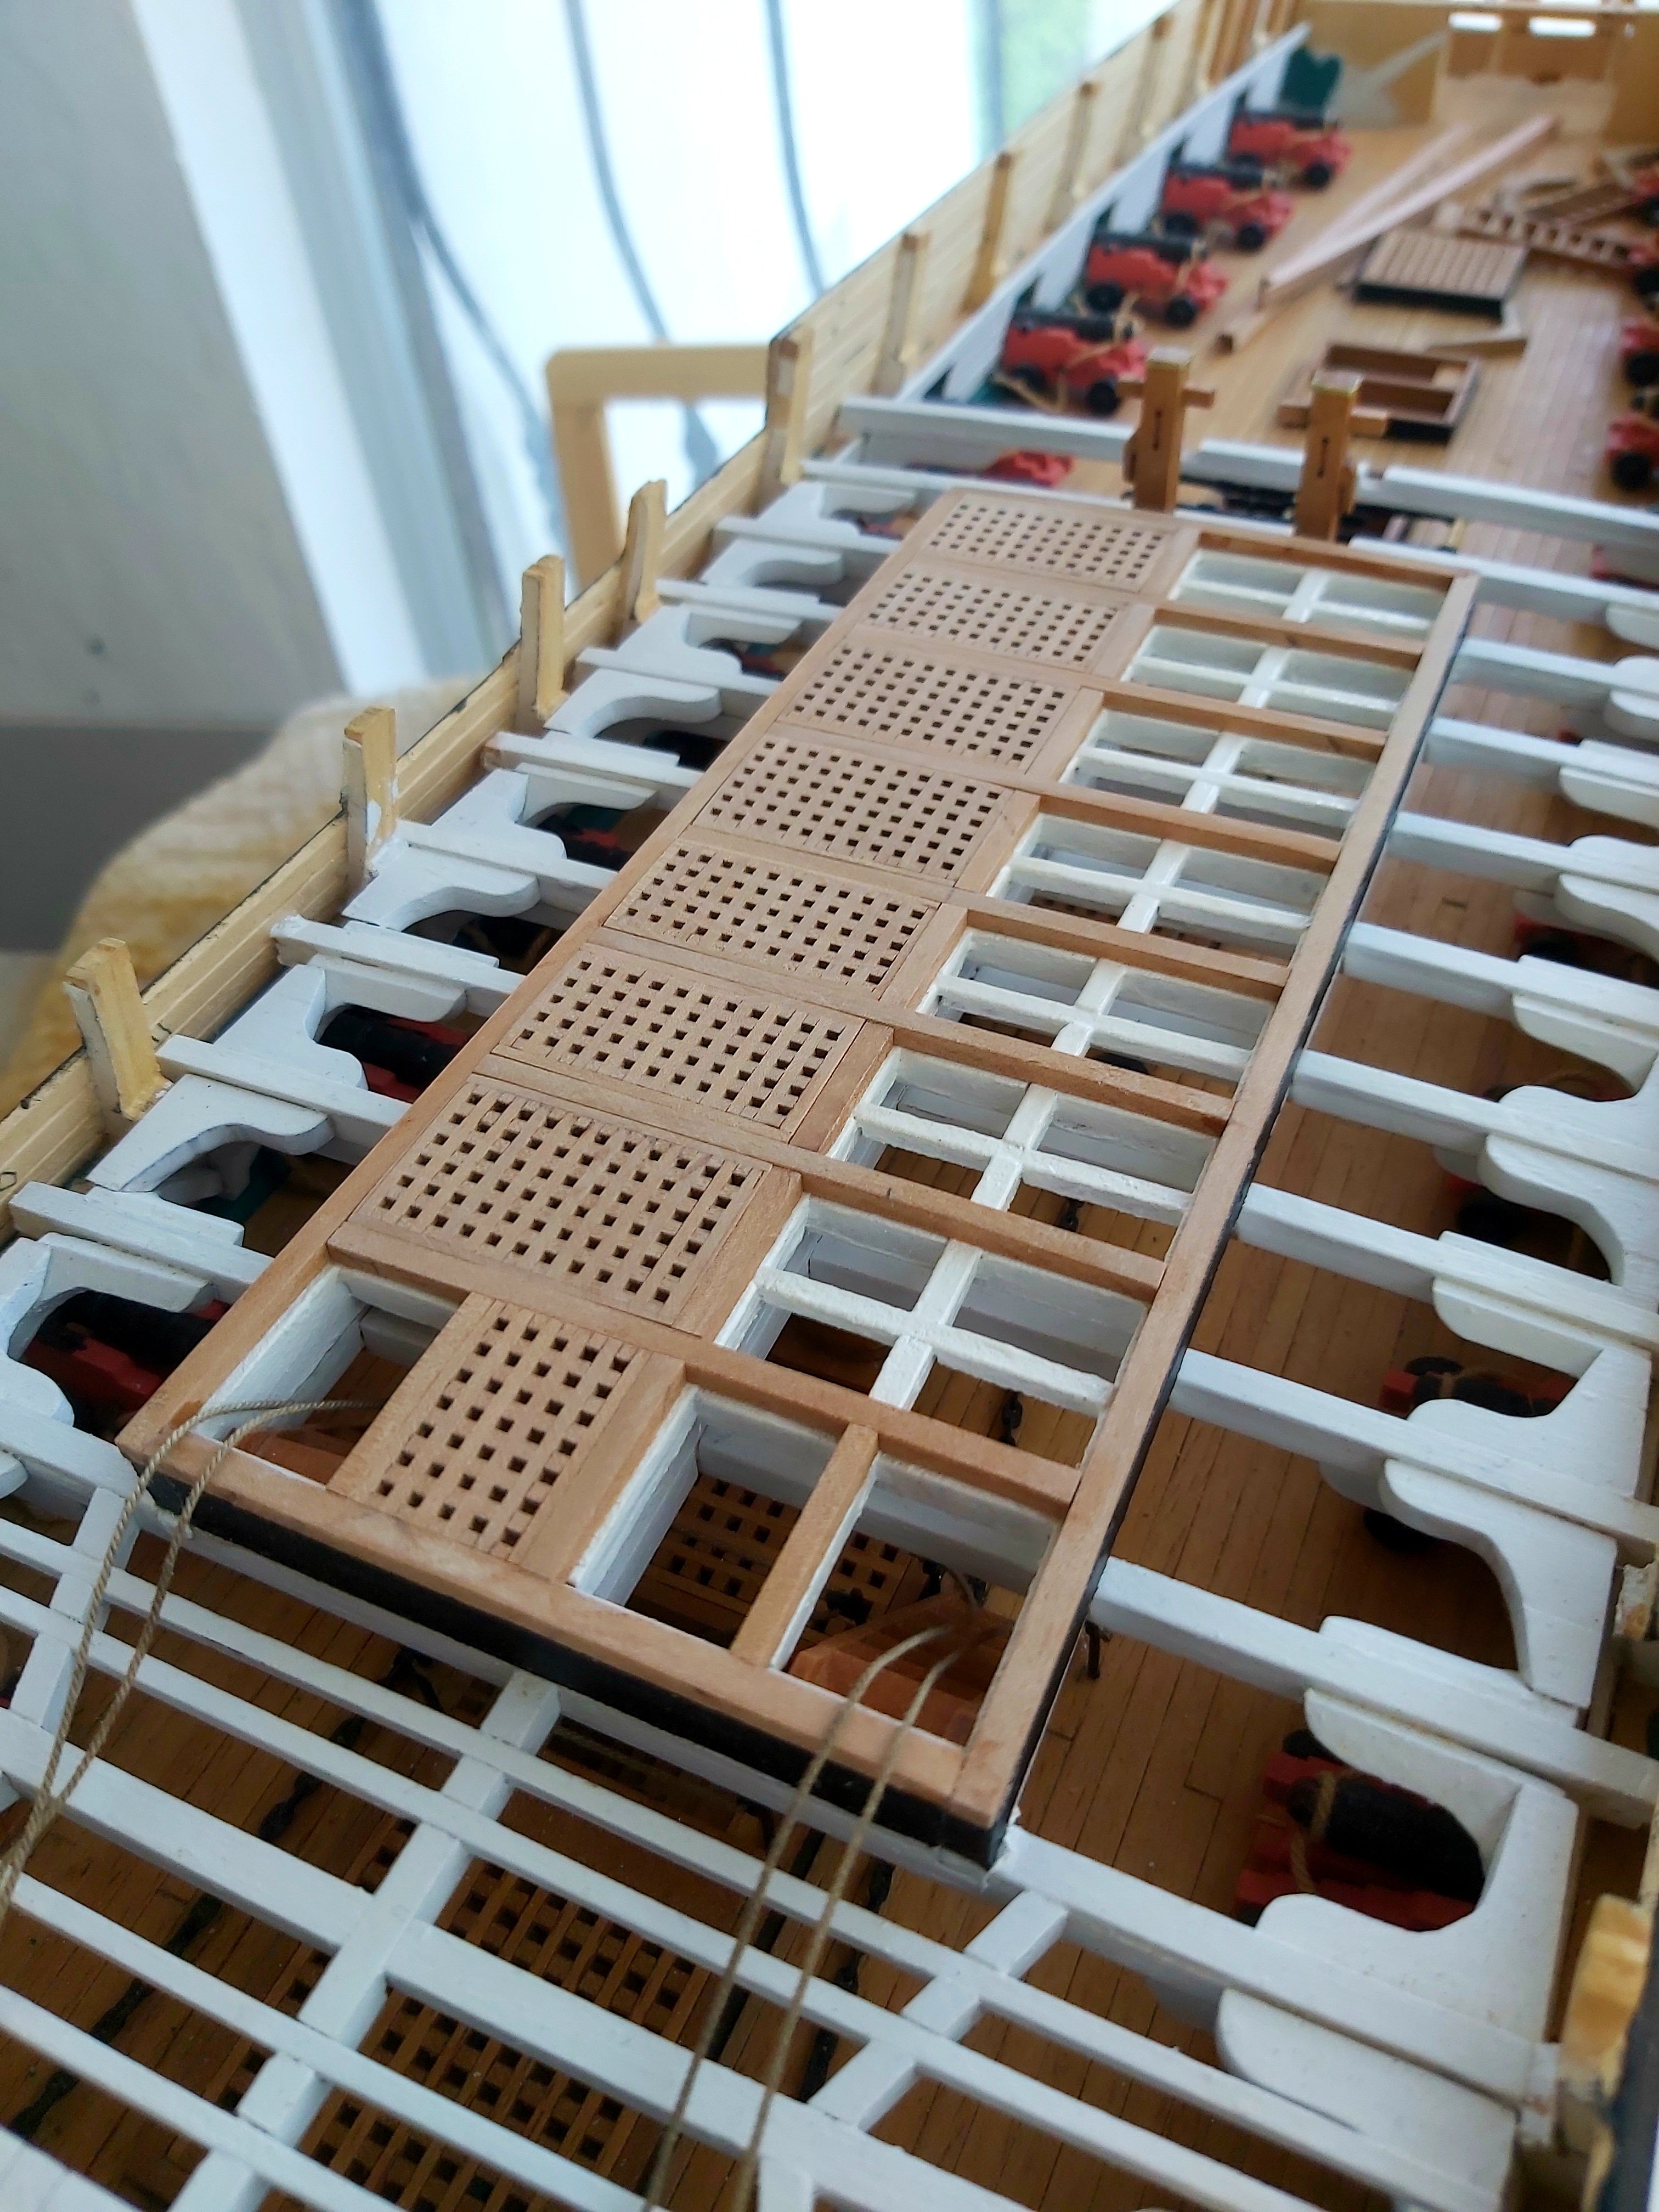
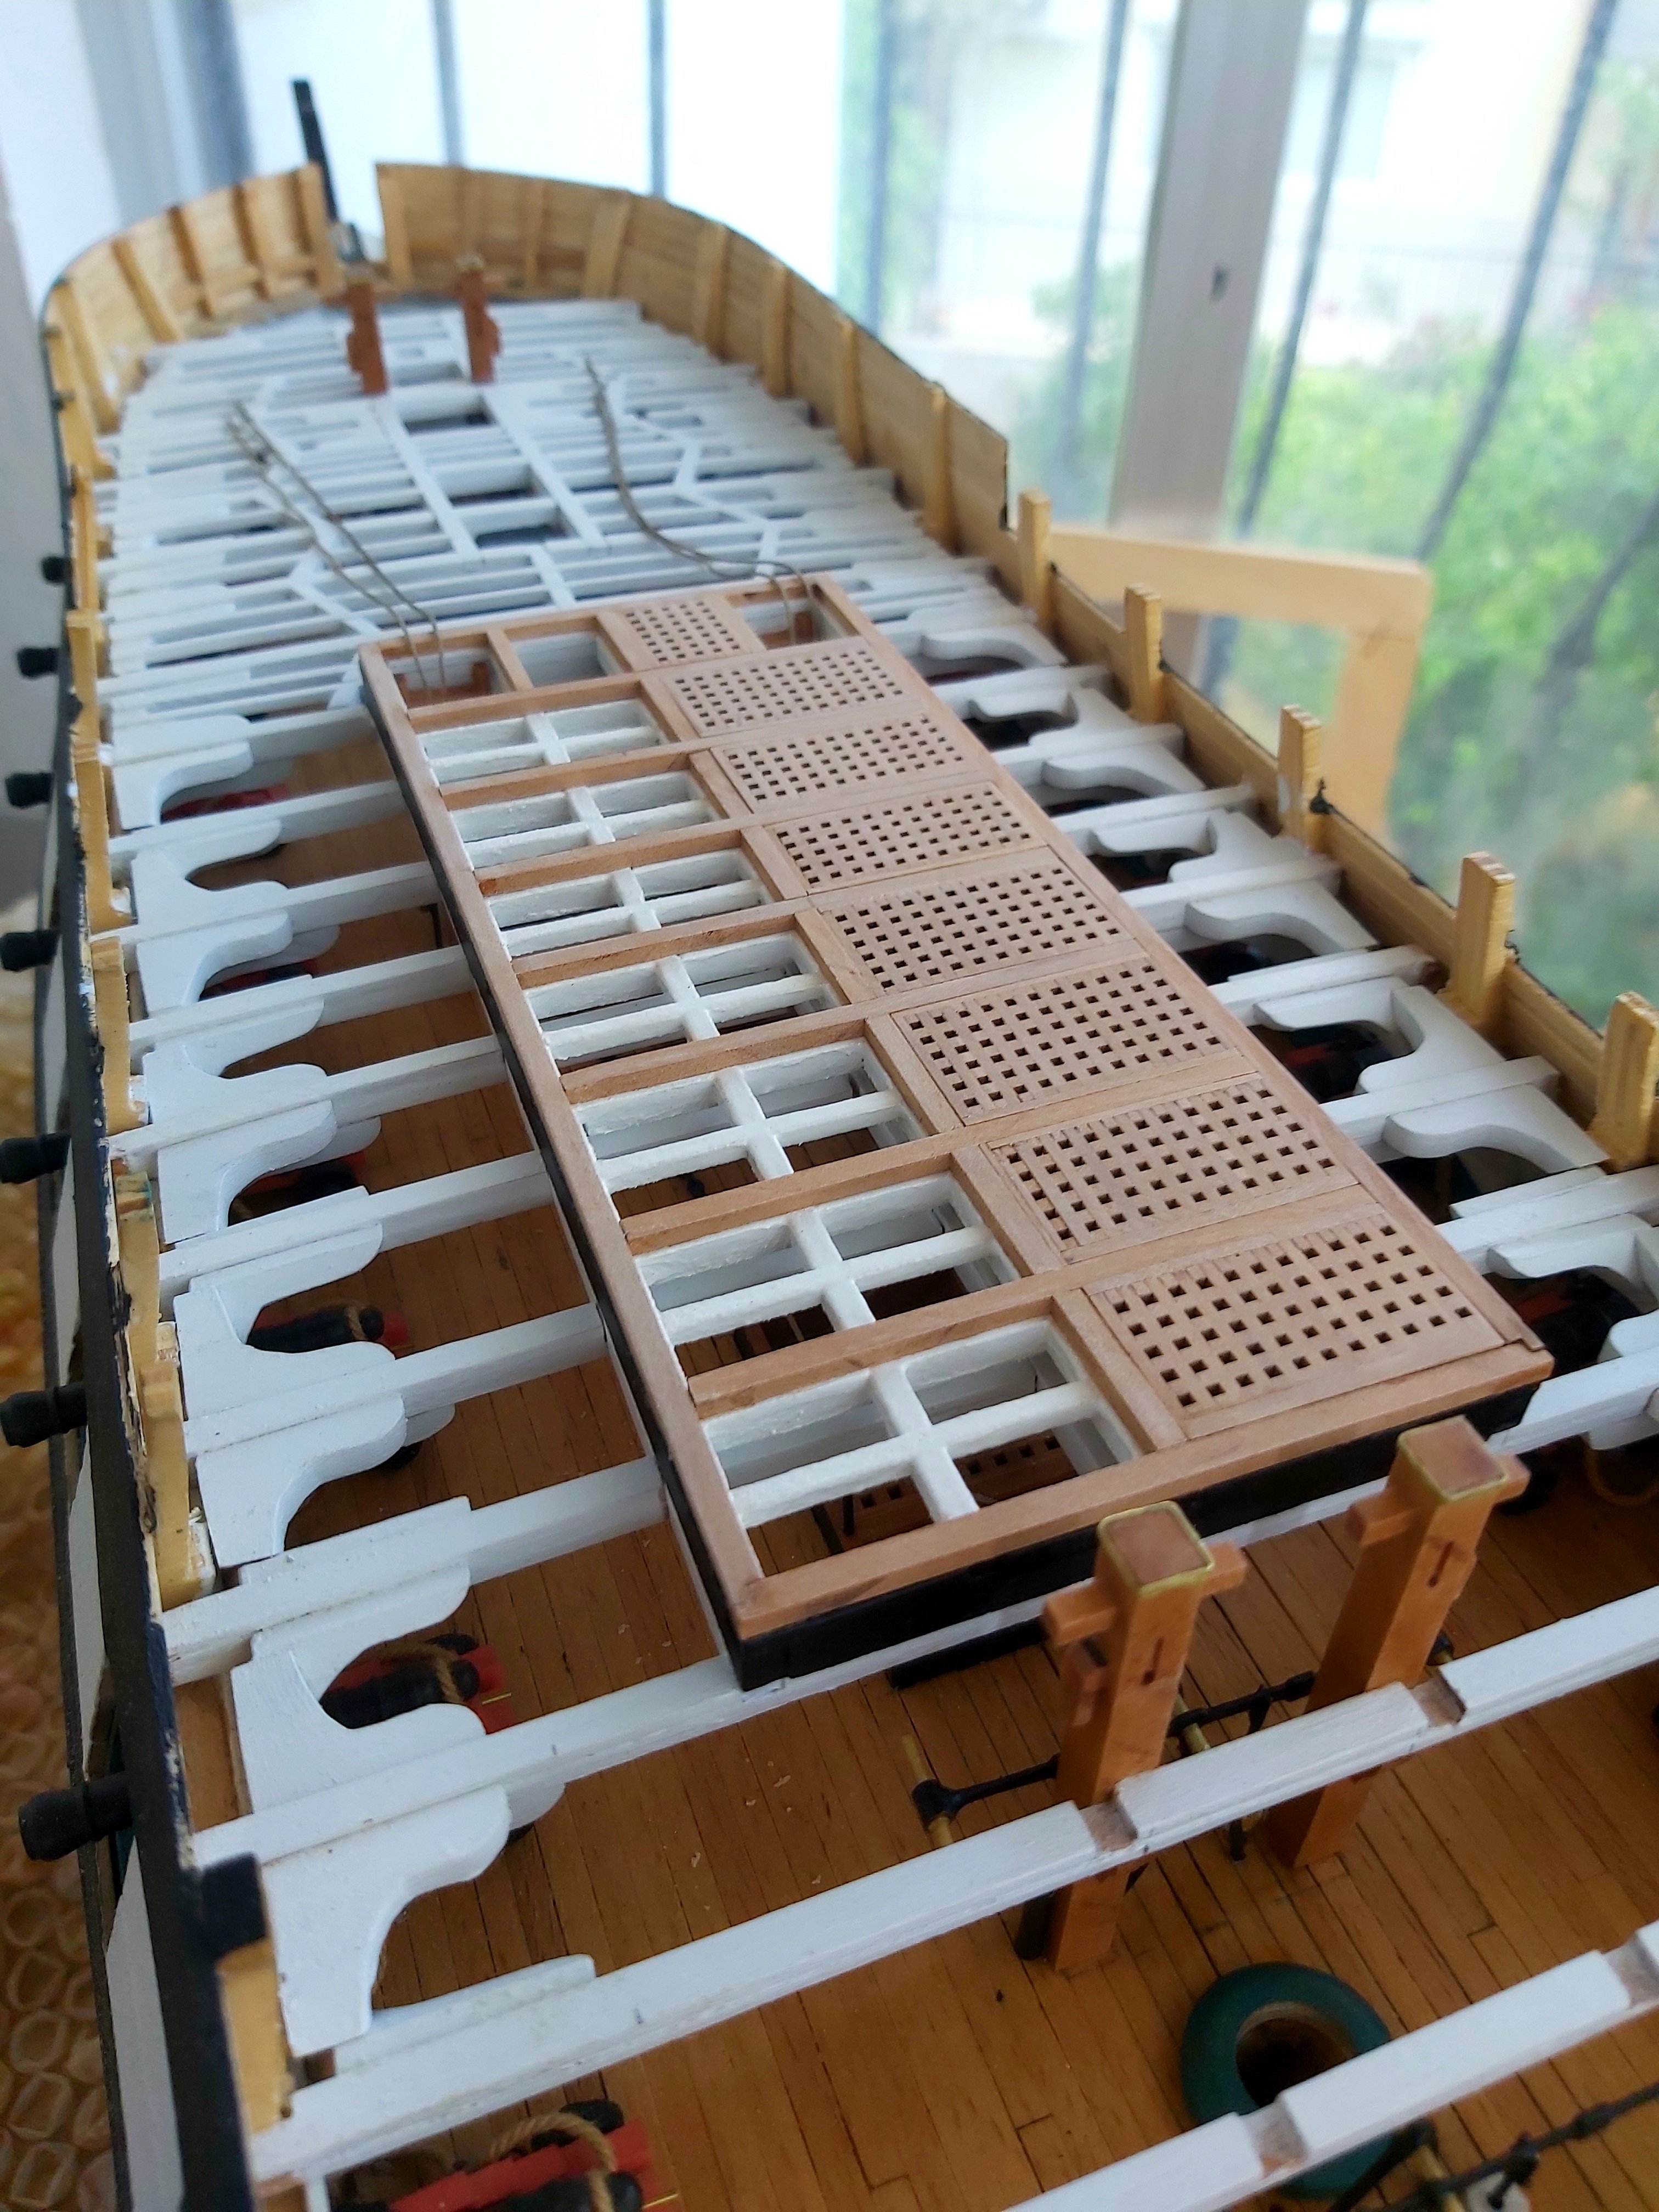
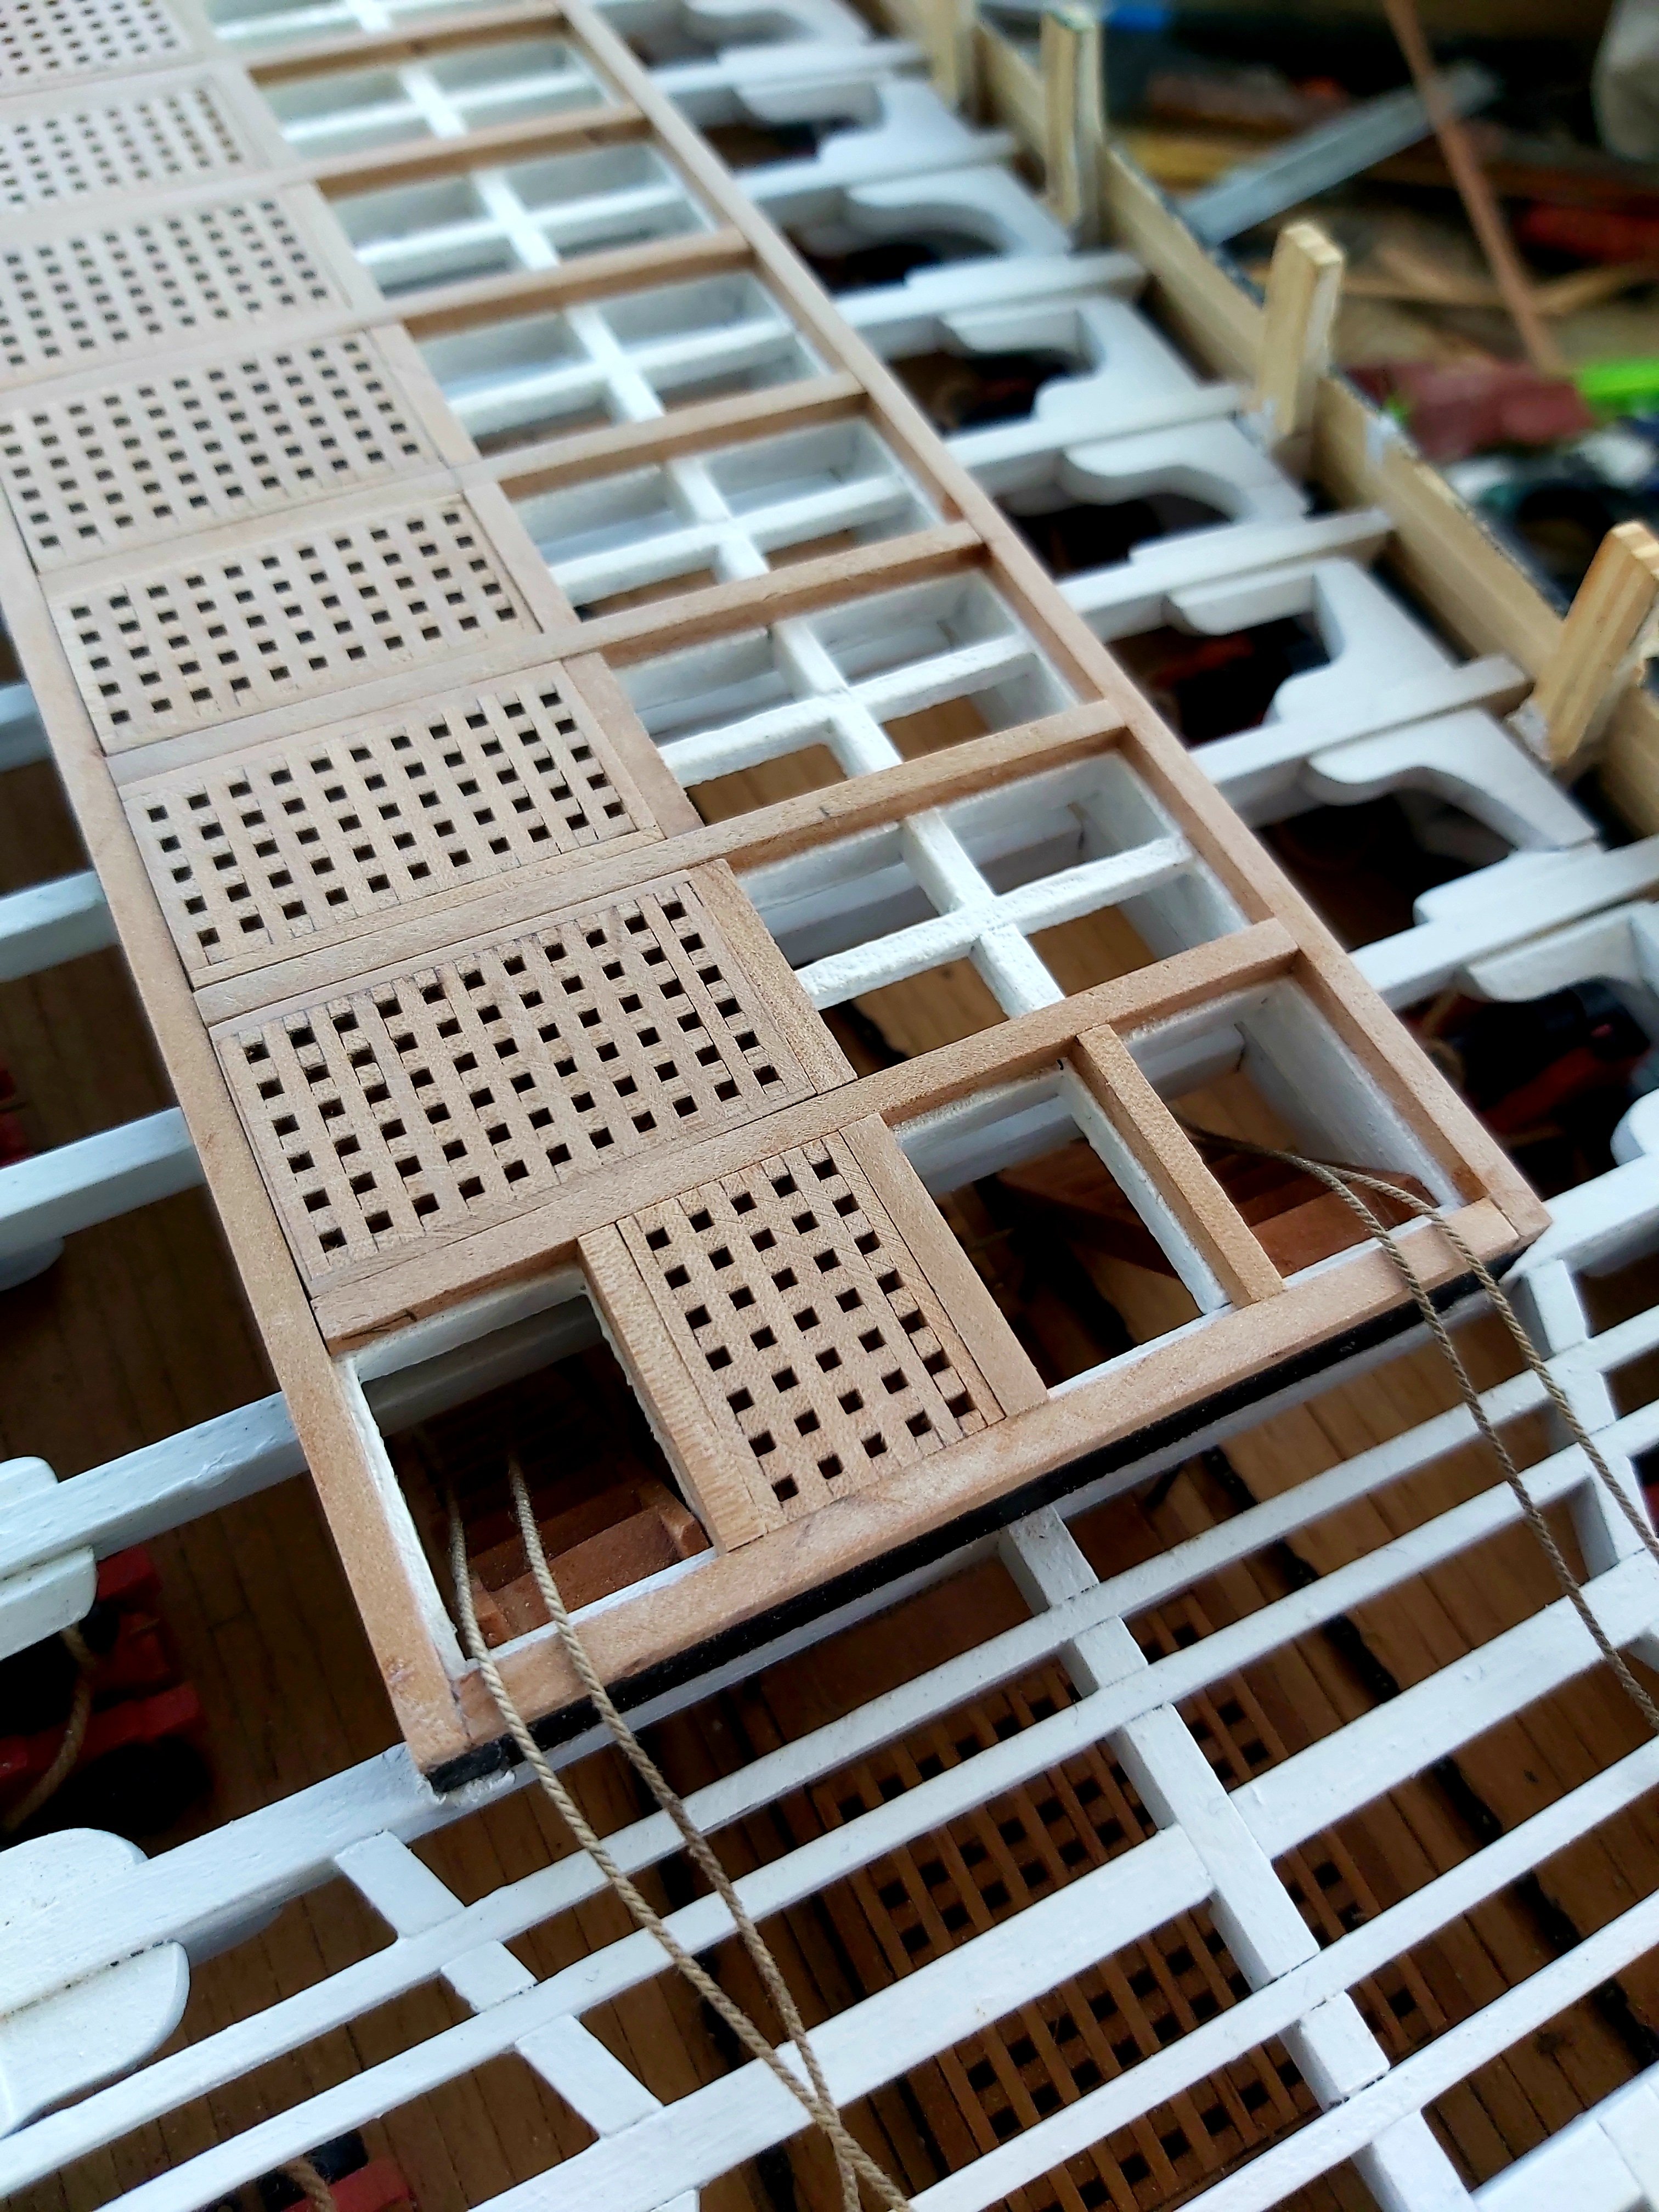
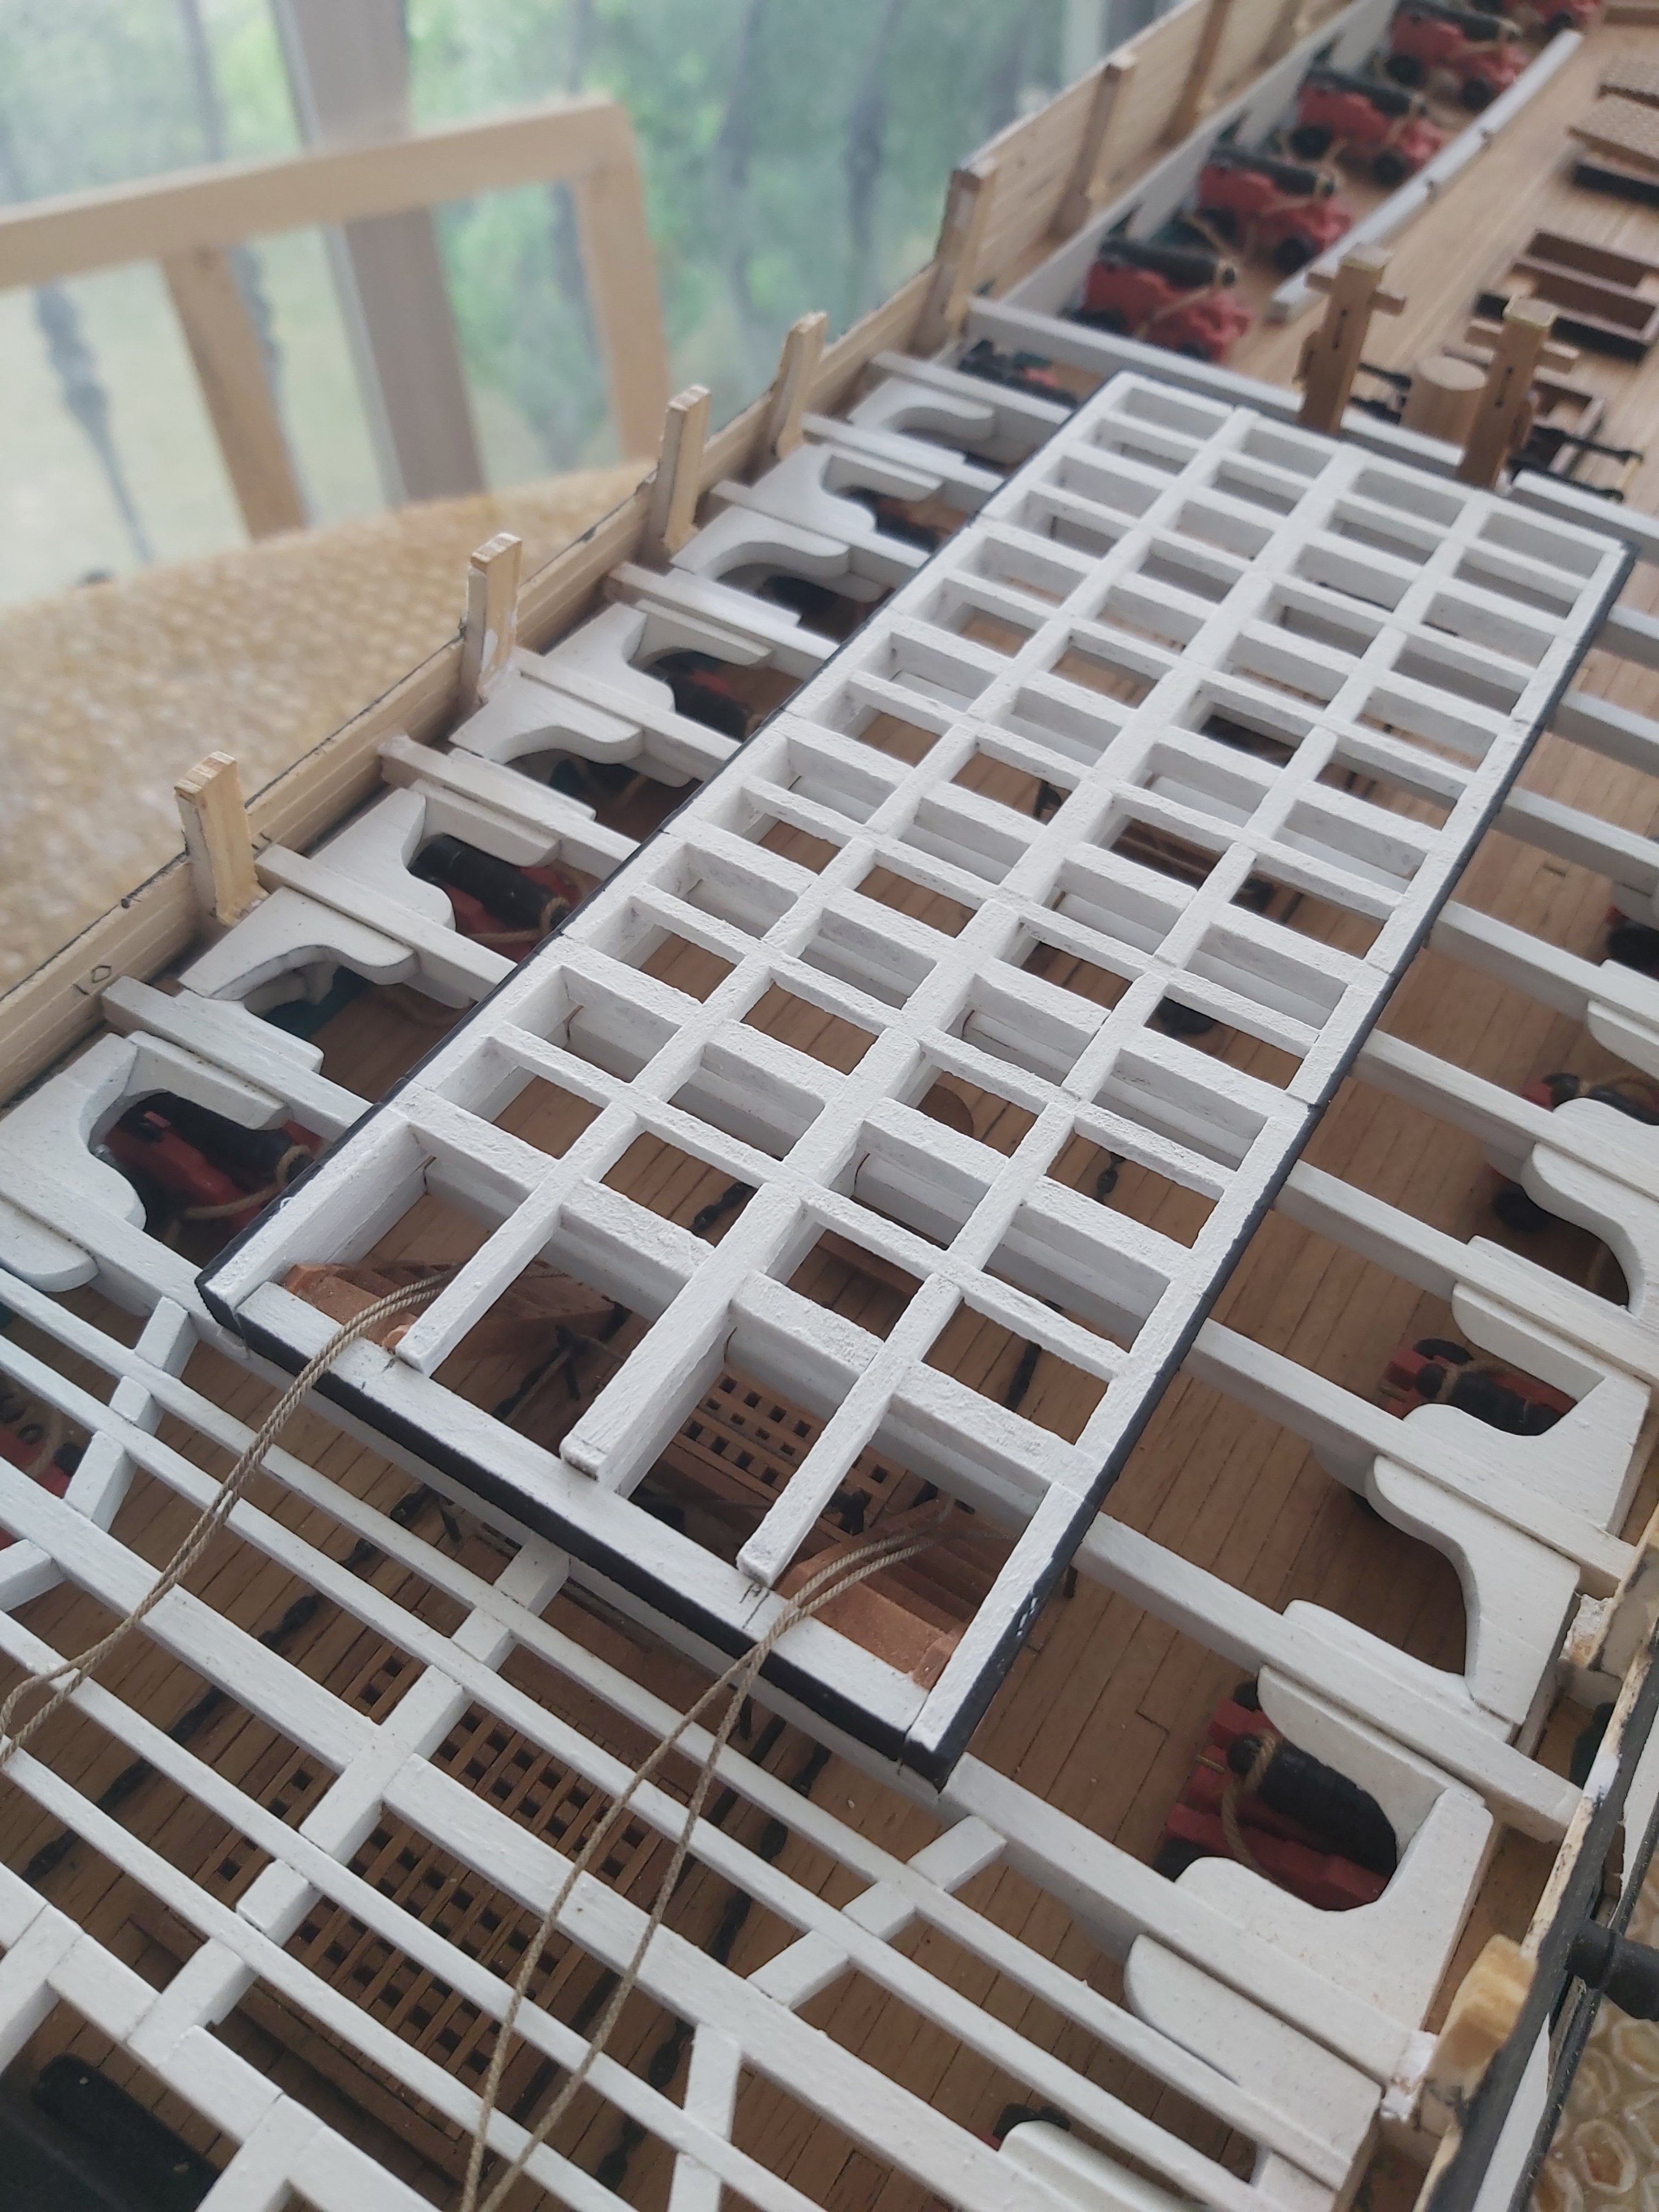
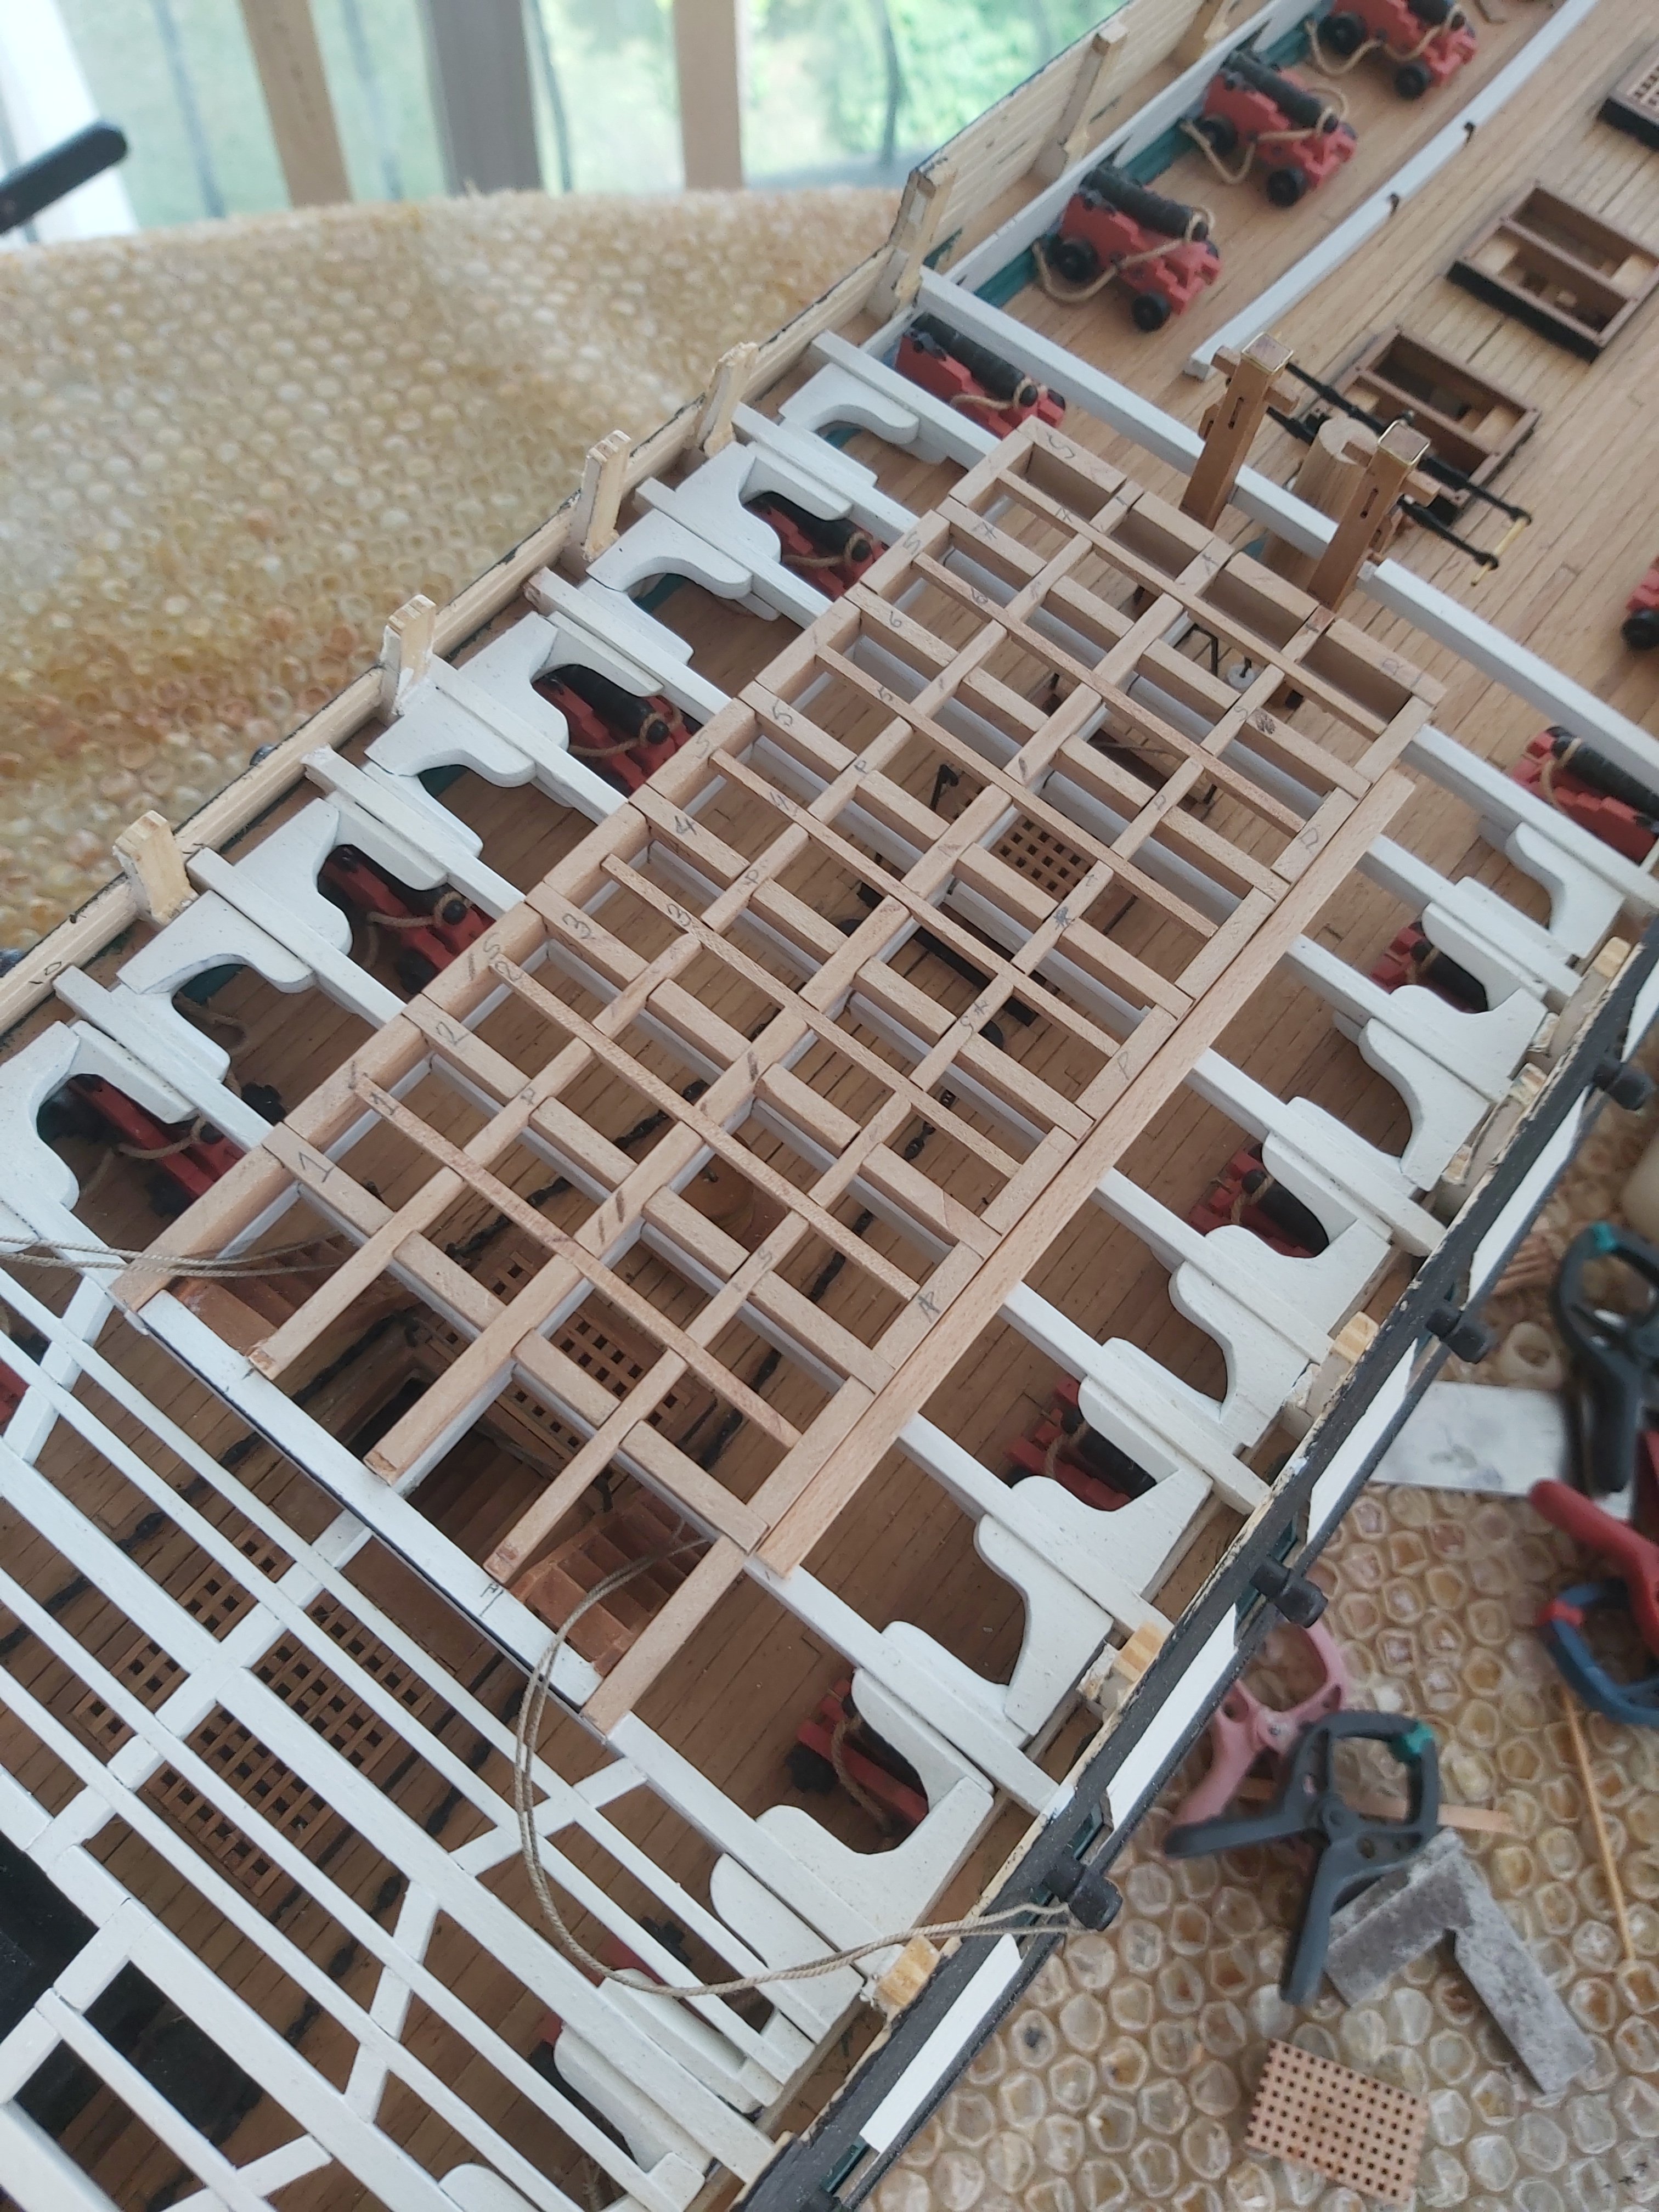
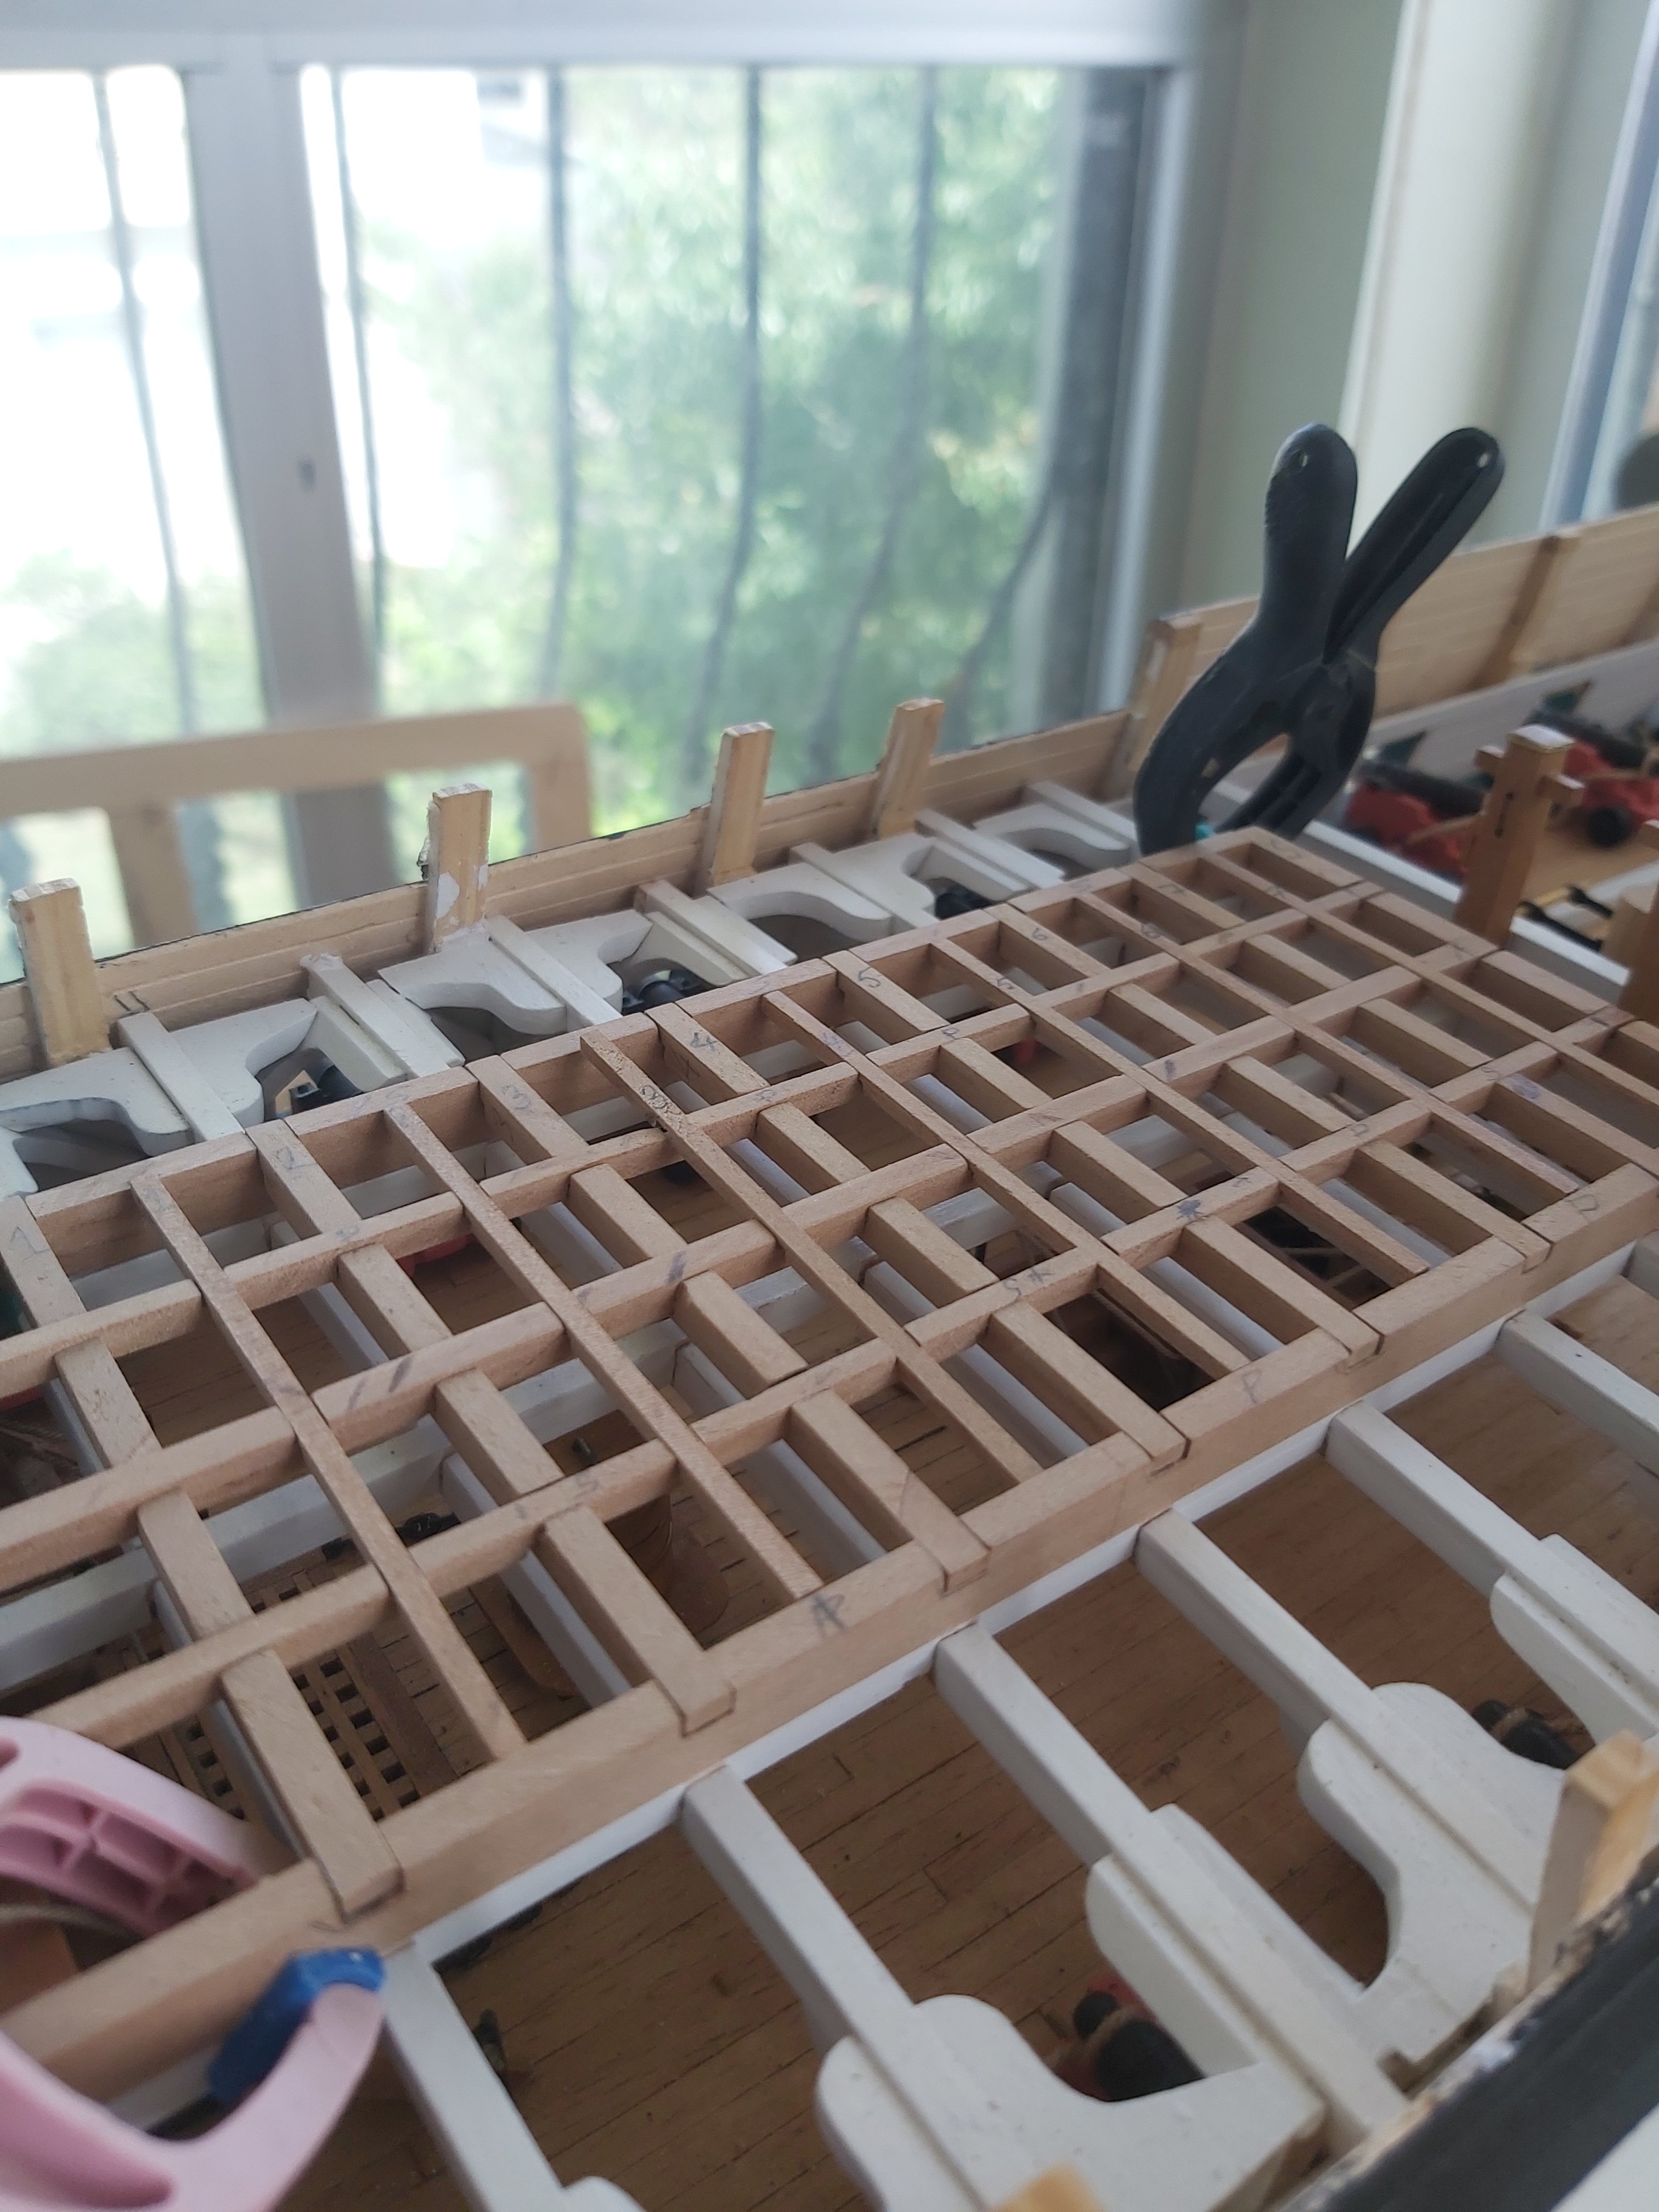
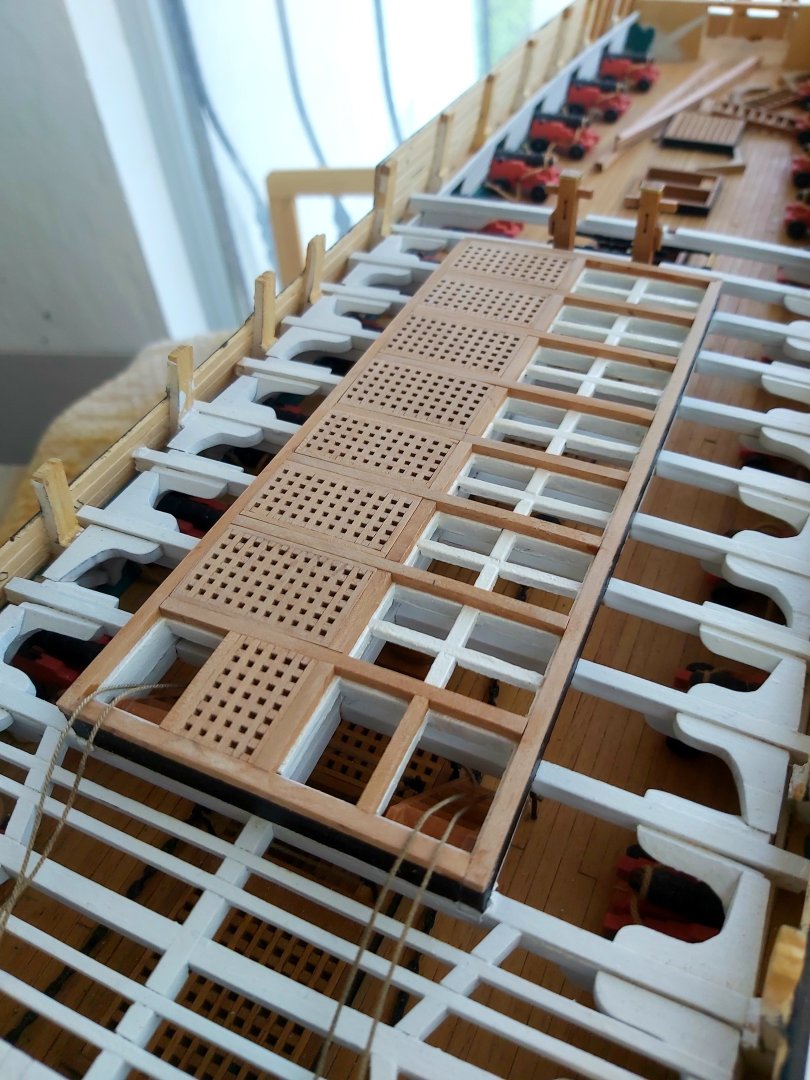
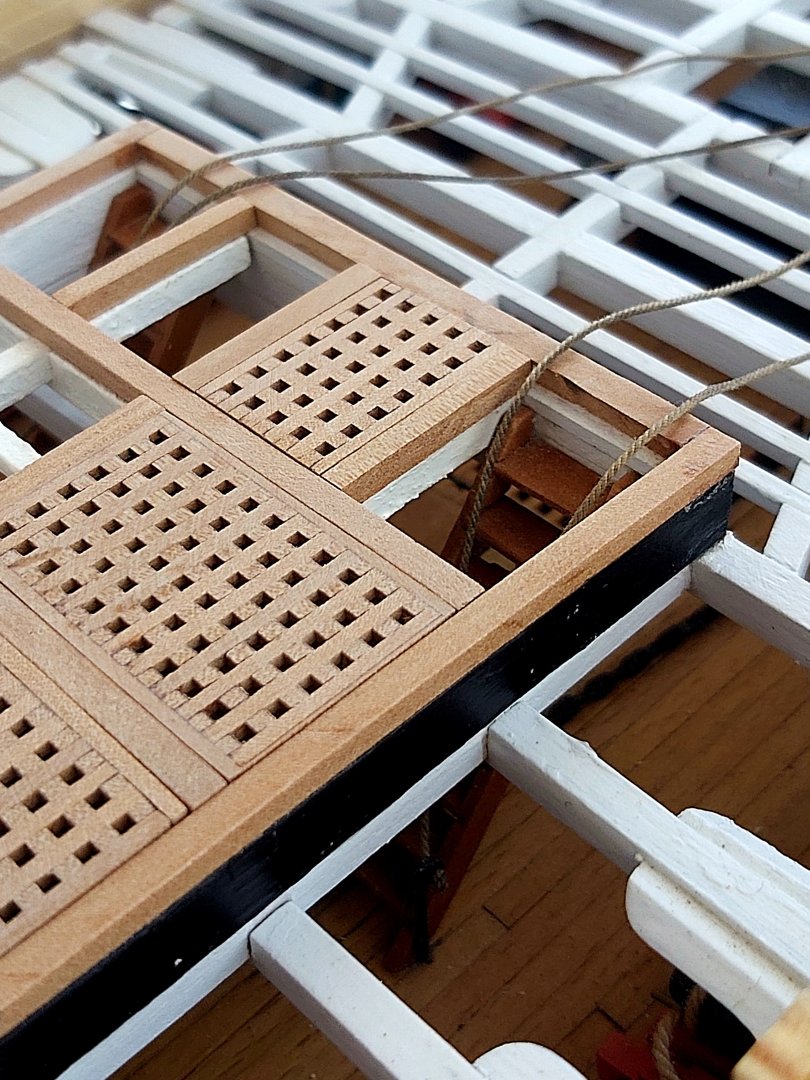
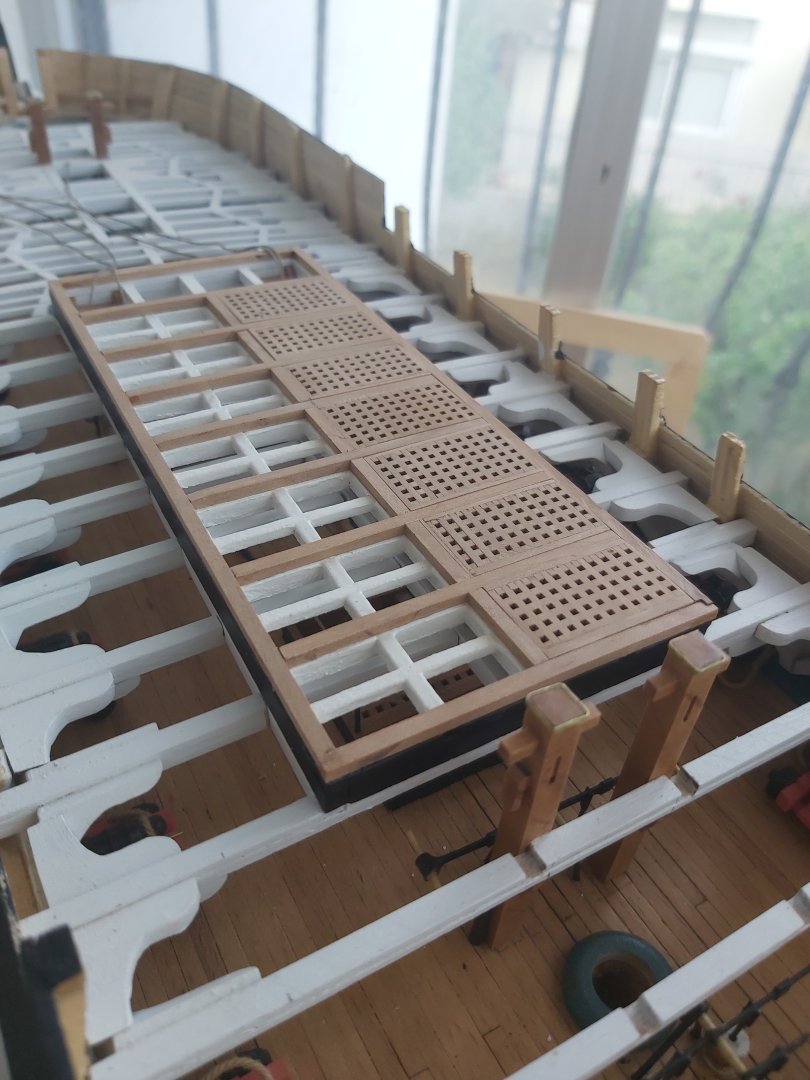
I started installing the grates. I will only put the grates on the starboard side of the hatch coaming so viewers can see the gun deck details.

-
USS Constitution by mtbediz - 1:76
mtbediz replied to mtbediz's topic in - Build logs for subjects built 1751 - 1800
Thank you Jon. I have not fully planned everything I will do from the beginning to the end of the build. I am deciding according to the development. I will cover only one side of the hatch coaming, just like you said. I want the gun deck to be as much visible as possible, Spar deck planking will also be very minimal. -
USS Constitution by mtbediz - 1:76
mtbediz replied to mtbediz's topic in - Build logs for subjects built 1751 - 1800
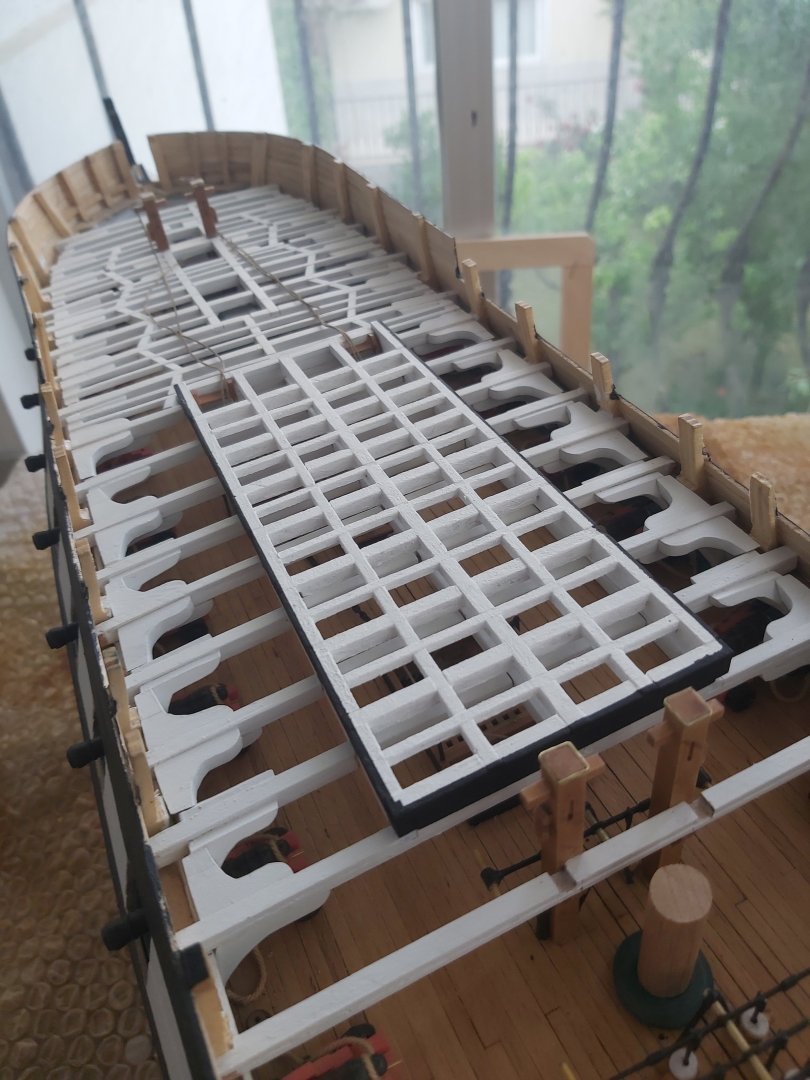
Hatch coaming was glued and painted.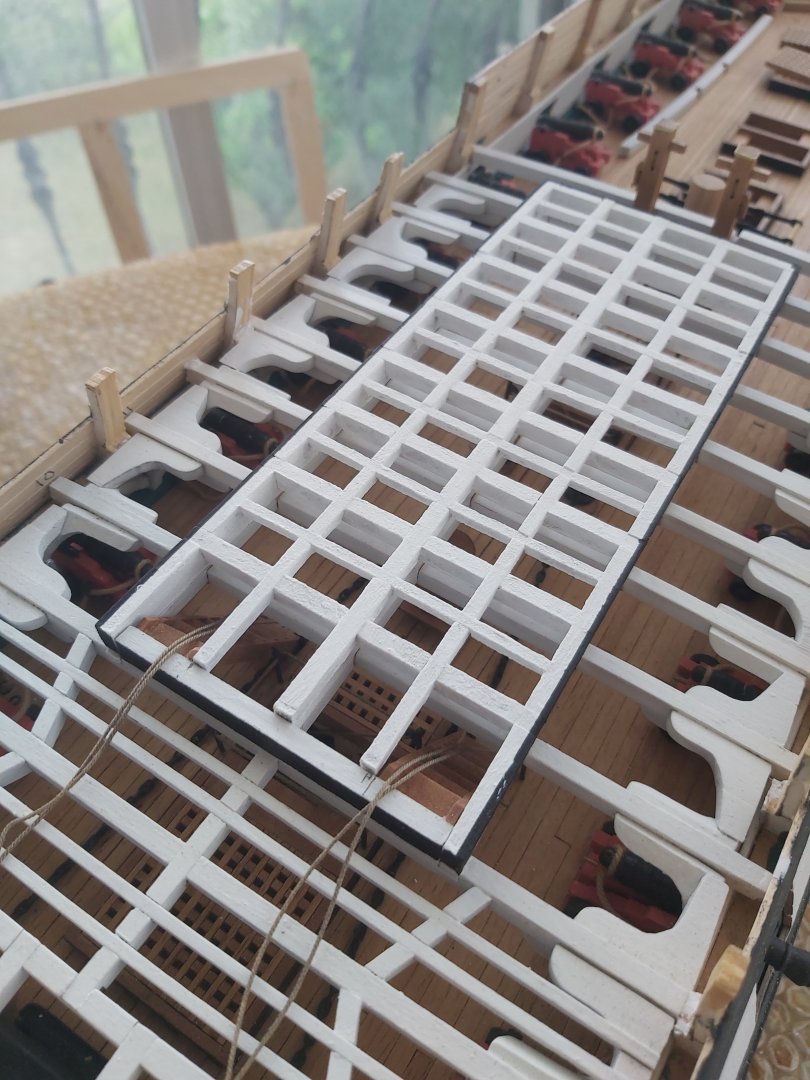

-
I used self adhesive copper foil tape. I remember I shared a few photos in my build log about how I implemented it. (Something like in the link below) https://tr.aliexpress.com/item/32876412753.html?src=google
-
USS Constitution by mtbediz - 1:76
mtbediz replied to mtbediz's topic in - Build logs for subjects built 1751 - 1800
Thank you very much for your interest Bruce. Like everyone else on this forum, I'd be happy to help. Please don't hesitate to ask whenever you need. -
USS Constitution by mtbediz - 1:76
mtbediz replied to mtbediz's topic in - Build logs for subjects built 1751 - 1800
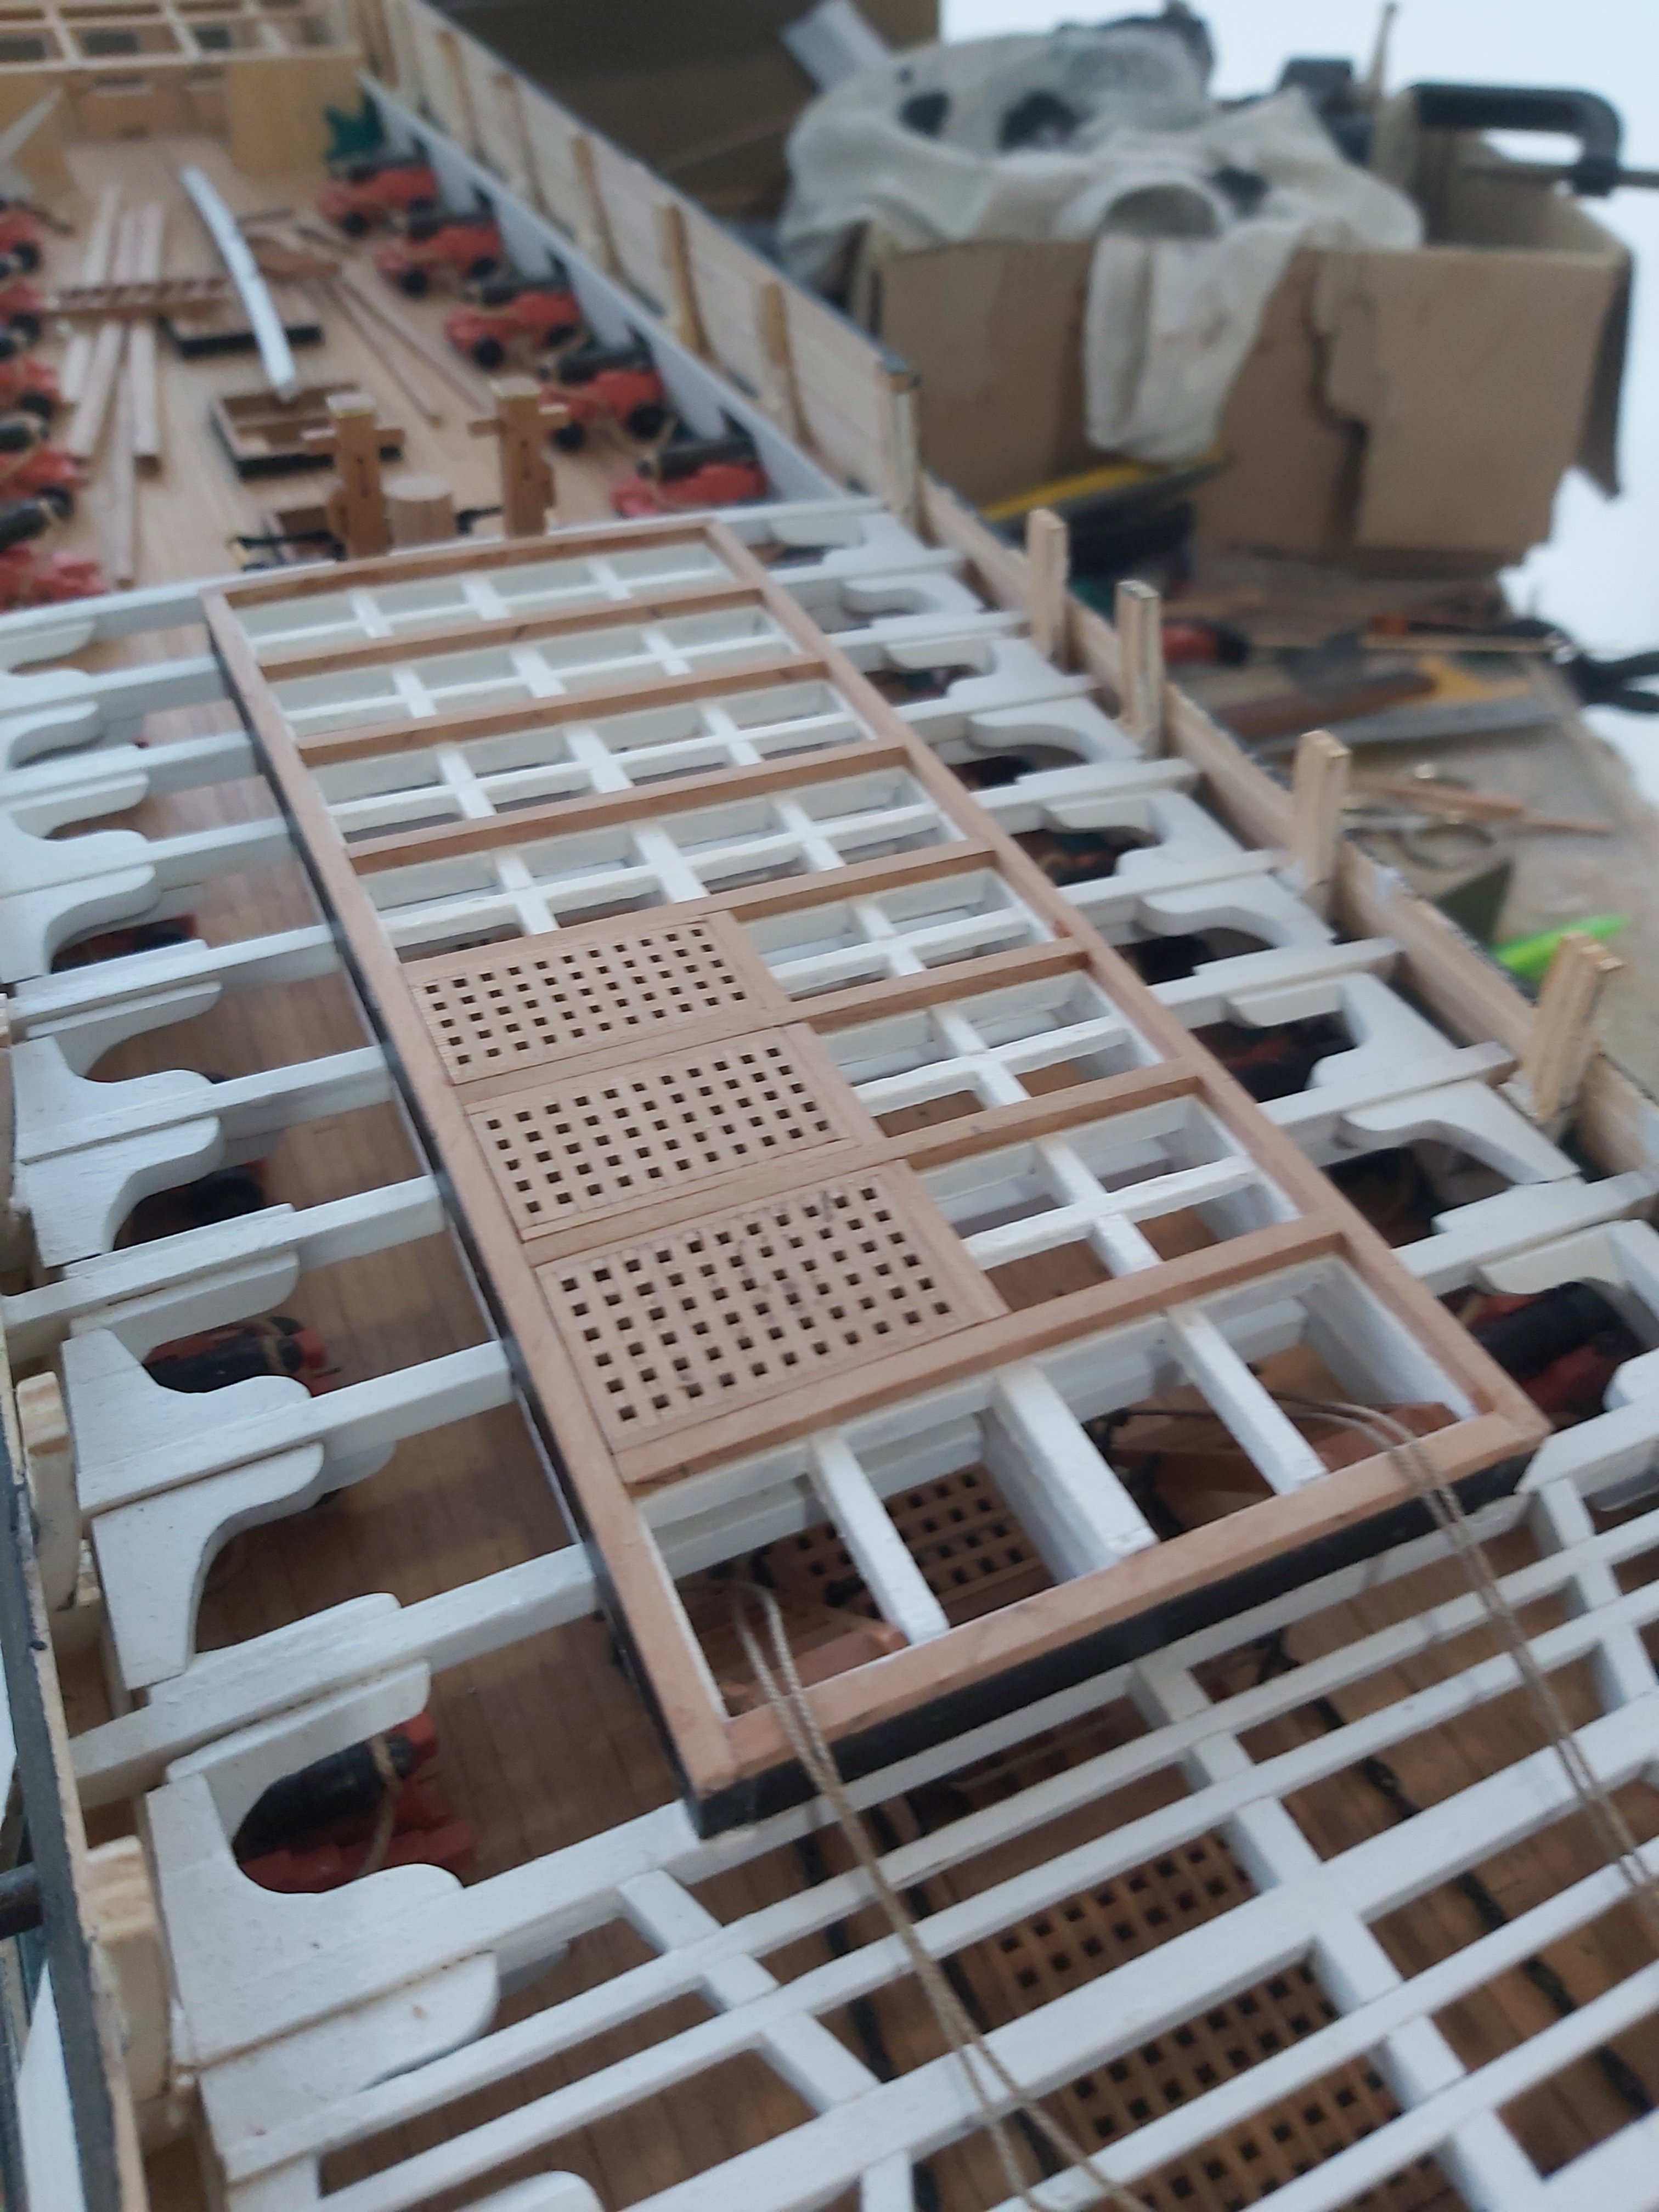
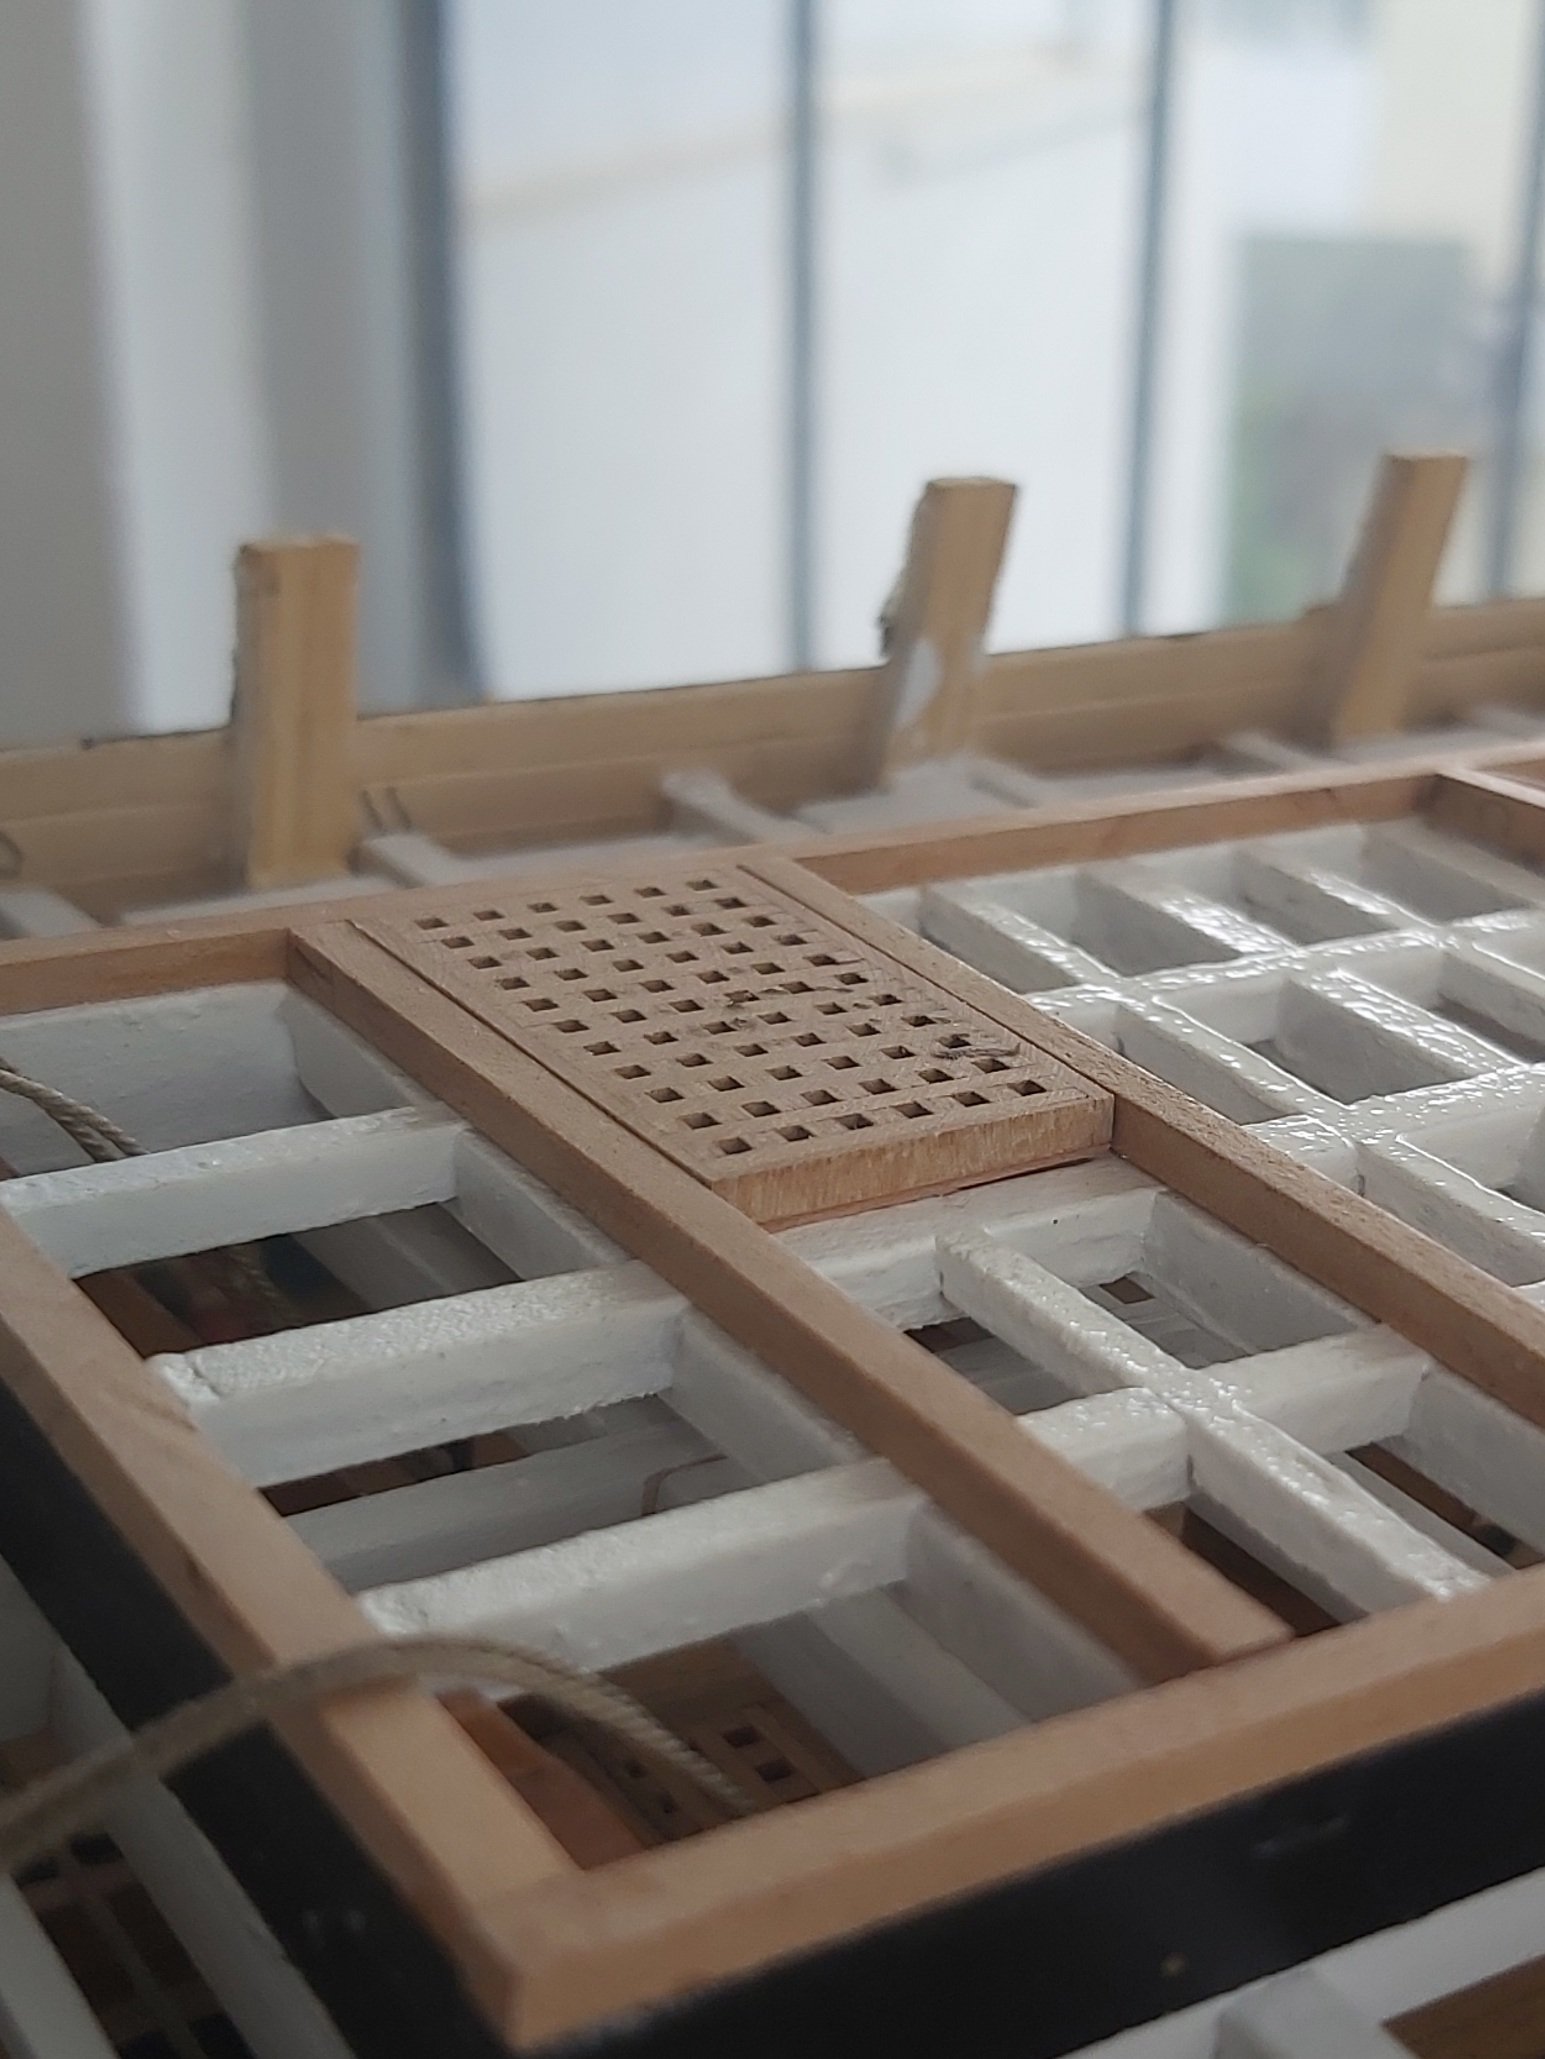
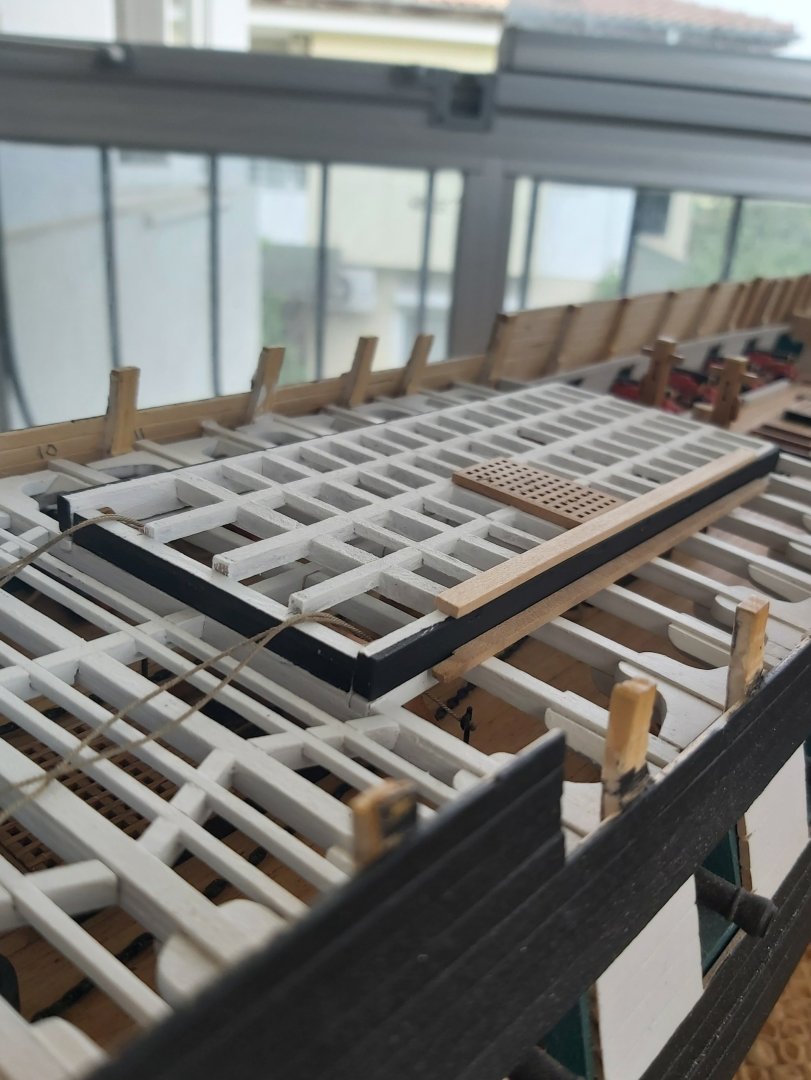
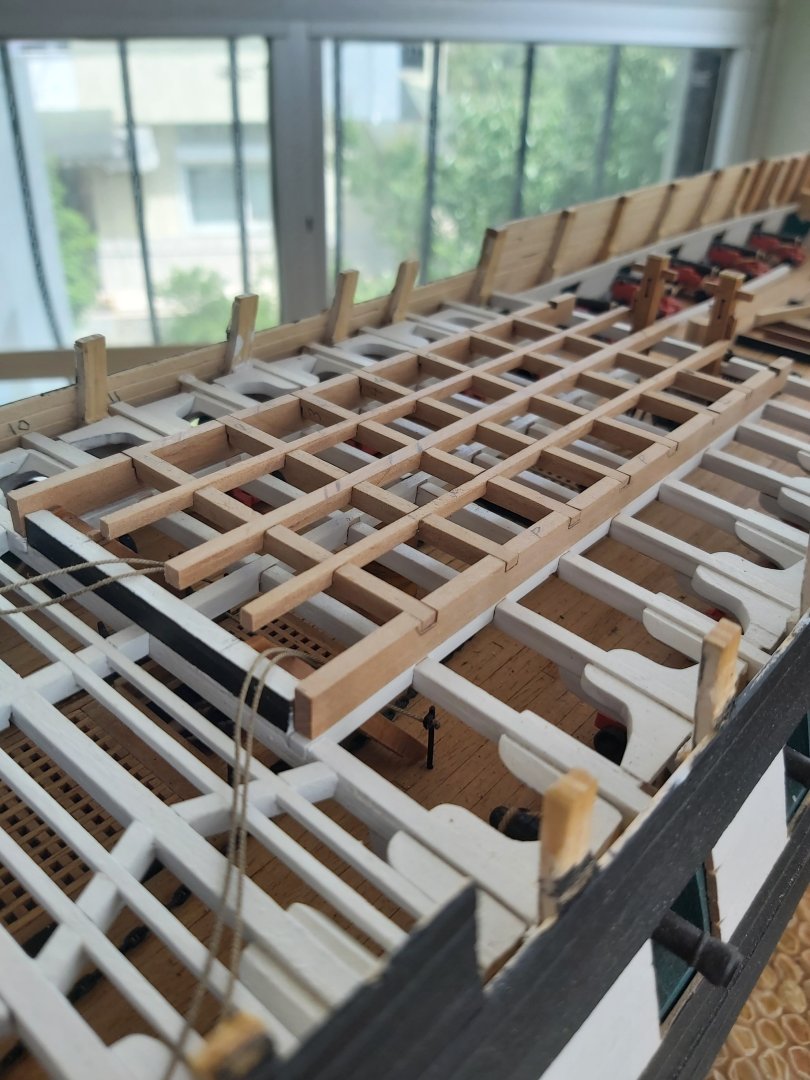
Infrastructure of the main hatch coaming has been completed. Nothing is glued yet.


-
USS Constitution by mtbediz - 1:76
mtbediz replied to mtbediz's topic in - Build logs for subjects built 1751 - 1800
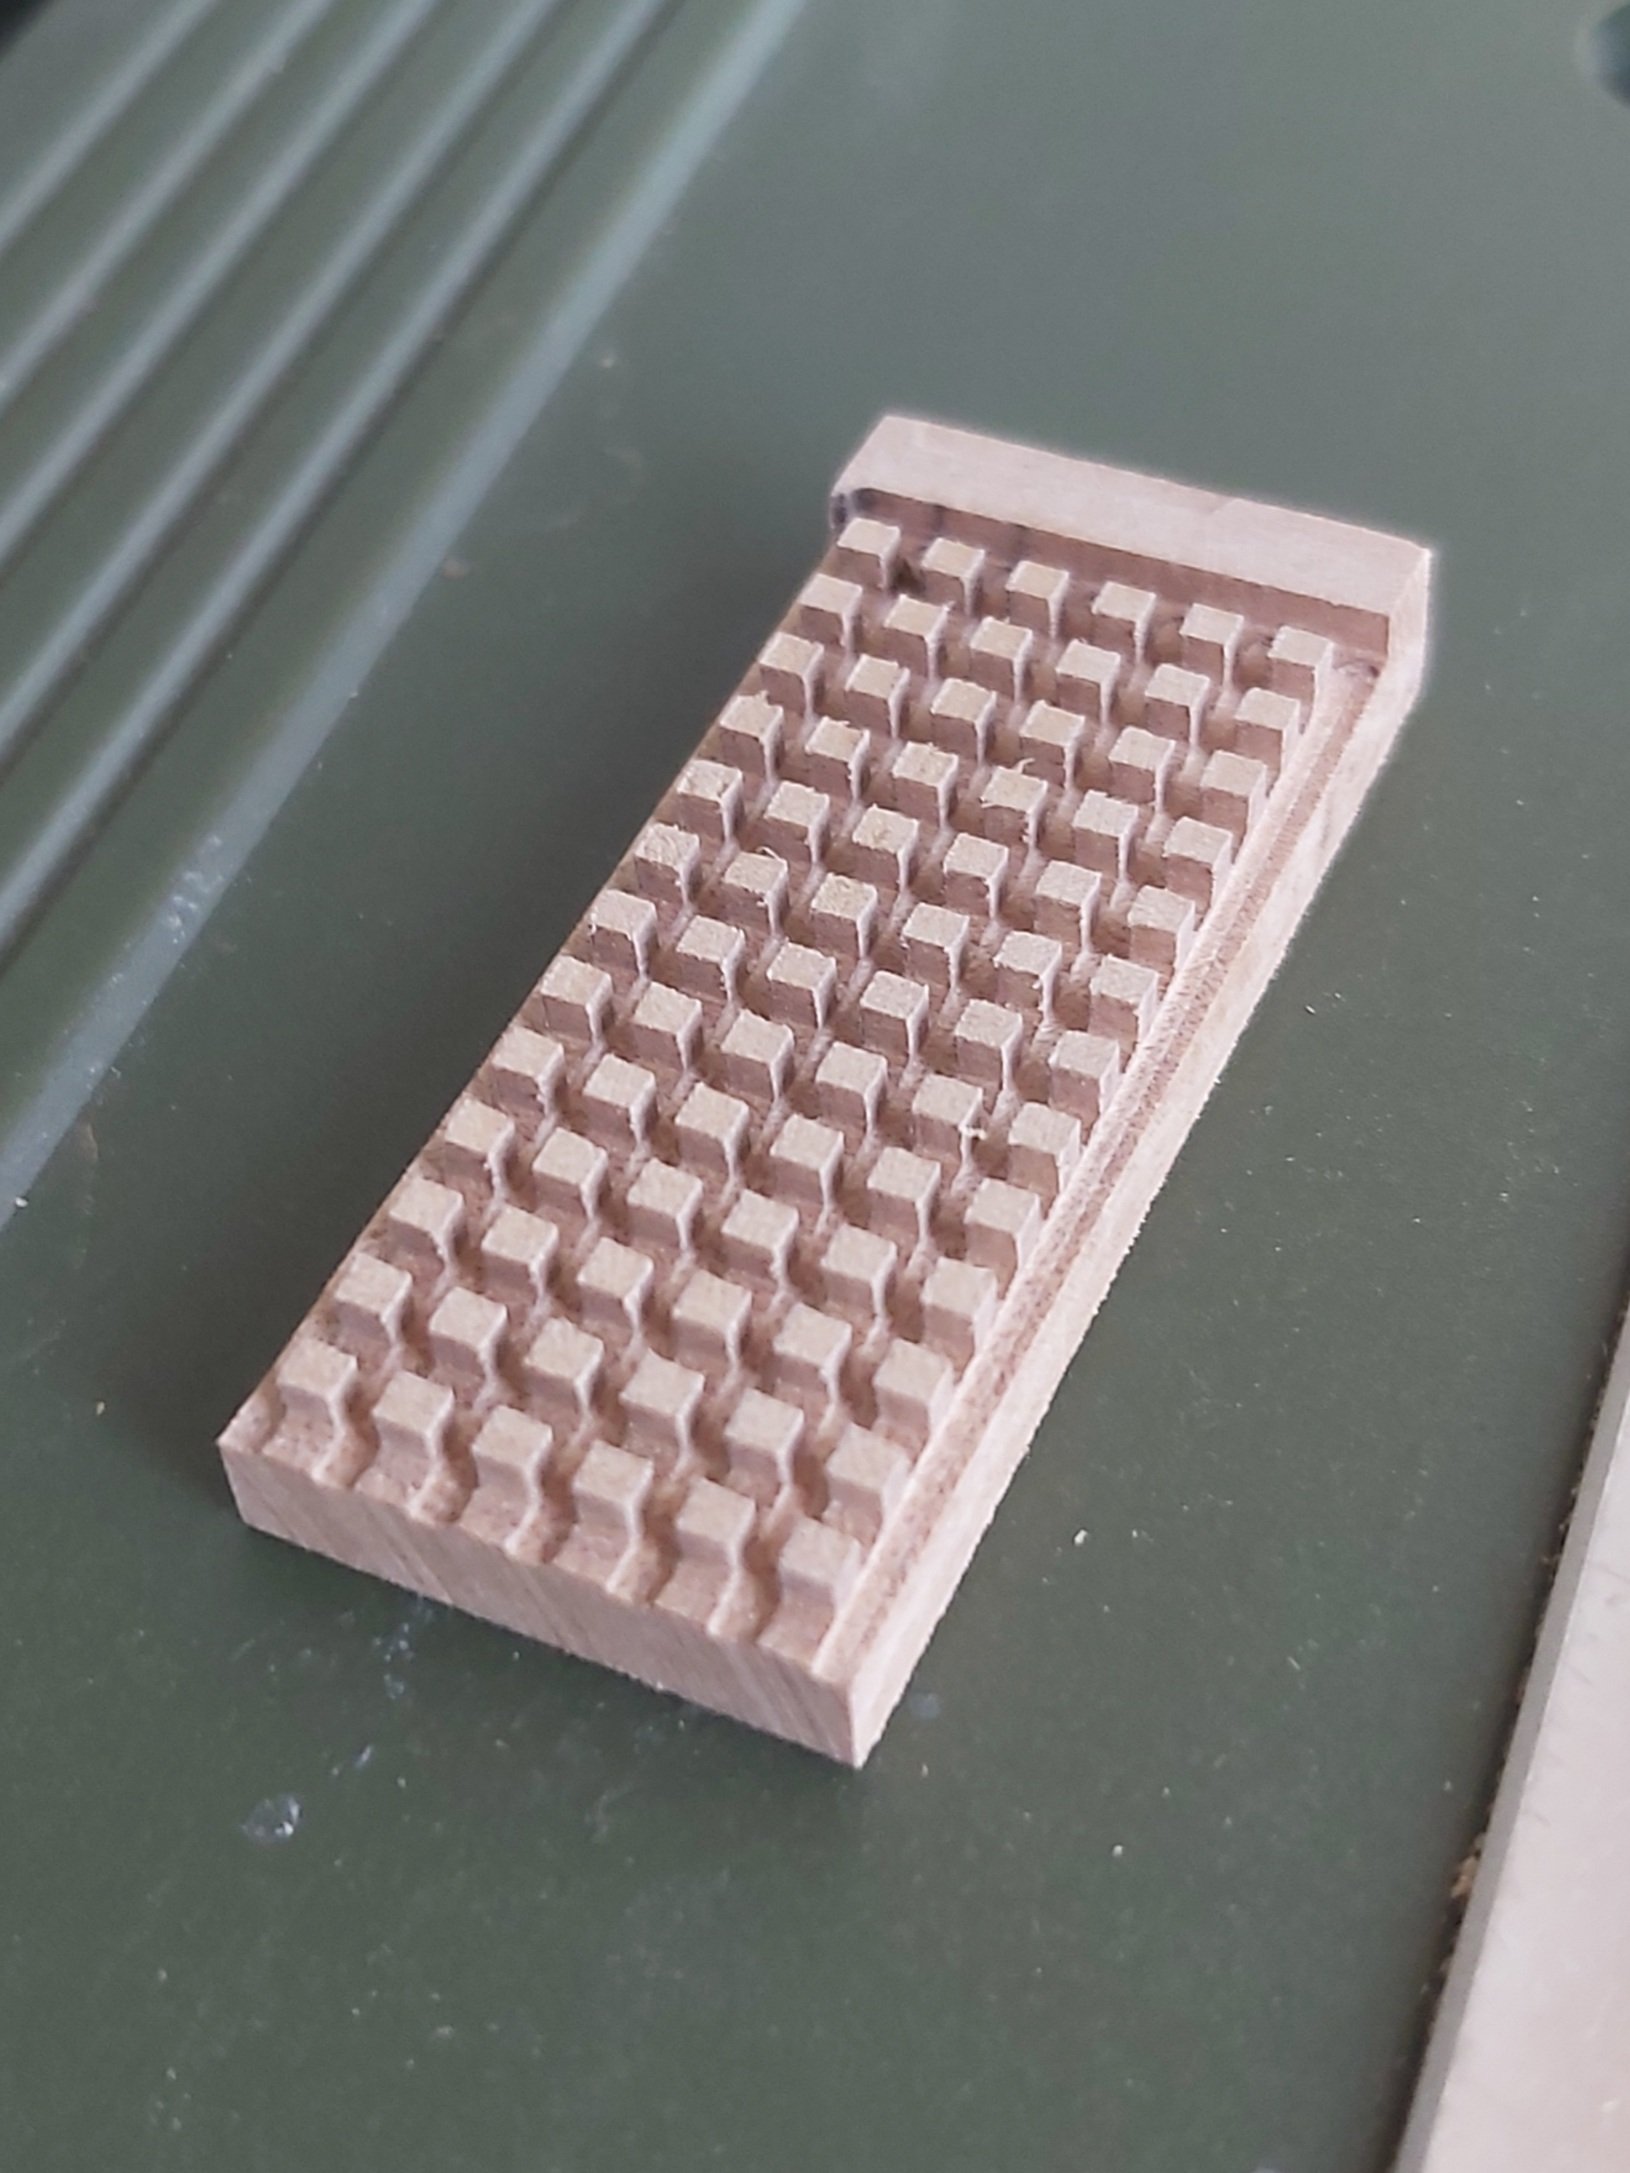
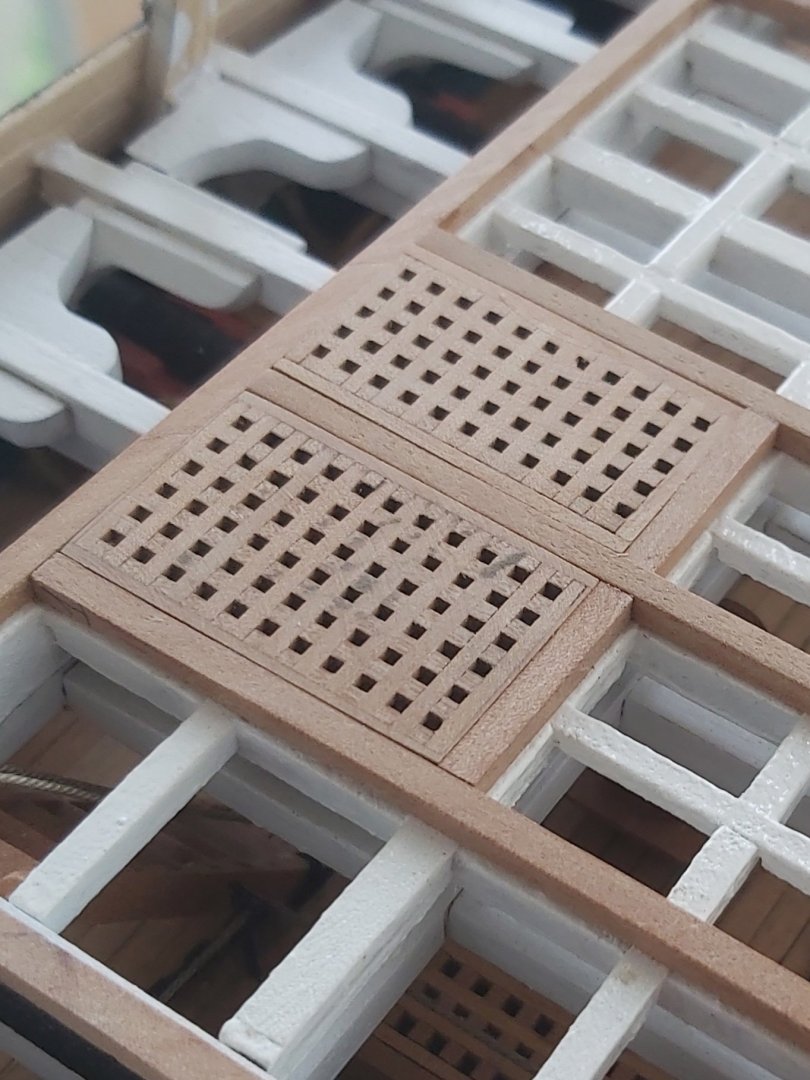
While the construction of the main hatch coaming was continuing, I also started making the gratings.

-
USS Constitution by mtbediz - 1:76
mtbediz replied to mtbediz's topic in - Build logs for subjects built 1751 - 1800
No problem Peter