HOLIDAY DONATION DRIVE - SUPPORT MSW - DO YOUR PART TO KEEP THIS GREAT FORUM GOING! (Only 13 donations so far - C'mon guys!)
×
Beckmann
-
Posts
421 -
Joined
-
Last visited
Content Type
Profiles
Forums
Gallery
Events
Everything posted by Beckmann
-
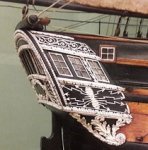
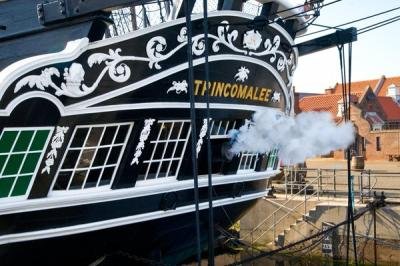
 Hi Keith, there are some examples of sliding windows, like Victory and Trincomalee. See the pictures below. Also a drawing from Blaise Olivier. It was obviously not unusual to install these windows on ships. Matthias
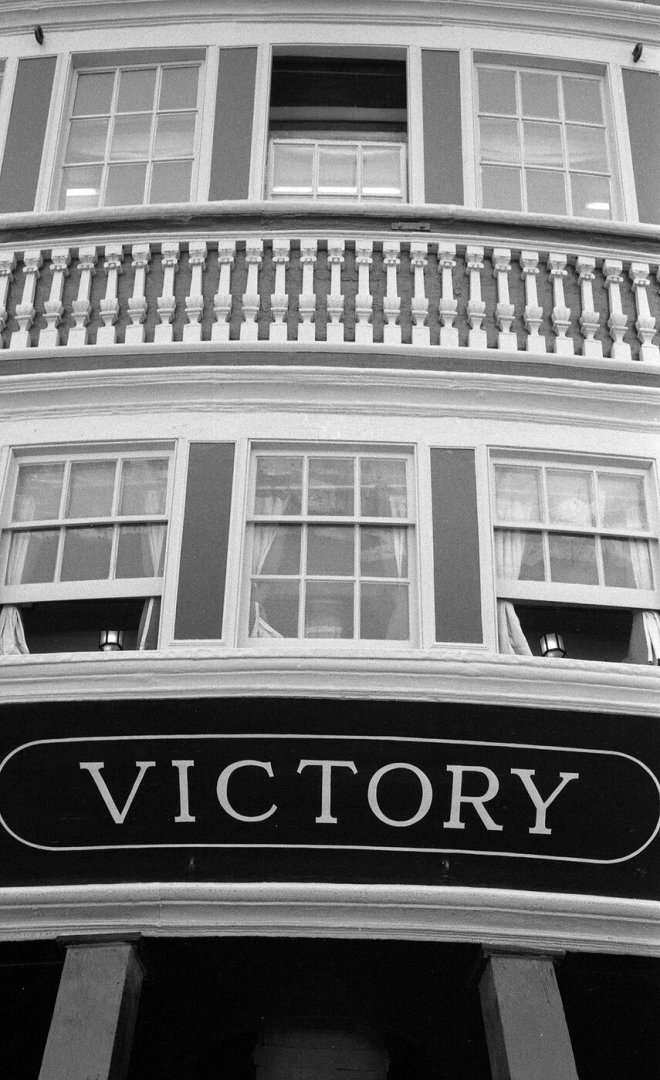

-
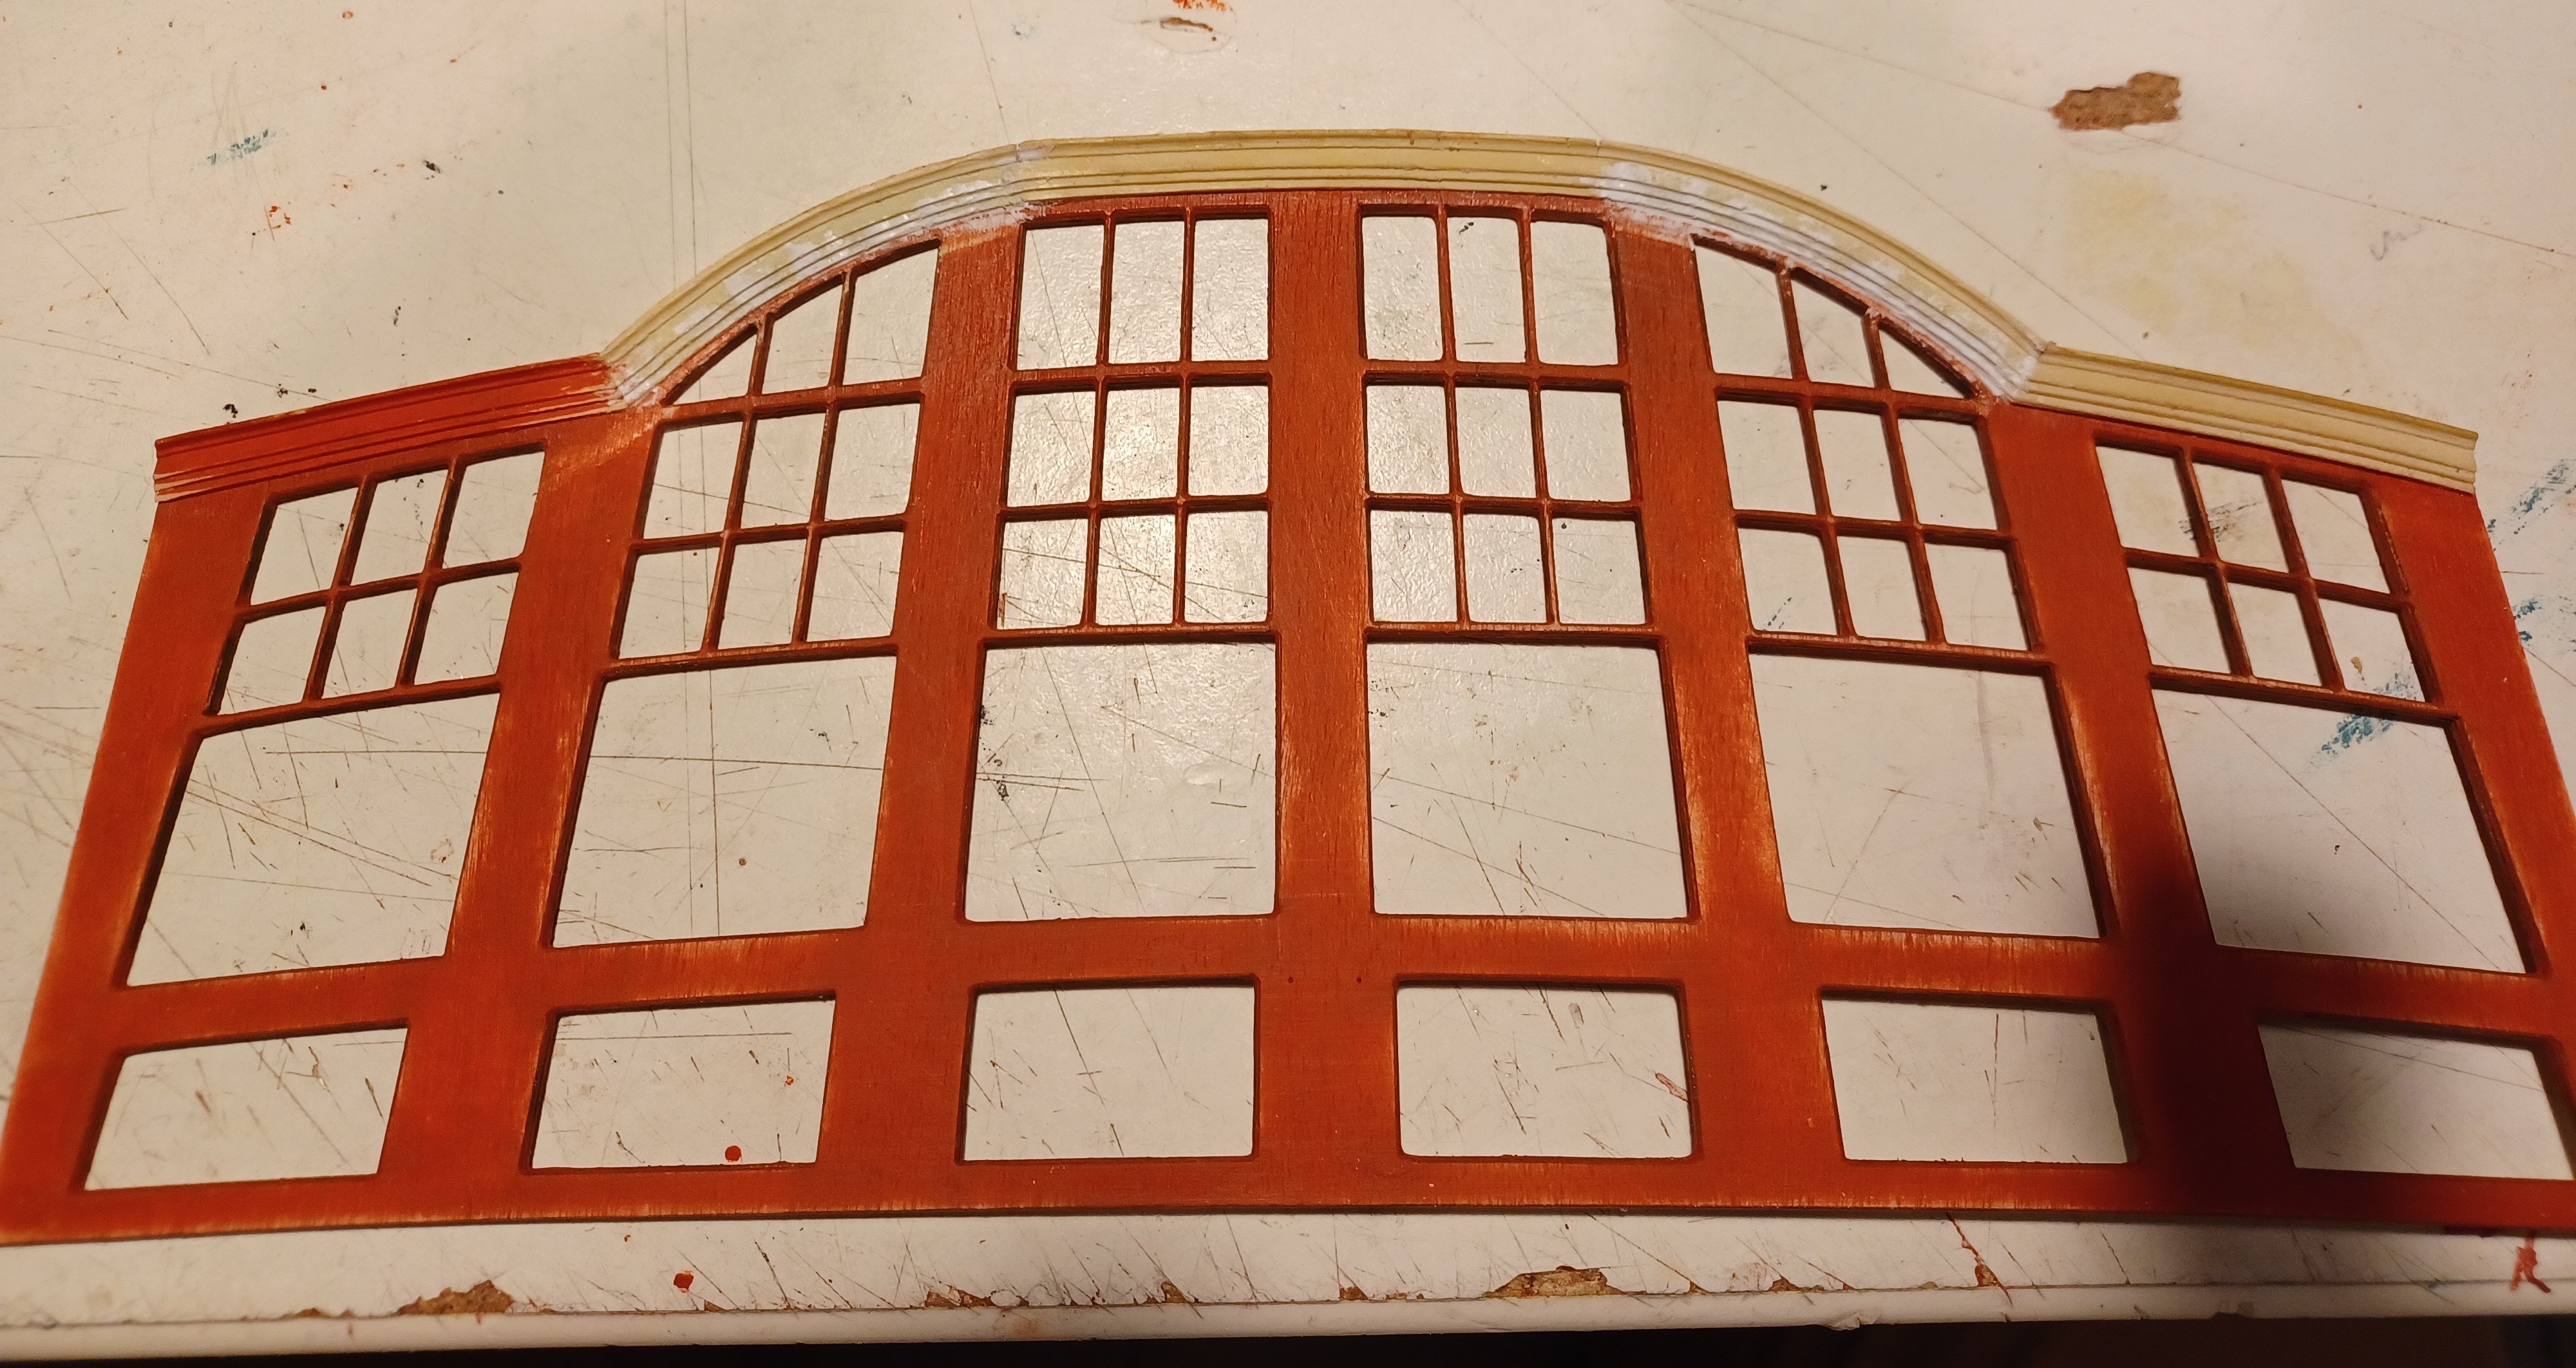
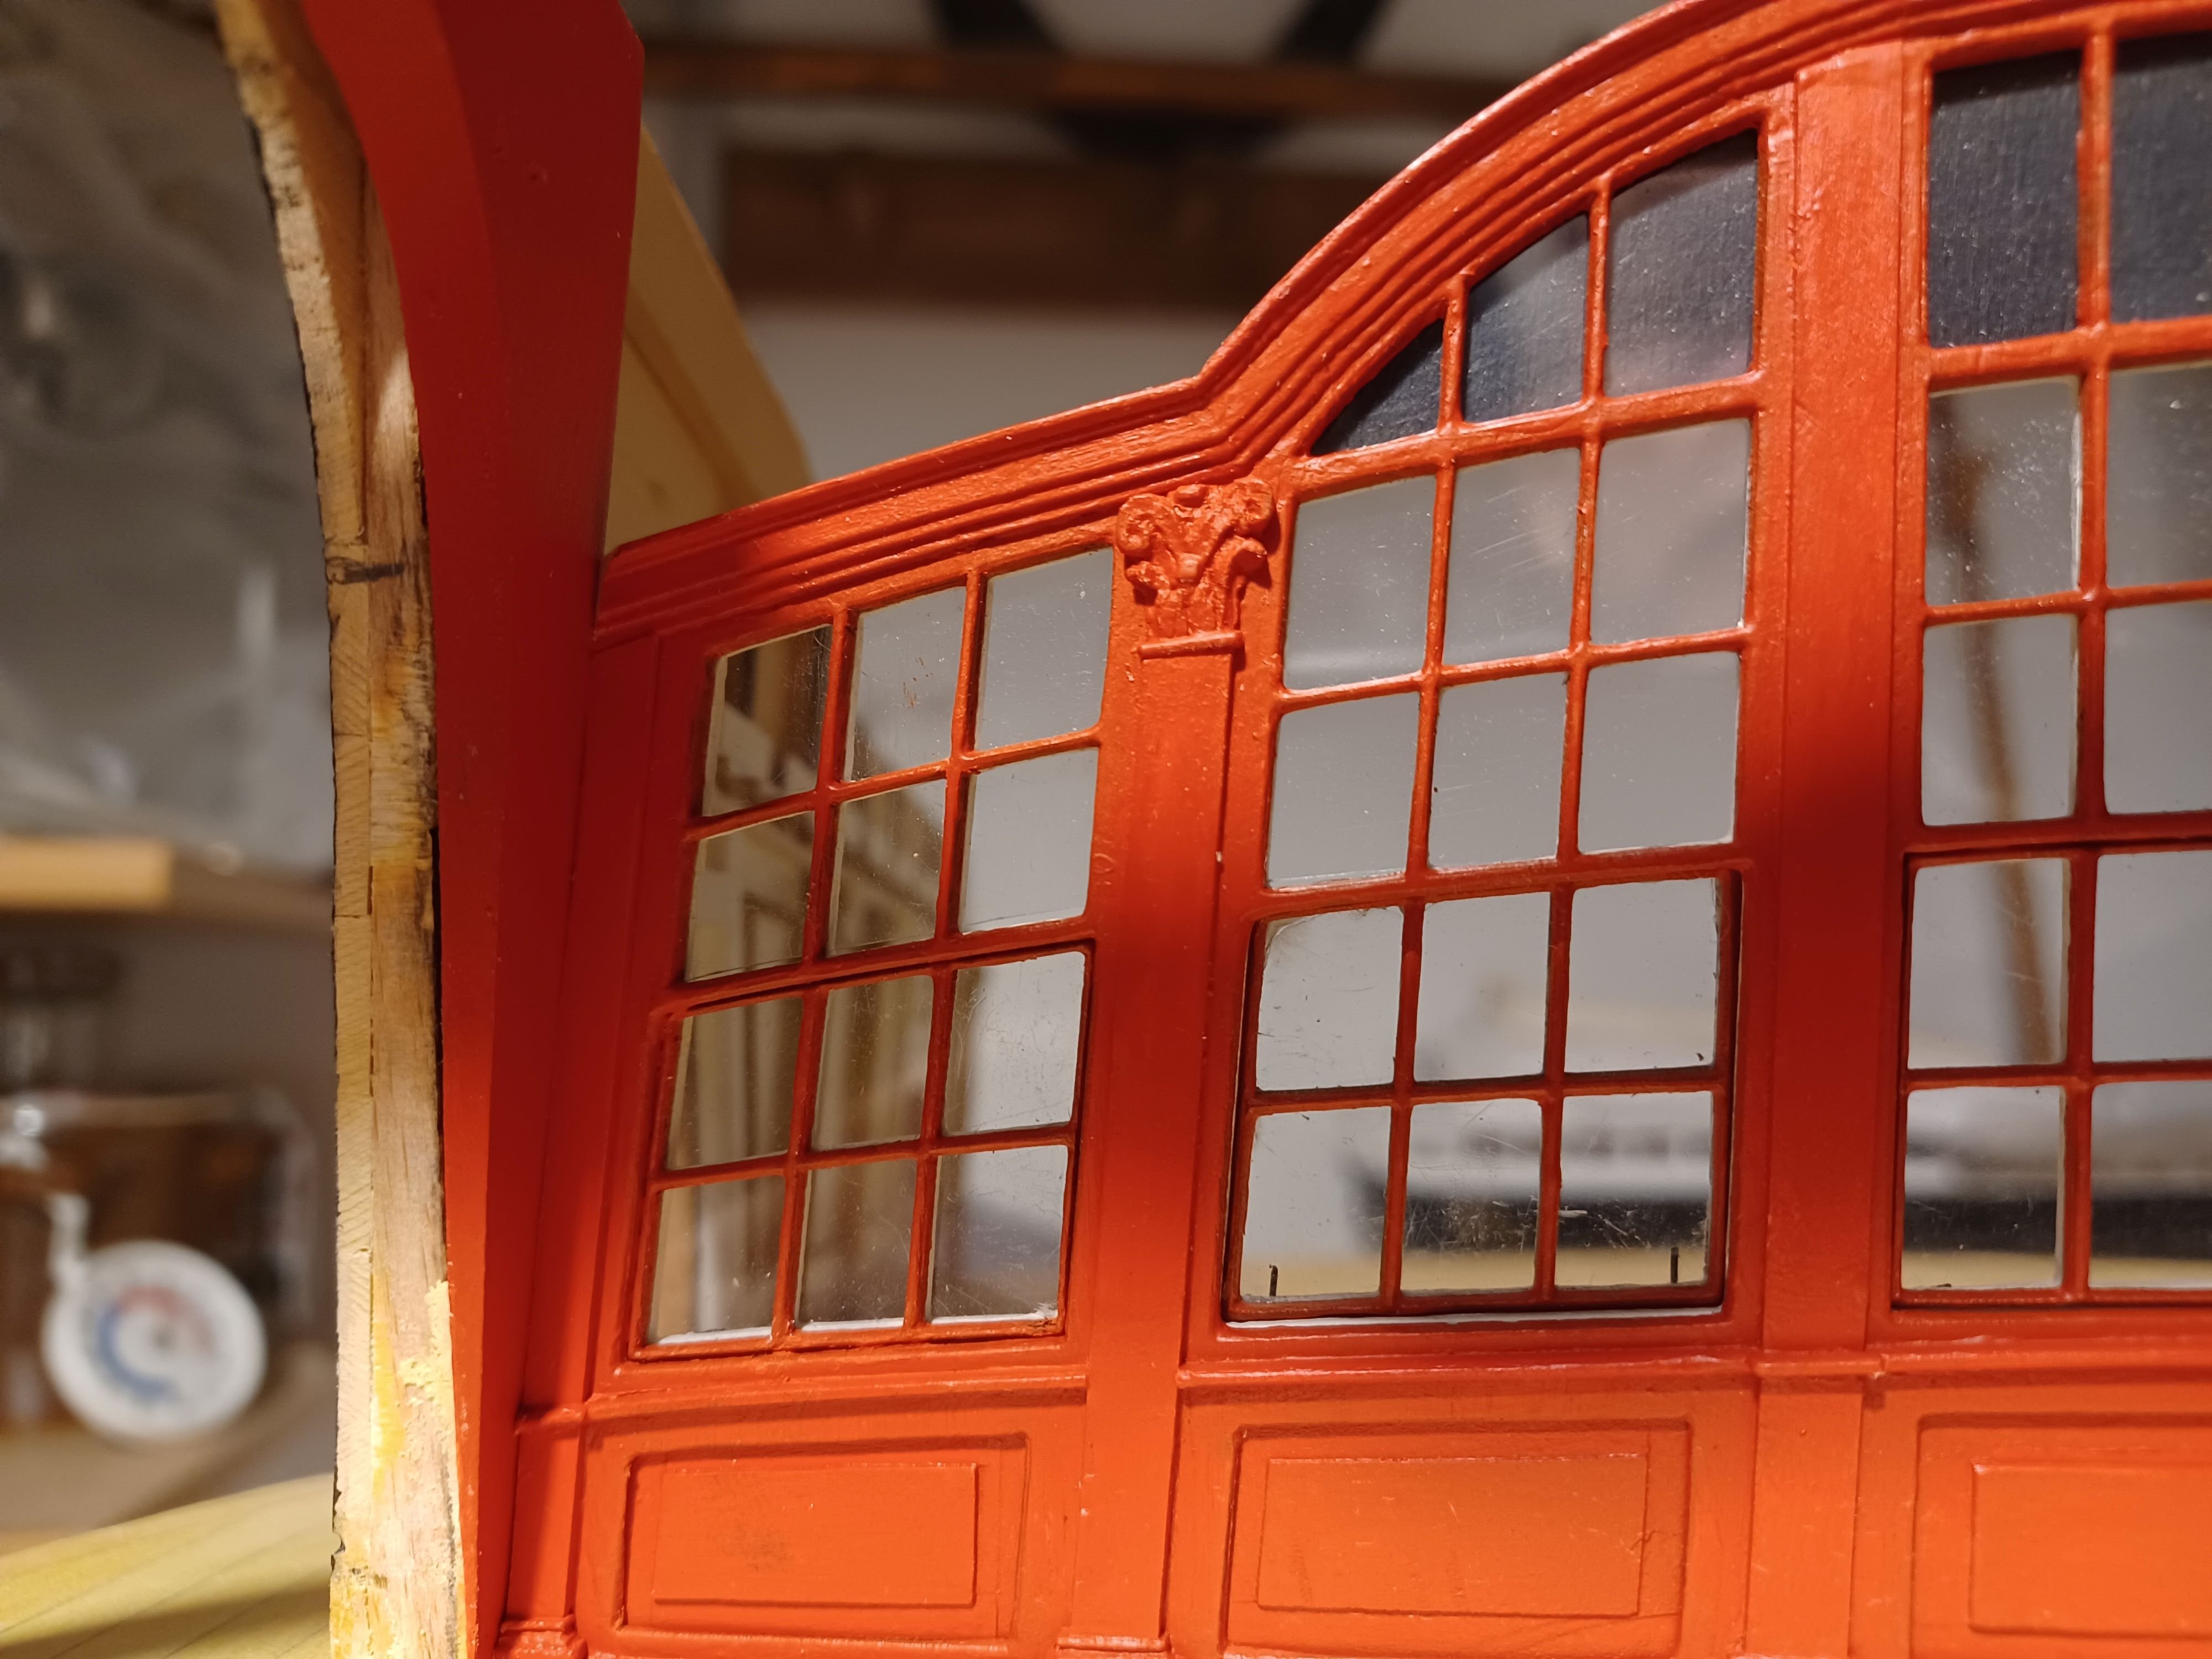
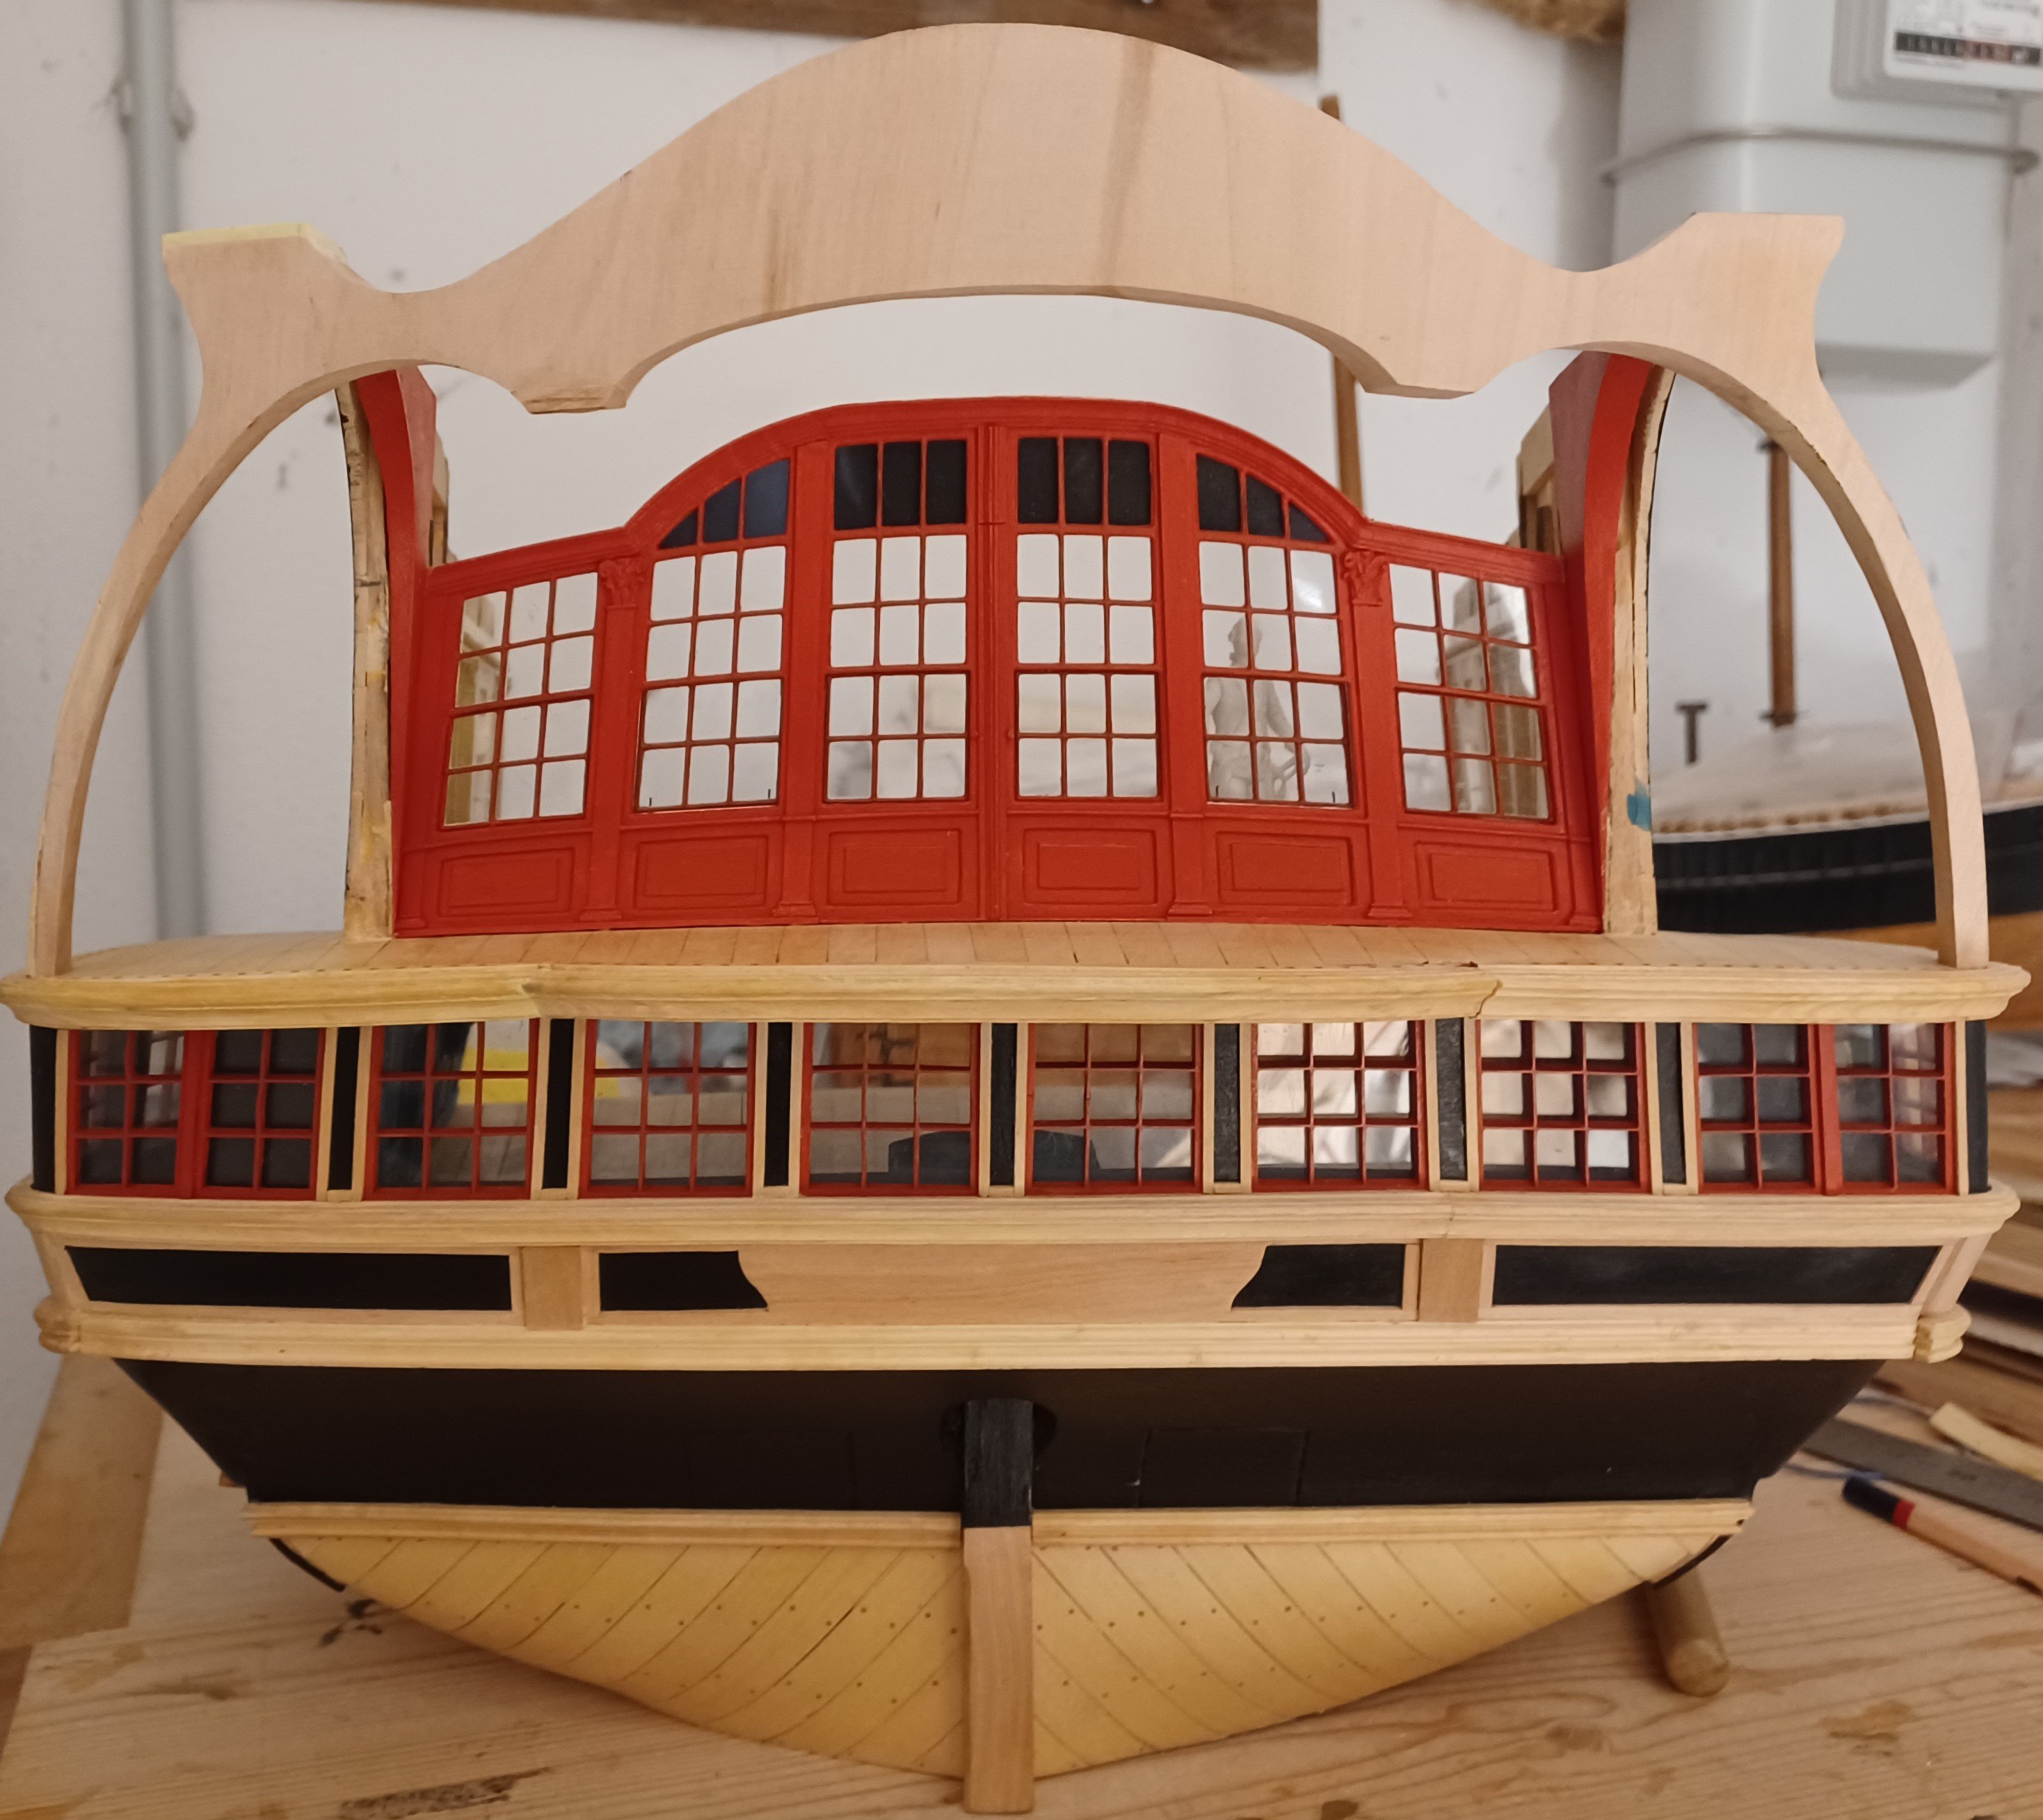
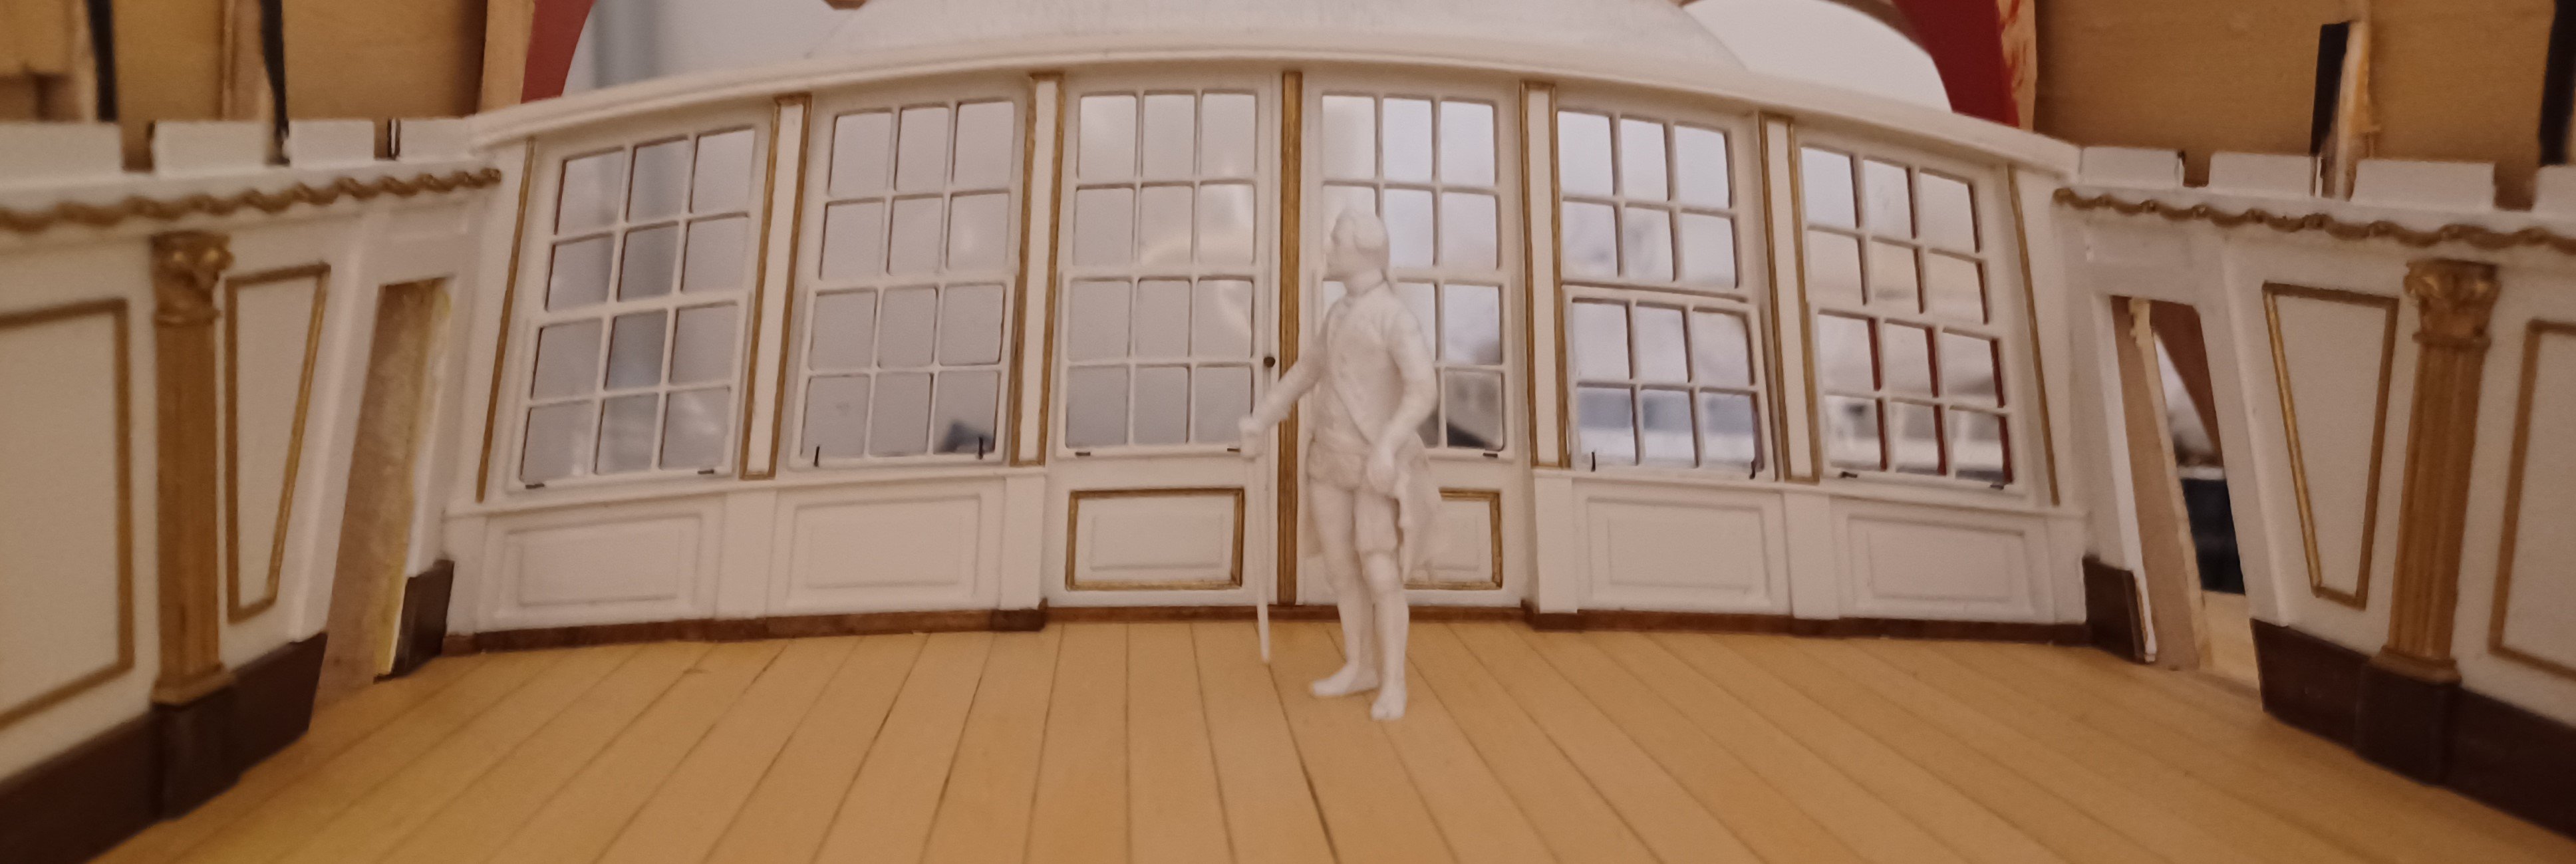
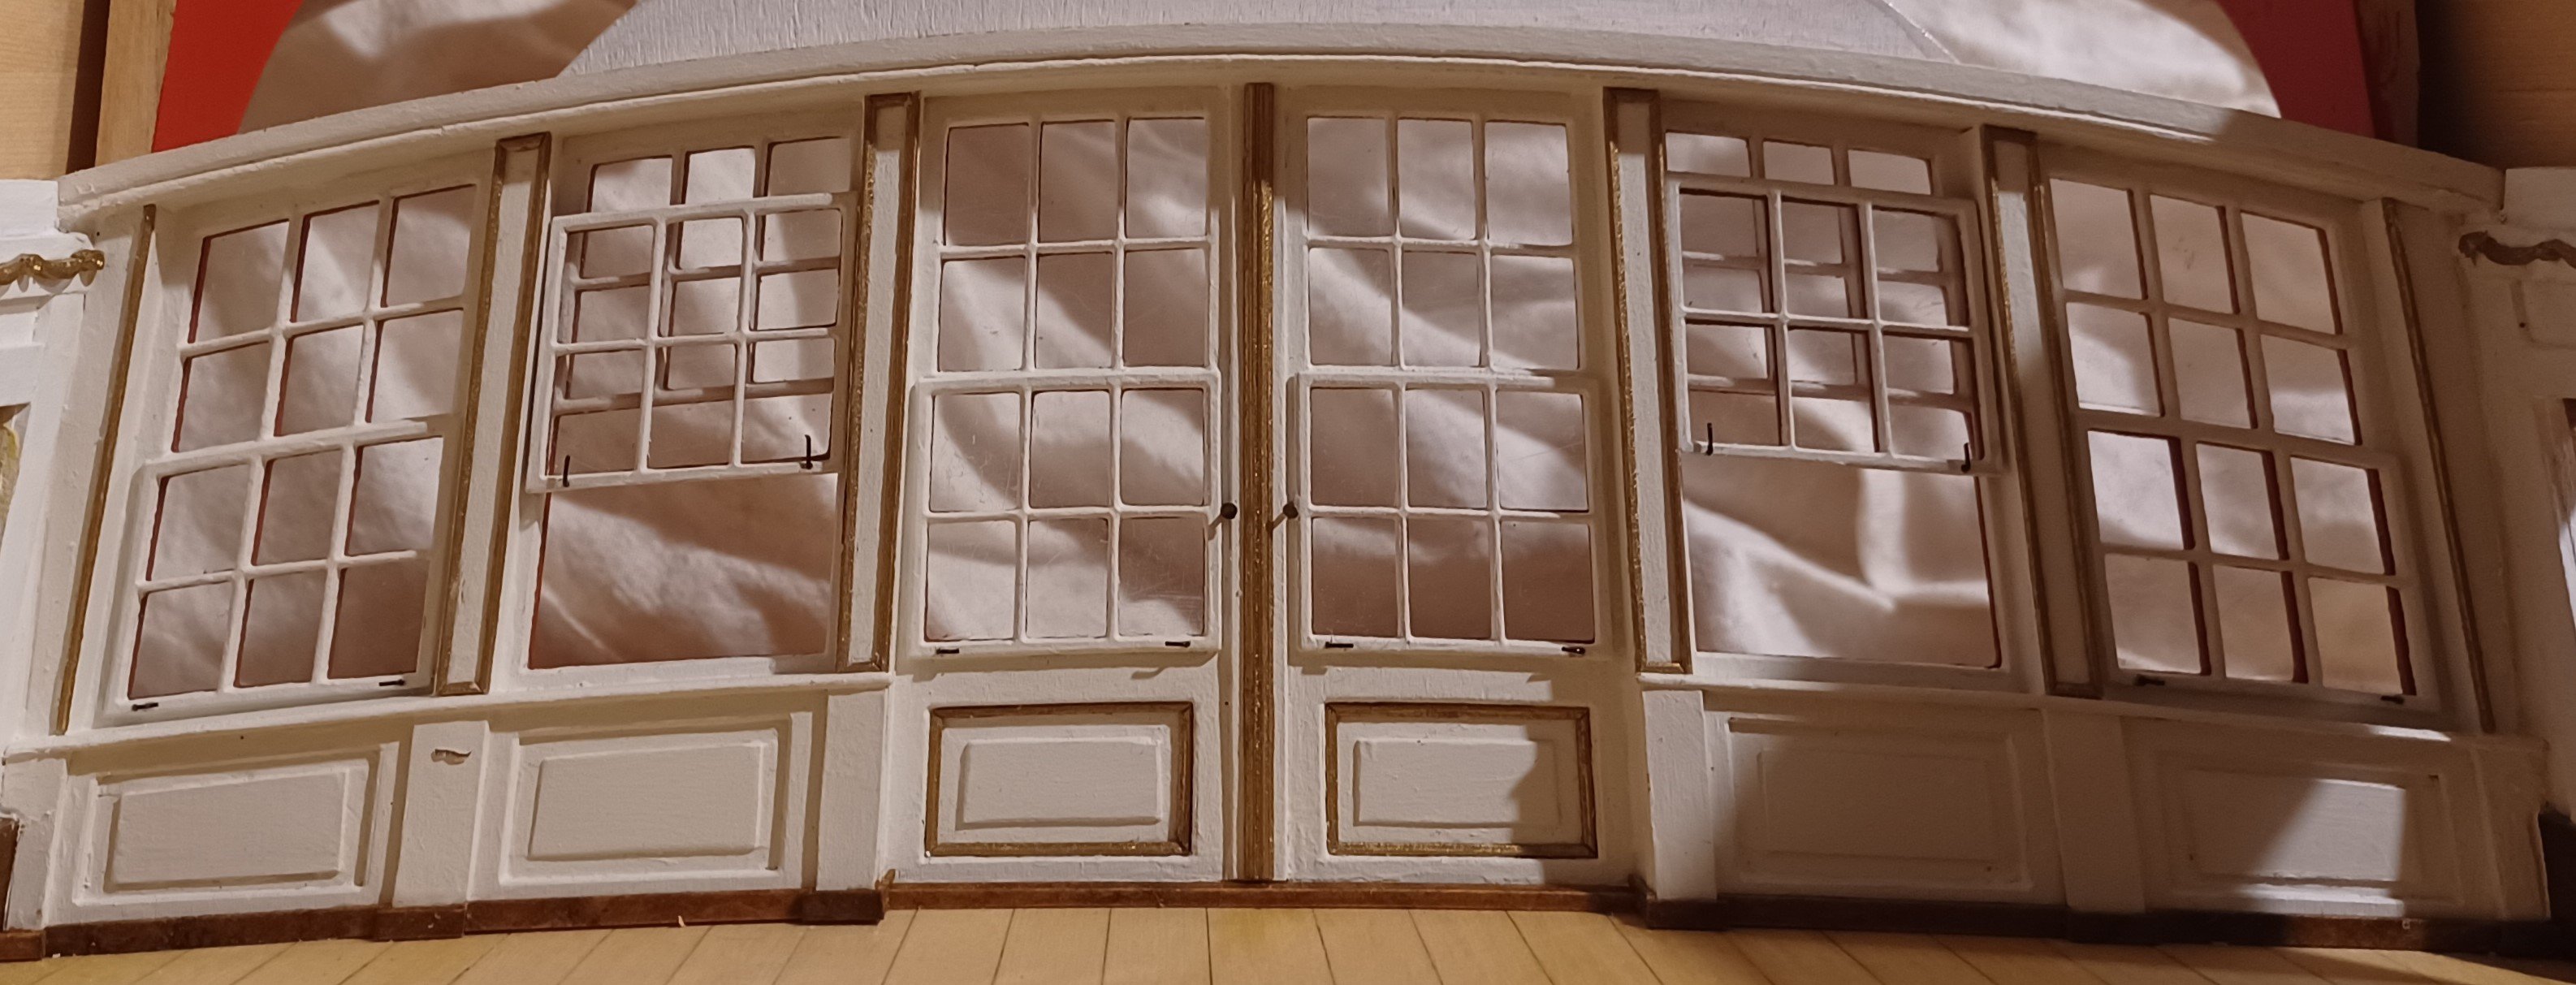
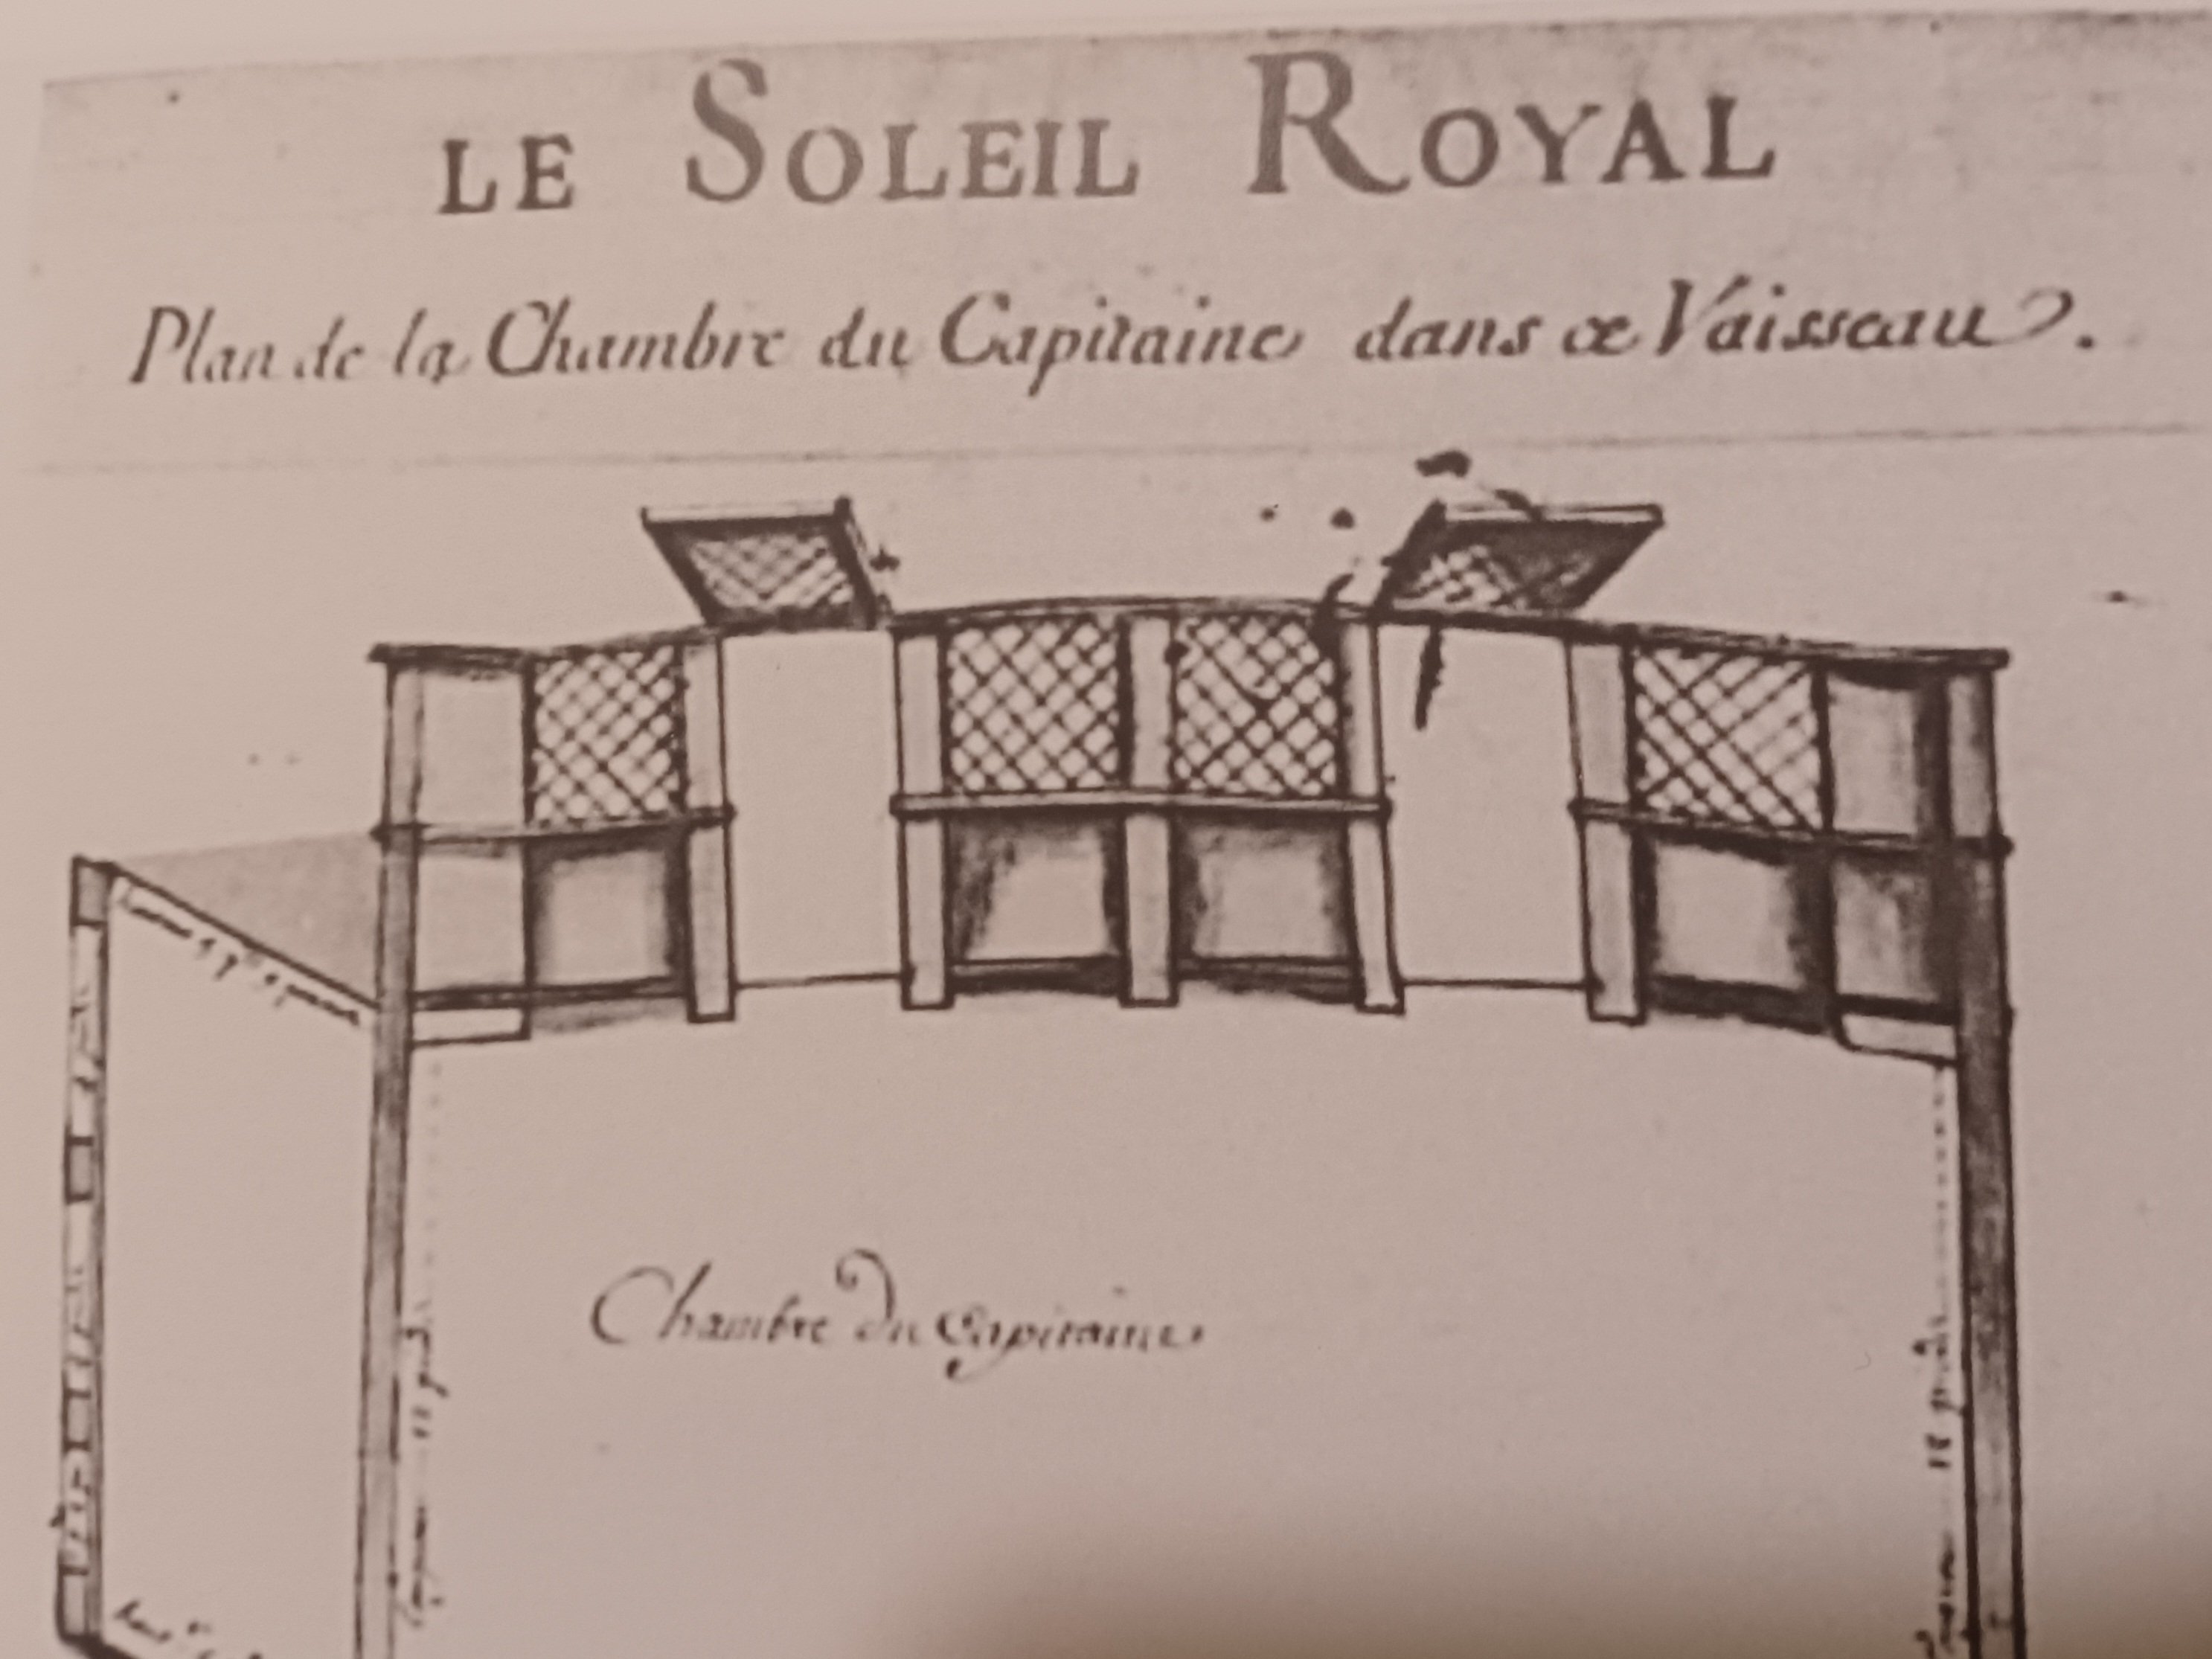
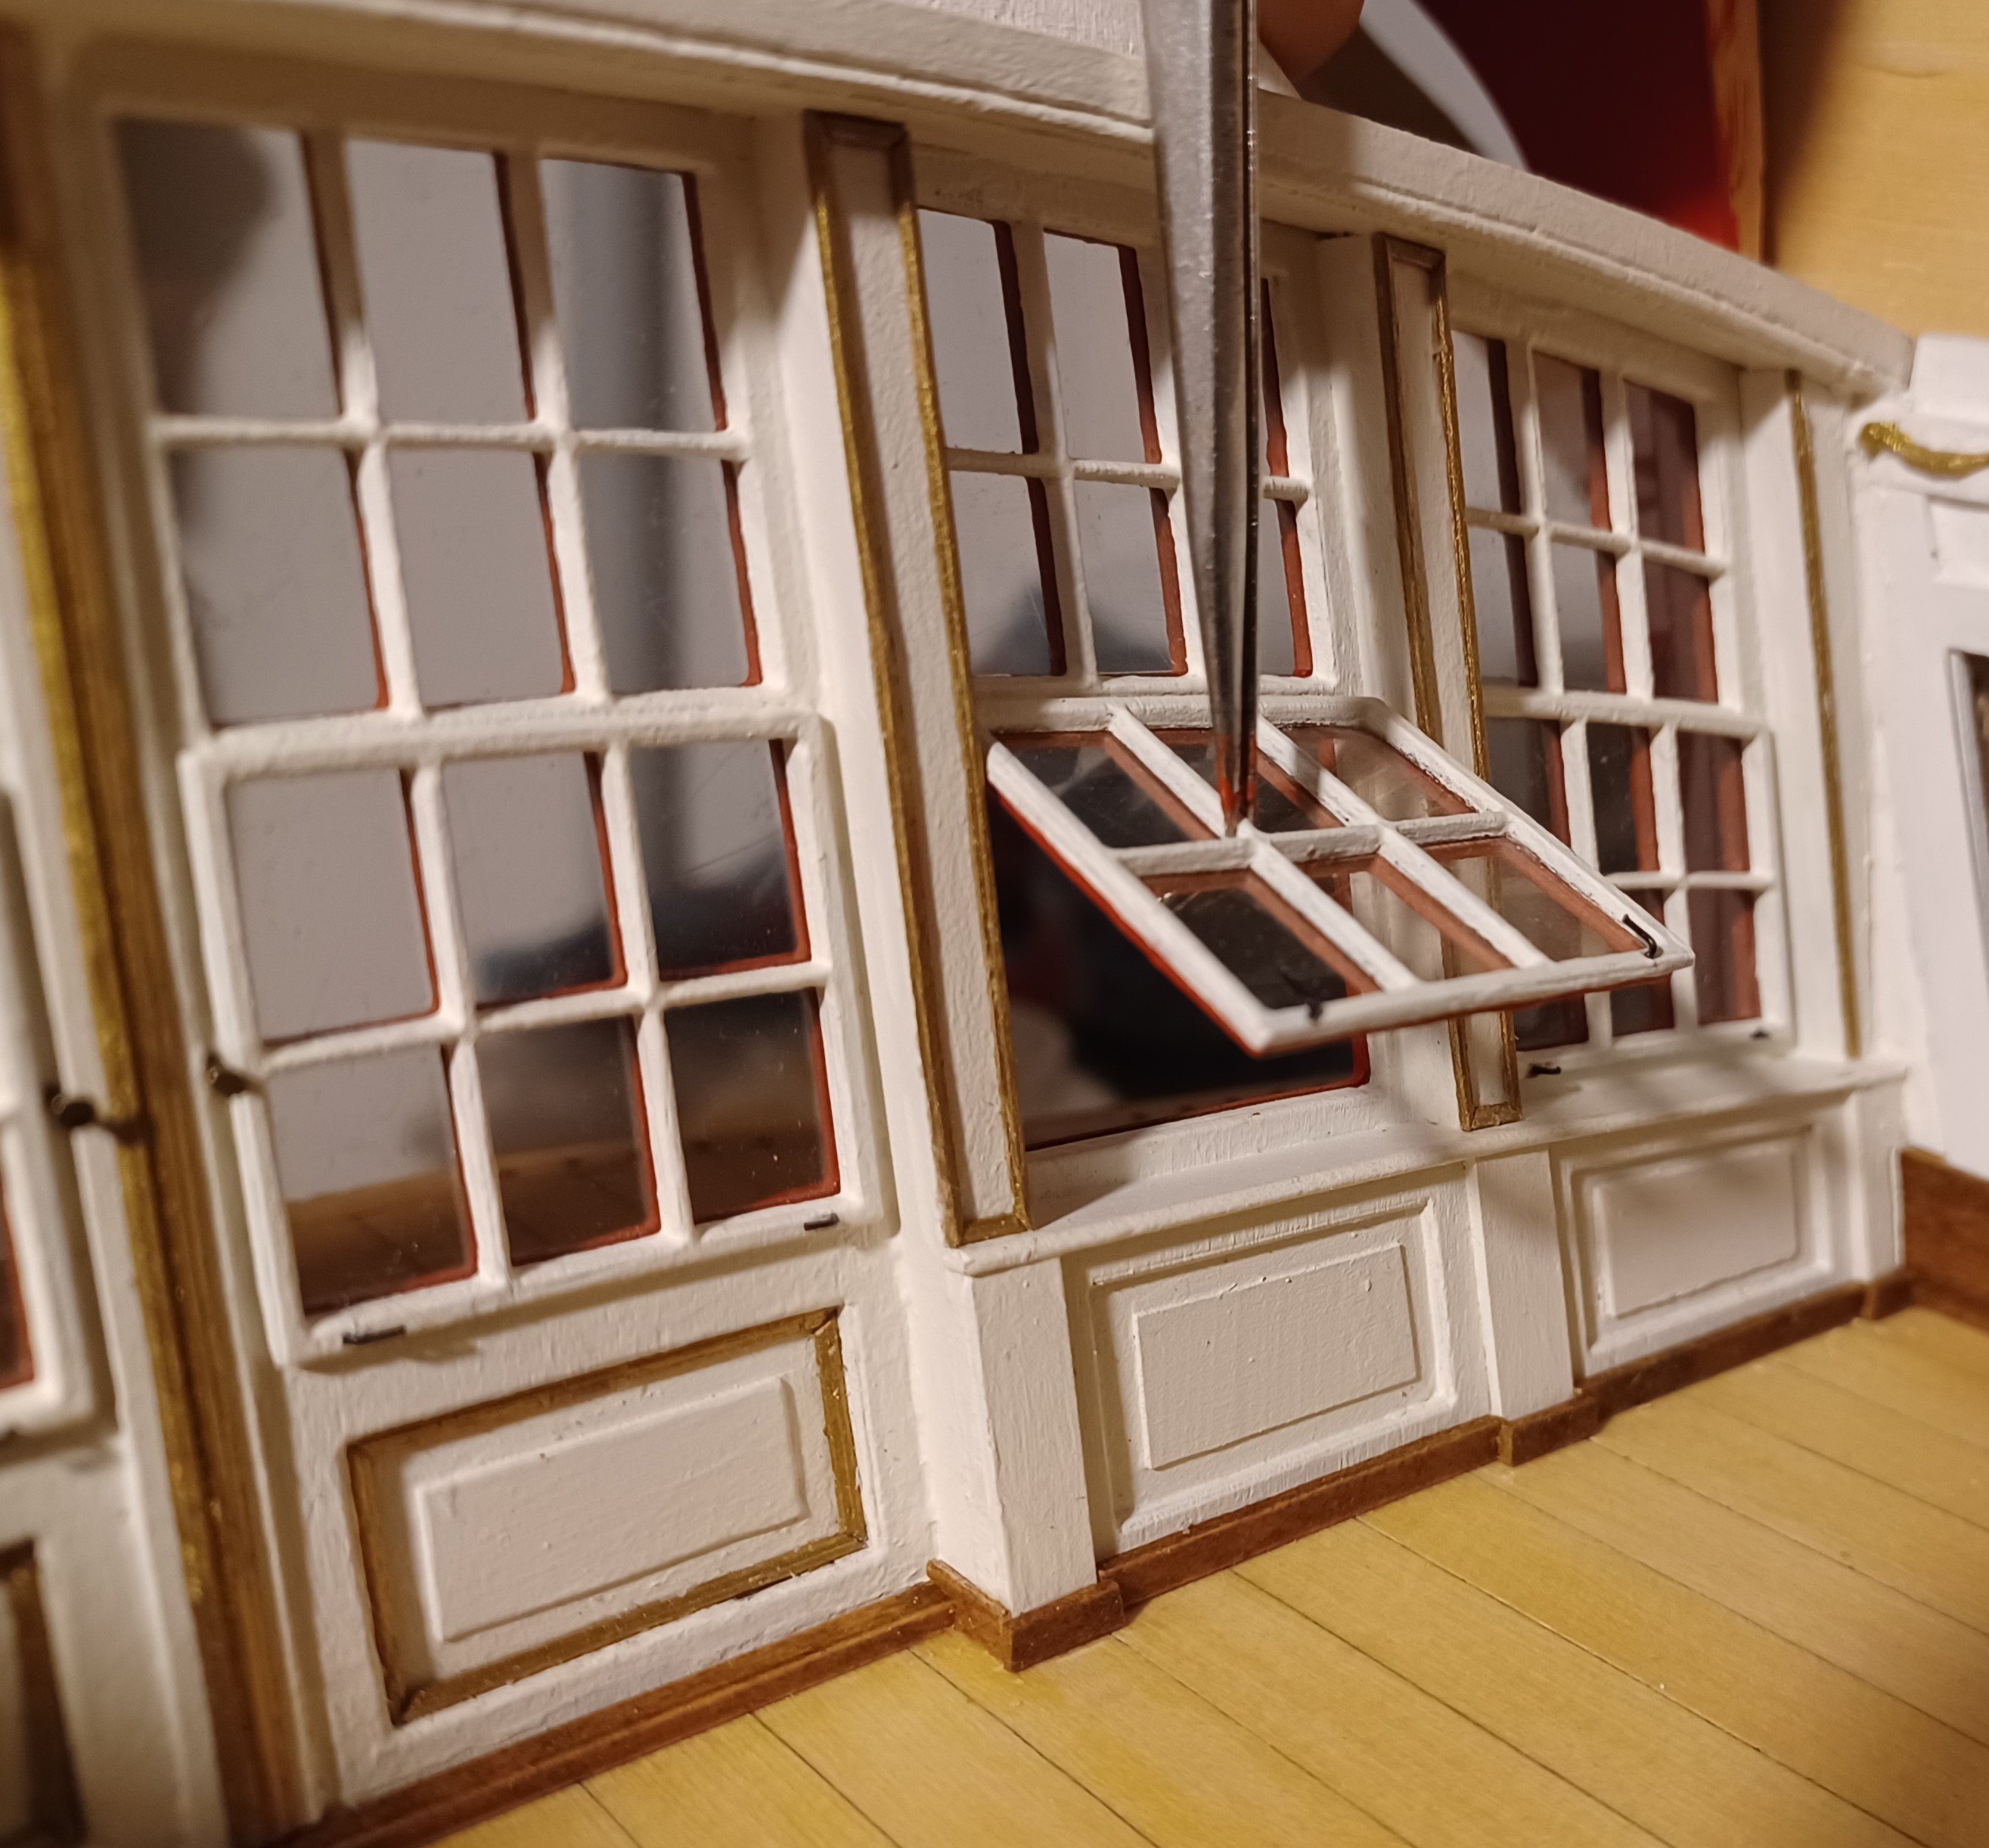
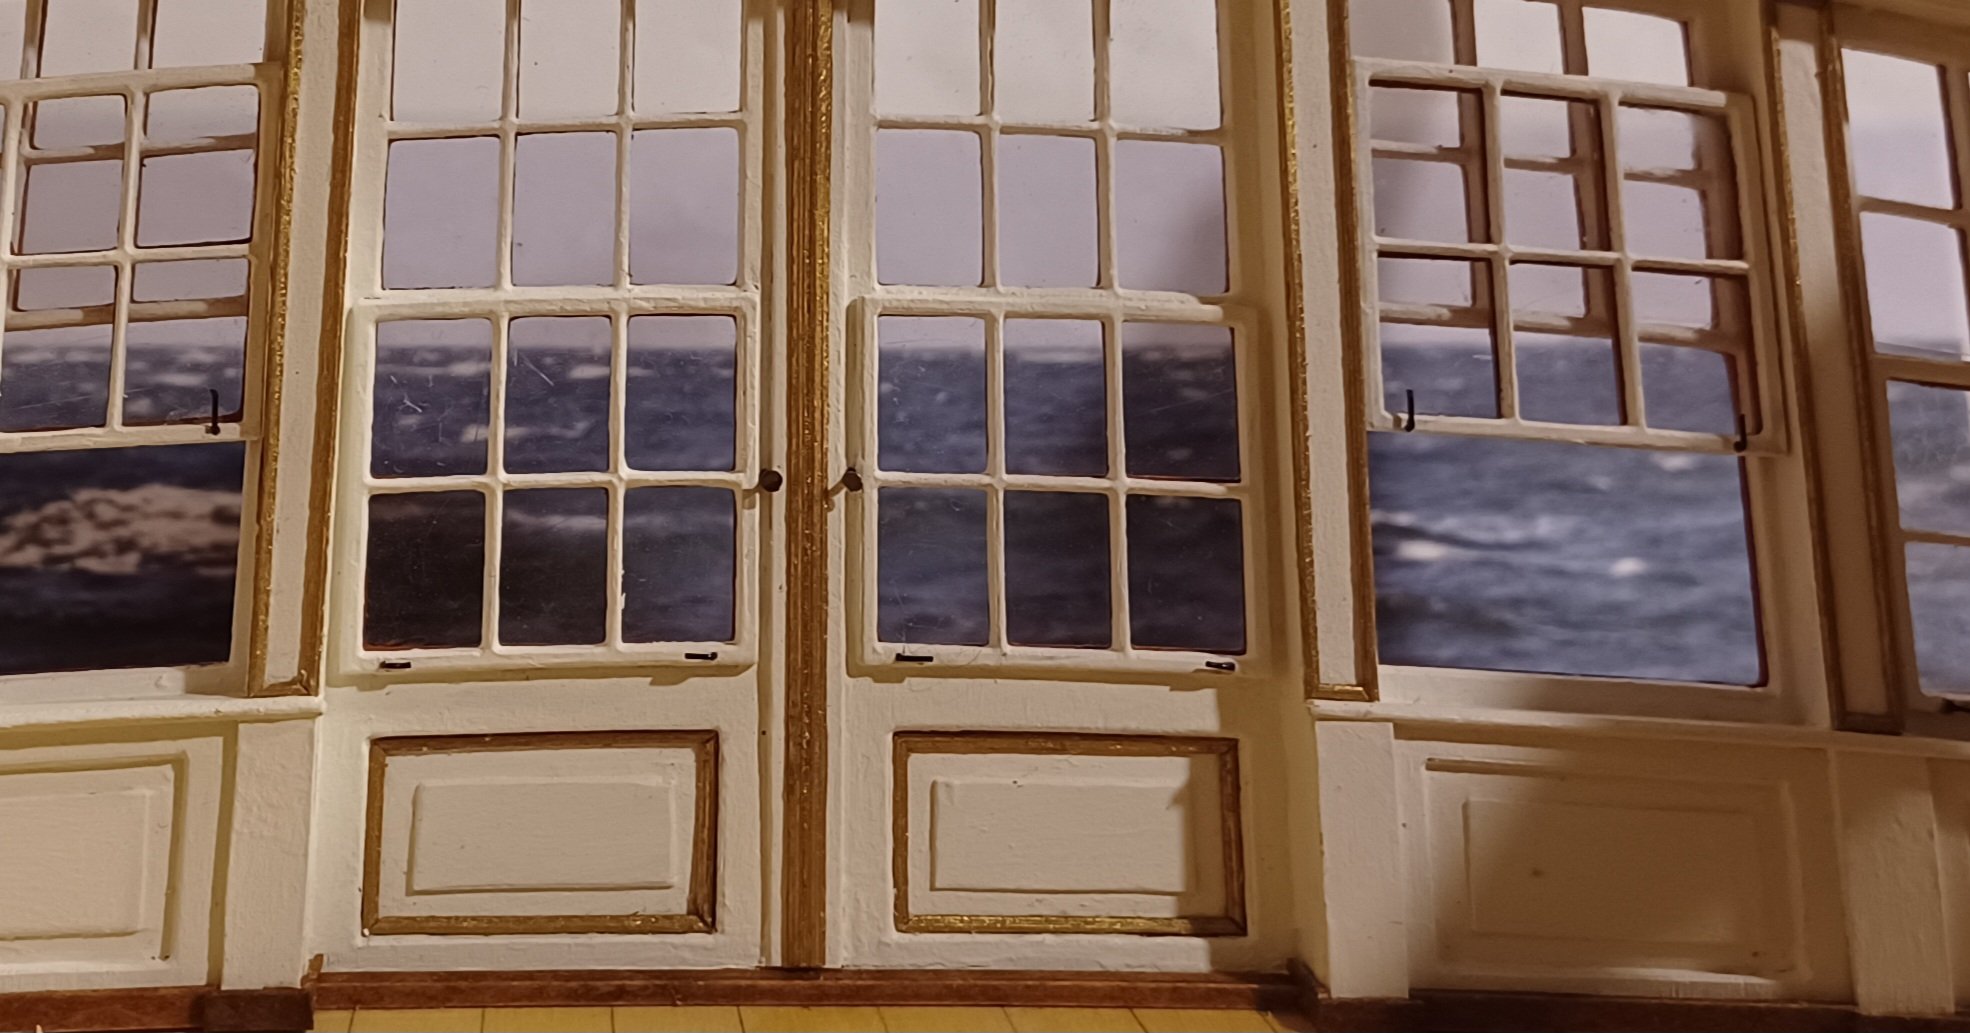
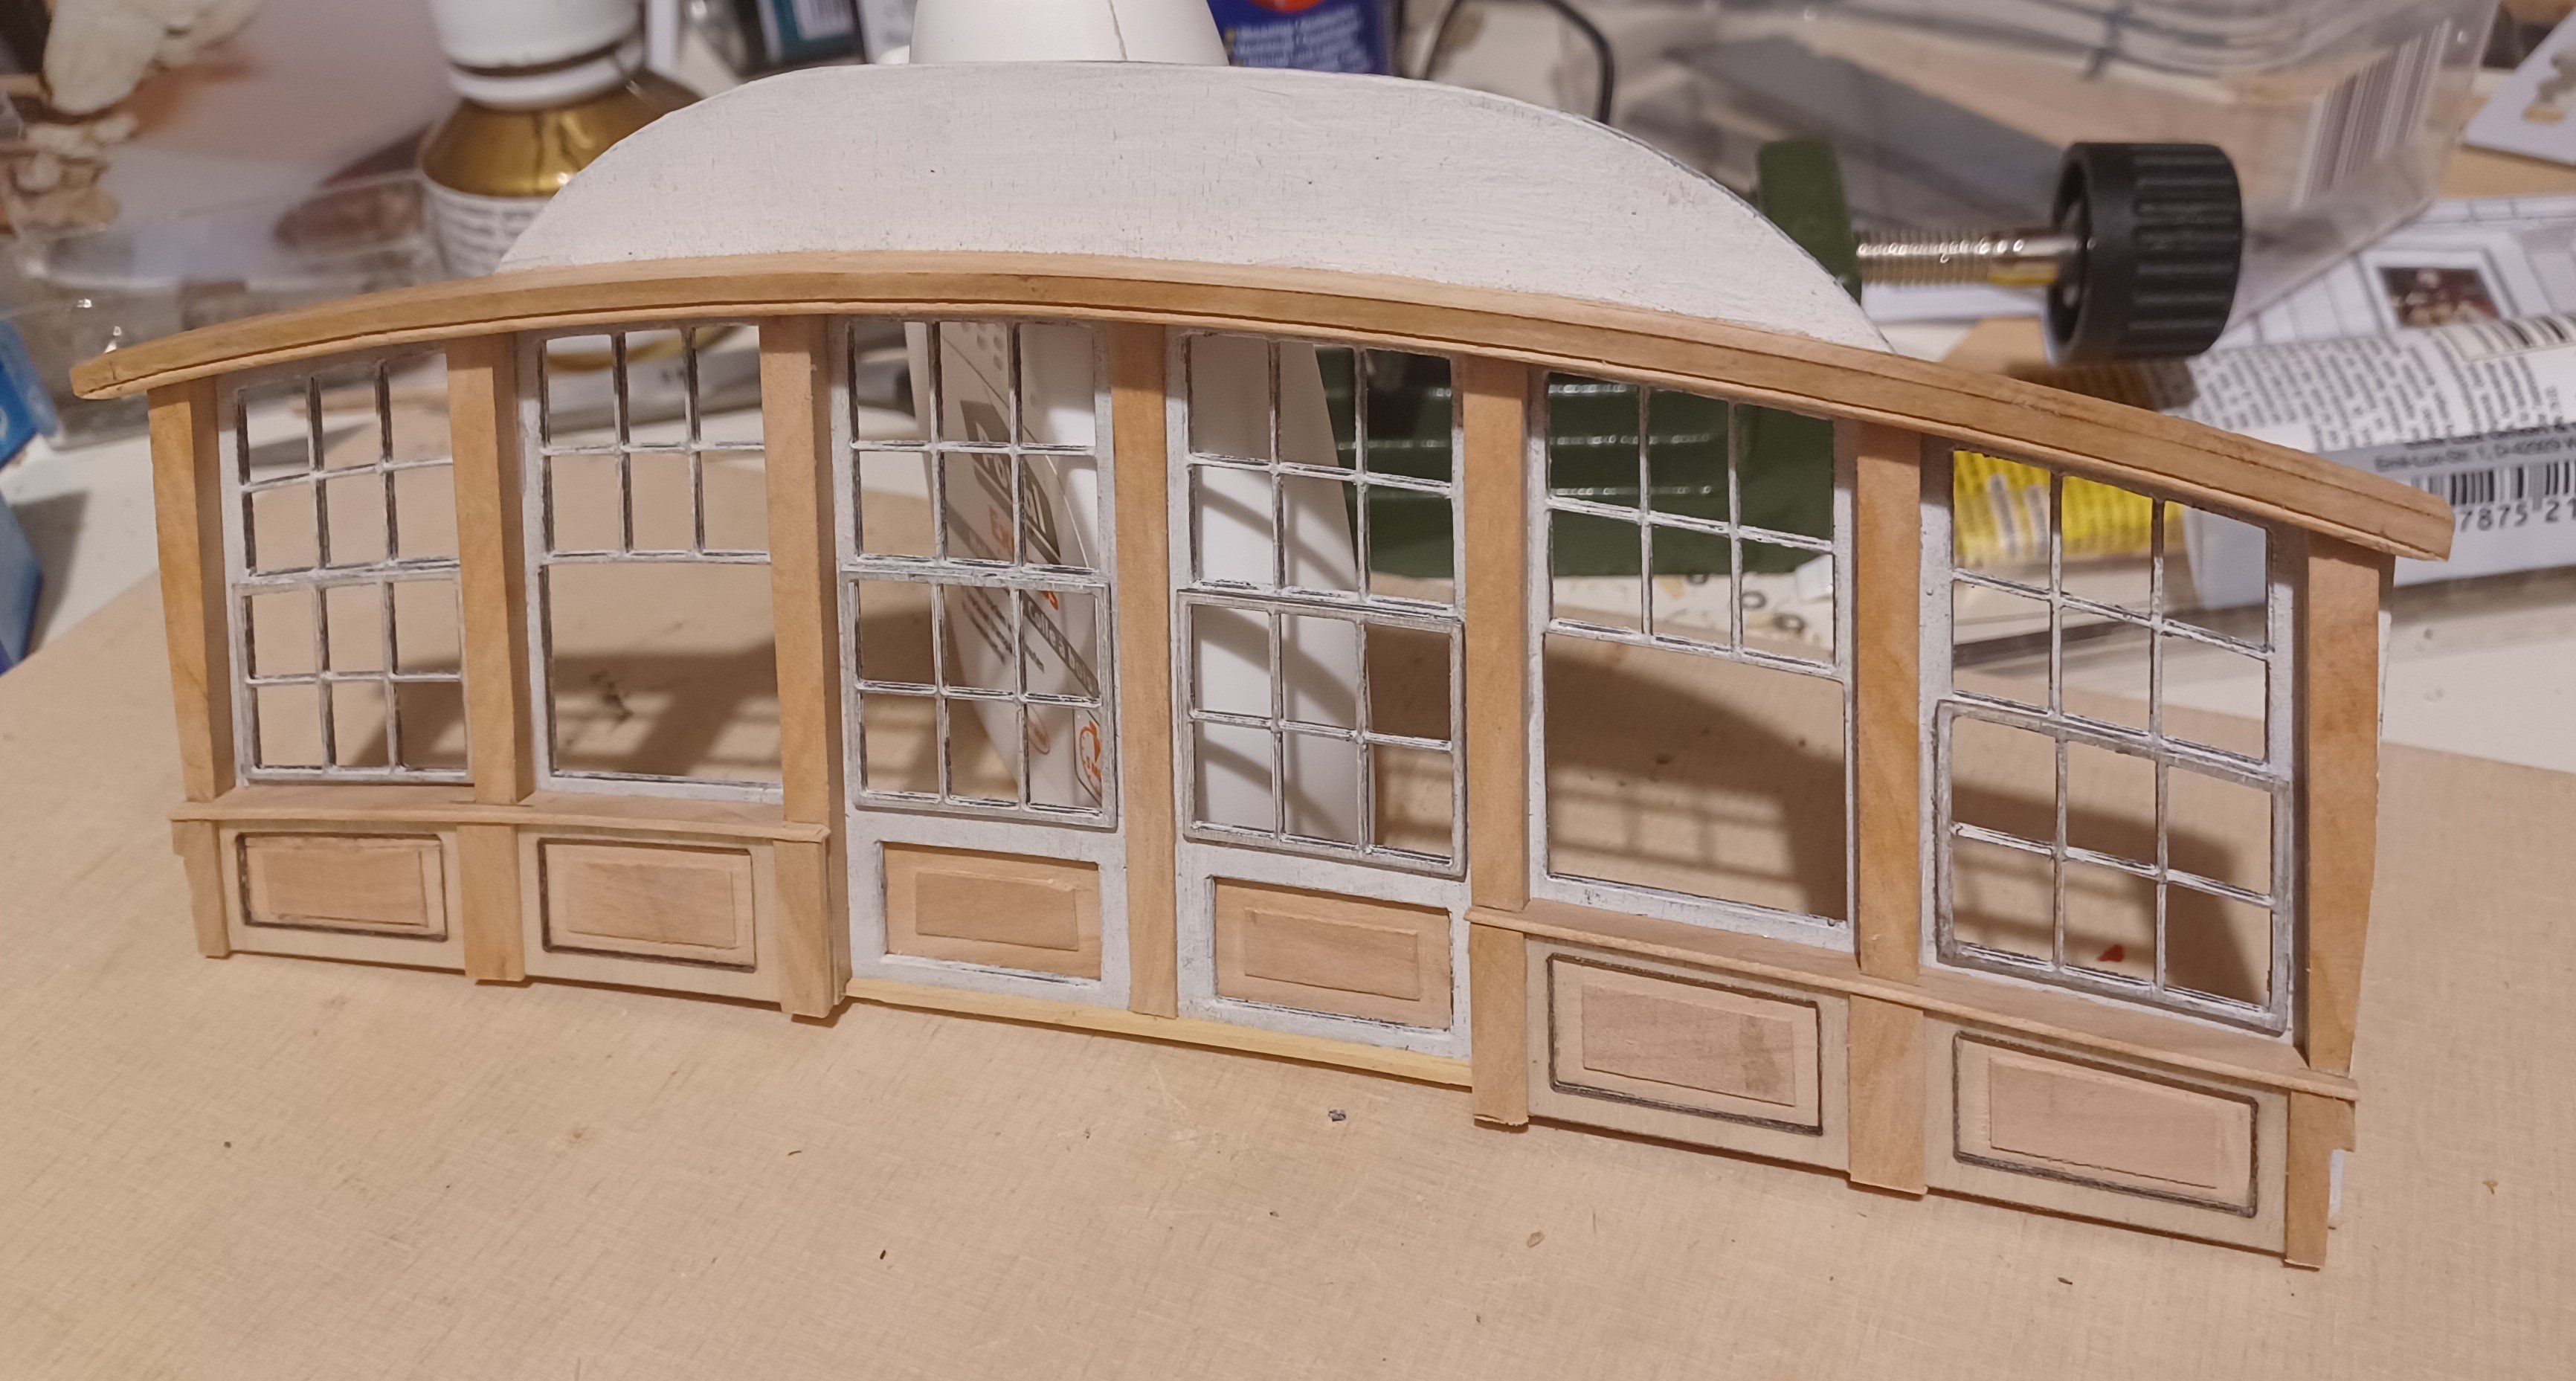
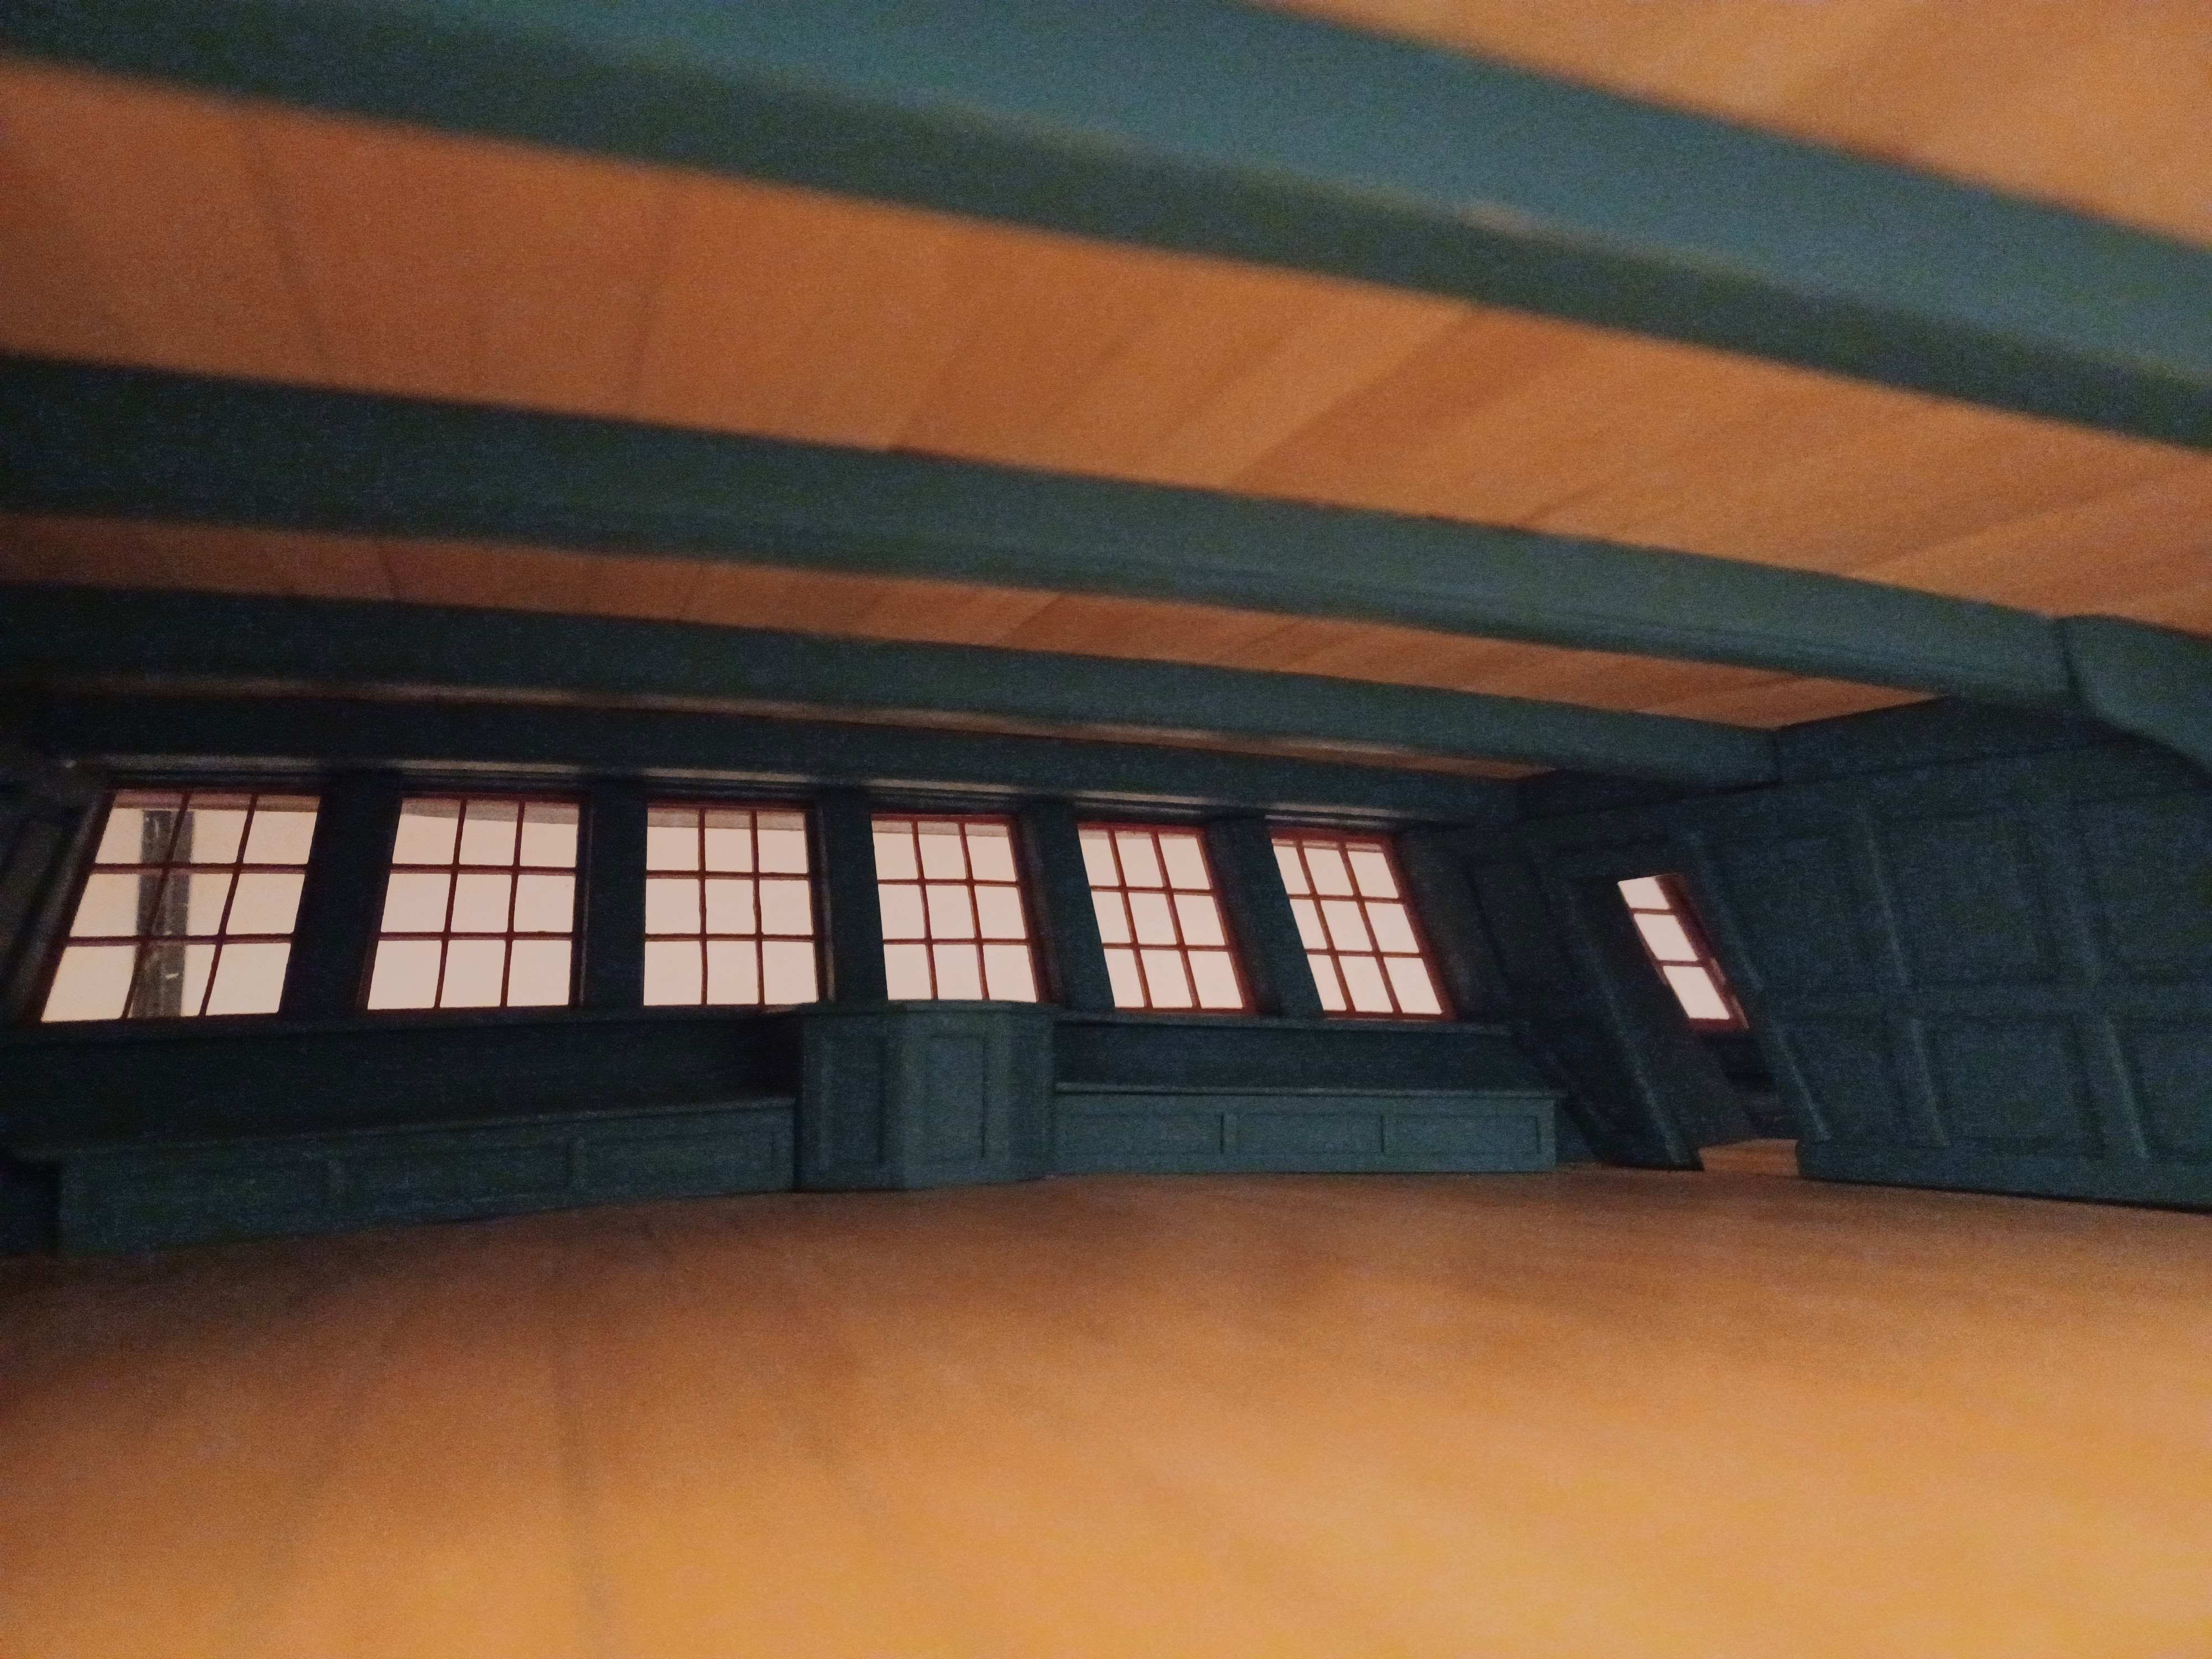
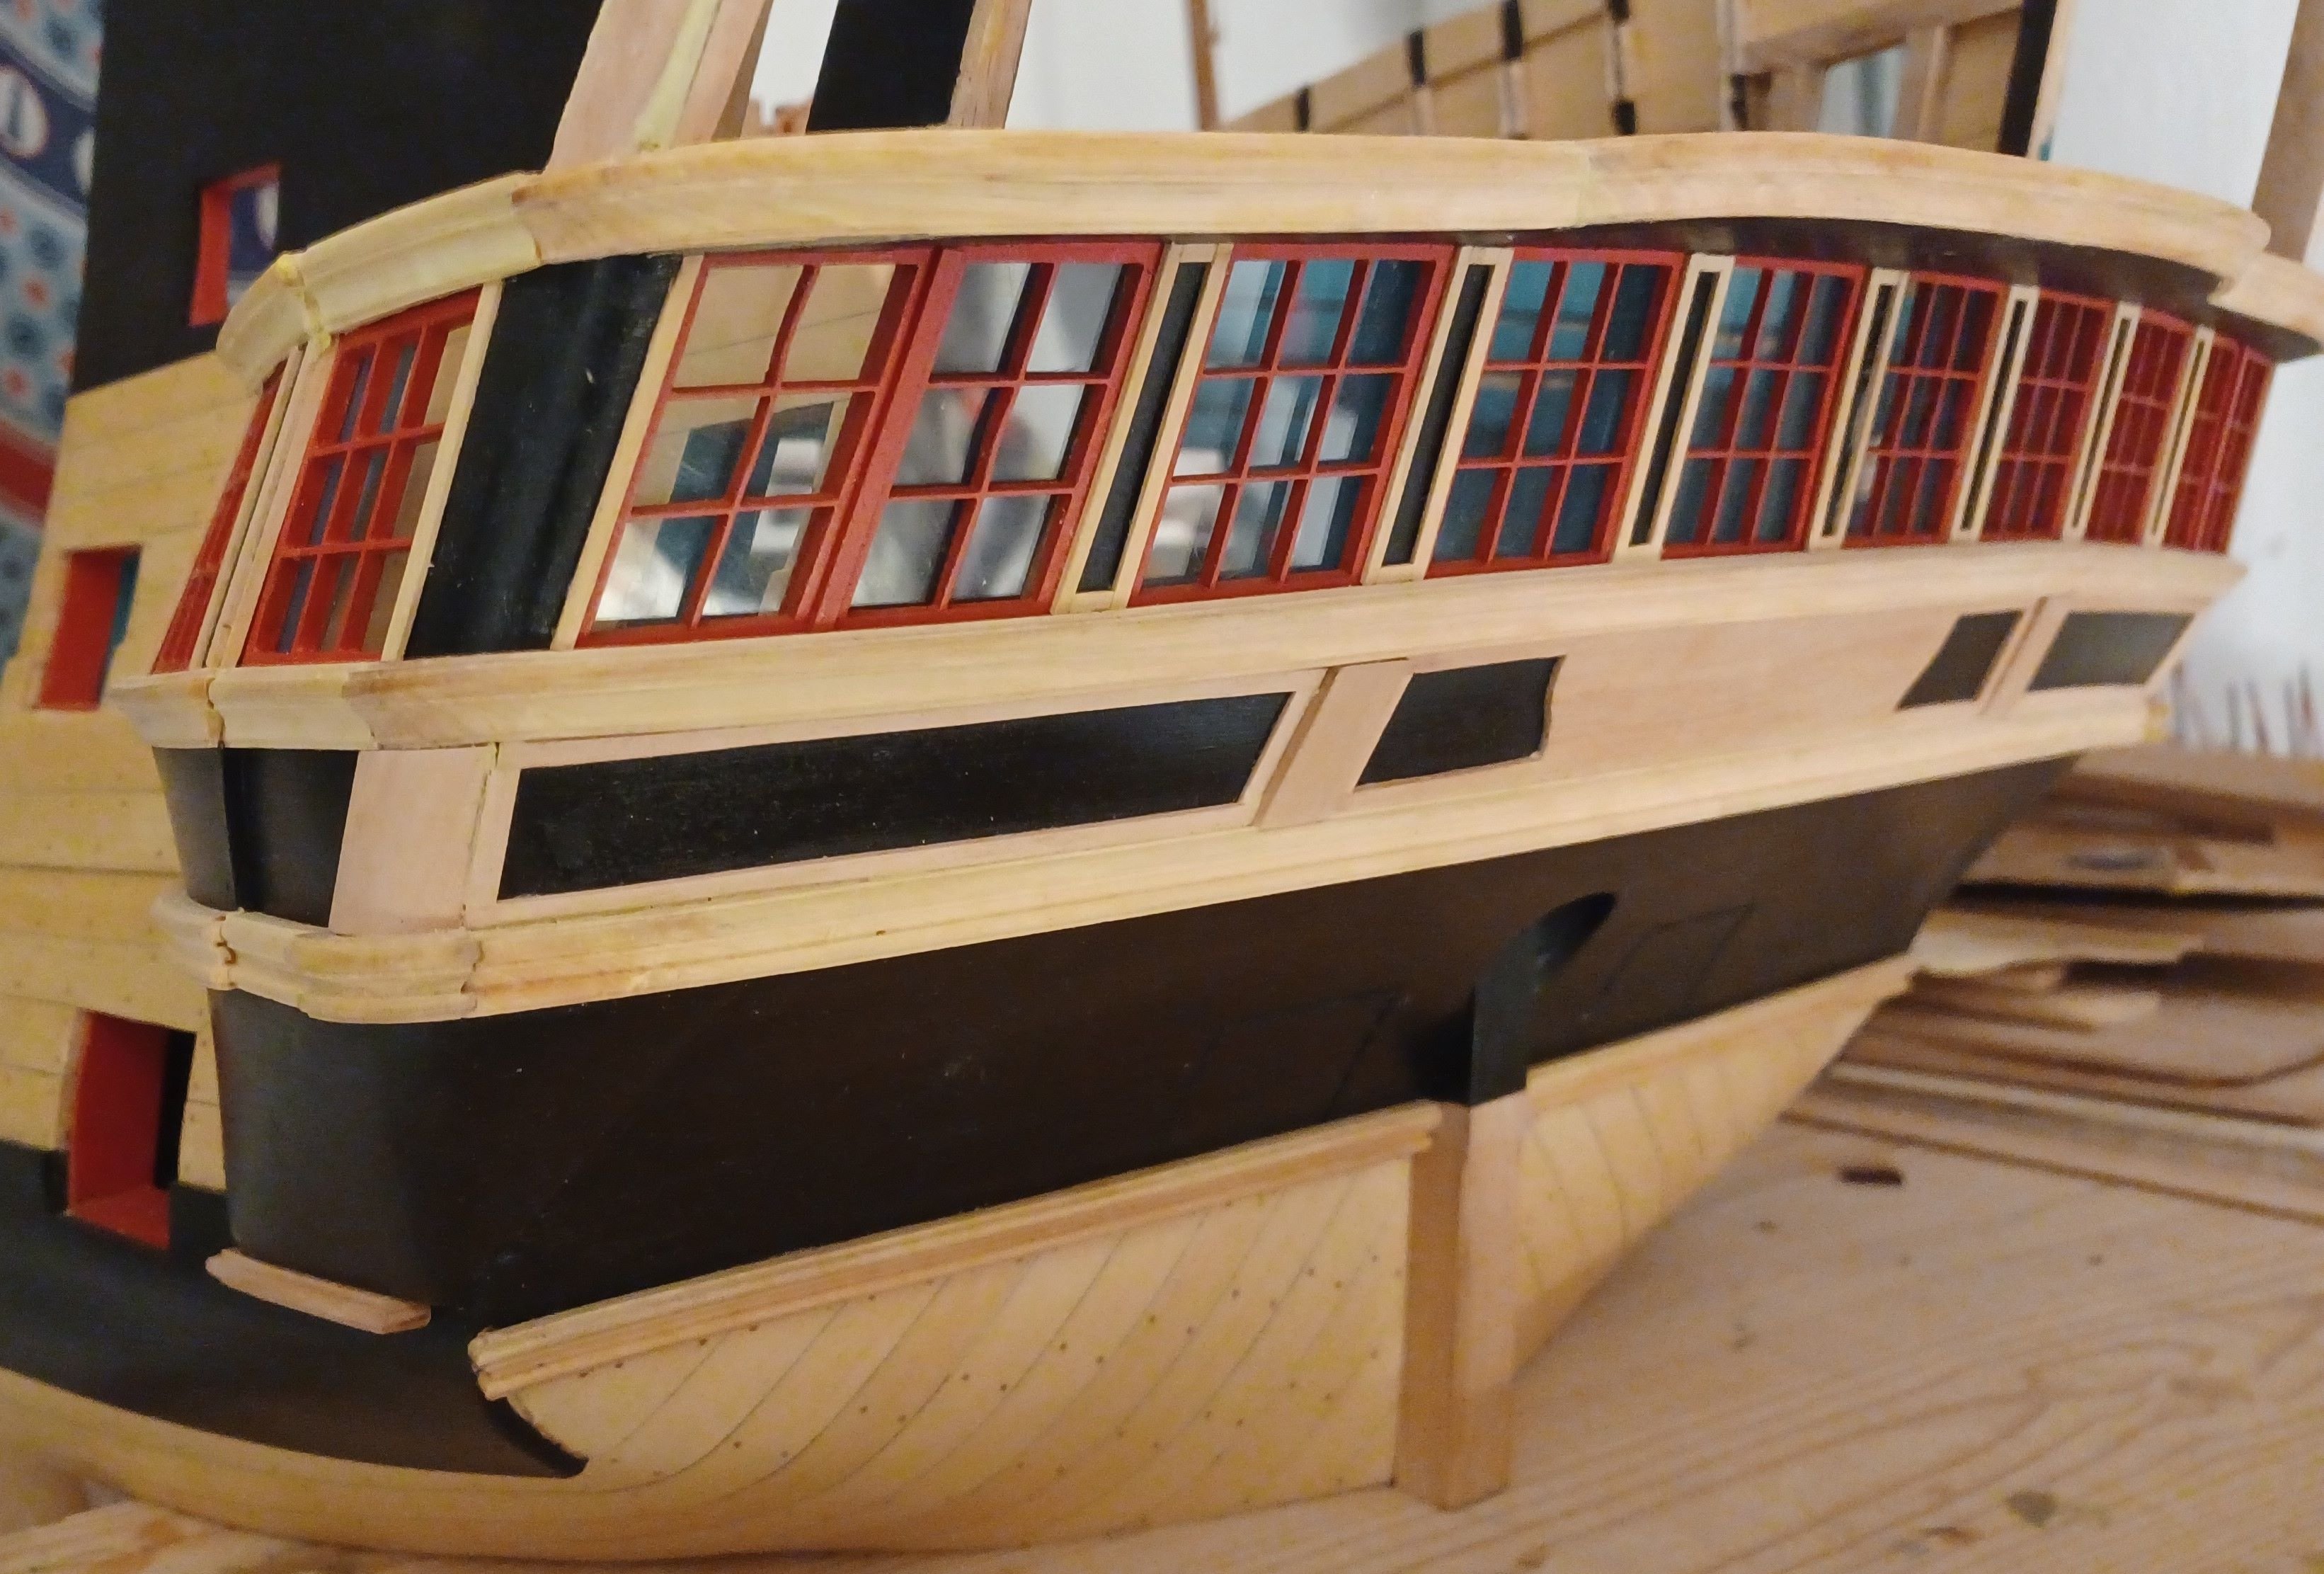
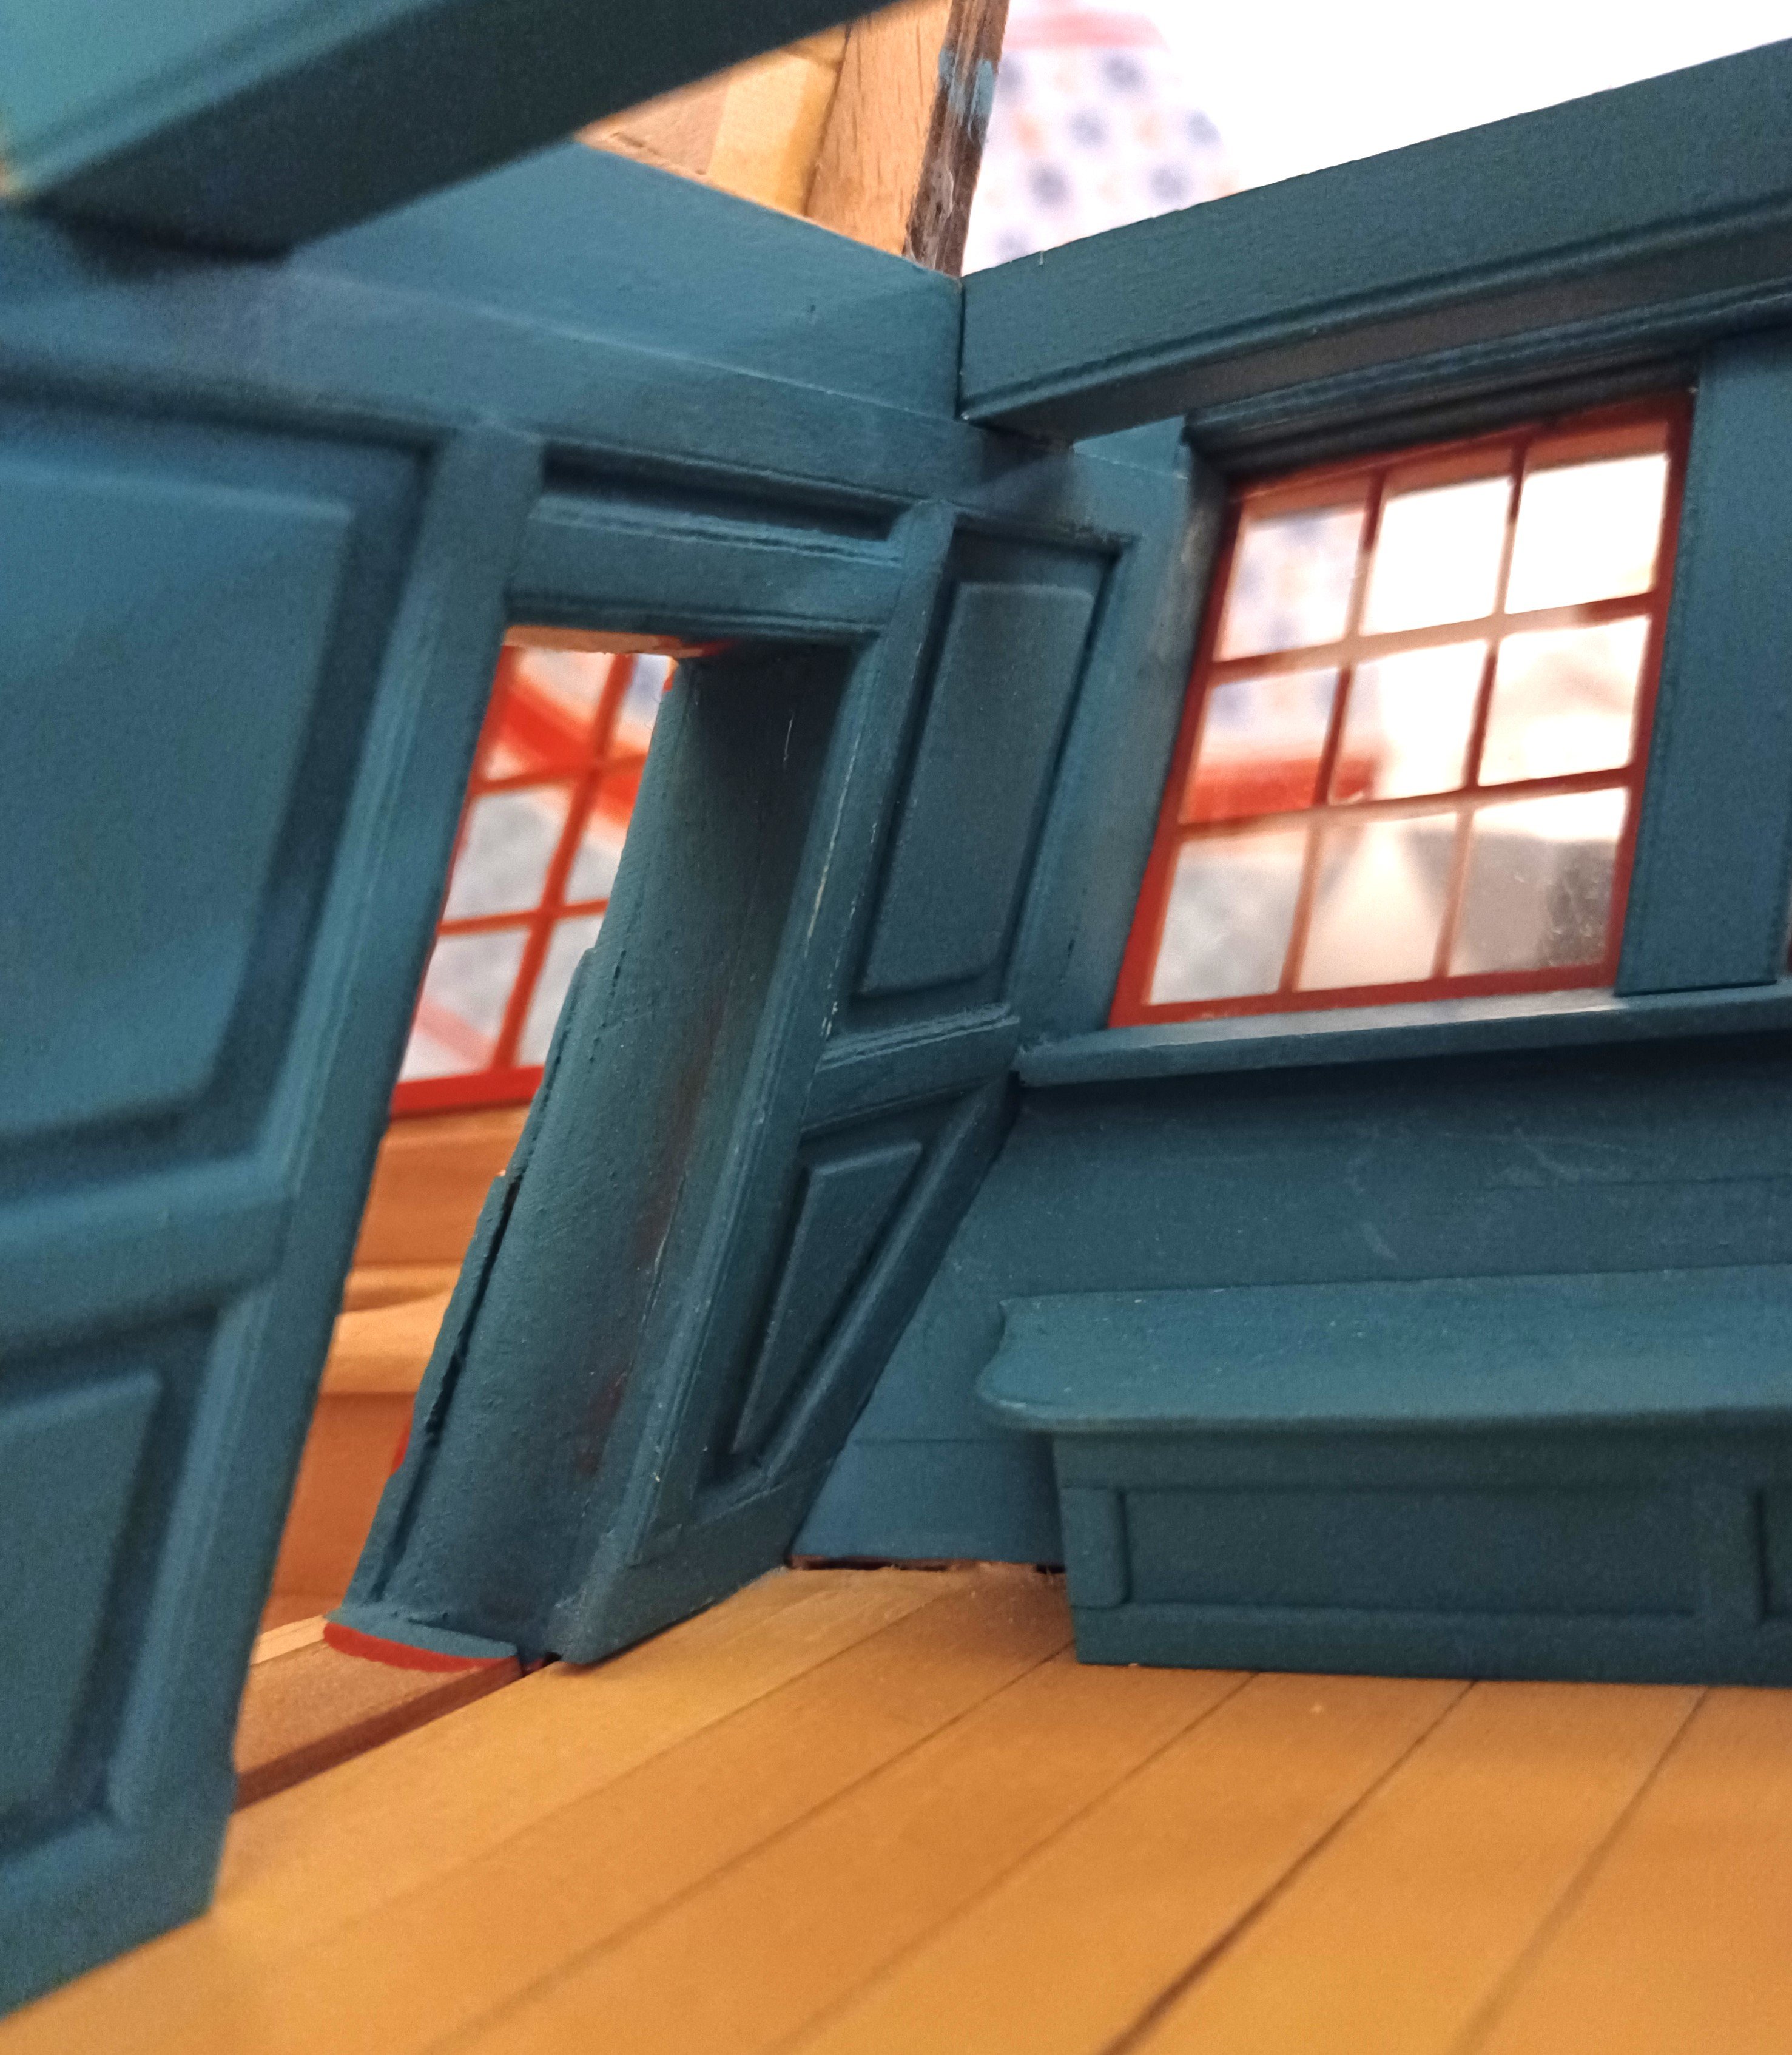
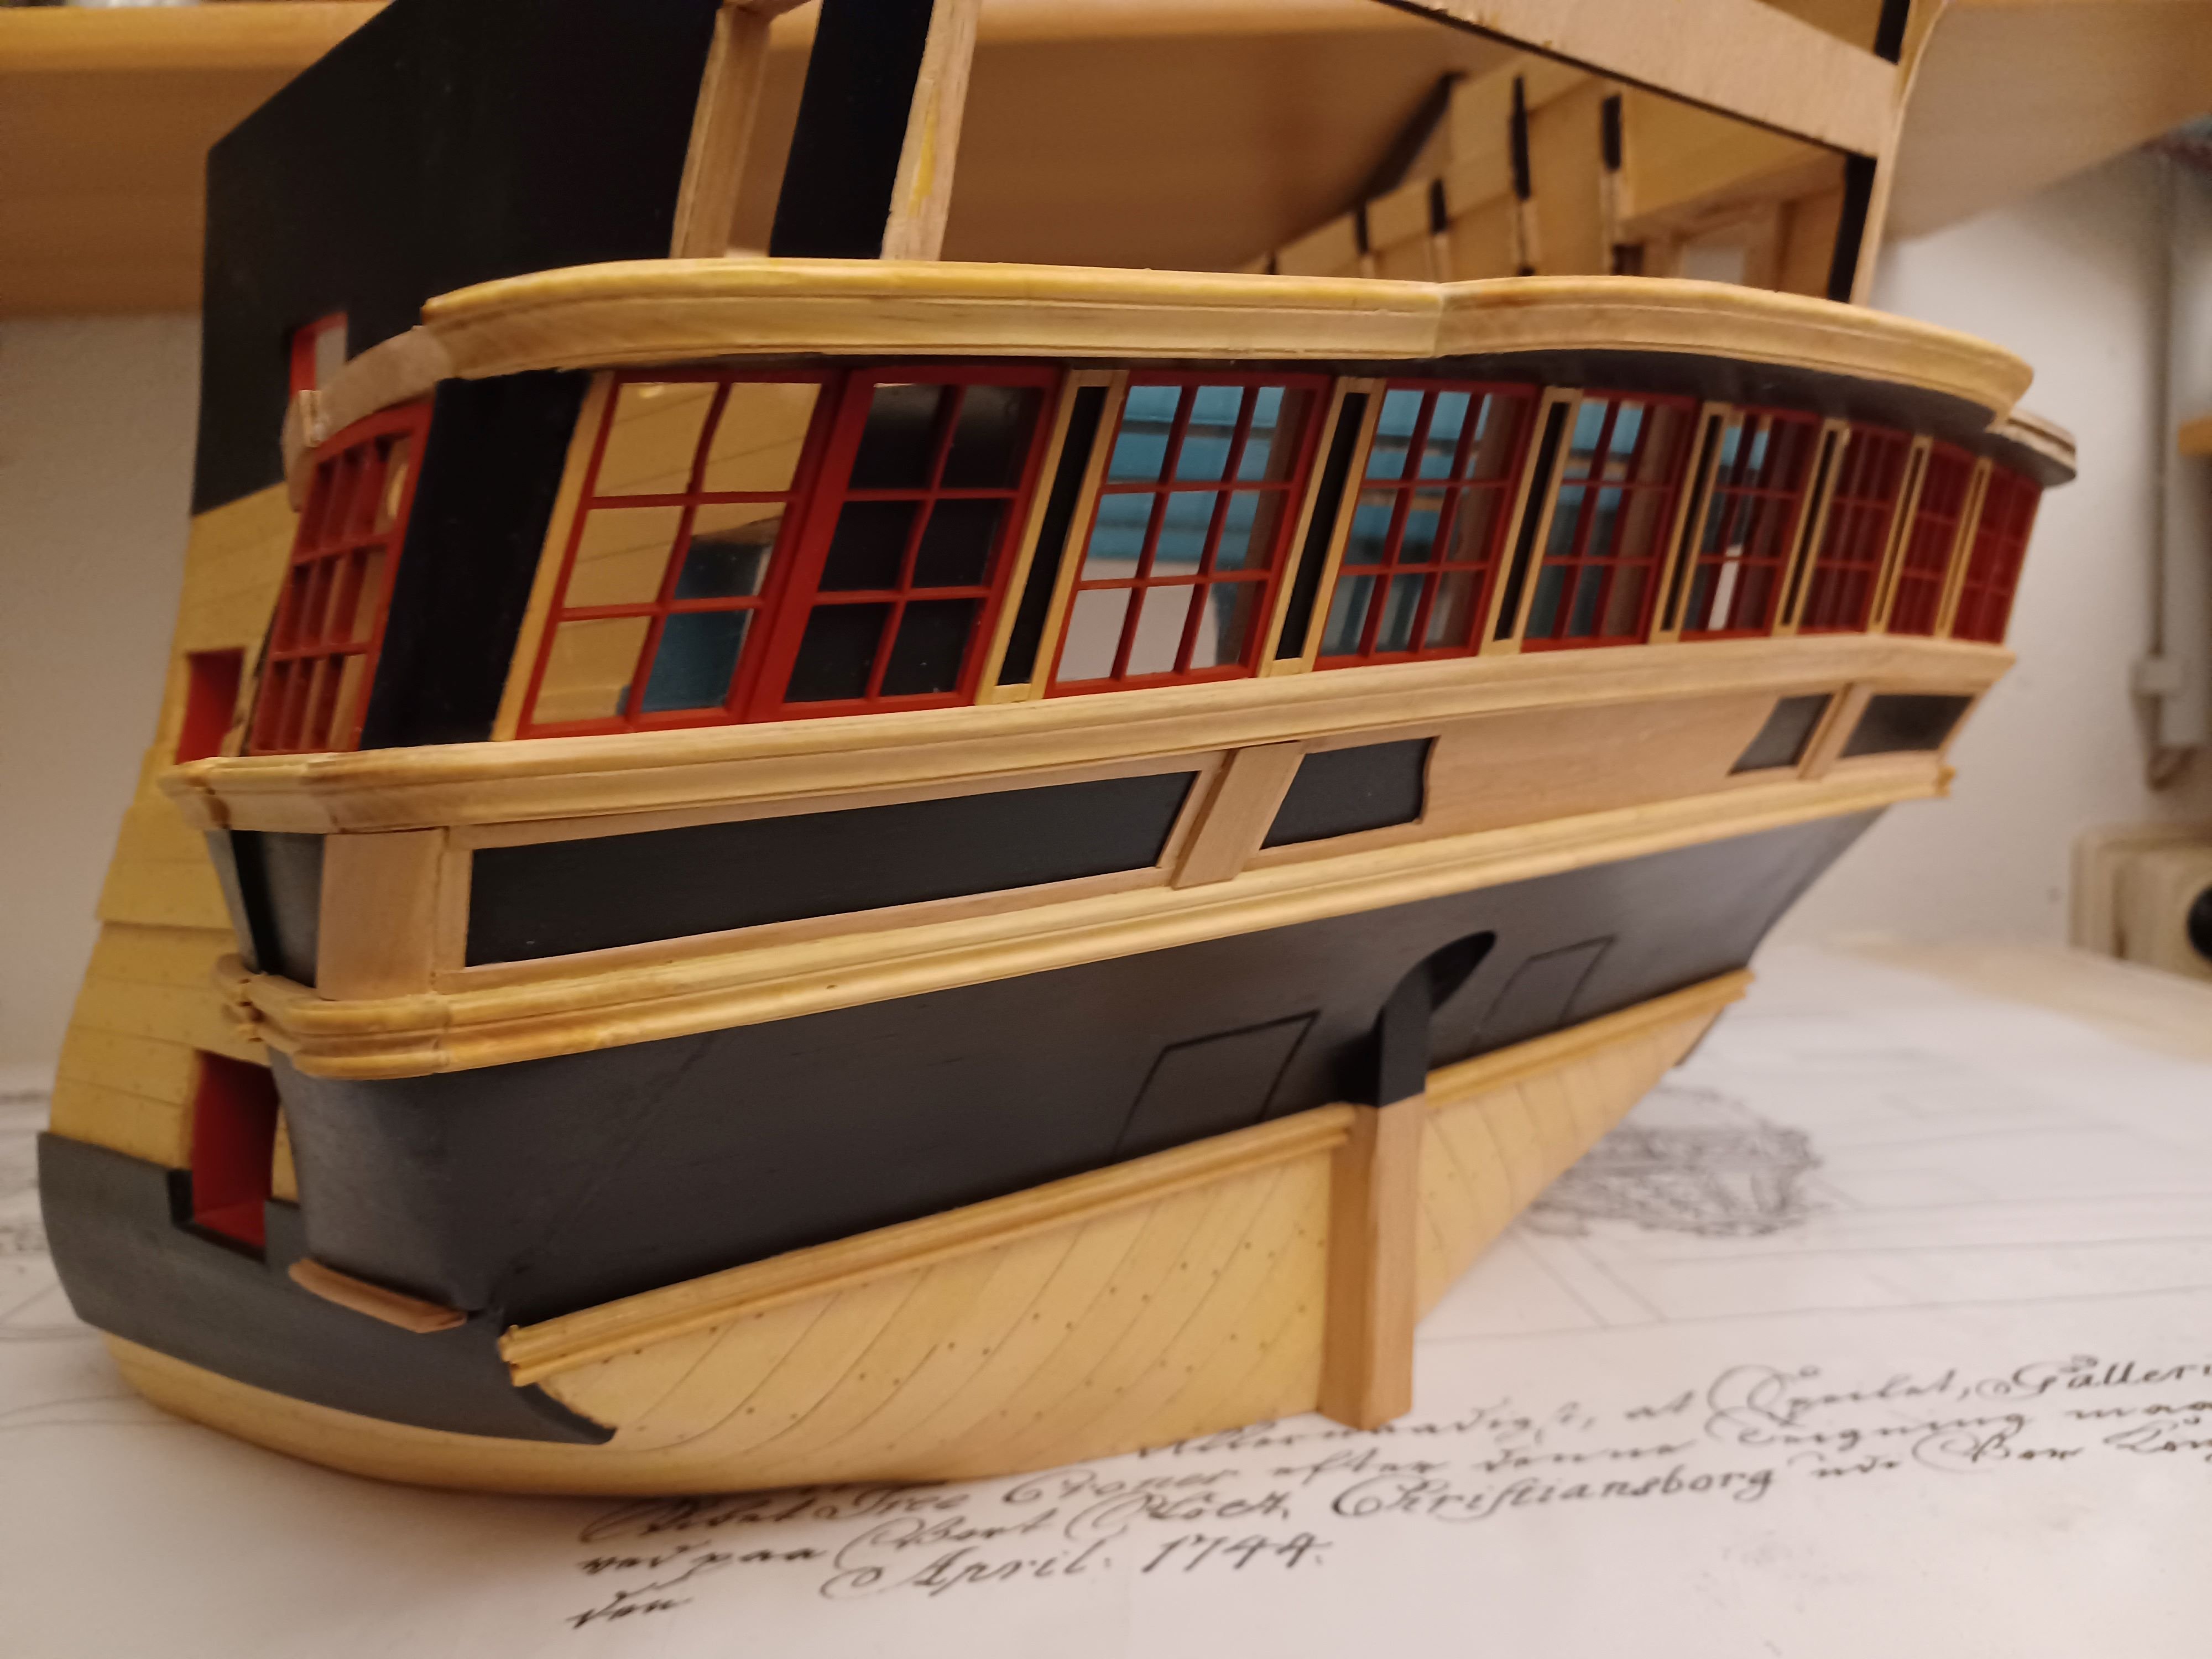
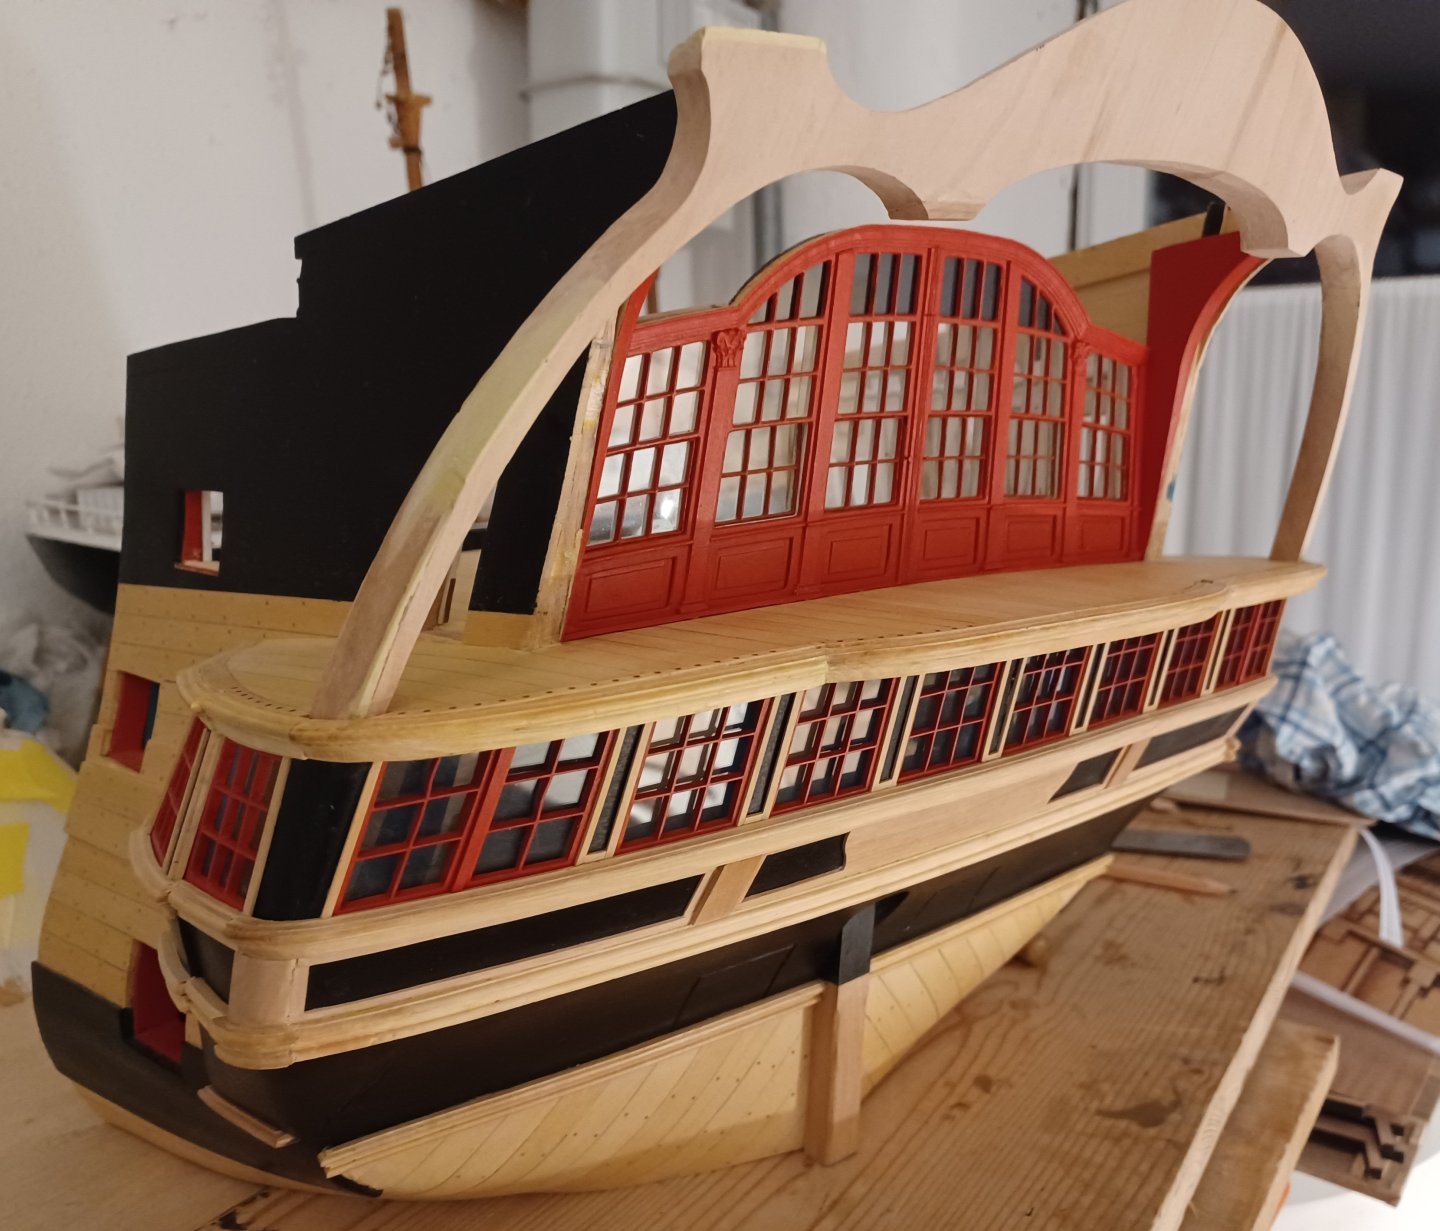
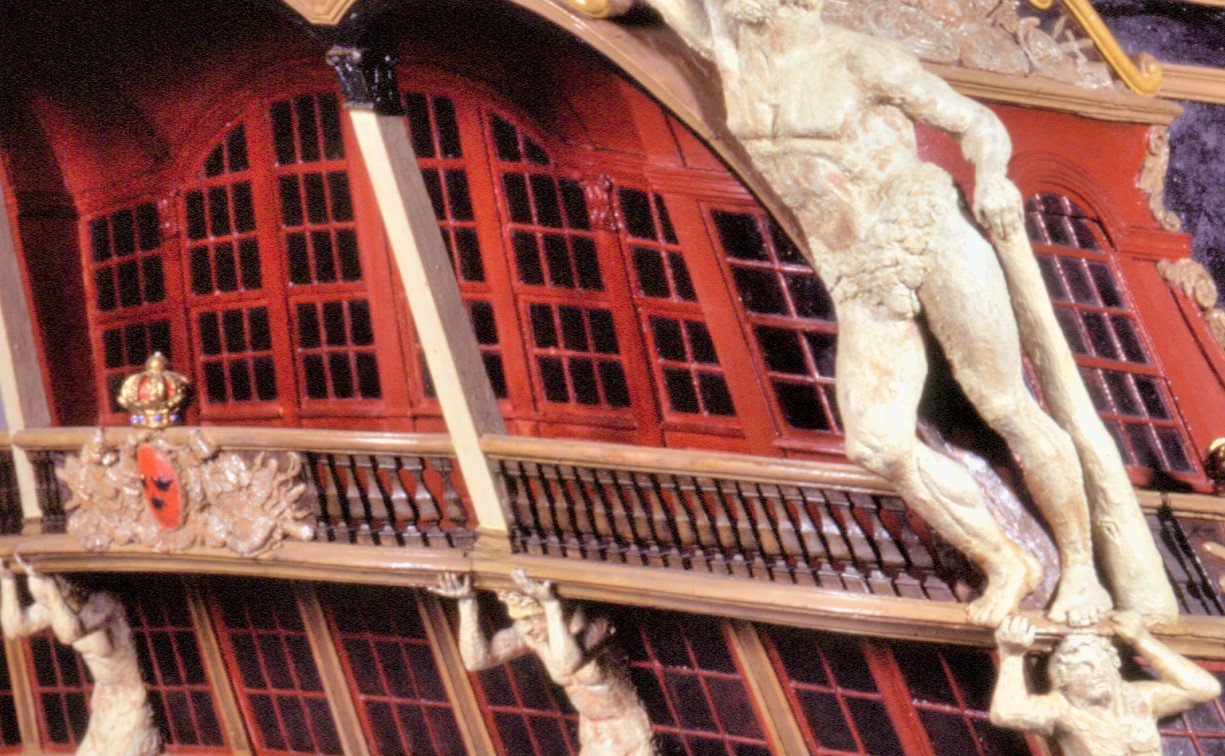
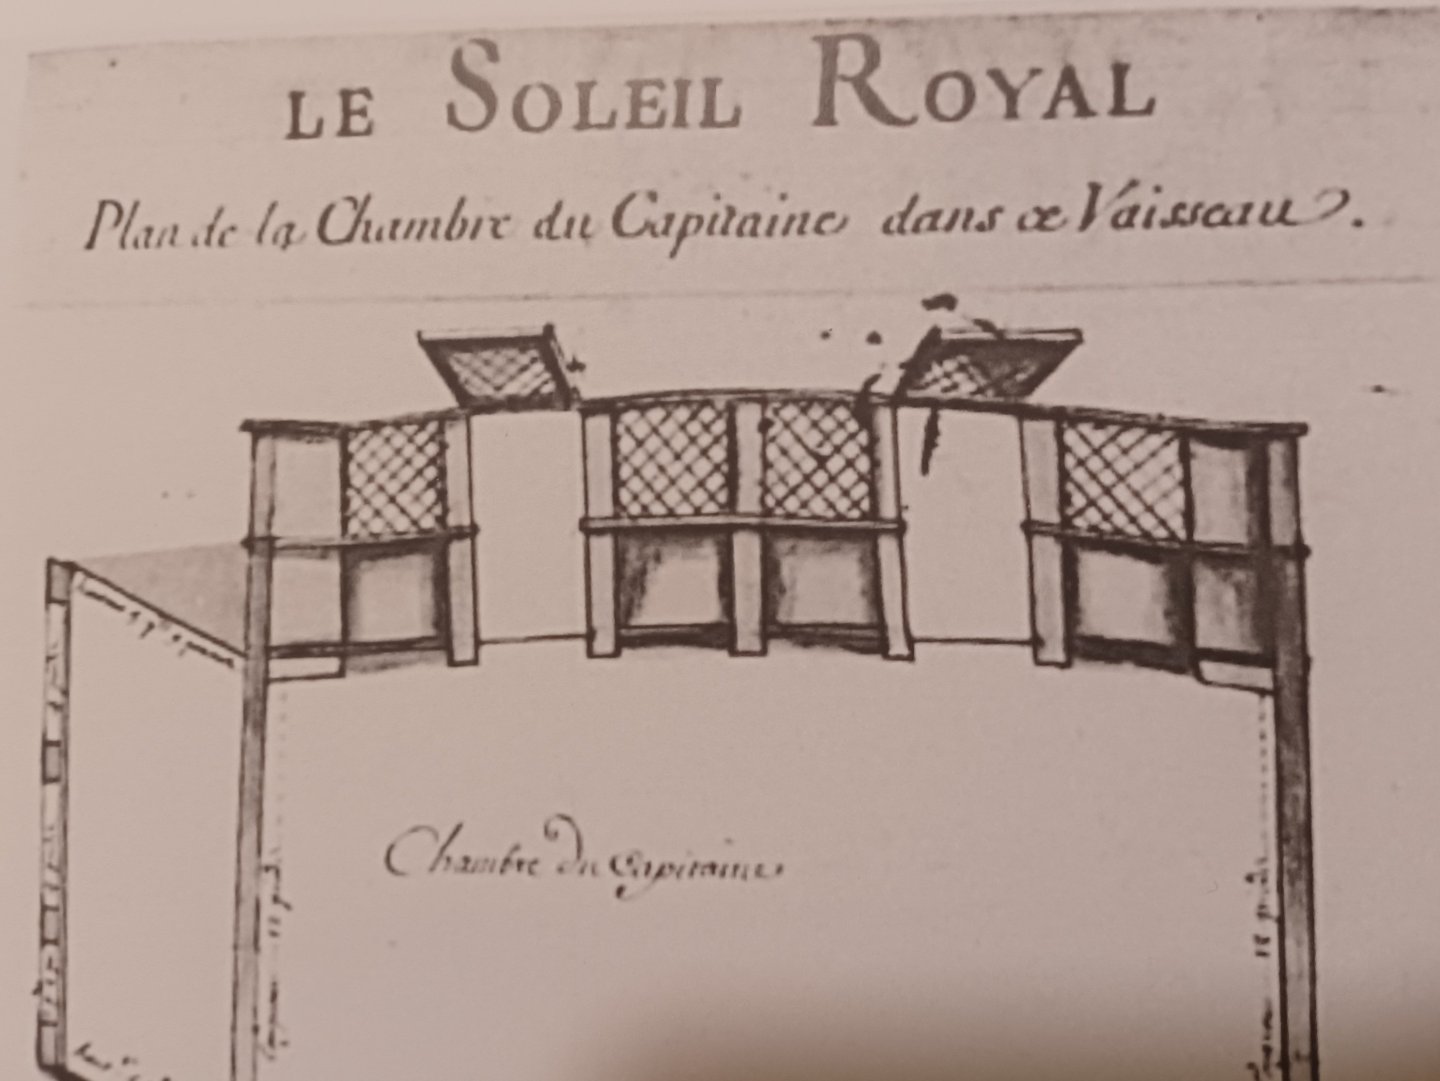
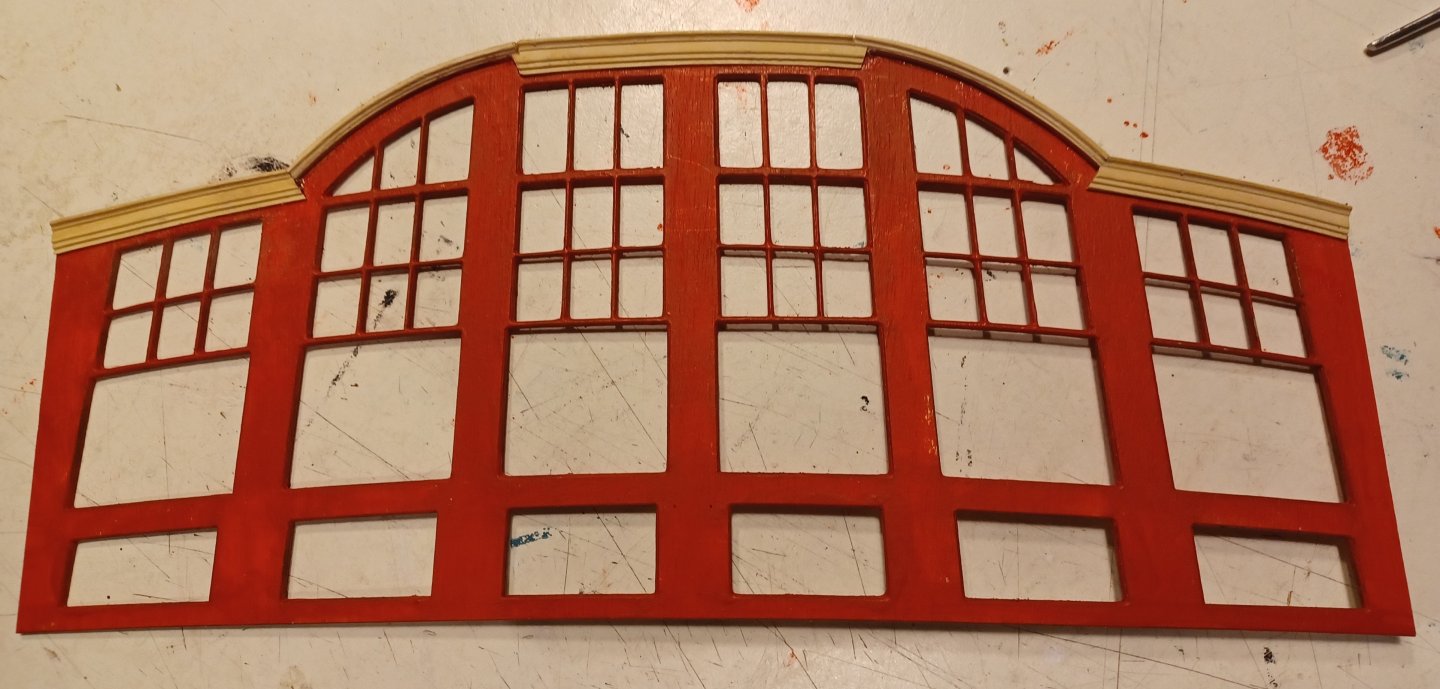
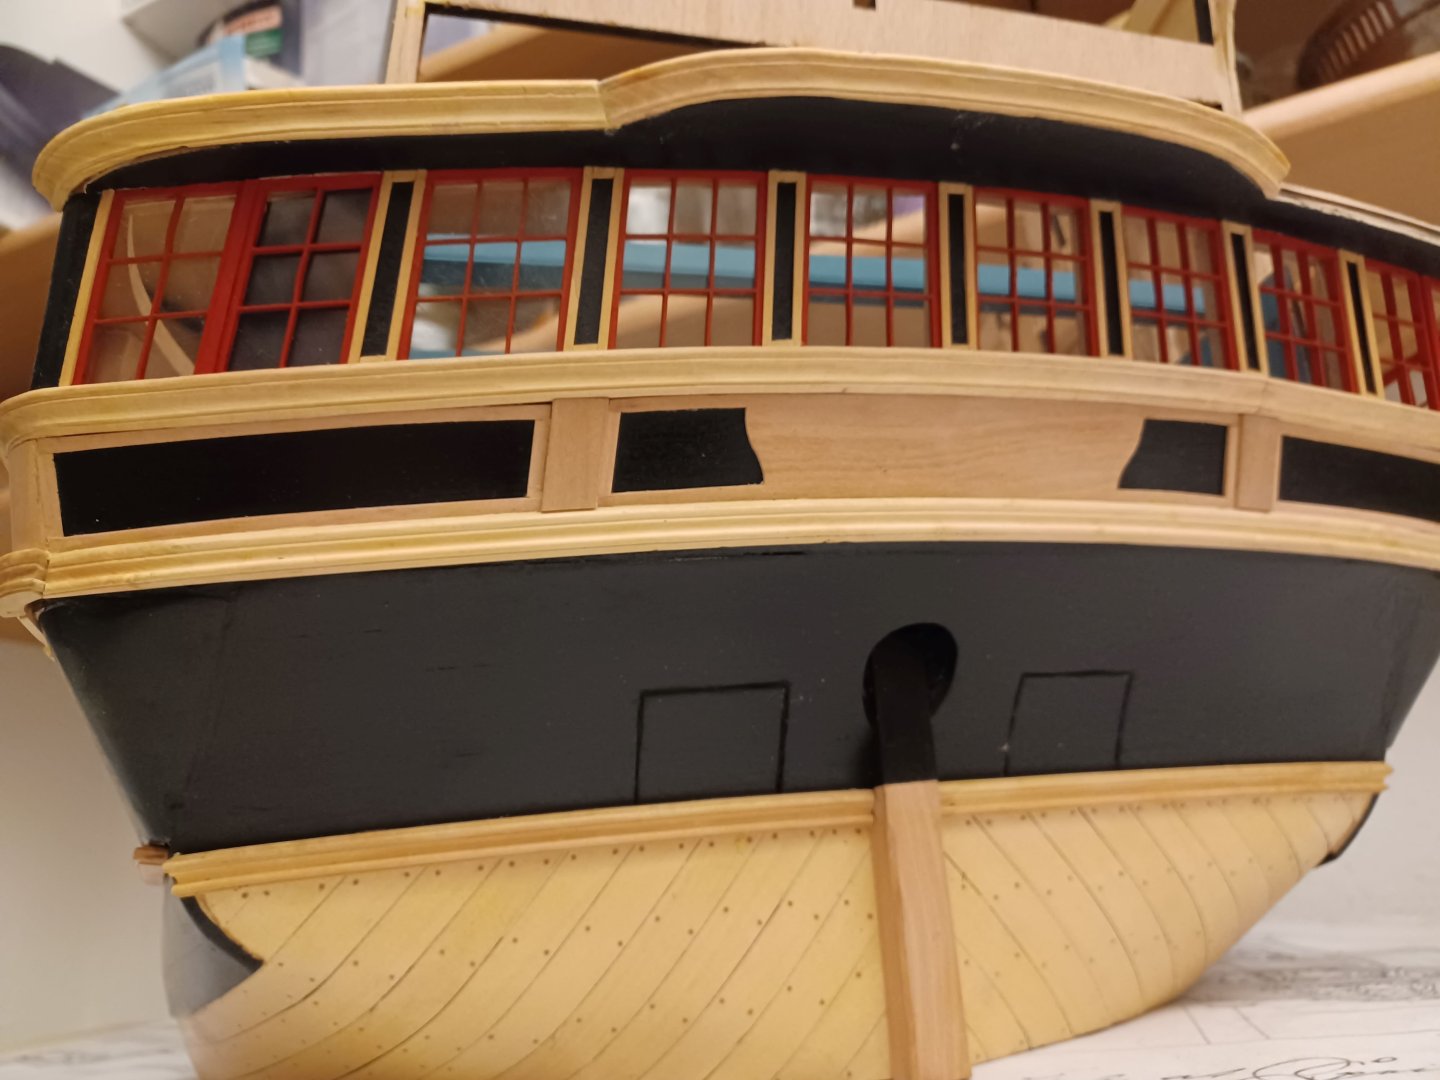
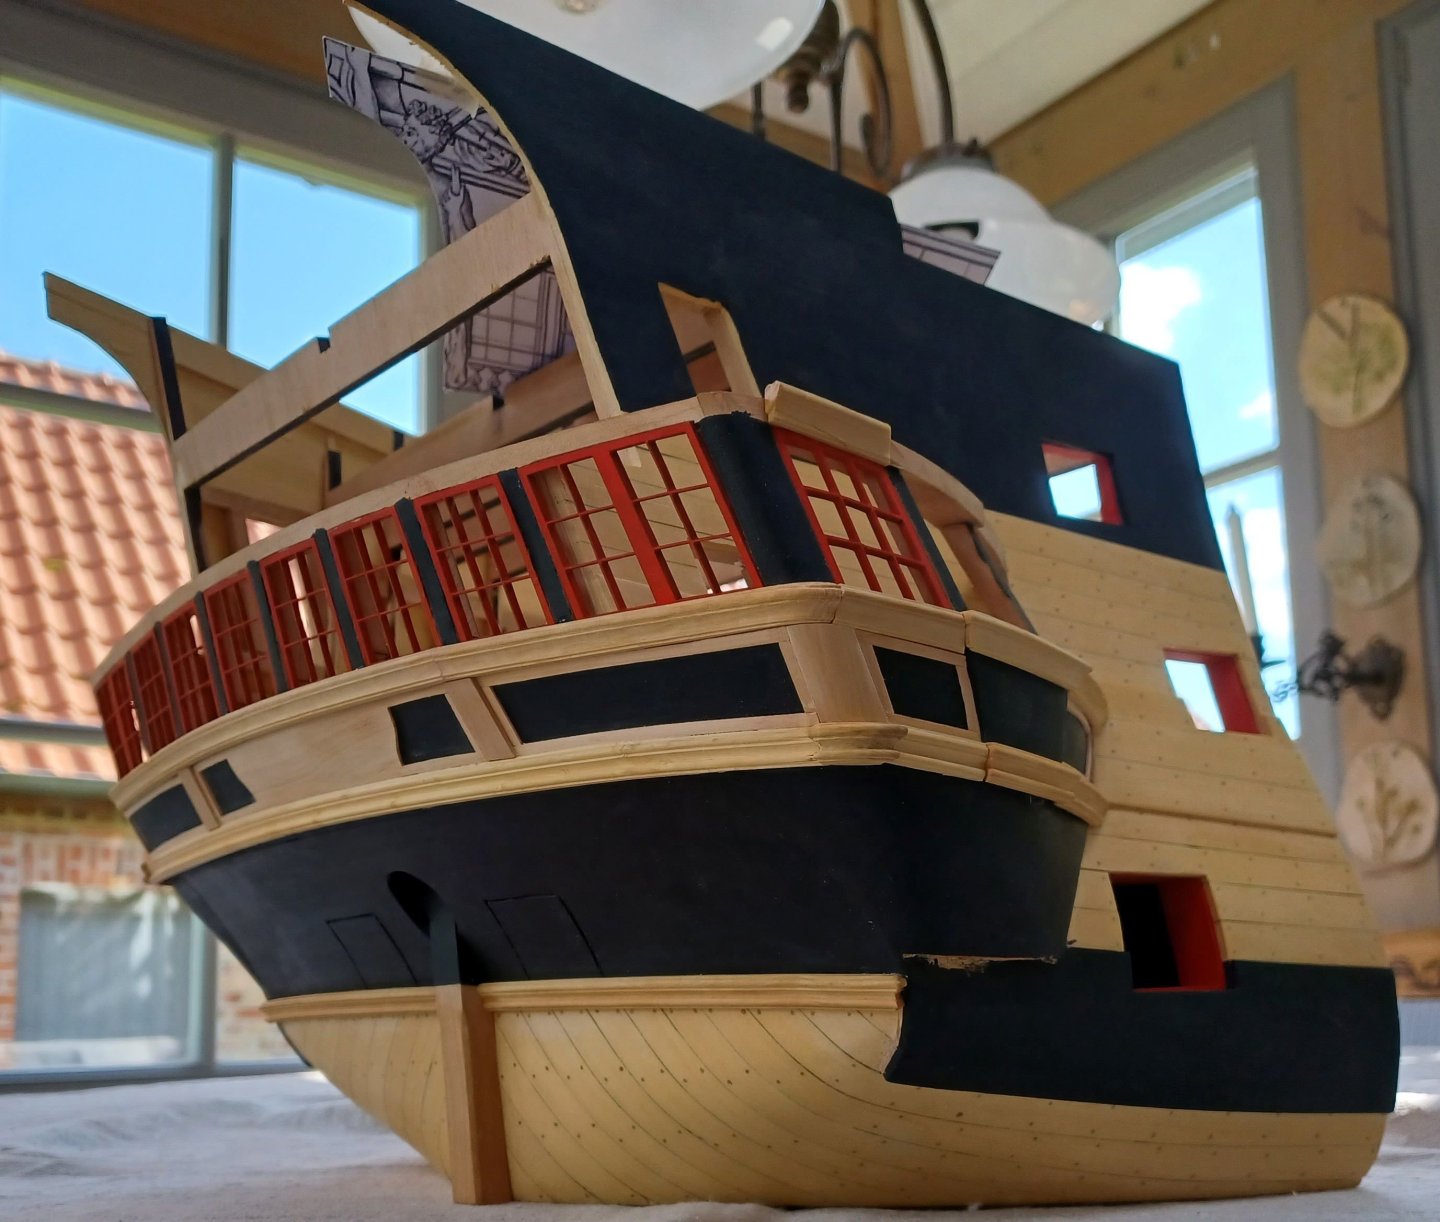
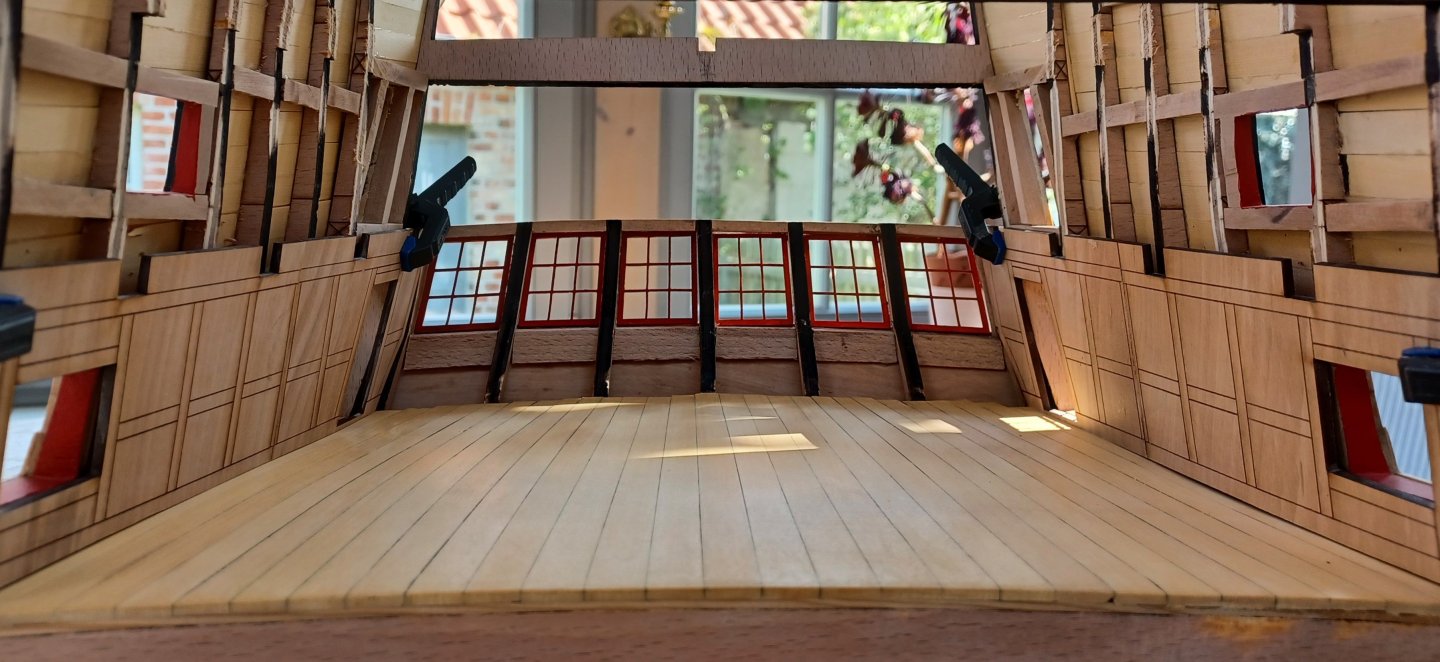
Dear fellow modellers, Work continues with the window front of the great cabin. The curved profile was finished with wood filler and profiled. Here you can see the moulded cornice, I finally went over it again with some paint filler to make the surface fine enough. And here is the result. After the two halves of the window front had been joined together, I installed the part on the model. One thing that still concerns me is the opening of the windows. The lower sashes were apparently always openable. The original model in the Krigsmuseet indicates this by a slight offset of the lower sashes, which can also be seen in the plans. Now the big question: Folding or sliding? The only references I found were a picture of the French liner le Soleil Royal, where details of the superstructure are shown, here the windows are hinged, and a photo from 1944 of the HMS Implacable, which is originally French, here you can also see the hooks on the ceiling, where the hinged windows were hooked on. However, the two situations are not entirely comparable, as the windows of the TRE KRONER are organised differently and each consist of an upper fixed glazing and a lower opening sash. This is the classic sliding window division. Does anyone here know any more details? Best regards, Matthias


-
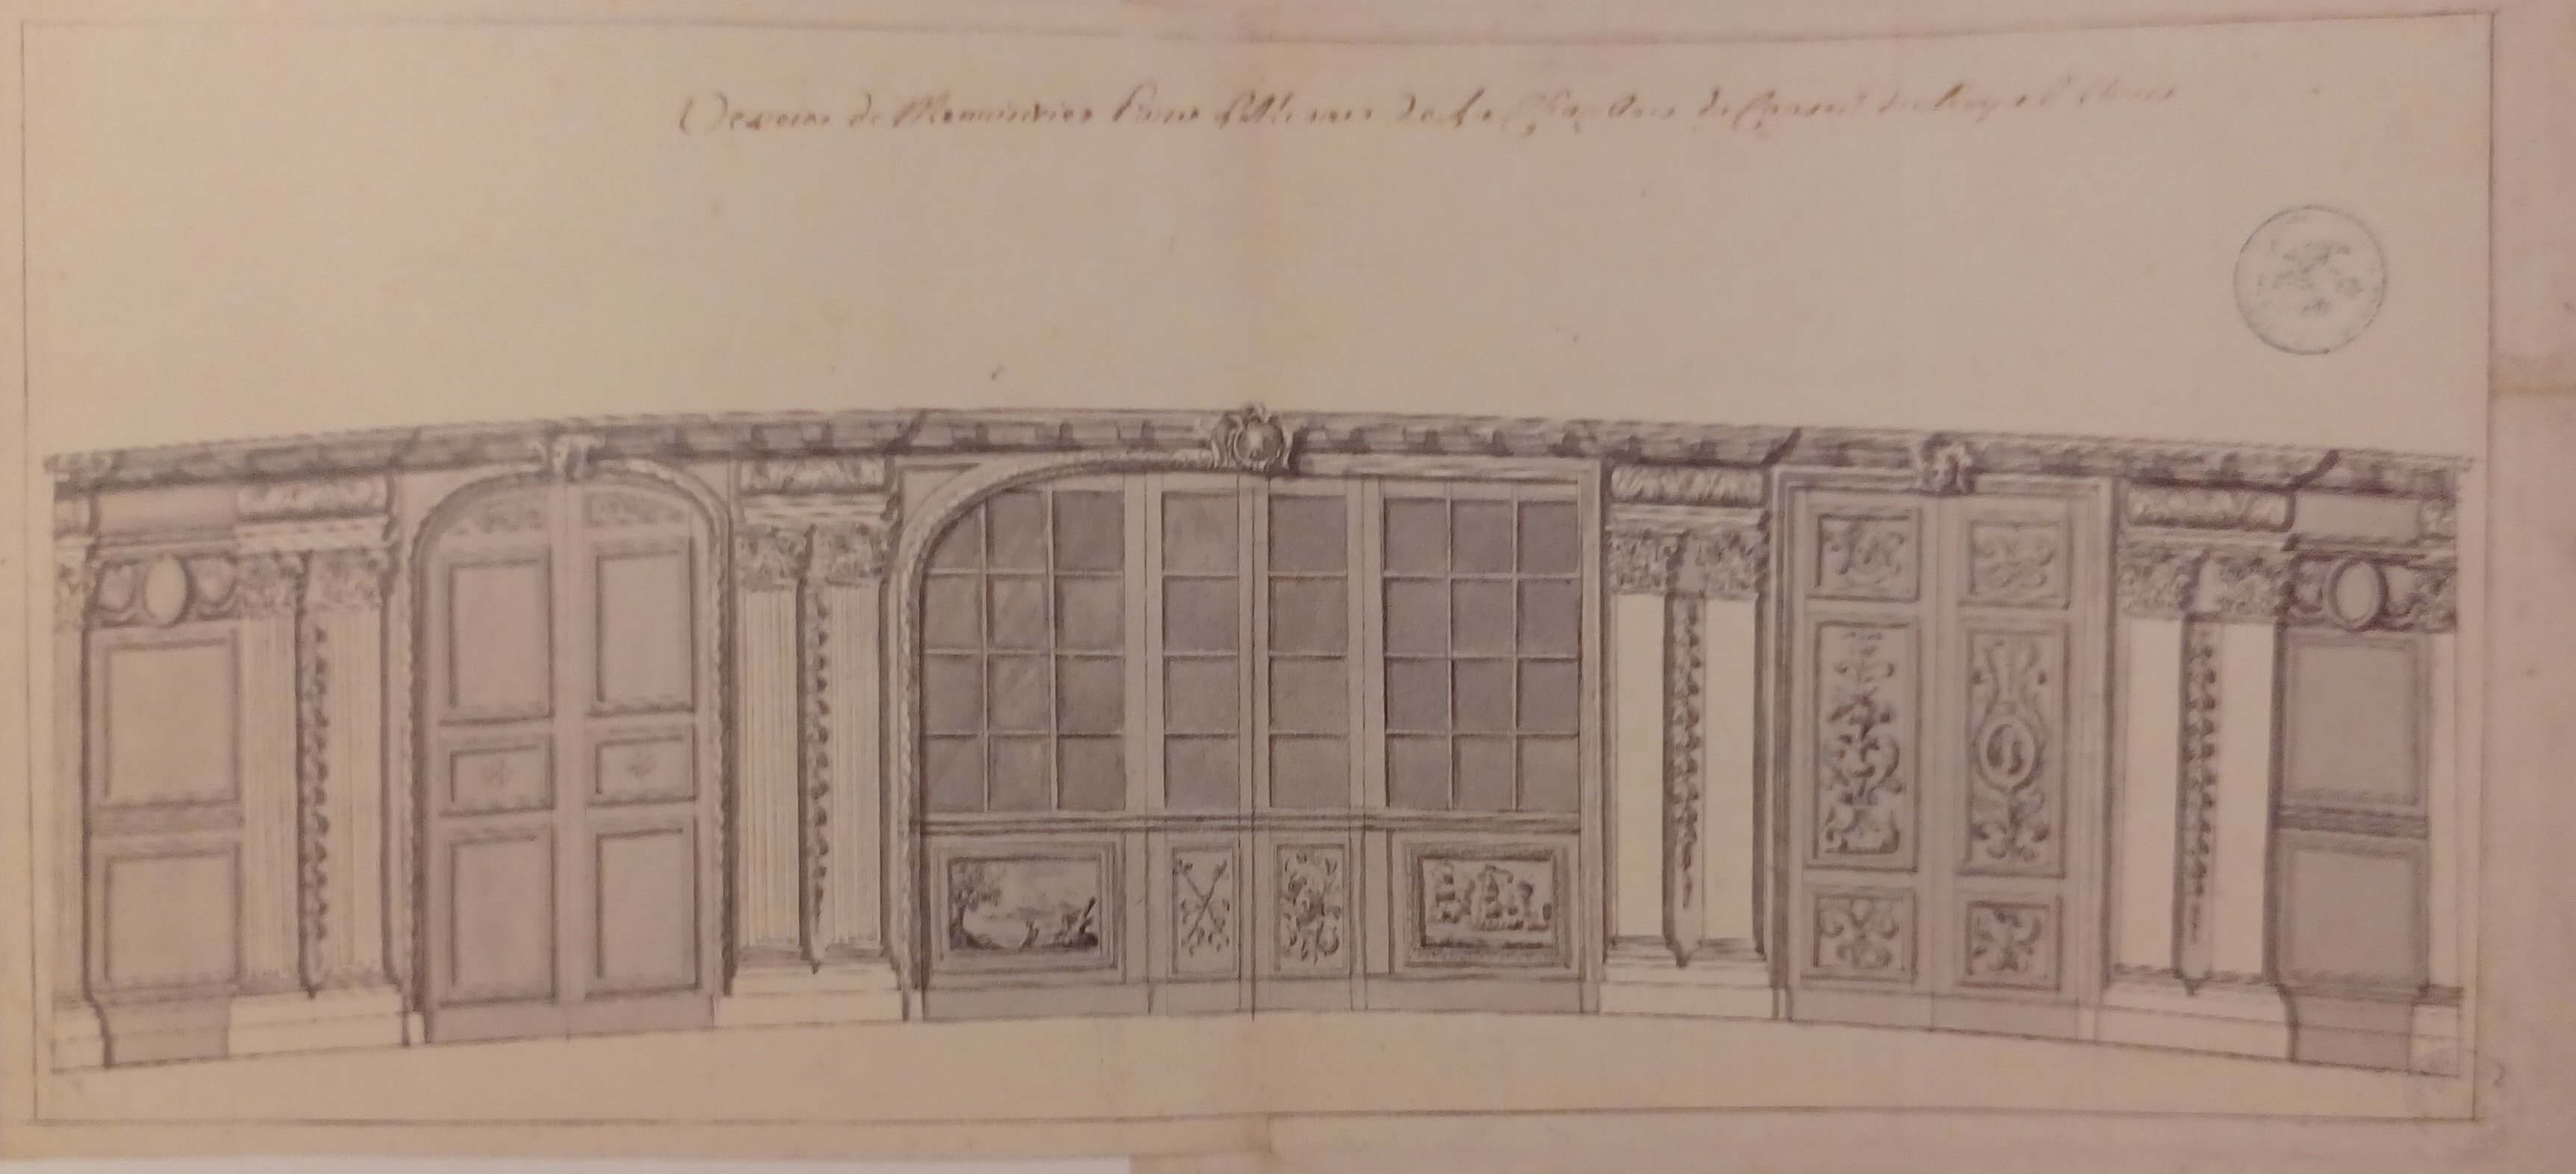
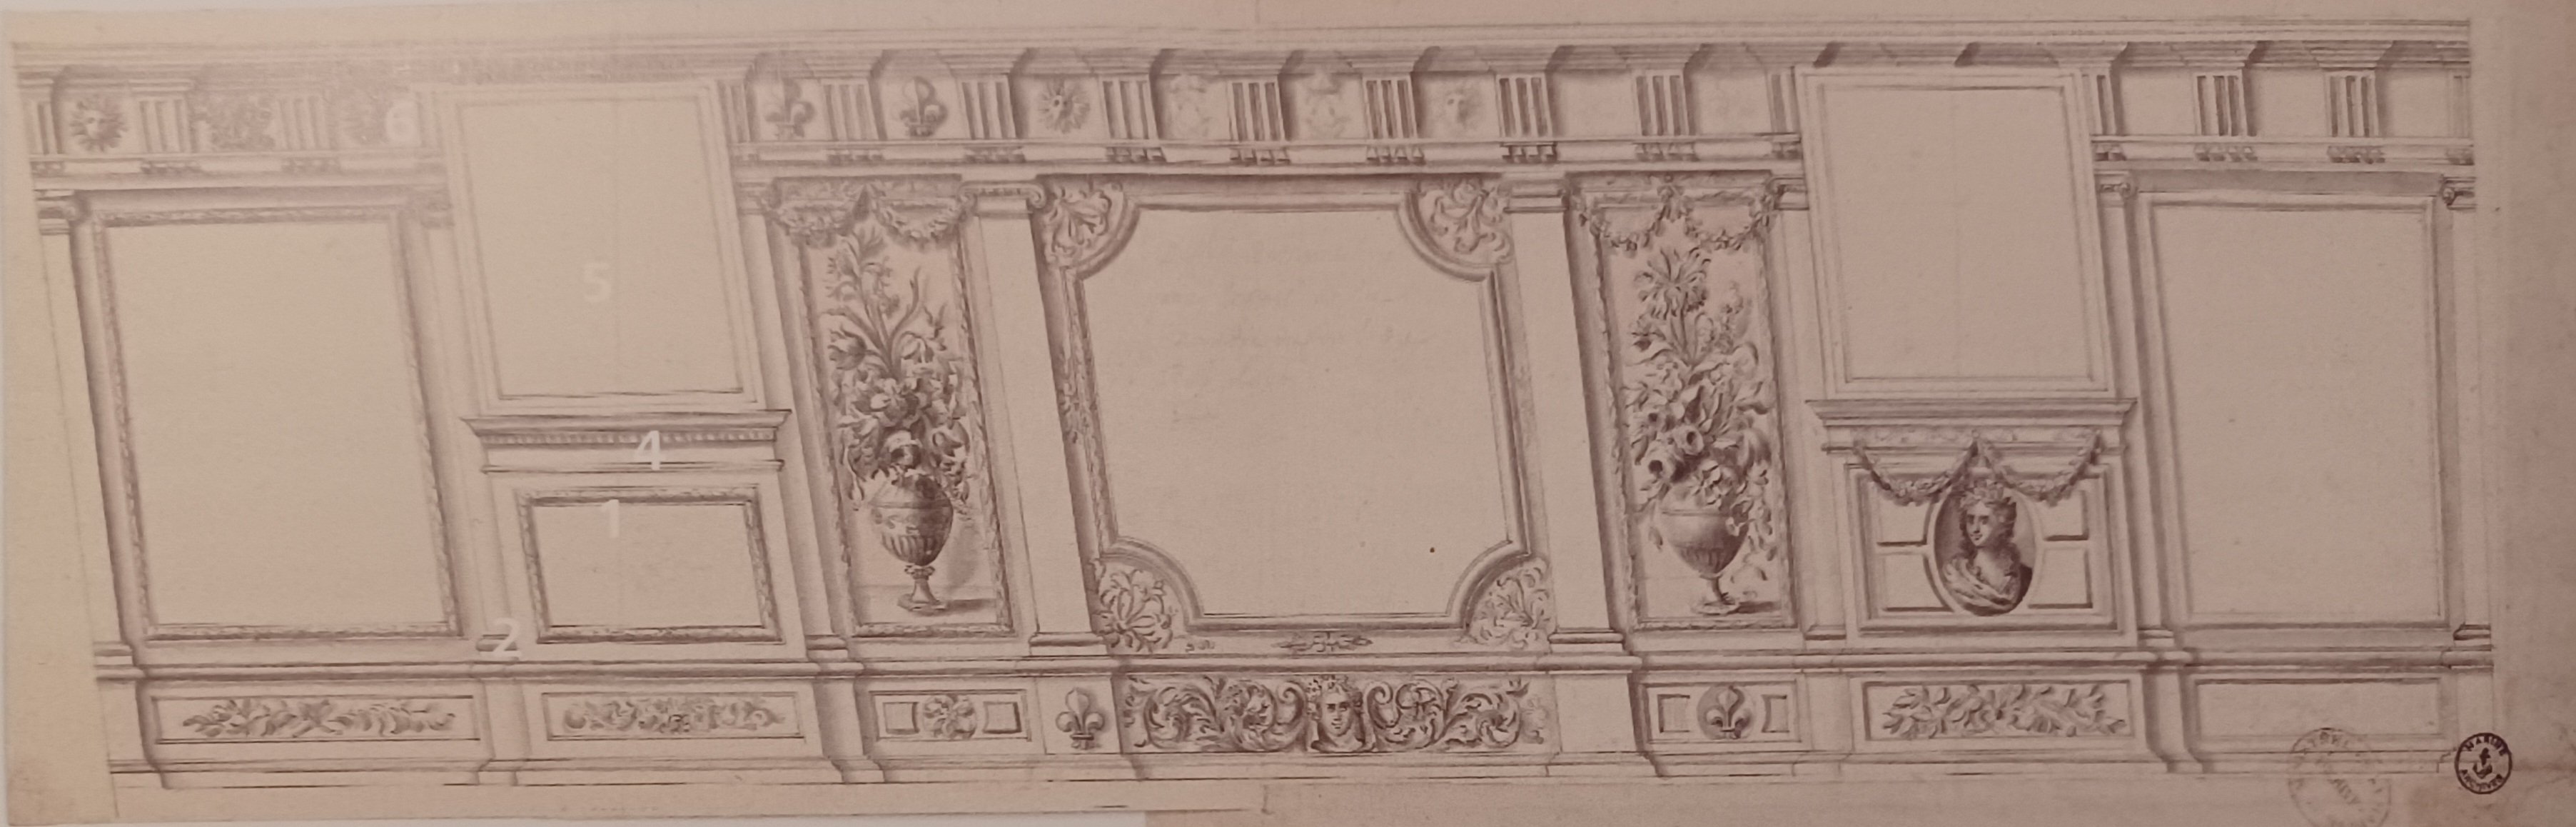
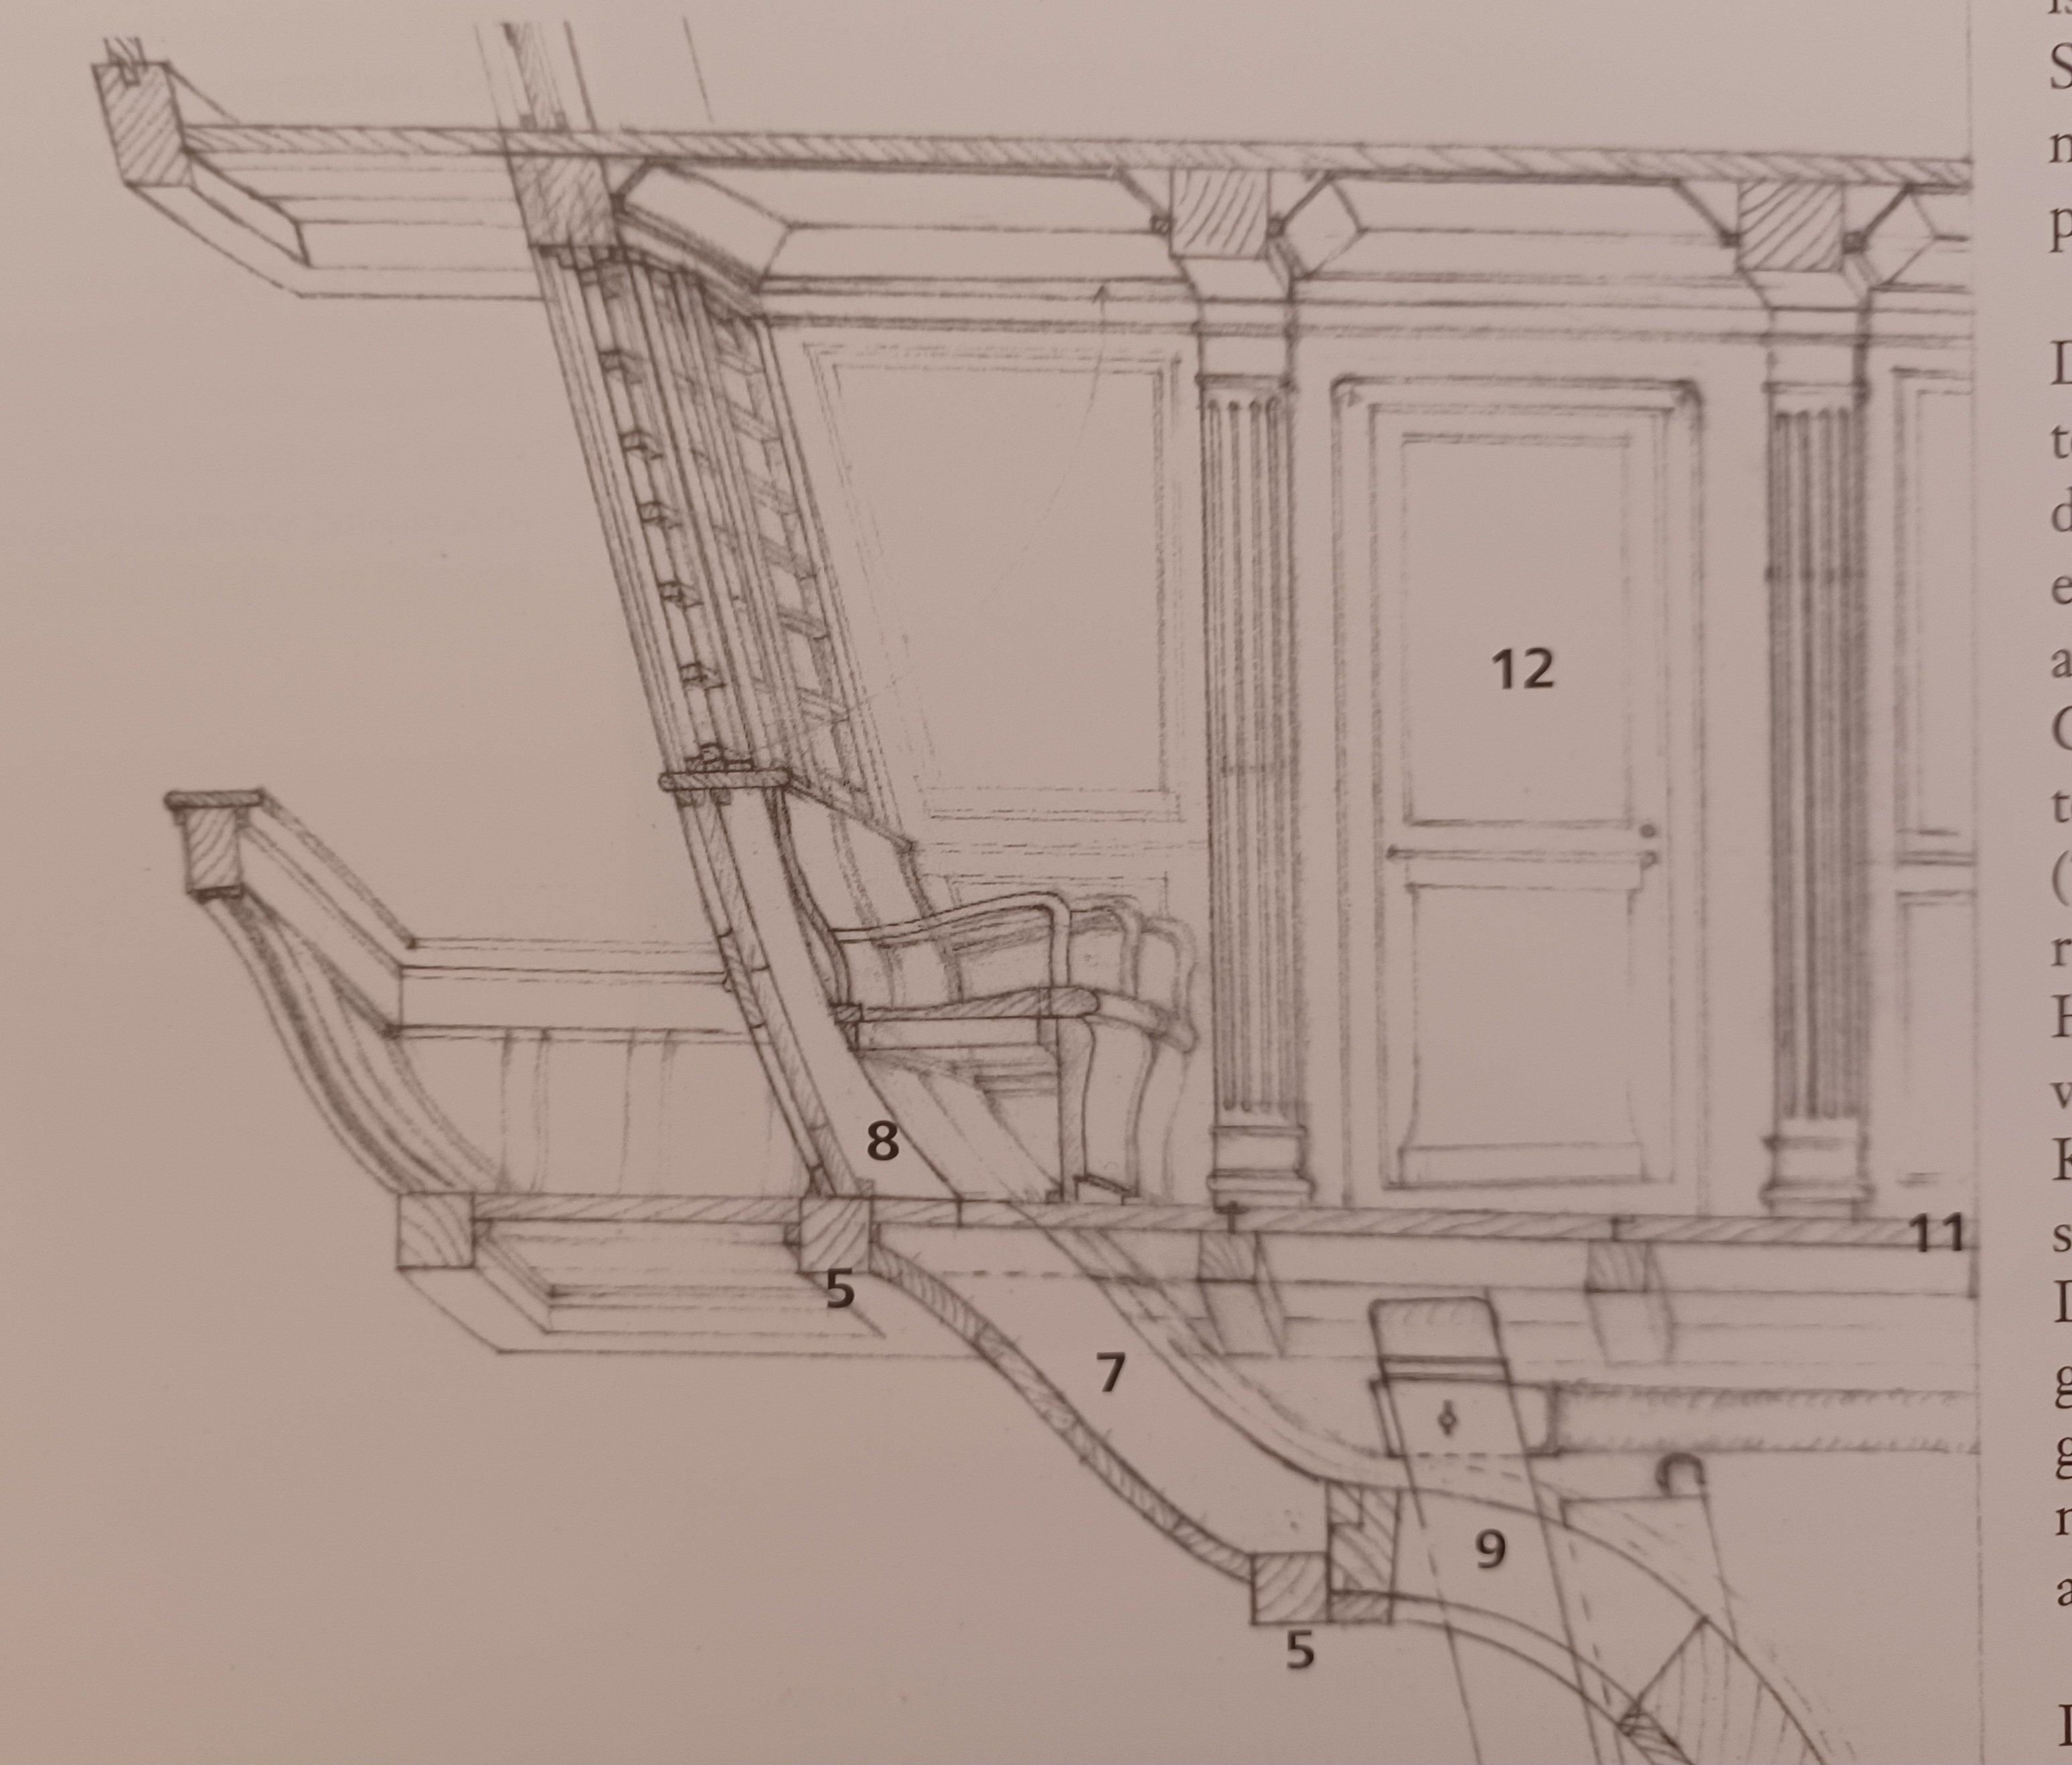
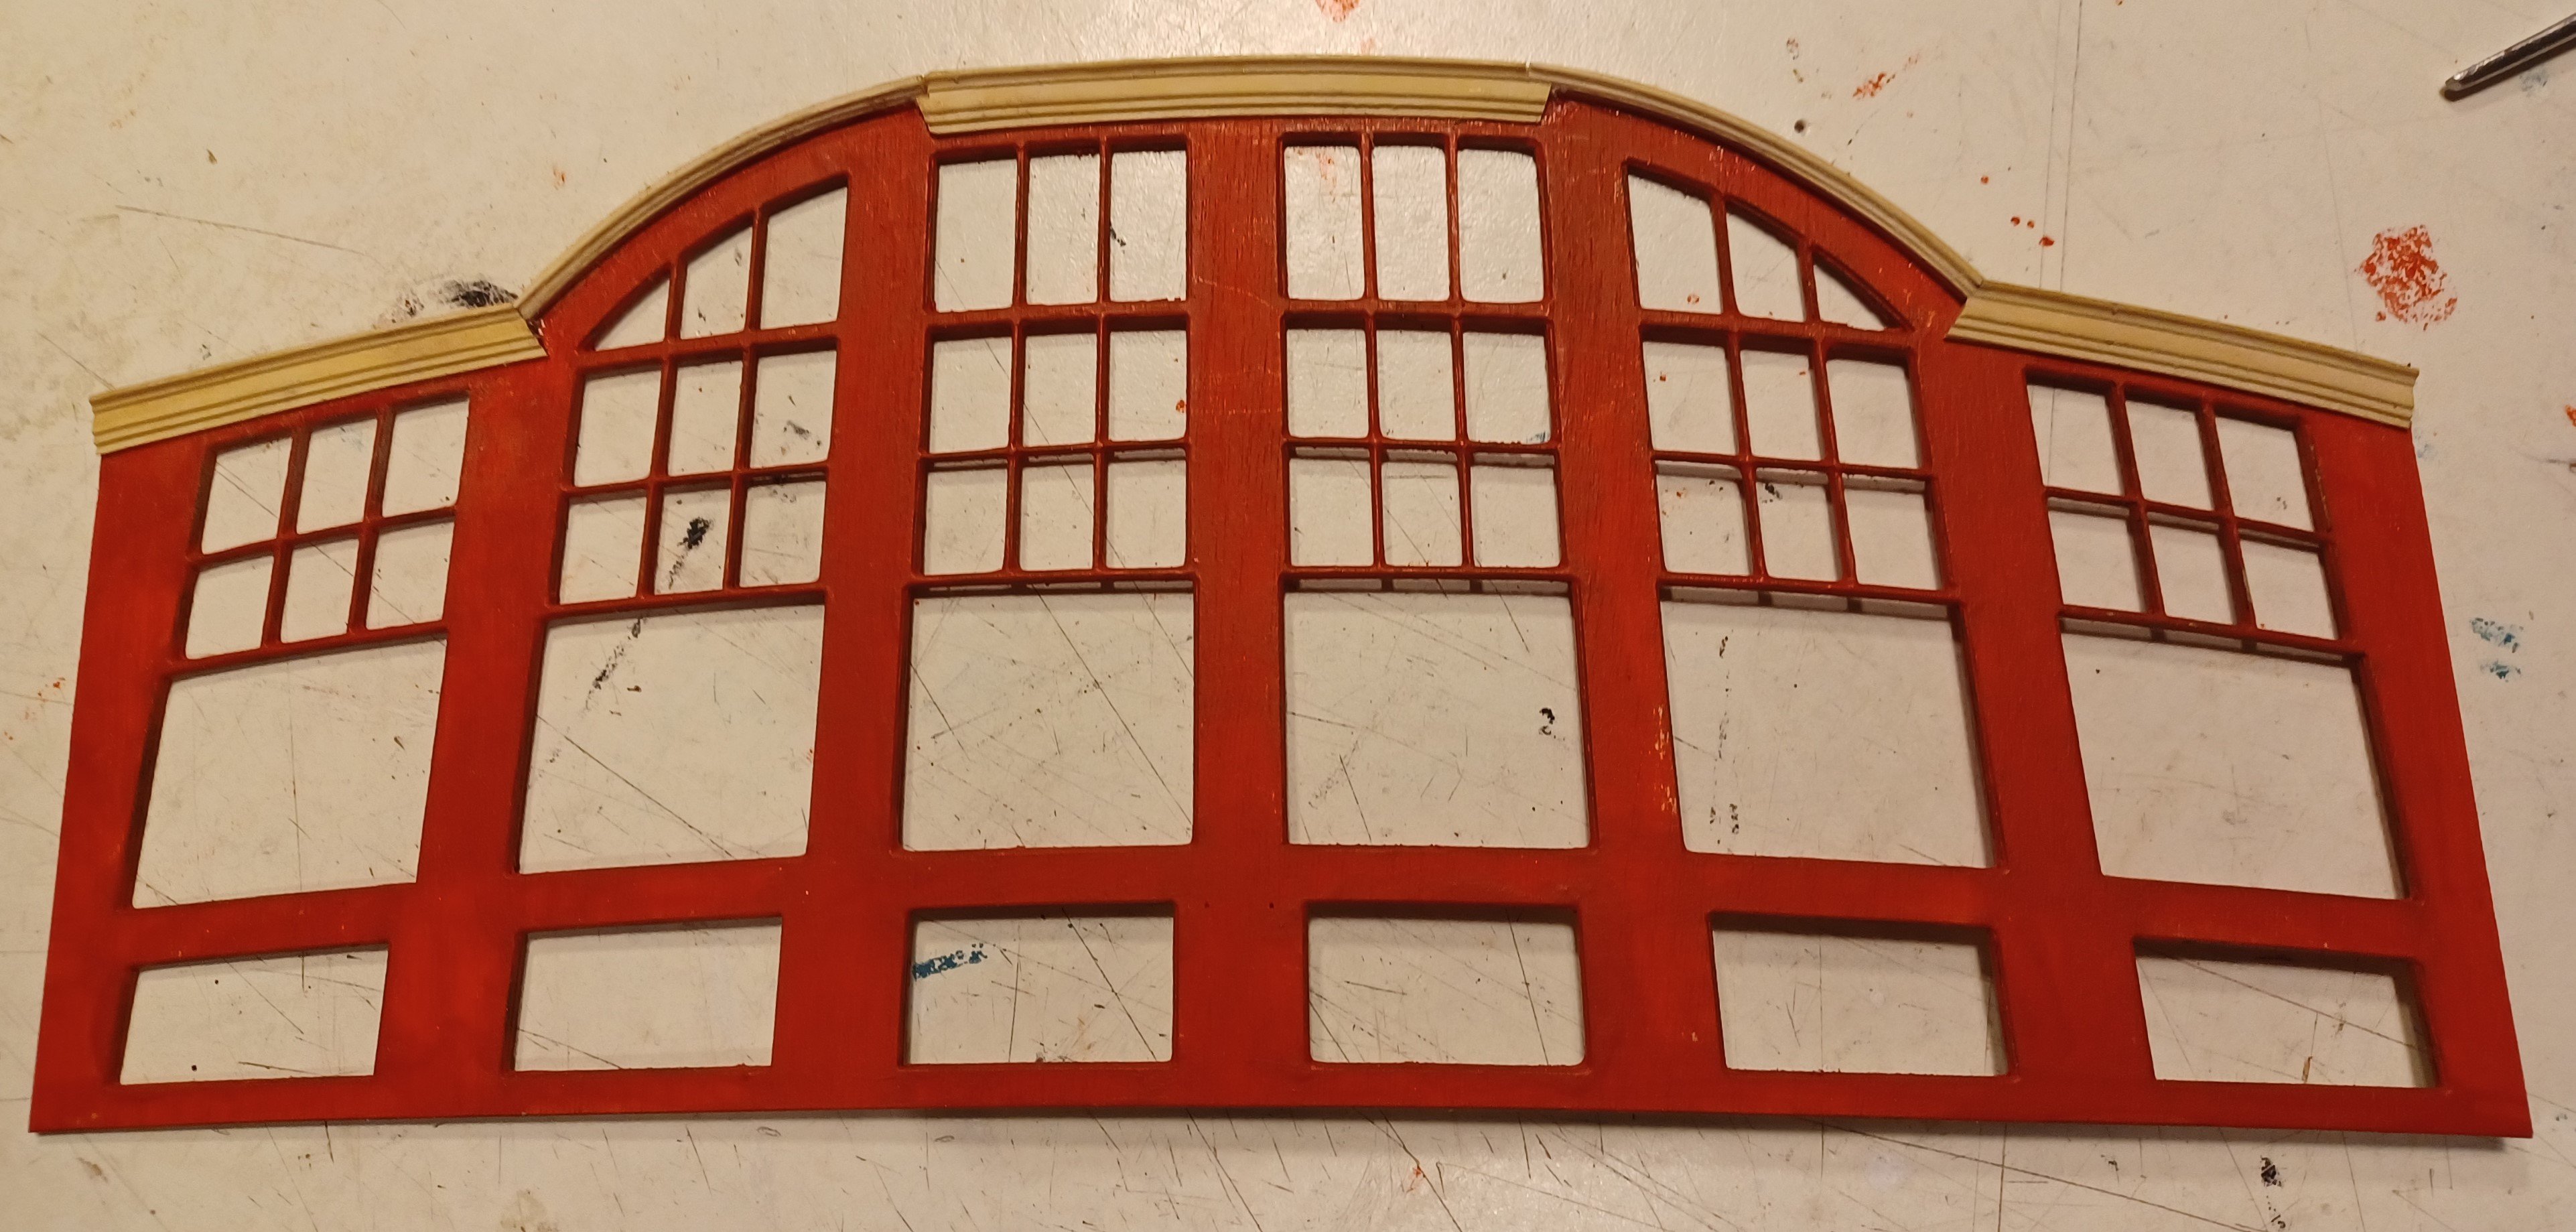
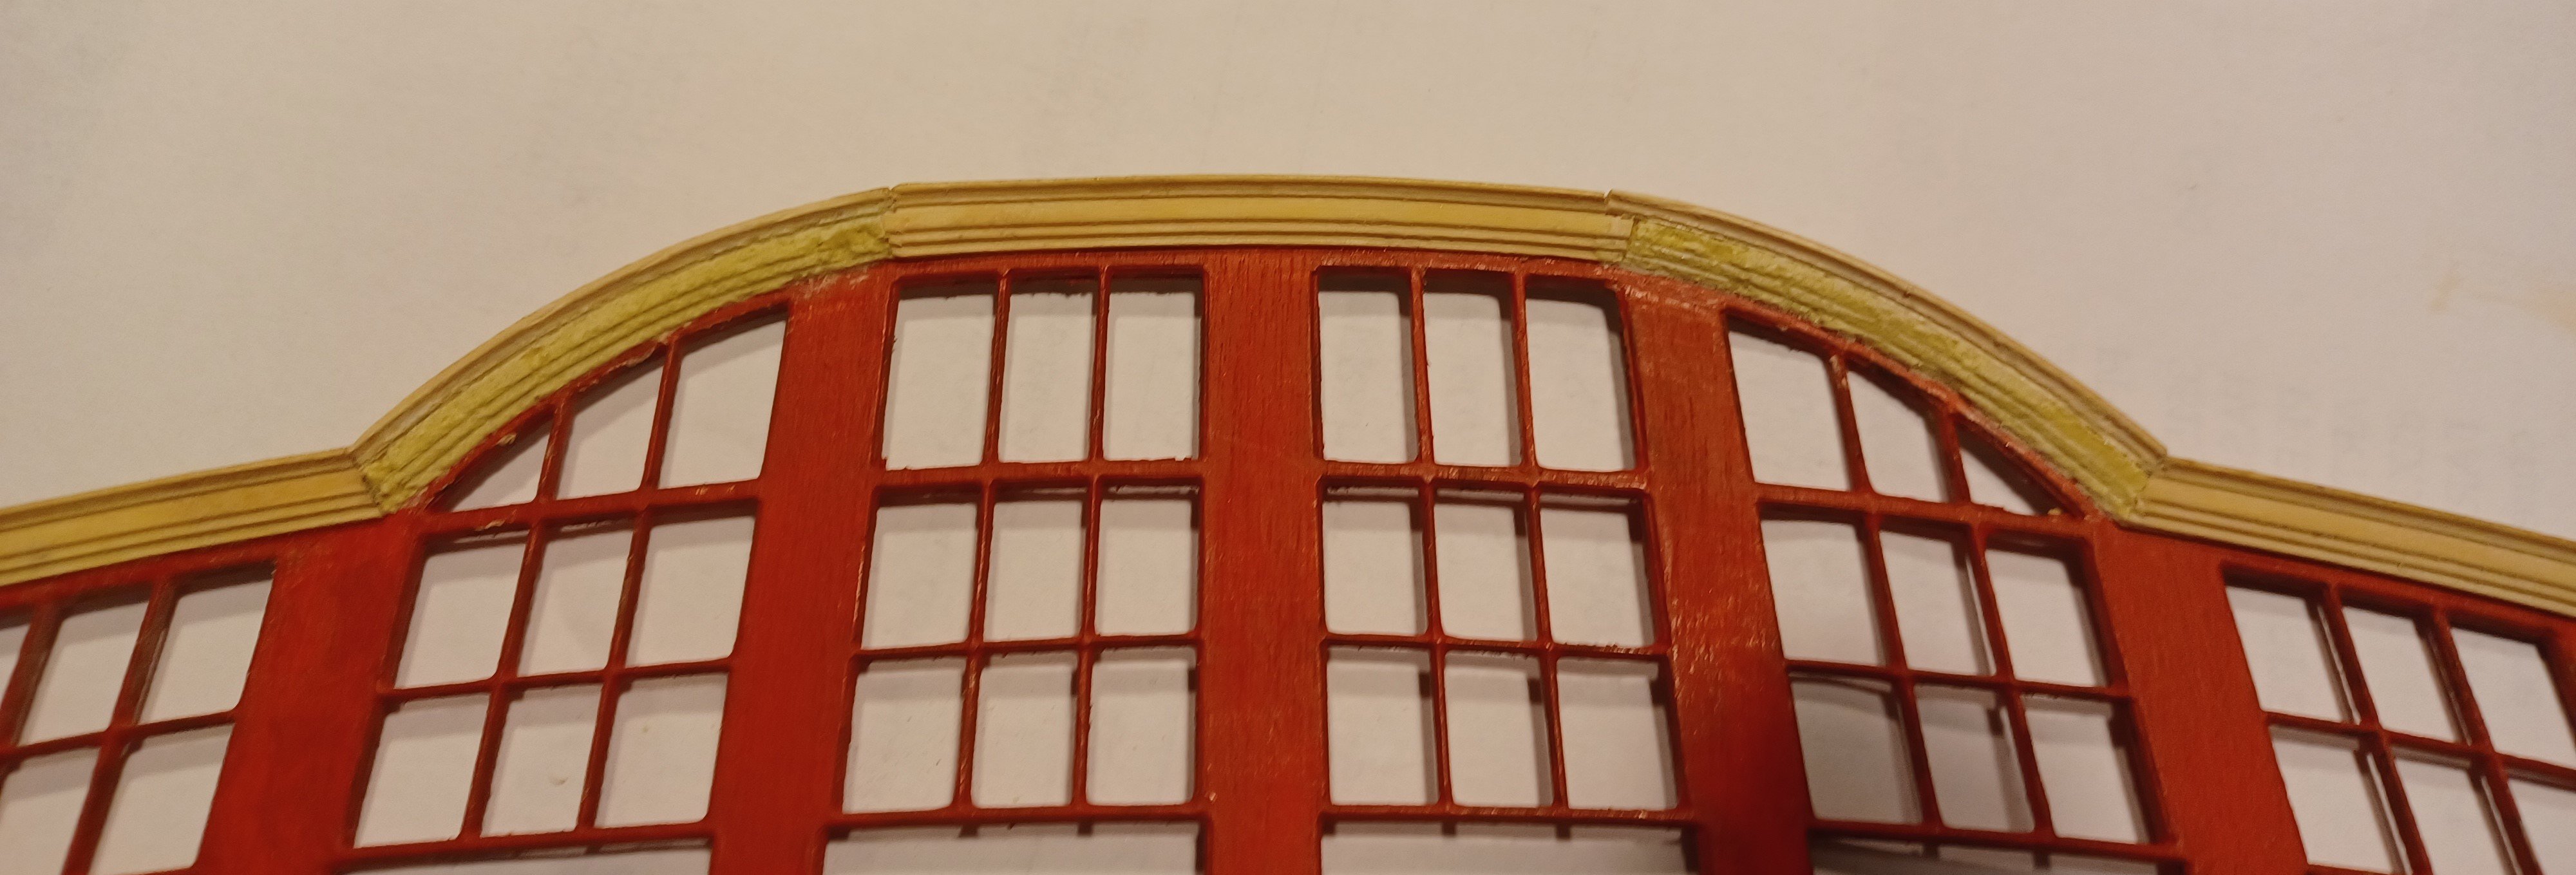
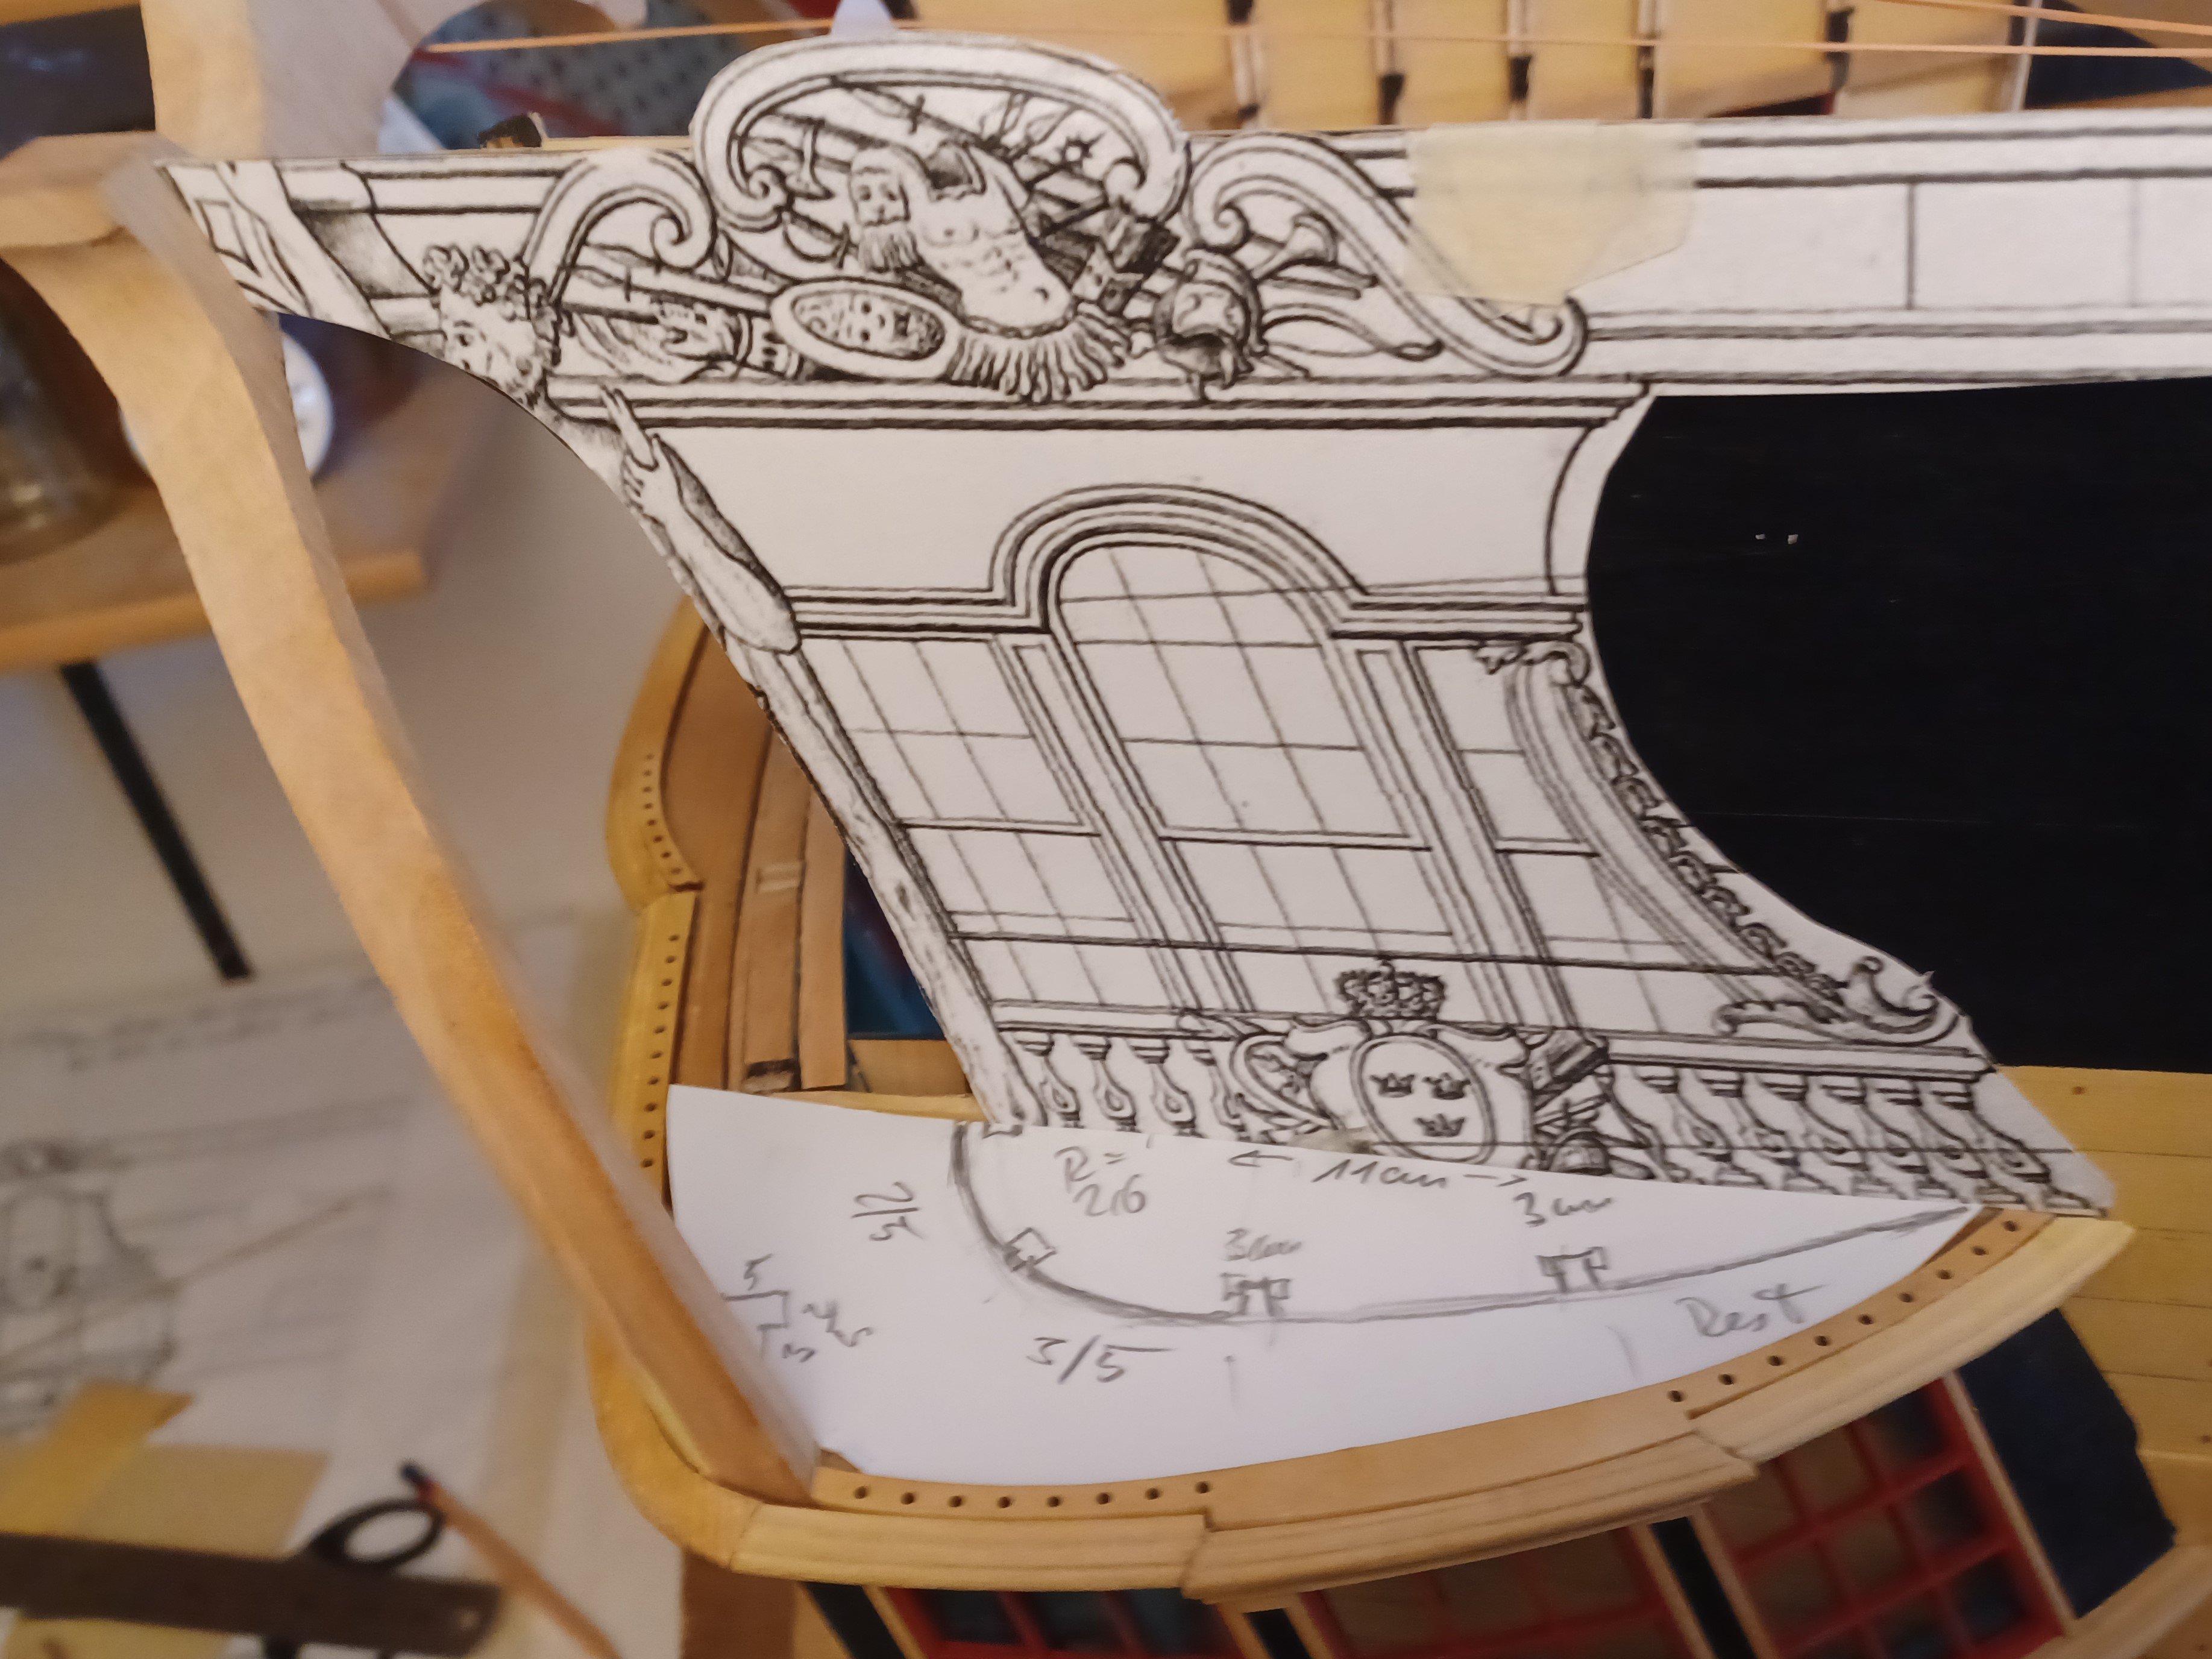
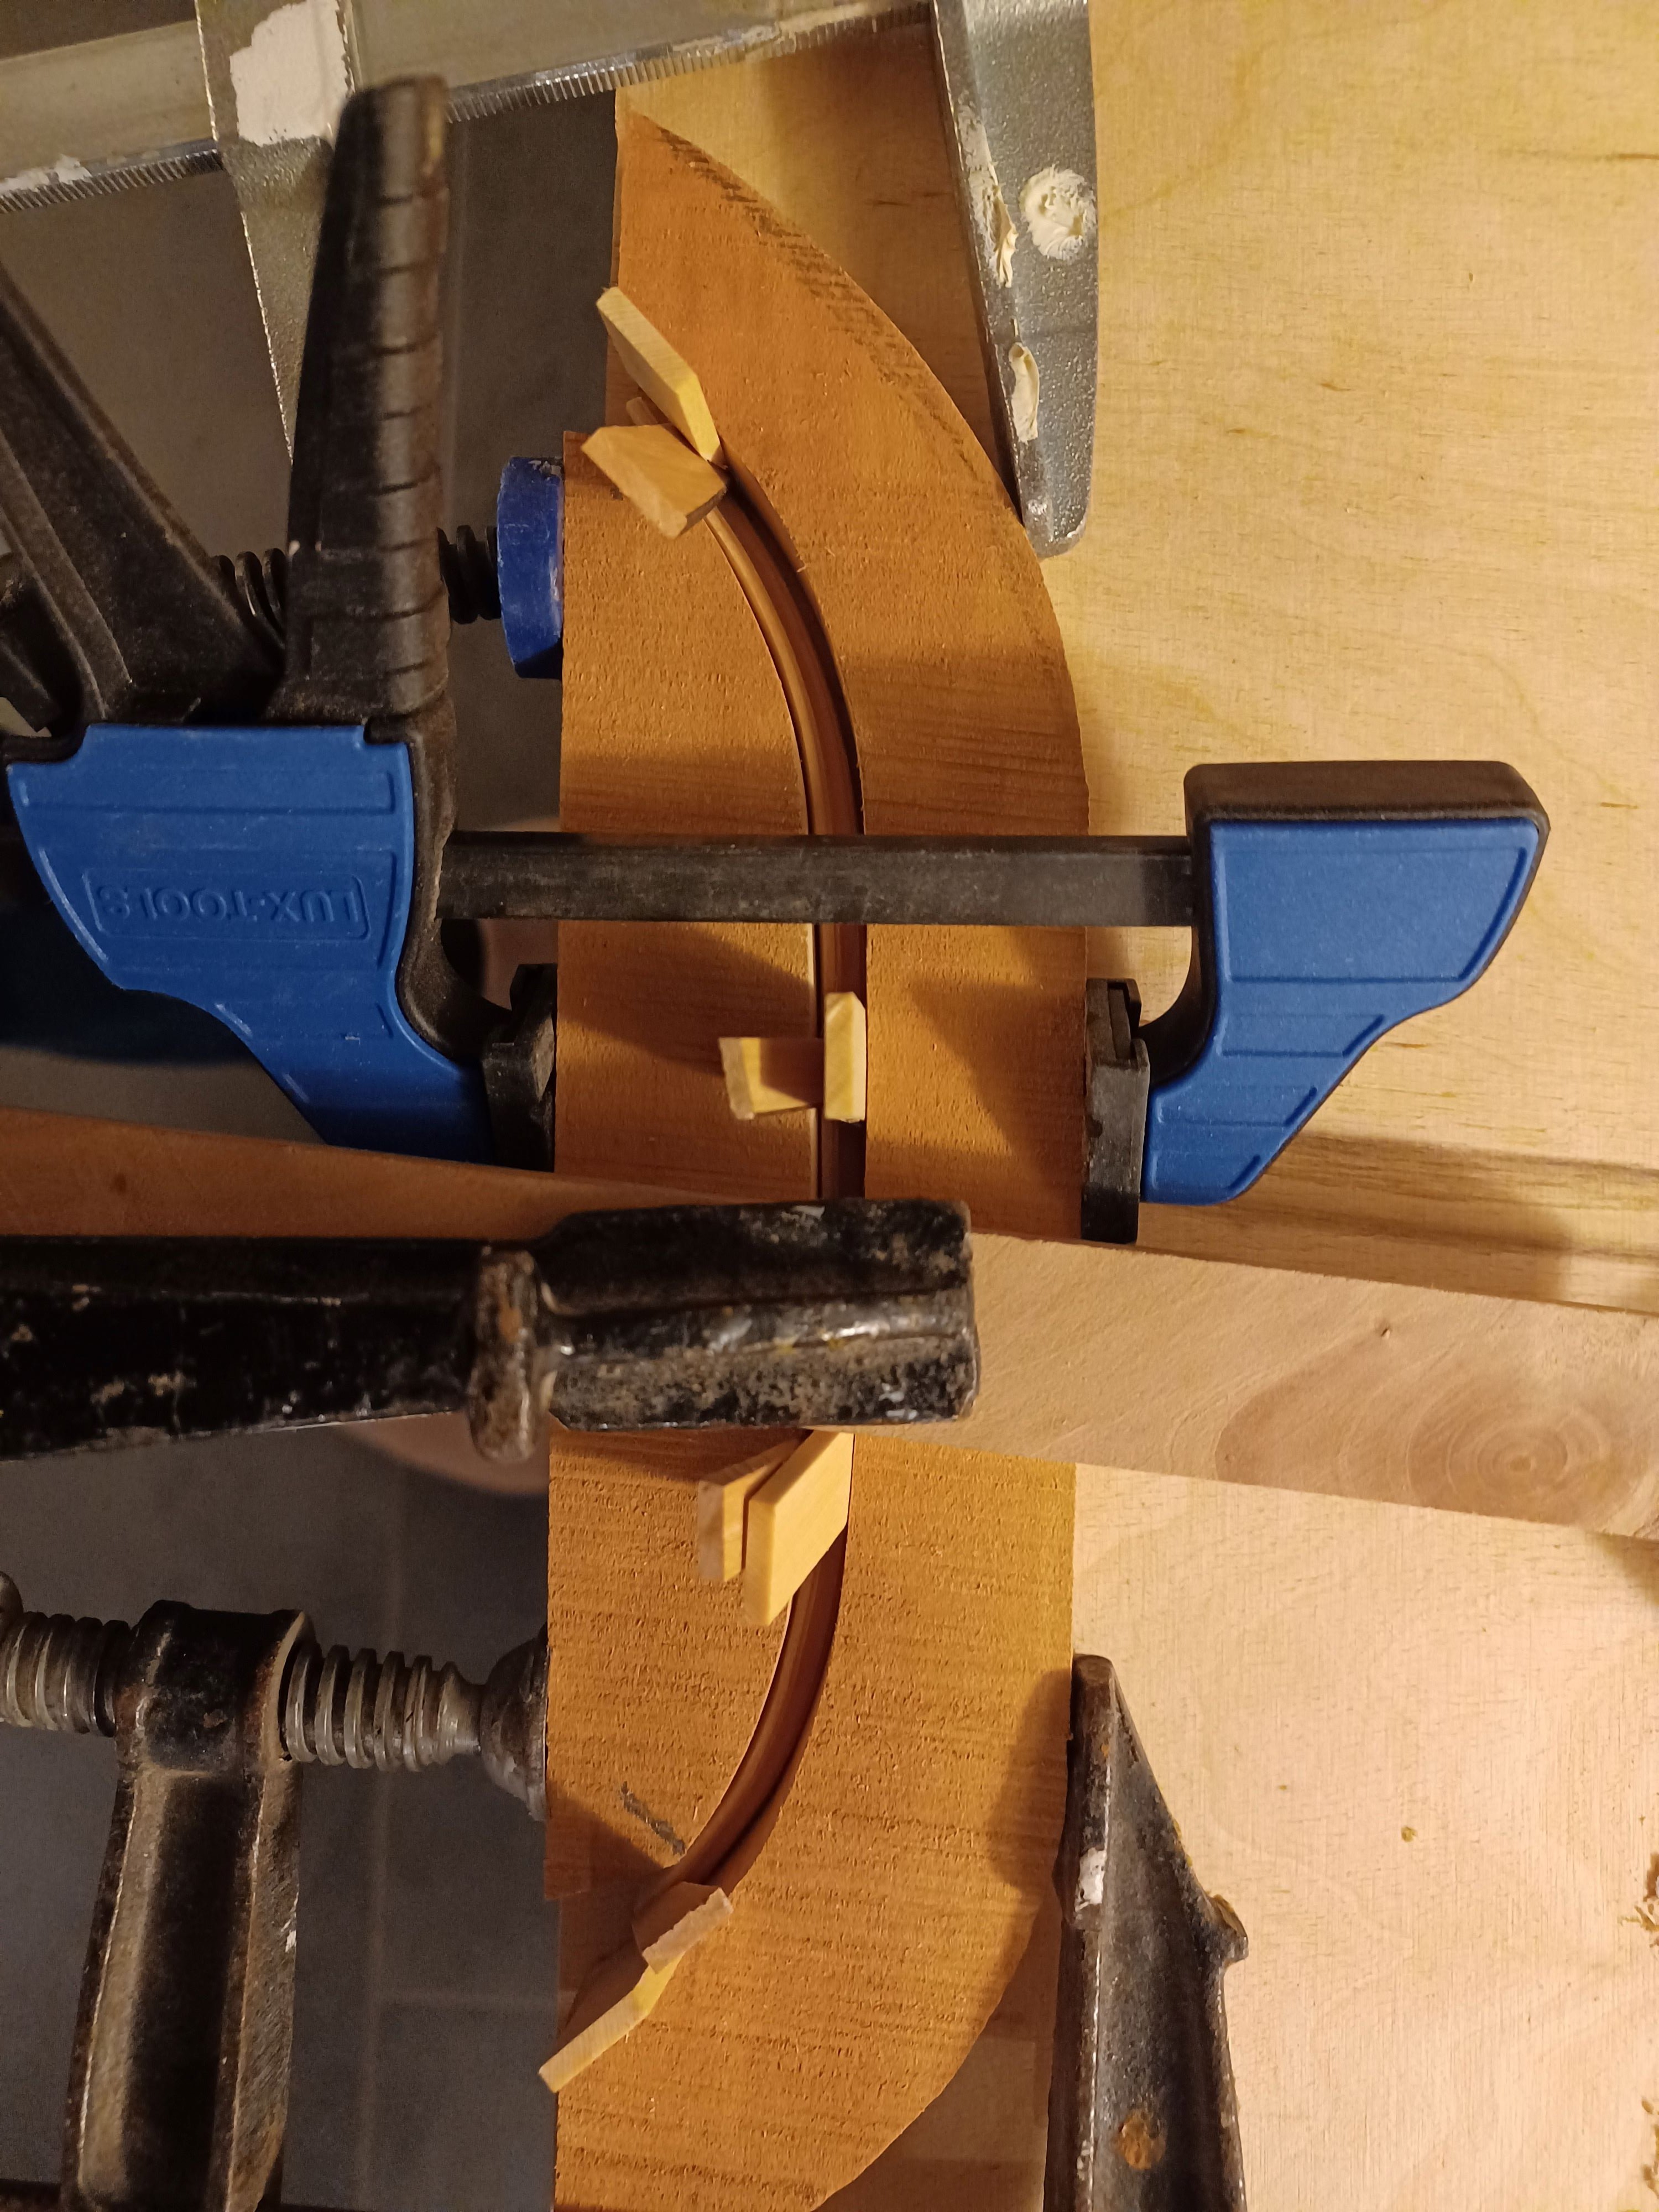
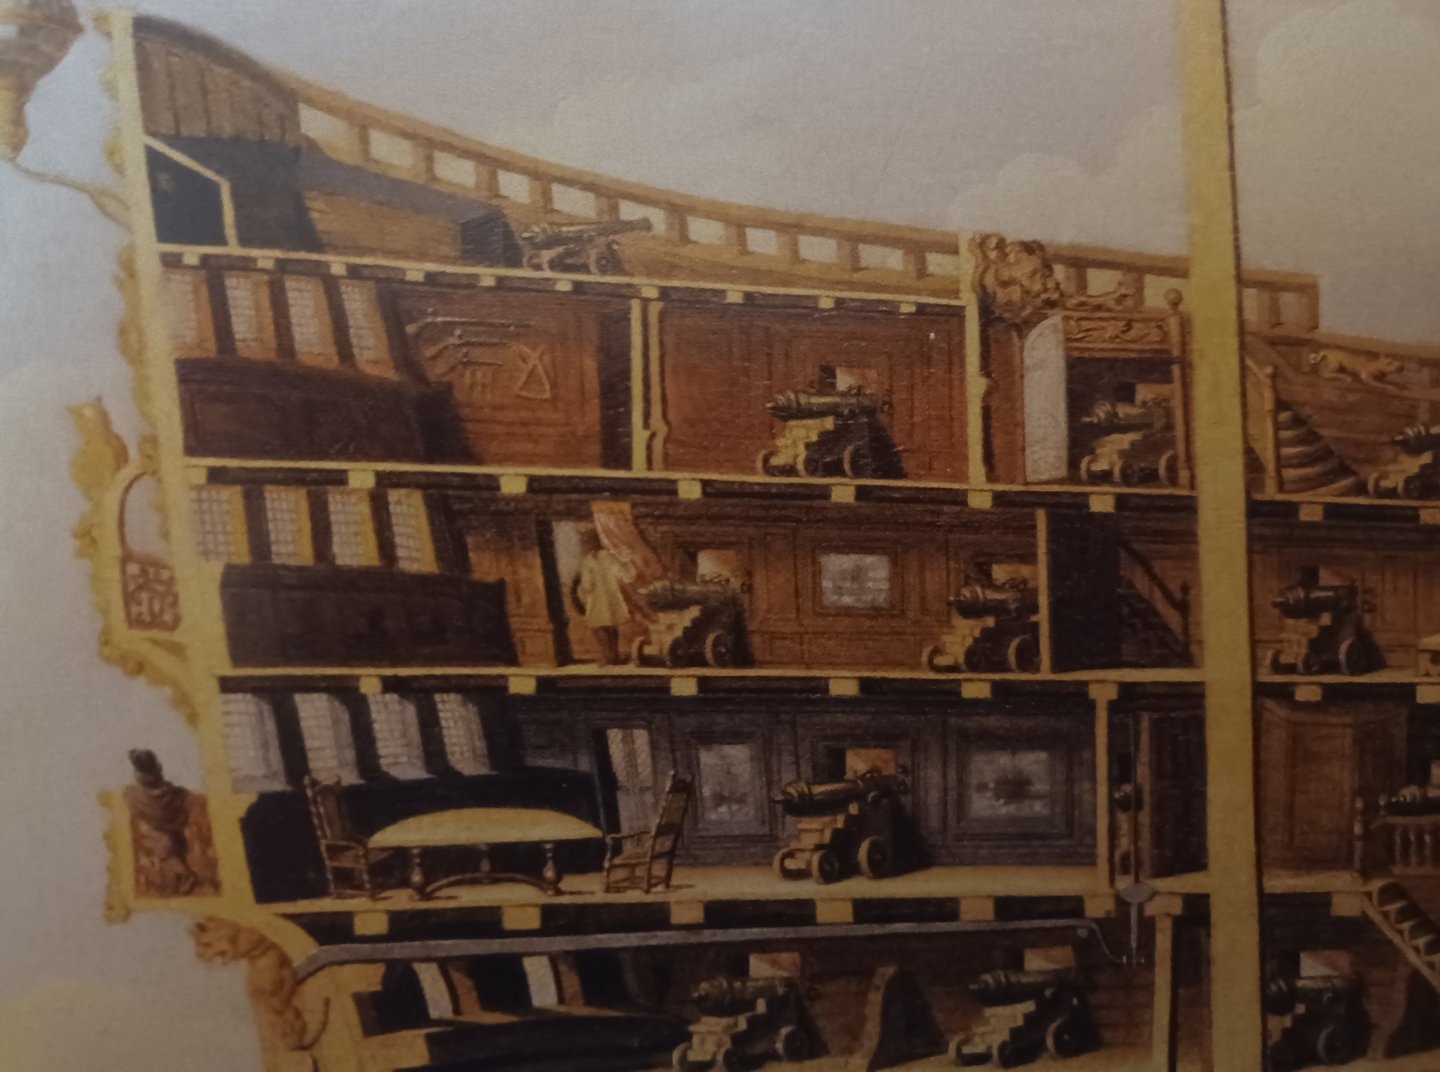
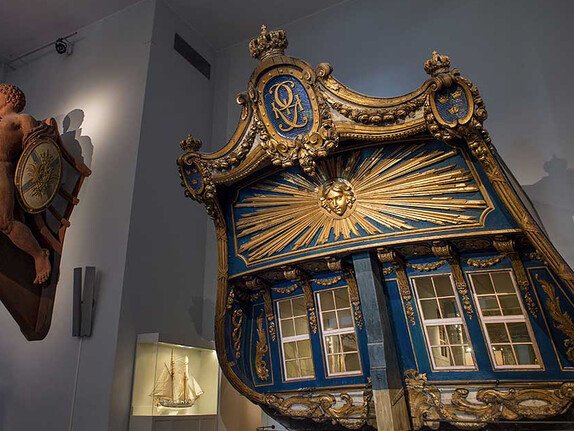
Dear fellow modellers, First of all, I would like to wish you a healthy new year and lots of exciting projects. I would like to start my contribution with a book recommendation. The history of shipbuilding is usually told from the perspective of the technical development of sailing ships, with artistic aspects playing a more marginal role. In my opinion, the book ‘Das barocke Schiffsheck als Architekturprospekt’ by Jan Piper from 2017 has provided a nice addition here. It deals with the causes and developments of ship decorations in the French Baroque of the 17th and 18th centuries, which became style-defining in Europe, just as French art, building culture and language were formative throughout Europe during this period. The book digs quite deep here and is richly illustrated. It is interesting for my project in that the ship of the line TRE KRONER was built by a Frenchman - Laurent Barbé as shipbuilder and the sculptor - Just Wiedewelt had previously spent 10 years in Paris learning at the court of the French kings. I was a little worried at times that my interior was exaggerated, but what is shown here goes far beyond that. The following photos show models for interior decorations of French ships of the line from the late 17th and early 18th centuries. So I continue as I started. Progress over the Christmas holidays was limited, as there was a lot going on, but I can still show a little here. The side panelling of the captain's cabin is finished and the stern is currently being worked on. There is also a nice drawing for the stern front in the book mentioned above, which I am using as a guide: The component is made up of two halves. I have already shown the inner part above, the outer part is painted red and presents the challenge of flat, curved profiles. I wasn't able to bend them flat in the required radii, so I resorted to drawing them in a stucco style. The outer radius is still made in wood and serves as a gauge, the curved profile is then applied in several passes of wood putty. I still have to make 2-3 more passes, then it should be precise enough. I suspect that the artists of the time worked in a very similar way. The decorations were made from modelling wax, so they must have done it in a similar way. Best regards, Matthias


-
Hi Igor,. great work on these decorations!! Incredible design of J. Berain. So much fine art in a warship. These decorations must have been more expensive than the whole rest of the ship. Matthias
-
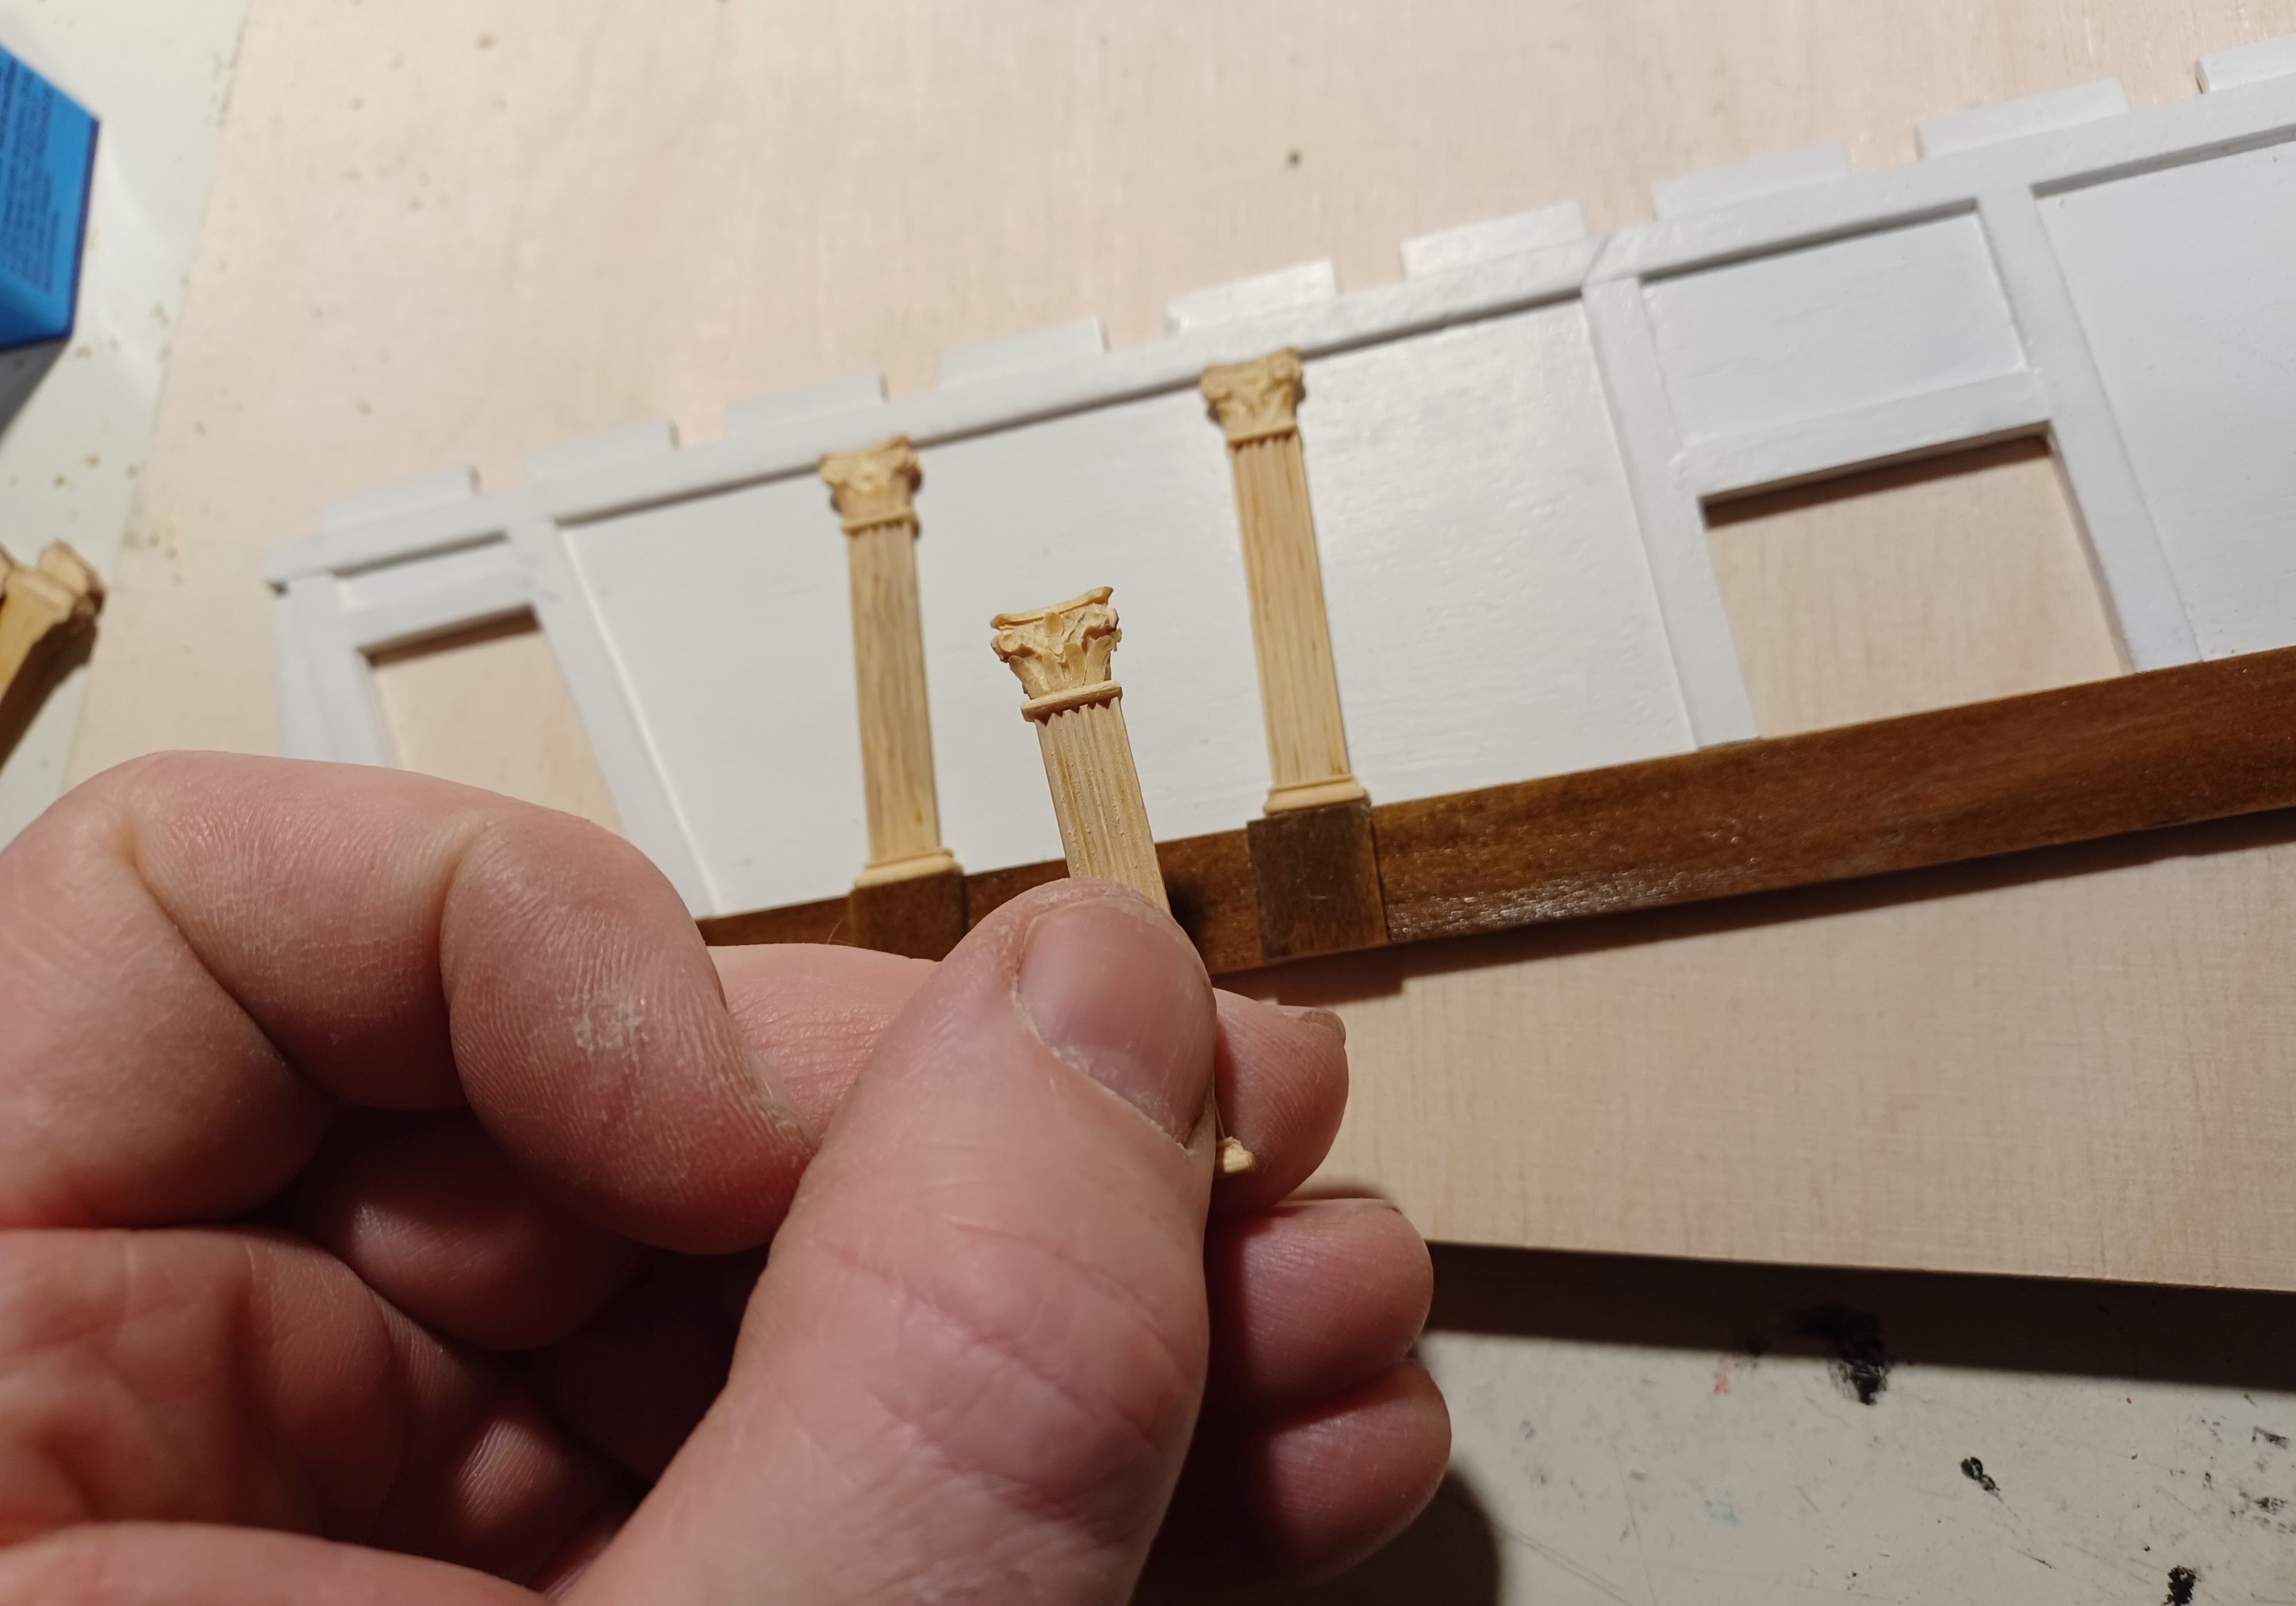
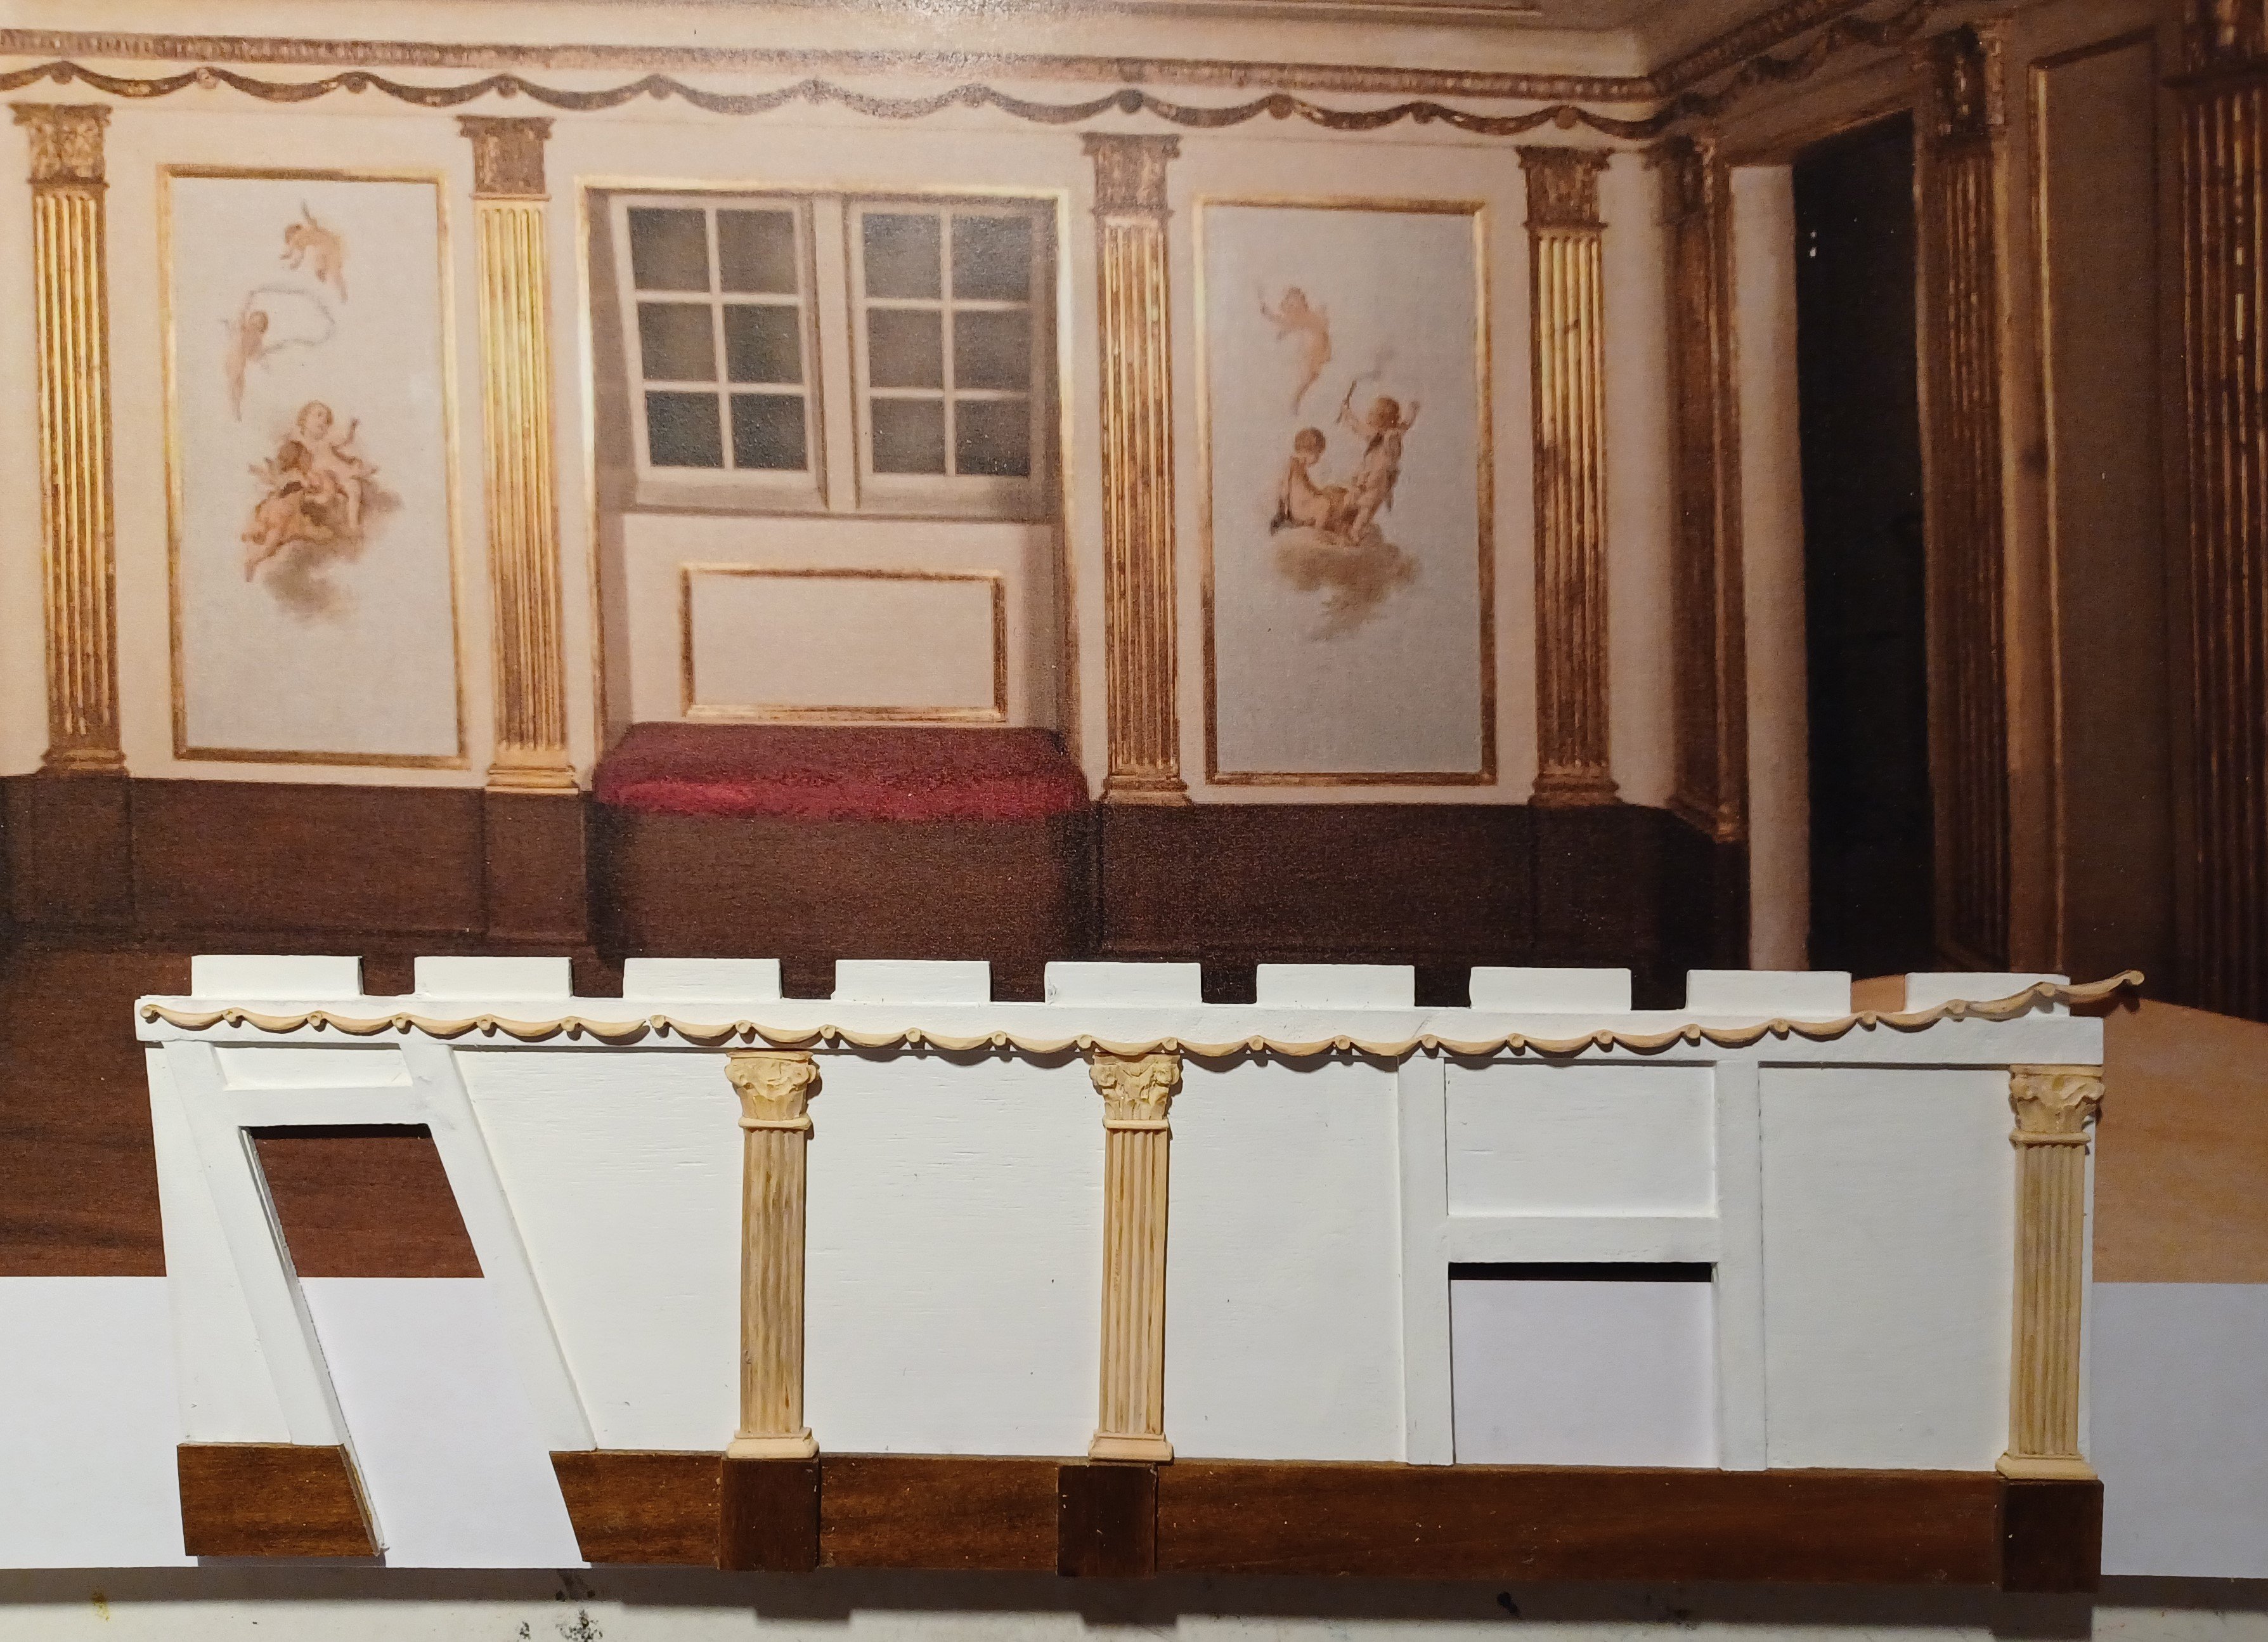
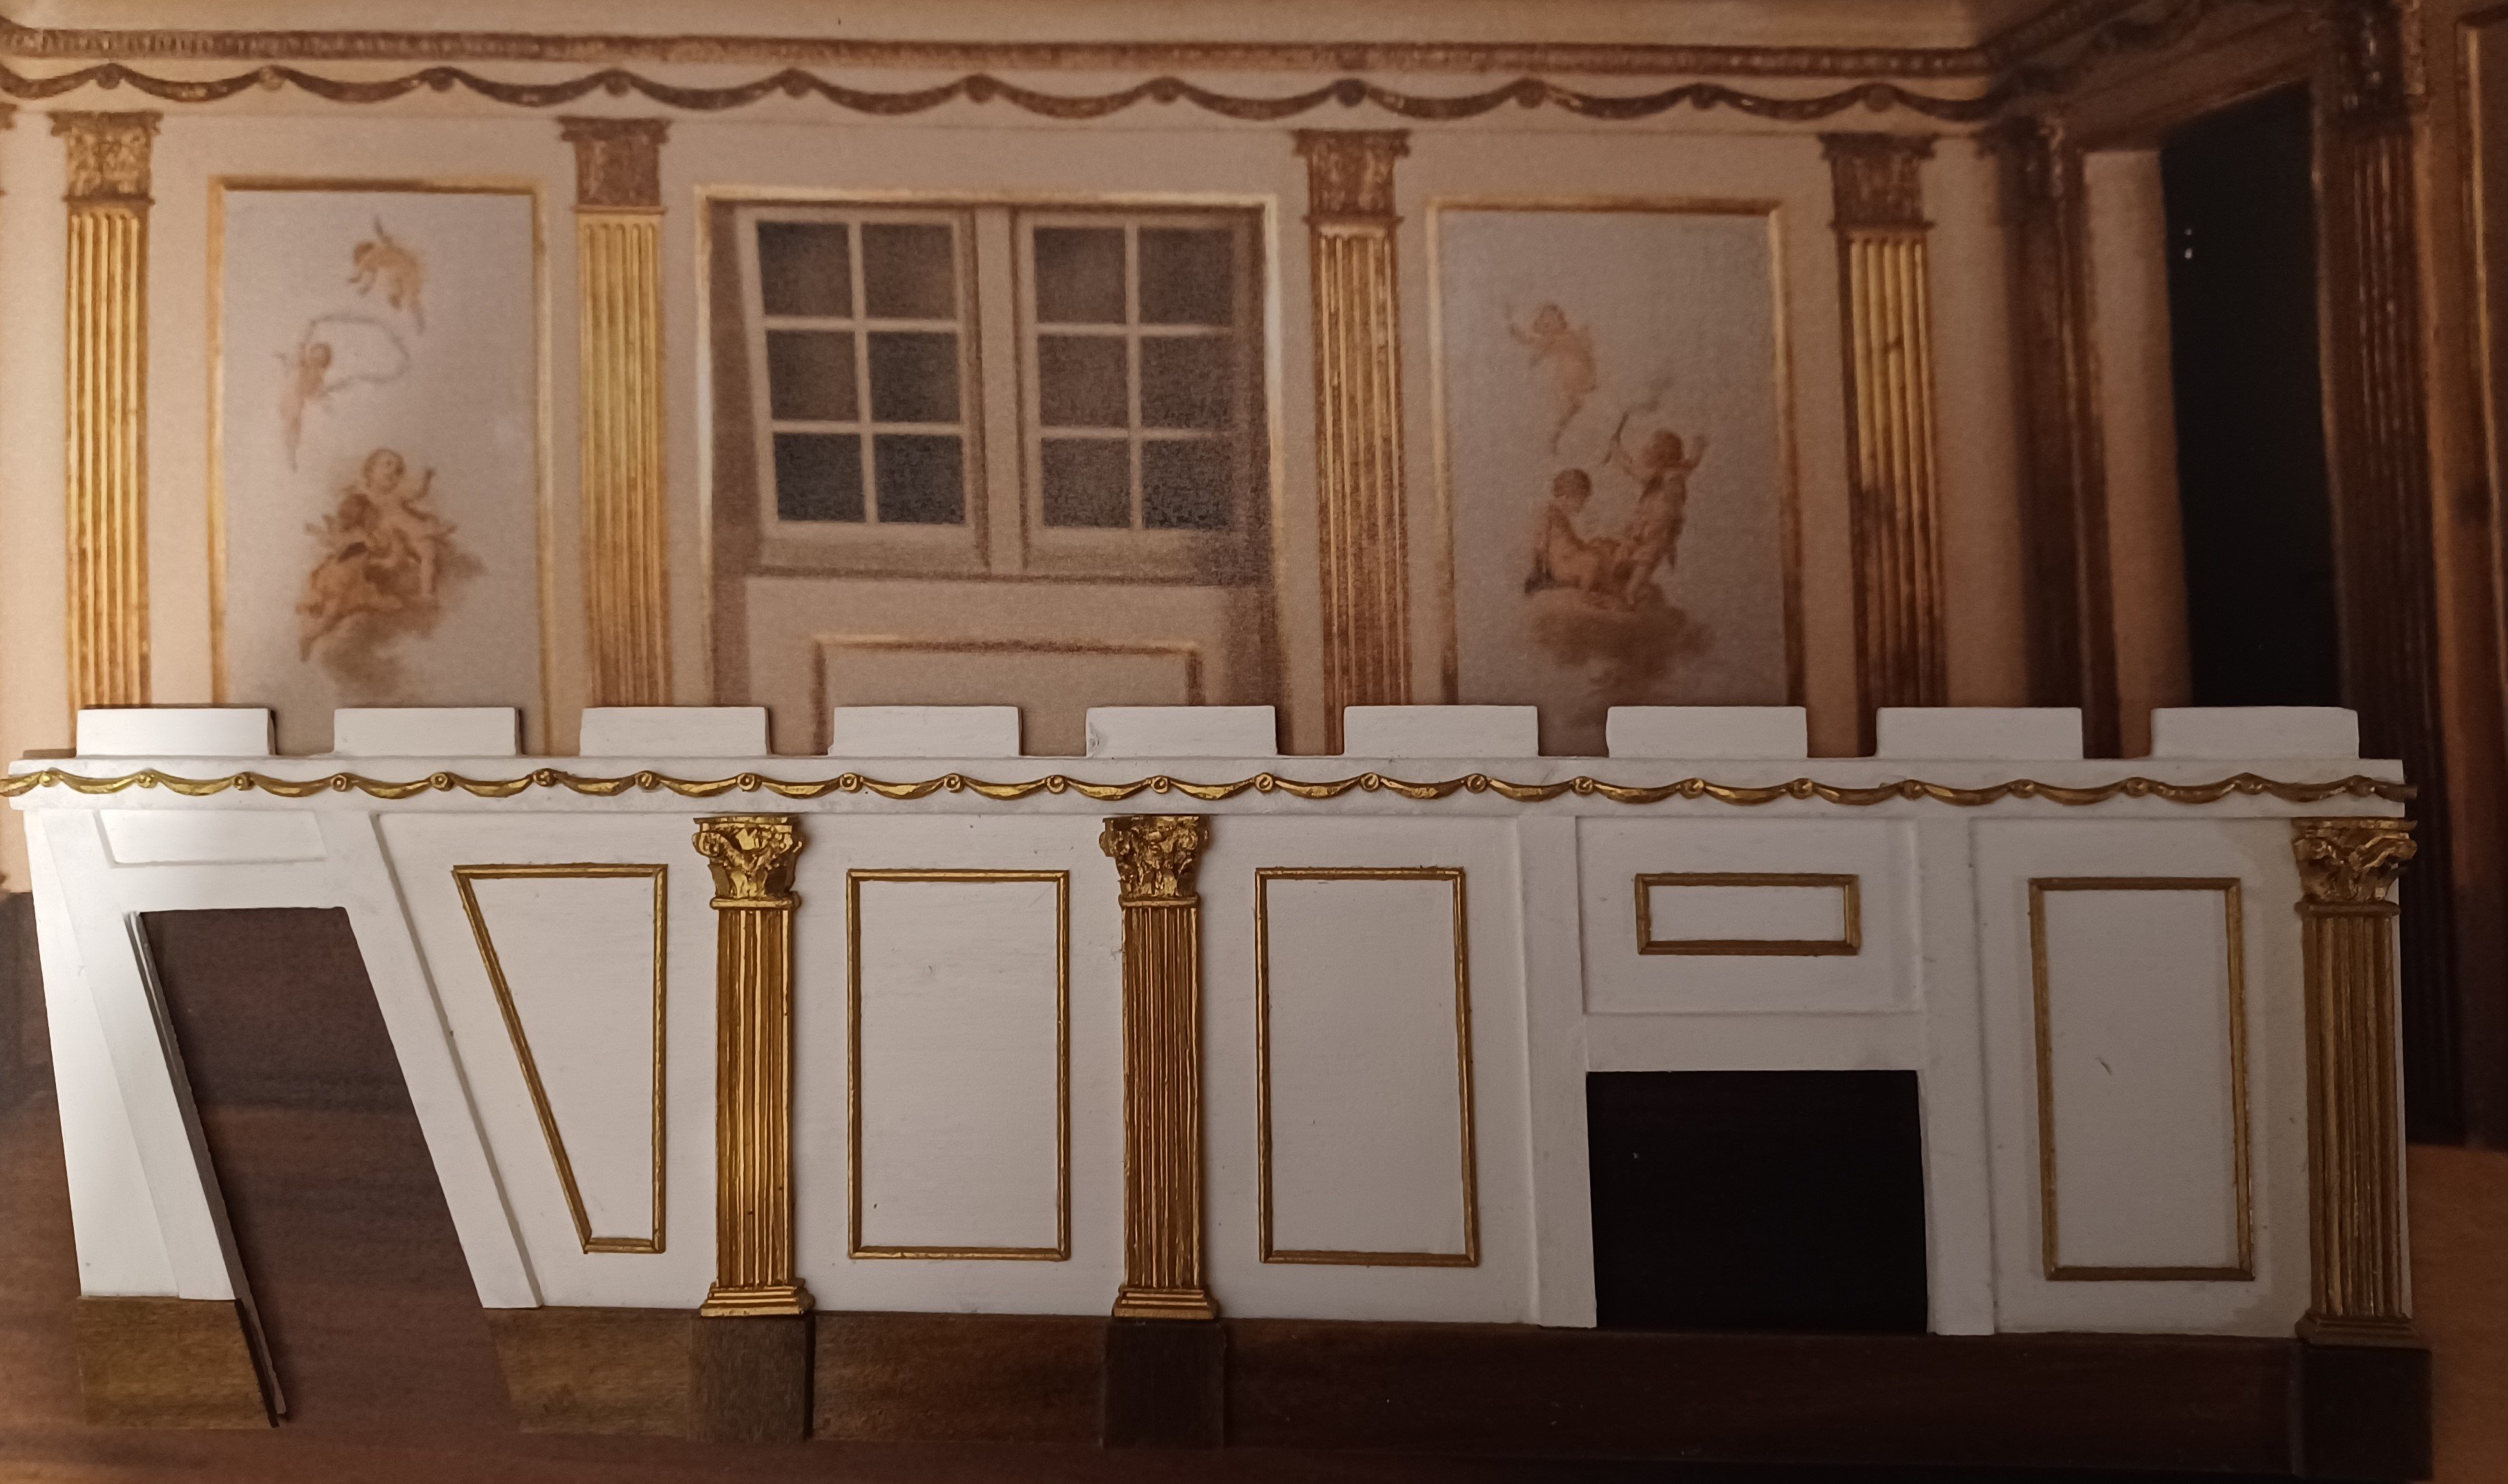
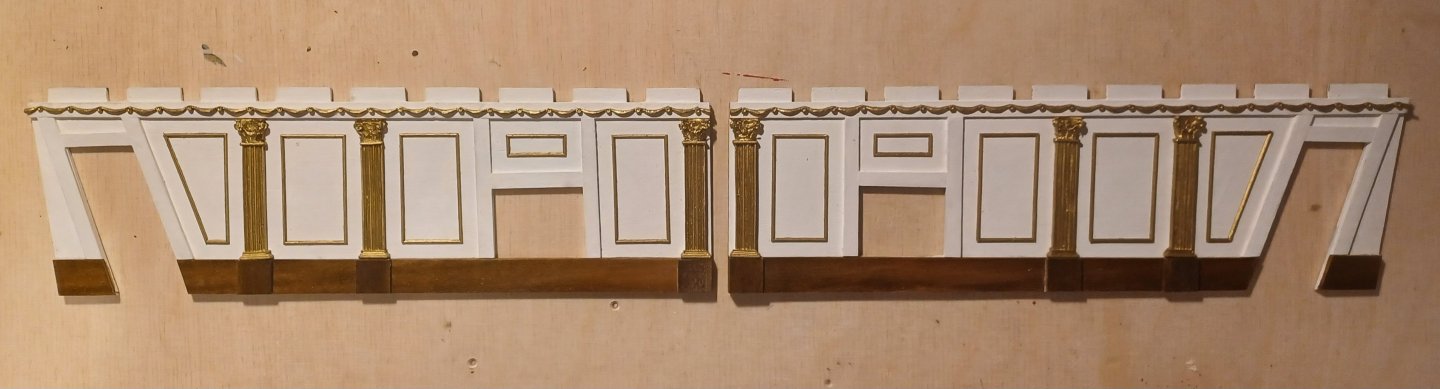
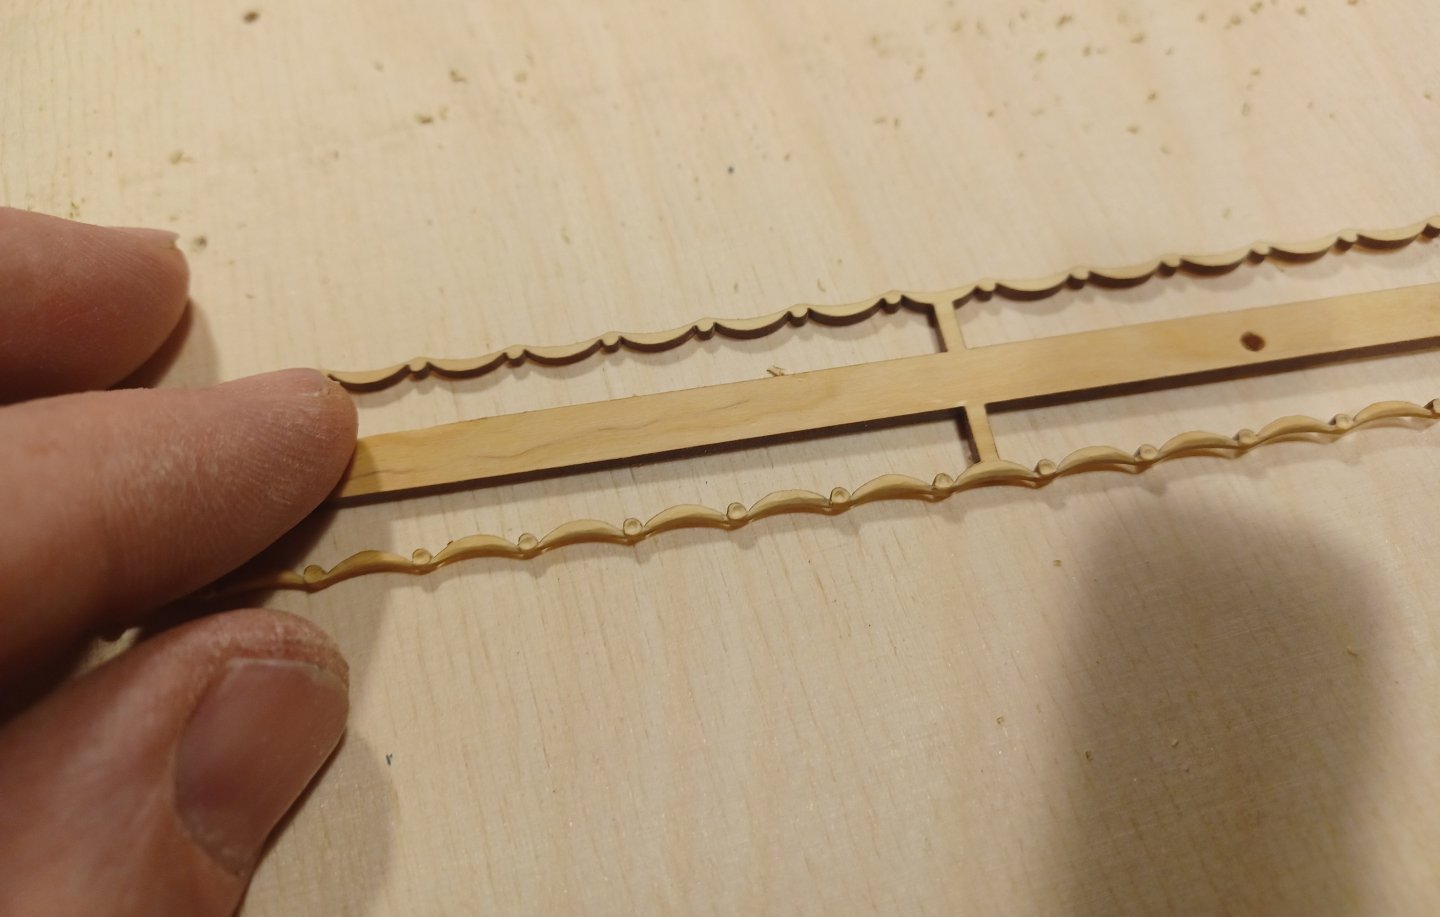
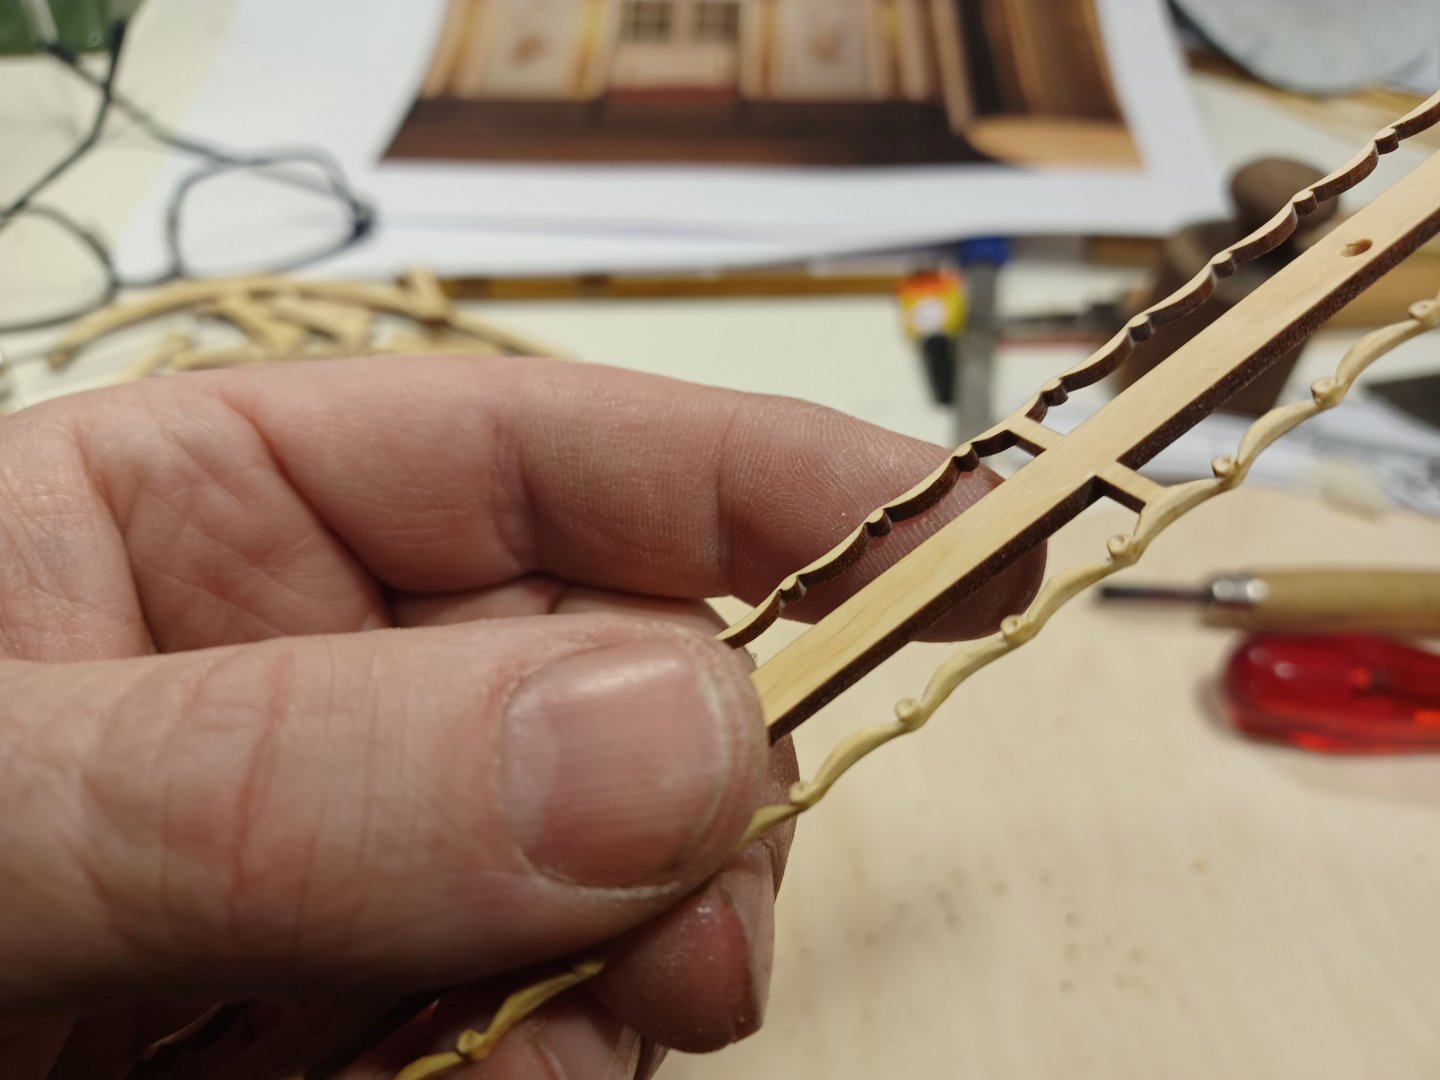
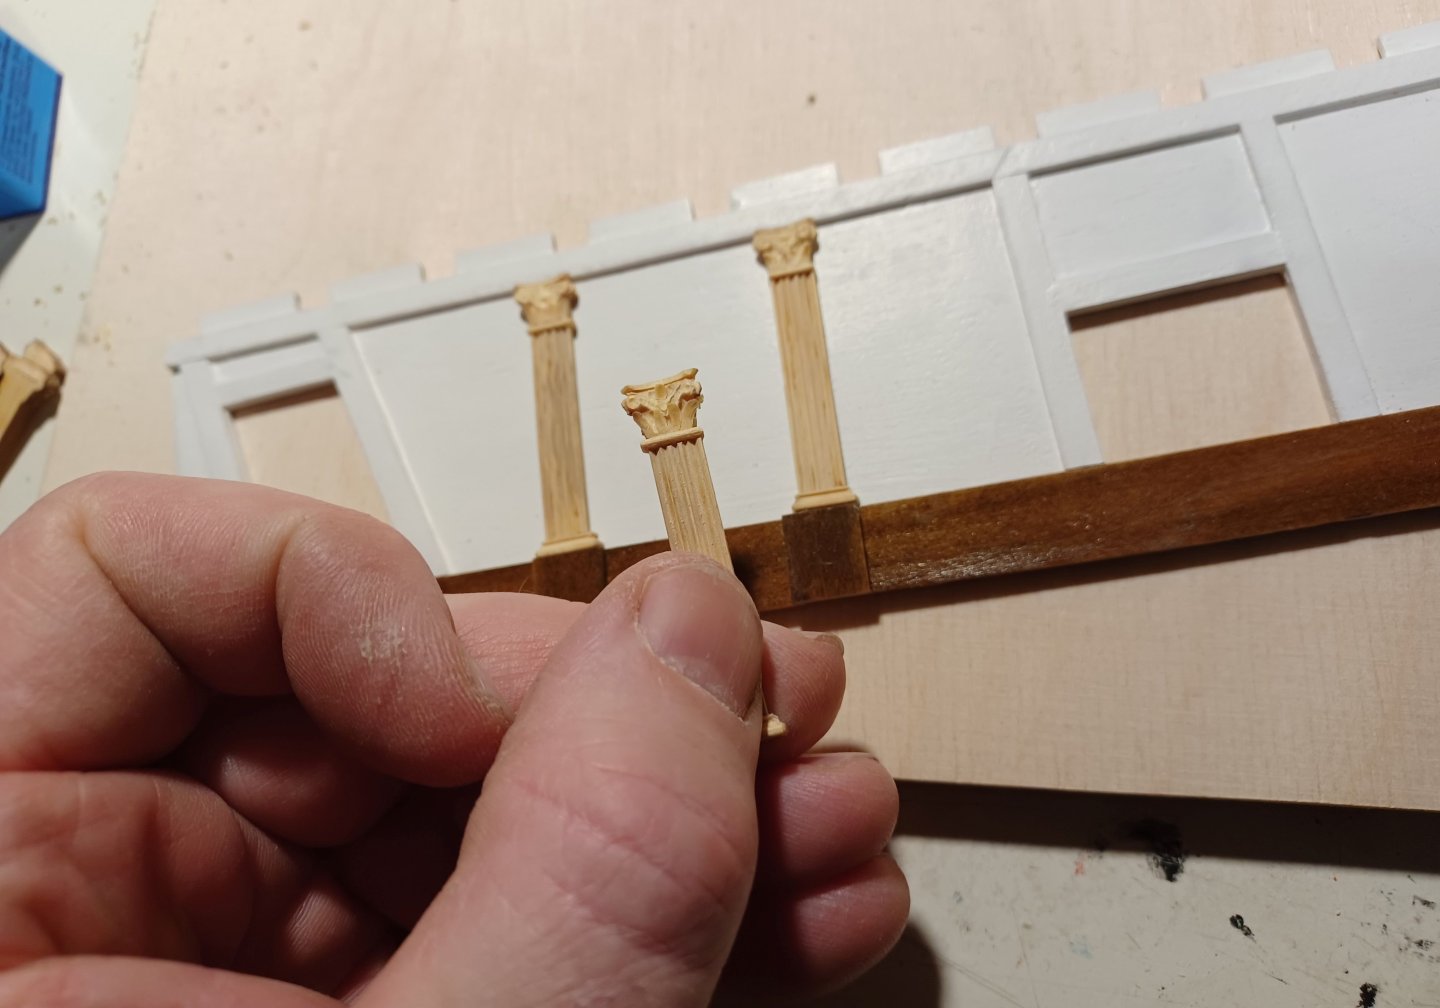
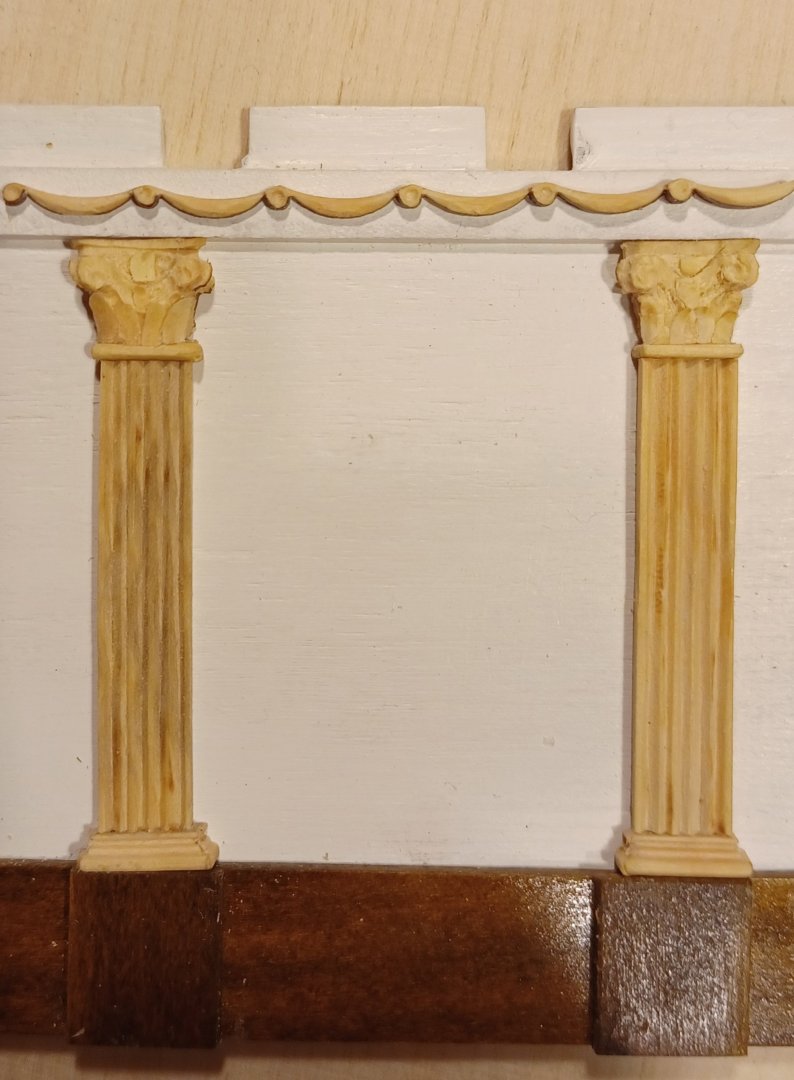
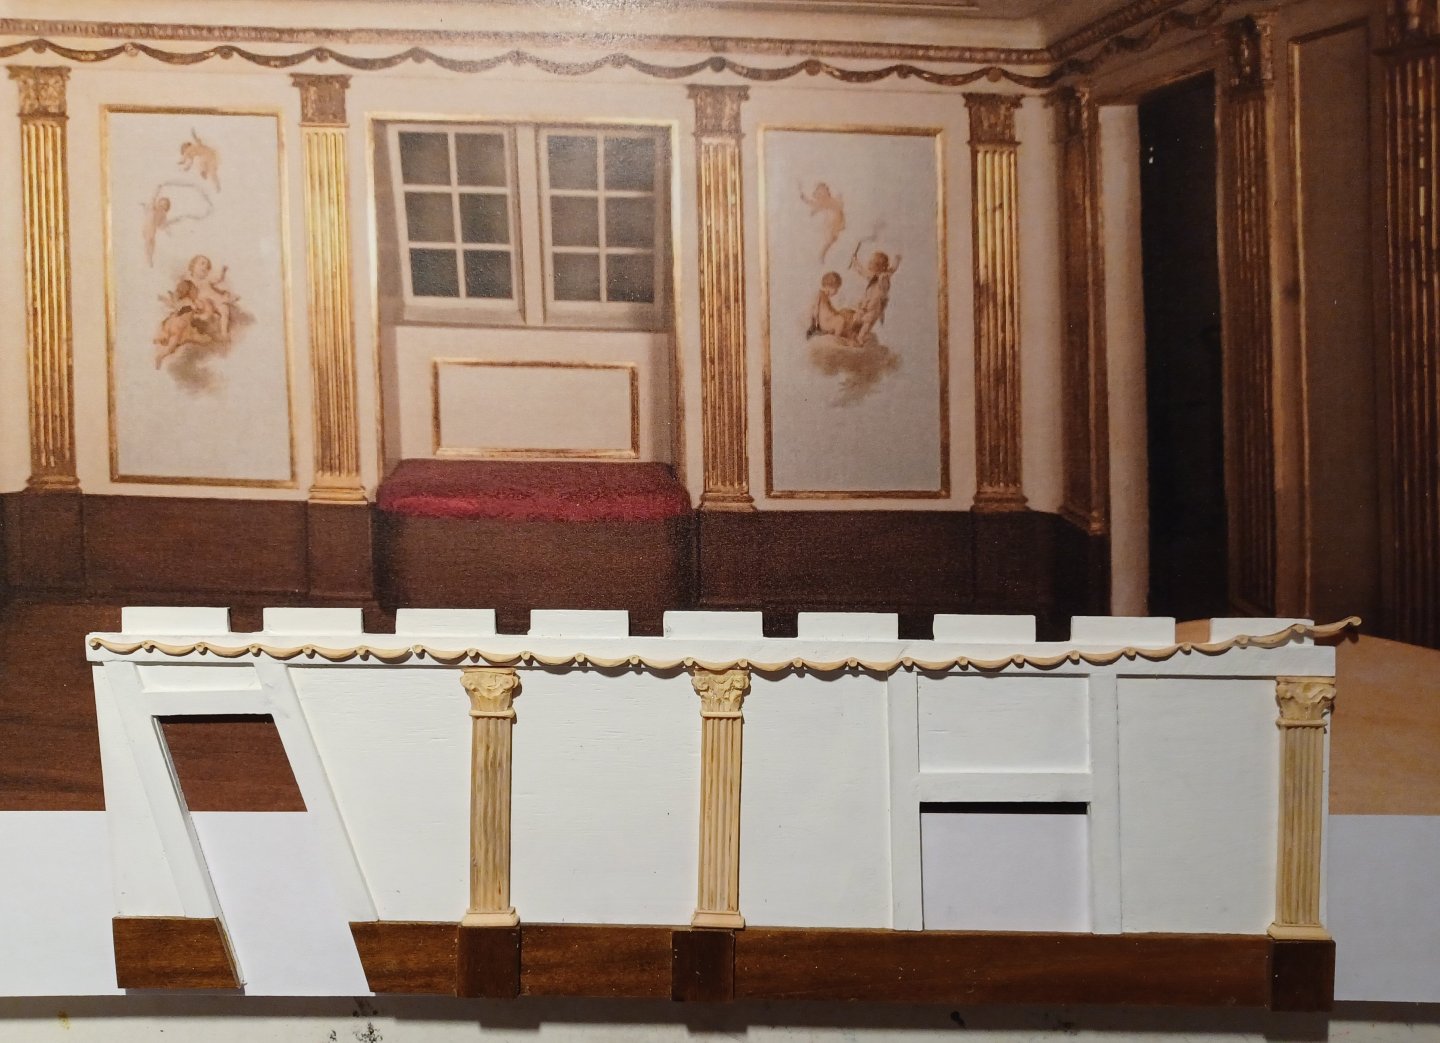
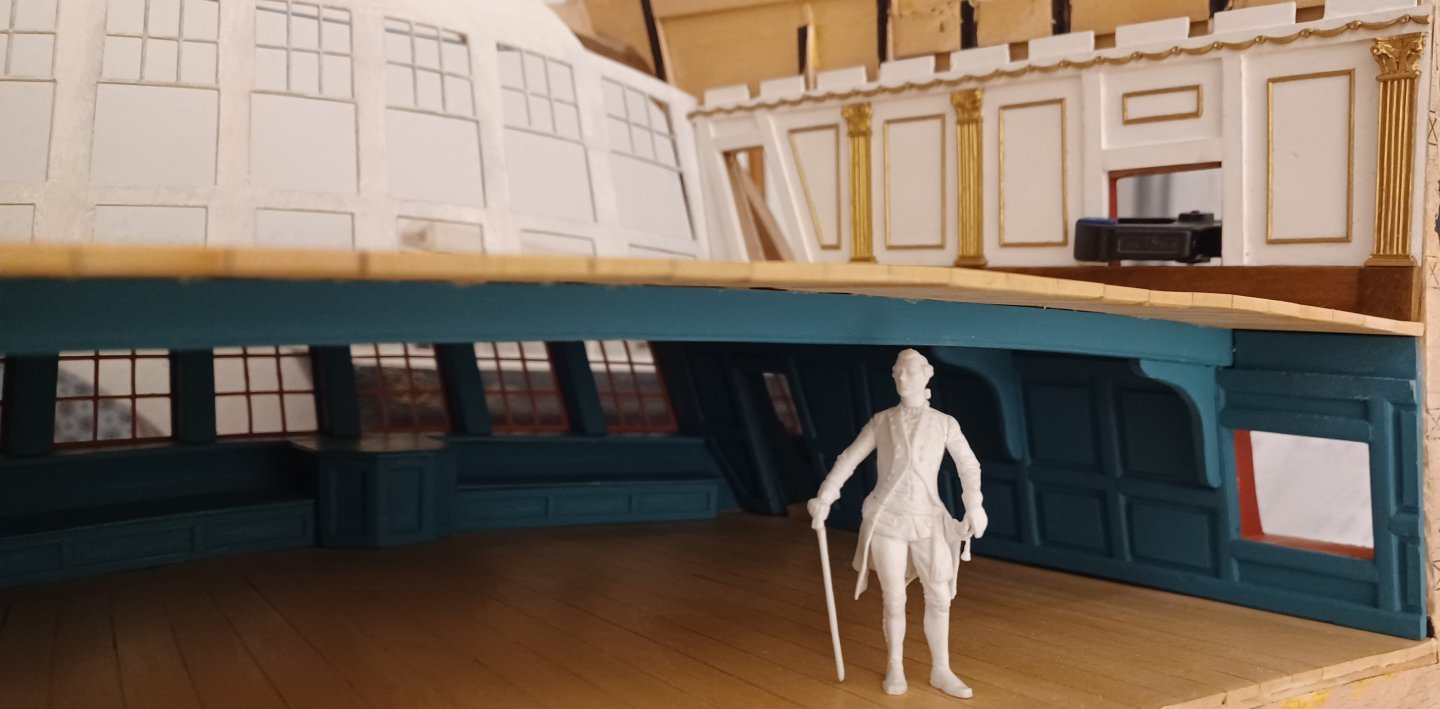
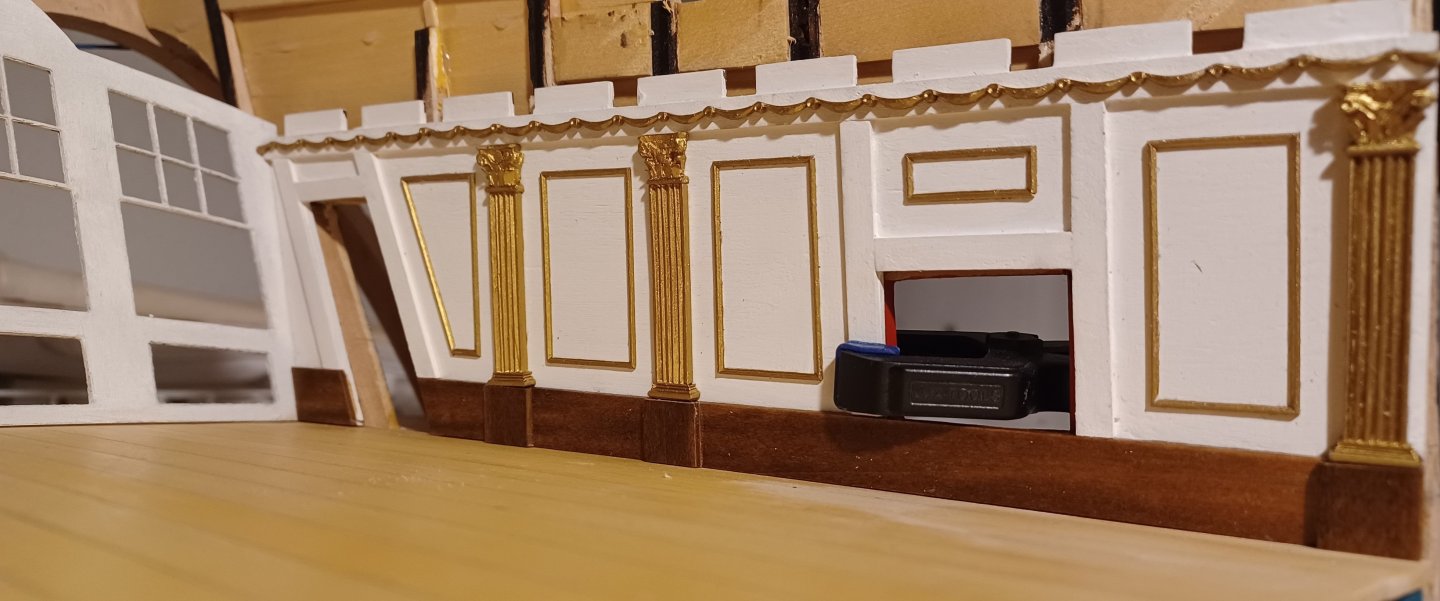
Hello everyone, Thank you for your encouragement, the work is continuing with the interior work on the upper deck, where the paneling of the “Store Kajüt” (great cabin) described above is now in progress. This also involved some initial carving work. I have now decided to build more or less on the original 18th century interior of the Amphion in Stockholm. I started with the carved garland below the deck beams: I laser-cut the rather filigree part with supports and screwed it to the table, then the tools can be used freely with both hands. Then the flat columns as a structuring element, here of course the capitals as the first major hurdle. and here they are put together You could also leave the result in wood, which might have been more discreet and more appropriate for a warship, but I went for a pot of gold paint... Best regards, Matthias

-
Thank you Ken, Colonial Williamsburg ist really a nice reference, I didn't know about this place before. Matthias
-
Hi TJM, Very interesting research, indeed. I have to keep that in mind, in case I build cannons for my TRE KRONER model. Will you dress Ltn. Hornblower in a danish uniform? Matthias
- 111 replies
-
- 2
-

-
- Christiania
- Vanguard Models
- (and 1 more)
-
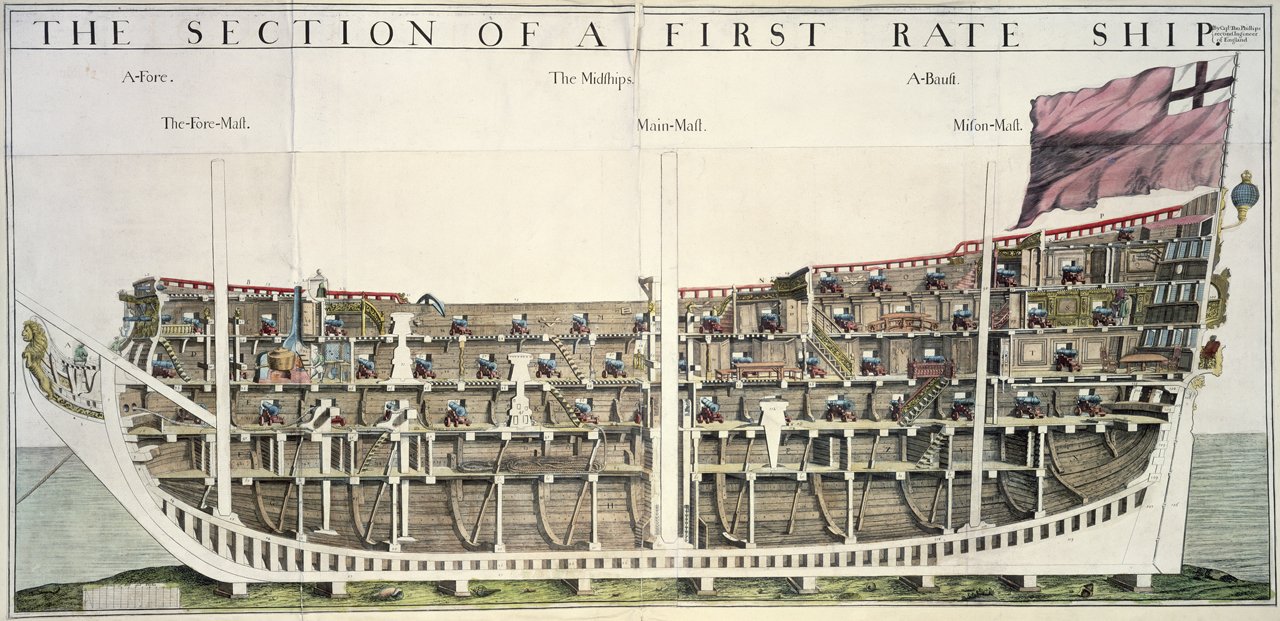
...and here another drawing from Thomas Phillips from the RMG-Homepage. The captains cabin looks very well equipped. Matthias
-
Yesterday I found this contemporary drawing from Thomas Phillips, dating 1701. All the cabins show elaborate interior. Even my petrol colour can be found in the lower cabin and some pictures of maritime subjects. Matthias
-
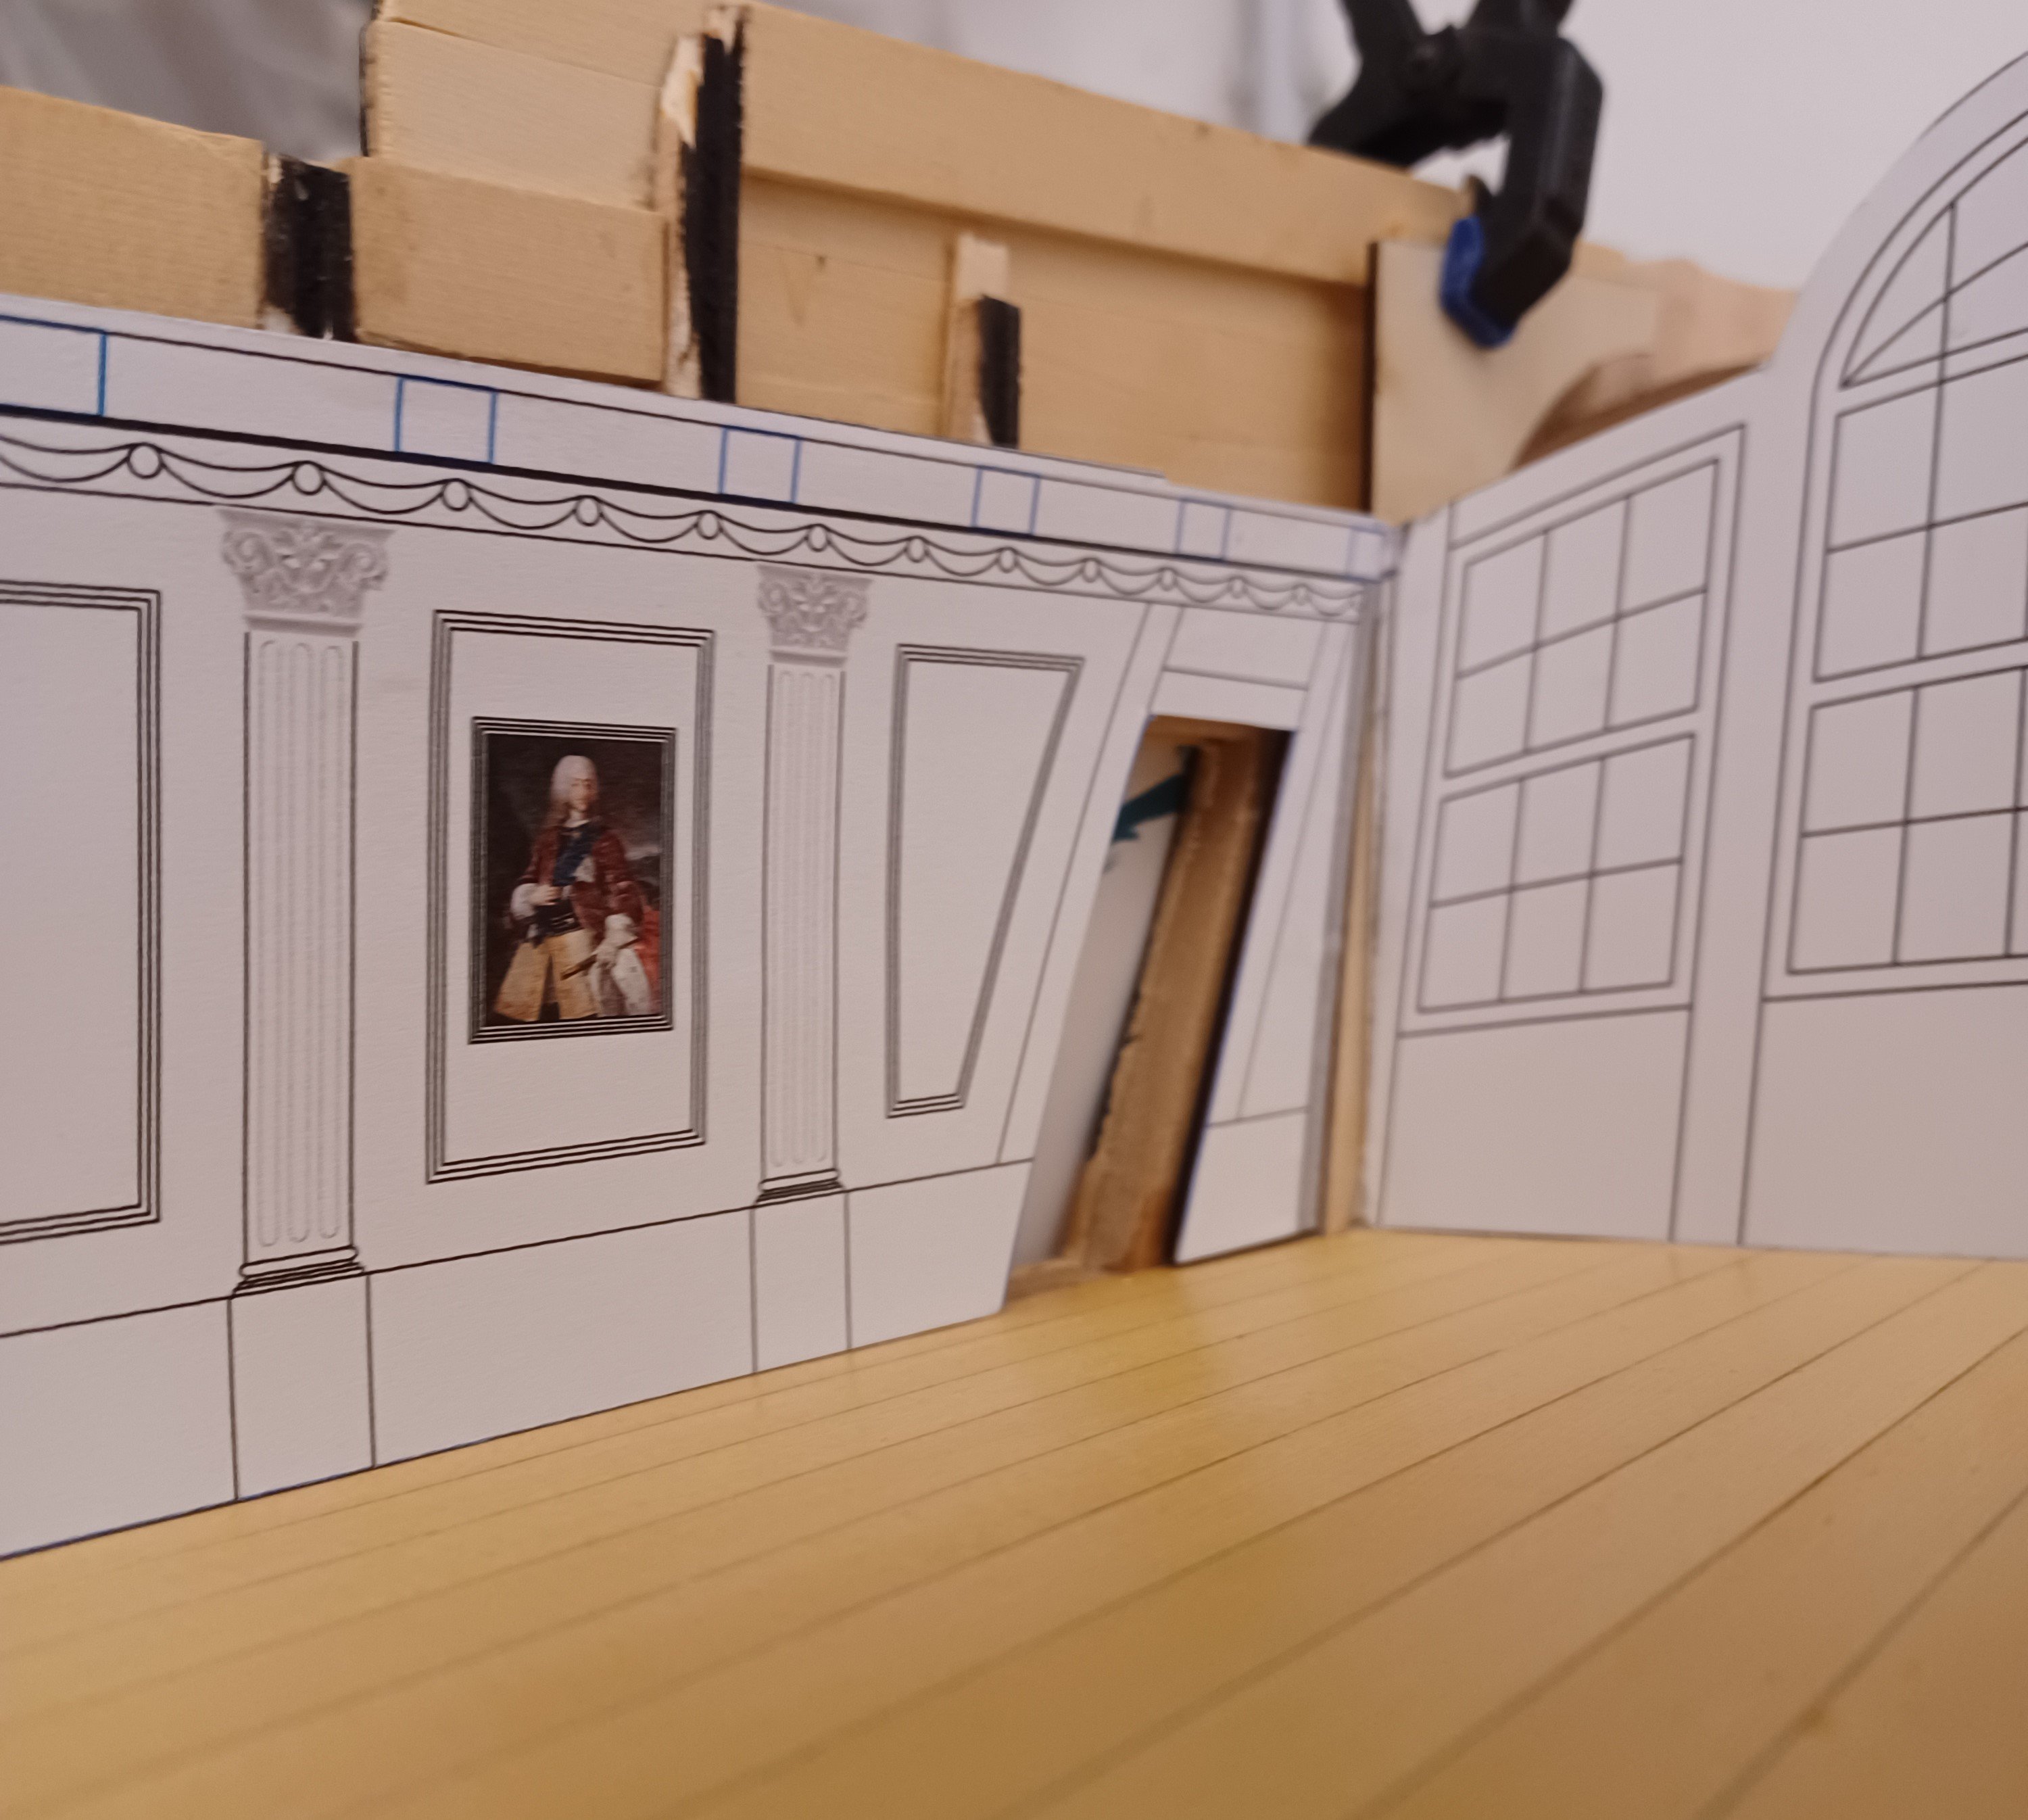
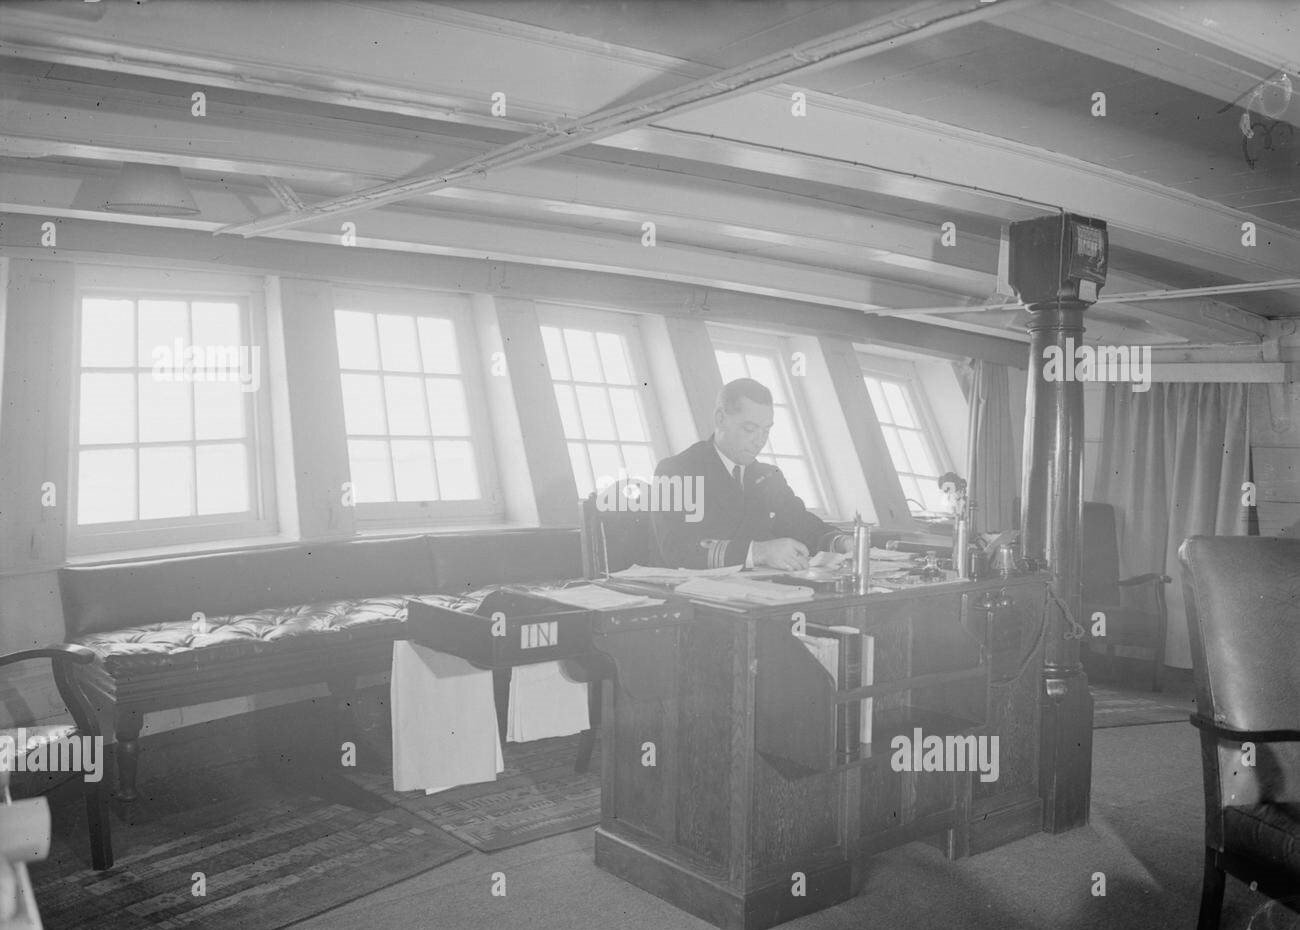
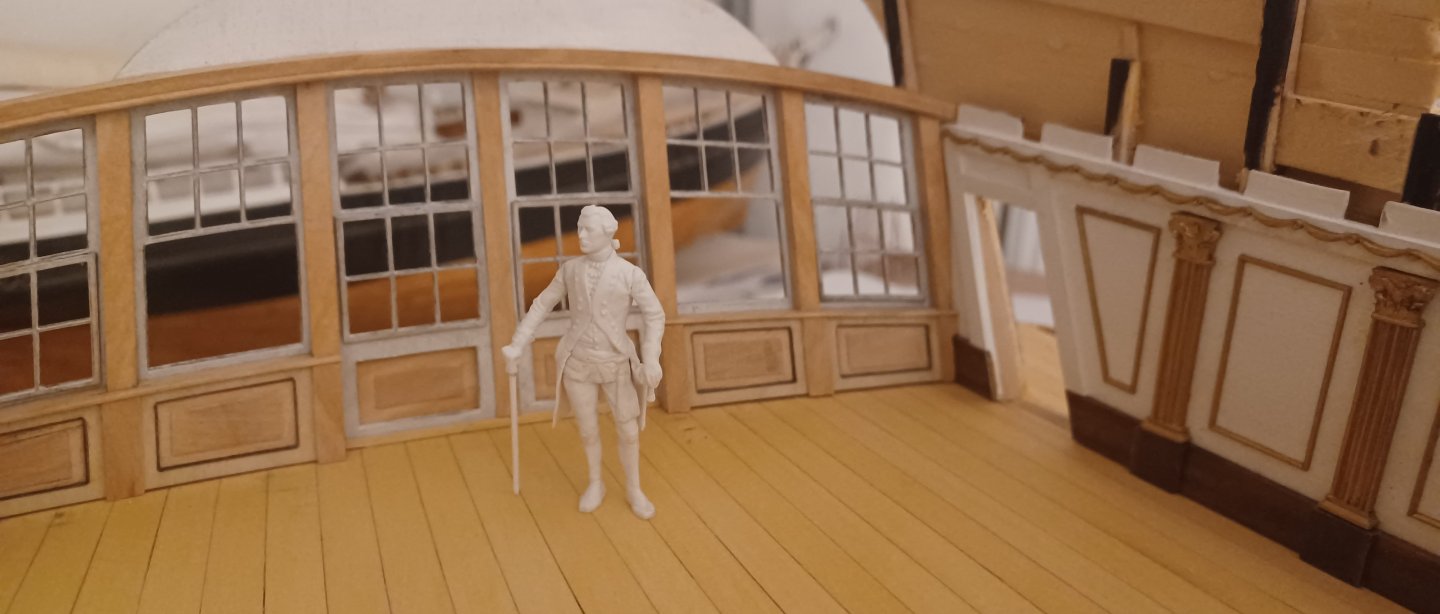
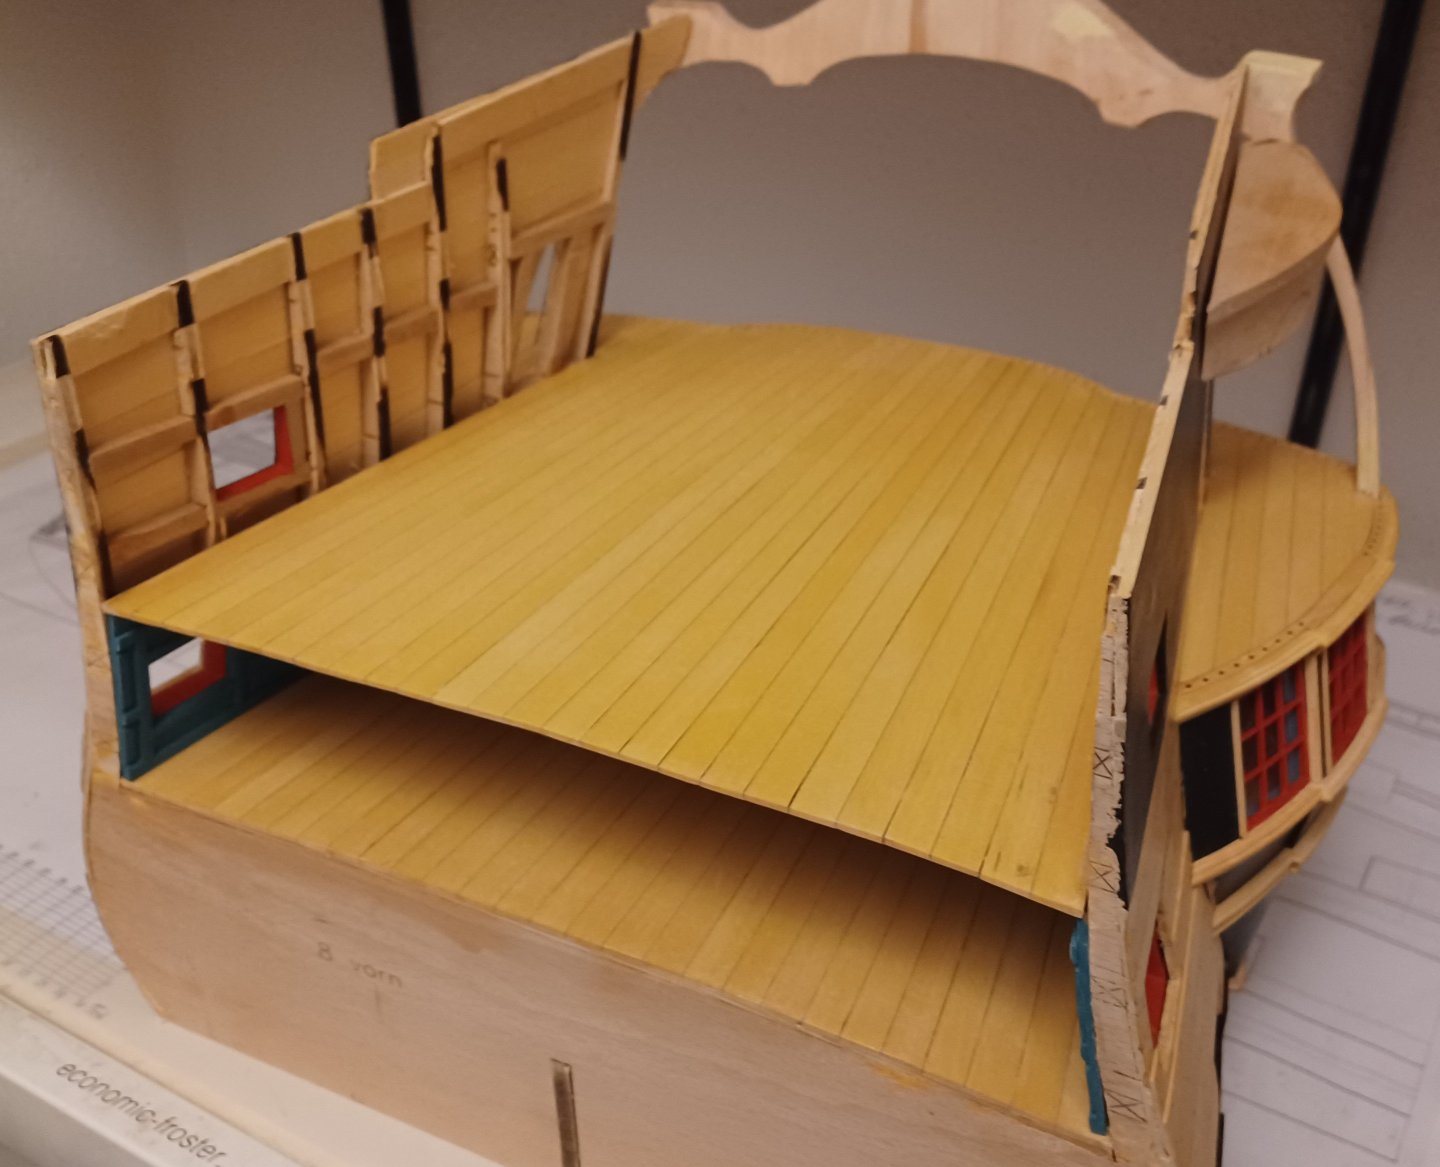
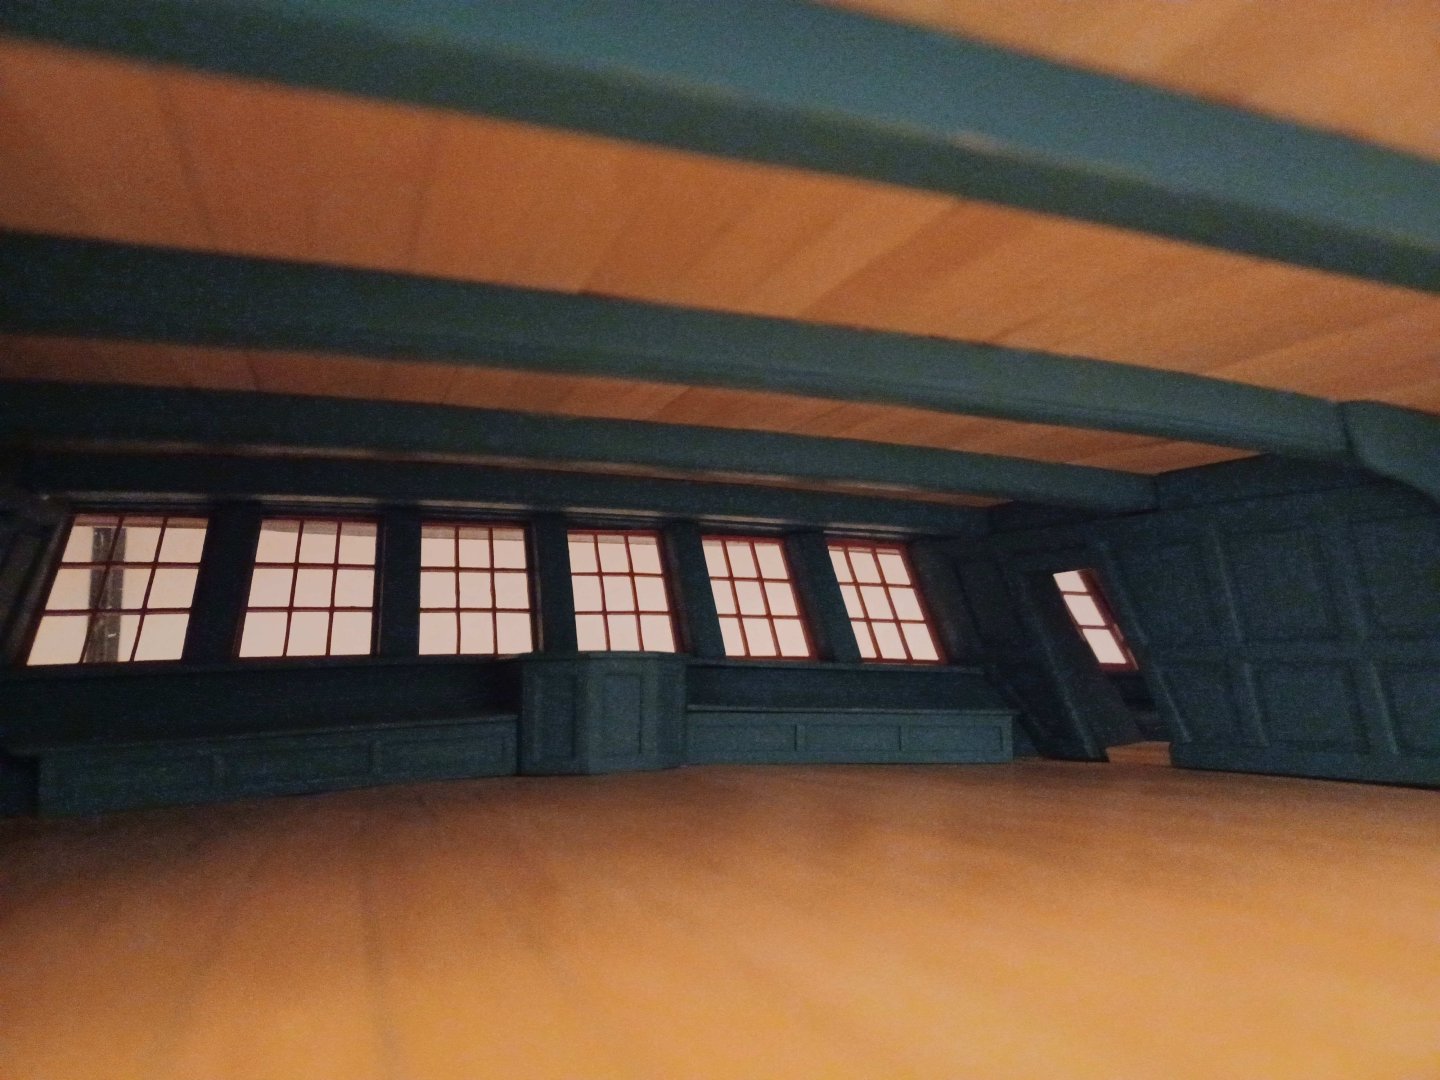
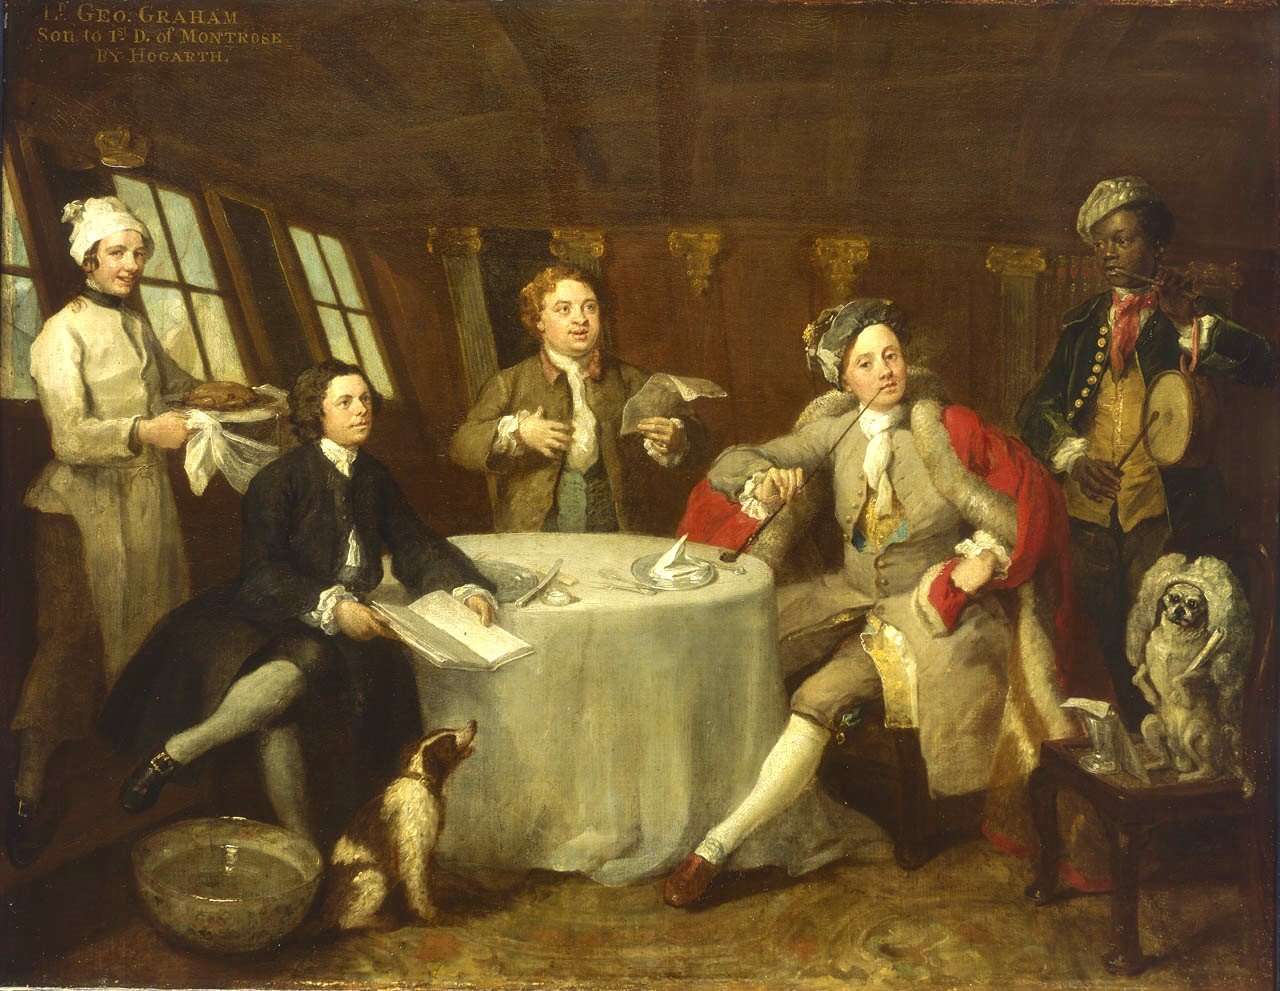
Hello everyone, There is some minor progress to report on the model and some planning considerations on how to proceed, where perhaps this or that person has an additional idea? The deck above the already completed lower cabin of the battery deck has been laid and some thoughts on the further planning of the side galleries have been sketched. It's slowly getting cozy down there... I looked for references for the further development of the captain's cabin and unfortunately didn't find much. There is a contemporary painting of an English captain on board the HMS Nottingham (60 guns) from 1742, the year the TRE KRONER was built, painted by William Hogarth: Here you can see that the wall paneling is quite elaborately decorated. Fluted flat columns and gilded carved capitals can be seen in the background. Between the stern windows, you can see the surrounding molded panels that also divide the rows of windows on the outside of the TRE KRONER. In my opinion, the cabin was relatively elaborate and of high quality, whereas later examples are rather simpler. The cost of ship decorations was continually reduced throughout the 18th century, this applies to the exterior decoration and presumably also to the interior. There is a detailed section through the Danish ship of the line Sophie-Magdalena from 1727, where a similar decoration is shown: In Stockholm there is also the original paneling of the Amphion from 1778, a little too young and perhaps already influenced by classicism, but the elements are similar. I made a drawing and put the Danish King Christian VI on the wall, what do you think? Best regards, Matthias


-
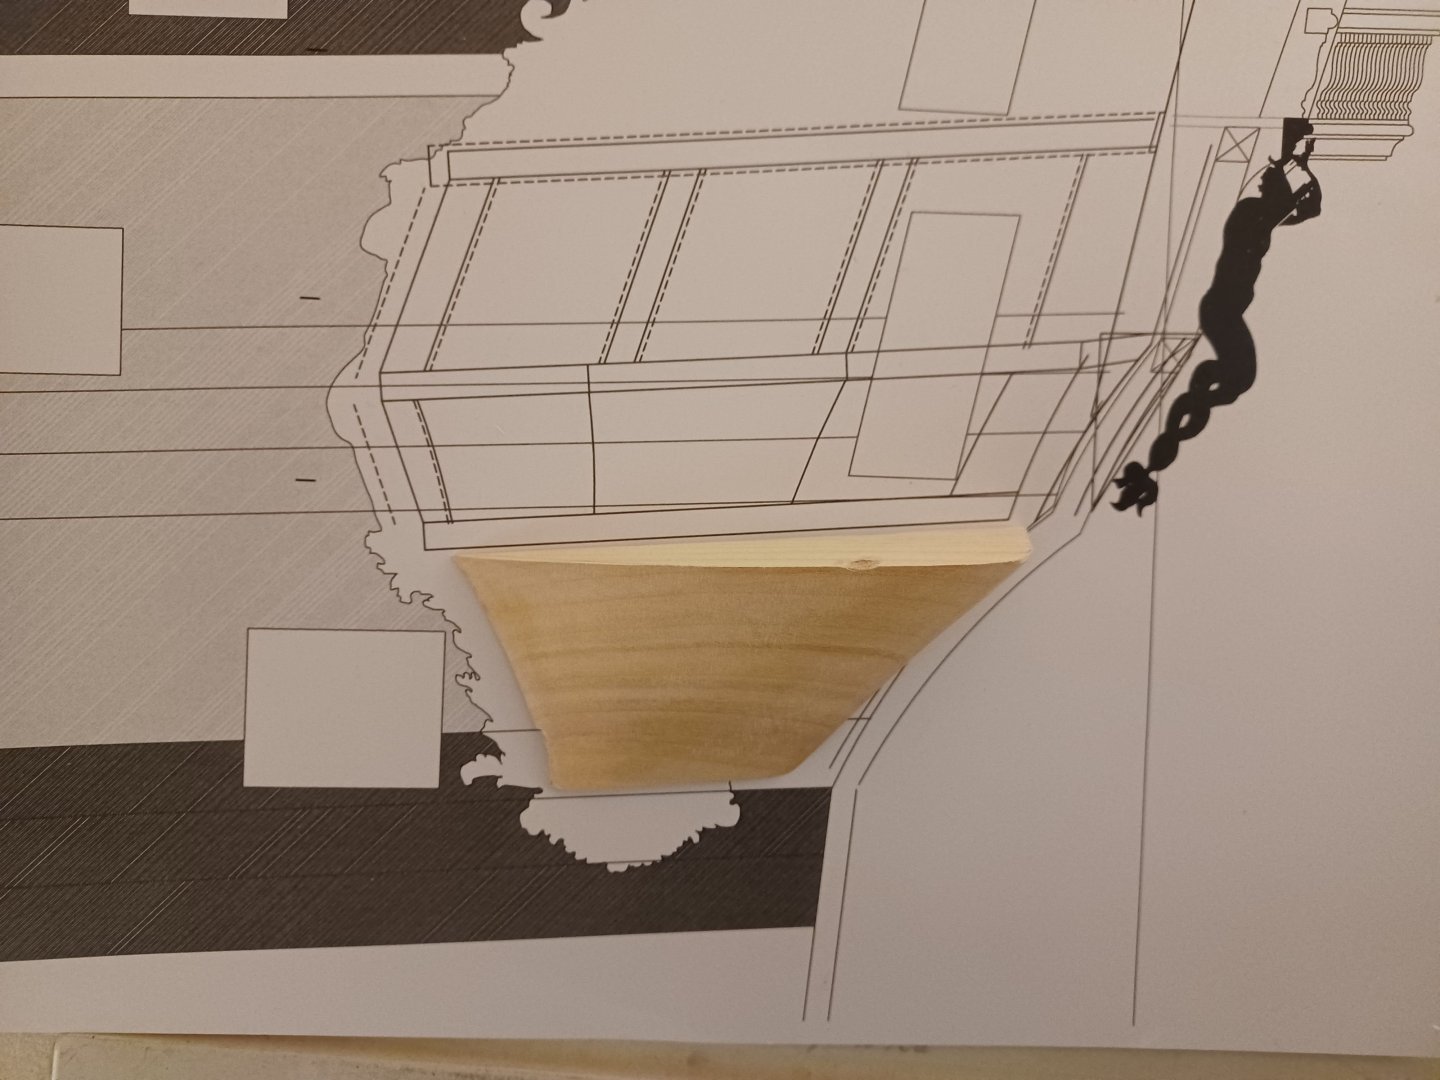
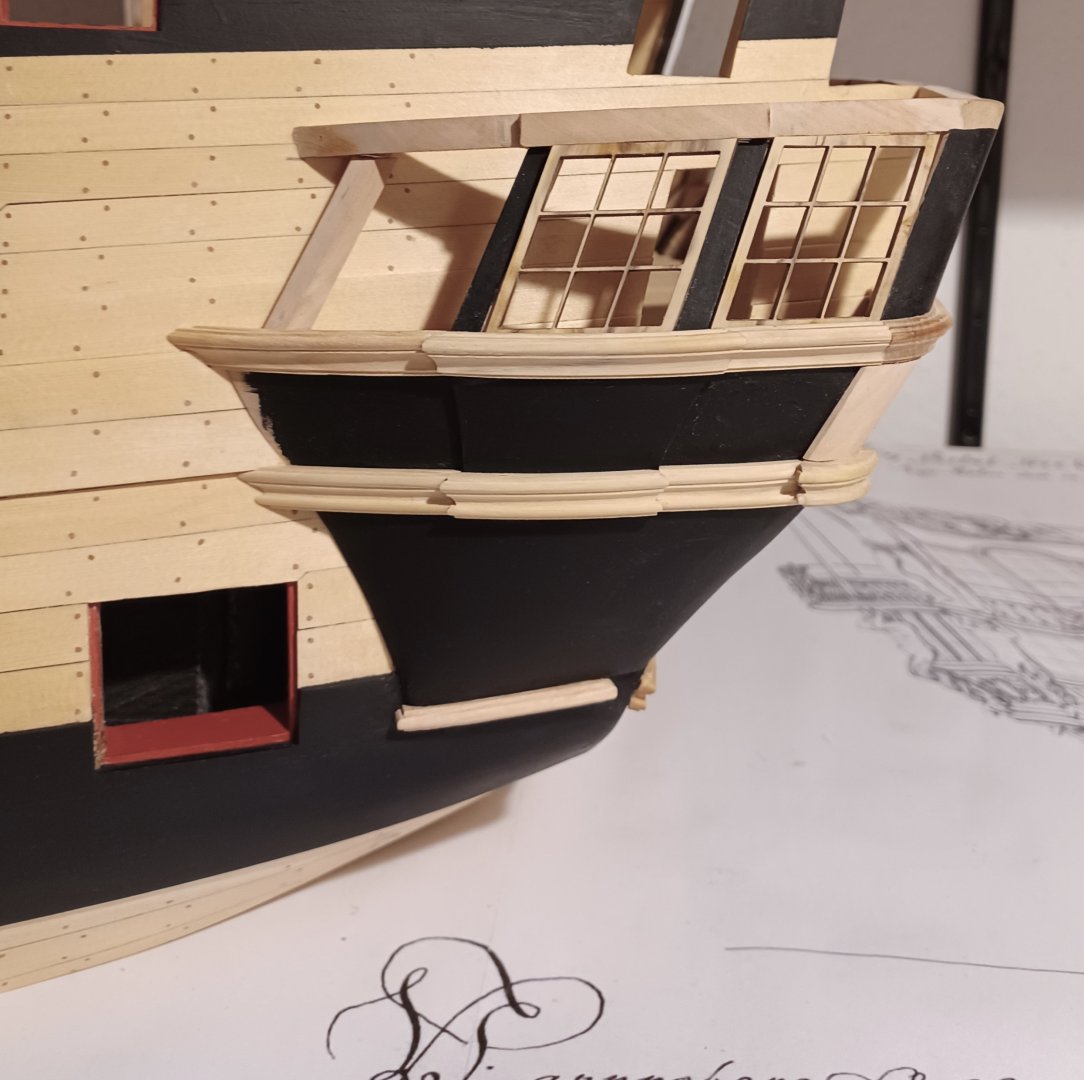
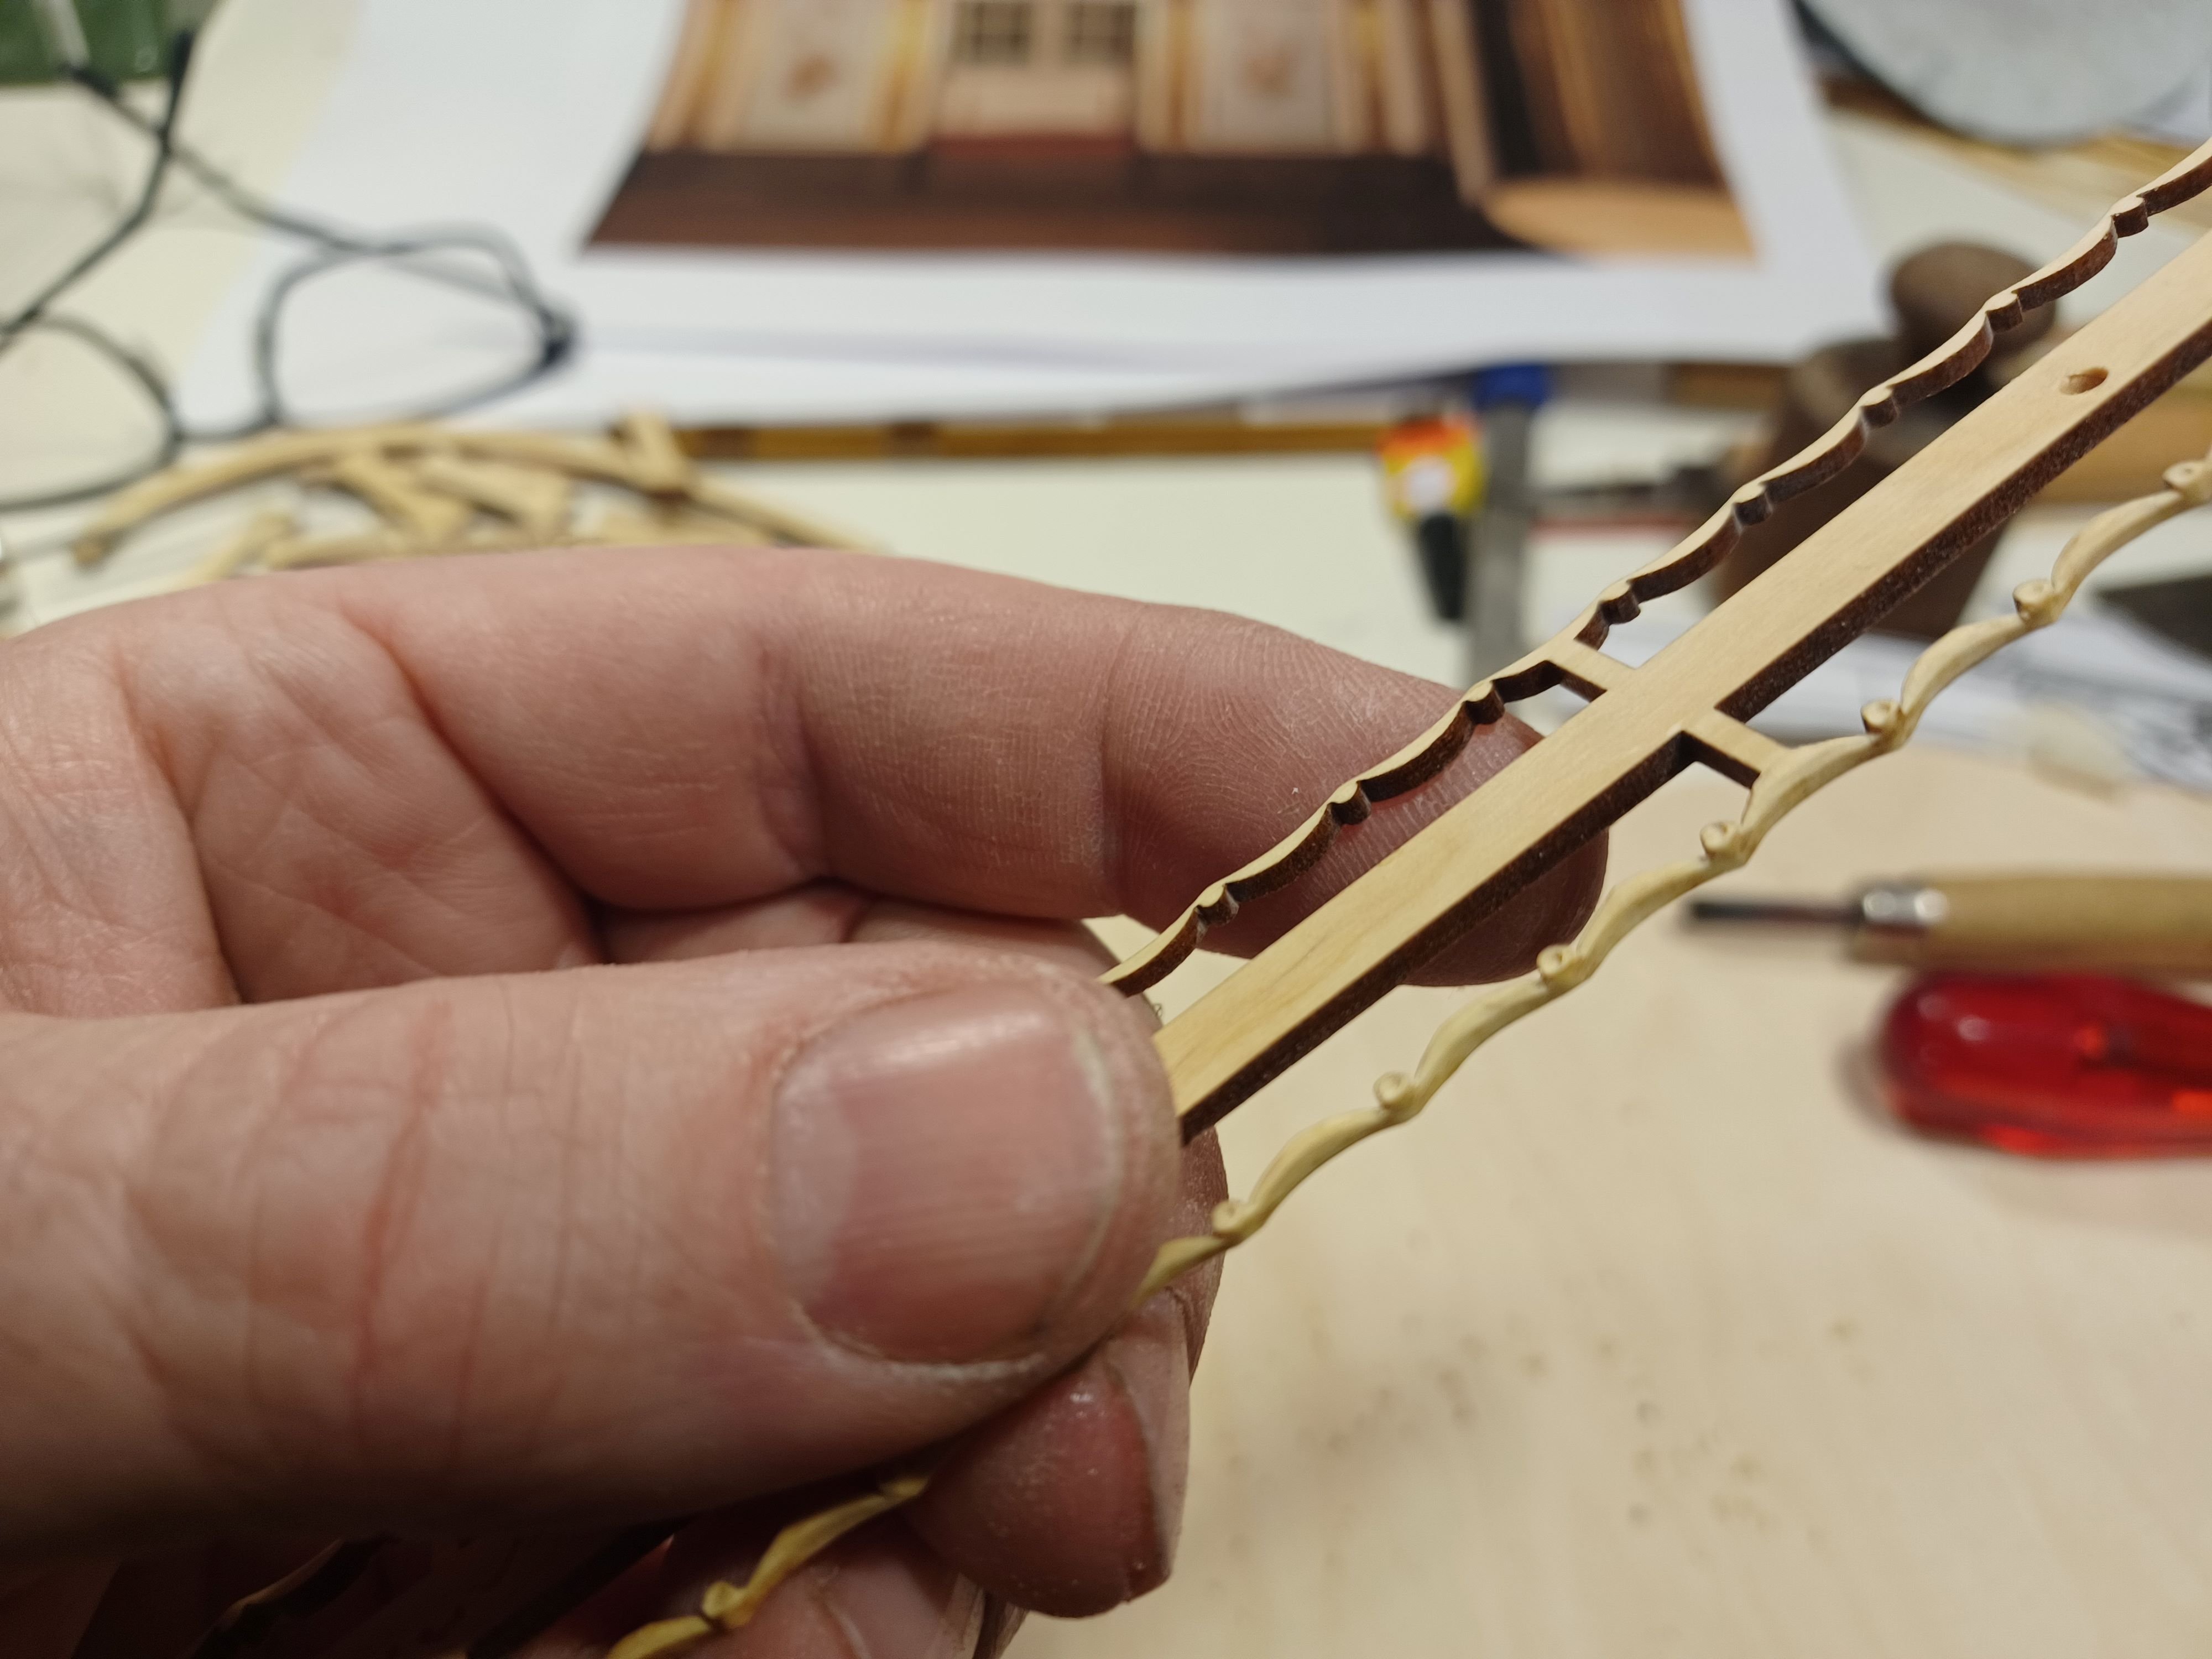
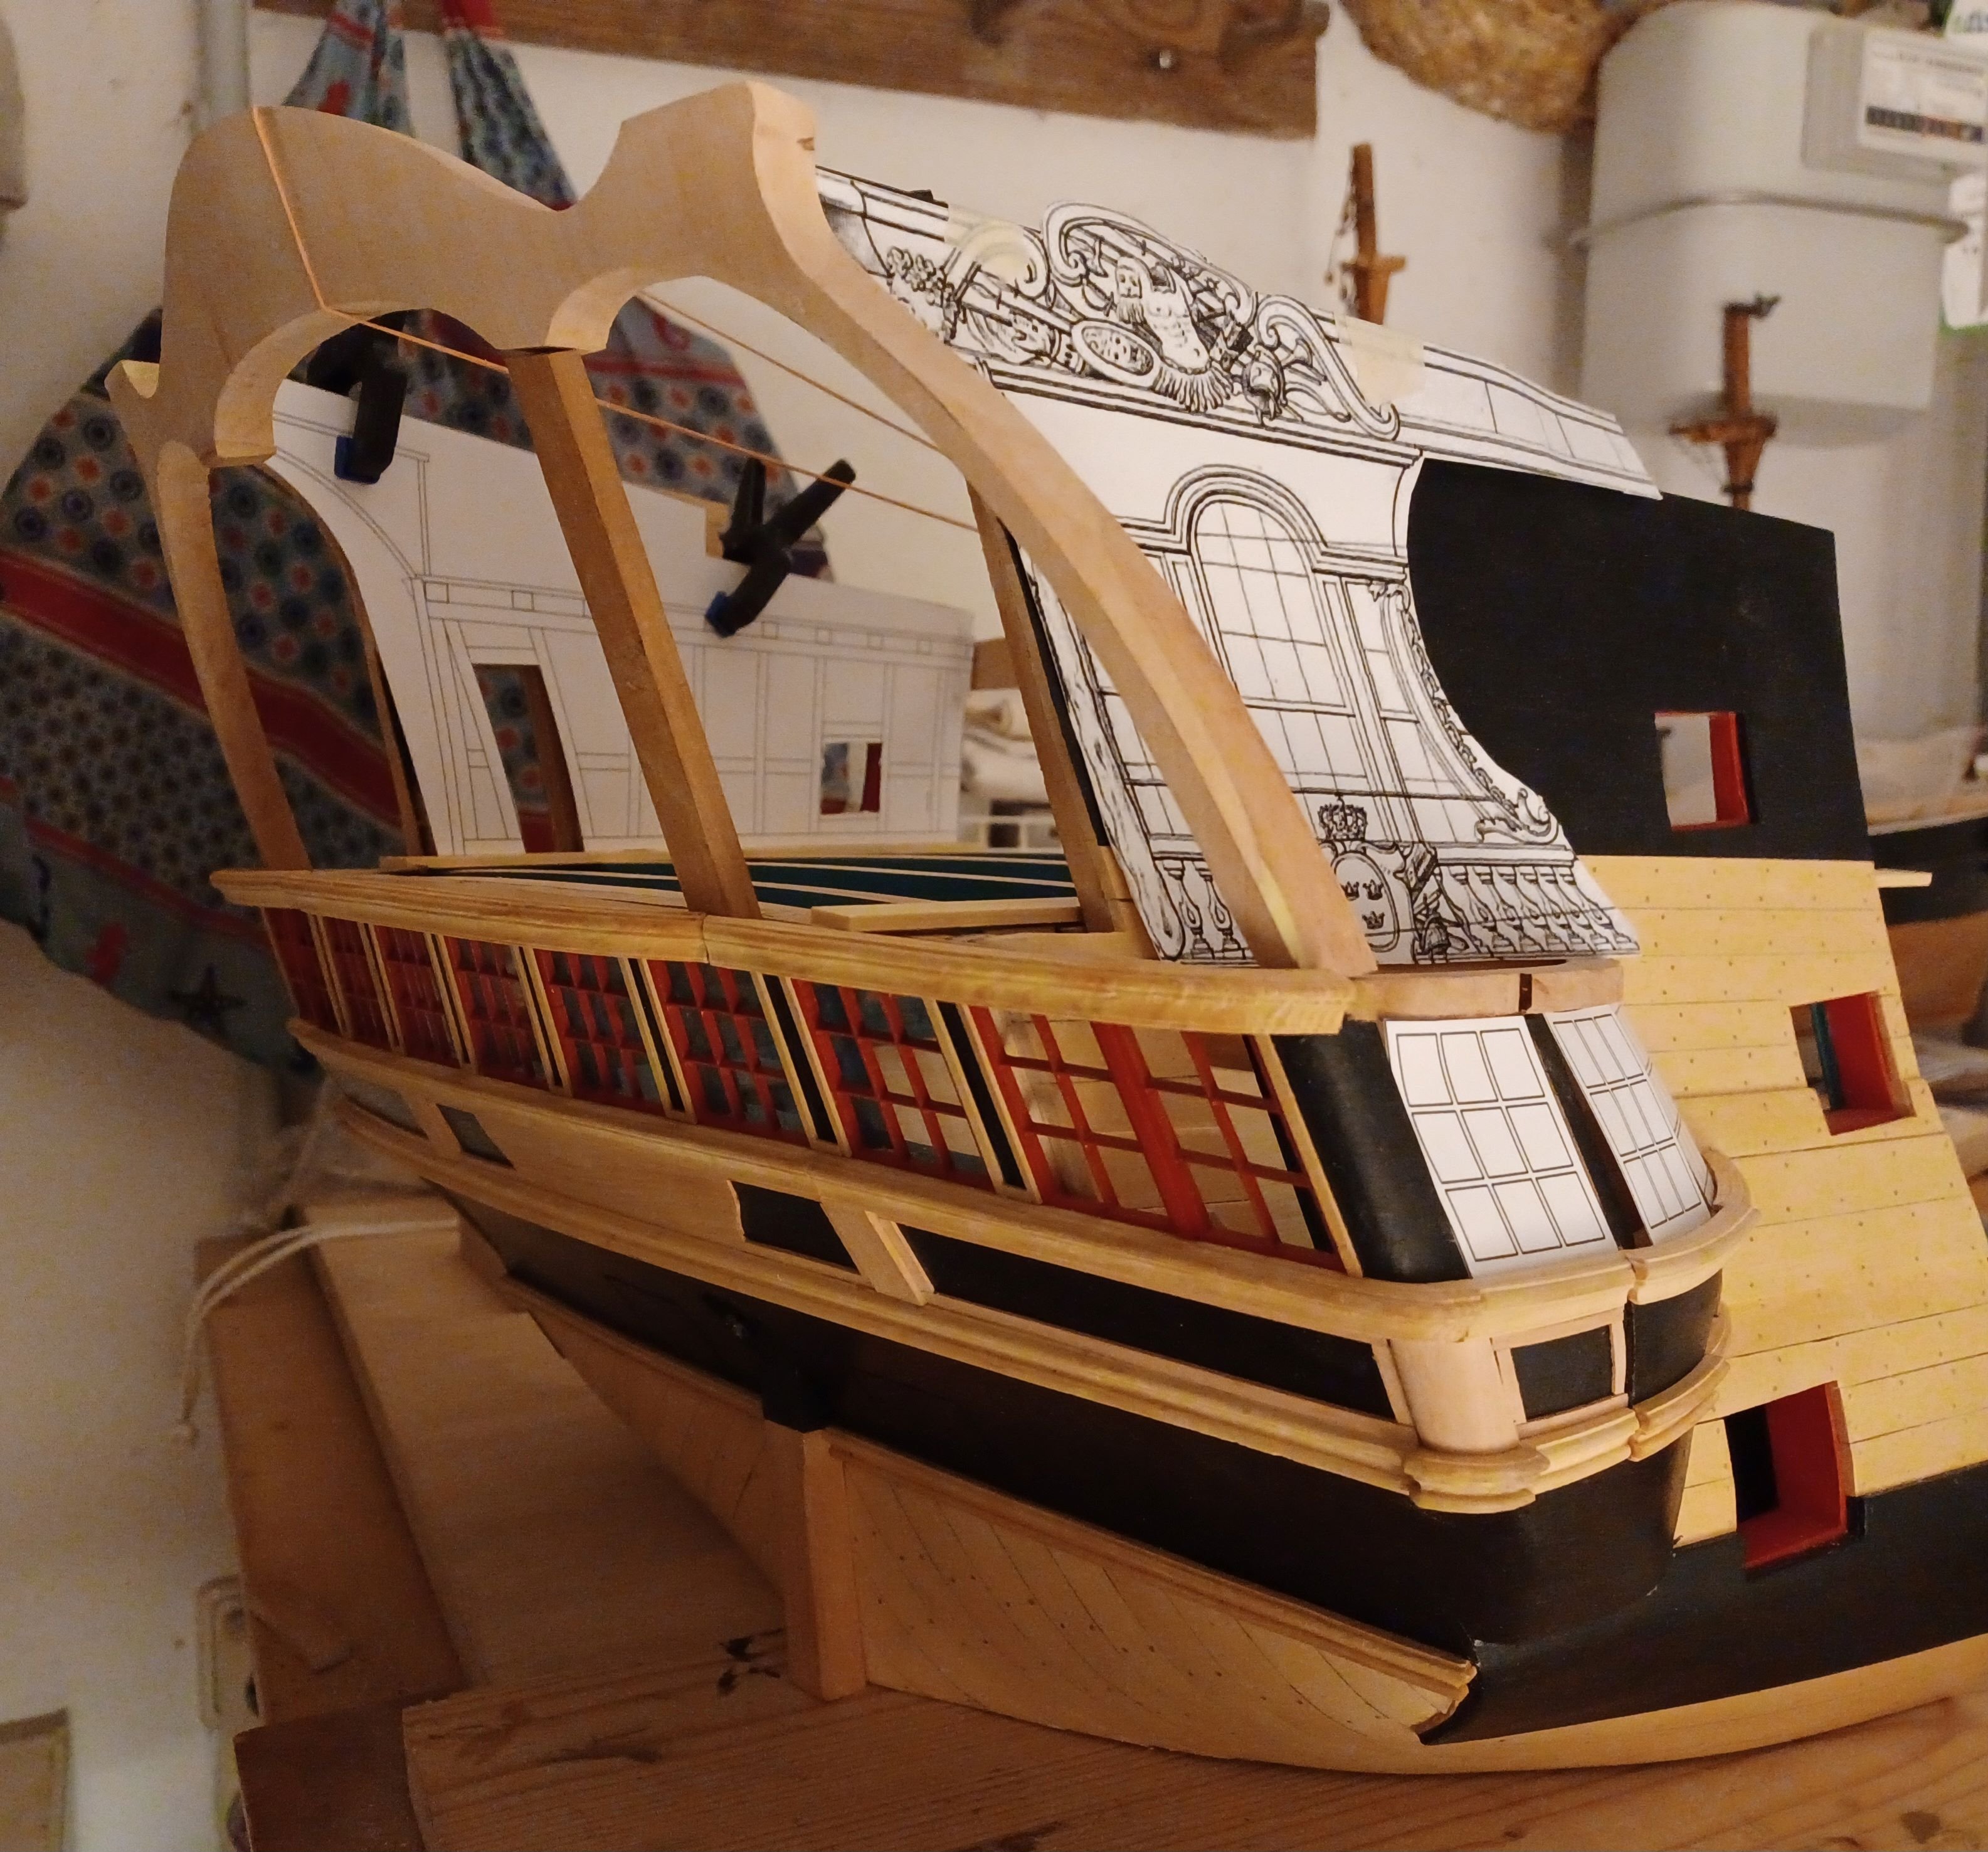
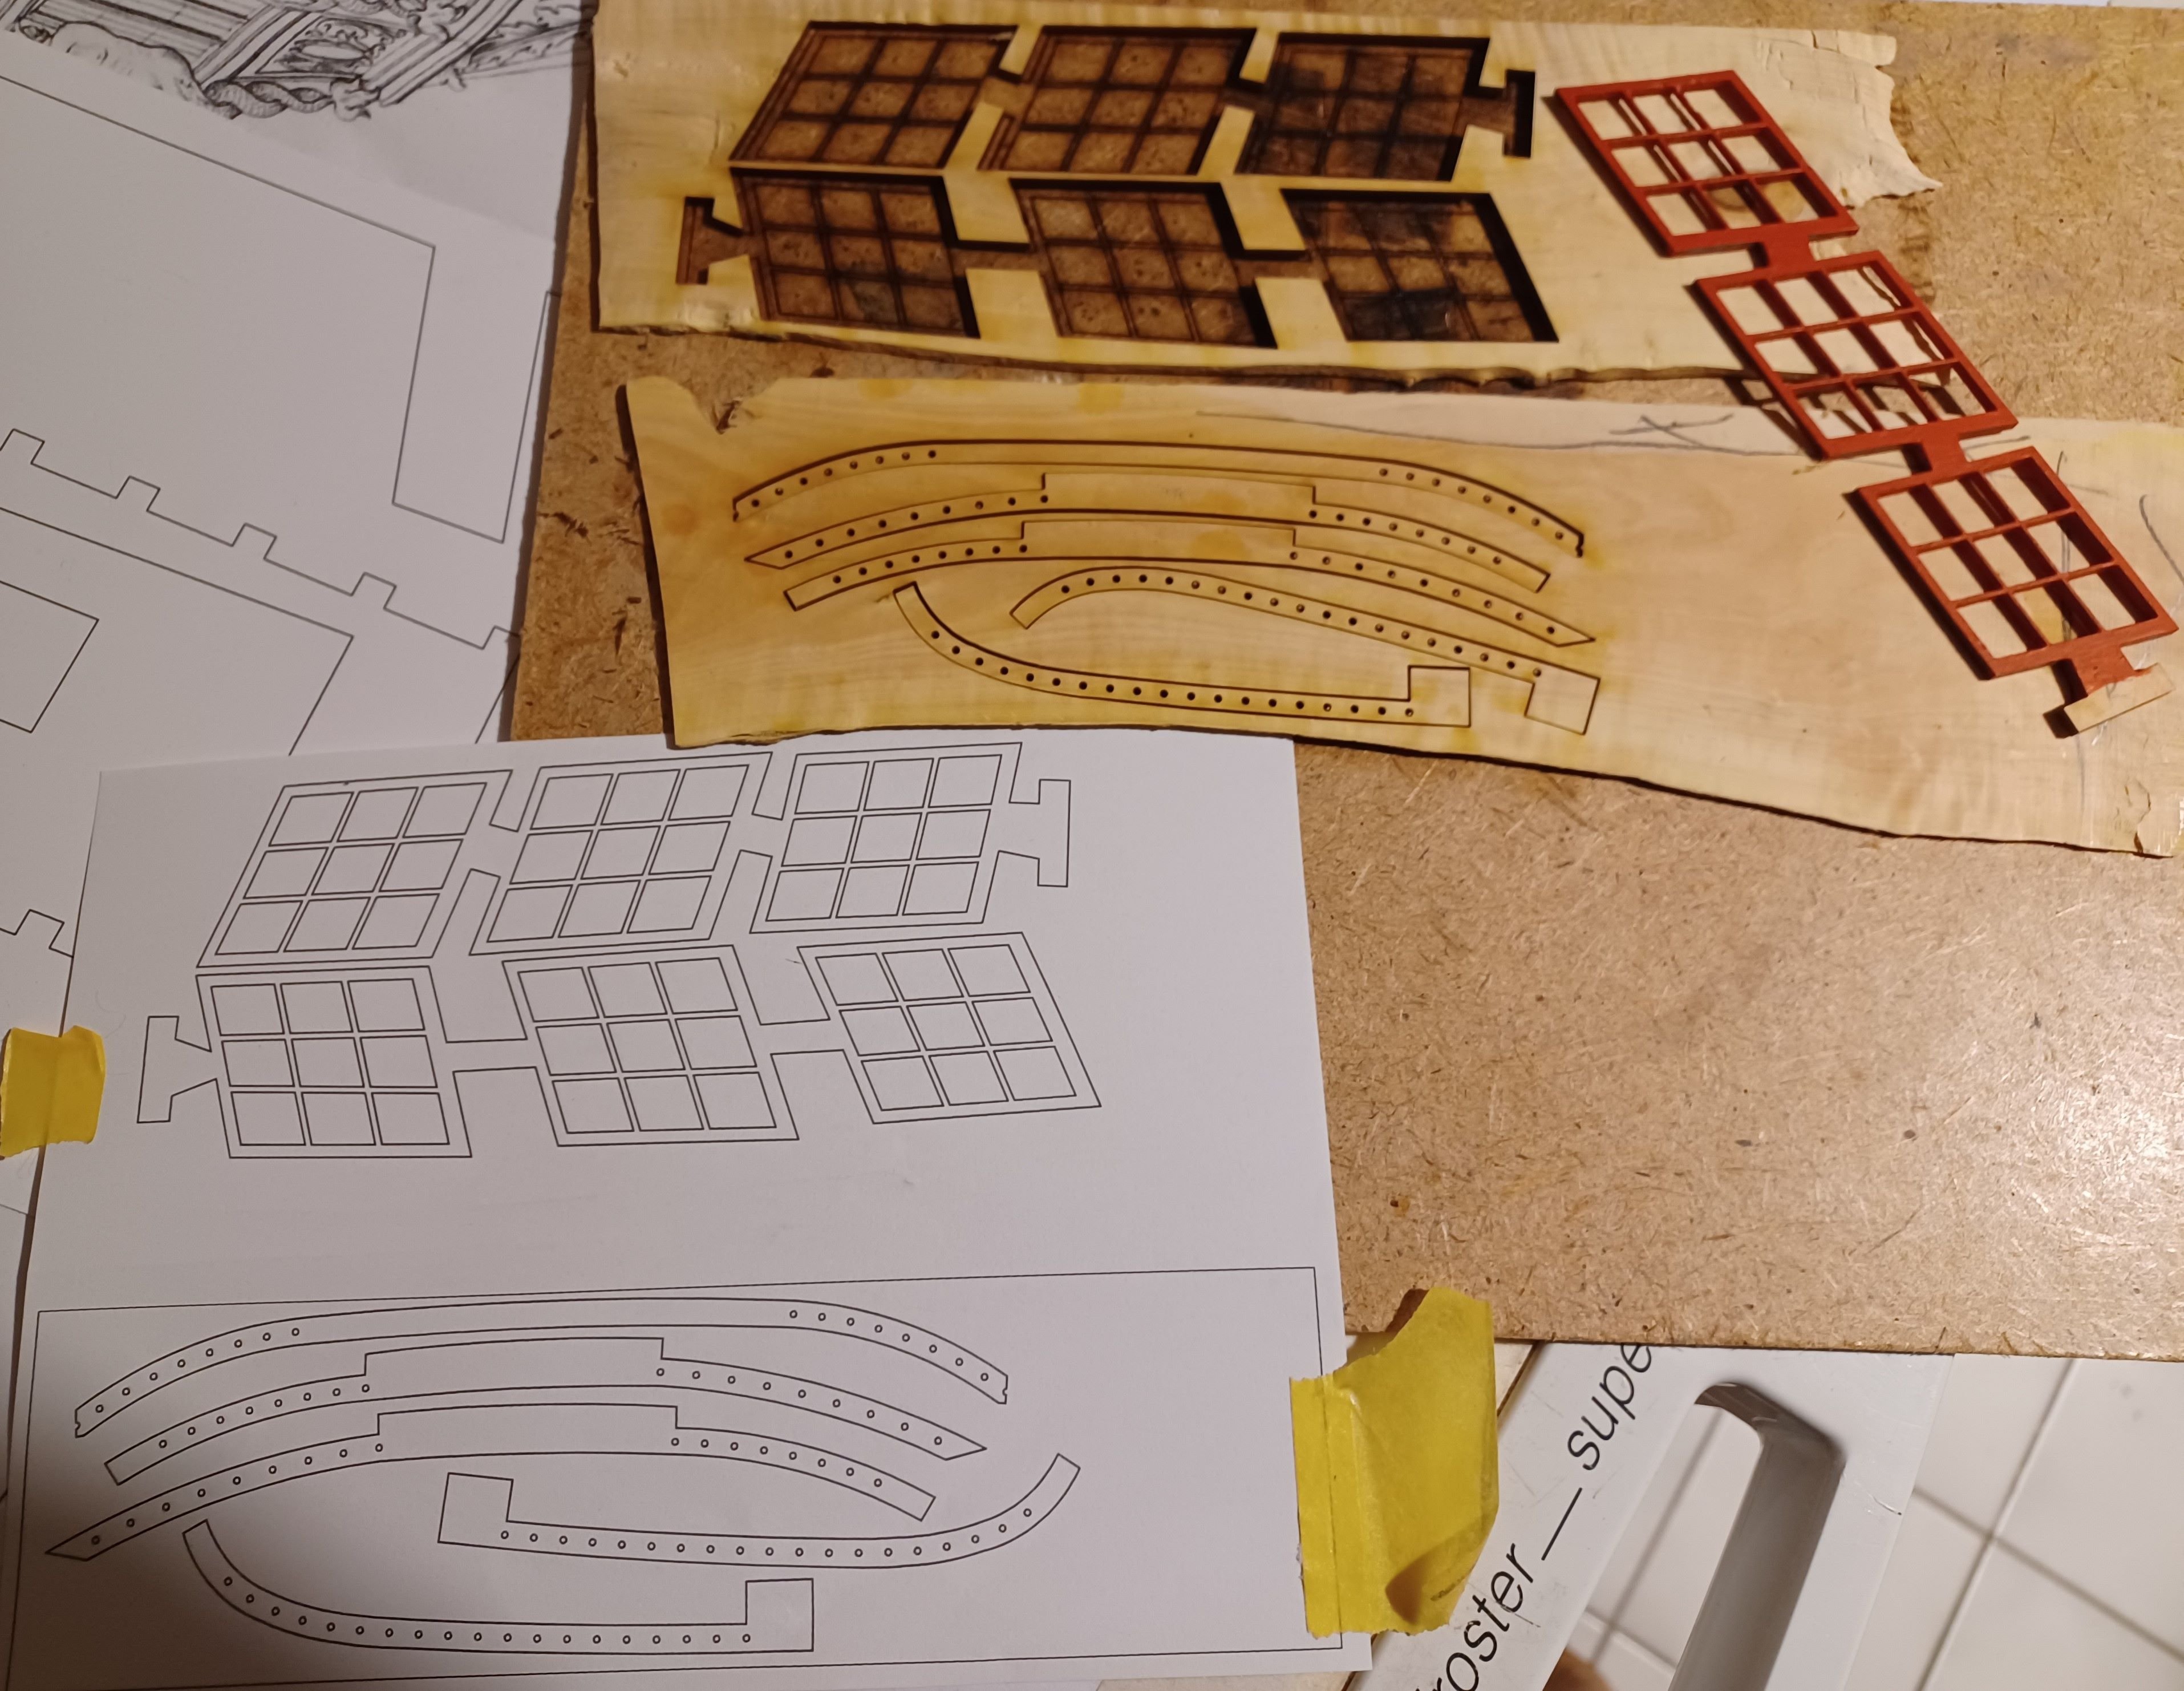
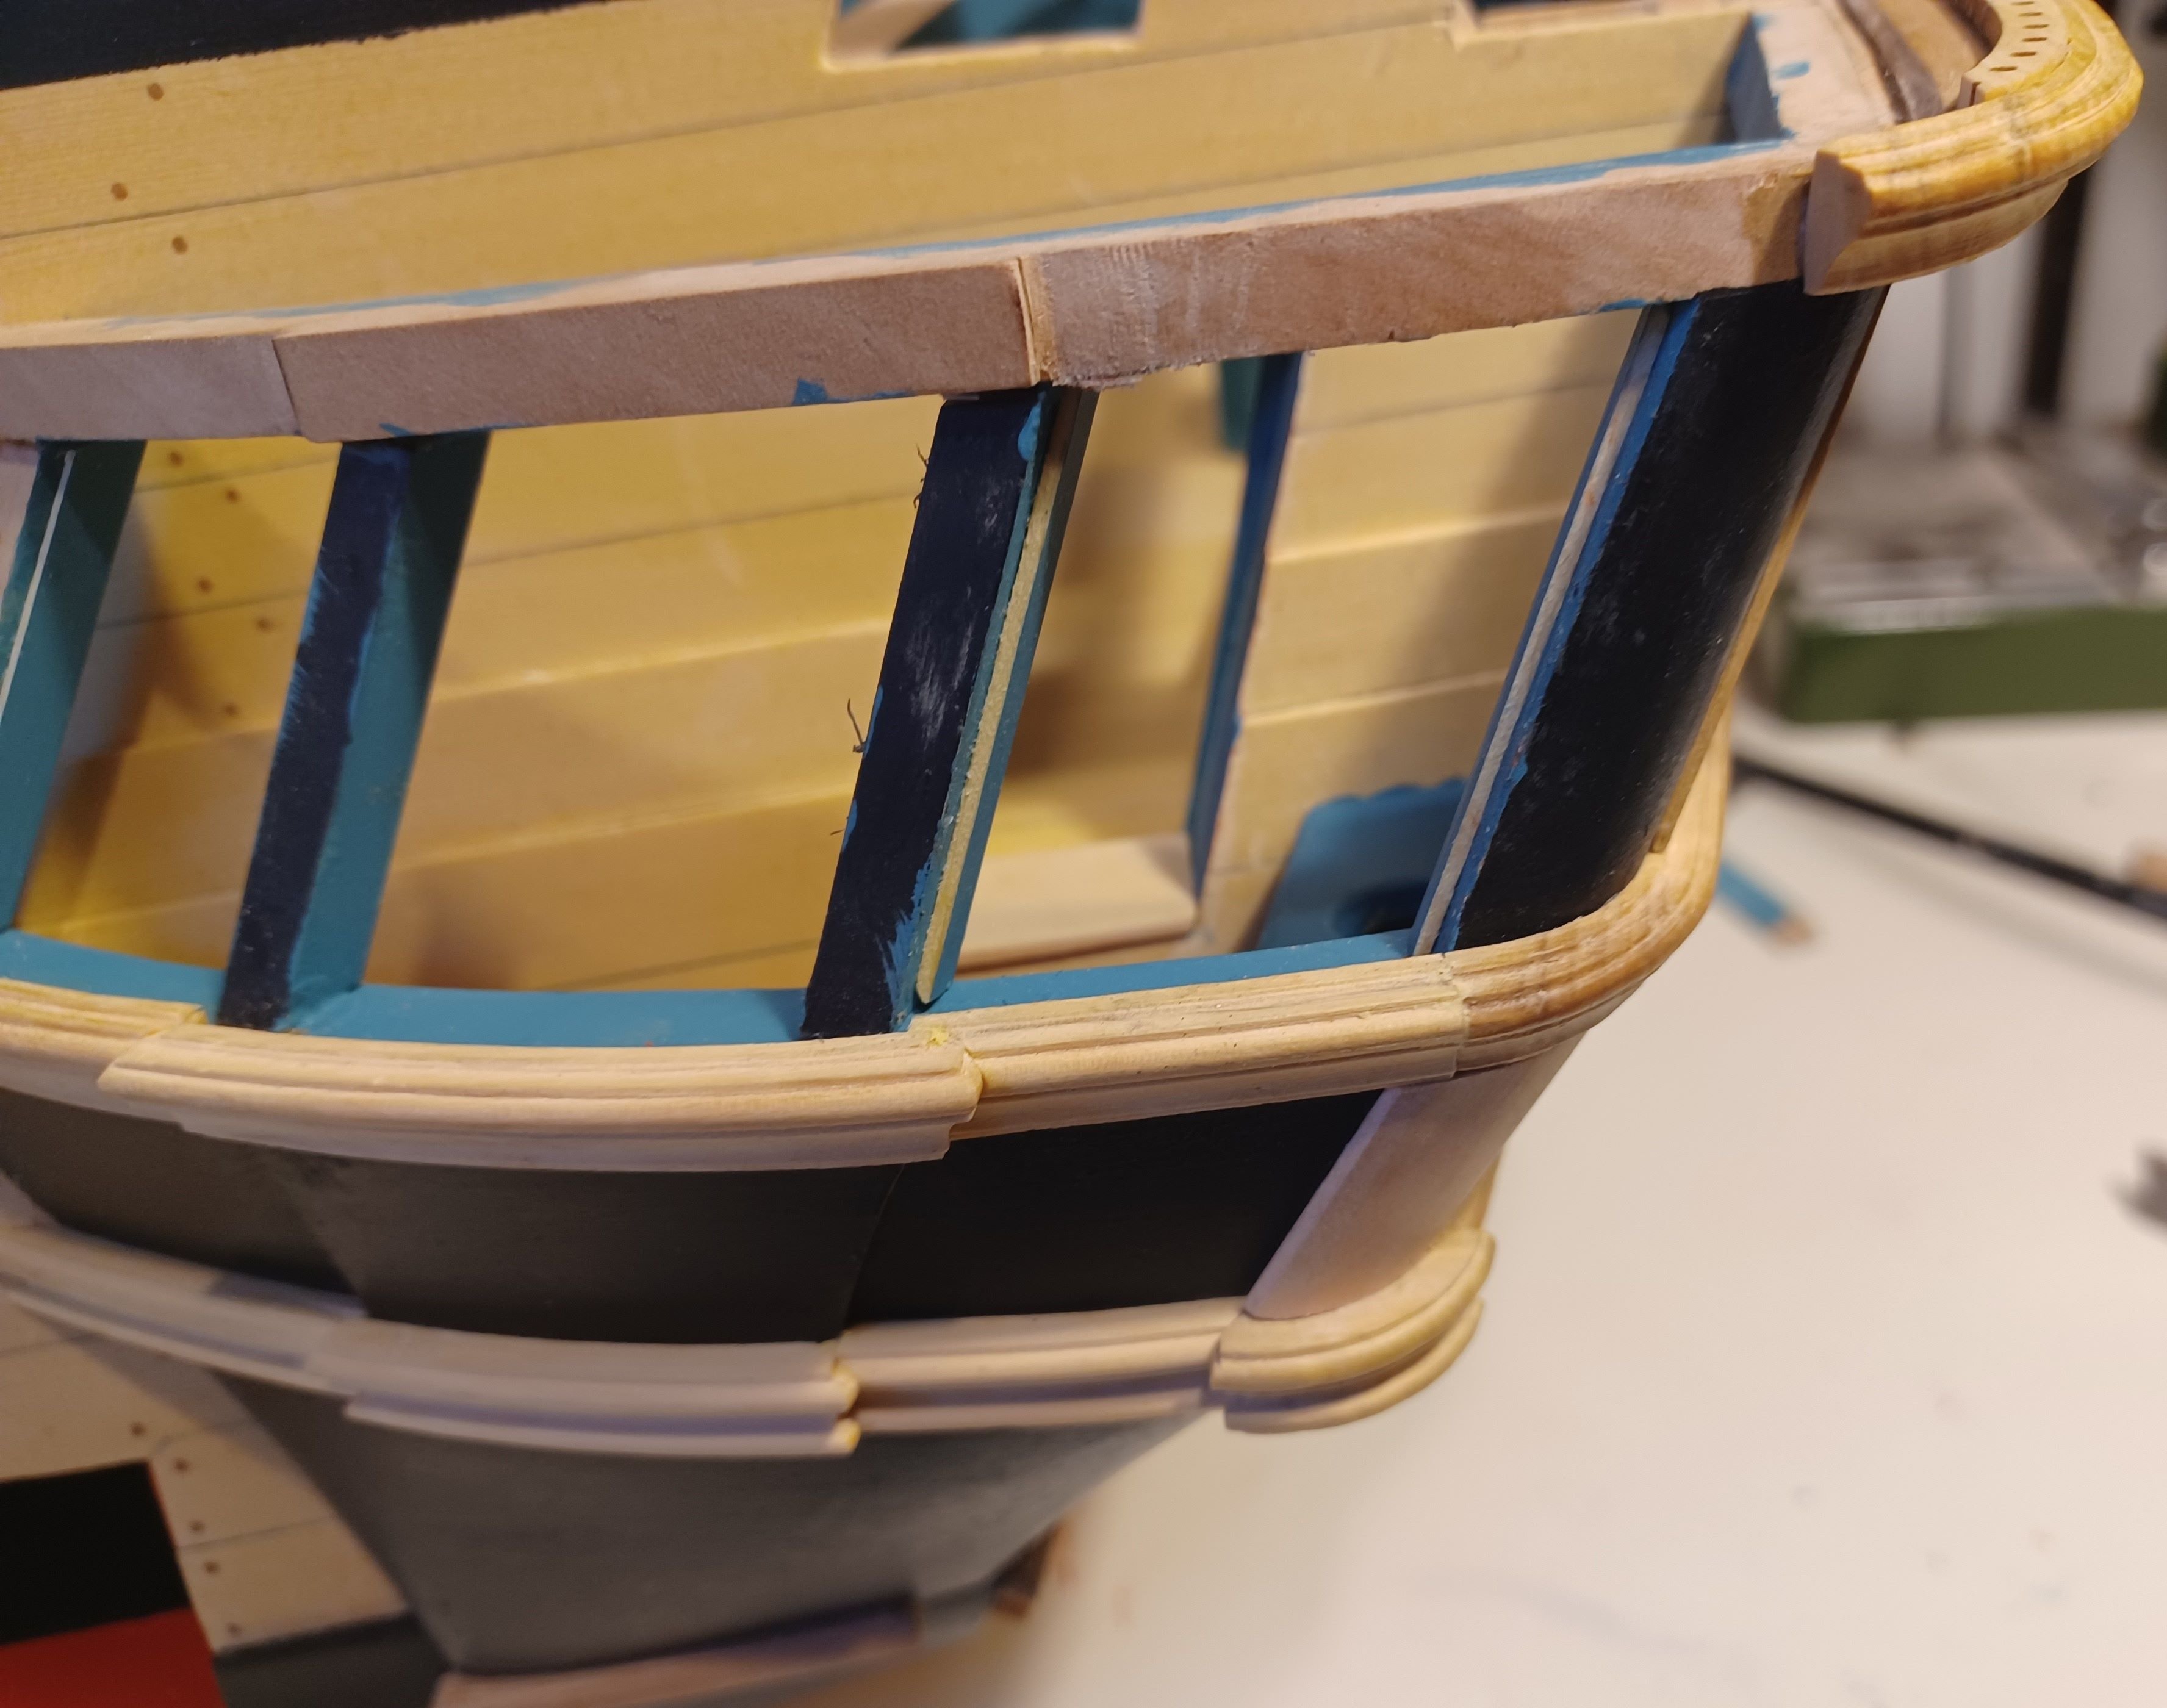
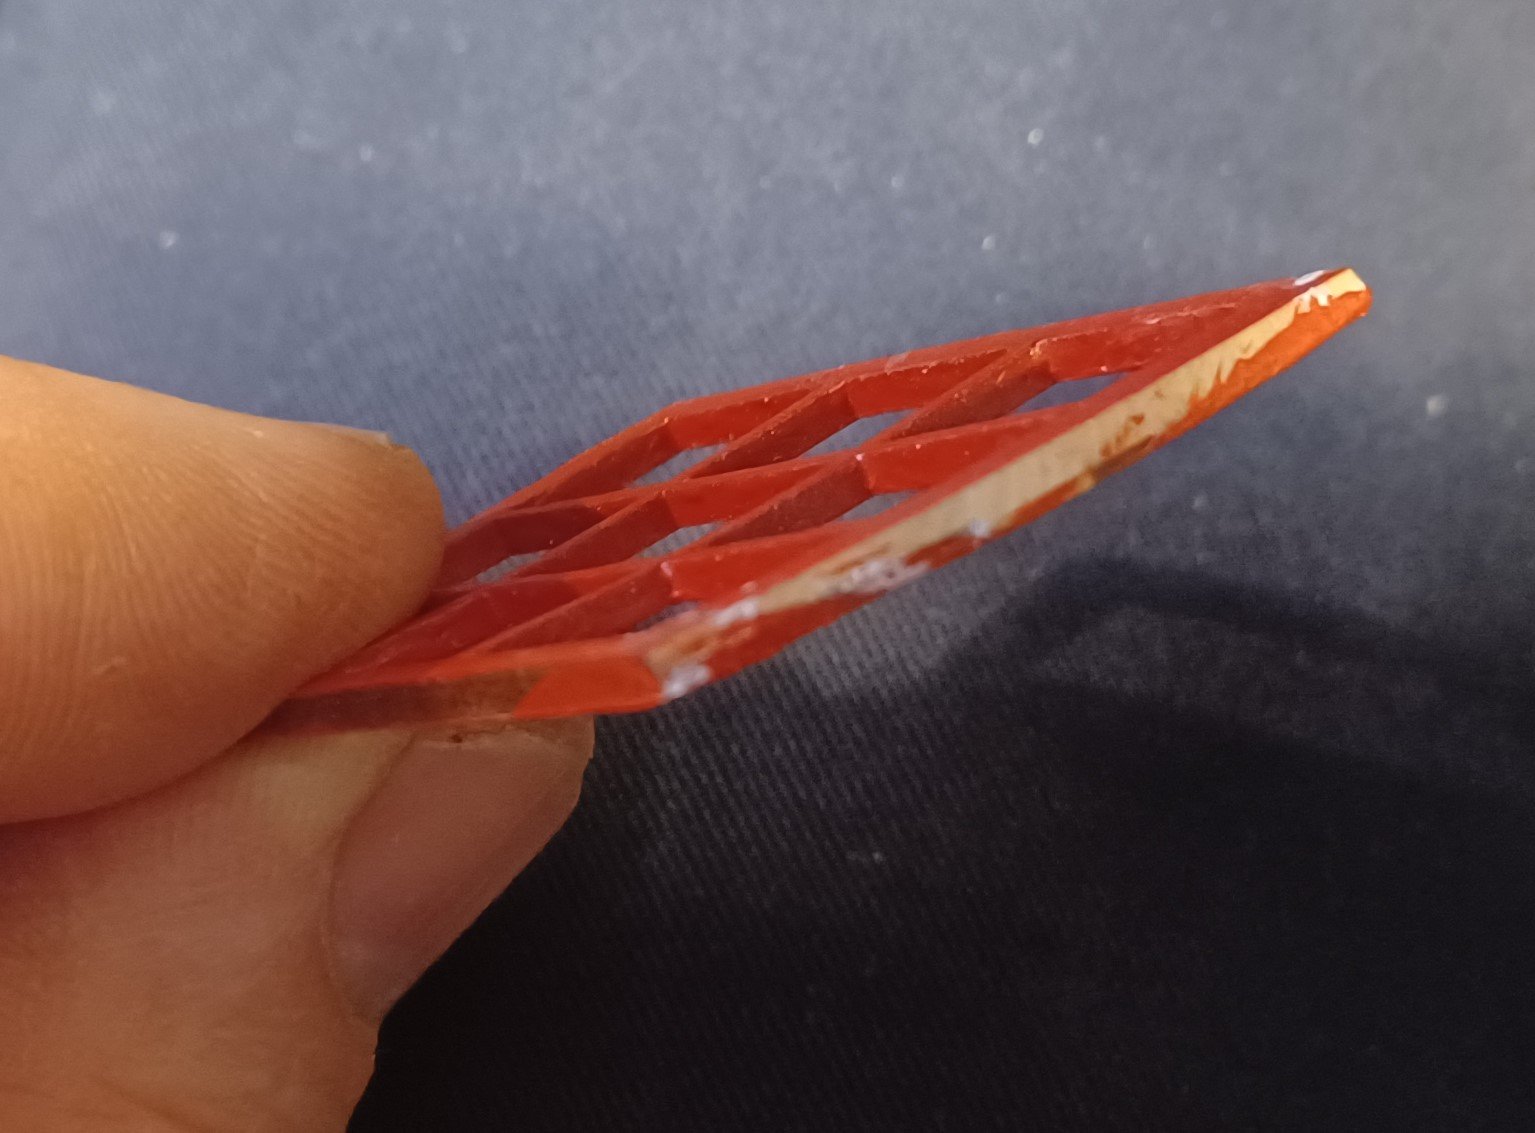
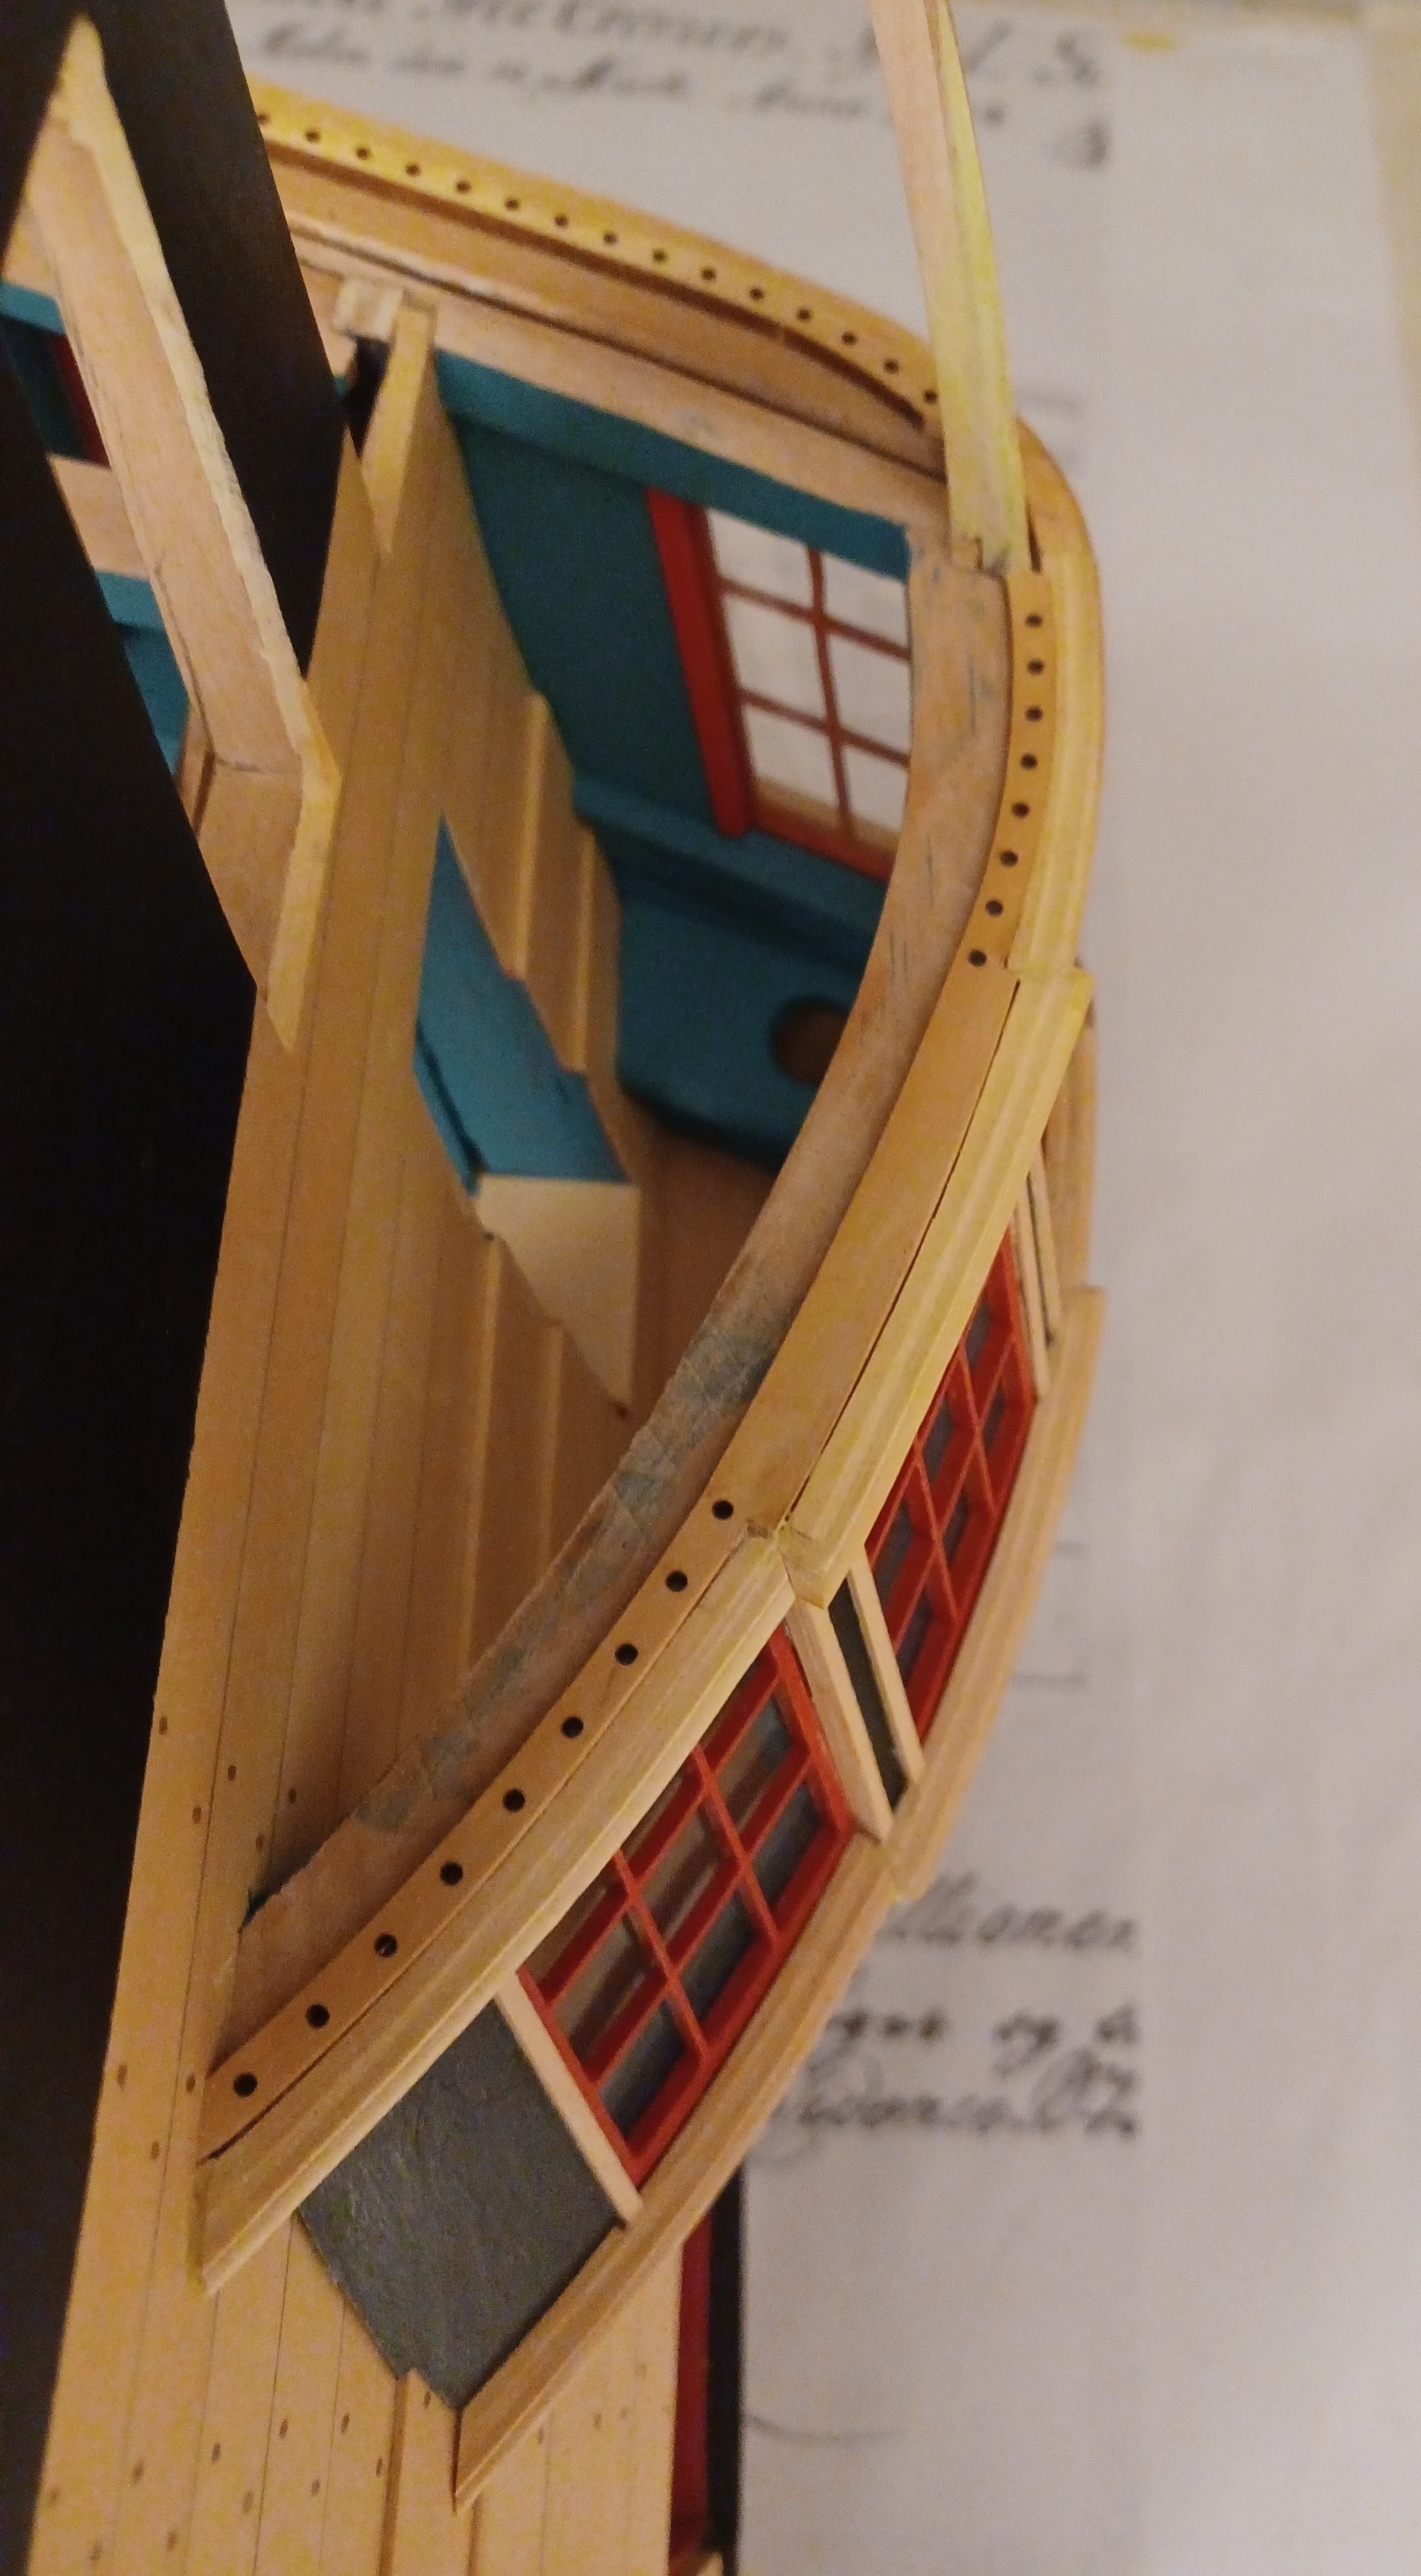
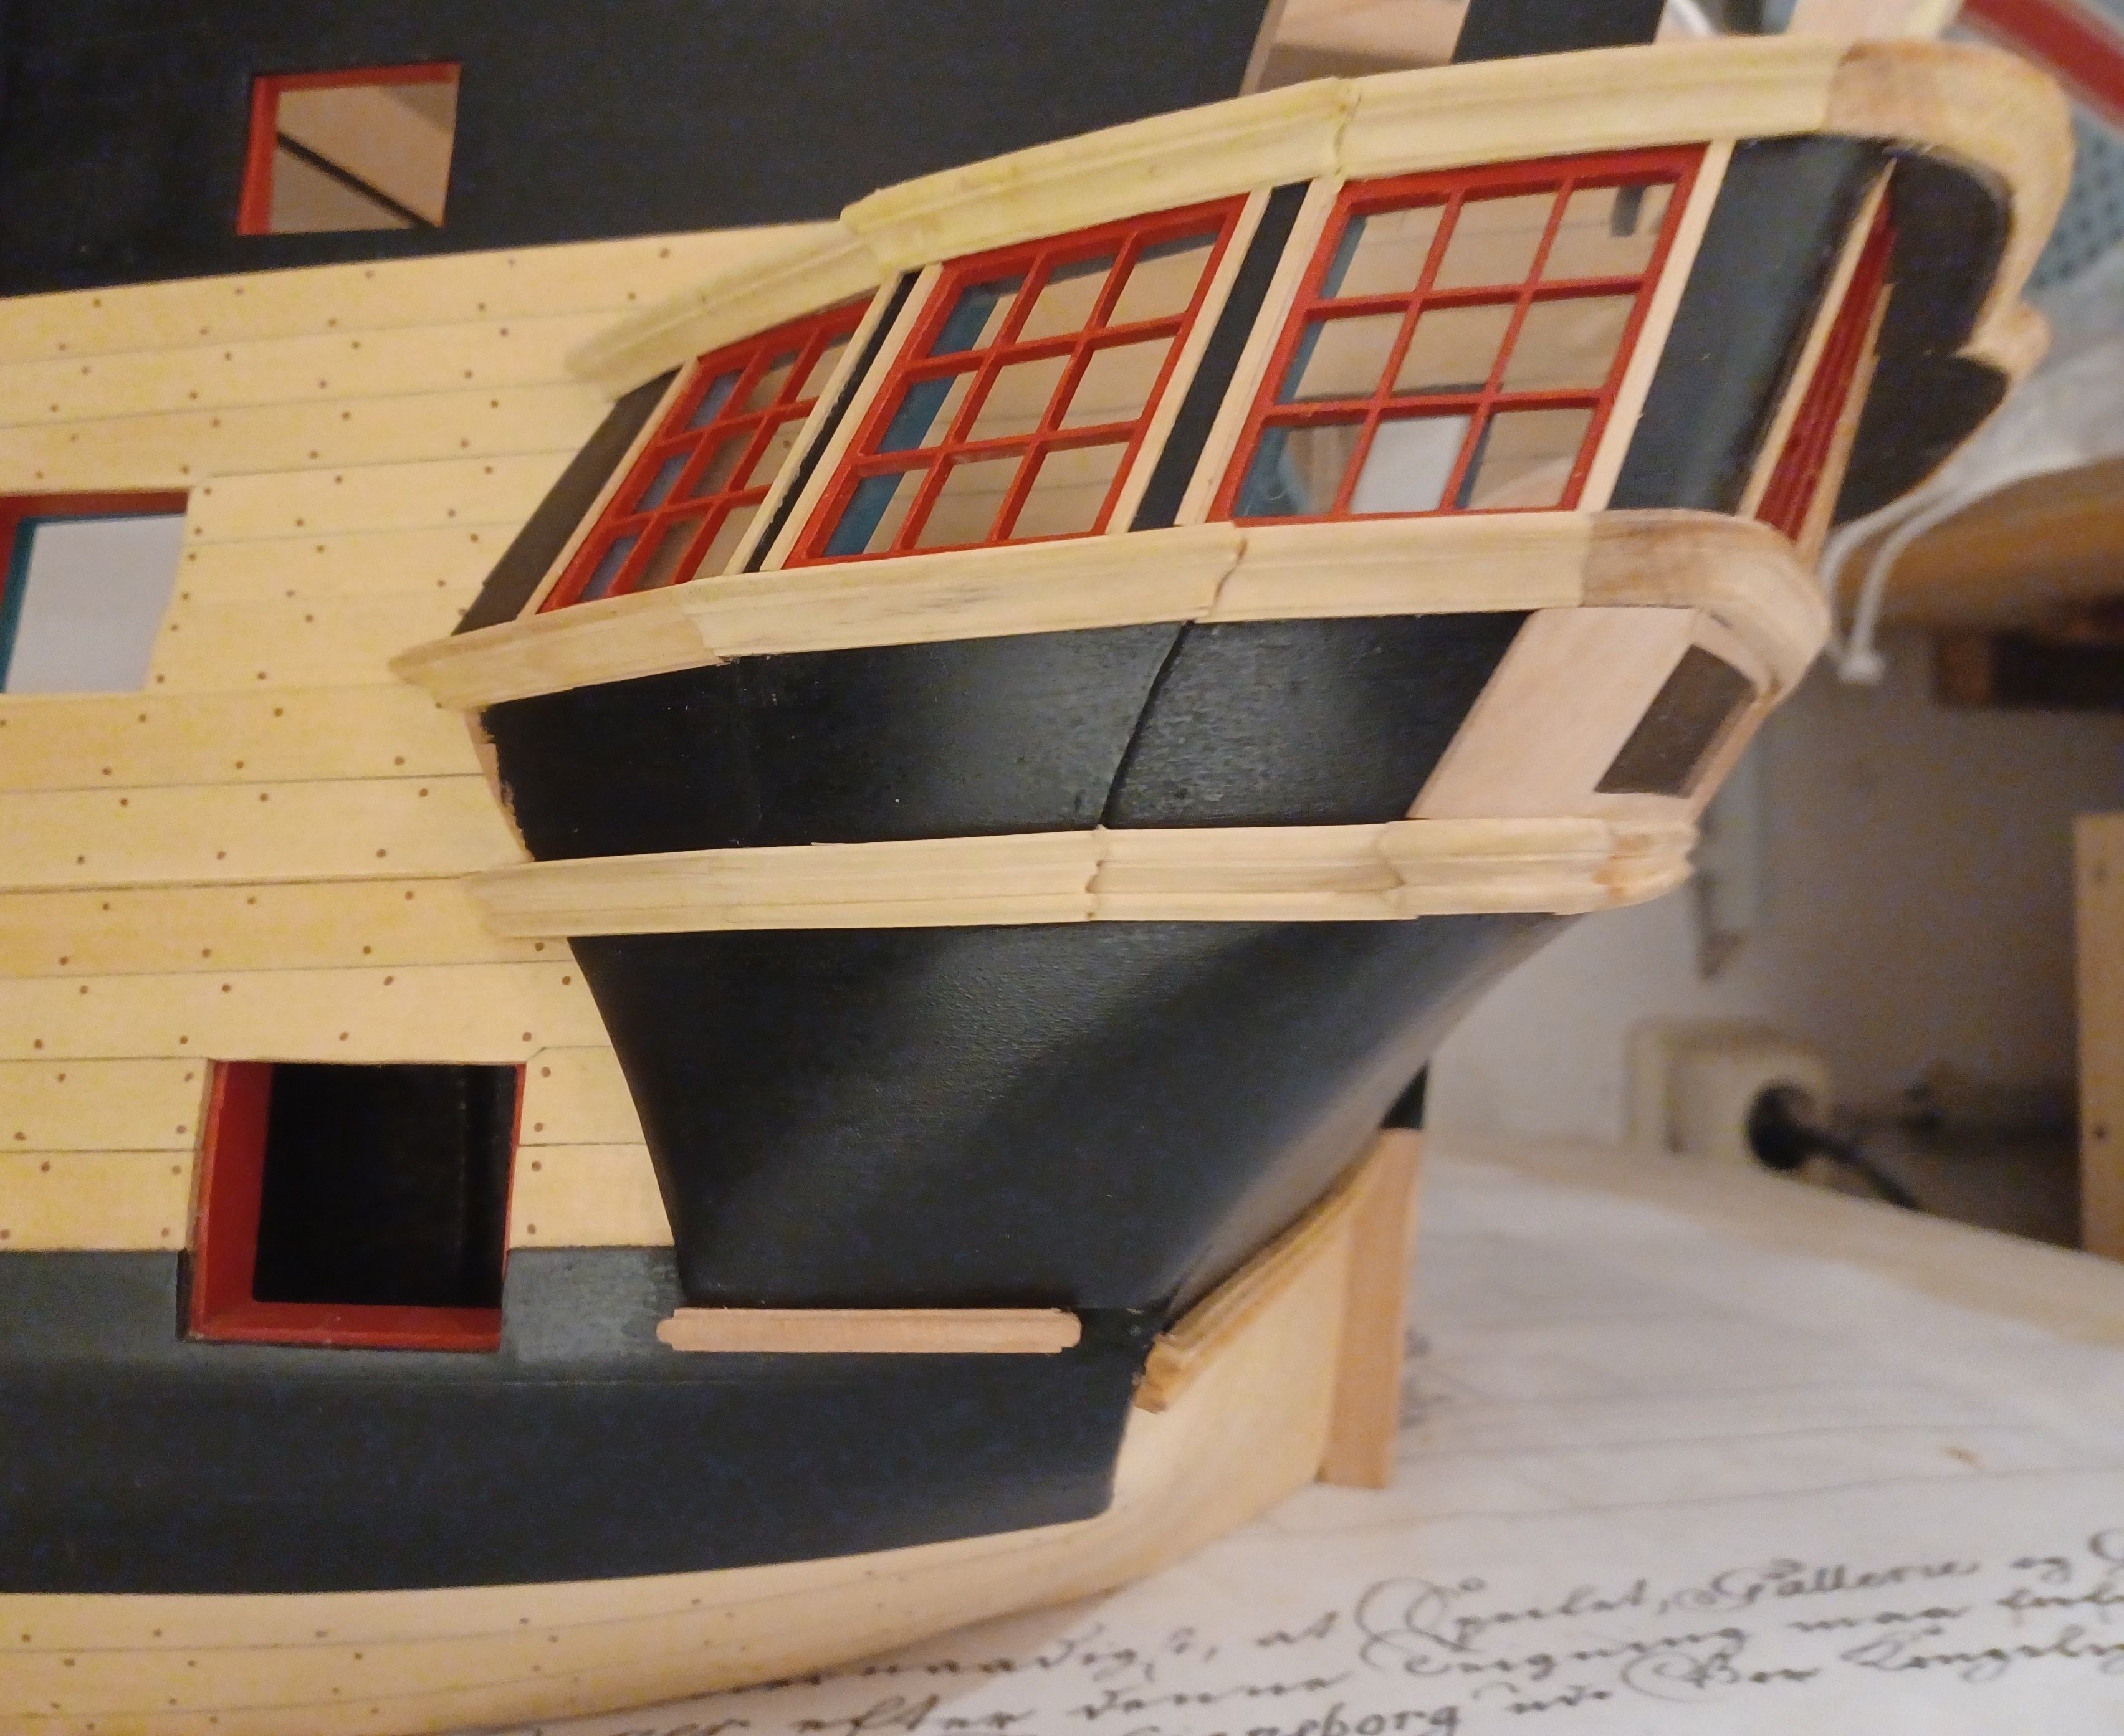
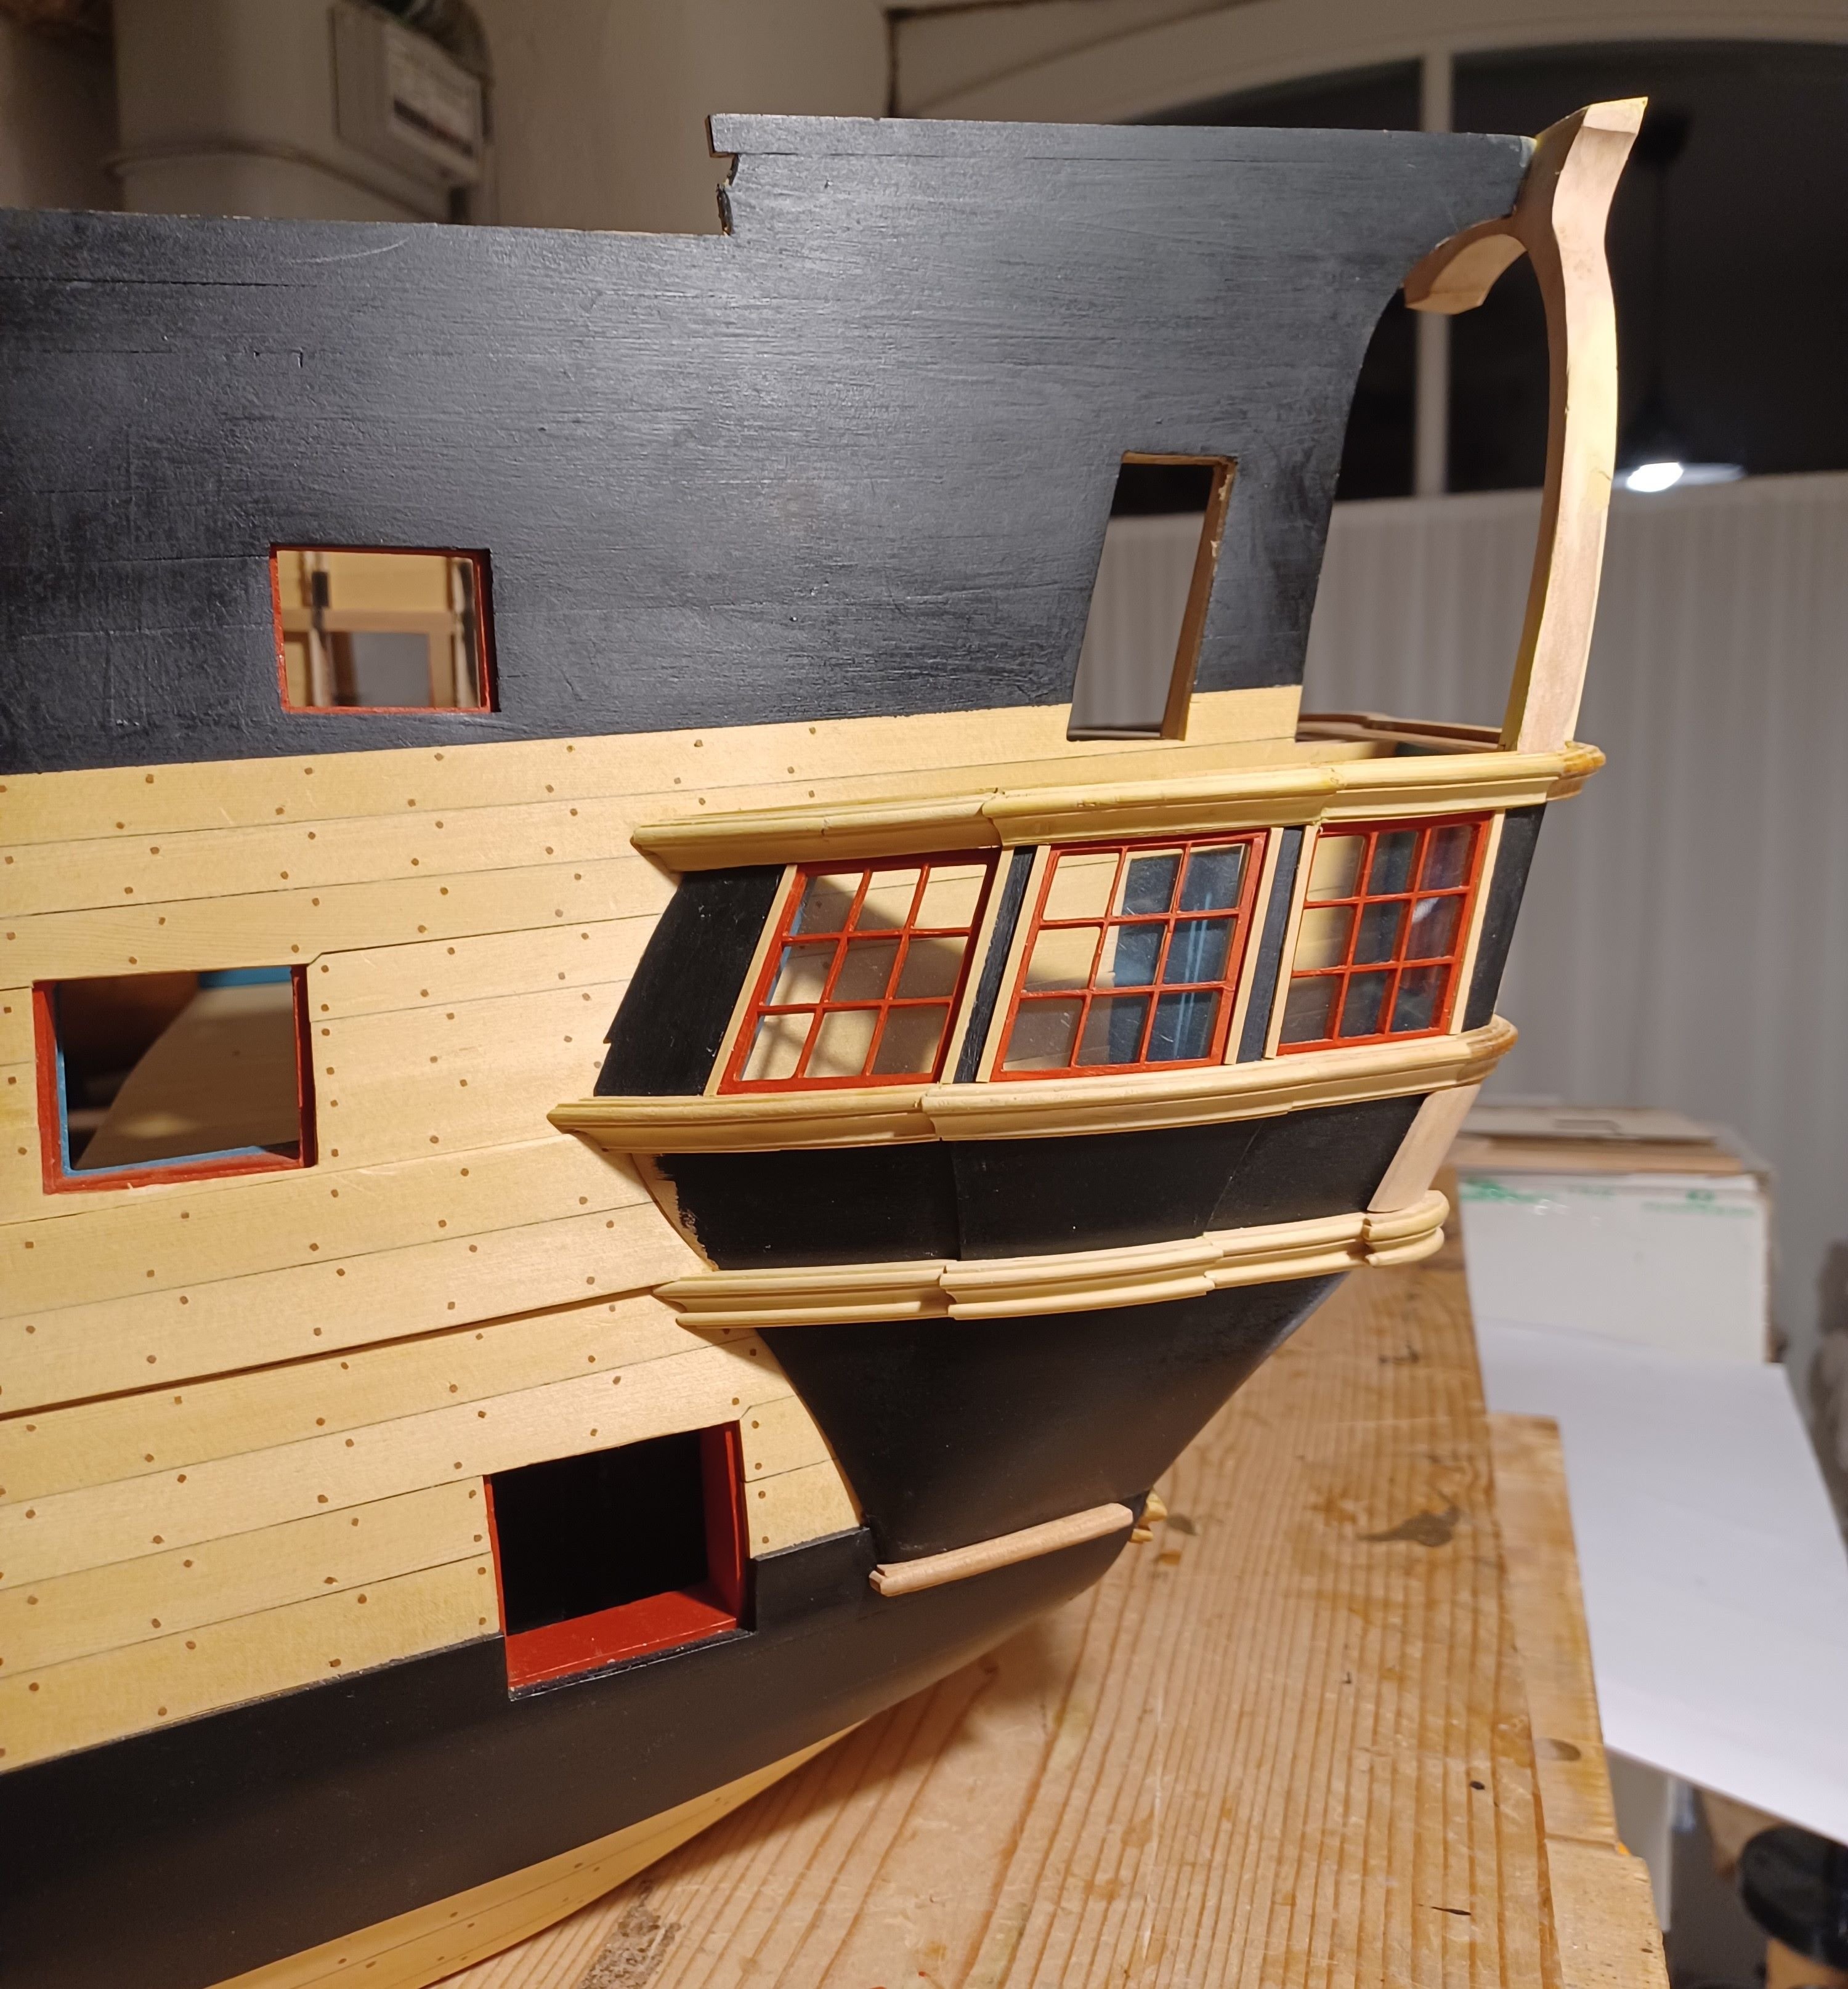
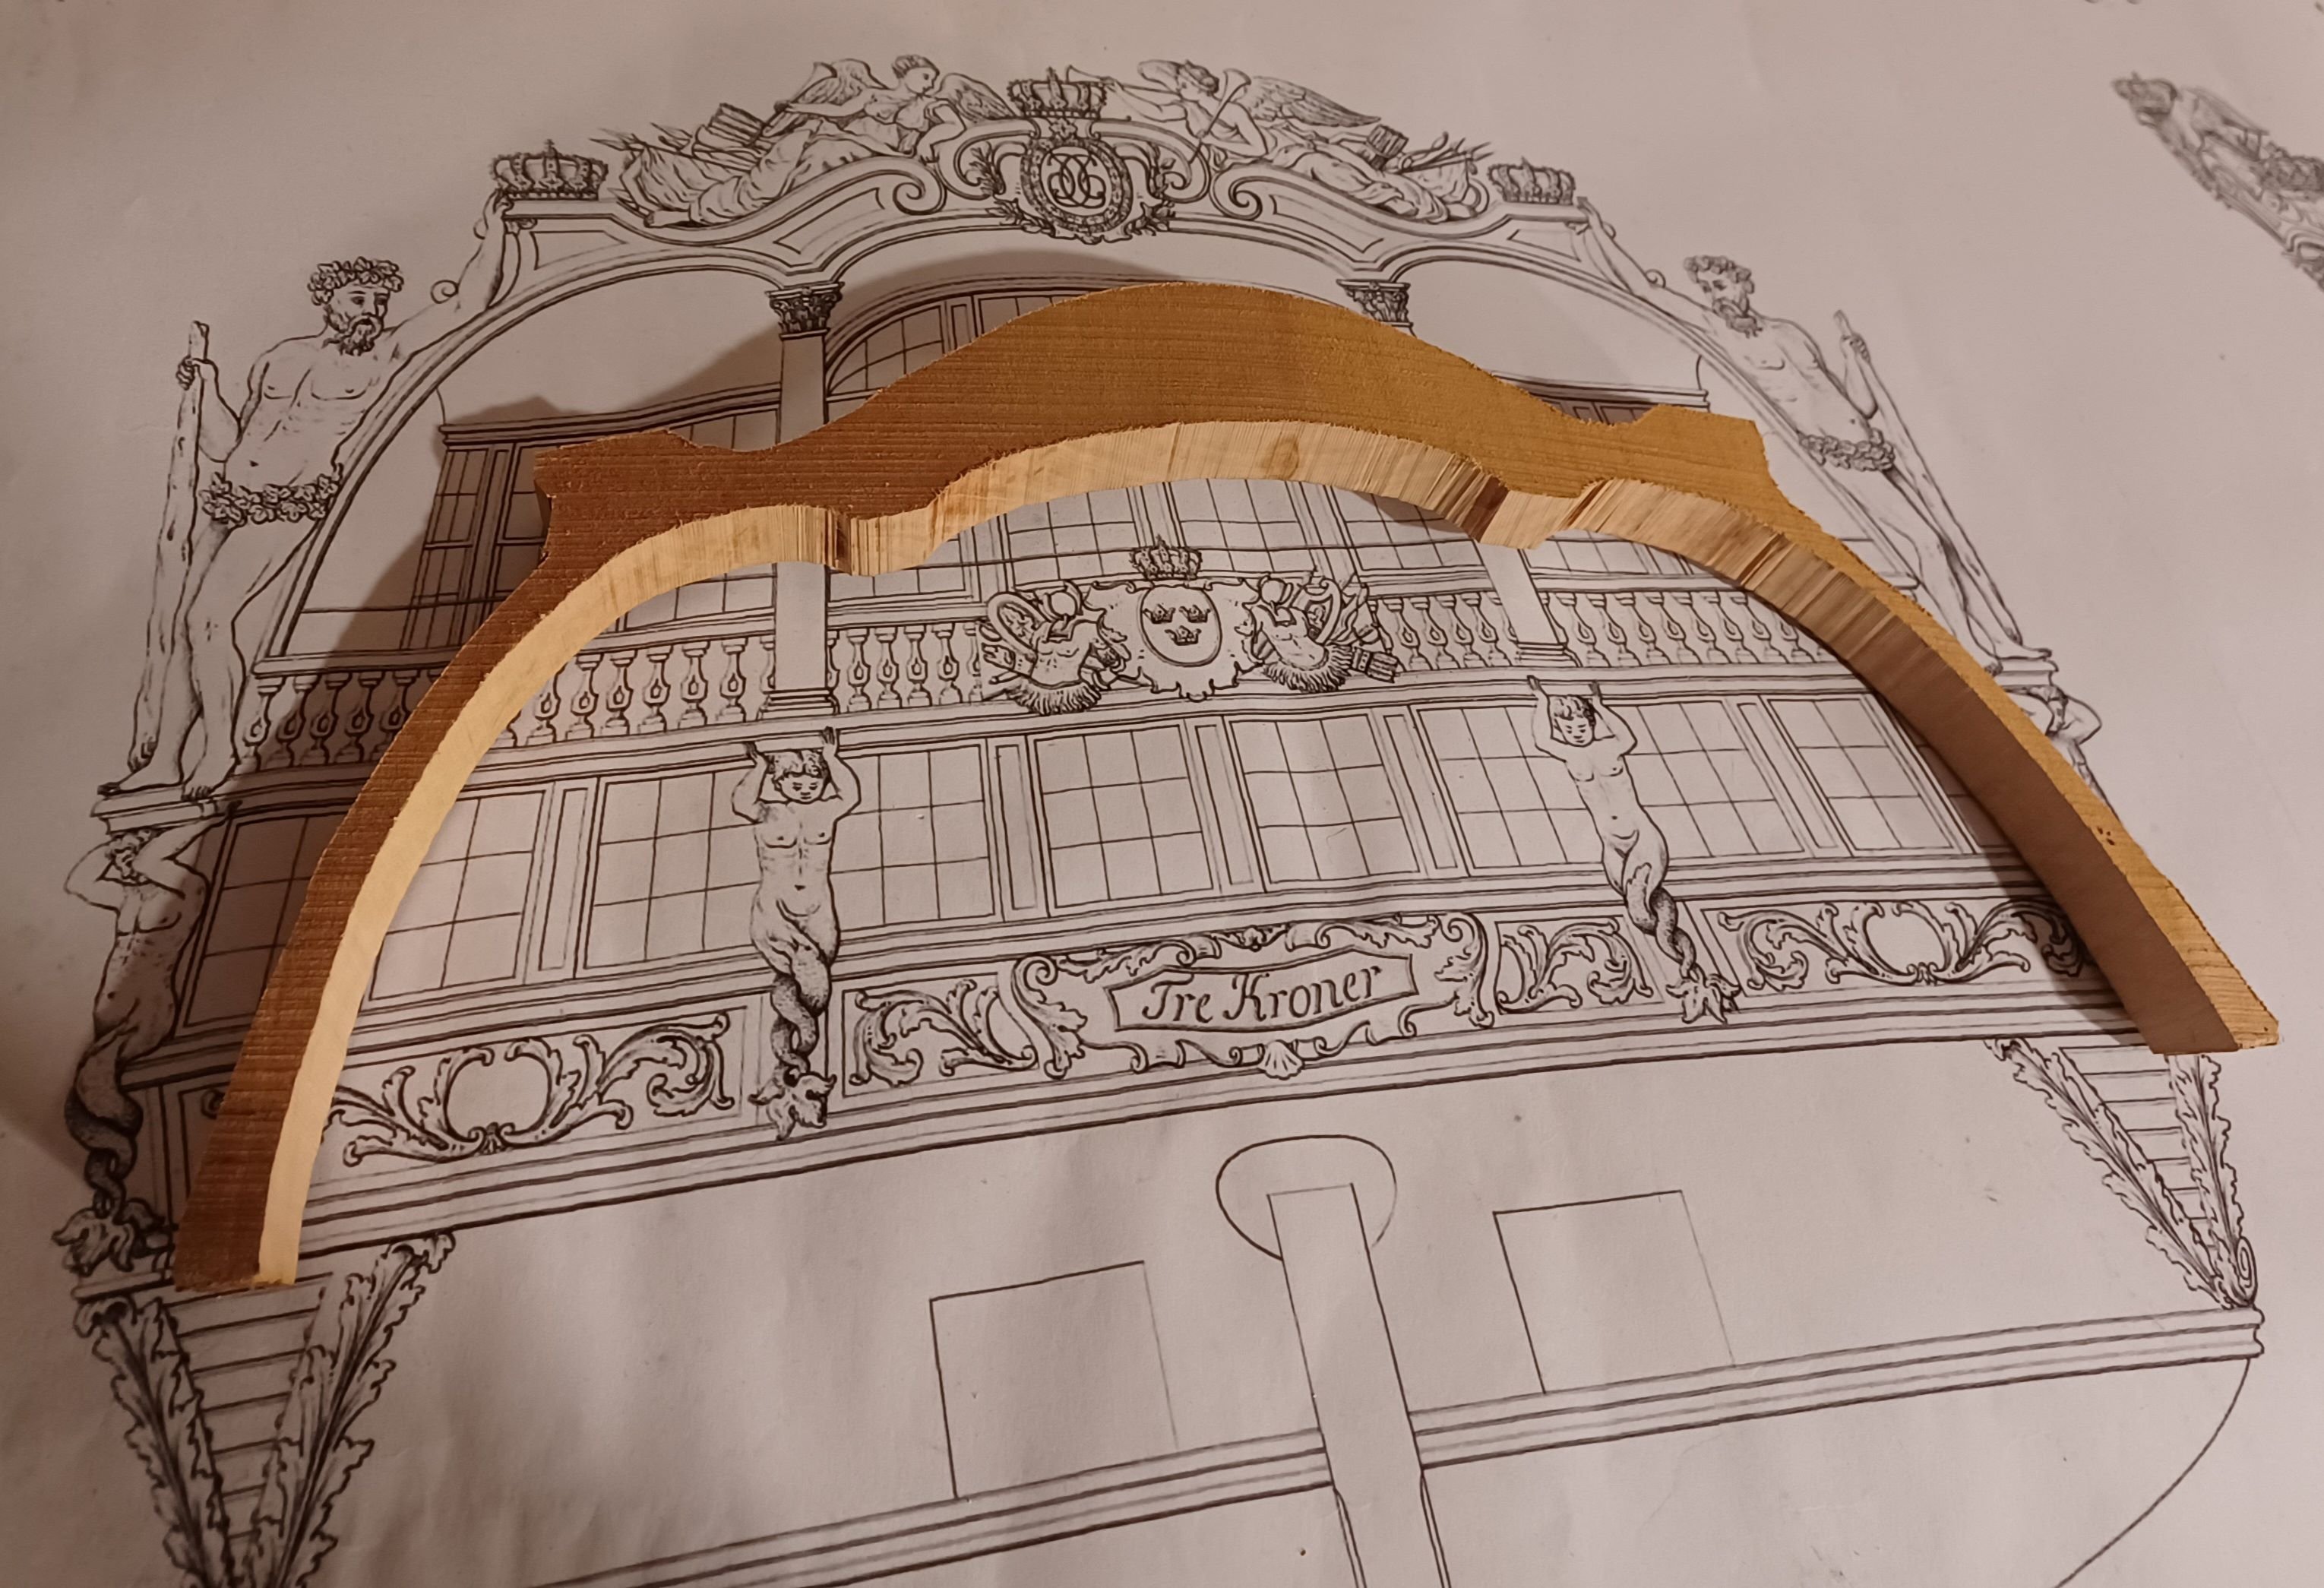
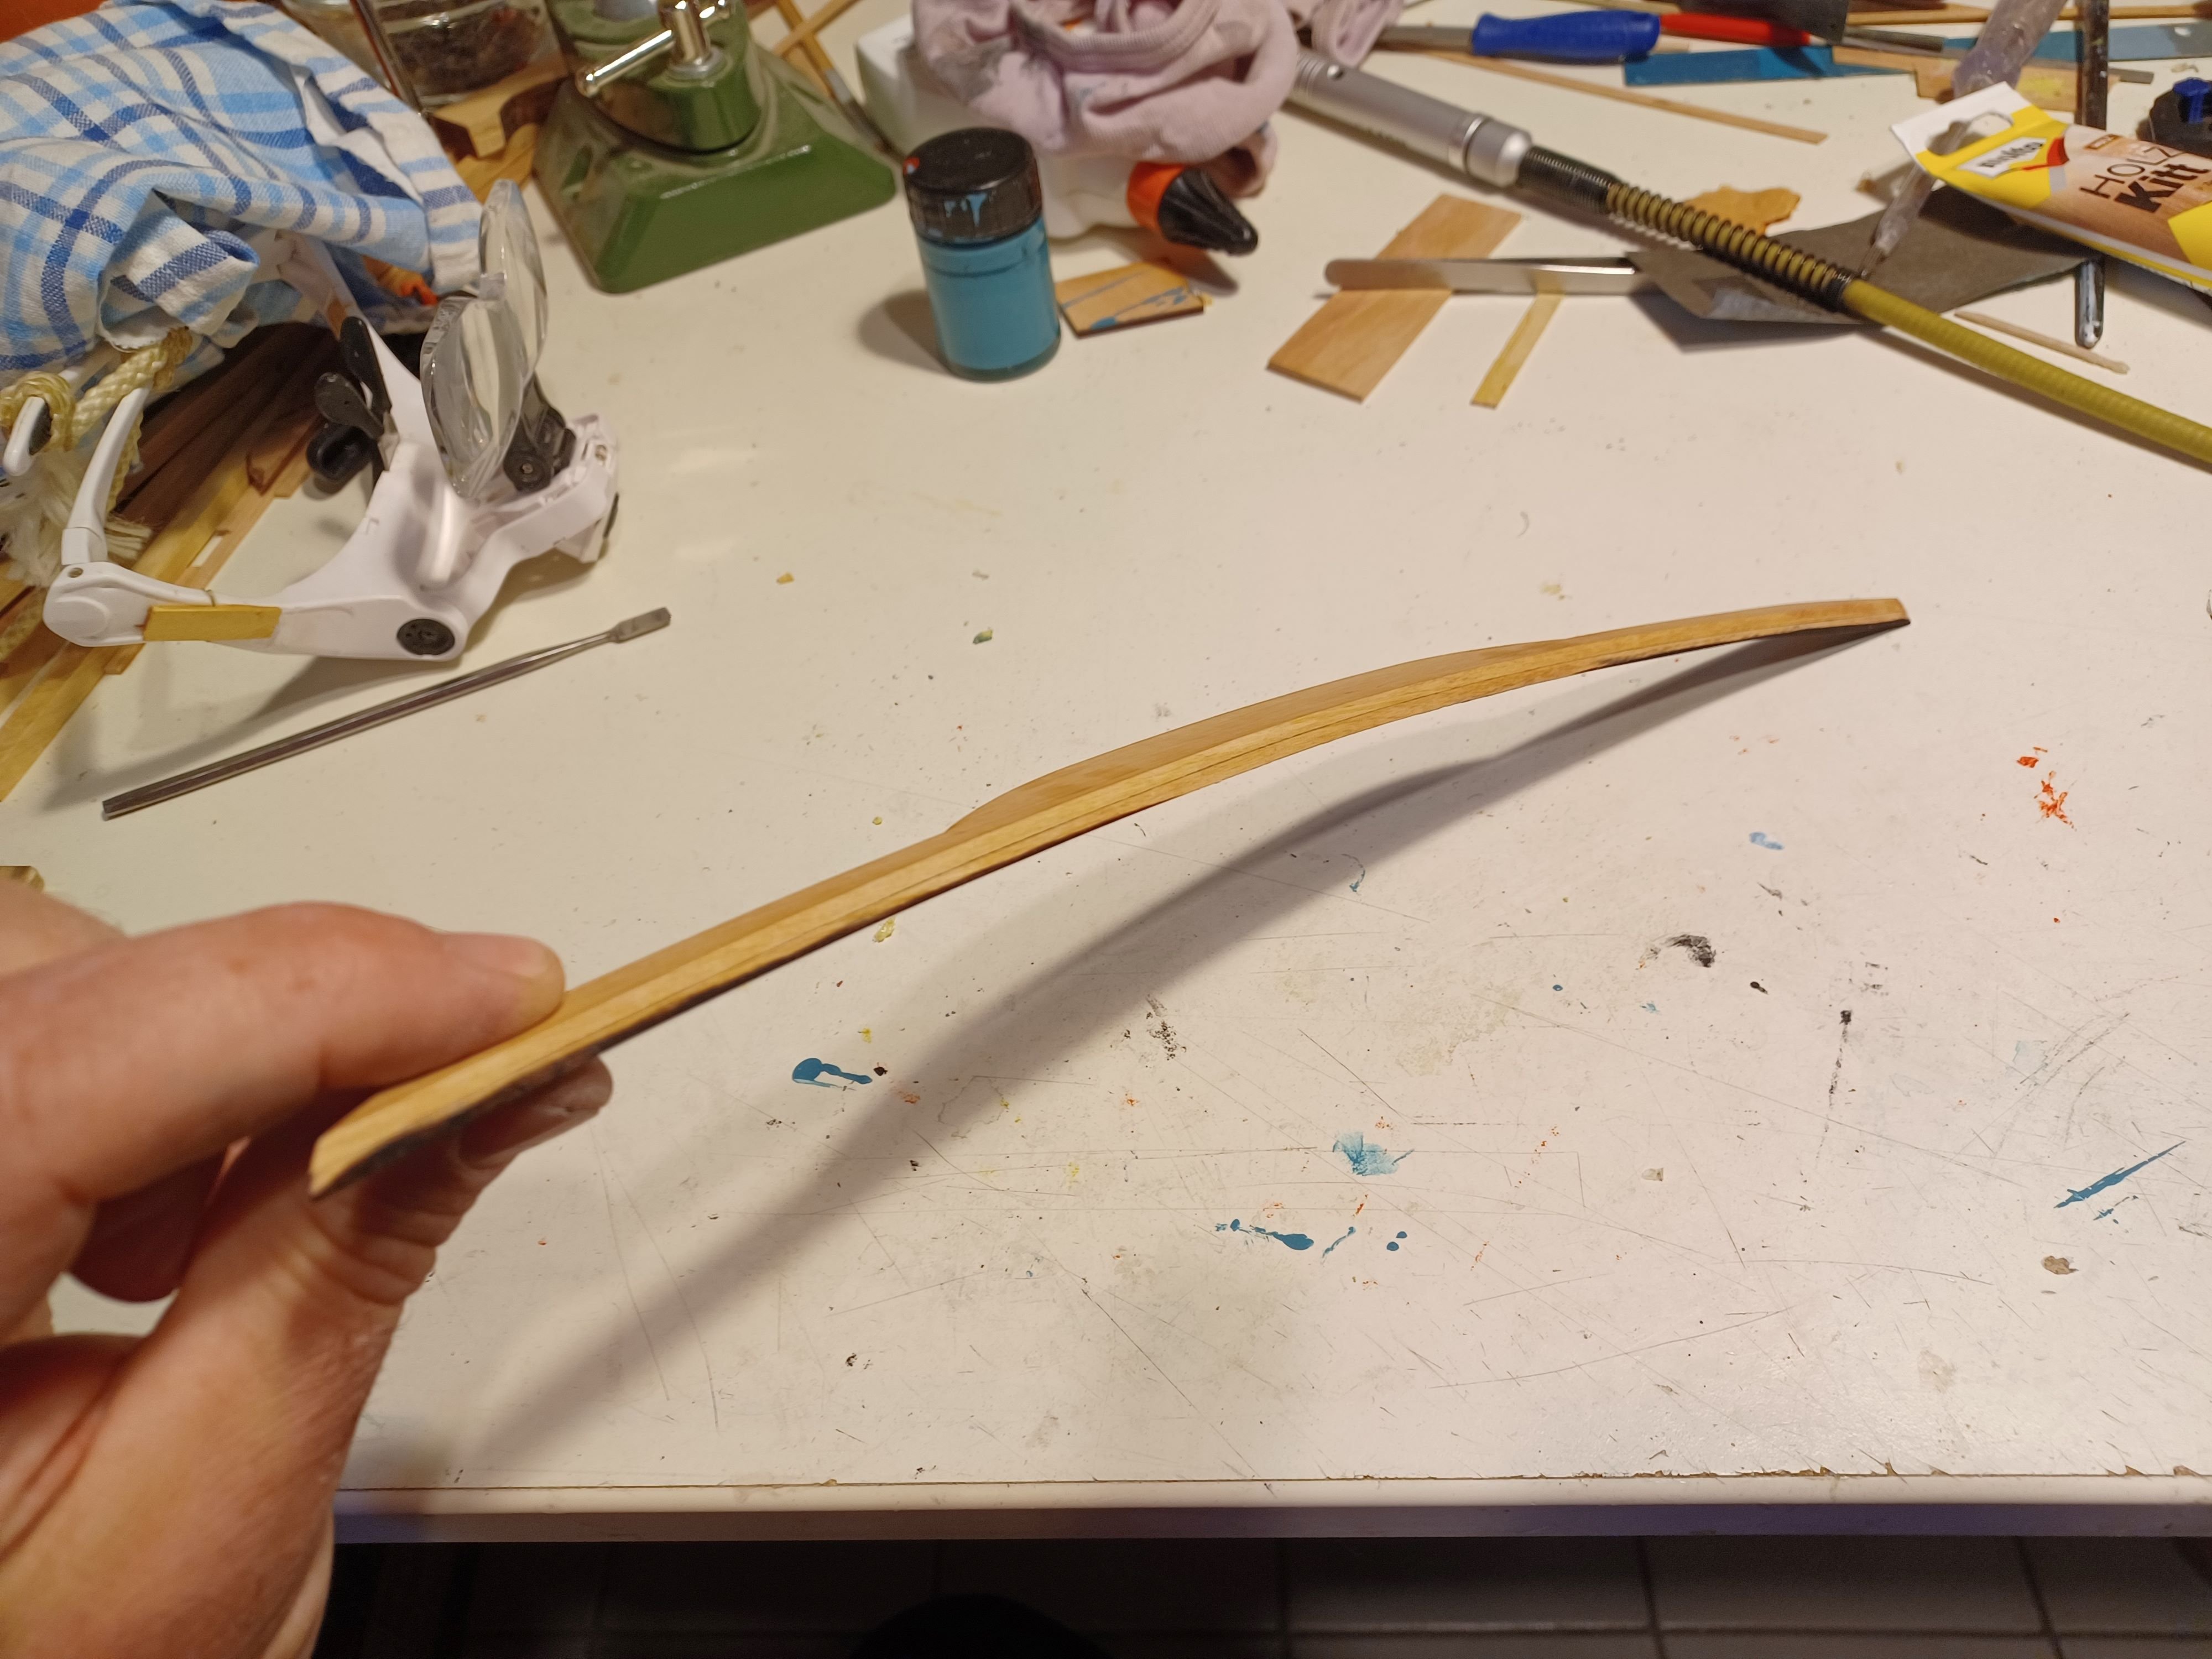
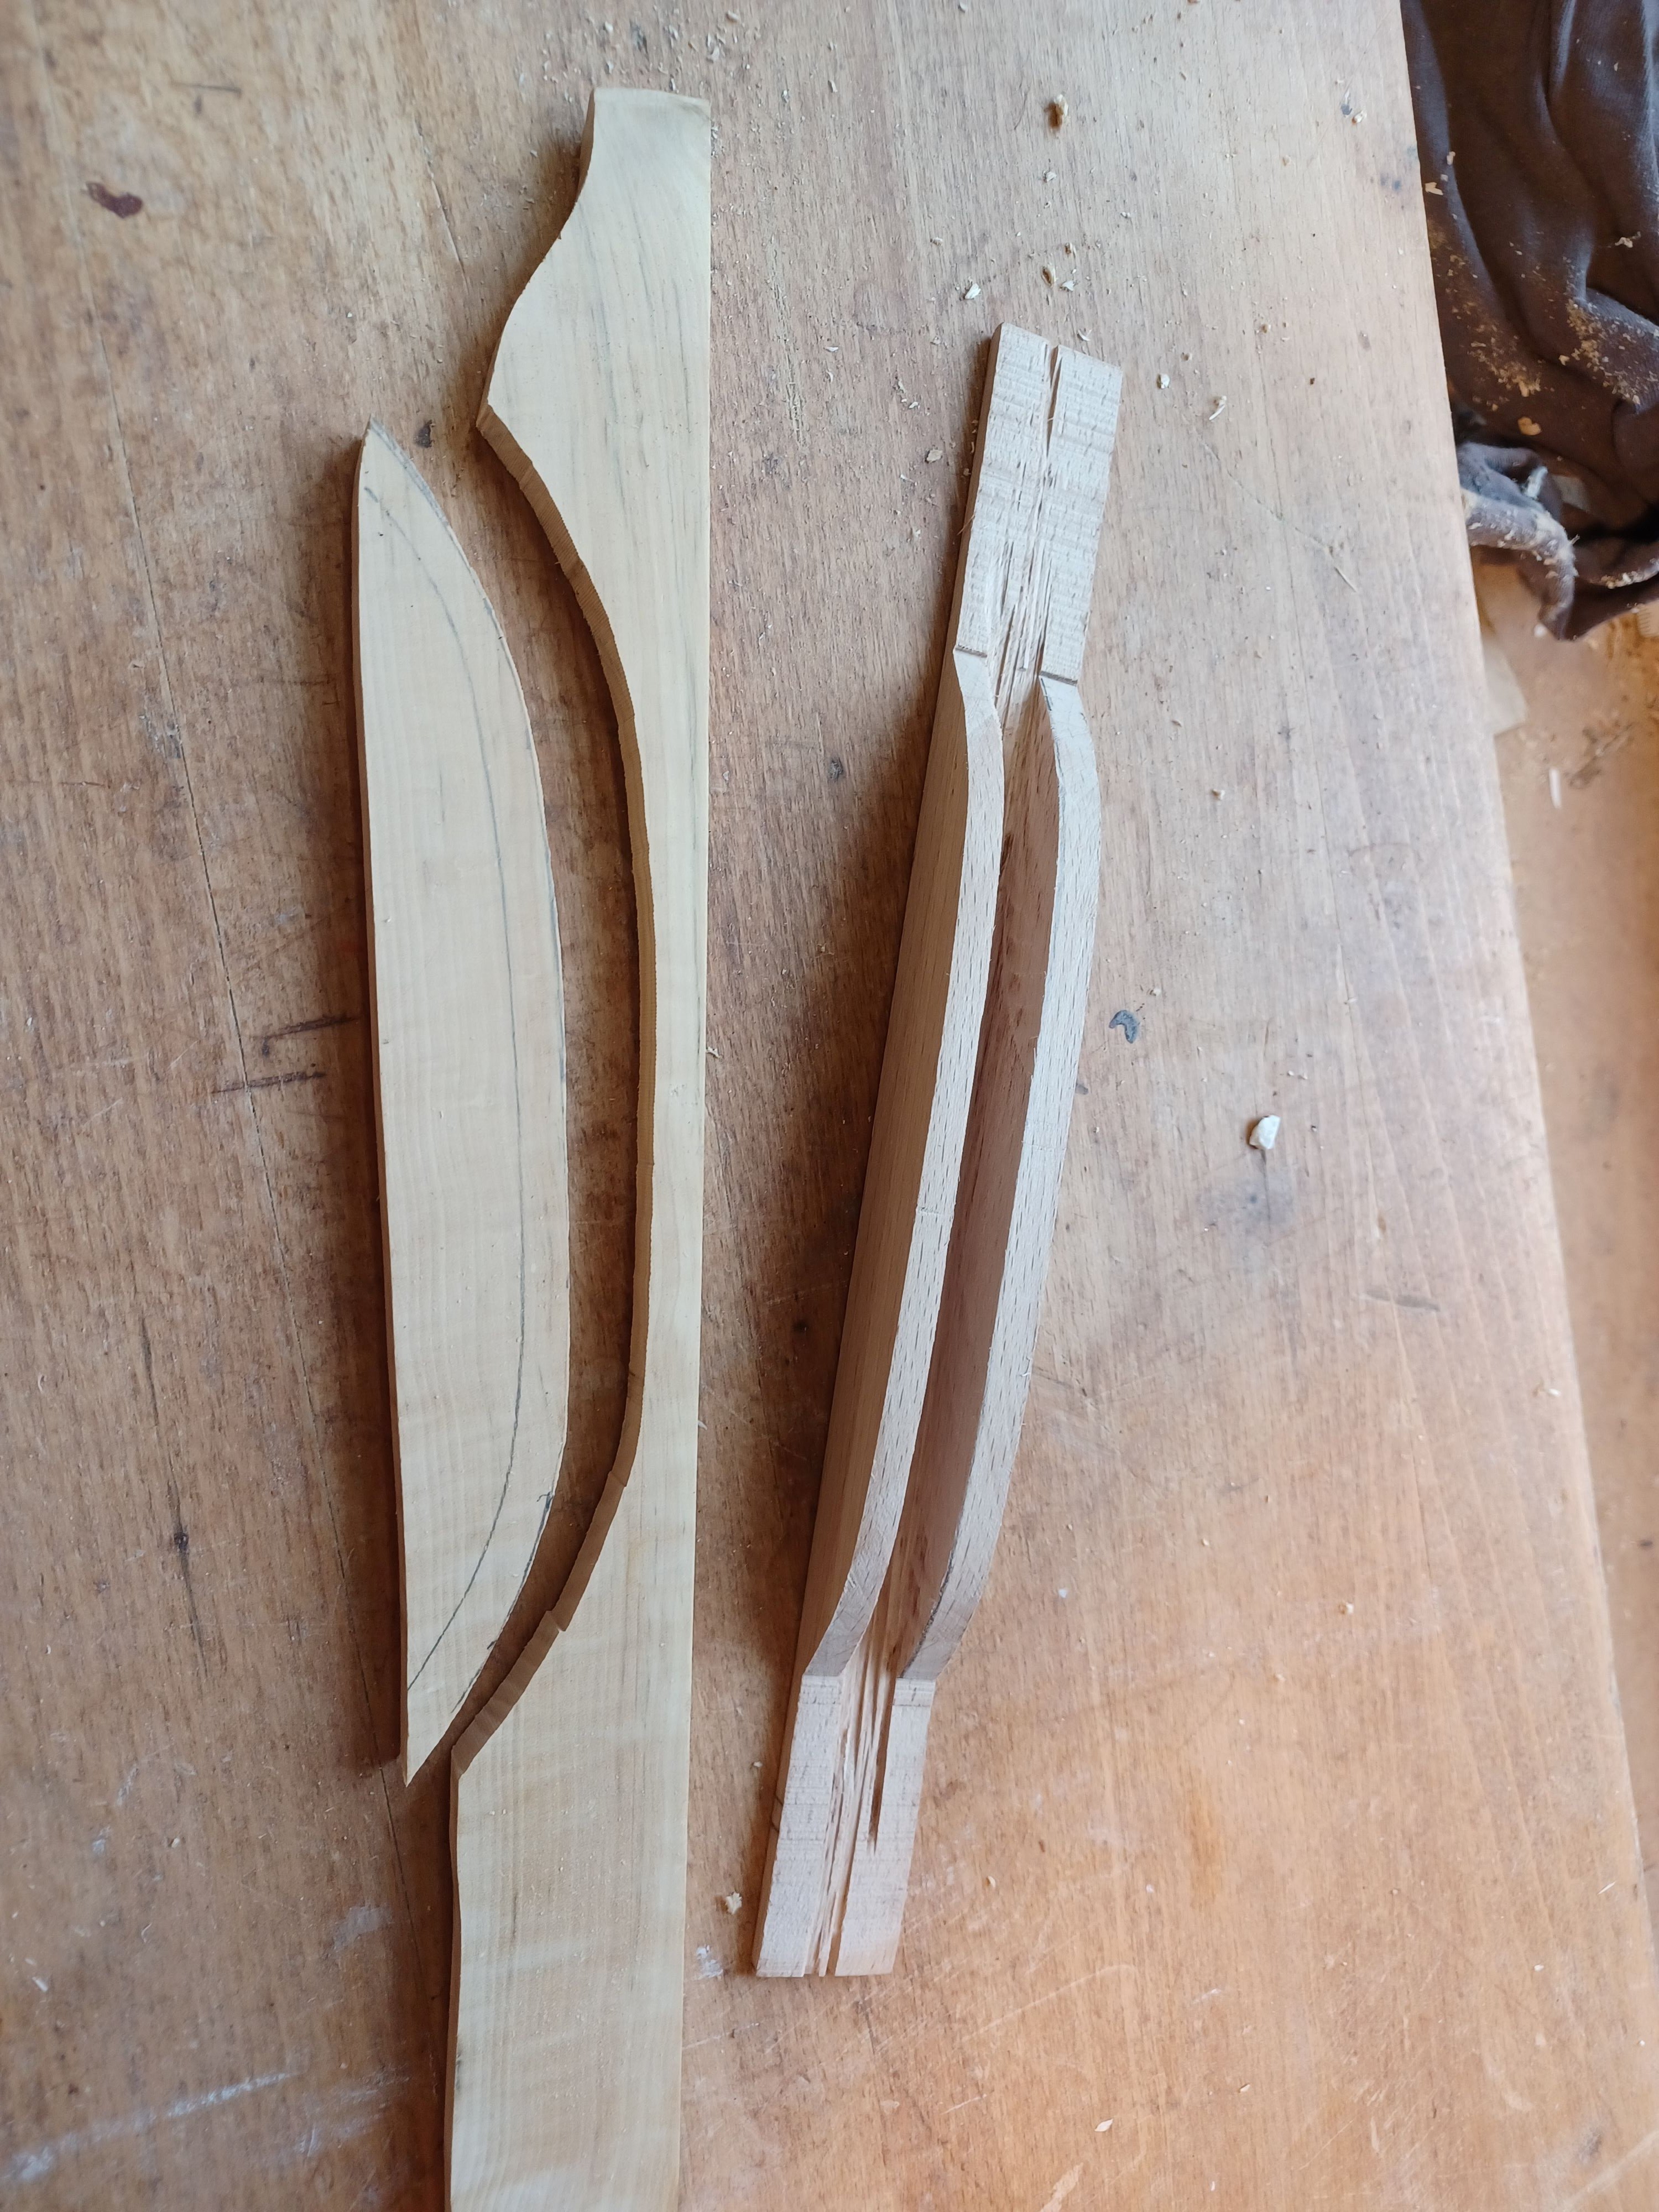
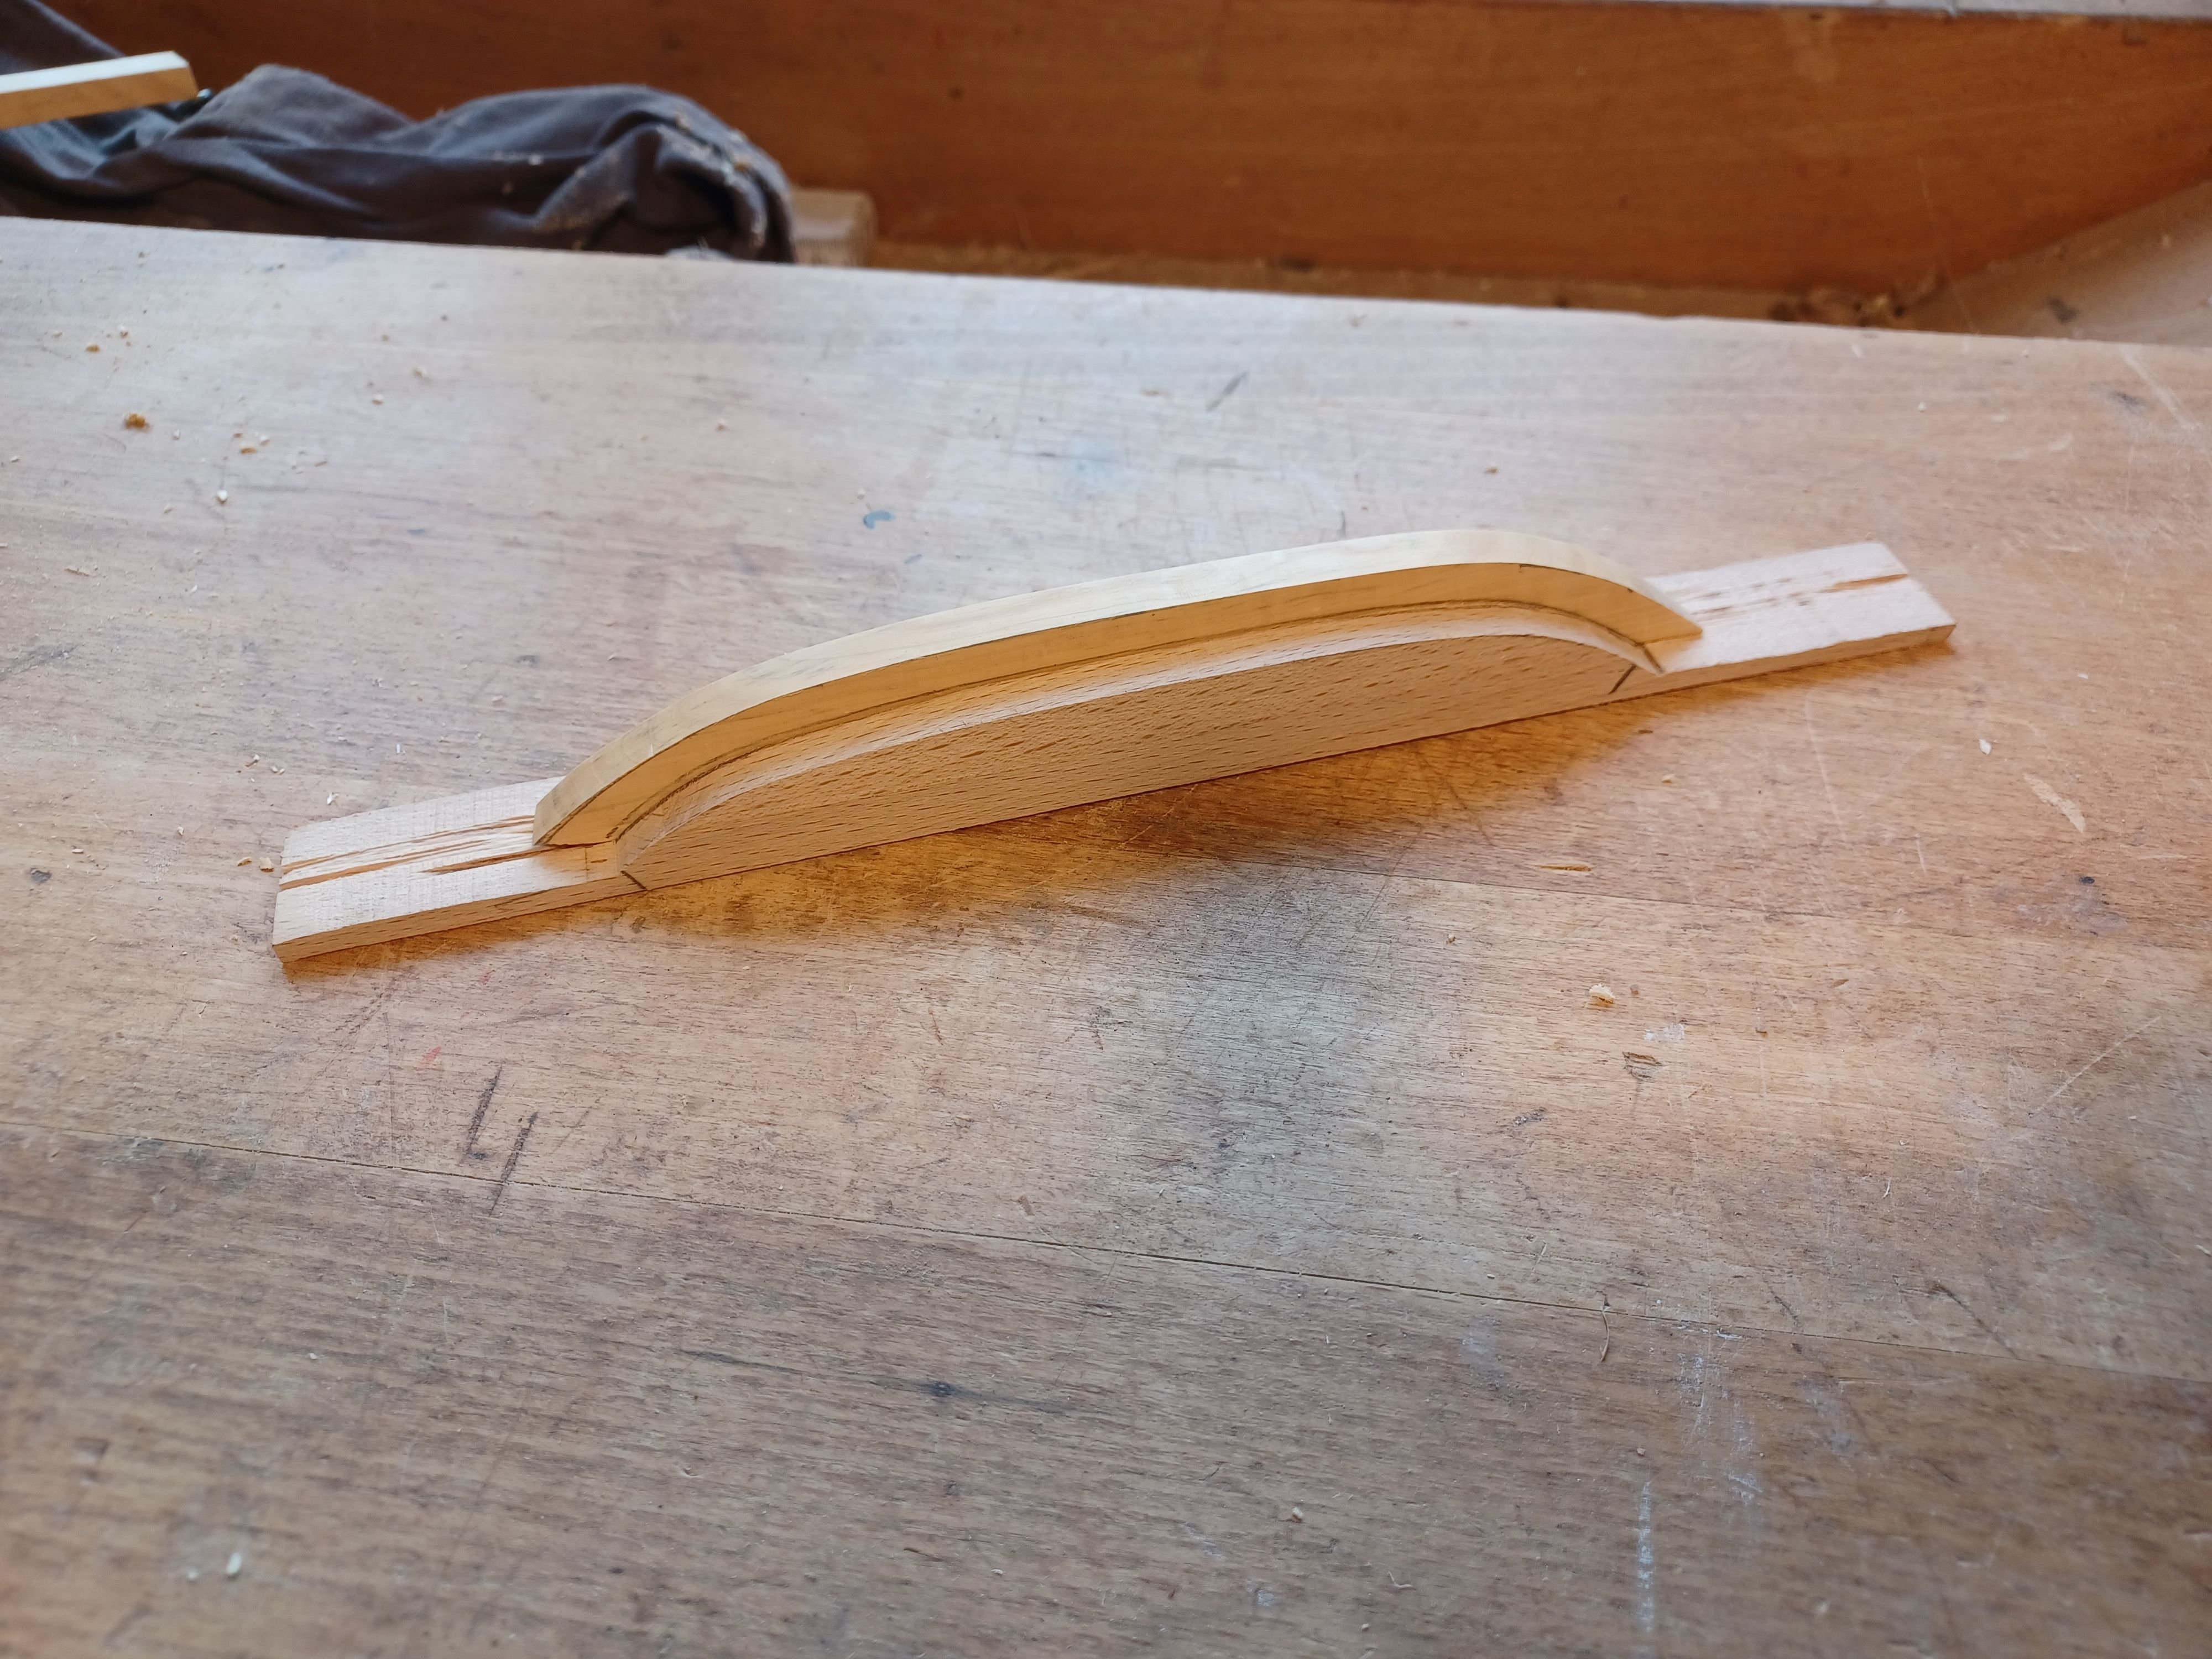
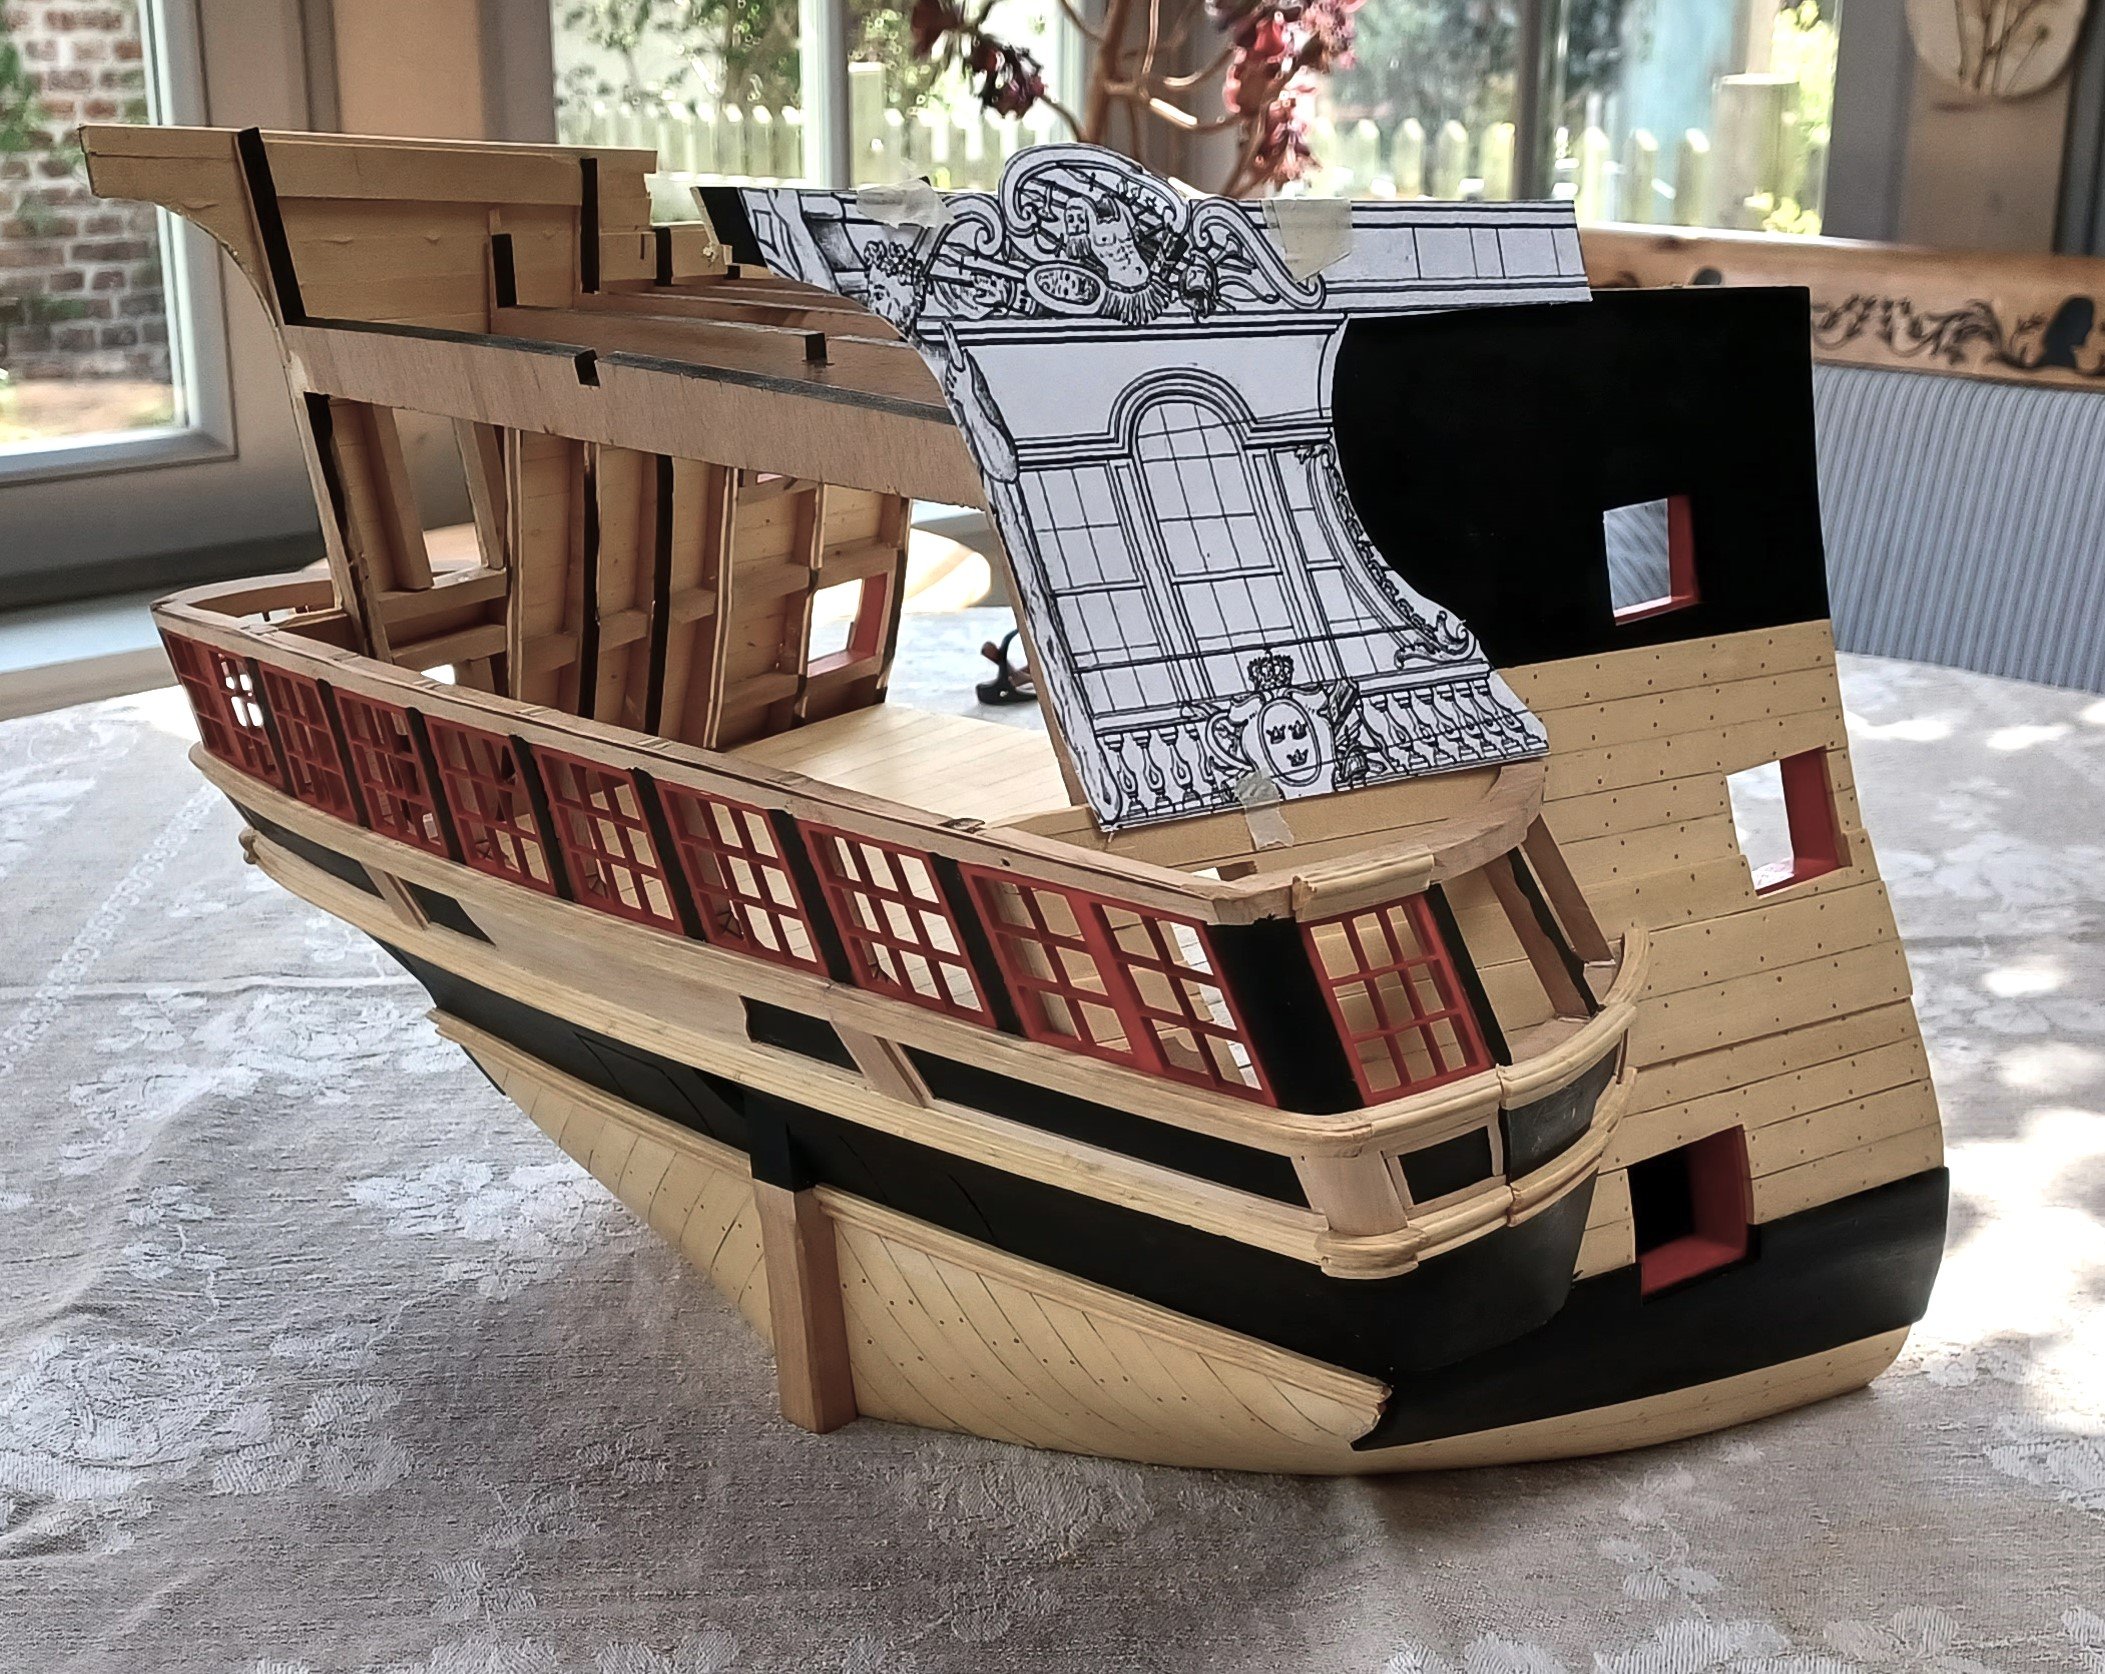
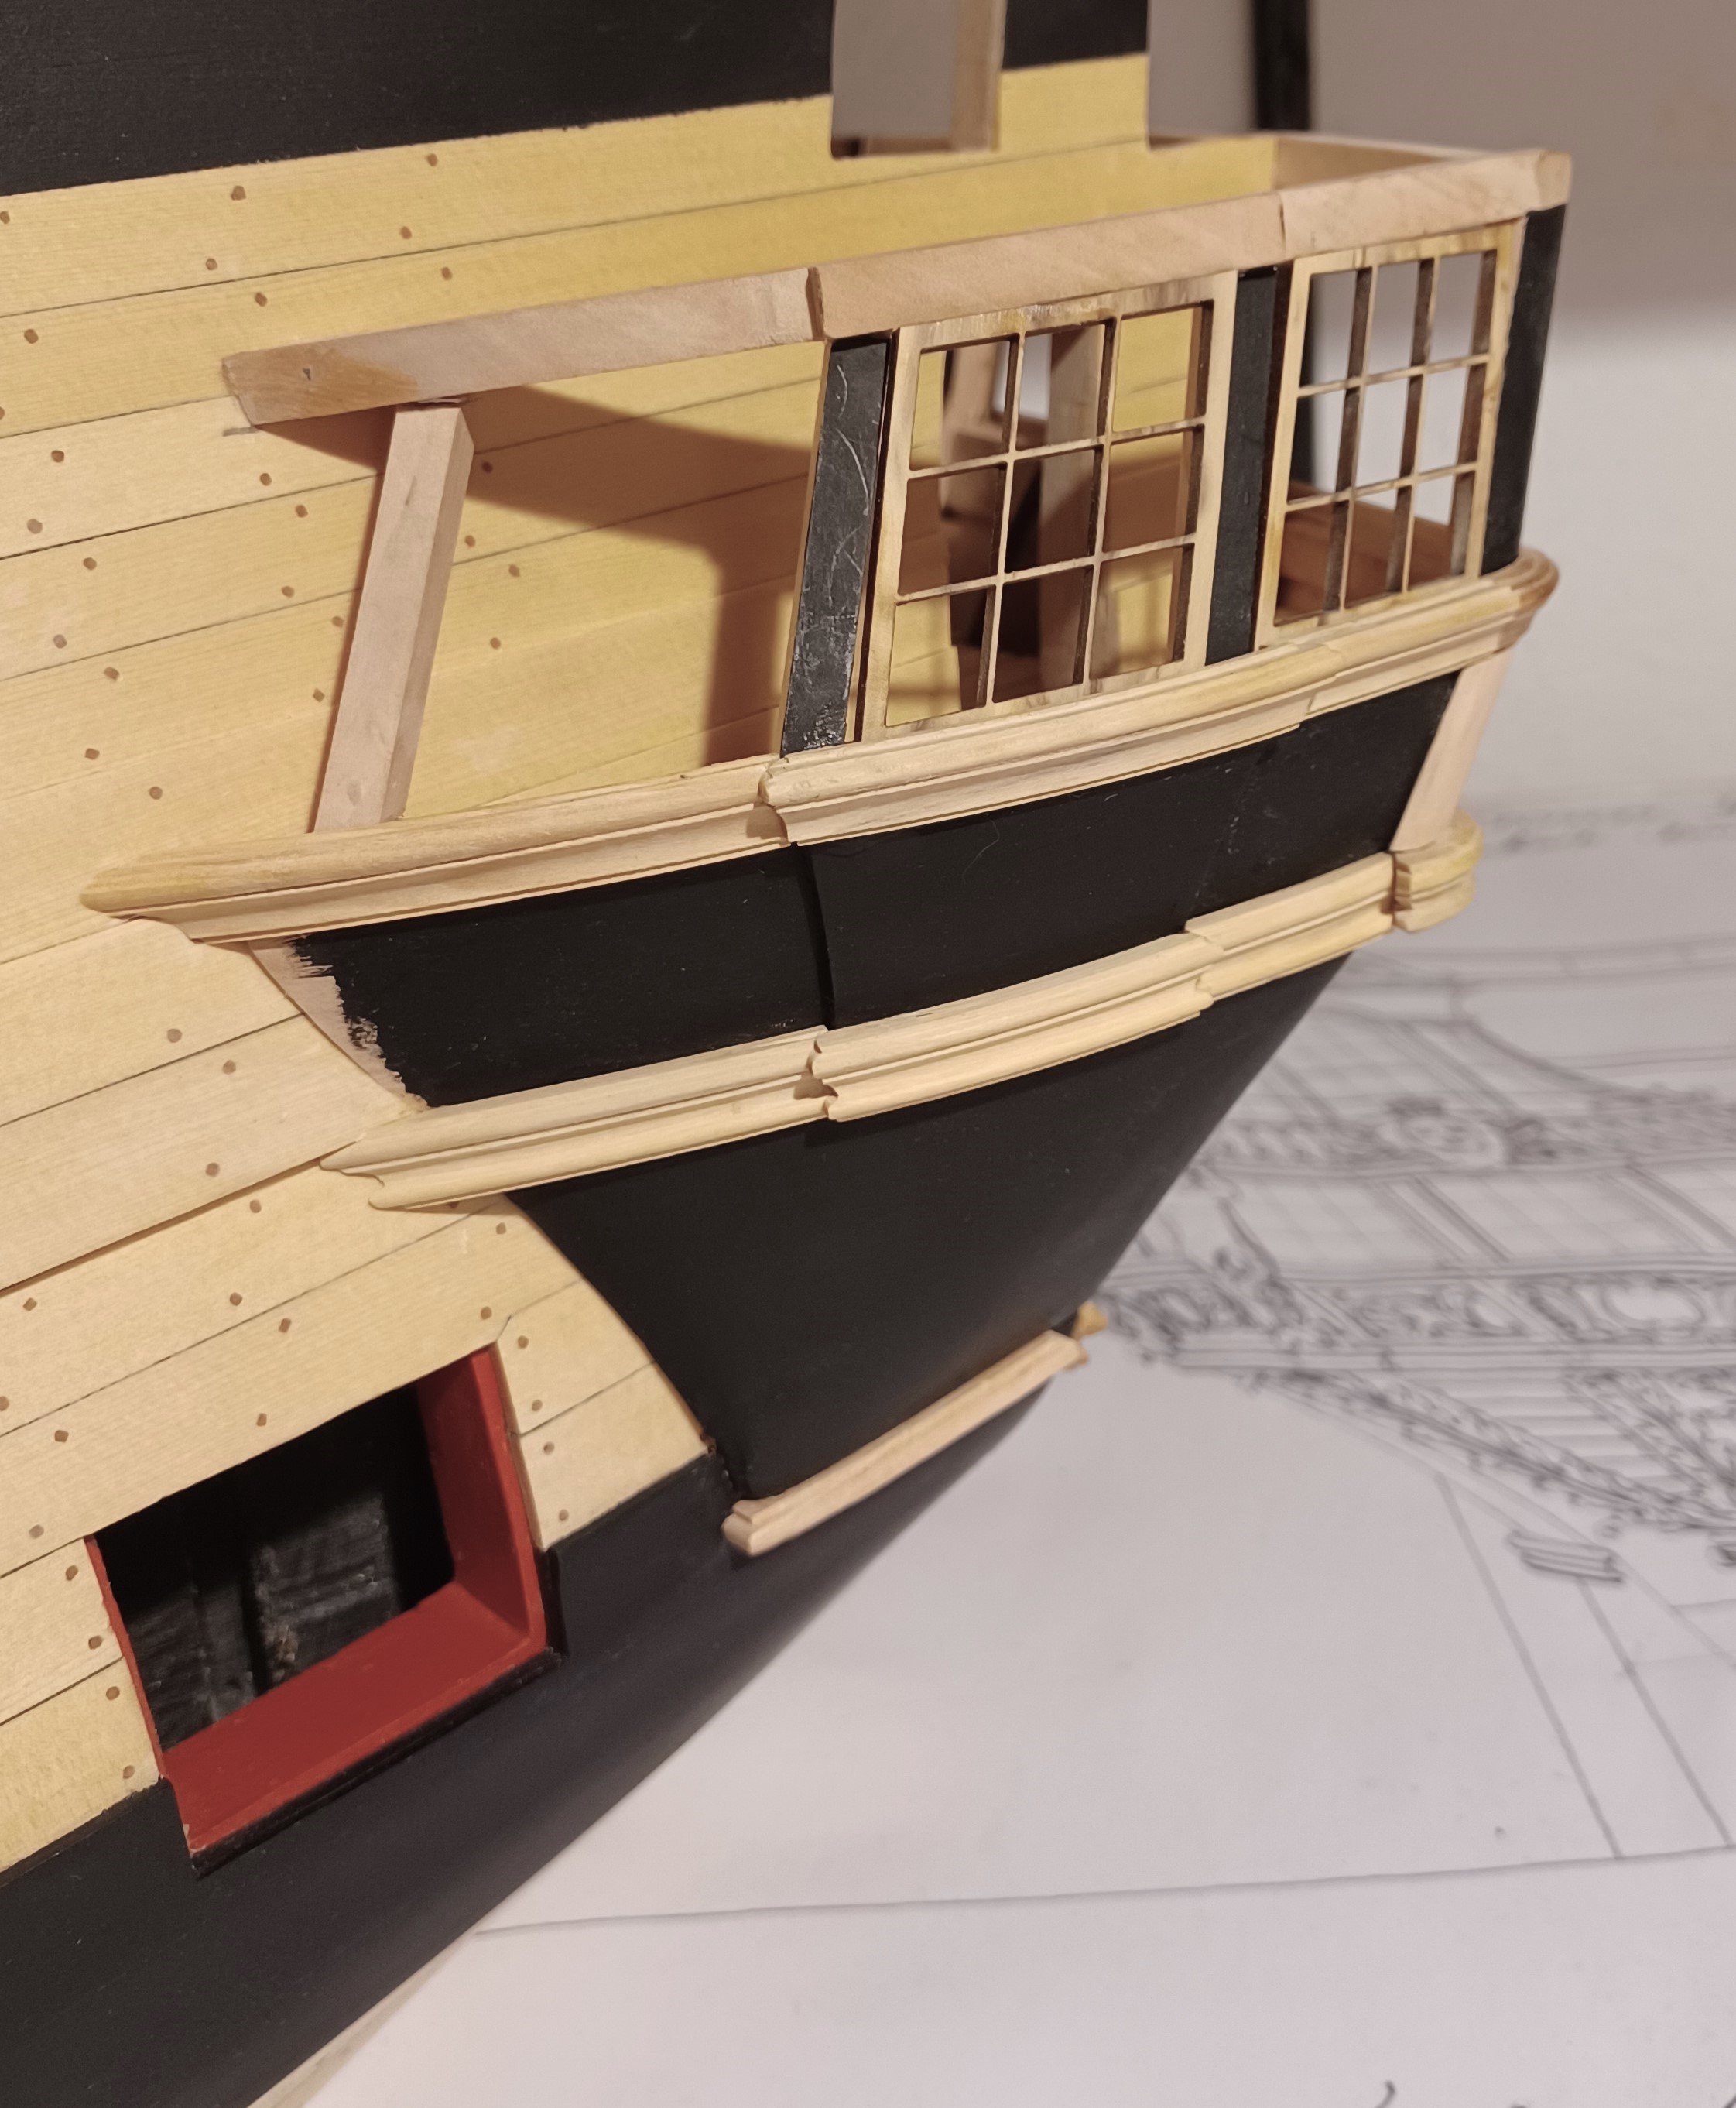
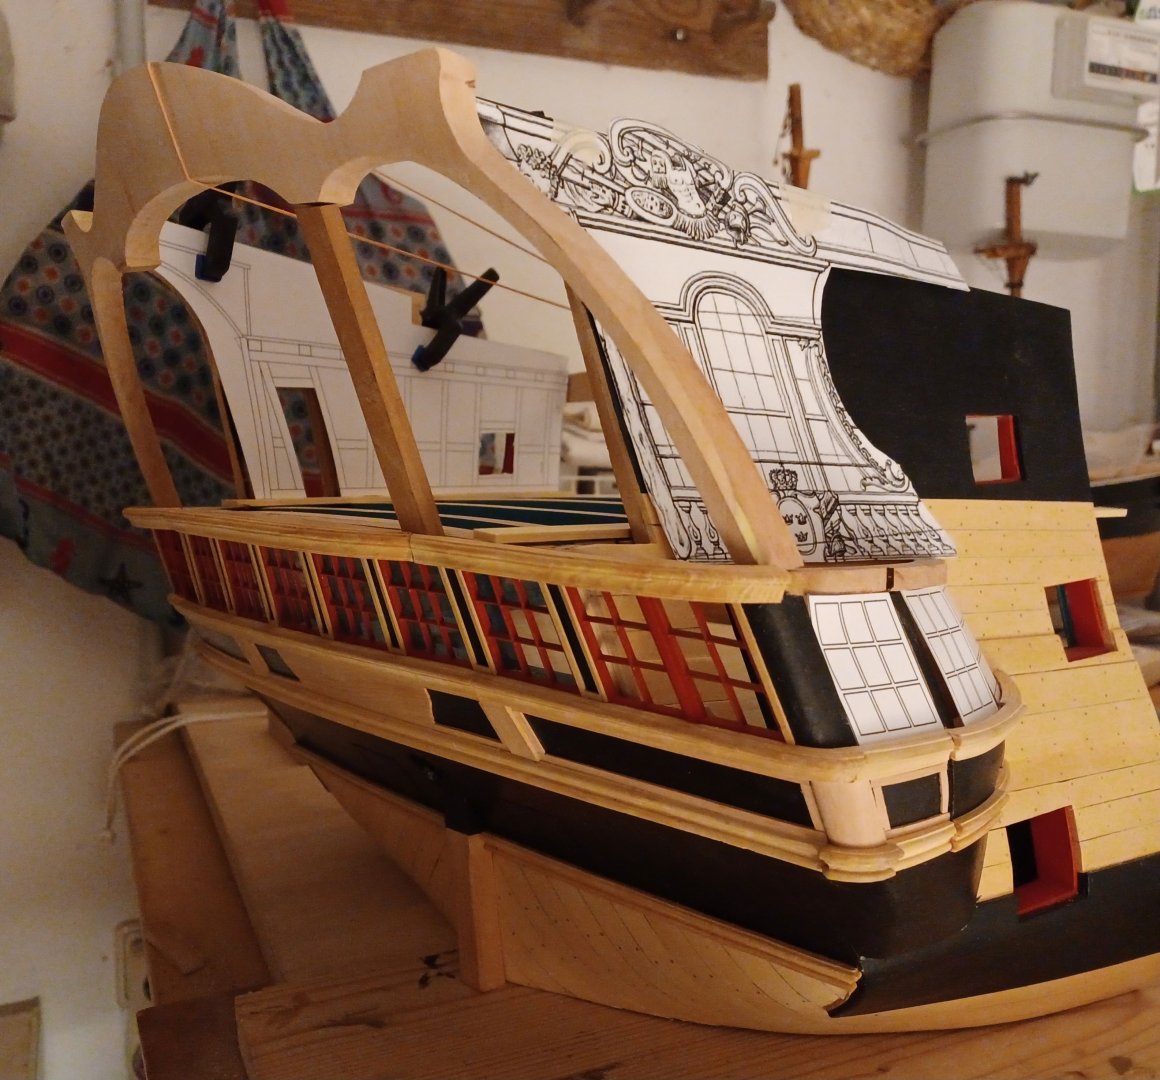
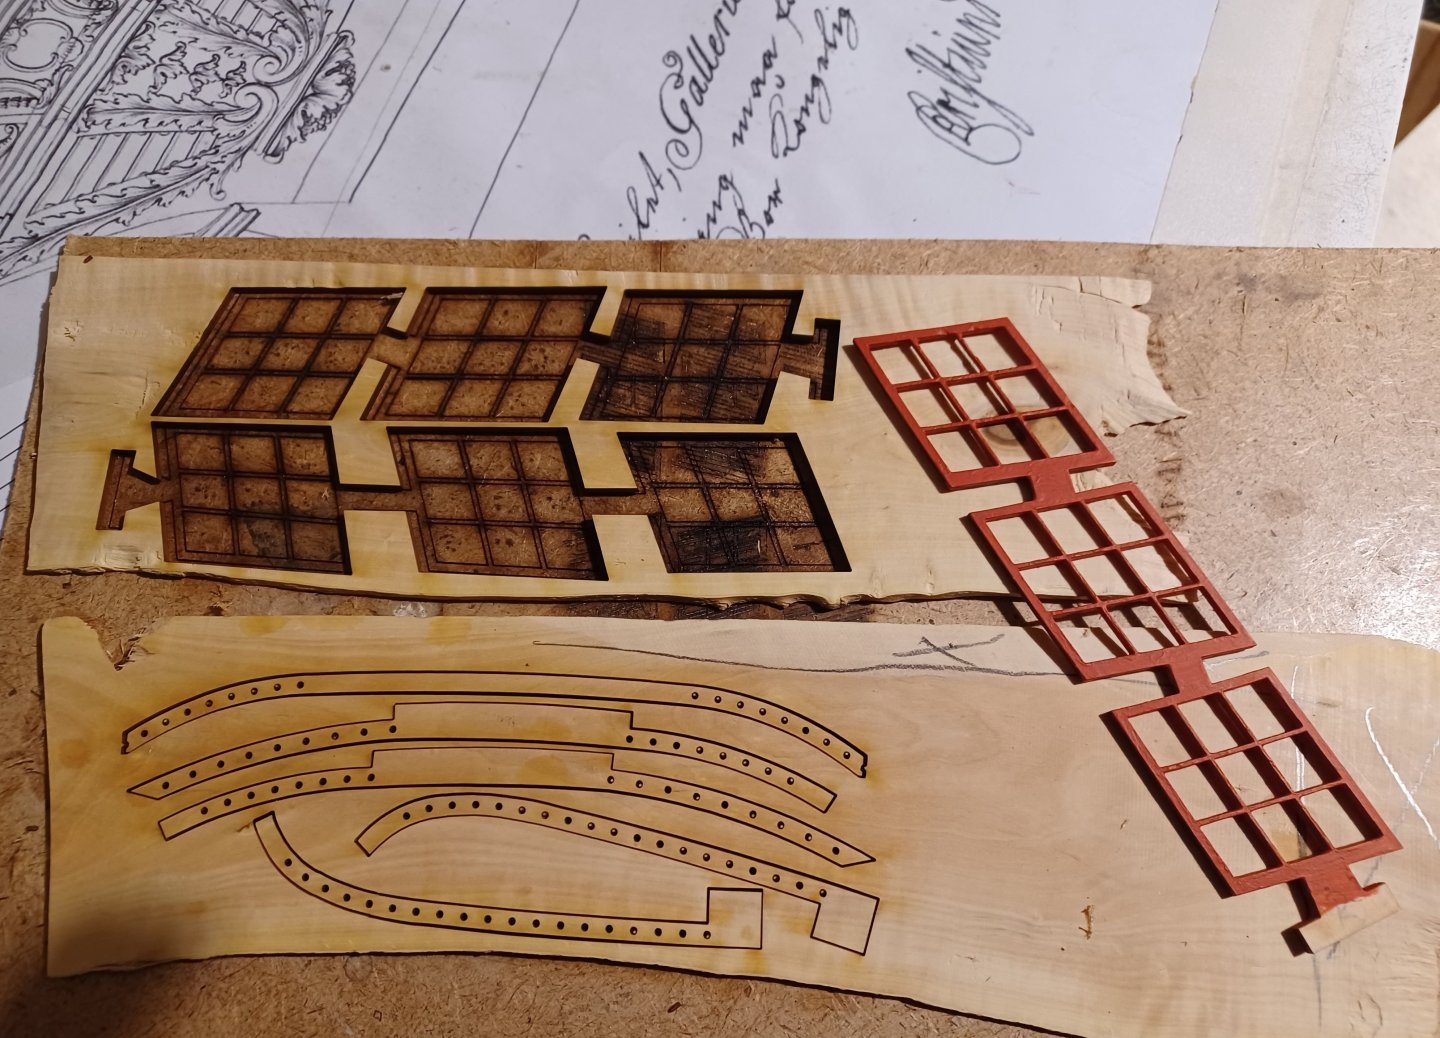
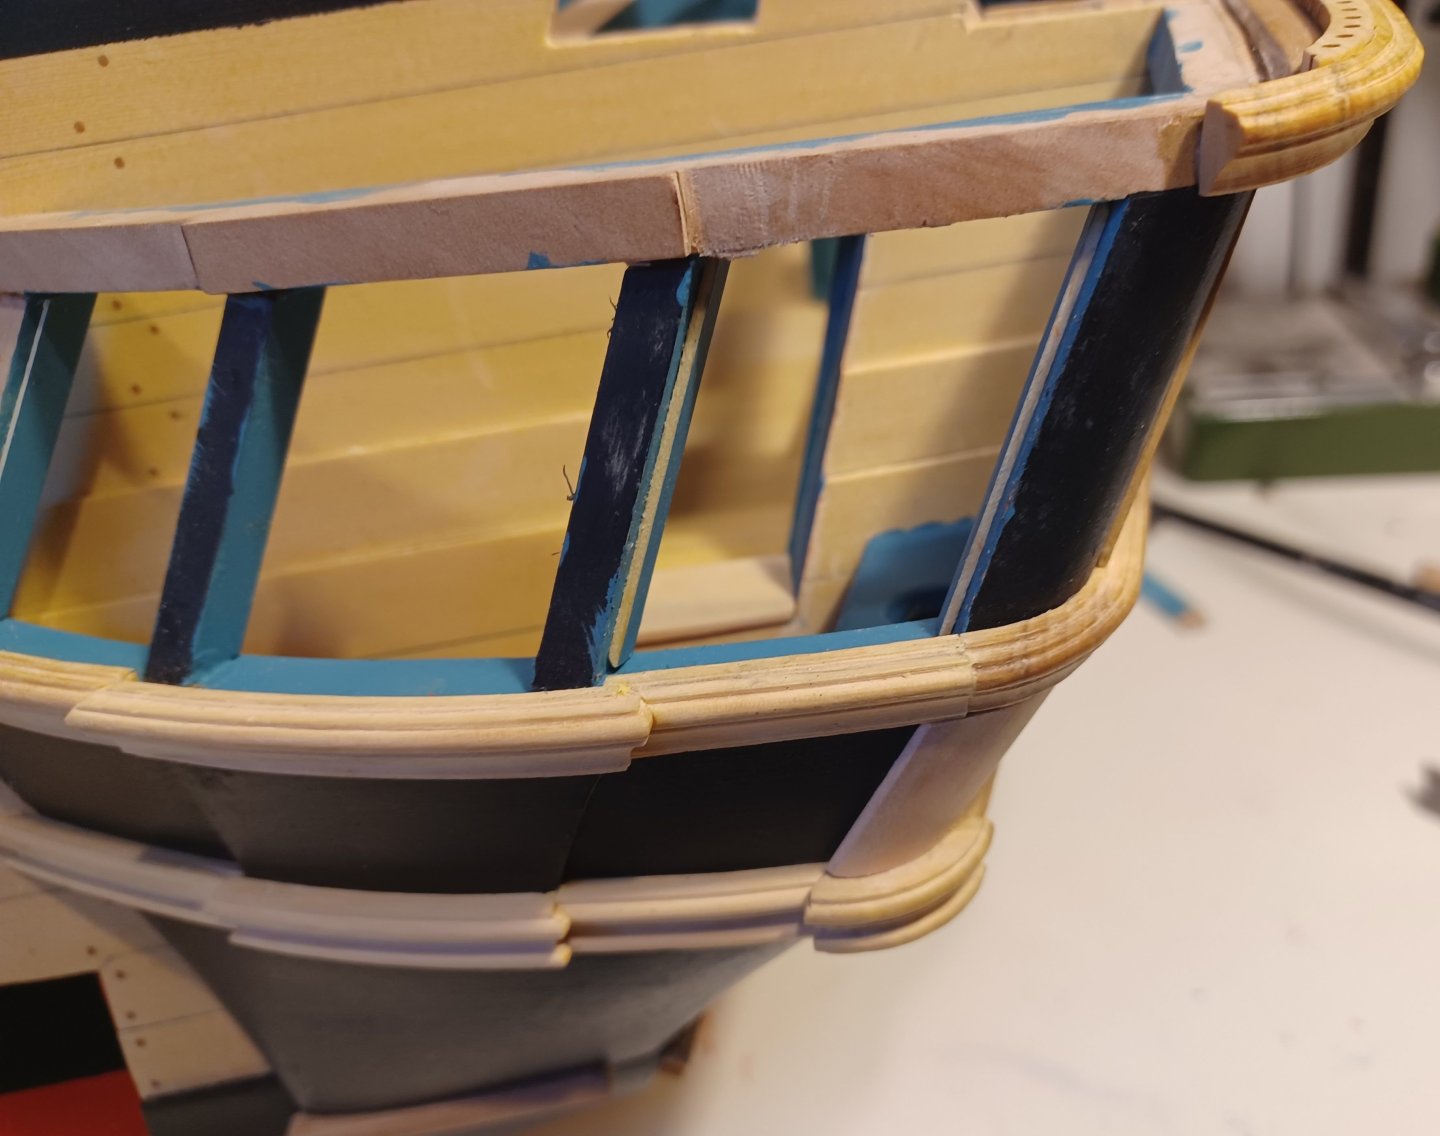
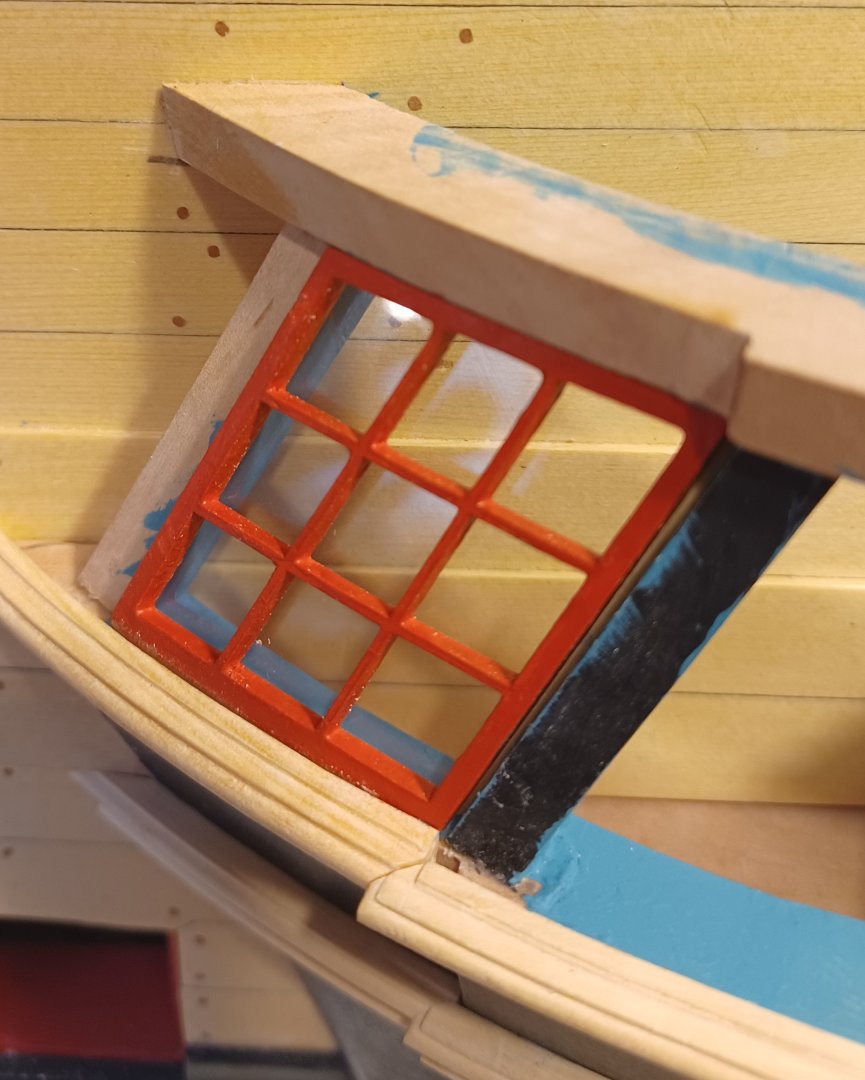
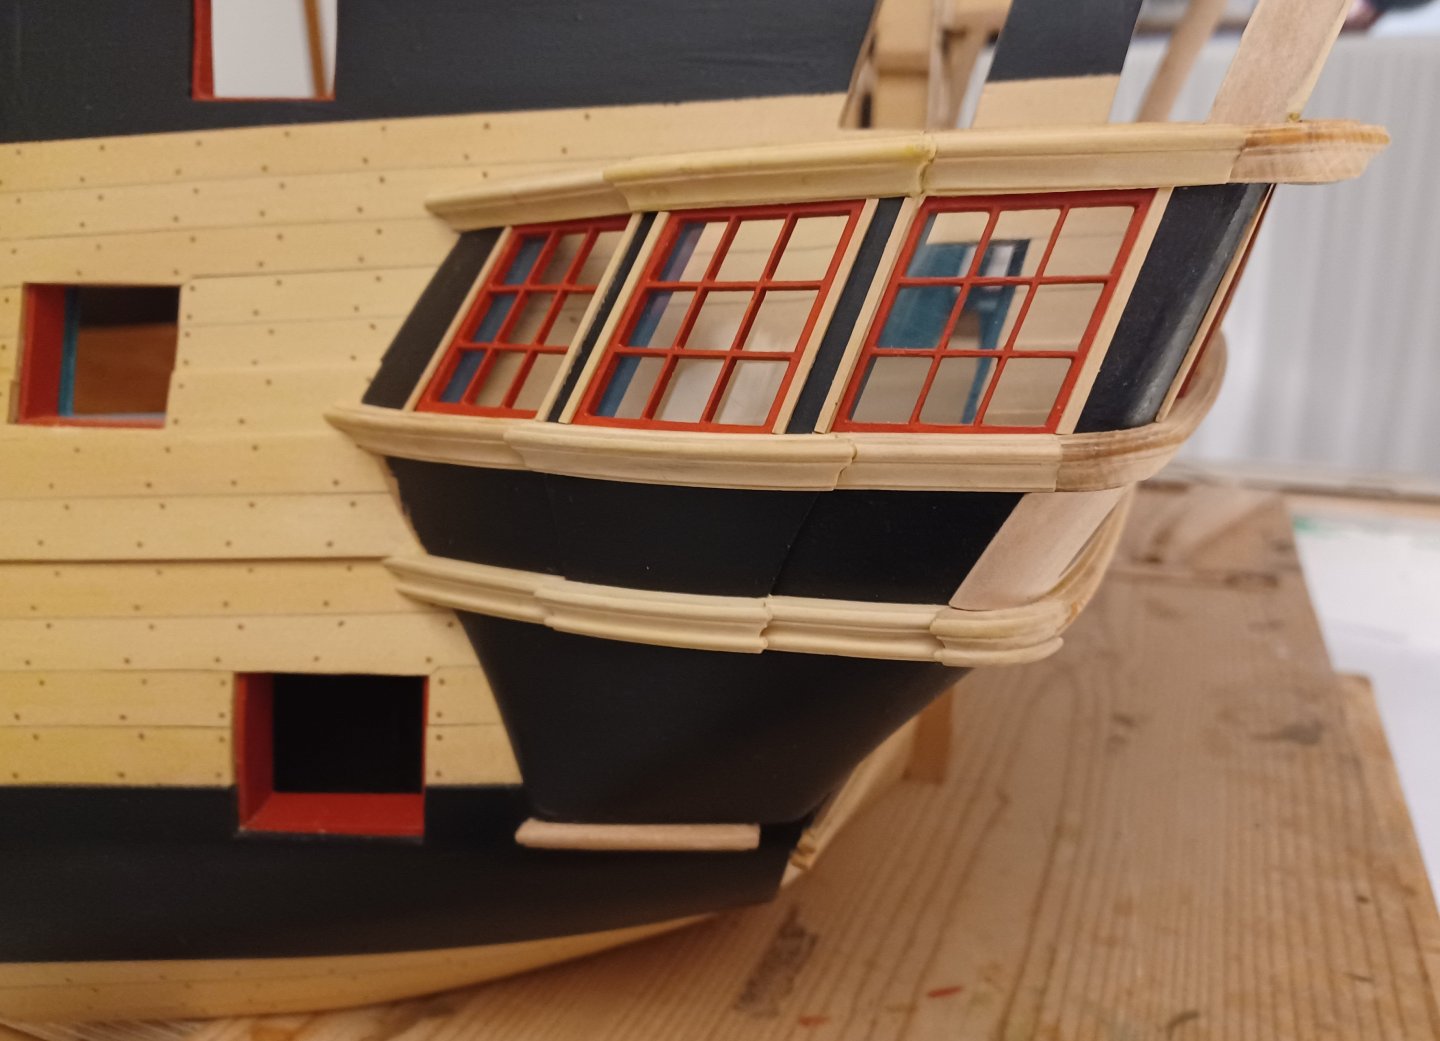
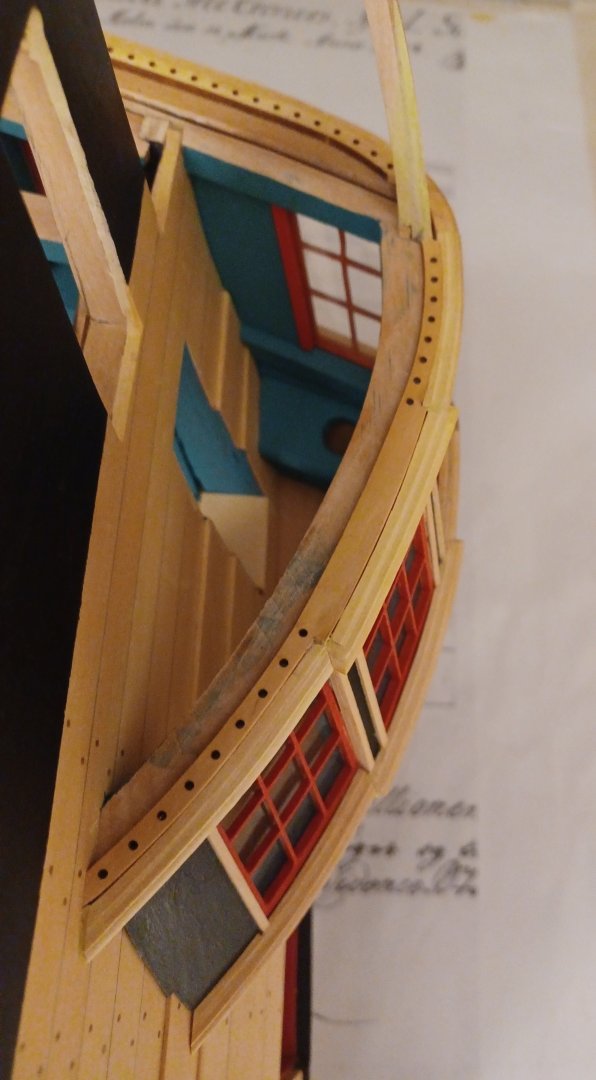
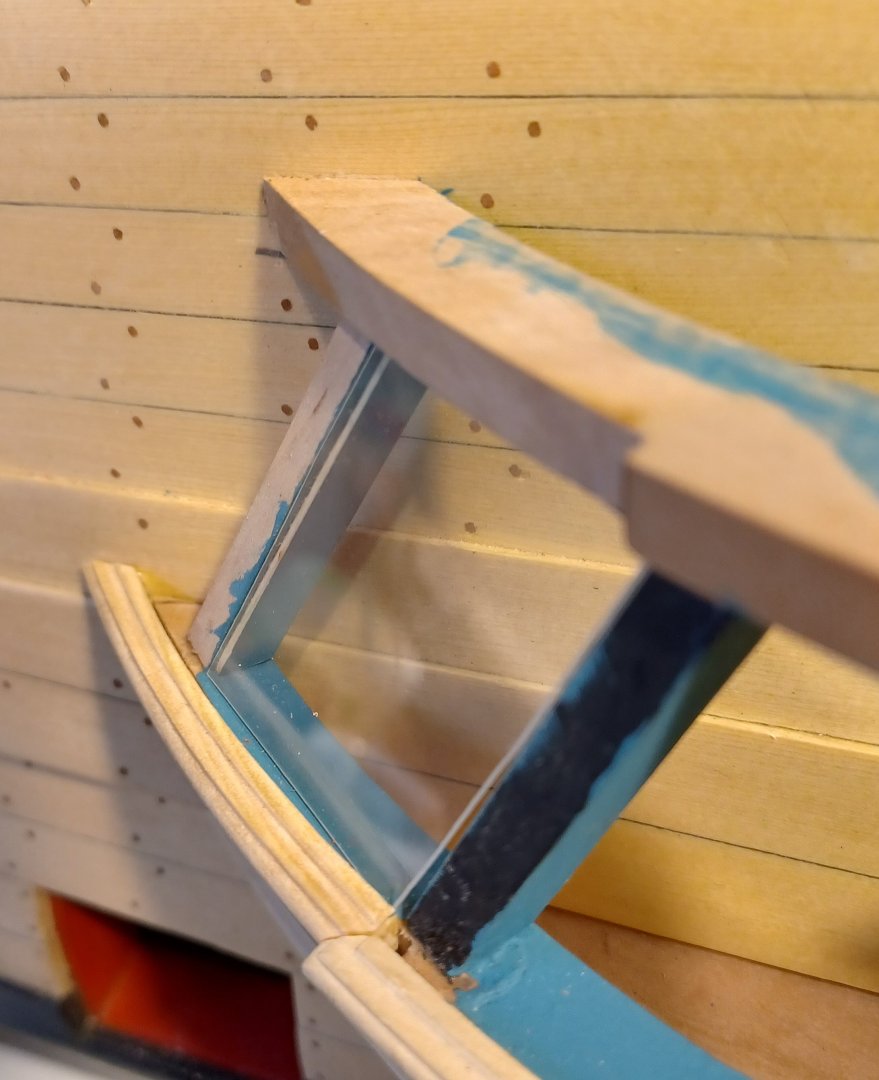
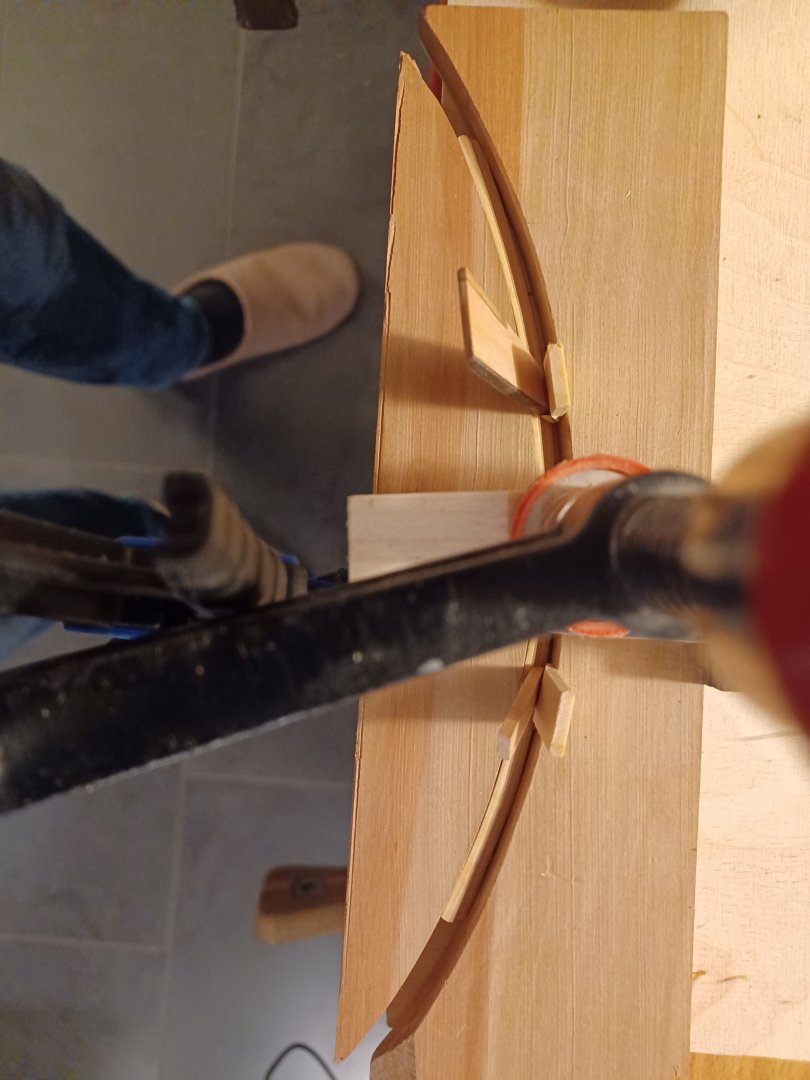
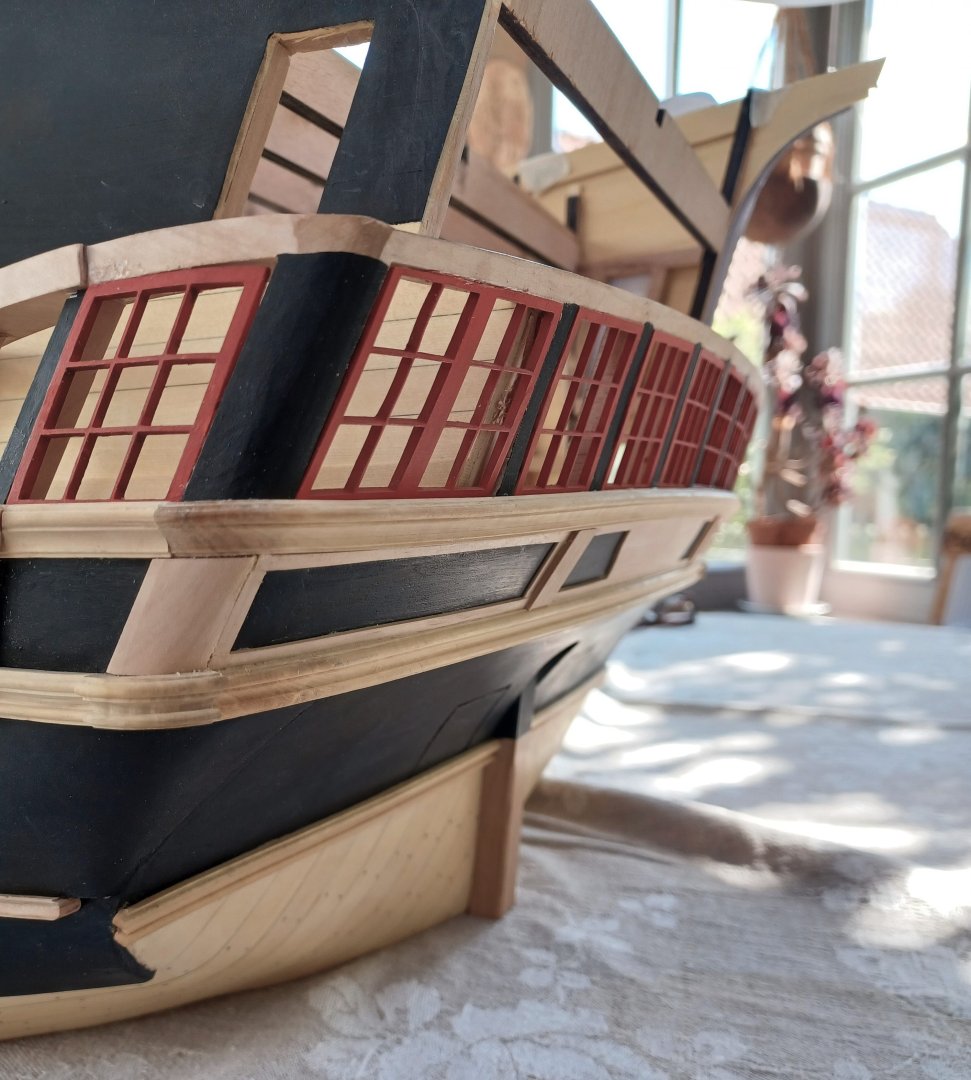
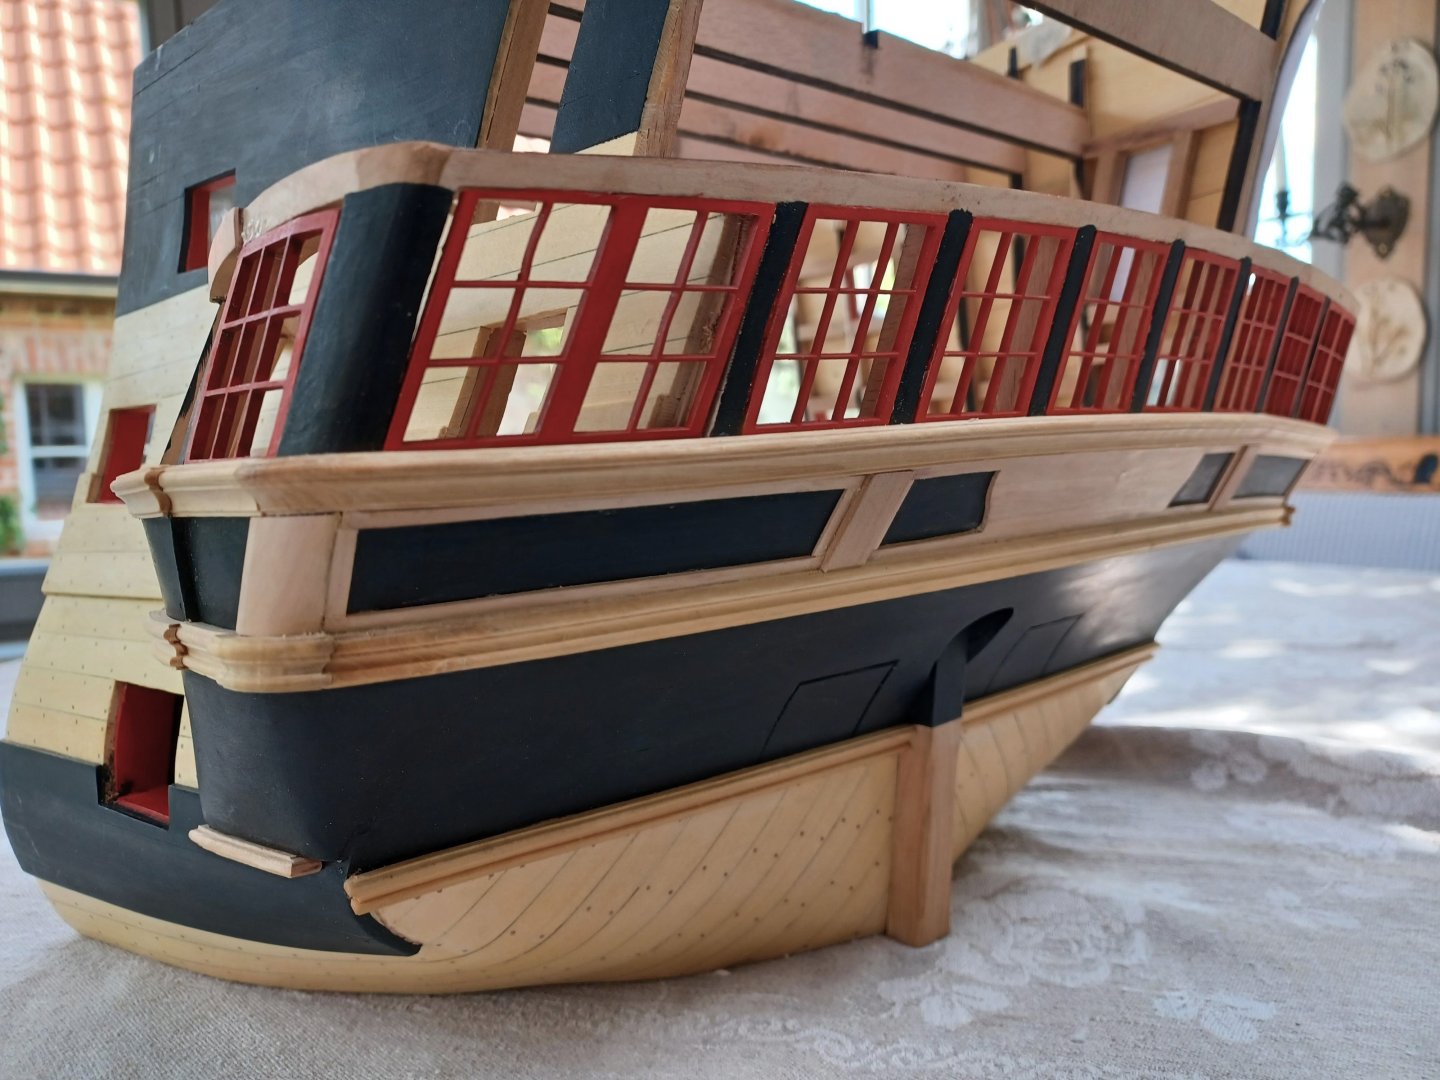
Hello everyone, There is some progress to report. Over the past few days, I've been working on the large arch, which is crucial for the design of the TRE KRONER's transom. As the component is a triple-curved arch with a curvature that should follow the stern and is also inclined, it was a little difficult to achieve the exact fit here. I cut out the arch from a pear wood plank with an allowance according to the drawing and then worked on it until the shape was right, at least to the eye. The final assembly will take some time, but it was important for me to have an idea of how the stern design will develop towards the top. The rear arch will later be accentuated with fancy moldings in different colours before I finally attach it to the model. Until then, I continued with the completion of the lower quarter galleries. The framework has been in place for some time, but I still had to fit the windows and moldings. As always, I worked with paper templates to find the right shapes in the three-dimensional space, as these are not immediately recognisable from the drawing. These were then laser-cut out of boxwood. The perforated mouldings are the bases for the balcony railings, where the balustrades will later be placed. The windows are placed on stop mouldings from the outside, the glazing is cut from Ferrero Rocher tins. To ensure that the shape of the windows follows the curve of the side gallery better, they were heated and bent by hand. This works quite well if you make sure that the grain is on edge. Then the upper mouldings had to be fitted and the window joints covered. Here are a few more pictures of the current status of the work: Once the other side gallery has been completed, the deck panelling above the main deck will be installed. Best regards, Matthias


-
Hi TJM, thank you very much for your explanations. I did not know, that there exists a list of ship names. I used to spend hours, looking througt the online-archive in search of special plans. This list is of great value if you are looking for something, it contains also ships of similar construction. Thanks a lot for that. Matthias
-
Hi TJM, I just came across your build log of the Frigate Christiania and this topic about the CAD-plans on the basis of the riksarchiv. I am myself very interested in the danish navy and have a build log myself about building the stern-section of the orlogskib TRE KRONER from 1742. Maybe we can get in contact about how to use the riksarchiv best, I have the problem of not understanding danish language very well, but my method of working with the plans is similar to your method. Matthias
-
Hi Igor, Can you make CNC carvings yourself? And did you try it with the ornaments of L’Ambitieux or Dauphin Royale? Matthias
-
Good morning Igor, that looks fantastic!! How can you transform these drawings now into a real model? Can you use them for Cnc carving? Matthias
-
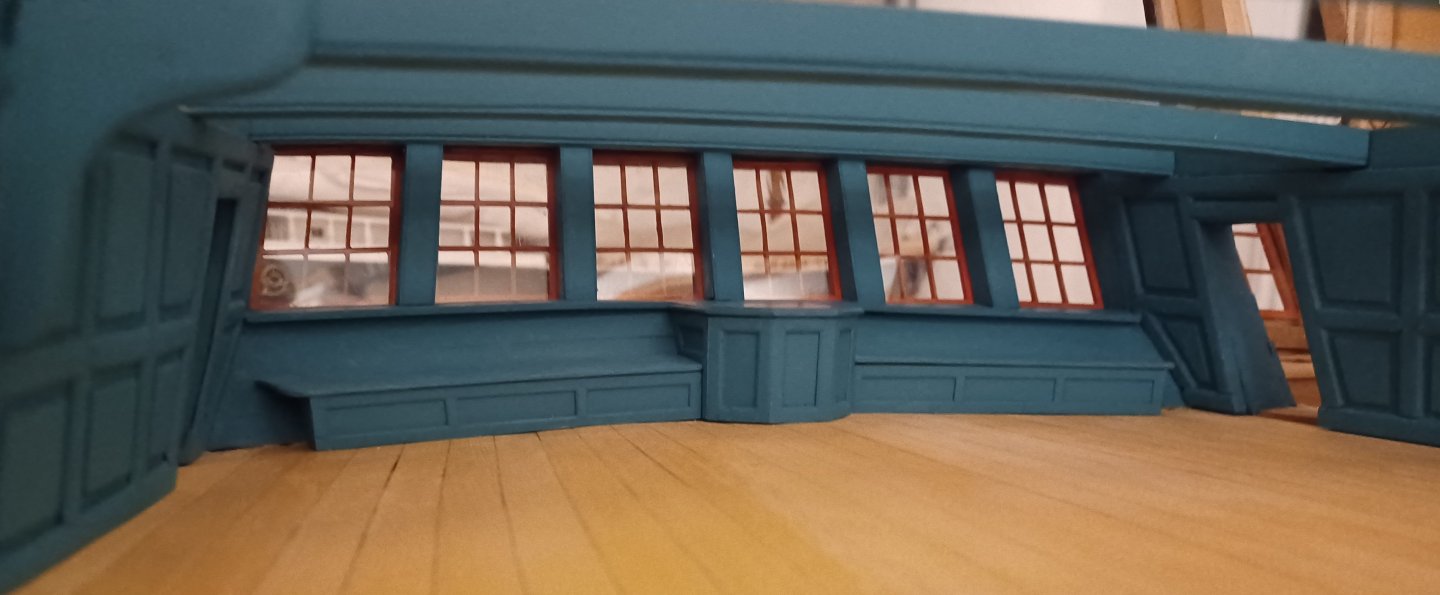
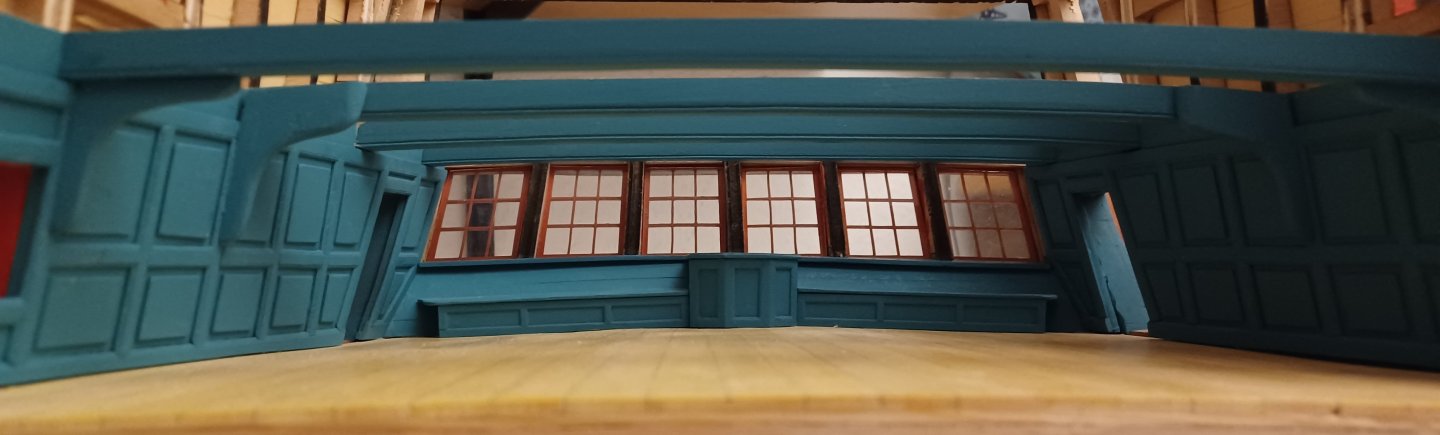
Dear colleagues, thanks for the likes and comments, As a short addendum to my previous post, here are three more pictures of the now completed ‘underste Kajyt’, best regards, Matthias

-
Hi Tartane, Thank you for your message, I hope to begin with the carvings in 3-4 months. Matthias
-
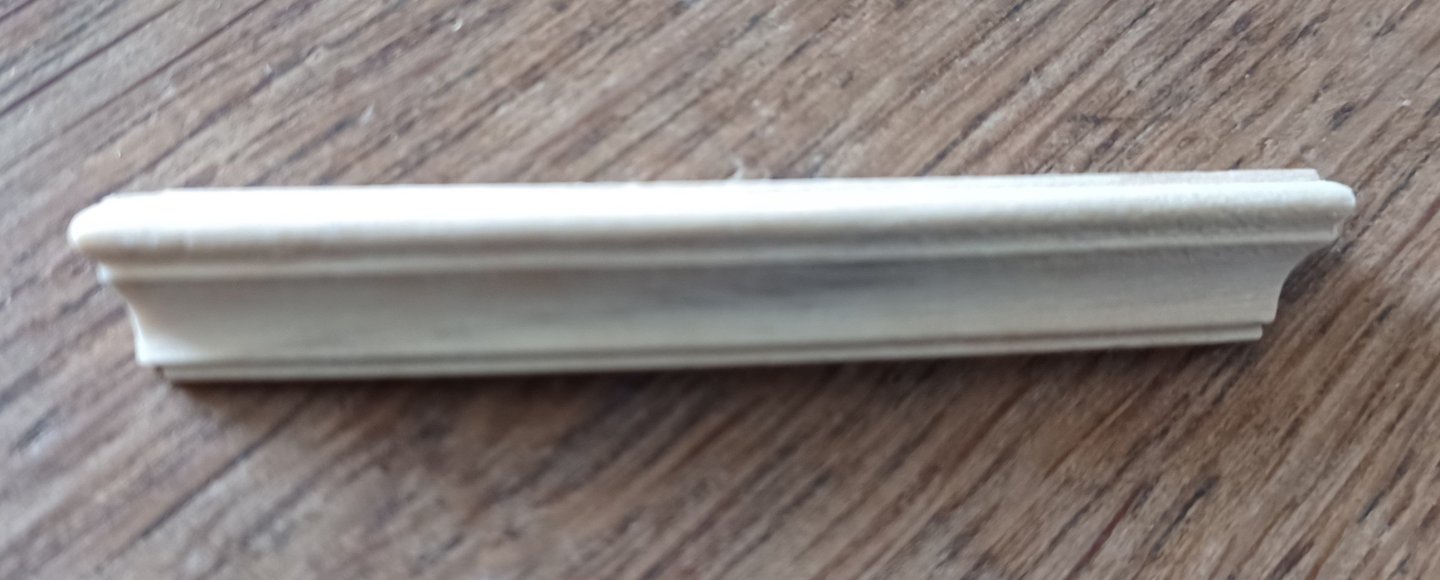
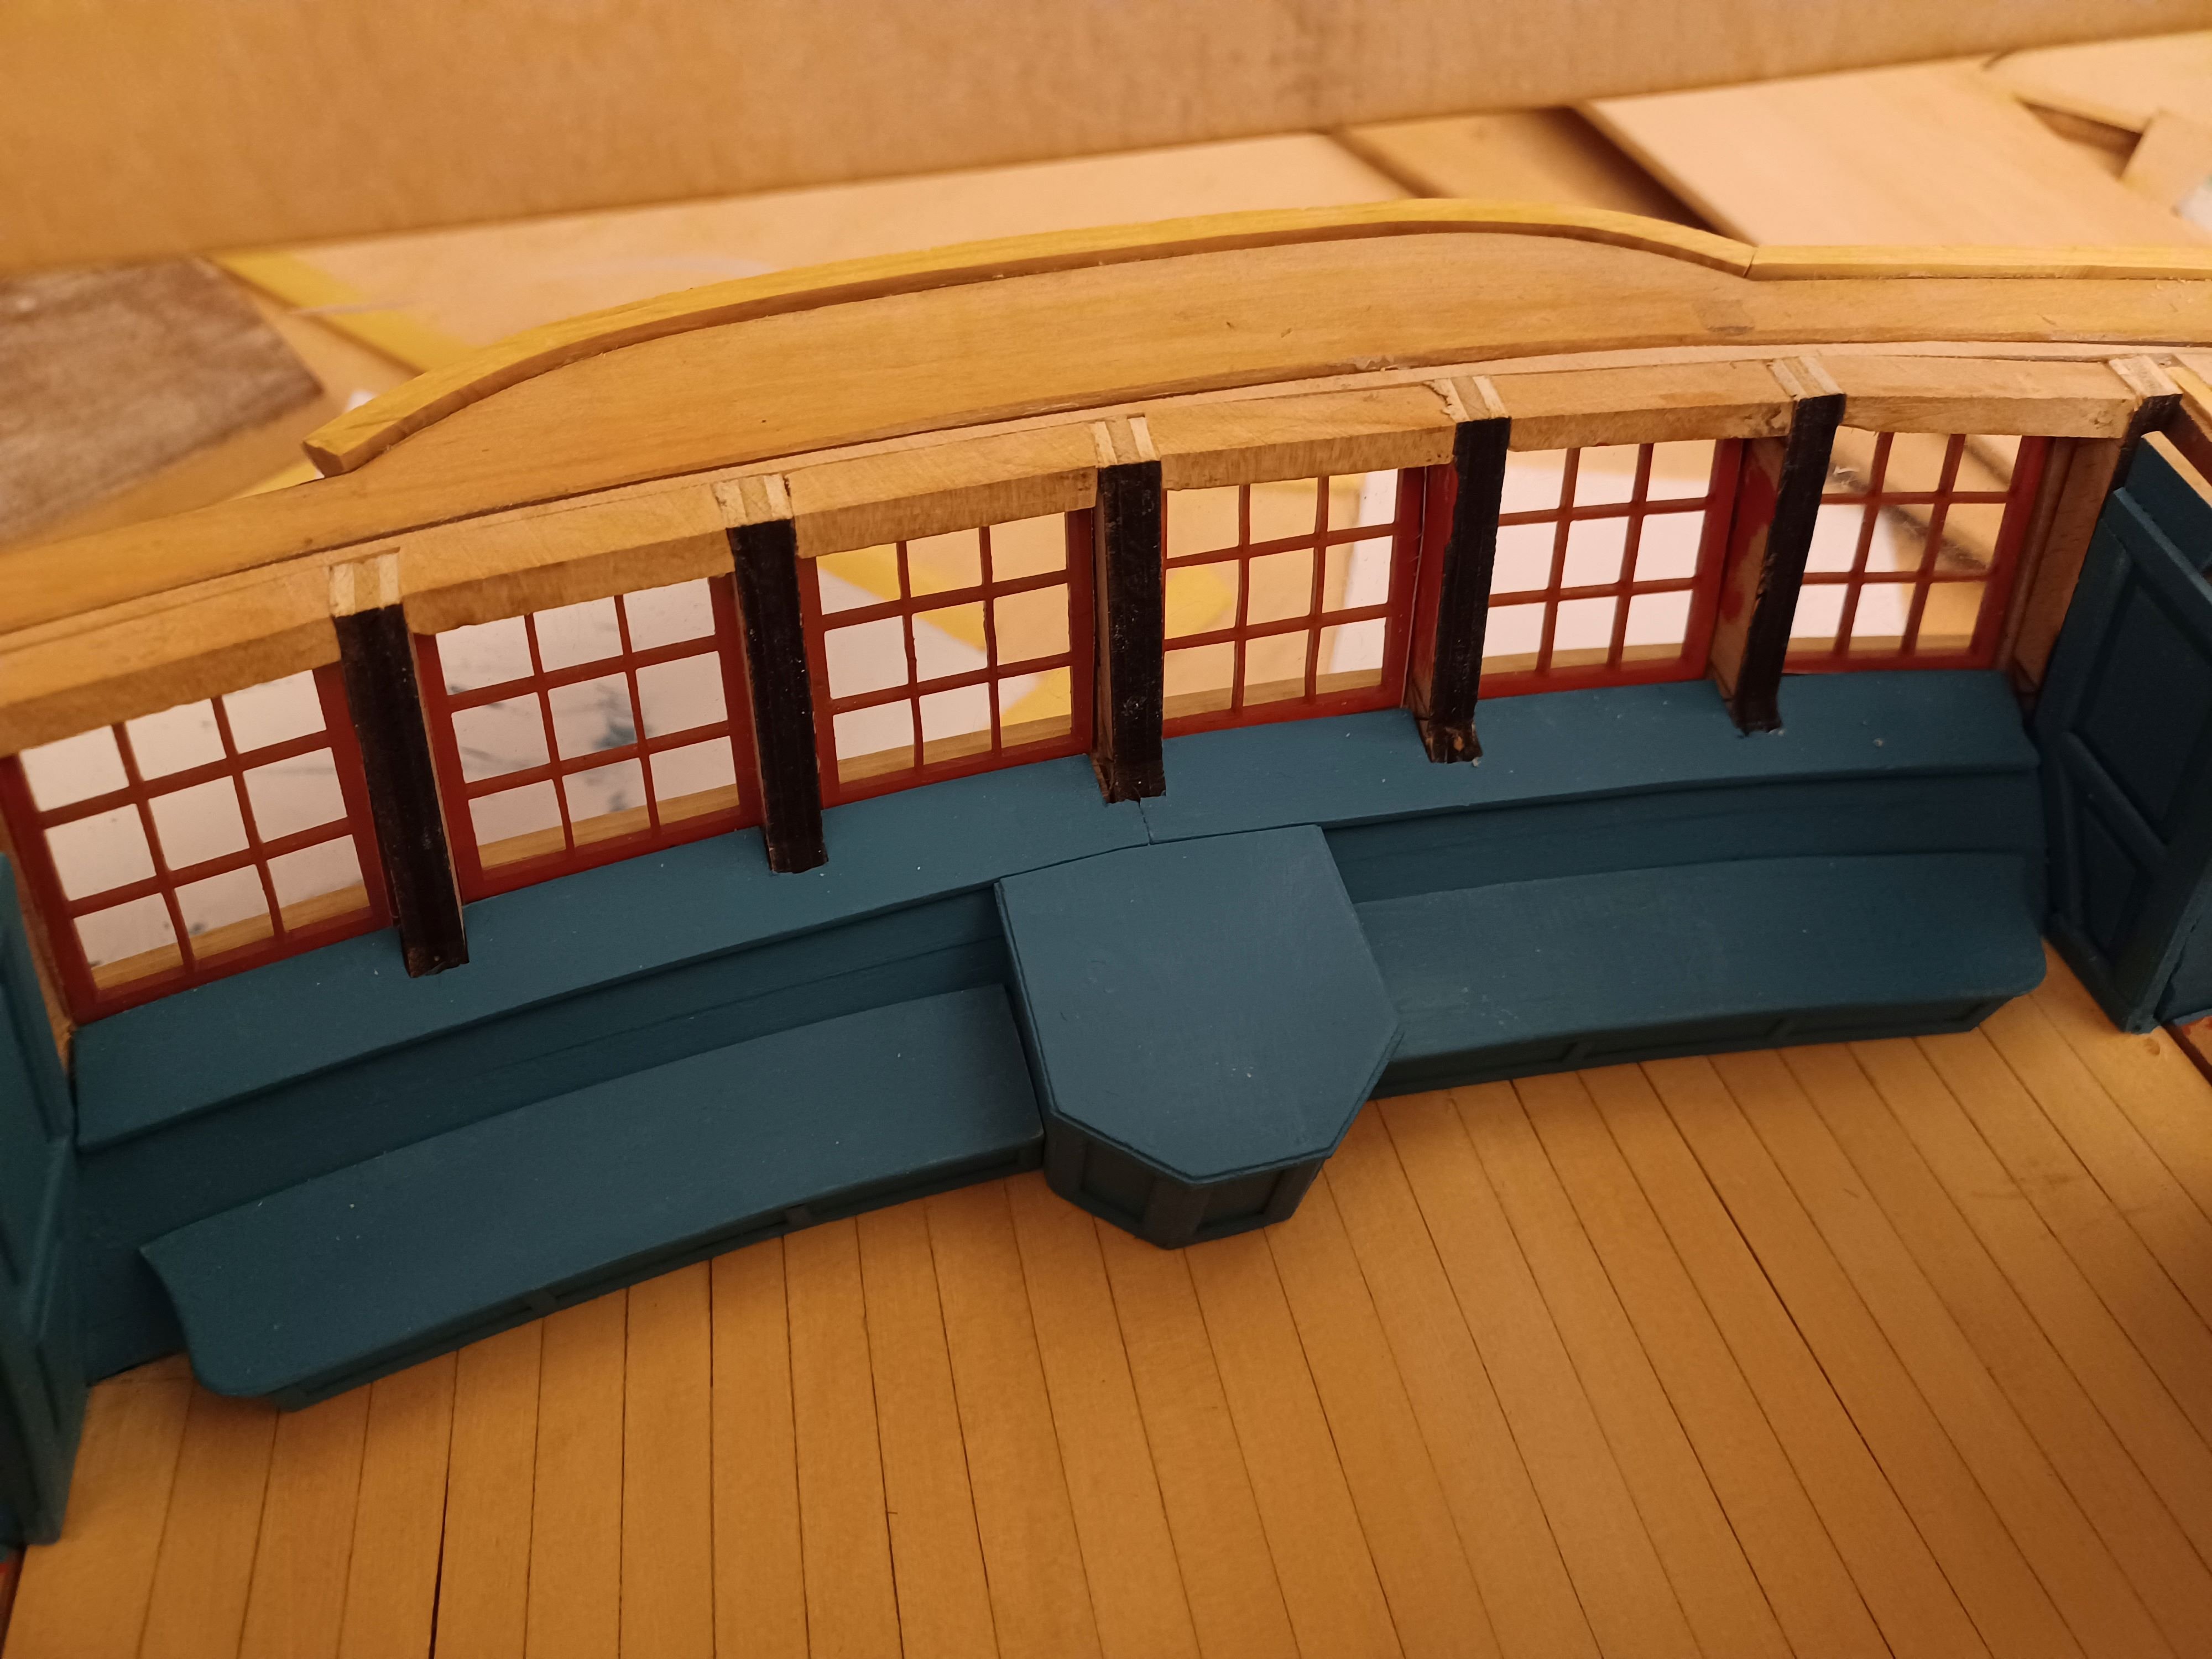
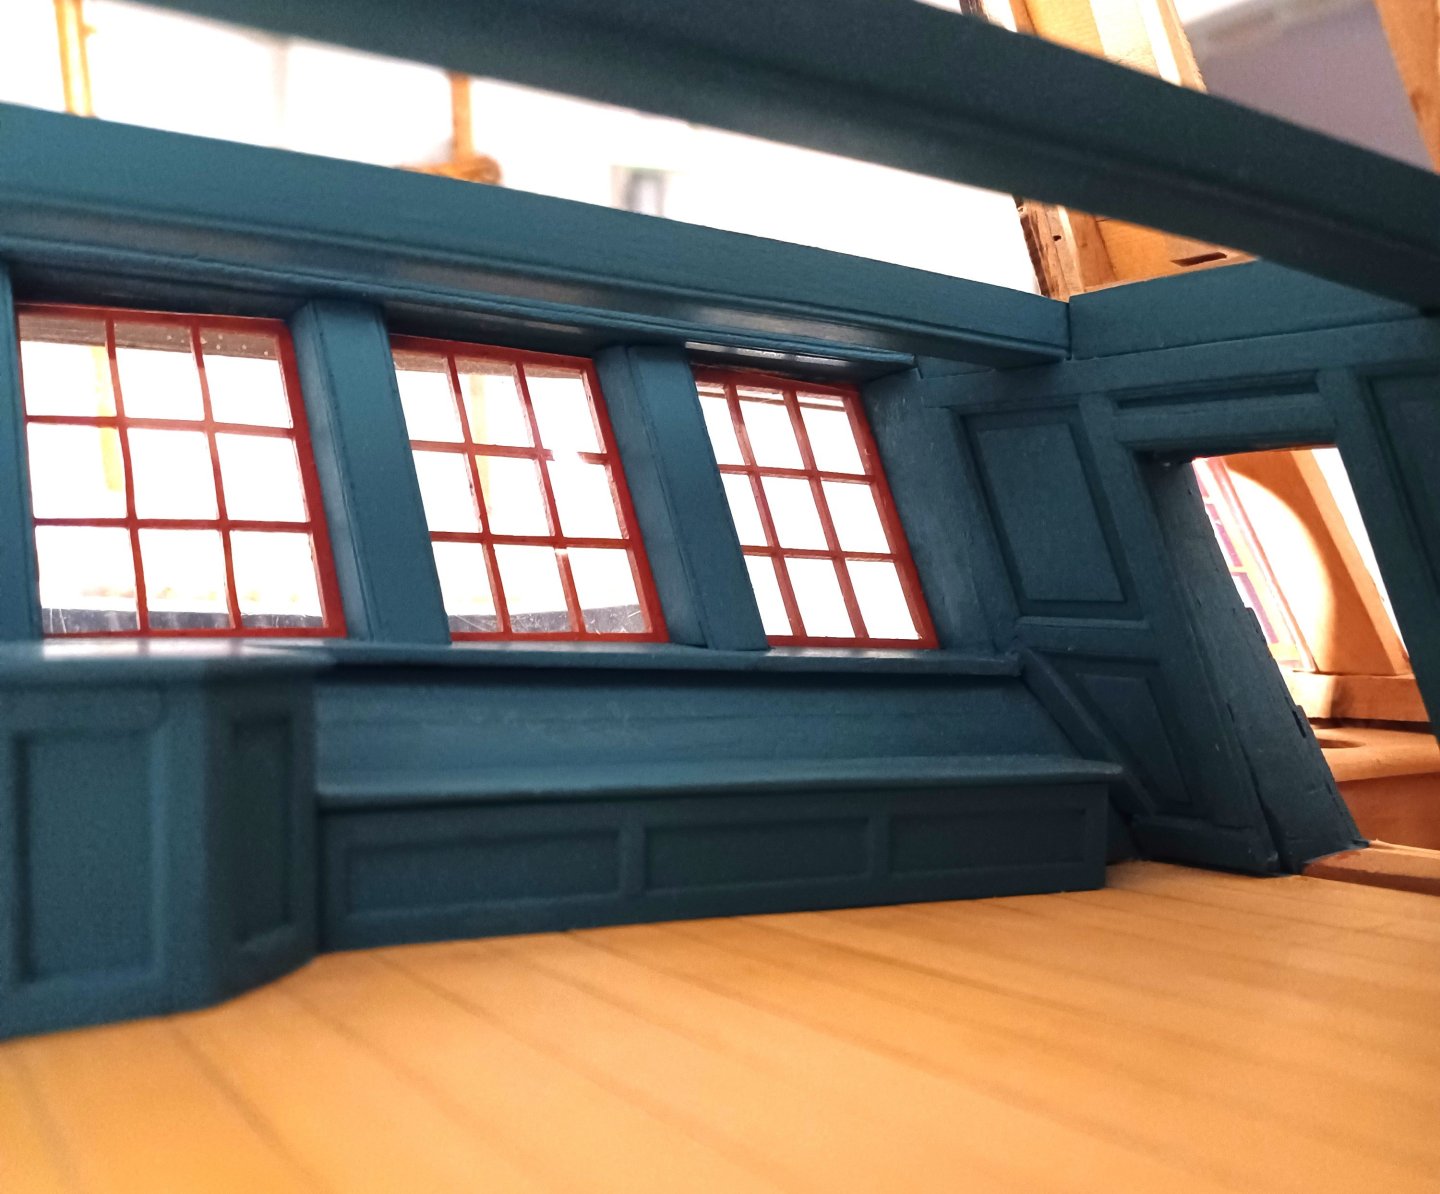
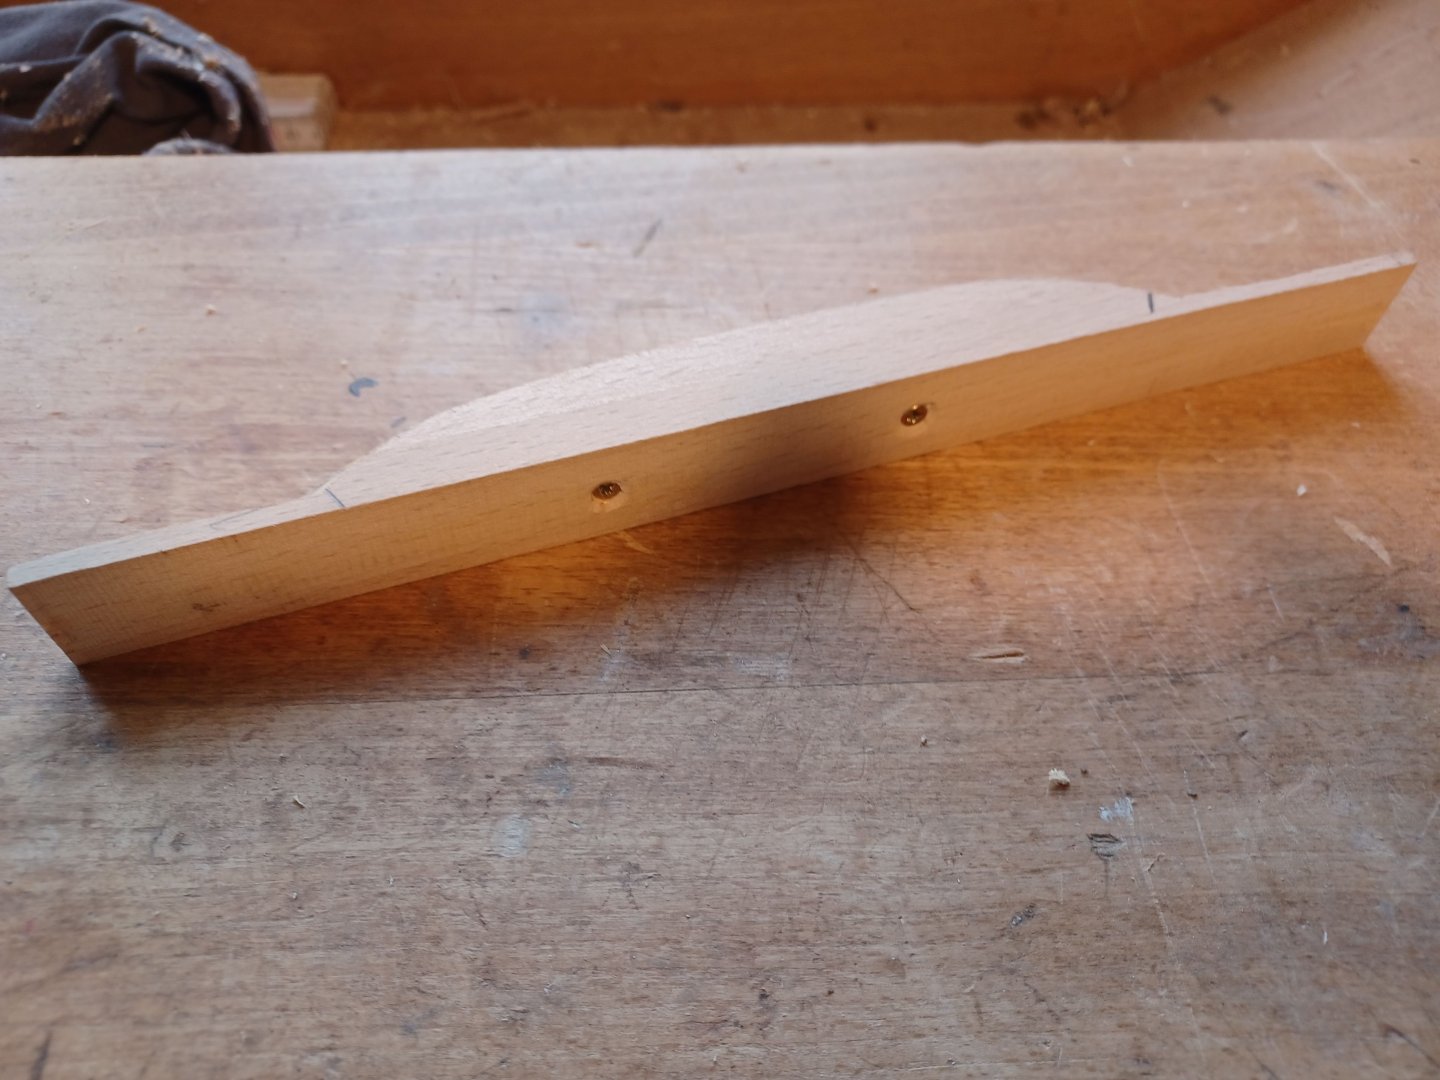
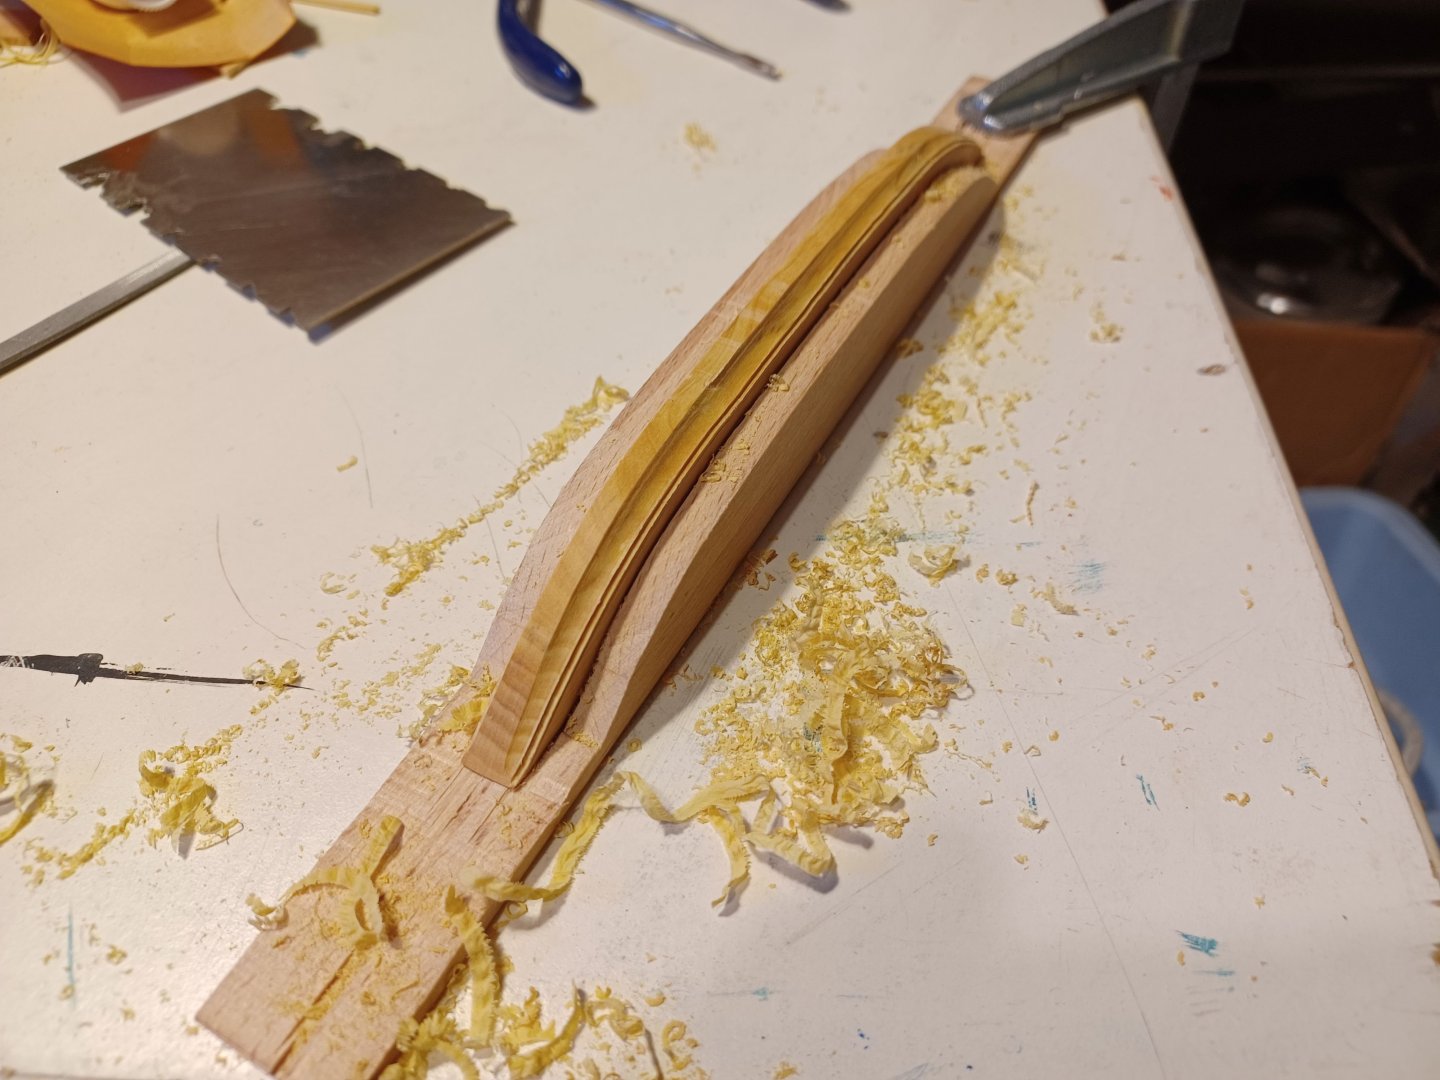
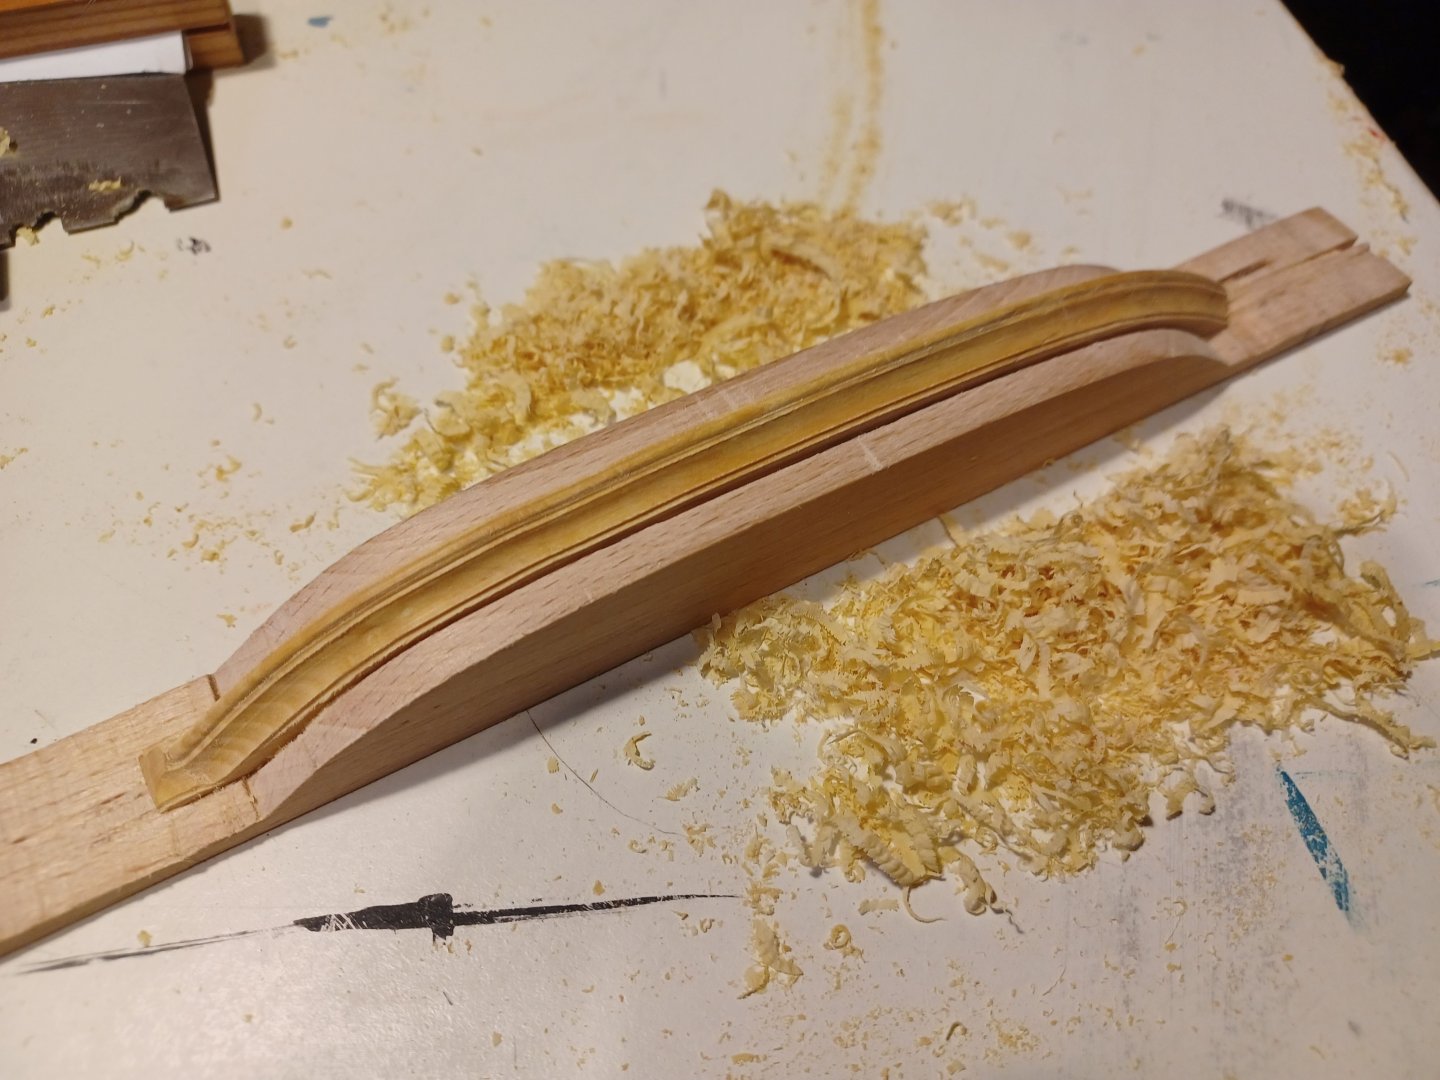
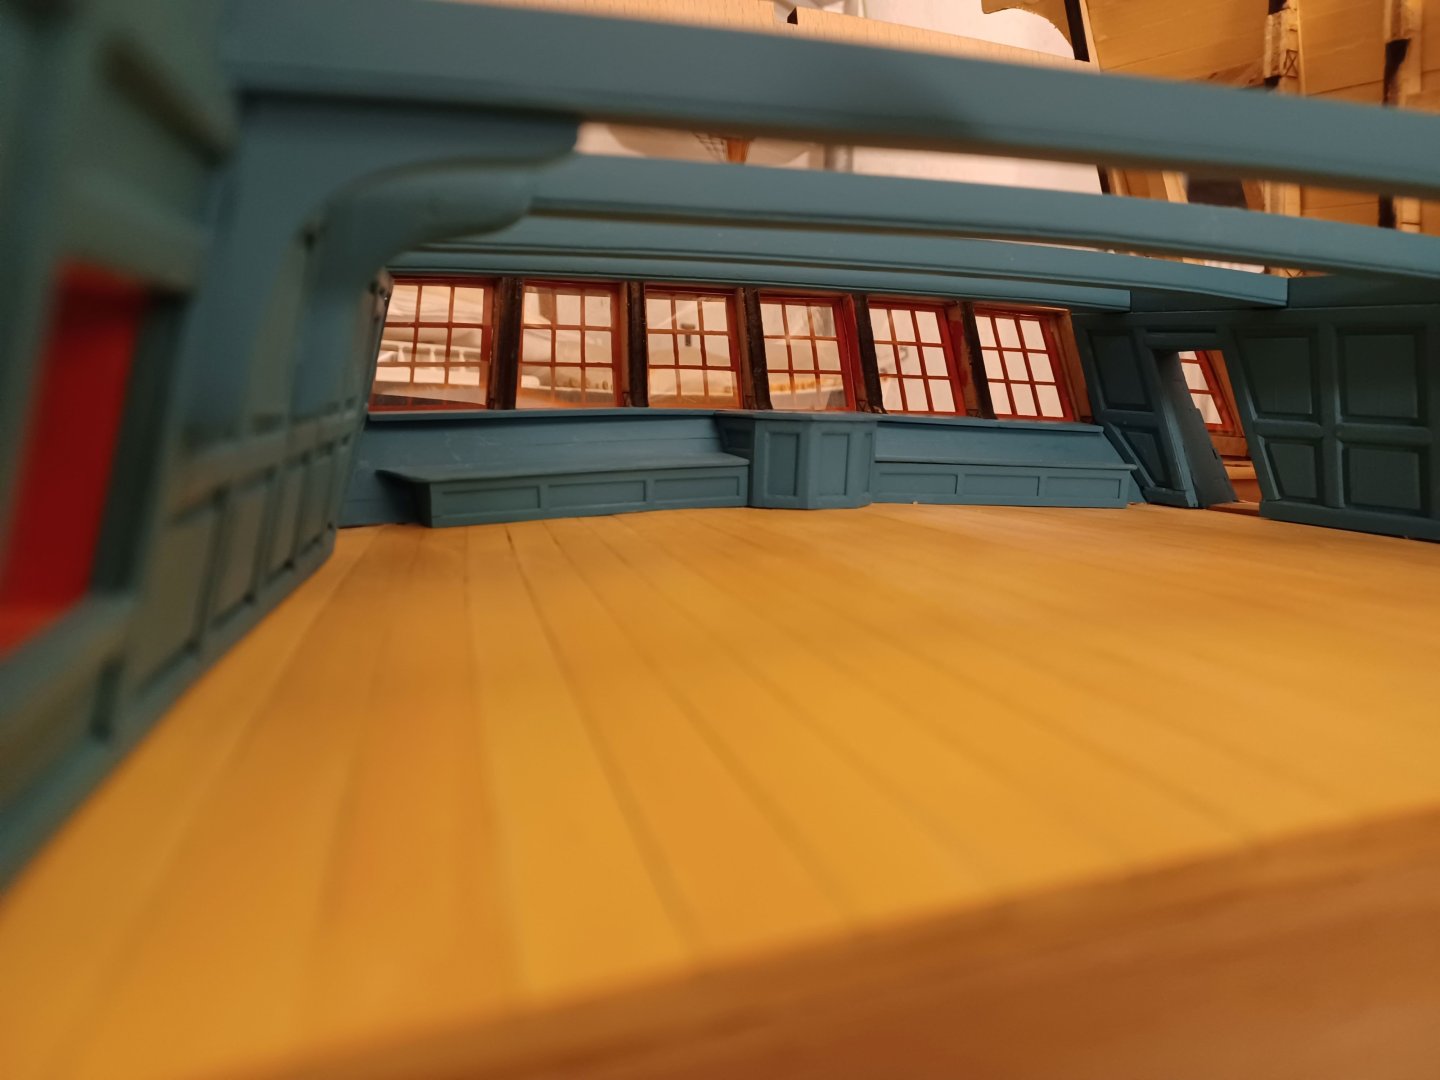
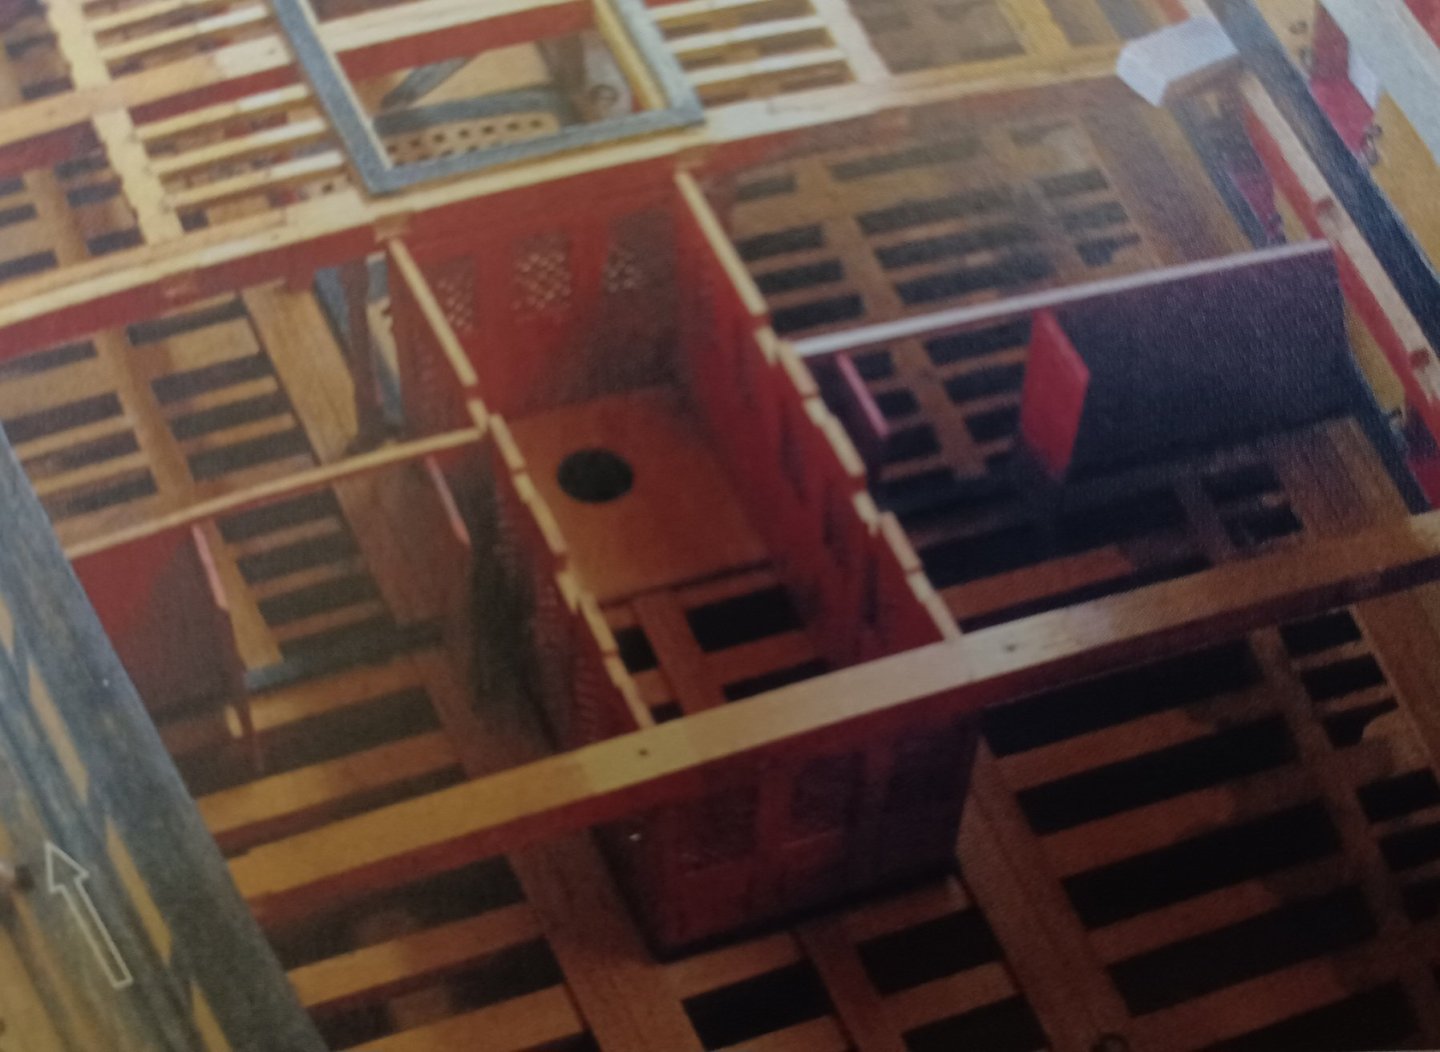
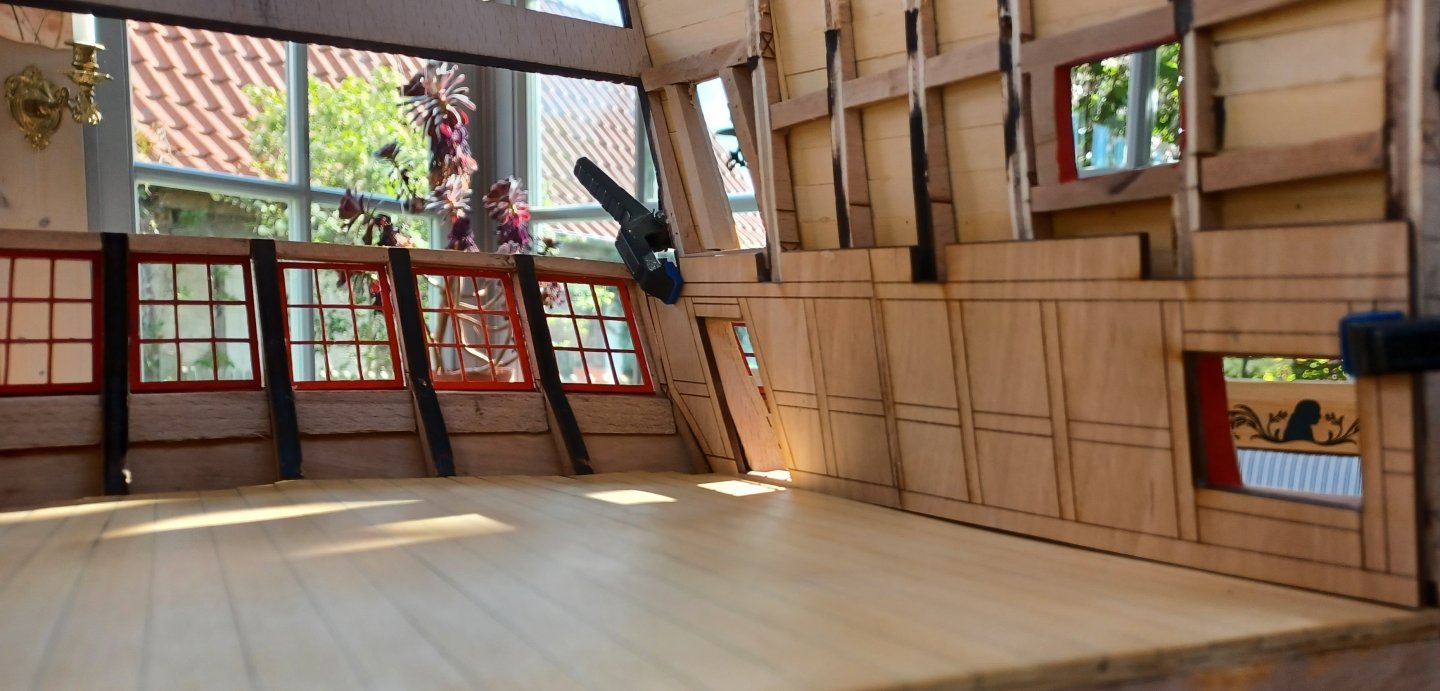
Hello everyone, After the summer break, I have returned to the TRE KRONER. The model continues to develop from bottom to top, so the interior of the ‘Underste Kajyt’ is currently being worked on, as well as the continuation of the transom from the outside. Here we start with the cantilevered balcony, which was glued into shape from two layers of pear wood and butt-jointed to the model: The cornices that form the end here are again partially curved. I experimented a little and steamed the rather stiff boxwood mouldings (7/10 mm) in the cooking pot and shaped them. This works quite well for continuous curves, from which the segments for the side pockets are cut, the attempt for the balcony railing went wrong, I then discarded that and chose another way: In principle, this consists of building a jig in which the moulding is fixed and the profile is profiled to its final shape. The advantage is that there is no need for hot forming or the use of force if it doesn't quite fit and the profile follows the mould neatly. The disadvantage, of course, is that the curved ends always run slightly against the fibre, which makes the profiling process somewhat laborious. Here are the first cornices fitted to the model, the accuracy of fit is quite good: Finally, I continued working on the interior. I've had some feedback that my choice of colours is not authentic and that the colour scheme is definitely too strong. However, I have somehow fallen in love with this petrol shade and find it quite suitable. The bold interior colours are also not completely untypical for the Baroque period; you can find something similar in residential buildings. The colour restraint only really became predominant again in Classicism with the imitation of the ideal material marble. Anyway, I stuck with my colour and painted the stern bench, rudder head box and panels the same colour. Best regards, Matthias


-
Thanks Chuck, One day I would like to add the medway longboat to this collection. Will there be the chance of getting a kit of the longboat in future? Matthias
-
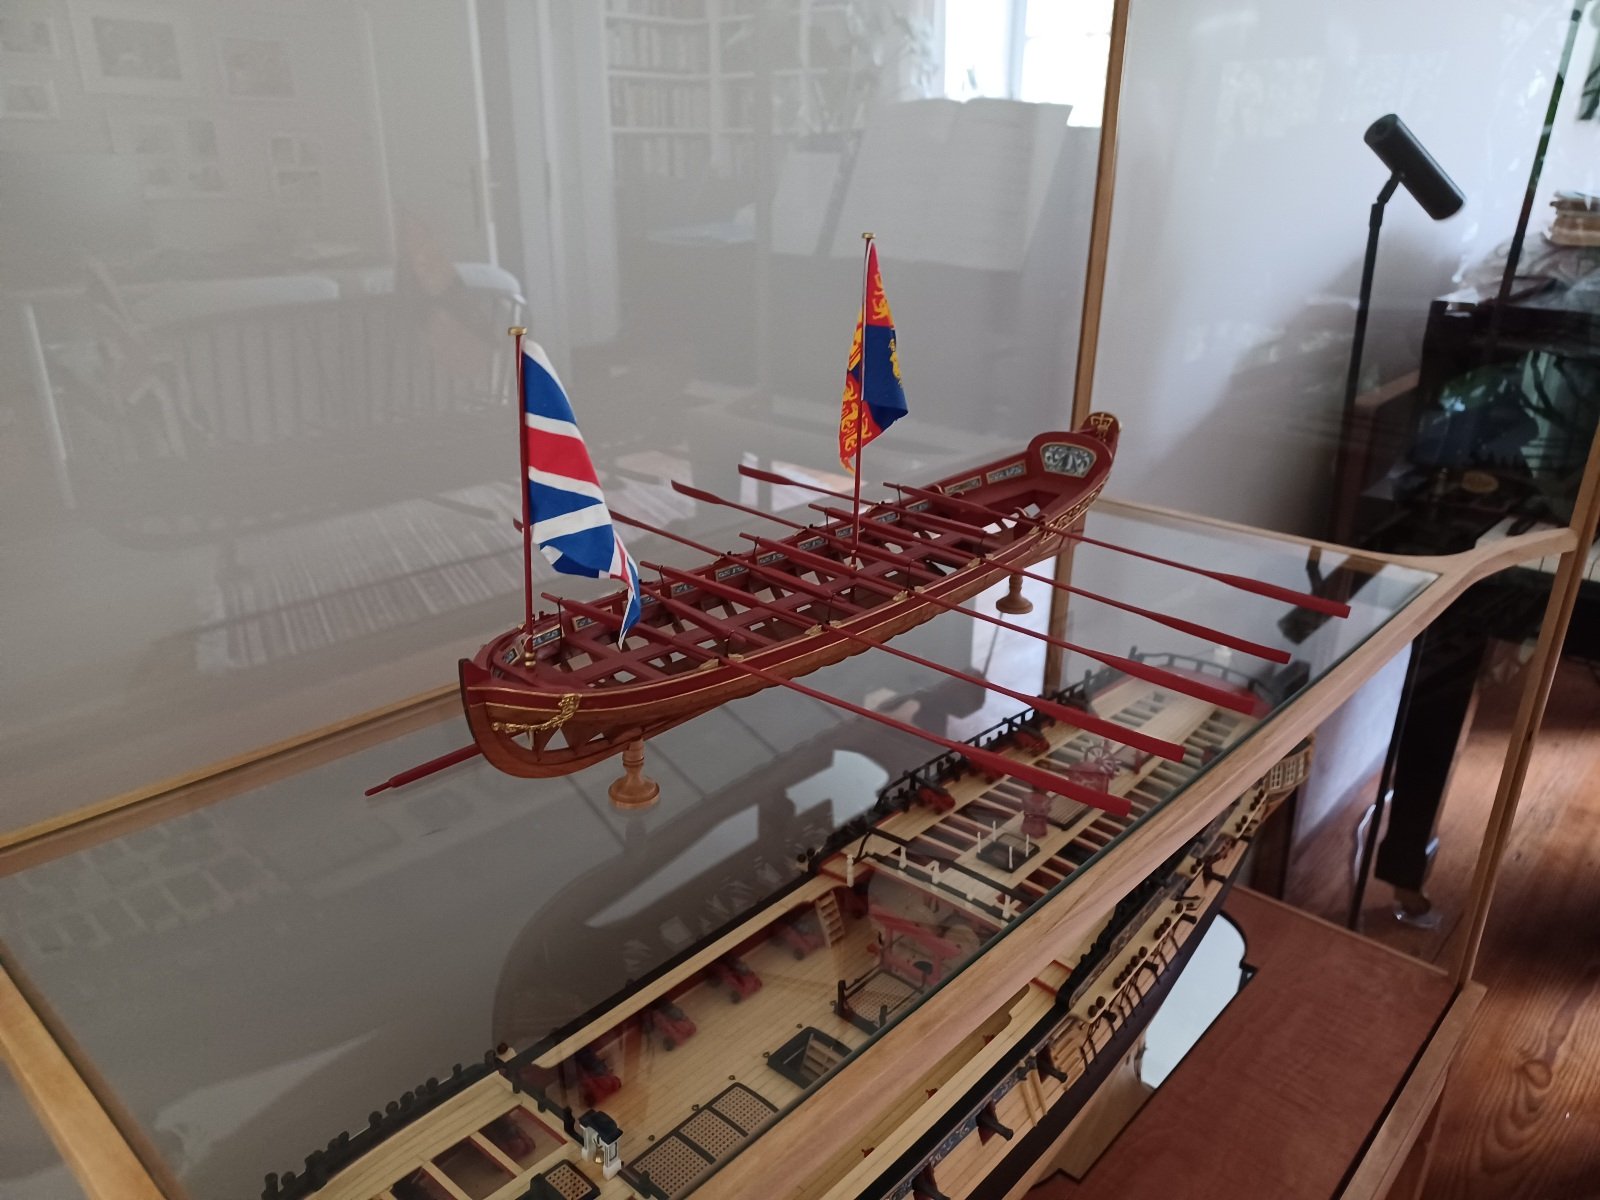
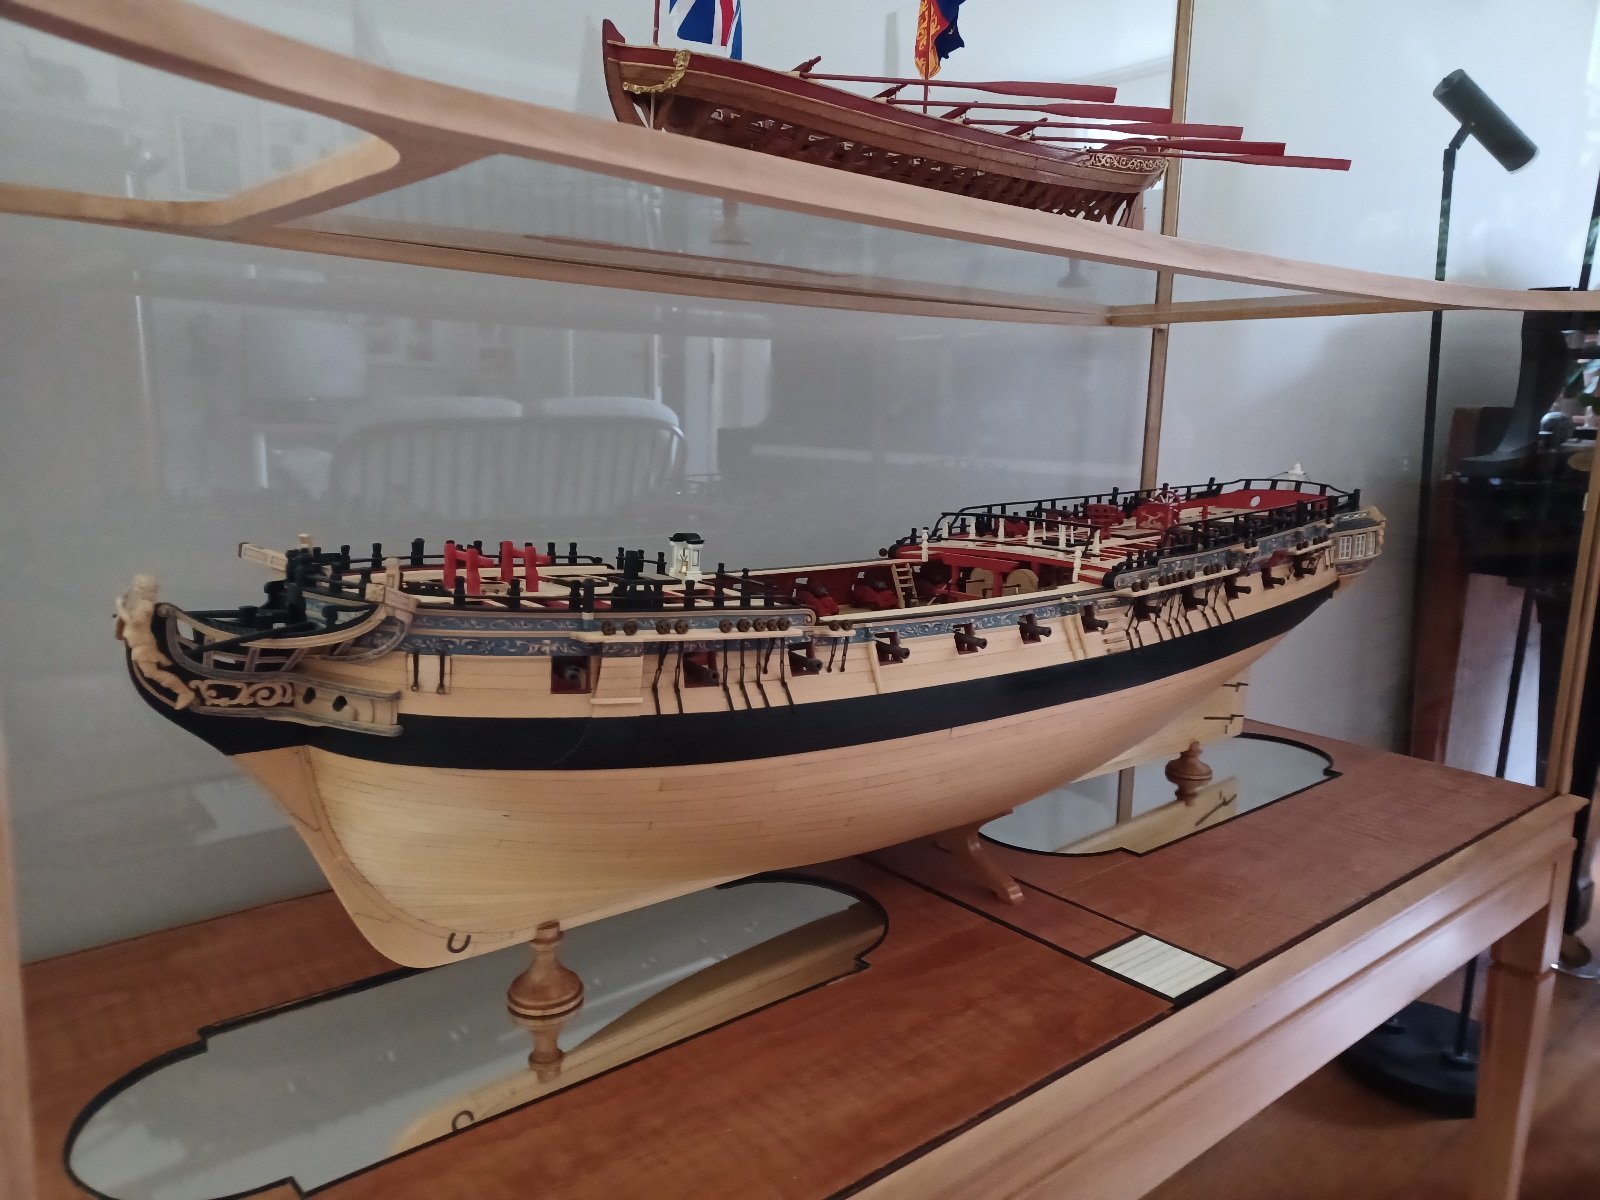
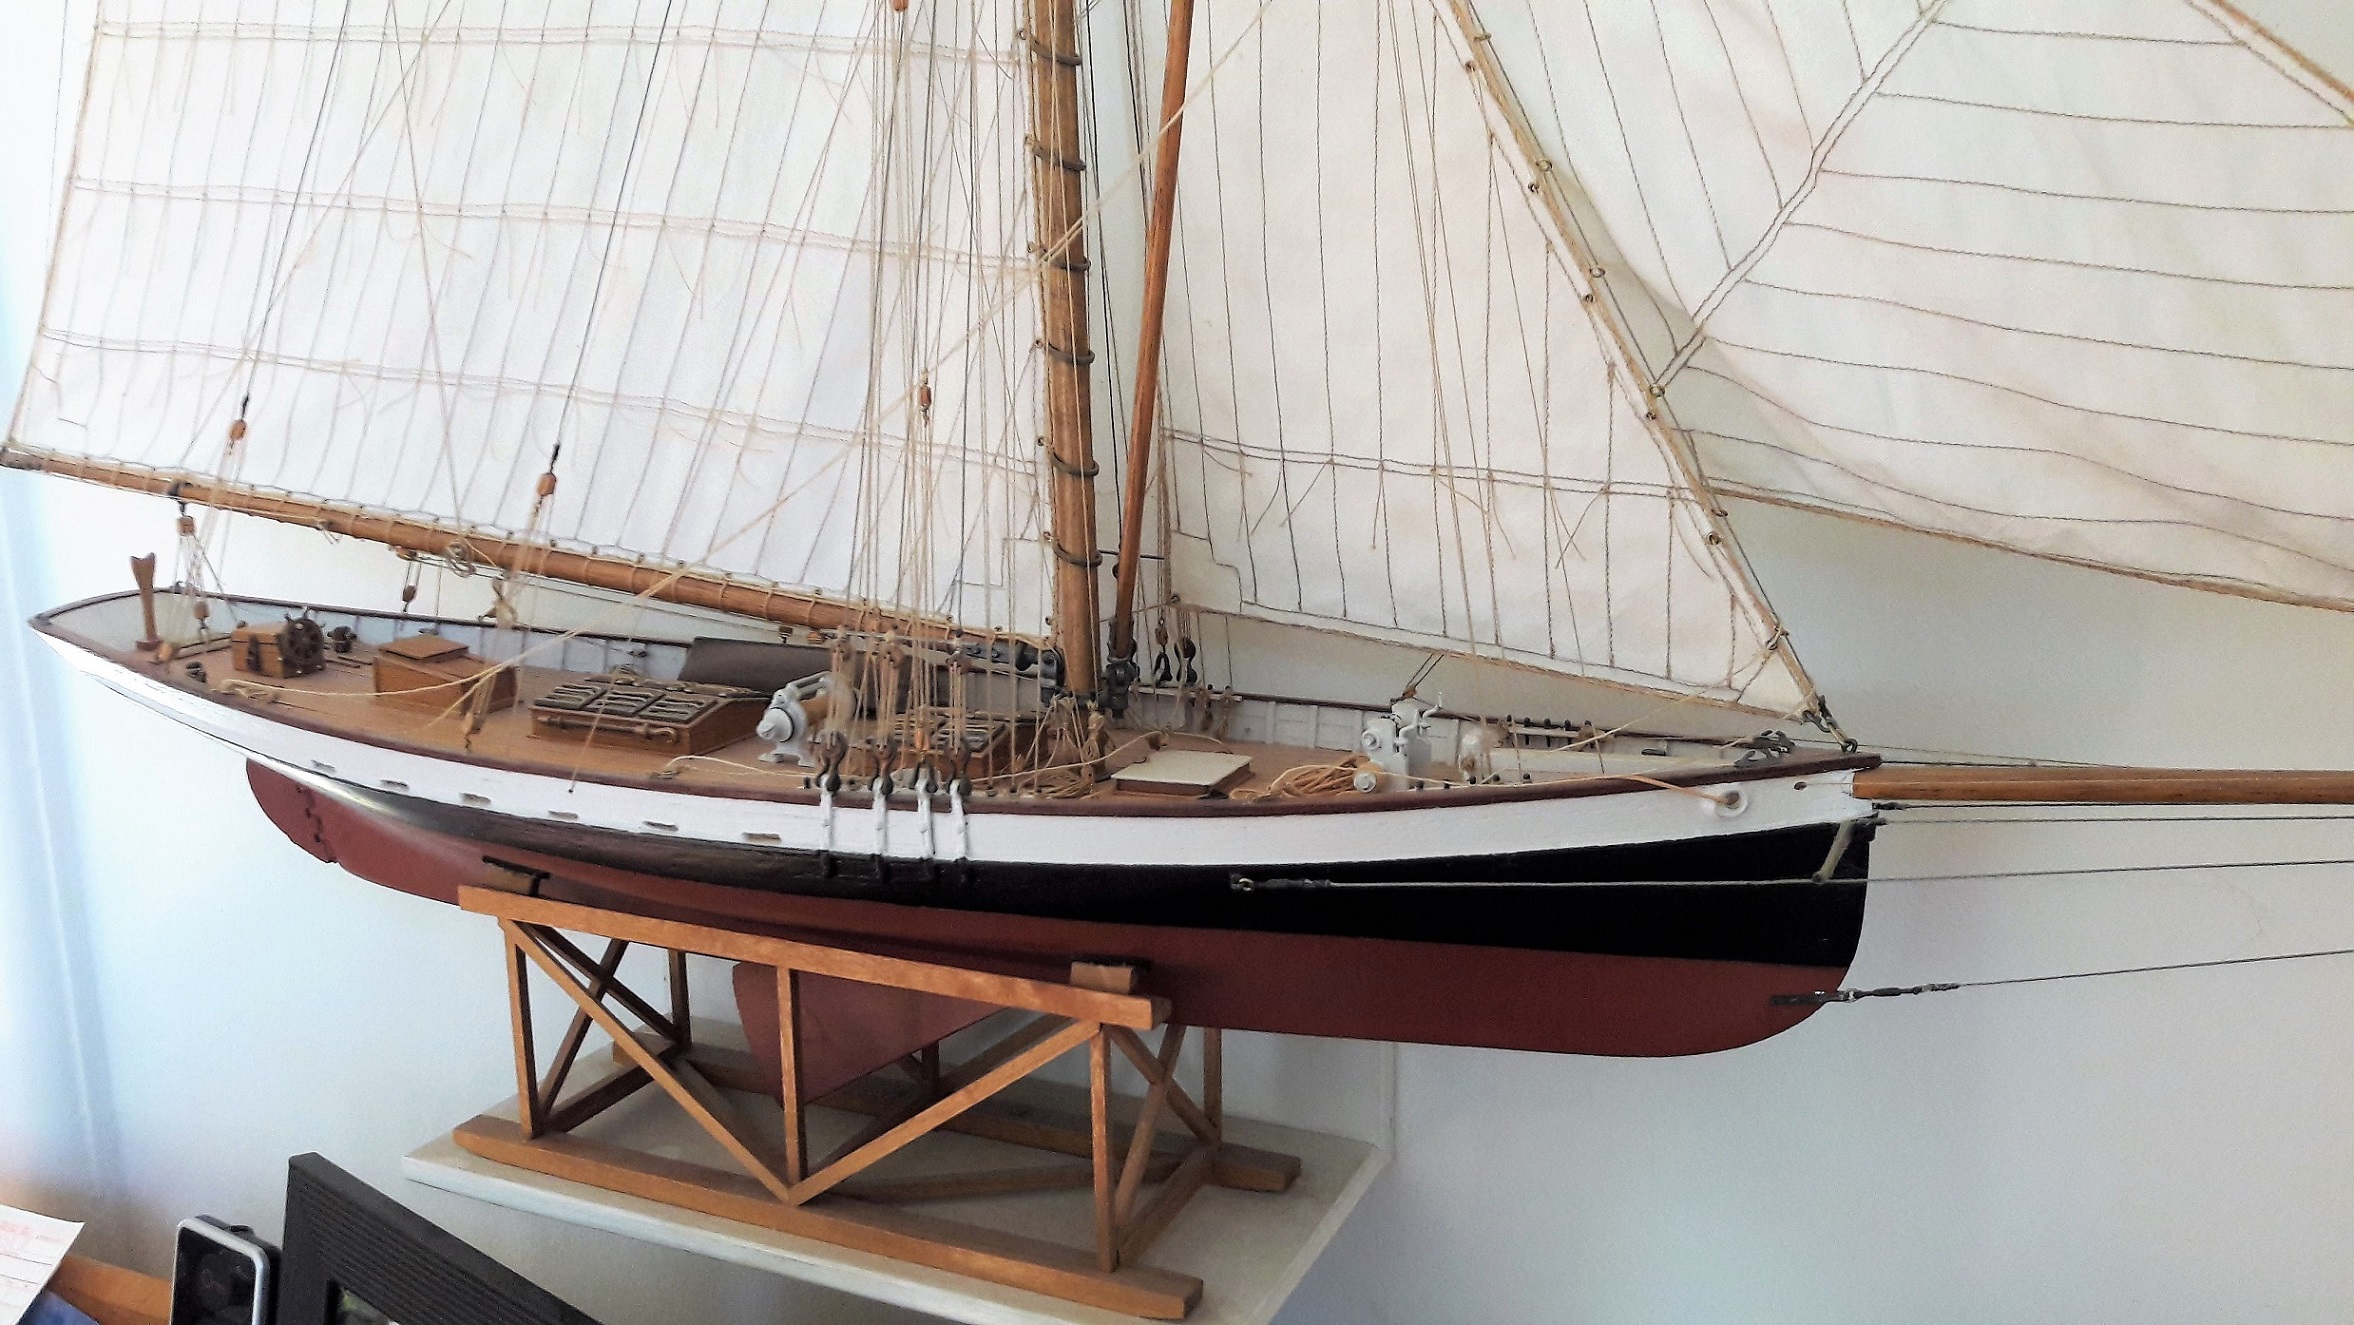
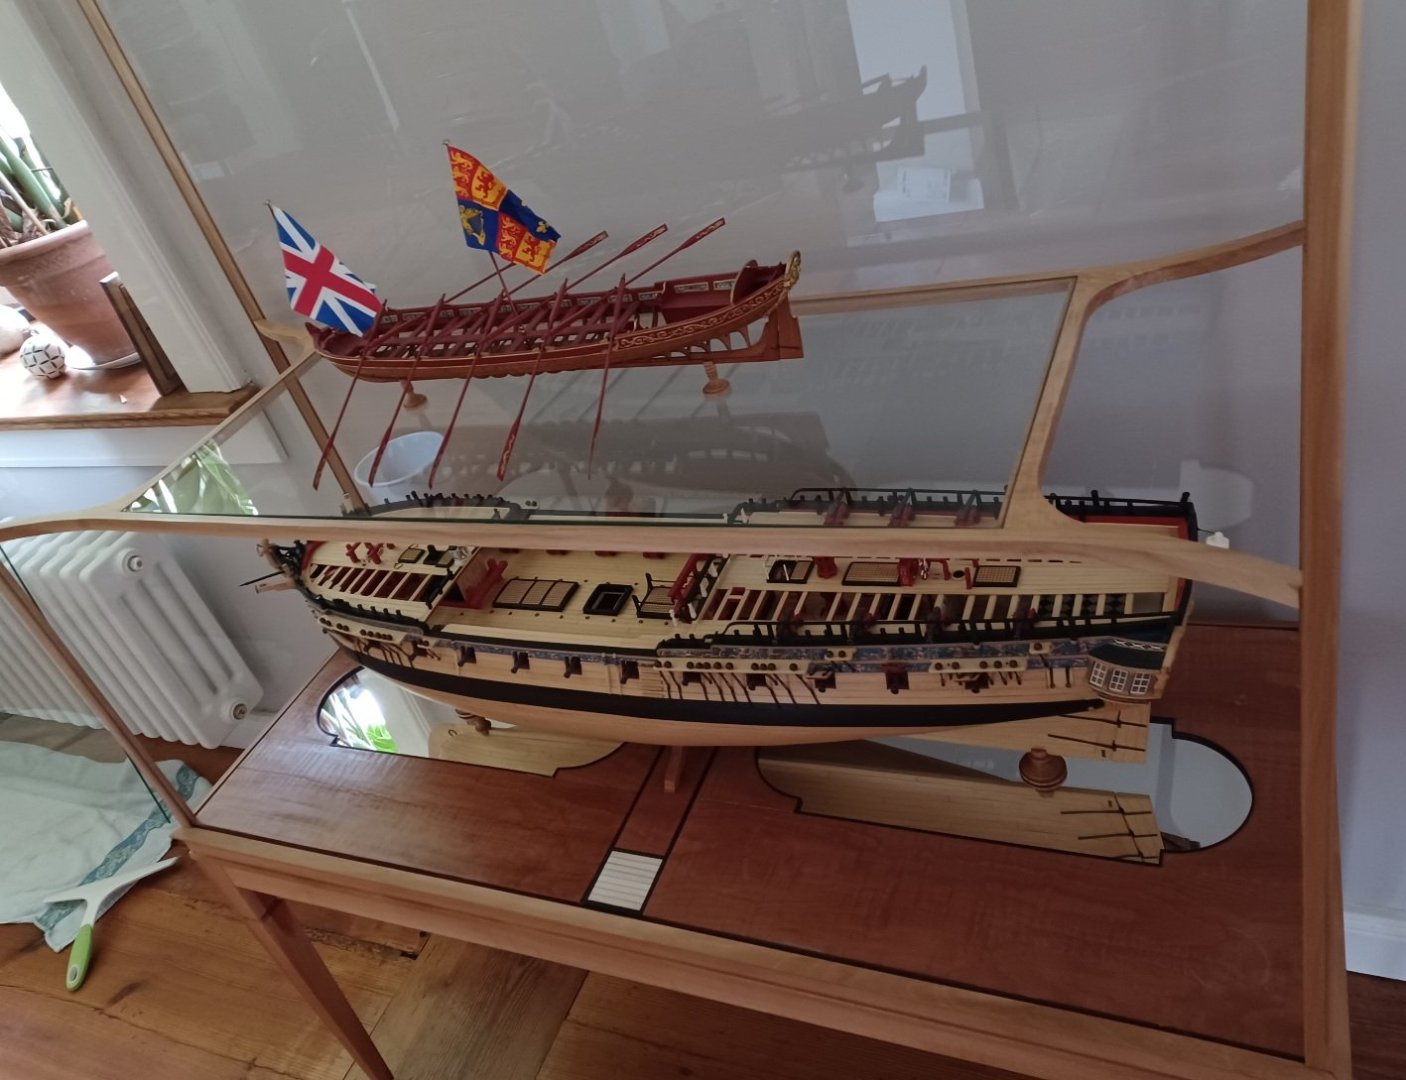
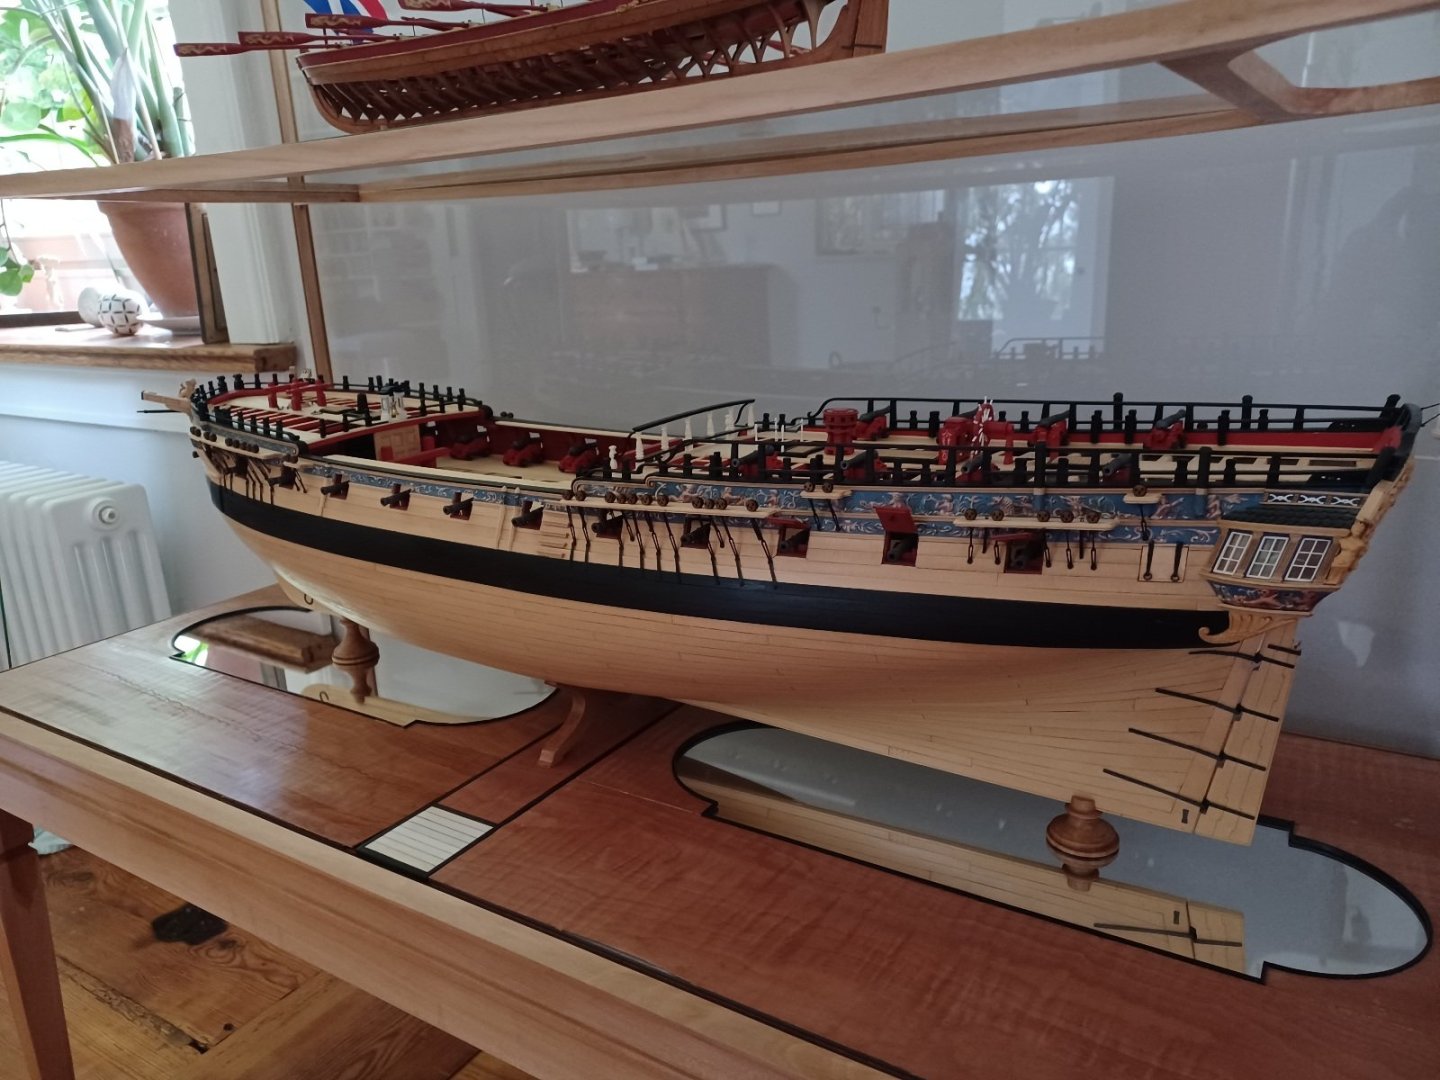
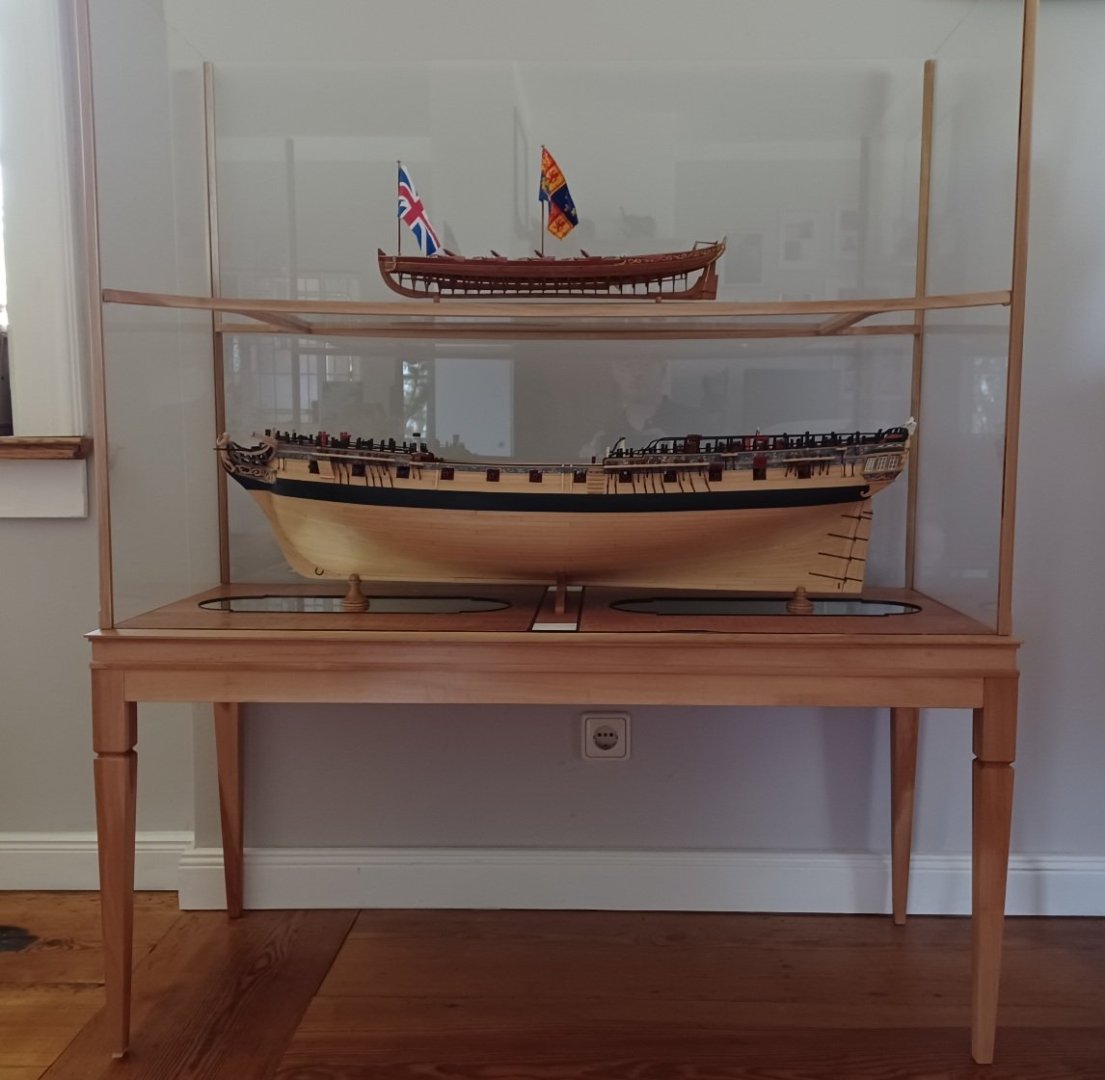
Hello everybody, in the summer, unfortunately, nothing is really going on in the workshop, but a little bit has happened with the displaycase. I've changed the arrangement of the models a bit and today they were given a trial run. Matthias


-
Very impressive and perfectly executed. Congratulation. Are you going to make a display case for the model? It will be huge. Matthias
- 488 replies
-
- 3
-
-
- Indefatigable
- Vanguard Models
- (and 1 more)
-
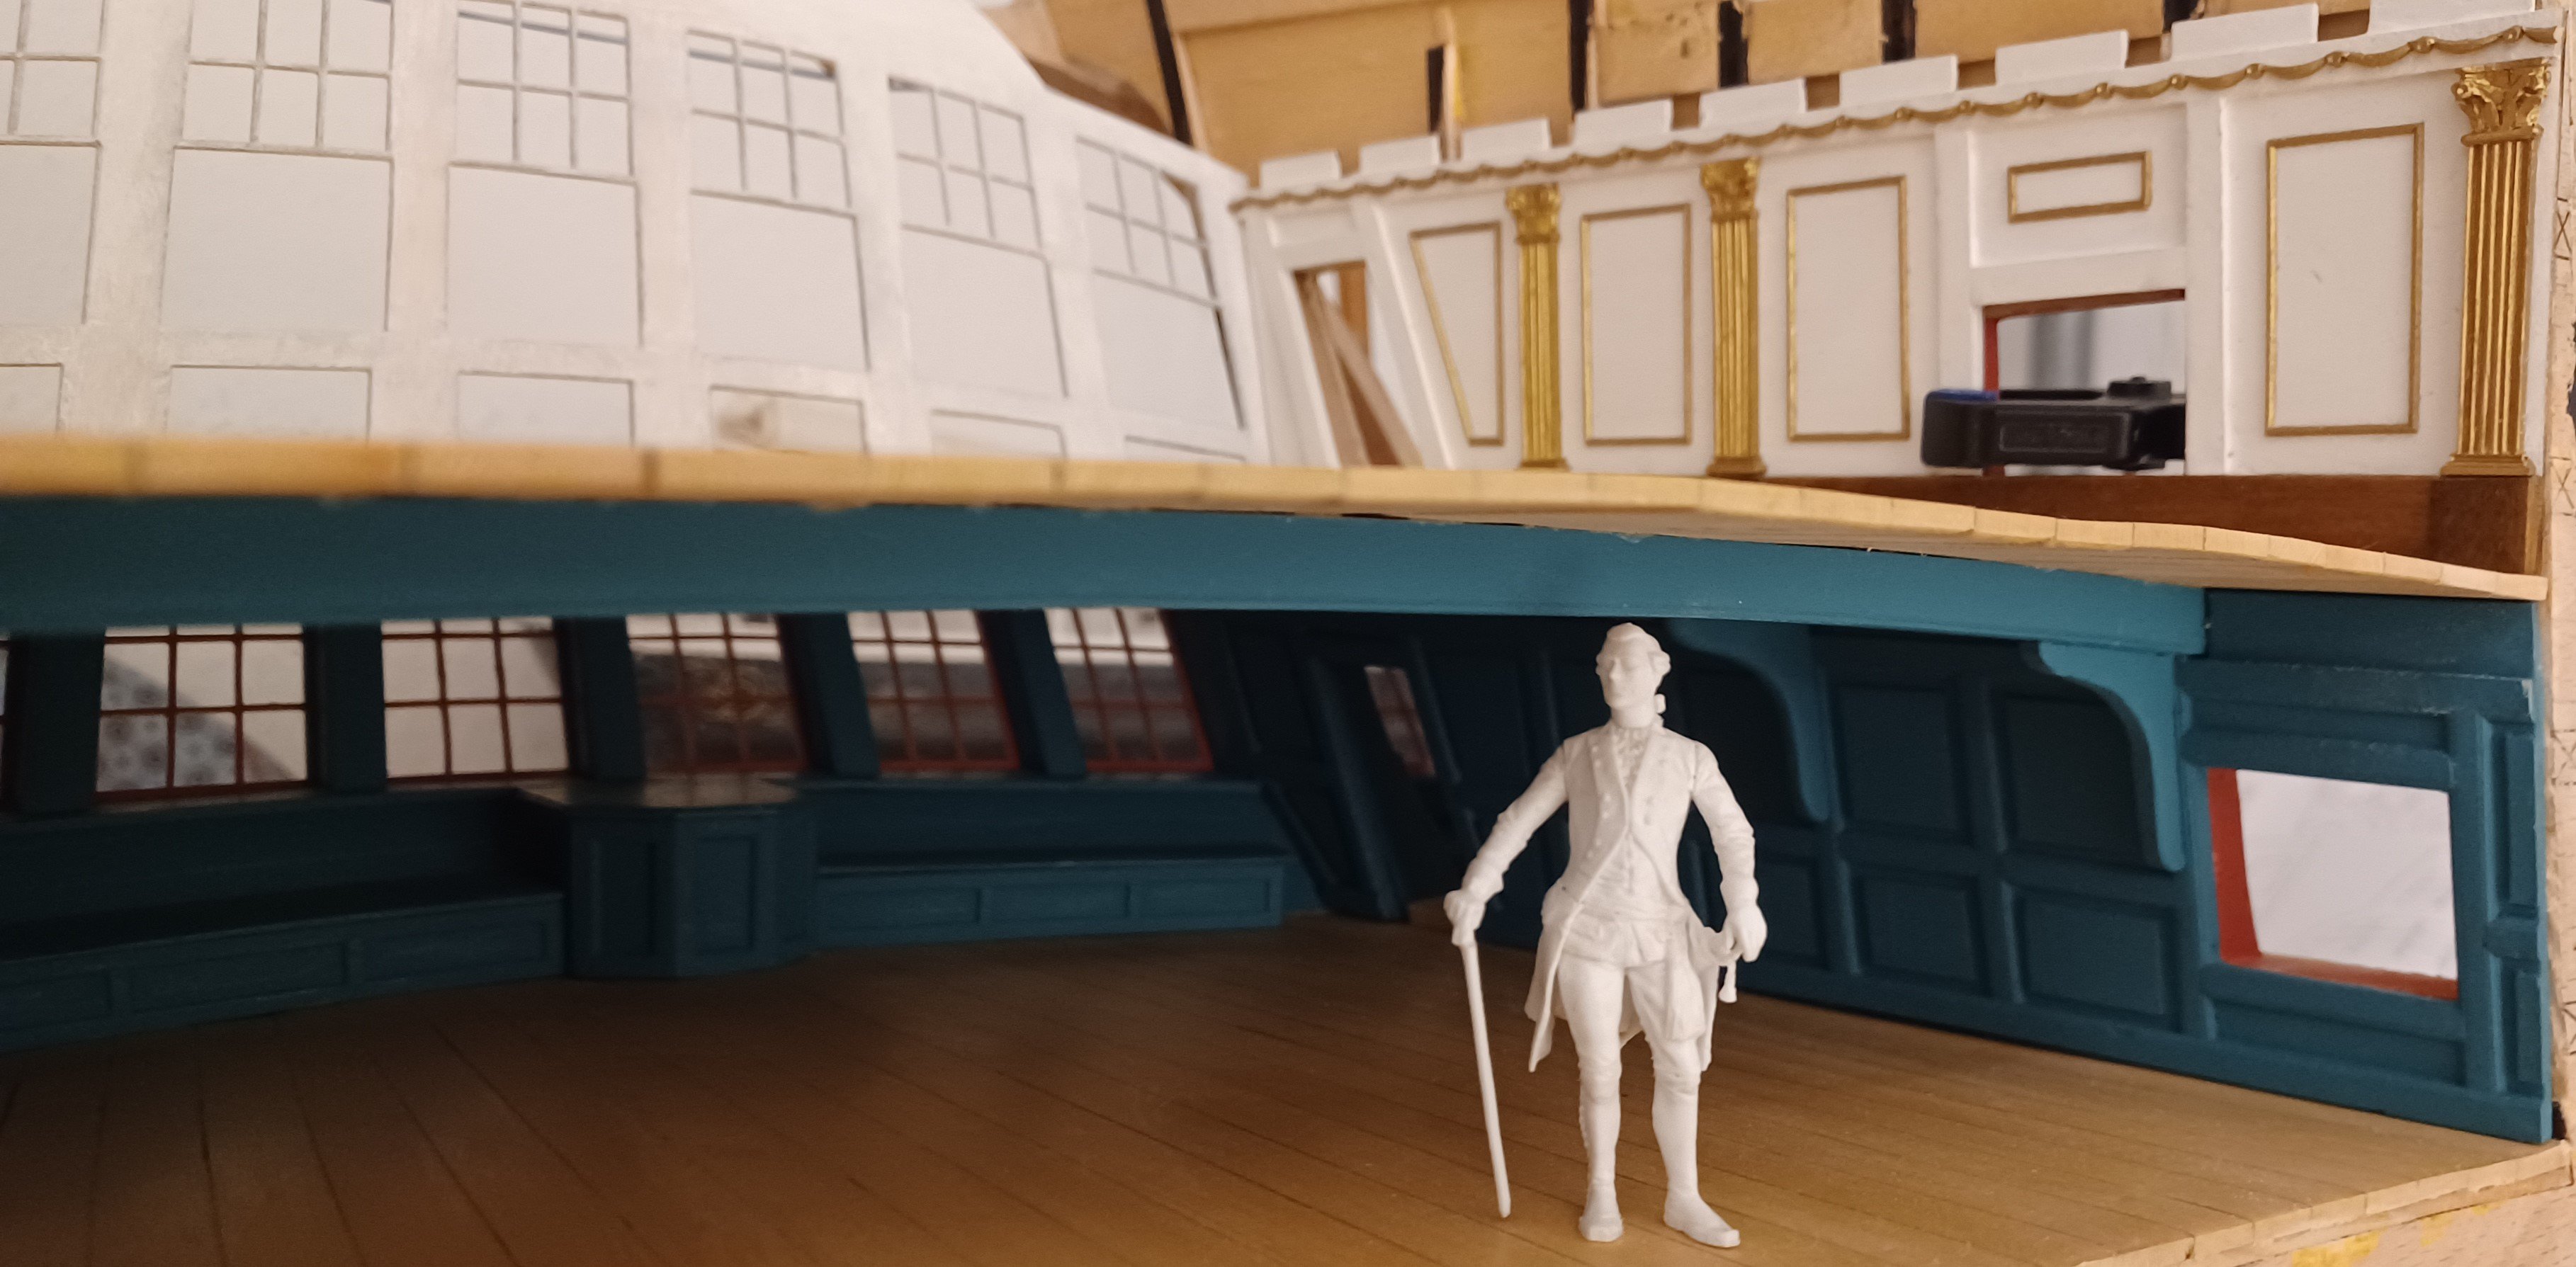
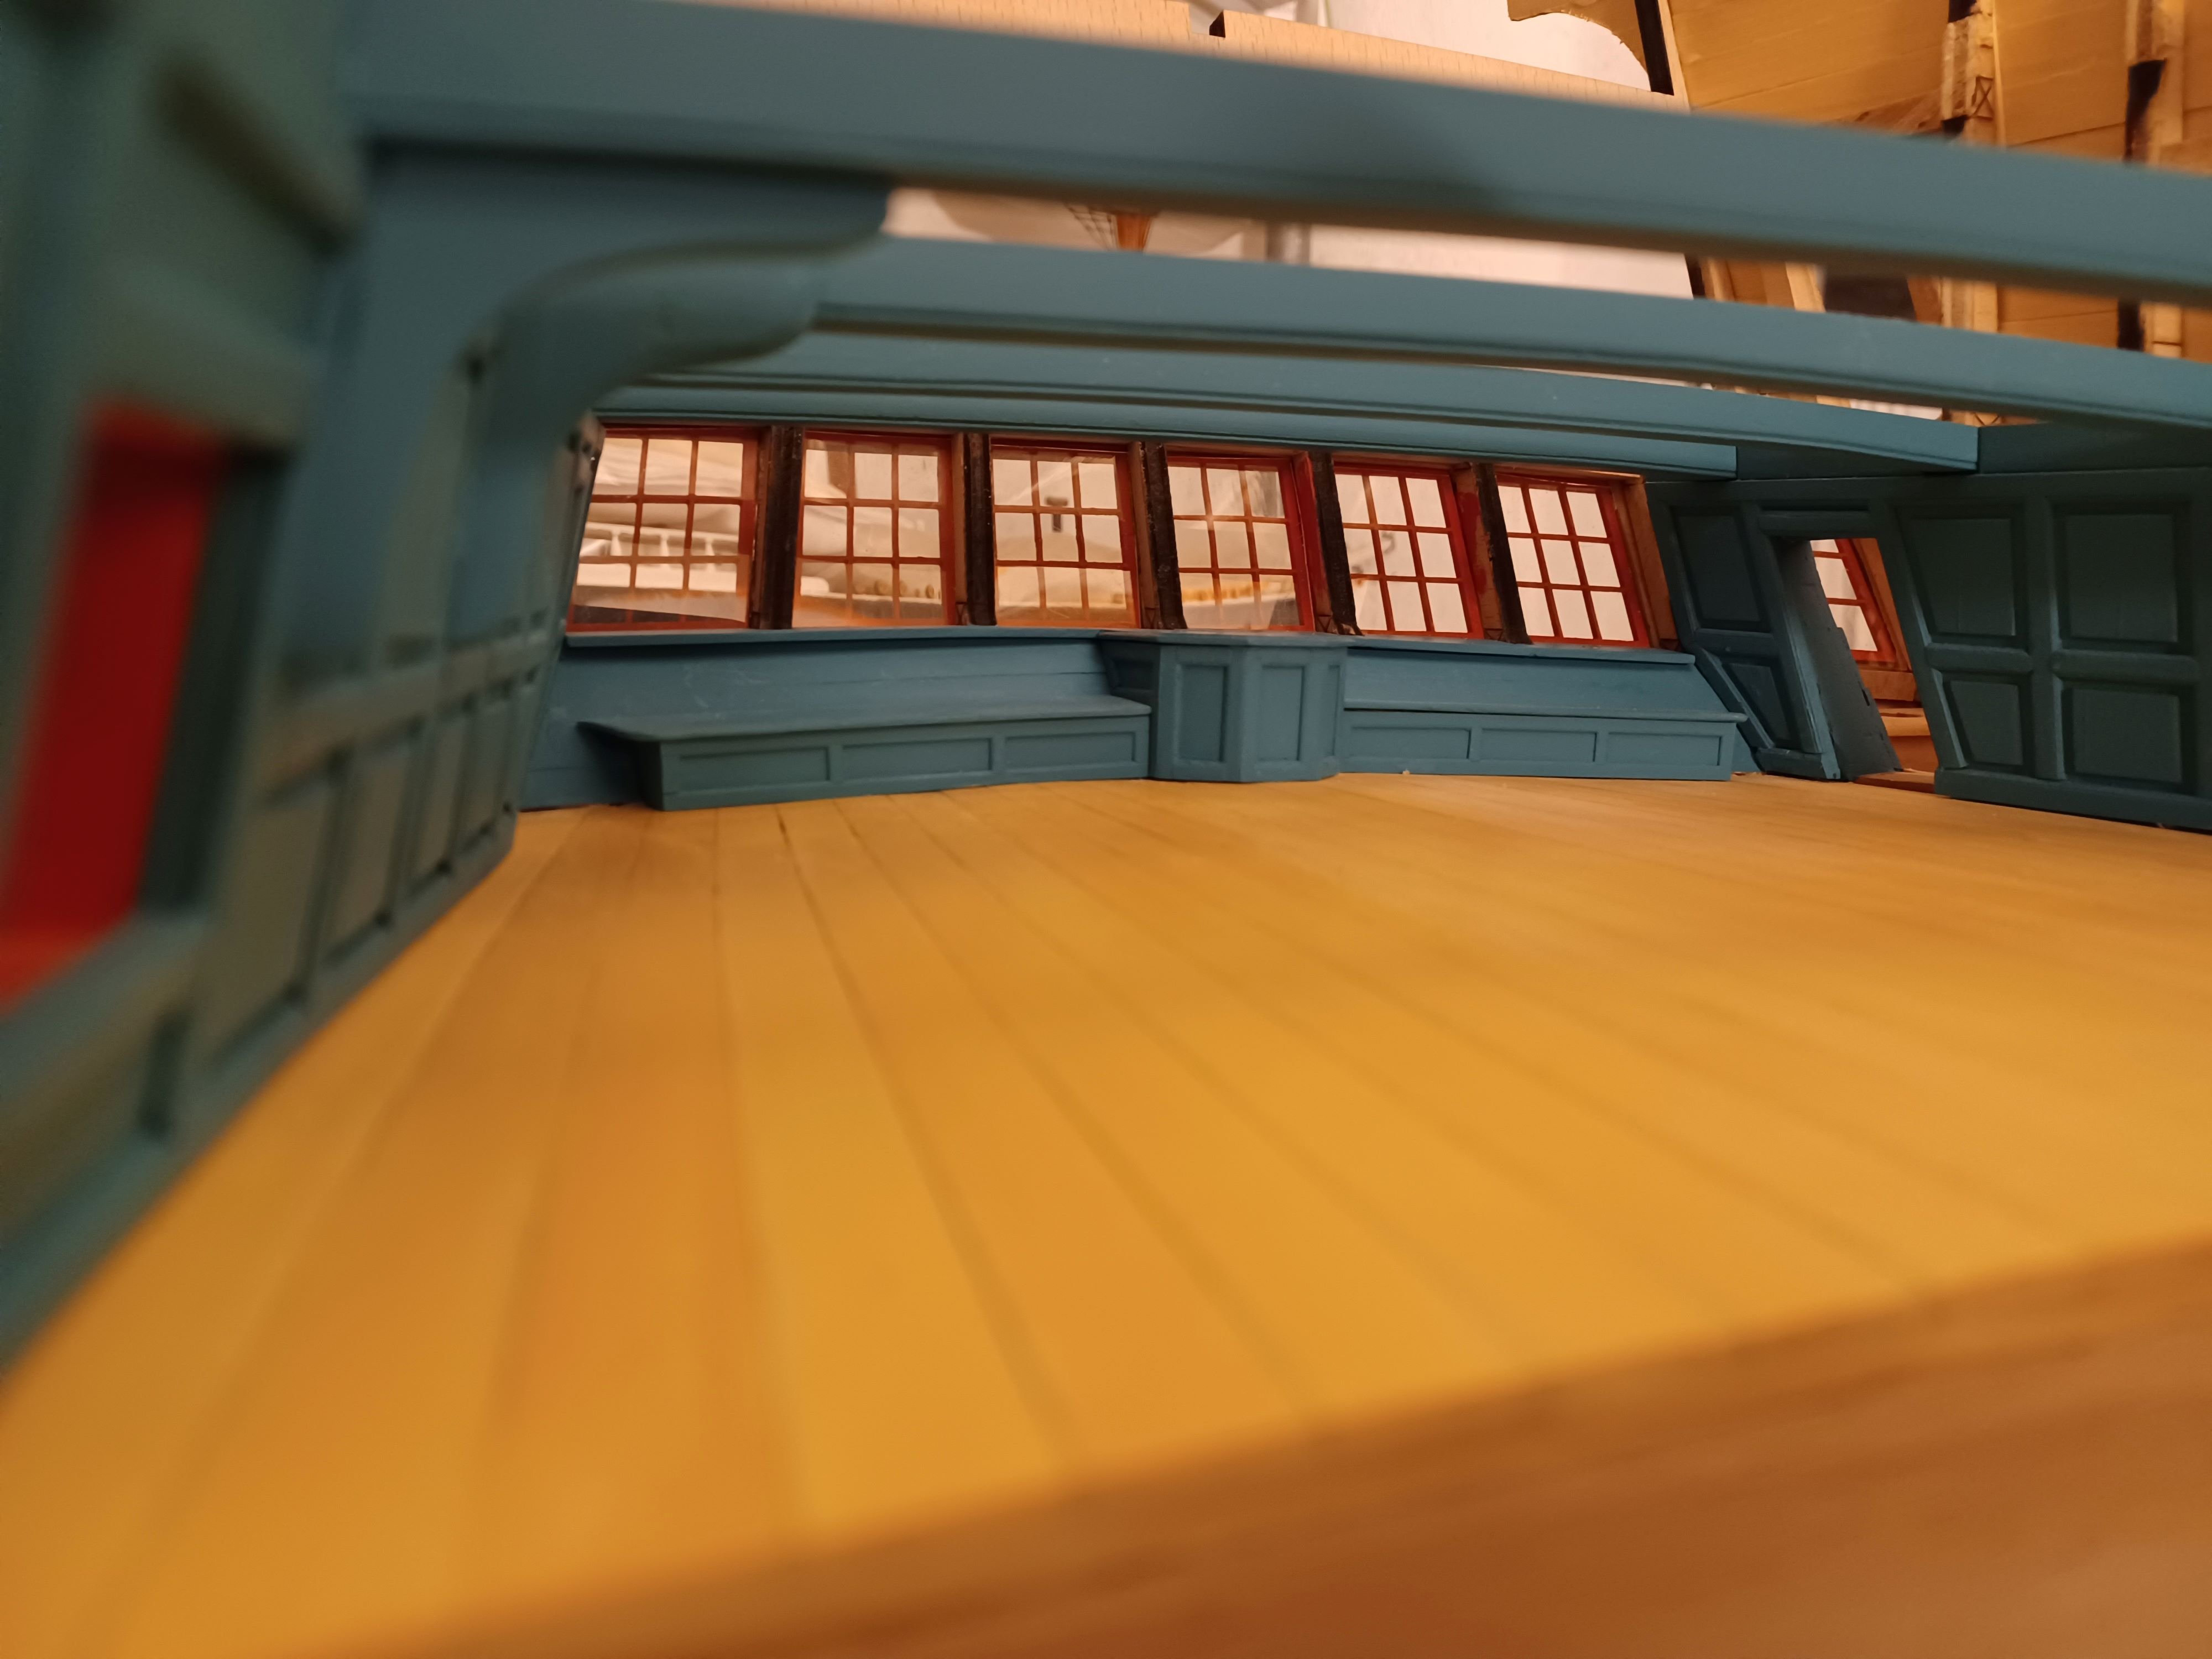
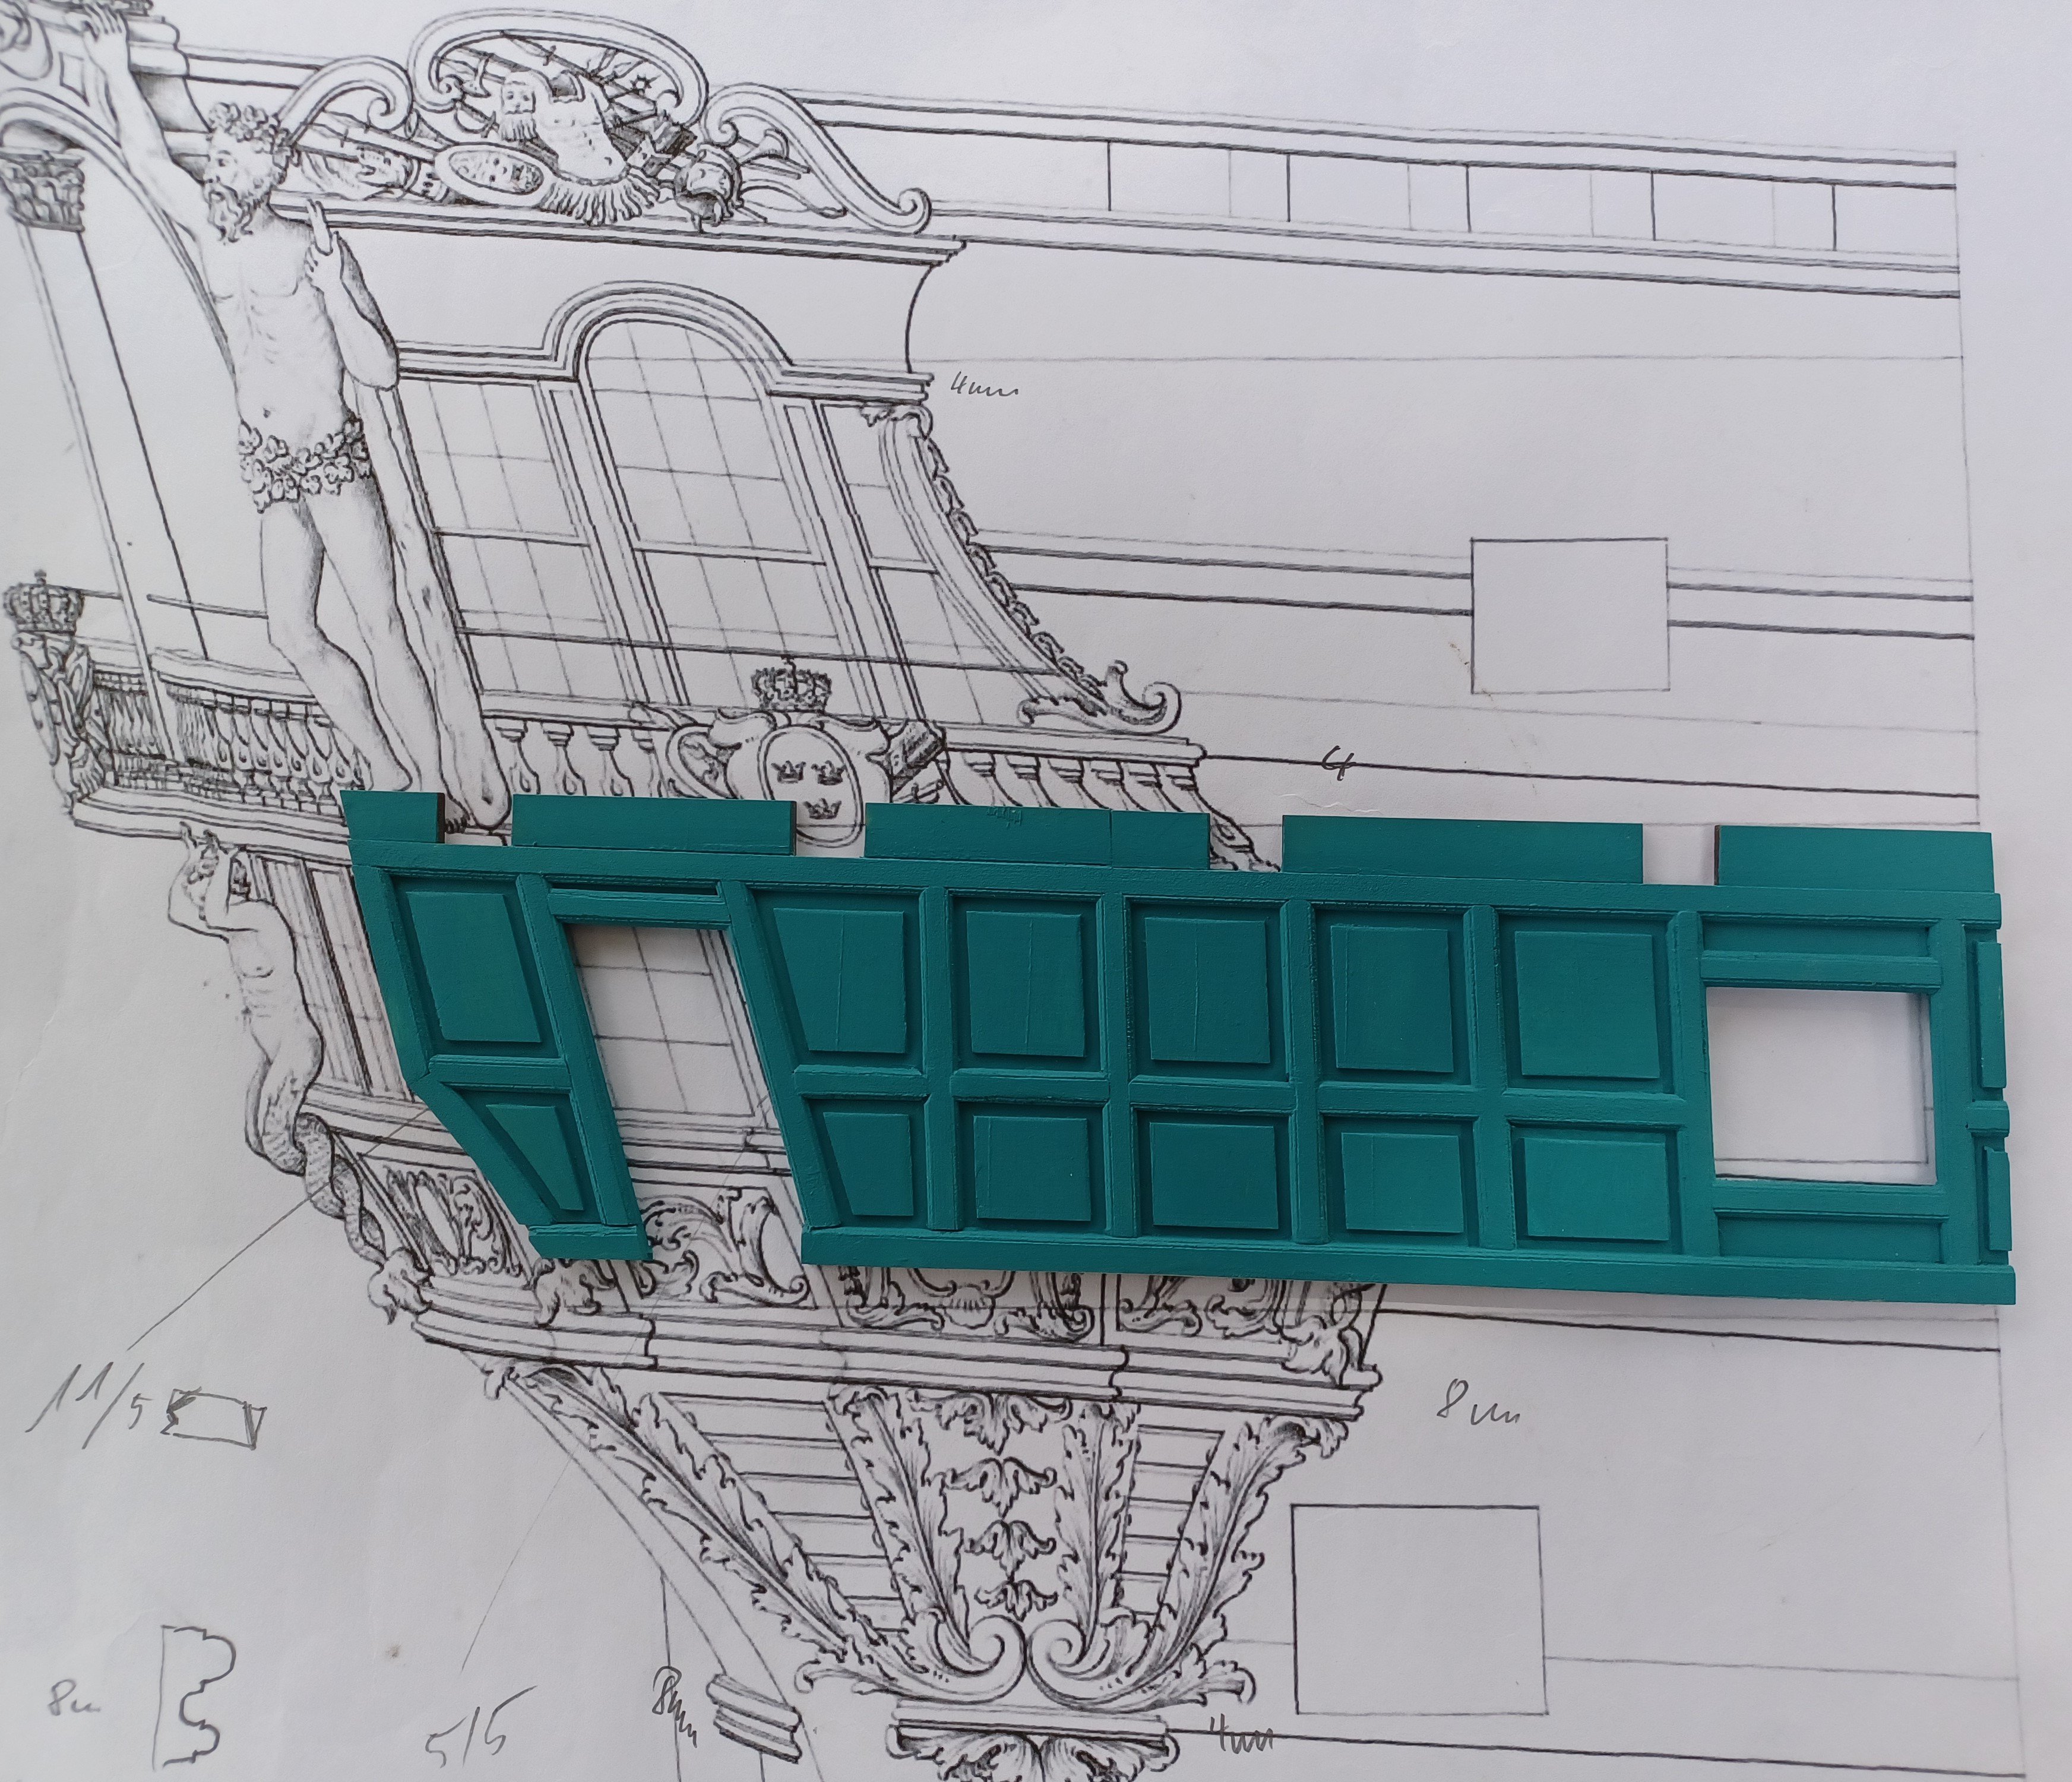
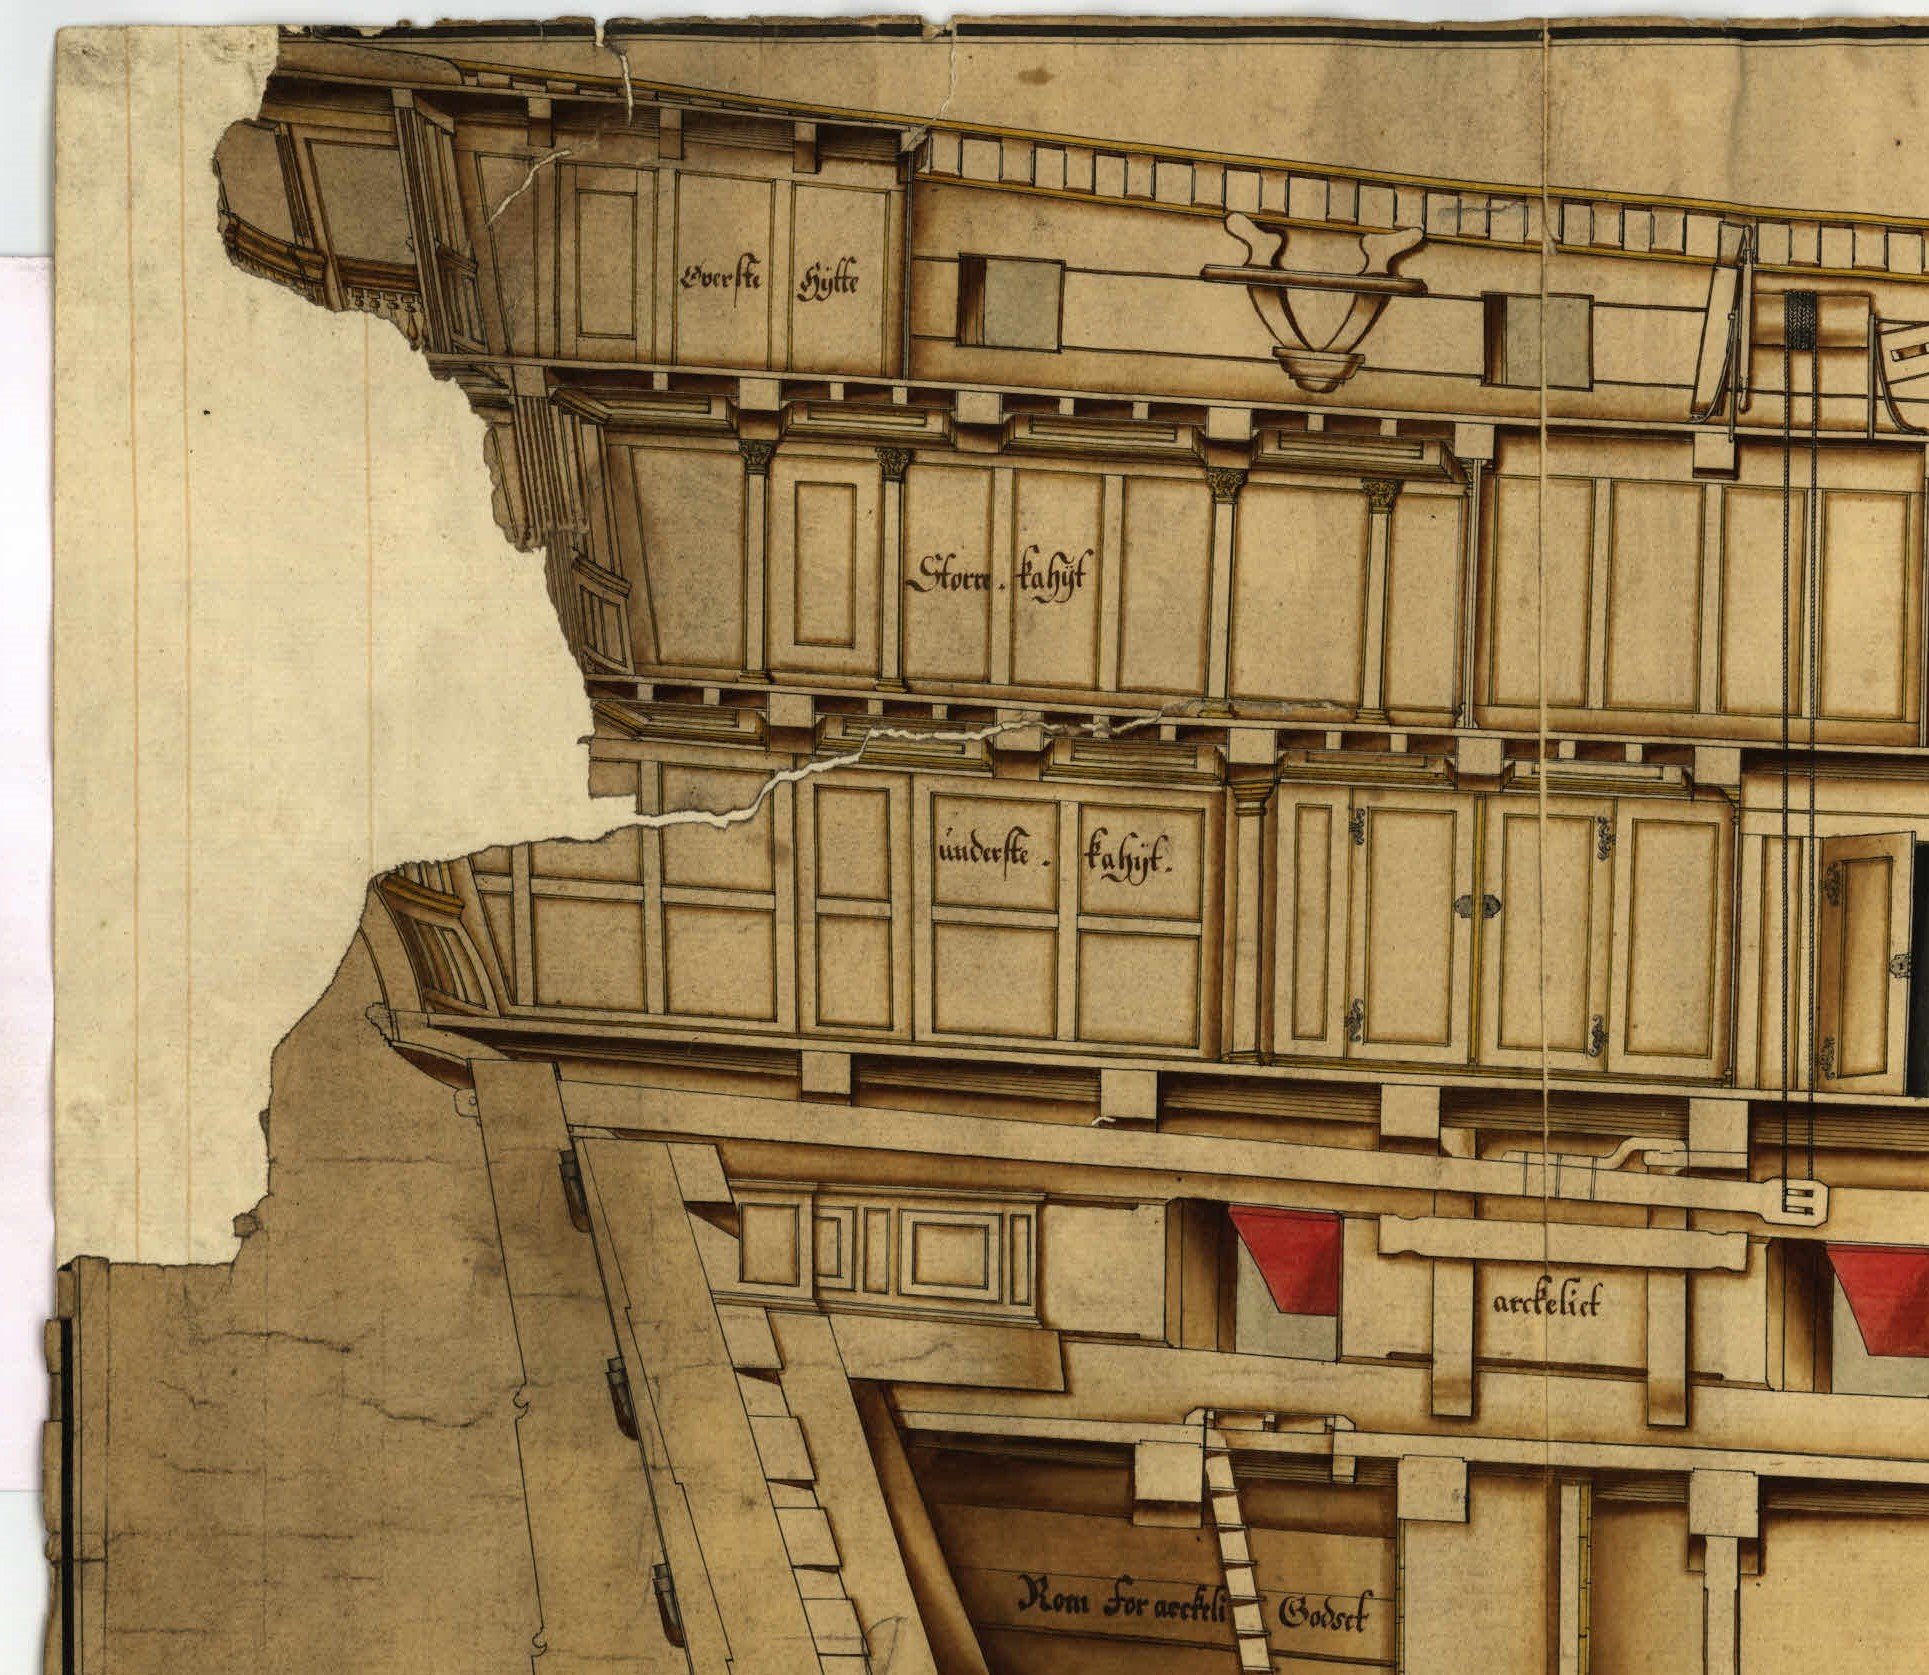
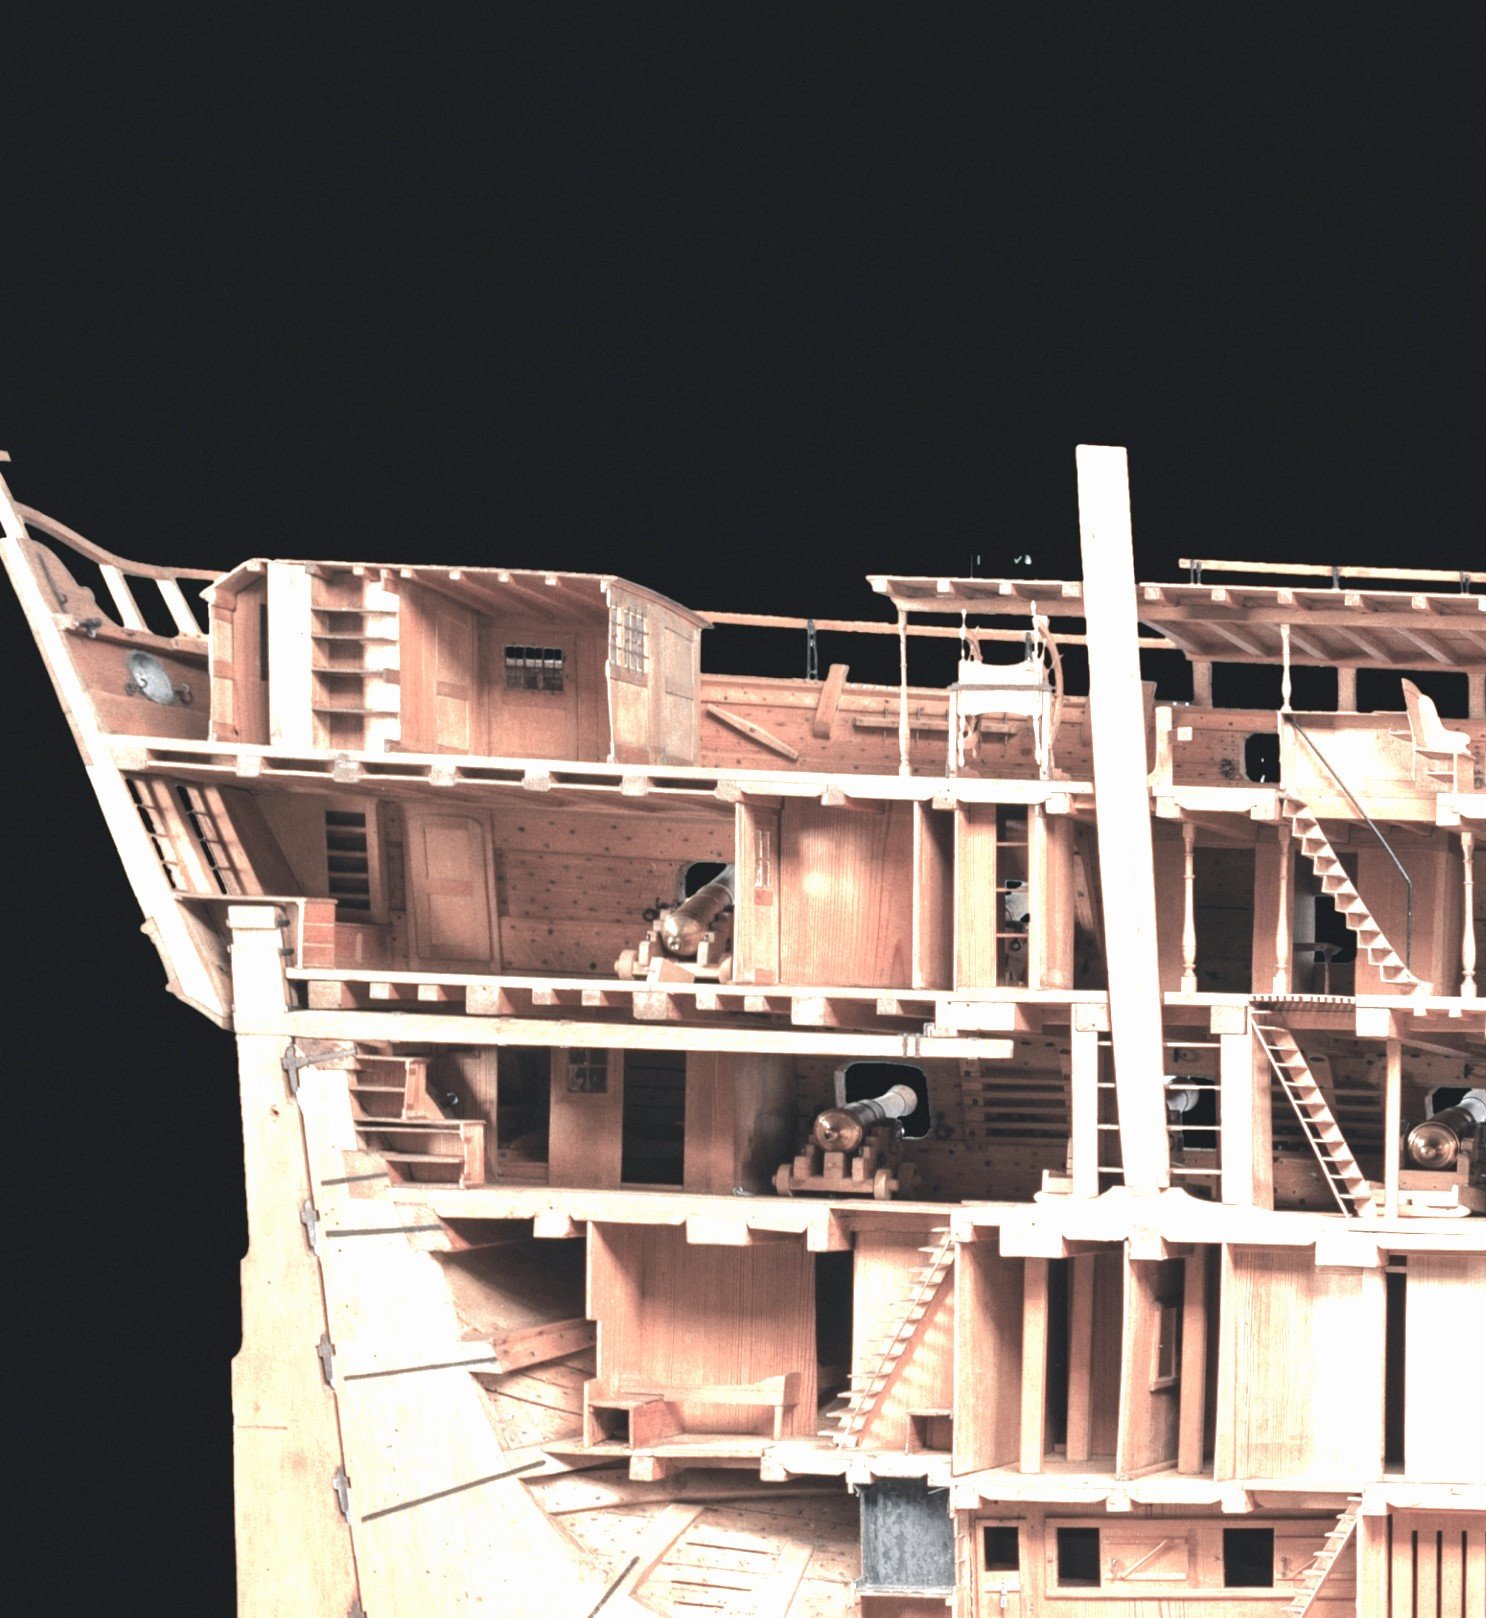
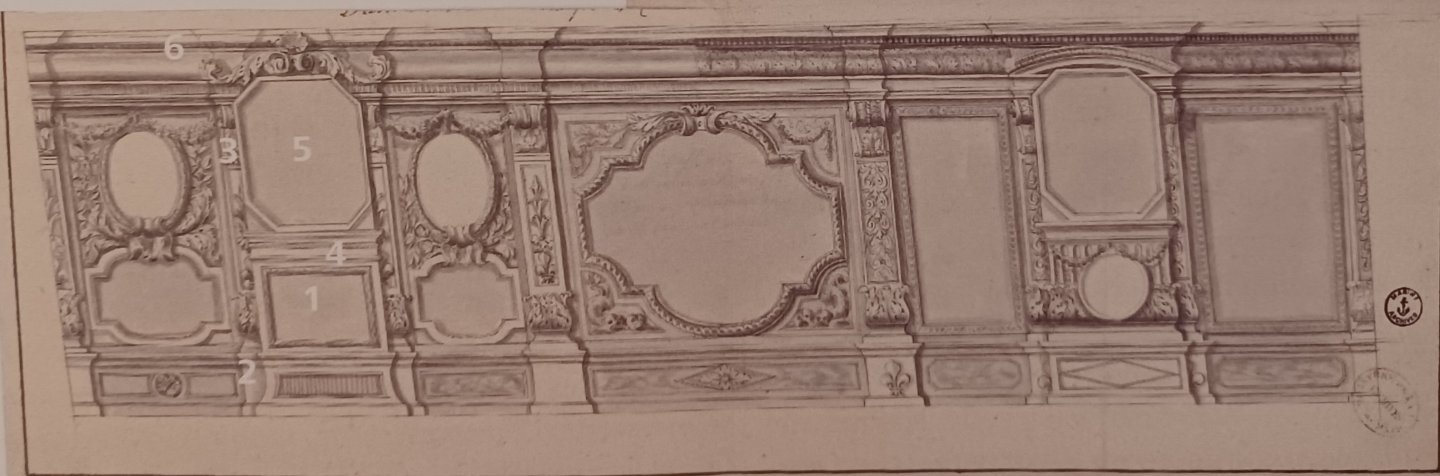
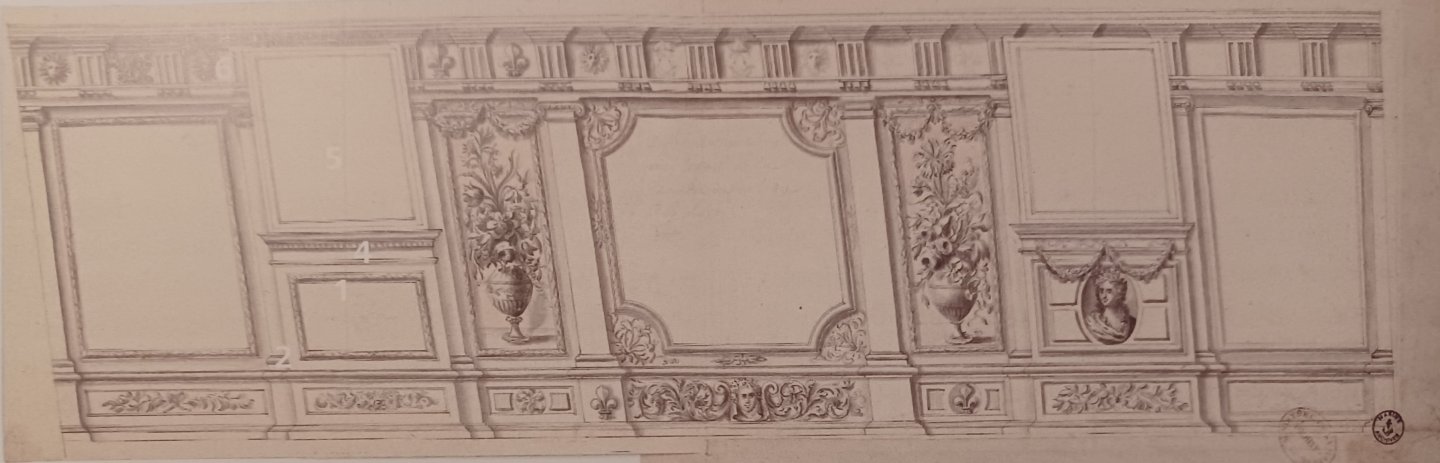
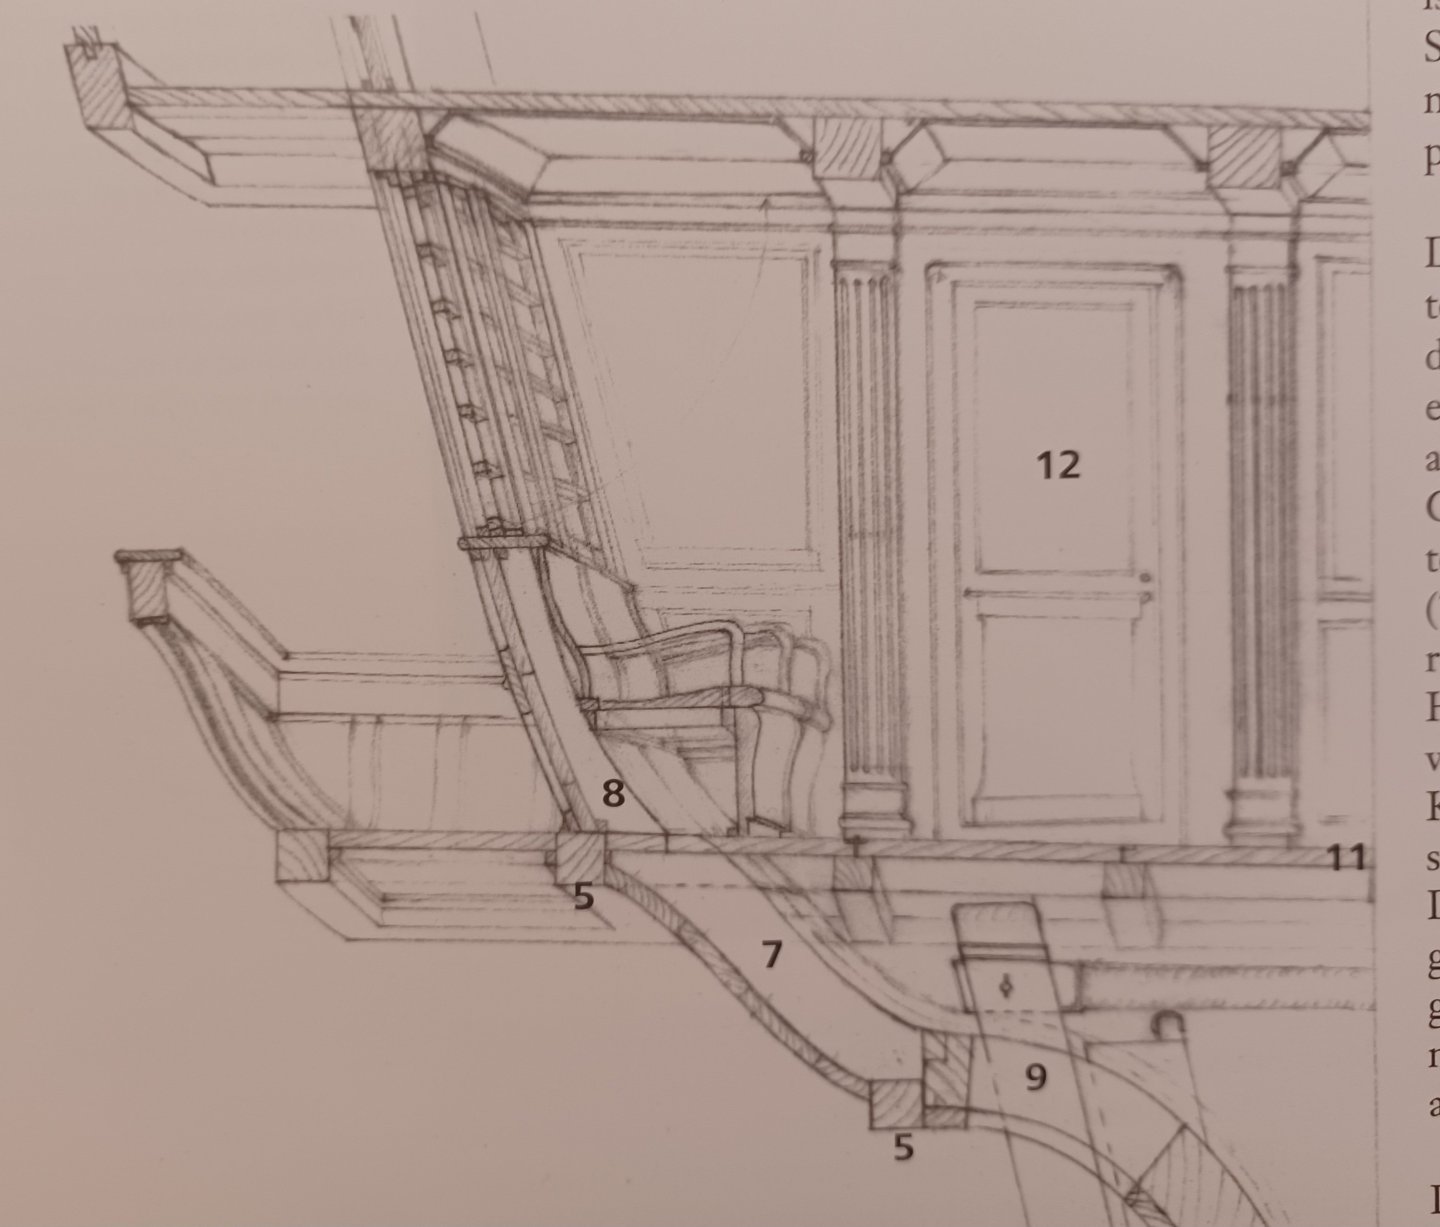
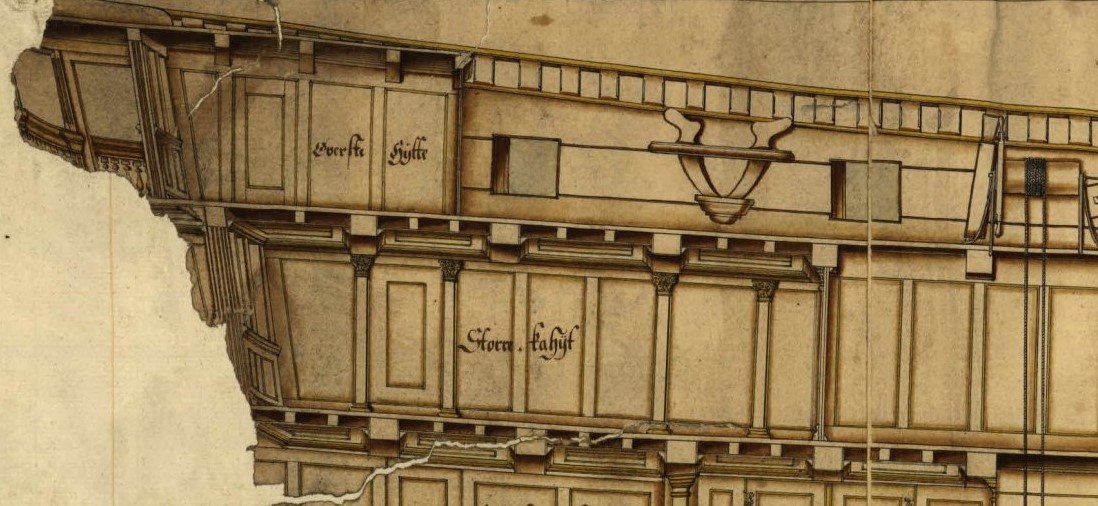
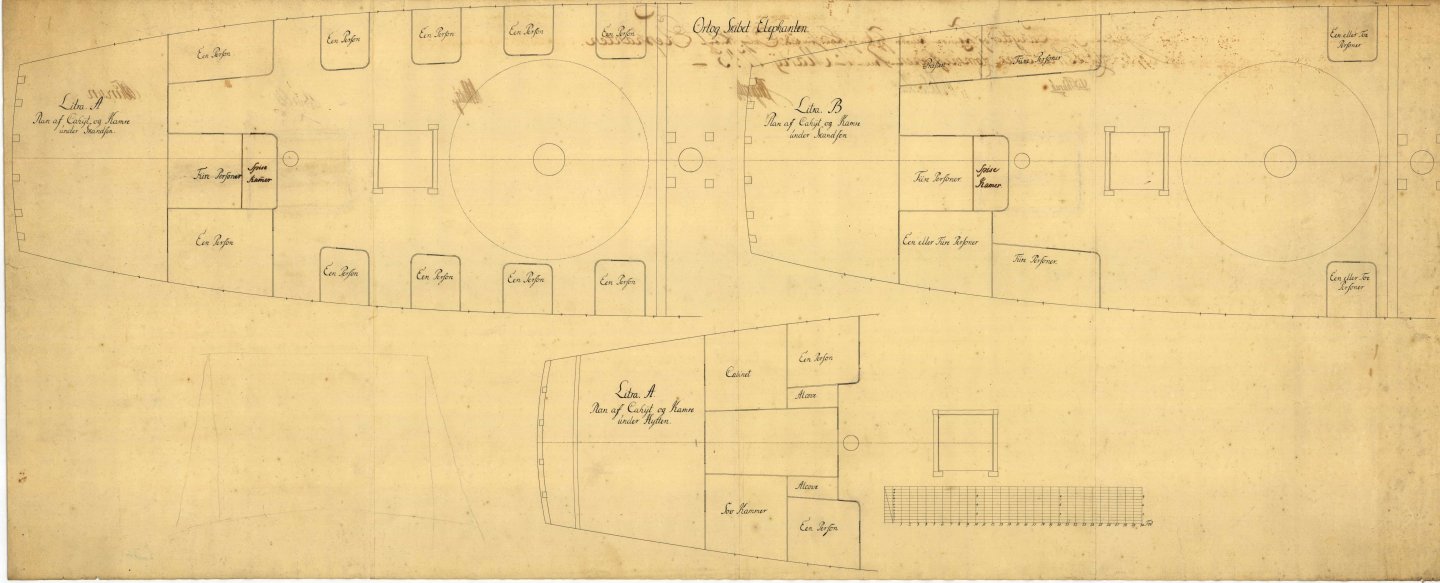
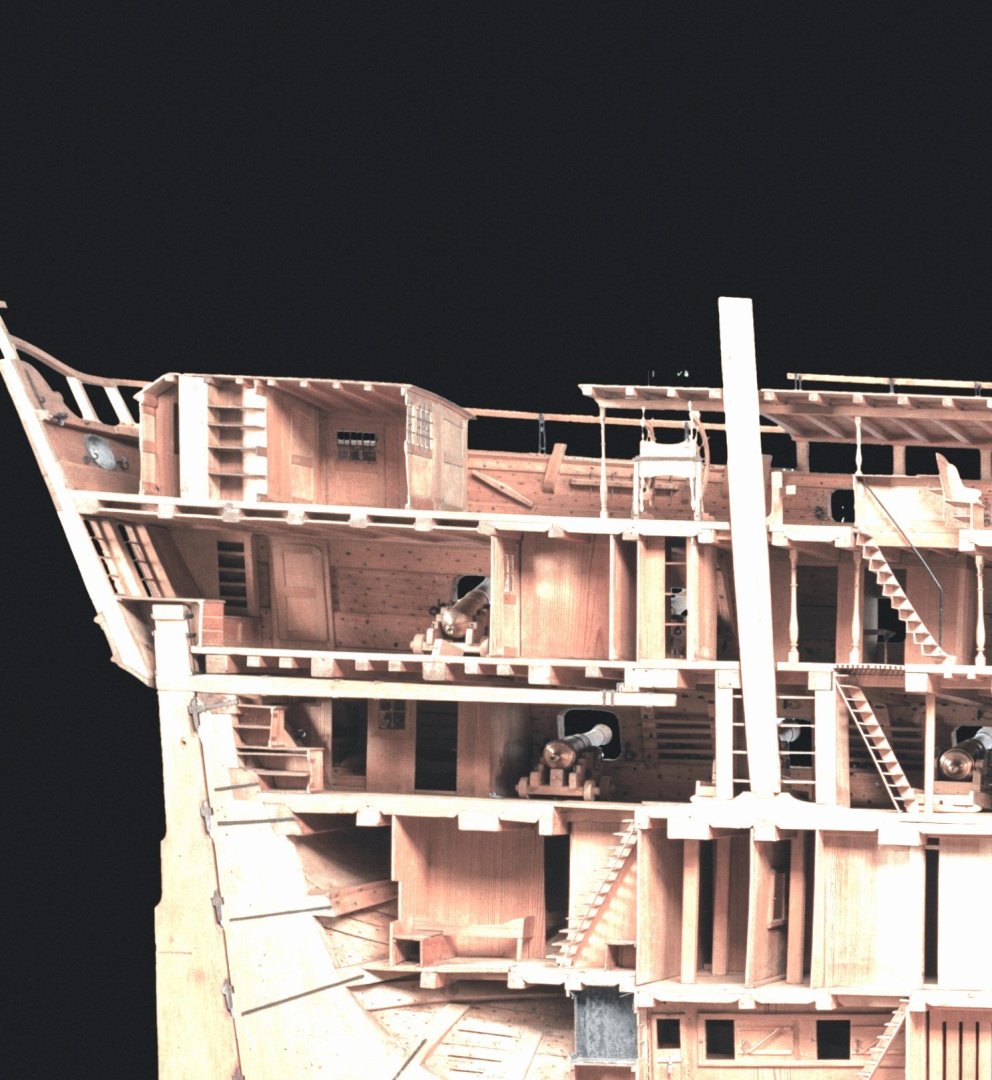
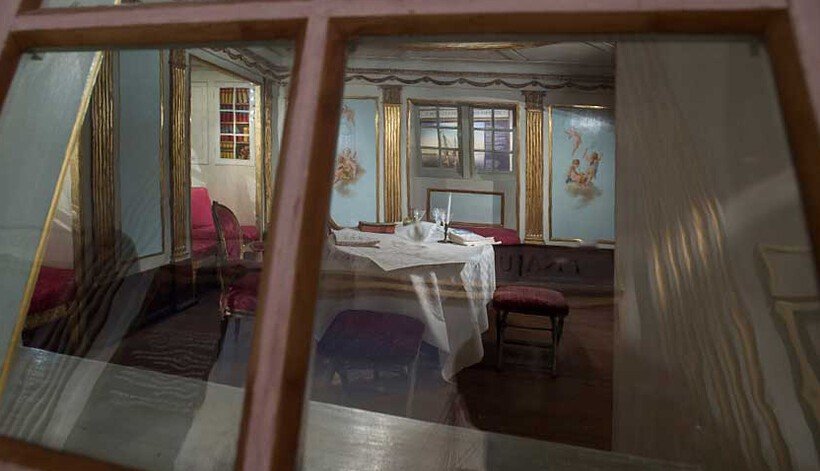
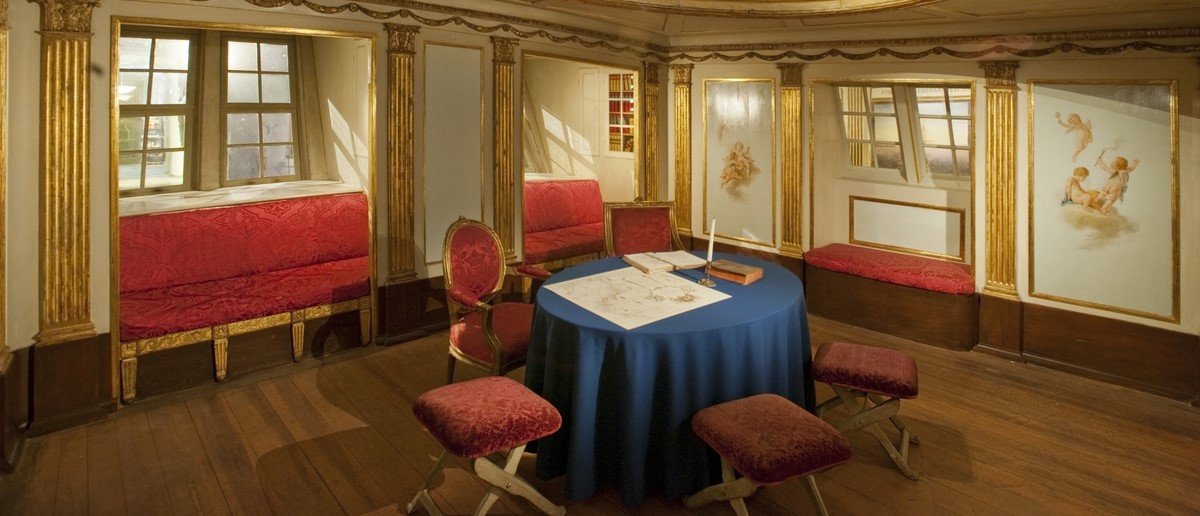
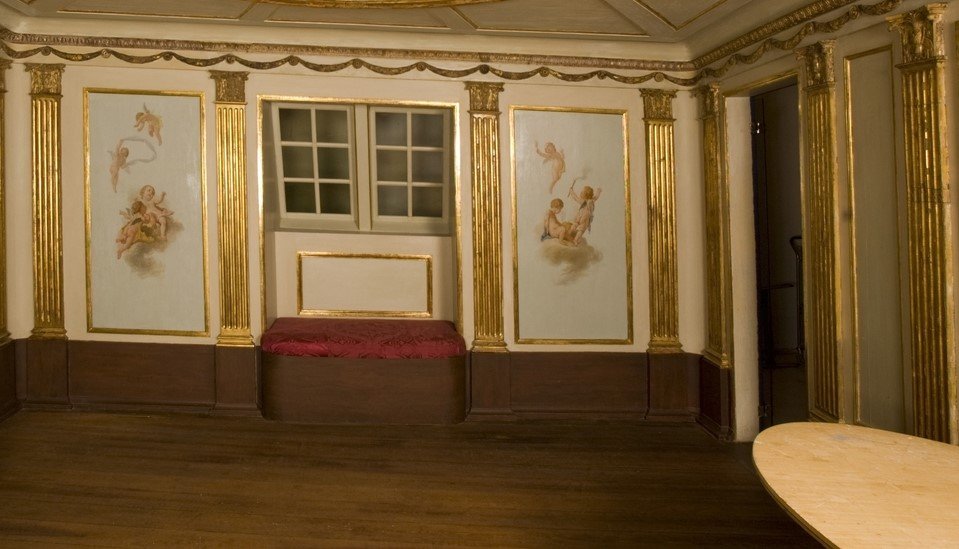
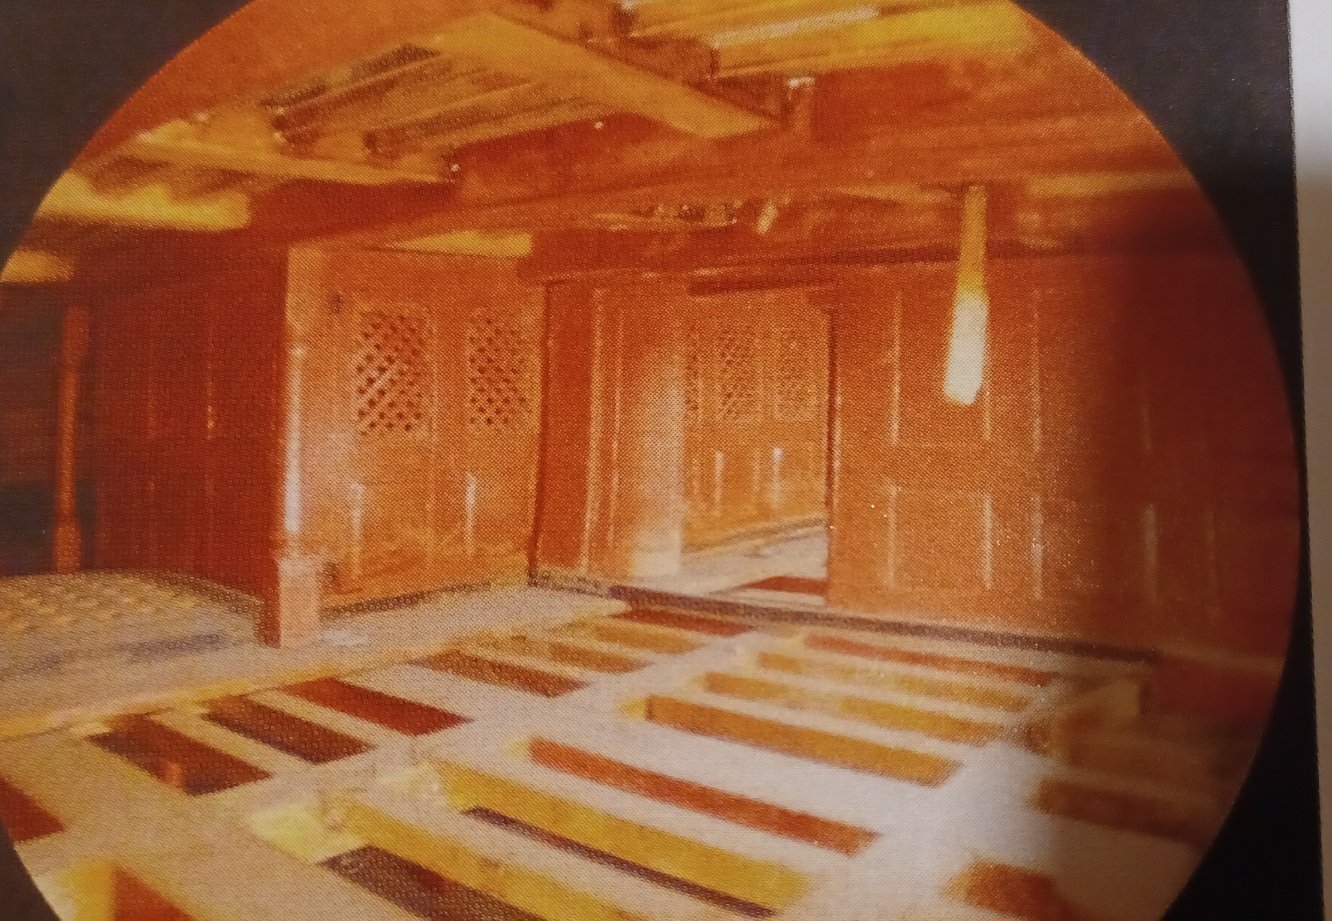
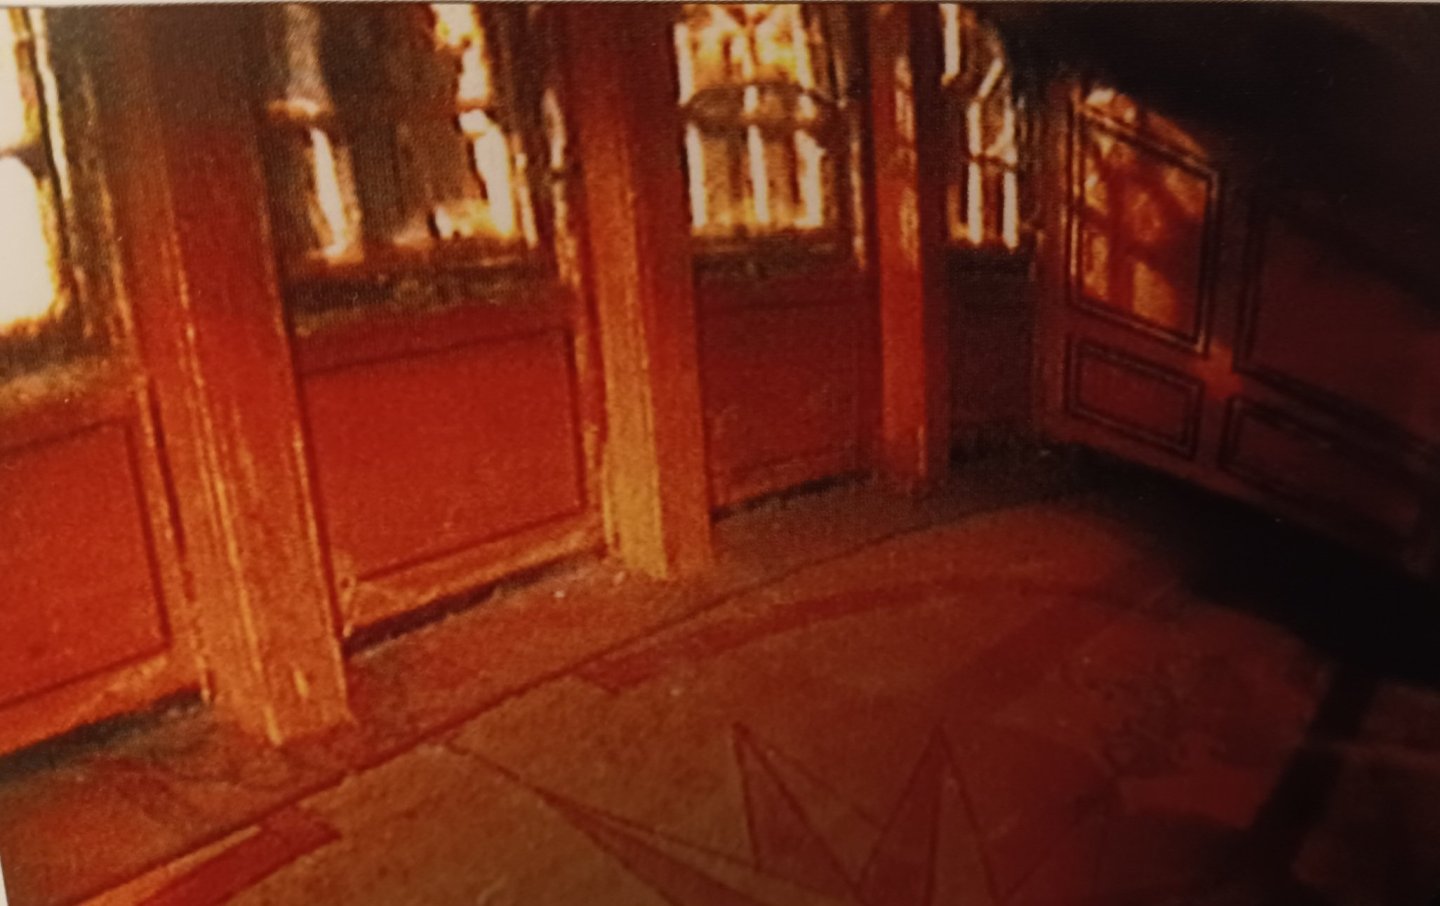
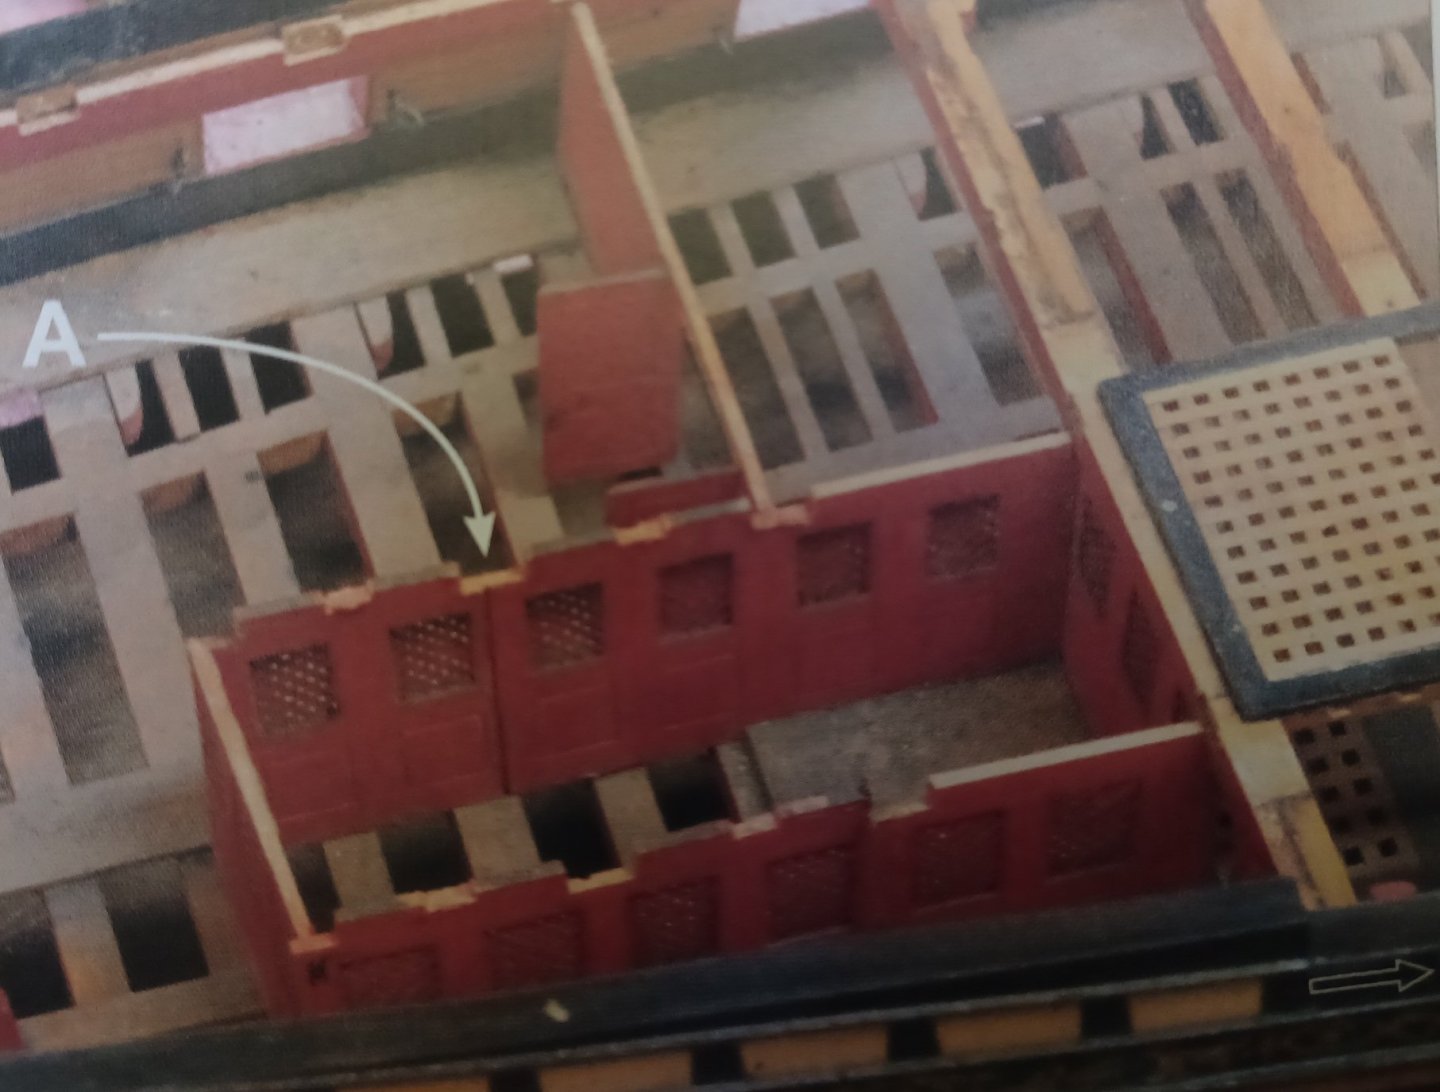
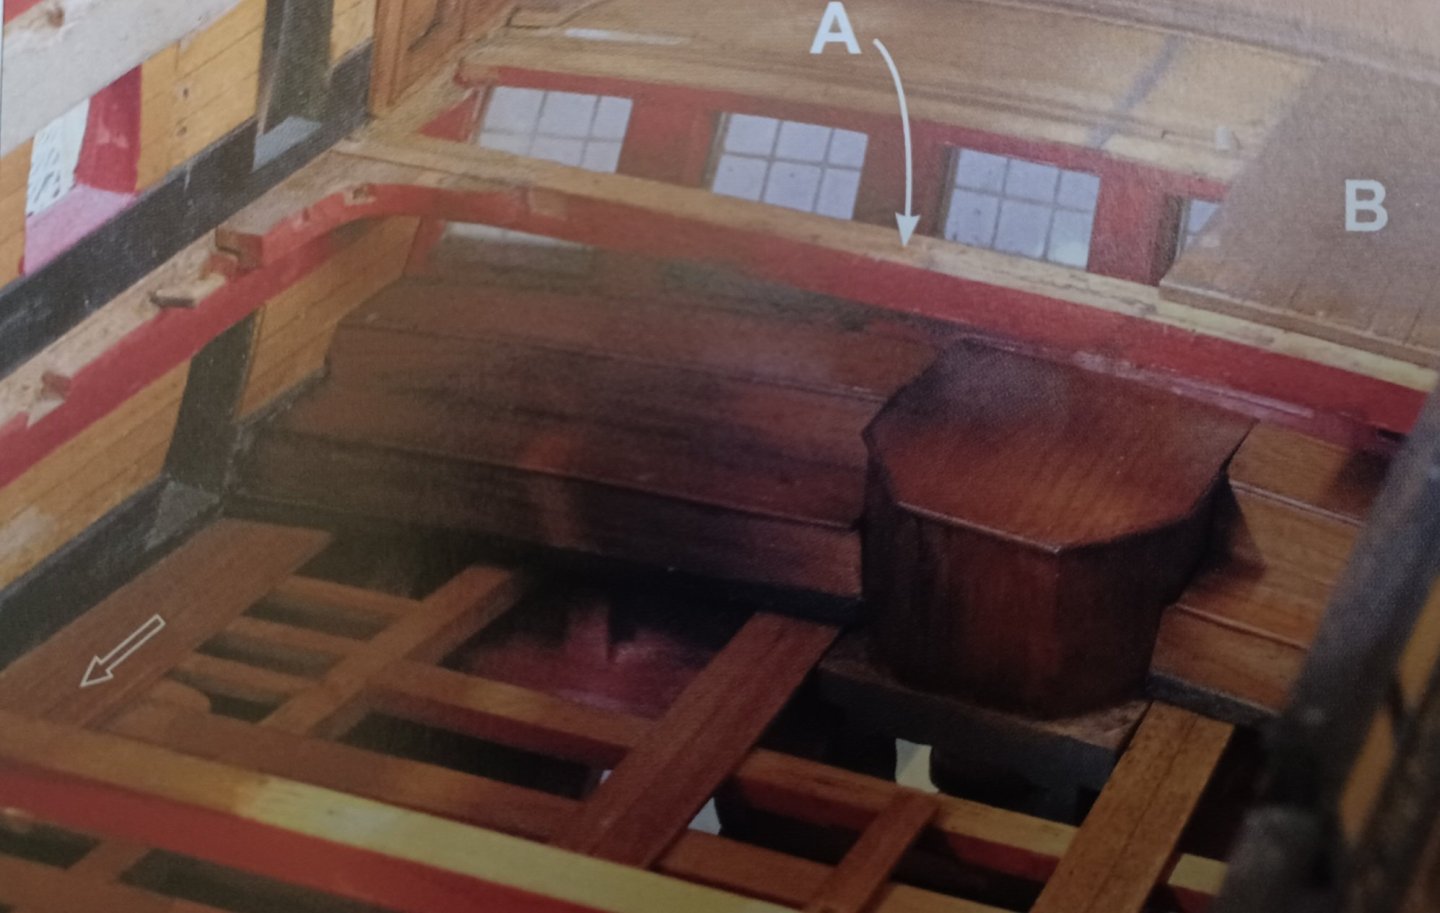
Hello everyone, and thank you for your interest and comments. Not much has happened since my last post, but I have decided on a color to be used for the paneling of the “underste Kajyt”. Siggi had suggested a turquoise color, which is common for the rococo-style. In addition to all sorts of other suggestions such as grey, natural or red, I somehow stuck with it. Not because it was historically vouched for my model, but because it is something different from the usual red and white, and spreads a Northern European-Scandinavian cool atmosphere, which I like for my model, it is not English, so red would have been a good choice. It may still be a little intense, but I'll leave it that way for now: In the Danish National Archives, under the archive number A 1175d, there is a layout of the stern cabins of the Orlog ship ELEPHANTEN (same size, same designer and same year of construction as the TRE KRONER) and under the archive number A 975 an elaborately drawn longitudinal section of a Danish ship oft he line, which also shows the paneling of the “underste Kajyt” and the “Storre Kajyt” (great cabin). The “Storre Kajyt” has fluted flat columns with Corinthian capitals. I am basing my model on both drawings, i.e. there will be no partitions in the areas of my stern section and the paneling in the upper cabin will be correspondingly more elaborate. Further clues are provided by a contemporary cutaway model from the Krigsmuseet, where the rudder trunk, the stern bench and a bookshelf are beautifully depicted, and the preserved interior of the Swedish royal yacht AMPHION in the Sjohistoriska Museet in Stockholm. It doesn't have to be quite so magnificent, but the columns and the paneling are comparable to the sectional drawing A 975 (see above) I visited and photographed the Amphion myself, it is extremely impressive. Best regards, Matthias


-
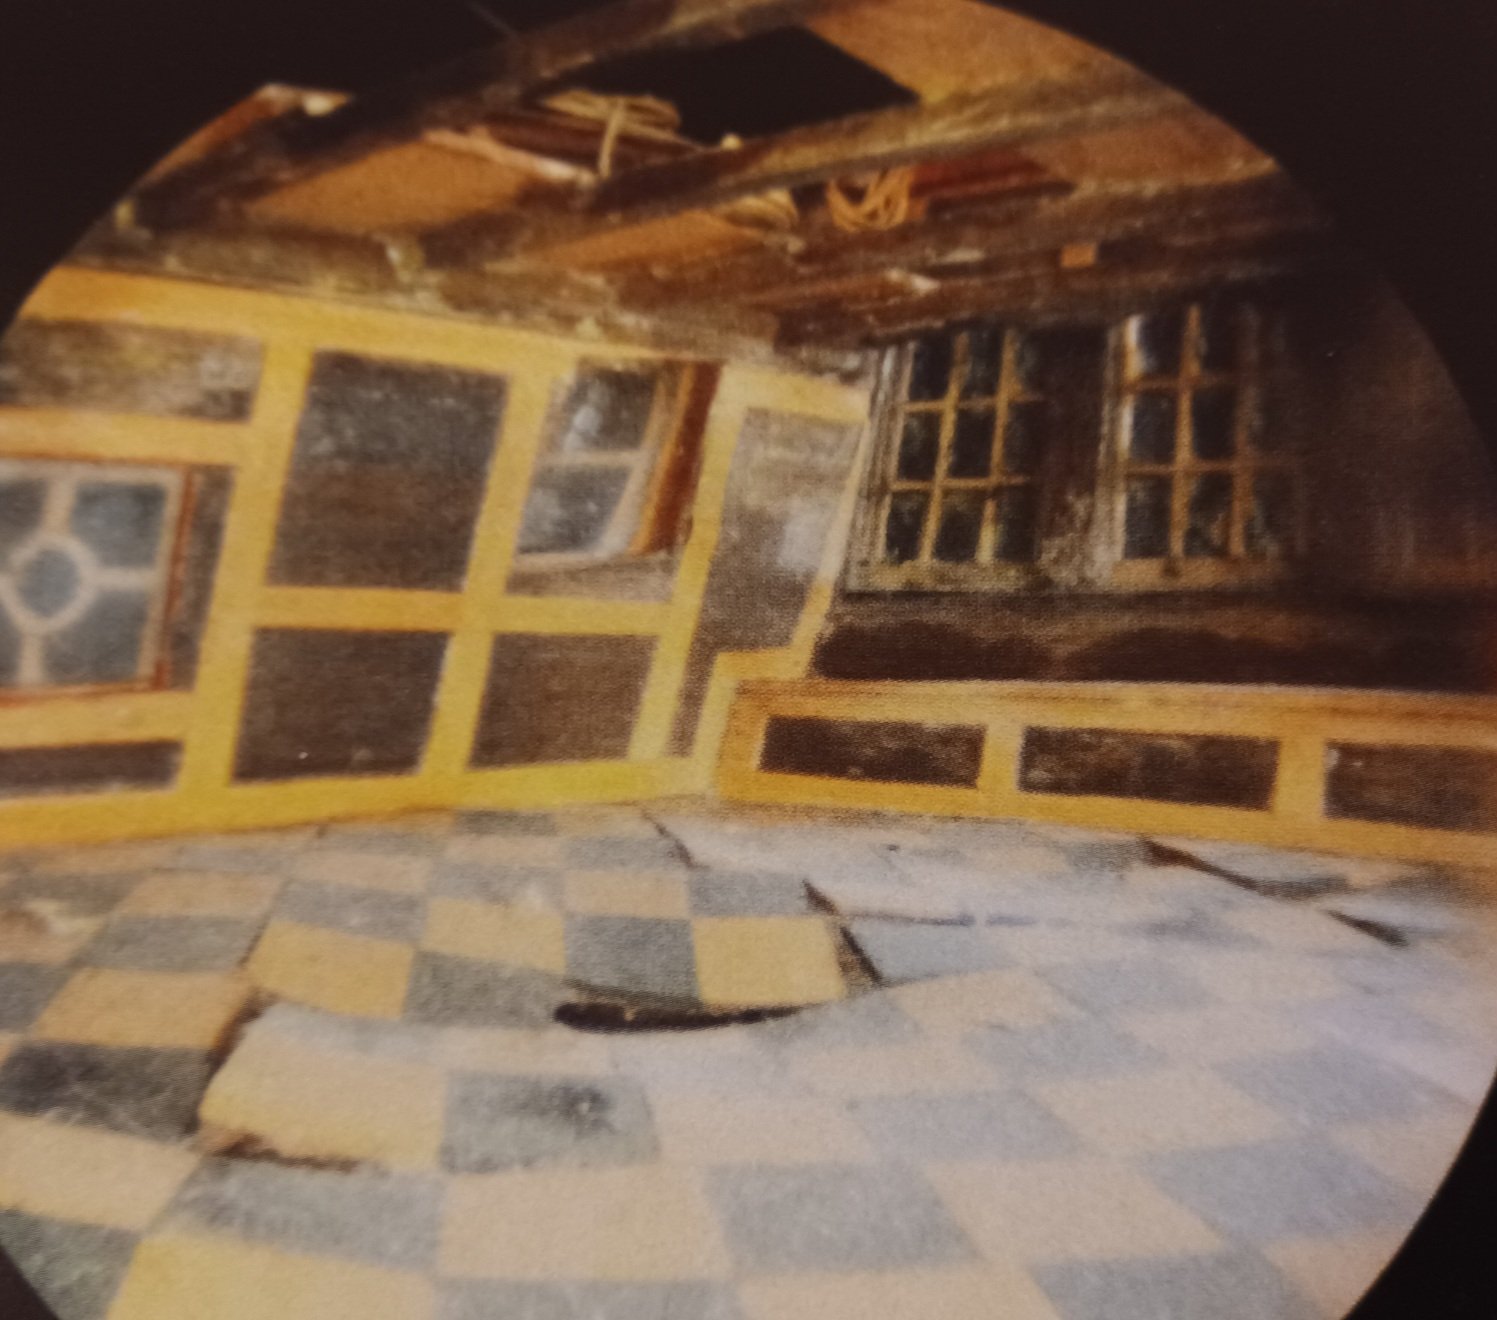
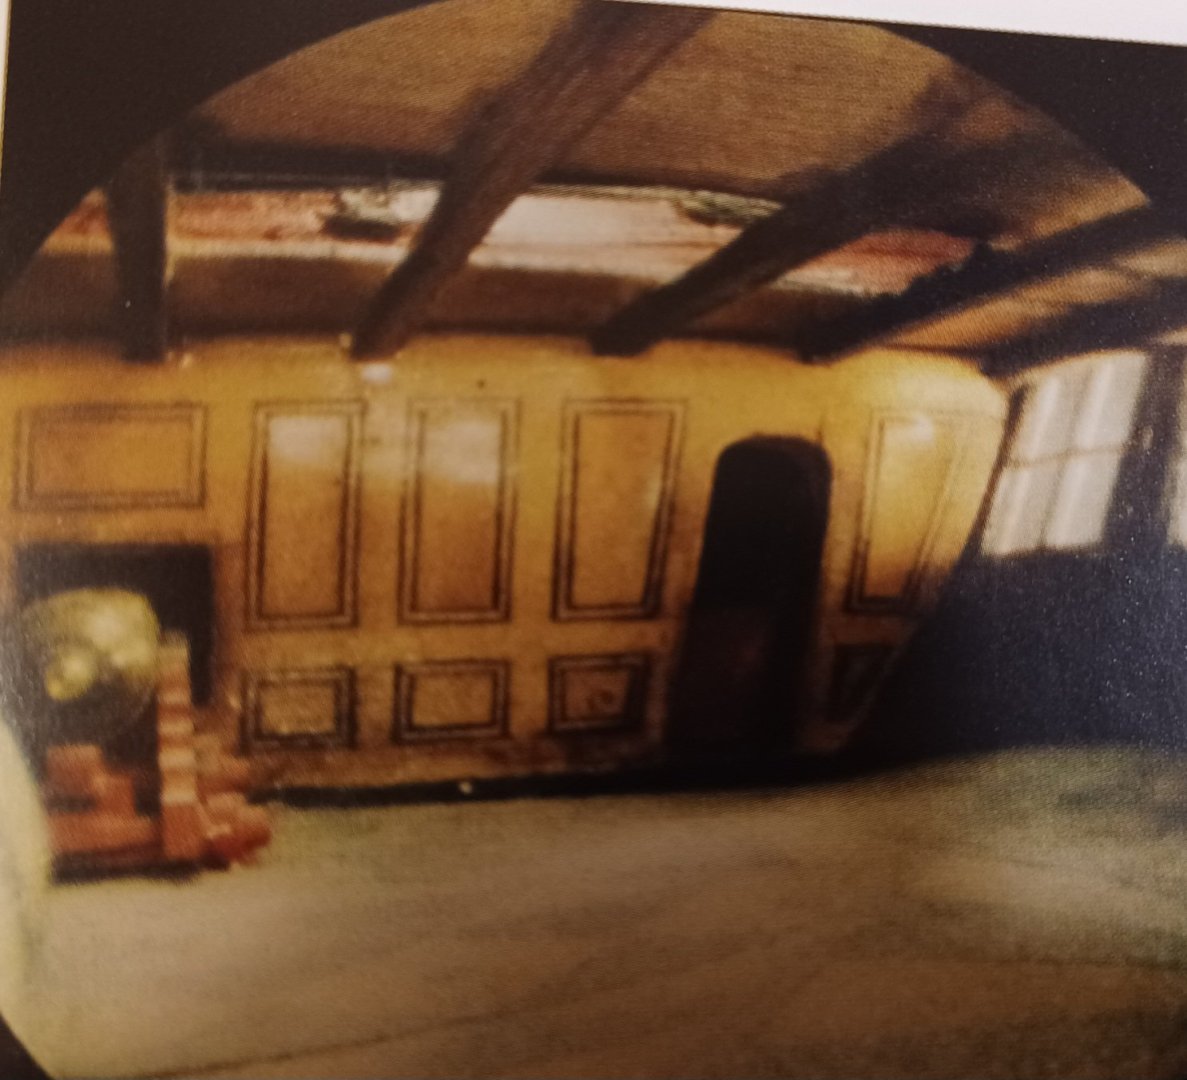
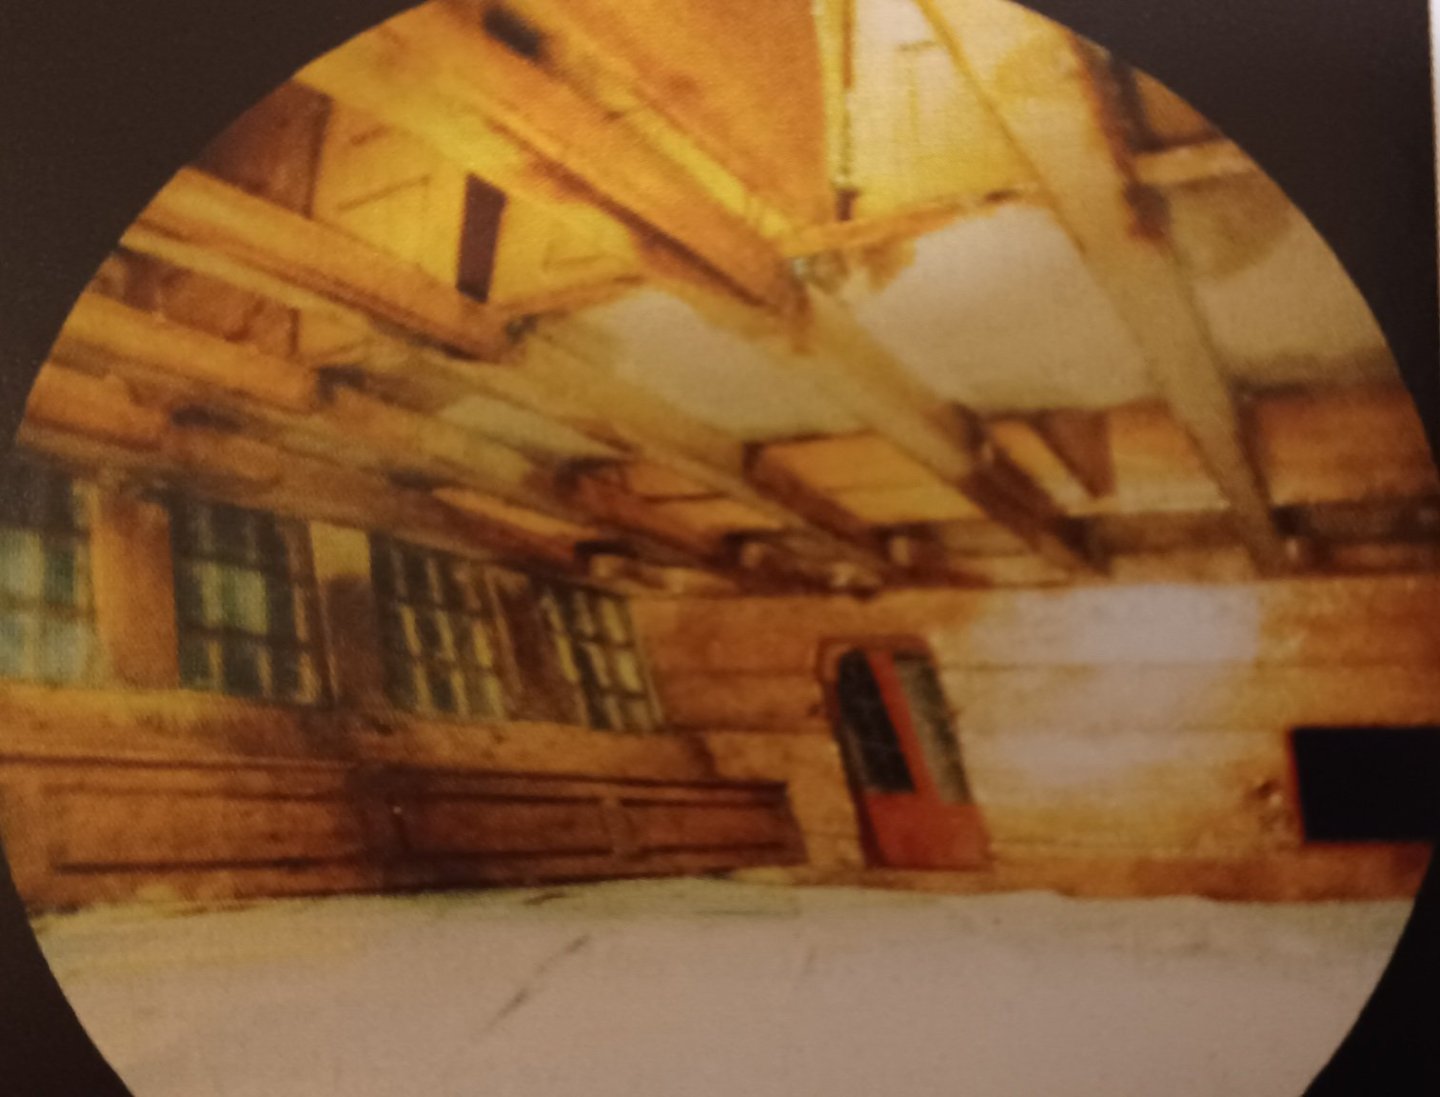
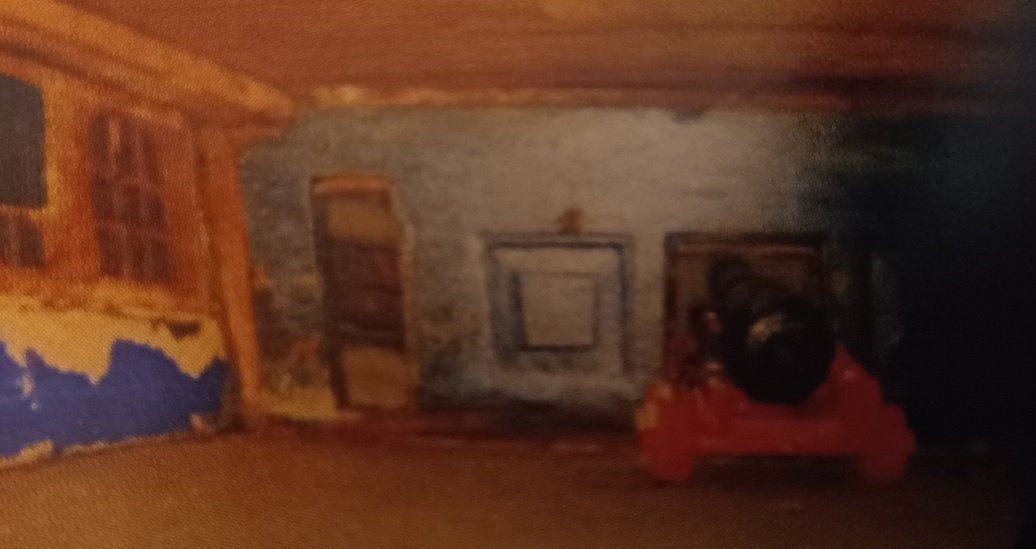
Hello everybody, At the moment I am planning how to colour the interior of the lower deck cabin. I've looked through all my picture books and picked out a selection of interior shots. There are all sorts of things: Left natural: Or bright blue: Or the panelling and rear gallery inside in black: But also red: The more detailed pictures are from the Princess Royal, red bulkheads, inside of the stern gallery red, sides natural with red beams and black below the ports, red deck beams and knees: Is there any more information on this anywhere in the literature? I actually wanted to paint the lower cabin red, with a stern bench, rudder trunk and one or two rows of supports in red under the red deck beams. Then white in the upper cabin. Nothing has happened yet, here is the status of my work, I would be pleased to receive suggestions for the correct colour scheme. Best regards Matthias

-
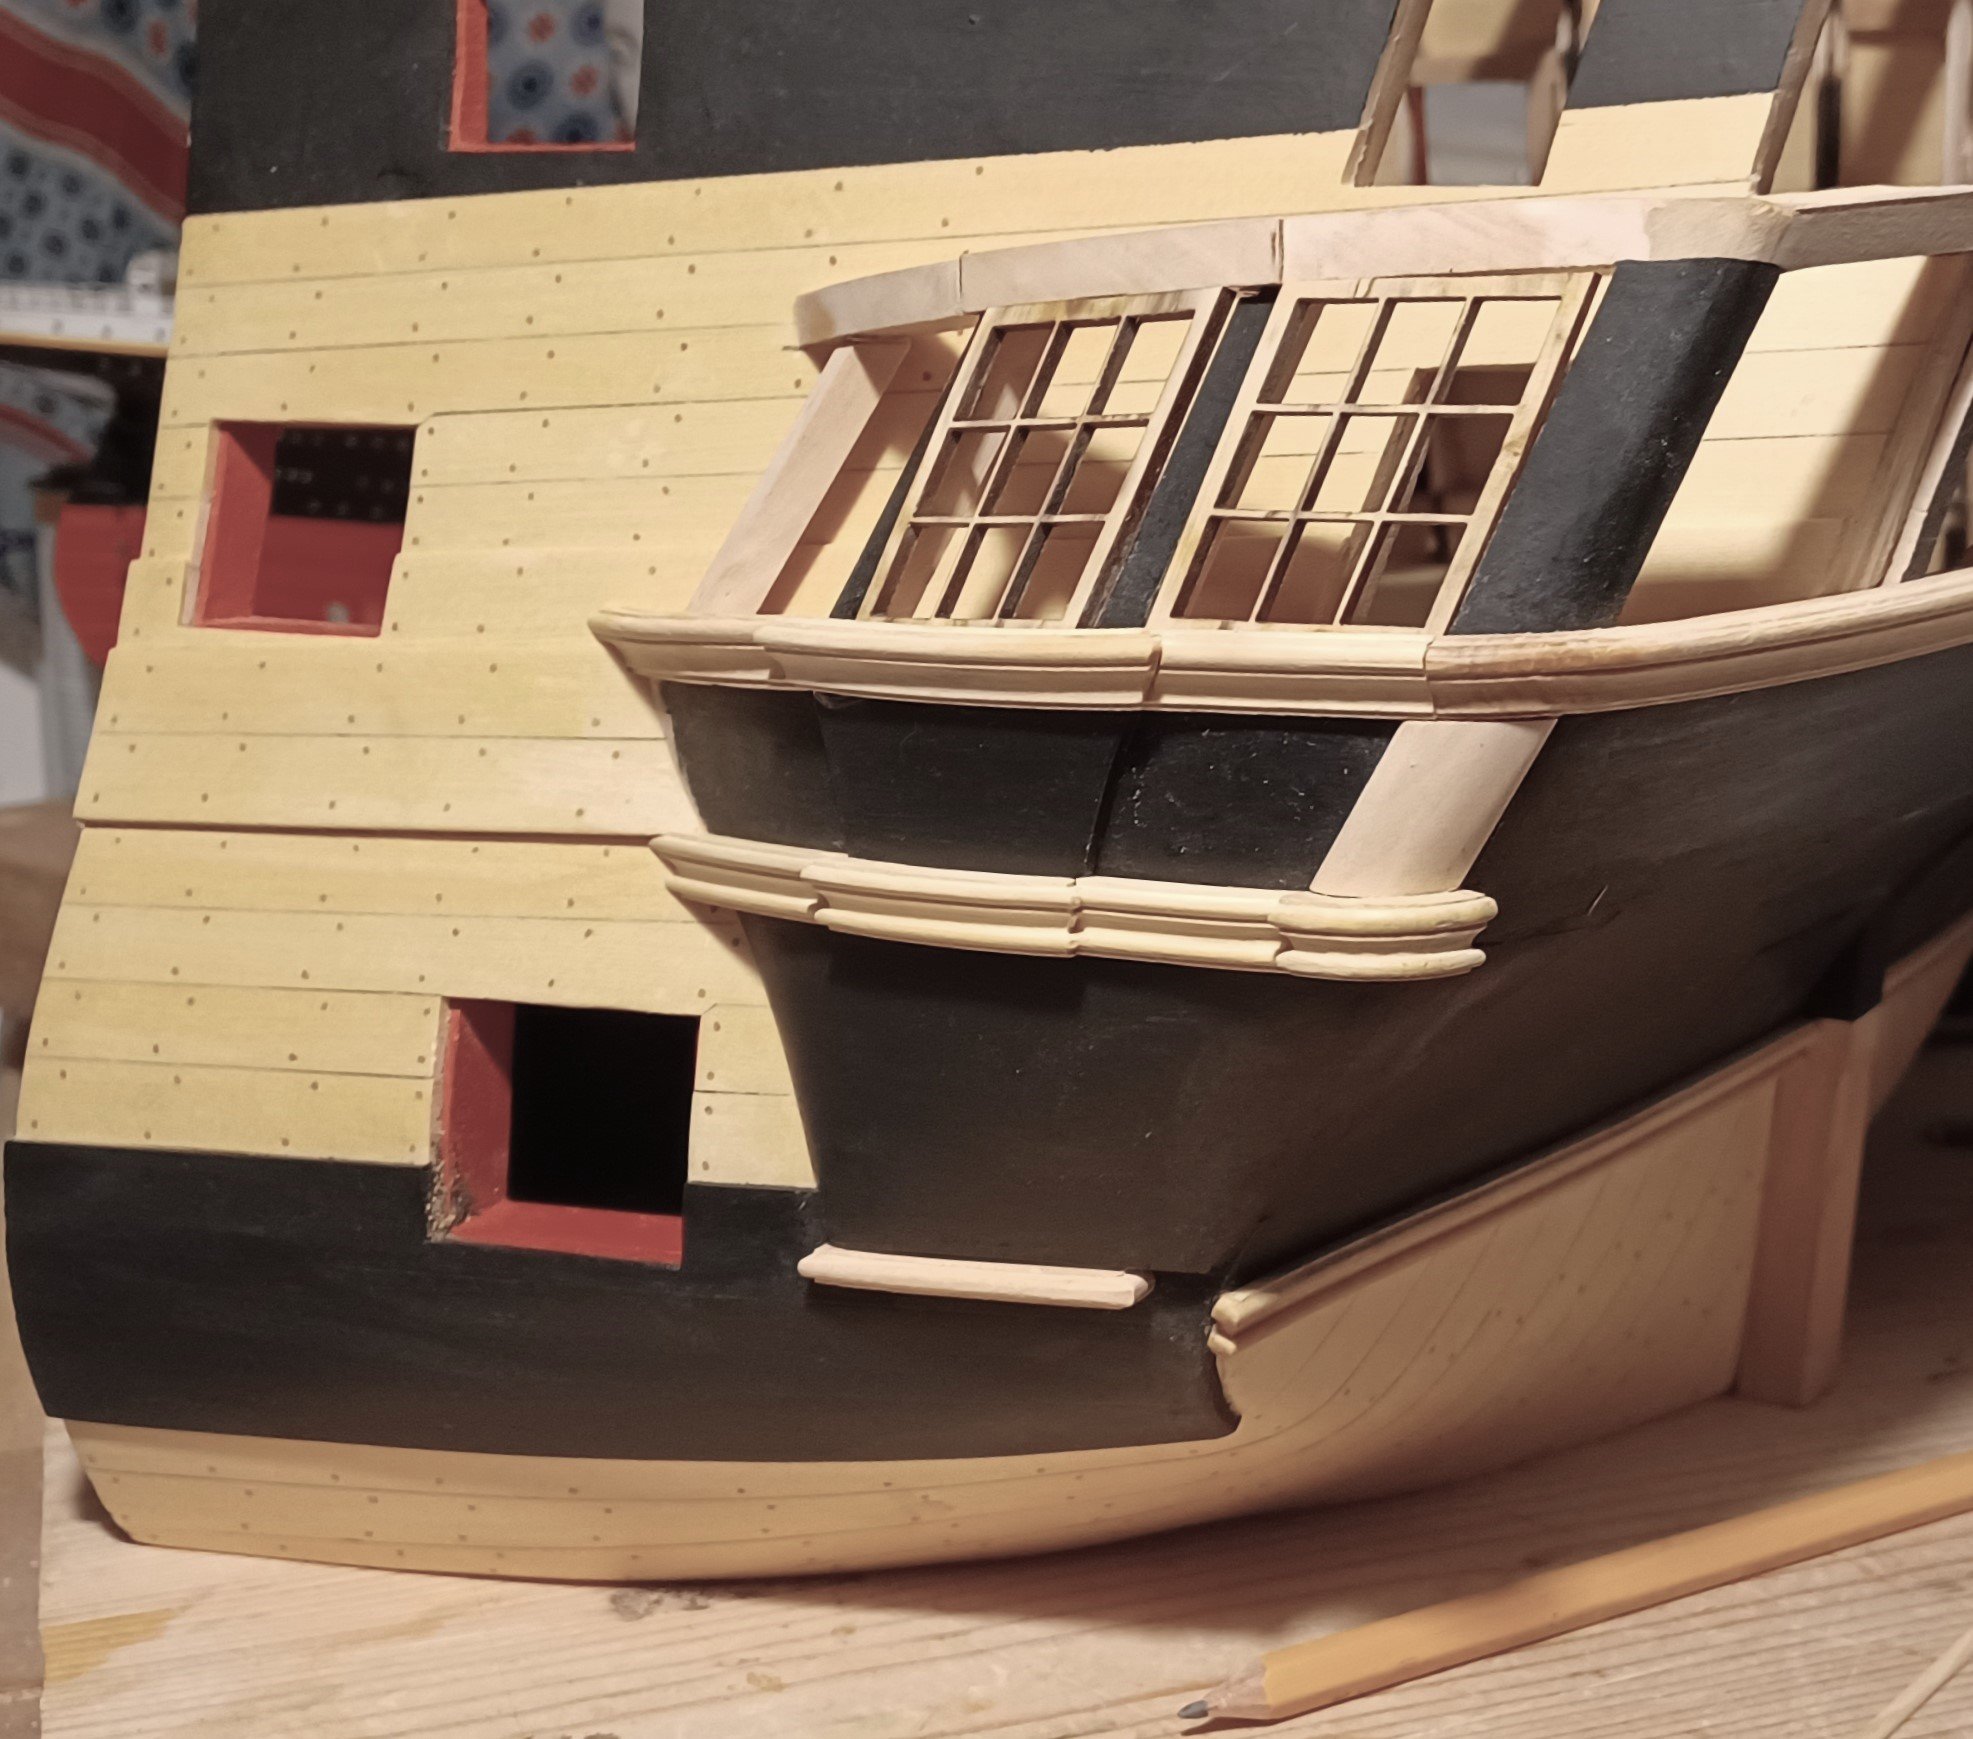
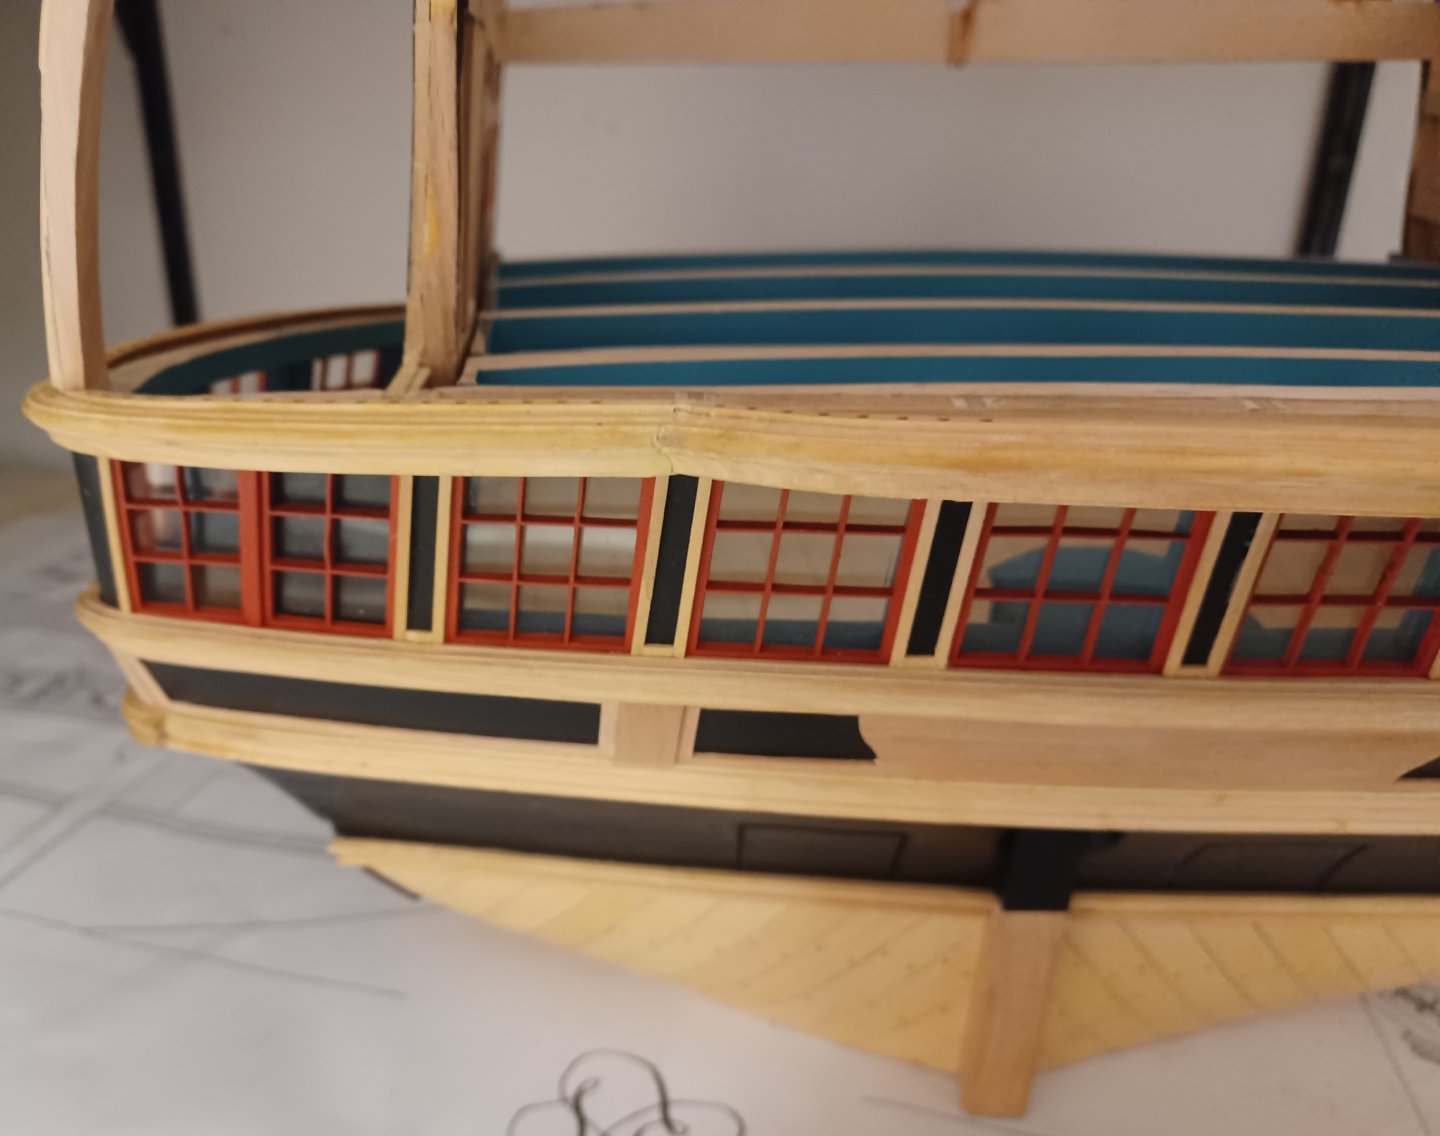
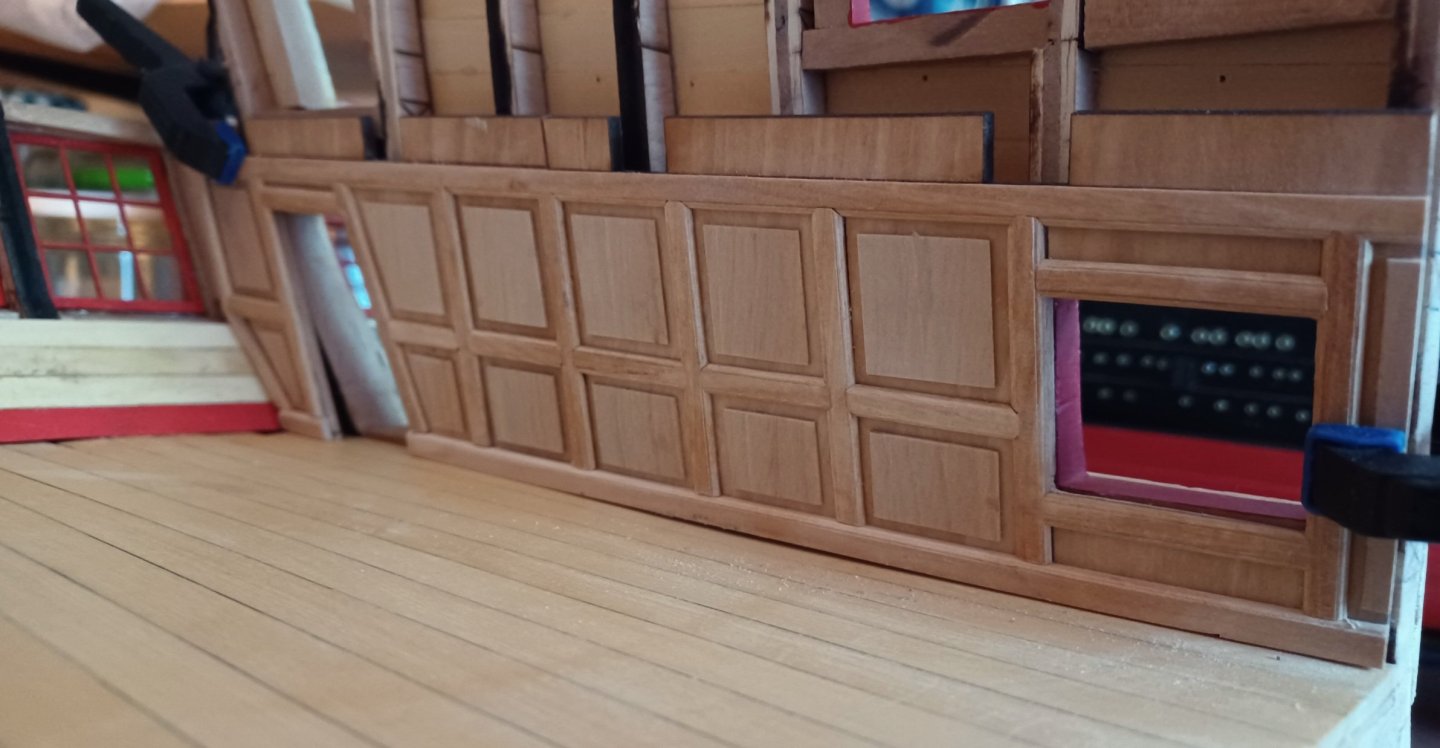
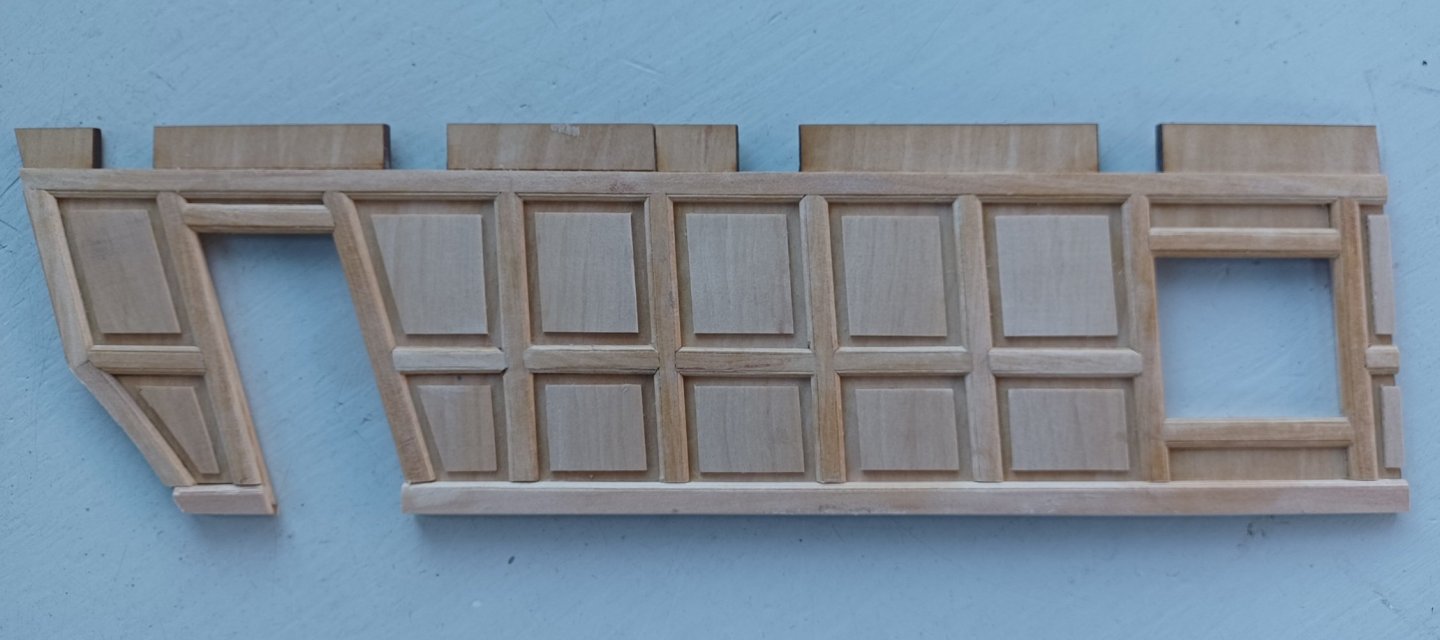
Hello and thank you for your encouragement, In the meantime, I have made some progress on the lower section of the stern-gallery and added the cornices and surrounds for the parapet panels. The gallery windows have also been partially installed, but still without glazing. The basic structure is already quite recognisable. There is nothing new to report on the craftsmanship at the moment; it is essential to create the correct bending radii in advance so that each moulding finds its correct place in the arrangement. The foliage carvings will later be inserted into the black fields below the window gallery and the arcanthus fronds below the side gallery, but there is still some way to go until then, although my fingers are itching to get started. But first I'll continue with the interior of the model, the panelling of the lower cabin is laser-cut from 2 mm pear wood, the posts and transoms are placed along the markings. I originally wanted to leave it natural, but now I'm leaning towards painting everything brown-red, like the windows of the rear gallery. Best regards, Matthias Translated with DeepL.com (free version)

-
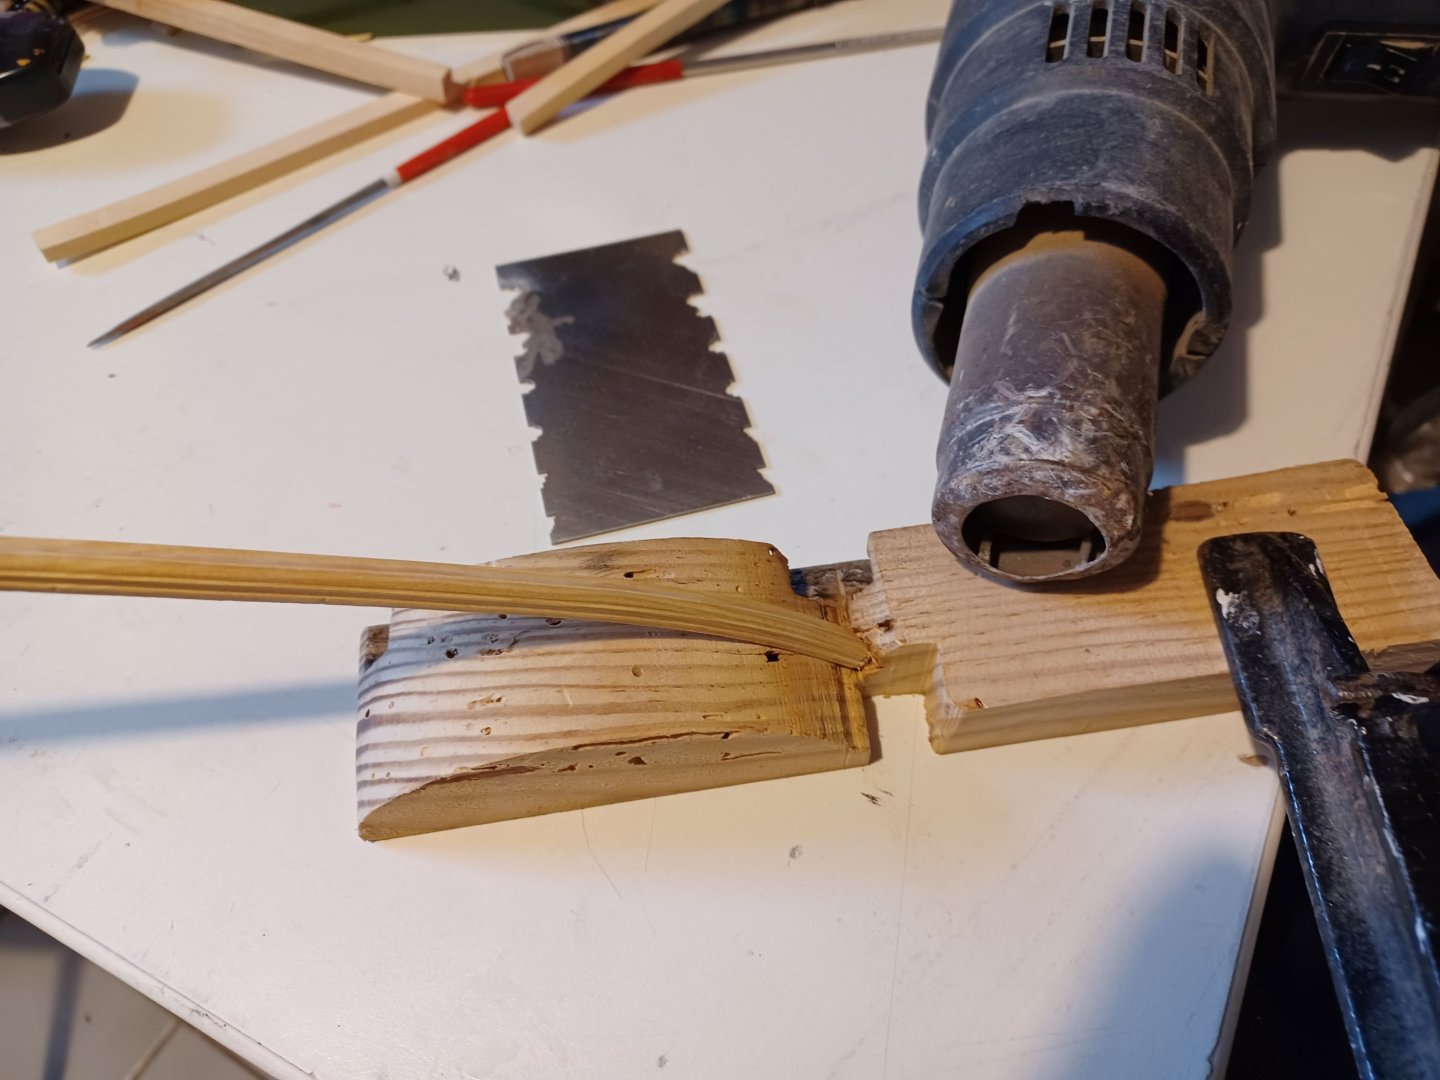
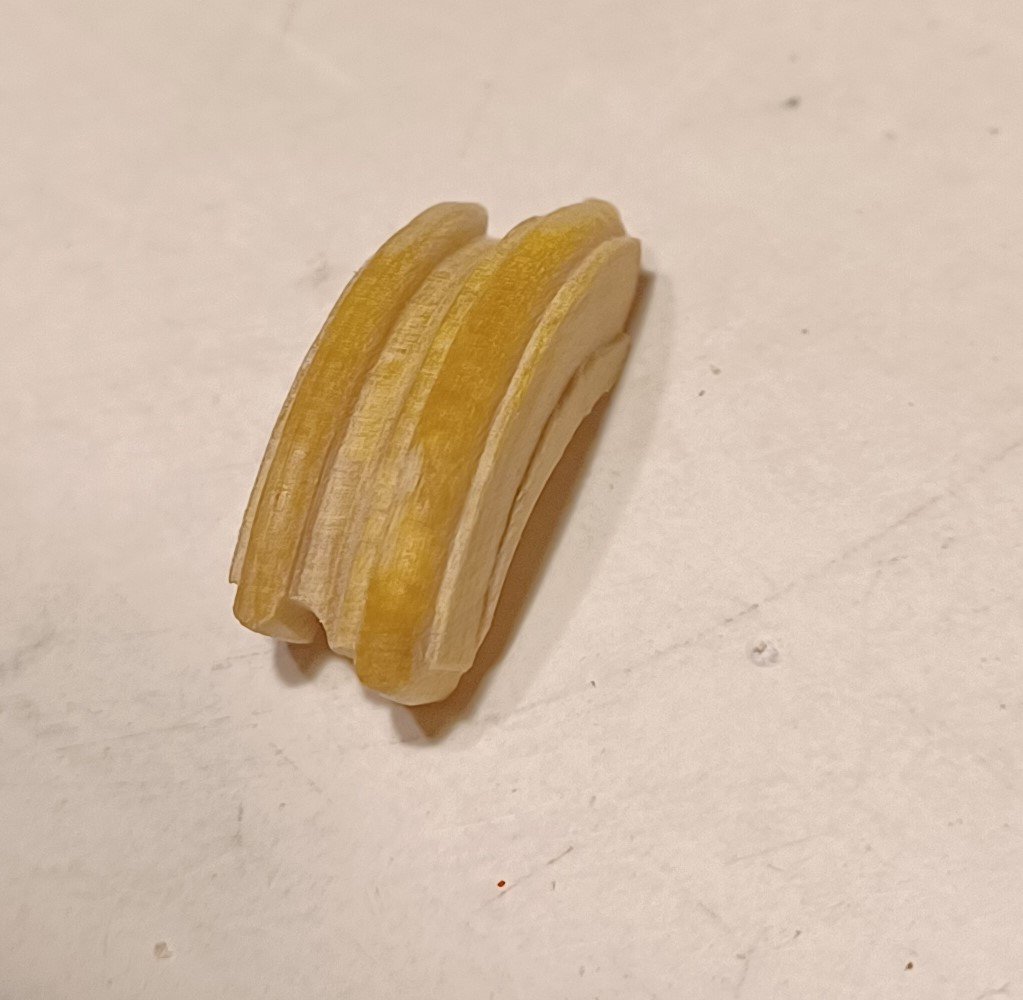
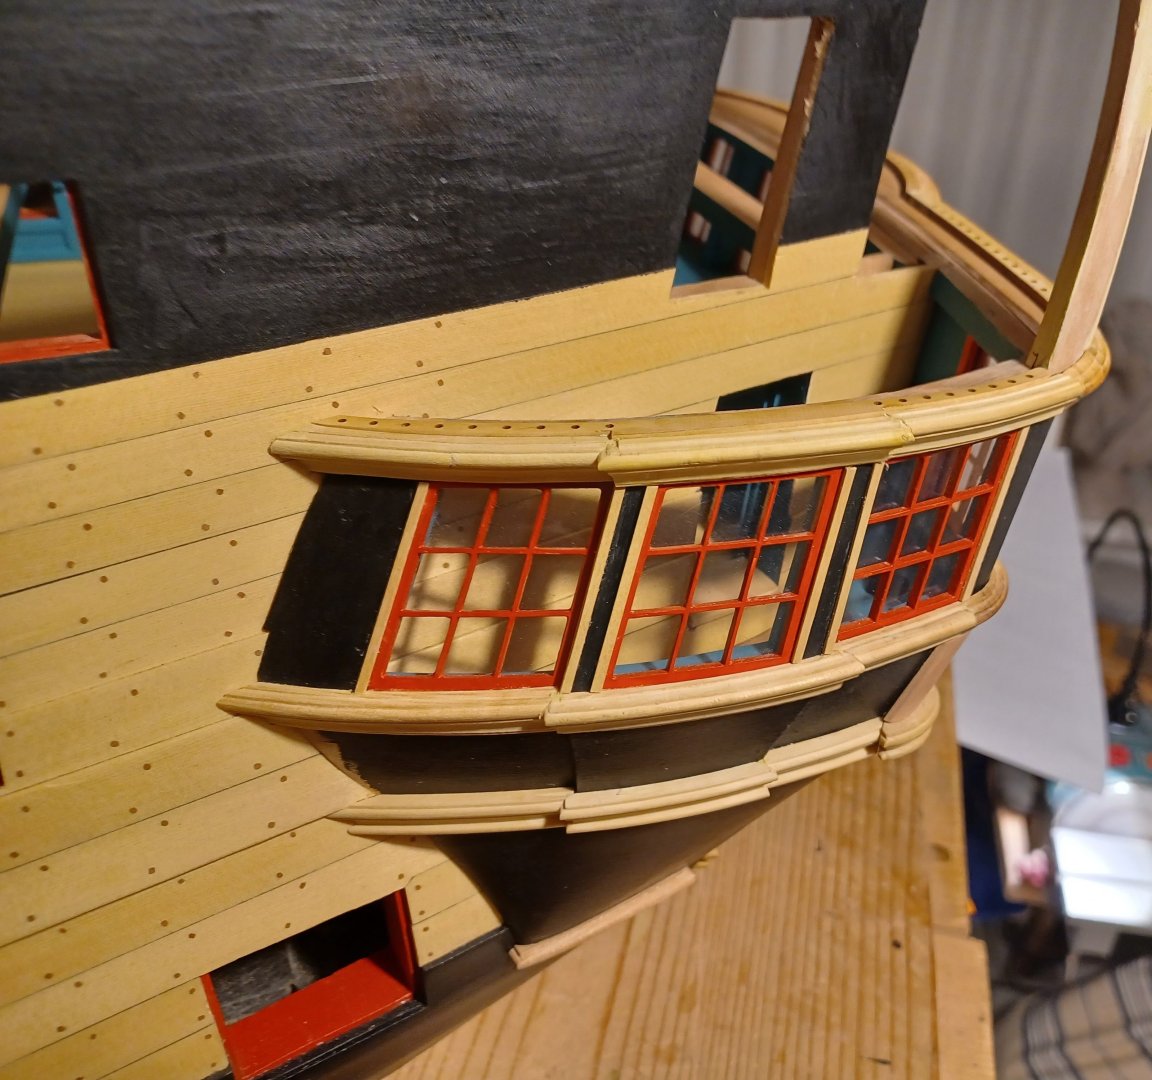
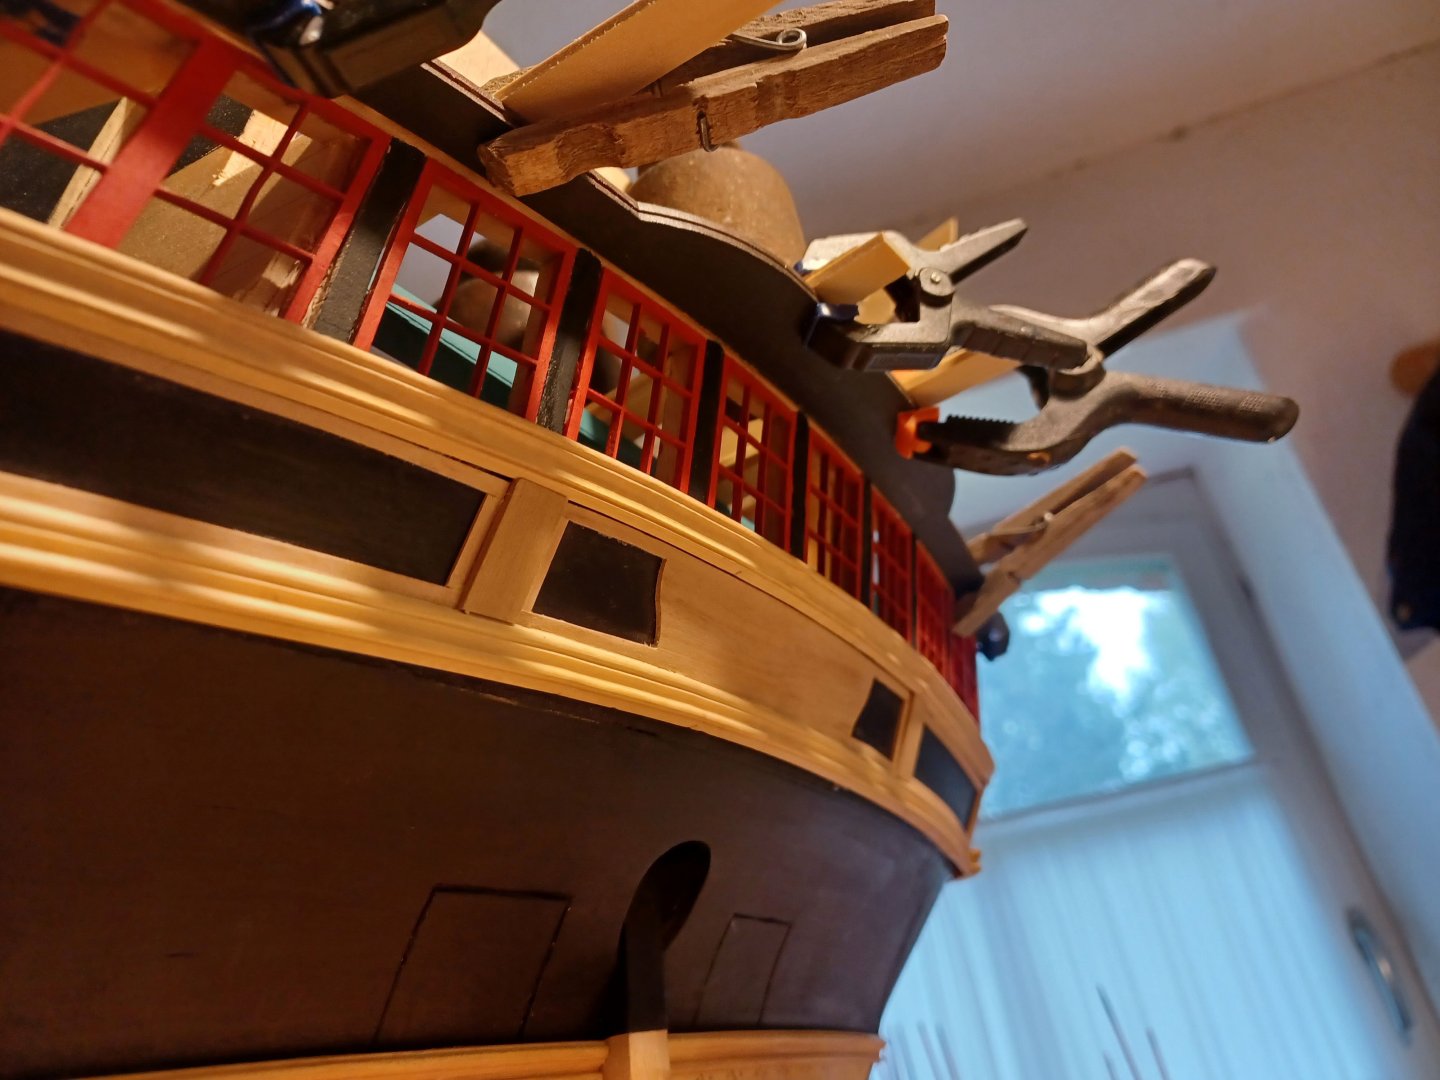
Hello everybody, I'm slowly making progress with the building of the quarter galleries. First Im made myself a certain supply of mouldings. These mouldings have to be prebent. On a scale of 1:32, boxwood mouldings are quite stubborn. Cold bending and clamping them in place is not an option, nor is it any fun, as the slightest slippage disturbs the whole arrangement considerably. Heating with an iron doesn't work with mouldings either. After some try and error, I got stuck with the hot air gun. However, you have to work carefully with it, so that the moulding can be bent and remains in its curved shape, it has to be heated quite strongly, but the surface should not get brown. A moment too long will result in a charred surface. The model in the Nationalmuseet at Copenhagen has painted mouldings, but I prefer to leave them natural. Here you can see my somewhat primitive bending device. The bent moulding is then filed at the ends so that the ends match the profile. In the corner areas, however, the curves become so tight that bending no longer works. I used the scraper to round off the middle moulding, which was very tedious. In the protruding corner area of the lower gallery end, I cut a round disc with the circular hole saw, clamped it in the upright drill and inserted the scraper there while the machine was running. The long wood areas turned out well, the cross wood areas can be thrown away. But it only needs a 50-60° cut-out, so it worked. The lower "drop" of the side gallery was sanded freehand from a piece of pear wood. Now a few more photos from the state of construction The windows do not fit very well, I will make new ones, now, that the exact shape is fix. Best regards, Matthias