
MORE HANDBOOKS ARE ON THEIR WAY! We will let you know when they get here.
×


Heronguy
-
Posts
863 -
Joined
-
Last visited
Content Type
Profiles
Forums
Gallery
Events
Everything posted by Heronguy
-
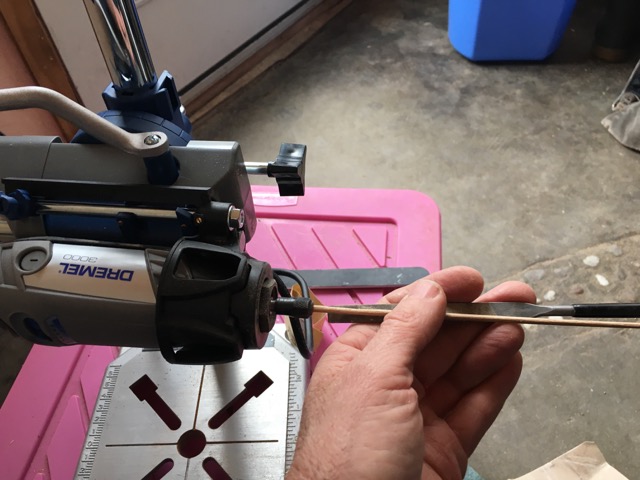
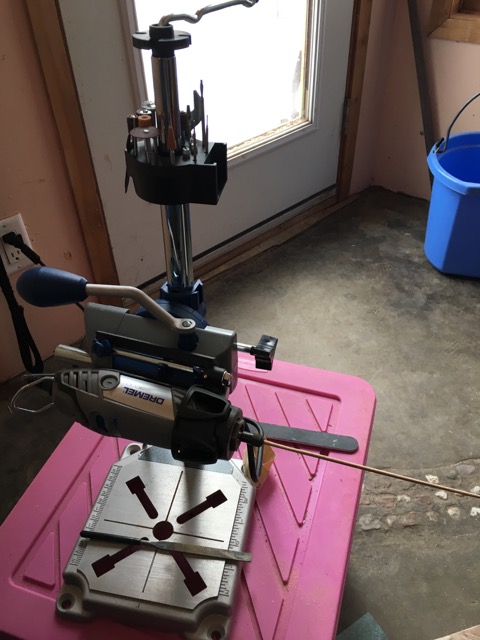
 Well, some success with the dowels. I invested in a dremel and a dremel "workstation" this week. As I mentioned previously the fore topmast is former from a 3mm (1/8") dowel which conveniently fits in the 1/8" collet. Using the newly purchased dowel (since I broke the kit ones) I was able to successfully shape them as long as I carefully supported the dowel end (I was considering making a little support stand but had enough hands to be able to work!) I used a file for the shaping and some sandpaper for a final smoothing. The bottom of the mast needed a small reduction to fit the trestle tree and cap.
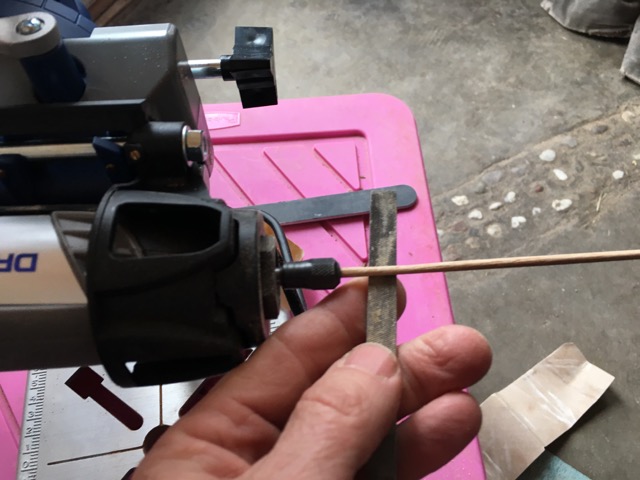

- 93 replies
-
- 6
-

-
- billing boats
- bluenose ii
- (and 1 more)
-
Looks pretty good Steve! I'm facing the issue of the stern on my Krabbenkutter - I botched the 1st attempt. Did your kit use the laminated shapes or have you adapted that approach? Did you find the laminated shapes eased the fairing? I'd like to try that rather than shaping a solid block. Doug
-
Thanks maturin52. I've picked up some more dowel rod and will try various techniques to see what will work for me. Doug
-
Good start Len! Exciting to be building isn't it. When I finally got to the point where my hull was planked and smoothed I just wanted to hold the model for a while - it felt so nice to be able to handle it. Of course, next stages of construction - adding the bits and pieces mean you have to be careful again! Doug
- 296 replies
-
- 3
-
-
- chaperon
- model shipways
- (and 1 more)
-
That's encouraging Steve. I'll likely try some more trials. The kit dowel had very little extra otherwise I'd have lived with the chuck impressions then cut them off for stepping the mast. I'll have longer dowel to play with next time! Doug
-
Steve, I've tried the masking tape on the dowel. It still crushed the dowel in the chuck. I wonder if the wood in the kit supplied dowel is particularly soft. The parts list lists it as ramin. I imagine the ones in the local hardware are birch. I'll look tomorrow. I was careful with the sandpaper for the reason you indicated. I've seen the wrapping effect though I don't think that's what got me this time. I appreciate your suggestions! Skifflake, nice to meet you. Is it this particular Bluenose II kit you've built? If so, may I ask you the odd question on things I'm having trouble interpreting on the plans? I also have a Artesania Latina Bluenose II in process. I've (mostly) been applying John H. Earl's mods to the kit instructions. Fixing the transom and bulwarks just now. Doug
- 93 replies
-
- 1
-
-
- billing boats
- bluenose ii
- (and 1 more)
-
Re-purposed Pland Bending Tool
Heronguy replied to Worldway's topic in Modeling tools and Workshop Equipment
Really useful for cutting pizza too. Doug -
Perhaps the masts are going to annoy me! The foremast is a 5mm dowel that is tapered to 3mm at the top. I decided to try the "dowel in the drill" for sanding. Worked ok except that tightening the chuck jaws pretty well crushes the end of the dowel. In this 1:100 scale the fore topmast is a 3mm dowel tapered to 2mm. Too small for the drill but it fits perfectly in the 1/8"collet of my dremel. 1st try - when I hit the speed switch it sent dowel across the room - except for the 10mm in the collet. Try 2 was going much better. I carefully supported the middle of the dowel and used a lower speed. All was well until this dowel snapped at the collet as well - no obvious reason. Off to the store for more dowels I guess. Hand sanding may not be as fast but maybe I'll end up with a mast eventually. Any other tips?? Doug
- 93 replies
-
- 1
-
-
- billing boats
- bluenose ii
- (and 1 more)
-
I'll bet it feels pretty good to be able to start finishes on the hull! Nice work Steve. Doug
- 291 replies
-
- 3
-
-
- bounty
- billing boats
- (and 1 more)
-
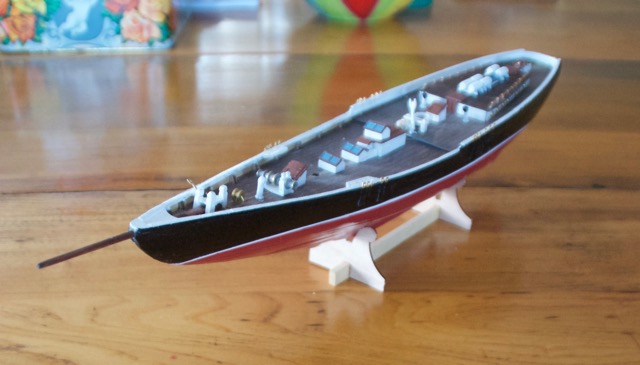
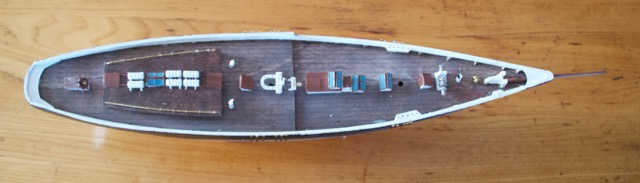
Finished the deck furniture. Onward to the rigging!
- 93 replies
-
- 3
-
-
- billing boats
- bluenose ii
- (and 1 more)
-
Thanks Derek. I'm enjoying it. Looking forward to rigging (I think).
-
Achieved? More like it happened! In this kit the deck is a simple plywood cutout. Based on things I read on here on MSW I decided to "plank" it by pencil. The 1st attempt wasn't very good so I erased by sanding and tried again. Wasn't too bad so I stained the deck with Minwax mahogany. That pretty well obscured the pencil lines so I relined it again on top of the stain. And that's all. The mottled look I think came from the state of the deck board when I stained it. I'm planking my 2nd Bluenose II more "traditionally". We'll see how that one turns out soon! Doug
- 93 replies
-
- 1
-
-
- billing boats
- bluenose ii
- (and 1 more)
-
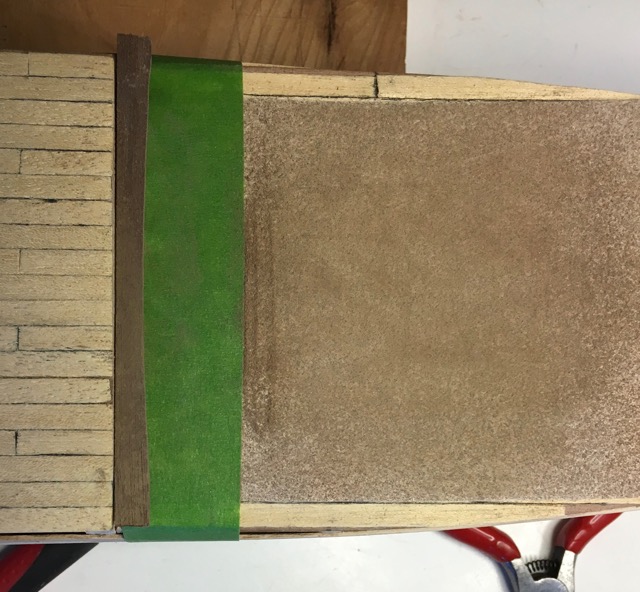
A good idea from the forum that I really like. There is a narrow walnut piece between the quarterdeck and the foredeck. It needs to be shaped to the curve of the deck. Tape some sandpaper to the deck and use that as your sanding block for the strip. Get the right curvature (by definition) every time.
-
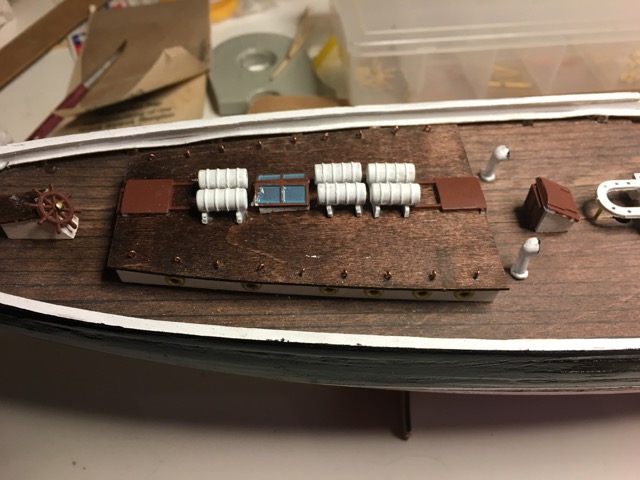
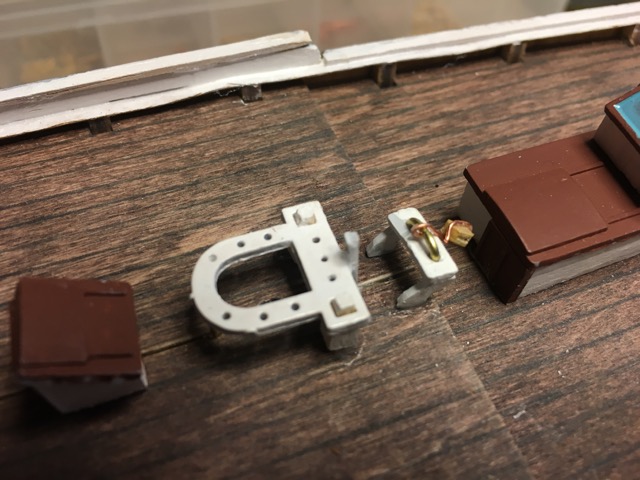
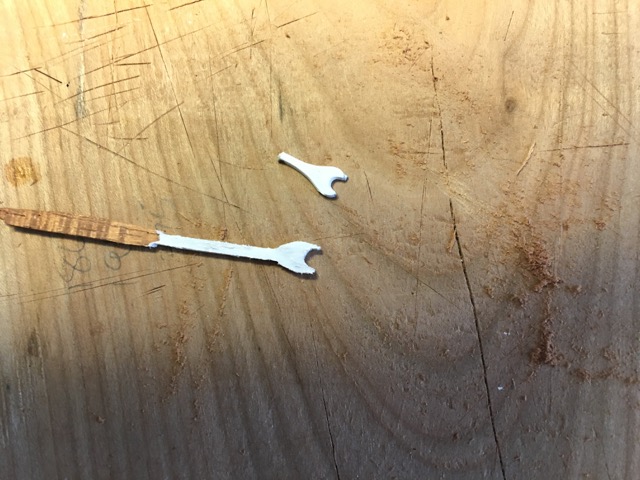
Started installing the "deck furniture". Kinda fun to paint these little things. I discovered how easy it is to make little problems by not planning ahead. For instance, having installed the cabin I discovered I'd omitted the railing and had to drill holes for the railing supports. Unfortunately while doing that I snapped off the plastic boom crutch further up-deck. Not surprisingly, there is no chance that gluing such a narrow neck together will hold. Fortunately wood is pretty easy to work with so I fashioned a new one from a scrap. Now if only I could find the brass wire for the railing in my mess of a shipyard! Doug
- 93 replies
-
- 5
-
-
- billing boats
- bluenose ii
- (and 1 more)
-
I've tried dry heat bending, soaked strips then heat gun, and plank bender (head soldering iron with a big head). So far I've found the plank bender has been my friend! I haven't tried maturin52's approach yet. I'm going to revisit all the techniques as I move along before I settle into the one that works best for me. Doug
-
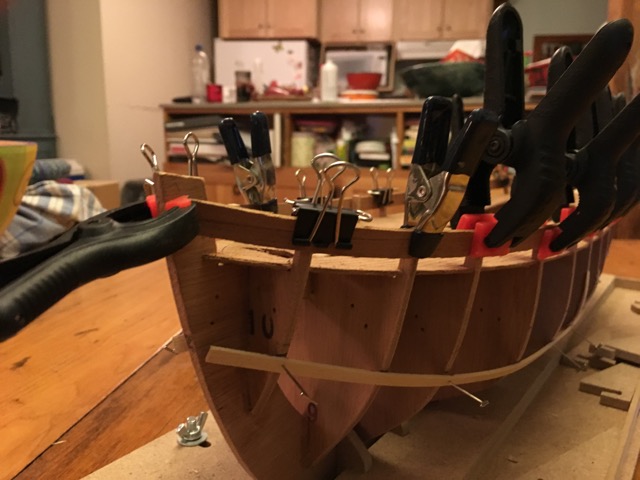
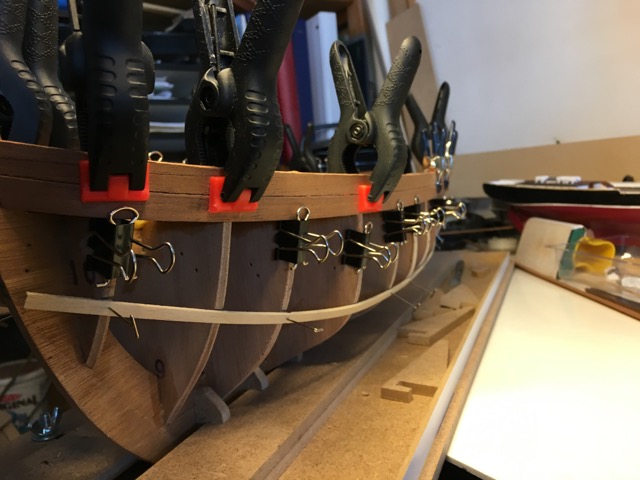
Krabby (my new name for the boat) and I have been negotiating the planking plan. The planking batten was placed and the 1st couple of strakes have been mounted. I think the benefit of having multiple builds in progress is now clear to me: while Krabby's planks are setting, I can paint the pinrails on the little Bluenose II and cut out the bulkwarks on the bigger Bluenose II. Hmmm, maybe its time to start another build. Doug
-
Hi Rossi, I'm on my 1st build(s) too. I wasn't as courageous as you to start with but I'll watch your build with interest. Doug
- 144 replies
-
- 2
-
-
- surprise
- artesania latina
- (and 2 more)
-
Hi Len, A fellow Ontarian saying welcome on the journey! Doug
-
Hi Derek, Go right ahead - also make improvements and let me know what works for you. I'm a newbie ship builder as well as a non-woodworker so my ideas are pretty unsophisticated! I used the plank bending jig almost exclusively for lateral bends - trying to emulate what Chuck Passaro promotes for planking. WhenI tried (yesterday) to bend the planks for my Krabbencutter hull (much more curvy than the bluenose II) I found my pegs were too short (10mm planks rather than the 5mm strips from the Bluenose II). II that case I went to the plank-bender (soldering iron with a big head on it) . I'll have to hunt down some longer pegs. You'll enjoy the Bluenose. Doug
-
I don't want to finish sanding the hull too soon because I love the feel of the hull - the smooth curves and hollows! Doug
-
You're moving right along Fred! I'm just planking the quarterdeck today. Then on to the foredeck. My instructions have me do the decking before the bulwarks. You'll be building and installing deck fixtures before I get there! Keep up the good work. Doug
-
Welcome aboard Joshua. I expect this will be my slow one. It appears neither the boat nor I were built for speed! Doug
-
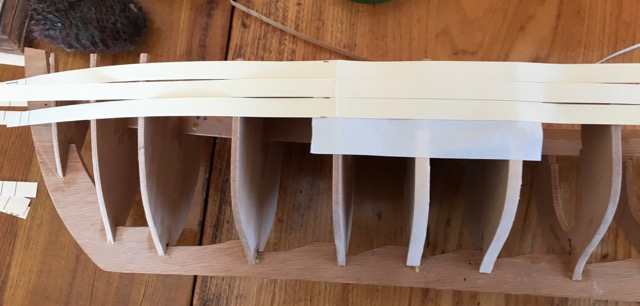
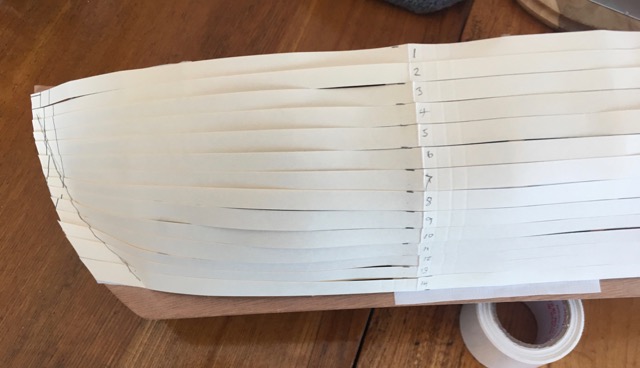
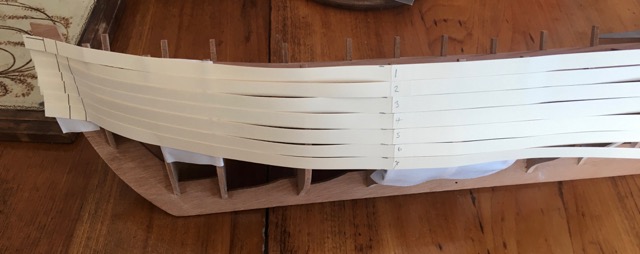
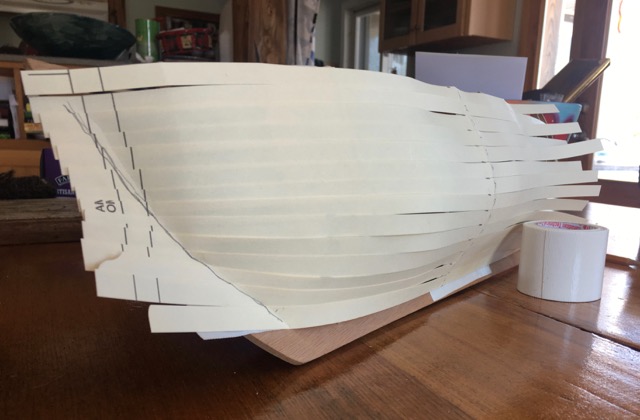
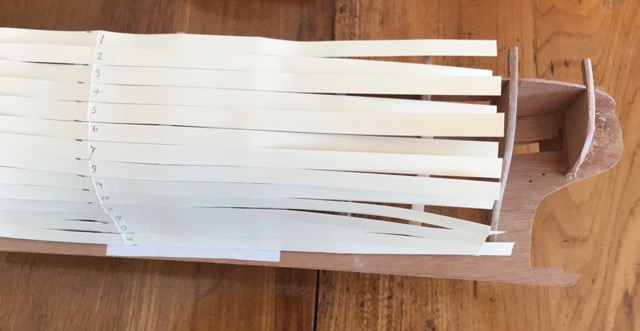
Although I have read various notes on lining the hull for planking and will use techniques described I am still nervous about placing a planking batten to create the planking belts. To gain some confidence I decided to "plank" the hull with a file folder. Material req'd: hull double-sided tape (I used carpet tape) a file folder paper cutter ruler pencil Method Cut the file folder into strips the width of your planking stock (in my case 14 strips 10mm wide) Put some tape over the midsection bulkheads and over at least a pair of bulkheads near the bow and stern. Plank with the strips overlapping them at the bow and stern as required. Unfortunately my file folder strips weren't long enough for my hull. Off to the craft store to get some Bristol board for the next "planking" This technique has given me a bit more insight into what will happen when I plank this hull. I considered marking the "planks" where they overlap in order to create a template for shaping the strakes but I'm simply going to go back to the usual methods of placing a planking batten (say plank 7 of my strips) and then dividing the space at each bulkhead using the planking fan. I don't know if I'll use this method in the future but it gave me some confidence this time around. Any thoughts about this? Doug
-
Glad to see you're doing a build log. I'll follow with interest. You're building faster than I am! Doug