

.JPG.1db74a3c50dee7c3f86fbf4fdabbb0e2.JPG)
Ondras71
-
Posts
443 -
Joined
-
Last visited
Content Type
Profiles
Forums
Gallery
Events
Everything posted by Ondras71
-
.thumb.JPG.4d3261ccae06041fa7cc2933fb43d577.JPG)
MONTAÑES by Amalio
Ondras71 replied to Amalio's topic in - Build logs for subjects built 1751 - 1800
I'm getting more and more like your beautiful and clean work. I'm losing my hat. O. -
Roter Löwe 1597 by Ondras71
Ondras71 replied to Ondras71's topic in - Build logs for subjects built 1501 - 1750
I've finished pinning the lower mirror. There's no pins at all in the plan. I was looking for a suitable pattern, I found it in the Prins Willem monograph.. I altered my pins a bit in a way they would look on a smaller ship...thumb.JPG.0a3739f58357810e3305b96200ece4f2.JPG)

.thumb.JPG.fe2556af68f889258ad7d8805b91a14d.JPG)
.thumb.JPG.8ed69a851e34bd4b46af8f5dad560749.JPG)
-
Roter Löwe 1597 by Ondras71
Ondras71 replied to Ondras71's topic in - Build logs for subjects built 1501 - 1750
The pins placed at the bottom of the sides...thumb.JPG.0177946e2ca312a9115714ac32c60591.JPG)
.thumb.JPG.079e2ba3b114621c79b69360c0f09a02.JPG)
.thumb.JPG.786384d84778c0ab9a176d0cf3580a8a.JPG)
.thumb.JPG.c991f0efb039fc68ef8a8c45daa167f5.JPG)
.thumb.JPG.fcc86368ca9291d47ea1c409ec89e926.JPG)
.thumb.JPG.caf77782fa390a59adbd007cab5f3b58.JPG)
-
As the Ulises Victoria writes. Surely you'll be adding detail photos of the ship from all directions. Thanks Ondras
-
Impressive ship, impressive scale !! For a beautiful model the house is never small .. Do you share with us other ship details ...? Ondras
-
Roter Löwe 1597 by Ondras71
Ondras71 replied to Ondras71's topic in - Build logs for subjects built 1501 - 1750
Somewhere I read that the pins are like Braille... I guess it is true, I quite enjoyed reading these lines .. The polished left side.. After waxing the pins are well noticeable..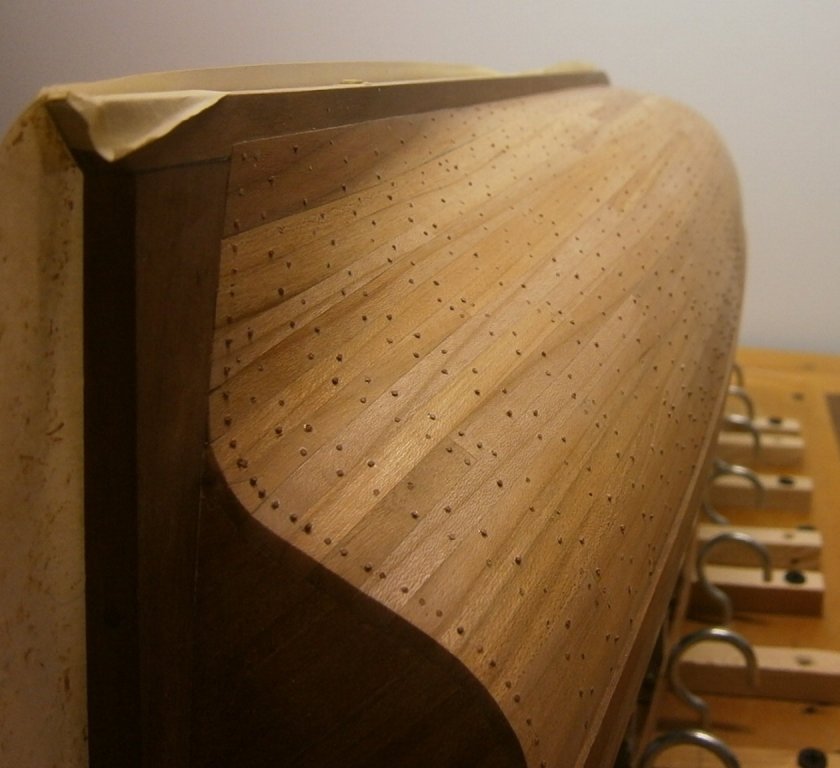
-
Pandora by marsalv - FINISHED - 1:52
Ondras71 replied to marsalv's topic in - Build logs for subjects built 1751 - 1800
Your work still rises upward Marsalv. I admire and support .. Ondras71 -
Roter Löwe 1597 by Ondras71
Ondras71 replied to Ondras71's topic in - Build logs for subjects built 1501 - 1750
Thank you Vivian!! I started with the installation of pins .. The first piece is polished. After waxing the pins will be beautifully seen .. O..thumb.JPG.52f30455717bbaf0a7c0ed7aaa4b9ed8.JPG)
.thumb.JPG.8a6959dad627cbab1b6c187b9c46128b.JPG)
.thumb.JPG.c1d706755dbd996164484b54e585144b.JPG)
.thumb.JPG.5fb6933f2a6431e88e012cd0b4fff4da.JPG)
-
Roter Löwe 1597 by Ondras71
Ondras71 replied to Ondras71's topic in - Build logs for subjects built 1501 - 1750
Thank you Srodbro!! I marked the whole left side with a spike and immediately started drilling 0,65 mm holes. There's cca 1600 of them on one side, but it's going unexpectedly well..
.thumb.JPG.f75a38e49bd0d5e6b379c692a44b31a1.JPG)
.thumb.JPG.4acf204434650a98bcf0982bd13eaf59.JPG)
.thumb.JPG.60d2944acefa269e7509fd575eb54fda.JPG)
.thumb.JPG.88e0bf1b9bdbb120a6183e6229daf0c3.JPG)
-
Roter Löwe 1597 by Ondras71
Ondras71 replied to Ondras71's topic in - Build logs for subjects built 1501 - 1750
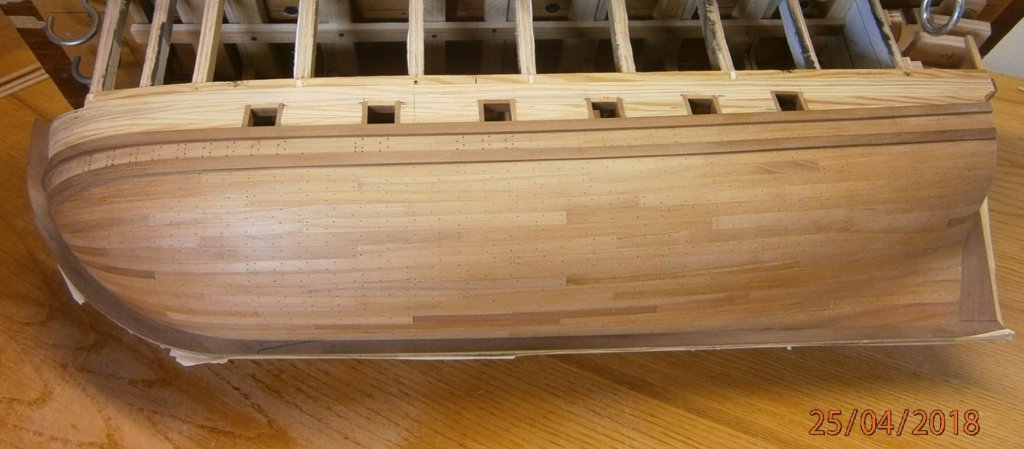
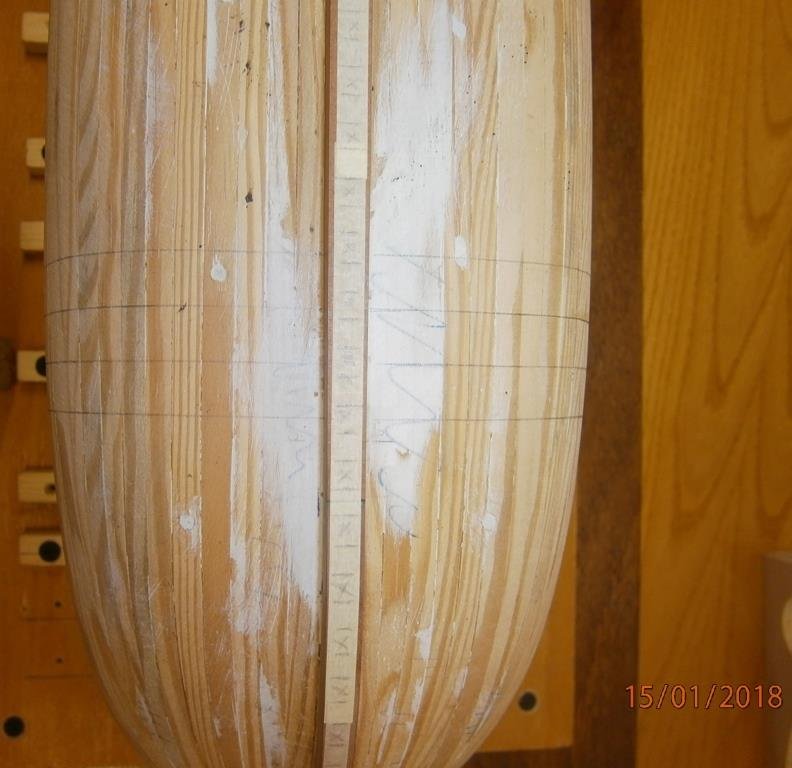
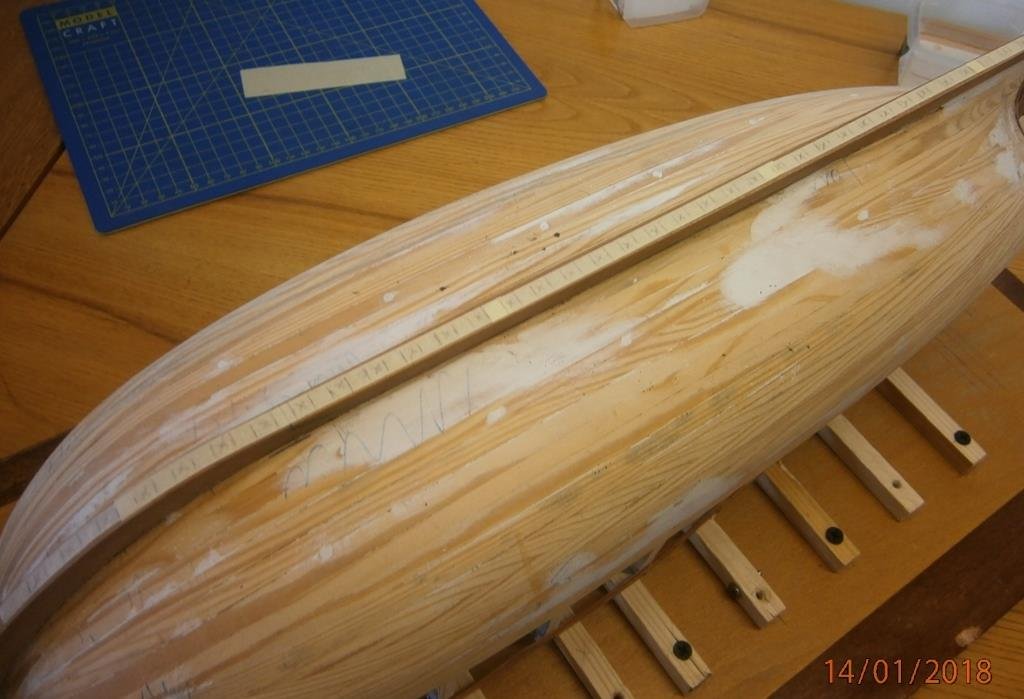
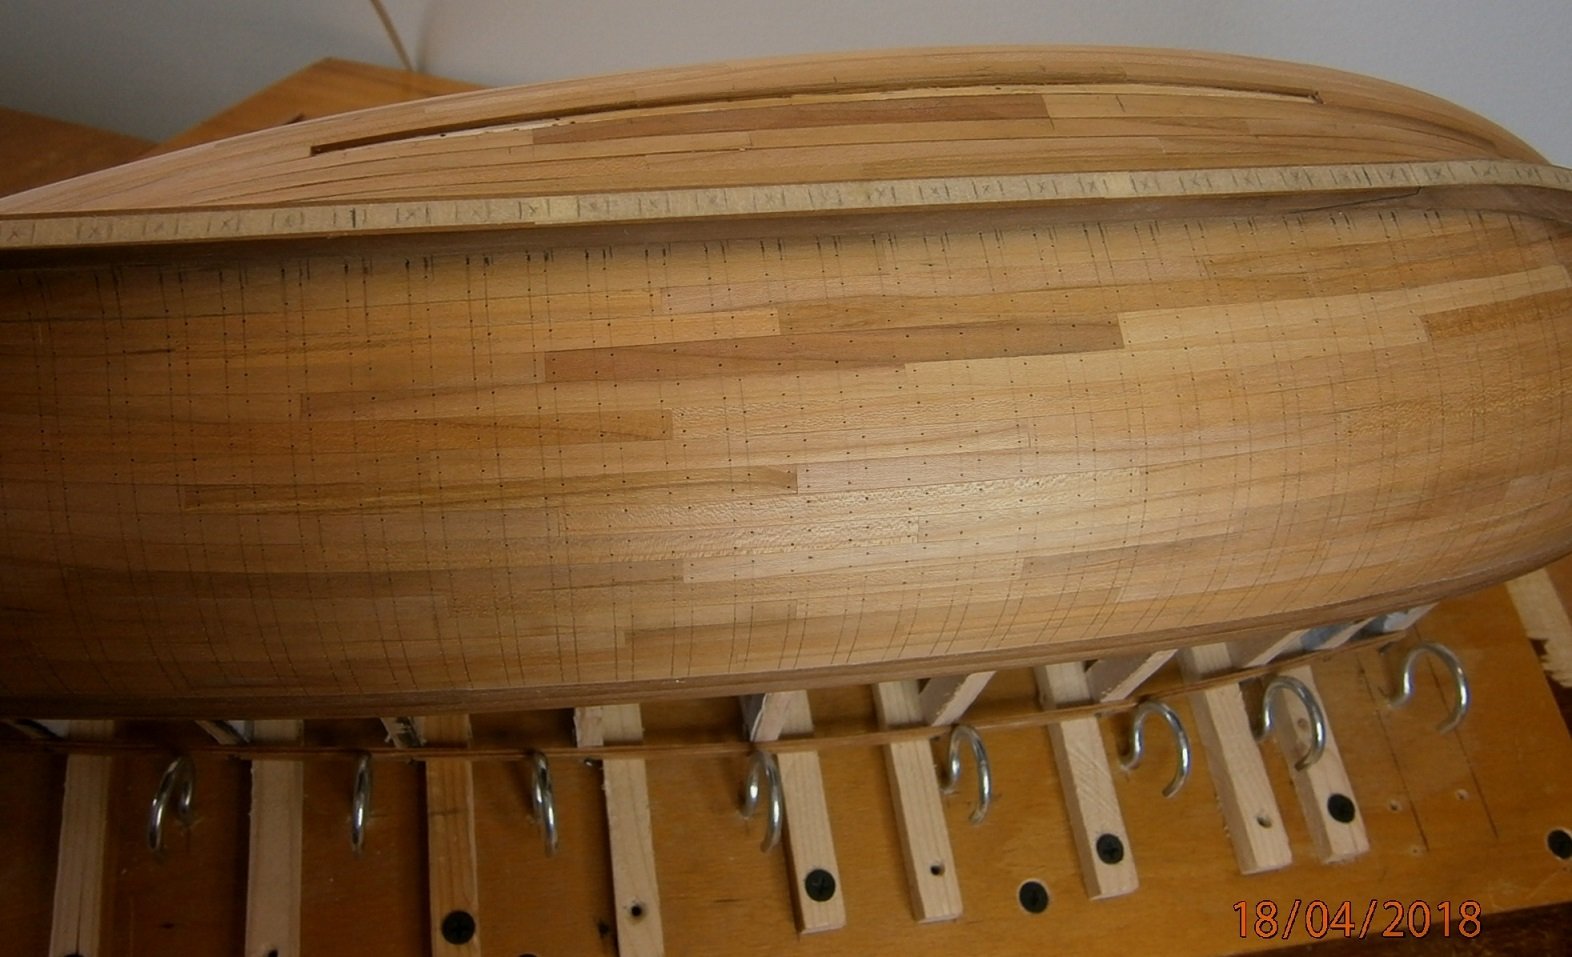
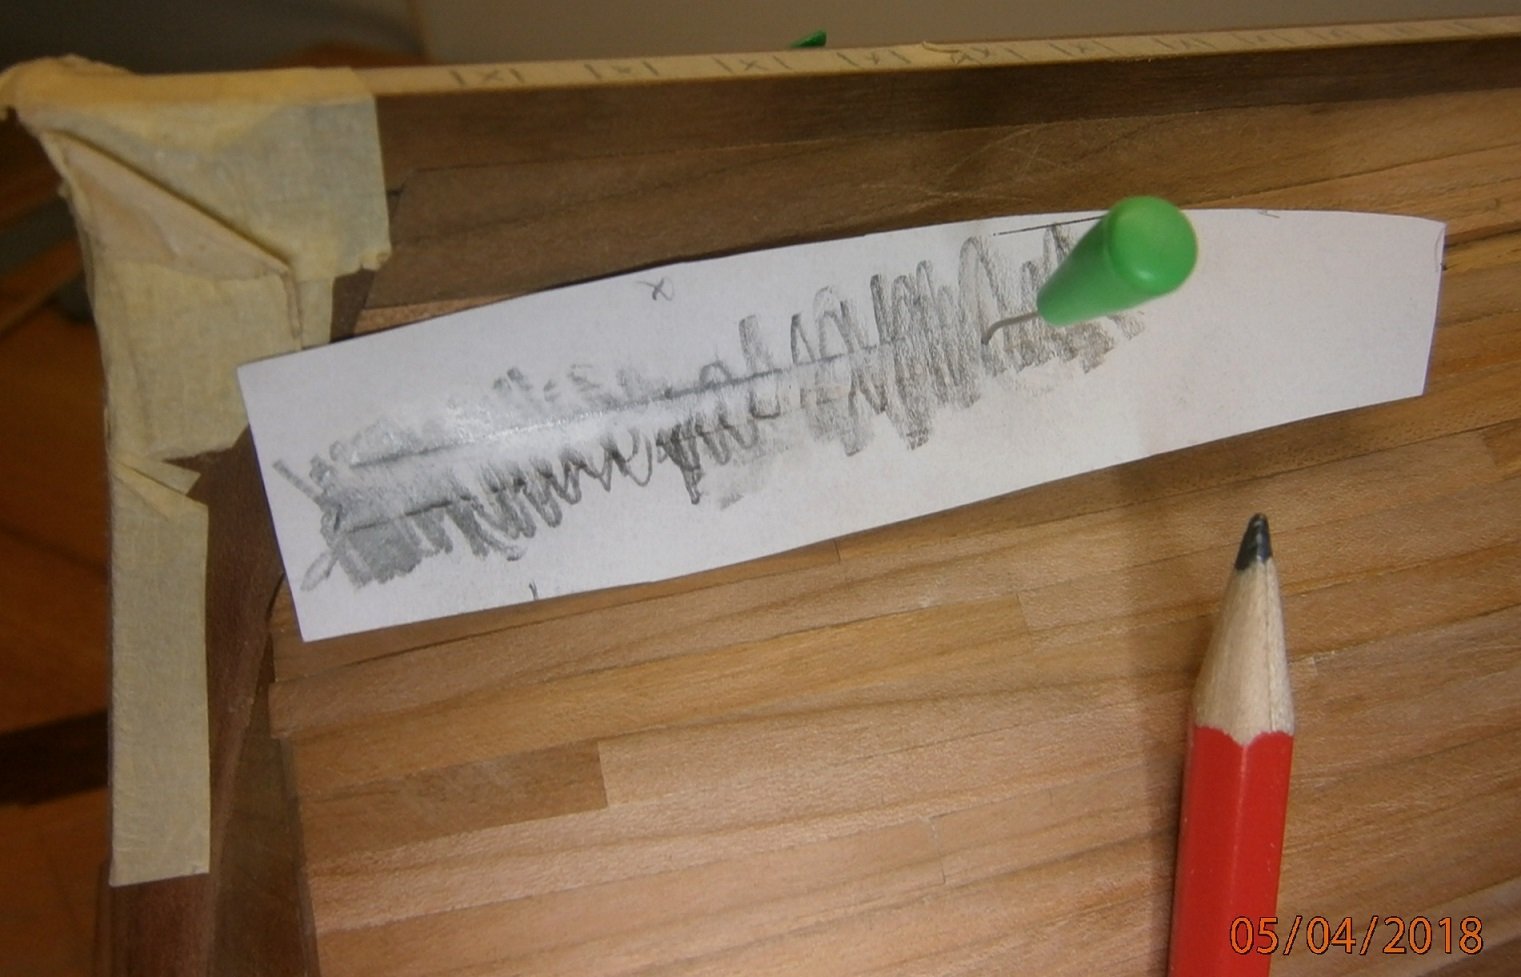
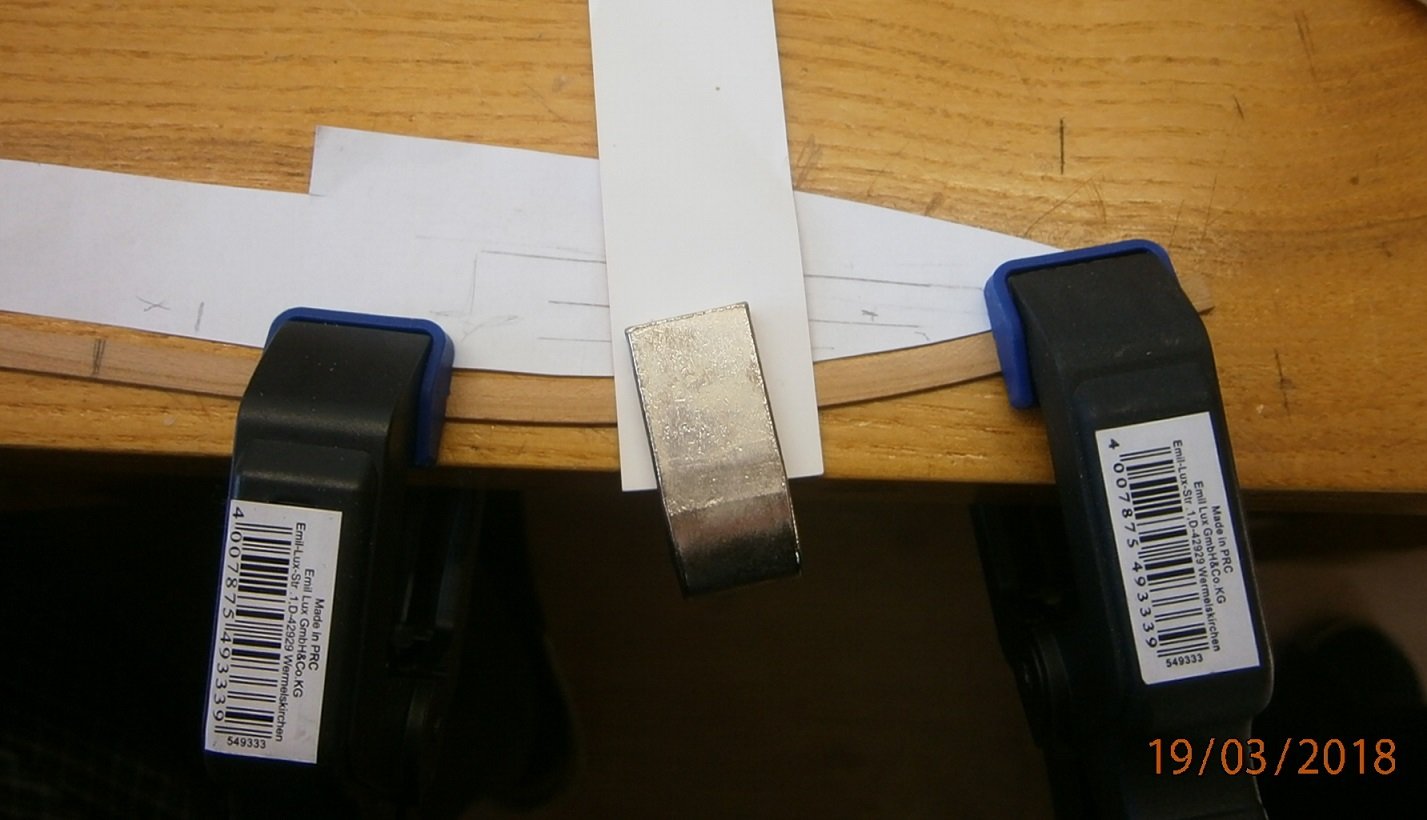
Thank you Michael Mott. I started measuring and painting lines for placing the pins .. Before drilling, I decided to use a spike to get the accurate spacing of the holes...thumb.JPG.22af8eadf826a1831517ad768d514052.JPG)
.JPG.5c6920907ba45ff51ed9d4d1cbf23ca1.JPG)
.thumb.JPG.52d7444ee77441bac7fdb5b684fd7c41.JPG)
.thumb.JPG.eb9d7850172c4e25cd3df0123f84abe8.JPG)
.thumb.JPG.b87c9d8c16c2932614183b61d6b5d964.JPG)
-
Roter Löwe 1597 by Ondras71
Ondras71 replied to Ondras71's topic in - Build logs for subjects built 1501 - 1750
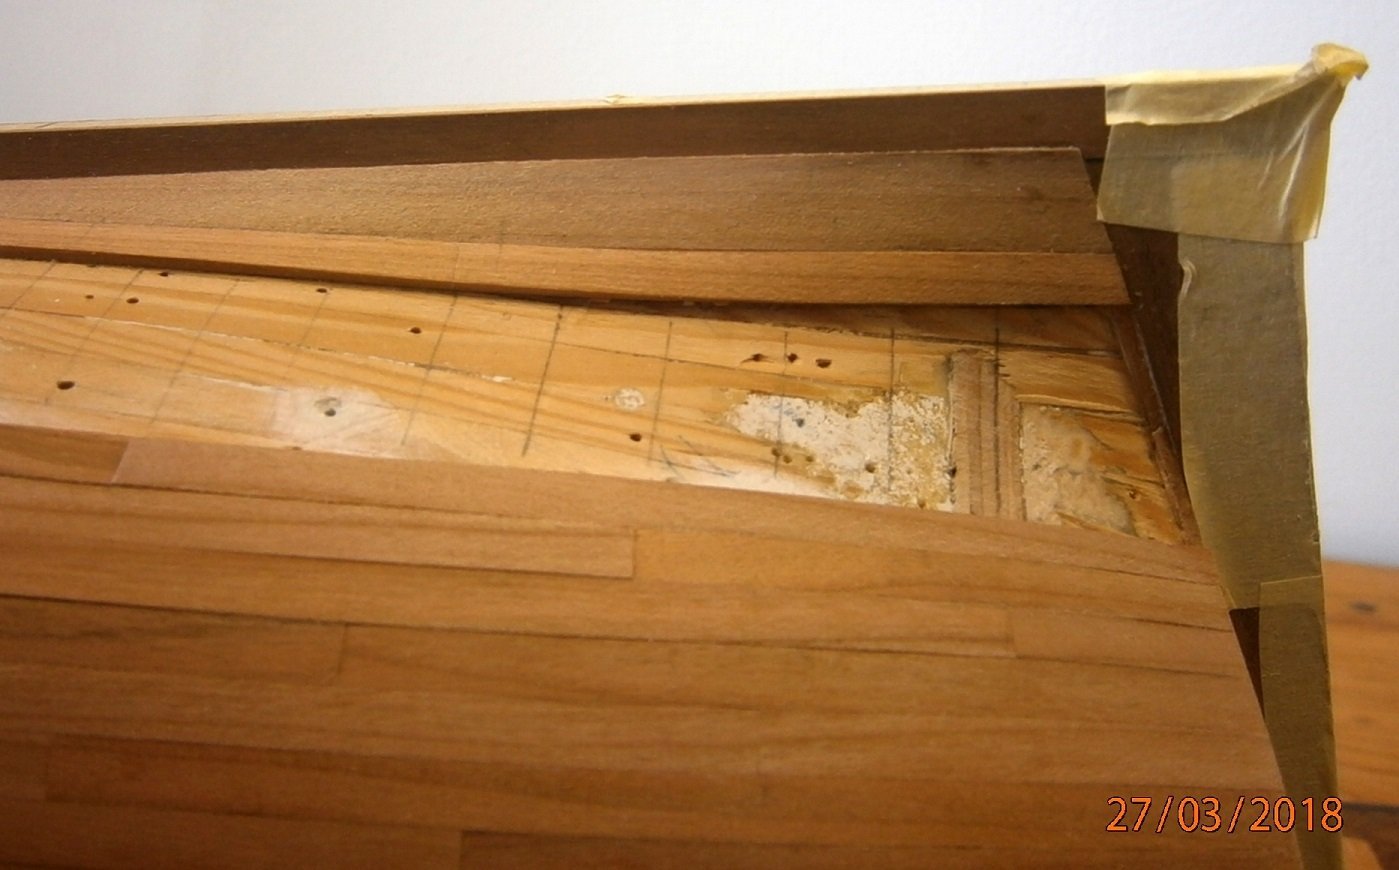
The left part of the hull is finished and ground before installing the pins...thumb.JPG.6048b166c5721ac7036cb40984d5b868.JPG)
.thumb.JPG.1e775f8fc6ed7f8d968789227bc92467.JPG)
.thumb.JPG.a34c190b418b9de5d63bf74627ece2f7.JPG)
.thumb.JPG.fb01f7eb17a7b8e624ddcb2b6885541b.JPG)
-
The banner with the name of the ship is amazing as well as the entire ship. Very inspiring building !! Ondras71
- 487 replies
-
- 2
-

-
- ship of the line
- 80 guns
- (and 1 more)
-
Roter Löwe 1597 by Ondras71
Ondras71 replied to Ondras71's topic in - Build logs for subjects built 1501 - 1750
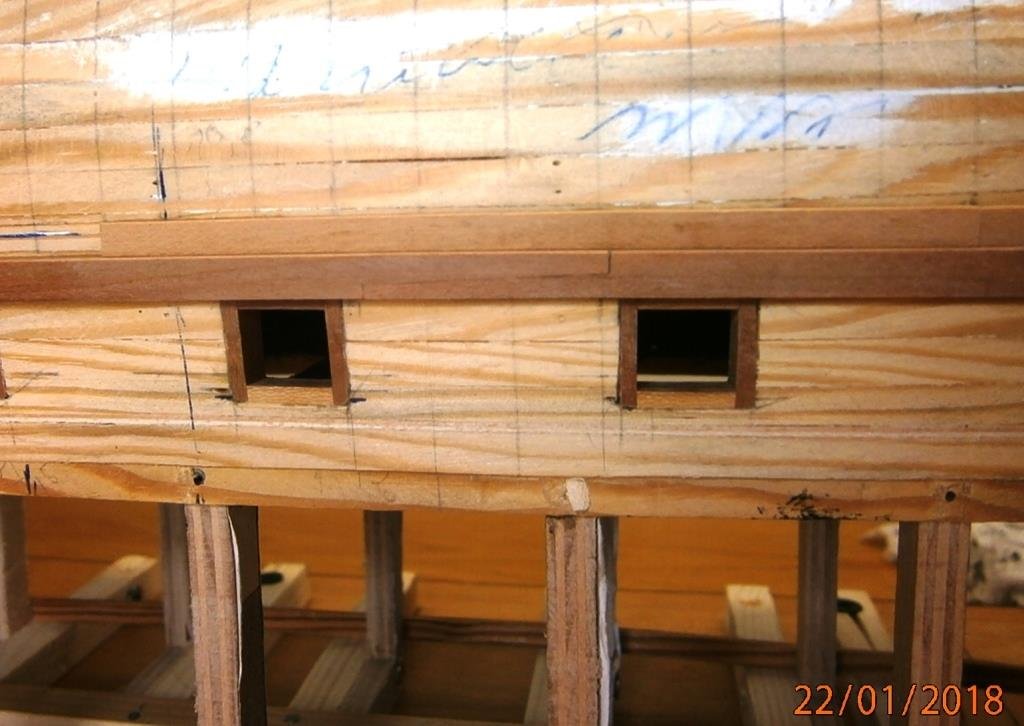
The stern under the mirror is finished .. Closing the hull ..
.thumb.JPG.f708af2590b3f598aaa3d4cf40c33d3c.JPG)
.thumb.JPG.10e177ea1c39d950d5530f3171b1607c.JPG)
.thumb.JPG.6001dc24a868e25384f80dcb812f19a2.JPG)
.thumb.JPG.dd0c45286ac81fbcb85dcbb1b76e6537.JPG)
-
Roter Löwe 1597 by Ondras71
Ondras71 replied to Ondras71's topic in - Build logs for subjects built 1501 - 1750
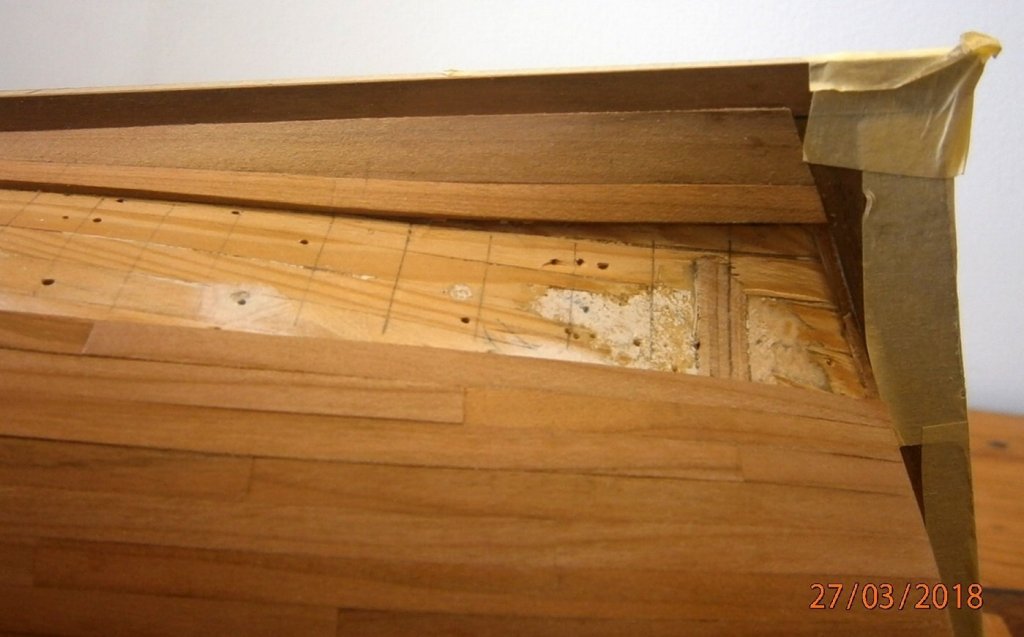
Thank you very much Backer, Ferit KUTLU.. The planking continues, difficult places at the stern under the mirror already done.. Bow closed and ready to install pins ...thumb.JPG.95557d9d9123958ff7caf99ccb91bab3.JPG)
.thumb.JPG.2a8793513c277ff4cd4a218d5ef8bb66.JPG)
.thumb.JPG.9332eb08bcf0fa34bed9507b4a0e753a.JPG)
.thumb.JPG.15fd02c657831315ac9c346139a47008.JPG)
.thumb.JPG.2760c7ad8a7da3d3a1a0a1dce90dd467.JPG)
.thumb.JPG.8d516d63bc3c9b2f5239b9b22acd0c63.JPG)
.thumb.JPG.56f325785b82f5d8dc3740443468f6dc.JPG)
-
Roter Löwe 1597 by Ondras71
Ondras71 replied to Ondras71's topic in - Build logs for subjects built 1501 - 1750
I continue tiling the hull.. I have already roughly straightened the mirror ledges..
.thumb.JPG.f99d5e0fd8c65b06ff2beb798de396ad.JPG)
.thumb.JPG.b854cdee09f744a1780c754e1e2e2c93.JPG)
.thumb.JPG.8118602e4b9d8c2c81165ce40118583c.JPG)
.thumb.JPG.3fd87e29ad37468d34548ce6eb30e9e2.JPG)
-
Roter Löwe 1597 by Ondras71
Ondras71 replied to Ondras71's topic in - Build logs for subjects built 1501 - 1750
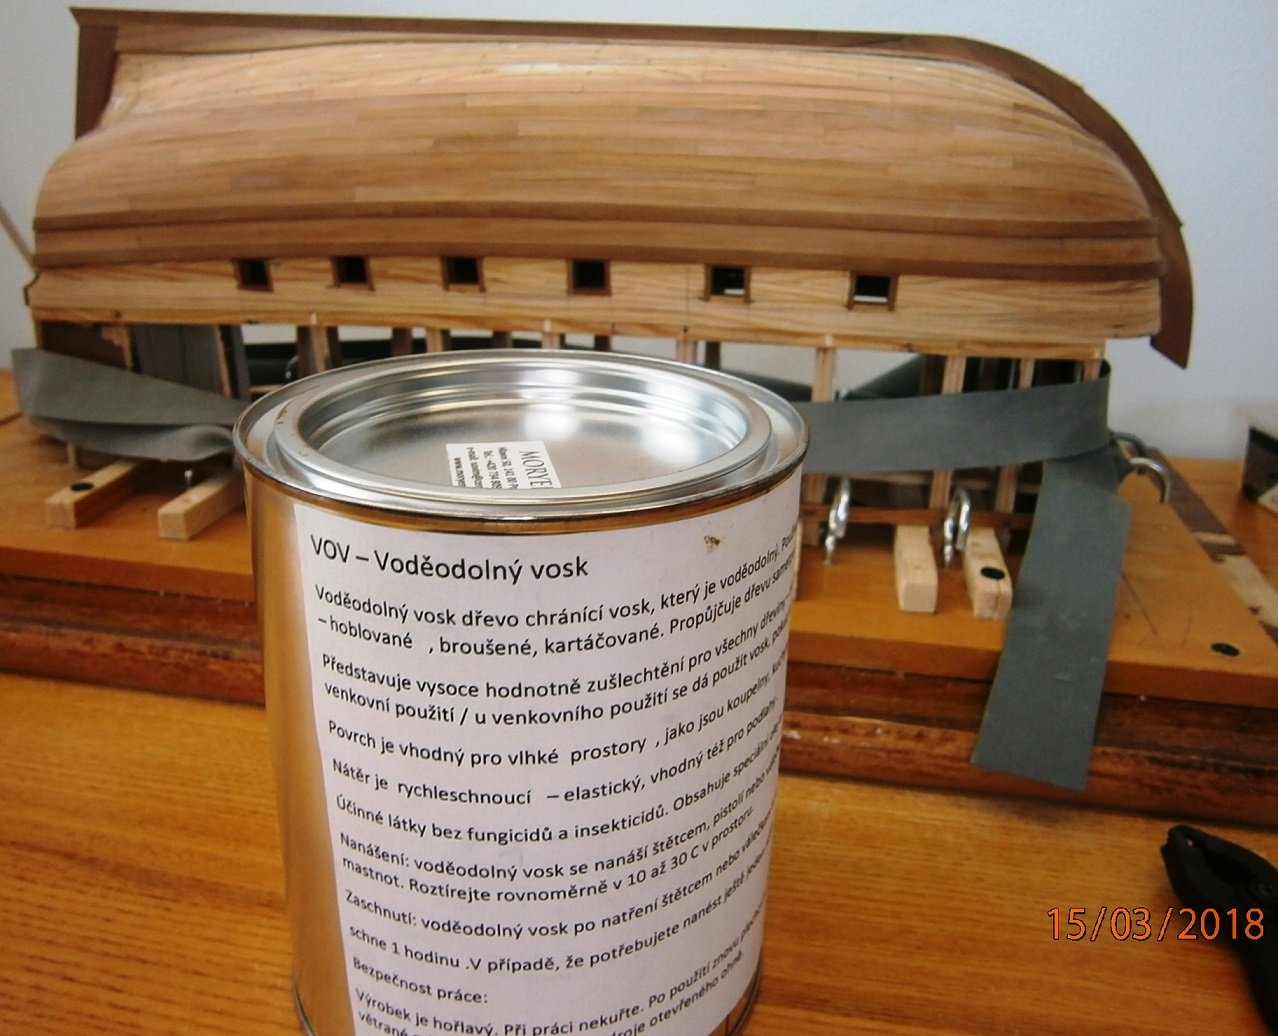
Thank you very much, I know it will be a long work. However, it is the result that's important. I created about 3,700 pcs of pins, it is stereotypical but quick, about 500 pcs in an hour.. Pinning the hull test, the dark cherry pins are nicely visible in the light cherry! I'm planning to smear the surface of the hull with restoration wax, testing it ..
.thumb.JPG.96427e561fbc358175dc085b5b8352bb.JPG)
.thumb.JPG.8e121d6f3920ac1132509f9e0dee508f.JPG)
.thumb.JPG.893106066e22a90ba1318972c7159842.JPG)
.thumb.JPG.a03c06b2695549c43025771a81a2ecd8.JPG)
-
Roter Löwe 1597 by Ondras71
Ondras71 replied to Ondras71's topic in - Build logs for subjects built 1501 - 1750
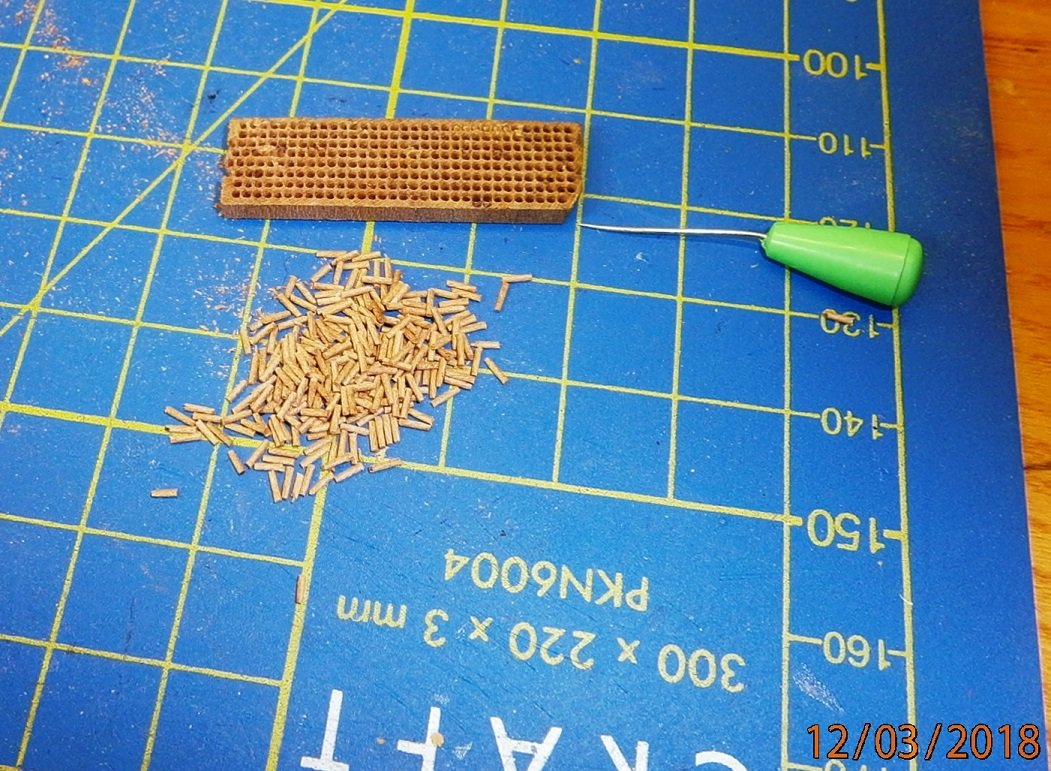
Thank you Mirabell61 I continue with the hull tiling .. I started making 0.65 mm diameter pins for the hull, only at the bottom there will be about 3.300 pieces..
.thumb.JPG.f9298c061a6349185ee93420f5264768.JPG)
.thumb.JPG.63f4497375c239714fbd024be7b3a8ee.JPG)
.thumb.JPG.bd895af955b0b4af909746f553c5f2eb.JPG)
.thumb.JPG.fb98983aa7ebbb8f9cf0da98c63a022d.JPG)
.JPG.1ee6463e3857215afe4e1d71cf8e9ec1.JPG)
.JPG.91d10f6bd6959bffba516dc30e123f9d.JPG)
.thumb.JPG.20cb9dc9140cc3b482ba3cdc109274bc.JPG)
-
Beautiful building, wonderful pattern for others !! I'm holding my thumbs, no problem with the sequel. O.
-
Roter Löwe 1597 by Ondras71
Ondras71 replied to Ondras71's topic in - Build logs for subjects built 1501 - 1750
Garboard Plank...thumb.JPG.edaec4ba063c7d38b50fc1bdd289760c.JPG)
.thumb.JPG.003a49662e0e9a521b17f1ac8a7f589d.JPG)
.thumb.JPG.c8f55286222db297486c5f6ac93b5bf2.JPG)
.thumb.JPG.d6351e0306425b6218de9b353ccb3ade.JPG)
.thumb.JPG.f1c4c1033354ff625e2006a5fc40f057.JPG)
.thumb.JPG.d8b8ef472ed9d74ab4489760f11844ce.JPG)
.thumb.JPG.74ac956521b86c3194a05d8c0176759a.JPG)
-
Roter Löwe 1597 by Ondras71
Ondras71 replied to Ondras71's topic in - Build logs for subjects built 1501 - 1750
Continue slowly in the hull tiling. The first hook on the bow has already been created .. Current condition after rough grinding ...thumb.JPG.2cab1788469d26b6d3382bf801a0d42f.JPG)
.thumb.JPG.53c6de81ff5f99303b7405d84f87d317.JPG)
.thumb.JPG.eaf89e94a3c7d0f5db3e55dad2d185af.JPG)
.thumb.JPG.5149be27beb12ab8d0e36725f23a9d1e.JPG)
.thumb.JPG.edd0324f81370f64cde93cae3e7fac38.JPG)
.thumb.JPG.d93aeaed44bf8b56089313d3e6919ae4.JPG)
-
Roter Löwe 1597 by Ondras71
Ondras71 replied to Ondras71's topic in - Build logs for subjects built 1501 - 1750
Slowly tilting the hull planks ..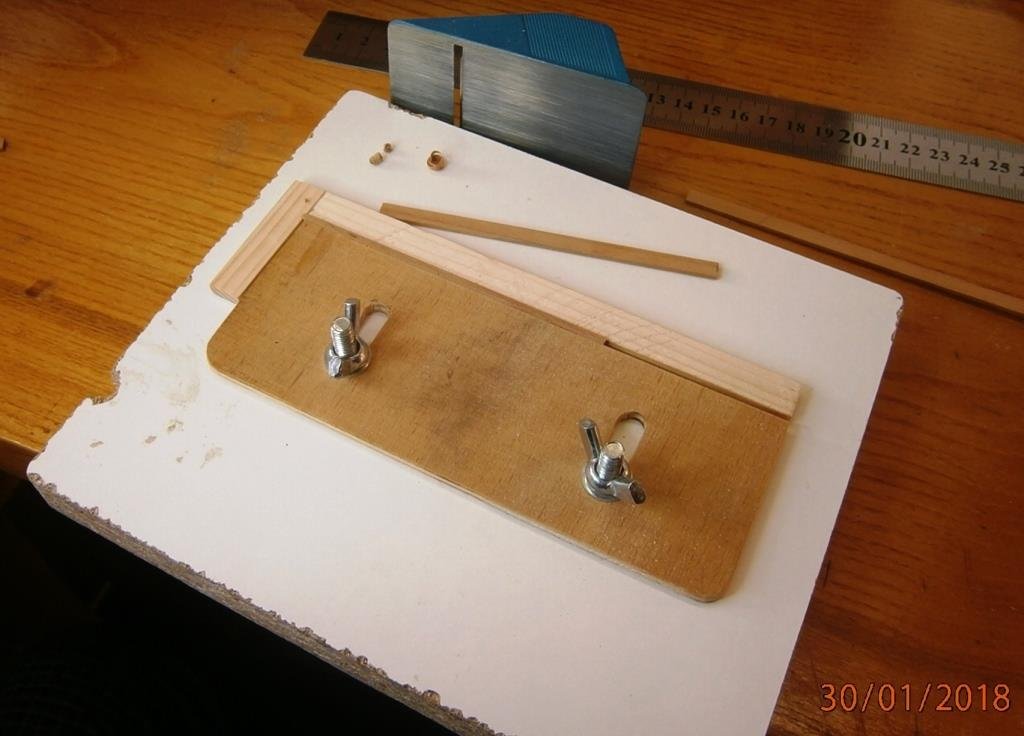

.thumb.JPG.95f235327db7c68053bd1be03a7bd8d8.JPG)
.thumb.JPG.671e2ccf2199e7d176638e0df2333ce6.JPG)
.thumb.JPG.985d32ea82169a8e447e2b441191d81e.JPG)
.thumb.JPG.a94eb79324df1d8ccdbe9565a7bfc8e1.JPG)
-
Greetings. Very nice building, very nice scale. I watch everything with interest! O.
-
Roter Löwe 1597 by Ondras71
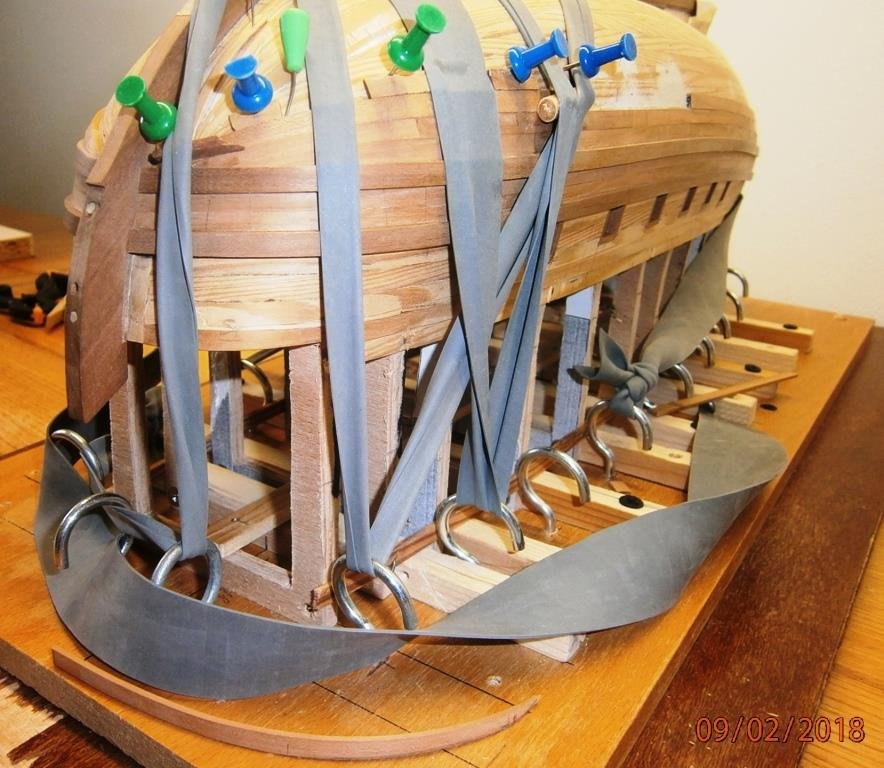
Ondras71 replied to Ondras71's topic in - Build logs for subjects built 1501 - 1750
Little progress, lower wales ...thumb.JPG.516262279eb630309b6d0075dcfc1c65.JPG)
.JPG.fbb3afd67211b5127cf3d1090ba8f543.JPG)
.JPG.429495497befe36b82533be736e0019a.JPG)
.thumb.JPG.de87fe7d6c807b120827ed98a4142267.JPG)
.JPG.0c299f4a5c2094f1afc6d0185fdd597d.JPG)
.JPG.1b33eeba0c6988815a4201708647be31.JPG)
.thumb.JPG.d6de882c7f70c29a9847f349a43ea717.JPG)
-
Roter Löwe 1597 by Ondras71
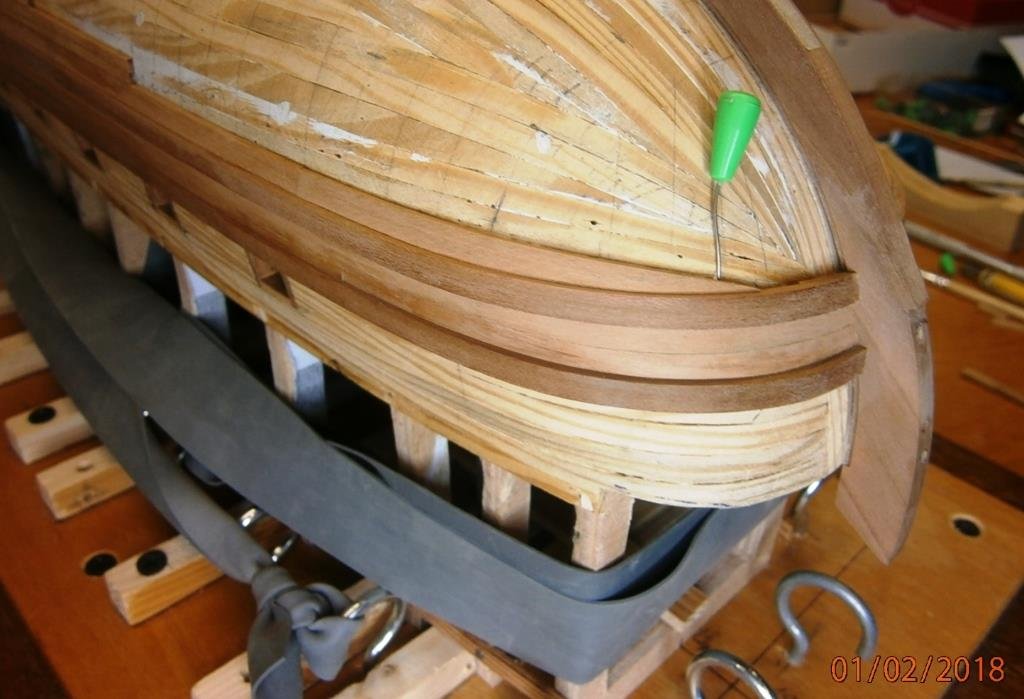
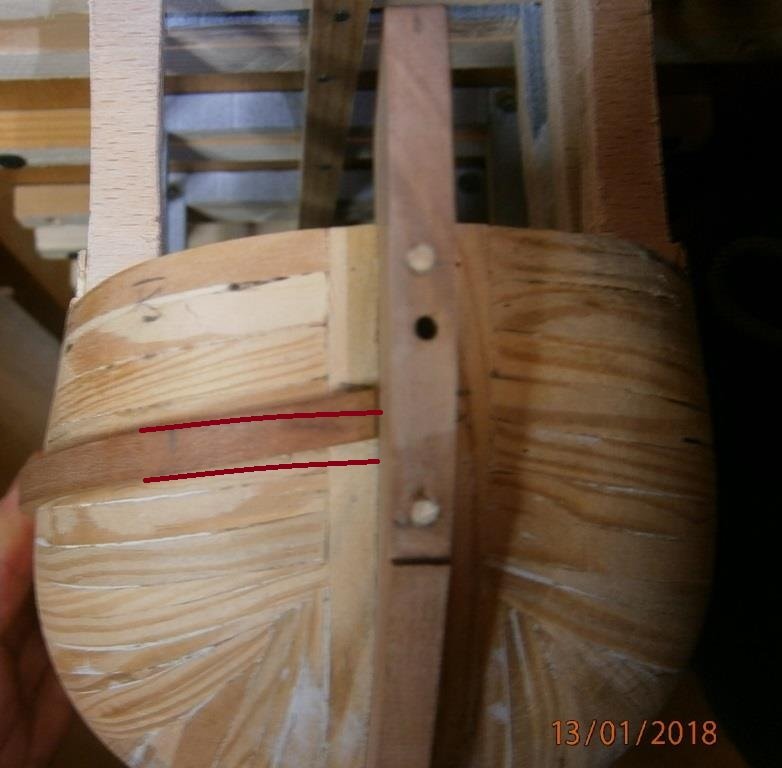
Ondras71 replied to Ondras71's topic in - Build logs for subjects built 1501 - 1750
Placed top wales made of 5x3 mm strips.. Bending it into an arc created an unsuitable shape at the stem .. The end of the strip adjusted.. The result is satisfying .. planking started..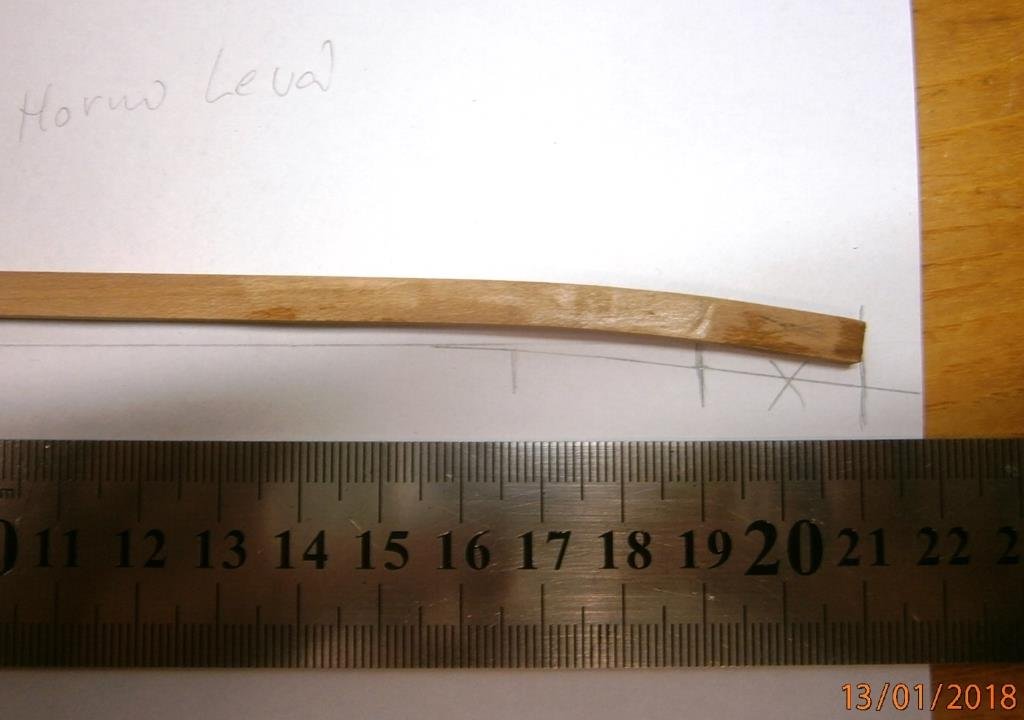
.JPG.e13c8f42626ff0ee7999a8c35e31d01e.JPG)
.JPG.00741abc214c78a61d393f5d74694288.JPG)
.JPG.ba5eafb49573a6cffe0ba3e528ad8f51.JPG)

.JPG.5e5755ad888476b87e07b8dfa5f7eb7d.JPG)
.JPG.42391ef01a3d41d23020f2b380ba94f0.JPG)
.JPG.bfe025f09773b0d1879b5ea96a4f25ad.JPG)
-
Roter Löwe 1597 by Ondras71
Ondras71 replied to Ondras71's topic in - Build logs for subjects built 1501 - 1750
Thank you honestly zappto, Backer, HubacsHistorian..!! I placed the keel, stem, stern post .. According to the instructions I found on the Internet, I have created a tool for accurate ribbing.. And it works .. And it works .. When ordering wooden strips I forgot to order 5x3 mm strips for wales, so I was forced to make them on a saw ...JPG.b6eb8f383e16b0d8bc115f33345042f1.JPG)
.JPG.b63c0e40217c011ee26df4a61e41683e.JPG)
.JPG.187668a01f60c8d38ed2191317ab1846.JPG)
.JPG.8ee052f6950f06be3a83ab420ce511f1.JPG)
.JPG.c5c8d70c102a78d690371c51fcde4228.JPG)
.JPG.9ab5b745db5aaded9d9bea62ed808c1f.JPG)
.JPG.7b9fcaa2f2607fc8811adf48e1486626.JPG)
.thumb.JPG.6e9fa6b275cfdccd717bc39d6e85ca82.JPG)
.JPG.a96b749f14a556eaf843f5738bc6ff2b.JPG)
.JPG.871e30eb25a97277a7ea1334dec3a748.JPG)
.JPG.646b6167a45c6a3f2bf43ce86652210c.JPG)
.JPG.7887dc53adc02dbbda71d6ec9413c7d7.JPG)
.JPG.1bd38db9c00dce0b0a45ebb9ff7b6104.JPG)
.JPG.56889157a2f02febbadb020b22dda2c1.JPG)
.JPG.59df4aaa5c558386ff7abbe2b779f546.JPG)
.JPG.0b526c33d61e9e3af92abd2db826e198.JPG)
.JPG.33b1a1782f7518811050dc28765fcb06.JPG)


.JPG.f5dcd4b2a25c250044b42ce58904a62a.JPG)
.JPG.3f33f8387a463dee3935a6ec89a742f0.JPG)
.JPG.4b52f692d027a6709b9fa5fe7edc5362.JPG)
.JPG.d53c0de62b451f1ec3877d339d1b395e.JPG)
.JPG.6f9c9f1eeb6bba41244c50ffc45d557e.JPG)
.JPG.aa90e85c5679cd87bb13809f0ca98124.JPG)
.JPG.a4ed3660f4006a87bd1449d9b132b1cf.JPG)
.JPG.71b40be80d93e480ec40e3c602c173a9.JPG)
.JPG.a50d74ebc2e5a5072ee63a7a738b9c2e.JPG)
.JPG.33442991f835ac9f34d550a749a41803.JPG)
.JPG.cb0df0b6778e4f6af9dcec80b86f11b6.JPG)
.JPG.e0e2948f02e2e94d8343eaba6e60156a.JPG)
.JPG.c25ce841c51cab977df876a2f52253e7.JPG)
.JPG.95f66af6ebd70297b8a8531addfc277d.JPG)
.JPG.9ea791210849996eb58e9cba5730ea27.JPG)
.JPG.e14df376387938675343a638075cc4a7.JPG)
.JPG.bf8149699407f3f765b569e02dbd2735.JPG)
.JPG.e0ad74200f7ab4cd9cacf3b6a3c579c6.JPG)
.JPG.d919915a8487b9bd4b9aa8633ab0e5db.JPG)
.JPG.02986b23554067da7e743eb1239e0df1.JPG)
.JPG.fc1e0877a278690af0b956d6dadf5e3d.JPG)
.JPG.ca63d5b55fdef0079364663987944514.JPG)
.JPG.c10f33e461c7c07414919ea31d885292.JPG)
.JPG.d7809aace17aafe233d9247582325355.JPG)
.JPG.d702bba6e4ca060f104623467acada1a.JPG)
.JPG.db317ce7838818a86badfc58369850de.JPG)
.JPG.c7c89baf88bed7cc7ddfb7204fd13e53.JPG)
.JPG.7443179c9ef4f462f133b7476cb6a776.JPG)
.JPG.dbdf00f3188b29cc4f2fbd95951dd4cd.JPG)
.JPG.35a1d9ef5d6068d1ab6411360a0189b1.JPG)
.JPG.e8a3e893760038cc7cfb6890e9151a2d.JPG)
.JPG.ebea285afd435fa30527da906876f1a1.JPG)
.JPG.d1aa4e6f8203e03d6f8ac9ced2963977.JPG)
.JPG.d40fffaaa28492f91dad4b71731a512b.JPG)
.JPG.b2a1dec63975952e85c52399d33462db.JPG)
.JPG.65a1350a0d6875af44b88e7dbd44fac9.JPG)
.JPG.e3eb6537bfe7f232d86caa057d28c479.JPG)
.JPG.f3f972be0b8c8a8563e5a2c710271862.JPG)
.JPG.44acc491c8d7ce886df8df06a0158ae5.JPG)
.JPG.381744a7c8fdd226e651dffe50a7ac92.JPG)

.JPG.906dd4aa4f7c7d44a1190bbe52afd6a9.JPG)
.JPG.c202fd3f23aabc96cdffdcd849c65f98.JPG)
.JPG.b8ab2080d0bee95fec3c8720a3d3a88b.JPG)
.JPG.b71b44a01ace02d1aa19a73871157ce6.JPG)
.JPG.fb51eeb1f5916e244ee85874ab75a3e9.JPG)
.JPG.d99d6d346efd1d74440ed30773edeb7f.JPG)
.JPG.ac1678e5a02cd0dbad4036fed06eab3c.JPG)
.JPG.7dfb3d03bbd27f9e5fbbd05e0b27c80c.JPG)
.JPG.c93be60e30d893e24bb1fd3f46ae06f9.JPG)
.JPG.9b074d4ea6d4f2b2245525bfefa49336.JPG)
.JPG.a8560b3dd7b43bb40e5409bb6d6d36e7.JPG)
.JPG.ab13c69b03e325d57ae0345bafa9f95d.JPG)
.JPG.577834e9323329e6576af208d523e808.JPG)
.JPG.ff827e37e49b1434bacc4ab6bc8970c0.JPG)
.JPG.1c600f6a9dd22cc83abc71b21ef33e5f.JPG)
.JPG.8e04c0d6e54d738bd0120e2a5bc77b9b.JPG)
.JPG.95a2537eed564a0960dbd811db759cef.JPG)
.JPG.639900c2e8887169b757c56dfb5d4426.JPG)
.JPG.165d1d61ff16828cdc5753e68454da5f.JPG)
.JPG.d80bbf0285103a839912889c8c336c65.JPG)
.JPG.e8906171d46b503594d79c1673cb2ca9.JPG)