

.JPG.1db74a3c50dee7c3f86fbf4fdabbb0e2.JPG)
Ondras71
-
Posts
438 -
Joined
-
Last visited
Content Type
Profiles
Forums
Gallery
Events
Everything posted by Ondras71
-
.thumb.JPG.4d3261ccae06041fa7cc2933fb43d577.JPG) Beautiful wooden cladding with pear planks, is not it a shame to cover the color ...? I hold my thumbs to continue building. O.
Beautiful wooden cladding with pear planks, is not it a shame to cover the color ...? I hold my thumbs to continue building. O. -
Roter Löwe 1597 by Ondras71
Ondras71 replied to Ondras71's topic in - Build logs for subjects built 1501 - 1750
Thank you very much Hubac s Histian a Backer.. I made a bowsprit.. The first door on the rear wall is fitted to the already used wax.. O..thumb.JPG.8411365b28ff7579c3094f746ed0930a.JPG)
.thumb.JPG.c102c59ff28d59637dc009100edd1ecf.JPG)
.thumb.JPG.a8a3ad399e090dca4d16f2830ab1f142.JPG)
.thumb.JPG.bcf96ec1f5b2b61d00f72de8288b94a8.JPG)
.thumb.JPG.d04170d5474263d60afd497b83374a0e.JPG)
.thumb.JPG.26f84313e1a143030f35f65d45562797.JPG)
.thumb.JPG.22e234b42232371bc0bad4b72a552431.JPG)
-
I think the problem was with starting by following the kit accurately, e.g. wide deck boards and gaps between them. After that, I started studying more. But I'm still happy as it is. I also found out that little would be enough to make the kit more accurate, but the manufacturer probably doesn't want that or it would be too expensive. Thank you very much for your feedback! Ondras71
-
With the completed model, I participated in the Czech Championship 2018 in the C8 category and here is the result.. O.
.thumb.JPG.d3d4a1d242095adb4a305fa5ae6b8ee2.JPG)
.thumb.JPG.aa6e302918b2dd12a16303bd42144bd4.JPG)
.thumb.JPG.5933f58a8ab5d9fee16f545c4ddc3a93.JPG)
-
Cutting Planks
Ondras71 replied to sfotinos's topic in Building, Framing, Planking and plating a ships hull and deck
With the Proxxon TG 125 / Ebrousím these surfaces .. O.
-
Cutting Planks
Ondras71 replied to sfotinos's topic in Building, Framing, Planking and plating a ships hull and deck
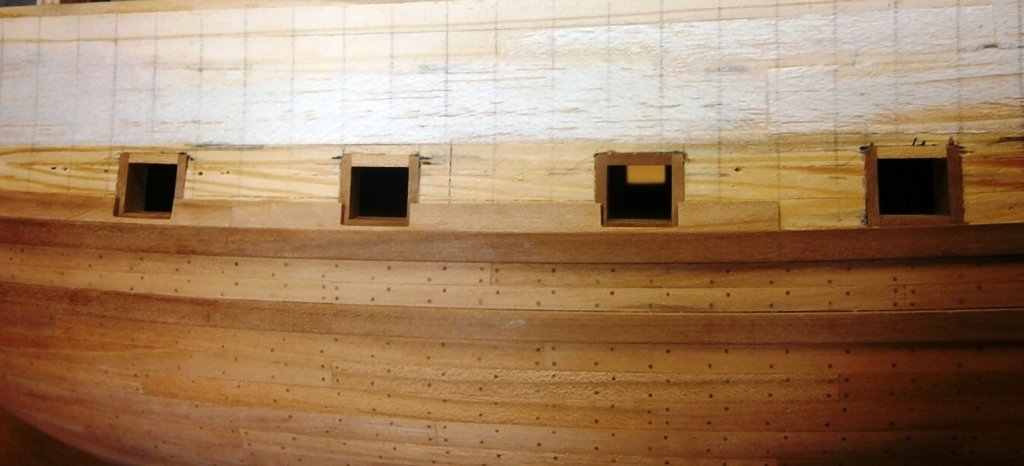
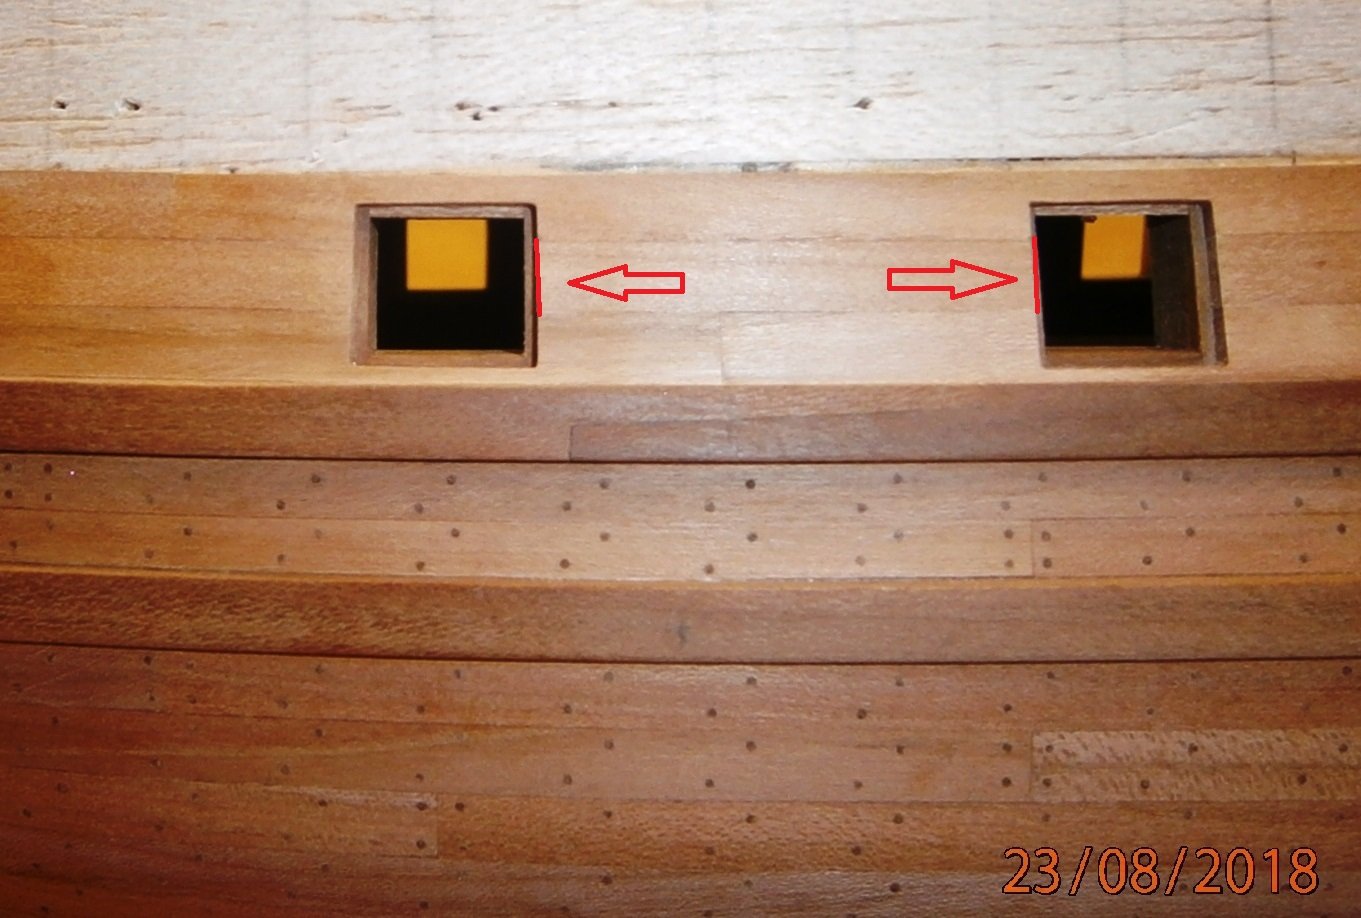
Hello. I was also dealing with how to make clean edges on the gunports. On the internet i found a simple way of hand-making this. I mark the ends of the boards with a hole-shaped cork, cut it out roughly and then grind it with sandpaper on a strip. After some testing, it works.... I use the Proxxon TG 125 / E front disc grinder to grind the board ends. If needed, I slowly turn it by hand taking less material... O..JPG.d28e2647088ce169156933ffefdf3c79.JPG)
.thumb.JPG.29d89a3d58371705eb5a45a47c87cb8b.JPG)
.JPG.1b2047db4bbcd1488bc71413db08f286.JPG)
-
Pandora by marsalv - FINISHED - 1:52
Ondras71 replied to marsalv's topic in - Build logs for subjects built 1751 - 1800
Beautiful work Marsalv. I'm looking forward to a personal tour of your boat at the Czech Championship 2018 !!!! -
MONTAÑES by Amalio
Ondras71 replied to Amalio's topic in - Build logs for subjects built 1751 - 1800
Incredibly clean work Amalio !!! I still admire .. O. -
Roter Löwe 1597 by Ondras71
Ondras71 replied to Ondras71's topic in - Build logs for subjects built 1501 - 1750
I put the gunports on the left, the left is working ...JPG.58c73b0ed0f014c796a92ea0054bb215.JPG)
.thumb.JPG.c59c3865c944c21ae358367ebc3c046a.JPG)
.thumb.JPG.1f275323c497ec58e73bafacd0ec6e52.JPG)
.thumb.JPG.5531cc26b63901b65cd5f49b7c3468bf.JPG)
.thumb.JPG.a8e99f489fe199e18bac1ba80e8fff8c.JPG)
.thumb.JPG.0465a29da63b27e13a08e8e0521b8a14.JPG)
.thumb.JPG.363b3712c2e7f48066f0a50ef63098b1.JPG)
.thumb.JPG.aba5a99be2ffdc6fdbe10cdd7535ceef.JPG)
-
Roter Löwe 1597 by Ondras71
Ondras71 replied to Ondras71's topic in - Build logs for subjects built 1501 - 1750
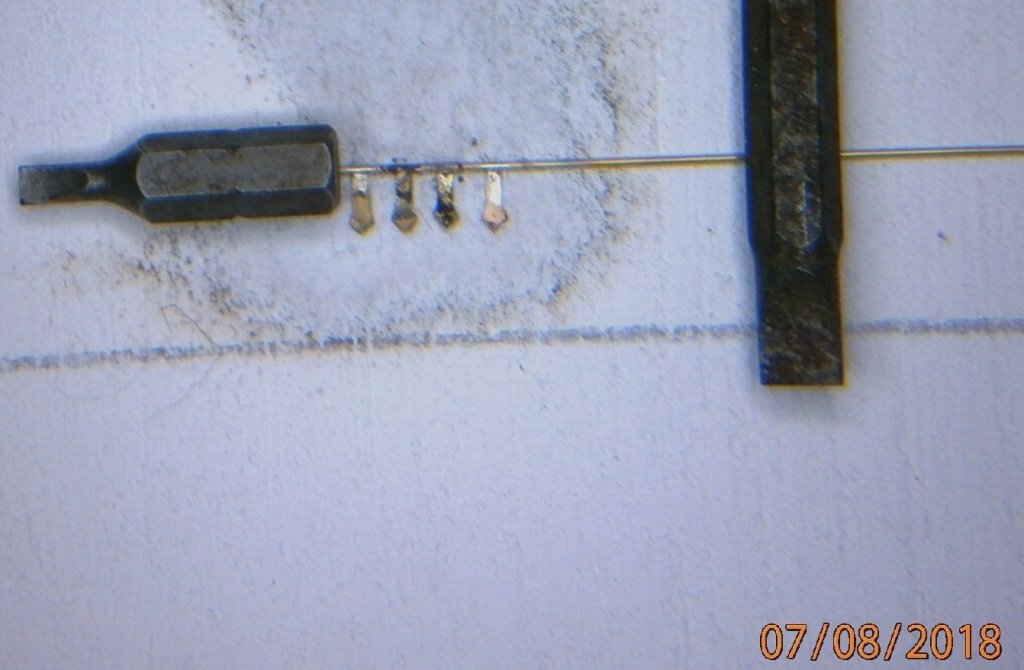
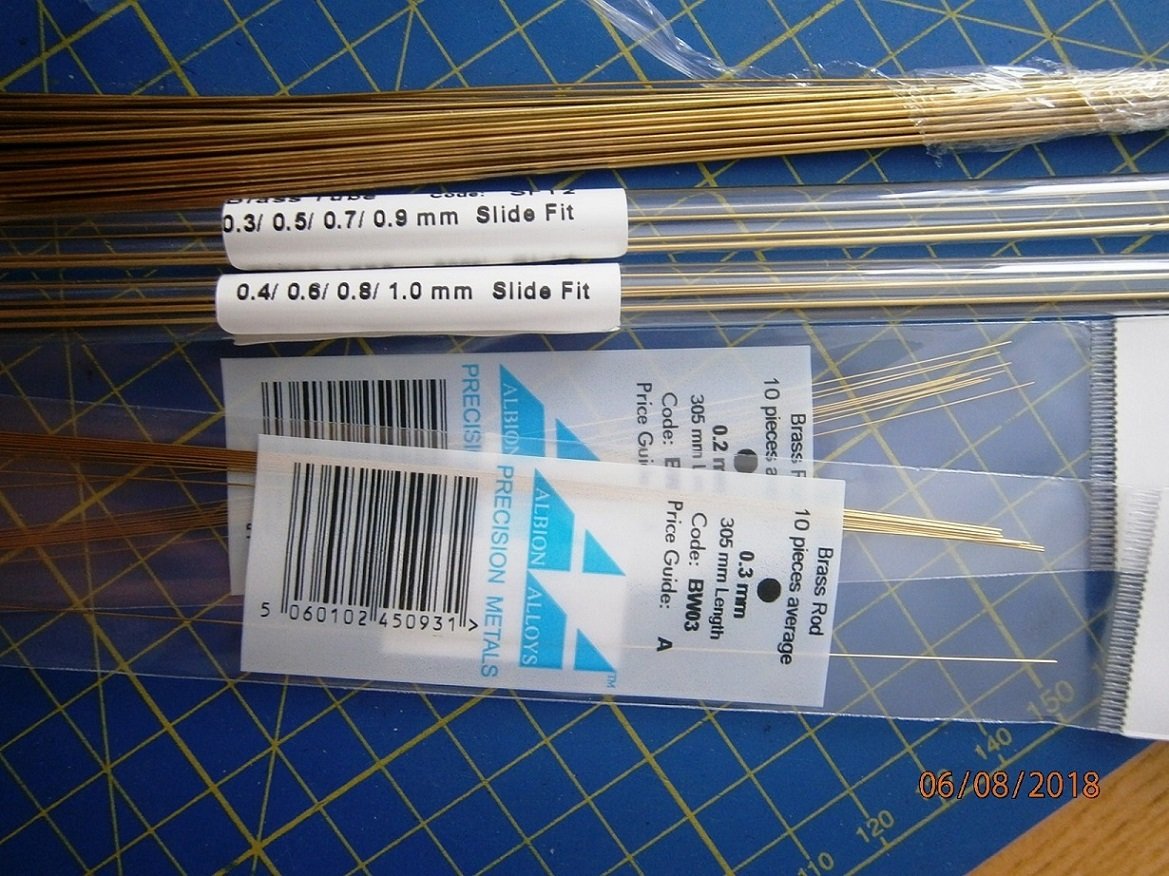
Thank you very much Louie da fly.. I continue laying planks between gun ports, but it's very slow.. I received brass material ordered from http://www.litomysky.cz/mat/mso.htm I ordered a 0.2 mm sheet, tubes ranging from 0.3 to 1 mm and wires from 0.2 to 1 mm. Material is great.. The first door hinges are made..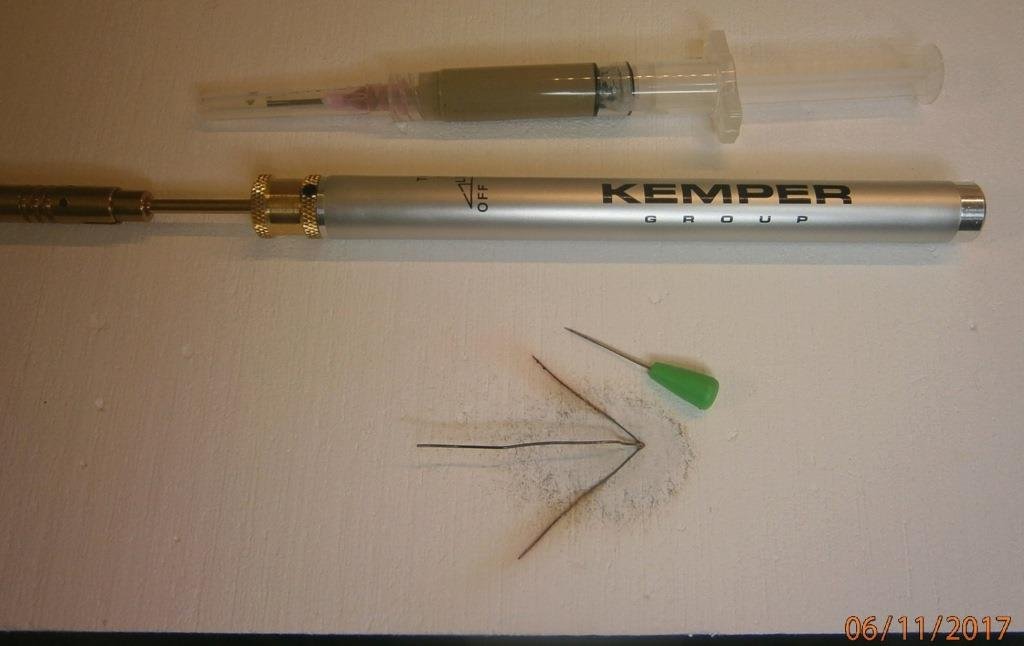

.thumb.JPG.232ffe7b9b977cd539d113000fc4783b.JPG)
.thumb.JPG.fd4cbd85c366a9c23772c61204cf368e.JPG)
.thumb.JPG.3704a2e3bd6839c083988a2387e5cf41.JPG)
-
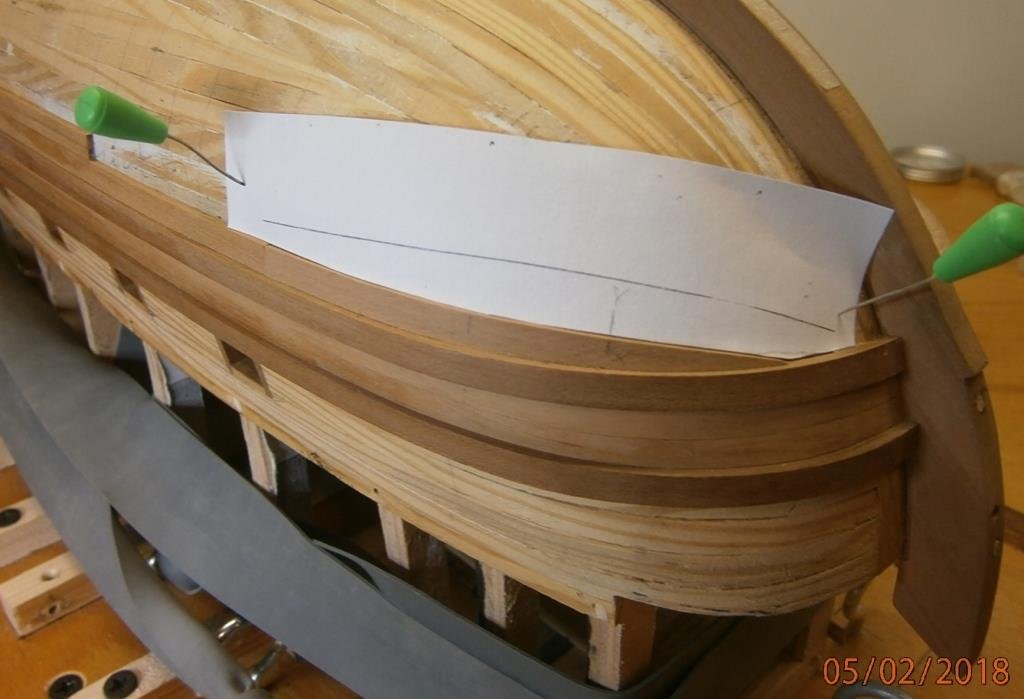
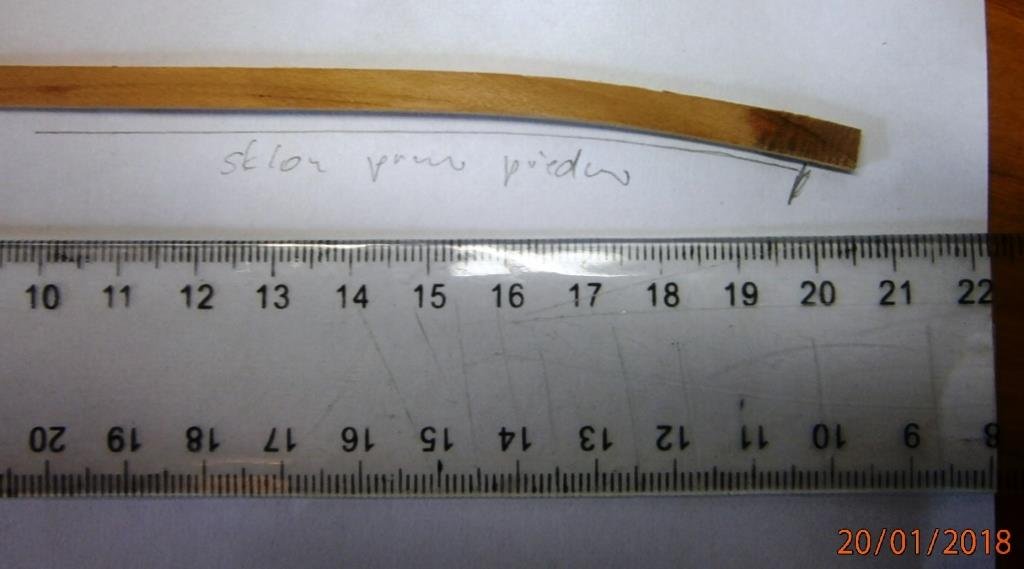
Before placing the curved planks, make a paper form, according to it bend the boards sideways and then according to the hull. do not create a clinker surface .. it's a wonderful job. You are going very well! Ondras.
-
Roter Löwe 1597 by Ondras71
Ondras71 replied to Ondras71's topic in - Build logs for subjects built 1501 - 1750
Doors placed in frame, frame bent over a template, wood shortly boiled in water .. First attempts to produce fittings. 0.2 mm brass sheet out of frames from accessories from HiSModel.com .. Still thinking about having the fittings etched, the result would definitely be better, but maybe after trying longer I'll manage to make it ...thumb.JPG.3171c36bc02f2bb93c0c8d800e6e6033.JPG)
.thumb.JPG.c4f1644f3dd6d5a474a82c769a0b1b76.JPG)
.thumb.JPG.a174a49e9b148c1d44cd24c0a590ff69.JPG)
.thumb.JPG.c3bfd0619fea5c1b52b1fe55190cc6cb.JPG)
.thumb.JPG.dc3267b70db49336c31a4c808e94c480.JPG)
-
Roter Löwe 1597 by Ondras71
Ondras71 replied to Ondras71's topic in - Build logs for subjects built 1501 - 1750
While drying the planks I started making doors. Soon I will need first ones for the mirror. I was so into it, that I also made all the door wings and prepared a form for frame bending.. O..JPG.d5cfdf098dfbf8ac908cfe7bb3ab73e5.JPG)
.thumb.JPG.4c520553c33c7000f70893c0202076f7.JPG)
.thumb.JPG.9768d1804da53bbc9c227ef4e94e872f.JPG)
.thumb.JPG.b2ba1f9e17aaff490bb71a55e4d2a0ed.JPG)
.JPG.0e048c4810cb339be61d785a7a32f06e.JPG)
-
I agree the larger draft is better. Your work is admirable. It's a beautiful sailing ship, and actually a functional one. I guess my wife is going to be forcing me to these results as well. Ondras
- 213 replies
-
- 3
-

-
- la couronne
- 74 gun
- (and 2 more)
-
Roter Löwe 1597 by Ondras71
Ondras71 replied to Ondras71's topic in - Build logs for subjects built 1501 - 1750
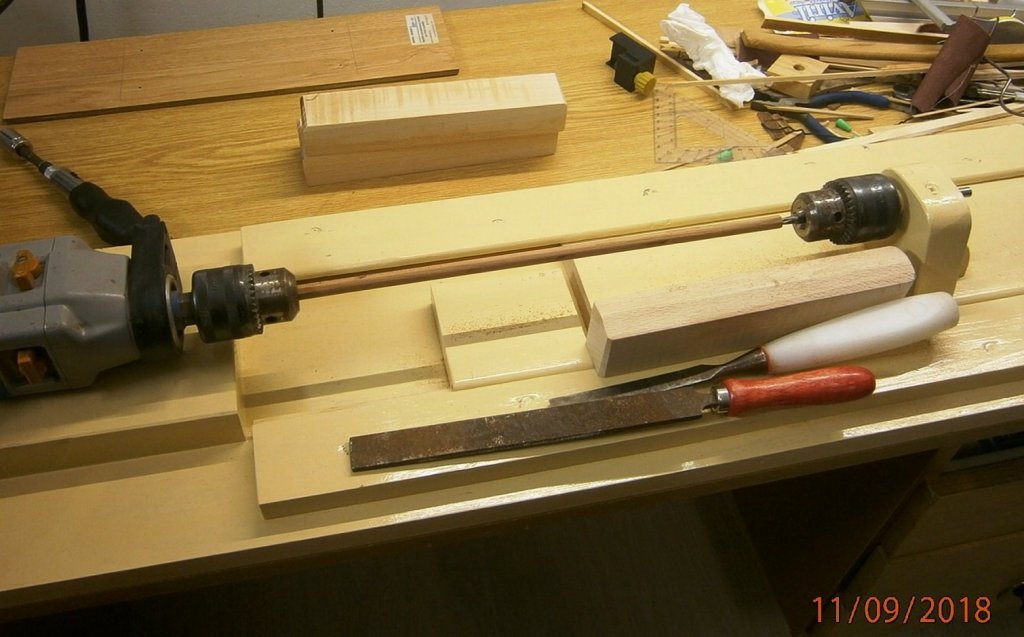
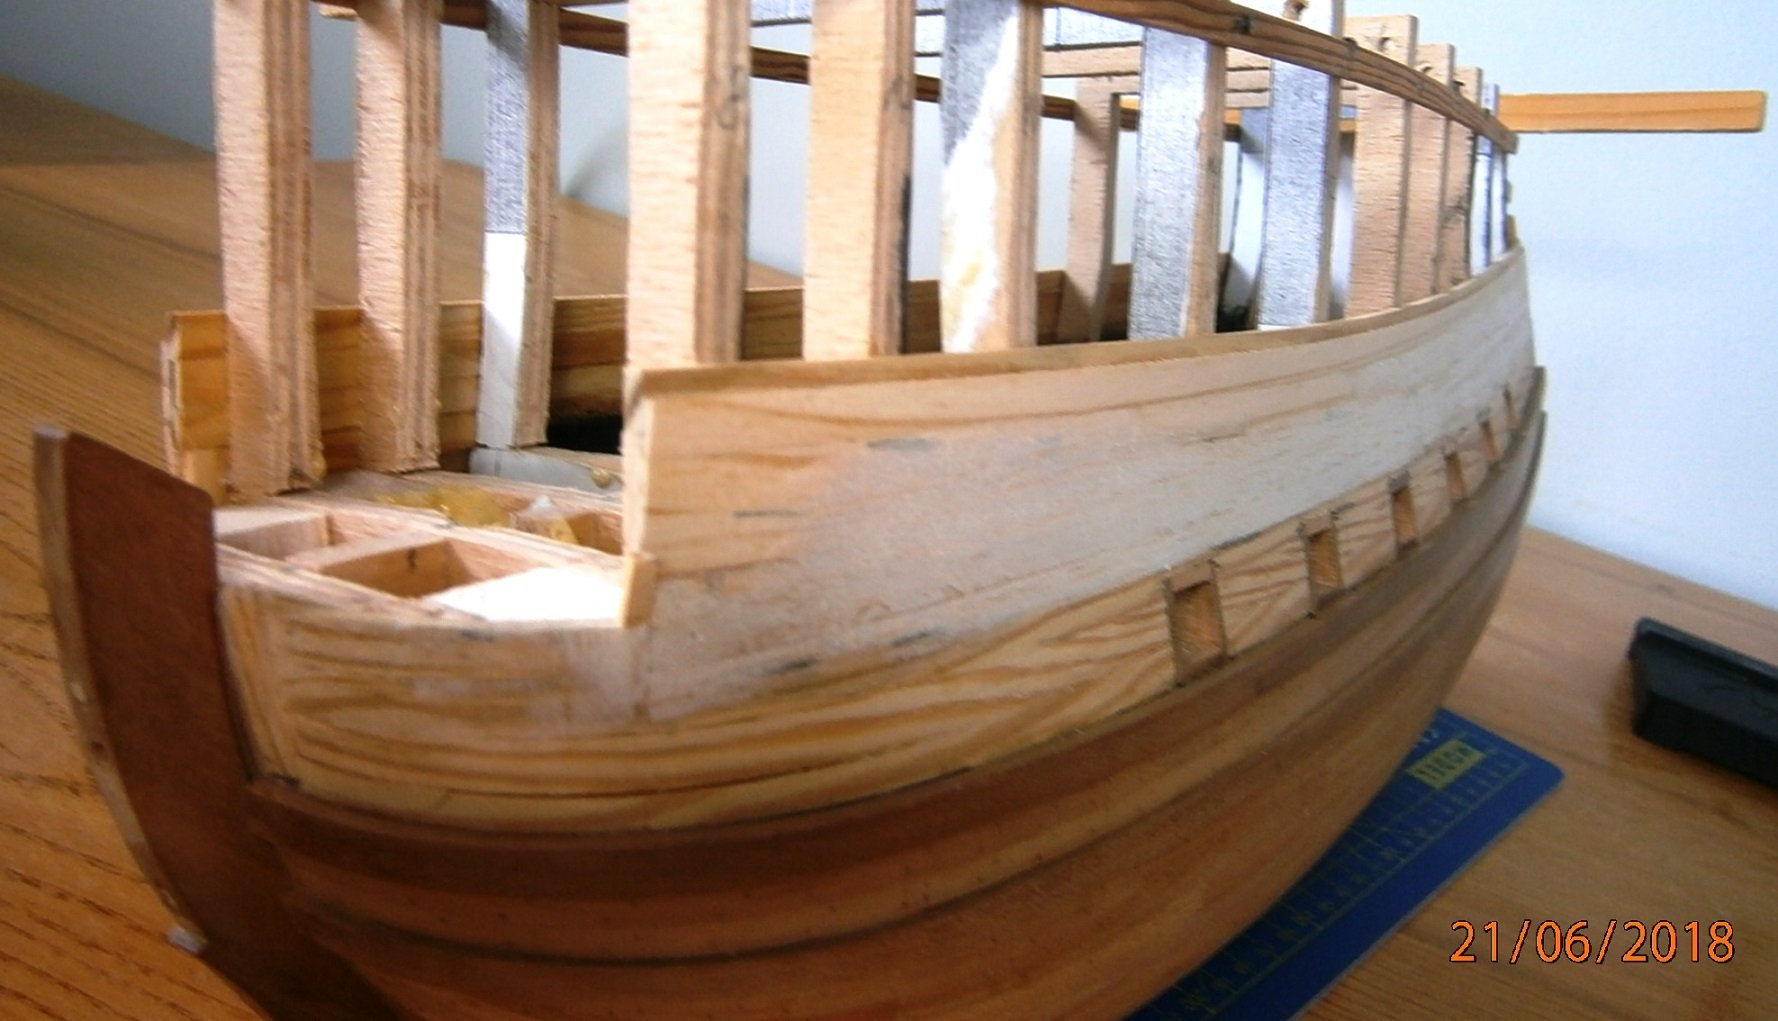
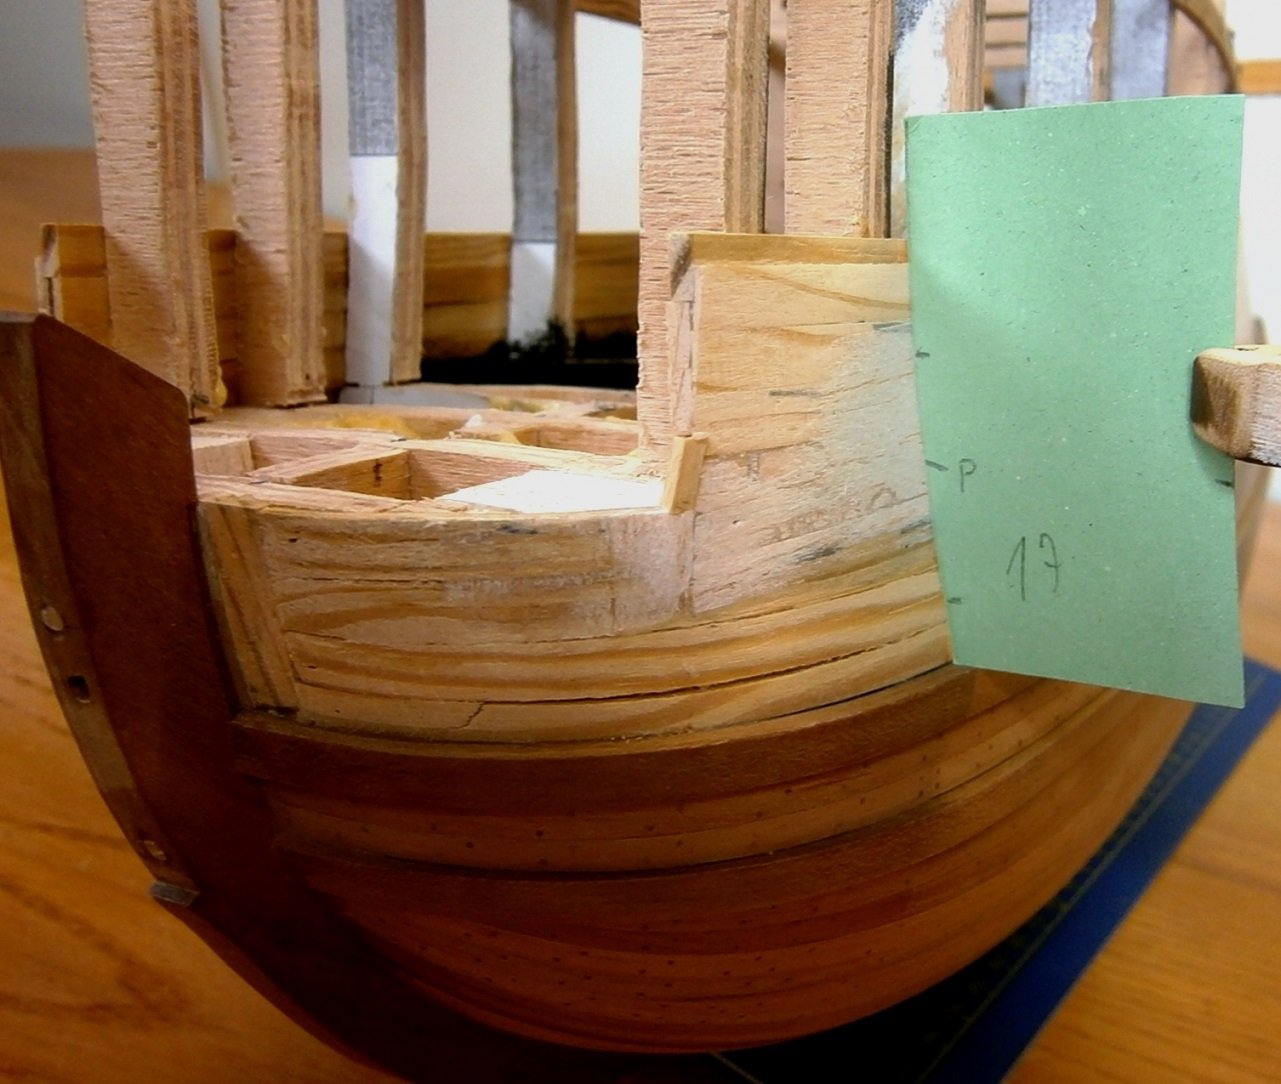
Thank you Backer!! After a long break I started laying planks over the wales .. I picked up and made a tool for safe sanding of planks to create narrow strips around the gun ports.. I bought additional clamps, four sizes of office ones and the commended MT 70 clamps with 11 cm jaws..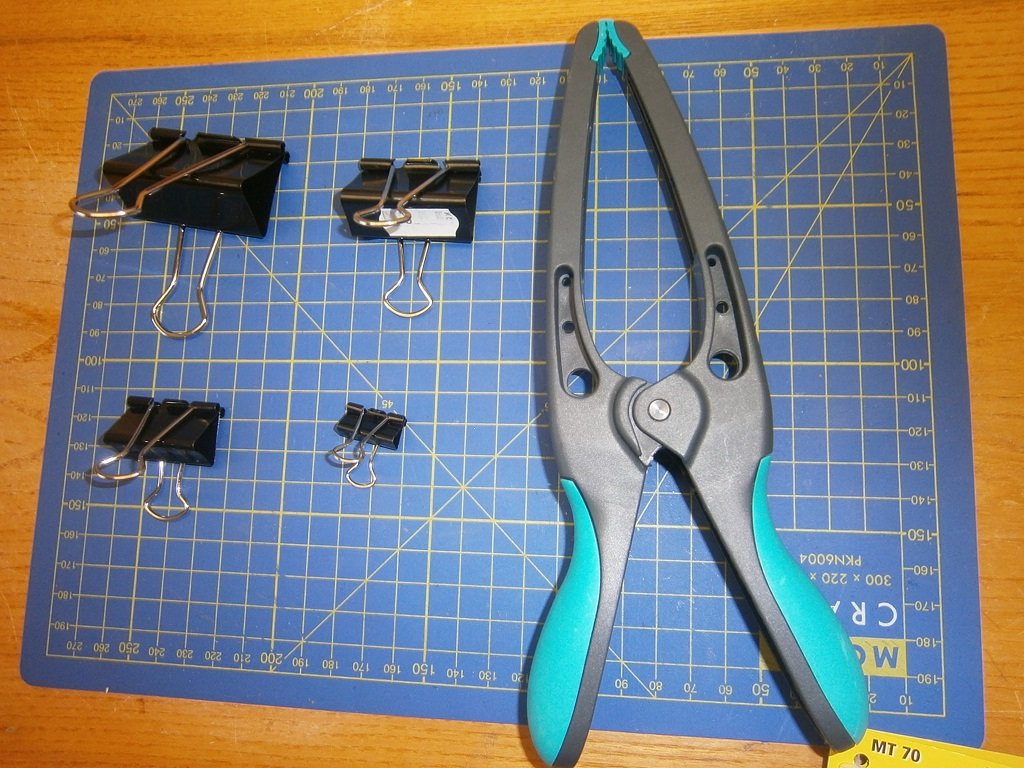
.thumb.JPG.e87525a8f855a6b4a6a27bc53a738e5e.JPG)
.thumb.JPG.d87dc1dc523bfc1295773e1bae6ad60a.JPG)
.JPG.74ae890ef75961d1a782e2696bacbe10.JPG)
.thumb.JPG.22b184a112f62c0f62f8a31a4b29414c.JPG)
.thumb.JPG.1ebef51c6c7efd717643e868efcc190a.JPG)
.thumb.JPG.27b9820277195eede73ac2981114e472.JPG)
-
Hi Doris. Your results are becoming more and more astonishing to me. O.
- 1,035 replies
-
- 5
-
-
- royal katherine
- ship of the line
- (and 1 more)
-
Roter Löwe 1597 by Ondras71
Ondras71 replied to Ondras71's topic in - Build logs for subjects built 1501 - 1750
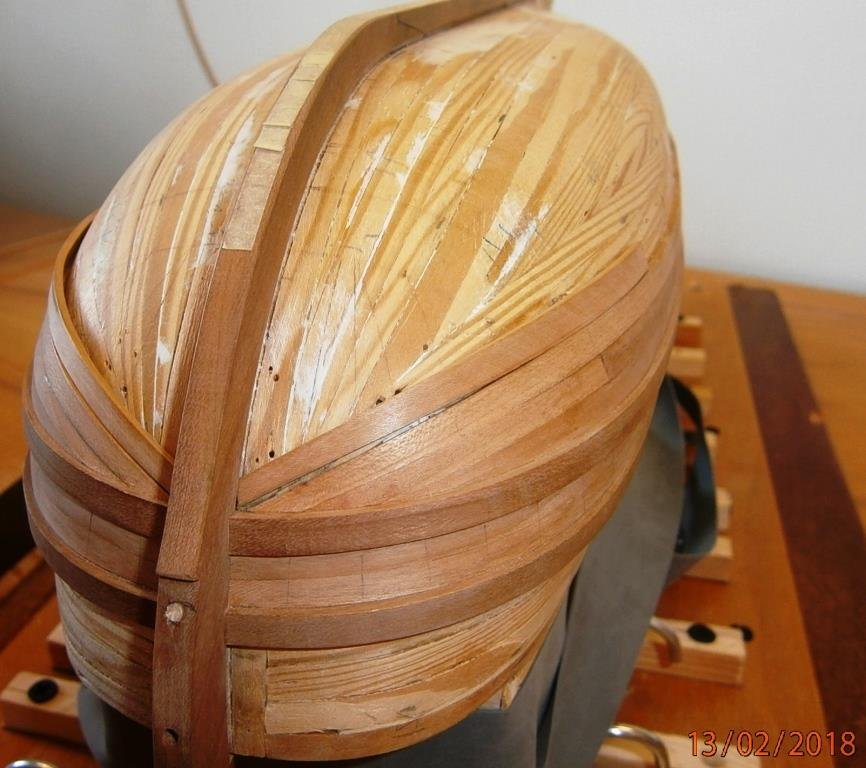
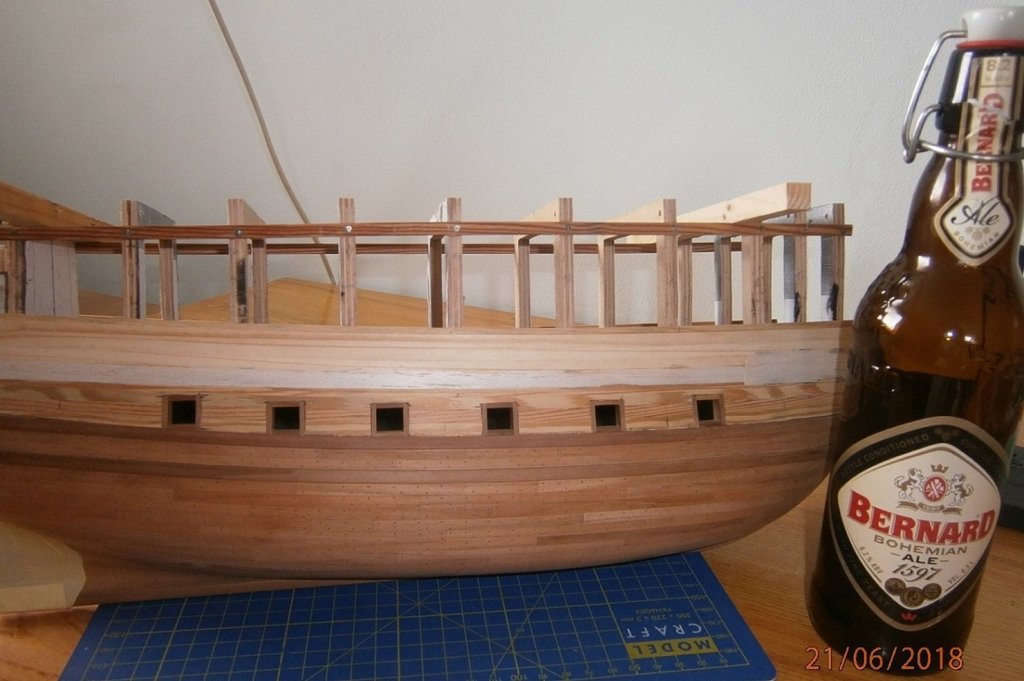
After raising the sides.. ..I modified the shape with balsa .. The hull is ready for the outer cladding up to the colored part of the sides.. I found a Czech beer of the right year..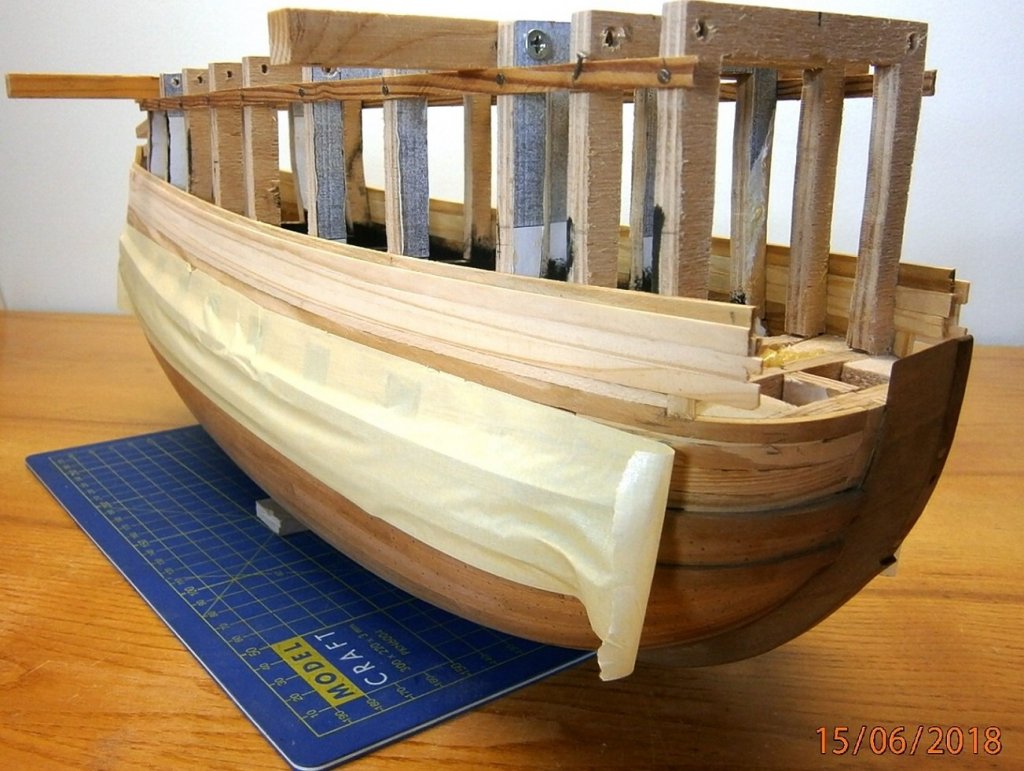


-
Roter Löwe 1597 by Ondras71
Ondras71 replied to Ondras71's topic in - Build logs for subjects built 1501 - 1750
Thank you GrandpaPhil.. I prepared the keel on the stand .. Pins between wales, approx. 3,300 pins placed .. I cut the spruce into 1x5 mm strips.. And increased the base of the hips with the 2 and 1 mm layers, That makes it 3 mm strong, on that comes the outer and inner cherry planking ...thumb.JPG.1a7535b286cdcdc386215e1128140490.JPG)
.thumb.JPG.218696554c8416f46a54ff9a21ecba4d.JPG)
.thumb.JPG.33ae8b27d0fe01a9153bcd807b4adacd.JPG)
.thumb.JPG.90efffe8c67dead92d539c654c8e59db.JPG)
.thumb.JPG.f3d4fb91c3e10fe972d37e2669d5d69d.JPG)
.thumb.JPG.cc5ac2beb92df077a6207a1df5cdc0f6.JPG)
.thumb.JPG.60f03daaf0672fc9c297aae83444d650.JPG)
-
MONTAÑES by Amalio
Ondras71 replied to Amalio's topic in - Build logs for subjects built 1751 - 1800
I'm getting more and more like your beautiful and clean work. I'm losing my hat. O. -
Roter Löwe 1597 by Ondras71
Ondras71 replied to Ondras71's topic in - Build logs for subjects built 1501 - 1750
I've finished pinning the lower mirror. There's no pins at all in the plan. I was looking for a suitable pattern, I found it in the Prins Willem monograph.. I altered my pins a bit in a way they would look on a smaller ship...thumb.JPG.0a3739f58357810e3305b96200ece4f2.JPG)

.thumb.JPG.fe2556af68f889258ad7d8805b91a14d.JPG)
.thumb.JPG.8ed69a851e34bd4b46af8f5dad560749.JPG)
-
Roter Löwe 1597 by Ondras71
Ondras71 replied to Ondras71's topic in - Build logs for subjects built 1501 - 1750
The pins placed at the bottom of the sides...thumb.JPG.0177946e2ca312a9115714ac32c60591.JPG)
.thumb.JPG.079e2ba3b114621c79b69360c0f09a02.JPG)
.thumb.JPG.786384d84778c0ab9a176d0cf3580a8a.JPG)
.thumb.JPG.c991f0efb039fc68ef8a8c45daa167f5.JPG)
.thumb.JPG.fcc86368ca9291d47ea1c409ec89e926.JPG)
.thumb.JPG.caf77782fa390a59adbd007cab5f3b58.JPG)
-
As the Ulises Victoria writes. Surely you'll be adding detail photos of the ship from all directions. Thanks Ondras
.JPG.7917ffd55d00160e7b83711efb835b87.JPG)

.JPG.b4eb7433e0876218bbe67a982c326a5e.JPG)
.JPG.5d67b49239f49a48b0e7a47220bf9c40.JPG)
.JPG.8657516d37419ed2d4a3b4147d23aaf1.JPG)
.JPG.cd0ae68729c7b6ace4d2ad5bc61810d4.JPG)
.JPG.c5dd74c03c79fd027a89f10ba1b622d0.JPG)
.JPG.bb8d6615dd398bb9a27e9f6c46acc447.JPG)
.JPG.d76153e6b00f94d042a9330909d2f7a2.JPG)
.JPG.3609c2d0eaf6292f9aa7aa749f759032.JPG)
.JPG.27c9febfe686616f8a5d25f34255fdb6.JPG)
.JPG.f36b8f2c602e2cb76104129459204302.JPG)
.JPG.5a4676a5b6a7194e5606d7f5460d9383.JPG)
.JPG.da689c5cc5e2ce03ac5ef6eb115e586c.JPG)
.JPG.a917327da771dbf283371af7fd66eb1d.JPG)
.JPG.1a3588b16d80ff51a79d0a54d6505870.JPG)
.JPG.4cbdb84d06e381cbd231ce6d77910b3c.JPG)
.JPG.caa26753f8ce6a4df737c2abaa95b476.JPG)
.JPG.a217770492dbc95daf07925437cfb343.JPG)

.JPG.f156bf60c02ff0133863c6bef78d05ab.JPG)
.JPG.fee1e52a162a8ffcc280ed962c084d90.JPG)
.JPG.bc745ed1ec51b60276178f8f1ed2a0ba.JPG)
.JPG.33725e2c1242d95679e905783c5bd8bd.JPG)
.JPG.1f93e0cb685dca7d0b4f1f0f2bfdf226.JPG)
.JPG.3c9ffe5549133ddcd5b4e5b4e12a17c9.JPG)
.JPG.710acc73b4413416818a4d5c92043cb9.JPG)
.JPG.c5e4f0e7631b58427a4a6fe3271f3f00.JPG)
.JPG.cb41d988ee84bd8f1055fdbec5438c63.JPG)
.JPG.e6b8c2d77f8878e0ee7bdbc95cc7af33.JPG)
.JPG.a5c0790cfcbc0ff2e9e2fbedf1c8e8e5.JPG)
.JPG.21b5634cfcc6573cdc8c7a9d463d620c.JPG)
.JPG.52c10571bd05c0affb556d4a8c0a128a.JPG)
.JPG.c18411b3cc44caf264a5b34190f89a45.JPG)
.JPG.3cf3f0488b72d2e25fdd1a55bc4fad36.JPG)

.JPG.88861b00e65644f6231b8dea3d3e19b5.JPG)


.JPG.a8b247b379365e3da0b47f61f16a8462.JPG)
.JPG.5788af35c09dc124b83c60e6f73d1e5b.JPG)
.JPG.72460c5dc7863ac013db1a601adcd281.JPG)
.JPG.e5254d8c62efbf86cfda98732976900a.JPG)
.JPG.cb1a60f05f2149024b1db8f7aabf4684.JPG)
.JPG.fafb8221abcd95c81de8689582126686.JPG)
.JPG.ab8d33ce3d6d8e03c2ef976ad5c0d3c4.JPG)
.JPG.a96b749f14a556eaf843f5738bc6ff2b.JPG)
.JPG.871e30eb25a97277a7ea1334dec3a748.JPG)
.JPG.646b6167a45c6a3f2bf43ce86652210c.JPG)
.JPG.7887dc53adc02dbbda71d6ec9413c7d7.JPG)
.JPG.1bd38db9c00dce0b0a45ebb9ff7b6104.JPG)
.JPG.56889157a2f02febbadb020b22dda2c1.JPG)
.JPG.59df4aaa5c558386ff7abbe2b779f546.JPG)
.JPG.0b526c33d61e9e3af92abd2db826e198.JPG)
.JPG.33b1a1782f7518811050dc28765fcb06.JPG)