

.JPG.1db74a3c50dee7c3f86fbf4fdabbb0e2.JPG)
Ondras71
-
Posts
443 -
Joined
-
Last visited
Content Type
Profiles
Forums
Gallery
Events
Everything posted by Ondras71
-
.thumb.JPG.4d3261ccae06041fa7cc2933fb43d577.JPG)
Roter Löwe 1597 by Ondras71
Ondras71 replied to Ondras71's topic in - Build logs for subjects built 1501 - 1750
Unpainted left side planks finished. The window has not been stuck yet...thumb.JPG.13c797b1733c589223caac5a3ad9a918.JPG)
.thumb.JPG.15b5dd021b25023d62168aa651f2f76c.JPG)
.thumb.JPG.ec17aa66f702c3a9dc70656295c2781e.JPG)
.thumb.JPG.8266c56203b50477a17f86bbec3ff6c6.JPG)
.thumb.JPG.ab8a50e2f3532a8e24e10ba034f2ad1a.JPG)
-
Roter Löwe 1597 by Ondras71
Ondras71 replied to Ondras71's topic in - Build logs for subjects built 1501 - 1750
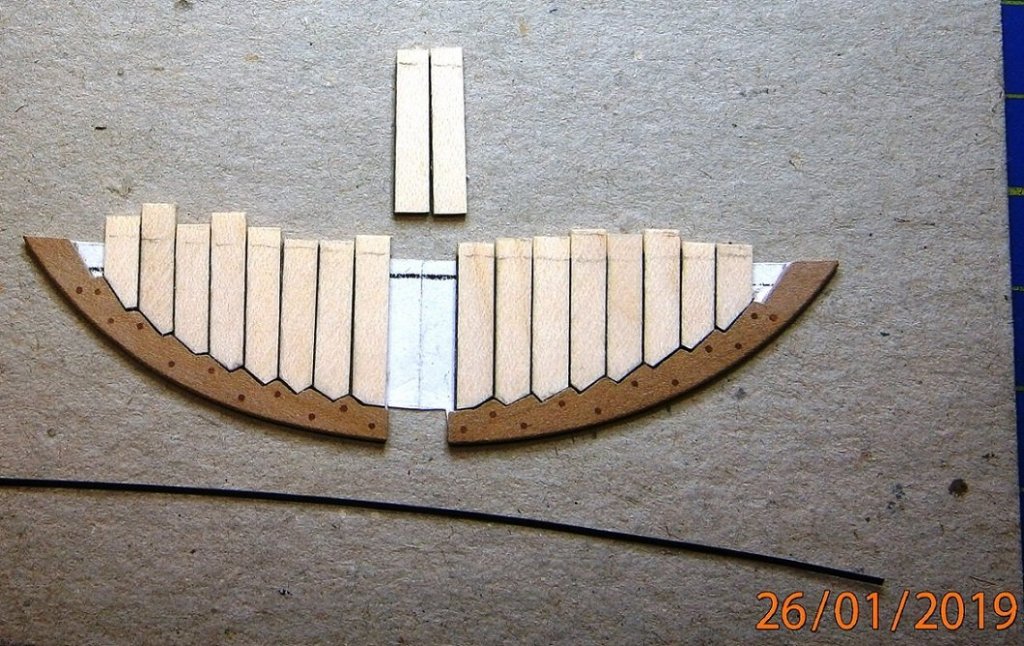
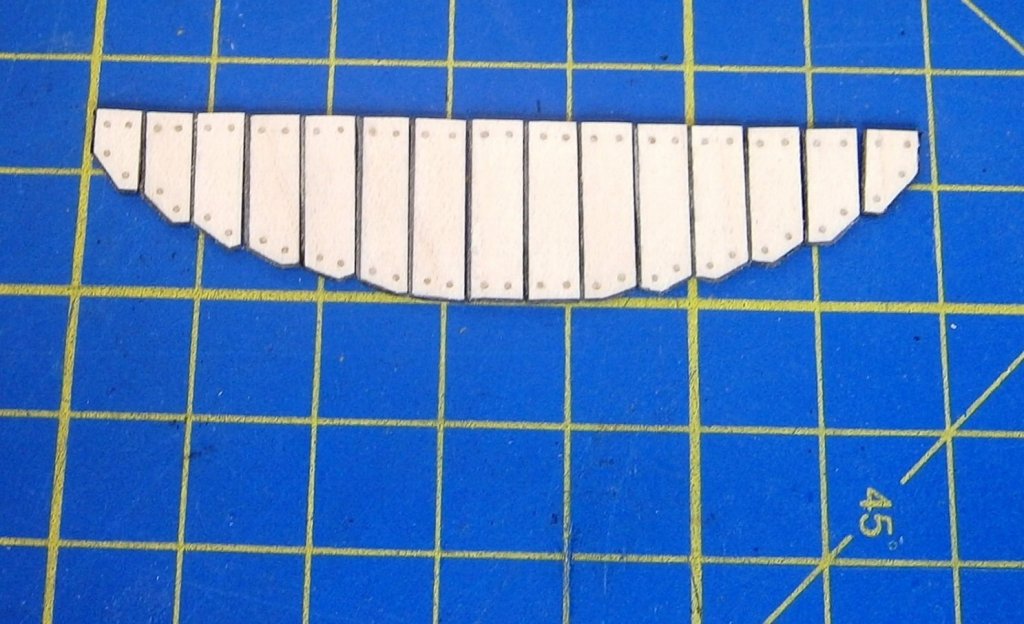
Slow Laying of Expanding Planks .. Side Window Manufacturing ...thumb.JPG.bc8bcebf7f9d19496b1e9bdb893b8e47.JPG)
.thumb.JPG.7bbc3bbd8f897a5d0fad3cb7d7559bf2.JPG)
.thumb.JPG.079e5a1cc89e80772fe6434927e3399a.JPG)
.thumb.JPG.cdc2e2ed44b3d7f7f77a59af76e211d3.JPG)
.JPG.941692594ba270d7124c48aca6fd2bd9.JPG)
-
Roter Löwe 1597 by Ondras71
Ondras71 replied to Ondras71's topic in - Build logs for subjects built 1501 - 1750
I continue on the last strip of uncolored boards. Front of the gunports .. O..thumb.JPG.37ec289ab1c1044c23c4e721d6025d70.JPG)
.thumb.JPG.7cd6ceacc9987851254e4270e3462949.JPG)
.thumb.JPG.71c9fb23de8930e3e0869cf796cc9bec.JPG)
-
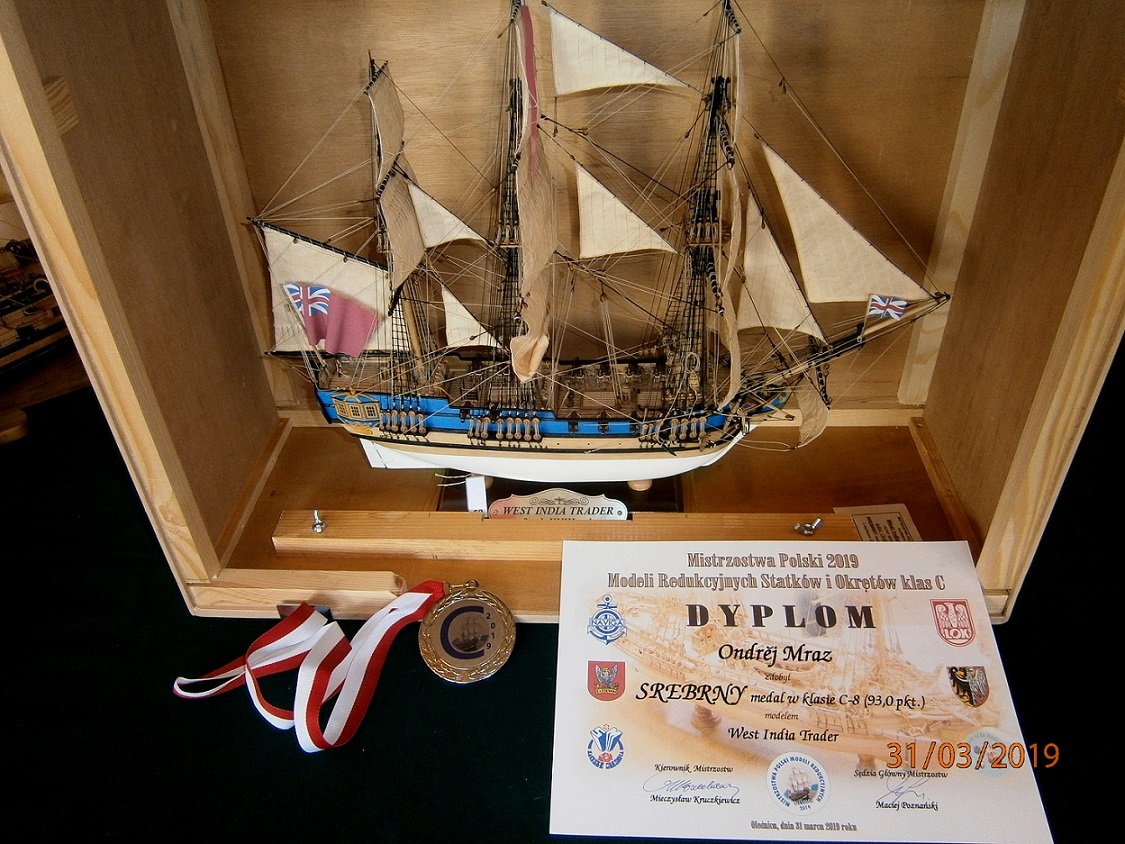
Thank you all... Now silver in C8 confirmed at Polish Championship 2019 C in Olešnice .. O.

-
Roter Löwe 1597 by Ondras71
Ondras71 replied to Ondras71's topic in - Build logs for subjects built 1501 - 1750
Greetings Backer and thank you for the information, I will definitely use it..🔎 I placed the drain on the left side and added wales.. O.
.thumb.JPG.506838f4ca1aa4a089cd1b888d68eb02.JPG)
.thumb.JPG.94bb9d41b28be31449808ae15caa6a06.JPG)
.thumb.JPG.254a229c3e8e30618a3ee1a7639d41e3.JPG)
.thumb.JPG.0a33ba6d60f80e4b7e3cf9b6cb88babd.JPG)
.thumb.JPG.1116f0a9abac3d7045ec8dc1ffdc8ecb.JPG)
.thumb.JPG.a61427d4e02aecc9d6d1bca769e7b2c2.JPG)

-
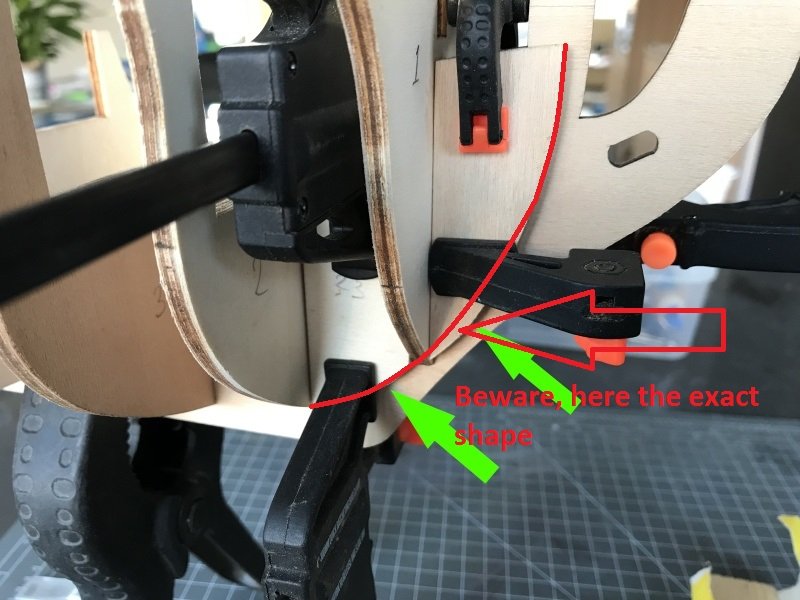
Greetings SHIPSCAT. Here's another observation about building this kit. Problems started with skeleton .. I keep my fingers crossed for the building .. Maybe this information will help you.. https://www.modelforum.cz/viewtopic.php?f=177&t=100656 O.
-
Roter Löwe 1597 by Ondras71
Ondras71 replied to Ondras71's topic in - Build logs for subjects built 1501 - 1750
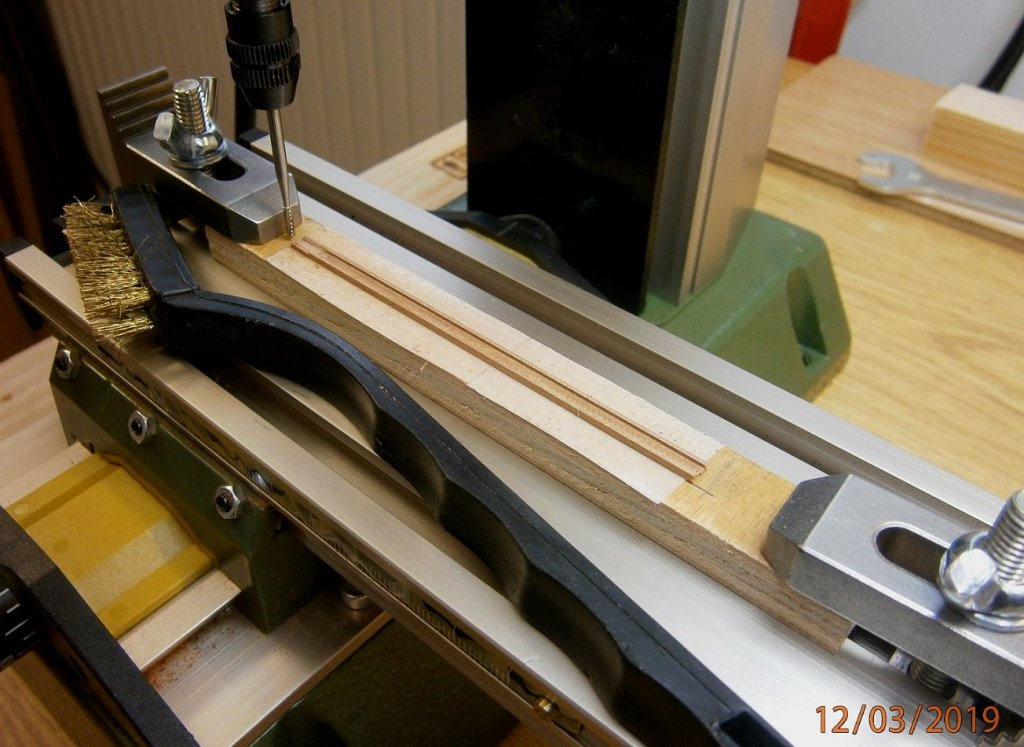
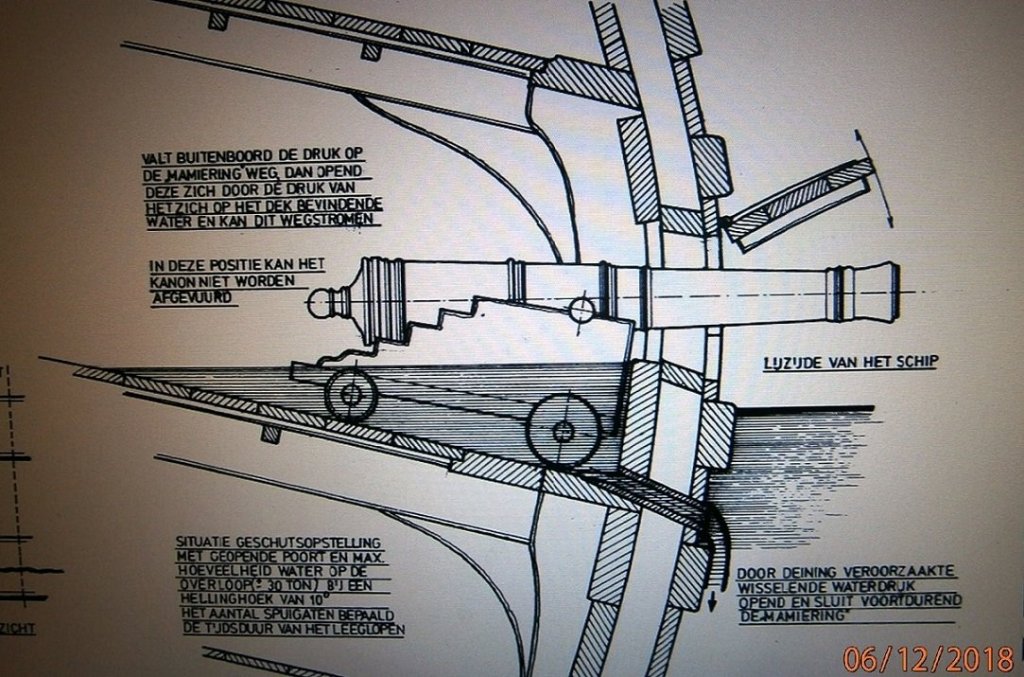
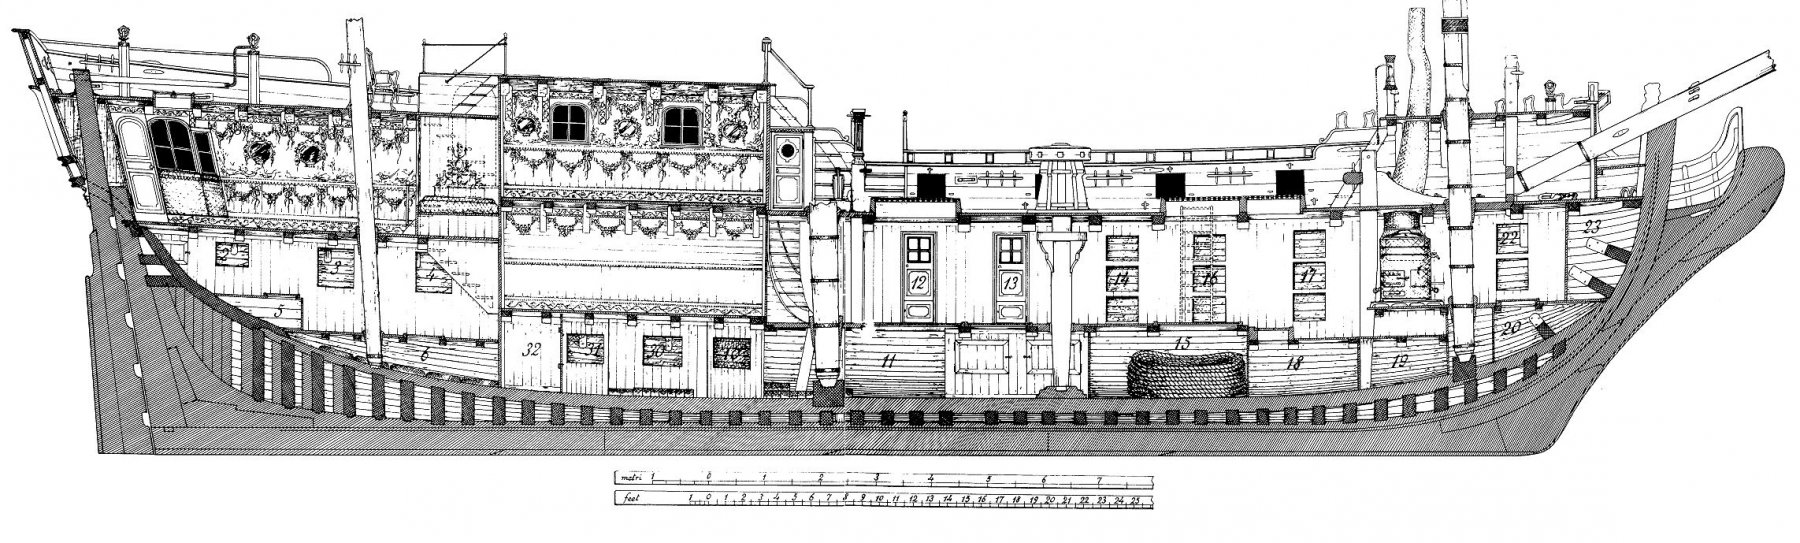
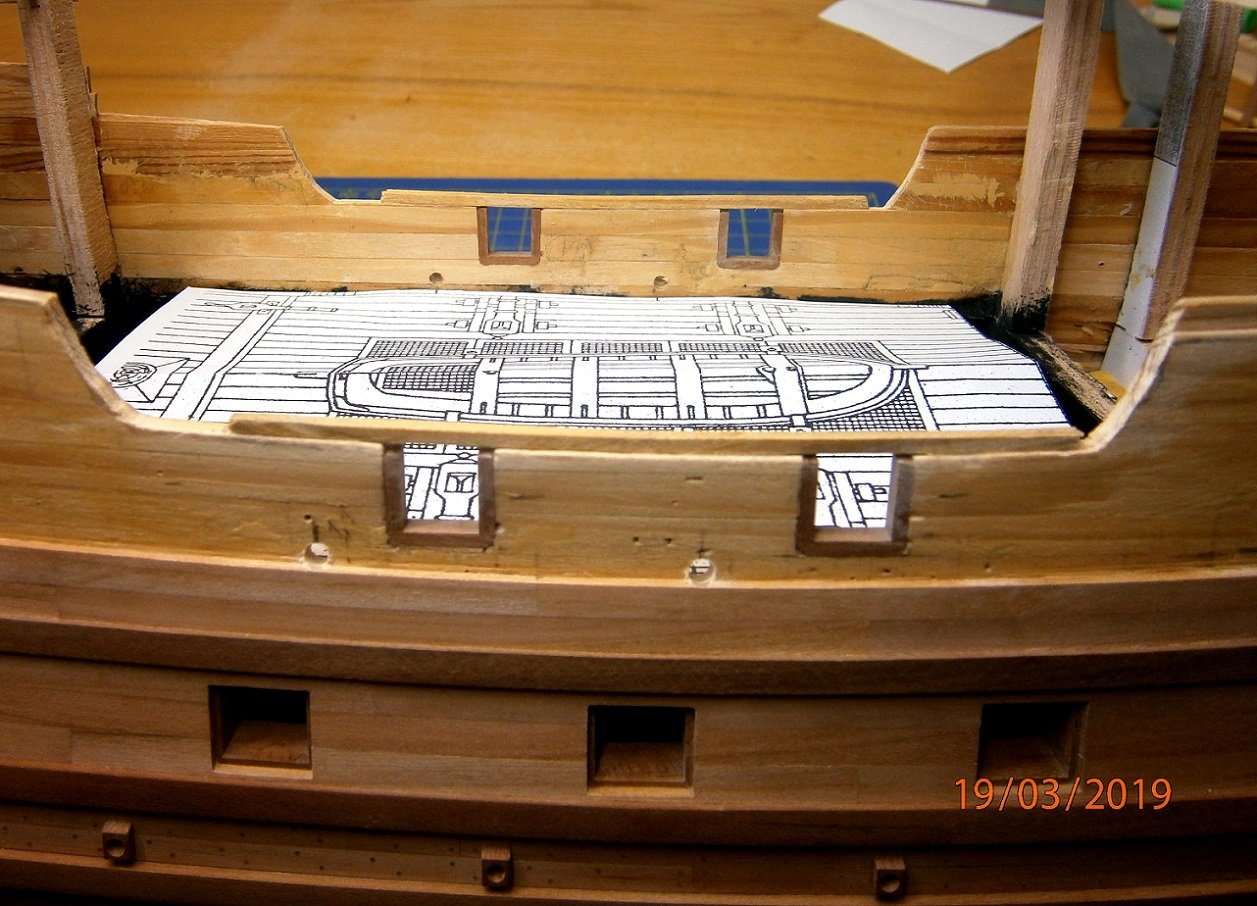
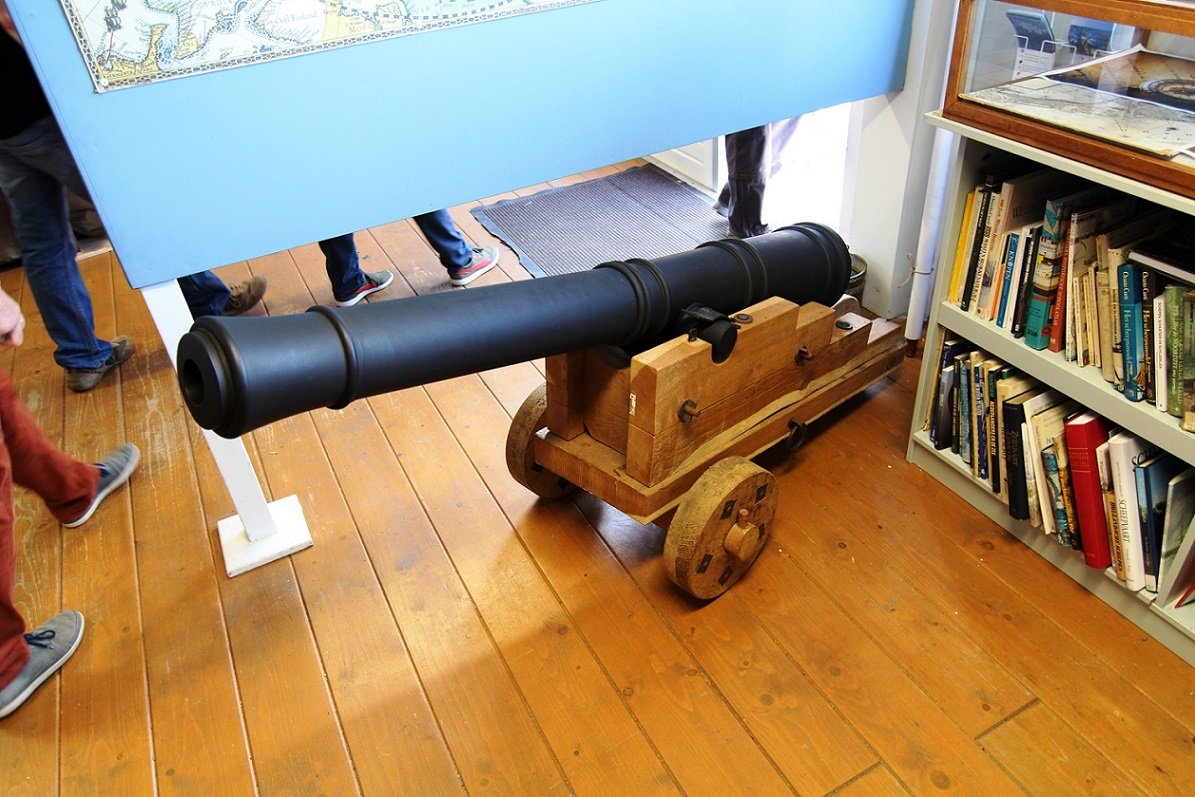
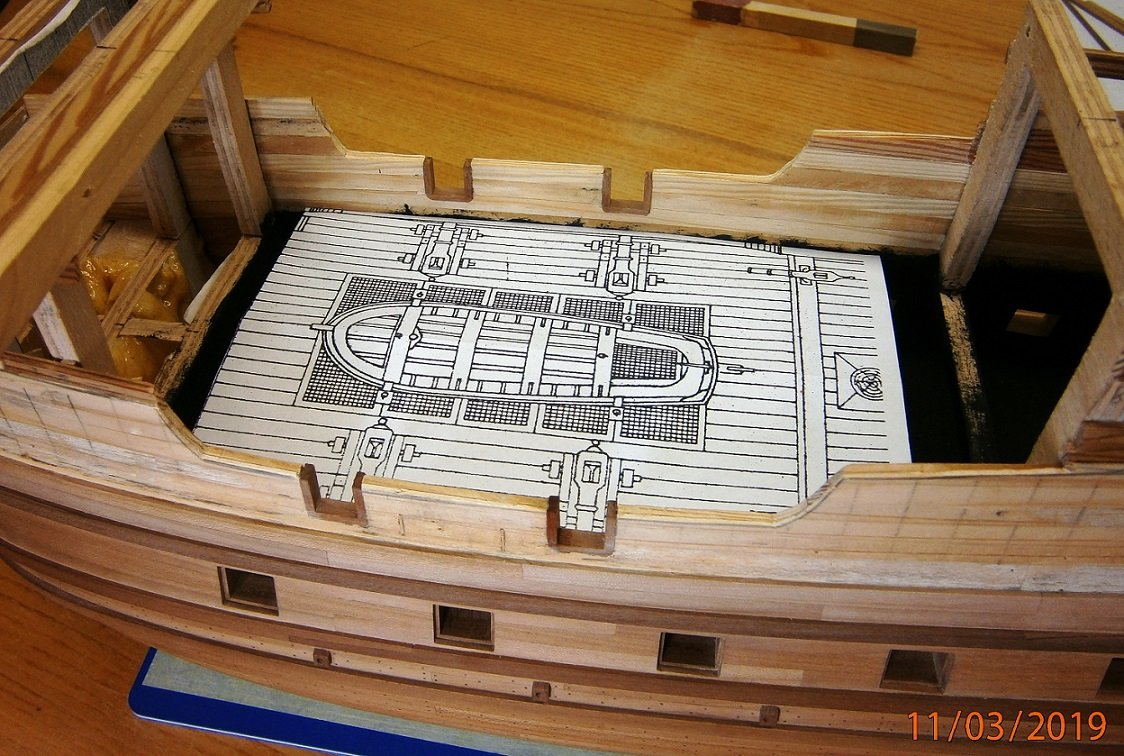
The deck is already in shape.. I decided to place square drains on the top deck. There are none in the plan, but all ships had them. Preparing the lath... I studied the cannons: The ones in the plan look older..😳 At the end of the 16th century, cast cannons were already used. I've found a current build of a same age replica of Barents' ship from 1595, which already had cast cannons with a carriage with only front wheels. The build is based on archaeological findings of wrecks.. http://debarentsz.nl/home/foto.html A video of awreck of aSwedish ship Mars sunk in 1564, also with cast gun barrels.. Regarding Roter Lowe (1597) there isn't much to be found, I've only found this on Wikipedia.. https://de.wikipedia.org/wiki/Roter_Löwe_(Schiff,_1597 As to all the plans in the "Risse von Schiffen des 16./17. Jahrhunderts" book, I've read somewhere that these aren't very good reconstructions..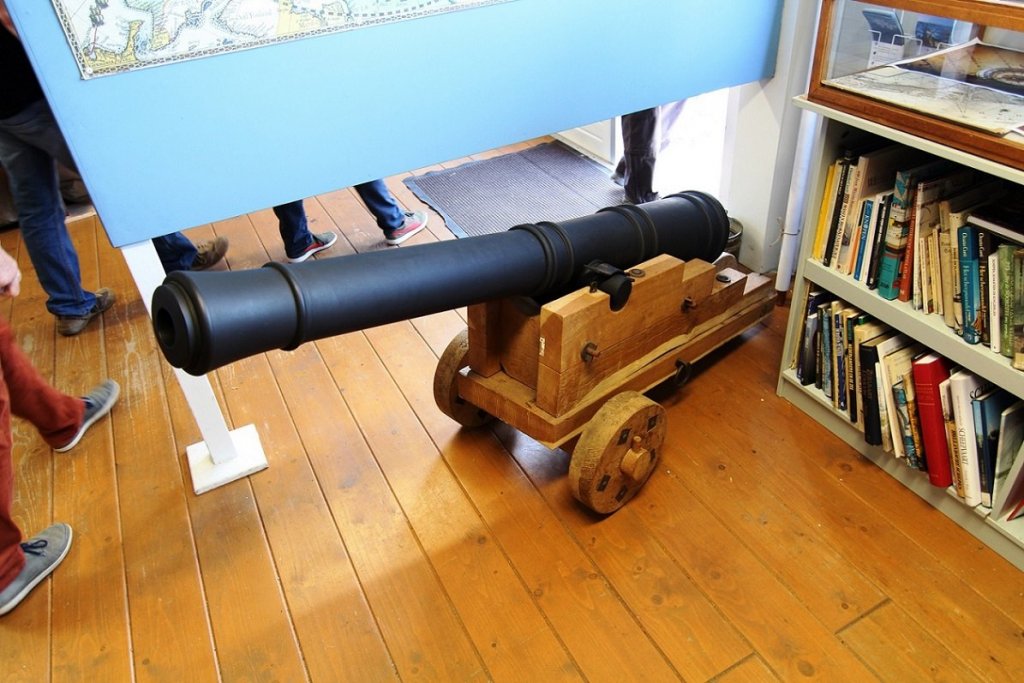
.thumb.JPG.df262ab93bef24422d5be9ea124b64e0.JPG)

-
Roter Löwe 1597 by Ondras71
Ondras71 replied to Ondras71's topic in - Build logs for subjects built 1501 - 1750
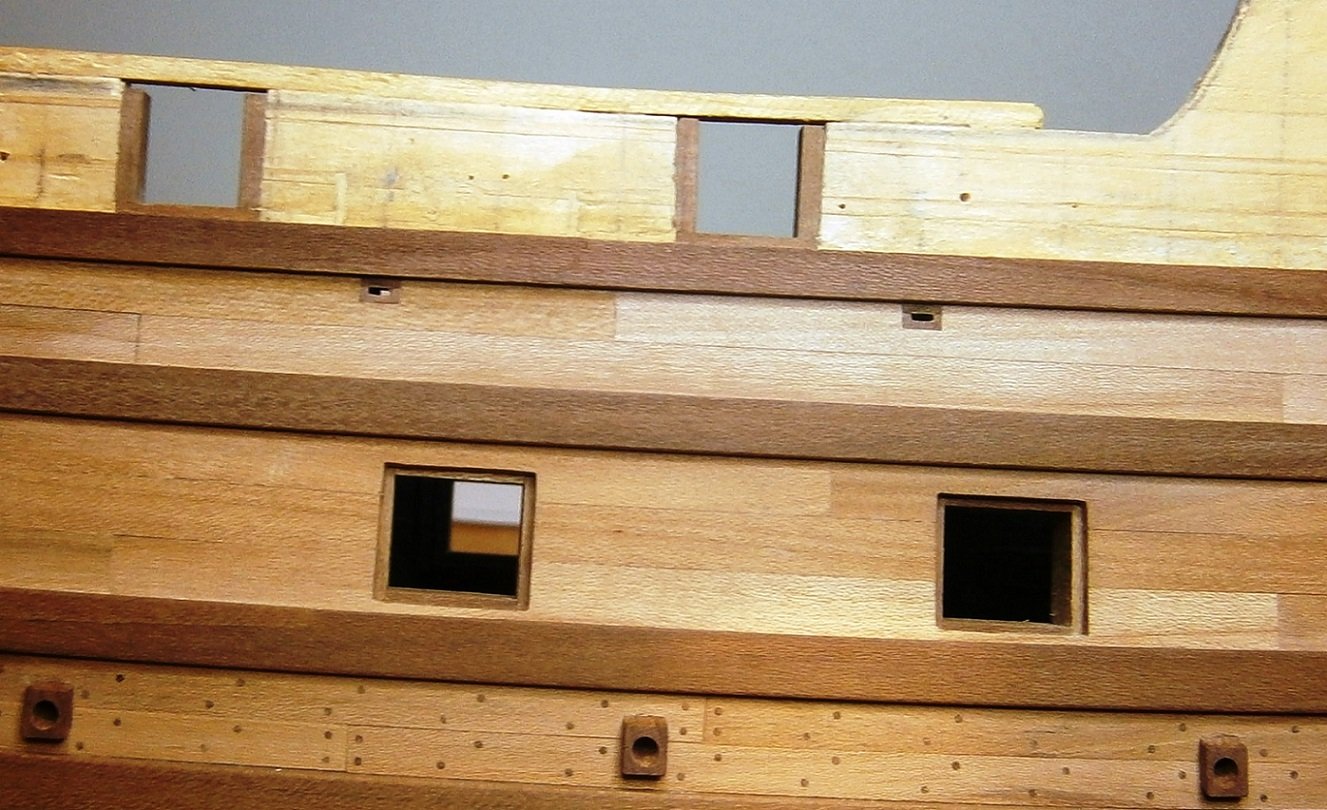
Carved upper gunports. Frames lined with cherries ...thumb.JPG.c07f992f569559779b3c24d2573640df.JPG)
.thumb.JPG.9b44010c5ad81d1c30a41f09baa3d35a.JPG)
.thumb.JPG.c1a3712cf26ad38489cf9de346dfc83f.JPG)
.thumb.JPG.15cc06eb4f45a74cd72f834244959f8f.JPG)
.thumb.JPG.1514c698a7c4cfb5d1e67e5b6e4db847.JPG)
.thumb.JPG.6bbad05b96ce3e0699a5d93ac02188e6.JPG)
-
Roter Löwe 1597 by Ondras71
Ondras71 replied to Ondras71's topic in - Build logs for subjects built 1501 - 1750
Have added another strip of planks on the side .. Removed mounting ribs of the main deck .. Grinded the sides from the inside and measured the gunports of the main decks.. O.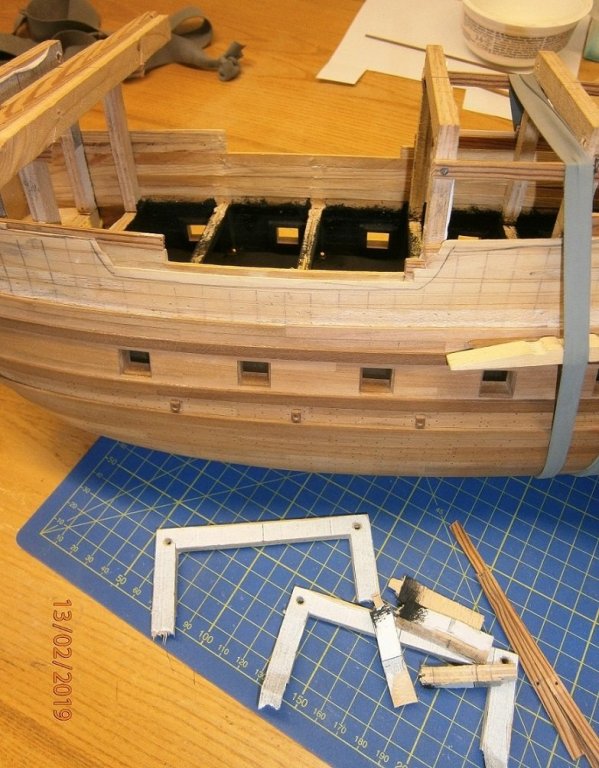
.thumb.JPG.44fd66e919d774616678fc5de3edfa25.JPG)
.thumb.JPG.bb3bc55db679cf914da99606a62d3ace.JPG)
.thumb.JPG.a20158bedb7b39eacba06721aa5b5b38.JPG)
.thumb.JPG.3cfbb82f307d14a8773aba82e8e34aca.JPG)
-
I understand your struggle with the kit .. O.
-
Really very beautiful building !!! O.
-
Roter Löwe 1597 by Ondras71
Ondras71 replied to Ondras71's topic in - Build logs for subjects built 1501 - 1750
A bow deck bordered by planks ...thumb.JPG.ccf20cf953f4266ed8cbfc3b1c539595.JPG)
.thumb.JPG.d2f2b00ebbd279db5df126505d538161.JPG)
.thumb.JPG.8ef72f9830abcedb84eead9ae27d0f81.JPG)
-
Roter Löwe 1597 by Ondras71
Ondras71 replied to Ondras71's topic in - Build logs for subjects built 1501 - 1750
The deck, repaired, now looks more realistic..👌 As a reminder, here is the old version...thumb.JPG.bb31417b071e3008afaaafee4af855ce.JPG)
.thumb.JPG.474cf5993970d09da88eb2814e9dc32d.JPG)

-
Roter Löwe 1597 by Ondras71
Ondras71 replied to Ondras71's topic in - Build logs for subjects built 1501 - 1750
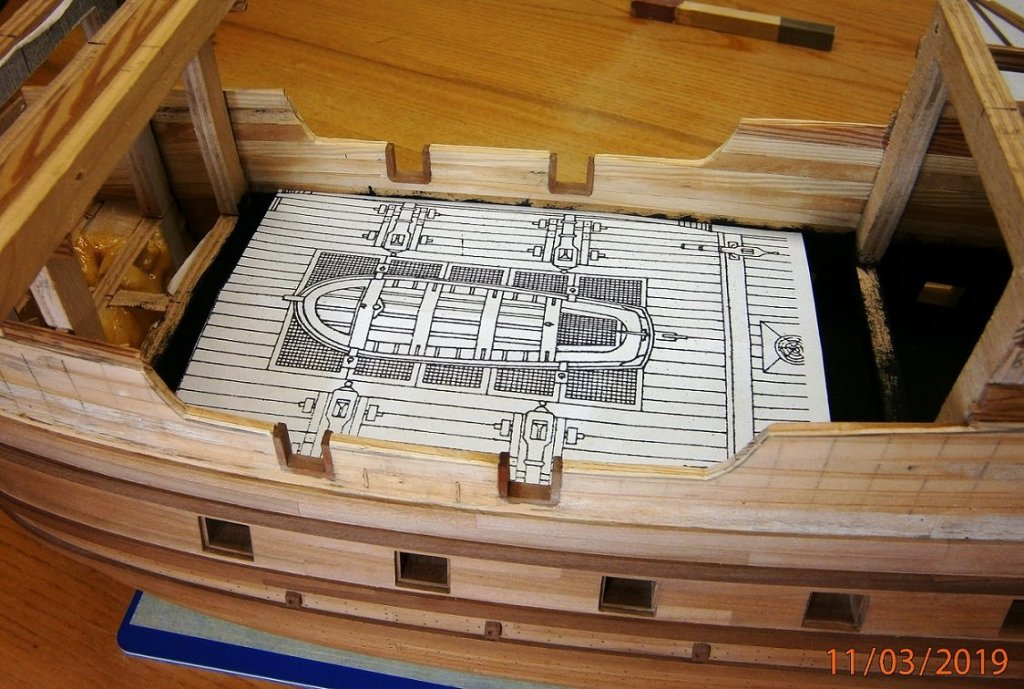
I found out, that the plank gaps are too wide. I therefore removed the deck and I'm going to use a thinner paper (0.09 mm). It is better to redo it now, than to end up having to tear down multiple decks made the wrong way..thumb.JPG.39491d1275c4d750c4f11222a5583f73.JPG)
.JPG.8231560ff65dd3b0c5fa885710cbdbff.JPG)
.thumb.JPG.d3db8acb3c50864989ca7f50f19f534c.JPG)
.thumb.JPG.29e4de6d9e2f26f800d9d6e04a5732f8.JPG)
-
Roter Löwe 1597 by Ondras71
Ondras71 replied to Ondras71's topic in - Build logs for subjects built 1501 - 1750
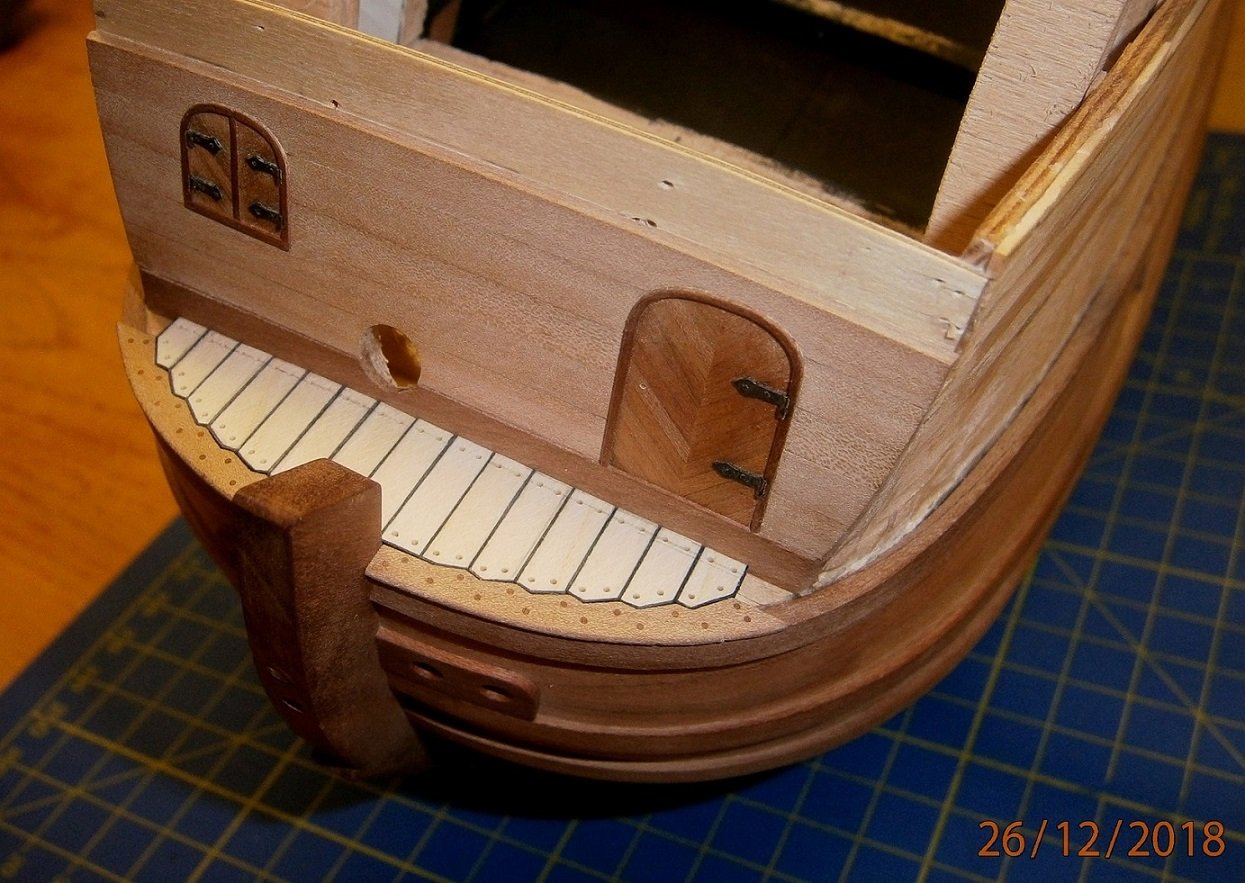
Thank you, Backer Treenails on the front wall.. O..thumb.JPG.6def27bcd5b0e8676d81f7082cfb7a7f.JPG)
.thumb.JPG.a764b4d9d3f97f65e38c75ce657f0e7c.JPG)
.thumb.JPG.e1cd3506cf0eb935551fa4a2409ca730.JPG)
-
Roter Löwe 1597 by Ondras71
Ondras71 replied to Ondras71's topic in - Build logs for subjects built 1501 - 1750
Thank you very much zappto!! Front deck.. I wish all model builders all the best in the New year 2019. Ondras71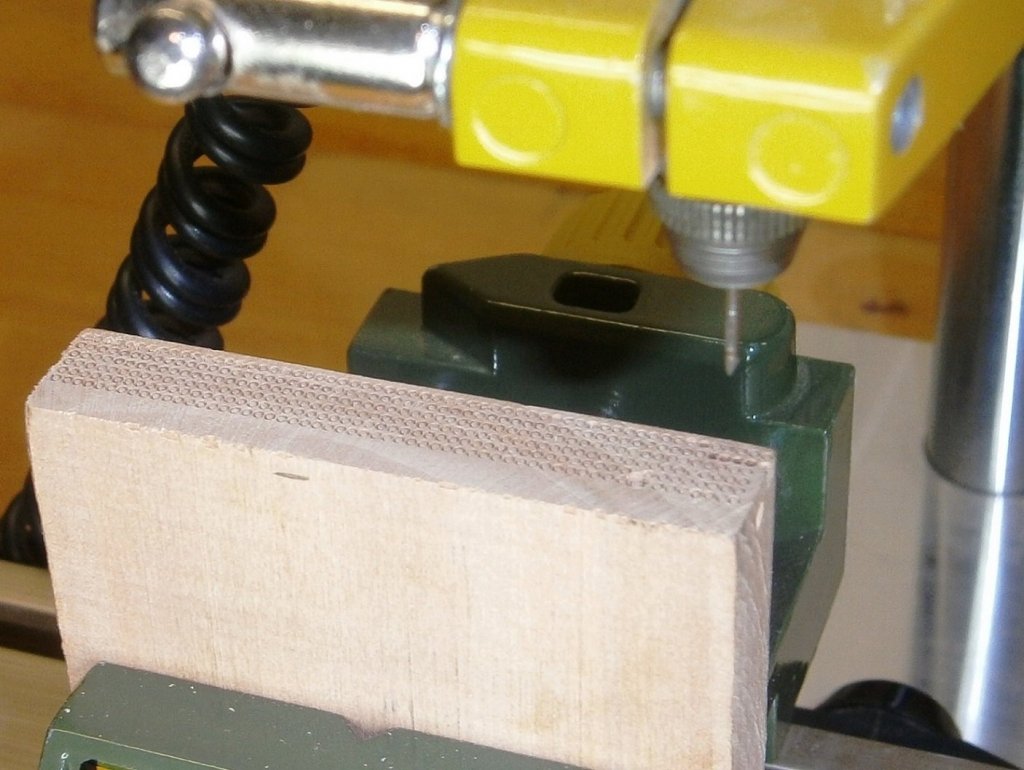
.thumb.JPG.a129aeb46c9a1a51b2b563620d12925d.JPG)
.thumb.JPG.e10857d3eff612ad48b802cc1df46731.JPG)
.thumb.JPG.ffbc2bb67427d3801c7ad17f77df2d71.JPG)
.thumb.JPG.9f5dd314c773628a627c03e525a20a71.JPG)
.thumb.JPG.fde11e23afc4063622a939ae7a5e841c.JPG)
.thumb.JPG.2b0a016c0f408f9aef7c02dadb283577.JPG)
.JPG.776af70bba6985595d805f6c2cc902e3.JPG)
-
Roter Löwe 1597 by Ondras71
Ondras71 replied to Ondras71's topic in - Build logs for subjects built 1501 - 1750
left side finished .. hawse holes, waxed..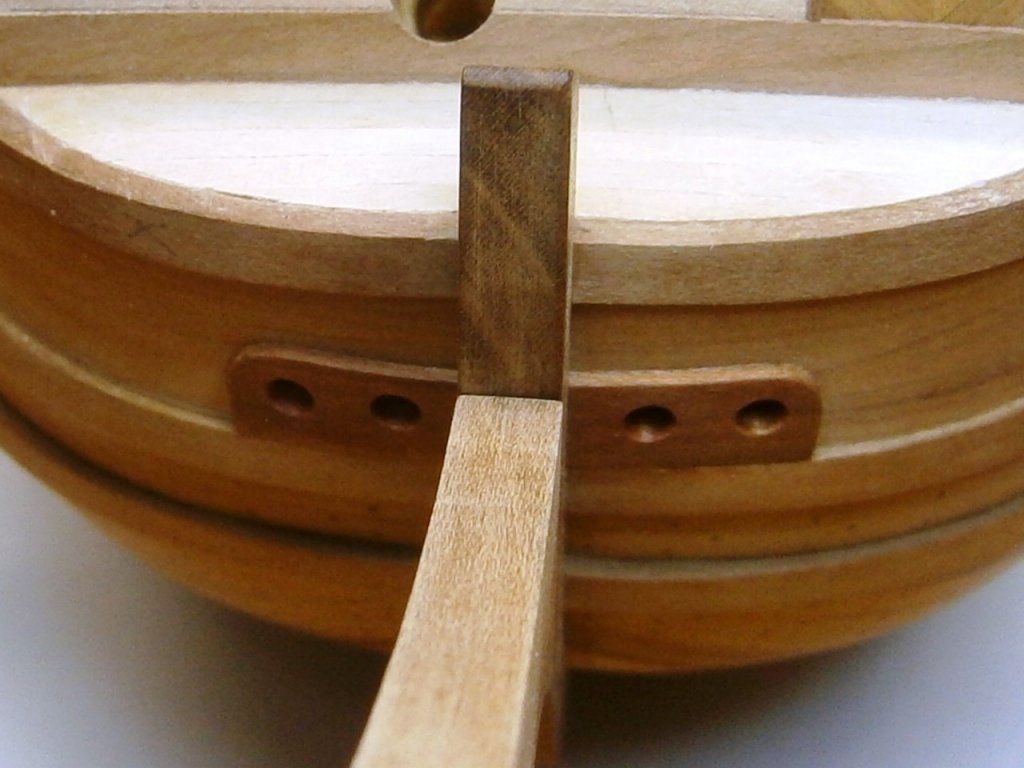
.thumb.JPG.45e94abf7329dd8157e85653d9039fc4.JPG)
.thumb.JPG.f045af17528dbfb3e08ef5662d53d377.JPG)
.thumb.JPG.f3621cc178b764149d4a37e05bdeb35c.JPG)
.thumb.JPG.de6635196e747768cf0e2596d92a3d60.JPG)
-
Roter Löwe 1597 by Ondras71
Ondras71 replied to Ondras71's topic in - Build logs for subjects built 1501 - 1750
...O. Right side....thumb.JPG.170c6c1b3838d9baece66d449d22a4ba.JPG)
.thumb.JPG.1301f07487d81f690613412920a900db.JPG)
.thumb.JPG.4c1a7f2695c22c95d160a4429f6ec48f.JPG)
-
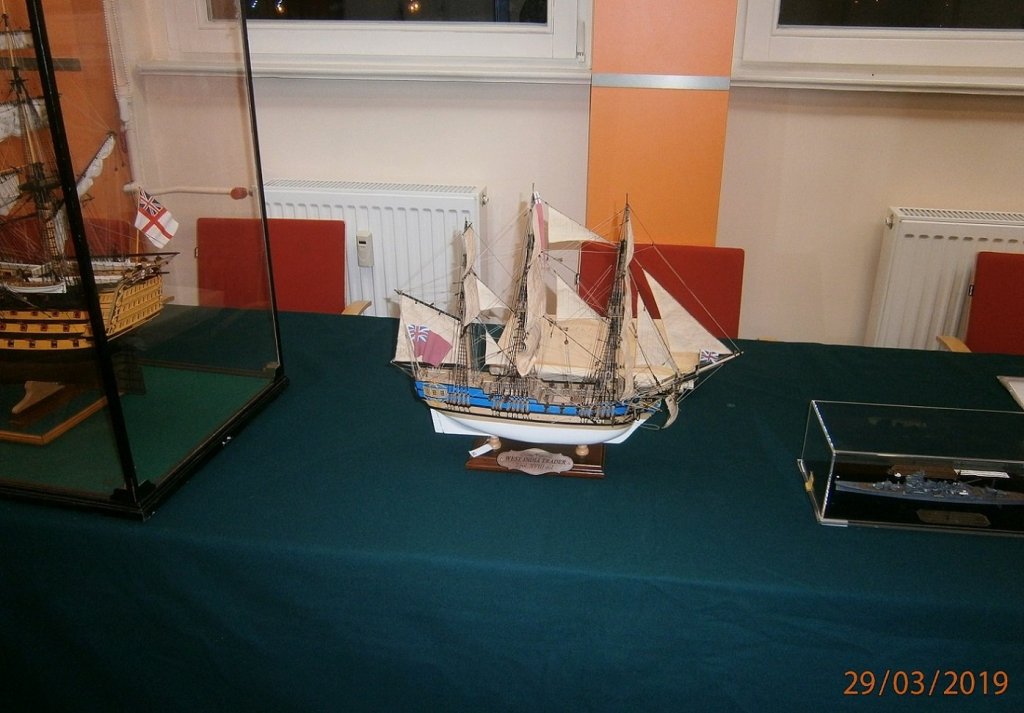
Finally, another ship from the turn of the 16th and 17th century. I'll love to keep watching this original construction..
-
Roter Löwe 1597 by Ondras71
Ondras71 replied to Ondras71's topic in - Build logs for subjects built 1501 - 1750
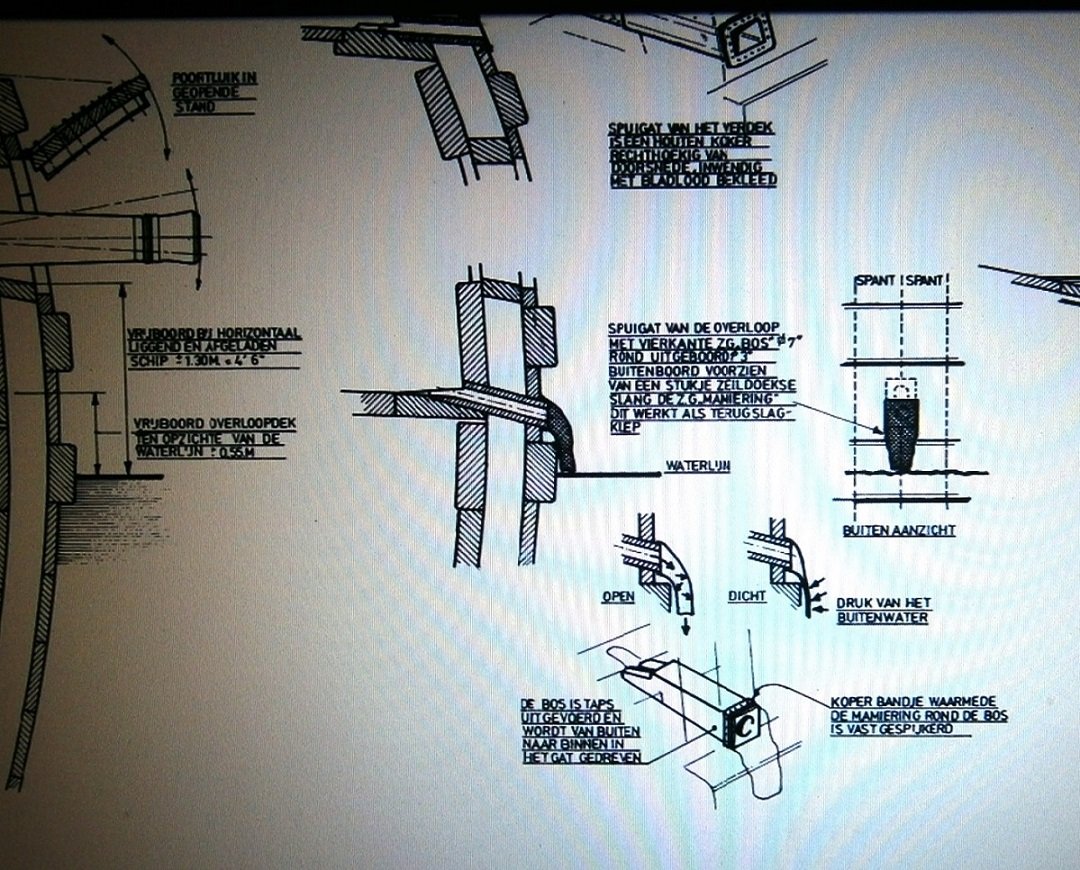
Lower deck drainage. The De Zeven Provincien reconstruction from 1665 has the drainage well portrayed.. I had already drilled the drain slope a long time ago.. The first one....thumb.JPG.529f5cc159c09fff7b9671682bfcfad6.JPG)
.thumb.JPG.8c89ba8e078175957964a5d5a04a76a9.JPG)

.thumb.JPG.a6dddb979ca24bc08957cbf47102670e.JPG)
.thumb.JPG.4596d78b3aba3a8cbcd7dda7572263f9.JPG)
.thumb.JPG.943ee954fb78a82b8578f65052bcdb92.JPG)
-
Wonderful work !!! The first POF? Surely you have been doing this for many years, that ...? !!!!

.JPG.cff5324b7fc9032b4bdcb61e2bfd081e.JPG)
.JPG.aa90147f4b40e66a2d78930bf48c186d.JPG)
.JPG.ab1993955d8ac84b4680102aa8a5b97e.JPG)
.JPG.96c10abdfb2c75141ce3c260556705c2.JPG)
.JPG.b41efbcae3aedf3b173ed67a4f042142.JPG)
.JPG.e53e349f577daecdc06a34b3008dcc4b.JPG)
.JPG.1d2a260c3ebb31f7e8d67f42c98fce3f.JPG)
.JPG.a75a184e664ee15e134b392ed4b1519e.JPG)
.JPG.f13662a11311d9ee87de5c058dbee05b.JPG)
.JPG.1b09b379b97d1cd142b498c8d4d0419e.JPG)
.JPG.29a960ccea8eb5c319b5338bd98ea1fd.JPG)
.JPG.55ef7180cfbd84a5a8cf67436ebd30ef.JPG)

.JPG.986f8891d61f9797fc1737feb4805a97.JPG)
.JPG.d8bd3afc8e133af1f906ac8b5c7bae51.JPG)
.JPG.91c0df39761bd0e2f0a7d86422445d7d.JPG)
.JPG.10400a8212eeb9a7a277936c7297a90a.JPG)
.JPG.7eb8742fe57fa5d279843e4f8628dd9a.JPG)
.JPG.74bb640d001468911012e4e1d2b1e229.JPG)

.JPG.4de2d28dd2cacf854a3dea988182e9dc.JPG)
.JPG.988ee2002839538db07db56d84101f12.JPG)
.JPG.363c32978c1351e80eb0549fe849cdc6.JPG)
.JPG.54eafd6a9337b7153bbcad8d8a6c1b0b.JPG)
.JPG.da0996d11c607151c7bc32a716aa3039.JPG)
.JPG.afe35820522e59df2782eab7ba848bc5.JPG)
.JPG.544ae4ec3d6f6c3967aad57e11a1ee18.JPG)

.JPG.58aa3e7b4166f9eac80b959f04f8f9a1.JPG)
.JPG.81e5f285d47b751ebdb83c1ce0c6ec11.JPG)
.JPG.71b630653b3dc6597cacac3190b4ff85.JPG)
.JPG.48f8ed43e18b25e8970ca26709d59798.JPG)
.JPG.5207f68387426a1ee90ee2dd24ee2f8d.JPG)
.JPG.16f608bc7d73ba8e5ce13bb998d75ac9.JPG)
.JPG.2ed3b6d6b94df6039e9d3ac445d5352b.JPG)
.JPG.8db00e780dd41b8bbc471deb53c788cf.JPG)
.JPG.7bf9ceed44bcd3bd7f49df2cae786deb.JPG)
.JPG.f5cb841a9669c736aabf4942ccf1927a.JPG)
.JPG.ecf3b4c2687ef5323a423ecdbb7406ea.JPG)
.JPG.60663360be1796873f57a861ffbf7c62.JPG)

.JPG.175ad1ebe817705bb6be403c58588263.JPG)
.JPG.539ec197f40bd34b33790dcdd7441a00.JPG)
.JPG.1a344f268fc5afd6c514bd901b531ddf.JPG)

.JPG.8d0e49a805b88d5490d92656305870a7.JPG)

.JPG.e14777c29afad6b378a936b3368cd41b.JPG)
.JPG.e7b67d1fc8d9fec3c1e59d06b48f96a8.JPG)
.JPG.04e4f1e0268e96e5ab729e268e5a54a7.JPG)
.JPG.a02441d661b616e8aebb7b493a6f612d.JPG)
.JPG.2795f7ca712c25c547fe3b4097cac4da.JPG)

.JPG.8e7d0f32fb305672e1f005d4568dc9a6.JPG)
.JPG.a25acc24198f7485e8e64bbcb4339a97.JPG)
.JPG.ae981e7e07e502154c41c109ae6f3a47.JPG)
.JPG.d0d2e3dd9bf0ab1797c167c0ff52bb2b.JPG)
.JPG.073e590528626d4015f17d3682283c11.JPG)
.JPG.895ac8f6d4aeff06d2b9998008d6edc9.JPG)
.JPG.b793ddc5f1d5586a02e3d48b7e7fa12a.JPG)
.JPG.4a59aa3d1e556bd29490a262b24bd6c7.JPG)
.JPG.55dbff03d629ed7c8232d2ac65bdb9fe.JPG)

.JPG.6039e9af043da500ab7afc9a594dc6b4.JPG)
.JPG.17dcaec22e09a2ed89cd06e8e0ace55b.JPG)
.JPG.0963b4f53b2a9aa9bace994438c17906.JPG)