


Keith Black
-
Posts
6,727 -
Joined
-
Last visited
Content Type
Profiles
Forums
Gallery
Events
Everything posted by Keith Black
-
 The historical aspect of this project is fascinating, Eric. Thank you for taking the time to be our guide into the past.
 -
I'm amazed they got away with no oil on those gears unless there was runout oil from/off the crankshaft/prop shaft. Or is there a cover I've somehow missed?
- 288 replies
-
- 2
-

-
- Santos Dumont No. 18
- hydroplane
- (and 1 more)
-
I assume this beast had a camshaft, is the large gear driven off the prop shat the timing gear driving the camshaft?
- 288 replies
-
- 2
-
-
- Santos Dumont No. 18
- hydroplane
- (and 1 more)
-
You guys are way ahead of me on the engines technical details but have either of you considered a simple thermosiphon cooling system? The elongated radiators on either side appear to be ideal for such a system.
- 288 replies
-
- 3
-
-
- Santos Dumont No. 18
- hydroplane
- (and 1 more)
-
For being that tiny those are some well executed cap rails, Eberhard. 🙇
-
That derrick tower is detail intense, mcb. 👍 Absolutely amazing. And the cannon.......LOL 🤣
-
You having fun makes the journey fun for those of us following along.
-
John, congratulations!
-
Eric, I thought the same thing. Ferrus started his build log fire not realizing how many ole moths would be drawn to the flame which is a testament to those in the modeling community who's interest run deep in sternwheelers and working boats.
- 56 replies
-
- 5
-
-

-
- Lindberg
- sternwheeler
- (and 1 more)
-
\ Ferrus, the flue gasses travel in a u-shape going from front to back and back to the fore to exit. Theory of design being the longer the flue gasses remained in the boiler the greater the heating capacity. IMHO the Southern Belle kit is a rudimentary example of a 19th century sternwheeler begging no forgiveness for details not accurately betrayed. It is what it is, made for the enjoyment of building the kit.
- 56 replies
-
- 4
-
-
- Lindberg
- sternwheeler
- (and 1 more)
-
Spectacular work on the rigging, Bob. Glad to see your arm hasn't slowed you down too much. Even at a little slower pace you're at least twice as fast as I am.
-
Those davits turned out great, Glen.
- 301 replies
-
- 5
-
-

-
- Constitution
- Bluejacket Shipcrafters
- (and 1 more)
-
Very well done, Ian. 3D printed parts are such a plus especially when you can do them yourself.
-
Thank you, Glen. If you lived here in Michigan I'd love to help but.... You've just started and one can already see the Kentoshi lines taking shape. Will you still need to split the hull?
- 106 replies
-
- 2
-
-
- Kentoshi-Sen
- bottle
- (and 1 more)
-
When I started Lula I couldn't even spell sternwheeler. I've had to do a ton of research including going through the excellent build logs of many sternwheelers/riverboats. Thank God for the resources here on MSW and sharing knowledge is what the NRG/MSW is all about. Thank you very much, Ferrus. I've enjoyed building little Lula, I've tried very hard doing the best me old self can achieve knowing Lula was going to be the bookend to the pile driver.
- 56 replies
-
- 4
-
-
-
- Lindberg
- sternwheeler
- (and 1 more)
-
This is the least expensive oscillating spindle sander I could find, Jacques. https://www.amazon.com/WEN-6510T-Oscillating-Spindle-Sander/dp/B07KKXNWWX/ref=asc_df_B07KKXNWWX?mcid=77d015617dc9336bb8c9eb9849cd55a2&hvocijid=13510325352385267804-B07KKXNWWX-&hvexpln=73&tag=hyprod-20&linkCode=df0&hvadid=721245378154&hvpos=&hvnetw=g&hvrand=13510325352385267804&hvpone=&hvptwo=&hvqmt=&hvdev=c&hvdvcmdl=&hvlocint=&hvlocphy=1019476&hvtargid=pla-2281435175938&psc=1
- 139 replies
-
- 3
-
-
- ancre
- Bateau de Lanveoc
- (and 2 more)
-
Glad to see you back at work, Bob. The Astrolabe is really looking sweet! 👍
-
Ras, I'm sorry the Archer transfer rivets aren't going to work for you. Hopefully you can use the rivets you received somewhere and it's not a total waste of your money.
-
Ferrus, not that it matters two hoots but FYI, the paddles are called buckets. I have no clue to why because they don't look like buckets.
- 56 replies
-
- 3
-
-
-
- Lindberg
- sternwheeler
- (and 1 more)
-
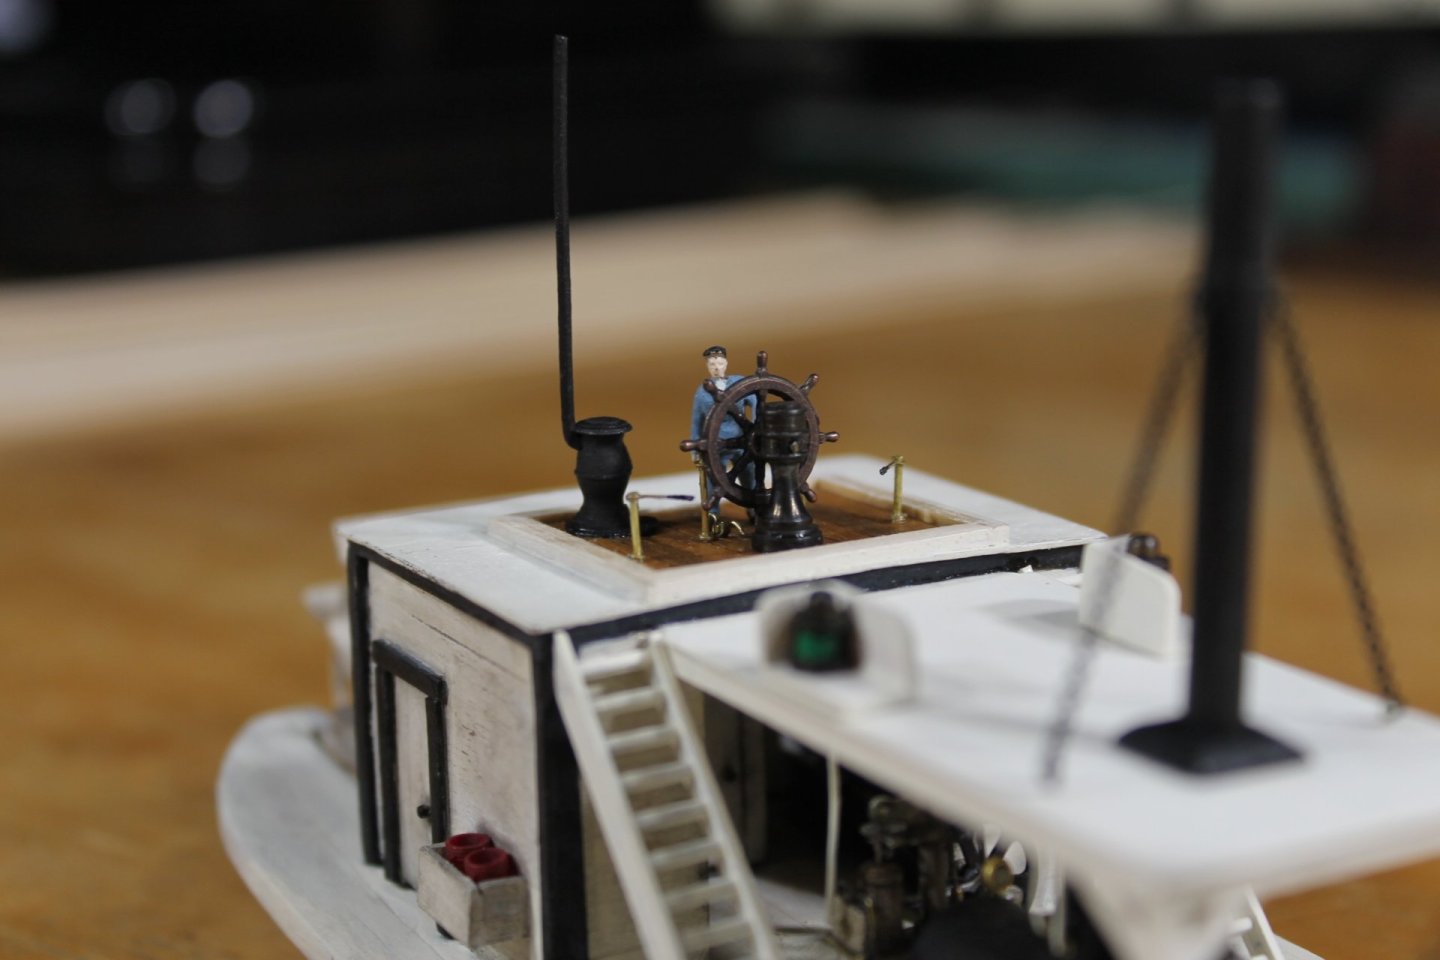
Thank you to each of you for your comments and likes. Meet William R. Waterman, Lula's new captain/pilot. He was born in Hudson, New York in 1826. I had interviewed with a couple of men before William's interview but something didn't seem right about the way they stood behind the wheel. But Captain Bill is a natural, seems to know a lot about New York Harbor and has captained sternwheelers on the Missouri and Ohio so I hired him on the spot!. But something kept nagging me about Captain Bill's name, it sounded familiar and when I questioned him about it he said he had a famous uncle but didn't or wouldn't go into details? Captain Bill said he would see to the crewing of Lula, so be it. I'm sure they'll come drifting in one by one over the next couple of weeks. The figure for Captain Bill was one of the Holden late 19th century British naval figures with gaiters requiring me to carve away most of the uniform. It's very hard to see any remaining uniform at normal viewing distance. I'm not just messing about with figures, I'm also building the pilothouse walls. I've almost got the stern wall done and moving next to the fore wall. Thank you again for your support and for being part of the journey. Keith

- 732 replies
-
- 22
-
-

-
- Lula
- sternwheeler
- (and 1 more)

