Keith Black
-
Posts
6,716 -
Joined
-
Last visited
Content Type
Profiles
Forums
Gallery
Events
Everything posted by Keith Black
-
 If this was my problem I'd CA a piece of thin plywood (any type of thin wood) on the backside of the opening then cut the plank to fit. It may not be kosher but it fills the hole.
 -
Kurt, I think oxygen plays as important part in the blackening process as the solution itself. Soaking pieces in the solution is too much and a paint brush maybe too much as well plus it's hard to rub with a paintbrush. I know rubbing with a Q-tip works like the bee's knees.
- 732 replies
-
- 6
-

-
- Lula
- sternwheeler
- (and 1 more)
-
Removal might create a crater but could be easily filled with a sawdust and CA mixture. Until the eyebolt eye broke off it was a very nice clean looking piece and I know you hate messing about with it.
- 312 replies
-
- 1
-
-
- Chile
- Latin America
- (and 6 more)
-
Ian, we're both of that "we don't need no stinkin' directions" school of thought. I forgot to mention that I placed the parts to be blackened on a folded paper towel to absorb any excess blackening solution and once rinsed in water I buffed them with a clean paper towel before repeating the process. I hope it works as well for you as it did for me. Thank you, Eberhard. Oh, how very true!
- 732 replies
-
- 5
-
-
- Lula
- sternwheeler
- (and 1 more)
-
Tom, I'd say natural because of the contact of the line with the sail.
- 346 replies
-
- 5
-
-
- Sophie
- Vanguard Models
- (and 1 more)
-
Jacques, you might try putting a very small amount of acetone at the base of the eyebolt shaft with a needle and see if you can tease the shaft out. It would be a lengthy process as acetone evaporates very quickly. Normally I'd use a Q-tip dipped in acetone but that maybe too much acetone for your working area?
- 312 replies
-
- 3
-
-

-
- Chile
- Latin America
- (and 6 more)
-
Ian, until recently I would have agreed with you 100% but the last two times I've used Birchwood Casey I've had success amazingly enough. I blackened the chains for the derrick crane stays and the sidelight lanterns and they came out perfect. I'm somewhat shocked because in the past I've had a flakey/sooty finish which easily rubbed off. The last two times I've soaked the pieces to be blackened in acetone and thoroughly rinsed in water as usual but instead of soaking the parts in the blackening solution I used a Q-tip soaked in BC and rubbed the pieces for 30 to 45 seconds and let sit for 15 seconds. I did this twice rinsing in water after each application and they came out great. I am ashamed to say that with the exception of using acetone instead of alcohol these are the exact directions on the bottle which after seven or eight years of frustration I finally read.
- 732 replies
-
- 9
-
-

-
- Lula
- sternwheeler
- (and 1 more)
-
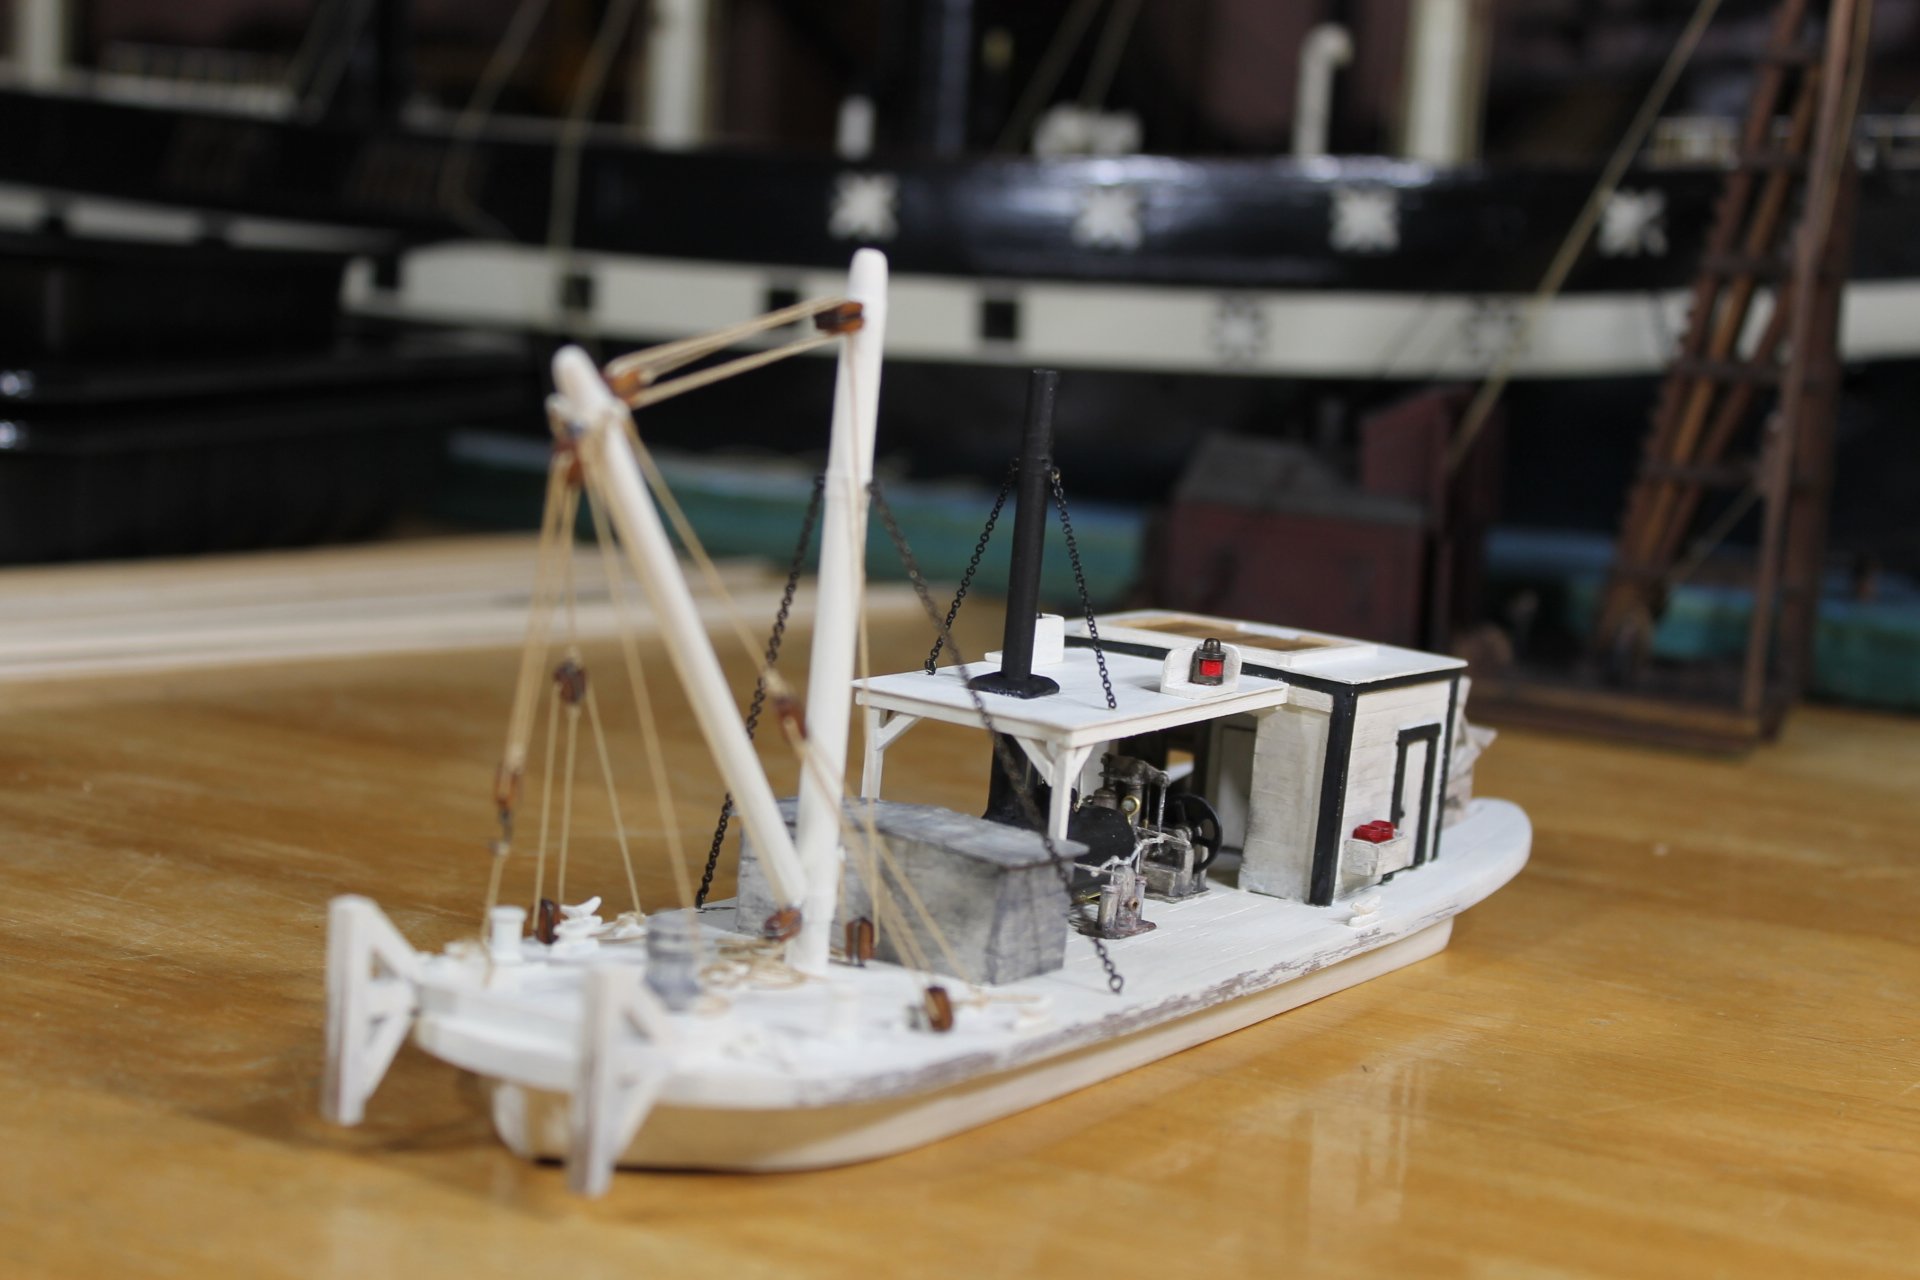
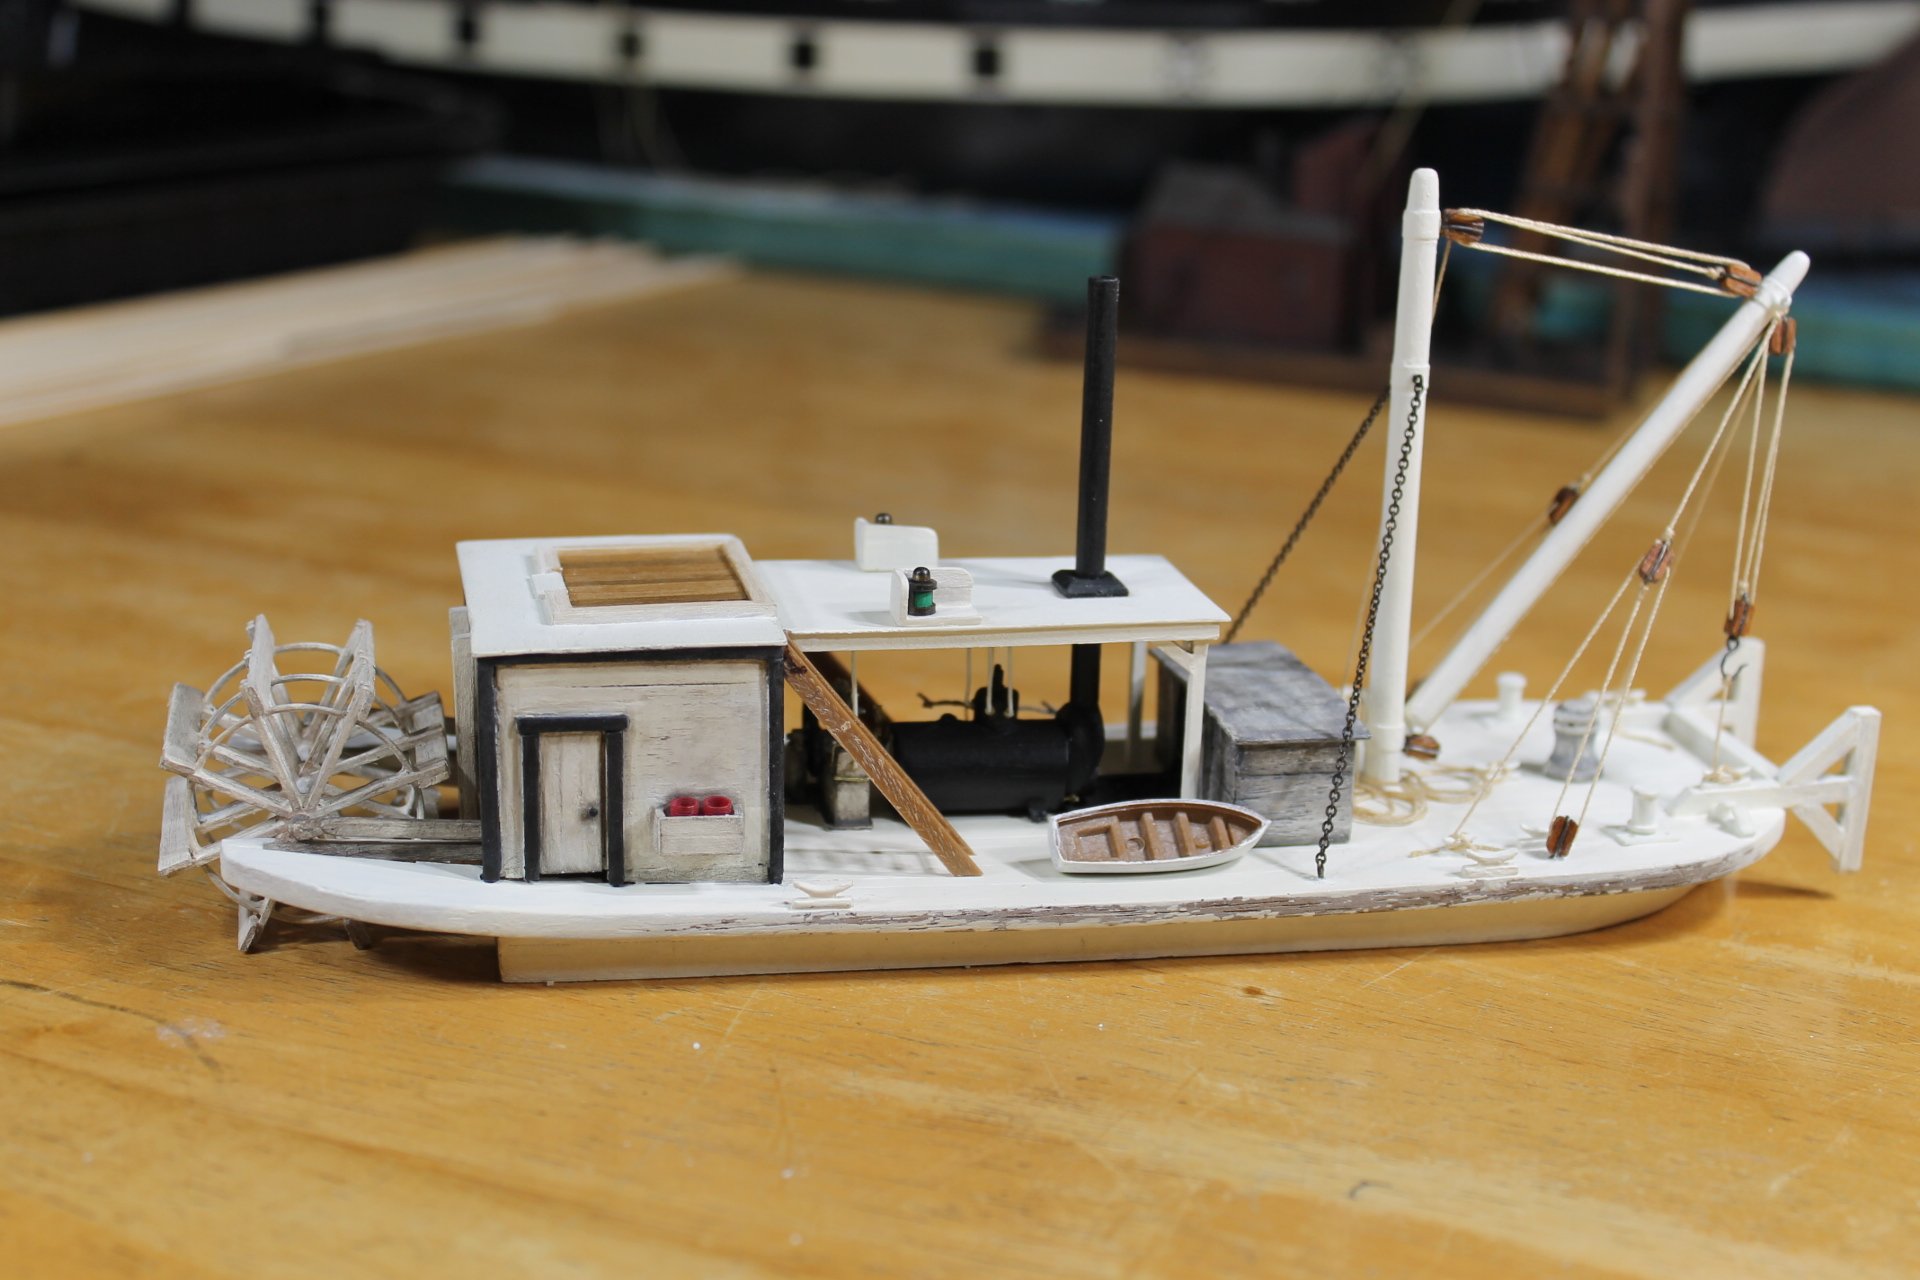
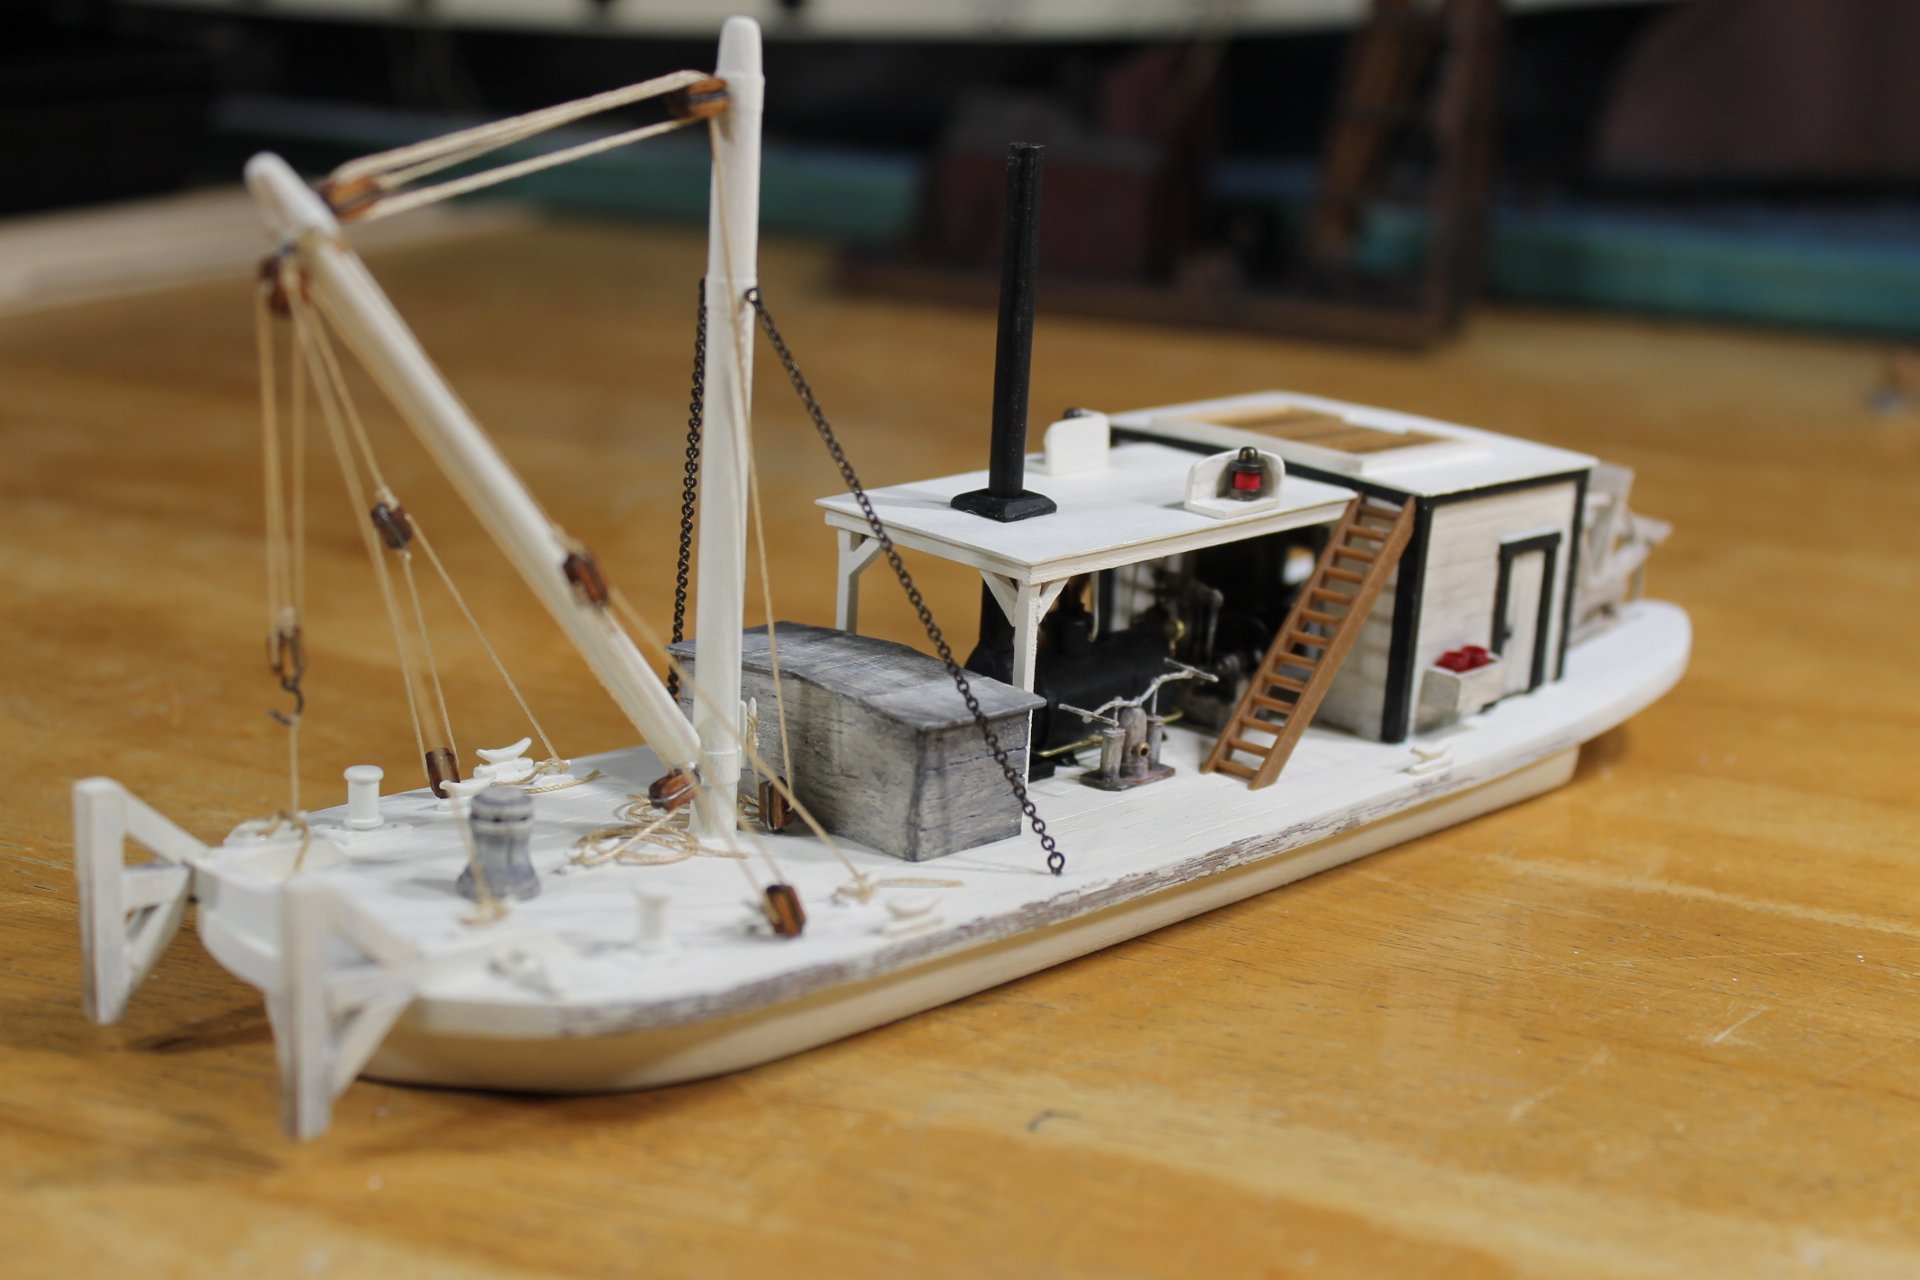
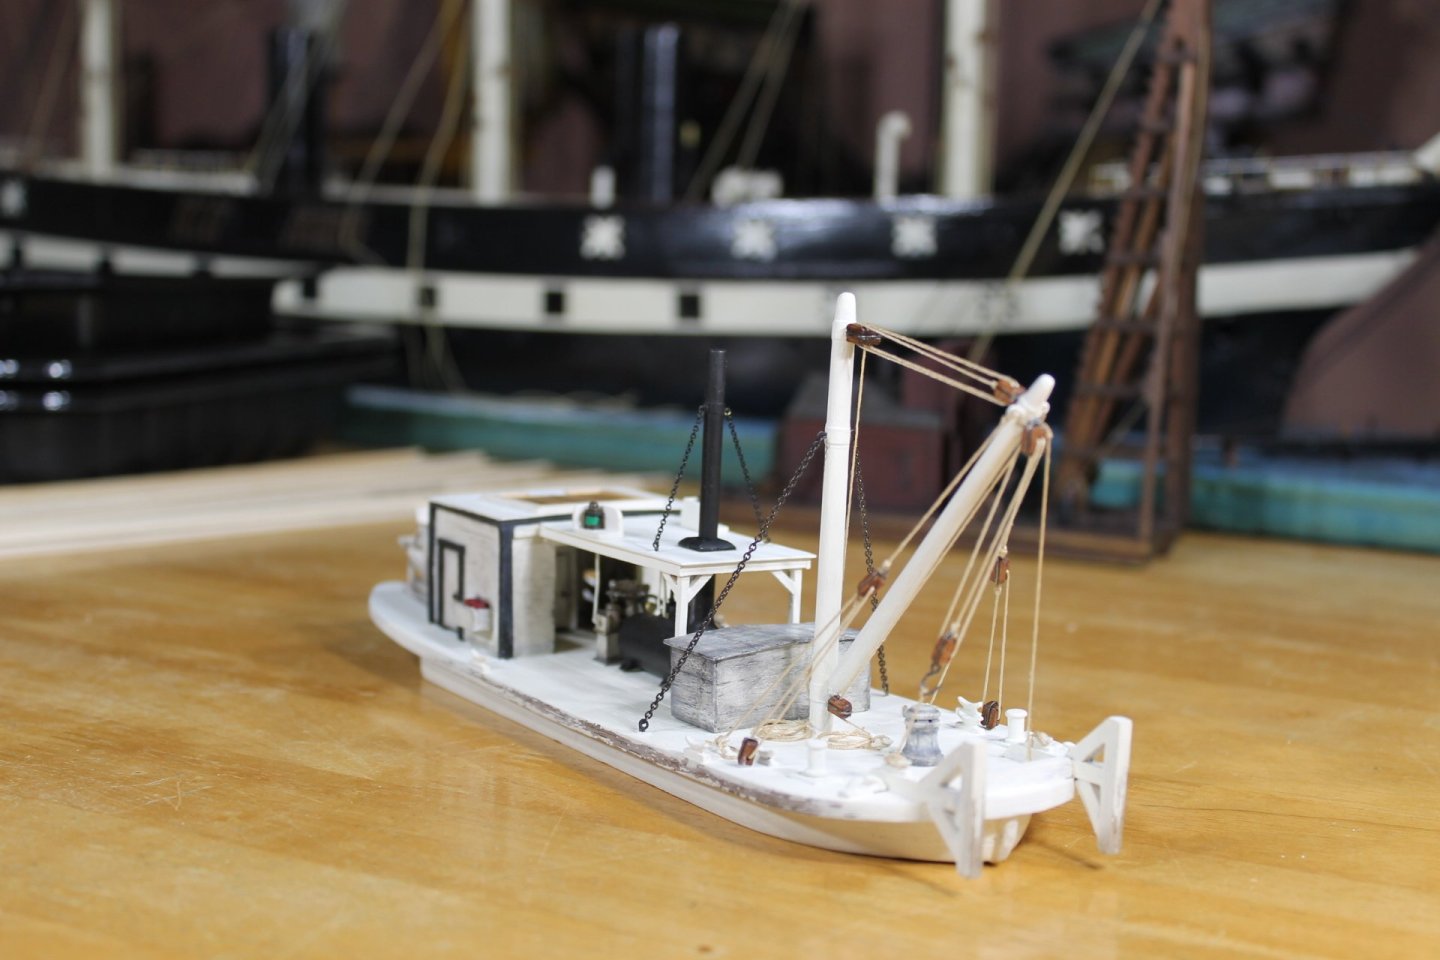
Thank you to everyone for your comments and likes As I said, I'll be leaving Lula's light boards white. Side lights were recommended in 1858 and signed into law in1864 by President Lincoln. I can not find light board color requirements mentioned in the early regulations. A brief update... I got the boiler stack chain stays attached which took the better part of a full workday. The chain size required wire no greater than 28 GA for making the eyes. To attach chain stays I have to sneak up on the correct link length by trial and error. It's a very tedious process and I wish I knew a faster/better means to accomplish this task. One link makes all the difference in the world and it drives me a bit batty getting the perfect length. With the stack stays done next up is the pilothouse. It'll be three or four days before I have an opportunity to get back to work on Lula so it will be awhile before I'm able to post progress and photos. Thank you for your support and for following along. Keith

- 732 replies
-
- 15
-
-

-
- Lula
- sternwheeler
- (and 1 more)
-
Rick, I use annealed wire for a couple of reasons, one it's black so I don't have to paint it and two, it's easy to work with. I work at 1:120 so I need all the advantages I can get.
- 359 replies
-
- 1
-
-
- Flying Fish
- Model Shipways
- (and 1 more)
-
Rick, I post the following trying to be of help and not trying to hijack your build log. See page 12, post # 352 on how I wire strop blocks.
-
That's great news, Lynn.
-
Thank you, Roel. The 1972 Convention was designed to update and replace the Collision Regulations of 1960 which were adopted at the same time as the 1960 SOLAS Convention. Annex I - Positioning and technical details of lights and shapes 5. Screens for sidelights The sidelights of vessels of 20 m or more in length shall be fitted with inboard screens painted matt black, and meeting the requirements of section 9 of this annex. On vessels of less than 20 m in length the sidelights, if necessary to meet the requirements of section 9 of this annex, shall be fitted with inboard matt black screens. With a combined lantern, using a single vertical filament and a very narrow division between the green and red sections, external screens need not be fitted. Craig, you better nix the thought of white light boards. Sorry to have lead you and anyone else astray.
- 732 replies
-
- 5
-
-
- Lula
- sternwheeler
- (and 1 more)
-
That looks like a lot of fun work, Eric. I look forward to seeing how you make the geographical features.
-
John, thank you for questioning the light boards color. I also went with white light boards because of Lula's owners decision, with the exception of the black trim, to paint everything that didn't move white. Thank you, Craig. I try to be accurate when building but sometimes I fail and that bothers me. Hopefully I'll continue to learn and each new project will be more accurate than the last.
- 732 replies
-
- 3
-
-
- Lula
- sternwheeler
- (and 1 more)
-
Thank you, Glen. I'll leave SIB work to your capable hands and as far as penguins go........I'm back on the patch. Thank you, Keith. I've managed to get some extra work time in on Lula lately. Thank you, John. Yes, I'm leaving the light boards white because white paint reflects better according to Google AI. "Red light will appear brighter when reflected off white paint because white paint reflects all colors of light, including red, while red paint only reflects red light" "Red paint contains pigments that selectively reflect red light and absorb other colors. When red light shines on red paint, the red paint reflects the red light back, but the amount of reflected light is less than that of white paint, as it doesn't reflect all wavelengths of light" "Green light will appear brighter when reflected off white paint because white paint reflects all wavelengths of light, including green, while green paint only reflects green light and absorbs others" "Since white paint reflects all colors, including green, it will appear brighter when illuminated with green light compared to green paint, which only reflects green light" I've seen light boards left natural when hung in the shrouds, painted red and green, painted black, dark gray, and silver. But because of the above I went with white.
- 732 replies
-
- 5
-
-
- Lula
- sternwheeler
- (and 1 more)
-
Thank you, Eric. Too funny regarding space, "things" can go from horizontal to vertical if one doesn't keep them in check. Ask me how I know.
- 732 replies
-
- 7
-
-
-
- Lula
- sternwheeler
- (and 1 more)
-
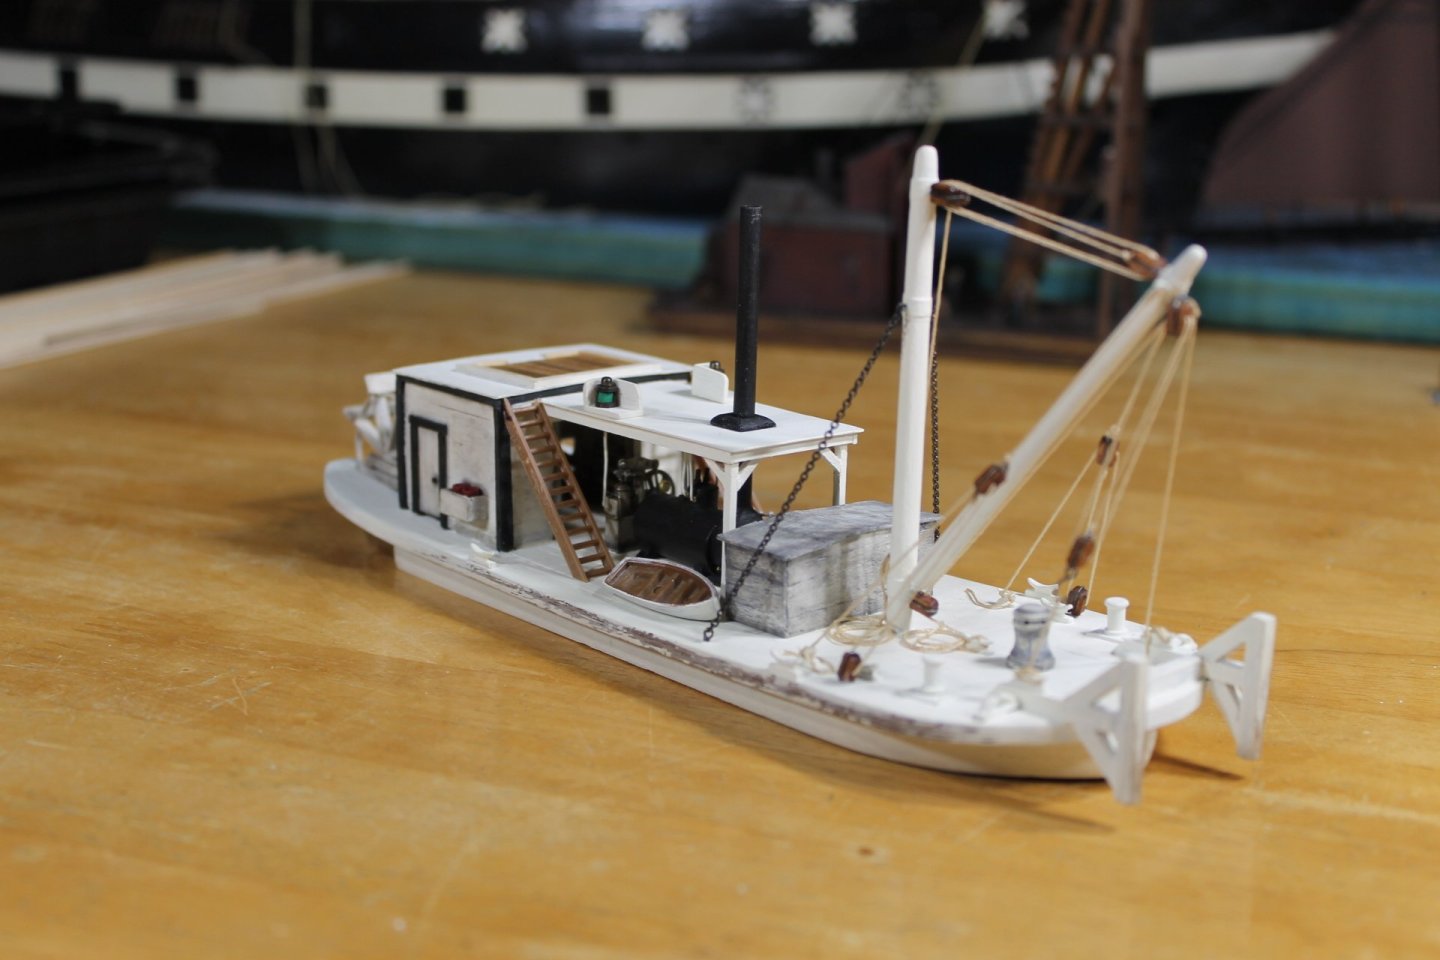
Ian, that sounds like so much fun. Unfortunately I'm not close to a modeling club and with the exception of my wife and sisters no one in my immediate circle gives two hoots. Thank God for MSW as it's my only resource for sharing and learning and that's perfectly fine. Thank you, mcb. I'd love to build a diorama with Lula and the pile driver in the mix but once Lula is finished I have to get back on the Tennessee and finish her. She's the one that brought me to the dance and she deserves to be finished. Once the Tennessee is done then I'd love to start on a diorama. Thank you for the comments, likes and support. The boiler deck is finished and glued down. I added the light boards and flashing for the boiler stack. I went back and forth between painting the trim black or white. I finally decided on white because if the need arose to touchup any paint around the stairways black would have been a nightmare. I have the stairways temporarily in place to shown the relationship to the boiler deck and also the amount of space allowed by placing the dinghy on the main deck. I was going to stow the dinghy on the boiler deck but it would be such a hassle to get it lowered to the main deck. There's a little space on the boiler deck for something, maybe a paint locker directly in front of the pilothouse below window level? It could also house coal oil and lantern wicks, etc. I still haven't gotten to weathering the main deck. Wood keeps jumping in front of me saying, cut me! Lula is really staring to get busy. The pilothouse and railings is just about the end of the line. Thank you for following along. Keith


- 732 replies
-
- 18
-
-
-
- Lula
- sternwheeler
- (and 1 more)
-
Laying out the deck furniture is one of those milestones in a ships build. Looks great, Mark.
-
Brian, welcome to MSW. Glad to have you aboard.
-
Thank you, Rick. That's got to be great being able to talk to folks who are truly interested in the model and modeling in general. I bet you are the star attraction.
- 732 replies
-
- 7
-
-
- Lula
- sternwheeler
- (and 1 more)
-
Gunboat Philadelphia 1776 by tmj
Keith Black replied to tmj's topic in - Build logs for subjects built 1751 - 1800
Tom, these frames kinda remind me of the treenails for this project. Speaking treenails......