HOLIDAY DONATION DRIVE - SUPPORT MSW - DO YOUR PART TO KEEP THIS GREAT FORUM GOING! (Only 13 donations so far - C'mon guys!)
×


Paddy
-
Posts
371 -
Joined
-
Last visited
Content Type
Profiles
Forums
Gallery
Events
Everything posted by Paddy
-
 Thank you Ron. Its been a good one but now my sails have lost the wind.
 -
Marius, that embuia wood you turned the cannon with looks very good. Also, as Pete mentioned, I too like your beam bending jig.
-
Thanks Grant. Feel like I'm underway Now.
-
Thanks Anja and Pete for the birthday wishes. Annie will make it a fun day.
-
Rusty, another special thanks for showing us how you did your mortise and tendon work for it has me now looking forward to attempting the process using your approach when I arrive at that point. No longer dreading it. Thanks again.
-
Great job Ron. Like the extra effort you're applying.
-
Thanks for that Antony. Interesting about the treenails and your being station on one of the ships. That must have been a great experience. I could go on and on about areas that I have been too, work or otherwise, and didn't take advantage of it when it came to visiting historic ships. Kicking myself now. Got the "B" forward and abaft futtocks templates attached to the cherry this evening but I think my wife has plans for tomorrow so milling may have to wait a day or two.
-
That's a very nice looking job on the ropewalk. I sure understand about the finger check that occured on the pre-flight. I'm no stranger to such occurrences.
-
Russ, Pete, Rusty, Joss, and Bob, Thank you gents for taking a look and your comments. Today the temperature is supposed to reach into the lower sixty’s which means I can put the first sealer layer on the gantry building board. I will take the board outside as I don’t want to subject the mousers to the fumes or me either for that matter. Want to have it ready for the keel attachment and first frame raising. Thanks for that Joss and the idea. Taking my needle epoxied in a dowel that I use for a center punch I marked the treenail locations by the eye-ball method. But now I’ll make a template off of frame “C” so I can get reasonably close to the same locations for the rest of the frames. Hopefully I’ll have enough time in the shop today to start rubber cementing the futtock templates to the cherry for frame “B”.
-
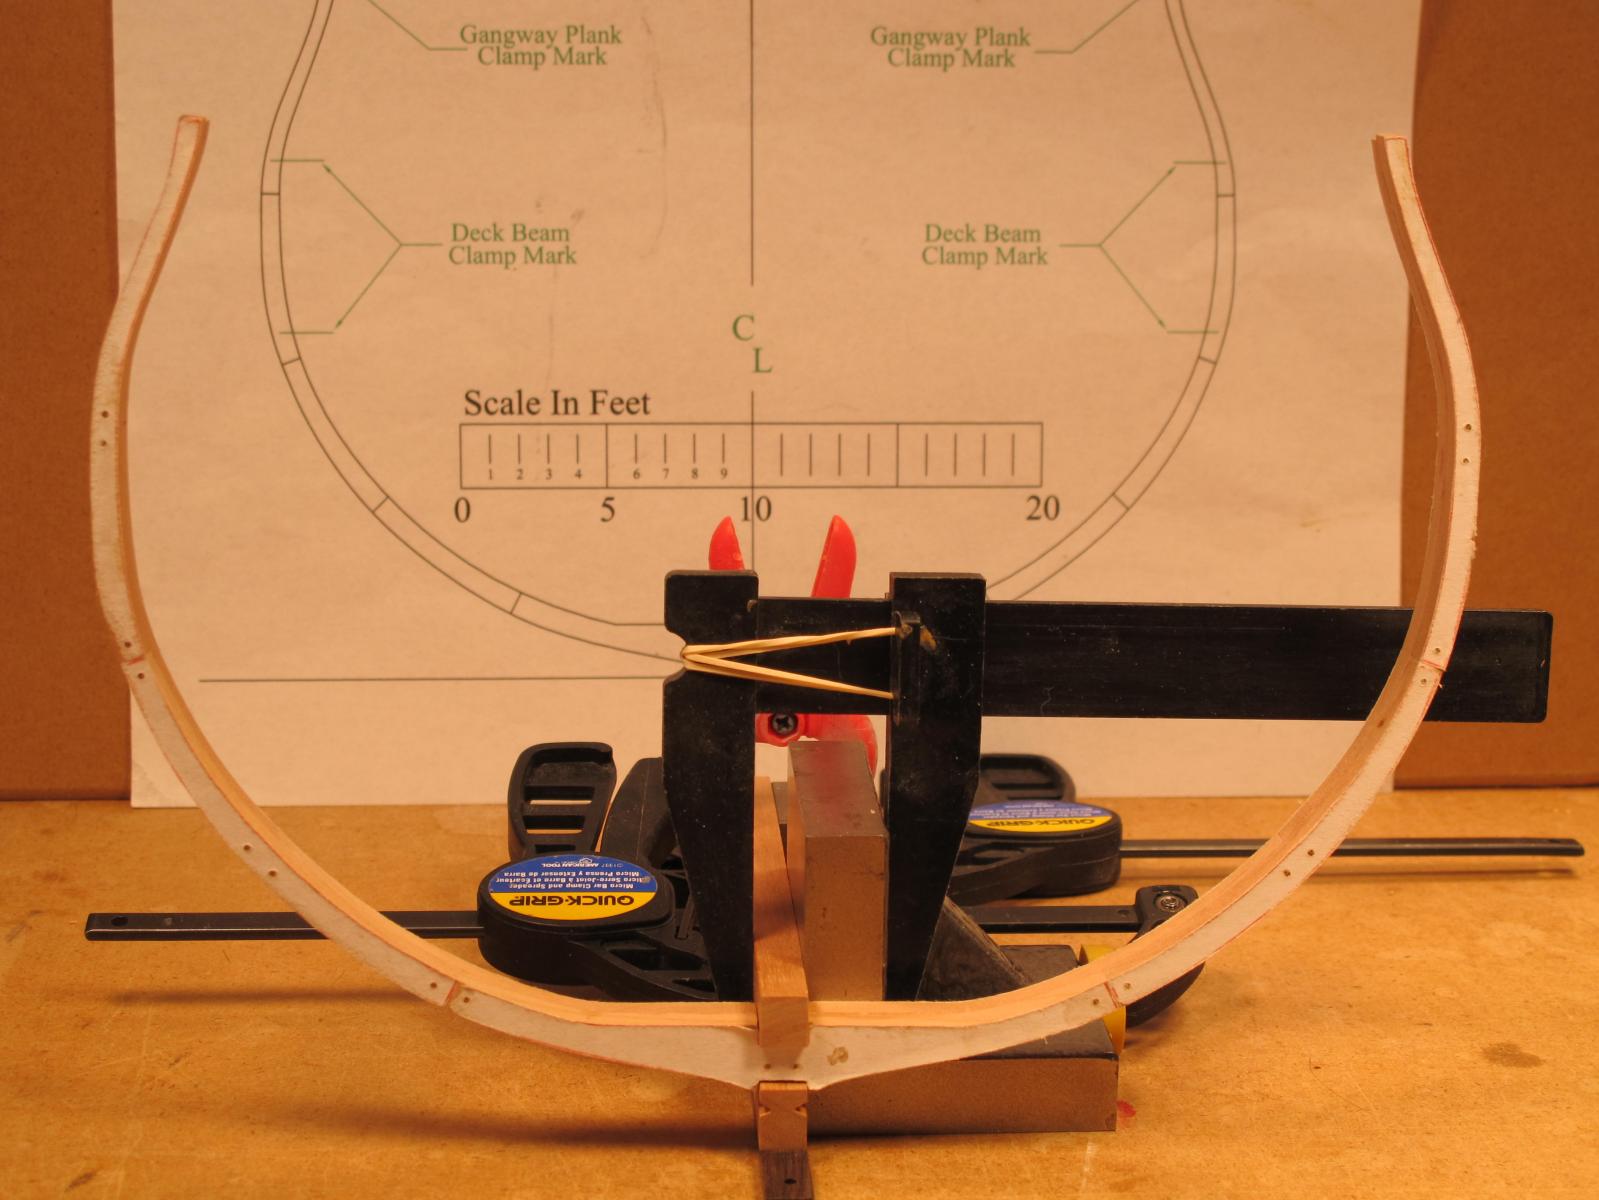
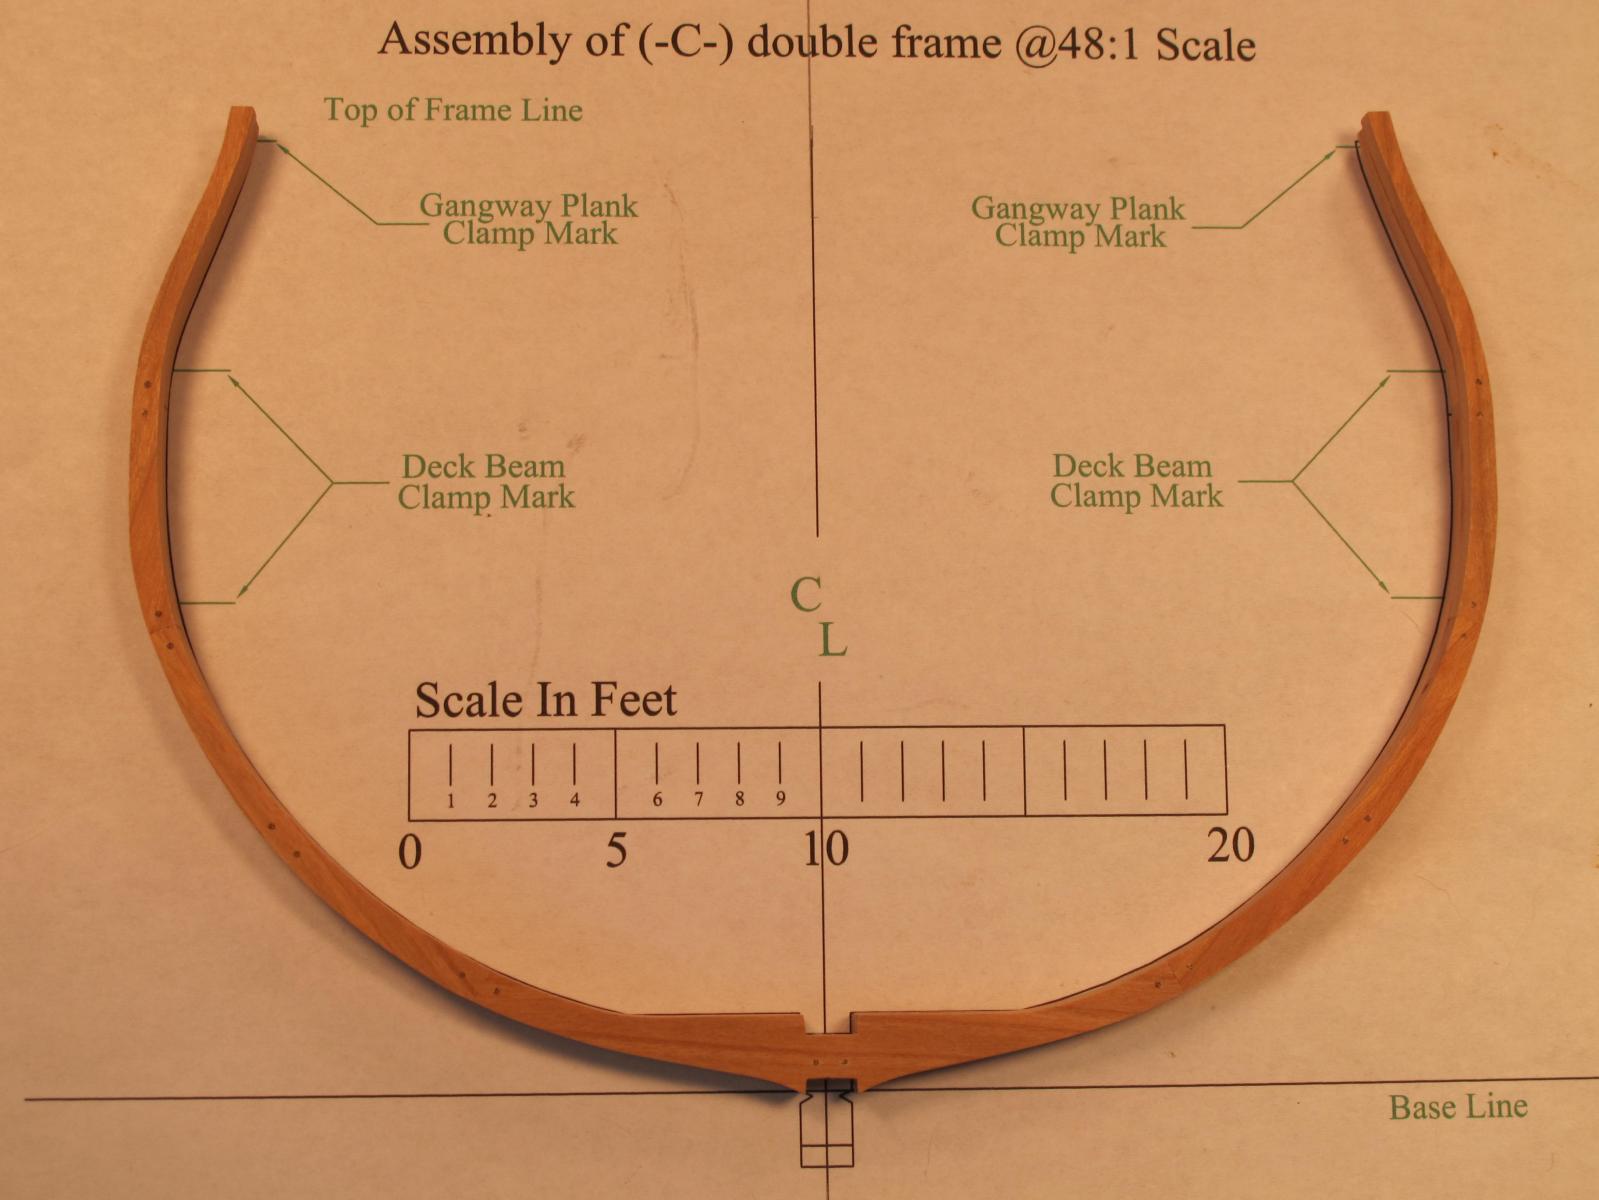
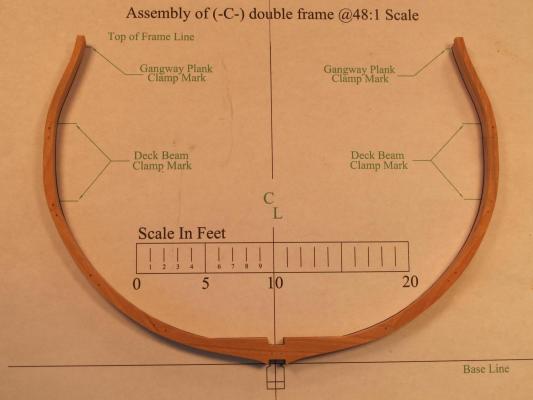
Time to celebrate by knocking back a double tot of Nelson’s blood me thinks; I finished my first frame today. I am pleased with how it turned out with the exception of a couple of the futtock butt joints and having to sand so close to the template lines to even out the forward and aft frame segments. If I had stayed at least 1/32 of an inch proud of the template lines it would have been a big help, which will be the case for the next frame. After letting the treenails cure over night I trimmed them so I could take the frame to the drum sander for the frame clean up. I then jigged up the frame so I could make sure that the frame mortises allowed the proper fit and squaring up to the keel and keelson. The template paper was then removed and the final sanding of the treenails with a small sanding block took place. The second picture is of the clean frame's forward side or the side that will be see as it's the "C" frame. I know I’ve said this before but once again I’m really enjoying this. Russ and those who worked with you, thank you very much for giving us the Triton Frigate Cross Section.
-
Thanks for that Larry. Treenailedl the first frame yesterday afternoon. Will clean them up this morning then take a look at the results before starting frame "B".
-
I took a look a Goodwin's book and decided it was to much, then at Davis' The Built Up Ship Model on page 24 and said that's more like it, but I like your suggestion the best. Thanks for that Russ.
-
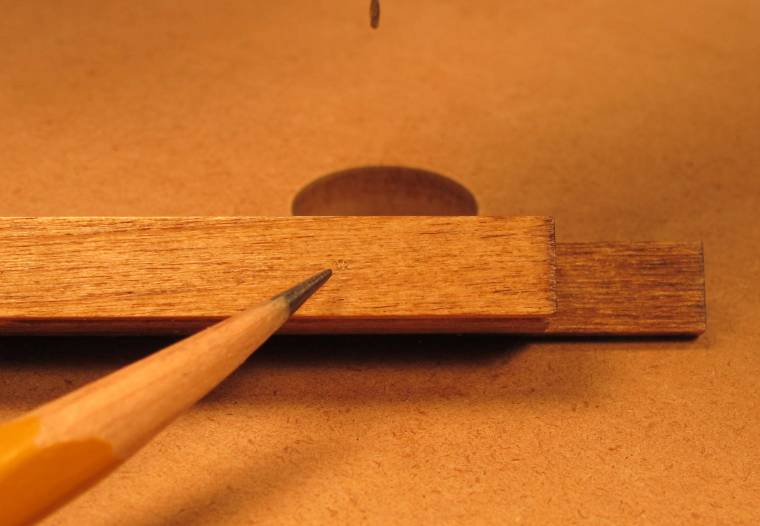
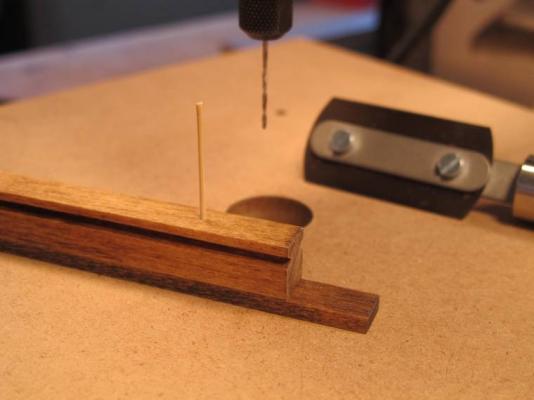
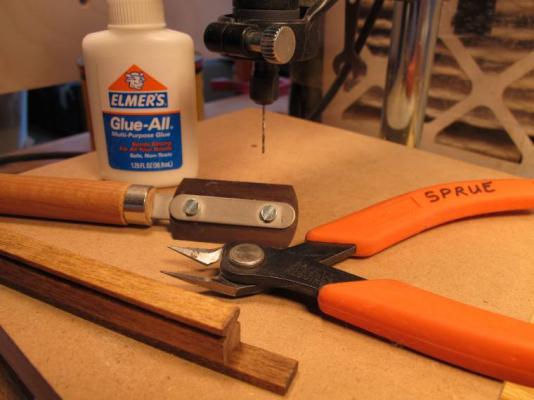
While not being able to get to the shop until late yesterday evening I did practice installing my first treenails pinning the stained basswood keel and false keel I replaced as the practice piece. Using bamboo the treenails used where pulled to .037” and inserted after applying glue to the bore. I was amazed how fast the pins would grabbed and not budge. First lesson, don't dally, get the nails home quickly. The second photo is a close up of one of the trimmed and sanded treenails which you are just able to see and pointed to with the pencil. When I start applying the treenails to the cherry frame this afternoon we’ll see what contrast occurs between the cherry and the bamboo. The last photos is the tools I used trying the razor saw and the sprue nippers. Both work well but the razor saw is limited to how close you can get to the base of the treenail depending on the location. I’ll be using .039” treenails for the frames. Now to research where and how many treenails I should use per futtock. Lunch, then back to the shipyard. Fun!

-
Outstanding!
-
Thanks Russ.
-
Thanks gents. I glued in the second set of futtocks around noon Central Time and thought I would wait until at least tomorrow mid-morning before pulling the frame. I should have listen and not milled the pieces quite so close to the template lines. When I start cutting the "B" futtocks I'll do that. Really an enjoyable process and looking forward to getting started above the keel.
-
Would you all suggest installing the treenails in the frames as they leave the lay-up jig? It seems to me that it would help reinforce the frame before any serious handling.
-
Russ, Pete and Larry, Thanks for taking a look. The wheels have been turning ever since I left the shop. Tomorrow I'll lay-up the rest of the fore futtocks, then when I pull the cured frame there are at least two quick and dirty mods I’ll make to the jig. Then we’ll go from there. Maybe by the time I finish all the frames I’ll have the jig worked out. Pete, thanks for the link to your weight photos. BTW, if you don’t mind, what wood are you using for your treenails? I have been practicing with bamboo using a vice to hold the Byrnes draw plate and that seems to be going reasonably well. Larry, it does feel good to be starting on the frames now.
-
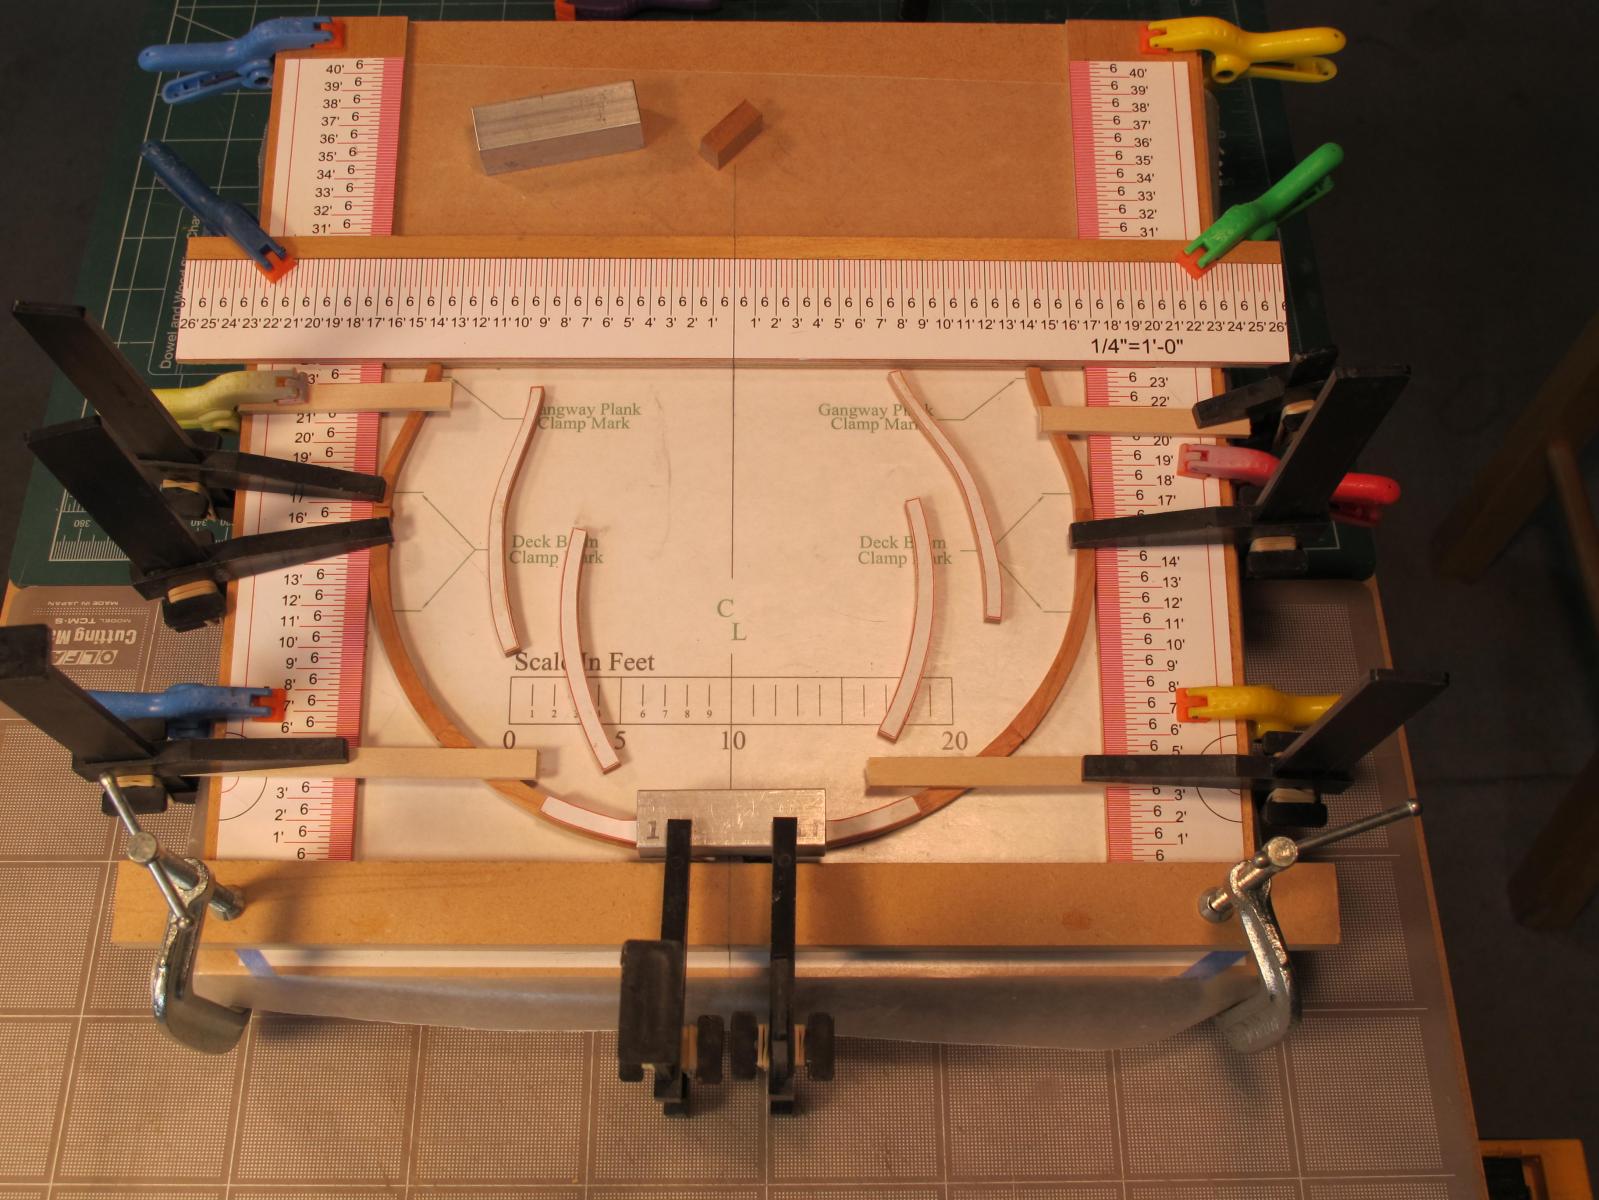
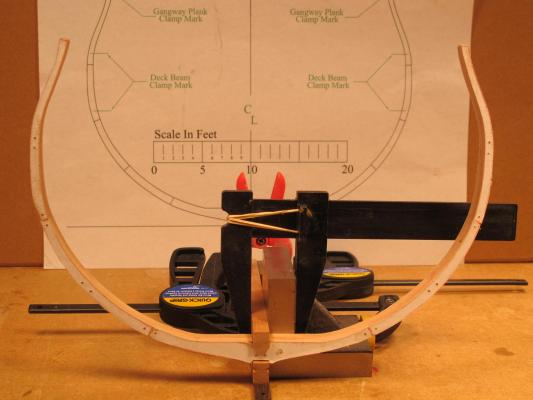
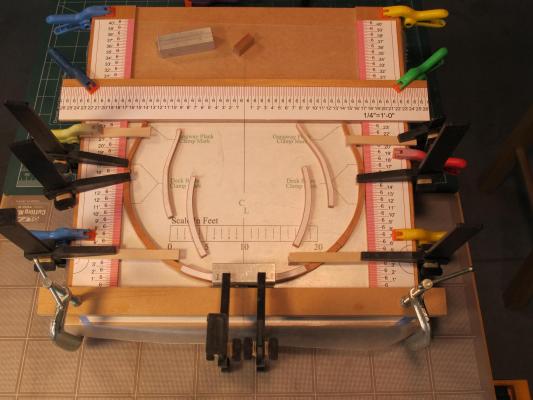
Thought I would let you all get a look at my lash-up after starting the first frame assemble. After going this far it’s obvious that it could easily have been better but I will give it a go to completion of the first frame. Then if I can’t stand it I’ll make some modifications to improve it. The basic idea is OK I think I just should have planned the under framing of the jig giving more thought to the clamps I have on hand and clearances needed to take advantage of their jaw lengths. Next time. Having read a suggestion by Russ in one of the logs I’m placing the aft futtocks with their templates to the jig and the fore futtocks with their templates facing up to aid shaping the frames once pulled from the jig.
-
Splendid Rusty! That joint work adds so much beauty to the structure.
-
Thanks for that and I appreciate it Rusty. Ah, the Bomb Vessel, great. I have the plans for the Bomb Vessel also and hope to be going there after learning all I can with the Triton which I’m really enjoying. I’ll be look forward to watching your shipyard when you start laying the keel. That will be another good one I’m sure. Thumbs up.
-
Sanding noodle! What a top drawer idea.
-
You're doing a great job and I thank you for the detail and pictures. Like those wing-nut clamps you're using. Build on!
-
Hi Pete, Concerning the keelson bolts, on page 28 of Peter Goodwin’s book The Construction and Fitting of the Sailing Man of War 1650 ~1850 he states the following in the section The Keelson Assembly: “Before 1800 the keelson was only bolted through to the keel at every other floor. After this the keelson was bolted through every floor. Two bolts were used, the sizes varying from 2in to 1in, though bolts of 2 1/2in were used on the Victory.” Skipping down the text a little Goodson continues: “The bolts were copper.” Hope this is some help Pete. Just recently received a copy of the Goodson book and appreciate it for the text, pictures and drawings. P.S. Thanks for mentioning this. Sure something I will attempt when reaching this point. Sounds like some copper wire of the correct diameter would do the trick.
-
HI Joss, I assume you're referring to the African Blackwood for the false keel. When you lay ebony next to the blackwood they are very simular although the ebony is blacker. There seems to be a little purple tint to the blackwood. It is suppose to be very good for turning and I've been thinking it would be interesting to turn a cannon with it just to see how it looked. It's not to late for me to make another keel and attach a false keel with less contrast.