


Paddy
-
Posts
371 -
Joined
-
Last visited
Content Type
Profiles
Forums
Gallery
Events
Everything posted by Paddy
-
I decided to post my question yesterday instead of waiting for the start of the work week and when I arrived home yesterday evening there was a reply from Jim. What great customer service. These folks are undoubtedly the Gold Standard of product and customer service. Thank you very much Jim and Donna.
-
 Snowmans, her beauty grows with each step you take.
 -
Splendid work Mark. Love those cannon too. Well done!
-
Hello Antony, I join too in thinking you have picked some good looking wood for your Triton CS. Looking forward to your getting underway.
-
Meredith, One last thing. If you go to the HobbyMill website you will find an excellent article about using Jim’s saw which is used by the HobbyMill owner to cut timber orders they receive. Here’s the URL. Make sure to read through it. I’ll be referencing it more as I setup my workstation for the JimSaw. http://www.hobbymillusa.com/byrnes-saw-operation.php Though you weekend is already half over have a good one. CUL
-
Thats great. OK, so up here we may say you've made it to first and the fun is about to begin. Interesting what you said about using large power equipment. Have had no issues with what we would call large power machines but did the worst damage with a very sharp woodcarving knife. I chuckle about it now but then the blood did fly. Didn't do any permanent damage but it sure slowed my learning process for a bit of time.
-
Meredith, have your purchased any book on using the table saw? If not, it may get you past the shyness of using the saw. One of the first things IMO is use it only when you can give it your full attention as with any power tool, always thinking about where your hands are. I don’t know if Woodsmith’s books are available to you down there but if so you may want to check for one of their new releases titled Ultimate Table Saw Handbook. Reasonably priced in the states. Anyway, check some of your book sellers and purchase one. Most have good information including the making of jigs to use with the table saw that you will reference many times. You’ll just scale some of these down for the 4” Byrnes. All the best.
-
My gorgeous Byrnes Table Saw arrived this afternoon and after locating where it will reside in the shop and reading through the instructions I noted that Jim suggests applying a coat of good car wax to the table top. After searching for a can of Carnauba Car Wax I thought I had, with no luck, I pulled a can of Briwax 2000 natural which contains Beeswax and Carnauba out of the locker and applied that. Think it should be OK but maybe I should have waited until Monday when I plan on e-mailing Donna with a question about the zero-clearance inserts. I’m getting a twist in my knickers thinking about running a slitter blade through each insert and wondering if I will ruin the blade? Anyway, looking forward to tomorrow for my familiarization and shake-down cruise. I know the first project I want to try and will need to have the .040 kerf slitter blade installed. What a beautiful piece of equipment! Thank you Donna and Jim.
-
Grant, I like the contrast in the woods you picked for the Deck Beams and Carlings to the Ledges. The new grating looks very good and the colour that you arrived at on the cordage looks the part. Well done on all! Are the grating and deck planks the same wood? Thanks.
-
Good to hear your on the move with the treenails already. I'll have to look for some of the hard setting the next time I make it across the river. All I had on hand was a jar of the non-harding when I decided to give it a try.
-
Hi Martin, Thanks for the pictures. I am sorry to hear that you’re not pleased with the frames at this point. Thinking about that during your convalescent time may keep you from doing something rash. That vac box for your drum sander makes for a top drawer setup. Looks like it really does a good job. Now you have me thinking about building one for my setup. I’ve been clamping the vac hose to the drill press table for my pickup but only works after a fashion. Great to hear that you like your Byrnes disc sander. I just ordered one last week and you’ve made my day with your comment. I’m standing on one foot and the other with anticipation as I ordered the Byrnes table saw too. Will be pulling for you mate that you’ll be back at it before you know it and in excellent shape. All the best.
-
Ata boy rocker, great news. Good to hear that you’re off and running. Looking forward to hearing more of your progress reports.
-
Can tell you're having fun now. Great work Bob.
-
I had been wondering about cutting the beams to shape.
-
Thanks for that Rusty. It's just what I've been looking for.
-
Maruis, if I may, check to see if Excel blades are available to you. They are far superior to Exacto IMO and come in the usually assortment from #11 to chisel types. A suggestion about the treenails. I am fortune enough to have a Byrnes draw plate which I am using to pull .039 bamboo nails for the frames but I have started testing the possibility of using colored paste for wood for smaller treenails and those that maybe difficult to reach. After applying one coat of finish I drill the hole and then fill with the paste, which is non-harding, wipe the excess off with a soft cloth, then put another finish coat over that. In this case I have been using Watco’s Danish Oil Neutral. I’m liking how this looks so far and will try more tests using larger bores of .039. Just a thought you may want to test. P.S. Thanks for the recommendation to increase the soak time of the timber.
-
Hang in there rocker. You'll get it worked out.
-
Marius, she's looking very good. That's interesting about losing some of the camber in the pear wood. I still think your jig for setting the beams is a good one and like you say maybe it's just the wood. I haven't decided the wood I'll use for the beams myself, although I'm using cherry for the frames and may try to stay with it. I'm thinking its a good time to make the jig and begin testing some wood to see how well it holds the camber. Maybe I’ll try setting the pattern to over bend just a tad.
-
I too have mousers in the workshop. Grand company although at times they feel they need to be right in the middle of what I’m doing, except with the power equipment. Another problem is I can’t get them to keep their ear protection on when I’m running the noisier machines. P.S. I should have mentioned my first Model Machines’ item was the draw plate.
-
Those beams and beam arms are looking great. Your mortise work ain't to shabby either.
-
That cordage looks excellent Grant and compared to the store bought quickly explains the reason for making your own. Also, another thank you for your block making technique. Good stuff. P.S. Asked my better half what DMC was and she quickly explained it to me.
-
Being a beginning apprentice the process of milling, cutting the futtocks and assembling the frames has been a good learning experience. I’m now on the cleanup of the third frame, “A” in this case, and was thinking about what I’ve learned to this point. One of the things is not how to use some of the tools I have but when to use them. Almost, I say almost, makes me want to go back and do the first two frames again. Anyway, a big thanks to all of you with your guidance of suggestions, recommendations or presenting your photos with descriptions. A great group assembled here in the Triton Squadron. One of the tools that I must be careful with is an old disc sander I’m using and have wanted to replace for a number of years now. Has served me well for whatever I needed to use it for but it’s a drag to have to check that the table is still at 90 degrees to the disc before and during use. Even have blocks under the table to help in the stabilization because the table locking screws don’t hold no matter how much I torque them. Well, that’s enough rambling for a Friday night here in the mid-western colonies.
-
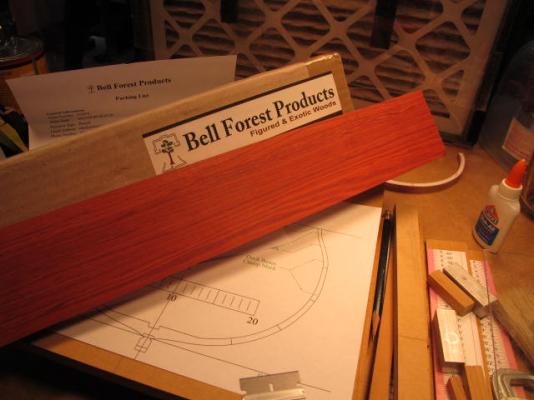
My Redheart plank arrived today and is a good looking piece of wood. Thank you Rusty for pointing out your choice of wood for the hatch coamings and water ways. I’m going to copy your choice of Redheart for the hatch coamings at least. For the hatch gratings I’ll either use Boxwood or Yellowheart I think. I’m enjoying this project. Hope I don’t botch it to bad.
-
Grant, the more I study your rope walk the more I like the simplicity of the design. Looks like you can also operate it hands free once you get the tension set correctly, hanging weight?, and have the speed of the wrap adjusted where you want it. I think it’s time for the gathering of parts and attempt a copy of your design. For a power supply I’m wondering if a model train transformer would do the job with the variable speed control and direction switch to give you LH or RH twist? I have one stored away in the locker somewhere and if it would work then I’ve found a real use for it. Hear, hear on adding your design to the database Joss speaks of.
-
Well, here's a double tot of Nelson's blood to the Byrnes Model Machines, Donna and Jim. Last week I ordered my first machine which was the table saw and just a few minutes ago I couldn't stand it any longer and ordered the disc sander. I'll be well prepared as I get deeper into the Triton Cross Section now I think. I've become a believer and now building up the anchor pool for the next Model Machine.

