


Jaxboat
-
Posts
327 -
Joined
-
Last visited
Content Type
Profiles
Forums
Gallery
Events
Posts posted by Jaxboat
-
-
Ulises,
Thank you so much for reposting. Your build pictures are awesome. You are an accomplished photographer as well as an outstanding builder. I was carefully following your progress when the world ended and the site crashed. I look forward to your new posts!
Best
Jaxboat

-
Look forward to you leading the way with the Big Mo. I also bought the kit as well as the top end Pontos PE and deck set. It's quite pricey unfortunately but instructions an details are amazing.
Best
Jaxboat
-
Druxey is correct about Beeswax. It will degrade the line eventually. I checked his comments with a Beeswax expert and he confirmed that conservators wax should be used. That wax is a microcrystaline wax and will not cause any issues. I would check an art supply company as a supply source That being said, if you are not making your model for the "ages"
 I guess beeswax will do
Best
Jaxboat
-
The bulkheads and former are made out of some mystery SA wood that is very tough. I had to use a hammer to seat my bulkheads.when I was working with Sam. The slots are also too small for the thickness of the Bulkheads. The tabs were also miserable to saw through . Quality control does not seem to be a priority at MS on launching their new kits.
 They are wonderful at replacing parts but they would save lots of money and their customers lots of frustration if they just did it right the first time. I agree wholeheartedly with Bob and Sam. Wait for the fix. I know Sam will get things sorted as soon as possible and I am sure it will be worth the wait.
Best
Jaxboat
-
I have become somewhat of an expert on this topic as my early efforts had real splotching issues. There are many great suggestions form the experts on our blog that I have tried. Here are the techniques I employ for preventing/correcting the issue:
Pre-staining/sealing definitely works. I have found that if you get a little white glue on the prestained/ sealed plank it will peel off. Not so for CA but you can readilly remove using techniques described below
If you get white glue (PVA) on an unsealed plank apply IPOH (isopropol alcohol) on the splash as soon as possible with a Q tip (rub vigoorously). Use copious amount and follow up with a brisk rub with soft cloth before the spot dries. After the spot dries, sand.
CA can be removed with nail polish remover (acetone). Use the q-tip method.
If a spot persists with either glue then scrape with a 22 blade (carefully!), retreat with appropriate solvent and resand.
I also inspect the hull thoroughly before applying stain/ sealer to raw installed planking for spots that need treament. They generally show up as glossy spots on the unsealed wood. In fact, with a litte practice you can recognize CA spots versus PVA
By using these techniques as well as immediately wiping any excess glue immediately it occurs, I have been able to greatly reduce glue splotches that have to be "post treated)
To summarize:
Use prestaining pre sealing as much as possible
Be neat when you glue.
If you do have a spot of excess glue, wipe away as soon as possible and apply appropriate solvent to the affected area using a q-tip to rub down spot, let dry and sand
Examine installed unstained/sealed wood (hull, deck, etc) before you apply finish and treat any glue spots. Lightly sand after treament
For persistent splotches use a 22 blade and scrape, reapply solvent let dry and sand
Best
Jaxboat
-
Great news for Floquil fans. Micro Mark is now selling a new paint line made by Valejo for them with colors that are direct matches for he Floquil colors. Big difference will be that they are water based acrylics. I have used their paints before and like them.
Best
Jaxboat
-
-
Nice jig for the counter planking curve, Augie
 . Ben's log and warnings kept me from doing it wrong (thank you, Ben!
  ) but yours is an elegant and simple solution on how to ensure the curve is exactly correct. Thanks for the tip. Your build looks great. Now you can look forward to planking about an acre of hull. I am almost through completing all of the wales planking. Ben told me it was lots of fun but I think he may have been exagerating :P . And I haven't even begun spiling the lower hull
  !!!
!!!Best
Jax
-
Andy,
Thank you for bringing this topic up on the blog. I am a Chemist by schooling and profession. Even the most hazardous chemicals can be used safely when you know how and employ the proper techniques and safety equipment. As you point out, that is where the MSDS comes in. It is supposed to list hazards and how to saferly overcome them. We should all take the time to read the MSDS for the solvents, paints, fillers and glues we use and protect our health accordingly.
Best
Jaxboat
-
Chris,
Thanks for the assessment
. Additionally, the quality of plans for new kits put out by you as well as Chuck and Sam are excellent. I will start saving up for the room addition I will need to house Victory. I'm surprised the Victory was only a bit heavier than Vanguard. That's encouraging though. I should be able to get it into my workshop without need for a forklift.
Best
Jaxboat
-
3D printer! Awesome! Will the kit parts be be cast in resin?
2 questions: other than size would you say that Victory, Revenge and Vanguard differ in the complexity of build
 ? and
? andHow many stone does your Victory weigh. I lifted the Vangurad kit up and almost got a hernia!
:P Glad your trip was without incident. It will probably take years, however, for the Abba songs to leave your head
Best
Jaxboat
-
Excellent work! And thank yoiu for sharing building techniques. Very helpful to beginners like me
Best
Jaxboat
-
Road Trip! Enjoy the drive and the music!
Be safe!!Best Jaxboat
-
Thanks Guys! Very encouraging!
Best
Jaxboat
-
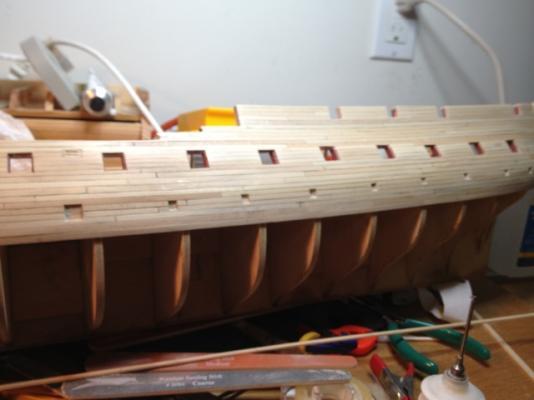
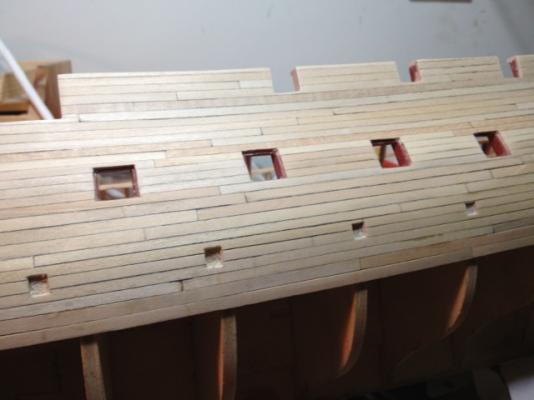
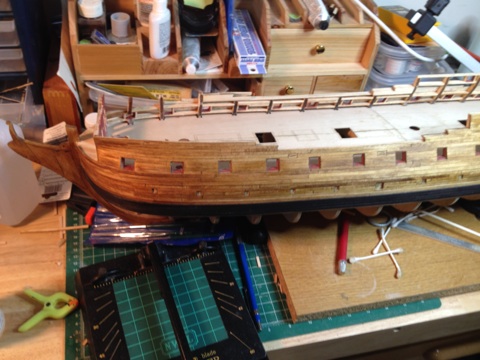
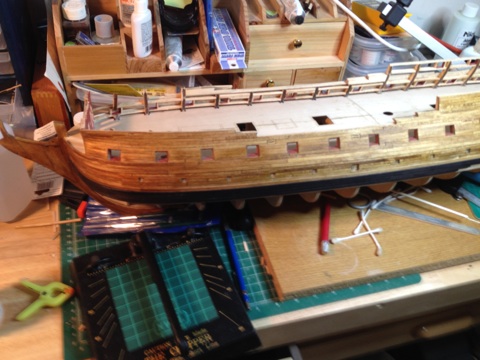
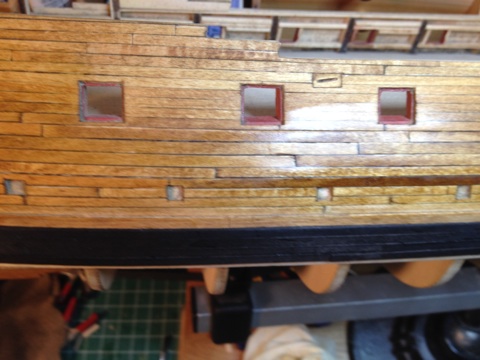
OK. Here is the port side wales planking pretty much done. Still need some finishing on the gunports. I used shoe dye for the lower wales and Admiralty Paint dull black topside. The Admiralty finish is beautiful (flow and leveling were excellent for a water borne acrylic) but the gloss is a little higher than I wanted
. I rubbed on a thin coat of beeswax on the lower wales which made them even more jet and gave them a nice low angle sheen.I am now working on the Starboard side wales planking then I will take the plunge on the lower planking. Have I said this is a beautifully designed model by CP and tons of fun to work on even for a Weeblo like me! Best
Jaxboat
-
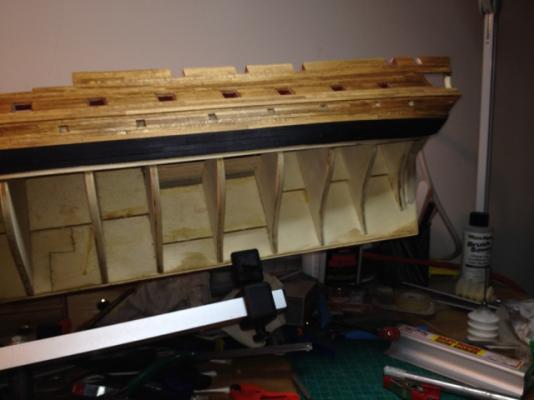
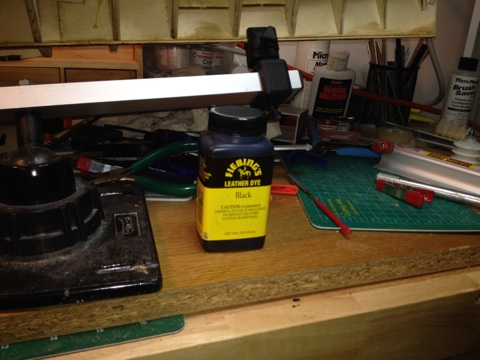
I have used the dye very successfully even on my first try. I really recommend applying the stuff before you mount the wood. The dye is very low viscosity and micro splashes can occur. You can also have problems if you have residual glue on the wood surfaceI applied the dye with an old brush. You can readily clean up the brush with IPA. The final appearance of the wood is awesome with great jetness and surface appearance. At Druxey's suggestion, I applied a thin coat via soft cloth and buffed lightly. This procedue gave a lovely light 60 degree sheen. I used the dye on Basswood for the ME Confederacy. The wood took it like a sponge. I will use Box or Pear next time although there was no issue with the basswood other than the dye looks better on Box or Pear.
Best
Jaxboat
-
-
-
-
LOL.It does seem like a football field!
Thanks for the comments on the finish . It is a rich brown color and it will contrast nicely to the Lower planking. Now on to the spiling Ben has assured me it will be great fun! 
Best
Jaxboat
-
Hi Ben
Sorry I missed your post
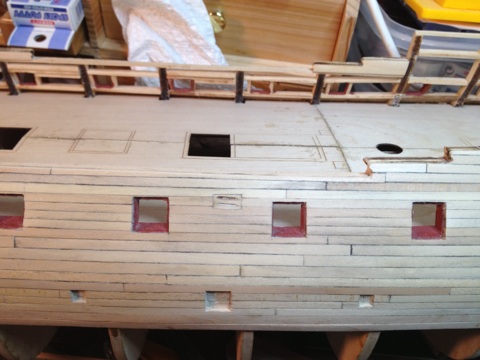
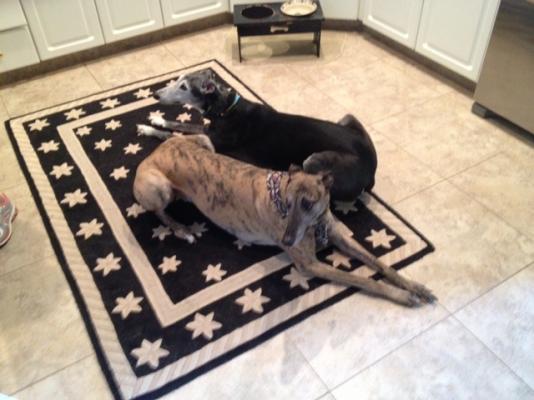
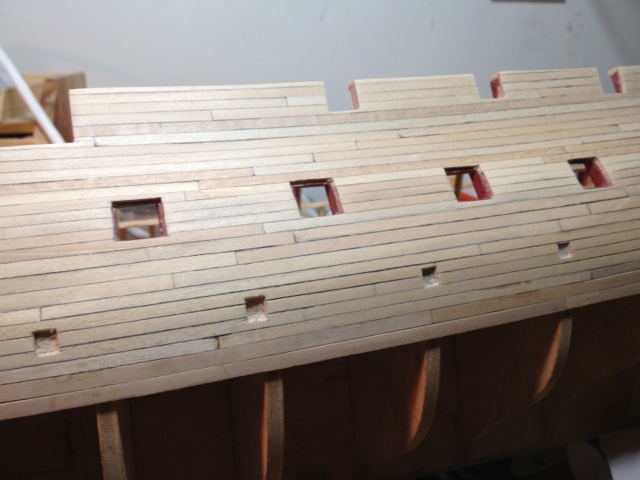
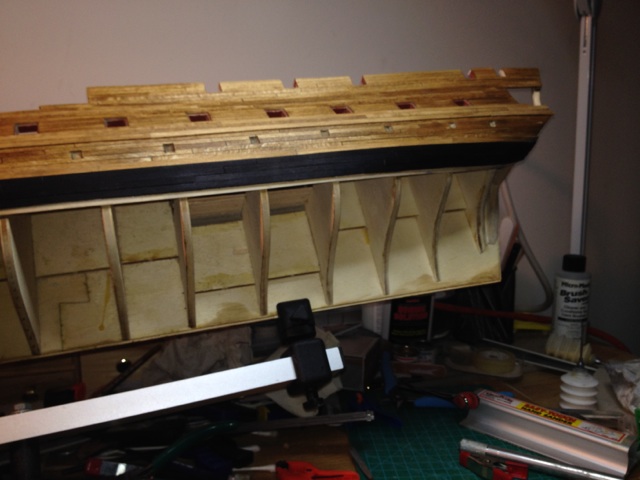
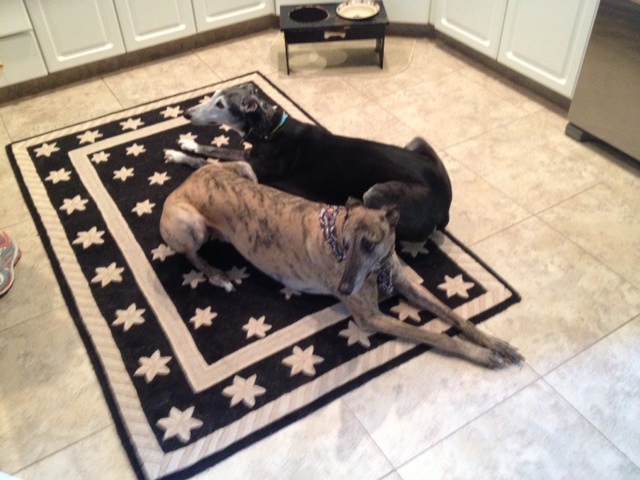
. Yes, I have been moving right alongI have finished port side wales planking. IN hindsight I wished I blended the golden oak with something a tad lighter. I made use of Greg and Druxey's black shoe dye technique. The stuff is dead flat an startling deep black.. awesome! Still need to clean up gunports in some places. Starboard side is about 3/4 completed on wales planking. I also need to steel wool hull and make sure stain is uniform. Next big step is to repair stern which suffered some breakage. I think it will be challenging to repair but what the heck. Here are some pics. I have included my shipyard helpers. They don't do much (no opposable thumbs ) but they look pretty. Planking seems endless but having lots of fun and learning along the way.
Best
Jaxboat
-
HI Sam,
You have outlined a very sound and professional approach, IMHO, to analysing and correcting any kit faults. I, for one, will watch for your updates and findings. I am sure you and ME will get things "sqared away".
Best Regards
Jaxboat
-
LMAO
It was NSA ...again.


-
Bill et al
You likely do not have the updated instruction booklet. A PDF of the new edition is on the ME website under documents for TH Essex Kit. Eric Snowindicated a printed version will be available soon but you will have to request it from ME.
Best
Jaxboat


USS NEW JERSEY (BB-62) 67-69 by Hank - FINISHED - Trumpeter - 1:200 - PLASTIC
in - Kit build logs for subjects built from 1901 - Present Day
Posted · Edited by Jaxboat
Right you are, W2 ! I failed to notice he was bashing the Missouri kit to the New Jersey. My older brother was her re-commisioning Eng Off in the 80s. He gave me the five dollar tour. She is truly impressive. I spent a number of years on an Oiler as her fueling officer in the seventies. But we strictly refueled East Coast ships. Big model! Hank may have to build an addition to his house to display her
Best
Jaxboat